I love simple tattoo ideas because they’re basically tiny drawings with big personality—clean lines, easy shapes, and no fuss. If you’re craving something minimalist, low-commitment, and still totally you, these are the kinds of designs I’d sketch on repeat in my studio.
Tiny Heart Outline

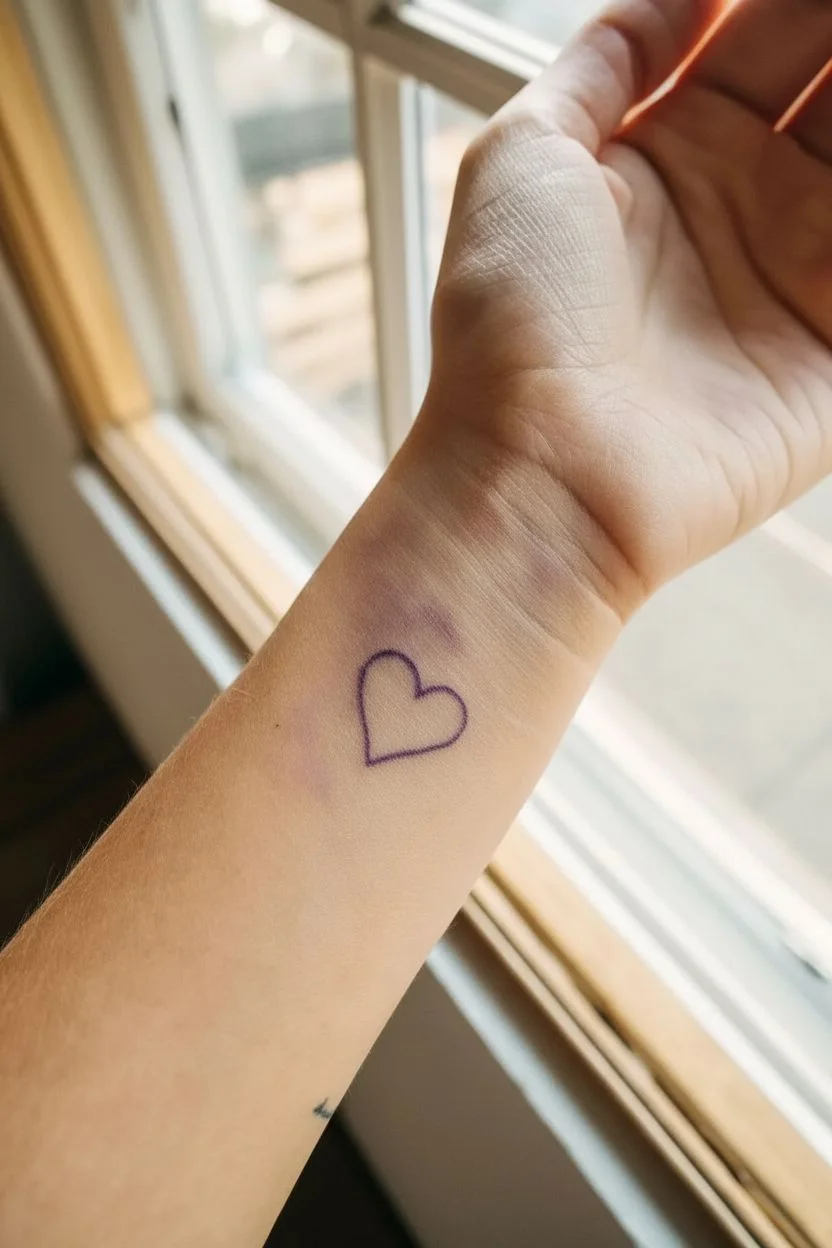
This delicate heart outline tattoo is a timeless choice, offering a subtle yet meaningful design perfectly suited for placement on the inner wrist. Its clean lines and open center create an airy, minimalist look that is both understated and classic.
Step-by-Step Tutorial
Materials
- Professional tattoo machine (coil or rotary)
- 3RL (3 Round Liner) tattoo needle cartridge
- Dynamic Black tattoo ink (or comparable high-quality black lining ink)
- Ink caps
- Stencil paper (thermal or freehand)
- Stencil transfer gel (e.g., Stencil Stuff)
- Green soap and squeeze bottle
- Distilled water
- Paper towels
- Medical-grade nitrile gloves
- Skin marker (surgical marker)
- Vaseline or A&D ointment
- Razor (single-use)
- Alcohol prep pads
- Aftercare bandage (Second Skin or similar)
Step 1: Preparation & Stencil
-
Design the Heart:
Begin by sketching a simple, symmetrical heart shape on paper or a tablet. For this specific look, ensure the lines are not perfectly uniform; a slight taper at the bottom point adds elegance. -
Sizing:
Scale your design down until it is approximately 0.75 to 1 inch in height. Simple designs often look cleaner when kept small. -
Create the Stencil:
Transfer your final design onto tattoo stencil paper. A thermal copier works best for crisp lines, but hand-tracing with a hectograph pencil is fine for such a simple shape. -
Prep the Skin:
Put on your gloves. Clean the inner wrist area thoroughly with green soap and water. Even if no hair is visible, gently shave the area to remove peach fuzz that could interfere with the stencil. -
Sterilize:
Wipe the area down with an alcohol prep pad to remove oils and ensure the skin is sterile. Let it air dry completely. -
Apply Stencil Gel:
Apply a thin, even layer of stencil transfer gel. It should be tacky, not wet. If it’s too wet, the stencil will bleed. -
Place the Transfer:
Carefully press the stencil onto the center of the wrist. Have the client (or yourself) flex the wrist gently to ensure placement looks natural during movement. Hold for 5–10 seconds and peel back carefully. -
Dry Time:
Allow the stencil to dry on the skin for at least 10–15 minutes. This prevents the purple lines from wiping away when you start tattooing.
Needle Tip
For ultra-thin lines on delicate wrist skin, a 3RL (Round Liner) is standard. For an even fainter, ‘fine-line’ style, switch to a tight 3RL bugpin needle.
Step 2: The Tattoo Process
-
Setup Machine:
Set up your tattoo machine with a 3RL needle. This fine liner is crucial for achieving that delicate, thin look shown in the photo. -
Voltage Check:
Run your machine at a medium voltage suitable for lining—usually around 7.5 to 8.5 volts, depending on your machine’s stroke and hardness. -
Dip and Cap:
Pour your black ink into a small cap. Dip the needle tip briefly, running the machine for a split second to draw ink into the cartridge reservoir. -
Ointment Layer:
Apply a tiny amount of Vaseline or A&D ointment over the stencil. This lubricates the skin and keeps excess ink from pooling and obscuring your view. -
Stretch the Skin:
This is vital. Use your non-tattooing hand to stretch the wrist skin tightly in three directions if possible. Taut skin ensures a clean, straight line without blowouts. -
First Pass – Keep it Shallow:
Begin at the bottom point of the heart. Enter the skin at a slightly angled position. Move your hand steadily, following the stencil line up one side of the heart curve. -
Consistent Depth:
Maintain a needle depth of about 1.5mm to 2mm. Avoid pressing too hard into the delicate wrist skin, as ink can spread (blowout) easily in this area. -
Complete the Loop:
Pick up your line where you left off or connect from the other side. Try to join the lines cleanly at the dip of the heart so there isn’t a visible overlap dot. -
Wipe and check:
Gently wipe away excess ink with a paper towel dampened with green soap solution. Inspect your line weight. It should look like a fine pen mark. -
Refining:
If there are any faint spots, very carefully go over them again. I prefer to use a ‘sculpting’ motion here to just thicken the line fractionally rather than re-lining the whole thing. -
Final Cleanse:
Once satisfied, clean the entire area thoroughly with green soap and then distilled water to remove all plasma and lymph. -
Protect:
Pat dry with a clean paper towel. Apply a suitable aftercare bandage or wrap to protect the fresh tattoo from bacteria.
Preventing Blowouts
Wrist skin is very thin. If lines look blurry or blueish immediately, you are going too deep. Lighten your hand pressure significantly and stretch the skin more.
Enjoy your new, elegant piece of permanent art


Classic Five-Point Star
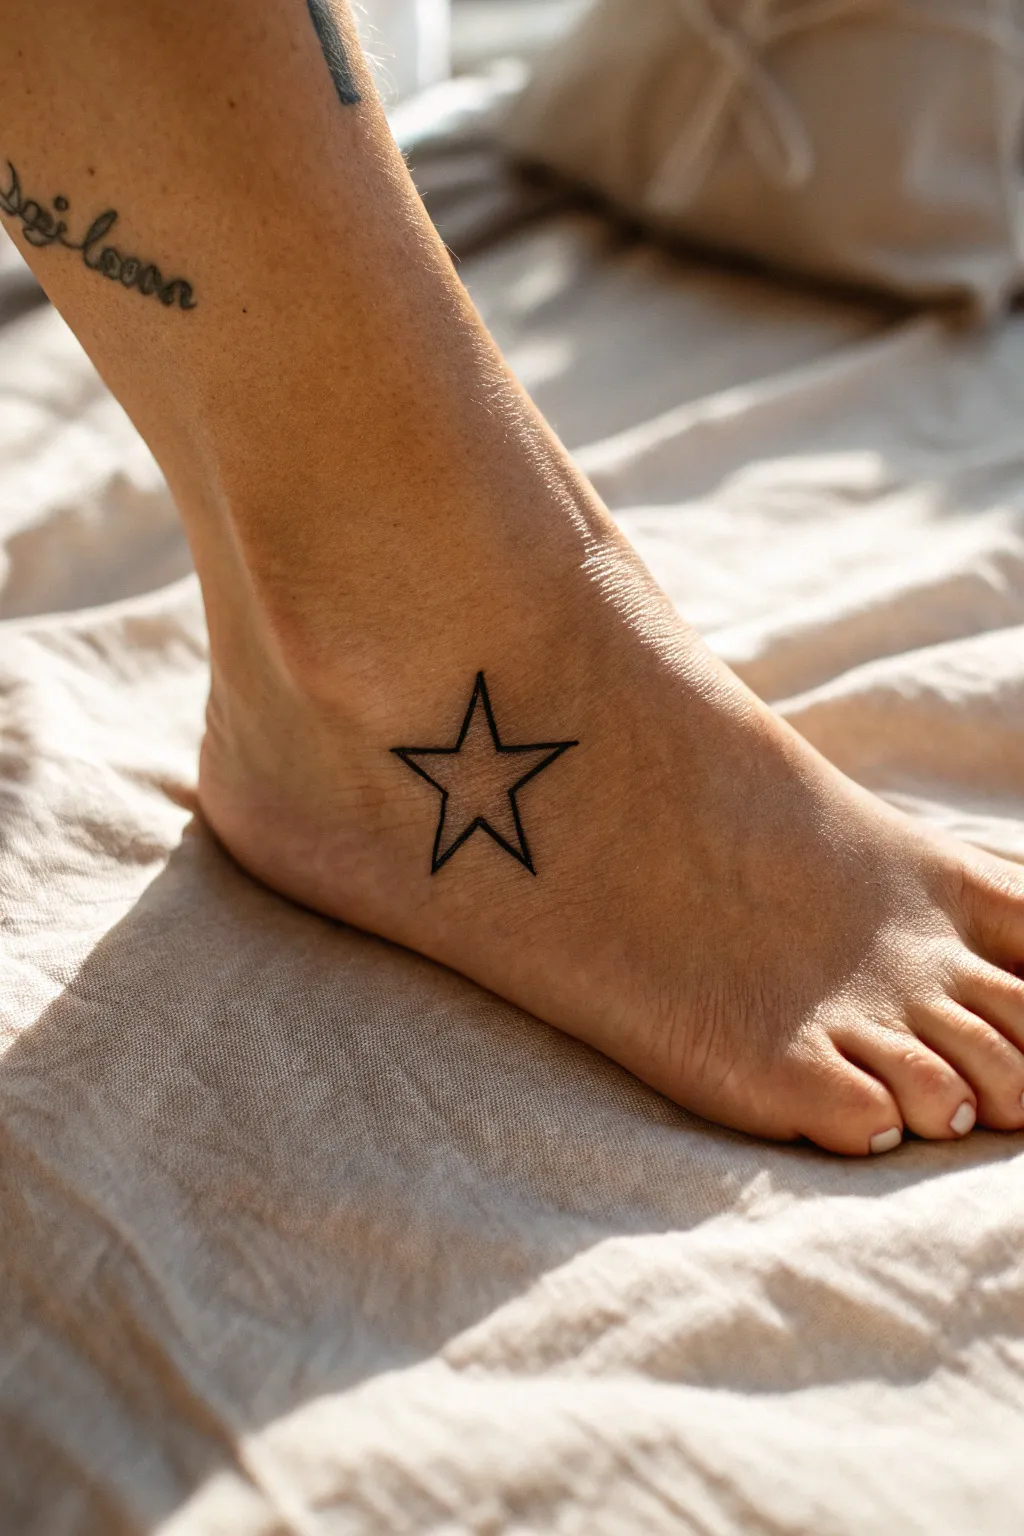
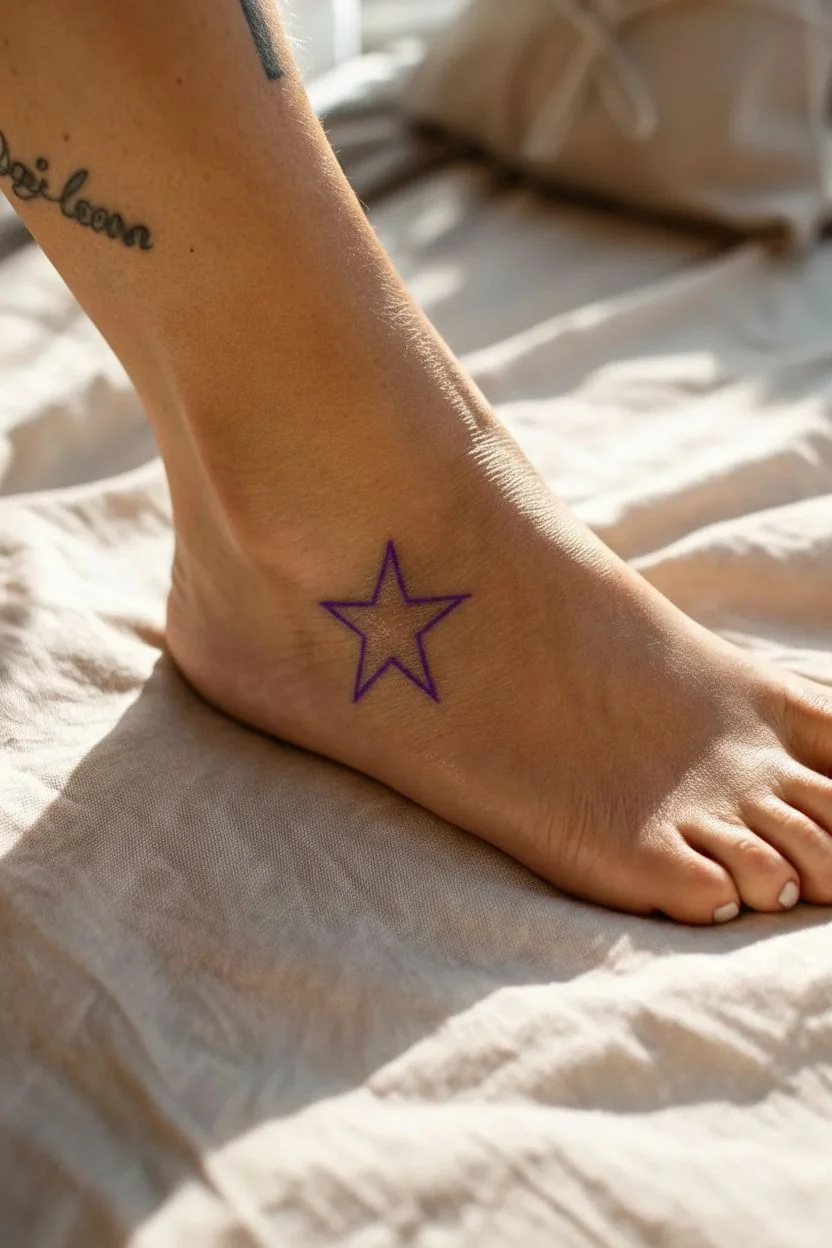
This classic five-point star is the epitome of simple elegance, featuring clean black lines and an open center that sits perfectly on the curve of the foot. It’s an ideal first tattoo design or a subtle addition to a growing collection, relying on steady handiwork and perfect symmetry.
Detailed Instructions
Materials
- Tattoo machine (pen or coil)
- 3RL or 5RL tattoo needle cartridge (for clean, thin lines)
- Black lining tattoo ink
- Stencil paper
- Stencil transfer solution
- Green soap
- Distilled water
- Paper towels
- Disposable ink caps
- Disposable gloves
- Vaseline or tattoo glide
- Alcohol wipes
- Clip cord cover and machine bag
Step 1: Preparation and Stencil
-
Design the star:
Begin by drawing a five-pointed star on paper to get the proportions right. For this specific look, aim for a star where the arms are moderately wide—not too skinny, but not blocky either. The lines should connect sharply at the inner angles. -
Transfer to stencil paper:
Once you are happy with your drawing, trace it onto the carbon sheet of your stencil paper. Use a ballpoint pen with firm pressure to ensure a solid, crisp purple line on the transfer sheet. -
Prepare the skin:
Clean the area on the side of the foot thoroughly with green soap and an alcohol wipe. If there is any fine hair in the area, shave it carefully to prevent ingrown hairs later. -
Apply the stencil:
Apply a thin, even layer of stencil transfer solution to the skin. It should be tacky, not wet. Carefully place your star stencil just below the ankle bone, ensuring the top point aims slightly upward toward the leg. -
Let it dry:
Press the paper down firmly for a few seconds, then peel it back. Allow the purple stencil to dry completely on the skin for at least 10–15 minutes. This creates a durable guide that won’t wipe away during the tattooing process.
Placement Pro Tip
Avoid placing the ink too low toward the sole of the foot. The skin changes texture there (callous skin) and ink tends to fade or ‘fall out’ much faster during healing.
Step 2: Lining the Tattoo
-
Set up your station:
While the stencil dries, cover your work surface, wrap your machine and clip cord, and pour your black ink into a small ink cap. Put on a fresh pair of gloves. -
Load the needle:
Insert a 3RL or 5RL needle cartridge into your machine. A 5RL (Round Liner) is often best for this project as it provides a solid, visible line that isn’t too wispy, matching the boldness of the photo. -
Stretch the skin:
The skin on the foot is thin and can be tricky. Use your non-tattooing hand to stretch the skin tightly in three directions if possible. This prevents the needle from bouncing and ensures clean ink deposit. -
Begin the first line:
Dip your needle in the ink and start your first line. I like to start at a point and pull the line toward me. Move your hand at a steady, medium pace to avoid blowouts or faint lines. -
Connect the points:
Work your way around the star, connecting each outer point to the inner angle. Focus intensely on the corners; sharp, crisp intersections are what make this simple design look professional. -
Manage ink flow:
Dip for fresh ink frequently. If you notice excess ink pooling on the skin and obscuring your stencil, gently dab—don’t wipe—with a paper towel moistened with a little distilled water or green soap. -
Complete the outline:
Continue until all five points are connected. Avoid going over the same line multiple times, as this can cause scarring or uneven thickness. Trust your first pass. -
Check for holidays:
Wipe the area clean with green soap to remove the stencil and excess ink. Inspect the lines closely. If there are any tiny gaps (holidays) or faint spots, carefully touch them up now.
Level Up: Cosmic Dust
Add tiny dot-work shading inside the points of the star or scatter small stippled dots around the outside to give it a sparkly, magical effect without heavy shading.
Step 3: Aftercare
-
Clean and protect:
Give the finished tattoo a final clean with green soap to soothe the skin. Pat it dry with a clean paper towel. -
Apply ointment:
Apply a very thin layer of tattoo aftercare ointment or a specialized second-skin bandage. The foot is a high-motion area, so a protective film can help prevent rubbing against socks or shoes.
Enjoy your crisp new star tattoo and remember to keep it out of the sun while it heals


Crescent Moon With Tiny Stars
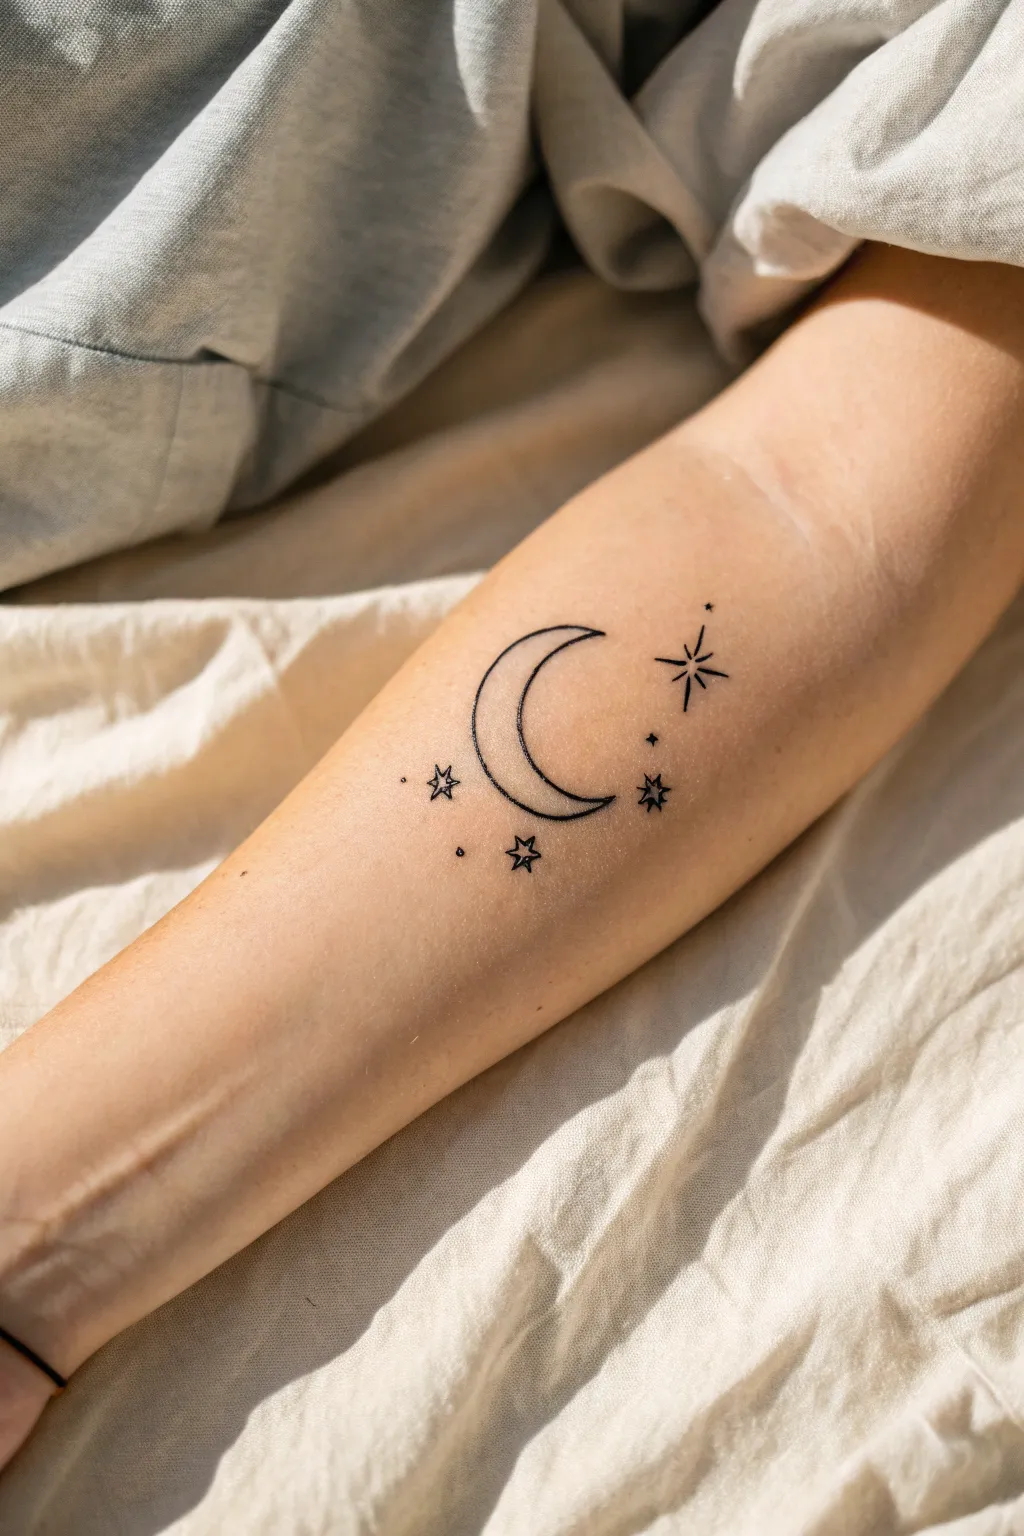
This minimalist design features a delicate crescent moon surrounded by a constellation of tiny, scattered stars and dots. It uses clean, fine lines to create a dreamy, night-sky aesthetic that looks perfect placed on the forearm or wrist.
How-To Guide
Materials
- Fine-tip drawing pen (0.3mm or 0.5mm)
- Pencil (HB or 2B)
- Soft eraser
- Tracing paper or skin-safe transfer paper (optional)
- Smooth drawing paper
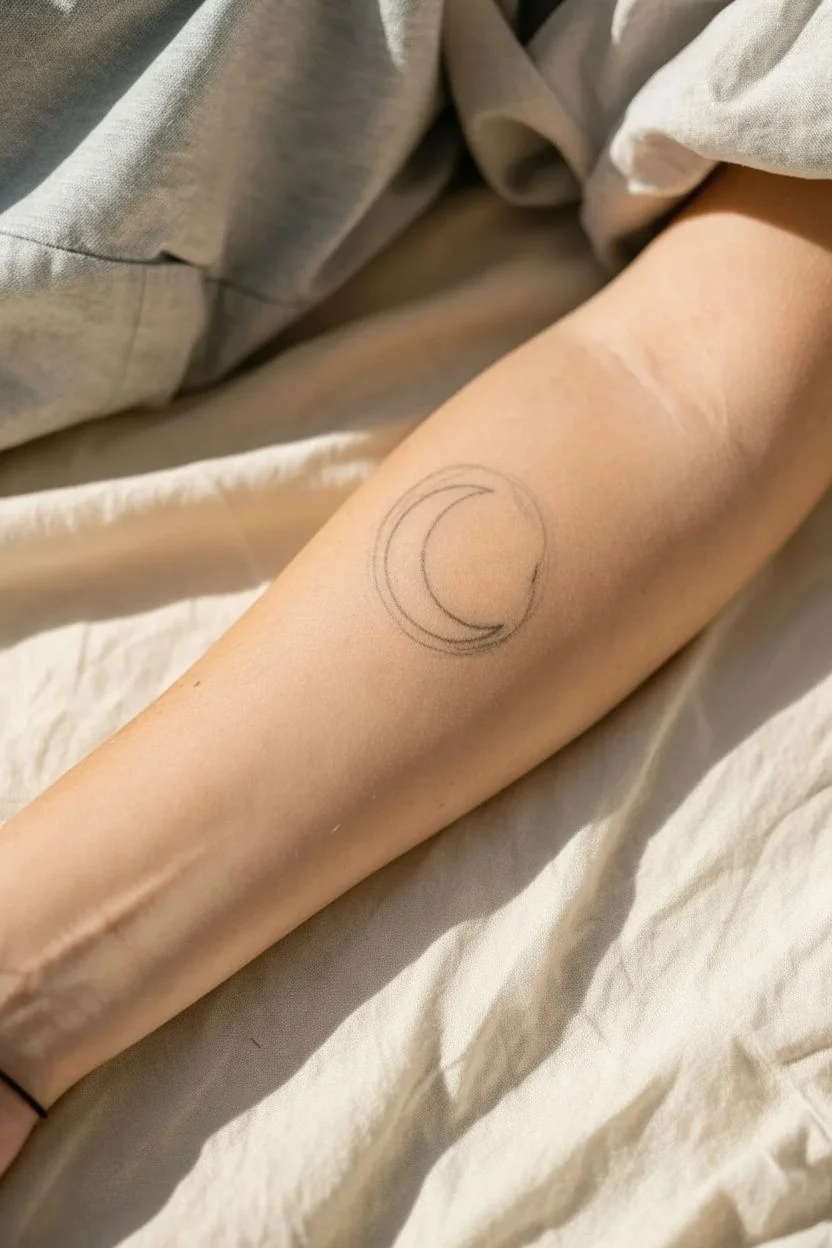
Step 1: Drafting the Moon
-
Set the curve:
Begin by lightly sketching a large ‘C’ shape with your pencil to define the outer curve of the moon. Keep the curve gentle and smooth. -
Define the inner arc:
Draw a smaller, inner curve connecting the top and bottom tips of your first ‘C’. The widest part of the moon should be in the center, tapering to sharp points at the tips. -
Refine the shape:
Go over your pencil lines to ensure the crescent looks balanced. I like to rotate the paper to check if the curve looks natural from different angles.
Wobbly Lines?
If your hand shakes while inking curves, try moving your entire arm from the shoulder rather than just your wrist. This creates smoother, more confident arcs.
Step 2: Adding the Constellation
-
Position the main star:
To the right of the moon, slightly above the center line, pencil in a small cross to mark the largest star. -
Sketch the star rays:
Turn the cross into an eight-pointed star (or a ‘sparkle’ shape) by drawing two long intersecting lines and two shorter diagonal lines crossing through the center. -
Add secondary stars:
Below the moon, sketch three smaller, five-pointed open stars. Vary their sizes slightly to create a sense of depth and randomness. -
Sprinkle the dots:
Mark the positions for tiny dots around the moon and stars. Place one or two near the top tip, a couple between the stars, and one floating near the bottom curve.
Step 3: Inking the Design
-
Trace the moon:
Switch to your fine-tip pen. carefully trace the outer and inner curves of the moon. Use a steady, continuous motion to keep the line weight consistent. -
Ink the Sparkle:
Draw the large star to the right. Start from the center point and flick the pen outward for sharp, tapered points on the main rays. -
Outline tiny stars:
Ink the three small five-pointed stars below the moon. Keep these lines very crisp; don’t fill them in, leave them as open outlines. -
Fill the accent star:
Find the small star usually nestled between the moon and the larger sparkle. Fill this one in completely solid black for contrast. -
Stipple the dots:
Finally, gently press the tip of your pen to create the scattered dots. Don’t drag the pen; just a simple touch-and-lift motion works best. -
Clean up:
Wait at least five minutes for the ink to dry completely. Gently erase all underlying pencil sketch marks to reveal the clean, sharp design.
Try Temporary
Draw this design on tracing paper first. Flip it over, coat the back deeply with soft pencil, then press it onto your skin to preview placement before committing.
You now have a beautifully simple celestial design ready for a stencil or temporary tattoo application


Single-Line Wave
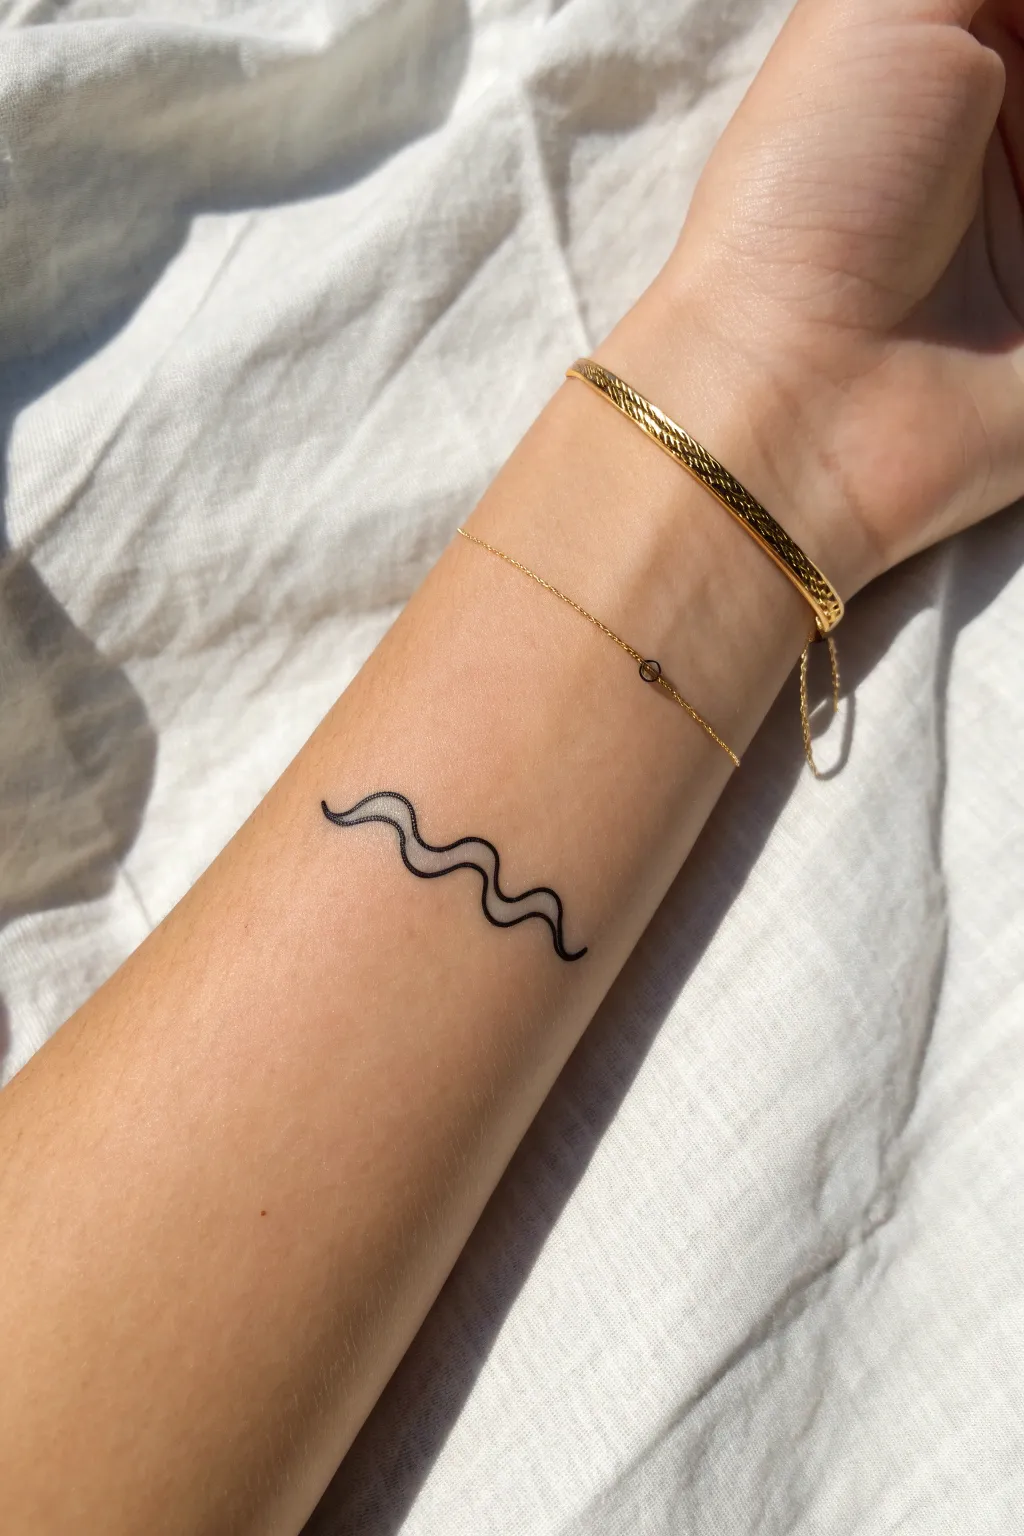
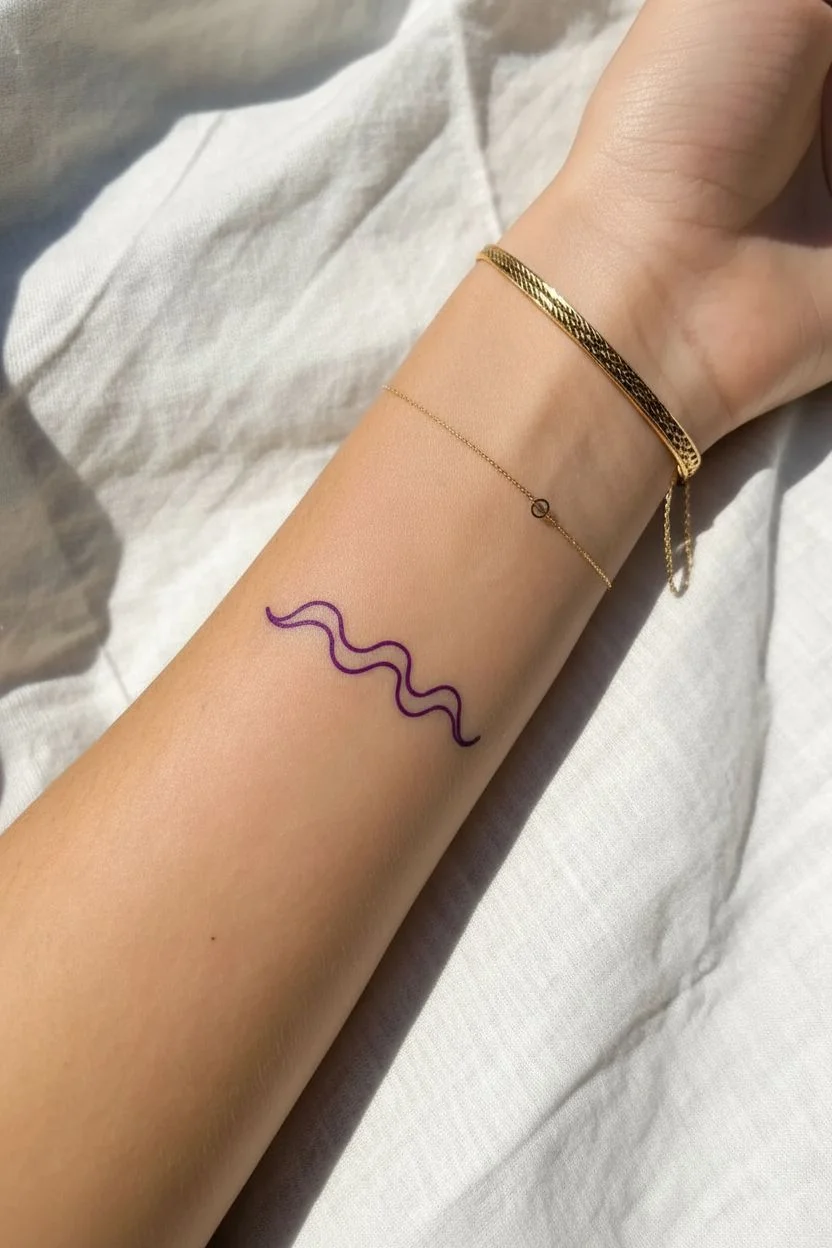
Capture the fluid motion of the ocean with this elegant and understated single-line wave design. This minimalist aesthetic relies on clean linework and smooth curvature to create a timeless piece that sits beautifully on the inner forearm.
Step-by-Step
Materials
- Tattoo machine (liner setup) or complete hand-poke kit
- Sterile tattoo needles (3RL or 5RL for fine lines)
- Black tattoo ink
- Ink caps
- Stencil paper (thermal or freehand)
- Stencil transfer gel
- Green soap and squeeze bottle
- Distilled water
- Surgical gloves (nitrile)
- Paper towels
- Disposable razor
- Skin marker (optional for adjustments)
- Aftercare ointment (e.g., A&D or Aquaphor)
Step 1: Preparation & Stenciling
-
Design the wave:
Begin by sketching your wave design on plain paper first. The goal is a fluid, continuous line that undulates three times; the central curve should be slightly deeper than the outer two for balance. -
Transfer to stencil:
Once satisfied with the flow, trace your design onto the top sheet of the stencil paper. Press firmly with a ballpoint pen to ensure the carbon backing transfers clearly to the underside. -
Prepare the skin:
Clean the inner forearm area thoroughly with green soap and water. Even if you don’t see hair, shave the area gently with a disposable razor to ensure a smooth canvas. -
Sanitize for placement:
Wipe the area down one more time with an alcohol pad or green soap to remove surface oils. Allow the skin to dry completely for a moment before applying the gel. -
Apply transfer gel:
Apply a thin, even layer of stencil transfer gel to the placement area. It should be tacky to the touch, not soaking wet, or the ink will bleed. -
Place the stencil:
Carefully press your cut-out stencil onto the skin. Hold it firmly in place for about 10-15 seconds without shifting it, then peel it back in one smooth motion. -
Dry the stencil:
Let the stencil dry on the skin for at least 10-15 minutes. This is crucial; if you start tattooing too soon, you’ll wipe the purple guide away instantly.
Fixing Shaky Lines
If a curve looks wobbly, don’t just go over it immediately. Wait for the skin to calm down, then use a slightly thicker needle (e.g., 7RL) to smooth the outer edge.
Step 2: Tattooing the Line
-
Setup your station:
Put on fresh gloves. Pour your black ink into a small ink cap and have your petroleum jelly or glide ready. -
Load the needle:
Dip your sterile needle (I recommend a 5RL for a line that isn’t too faint) into the ink cap. Run the machine briefly or tap the hand-poke needle to remove excess drip. -
Stretch the skin:
Using your non-tattooing hand, stretch the skin on the forearm tightly. Think of stretching in three directions if possible to create a firm, flat surface. -
Begin the line:
Start at one end of the wave. Enter the skin at a slight angle. If using a machine, maintain a steady hand speed to match your voltage. -
Trace the curves:
Follow the purple stencil line carefully. Focus on maintaining a consistent depth—you want to be in the dermis layer (approx 1-2mm deep), avoiding going too deep which causes blowouts. -
Manage the peaks:
As you navigate the curves of the wave, try to move your whole arm rather than just your wrist. This creates smoother arcs and prevents shaky, jagged turns. -
Handling stops:
If you need to lift the needle to get more ink, try to taper out of the skin gently. When re-entering, overlap your last stroke slightly to avoid visible gaps. -
Wiping and checking:
Dab—don’t wipe—excess ink away gently with a paper towel and a little green soap to check your line weight. Wiping too aggressively early on can erase your remaining stencil. -
Refining the ends:
The ends of this specific design have a subtle taper. You can achieve this by lightening your hand pressure significantly as you approach the very tip of the line.
Add a Gradient
Make the wave dynamic by using dotwork (stippling) on the underside of each curve. This adds depth and a 3D shadow effect without heavy shading.
Step 3: Aftercare
-
Final cleanse:
Once the line is solid and complete, give the entire area a thorough clean with green soap and distilled water to remove plasma and excess ink. -
Protect the art:
Apply a very thin layer of aftercare ointment. If desired, cover with a protective tattoo film (like Saniderm) or wrap with cling film for the first few hours.
Enjoy your sleek new piece of body art and remember to keep it moisturized while it heals
BRUSH GUIDE
The Right Brush for Every Stroke
From clean lines to bold texture — master brush choice, stroke control, and essential techniques.
Explore the Full Guide
Simple Mountain Horizon
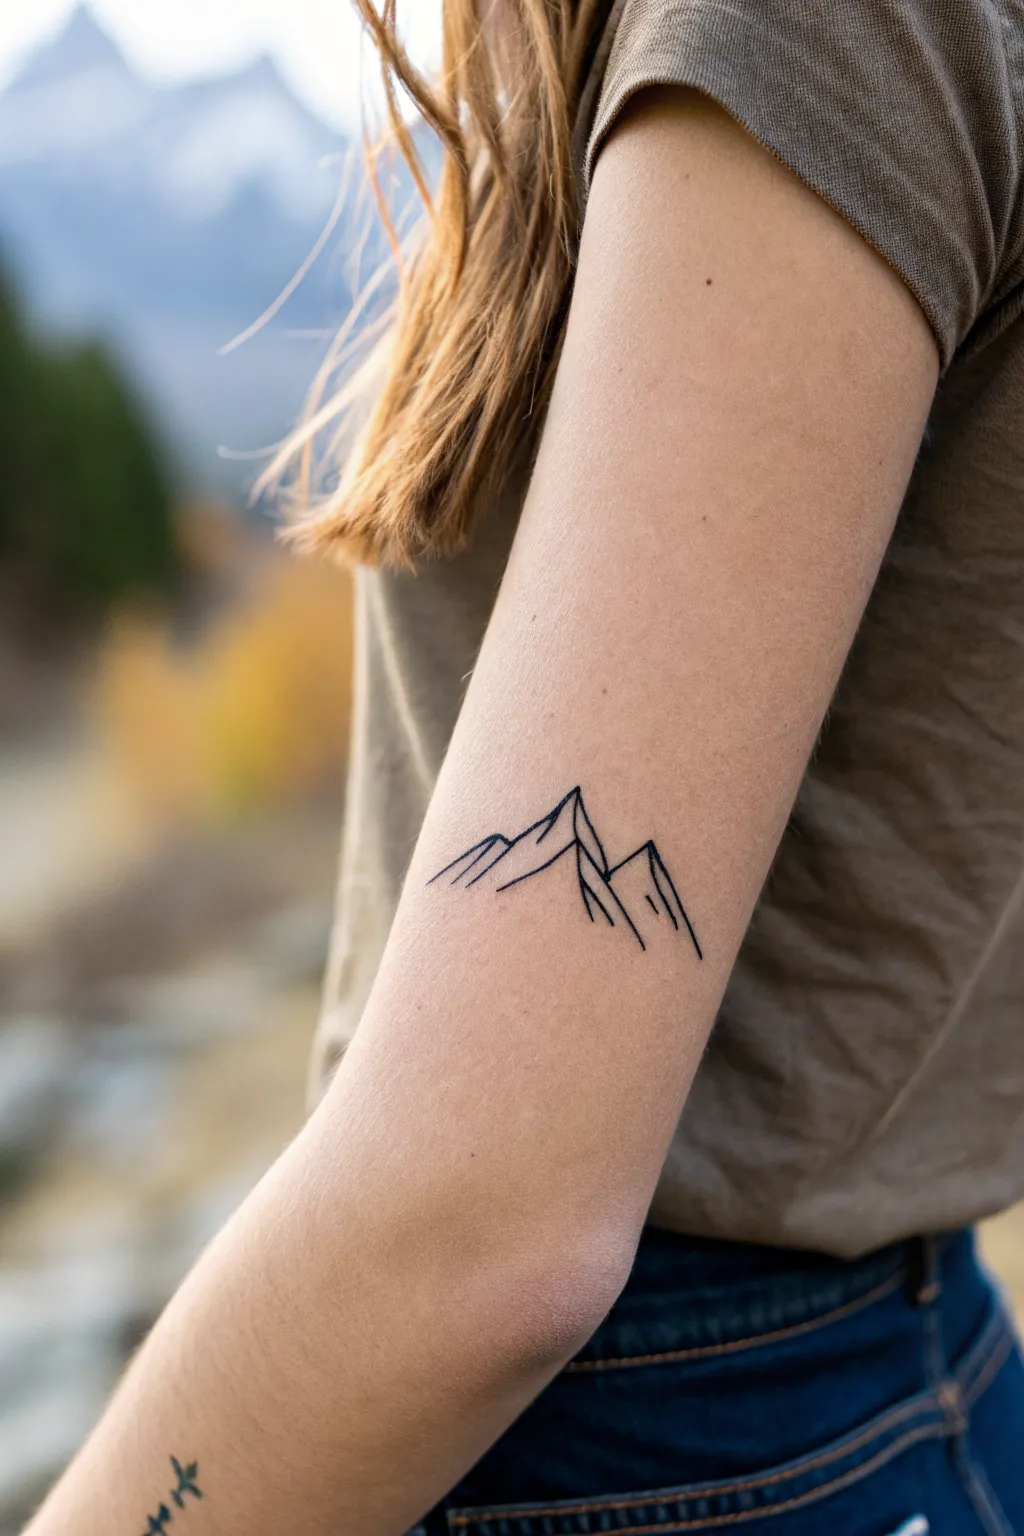
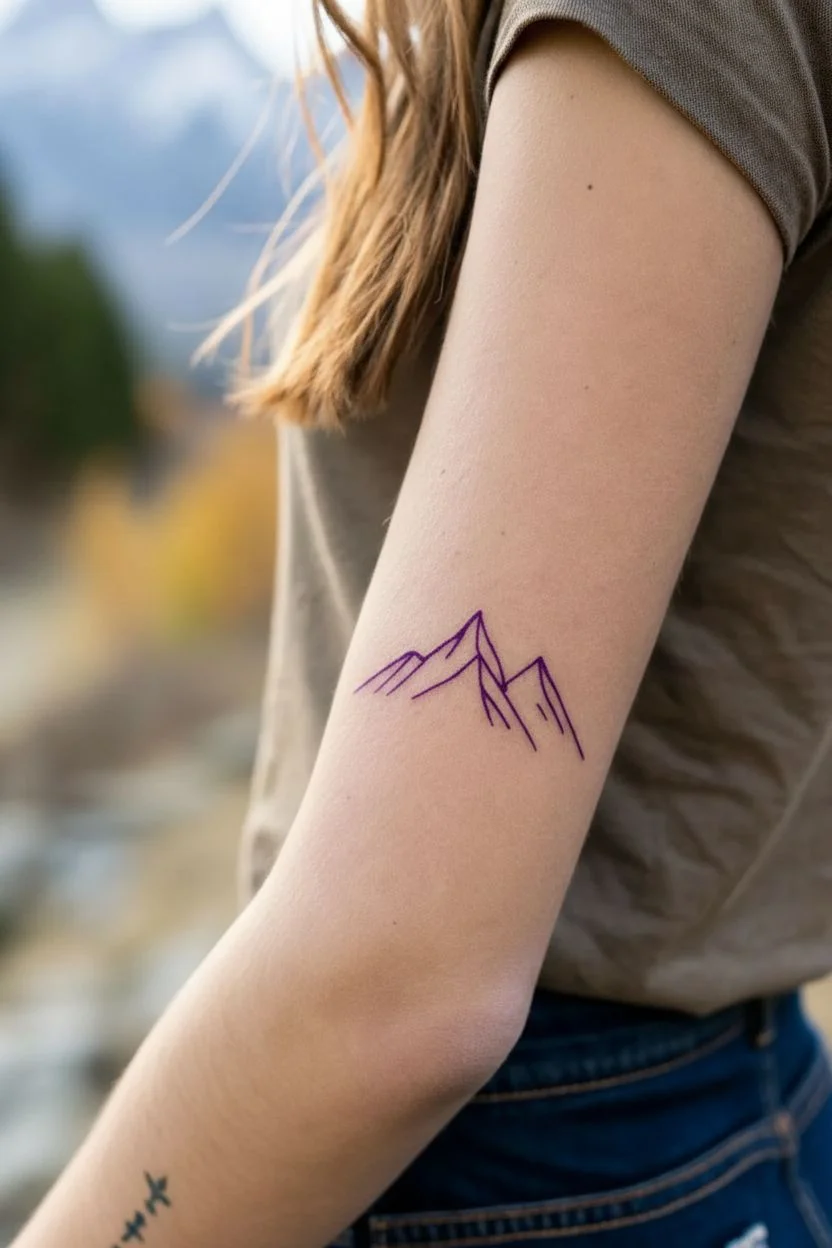
Capture the serenity of the great outdoors with this clean, geometric mountain range design. This fine-line tattoo uses crisp angles and open space to create a timeless, minimalist aesthetic perfect for placing on the forearm.
Detailed Instructions
Materials
- Tattoo machine (pen or rotary style preferred)
- Round Liner needle cartridge (3RL or 5RL for crisp lines)
- Black tattoo ink (high viscosity, lining black)
- Stencil paper and transfer gel
- Green soap and distilled water
- Paper towels and medical gloves
- Aftercare ointment (e.g., Aquaphor or specialized tattoo balm)
- Disposable ink cups
- Shaver and alcohol wipes
Step 1: Preparation & Design
-
Refine the drawing:
Sketch the mountain range on paper first. The design consists of three main peaks: a central, highest peak flanked by two slightly lower ones. Keep the lines straight and angular rather than curvy to maintain that geometric feel. -
Simplify the details:
Add interior lines to suggest dimension. Notice how the original image uses just a few diagonal strokes inside the peaks to imply the ridge lines and shadow side without shading. Less is more here. -
Create the stencil:
Trace your final design onto hectograph stencil paper. Press firmly to ensure the transfer lines are solid and dark, as fine-line tattoos leave little room for error if the stencil is faint. -
Prep the skin:
Clean the outer forearm area thoroughly with green soap. Shave the area to remove fine hairs, even if they aren’t immediately visible, to prevent ingrown hairs later. -
Apply the transfer:
Wipe the skin with an alcohol pad to remove oils, then apply a thin, even layer of stencil transfer gel. Place the stencil carefully, ensuring the horizon line follows the natural flow of the arm. -
Let it set:
Peel back the paper and allow the stencil to dry on the skin for at least 10–15 minutes. I always wait this full duration because it prevents the purple lines from wiping away during the tattooing process.
Shaky Lines?
If your lines look wobbly, increase your hand speed slightly. Moving too slowly causes the needle to snag. Practice on synthetic skin or fruit first.
Step 2: Lining the peaks
-
Setup the machine:
Load a 3RL or 5RL needle cartridge. A 3RL will give you very delicate, wispy lines, while a 5RL offers slightly more stability and boldness. Set your voltage appropriate for lining (usually between 7–9 volts depending on your hand speed). -
Begin the outline:
Dip into your lining black ink. Start with the main outline of the mountains. Pull your lines toward you when possible for better control. -
Anchor your hand:
Stretch the skin taut with your non-working hand. This is crucial for fine lines; if the skin is loose, the line will look shaky or ‘blown out’. -
commit to the stroke:
execute the long slopes of the mountains in single, continuous passes where possible. Avoid stopping and starting in the middle of a line segment to prevent ink pooling. -
Check needle depth:
Keep your needle depth consistent—just barely grazing into the dermis (about 1.5mm). Going too deep will cause the ink to spread and blur these crisp mountain peaks over time.
Step 3: Detailing & Aftercare
-
Add internal ridges:
Move on to the interior detail lines. These should be created with the same weight as the outline. Use quick, confident strokes for the shorter diagonal marks that define the mountain faces. -
Clean continuously:
Dab—don’t wipe—excess ink away gently with a paper towel moistened with green soap water. Wiping aggressively can blur your stencil before you are finished. -
Review and refine:
Once the primary lines are done, give the skin a final clean to inspect the work. Look for any faint spots in the lines and carefully touch them up, connecting any gaps at the peaks. -
Protect the fresh art:
Apply a thin layer of soothing ointment or a second-skin bandage. This protects the fine lines from bacteria while the skin begins its initial healing phase.
Level Up
Add a tiny, simple sun or crescent moon hovering above the central peak to give the scene a specific time of day like dawn or dusk.
Now you have a permanent reminder of the mountains to carry with you on every adventure
Small Sun Arc (Sunrise Style)
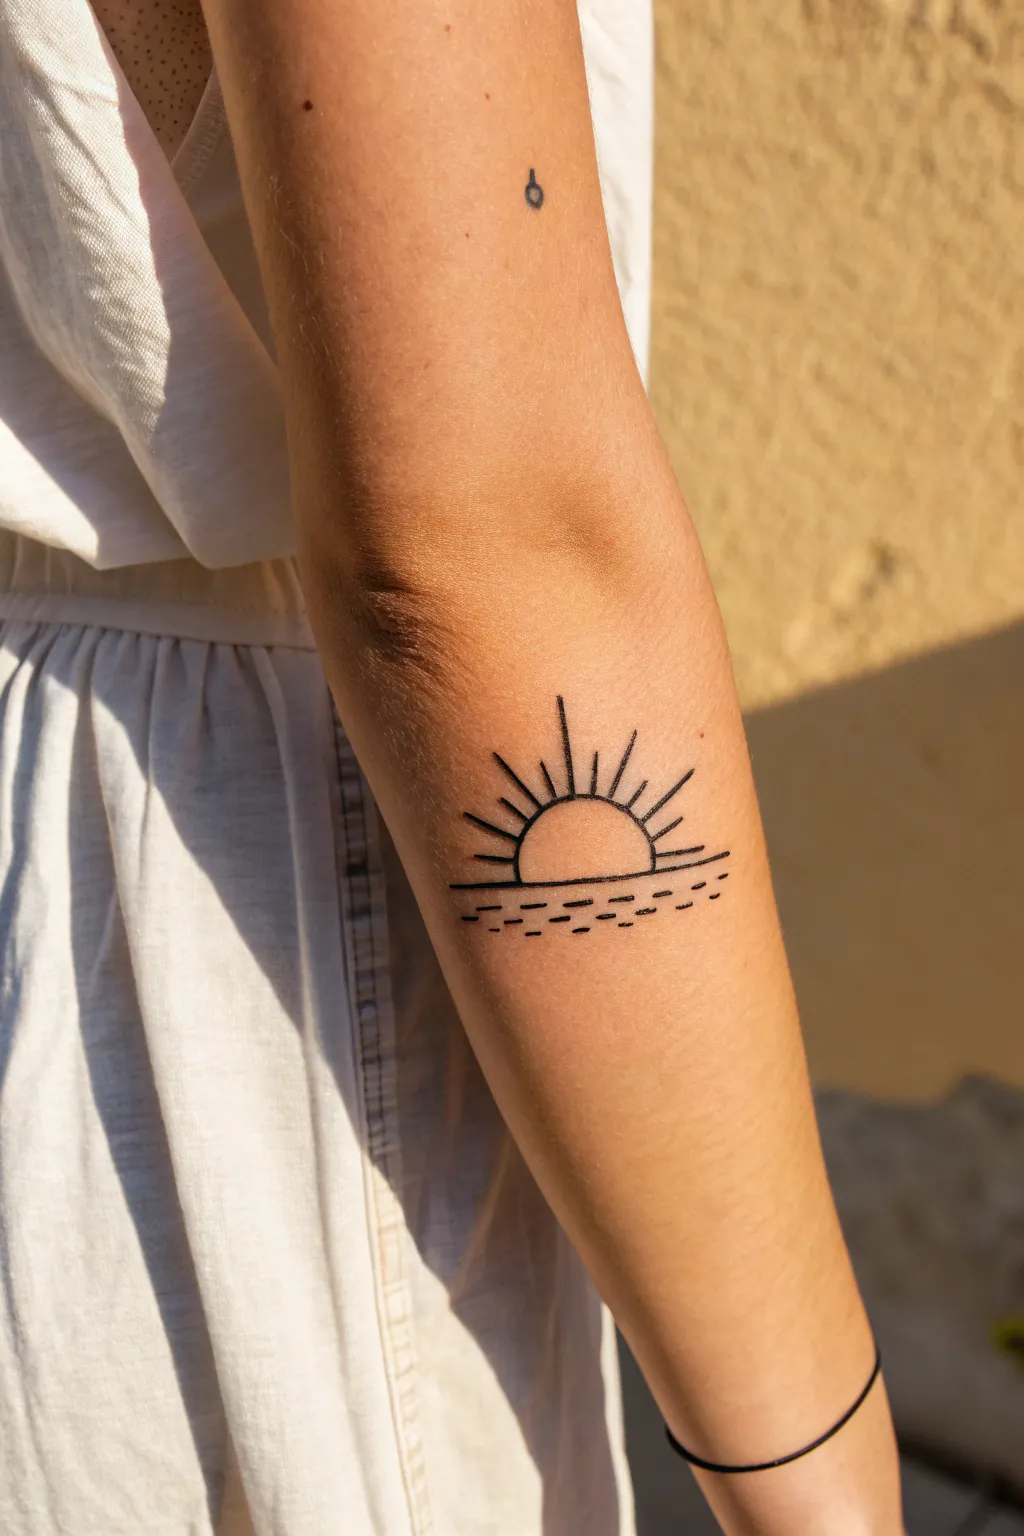
Capture the calm of daybreak with this clean, minimalist line art design perfect for body art or a simple illustration. Its geometric balance of a semicircle sun and rhythmic water dashes makes for an elegant, understated statement piece.
Step-by-Step Guide
Materials
- Tracing paper or sketch paper
- Pencil (HB or lighter)
- Fine liner pen (0.3mm or 0.5mm, black)
- Ruler or straight edge
- Compass or circular object (approx. 1-1.5 inch diameter)
- Eraser
- Body art marker or skin-safe pen (if applying to skin)
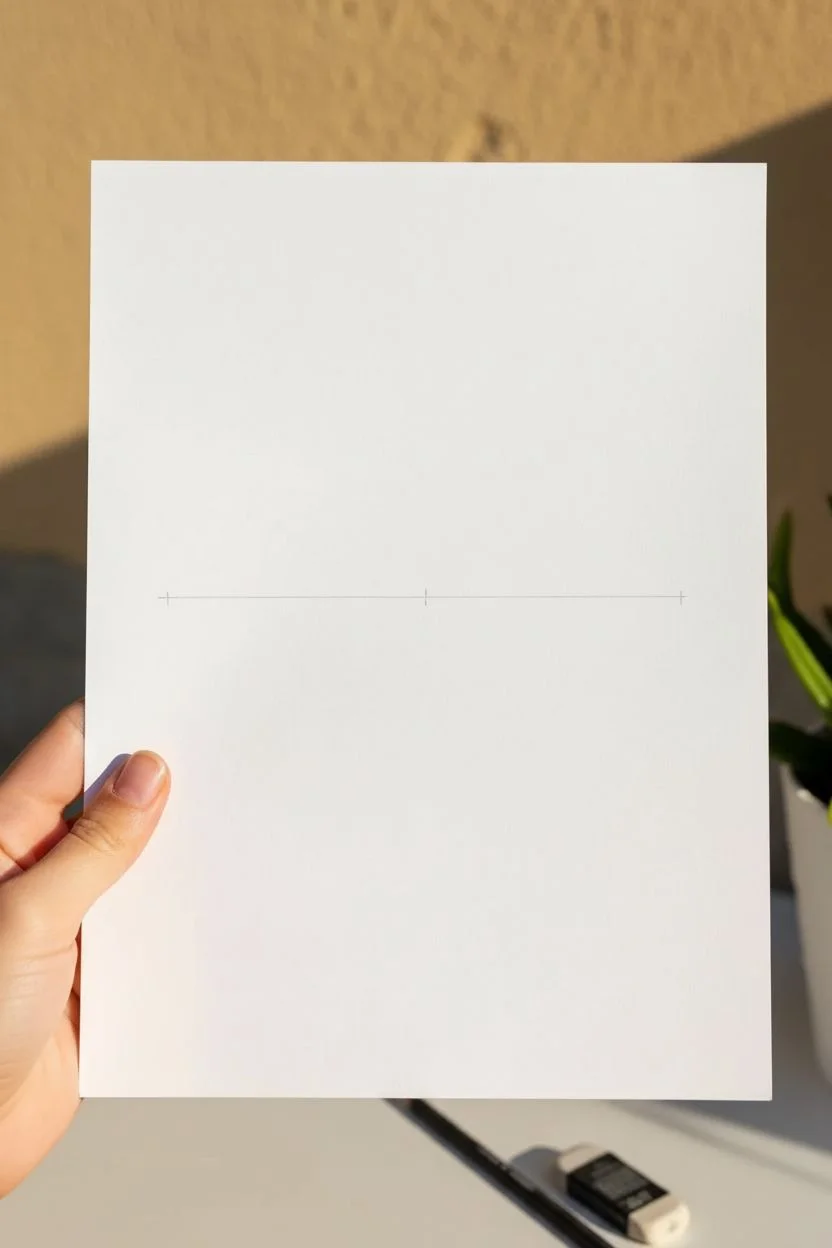
Step 1: Planning the Horizon
-
Set the anchor line:
Begin by drawing a perfectly straight horizontal line on your paper. This will serve as the horizon line where the sun meets the water. -
Mark the center:
Find the midpoint of your horizon line and make a tiny, faint mark. This ensures your sun sits symmetrically in the composition. -
Define the width:
Decide how wide you want the sun to be. Mark two points equal distances from your center mark; a total width of about 1.5 inches usually looks balanced on a forearm.
Step 2: Drawing the Sun
-
Create the arc:
Using a compass set to half your width, or tracing a small circular object like a bottle cap, draw a semi-circle resting on top of your horizon line. -
Check the shape:
Ensure the arc is smooth and connects perfectly with the ends of your horizon line marks. -
Find the ray angles:
Lightly sketch a vertical line straight up from the center of the sun’s arc. This is your central ray guide. -
Position the side rays:
Sketch two more ray guides on the left and two on the right, fanning them out evenly like the spokes of a wheel. -
Inking the rays:
Switch to your fine liner. Draw the central ray first, making it the longest. Then, draw the outer rays slightly shorter to create a rounded, radiating effect. -
Ensure separation:
Make sure your rays do not touch the sun’s arc; leave a small, uniform gap between the arc and the start of each ray for a modern, airy look.
Wobbly Lines?
If your hand shakes while inking the long horizon line, try exhaling slowly as you pull the pen across the paper. Speed usually creates straighter lines than going slow.
Step 3: Creating the Reflection
-
First water level:
Below the main horizon line, roughly 2mm down, draw a dashed line. The dashes should be long and flat, mimicking the calm surface of water. -
Second water level:
Move down another 2-3mm. Draw a second row of dashes, offsetting them slightly from the first row like a brick pattern. -
Third water level:
Create a third row of dashes. I find making these slightly shorter than the previous rows helps suggest perspective and distance fading away. -
Refining the flow:
Add a final, fourth row with just a few small dashes in the center to taper the design downward into a vague triangle shape.
Make it a Set
Create a matching moon version for the other arm. Use a crescent shape instead of the sun and replace the straight rays with small stars or dots.
Step 4: Finalizing the Design
-
Ink the main lines:
Go over your pencil sketches with the fine liner. Use a steady hand to ink the main horizon line and the sun’s arc. -
Line weight consistency:
Keep your pressure even. The beauty of this design relies on the consistent thickness of the black lines. -
Erase guidelines:
Wait for the ink to dry completely to avoid smudging. Then, gently erase all pencil marks and the center guide point. -
Transfer or display:
Your design is now ready. You can scan it for tattoo artist reference or redraw it directly onto skin using a skin-safe body art marker.
Now you have a serene piece of art that carries the promise of a new day wherever it goes

PENCIL GUIDE
Understanding Pencil Grades from H to B
From first sketch to finished drawing — learn pencil grades, line control, and shading techniques.
Explore the Full Guide
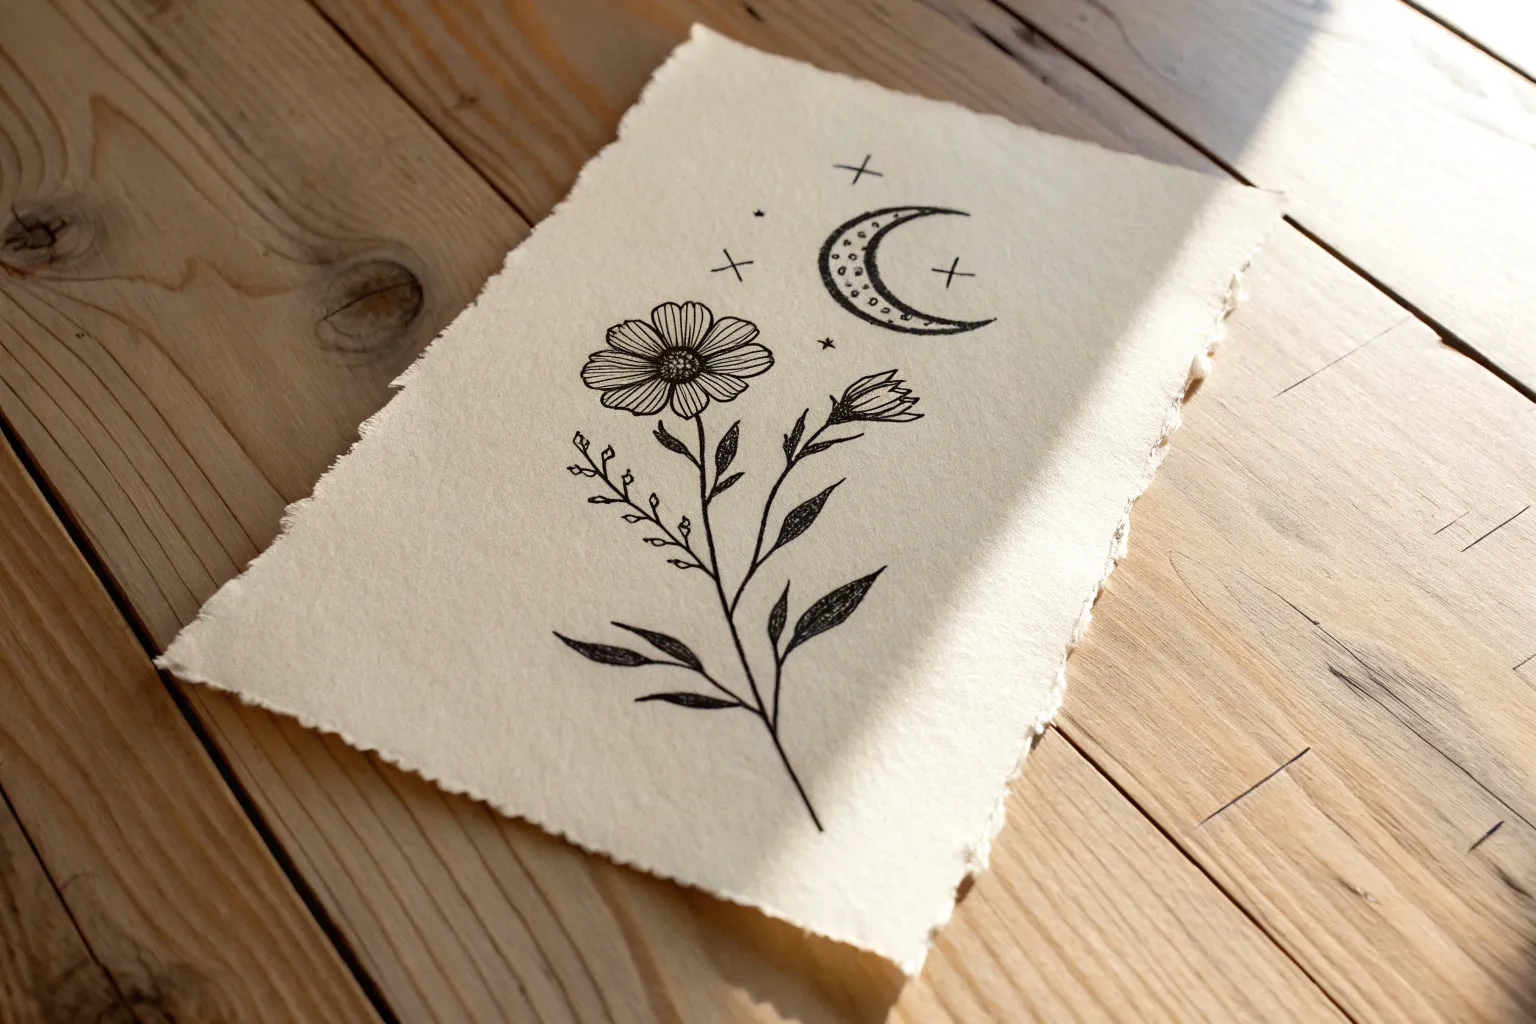
Minimal Flower Sprig
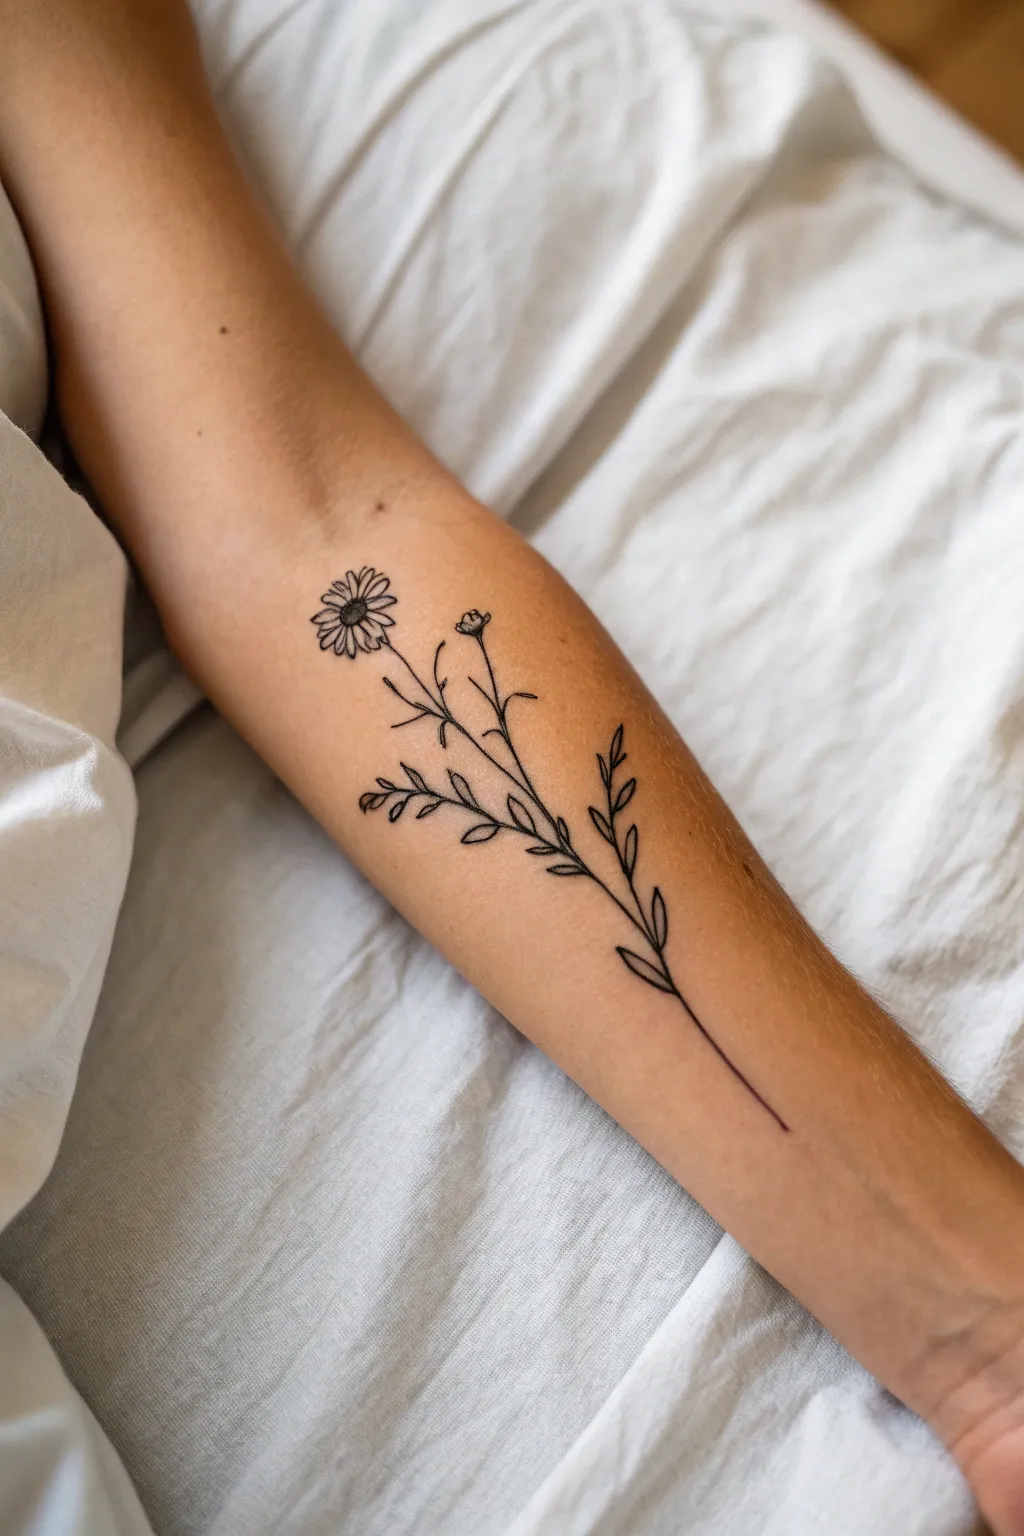
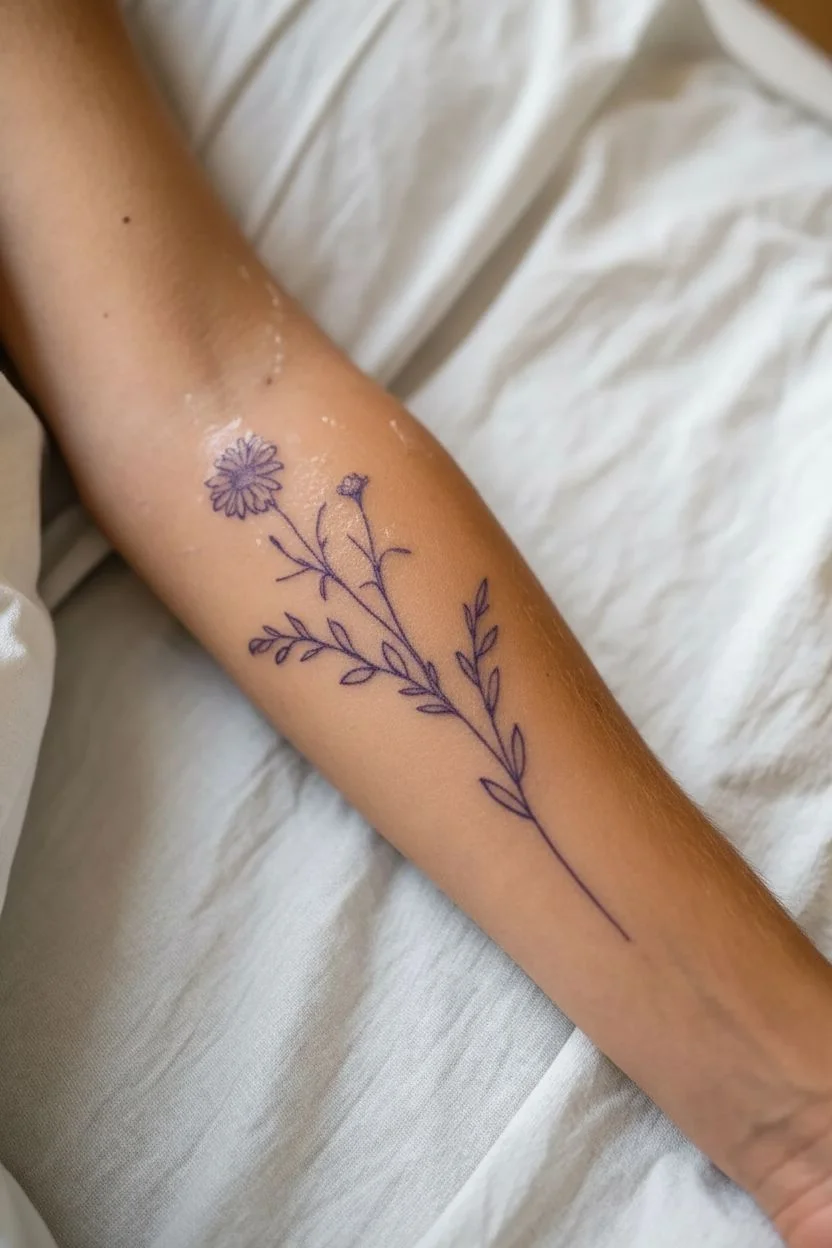
This minimal flower sprig tattoo captures the elegance of nature with fine, clean lines. The design features a daisy-like bloom accompanied by a small bud and delicate foliage, perfect for placement along the forearm.
Detailed Instructions
Materials
- Tattoo machine (pen style or coil)
- Round Liner (RL) cartridges: 3RL (for details) and 5RL (for main lines)
- Black tattoo ink (high quality lining black)
- Stencil paper and transfer gel
- Green soap and squeeze bottle
- Vaseline or ink glide
- Disposable gloves and sterile setup
- Ink caps
- Razor (for skin prep)
Step 1: Preparation & Stencil
-
Design the sprig:
Sketch your design first on paper or a tablet. Draw a long, slightly curved main stem that splits near the top. Add a main daisy head on the left branch and a small, closed bud on the right branch. -
Add foliage:
Along the main stem, draw staggered leaves. Keep them simple and almond-shaped with singular central veins. Ensure the spacing feels organic and not too symmetrical. -
Create the stencil:
Transfer your final clear line drawing onto hectograph stencil paper. Press firmly to ensure the fine details like the flower petals transfer clearly. -
Prepare the skin:
Clean the forearm area thoroughly with green soap. Shave the area carefully, then clean again with alcohol to remove oils. -
Apply the stencil:
Apply a thin, even layer of stencil transfer gel. Place the stencil carefully, ensuring the stem follows the natural line of the forearm muscles. Let it dry for at least 10-15 minutes so it doesn’t wipe away while working.
Clean Line Tip
For super crisp stems, exhale slowly as you pull the long line. This steadies your hand and reduces natural body micro-tremors.
Step 2: Lining the Stem & Leaves
-
Setup machine:
Load your machine with the 5RL needle cartridge. I prefer setting the voltage just high enough for a smooth, single-pass line, usually around 7.5-8.5v depending on your machine. -
Dip and glide:
Dip your needle into the black ink cap. Apply a tiny amount of glide over the bottom of the stencil where you will start. -
Outline the main stem:
Begin at the very bottom of the stem. Pull a steady, consistent line upwards. Use your pinky finger as a stabilizer on the client’s skin to keep the depth consistent. -
Leaf outlines:
Work your way up the stem, outlining the outer shape of each leaf. Keep your hand speed consistent with your voltage to avoid blowouts or snagged lines. -
Switch to fine details:
Once the main structural lines (stem and leaf outlines) are done, switch to a 3RL needle for the finer interior details. -
Add leaf veins:
With the 3RL, gently softly drag the needle to create the central vein in each leaf. These lines can be slightly lighter than the outline.
Step 3: Flowering Details
-
Outline the bud:
Move to the small bud on the right branch. Use the 3RL to create the small, tight petals and the cup-like sepal holding them. -
Center of the daisy:
For the main flower, start with the center disk. Stipple tiny dots or very small circles to create texture rather than a solid outline. -
Petal formation:
Draw the petals radiating outward from the center. Ensure they overlap slightly and vary in size to look natural, rather than perfectly uniform. -
Refine lines:
Check your work. If any lines look too faint, carefully go over them again, but be extremely cautious not to create a ‘double line’ effect. -
Final wipe:
Gently clean the entire tattoo with green soap and water to remove excess ink and plasma. Pat dry with a clean paper towel. -
Aftercare start:
Apply a thin layer of aftercare ointment or a second-skin bandage to protect the fresh artwork.
Add Dimension
Use a diluted grey wash drop to add tiny shadows where the leaves meet the stem or under the flower petals for subtle 3D depth.
Enjoy the timeless beauty of this permanent botanical art piece
Tiny Butterfly Outline
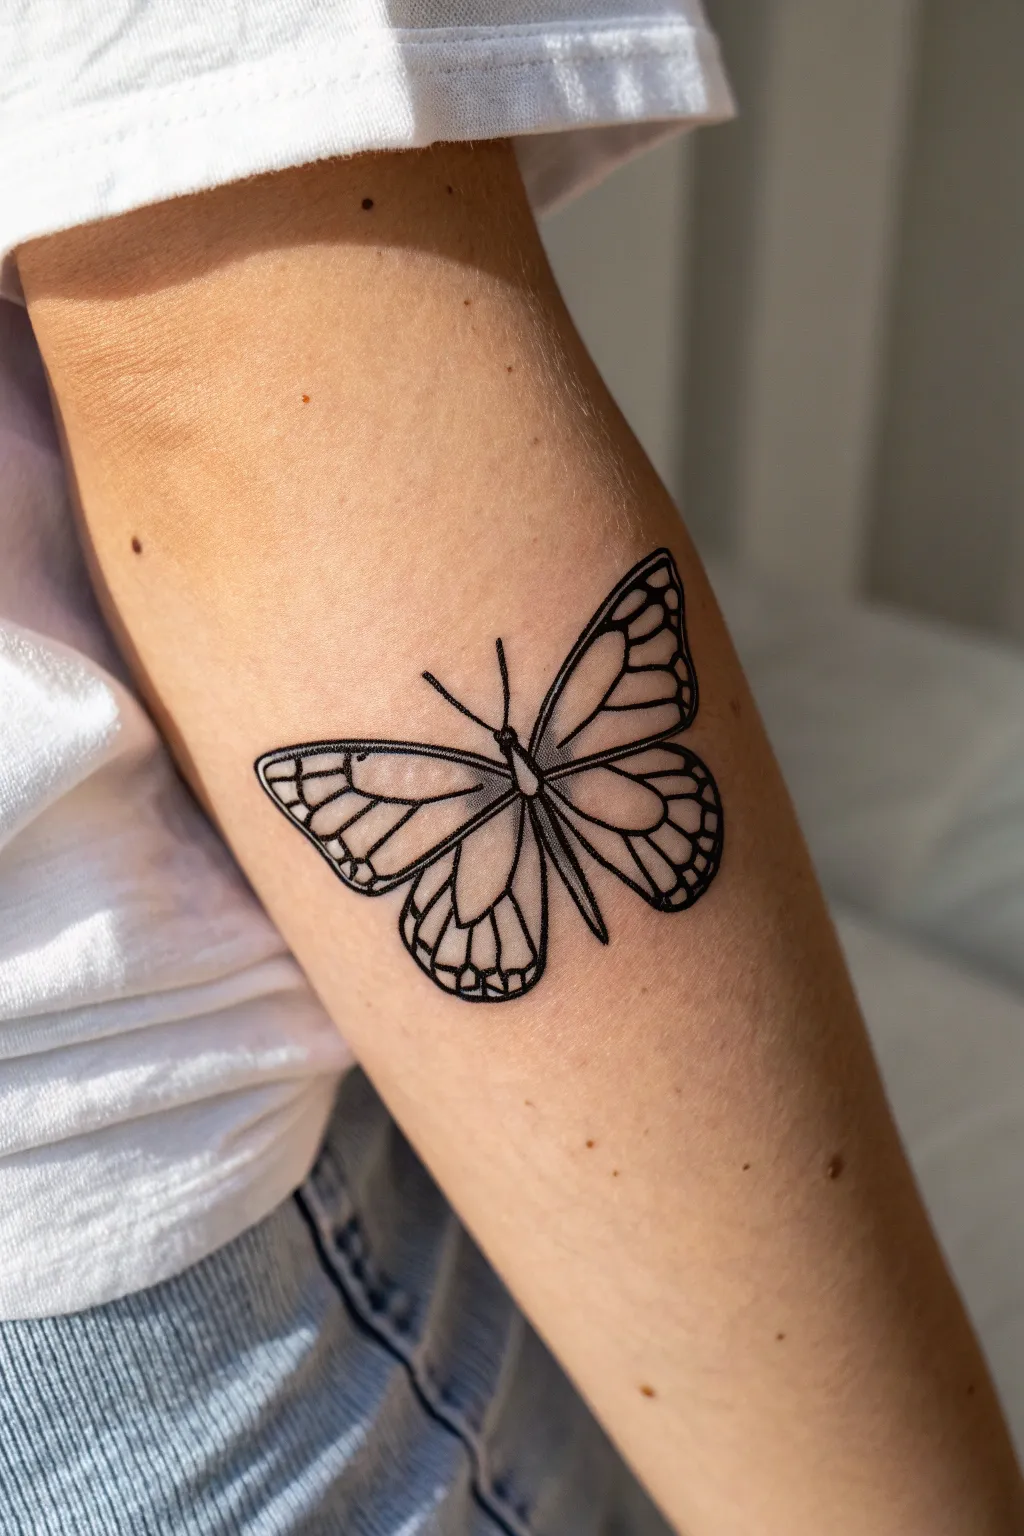
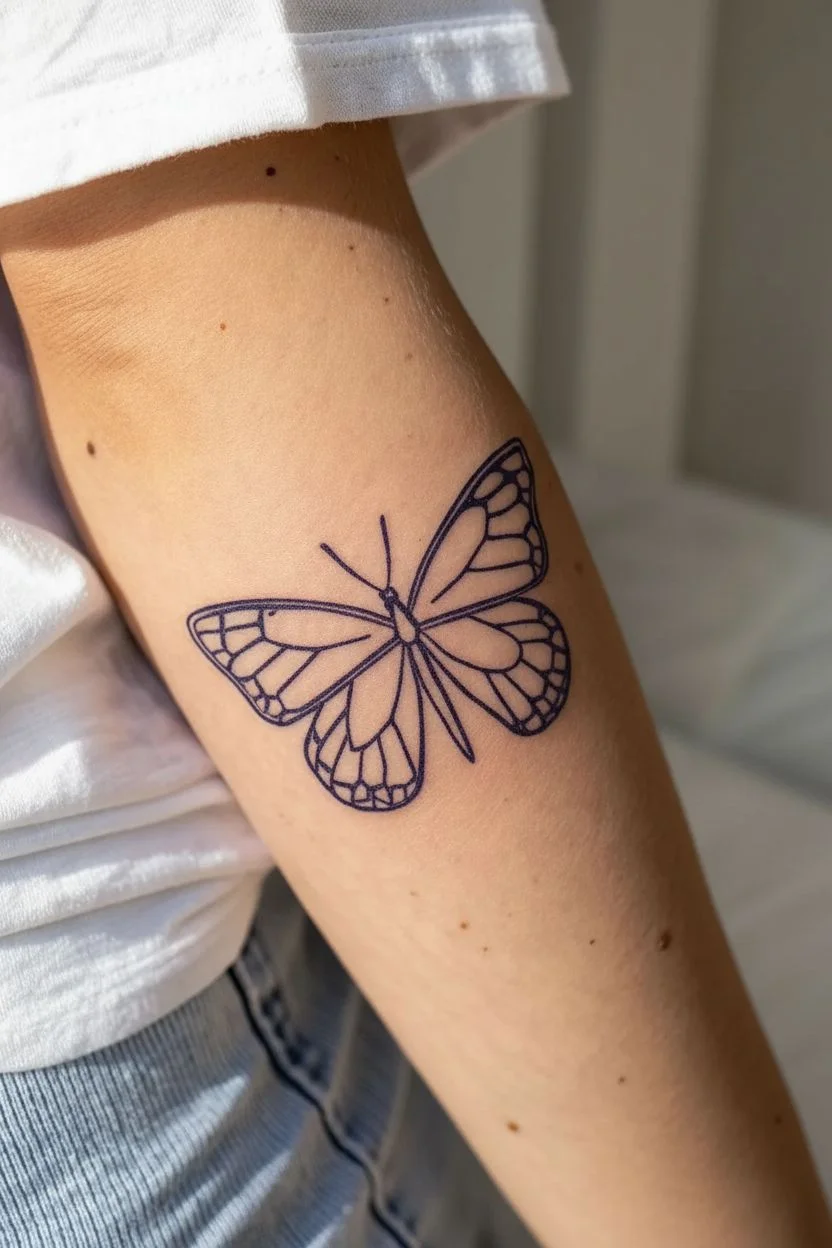
Capture the delicate beauty of nature with this crisp, black ink butterfly tattoo featuring clean outlines and subtle shading. This design relies on precise line work and negative space to create a timeless, elegant piece suitable for the upper arm or wrist.
Step-by-Step Tutorial
Materials
- Tattoo machine (pen style or coil)
- 3RL (Round Liner) tattoo needle cartridge
- 5RL (Round Liner) tattoo needle cartridge
- Dynamic Black tattoo ink (or comparable high-quality black lining ink)
- Stencil paper and transfer gel
- Green soap and squeeze bottle
- Paper towels
- Vaseline or tattoo glide
- Disposable ink caps
- Disposable gloves
- Razor for skin preparation
Step 1: Preparation and Stencil
-
Prepare the design:
Sketch your butterfly design on paper first, focusing on symmetry between the left and right wings. The top wings should be slightly larger and more triangular, while the bottom wings are rounded. -
Create the stencil:
Trace your final design onto the carbon sheet of your stencil paper. Press firmly to ensure a clean, dark transfer line, as this will be your only guide. -
Prep the skin area:
Clean the upper arm area thoroughly with green soap, then shave the area dry to remove any fine hairs that could interfere with the needle. -
Apply the stencil:
Apply a thin, even layer of stencil transfer gel to the skin. Place the stencil carefully, press down for a few seconds, and peel it back. Let it dry for at least 10 minutes so it doesn’t wipe away easily.
Clean Line Pro-Tip
Exhale as you pull your longest lines. Controlling your breathing stabilizes your core and hand, reducing micro-tremors for that perfectly smooth, continuous butterfly wing edge.
Step 2: Outlining the Structure
-
Set up your machine:
Load a 5RL needle cartridge for the main structural lines. Dip the needle into your black ink cap, running the machine briefly to pull ink into the reservoir. -
Apply glide:
Apply a very thin smear of Vaseline or tattoo glide over the stencil area you are about to work on to lubricate the skin. -
Start with the central body:
Begin by lining the thorax (body) of the butterfly. Use a steady hand to create the elongated oval shape and the small head section. -
Line the upper wings:
Trace the outer perimeter of the top wings. Keep your hand speed consistent with your voltage to ensure a solid, non-shaky line. -
Line the lower wings:
Continue the perimeter line down to the lower wings, ensuring the curve meets the body cleanly. I find it helpful to stretch the skin tightly with my non-drawing hand to get the crispest line possible. -
Add the antennae:
Carefully pull the lines for the two antennae extending from the head. These should be thin and taper slightly at the ends.
Stencil smudging?
If your stencil blurs while working, stop immediately. Do not guess the line. Consult your original reference drawing or re-stencil the specific lost section to ensure accuracy.
Step 3: Detailing and Shading
-
Switch to a finer needle:
Swap your cartridge to a 3RL. This finer needle is perfect for the intricate geometric patterns inside the wings and the delicate shading. -
Map the inner wing veins:
Draw the ‘veins’ inside the wings. These lines create the stained-glass effect. Be careful not to merge these lines with the thick outer border; leave a tiny breath of space if needed for clarity. -
Detail the wing tips:
Add the small scalloped shapes along the outer edges of the lower wings. Precision is key here, as these shapes are quite small. -
Start the whip shading:
Using the 3RL, add shading near the body where the wings attach. Use a ‘whip shading’ motion—flicking the needle out towards the wing tips—to create a gradient from black to skin tone. -
Darken the body patterns:
Add the small circular details inside the upper wing corners. You can stipple these (dot work) or carefully line them to create texture without solid black packing. -
Refine the connection points:
Go back over areas where lines intersect, specifically near the body, to slightly thicken the junctions. This adds visual weight and makes the tattoo look grounded.
Step 4: Cleaning and Aftercare
-
Final wipe down:
Using distilled water and green soap, gently wipe away excess ink and plasma to reveal the final clean lines. -
Inspect for dropouts:
Check the lines one last time. If any spots look faint or didn’t saturate, touch them up quickly with the 3RL. -
Bandage the work:
Apply a thin layer of aftercare ointment or a second skin adhesive bandage to protect the fresh tattoo while it begins healing.
Now you have a permanent piece of wearable art that celebrates delicate natural geometry


Lightning Bolt Icon
Capture the energy of a storm with this striking pair of lightning bolt icons. This minimalist design features two clean, open outlines—one large and one small—creating a balanced and dynamic look that fits perfectly on the forearm.
Detailed Instructions
Materials
- Tattoo machine (pen or coil style)
- 3RL (Round Liner) tattoo needle cartridge
- 5RL (Round Liner) tattoo needle cartridge (optional for bolder lines)
- Black tattoo ink (high quality)
- Stencil paper
- Stencil transfer fluid
- Green soap and squeeze bottle
- Ink cups
- Petroleum jelly or tattoo process butter
- Disposable gloves
- Paper towels
- Isopropyl alcohol
- Razor
- Cling film and medical tape
Step 1: Preparation & Design
-
Design the bolts:
Begin by sketching two lightning bolts on paper. The larger bolt should be roughly 3-4 inches tall with sharp, angular turns. The smaller bolt is a miniature echo, about 0.5 inches tall, placed above the larger one. -
Clean up the lines:
Refine your sketch so the lines are perfectly straight and the corners are crisp points. This is a geometric design, so wobbles will show. -
Create the stencil:
Place your final design over a sheet of thermal or hand-trace tattoo stencil paper. Press firmly with a ballpoint pen to transfer the purple carbon onto the backing sheet. -
Prepare the skin:
Clean the forearm area thoroughly with green soap. Shave the area with a fresh razor to remove any hair that could interfere with the needle. -
Sanitize the area:
Wipe the skin down with isopropyl alcohol to remove oils and sanitize the surface. Let it air dry for a moment. -
Apply the stencil:
Apply a thin, even layer of stencil transfer fluid. Press the stencil onto the skin, ensuring the bolts are aligned vertically with the arm. Hold for a few seconds and peel back carefully. -
Let it dry:
Allow the stencil to dry on the skin for at least 10-15 minutes. This prevents the purple lines from wiping away when you start tattooing.
Step 2: Process & Line Work
-
Setup the machine:
Load your tattoo machine with a 3RL cartridge for fine, crisp lines. Pour your black ink into a small ink cup. -
Lubricate the skin:
Apply a very thin smear of petroleum jelly or process butter over the stencil area. This helps the needle glide and prevents ink from pooling. -
Start the small bolt:
Dip your needle throughout the process. I prefer starting with the smaller top bolt to get a feel for the skin. Trace the outline carefully, maintaining a steady hand speed to keep the line weight consistent. -
Outline the large bolt:
Move to the larger bolt. Start at the top point and pull your line down to the first angle. Stop at the corner, lift the needle slightly if needed, and reposition your hand for the next segment. -
Connect the corners:
Ensure all your corners meet at sharp points. Avoid overshooting the lines; precise stops are crucial for this geometric style. -
Check line saturation:
Wipe away excess ink with a damp paper towel (dab, don’t scrub). Check if any segments look faint. If a line isn’t solid black, go over it one more time very carefully.
Stay Steady
For long straight lines, hold your breath slightly while pulling the line. Anchoring your pinky finger on a solid surface creates a tripod effect for stability.
Step 3: Aftercare
-
Final clean:
Once finished, clean the entire area with green soap and water to remove all plasma and excess ink. The lines should look crisp and bold against the skin. -
Wrap it up:
Apply a thin layer of aftercare ointment/butter. Cover the fresh tattoo with cling film or a sterile adhesive bandage (like Saniderm) to protect it from bacteria.
Level Up: Filled or Shaded
For a bolder look, use a magnum needle to fill the large bolt with solid black, leaving the small one as an outline for contrast.
Enjoy your sharp new ink and remember to keep it moisturized while it heals.
Small Arrow (Straight and Clean)
This minimalist tattoo design combines the classic symbolism of an arrow with the playful nostalgia of a paper airplane. The clean black linework creates a sleek, modern aesthetic that sits perfectly along the forearm.
How-To Guide
Materials
- Tracing paper or tattoo transfer paper
- Fine-point black illustration pen (005 or 01 micron)
- Medium-point black marker (for filling)
- Skin-safe temporary tattoo marker or eyeliner (if testing placement)
- Tattoo stencil stuff/gel (if applying stencil)
- Ruler
- Pencil and eraser
Step 1: Designing the Template
-
Draw the central axis:
Start by drawing a long, perfectly straight line on your paper using a ruler. This will be the shaft of the arrow and serves as the anchor for the entire design. -
Sketch the paper plane head:
At the top end of the line, sketch a ‘V’ shape pointing upwards. Connect the top open ends of the ‘V’ with a horizontal line to form a triangle. -
Add the inner fold detail:
Draw a vertical line from the tip of the triangle down to the horizontal base. Then, draw two diagonal lines from that center vertical line out to the bottom corners to simulate the folded wings of a paper airplane. -
Create the midpoint detail:
Find the rough center of your main shaft line. Draw a small, solid black triangle pointing downward right on the line. -
Refine the midpoint shape:
Slightly curve the top edge of this small triangle to give it a more organic feel, ensuring it looks like a decorative bead or fletching knot. -
Draft the fletching spines:
At the bottom end of the shaft, mark off the section where the feathers will go. Draw roughly 5 to 6 diagonal lines on the left side of the shaft, slanting downwards. -
Mirror the fletching:
Repeat this process on the right side of the shaft. Try to align these diagonal lines with the ones on the left so they meet at the center shaft, creating chevron shapes. -
Check symmetry:
Look over the design. If the fletching looks too uniform, you can slightly offset a line or two to give it a hand-drawn character.
Straight Line Hack
When placing the stencil, have the person bend their arm slightly. Skin twists when the arm rotates, so align the arrow while the arm is in a relaxed, natural position.
Step 2: Finalizing the Stencil
-
Ink the outlines:
Take your fine-point illustration pen and carefully trace over your pencil sketch. Keep your hand steady to ensure the long shaft remains straight. -
Fill the details:
Use a slightly thicker marker or press harder with your pen to fill in the small midpoint triangle completely black. Leave the paper airplane head as an outline. -
Clean up:
Once the ink is fully dry, erase all underlying pencil marks to reveal a crisp, high-contrast design. -
Prepare for transfer:
If you are using tattoo transfer paper, place your drawing under the carbon sheet and trace firmly over your inked lines to create the purple stencil.
Make It Personal
Instead of a paper airplane, swap the head for a compass needle or a tiny geometric heart. You can also shade the fletching for a gradient effect.
Step 3: Placement and Visualization
-
Prep the skin:
Clean the forearm area thoroughly with alcohol to remove oils. This is crucial for the stencil or marker to adhere properly without smudging. -
Apply transfer gel:
Apply a thin layer of stencil gel or even a stick of clear deodorant to the skin area. -
Position the stencil:
Carefully place your transfer paper onto the arm. I find it helpful to align the arrow’s shaft with the natural line of the tendons in the wrist for better flow. -
Peel and reveal:
Press down firmly for a few seconds, then gently peel back the paper. Allow the transfer to dry on the skin for at least 10 minutes before touching it. -
Temporary option:
If simply testing the look with a skin-safe marker, tape your original drawing next to your arm as a reference and freehand the lines slowly, starting with the ruler-guided shaft.
Now you have a sharp, symbolic design conceptualized and ready for your artist or reference collection
Tiny Paw Print
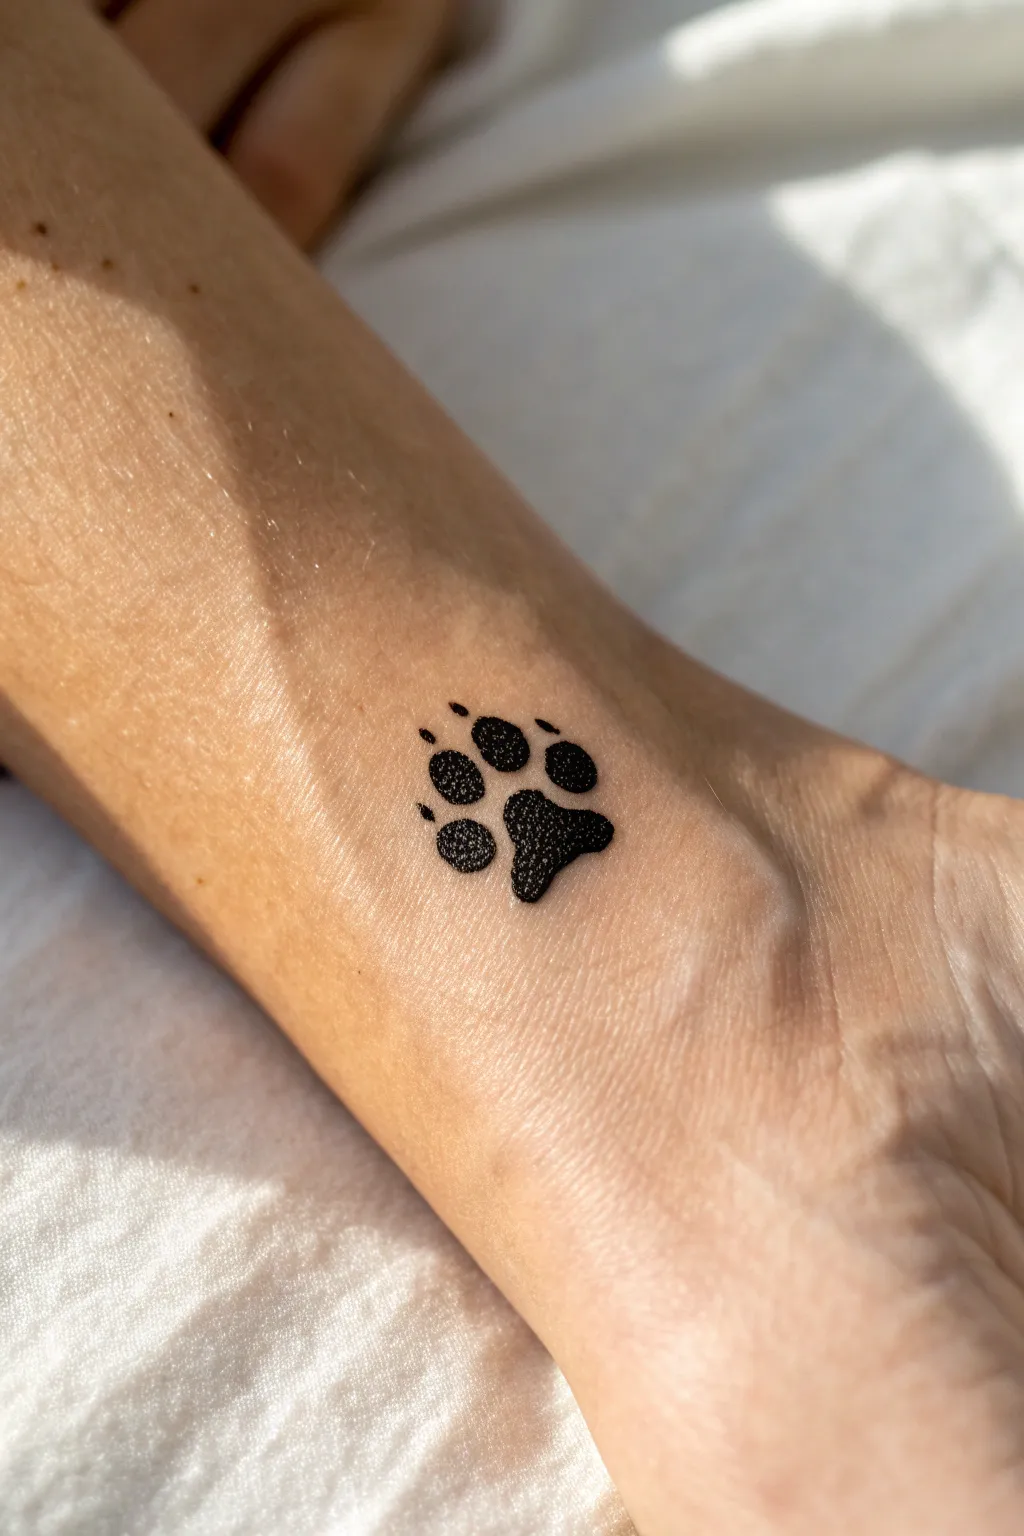
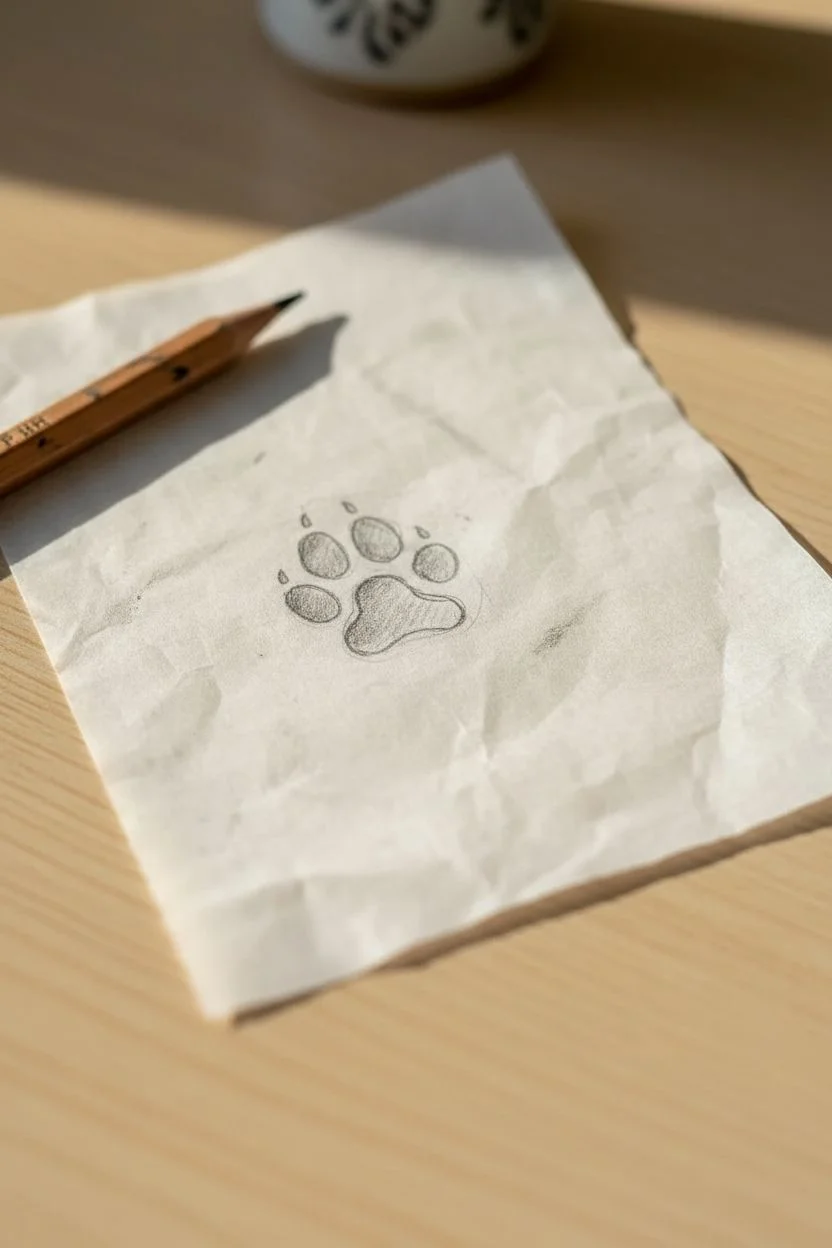
This minimalist paw print design captures the essence of your furry friend in a clean, bold silhouette. Perfect for a wrist or ankle placement, this petite artwork uses simple shapes to create a lasting tribute that manages to be both subtle and striking.
Step-by-Step Tutorial
Materials
- Fine-point tattoo marker (black) or waterproof eyeliner
- Tracing paper
- Pencil (HB or B)
- Rubbing alcohol
- Cotton pads
- Translucent powder (setting powder)
- Hairspray or liquid bandage (optional sealant)
- Surgical marker (optional for stenciling)
Step 1: Drafting the Design
-
Sketch the main pad:
Begin on your tracing paper by drawing an upside-down heart shape with rounded bottom edges. This forms the large central pad of the paw. Keep the lines smooth and the shape slightly wider than it is tall. -
Add the toes:
Draw four small, oval shapes arching above the main pad. These should be evenly spaced but follow the natural curve of the main pad. Make the two middle toes slightly higher than the outer toes for a realistic look. -
Refine the shapes:
Go over your pencil lines to darken them. Ensure the spacing between the pad and the toes is consistent—close enough to look connected, but with clear separation. -
Create the claws:
Add tiny, sharp triangular points or small dots floating just above each toe bean. This detail is optional but gives the print a distinct, slightly wilder character as seen in the reference.
Sharper Lines
If using eyeliner, store it tip-down for an hour before starting. This ensures the ink flows smoothly and prevents the ‘skipping’ that creates jagged edges.
Step 2: Preparing the Canvas
-
Determine placement:
Choose a spot on your inner wrist or forearm where the skin is relatively flat and hairless. Hold your arm out to see how the design will orient when your arm is in a natural position. -
Clean the skin:
Soak a cotton pad with rubbing alcohol and thoroughly wipe the chosen area. This removes natural oils and dead skin, which is crucial for helping the pigment adhere and stay crisp. -
Dry thoroughly:
Wait a moment for the alcohol to evaporate completely. The skin must be bone dry before you attempt to transfer any ink.
Step 3: Transfer and Inking
-
Create the stencil:
Flip your tracing paper over so the graphite side is facing your skin. Press it firmly onto the clean area. Dampen the back of the paper slightly with a wet paper towel to help transfer the graphite outline. -
Peel and inspect:
Carefully peel back the paper. You should see a faint grey outline of your paw print on your skin. If it’s too faint, you may need to freehand sketches over the faintest areas with a surgical marker. -
Outline the main pad:
Using your fine-point tattoo marker or waterproof eyeliner, carefully trace the outline of the large heart-shaped pad first. Keep your hand steady and rest your pinky finger on your arm for balance. -
Fill the pad:
Slowly colour inside the lines of the main pad. use small circular motions rather than long strokes to ensure solid, opaque coverage without streaks. -
Ink the toes:
Move on to the four toe beans. Outline each oval first, then fill them in. I find it easiest to work from left to right to avoid smudging the fresh ink with my hand. -
Add the claw details:
With the very tip of your marker, dot or flick the small claw marks above the toes. These should be delicate and sharp compared to the bolder pads. -
Let it set:
Allow the ink to dry completely for at least 5-10 minutes. Avoid touching it or bending your wrist excessively during this time.
Smudge Rescue
Did your hand slip? Dip a Q-tip in makeup remover or alcohol and carefully clean up the edge immediately. Wait for that spot to dry before re-drawing the line.
Step 4: Setting the Tattoo
-
Apply powder:
Take a small amount of translucent setting powder on a brush or your finger. Gently pat—don’t rub—it over the dried design. This removes the shine and makes it look more like real skin texture. -
Settle the powder:
Leave the powder on for a minute, then lightly dust off any excess. The black ink should now look matte and velvety. -
Seal the deal:
Spray a light coat of hairspray or apply a dedicated liquid bandage product over the area from a distance of about 6 inches. This locks the pigment in and provides a water-resistant shield.
Now you have a sweet, personalized mark to show off your love for animals without the lifetime commitment
Minimal Music Note


This elegant project captures the essence of music through pointillism, creating a delicate treble clef design that serves as perfect inspiration for a minimal tattoo. Using a stippling technique adds texture and depth to the simple black curves, printed on textured cardstock to mimic the feel of skin or parchment.
Step-by-Step Guide
Materials
- Cream or off-white textured cardstock
- Fine liner pen (01 or 03 nib size, black)
- Pencil (HB or H)
- High-quality eraser
- Ruler
- Printed treble clef reference image
Step 1: Preparation and Sketching
-
Prepare your workspace:
Find a well-lit area to work in. Place your cream cardstock on a flat, clean surface. The texture of the paper is important for the aesthetic, so handle it gently to avoid creasing. -
Find your center:
Using your ruler, lightly mark the center of your cardstock to ensure your design is balanced. This will help frame the solitary note perfectly. -
Draft the spine:
Start sketching the vertical line of the treble clef lightly with your pencil. It should have a slight hook at the bottom and extend straight upward. -
Create the upper loop:
From the top of your vertical line, draw the loop coming down the right side, crossing over the vertical spine about a third of the way down. -
Draw the lower spiral:
Continue the line to form the large belly of the clef on the left side, circling back around the vertical line to spiral inward. Aim for a smooth, continuous flow. -
Refine the shape:
Check your proportions against your reference image. The beauty of this design lies in its recognizable curves, so take a moment to adjust any wonky lines now while they are still in pencil. -
Thicken the outline:
Instead of a single line, draw a second parallel line very close to the first to create a shape that can be filled. Varry the width slightly—thicker on the downstrokes—to mimic calligraphy.
Step 2: Inking and Stippling
-
Outline the form:
Take your fine liner pen and carefully trace the outer edges of your pencil sketch. Keep your hand steady and use confident strokes to avoid wobble. -
Begin the dotwork:
Start filling the inside of your shape with tiny dots. I like to start at the bottom spiral, placing dots densely near the edges to create a sense of shadow and definition. -
Create gradients:
As you move toward the center of the lines, space your dots further apart. This transition from dense black to lighter spacing creates a rounded, 3D effect. -
Fill the intersections:
Where lines cross or overlap, increase the density of your dots to simulate a darker shadow, giving the drawing depth and weight. -
Detail the spiral:
Pay special attention to the inner spiral. Ensure clarity by distinctively stippling the lines so they don’t merge into a single black blob. -
Check the balance:
Step back and look at the overall contrast. Add more dots to any areas that look too pale or flat compared to the rest of the symbol. -
Let it dry completely:
Give the ink plenty of time to set. Smudging at this stage is heartbreaking, so wait at least 10-15 minutes depending on your pen’s ink flow. -
Erase guidelines:
Gently erase the underlying pencil structure. Hold the paper taut with one hand while erasing to prevent wrinkling the cardstock. -
Final touches:
Review the clean inked drawing. If the erasing lifted any pigment, carefully add a few final dots to restore the deep black contrast.
Fixing Ink Smudges
If you accidentally smudge wet ink, wait for it to fully dry, then carefully scratch the mistake away with a craft knife or use a white gel pen to cover it.
Add Botanical Elements
Make it unique by intertwining tiny vines or leaves through the loops of the clef, matching the natural aesthetic of the inspiration photo.
You now have a beautifully stippled design ready to be framed or taken to your tattoo artist as a custom reference
Minimal Constellation Dots and Lines
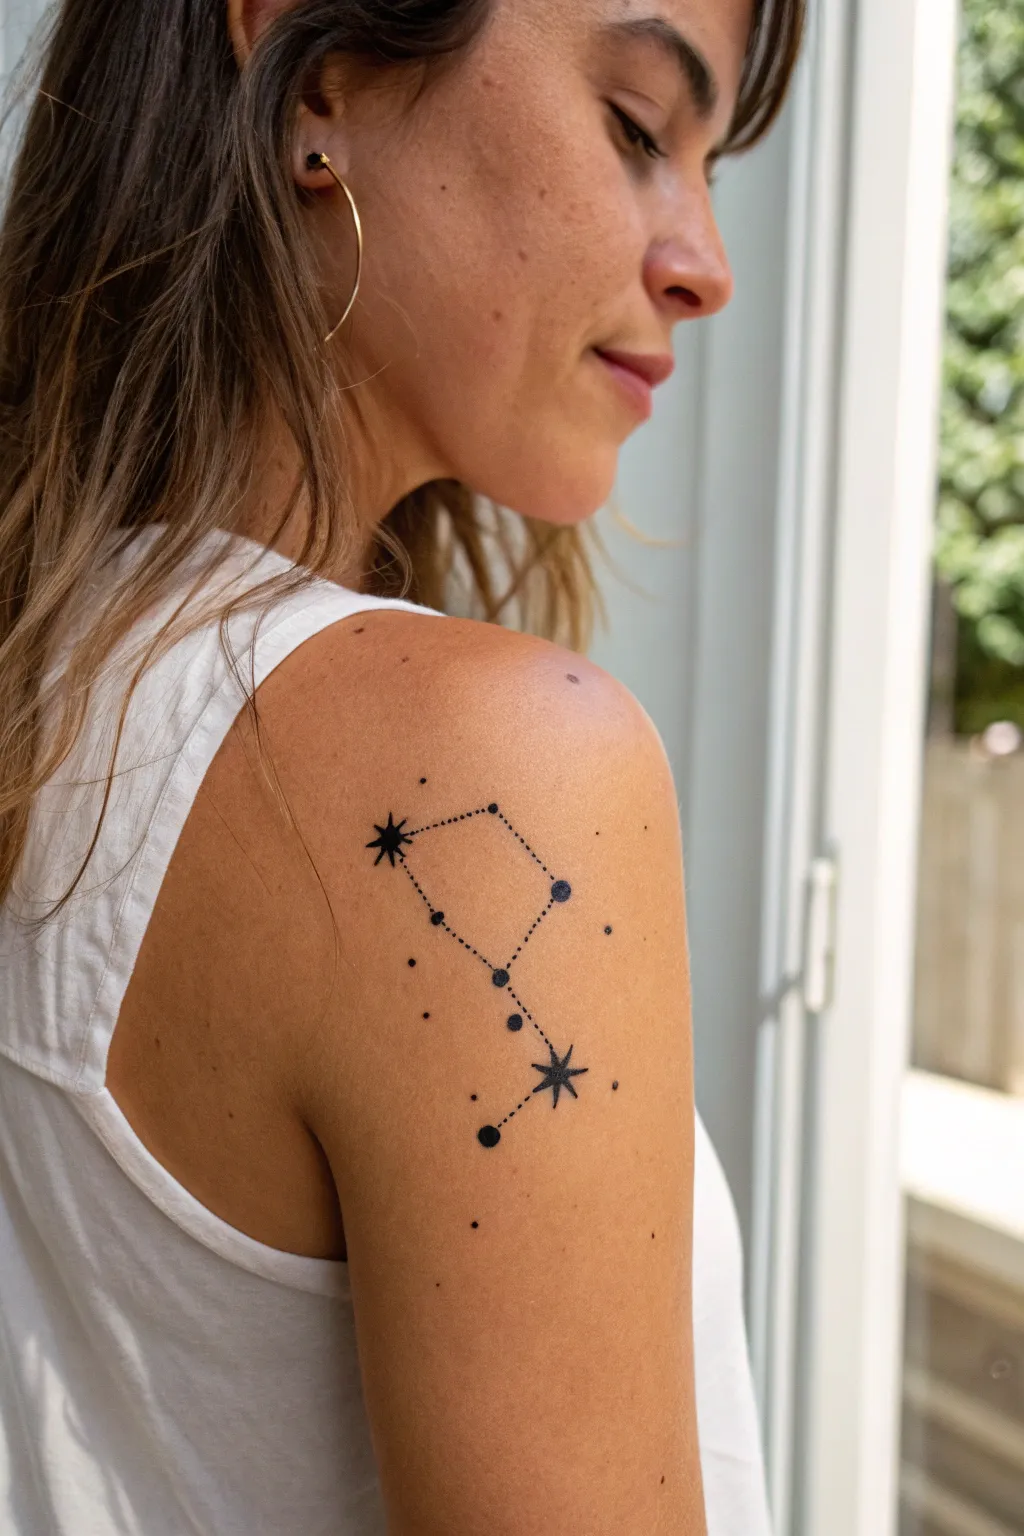
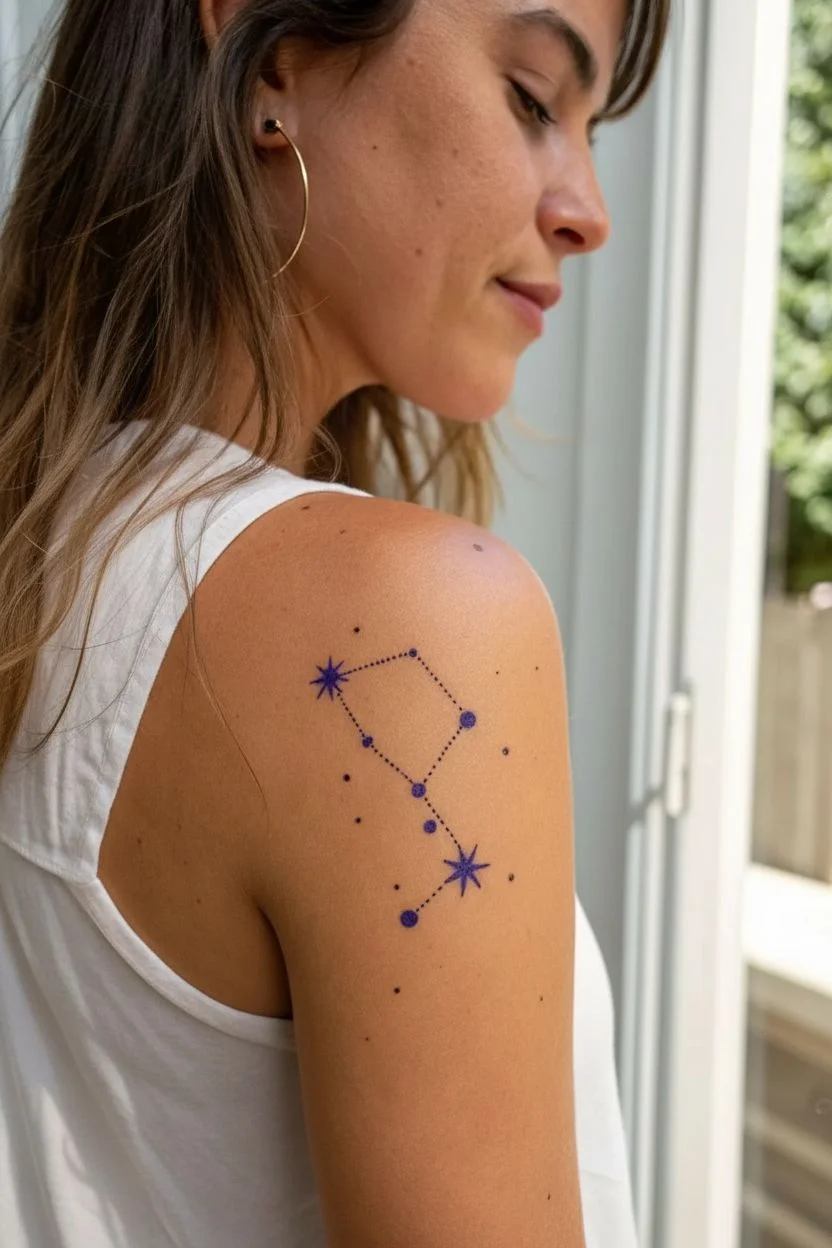
Capture the magic of the night sky with this minimalist constellation design featuring delicate dotted lines and bold starbursts. The contrast between solid planetary dots and fine stippled connectors creates an elegant, airy look that sits beautifully on the shoulder.
Step-by-Step
Materials
- Tattoo machine (or hand poke tool)
- 3RL (3 Round Liner) needle cartridge
- 5RL or 7RL (Round Liner) needle cartridge for larger dots
- Black tattoo ink (high quality)
- Stencil paper and transfer gel
- Green soap and squeeze bottle
- Ink cups
- Vaseline or tattoo glide
- Disposable gloves
- Paper towels
- Skin marker (surgical pen)
Step 1: Preparation and Stencil
-
Design the constellation:
Begin by drawing your pattern on paper or a tablet. This design features a trapezoidal main body with a ‘tail’ extending downwards. Mark positions for two main large stars—one at the top left corner and one near the bottom of the tail. -
Plan the connections:
Instead of solid lines between points, plan for dotted or stippled lines. This gives the piece its signature airy, celestial feel. -
Create the stencil:
Trace your final design onto transfer paper. Be very precise with the placement of the circles; signify larger dots versus smaller connector dots clearly so you don’t confuse them later. -
Prep the skin:
Clean the shoulder area thoroughly with green soap and a razor to remove fine hairs. Wipe with alcohol to sterilize and degrease the skin for a clean transfer. -
Apply the transfer:
Apply a thin, even layer of stencil gel. Press the stencil firmly onto the shoulder, ensuring it follows the natural curve of the deltiod muscle. Peel it back carefully and let it dry for at least 10-15 minutes.
Blowout Prevention
On the shoulder, skin is thin. Don’t go too deep! Use a light hand, especially for the tiny connector dots, to prevent ink spreading under the skin.
Step 2: Inking the Stars
-
Outline the starbursts:
Using a 3RL needle, carefully line the two main eight-pointed stars. Start with the vertical and horizontal points, making them slightly longer, then add the shorter diagonal points in between. -
Fill the stars:
Switch to a slightly larger liner if you prefer, or stick with the 3RL to pack solid black into the star shapes. Move in tight circles to ensure total saturation without trauma. -
Ink the major planets:
Identify the larger circular nodes in the constellation. Using a 5RL or 7RL, carefully tattoo these solid circles. Start in the center and spiral outward to the stencil edge to keep them perfectly round. -
Wipe and check:
Gently wipe away excess ink with a soapy paper towel to check the saturation of your solid black elements.
Step 3: The Constellation Lines
-
Begin the dotted lines:
Switch back to your fine 3RL needle. Lower your voltage slightly if using a machine for better control over individual dots. -
Stipple the connectors:
Create the lines connecting the main stars by tattooing a row of tiny, evenly spaced dots. I find it helpful to follow the stencil line but lift the needle fully between each dot to keep them distinct. -
Vary dot density:
For the connectors, keep the dots small and uniform. This creates visual separation from the larger ‘planet’ dots you tattooed earlier. -
Add satellite details:
Place a few tiny, stray dots outside the main constellation lines as shown in the reference. These floating specks add a sense of cosmic dust and realism. -
Final clean and reveal:
Do a final wipe with green soap. Apply a thin layer of aftercare balm to soothe the skin and reduce redness immediately, allowing the black ink to pop.
Pro Tip: Sharp Stars
For the crispest star points, pull your needle OUT away from the center of the star rather than pushing into it. This keeps the tips needle-sharp.
Now you have a piece of the galaxy permanently etched with elegant precision
Geometric Animal Head (Angular Line Art)
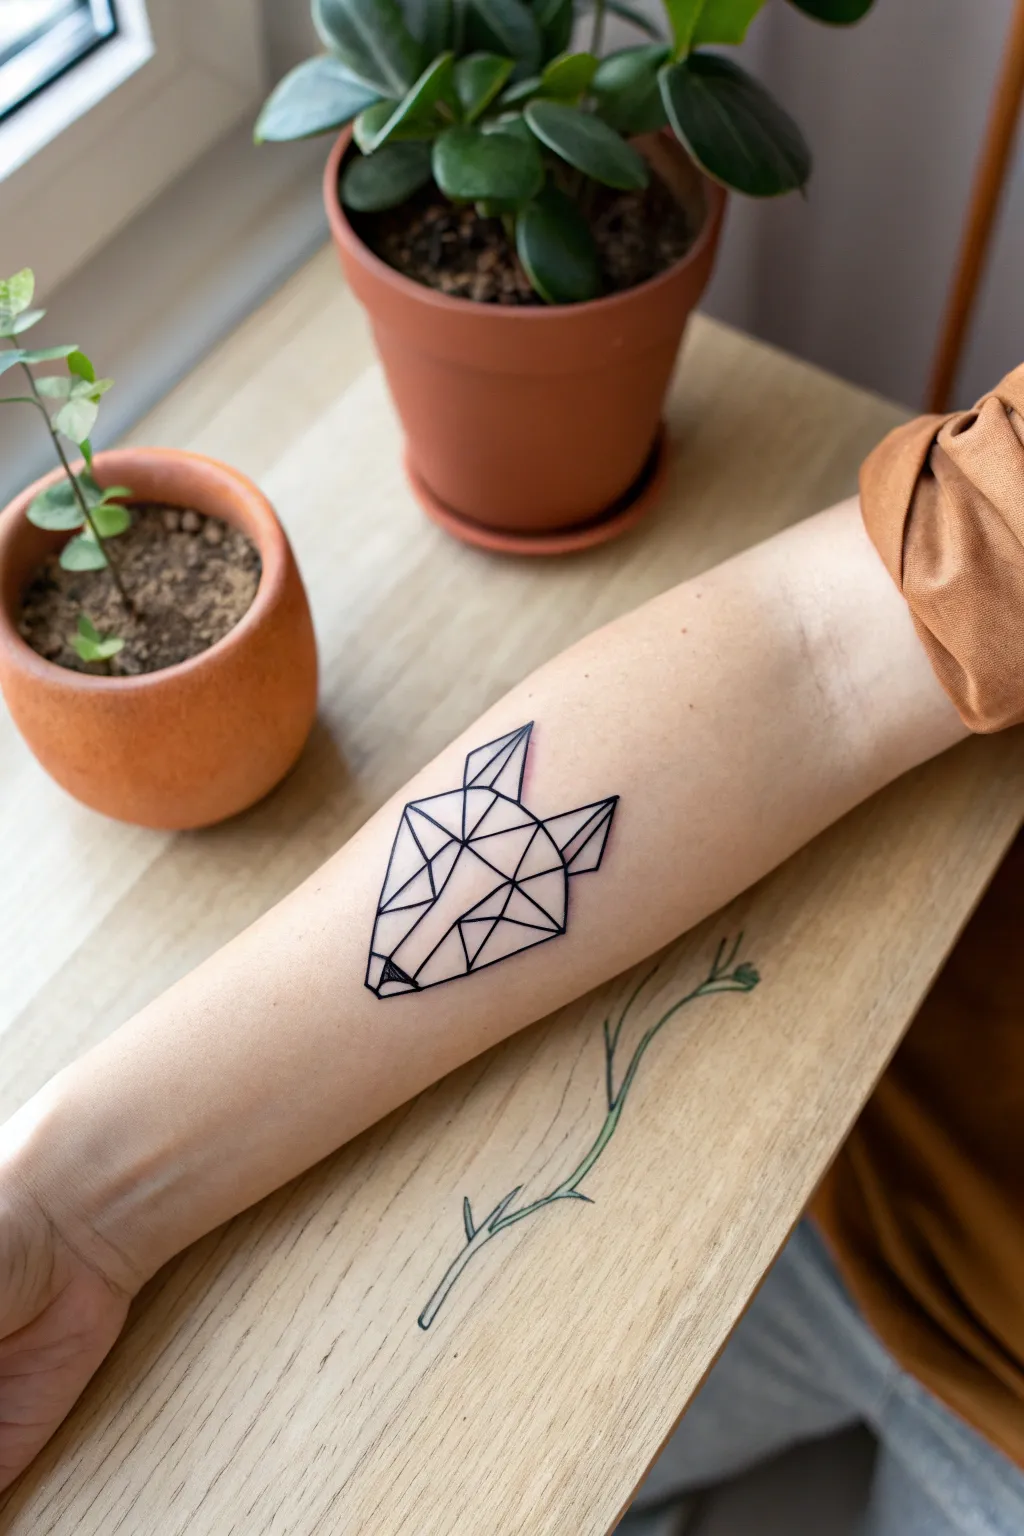
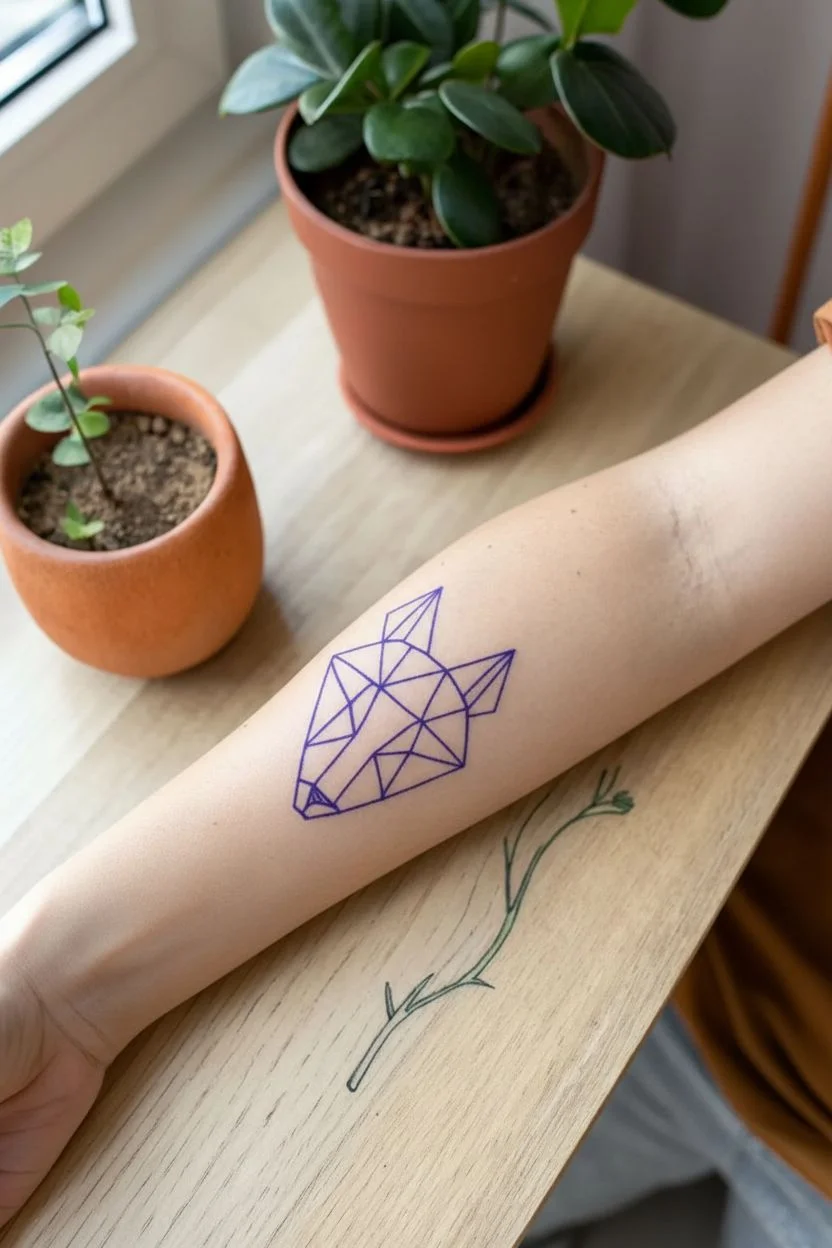
This minimalist fox design captures the essence of the animal using clean, angular lines and geometric shapes. It is a modern, sharp artwork that works perfectly on forearms or calves, relying on precise linework rather than shading.
Step-by-Step Tutorial
Materials
- Tattoo machine (pen or coil style)
- Round Liner (RL) needle cartridges (3RL for details, 5RL or 7RL for outer lines)
- Black tattoo ink
- Stencil paper and transfer gel
- Green soap and squeeze bottle
- Paper towels
- Petroleum jelly or tattoo glide
- Disposable gloves
- Disinfectant and razor for prep
- Cling film/protective barrier for the machine
Step 1: Preparation and Stencil
-
Design the geometry:
Start by drawing your fox head on paper or a tablet. Use a ruler to ensure every line is perfectly straight. The design consists of a central diamond shape for the snout, triangles for ears, and polygonal facets connecting the nose to the forehead. -
Finalize the line weight:
Simplify the design into a single line weight for a cohesive look, or decide if you want the outer perimeter slightly thicker. The nose tip should be the only filled-in black area. -
Create the stencil:
Print your final design or hand-trace it onto hectograph carbon paper. Press firmly but evenly to ensure every geometric intersection is crisp. These corners are crucial references. -
Prep the skin:
Clean the inner forearm area thoroughly with green soap. Shave the area carefully, even if no hair is visible, to prevent needle snagging. -
Apply the transfer:
Coat the skin with a thin, even layer of stencil transfer gel. Place the stencil carefully, ensuring the snout points exactly down toward the wrist. Press firmly and peel back. Let it dry for at least 15 minutes so it doesn’t wipe away.
Step 2: Tattooing the Outline
-
Setup the station:
While the stencil dries, set up your machine. Wrapped and sterile. Pour a small cap of black ink. I usually keep a small dip cup of distilled water nearby for rinsing if needed. -
Begin with the central lines:
Start at the bottom center of the design—the snout. Dip your needle (a 5RL works well here) and run a test line on a paper towel to check ink flow. Begin tattooing the central vertical line first. -
Pull straight lines:
Geometric tattoos require steady hands. Stretch the skin tight with your non-tattooing hand. Inhale, and pull the line on your exhale to minimize jitter. Connect the snout point to the forehead point. -
Build the left side:
Move to the left cheek area. Tattoo the outer perimeter line of the cheek first, then fill in the internal connecting lines. Always work away from the stencil to avoid smudging it with your hand. -
Construct the right side:
Mirror your actions on the right side. Be extremely careful at intersections; lines should meet perfectly at a point, not overlap or stop short. -
Tattoo the ears:
Move up to the ears. These are composed of sharp triangles. Tattoo the outer triangle first, then the inner line that gives the ear depth. Ensure the tips are sharp. -
Fill the nose:
Switch to a small mag shader or carefully use your liner to pack solid black into the tiny triangular nose tip at the very bottom. This anchors the design.
Clean Corner Tip
To get perfectly sharp corners, lift the needle out of the skin exactly at the intersection point rather than pivoting the machine while it’s still running.
Step 3: Cleaning and Aftercare
-
Initial wipe down:
Gently wipe the tattoo with green soap and a paper towel. Do not scrub. Reveal any areas that might need a second pass to thicken a line. -
Check intersections:
Inspect the corners where lines meet. If any are faint, carefully touch them up with the very tip of the needle. -
Final sanitize:
Clean the entire area with green soap to remove excess ink and plasma. Pat dry with a clean paper towel. -
Apply protection:
Apply a thin layer of aftercare ointment or a ‘second skin’ adhesive bandage to protect the fresh work from bacteria.
Add Dotwork Shading
Give the design depth by adding stippling (dotwork) shading inside just one side of the geometric facets, creating a 3D low-poly effect.
Enjoy your new piece and remember to keep it moisturized during the healing process
Lightbulb Idea Spark


Capture a moment of sudden inspiration with this minimalist lightbulb design, featuring clean black lines and a classic filament detail. This simple yet impactful tattoo sits perfectly on the forearm, symbolizing creativity and bright ideas.
Step-by-Step Tutorial
Materials
- Tattoo transfer paper (or stencil paper)
- Black tattoo ink (lining black)
- Tattoo machine with a fine liner needle (e.g., 3RL or 5RL)
- Green soap or tattoo skin cleanser
- Paper towels
- Vaseline or tattoo glide
- Latex or nitrile gloves
- Stencil stuff or transfer gel
- Razor (for skin prep)
Step 1: Preparation and Stencil
-
Design the bulb:
Start by drawing your lightbulb on paper first. Sketch a classic pear shape for the glass bulb, curving gently inward towards the bottom neck. -
Detail the base:
At the bottom of the bulb shape, draw the metal base. Create four small, stacked horizontal ovals or rounded rectangles to represent the screw threads. -
Add the contact point:
Finish the very bottom with a small, rounded nub or button shape—this is the electrical contact point. -
Draw the filament stem:
Inside the bulb, draw a vertical stem rising from the base. It should be slightly thicker at the bottom and consist of two parallel lines. -
Create the filament coil:
Top the stem with a small, stylized filament. Draw a curvy ‘w’ shape or a small cloud-like squiggle that connects the two sides of the stem. -
Finalize the drawing:
Add several short, straight lines radiating outward from the top half of the bulb to represent glowing light rays. Trace your final design onto the transfer sheet of your stencil paper.
Step 2: Applying the Stencil
-
Clean the skin:
Put on your gloves. Thoroughly clean the forearm area with green soap and water to remove oils and dirt. -
Shave the area:
Even if the hair is fine, shave the placement area to ensure the stencil adheres perfectly and the tattoo needles don’t snag. -
Apply transfer gel:
Rub a thin, even layer of stencil stuff or transfer gel over the cleaned skin. It should be tacky, not wet. -
Place the stencil:
Carefully press your stencil onto the center of the forearm. Hold it firmly in place for a few seconds to let the purple ink transfer, then peel it back gently. Let it dry for 10-15 minutes.
Needle Depth Check
Keep your needle depth shallow (approx 1.5mm). Going too deep causes blowouts, blurring those crisp thin lines.
Step 3: Inking the Outline
-
Set up your machine:
Load your machine with a fine liner needle (a 3RL or 5RL works best for these thin lines) and dip it into your black lining ink. -
Begin the bulb outline:
Start at the bottom neck of the bulb. With steady hand speed, trace the main curve of the glass. I usually pull the line towards me for better control. -
Inking the threads:
Move to the metal base threads. These are small, curved lines. Be careful not to merge them; keep a tiny gap between each thread level. -
Inking the filament:
Tattoo the internal stem and the squiggly filament. These lines are delicate, so use a light touch to avoid blowouts. -
Add texture to stem:
For the stem specifically, you can add tiny horizontal dashes inside the parallel lines to give it a coiled or textured look, just like in the reference. -
Add the radiance:
Finally, tattoo the radiating lines around the outside. Keep them straight and evenly spaced, lifting your needle cleanly at the end of each stroke to keep the points sharp. -
Wipe and clean:
Gently wipe away excess ink and plasma with a paper towel dampened with green soap. Apply a thin layer of soothing ointment to protect the fresh work.
Fixing Shaky Lines
If a line looks shaky, don’t go over it immediately. Wait for the skin to heal, then touch it up in a second session.
Enjoy your new piece of permanent inspiration and let it remind you to stay creative.
Abstract Scribble Knot (One-Stroke Style)
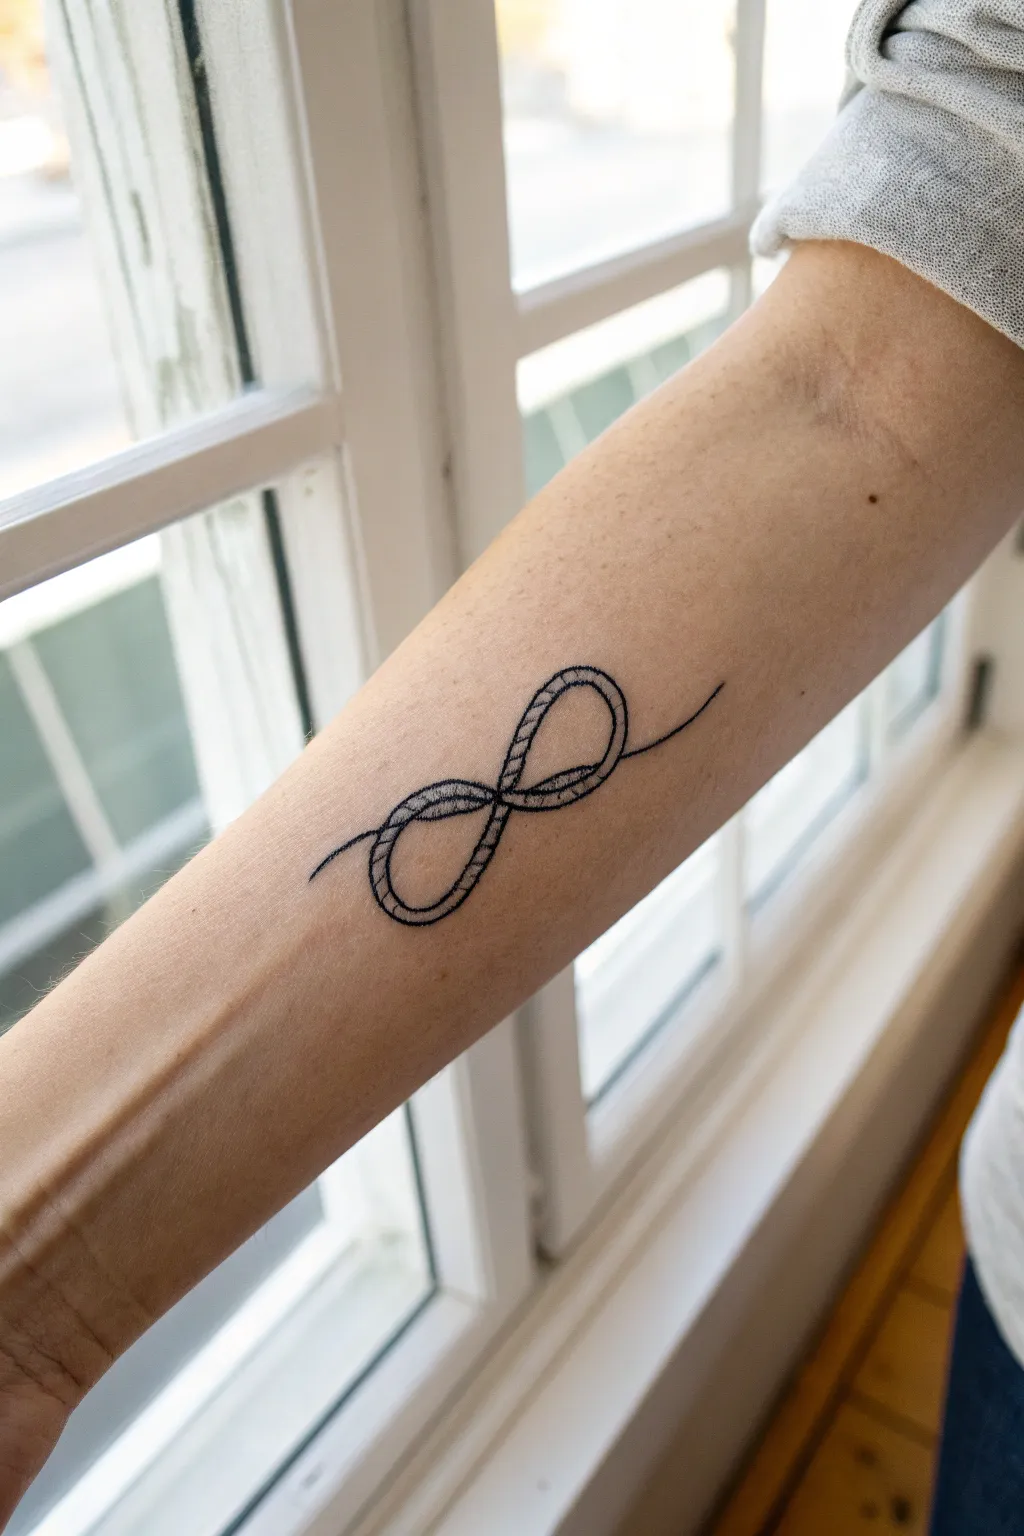
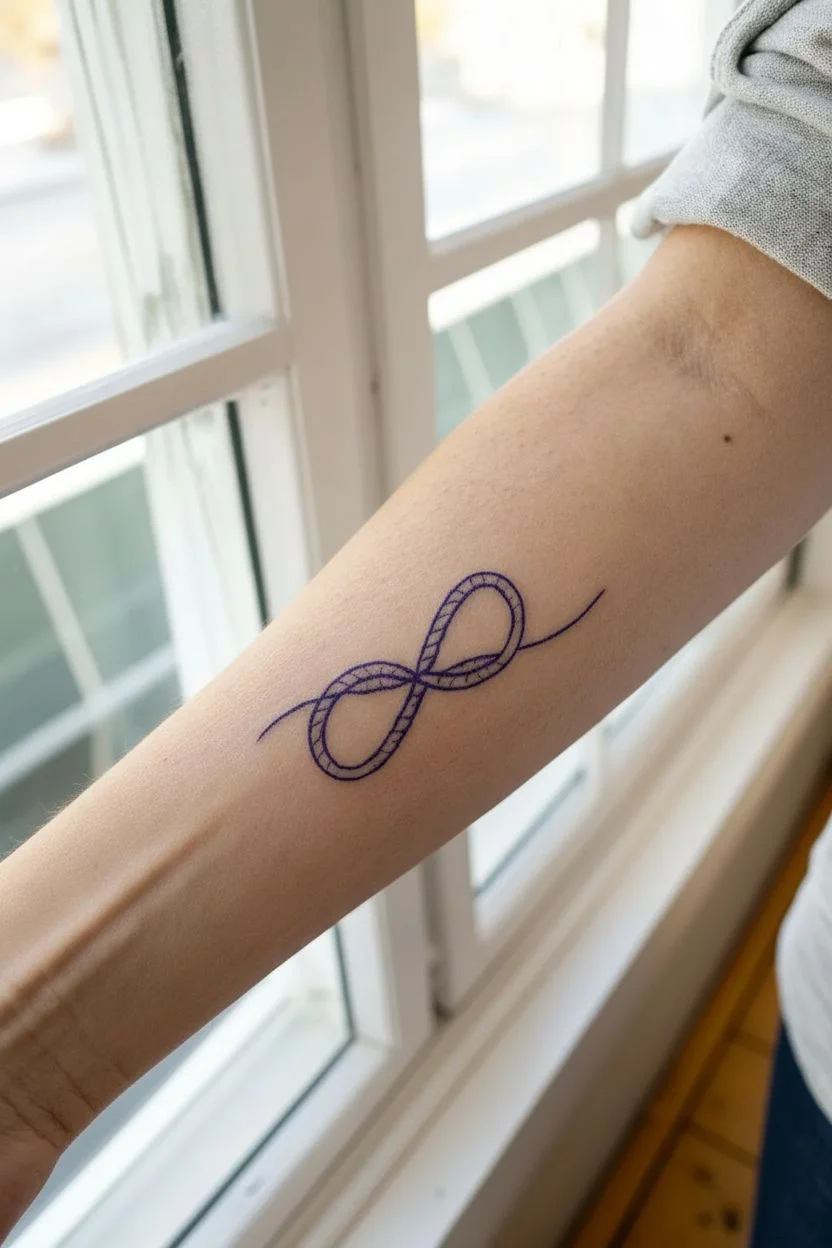
This elegant forearm tattoo design combines the classic infinity symbol with a loosely tied knot aesthetic, creating a simple yet conceptually rich piece. Using fine lines and subtle interior texture, the design mimics the look of a single strand of thread or rope looping back on itself effortlessly.
How-To Guide
Materials
- Tattoo machine (pen style rotary preferred)
- Round Liner needle cartridge (3RL or 5RL for outlines)
- Round Liner needle cartridge (1RL or tight 3RL for texture)
- Professional black tattoo ink
- Stencil paper and transfer gel
- Skin safe marker (surgical marker)
- Razor and rubbing alcohol
- Green soap and wash bottle
- Petroleum jelly or tattoo glide
- Disposable gloves
- Paper towels
Step 1: Preparation and Stenciling
-
Create the design:
Sketch the knot design first. Imagine a loose piece of string forming a figure-eight. Instead of a perfect mathematical infinity symbol, let the loops be slightly organic and asymmetrical. Ensure there are two distinct ‘tail’ ends extending outward. -
Refine the crossing points:
Visualize which part of the ‘string’ goes over and which goes under. Erase the intersecting lines accordingly to clearly show the over-under weave pattern, which gives the knot its dimensionality. -
Transfer to stencil:
Once finalized, trace your design onto hectograph stencil paper. Press firmly to ensure a solid purple line transfer. -
Prepare the skin:
Clean the forearm area thoroughly with green soap, shave the area with a disposable razor, and sanitize with rubbing alcohol to remove oils. -
Apply the stencil:
Apply a thin, even layer of stencil transfer gel. Place the stencil carefully on the forearm, ensuring it aligns with the natural flow of the arm muscles. Peel it back gently and let it dry completely (10-15 minutes) so it doesn’t wipe away during tattooing.
Wobbly Lines?
If your hand shakes, increase your machine speed slightly or stretch the skin tighter with your non-dominant hand. A tighter canvas makes straight lines much easier.
Step 2: Outlining the Form
-
Set up your machine:
Load a 3RL or 5RL needle cartridge. These smaller groupings are ideal for the delicate, crisp lines needed here. Dip into your black ink cap. -
Begin the outline:
Start tracing the main outer edges of the ‘rope’. I usually find it easiest to start from one of the loose tail ends and work my way toward the center loops. Keep your hand steady and your voltage moderate for smooth lines. -
Navigate the overlaps:
Pay close attention to the crossing points you designed. Lift your needle precisely where a line should pass ‘under’ another to maintain the illusion of depth. Do not connect lines that represent the bottom thread. -
Complete the perimeter:
Finish outlining the entire shape. You should now have a hollow ‘tube’ shape forming the knot. Wipe away excess ink gently with a paper towel dampened with green soap to check your consistency.
Rope Texture
Keep your diagonal hatch marks all facing the same relative direction along the ‘twist’ of the rope. If they flip-flop randomly, the rope will look broken.
Step 3: Adding Texture and Detail
-
Switch needles:
Swap to a finer needle, like a 1RL or a very tight 3RL. This phase is about adding the internal texture that makes the line look like twisted rope or thread. -
Start the hatching:
Inside the outlines, begin adding short, diagonal hatch marks. These shouldn’t be solid straight lines but slightly curved to follow the contour of the rope. -
Vary the density:
Concentrate these small hash marks near the edges of the rope or near the crossing points where shadows naturally fall. Leave the center of the ‘tube’ relatively open or with lighter marks to suggest a highlight. -
Detail the tails:
Extend a single, thinner line out from the ends of the knot to taper it off, making it look like a loose piece of thread sitting on the skin. -
Final wipes and checks:
Clean the area thoroughly again. Look for any holidays (gaps) in your main outline and tough them up carefully. -
Aftercare application:
Apply a thin layer of protective ointment and wrap with a sterile bandage or second-skin film to protect the fresh artwork.
This delicate piece heals into a subtle, stylish adornment that flows beautifully with the natural lines of the arm


Have a question or want to share your own experience? I'd love to hear from you in the comments below!