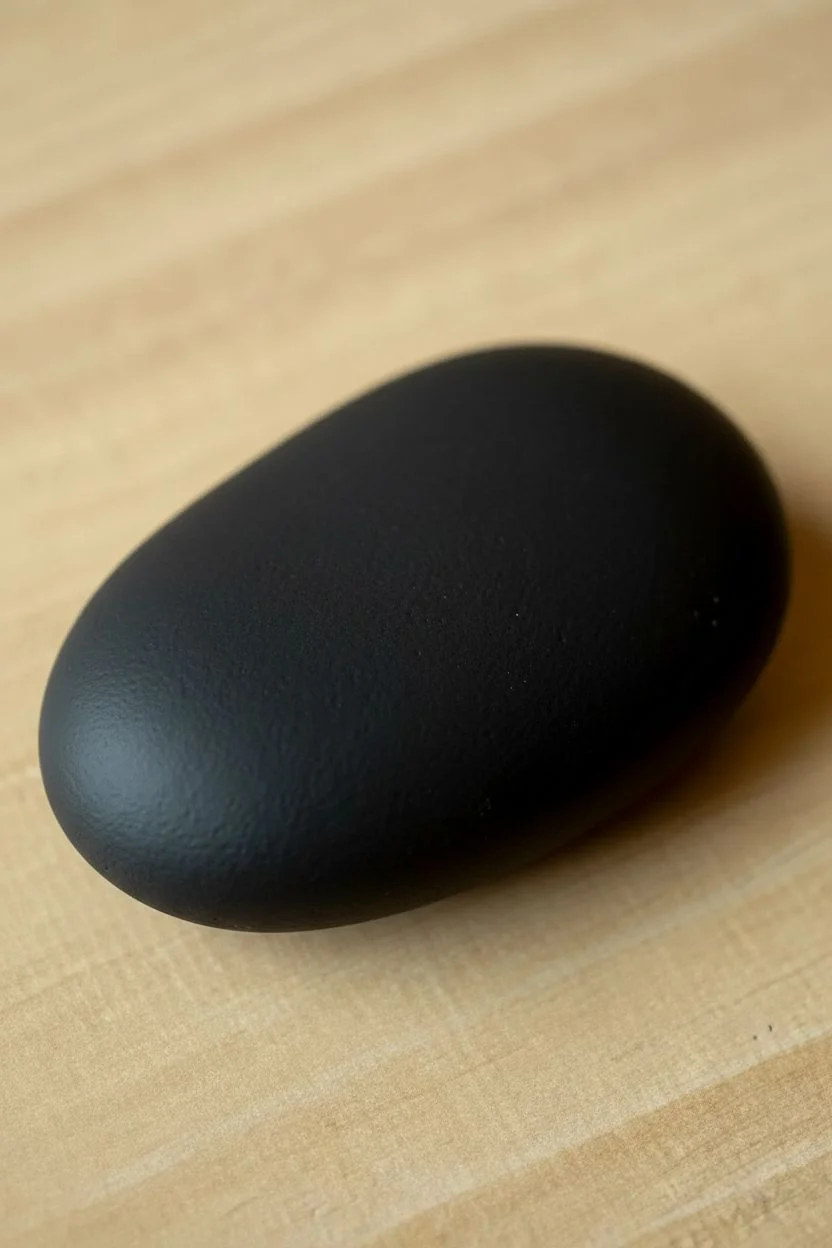
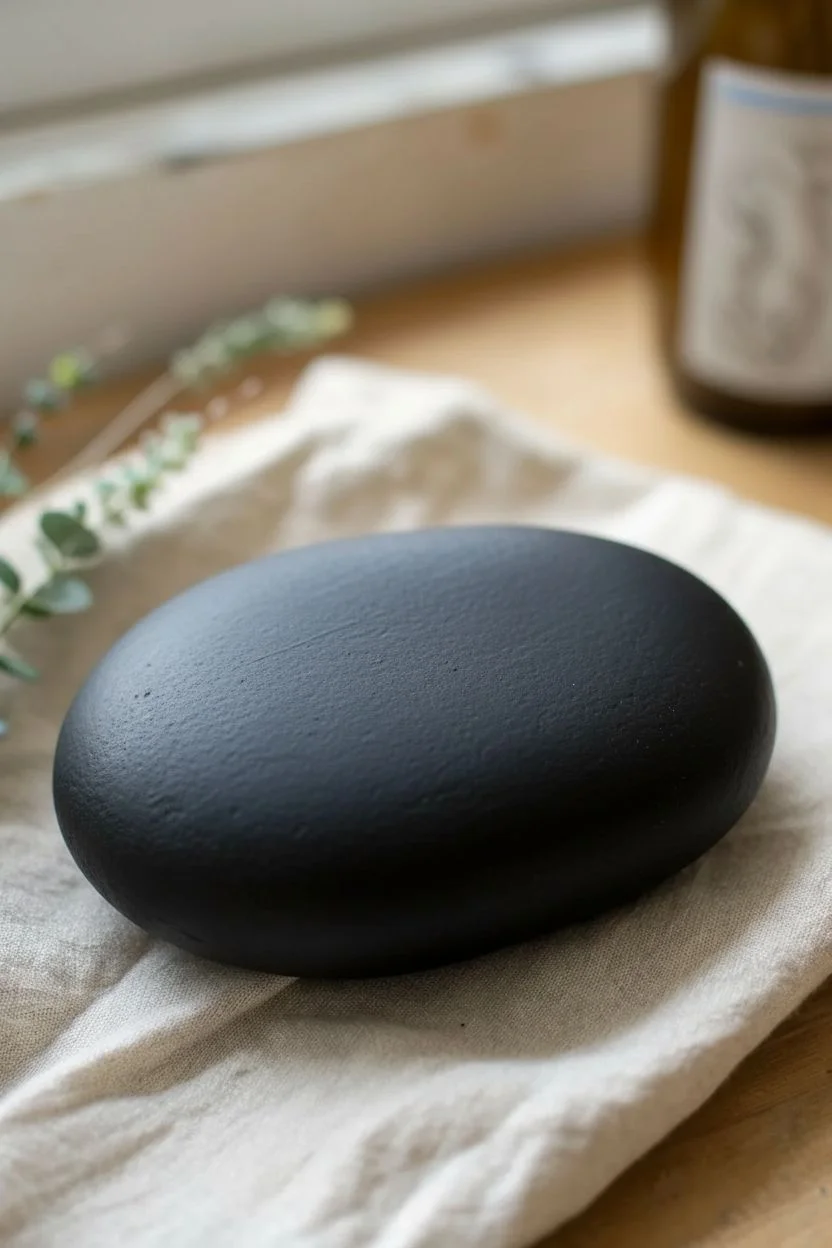
I love how a black rock does half the work for you—the dark base turns every mark into instant high contrast drama. Here are my favorite black rock painting ideas that truly pop with white linework, metallic sparkle, and bold, opaque color.
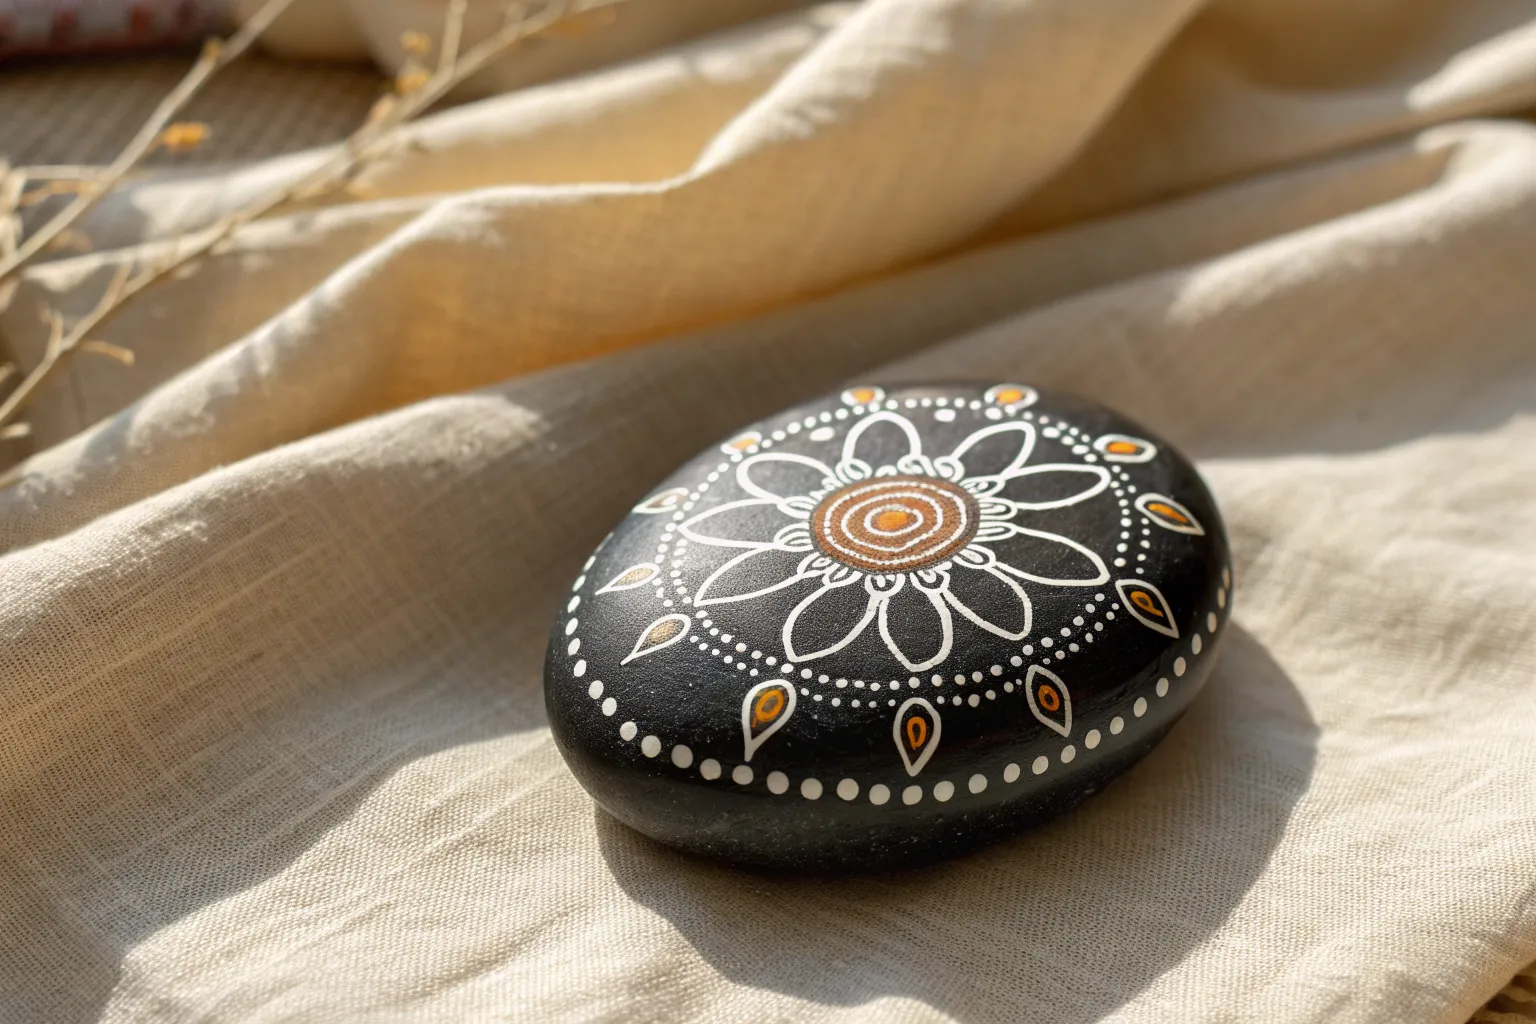
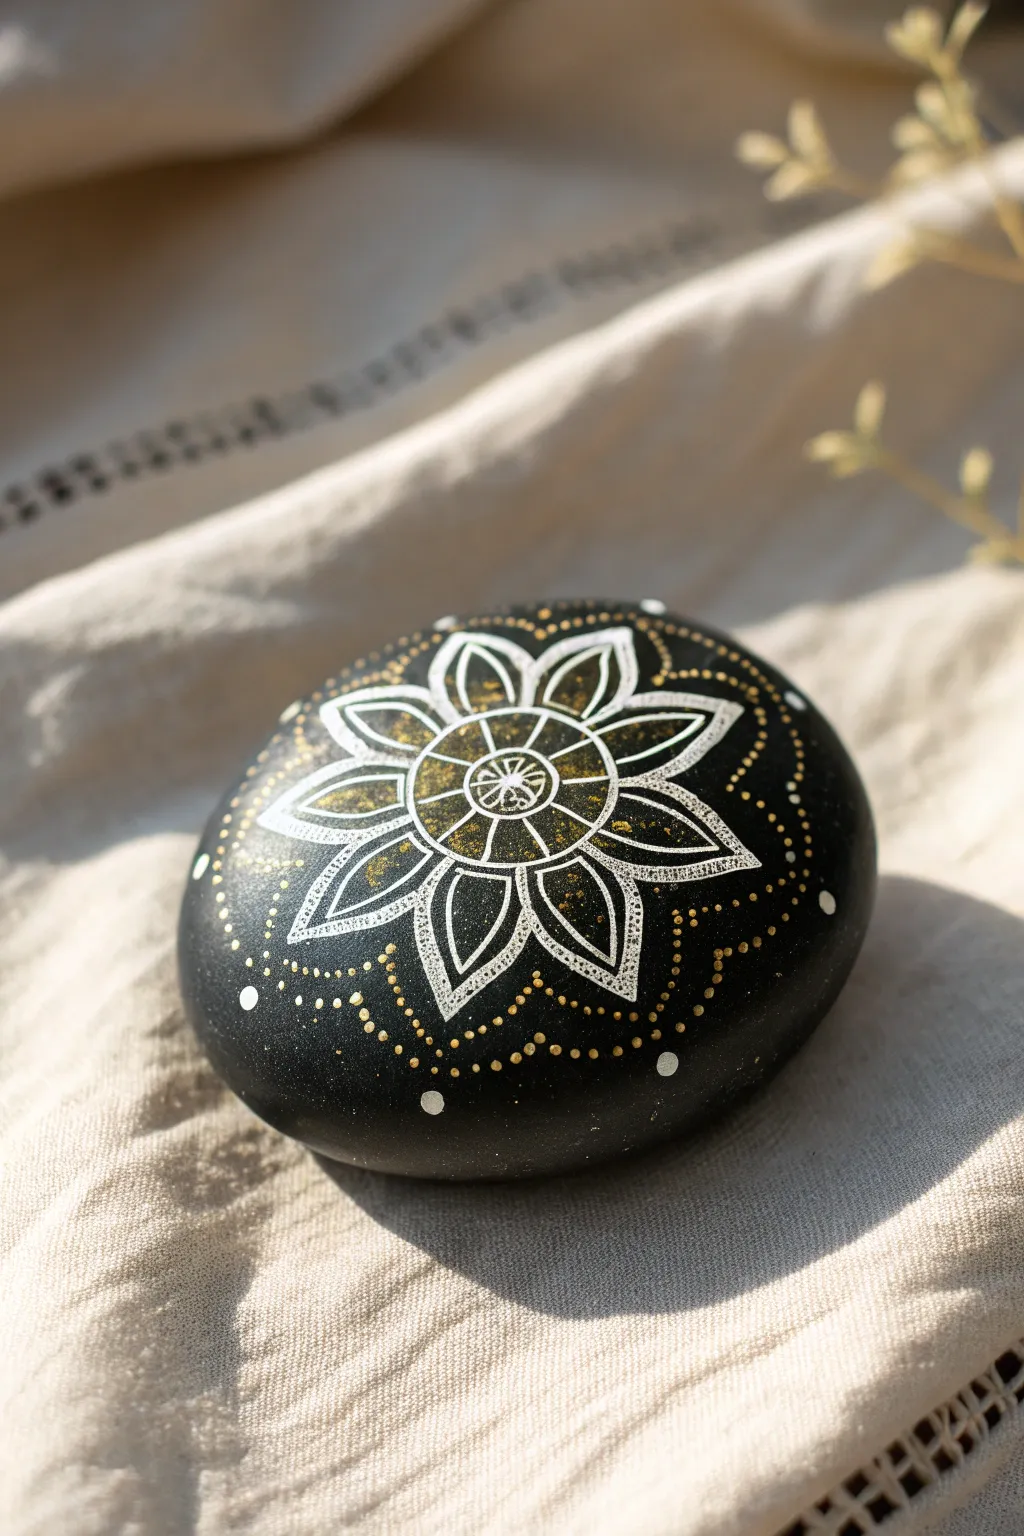
White Mandala Dotwork on a Black Rock
This elegant project transforms a simple smooth river rock into a mesmerizing piece of art using nothing but white ink and careful precision. The high-contrast design features radiating floral petals and classic dotwork that looks incredibly intricate but is built simply, one dot at a time.
How-To Guide
Materials
- Smooth, oval river rock (approx. 4-6 inches)
- Black acrylic paint (matte or satin finish)
- White acrylic paint or specialized dotting paint
- Set of dotting tools (various sizes)
- Fine liner brush (size 0 or 00)
- White charcoal pencil or chalk pencil
- Compass or circle template (optional)
- Damp paper towel
- Clear spray varnish (matte or gloss)
- Flat paintbrush (for base coat)
Step 1: Preparation & Base
-
Clean surface:
Begin by washing your stone thoroughly with soap and water to remove any dirt or oils. Let it dry completely before starting. -
Apply base coat:
Even if your rock is naturally dark, apply two thin coats of black acrylic paint using a flat brush. This ensures a uniform, deep background that makes the white pop. Allow the first coat to dry fully before adding the second. -
Mark the center:
Once the black paint is bone dry, use your white charcoal pencil to make a tiny ‘X’ or dot in the absolute center of the stone. This will anchor your entire mandala. -
Draft guide lines:
Lightly sketch a few concentric circles around your center point using a compass or circle template. These don’t need to be perfect, but they will help keep your petal layers symmetrical.
Paint Consistency Pro-Tip
For crisp dots that don’t finish with peaks, mix a tiny drop of distinct pouring medium or water into your white paint. It should be the consistency of heavy cream.
Step 2: Core Floral Pattern
-
The central seed:
Using a small-medium dotting tool, place a single white dot in the center. Surround this central dot with a ring of tiny dots using your smallest tool or the tip of a toothpick. -
First petal layer:
Paint a small circle around your center. Inside this circle, draw four simple petal shapes meeting in the middle like a four-leaf clover. Fill the negative space with tiny stippled dots. -
Second ring:
Surround the clover shape with a circle of uniform, small dots. Keep your spacing tight but don’t let the wet paint touch. -
Radiating lines:
Draw a larger circle around the previous ring. Create a ‘sunburst’ effect by drawing short, straight lines radiating outward from the center towards this new boundary line.
Fixing Smudges
If you smudge a wet dot, don’t wipe it immediately! Wait for it to dry completely, paint over the mistake with black, let that dry, and then re-dot the white.
Step 3: Building the Petals
-
Outline main petals:
Using your fine liner brush, paint the outline of eight flower petals. These should extend from your central circle outward. The tops of the petals should be slightly pointed. -
Inner petal details:
Inside each of these newly drawn petals, add a second, smaller petal outline. This creates a double-lined effect. -
Connect the petals:
Between the peaks of the petals, add a scalloped line connecting them. It should look like a delicate web linking the flower together. -
Outer petal layer:
Draw larger, wider petal shapes behind the first set. These should be placed in the gaps between the first petals, creating a layered, blooming effect. Outline these with tiny dots rather than a solid line for texture.
Step 4: Outer Details & Finishing
-
Dotted border:
Around the outermost edge of the main flower design, use a medium dotting tool to place a ring of prominent white dots. Spacing is key here for a professional look. -
Descending dots:
In the negative space between the large outer petals, add a ‘tail’ of dots. Start with a larger dot near the center and use progressively smaller tools to make the dots shrink as they move outward. -
Scattered stardust:
Fill the remaining black space around the edges of the stone with random, tiny dots. I find this helps soften the transition between the design and the bare stone. -
Clean up guidelines:
Allow the white paint to dry completely—give it at least an hour. Then, gently wipe away any visible charcoal guidelines with a damp Q-tip or a soft, damp cloth. -
Seal the work:
Finish by spraying the stone with a clear acrylic varnish. This protects the delicate dotwork from scratching and gives the black background a rich, finished sheen.
Place your finished mandala stone in a garden or on a desk as a calming reminder of your artistic patience


High-Contrast Geometric Patterns in White
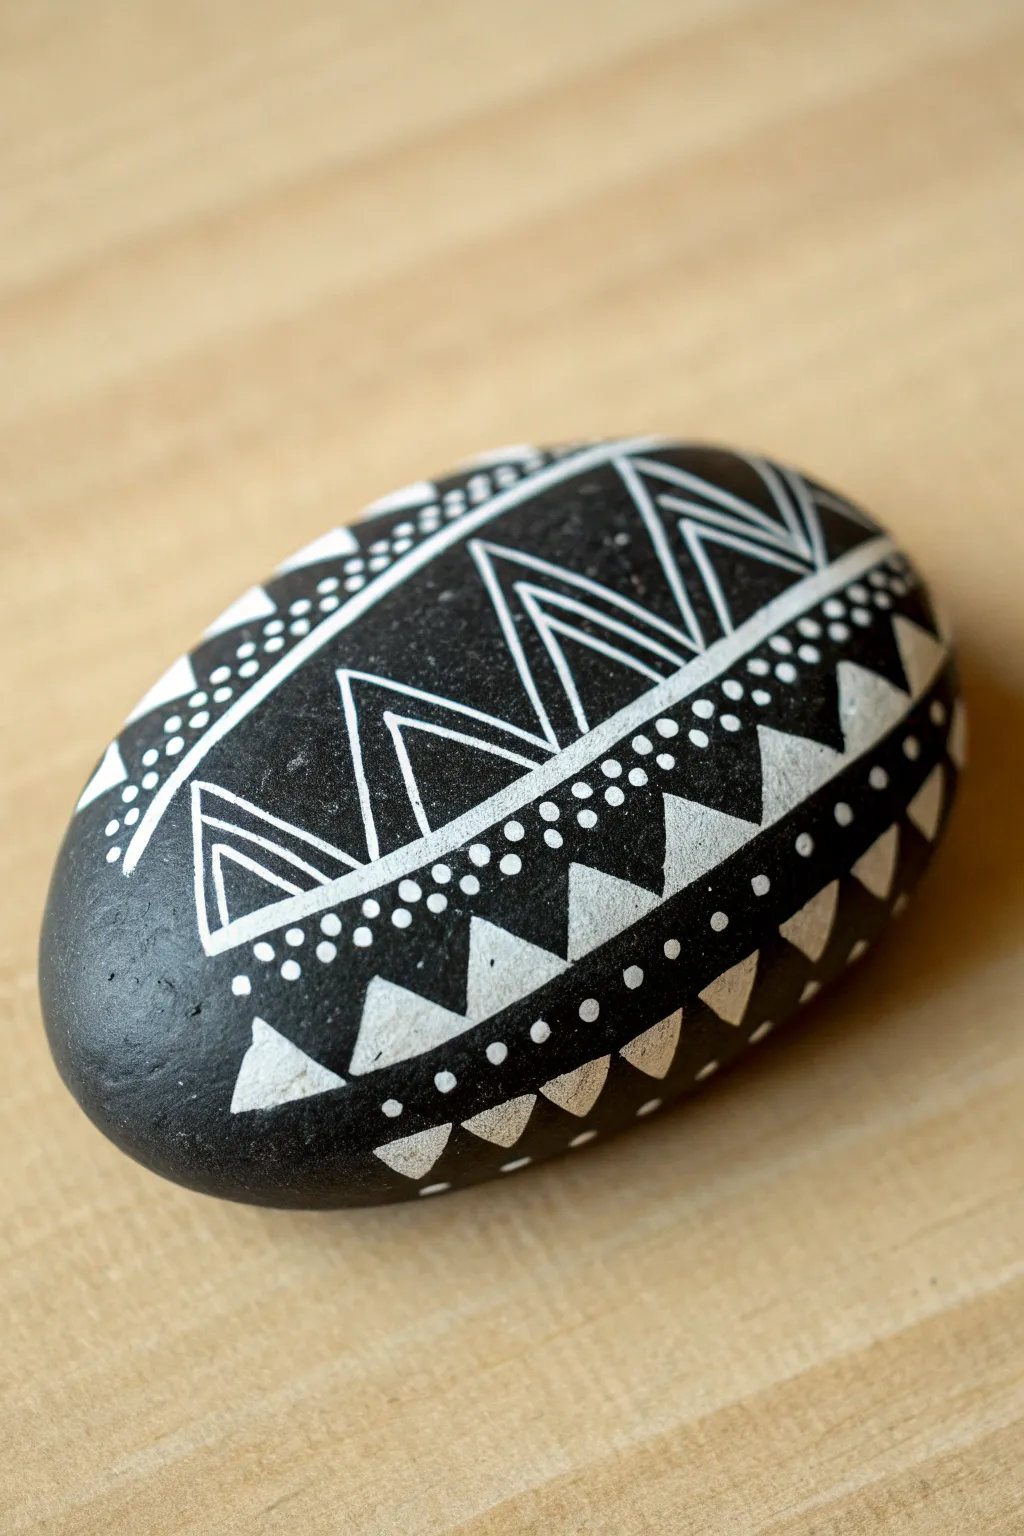
Transform a smooth, ordinary stone into a striking piece of decor with this high-contrast geometric design. Using just black background and white line work, you will create a layered pattern of triangles, dots, and chevrons that feels both modern and primal.
Detailed Instructions
Materials
- Smooth oval river rock (approximately palm-sized)
- Black acrylic paint (matte or satin finish)
- White acrylic paint or a white fine-tip paint pen (0.7mm or extra fine)
- Flat paintbrush (medium size)
- Small round detail brush (optional, if not using a pen)
- Clear acrylic sealer (matte or gloss spray)
- Pencil (white charcoal or standard)
- Water cup and paper towels
Step 1: Preparation and Base Coat
-
Clean the surface:
Begin by scrubbing your rock with warm soapy water to remove any dirt or oils. Rinse it thoroughly and let it dry completely, as any moisture trapped inside can ruin the paint later. -
Apply the foundation:
Using your flat paintbrush, coat the entire top surface of the rock with black acrylic paint. I usually apply two thin coats rather than one thick one to ensure a solid, opaque black without brushstrokes. -
Allow to dry:
Let the black base coat dry fully. It should be dry to the touch and not tacky before you attempt any design work.
Step 2: Drafting the Design
-
Mark the center line:
Visualize or lightly sketch a curved line running horizontally across the middle of the rock. This will be the anchor for your central band of triangles. -
Sketch the main band:
Sketch a series of large, connected triangles creating a zigzag pattern across the widest part of the rock. The points should face up and down alternately.
Shaky hands?
If your lines are wobbling, rest your pinky finger on the rock surface (in a dry spot) to anchor your hand. This stabilizes your movement for straighter lines.
Step 3: Banding the Top Section
-
Outline the top triangles:
Using your white paint pen or fine brush, carefully trace your sketched triangles on the upper half of the rock. Make the lines crisp and solid. -
Add internal definition:
Inside each large triangle, draw a slightly smaller triangle. Repeat this again to create a nested effect, leaving a small black triangle in the very center. -
Create the upper border:
Draw a thick white line parallel to the tops of your main triangle band. This separates the main pattern from the smaller details above. -
Add decorative dots:
Just above that border line, add a row of small, evenly spaced white dots that curve along with the shape of the rock. -
Detail the top edge:
Above the dots, paint a row of small, solid white triangles pointing downwards.
Add some pop
For a ‘Level Up’, paint the solid triangles in metallic gold or silver instead of white. This adds a luxurious contrast against the matte black stone.
Step 4: Detailing the Lower Section
-
Define the lower border:
Draw a thick white line underneath your main zigzag band, mirroring the one you drew on top. -
Dot the line:
Below this line, add two rows of small dots. I find that offsetting the second row (placing dots in the gaps of the first row) creates a nice texture. -
Create solid triangles:
Paint a row of medium-sized, solid white triangles pointing upwards. Make sure these are filled in completely for maximum contrast. -
Add the bottom chain:
Below the solid triangles, add another row of very small dots. -
Finish the bottom edge:
Paint final row of small, open triangles (chevrons) pointing downwards along the bottom curve of the stone to complete the layout.
Step 5: Final Touches
-
Double-check opacity:
Look closely at your white lines. If the black rock is showing through, carefully go over the lines a second time to make the white bright and crisp. -
Clean up errors:
If you made any smudges, use a tiny bit of black paint on a detail brush to ‘erase’ the white mistake once it is dry. -
Seal the artwork:
Once the paint is cured (wait at least 4 hours), spray the rock with a clear acrylic sealer to protect the design from scratches and fading.
Place your finished rock on a shelf or in a garden pot to enjoy your handiwork


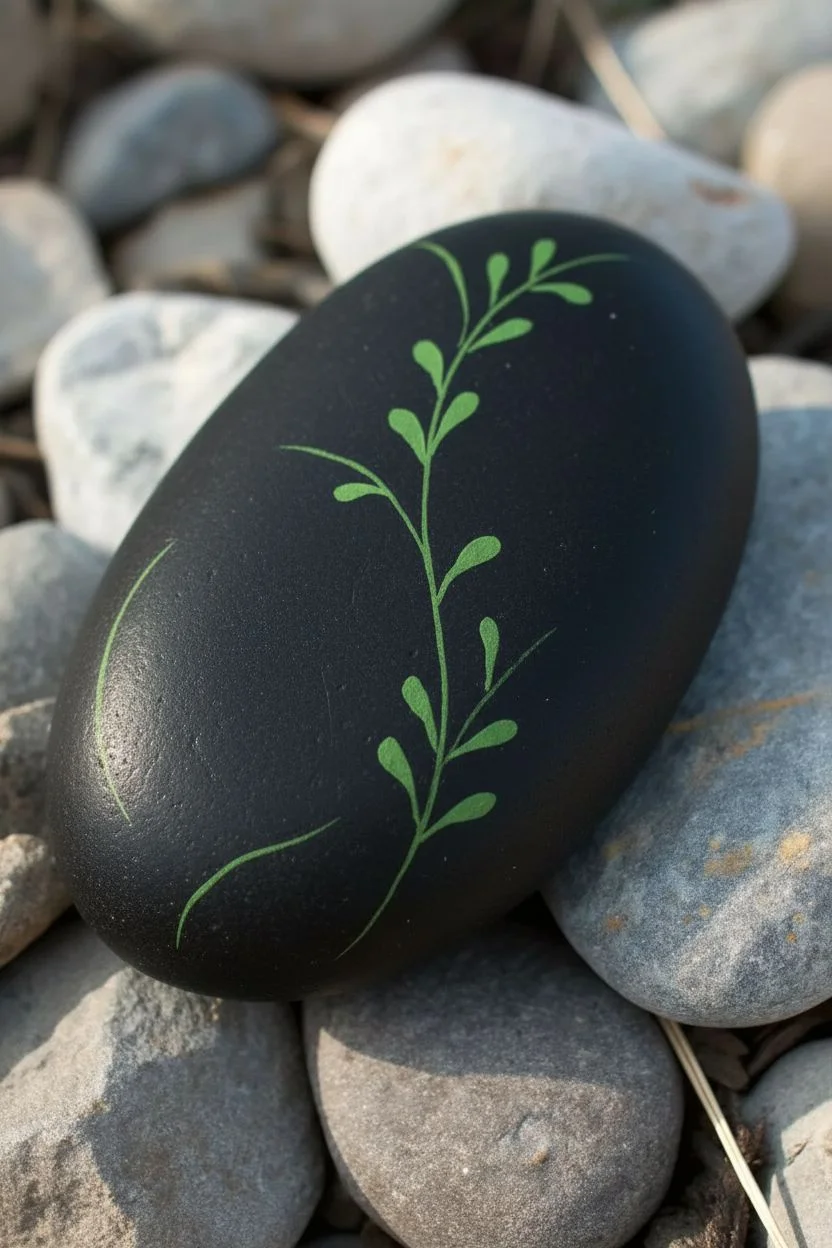
Simple Botanical Line Art That Pops
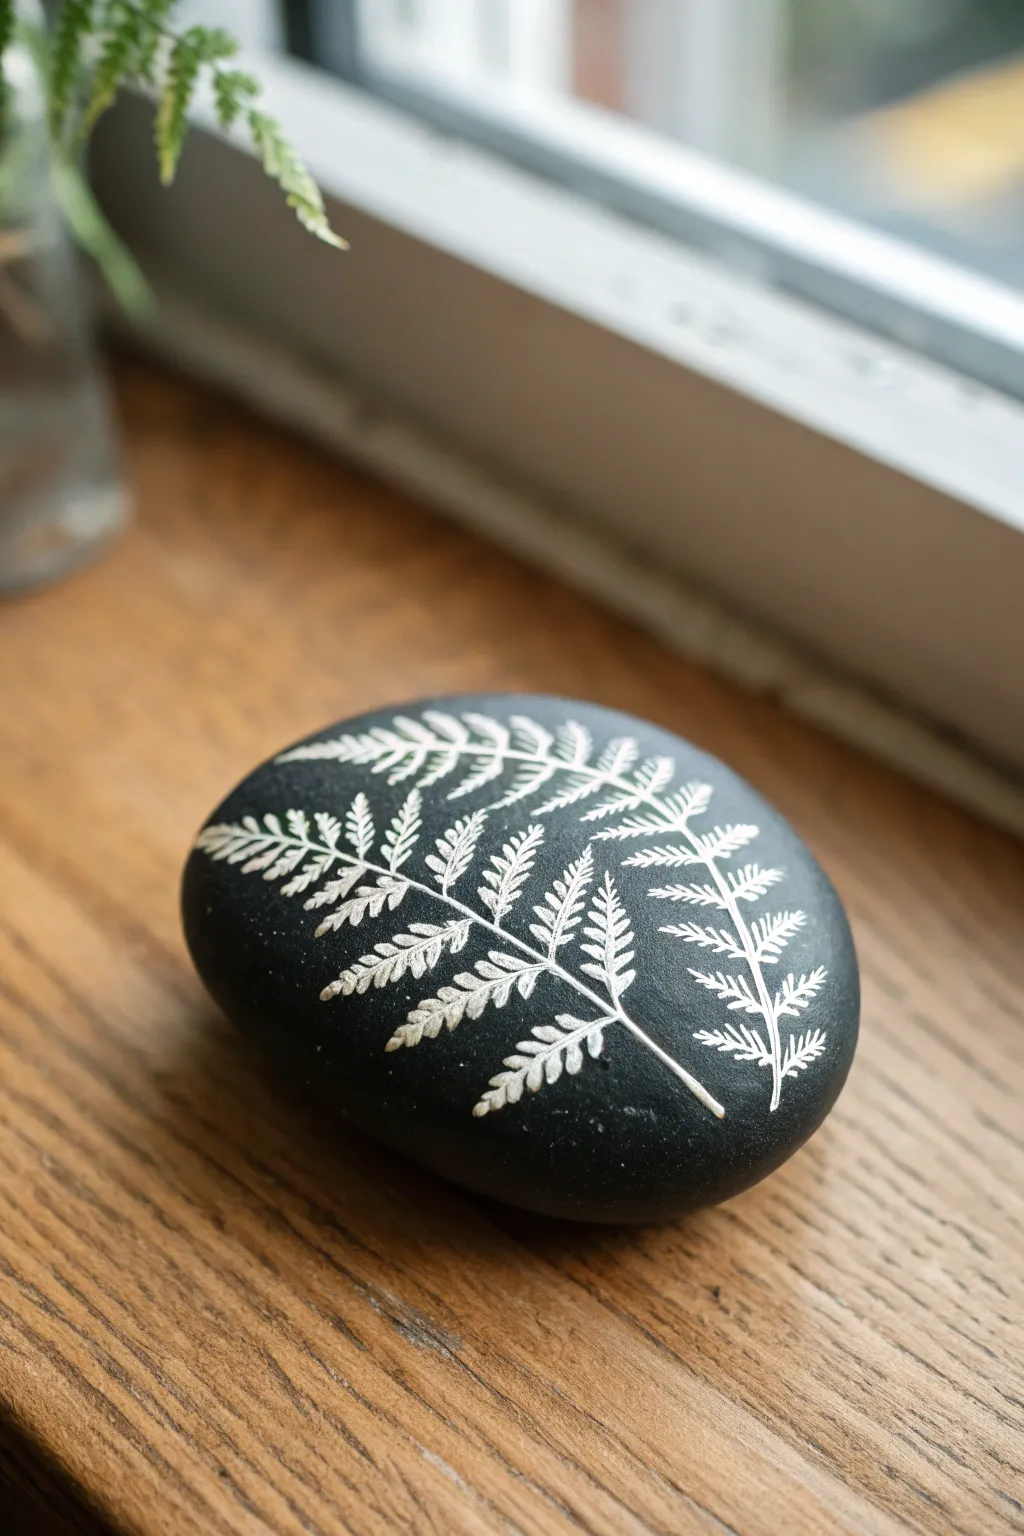
Achieve a stunning high-contrast look by pairing a smooth, matte black river stone with a delicate, chalky white fern design. This project focuses on the simplicity of botanical line art, where negative space is just as important as the drawing itself for creating impact.
Step-by-Step Guide
Materials
- Smooth river rock (oval or rounded shape)
- Black acrylic paint (matte finish preferred)
- White or metallic silver gel pen (0.7mm or 1.0mm)
- White paint pen (extra-fine tip)
- Small flat paintbrush
- Pencil (H or HB)
- Sealer (spray varnish, matte or satin)
- Fine-grit sandpaper (optional)
Step 1: Preparation and Base Coat
-
Surface Prep:
Begin by washing your stone with warm water and a little dish soap to remove any dirt or oil. Let it dry completely. -
Smoothing:
If your chosen rock has rough patches, buff them gently with fine-grit sandpaper to create a better canvas for your pen work. -
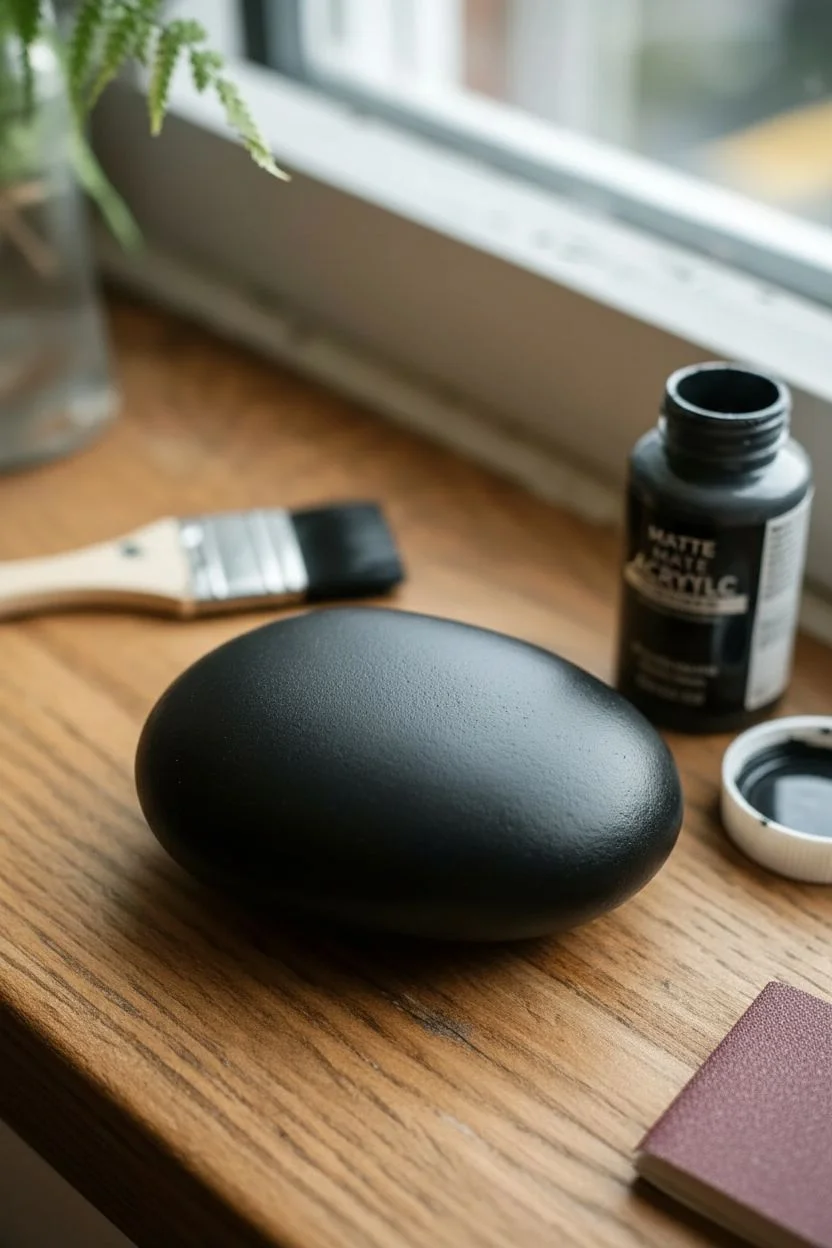
Base Base Layer:
Using a small flat brush, apply an even coat of black acrylic paint to the entire top surface of the stone. -
Full Coverage:
Allow the first coat to dry, then apply a second coat if the rock’s natural color is peeking through. You want a solid, opaque black background. -
Extended Drying Time:
Ensure the black paint is 100% dry before moving on. I usually let it sit for at least an hour, as pens can snag and clog on tacky paint.
Use a Light Touch
When sketching on black paint, standard graphite can be hard to see. Try a white charcoal pencil for the sketch phase—it wipes away easily later.
Step 2: Drafting the Design
-
Central Spine:
With a regular pencil, lightly sketch a curved line starting from one edge and arcing across the stone to establish the main stem of the fern. -
Secondary Stem:
Draw a second, slightly smaller curved line branching off the first one, or running parallel to it, to create a fuller composition. -
Placement Guide:
Lightly mark small ticks along the stems where the fronds (leaves) will extend. This spacing check ensures your design doesn’t get too crowded.
Step 3: Inking the Botanical Details
-
Stem Definition:
Switch to your white paint pen or gel pen. Trace over your pencil spines first, making the line slightly thicker at the base and tapering off toward the tip. -
First Fronds:
Start at the bottom of the main stem. Draw the first set of leaves extending outward, using short strokes that mimic the feathery texture of a fern. -
Leaf Shape Technique:
Instead of drawing a simple oval, use tiny, jagged zigzag strokes to form the outline of each leaf. This gives it that organic, fern-like quality. -
Working Upward:
Continue adding leaves up the stem, gradually making them smaller as you reach the tip of the frond. -
Second Branch:
Repeat the leaf-drawing process on your secondary stem. Be mindful of where the leaves might overlap; simply stop the line if it hits an existing leaf to create depth. -
Visual Balance:
Step back and look at the rock. If any areas look too sparse, add tiny, singular curled leaves near the base of the stems. -
Detailing:
Go back with your pen and add a central vein line down the middle of the larger leaves for added realism.
Go Metallic
Swap the white pen for a fine-tip metallic gold or silver marker. The shimmer against the matte black background looks incredible in sunlight.
Step 4: Finishing Touches
-
Cleanup:
Once the white ink is fully dry, gently erase any visible pencil sketch marks that weren’t covered by the ink. -
Sealing Purpose:
Rocks are porous and ink can fade, so sealing is crucial. Shake your spray varnish well. -
Final Seal:
Spray a light, even coat of matte or satin varnish over the stone. Do not brush-on sealer, as it often smears ink designs.
Place your finished stone on a windowsill or near a houseplant to bring a quiet touch of nature into your home


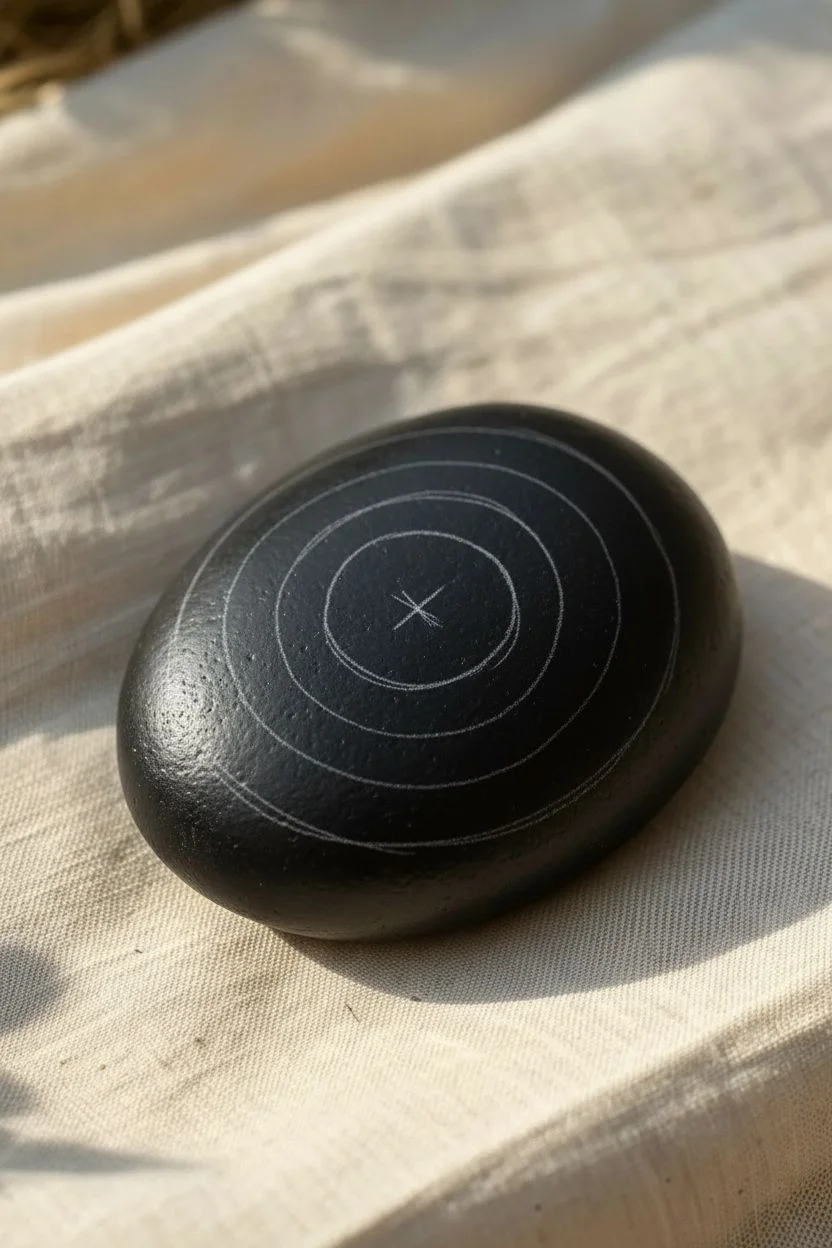
Starry Night Constellations on Black Stone
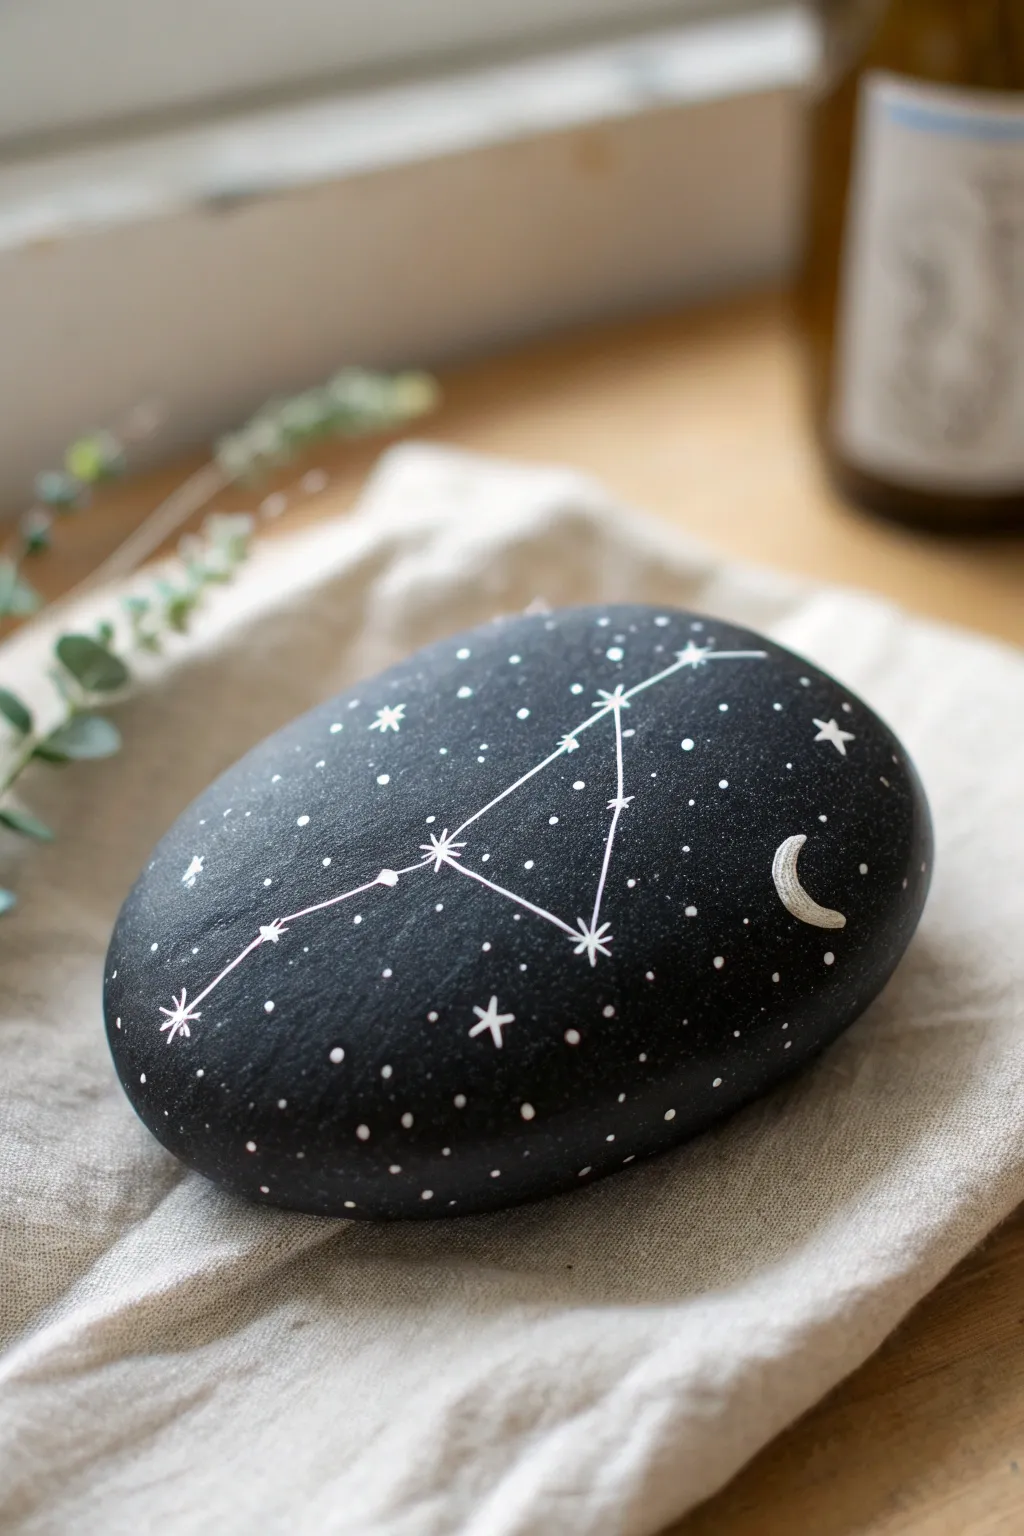
Transform a simple river rock into a piece of the night sky with this elegant constellation design. The stark contrast of white ink against a deep matte black background creates a sophisticated piece perfect for display or gifting.
Step-by-Step Tutorial
Materials
- Smooth, oval river rock (medium size)
- Black acrylic paint (matte finish preferred)
- Wide flat paintbrush
- White gel pen (fine point, 0.5mm or 0.8mm)
- White extra-fine tip paint marker (optional, for bolder lines)
- Pencil (white charcoal or standard graphite)
- Matte spray sealant or varnish
Step 1: Preparing the Canvas
-
Clean the stone:
Begin by thoroughly washing your stone with warm soapy water to remove any dirt or oils. Use a scrub brush if needed to get into the texture. Let it dry completely before moving on. -
Apply the base coat:
Using a wide flat brush, paint the entire top surface of the rock with black acrylic paint. I prefer using long, smooth strokes to minimize brush marks. -
Let it dry:
Allow the first coat to dry until it’s no longer tacky to the touch. This usually takes about 15-20 minutes. -
Apply a second coat:
For a truly opaque, deep space background, apply a second coat of black paint. Ensure full coverage so no natural stone color shows through. -
Final drying time:
Let this black base layer cure fully. It needs to be perfectly dry so your white ink doesn’t pick up wet paint and turn gray.
Step 2: Mapping the Stars
-
Choose your constellation:
Pick a real zodiac constellation or create a geometric shape that mimics one. The design in the image uses a triangular shape with a few connecting legs. -
Draft the main stars:
Lightly mark the position of the main ‘structural’ stars using a pencil. If your black paint is very matte, a standard pencil will show a shiny graphite mark; otherwise, use a white charcoal pencil. -
Connect the dots:
Using your white gel pen or extra-fine paint marker, draw straight lines connecting your marked star points to form the constellation skeleton. -
Emphasize the anchor stars:
Go back to the points where your lines intersect. Draw an asterisk shape (*) over these points to make them look like shining stars rather than just geometric dots. -
Thicken major stars:
For the largest stars in the constellation, add a small dot in the center of your asterisk to make them stand out as the brightest points.
Ink Smearing?
If your gel pen smears when sealing, the ink wasn’t dry enough. Let it cure overnight, or switch to a water-based acrylic paint marker for faster drying times.
Step 3: Adding the Atmosphere
-
Draw the crescent moon:
To the right of your constellation, draw a small C-shape for the crescent moon. Fill it in with your white pen, leaving the inner curve slightly jagged or textured to mimic craters. -
Add secondary stars:
Look at the empty spaces around your constellation. Draw a few medium-sized ‘twinkle’ stars (simple cross or plus shapes) scattered randomly. -
Create background dust:
Now for the magic. Gently tap the tip of your white pen against the rock to create hundreds of tiny dots. Group them denser in some areas to create a ‘Milky Way’ effect. -
Vary dot sizes:
Make sure your background stars aren’t all uniform. Apply slightly more pressure for some dots and a feather-light touch for others to create depth. -
Review the balance:
Step back and look at the composition. If a certain area looks too empty, add a few more tiny dots to balance the visual weight.
Add Dimension
Mix a tiny drop of metallic silver paint into your black base coat before applying. It gives the ‘night sky’ a subtle shimmer underneath the stars.
Step 4: Finishing Touches
-
Dry the ink:
Gel ink can smudge easily on non-porous acrylic paint. Let the design sit undisturbed for at least an hour. -
Seal the artwork:
In a well-ventilated area, seal your rock with a matte spray varnish. Hold the can about 12 inches away and do a light misting pass first to set the ink. -
Final coat:
Once the mist coat is dry, apply a fuller coat of sealant to protect your work from scratches and fading.
Place your finished celestial rock on a desk or windowsill to enjoy a little piece of the universe at home
BRUSH GUIDE
The Right Brush for Every Stroke
From clean lines to bold texture — master brush choice, stroke control, and essential techniques.
Explore the Full Guide
Chalkboard-Style Quotes on a Black Rock

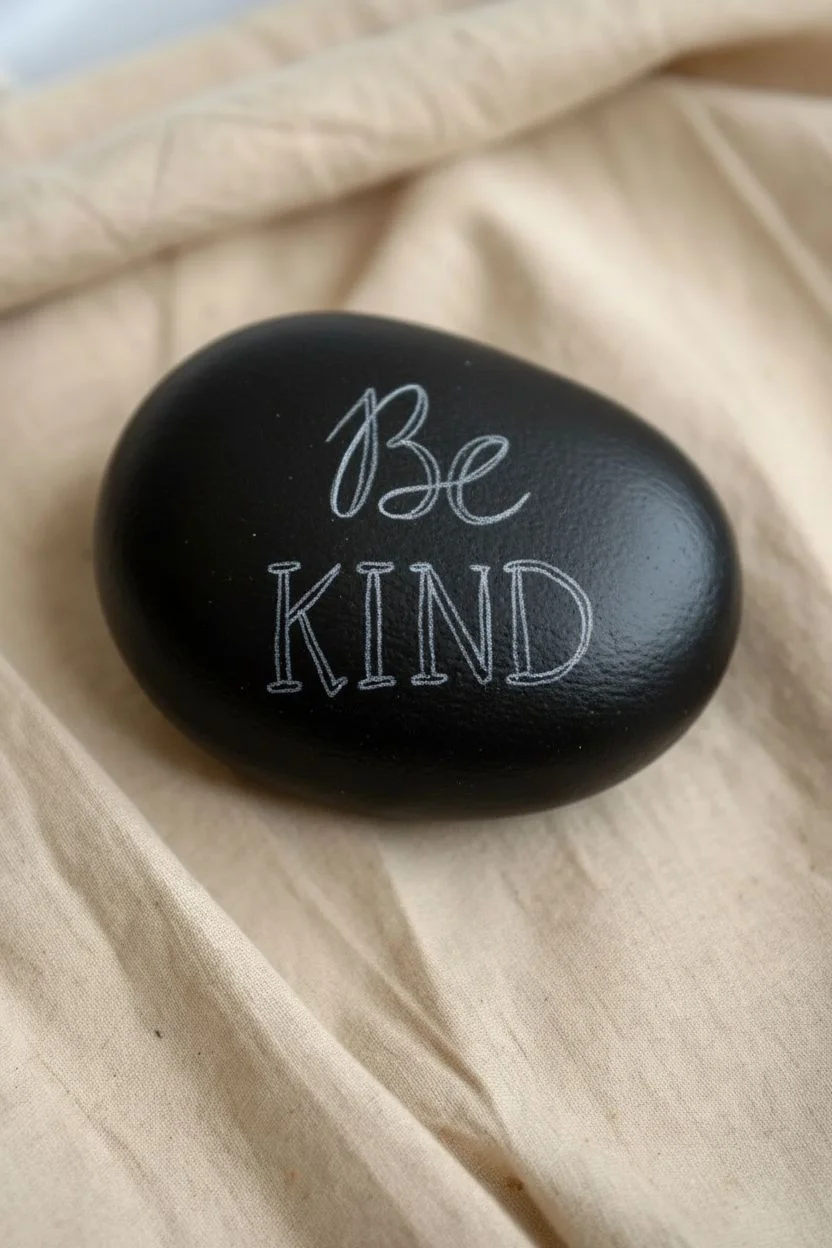
Spread a little positivity with this sophisticated yet simple rock painting project that mimics the look of classic chalkboard art. The high contrast of bright white ink against a smooth black stone makes the inspiring message truly pop.
How-To Guide
Materials
- Smooth, oval river rock (medium size)
- Black acrylic paint (matte finish)
- Wide flat paintbrush
- White extra-fine tip paint pen (0.7mm or similar)
- White medium tip paint pen (1mm – 3mm for filing letters)
- Pencil (HB or lighter)
- White colored pencil (optional, for drafting)
- Matte spray sealer
Step 1: Preparing the Canvas
-
Clean and Dry:
Begin by washing your stone thoroughly with warm soapy water to remove any dirt or oils. Scrub well with an old toothbrush if needed to get into the pores. Allow it to bone dry before proceeding. -
Base Coat:
Using a wide flat brush, paint the entire top surface of the rock with matte black acrylic paint. I like to apply this in long, smooth strokes to minimize texture. -
Second Layer:
Once the first coat is dry to the touch, apply a second coat of black paint to ensure opaque, solid coverage. Let this dry completely—if the paint is wet, your paint pens will snag. -
Drafting the Design:
Lightly sketch your design layout using a white colored pencil or very gently with a standard pencil. Mark the position for ‘Be’ on the upper half and ‘KIND’ on the lower half to ensure centering.
Paint Pen Flow
If your white ink looks transparent or watery, shake the pen vigorously and press the nib on a scrap paper to re-saturate it with fresh pigment before sketching.
Step 2: Lettering
-
Writing ‘Be’:
Using your extra-fine white paint pen, write the word ‘Be’ in a cursive script style near the top center. Focus on fluid, connected motions. -
Thickening Downstrokes:
To simulate faux-calligraphy, go back over the ‘downstrokes’ (anywhere your pen moved downward) of the cursive letters and thicken those lines slightly. -
Outlining ‘KIND’:
Below the cursive, use the extra-fine pen to outline the capital letters for ‘KIND’. Use a serif font style, adding little feet to the tops and bottoms of the letters. -
Filling the Capitals:
Switch to your medium tip white pen to fill in the block letters of ‘KIND’. This ensures solid coverage without the streakiness that sometimes happens with finer tips.
Step 3: Decorative Accents
-
Bottom Swirls:
With the extra-fine tip pen, draw four connected swirls underneath the word ‘KIND’. I start from the center and work outward to keep them symmetrical. -
Adding Hearts:
Draw small, simple heart outlines on the left and right sides of the text. Vary their angles slightly so they look playful rather than rigid. -
Drawing Sparkles:
Add asterisks or star shapes near the hearts and in empty spaces. Draw a simple cross, then an ‘X’ over it to create an eight-point star. -
Stippling:
Fill in any remaining negative space with tiny dots. Gently tap the tip of your fine paint pen against the rock to create varied sizes of dots.
Faux-Chalk Texture
For an authentic dusty chalkboard look, lightly smudge a tiny bit of white pastel chalk over the black background before sealing it.
Step 4: Finishing
-
Touch-ups:
Examine the white ink. If the black background is showing through the letters, carefully apply a second layer of white ink once the first is dry. -
Clean Up Draft Lines:
If any pencil marks are still visible, wait until the paint is 100% cured, then gently erase them with a soft eraser. -
Sealing:
Take the rock outside and spray it with a matte sealer. A glossy sealer would ruin the chalkboard effect, so ensure your spray is labeled ‘matte’ or ‘flat’. -
Drying:
Let the sealer dry for at least 24 hours before handling or placing your rock in the garden.
Place this beautiful reminder where you will see it daily or gift it to brighten someone’s day
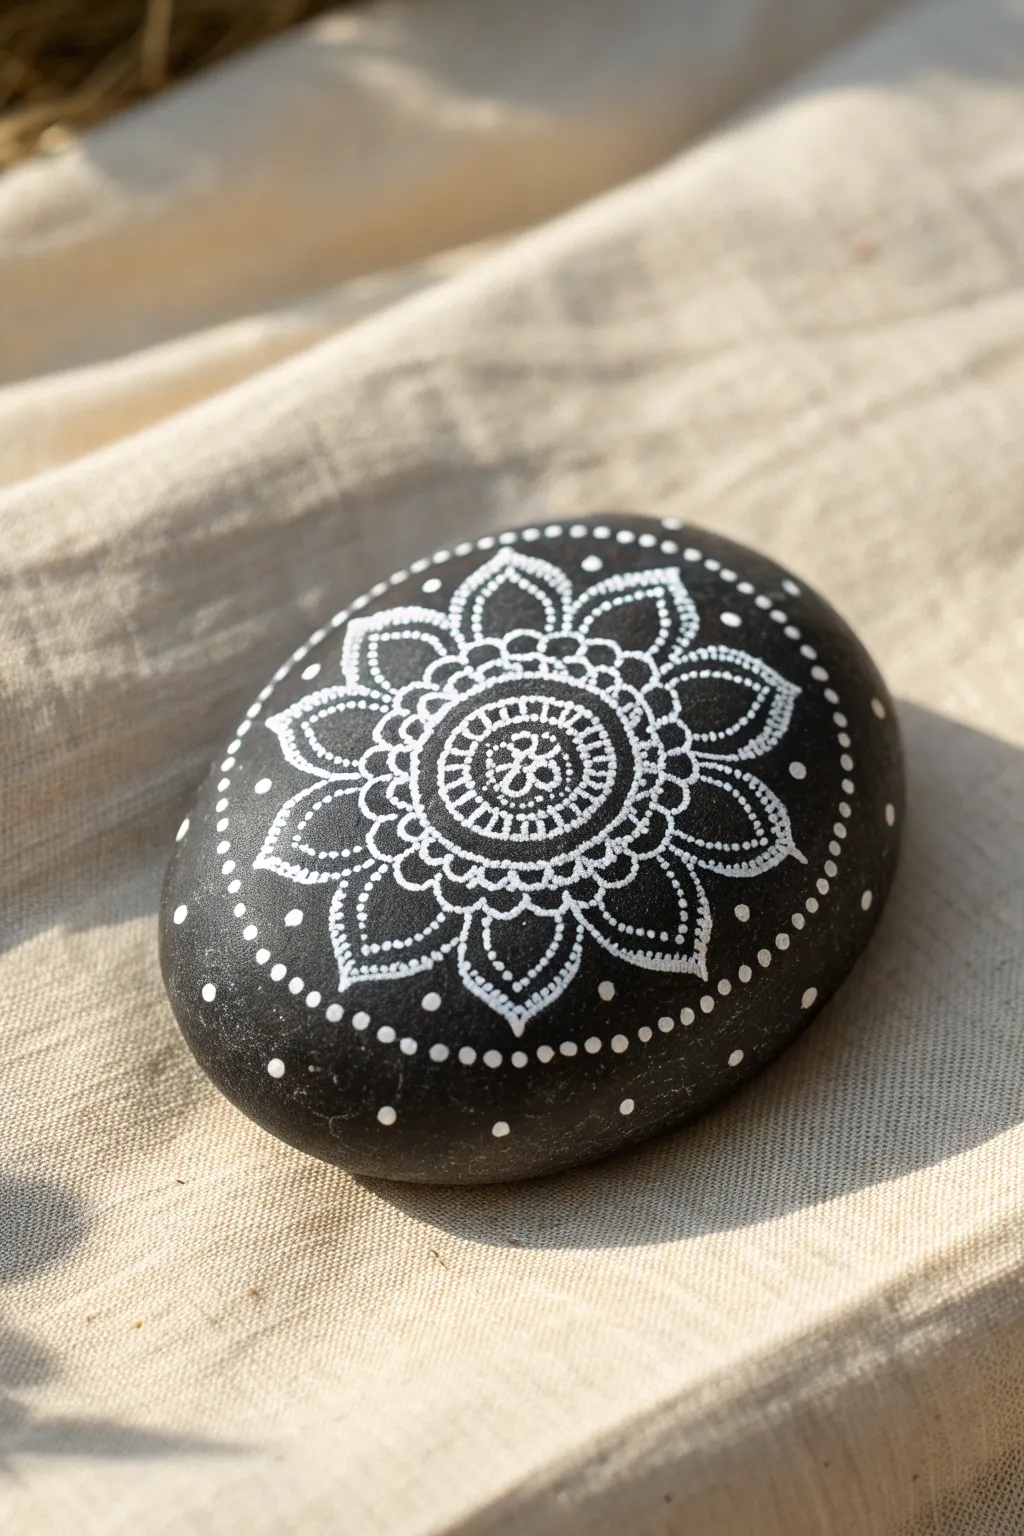
White Doodle Borders and Mini Icons
Transform an ordinary smooth stone into a piece of monochromatic art with delicate white floral doodles. This striking black and white design utilizes high-contrast line work and repeating patterns for a polished, elegant look.
Step-by-Step Tutorial
Materials
- Smooth, oval river rock or stone
- Black acrylic paint (matte or satin finish)
- Wide flat paintbrush
- Extra-fine tip white paint pen (0.7mm or 0.5mm)
- Fine tip white paint pen (1mm)
- Pencil (optional for sketching)
- Clear acrylic sealant spray (matte) or varnish
Step 1: Base Preparation
-
Clean the surface:
Begin by washing your stone thoroughly with soap and water to remove any dirt or oils. Let it dry completely before handling. -
Apply the base coat:
Paint the entire top surface of the stone with black acrylic paint using a wide flat brush. Ensure you get smooth, even coverage. -
Second coat:
Once the first layer is dry to the touch, apply a second coat of black paint to ensure the background is solid and opaque. Let this dry fully for at least 30 minutes.
Ink Flow Pro-Tip
Test your white paint pen on a scrap piece of paper before touching the rock. This ensures the ink is flowing smoothly and prevents sudden puddles on your artwork.
Step 2: Designing the Scalloped Border
-
Start the lower border:
Using your fine tip white paint pen, draw a simple curved line that runs along the lower edge of the rock, following its natural shape. -
Add scallops:
Along the top of that curved line, draw a series of small, connected semi-circles or arches to create a scalloped lace effect. -
Border details:
Inside each scallop arch, place a single small dot. Above the connection point between each scallop, draw a tiny vertical line with a dot on top, resembling a small pin. -
Lower decorative elements:
Below the main curved line, draw small downward-facing details. Alternate between a simple ‘V’ shape with a dot at the point and small three-pronged tulip shapes. -
Side border extension:
Extend the scallop pattern slightly up the sides of the rock, transitioning into a simple wavy vine line that frames the central area.
Step 3: Drawing the Botanical Center
-
Anchor the main vine:
In the center-left area, draw a long, slightly curved stem rising from the bottom border toward the top left. -
Add veined leaves:
On this main stem, draw large, pointed oval leaves. Inside each leaf, draw a central vein line and small V-shaped veins branching off. -
Create the secondary fern:
To the right of the main vine, draw a second curved stem. Add many small, simple teardrop-shaped leaves along both sides of this stem to create a fern-like appearance. -
Draw the solitary leaf:
In the lower right empty space, draw one large, separate leaf shape resting horizontally. Fill it with the same detailed veining pattern used on the first vine.
Level Up: Metallic Accent
Swap the white pen for silver or gold on just the small dots or star centers. The subtle metallic shimmer adds depth while keeping the monochromatic vibe.
Step 4: Filler Details and Finishing
-
Add starbursts:
Scatter 3-4 simple starbursts around the leaves. Draw these by crossing three short lines over a central point. -
Draw flower icons:
Near the top right and top center, add simple daisy-like flowers. Draw a dot for the center and five or six petal loops surrounding it. -
Fill empty space with magic:
Look for any large black gaps in the background. Gently tap the tip of your pen to add tiny dots or ‘stardust’ to balance the composition without overcrowding it. -
Dry time:
Allow the white ink to dry completely. Paint pens can smear easily if touched too soon, so I recommend waiting at least 15 minutes. -
Seal the artwork:
Once fully cured, apply a coat of clear matte sealant spray or brush-on varnish to protect your design from chipping.
Place your finished stone on a shelf or in the garden to add a touch of handcrafted elegance to your space

PENCIL GUIDE
Understanding Pencil Grades from H to B
From first sketch to finished drawing — learn pencil grades, line control, and shading techniques.
Explore the Full Guide
Bright Neon Florals on a Black Rock
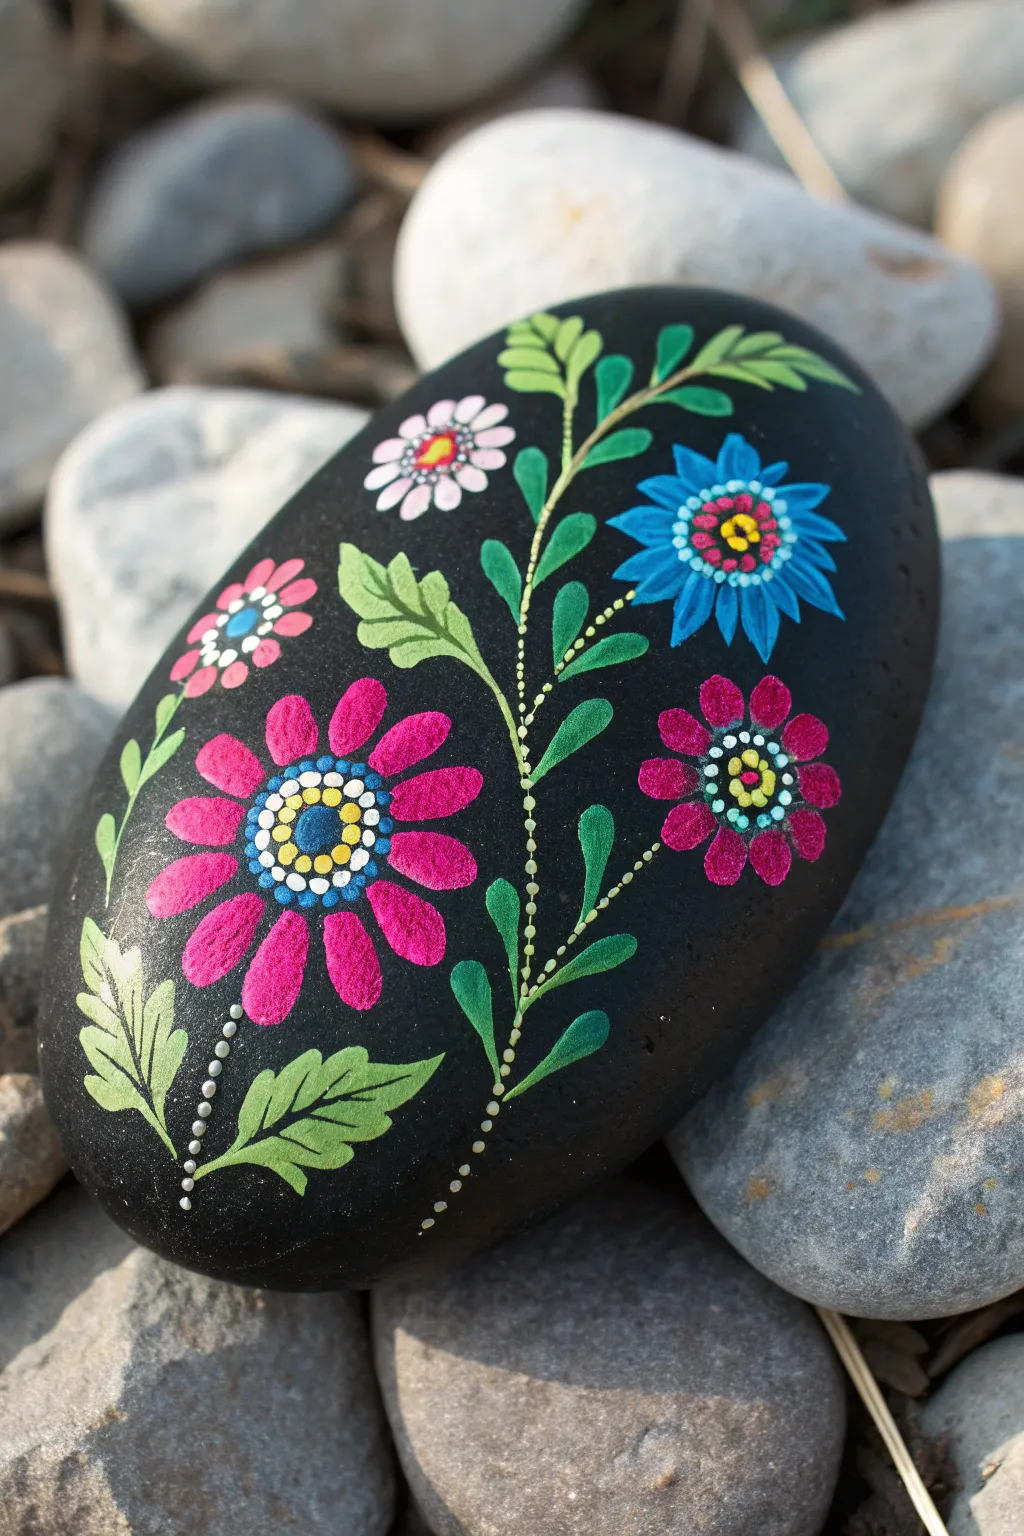
Transform a simple river rock into a stunning piece of folk art with this bright floral design. The striking contrast between the matte black background and the vivid pinks and blues makes the flowers practically pop off the surface.
Step-by-Step
Materials
- Smooth oval river rock
- Black acrylic paint (matte finish)
- White Gesso or primer (optional but recommended)
- Acrylic paints: Bright Pink, Cyan Blue, Magenta, White, Leaf Green, Emerald Green, Yellow
- Fine liner brushes (sizes 00 and 0)
- Small round brush (size 2)
- Dotting tools (various small sizes)
- Spray varnish or sealant (gloss or matte)
Step 1: Base and Structure
-
Prepare the canvas:
Begin by washing your stone with soapy water and drying it completely. Paint the entire surface with two coats of matte black acrylic paint, allowing the first coat to dry fully before applying the second to ensure solid, opaque coverage. -
Map the vines:
Using a very fine liner brush and a diluted Leaf Green mixed with a touch of white, lightly sketch the main curved vine running vertically up the center of the rock. Add a secondary shorter stem curving off to the left near the bottom.
Step 2: Painting the Main Flowers
-
Base the large pink flower:
On the lower left, paint the large pink flower. Start with the petals radiating from a center point. Use Bright Pink to create elongated teardrop shapes. Don’t worry about opacity yet; you can add a second coat later. -
Create the blue cornflower:
On the upper right side, paint the blue flower. Use Cyan Blue to paint spiky, pointed petals that overlap slightly. These should look a bit sharper than the rounder pink petals. -
Add secondary blooms:
Paint a smaller magenta/red flower below the blue one using rounded petals. Then, paint two tiny pink blooms on the far left stem and a small white daisy-like flower near the top left. -
Highlight the petals:
This is where the ‘neon’ effect happens. I like to mix a tiny bit of white into my original petal colors and paint a smaller, thinner stroke inside each petal to create dimension and light.
Paint opacity fix
If your neon colors look dull against the black, paint the flower shape in white first. Let it dry completely, then paint your bright color on top for maximum vibrancy.
Step 3: Adding Greenery
-
Paint large leaves:
Using Leaf Green, paint the larger, jagged leaves at the base of the pink flower. These leaves have serrated edges, resembling rose leaves. Add lighter green veins for detail once dry. -
Add flowing vines:
Along the main central stem, paint flowing, elongated leaves using Emerald Green. Use a ‘press and lift’ motion with your round brush to get that tapered shape. -
Create fern details:
Near the top of the rock, paint delicate fern-like fronds branching off the main stem using your finest liner brush and a lighter green shade.
Steady hand tip
Rest your pinky finger on a dry part of the rock while painting fine details. This anchors your hand and gives you much better control for the tiny dots and vines.
Step 4: Detailed Dot Work
-
Dotted stems:
Instead of solid lines for the smaller connecting stems, use a fine dotting tool or the tip of a toothpick. Dip it in light green paint and create lines of tiny, evenly spaced dots connecting the flowers to the main vine. -
Pink flower center:
For the large pink flower, create a center with rings of dots. Start with a large blue dot in the middle, surrounded by a ring of yellow dots, then a ring of white dots. -
Blue flower center:
Give the blue flower a vibrant center by placing a yellow dot in the middle, surrounded by Magenta dots, and finally a ring of tiny white dots on top of the inner petals. -
Small flower centers:
Finish the smaller flowers with simple dot clusters. Key combinations are yellow centers with white surrounds for the red flower, and simple yellow dots for the tiny pink blooms. -
Final decorative dots:
Add a trail of tiny white or light green dots cascading down the bottom left of the rock to balance the composition.
Step 5: Finishing Touches
-
Clean up borders:
If any paint went outside the lines or looks messy, use a small brush with black paint to ‘erase’ the mistakes and crisp up the edges of your petals. -
Seal the artwork:
Allow the rock to cure for at least 24 hours. Once fully dry, spray with a clear UV-resistant varnish to protect the paint from chipping and to make the colors shine.
Place your finished masterpiece in a garden pot or on a desk to add a permanent splash of color to your day
Metallic Accents That Sparkle Against Black
Transform a simple river rock into a mesmerizing piece of art with this elegant mandala design. The striking contrast of metallic gold and crisp white ink against a deep matte black background creates a sophisticated look that shimmers beautifully in the light.
Step-by-Step Guide
Materials
- Smooth, oval river rock ( palm-sized)
- Black gesso or black acrylic paint (matte)
- Wide flat paintbrush
- Gold metallic acrylic paint
- Fine point white paint marker (0.7mm or similar)
- Detail brush or dotting tool
- Regular pencil
- Clear spray sealer (gloss or matte depending on preference)
Step 1: Preparation and Base
-
Clean Your Canvas:
Begin by thoroughly washing your rock with warm, soapy water to remove any dirt or oils. Use a stiff brush if necessary to get into crevices. Allow the stone to dry completely before proceeding. -
Apply the Base Coat:
Using your wide flat brush, apply a coat of black gesso or black acrylic paint. I prefer using a matte finish here because it really makes the metallic accents pop later on. Let the first coat dry fully. -
Second Coat for Depth:
Apply a second layer of black paint to ensure rich, opaque coverage with no stone showing through. Allow this layer to dry completely, preferably for at least an hour.
Step 2: Drafting and Gilding
-
Pencil Sketching:
Lightly sketch a central circle in the middle of your stone using a pencil. Around this, lightly draw eight petal shapes radiating outward to form a flower. Don’t worry about perfection; these are just guidelines. -
Base Gold Layer:
Load a small detail brush with metallic gold acrylic paint. Carefully fill in the central circle and paint broad strokes inside each of your sketched petals. -
Soft Edges:
The gold shouldn’t be a solid block of color; allow the edges inside the petals to be slightly rough or feathered. This creates a textured, stardust effect behind the white lines you’ll add later. -
Drying Time:
Let the gold paint dry completely. Metallic paints can sometimes take a bit longer to set than standard acrylics, so be patient to avoid smudging.
Fixing Wobbly Lines
If a white line goes astray, wait for it to dry completely. Then, use a tiny brush with black paint to carefully paint over the mistake like an eraser.
Step 3: Detailed Line Work
-
Prime Your Marker:
Prepare your fine point white paint marker by shaking it well and pressing the nib on a scrap piece of paper until the ink flows smoothly. -
Center Details:
Draw the center of the mandala first. Outline a small circle in the very middle, then draw a slightly larger circle around it. Divide the space between them into small sections like a wheel. -
Inner Petal Outlines:
Draw the outlines for eight inner petals radiating from the center. These should be smaller tear-drop shapes. Inside each petal, draw a slightly smaller tear-drop to create a double-line effect. -
Outer Petal Definition:
Move to the outer layer. Draw larger petal shapes that extend from between the inner petals. Outline them clearly in white ink, ensuring they encompass the gold paint you applied earlier. -
Petal Accents:
Inside these larger outer petals, draw a second outline just inside the first one. Then, add a central line or small vein detail running down the middle of each petal for added intricacy.
Add Extra Dimensions
For a 3D effect, add a tiny drop of clear craft glue or resin over the center gold circle. It creates a gemstone-like dome once dry.
Step 4: Dotted Embellishments
-
Inner Dotted Halo:
Using your paint marker or a fine dotting tool dipped in gold paint, add tiny dots between the petals of the inner flower layer. This adds texture and connects the design elements. -
Scalloped Borders:
Create decorative arcs of gold dots connecting the tips of the outer petals. Think of this like draping a beaded necklace from one petal tip to the next. -
Outer Radiance:
Continue the dotted pattern outward. Add a second, larger scalloped row of dots further out from the center to expand the mandala design toward the edges of the rock. -
Large White Accents:
Use the white paint marker (or a larger dotting tool with white paint) to place four or five larger, distinct white dots around the perimeter of the stone, spaced evenly apart. -
Final Inspection:
Look over your design. If any black areas look a bit dusty from pencil marks, gently erase them once you are 100% sure the ink is dry. Touch up any white lines that might look faint. -
Protect Your Art:
Once everything is cured (give it at least 24 hours), take the rock outside and apply a clear spray sealer. This protects the paint from chipping and keeps those metallic accents shining bright for years.
This sophisticated black and gold stone makes a stunning paperweight or a thoughtful handmade gift for a friend


Galaxy Gradient With Splattered Stars
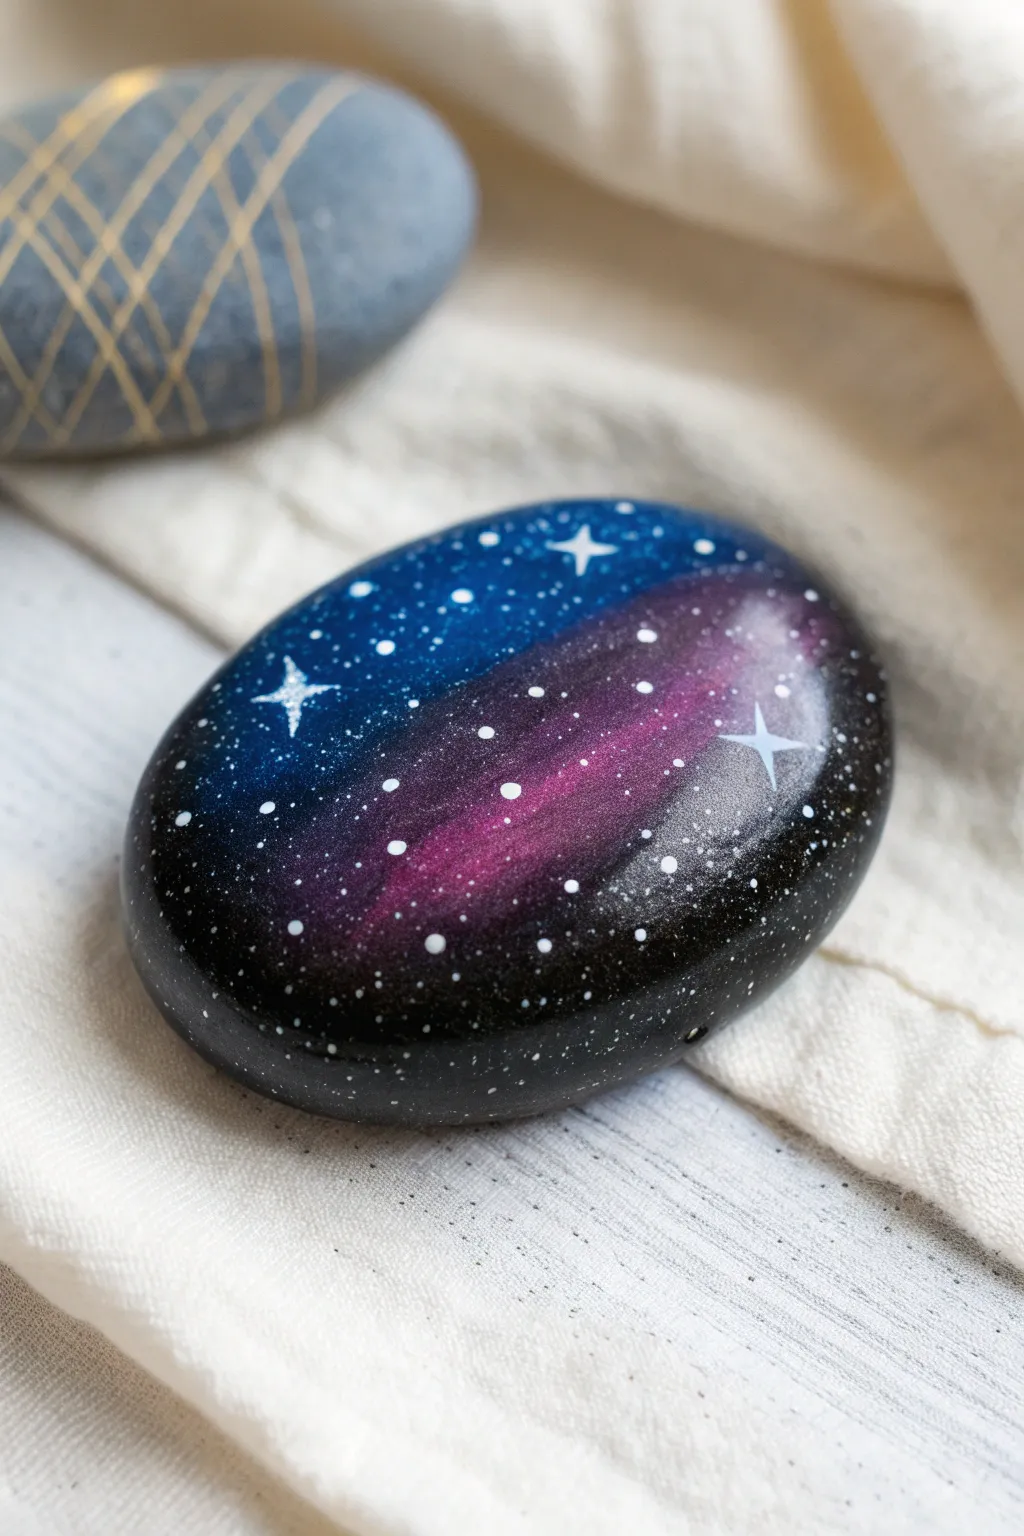
Transform a simple stone into a window to the cosmos with this stunning galaxy design. By blending deep blues and purples into a jet-black background, you’ll create a mesmerizing nebula effect that fits in the palm of your hand.
Step-by-Step Tutorial
Materials
- Smooth, oval river rock
- Gesso or white primer (optional, but recommended for smoothness)
- Black acrylic paint
- Phthalo Blue acrylic paint
- Violet or deep purple acrylic paint
- Magenta or bright pink acrylic paint
- Titanium White acrylic paint
- Flat brush (medium size)
- Small round detail brush (size 0 or 00)
- Old toothbrush or stiff bristle brush
- Gloss varnish or sealer
Step 1: Preparing the Void
-
Clean surface:
Begin by washing your rock thoroughly with soap and water to remove any dirt or oils. Let it dry completely before starting. -
Prime the rock:
If your rock is porous, apply a thin coat of gesso or primer. This creates a smoother surface for blending, though it isn’t strictly necessary for darker designs. -
Apply the base coat:
Paint the entire top surface of the rock with black acrylic paint. You want a solid, opaque background, so applying two thin coats is often better than one thick, gloopy layer. -
Dry completely:
Wait for the black base coat to fully cure. If you try to blend colors on wet black paint, you’ll end up with a muddy grey mess instead of vibrant space dust.
Cosmic Blending
Use a small piece of torn kitchen sponge instead of a brush to dab on the galaxy colors. This creates a natural, textured ‘gas cloud’ effect instantly.
Step 2: Creating the Nebula
-
Add deep blue:
Squeeze a small amount of Phthalo Blue onto your palette. Using your flat brush, sponge or dab the blue onto the left side of the rock, keeping the edges soft and irregular. -
Blend the purple:
While the blue is still slightly tacky, pick up some violet paint. Dab this next to the blue, allowing them to overlap slightly in the center diagonal of the rock. -
Brighten with magenta:
To make the nebula glow, touch a bit of magenta or bright pink into the center of the purple section. This creates a highlight where the galaxy gas would be densest. -
Feather the edges:
Clean your brush until it’s just damp. Gently feather the outer edges of your blue and purple colored patches outward into the black background so there are no harsh lines. -
Layering depth:
I like to repeat the color application once the first layer is dry. A second pass of blue and magenta makes the colors pop vividly against the dark stone.
Step 3: Adding the Stars
-
Prepare splatter paint:
Mix a small amount of titanium white paint with a drop or two of water. The consistency should be like heavy cream—thick enough to be opaque, but thin enough to flick. -
Splatter stars:
Dip an old toothbrush or stiff brush into the thinned white paint. Hold it over the rock and run your thumb across the bristles to spray fine mist and tiny dots across the surface. -
Hand-paint distinct stars:
Using your smallest detail brush, pick out 3 to 5 spots to turn into larger stars. Paint a small plus sign (+) first, focusing on where the galaxy colors are brightest. -
Refine star shape:
Elongate the vertical and horizontal lines of your plus signs, tapering them to sharp points to create the classic twinkle effect shown in the example. -
Add center dots:
Place a tiny, solid white dot in the very center of your four-pointed stars to make them shine brightly. -
Clean up:
If any large blobs of white paint accidentally landed during the splatter phase, you can gently paint over them with black or colored paint to hide them.
Metallic Magic
Mix a tiny amount of metallic silver or interference blue medium into your colored paints to give the nebula a subtle, shimmering quality when it catches the light.
Step 4: Finishing Touches
-
Dry thoroughly:
Allow the entire rock to dry for several hours or overnight to ensure no moisture is trapped under the sealer. -
Seal the rock:
Apply a coat of gloss varnish. A glossy finish is ideal here as it mimics the depth of space and makes the dark colors look wet and rich.
Enjoy the deep, starry finish of your new miniature galaxy rock
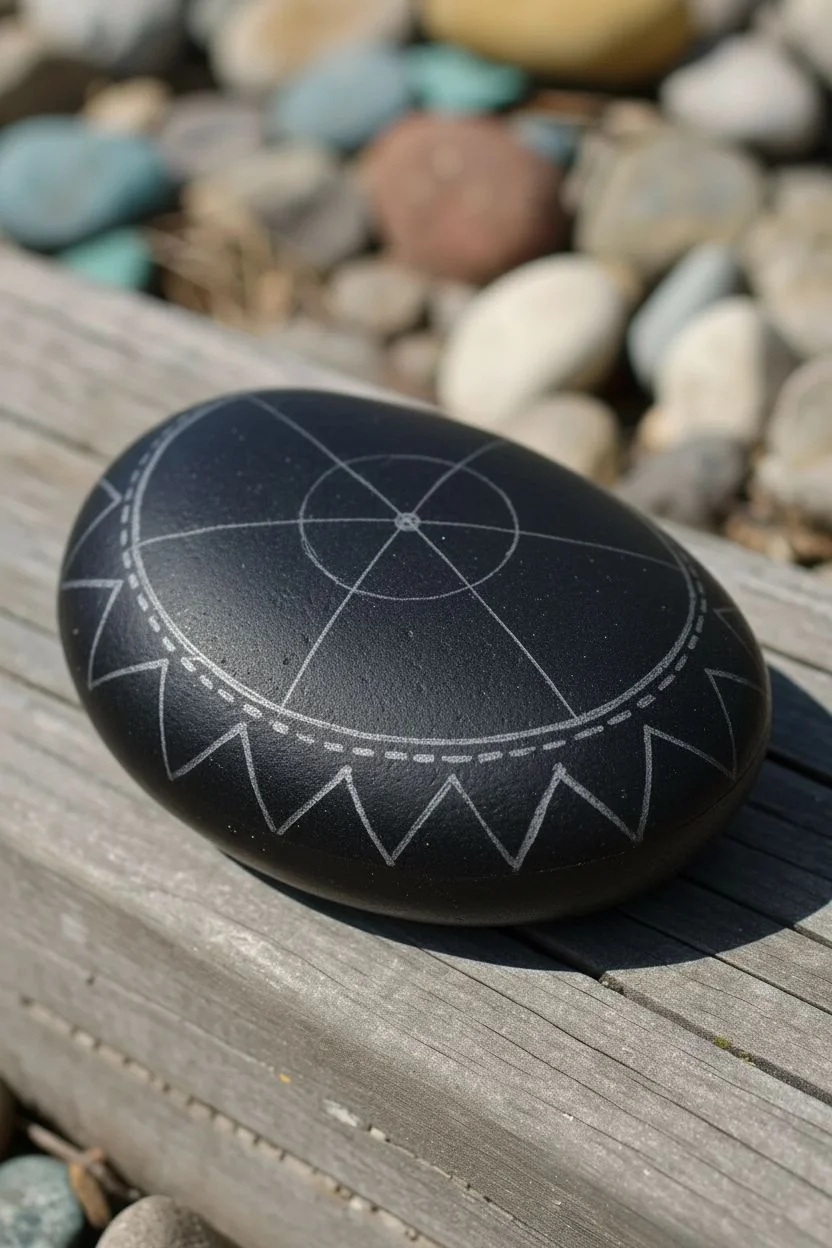
Minimal Color Blocks With White Linework Details
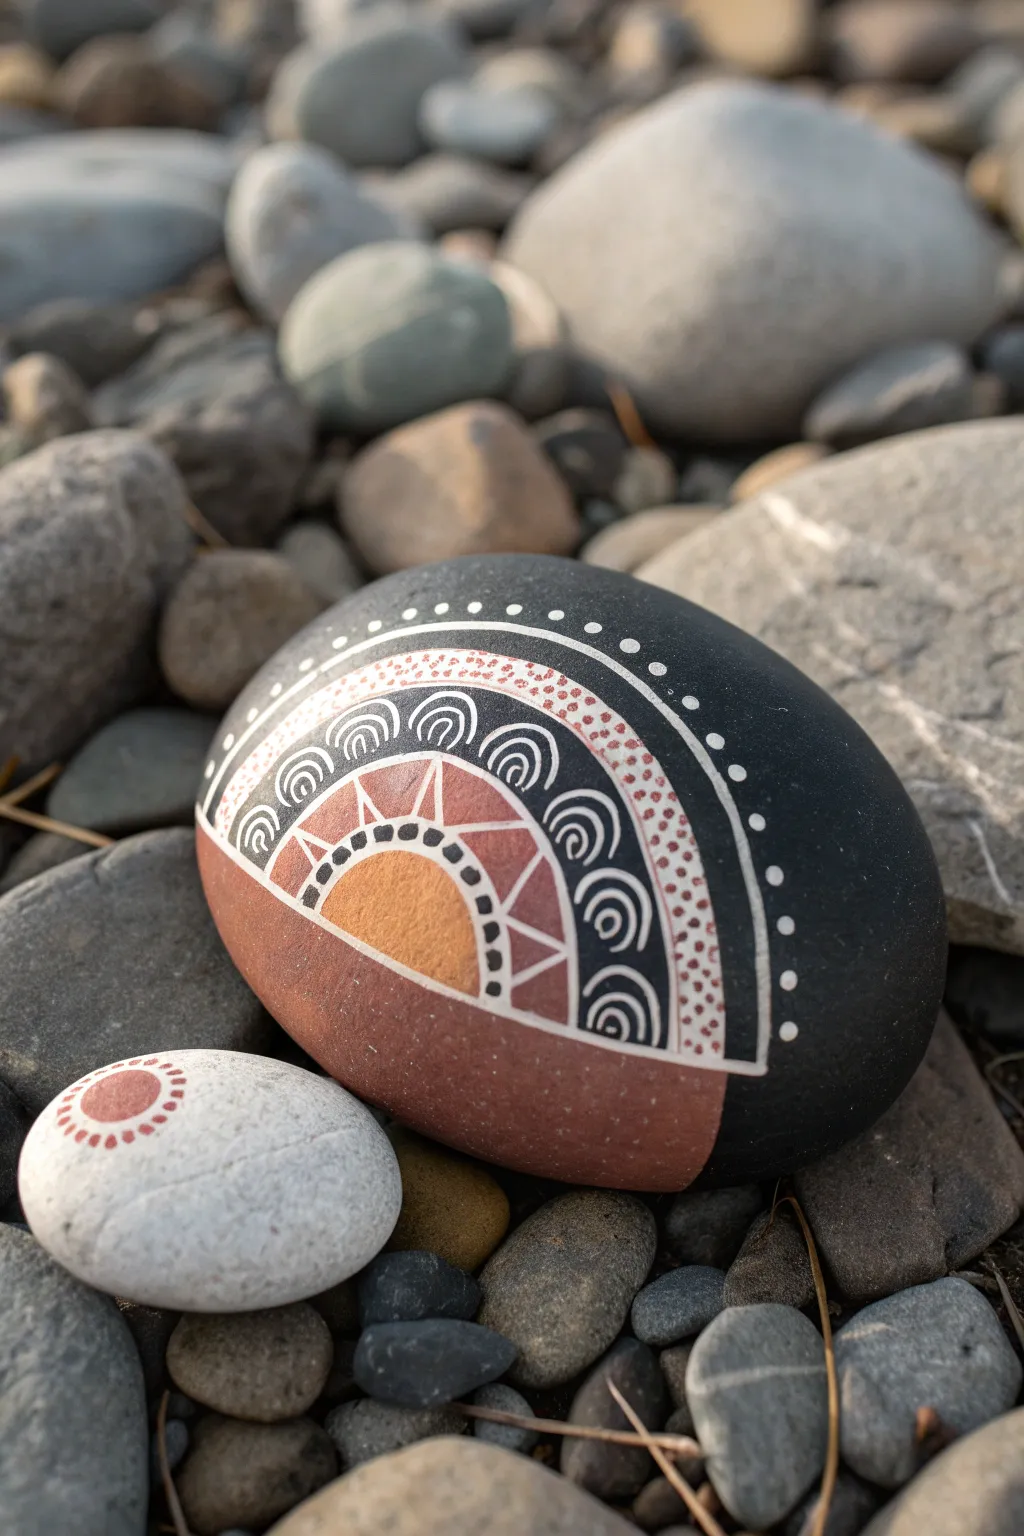
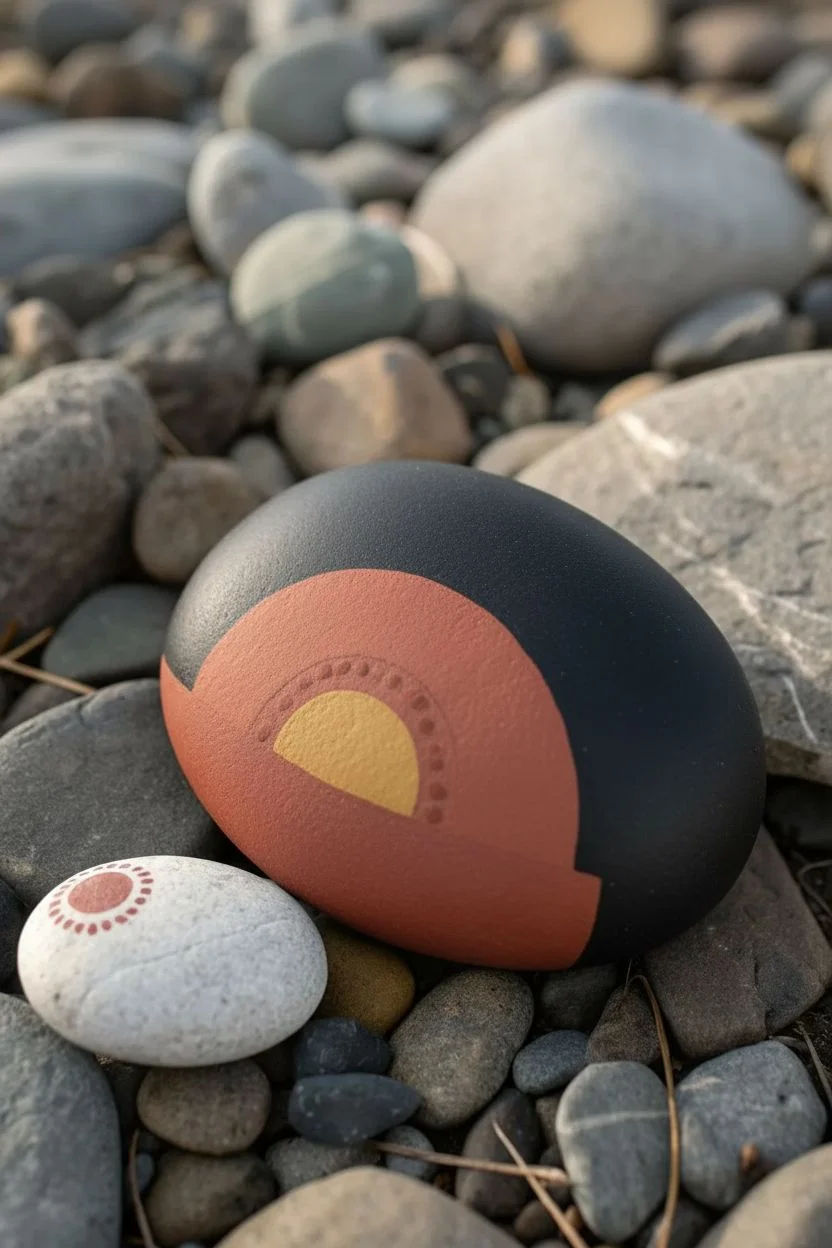
Embrace the contrast of matte black against warm, earthy tones with this sophisticated rock painting project. The design features precise white linework that frames a stylized sunrise motif, perfect for creating a modern decorative accent.
How-To Guide
Materials
- Smooth oval river rock (medium to large size)
- Black acrylic paint (matte finish recommended)
- White acrylic paint or extra-fine tip white paint pen (0.7mm)
- Terracotta/rust acrylic paint
- Golden ochre or mustard yellow acrylic paint
- Flat synthetic liner brush
- Small round detail brush (size 0 or 00)
- Pencil for sketching
- Matte spray varnish
Step 1: Base Coat & Color Blocking
-
Prepare the surface:
Begin by washing your stone thoroughly with soap and water to remove any river grit or oils. Let it dry completely before starting. -
Apply the black base:
Coat the entire top surface of the stone with matte black acrylic paint. You may need two coats for full opacity, allowing the first to flourish before applying the next. -
Sketch the layout:
Once the black paint is bone dry, lightly use a pencil to mark a horizontal line across the lower third of the rock. Then, draw a large semi-circle arching over this line to define the main design area. -
Paint the terracotta foundation:
Fill the large semi-circle area with your terracotta or rust-colored paint. Use a flat brush to get a crisp straight edge along the bottom. This might need two thin coats to cover the black fully. -
Add the sun center:
Load a small round brush with ochre or mustard paint. At the bottom center of your terracotta semi-circle, paint a smaller, solid half-circle to represent the sun.
Steady Hand Trick
Rest your painting hand’s pinky finger on the dry part of the rock while drawing lines. This acts as an anchor and significantly reduces shakiness.
Step 2: Detailed White Linework
-
Outline the main shape:
Using your extra-fine white paint pen or a liner brush, draw a prominent white line tracing the entire outer curve of the terracotta semi-circle. -
Create the sun rays:
Draw an arched line slightly above the yellow sun center. Connect this line to the yellow center with small vertical white dashes. -
Build the triangle tiers:
Above the sun ray arch, draw a series of large, open triangles. The points should touch the top edge of the terracotta zone, creating a geometric radiating effect. -
Add the wave band:
Immediately outside the main terracotta semi-circle, paint a thick black band (or leave the background visible). Inside this band, draw a series of repeating white semi-circles or ‘rainbow’ arches. -
Detail the waves:
Inside each of those white arches, add 1-2 smaller concentric white arches to create a rippled, shell-like texture.
Uneven Paint Coverage?
If the terracotta looks streaky over the black base, let it dry fully and apply a second thin coat rather than piling on thick, wet paint.
Step 3: Outer Decorative Bands
-
Stipple the texture band:
Draw another arched white line encasing the wave layer. In the space created between this line and the waves, fill the area with small terracotta dots using the tip of your brush or a toothpick. -
Draw the final border:
Create one last, strong white arched line outside the dotted section. This defines the final boundary of the artwork against the black rock. -
Add the halo dots:
In the black negative space surrounding the top of the design, place a series of evenly spaced white dots horizontally, following the curve of the artwork. -
Clean up edges:
If any paint went outside the lines, use a small brush with black paint to touch up the background and sharpen your edges. -
Seal the stone:
Allow the rock to cure for at least 24 hours. Finish with a matte spray varnish to protect the delicate linework without adding unwanted shine.
Place your finished geometric masterpiece in a garden pot or on a sunny windowsill to enjoy the warm design.
Peeking Creature Eyes From the Darkness
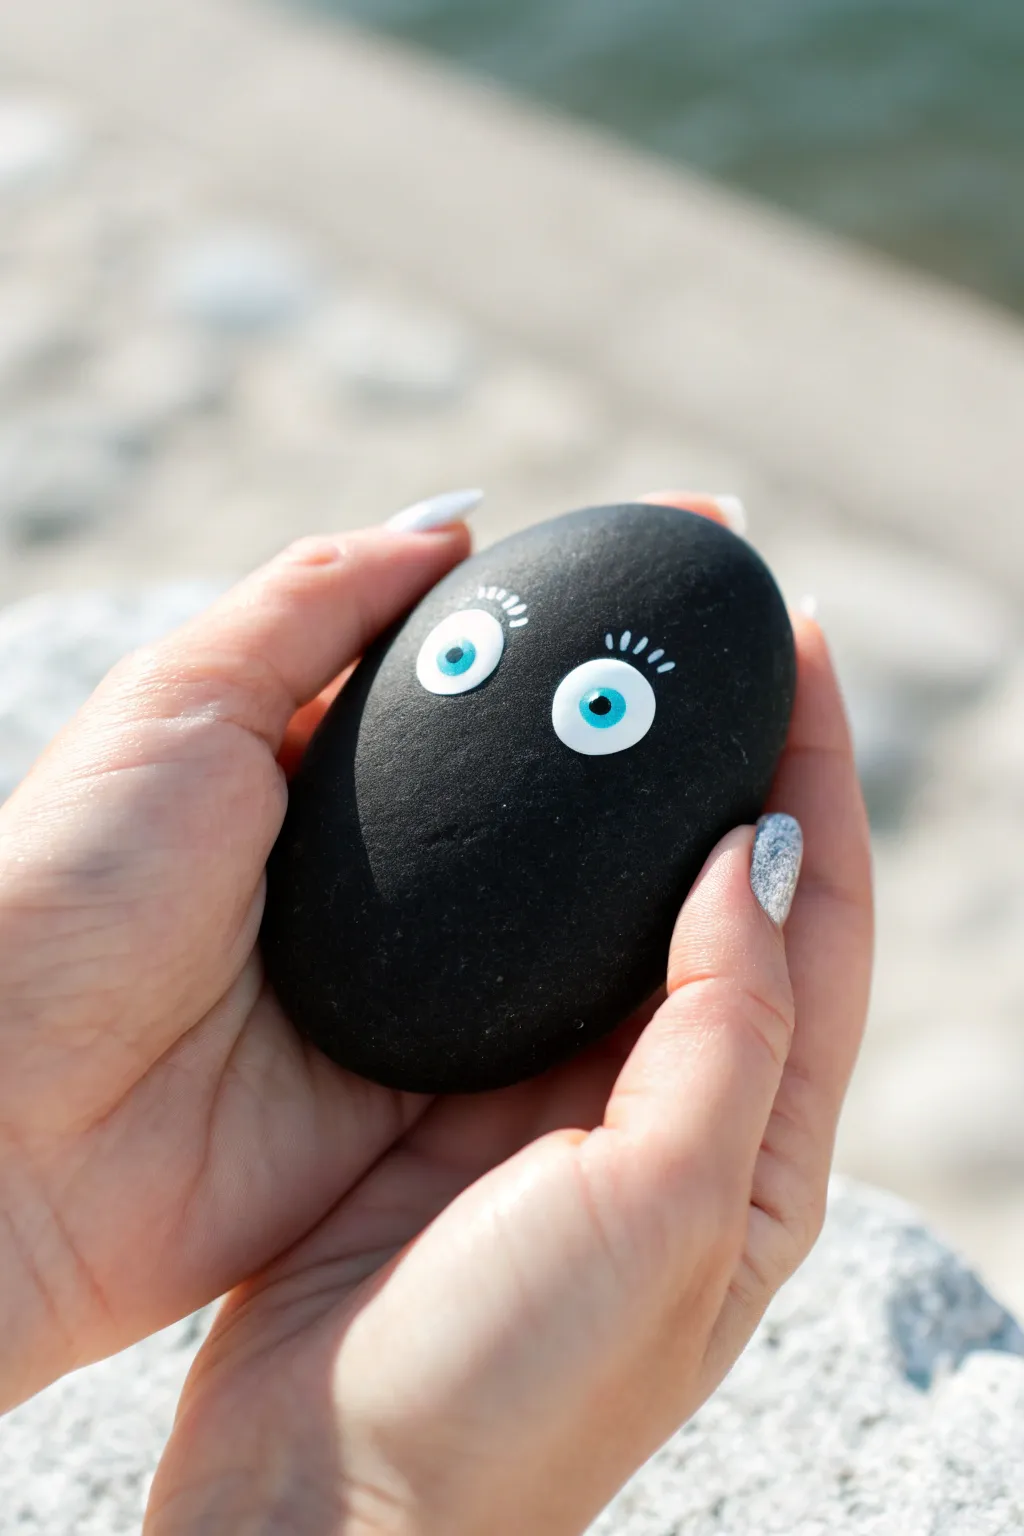
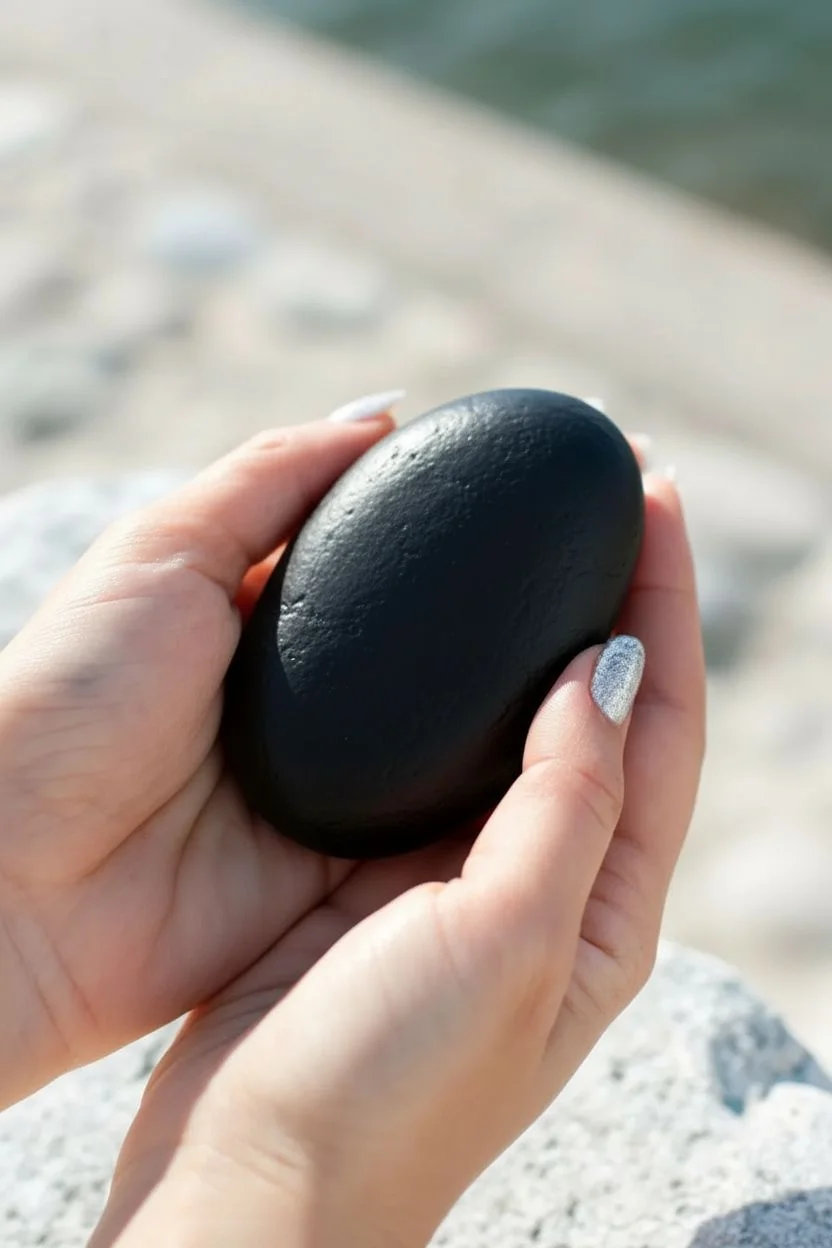
This minimalist yet expressive project transforms a simple black stone into a curious creature hiding in the shadows. With just a few dabs of paint, you can create a pair of bright, watchful eyes that seem to follow you from the darkness.
Step-by-Step Tutorial
Materials
- Smooth river rock (preferably naturally dark or primed)
- Black acrylic paint (matte)
- White acrylic paint
- Bright cyan or turquoise acrylic paint
- Small flat brush
- Fine detail brush (size 00 or 0)
- Dotting tools (various sizes)
- Matte sealer or varnish
Step 1: Preparing the Canvas
-
Clean and Dry:
Start by scrubbing your chosen rock with warm, soapy water to remove any dirt or oils. Let it dry completely in the sun or use a hairdryer to speed the process. -
Base Coat:
Even if your rock is naturally dark, apply a solid coat of matte black acrylic paint across the entire surface. This ensures a uniform, deep background that makes the eyes pop. -
Second Coat:
Inspect the first layer for streaks. Apply a second coat of black if necessary to get absolute opacity, then allow it to dry fully before starting the details.
Perfect Circles
If you don’t have dotting tools, use household items like the flat end of a drill bit, a nail head, or a chopstick to stamp perfect circles.
Step 2: Painting the Sclera
-
Positioning the Eyes:
Visualize where the eyes will sit on the upper third of the rock. They should be slightly off-center or tilted to give the creature personality. -
White Base:
Using a medium-sized dotting tool or the back of a paintbrush handle, dip into white paint and create two solid white circles. If you want larger eyes, swirl the tool gently to expand the circumference. -
Refining Shape:
Smooth out the edges of your white circles using a small brush if the dotting tool left raised ridges. Let this white layer dry completely; you don’t want the colors to mix. -
Adding Opacity:
White paint over black often looks translucent at first. I like to add a second layer of white here to ensure the whites of the eyes are bright and crisp.
Glow in the Dark
Swap the white paint for phosphorescent paint for the sclera. Your creature’s eyes will actually glow when the lights go out.
Step 3: Adding the Iris and Pupil
-
The Blue Iris:
Select a smaller dotting tool. Dip it into your bright cyan or turquoise paint and place a colored dot in the center of each white circle. -
Directional Gaze:
Consider where your creature is looking. Placing the iris slightly to the left or right, rather than dead center, creates a more engaging expression. -
The Pupil:
Once the blue paint is dry to the touch, switch to an even smaller dotting tool. Dip it in black paint. -
Placing the Black Dot:
Carefully place the black pupil in the center of the blue iris. Ensure you leave a ring of blue visible around the black dot.
Step 4: Fine Details and Finishing
-
Creating the Reflection:
This is the most crucial step for life-like eyes. Use your finest detail brush or a toothpick with a tiny amount of white paint. -
The Catchlight:
Add a tiny white speck on the exact same side of both pupils (e.g., the top right creates a light source from that direction). -
Tiny Lashes:
Using your size 00 or 0 detail brush, paint three or four extremely thin, short lines radiating from the top of the white circles to create delicate eyelashes. -
Lash Correction:
If the lashes look too thick, you can carefully paint over the outer edges with your black base color to thin them down once they dry. -
Full Dry:
Let the entire piece sit undisturbed for several hours to ensure the thick dots of paint have hardened all the way through. -
Sealing:
Apply a coat of matte varnish over the rock. A glossy varnish might create too much glare on the black surface, distracting from the painted eyes.
Now you have a charming little pocket companion ready to surprise anyone who spots it
Spooky Spiderwebs and Night Critters on Black
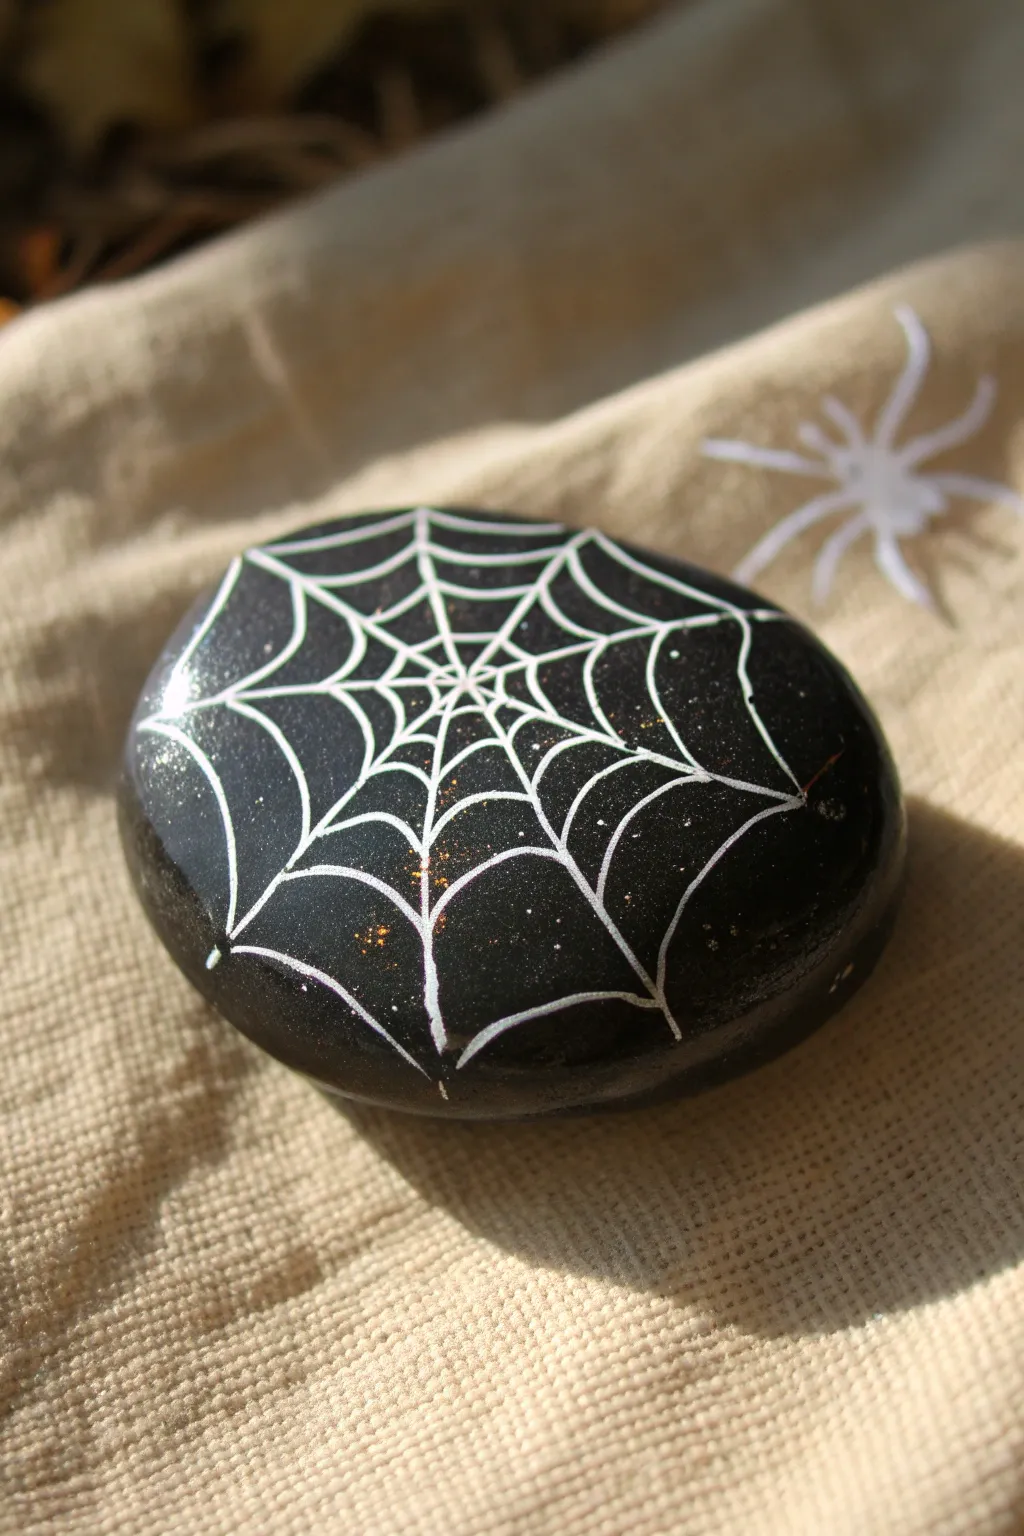
Transform a simple smooth stone into a spooky yet elegant decoration perfect for Halloween. This project features a classic white web design atop a deep, glittery black background that catches the light like a night sky.
How-To Guide
Materials
- Smooth, round river rock
- Black acrylic paint
- Fine glitter paint or loose glitter (gold or silver)
- White acrylic paint or a fine-tip white paint pen
- Flat paintbrush
- Fine detail paintbrush (size 0 or 00)
- Glossy varnish or sealant (spray or brush-on)
- Water cup and paper towels
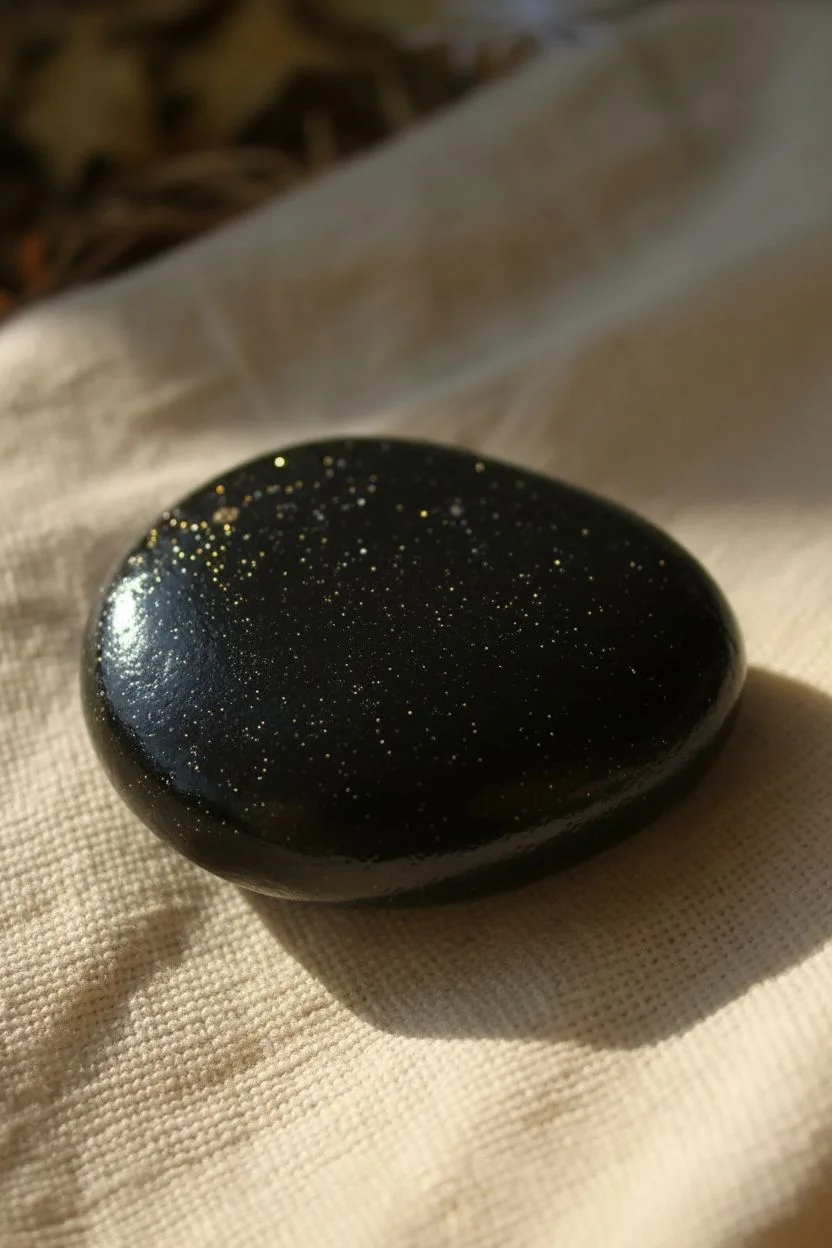
Step 1: Preparing the Canvas
-
Clean your stone:
Begin by washing your rock with warm, soapy water to remove any dirt or oils. Use a scrub brush if needed, then let it dry completely before starting. -
Apply the base coat:
With your flat brush, paint the entire top surface of the rock with black acrylic paint. You want a solid, opaque background, so don’t be afraid to be generous. -
Double check coverage:
Allow the first coat to dry somewhat. If you can still see the stone’s original color peeking through, apply a second coat of black for a deep, rich void. -
Add some sparkle:
While the final black layer is still slightly tacky, lightly brush on a thin layer of fine glitter paint. Alternatively, you can sprinkle a tiny pinch of loose gold or silver glitter over the wet paint for a starry night effect. -
Complete drying:
Let the black and glitter base layer dry completely. This is crucial—painting white lines on wet black paint will turn them gray and muddy.
Step 2: Weaving the Web
-
Find the center:
Imagine where the center of your web will be. It doesn’t have to be perfectly centered on the rock; slightly off-center can look more dynamic. -
Paint the radial lines:
Using your fine detail brush or a white paint pen, draw straight lines radiating outward from your chosen center point to the edges of the rock, like the spokes of a bicycle wheel. -
Make the first loop:
Starting near the center, paint small curved lines connecting the spokes. These little scallops create the first inner circle of the web. -
Expand the pattern:
Move slightly further out and create a second ring of connecting curves. Try to keep the curve dipping inward toward the center to give it that realistic silky sag. -
Continue outward:
Keep adding concentric rings of webbing, getting wider as you move toward the edge of the stone. -
Manage the paint flow:
If using a brush, I like to reload with fresh white paint frequently to ensure the lines stay crisp and opaque against the dark background. -
Adjust line thickness:
It’s natural for outer lines to be slightly thicker than the inner ones. Don’t worry about perfection; wobbles just make it look like an old, dusty web. -
Reach the edge:
Continue the pattern until you reach the edge of your painted black area. Let some web lines ‘fall off’ the side to imply the web continues. -
Touch ups:
Look over your design. If any black shows through your white lines too much, carefully retrace them once the first layer is dry to brighten the white.
Oops, Smudged Line?
If you smudge white paint, wait for it to dry completely. Then, carefully paint over the mistake with black paint, effectively ‘erasing’ it before redrawing the line.
Step 3: Finishing Touches
-
Let it cure:
Allow your web design to dry thoroughly. Acrylic paint pens can sometimes smear if sealed too quickly, so patience is key here. -
Seal the deal:
Apply a coat of glossy varnish or spray sealant. This not only protects your artwork from chipping but also makes the black background look deeper and the glitter sparkle more intensely.
Add a Resident
Paint a tiny spider hanging from one of the threads using a dotting tool or toothpick. A single black dot for the body and tiny legs adds a fun 3D element.
Place your finished shimmering web rock in a dark corner or on a mantle to add a festive touch of spookiness to your home
Bioluminescent Underwater Designs on Black Rock
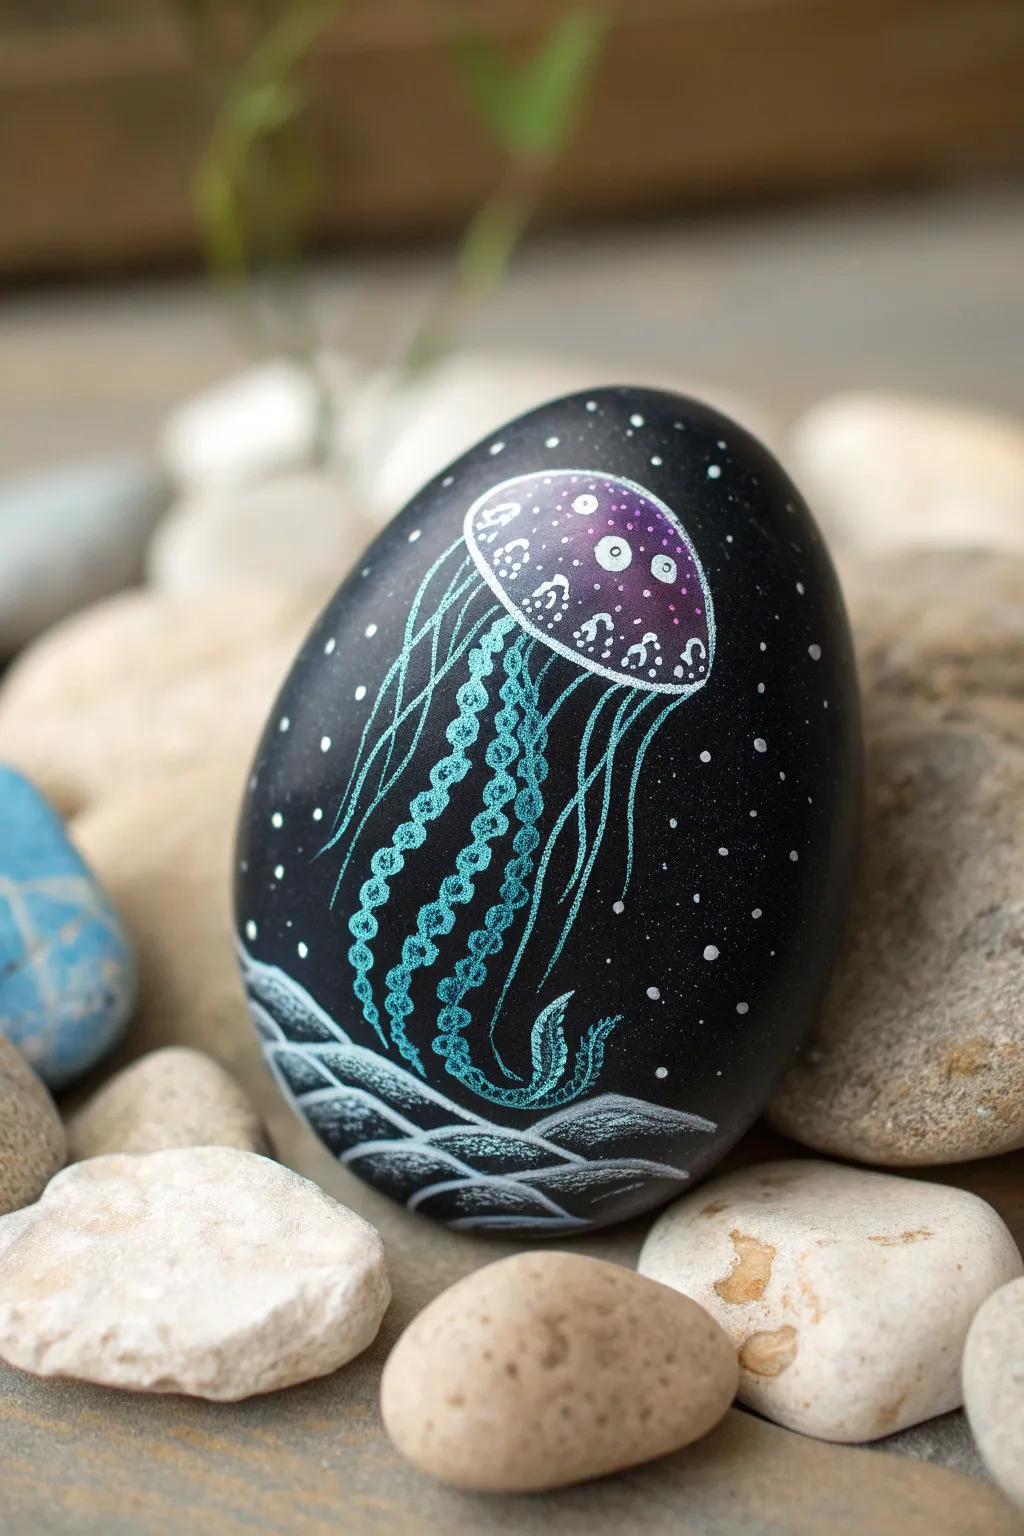
Transform a simple black stone into a deep-sea wonder with this striking jellyfish design. The contrast between the dark background and the iridescent blues and purples creates a stunning bioluminescent effect that captures the mystery of the ocean floor.
Step-by-Step Guide
Materials
- Smooth, oval-shaped river rock
- Black acrylic paint (matte finish preferred)
- Wide flat paintbrush
- Fine detail paintbrush (size 0 or 00)
- White gel pen or fine-tip white acrylic paint pen
- Metallic turquoise or cyan acrylic paint
- Metallic purple or magenta acrylic paint
- Acrylic sealer (gloss or matte sprays work well)
Step 1: Preparing the Canvas
-
Clean the Stone:
Begin by washing your stone with warm soapy water to remove any dirt or oils. Let it dry completely before starting to ensure the paint adheres properly. -
Base Coat Application:
Using your wide flat brush, coat the entire top surface of the rock with black acrylic paint. You want a solid, opaque background, so applying a second coat after the first one dries is usually necessary for full coverage.
Step 2: Painting the Jellyfish Body
-
Outline the Bell:
Once the black base is bone dry, use a white gel pen or a very fine brush with diluted white paint to lightly sketch the mushroom-shaped cap (bell) of the jellyfish near the top center of the rock. -
Add Purple Glow:
Load a small brush with metallic purple paint. Fill in the top portion of the jellyfish bell, gently blending it downward. It doesn’t need to be solid; a little translucency adds to the ghostly effect. -
Create Highlights:
While the purple is still slightly tacky, dab a tiny amount of white paint near the top center of the bell to create a glowing highlight. Diffuse the edges so it looks like light is radiating from within. -
Detail the Bell Rim:
Use your white pen or fine brush to create the scalloped bottom edge of the bell. Draw small U-shapes or dashes along the rim to give it texture and form. -
Add Internal Patterns:
Inside the purple area, carefully dot small circles and clusters of tiny spots using white. This mimics the internal organs often visible inside deeper sea jellies.
Paint Consistency Tip
For the thin tendrils, thin your white acrylic paint with a drop of water until it has an ink-like consistency. This helps the paint flow smoothly off the brush without breaking.
Step 3: Creating Tentacles and Environment
-
Drafting the Main Tentacles:
Switch to your metallic turquoise paint. Using your finest brush, paint three to four thick, wavy lines descending from the center of the bell. These main oral arms should look like twisted ribbons. -
Adding Texture to Tentacles:
To create the ‘chain-link’ look shown in the image, paint small loops or connected circles over your turquoise lines using a brighter shade of blue or white mixed with turquoise. -
Fine Filament Tentacles:
Using the white gel pen or thinned white paint, draw very fine, hair-like lines flowing out from the edge of the bell. Keep your hand loose to make these lines look like they are drifting in a current. -
Ocean Floor Waves:
At the very bottom of the rock, paint stylized, intersecting wavy lines in white or light blue. Cross-hatch them slightly to suggest a seabed or shifting currents beneath the creature. -
Starry Surroundings:
Dip the tip of a toothpick or the handle end of a brush into white paint. Dot the black background surrounding the jellyfish with various sizes of specks to represent bioluminescent particles or distant stars. -
Final Highlights:
Go back over the brightest parts of the design—the top of the bell and the thickest tentacles—with pure white to make the design truly pop against the black darkness. -
Sealing the Art:
Allow the glowing design to dry for at least 24 hours. Once set, apply a clear acrylic sealer to protect the paint from chipping and to give the rock a finished, professional sheen.
Make it UV Reactive
Swap the standard metallic paints for fluorescent or glow-in-the-dark acrylics. Your jellyfish will absorb light during the day and actually glow green or blue at night.
Display your luminous deep-sea creation on a shelf or hide it in the garden for someone to discover
Faux Stained Glass Mosaic With Bold Outlines
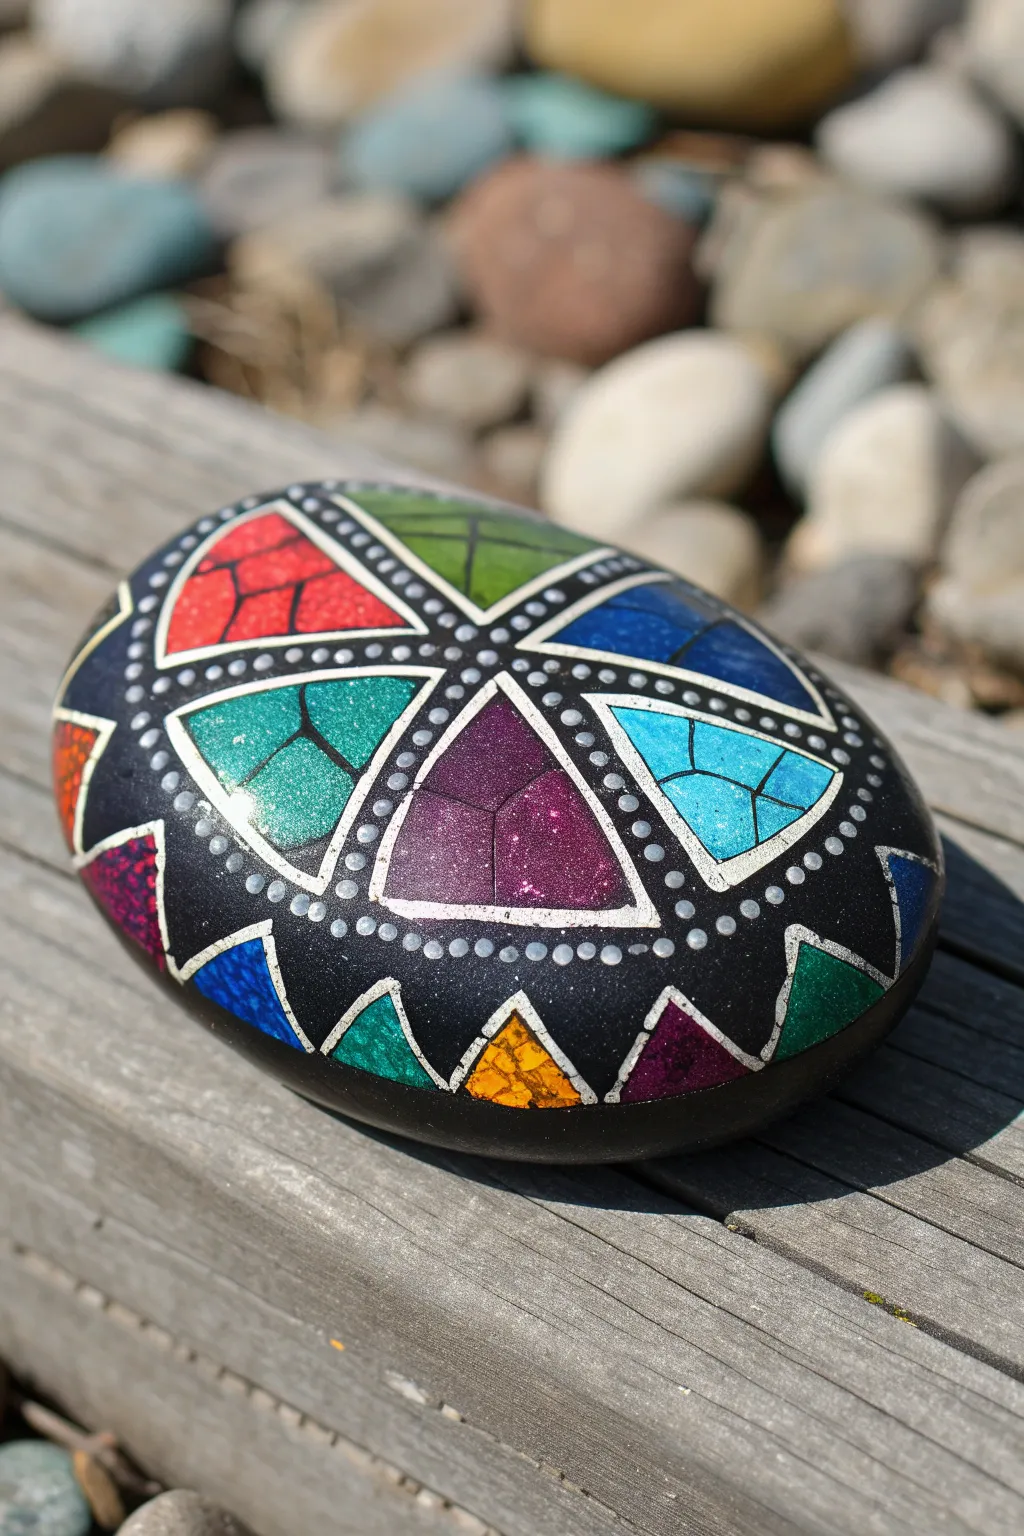
Transform a smooth river rock into a glittering faux stained-glass masterpiece using high-contrast outlines and shimmering jewel tones. This project combines precise geometry with the fun of glitter paint to create a stunning, mandala-like decoration.
Step-by-Step Tutorial
Materials
- Smooth, oval river rock
- Black acrylic paint (matte finish preferred)
- White acrylic paint or fine-tip white paint pen
- Glitter acrylic paints (red, green, blue, teal, purple, yellow/gold)
- Fine detail paintbrush (size 0 or 00)
- Small dotting tool or toothpick
- Pencil for sketching
- Clear acrylic sealer (spray or brush-on gloss)
- Ruler or straight edge (optional)
Step 1: Base Painting & Layout
-
Prepare the Canvas:
Begin by washing your rock with soap and water to remove any dirt or oils, then let it dry completely. Apply two coats of black acrylic paint to the entire surface, allowing the first coat to dry before applying the second to ensure solid, opaque coverage. -
Find the Center:
Once the black base is bone dry, lightly mark the center point of the rock’s top surface with a pencil. -
Sketch the Spokes:
Draw four to six straight lines radiating outward from the center point like a star or wheel spokes. These will form the boundaries between your main triangular sections. -
Connect the Triangles:
Sketch a circle (or oval, following the rock’s shape) connecting these spokes about halfway down the rock’s side. This creates the primary triangular ‘panes’ of your mosaic window. -
Add the Outer Ring:
Around the parameter of your central design, sketch a series of smaller, jagged triangles pointing outward, like a starburst or jagged crown, to fill the remaining space on the sides.
Glitter Paint Fix
If your glitter paint looks milky when wet, don’t panic. Most glitter mediums dry clear, leaving only the sparkle behind. Wait for it to fully dry.
Step 2: Outline & Fill
-
Paint the Borders:
Using a fine-tip white paint pen or a liner brush with white paint, carefully trace over all your pencil lines. Keep your hand steady to create even, distinct borders for each section. -
Create the Mosaic Effect:
Inside the larger central triangles, draw random, angular black lines to subdivide them into 2-3 smaller shard-like shapes. This mimics the look of broken glass pieces fitted together. -
Color Selection:
Select your glitter paint palette. Plan to alternate colors (like red, green, blue, purple) in neighboring sections to maximize contrast. -
Fill the Sections:
Load a small detail brush with plenty of glitter paint. Dab and glide the paint into the ‘shards’ within the white borders. Do not brush back and forth too much, as this can wipe away the glitter particles. -
Layering for Intensity:
Glitter paint is often translucent. Allow the first layer of color to dry completely, then add a second or even third coat until the color pops against the black background. I like to let this dry briefly between coats to check the sparkle level. -
Color the Edge Triangles:
Paint the smaller outer ring of triangles with solid glitter colors. You don’t need to subdivide these small shapes; just fill them with bright, contrasting hues like gold, teal, or magenta.
Step 3: Detailing & Finishing
-
Refine the Lines:
If your color painting overlapped any white borders, touch them up now with your white pen or brush to keep the grid looking crisp and sharp. -
Add the Dotwork:
Dip a small dotting tool (or the tip of a toothpick) into silver or pearl white paint. Place tiny, evenly spaced dots along the black separation lines between the main color sections. -
Dot the Frame:
Continue the dotting pattern along the outer white borders of the central triangles, adding texture that resembles soldering on stained glass. -
Final Inspection:
Check for any stray glitter or uneven lines. Use a tiny brush with black paint to ‘erase’ mistakes by painting over them. -
Seal the Deal:
Once the rock feels dry to the touch (give it at least 24 hours to cure fully), apply a glossy clear acrylic sealer. This will protect the paint and make the glitter sparkle brilliantly.
Sharper Lines
For the crispest white lines, use a white Posca paint pen (extra fine tip) instead of a brush. It gives you much more control over the geometry.
Place your finished rock in a sunny spot to enjoy the full stained-glass effect as the light hits the glitter


Have a question or want to share your own experience? I'd love to hear from you in the comments below!