
Father’s Day toddler paintings are my favorite kind of art-making: sweet, messy, and actually doable in one short burst of attention. Here are simple Father’s Day painting ideas for toddlers that capture tiny handprints, bold color, and big love for Dad.
Classic Handprint Heart Card for Dad
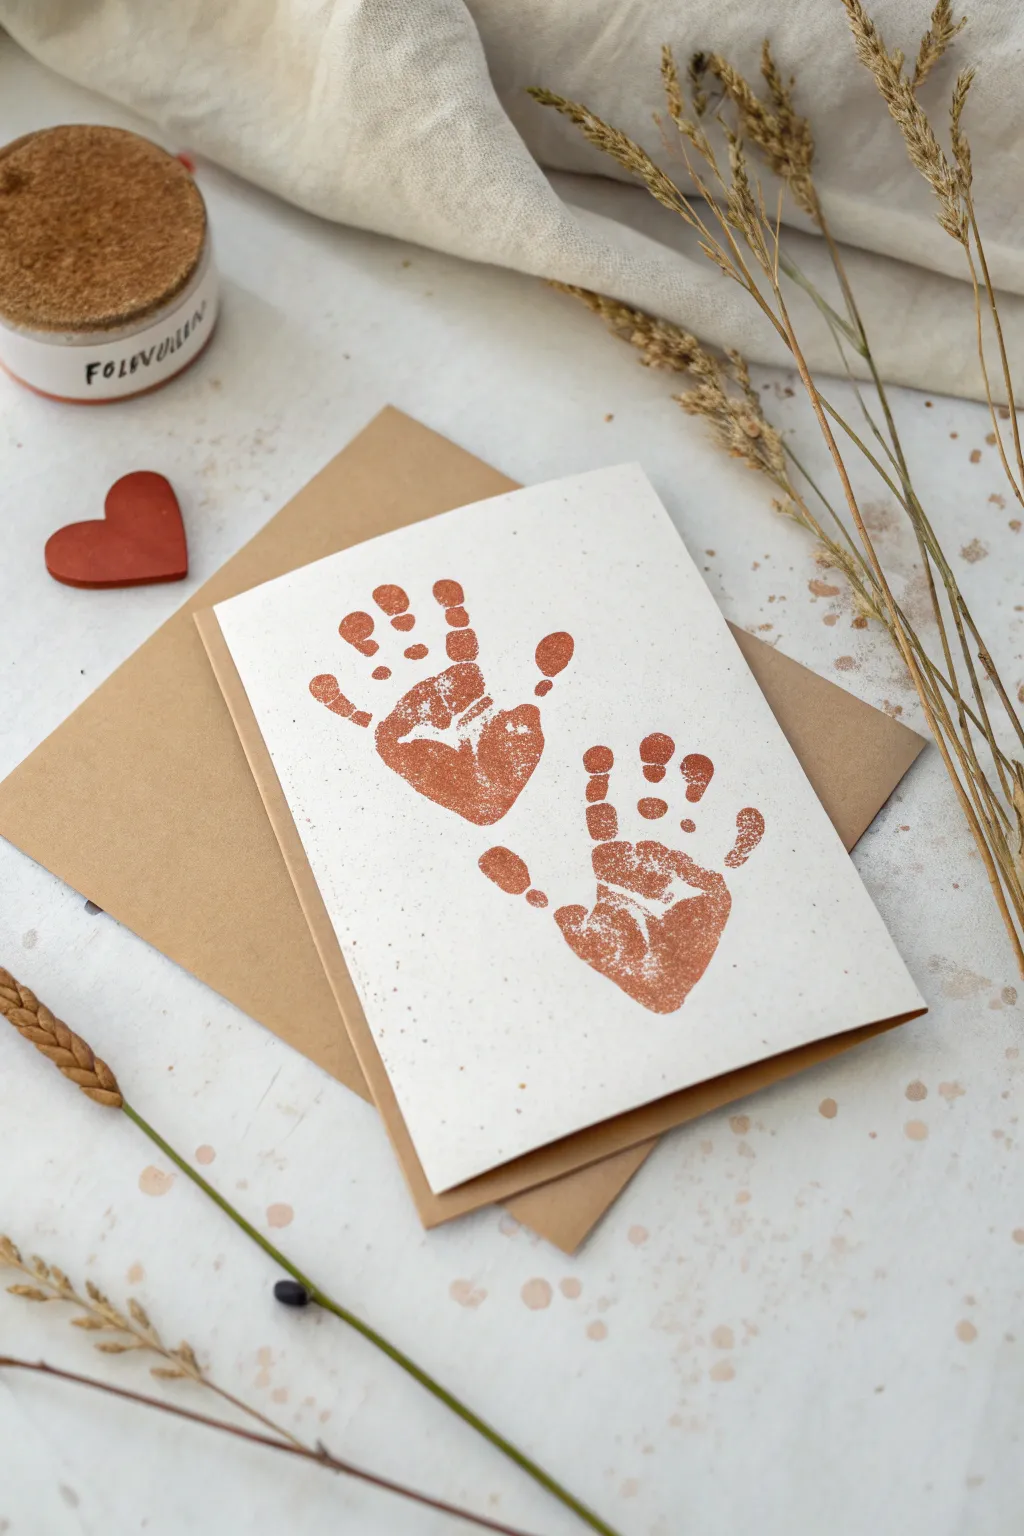
Capture a moment in time with this sweetly simple card design that turns tiny handprints into a timeless keepsake. The warm, terracotta tones against textured white paper create a rustic, earthy look perfect for a nature-loving dad.
Step-by-Step Guide
Materials
- Heavyweight white textured cardstock or watercolor paper
- Kraft brown A5 envelope or folded cardstock
- Terracotta or rust-colored poster paint (non-toxic)
- Sponge brush or large paintbrush
- Paper plate (for paint palette)
- Baby wipes or damp cloth
- Glue stick or double-sided tape
- Scrap paper (for testing)
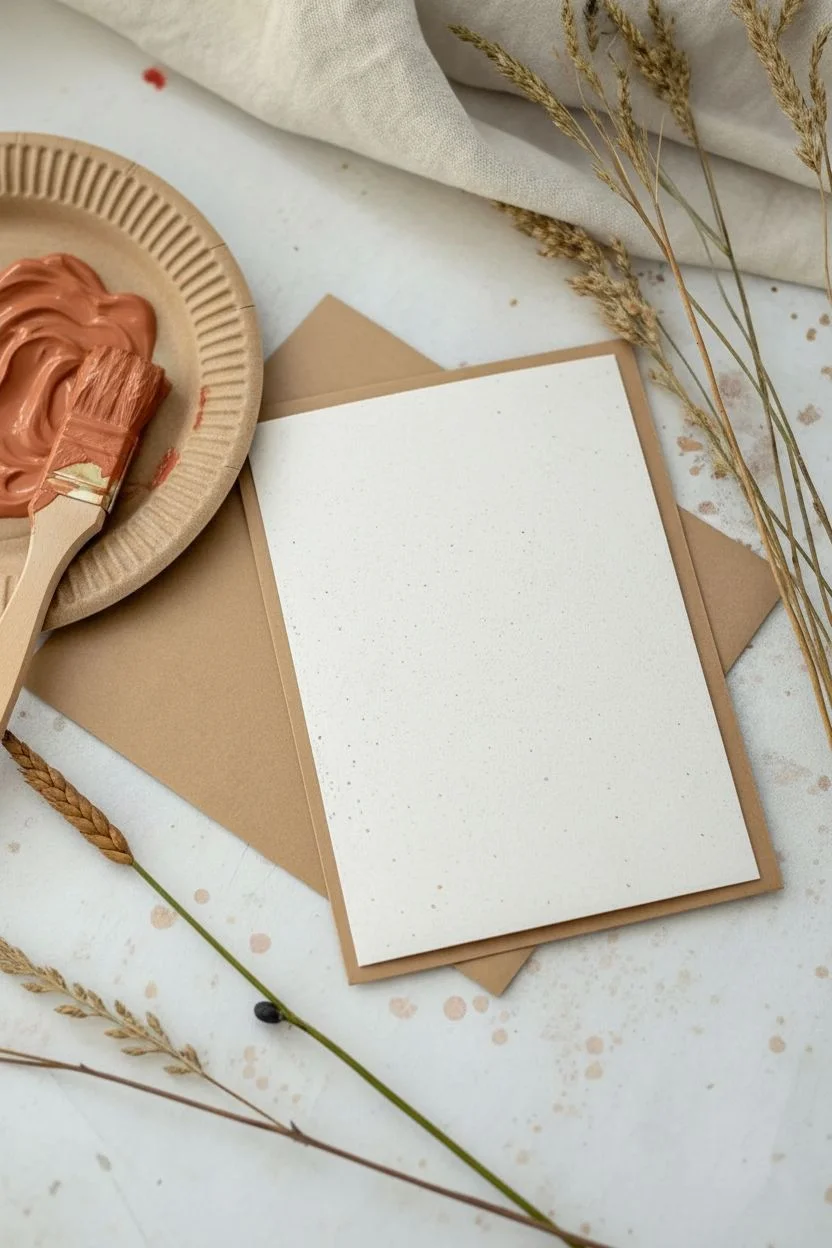
Step 1: Preparing the Base
-
Select your paper:
Choose a high-quality, heavyweight white paper for the handprints. A paper with a slight texture, like cold-press watercolor paper, adds to the rustic charm shown in the photo. -
Size the canvas:
Cut your white paper so it is slightly smaller than your kraft brown envelope or backing card. You want about a half-inch border of brown visible around the edge later. -
Prepare the paint:
Squeeze a generous amount of terracotta paint onto a paper plate. If you don’t have this specific shade, mix a drop of brown into orange paint until you achieve that warm, earthy clay tone. -
Test the consistency:
Use your sponge brush to spread the paint slightly. It should be creamy but not too watery; too much water will cause the handprint to lose its detailed ridge lines.
Step 2: Creating the Prints
-
Coat the first hand:
Using the sponge brush, paint your toddler’s left hand. Ensure the entire palm and all fingers are covered evenly, but not dripping with paint. -
Position the first print:
Orient the white paper vertically. Guide the painted hand to the upper-left quadrant of the paper, fingers pointing slightly upward and outward toward the left corner. -
Press and lift:
Press down firmly on the center of the palm and each finger. Hold for a second, then lift the hand straight up quickly to avoid smudging the edges. -
Clean up quickly:
Immediately wipe the first hand with a baby wipe before moving on to the second to avoid accidental transfer marks on your clean paper. -
Coat the second hand:
Apply the same terracotta paint to the toddler’s right hand. I find applying a fresh layer of paint to the sponge first ensures the color density matches the first print. -
Position the second print:
Place this handprint in the lower-right quadrant. The fingers should point slightly upward and toward the right edge, creating a diagonal flow with the first print. -
Allow specifically for splatter:
If you look closely at the example, there are tiny speckles of paint. You can recreate this by gently flicking your paint brush bristles over the paper, or just let the natural imperfections of the stamping process remain.
Print Perfection
For the sharpest prints, do a practice run on scrap paper first. This removes excess goopy paint and helps you gauge how much pressure is needed.
Step 3: Assembly and Finishing
-
Let it dry completely:
Set the white paper aside in a safe place. Thick poster paint can take 20-30 minutes to dry fully, and you don’t want to smear those cute prints. -
Check the layout:
Once dry, lay the white paper on top of your kraft brown backing. Ensure the margins are even on all sides. -
Apply adhesive:
Flip the white paper over and apply a strong glue stick or double-sided tape around the very edges and an ‘X’ in the center. -
Mount the artwork:
Carefully press the white paper onto the kraft backing. Smooth it down from the center moving outwards to remove any air bubbles. -
Optional personalization:
The example is minimal, but you can write a small message inside the card or add a tiny date on the back to remember exactly when those hands were this small.
Smudge Rescue
Smudged a print? Don’t panic. If the paint is still wet, a damp Q-tip can often lift away small mistakes on thick paper without ruining the texture.
Now you have a beautifully simple, organic piece of art that any father will cherish for years to come


Tape-Resist “DAD” Canvas With Finger Painting

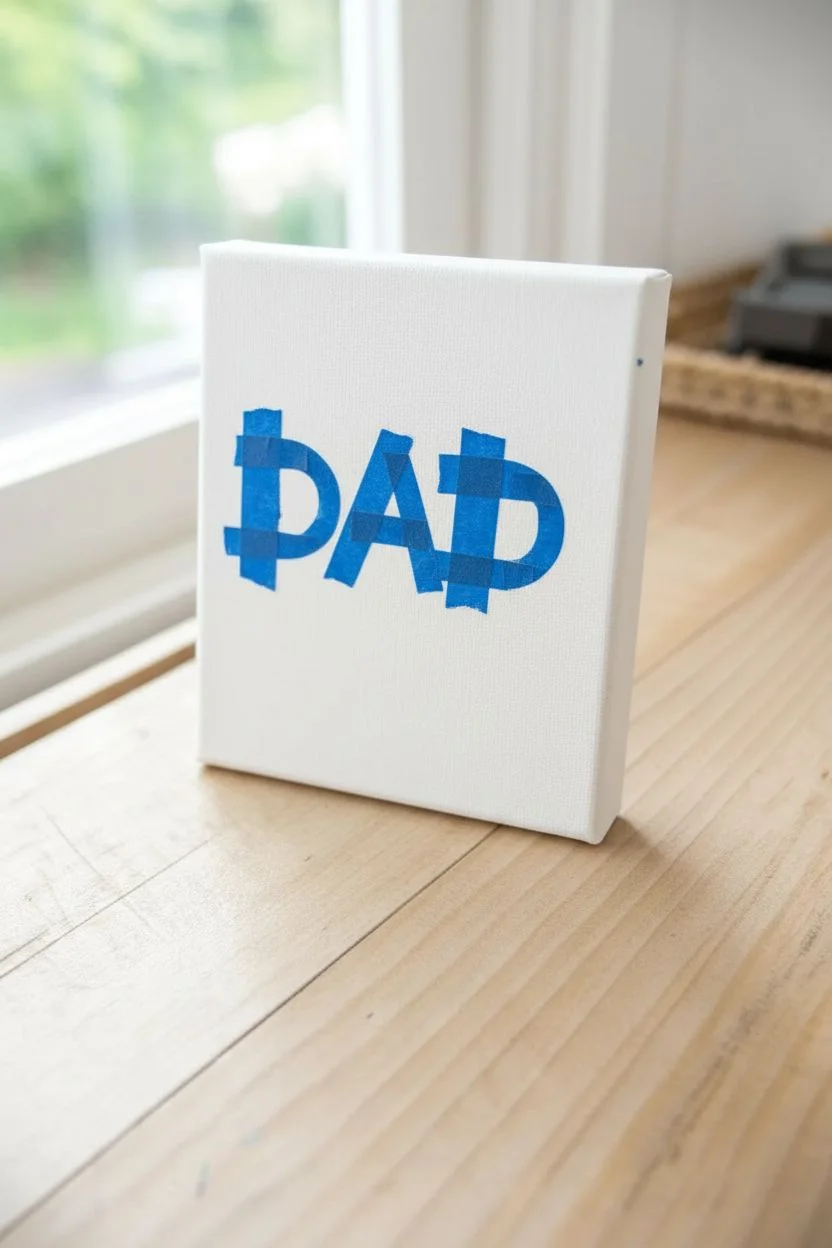
Create a vibrant keepsake for Father’s Day that lets little ones get their hands messy in the best way possible. This project uses a clever tape-resist method to reveal a crisp, white message amidst a sea of swirling blue and green finger-painted patterns.
How-To Guide
Materials
- Small stretched canvas (approx. 5×7 or 8×10 inches)
- Painter’s tape or masking tape (blue tape works well)
- Acrylic craft paints (various shades of blue, teal, and green)
- Scissors
- Paper plate or palette
- Drop cloth or newspaper for surface protection
- Baby wipes (essential for messy fingers!)
Step 1: Preparing the Canvas
-
Prepare your workspace:
Before bringing the kids in, cover your table with newspaper or a drop cloth. This is going to be a hands-on project, and paint tends to travel. -
Create the letters:
Tear off strips of painter’s tape. If your tape is wide, you may need to cut it lengthwise to make thinner strips suitable for lettering. -
Form the ‘D’:
Place a vertical strip on the left side of the canvas. Use smaller, curved pieces to form the belly of the ‘D’. Make sure the tape edges overlap slightly so paint doesn’t sneak through the gaps. -
Form the ‘A’:
Create an ‘A’ in the center using two angled strips meeting at a peak, followed by a small horizontal crossbar. -
Form the second ‘D’:
Repeat the process for the final ‘D’ on the right side, trying to keep the size consistent with the first one. -
Secure the tape:
Press down firmly on all the tape pieces. I like to run a fingernail along the edges to truly seal them against the canvas texture, which prevents fuzzy lines later.
Tape Peeling Trick
If the tape seems stuck or is lifting paint, quickly blast it with a hairdryer on warm to loosen the adhesive before peeling.
Step 2: The Painting Process
-
Dispense the paint:
Squeeze generous dollops of blue, dark blue, and green acrylic paint onto a paper plate. Do not mix them yet. -
Begin finger painting:
Encourage your toddler to dip their fingers (or whole hands!) into the paint. -
Apply to canvas:
Have the child spread the paint directly onto the canvas. Guide them to paint right over the tape letters—don’t avoid them. -
Create the swirls:
Show them how to make circular, swirling motions with their fingertips to blend the blue and green together directly on the canvas surface. -
Check for coverage:
Ensure the entire white surface is covered, paying special attention to the areas immediately surrounding the tape letters. -
Cover the sides:
Don’t forget the edges! Wrapping the paint around the sides of the stretched canvas gives it a professional, finished look.
Step 3: The Reveal
-
Let it dry completely:
Set the canvas aside in a safe spot. The paint needs to be fully dry to the touch before removing the tape to avoid smudging. -
Start peeling:
Once dry, carefully lift up the edge of one tape strip. Peel it back slowly at a sharp angle. -
Remove all tape:
Continue removing the tape pieces one by one to reveal the bright white canvas underneath. -
Touch up if needed:
If any paint bled under the tape, you can use a tiny brush and white paint to clean up the edges, though slightly imperfect lines add to the charm.
Add Some Sparkle
Mix a small amount of fine silver glitter into the wet blue paint for a galaxy-like effect that shimmers in the light.
Display this charming piece on a desk or shelf to remind Dad how much he is loved every day
“Best Dad Hands Down” Handprint Poster
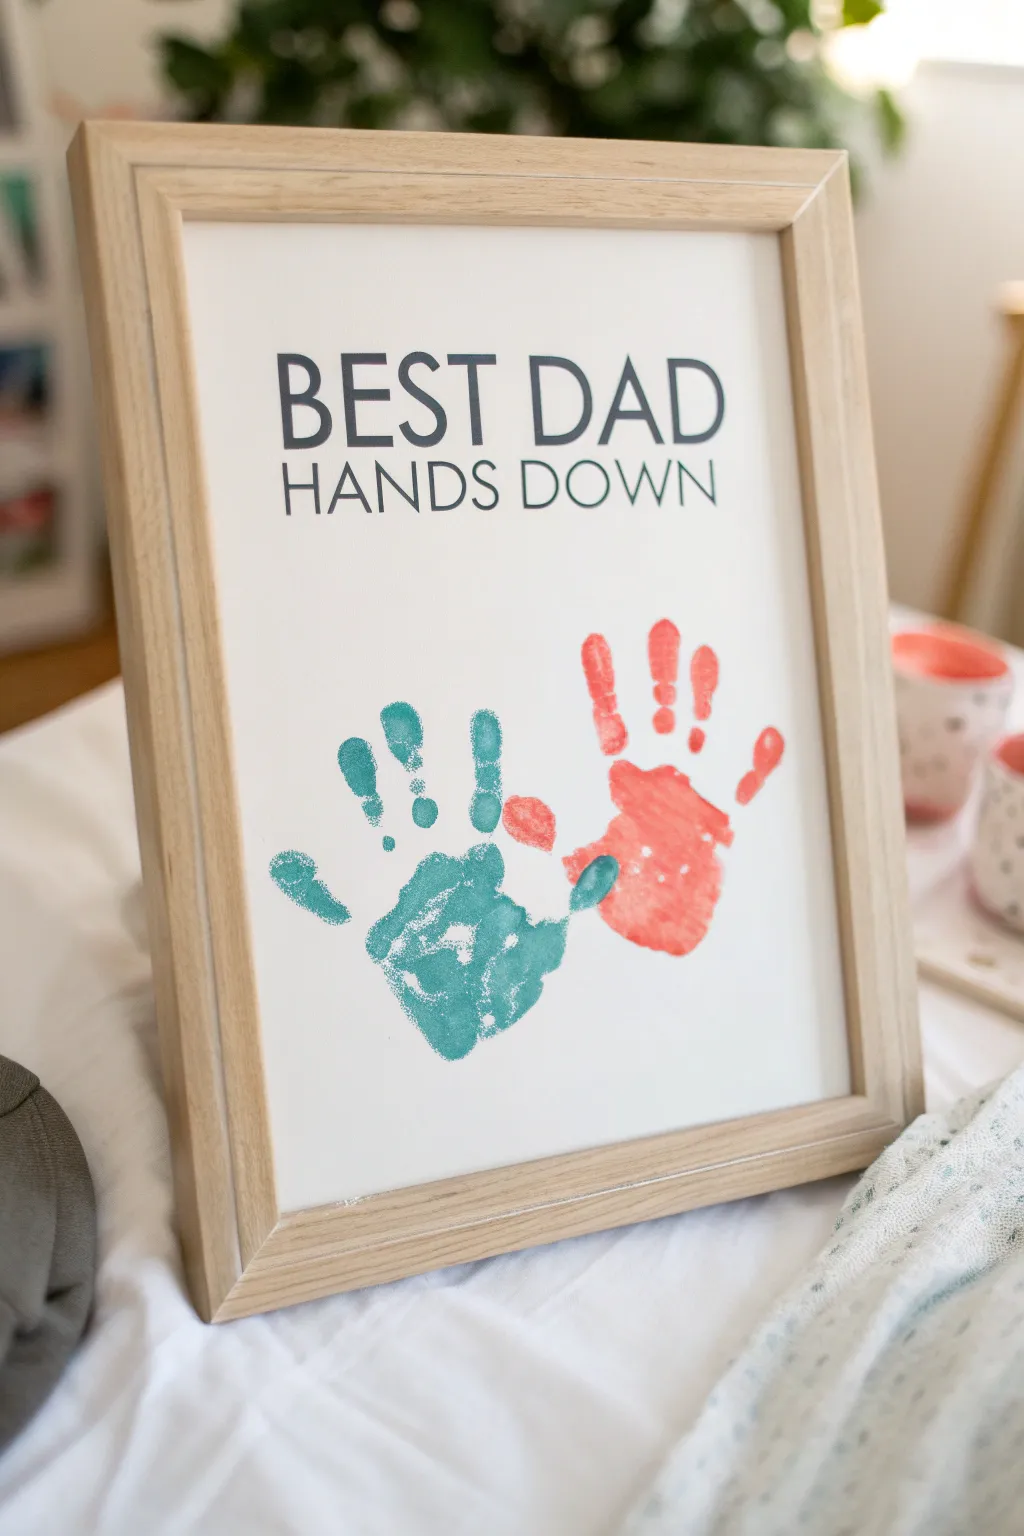

This minimalist keepsake turns adorable toddler handprints into a clever visual pun that any father will cherish. Using soft, muted tones of teal and coral against crisp white paper creates a modern look suitable for framing and displaying year-round.
Step-by-Step
Materials
- High-quality white cardstock or watercolor paper (heavyweight)
- Non-toxic acrylic craft paint or tempera paint (teal and coral/salmon)
- Foam paint brushes or a medium flat paintbrush
- Computer and printer (for the text)
- Word processing software (like Word or Canva)
- A light wood picture frame (A4 or 8×10 size)
- Paper plate or palette
- Baby wipes or damp paper towels (essential for toddlers!)
- Scissors (if trimming is needed)
Step 1: Preparing the Digital Template
-
Open your design software:
Start by opening a blank document in your preferred word processor or design platform like Canva. Set the canvas size to match the frame you intend to use, typically 8×10 inches or A4. -
Select your font:
Choose a clean, sans-serif font to match the modern aesthetic of the example. A font like ‘Lato Light’, ‘Century Gothic’, or ‘Montserrat’ works beautifully for this minimalist style. -
Type the primary text:
Type the phrase ‘BEST DAD’ in all capital letters. Increase the font size significantly so it dominates the top third of the page, ensuring it’s centered. -
Add the secondary text:
On the line directly below, type ‘HANDS DOWN’ in a slightly thinner weight or smaller font size. This capitalization hierarchy is key to the design’s professional look. -
Adjust spacing:
Check the gap between ‘BEST DAD’ and the bottom of the page. You need to leave a large, open white space in the bottom two-thirds of the document to accommodate two toddler-sized handprints. -
Print the template:
Load your heavy white cardstock into the printer. I like to print two copies just in case the first attempt at hand-stamping gets a little too messy.
Step 2: Creating the Handprints
-
Prepare the paint:
Squeeze a dollop of the teal paint and a dollop of the coral paint onto a paper plate. You want enough to coat a hand but not so much that it becomes gloppy. -
Get the child ready:
Set up your workspace on a flat surface. Roll up sleeves and have those baby wipes open and within immediate reach for quick clean-up. -
Apply the first color:
Using a foam brush, paint the child’s left hand with the teal paint. Apply a thin, even coat over the entire palm and fingers, ensuring you don’t miss the fingertips. -
Position the first hand:
Guide the child’s hand toward the left side of the paper, below the text. Aim to have the fingers pointing slightly outward and upward relative to the center. -
Press and lift:
Firmly press the palm and each finger down onto the paper. Lift the hand straight up quickly to avoid smudging the details of the print. -
Clean and switch colors:
Immediately wipe the teal paint off the hand thoroughly (or wash with soap and water) before moving on to the next color. -
Apply the second color:
Paint the child’s right hand with the coral/salmon color. Again, ensure the coverage is even but not dripping wet. -
Position the second hand:
Place this hand on the right side of the paper. Orient it so the thumbs of both handprints are close to each other near the center, creating a balanced composition. -
Create the second print:
Press the hand down firmly. If the prints overlap slightly in the middle, that’s perfectly fine and adds a sweet, layered touch. -
Allow to dry:
Set the artwork aside in a safe place to dry completely. This usually takes about 30 minutes to an hour depending on how thick the paint application was.
Paint Prep Pro-Tip
Don’t dip the hand in paint! Using a sponge brush to paint the toddler’s hand ensures a detailed print where you can see the unique lines, rather than a shapeless blob.
Step 3: Finishing Up
-
Inspect the print:
Once dry, check for any stray smudges. If you have a tiny smudge of paint where it shouldn’t be, you can sometimes carefully scrape it off with a craft knife or cover it with a tiny dab of white-out. -
Prepare the frame:
Clean the glass of your light wood frame to ensure it is free of dust and fingerprints. -
Frame the artwork:
Place your dry cardstock into the frame. If your paper is larger than the frame, lightly mark the edges with a pencil and trim it down to size before inserting. -
Final check:
Secure the back of the frame and turn it over to admire the finished piece. The natural wood tone really complements the earthy paint colors.
Date It
Use a fine-tip black pen to write the year or the child’s age in extremely small text at the very bottom corner of the print alongside their name.
This simple yet impactful artwork creates a timeless snapshot of how small their hands once were, ready to make Dad smile


Thumbprint Heart Cluster “I Love You, Dad”
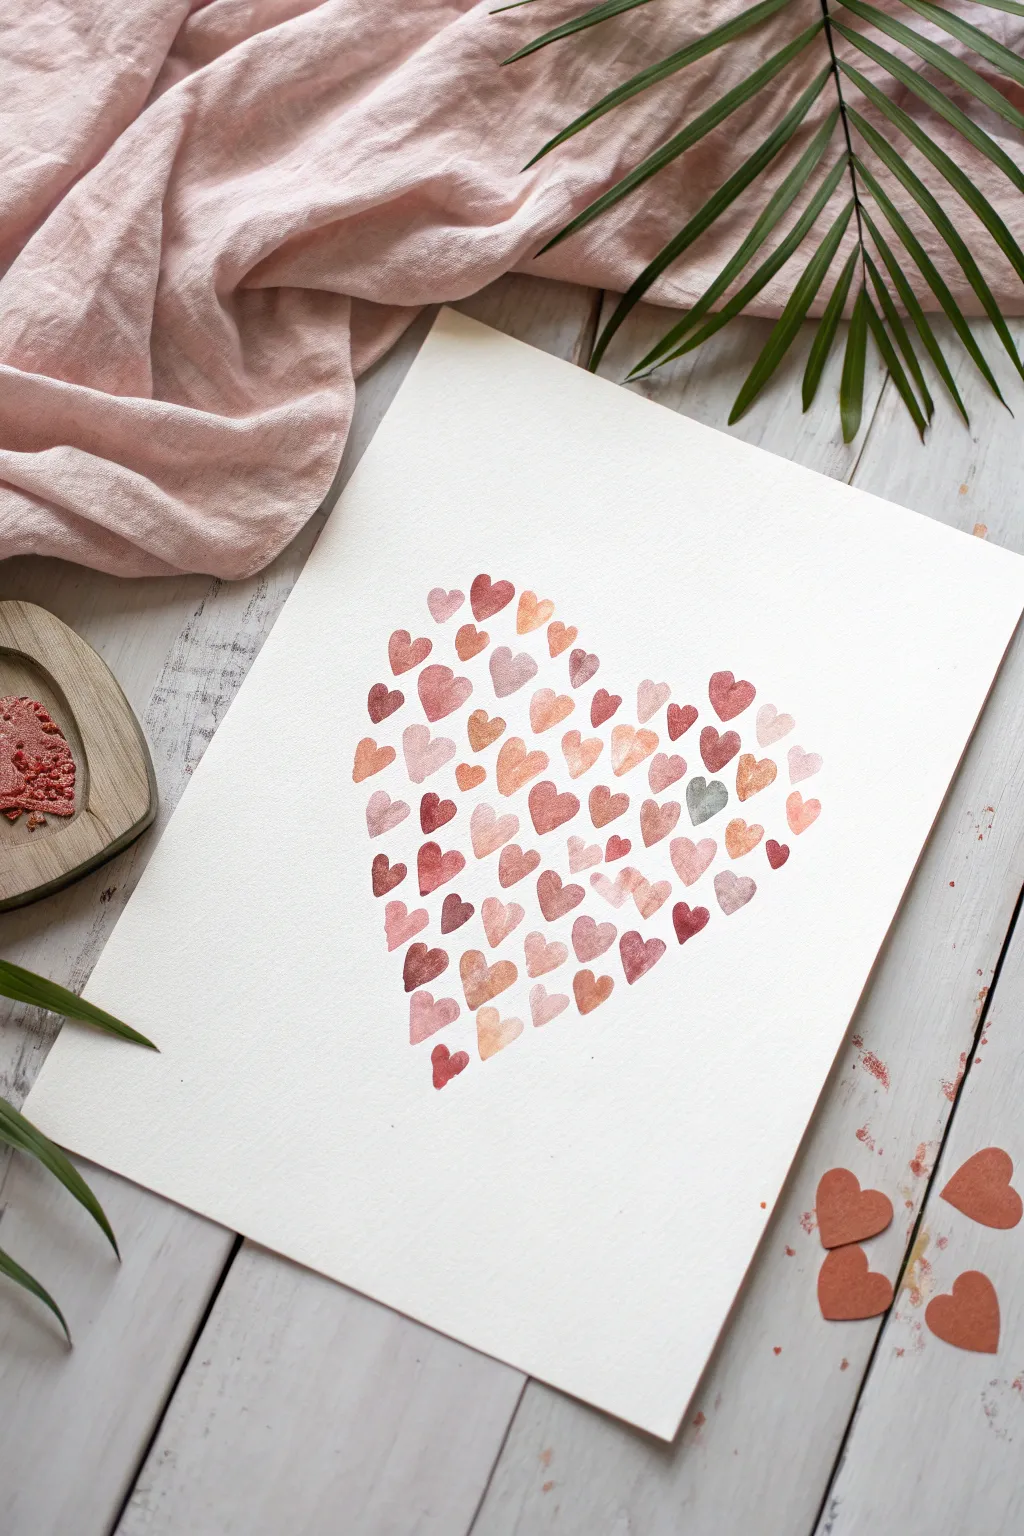
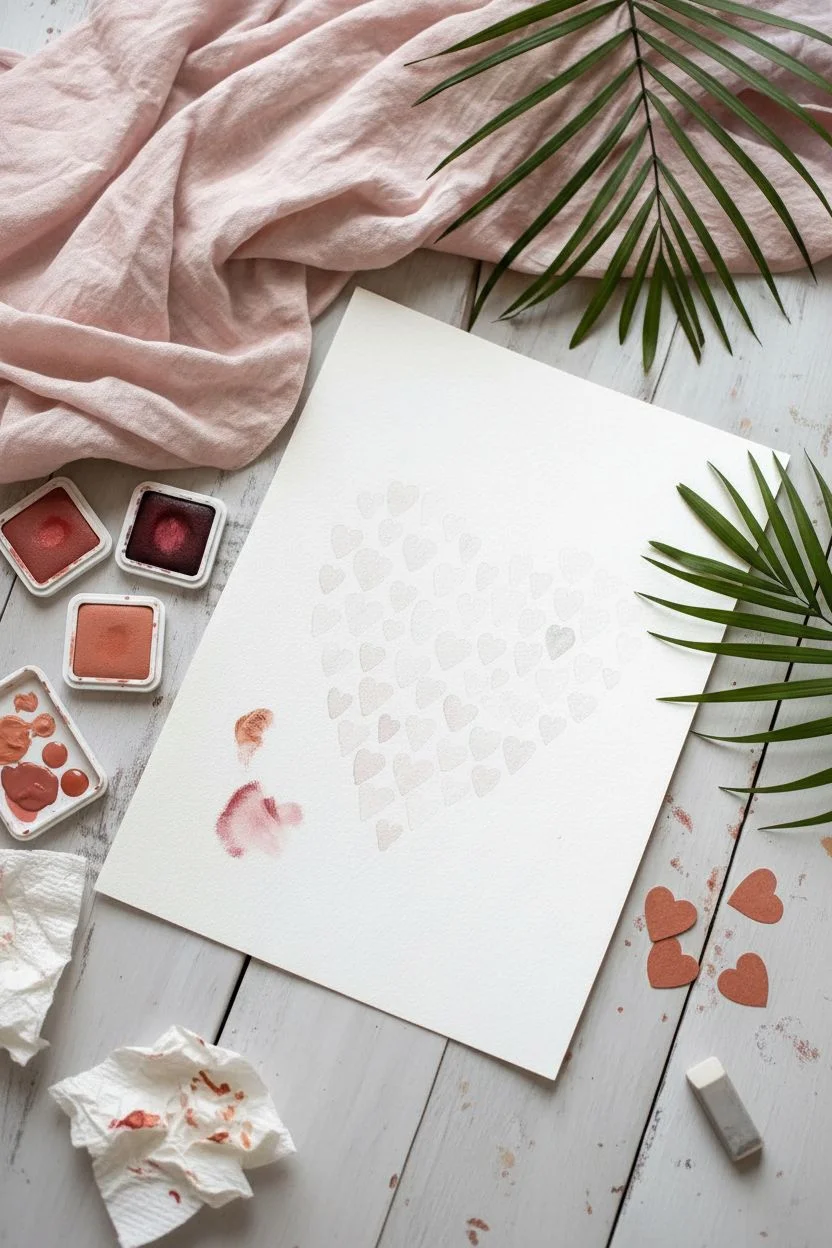
Every dad loves a keepsake that captures how small his little one’s hands once were, and this art piece turns simple thumbprints into a sophisticated display of love. Using a warm, cohesive palette of pinks, rusts, and peaches, you will help your toddler stamp a large heart shape that looks beautiful enough to frame.
Detailed Instructions
Materials
- High-quality watercolor paper (white or cream)
- Washable ink pads or craft paints in various shades (terra cotta, dusty rose, peach, maroon)
- Pencil
- Heart-shaped paper cutout or stencil (for guide)
- Soft eraser
- Paper towels or baby wipes
- Small flat brush (optional, for touch-ups)
Step 1: Preparation & Setup
-
Prepare your workspace:
Lay down newspaper or a craft mat to protect your table. Since we are working with toddlers and potentially paint or ink, have plenty of baby wipes or damp paper towels within arm’s reach for quick cleanups between color changes. -
Create a guide:
Lightly trace a large heart shape onto the center of your watercolor paper using a pencil. This outline will serve as the boundary for where your toddler should place their prints. Keep the line extremely faint so it won’t be visible later, or plan to erase it as you go. -
Set up your palette:
If using craft paints, squeeze small dollops of each color onto a paper plate. Aim for a harmonious ‘sunset’ palette with muted reds, oranges, and soft pinks. If using ink pads, open them all up so they are ready for rapid stamping.
Smudge Fixer
If a print smudges outside the line, turn it into a ‘flying’ heart escaping the cluster! It adds movement and looks intentional rather than messy.
Step 2: Stamping the Hearts
-
Practice the technique:
Before touching the final paper, do a practice run on scrap paper. Show your toddler how to press their thumb into the ink or paint, then press it onto the paper at a slight angle to the left. -
Complete the heart shape:
To make a heart, instruct them (or guide their hand) to make a second print overlapping the bottom of the first one, but angled to the right. The two thumbprints should meet at the bottom to form a ‘V’ shape. -
Start loosely:
Begin stamping the thumbprint hearts inside your penciled outline. It helps to start near the center to get comfortable before moving to the edges which define the shape. -
Rotate colors:
Encourage switching colors frequently. Clean the thumb with a wipe between colors to keep the shades distinct and prevent muddying. I find that alternating between a dark maroon and a light peach creates nice depth. -
Fill the edges:
As you move toward the pencil line, be more careful with placement. Use the thumbprint hearts to define the outer edge of the large heart shape. It is okay if they don’t line up perfectly straight; a jagged, organic edge adds charm. -
Vary the density:
Allow some space between the individual hearts so the white paper shows through. This keeps the design looking airy and delicate rather than like a heavy block of color. -
Add texture:
Vary the pressure slightly. Some hearts can be solid and opaque, while others can be lighter, showing the unique swirl of the thumbprint texture, which is the most special part of this gift.
Step 3: Refining & Finishing
-
Check for gaps:
Step back and look at the overall shape. If there are large empty spots that disrupt the heart silhouette, guide your toddler to add one or two more small hearts to fill them in. -
Dry completely:
Let the artwork sit undisturbed until the paint or ink is completely dry to the touch. This prevents smudging during the final cleanup steps. -
Erase guidelines:
Once fully dry, take your soft eraser and very gently remove any visible pencil lines from your initial guide. Be careful not to rub over the painted areas. -
Optional embellishment:
If you want a little sparkle, you can lightly touch a metallic gold pen to the occasional heart, but the natural matte look is beautiful on its own.
Design Tip
For a cohesive look, pick 3-4 distinct colors that are neighbors on the color wheel, like red, rust, orange, and pale pink.
Frame this lovely collection of prints for a Father’s Day gift that celebrates the unique imprint he has on your family’s life
BRUSH GUIDE
The Right Brush for Every Stroke
From clean lines to bold texture — master brush choice, stroke control, and essential techniques.
Explore the Full Guide
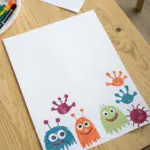
Q-Tip Dot Painting That Spells “DAD”
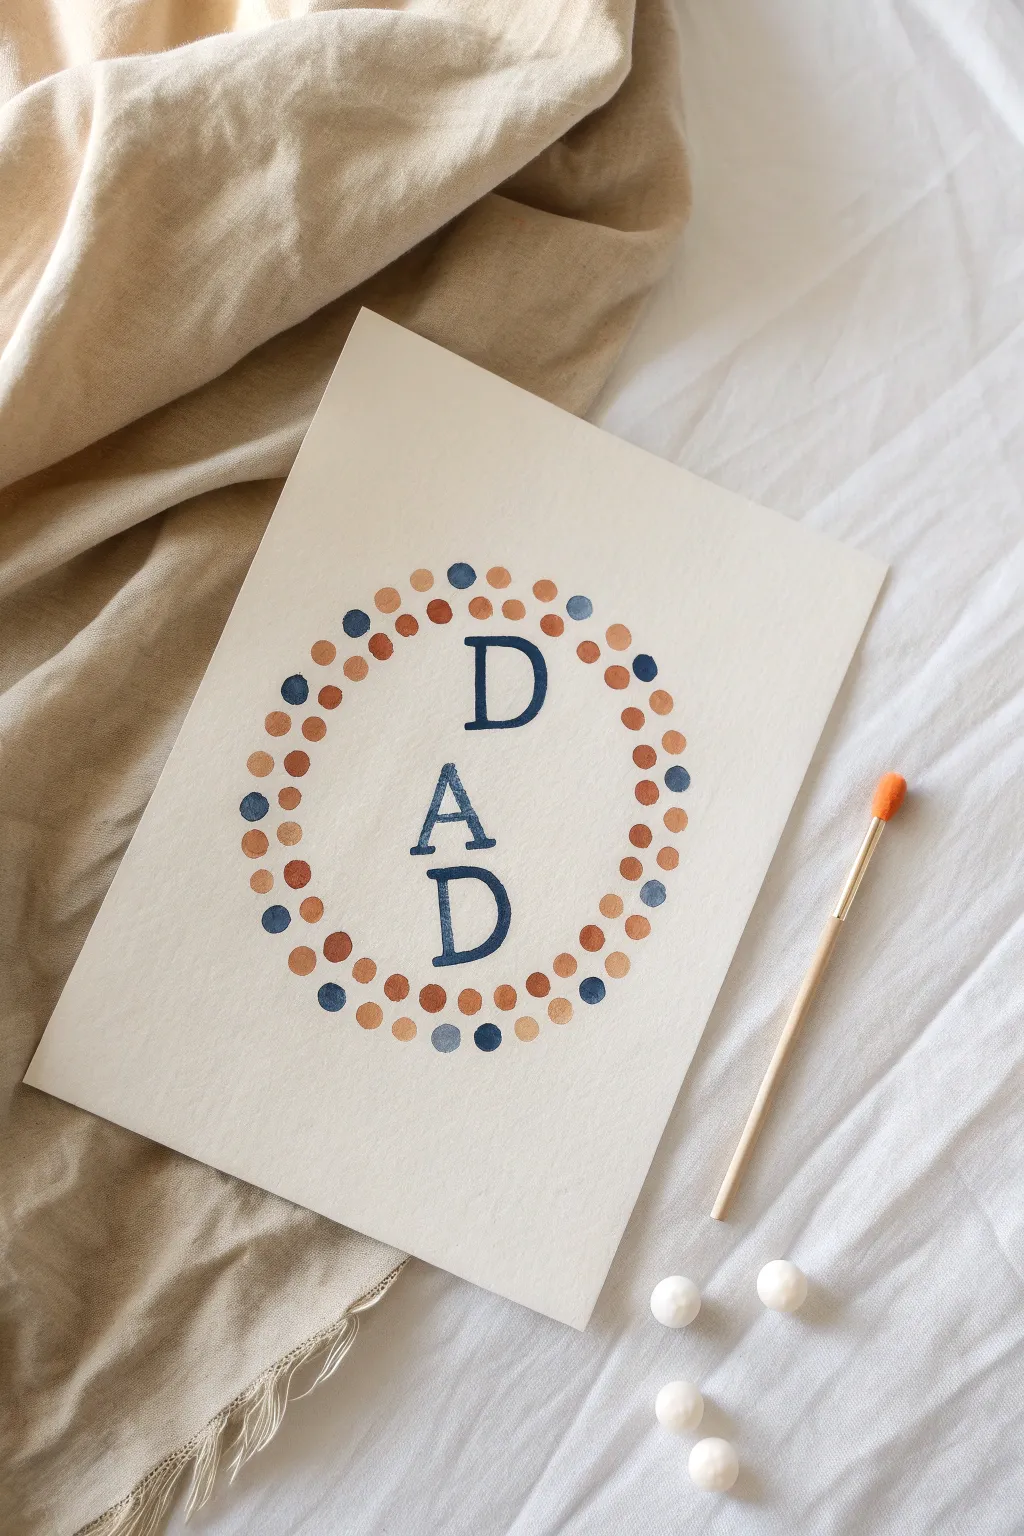
This minimalist card design combines simple lettering with a playful border of painted dots, perfect for tiny hands to assist with. The warm earth tones and clean layout create a modern, frame-worthy piece of art that fathers will cherish.
Step-by-Step Tutorial
Materials
- High-quality watercolor paper or heavy cardstock (creamy off-white suggested)
- Acrylic paints or tempera paints (Navy blue, rust orange, terracotta, warm beige)
- Q-tips (cotton swabs)
- Small foam pouncer or round sponge brush (optional, for larger dots)
- Pencil
- Eraser
- Letter stencils (optional)
- Round object (like a bowl) for tracing
- Palette or small paper plate for paints
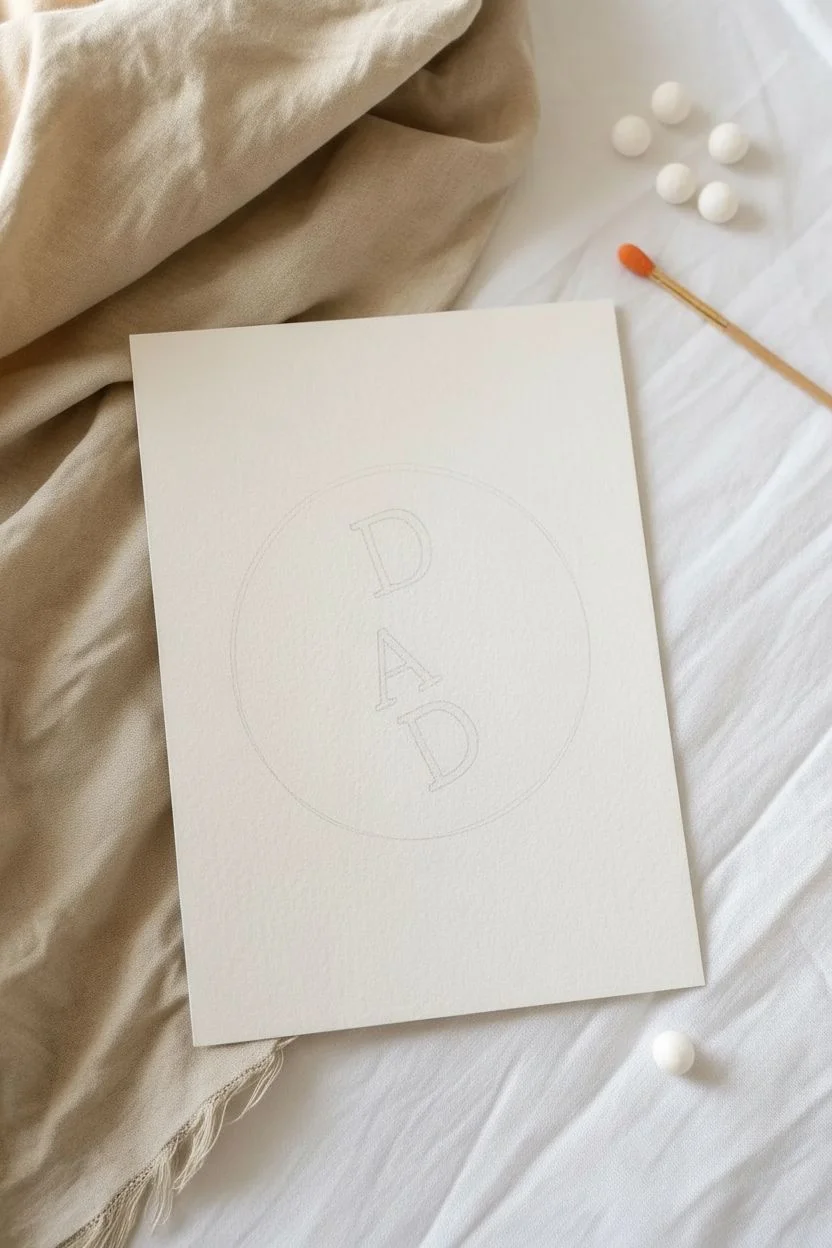
Step 1: Preparation & Lettering
-
Prepare your canvas:
Cut your watercolor paper or cardstock to your desired size. A standard 5×7 inch or A5 size works beautifully for this design. -
Trace the circle guide:
Place a bowl or round object lightly in the center of the paper. Use a pencil to trace a very faint circle around it. This will be the guide for your dot wreath. -
Sketch the letters:
In the center of your traced circle, sketch the letters ‘D-A-D’ vertically. Aim for a classic serif font style to match the image. -
Refine the spacing:
Make sure the letters are evenly spaced and centered within the circle before moving on to paint.
Step 2: Painting the Letters
-
Mix the navy paint:
Prepare a deep navy blue paint on your palette. If your blue is too bright, add a tiny touch of black or dark grey to mute it. -
Paint the letters:
Using a fine paintbrush, carefully fill in your penciled letters. A flat brush works well for the straight edges of the serifs. -
Create a textured look:
For the slightly rustic look seen in the photo, don’t worry if the paint isn’t perfectly opaque. A little variation in transparency adds character. -
Let the letters dry:
Allow the lettering to dry completely so you don’t accidentally smudge it while working on the border.
Stamp Master Tip
For toddlers, rubber bind distinct Q-tips together for each color so they don’t mix them up. It keeps the distinct color palette clean giving it that ‘pro’ look.
Step 3: Creating the Dot Border
-
Prepare the dot colors:
Squeeze out small amounts of your rust orange, terracotta, warm beige, and the same navy blue onto your palette. -
Start the inner circle:
Dip a Q-tip into one color and press it gently onto your penciled circle line. Lift straight up to keep the dot round. -
Alternate colors:
Continue placing dots along the pencil line, alternating colors in a semi-random pattern. I find that avoiding two of the same color side-by-side looks best. -
Spacing the inner dots:
Leave a small gap between each dot, roughly half the width of a dot itself. -
Start the outer circle:
Once the inner ring is done, begin a second ring of dots just outside the first one. -
Stagger the placement:
Try to place the outer dots in the ‘windows’ between the inner dots for a honeycomb effect. -
Vary dot sizes:
If you want the variation seen in the example, use a slightly larger round tool (like the back of a pen or a small dowel) for some dots and Q-tips for others. -
Check for balance:
Step back and look at your wreath. If there are large gaps or uneven color distribution, add a small dot to fill it in.
Uneven Dots?
If a dot smudges or looks messy, let it dry completely. Then can paint over it with the background paper color (white/cream) and restamp a fresh dot on top.
Step 4: Finishing Touches
-
Erase guidelines:
Wait until the paint is 100% dry—this is crucial. Then, gently erase any visible pencil marks from your initial circle guide. -
Clean up edges:
If any letters look uneven, do a final touch-up with your navy blue paint and a very fine brush.
Now you have a beautifully handcrafted card that brings a sophisticated touch to a classic kid’s craft
Fork or Comb Texture Painting With “DAD” Initials
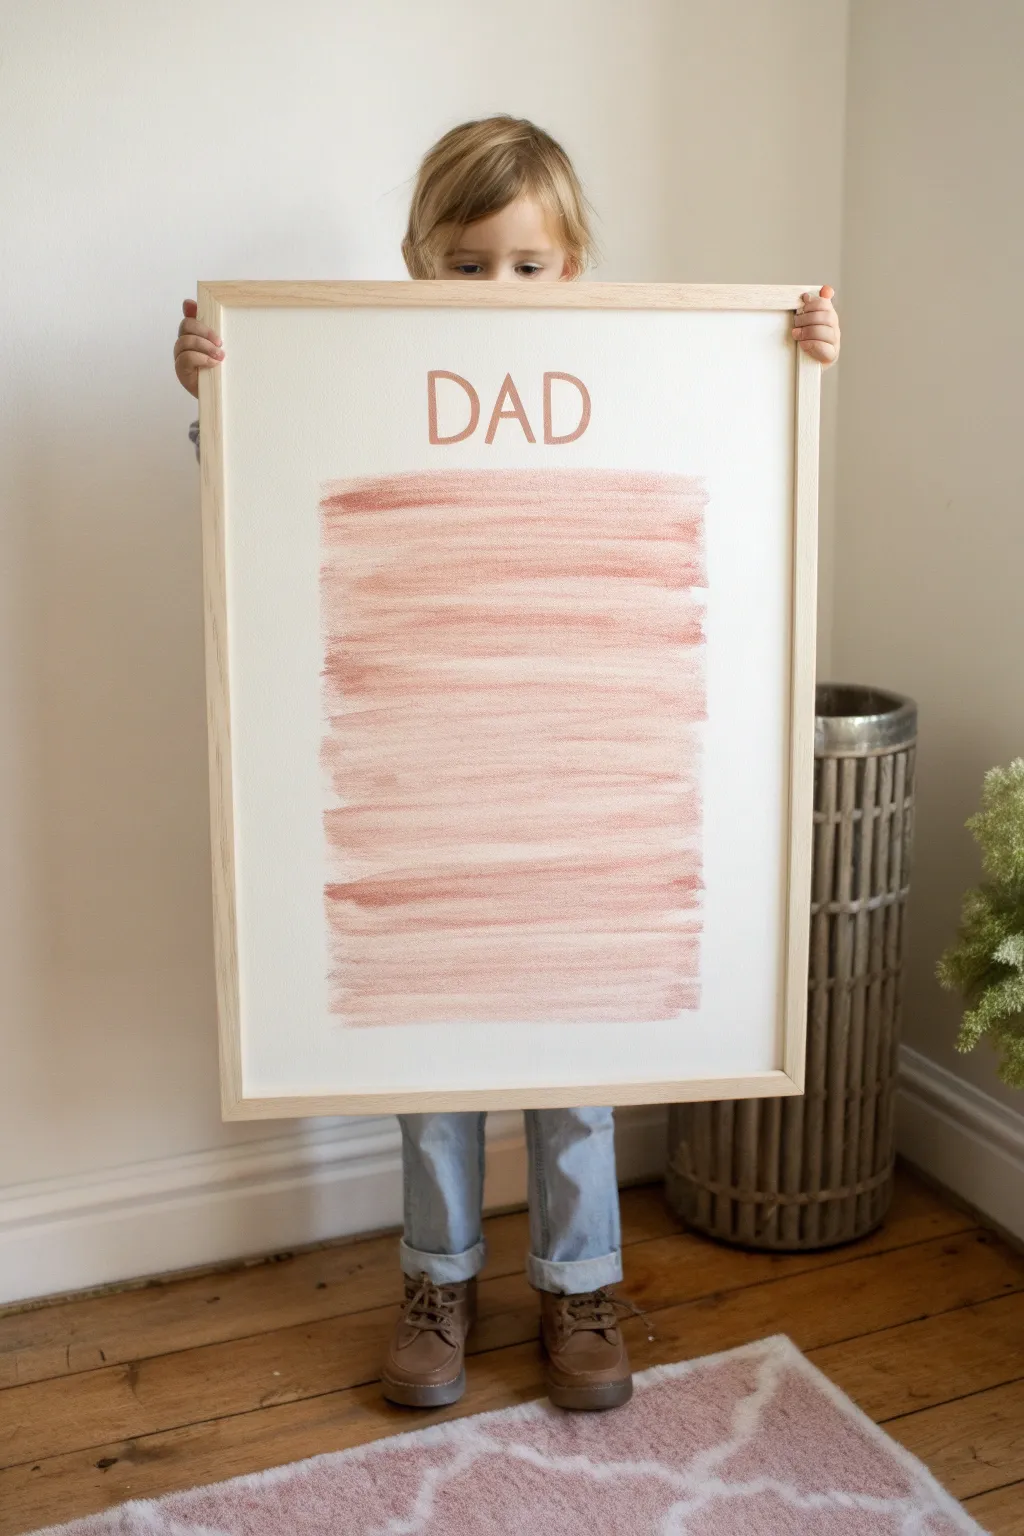
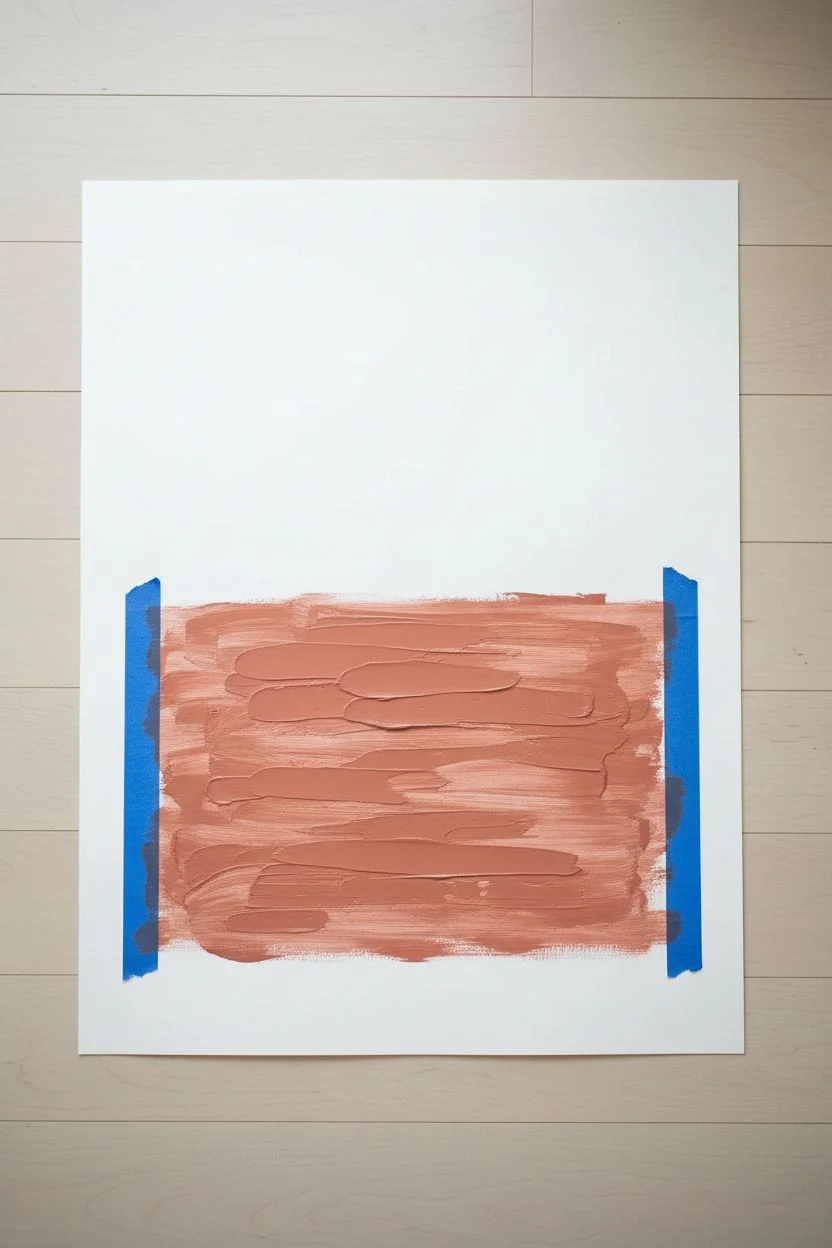
This minimalist yet striking art piece uses simple tools to create a sophisticated textured effect that looks perfect in a large frame. By dragging a comb or fork through paint, toddlers can create satisfying, rhythmic lines that transform into a modern abstract background for a sweet dedication.
Step-by-Step
Materials
- Large sheet of heavy white cardstock or watercolor paper (A2 or A1 size)
- Reddish-brown or terracotta acrylic paint
- Large flat paintbrush or foam brush
- Wide-toothed comb or plastic fork
- Letter stencils (large sans-serif font)
- Stencil brush or sponge dabber
- Painter’s tape or masking tape
- Large wooden frame (to fit paper size)
- Paper plate or palette
Step 1: Setting the Stage
-
Plan the Layout:
Lay your large paper on a flat surface. Using a pencil lightly, mark off a rectangular area in the center-bottom roughly where you want the textured painting to go, leaving plenty of white space at the top. -
Tape the Boundaries:
Apply painter’s tape along the vertical sides of your planned rectangle. This will ensure crisp, clean edges for the painted section, making the final result look professional regardless of how wild the painting gets. -
Mix the Color:
Squeeze a generous amount of reddish-brown acrylic paint onto a paper plate. If the paint is too thick, I find adding a drop or two of water helps it spread more smoothly for the combing step.
Comb vs. Fork
A wide-tooth hair comb creates thick, bold lines perfect for large paper. A plastic fork creates thinner, closer lines. Try cutting teeth out of a cardboard scrap for custom spacing.
Step 2: Creating Texture
-
Apply the Base Layer:
Using the large flat paintbrush, have your toddler paint a thick horizontal strip of paint at the very top of your taped-off section. Don’t let it dry yet—speed is helpful here. -
The First Drag:
immediately hand the child the wide-toothed comb or fork. Instruct them to drag the tool horizontally through the wet paint from left to right, creating those distinct parallel lines. -
Continue the Process:
Paint another horizontal strip just below the first one, slightly overlapping. Again, drag the comb through while wet. Repeat this ‘paint-then-comb’ rhythm all the way down the page. -
Vary the Strokes:
It’s okay if the lines aren’t perfectly straight or if the paint fades out in spots. That variation creates the beautiful ‘dry brush’ look seen in the example photo. -
Finish the Block:
Continue until you reach the bottom of your planned rectangle. Ensure the paint texture is consistent. -
Remove the Tape:
Carefully peel away the painter’s tape while the paint is still slightly tacky to avoid tearing the paper. Let the textured block dry completely before moving on.
Make it Metallic
Mix a small amount of bronze or copper shimmering medium into your terracotta paint. The texture from the comb will catch the light beautifully when hung on the wall.
Step 3: Adding the Title
-
Position the Stencils:
Once the background is dry, arrange your ‘DAD’ stencils centered in the white space above the painted block. Use a ruler to ensure they are straight and evenly spaced. -
Secure the Stencils:
Tape the edges of the stencils down gently so they don’t slide around while painting. -
Stenciling Technique:
Dip a stencil brush or sponge dabber into the same reddish-brown paint. Dab off excess paint onto a paper towel until the brush is almost dry. -
Fill in Letters:
Using an up-and-down dabbing motion, fill in the stencil openings. Avoid brushing side-to-side, as this can push paint under the stencil edges. -
Reveal the Text:
Lift the stencils straight up immediately after painting to reveal crisp letters.
Step 4: Final Assembly
-
Dry Completely:
Allow the entire artwork to cure for at least an hour to ensure no paint smears against the glass. -
Clean the Glass:
Wipe down the inside of your frame’s glass to remove any dust or fingerprints. -
Frame It:
Place the artwork into the frame, secure the back, and it’s ready for gifting.
This large-scale textured art makes a bold statement piece that any dad will be proud to hang in his office or living room

PENCIL GUIDE
Understanding Pencil Grades from H to B
From first sketch to finished drawing — learn pencil grades, line control, and shading techniques.
Explore the Full Guide
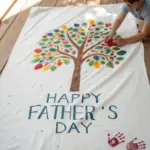
Handprint Tree Keepsake: “No Matter How Tall I Grow, I Love You, Dad”
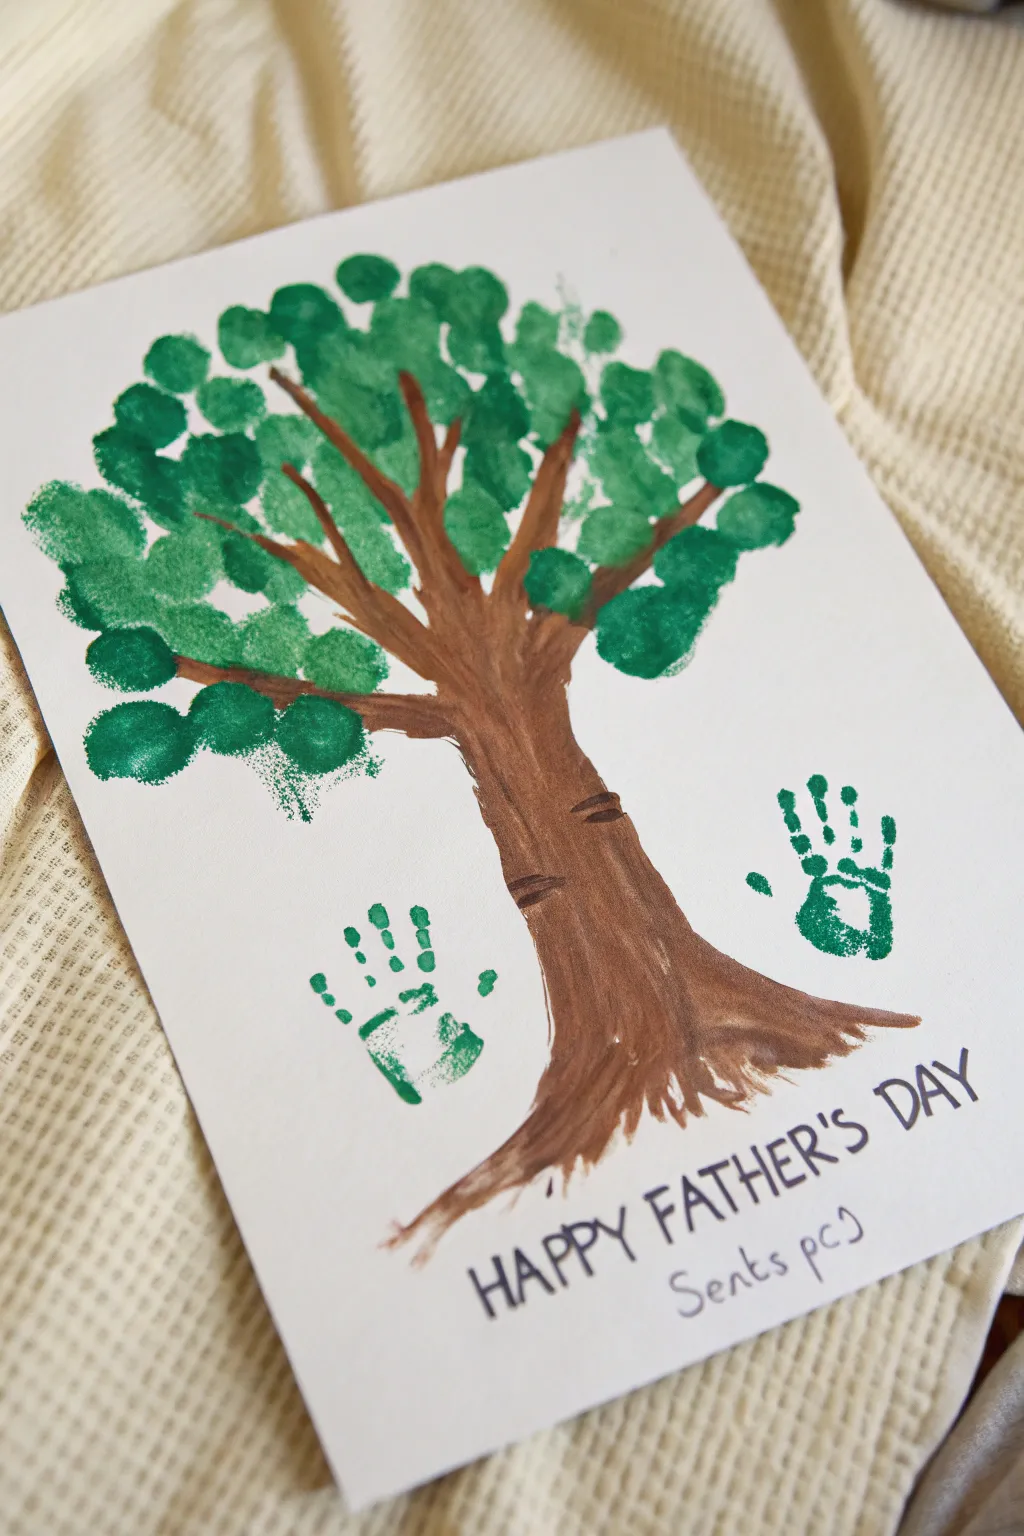
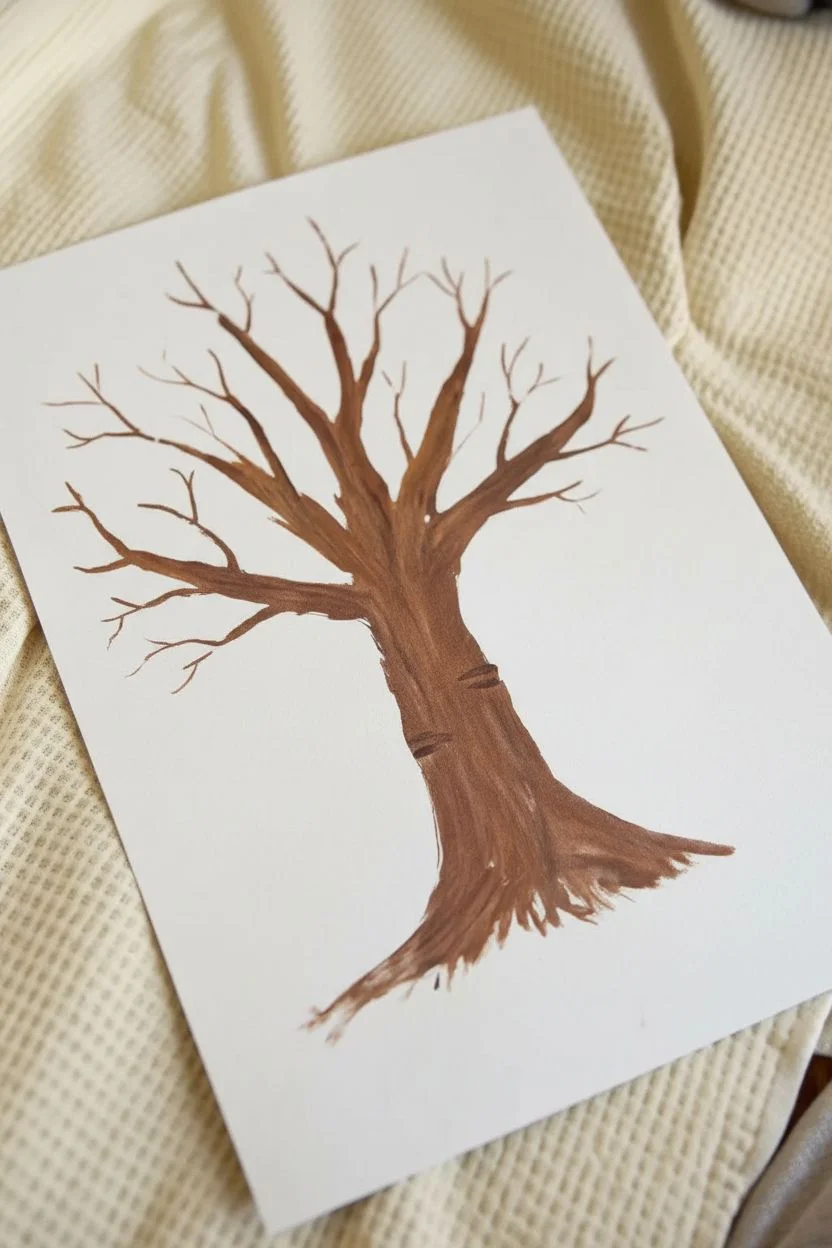
Create a timeless memory with this beautiful handprint tree, combining your little one’s prints with a painted tree design. The lush green canopy is made from simple fingerprints, while actual handprints frame the trunk for a personal touch that captures just how small they once were.
Step-by-Step
Materials
- White cardstock or heavy watercolor paper
- Brown acrylic or tempera paint
- Green acrylic or tempera paint (consider 2 shades for depth)
- Medium paintbrush (for the trunk)
- Fine tip black marker or pen
- Paper plate or palette
- Baby wipes or damp cloth (essential for quick cleanup)
Step 1: Painting the Foundation
-
Prepare the workspace:
Lay down some newspaper or a craft mat, as finger painting can get a little messy. -
Mix the brown paint:
Squeeze a dollop of brown paint onto your palette. If it’s too thick, add a drop of water to help it flow smoothly for the branches. -
Paint the trunk base:
Start near the bottom center of your paper. Paint a wide, sturdy trunk that tapers slightly as it goes up. -
Add roots:
Flick your brush downward at the very bottom of the trunk to create uneven, natural-looking roots anchoring the tree. -
Branch out:
From the top of the trunk, paint four or five main branches reaching upwards and outwards towards the corners of the page. -
Add smaller twigs:
Using the tip of your brush, add smaller, thinner lines coming off the main branches to fill out the tree’s skeleton. -
Add texture details:
While the brown paint is still slightly wet, you can use a darker brown or just a heavier stroke to add a few horizontal lines on the trunk for bark texture. -
Let the trunk dry:
Allow the brown paint to dry completely before moving on to the green leaves. This prevents the colors from gleaming into a muddy mess.
Smudge Control
If a handprint smudges, don’t panic. Wait for it to dry, then turn the smudge into a ‘fallen bush’ or some grass near the roots with a few extra brush strokes.
Step 2: Adding the Foliage
-
Prepare green paint:
Pour a small amount of green paint onto the palette. I find using two slightly different shades of green adds lovely dimension, but one shade works perfectly well too. -
Dip the finger:
Guide your toddler to dip one finger into the green paint. You want the pad of the finger covered, but not dripping. -
Create the canopy:
Have your child press their painted fingertip repeatedly around the ends of the branches. -
Group the leaves:
Encourage clustering the fingerprints together in groups of 3 to 5 at the end of each twig to look like bushy leaves. -
Fill in gaps:
Continue adding fingerprints until the tree looks full and lush. Overlapping some prints is okay and actually makes it look more realistic. -
Clean hands:
Wipe that green finger clean immediately with a baby wipe before moving to the next step.
Step 3: Personalizing the Keepsake
-
Prepare for handprints:
Refresh your green paint supply if needed. Ensure the child’s whole hand fits comfortably on the open space to the left or right of the trunk. -
Paint the hand:
Use a brush to apply a thin, even layer of green paint to your child’s entire palm and fingers. Using a brush is often less gloppy than dipping. -
Press the left print:
Gently guide your child’s hand to the empty space on the left of the trunk. Press down firmly on the palm and each finger. -
Press the right print:
Repeat the process with the other hand (or re-paint the same hand) and stamp it on the right side of the trunk. -
Dry completely:
Set the artwork aside until the thickest parts of the paint are fully dry to the touch. -
Add the inscription:
Using your fine tip black marker, write ‘HAPPY FATHER’S DAY’ clearly at the bottom. -
Sign and date:
Don’t forget to write the child’s name and the current year below the greeting so you remember exactly when those hands were this small.
Make It Pop
For a ‘Level Up,’ use a lighter green for the fingerprints and a darker green for the handprints to make the personalised elements visually distinct.
Now you have a charming, framed-worthy piece of art that celebrates dad and freezes a moment in time


Have a question or want to share your own experience? I'd love to hear from you in the comments below!