Shot glasses are tiny canvases with big personality, and that curved surface is way more fun than it looks. Here are my favorite shot glass painting ideas that stay doable, look crisp from every angle, and feel gift-worthy without being fussy.
Classic Polka Dot Party Set
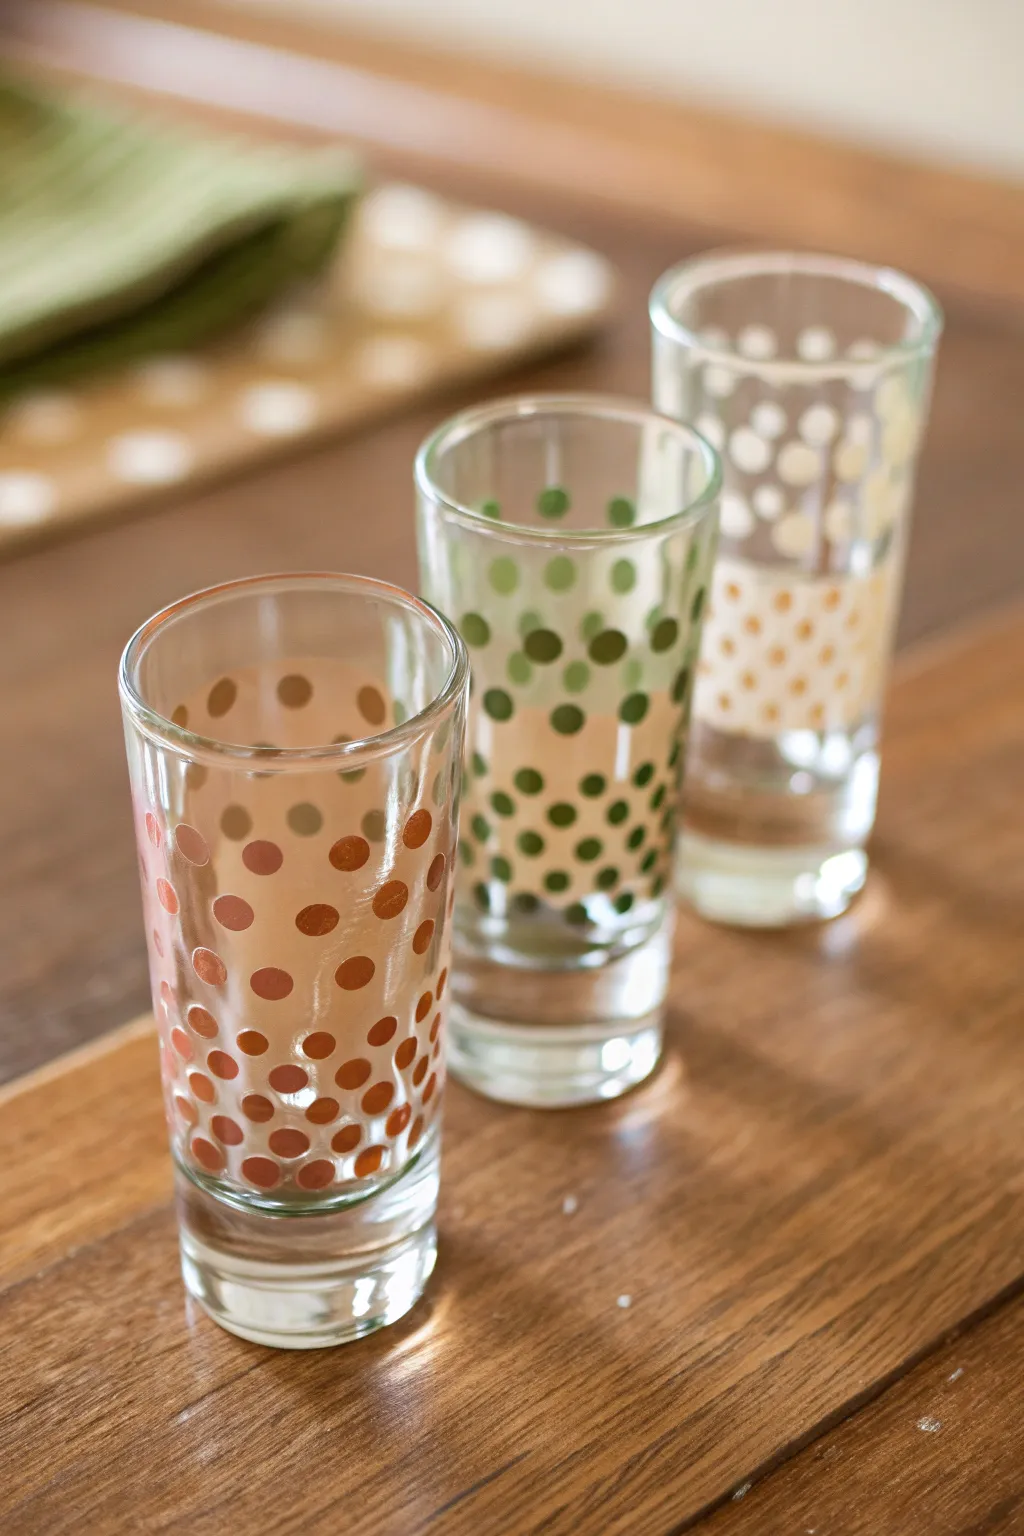
Transform plain glassware into a custom party set with this charming polka dot design. The translucent pattern adds a pop of color while keeping the look light and playful, perfect for your next gathering.
Detailed Instructions
Materials
- Clear glass shot glasses
- Rubbing alcohol
- Cotton pads or paper towel
- Enamel glass paints (brick red, olive green, cream)
- Round foam pouncers (small size)
- Small round paintbrush (optional alternative)
- Paper plate or palette
- Cotton swabs
- Oven (for curing)
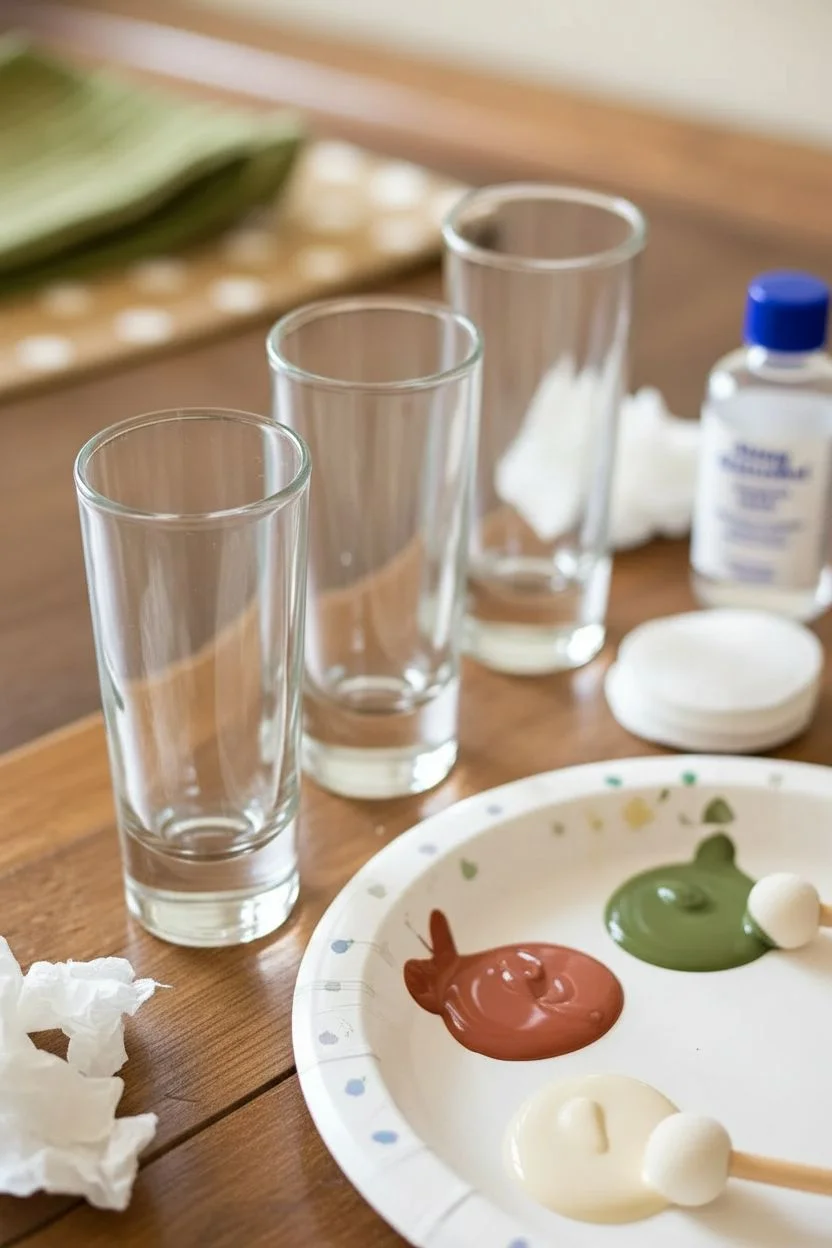
Step 1: Preparation
-
Clean the Glass:
Before you begin painting, it is crucial to remove any oils or fingerprints from the glass surface. Wipe the exterior of each shot glass thoroughly with rubbing alcohol and a cotton pad. -
Set Up Your Palette:
Squeeze a small amount of your chosen enamel paint colors onto a paper plate. For this look, we are using a warm brick red, a soft olive green, and a creamy off-white. -
Test Consistency:
Dip your foam pouncer or brush into the paint and test a few dots on the paper plate first. You want enough paint to create an opaque circle, but not so much that it drips.
Step 2: Painting the Dots
-
Start the First Color:
Choose your first glass and color, perhaps the brick red. Dip your round foam pouncer lightly into the paint, ensuring the entire circular face is covered evenly. -
Apply the First Row:
Starting near the rim (but leaving enough space for lips to touch glass, not paint), press the pouncer straight onto the glass surface. Lift straight off to leave a perfect circle. -
Continue the Pattern:
Work your way around the glass, spacing the dots roughly half an inch apart. Try to keep them in a horizontal line, though a little irregularity adds charm. -
Stagger the Second Row:
Move down the glass for the next row. Position these dots in the spaces between the dots of the row above, creating a brick-lay or staggered pattern. -
Fill the Glass:
Continue this staggered pattern down toward the heavy glass base. I usually stop just before the glass curves into the bottom to keep the design visible. -
Clean Up Edges:
If any dots smudge or look uneven, quickly wipe them away with a wet cotton swab or a little rubbing alcohol while the paint is still wet. -
Repeat for Other Colors:
Switch to a fresh pouncer and paint your second glass with the olive green paint, following the same staggered pattern technique. -
Finish the Set:
Complete the trio with the cream-colored paint on the third glass. Ensure the spacing feels similar across all three pieces for a cohesive look.
Drip Disaster?
If paint is dripping, your pouncer is overloaded. Dab excess paint onto paper first. Let drips dry slightly, then scrape off with a craft knife.
Step 3: Curing and Care
-
Initial Drying:
Allow the painted glasses to air dry for at least one hour until the paint is dry to the touch. This prevents smearing during handling. -
Full Cure Time:
Follow the specific instructions on your enamel paint bottle. Most brands require 21 days of air drying for a full cure, or an oven-bake method for faster results. -
Oven Baking Method:
Place the glasses in a cool oven. Set the temperature to 350°F (175°C) and bake for 30 minutes. The key is to let the glass heat up with the oven to prevent cracking. -
Cool Down:
Turn the oven off after 30 minutes but leave the glasses inside. Let them cool down completely inside the oven before removing them. -
Final Wash:
Once cured (either by time or heat) and fully cooled, hand wash the glasses gently with mild soap and water before their first use.
Mix It Up
Make it a confetti party! Instead of single colors, mix multiple colors on one glass, or use different sized pouncers for a playful, bubbly effect.
Now you have a custom set of glassware ready to toast at your next celebration


Simple Stripes With a Clean Wraparound
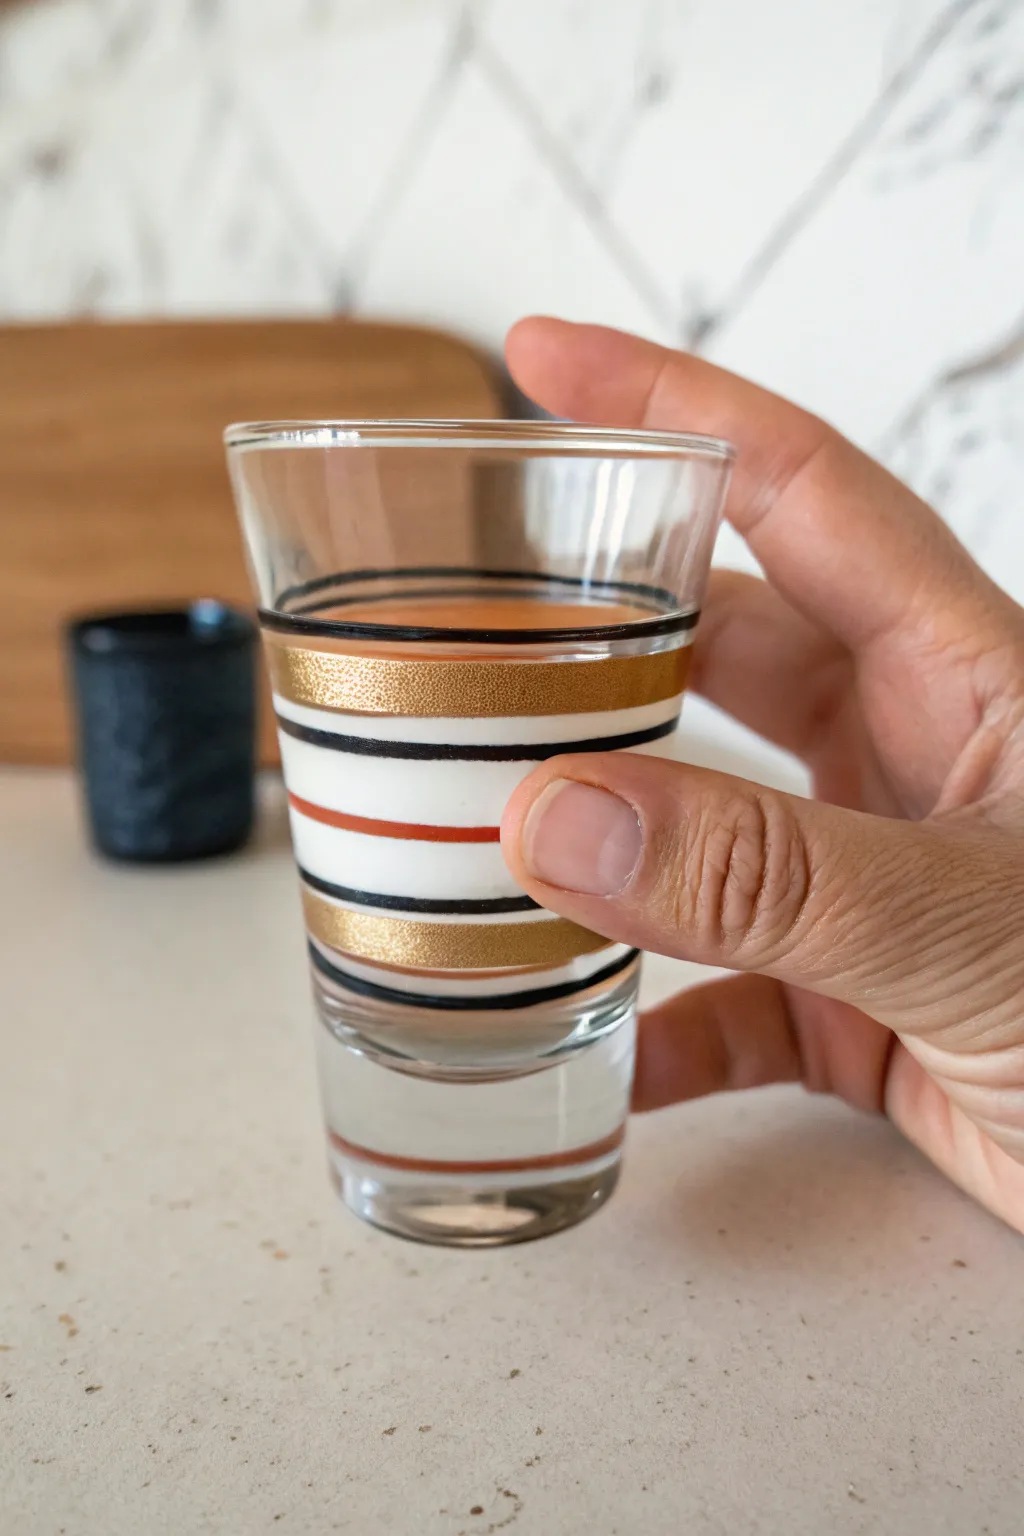
Elevate clear glassware with this sophisticated, geometric design featuring crisp horizontal bands. The combination of matte black, creamy white, earthy terracotta, and shimmering gold creates a timeless look that feels both retro and modern.
How-To Guide
Materials
- Clear glass shot glass (clean and free of grease)
- Rubbing alcohol and cotton pads
- Enamel glass paints (Black, White, Metallic Gold/Glitter Gold, Burnt Orange/Terracotta)
- Fine-tip paintbrush (size 0 or 00) for lines
- Small flat shader paintbrush (size 2 or 4) for filling bands
- Painter’s tape (1/4 inch width or similar)
- Palette or small dish
- Oven for baking (if using bake-to-set paints)
Step 1: Preparation and Planning
-
Clean the surface:
Before laying down a single drop of paint, thoroughly wipe the exterior of the shot glass with rubbing alcohol on a cotton pad. This removes any finger oils or dust that might prevent the paint from properly adhering to the smooth glass surface. -
Plan your spacing:
Visualize where the bands will sit. Notice in the design that the thickest white band is near the center, flanked by thinner accent stripes. You can lightly mark the glass with a dry-erase marker if you need guidelines, but freehanding often adds a nice organic touch.
Step 2: Painting the Base Bands
-
Apply the central white band:
Start with the most prominent feature: the thick white band in the middle. Using your small flat brush, load it with white enamel paint. -
Rotate to paint:
Hold the brush steady and rotate the glass with your other hand to create a continuous, even stripe around the circumference. Don’t worry if the edges aren’t perfect yet; we will refine them later. -
Let the white dry:
Allow this white layer to dry considerably so it doesn’t smear when we add adjacent colors. I like to wait about 15-20 minutes between major color blocks. -
Add the gold bands:
Repeat the rotation technique with the Metallic Gold paint. Paint a thick band directly above the white section and another thick band below it. The gold should be roughly equal in width to the white stripe. -
Paint the terracotta accent:
Using a smaller brush, add a thin stripe of the Burnt Orange or Terracotta paint slightly below the bottom gold band. This adds a warm pop of color to the palette.
Use a Turntable
For steadier lines, place the glass on a small manual pottery wheel or a Lazy Susan. Hold your brush still and spin the table.
Step 3: Defining with Detail Lines
-
Prepare the black paint:
Switch to your finest detail brush (size 0 or 00). Ensure your black enamel paint flows smoothly; if it’s too thick, the lines will be bumpy. -
Edge the top gold band:
Carefully paint a very thin black line along the top edge of the upper gold band. Resting your pinky finger on the glass base can help stabilize your hand. -
Separate the colors:
Paint thin black divider lines between the gold and white sections. This high-contrast outline is crucial for that clean, graphic look. -
Add the terracotta detail:
Paint a thin terracotta or burnt orange stripe directly onto the middle of the white band. This breaks up the white space and repeats the lower accent color. -
Bottom framing:
Add a final thin black line framing the bottom of the lower gold band. -
Base stripe:
For a finished look, paint one last thin terracotta stripe near the very bottom base of the glass, leaving some clear glass between it and the main design.
Textured Gold
Instead of metallic paint, apply a line of sizing glue and press loose gold glitter onto the stripes for a disco-ready sparkle.
Step 4: Finishing and Curing
-
Clean up edges:
If any lines are wobbly or smudged, dip a toothpick or a cotton swab in rubbing alcohol and gently nudge the paint back into place or wipe away mistakes while wet. -
Extended drying time:
Allow the glass to air dry for at least 24 hours (or as recommended by your specific paint manufacturer). The paint needs to fully cure before the baking process. -
Bake to set:
Place the shot glass in a cool oven. Turn the heat to 350°F (175°C) and bake for 30 minutes. The key is to let the glass heat up with the oven to prevent cracking. -
Cool down slowly:
Turn the oven off and leave the glass inside until the oven is completely cool. This gradual temperature change tempers the paint for durability.
Your stylish new barware is now ready for your next toast with friends


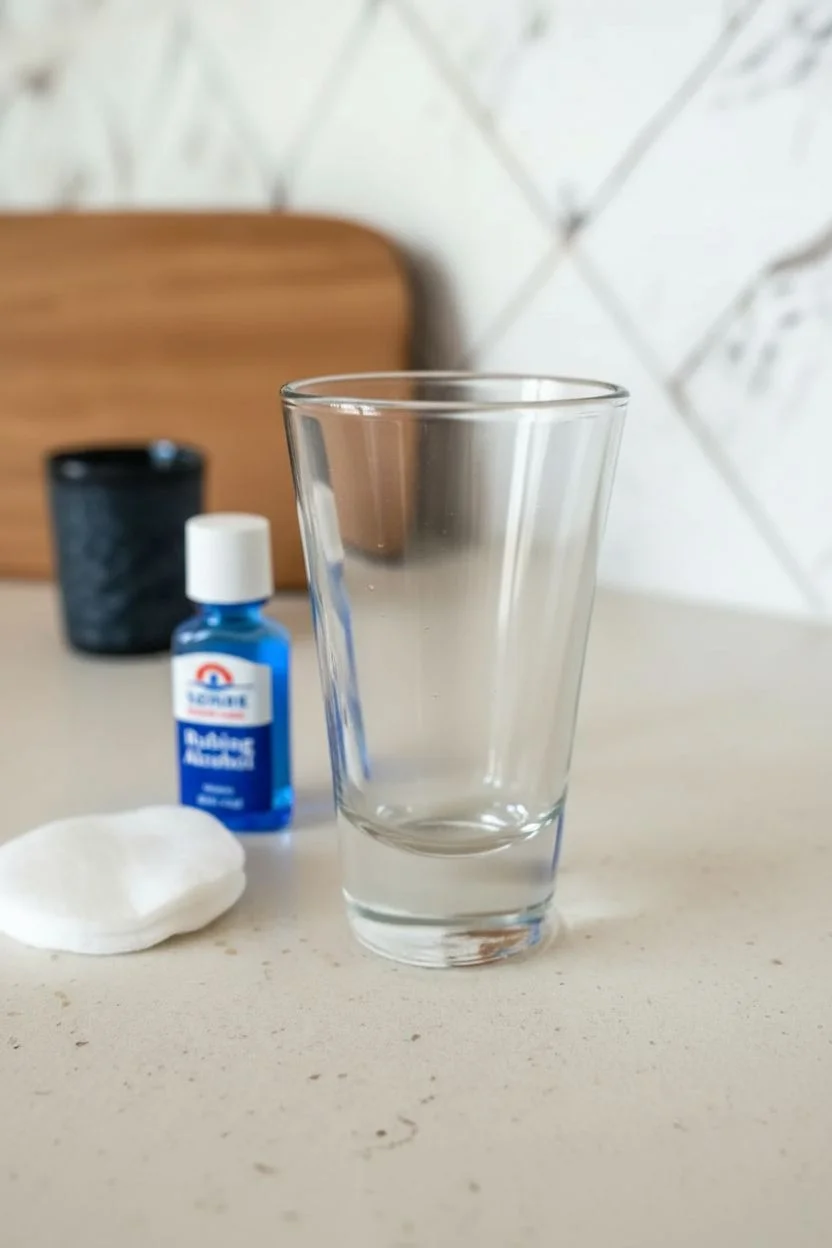
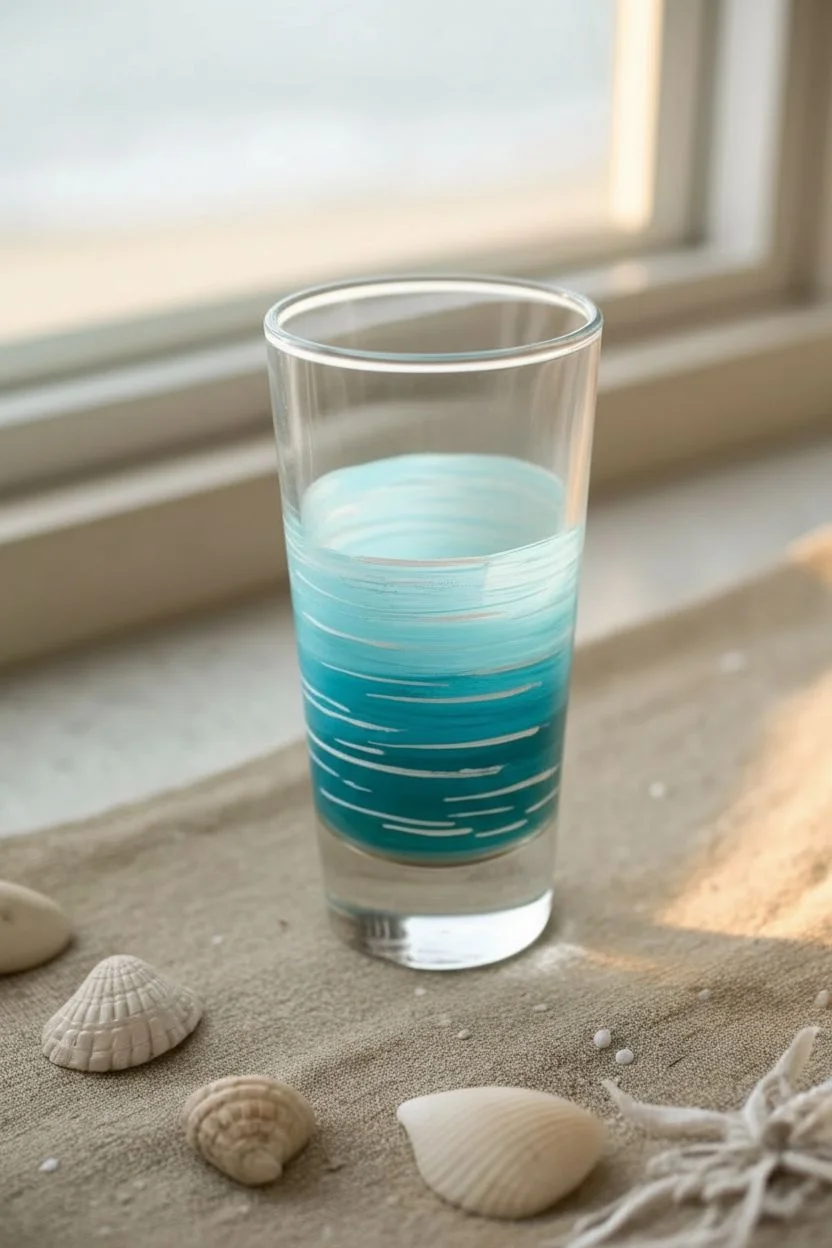
Bottom-Up Ombre Fade
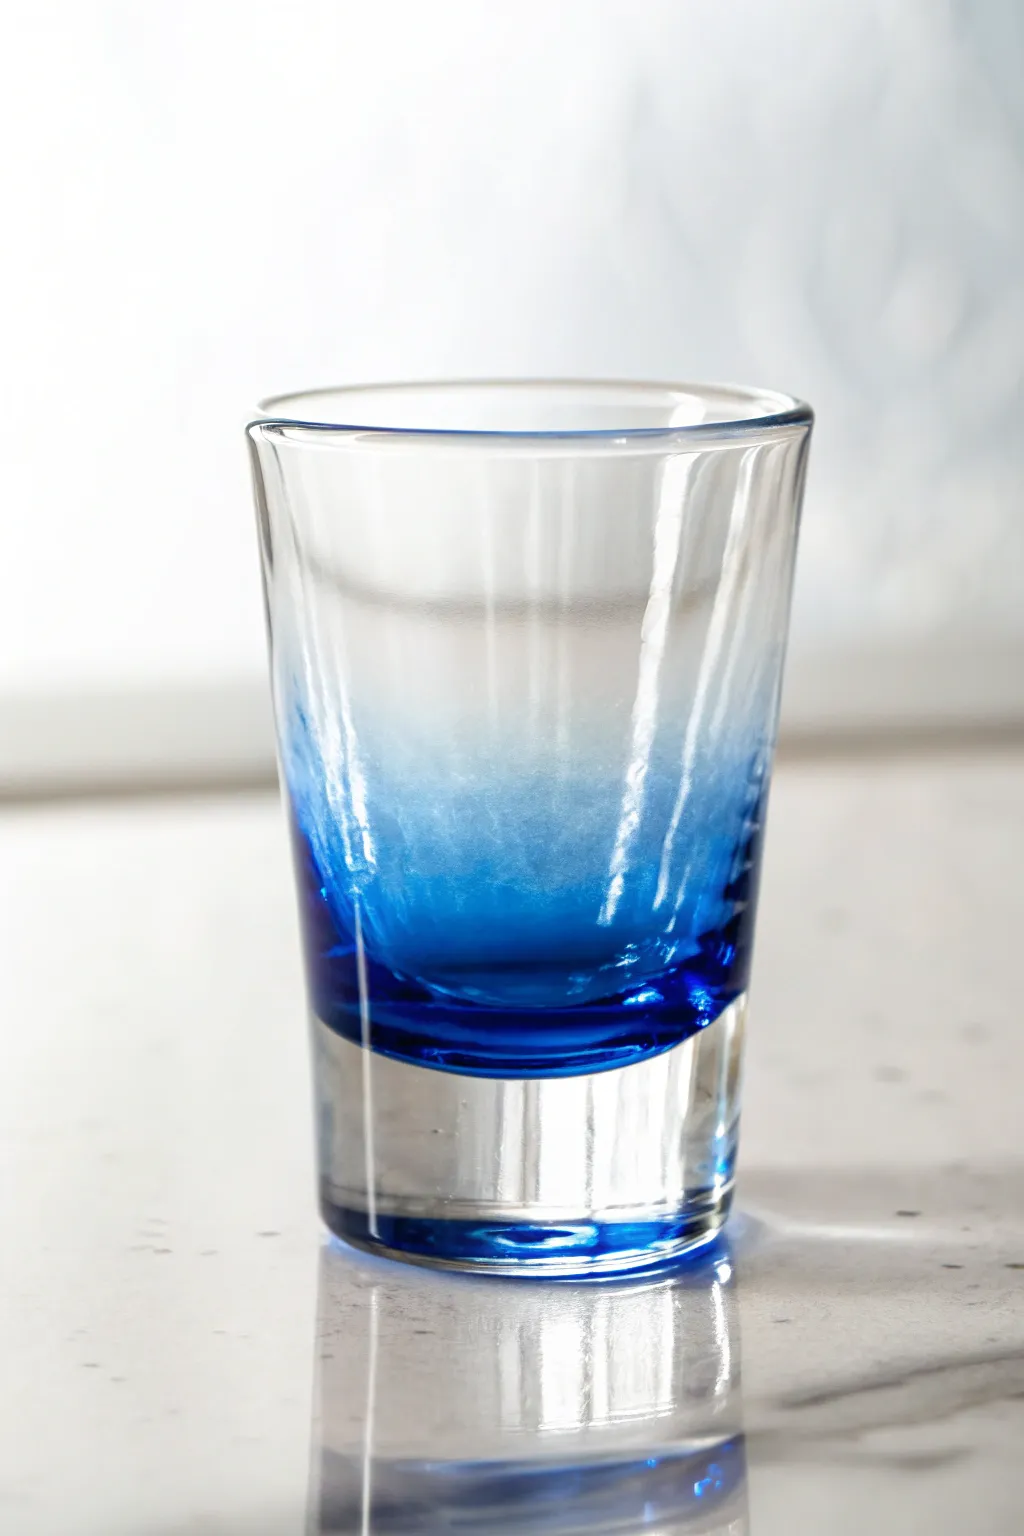
Transform a plain shot glass into a stunning piece of barware with this subtle yet striking bottom-up fade. The result mimics the serene depths of the ocean, transitioning from a rich, deep blue base into crystal clear glass at the rim.
Detailed Instructions
Materials
- Clear glass shot glass
- Rubbing alcohol
- Cotton pads or paper towel
- Pebeo Vitrea 160 (or similar transparent glass paint) in Turquoise or Deep Blue
- Pebeo Vitrea 160 Thinner (or clear medium)
- Small cosmetic sponge wedges
- Foil or palette specifically for glass paint
- Oven (for curing, if using bake-on paints)
Step 1: Preparation
-
Clean the Surface:
Before opening any paint, wipe the outside of your shot glass thoroughly with rubbing alcohol on a cotton pad. This removes invisible oils and fingerprints which are the enemy of glass painting. -
Wait for Evaporation:
Let the alcohol evaporate completely for a few moments so the surface is bone dry. -
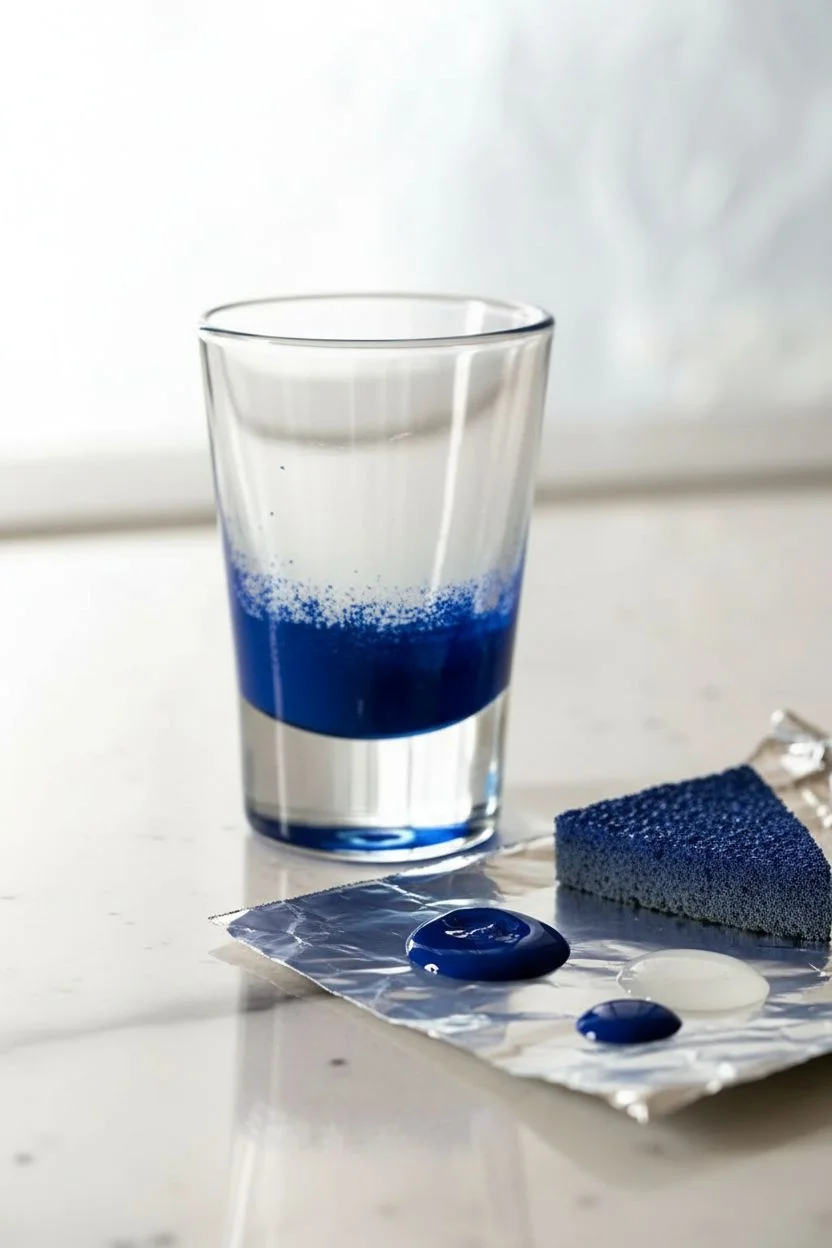
Prepare Your Palette:
Squeeze a dime-sized amount of your blue glass paint onto your foil palette. Next to it, pour an equal amount of the thinner or clear medium.
Sponge Sensitivity
Use a pouncing motion (tapping up and down) rather than dragging. Dragging creates streaks, while pouncing mimics the frosted texture of the glass.
Step 2: Creating the Base Layer
-
Load the Sponge:
Take a cosmetic sponge wedge and dab the flat bottom face into the pure blue paint. You don’t want it dripping, just evenly coated. -
Apply the Bottom Coat:
stipple the paint onto the heavy glass base of the shot glass. Since the base is thick, I find applying paint to the very bottom exterior helps refract the color upwards through the glass. -
Start the Gradient:
Reload your sponge slightly and begin dabbing around the very bottom edge of the wall of the glass, creating a solid band of blue about a quarter inch high. -
Check for Opacity:
Hold the glass up to the light. The bottom ring should be your darkest point. If it looks too streaky, let it dry for ten minutes and dab on a second thin layer.
Crystal Effect
Before the paint dries, sprinkle a tiny pinch of ultra-fine clear glitter into the wettest blue section at the bottom for a shimmering, icy look.
Step 3: Fading Upwards
-
Mix a Lighter Tone:
On your palette, mix a small amount of blue with the clear medium/thinner. This dilutes the pigment without making the paint runny. -
Apply the Mid-Tone:
Using a fresh side of your sponge, pick up this lighter mix. Dab it just above your dark blue band, overlapping slightly to blend the seam. -
Soften the Transition:
While the paint is still wet, gently tap the sponge over the line where the dark blue meets the lighter blue to blur distinct edges. -
Dilute Further:
Add even more thinner to your mixture on the palette, so it is barely tinted. -
Create the Fade Out:
Sponge this very faint mixture upwards towards the middle of the glass. You want the paint to naturally ‘run out’ on your sponge as you move up. -
Feather the Edge:
With a completely clean, dry sponge, lightly tap the topmost edge of your painted area. This lifts excess paint and creates that misty, disappearing effect seen in the photo. -
Clean the Rim:
Ensure no stray paint marks made it near the drinking rim. Wipe the top half of the glass with a clean cloth if necessary.
Step 4: Curing
-
Initial Drying:
Allow the glass to air dry for at least 24 hours. The paint needs to be fully set to the touch before baking. -
Place in Cold Oven:
Place the shot glass on a baking sheet inside a cold oven. Do not preheat the oven, as thermal shock can crack the glass. -
Bake to Set:
Set the temperature to 325°F (160°C) and bake for 40 minutes (or follow the specific instructions on your paint bottle). -
Cool Down:
Turn the oven off and open the door slightly, but leave the glass inside until the oven is completely cool.
Once cooled, your custom ombre glassware is ready to be the star of your next gathering


Confetti Dot Burst Around the Rim
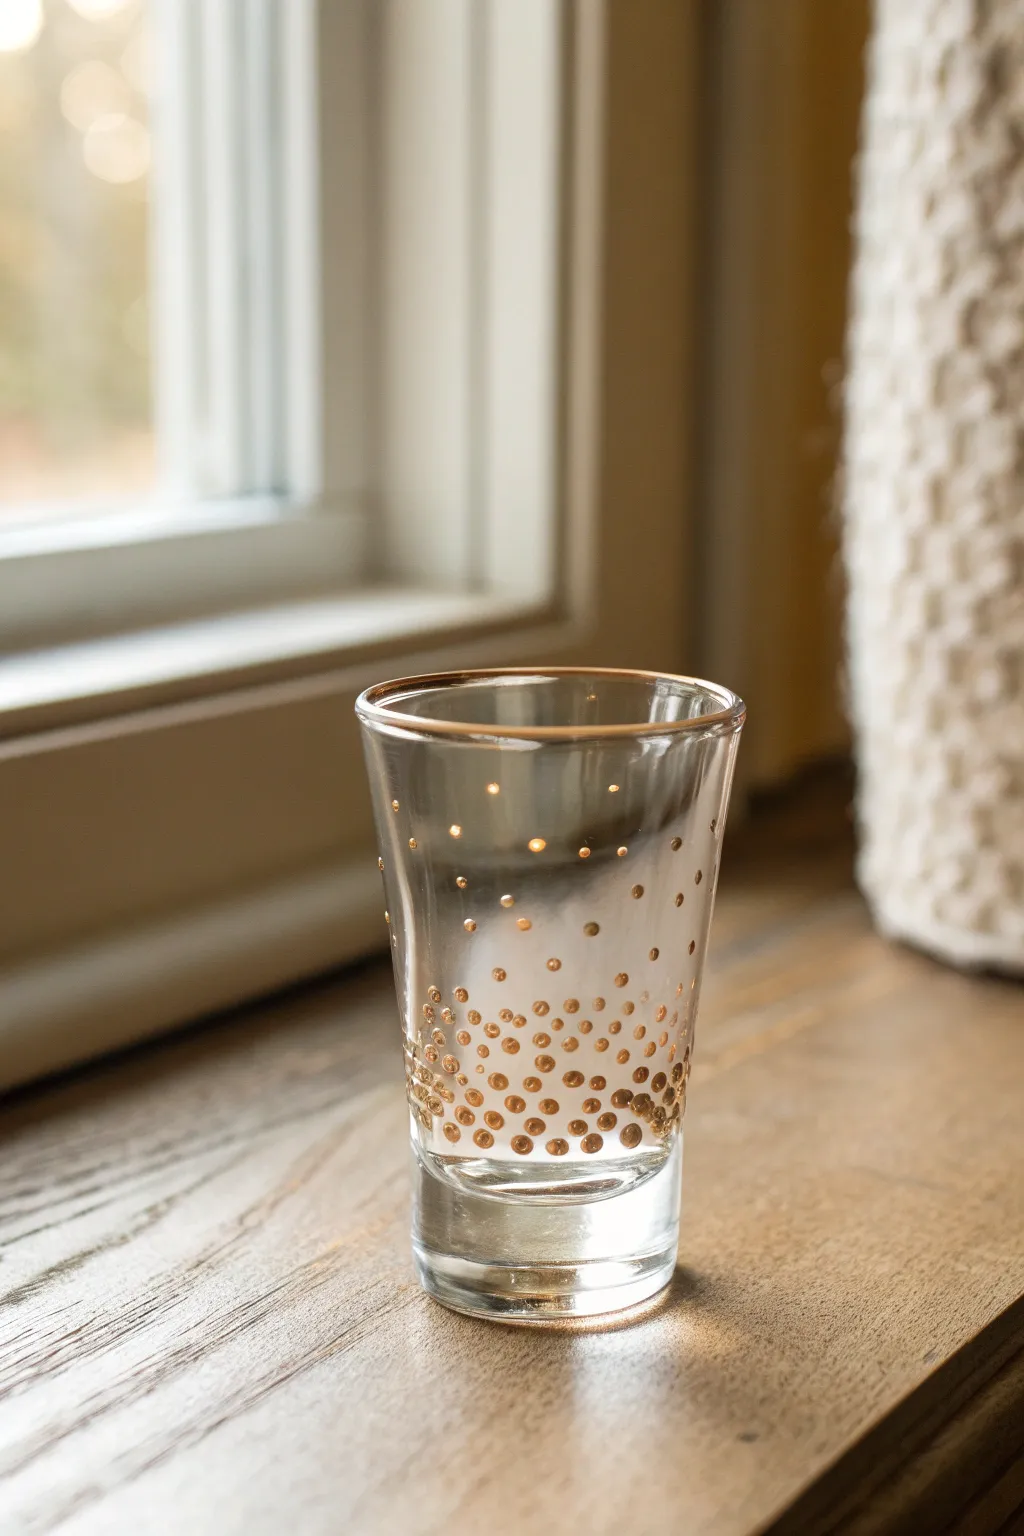
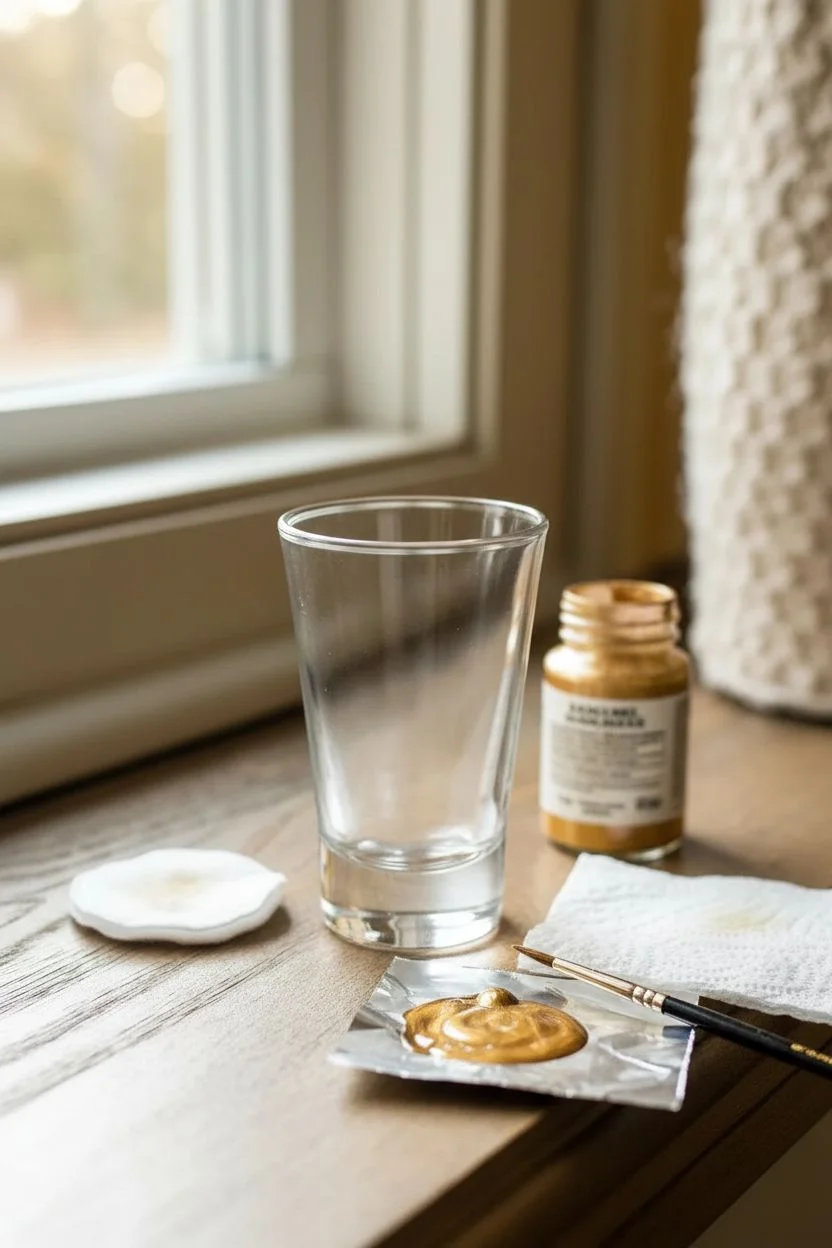
This elegant design mimics the effervescence of champagne with a gradient of golden dots rising from the base. It transforms a simple clear shot glass into a celebratory piece perfect for New Year’s Eve or special toasts.
Step-by-Step Guide
Materials
- Clear shot glass
- Rubbing alcohol
- Cotton pads or paper towel
- Gold metallic enamel paint (glass-safe)
- Fine liner paintbrush or detail brush
- Toothpicks (optional for tiny dots)
- Baking sheet
- Oven (for curing)
Step 1: Preparation
-
Clean surface:
Before you begin painting, it is crucial to remove any oils or fingerprints from the glass. Wipe the entire exterior surface of the shot glass thoroughly with rubbing alcohol and a cotton pad. -
Dry completely:
Allow the alcohol to air dry completely for a moment. Avoid touching the area you plan to paint with your bare hands, as skin oils can prevent the paint from adhering properly. -
Prepare paint:
Shake your metallic gold enamel paint well. Squeeze a small amount onto a palette or a piece of foil. If the paint feels too thick, check the manufacturer’s instructions for thinning, though usually, straight from the bottle works best for dots.
Drip Prevention
If your gold dots look like they verify dripping or running, your paint is too thick or you’ve overloaded the tool. Use a toothpick to lift excess paint off the glass before it dries.
Step 2: Painting the Gold Rim
-
Load the brush:
Dip your fine liner brush into the gold paint. You want enough paint to flow smoothly but not so much that it drips. -
Steady the glass:
Place the shot glass upside down on a flat surface if that helps you steady your hand, or hold it comfortably. I find resting my pinky finger on the glass helps stabilize the brush. -
Paint the rim:
Carefully run the brush along the very top edge of the glass rim. Apply a continuous line of gold. Don’t worry if it’s not perfectly even on the first pass; you can touch it up. -
Refine the edge:
Go over the rim again to ensure full coverage. Keep the paint purely on the outside edge or the top lip, avoiding the area where lips directly touch the inside if possible, although glass enamels are generally safe once cured.
Add Some Dimension
Mix a tiny drop of white pearl paint with your gold for half the dots. This subtle color variation adds depth and makes the ‘bubbles’ look like they are catching different light.
Step 3: Creating the Dot Gradient
-
Start at the base:
Begin dipping the handle end of your paintbrush or a large dotting tool into the gold paint. Apply a dense collection of larger dots around the very bottom third of the glass. -
Pack them tight:
In this lower section, the dots should be close together, almost touching, creating a solid ‘heavy’ look at the base. This concentration grounds the design. -
Move upward:
As you move up past the bottom third, start spacing the dots out slightly more. Continue using the larger dotting tool or brush handle for consistency in size for now. -
Transition to medium dots:
Clean your tool or switch to a slightly smaller brush tip. Add medium-sized dots in the middle section of the glass, intermingling them with the upper edge of the heavy base layer. -
Create the fade:
As you reach the upper half of the glass, make the dots significantly sparser. Imagine bubbles floating up and separating from each other. -
Switch to tiny dots:
For the most delicate bubbles near the top, switch to a toothpick or a very fine brush tip. Dip it lightly in paint and add tiny specks. -
Final scattering:
Place these tiniest dots randomly near the top third, just below the gold rim. They should be very spread out, leaving plenty of negative space to enhance the ‘rising bubble’ effect. -
Review spacing:
Take a step back and look at the gradient. Ensure the transition from heavy dots at the bottom to sparse dots at the top looks smooth and organic, not like distinct bands of stripes.
Step 4: Curing
-
Dry time:
Let the paint dry to the touch for at least one hour. Consult your specific paint bottle, as some enamels require 24 hours of air drying before baking. -
Load the oven:
Place the shot glass on a baking sheet and put it into a cold oven. Do not preheat the oven, as the sudden temperature change can crack the glass. -
Bake:
Turn the oven on to 350°F (or the temperature specified by your paint brand) and set a timer for 30 minutes. The timer starts once the oven reaches temperature. -
Cool down:
Once the time is up, turn the oven off and open the door slightly. Leave the glass inside to cool down completely along with the oven before removing it.
Now you have a shimmering piece of glassware ready to celebrate your next special occasion
BRUSH GUIDE
The Right Brush for Every Stroke
From clean lines to bold texture — master brush choice, stroke control, and essential techniques.
Explore the Full Guide
Dainty Wildflower Stems Up the Side
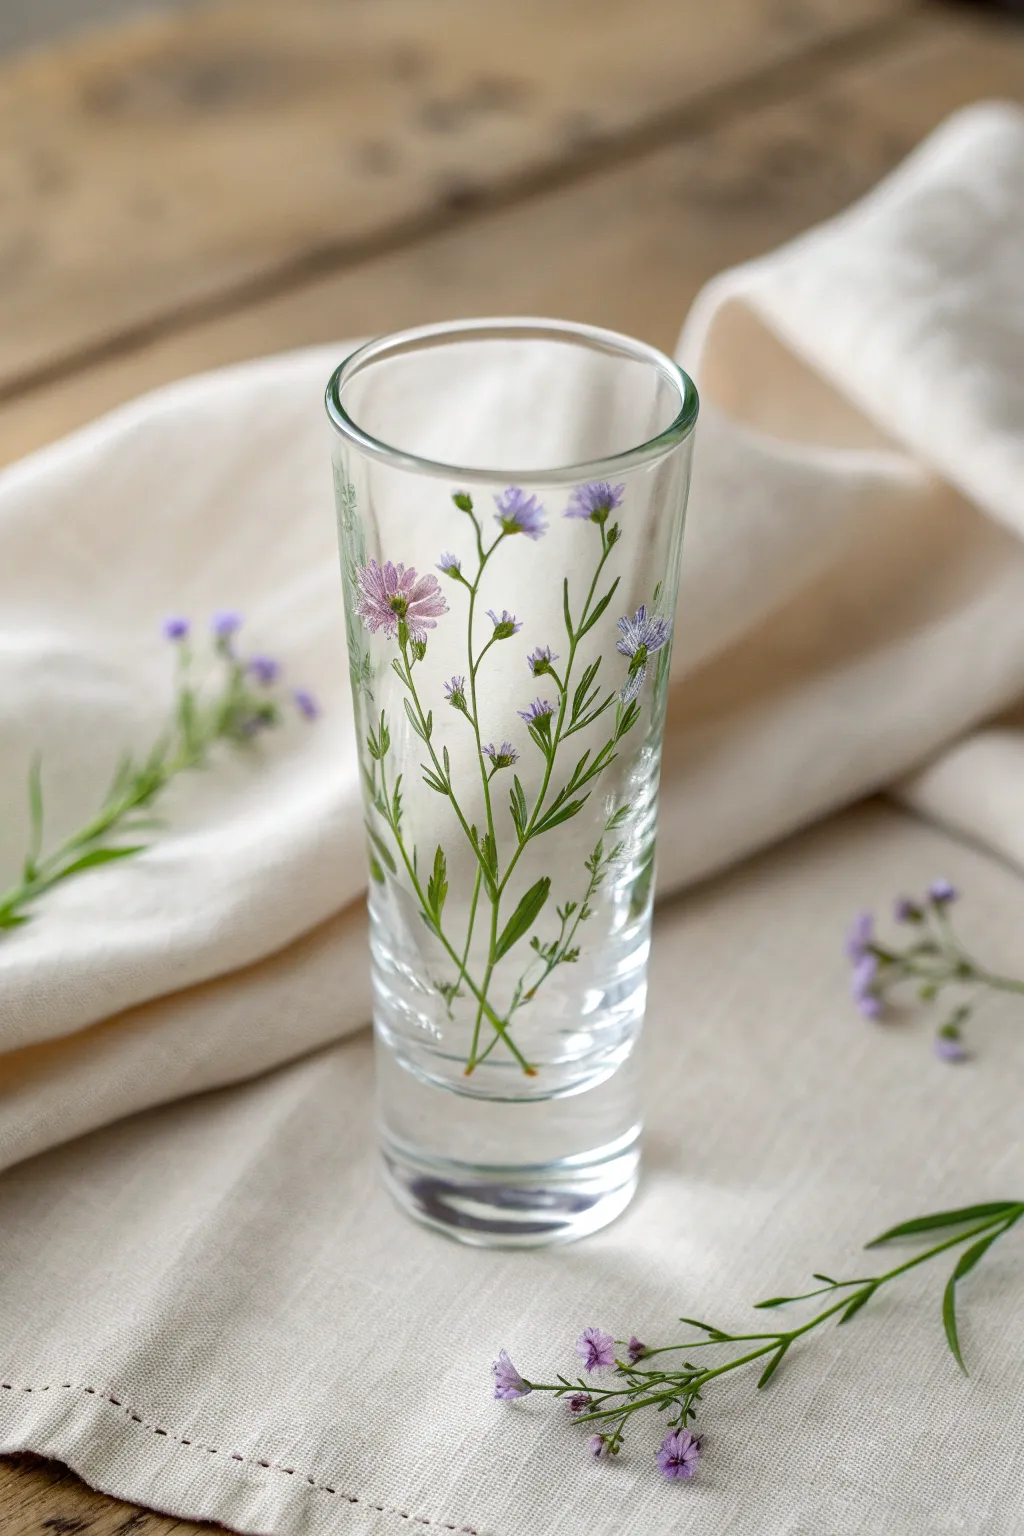
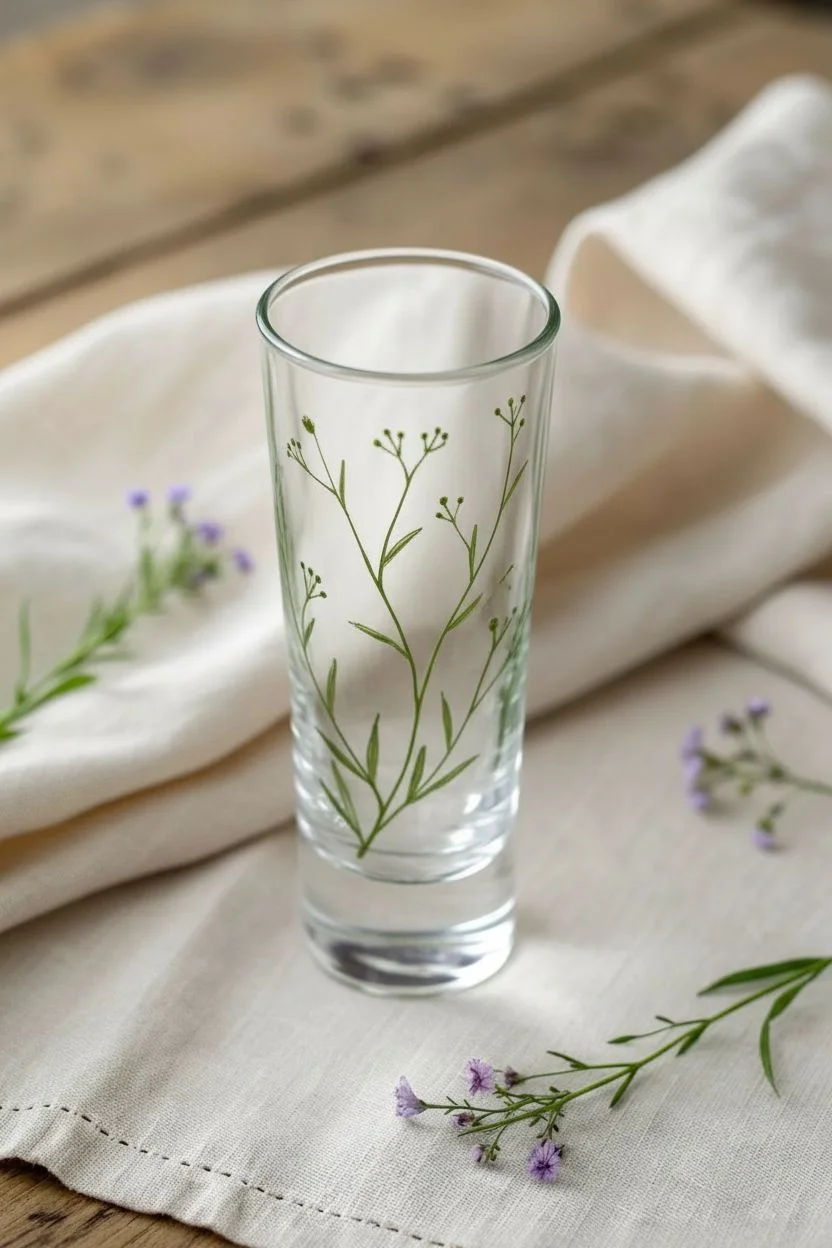
Capture the fleeting beauty of a wildflower meadow with this delicate design that climbs gracefully up a standard shot glass. Using fine liner work and soft, gentle hues, you’ll create dainty blooms that look almost pressed against the glass.
Step-by-Step Tutorial
Materials
- Tall, clear shot glass (shorter ones work, but tall gives more room for stems)
- Rubbing alcohol and cotton pad
- Enamel glass paints (gloss or frosted finish)
- Colors: Sap Green, Olive Green, Lavender, Periwinkle Blue, White, soft Yellow
- Fine liner brush (size 00 or 000)
- Small round brush (size 1)
- Paper palette or mixing plate
- Oven for curing (optional, depends on paint brand)
Step 1: Preparation & Stem Structure
-
Clean surface:
Before dipping your brush, thoroughly wipe the exterior of the shot glass with rubbing alcohol on a cotton pad. This removes invisible oils from your fingers that could cause the paint to peel later. -
Palette setup:
Mix a tiny amount of Sap Green with a dot of Olive Green on your palette to get a natural, organic stem color. I find that pure tube green often looks too artificial, so blending creates depth. -
Anchor stems:
Using your finest liner brush (000), paint the first main stem starting about 1/4 inch from the very bottom edge of the glass. Pull the stroke upward in a slightly wavy, organic line, stopping about an inch from the rim. -
Add variance:
Paint two or three additional main stems at varying heights. Ensure they crisscross or lean away from each other slightly to mimic how wildflowers actually grow in a field. -
Branching out:
From the main vertical lines, add tiny, hairline offshoots. These should be extremely thin and angled upward at about 45 degrees, ready to hold buds or leaves. -
Initial leaves:
Using the same green mix, press the belly of your liner brush gently against the glass along the lower stems to create narrow, lance-shaped leaves. Lift the brush quickly at the end to create a sharp point.
Uneven Lines?
If your stems look shaky or too thick, wait for the paint to dry slightly, then use a wooden toothpick to gently scratch away the edges and refine the line into a perfect sliver
Step 2: Painting the Blooms
-
Mixing petal colors:
Prepare two main petal colors: a soft Lavender mixed with a touch of White for opacity, and a Periwinkle Blue for variety. -
Primary flowers:
Select a few tips on your tallest stems for the open blooms. Using the size 1 round brush, dab tiny, short strokes radiating outward from a central point. Keep the paint somewhat thin to maintain that delicate, translucent watercolor look. -
Layering petals:
Once the first layer of lavender petals is tacky but not fully dry, add a few smaller strokes of White on top of them to create highlights and dimension. -
Adding buds:
On the shorter stems or lower branches, paint small, closed tear-drop shapes in Periwinkle Blue to represent unflowered buds. -
Flower centers:
dip the very tip of your liner brush into the soft Yellow paint. Place a singular, tiny dot in the center of the open lavender flowers. For a realistic touch, add minuscule dots of green around the yellow center. -
Calyx detailing:
Where the flower heads meet the stems, paint a tiny green ‘cup’ (the calyx) holding the petals. This connects your purple blooms visually to the green structure.
Step 3: Finishing Touches
-
Green highlights:
Mix a dot of White into your leftover green mixture. Carefully add hairline highlights to one side of the thickest stems to make them look round rather than flat. -
Cleanup:
Check the rim of the glass. If any paint strayed too close to where lips will touch, use a damp cotton swab or toothpick to scrape it away for a clean 3/4-inch clearance. -
Air dry:
Allow the glass to sit undisturbed for at least 1 hour until the paint is dry to the touch, or 24 hours for a full cure before handling. -
Curing:
Follow your specific paint brand’s instructions for baking. Typically, this involves placing the glass in a cold oven, setting to 350°F, baking for 30 minutes, and letting it cool inside the oven.
Dew Drop Effect
Add tiny dots of clear gloss medium or transparent glass paint on a few leaves. Once dry, they will look like permanent morning dew drops catching the light
Now you have a stunning, nature-inspired vessel ready for your next gathering
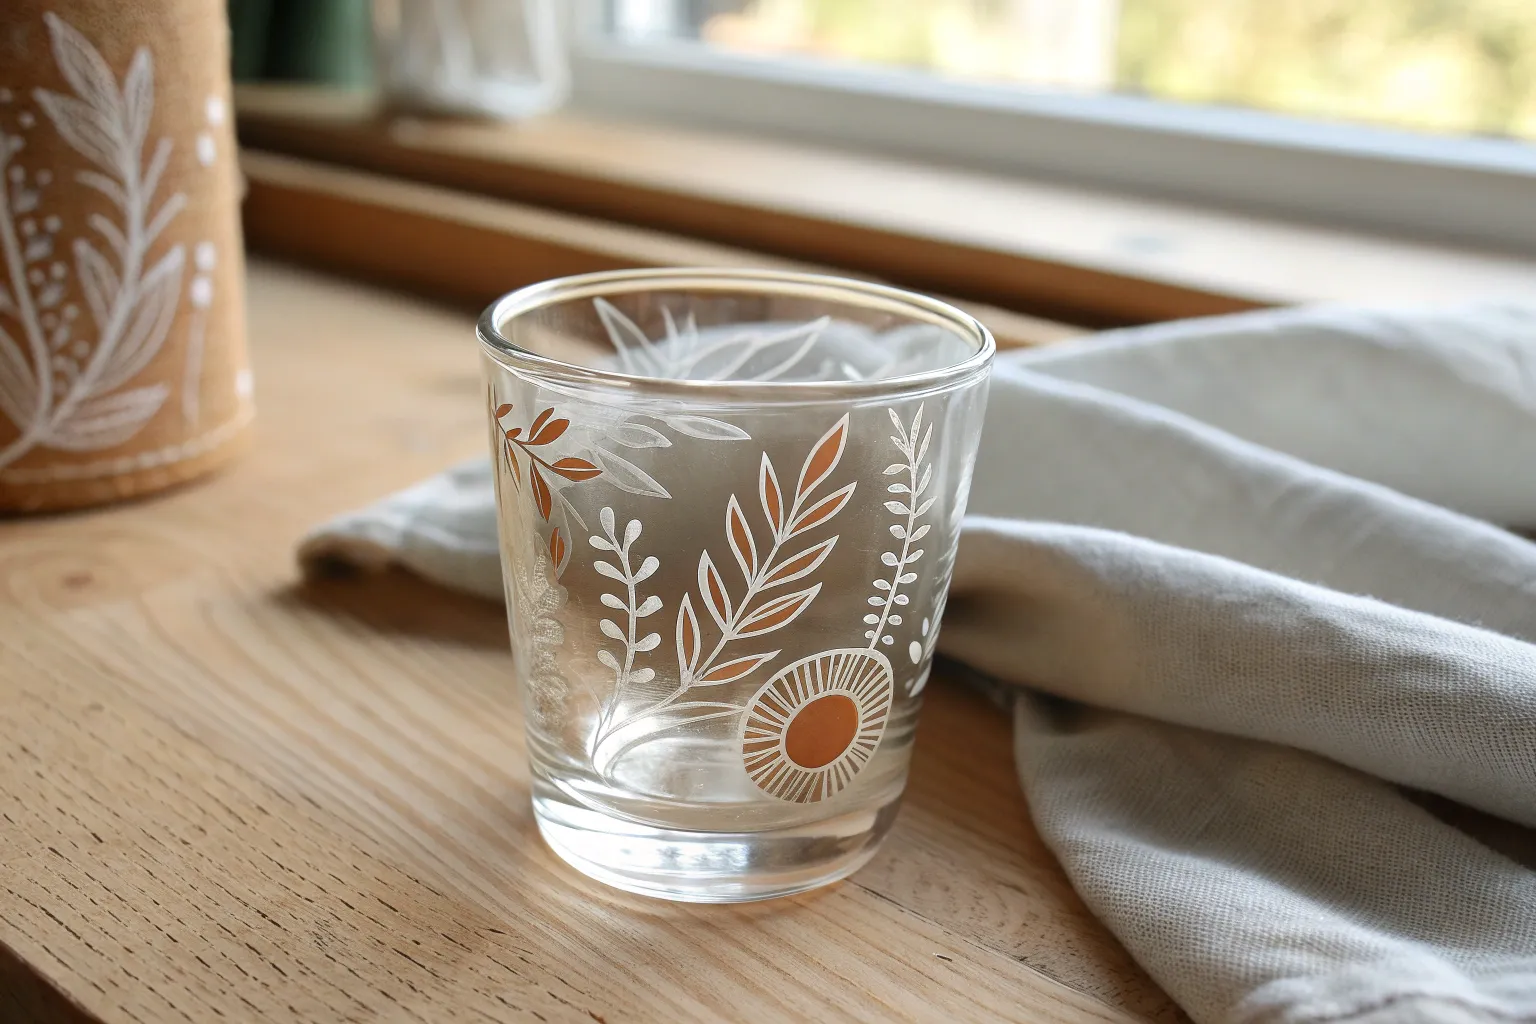
Bold Sunflower Face on a Tiny Canvas
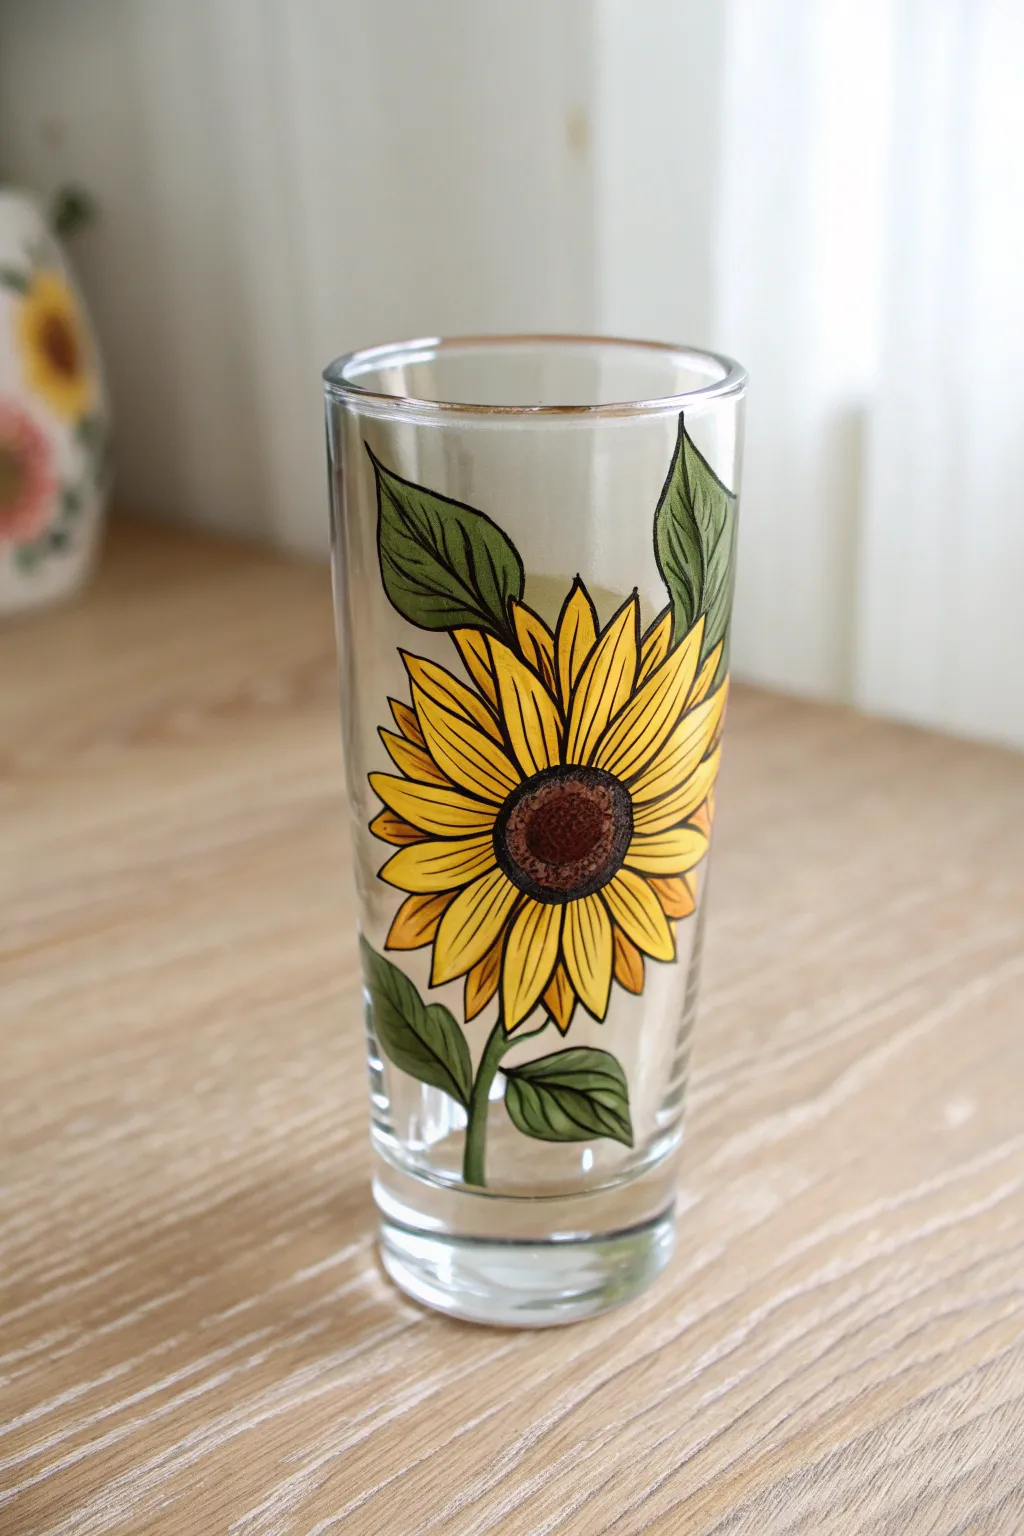
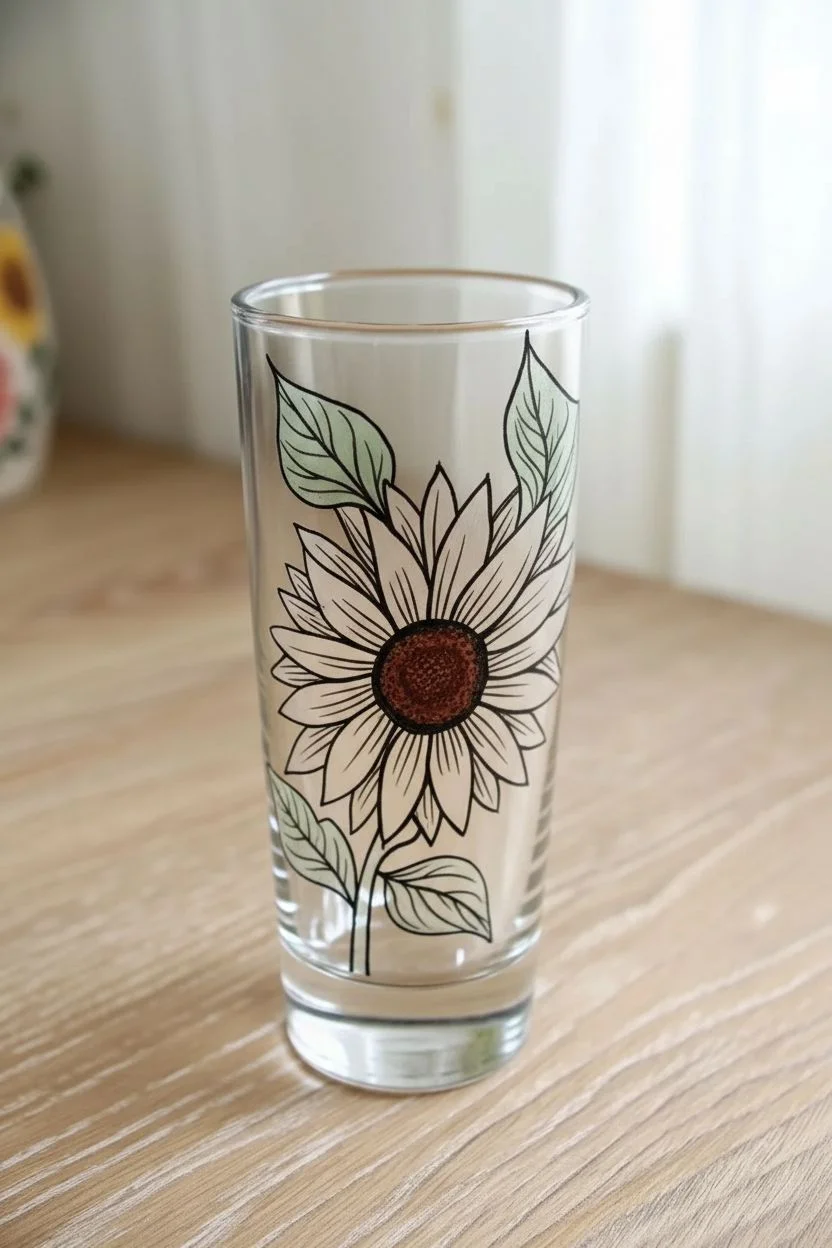
Brighten up your glassware collection with this radiant sunflower design that brings a touch of summer to every sip. The bold black outlines give it a crisp, illustrative quality, making the vibrant yellow petals pop beautifully against the clear glass.
How-To Guide
Materials
- Tall clear glass (shot glass or tumbler)
- Rubbing alcohol and cotton pad
- Glass enamel paints (bright yellow, golden yellow, dark brown, medium brown, sap green)
- Fine liner brush (size 00 or 000)
- Small round brush (size 2)
- Black glass liner paint (or oil-based paint marker for outlining)
- Paper palette or foil
- Oven (for curing, if paint requires)
Step 1: Preparation & Outline
-
Clean the surface:
Thoroughly wipe down the exterior of your glass with rubbing alcohol on a cotton pad. This removes invisible oils and fingerprints which are the enemy of paint adhesion. -
Sketch the center:
Using your black glass liner or paint marker, draw a medium-sized oval about two-thirds of the way up the glass. This will be the seed head of your sunflower. -
Draft the petals:
Around the central oval, draw pointed petal shapes radiating outward. Start with the ones in the front, making them slightly wider, and then fill in the gaps behind them with peeking tips of other petals. -
Add foliage:
Draw two large leaves near the top extending upwards, and two smaller leaves near the bottom stem area. Give them jagged, slightly serrated edges to mimic real sunflower leaves. -
Connect the stem:
Draw a sturdy stem line connecting the flower head down to the bottom leaves and continuing to the base of the glass. -
Add details:
Draw a central vein line down the middle of each leaf. Inside the petals, add quick, short lines near the base to suggest texture. Let this outline dry completely—usually at least an hour—before painting.
Paint Slipping?
If paint streaks or slides too much on the smooth glass, sponge it on lightly instead of brushing. This builds better tooth and opacity.
Step 2: Painting the Flower
-
Base coat the petals:
Dip your small round brush into the bright yellow glass paint. Fill in each petal carefully, trying to stay within your black black lines. The glass is slippery, so I find stippling (dabbing) sometimes works better than stroking. -
Shade the petals:
While the yellow is still slightly tacky or wet (depending on your paint type), add a tiny touch of golden yellow or light orange near the base of the petals where they meet the center. Blend it outward slightly for depth. -
Paint the center:
Fill the central oval with dark brown paint. You want this to look dense and solid. -
Texture the seeds:
Top the dark brown with tiny dots of medium brown or a lighter tan color using the very tip of your fine liner brush. Concentrate these dots in the very middle to make it look like a rounded seed head.
Step 3: Leaves & Finishing Touches
-
Leaf base color:
Clean your brush and switch to sap green. Fill in all the leaf shapes and the stem. The green can be somewhat translucent, which looks lovely on clear glass. -
Leaf shading:
If you want more dimensionality, mix a tiny bit of brown into your green and paint along the vein lines you drew earlier. -
Refine outlines:
Once all the color is dry, inspect your black outlines. If you painted over any lines significantly, you can carefully re-trace them with your liner or marker to crisp up the edges again. -
Cure the paint:
Follow the instructions on your specific bottle of glass paint. Most require air drying for 21 days or baking in a cool oven (place glass in cool oven, heat to 350°F, bake for 30 mins, cool in oven) to become dishwasher safe.
Add Little Friends
Paint a tiny ladybug on one of the leaves or a small bumblebee hovering near the petals for an extra dose of cuteness.
Once baked and cooled, your custom glassware is ready to hold your favorite drink in sunny style

PENCIL GUIDE
Understanding Pencil Grades from H to B
From first sketch to finished drawing — learn pencil grades, line control, and shading techniques.
Explore the Full Guide
Citrus Slices for a Fresh Bar Cart Vibe
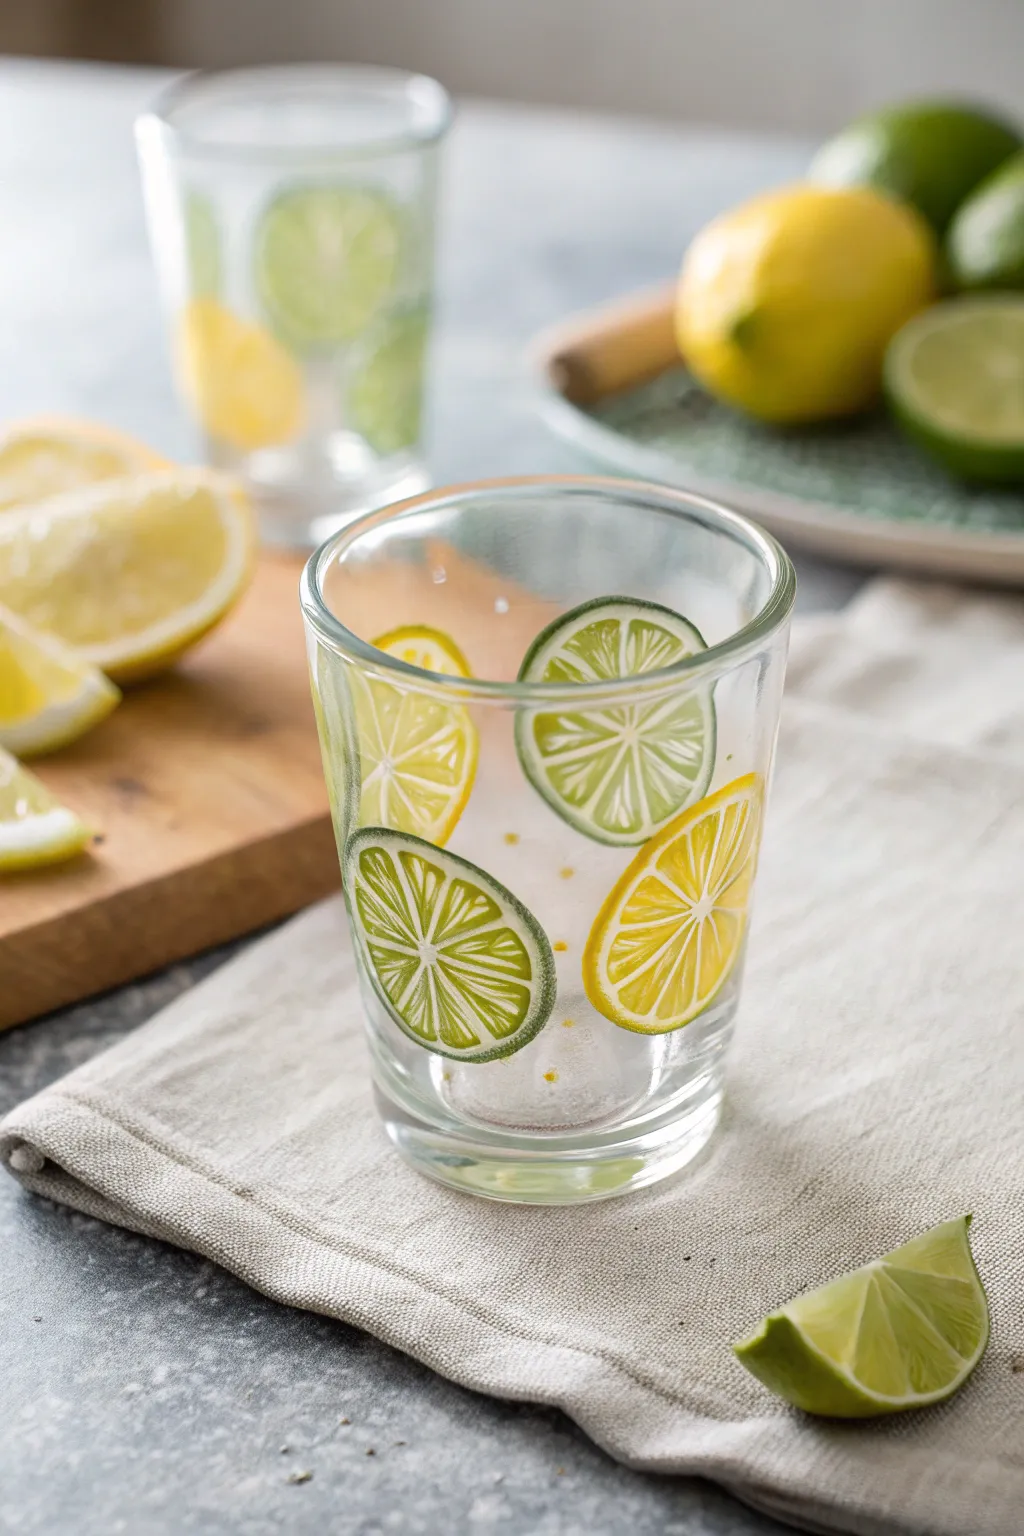
Brighten up your next happy hour with these refreshingly adorable painted tumblers featuring stylized lemon, lime, and orange slices. The translucent design mimics the juicy freshness of fruit floating in your drink, creating a perfect addition to any summer bar cart.
Step-by-Step Tutorial
Materials
- Clear glass tumblers or shot glasses
- Rubbing alcohol
- Cotton pads
- Enamel paint for glass (Citrus Yellow, Leaf Green, White)
- Small flat brush (size 2 or 4)
- Fine liner brush (size 00 or 0)
- Paint palette
- Oven (for curing)
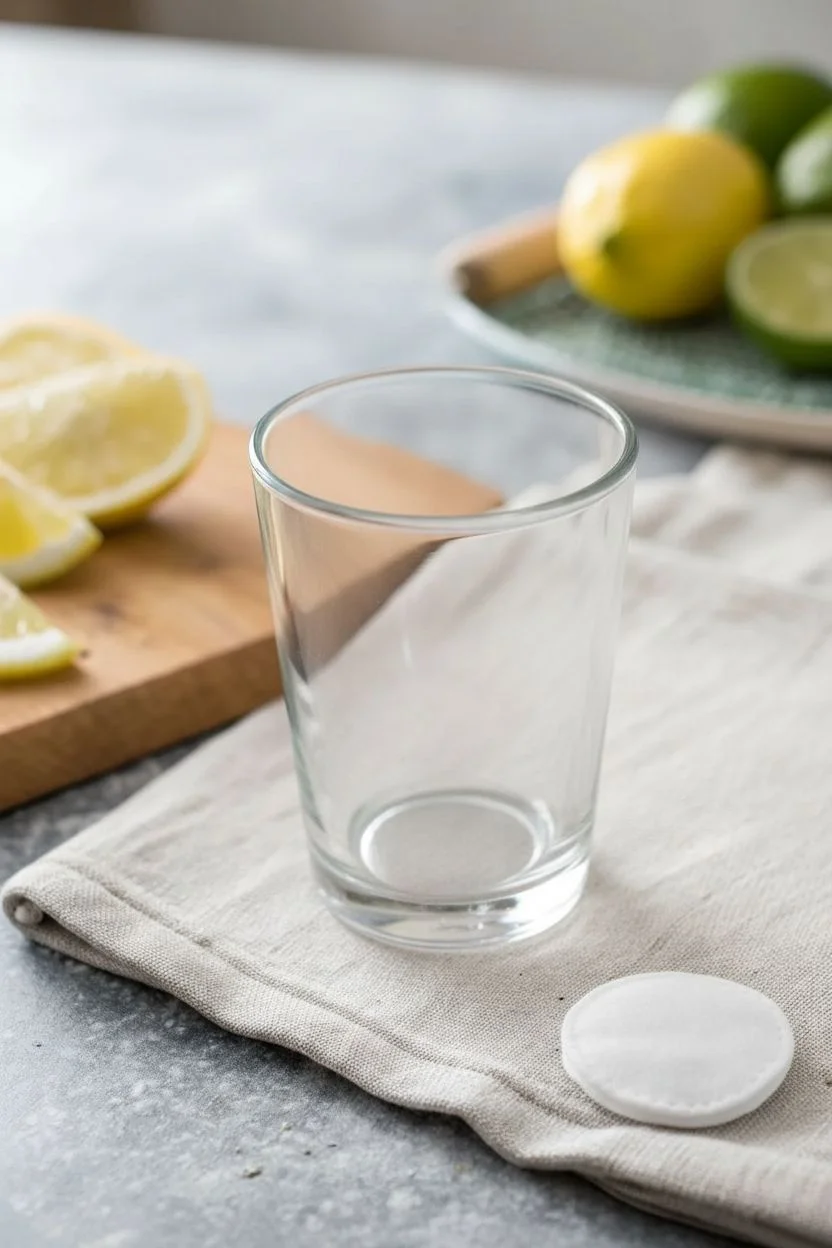
Step 1: Preparation
-
Clean the Glass:
Before dipping your brush into any paint, wipe down the entire exterior surface of your glass with rubbing alcohol and a cotton pad. This removes invisible oils or fingerprints that prevent enamel paint from adhering properly.
Step 2: Painting the Fruit Slices
-
Mix Your Base Colors:
Prepare a small amount of yellow and green enamel paint on your palette. If you want a more translucent, realistic look, you can mix in a tiny drop of glass medium or clear extender, though straight paint offers bolder color. -
Paint Yellow Circles:
Using your flat brush, paint simple circles randomly around the glass using the yellow paint. These don’t need to be perfectly round—natural fruit has slight variations. Aim for circles about the size of a quarter or half-dollar. -
Add Green Circles:
intersperse green circles among the yellow ones. Be sure to stagger their placement: put some near the rim and others closer to the base. Leave enough negative space between them so the glass doesn’t look cluttered. -
Partial Slices:
For a dynamic composition, paint a few half-circles or partial shapes near the very bottom or top edge, as if the fruit slice is going ‘off-screen.’ -
Let the Base Dry:
Allow these base color circles to dry completely. Enamel paint can be tacky, so I recommend waiting at least one hour before adding the detailed white lines on top.
Paint Slipping?
If paint slides around or separates on the glass, the surface is likely too slick or oily. Wipe it again with rubbing alcohol and let it air dry completely before reapplying paint.
Step 3: Adding Details
-
Outline the Rind:
Switch to your fine liner brush and white enamel paint. Carefully paint a thin ring just inside the outer edge of each colored circle. This creates the ‘pith’ layer between the peel and the fruit flesh. -
Find the Center:
Place a tiny dot of white paint in the absolute center of a fruit circle to act as your guide for the segments. -
Create Segments:
Paint thin, straight lines radiating from the center dot out to the white ring you just painted. Imagine cutting a pizza; usually, 6 to 8 lines work best for this scale. -
Soften the Segments:
The segments shouldn’t be sharp triangles. Use the liner brush to gently round off the inner corners of each wedge near the rind, giving them that characteristic teardrop shape found in real citrus. -
Refine the Lines:
Go back over your white lines to ensure they are opaque. If the color underneath is showing through too much, a second thin coat of white adds crispness. -
Repeat for All Fruits:
Continue this detailing process for every yellow and green circle on the glass. It requires a steady hand, so take breaks if you need to reset your grip. -
Optional Seeds:
If you want extra detail, add tiny, almost invisible yellow or white specks between the fruit slices to mimic stray seeds or pulp floating in the liquid.
Pro Tip: Translucent Layers
For a juicy look, mix a tiny drop of clear gloss medium into your colored paints. It makes the fruit look transparent and realistic when light hits the glass.
Step 4: Curing
-
Air Dry First:
Let the finished painting air dry for at least 24 hours. Even if it feels dry to the touch, the layers underneath need to harden before baking. -
Cold Oven Method:
Place your glasses into a cold oven. Set the temperature to 350°F (175°C) or follow the specific instructions on your paint bottle. -
Bake:
Once the oven reaches temperature, bake for 30 minutes. The gradual heat prevents the glass from cracking. -
Cool Down:
Turn the oven off and leave the door closed. Let the glasses cool down completely inside the oven before removing them.
Once cooled, your custom citrus glassware is ready to be filled with lemonade or your favorite cocktail for a sunny celebration
Strawberries and Tiny Leaves Wraparound
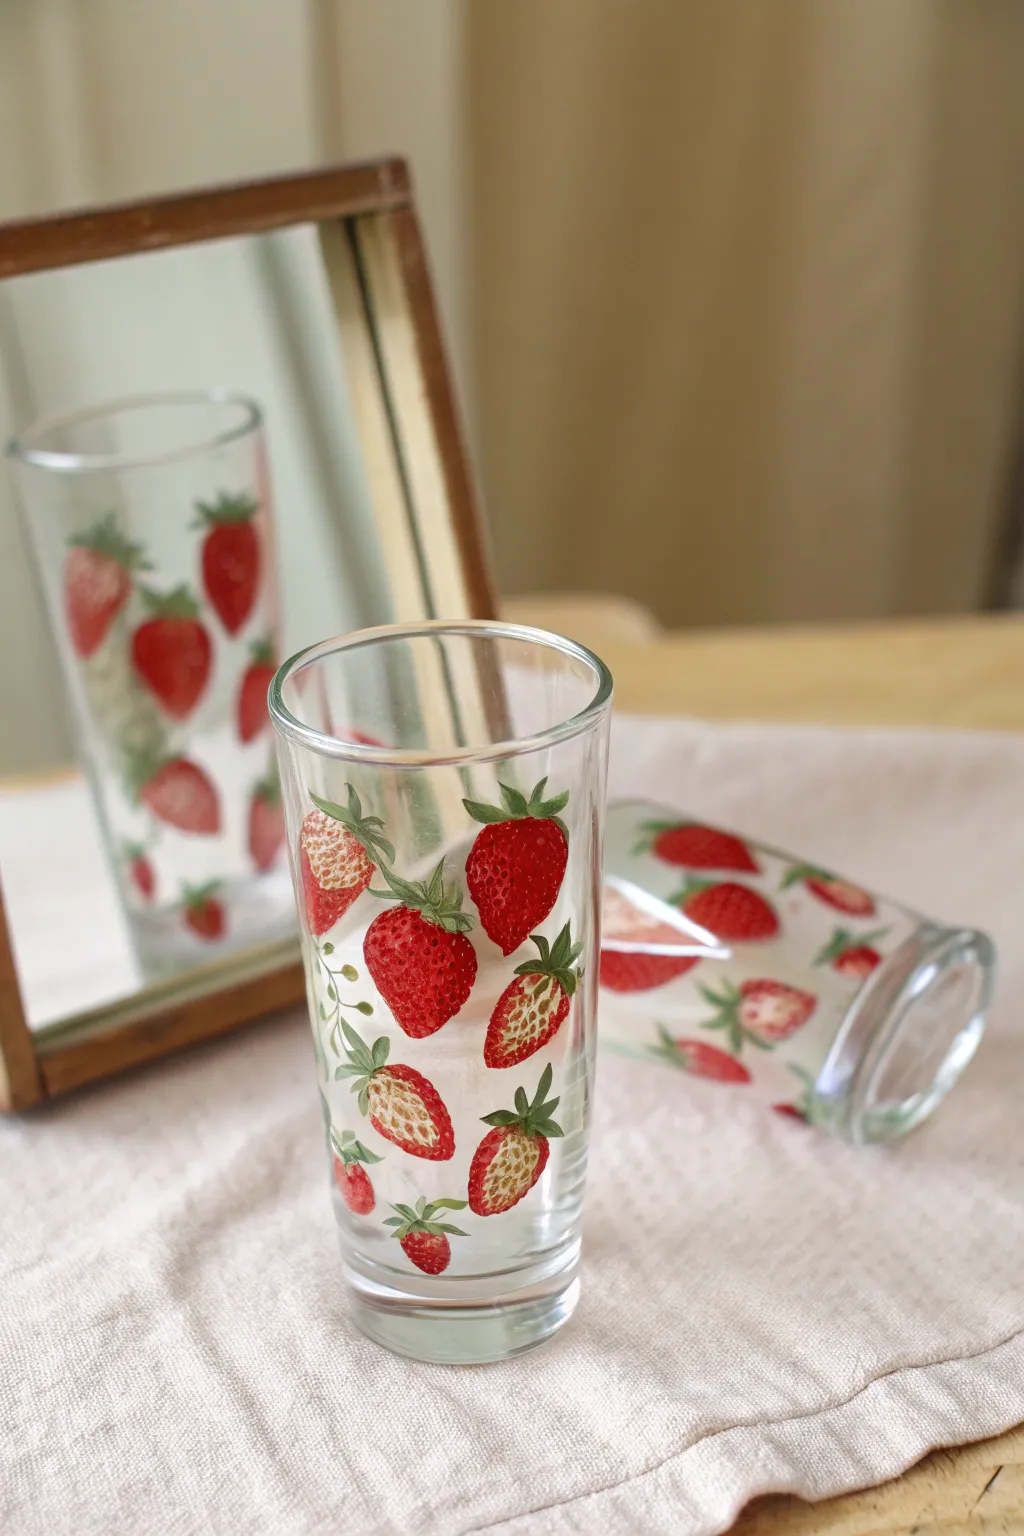
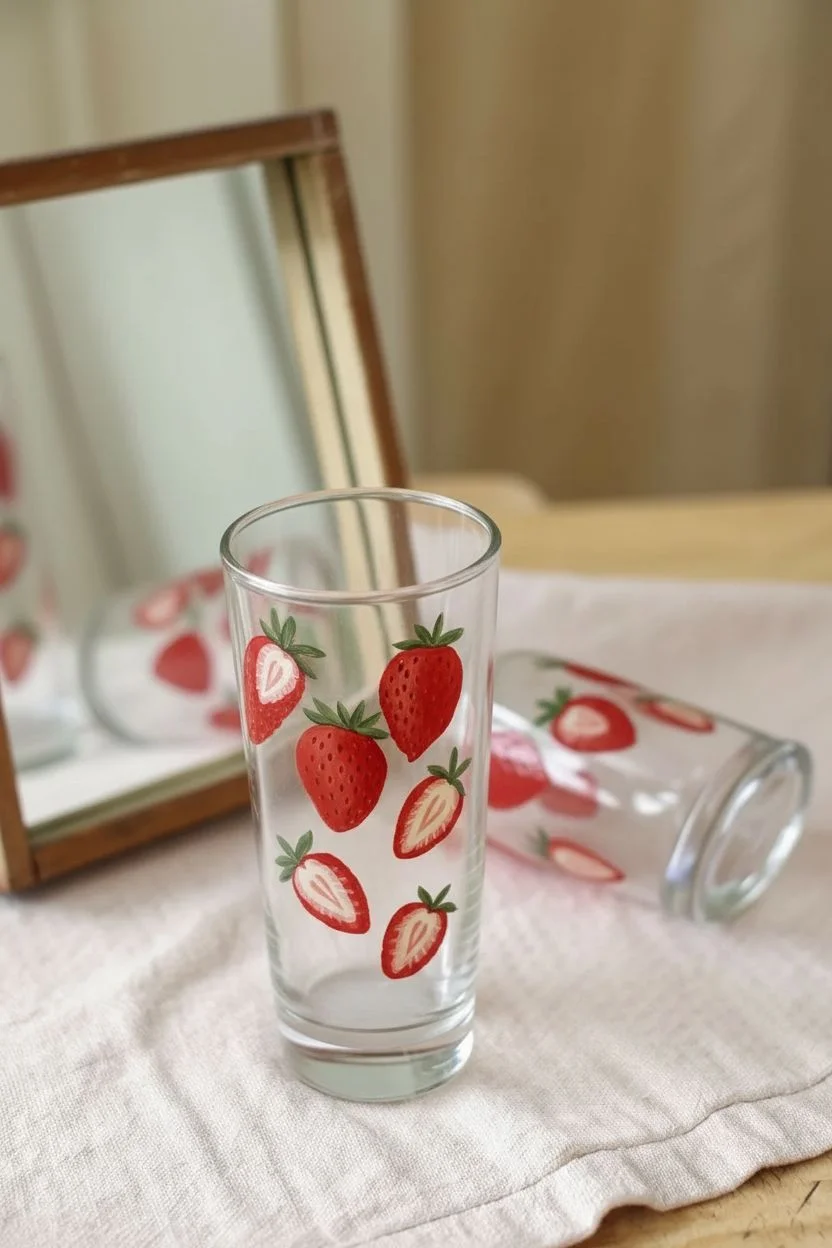
Bring the charm of a summer garden to your glassware with these delightful hand-painted strawberries. The design features a mix of ripe red berries and halved fruit, creating a playful and organic wraparound pattern that looks fresh from the vine.
Step-by-Step Guide
Materials
- Clear glass tumblers or highball glasses
- Rubbing alcohol and cotton pads
- Enamel glass paint (opaque red, white, yellow, green)
- Fine detail paintbrush (size 0 or 00)
- Medium round paintbrush (size 2 or 4)
- Small painting palette or ceramic plate
- Oven (for curing, optional depending on paint brand)
Step 1: Preparation & Base Layers
-
Clean surface:
Before you begin, wipe down the exterior of your glasses thoroughly with rubbing alcohol and a cotton pad. This removes any oils or fingerprints that could prevent the paint from adhering properly. -
Plan placement:
Visualise a scattered pattern where some strawberries tilt left and others tilt right. You want a mix of whole berries and halved ones to recreate the dynamic look in the photo. -
Paint whole berry shapes:
Using your medium round brush and opaque red paint, create soft triangular shapes with rounded tops. Fill them in completely, ensuring the paint is thick enough to be opaque but not so thick that it drips. -
Paint berry halves:
For the sliced strawberries, mix a tiny bit of yellow into your red to warming it up, or stick with pure red for the outer skin. Paint the outline of the berry shape first. -
Fill the centers:
While the red outline is wet or slightly tacky, clean your brush and pick up white paint mixed with a mere spec of yellow (cream). Fill the inside of your ‘halved’ berries, carefully blending the edge slightly into the red border for a natural transition. -
First drying time:
Allow these base shapes to dry for at least 15-20 minutes. The paint needs to be dry to the touch before you add the seeds on top.
Step 2: Details & Seeds
-
Mix seed colour:
Combine a small amount of yellow paint with a touch of red to create an orange-gold hue suitable for the seeds. -
Dot the whole berries:
Using your finest detail brush, gently dab tiny, teardrop-shaped seeds onto the red berries. Distribute them evenly but randomly, avoiding rigid rows. -
Texture the cut berries:
For the creamy white centers, switch to a darker yellow-brown mix. Paint a small central vein and radiate tiny dashes outward to mimic the interior texture of a real strawberry. -
Highlighting:
Wash your detail brush and pick up pure white. I like to add a tiny, curved highlight line on the upper shoulder of the red whole berries to make them look glossy and plump.
Uneven Coverage?
If the red paint looks streaks or sheer after the first coat dries, don’t overwork it. Let it dry completely, then gently apply a second thin layer for solid opacity.
Step 3: Leaves & Finishing
-
Mix leaf green:
Prepare a forest green shade on your palette. If your green is too bright, tone it down with a tiny touch of red. -
Add the calyx:
Paint the leafy tops (calyx) on every strawberry. Start from the center top of the berry and flick your brush outward to create 4-5 small, pointy leaves. -
Connect with stems:
Where appropriate, extend long, thin stems from the leaves. Let some stems intersect or curve elegantly down the glass. -
Add tiny leaves:
Along the stems or in empty negative spaces, paint miniature individual leaves to fill out the pattern without overcrowding it. -
Clean up:
If you made any smudges, use a cotton bud dipped in alcohol or water to gently erase them before the paint sets fully. -
Cure the glass:
Follow the instructions on your specific bottle of enamel paint. Most require air drying for 21 days or baking in a cool oven that heats up to 350°F (175°C) for 30 minutes to become dishwasher safe.
Gilded Berries
For a glamorous twist, use metallic gold paint for the seeds instead of yellow. The subtle shimmer catches the light beautifully when the glass is filled.
Enjoy sipping your favourite cold drinks from your new custom-painted garden glassware


Minimal Mountain Silhouette Band
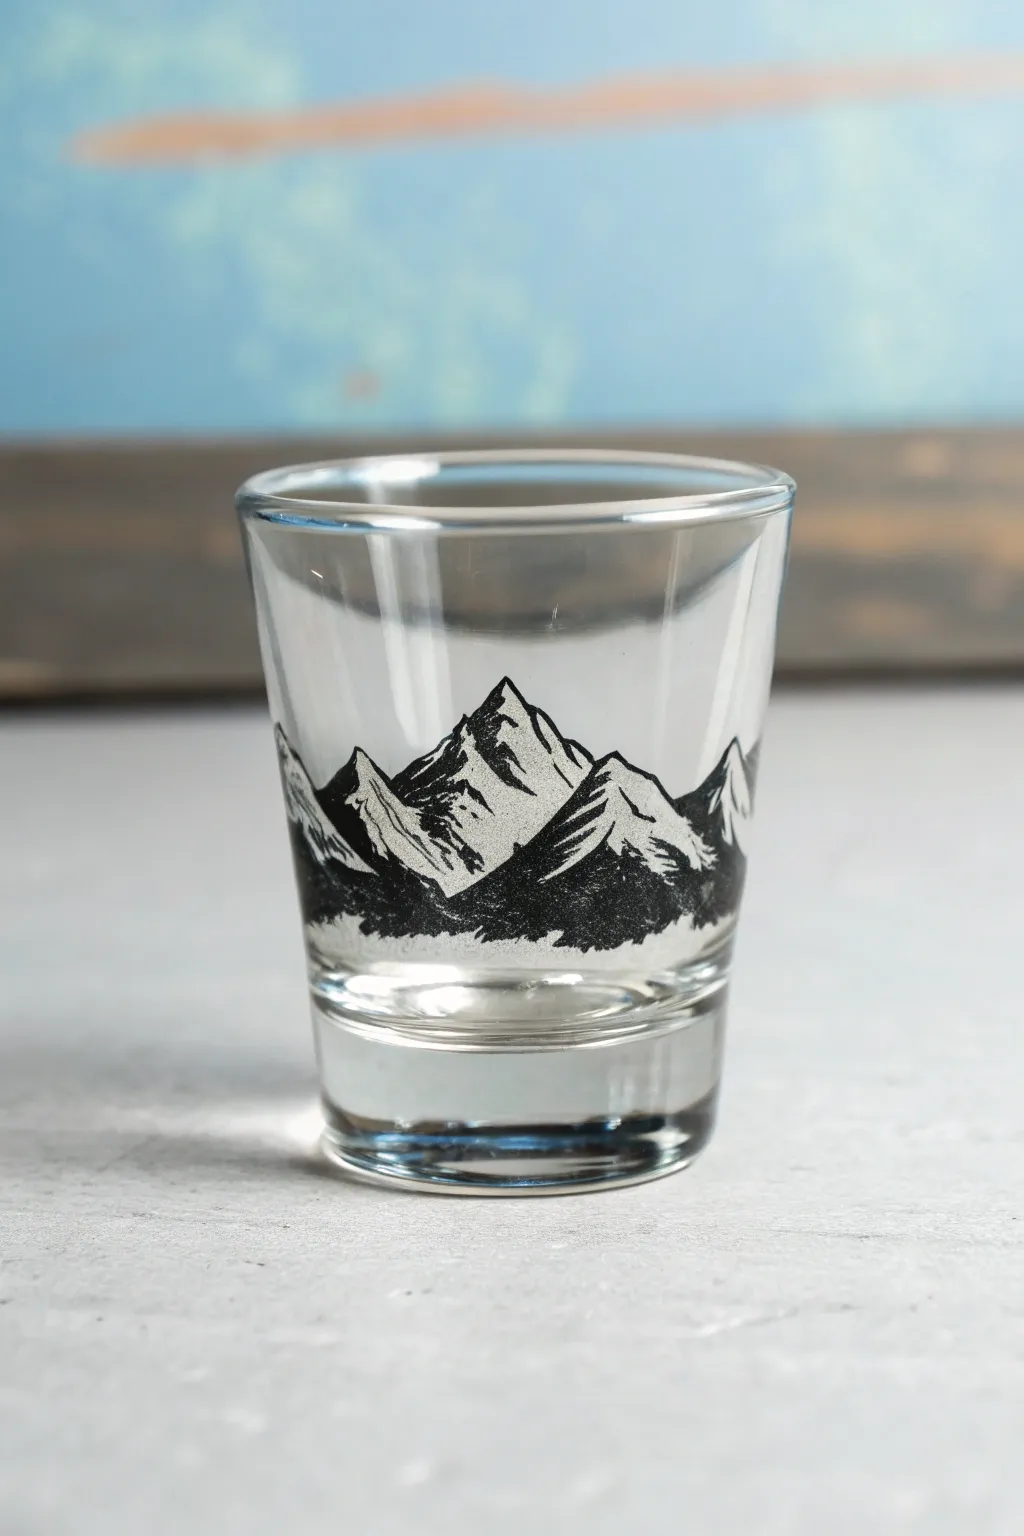
Capture the spirit of the outdoors with this stark, elegant mountain silhouette that wraps seamlessly around your glass. The detailed, sketchy style mimics the look of a vintage engraving or ink drawing, making it a sophisticated addition to your barware collection.
Detailed Instructions
Materials
- Glass shot glass
- Rubbing alcohol
- Cotton pads
- Black enamel paint for glass (or oil-based paint marker)
- Fine point detail brush (00 or 000 size)
- Masking tape or painter’s tape
- Pencil and paper (for sketching)
- Black permanent marker (fine tip)
- Craft knife (optional)
Step 1: Preparation
-
Clean surface:
Begin by thoroughly cleaning the exterior of the shot glass with rubbing alcohol and a cotton pad. This step is crucial because even invisible oils from your fingers can prevent the paint from adhering properly. -
Dry completely:
Allow the alcohol to evaporate completely before you touch the glass again. Handle the glass by the rim or inside to keep the painting area pristine. -
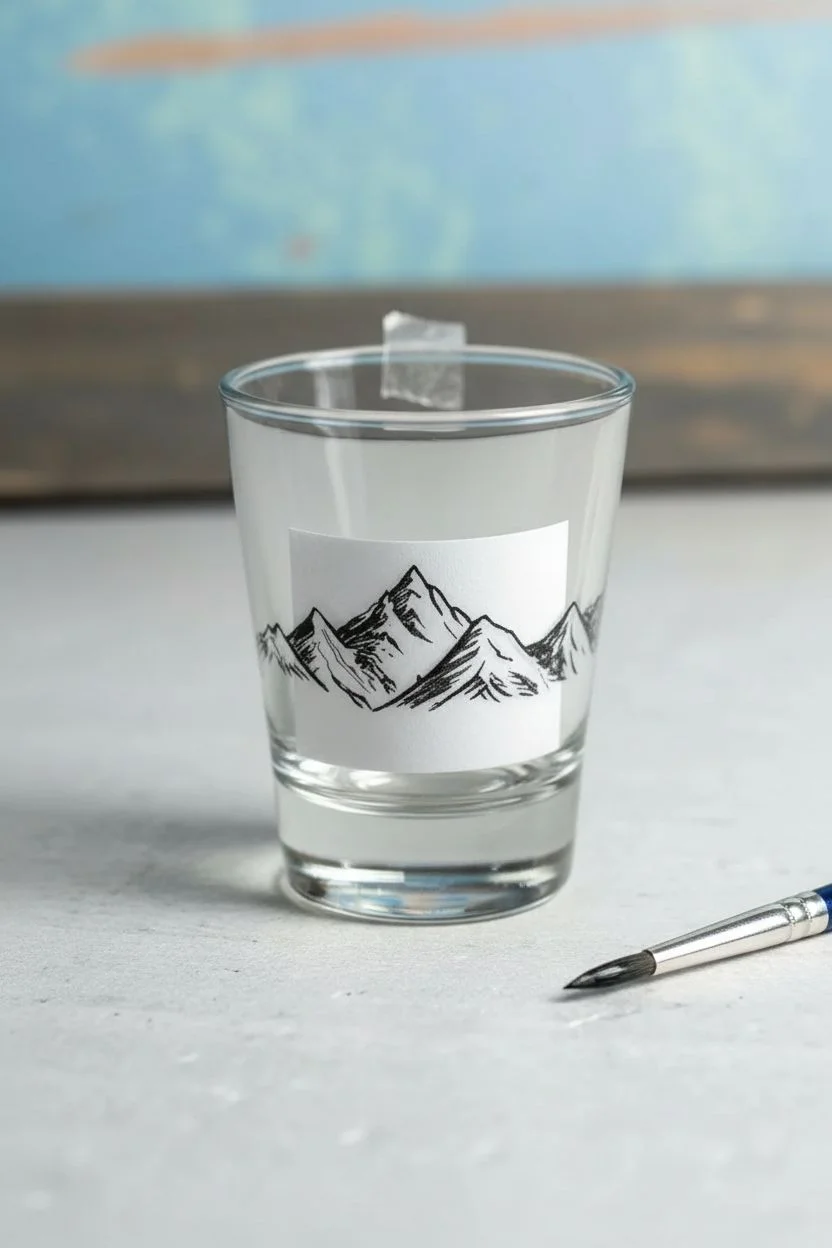
Sketch the band:
On a small strip of paper cut to the height of your shot glass, sketch out a continuous mountain range. Ensure the ends of your drawing match up so the landscape flows seamlessly when wrapped like a cylinder. -
Transfer the guide:
Place your sketch inside the shot glass, pressing it against the glass wall. Secure it with a small piece of tape. This internal paper will serve as your tracing guide while you paint on the outside.
Uneven Lines?
If your brushstrokes feel too shaky, switch to a fine-point oil-based paint marker. It offers more control than a brush for beginners while still providing the durability of paint.
Step 2: Painting the Peaks
-
Establish the outline:
Using your fine detail brush and black enamel paint, carefully trace the highest peaks of the mountains along the top edge of your guide. Keep your hand steady and use the very tip of the brush for sharp, jagged summits. -
Fill the base:
Paint a solid black band at the bottom of the mountain range to anchor your design. This doesn’t need to be perfect yet, but it creates the dark foundation for the shadows. -
Create the shadows:
Visualize a light source coming from one side (usually the top right or left). Paint heavy, solid black shadows on the side of the mountains facing away from your imagined light. This creates the primary triangular shapes. -
Feathering technique:
Now for the texture. Instead of filling spaces solidly, use quick, short flicks of your brush to drag paint from the dark shadow areas into the lighter areas. This ‘feathering’ mimics the rocky, engraved texture seen in the photo. -
Detailing the ridges:
Add thin, erratic lines running down the spine of the mountains to define ridges. These lines should be broken and slightly uneven to look organic rather than geometric.
Step 3: Refining and Sealing
-
Add high contrast:
Leave areas of clear glass completely untouched on the ‘lit’ side of the peaks. The contrast between the opaque black paint and the transparent glass is what gives this design its dimensional pop. -
Check connectivity:
Rotate the glass to ensure your mountain range connects seamlessly where your pattern ends meet. You may need to paint an extra small peak or valley to bridge the gap naturally. -
Clean up edges:
If any lines went astray or became too thick, use a toothpick or a craft knife to gently scrape away the excess paint while it is tacky but not fully hardened. -
Initial drying:
Carefully remove the paper guide from inside the glass. I usually let the paint sit for at least an hour to ensure the surface skin is dry before doing any final checks. -
Cure the paint:
Follow the specific instructions on your enamel paint bottle for curing. Most require baking in a cold oven (usually heating to 350°F and baking for 30 minutes) to make the design dishwasher safe. -
Cool down:
After baking, turn the oven off and let the glass cool down completely inside the oven with the door closed. Removing it too quickly can cause the glass to crack from thermal shock.
Frosty Peaks
Apply a layer of frosted glass spray or etching cream before painting the black mountains. This gives the ‘sky’ and snow caps a realistic matte, icy texture.
Now you have a rugged, artistic vessel ready for your next toast.
Beach Souvenir Scene With a Painted Horizon

Transport yourself to a permanent vacation with this breezy, palm-adorned shot glass featuring a serene blue gradient and classic black silhouettes. The semi-translucent water effect creates a lovely depth against the clear glass, making it a perfect functional souvenir or gift.
Step-by-Step Guide
Materials
- Shot glass (standard clear glass)
- Rubbing alcohol and cotton pad
- Enamel glass paints (Teal, Light Blue, White, Black)
- Small flat brush (size 2 or 4)
- Fine liner brush (size 0 or 00)
- Palette or small dish
- Oven (for curing, unless using air-dry paints)
Step 1: Preparation & Background
-
Clean the Surface:
Begin by wiping the exterior of the shot glass thoroughly with rubbing alcohol on a cotton pad. This removes oils and fingerprints that prevent paint adhesion. -
Establish the Horizon:
Imagine a line about one-third of the way up from the bottom. Using your flat brush, paint a horizontal band of teal enamel paint here to serve as the deep water line. -
Blend the Sky:
While the teal is still wet, add a stripe of light blue right above it. Gently stroke where the colors meet to create a soft, ombre gradient fading upward into the clear glass. -
Add Water Highlights:
Clean your flat brush and pick up a tiny amount of white paint. Drag it lightly through the wet blue and teal sections horizontally to create streaks of sunlight reflecting on the water. -
First Drying Phase:
Let this background layer dry completely. Enamel paints can be tacky, so I usually give this at least an hour before attempting the detailed heavy work on top.
Paint Slipping?
If the paint beads up or slides off, the glass is too slick. Wipe it again with rubbing alcohol, and try sketching your design lightly with a permanent marker first for ‘grip’.
Step 2: Painting the Foreground
-
Ground the Scene:
Switch to your fine liner brush and black enamel paint. Draw a slightly uneven, solid black line right at the base of your blue water to represent the shoreline or island ground. -
Start the Trunks:
From the black shoreline, paint three or four thin lines curving exclusively upward. Vary their heights and lean them slightly to mimic the natural curve of palm trees. -
Form the Palm Fronds:
At the top of each trunk, paint five to seven curved lines radiating outward like an exploding firework. These are the spines of the palm leaves. -
Add Leaf Detail:
Using the very tip of your liner brush, make tiny, quick flicking motions hanging down from each frond spine. This creates the feathery texture of real palm leaves. -
Layering Trees:
If you are painting multiple trees, you can overlap the leaves slightly. The silhouette style is forgiving, so solid black overlapping areas look natural. -
Paint Distant Palms:
For depth, add smaller, fainter trees slightly higher up on the horizon line using less pressure on your brush.
Step 3: Final Details & Curing
-
Define the Water:
Clean your liner brush and reload with fresh black paint. Add very thin, distinct horizontal lines across the blue gradient area to suggest ripples and waves. -
Ground Texture:
Add a few broken horizontal lines below the main island mass in the clear glass area to suggest sand bars or reflections near the bottom rim. -
Personalize It:
Using the finest tip possible, carefully paint a date or location name in small text along the bottom curve of the painted area. -
Dry Time:
Allow the finished piece to air dry for at least 24 hours, or 1 hour if you plan to bake it immediately. -
Curing Process:
Place the glass in a cool oven. Set temperature to 350°F (175°C) and bake for 30 minutes once it reaches temperature. Turn the oven off and let the glass cool completely inside to prevent cracking.
Pro Tip: Translucency
Mix a drop of clear glazing medium into your blue paints. This keeps the water looking like stained glass rather than opaque plastic, letting light shine through the shot.
Once baked and cooled, your tropical shot glass is durable enough for hand washing and ready for a toast
Cactus Minis for a Cute Desert Set
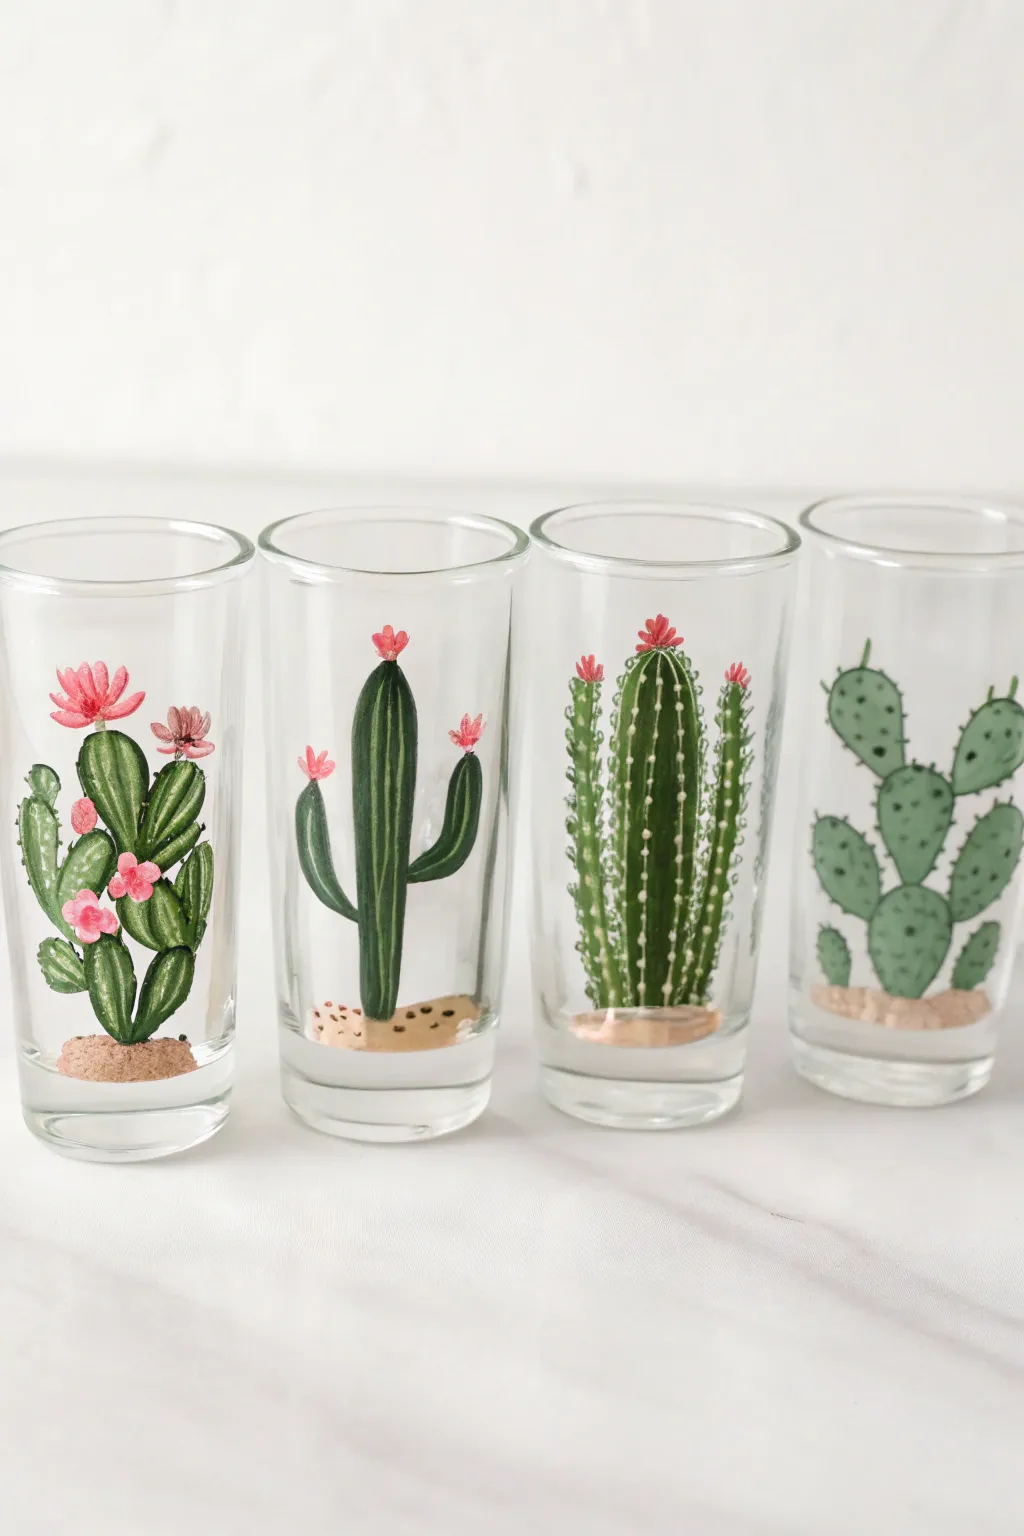
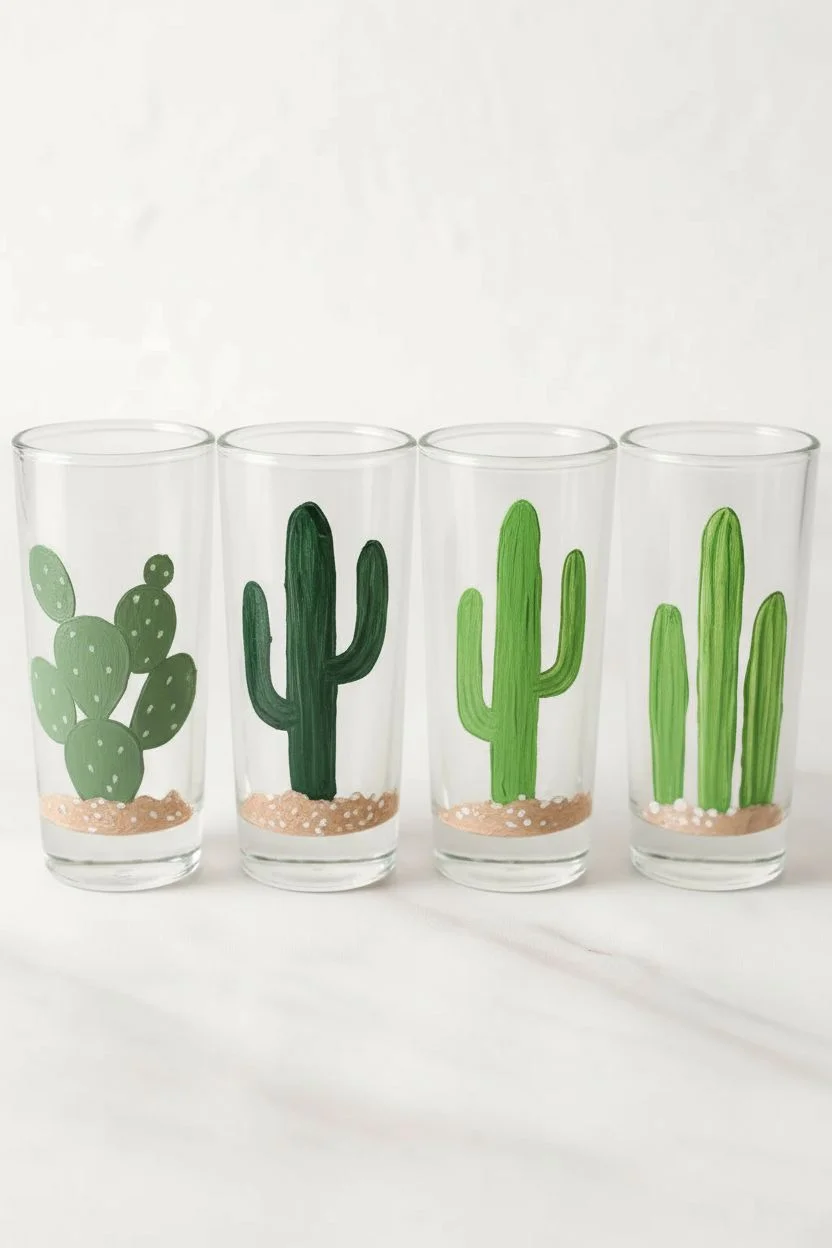
Bring a touch of the Southwest to your bar cart with this adorable set of four hand-painted shot glasses. Each glass features a unique cactus species, ranging from blooming prickly pears to tall saguaros, creating a cohesive yet varied desert collection.
How-To Guide
Materials
- 4 clear glass shot glasses
- Rubbing alcohol and cotton pads
- Enamel craft paint (various shades of green, white, pink, tan/sand)
- Small flat shader brush
- Fine detail liner brush (size 0 or 00)
- Small round brush
- Palette or paper plate
- Water cup and paper towels
- Oven (for curing)
Step 1: Preparation and Base Shapes
-
Clean the glass:
Before dipping your brush, thoroughly wipe down the outside of each shot glass with rubbing alcohol. This removes oils and fingerprints that prevent paint from adhering properly. -
Paint the sandy bases:
On the bottom edge of the glass, use a small round brush to dab a mixture of tan and white enamel paint. Create an irregular, lumpy mound shape to look like desert sand. Repeat for all four glasses and let dry. -
Outline the Saguaro:
For the first glass, mix a dark forest green. Using your shader brush, paint a central tall column rising from the sand. Add two curved arms branching upward on either side. Keep the edges smooth. -
Create the Prickly Pear:
On the second glass, use a flatter, rounded paddle shape. Paint a central oval near the sand, then stack smaller oval ‘pads’ on top of it using a medium sage green. Vary angles slightly for a natural look. -
Form the Columnar Cactus:
For the third glass, paint three tall, thin pillars standing side-by-side. Use a brighter grass green for this one. Make the central pillar slightly taller than the two flanking it. -
Draft the Bunny Ear Cactus:
On the final glass, paint elongated oval shapes clustering together. Use a medium green, painting vertical strokes to imply the texture of the plant.
Step 2: Adding Dimension and Needles
-
Shade the Saguaro:
Once the green base is dry, take a slightly lighter green and paint vertical stripes down the center of the main trunk and arms to create a ribbed 3D effect. -
Detail the Prickly Pear:
Load your fine liner brush with dark green. carefully paint tiny ‘V’ or dot clusters scattered across the pads. These represent the glochids (tiny spines). -
Add ribs to the Columnar Cactus:
Using a very light green or white mixed with green, paint thin, straight vertical lines all the way up the three pillars. This defines the ridges of the cactus. -
Highlight the Bunny Ear:
Mix a lighter lime green and add highlights to the left side of each oval pad to suggest a light source. -
Add the spines:
Switch to pure white paint on your finest liner brush. For the columnar cactus, paint tiny dots in vertical rows along the ridges. For the bunny ear cactus, paint tiny white clusters of dots.
Fixing Translucent Paint
If your green paint looks streaky or see-through, don’t keep brushing wet paint! Let the first layer dry completely (15 mins), then apply a second coat for solid coverage.
Step 3: Blooms and Finishing Touches
-
Paint the flower bases:
Identify the tips of the cacti where flowers would naturally bloom. Dab small circles of pink paint on the tops of the Saguaro arms and the Columnar peaks. -
Detail the petals:
Using a slightly darker pink or red, paint tiny lines radiating outward within your pink circles to define individual petals. -
Add Prickly Pear fruits:
For the prickly pear, paint larger, more prominent pink flowers on the top edges of the highest pads. I like to add a tiny touch of white to the center for depth. -
Texture the sand:
Go back to your dry sandy bases. Dilute a tiny bit of brown paint and stipple (dot repeatedly) over the tan area to give it a gritty, earthy texture. -
Final Cleanup:
Use a damp cotton swab or toothpick to gently scrape away any stray paint marks or mistakes around the edges of your designs. -
Cure the paint:
Allow the glasses to air dry for at least 24 hours. Then, place them in a cool oven and heat to 350°F (175°C) for 30 minutes. Let them cool completely inside the oven to prevent cracking.
Make It 3D
Use ‘puffy’ fabric paint for the white spines instead of flat enamel. The tiny dots will be raised to the touch, mimicking the texture of real cactus needles!
Enjoy your customized desert glassware at your next gathering
Dragonfly Wings in a Stained-Glass Look
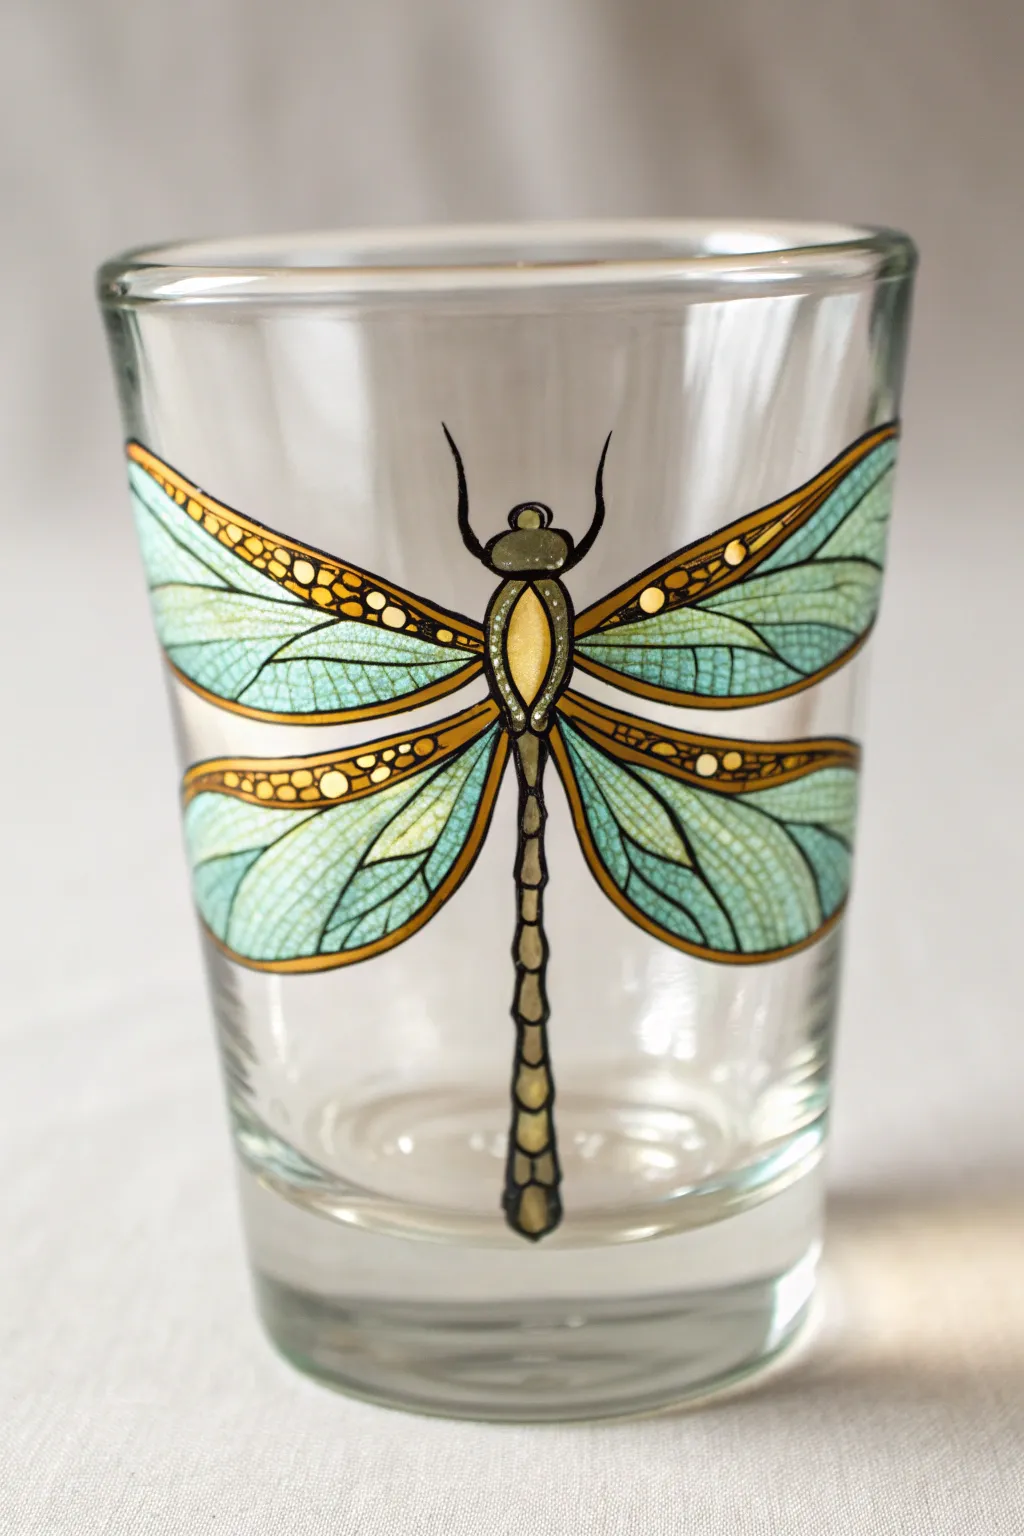

Transform a simple shot glass into a shimmering piece of art with this faux stained-glass dragonfly design. The technique uses raised outliners and translucent glass paints to mimic the delicate, segmented beauty of insect wings.
Step-by-Step
Materials
- Clear shot glass
- Rubbing alcohol and cotton pads
- Black liquid leading or glass outliner paint (fine tip)
- Solvent-based glass paint (Light Turquoise/Cyan)
- Solvent-based glass paint (Gold/Amber)
- Solvent-based glass paint (Dark Grey/Charcoal)
- Masking tape
- Small printed dragonfly template (sized to fit the glass)
- Fine round paintbrush (Size 0 or 00)
- Toothpicks
- Oven (optional, check paint manufacturer instructions)
Step 1: Preparation & Templating
-
Clean the surface:
Begin by thoroughly cleaning the shot glass with warm soapy water to remove any manufacturing oils or dust. -
Degrease with alcohol:
Wipe the entire exterior surface with a cotton pad soaked in rubbing alcohol. This is crucial for paint adhesion; avoid touching the glass with your fingers after this step. -
Prepare the template:
Print or draw a dragonfly pattern where the wingspan wraps slightly around the curve. The body should be vertical. -
Secure the design:
Roll up the paper template and insert it inside the shot glass. Use translucent tape or a bit of rolled masking tape to press the design against the glass wall so it is clearly visible from the outside.
Clean Lines Pro Tip
Keep a needle handy while outlining. If an air bubble pops up in your black leading, pop it instantly with the needle tip before it dries to prevent a hollow spot in your barrier.
Step 2: Outlining the Structure
-
Trace the main body:
Using the black glass outliner directly from the nozzle, carefully trace the dragonfly’s head, thorax, and segmented tail. Keep the pressure steady to create an even, raised line. -
Outline the upper wings:
Draw the bold outer edges of the two large upper wings. The outliner acts as a dam for the liquid paint later, so ensure there are no gaps in your lines. -
Outline the lower wings:
Trace the shape of the two lower wings, extending them downwards from the thorax. -
Add internal wing details:
With a very light touch, draw the delicate veins inside the wings. You don’t need to copy every single line from a real dragonfly—just enough to create distinct ‘cells’ for the stained-glass look. -
Detail the leading edge:
Add small circular details along the top edge of each wing, creating tiny pockets that we will later fill with gold. -
Allow to cure:
Let the black outlines dry completely. This usually takes 1-2 hours, but checking the bottle instructions is always best to prevent smudging.
Level Up: Frosted Texture
Before outlining, use a sponge to dab a thin layer of ‘frosted glass’ medium over the wings area. This creates a matte background that makes the glossy wing veins pop even more.
Step 3: Adding Translucent Color
-
Paint the body:
Dip your fine brush into the dark grey or charcoal glass paint. Carefully fill the head and the small segments of the tail, leaving the central thorax area empty for now. -
Fill the thorax:
Paint the central oval of the thorax with the gold/amber paint to give the dragonfly a glowing core. -
Flood the wings:
Load your brush with the light turquoise paint. Gently ‘flood’ the larger cells of the wings. I find that dabbing the paint into the center of a cell and pushing it to the black edges creates the smoothest finish. -
Add golden accents:
Using a clean brush or a toothpick, drop tiny amounts of gold paint into the small circular cells along the top ridge of the wings and near the body connection points. -
Correct mistakes:
If paint goes over the black lines, use a clean toothpick to gently scrape it away or push it back while it is still wet. -
Dry and remove template:
Once the paint is tack-free, remove the paper template from inside the glass to check your coverage against the light. -
Final cure:
Allow the glass to cure fully for at least 24 hours. If your paint system requires heat setting, place the glass in a cool oven, heat to the recommended temperature, and let it cool down inside the oven.
Now your glass is ready to catch the light beautifully on a sunny windowsill or at your next gathering
Snowy Winter Icons for Holiday Sets
Bring a touch of winter wonder to your holiday table with these charming hand-painted shot glasses. Featuring a cheerful snowman flanked by evergreen trees and delicate snowflakes, this design creates a mini festive scene right on the glass.
How-To Guide
Materials
- Clear shot glass (straight-sided works best)
- Rubbing alcohol and cotton pads
- Enamel glass paint (White, Dark Green, Orange, Black, Red)
- Fine detail brush (size 00 or 000)
- Small round brush (size 1 or 2)
- Dotting tool or toothpick
- Palette or small plate
- Oven for baking (if using heat-set paints)
Step 1: Preparation & Base shapes
-
Clean the Surface:
Before painting, wipe the exterior of the shot glass thoroughly with rubbing alcohol on a cotton pad. This removes oils and fingerprints that prevent paint adhesion. -
Outline the Snowman Body:
Using your fine detail brush and white enamel paint, draw a circle roughly 1/3 of the way up the glass for the snowman’s head. -
Add the Lower Body:
Paint a slightly larger, oval-like shape directly beneath the head for the snowman’s body. Don’t worry about perfect circles; a slightly organic shape adds charm. -
Fill in the White:
Using the small round brush, fill inside your snowman outlines with opaque white paint. Applying two thin coats is better than one thick coat to avoid drips. -
Paint the Trees:
Switch to dark green paint. On either side of the snowman, use the tip of your detail brush to paint a vertical line for the tree trunk.
Step 2: Adding Details
-
Create Tree Branches:
Starting at the top of the trunk line, use short, downward-angled strokes to create pine branches. Make them wider as you move down the tree for a triangular silhouette. -
Layer the Texture:
Go back over your trees with a few lighter or darker green strokes while the paint is wet to add depth and texture to the needles. -
Draw the Face:
Once the white body is fully dry, use the finest brush and black paint to add two small dots for eyes and a curved line for the smile. -
Add the Carrot Nose:
With a tiny amount of orange paint, carefully draw a sideways triangle for the carrot nose between the eyes. -
Paint the Buttons:
Using the tip of a toothpick or the very end of your brush handle dipped in paint, place three vertical dots down the snowman’s body. Use black for the top two. -
The Final Button:
For a pop of color, paint the bottom button red, just like in the inspiration piece. -
Stick Arms:
Using the thinnest black lines possible, paint stick arms reaching upwards from the snowman’s sides. Add tiny ‘fingers’ at the ends.
Clean Lines Pro-Tip
Keep a damp cotton swab handy while painting. If you make a mistake on the slippery glass, you can quickly wipe it away before the paint sets and try again.
Step 3: Snowy Atmosphere
-
Large Snowflakes:
Identify empty spaces in the ‘sky’ area above the scene. Paint simple asterisks (*) in white to represent large snowflakes. -
Detailed Flakes:
Enhance some of your asterisks by adding tiny ‘V’ shapes at the end of each line to create more intricate crystalline shapes. -
Falling Snow:
Dip a dotting tool or toothpick into white paint and dot random ‘snow’ all around the glass, filling the empty negative space. -
Drying Time:
Allow the glass to dry for at least 24 hours (or as recommended by your specific paint brand) before handling. -
Curing:
To make the glasses dishwasher safe, place them in a cold oven, heat to 350°F (175°C), bake for 30 minutes, and let them cool inside the oven.
Troubleshooting: Streaky White
White glass paint can be translucent. If the snowman looks streaky, let the first layer dry completely, then dab—don’t drag—a second coat on top.
Now you have a frosty, festive set of glassware ready to toast the holiday season
Spooky Night Motifs for Halloween Shots
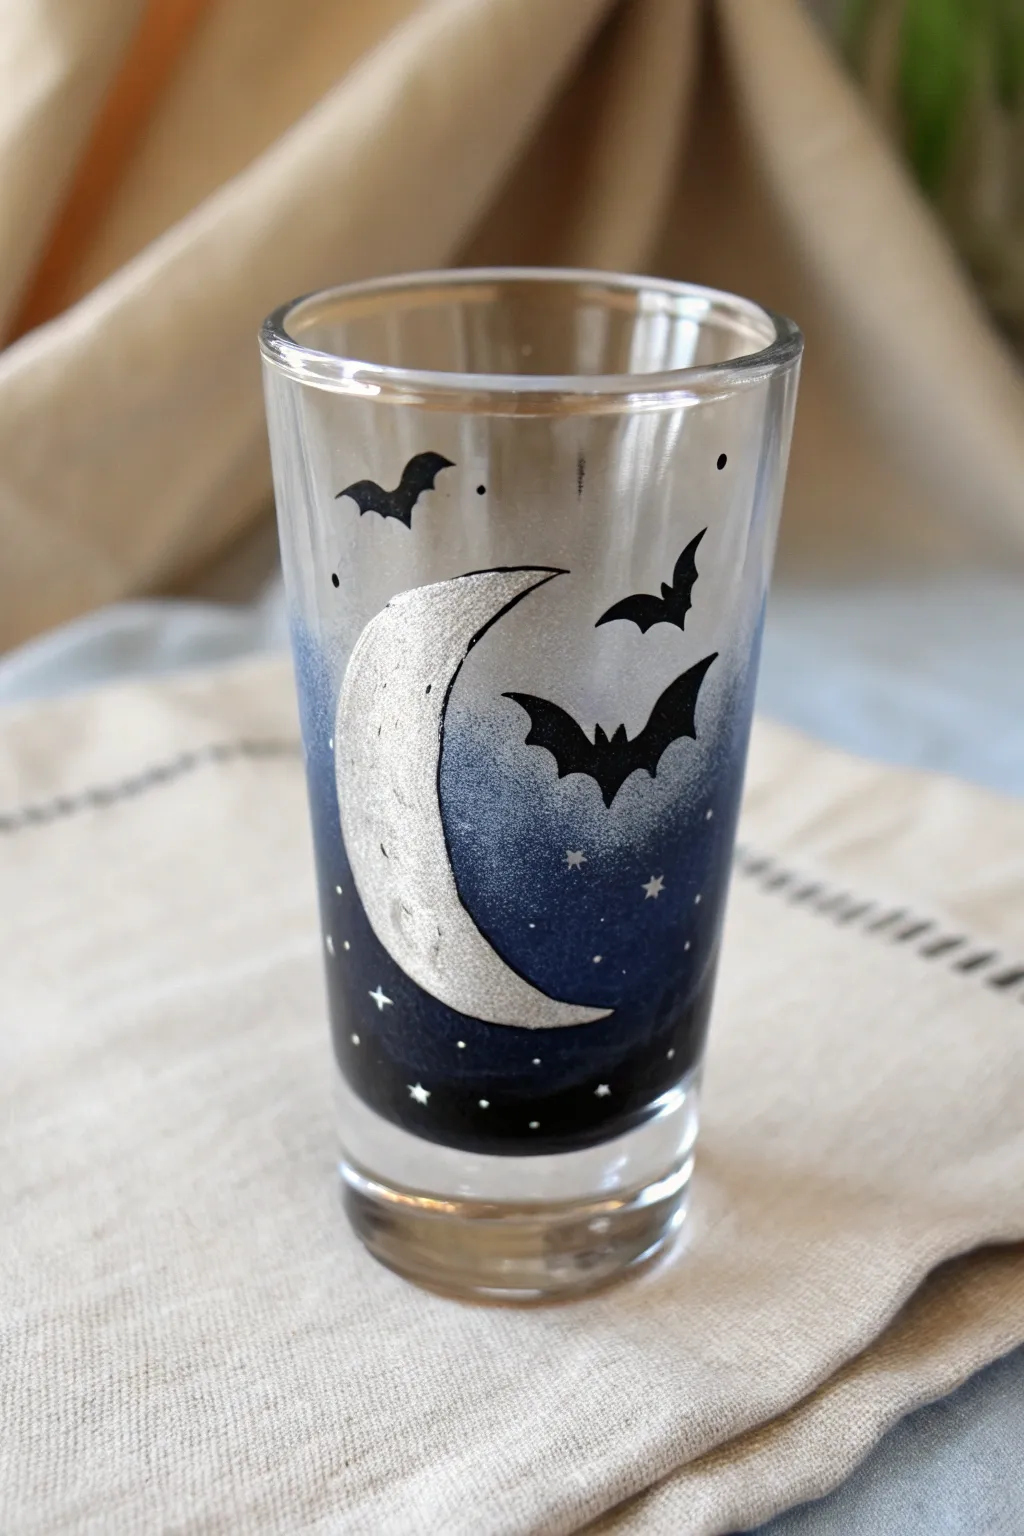
This eerie yet elegant design captures the essence of Halloween with a silhouetted night sky. Featuring a shimmering crescent moon, fluttering bats, and a deep Ombré background, this shot glass brings a touch of midnight magic to your spooky celebrations.
Step-by-Step
Materials
- Clear glass shot glass
- Rubbing alcohol and cotton pad
- Enamel glass paints: Indigo/Deep Blue, Black, Metallic Silver
- Small sponge applicator or cosmetic wedge
- Detail brush (size 0 or 00)
- Small round brush (size 1 or 2)
- Toothpick or dotting tool
- Oven (for curing, optional depending on paint brand)
- Paper plate or palette
Step 1: Prepping the Surface
-
Clean the glass:
Before you unscrew any paint caps, thoroughly wipe the outside of your shot glass with rubbing alcohol on a cotton pad. This removes oily fingerprints that could prevent your spooky scene from sticking. -
Dry completely:
Let the alcohol evaporate fully for a minute or two. Avoid touching the area where you plan to paint to keep it pristine.
Step 2: Creating the Night Sky Gradient
-
Prepare the blue base:
Squeeze a small amount of Indigo or Deep Blue enamel paint onto your palette. Dab your sponge applicator into the paint, blotting excess off on the palette first. -
Initial sponge application:
Start sponging the paint around the middle section of the glass. Use a light pouncing motion to create a textured, cloudy effect rather than a solid block of color. -
Fade the top edge:
As you move upward toward the rim, use less and less pressure with the sponge. You want the blue to fade out gently into the clear glass, creating a misty atmosphere. -
Prepare the black bottom:
Now, taking a fresh corner of the sponge (or a new one), load it with Black enamel paint. -
Sponge the base:
Apply the black paint heavily at the very bottom of the glass. This anchors the design. -
Blend the transition:
Work the black paint upward while it’s still wet, slightly overlapping the blue section. Gently dab where the two colors meet to create a seamless Ombré transition from deep black to midnight blue. -
Dry the background:
Allow this background layer to dry completely. Since we’ll be painting crisp details on top, I usually wait at least an hour here to avoid smudging the gradient.
Sponge texture tip
For a truly misty look, tear a small piece off a kitchen sponge rather than using a dense cosmetic wedge. The rough, torn surface creates a more organic, cloudy texture for the night sky.
Step 3: Painting the Moon
-
Outline the crescent:
Using your small round brush and Metallic Silver paint, carefully paint a distinct ‘C’ shape on top of the blue gradient. This forms the crescent moon. -
Fill and texture:
Fill in the crescent shape with more silver paint. You can dab the brush slightly to give the moon a rough, crater-like texture rather than smoothing it out perfectly. -
Add highlights:
If you want extra dimension, mix a tiny dot of white into your silver and dab it onto the center of the crescent for a glowing effect.
Fixing wobbly bats
If your bat wings look uneven, don’t panic. Quickly use a damp toothpick to gently scrape away the wet paint and reshape the line. Glass paint is forgiving until it starts to set.
Step 4: Adding Bats and Stars
-
Paint the first bat body:
Switch to your fine detail brush (size 0/00) and load it with black paint. Paint a small, shallow ‘v’ shape for the bat’s body near the moon. -
Add the wings:
Extend curved lines out from the ‘v’ to create the scalloped wings. Make the wings pointed at the tips and arched along the top. -
Vary sizes:
Paint two or three more bats in different sizes around the glass. Having some appear ‘further away’ adds nice depth to the scene. -
Dot the stars:
Dip a toothpick or a dotting tool into white or silver paint. Gently touch the tip to the glass in the dark blue and black areas to create tiny, distant stars. -
Add sparkle stars:
For a few larger stars, use your detail brush to paint a tiny cross or asterisk shape in silver, scattering them sparingly among the dots.
Step 5: Finishing Touches
-
Clean up edges:
If any paint strayed too close to the rim where lips will touch, use a damp cotton swab to wipe it away promptly for a clean drinking edge. -
Final cure:
Follow your specific paint brand’s instructions for curing. This usually involves air drying for 21 days or baking the glass in a cool oven that heats up to 350°F for 30 minutes.
Once cured, your spooky night sky shots are ready to be filled with your favorite potion
Flame Licks for a Loud, Edgy Party Look
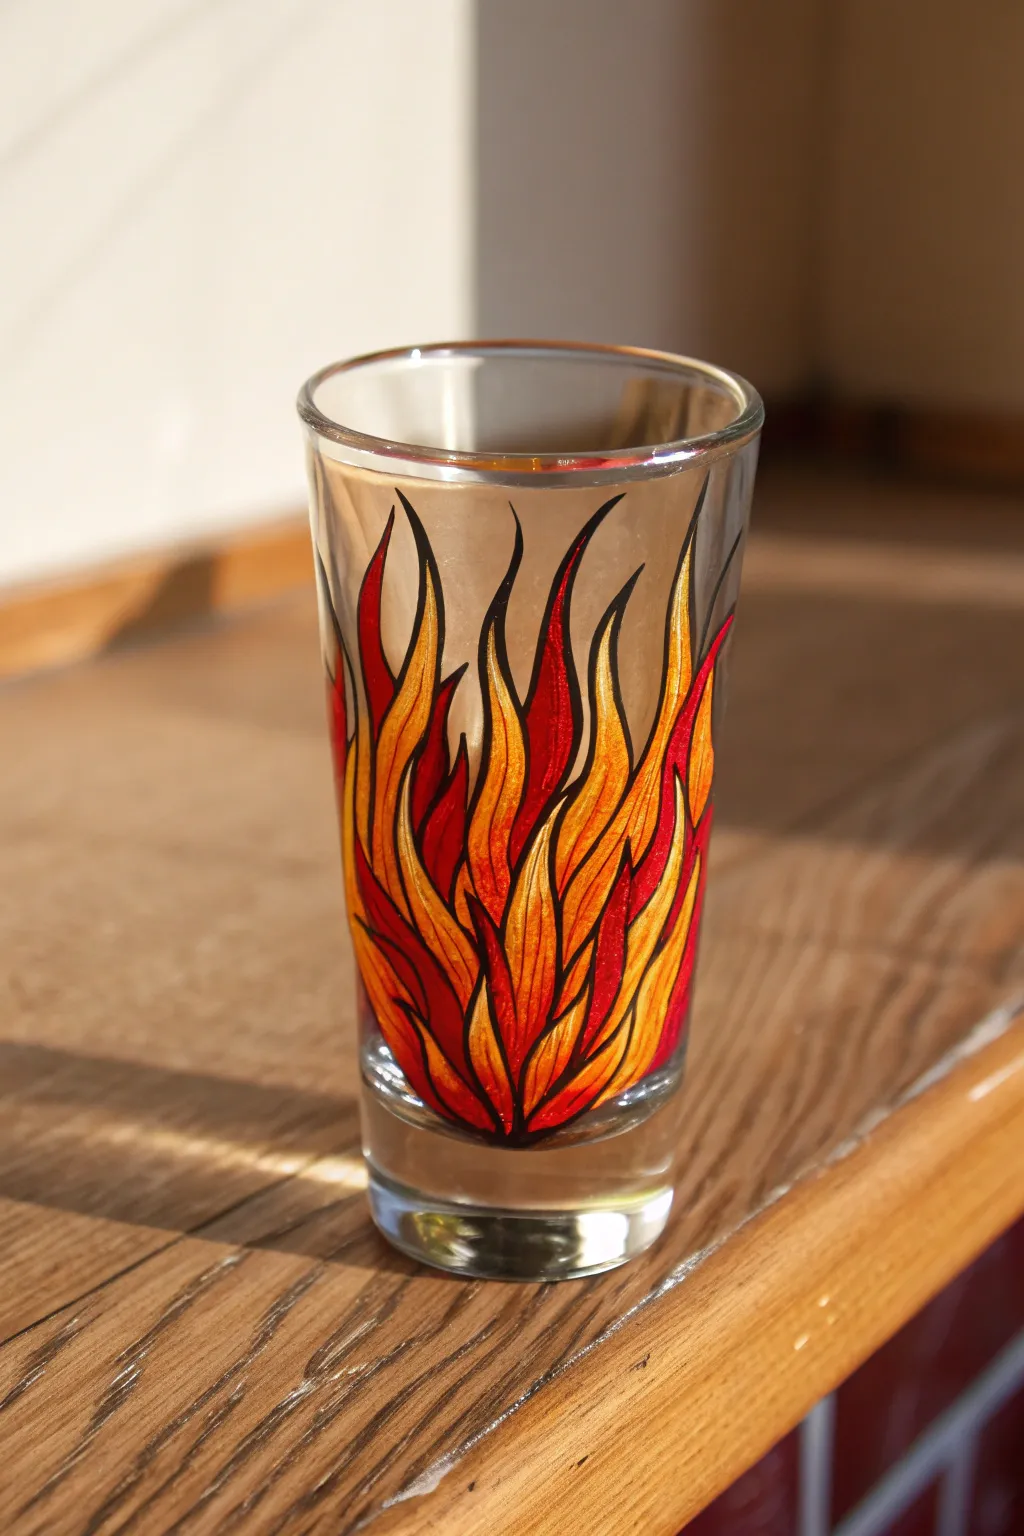
Ignite your next celebration with these bold, edgy shot glasses featuring stylized flame designs. The vibrant gradient of yellows, oranges, and reds against the clear glass creates a striking look that’s perfect for high-energy parties or as a unique gift for a rock-and-roll fan.
How-To Guide
Materials
- Clear shot glass (standard size)
- Rubbing alcohol
- Cotton pads or paper towel
- Pebeo Vitrea 160 glass paints (or similar enamel glass paint) in: Sunny Yellow, Orange, Deep Red, Shimmer/Glitter Red
- Black glass outliner tube (or very fine black paint pen for glass)
- Fine detail brush (size 0 or 00)
- Small flat brush (size 2)
- Palette or small plate
- Oven (for curing)
Step 1: Preparation and Outline
-
Clean surface:
Before starting any painting, thoroughly wipe down the outside of the shot glass with rubbing alcohol and a cotton pad. This removes oils and fingerprints that could prevent the paint from adhering properly. -
Plan placement:
Visualize where your flames will sit. You want the base of the fire to start near the bottom thickened glass curve, extending upwards about two-thirds of the way to the rim. Avoid painting the very top lip where mouths will touch. -
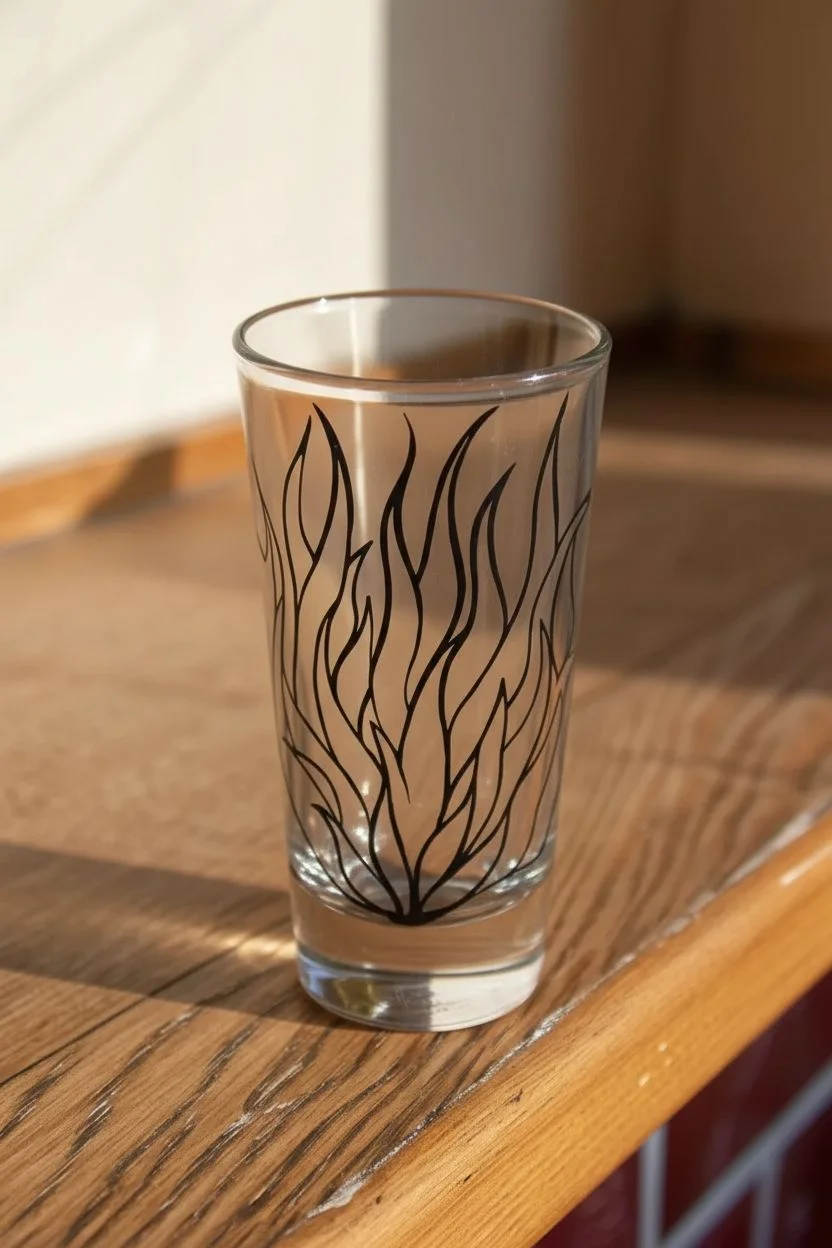
Start the outline:
Using your black glass outliner tube, squeeze gently to begin drawing the central flame lick. Start from the bottom center and pull upward in a wavy, S-curve motion to create a sharp tip. -
Build the fire:
Continue drawing flame outlines on either side of your center flame. Vary the heights and curvature—some should curl left, some right—to mimic the organic movement of fire. -
Connect the base:
Ensure all your flame tips connect back down to a common base point or baseline near the bottom of the glass so the design feels grounded. -
Check line weight:
If your lines are too thin, you can carefully re-trace them while wet, or wait for them to dry and add a second pass. The bold black line is crucial for the comic-book style look. -
Dry the outline:
Let the black outline dry completely according to manufacturer instructions (usually at least 1-2 hours) before attempting to fill in color to prevent smudging.
Pro Tip: Gravity Assist
When painting the gradients, hold the glass upside down occasionally. This helps the lighter yellow paint flow slightly into the orange, creating a more natural upward fade.
Step 2: Adding Color
-
Yellow tips:
Squeeze a small amount of yellow, orange, and red paint onto your palette. Using the fine detail brush, load up the yellow paint first. -
Paint the highs:
Fill the top third of each flame lick with the yellow paint. I prefer to leave a tiny gap near the black line initially to avoid accidental blending, then nudge the paint closer. -
Transition to orange:
Clean your brush and pick up the orange paint. Fill the middle section of the flames, overlapping slightly with the wet yellow to create a soft blend where they meet. -
Red base:
Fill the bottom third of the flames with deep red. Blend this upwards into the orange section while the paint is still wet to achieve a seamless gradient. -
Adding depth:
For the flames in the ‘background’ (the ones tucked behind the main central flames), use slightly darker red tones or less yellow to visually push them back. -
Sparkle finish:
Once the base layer is tacky but not fully dry, apply a very thin layer of shimmer or glitter red medium over the darkest red sections for a glowing ember effect. -
Cleanup lines:
If you painted over your black lines, use a clean, damp toothpick to gently scrape away excess color from the black borders.
Troubleshooting: Air Bubbles
If you see tiny bubbles in your paint while filling the shapes, pop them immediately with a needle or pin. If they dry, they will leave craters in your smooth flame surface.
Step 3: Curing
-
Air dry:
Allow the painted glass to air dry for 24 hours. Does it look dry sooner? Yes, but don’t rush this; deep drying is essential for durability. -
Bake to set:
Place the glass in a cool oven. Set the temperature to 325°F (160°C). Once the oven reaches temperature, bake for 40 minutes. -
Cool down:
Turn the oven off and open the door slightly, leaving the glass inside to cool down gradually with the oven. This prevents the glass from cracking due to thermal shock.
Once baked and cooled, your fiery glass is dishwasher safe (on the top rack) and ready to light up the night
Galaxy Swirl With Splatter Stars
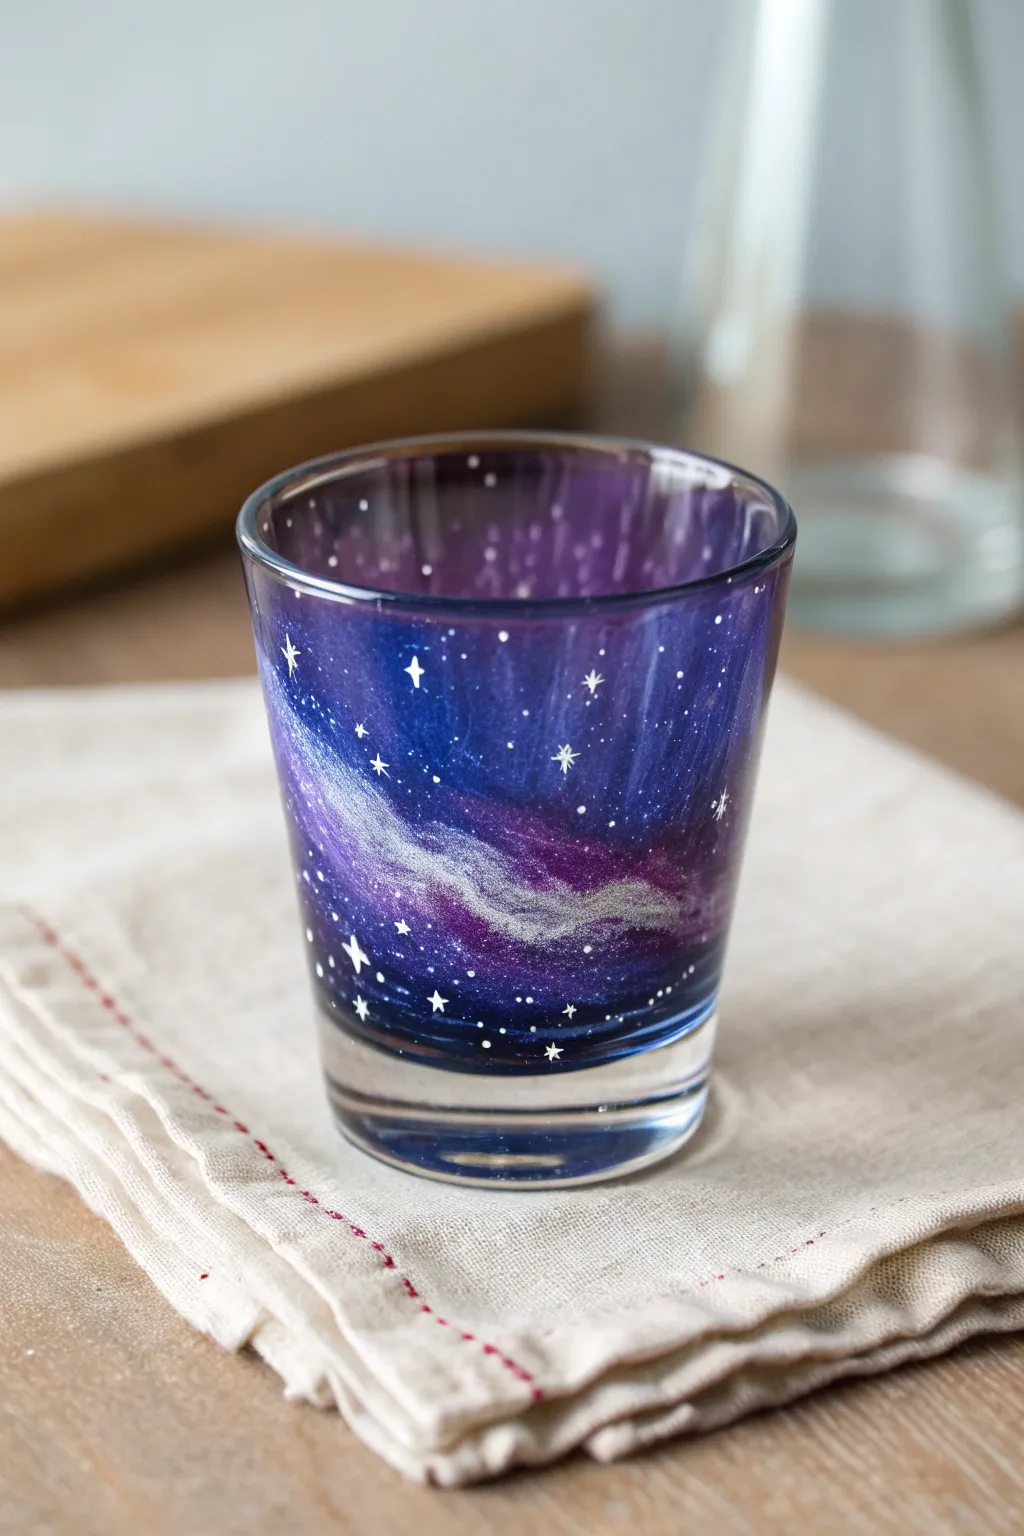
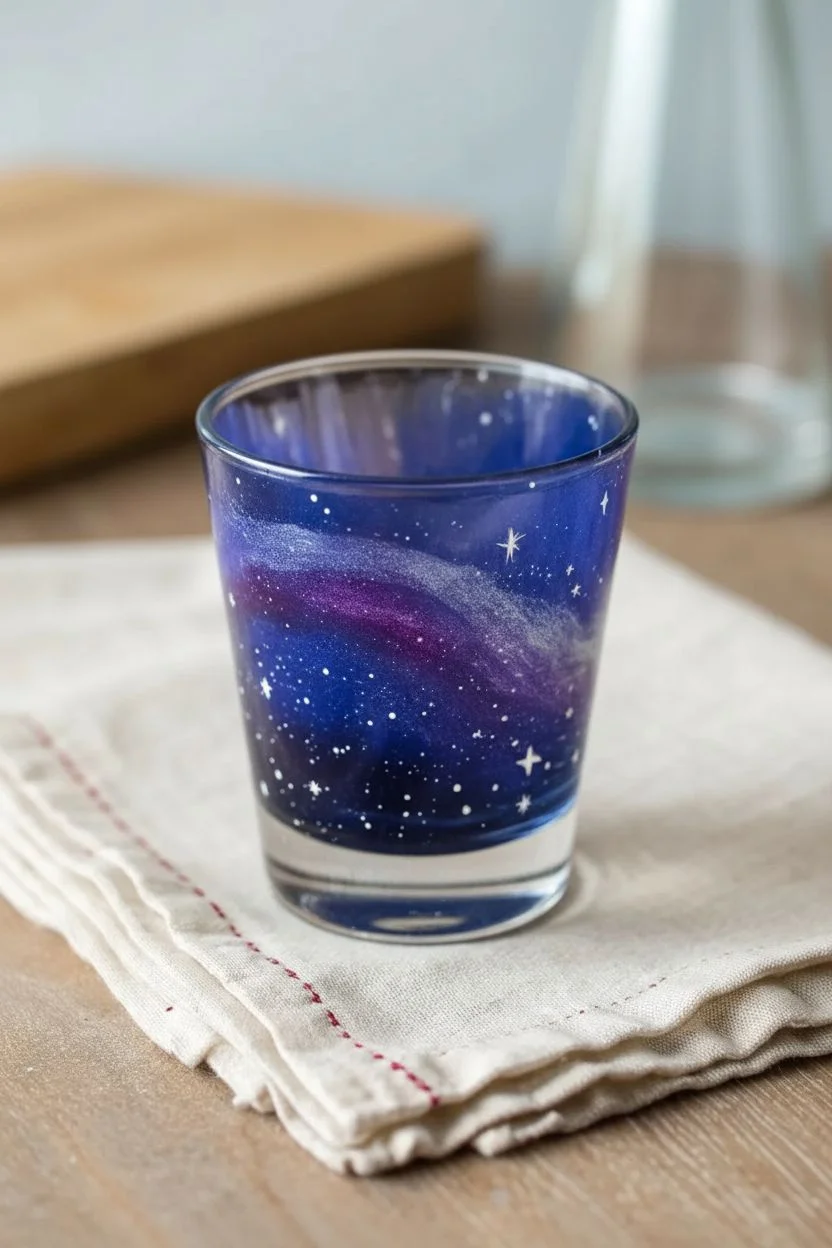
Capture the mysteries of the cosmos right in the palm of your hand with this celestial shot glass design. Deep blues and purples blend seamlessly into a shimmering silver nebula, accented by delicate hand-painted stars.
Step-by-Step
Materials
- Clear glass shot glass
- Rubbing alcohol and cotton pad
- Enamel glass paints (deep blue, violet, white, metallic silver)
- Small flat paintbrush
- Fine liner brush (size 0 or 00)
- Syntethic cosmetic sponge wedge
- Palette or small plate
- Oven (for curing)
Step 1: Preparation & Base Layers
-
Clean the Glass:
Before painting, thoroughly wipe the shot glass with rubbing alcohol on a cotton pad. This removes any oils or fingerprints that might prevent the paint from adhering properly. -
Sponge the Blue Base:
Squeeze a small amount of deep blue enamel paint onto your palette. Dip the flat edge of a cosmetic sponge into the paint and dab off the excess until it’s almost dry. -
Apply the First Layer:
Gently stipple the blue paint onto the glass, covering about two-thirds of the surface in random patches. Keep the layer thin and translucent; we’ll build opacity later. -
Dry Briefly:
Let this first blue layer dry for about 10-15 minutes. It doesn’t need to be rock hard, just dry to the touch so the next colors don’t become muddy. -
Add Violet Depth:
Using a clean section of the sponge, apply the violet paint. Dab this over the edges of the blue areas and into some of the empty spaces, blending the two colors slightly where they meet. -
Deepen the Colors:
Once the first layers are dry, go back in with both blue and violet. Focus on darker concentration near the bottom and sides to create the illusion of deep space.
Sponge Technique Tip
Don’t drag the sponge! Use an up-and-down blotting motion. Dragging streaks the paint and ruins the fluffy, cloud-like nebula texture.
Step 2: The Nebula Swirl
-
Mix the Milky Way:
On your palette, mix a small drop of metallic silver with a tiny bit of white paint. You want a shimmering, pearlescent shade that isn’t completely opaque. -
Paint the Sweep:
Using the small flat brush, paint a diagonal, sweeping stroke across the darkest part of the glass. This forms the backbone of your galaxy swirl. -
Soften the Edges:
While the silver sweep is still wet, use a barely damp brush to gently feather the edges outward into the blue and purple background. It should look misty, not like a solid stripe. -
Intensify the Highlight:
Add a thin line of pure metallic silver right in the center of your swirl for a bright, concentrated core.
Step 3: Stars & Finishing
-
Load the Liner Brush:
Thin a small amount of white paint with a tiny drop of water so it flows like ink. Load your fine liner brush with this mixture. -
Dot the Distant Stars:
Gently touch the tip of the brush to the glass to create tiny dots. Vary the pressure to create different sizes, clustering some near the silver swirl. -
Create Cross Stars:
For the brighter ‘twinkling’ stars, paint a small vertical line, then cross it with a horizontal line. Keep the center slightly thicker and the ends tapered. -
Add Magic Sparkles:
I like to add a few tiny ‘x’ shapes alongside the larger stars to give the galaxy more variety and texture. -
Clean the Rim:
If any paint got too close to the drinking rim, wipe it away cleanly with a damp cloth or cotton swab. Ensure there is at least 1/4 inch of clear glass at the top. -
Cure the Paint:
Follow your specific paint brand’s instructions for curing. This typically involves air drying for 24 hours, then baking the glass in a non-preheated oven for 30 minutes to make it dishwasher safe.
Make It 3D
Once the main painting is dry, add dots of 3D puff paint or dedicated glass outliner in silver for stars that physically stand out from the surface.
Now you have a stunning piece of functional galaxy art ready for your next gathering
Geometric Color Blocks That Line Up in a Set
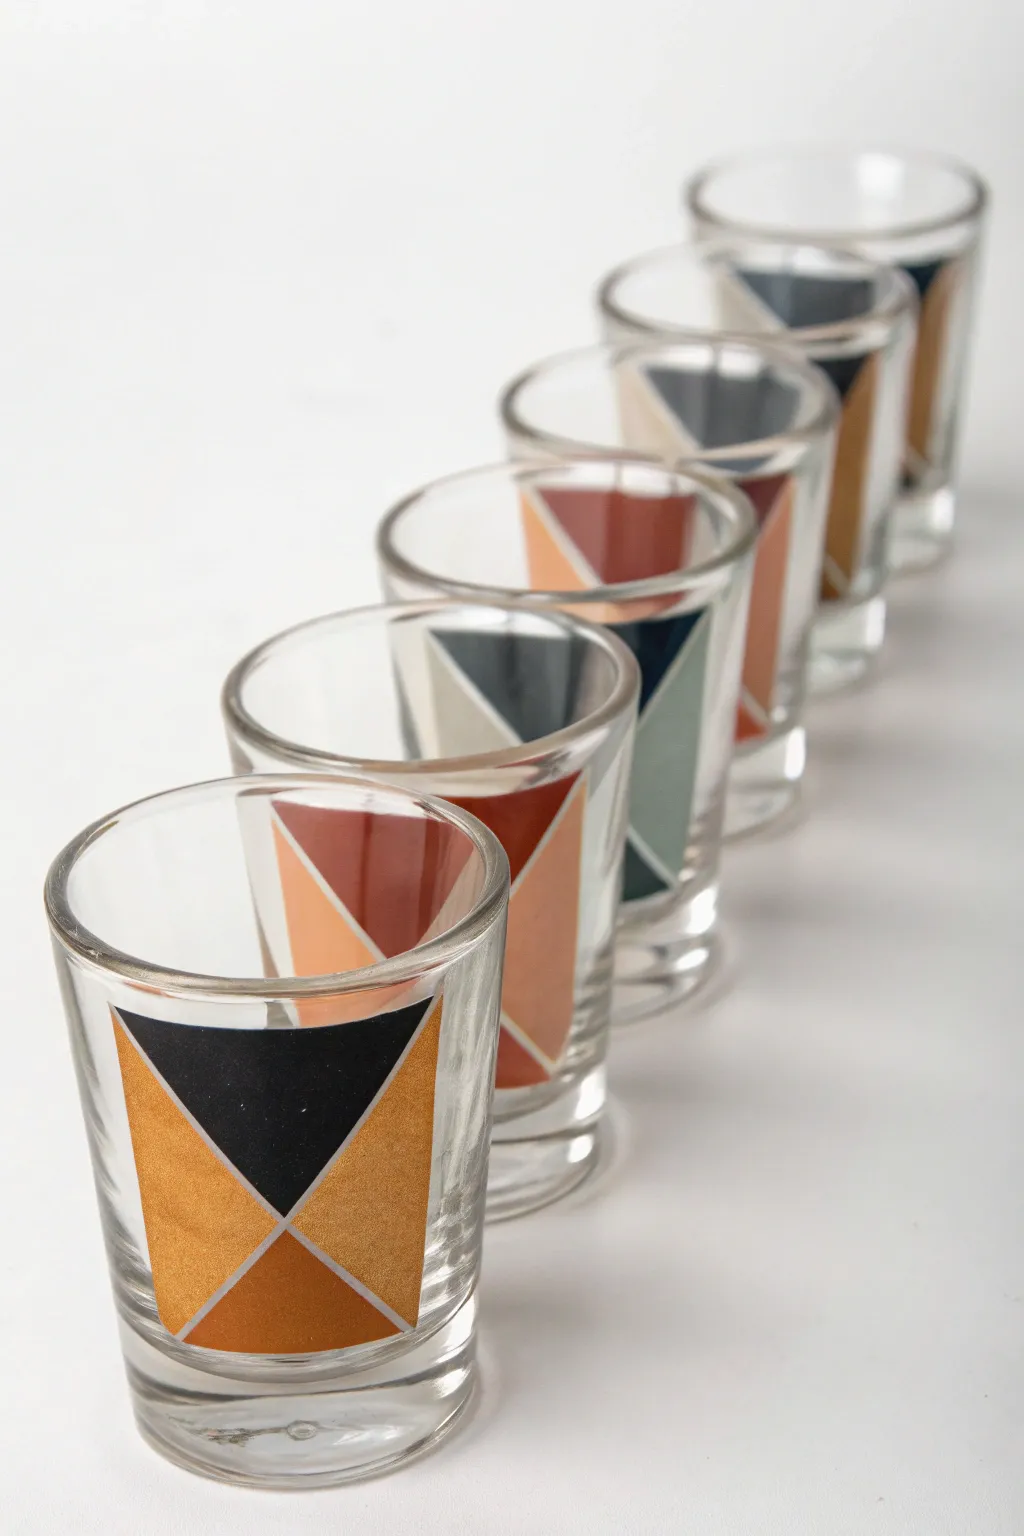
Transform a simple set of shot glasses into a modern art installation for your bar cart. This project uses precise masking and a sophisticated, earthy color palette including gold, rust, and navy to create clean, graphical blocks that look impressive lined up or passed around.
How-To Guide
Materials
- Set of plain glass shot glasses (straight-sided works best)
- Enamel glass craft paint (Gold/Bronze, Black, Rust/Terracotta, Slate Blue)
- Rubbing alcohol
- Cotton pads or lint-free cloth
- Painter’s tape or graphic art tape (very thin is helpful)
- Craft knife or precision blade
- Small flat shader brush
- Small round detail brush
- Baking sheet and parchment paper (for curing)
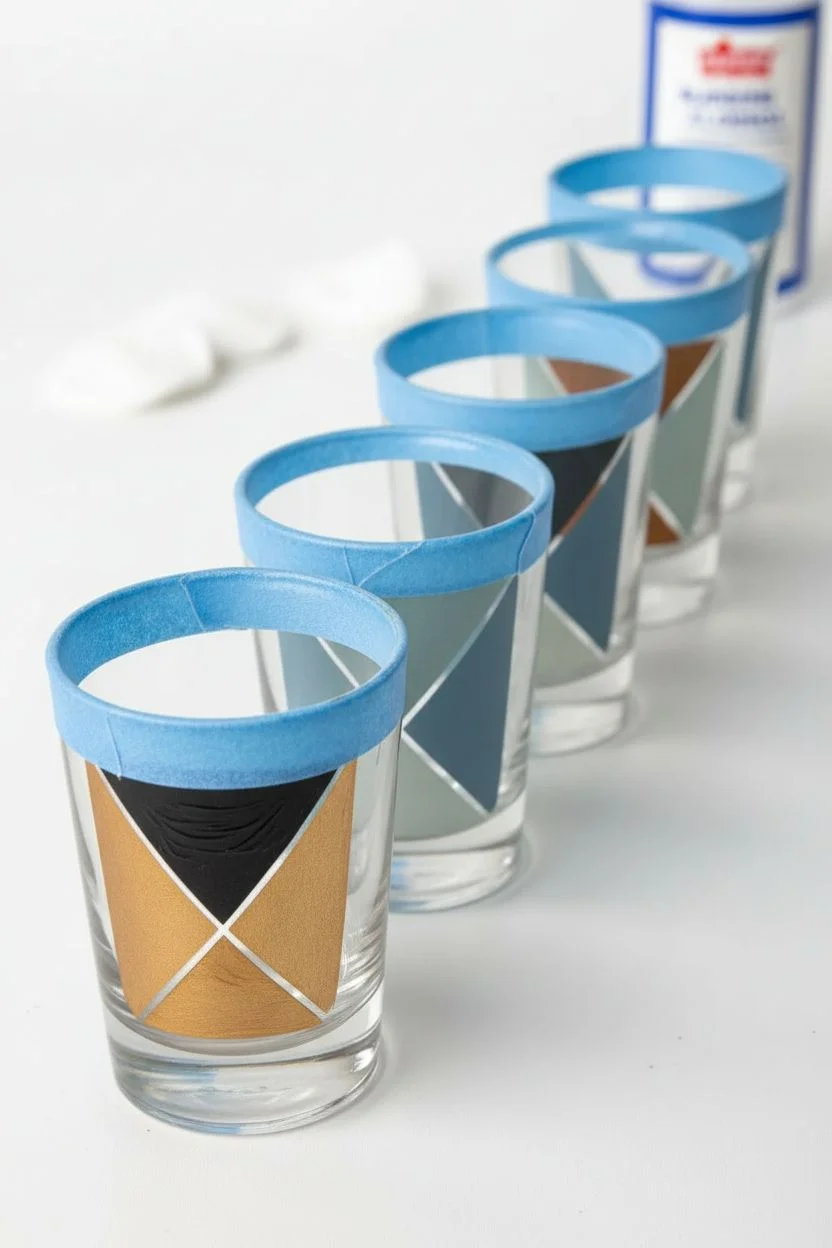
Step 1: Preparation & Masking
-
Clean the surface:
Begin by wiping down your shot glasses thoroughly with rubbing alcohol and a lint-free cloth. This removes oils and fingerprints that prevent paint adhesion. -
Establish the base line:
Decide how high up on the glass you want your design to start. Place a strip of painter’s tape horizontally around the bottom third of the glass to create a crisp bottom edge for your shapes. -
Create the upper boundary:
Place a second horizontal strip of tape near the top rim, leaving a large, clear band in the middle where your geometric shapes will live. -
Form the large X:
Cut two pieces of thin tape. Apply them diagonally across the clear band to form a large ‘X’ shape. Ensure the center of the X intersects cleanly. -
Define the triangles:
You should now have four triangular open spaces created by your tape lines. Use your fingernail or a credit card edge to firmly burnish down all tape edges so paint won’t bleed underneath. -
Customize the angles:
For variety across the set, you can shift the center point of your X up or down on different glasses, or change the angle of the diagonal tape to make some triangles wider or narrower.
Tape Trick
If you don’t have thin graphic tape, simply place a strip of standard blue painter’s tape on a cutting mat and use a ruler and knife to slice it into thin, manageable strips.
Step 2: Painting the Texture
-
Select your palette:
Choose 2-3 colors for a single glass. The example uses a high-contrast mix like gold and black, or rust and slate blue. -
Apply the first color:
Dip your flat shader brush into your first color—let’s start with the metallic gold on the bottom triangle. Apply the paint in thin, even strokes, brushing away from the tape edge inward to minimize bleeding. -
Block in the contrast:
Use the black or dark navy paint for the top triangle. I like to apply this quickly so the texture remains somewhat consistent with the metallic section. -
Fill side sections:
If your design calls for it, paint the side triangles in a third color or repeat one of the previous shades. Be careful not to cross into neighboring wet paint zones. -
Check opacity:
Hold the glass up to the light. If the paint looks too sheer, let it dry for about 20 minutes and apply a second coat for rich, opaque color.
Bleaky Lines?
If paint bleeds under the tape, wait for it to dry completely. Then, dampen a Q-tip with a tiny amount of rubbing alcohol and very gently wipe away the mistake.
Step 3: Refining & Curing
-
Remove tape while damp:
This is crucial: carefully peel off the tape while the paint is still slightly tacky, not fully dry. Pull the tape away at a 45-degree angle to ensure a sharp line. -
Tidy up edges:
If any paint bled under the tape, use a craft knife to gently conduct a ‘scratch test’ and scrape away the excess paint once it is dry to the touch but not fully hardened. -
Initial drying:
Allow the glasses to air dry for at least 1 hour. Avoid touching the painted areas. -
Curing instructions:
Read your specific paint bottle instructions. Most glass enamels require either 21 days of air curing or baking in a home oven to become dishwasher safe. -
The baking method:
If baking, place the glasses on a parchment-lined sheet in a cold oven. Set the temp to 350°F (or as directed). Once it reaches temp, bake for 30 minutes, then turn the oven off and let them cool completely inside.
Once cured, your modern geometric glassware is ready for your next gathering


Have a question or want to share your own experience? I'd love to hear from you in the comments below!