Painting bar stools is one of my favorite little glow-ups because the payoff is huge and the surface area is totally manageable. If you’ve got stools that feel dated, beat up, or just “not you,” a smart paint plan can make them look custom in a weekend.
Classic Solid-Color Makeover
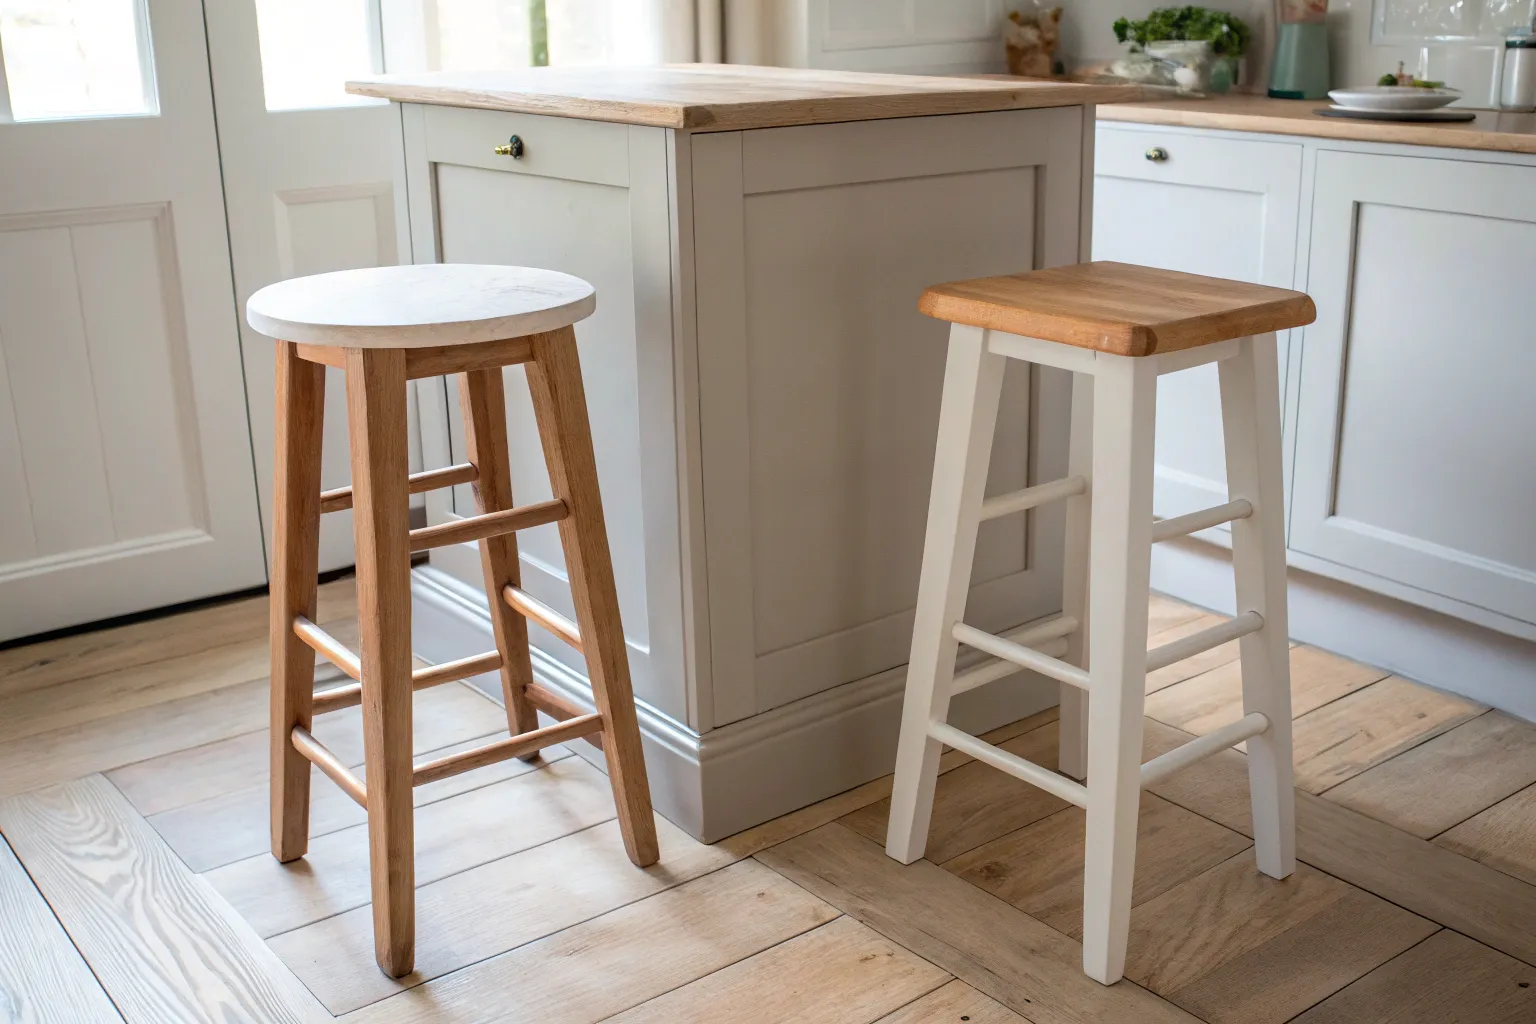
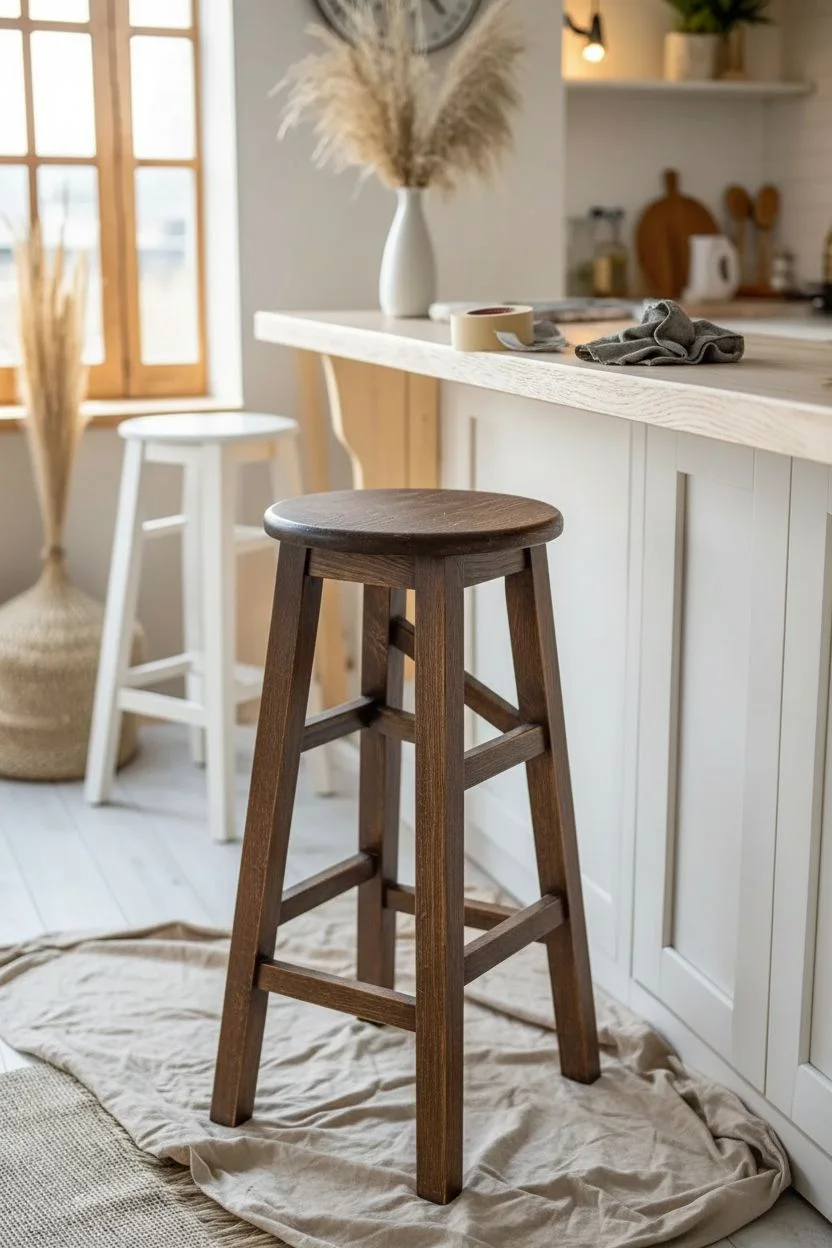
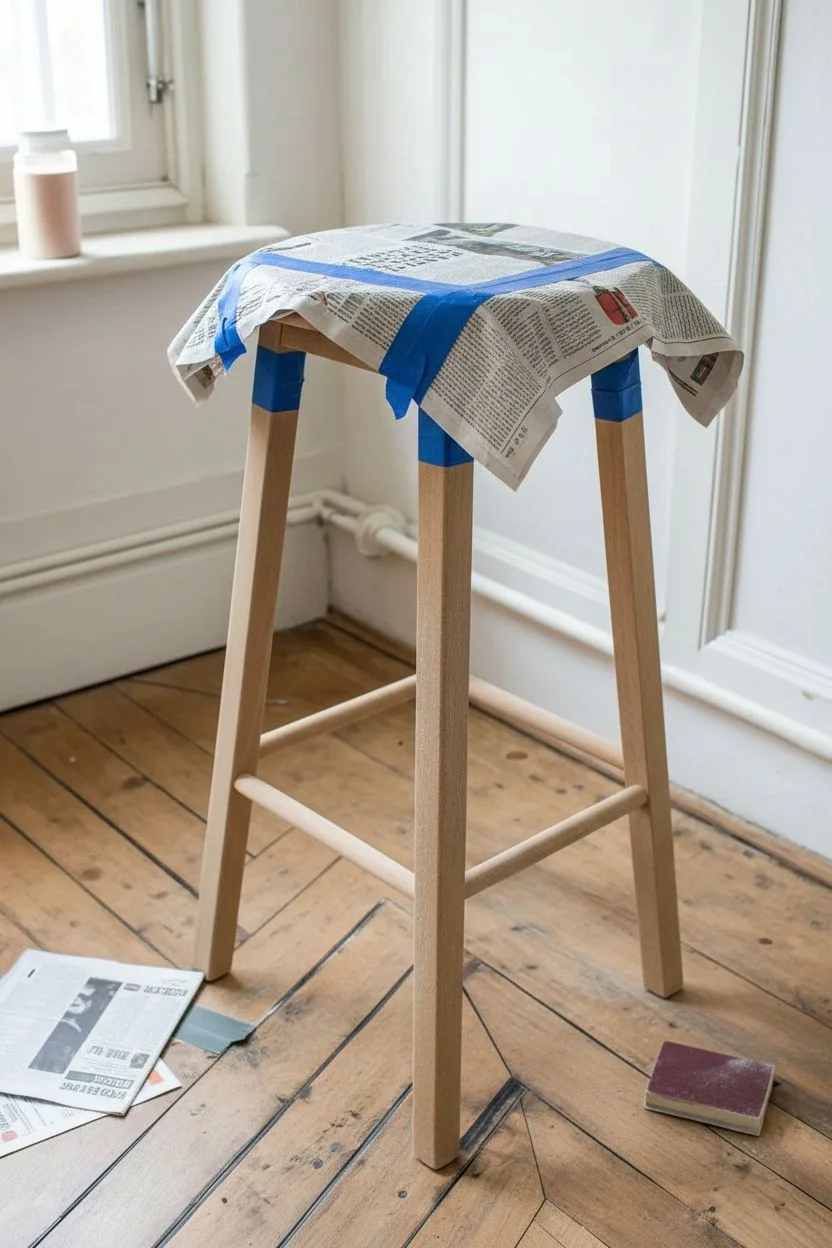
This project breathes new life into a standard wooden bar stool by pairing creamy, off-white legs with a beautifully exposed natural wood seat. It’s a timeless, farmhouse-inspired update that highlights the best of both worlds—clean paint lines and organic grain texture.
Step-by-Step Tutorial
Materials
- Wooden bar stool (unfinished or previously finished)
- Orbital sander
- Sandpaper (80, 120, and 220 grit)
- Tack cloth or microfiber rags
- Painter’s tape (high quality)
- Wood stain (optional, light oak or natural)
- Polycrylic topcoat (clear satin or matte)
- Primer (bonding primer recommended)
- High-quality furniture paint (Cream or Off-White)
- Angled sash brush (1.5 – 2 inch)
- Small foam roller (optional for smooth finish)
- Drop cloth
Step 1: Preparation & Sanding
-
Assess the surface:
Begin by cleaning your stool thoroughly to remove any grease or grime. If the stool has an existing shiny finish, you’ll need to sand more aggressively to break that seal. -
Sand the seat top:
Using an orbital sander with 80-grit sandpaper, carefully sand the seat to remove the old finish completely. Since we are keeping this wood exposed, you need to get down to raw timber. -
Refine the seat:
Switch to 120-grit and then 220-grit sandpaper on the seat. This progressive sanding ensures the wood grain is incredibly smooth and ready for sealing. -
Scuff the legs:
You don’t need to strip the legs to bare wood since they will be painted. Simply scuff sand them by hand with 120-grit sandpaper to create a ‘tooth’ for the primer to grip. -
Clean up dust:
Vacuum the entire stool and wipe it down with a tack cloth. Any leftover dust will ruin your smooth paint finish.
Sticky Situation
If paint peels up with the tape, your paint may have dried too long bridging the gap. Score the edge lightly with a utility knife before pulling.
Step 2: Finishing the Seat
-
Protect the legs:
Apply painter’s tape just under the lip of the seat where it meets the legs. This protects the area you intend to paint later. -
Stain (optional):
If you want a specific tone, apply a wood stain now using a lint-free rag. For the natural look in the photo, you can skip this and simply seal the raw wood. -
Apply first coat of sealer:
Brush on a thin layer of Polycrylic (water-based polyurethane) to the seat. I prefer water-based formulas here because they won’t yellow over time like oil-based ones do. -
Sand and re-coat:
Once dry, lightly sand the seat by hand with 220-grit paper to knock down any raised grain. Apply two more coats of Polycrylic for a durable surface.
Step 3: Painting the Base
-
Tape the seat:
Once the seat is fully cured (give it at least 24 hours), run a precise line of painter’s tape around the edge of the seat to protect your beautiful wood finish. -
Flip and prime:
Flip the stool upside down on a drop cloth. Apply a coat of high-quality bonding primer to the legs and spindles. This step is crucial for durability on furniture that gets kicked often. -
Sand the primer:
After the primer dries, run your hand over the legs. If they feel rough, give them a very light sanding with 220-grit paper and wipe clean. -
Paint the first coat:
Using your angled sash brush, apply the first coat of creamy off-white paint. Work in sections—legs first, then the spindles. -
Watch for drips:
Spindles are notorious for drips. Keep a close eye on the undersides of the rungs and smooth out any pooling paint immediately. -
Apply second coat:
Let the first coat dry completely according to the can’s instructions. Apply a second coat for full, opaque coverage. -
Remove tape:
While the final coat is still slightly tacky (not fully dried), carefully peel away the painter’s tape from the seat edge to ensure a crisp, clean line. -
Cure time:
Let the stool cure for several days before regular use. Paint takes longer to harden than it does to dry to the touch.
Distressed Detail
For a rustic vibe, lightly sand the edges of the freshly painted legs (before sealing) to reveal a peek of the wood underneath.
Now you have a beautifully customized stool that looks fresh from a boutique furniture shop


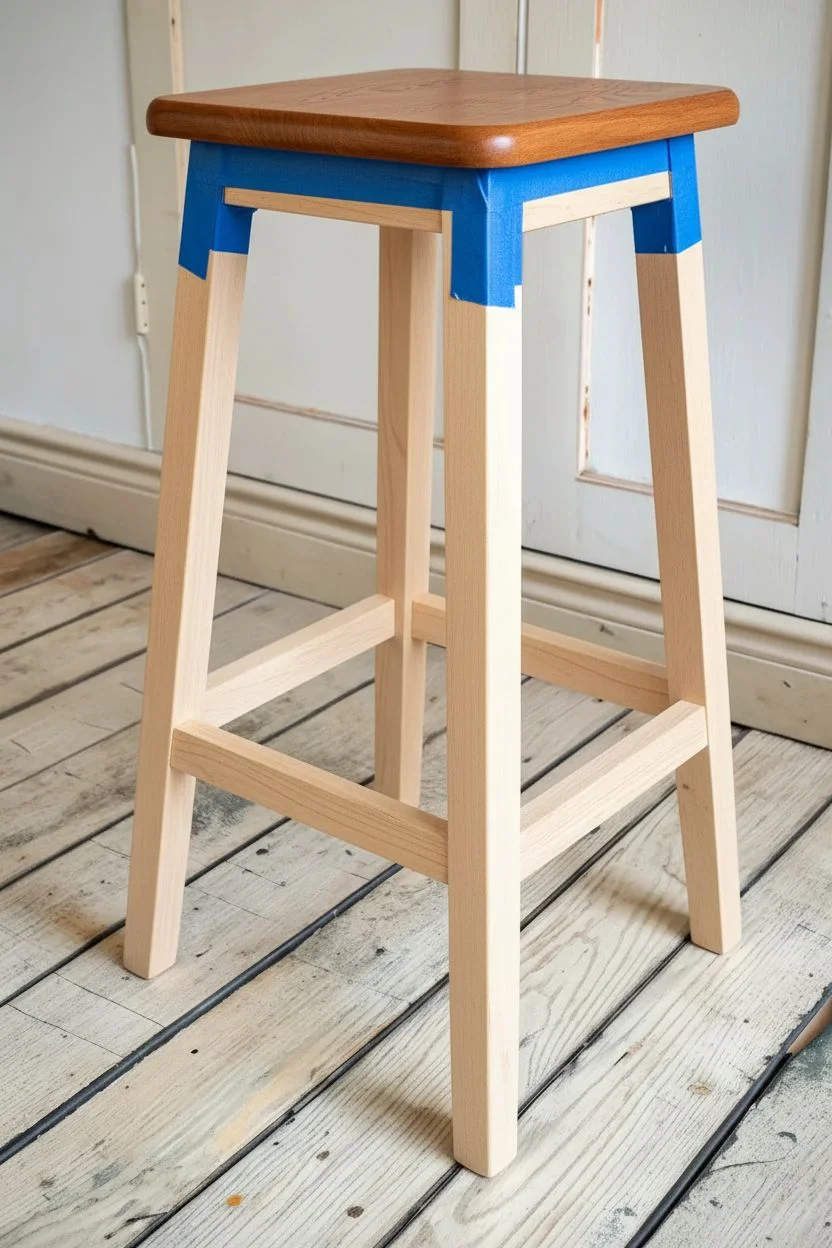
Bright White For a Clean, Airy Look
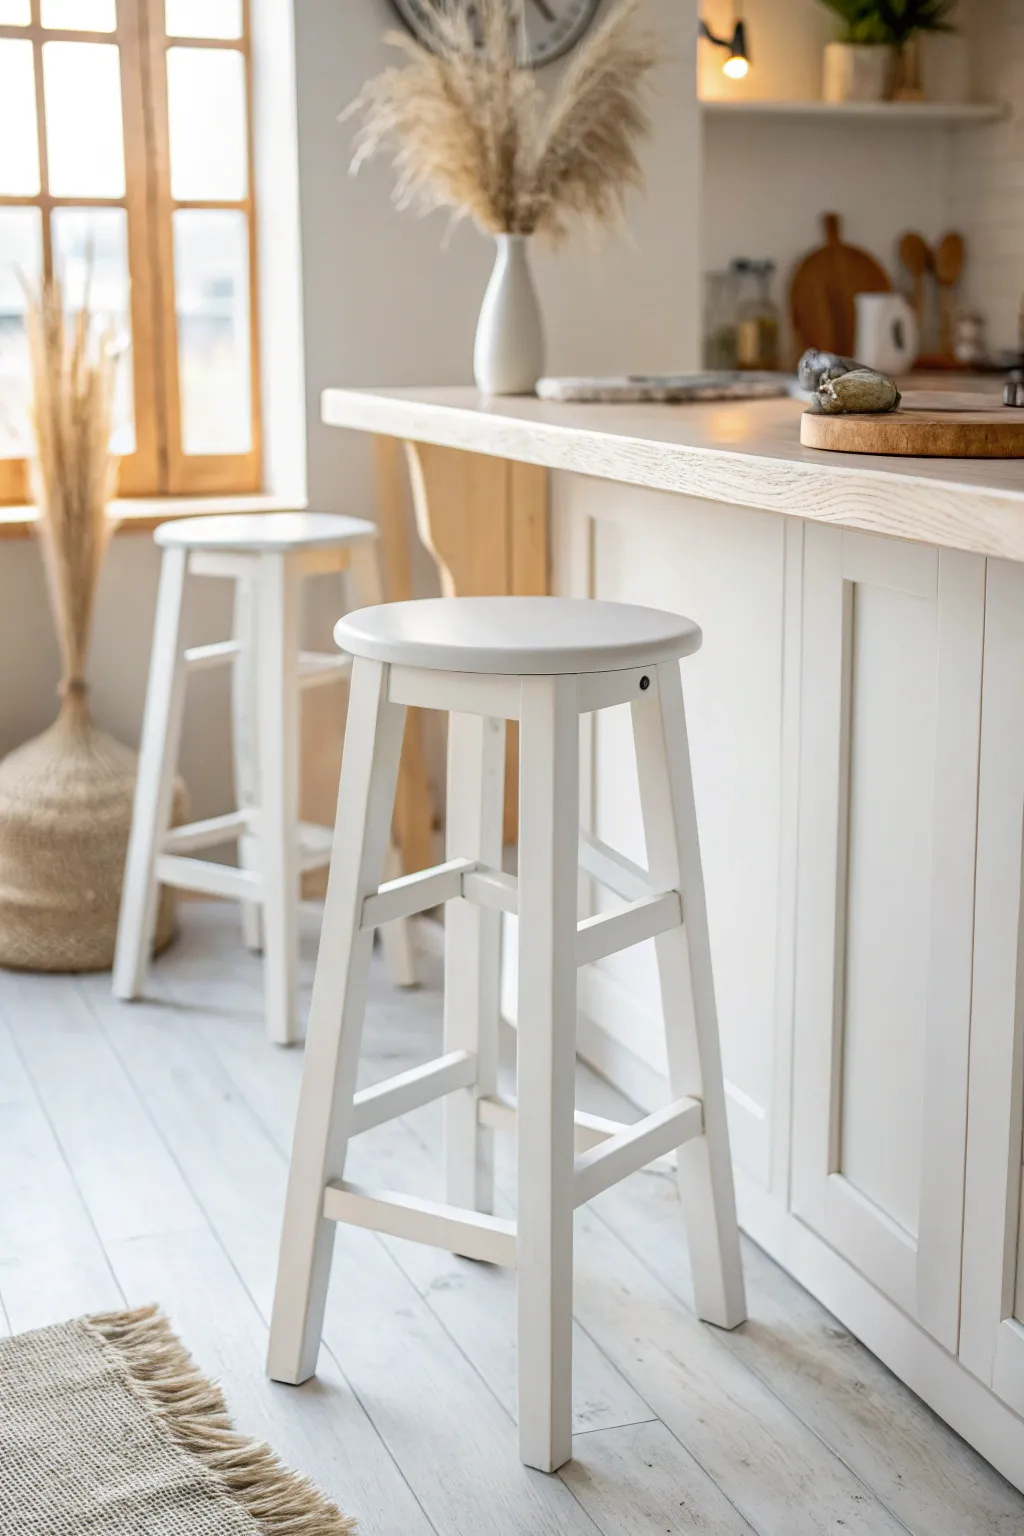
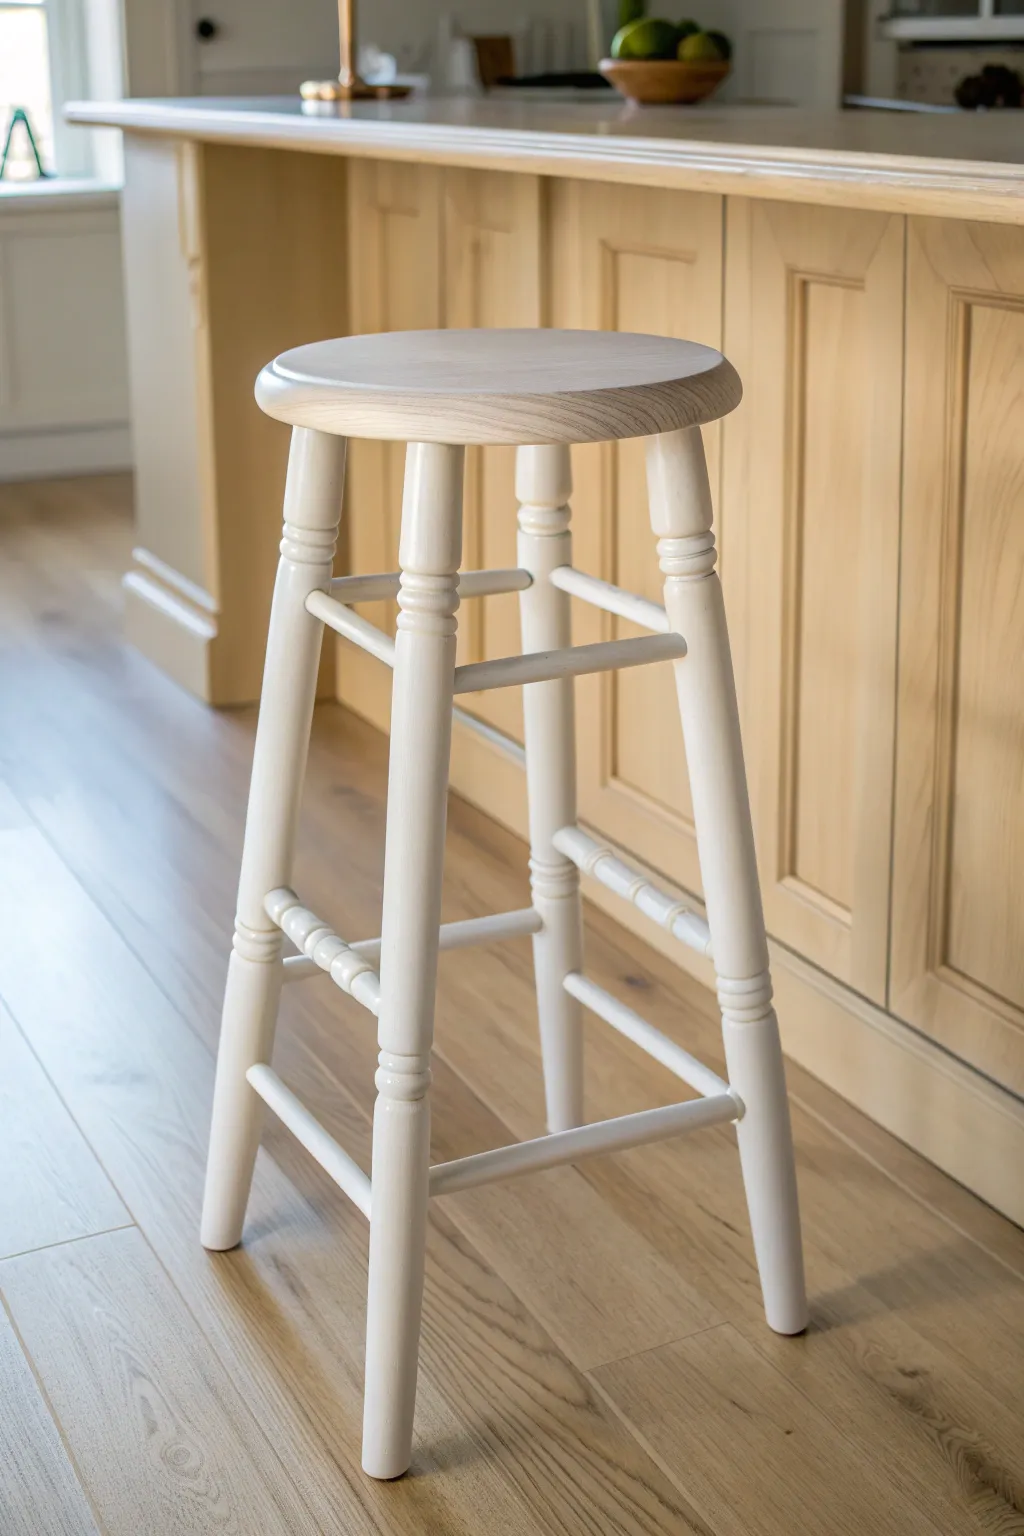
Transform dated or plain wooden bar stools into bright, modern seating that instantly opens up your kitchen space. This project creates a clean, airy look with a flawless white finish that feels both classic and contemporary.
Step-by-Step
Materials
- Wooden bar stools
- Medium grit sandpaper (120-150 grit)
- Fine grit sandpaper (220 grit)
- Tack cloth or damp microfiber rag
- High-quality bonding primer (white)
- Satin or semi-gloss interior paint (pure white)
- Small foam roller
- 2-inch angled sash brush
- Fine-bristle artist brush (optional)
- Drop cloth
- Painter’s tape (optional)
Step 1: Preparation
-
Clean thoroughly:
Begin by wiping down your stools with a degreaser or warm soapy water to remove accumulated kitchen oils and grime. Let them dry completely before moving on. -
Rough sanding:
Use medium grit sandpaper (120-150) to scuff the entire surface of the stool. You aren’t trying to strip it to bare wood, just removing the existing sheen so the new paint grips tightly. -
Dust removal:
Wipe away all sanding dust. A tack cloth works best for this, as it grabs fine particles that a regular rag might miss. -
Protect the area:
Lay down your drop cloth in a well-ventilated workspace. If your stool has non-removable upholstery or metal footplates you want to keep clean, mask them off carefully with painter’s tape.
Step 2: Priming
-
First coat of primer:
Apply a thin, even coat of bonding primer. Start with the stool upside down to easily reach the underside of rungs and legs, painting with the grain. -
Flip and finish priming:
Flip the stool right-side up and prime the top seat and upper legs. Don’t worry if the old color shows through slightly; coverage will improve with subsequent layers. -
Dry and inspect:
Allow the primer to dry according to the can’s instructions, usually about an hour. Check for any drips or runs and smooth them out. -
Light sanding:
Once dry, run a piece of fine-grit sandpaper (220) lightly over the primed surface to knock down any raised grain or brush marks. Wipe away dust again.
Elevate Your Stools
For a trendy ‘dipped’ look, tape off the bottom 3 inches of the legs and leave them natural wood or paint them a contrasting color like gold or black.
Step 3: Painting
-
Paint the legs:
Stir your white satin or semi-gloss paint thoroughly. Begin painting the legs and rungs using your angled sash brush, working in long, smooth strokes. -
Paint the seat:
For the flat seat surface, switching to a small foam roller can help achieve a perfectly smooth, brush-stroke-free finish. Roll lightly and finish with a single direction pass. -
Watch for drips:
As you work around the cylindrical legs, keep an eye out for paint pooling at the joints or dripping down the sides. Smooth these out immediately with your brush. -
Drying time:
Let this first coat dry for at least 4-6 hours, or overnight if possible. This patience prevents the paint from pulling up when you apply the next layer. -
Sanding between coats:
I usually do a very quick, gentle pass with 220-grit sandpaper between paint coats. It ensures that professional-grade smoothness. -
Apply second coat:
Apply your second coat of white paint exactly like the first. Two coats are generally sufficient for solid coverage, but a third thin coat may be needed for very dark original woods. -
Detail check:
Use a small artist brush to touch up any tiny spots you missed, particularly under the seat ledges or inside tricky angles. -
Curing:
Let the stools cure for at least 48 to 72 hours before using them. While dry to the touch sooner, the paint needs time to harden so it won’t chip or dent easily.
Smoother Finishes
Adding a paint conditioner like Floetrol to your white paint extends drying time slightly, allowing brush marks to level out for a factory-like finish.
Enjoy the fresh, modern vibe your bright new stools bring to your kitchen island


Moody Black For Instant Contrast

Transform a plain or outdated wooden bar stool into a modern statement piece with a rich, deep black finish that instantly adds contrast to light interiors. This moody makeover creates a sophisticated, factory-chic vibe perfect for white kitchens or neutral spaces.
Step-by-Step Guide
Materials
- Wooden bar stool
- Medium grit sandpaper (120-150 grit)
- Fine grit sandpaper (220 grit)
- Tack cloth or microfiber rags
- High-quality interior primer (bond coat)
- Matte or satin black acrylic latex paint (enamel preferred)
- 2-inch angled sash brush
- Small 1-inch paintbrush (for tight corners)
- Painter’s tape (optional)
- Canvas drop cloth
- Degreasing cleaner (like TSP substitute)
Step 1: Preparation
-
Clean and Degrease:
Begin by thoroughly cleaning the stool to remove typical kitchen grease, oils, or old wax. A degreaser or TSP substitute works best here to ensure your new paint adheres properly. -
Initial Sanding:
Scuff sand the entire surface using medium-grit sandpaper (around 120-150 grit). You don’t need to strip it to bare wood, but you must roughen the existing finish to create a ‘tooth’ for the primer. -
Dust Removal:
Wipe down the entire stool with a tack cloth or a slightly damp microfiber rag to remove every speck of sanding dust. Dust is the enemy of a smooth black finish. -
Tape Off (Optional):
If your stool has any metal glides on the feet or specific hardware you want to keep unpainted, wrap them carefully with painter’s tape now.
Step 2: Priming
-
Apply Primer:
Using your angled brush, apply a coat of high-quality bonding primer. Start with the legs and cross-braces, flipping the stool upside down to reach underneath easily. -
Get into Corners:
Use the smaller 1-inch brush to dab primer into the joints where the cross-braces meet the legs, ensuring no drips collect in these crevices. -
Dry and Inspect:
Let the primer dry completely according to the can’s instructions. Once dry, check for any drip marks or rough patches. -
Light Sanding:
Gently run fine-grit sandpaper (220) over the primed surface. This step is crucial for that factory-smooth feel; just a quick pass will knock down any raised grain.
Sticky Situation?
If the paint feels tacky after drying, humidity is likely the culprit. Move the stool to a cooler, air-conditioned room to help the curing process speed up
Step 3: Painting
-
First Coat Strategy:
Stir your matte black paint thoroughly. Flip the stool upside down again—I find this is the best way to catch missed spots on the underside of rungs. -
Painting the Legs:
Apply the paint in long, smooth strokes along the grain of the wood. Don’t overload your brush; two thin coats are always better than one thick, drippy one. -
Flip and Top:
Turn the stool right-side up and paint the seat. Work from the center outward to edges to avoid pooling paint on the rim. -
Dry Time:
Allow the first coat to dry for at least 4-6 hours. Black paint can sometimes look patchy while drying, so don’t panic if it isn’t perfect yet. -
Sand Between Coats:
Very lightly sand with 220 grit paper again. This removes brush marks and dust nibs, making the final surface feel professional. -
Final Coat:
Apply the second coat of black paint, paying extra attention to the seat and any high-traffic areas where feet might rest. -
Curing:
Let the stool cure for at least 24-48 hours before use. Although it feels dry to the touch sooner, the paint needs time to harden against scuffs.
Add Dimension
For a slight distressed look, gently sand the edges of the seat and legs after the black paint dries to reveal a bit of raw wood, then seal with wax
Place your newly painted stool at your island and enjoy the dramatic flair it brings to your kitchen workspace


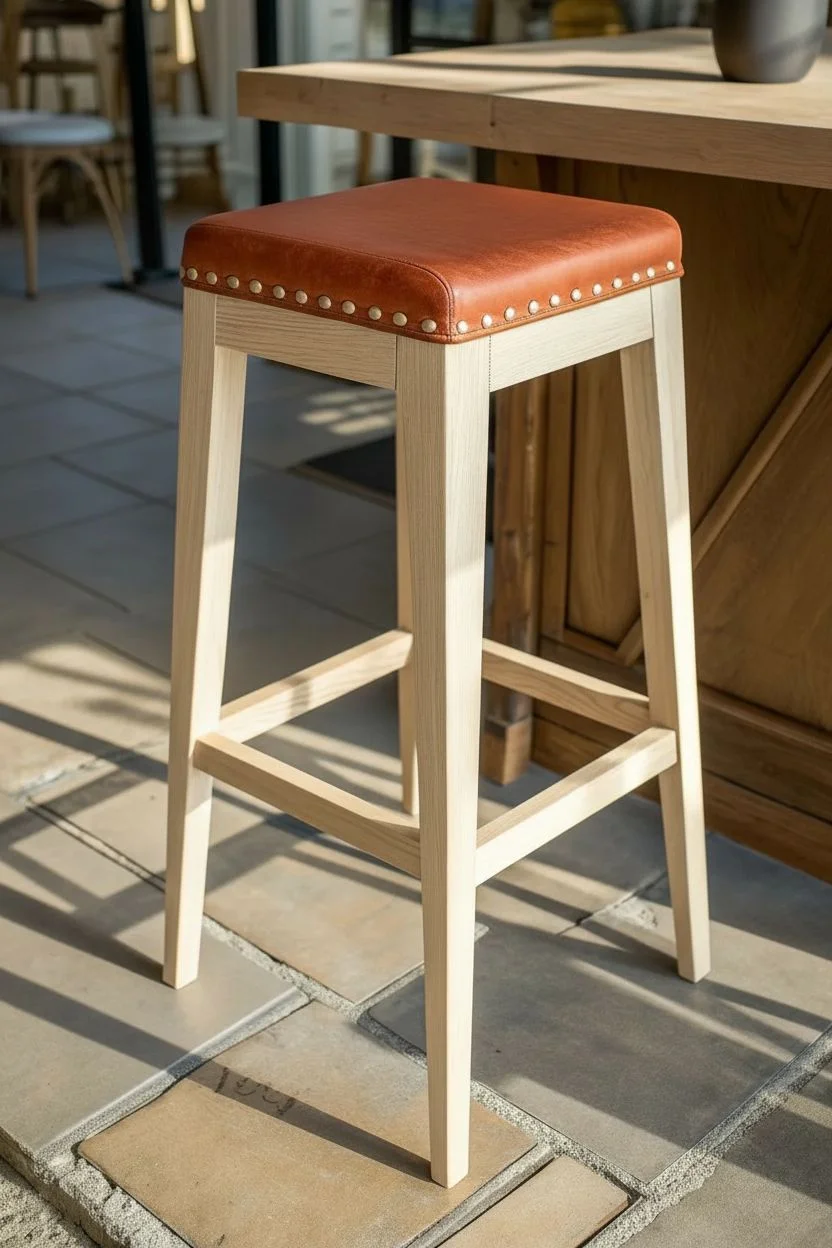
Two-Tone Seat and Base Combo
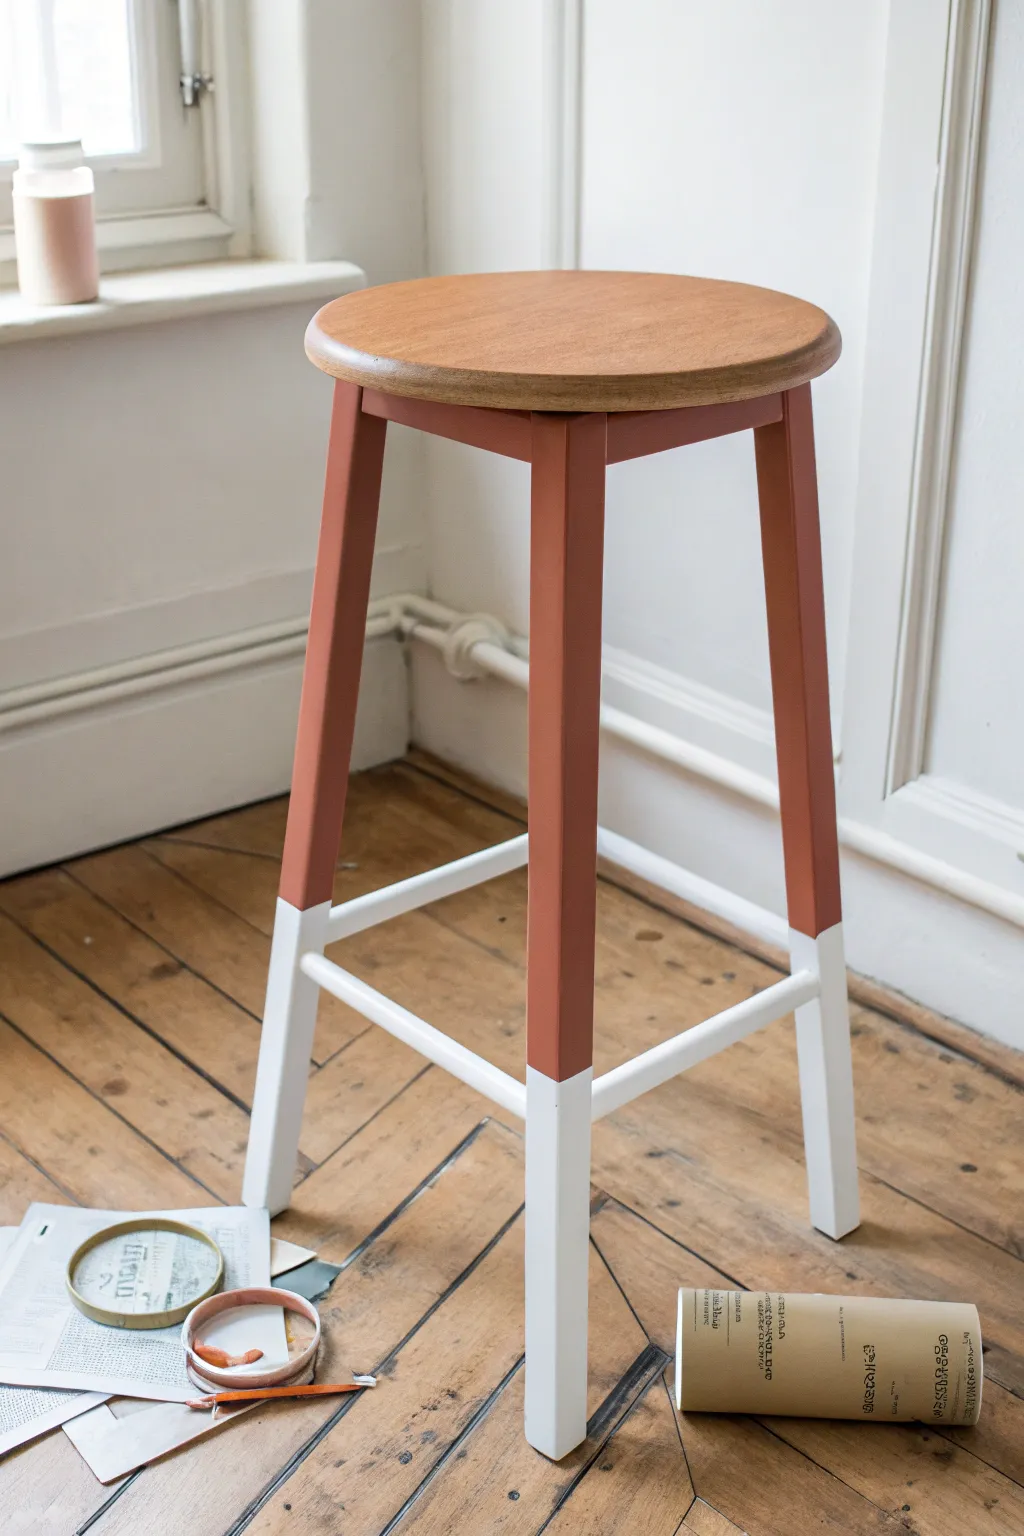
Bring a touch of modern warmth to your space with this stylish two-tone stool makeover. By combining a rich, earthy terracotta hue with crisp white accents and a natural wood seat, you’ll create a piece that feels both grounded and contemporary.
Step-by-Step Guide
Materials
- Bar stool with a wooden seat
- Sandpaper (120 and 220 grit)
- Painter’s tape (high quality)
- White primer (spray or brush-on)
- Terracotta or rust-colored furniture paint
- White furniture paint
- Clear matte or satin varnish
- Paintbrushes (one medium angled, one small detail brush)
- Small foam roller (optional for smooth finish)
- Clean cloth or tact cloth
- Drop cloth or newspapers
- Ruler or measuring tape
- Pencil
Step 1: Preparation
-
Clean the surface:
Start by wiping down the entire stool with a damp cloth to remove any dust, grease, or grime. Allow it to dry completely before moving on. -
Protect the seat:
Since we want to keep that beautiful natural wood grain on the seat, carefully apply painter’s tape around the top edge of the legs where they meet the seat. Cover the rest of the seat with newspaper or plastic to catch stray splatters. -
Sand the legs:
Use 120-grit sandpaper to scuff up the glossy finish on the legs and crossbars. This helps the primer adhere better. Wipe away the sanding dust with a tack cloth.
Bleed-Proof Lines
Use “FrogTape” (the green kind) rather than standard blue tape. Its reactive edge technology forms a gel barrier when wet, giving you a significantly sharper line.
Step 2: Priming and Base Coat
-
Apply primer:
Apply a coat of primer to the legs and crossbars. If the original wood is dark, a second coat might be necessary to ensure the white paint pops later. Let this dry according to the manufacturer’s instructions. -
Light sanding:
Once the primer is dry, give it a quick, light pass with 220-grit sandpaper to smooth out any brush strokes or bumps. -
Paint the white section:
Paint the bottom third of the legs and the lower crossbars with your white furniture paint. Don’t worry about a perfect line at the top yet; just paint high enough to cover the dipped area. -
Let it cure:
Allow the white paint to dry completely. This is crucial because we will be applying tape over it, and we don’t want to peel the paint off.
Step 3: Creating the Dipped Look
-
Measure the line:
Decide where you want the color transition to be. In the example, the switch happens right above the lower crossbars. Measure up from the floor on each leg and mark this height lightly with a pencil. -
Apply the tape:
Wrap painter’s tape around each leg at your pencil marks. Press the bottom edge of the tape down firmly with your fingernail or a credit card to seal it tight—this prevents the terracotta paint from bleeding under. -
Seal the edge:
I like to brush a tiny amount of the *white* paint over the edge of the tape first. This seals any microscopic gaps; if anything bleeds, it will be white-on-white and invisible. -
Paint the terracotta:
Now, paint the upper portion of the legs and the upper crossbars with your terracotta color. Use smooth, vertical strokes. -
Second coat:
Once the first coat is dry to the touch, apply a second coat of terracotta for a rich, opaque finish. -
Remove the tape:
While the final coat of terracotta paint is still slightly tacky (not fully dry), carefully peel off the tape at a 45-degree angle. This ensures a crisp, sharp line without chipping.
Create a Set
If you are painting multiple stools, vary the height of the “dip” line on each one slightly, or use different earth-tones like sage green and mustard for an eclectic look.
Step 4: Finishing Touches
-
Touch ups:
Inspect your lines. If any paint bled through, use a small detail brush or an artist’s brush to carefully touch up the transition. -
Sand the seat (optional):
If the wooden seat needs refreshing, lightly sand it with 220-grit paper to remove old varnish. -
Seal the seat:
Apply a clear wax or oil to the wooden seat to nourish the wood and give it a soft sheen. -
Apply varnish:
To protect your hard work from scuffs and shoes, apply a clear protective varnish over the painted legs. Two thin coats are better than one thick one. -
Dry time:
Let the stool cure fully for at least 24 hours before using it to ensure the finish is hard and durable.
Place your newly painted stool in the kitchen or studio and enjoy the burst of color it adds to the room
BRUSH GUIDE
The Right Brush for Every Stroke
From clean lines to bold texture — master brush choice, stroke control, and essential techniques.
Explore the Full Guide
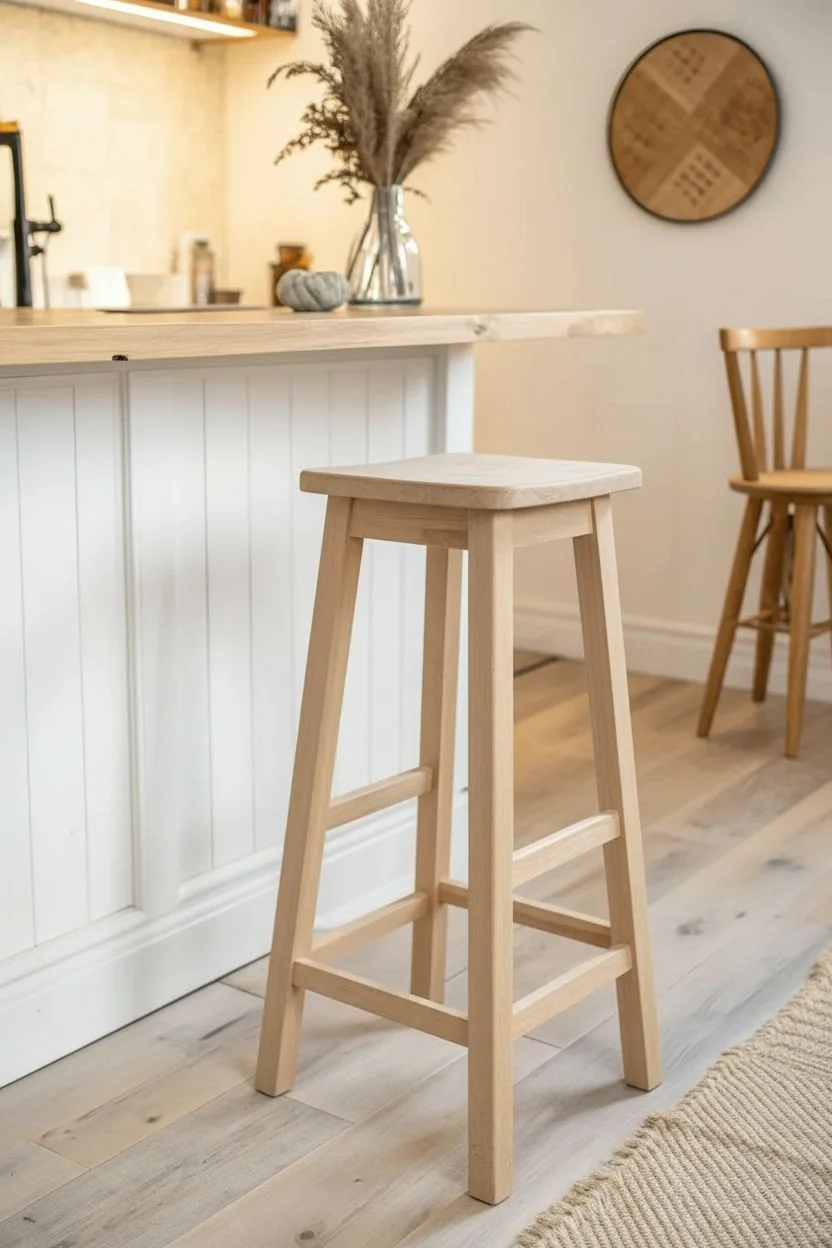
Natural Wood Seat With Painted Frame
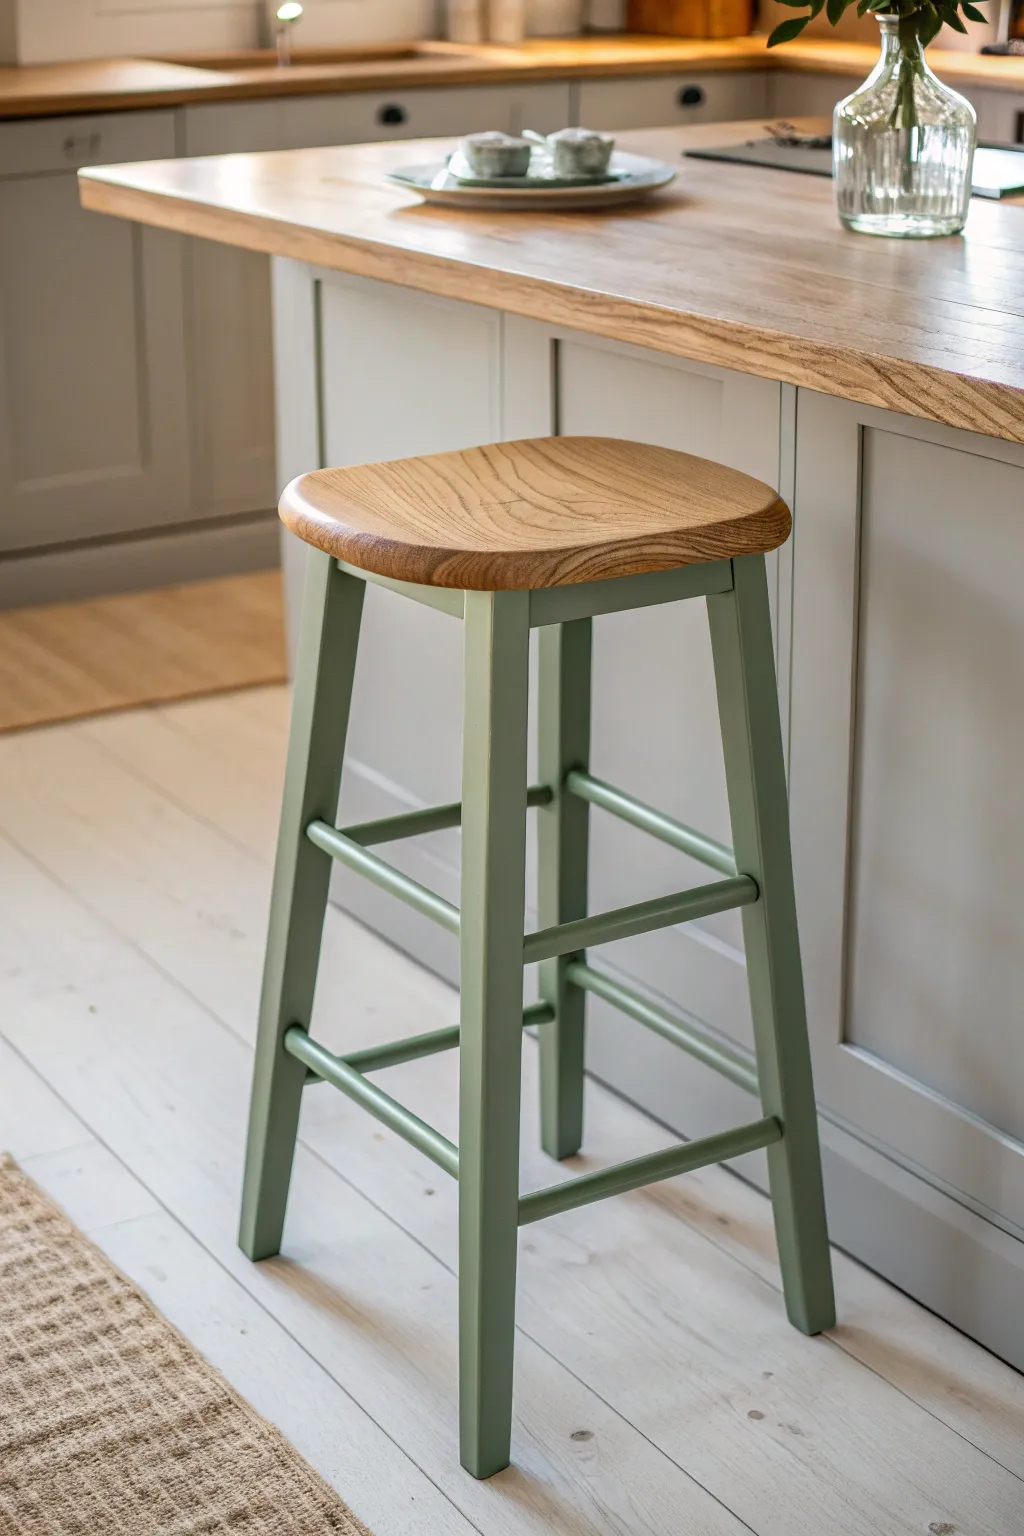
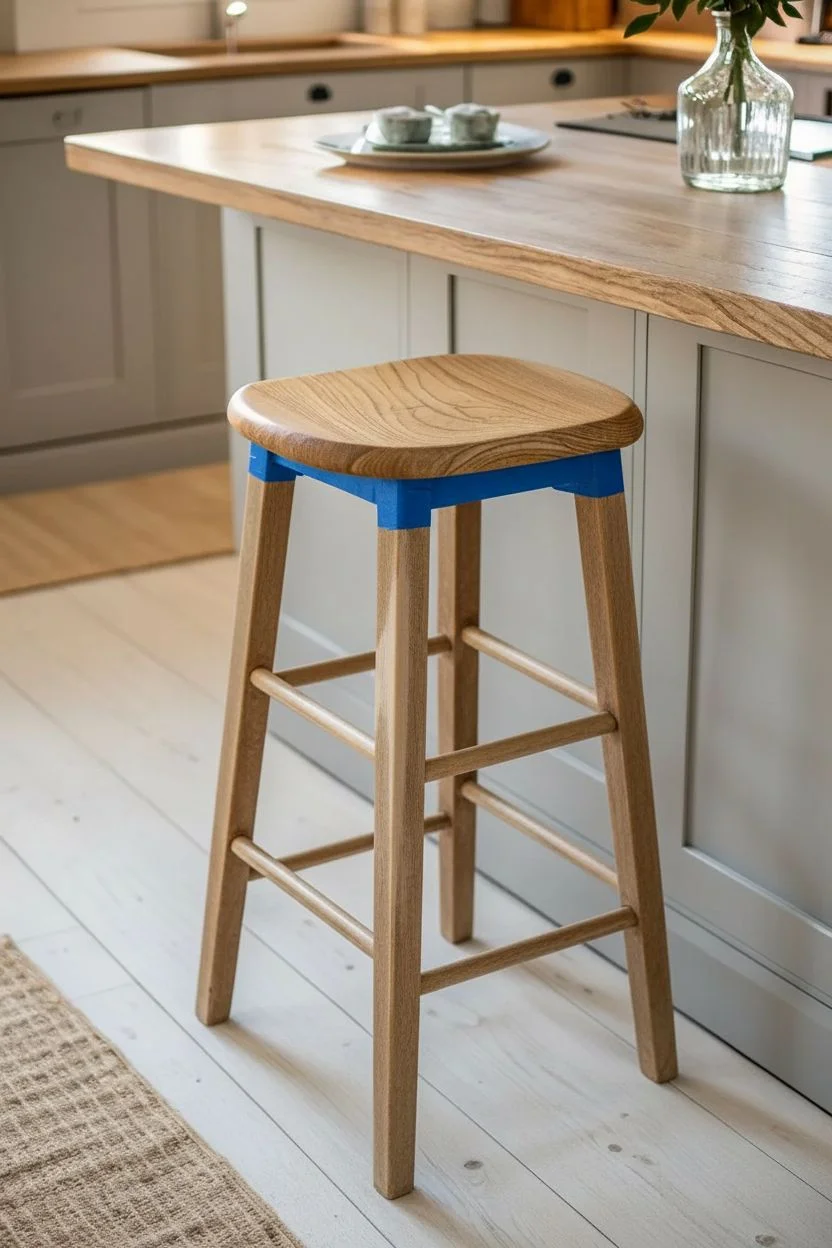
Transform a plain wooden stool into a piece of custom furniture with this elegant two-tone look. By combining the warmth of natural wood grain with a trendy muted soft sage green frame, you create a sophisticated yet cozy seating option perfect for farmhouse or modern kitchens.
Detailed Instructions
Materials
- Unfinished wooden bar stool (or an existing one to strip)
- Orbital sander
- Sandpaper (80, 120, and 220 grit)
- Painter’s tape (high quality)
- Wood stain (optional, light oak tone)
- Polycrylic topcoat or polyurethane (satin finish)
- Primer suitable for wood
- Furniture paint (soft sage green, satin or eggshell finish)
- Angled sash brush (1.5 to 2 inch)
- Small foam roller
- Tack cloth
- Drop cloth
Step 1: Preparation & Sanding
-
Clean the Surface:
Begin by wiping down the entire stool with a damp cloth to remove any dust or grease. If you are refinishing an old stool, use a degreaser to ensure a clean base. -
Sand the Seat:
Using an orbital sander with 80-grit paper, sand the seat top to remove any old finish or rough spots. Follow up with 120-grit, and finish with 220-grit for a buttery smooth surface. The goal is to reveal the raw, beautiful wood grain. -
Sand the Frame:
Scuff sand the legs and crossbars by hand using 120-grit sandpaper. You don’t need to remove all the old finish down to bare wood here; just create a rough texture so the primer adheres properly. -
Remove Dust:
Wipe away all sanding dust meticulously with a tack cloth. Any leftover particles will ruin your smooth paint finish.
Paint Peeling?
If paint scrapes off easily, you likely skipped the scuff-sanding step. Sand the peeling area smooth, apply a bonding primer specifically for glossy surfaces, and repaint.
Step 2: Treating the Seat
-
Tape Off the Legs:
Apply painter’s tape around the very top of the legs where they meet the seat. This protects the area you intend to paint later. -
Apply Clear Coat or Stain:
If you love the raw wood look shown in the image, skip stain and go straight to a clear coat. If you want a specific tone, apply a light oak stain with a rag, wiping off excess immediately. -
Seal the Wood:
Apply a thin layer of satin Polycrylic to the seat using a synthetic brush. I find long, even strokes with the grain give the best result. -
Sand Between Coats:
Once dry (check manufacturer times), lightly hand-sand with 220-grit paper to knock down any raised grain. -
Final Seal:
Apply a second and third coat of Polycrylic for durability, allowing full drying time between layers. Once the final coat is cured, cover the seat completely with plastic or paper and tape it off to protect it during the painting phase.
Step 3: Painting the Frame
-
Flip and Prime:
Flip the stool upside down on a drop cloth. Apply a coat of high-quality wood primer to the legs and supports. Use an angled brush to get into corners and a small foam roller for the round legs to avoid brush marks. -
Inspect and Sand Primer:
Once the primer is dry, check for drips. Lightly sand any rough patches with 220-grit paper and wipe clean. -
First Coat of Color:
Stir your sage green furniture paint thoroughly. Using your angled brush, start painting the tricky areas like the joints and underside of the rungs first. -
Rolling the Legs:
While the paint is wet, use a small foam roller on the longer straight sections of the legs to smooth out the finish. -
Dry and Repeat:
Allow the first coat to dry completely. Apply a second coat using the same method to ensure full, opaque coverage. -
Optional Topcoat:
If you used a self-sealing furniture paint, you can skip this. Otherwise, apply a coat of clear matte or satin poly over the green paint to protect it from scuffs.
Get a Factory Finish
For the smoothest legs possible, consider using a paint sprayer instead of a brush. Thin your paint with a conditioner like Floetrol to help it level out perfectly without brush marks.
Step 4: Finishing Touches
-
Remove Tape:
Carefully peel away the painter’s tape from the seat. Do this slowly while the final coat of paint is still slightly tacky to ensure a crisp line. -
Add Protection:
Attach felt pads or plastic glides to the bottom of the feet to protect your floors. -
Cure Time:
Let the stool cure for at least a few days before heavy use to let the finish harden completely.
Now you have a beautifully refreshed stool that looks custom-made for your space
Metal Bar Stool Color Refresh With Rust-Smart Prep
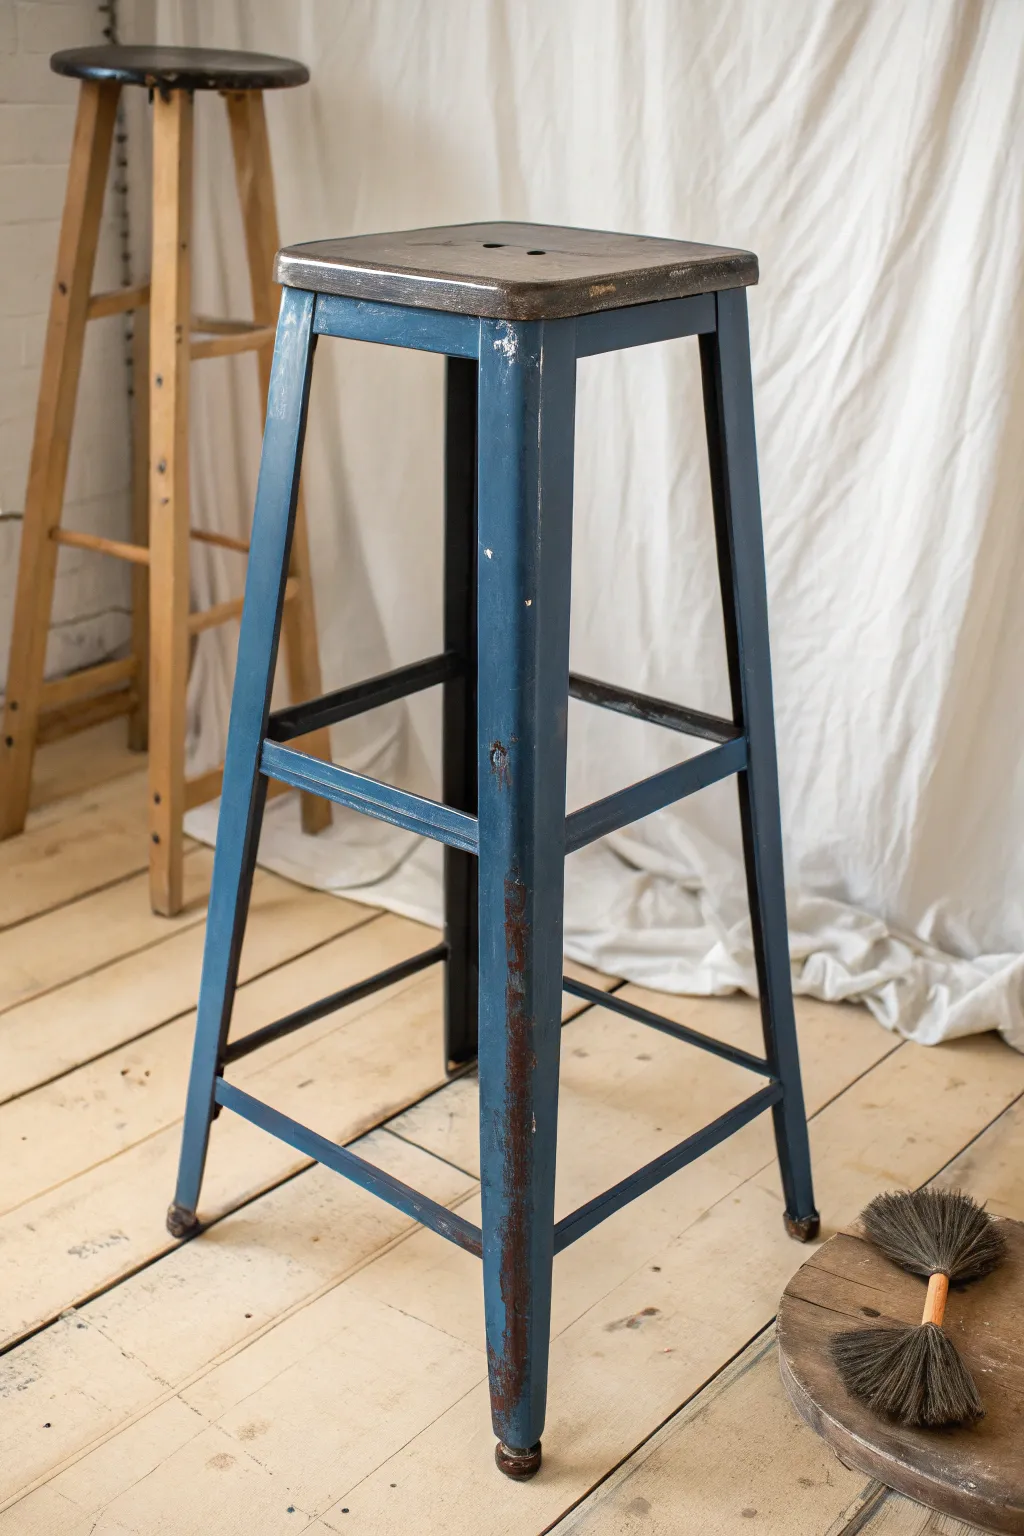
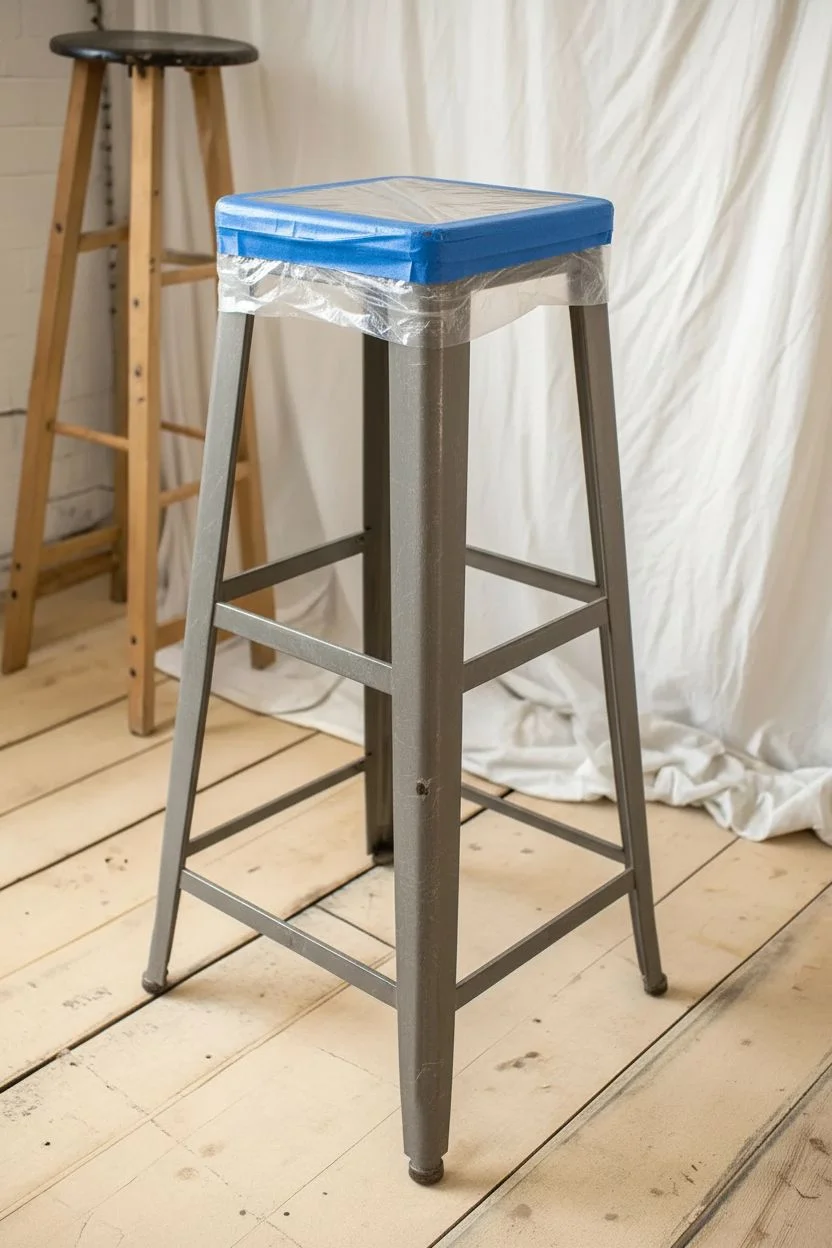
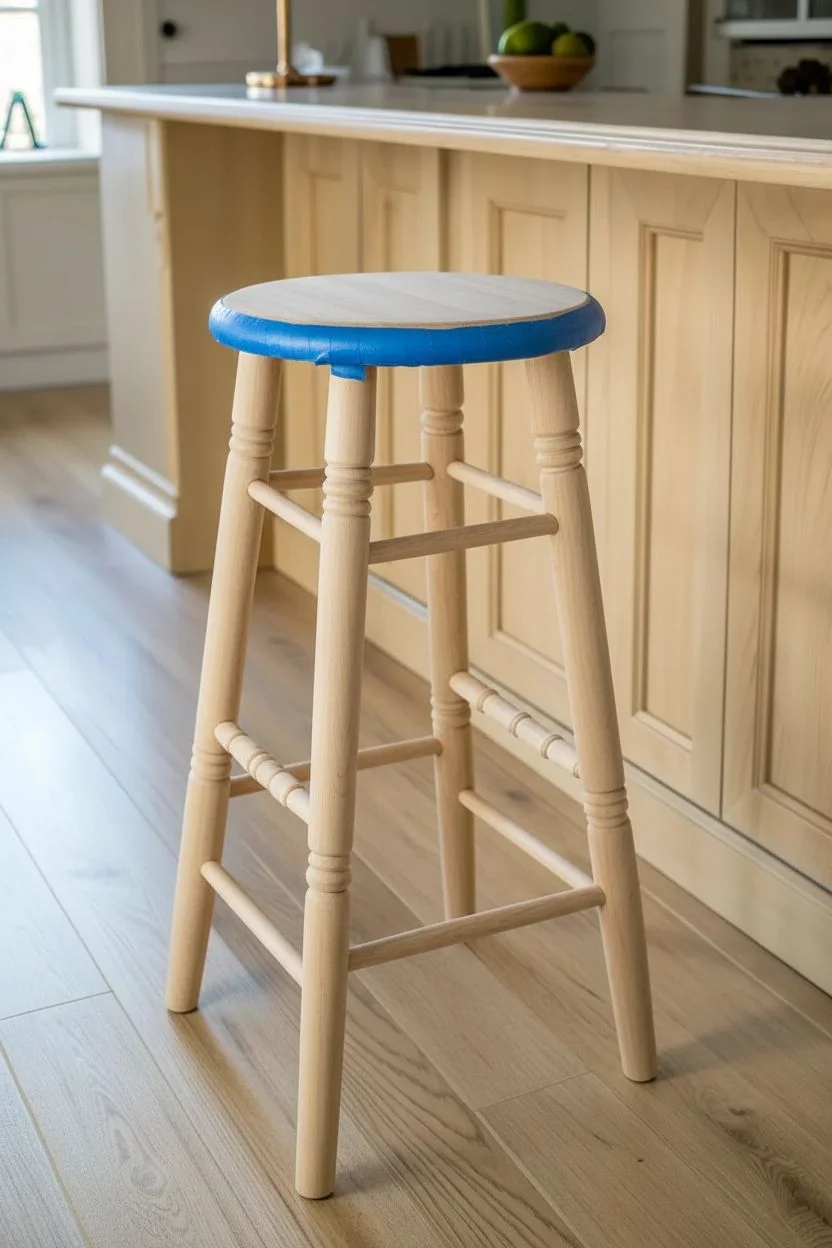
Transform a generic metal stool into a vintage-industrial statement piece with this clever layering technique. By intentionally revealing rust tones under a deep blue finish, you’ll achieve an authentic workshop aesthetic that looks decades old.
Step-by-Step
Materials
- Tolix-style metal bar stool
- Medium-grit sandpaper (120-150 grit)
- Fine-grit sandpaper (220 grit)
- Wire brush
- Damp cleaning cloth
- Mild degreaser or soapy water
- Rust-colored metal primer (red oxide)
- Deep slate blue spray paint (satin or matte finish)
- Matte clear coat sealer
- Petroleum jelly or candle wax
- Drop cloth
- Painter’s tape and plastic bag (to cover the wooden seat if applicable)
Step 1: Preparation & Cleaning
-
Protect the Wood:
If your stool has a wooden seat like the one pictured, protect it carefully. Wrap the entire seat in a plastic bag and secure it tightly underneath with painter’s tape to ensure a sharp paint line. -
Scrub the Surface:
Clean the entire metal frame thoroughly with warm soapy water or a mild degreaser. Metal furniture often accumulates oils that repel paint, so a good scrub is essential. -
Scuff Sanding:
Using your medium-grit sandpaper, gently scuff the entire metal surface. You aren’t trying to remove all the old finish, just creating a textured ‘tooth’ for the new primer to grab onto. -
Address Flaking:
If there are any areas of old, loose paint, use a wire brush to knock them away until the surface is solid. -
Final Wipe Down:
Remove all sanding dust with a damp cloth and let the stool dry completely before moving to the painting phase.
Paint Wont’t Stick?
If the paint separates or ‘fisheyes’ on the metal, there is likely residual grease. Let it dry, sand that spot back, clean with mineral spirits, and re-spray.
Step 2: Building the ‘Rust’ Base
-
Apply Red Oxide Primer:
Spray the entire metal frame with a rust-colored (red oxide) metal primer. This color will act as your ‘fake rust’ later on. -
Target the Wear Points:
Ensure you get solid coverage on the corners of the legs, the footrests, and the very top edges where the metal meets the wood seat, as these are natural wear spots. -
Dry Time:
Allow the primer to dry fully according to the can’s instructions, usually about 1-2 hours. -
Apply the Resist Medium:
To create the chipped effect, use your finger to smear small dabs of petroleum jelly or rub a candle on specific areas where you want the ‘rust’ to show through. -
Strategic Placement:
Focus your petroleum jelly application on the vertical edges of the legs and the corners of the cross-braces, mimicking natural wear patterns.
Step 3: The Blue Transformation
-
First Coat of Blue:
Shake your deep slate blue spray paint well. Apply a light, even coat over the entire stool, spraying right over the petroleum jelly spots. -
Avoid Drips:
Keep the can moving constantly to prevent drips. It’s better to do two thin coats than one heavy, runny one. -
Second Coat:
Once the first coat is tacky dry (usually 15-20 minutes), apply a second coat to ensure full, opaque coverage of the red primer. -
Wait for Drying:
Let the paint dry until it is no longer tacky but not fully cured—usually about an hour.
Dark Wax Detail
After the clear coat dries, rub dark furniture wax over the blue paint and into the crevices. Buff it off to leave a grime-like, antique patina in the corners.
Step 4: Distressing & Finishing
-
Reveal the Rust:
Take a dry cloth or paper towel and wipe the areas where you applied the petroleum jelly. The blue paint will wipe right off, revealing the rusty red primer underneath. -
Enhance with Sanding:
For a more weathered look, take fine-grit sandpaper and lightly distress other edges. I like to sand until I see a tiny bit of bare metal peeking through the ‘rust’ primer for extra depth. -
Clean and Seal:
Wipe away any oily residue or dust with a clean, dry cloth. -
Final Protection:
Spray the entire metal frame with a matte clear coat. This seals the finish and prevents the ‘fake rust’ spots from accidentally peeling further. -
Unmask the Wood:
Carefully remove the tape and plastic from the wooden seat to reveal your beautifully contrasted, industrial-style stool.
Now you have a rugged, industrial seating option that brings instant character to your kitchen or workspace

PENCIL GUIDE
Understanding Pencil Grades from H to B
From first sketch to finished drawing — learn pencil grades, line control, and shading techniques.
Explore the Full Guide
High-Gloss Pop for a Statement Stool
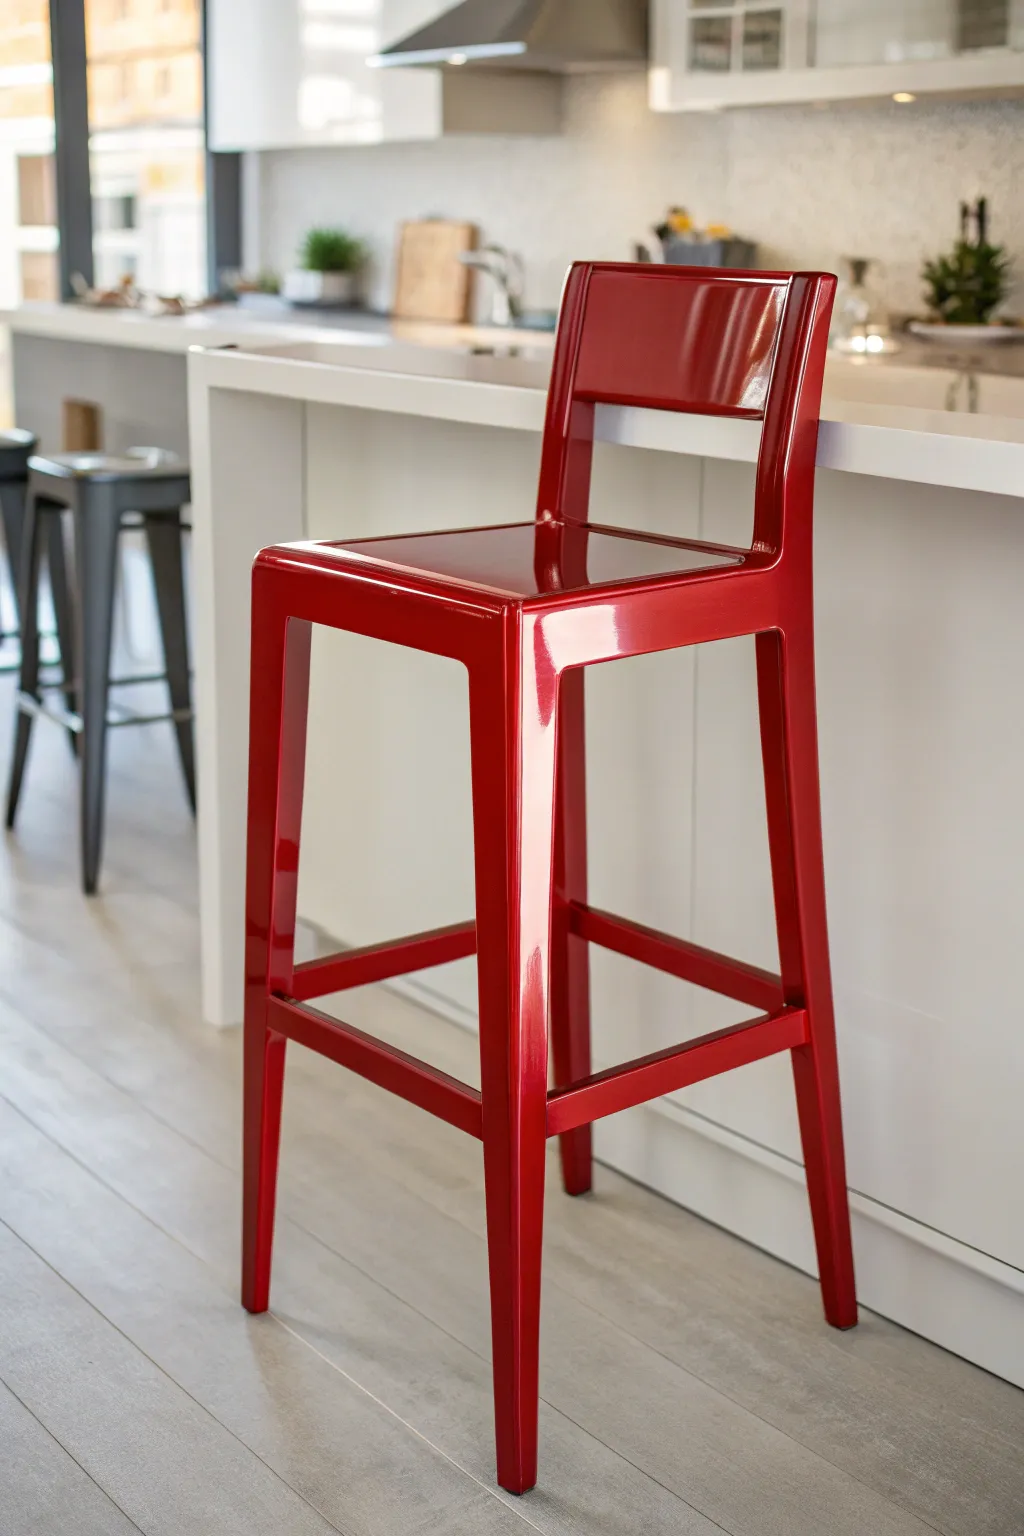
Transform a plain or tired bar stool into a show-stopping focal point with this ultra-high-gloss finish. The deep, lipstick-red color combined with a mirror-like shine creates a modern, lacquered look that instantly elevates any kitchen island.
Step-by-Step Guide
Materials
- Bar stool (wooden is easiest, metal requires specific primer)
- Medium-grit sandpaper (120-150 grit)
- Fine-grit sandpaper (220-320 grit)
- Tack cloth and microfiber rags
- High-quality spray primer (grey or white)
- High-gloss enamel spray paint (Cherry Red)
- Clear gloss polyurethane or lacquer spray/can
- Plastic drop cloths
- Painter’s tape
- Respirator mask
- Degreaser or TSP substitute
Step 1: Preparation & Priming
-
Clean thoroughly:
Begin by scrubbing the entire stool with a degreaser or TSP substitute. Kitchen stools often collect hidden grease, which is the enemy of a glossy finish, so be thorough. -
Scuff sand:
Using medium-grit sandpaper, sanding the entire surface. You don’t need to strip it to bare wood, but you must dull the previous finish completely to help the new paint stick. -
Dust removal:
Wipe away the heavy dust with a dry rag, then go over every inch with a tack cloth to pick up fine particles. Dust is the biggest threat to high-gloss finishes. -
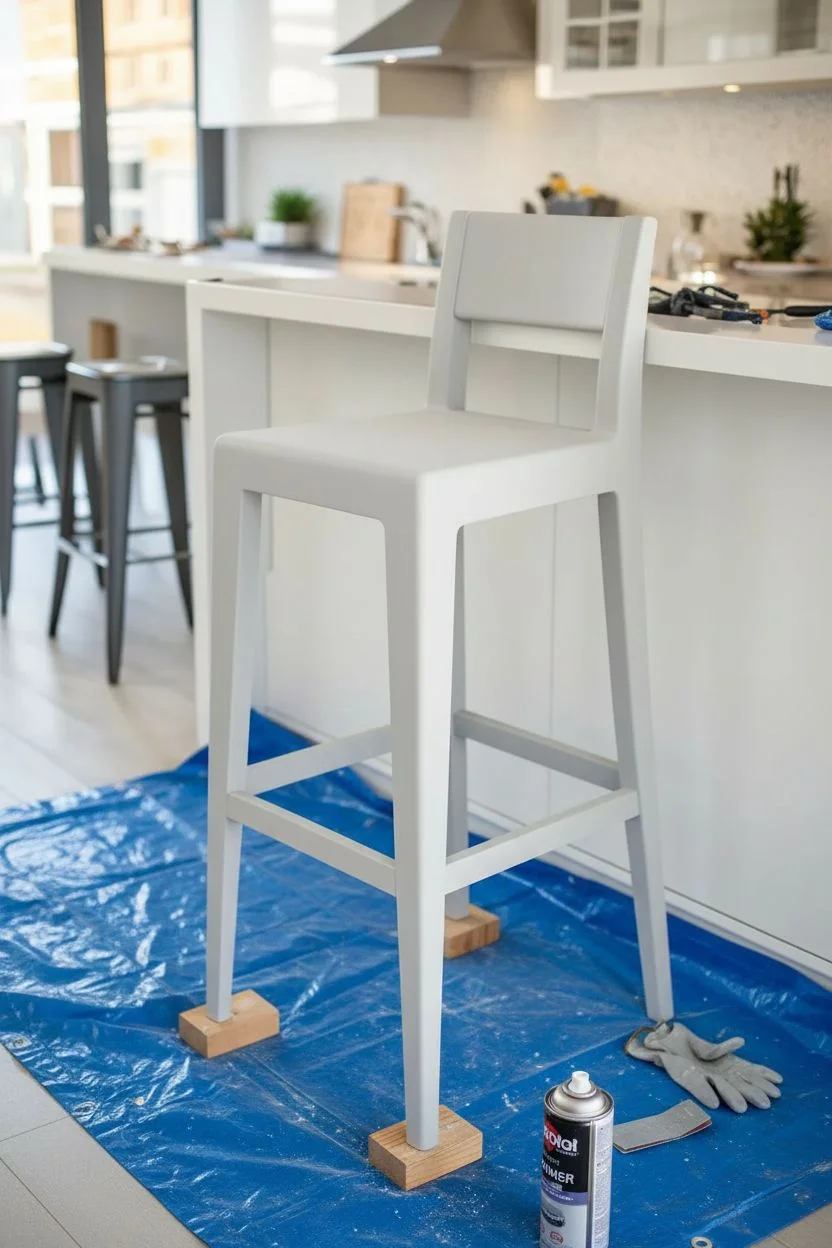
Setup workspace:
Move to a well-ventilated, dust-free area. Lay down your drop cloths and prop the legs up on small blocks or scrap wood to reach the bottom feet easily. -
Apply primer:
Shake your primer can vigorously. Apply a thin, even coat, keeping the can moving to avoid drips. I prefer grey primer for deep reds as it helps build color richness faster than white. -
Sand the primer:
Once the primer is fully dry, lightly sand it with fine-grit paper until it feels smooth as glass. Wipe clean with a fresh tack cloth.
Fixing the Drips
Wait for the drip to dry fully (don’t wipe it wet!). Slice the top off with a razor blade, sand the spot flat with 320-grit paper, and respray the area.
Step 2: The Color Coats
-
First color pass:
Apply your first coat of high-gloss red. Keep this coat light and misty; don’t try to get full opacity yet, or you’ll risk runs. -
Drying time:
Allow this coat to dry according to the manufacturer’s instructions. Do not rush this, as trapped solvents can ruin the gloss later. -
Second color pass:
Apply a second, slightly heavier coat. Focus on maintaining a ‘wet edge’ by slightly overlapping your spray lines to ensure a consistent sheen. -
Check for flaws:
Inspect the stool under bright light. If you see any dust nibs, let the paint cure, lightly sand them out with 320-grit paper, and wipe clean before the next coat. -
Final color coat:
Apply the final red coat for deep, opaque coverage. By now, the color should be rich and even across all surfaces.
Step 3: The Mirror Finish
-
Clear coat preparation:
Wait 24-48 hours for the color to fully cure. Lightly wipe with a tack cloth one last time to ensure absolutely no dust is present. -
Apply clear gloss:
Spray a coat of clear gloss lacquer or polyurethane. This adds depth and protects the paint from chipping. -
Build the shine:
Apply 2-3 coats of clear gloss allowing proper drying time between each. Multiple thin clear coats create that deep ‘dipped in liquid’ look. -
The final cure:
Leave the stool untouched in a dust-free area for at least 3-5 days. High-gloss finishes stay soft for a while, and handling it too soon will leave permanent fingerprints. -
Buff (optional):
For extreme perfectionists, you can use a fine polishing compound and a microfiber cloth to buff out any final imperfections once fully cured.
Two-Tone Twist
Before clear coating, mask off the bottom 3 inches of the legs and spray them gold or copper for a trendy ‘dipped leg’ effect.
Enjoy the sleek, vibrant addition to your kitchen space
Matte, Chalky Finish for a Soft Farmhouse Vibe
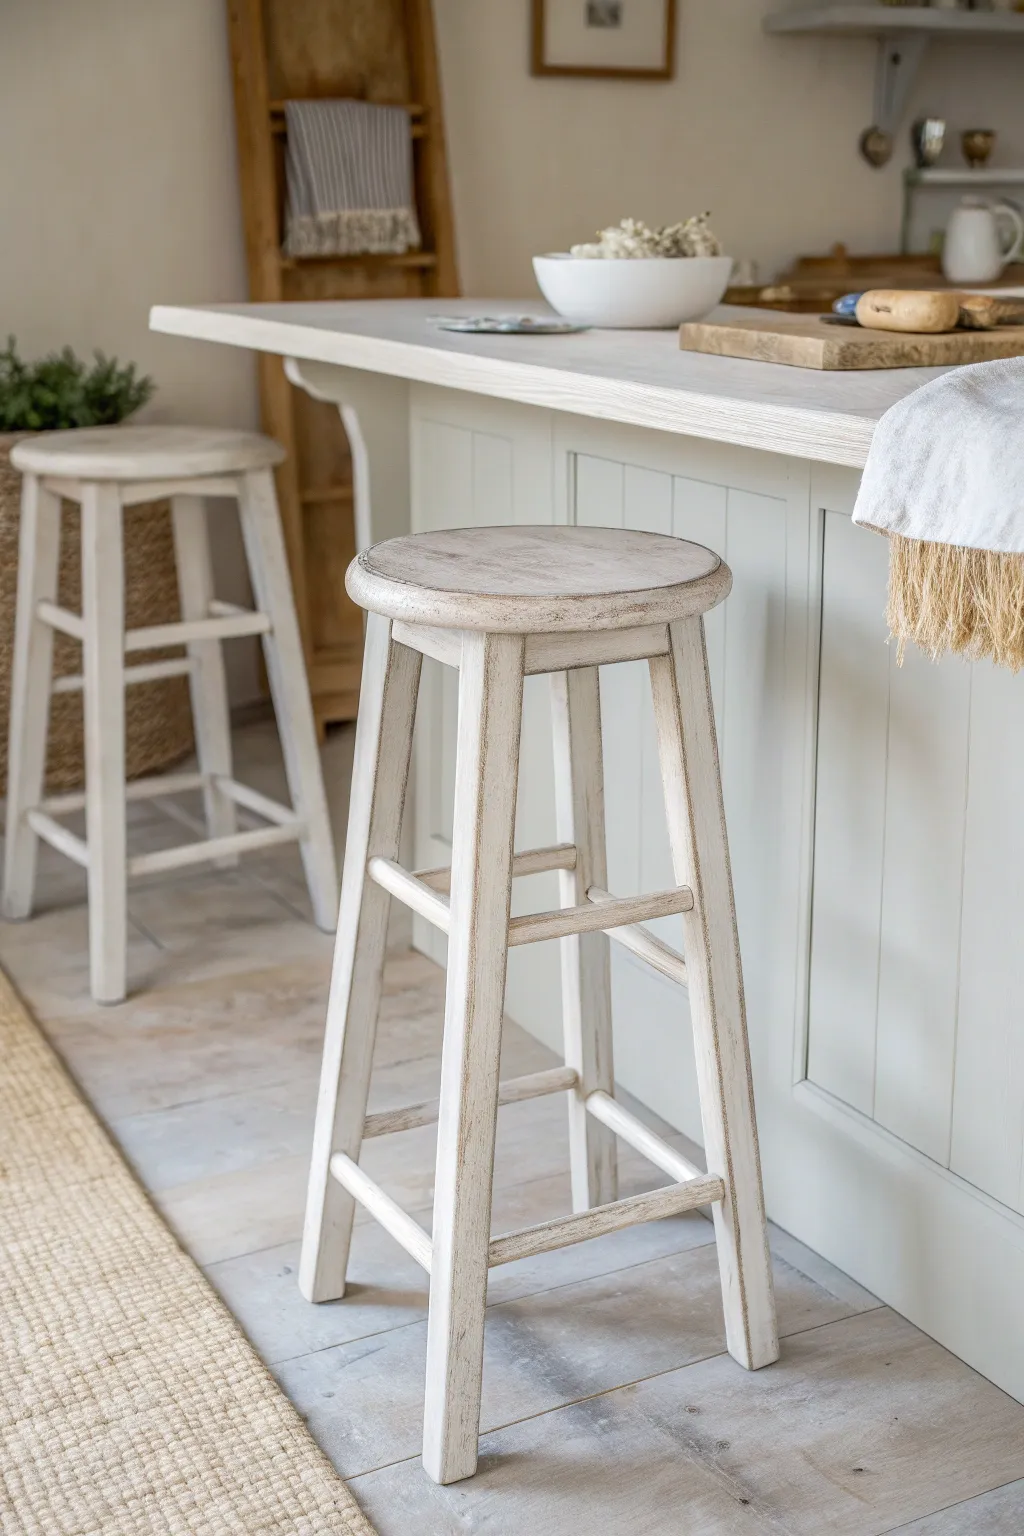
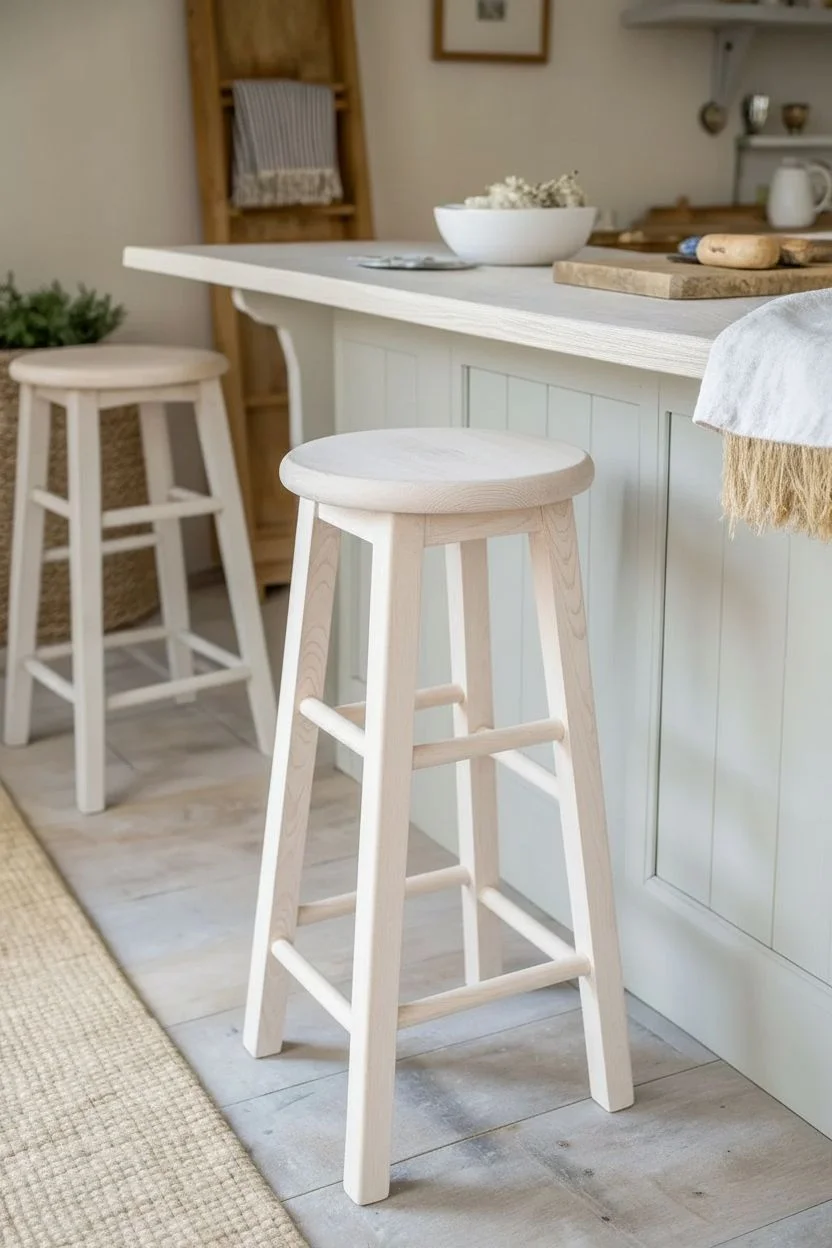
Achieve a dreamy, sun-bleached look on your wooden bar stools with this layering technique that highlights natural wood grain. This project uses chalk paint and wax to create a soft, matte finish that feels perfectly at home in a rustic kitchen.
How-To Guide
Materials
- Wooden bar stool (unfinished or stripped)
- Medium-grit sandpaper (120-150 grit)
- Fine-grit sandpaper (220 grit)
- Tack cloth or damp rag
- White chalk paint (or soft cream)
- Water for diluting paint
- Paint mixing container
- Synthetic bristle paintbrush (2-inch)
- Lint-free cotton rags
- Clear furniture wax
- White or liming wax
- Wax brush or clean cloth
Step 1: Preparation
-
Assess the surface:
Begin by checking your stool’s current condition. If it has a glossy varnish or thick paint, you’ll need to strip it down to raw wood first for this specific wash effect to work properly. -
Initial sanding:
Sand the entire stool with medium-grit sandpaper. You want to open up the pores of the wood so the wash can soak in, rather than sit on top. Focus on removing any existing sealer. -
Smooth the grain:
Follow up with a quick pass of fine-grit sandpaper. This ensures the wood feels smooth to the touch but remains porous enough to accept the pigment. -
Clean thoroughly:
Wipe down the entire stool with a tack cloth or a slightly damp rag to remove all sanding dust. Dust particles will muddy your whitewash, so be thorough here.
Step 2: Creating the Whitewash
-
Mix the wash:
In your mixing container, combine your white chalk paint with water. I generally prefer a 1:1 ratio—equal parts paint and water—to create a milky consistency that acts more like a stain than a paint. -
Test the consistency:
Test your mixture on the underside of the seat. If it’s too opaque, add a splash more water. If it’s too transparent, stir in a little more paint.
Grain Guidance
Work the paint deep into the open grain using circular motions first, then finish with long straight strokes before wiping. This ensures pigment actually settles into the wood texture.
Step 3: Applying the Wash
-
Paint in sections:
Dip your synthetic brush into the wash and apply it to one section of the stool at a time (e.g., just the legs or just the seat). Brush in the direction of the wood grain. -
Wipe back immediately:
While the paint is still wet, take a lint-free cotton rag and wipe the surface in the direction of the grain. This pushes the pigment into the wood pores while removing the excess sitting on top. -
Evaluate the coverage:
Check the opacity. If you want a whiter look, let this layer dry for about 20 minutes and repeat the process. The goal is to see the wood grain through the white veil. -
Finish the stool:
Continue this paint-and-wipe method across the seat, crossbars, and legs until the entire stool is covered. Ensure you wipe away any drips that gather at joints or corners. -
Let it dry:
Allow the stool to dry completely. Since chalk paint dries quickly, 1-2 hours is usually sufficient, but check the manufacturer’s instructions.
Rustic Texture Pop
For a more weathered look, use a wire brush heavily on the raw wood before painting. This digs out soft wood fibers, creating deep grooves that will catch more white wax later.
Step 4: Distressing and Waxing
-
Light distressing:
Take your fine-grit sandpaper and gently sand high-wear areas like heavy edges of the seat and where feet would rest on the crossbars. This mimics natural aging. -
Clean again:
Wipe away any new dust created by the distressing process with a clean, dry cloth. -
Apply clear wax:
Using a wax brush or cloth, apply a thin layer of clear furniture wax over the entire stool. This seals the chalk paint and provides a workable base for the next step. -
Add white wax (optional):
To enhance the ‘limed’ look shown in the photo, apply a small amount of white or liming wax into the grain and crevices. The clear wax base prevents it from staining too darkly. -
Buff to finish:
After the wax has sat for about 10-15 minutes, use a clean cotton cloth to buff the surface vigorously. This cures the wax and gives the finish that subtle, beautiful sheen seen in the image.
Place your newly refreshed stools at your kitchen island and enjoy the airy, casual elegance they bring to your space


Color-Blocked Panels for a Modern Art Feel
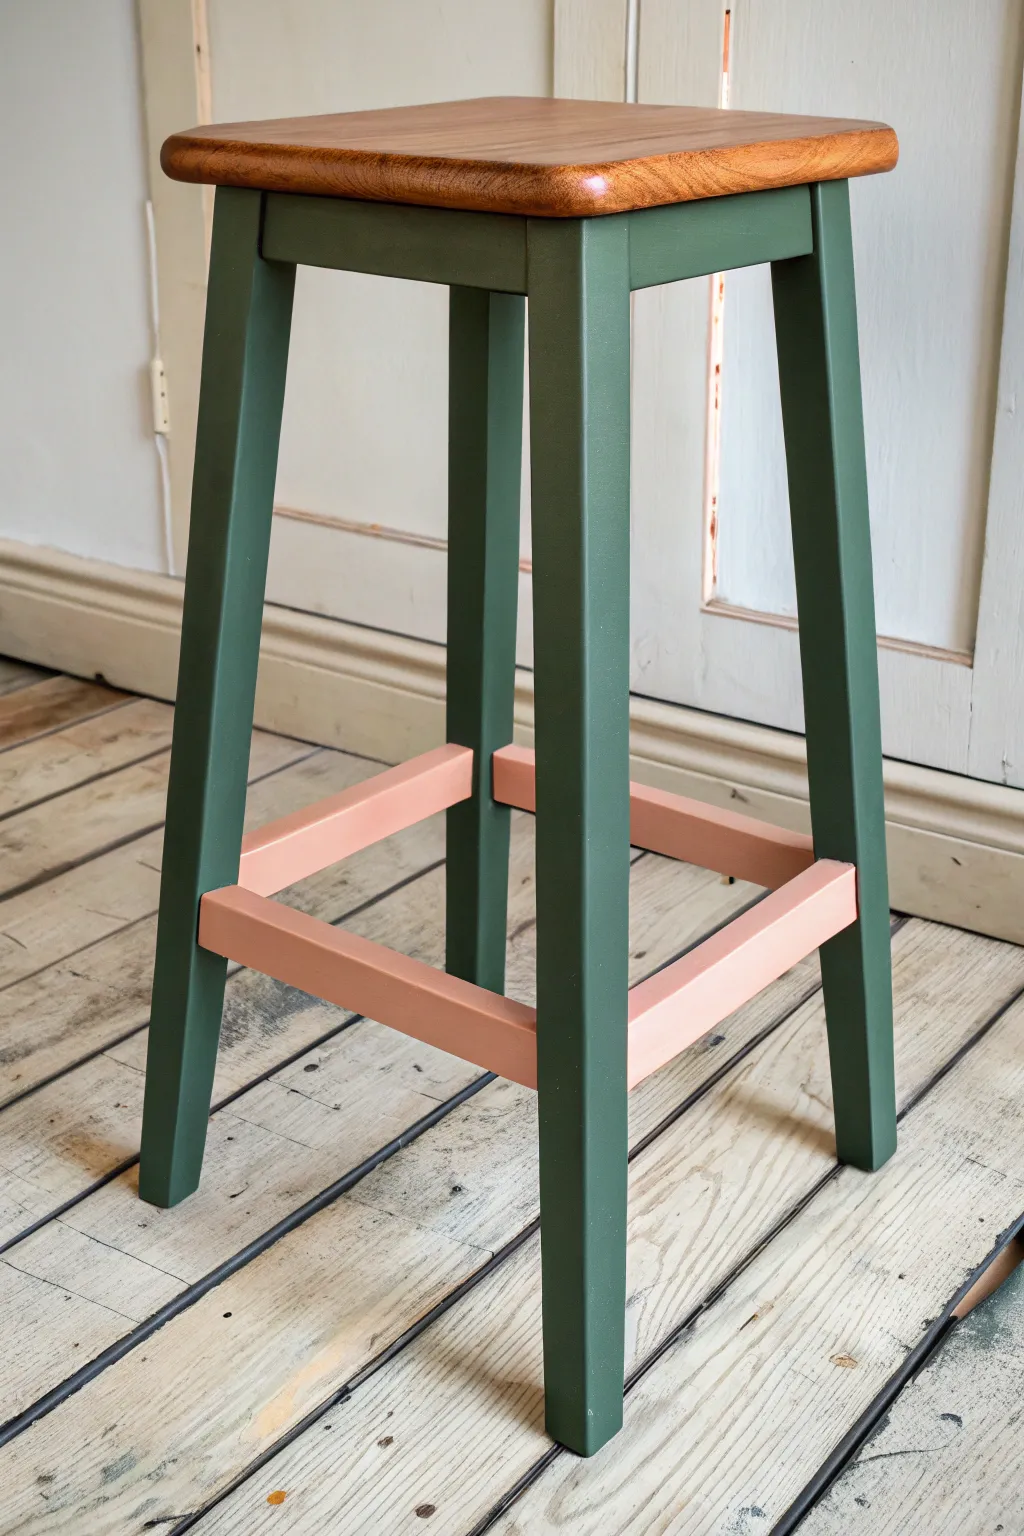
Give a simple wooden stool a striking modern update by combining natural wood tones with bold color blocking. This project pairs deep forest green legs with playful peach cross-bars for a sophisticated yet unexpected look that instantly elevates any corner.
Step-by-Step
Materials
- Wooden bar stool (unfinished or sanded down)
- Medium-grit sandpaper (120-grit)
- Fine-grit sandpaper (220-grit)
- Natural wood stain (warm oak or teak tone)
- Clean lint-free rags
- Painter’s tape (high quality)
- Primer (suitable for wood)
- Furniture paint (Forest Green, matte or eggshell finish)
- Furniture paint (Peach/Soft Pink, matte or eggshell finish)
- Small foam roller
- Angled sash brush (1.5 inch)
- Small artist brush
- Clear matte varnish or polycrylic topcoat
- Drop cloth
Step 1: Preparation & Staining
-
Clean the surface:
Start by wiping down your stool to remove any dust, grease, or grime. If you are using an old stool, ensure it is completely clean before moving on to sanding. -
Sand the wood:
Using 120-grit sandpaper, thoroughly sand the entire stool. If the stool has an existing finish, you’ll need to sand it back until you see raw wood, especially on the seat where the stain needs to penetrate. -
Refine the finish:
Switch to 220-grit sandpaper for a final pass. This smooths out any scratches from the coarser paper and prepares the wood fibers to accept the stain evenly. Wipe away all sanding dust with a damp cloth or tack cloth. -
Tape off the legs:
Carefully apply painter’s tape around the very top of the legs, just underneath the seat. You want to protect the leg area from the stain that will be applied to the seat. -
Apply the stain:
Dip a clean rag into your warm wood stain and rub it into the seat top and sides. Follow the direction of the wood grain for the most natural look. -
Wipe away excess:
After letting the stain sit for a few minutes (check your can’s instructions), wipe away any unabsorbed stain with a clean cloth. Let the seat dry completely, usually overnight.
Step 2: Painting the Base
-
Mask the seat:
Once the stain is fully dry, remove the old tape. Now, tape off the underside of the seat precisely where it meets the legs to protect your beautiful wood finish from the paint. -
Prime the frame:
Apply a thin coat of wood primer to the legs and the cross-bars. While not strictly necessary for all furniture paints, I find this step ensures the forest green and peach colors pop without the wood grain muddying them. -
Tape the color transition:
This is crucial for the color-blocked look: Use painter’s tape to mask off the horizontal cross-bars (stretchers) right where they join the vertical legs. Press the tape edges down firmly to prevent bleed. -
Paint the legs green:
Using an angled sash brush or a small foam roller, apply the Forest Green paint to the four vertical legs. Be careful not to paint over the tape protecting the cross-bars. -
Apply a second coat:
Let the first coat dry according to the manufacturer’s time, then lightly sand with fine paper if needed and apply a second coat of green for full, opaque coverage. -
Reveal the cross-bars:
Once the green paint is dry to the touch, carefully peel away the tape covering the ends of the cross-bars. You should have clean, unpainted wood ready for the next color. -
Mask the green legs:
Reverse the taping process. Now, apply tape to the green legs precisely around the joint where the cross-bars meet them. Take your time here to get a sharp line. -
Paint the cross-bars peach:
Apply the Peach/Pink paint to the horizontal stretchers. An angled brush works well here to get into the corners. Watch for drips on the underside of the bars. -
Second coat of peach:
After the first coat is dry, add a second coat of peach. Light colors often need a little extra coverage to look solid.
Tape Bleed Fix
If paint bled under the tape, wait until fully dry. Gently scrape the excess away with an X-Acto knife or use a tiny brush with the base color to cover the mistake.
Step 3: Finishing Touches
-
Remove tape:
Peel off all remaining painter’s tape while the final coat is still slightly tacky—this helps prevent peeling up the dry paint film. -
Touch up:
Use a tiny artist brush to fix any small bleeds or missed spots near the joints between the green and peach sections. -
Seal the stool:
Wait at least 24 hours for the paint to cure fully. Apply a clear matte varnish or polycrylic over the entire stool—seat and legs—to protect against scuffs and foot traffic.
Level Up: Dipped Feet
For added flair, tape off the bottom 3 inches of the legs and paint them gold or leave them raw wood for a trendy ‘gold-dipped’ sock effect that protects the paint.
Place your newly refreshed stool in your kitchen or studio and enjoy the burst of modern color contrast
Painted “Wear Zones” That Intentionally Highlight the Footrest
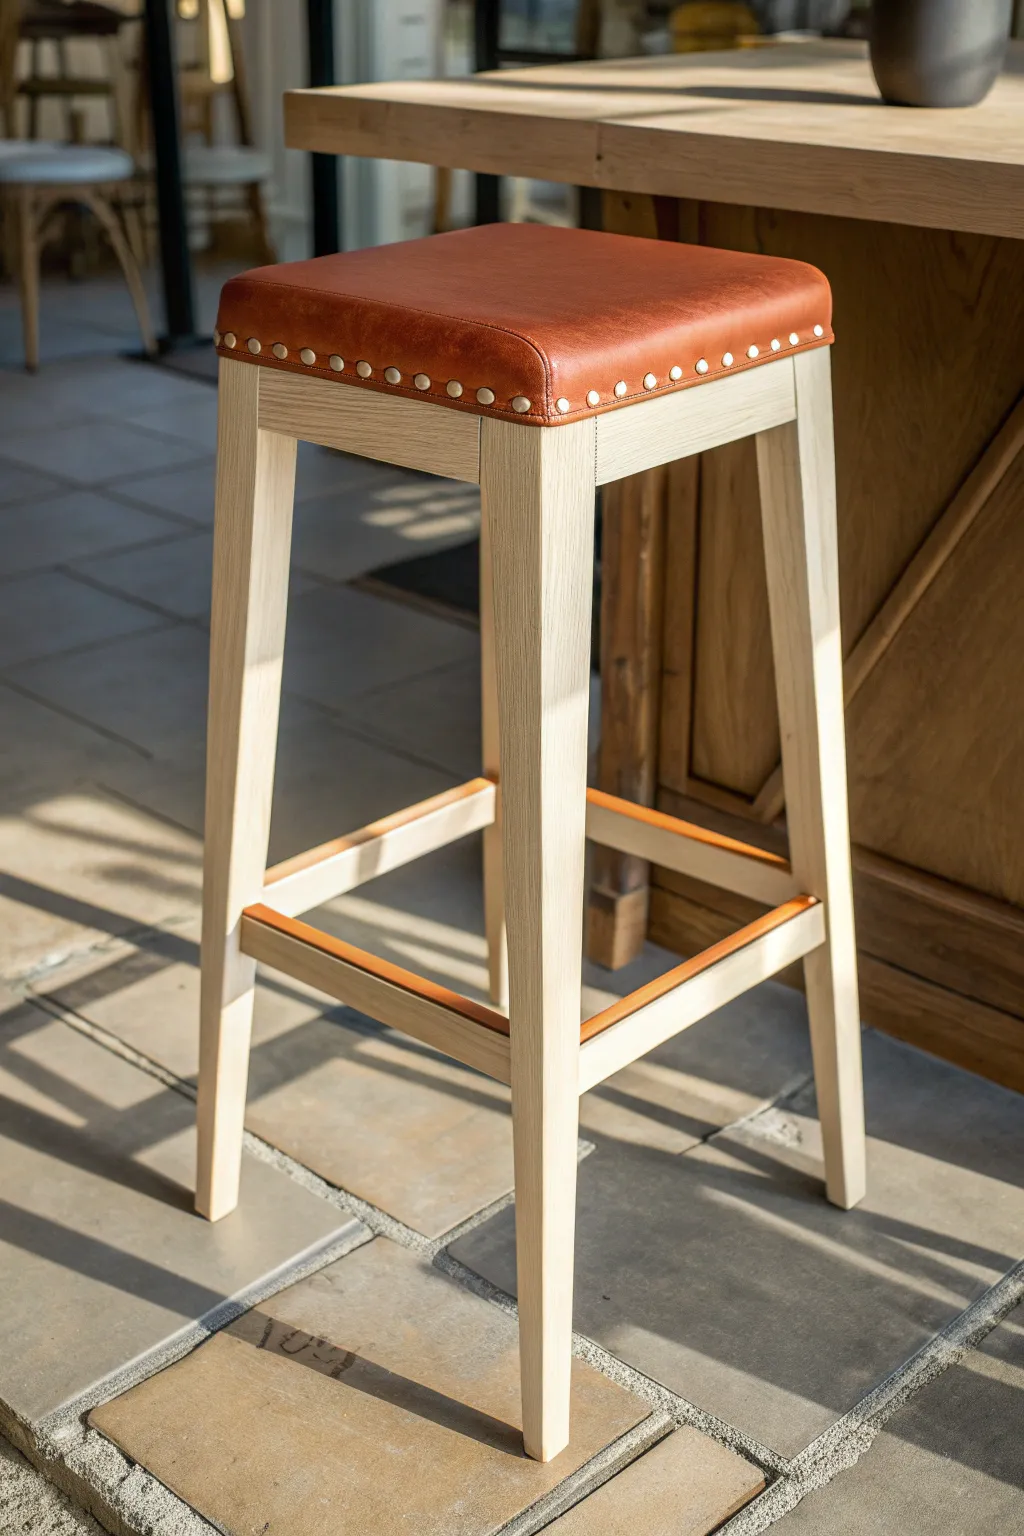
This clever upgrade protects your stool’s footrests from scuffs while adding a cohesive, high-end look that ties directly into the seat upholstery. By wrapping the highest-traffic area in matching leather, you create a thoughtful “wear zone” that looks custom-built rather than just repaired.
Detailed Instructions
Materials
- Bar stool with existing leather seat
- Matching leather or faux leather strip (approx. 2 inches wide)
- Strong leather adhesive or contact cement
- Utility knife or sharp scissors
- Measuring tape
- Straight edge ruler
- Fine-grit sandpaper (220 grit)
- Clean cloth
- Clamps or masking tape (for holding while drying)
Step 1: Preparation & Measuring
-
Clean the surface:
Before doing anything, ensure the wooden footrest rails are completely free of dust, grease, or existing wax. Wipe them down thoroughly with a damp cloth and let them dry. -
Light scuffing:
Take your fine-grit sandpaper and very lightly scuff the top surface of the footrest where the leather will sit. This gives the adhesive a better ‘tooth’ to grab onto without damaging the structural integrity. -
Measure the length:
Measure the exact length of the footrest rail, from the inside of one leg to the inside of the other. You want a precise fit here so there are no gaps at the corners. -
Determine the width:
Measure the width of the top of the rail, plus the sides if you plan to wrap it partially down the edges. In this specific look, the leather sits primarily on the top surface, perhaps curving just slightly over the eased edges.
Pro Tip: Edge Finishing
If the cut edges of your leather look too light or unfinished, run a matching furniture touch-up marker or leather edge paint along the raw side for a factory look.
Step 2: Cutting the Material
-
Select your leather:
Choose a piece of leather that matches the texture and color of your seat cushion as closely as possible. If you can’t find an exact match, a slightly darker tone often looks intentional and anchors the design. -
Mark your cuts:
Using a straight edge and a pen on the backside of the leather (the suede side), mark out your strips according to the measurements you took earlier. -
Cut the strips:
With a sharp utility knife and a metal ruler as a guide, slice your leather strips. A fresh blade is crucial here to avoid dragging or fraying the edges of the leather. -
Test fit:
Place the cut strip onto the wooden rail without glue. Check that the length is perfect; it should butt up snugly against the legs without buckling.
Step 3: Application
-
Apply adhesive to ledges:
Carefully brush a thin, even layer of contact cement or leather adhesive onto the top surface of the wooden footrest. Avoid getting glue on the vertical legs. -
Apply adhesive to leather:
Apply a corresponding layer of adhesive to the rough backside of your leather strip. I find it helpful to work on a piece of scrap cardboard to keep things tidy. -
Wait for tackiness:
If using contact cement, wait the recommended time (usually 5-10 minutes) until both surfaces feel tacky to the touch but not wet. This is critical for a permanent bond. -
Align and press:
Starting at one end, carefully position the leather strip. Once it touches, it will grab instantly, so alignment is key. Press it down firmly, working your way to the other end. -
Smooth it out:
Use a smooth, hard object (like the handle of your scissors or a bone folder) to burnish the leather down. Rub firmly along the entire strip to eliminate air bubbles and ensure full contact. -
Secure edges:
If the leather wants to curl up at the very edges while the glue cures, you can use small strips of masking tape to hold it flat against the wood. -
Clean up excess:
Inspect the edges for any tiny beads of glue that might have squeezed out. Rub them away gently with a rubber cement pickup tool or your finger before they harden completely. -
Final cure:
Allow the adhesive to cure fully according to the manufacturer’s instructions—usually 24 hours—before allowing anyone to rest their feet on the new surface.
Level Up: Decorative Nails
Add tiny brass upholstery tacks to the ends of the leather strip. It mimics the studded detail on the seat and mechanically secures the leather endpoints.
Now your stools not only look custom-designed, but they are also ready to withstand daily use with style


Have a question or want to share your own experience? I'd love to hear from you in the comments below!