When I’m hunting for fresh dress ideas to draw, I start with a strong silhouette and then let the details (drape, texture, sparkle) do the rest. Here are 20 dress drawing prompts you can use like a menu—pick one, sketch it fast, then level it up into a finished illustration.
Classic A-Line Evening Dress

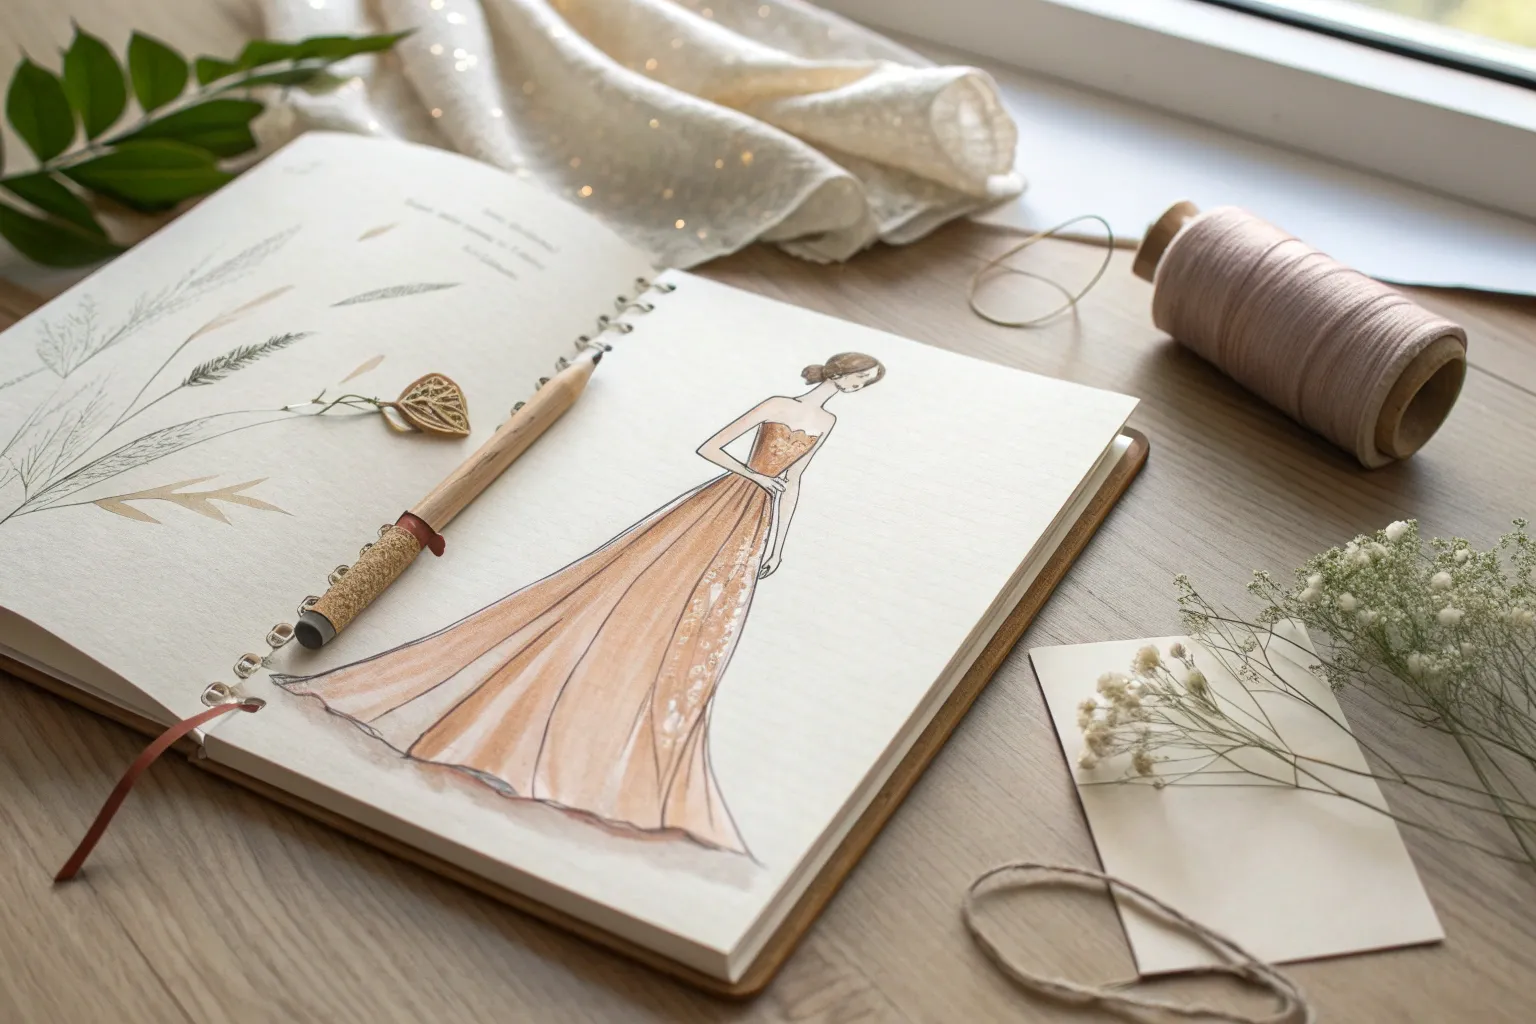
Capture the elegance of vintage fashion with this graceful A-line dress illustration. This linear drawing style builds from simple geometric shapes into a sophisticated design, perfect for practicing fabric drape and posture.
Step-by-Step Tutorial
Materials
- Sketchbook with cream or off-white paper (slight texture preferred)
- HB or 2B graphite pencil for initial sketching
- Fine liner pen (0.3mm or 0.5mm, black)
- Kneaded eraser
- Ruler (optional, for guidelines)
Step 1: Constructing the Croquis
-
Establish the balance line:
Start by drawing a vertical line down the center of your page. This axis helps maintain the figure’s balance. Mark the head at the top and the feet at the bottom to define the total height. -
Sketch the head and shoulders:
Draw an oval for the head, slightly tilted to the right for a natural look. Just below, sketch a horizontal line for the shoulders, keeping them relaxed but straight. -
Define the torso and waist:
Connect the shoulders to a tapered waistline. The waist should sit slightly higher than natural proportion to emphasize the long, elegant skirt of the A-line cut. -
Map out the limbs:
Sketch simple lines for the arms. The left arm should hang somewhat straight, while the right arm bends slightly at the elbow. Draw legs that taper down, crossing at the ankles to suggest a walking motion.
Style Secret
Keep your pen flowing! In fashion illustration, a slightly loose or broken line often looks more stylish and energetic than a perfectly closed, rigid outline.
Step 2: Designing the Dress Silhouette
-
Outline the bodice:
Draw the neckline. For this classic look, sketch a wide boat neck (bateau) that extends towards the shoulders. Outline the sleeveless armholes. -
Define the waist belt:
Create a distinct waistband area. Draw two horizontal lines close together at the narrowest part of the torso and fill the space with tiny vertical hatches to simulate a ribbed or textured belt. -
Draft the skirt shape:
From the waistband, flare the skirt out wide in a triangular ‘A’ shape. The hem should fall below the knees, creating a ‘tea-length’ or midi silhouette. Let the hemline curve slightly to show the fabric’s volume. -
Add pleats and folds:
Draw long, vertical lines originating from the waistband down to the hem. These don’t need to be perfectly straight; slight curves suggest the fabric draping over the hips and legs.
Step 3: Inking and Detailing
-
Refine the face and hair:
Switch to your fine liner. Outline the profile of the face, keeping features minimal. Draw the hair pulled back into a low, neat bun at the nape of the neck. -
Ink the dress outline:
Go over your pencil lines for the dress. Use confident, sweeping strokes for the skirt to capture fluidity. I often vary the line weight slightly here—thicker on the shadow side, thinner on the light side. -
Detail the accessories:
Focus on the hand holding the clutch or flowers. Sketch a small, textured bundle at the waistline where the hand rests. Then, define the high-heeled shoes with simple, sharp curves. -
Create texture with hatching:
Using your pen, add diagonal hatching lines on the skirt. Group these lines within the pleat folds to create shadow and depth, giving the dress a 3D effect. -
Add bodice shading:
Add lighter, shorter hatching marks on the side of the bodice to show roundness. -
Erase pencil guides:
Wait for the ink to dry completely to avoid smudging. Gently rub the kneaded eraser over the entire drawing to lift the initial graphite sketch. -
Ground the figure:
Draw a few quick, horizontal sketch lines beneath the feet and a diagonal shadow line trailing behind the heels. This prevents the figure from looking like it’s floating in space.
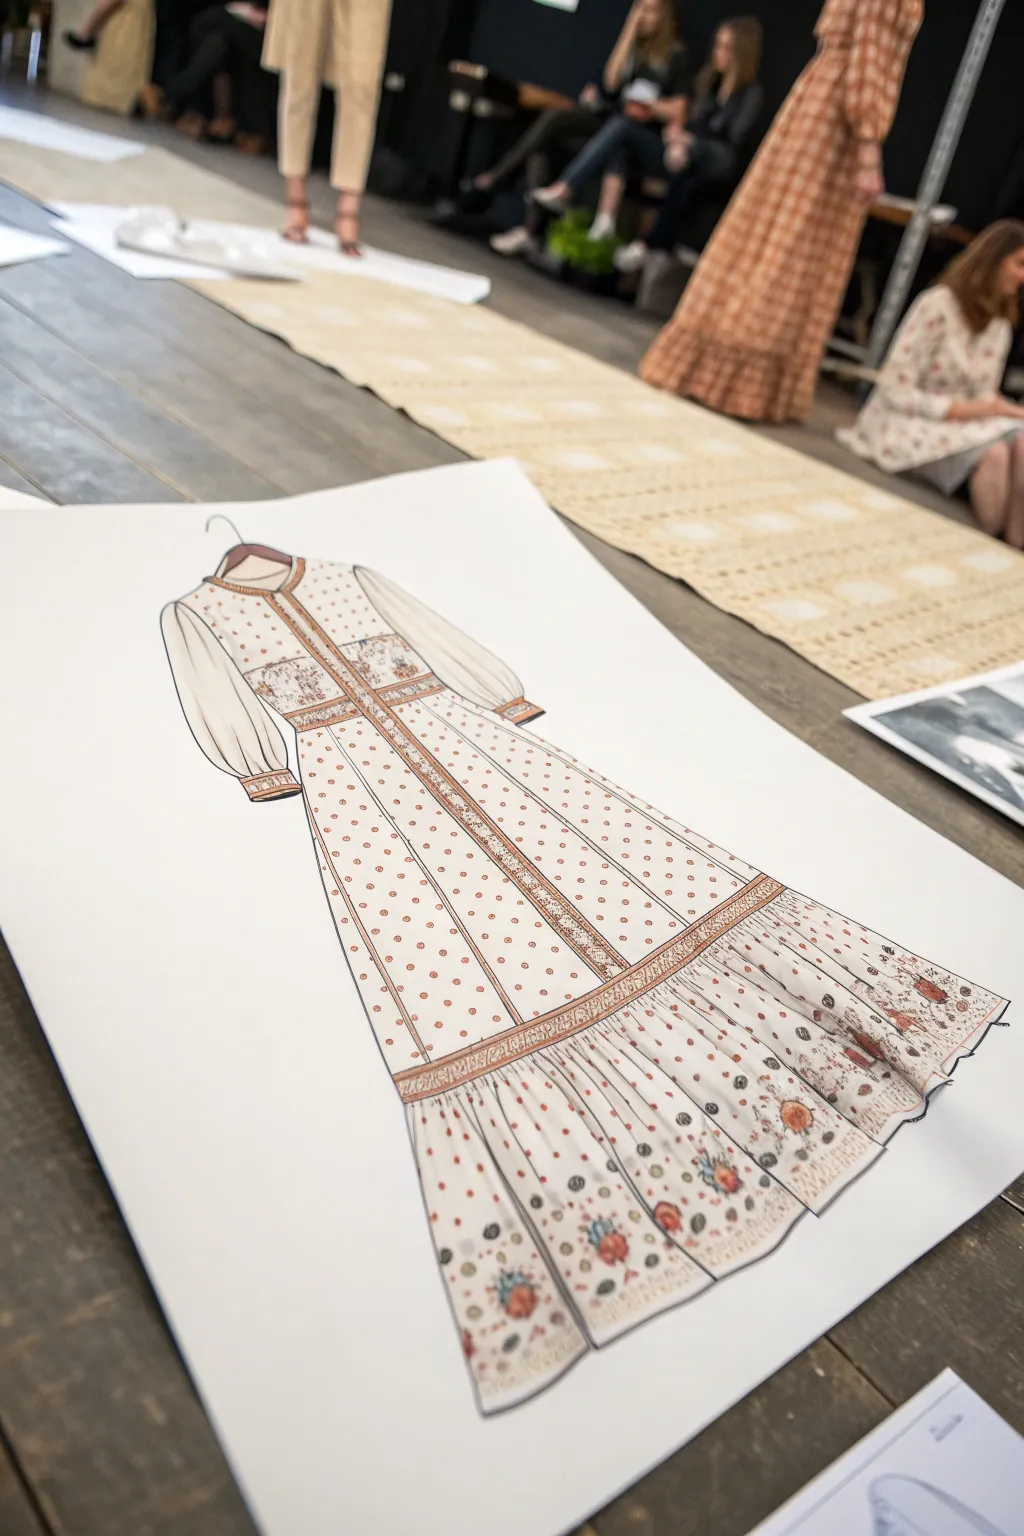
Level Up: Pattern Play
Instead of simple hatching, fill the skirt panels with a subtle polka dot or floral pattern to turn this into a breezy summer dress design.
You now have a chic fashion illustration ready to inspire your next sewing project or add flair to your portfolio


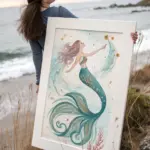
Mermaid Silhouette With a Flared Hem
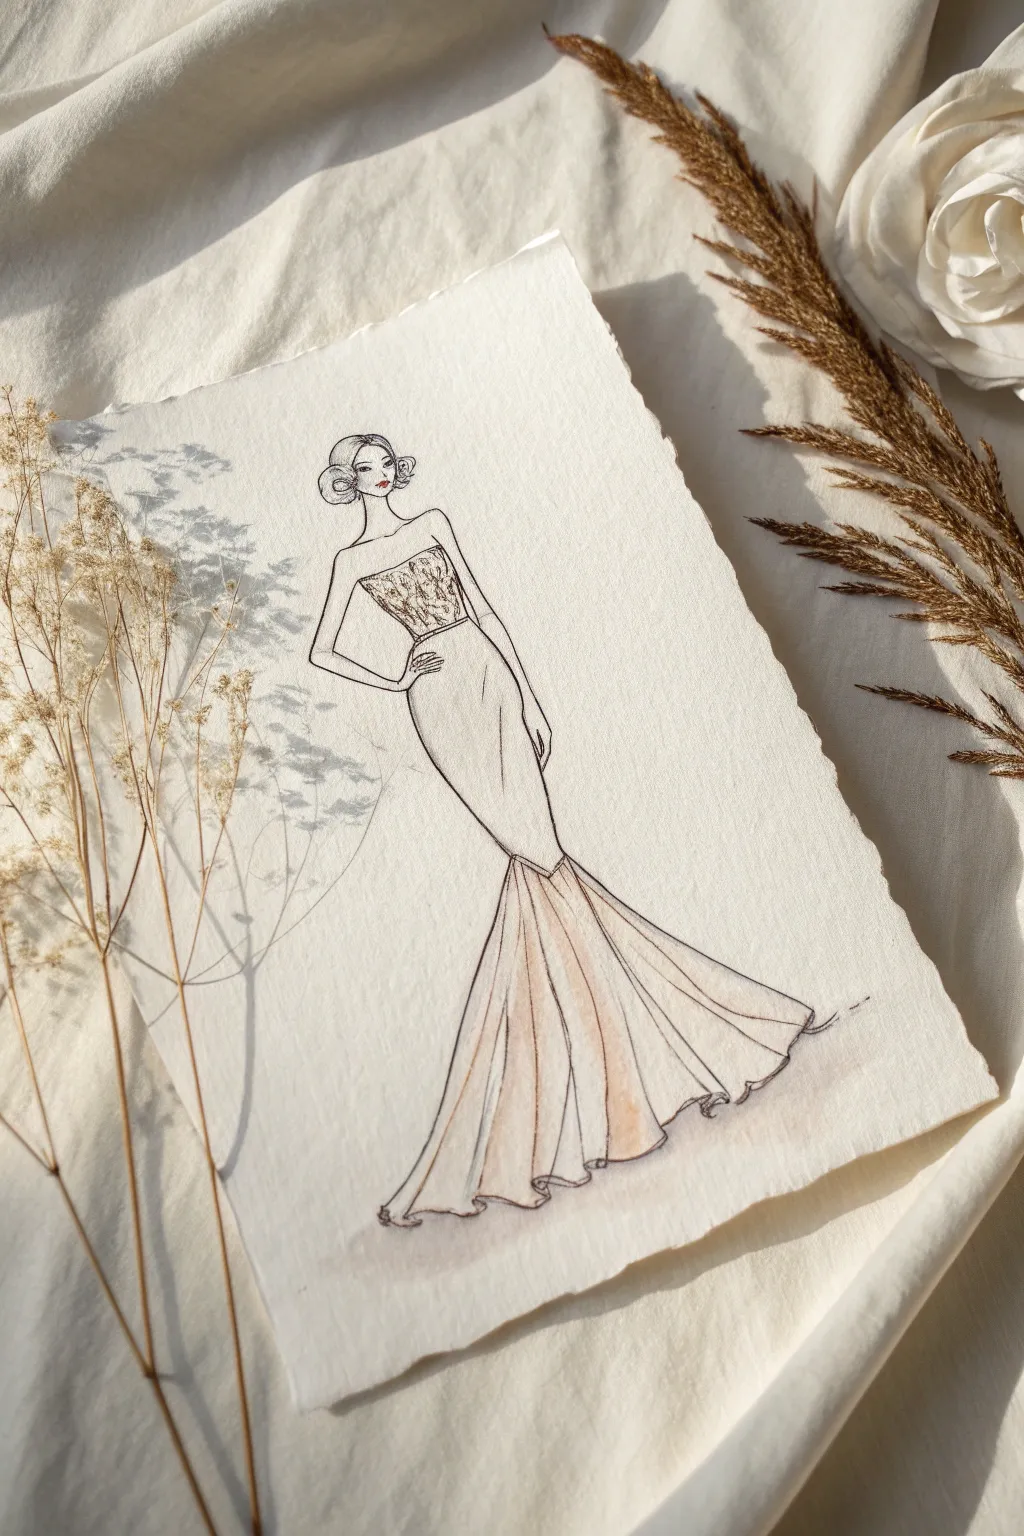

Capture the fluid elegance of fashion design with this delicate mermaid silhouette sketch. Using fine liners and soft washes on textured paper, you’ll create a sophisticated illustration that balances structured lines with flowing movement.
Step-by-Step Guide
Materials
- Cold press watercolor paper (A5 size or similar)
- Hard pencil (2H or H) for sketching
- Kneaded eraser
- Fine liner pens (sizes 0.05, 0.1, and 0.3, black)
- Watercolor paints (skin tone, soft peach/blush, subtle grey)
- Small round paintbrushes (sizes 2 and 4)
- Gold or metallic pen (optional for embellishment)
Step 1: Drafting the Fashion Figure
-
Establish the croquis line:
Begin by lightly drawing a vertical ‘balance line’ down the center of your paper using your H pencil. This guides the figure’s posture. Mark the head, shoulder line, waist, and hips to establish classic ‘9-head’ fashion proportions, keeping the figure elongated. -
Sketch the body shape:
Lightly sketch the torso and hips. For this mermaid silhouette, exaggerate the curve of the hip slightly to create a dramatic hourglass shape before tapering the legs inward at the knees. -
Define the pose:
Position the left arm bent with the hand resting on the hip to emphasize the waistline. Let the right arm hang naturally at the side, following the curve of the body. -
Outline the head and hair:
Sketch a simple oval for the face. Add the hairstyle—drawn here as a sleek, low chignon with soft waves framing the face—keeping the details minimal and stylistic.
Step 2: Designing the Dress
-
Draw the bodice:
Outline a strapless bodice that cuts straight across the chest. Follow the body’s curves tightly down past the waist and hips to the mid-thigh area. -
Create the flare point:
At the mid-thigh or just above the knee, draw a ‘V’ shape or inverted curve where the fabric will begin to flare out. This is crucial for the mermaid silhouette. -
Sketch the skirt volume:
Extend long, sweeping lines from that flare point down to the floor. Fan them out widely to create volume. The hemline should look like it is pooling slightly, so use wavy, organic lines at the bottom. -
Add fold details:
Inside the flared skirt area, draw long, vertical lines radiating from the knee down to the hem. These indicate the deep folds and movement of the fabric.
Pro Tip: Paper Choice
Use textured paper (cold press) specifically. The ‘tooth’ of the paper creates broken lines when sketching quickly, adding a professional, effortless fashion-illustration vibe.
Step 3: Inking and Definition
-
Refine with fine liner:
Switch to your 0.1 fine liner. Carefully go over your pencil lines. Use a confident, continuous stroke for the long skirt lines to avoid wobbles. I find it helps to lock my wrist and move my whole arm for these long curves. -
Vary line weight:
Use the thicker 0.3 pen for the shadow side of the dress (usually the right side) to create depth. Use the ultra-fine 0.05 pen for delicate details like the facial features, hair strands, and intricate bodice patterns. -
Detail the bodice:
Draw tiny, scattered floral or abstract scribbles on the bodice area to simulate lace or beading texture. Keep this loose and impressionistic rather than rigid. -
Erase guidelines:
Once the ink is completely dry—give it a few minutes to be safe—gently dab and rub with your kneaded eraser to remove all visible pencil marks.
Troubleshooting: Shaky Lines
If your long skirt lines look nervous or shaky, try drawing them faster. Speed smooths out jitters. You can also rotate the paper to pull the pen toward you comfortably.
Step 4: Adding Color and Shadow
-
Paint skin tones:
Mix a very watery, pale skin tone. Apply a light wash to the face, neck, and arms. Let the color pool slightly on one side of the limbs to suggest roundness. -
Add a pop of lip color:
With the very tip of your smallest brush, dab a tiny spot of red or pink onto the lips. This small accent brings the face to life. -
Wash the skirt:
Mix a diluted peach or blush color. Paint the flared section of the skirt, using long strokes that follow the fold lines you drew. Leave some white space on the ‘tops’ of the folds to act as highlights. -
Deepen the shadows:
While the skirt wash is still damp, drop a slightly darker peach or grey mix into the valleys of the folds and under the flare point. This wet-on-wet technique creates soft, blended shadows. -
Tint the bodice:
Add a very light wash of color over the bodice texture. If you want sparkle, you can gently trace some of the lace patterns with a gold pen once the paint is fully dry. -
Ground the figure:
Add a very faint, watery wash of grey just under the hem of the dress to hint at a shadow on the floor, grounding the illustration so it doesn’t look like it’s floating.
Step back and admire the classic elegance of your fashion sketch, perfect for framing or a design portfolio


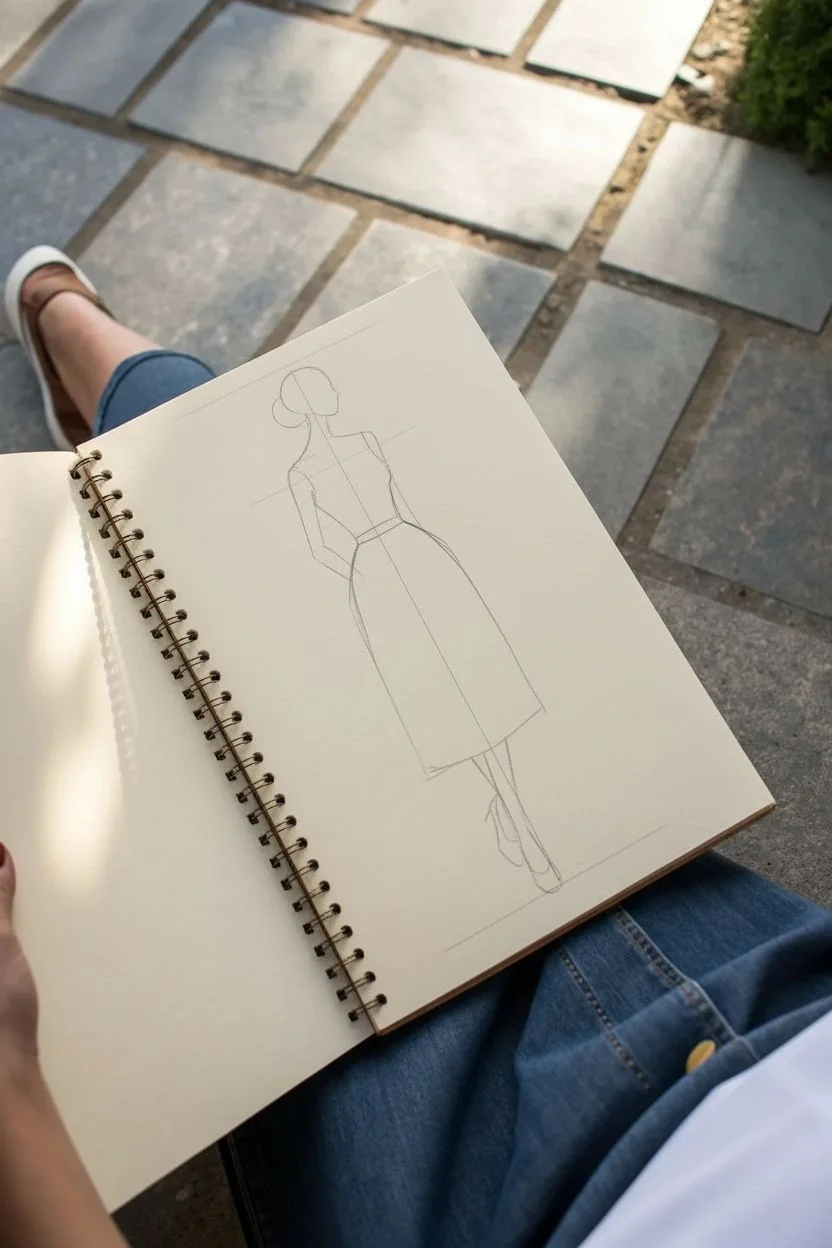
Sleek Column Dress With Minimal Seams
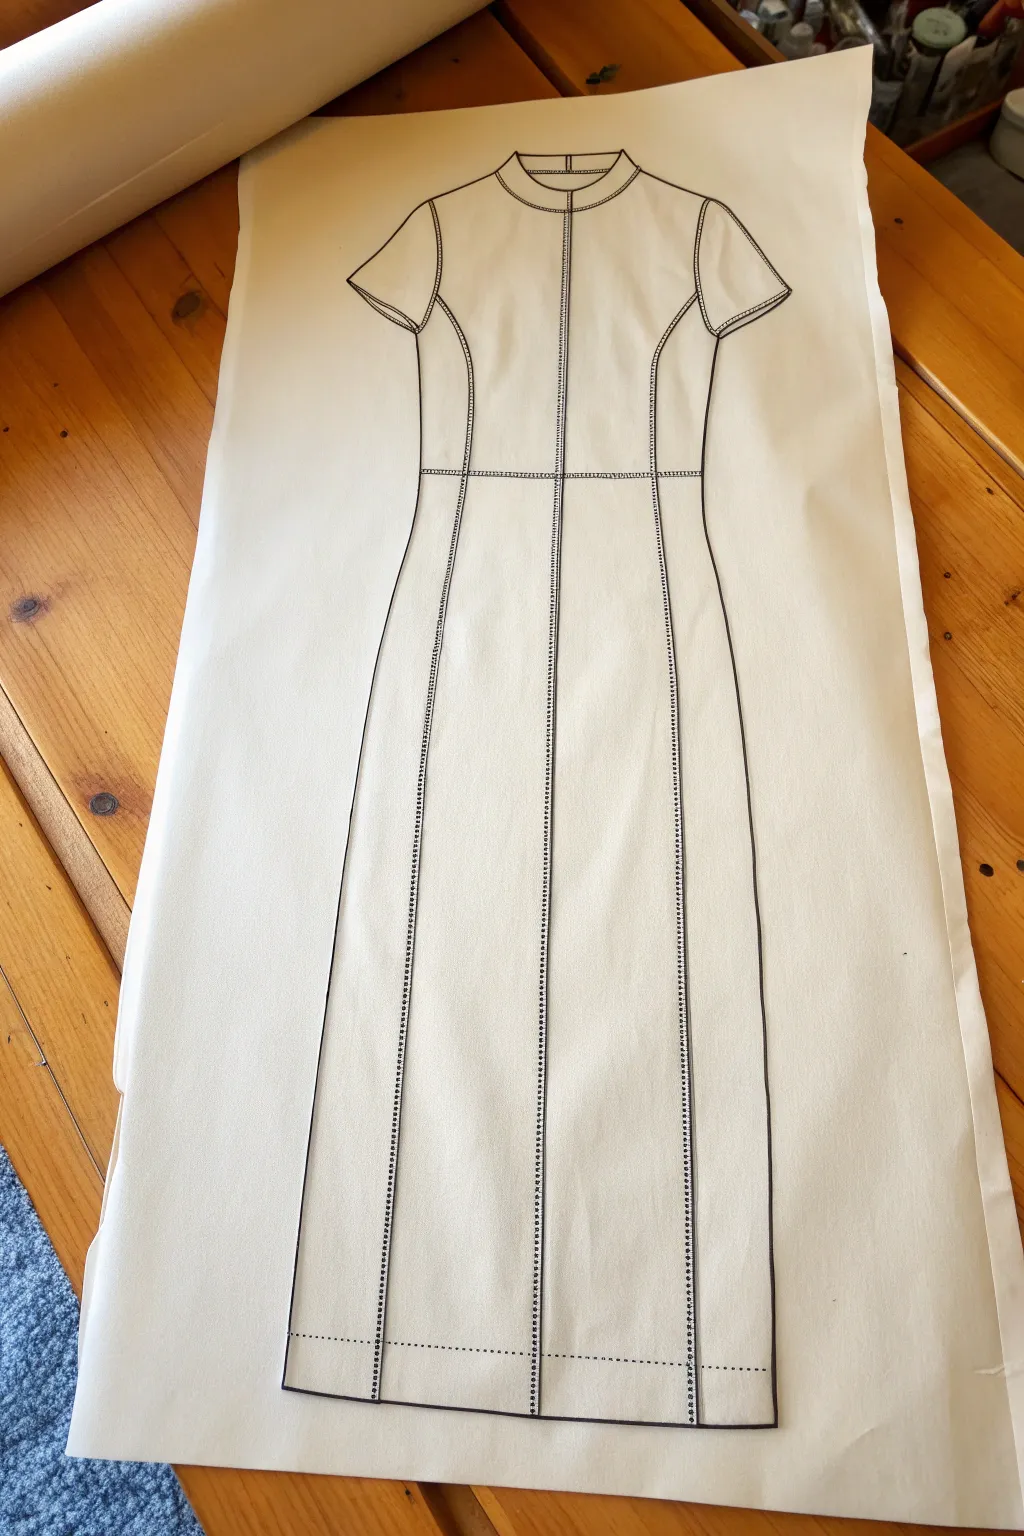
Master the art of technical fashion illustration with this clean, precise line drawing of a structured column dress. By focusing on line weight variation and accurate seam placement, you’ll create a professional-looking sketch that beautifully communicates garment construction.
Step-by-Step Tutorial
Materials
- Large sheet of white bond paper or pattern paper (approx. 18×24 inches)
- Ruler (18-inch or longer)
- French curve tool (optional but helpful)
- Graphite pencil (HB or 2H for initial lines)
- Fine-liner pen (0.5mm, black archive ink)
- Ultra-fine liner pen (0.1mm or 0.2mm, black archive ink)
- Eraser (kneaded or soft vinyl)
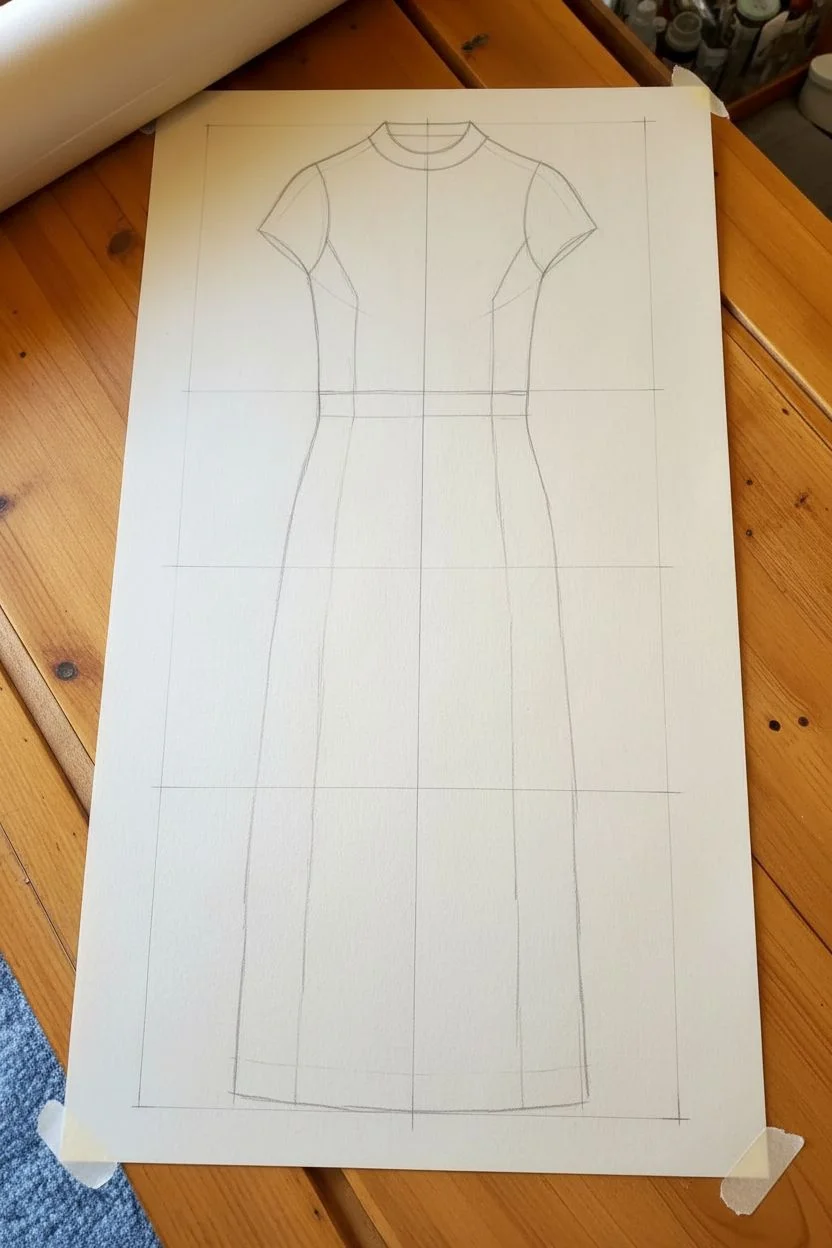
Step 1: Establishing the Foundation
-
Prepare the canvas:
Roll out your large sheet of paper on a smooth, hard surface. Tape the corners down lightly to prevent shifting, ensuring the paper is perfectly flat. -
Draw the center front line:
Using your long ruler and pencil, draw a faint vertical line straight down the center of the paper. This will serve as your axis of symmetry and the center front seam. -
Mark horizontal guidances:
Lightly mark horizontal lines across the center axis to establish key body points: the shoulder line at the top, bust line, waistline, hip line, and the hemline at the bottom. -
Outline the silhouette:
Sketch the outer shape of the dress lightly in pencil. Start with the neckline curve, extend out to the shoulders, down the armholes, and then flow into the side seams, keeping the shape relatively straight drawing down to the hem to create the column effect.
Step 2: Defining the Structure
-
Sketch the princess seams:
Draw vertical curved lines starting from the armhole/shoulder area, curving over the bust point, and running down the length of the dress to the hem. These should run parallel to your center front line once they pass the hip. -
Add the waist definition:
Draw a horizontal waist seam line that intersects with your vertical princess seams and center front line. Keep this line slightly curved to show the volume of the body. -
Detail the neckline and sleeves:
Refine the high crew neckline with a double line to indicate a band. Sketch short, angled sleeves, ensuring the hem of the sleeve wraps slightly around the arm form. -
Indicate hem stitching:
Draw a horizontal line a few inches above the bottom edge of the dress to represent the deep hem allowance.
Wobbly Lines?
If your long lines aren’t straight, don’t hesitate to run your pen along the edge of a ruler. Wipe the ruler edge frequently to avoid ink smudges.
Step 3: Inking the Final Artwork
-
Ink the main outline:
Switch to your 0.5mm fine-liner. trace over the exterior silhouette—shoulders, side seams, and sleeve edges. Use confident, continuous strokes for a clean look. -
Define internal major seams:
Using the same 0.5mm pen, ink the major internal structure lines like the neckline band and the sleeve hems. -
Create the stitch details:
Switch to your thinner 0.1mm or 0.2mm pen. I find this creates the best contrast. Carefully draw the stitching lines along the center front seam and princess seams. -
Stipple the seam allowance:
For the vertical seams, instead of a solid line, use a series of tiny, closely spaced dots or dashes to represent the topstitching texture. -
Ink the waist and hem:
Continue with the thin pen to create dash lines for the waist seam and the bottom hem stitching line. -
Refine line weights:
Go back over the outermost perimeter lines (the silhouette) one more time to thicken them slightly. This makes the drawing ‘pop’ off the page. -
Erase guidelines:
Wait until the ink is completely dry—give it a good ten minutes to be safe. Then, gently erase all the underlying pencil marks to reveal the crisp black-and-white illustration.
Pro Tip: Line Weight
Make outer contour lines measuring about 2x thicker than internal seam lines. This hierarchy helps the viewer understand the form instantly.
Now you have a precise, industry-style fashion flat that looks ready for the pattern room


High-Low Hem With Layered Skirt Panels
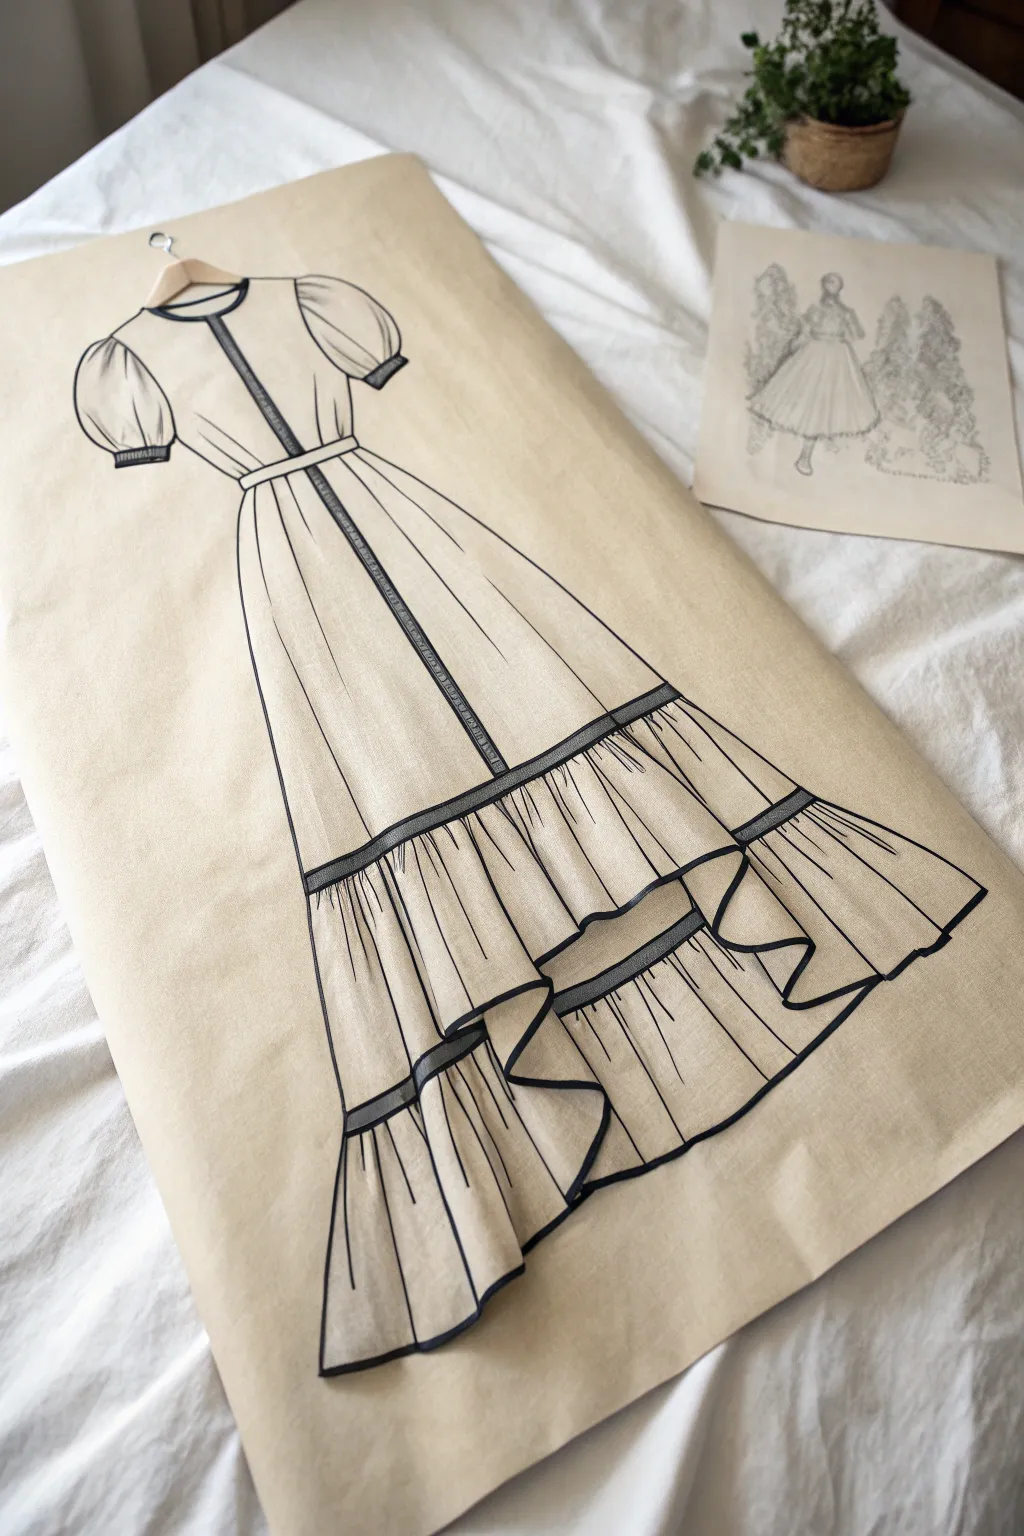
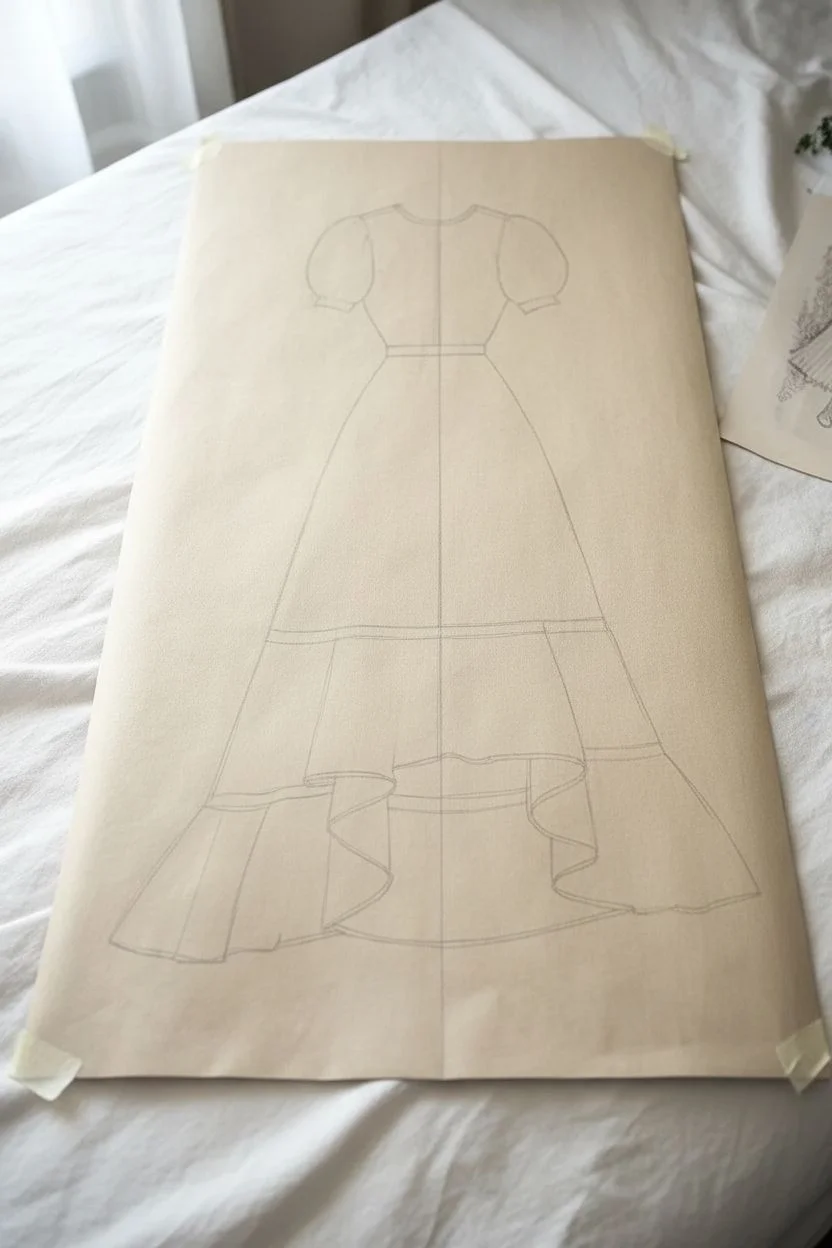
This project involves creating a stunning, large-scale fashion illustration that mimics the look of a vintage dress pattern or a designer’s concept sketch. Using kraft paper and bold markers, you’ll draft a flowing high-low hem dress with tiered ruffles that looks ready to step off the page.
How-To Guide
Materials
- Large roll of brown kraft paper or butcher paper (at least 3ft wide)
- Black permanent marker (broad chisel tip)
- Black permanent marker (fine tip)
- Pencil (HB or 2B)
- Large eraser
- Long ruler or yardstick
- Tape or pattern weights
- Reference photo of a dress with tiered ruffles
Step 1: Preparation and Basic Structure
-
Prepare the canvas:
Roll out a large sheet of kraft paper on a flat surface like a floor or a large dining table. Tape down the corners gently or use weights to keep it flat. I find that taping it to the floor gives the best stability for long, sweeping lines. -
Draft the centerline:
Using your yardstick and pencil, draw a faint vertical line down the center of the paper. This will act as your guide to ensure the dress remains symmetrical. -
Sketch the bodice outline:
Lightly sketch the bodice using your pencil. Start with increased shoulder width for the puff sleeves, a round neckline, and taper down to a defined waistline. Don’t worry about perfect details yet; just get the proportions right. -
Draft the sleeves:
Add the puff sleeves by drawing rounded shapes extending from the shoulders. Mark where the cuff of the sleeve sits, keeping them symmetrical on both sides of your centerline. -
Create the waist and skirt shape:
Draw a waistband horizontally across the waistline. From there, flare out two long, A-line curves for the skirt. Since this is a high-low design, the main skirt outline should be long, reaching towards the bottom of your paper.
Wobbly Lines?
Don’t stress if your long lines aren’t ruler-straight. In fashion illustration, a slightly shaky or organic line actually adds movement and suggests the drape of real fabric better than a perfect line.
Step 2: Designing the High-Low Hem
-
Mark the hemline tiers:
This dress features a tiered skirt. Lightly draw curved horizontal lines across the skirt section to indicate where the different fabric panels would join. The top tier should be shorter, while the bottom tier is wider. -
Sketch the high-low curve:
For the dramatic hem, draw a sweeping curve that starts higher in the center front and dips lower towards the sides (which represent the back of the dress wrapping around). Visualize a ribbon curving in space. -
Add ruffle depth:
At the bottom of your tiered lines, sketch vertical squiggly lines or gathers. This indicates where the fabric would bunch up to create volume. This is crucial for that ‘flowy’ look. -
Draft the inner skirt view:
Because the front hem is higher, you can see the back of the skirt through the opening. Draw the back hemline lower down on the paper, peeking out from under the front curve.
Step 3: Inking and Detailing
-
Outline main structural lines:
Switch to your broad chisel-tip black marker. Confidently trace over your main pencil lines—the bodice sides, the waist, and the long outer edges of the skirt. The chisel tip gives a bold, pattern-like quality. -
Detail the neckline and placket:
Draw a thick line around the neck and straight down the center front to the waist. This represents the collar binding and the front button placket. Fill this area in solidly with black or shade it with cross-hatching for texture. -
Ink the tier seams:
Using the broad marker, trace the horizontal lines separating the skirt tiers. Make these lines slightly thicker to represent ribbon trim or piping, consistent with the reference style. -
Add fabric folds:
Switch to the fine-tip marker. Draw thin, vertical lines radiating from the waist and the tier seams. These lines shouldn’t be perfectly straight; curve them slightly to mimic the drape of soft fabric. -
Define the ruffles:
On the bottom hem, use the fine tip to draw wavy, looping lines that connect the front hem to the back. Emphasize the ‘ins’ and ‘outs’ of the fabric folds to give it a 3D appearance. -
Add fine texture:
Add very delicate, short strokes near the gathered areas (waist, sleeve cuffs, and tier seams). This shading implies tension in the fabric. -
Final clean up:
Once the ink is completely dry—give it a few minutes to prevent smudging—take your large eraser and gently remove all visible pencil guidelines. This leaves you with a stark, professional-looking illustration.
Add a Pattern
To make the dress more intricate, use a fine-tip pen to add a subtle print like polka dots or small florals, but apply it sparsely near the fold lines to suggest shadow and depth without overcrowding.
Hang your oversized artwork with a wooden hanger or washi tape for an instant studio vibe

PENCIL GUIDE
Understanding Pencil Grades from H to B
From first sketch to finished drawing — learn pencil grades, line control, and shading techniques.
Explore the Full Guide
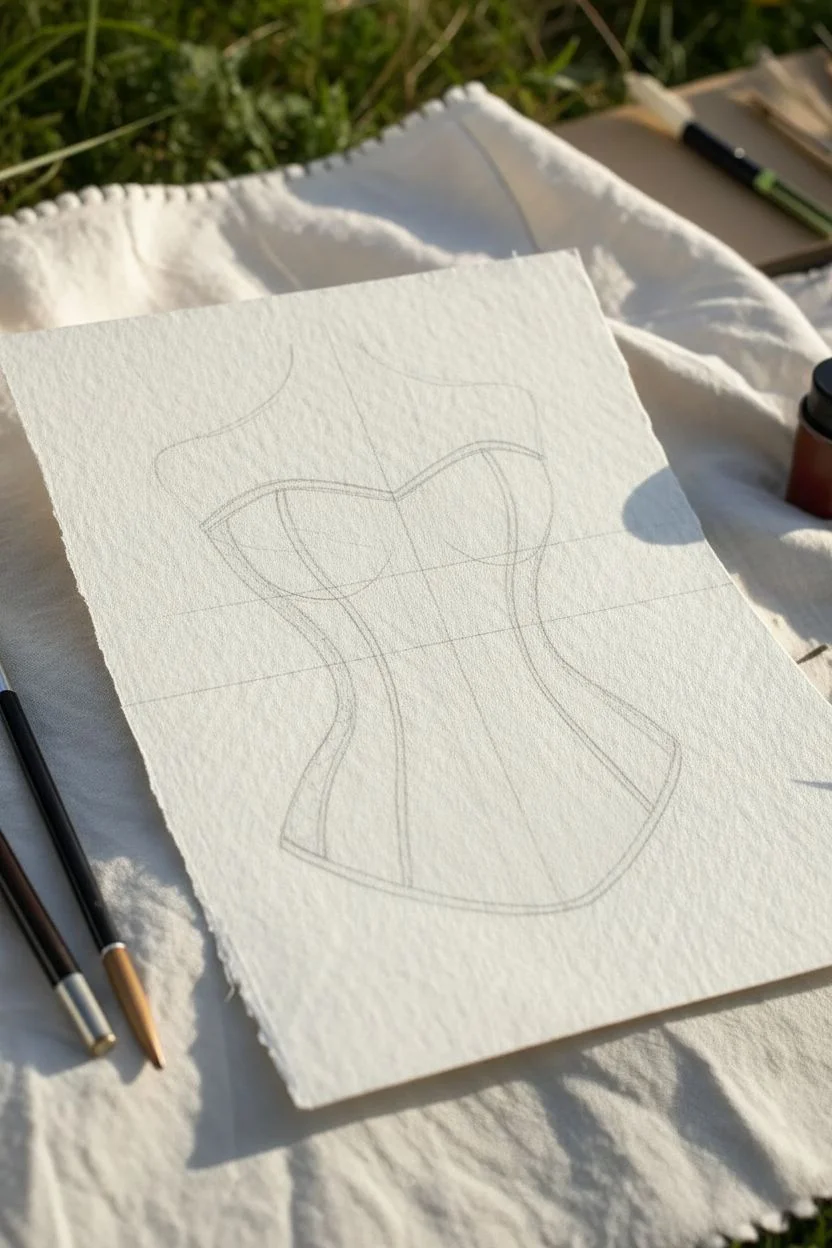
Strapless Bodice With a Sweetheart Neckline
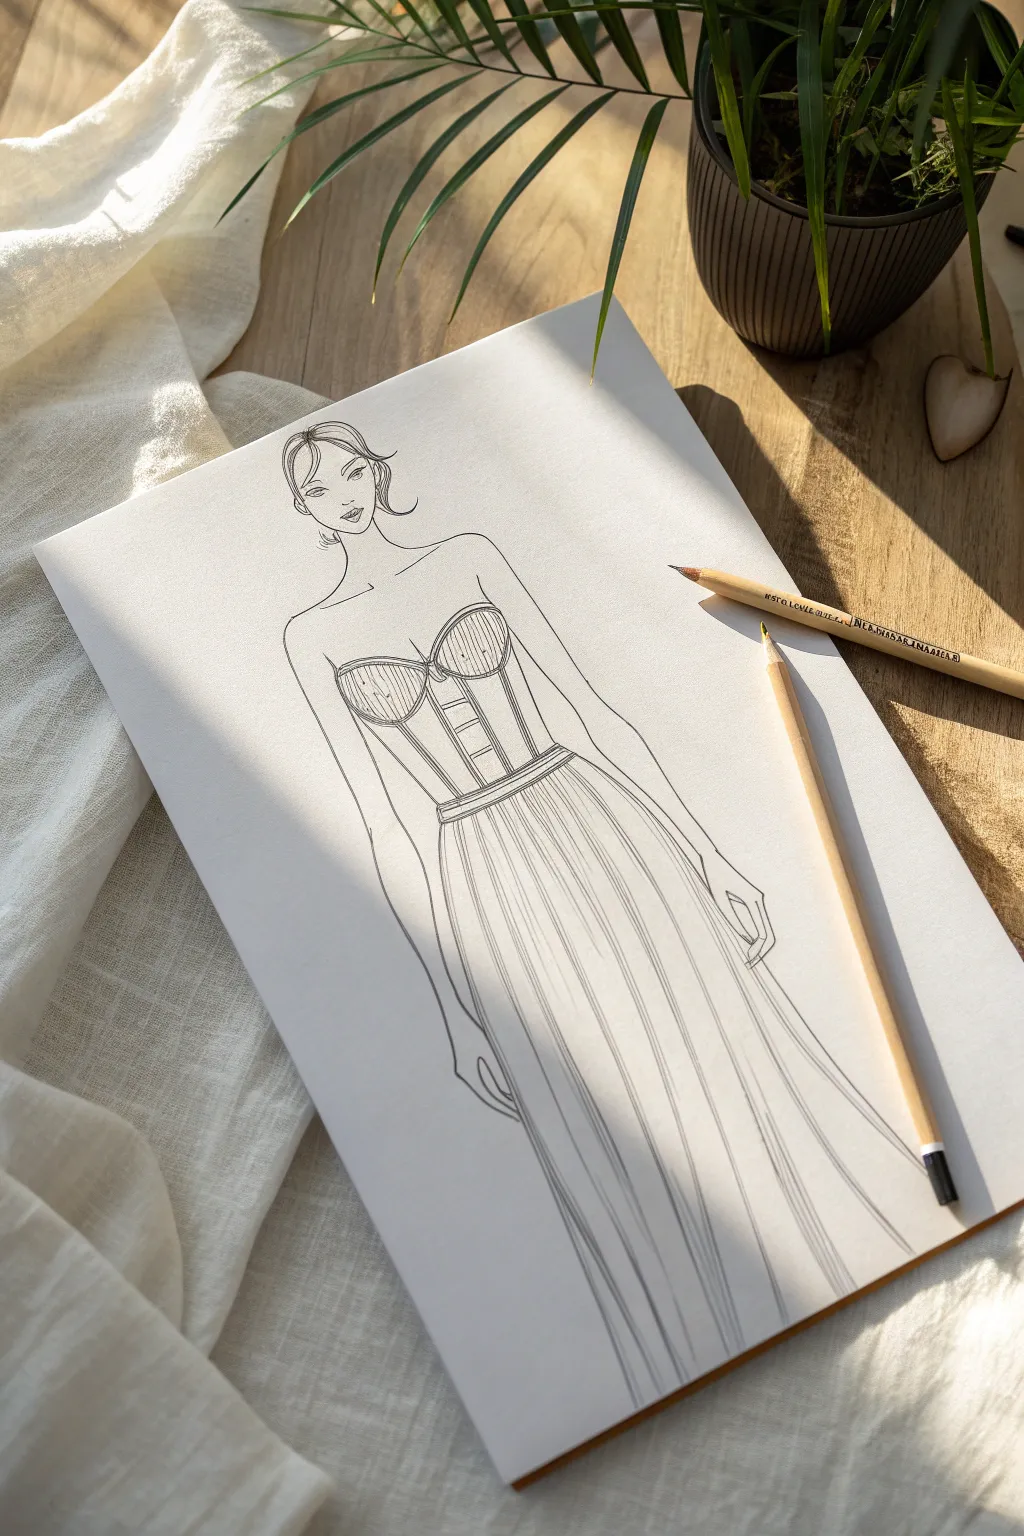
Master the art of delicate fashion illustration with this tutorial on drawing a strapless gown featuring a structured corset bodice and flowing skirt. The result is an elegant, minimalist line drawing perfect for design portfolios or artistic journaling.
Step-by-Step Guide
Materials
- Smooth white drawing paper or sketchbook
- HB or 2B graphite pencil (for initial sketching)
- Fine-point mechanical pencil (optional, for details)
- Kneaded eraser
- Ruler (optional)
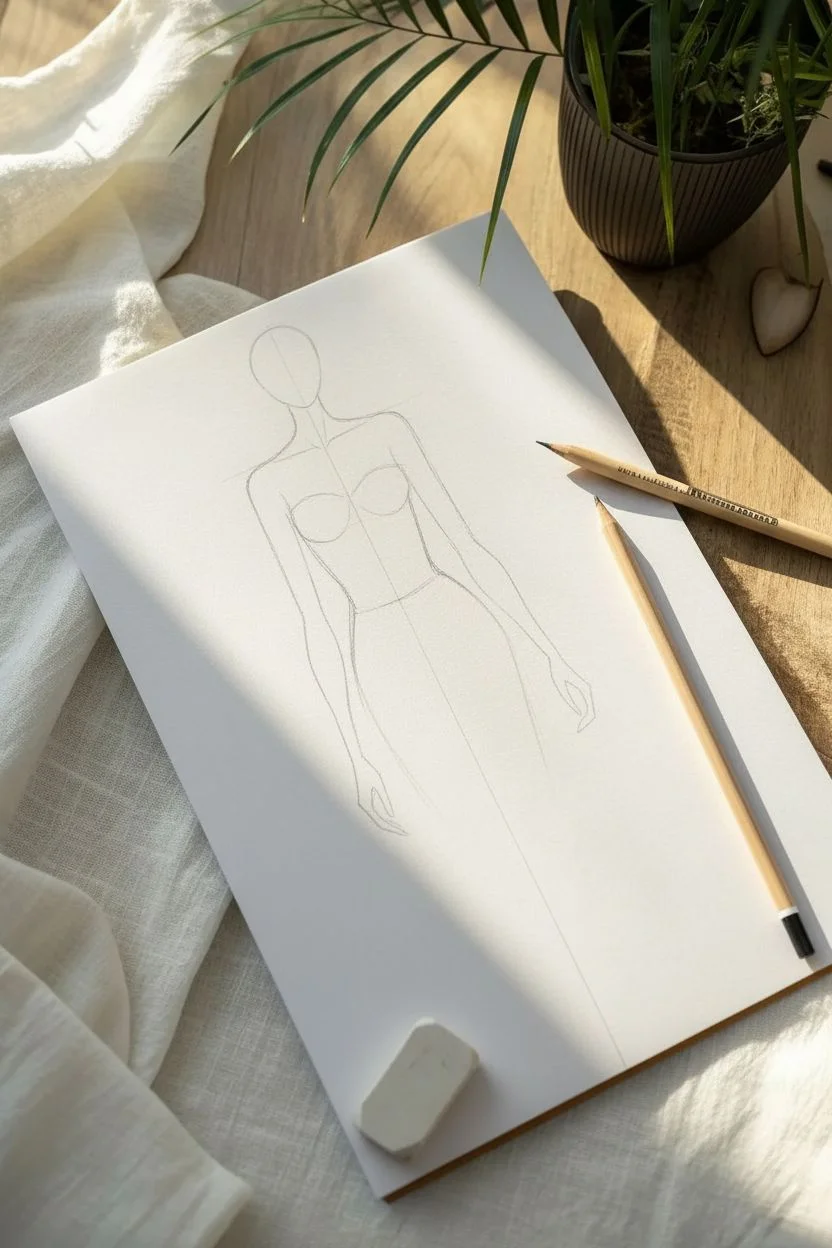
Step 1: Establishing the Pose
-
Draw the fashion croquis centerline:
Begin by lightly drawing a vertical line down the center of your page. This balance line will help align the head, torso, and hips, keeping your figure standing straight. -
Map out the head and shoulders:
Sketch a simple oval for the head at the top of your centerline. Just below it, draw a horizontal line for the shoulders, slightly angled to give the figure a relaxed posture. -
Outline the torso and hips:
Sketch the neck connecting to the shoulders. Draw the torso shape, tapering in for the waist and curving out for the hips. Keep the lines faint so they can be easily erased later. -
Draft the arms:
Add simple lines for the arms, letting them hang naturally by the sides. The hands can be simple elongated shapes for now, just to establish their placement.
Step 2: Drawing the Bodice
-
Define the sweetheart neckline:
At the chest area, draw the top edge of the bodice. Create a ‘sweetheart’ shape by dipping the line in the center and curving it up over the bust points. -
Structure the cups:
Draw the underwire or cup seams beneath the sweetheart line exactly as you see in the reference. These are curved U-shapes that define the bust area. -
Add vertical boning details:
From the bottom of the cups down to the waistline, draw vertical lines to represent the corset boning. These should follow the curvature of the torso to suggest volume, not just flat stripes. -
Texture the cups:
Inside the bust cups, add delicate vertical hatching lines. This suggests a ribbed fabric or texture different from the rest of the corset. -
Define the waist seam:
Draw a double horizontal line at the narrowest part of the torso to create a defined waistband. This separates the structured bodice from the flowing skirt.
Uneven Proportions?
If the body looks unbalanced, flip your paper horizontally and hold it up to a light. The reverse view instantly reveals symmetry errors you missed.
Step 3: Creating the Skirt Flow
-
Outline the skirt silhouette:
Starting from the waistband, draw two long, flowing lines downward to establish the width of the skirt. Let the lines create a subtle A-line shape. -
Add primary pleats:
Draw long, vertical lines originating from the waistband down to the hem. These don’t need to be perfectly straight; a slight wave adds movement and softness to the fabric. -
Refine the fabric drape:
Add shorter, fainter lines in between the main pleats near the waist. This technique mimics the gathering of fabric where the skirt meets the bodice. -
finalize the hem:
At the bottom of the page, connect your skirt lines. Keep the hem loose and open-ended to maintain that artistic sketch aesthetic.
Add Fabric Texture
Use the side of your pencil to lightly shade the ‘valleys’ of the skirt folds. This creates depth and makes the skirt look like real, heavy fabric.
Step 4: Final Details & Inking
-
Refine the facial features:
Zoom in on the face. Draw refined almond-shaped eyes, a small nose, and lips. I like to keep the facial features somewhat stylized and minimal to match fashion illustration norms. -
Sketch the hair:
Draw the hair pulled back, with a few loose strands framing the face. Use quick, confident strokes to suggest hair texture without drawing every single strand. -
Define the hands:
Refine the shape of the hands and fingers. You don’t need anatomical perfection; elegant, elongated finger shapes work best here. -
Darken main lines:
Go over your final lines with slightly more pressure to define the drawing. Focus on the bodice outlines and the main folds of the skirt. -
Clean up:
Use your kneaded eraser to gently lift away the initial construction lines and the balance line, leaving only your finished fashion illustration.
Now you have a chic, runway-ready sketch to add to your portfolio
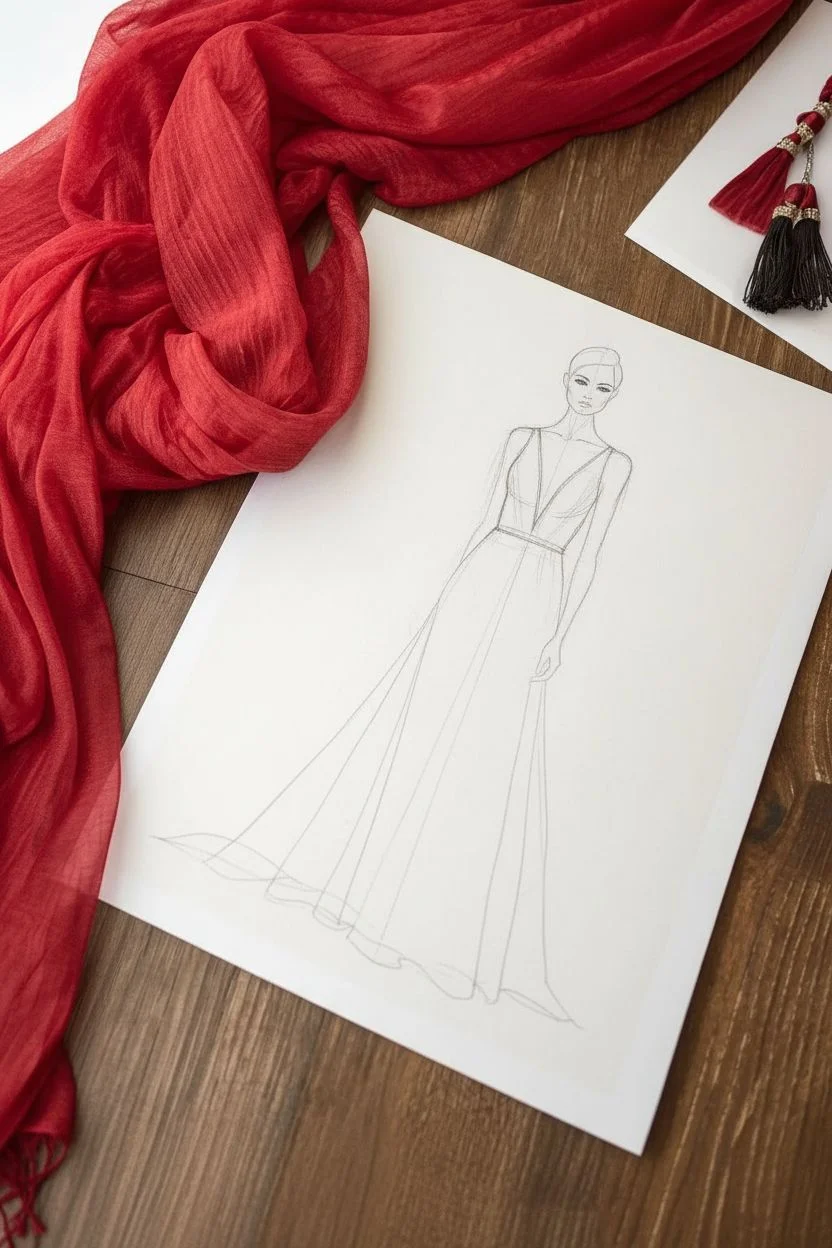
Wrap-Style Gown With a Tied Waist


Capture the fluid movement and sophisticated drape of a wrap-style evening gown with this pen-and-ink sketching tutorial. You will learn to translate the softness of fabric into crisp lines, focusing on the intricate folds created by a waist-tie design.
How-To Guide
Materials
- Wire-bound sketchbook (smooth, heavy paper)
- HB graphite pencil
- Kneaded eraser
- Fine liner pen (0.3mm or 0.5mm, black)
- Fine liner pen (0.1mm, black for details)
- Clear ruler (optional for proportions)
Step 1: Planning the Silhouette
-
Establish the vertical axis:
Begin by lightly drawing a vertical centerline down the middle of your page with your HB pencil. This line will help you keep the figure balanced and symmetrical. -
Mark major landmarks:
Make small horizontal dashes along your centerline to indicate where the shoulders, waist, and hemline will sit. For this gown, place the waistline slightly higher than natural to elongate the legs. -
Outline the torso shape:
Sketch a simplified trapezoid for the upper torso. Since this is a sleeveless V-neck design, tapering the shape inward toward the waist helps establish the fitted bodice look. -
Draft the skirt volume:
From the waist marks, draw two long, flowing lines downward and outward to define the skirt’s A-line shape. Let the hemline curve slightly upwards at the sides to suggest movement.
Step 2: Defining the Bodice Design
-
Sketch the V-neckline:
Draw two diagonal lines extending from the shoulder points down to the center of the chest. Ensure they cross over each other slightly to indicate the wrap style construction. -
Mock up the armholes:
Curve lines from the shoulders down to the side of the bodice. Keep these curves gentle, as the fabric should look like it sits softly against the skin. -
Create the waist sash:
Draw a wide horizontal band at the waist. In the center, sketch a rough oval shape where the knot will be, and extend two ribbons hanging down casually from this point. -
Refine the wrap folds:
Add faint diagonal lines across the bodice, following the direction of the wrap. This mimics the tension of the fabric being pulled toward the waist tie.
Fabric Weight Tip
For lighter fabrics like chiffon, use broken, airy lines. For heavier satin, use continuous, confident strokes to show weight.
Step 3: Inking the Final Lines
-
Outline the main contours:
Switch to your 0.5mm fine liner. Carefully trace the outer silhouette of the dress, using confident, continuous strokes for the long skirt lines to avoid a shaky look. -
Detail the bodice folds:
Use the 0.3mm pen to ink the V-neck and the diagonal tension lines on the chest. I find that lifting the pen at the end of these strokes creates a nice, tapered line that suggests softness. -
Draw the knot and sash:
Ink the center knot with curved, overlapping lines to show dimension. Let the hanging sash pieces drape with slightly wavy edges to show they are made of soft fabric. -
Ink the skirt pleats:
Starting from the waistline, draw long, sweeping lines down the skirt. Focus these lines on the areas under the knot, showing how the fabric gathers and falls. -
Add hemline movement:
At the bottom of the skirt, use wavy lines to connect the vertical pleat lines. This creates the ‘lettuce edge’ look of a flowing hem.
Ink Smearing?
Work from the top left to bottom right (if right-handed) to prevent your hand from dragging across wet ink.
Step 4: Refining and Cleaning
-
Suggest the figure underneath:
With your 0.1mm pen, lightly hint at the arms hanging by the sides. You don’t need full distinct fingers; a simple outline is enough to give the dress context. -
Add depth with hatching:
Use very fine, short parallel lines (hatching) in the deepest folds of the skirt and directly under the bust to create subtle shadows. -
Erase pencil guides:
Wait until the ink is completely dry—give it a full minute or two. Then, gently use the kneaded eraser to lift away all the graphite guidelines. -
Final contrast check:
Look for areas that need more definition. You might want to darken the space between the arm and the torso to make the dress pop off the page.
Now you have a timeless fashion illustration ready to inspire your next design project
BRUSH GUIDE
The Right Brush for Every Stroke
From clean lines to bold texture — master brush choice, stroke control, and essential techniques.
Explore the Full Guide
Pleated Skirt With Sharp Fold Rhythm
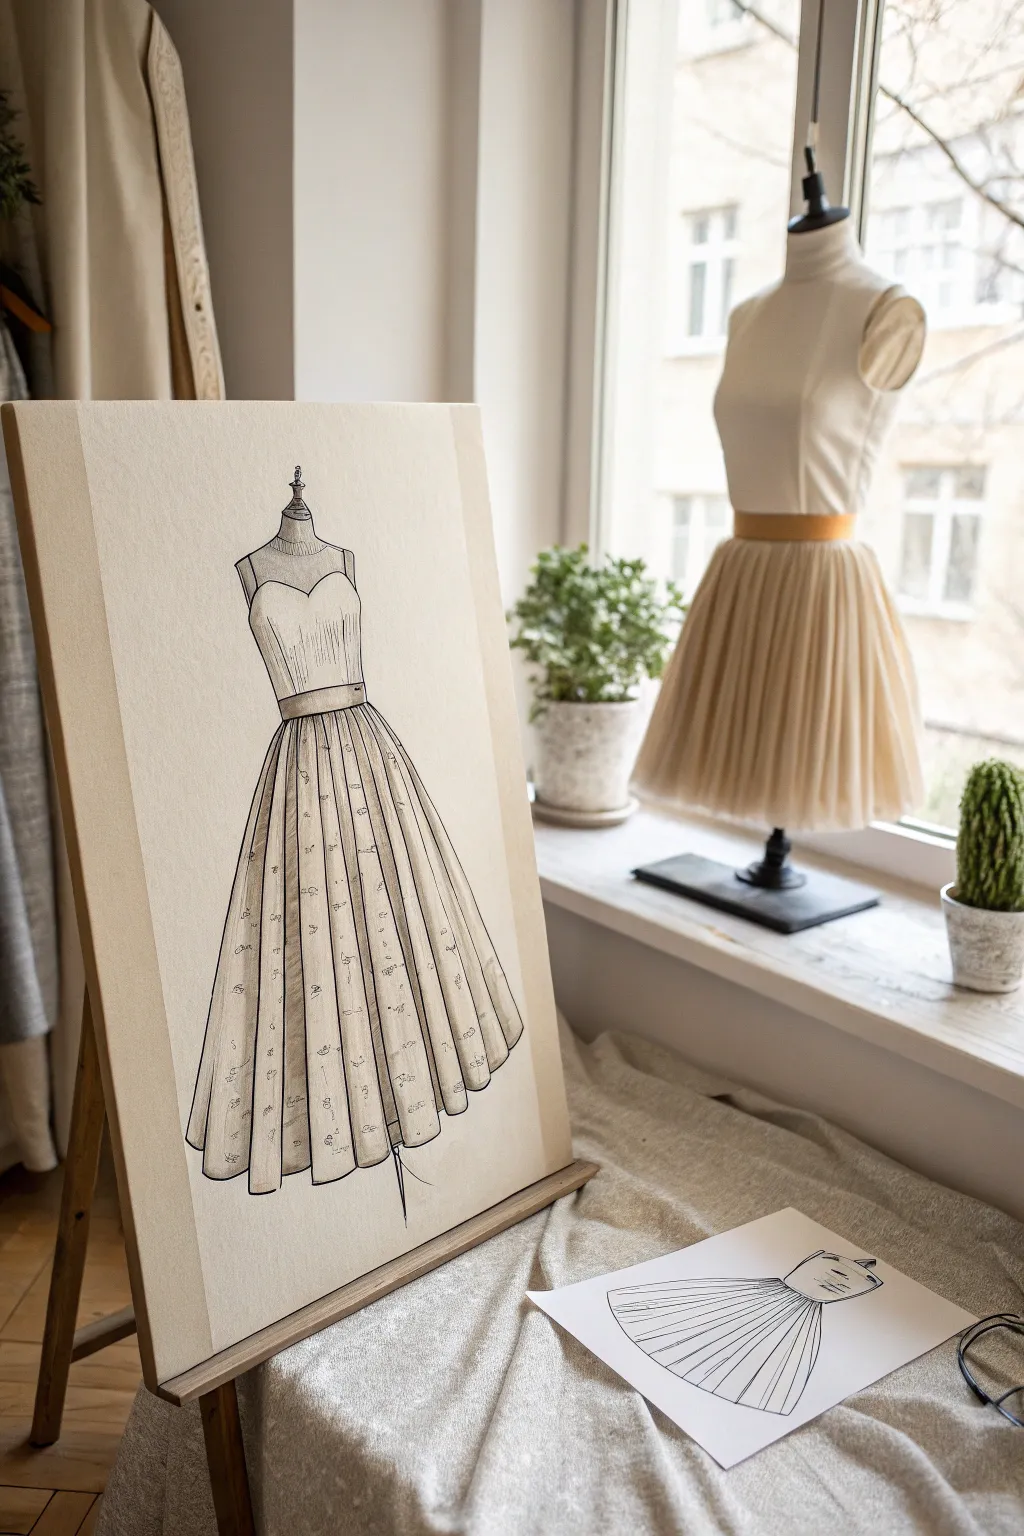
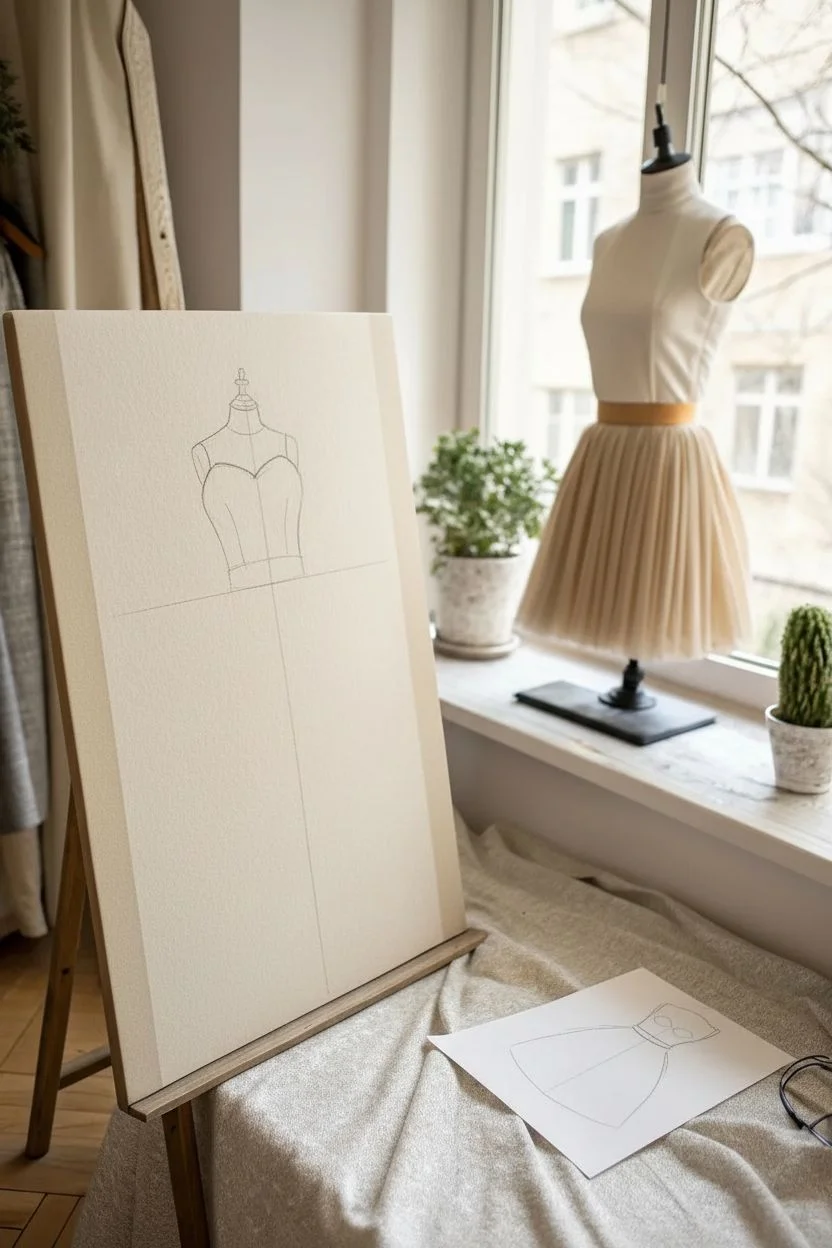
Capture the tailored elegance of a classic ballgown with this detailed sketching tutorial. Using simple pencil strokes to build volume and texture, you will create a refined illustration of a dress form showing off a sharply pleated skirt.
Step-by-Step
Materials
- Textured drawing paper (cream or off-white, approx. A3 size)
- Graphite pencils (HB for outlines, 2B and 4B for shading)
- Fine liner pen (black, 0.1mm or 0.3mm)
- Kneaded eraser
- Ruler (optional)
- Wooden easel or stiff backing board
- Paper blending stump (tortillon)
Step 1: Constructing the Form
-
Establish the vertical axis:
Begin by lightly drawing a central vertical line down the middle of your paper using an HB pencil. This axis will help ensure your dress form stands straight and the skirt falls symmetrically. -
Outline the mannequin torso:
Near the top of your axis, sketch the neck and shoulders of the mannequin. Draw the neck cap detail—a small knob and curved top plate—to establish that this is a dressmaker’s form, not a human figure. -
Define the bodice shape:
Sketch a sweetheart neckline slightly below the shoulder line. Draw the sides of the bodice tapering inward to create a defined waistline. Keep these lines relatively light so you can refine them later. -
Mark the waistband:
Draw a distinct horizontal band at the narrowest part of the torso. This waistband serves as the anchor point for the pleats we will add next.
Uneven Pleats?
If your pleats look flat, check your hemline. A straight hem flattens the image; curve the bottom of each fold firmly upward to show the fabric has thickness and volume.
Step 2: Designing the Skirt
-
Sketch the skirt silhouette:
From the bottom of the waistband, lightly draw the outer bell shape of the skirt extending downwards. Make the hemline slightly curved (like a smile) to suggest volume and perspective. -
Map out the pleat intervals:
make small tick marks along the waistband to decide where your major pleats will start. I find that spacing them slightly unevenly creates a more natural, hand-draped look than perfect mathematical precision. -
Draw the main vertical folds:
Draw long, sweeping lines from your tick marks down to the hem. These lines should fan out slightly as they reach the bottom, following the bell shape of the skirt. -
Create the hemline rhythm:
Connect the bottom of your vertical lines with a scalloped or zigzag pattern. This ‘up-and-down’ hemline shows the dimensionality of the fabric folding in on itself.
Pro Tip: Line Weight
Vary your pressure! Thin, barely-there lines for the illuminated tops of folds and thick, dark lines for the deep creases will instantly make your drawing look professional.
Step 3: Adding Depth and Texture
-
Darken the deepest shadows:
Switch to a 4B pencil. Shade the narrow recessed areas between the pleats, specifically right under the waistband and deep inside the folds near the hem. This contrast makes the pleats pop forward. -
Detail the bodice:
Add faint vertical hatching lines to the bodice area to suggest structure or boning. Keep these strokes delicate to differentiate the bodice texture from the flowing skirt. -
Refine the contour lines:
Using your 2B pencil or a fine liner pen, carefully trace over your initial structural lines. Use a confident, slightly varying line weight—pressing harder on the shadowed side of the dress (usually the right) and lighter on the illuminated side. -
Add fabric pattern details:
Scatter small, abstract floral or geometric motifs across the skirt panels. Apply these markings lightly; they should follow the curve of the pleats, compressing in the shadows and expanding on the highlighted ridges. -
Blend the mid-tones:
Take your paper blending stump and gently smudge the graphite on the sides of the dress form. This softens the transition from light to dark, giving the mannequin rounding and volume.
Step 4: Final Touches
-
Ground the figure:
Sketch a simplified stand or leg at the very bottom center of the hem. A few quick, scribbled shadow lines on the ‘floor’ beneath the hem will stop the drawing from looking like it’s floating in space. -
Clean up highlights:
Use the kneaded eraser to lift off any graphite smudge from the tops of the pleats and the center of the bodice. These clean, white areas act as high-contrast highlights. -
Final assessment:
Step back from the easel to view the piece as a whole. Darken any lines that feel too weak, particularly the outer silhouette, to ensure the drawing commands attention.
Now you have a timeless fashion illustration ready to be framed or used as inspiration for your next sewing project
Ruffles and Tiered Skirt Volume Study
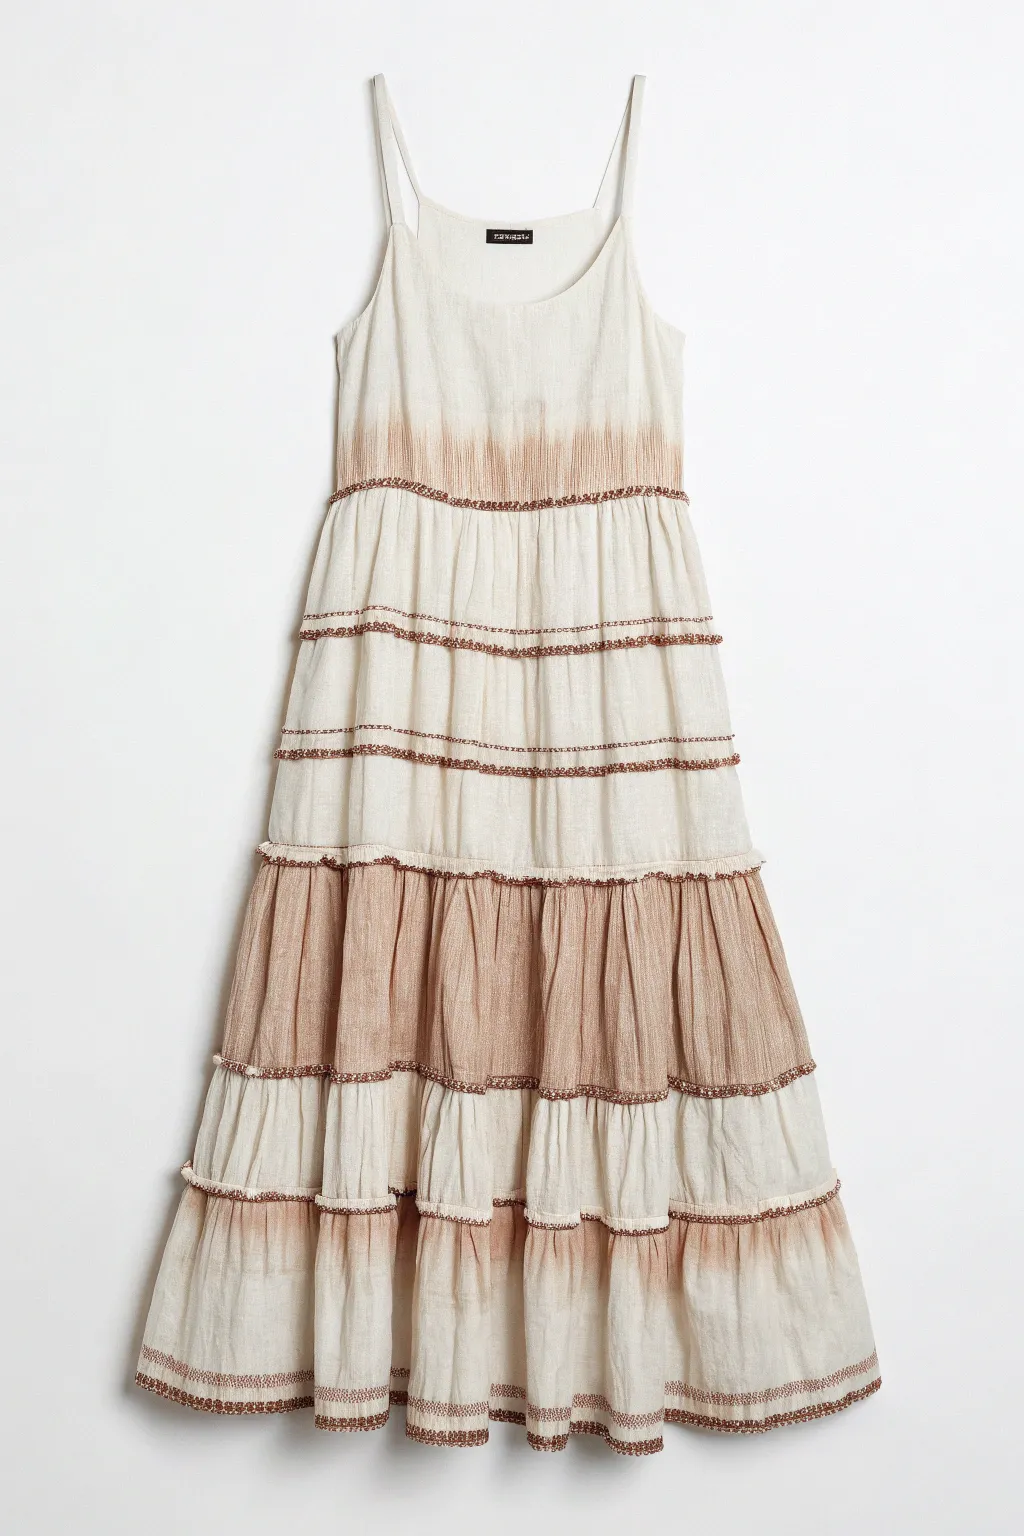
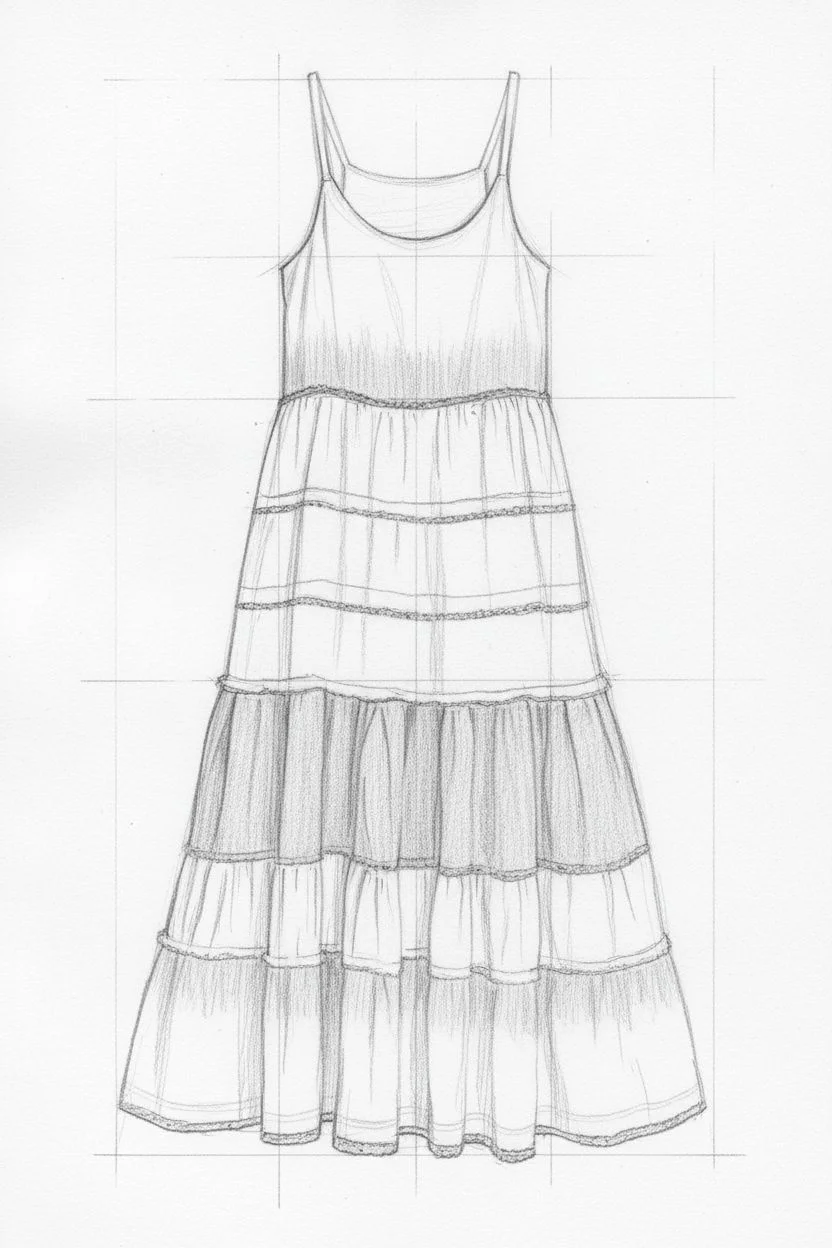
Master the art of illustrating flowing fabric and tiered volume with this study of a breezy maxi dress. You will capture the delicate dip-dye transitions and the weight of ruffled layers using mixed media techniques.
Step-by-Step Guide
Materials
- Heavyweight mixed-media paper or hot press watercolor paper
- HB and 2B graphite pencils
- Kneaded eraser
- Watercolors (Burnt Sienna, Yellow Ochre, Sepia, Titanium White)
- Round watercolor brushes (sizes 2, 4, 8)
- Fine liner pen (brown or sepia, 0.1mm)
- Colored pencils (cream, warm grey, terracotta)
- White gouache or gel pen
Step 1: Basic Structure & Sketching
-
Establish the vertical axis:
Begin by drawing a faint central vertical line to ensure symmetry, then mark the shoulder straps’ top points and the dress’s total length. -
Block in the tiers:
Sketch horizontal guidelines for the tiers. Start with the bodice, then mark the waistline. Divide the skirt portion into four distinct horizontal bands, getting slightly wider as you move down. -
Outline the bodice:
Refine the bodice shape with a gentle U-neckline and thin spaghetti straps. Allow the fabric to flare out slightly under the armpits. -
Add the gather lines:
At each horizontal tier line, draw small, vertical wiggly lines to indicate gathering. I like to make these slightly irregular to suggest natural fabric bunching. -
Connect the silhouette:
Draw the side seams of the skirt, angling them outwards to create an A-line silhouette that widens at the bottom.
Natural Folds Pro-Tip
When drawing vertical fold lines, vary their length and pressure. Don’t draw straight lines from top to bottom; break them up to show movement.
Step 2: Watercolor Washes
-
Base cream layer:
Mix a very dilute wash of Yellow Ochre and Titanium White. Apply this to the entire dress shape, leaving the very brightest highlights purely white. -
Wet-on-wet bodice gradient:
While the paper is slightly damp but not soaking, mix Burnt Sienna with a touch of Sepia. Gently touch this color to the bottom of the bodice area, letting it bleed upward to create that soft dip-dye effect. -
Painting the tiered stripes:
For the skirt tiers, apply the terracotta mix (Burnt Sienna) to specific bands. Look closely at the reference: paint the third tier fully, and add gradient touches to the bottom hem and the transition zones of the upper tiers. -
Softening the transitions:
Use a clean, damp brush to soften any hard edges in the dye sections, ensuring the brown fades naturally into the cream fabric. -
Shadowing the folds:
Mix a watery warm grey or dilute Sepia. Paint vertical stripes following your pencil ‘gather lines’ to create the illusion of folds and depth within the skirt volume.
Step 3: Detailing & Texture
-
Defining the trim:
Once the paint is completely dry, use a sharp terracotta colored pencil or a very fine brown liner to draw the decorative trim separating each tier. Use tiny stippling dots or small ‘x’ shapes to mimic embroidery or beading. -
Deepening the shadows:
Use a 2B pencil or a darker grey colored pencil to deepen the shadows right underneath each horizontal tier seam. This makes the tiers look like they are overlapping. -
Enhancing the fabric texture:
Lightly cross-hatch with a cream colored pencil over the lighter areas to give the impression of a linen or cotton texture. -
Refining the hems:
Go over the bottom hemline with a slightly wavy line to show the drape of the fabric, ensuring it doesn’t look like a stiff cardboard cutout. -
Final highlights:
Use a white gel pen or a tiny dot of white gouache to add highlights to the top edges of the gathers and any metallic sheen on the trim.
Muddy Color Troubleshooting
If your cream and terracotta colors are blending into mud, let the first layer dry completely before adding shadows. Layering wet-on-dry keeps colors crisp.
Now you have a beautifully voluminous dress study perfect for your fashion portfolio


Corset-Inspired Bodice With Panel Seams
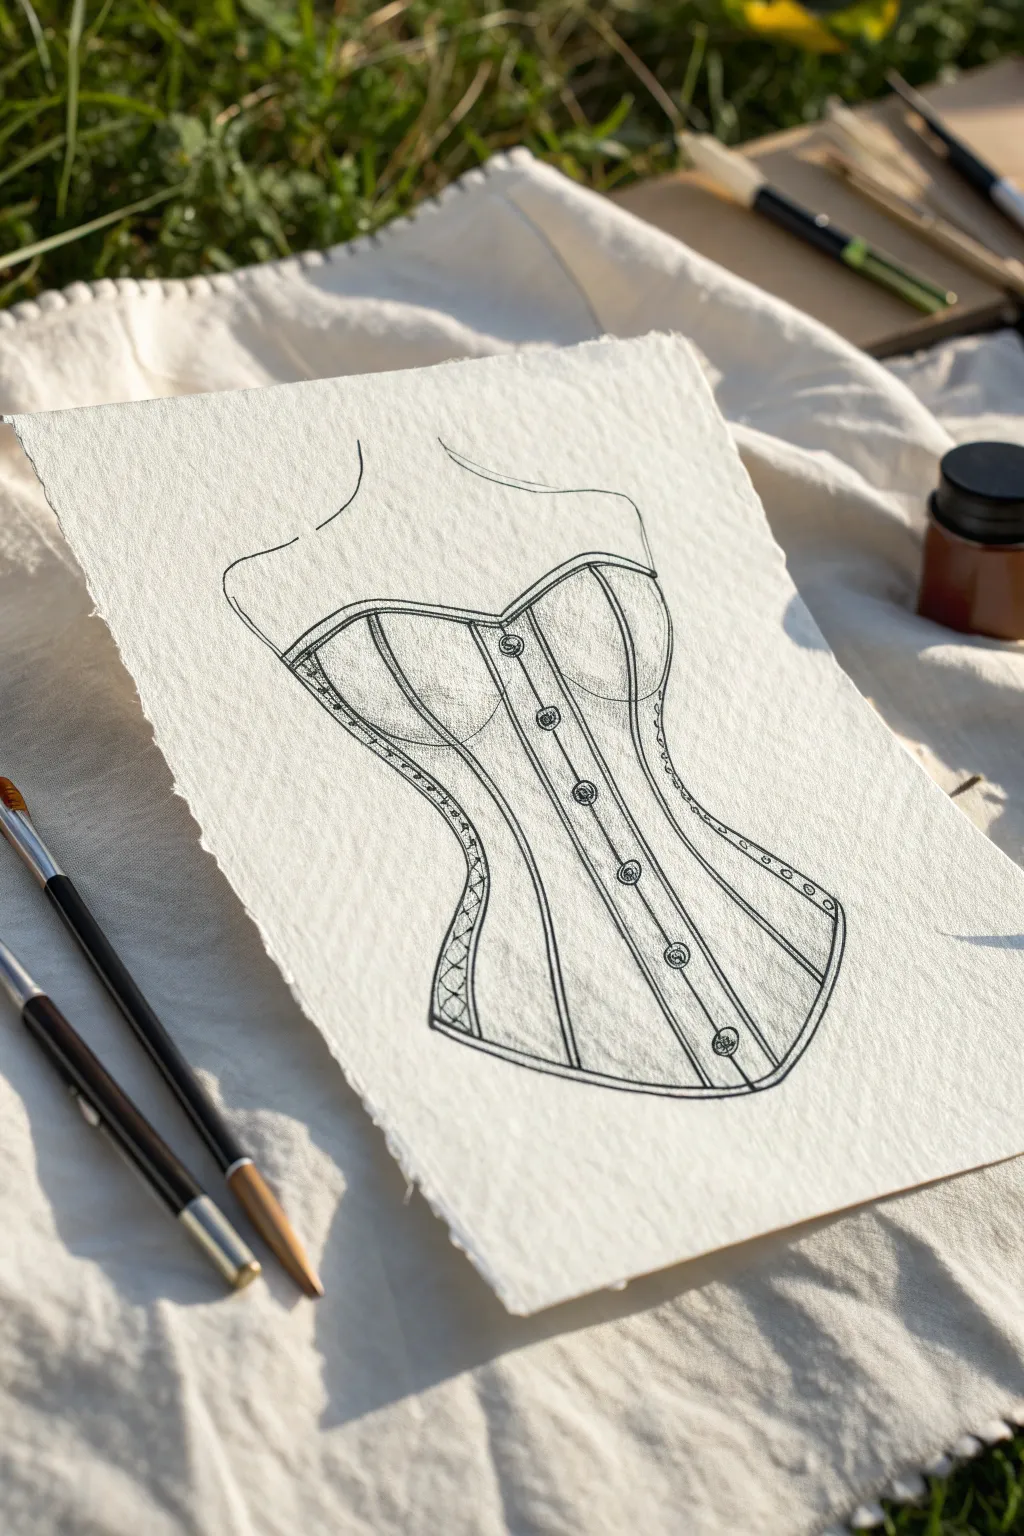
Capture the elegance of vintage fashion illustration with this detailed ink drawing of a paneled corset. Using fine liners on textured paper creates a timeless, hand-crafted look that mimics the charm of old-world dressmaker sketches.
How-To Guide
Materials
- Heavyweight textured paper (cold press watercolor or handmade cotton paper)
- HB graphite pencil
- Kneaded eraser
- Fine liner pens (sizes 0.1, 0.3, and 0.5)
- Ruler (clear plastic is best)
- Paper blending stump or tortillon
Step 1: Planning the Silhouette
-
Establish the centerline:
Begin by lightly drawing a vertical line down the center of your paper with your HB pencil. This axis is crucial for keeping the corset symmetrical. -
Mark the torso guidelines:
Sketch horizontal guides for the bust level, waist, and hip. The waist should pinch in significantly to create that classic hourglass shape. -
Draft the outline:
Connect your guides to create the outer silhouette. Draw a curved sweetheart neckline at the top and a gentle V-shape at the bottom hem. -
Add the phantom body:
Very faintly sketch the suggestion of shoulders and a neck above the corset. These lines should be extremely subtle, just enough to give the garment context.
Step 2: Drafting the Panels
-
Define the center placket:
Draw two vertical parallel lines down the center front, about a half-inch wide, following the curve of the torso. -
Create the bust cups:
Sketch curved lines originating from the underarm area and swooping down to meet the waistline, defining the separate bust panels. -
Add vertical boning channels:
Draw the remaining vertical seams. These should radiate slightly from the waist, curving outward toward the bust and hip to emphasize the 3D form. -
Detail the side lacing:
On the left side seam, sketch a small panel with crisscrossing lines to represent decorative lacing or side gussets.
Uneven Symmetry?
If one side looks wider than the other, measure from your center line out to the side seam at the bust, waist, and hip. Mark these distances on the other side before drawing the final curve.
Step 3: Inking the Design
-
Outline the main shape:
Switch to your 0.5 fine liner. Carefully trace the outer perimeter of the corset, using confident, smooth strokes. -
Ink the structural seams:
Use a 0.3 pen for the internal panel lines. I find that breaking the line very slightly in a few places adds to that vintage sketch character. -
Add the buttons:
Draw small circles down the center placket using the 0.3 pen. Add a tiny dot or cross inside each to look like stitches or buttonholes. -
detail the stitching:
Switch to your finest 0.1 pen. extensive stitching is key here; draw dashed lines along every major seam and around the perimeter of the corset. -
Texture the side panel:
Ink the crisscross lacing pattern on the side panel with the 0.1 pen, keeping these lines very delicate.
Pro Tip: Line Weight
Vary your pen pressure. Press harder on the shadowed side (usually the right) and lift pressure on the highlighted side (left) to give the drawing instant three-dimensionality.
Step 4: Shading and Finishing
-
Erase pencil marks:
Once the ink is completely dry—give it a few minutes—gently lift away your graphite guidelines with a kneaded eraser. -
Add volume with hatching:
Use the 0.1 pen to add very fine diagonal hatching lines on the sides of the waist and under the bust cups to suggest shadow. -
Deepen the contrast:
Go over the outermost silhouette lines one more time with the 0.5 pen to make the drawing pop off the page. -
Soft graphite shading:
Take your pencil again and lightly shade inside the corset panels, focusing on the edges where the fabric would curve away from the light. -
Blend for softness:
Use a blending stump to smooth out the pencil shading. This creates a fabric-like texture that contrasts beautifully with the crisp ink lines.
Now you have a stunning, classical fashion illustration ready to frame or add to your portfolio
Deep V-Neck With Illusion Mesh

Capture the elegance of illusion mesh and delicate draping with this fashion illustration tutorial. You will learn to render sheer fabrics and intricate pleating using graphite and markers for a sophisticated, professional look.
Detailed Instructions
Materials
- Heavyweight smooth drawing paper or Bristol board
- HB and 2B graphite pencils
- Fine liner pens (0.05mm and 0.1mm, dark brown or black)
- Alcohol-based markers (skin tones, cool grays)
- White gel pen or gouache
- Kneaded eraser
- Ruler
Step 1: Planning and Croquis
-
Establish the pose:
Begin by lightly sketching a standard 9-head croquis figure. Draw a vertical balance line, then place the head, shoulders, waist, and hips. The figure should be standing straight with one leg slightly extended to give the skirt movement later. -
Outline the bodice shape:
Defining the deep V-neck constitutes the focal point of this sketch. Draw two diagonal lines plunging from the shoulders to the waistline. Add a horizontal line across the bust area where the darker mesh begins versus the lighter illusion netting. -
Draft the skirt volume:
From the waist, extend long, flowing lines downward to the floor. Fan them out slightly into an A-line shape. Allow the hemline to pool slightly on the ground, creating small curves to suggest fabric accumulating.
Step 2: Rendering the Skin and Mesh
-
Base skin tones:
Using your alcohol markers, fill in the exposed skin areas—face, neck, arms, and the chest area visible through the deep V. Use a light wash first, keeping it even. -
Add shading to the skin:
Once the base is dry, use a slightly darker marker shade to add definition under the chin, along the collarbones, and on the underside of the arms. -
Create the illusion mesh effect:
For the deep V-neck area, you want it to look sheer. Take a very sharp pencil or a fine brown pen and draw tiny cross-hatching or stippling over the chest area, but keep the underlying skin tone visible. This mimics the mesh texture. -
Define the bodice structure:
Darken the waistline and the straps of the V-neck. Use a 2B pencil to shade the bodice panels, making them darker than the skin but lighter than solid fabric to maintain that semi-transparent look.
Uneven Marker Streaks?
If your marker coloring looks streaky on the skin, you are likely working too slowly. Markers blend best when the ink is still wet, so work quickly in small circular motions to saturate.
Step 3: Drawing the Pleated Skirt
-
Establishing the pleats:
From the waistline, draw long, continuous vertical lines all the way to the hem. These lines shouldn’t be perfectly straight; give them a slight wave to show the fabric’s softness. -
Shading the folds:
This step brings the skirt to life. Identify where the ‘valleys’ of the pleats are. Use a cool gray marker or soft pencil shading to darken these recessed areas, leaving the ‘peaks’ of the pleats white or very light. -
Adding directional strokes:
I like to use a sharp HB pencil to flick rapid lines from the waist downward. This adds texture and reinforces the vertical flow of the tulle or chiffon material. -
Detailed cross-hatching:
On the darker sections of the skirt (the shadows), use delicate cross-hatching to deepen the contrast. This makes the lighter parts of the skirt appear translucent. -
Refining the hemline:
Where the skirt touches the floor, darken the contact points. Add soft shadows underneath the hem to ground the figure.
Add Metallic Texture
For a glamorous upgrade, trace the embroidery lines on the bodice with a silver or gold metallic gel pen instead of a standard graphite pencil.
Step 4: Final Details
-
Facial features:
Carefully ink in the eyes, nose, and lips with your finest pen. Keep the lines minimal to maintain a chic fashion illustration style. -
Hair styling:
Draw the hair in a sleek, pulled-back style. Use sweeping strokes to show the direction of the hair strands, darkening the area behind the ears and at the nape of the neck. -
Sparkle and embellishment:
Using a white gel pen or a tiny dot of white gouache, add scattered dots across the skirt and bodice. These represent sequins or beads catching the light. -
Final outline check:
Go over the main silhouette lines with a 0.1mm pen to ensure the figure stands out clearly from the background paper.
Step back and admire the flow of your delicate fashion illustration
Sheer Sleeves With Cuff Details
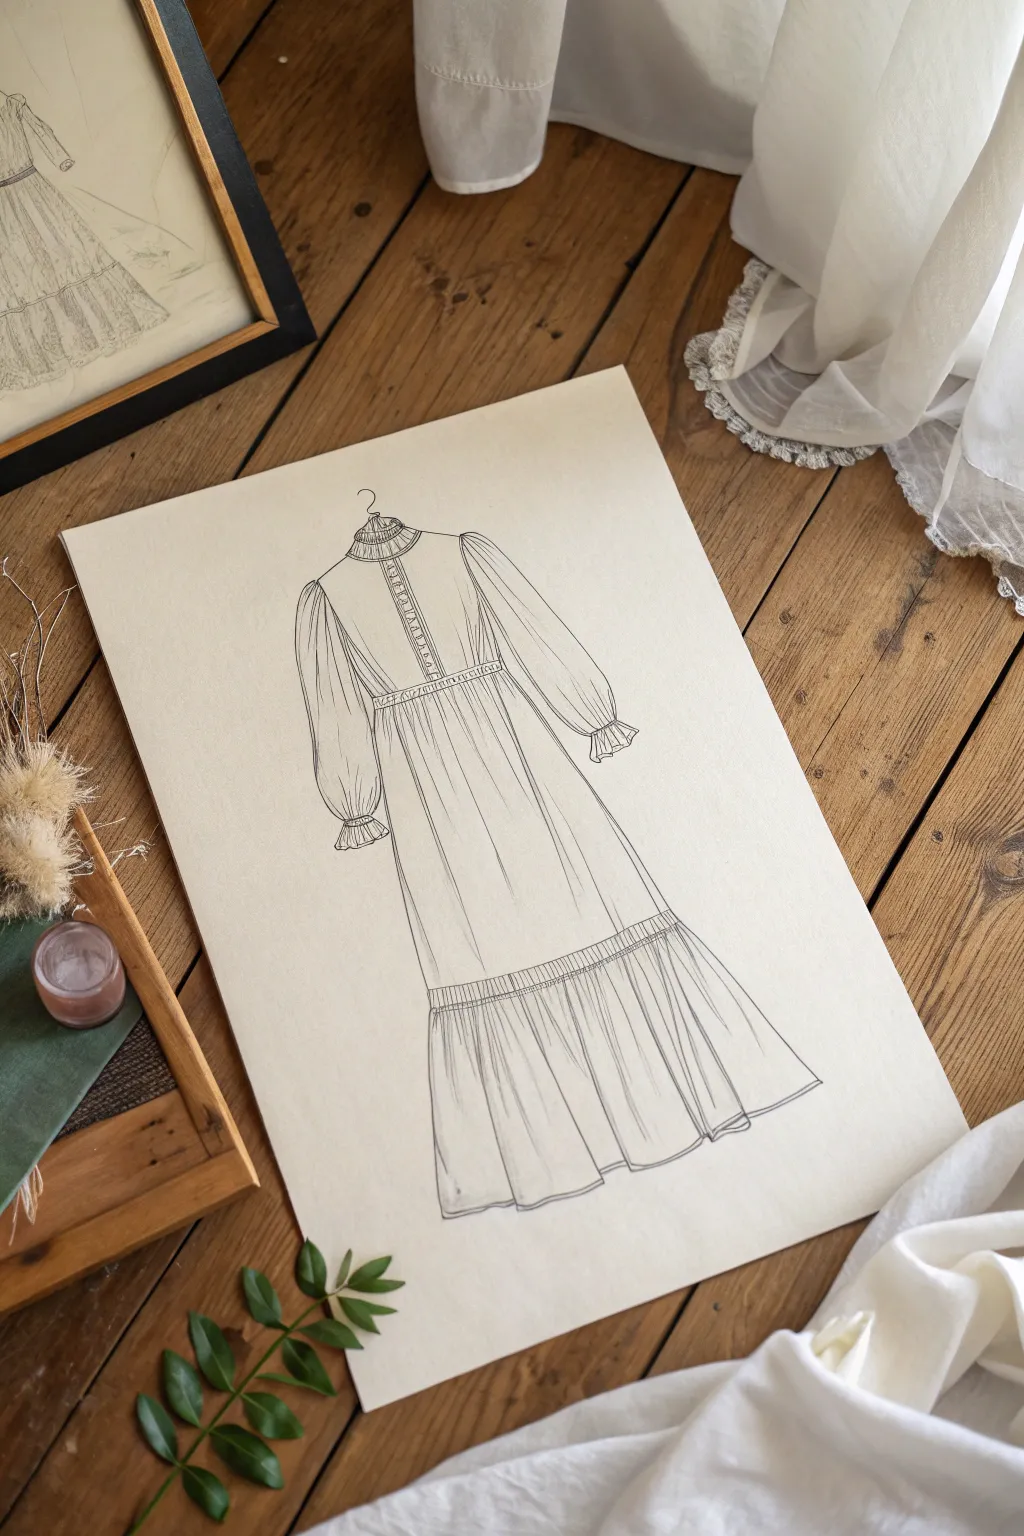
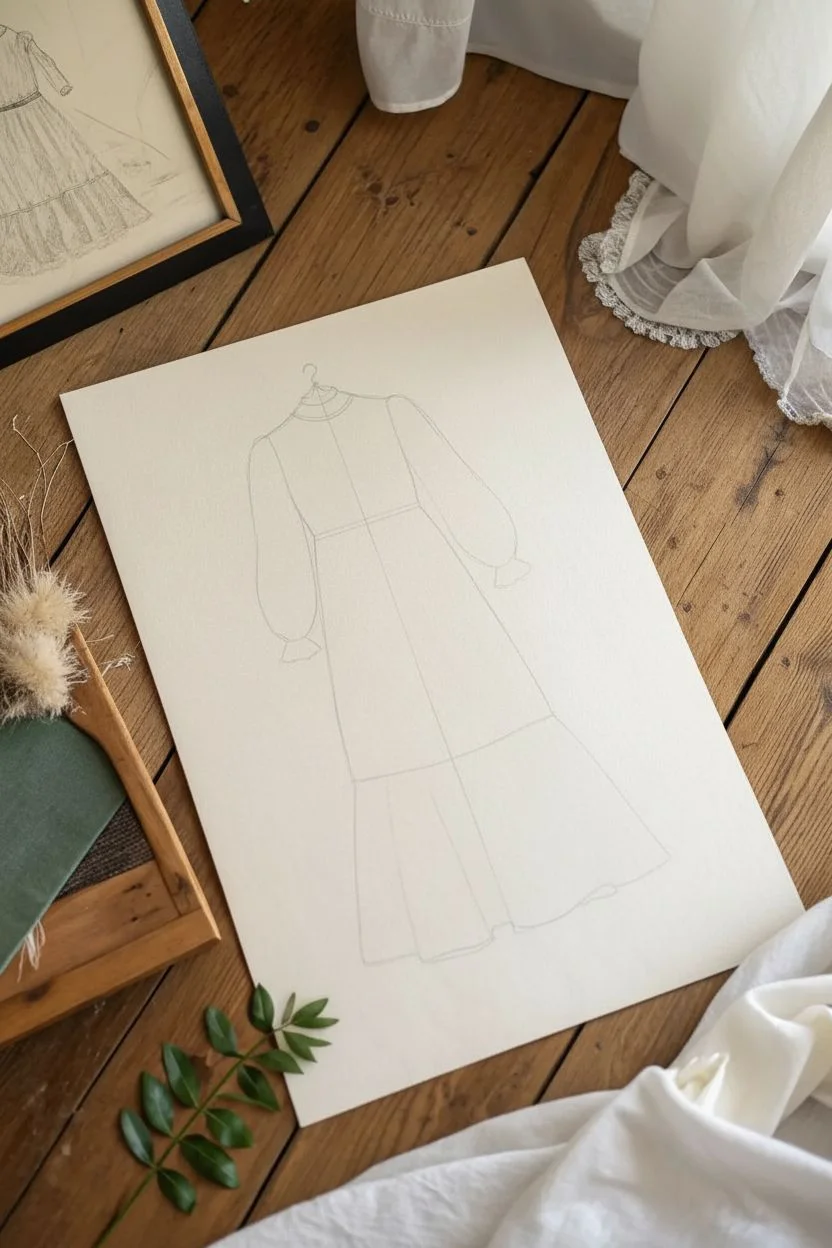
This elegant line drawing captures the romance of a vintage-inspired gown, featuring delicate sheer sleeves and charming ruffle details. The minimalist style emphasizes the flow and structure of the garment, making it a perfect project for practicing fabric folds and silhouette sketching.
Step-by-Step Guide
Materials
- High-quality sketching paper (A3 or A4, slightly textured)
- HB graphite pencil for initial shapes
- Fine liner pens (0.1mm, 0.3mm, and 0.5mm, black ink)
- Kneaded eraser
- Ruler
- Art masking tape (optional to hold paper steady)
Step 1: Planning the Silhouette
-
Center and Hanger:
Start by drawing a faint vertical centerline down the middle of your paper to ensure symmetry. At the top, sketch a small, simple wire hanger hook and the curved shoulder supports. -
Shoulder and Neckline:
Lightly sketch the high collar shape right below the hanger hook. Extend lines outward for the shoulders, keeping them slightly sloped to mimic a dress hanging naturally. -
Bodice Guidelines:
Draw the basic rectangular shape of the bodice, extending down to the waistline. Mark the waist position clearly, as this dress has a defined, gathered waist. -
Skirt Outline:
From the waist marks, draw two long, slightly A-line strokes downward to define the main skirt panel. Stop about three-quarters of the way down the page to leave room for the bottom ruffle tier. -
Sleeve Mapping:
Map out the voluminous sleeves. Draw balloon shapes extending from the shoulders, tapering in at the wrists. Don’t worry about details yet; just capture the overall volume.
Step 2: Refining the Details
-
High Collar Ruffles:
Using your pencil, add the ruffled texture to the high neck. Draw small, vertical zig-zag lines to represent the gathered fabric standing up around the neck. -
Button Placket:
Draw a vertical strip down the center of the bodice. Inside this strip, sketch small circles for buttons, spacing them evenly from the neck to the waist. -
Waist Definition:
Refine the waistline by drawing a horizontal band. Add tiny, short vertical dashes along the top and bottom of this band to suggest gathering and elasticity. -
Sleeve Cuffs:
At the wrist tapered point, draw the cuff bands. Add a flared ruffle extending from the cuff, using wavy lines to show the soft movement of the fabric. -
Bottom Tier:
Draw the horizontal seam where the bottom ruffle tier begins. From this seam, sketch the skirt’s hemline near the bottom of the page, making it slightly curved and uneven to look natural.
Fabric Texture Trick
To imply sheer fabric on the sleeves, use broken or thinner lines compared to the bodice. This subtle weight difference suggests transparency.
Step 3: Inking and Drapery
-
Strong Outlines:
Switch to a 0.5mm fineliner. Carefully trace the main outer silhouette of the dress, the hanger, and the main seam lines (waist and tier seam). -
Detailing the Bodice:
Use a 0.3mm pen for the buttons and collar details. When inking the button placket, you can add tiny stitching lines on either side for realism. -
Creating Sleeve Folds:
With the 0.1mm pen, draw long, flowing lines inside the sleeve shapes. Start from the shoulder seam and curve them downwards to follow the gravity of the hanging fabric. -
Wrist Gathers:
Add concentration of small lines near the cuffs where the fabric bunches up. This visual density makes the sleeves look billowy. -
Skirt Drapery:
Draw vertical fold lines running down the main skirt panel. Keep your hand loose; these lines shouldn’t be perfectly straight ruler lines, but rather gentle curves. -
The Bottom Ruffles:
Ink the bottom tier with plenty of vertical lines close together to show the heavy gathering. I find that varying the length of these fold lines adds visual interest. -
Final Cleanup:
Once the ink is completely dry (wait at least 5 minutes), gently erase all the underlying pencil guidelines with your kneaded eraser.
Add a Color Wash
Scan your line art and print it on watercolor paper. Apply a very pale, dusty beige or sage green wash to give the design a vintage fashion plate look.
Your beautiful fashion illustration is now ready to be framed or added to your design portfolio
All-Over Pattern That Follows the Form

Master the art of fashion sketching with this detailed illustration of a vintage-inspired maxi dress, focusing on how pattern follows the garment’s flow. You’ll create a structured yet airy design featuring delicate floral motifs and rhythmic polka dots that curve with fabric folds.
Step-by-Step
Materials
- Large format Bristol board or smooth watercolor paper (A2 or A3)
- HB and 2B graphite pencils
- Kneaded eraser
- Fine liner pens (0.05, 0.1, and 0.3mm in black or sepia)
- Alcohol-based markers (pale cream/ivory tone, muted terra cotta, sage green, dusty blue)
- Colored pencils (burnt sienna, red ochre, indigo)
- French curves or a clear ruler
Step 1: Planning the Silhouette
-
Establish the centerline:
Begin with a very light, straight vertical line down the center of your paper using a ruler and HB pencil. This axis is crucial for symmetry. -
Map the proportions:
Mark the key horizontal levels: the neckline, the waistline (slightly high-waisted for this style), the knee level, and the floor-length hem. -
Outline the bodice:
Sketch the bodice shape. Draw a rounded neckline with a small V-split. Add the shoulder seams and sketch the voluminous, puffed ¾ sleeves that end in fitted cuffs. -
Draft the skirt structure:
Extend lines from the waist down in an A-line shape. The skirt should be segmented: a main panel that goes to the knees, followed by a wide ruffled tier at the bottom. -
Add vertical panel lines:
Draw vertical seam lines running from the shoulders down to the ruffle seam. These panels will structure your pattern placement later. -
Refine the hemline:
At the bottom, draw the hem with gentle waves to suggest fabric movement. Connect these waves upward with short, vertical fold lines to show the gathering of the ruffle.
Uneven Pattern?
Pattern looks flat? Use curved guidelines. Draw faint horizontal ellipses wrapping around the form before adding dots to ensure they follow the body’s volume.
Step 2: Inking the Outline
-
Clean up the sketch:
Use your kneaded eraser to lift barely-there graphite marks, leaving just enough to guide your pen. -
Ink the main structural lines:
With a 0.3mm pen, trace the outer silhouette, the waist seam, and the main vertical panel seams. Keep your hand relaxed to avoid stiff mechanical lines. -
Ink the folds and gathers:
Switch to a 0.1mm pen to draw the gather marks at the sleeve heads, cuffs, and the ruffled hem. These strokes should be quick and tapered.
Step 3: Applying the Pattern
-
Draw the detailed borders:
Along the vertical seams, the waistband, cuffs, and the main horizontal ruffle seam, draw parallel lines to create narrow borders. Fill these with tiny geometric zig-zags or loops using the 0.05mm pen. -
Grid the polka dots:
Lightly pencil a grid across the main fabric panels. This ensures your dots remain evenly spaced even as the skirt flares out. -
Ink the dots:
Using a fine pen or a burnt sienna colored pencil, draw the small dots. Crucially, distort them slightly near the fold lines—make them narrower ovals—to simulate the fabric wrapping around the form. -
Add floral motifs to the hem:
On the bottom ruffle tier, pencil in larger floral sprays spaced evenly. Ink them delicately, focusing on varied flower shapes like tulips or rounded blooms.
Add Fabric Texture
For a linen look, lightly drag a textured surface (like sandpaper) under your paper and rub over it with a blending stump or very soft pale pencil.
Step 4: Color and Dimension
-
Lay the base tone:
Apply a very pale cream alcohol marker over the entire dress to remove the stark white of the paper, giving it a vintage textile feel. -
Color the patterned borders:
Use terra cotta and sage green markers to fill in the tiny border designs. Precision is key here; you want the effect of embroidery. -
Tint the floral hem:
Color the floral motifs on the bottom ruffle using muted reds and blues. I find keeping the colors slightly desaturated maintains the elegant look. -
Shade the folds:
Take a cool grey or pale beige marker and add shadows wherever the fabric gathers: under the bust, inside the sleeve puffs, and within the deep folds of the hem ruffle. -
Enhance texture with pencil:
Use colored pencils to deepen the darkest shadows in the gathers and add texture to the ’embroided’ sections, layering over the marker for a mixed-media finish.
This technical drawing technique will serve you well for any garment requiring intricate surface design.
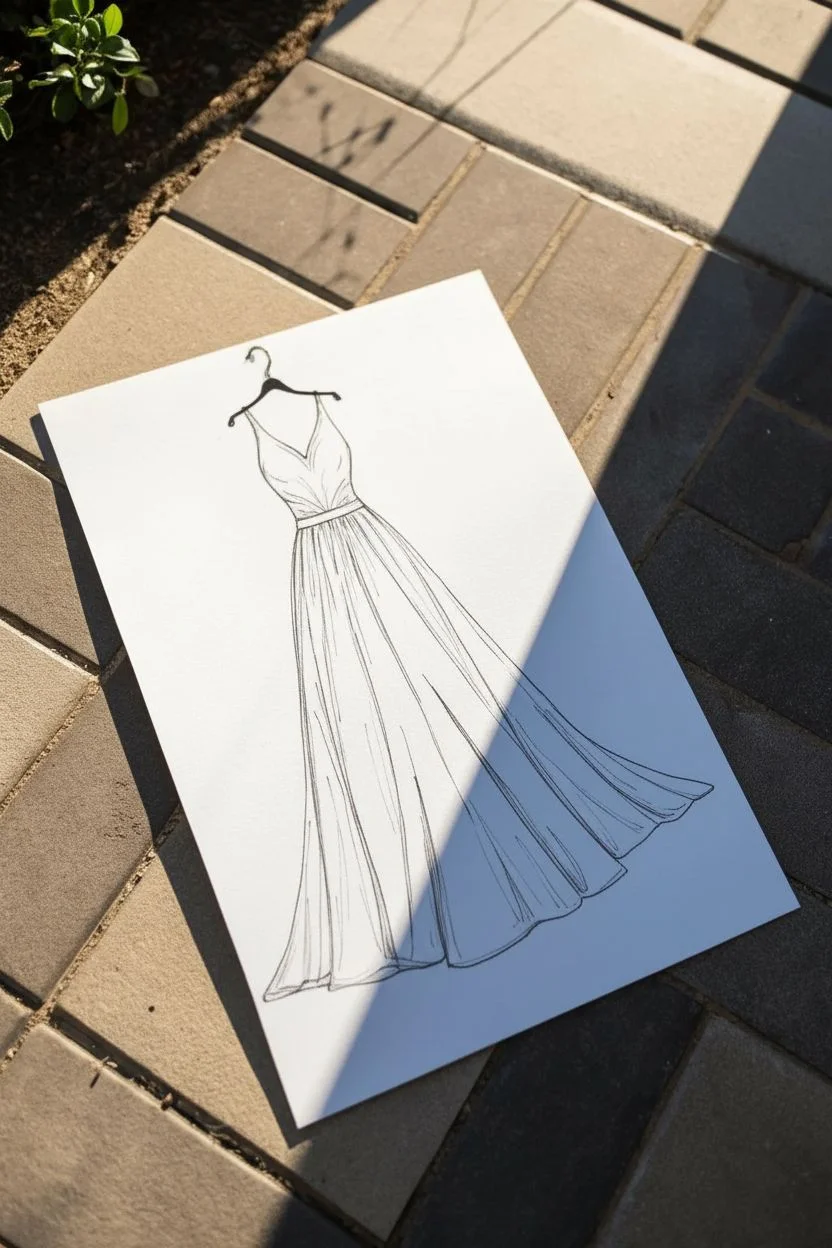
Sparkle and Shine With Glittery Fabric Rendering
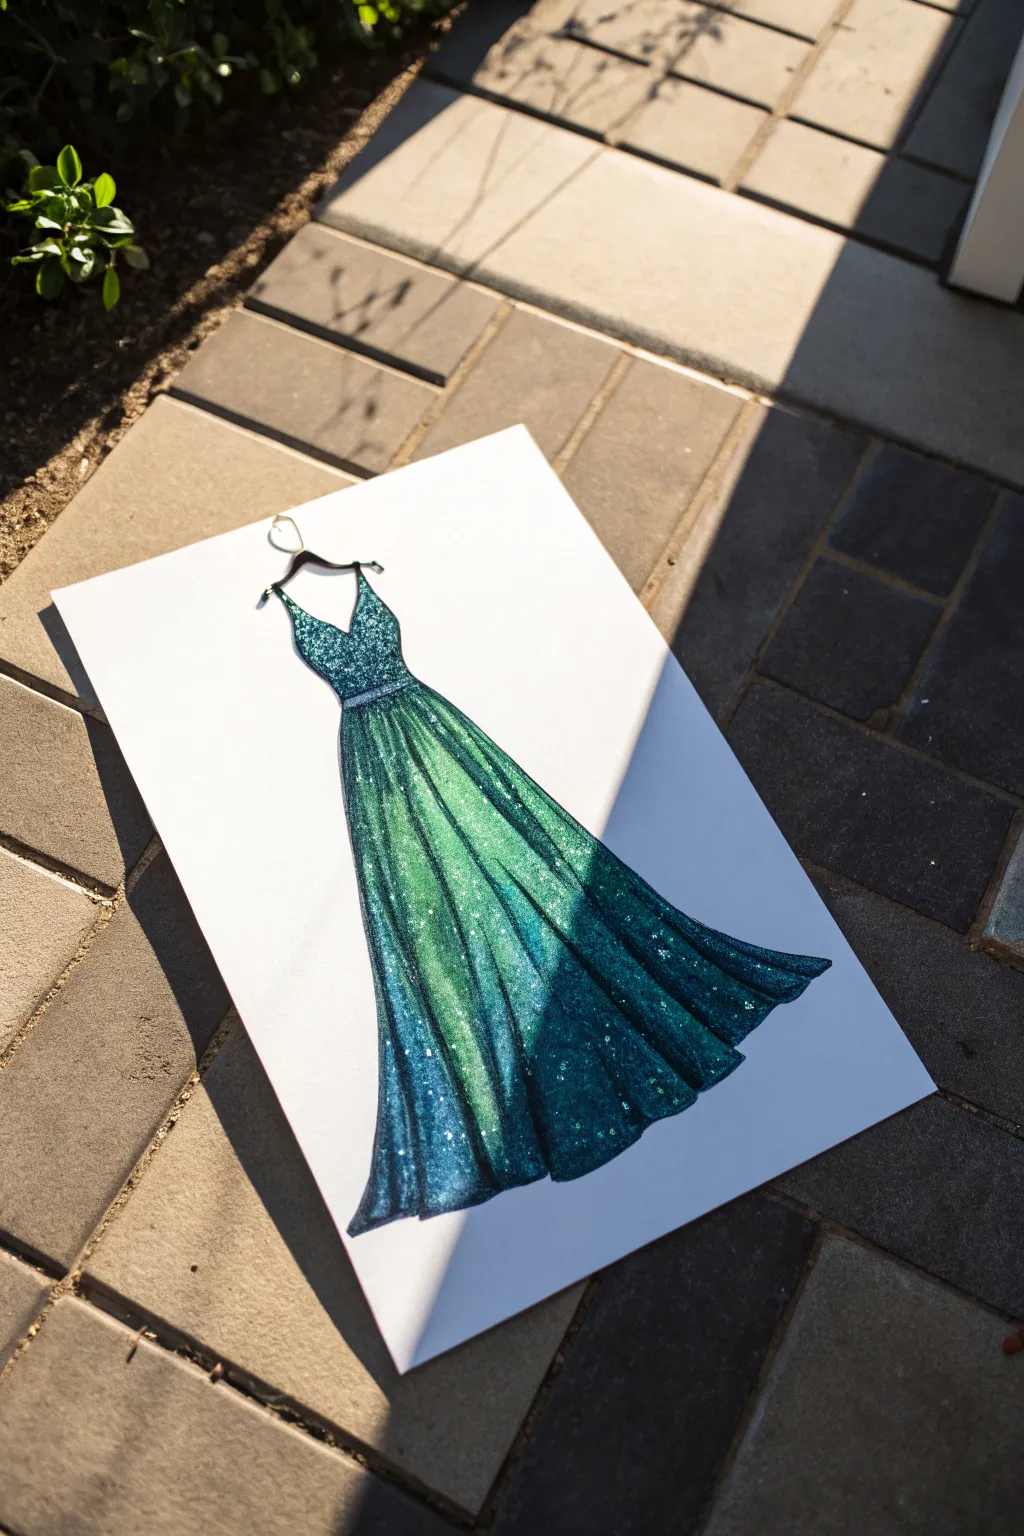
Capture the magic of evening wear with this striking fashion illustration featuring a floor-length gown in vibrant teal and emerald hues. Using a combination of blending markers and glitter accents, you will create a texture that looks like shimmering fabric catching the light.
How-To Guide
Materials
- Heavyweight mixed-media or marker paper (bright white)
- Pencil (HB or 2H)
- Fine liner pen (black, 0.3mm or 0.5mm)
- Alcohol-based markers (Teal, dark green/emerald, navy blue, light aqua)
- White gel pen or opaque white ink
- Teal or silver fine glitter (optional)
- Clear glue pen (if using loose glitter)
- Kneaded eraser
Step 1: Drafting the Design
-
Sketch the hanger:
Begin near the top center of your paper by drawing a simple wire hanger shape. Keep the lines thin and delicate, adding a small hook at the very top. -
Outline the bodice:
From the hanger’s shoulders, lightly sketch the straps and the V-neckline of the dress. The bodice should be fitted, extending down to a defined waistline. -
Draw the skirt silhouette:
Flowing from the waistline, sketch a long, A-line skirt that extends to the bottom of the page. Allow the hem to flare out slightly on the sides to suggest movement and volume. -
Add fabric folds:
Draw verical curved lines running from the waist down through the skirt. These lines represent the majestic folds and pleats of the heavy fabric. -
Ink the outline:
Using your fine black liner, trace over your pencil sketch. Keep the lines relatively thin for a refined look. Once the ink is completely dry, gently erase the pencil guidelines with a kneaded eraser.
Lighting Secret
Photograph your finished artwork in direct sunlight (as seen in the example) to make the glittery texture pop and create dramatic natural shadows.
Step 2: Coloring and Shading
-
Establish the base color:
Take your lightest aqua or teal marker and fill in the entire dress. This acts as a primer and ensures the paper is saturated for better blending later. -
Define the shadows:
Using the dark green or emerald marker, color in the ‘valleys’ of the skirt folds—the areas between the vertical lines you drew earlier. -
Deepen the contrast:
Apply the navy blue marker to the deepest parts of the shadows, particularly near the hem and right under the waistband. This creates dramatic depth. -
Blend the gradients:
Go back over the transition areas between the dark shadows and the light base color with your mid-tone teal marker. Use circular motions to soften any harsh lines. -
Preserve highlights:
Ensure the ‘peaks’ of the fabric folds remain the lightest teal color. This contrast is what gives the skirt its three-dimensional volume.
Fabric Variation
Change the texture by altering your dotting technique. Dense dots look like velvet, while sparse, sharp white dots look more like satin or silk.
Step 3: Adding the Sparkle Texture
-
Stipple the texture:
Using a dark teal or green fine-point pen (or the fine tip of your marker), create tiny dots all over the dress, concentrating them more densely in the shadowed areas. -
Add white highlights:
Take your white gel pen and tap tiny white dots primarily on the highlighted ‘peaks’ of the folds and the bodice area. This mimics light catching the sequins. -
Optional: Apply glitter:
For a true 3D effect like the photo, apply a thin layer of glue with a glue pen over the darkest shadow areas. -
Dust and shake:
Sprinkle fine teal or emerald glitter over the wet glue. I like to let this sit for a moment before tapping the excess off onto a scrap sheet of paper. -
Final touches:
Review the illustration for balance. If the glitter overwhelmed the drawing, use the black liner to re-define the silhouette edges or the hanger hook.
Now you have a dazzling fashion illustration ready to be framed or added to your portfolio
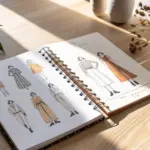
Front, Back, and Side Dress Lineup Sheet
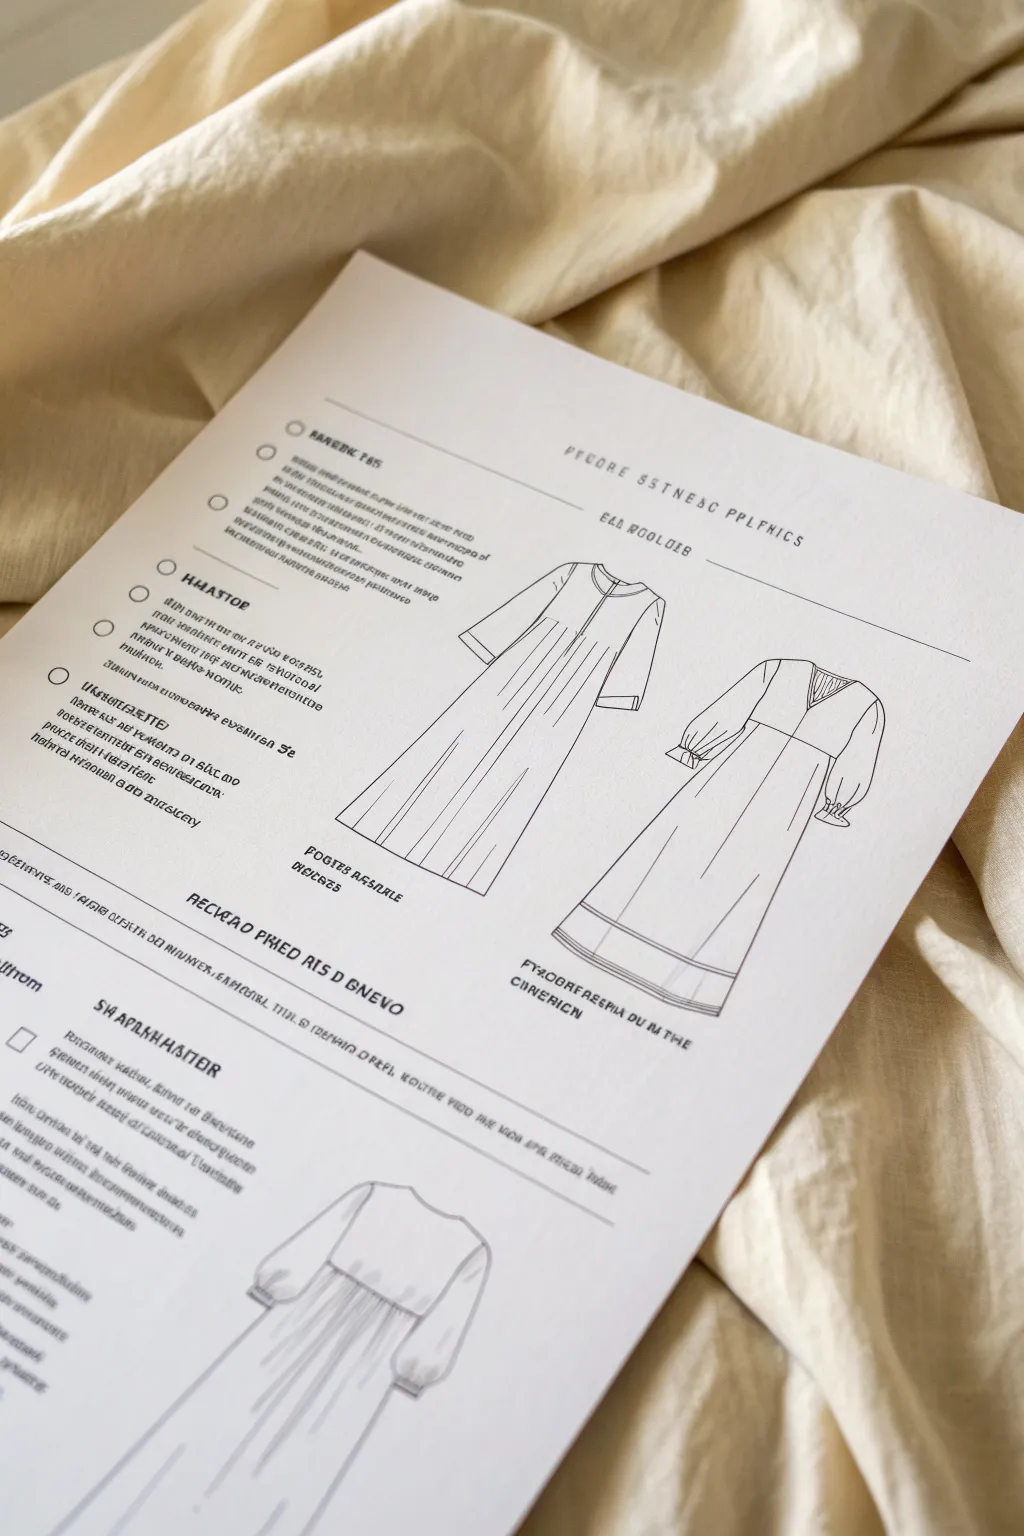
This project guides you through creating a professional-looking fashion flat lineup sheet, featuring front and back views of a flowing maxi dress. The result is a clean, minimalist technical drawing that captures the drape and structure of the garment with precision.
Detailed Instructions
Materials
- Smooth bristol board or heavy sketching paper (A4 or Letter size)
- HB or F graphite pencil for initial layout
- Fine liner pens (0.1mm, 0.3mm, and 0.5mm) in black
- Ruler or straight edge
- French curve (optional but helpful)
- Eraser (kneaded preferred)
- Word processing or layout software (optional for adding text)
Step 1: Planning the Layout
-
Establish the centerline:
Begin by lightly drawing a vertical centerline for each figure you intend to draw. For this lineup, space them evenly apart—one for the front view on the left and one for the back view on the right. -
Mark proportions:
Using your ruler, lightly mark horizontal guidelines across both centerlines for key body landmarks: the shoulder line, the bust line, the waist, and the hemline. This ensures your front and back views are perfectly aligned in height.
Step 2: Drafting the Silhouettes
-
Sketch the bodice outline:
With your HB pencil, lightly sketch the V-neck shape for the front view and the higher neckline for the back. Draw the shoulder slopes and armholes, keeping lines loose and adjustable. -
Draft the sleeves:
Add the 3/4 length loose sleeves. Start from the shoulder point and extend outward, curving slightly for a natural drape. Sketch the cuff detail at the end of the sleeve. -
Define the waist seam:
Draw the empire waistline or under-bust seam. This should be a slightly curved line wrapping around the form to imply volume, rather than a flat straight line. -
Create the skirt flow:
Extend lines from the waist down to the hem. Flare the lines outward gently to create an A-line silhouette. I usually add a slight wave to the bottom hemline to suggest fabric movement. -
Add vertical pleating:
From the waist seam down, sketch vertical lines that radiate slightly into the skirt. These represent the gathers or pleats that give the dress its fullness. Vary their lengths so they don’t look too rigid.
Clean Lines
For crucial curves like the hem or neck, rotate the paper as you draw. Pull the pen toward your body rather than pushing it away for smoother arcs.
Step 3: Inking the Drawing
-
Outline the main shape:
Switch to your 0.5mm fine liner. Carefully trace the outer silhouette of the dress (shoulders, side seams, and sleeves). Use confident, continuous strokes to avoid feathery lines. -
Ink the structural seams:
Use the 0.3mm pen for major internal seams like the neckline, the waist seam, and the hem cuff. This creates a visual hierarchy where the outline is boldest. -
Detail the gathers:
Switch to your finest 0.1mm pen for the drape lines and gathers. Start the stroke at the seam with a bit of pressure and flick the pen outward, lifting it off the paper to create a tapered line that mimics fabric folds. -
Add hem stitching:
If you want to suggest a wide hem facing, draw a horizontal line parallel to the bottom edge using the 0.1mm pen. Keep this line very delicate. -
Back view details:
For the back view figure, ensure you draw the neckline curve correctly (dipping slightly in the center). Replicate the sleeve and skirt volume exactly as you did for the front.
Digital Hybrid
Draw your fashion flats by hand, then scan them. Use vector software like Illustrator to add the crisp typography and headers for a truly professional industry look.
Step 4: Finishing Touches
-
Erase pencil guides:
Allow the ink to dry completely—give it at least five minutes to prevent smudging. Gently erase all graphite guidelines with a kneaded eraser. -
Layout text blocks:
To mimic the technical sheet look, add text blocks. You can hand-letter these or, for a cleaner look, scan your drawing and overlay text digitally. Create a header at the top and list-style text on the left. -
Add checkboxes:
Draw small circles or squares next to your text list items on the left side. This mimics a ‘spec sheet’ used in fashion production. -
Include a detail sketch:
At the bottom of the page, add a cropped, zoomed-in sketch of a specific detail, like the sleeve gathering or back closure, to fill the composition.
Now you have a crisp technical flat that beautifully communicates your design intent


Have a question or want to share your own experience? I'd love to hear from you in the comments below!