
When you’re craving a real challenge, the best hard drawing ideas are the ones that force you to slow down and earn every shadow, highlight, and tiny texture mark. I pulled together my favorite high-skill prompts that test precision, patience, and your ability to truly see what’s in front of you.
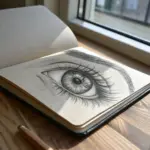
Hyper-Realistic Eye With Crisp Reflections
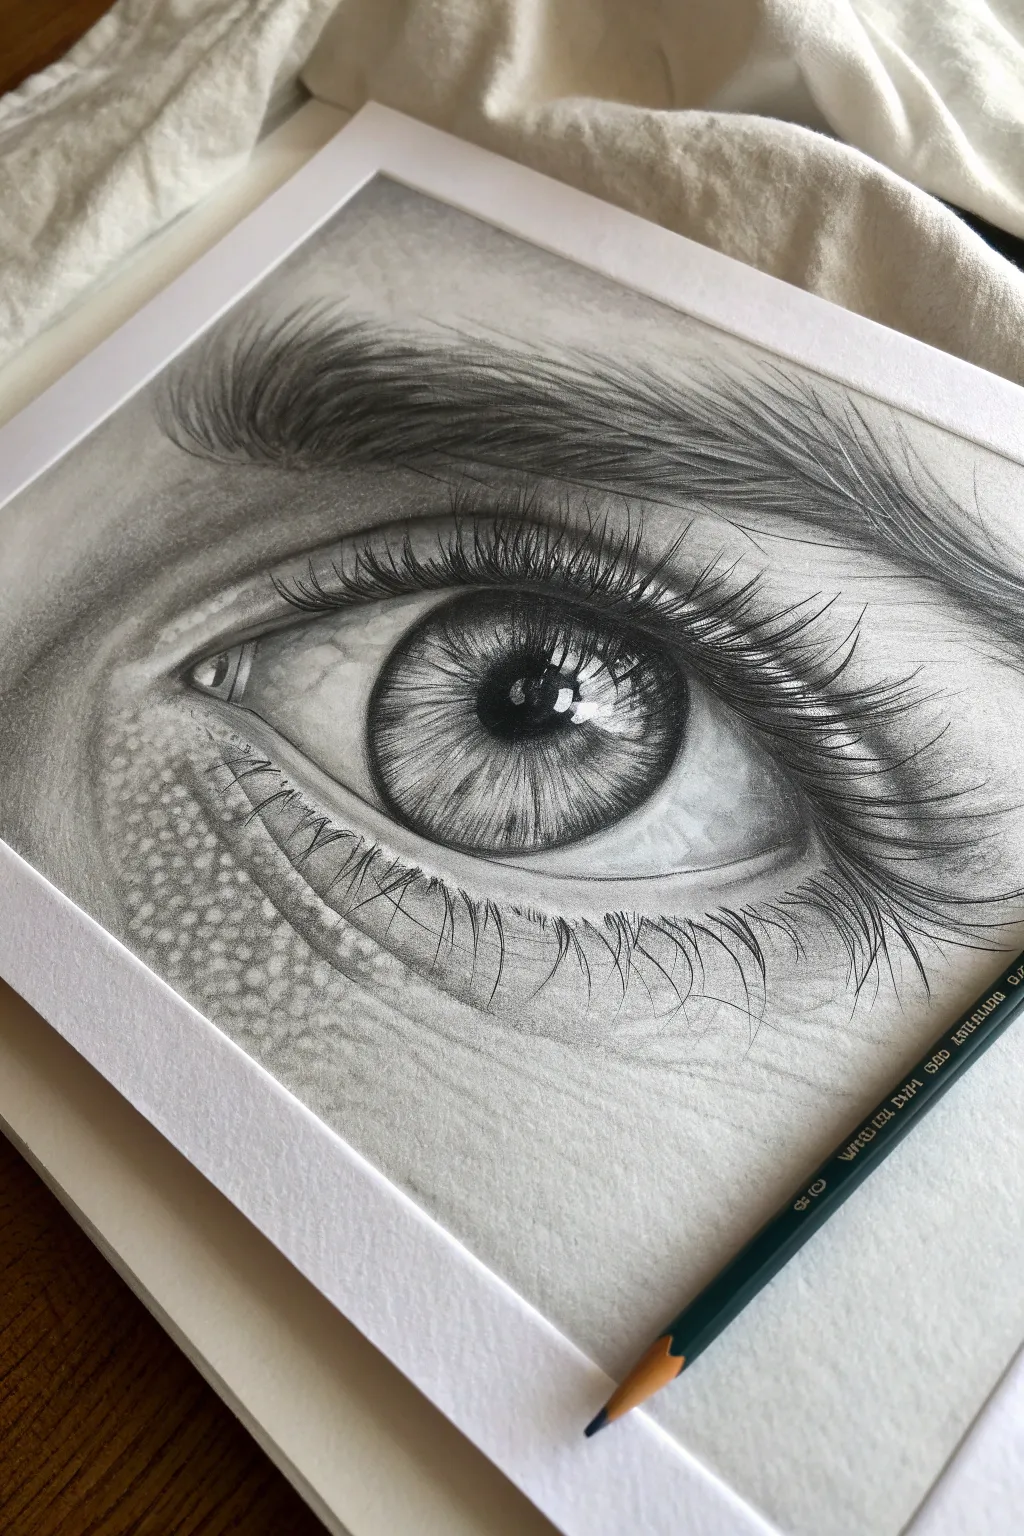
Master the art of graphite realism with this striking eye study. You will focus on capturing the delicate textures of skin, the glassy depth of the iris, and that all-important crisp reflection that brings the drawing to life.
Step-by-Step
Materials
- High-quality drawing paper (smooth or bristol vellum surface recommended)
- Graphite pencils (HB, 2B, 4B, 6B, 8B)
- Mechanical pencil (0.5mm HB or 2B) for fine details
- Kneaded eraser
- Precision eraser (mono zero type)
- Blending stumps (tortillons)
- Soft tissue or cotton swab
- White gel pen (optional for brightest highlights)
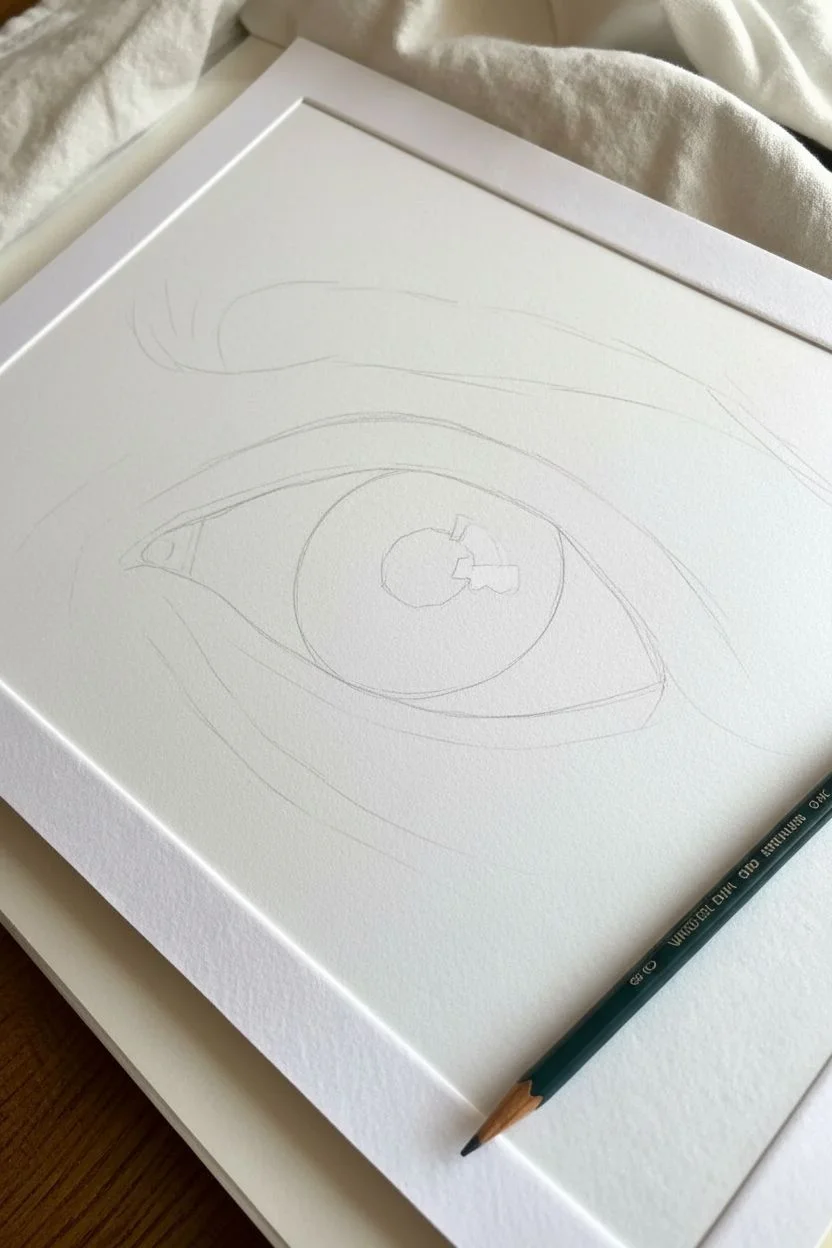
Step 1: Laying the Foundations
-
Outline the main shapes:
Start with a light HB pencil to sketch the almond shape of the eye. Lightly mark the circle of the iris, ensuring a portion of the top is covered by the upper eyelid. Sketch the pupil in the center and, crucially, outline the shape of the reflection highlight now so you can preserve it as pure white paper. -
Define the skin folds:
Lightly sketch the crease of the upper eyelid and the subtle fold under the eye. Don’t press hard; these guide lines need to disappear later. -
Establish the pupil:
Using a 6B or 8B pencil, fill in the pupil. Work carefully around the highlight shape you outlined earlier. The pupil needs to be the darkest part of your drawing to create depth.
Keep A Clean Sheet
Place a piece of scrap paper under your drawing hand. This prevents your palm from smudging your hard work and transferring oils to the paper.
Step 2: Detailing the Iris
-
Map the iris spokes:
With a sharp 2B pencil, draw lines radiating outward from the pupil towards the outer edge of the iris. Leave some gaps and vary the length and darkness of these lines to mimic the muscle fibers of the eye. -
Darken the outer ring:
Use a 4B pencil to shade the outer rim of the iris (the limbal ring). Blend this inward slightly so it isn’t a harsh outline, but rather a soft, dark halo. -
Create mid-tone texture:
Lightly shade the rest of the iris with an HB pencil, blending over your radiating lines. Use a blending stump to smooth it out, but keep the radial motion to maintain texture. I find using a small circular motion with the stump here muddies the detail, so stick to strokes moving from center to edge. -
Add reflection details:
Look closely at the reflection in the reference. It’s not just white; there might be faint reflections of eyelashes or window panes. Draw these subtle distortions inside the highlight area using a sharp HB pencil.
Flat Looking Eye?
If the eye looks flat, the sclera (white part) is likely too bright. Use a blending stump to darken the corners more aggressively to emphasize the spherical shape.
Step 3: Shading the Sclera and Skin
-
Shade the eyeball:
The ‘white’ of the eye isn’t pure white. Use a dirty blending stump (one with graphite already on it) to shade the corners of the eyeball, making it look spherical. Leave the area right next to the iris lighter. -
Texture the tear duct:
In the inner corner, draw the fleshy tear duct. This area is wet, so use your precision eraser to lift out tiny highlights after shading it with a 2B pencil. -
Render skin texture:
For the skin around the eye, apply a base layer of graphite using an HB pencil. Then, use a mechanical pencil to draw tiny, irregular cells and pores. This ‘stippling’ and small circular motion creates the realistic skin texture seen in the reference. -
Deepen the creases:
Use a 4B pencil to darken the upper eyelid crease and the folds under the eye. Blend these out softly so they look like folds of skin, not drawn lines.
Step 4: Lashes and Final Refinements
-
Draft the eyelash curve:
Before drawing individual hairs, lightly practice the curve on scratch paper. Eyelashes should curve down slightly from the lid and then swoop upward. -
Draw upper lashes:
Using a sharp 4B or 6B pencil, draw the upper lashes in swift, confident strokes. Start thick at the root on the eyelid rim and flick the pencil up to a fine point. Group some lashes together to look more natural. -
Add lower lashes:
Draw the lower lashes similarly, but make them shorter, thinner, and more sparse than the upper ones. Ensure they originate from the outer ridge of the lower lid, not the eyeball itself. -
Refine the brow:
Sketch the eyebrow hairs using short strokes that follow the direction of hair growth. Layer HB strokes underneath for density and add darker 4B strokes on top for definition. -
Enhance reflections:
Check the main highlight in the eye. If it got smudged, use your precision eraser or a white gel pen to make it piercingly bright. -
Shadow casting:
Lightly shade a shadow cast by the upper eyelashes onto the top of the eyeball and iris. This subtle step grounds the lashes and adds immense realism.
Step back and admire the depth you’ve created with just a few pencils


Full Portrait in Dramatic Chiaroscuro Lighting
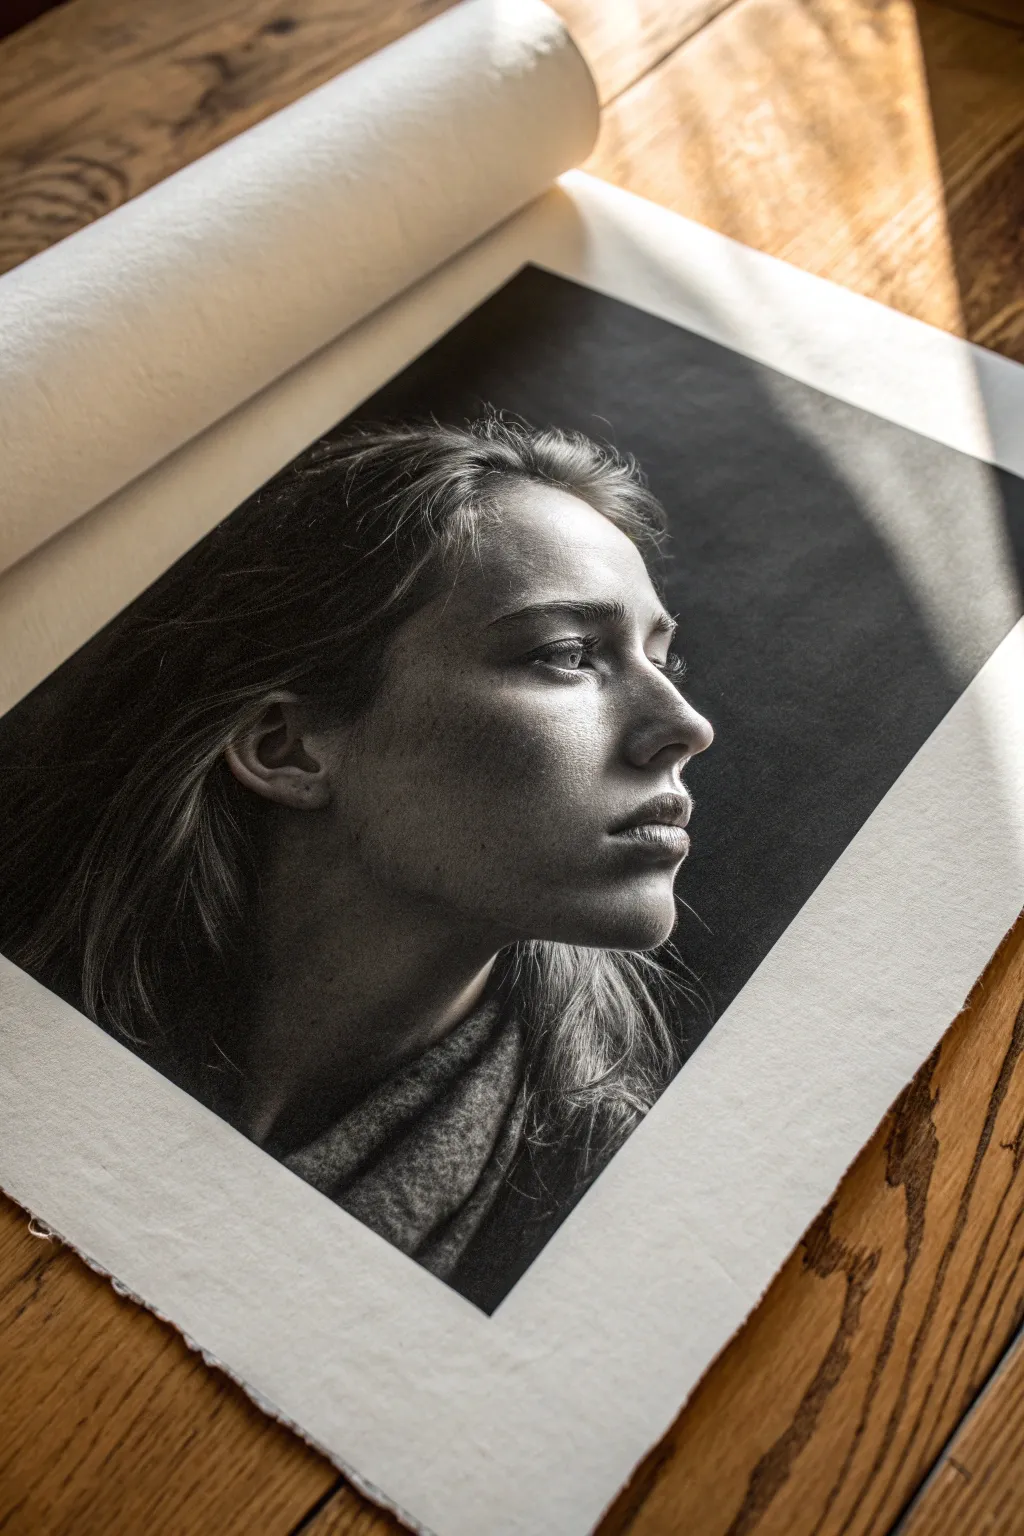
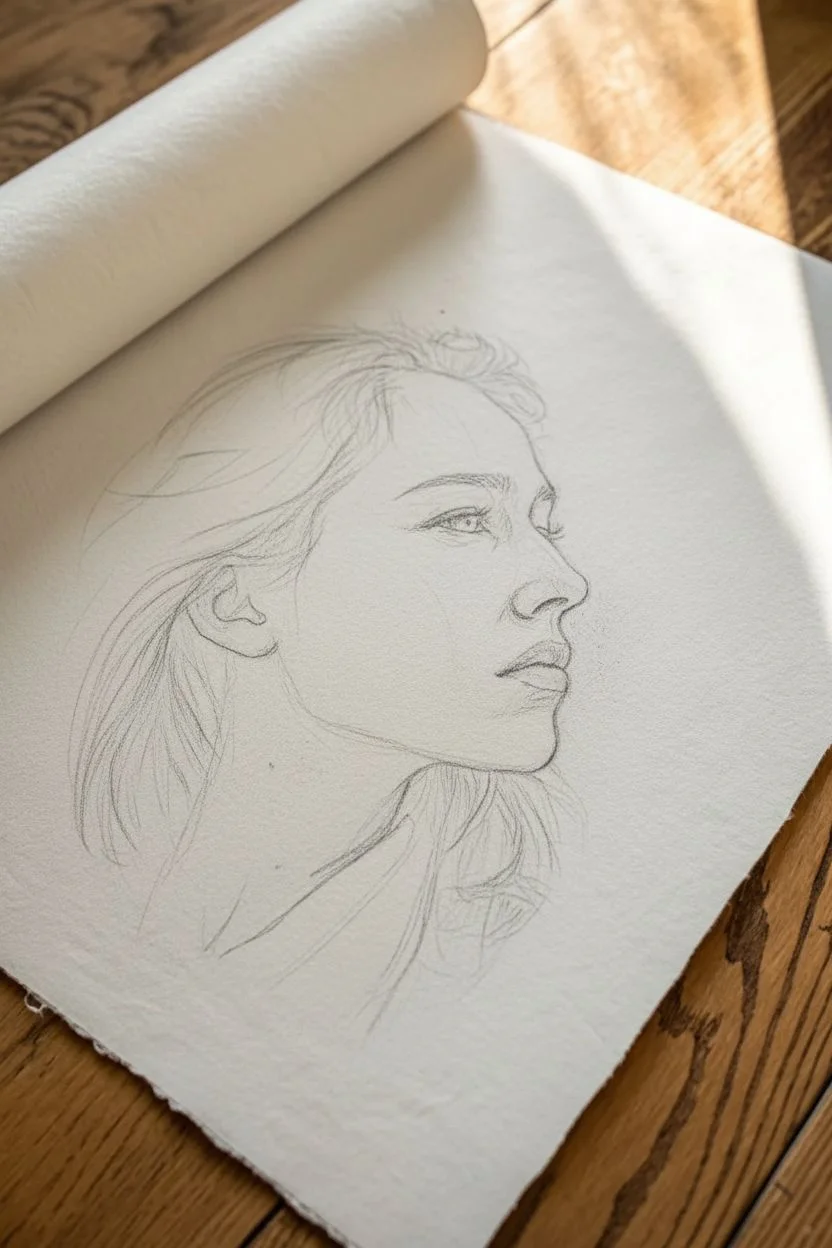
Master the dramatic art of chiaroscuro with this deep, emotive charcoal portrait on textured paper. You’ll learn to sculpt facial features using extreme contrast between light and dark, creating a moody, atmospheric piece that feels almost three-dimensional.
Step-by-Step
Materials
- High-quality textured drawing paper (heavyweight, cold press watercolor paper or Bristol vellum)
- Vine or willow charcoal (soft/medium)
- Compressed charcoal sticks (for deepest blacks)
- Charcoal pencils (soft, medium, hard)
- Kneaded eraser
- Precision mono eraser (stick eraser)
- Blending stumps (tortillons)
- Soft blending brush (makeup brush or drafting brush)
- Workable fixative
- Paper tape or painter’s tape
Step 1: Setting the Foundation
-
Paper preparation:
Begin by taping down your paper to a rigid board to prevent it from buckling or shifting. If you’re working from a roll like the image suggests, cut a generous size but keep the natural curve in mind. -
Establish the light source:
Before making a mark, visualize your light source hitting the subject from the right side. This directional light is the key to the entire drawing. -
Loose gesture sketch:
Using a stick of vine charcoal, lightly sketch the overall envelope of the head and the swoop of the hair. Keep your hand loose and grip the charcoal overhand. -
Feature placement:
Refine the gesture by marking the eye line, nose base, and mouth position. Focus on the tilt of the head—she is looking slightly upward and to the right.
Step 2: Building Values
-
Mapping shadow shapes:
Still using vine charcoal, block in the large shadow masses on the left side of the face (the viewer’s left). Ignore details; just separate light from dark. -
First blend:
Use a soft brush or chamois cloth to gently wipe the vine charcoal into the paper. This creates a soft, mid-tone gray base for your shadows without embedding the pigment too deeply yet. -
Deepening the background:
To make the light side of the face pop, commit to the background now. Use compressed charcoal to lay down a solid, rich black behind the profile, fading it out as you move left. -
Sculpting the nose and eye:
Switch to a medium charcoal pencil. Carefully draw the eye on the lit side, emphasizing the sharp shadow cast by the brow bone. Keep the lines crisp where the light hits the bridge of the nose. -
Defining the core shadow:
Locate the ‘terminator line’—the point where the light transitions into shadow across the cheek and jaw. Reinforce this area with darker value, but keep the transition soft.
Pro Tip: Clean Hands
Place a piece of scrap paper or glassine under your drawing hand. The oils from your skin can ruin the paper’s tooth and cause charcoal to smudge unpredictably.
Step 3: Refining Texture and Detail
-
Skin texture rendering:
Allow the texture of the paper to work for you. Lightly drag a charcoal pencil sideways over the cheek area to suggest skin pores and freckles without drawing every dot. -
The lips:
Render the lips by focusing on the shadows between them and underneath the lower lip. Avoid outlining the lips; let the value change define their edges. -
Hair massing:
Treat the hair as large shapes, not individual strands. Use broad strokes of compressed charcoal for the dark recesses of the hair near the neck. -
Adding flyaways:
With a sharpened hard charcoal pencil, add the fine flyaway hairs backlit by the sun. Use quick, confident flicks of the wrist. -
Scarf textures:
Sketch the collar or scarf area loosely. Use cross-hatching or a rougher application of charcoal to differentiate the fabric texture from the smooth skin.
Level Up: White Charcoal
If you are working on toned gray or tan paper instead of white, use a white charcoal pencil for the highlights. This creates an even more dynamic, luminous range of values.
Step 4: Final Polish
-
Lifting highlights:
Take your kneaded eraser and pinch it to a sharp point. ‘Draw’ with the eraser by lifting pigment off the tip of the nose, the crest of the cheekbone, and the wetness of the lower eyelid. -
Refining the silhouette:
Check the edge where the bright profile meets the dark background. Use your precision mono eraser to ensure this edge is clean and sharp. -
Enhancing contrast:
Do a final pass with your darkest compressed charcoal. Push the deepest shadows (nostrils, corner of the eye, under the jaw) to pure black to maximize the drama. -
Fixative application:
Once satisfied, spray a light coat of workable fixative outdoors to prevent smudging, especially if you plan to unroll or display the paper.
Step back and admire how the interplay of light and shadow brings your subject to life on the page


Curly Hair Study With Flyaways and Shine Bands
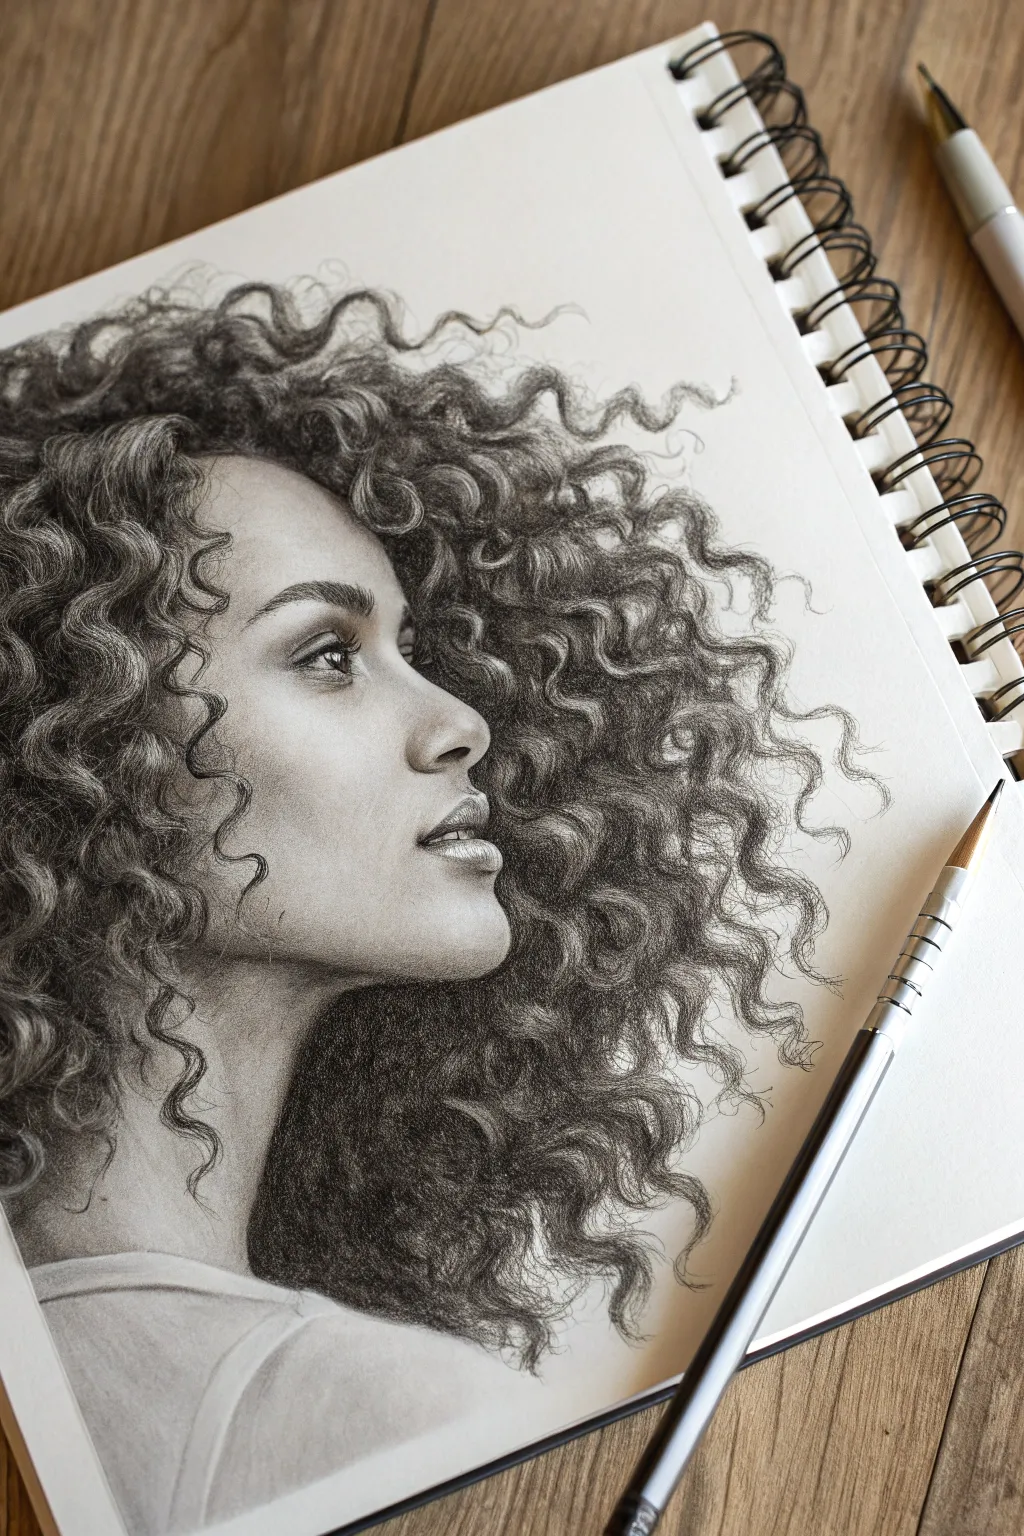
Master the intricate beauty of curly hair with this detailed graphite study, focusing on realistic volume and light. You’ll learn how to build deep contrast while preserving delicate highlights to create textured, bouncy ringlets that seem to lift off the page.
Step-by-Step Tutorial
Materials
- High-quality sketchbook paper (smooth or vellum surface)
- Graphite pencils (HB, 2B, 4B, 6B)
- Mechanical pencil (0.5mm, 2B lead)
- Kneaded eraser
- Fine-tip eraser pen (optional but recommended)
- Blending stump or tortillon
- Soft tissue or cotton swab
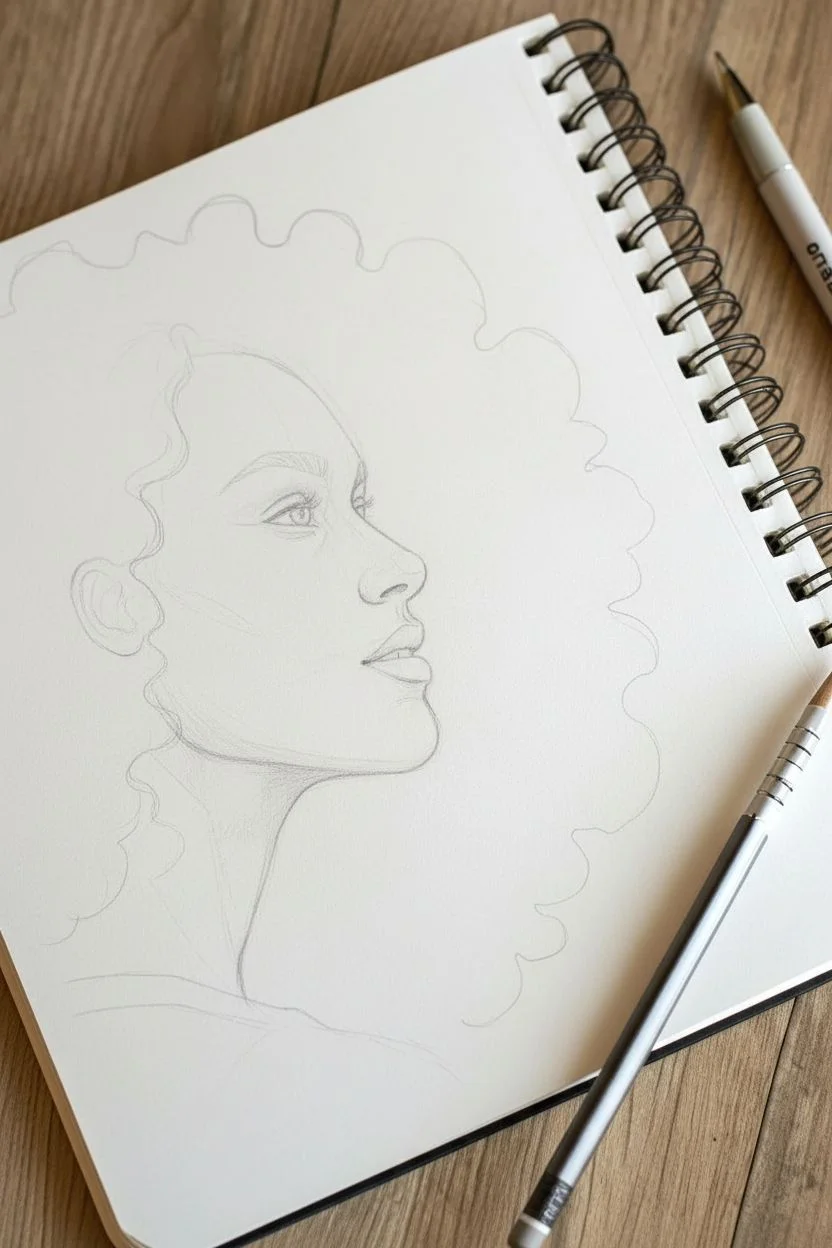
Step 1: Facial Structure & Base Outlines
-
Sketch basic proportions:
Begin with a light HB pencil to block in the profile view. Focus on the angle of the jawline, the tilt of the nose, and the placement of the eye relative to the ear area. -
Refine facial features:
Tighten the drawing of the eye, nostril, and lips. The expression is soft, so keep lines relatively faint, saving your darkest values for later shading. -
Map hair masses:
Instead of drawing individual hairs, lightly sketch irregular cloud-like shapes to define where the major clumps of curls will sit. Ensure you capture the massive volume expanding outward from the head.
Hair looking like spaghetti?
Avoid outlining individual curls with hard lines. Instead, define curls using the shadows *between* them and the highlights on top. Focus on shapes, not outlines.
Step 2: Shading the Face
-
Lay down initial skin tone:
Using a 2B pencil, lightly hatch over the shadowy areas of the face—under the chin, the cheek hollow, and around the eye socket. -
Blend for smoothness:
Use a soft tissue to gently smudge the graphite on the skin, creating a smooth, realistic complexion. Be careful not to smudge into the bright highlight areas on the cheekbone and nose bridge. -
Define facial details:
Switch to a 4B pencil to deepen the pupil, eyelashes, and the shadow line of the lips. Add the eyebrow hairs using short, flicking strokes with a sharpened HB pencil.
Step 3: Constructing the Curls
-
Identify the curl ribbon:
Pick a prominent curl near the forehead. Visualize it as a twisting ribbon. Mark the shadow side (inside the twist) and the light side (hitting the curve). -
Apply core shadows:
With a 4B pencil, shade the darkest recesses between the curls. This negative space is crucial; pushing these areas to near-black makes the lighter curls pop forward. -
Create shine bands:
As you shade the individual ringlets, leave a distinct, unshaded gap on the rounded part of the curl where the light hits. This is the ‘shine band’ that gives the hair a glossy texture. -
Texture with mechanical pencil:
Use a 0.5mm mechanical pencil to draw individual strands within the shaded blocks. Follow the curve using ‘S’ shaped strokes, running from the dark root into the shine band and fading out. -
Deepen the contrast:
Switch to your 6B pencil. Go back into the deepest pockets of hair—especially behind the neck and under the main mass of curls—to create true depth. I find this high contrast is what really sells the realism.
Make it Pop
Use a white gel pen for ultra-tiny, specular highlights on just 3-4 of the closest curls to make them look wet or extra glossy.
Step 4: Refining & Flyaways
-
Blend the hair base:
Lightly touch a blending stump to the mid-tones of the hair to soften the transition between the dark shadows and the shine bands, but don’t over-blend or you’ll lose the strand definition. -
Lift bright highlights:
Take your kneaded eraser, pinch it to a fine point, and dab along the shine bands to lift graphite and restore bright white highlights on the most prominent curls. -
Add stray hairs:
Using a very sharp HB or mechanical pencil, draw loose, erratic hairs escaping the main shape. These ‘flyaways’ should break the silhouette and curve in random directions for a natural look. -
Soften the hairline:
Ensure the transition from forehead to hair isn’t a hard line. Add tiny baby hairs and gentle shading at the hairline to connect the skin to the curls. -
Final assessment:
Step back and check your values. If the hair looks flat, darken the negative spaces between the ringlets one last time to enhance the 3D effect.
Take your time with the final texturing, as those individual stray hairs bring the whole portrait to life


Intertwined Skull and Snake for Complex Overlaps
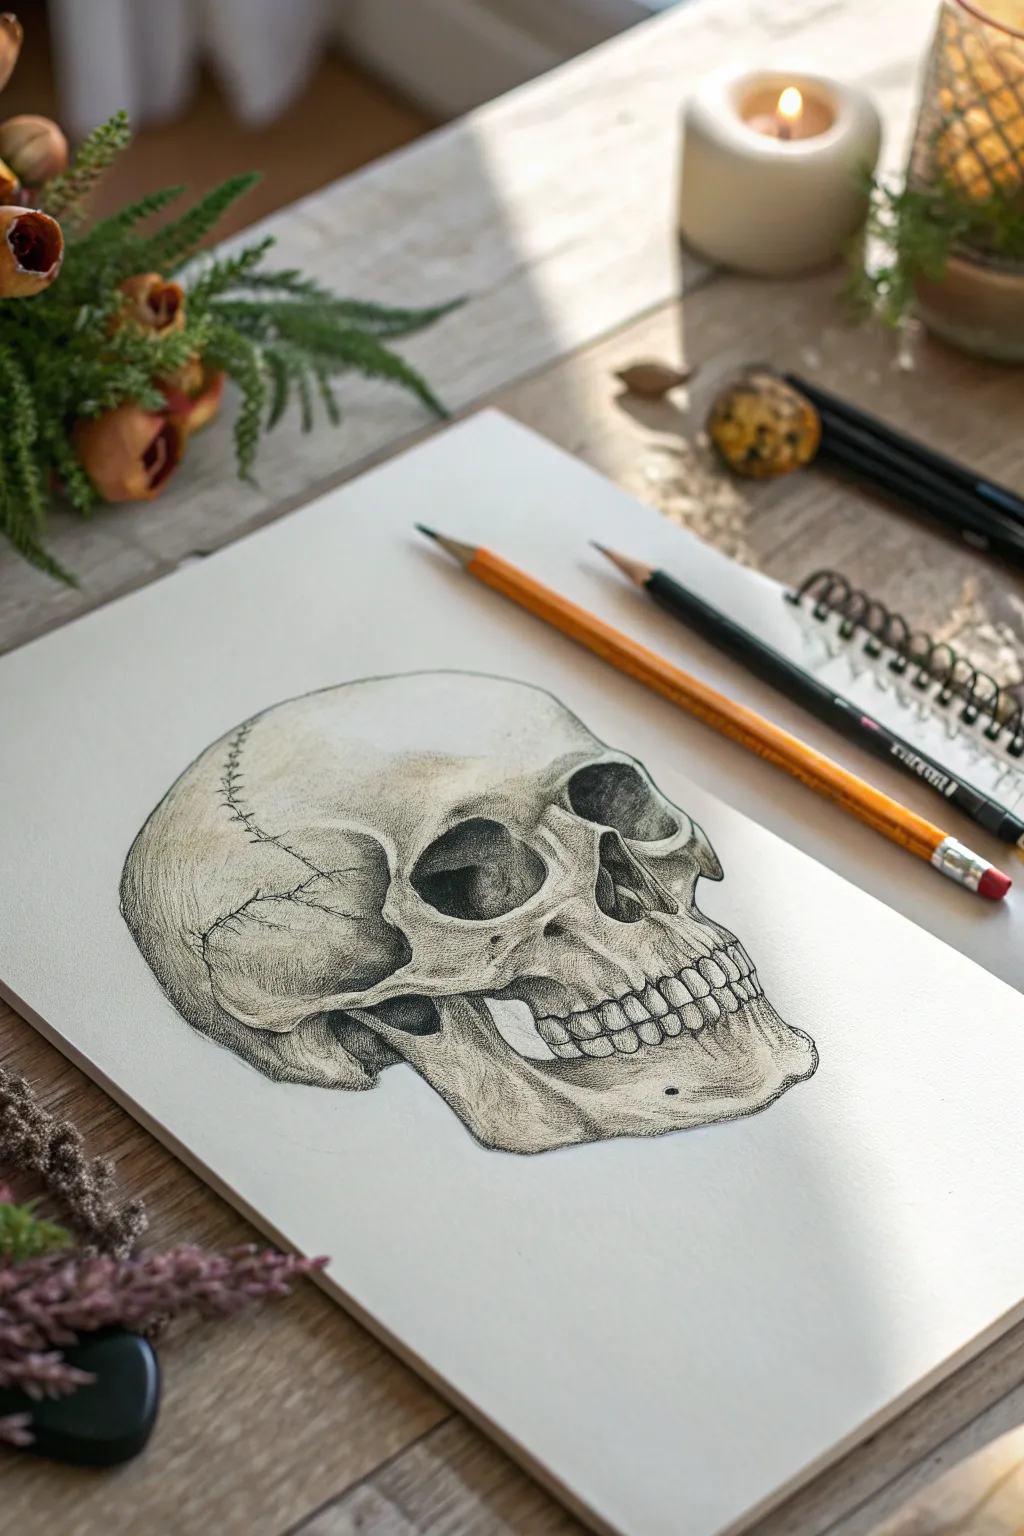
Master the art of anatomical drawing with this detailed study of a human skull, focusing on bone textures and structural accuracy. This project uses fine linework and careful shading to create a striking, three-dimensional effect that pops off the page.
Detailed Instructions
Materials
- Smooth bristol or drawing paper (heavyweight)
- H or HB pencil (for sketching)
- 2B and 4B pencils (for shading)
- Fine liner or technical pen (0.1mm – optional for stippling)
- Kneaded eraser
- Pencil sharpener
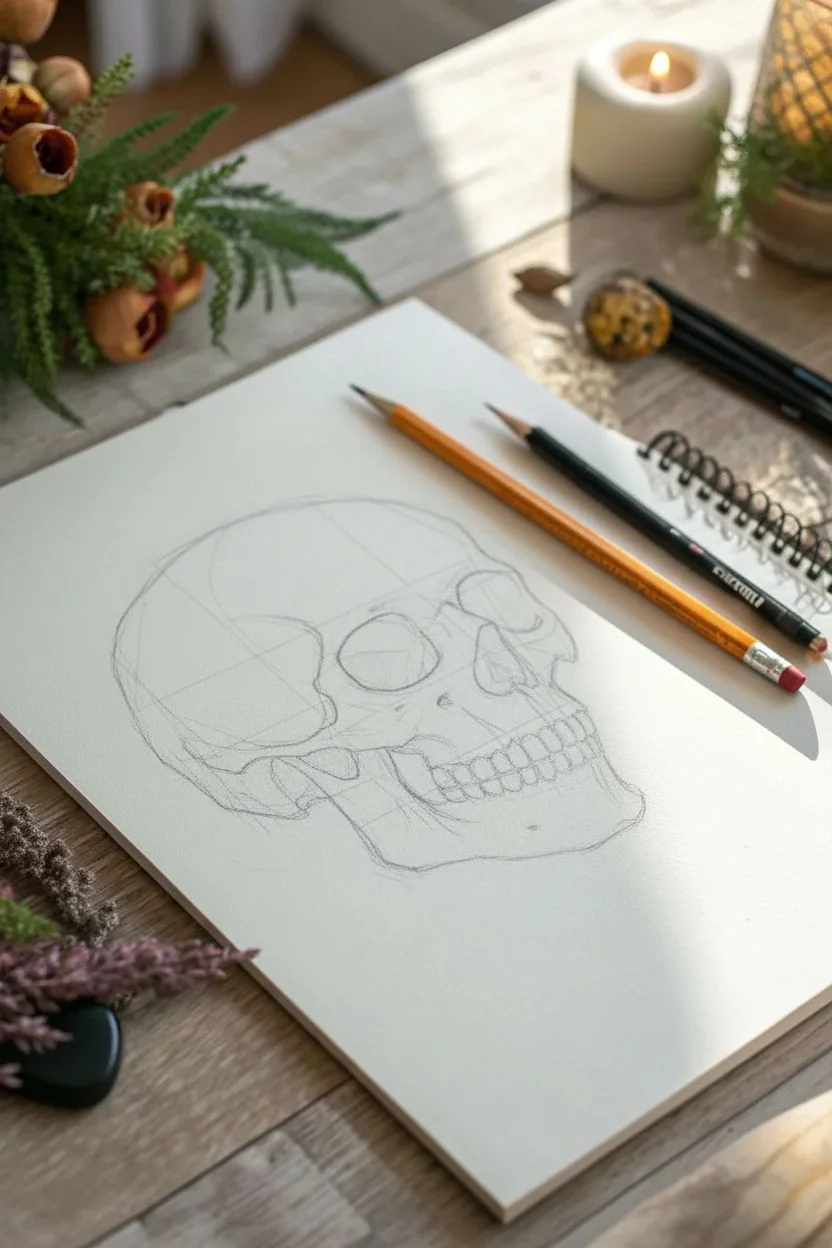
Step 1: Structural Foundation
-
Initial Shape:
Begin with a light, loose circle using your H pencil to represent the cranium (the top part of the skull). Don’t press hard; these are just guidelines. -
Face Box:
Attach a box-like shape to the lower front of your circle to map out where the cheekbones and jaw will sit. -
Eye Sockets:
Sketch two large, slightly irregular oval shapes for the eye orbitals. Note that in a side/3-quarter view, the far socket is partially hidden by the nasal bone. -
Nasal Cavity:
Draw the nasal cavity as an upside-down heart shape, positioned centrally between and slightly below the eye sockets. -
Jawline Definition:
Refine the jawbone (mandible) line, ensuring it angles sharply upward towards the ear area.
Step 2: Detailed Features
-
Teeth Placement:
Draw a curved guideline for the mouth. Lightly sketch the individual teeth, remembering they are rooted deep in the bone. Keep the front teeth larger and the molars flatter. -
Cheekbone Architecture:
Define the zygomatic arch (cheekbone). It should bridge the gap between the eye socket and the ear area, creating a distinctive hollow underneath. -
Cranial Sutures:
Lightly trace the squiggly, crack-like lines of the cranial sutures across the top and side of the skull. These add immediate realism. -
Clean Up:
Use your kneaded eraser to lift away the initial geometric guidelines, leaving only your faint, refined outline.
Flat Looking?
If the skull looks flat, you likely need more contrast. Don’t be afraid of the darks! Deepen the shadows in the eye sockets and under the cheekbone to push those areas back in space.
Step 3: Shading and Texture
-
Core Shadows:
Switch to a 2B pencil. Fill in the darkest areas first—specifically the deep recesses of the eye sockets and the nasal cavity. These should be nearly black. -
Orbital Depth:
When shading the eye sockets, don’t just clear fill them; leave subtle variations or reflected light near the edges to show the bone’s thickness. -
Bone Texture (Stippling):
This is where patience pays off. Use tiny dots or very short dashes to create a porous bone texture. Focus this texture on the forehead and cheekbones. -
Cross-Hatching Shadows:
Use fine cross-hatching around the temple, under the cheekbone, and along the jawline to create form. I find layering these lines slowly builds a better gradient than smudging. -
Refining the Teeth:
Darken the gaps between the teeth, but keep the teeth themselves mostly white. Add tiny, vertical hairline cracks on a few teeth for an aged look. -
Suture Darkness:
Go back to the cranial sutures and darken them with a 4B pencil or pen, making the jagged lines distinct.
Aged Bone Texture
To make the bone look old and brittle, avoid smooth shading. Instead, use a ‘scumbling’ technique—moving your pencil in tiny, tight, irregular circles to build up a rough surface.
Step 4: Final Touches
-
Highlighting:
Use the clean edge of an eraser to lift out bright highlights on the brow ridge and the curve of the cheekbone. -
Deepening Values:
Do a final pass with your darkest pencil (4B) to push the contrast in the deepest shadows, especially under the jaw and behind the zygomatic arch. -
Edge Control:
Make sure the outer contour of the skull is clean and distinct, but vary the line weight—thickening it in shadow areas and thinning it near highlights.
Step back and admire the complex geometry and shading of your detailed anatomical study

PENCIL GUIDE
Understanding Pencil Grades from H to B
From first sketch to finished drawing — learn pencil grades, line control, and shading techniques.
Explore the Full Guide
Surreal Anatomy Dissolving Into Smoke and Particles

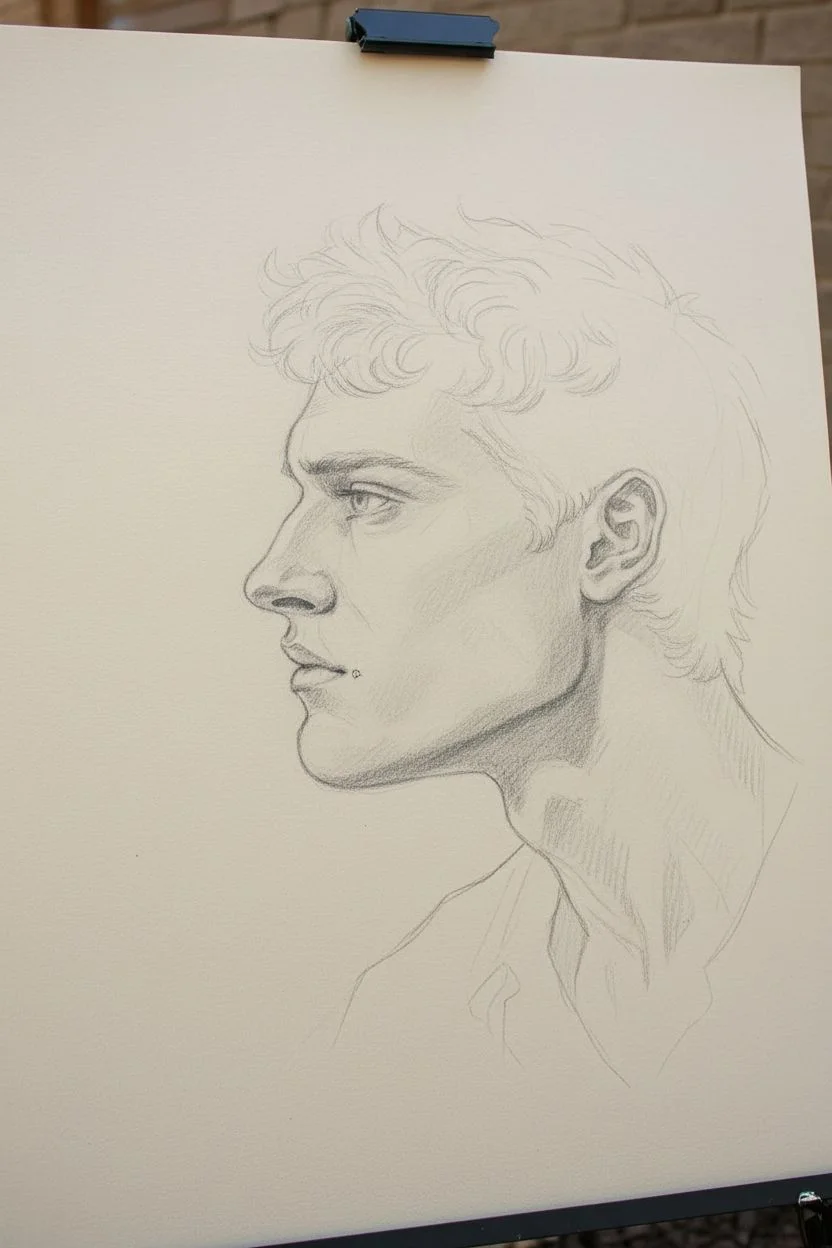
This project is a deep dive into realistic portraiture, focusing on capturing a striking male profile with intricate hair texture and subtle skin shading. You will learn to build depth using charcoal pencils, mastering the balance between sharp details and smooth tonal transitions.
Step-by-Step Guide
Materials
- Heavyweight drawing paper (smooth or vellum finish)
- Charcoal pencils (soft, medium, hard)
- Willow charcoal sticks
- Kneaded eraser and stick eraser
- Blending stump (tortillon)
- Soft brush (for sweeping dust)
- Workable fixative spray
- Drawing board or easel
Step 1: Laying the Foundation
-
Map the silhouette:
Begin with a hard charcoal pencil or a light graphite pencil to sketch the faint outline of the head. Focus on the negative space around the profile to get the proportions of the forehead, nose, and chin correct. -
Establish landmarls:
Mark the key facial landmarks: the corner of the eye, the nostril wing, the corner of the mouth, and the angle of the jaw. Double-check the alignment between the ear and the nose. -
Block in major shadows:
Using a willow charcoal stick, lightly glaze over the areas that will be in shadow, particularly under the jawline, behind the ear, and the back of the neck. This creates a base tone without committing to dark details yet.
Smudgy Skin?
If facial shading looks dirty, you likely over-blended. Lift the muddy charcoal with a kneaded eraser until you get back to the paper grain, then re-apply fresh charcoal more lightly.
Step 2: Sculpting the Face
-
Define the eye:
Switch to a medium charcoal pencil to draw the eye. Pay close attention to the upper lid’s thickness and the shadow cast by the brow bone. Keep the iris dark but leave a tiny speck of white paper for the highlight. -
Shape the nose and mouth:
Refine the profile line of the nose. Use a blending stump to pull shadow down from the bridge of the nose onto the cheek. For the lips, focus on the shadow shapes beneath the lower lip rather than drawing hard outlines. -
Shade the cheek and jaw:
Using the side of a soft charcoal pencil, lay down broader strokes along the cheekbone and jaw. Blend these gently with a stump or tissue to create smooth skin gradations. -
Render the ear:
The ear is complex; break it down into light and dark shapes. Use the hard pencil for the intricate cartilage folds and the soft pencil to deepen the canal shadow.
Keep it Clean
Place a scrap sheet of paper under your drawing hand. Charcoal transfers easily, and this simple barrier prevents the oils in your skin from ruining the smooth blends you’ve already created.
Step 3: Hair and Texture
-
Map hair flow:
Don’t draw individual strands yet. Instead, draw the larger ‘clumps’ or waves of hair to establish the direction of growth, sweeping back from the forehead and down the neck. -
Deepen hair shadows:
Identify the darkest crevices between the hair clumps. Press firmly with a soft charcoal pencil here to create high contrast, which suggests depth and volume. -
Create highlights:
I like to use a clean kneaded eraser to lift out charcoal from the top of the curls. This reductive drawing technique mimics the way light hits the glossy curves of the hair. -
Detail strands:
Now, use a sharpened hard charcoal pencil to add flyaway hairs and finer texture over the shaded masses. Keep these strokes loose and confident.
Step 4: Neck and Clothing
-
Anatomical structure:
Define the sternocleidomastoid muscle running from the ear to the collarbone. Shade heavily behind it to push the neck back in space. -
Suggesting clothing:
Keep the clothing sketchy and loose compared to the face. vivid strokes that suggest a collar and shoulder structure are enough; let them fade out at the bottom of the paper.
Step 5: Final Refinements
-
Background atmosphere:
Apply a very light, hazy layer of charcoal dust to the background behind the face, smudging it completely smooth. This helps the sharp profile pop forward. -
Punch up contrast:
Review the drawing from a distance. Re-darken the pupil, the nostrils, and the deepest hair shadows to ensure the full tonal range is used. -
Clean edges:
Use the stick eraser to crisp up the very edge of the profile (nose, lips, chin) against the background. -
Seal the work:
Once satisfied, spray the drawing with workable fixative in a well-ventilated area to prevent smudging.
Step back and admire how the interplay of light and shadow brings your subject to life


Have a question or want to share your own experience? I'd love to hear from you in the comments below!