If you’ve got a plain stocking and a little paint, you’re already halfway to something seriously special. These are my go-to stocking painting ideas—starting with the classics and drifting into more playful, artsy twists as we go.
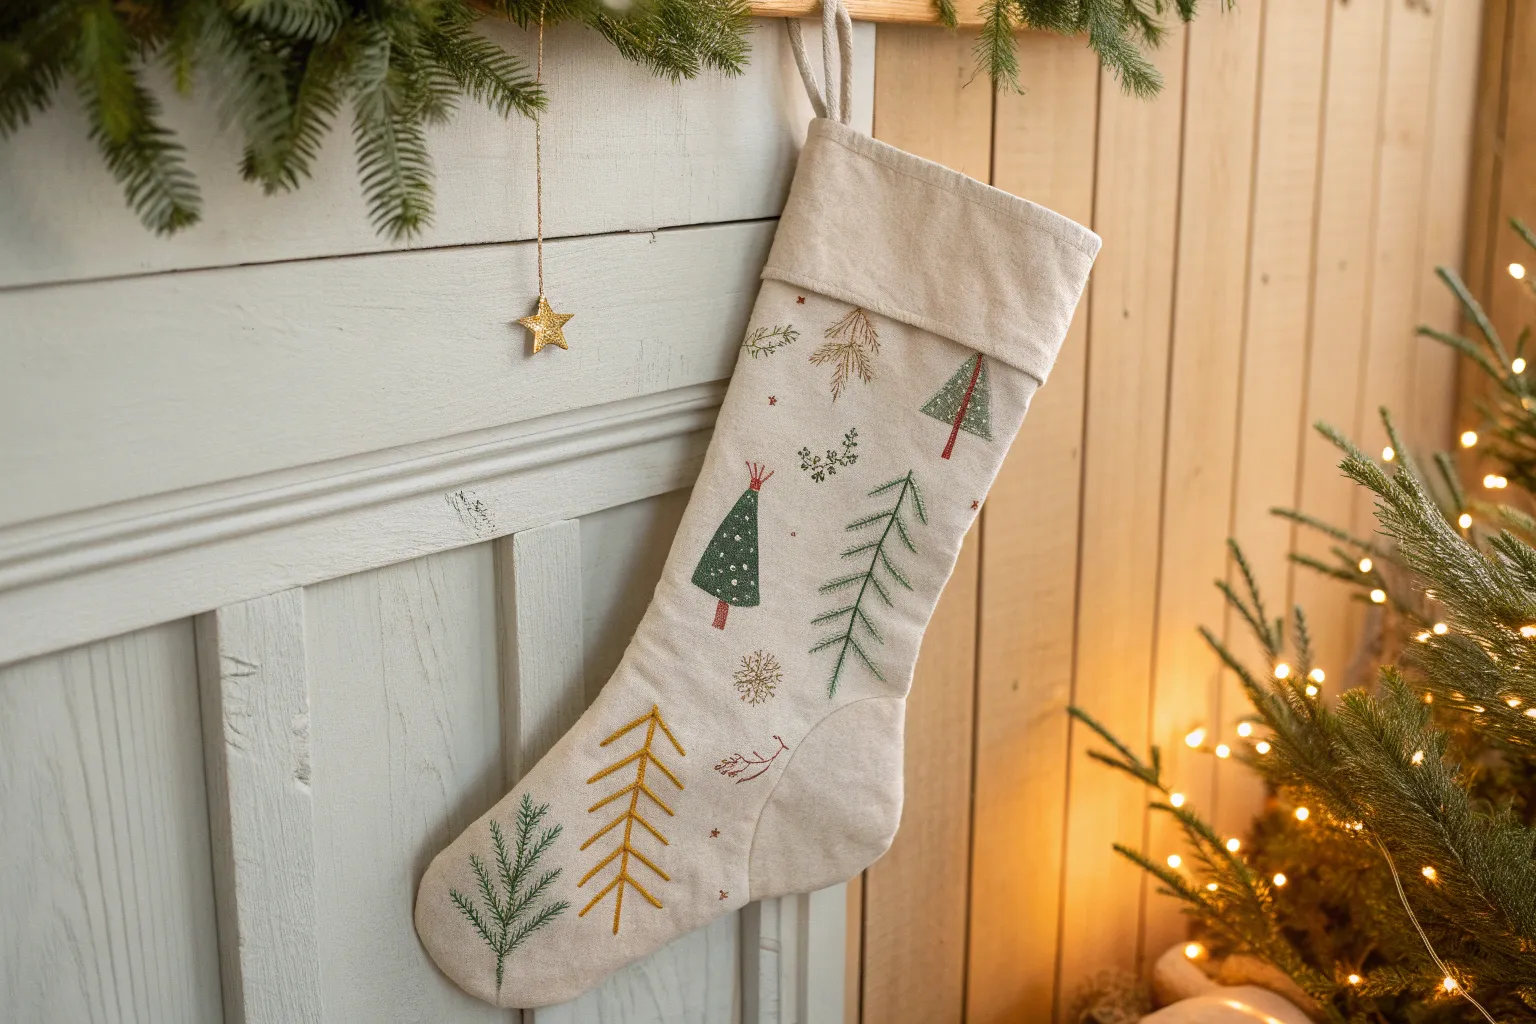
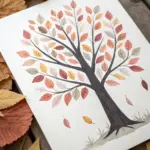
Evergreen Tree With Snow-Tipped Branches on a Stocking
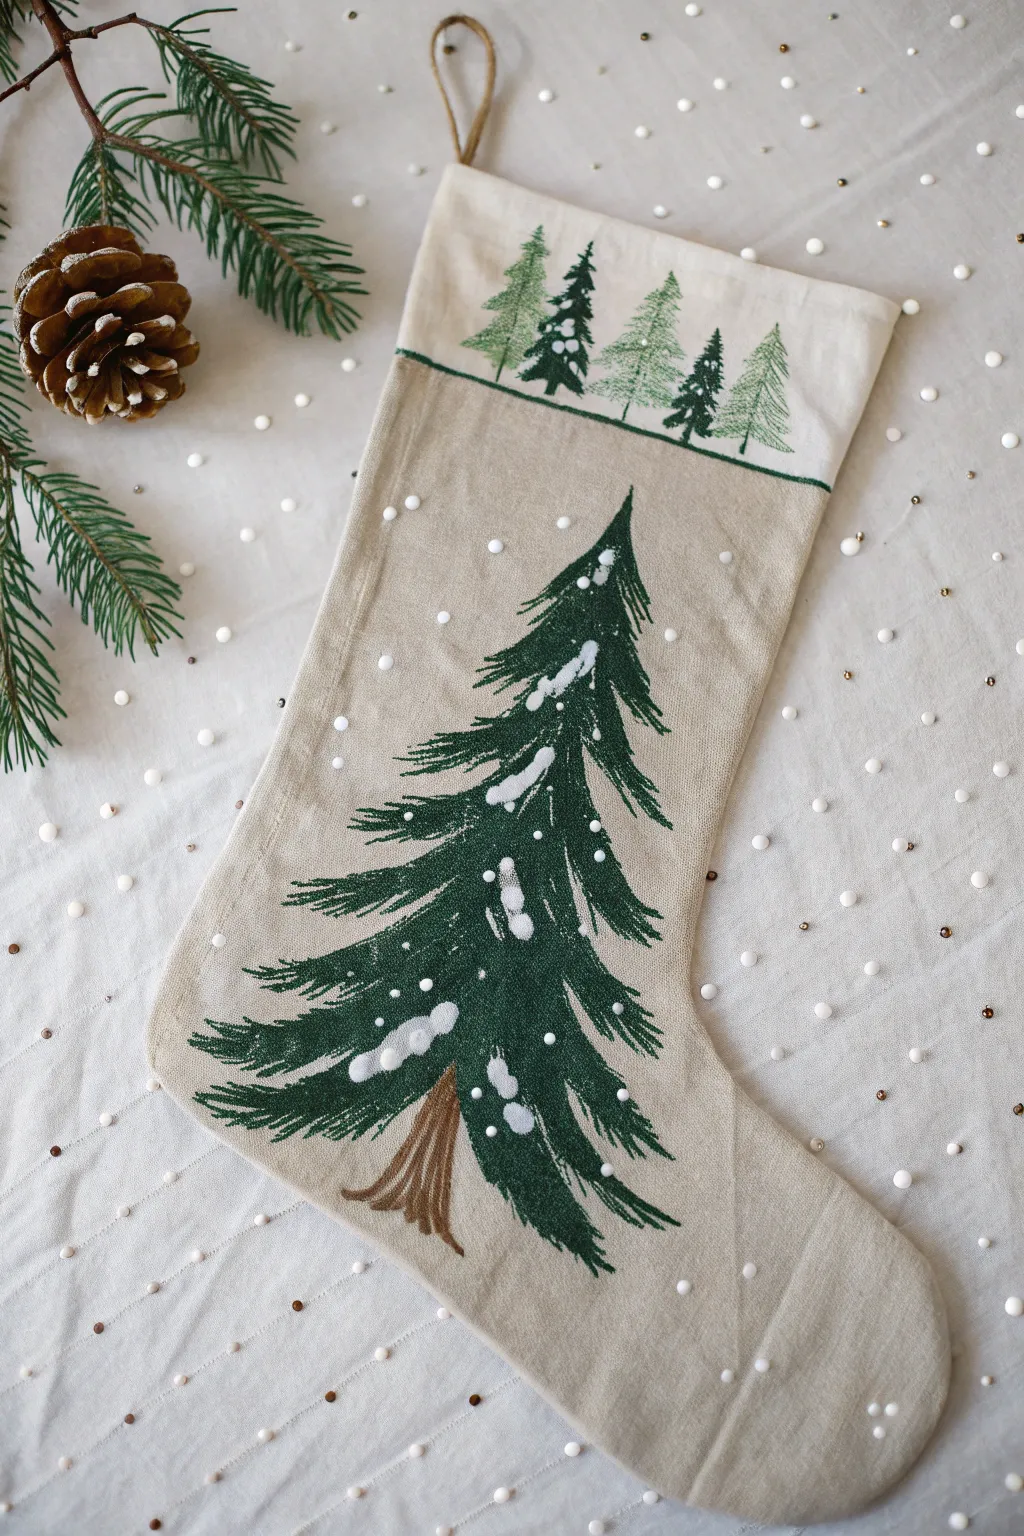

Bring the quiet beauty of a winter forest indoors with this elegant, nature-inspired stocking project. Using simple stenciling and freehand painting techniques on a linen base creates a rustic yet sophisticated holiday decoration.
Step-by-Step Tutorial
Materials
- Beige linen or cotton canvas stocking
- Fabric paints (Forest Green, Dark Hunter Green, White, Brown)
- Flat shader brushes (medium and small)
- Small round detail brush
- Stencil depicting a row of pine trees
- Painter’s tape or masking tape
- Paper plate or palette
- Cardboard insert for stocking
- Small blending sponge or stencil brush
- Old toothbrush (optional for splatter effect)
Step 1: Preparing the Canvas
-
Insert Protection:
Before opening any paint, slide a piece of cardboard or heavy cardstock inside the stocking. This crucial step prevents paint from bleeding through to the back side of the fabric. -
Smooth the Surface:
Iron the stocking flat if it has any deep creases, as a smooth surface makes painting sharp lines much easier.
Dry Brush Technique
For realistic pine needles, use very little paint on your brush. Drag the bristles lightly at the ends of the branches so the fabric texture shows through, mimicking needles.
Step 2: Creating the Top Border
-
Tape the Boundary:
Decide where you want the top decorative band to sit. Place a strip of painter’s tape horizontally across the top cuff area to create a crisp bottom line for your forest border. -
Base Line:
Using a small flat brush and dark green paint, paint a thin, straight line along the top edge of your tape. This anchors your tree border. -
Stencil Placement:
Position your pine tree row stencil just above the green line you painted. Secure it gently with tape if needed. -
Stenciling the Trees:
Load a stencil brush or sponge with a mix of Forest Green and a touch of Dark Hunter Green. Dab off excess paint on your palette until the brush is almost dry, then lightly pounce paint over the stencil. This creates a soft, textured look rather than a solid block of color.
Add Some Sparkle
Mix a tiny amount of pearl medium or fine iridescent glitter into your white paint for the snow. It will catch the light beautifully when hanging by the fireplace.
Step 3: Painting the Main Tree
-
Establish the Trunk:
For the large central tree, start near the bottom. Use a medium flat brush and brown paint to create a simple, tapered trunk structure. It doesn’t need to be perfectly straight; a little curve adds character. -
Map the Shape:
I find it helpful to lightly mark the top point and the widest bottom points of the tree with a tiny dot of green paint to guide the overall triangular shape. -
Layering Branches:
Switch to your medium flat brush loaded with Dark Hunter Green. Starting from the top, paint downward-sweeping strokes to form branches. Use the chisel edge of the brush to create the sharp tips of the needles. -
Building Texture:
Continue working down the tree, letting the branches flare out wider as you go. Overlap your strokes significantly to create density, but leave small gaps of beige fabric showing through near the trunk to keep it airy. -
Adding Dimension:
While the dark green is still slightly tacky, mix a little lighter Forest Green in and add a few strokes on top of the existing branches to suggest depth and light hitting the needles.
Step 4: Adding the Snow
-
snowy Accents:
Once the green tree requires is dry to the touch, load a round detail brush with opaque white fabric paint. Gently dab white paint onto the tops of the branches, focusing on where snow would naturally settle. -
Soften the Snow:
Don’t make the snow lines perfect; pressing slightly harder in the middle of the stroke and lifting off at the end creates a realistic, fluffy drift effect. -
Falling Flakes:
Dip the handle end of a small paintbrush into the white paint. Dot the background fabric randomly to create falling snow. Vary the pressure to create different sized dots. -
Final Drying:
Remove the painter’s tape from the top border carefully. Allow the entire stocking to dry flat for at least 24 hours before removing the cardboard insert.
Now you have a timeless holiday keepsake ready to be filled with seasonal treats


Painted Mantel Scene With Stockings Hanging by Loops
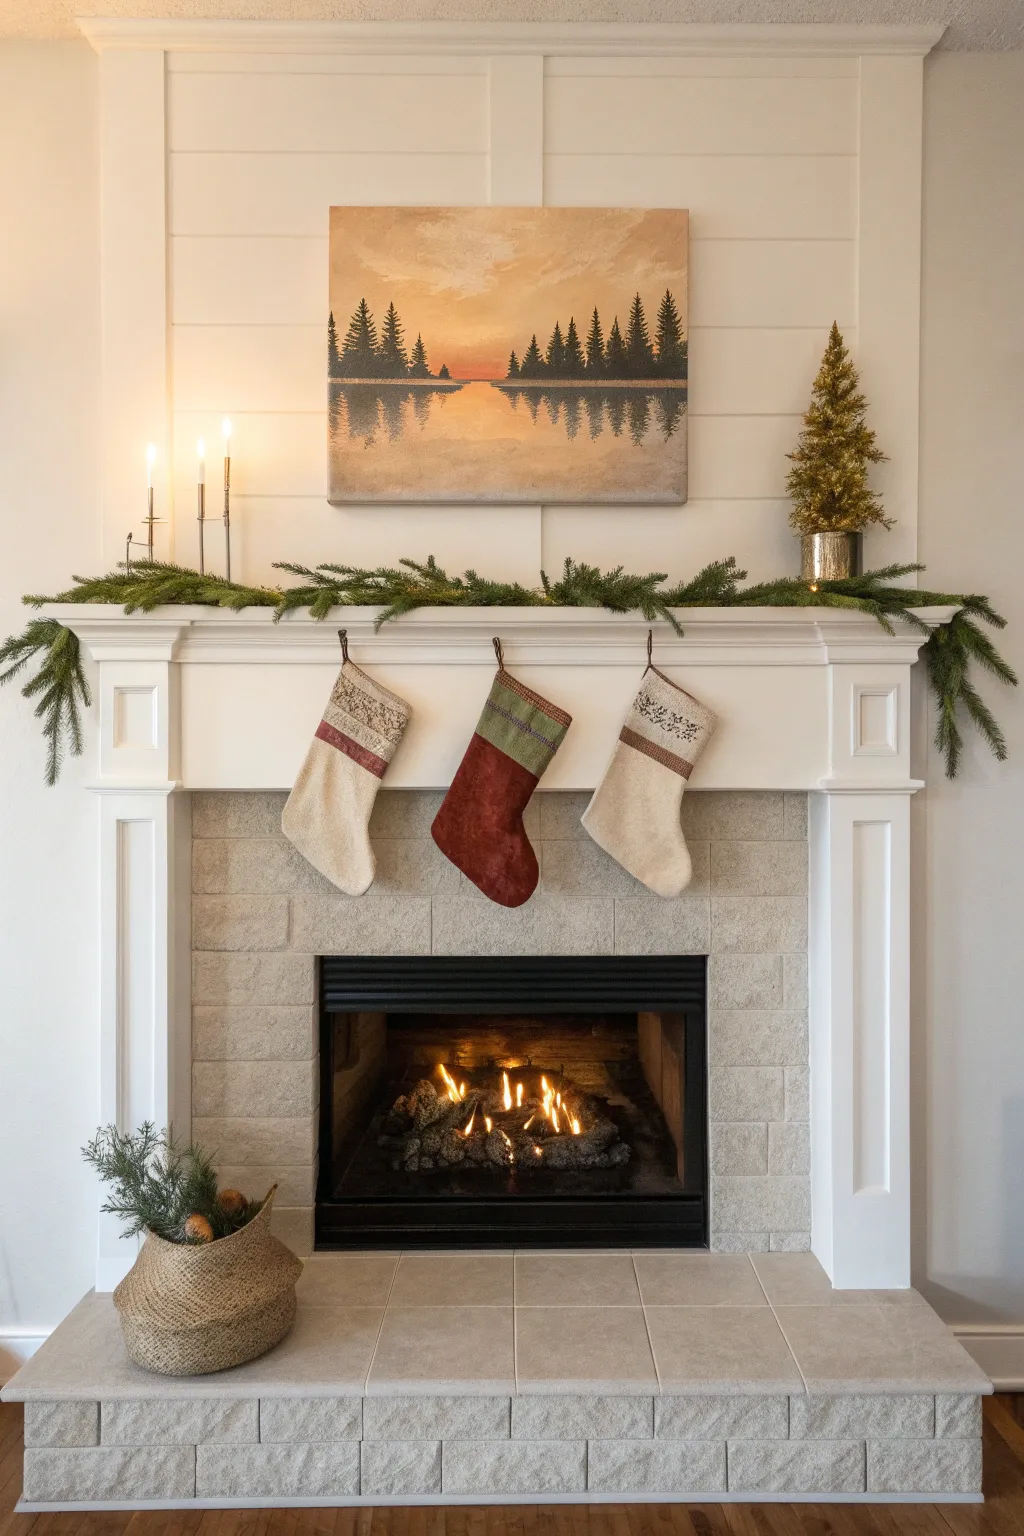
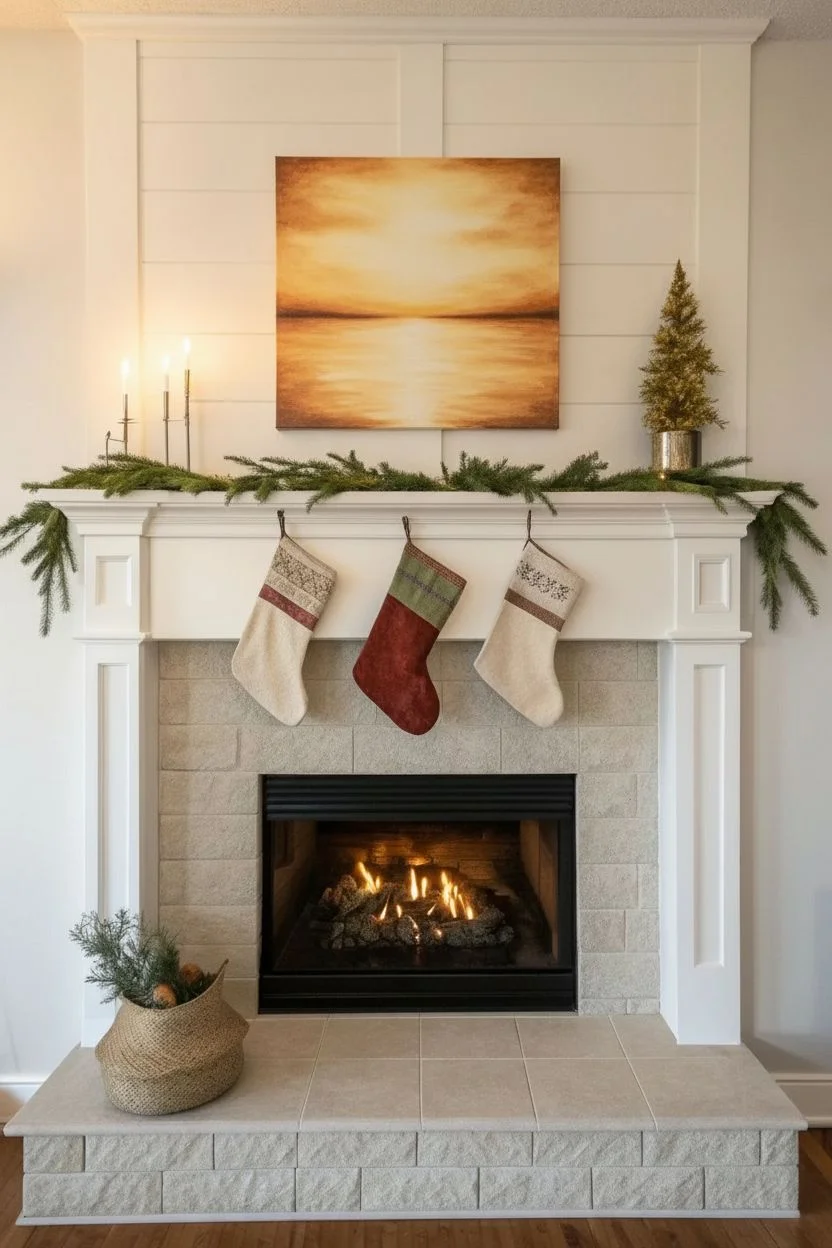
Capture the serene beauty of a winter sunset with this striking landscape painting designed to anchor your mantel decor. The scene features silhouetted evergreens reflecting over a calm lake, bathed in warm golden hues that perfectly complement seasonal greenery.
How-To Guide
Materials
- Large square canvas (approx. 24×24 inches)
- Acrylic paints: Titanium White, Yellow Ochre, Cadmium Orange, Burnt Sienna, Carbon Black, Raw Umber
- Large flat brush (2-inch width)
- Medium flat brush (1-inch width)
- Small round brush (size 2 or 4)
- Fan brush (optional, for trees)
- Palette knife or paper plate
- Cup of water and paper towels
- Easel or flat work surface
Step 1: Creating the Sunset Sky
-
Prime the background:
Begin by covering the top two-thirds of your canvas with a mix of Titanium White and a very small touch of Yellow Ochre. Use your large flat brush with horizontal strokes to create a pale smooth base. -
Add warmth to the horizon:
While the paint is still slightly wet, blend in a mix of Yellow Ochre and Cadmium Orange near the center horizon line. Focus the brightest orange color in the very middle where the sun would be setting. -
Blend the upper sky:
Taking a bit of Burnt Sienna mixed with white, feather this darker tone into the top corners and upper edge of the canvas. Blend downwards into the pale yellow center to create a soft, clouded vignette effect. -
Soften the transitions:
Clean your large brush and run it horizontally across the entire sky area with very light pressure. This smooths out brushstrokes and creates that ethereal, hazy atmosphere essential for a sunset.
Pro Tip: Horizon Line
Use a strip of painter’s tape to mark your horizon line before starting. It keeps the water separate from the sky and ensures your world is perfectly level.
Step 2: Painting the Reflection
-
Establish the water base:
For the bottom third of the canvas, replicate the sky colors but in reverse order. Start with the bright orange-yellow mix in the center just below the horizon line using horizontal strokes. -
Darken the water edges:
Blend the Burnt Sienna and white mix into the bottom corners and edges of the canvas. The water should be slightly darker and more muted than the sky above it to add depth. -
Create surface texture:
Dip a dry medium flat brush into a tiny amount of white paint. Drag it very lightly horizontally across the water area to simulate the shimmering surface of a lake.
Level Up: Metallic Glow
Mix a small amount of gold metallic paint into your orange sunset color. It will catch the twinkle of Christmas lights nearby for a magical effect.
Step 3: Adding the Silhouette Forest
-
Mix the tree color:
Create a deep, dark green by mixing Carbon Black with Raw Umber and a touch of Burnt Sienna. It should look almost black but have warmth. -
Mark the tree line:
Using your medium flat brush, tap a jagged horizontal line across the middle of the canvas to establish the ground. Leave a gap in the center for the sun’s reflection pathway. -
Paint the tree trunks:
With the small round brush, paint thin vertical lines differing in height rising from the ground line. Make the trees taller on the outer edges and shorter towards the center gap. -
Foliage application:
Switch to a small fan brush or use the corner of a flat brush. Tap the dark paint onto the trunks, starting narrow at the top and getting wider towards the base, mimicking the shape of majestic evergreens. -
Start the reflection:
Clean your brush slightly but keep the dark mix. Directly below each tree, pull the dark paint straight down into the water area using vertical strokes. -
Distort the reflection:
I like to take a clean, dry flat brush and gently swipe horizontally across the painted reflections while wet. This blurs the vertical lines, making them look like shadows on rippling water.
Step 4: Final Details
-
Refine the horizon gap:
Use a small brush with your brightest orange-yellow mix to sharpen the horizon line right in the center gap between the tree lines, ensuring the light looks like it’s breaking through. -
Add subtle highlights:
Mix a tiny bit of white into your dark tree color to make a dark grey. Lightly tap this on the very tops of a few trees to suggest moonlight or fading daylight catching the tips. -
Paint the canvas edges:
Don’t forget to paint the sides of your canvas with the dark tree mixture or a neutral beige to give it a finished, gallery-ready look without a frame. -
Varnish for protection:
Once fully dry (wait at least 24 hours), apply a coat of satin or matte varnish to protect your landscape from dust and fireplace soot.
Place your masterpiece centrally above the mantel to serve as the heartwarming focal point of your holiday display


Pet-Themed Stocking With Paw Prints and Treat Shapes
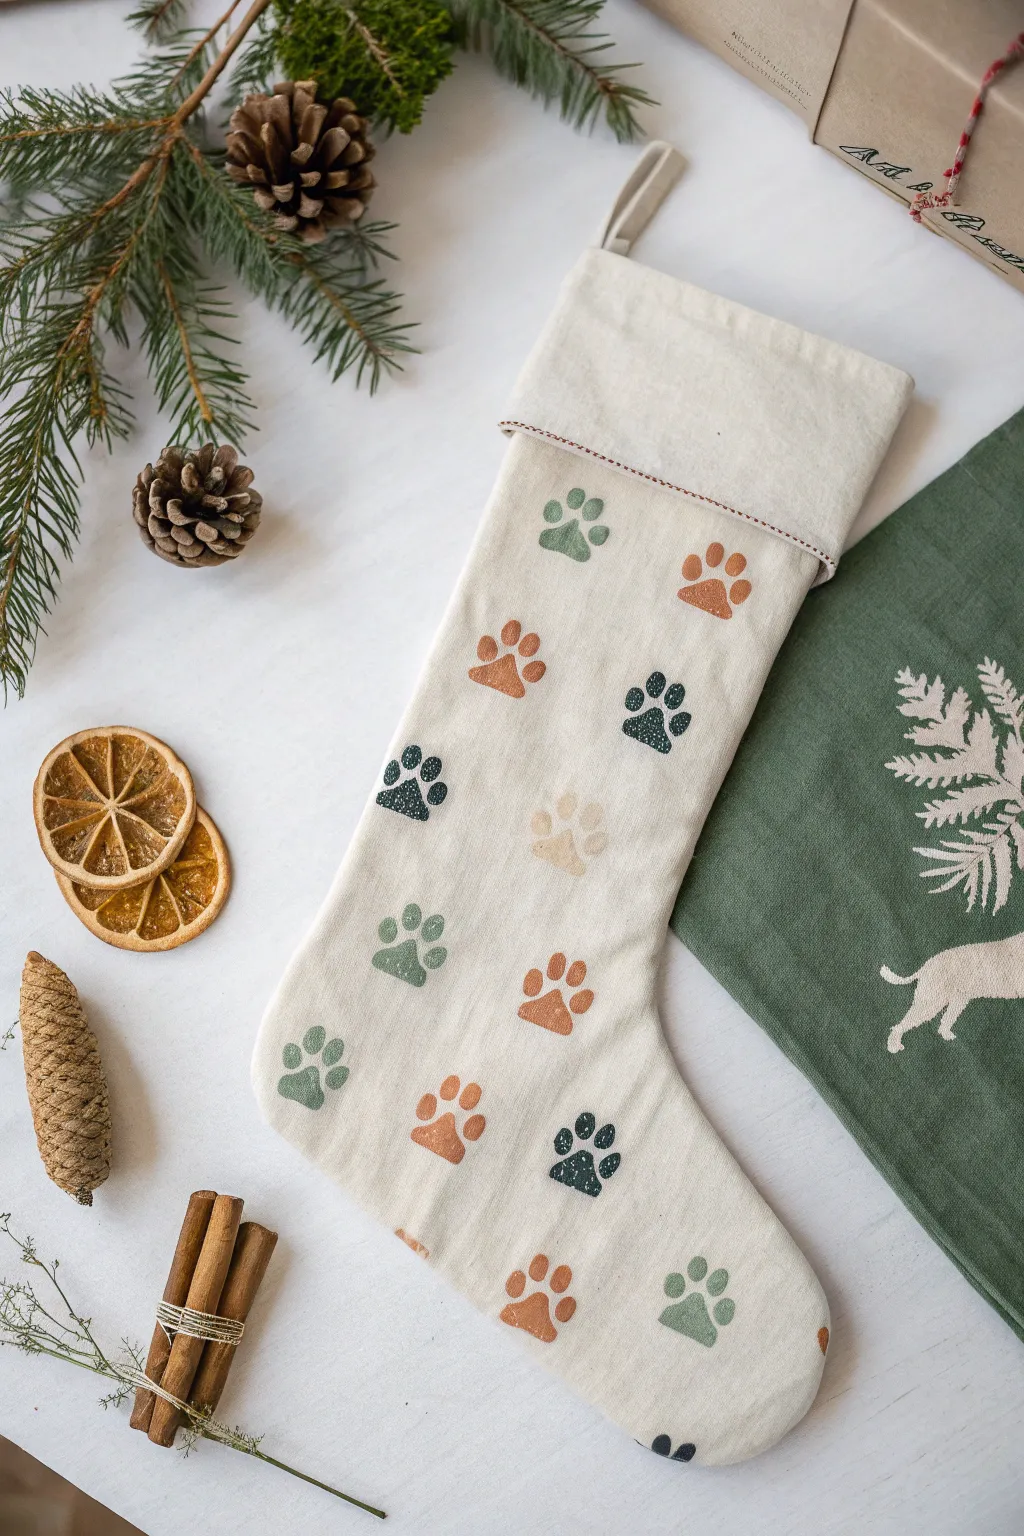
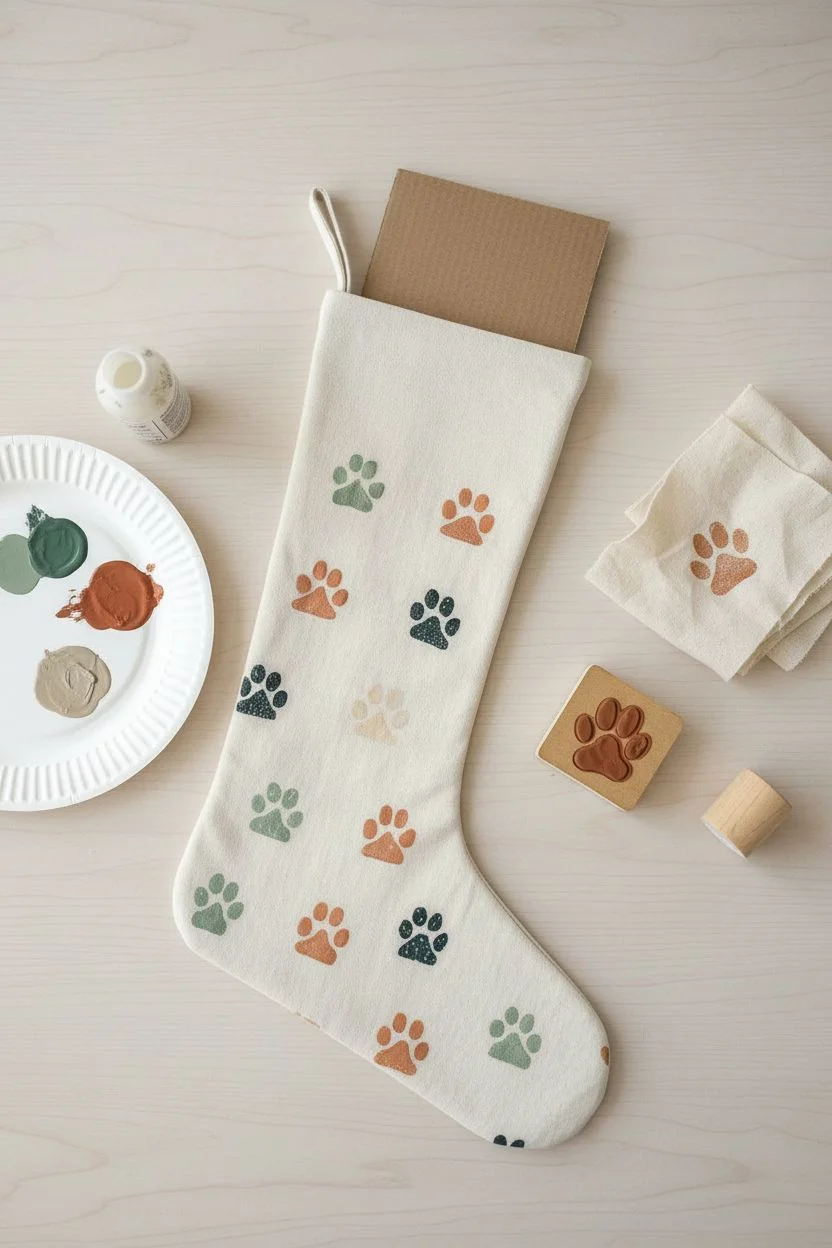
Celebrate your furry friend this holiday with a custom-stamped stocking featuring a playful pattern of paw prints. Using a muted, earth-tone color palette gives this festive project a modern, sophisticated look that blends beautifully with natural decor.
Detailed Instructions
Materials
- Plain canvas or linen Christmas stocking (cream or oatmeal color)
- Fabric paint or acrylic paint mixed with textile medium
- Colors: Sage green, forest green, terracotta/rust, beige/tan
- Paw print foam stamp or stencil
- Small foam pouncer or sponge applicator
- Paper plate or palette
- Cardboard insert
- Iron and pressing cloth (for heat setting)
- Scrap fabric for testing
Step 1: Preparation and Planning
-
Prepare the Stocking:
Start by ironing your stocking to remove any creases or wrinkles that could interfere with the stamping process. -
Protect the Fabric:
Slide a piece of cardboard inside the stocking. This is crucial as it prevents the paint from bleeding through to the back side of the fabric. -
Mix Components:
If you are using regular acrylic paint, mix it with a textile medium according to the bottle’s instructions. This ensures the paint remains flexible on the fabric rather than cracking. -
Select Your Palette:
Pour a small amount of each paint color (sage, forest green, rust, beige) onto your paper plate palette. Keep the puddles separate.
Clean Stamp Trick
If paint builds up in the crevices of your stamp, use an old toothbrush and warm water to scrub it out between color changes for crisp prints.
Step 2: Stamping the Design
-
Load the Stamp:
Dip your foam pouncer lightly into the first color—let’s start with the rust tone. Dab it onto the paw print stamp surface, ensuring an even, thin coat without overloading the crevices. -
Test First:
Press the stamp onto a piece of scrap fabric first. This helps you gauge how much pressure is needed and ensures you haven’t applied too much paint. -
First Impression:
Choose a spot on the stocking to begin. I usually like to start near the center so the pattern radiates outward naturally. Press the stamp firmly down, hold for a second, and lift straight up. -
Create a Scatter Pattern:
Continue stamping with the first color, spacing the prints randomly across the stocking. Rotate the stamp slightly each time so the paws point in different directions for a playful look. -
Clean and Switch:
Wipe the stamp thoroughly with a damp paper towel or baby wipe before switching colors to avoid muddy mixing. -
Add Green Tones:
Repeat the process with the sage green paint. Fill in the gaps between the rust prints, maintaining that random, organic spacing. -
Deepen the Contrast:
Clean the stamp and switch to the darker forest green. Add just a few of these darker prints to anchor the design and add visual depth. -
Soften with Beige:
Finally, use the beige or tan paint to fill any remaining large empty spaces. These lighter prints act as a subtle background element. -
Review the Pattern:
Step back and look at the stocking as a whole. If you see any large empty areas that look unbalanced, add a partial print near the edge to make the pattern look like continuous fabric.
Step 3: Finishing Touches
-
Let it Dry:
Allow the stocking to dry completely. This usually takes at least 24 hours, though thin layers may dry faster. -
Heat Set the Design:
Once dry, heat set the paint to make it permanent. Place a pressing cloth over the design and iron on a cotton setting (no steam) for a few minutes. -
Remove Insert:
Carefully remove the cardboard insert from inside the stocking once everything is cool.
Uneven Print?
If a stamp doesn’t transfer fully, refrain from restamping directly over it. Instead, use a fine detail brush to carefully hand-paint the missing section.
Hang your finished creation by the chimney and wait for Santa to fill it with treats for your four-legged friend


Night-Sky Stocking With Stars, Snow, and Deep Shadows
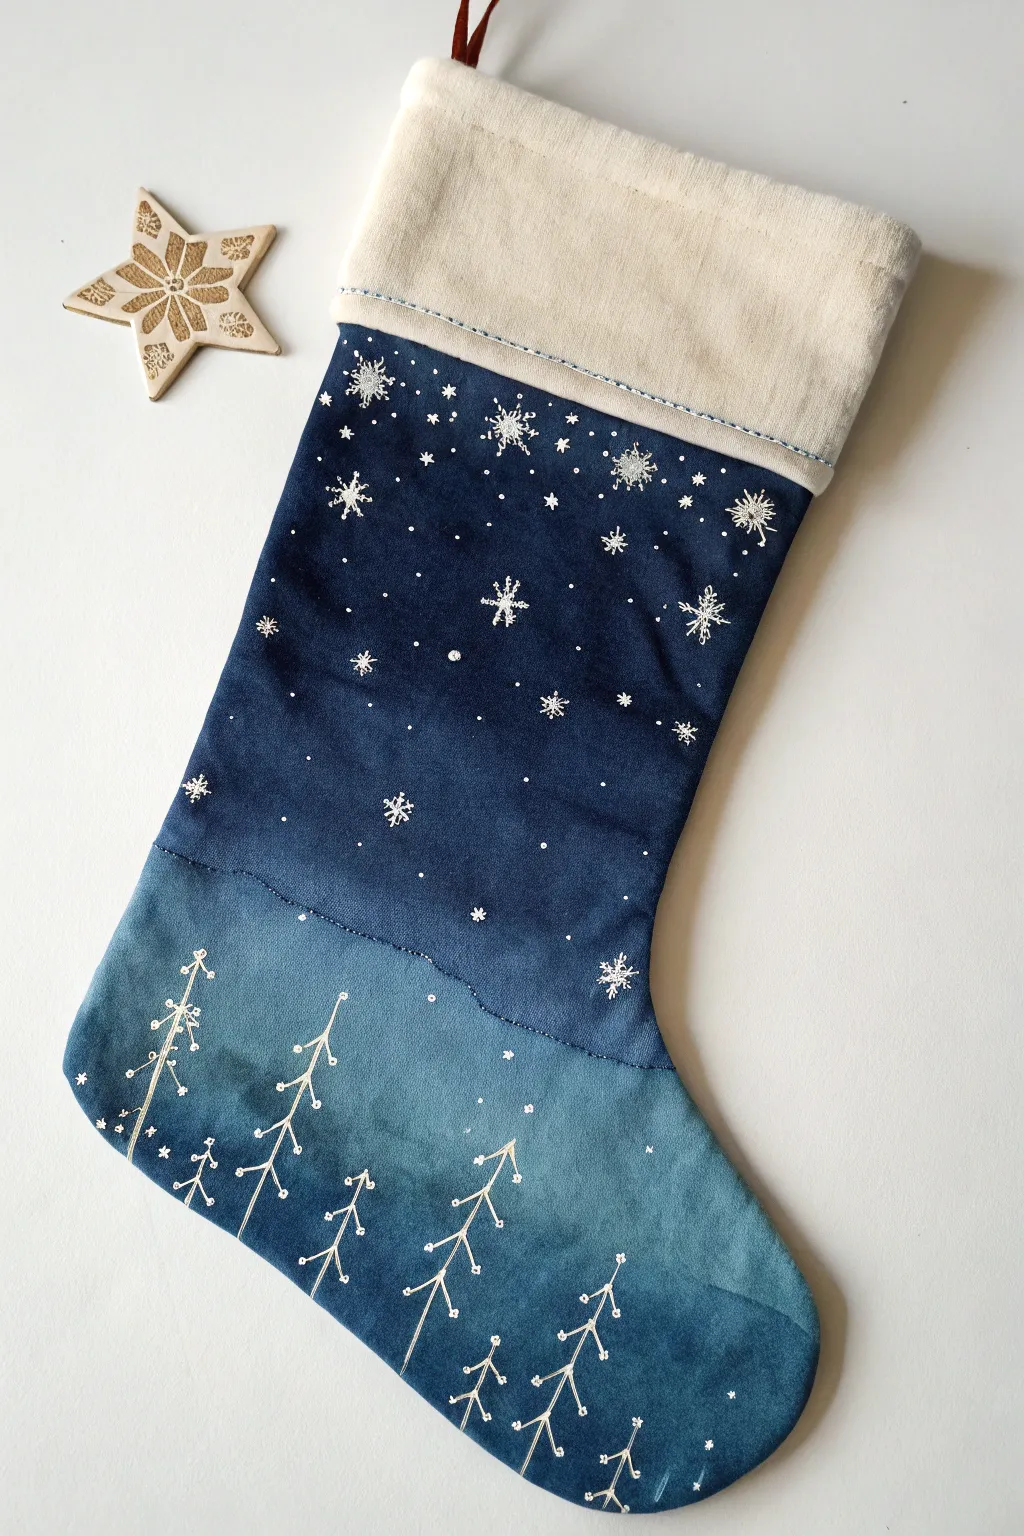
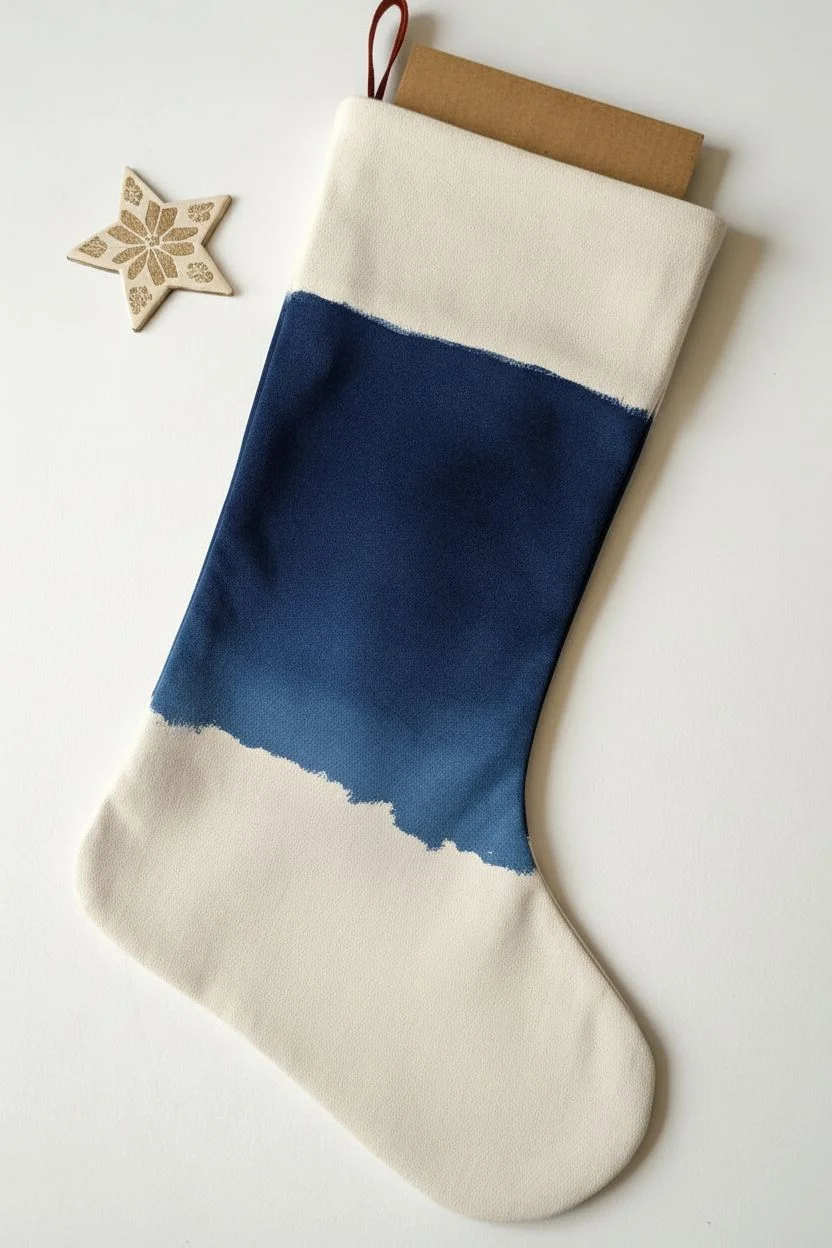
Capture the magic of a silent winter night with this elegant two-tone stocking. Featuring a deep navy sky full of sparkling stars above a misty, ombre forest floor, this project combines fabric painting with delicate line work for a sophisticated holiday look.
Step-by-Step
Materials
- Pre-made stocking with cream cuff (or fabric to sew one)
- Fabric paints: Midnight Blue, Teal, White
- Fabric medium (optional, to thin paints)
- Fine-tip silver glitter fabric paint or dimensional paint
- White fabric marker or gel pen
- Flat shader brush (medium size)
- Fine liner brush
- Water cup and palette
- Iron (for heat setting)
- Cardboard insert
Step 1: Setting the Scene
-
Prepare the stocking:
Before you begin painting, slide a piece of cardboard inside the stocking. This prevents paint from bleeding through to the back side and gives you a firm surface to work on. Smooth out any wrinkles in the fabric. -
Map the horizon:
Decide where your horizon line will be. In the inspiration image, the divide is roughly halfway down the blue section, curving slightly downwards from left to right. You can lightly mark this with a piece of chalk or just freehand it. -
Paint the night sky:
Using your medium flat brush, apply the Midnight Blue fabric paint to the upper section of the stocking, right up to the cream cuff. Ensure the coating is opaque and even. The fabric texture might require a second coat for deep saturation.
Step 2: Creating the Misty Forest
-
Mix the forest tones:
For the bottom section, you want a lighter, deeper teal-blue that looks a bit mottled or misty. Mix a small amount of Midnight Blue with Teal and a touch of White. You can dilute this slightly with water or fabric medium to create a more watercolor-like wash. -
Paint the forest floor:
Apply your mixed teal color to the bottom half of the stocking. Don’t worry about perfect coverage here; allowing some subtle variation in the color adds to the misty, atmospheric look of the forest floor. -
Blend the transition:
While the paints are still tacky, soften the line where the dark sky meets the lighter ground. You don’t need a seamless gradient, but a harsh straight line can look unnatural. A slightly damp brush can help feather the edges together. -
Dry completely:
This is crucial: allow the background paints to dry entirely before moving on to the details. If you rush this steps, your fine lines will bleed into the background. A hairdryer on a low setting can speed this up.
Pro Tip: Masking Tape
For a perfectly crisp edge between the painted blue sky and the cream cuff, lay down a strip of painter’s tape along the bottom edge of the cuff before you start painting.
Step 3: Starlight and Snowfall
-
Add large snowflakes:
Using a fine liner brush and silver glitter paint (or white paint mixed with a little shimmer), paint several large, eight-pointed snowflakes in the dark sky area. Vary their sizes for interest. -
Sprinkle the stars:
Fill the empty spaces in the sky with tiny dots and small cross-shapes to represent distant stars. Concentrate them more heavily near the top cuff and let them get sparser as they approach the horizon. -
Add micro-details:
For extra depth, add the tiniest pin-prick dots of white paint in clusters. This mimics the look of the Milky Way or very distant snow flurries.
Level Up: Embroidered Details
Instead of just painting, use metallic silver embroidery thread to stitch the snowflakes and tree trunks. The texture creates a stunning, high-end finish.
Step 4: Planting the Trees
-
Draft the tree trunks:
Switch to your white fabric marker or a stiff liner brush with white paint. Draw thin, vertical lines rising from the bottom edge of the stocking. These will be your tree trunks. Vary their heights so they don’t look like a uniform fence. -
Sketch the branches:
Draw the branches using downward-slanting lines, similar to arrow fletching. Start small at the top of the trunk and make the branches slightly wider as you move down. Keep the lines thin and delicate. -
Cluster the forest:
Create depth by overlapping some trees. I usually place a few smaller trees “behind” the larger ones by drawing them slightly higher up on the stocking and making their lines thinner. -
Highlight with silver:
Once the white trees are dry, trace over select branches or the tips of the trees with your silver glitter paint. This gives the illusion of frost catching the moonlight.
Step 5: Finishing Touches
-
Review and refine:
Step back and look at the composition. If the sky looks too empty, add another star. If the forest floor looks too dark, you can dry-brush a very small amount of white near the tree bases to look like snow drifts. -
Heat set:
Once everything is completely dry (give it 24 hours to be safe), remove the cardboard. Place a pressing cloth over the design and iron it according to your fabric paint’s instructions to make the design permanent.
Hang your beautiful new creation by the chimney and enjoy the serene winter scene all season long


Have a question or want to share your own experience? I'd love to hear from you in the comments below!