A playroom mural is one of my favorite ways to turn an everyday wall into a whole little world your kid can step into. Whether you want something calm and cozy or bold and energizing, a few well-placed shapes and colors can totally transform the vibe.
Giant Smiling Sun With Simple Rays
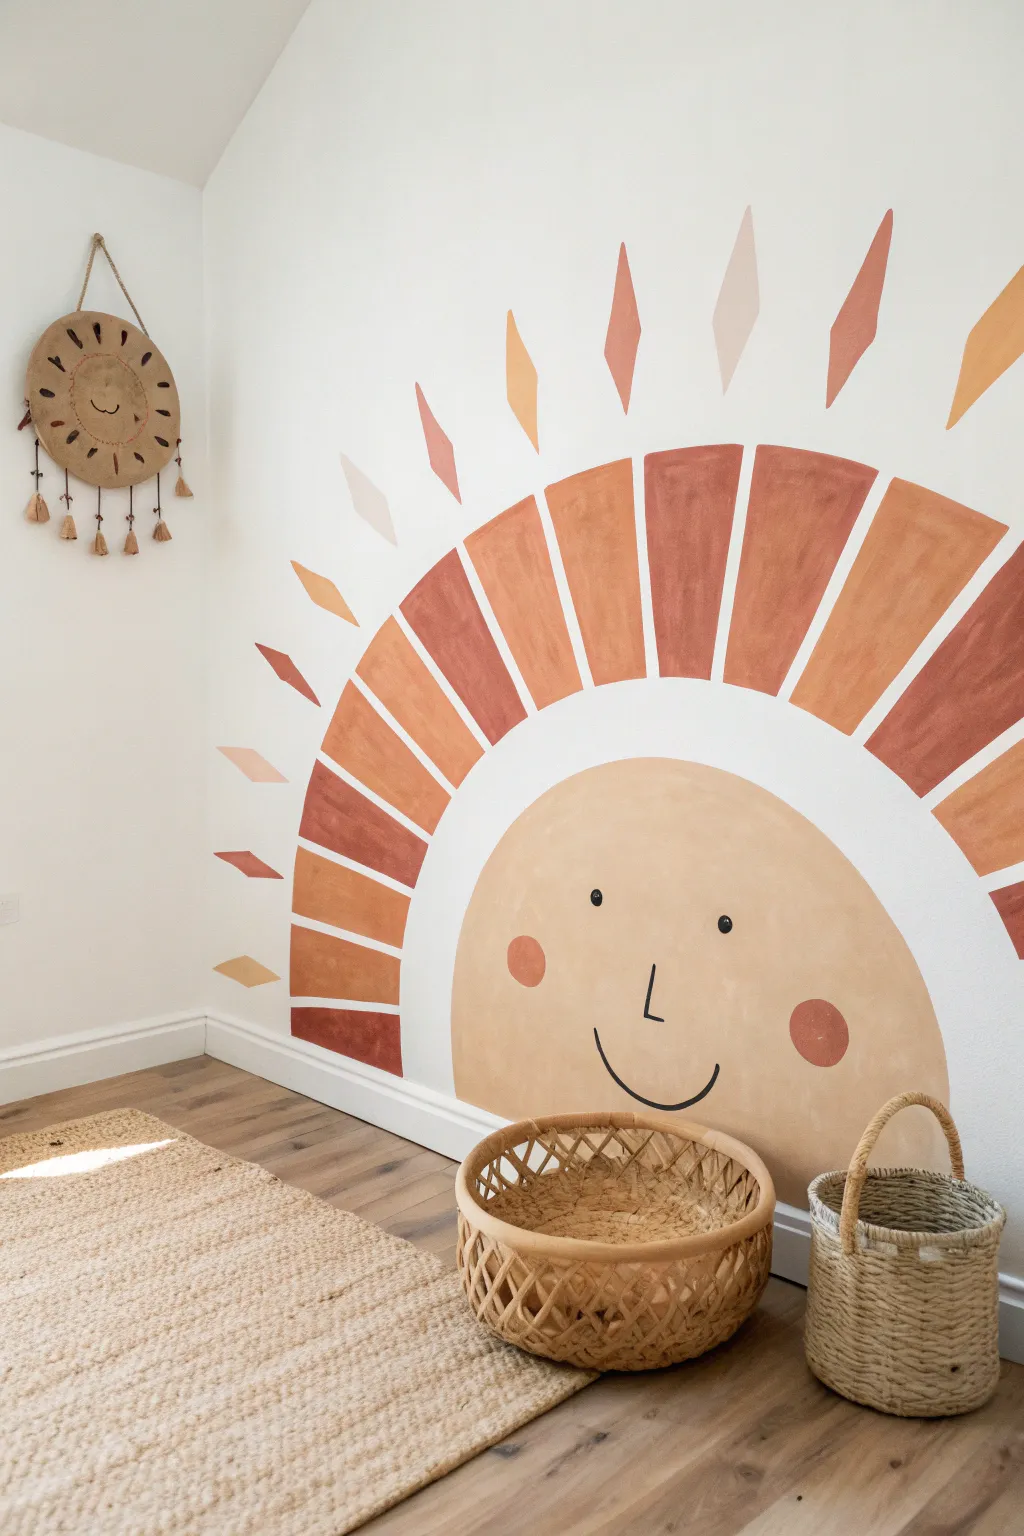
Bring warmth and cheer to any playroom with this oversized, earth-toned sun mural. Its gentle, smiling face and radiating geometric rays create a cozy focal point that feels both modern and playfully rustic.
Step-by-Step Guide
Materials
- Interior latex wall paint (Beige/tan for face)
- Interior latex wall paint (Terracotta/rust orange)
- Interior latex wall paint (Muted orange/burnt sienna)
- Interior latex wall paint (Mustard yellow)
- Black acrylic paint or paint pen (for face details)
- Pink/Rose paint (for cheeks)
- Pencil and large eraser
- String and push pin (for compass method)
- Painter’s tape (optional, for crisp edges)
- Angled sash brush (2-inch)
- Small round artistic brush (size 4 or 6)
- Flat artistic brush (1-inch)
- Measuring tape
- Bubble level
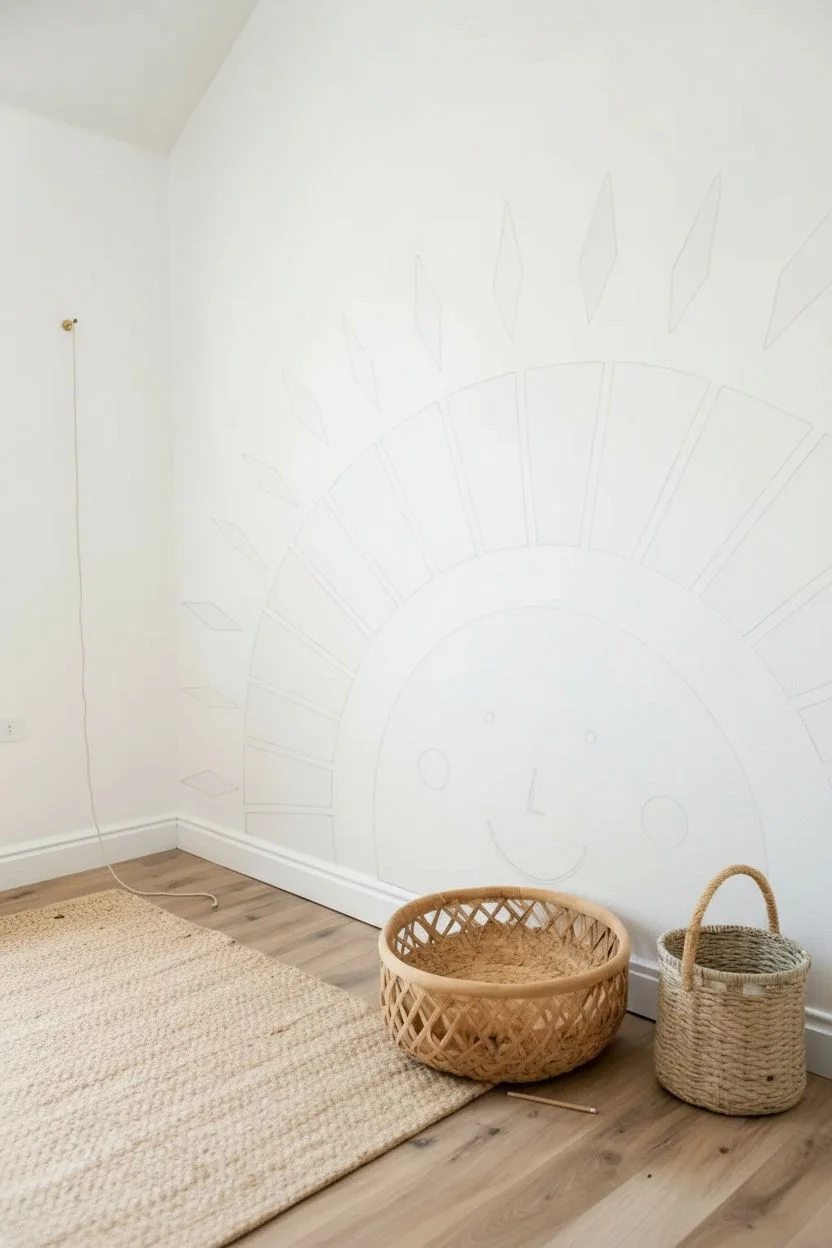
Step 1: Planning and Sketching
-
Prepare the wall:
Start with a clean, dry wall surface. If the base wall color is dark, consider priming the area first to ensure your sun colors pop. The base wall in the example is a clean white, which works best. -
Find your center:
Determine the center point of where you want the sun to rise from the floor. Mark this spot just above the baseboard with a pencil. -
Draw the inner arc (face):
Create a makeshift compass by tying a string to a pencil. Pin the other end of the string to your center mark. Adjust the string length to your desired face size (approx. 2-3 feet radius) and lightly draw a large semi-circle. -
Draw the ray guideline:
extend your string roughly 8-10 inches longer than your first arc. Draw a second, larger semi-circle. This gap will become the white space between the face and the rays. -
Draw the outer ray boundary:
Extend the string one last time, adding about 12-15 inches to the length. Draw the final, largest semi-circle. This marks the outer tips of your main sun rays. -
Sketch the rays:
Using a straight edge or level, lightly sketch the lines for the chunky rectangular rays. They should radiate outward from the center point like wheel spokes. Don’t worry about perfection; a hand-drawn look adds charm. -
Add the floating diamonds:
Above the main rays, sketch small diamond shapes. These should float freely, aligned with the gaps between the larger rays, creating a sparkling effect.
Step 2: Painting the Sun
-
Paint the sun face:
Using your 2-inch angled brush and beige paint, carefully cut in the outline of the inner semi-circle. Fill in the rest of the semi-circle with smooth strokes, aiming for even coverage. Let this dry completely. -
Block in the rays:
Select your terracotta, muted orange, and mustard yellow paints. Plan a repeating pattern or random mix. Use the flat artistic brush to paint the rectangular rays, keeping the edges fairly crisp but hand-painted. -
Paint the diamonds:
Using a smaller brush, fill in the floating diamond shapes with corresponding colors. I like to alternate the diamond colors so they contrast slightly with the ray immediately below them. -
Second coats:
Once the first layer is dry to the touch, assess the opacity. Earth tones often need a second coat to look rich and velvety. Apply a second layer to the face and rays if needed.
Uneven Edges?
If your straight lines look too wobbly, use a flat-edge artist brush like a stamp rather than dragging it. Press, lift, move, and press again to create clean edges.
Step 3: Adding the Details
-
Paint the rosy cheeks:
Dip a small round brush or a stencil dauber into the pink paint. Paint two soft circles on the beige face for cheeks. Placement is key—keep them wide apart and relatively low for a cute look. -
Identify face placement:
Lightly sketch the eyes, nose, and mouth with a pencil first. The eyes should sit roughly above the cheeks, and the smile should be a wide, gentle ‘U’ shape low on the face. -
Paint the eyes:
Using black acrylic paint and a fine detail brush (or a black paint pen for easier control), fill in two small, solid black circles for the eyes. -
Define the nose:
Paint a simple ‘L’ shape for the nose. Keep the line thin and delicate. -
Create the smile:
Carefully trace your pencil smile line with black paint. Widen the stroke slightly in the middle and tamper it at the ends for a friendly expression. -
Cleanup:
Once everything is fully dry, gently erase any visible pencil marks from your initial sketch, especially around the white gaps.
Level Up
Mix a clear glaze into your beige sun-face paint to create a slightly translucent, watercolor effect that shows brushstrokes for extra texture.
Step back and admire your new, cheerful roommate who promises to keep the playroom bright regardless of the weather outside


Calm Cloudscape With Floating Kites
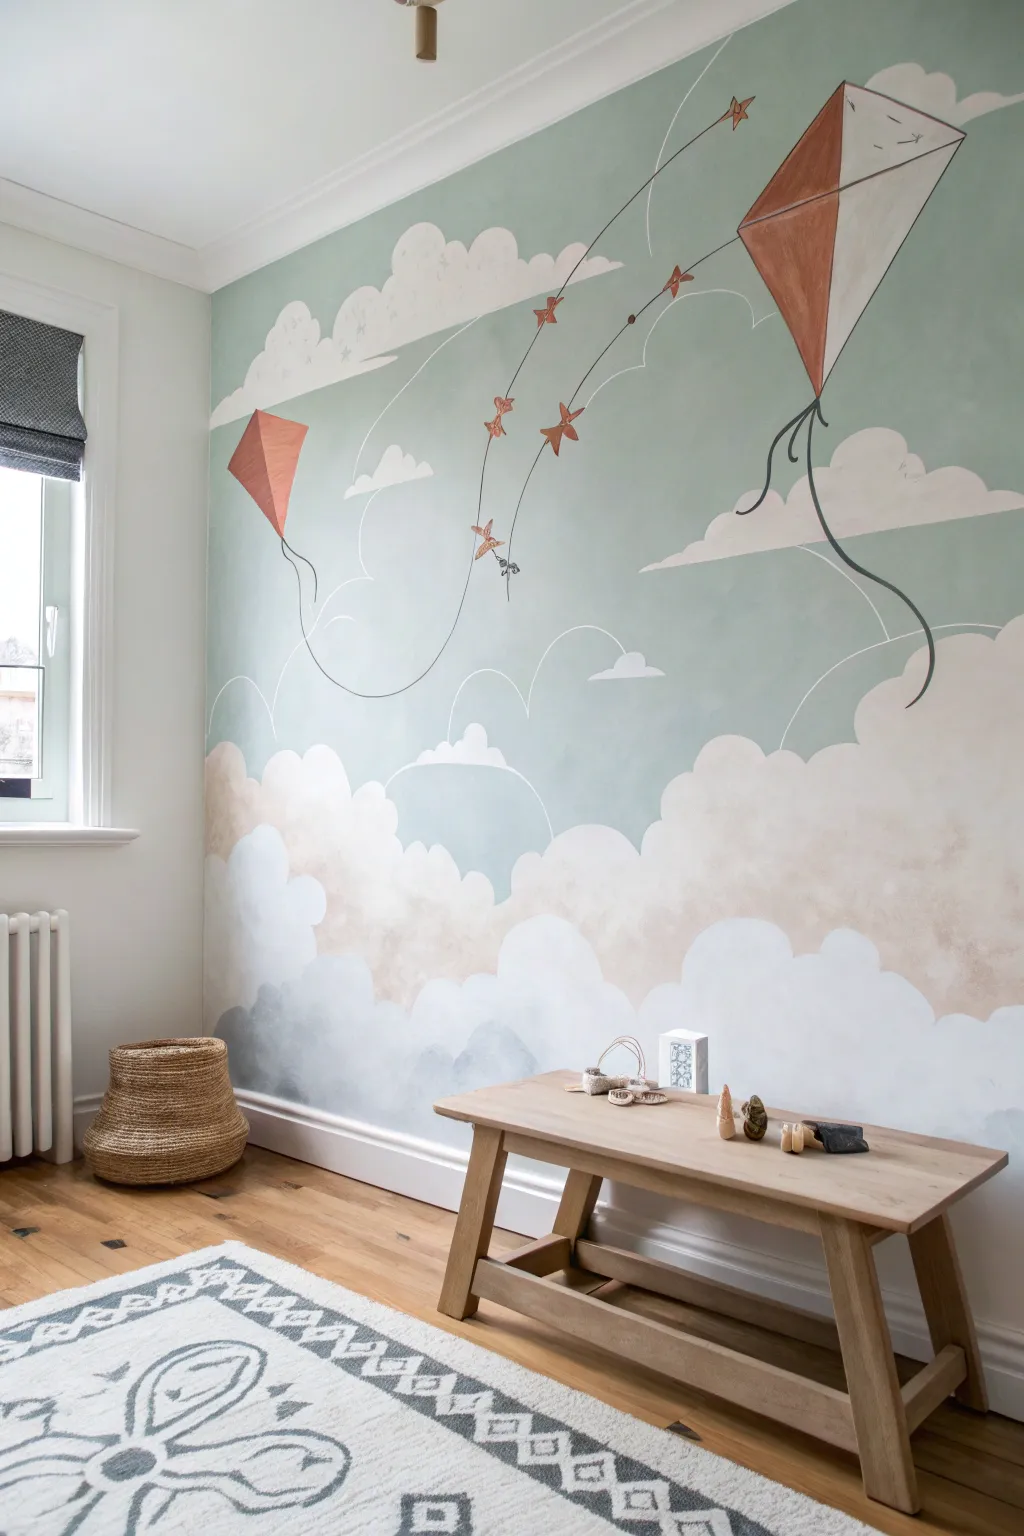
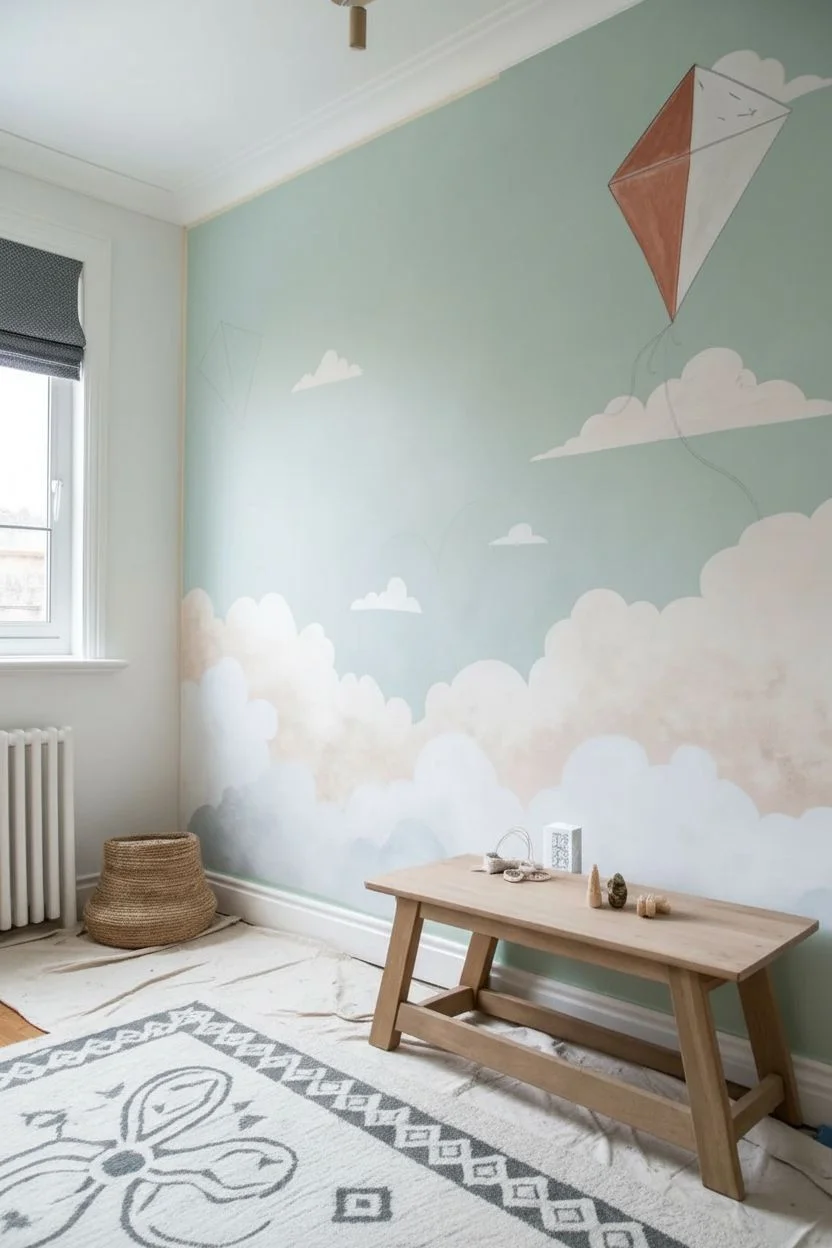
Transform a plain wall into a whimsical sky adventure with this gentle, dreamy mural. Featuring soft, billowy clouds and vintage-style kites on a calming mint backdrop, this large-scale art project creates a perfect, peaceful atmosphere for a playroom or nursery.
Step-by-Step Tutorial
Materials
- Satin or eggshell wall paint (Mint Green base)
- Acrylic or latex paint (White, Cream/Off-White, Warm Rust, Dark Grey/Charcoal)
- Wide paint roller and tray
- Large round brush (for clouds)
- Medium flat brush (for kites)
- Fine liner brush (for strings and details)
- Pencil
- Painter’s tape
- Sea sponge (optional)
- Ladder or step stool
- Drop cloth
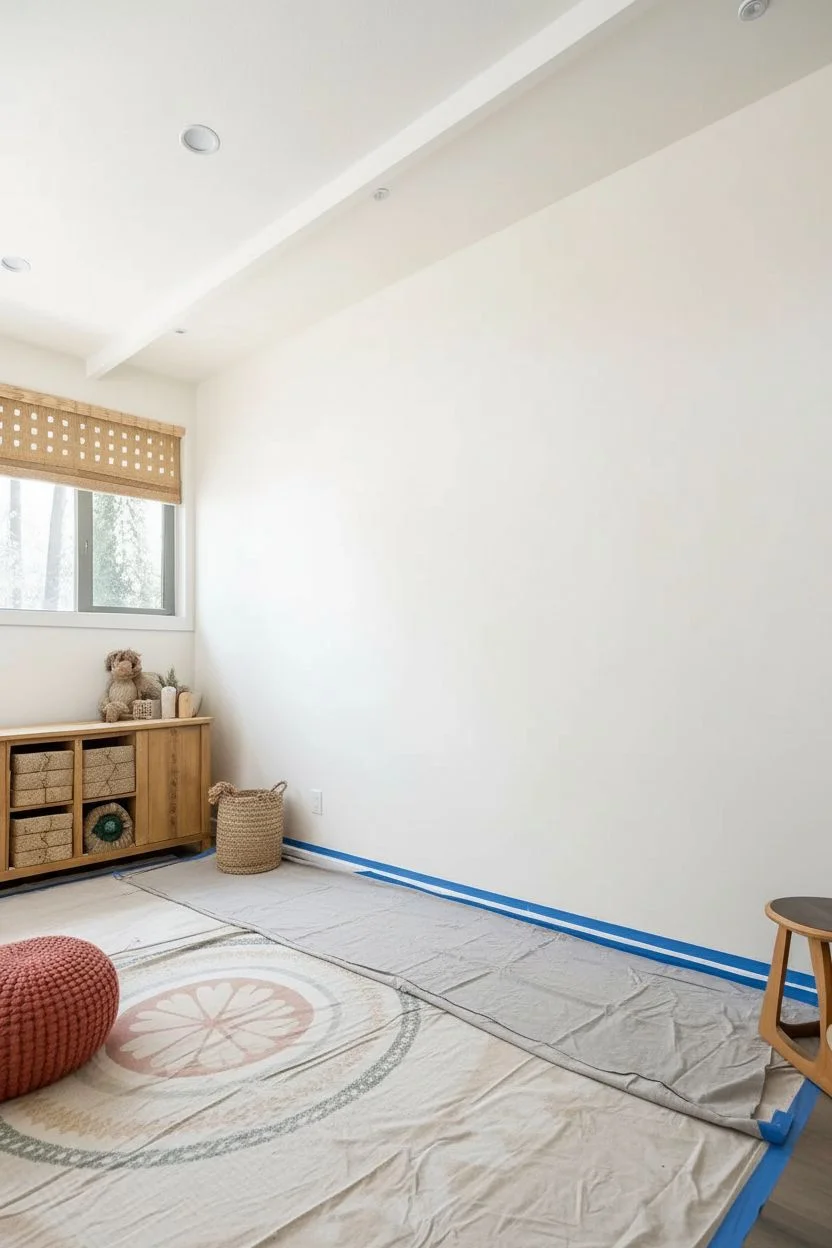
Step 1: Setting the Sky Scene
-
Prepare the room:
Clear the area against the wall, remove any switch plates, and lay down your drop cloth to protect the flooring. Tape off the baseboards, ceiling line, and adjacent walls. -
Apply the base color:
Roll on the mint green base coat over the entire wall. This sets the atmospheric tone. Depending on your paint quality, you may need two coats for full, opaque coverage. Let this dry completely—usually at least 4 hours. -
Sketch the layout:
Using a pencil very lightly, sketch the large cloud formations starting from the bottom up. Draw rounded humps of varying sizes. Then, sketch the positions of the two kites in the upper right and left areas.
Cloud Fluff Pro-Tip
Don’t overmix your cloud colors on the palette. Dip your brush into white and cream simultaneously. The colors will blend naturally on the wall, creating beautiful, organic streaks and texture.
Step 2: Painting the Clouds
-
Block in white clouds:
Load a large round brush with plain white paint. Fill in the top edges of your pencil cloud outlines, using curved, sweeping strokes to mimic the fluffiness of cumulus clouds. -
Fill the lower clouds:
For the clouds closer to the floor, mix a generous amount of white with a tiny touch of the mint base or a soft grey to create depth. Paint these lower sections, blending them partially into the stark white tops while the paint is still wet. -
Add cream accents:
While your white layer is tacky, brush in swirls of cream or off-white paint into the middle of the cloud bodies. This warms up the scene and prevents the clouds from looking like flat stickers. -
Soften the edges:
I like to use a barely-damp sea sponge or a dry brush to gently pat the edges of the clouds where they meet the mint sky. This creates that lovely, hazy atmospheric look rather than sharp, cartoonish lines. -
Layering transparency:
Mix a very watery glaze of white paint (50% water, 50% paint). Apply this translucent layer over parts of the mint sky just above the solid clouds to create wispy, distant vapors.
Step 3: Creating the Kites
-
Outline the kites:
Using your medium flat brush and the warm rust paint, carefully fill in the diamond shapes of the kites. The larger kite on the right has a split design, so paint the left half rust and the right half white. -
Add kite details:
For the smaller kite on the left, paint the whole shape rust. Once dry, you can add faint white highlights to suggest the fabric texture stretching over the frame. -
Define the structure:
With a fine liner brush and dark grey paint, draw thin lines for the cross-spars (the sticks) on the kites. On the large white/rust kite, outline the perimeter to make it pop against the background. -
Draw the faces:
If you look closely at the large kite, it has a subtle sleeping face. Use your finest brush to paint two small curved lines for eyes and a small dash for a mouth near the top.
Level Up: 3D Elements
Glue actual grosgrain ribbon or fabric bows onto the painted kite strings using strong adhesive. This mixed-media touch adds tactile interest and makes the mural truly come alive.
Step 4: Strings and Final Touches
-
Map the strings:
Sketch the swooping paths of the kite strings first. They shouldn’t be straight lines; let them loop and curve dramatically across the sky to show movement. -
Paint the main lines:
Using the liner brush and dark grey or charcoal paint, trace your pencil lines. Keep a steady hand, but don’t worry if the line thickness varies slightly—it adds character. -
Add the bows:
Along the kite strings, paint small ‘X’ shapes or butterfly shapes in rust paint to represent the fabric ties on the tail. Space them out irregularly for a natural look. -
Paint the ribbons:
At the bottom of the large kite, paint two loose, wiggly ribbons flowing downwards in dark grey, contrasting with the rust bows on the main string. -
Final smooth out:
Step back and check your work. If any pencil lines are still visible through the light cloud paint, gently touch them up with a bit more white. -
Clean up:
Wait for the mural to be touch-dry before removing the painter’s tape carefully at a 45-degree angle to ensure crisp edges.
Now you have a serene, sky-high focal point that encourages daydreaming and calm play.


Whimsical Forest With Oversized Trees

Transform a plain wall into a storybook escape with this oversized forest mural. The hand-painted look, featuring soft greens, muted ochres, and towering trees, creates a calm yet imaginative backdrop perfect for a playroom.
How-To Guide
Materials
- Interior latex paint (white base)
- Sample pots: Deep forest green, sage green, warm ochre, soft pink, dark brown, medium brown
- Paint rollers and tray
- Angled sash brush (2-inch)
- Round artist brushes (various sizes for details)
- Painter’s tape
- Pencil and large eraser
- Drop cloths
- Ladder
- Chalk or projector (optional for sketching)
Step 1: Preparation and Background
-
Prep the canvas:
Clear the room and lay down drop cloths to protect your flooring. Ensure the wall is clean, dry, and primed if you are painting over a dark color. -
Base coat:
Roll on two coats of a soft, creamy white interior latex paint to create a neutral sky background. Allow this to dry completely for at least 4 hours before sketching.
Step 2: Sketching the Scene
-
Map out the terrain:
Using a pencil, lightly sketch a rolling hill line across the bottom third of the wall. Let the line dip and rise organically rather than staying perfectly straight. -
Outline the giants:
Draft the main oversized trees. Start with tall, vertical trunks that extend from the hills all the way to the ceiling. Add large branches that V-shape upwards. -
Add forestry details:
Sketch triangles for pine trees and rounded shapes for other foliage in the background. Don’t worry about perfect symmetry; whimsical shapes work best here.
Uneven Lines?
If your painted edges look shaky, wait for them to dry completely. Then, use an angled shader brush with a tiny bit of the background color to ‘cut in’ and straighten the line.
Step 3: Painting the Landscape
-
Fill the ground:
Use a roller or a large brush to fill in the bottom hill section with your deep forest green paint. Work carefully along the top edge to keep the curve smooth. -
Paint the trunks:
Using the medium brown paint and an angled brush, fill in the large tree trunks. Keep your brushstrokes vertical to mimic the texture of bark. -
Add pine trees:
Paint the triangle pine trees using sage green, ochre, and rust colors. Varying the colors helps create depth and visual interest.
Interactive Art
Paint the lower hill area with clear chalkboard paint or magnetic primer before the green topcoat. This turns the forest floor into an interactive play surface for kids.
Step 4: Foliage and Details
-
Create leaf clusters:
For the oversized leaves on the main trees, use sage green and muted teal. Paint large, oval or scalloped shapes attached to the branches. -
Detail the bark:
Once the brown trunks are dry, take a smaller brush and the dark brown paint to add vertical lines and knots. This adds dimension so the trees don’t look flat. -
Leaf details:
Use a fine artist brush and a lighter green or white to paint the veins on the large leaves. Keep the lines thin and delicate. -
Add playful elements:
Paint small details like mushrooms, tiny flowers, or stylized grass tufts along the hill line using your accent colors. -
Falling snow or pollen:
Dip the back end of a small paintbrush into white or light grey paint. Dot the ‘sky’ area randomly to create a texture that looks like falling snow or magical forest dust.
Step 5: Final Touches
-
Review and refine:
Step back to view the whole wall. Use a small brush to touch up any uneven edges where the trees meet the sky. -
Erase guidelines:
Gently erase any visible pencil lines that weren’t covered by paint, or touch them up with the base wall color. -
Clean up:
Remove painter’s tape carefully from the baseboards and ceiling edges while the paint is still slightly tacky to prevent peeling.
Now you have a stunning, custom forest mural that makes playtime feel like an outdoor adventure


Underwater World With Big Friendly Sea Creatures
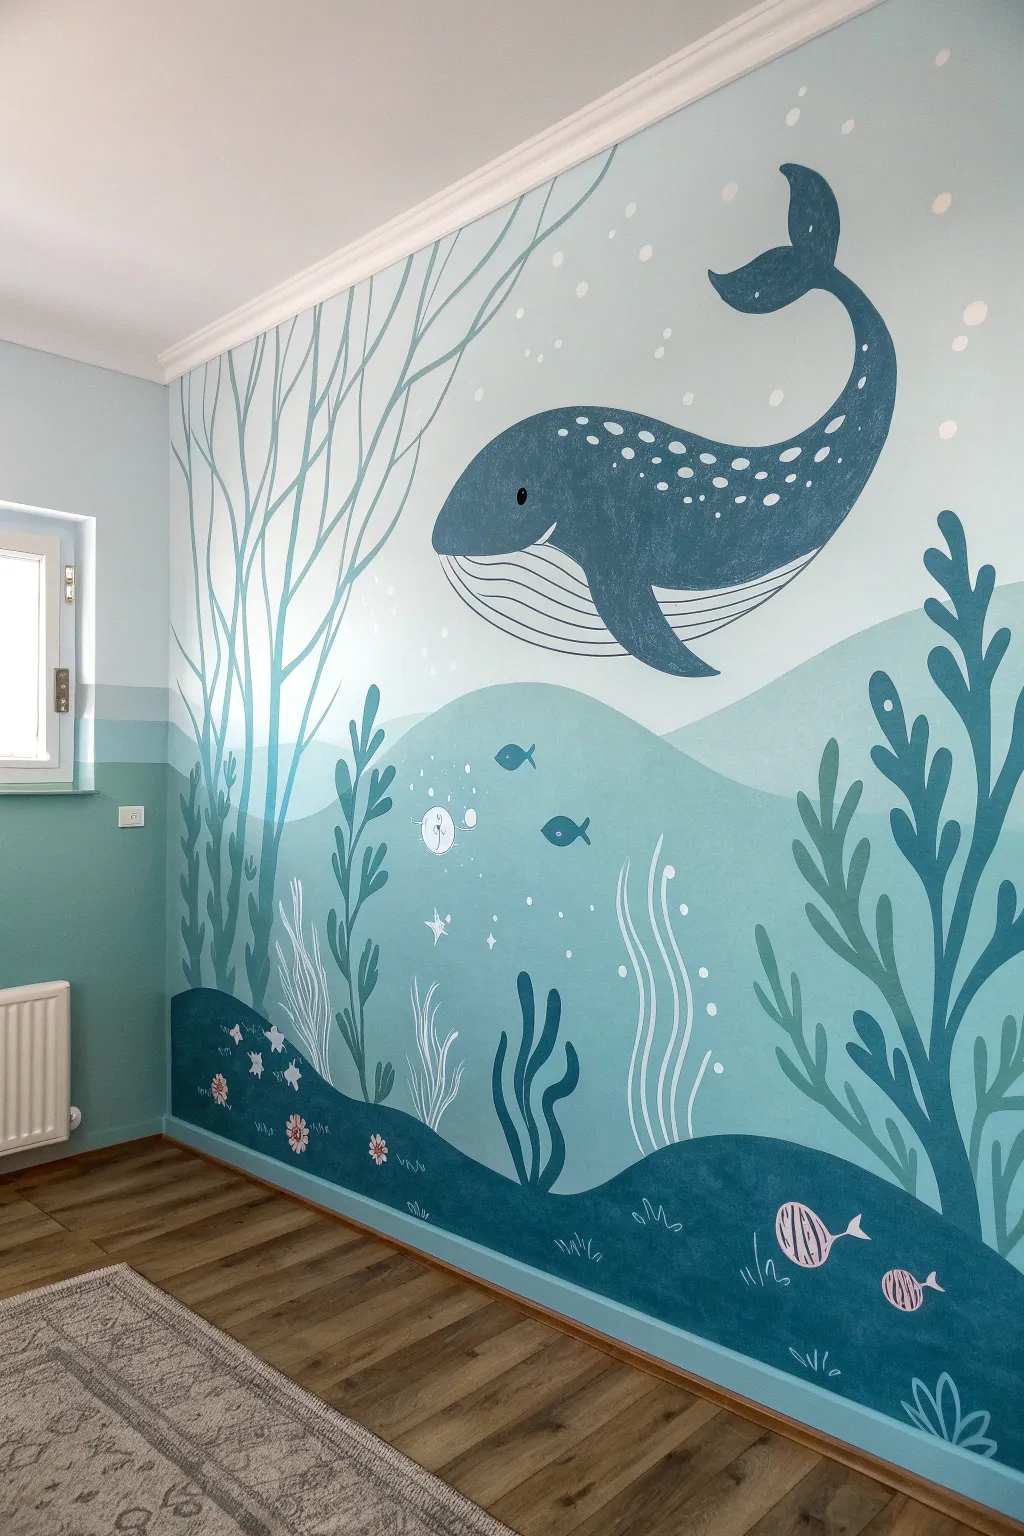
Transform a blank wall into a serene underwater soundscape featuring a gentle giant and swaying flora. This project uses layers of soft blues and teals to create depth, making it a calming focal point perfect for a nursery or playroom.
Detailed Instructions
Materials
- Interior emulsion paint (White base)
- Acrylic paints or wall paint testers (Deep navy, teal, turquoise, sage green, light blue)
- Painter’s tape
- Drop cloth
- Pencil and large eraser
- Assorted paintbrushes (medium angled sash brush for curves, small round brush for details)
- Paint rollers and tray
- Chalk (optional, for sketching)
- Ladder (if the wall is high)
Step 1: Preparation and Background
-
Prepare the workspace:
Clear the area against the wall and protect your flooring with a drop cloth. Tape off the skirting boards, ceiling line, and adjoining walls with painter’s tape to ensure crisp edges. -
Apply the base coat:
Roll on a fresh coat of very light blue or off-white paint over the entire wall. This will serve as the ‘water’ sky background. Let this dry completely, usually for about 2-4 hours, before sketching.
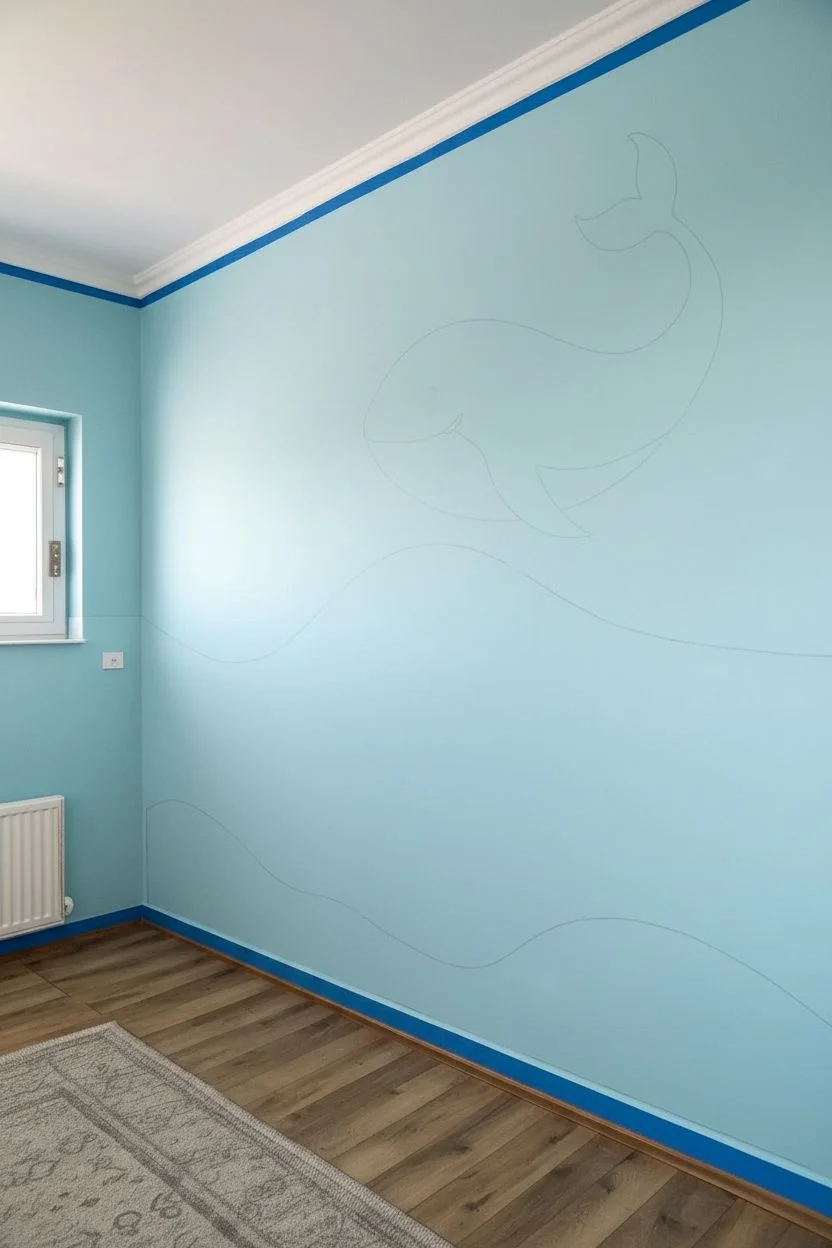
Step 2: Creating the Landscape Layers
-
Sketch the rolling hills:
Using a pencil or white chalk, lightly sketch three distinct layers of rolling ‘hills’ or seabed dunes. The highest hill needs to be large and sweeping on the right side, while the foreground should be low and wavy. -
Paint the background hill:
Mix a soft, dusty turquoise shade. Using a medium angled brush, carefully cut in the top wavy edge of the furthest back hill layer. Fill in the rest of that shape using a small roller for a smooth finish. -
Add the middle ground:
Create the second layer using a slightly darker teal shade. This layer should overlap the first one slightly. Paint the top edge cleanly with your brush, representing the middle depth of the ocean floor, and fill downward. -
Paint the foreground:
For the closest layer at the bottom, mix your deepest teal-blue. This creates strong contrast and anchors the mural. Paint the wavy top edge and fill in solidly all the way down to the skirting board.
Master the Curves
When painting long, wavy lines for seaweed or hills, move your entire arm from the shoulder, rather than just your wrist. This creates smoother, more confident curves without shaky stops and starts.
Step 3: Painting the Sea Life
-
Outline the whale:
In the upper right quadrant, lightly sketch the large whale shape. Focus on a big curve for the back, a rounded head, and a tail flipping upward. Don’t worry about perfection; organic shapes look better here. -
Fill the whale body:
Paint the whale’s body in a deep, slate blue. Use a medium flat brush to handle the edges and a smaller roller or large brush to fill the center. Leave the belly area unpainted or paint it a lighter grey-blue. -
Detail the whale:
Once the body is dry, use a fine round brush with white or very pale grey paint to add the belly stripes. Add small dots and speckles along the whale’s back for texture, and paint a small black eye. -
Add floating fish:
Scatter a few small fish silhouettes in the mid-water section. Use simple football shapes in dark blue or teal. I find adding a tiny white dot for the eye instantly brings them to life. -
Paint the snail shells:
On the dark foreground layer, paint small, spiral shell shapes using a contrasting light pink or lavender. Add simple line details to define the spiral.
Uneven Coverage?
If your dark blues look patchy after the first coat, don’t keep brushing wet paint. Let it dry completely, then apply a second thin coat. Dark pigments often need two laters for true opacity.
Step 4: Plant Life and Finishing Touches
-
Sketch the coral trees:
Draw large, branching tree-like coral structures on the left side, reaching up from the middle layer towards the ceiling. Keep the branches spindly and elegant. -
Paint the background coral:
Trace over your coral sketches with a light teal or sage green paint. A liner brush or a long-bristled script brush works best here to get smooth, continuous lines for the branches. -
Add foreground seaweed:
On the right side, painting over the background hills, add thick, wavy seaweed shapes using a darker teal. These should feel closer to the viewer and flow vertically. -
Introduce white accents:
Using white paint, add delicate, thin seaweed strands rising from the dark bottom layer. These ghost-like plants add wonderful depth and brightness against the dark blue. -
Paint the bubbles and dots:
Dip the handle end of a paintbrush into white paint to stamp perfect circles of varying sizes around the whale and fish to create bubbles. -
Final inspection:
Step back and check your work. Use a small brush to touch up any wobbly lines where the color blocks meet or where the background shows through the whale’s body. -
Clean up:
While the paint is still slightly tacky but mostly dry, carefully peel off the painter’s tape at a 45-degree angle to reveal your clean edges.
Enjoy the calming atmosphere of your new underwater masterpiece
BRUSH GUIDE
The Right Brush for Every Stroke
From clean lines to bold texture — master brush choice, stroke control, and essential techniques.
Explore the Full Guide
Storybook Mountain Landscape With a Tiny Path
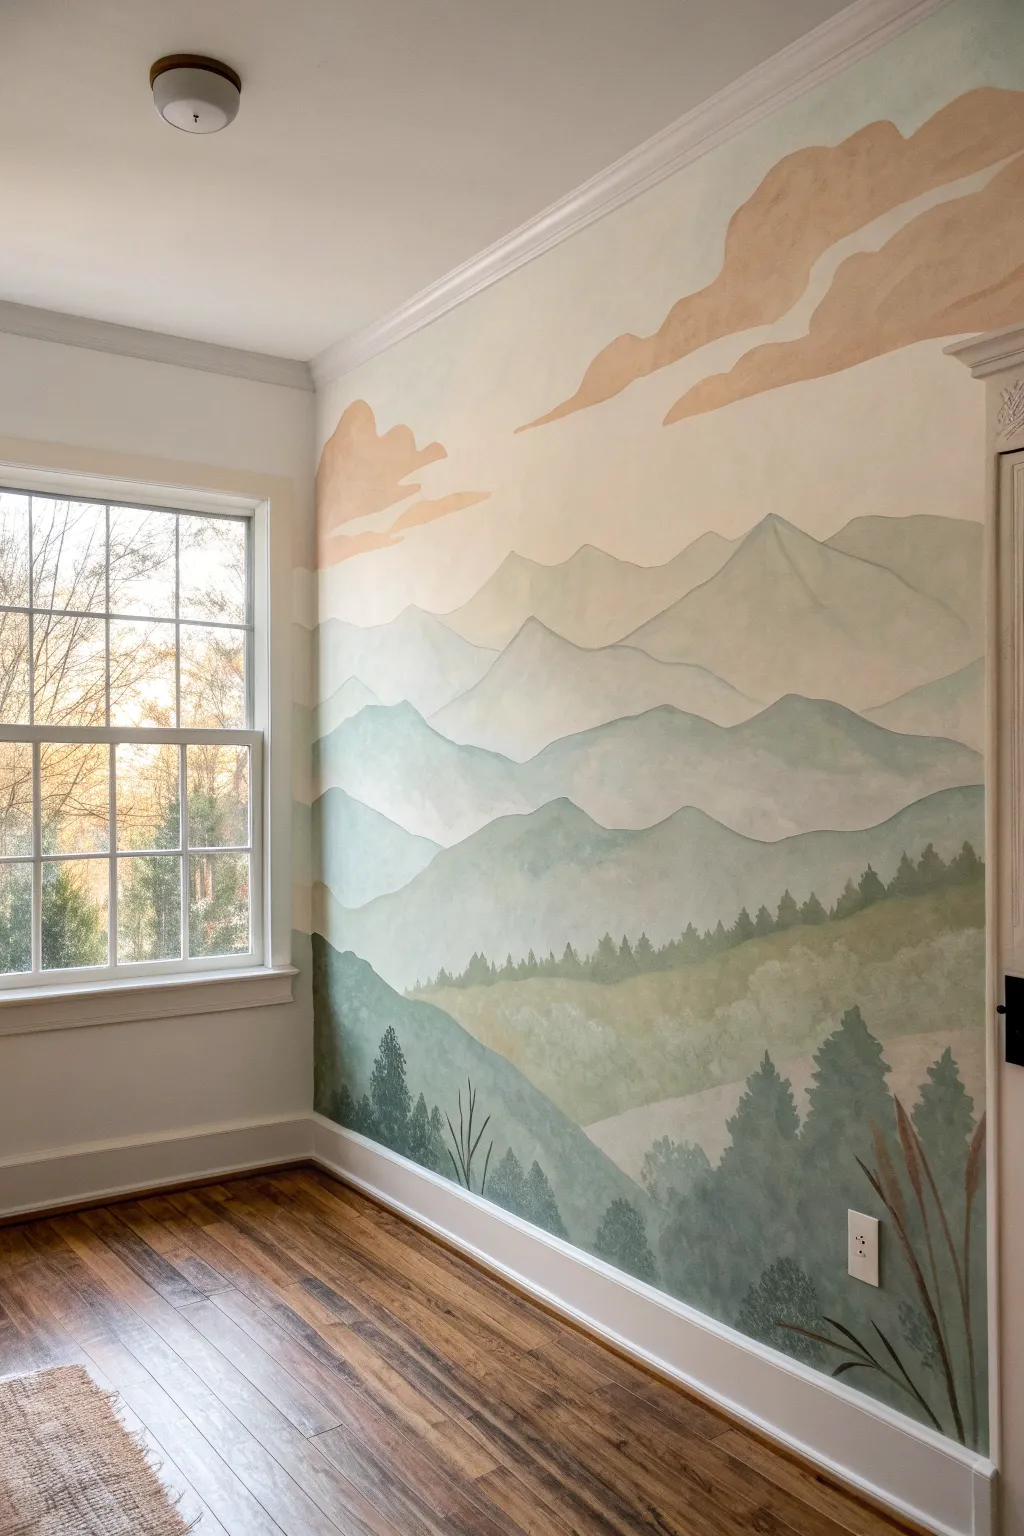
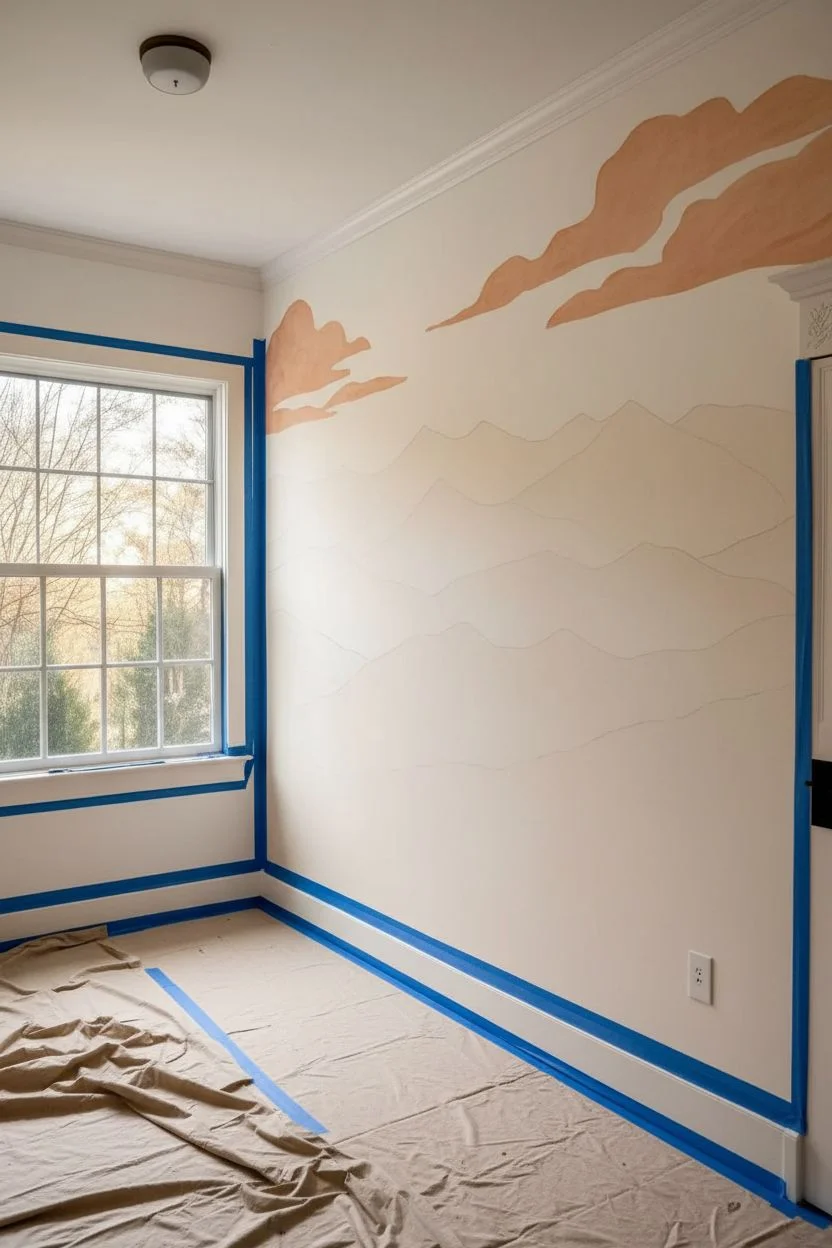
Transform a plain wall into a serene escape with this layered mountain mural, featuring soft, misty peaks and a dreamy pastel sky. The uneven, hand-painted edges and gentle color gradients give it a charming storybook quality perfect for sparking imagination.
Step-by-Step
Materials
- Interior latex paint (white base)
- Sample pots of paint (dark sage, light sage, gray-blue, peach, terracotta)
- Glaze medium (clear)
- Pencil and large eraser
- Assorted synthetic brushes (2-inch sash brush, 1-inch flat, small round detail brush)
- Sea sponge or rag for texture
- Painter’s tape
- Drop cloths
- Ladder or step stool
- Mixing cups or small plastic containers
Step 1: Preparation and Sky Layer
-
Prep the workspace:
Clear the furniture from the wall area and lay down drop cloths to protect those beautiful hardwood floors. Tape off the baseboards, ceiling line, and window trim with painter’s tape to ensure sharp edges. -
Sketch the horizon:
Using a pencil, very lightly sketch the placement of your mountain ranges. Don’t worry about being perfect; just mark out roughly four or five distinct layers, starting from the foreground at the bottom and moving up to the distant peaks. -
Mix the sky base:
Pour some white paint into a mixing cup and add just a tiny drop of peach or warm cream. You want a very pale, atmospheric color for the majority of the upper wall. -
Paint the upper sky:
Roller or brush this pale mix onto the top third of the wall, extending down to where your highest mountain peak will begin. Let this base coat dry completely. -
Add stylized clouds:
Mix a terracotta or muted orange tone with a bit of glaze medium. Using a 2-inch brush, paint sweeping, organic cloud shapes near the ceiling, keeping edges soft and purposefully uneven for that storybook feel.
Step 2: Layering the Mountains
-
Mix the furthest range:
For the most distant mountains (the top layer), mix a very pale gray-blue with plenty of white. It should look like it’s fading into the distance. -
Paint the top peaks:
Outline the top edge of your highest mountain range with a brush, creating jagged but soft peaks. Fill in the area down to the next pencil line. While the paint is wet, dab it gently with a dry rag or sponge to create a mottled, misty texture. -
Create the middle range:
Mix a slightly darker, greener tone for the next layer down. Add a little glaze to keep it translucent. Paint this section below the first range, letting the bottom edge of the previous layer guide you but overlapping slightly if needed. -
Add depth variations:
As you move lower down the wall, darken your paint mixtures. Transition from the misty blues into soft sage greens. This creates atmospheric perspective. -
Texture the foothills:
For the lower middle section, use more varied brushstrokes. Instead of flat color, swirl the brush slightly to mimic rolling hills and dense foliage without painting individual trees yet.
Misty Texture Tip
Mix a clear glaze medium into your paint (approx 1 part paint to 2 parts glaze). This makes the paint translucent like watercolor, allowing underlayers to peek through for a dreamy effect.
Step 3: Foreground and Details
-
Paint the darkest foreground:
Mix your darkest shade of forest green or deep sage for the bottommost layer right above the baseboard. This grounds the mural. -
Creating the tree line:
Along the top ridgeline of your foreground and lower middle layers, use a smaller flat brush to dab vertical strokes. These suggest dense pine forests without needing to paint every branch. -
Add individual pines:
Choose a few spots in the foreground to feature distinct trees. Use a small round brush to paint a vertical line for the trunk, then use quick, downward strokes to fan out the branches in a triangular shape. -
Paint foreground stalks:
In the bottom right or left corners, use a fine liner brush and darkened brown-green paint to create tall, thin grass stalks or wheat-like plants rising up from the bottom edge. -
Soften harsh lines:
Step back and look for any edges that look too ‘cut out.’ Usually, I like to take a slightly damp sea sponge and gently pat any transition lines that feel too sharp to blend them back into the atmosphere. -
Final touches:
Check for any pencil marks still visible and erase them gently. Remove the painter’s tape slowly at a 45-degree angle to reveal your crisp borders.
Level Up: Hidden Friends
Use a tiny detailing brush to paint small silhouettes of birds flying near the peaks or a tiny fox sitting on one of the foreground hills to add a narrative element.
Step back and admire the peaceful depth you have added to the room with simple layers of color
Hot Air Balloons Floating Above the Baseboards
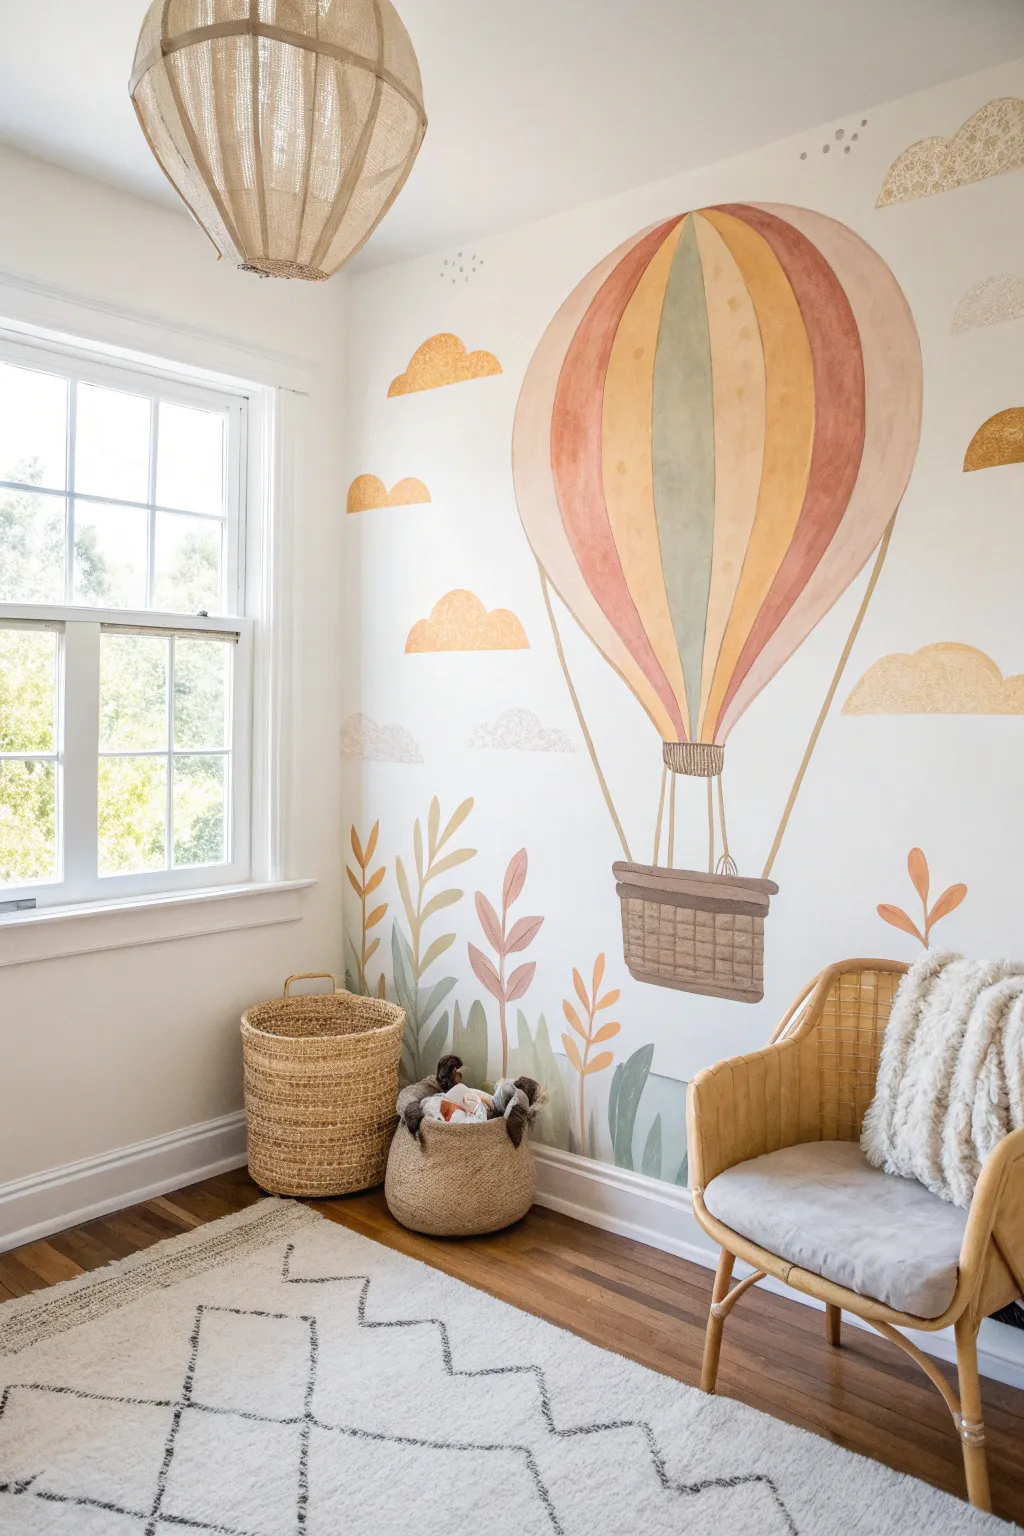
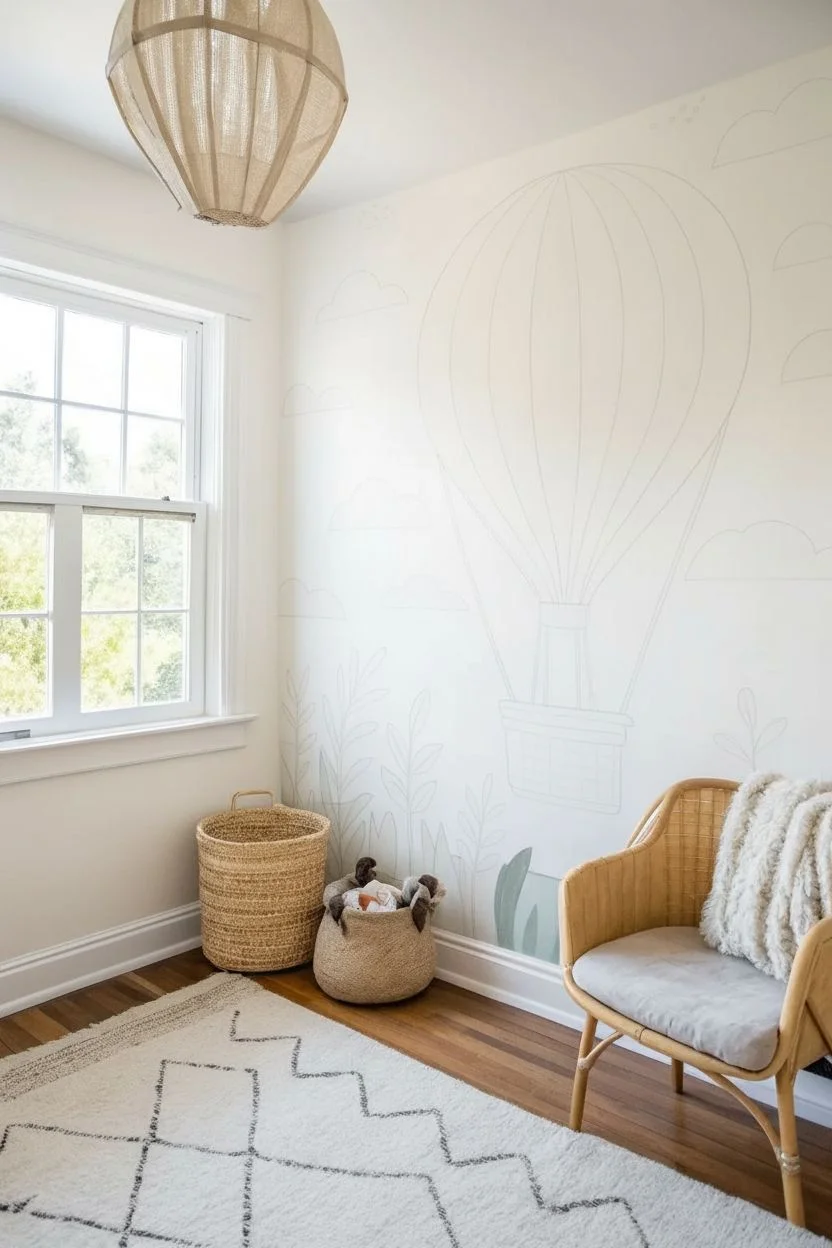
Transform a nursery or playroom wall into a serene sky scene with this large-scale mural featuring soft, earthy tones and watercolor-style textures. The gentle washes of rust, sage, and ochre create a calming atmosphere perfect for imaginative play.
Step-by-Step Tutorial
Materials
- Interior latex wall paint (white eggshell base)
- Acrylic artist paints (rust, ochre/mustard, sage green, blush pink, soft brown)
- Projector or chalk for outlining
- Pencil
- Large round watercolor brushes (sizes 10 and 12)
- Small liner brush (size 2)
- Mixing containers or palette
- Water cups
- Painters tape
- Drop cloth
- Rags or paper towels
- Glazing medium (clear)
Step 1: Preparation and Sketching
-
Prepare the workspace:
Clear the area against your chosen wall and lay down a drop cloth to protect the floor from drips. Ensure your base wall color is a clean, fresh white eggshell finish, which helps the translucent paint layers stand out. -
Project or sketch the design:
If you are confident drawing freehand, lightly sketch the large balloon shape using white chalk or a very light pencil. For precision, use a projector to cast the balloon outline, basket, and ground foliage onto the wall. -
Refine the outline:
Trace the projected lines lightly with a pencil. Focus on the vertical segments of the balloon, the square basket, and the swaying plant shapes at the baseboard level. -
Mix the wash colors:
Creating the watercolor look requires thinning your acrylics. Mix each color (rust, ochre, sage, blush) with water and a clear glazing medium. The consistency should be like heavy cream—translucent but not runny.
Step 2: Painting the Balloon
-
Paint the first balloon segment:
Starting with your rust color, fill in one of the outer vertical stripes of the balloon. work from the top down, letting the paint pool slightly at the bottom edge to mimic a watercolor settle. -
Add the central sage stripe:
Using a clean brush, apply the diluted sage green to the center stripe. I like to keep a wet edge to ensure the color looks fluid, though try not to let it bleed into neighboring drying sections unless you want a blended effect. -
Fill remaining stripes:
Continue filling the balloon segments with alternating ochre, blush, and differing shades of rust. Leave a tiny hairline of white space between colors if you want distinct separation, or strip them close for softness. -
Paint the basket:
Use the soft brown mixture to paint the rectangular basket shape. Apply the paint somewhat unevenly, using horizontal strokes to suggest a wicker texture without needing high detail. -
Connect with ropes:
With a steady hand and your small liner brush, paint thin brown lines connecting the balloon envelope to the basket. These should look taut and delicate. -
Detail the basket texture:
Once the base brown of the basket is dry, use a slightly darker, undiluted brown to paint a grid pattern over it, simulating the weave of the wicker.
Drips Happen
If your watery paint runs, simply blot it instantly with a damp sponge. Don’t wipe, or you’ll smear it. Once dry, you can touch up the area with your white wall paint.
Step 3: Adding Landscape Elements
-
Paint the base foliage:
Using the sage green wash, paint broad, flowing leaf shapes rising from the baseboard. Vary the height and opacity to create depth in your garden bed. -
Add secondary plants:
Switch to your rust and ochre mixtures to add contrasting plant sprigs. These shapes should be simpler—think long stems with oval leaves—layering them slightly behind or in front of the green foliage. -
Create the clouds:
For the clouds, use a very sheer wash of the ochre or a warm grey. Dab the paint on in rounded, fluffy shapes, keeping the edges soft and indistinct. -
Add texture to clouds:
While the cloud paint is still damp, dab it with a dry rag to lift some pigment off. This technique creates a lovely, mottled texture that usually happens naturally on paper. -
Detail the balloon highlights:
If parts of the balloon look too flat, wash a slightly darker version of the base color along the edges of each stripe to create a rounded, 3D volume effect. -
Final touches:
Step back to review the composition. You might want to add a few small dot clusters near the ceiling to represent distant stars or birds using a grey-blue shade.
Fabric Texture Trick
For a textile look on the balloon, press a piece of rough linen or canvas into the wet paint and peel it back. It leaves a subtle woven imprint.
Now stepping back, you can admire how a simple wall has become a gateway to the clouds

PENCIL GUIDE
Understanding Pencil Grades from H to B
From first sketch to finished drawing — learn pencil grades, line control, and shading techniques.
Explore the Full Guide
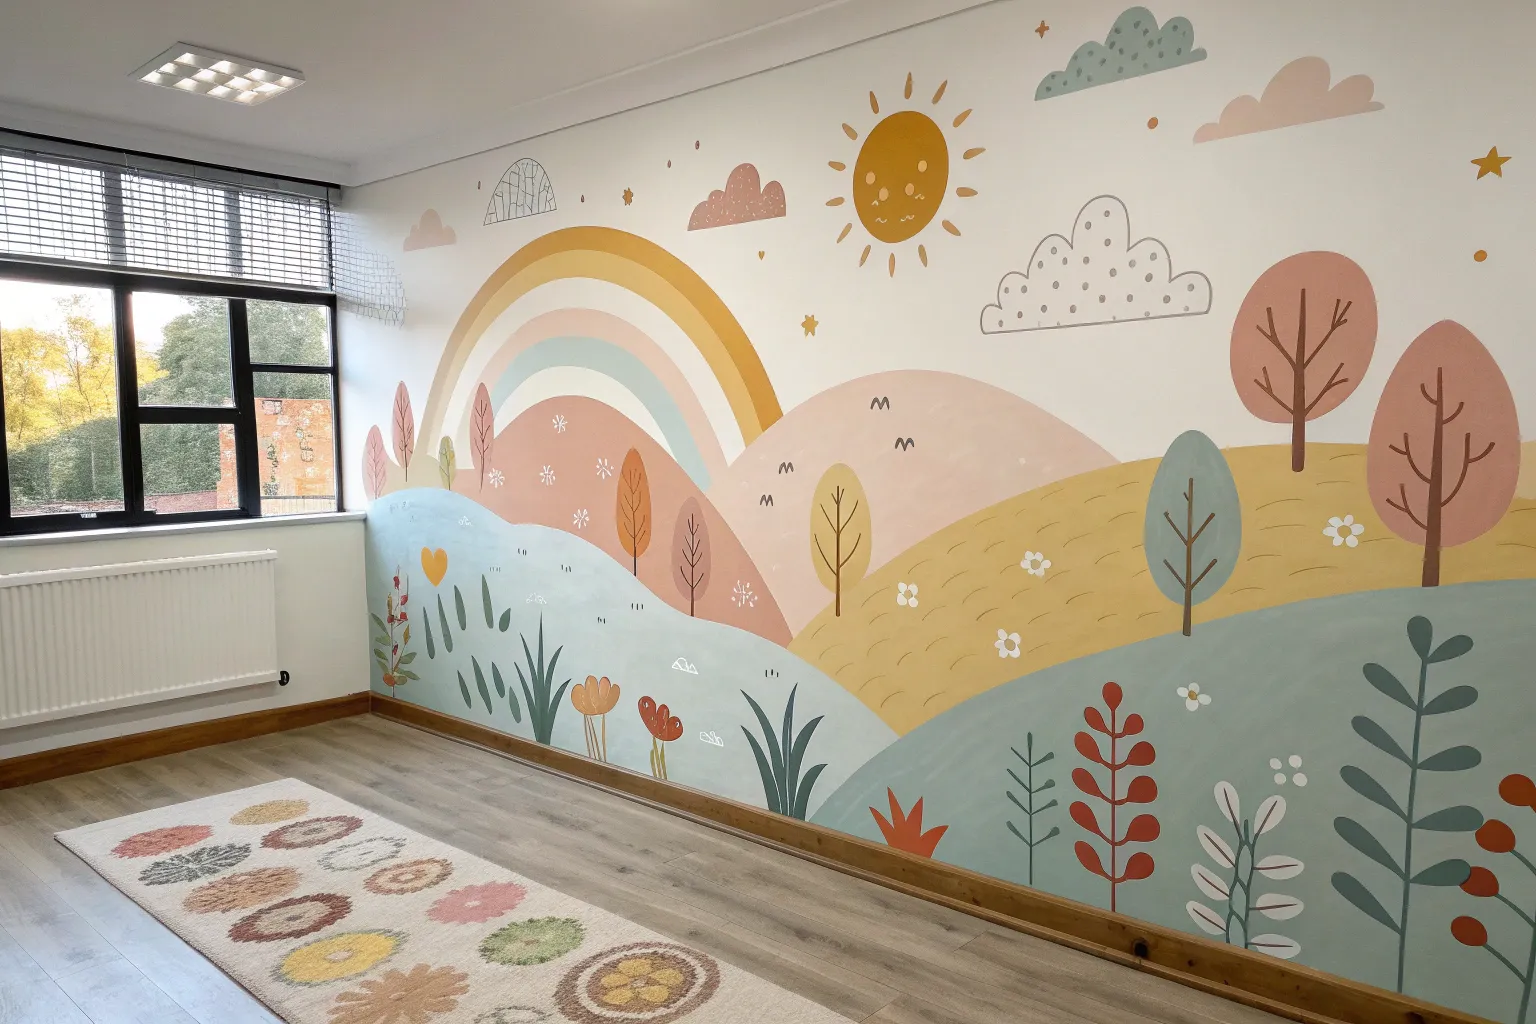
Simple Geometric Color Blocks for a Modern Playroom
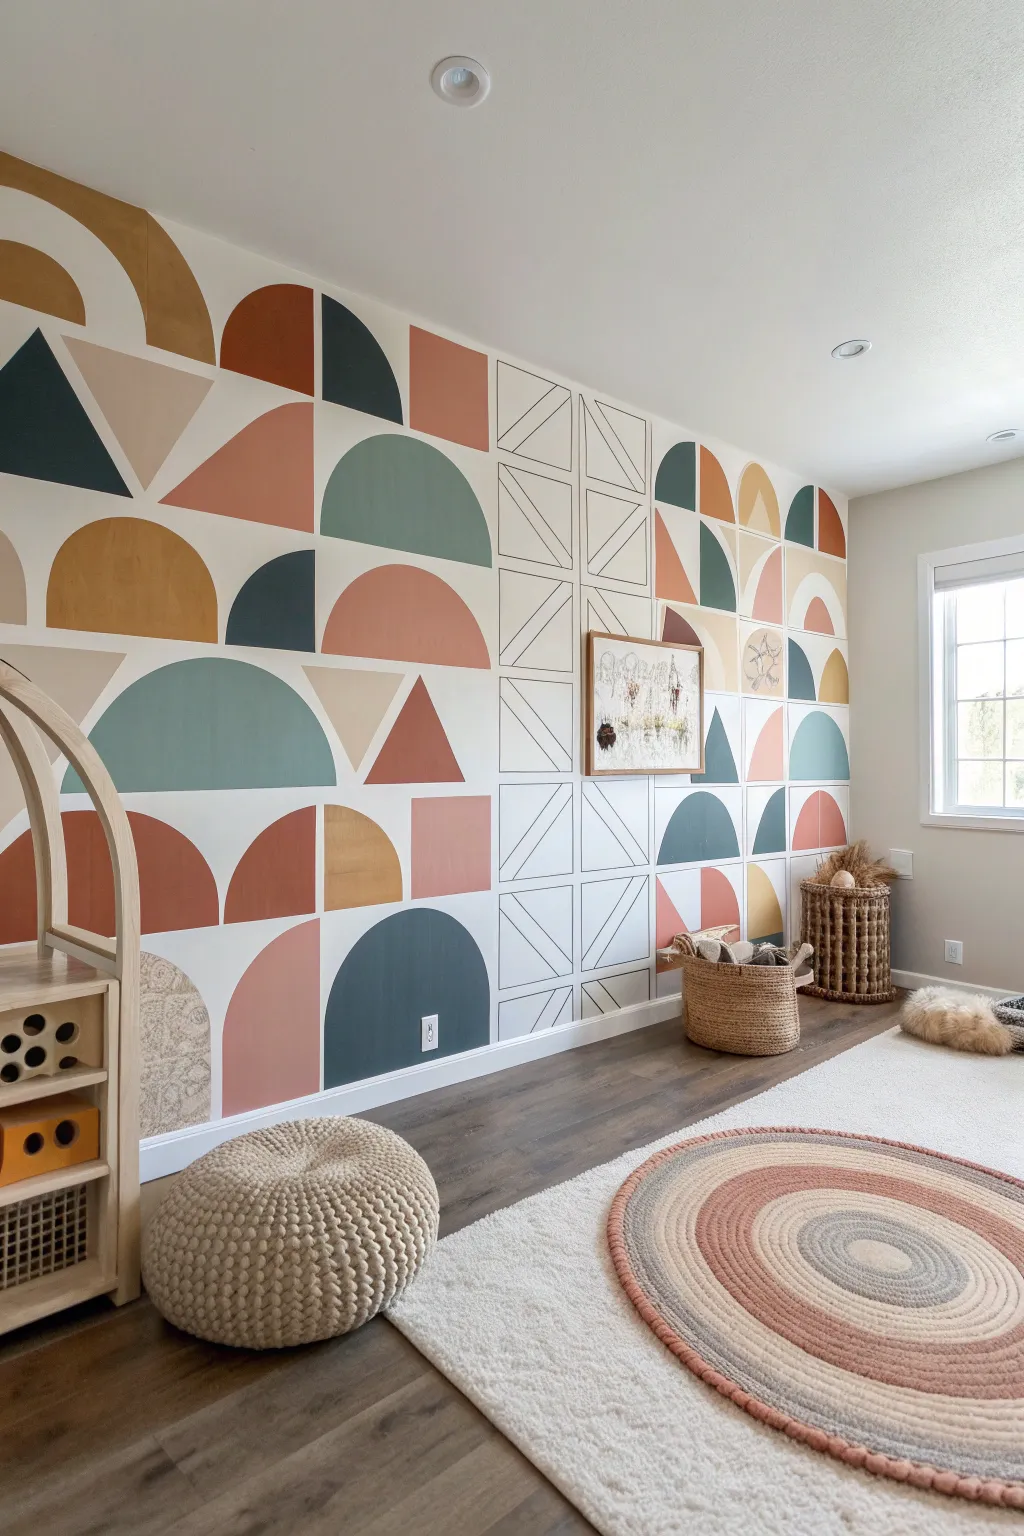
Transform a blank wall into a playful masterpiece with this large-scale geometric mural featuring earthy arches, triangles, and semi-circles. The design balances bold color blocks with intricate line art, creating a modern yet warm focal point perfect for a creative space.
How-To Guide
Materials
- Interior latex paint (Eggshell finish recommended)
- Painter’s tape (multi-surface)
- Laser level or long spirit level
- Measuring tape
- Pencil and eraser
- String and thumb tack (for creating compass)
- Small angled sash brush (1.5 – 2 inch)
- Mini foam rollers and tray
- Paint pens or thin detail brush (black/dark grey)
- Drop cloth
- Ladder or step stool
Step 1: Planning and Grid Layout
-
Prep the surface:
Begin by cleaning the wall thoroughly with a damp cloth to remove dust or grease, and fill any nail holes with spackle. Once dry, sand smooth and apply a coat of primer if you’re painting over a dark color. -
Determine the grid size:
Measure the total width and height of your wall. This design relies on a grid system—likely 2×2 feet or 18×18 inches per square—so divide your wall dimensions to find a square size that fits evenly across the space. -
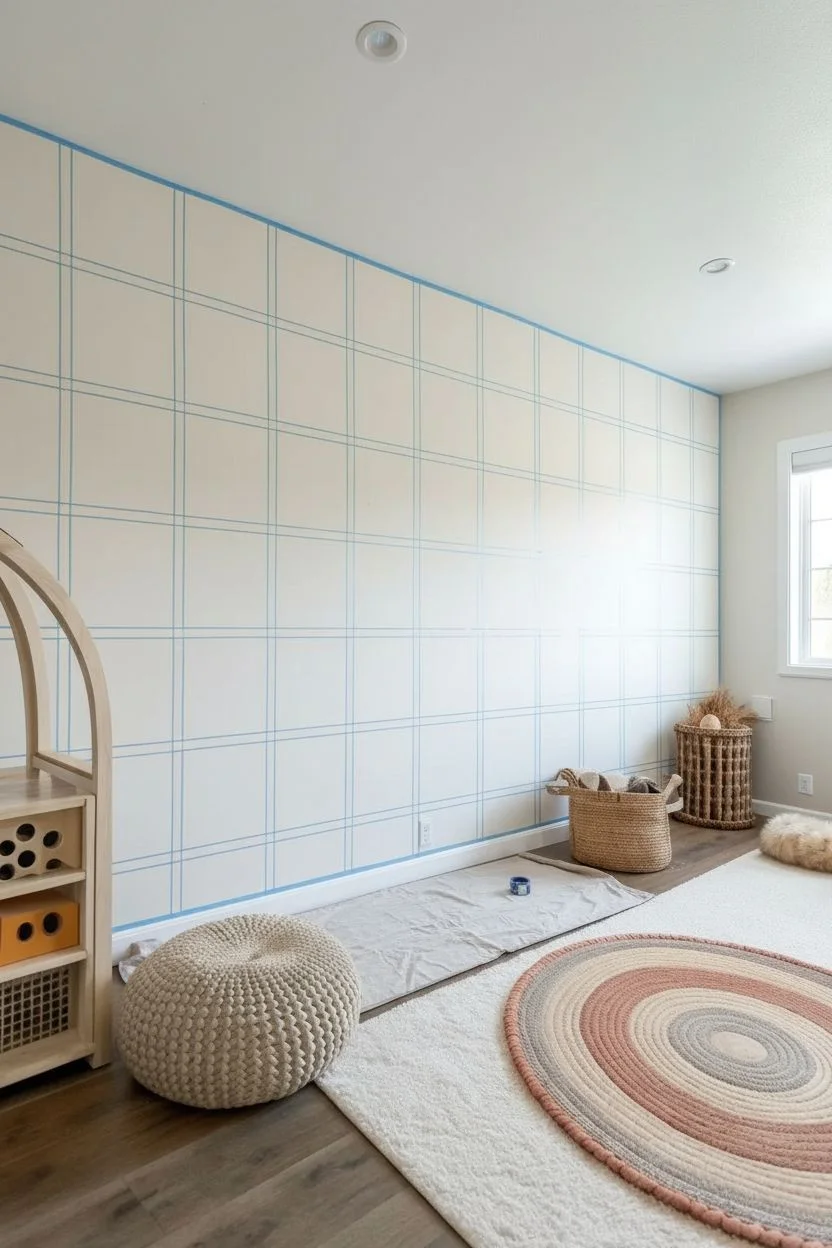
Mark the vertical lines:
Using a laser level or a long spirit level, mark vertical lines across the entire wall at your determined intervals. Lightly draw these lines with a pencil, ensuring they remain perfectly plumb from ceiling to floor. -
Mark the horizontal lines:
Repeat the process horizontally, measuring down from the ceiling to create your grid rows. You should now have a faint checkerboard pattern covering the entire wall. -
Tape the grid (optional):
If you want crisp separation between every single block (like the white lines shown in the image), apply painter’s tape over your pencil lines now. Alternatively, you can paint shapes directly touching each other, but the white gaps add a nice graphic pop.
Bleed-Proof Lines
If you have textured walls, tape alone won’t work. After taping, apply a thin layer of clear matte medium or the base wall color over the tape edge. This fills the texture gaps before you add color.
Step 2: Drafting the Shapes
-
Sketch the geometric forms:
Reference the photo to sketch the shapes into your grid squares. Notice how some squares contain full semi-circles (arches), while others are split diagonally into triangles or quarter-circles. -
Create a string compass:
For perfect arches and circles, tie a piece of string to a pencil. Pin the other end of the string to the center-bottom of a grid square (for an arch) or the corner (for a quarter circle). -
Draw the curves:
Keep the string taut and swing the pencil to draw your curved lines. Double-check that your string length matches exactly half the width of your grid square to ensure the shapes fit perfectly. -
Define the linear column:
Identify the distinct vertical column that features line drawings instead of solid paint (seen in the center-right of the image). Sketch out the ‘X’ and diamond patterns within those specific grid blocks using a straight edge.
Step 3: Painting the Color Blocks
-
Select your palette:
Choose 5-6 earthy tones like terracotta, mustard yellow, sage green, deep teal, and dusty rose. Keep a ‘map’ handy so you know which color goes into which shape. -
Tape individual shapes:
Working in sections, apply painter’s tape along the straight edges of your first set of shapes. For curves, you can either freehand carefully or use flexible masking tape designed for curves. -
Seal the tape edges:
Press the tape down firmly with a credit card or putty knife. I always like to lightly paint over the tape edge with the existing wall color (usually white) first; this seals the tape and prevents the colored paint from bleeding underneath. -
Cut in the edges:
Use your angled sash brush to carefully paint the outlines of your shapes, especially along the curved lines where you can’t easily tape. -
Fill the centers:
Once the edges are cut in, use a mini foam roller to fill the center of the geometric shapes. This provides a smoother finish than brushing the entire area. -
Apply second coats:
Allow the first coat to dry according to the can’s instructions, then apply a second coat for rich, opaque coverage. -
Remove tape while damp:
Carefully peel off the painter’s tape while the final coat is still slightly tacky. Pulling at a 45-degree angle helps ensure a crisp line without peeling up dried paint chips.
Custom Texture
Instead of solid paint, use a sponge to dab paint into one or two shapes per column. This adds subtle texture that mimics the look of the rug or plywood elements in the room.
Step 4: Detailing and Finishing
-
Execute the line art column:
For the column with the line drawings, use a black paint pen or a very fine artist’s brush with dark paint. Use a ruler to trace over your pencil sketches to create the geometric ‘X’ and diamond patterns. -
Touch up imperfections:
Once all the extensive color work is dry, inspect your lines. Use a small artist brush and your base wall color (white) to tidy up any smudges or uneven curves. -
Erase guide lines:
Gently erase any remaining visible pencil marks from your initial grid setup. -
Style the space:
Hang artwork (like the framed piece shown) over the mural to break up the pattern and add dimension.
Step back and admire how these simple shapes come together to create a sophisticated, joyful backdrop for play.
Painted Arches That Frame Shelves and Corners
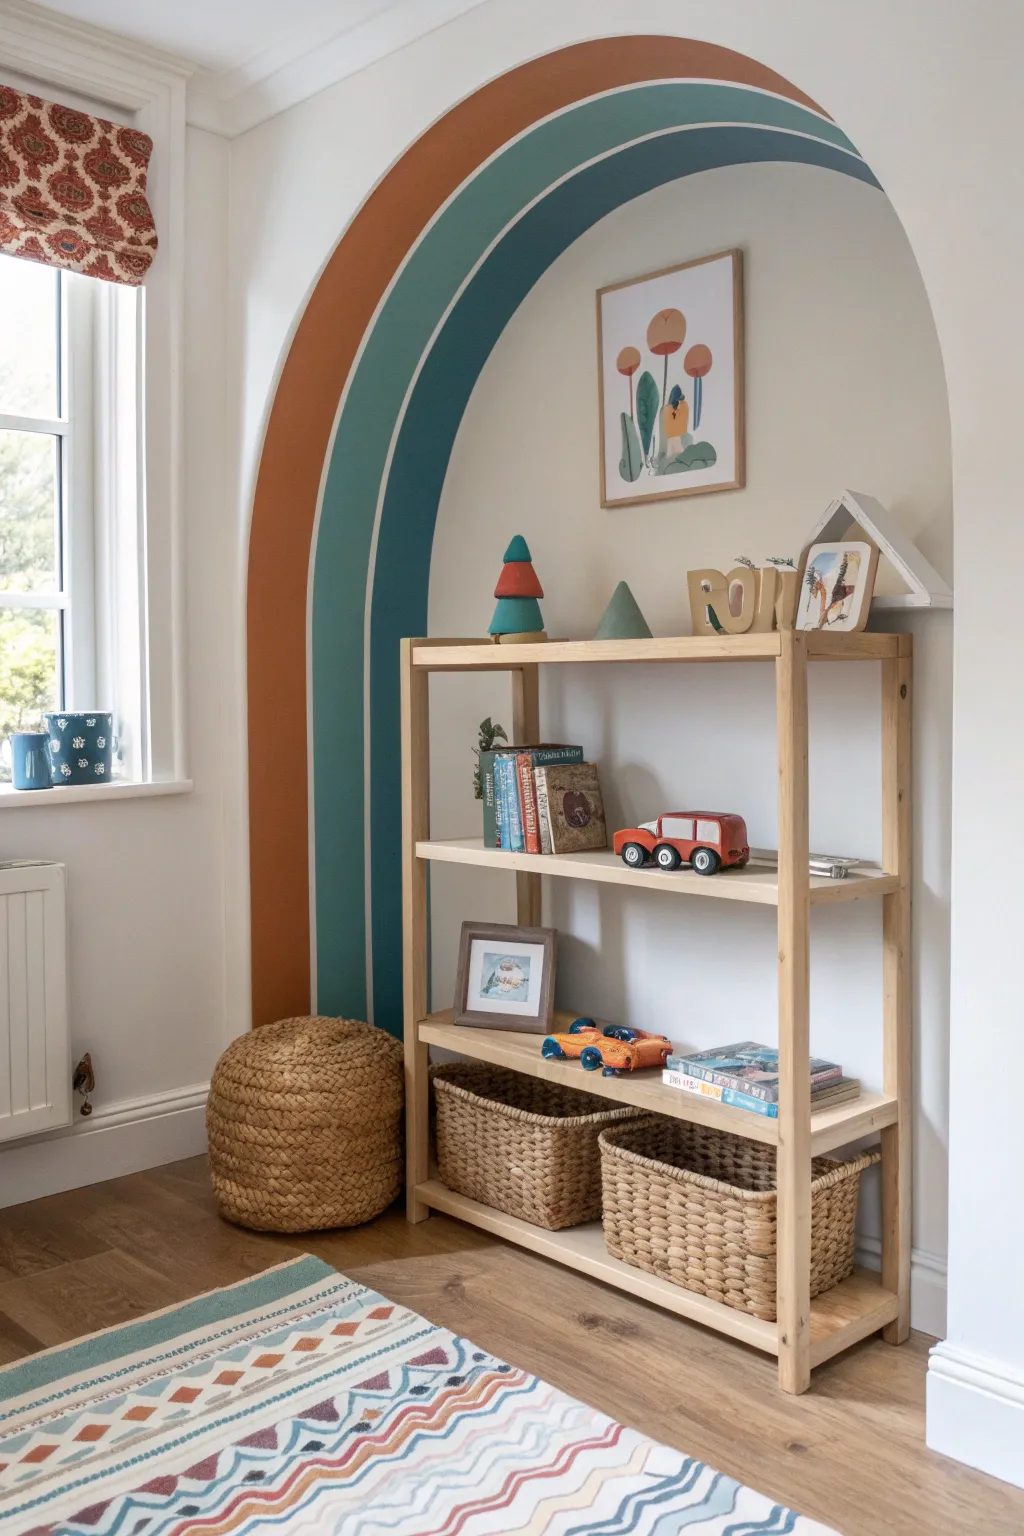
Bring warmth and whimsy to a playroom corner with this oversized, earth-toned rainbow arch. This budget-friendly mural creates a stunning architectural focal point that perfectly frames open shelving.
Detailed Instructions
Materials
- Latex wall paint in three colors (terracotta/burnt orange, teal/dark cyan, creamy off-white)
- Painter’s tape
- Measuring tape
- Pencil
- String
- Push pin or small nail
- Small angled sash brush (1.5 – 2 inch)
- Small foam roller and tray
- Spirit level
- Drop cloth
Step 1: Planning and Mapping
-
Measure the space:
Before putting any paint on the wall, determine the exact placement of your shelves. Center your shelf unit in the desired alcove or wall space and lightly mark its outer edges with a pencil. -
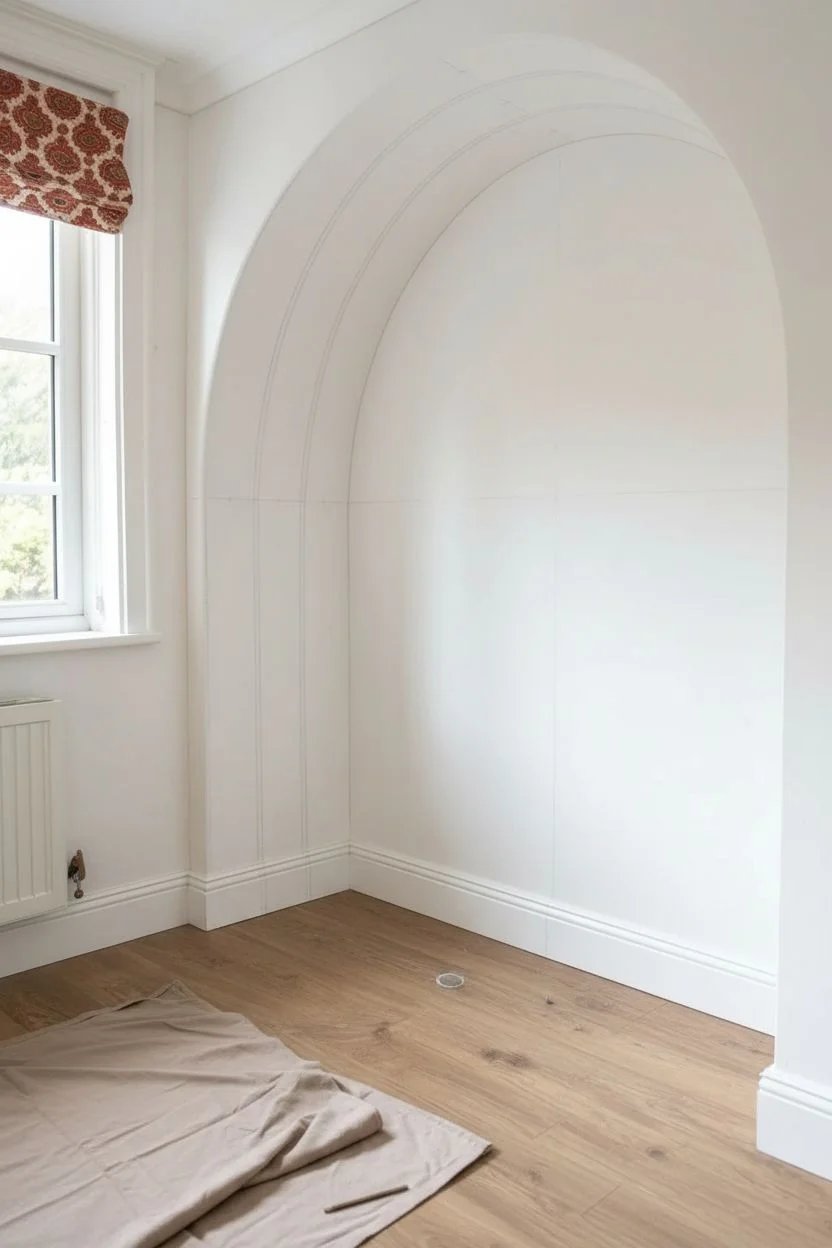
Determine the arch center:
Find the horizontal center point on the wall relative to where your shelves will sit. Mark this center point about 6-12 inches above the top of your shelving unit to ensure the arch clears the furniture nicely. -
Create a compass tool:
Tie a piece of non-stretchy string to a pencil. Measure the string length needed for your outermost arch radius, ensuring it extends wide enough to encompass the shelving unit with breathing room on the sides. -
Draw the outer arc:
Secure the free end of the string to your center mark using a push pin. Keeping the string taut, lightly draw the large semi-circle arch on the wall. -
Mark vertical lines:
Use a spirit level and a straight edge to extend lines straight down from the ends of your semi-circle all the way to the floor or baseboard. This creates the legs of your arch. -
Draw the inner bands:
Shorten your string by the desired width of your first color band (approx 4-6 inches) and draw the second arc. Repeat this process one more time to create three distinct sections: the outer band, the middle band, and the inner arch area. -
Extend inner vertical lines:
Use the level again to draw the straight vertical lines down from the ends of your two inner arcs, ensuring they run parallel to the outer lines.
Clean Curves Secret
If you have a shaky hand, don’t use painter’s tape on curves; it rarely lays flat. Instead, act confident and maintain speed with a high-quality angled sash brush for naturally smoother lines.
Step 2: Painting the Bands
-
Prep the area:
Lay down a drop cloth to protect your flooring and tape off the baseboards where the arch legs will meet the floor. -
Edge the outer terracotta band:
Start with the burnt orange/terracotta color. Use your angled sash brush to carefully cut in along the outer pencil line and the boundary line of the middle band. I find taking a deep breath and exhaling while drawing the brush helps keep my hand steady. -
Fill the outer band:
Once the edges are cut in, use a small foam roller to fill in the rest of the terracotta band for a smooth, consistent finish. -
Edge the middle teal band:
Switch to your teal or dark cyan paint. Carefully cut in along the boundary of the terracotta band and the line for the inner arch area using a clean angled brush. -
Fill the middle band:
Roll the teal paint onto the middle section, being careful not to push the roller too hard near the edges to avoid slight splatters on the damp terracotta paint. -
Paint the inner arch:
Finally, outline the innermost curve with your angled brush using the creamy off-white color (or whatever color matches your base wall if you prefer a negative space look). Fill the center entirely if using a contrast color. -
Apply second coats:
Allow the first coat to dry for at least 2-4 hours. Apply a second coat to all bands to ensure the colors are rich and opaque, especially with that deep teal.
Add Dimension
For a subtle level-up, mix a small amount of glazing medium into your teal paint for the final coat. It creates a slight depth and richness that looks beautiful in natural light.
Step 3: Finishing Touches
-
Touch up lines:
Once fully dry, inspect the borders between the colors. Use a small artist’s brush to tidy up any wavering lines or gaps for a crisp, professional look. -
Erase pencil marks:
Check for any visible pencil lines at the very edges of the paint and gently erase them with a clean gum eraser. -
Style the shelves:
Move your shelving unit back into place, centering it perfectly under the arch. Fill the shelves with books and toys to complete the scene.
Now you have a dynamic, colorful corner that transforms simple storage into a true design feature.


Big Polka Dots in a Loose, Hand-Painted Style
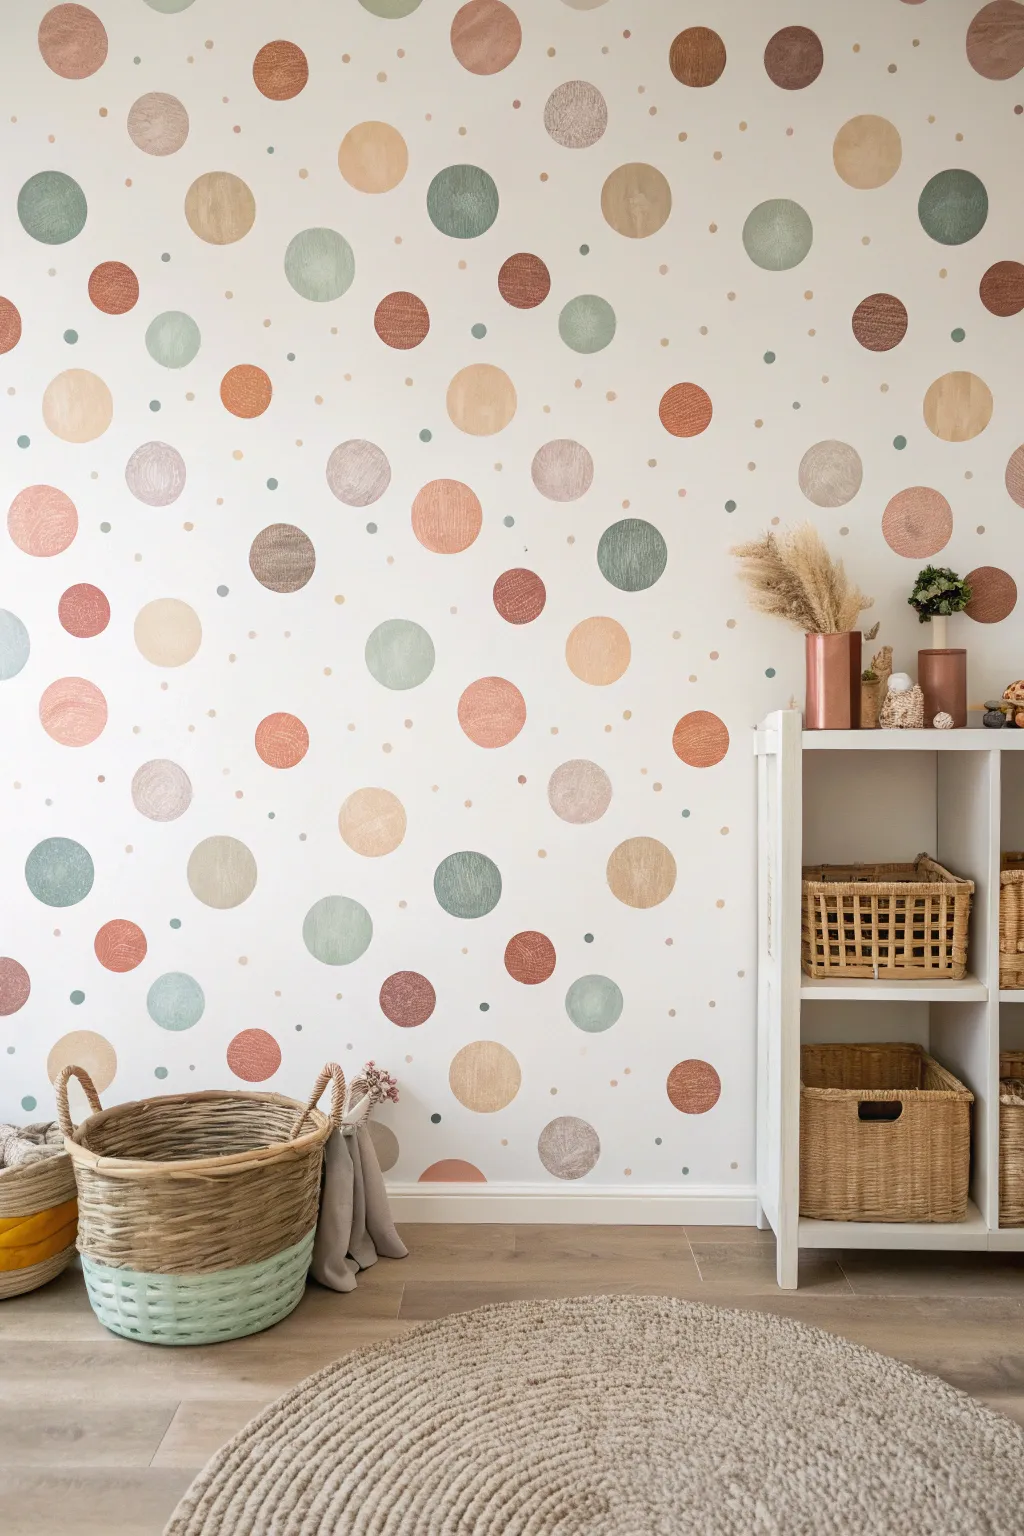
Transform a plain wall into a whimsical focal point with these charming, intentionally imperfect polka dots. The muted earth tones and loose, hand-painted edges give the room a soft, organic feel that is perfect for a cozy nursery or playroom.
Step-by-Step Tutorial
Materials
- Latex interior wall paint (Base color: Off-white/Cream)
- Acrylic craft paints or sample pots (Terracotta, Sage Green, Beige, Muted Pink, Warm Brown)
- Round foam pouncers (varying sizes: 2-inch, 3-inch, 4-inch)
- Medium round bristle brush (Size 10 or 12)
- Small round detail brush
- Painter’s tape
- Drop cloth
- Paper plates (for palettes)
- Pencil (optional)
- Measuring tape (optional)
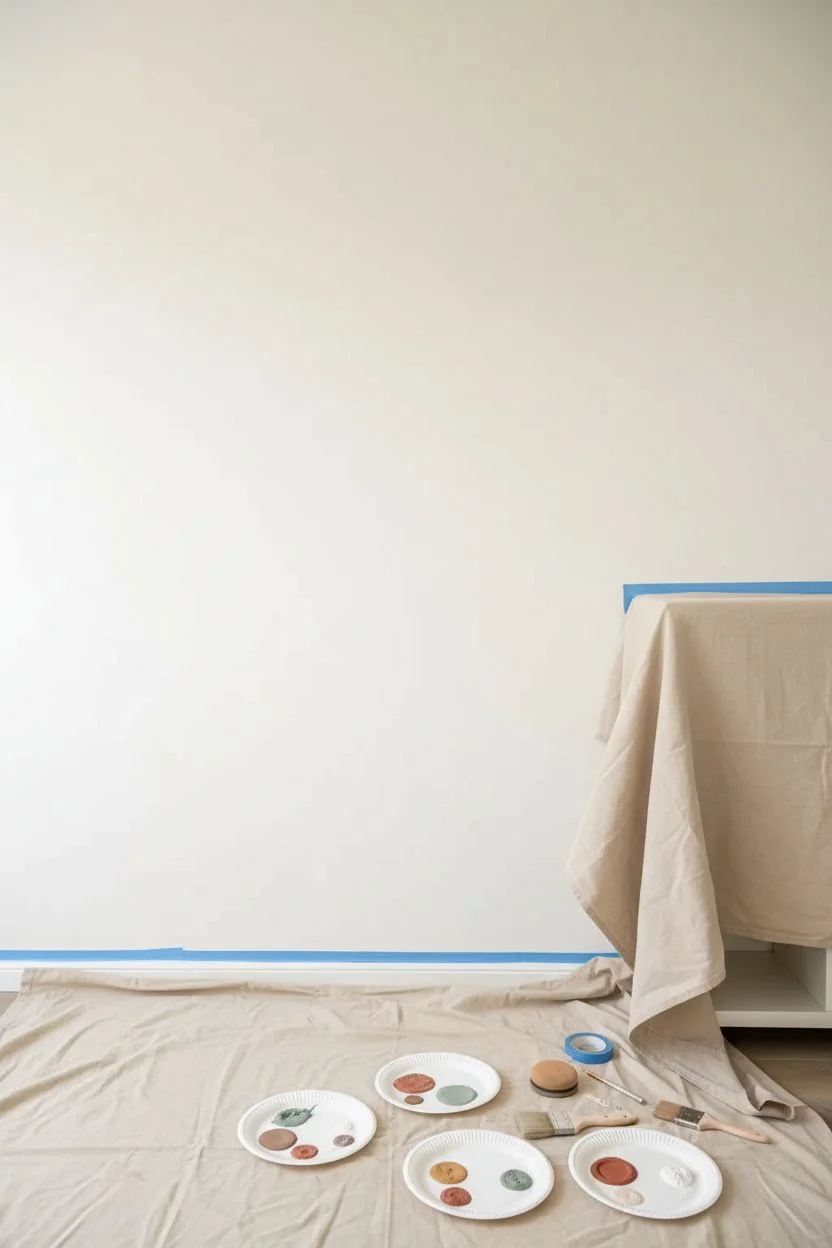
Step 1: Preparation & Planning
-
Prepare the workspace:
Clear the area against the wall you intend to paint. Lay down a drop cloth to protect your flooring from any accidental drips or spills, and tape off the baseboards and ceiling line with painter’s tape for crisp edges. -
Base coat application:
If your wall isn’t already the desired background shade, apply a coat of warm off-white or cream latex paint. Let this base coat dry completely (refer to the manufacturer’s drying times) before starting the dot work. -
Mix your palette:
Pour small amounts of your muted accent colors onto paper plates. For this look, stick to earthy tones like sage, terracotta, sandy beige, and soft pink. Adding a tiny drop of white to some colors can help vary the opacity and tone.
Uneven Edges?
Don’t panic if your circles look wobbly! That is exact look you want. If a circle looks too misshapen, just widen it slightly with a brush. Perfection is the enemy of this style.
Step 2: Painting the Large Dots
-
Load the foam pouncers:
Select your largest foam pouncer first. Dip it into one of your paint colors, ensuring the foam is evenly coated but not dripping. Tap off excess paint on a clean part of the plate to prevent globs. -
Stamp the main dots:
Press the pouncer firmly against the wall and give it a slight twist to release the paint. Don’t worry about perfect coverage; the slightly textured, semi-sheer look is part of the charm. -
Create a random distribution:
Space these large dots randomly across the wall. avoid creating grid lines. Step back frequently to ensure the spacing feels organic and balanced, leaving plenty of negative space for smaller dots. -
Refine edges manually:
One of the key features of this mural is the ‘hand-painted’ look. Take your medium round brush and go over the stamped circles. Swirl the paint to add texture and slightly soften the perfect circular edge created by the foam. -
Repeat with accent colors:
Clean your pouncer or switch to a new one, then move on to your next color. Repeat the stamping and swirling process, filling in gaps while trying not to cluster the same colors too close together.
Pro Tip: Transparency
Mix a tiny amount of glazing medium or water into your acrylic paints. This makes the paint slightly translucent, allowing the brush strokes and wall texture to show through beautifully.
Step 3: Adding Detail & Texture
-
Vary the sizes:
Switch to smaller foam pouncers (2-inch and 3-inch) to add variety. Place these medium-sized dots in the larger open spaces between your big circles. -
Simulate brushstrokes:
For some of the dots, I like to use the bristle brush entirely instead of the stamp. Paint a few circles freehand. These will have more visible brushstrokes and transparency variation, adding to the artistic, watercolor effect. -
Paint the ‘micro’ dots:
Dip the handle end of a small paintbrush or a very small round brush into your paint. Use this to create tiny speckles and dots scattered throughout the design. -
Group the tiny dots:
Place these smallest dots strategically—sometimes clustering two or three near a large circle, and other times letting them float independently in the white space. -
Check color balance:
Step back to the other side of the room. Look for any areas that feel too heavy with one color or too empty. Add a few more medium or small dots to balance the composition.
Step 4: Finishing Touches
-
Touch up texture:
Inspect the larger dots. If any look too solid or ‘sticker-like,’ take a slightly damp brush with a tiny bit of paint and dry-brush over them to add that scratchy, hand-painted texture seen in the photo. -
Correct spills:
If you dripped any paint, use a small brush with your wall’s base color to carefully paint over the mistake once it is dry. -
Remove tape:
Once all paint is dry to the touch, slowly peel away your painter’s tape at a 45-degree angle to reveal your clean edges.
Now you have a serene, playful backdrop that adds personality without overwhelming the space
Playroom Chalkboard Mural With a Painted Frame
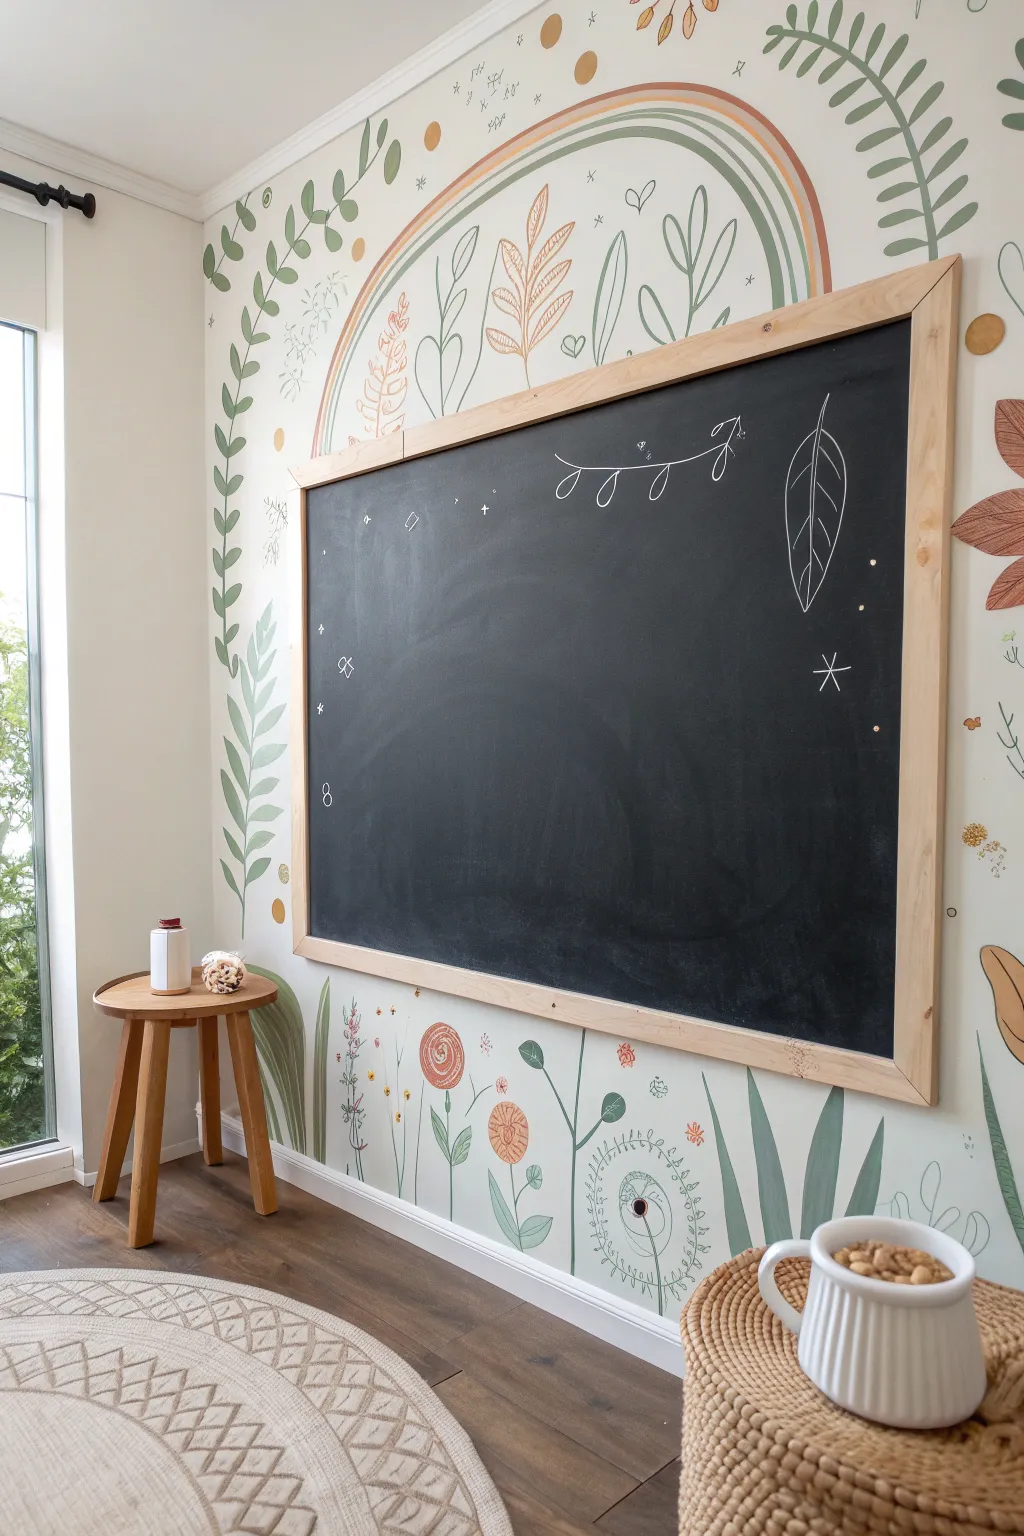
Transform a plain playroom wall into an interactive art station surrounded by a whimsical, nature-inspired mural. This project combines a functional DIY chalkboard with hand-painted botanical elements in soft earthy tones, perfect for sparking creativity.
Step-by-Step
Materials
- Large plywood sheet or MDF board (approx. 4′ x 6′)
- Chalkboard paint (black)
- Pine molding strips or 1×2 lumber (for framing)
- Wood glue and finish nails
- Latex wall paint (white or cream base)
- Acrylic craft paints (sage green, terracotta, mustard yellow, beige)
- Assorted paintbrushes (medium flat brush, small round detail brush)
- Pencil and eraser
- Painter’s tape
- Drop cloth
- Foam roller and tray
- Sandpaper (220 grit)
- Level and measuring tape
- Wall anchors and screws
Step 1: Prepping the Chalkboard
-
Sand the surface:
Begin by sanding your plywood sheet or MDF board lightly with 220-grit sandpaper to remove any rough spots. Wipe away all dust with a damp cloth or tack cloth to ensure a completely smooth base. -
Apply chalkboard paint:
Using a foam roller, apply a thin, even coat of black chalkboard paint to the board. Let it dry according to the manufacturer’s instructions, usually 1-2 hours. -
Layer up for durability:
Lightly sand the first coat once dry, wipe clean, and apply a second coat. I find that three coats creates the most durable writing surface for kids. Let this cure for at least 24 hours. -
Prime the surface:
Once fully cured, condition the board by rubbing the side of a piece of chalk over the entire surface, then wiping it clean with a dry cloth. This prevents ‘ghosting’ from the first few drawings.
Clean Lines Pro Tip
For the rainbow arch, tie a string to a pencil and tape the other end to the wall center point. Use it as a compass to guide your brush for smoother curves.
Step 2: Painting the Mural Base
-
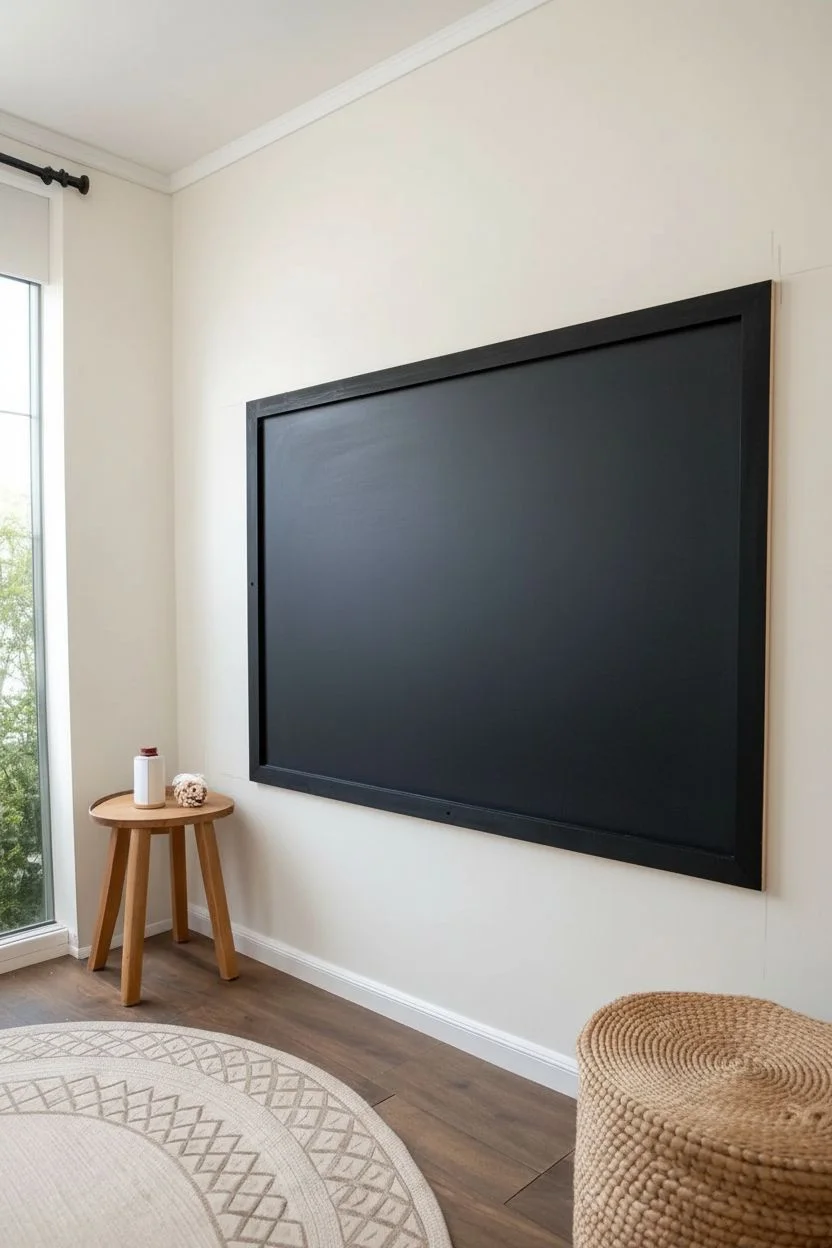
Plan the placement:
Determine where your chalkboard will hang on the wall. Lightly mark the corners with a pencil so you know where the mural art should frame the board. -
Sketch the rainbow arch:
Above the top pencil marks, lightly sketch a large, imperfect rainbow arch. It doesn’t need to be mathematically perfect; a hand-drawn look adds charm. Extend the lines out comfortably wide. -
Outline botanical elements:
Sketch tall leaves and grasses rising from the baseboard area up towards the bottom of where the board will sit. Add trailing vines cascading down the sides of your marked area. -
Paint the rainbow stripes:
Using a medium flat brush, paint the rainbow arches. Use terracotta for the outer ring, followed by sage green, cream, and mustard yellow. Let the strokes be organic rather than rigid. -
Add the greenery:
Switch to your sage green paint and fill in the large fern-like leaves on the sides. Use a confident, sweeping motion to mimic the natural curve of a fern frond.
Step 3: Adding Details & Frame
-
Paint floral details:
Using a smaller detail brush, add the whimsical flowers at the bottom. Paint simple circular blooms in terracotta and mustard, adding thin stems in sage green connecting them to the ‘ground’. -
Create fine line art:
Mix a small amount of water into your dark grey or black acrylic paint to create an ink-like consistency. Use a fine liner brush to paint delicate outlines over some leaves and add doodle-style flowers for contrast. -
Add decorative dots:
Dip the back end of a paintbrush into mustard or gold paint and stamp small dots around the rainbow and leaves to fill empty space with texture. -
Build the frame:
Cut your pine molding strips to fit the exact dimensions of your chalkboard panel. Miter the corners at 45 degrees for a clean join or use simple butt joints for a rustic look. -
Attach the frame:
Secure the wood strips to the edges of the chalkboard using wood glue and finish nails. I like to leave the wood raw for a scandi vibe, but you can seal it with a clear matte varnish. -
Mount the board:
With a helper, lift the framed chalkboard and screw it directly into wall studs or heavyweight anchors, aligning it perfectly within the negative space you left in the mural. -
Final touches:
Use white chalk to draw a few starter doodles—like a vine or stars—on the board to integrate it visually with the painted mural surrounding it.
Paint Blotches?
If you drip paint on the wall, wait for it to fully dry before trying to fix it. Wet paint smears; dry paint can be easily sanded off or painted over with the wall color.
Step back and admire a playful corner that invites imagination and blends seamlessly with your decor.
A Painted Road Map for Cars and Imagination Play
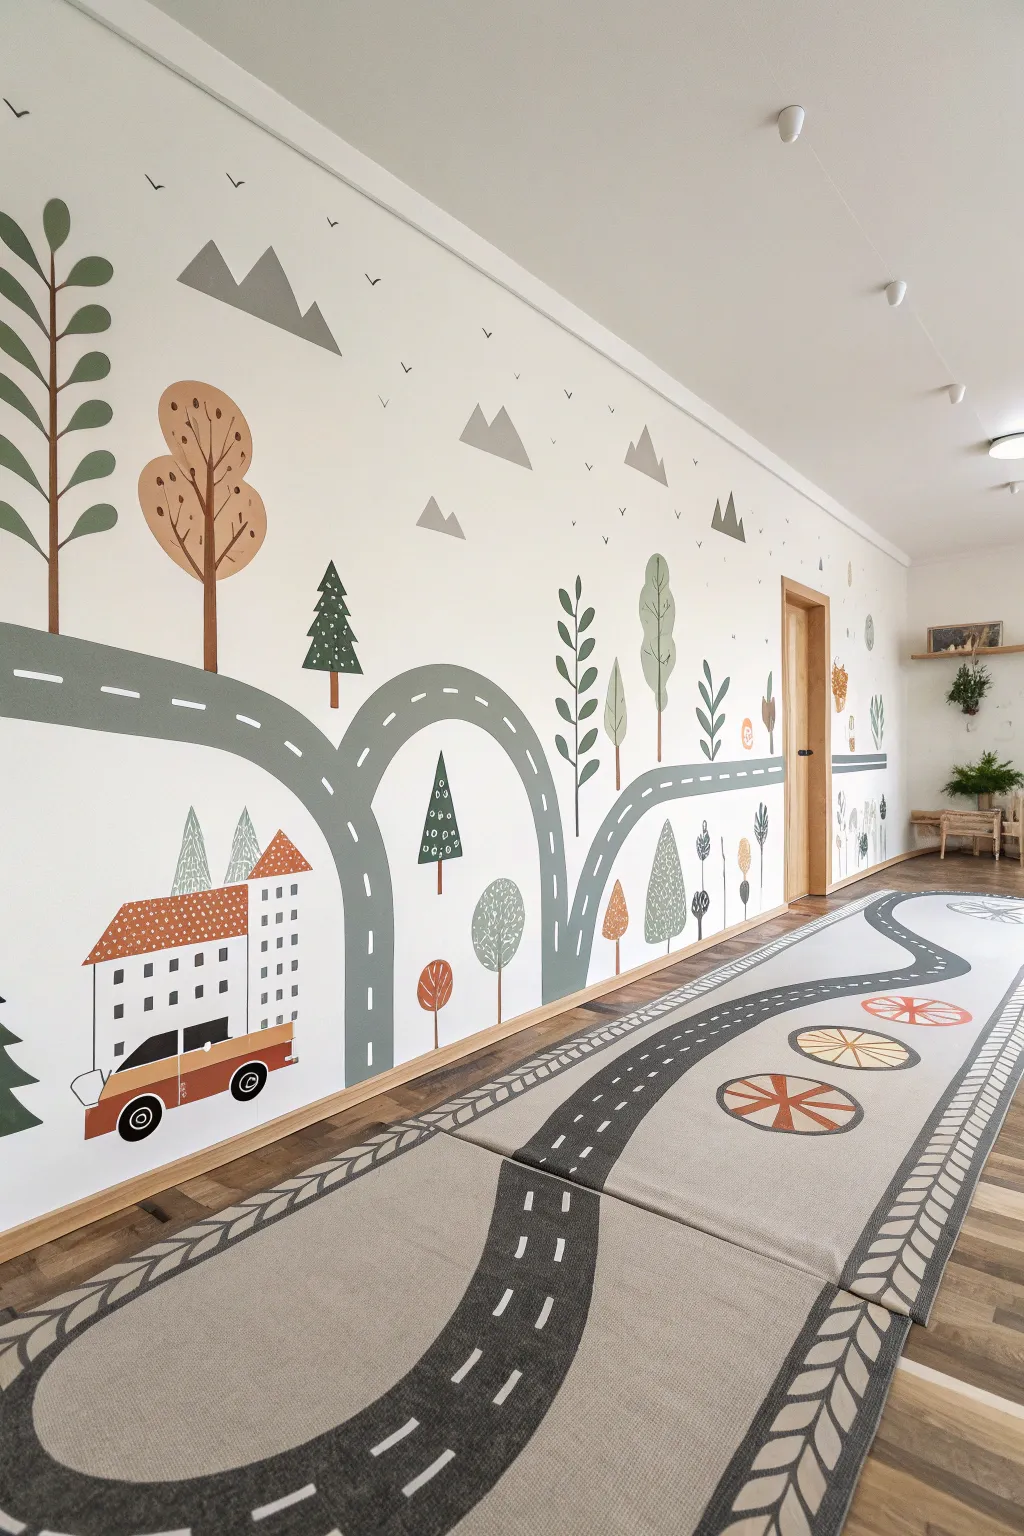
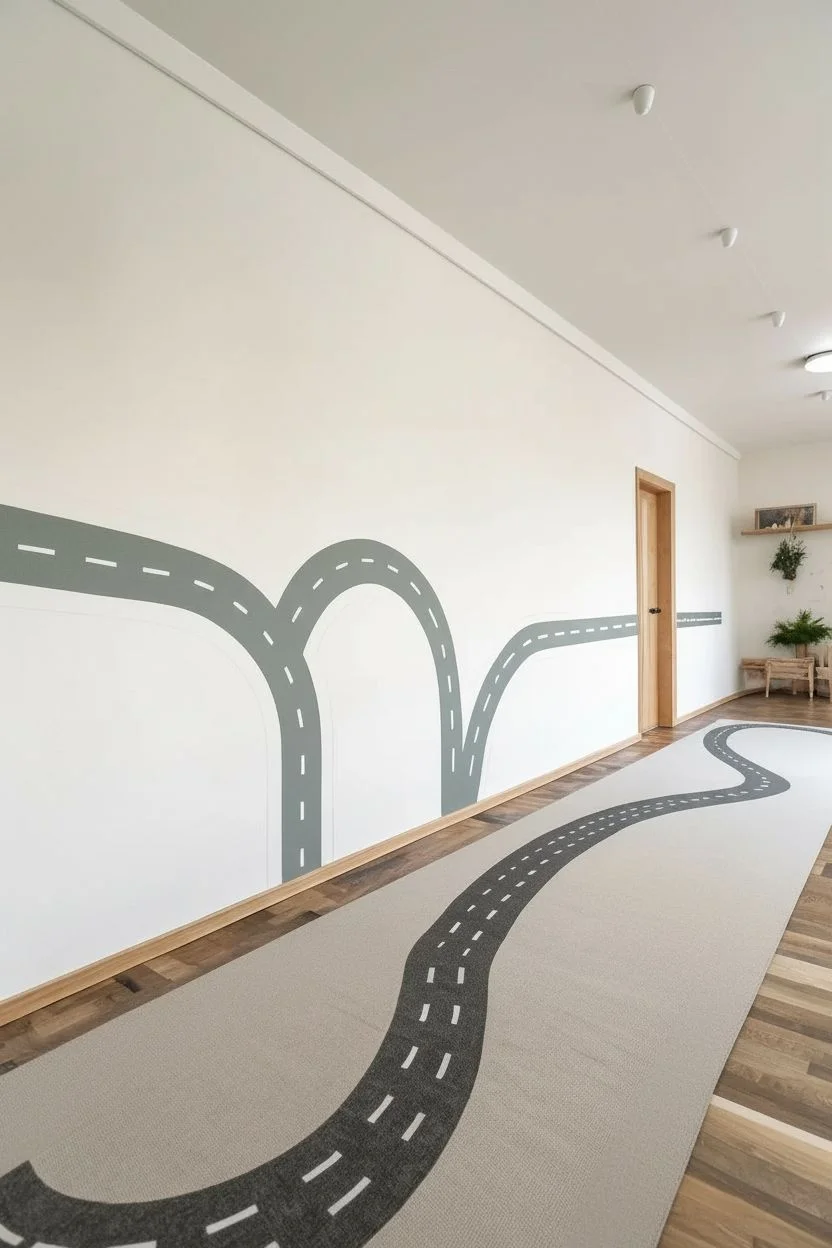
Transform a blank wall into an imaginative landscape with this Scandinavian-inspired road map mural. Featuring soft earth tones and playful illustrations, this large-scale art project creates a perfect backdrop for toy cars and creative storytelling.
How-To Guide
Materials
- Interior latex paint (white base)
- Sample pots of paint (charcoal grey, burnt orange, sage green, olive green, warm beige, soft grey)
- Painter’s tape (various widths, including 1-inch and 2-inch)
- Pencil and eraser
- Level or laser level
- Assorted paintbrushes (2-inch sash brush, 1-inch flat brush, fine liner brush)
- Small foam rollers and tray
- Drop cloth
- Ladder or stepstool
Step 1: Preparation and Road Layout
-
Prepare the surface:
Begin by cleaning your wall surface with a mild soap and water mixture to remove any dust or fingerprints. If your base wall color isn’t already a fresh, bright white, apply a coat of white interior latex paint and let it dry completely. -
Sketch the path:
Using a pencil, lightly sketch the flowing path of the road across the length of the wall. Create large, gentle curves and humps rather than straight lines to give the mural movement. You want the road to undulate like rolling hills. -
Define road width:
Once you are happy with the single line flow, draw a parallel line about 4 to 5 inches underneath it to define the road’s width. Keep the spacing consistent as you navigate the curves. -
Paint the road base:
Using a small foam roller and charcoal grey paint, carefully fill in the space between your pencil lines. You might need two coats for solid coverage. Don’t worry about the center dashes yet.
Paint Bleeding?
If paint bleeds under tape or sketches, wait for it to dry completely. Then, use a small angled brush and your white wall base paint to carefully ‘erase’ and cut in the line again.
Step 2: Landscaping with Trees and Mountains
-
Sketch background elements:
While the road dries, lightly pencil in your larger landscape features. Place triangular mountains near the top third of the wall and position larger trees along the road’s curves to balance the composition. -
Paint the mountains:
Mix a very soft grey paint and fill in the mountain triangles. I like to make some mountains slightly darker than others to create a sense of depth. Use a flat brush to keep the edges sharp. -
Create the large trees:
For the tall, leafy trees, paint long, thin trunks using brown or beige paint. Add large, simple leaf shapes—ovals or teardrops—clustered along the trunk in sage and olive greens. -
Add evergreen trees:
Scattered along the ‘hills’ of your road, paint simple evergreen shapes. Draw a vertical line for the trunk, then stack graduated triangles or zigzag strokes in dark green on top. -
Detail the round trees:
Paint circles on top of thin trunks for the stylized round trees. Once the base color dries, use a fine liner brush and white or darker contrasting paint to add simple botanical patterns like veins or dots inside the foliage.
Step 3: Houses, Vehicles, and Final Details
-
Draft the buildings:
Choose a focal point, perhaps near a dip in the road, to add a cluster of houses. Use a ruler to lightly pencil in rectangular building shapes with triangular roofs. -
Paint the architecture:
Fill in the building bodies with white (or leave the wall color showing) and paint the roofs in burnt orange or terracotta. Allow this to dry fully before adding details. -
Add windows and doors:
Using a small flat brush and dark grey paint, carefully stamp small squares for windows. Keep them aligned in rows to maintain a tidy graphic look. -
Illustrate the car:
Sketch a simple retro car shape driving on the road. Paint the body in a warm tone like beige or orange, and add black circles for wheels. Use your liner brush to delineate the bumper and windows. -
Paint road markings:
Now that the charcoal road is fully dry, take a flat brush and white paint to add the center line. Paint short, evenly spaced dashes following the curve of the road. -
Add tiny birds:
Using your finest brush and black paint, add tiny ‘V’ shapes in the upper sky area to represent birds flying in the distance. -
Final touch-ups:
Step back and inspect your work. Use a small artist’s brush and the wall base color to clean up any smudged edges on the trees or road for a crisp finish.
Pro Tip: Consistent Dashes
Cut a small rectangular sponge to size (approx. 1×3 inches). Dip it in white paint and stamp it along the road center. This ensures every road marking is identical in size and width.
Now you have a whimsical, interactive landscape ready for hours of creative play
Interactive Mural With “Climbable” Painted Holds and Peaks
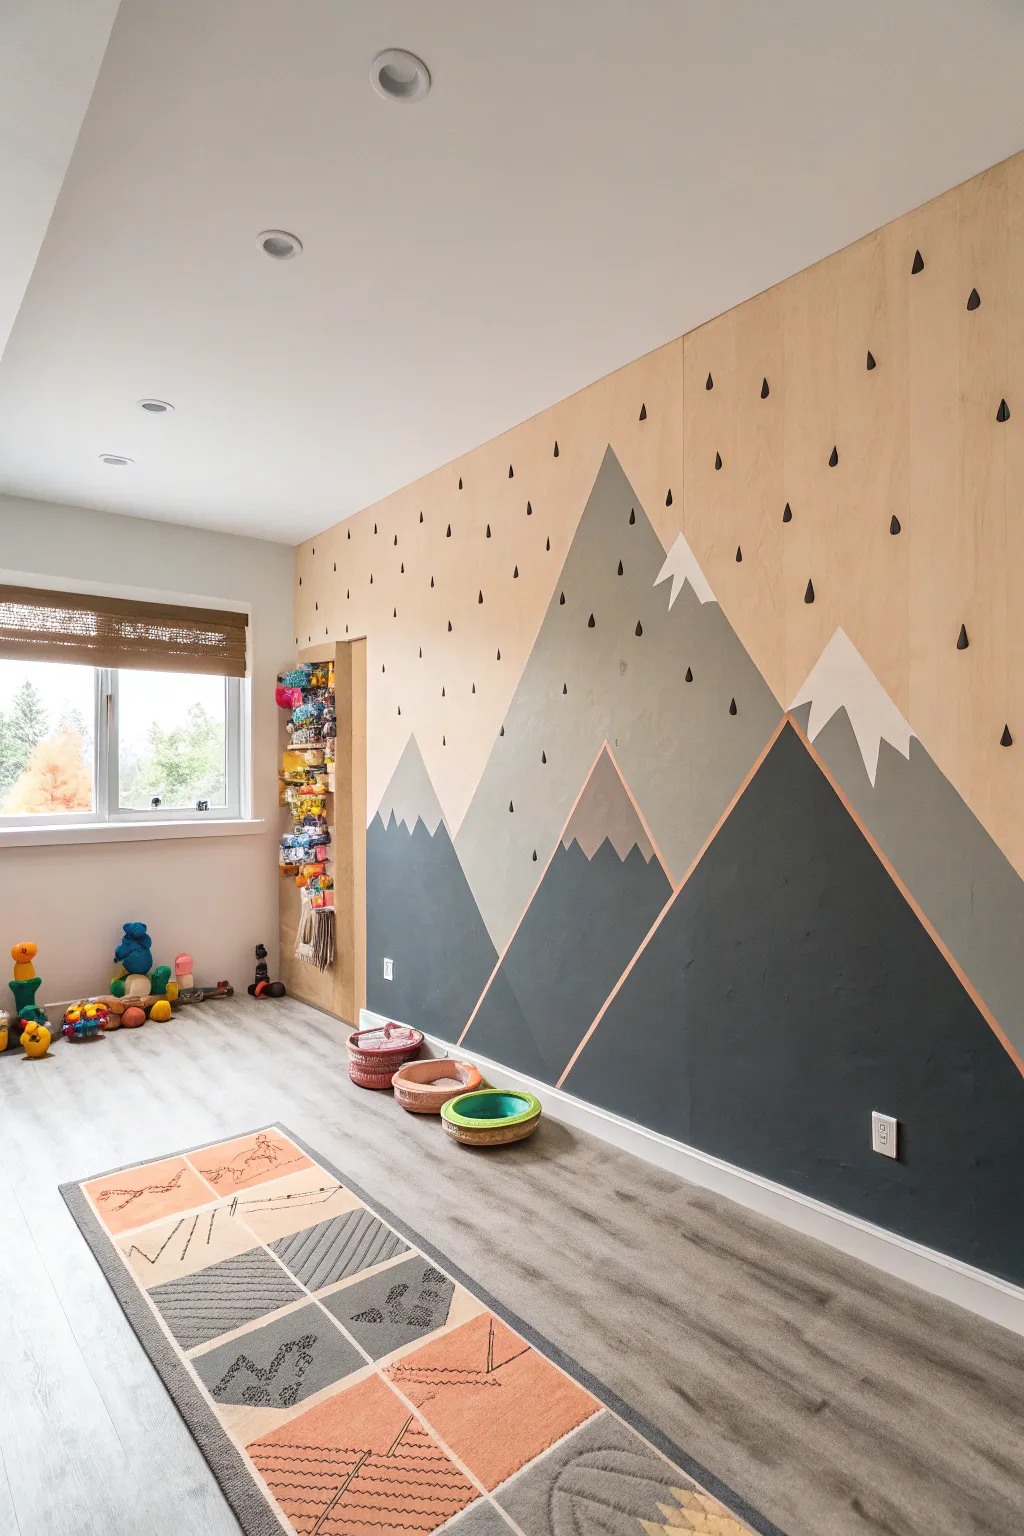
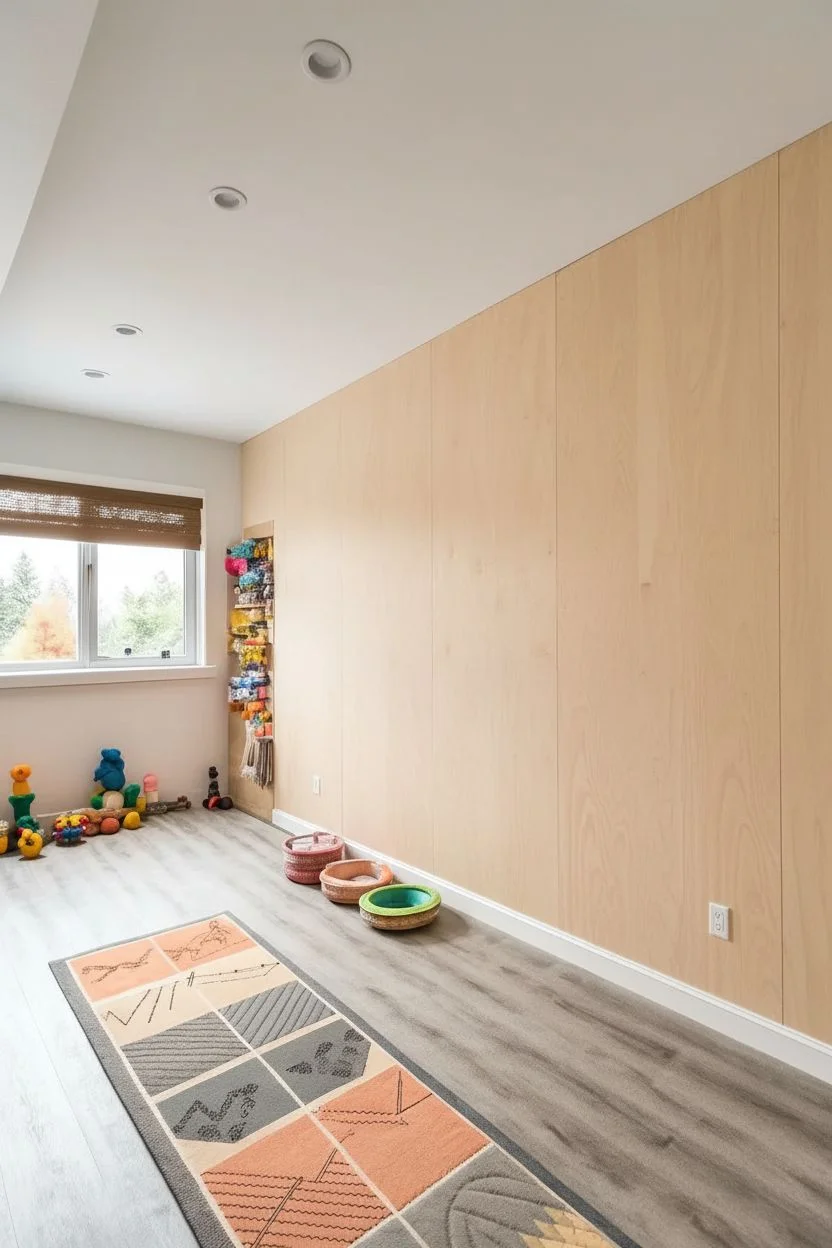
Transform a plain wall into an adventurous landscape with this striking geometric mountain mural painted directly onto plywood panels. The natural wood grain serves as the sky while bold shades of grey and charcoal create depth, finished with unique raindrop climbing holds for an interactive touch.
Detailed Instructions
Materials
- Birch or maple plywood sheets (4ft x 8ft)
- Circular saw or table saw
- Construction adhesive (e.g., Liquid Nails)
- Wood screws and stud finder
- Painter’s tape (choose a high-quality brand for crisp lines)
- Interior latex paint (Dark Charcoal, Medium Grey, Light Grey)
- White or light cream paint (for snow caps)
- Copper foil tape (1/4 inch or 1/2 inch width)
- Foam paint rollers and angled brushes
- Black wooden teardrop shapes or climbing holds
- Drill and mounting hardware for holds
- Clear matte polyurethane (optional)
Step 1: Prepping the Canvas
-
Install the Plywood Base:
Begin by covering your existing drywall with large plywood sheets. Locate your studs first, then mount the 4×8 panels vertically using construction adhesive and wood screws driven into the studs. Ensure the seams between panels are tight and level. -
Sand and Clean:
Lightly sand the entire plywood surface with 220-grit sandpaper to remove any rough splinters or factory coatings. Wipe down the wood with a tack cloth or slightly damp rag to ensure it’s dust-free. -
Seal the Wood (Optional):
If you want to protect the raw wood areas that act as the ‘sky,’ apply a coat of clear matte polyurethane now. I prefer doing this first so paint splatters wipe off the wood easier later.
Tape Like a Pro
To get perfectly crisp lines on textured wood, quickly brush a layer of clear matte medium over the tape edge before applying your colored paint.
Step 2: Mapping the Mountains
-
Rough Sketch:
Using a pencil, lightly sketch your mountain peaks directly onto the wood. Aim for three distinct layers: a large foreground range, a medium mid-ground peak, and smaller background mountains. -
Define the Background Peaks:
Apply painter’s tape along the outlines of your furthest, lightest colored mountains first. Press the tape edges down firmly with a credit card to prevent bleed-under. -
Paint the Lightest Layer:
Fill in these shapes with your lightest grey paint. Use a small foam roller for a smooth finish and let it dry completely before peeling the tape.
Step 3: Building Dimensions
-
Tape the Mid-Ground:
Once the first layer is dry, tape off the large central peak. This one should overlap the background mountains slightly to create depth. Ensure your angles are sharp triangles. -
Painting the Mid-Tones:
Paint this central mountain with your medium grey shade. Apply two thin coats rather than one thick one for better coverage. -
Create the Foreground:
Tape off the largest, bottom-most mountain range. This section covers the most area and visually grounds the mural. -
Apply the Darkest Shade:
Use your dark charcoal or slate blue paint for this layer. Because this is high-touch area near the floor, consider using an eggshell or satin finish for durability. -
Add Snow Caps:
Once all mountain layers are fully dry, tape off small, jagged triangles at the very tips of the peaks. Paint these white or cream to mimic snow caps.
Glow-in-the-Dark
Paint the snow caps with glow-in-the-dark paint, or add tiny glow stars in the wood grain ‘sky’ for a magical night-time effect.
Step 4: Adding Details & Texture
-
Apply Metallic Accents:
To give the mural a modern, graphic pop, run strips of copper foil tape along the angular edges of the mountains where different colors meet. This defines the shapes and adds a subtle shine. -
Smooth the Copper:
Run a soft cloth over the copper tape to ensure it adheres fully to the plywood grain and doesn’t peel up at the corners. -
Layout the Raindrops:
Plan the placement of your black teardrop shapes. Arrange them in a staggered, falling rain pattern across the sky and upper mountain peaks. -
Installing the Holds:
Drill pilot holes for your decorative touches. If these are purely decorative wood shapes, use strong adhesive or small nails. If they are functional climbing holds, ensure you are drilling into studs or structural blocking installed behind the plywood. -
Final Touch-Ups:
Inspect the mural for any paint bleeds under the tape or smudges on the raw wood. Use a small detail brush or a bit of sandpaper to clean up these imperfections.
Now you have a stunning, nature-inspired focal point that brings the great outdoors right inside your home
Glow-In-The-Dark Star Trail for Nighttime Magic
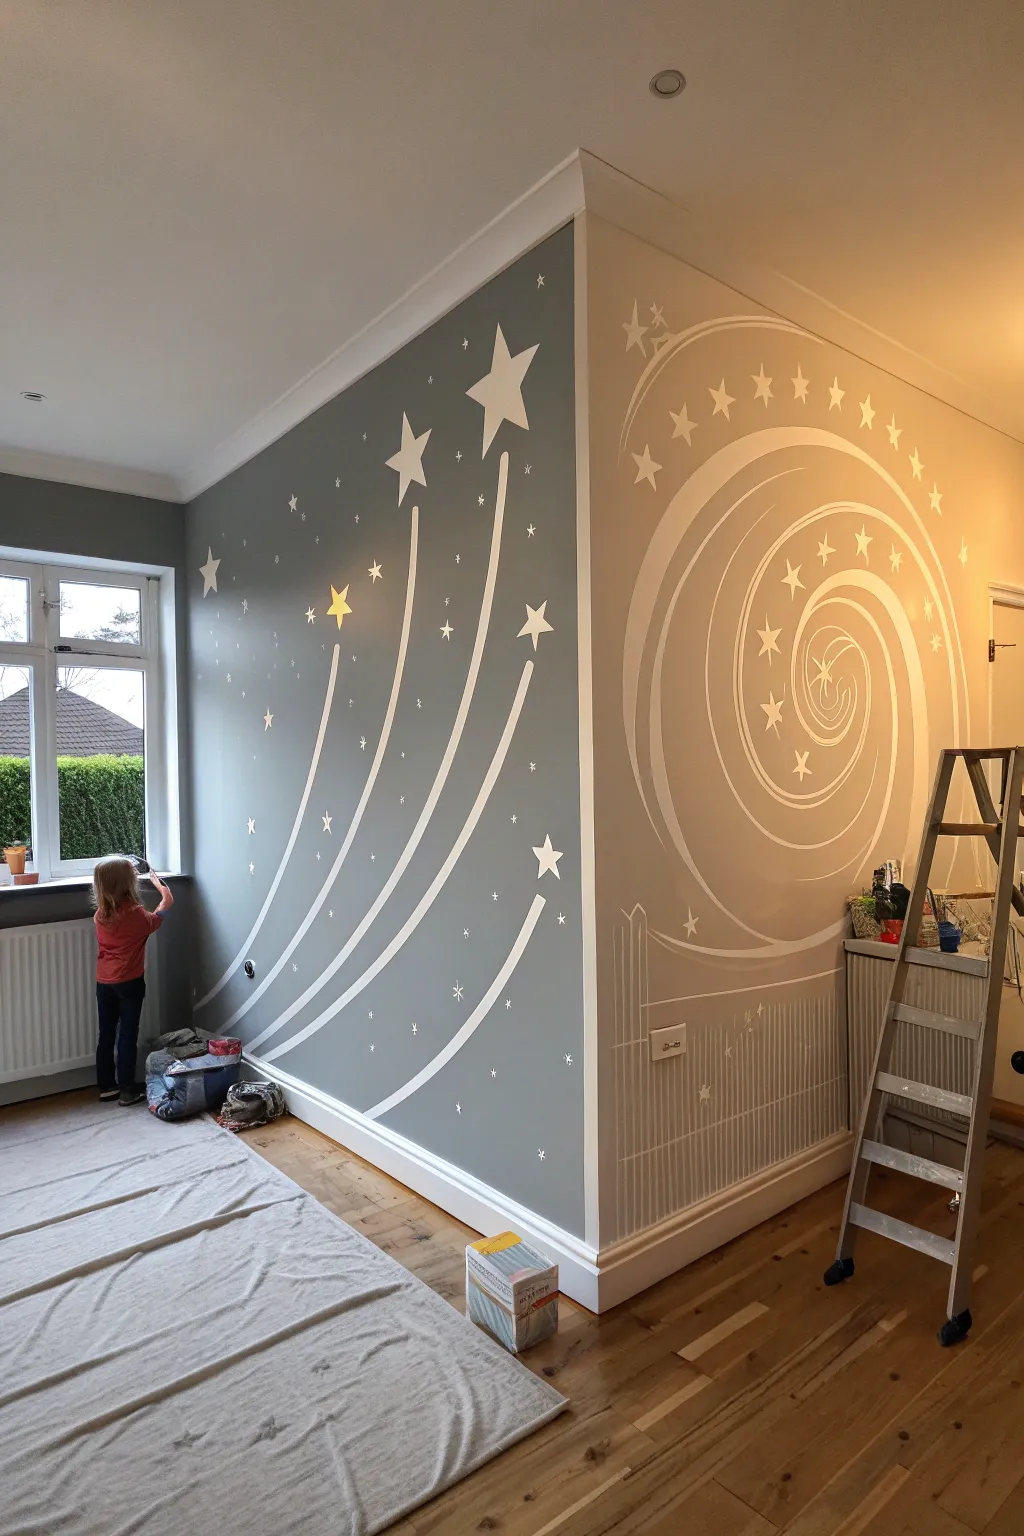
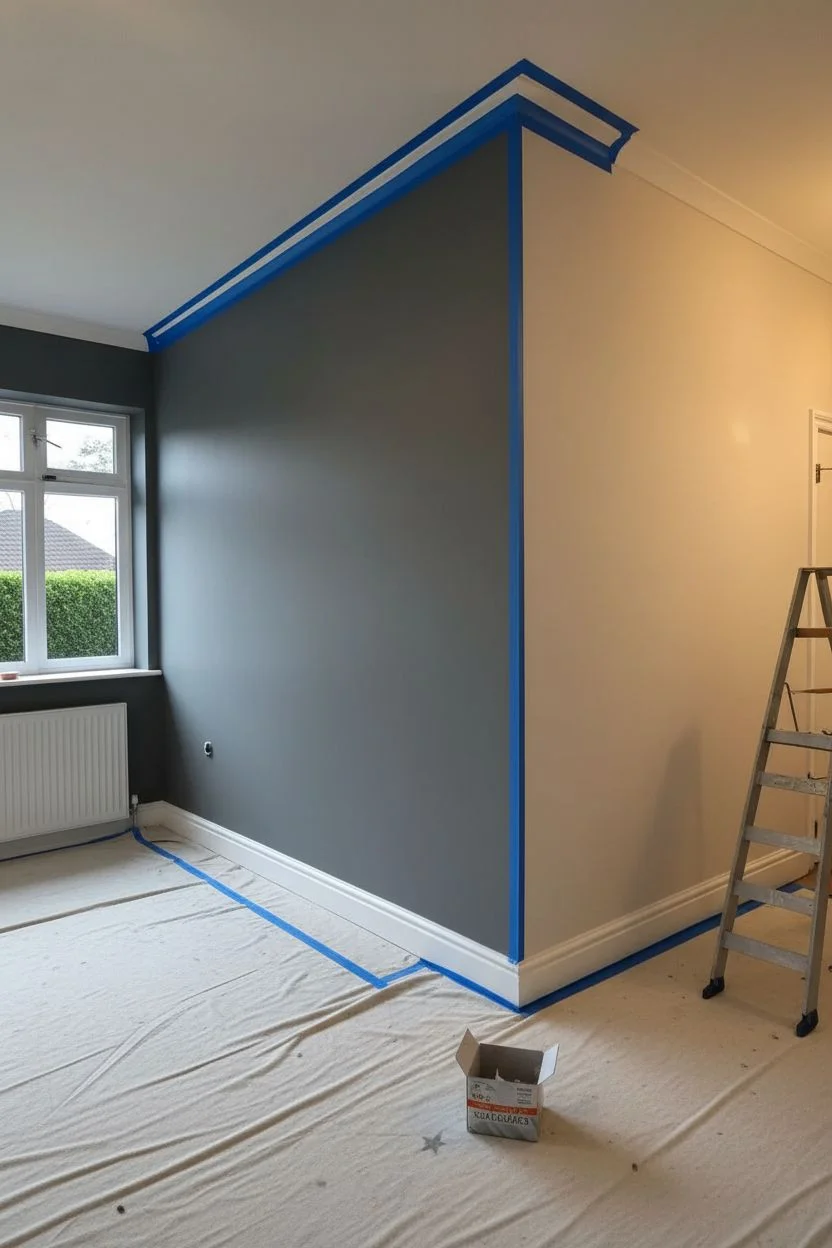
Transform a plain corner into a magical galaxy with this sweeping, two-part mural design. Featuring dynamic shooting star trails on one side and a mesmerizing starry vortex on the other, this project uses contrasting wall colors to create a cozy, dreamy atmosphere perfect for bedtime stories.
Step-by-Step Guide
Materials
- Dark grey satin interior wall paint (left wall base)
- Light beige or warm grey satin interior wall paint (right wall base)
- White semi-gloss or eggshell paint (for the stars/swirls)
- Glow-in-the-dark paint medium (optional top coat)
- Painter’s tape (various widths)
- Pencil and eraser
- Chalk snap line or long ruler/straightedge
- Assorted stencils (stars of various sizes)
- Small foam roller
- Detail brushes (round No. 4 and flat angled)
- Drop cloths
- Ladder
Step 1: Preparation and Base Coat
-
Clear and prep the area:
Begin by removing any furniture, outlet covers, or switch plates from the corner area. Lay down your drop cloths to protect the flooring and tape off the ceiling line and baseboards with high-quality painter’s tape to ensure crisp edges. -
Paint the contrasting backgrounds:
Paint the left wall surface with your dark grey paint to simulate the deep night sky. Paint the perpendicular right wall with the lighter beige tone. I find that applying two coats gives the richest color depth, so allow adequate drying time between layers according to the paint can’s instructions. -
Let the base cure:
Wait at least 24 hours for the base coats to fully cure before sketching or applying tape over them. This prevents the new paint from peeling up when you work on the detailed design later.
Step 2: Drafting the Design
-
Sketch the shooting star arcs:
On the dark grey wall, lightly sketch four or five sweeping curved lines starting from the bottom corner near the floor and arching upward toward the ceiling. These will be the tails of your shooting stars. Vary the spacing so they fan out naturally. -
Outline the vortex swirl:
On the lighter wall, use a pencil to draw a large spiral shape. Start near the center of the wall and spiral outward, getting larger as you reach the edges. Imagine a snail shell or a galaxy spiral as your reference. -
Add a cityscape foundation (optional):
At the very bottom of the lighter wall, sketch a faint outline of a picket fence or simple cityscape silhouette. This grounds the floating spiral design, giving it a sense of scale.
Pro Tip: Chalk Trick
Draw your initial swoops with white chalk instead of pencil. It’s easier to see on the dark wall and wipes away instantly with a damp rag if you need to re-do a curve.
Step 3: Painting the Star Trails (Left Wall)
-
Define the trail width:
Using your pencil lines as a guide, thicken the lines to create the tails. They should be widest near the ‘star’ head at the top and taper slightly as they reach the bottom corner. -
Paint the trails white:
Use a steady hand and a flat angled brush to fill in these curved trails with white paint. You may need two coats to get solid coverage over the dark grey background. -
Create the main stars:
At the top tip of each white trail, paint a large, five-pointed star. You can hand-paint these or use a stencil for precision. Tilt them at slightly different angles for a dynamic sense of movement. -
Fill the sky with constellations:
Scatter smaller five-pointed stars and tiny dots (using the back of a brush handle) throughout the empty grey space. Vary the size of the stars to create depth—some should be tiny pinpricks of light, while others are distinct shapes.
Level Up: Metallic Pop
Top a few key stars (like the leading shooting stars) with metallic gold or silver leaf paint. They will catch the sunlight during the day and contrast beautifully with the matte wall.
Step 4: Creating the Vortex (Right Wall)
-
Thicken the spiral lines:
Return to your spiral sketch on the lighter wall. Paint the main spiral lines with white paint using a wider brush or small roller if you have a steady hand. The lines should act as ‘tracks’ for the stars to sit on. -
Add stars to the spiral:
Paint white stars directly onto or just alongside the spiral lines, following the curve. Make the stars in the center of the vortex smaller and gradually increase their size as the spiral moves outward. -
Paint the bottom fence detail:
Fill in your fence or cityscape sketch at the bottom of the wall with white paint. Use thin, vertical strokes to mimic fence posts, keeping the paint application slightly translucent or ‘sketchy’ for a softer look if desired.
Step 5: Finishing Touches
-
Apply the glow layer:
Once the white paint is completely dry, brush a layer of translucent glow-in-the-dark medium over the white stars and trails. This step is invisible during the day but creates the magic at night. -
Clean and peel:
Carefully remove all painter’s tape from the ceiling and baseboards. Touch up any spots where the wall paint might have bled or peeled with a small artist’s brush. -
Seal edges (optional):
If you want extra durability, especially in a kid’s room, you can apply a clear matte water-based sealer over the mural area, though this is not strictly necessary with quality paint.
Step back and dim the lights to watch your new corner of the universe come to life


Have a question or want to share your own experience? I'd love to hear from you in the comments below!