
If you’ve got a handful of cotton swabs and some paint, you’ve already got one of my favorite tools for playful Q-tip painting. These dot art ideas are easy to start, super satisfying to build up, and they create that textured, polished look without any fancy brushes.
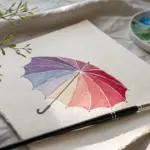
Rainbow Arc Dot Painting With Smooth Color Shifts
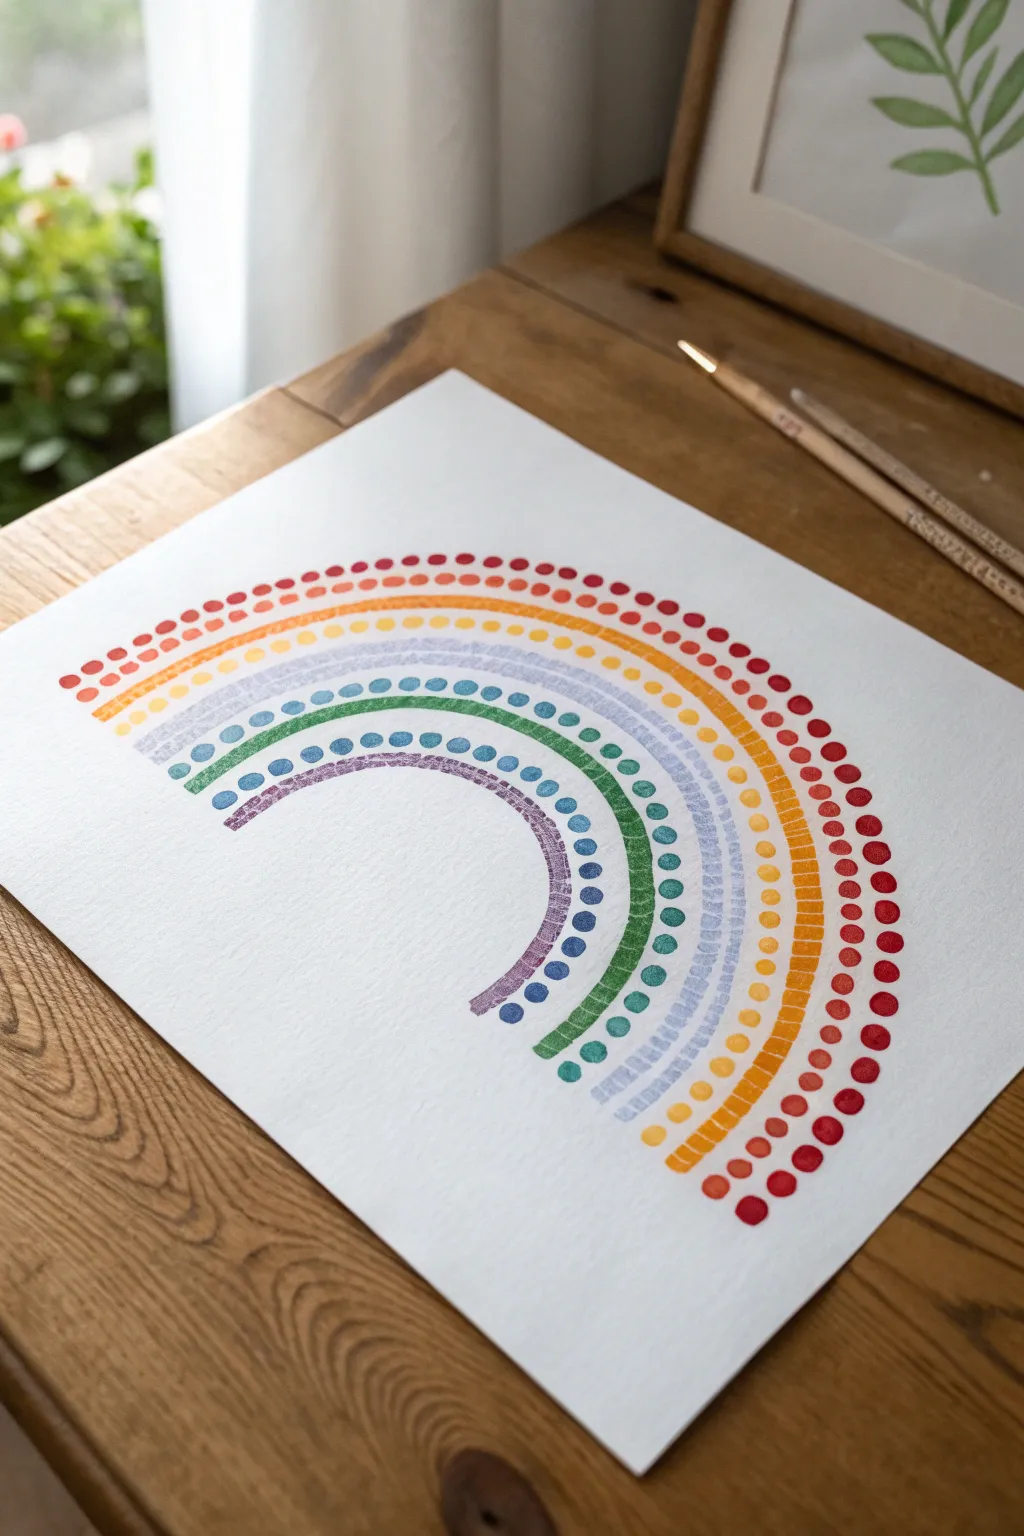
This charming project combines smooth, sweeping lines with playful stippling to create a textured rainbow arc. The finished piece features vibrant color transitions from red to violet, perfect for brightening up a nursery or craft corner.
Step-by-Step Guide
Materials
- Heavyweight watercolor paper or mixed media paper
- Watercolor paints or fluid acrylics
- Flat paintbrush (medium width, approx. 1/2 inch)
- Cotton swabs (Q-tips)
- Palette or small dishes for mixing
- Pencil
- String and pushpin (or a large compass)
- Paper towels
- Water cup
Step 1: Preparation and Sketching
-
Set up your workspace:
Arrange your paper on a flat surface. Ensure your colors are pre-mixed or squeezed onto your palette, arranged in rainbow order: Red, Orange, Yellow, Green, Light Blue, Dark Blue, Purple. -
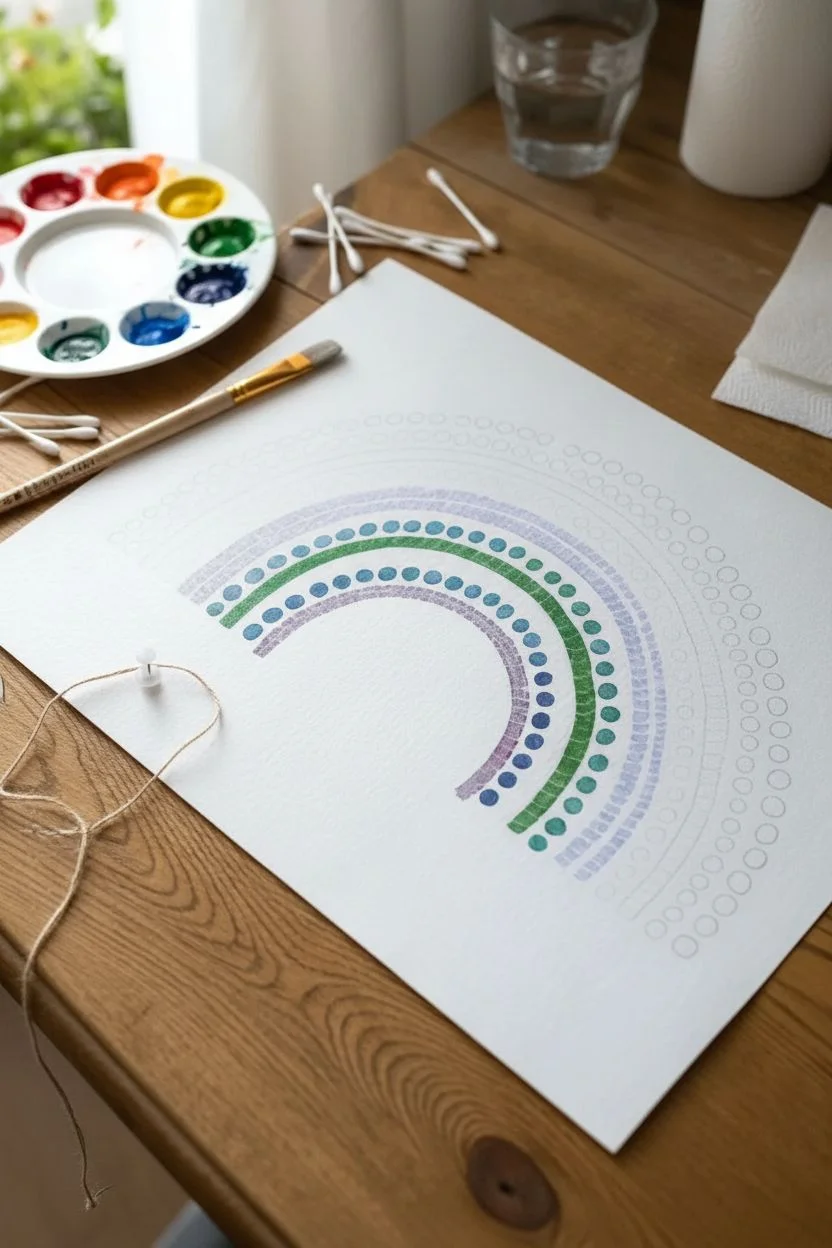
Create a compass guide:
To get perfectly even arcs, tie a string to a pencil. Place a pushpin or hold the string specifically at the center-bottom of your paper (or slightly below the edge for a flatter arc). -
Sketch the guide arcs:
Lightly draw concentric semi-circles to guide your painting. Space them out enough so that each color band has room for both a painted stripe and a row of dots—about 3/4 inch per band is a good estimate.
Clean Dots Trick
Don’t reuse Q-tips for different colors. Using a fresh swab for every single color ensures your dots stay crisp and vibrant without muddy mixing.
Step 2: Painting the Bands
-
Start with the red stripe:
Load your flat brush with red paint. Starting from the outermost sketched line, paint a smooth, continuous stripe that follows the curve. Keep the stripe about half the width of your total band space. -
Add red dots:
Dip a fresh Q-tip into the red paint. Firmly press dots along the outer edge of your wet red stripe. Try to space them evenly, following the curve of the painted line. -
Clean your brush:
Rinse your flat brush thoroughly and dab it on a paper towel. You want it clean but slightly damp for the next color. -
Paint the orange stripe:
Move inward to the next guide line. Paint your orange stripe just below the red one, leaving a tiny sliver of white space between the red dots and the new orange line to keep things crisp. -
Add orange dots:
Using a new Q-tip, stamp your orange dots along the outer edge of the orange stripe. -
Continue with yellow:
Repeat the process for the yellow band. I like to make the yellow slightly more vibrant here so it doesn’t get lost against the white paper. -
Paint the green band:
Paint the green stripe and add the corresponding dots. Ensure your paint consistency remains fluid enough to glide but not so watery that the dots bleed. -
Add the blue layers:
Paint the light blue stripe and dots, followed by the dark blue (indigo) layer. As you get closer to the center, the arcs become tighter, so use a steady hand to maintain the curve. -
Finish with purple:
Paint final innermost stripe in purple. Add the last row of purple dots along its outer edge.
Step 3: Finishing Touches
-
Check for consistency:
Look over your rainbow. If any dots look faint, you can carefully re-stamp them with a bit more paint. -
Erase guide lines:
Once the painting is completely 100% dry (give it at least an hour), gently erase any visible pencil marks that show through the white gaps.
Wobbly Arcs?
If your hand shakes while painting the stripes, embrace it! The ‘stamped’ look of the Q-tip dots naturally distracts the eye from imperfect lines.
Allow your artwork to dry fully before framing it or displaying it on a shelf


Dot-Filled Heart With Neat Rows of Color
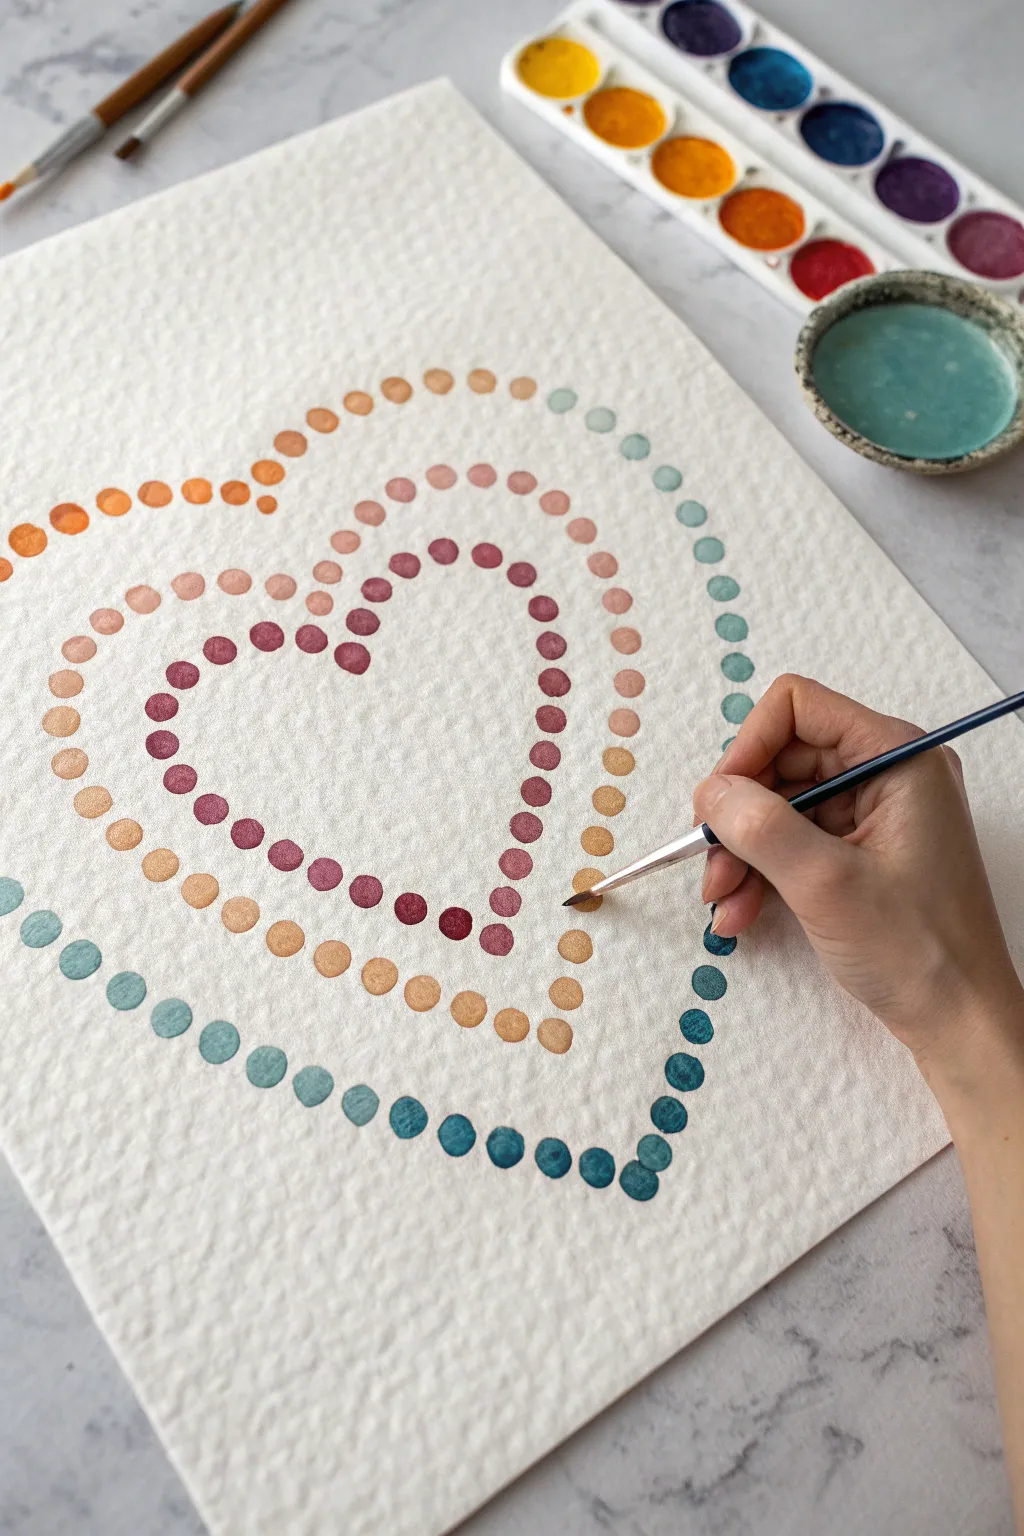
Create a soothing, geometric piece of art using simple dots to form concentric hearts. The beautiful transition of colors from cool blues to warm corals makes this project feel like a visual hug.
Step-by-Step Tutorial
Materials
- Cold press watercolor paper (textured)
- Watercolor paints (pan set preferred)
- Small round paintbrush (size 2 or 4) OR cotton swabs
- Pencil
- Eraser
- Water cup
- Paper towel
Step 1: Preparation
-
Outline the Shape:
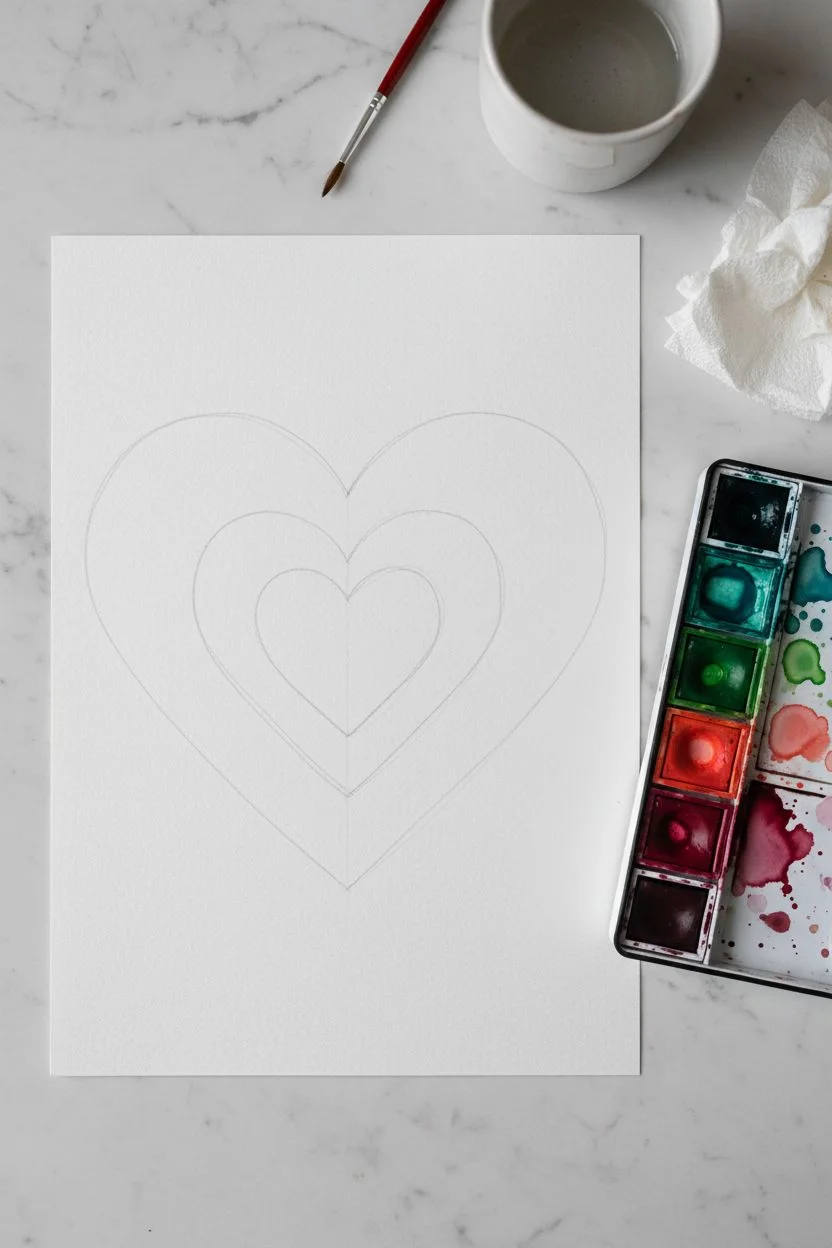
Begin by lightly sketching a large heart shape on your watercolor paper with a pencil. This will serve as the guide for your outermost ring of dots. -
Sketch Inner Guidelines:
Inside the first heart, lightly sketch two or three smaller, concentric heart shapes. Keep spacing relatively even between the lines, but don’t worry about perfection; the dots will hide minor wobbles. -
Prepare Your Palette:
Activate your watercolor pans with a drop of water. You will need a gradient of colors: teal/blue for the outer ring, moving into greens, corals, pinks, and finally deep burgundy for the center.
Uneven Dots?
If using a brush, press down vertically and lift straight up. If using Q-tips, press firmly and twist slightly before lifting to ensure a round mark.
Step 2: Painting the Outer Ring
-
Load the Brush:
Dip your brush—or Q-tip if you prefer a perfectly uniform circle—into a deep teal or blue-green paint. Ensure the paint is wet enough to flow but not dripping. -
Start the Point:
Place your first dot at the very bottom point of the outermost pencil heart outline. Press gently to create a full, round shape. -
Work Up the Sides:
Continue adding teal dots along the pencil line, spacing them about half a dot-width apart. Work your way up one side of the heart to the top curve. -
Complete the Outer Ring:
Repeat the process on the other side until the two lines meet at the center dip of the heart. Reload your brush frequently to keep the color saturation consistent.
Step 3: Creating the Gradient
-
Mix the Second Color:
Clean your brush or grab a fresh Q-tip. Mix a softer blue-green or light teal color for the next ring. -
Stagger the Dots:
Paint the second ring of dots just inside the first. Try to place each new dot in the ‘gap’ between two dots from the outer ring where possible, creating a honeycomb effect. -
Transition to Warm Tones:
For the third ring, switch to a warm, sandy beige or light coral color. This dramatic shift from cool to warm tones gives the piece its glowing effect. -
Paint the Middle Layer:
Apply the coral dots following your sketched guideline. If your pencil lines are too dark, you can gently erase them just before painting over the area. -
Continuing Inward:
Move to a pink or dusty rose shade for the next inner ring. As the heart gets smaller, you will need fewer dots to complete the loop.
Add Some Sparkle
Once dry, add tiny dots of metallic gold paint in the center of the dark burgundy dots for a subtle, elegant shimmer.
Step 4: Finishing Touches
-
The Center Heart:
For the innermost heart, mix a deep, rich burgundy or berry red. Paint these dots carefully, as space is tight in the center. -
Review Spacing:
Step back and look at your composition. If there are any large uneven gaps, you can add a tiny dot of the appropriate color to fill it, but be careful not to overcrowd. -
Dry Completely:
Let the artwork dry flat for at least an hour. Watercolor paper can buckle if moved while wet, so patience is key here. -
Erase Guidelines:
Once the paint is 100% bone dry (touch it carefully to check), gently erase any visible pencil marks remaining between the dots.
Frame your beautiful dotted heart or turn it into a heartfelt greeting card for someone special


Autumn Tree Canopy With Warm Dot Leaves
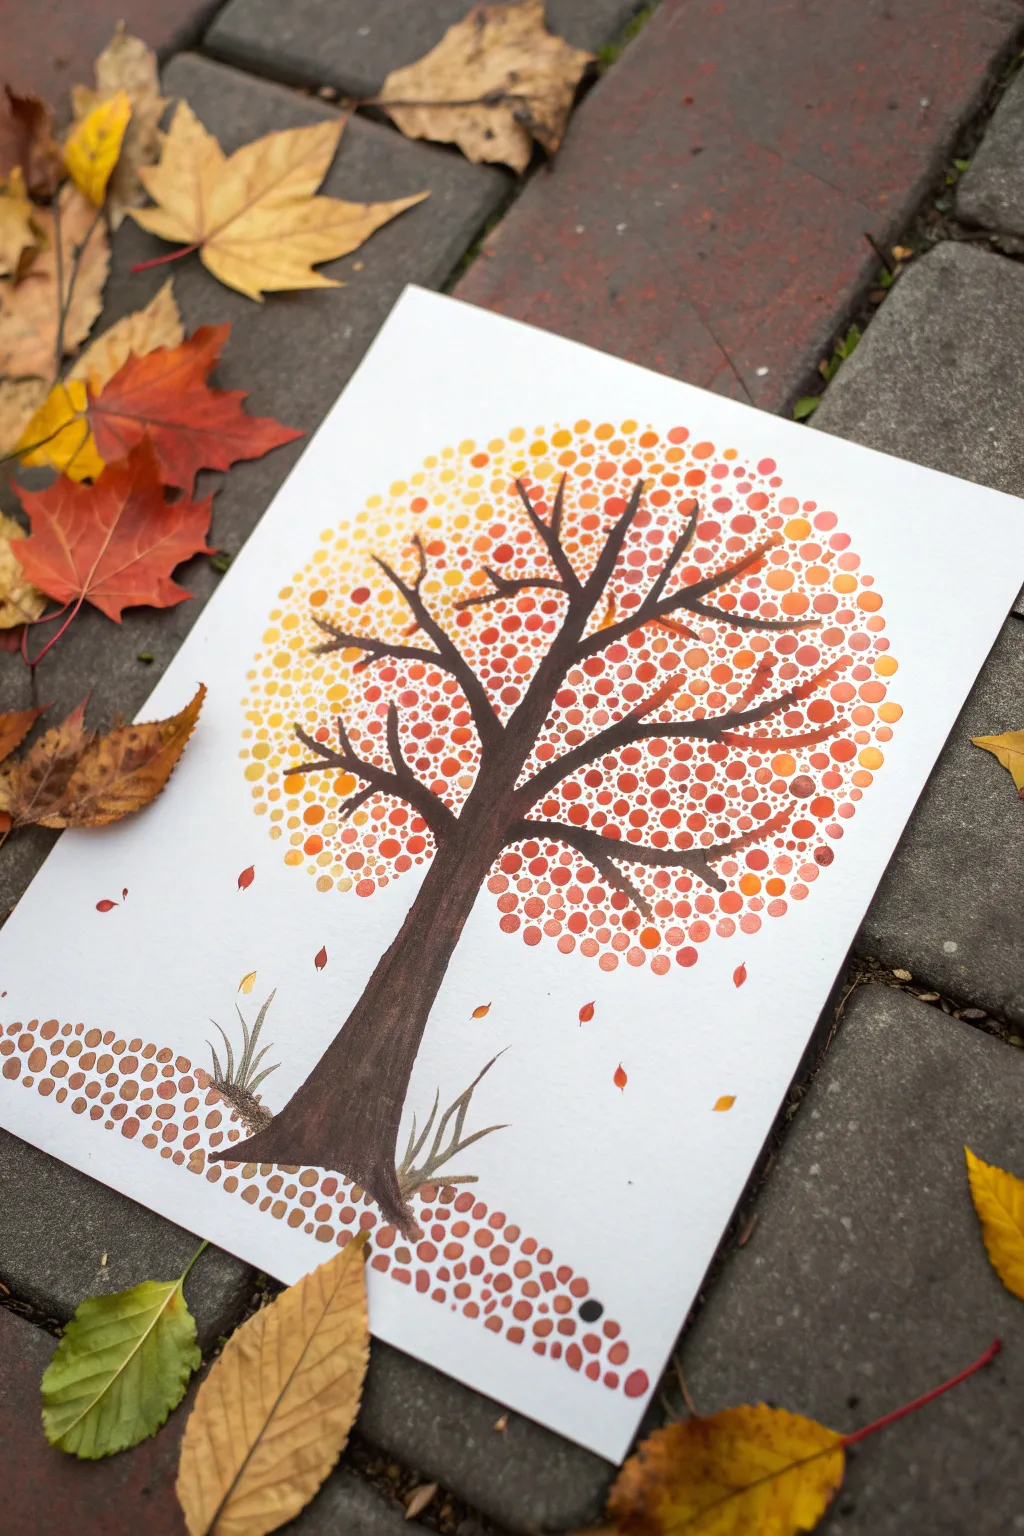
Capture the magic of an autumn afternoon with this vibrant tree painting that uses simple pointillism techniques. By clustering warm-colored dots to form the canopy, you’ll create a textured, glowing effect that brings the fall season right onto your page.
Step-by-Step Tutorial
Materials
- White cardstock or heavy watercolor paper
- Acrylic paints (dark brown, yellow, orange, red)
- Small round paintbrush (size 2 or 4)
- Q-tips (cotton swabs)
- Paper plate or palette
- Cup of water and paper towels
Step 1: Painting the Skeleton
-
Outline the trunk:
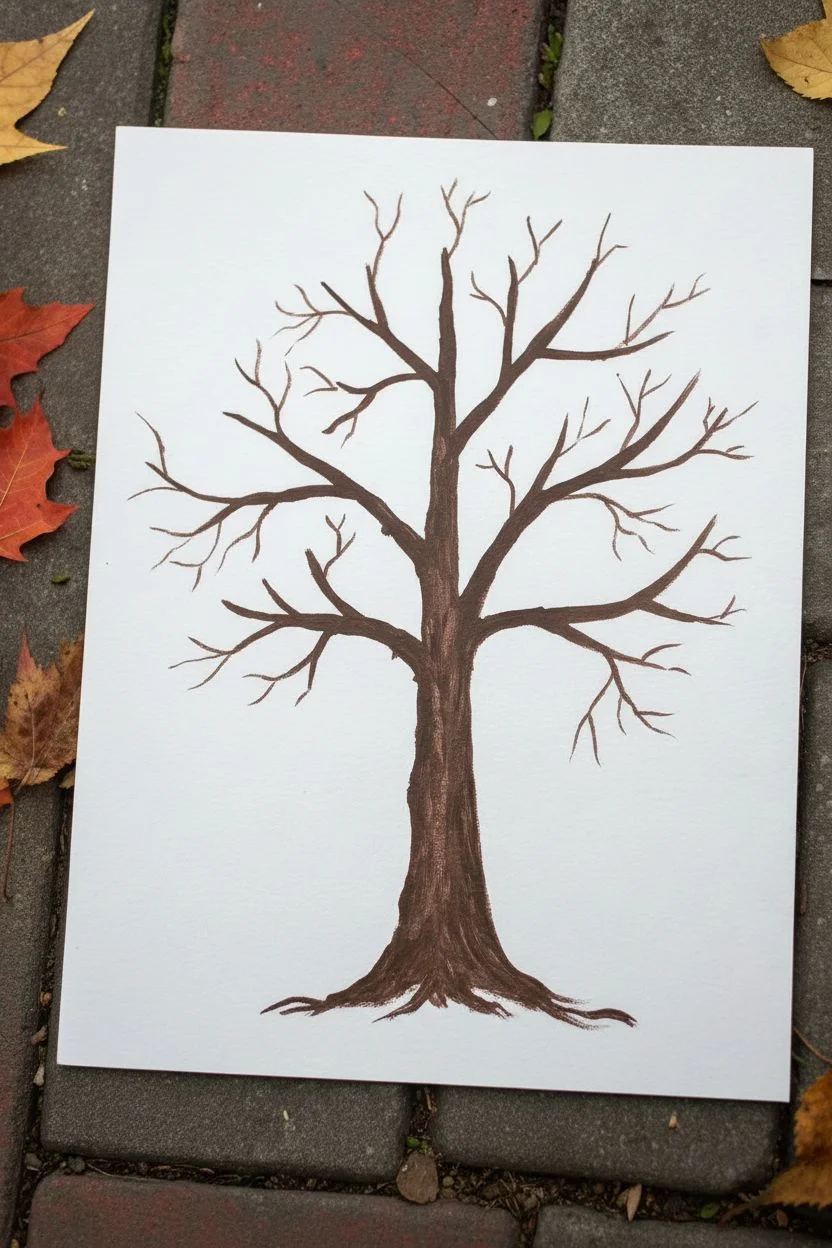
Start by dipping your small round brush into dark brown acrylic paint. Near the bottom center of your paper, paint a wide base that tapers slightly as it goes up, stopping about halfway up the page. -
Add main branches:
From the top of your trunk, extend three to four main branches outward. Make them slightly wavy rather than perfectly straight to look more organic. -
Create sub-branches:
Paint smaller, thinner branches splitting off from your main ones. Think of forming a ‘Y’ shape wherever a branch splits. Keep these lines delicate. -
Fill the roots:
At the very bottom of the trunk, flick your brush downward slightly to suggest roots gripping the ground. -
Let it dry:
Allow the brown paint to dry completely before starting the leaves. This prevents the colors from muddying if a Q-tip accidentally touches a wet branch.
Uneven Dots?
If your dots look more like patchy blobs, you might be pressing too hard or using too much paint. Use a light, vertical tapping motion and rotate the Q-tip frequently for rounder shapes.
Step 2: Creating the Canopy
-
Prepare your palette:
Squeeze out coin-sized amounts of yellow, orange, and red paint onto your palette. Ensure they are spaced out enough to not mix immediately. -
Start with yellow:
Dip a fresh Q-tip into the yellow paint. Begin stamping dots on the left side of the tree’s canopy. This will be our ‘light source’ area. -
Transition to orange:
Using a new Q-tip, stamp orange dots in the middle and right sections of the tree. I like to overlap the orange slightly with the yellow zone to create a natural gradient. -
Add red depth:
Dip a Q-tip into red paint and focus these dots on the lower right side and bottom edges of the canopy, where shadows would naturally fall. -
Shape the leaves:
Continue adding dots until you have a rough circular or oval shape for the whole canopy. Don’t make the outer edge perfect; let some dots stray for a realistic leaf look. -
Fill the gaps:
Look for large white spaces between your branches and fill them with more dots, mixing the colors slightly near the center of the tree.
Step 3: Ground and Details
-
Dot the ground:
To create the earthy ground, use a mix of brown and red dots. Stamp a horizontal mound shape at the base of the trunk. -
Paint falling leaves:
Take your orange or yellow Q-tip and stamp a few solitary dots floating in the air below the branches to represent falling leaves. -
Add grass blades:
Rinse your small brush and pick up a tiny amount of watered-down brown or dark green paint. Flick tiny, thin lines upward from the ground dots near the trunk base. -
Final touches:
Step back and assess your tree. If the canopy looks too thin, add a second layer of dots over the dry ones to build density and texture.
Make It 3D
Once the paint is fully dry, glue actual small crumbled dry leaf pieces or sequins over a few of the painted dots to give the artwork real texture and crunch.
Display your beautiful autumn tree on the fridge or frame it to bring a cozy fall atmosphere to your room


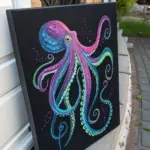
Ocean Bubbles and Coral With Clustered Q-Tip Dots
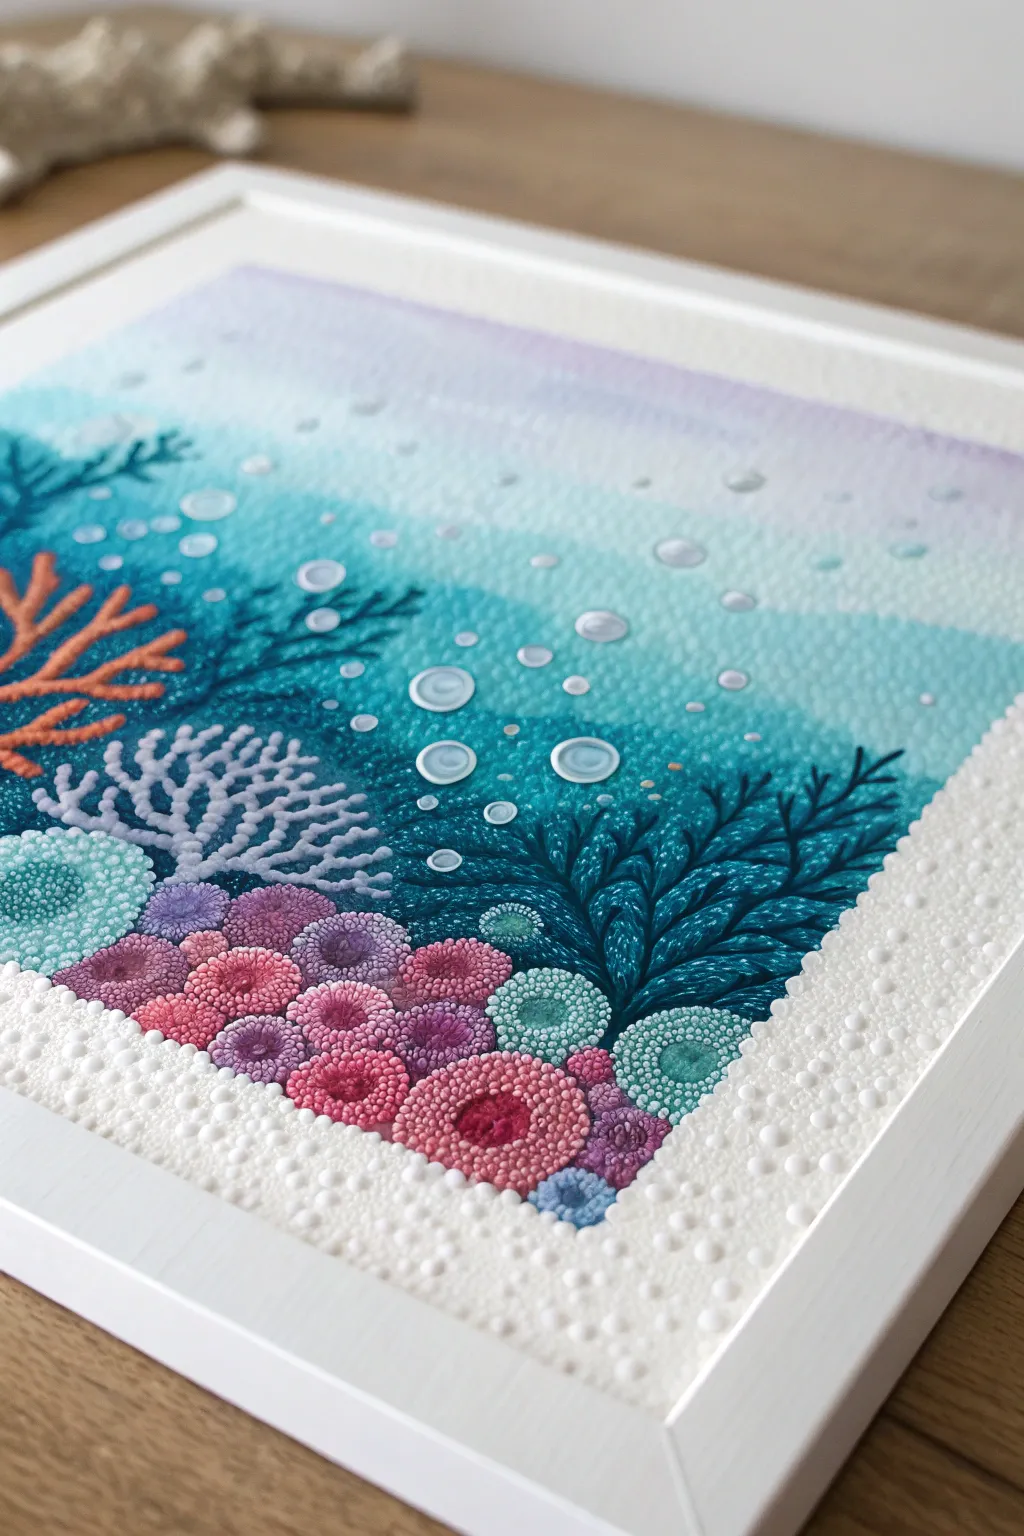
Dive into this textural underwater scene where vibrant corals and bubbles come to life through simple dotting techniques. Using Q-tips and dimensional paint, you’ll build layers of color that literally pop off the page for a stunning 3D effect.
How-To Guide
Materials
- Heavyweight watercolor paper or canvas board
- Watercolor paints (teal, blue, purple)
- Wide flat brush
- Acrylic paints (various pinks, purples, teals, dark blue, white)
- Q-tips (lots of them)
- Small dotting tool or toothpick
- Puff paint or dimensional fabric paint (white, pink, teal)
- Palette for mixing
Step 1: Creating the Ocean Backdrop
-
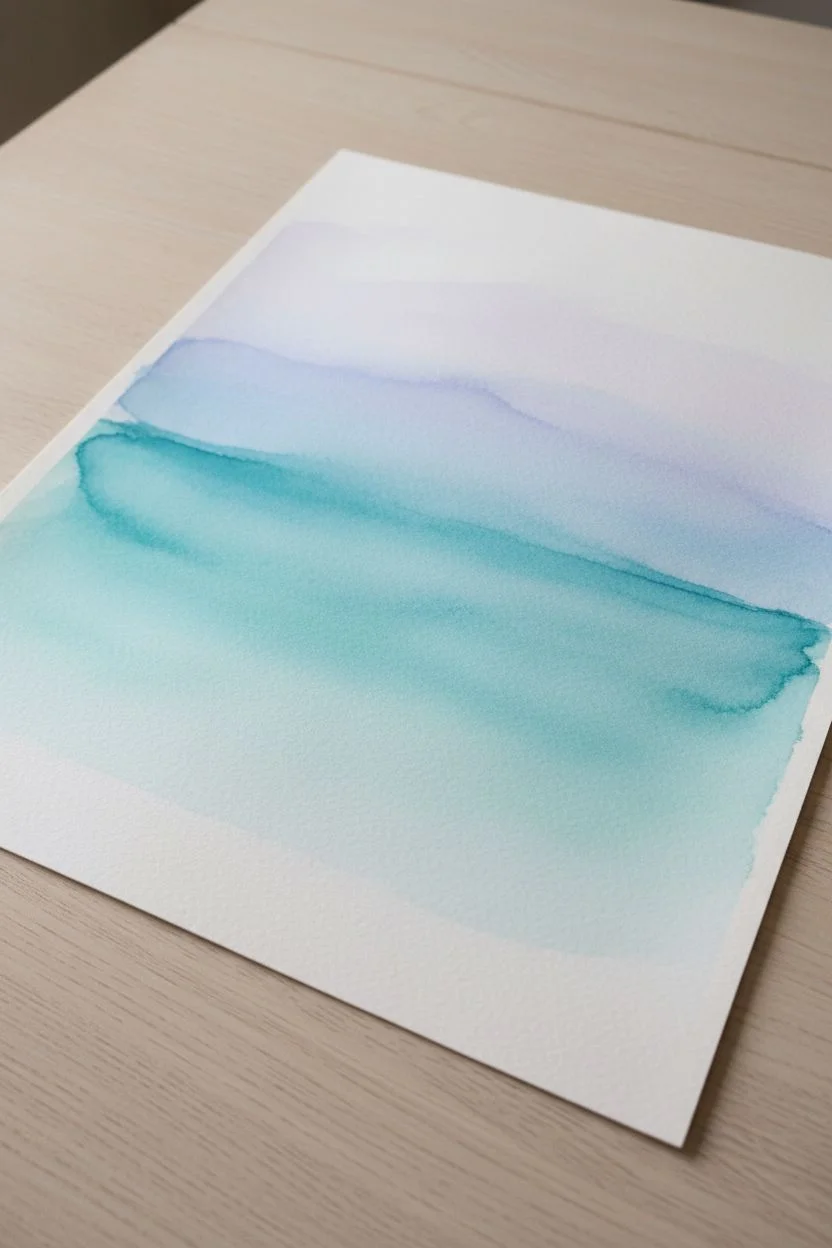
Prepare the gradient:
Start by mixing a watery wash of teal and purple watercolor paints. You want a soft, dreamy gradient that fades from a deeper teal at the bottom to a very pale purple or white at the top. -
Apply the background wash:
Using your wide flat brush, paint horizontal strokes across your paper. Let the colors bleed into each other slightly for that fluid, underwater look. Keep the bottom third of the paper unpainted or very light, as this will be covered densely with coral. -
Add depth and waves:
While the paper is still slightly damp, streak in a slightly more saturated teal line across the middle horizon to suggest depth in the water. Let this background layer dry completely before moving on.
Step 2: Painting the Coral Structure
-
Outline the coral shapes:
Using a small brush and dark blue acrylic paint, lightly sketch the flowing shapes of the seaweed and main coral structures. You don’t need detail yet, just the basic silhouettes of where the plants will grow. -
Fill the dark seaweed:
Paint the seaweed on the right side using a deep teal or navy blue acrylic. Use fluid, upward strokes that branch out to mimic swaying in the current. This dark base creates excellent contrast for the bright dots later. -
Base coat the bottom corals:
Paint rounded, mound-like shapes along the bottom edge using flat colors—pinks, purples, and light teals. These will serve as the foundation for your textured dots.
Paint Peaking?
If your acrylic dots have sharp peaks when you lift the Q-tip, tap the paper gently on the table while the paint is wet to settle them into domes.
Step 3: Dotting the Details
-
Start the Q-tip texture:
Dip a Q-tip into thick pink acrylic paint. Press it firmly onto your pink coral base to create large, consistent dots. Group these dots tightly together to resemble the bumpy surface of brain coral. -
Layer with puff paint:
For the most prominent corals in the foreground, switch to dimensional puff paint. Squeeze small dots directly onto the dried acrylic dots or spaces in between them. This creates that tactile, raised effect visible in the reference photo. -
Create the white coral branch:
Using white puff paint or heavy body white acrylic on a Q-tip, dot along the left side to create the branching white coral structure. Make the dots slightly smaller towards the tips of the branches. -
Add center details:
Once your base dots are tacky or dry, use a smaller tool like a toothpick or fine brush to add a tiny darker dot in the center of the larger pink and purple coral circles. This mimics the polyp center. -
Texture the dark seaweed:
Dip a clean Q-tip lightly into a lighter teal or white paint. Gently dab it over the dry dark seaweed branches you painted earlier. This highlighting technique gives them volume and separation.
Glow Up
Mix a little glow-in-the-dark medium into your white or light green paint for the bubbles and lighter corals to make a bioluminescent night scene.
Step 4: Bubbles and Final Touches
-
Dot the large bubbles:
Dip a fresh Q-tip into white paint. Make random stamps in the open water area. For the ‘hollow’ bubble look, press the Q-tip down and give it a tiny circular twist to lift paint from the center, or paint a white ring with a small brush. -
Add tiny fizz bubbles:
Use the small end of a toothpick or a very fine dotting tool to sprinkle tiny white specks around the larger bubbles and rising from the coral. This adds movement to the scene. -
Create the sandy border:
I love framing the piece with texture. Use white puff paint to create a border of densely packed dots along the bottom and side edges, simulating white sand or sea foam framing the view. -
Highlight the bubbles:
Mix a tiny bit of watery blue paint and glaze the bottom half of your larger white bubbles to make them look transparent and spherical. -
Final dry time:
Let the entire artwork sit flat for at least 24 hours. The puff paint and thick acrylic layers need significant time to cure fully hard.
Frame your textured masterpiece in a shadow box to protect the delicate raised surface.
BRUSH GUIDE
The Right Brush for Every Stroke
From clean lines to bold texture — master brush choice, stroke control, and essential techniques.
Explore the Full Guide
Bundled Q-Tips for Fast Flower Cluster Stamping
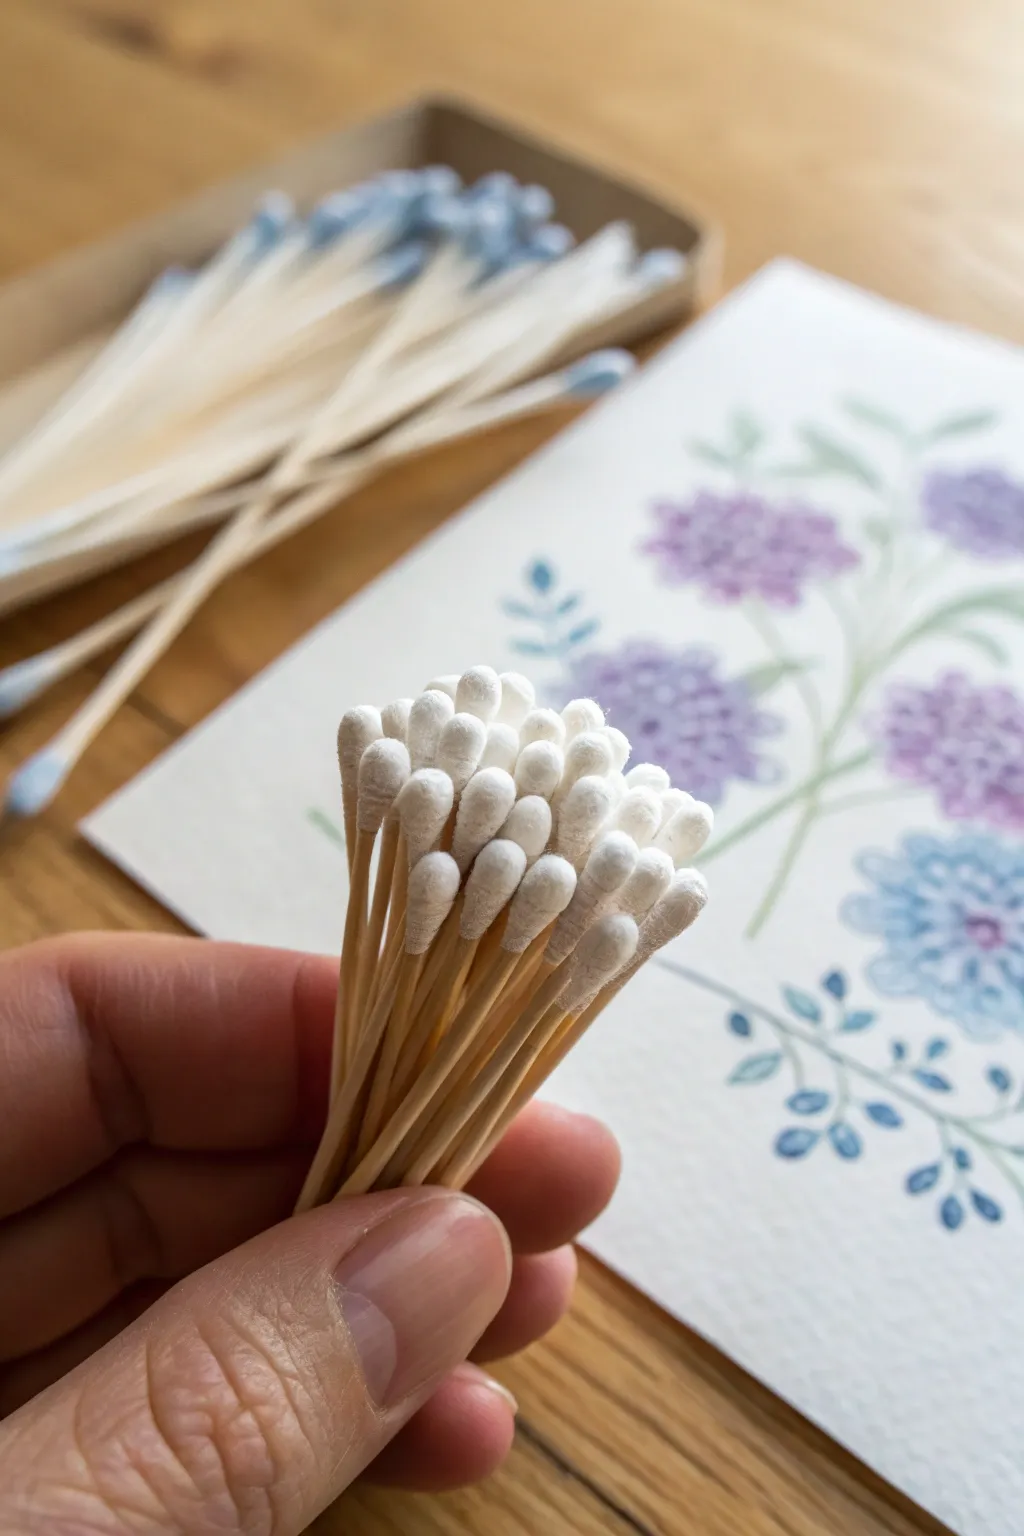
Create lush, rounded flower clusters effortlessly by bundling cotton swabs together for a clever stamping tool. This technique produces beautiful textures reminiscent of hydrangeas or alliums, making intricate floral art surprisingly simple to achieve.
Detailed Instructions
Materials
- Cotton swabs (Q-tips), preferably with wooden handles for sturdiness
- Rubber bands or tape
- Acrylic paints (purple, lavender, blue, white, green)
- Watercolor paper or heavy cardstock
- Small flat paintbrush
- Palette or paper plate
- Paper towels
- Container of water
Step 1: Preparing Your Stamping Tool
-
Gather the swabs:
Take a handful of roughly 15-20 cotton swabs. Ensure all the cotton heads on one side are aligned evenly so they create a flat stamping surface. -
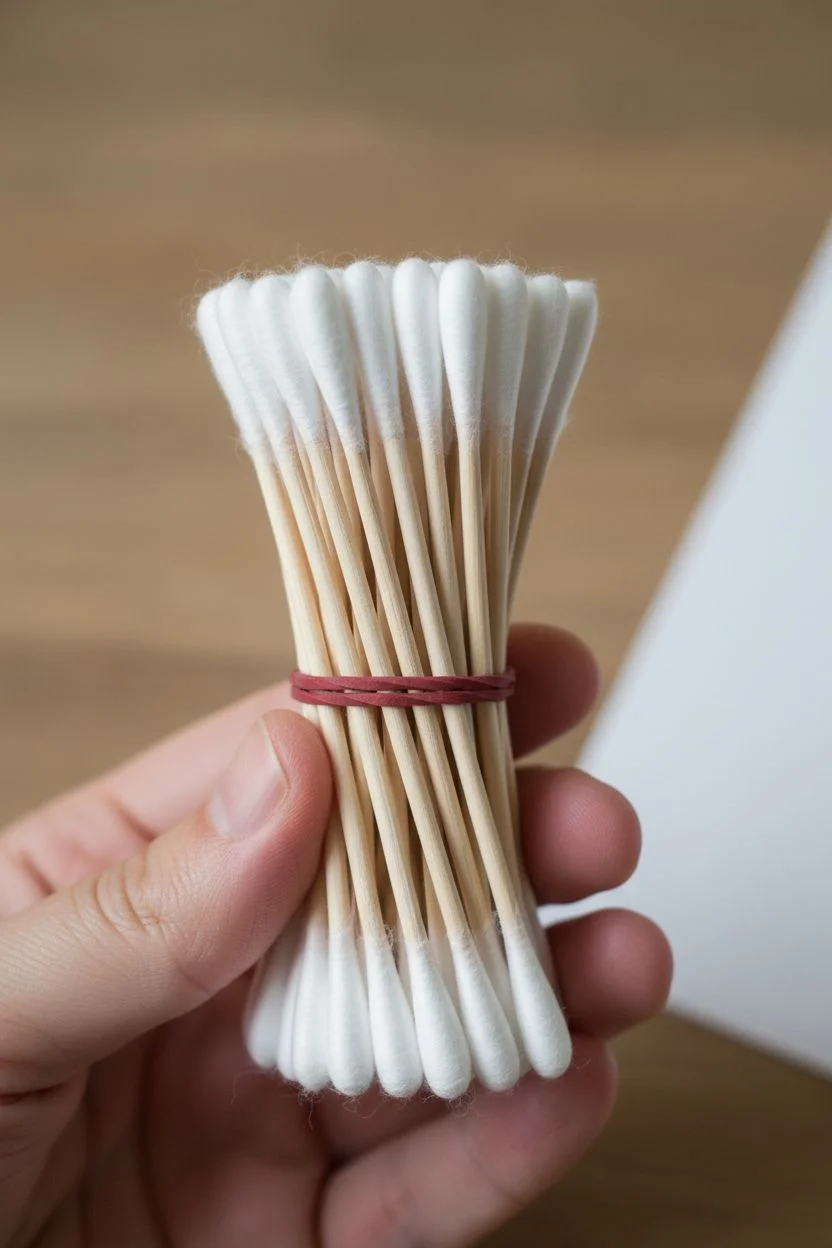
Secure the bundle:
Wrap a rubber band tightly around the middle of the stick handles to hold them securely in place. If the bundle feels loose, add a second rubber band closer to the cotton heads. -
Check the alignment:
Tap the bundled heads gently against a flat surface like your table to ensure none are sticking out further than the others, which would result in uneven prints.
Muddled Dots?
If your dots are merging into blobs, you have too much paint on the swabs. Blot the bundle on a paper towel before stamping to keep circles crisp.
Step 2: Creating the Floral Impression
-
Prepare the palette:
Squeeze out a generous amount of purple and lavender paint onto your palette. I like to keep the colors slightly separate but close enough to mix naturally. -
Load the stamp:
Dip your Q-tip bundle straight down into the paint. You want a decent amount of paint on the tips, but try blotting it once on a scrap paper to remove excess globs. -
Stamp the first bloom:
Press the bundle firmly onto your paper where you want your first flower head. Lift straight up to avoid smearing the dots. -
Reload and rotate:
Reload your paint, perhaps picking up a bit more white or a darker purple this time. Rotate your hand slightly and stamp again, slightly overlapping the first impression to create a fuller, rounder shape. -
Repeat for variety:
Continue this process to create two or three main flower clusters on your page. Varying the pressure will create different sized dots for visual interest.
Step 3: Adding Details and Stems
-
Switch colors:
Wipe off your Q-tip bundle or create a fresh, smaller bundle (with 5-7 swabs) for a different flower color, like the blue bloom shown in the example. -
Stamp the blue flower:
Dip the new bundle into blue and white paint mixed lightly together. Stamp this flower lower down or off to the side to balance the composition. -
Paint the stems:
Using a small flat paintbrush and green paint, draw thin, curving lines extending down from the bottom center of each flower cluster. -
Add leafy details:
Paint small, simple leaves along the stems. For a stylized look similar to the photo, paint small teardrop shapes or simple dashes in a symmetric pattern along the stem. -
Connect the scene:
If you have empty space at the bottom, add a decorative vine or extra leaves to frame the flowers and ground the composition. -
Dry completely:
Allow the stamped dots to dry fully. Because the paint is applied thickly with the swabs, this may take longer than a standard brush painting.
Add Depth
Once the first layer is dry, stamp a lighter shade (white mixed with color) right on top to create a highlight and 3D volume effect.
Frame your floral masterpiece or use it as a charming handmade greeting card front
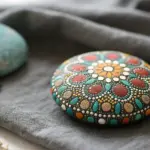
Mandala-Inspired Dot Rings With Q-Tip Rotation
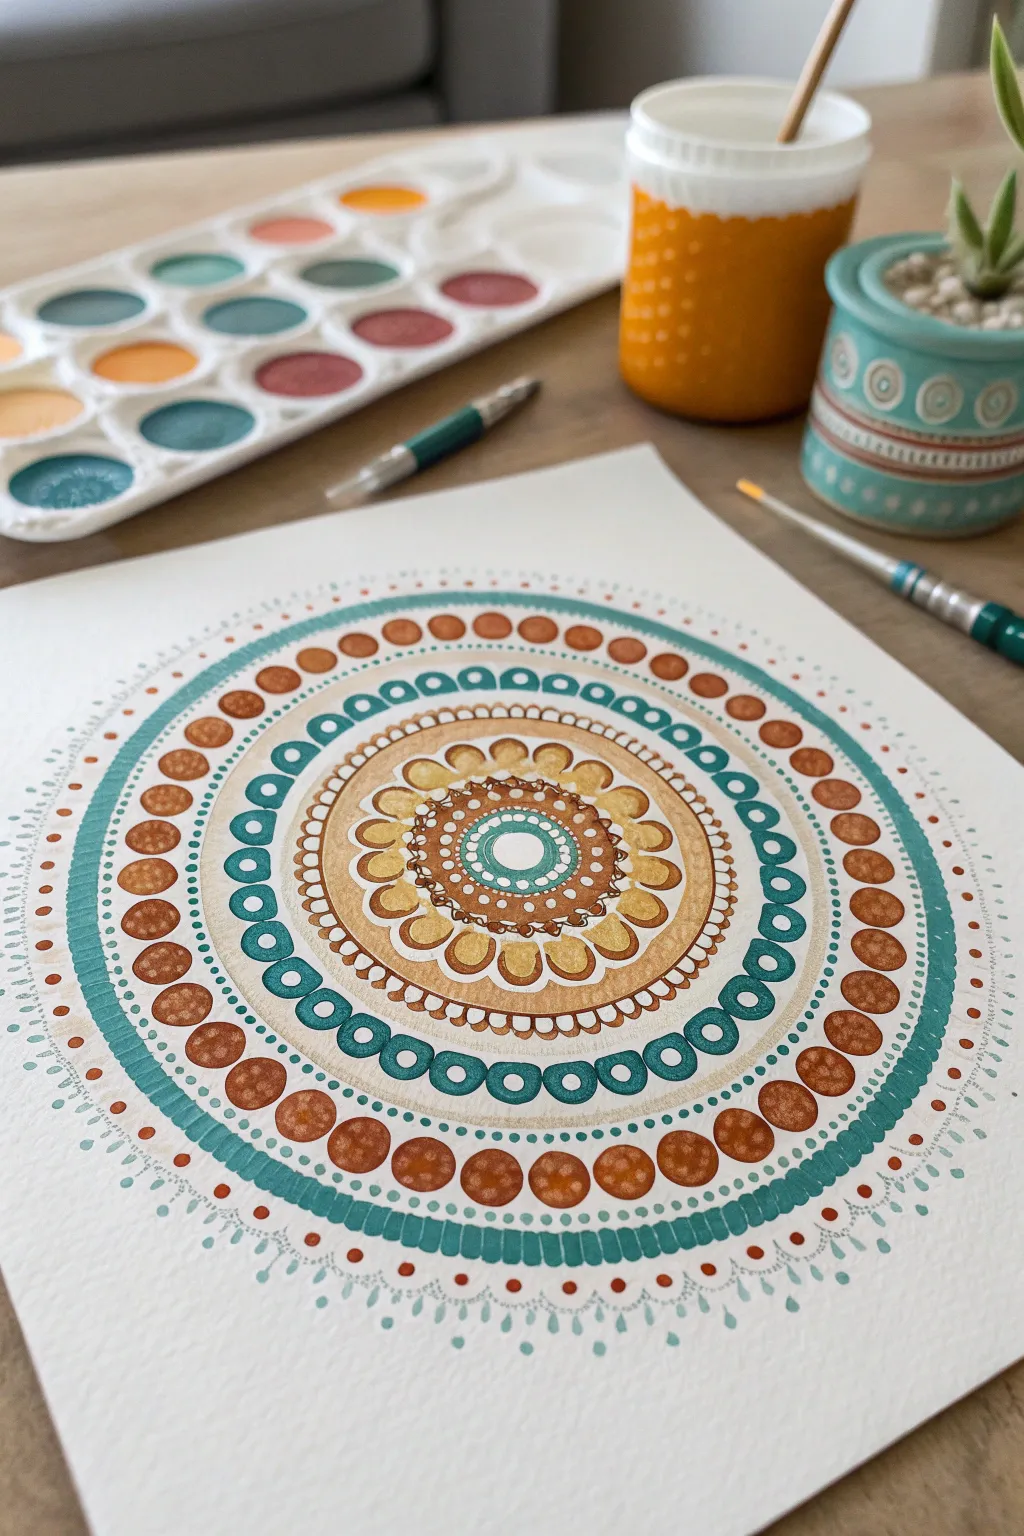
This soothing mandala project combines traditional brushwork with the precise, circular stamping power of Q-tips. The result is a stunning interplay of teal, rust, and golden hues radiating from a delicate center, perfect for framing or gifting.
Step-by-Step Guide
Materials
- Heavyweight watercolor paper or mixed media paper (square format recommended)
- Watercolor or gouache paints (Teal, Burnt Sienna/Rust, Yellow Ochre, White)
- Q-tips (cotton swabs)
- Fine detail paintbrush (size 0 or 1)
- Standard round paintbrush (size 4 or 6)
- Compass and pencil
- Palette for mixing paint
- Jar of water
Step 1: Preparation & Center
-
Grid creation:
Begin by finding the exact center of your paper. Using a compass and a very light pencil touch, draw a series of concentric circles radiating outward. Space them about 0.5 to 1 inch apart to serve as guidelines for your pattern rings. -
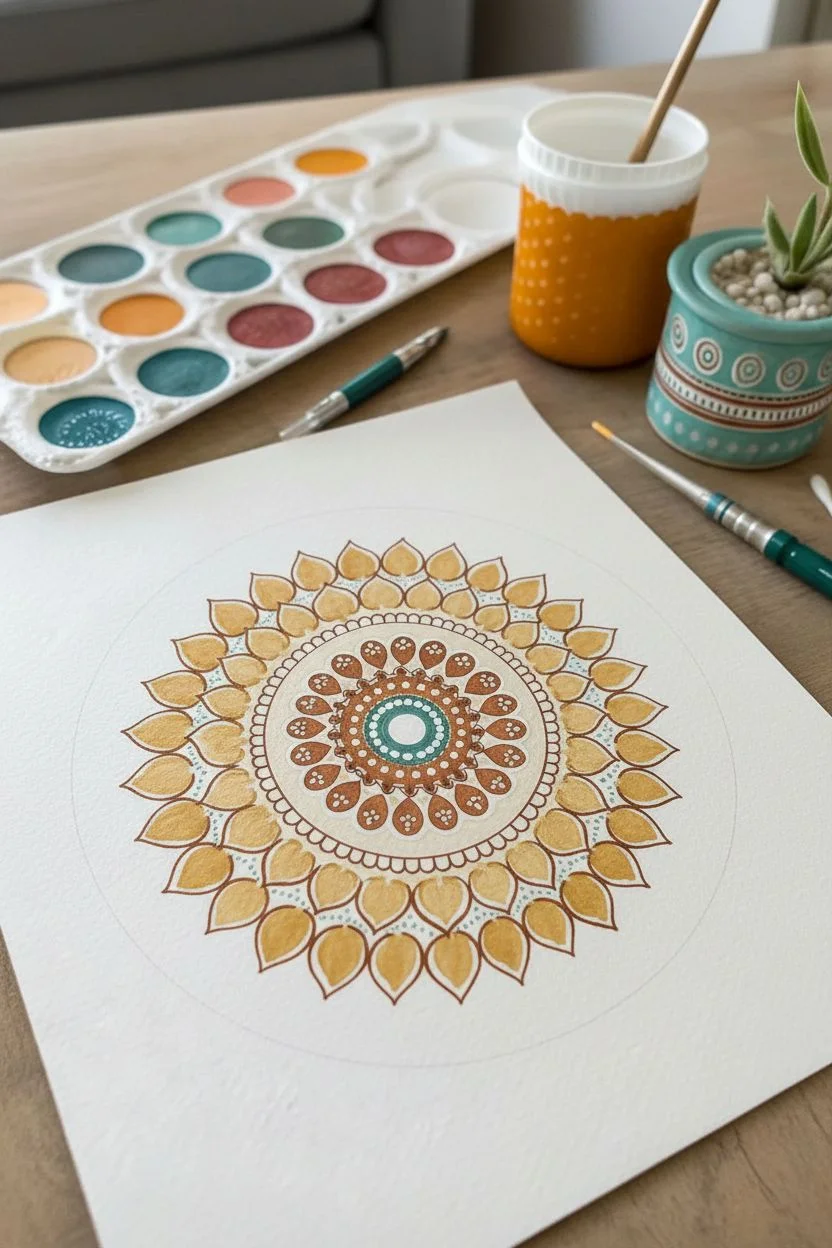
Central dot:
Start the painting with a single, crisp white dot in the very center. Then, paint a small teal circle around it using your fine brush. -
Inner flower:
Around the central teal ring, use a fine brush to paint small petal shapes in a rust or burnt sienna shade. Fill the negative space between petals with tiny white dots using a fine-tipped tool or a toothpick. -
Golden scallop layer:
Paint a larger ring of scalloped petals using yellow ochre. Make these petals wider and rounder than the previous layer. Once dry, outline them thinly with a darker brown or rust color for definition.
Fuzzy Dots?
If your Q-tip dots look too fuzzy, the cotton might be too loose. Dip the Q-tip in water and smooth the fibers down into a tight shape before dipping it into the paint
Step 2: The Q-Tip Rings
-
Teal chain ring:
Dip a fresh Q-tip into teal paint. Press firmly to create a ring of distinct, solid dots just outside your golden scallop layer. Try to keep the spacing even. -
Create hollow dots:
For the next ring, modify your technique. Dip a Q-tip in teal, press it down, and give it a slight circular twist to lift the paint from the center, creating a ‘hollow’ ring effect. Alternatively, paint a solid dot and immediately dab the center with a clean, dry Q-tip. -
Rust dot border:
Load a Q-tip with burnt sienna paint. Create a ring of large, bold dots outside the teal chain. Ensure each dot sits right on your pencil guideline to maintain symmetry.
Step 3: Expanding the Pattern
-
Teal band:
Using a standard round brush, paint a solid, thick band of teal around the rust dots. This solid ring acts as a visual anchor for the outer layers. -
Texture the band:
While the teal band is still slightly damp, take a clean Q-tip and press gently along the outer edge to lift a little pigment, creating a soft, textured rim. -
Large outer dots:
Mix a slightly darker shade of rust or terracotta. Use a Q-tip (or the back of a paintbrush handle for larger dots) to stamp a wide ring of circles. These should be the largest dots in your composition. -
Double teal border:
Paint two thin concentric rings of teal outside the large rust dots. Use your compass lightly again if you’ve lost your guide marks, as precision helps here. -
Miniature dot fill:
Between the two thin teal rings, use a toothpick or a very fine brush to add a series of tiny teal dashes or micro-dots, creating a zipper-like texture.
Gilded Edges
Once the paint is fully dry, trace the edges of the largest rust dots with a metallic gold gel pen or gold paint for a shimmering, luxurious finish
Step 4: Finishing Touches
-
Outer droplets:
For the final delicate flourish, paint tiny teardrop shapes drifting away from the main mandala. Use watered-down teal paint for a soft, fading effect. -
Accent dots:
intersperse the teal droplets with minuscule red-orange micro-dots using the very tip of a fine brush. -
Erase guidelines:
Allow the entire piece to dry completely—ideally overnight to prevent smudging. Once bone dry, gently erase any visible pencil lines from your initial grid.
Step back and admire the rhythmic, calming symmetry of your handcrafted mandala.


Have a question or want to share your own experience? I'd love to hear from you in the comments below!