If you’ve ever stood on your front porch thinking, “This space could feel so much more like me,” you’re in the right headspace. I’m sharing my favorite front porch color ideas that play beautifully with doors, trim, floors, and ceilings—like building a palette before you ever pick up a brush.
Classic Crisp White with Black Accents
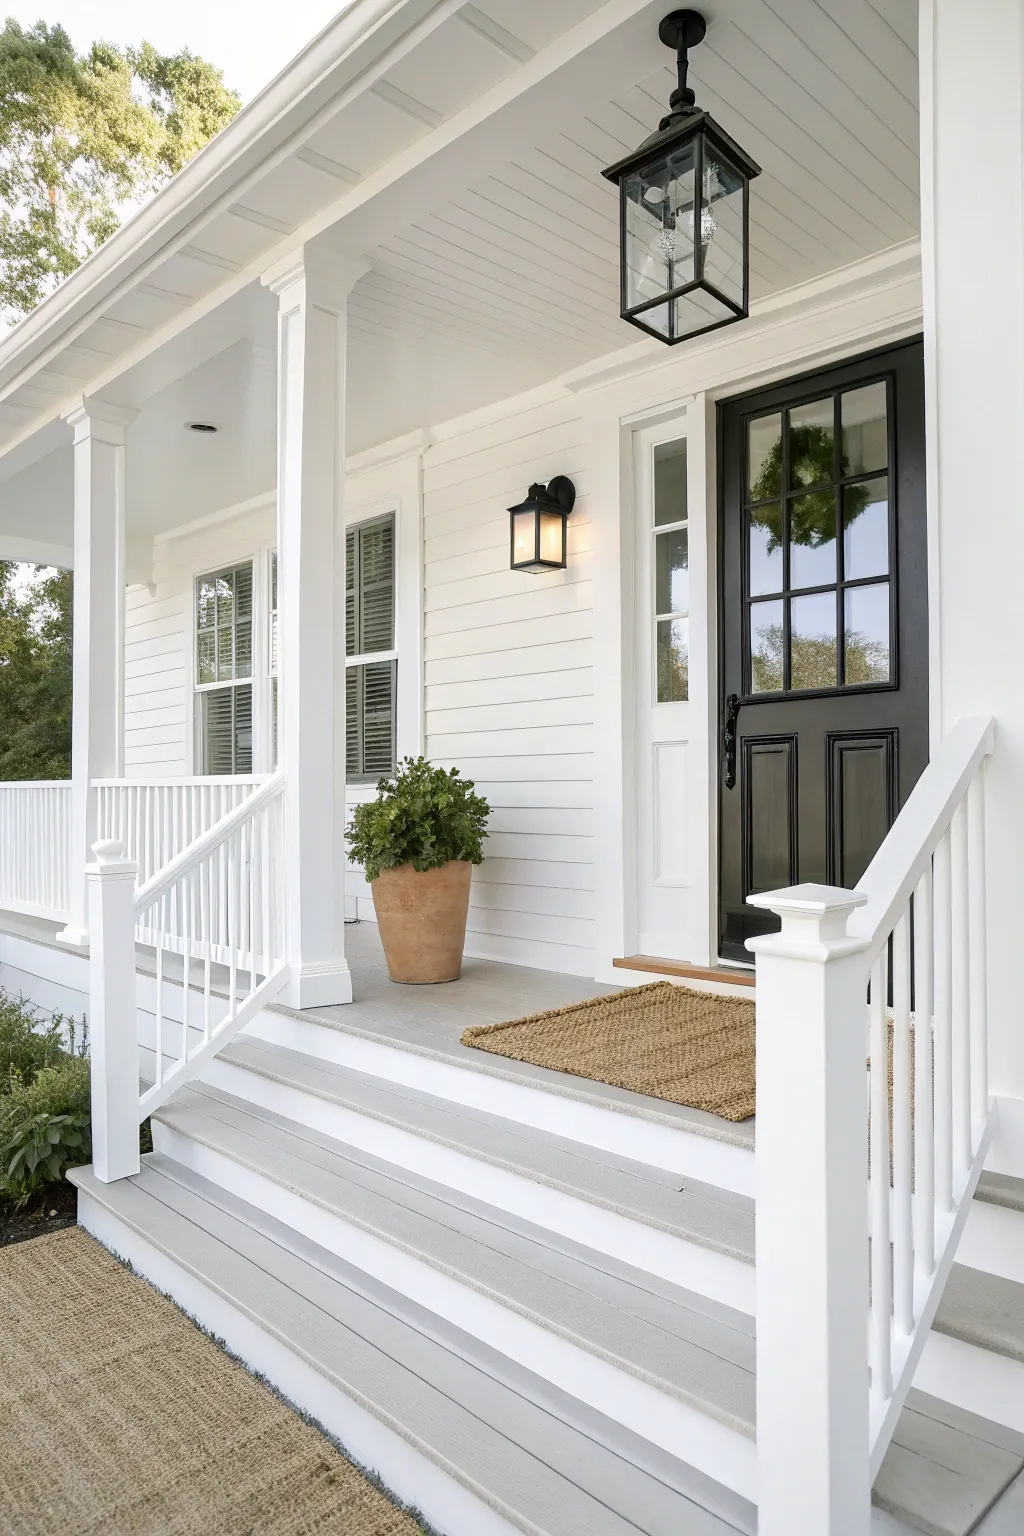
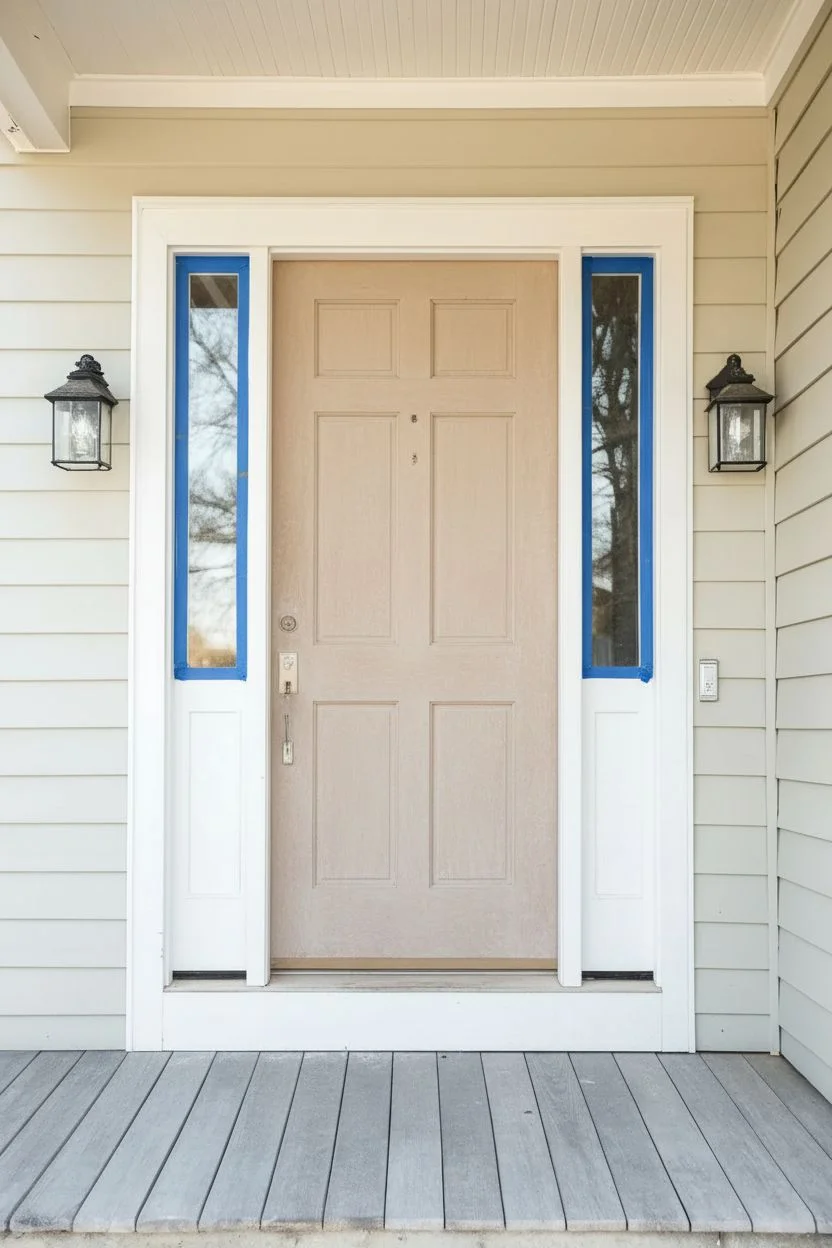
Transform your entryway into a classic, inviting space with this crisp white and black color scheme. The high-contrast palette creates a refined look that feels both historic and freshly modern.
How-To Guide
Materials
- High-quality exterior primer
- Exterior paint: bright white (satin or semi-gloss finish)
- Exterior paint: charcoal or pure black (semi-gloss)
- Deck/Porch floor paint: soft gray (specifically for walk-on surfaces)
- Sandpaper (80 and 120 grit)
- Painter’s tape and plastic drop cloths
- Pressure washer or stiff scrub brush
- Outdoor wood filler
- Caulk and caulking gun
- Paint rollers (medium nap for siding, smooth for doors)
- Angled sash brushes (2.5 inch)
- Cleaning solution (TSP substitute)
Step 1: Preparation & Repairs
-
Deep clean surfaces:
Begin by thoroughly cleaning the siding, porch floor, columns, and trim. Use a pressure washer on a low setting or scrub manually with a TSP substitute to remove dirt, mildew, and loose paint. -
Scrape and sand:
Once dry, inspect for peeling paint. Scrape away any loose chips, then sand rough areas with 80-grit sandpaper to feather the edges smooth. -
Fill imperfections:
Inspect the wood siding and trim for holes or cracks. Apply exterior wood filler, let it dry completely, and sand it flush with 120-grit paper. -
Caulk gaps:
Run a bead of exterior-grade caulk along seams where trim meets siding and around window frames to ensure a watertight seal and professional finish. -
Masking off:
Protect your windows, door hardware (if not removing), and landscaping. Use painter’s tape for precise lines around the glass panes on the door and windows.
Sticky Paint Troubles?
If the door paint feels tacky days later, known as ‘blocking,’ dust talcum powder on the seal edges. Humidity often slows cure time for dark colors.
Step 2: Painting the White Foundation
-
Prime bare areas:
Spot-prime any bare wood or filled areas. If you are making a drastic color change, apply a full coat of primer over everything for best coverage. -
Cut in the siding:
Start painting the siding by cutting in effectively with your angled brush around the trim, corners, and under the eaves. -
Roll the siding:
Use a roller to fill in the larger siding areas with your bright white exterior paint. Apply in the direction of the siding planks for a uniform texture. -
Columns and railings:
Paint the porch columns and railing spindles next. I like to use a smaller roller for the flat surfaces of the columns and a brush to get into the intricate details of the spindles. -
Ceiling refresh:
Don’t forget the porch ceiling. A fresh coat of white here reflects light and brightens the entire space. -
Second coat:
Allow the first coat to dry according to the manufacturer’s instructions, then apply a second coat to ensure a rich, opaque white finish.
Step 3: The Gray Foundation & Black Accents
-
Prep the floor:
Ensure the porch floor is completely dust-free. Vacuum or sweep rigorously before starting the floor painting process. -
Paint the floorboards:
Apply the soft gray floor paint. Start at the corner furthest from the stairs and work your way out so you don’t paint yourself into a corner. -
Paint the steps:
Continue the gray paint down the stair treads. For risers, you can stick with white to match the trim or continue the gray for a simpler look. -
Door preparation:
While the floor cures, move to the front door. Ensure the surface is impeccably clean and lightly sanded to help the black paint adhere. -
Painting the door:
Apply the charcoal or black paint to the door. Start with the recessed panels, then move to the vertical and horizontal stiles and rails. -
Second door coat:
Black can be tricky to get plain opaque. Apply a second or even third thin coat to achieve a deep, satiny finish without brush marks. -
Install fixtures:
Once all paint is fully cured, install black lantern-style light fixtures to echo the door color and unify the design. -
Finishing touches:
Remove all painter’s tape carefully. Add a natural fiber doormat and a potted green plant to warm up the stark contrast.
Add a Ceiling Surprise
Swap the white ceiling paint for a traditional ‘haint blue’ (a soft teal-blue). It adds Southern charm and visually lifts the roof height.
Enjoy the commanding curb appeal your freshly painted, high-contrast porch brings to the neighborhood


Soft Off-White for a Warm, Welcoming Glow
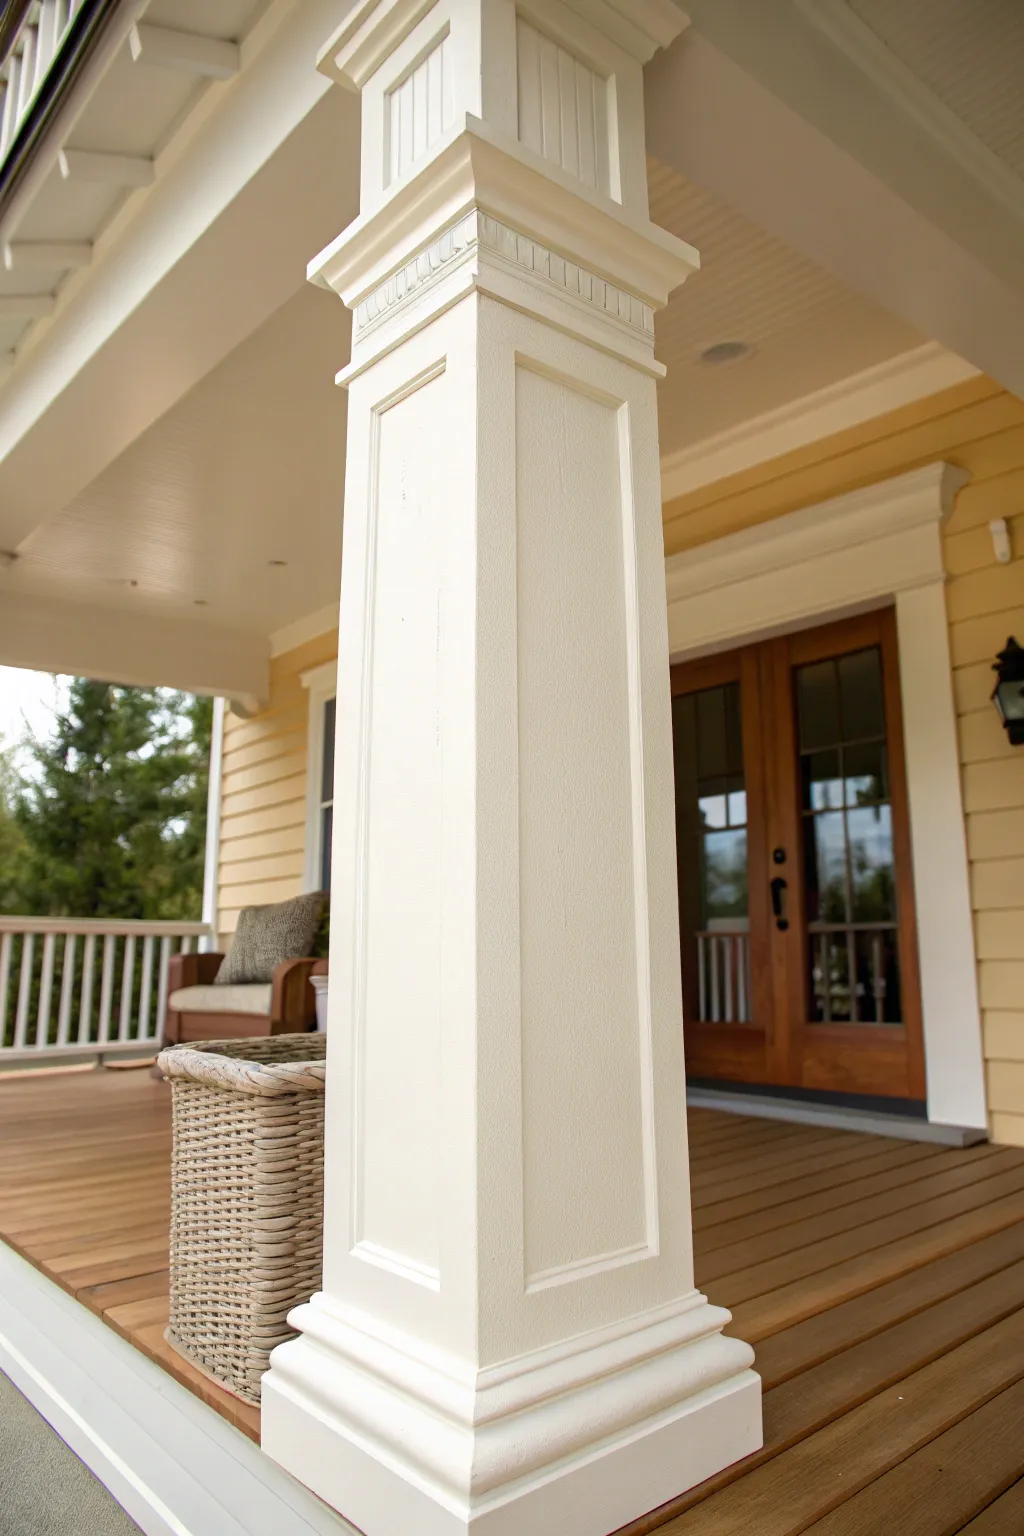
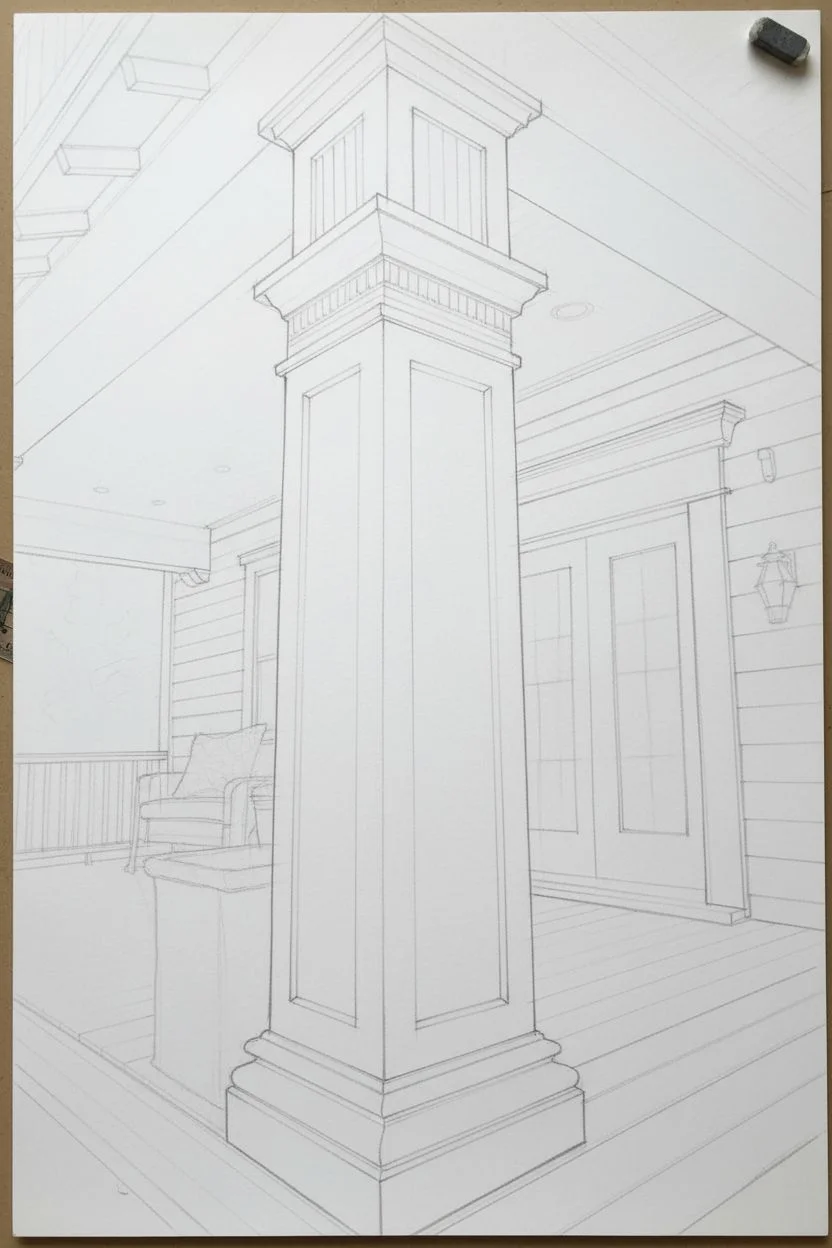
Capture the welcoming essence of a classic front porch by creating a realistic architectural painting of a stately column. This project emphasizes structural form, warm light, and the subtle interplay of soft off-whites against warm wood tones.
Step-by-Step Tutorial
Materials
- Canvas or primed wood panel (16×24 inches)
- Acrylic paints: Titanium White, Unbleached Titanium, Raw Sienna, Burnt Umber, Yellow Ochre, Payne’s Gray
- Gesso primer
- Pencil and large ruler
- Assorted flat brushes (1-inch, 1/2-inch, 1/4-inch)
- Small round detail brush
- Painter’s tape or masking tape (low tack)
- Palette knife for mixing
- Water cups and paper towels
Step 1: Drafting the Structure
-
Prepare your surface:
Start by applying a smooth coat of gesso to your canvas or panel. Sand it lightly once dry to ensure crisp lines later. -
Establish the perspective:
Using your pencil and ruler, draw the horizon line well below the center. Sketch the vertical lines of the main column slightly off-center to the left, capturing the slight upward viewing angle. -
Detail the architectural elements:
Draw the recessed panels within the column faces. Mark out the intricate molding at the capital (the top) and the wider base at the bottom. Accuracy here is key. -
Sketch the background:
Lightly pencil in the diagonal lines of the porch ceiling, the siding on the right, and the wooden door frame in the distance.
Straight Edge Secret
Use a mahl stick or steady your hand against a dry ruler to keep your long vertical brushstrokes perfectly straight without wobbling.
Step 2: Blocking In Colors
-
Mix your base whites:
Create a ‘warm off-white’ by mixing Titanium White with a tiny touch of Unbleached Titanium and a speck of Yellow Ochre. This will be the main column color. -
Mask the column:
Apply painter’s tape along the outer vertical edges of your column drawing to protect it while you paint the background. -
Paint the siding and ceiling:
Mix Yellow Ochre and White for the siding color. For the ceiling, use a very muted, darker version of your column white (add a tiny bit of Burnt Umber). Paint these areas with broad strokes, keeping the paint flat. -
Lay down the deck floor:
Mix Raw Sienna and Burnt Umber to create a medium wood tone. Paint the floor area with horizontal strokes to suggest the direction of the planks. Remove the tape once dry.
Warm Glow Glaze
Once dry, apply a very thin glaze of Zinc White and Yellow Ochre over the sunlit side of the column to unify the hues and boost warmth.
Step 3: Defining the Column
-
Apply the column base coat:
Fill in the entire column shape with your prepared warm off-white mixture. Use a large flat brush and paint vertically to mimic wood grain and structure. -
Create the shadow side:
Mix a slightly darker value of your off-white using a touch of Grey. Paint the left-facing side of the column and the recessed panels on that side to establish the light source coming from the right. -
Highlight the sunlit face:
Use pure Titanium White mixed with the tiniest bit of Yellow Ochre to paint the right-facing side of the column. This contrast creates the 3D form. -
Paint the recessed panels:
Using a smaller flat brush, carefully paint the interior rectangles of the column. The recessed areas should be slightly darker than the raised frame around them to show depth.
Step 4: Refining Details and Shadows
-
Add the molding details:
Switch to your detail brush. Mix a shadow color (White + Payne’s Gray). Paint thin lines under the decorative molding at the top of the column to suggest overhangs and grooves. -
Refine the floor planks:
Take a thin brush with Burnt Umber and draw the gaps between the floorboards. Vary the line thickness slightly to keep it natural. -
Paint the background door:
Mix a rich, dark brown using Burnt Umber and a touch of Red. Block in the door frame in the background. Keep the glass areas dark grey/black to suggest depth and reflection. -
Add the basket texture:
If you included the wicker basket in your sketch, use a rough scumbling technique with alternating light tan and dark brown strokes to build up the woven texture. -
Final highlights:
Add sharp, pure white highlights on the sharpest corners of the column facing the viewer. This makes the architecture pop.
Step back and admire how realistic your architectural study looks hanging on the wall


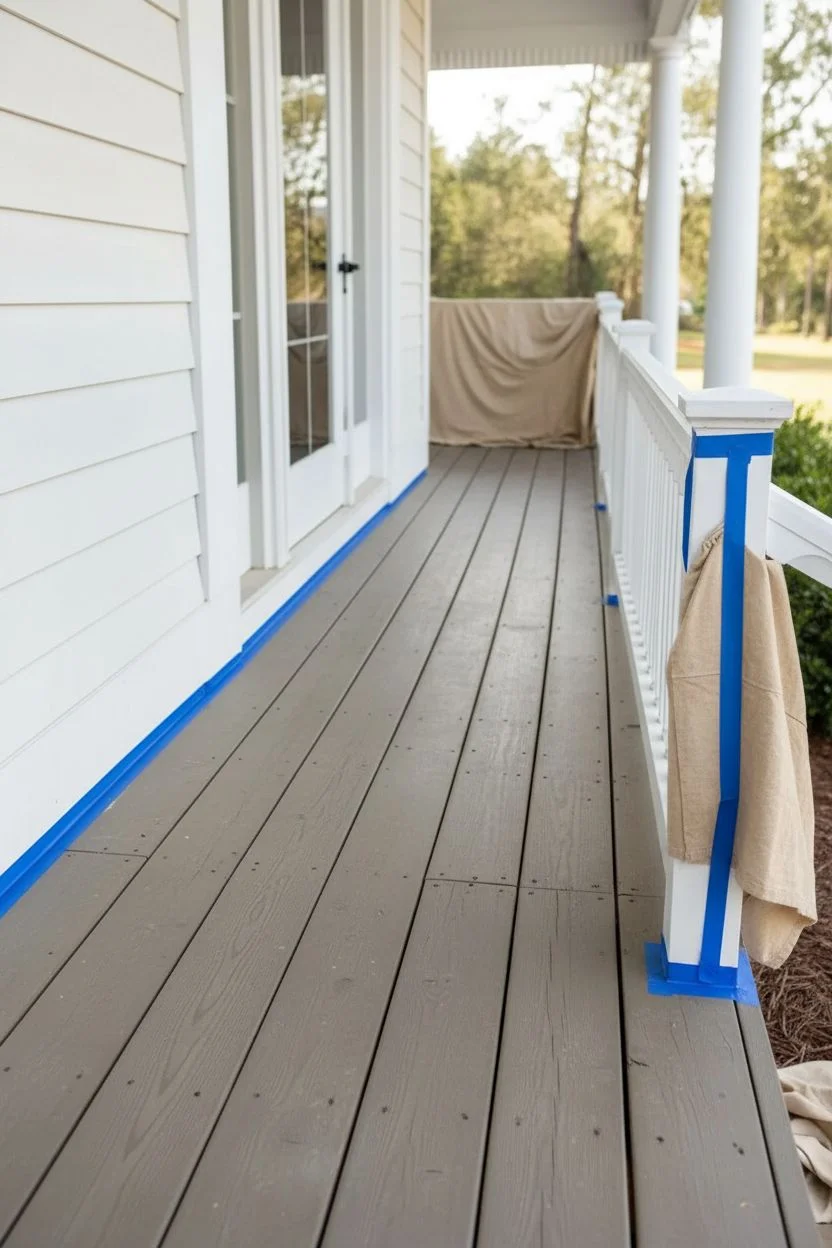
Charcoal Porch Floor for Instant Drama
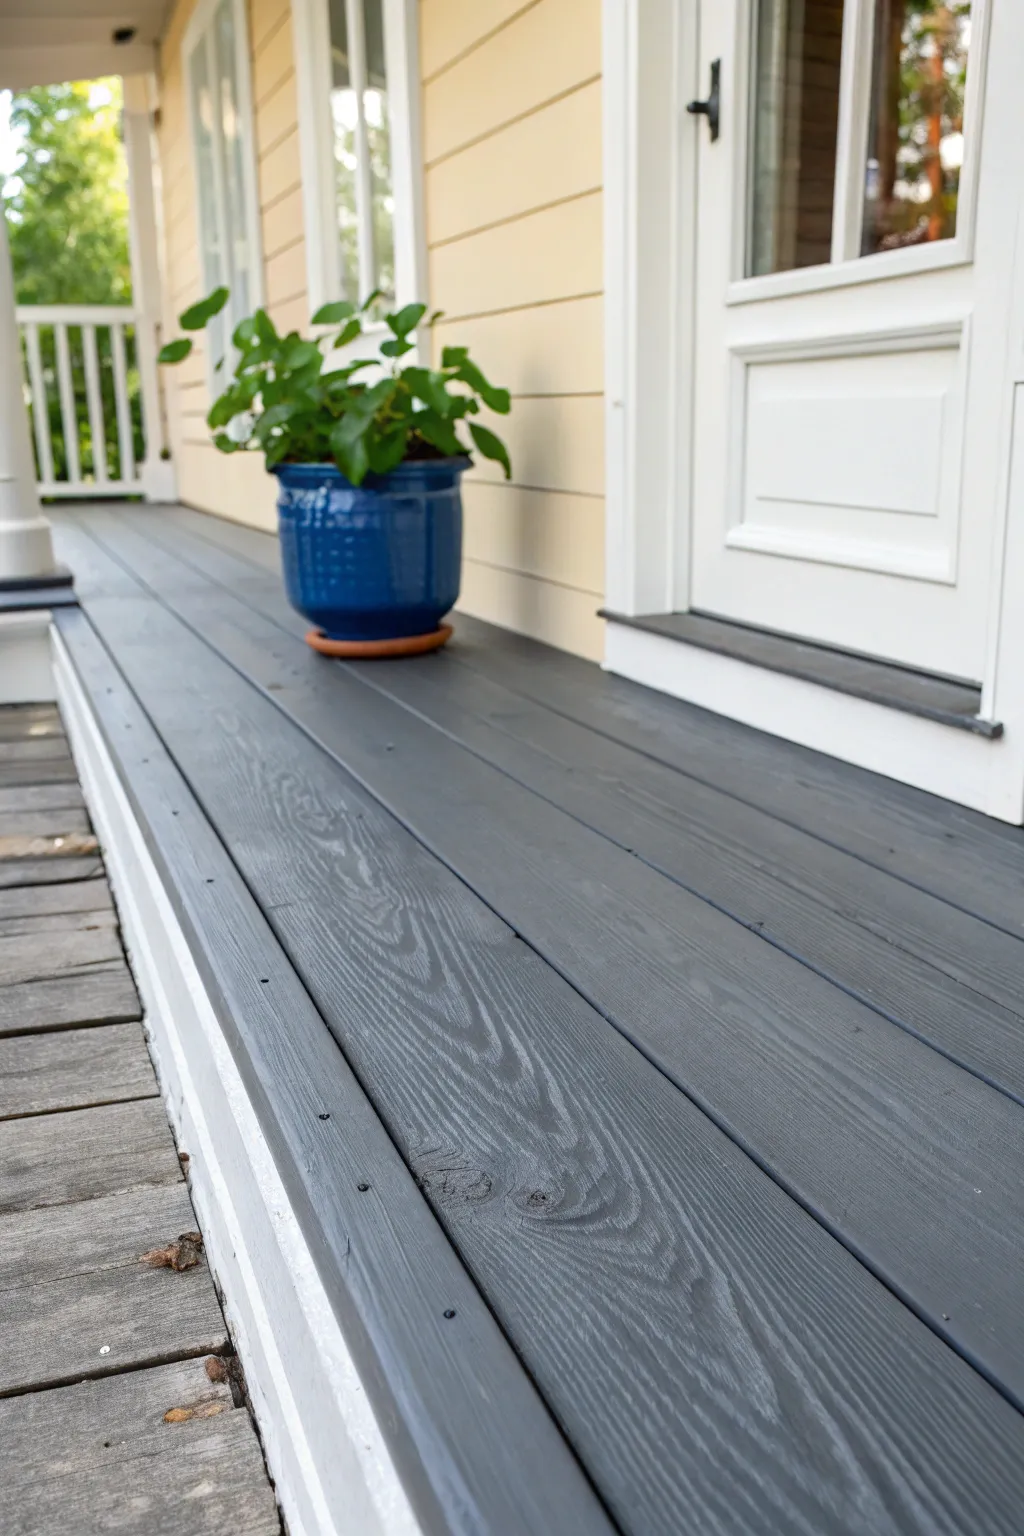
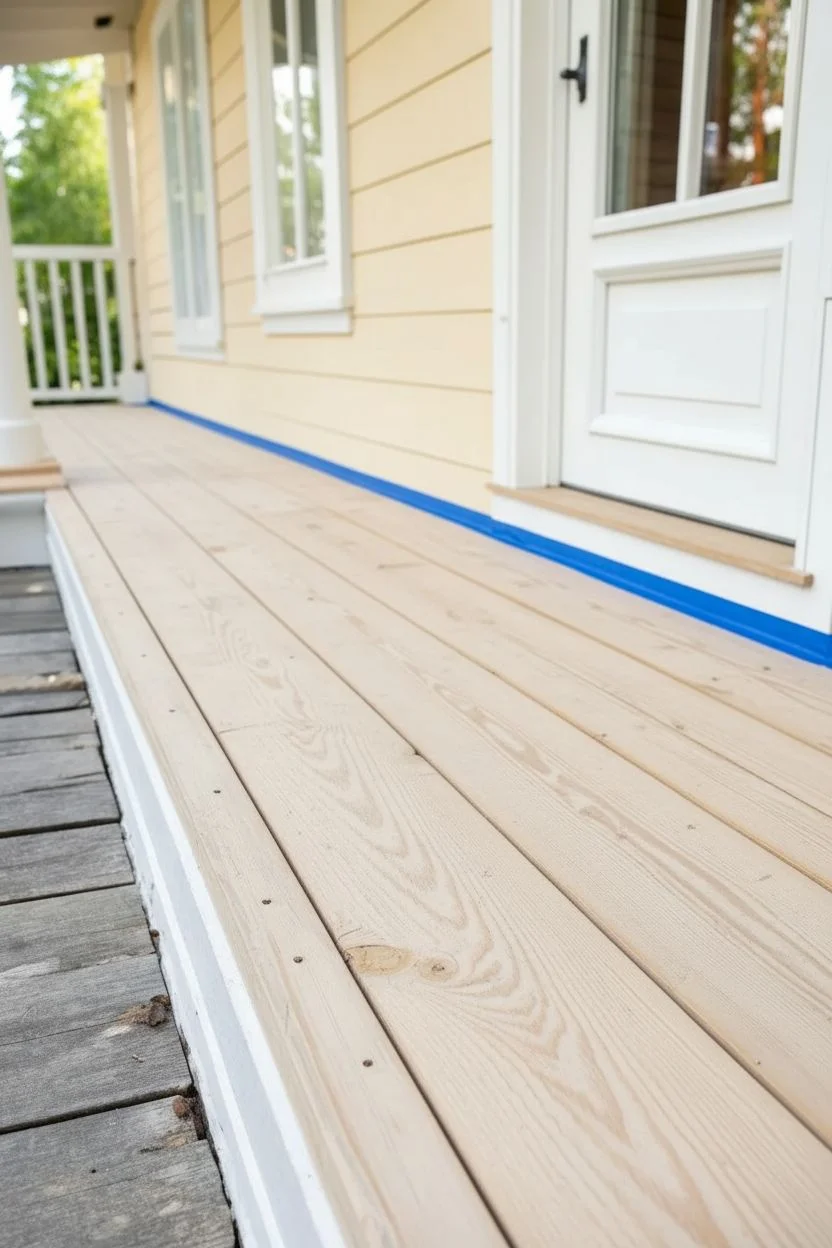
Transform your entryway with a sophisticated charcoal gray finish that instantly grounds the space and adds dramatic contrast to light siding. This project revitalizes worn wooden deck boards with a sleek, opaque stain that highlights wood grain while providing durable protection against the elements.
Step-by-Step Guide
Materials
- Exterior wood floor paint or solid stain (charcoal gray)
- Exterior primer (if using paint on bare wood)
- Wood cleaner/brightener
- Pressure washer or stiff bristle scrub brush
- Orbital sander with 80 and 120-grit sandpaper
- Synthetic bristle paintbrush (2-3 inch)
- Paint roller with extension pole
- Roller covers (3/8 inch nap for smooth wood, 1/2 inch for rough)
- Painter’s tape
- Wood filler (exterior grade)
- Putty knife
- Drop cloths
Step 1: Preparation
-
Clear and Clean:
Remove all furniture, rugs, and planters from the porch area. Sweep thoroughly to remove loose debris, dirt, and leaves. -
Deep Wash:
Apply a wood cleaner or brightener according to the manufacturer’s instructions. Scrub vigorous with a stiff bristle brush or use a pressure washer on a low setting to remove mildew, old loose paint, and deep-seated grime. -
Drying Time:
Allow the wood to dry completely. This is crucial; I like to wait at least 48 hours of dry weather to ensure no moisture is trapped inside the boards. -
Address Imperfections:
Inspect the boards for any deep cracks, gouges, or rotted areas. Use a putty knife to fill holes with exterior-grade wood filler and let it cure fully. -
Sanding:
Sand the entire floor surface using an orbital sander. Start with 80-grit paper to remove old finish and smooth out ridges, then switch to 120-grit for a smoother finish that accepts paint well. -
Dust Removal:
Vacuum up the sanding dust thoroughly, then wipe down the boards with a tack cloth or a slightly damp rag to ensure a perfectly clean surface. -
Masking Off:
Apply painter’s tape carefully along the bottom of the house siding, door trim, and any columns to protect them from stray brush marks.
Moisture Check
Before painting, tape a small square of clear plastic to the floor. If condensation forms underneath after a few hours, the wood is still too wet to paint.
Step 2: Priming and Painting
-
Prime Bare Wood:
If your floorboards are bare wood or have significant exposed areas, apply a quality exterior primer. Roll it on for the main areas and use a brush for the edges and gaps. -
Cut In Edges:
Stir your charcoal paint or solid stain thoroughly. Begin by ‘cutting in’ around the perimeter of the porch, along the house wall, and around columns using your synthetic bristle brush. -
Paint Between Boards:
While cutting in, use the brush to get paint down into the gaps between the deck boards. This ensures no old wood color peeks through later. -
First Coat Application:
Pour paint into a tray and load your roller. Apply the first coat working along the length of the boards, maintaining a wet edge to avoid lap marks. -
Back-Brushing:
For better adhesion and texture, I sometimes back-brush immediately after rolling—running a brush lightly over the wet paint to work it into the grain. -
Inter-Coat Dry:
Let the first coat dry according to the can’s instructions, usually 4-6 hours, though humidity can affect this. -
Second Coat:
Apply a second coat in the same manner as the first. This coat deepens the charcoal color and ensures a uniform, durable finish. -
Detail Work:
Check for any drips or missed spots, especially near the gaps, and touch them up with your brush before the final coat sets.
Rug Ready Style
Once fully cured, layer a patterned outdoor rug or a bright coir mat against the dark charcoal floor to make the color pop even more.
Step 3: Finishing Up
-
Remove Tape:
Carefully peel off the painter’s tape while the paint is still slightly tacky to prevent peeling the new finish. -
Cure Time:
Allow the floor to cure fully before replacing heavy furniture. Light foot traffic is usually fine after 24 hours, but give it 72 hours for heavy items.
Your dramatic new porch floor is now ready to welcome guests with modern flair


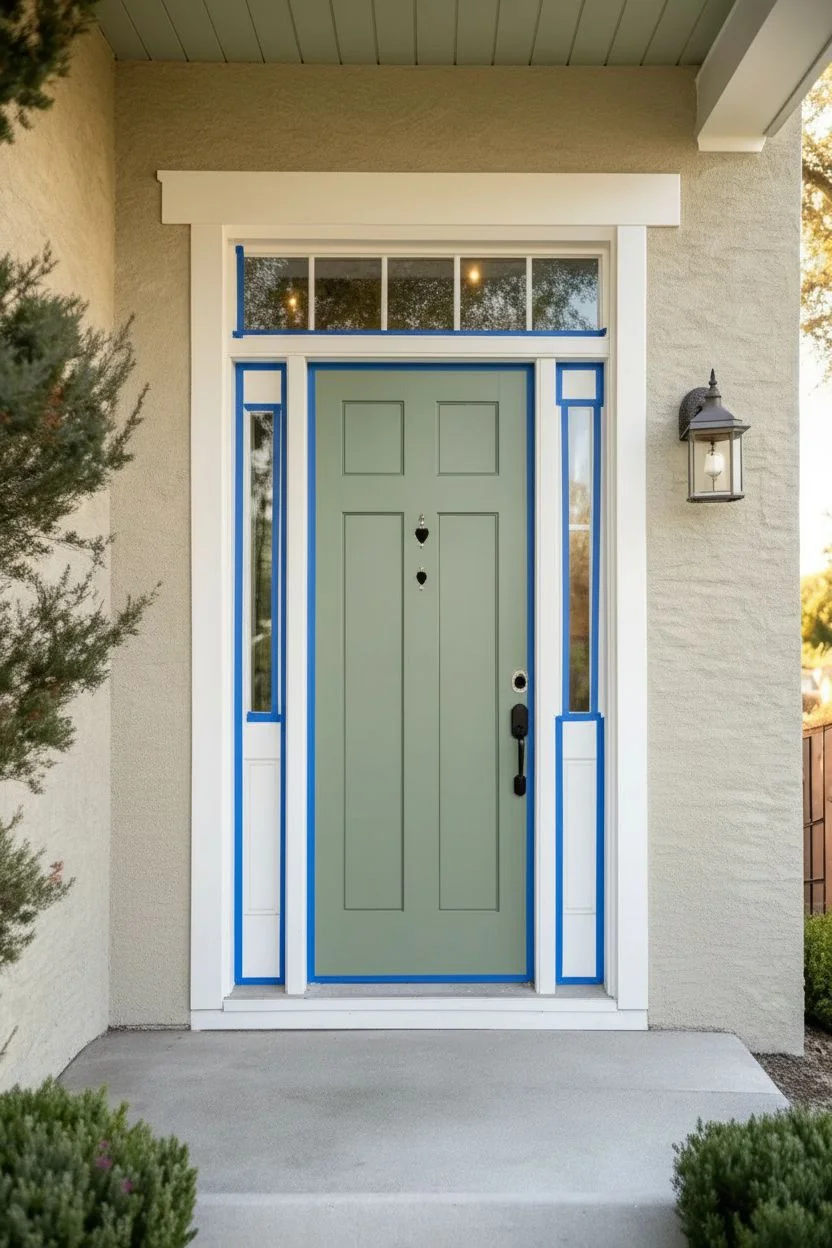
Navy Door Pop Against Neutral Trim
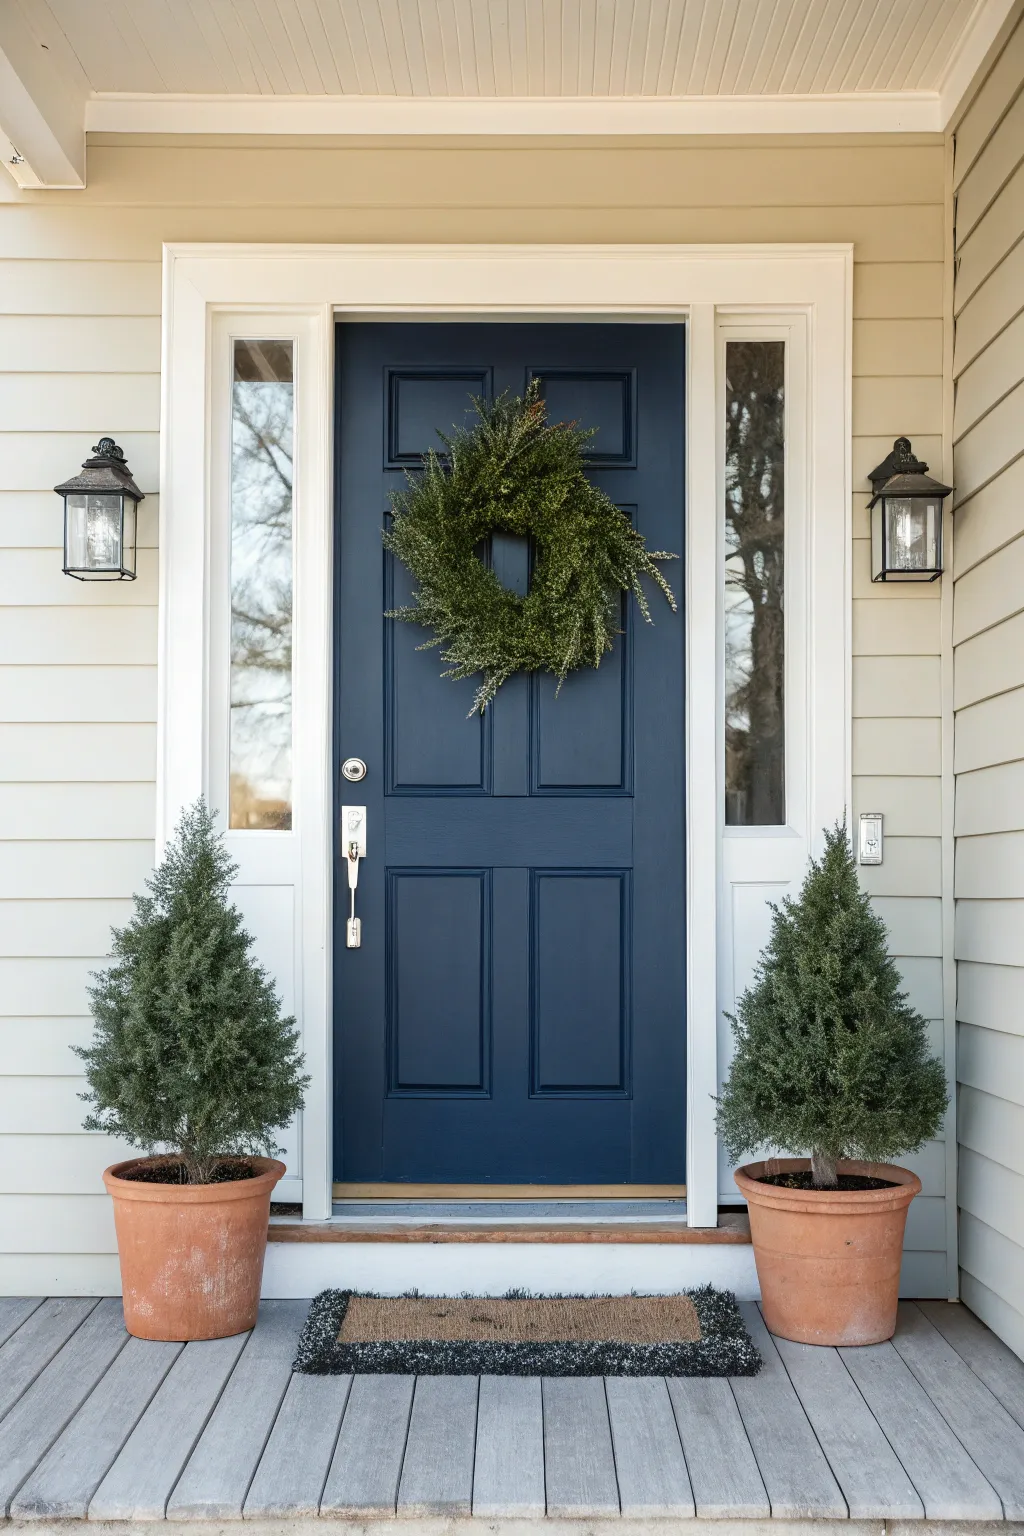
Transform your entryway with a sophisticated pop of navy blue that beautifully anchors neutral siding and crisp white trim. This project combines classic paint choices with thoughtful greenery to create a welcoming and timeless curb appeal update.
Step-by-Step Tutorial
Materials
- Exterior paint (Navy Blue – Satin or Semi-Gloss)
- Exterior primer (if transitioning from a dark or oil-based color)
- Painter’s tape (multi-surface)
- Drop cloths or plastic sheeting
- Sanding block (medium grid)
- Soap, water, and scrub brush
- Angled sash brush (2-2.5 inch)
- Mini foam roller and tray
- Screwdriver (for hardware removal)
- Two large terracotta planters
- Two dwarf Alberta spruce trees (or faux alternatives)
- Potting soil
- One large faux greenery wreath
- Heavy-duty wreath hanger or command hook
- Coir doormat with rubber backing
Step 1: Preparation
-
Clear and clean:
Begin by removing everything from the porch area to give yourself plenty of space. Thoroughly wash the door with soap and water to remove dirt, grime, and oils, as paint won’t adhere well to a dirty surface. -
Remove hardware:
Using your screwdriver, carefully take off the door handle, deadbolt, kickplate, and any other metal hardware. Set these aside in a safe place with their screws. -
Sand the surface:
Once the door is dry, lightly scuff the entire surface with a medium-grit sanding block. This helps the new paint grip better. Wipe away all sanding dust with a damp cloth. -
Masking time:
Apply painter’s tape carefully around any glass inserts, the peephole if it wasn’t removed, and along the weather stripping edges. Press the tape edges down firmly to prevent bleed-through.
Weather Watcher
Check the forecast before painting! Aim for a cloudy day with temps between 50°F and 80°F. Direct sun can dry paint too fast, causing lap marks.
Step 2: Painting the Door
-
Edge work:
Stir your navy paint thoroughly. Dip your angled sash brush and carefully paint the indented panels and moldings first, working from the top down. -
Vertical stiles:
Paint the vertical center stile (the strip between the panels) using your brush or a small roller, smoothing out any brush marks immediately. -
Horizontal rails:
Next, tackle the horizontal rails (top, middle, and bottom sections). I like to feather the edges where they meet the vertical sections to avoid hard lines. -
Outer edges:
Finish by painting the two long vertical outer edges of the door. Use the mini foam roller for the flattest sections to achieve a smooth, sprayed-on look. -
Dry and recoat:
Allow the first coat to dry according to the manufacturer’s instructions (usually 4-6 hours). Apply a second coat following the same order—panels, stiles, rails, then edges—for full, rich coverage. -
Reassemble:
Wait at least 24 hours for the paint to cure before removing the tape and reattaching your hardware. This patience prevents the tacky paint from peeling or sticking to the locks.
Sticking Door?
If the door sticks to the weather stripping after painting, apply a thin layer of petroleum jelly or wax to the stripping until the paint cures fully (about 30 days).
Step 3: Styling the Greenery
-
Potting the trees:
Fill your terracotta planters about halfway with potting soil. Remove the dwarf Alberta spruce trees from their nursery pots and center them in the new planters. -
Fill and settle:
Fill the rest of the pot with soil, pressing down gently around the root ball to remove air pockets. Water them lightly to help the soil settle. -
Placement:
Position the planters symmetrically on either side of the doorframe. Ensure they are pushed back enough to allow the door to open fully but are still visible. -
Adding texture:
Lay down your coir doormat. If you want a layered look like some pros do, you could place a slightly larger patterned outdoor rug underneath it. -
The finishing touch:
Fluff the branches of your green wreath to make it look full and lively. Hang it centered on the upper portion of the door using a wreath hanger that matches your hardware, or a sturdy outdoor command hook.
Step back and admire how the deep navy tone instantly elevates the character of your home entrance
BRUSH GUIDE
The Right Brush for Every Stroke
From clean lines to bold texture — master brush choice, stroke control, and essential techniques.
Explore the Full Guide
Soft Sky Blue Ceiling for an Airy Look
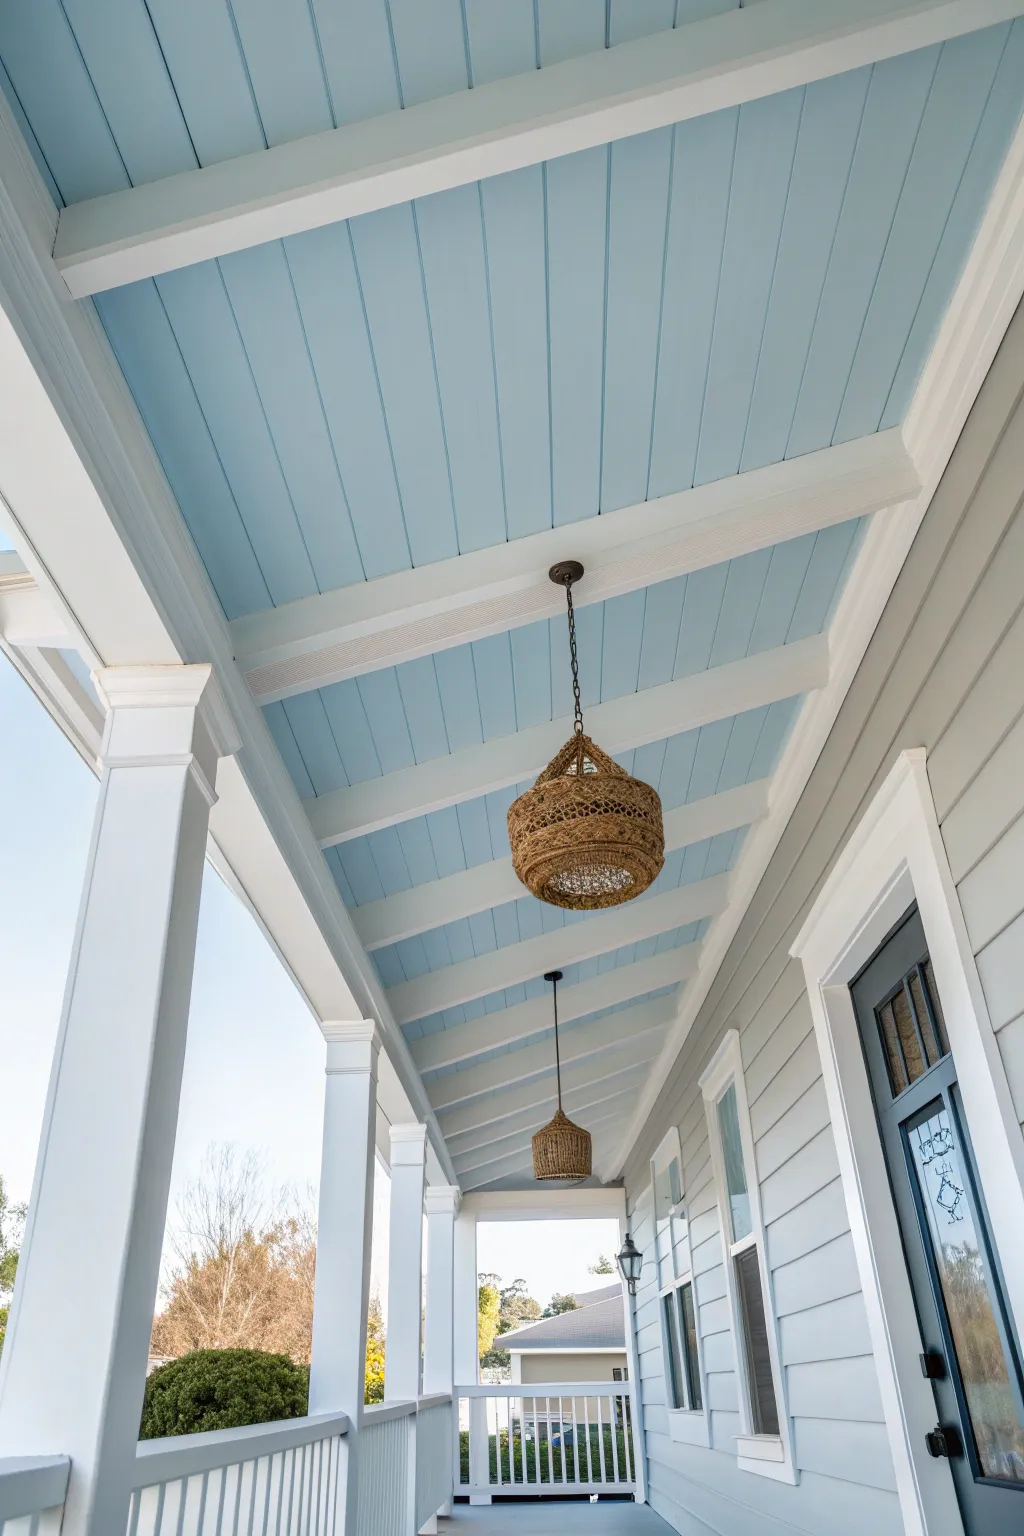
Bring a breath of fresh air to your entryway with this classic Southern-inspired porch ceiling makeover. The combination of soft sky-blue beadboard and crisp white trim creates an uplifting, airy atmosphere that feels like an eternal clear day, no matter the weather.
Step-by-Step Guide
Materials
- Exterior satin or semi-gloss paint (Sky Blue)
- Exterior semi-gloss paint (Pure White for trim & columns)
- Exterior flat or satin paint (Light Grey for siding)
- Painter’s tape (2-inch width)
- Drop cloths
- Sanding pole with fine-grit sandpaper
- High-quality angled sash brush (2.5 inch)
- Paint roller frame and extension pole
- 3/8 inch nap roller covers (for smooth surfaces)
- Ladder
- Screwdriver (for removing fixtures)
- Woven pendant light fixtures (outdoor rated)
- Cleaning supplies (TSP or exterior wash)
Step 1: Prep & Prime
-
Clear and clean:
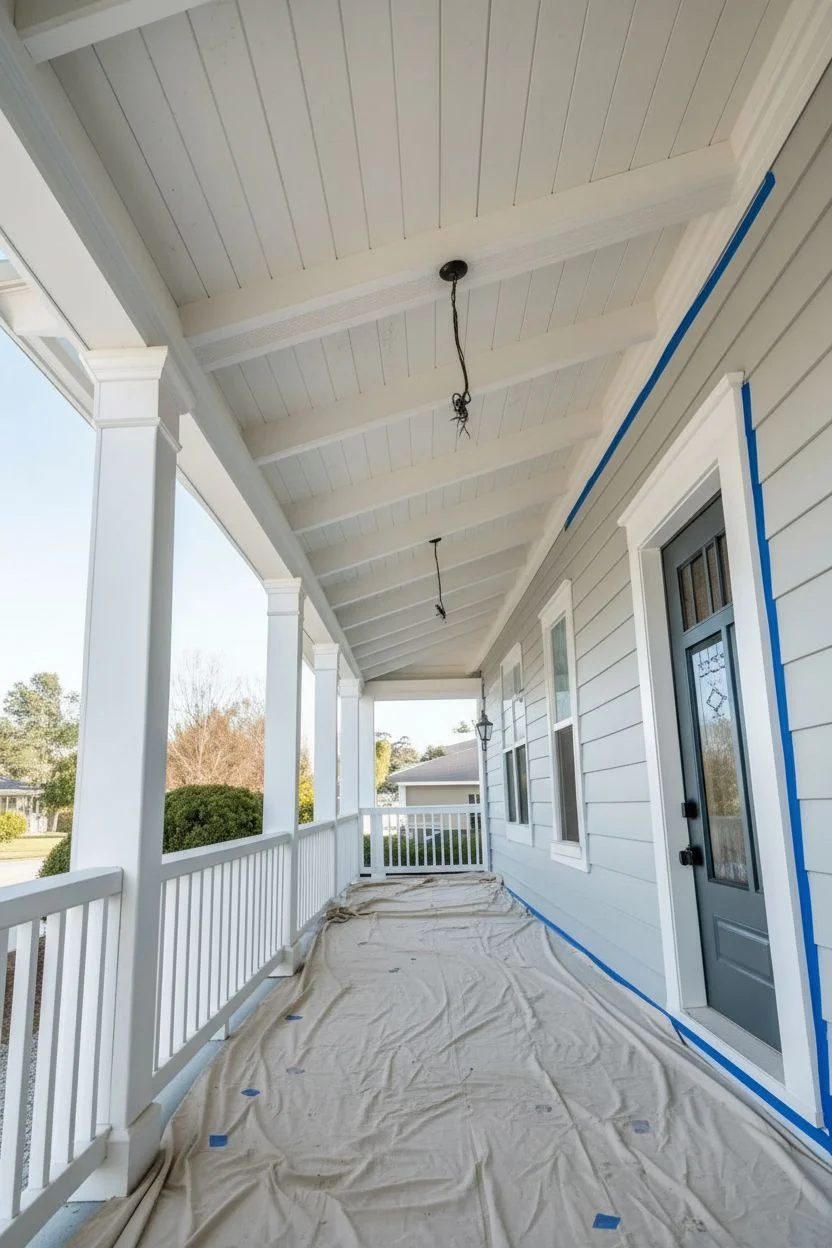
Begin by removing any furniture, rugs, or decorations from the porch area. Use a screwdriver to take down existing light fixtures, capping off the wires safely with wire nuts. Thoroughly clean the ceiling, beams, and columns with an exterior wash or TSP solution to remove dirt, mildew, and spiderwebs. -
Protect surfaces:
Lay down heavy-duty drop cloths over the entire porch floor to catch drips. Tape off the tops of the walls where they meet the ceiling if you aren’t painting the siding yet, and cover any door hardware with plastic and tape. -
Sand for adhesion:
Using a sanding pole, lightly scuff the existing paint on the ceiling and beams. This step is crucial for ensuring your new paint sticks well to the old surface. Wipe away the dust with a damp rag or tack cloth.
Clean Lines Secret
When taping over fresh paint, press the tape edge down firmly with a putty knife. This prevents paint bleed and ensures that crisp, professional line between the beams and the blue ceiling.
Step 2: Painting the Ceiling
-
Cut in the blue:
Open your sky-blue exterior paint. Using your angled sash brush, carefully ‘cut in’ the perimeter of each ceiling section, painting the blue right up to the edges where the beadboard meets the beams. Don’t worry about getting paint on the face of the beams, as those will be painted white later. -
Roll the sections:
Pour the blue paint into a tray. Attach a 3/8 inch nap roller to an extension pole. Roll the paint onto the flat beadboard sections between the beams, working in smooth, overlapping strokes. The slightly thicker nap helps get paint into the grooves of the beadboard. -
Check groove coverage:
Inspect the grooves of the beadboard. If the roller missed spots deep in the crevices, use a brush to quickly fill them in before the paint dries, then lightly roll over the area again to smooth out brush marks. -
Apply second coat:
Allow the first coat of blue to dry completely according to the manufacturer’s instructions (usually 4 hours). Apply a second coat for a rich, consistent color that truly pops.
Warm It Up
Switch out standard white bulbs for warm white LEDs (2700K-3000K) in your new pendants. The warmer light makes the blue ceiling look richer and more inviting during the evening hours.
Step 3: Detailing the Trim & Beams
-
Tape for crisp lines:
Once the blue ceiling paint has cured significantly (I usually wait 24 hours to be safe), apply painter’s tape to the blue ceiling edges exactly where they meet the beams. This ensures a razor-sharp line between the blue and white. -
Paint the beams:
Dip your angled brush into the Pure White trim paint. Paint the sides and bottom faces of the ceiling beams. Long, smooth strokes work best here to minimize texture. Remove the tape while the paint is still slightly tacky to prevent peeling. -
Coat the columns:
Move downwards to the columns. Using a combination of brushing for detailed moldings and rolling for the long flat faces, apply the white paint. These high-touch areas often benefit from two durable coats. -
Refresh the siding:
If your project involves the siding, cut in around windows and door frames with your light grey paint. Roll the main sections of the siding, working from the top down to maintain a wet edge.
Step 4: Finishing Touches
-
Install lighting:
Once all paint is fully dry, install your new woven pendant lights. The natural texture adds warmth and contrasts beautifully with the cool blue ceiling. Adjust the chain length so they hang at a visually pleasing height. -
Clean up:
Remove all drop cloths and painter’s tape from the floor. Re-place your porch furniture and enjoy the fresh new look.
Now you have a serene and welcoming entrance that captures the charm of a classic coastal cottage
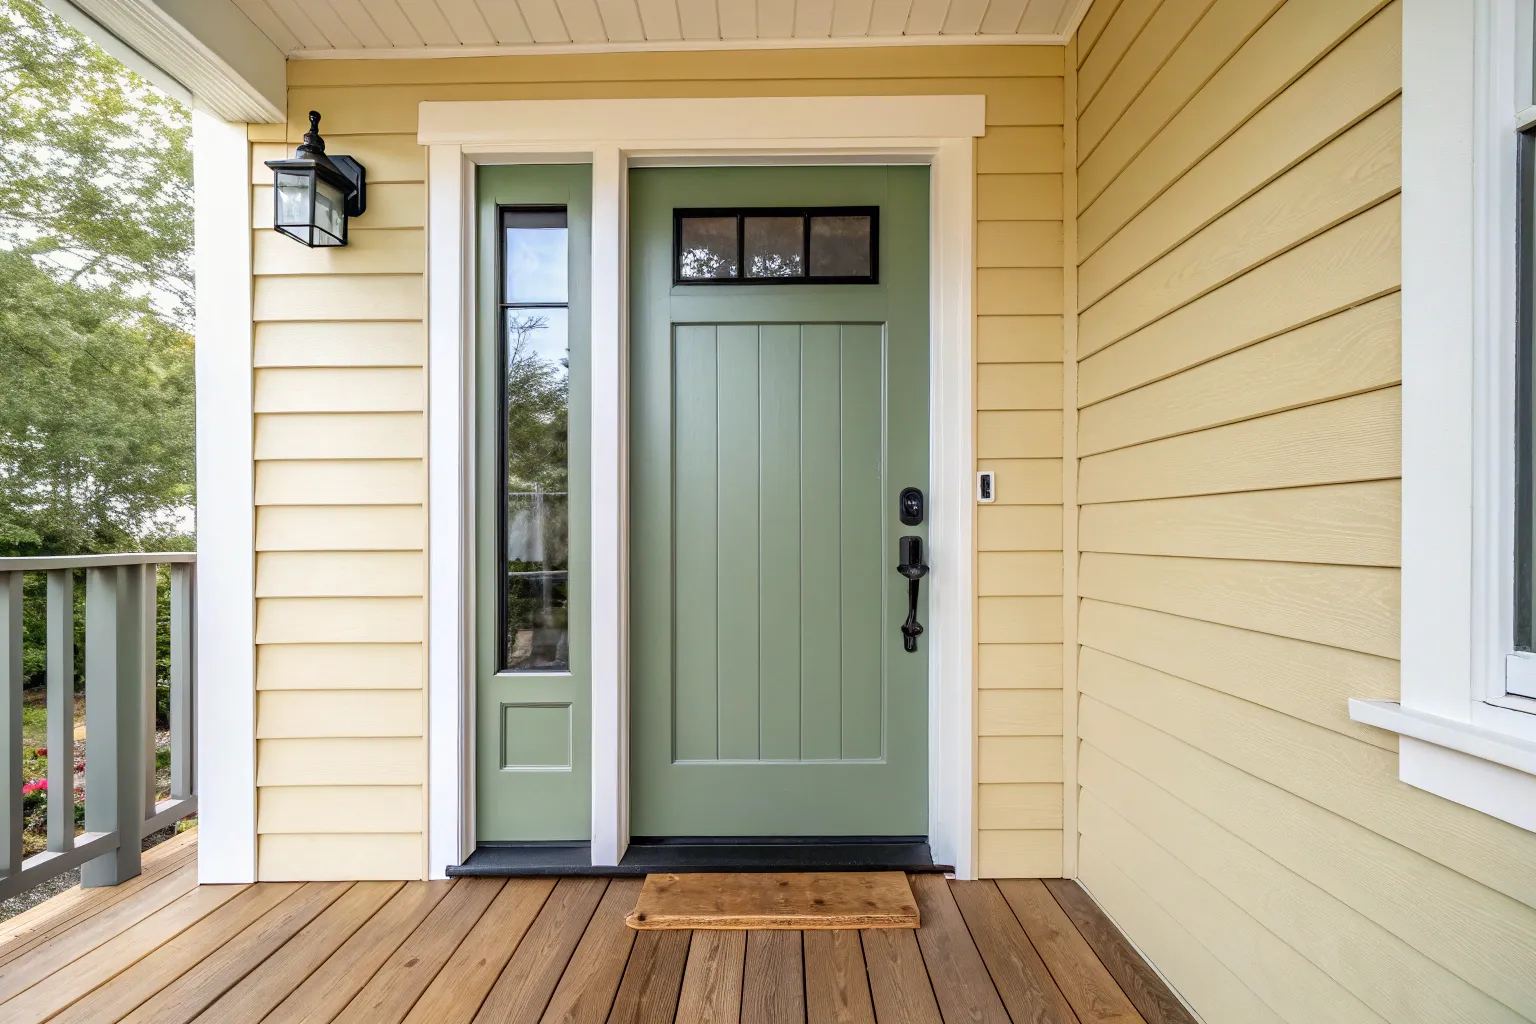
Sage Green That Blends with Landscaping
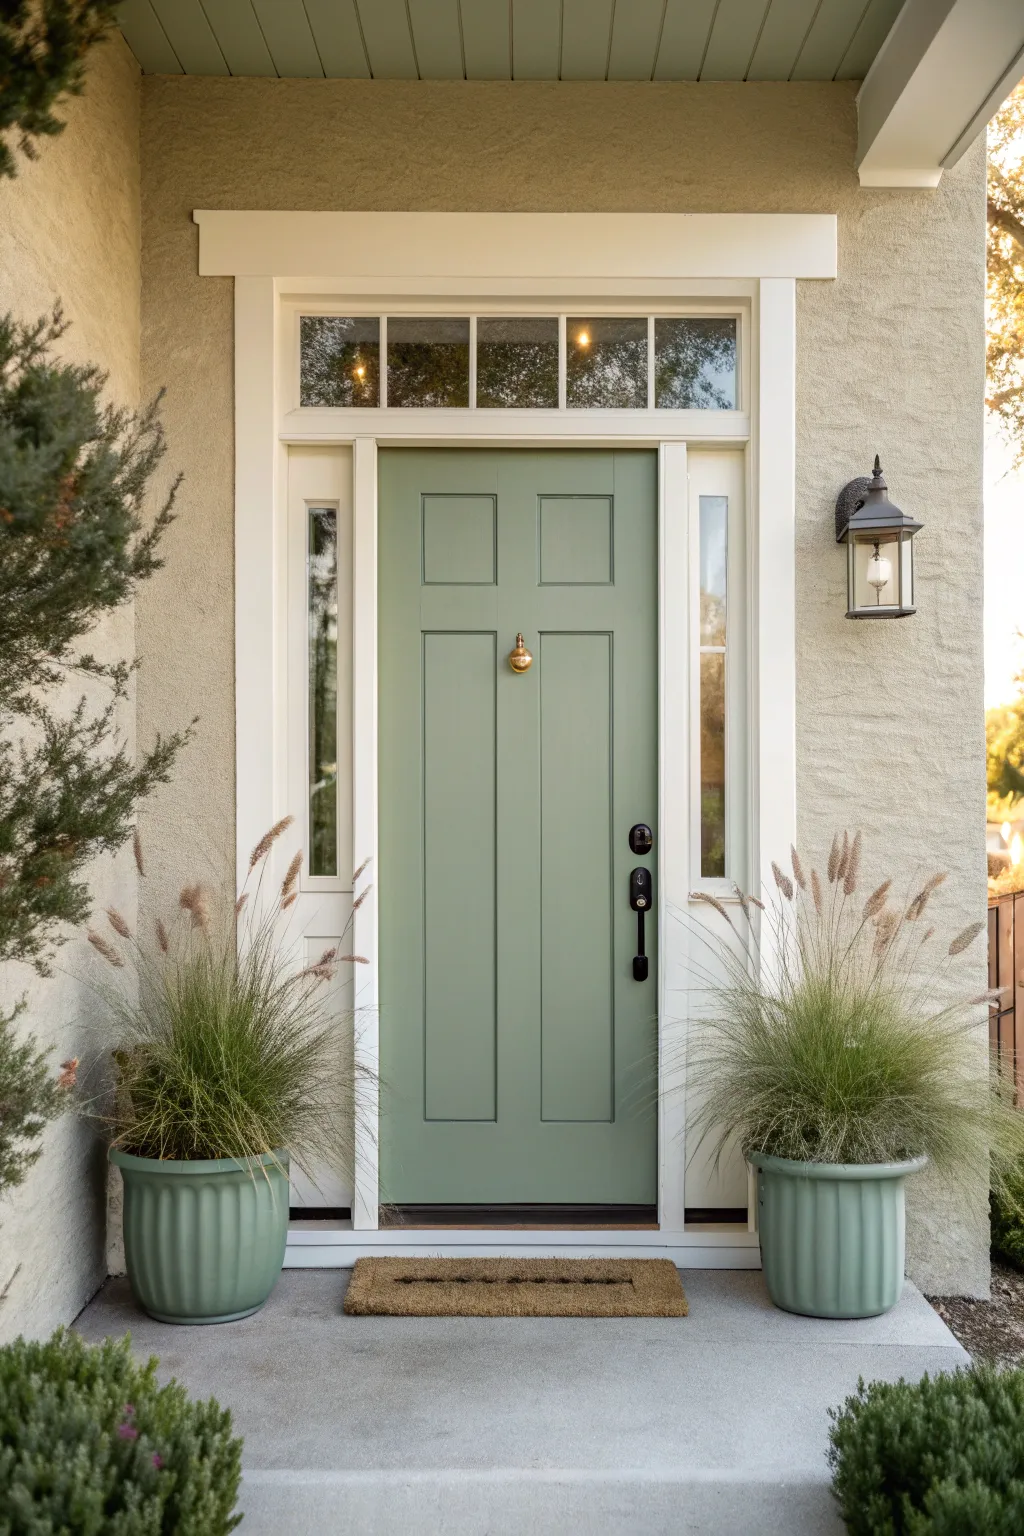
Create a welcoming, nature-inspired entrance with this calming sage green door makeover that perfectly bridges the gap between your home’s architecture and the surrounding landscape. This project focuses on achieving a professional, smooth finish on the door while accents of white trim and natural textures complete the look.
Step-by-Step
Materials
- Exterior semi-gloss paint (Sage Green)
- Exterior semi-gloss paint (Bright White)
- Exterior primer (bonding)
- Sandpaper (120-grit and 220-grit)
- Angled sash brush (2-inch)
- Mini foam roller and tray
- Painter’s tape
- Drop cloths
- Screwdriver or drill
- Cleaning solution (TSP substitute)
- Large planters (Celadon or Mint)
- Ornamental grass seeds or seedlings
- Coir doormat
Step 1: Preparation
-
Remove Hardware:
Begin by removing the door handle, deadbolt, knocker, and kickplate using a screwdriver. Keep all screws and parts organized in a labeled bag so nothing gets lost during the painting process. -
Clean Thoroughly:
Scrub the entire door, frame, and sidelights with a TSP substitute and water to remove dirt, grease, and grime. Rinse well with a clean sponge and let the surfaces dry completely before moving on. -
Sand Surfaces:
Lightly sand the existing finish with 120-grit sandpaper to create a ‘tooth’ for the new paint to adhere to. Wipe away the dust with a damp tack cloth or microfiber rag. -
Mask Off Areas:
Apply painter’s tape carefully around the glass panes in the sidelights, transom, and the door itself if it has windows. Tape off the edges where the trim meets the siding to ensure crisp lines.
Step 2: Painting the Trim
-
Prime the Trim:
Apply a coat of high-quality bonding primer to the door frame, sidelight frames, and overhead transom trim. Allow the primer to dry according to the manufacturer’s instructions. -
Paint Trim First Coat:
Stir your Bright White exterior paint well. Using an angled sash brush, carefully paint the intricate areas of the trim and molding. I find working from the top transom down prevents drips from ruining finished areas. -
Paint Trim Second Coat:
Once the first coat is dry, lightly sand with 220-grit paper for smoothness, wipe clean, and apply a second coat of white paint for solid, bright coverage.
Sticky Situation?
If the door sticks after painting, rub a clear candle or paraffin wax along the edges where it meets the frame. This lubricates the surface and prevents paint transfer.
Step 3: Painting the Door
-
Prime the Door:
Roll a coat of primer onto the flat surfaces of the door and use a brush for any recessed panels. Let it cure fully to ensure the sage green topcoat adheres properly. -
Paint Recessed Panels:
Start applying the Sage Green paint with a brush, focusing on the recessed panels and detailed molding first. Feather the edges out to avoid hard ridges of paint. -
Roll the Flat Surfaces:
Switch to a mini foam roller for the vertical and horizontal flat area (stiles and rails). Roll in long, smooth strokes to minimize texture and achieve that factory-finish look. -
Apply Second Coat:
Allow the first coat to dry completely (usually 4-6 hours). Lightly scuff sand with fine 220-grit paper, wipe clean, and apply the final coat of sage green using the same method. -
Remove Tape and Reinstall:
Carefully score the edge of the painter’s tape with a utility knife before pulling it off to prevent peeling. Once the paint has cured for at least 24 hours, reinstall your hardware.
Hardware Refresh
Spray paint your old hardware with an oil-rubbed bronze finish before reinstalling. This creates a striking, modern contrast against the soft sage green door.
Step 4: Styling the Porch
-
Select Planters:
Choose two large, ribbed planters in a soft celadon or mint hue that complements the door color without matching it perfectly. Position them symmetrically on either side of the entrance. -
Plant Decorative Grasses:
Fill the planters with potting soil and plant tall ornamental grasses like feather reed grass or fountain grass. These add height, texture, and movement that soften the architectural lines. -
Place the Doormat:
Lay down a simple, natural coir doormat. The neutral tan color provides a grounding element that ties the green door and the stone facade together effortlessly.
Step back and enjoy the tranquil, harmonious curb appeal you have created for your home

PENCIL GUIDE
Understanding Pencil Grades from H to B
From first sketch to finished drawing — learn pencil grades, line control, and shading techniques.
Explore the Full Guide
Deep Forest Green for a Classic Heritage Mood
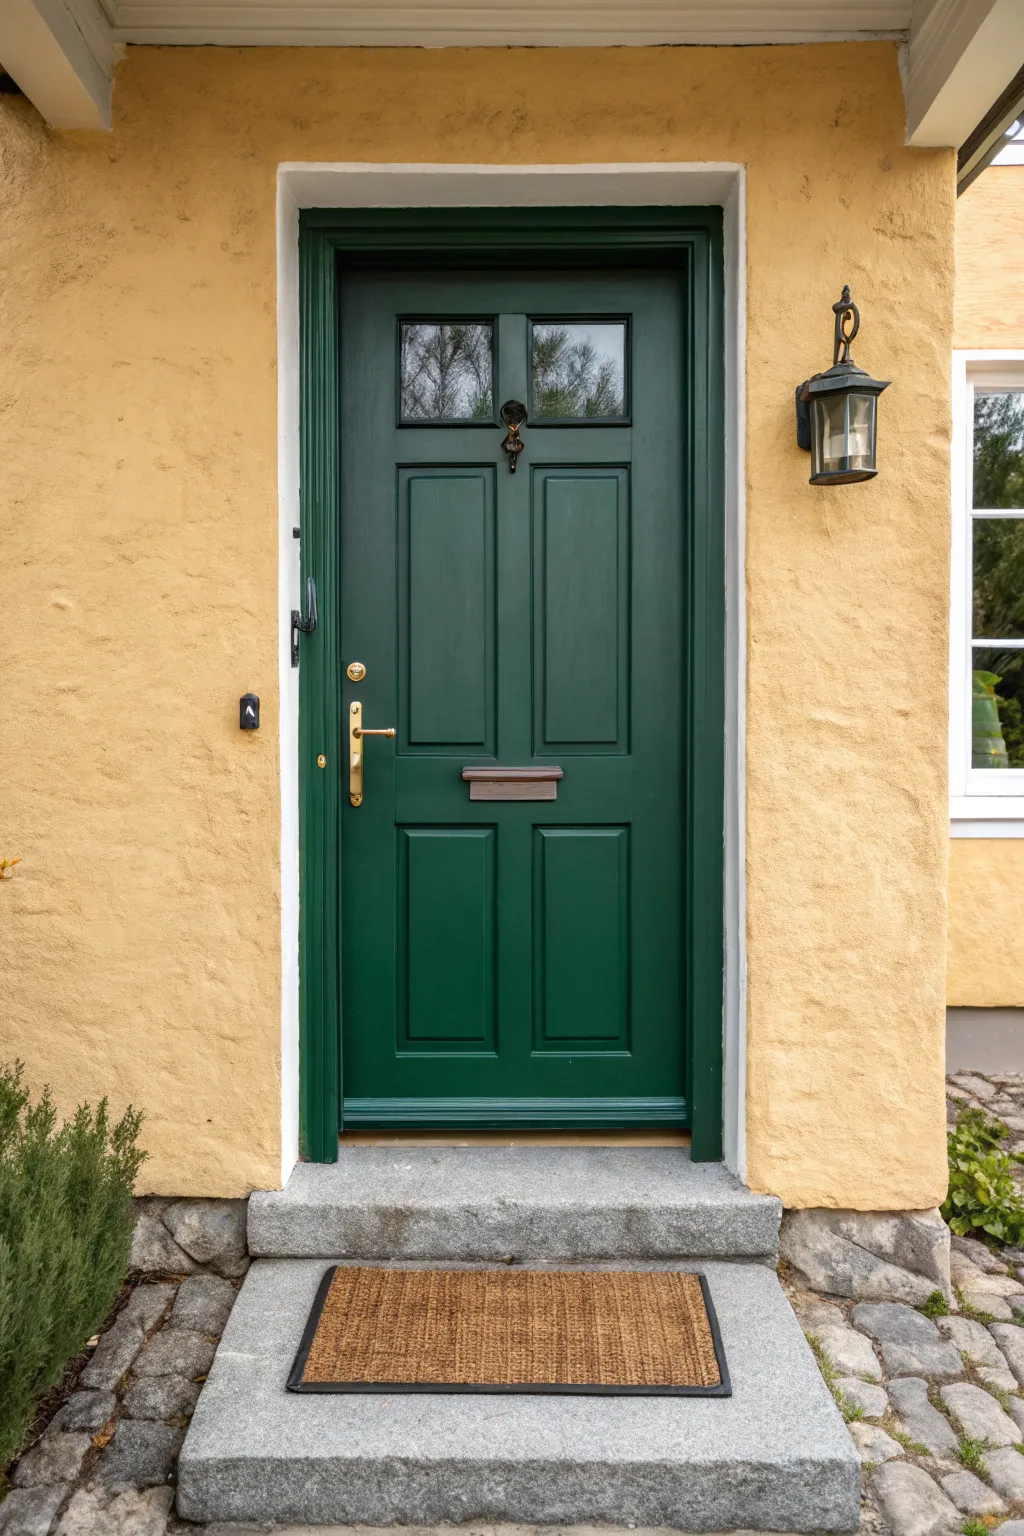
Transform your entryway with the rich, sophisticated character of deep forest green, a color that evokes a sense of heritage and calm. This project focuses on painting a classic paneled door to achieve a smooth, professional finish that perfectly complements warm exterior tones.
Step-by-Step Tutorial
Materials
- Deep forest green exterior paint (satin or semi-gloss finish)
- High-quality angled sash brush (2-2.5 inch)
- Mini foam roller and tray
- Painter’s tape
- Fine-grit sandpaper (220 grit) and sanding block
- TSP substitute or degreaser
- Clean rags
- Wood filler (if repairing old holes)
- Exterior primer (tinted grey recommended)
- Screwdriver or drill
Step 1: Preparation & Hardware Removal
-
Remove Hardware:
Begin by removing all door hardware, including the handle, knocker, letterbox, and kickplate. Store the screws in labeled bags so you don’t lose them. -
Clean Thoroughly:
Wash the entire door surface with a TSP substitute or degreaser to remove dirt, grime, and oils. Let it dry completely. -
Protect Glass:
Carefully apply painter’s tape to the glass panes. Press the edges down firmly with a putty knife or fingernail to prevent paint bleed. -
Sand the Surface:
Lightly sand the entire door using fine-grit sandpaper. You aren’t trying to strip the paint entirely, just scuffing the surface to help the new coat adhere. -
Dust Off:
Wipe away all sanding dust with a damp rag or tack cloth. Any remaining dust will create a bumpy finish.
Step 2: Priming & First Coat
-
Spot Prime:
If you exposed bare wood or filled any holes, apply a coat of exterior primer to those spots. For drastic color changes, I prefer priming the whole door. -
Paint the Moldings:
Start painting with your angled brush. Focus on the recessed molding profiles around the panels first, getting into the corners without pooling paint. -
Paint the Panels:
Switch to a mini foam roller or continue with the brush to paint the flat recessed panels. Smooth out brush strokes immediately. -
Paint Vertical Rails:
Paint the vertical center stile (the strip between the panels) and the vertical outer stiles. Maintain a wet edge to avoid lap marks. -
Paint Horizontal Rails:
Finish the first coat by painting the horizontal rails at the top, middle, and bottom of the door. Allow this coat to dry according to the paint can’s instructions, usually 4-6 hours.
Sticky Situation?
If the door sticks to the weatherstripping, rub a little paraffin wax or a clear bar of soap along the edges once the paint is dry to help it glide.
Step 3: Finishing Touches
-
Light Sanding:
Once the first coat is fully dry, very lightly sand any imperfections or rough spots with fine sandpaper. Wipe clean. -
Apply Second Coat:
Repeat the painting process for the second coat—moldings first, then panels, then rails. This ensures deep, opaque color coverage. -
Remove Tape:
Carefully peel away the painter’s tape while the paint is still slightly tacky, or score the edge with a utility knife if dry to prevent peeling. -
Reinstall Hardware:
Once the paint has cured for at least 24 hours (check your specific product guidelines), reattach your polished brass hardware. -
Clean Glass:
Use a razor blade to gently scrape off any stray paint specks from the glass panes for a crisp, professional look.
Level Up With Glaze
Apply a subtle dark glazing medium into the crevices of the molding after the green paint dries to add antique depth and accentuate the panel details.
Enjoy the welcoming elegance your freshly painted heritage door brings to your home’s facade
Earthy Brown Floors with Bright White Trim
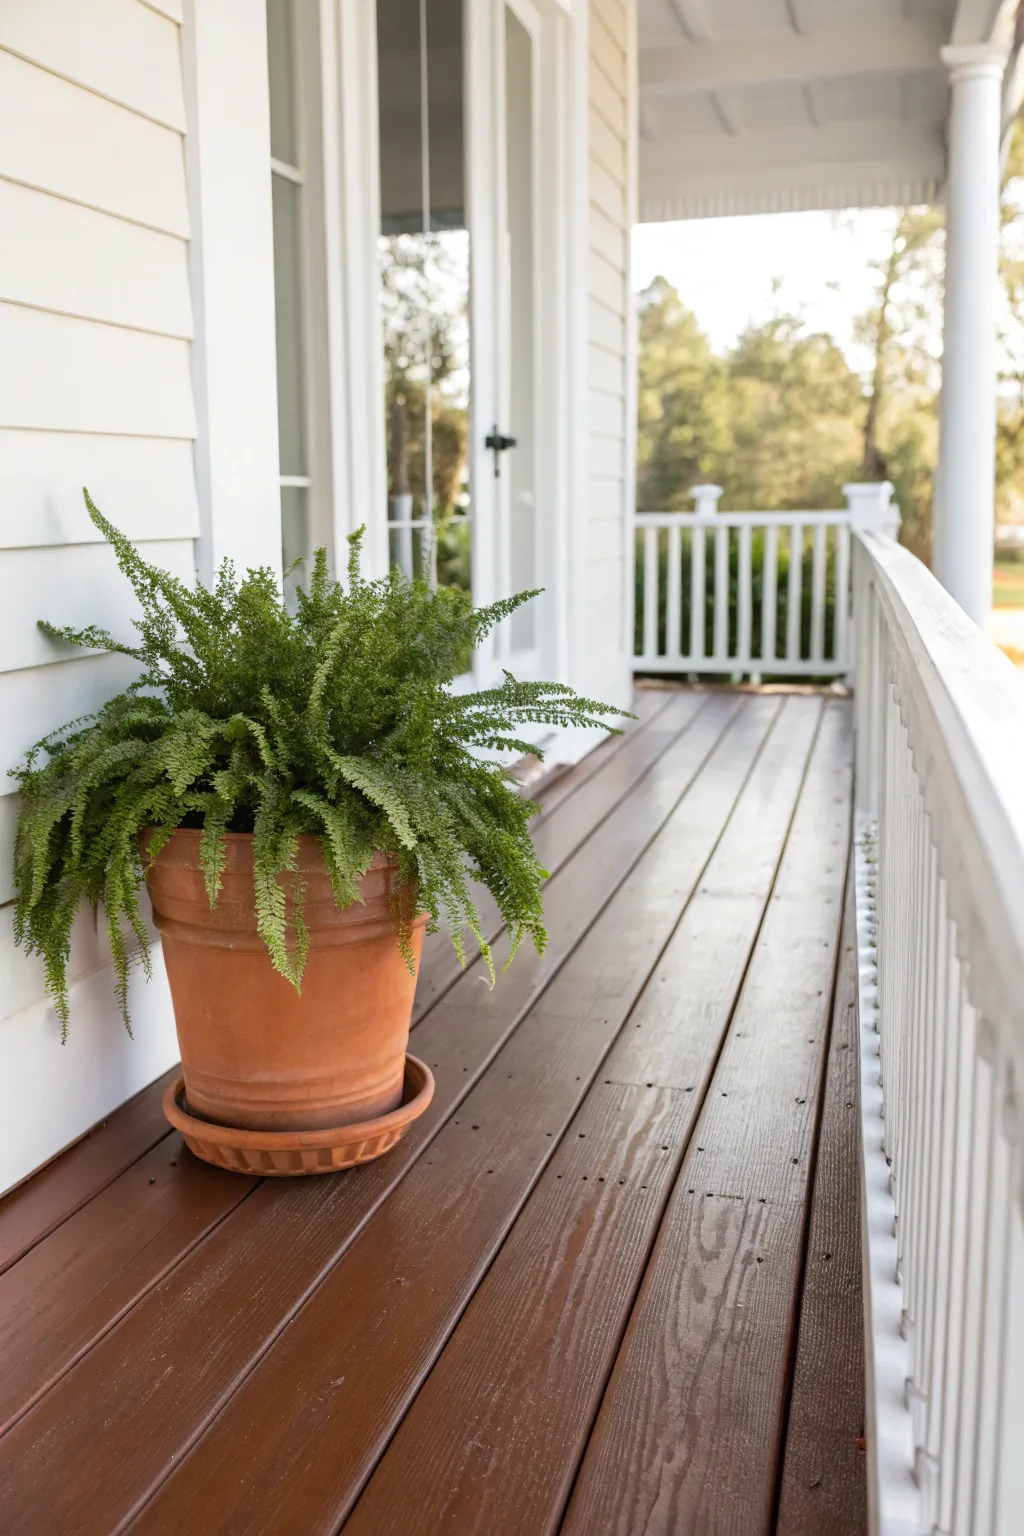
Transform your porch into a welcoming retreat by refinishing the decking with a rich, earthy brown stain that beautifully contrasts against crisp white trim. This project revitalizes worn wood and adds a layer of protection, creating a cozy outdoor living space perfect for relaxing.
Step-by-Step Tutorial
Materials
- Deck cleaner/stripper
- Pressure washer (optional but recommended)
- Stiff-bristle scrub brush
- Medium-grit sandpaper (80-100 grit)
- Exterior semi-transparent or solid wood stain (Earth Brown)
- High-quality stain brush (4-inch)
- Paint tray and liners
- Painter’s tape
- Drop cloths
- Rags for cleanup
- Safety glasses and gloves
Step 1: Preparation & Cleaning
-
Clear the Area:
Remove all furniture, plants, rugs, and décor from the porch. Sweep the floor thoroughly to remove loose dirt, leaves, and cobwebs. -
Protect Surrounding Areas:
Apply painter’s tape to the bottom of the white trim, door frames, and posts to protect them from stain splatters. Lay down drop cloths over nearby landscaping or siding. -
Apply Cleaner:
Dilute your deck cleaner according to the manufacturer’s instructions in a bucket or pump sprayer. Apply it liberally to the floorboards, working in small sections. -
Scrub the Surface:
Use a stiff-bristle brush to rigorously scrub the wet wood. This removes old grime, mildew, and loose finish which is crucial for the new stain to adhere properly. -
Rinse Thoroughly:
Rinse the entire porch with a garden hose or pressure washer on a low setting. Ensure all cleaning solution is removed. Let the wood dry completely for at least 24-48 hours.
Sticky Situation?
If the stain remains tacky after the recommended drying time, wipe off excess product with a rag dampened in mineral spirits. High humidity can slow drying significantly.
Step 2: Sanding & Repairs
-
Check for Imperfections:
Inspect the boards for any popped nails or loose screws. Hammer nails back in or tighten screws so the surface is flush. -
Sand the Floor:
Using a pole sander or handheld orbital sander with medium-grit sandpaper, lightly sand the floorboards. This opens the wood pores and smooths out rough spots. -
Inspect Edges:
Hand-sand any difficult-to-reach edges or corners near the trim to ensure even texture throughout. -
Remove Dust:
Sweep or use a leaf blower to remove all sanding dust. For a perfectly clean surface, wipe the boards down with a tack cloth or slightly damp rag.
Pro Tip: Board Logic
Always stain full lengths of boards rather than stopping in the middle. Stopping midway creates visible overlap marks where dried and wet stain meet.
Step 3: Staining Application
-
Stir the Stain:
Open your can of earth-tone stain and stir it thoroughly with a stick. Avoid shaking the can, which creates bubbles. -
Test a Patch:
Apply a small amount of stain to an inconspicuous area to confirm the color is exactly what you want before committing to the whole floor. -
Cut in Edges:
Use a smaller brush to carefully apply stain along the edges where the floor meets the house and the white railing posts. I usually do this first to maintain a clean line. -
Apply to Boards:
Dip your wide brush into the tray and apply stain to the main floorboards. Work along the length of 2-3 boards at a time to keep a wet edge and avoid lap marks. -
Back-Brush:
After applying stain to a section, run the brush over it one more time in long, smooth strokes. This pushes the stain into the wood grain and evens out puddles. -
Continue Across:
Work your way across the porch, maintaining that wet edge, until the entire floor is covered. Plan your exit so you don’t paint yourself into a corner. -
Assess Coverage:
Allow the first coat to dry according to the can’s instructions. If the color isn’t rich enough or the coverage is uneven, apply a second thin coat following the same method.
Step 4: Finishing Touches
-
Remove Tape:
While the final coat is still slightly tacky or just after it dries, carefully peel away the painter’s tape at a 45-degree angle to ensure crisp lines. -
Full Cure:
Let the floor cure fully before walking on it or replacing furniture. This usually takes 24 to 72 hours depending on humidity and product type. -
Style the Space:
Bring back your décor. Place a lush fern in a terracotta pot near the door to complement the new warm brown tones of the floor.
Enjoy your beautifully refreshed porch with its inviting new color scheme.


Tone-on-Tone Neutrals for Quiet Depth
Achieve a sophisticated, monochromatic look for your entryway by layering warm neutrals and rich browns. This project focuses on subtle contrast between the siding and trim, anchored by a deep cocoa door to create quiet depth and inviting curb appeal.
Step-by-Step Guide
Materials
- Exterior acrylic latex paint (Satin sheen) – Warm Buttercream/Deep Cream
- Exterior acrylic latex paint (Semi-gloss sheen) – Creamy Off-White
- Exterior acrylic latex paint (Semi-gloss or Satin sheen) – Rich Cocoa Brown
- Course grit sandpaper (80-100 grit)
- Fine grit sandpaper (220 grit)
- Painter’s tape (exterior grade)
- Drop cloths
- 2-inch angled sash brush
- 4-inch foam roller or mini microfiber roller
- Caulk gun and exterior paintable caulk
- Screwdriver (for hardware removal)
- Mild detergent and scrub brush
Step 1: Preparation & Surface Cleaning
-
Clear and clean:
Begin by removing all items from the porch, including the doormat and any furniture. Use a mild detergent mixed with water to scrub down the siding, trim, and door surface to remove dirt, pollen, and grease. -
Remove hardware:
Using a screwdriver, carefully remove the door handle, deadbolt, kickplate, and the light fixture next to the door. Label slight hardware pieces in a baggie so nothing gets lost during the commotion. -
Scuff and sand:
Lightly sand existing glossy surfaces on the door and trim with fine-grit sandpaper to help the new paint adhere better. For the rougher siding texture, a quick scuff with a coarser grit pad ensures a good bond. -
Masking off:
Apply exterior-grade painter’s tape around the glass inserts on the door and sidelights. Tape off the stone threshold and the floor where the trim meets the concrete to keep lines crisp.
Weather Watch
Check the forecast immediately before starting. Avoid painting in direct, hot sunlight or if rain is expected within 24 hours, as humidity can ruin the curing process.
Step 2: Creating the Neutral Backdrop
-
Cut in the siding:
Starting with the Warm Buttercream paint, use an angled sash brush to cut in along the edges of the siding boards where they meet the trim and corners. -
Roll the siding:
While the cut-in paint is still wet, use a roller to apply paint to the flat surfaces of the siding boards. Work in long, horizontal strokes to mimic the grain direction. -
Second coat application:
Allow the first coat to dry according to the manufacturer’s instructions. Apply a second coat to ensure full coverage and a rich, solid color that hides the old tone underneath. -
Painting the trim:
Switch to the Creamy Off-White paint. Use a clean angled brush to carefully paint the door casing, sidelight frames, and overhead molding. I find that slow, steady strokes here prevent drips on the freshly painted siding.
Step 3: The Focal Point Door
-
Detail work first:
Using the Rich Cocoa Brown paint and a small brush, paint the recessed panels of the door first. Get into the corners and grooves, smoothing out any pooling paint immediately. -
Vertical stiles:
Paint the vertical center stile (the strip running down the middle of the door) using vertical brush strokes. Feather the edges to blend them later. -
Horizontal rails:
Paint the horizontal rails (top, middle, and bottom sections) next. Keep your brush strokes horizontal to match the construction of the door. -
Outer stiles:
Finish by painting the two long vertical stiles on the far left and right edges of the door. This sequence helps manage drying times and reduces visible lap marks. -
Final smooth coat:
Once the first coat is dry to the touch, lightly sand any imperfections with 220-grit paper, wipe clean, and apply a final coat for that deep, durable finish.
Texture Play
Add a hammered bronze or matte black kickplate to the bottom of the door. It protects the finish and echoes the dark tone of the light fixture.
Step 4: Finishing Touches
-
Clean the glass:
Remove the painter’s tape carefully. If any paint seeped onto the glass panes, use a razor blade scraper to gently remove it for a flawless look. -
Caulk gaps:
Inspect the joints where the trim meets the siding. If you see gaps, run a thin bead of exterior caulk, smooth it with a wet finger, and touch up with paint once dry. -
Reinstall fixtures:
Reattach your door hardware and the light fixture. Ensure everything is tightened securely and level. -
Style the entrance:
Place a fresh coir doormat centered in front of the door. The texture of the natural fiber complements the stone and the new brown door color perfectly.
Step back and admire how the subtle layering of neutrals creates a warm, welcoming entrance for your home
Two-Tone Trim That Frames the Porch Like Artwork

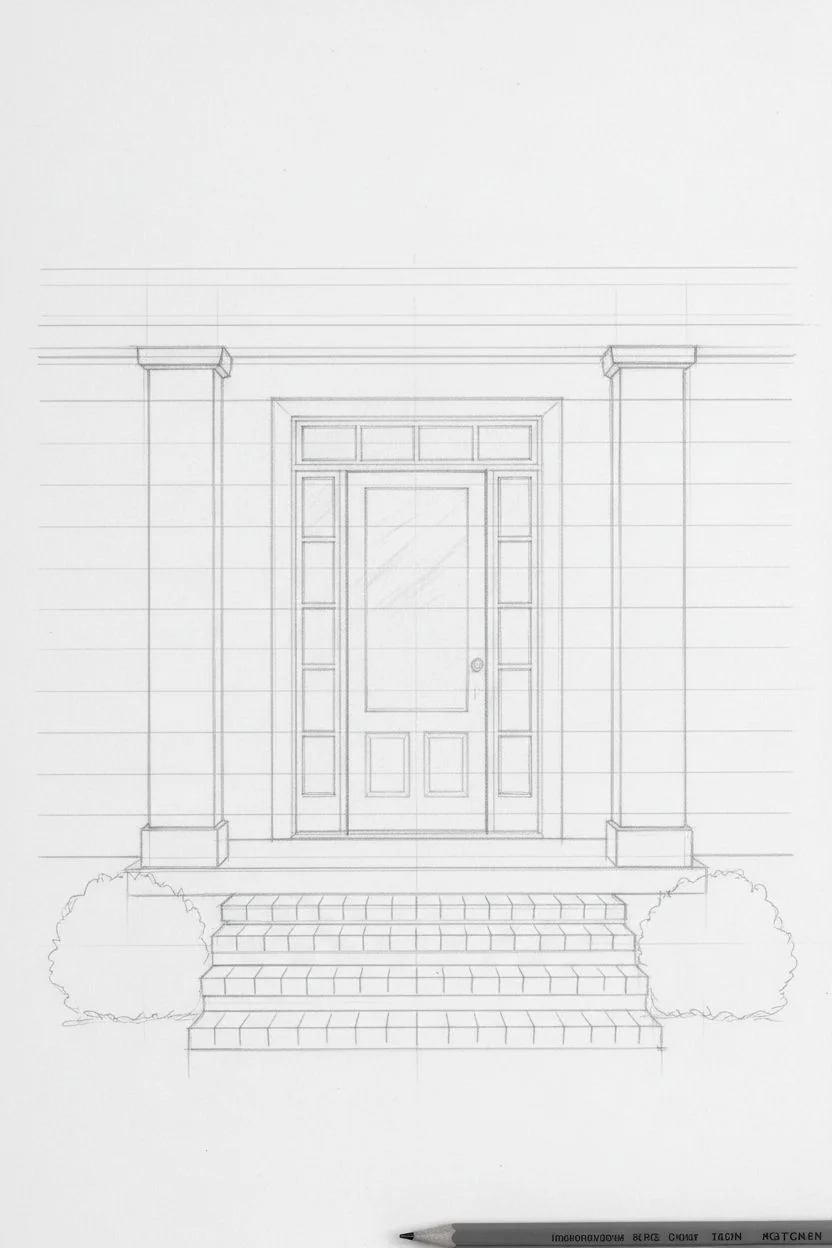
Capture the inviting warmth of a classic front porch with this architectural study in acrylics. You’ll learn to balance crisp straight lines with soft reflections in glass, mastering the interplay of shadows and structural details.
Step-by-Step Tutorial
Materials
- Heavyweight acrylic paper or prepared canvas board (11×14 inch)
- Acrylic paints: Titanium White, Yellow Ochre, Burnt Sienna, Burnt Umber, Payne’s Grey, Hooker’s Green
- Flat shader brushes (sizes 4, 8, and 12)
- Small round detail brush (size 0 or 1)
- Ruler or T-square
- Painter’s tape or masking tape
- Faint graphite pencil (2H)
- Palette knife for mixing
- Water container and paper towels
Step 1: Drafting the Foundations
-
Sketch the symmetry:
Begin by finding the vertical center of your canvas. Using your ruler and 2H pencil, lightly sketch the two large outer columns and the central door frame. Accuracy here is key to the architectural look. -
Detail the siding:
Mark horizontal guidelines for the lap siding on the house walls. Keep the spacing consistent, as this repetitive pattern creates the realistic rhythm of the siding. -
Map the steps:
Sketch the perspective of the brick steps at the bottom. The horizontal lines should remain straight, but drawing faint vertical tick marks now will help you paint individual bricks later.
Step 2: Blocking in Base Colors
-
Paint the siding:
Mix a warm, muted yellow using Yellow Ochre and Titanium White. Apply this flatly to the wall areas between your sketched trim, using a size 8 flat brush for even coverage. -
Establish the white trim:
With a clean brush, paint all the columns, door casing, railings, and kick plates in pure Titanium White. Don’t worry about shadows yet; just get a solid, opaque layer down. -
Base the porch floor:
Mix Burnt Sienna with a touch of Burnt Umber for a rich wood tone. Paint the floor deck area horizontally to mimic wood grain direction. -
The focal point door:
Create a custom terracotta shade by mixing Burnt Sienna with a tiny amount of Yellow Ochre and White. Paint the main door carefully, avoiding the window panes.
Wobbly Lines?
If your hand shakes while painting long straight architectural lines, use the edge of a ruler as a guide, or apply masking tape to shield areas and ensure crisp edges.
Step 3: Detailing and Depth
-
Shadow the siding:
Load the edge of a flat brush with a slightly darker version of your wall yellow (add a speck of Burnt Sienna). Run this thin line directly under each lap of siding to create the cast shadow of the board above it. -
Define the columns:
Mix a very light cool grey using White and a tiny dot of Payne’s Grey. Paint this down the left or right side of the columns (choose a light source direction) to give them cylindrical volume. -
Add door panels:
Using your small round brush and a darker version of the terracotta door color, paint the inner bevels of the door panels. Then, highlight the opposite bevels with a lighter mix to make the panels look recessed. -
Glass reflections:
Paint the window panes a dark grey-green (Payne’s Grey + Hooker’s Green). While wet, gently streak in faint white reflections to suggest trees or sky mirroring in the glass.
Add a Season
Change the vibe by adding a small painted wreath to the door for winter, or brighten the foliage greens and add painted flower pots on the steps for a summer look.
Step 4: Finishing Touches
-
Brickwork texture:
Paint the steps with a cool grey base. Once dry, use a small flat brush to stamp individual brick shapes in varied grey tones. Leave thin gaps for the grout lines. -
Hardware details:
Switch to your smallest detail brush. Use pure black or dark Payne’s Grey to paint the door handle, lock, and the lantern hanging from the ceiling. -
Greenery accents:
Mix Hooker’s Green with Burnt Umber for a deep foliage color. Stipple the bushes on the bottom left and right using an old, scruffy brush to create a leafy texture. -
Final highlights:
Add tiny dots of pure white to the lantern glass and the curve of the black hardware to show metallic sheen. A final crisp white line on the top edges of the brick steps sharpens the whole composition.
Step back and admire how a simple palette can build such a structured and welcoming scene
Black-and-White Checker Details for a Graphic Punch
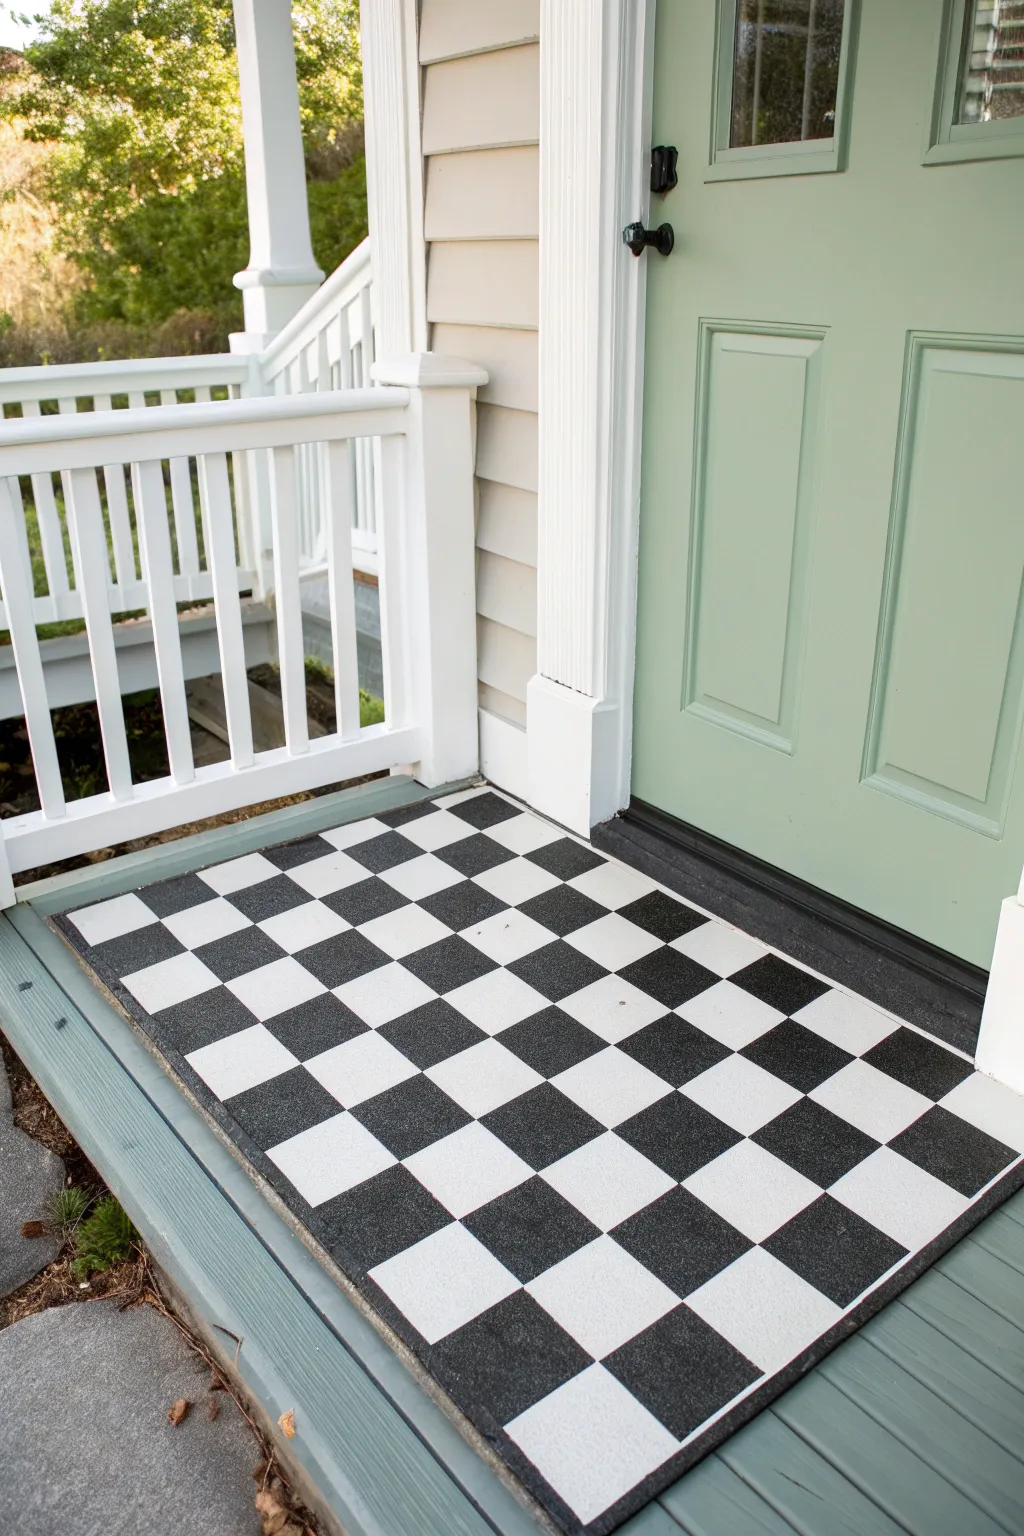
Give your entryway an instant facelift with this striking black-and-white checkerboard floor mat creates a bold graphic statement against neutral siding. This painted rug effect is durable, customizable to any size porch, and adds a timeless vintage charm to your curb appeal.
Step-by-Step Guide
Materials
- Heavy-duty utility mat or rubber-backed canvas rug
- Exterior acrylic latex paint (Black and White)
- Painter’s tape (1-inch width works best)
- Measuring tape
- Straight edge or yardstick
- Chalk or pencil
- Small foam roller
- Small paintbrush for touch-ups
- Utility knife
- Clear outdoor sealant spray (optional)
Step 1: Preparation and Base Coat
-
Clean the surface:
Before starting, ensure your utility mat is completely clean and free of dust or debris. If you are using an existing mat, scrub it down and let it dry fully in the sun. -
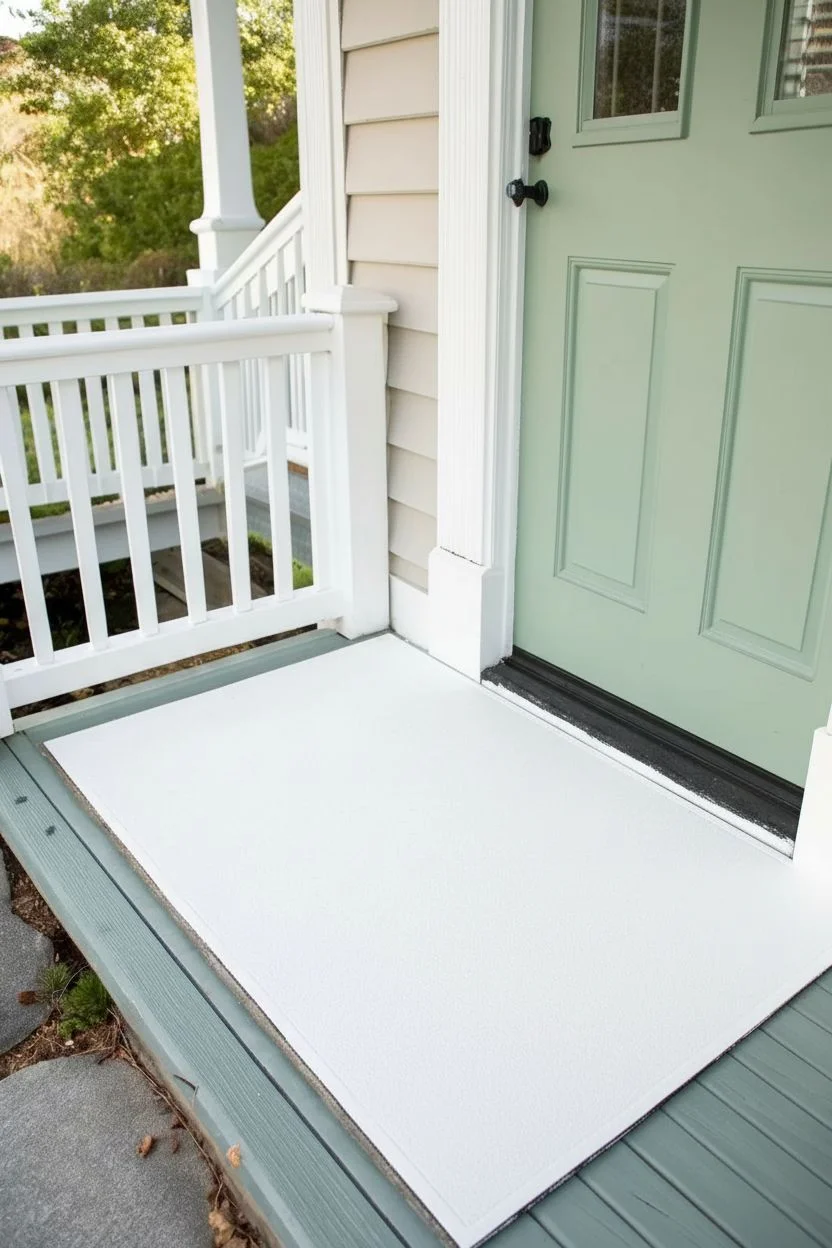
Base coat application:
Using your foam roller, apply a solid coat of white exterior paint across the entire surface of the mat. This will serve as the base for your lighter squares. -
Apply a second layer:
Once the first coat is dry to the touch, roll on a second coat of white paint to ensure opaque, solid coverage. -
Allow to cure:
Let the white base coat dry completely, preferably overnight. If the paint is tacky, the tape in the next step might peel it off.
Clean Lines Secret
Burnish your painter’s tape edges with an old credit card or loose change. Pressing it down firmly into the mat’s texture prevents fuzzy lines.
Step 2: Measuring and Taping
-
Determine square size:
Decide on the size of your checks; 3 to 4 inches is usually a good scale for a standard door mat. Measure the total width and divide by your desired square size to see how they fit. -
Mark the grid:
Use a measuring tape and a straight edge to mark small tick marks along the edges of the mat corresponding to your grid lines. -
Apply vertical tape lines:
Run strips of painter’s tape vertically across the mat, using your tick marks as guides. Press the edges of the tape down firmly to prevent bleed-under. -
Apply horizontal tape lines:
Lay down the horizontal strips of tape to complete your grid. You should now have a grid covering the entire mat. -
Cut the intersections:
This is the crucial trick: use a utility knife to carefully cut out the squares of tape where you want the black paint to go. I find it helpful to mark an ‘X’ lightly in the squares I plan to paint black. -
Remove specific squares:
Peel away the tape only from the squares that will be black, leaving the tape borders intact around the white squares. This creates a perfect stencil. -
Seal the tape edges:
Lightly brush a tiny amount of white paint over the edges of the remaining tape. This seals the edge so any bleeding will be white-on-white, keeping your black lines crisp.
Step 3: Painting the Pattern
-
Paint the black checks:
Using a fresh foam roller or brush, apply the black exterior paint into the exposed square areas. -
Watch the coverage:
Apply thin, even coats rather than one thick gloppy one. The texture of the mat can trap paint, so dab the brush if necessary to get into the crevices. -
Second black coat:
After the first black coat dries for about an hour, apply a second coat to ensure a deep, rich color. -
The big reveal:
Carefully peel off all the painter’s tape while the black paint is still slightly tacky. Pulling the tape at a 45-degree angle helps get a clean line.
Bleeding Paint?
If paint bleeds under the tape, don’t panic. Wait for it to dry fully, then use a tiny craft brush to paint over the mistake with the base color.
Step 4: Finishing Touches
-
Touch up edges:
Inspect your lines. If any paint bled through, use a small artist’s brush and the appropriate color to tidy up the edges. -
Seal for protection:
If your mat will be exposed to heavy rain or foot traffic, spray the entire surface with a clear outdoor sealant to lock in the design. -
Final cure:
Allow the finished mat to dry for at least 24 to 48 hours before placing it on your porch to ensure the paint has fully hardened.
Step back and admire how this sharp geometric accent transforms your porch into a welcoming entryway
Wide Striped Porch Floor for Instant Charm
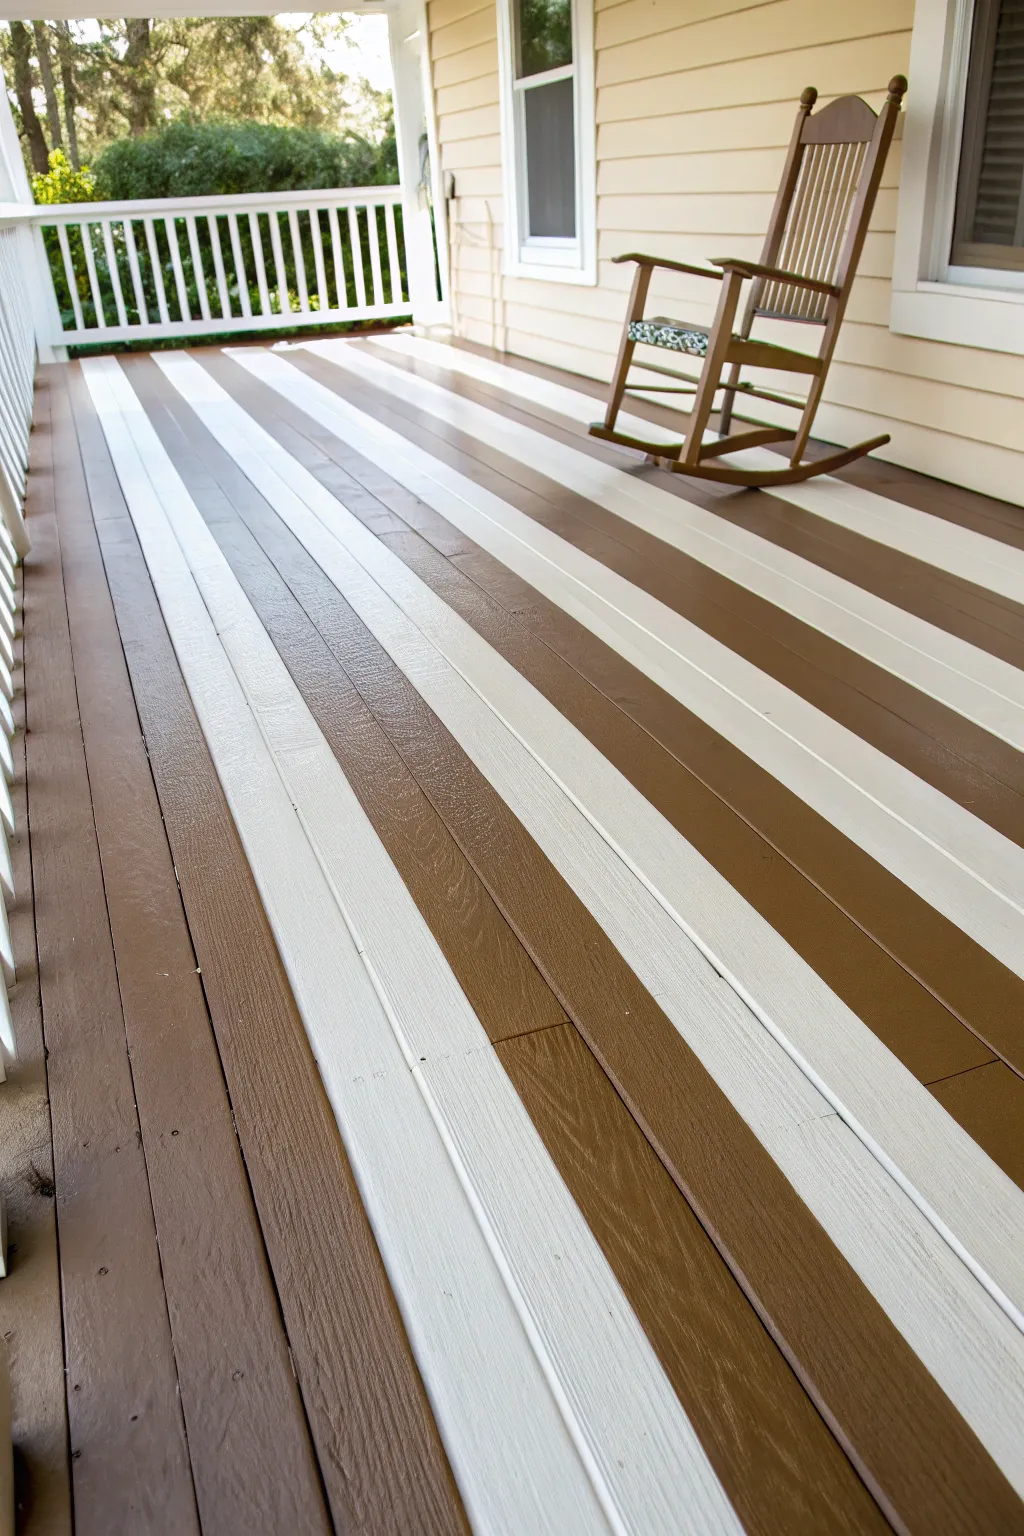
Transform a plain wooden porch into a statement entry with these bold, wide stripes reminiscent of classic seaside cottages. The alternating chocolate brown and creamy white pattern elongates the space and adds instant curb appeal.
Step-by-Step
Materials
- Exterior porch & floor paint (Brown)
- Exterior porch & floor paint (Creamy White)
- Exterior wood primer (optional, if bare wood)
- Painter’s tape (high quality, 2-inch width)
- Paint roller extension pole
- Paint roller frame
- Roller covers (3/8-inch nap for smooth wood, 1/2-inch for rougher)
- Angled sash brush (2.5 inch)
- Measuring tape
- Chalk snap line
- Power washer or scrub brush with deck cleaner
- Sandpaper or sanding pole (80-120 grit)
Step 1: Preparation & Base Coat
-
Deep clean the surface:
Before putting any paint down, the wood needs to be spotless. Use a power washer or a stiff scrub brush with deck cleaner to remove dirt, mildew, and loose old paint. Allow the wood to dry completely for at least 24 to 48 hours. -
Sand for adhesion:
Run a sanding pole with 80-100 grit paper over the floorboards to knock down any splinters and roughen the surface slightly. This ensures the new paint bonds properly. -
Prime bare spots:
If you have exposed raw wood, spot-prime those areas. If the entire deck is bare or previously unpainted, apply a full coat of quality exterior wood primer first. -
Cut in the edges:
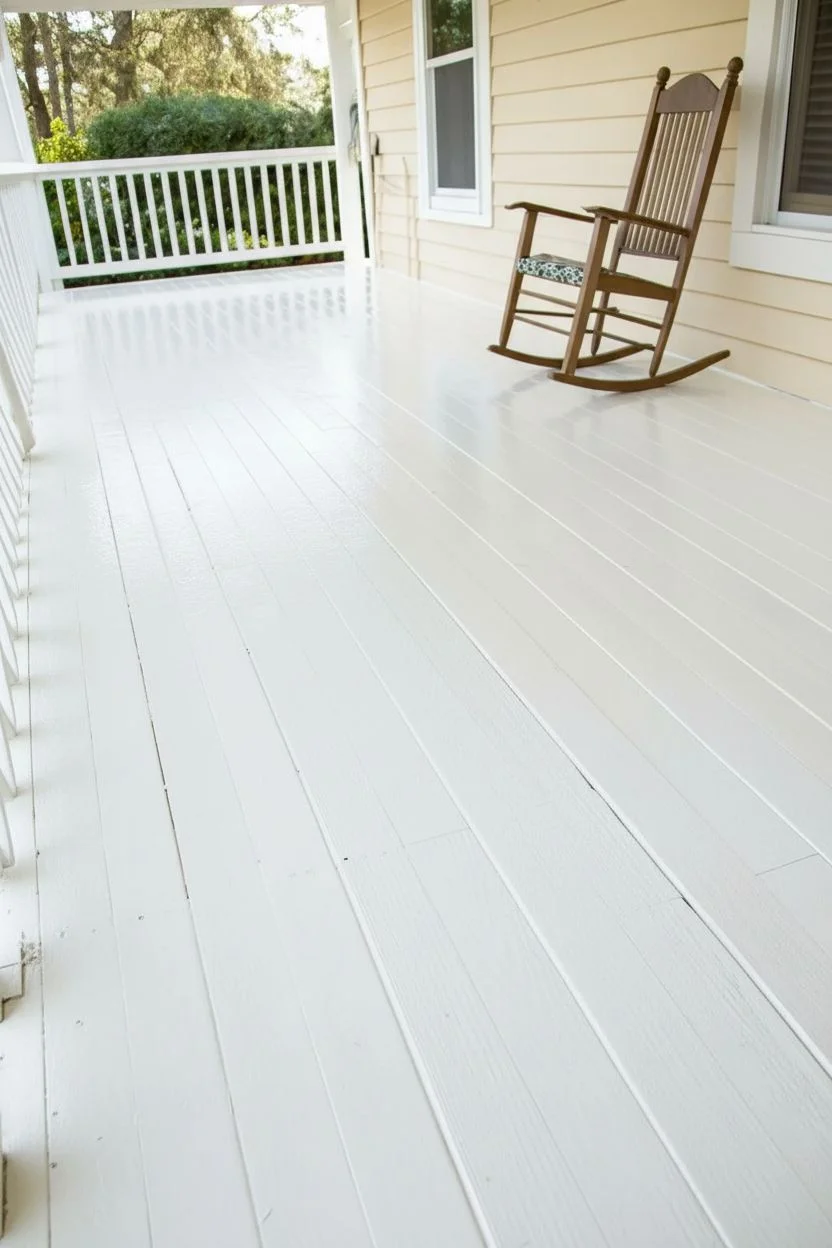
Starting with your lighter color (the creamy white), use your angled sash brush to cut in around the perimeter of the porch, railing posts, and near the house siding. -
Roll the first base color:
Pour the creamy white paint into a tray. Using a roller on an extension pole, paint the entire porch floor in this lighter shade. I prefer doing the lighter color first as it’s easier to cover with the darker stripes later. -
Apply a second coat:
Check the manufacturer’s instructions for drying time (usually 4-6 hours). Once dry to the touch, apply a second coat of the white paint to ensure solid, opaque coverage. Let this cure for a full 24 hours before taping.
Step 2: Measuring & Taping
-
Determine stripe width:
Decide on your stripe width. The image shows wide stripes that appear to cover roughly three standard floorboards each. Measure the total width of your porch to divide it evenly. -
Mark the layout:
Using a measuring tape, make small pencil marks at both ends of the porch (near the house and near the railing) to indicate where each stripe begins and ends. -
Snap the lines:
With a partner, hold a chalk snap line tight between your corresponding marks and snap it against the floor. This creates perfectly straight guidelines across the long expanse. -
Apply painter’s tape:
Apply your 2-inch painter’s tape along the chalk lines. Crucial step: Place the tape on the *outside* of the area you intend to paint brown. You want to preserve the white stripes under the tape. -
Seal the tape edges:
Run a putty knife or credit card firmly over the tape edges to seal them down. This prevents paint from bleeding underneath. -
The bleed-prevention trick:
Here is a secret for crisp lines: lightly brush a tiny amount of the *base color* (white) over the edge of the tape that faces the area to be painted brown. If anything bleeds under, it will be white-on-white, sealing the gap perfectly.
Tape Trouble?
If the tape pulls up existing paint when removed, it means the base coat didn’t cure long enough. Let base layers cure 24-48 hrs before taping.
Step 3: Painting Stripes & Finishing
-
Cut in the stripe edges:
Using the brown paint and your brush, carefully paint just inside the taped lines to ensure the edges are fully covered without relying on the roller. -
Roll the dark stripes:
Use a fresh roller cover to fill in the brown stripes. Work carefully to avoid splattering paint onto the taped-off white sections. -
Apply second brown coat:
Allow the first coat of brown to dry according to can instructions, then apply a second coat for a rich, deep finish consistent with the photo. -
Remove tape promptly:
While the final coat of brown paint is still slightly tacky (do not wait for it to fully cure), slowly peel up the painter’s tape at a 45-degree angle. This prevents the dried paint from cracking or peeling up with the tape. -
Touch up imperfections:
Inspect your lines. If any small bleeds occurred, use a tiny artist’s brush and a bit of the background white paint to clean them up. -
Allow full cure:
Keep foot traffic and furniture off the porch for at least 48 to 72 hours to allow the paint to harden completely.
Pro Tip
Align your stripes with the floorboards if possible. Painting ‘with the grain’ hides texture differences and makes taping straight lines much easier.
Enjoy your beautifully patterned new outdoor living space as you rock the afternoon away
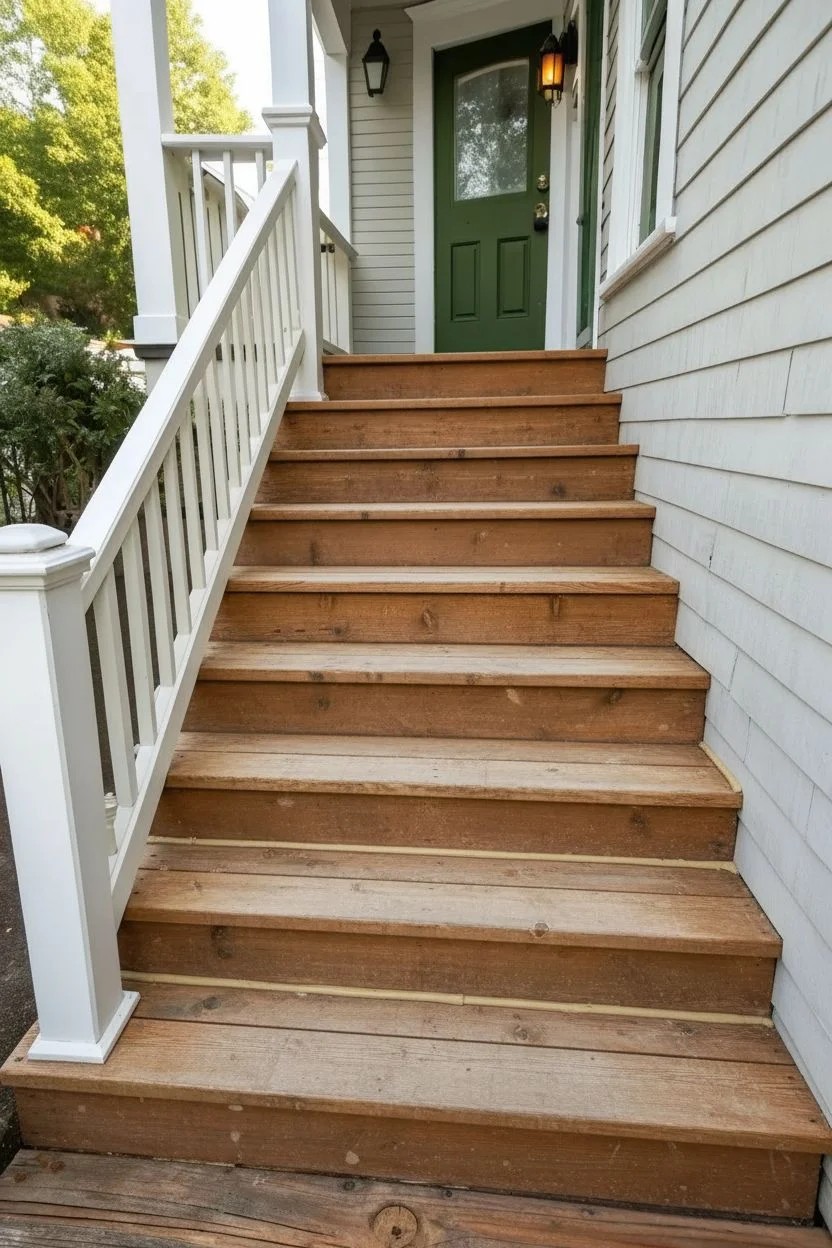
Painted Porch Steps in High-Contrast Bands
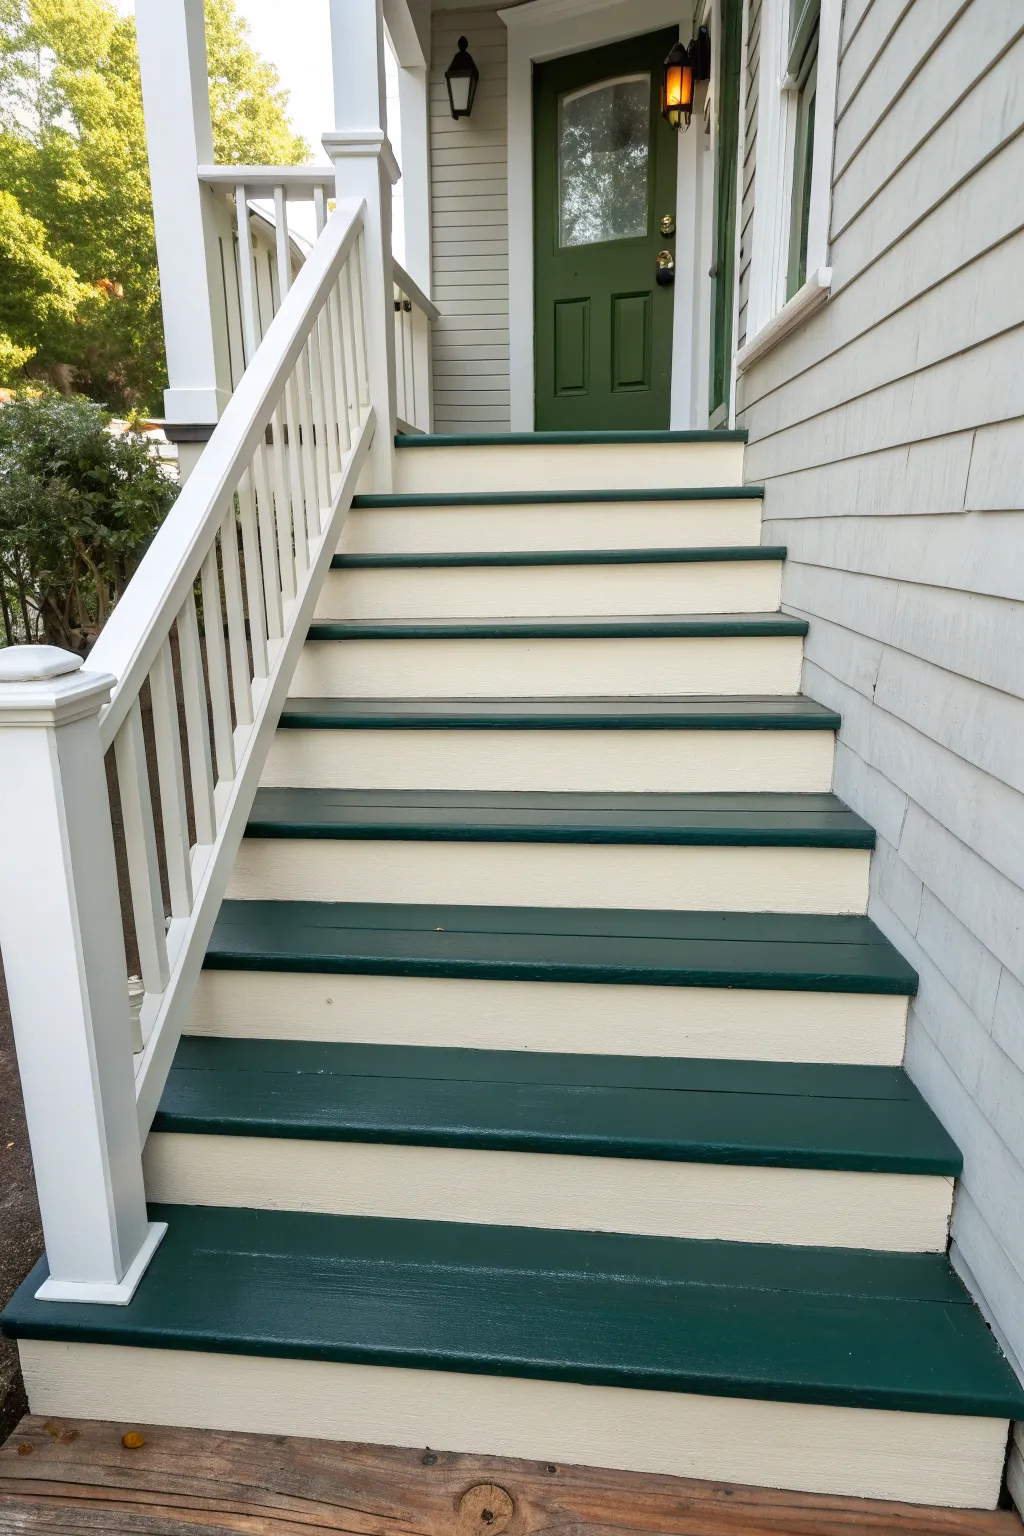
Give your entryway a sophisticated update with this classic two-tone stair design. By pairing deep forest green treads with creamy white risers, you create a crisp, tailored look that feels both historic and fresh.
How-To Guide
Materials
- Exterior porch & floor paint (Deep Forest Green)
- Exterior semi-gloss trim paint (Creamy White)
- Exterior primer (bonding)
- Sandpaper (80 and 120 grit)
- Orbital sander or sanding block
- Paint scraper
- Pressure washer or stiff scrub brush
- TSP substitute cleaner
- Painter’s tape (high-adhesion for exterior)
- 2-inch angled sash brush
- 4-inch foam roller or mini finish roller
- Small roller tray
- Canvas drop cloth
- Wood filler (exterior grade)
- Caulk and caulk gun
Step 1: Cleaning & Prep
-
Clear and clean:
Begin by removing any pots, mats, or decor from your stairs. Use a stiff broom to sweep away loose dirt, cobwebs, and debris from every corner. -
Scrape loose paint:
Inspect the existing surface for peeling or chipping paint. Use a sturdy paint scraper to remove any loose flakes until you have a relatively sound surface. -
Sand the surface:
Using an orbital sander or block with 80-grit paper, sand down any rough edges where paint was peeled. Follow with a pass of 120-grit over the entire surface—treads and risers—to degloss the old finish and help the new paint adhere. -
Wash thoroughly:
Mix a TSP substitute cleaner with water according to the package directions. Scrub the stairs vigorously to remove dirt, grease, and grime. Rinse thoroughly with a hose or pressure washer and let the wood dry completely for at least 24 hours. -
Fill repairs:
Check for cracks or deep gouges in the wood. Fill these with exterior-grade wood filler. Once dry, sand the filled areas smooth so they blend with the surrounding wood. -
Caulk gaps:
Apply a bead of exterior paintable caulk along the seams where the risers meet the treads or the sides. Smooth it with a wet finger for a seamless look.
Bleed-Through Blues?
If paint bleeds under tape, wait for it to fully dry. Then, re-tape the opposite side precisely over the line and touch up with the original color for a razor-sharp edge.
Step 2: Priming & Painting Risers
-
Prime the wood:
Apply a coat of high-quality exterior bonding primer to the bare wood spots and any filled areas. I like to prime the entire staircase if the color change is drastic or the old paint is very worn. -
Paint Risers – First Coat:
Start with the risers (the vertical parts). Using a 2-inch angled brush, cut in around the edges of the riser. Then, use a small 4-inch roller to fill in the center for a smooth finish. Use your creamy white trim paint. -
Allow to dry:
Let the first coat dry according to the manufacturer’s instructions, usually about 4 hours, before assessing if a second coat is needed. -
Paint Risers – Second Coat:
Apply a second coat of cream paint to the risers to ensure full, opaque coverage. Don’t worry too much about getting paint on the unfinished treads yet, as darker paint will cover it, but try to keep it neat. -
Cure time:
Let the risers dry completely—ideally overnight—before moving on to taping. The paint must be hard enough to withstand tape removal.
Step 3: Painting Treads
-
Tape the risers:
Carefully apply painter’s tape along the bottom edge of your freshly painted risers where they meet the treads. Press the edge of the tape down firmly with a putty knife to prevent bleed-through. -
Cut in the treads:
Open your Deep Forest Green floor paint. Use your angled brush to carefully paint the corners and edges of the treads (the horizontal steps), brushing away from the tape to minimize seepage. -
Roll the treads:
Use a fresh foam roller to apply paint to the main surface of the tread. Work your way down the stairs so you don’t paint yourself into a corner. -
Check for drips:
As you move down step by step, glance back at the riser immediately above the tread you are painting to catch and smooth out any accidental drips or splashes. -
Second coat:
Once the first coat is dry to the touch (check your can for recoat times), apply a second coat of green to the treads for maximum durability and richness of color. -
Remove tape:
While the second coat is still slightly tacky (not fully dry), carefully peel back the painter’s tape at a 45-degree angle to reveal your crisp lines. -
Touch ups:
Inspect your work stairs. If any green bled onto the white risers, use a small artist’s brush and a bit of cream paint to touch it up once the green is fully dry. -
Final cure:
Allow the paint to cure for at least 48 to 72 hours before walking on it with heavy shoes or placing furniture back onto the porch.
Pro Tip: Anti-Slip Trick
Mix a small amount of anti-slip additive into the final coat of your tread paint. It adds gritty texture invisible to the eye but essential for wet-weather safety.
Now step back and admire how a simple paint job has completely redefined the character of your home’s entrance
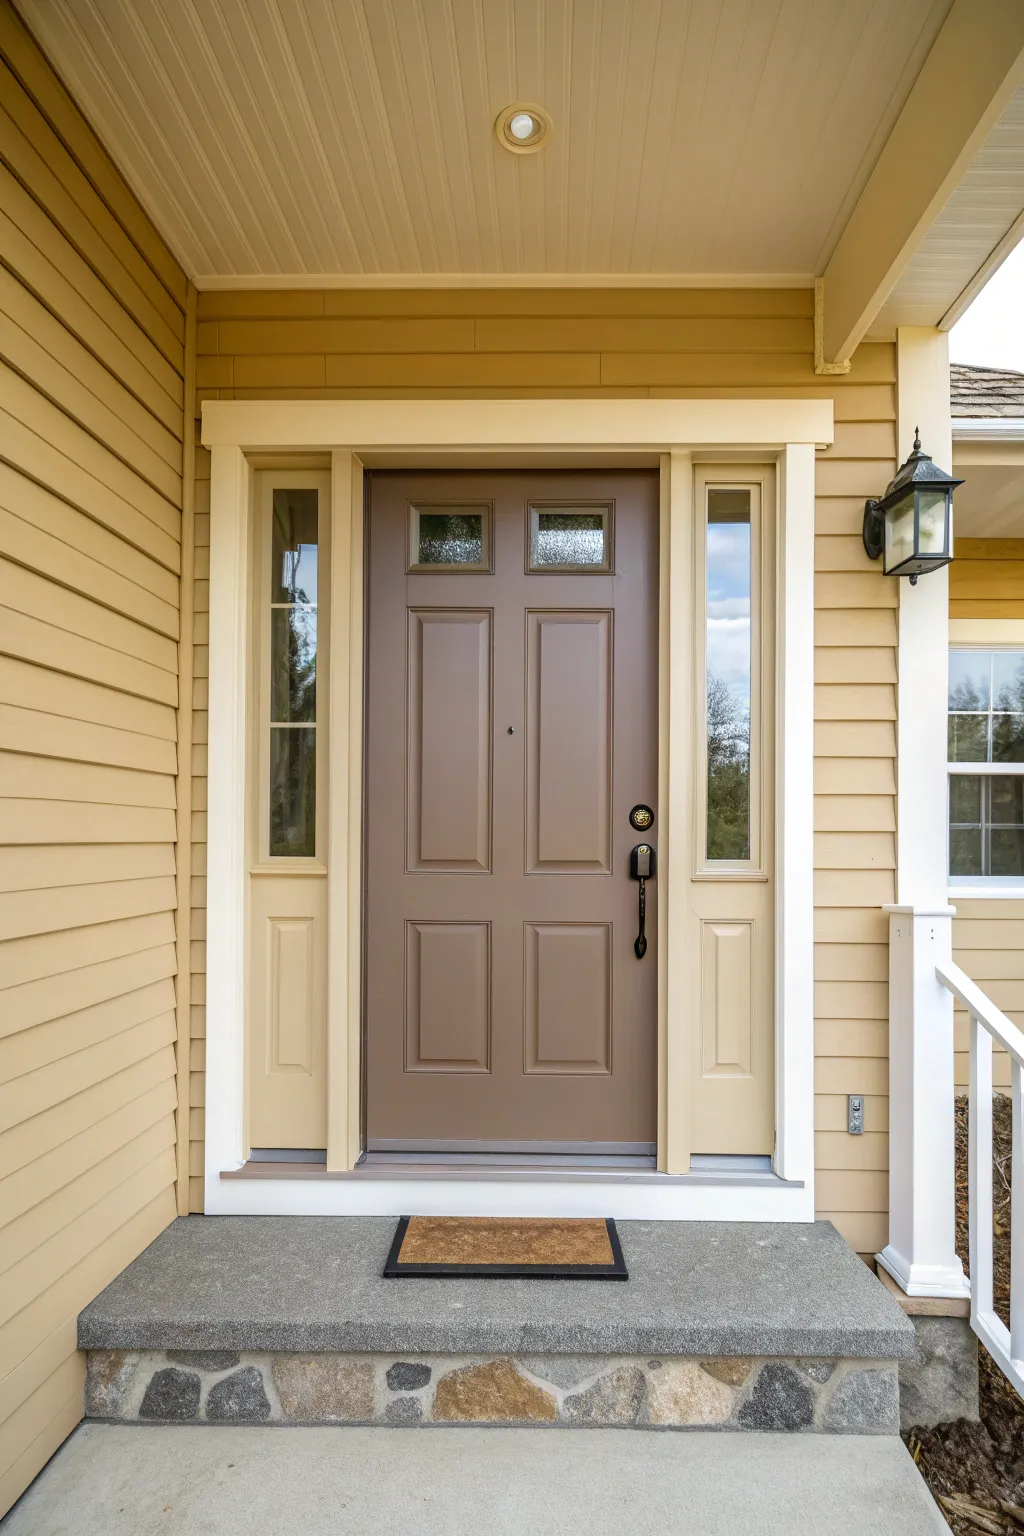
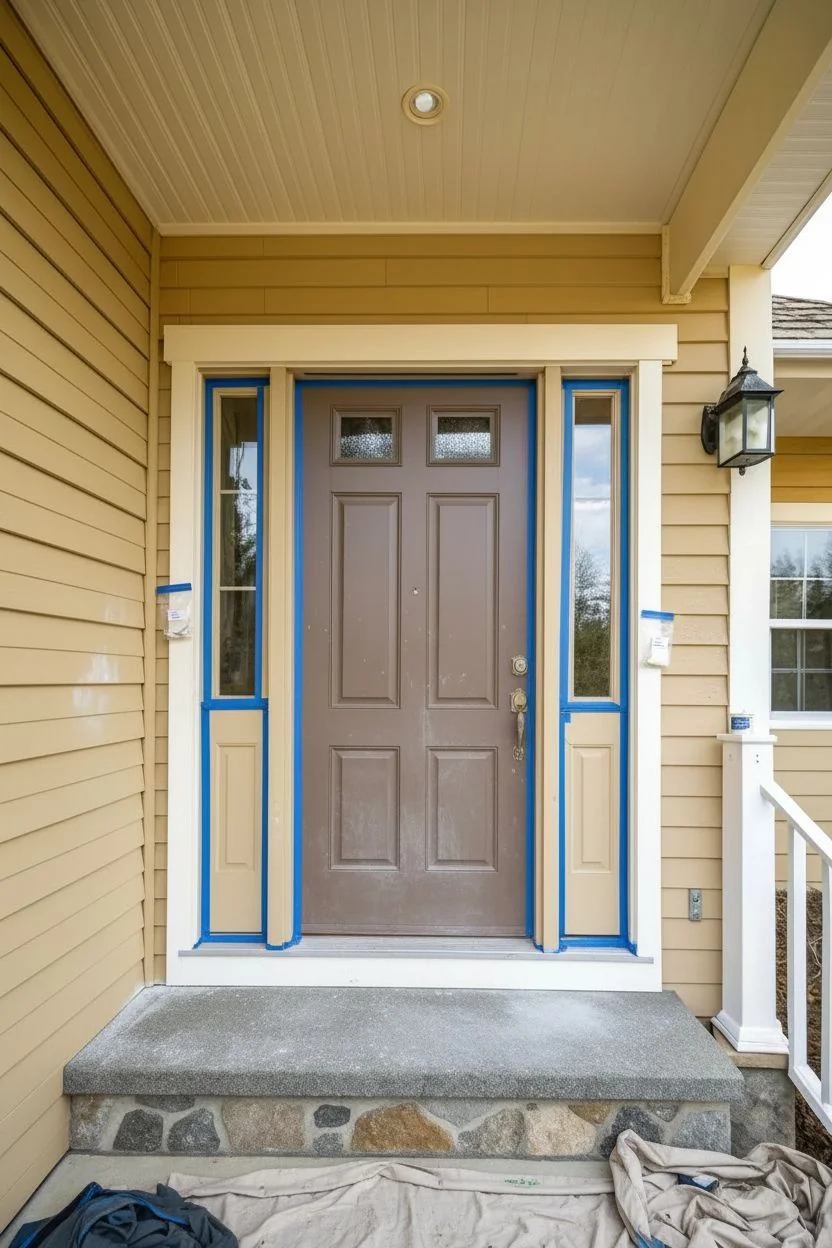
Brick-Friendly Colors That Work with Red or Brown Tones


Transform your entryway into a welcoming statement piece with this soft, earthy sage green that perfectly complements red brick tones. This project focuses on refreshing a standard front door and its surrounding trim to create a cohesive, custom look that boosts curb appeal instantly.
Step-by-Step Tutorial
Materials
- Exterior semi-gloss paint (Sage Green shade)
- Exterior semi-gloss paint (Creamy Off-White shade)
- Black spray paint or matte black metal paint (for hardware)
- Angled sash brush (2-inch)
- Mini foam roller (4-inch) with tray
- Painter’s tape (exterior grade)
- Sandpaper (120-grit and 220-grit)
- Tack cloth
- Drop cloths
- Screwdriver or drill
Step 1: Preparation
-
Remove hardware:
Start by removing the door handle, lockset, deadbolt, and any decorative knockers or peepholes using your screwdriver. Store all screws and small parts in a labeled bag so nothing gets lost. -
Clean thoroughly:
Wash the entire door and the surrounding trim with a mild detergent and water solution to remove dirt, grime, and grease. Let it dry completely before moving on. -
Sand the surface:
Lightly sand the door and trim with 120-grit sandpaper to rough up the existing finish. This helps the new paint adhere better. Wipe away dust with a tack cloth. -
Protect the area:
Lay down drop cloths to protect your porch floor and secure them with tape if it’s windy. Apply painter’s tape carefully around the glass panes, hinges, and the brick edges where the trim meets the wall.
Step 2: Painting the Door
-
Paint standard panels:
Begin painting the recessed panels of the door using the angled sash brush. Work the sage green paint into the corners and dragging it out towards the flat surfaces. -
Paint center stile:
Use the mini foam roller or brush to paint the vertical center strip (stile) between the panels. Keep your strokes vertical and consistent. -
Paint rails:
Paint the horizontal rails (top, middle, and bottom sections) next. Ensure you overlap the wet edges of the stile slightly to blend the paint seamlessly. -
Paint outer stiles:
Finish the door slab by painting the two long vertical stiles on the far left and right edges. Long, smooth strokes work best here to avoid start-stop marks. -
Apply second coat:
Allow the first coat to dry according to the manufacturer’s instructions (usually 4-6 hours). Lightly sand with 220-grit paper, wipe clean, and apply a second coat following the same order.
Sticky Situation?
If the door sticks after painting, rub a white candle or clear paraffin wax along the edges where it meets the frame to reduce friction while it fully cures.
Step 3: Painting Trim and Hardware
-
Prime the trim:
If the trim is bare wood or dark, apply a coat of exterior primer. If repainting over white, you can skip straight to your creamy off-white exterior paint. -
Paint sidelight frames:
Using the angled sash brush, carefully paint the narrow strips of wood framing the glass sidelights. take your time near the glass tape. -
Paint main frame:
Apply the cream paint to the header and side jambs surrounding the door unit. Two coats are usually necessary for a crisp, solid finish. -
Refresh hardware:
While the door dries, clean your removed hardware. If the finish is worn, apply two light coats of matte black spray paint for that modern farmhouse contrast.
Level Up The Look
Swap out standard glass for frosted or seeded glass film on the sidelights. It adds privacy and a vintage texture without the cost of replacing the actual panes.
Step 4: Finishing Touches
-
Remove tape:
Carefully score the edge of the painter’s tape with a utility knife before pulling it off. Do this while the paint is still slightly tacky to prevent peeling. -
Reinstall hardware:
Once the door paint has cured for at least 24 hours (to avoid sticking), reattach your handles, locks, and decorative elements. -
Clean glass:
Use a razor blade to scrape off any paint that might have seeped onto the glass, then clean the windows with glass cleaner for a sparkling finish. -
Style the porch:
Complete the look by adding a fresh coir doormat and a potted plant, like the rosemary bush shown, to echo the greenery of your new door color.
Step back and enjoy the fresh, inviting entrance you’ve created for your home
Stone-Friendly Cool Neutrals for Gray Foundations
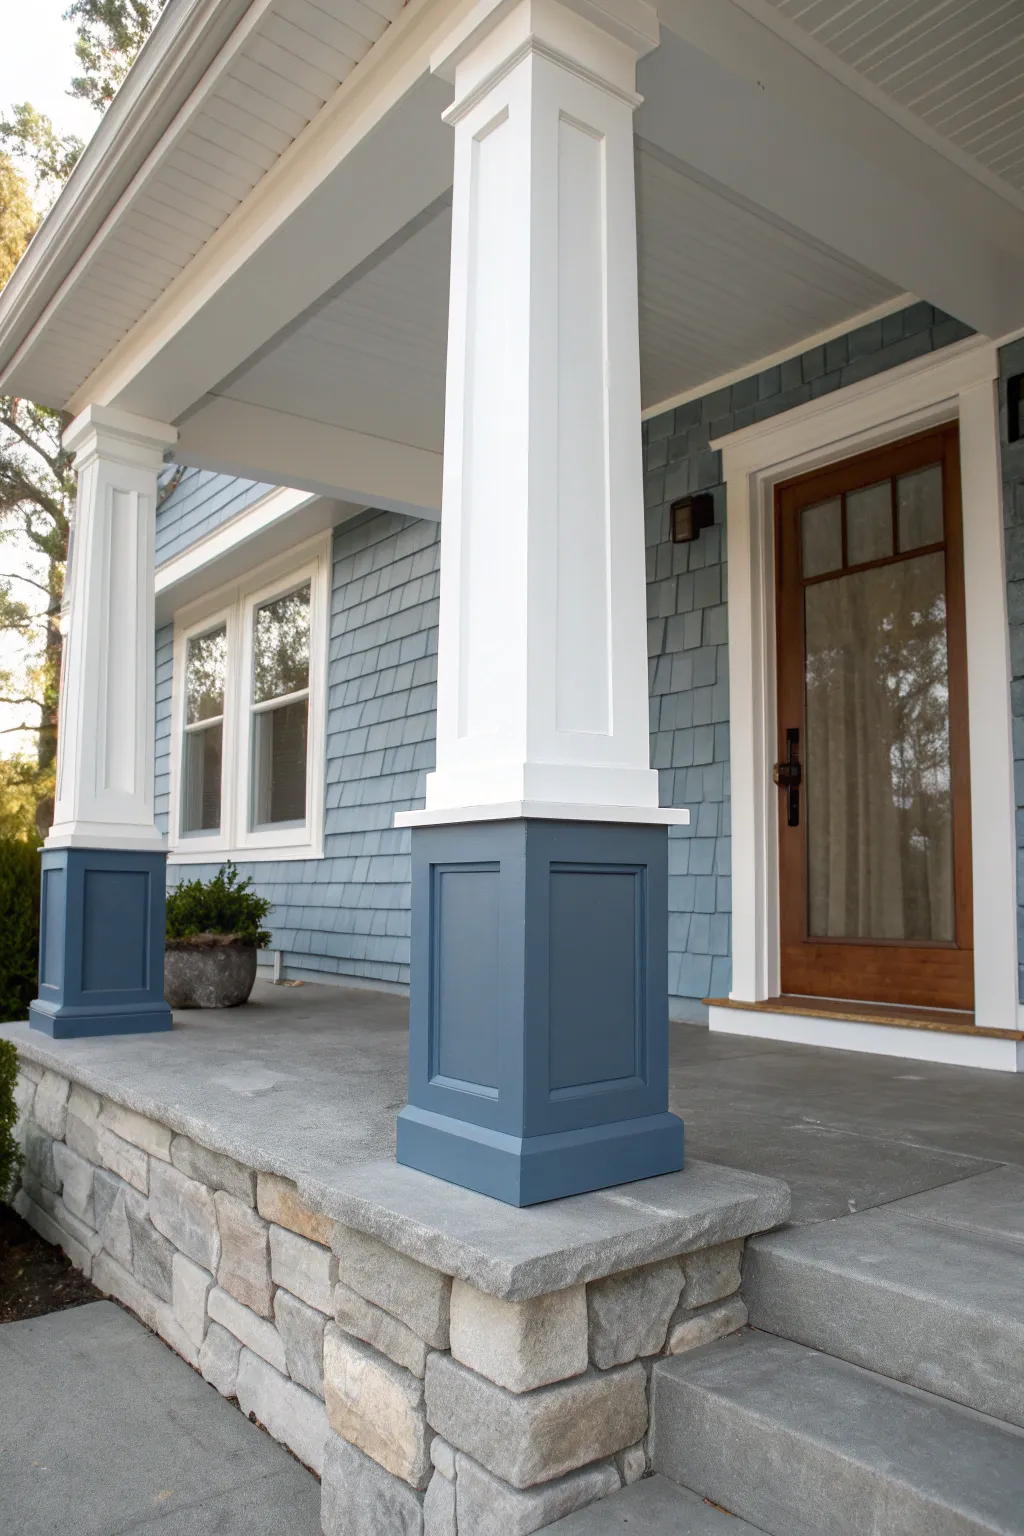
Enhance your home’s curb appeal by pairing a classic white column with a grounding, cool blue-gray pedestal base. This project bridges the gap between airy traditional trim and natural stone textures for a cohesive, welcoming entrance.
How-To Guide
Materials
- Exterior primer (high-quality)
- Exterior semi-gloss paint (White)
- Exterior satin or semi-gloss paint (Deep Blue-Gray, e.g., Slate Blue)
- Painter’s tape (exterior grade)
- Drop cloths
- Sandpaper (120 and 220 grit)
- Tack cloth
- Caulk and caulking gun (exterior paintable silicone)
- 2-inch angled sash brush
- 4-inch foam or low-nap roller
- Roller tray
- Wood filler (if repairs are needed)
- Cleaning solution (TSP substitute)
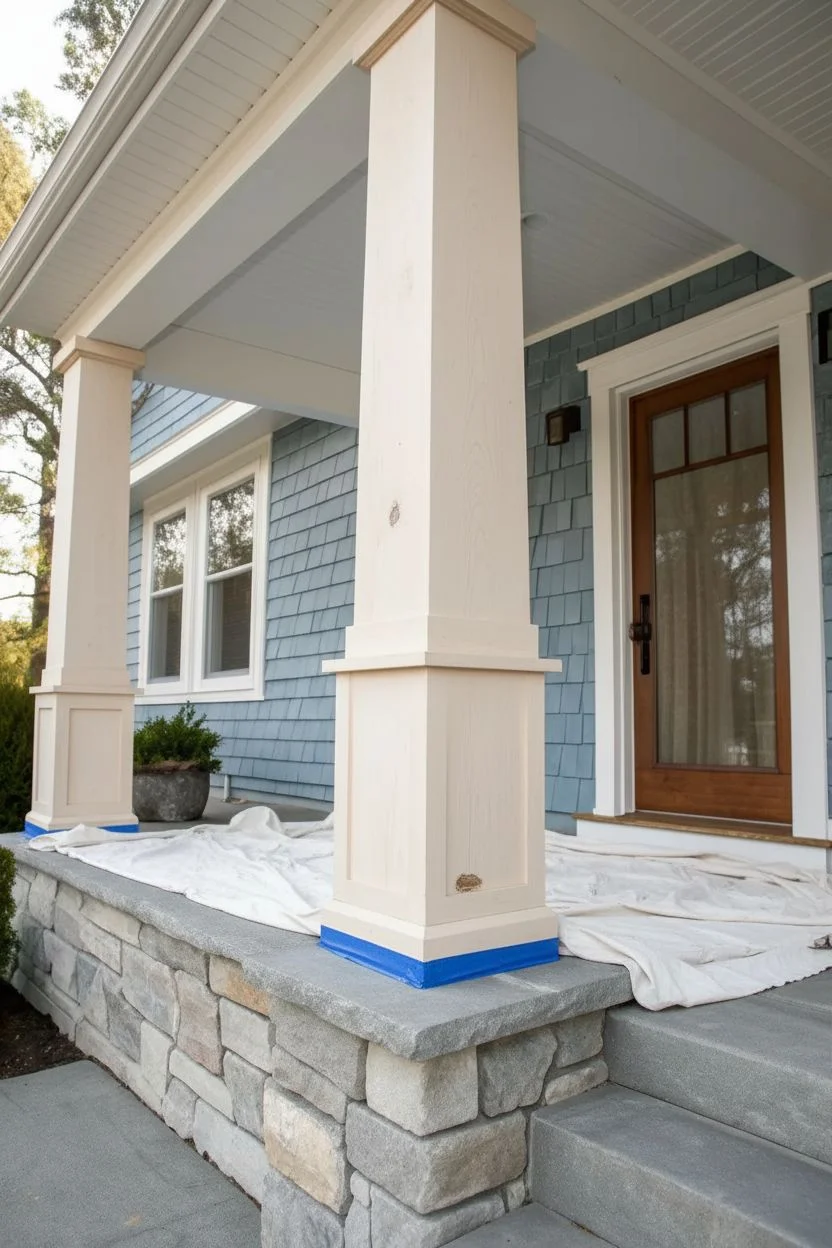
Step 1: Preparation & Cleaning
-
Protect the area:
Begin by laying down drop cloths over your stone porch floor and surrounding landscaping to catch any drips or debris. -
Clean surfaces thoroughly:
Wash the columns and pedestal bases using a TSP substitute and water. Scrub away dirt, mildew, and spiderwebs, then rinse well and let dry completely. -
Inspect and repair:
Check the wood for any rot or cracks. Fill nail holes or small gouges with exterior wood filler. Once dry, sand these spots flush. -
Sand for adhesion:
Lightly scuff sand the entire surface—both the upper column and the lower pedestal—using 120-grit sandpaper to help the primer stick. -
Remove dust:
Wipe everything down with a tack cloth to ensure no dust remains before painting.
Uneven Edges?
If paint bleeds under the tape, wait for it to dry completely. Then, re-tape the opposite side very tightly and lightly touch up the original color for a crisp line.
Step 2: Priming & Painting the White Upper
-
Caulk gaps:
Apply a bead of exterior paintable caulk to any seams or joints where the trim meets itself to ensure a watertight and seamless look. -
Prime the column:
Apply a coat of high-quality exterior primer to the entire structure if it’s new wood or bare spots are visible. For previously painted surfaces in good condition, spot priming is sufficient. -
Paint the top section first:
Start with the white paint on the upper column. Use the angled sash brush to cut in around the intricate molding at the top capital and the transition molding in the middle. -
Roll the smooth areas:
For the long, flat vertical faces of the column, use a small 4-inch roller to apply the white paint evenly. -
Paint the transition trim:
Paint the horizontal trim piece that separates the top column from the bottom pedestal white. This creates a clean visual break. -
Apply second coat:
Allow the first coat to dry according to the manufacturer’s instructions, then apply a second coat of white for full coverage and durability.
Weather Watch
Check the forecast before starting! Ensure you have at least 24-48 hours of rain-free weather with temperatures between 50°F and 85°F for optimal curing.
Step 3: Adding the Deep Blue Base
-
Tape the line:
Once the white transition trim is fully cured (give it at least 24 hours), apply painter’s tape along its bottom edge to protect your fresh white paint. -
Cut in the base color:
Using a clean angled brush, carefully cut in the deep blue-gray paint along the inside corners of the recessed panels and along the bottom where the wood meets the stone. -
Paint the panels:
Paint the recessed flat panels of the pedestal base. I like to use a brush here to work the paint into the corners, then smooth it out with long vertical strokes. -
Paint the stiles and rails:
Finish painting the raised frames (stiles and rails) around the panels using a brush or roller, ensuring smooth edges. -
Second coat for depth:
Dark colors often need two coats for true richness. Apply your second coat of blue-gray once the first is dry. -
Remove tape:
Carefully peel off the painter’s tape while the final coat is still slightly tacky to prevent peeling the paint film. -
Final touch-ups:
Inspect your work for any bleeds or missed spots. Use a small artist’s brush for tiny touch-ups if needed.
Step back and admire how this simple two-tone update instantly modernizes your entryway.
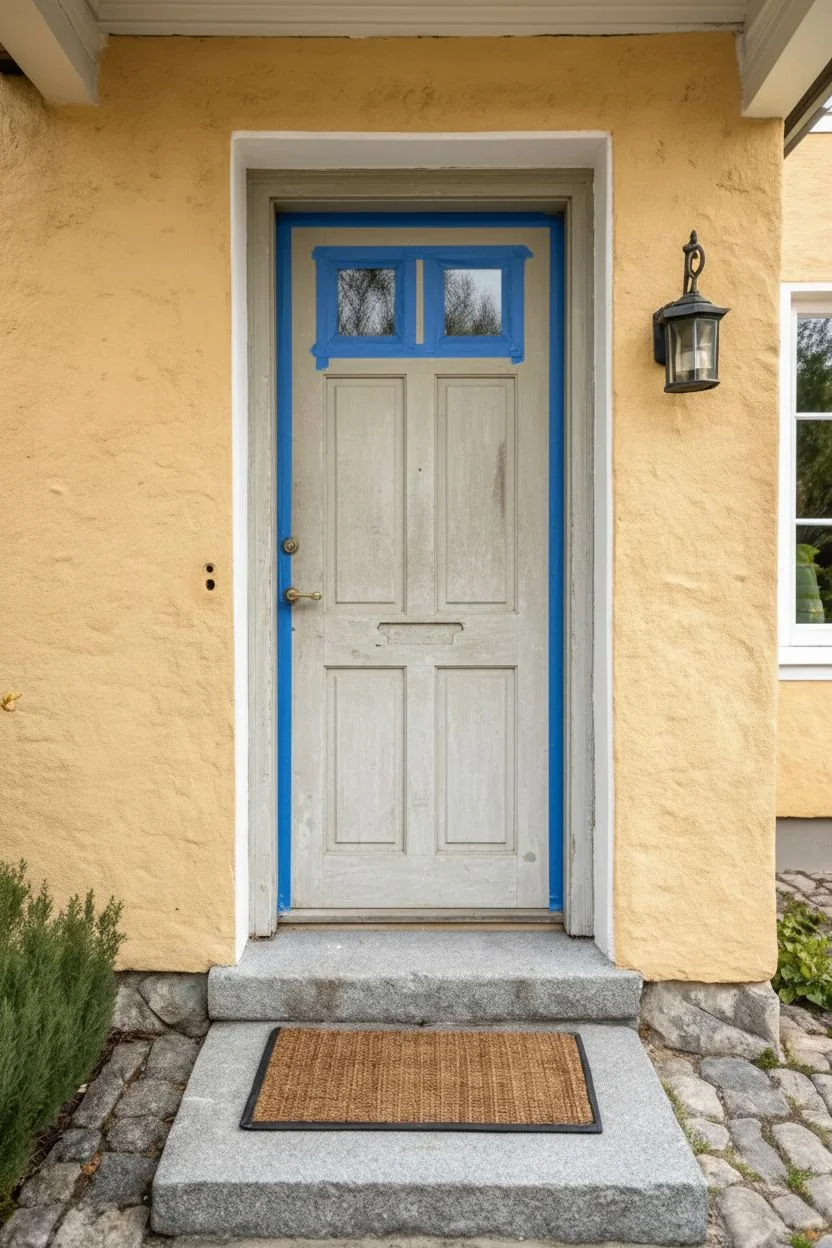
Muted Coastal Blues Without Going Too Themed

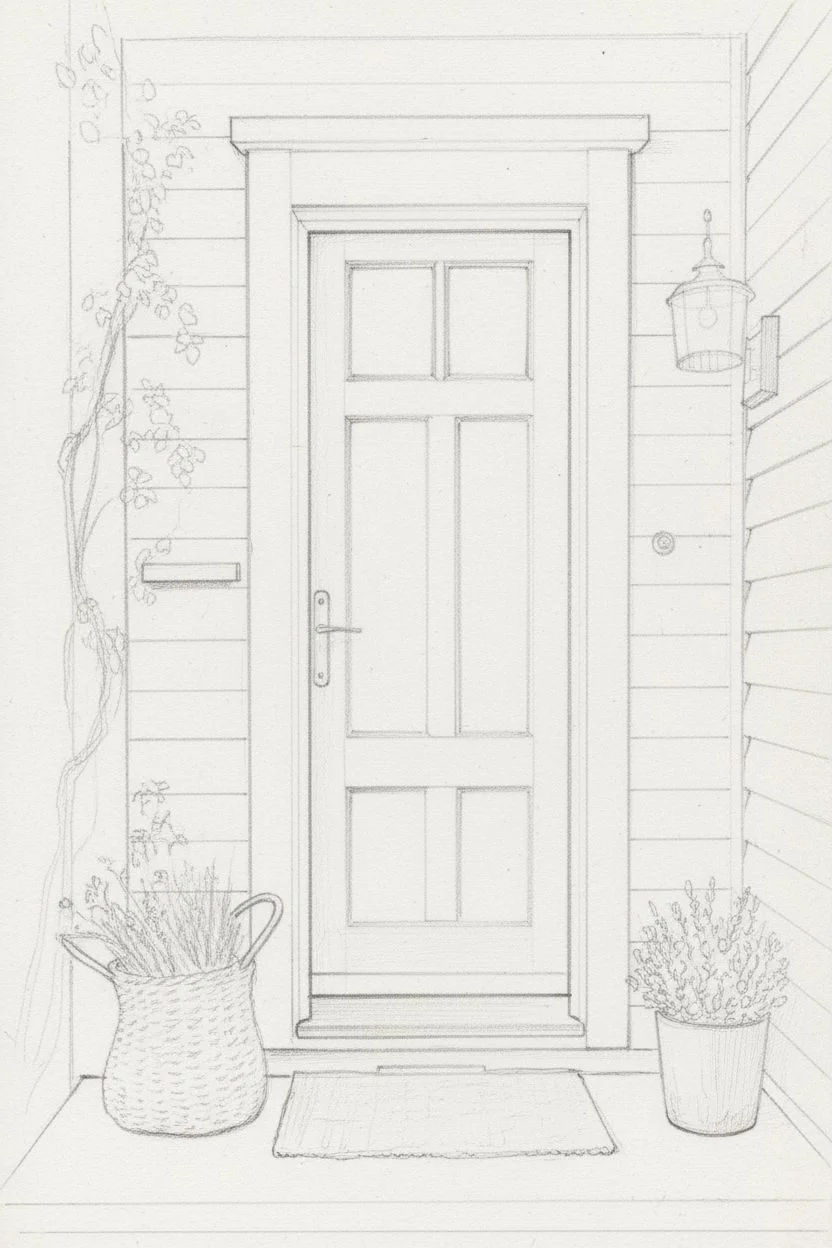
Capture the serene welcome of a coastal cottage with this realistic painting tutorial. You’ll layer soft architectural whites against sage-inflected blues to create a door that feels both weathered and refined.
Detailed Instructions
Materials
- Heavyweight watercolor paper or mixed media board (approx. 9×12 inches)
- Pencil (HB or 2B) and kneaded eraser
- Gouache or acrylic gouache paints (White, Lamp Black, Prussian Blue, Yellow Ochre, Burnt Sienna, Raw Umber, Sap Green)
- Flat shader brushes (sizes 6 and 10)
- Round detail brushes (sizes 0 and 2)
- Ruler or T-square
- Palette for mixing
- Two cups of water
- Paper towels
Step 1: Sketching the Architecture
-
Establish the frame:
Begin by using your ruler to draw the main vertical lines of the door frame centered on your paper. Leave space at the bottom for the porch step and mat. Lightly mark the siding lines horizontally on either side of the frame, ensuring they are evenly spaced. -
Define the door panels:
Sketch the inner rectangle for the door itself. Inside this, mark out the grid for the top windows and the vertical panels below. Pay attention to the cross-rail that divides the upper and lower sections of the door to get the proportions right. -
Add porch details:
Lightly sketch the large woven basket to the left and the potted lavender plant to the right. Don’t worry about individual leaves yet; just focus on the basic shapes of the containers and their relative sizes. -
Refine the climbing vine:
Draw a loose, twisting line climbing up the left side of the siding and over the top left corner of the door frame. Keep your pencil strokes organic and irregular to contrast with the straight architectural lines.
Step 2: Blocking in Base Colors
-
Mix the siding color:
Create a very pale, warm grey by mixing a large amount of White with tiny dots of Raw Umber and a whisper of Sap Green. Paint the siding horizontal strips, carefully cutting in around the vine leaves. -
Paint the door frame:
Using pure White with just the tiniest touch of Yellow Ochre to warm it, paint the thick door casing. Use a flat brush to keep the edges crisp and straight. -
Create the signature blue:
Mix Prussian Blue with White, then dull it down with a touch of Burnt Sienna and a hint of Black. You want a sophisticated, muted teal-grey, not a bright turquoise. Paint the entire door surface, avoiding the window glass areas. -
Fill the window panes:
Mix a dark grey-blue using Prussian Blue and Black. Fill the window panes, suggesting the reflection of trees or sky. -
Ground the scene:
Paint the concrete porch floor with a flat grey mix. For the doormat, use a base of Yellow Ochre mixed with Burnt Sienna to create a coir texture color.
Architectural Edge Trick
Use masking tape or low-tack washi tape along the long straight edges of the door frame and siding. It guarantees sharp, professional lines without requiring a totally steady hand.
Step 3: Adding Depth and Texture
-
Shadow the siding:
Mix a slightly darker version of your siding color. Run a thin line under each clapboard overlap to create the shadow cast by the board above. This immediately gives the wall dimension. -
Detail the door panels:
Using a smaller flat brush and a slightly darker version of your door blue mix, paint the recessed areas of the door panels. Add thin highlights on the upper edges of the molding with a lighter blue-white mix to make them pop. -
Render the woven basket:
Paint the basket on the left using horizontal strokes of Yellow Ochre and Raw Umber. Once dry, use a small round brush and dark brown to paint short, curved hatch marks to simulate the woven wicker texture. -
Paint the metal pot:
For the right-hand planter, use a wash of watery grey and black. Let the paint pool slightly at the bottom to mimic the weight and patina of aged metal. -
Detail the hardware:
Use opaque Black with a tiny dot of White (to make a charcoal grey) to paint the door handle, the doorbell to the right, and the lantern light fixture. Add a single tiny dot of pure white on the handle to show a metallic glint.
Fixing “Flat” Windows
If your window panes look like black holes, dab a bit of the sky-blue door color mixed with white into the center of the glass area while wet. It simulates the reflection of the sky behind you.
Step 4: Foliage and Finishing Touches
-
Paint the climbing vine:
Mix Sap Green with a little Raw Umber. Using the tip of a round brush, dab in leaves along your sketched vine. vary the pressure to make some leaves larger and some smaller. -
Fill the planters:
Paint the dried grasses in the basket with thin, flicking strokes of Yellow Ochre and Burnt Sienna. For the lavender on the right, use a stippling motion with dark green, then layer lighter grey-green dots on top for texture. -
Texture the doormat:
Return to the doormat and use a dry brush with dark brown paint to stipple over the base color, creating the rough, bristly look of coir. -
Refine the glass reflections:
I like to dilute some white paint until it’s very translucent and glaze a few diagonal streaks across the window panes. This softens the dark reflection and makes it look like real glass. -
Final clean up:
Check your white trim. If any blue or green strayed over the lines, use full-strength white gouache to tidy up the edges for that fresh, architectural look.
Step back and admire how the muted tones create a welcoming entrance on your paper.
Moody Plum-Gray for an Artsy, Unexpected Entry
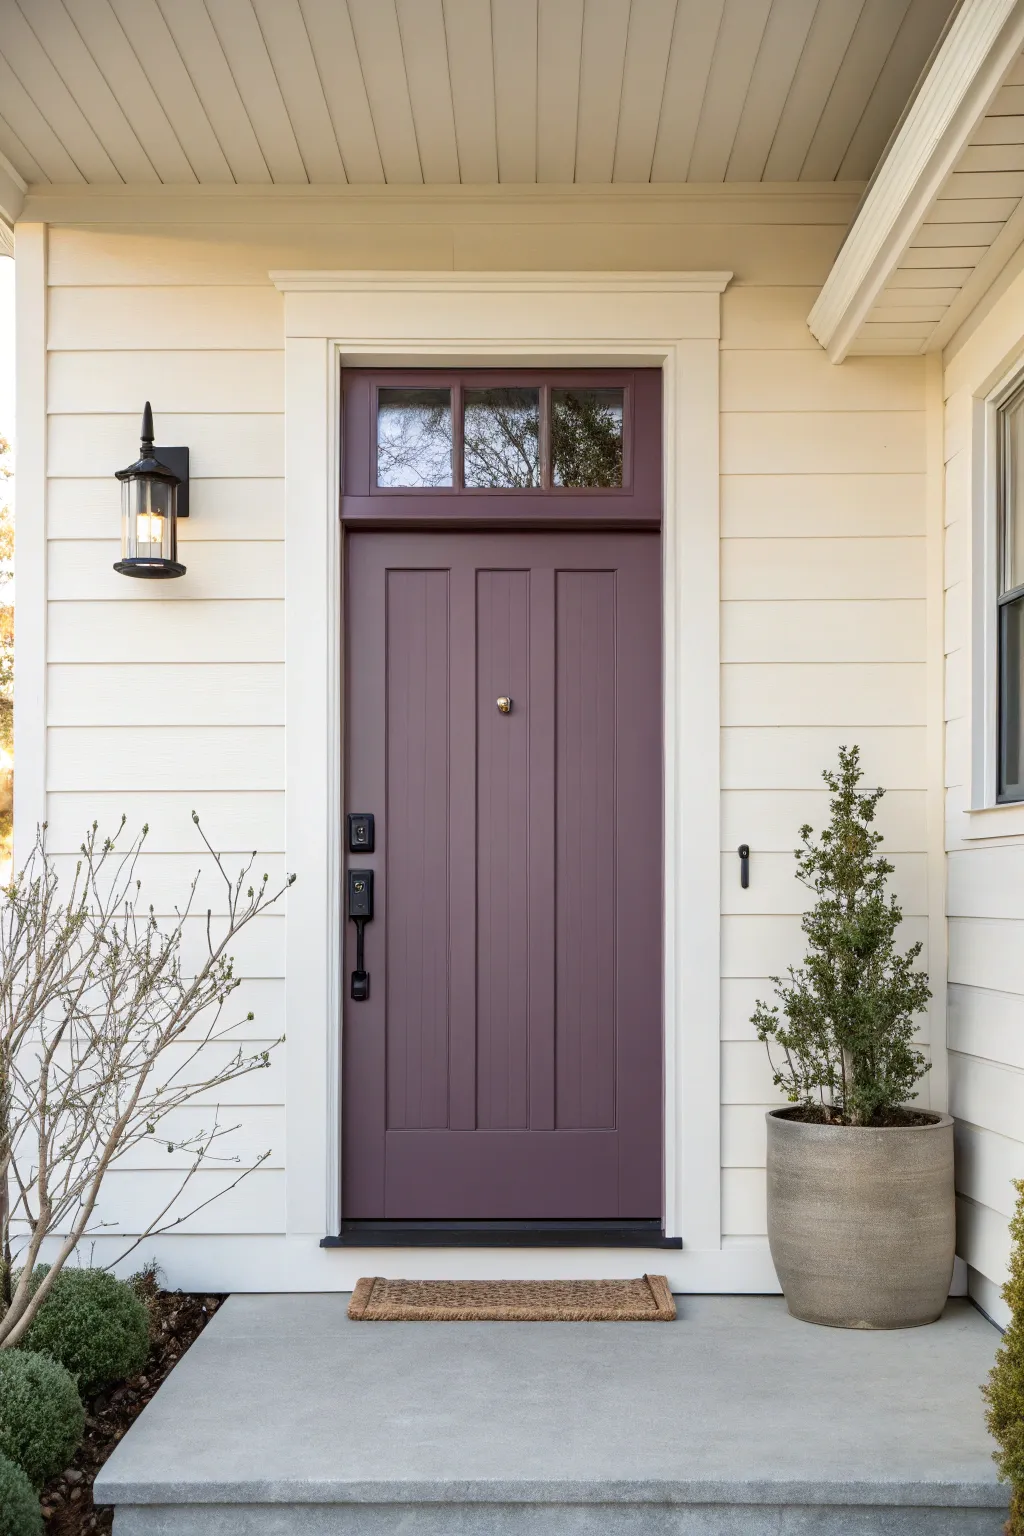
Transform your entryway into a sophisticated focal point with a moody plum-gray hue that strikes the perfect balance between artistic flair and timeless elegance. This project refreshes your curb appeal by combining a bold door color with classic creamy siding for a look that feels both unexpected and welcoming.
How-To Guide
Materials
- Exterior semi-gloss paint (Deep Plum/ Aubergine)
- Exterior flat or satin paint (Creamy Off-White)
- Exterior primer (tintable recommended)
- 2-inch angled sash brush
- 4-inch foam roller and tray
- Painter’s tape (blue or green)
- Sanding block (medium and fine grit)
- Clean rags and tack cloth
- Drop cloth or plastic sheeting
- Screwdriver or drill
- Concrete planter (large)
- Boxwood or similar evergreen shrub
- Black spray paint (for hardware update, optional)
Step 1: Preparation
-
Remove Hardware:
Begin by removing the door handle, lockset, peephole, and kickplate if present. While you could tape around them, taking them off ensures a much cleaner, professional finish. Keep all screws organized in a small baggie. -
Clean Surfaces:
Thoroughly wash the door and the surrounding trim with a mixture of warm water and mild detergent or TSP substitute. Scrub away any dirt, grime, or grease that has built up over time, then rinse with clean water and let it dry completely. -
Sand the Door:
Using a medium-grit sanding block, scuff sand the entire surface of the door to remove any gloss from the previous finish. This creates a ‘tooth’ for the new paint to adhere to. Don’t forget to sand the grooves and edges. -
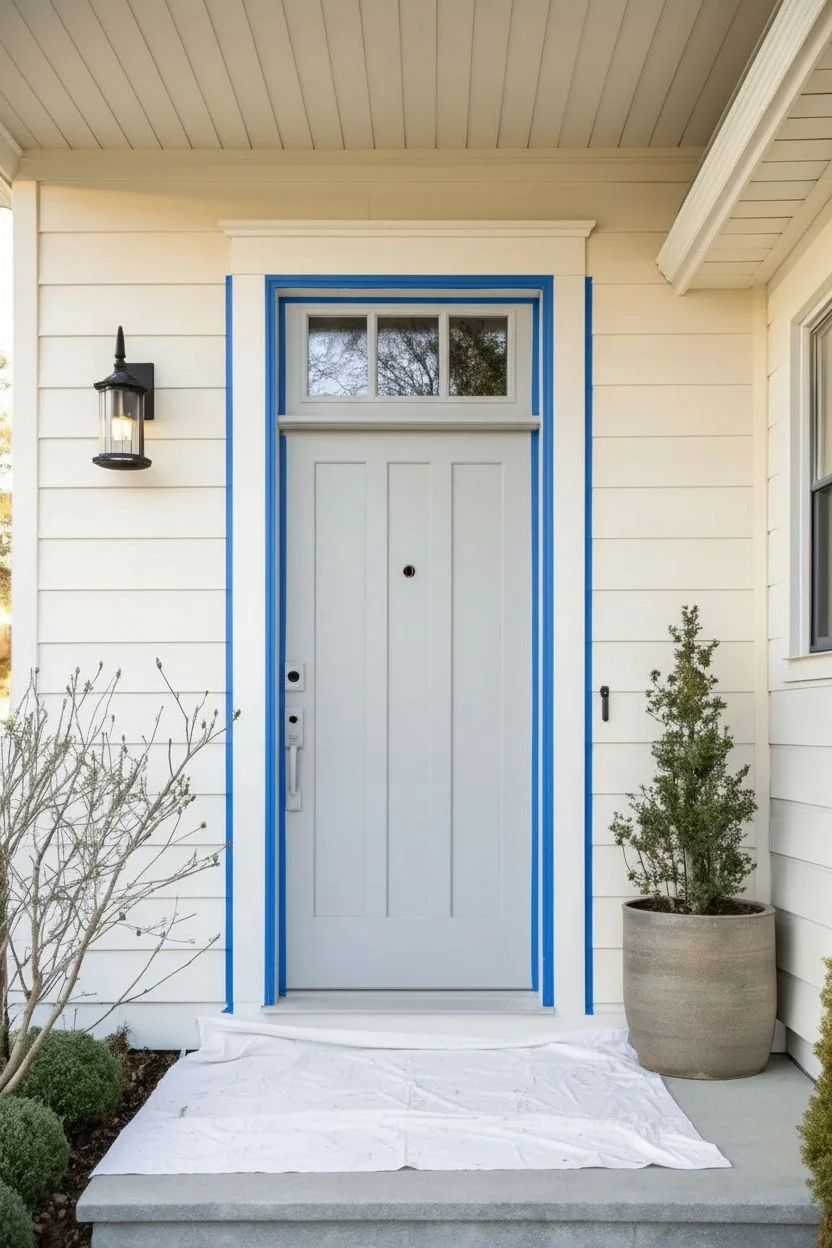
Protect the Area:
Lay down a drop cloth to protect your porch floor. Apply painter’s tape carefully around the glass panes in the transom window and along the edges where the door frame meets the siding to prevent errant brush strokes. -
Prime the Surface:
Apply a coat of high-quality exterior primer to the door. If you are making a drastic color change to a dark plum, I recommend using a gray-tinted primer to help with coverage. allow the primer to dry according to the manufacturer’s instructions.
Sticky Situation?
Does the door stick after painting? Rub a plain white candle or a bit of paraffin wax along the edges that touch the frame. This lubricates the surface and prevents paint transfer.
Step 2: Painting the Door
-
Paint the Panels:
Stir your deep plum semi-gloss paint thoroughly. Start by painting the recessed panels of the door using your angled sash brush. Work the paint into the corners and grooves, smoothing out any drips immediately. -
Paint Vertical Stiles:
Next, paint the vertical center stiles (the vertical pieces between panels). Use long, smooth strokes with the grain. If you see brush marks, lightly tip them off with the brush before the paint starts to set. -
Paint Horizontal Rails:
Move on to the horizontal rails at the top and bottom of the panels. Ensure you blend the wet edges where vertical and horizontal strokes meet to create a seamless look. -
Paint the Frame:
Finish the door by painting the outer vertical stiles and edges. Don’t forget the top edge if visible and the side edge that opens; leave the hinge edge unpainted if you aren’t removing the door from its hinges. -
Dry and Recoat:
Let the first coat dry for at least 4-6 hours, or as directed on the can. Lightly sand with a fine-grit block to remove any dust nibs, wipe with a tack cloth, and apply a second coat following the same order (panels, center, rails, edges).
Step 3: Finishing Touches
-
Paint the Trim:
While the door dries, address the surrounding trim. Using clean brushes, paint the door casing and siding with your creamy off-white exterior paint. Two coats will ensure a crisp, clean contrast against the plum door. -
Paint the Transom:
Carefully paint the mullions (the wood strips between glass) of the transom window above the door. Use the sash brush for precision and peel the tape away while the paint is still slightly tacky to avoid pulling up dried film. -
Reinstall Hardware:
Once the door is fully cured—ideally waiting 24 hours to prevent sticking—reinstall your handle, locks, and peephole. If your old hardware looks tired, a quick coat of matte black spray paint before reinstalling can make it look brand new. -
Style the Porch:
Place a large, concrete planter to one side of the door. Plant a tall, structural evergreen like a boxwood or cedar to add height and greenery that complements the purple hue. -
Final Cleanup:
Remove all drop cloths and sweep the porch clean. Place a natural fiber doormat centered in front of the door to complete the welcoming entryway setup.
Brass Appeal
Elevate the look by swapping standard nickel hardware for unlacquered brass. The warm gold tones contrast beautifully with the cool plum paint.
Step back and admire how this rich, unexpected splash of color completely redefines the personality of your home’s entrance
Desert-Inspired Clay and Sand Tones for Sun-Baked Warmth

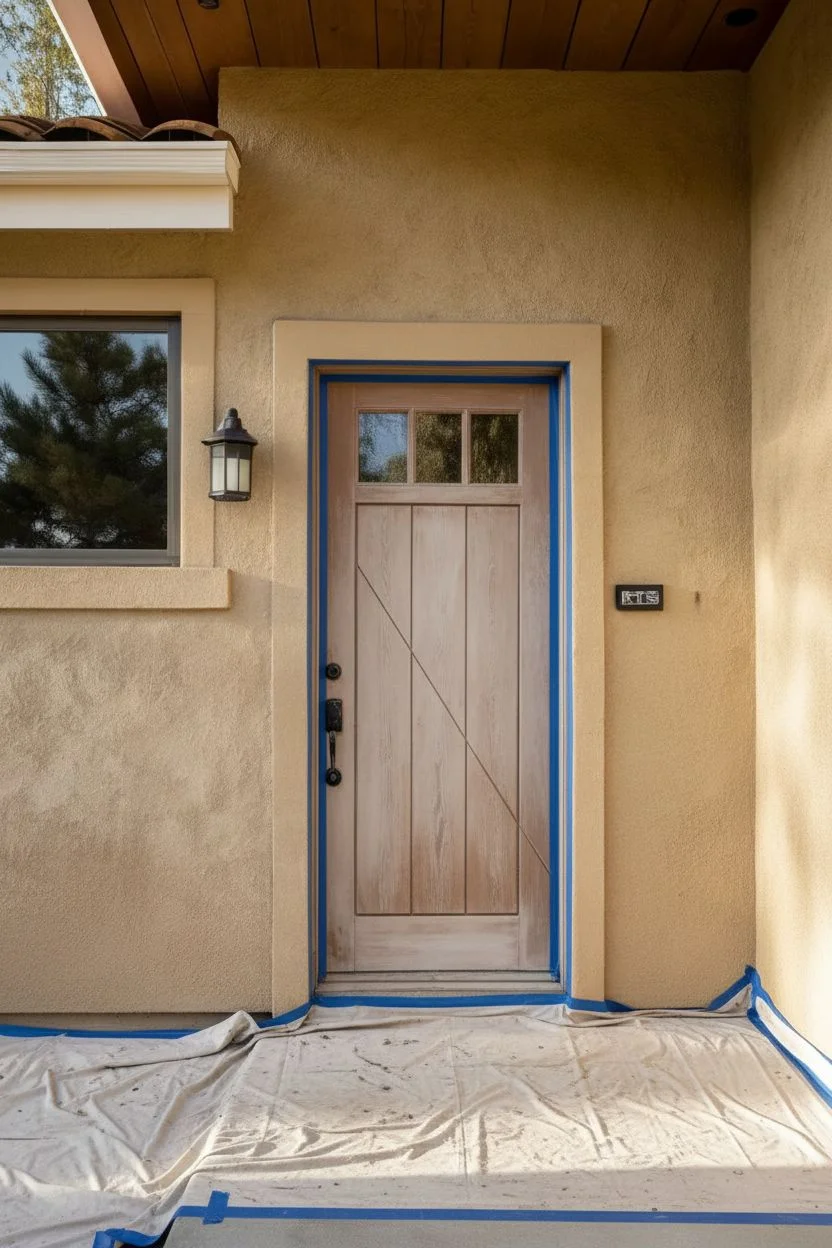
Transform your front entrance into a warm, inviting oasis with this desert-inspired palette. By combining sandy stucco tones with a rich terracotta door, you’ll create a sun-baked look that radiates curb appeal.
Step-by-Step Guide
Materials
- Exterior masonry paint (Warm Sand/Beige)
- Exterior semi-gloss paint (Terracotta/Clay)
- Dark walnut exterior wood stain (for soffit)
- Painter’s tape
- Drop cloths
- Sandpaper (120 and 220 grit)
- Roller frames and extension pole
- Deep-nap roller covers (for stucco)
- Foam roller covers (for door)
- 2-inch angled sash brush
- Outdoor planter (terracotta or clay finish)
- Ornamental grass or similar drought-tolerant plant
- Doormat (natural fiber)
- Black spray paint (optional, for hardware/fixture update)
Step 1: Preparation & Cleaning
-
Clear and clean:
Remove all items from the porch, including doormats, plants, and wall decor. Sweep the concrete thoroughly and use a stiff brush or power washer to clean the stucco walls and soffit, removing any dirt or cobwebs. -
Prep the door:
Wipe down the front door with a degreaser to remove oils and grime. If the existing finish is glossy, lightly scuff it with 120-grit sandpaper to help the new primer and paint adhere. -
Masking time:
Apply painter’s tape carefully around the door jamb, window trim, and the glass panes within the door. Cover the floor with drop cloths to protect the concrete from drips.
Paint Peeling Off?
If paint peels from the metal door, you likely skipped sanding or degreasing. Sand the spot smooth, clean with TSP, prime specifically for metal, and repaint.
Step 2: Painting the Stucco
-
Cut in edges:
Using your angled sash brush and the ‘Warm Sand’ masonry paint, carefully cut in around the door frame, windows, and along the roofline where the wall meets the soffit. -
Roll the walls:
Pour your paint into a tray and load a deep-nap roller. The texture of stucco requires a thicker nap (at least 3/4 inch) to get paint into all the crevices. Apply in W-patterns, working in manageable sections. -
Check coverage:
Stucco can be thirsty. Once the first coat is dry to the touch, inspect for pinholes or missed spots. I find a second coat is almost always necessary for a truly solid, rich color.
Go for Faux Wood
Instead of solid paint, use a gel stain on a fiberglass door to mimic real wood grain. It adds incredible depth and richness to the terracotta tone.
Step 3: Finishing the Door & Accents
-
Prime the door:
If you are making a drastic color change, apply a coat of high-quality exterior primer to the door. Let it dry completely according to the can’s instructions. -
Paint the details:
Start painting the door with the ‘Terracotta’ semi-gloss. Use a brush for the recessed panels and the muntins around the window glass first. -
Roll the flats:
Switch to a foam roller or a high-quality brush for the flat surfaces of the door to minimize brush strokes. Apply thin, even coats, letting each dry fully before adding the next. -
Stain the soffit:
If your wooden soffit needs refreshing, apply the dark walnut stain with a brush or rag. Work overhead carefully, wiping away excess stain as you go to reveal the wood grain. -
Hardware refresh:
If your handle set and light fixture look worn, remove them and give them a quick coat of matte black spray paint. This high-contrast look pops beautifully against the clay tones. -
Final inspection:
Once everything is dry, remove all painter’s tape carefully. Use a small artist’s brush to touch up any tiny spots where paint might have bled or peeled.
Step 4: Styling the Entry
-
Planting:
Fill your large clay planter with potting soil and plant a tall, textural ornamental grass. This mimics the desert landscape and adds vertical interest. -
Placement:
Position the planter to the side of the door where it won’t obstruct the path but fills the visual corner. -
The finishing touch:
Lay down a fresh natural fiber doormat. The coarse texture complements the stucco and completes the earthy, organic aesthetic.
Step back and enjoy the warm, welcoming glow of your newly refreshed desert-chic entrance
Painted “Porch Rug” Rectangle to Anchor the Seating Area
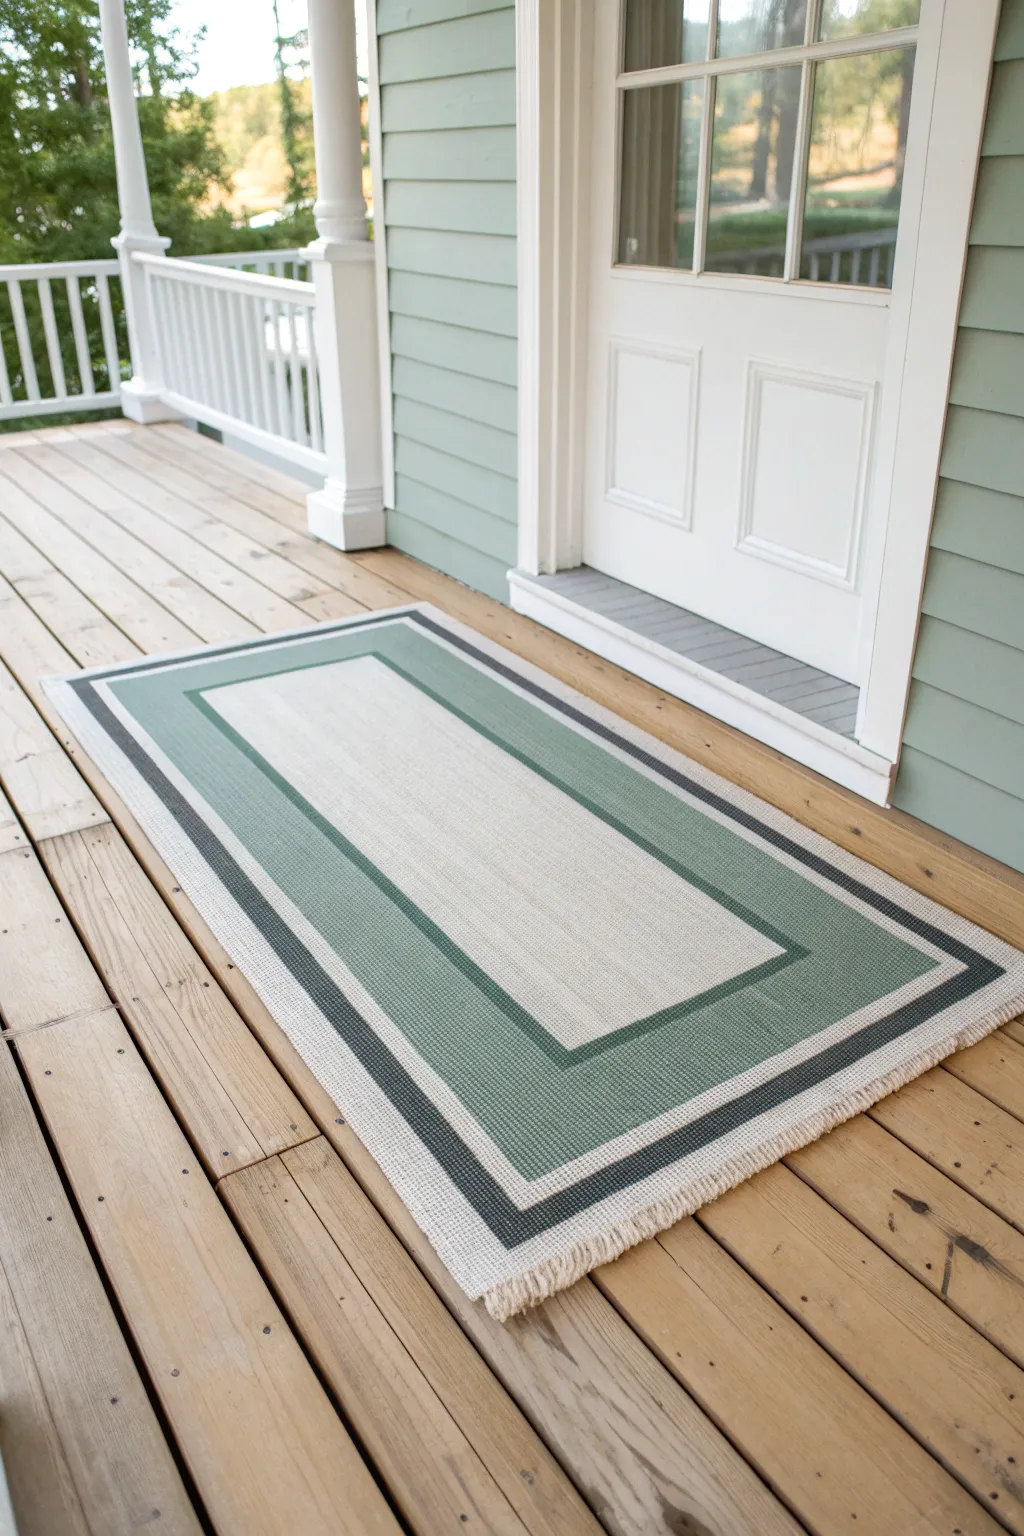
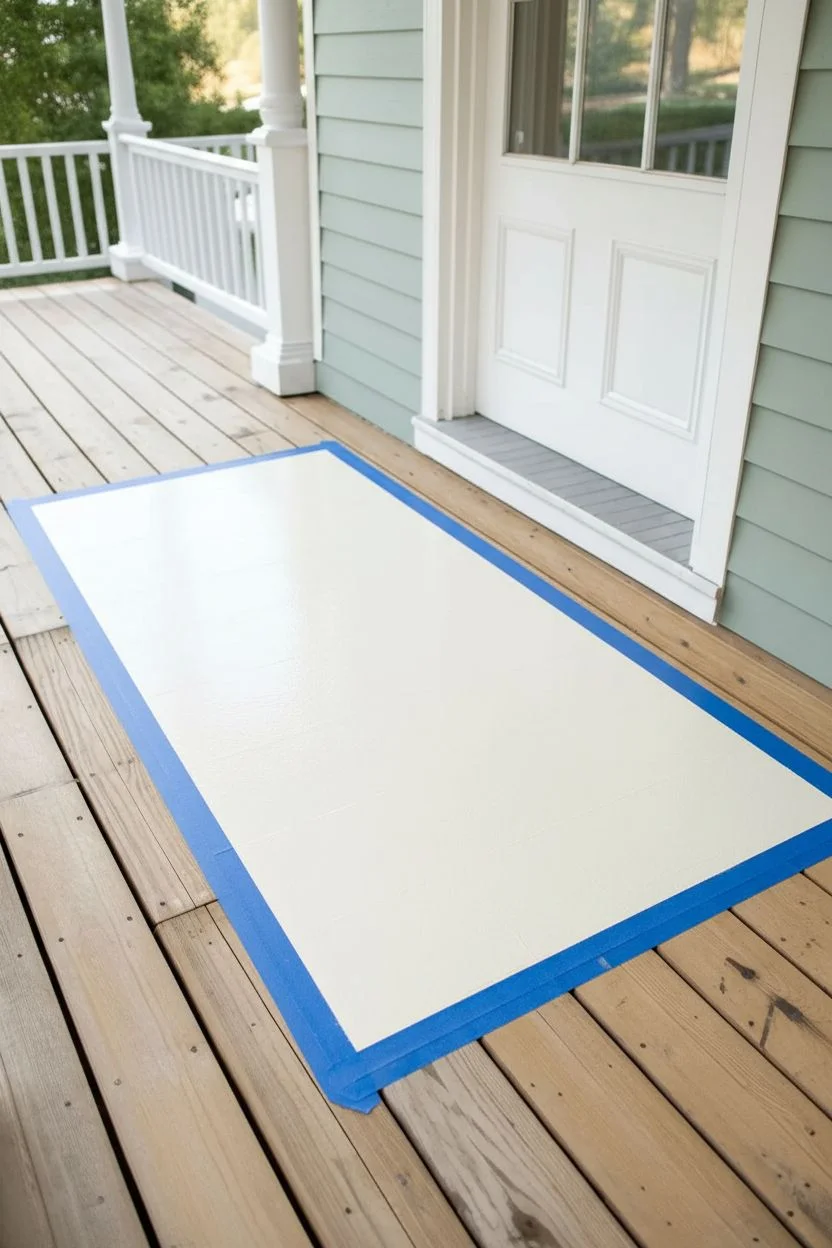
Transform your wooden deck with this clever painted illusion that mimics the texture and charm of a woven textile rug. Using layers of durable porch paint and careful taping, you’ll create a weather-resistant anchor for your outdoor seating area that never needs shaking out.
Detailed Instructions
Materials
- Exterior porch and floor paint (Cream/Off-white)
- Exterior porch and floor paint (Sage Green)
- Exterior porch and floor paint (Dark Charcoal/Black)
- Painter’s tape (various widths: 1-inch, 2-inch)
- Measuring tape
- Chalk line or pencil
- Sandpaper (80-120 grit)
- Roller frame and covers (low nap)
- Clean rags or tack cloth
- Small angled paintbrush
- Stiff bristle brush (for fringe effect)
- Clear exterior sealer (optional)
Step 1: Preparation & Base Coat
-
Clean the surface:
Start by thoroughly cleaning the area of the deck where your rug will go. Use a deck cleaner or pressure washer to remove dirt, mildew, and loose paint, then let the wood dry completely for at least 24 hours. -
Sand the area:
Lightly scour the designated rug area with sandpaper to smooth out rough splinters and create a better surface for adhesion. Wipe away all dust with a tack cloth. -
Mark dimensions:
Decide on the size of your rug. Measure the rectangle on the floor and mark the corners with a pencil. Snap a chalk line between points to create a perfect guide. -
Tape the perimeter:
Apply painter’s tape along the outside edge of your chalk lines to define the overall shape of the rug. Press the tape edges down firmly to prevent bleed-under. -
Apply base color:
Roll on the cream or off-white base color, covering the entire taped-off rectangle. I like to apply two thin coats rather than one thick one for better durability, allowing proper drying time between applications.
Seal for Sharpness
Before painting a new color, brush the base color over the tape edge first. This fills voids and ensures the colored stripe has a razor-sharp line.
Step 2: Creating the Geometric Pattern
-
Measure the borders:
Once the base coat is fully dry—ideally overnight—measure inwards from the edge to create your borders. Mark a consistent distance (e.g., 4 inches) for the wide green band. -
Tape inner rectangle:
Apply tape to protect the central cream rectangle. This tape line should correspond to the inner edge of your future green border. -
Tape outer border:
Apply another line of tape just inside the original perimeter, leaving a thin gap (about 1-2 inches) exposed for the dark charcoal stripe. You are effectively creating channels for your colors. -
Seal tape edges:
To ensure crisp lines, lightly brush a tiny amount of the base cream color over the edges of your new tape lines. This seals the tape so the next colors won’t bleed underneath. -
Paint the green band:
Using a small roller or brush, fill in the wide border section with your sage green paint. Be careful not to cross over into the reserved charcoal area. -
Paint the charcoal stripe:
Use a small angled brush to carefully paint the thin dark charcoal stripe closest to the outer edge. Two coats will likely be needed for this dark pigment. -
Remove tape:
While the paint is still slightly tacky, slowly peel back all the tape at a 45-degree angle to reveal your crisp geometric design. Let this dry completely.
Step 3: Woven Texture & Details
-
Simulate texture:
For a textile look, dip a stiff, dry bristle brush lightly into a slightly lighter shade of your colors and drag it horizontally and vertically across the solid blocks. This cross-hatching mimics woven fabric threads. -
Prepare for fringe:
Tape off a narrow strip at both short ends of the rug where the fringe will go. Paint this strip with your cream base color if it isn’t already covered. -
Paint the fringe:
Using a very small artist’s brush and the cream paint, hand-paint short, individual lines extending outward from the rug’s short ends. Vary their length slightly and curve a few to look like natural, loose threads. -
Add shadows:
Mix a tiny amount of grey into your cream paint. Use this to paint a faint shadow line underneath the ‘fringe’ strands to make them pop and look three-dimensional against the wood deck. -
Seal the project:
Once the artwork has cured for a few days, roll a coat of clear matte exterior sealer over the entire design to protect it from foot traffic and weather elements.
Stencil Stamping
Instead of a solid center, use a geometric stencil with the sage green paint inside the central rectangle for an intricate, high-end patterned look.
Enjoy your durable, stylish new porch rug that adds instant warmth without the worry of mold or soggy fabric


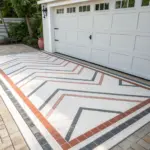

Have a question or want to share your own experience? I'd love to hear from you in the comments below!