
Pet rocks are my favorite kind of tiny art project because they turn an ordinary stone into a little character with real personality. If you’re craving playful, doable designs, I’ve got a bunch of pet rock ideas that feel like a mini studio party in your hands.
Classic Smiley Face Pet Rock
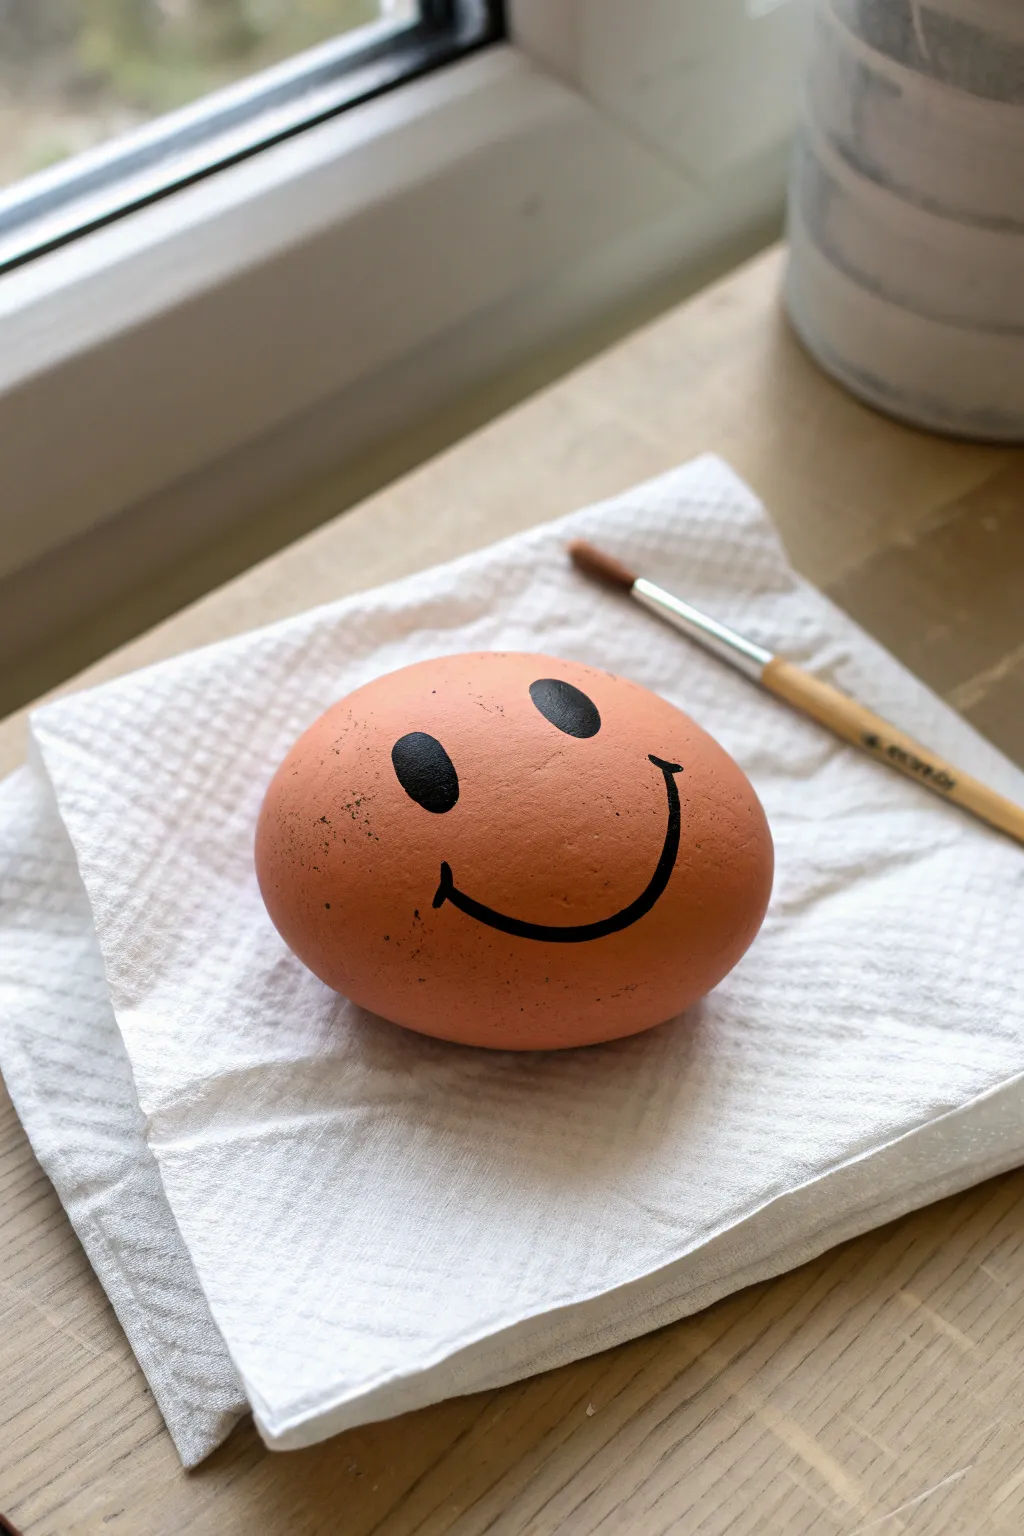
Sometimes the simplest designs bring the most joy, and this classic smiley face pet rock is a perfect example. With its warm terracotta hue and cheerful expression, this little stone friend is an endlessly charming desk accessory or pocket worry stone.
How-To Guide
Materials
- Smooth, oval-shaped river rock
- Terracotta or peach acrylic paint
- Black acrylic paint
- Medium flat paintbrush
- Fine detail paintbrush (size 0 or 00)
- Clean water cup
- Paper towels
- Palette or small plate
- Matte spray sealer (optional)
Step 1: Base Preparation
-
Select your stone:
Begin by finding a rock that is nice and smooth. A river rock with a naturally rounded, slightly flattened shape works best for a face. -
Clean the surface:
Wash your rock thoroughly with soap and warm water to remove any dirt or oils. Let it dry completely before starting, as moisture can trap under the paint. -
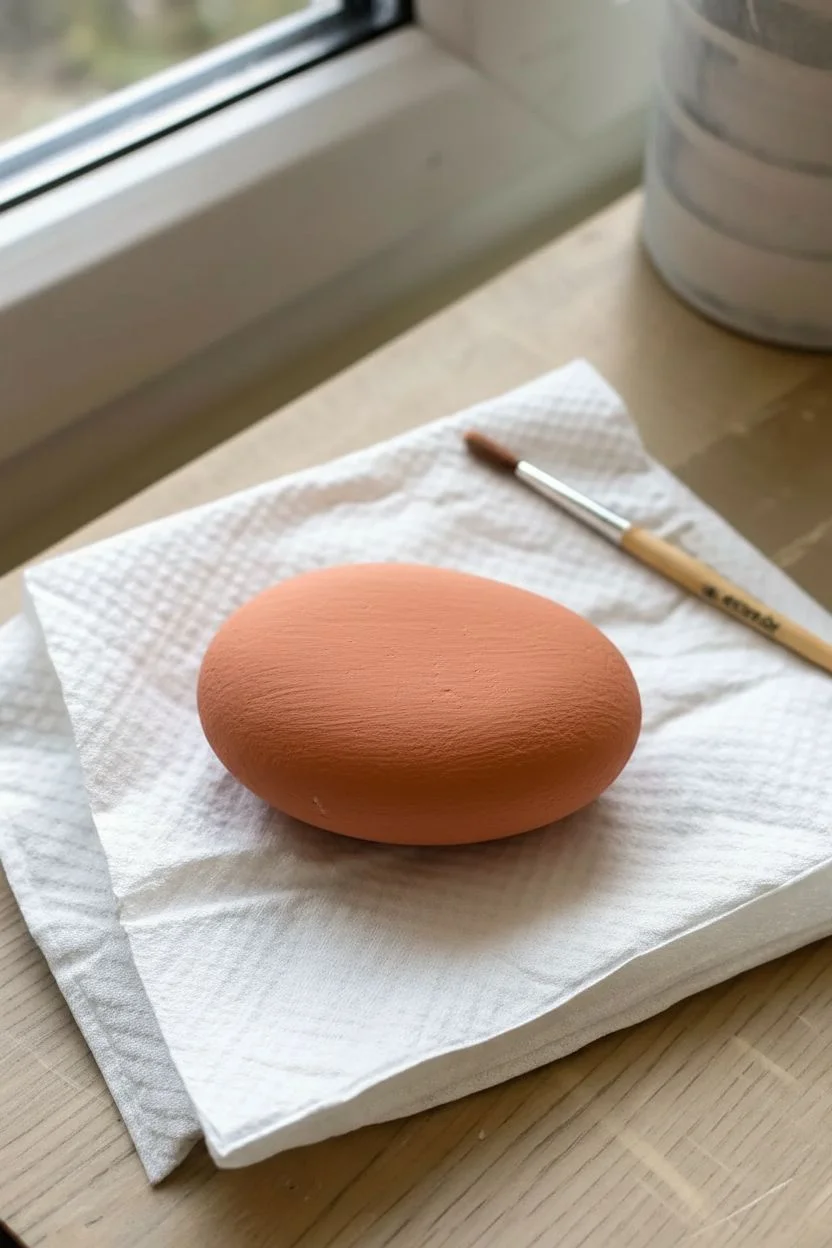
Load your base color:
Squeeze a nickel-sized amount of terracotta or heavy-body peach acrylic paint onto your palette. If the paint is very thick, add a tiny drop of water to improve flow. -
Apply the first coat:
Using your medium flat brush, paint the entire top surface of the rock. Don’t worry about the bottom yet; just focus on getting smooth coverage on the visible side. -
Let it dry:
Allow this first layer to dry for about 15-20 minutes. If the rock’s natural color is still showing through, apply a second coat for a solid, opaque finish. -
Check for smoothness:
Inspect the dried surface. If you see heavy brushstrokes, you can lightly sand them down with fine-grit sandpaper, though usually a third thin coat of paint levels everything out nicely.
Step 2: Painting the Face
-
Prepare the black paint:
Clean your brush thoroughly or switch to your fine detail brush. Put a small dot of black acrylic paint on your palette. -
Test the consistency:
I like to thin the black paint just slightly with water so it flows like ink—this helps create crisp edges without drag marks. -
Outline the eyes:
Visualize where the eyes should go. Using the very tip of your fine brush, lightly outline two vertical ovals near the top third of the rock. -
Fill the eyes:
Carefully fill in the ovals with black paint. Take your time to keep the edges smooth and rounded. If one looks slightly larger, gently adjust the other to match. -
Map the smile:
Before painting the full smile, you might want to mark the two endpoints with tiny dots to ensure the smile will be centered. -
Paint the smile curve:
Starting from the left, pull your brush in a swooping ‘U’ motion to connect your imaginary points. A long, confident stroke is often shakier than short, connected ones, so feel free to paint it in segments. -
Add the smile ends:
To give it that classic cartoon look, add small, subtle upward ticks—like serifs—at the very tips of the smile line. -
Thicken the line:
Go back over the smile line to thicken it slightly, especially in the center of the curve, tapering it out towards the ends.
Smooth Operator
If your rock has pits or bumps, prep it with a layer of white gesso before painting. This fills minor texture and makes your top colors pop.
Step 3: Finishing Touches
-
Dry the details:
Let the black paint dry completely. This usually takes longer than the base coat because the black pigment is dense. -
Clean up edges:
If you made any mistakes with the black paint, you can touch them up with a bit of the original terracotta color once the black is fully dry. -
Optional speckling:
For a textured, organic look like the photo, you can flick a tiny bit of dark brown paint from a toothbrush onto the surface, though this is optional. -
Seal the rock:
To protect your new friend from scratches, apply a coat of matte spray sealer or a brush-on varnish. This will keep the finish looking fresh.
Creative Expressions
Change the eye shape to customize feelings! Use sideways ‘V’ shapes for a laughing face, or add eyebrows for a confused thoughtful expression.
Now you have a permanent smile to keep you company wherever you go


Googly-Eyed Minimalist Pet Rock
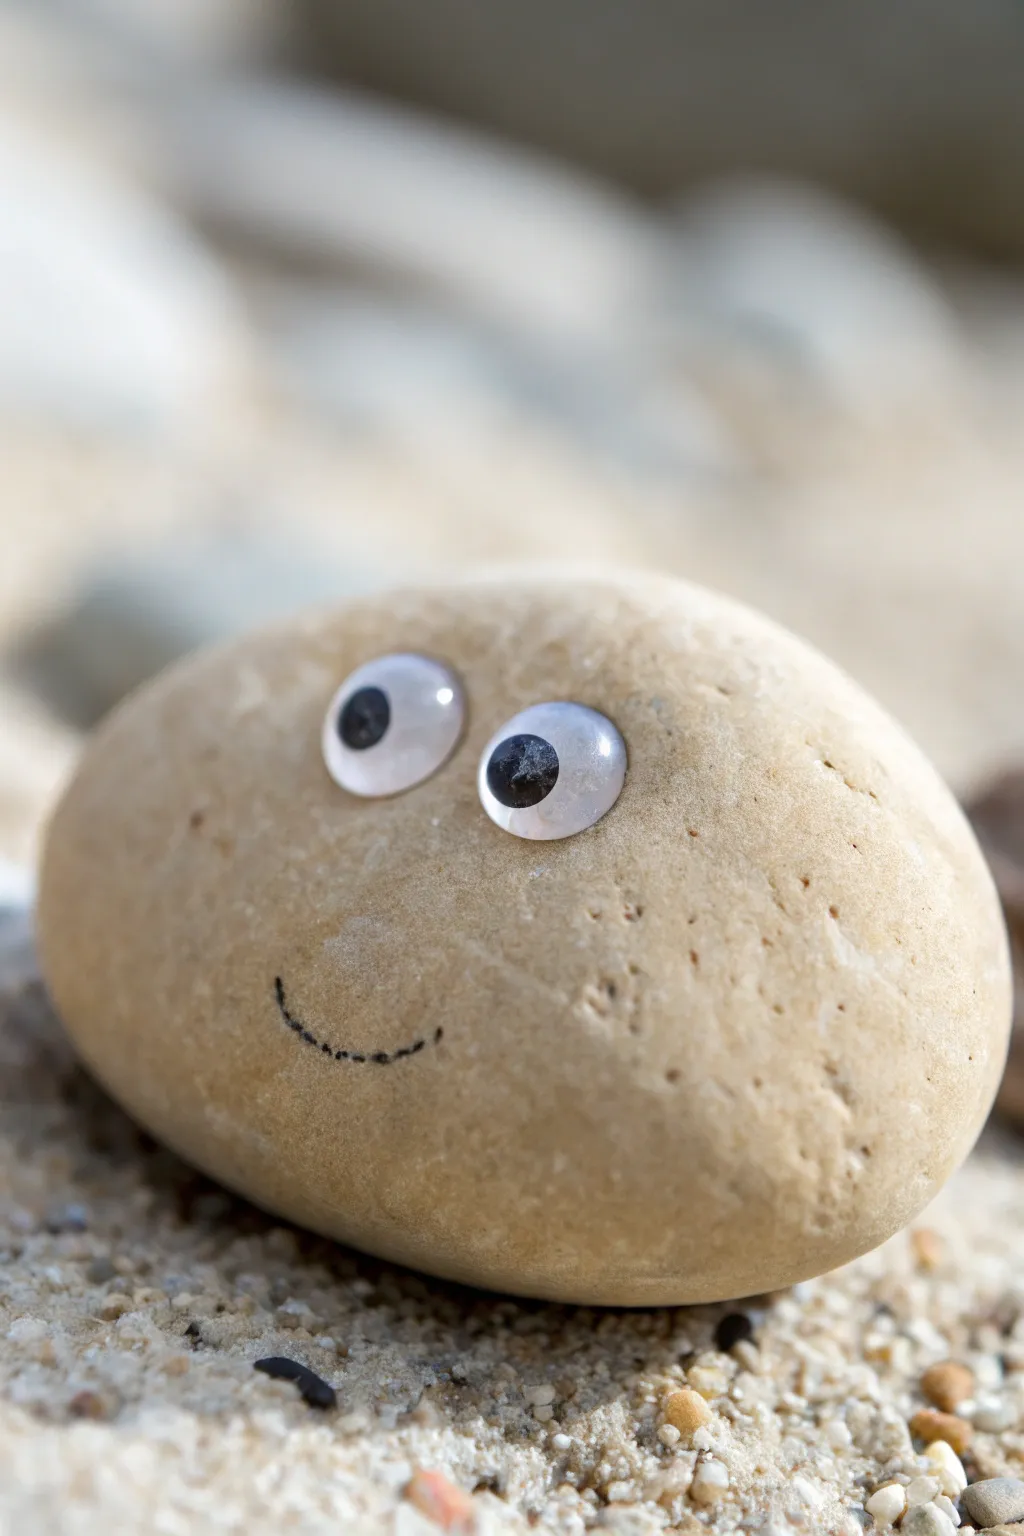
For the ultimate minimalist crafting experience, this charming little pet rock relies on clean lines and a friendly face. It uses the natural smoothness of a beach stone to create an adorably simple desk companion.
Step-by-Step
Materials
- Smooth, oval-shaped beach pebble (approx. 2-3 inches wide)
- Pair of 10mm or 12mm adhere-backed googly eyes
- Fine-point permanent marker or archival ink pen (black)
- Rubbing alcohol
- Cotton pad or cloth
- Clear matte varnish (optional)
Step 1: Preparation
-
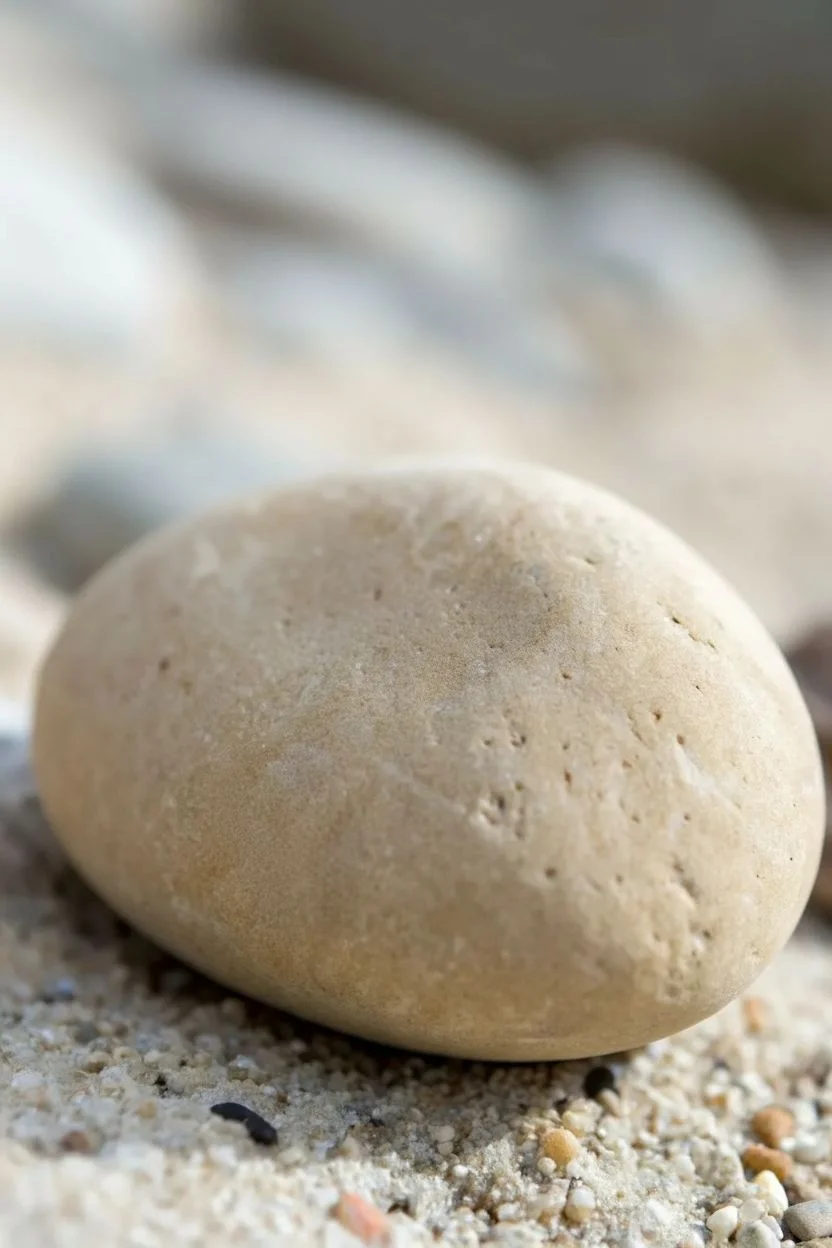
Select your stone:
Begin by hunting for the perfect canvas. Look for a stone that is relatively flat on one side so it sits without rolling, and has a smooth, pale surface. -
Clean the surface:
Even if the rock looks clean, oil from hands or dust can prevent glue from sticking. Wipe the entire surface thoroughly with a cotton pad dipped in rubbing alcohol. -
Dry completely:
Let the alcohol evaporate fully for a few minutes. The stone must be bone-dry before you attempt to stick anything to it. -
Position test:
Place the stone on your work surface. Poke it gently to find its natural center of gravity. You want the face to be looking slightly upward or straight ahead, not at the table.
Step 2: Adding the Face
-
Peel the backing:
Take your self-adhesive googly eyes. If yours aren’t self-adhesive, dab a tiny dot of craft glue on the back of each eye. -
Place the first eye:
Position the first eye slightly to the left of the center line, about a third of the way down from the top edge of the rock. -
Place the second eye:
Place the second eye right next to the first one. For this specific ‘cute’ look, the eyes should be touching or very close together. -
Press and hold:
Apply firm pressure with your thumb for about 10-15 seconds to ensure the adhesive bonds optimally with the textured stone surface. -
Plan the smile:
Before drawing, visualize where the smile should go. It should be small, simple, and placed centrally below the eyes. -
Draw the center:
Using your fine-point marker, lightly touch the stone surface. Start the smile directly below the point where the two eyes meet. -
Complete the curve:
Draw a small upward curve using light, stippled dots or a very gentle continuous line. The textured rock might make the pen skip, so go slowly. -
Refine the line:
Go back over your smile line once more to darken it. The line shouldn’t be too thick; a delicate, thin smile works best for this minimalist style.
Sticky Situation?
If the self-adhesive backing won’t stick to a rough stone, use a dab of E6000 or super glue gel. Holds tight on uneven surfaces.
Step 3: Finishing Touches
-
Let the ink set:
Allow the ink to dry for at least 5 minutes to prevent smudging. -
Optional sealing:
If you plan to keep this rock outdoors, brush a thin layer of matte varnish over the stone, avoiding the plastic eyes. -
Wait for varnish:
Should you choose to varnish, I like to let this dry briefly in a dust-free area for about an hour. -
Final display:
Place your new friend back in the sand or on a desk to enjoy its cheerful company.
Accessorize It
Give your rock personality by gluing on a tiny felt hat, a yarn wig, or painting small pink circles for cheeks.
Now you have a low-maintenance pet that is sure to bring a smile to anyone’s face


Bumblebee Stripe Pet Rock
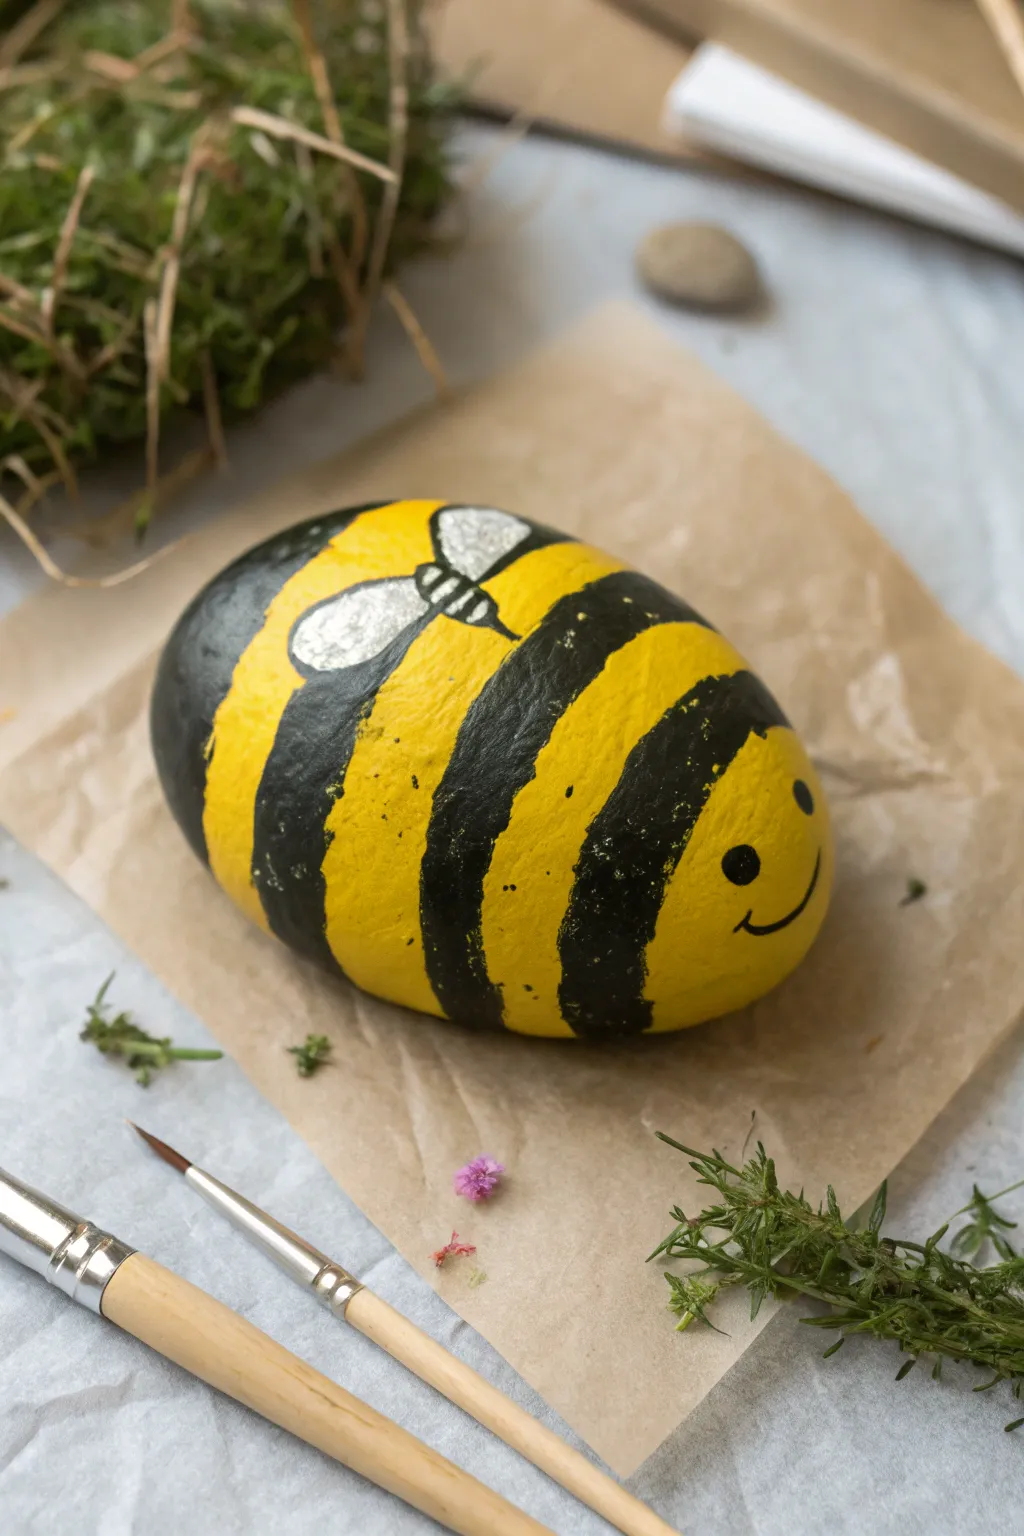
Transform a simple garden stone into a cheerful, buzzing friend with this adorable painting project. The bright yellow and black stripes, paired with shimmering silver wings, make this pet rock a standout addition to any garden or desk.
Step-by-Step Tutorial
Materials
- Smooth, oval-shaped river rock
- Yellow acrylic paint (bright, opaque shade)
- Black acrylic paint
- Silver or metallic white acrylic paint
- Flat paintbrush (medium size)
- Fine liner or detail paintbrush
- Pencil
- Palette or paper plate
- Cup of water and paper towels
- Spray sealer or varnish (optional)
Step 1: Base Coat & Prep
-
Clean the canvas:
Begin by thoroughly washing your chosen rock with soap and water to remove any dirt or oily residue. Let it dry completely before starting, as moisture trapped underneath can cause paint to peel later. -
Outline the sections:
Use a pencil to lightly sketch the head area and the stripe pattern onto the rock. This doesn’t need to be perfect, but having guidelines helps ensure your stripes end up relatively even. -
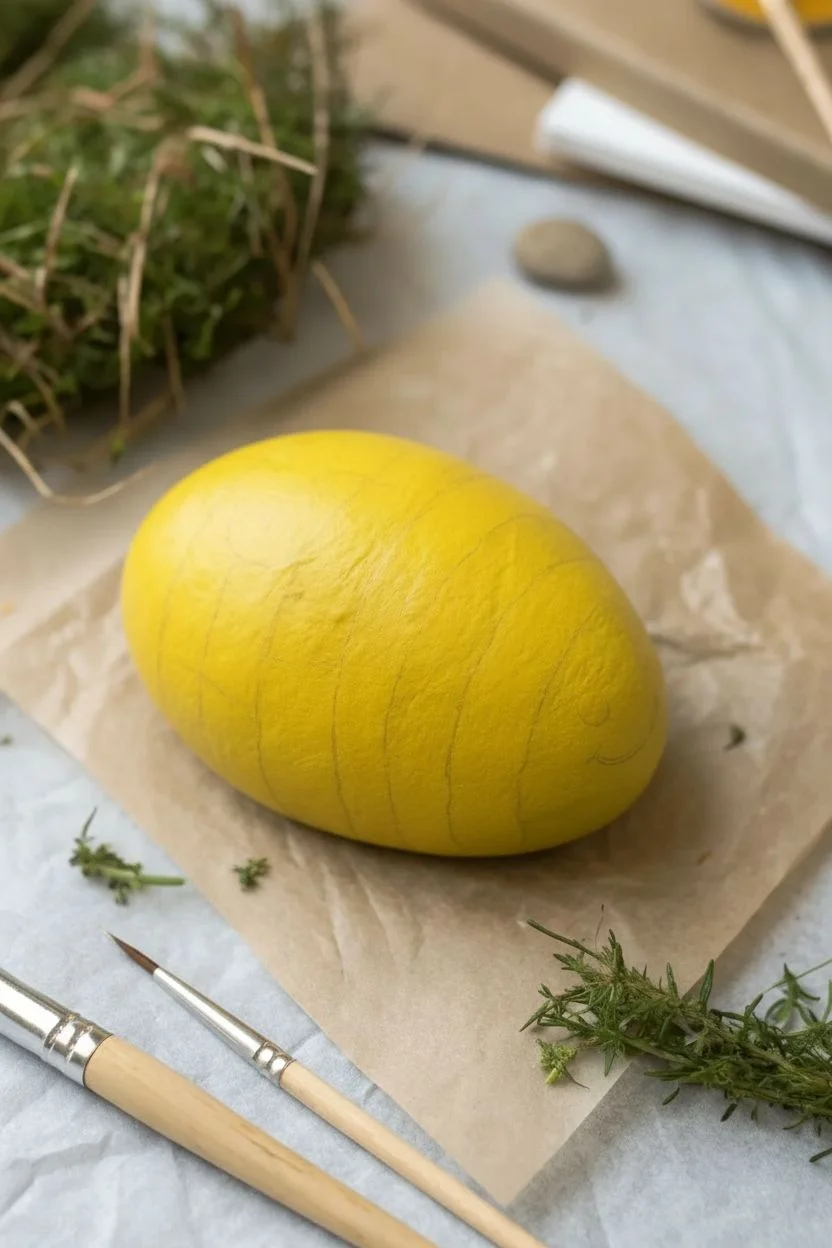
Start with yellow:
Load your flat brush with bright yellow paint. Fill in the sections intended for yellow stripes. You will likely need two or three thin coats to get full opacity, letting each layer dry in between. -
Paint the head:
While the yellow stripes are drying, use the yellow paint to fill in the front section for the face. Ensure the coverage is solid so the black details will pop later. -
Paint the bottom:
Don’t forget to flip the rock over once the top is touch-dry and continue the yellow bands around the underside for a complete look.
Uneven Coverage?
Yellow paint is notoriously transparent. If it looks streaky, paint a layer of white underneath the yellow sections first to make the color pop.
Step 2: Stripes & Details
-
Add the black bands:
Switch to your black acrylic paint. Carefully fill in the remaining bands between the yellow stripes. Using the edge of the flat brush helps create a crisp line where the colors meet. -
Refine the edges:
If your black paint wobbles into the yellow, don’t worry. Wait for it to dry completely, then touch it up with a little more yellow paint to straighten the line. -
Paint the back end:
Finish the very back tip of the rock with black paint to complete the bee’s body pattern. -
Sketch the wings:
Once the base stripes are fully dry, lightly sketch a pair of simple oval wings on top of the bee’s back using your pencil. -
Fill the wings:
Use the metallic silver paint to fill in the wing shapes. If the black paint underneath shows through, apply a second coat of silver for a brilliant shine. -
Outline the wings:
Switch to your fine liner brush and black paint. Carefully outline the silver wings and draw a small ‘V’ shape or tiny stripes in the center to connect them to the body.
Go 3D
Glue on small wire antennae or attach googly eyes instead of painting them for a fun, textured face that kids will love.
Step 3: Bringing it to Life
-
Create the eyes:
Using the detail brush or the handle end of a paintbrush, dot two small black circles onto the yellow face area for the eyes. -
Paint the smile:
With the very tip of your fine liner brush, paint a thin, curved line for a smile. Adding a tiny tick mark at the end of the smile gives it a cute, quirky expression. -
Let it cure:
Allow the rock to sit undisturbed for several hours. Acrylic paint dries quickly to the touch, but needs time to fully harden. -
Seal the deal:
To protect your bee from the elements, especially if it will live closely to real flowers outside, apply a clear spray sealer or varnish over the entire surface.
Find a nice sunny spot in the garden to place your new pet and enjoy the splash of color it adds


Turtle Shell Pet Rock
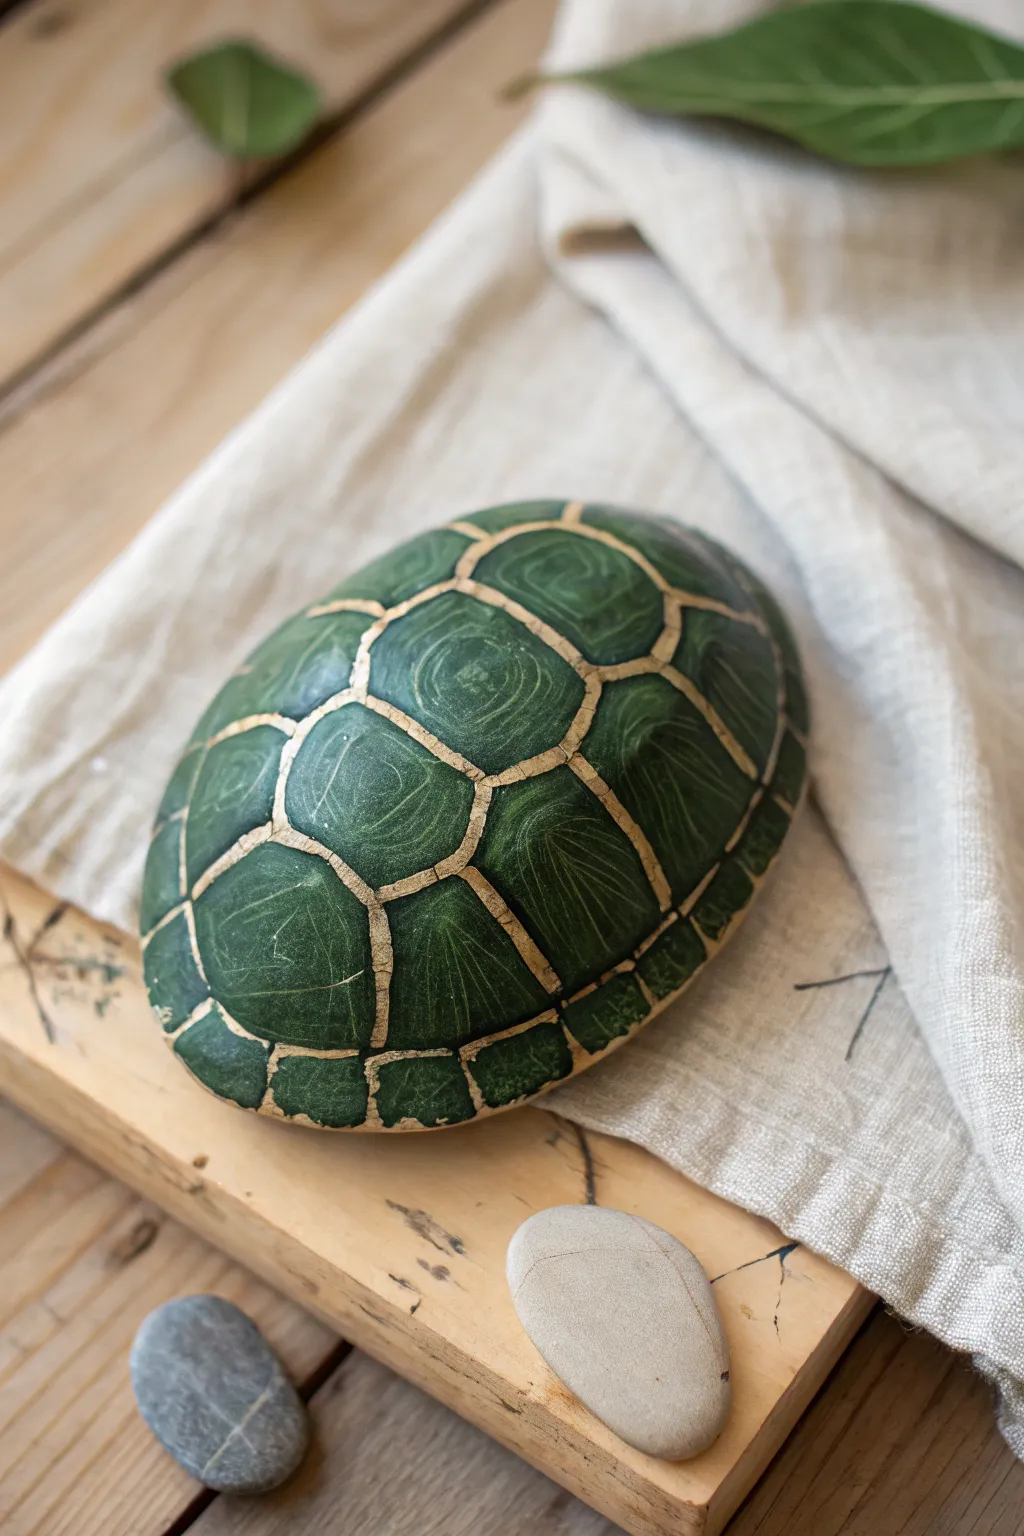
Transform a smooth, oval stone into a sophisticated faux-turtle shell using rich greens and striking metallic accents. This project relies on careful layering to achieve a dimensional, textured look that feels almost like polished jade.
Detailed Instructions
Materials
- Smooth, oval-shaped river rock (palm-sized)
- Acrylic paints: Carbon Black, Phthalo Green, Deep Forest Green, White, and Titanium Buff
- Metallic gold or brass acrylic paint (or a gold paint pen)
- Fine detail brush (size 0 or 00)
- Flat shader brush (size 4 or 6)
- Old toothbrush or stiff bristle brush
- Pencil
- Matte or satin varnish
Step 1: Base and Sketching
-
Stone preparation:
Begin by washing your stone thoroughly with soap and water to remove any dirt or oils. Let it dry completely before starting. -
Base coat:
Mix a dark, almost black-green using your Phthalo Green and a touch of Carbon Black. Coat the entire top surface of the rock. You might need two layers to get full opacity. -
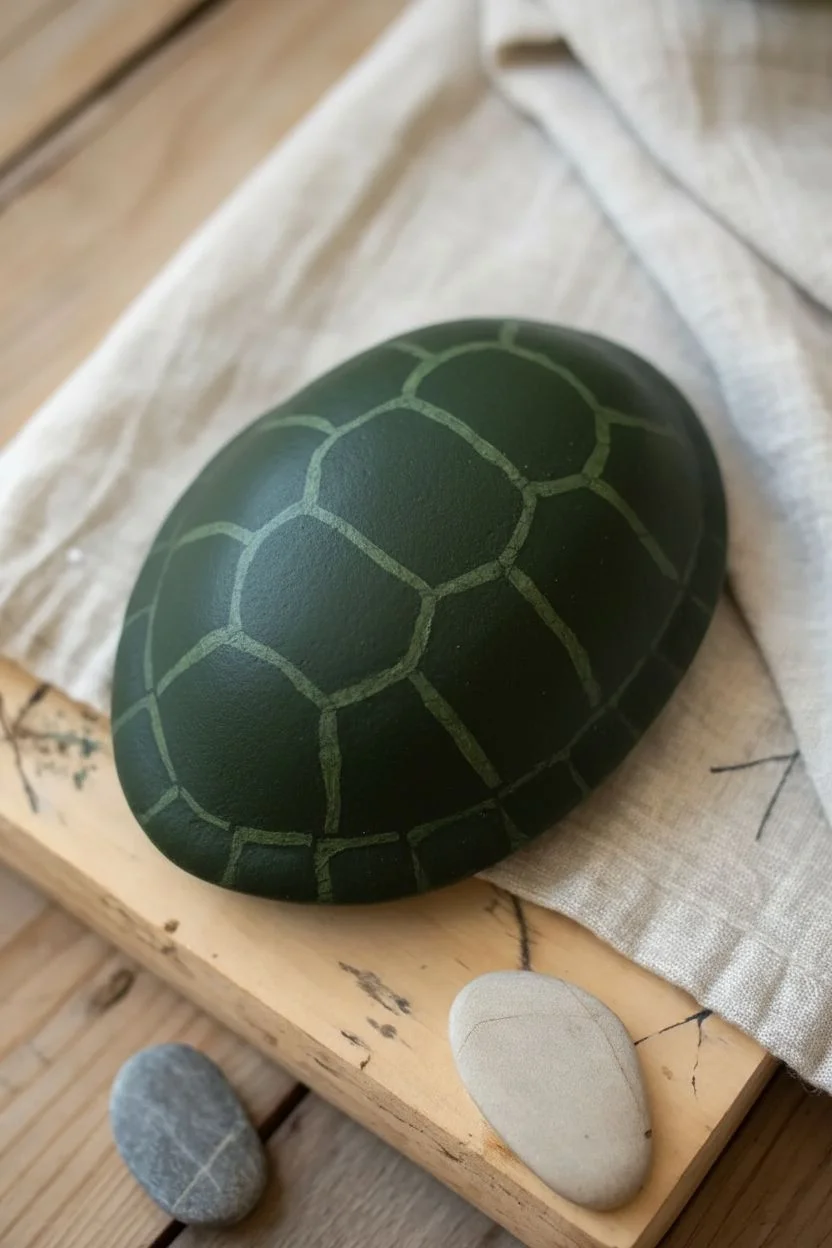
Mapping the shell:
Once the base is dry, lightly sketch the shell pattern with a pencil. Draw a central row of hexagonal shapes down the middle of the rock. -
Adding side scutes:
Sketch the side shapes radiating out from the center row, curving them downward toward the rock’s edge to mimic the natural dome of a turtle shell. -
Edge details:
Finish the sketch by drawing smaller, rectangular shapes along the very bottom rim of the stone to create the marginal scutes.
Natural Texture
Don’t aim for perfect smoothness. If your rock has pits/bumps, let your gold lines flow into them. Real shells aren’t perfect.
Step 2: Texturing the Shell
-
First highlighting layer:
Mix a medium Forest Green. Using your flat brush, paint inside each sketched shape, leaving a tiny gap between your paint and the pencil lines so the dark base is still visible as a border. -
Creating texture:
While the green is still slightly wet, use a clean, dry brush to streak through the paint gently. This creates a striated, organic texture. -
Lightening the centers:
Mix a lighter jade shade by adding Titanium Buff or a tiny drop of White to your green. Paint oval shapes in the center of the larger scutes to simulate the highest point of the curve. -
Feathering technique:
Use a dry brush to feather these lighter centers outward, blending them softly into the darker green surroundings. -
Adding fine striations:
Take your fine detail brush and a thinned mixture of light green. Paint very thin, scratchy lines radiating from the centers of the scutes. I find this really helps sell the ‘shell’ illusion. -
Textural spatter:
Load an old toothbrush with a very watery light green mix. Run your thumb over the bristles to flick tiny specks onto the rock for a natural, weathered look.
Step 3: The Golden Grid
-
Defining the lines:
Once all your green layers are fully bone-dry, load your fine detail brush with metallic gold or brass paint. -
Painting the channels:
Carefully trace over the original grid lines between the scutes. Don’t worry about making straight lines; a slightly wobbly, organic line looks more natural here. -
Varying line thickness:
Make the lines separating the main central scutes slightly thicker than the lines separating the smaller edge pieces. -
Refining intersection points:
Where the gold lines meet at corners, dab a little extra paint to soften the angles, making the scutes look like they are fitting together snugly. -
Sealing the work:
Allow the gold paint to cure for at least an hour. Finish by brushing on a layer of satin or matte varnish to protect the paint and give the shell a gentle sheen.
Ancient Relic
For an antique look, do a wash of diluted brown paint over the dried gold lines, then wipe it off quickly to leave grime in the cracks.
Place your finished shell in a garden pot or terrarium for a quiet, natural accent
BRUSH GUIDE
The Right Brush for Every Stroke
From clean lines to bold texture — master brush choice, stroke control, and essential techniques.
Explore the Full Guide
Penguin Belly Pet Rock
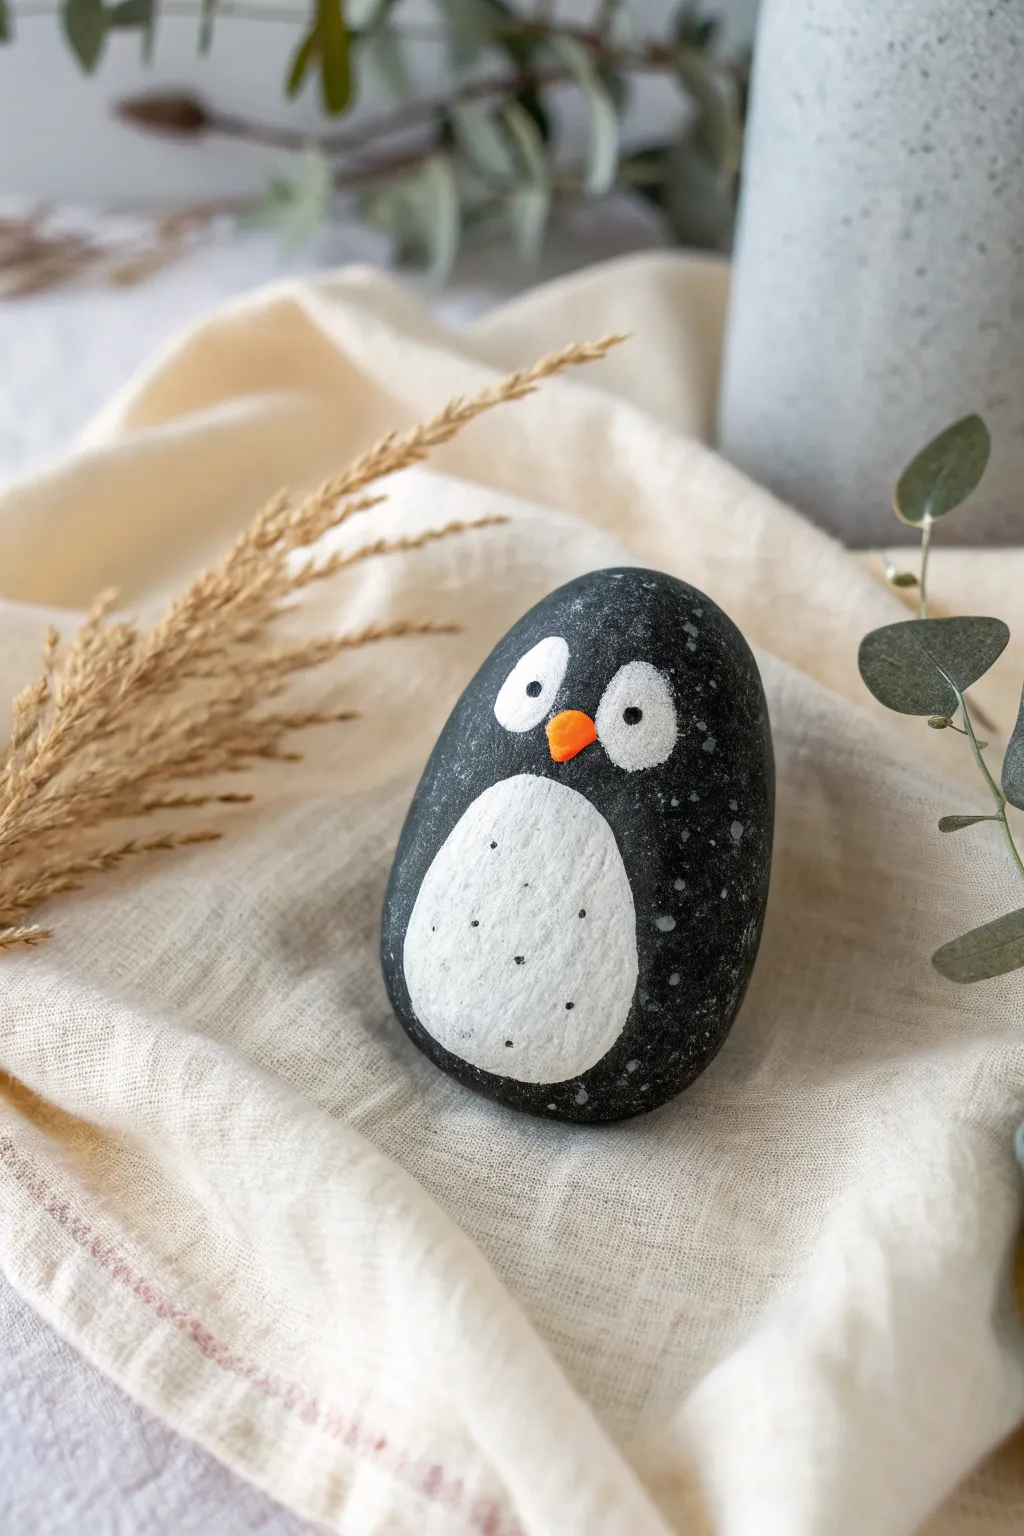

Transform a simple garden stone into an adorable, chilly companion with just a few strokes of paint. This minimalist penguin rock features a smooth, matte finish and charming speckled details that give it character without being overly complicated.
Step-by-Step Guide
Materials
- Smooth, oval-shaped river rock (palm-sized)
- Black acrylic paint (matte finish preferred)
- White acrylic paint
- Orange acrylic paint
- Flat paintbrush (medium size)
- Fine detail paintbrush (round)
- Dotting tool or toothpick
- Old toothbrush (optional for speckling)
- Clear matte sealer spray
- Soap and water for cleaning
Step 1: Preparing the Canvas
-
Clean the stone:
Begin by thoroughly washing your rock with warm soapy water to remove any dirt or oils. Use a stiff brush if needed to get into any crevices. -
Dry completely:
Let the rock dry fully in the sun or use a hairdryer to speed up the process. Paint won’t adhere well if moisture is trapped inside the stone. -
Prime the surface:
Paint the entire surface of the rock with a coat of black acrylic paint. I usually do one thin coat first to establish a base layer. -
Solidify the black base:
Once the first coat is dry to the touch, apply a second, thicker coat of black paint to ensure full, opaque coverage. Let this dry completely before moving on completely so the colors don’t muddy.
White Paint Transparency
If your white paint looks grey or streaky over the black base, don’t panic. Simply let it dry fully and add another thin layer. It often takes 3 coats for true opacity.
Step 2: Painting the Features
-
Outline the belly:
Load your medium brush with white paint. Visualize a large oval shape on the lower half of the rock and carefully paint the outline of the penguin’s belly. -
Fill the belly:
Fill in the oval shape with white paint. You will likely need 2-3 coats to make the white bright enough against the black background; let each layer dry in between. -
Create the eyes:
Using a smaller round brush or the handle of a larger brush, dab two large white circles near the top of the rock given the penguin its wide-eyed look. Keep them close together but not touching. -
Add the beak base:
Just below and between the eyes, paint a small, inverted triangle shape using orange paint. This will be the little beak. -
Refine the beak:
Once the orange base is tacky but drying, apply a tiny second dab of orange to build a slight texture or brightness if the black is showing through. -
Paint pupils:
Dip a fine detail brush or a dotting tool into black paint. Add a small dot into the center of each white eye circle to create the pupils.
Perfect Oval Bellies
For a symmetrical belly, trace an egg shape onto paper, cut it out, and use it as a stencil. Trace lightly with a white chalk pencil before painting.
Step 3: Adding Texture and Finish
-
Speckle the belly:
To give the belly texture like the reference image, dip a toothbrush or stiff brush into diluted grey or watered-down black paint. -
Flick the paint:
Hold the brush near the white belly area and gently run your thumb across the bristles to flick tiny speckles onto the white paint. Practice on paper first to control the spray. -
Add body details:
Using the same speckling technique with white paint, lightly flick a few tiny stars or snowflakes onto the black areas of the body for a wintry effect. -
Refine edges:
Check the edges where the white belly meets the black body. If the lines are shaky, use your fine brush with black paint to clean up and smooth the curves. -
Dry thoroughly:
Allow the finished painting to sit undisturbed for several hours. This prevents the sealer from smearing your hard work. -
Seal the rock:
Take the rock outside and spray it with a clear matte sealer. This protects the paint from chipping and weather if you plan to keep your penguin outdoors.
Now you have a stoic little penguin ready to guard your desk or garden path
Fish Scale Pet Rock
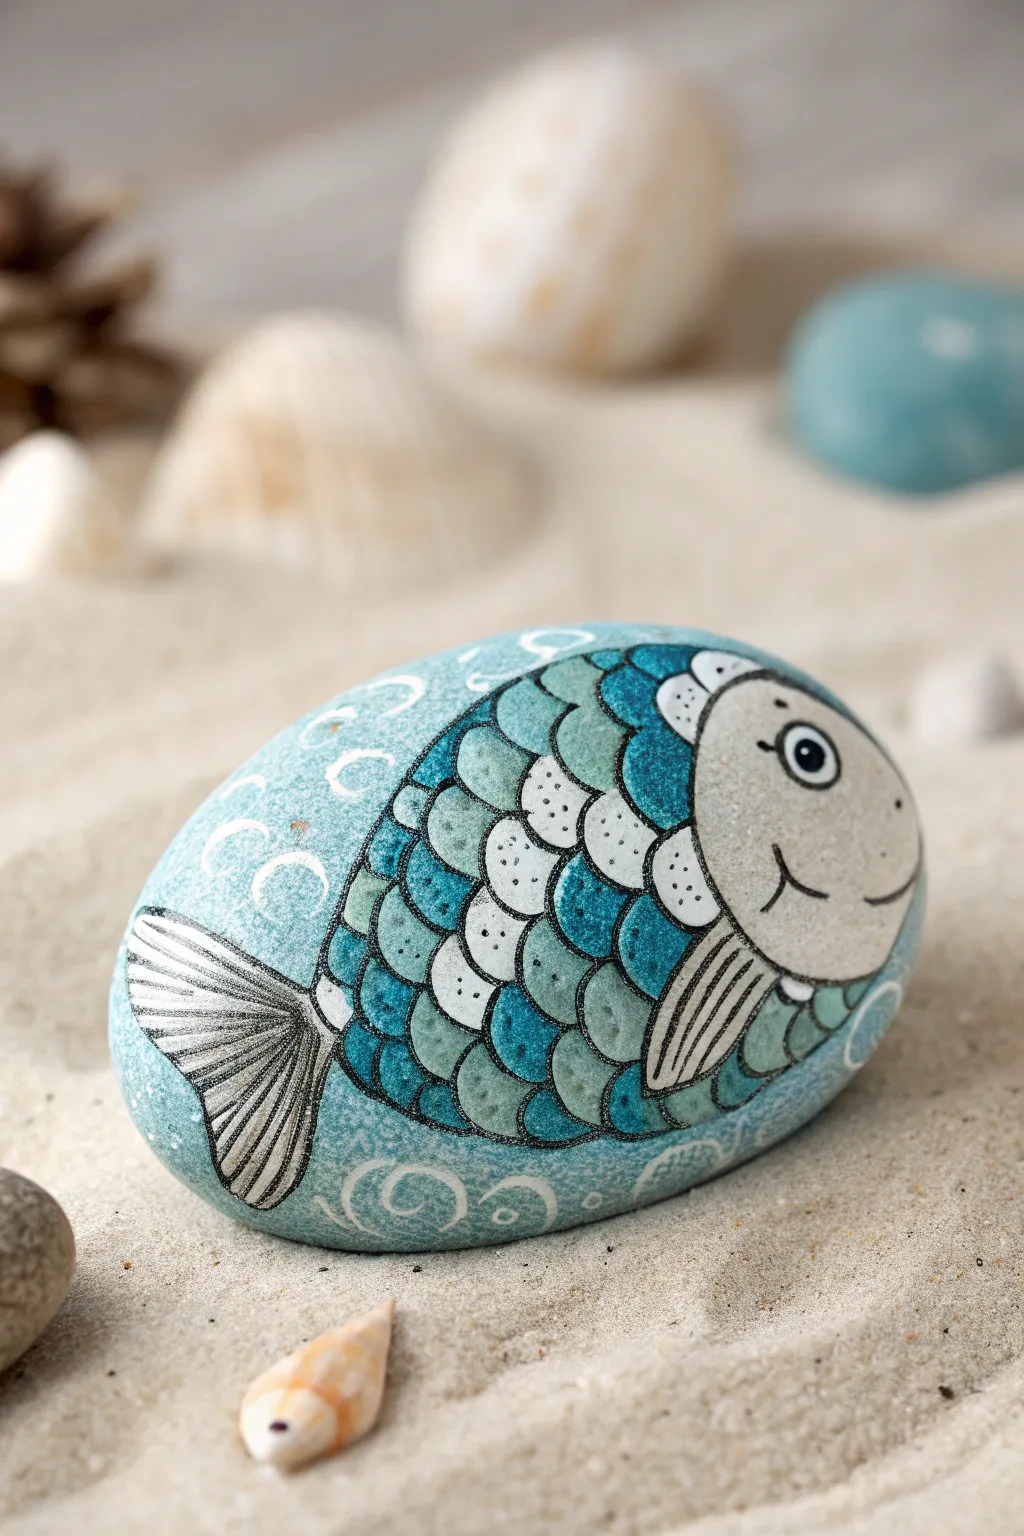
Transform a simple smooth stone into a charming underwater friend with this detailed painting project. The design features wonderful scalloped scales in varying shades of blue and teal, set against a bubbly ocean background.
How-To Guide
Materials
- Smooth, oval-shaped river rock (cleaned and dried)
- Acrylic paints (White, Teal, Dark Blue, Light Blue, Black)
- Fine detail paintbrushes (sizes 0 and 00)
- Medium flat brush
- Pencil
- Clear acrylic sealant (spray or brush-on)
- Palette or small dish for mixing
- Water cup and paper towels
Step 1: Base Coat and Sketching
-
Clean and prep:
Ensure your rock is completely free of dirt and fully dry before starting. A smooth surface is key for the fine details later. -
Apply the background:
Mix a soft, watery blue using white and a tiny drop of teal. Paint the entire surface of the rock with your medium flat brush to create the ocean water look. -
Let it dry:
Allow this base coat to dry completely. It should be matte to the touch before you sketch over it. -
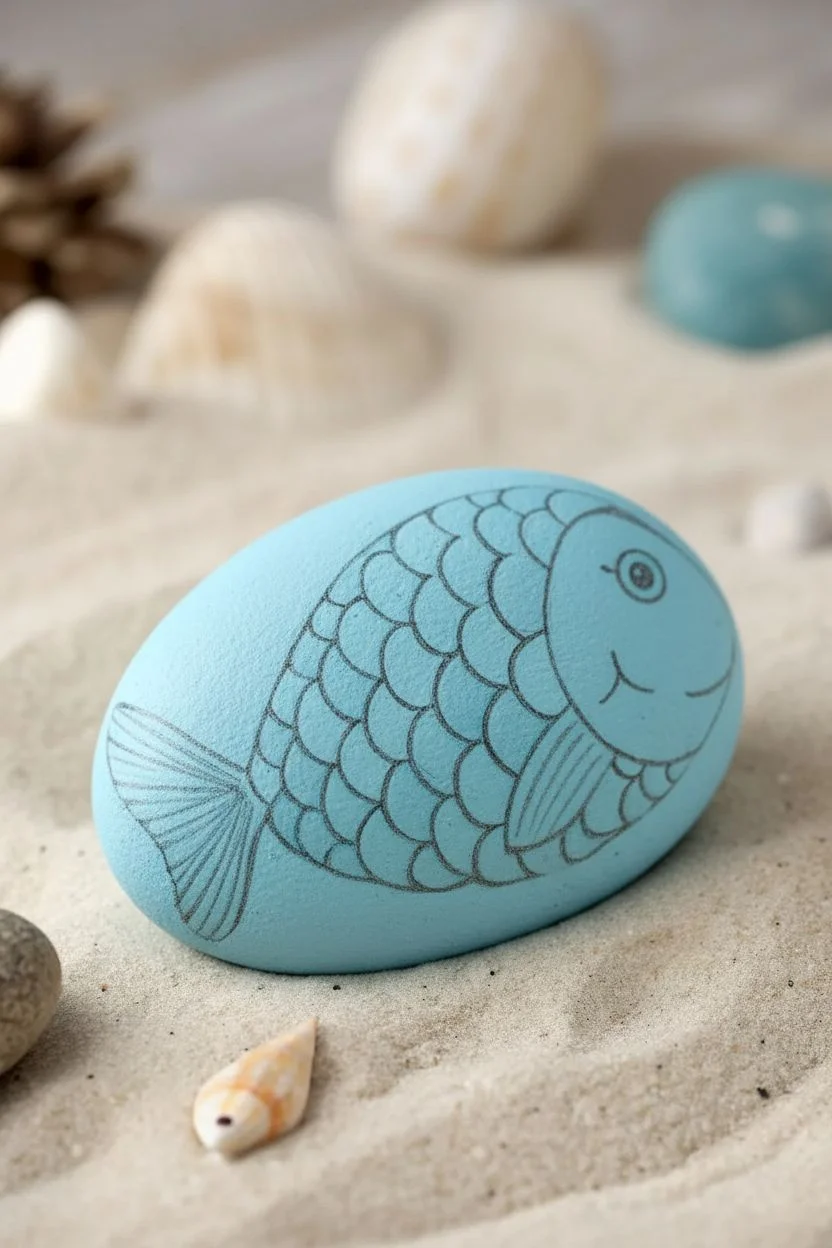
Outline the fish shape:
With a pencil, lightly sketch a large oval for the fish body in the center of the rock. It should take up most of the space. -
Add the main features:
Sketch a vertical curved line near the right side to separate the head from the body. Draw a triangle shape at the back for the tail fin. -
Sketch the scales:
Draw rows of scalloped ‘U’ shapes across the body section. Start from the head line and work your way back to the tail, stacking them like roof tiles.
Step 2: Painting the Fish
-
Paint the head:
Fill in the head section with a very light grey or off-white paint. This separates the face from the colorful patterned body. -
Color blocking the scales:
Using your fine brush, paint the scales in an alternating pattern. Use dark blue, teal, and white to create variety. -
Layering color:
For the teal and blue scales, I find dabbing the paint on slightly thicker gives them a nice texture that mimics real fish scales. -
Adding texture to white scales:
On the white scales, use a very fine brush or a toothpick to add tiny dots of grey or diluted black for a speckled texture. -
Paint the tail and fins:
Fill in the tail shape with white paint. Add a small pectoral fin near the gill line using the same white base. -
Outline the details:
Once the color blocks are dry, use black paint and your finest brush (size 00) to outline every scale, the head, and the body shape. -
Detail the fins:
Paint thin black stripes inside the white tail and pectoral fin to represent the fin rays.
Scales Running Together?
If your scale outlines are bleeding into the colors, ensure the color blocks are 100% dry. Use a black paint pen instead of a brush for easier control over outlines.
Step 3: Face and Finishing Touches
-
Paint the eye:
Paint a small white circle on the face. Once dry, add a black pupil in the center and a tiny white reflection dot to bring it to life. -
Add the mouth:
Paint a simple curved line for the smile and a small cheek mark to give the fish a happy expression. -
Create background bubbles:
Using white paint, draw delicate swirls and open circles around the fish on the blue background to simulate ocean bubbles. -
Wait for full cure:
Let the rock sit undisturbed for several hours until all paint layers are fully hardened. -
Seal the artwork:
Apply a coat of clear acrylic sealant to protect your work from chipping and to give the fish a wet, shiny look.
Pro Tip: Depth Effect
Mix a tiny amount of water into your dark blue paint to create a semi-transparent wash. Apply this gently at the base of each scale to create a shadow effect.
Place your finished fish rock in a garden pot or on a sunny windowsill to enjoy its cheerful smile


Have a question or want to share your own experience? I'd love to hear from you in the comments below!