Golf has this perfect mix of calm landscapes and split-second action, which makes it such a fun subject to paint. Here are my favorite golf painting ideas—starting with classic scenes and moving into more playful, artsy approaches.
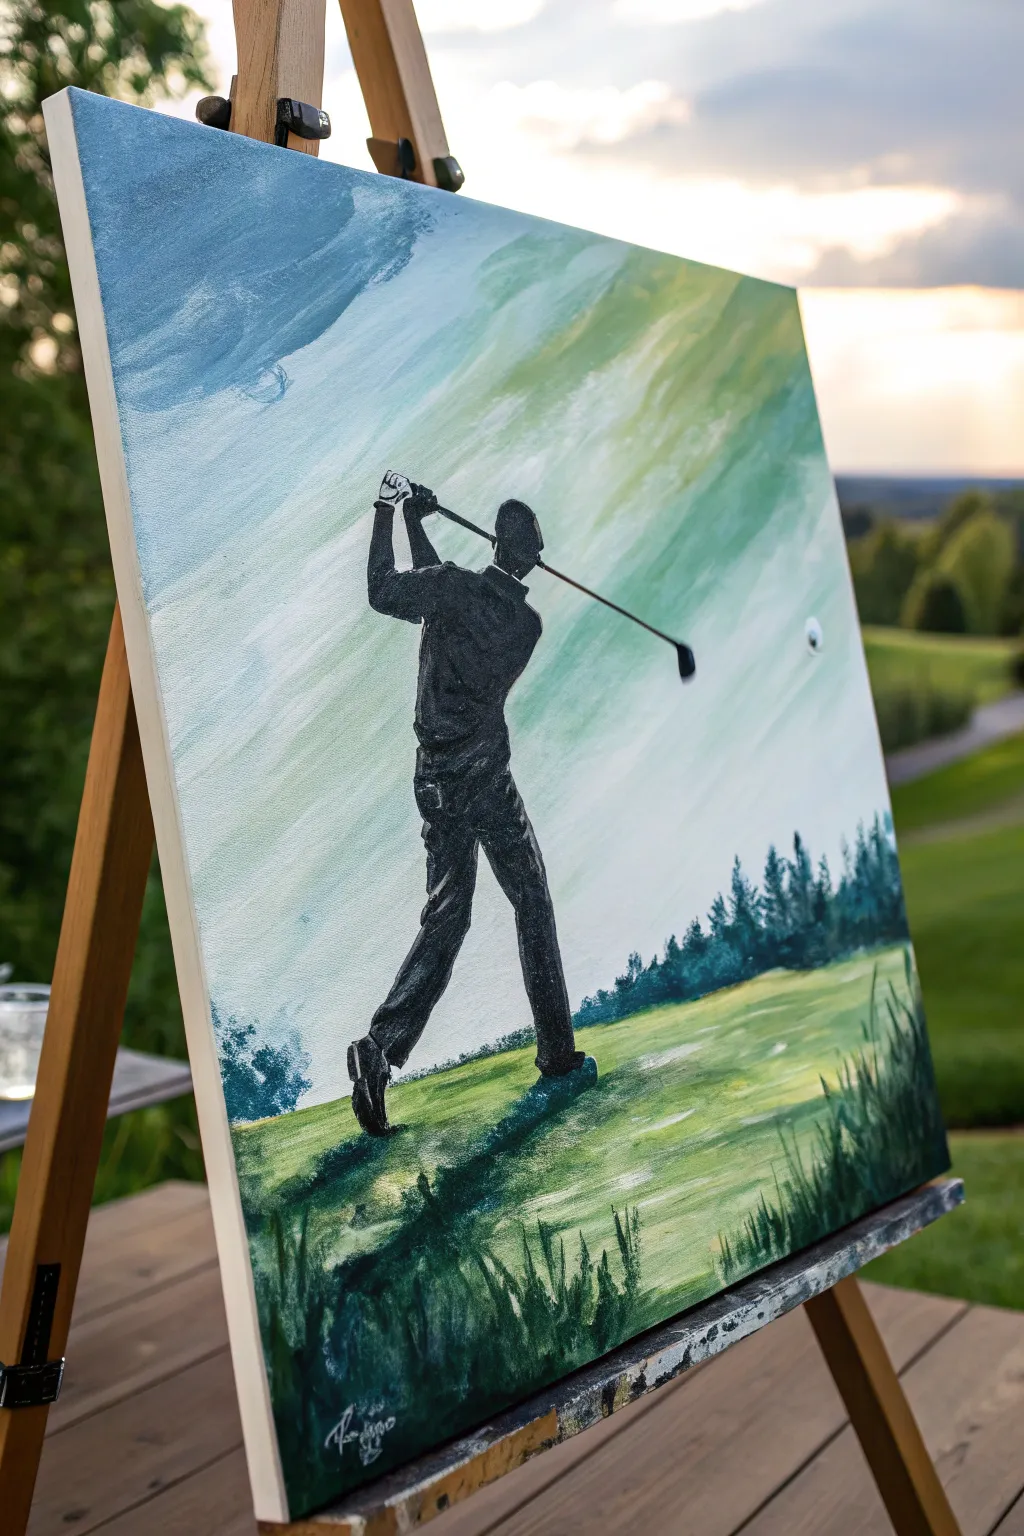
Golfer Silhouette Mid-Swing
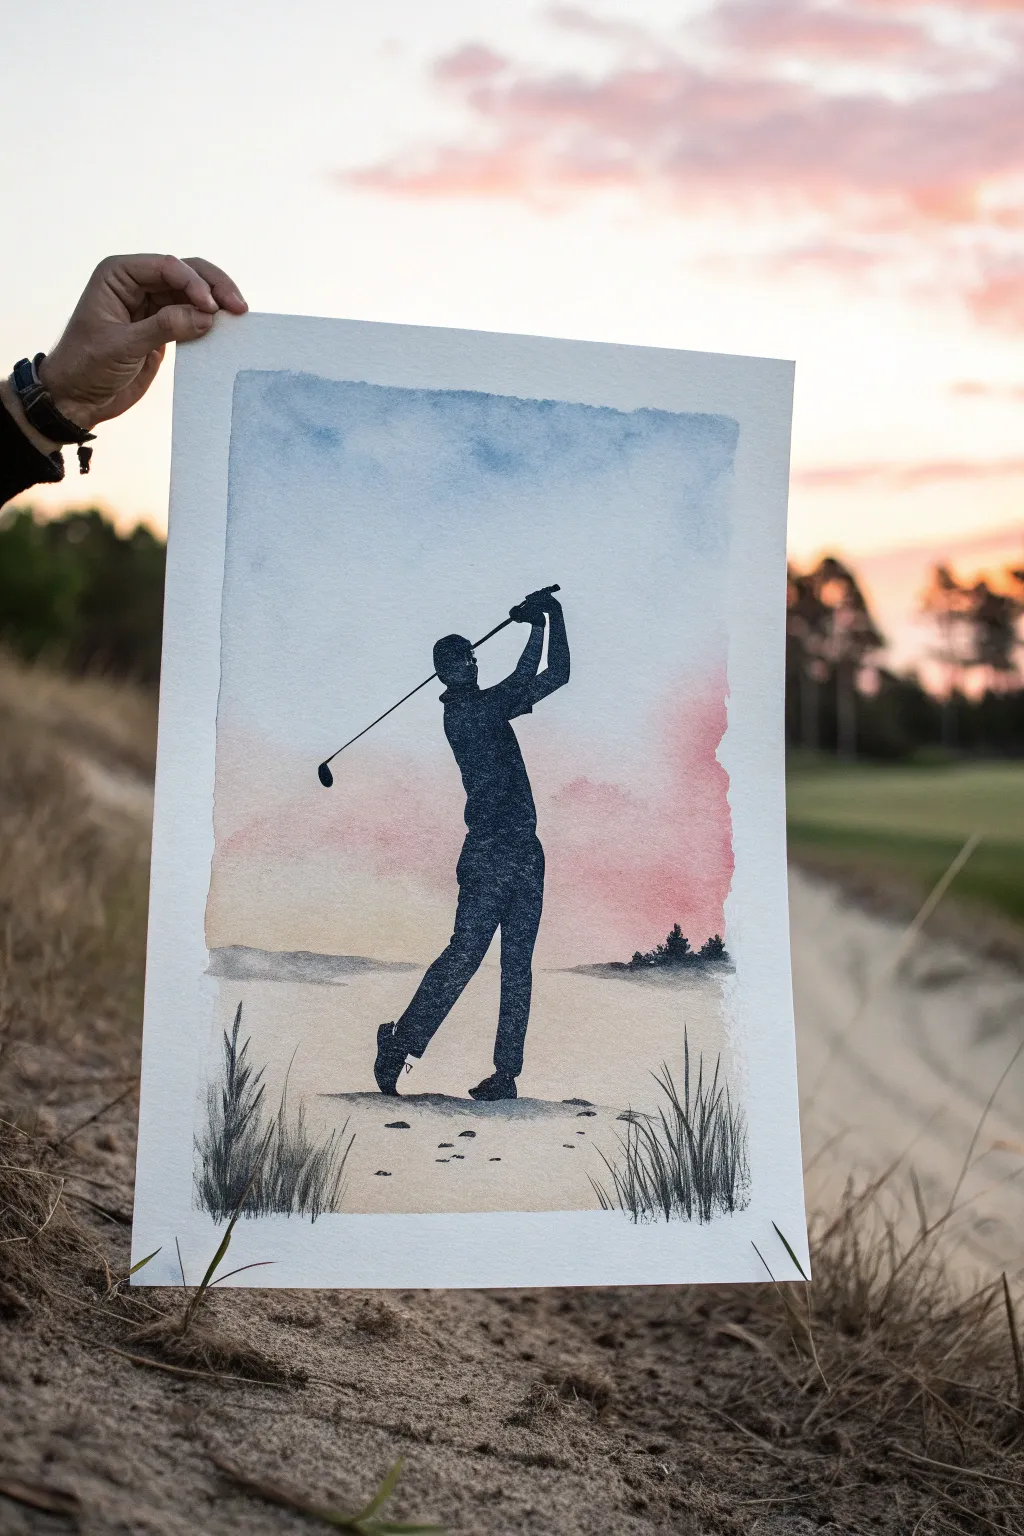
Capture the perfect stroke against a fading sky with this striking watercolor and ink project. The contrast between the soft, blended background and the crisp, dark silhouette creates a dramatic effect that looks professional but is surprisingly beginner-friendly.
Step-by-Step Tutorial
Materials
- Cold press watercolor paper (140lb/300gsm)
- Painter’s tape or masking tape
- Watercolor paints (Indigo Blue, Alizarin Crimson, Yellow Ochre, Burnt Sienna)
- Wide flat wash brush (1 inch)
- Round watercolor brush (size 6 or 8)
- Detailed liner brush (size 0 or 1)
- Black waterproof ink or black acrylic paint
- Pencil (HB or lighter)
- Two jars of water
- Paper towels
- Golf reference photo
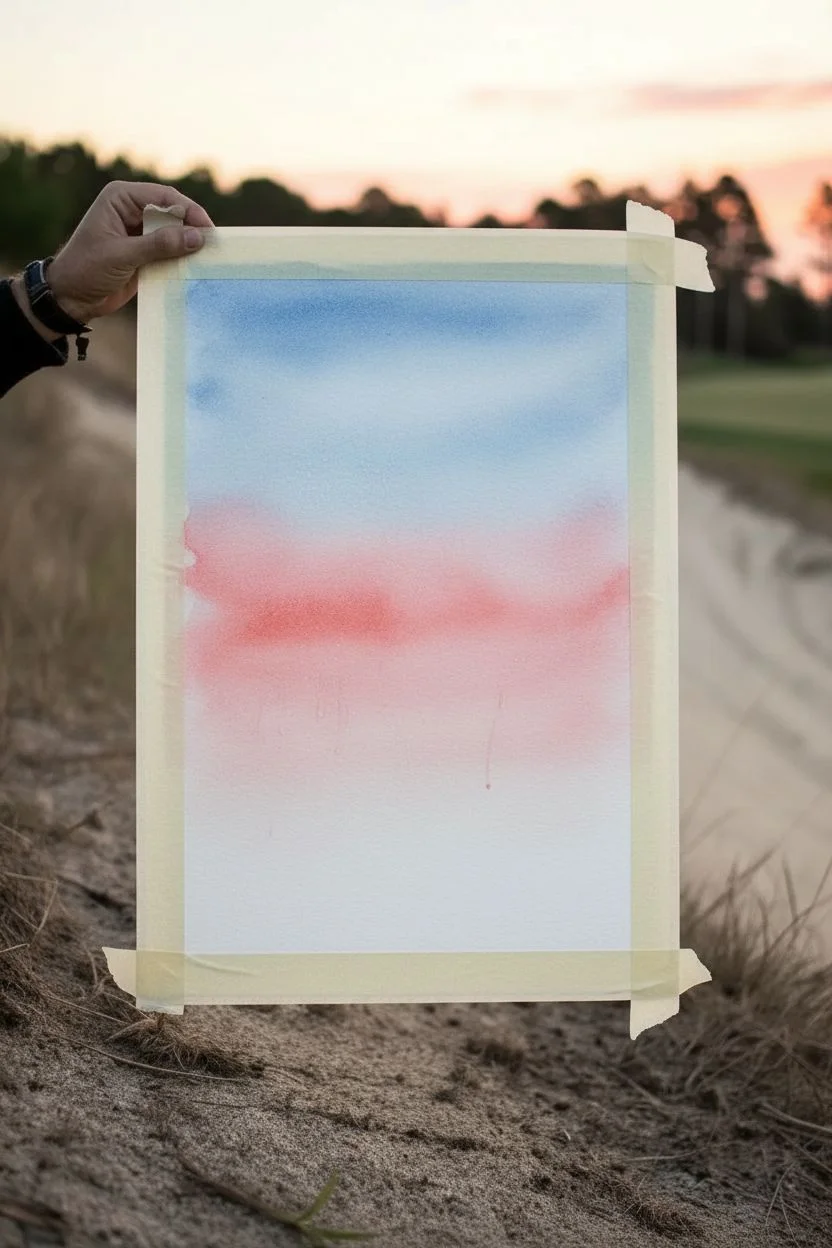
Step 1: Preparing the Sky
-
Secure the paper:
Tape your watercolor paper down to a board on all four sides. This prevents buckling when we add water and creates that crisp, clean border you see in the finished piece. -
Wet the sky area:
Using your large flat brush and clean water, apply a generous coat of water to the top two-thirds of the paper where the sky will be. The paper should glisten but not have standing puddles. -
Paint the upper sky:
Load your brush with diluted Indigo Blue. While the paper is still wet, sweep the color across the very top edge. The wet-on-wet technique allows the pigment to bloom and soften downwards naturally. -
Blend the sunset transition:
Rinse your brush thoroughly. Pick up a mix of Alizarin Crimson with a tiny touch of Yellow Ochre to make a coral pink. Paint this band below the blue, allowing the two colors to touch and merge softly without overworking them. -
Ground the horizon:
As you move lower towards the horizon line, fade the pink out to almost clear water, leaving the bottom third of the paper dry for now. Let the sky layer dry completely before moving on.
Fixing “Cauliflowers”
If water blossoms appear in your sky, don’t scrub! Let it dry, then gently lift the edge with a damp stiff brush, or embrace the texture as ‘cloud formations’ for a natural look.
Step 2: Creating the Terrain
-
Establish the ground line:
Mix a very watery wash of Yellow Ochre and a hint of Burnt Sienna to create a sand color. Paint the bottom third of the paper, creating an uneven horizon line that suggests rolling dunes rather than a flat field. -
Add distant texture:
While the sand layer is still damp, drop in slightly more concentrated Burnt Sienna in random horizontal patches to suggest shadows and uneven terrain. Let this layer dry fully. -
Paint distant trees:
Mix a muted greyish-purple using your blue and red paints. Using the round brush, dab in a small, uneven treeline on the right side of the horizon. Keep these shapes loose and indistinct to show depth.
Step 3: The Golfer Silhouette
-
Sketch the figure:
Once the background is bone-dry, lightly sketch the golfer’s outline with a pencil. Focus on the posture: the weight shift to the front leg, the follow-through of the arms, and the club angle. -
Outline in black:
Switch to your black ink or acrylic paint. I find using a small round brush gives the best control here. Carefully trace the outer edges of your pencil sketch. -
Fill the form:
Fill in the golfer’s body with solid black. Ensure the coverage is opaque; you may need a second coat if the watercolor paper texture shows through too much. -
Define the club:
Use your finest liner brush to paint the golf club shaft. It needs to be a very thin, straight line extending from the hands. Use a ruler as a guide if you have shaky hands, but be careful not to smudge the wet ink. -
Check the connection points:
Ensure the feet look grounded by slightly flattening the bottom of the black shape where it meets the ‘sand,’ rather than leaving them rounded.
Make It Personal
Instead of a generic golfer, trace a photo of the recipient for the silhouette. It makes an incredible personalized gift for Father’s Day or retirement.
Step 4: Foreground Details
-
Paint foreground grass:
Using the liner brush and black ink (or a dark grey mix), flick upward strokes in the bottom corners. Vary the pressure: start heavy at the root and lift off quickly to create thin, tapered tips. -
Add texture to the sand:
Dilute a tiny bit of black ink or dark paint. Add very small, horizontal dashes and dots in the sandy area near the golfer’s feet to simulate pebbles and divots. -
Reveal the border:
Wait until every part of the painting is completely dry to the touch. Slowly peel away the painter’s tape at a 45-degree angle, pulling away from the artwork to prevent tearing.
Frame your masterpiece in a simple black frame to really make those sunset colors pop against the dark silhouette


Pencil Sketch of Golf Clubs and Bag
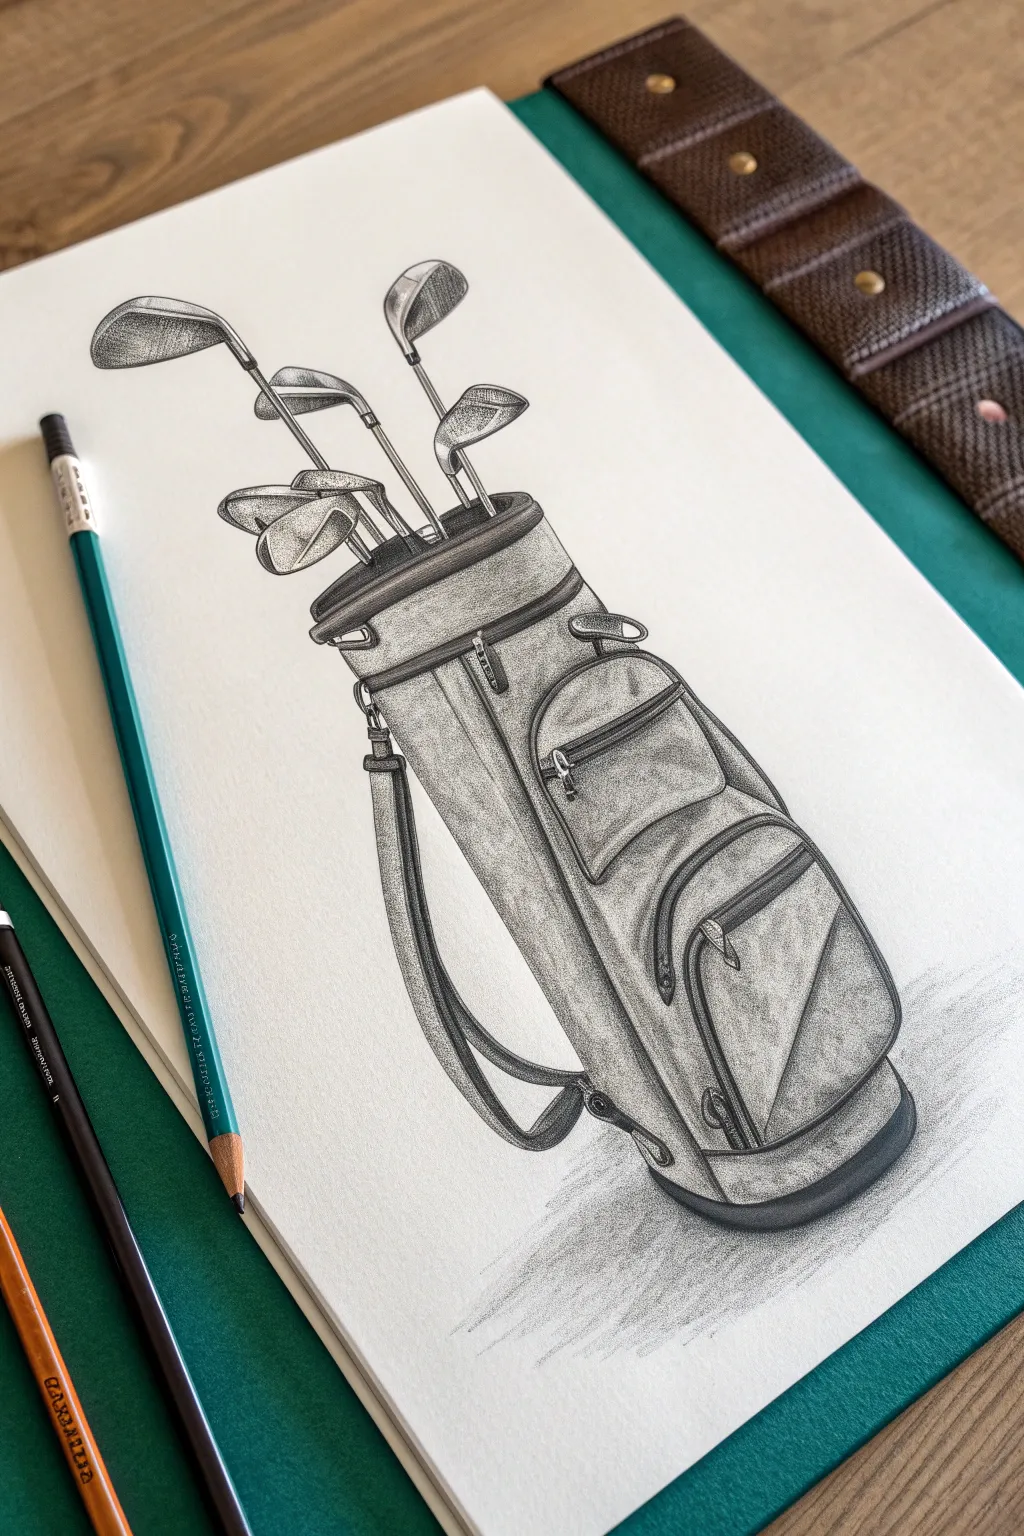
Capture the classic elegance of golf equipment with this detailed pencil study. This project focuses on texture and form, using simple graphite techniques to render the smooth fabric of the bag against the metallic shine of the clubs.
Detailed Instructions
Materials
- High-quality sketching paper (smooth or medium tooth)
- Set of graphite pencils (HB, 2B, 4B, 6B)
- Kneaded eraser
- Precision eraser or eraser stick
- Blending stump or tortillon
- Ruler (optional for club shafts)
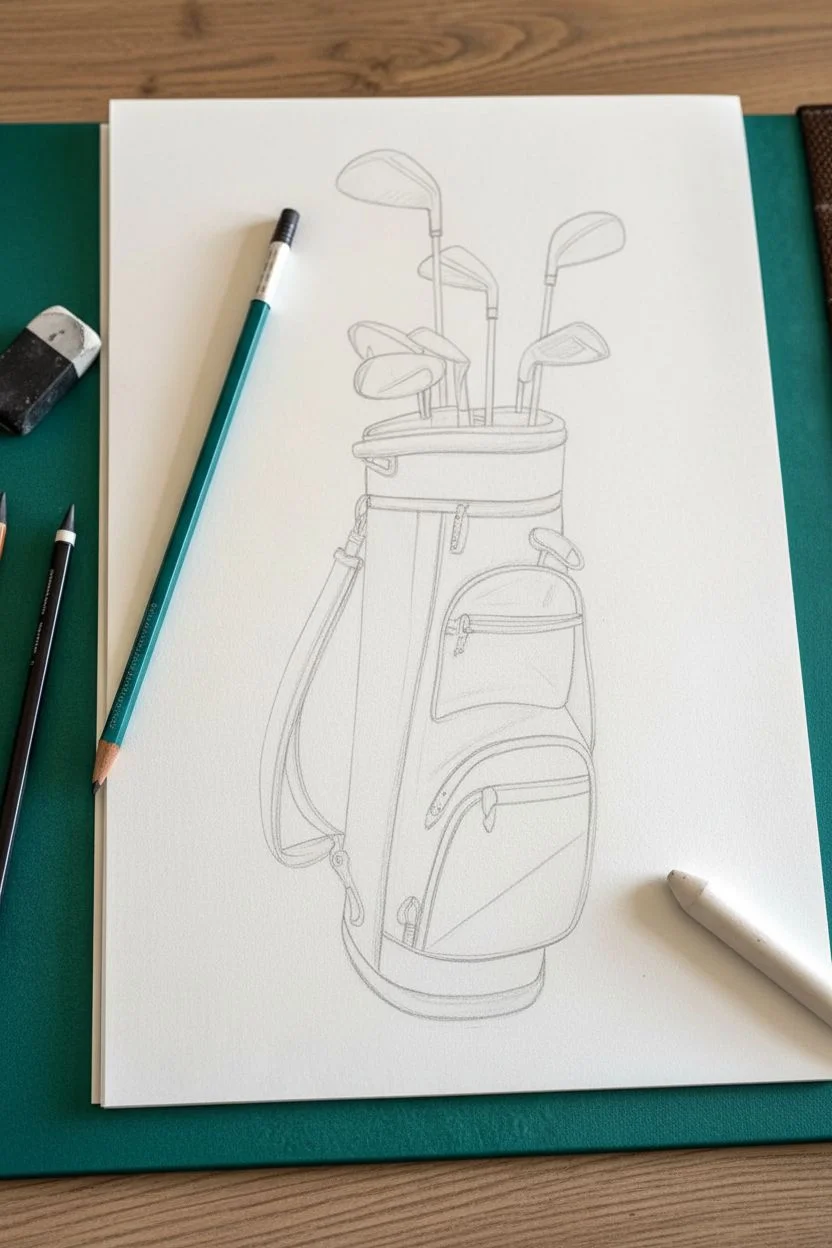
Step 1: Basic Outline & Structure
-
Establish the main shape:
Start with an HB pencil to lightly block in the cylindrical form of the golf bag. Draw a tall, slanted rectangle that widens slightly at the base, curving the bottom line to imply roundness. -
Add the pockets:
Sketch the large, protruding front pocket shapes. These should look like rounded, soft rectangular pouches attached to the main cylinder. Add the smaller upper pocket just below the bag’s rim. -
Draw the rim and strap:
Define the thick, padded rim at the top of the bag. From the side, sketch the shoulder strap hanging down in a loose loop, connecting near the top and bottom of the bag. -
Position the clubs:
Lightly draw straight lines emerging from the top opening to represent the shafts. Vary their angles slightly so they don’t look too uniform. -
Sketch the club heads:
Add the shapes of the club heads—irons and woods. Keep the irons angular and the woods more rounded. Place them at different heights to create a natural, clustered arrangement.
Step 2: Shading & Texture
-
Define the bag fabric:
Switch to a 2B pencil to start shading the main body of the bag. Use vertical hatching strokes that follow the curve of the cylinder to suggest volume. -
Shade the pockets:
shade the front pockets, paying attention to where the light hits. The centers of the pockets should be lighter, while the edges and crevices where they attach to the bag need darker shadows. -
Add zipper details:
With a sharpened HB or 2B, carefully draw the zipper lines on the pockets. Add small, dark rectangular tabs for the zipper pulls, casting tiny shadows beneath them. -
Deepen the shadows:
Use a 4B pencil to darken the deepest areas: inside the top opening of the bag, underneath the pockets, and the shadow side of the shoulder strap. This high contrast makes the form pop. -
Render the strap texture:
The strap often has a different texture than the bag. Use tight, small cross-hatching or stippling with an HB pencil to give it a rugged, woven appearance. -
Creating the base:
Darken the solid base of the bag with a 6B pencil. This should be the darkest part of the bag itself, grounding the object.
Smudge Control
Right-handed? Place a clean sheet of scrap paper under your drawing hand to prevent dragging graphite across your finished work. This keeps those white areas crisp.
Step 3: Metallic Details & Finishing
-
Render the shafts:
Go over the club shafts with a ruler if needed for straightness, but freehand looks more organic. Leave a thin sliver of white paper down the center of each shaft to represent a metallic highlight. -
Shade the club heads:
I like to treat the club heads like jewels; use high contrast. Shade the faces dark but leave crisp, bright white highlights on the top curves to mimic polished chrome. -
Detail the club grooves:
On the faces of the irons, draw tiny horizontal lines to represent the grooves. Keep these subtle so they don’t overpower the form. -
Refine edges:
Use your precision eraser to clean up the edges of the bag and clubs. A sharp, clean outline helps separate the object from the background. -
Cast shadow:
Using the side of a 4B or 6B pencil, create a soft, diffused shadow on the ground beneath the bag. Fade it out as it moves away from the base to anchor the drawing. -
Final highlights:
Take your kneaded eraser and lift out faint highlights on the rounded parts of the pockets and the top rim of the bag to emphasize the leather or nylon texture.
Make It Yours
Personalize the bag by sketching a custom logo or monogram on the largest pocket. You could also add a dangling towel or a headcover for extra character.
Now step back and admire the realistic textures you’ve built with just a few pencils


Loose Acrylic Brushwork for Fast Action Shots
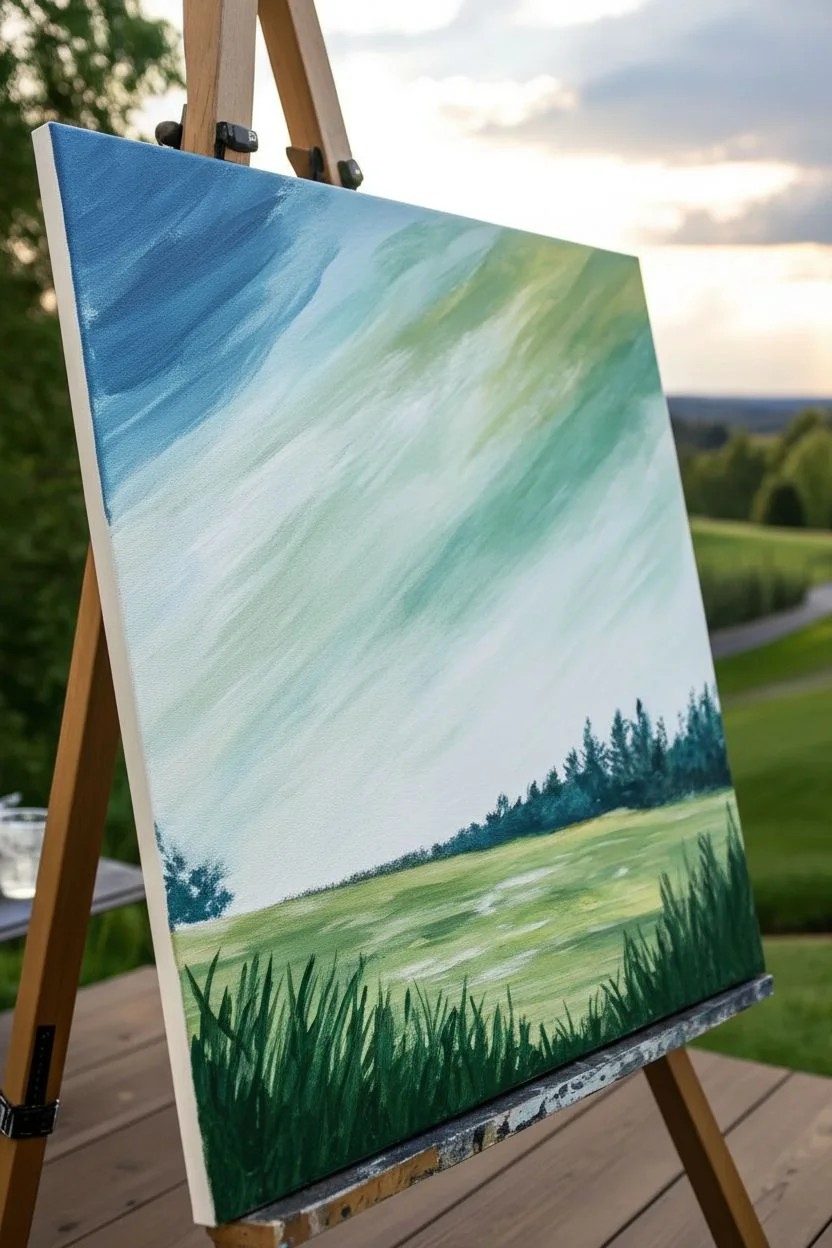
Capture the dynamic energy of a powerful drive with this striking acrylic painting that focuses on form rather than detailed features. Using loose, sweeping strokes for the sky and grass creates a sense of movement, while the solid black silhouette anchors the composition perfectly.
Step-by-Step Tutorial
Materials
- Stretched canvas (e.g., 16×20 inch)
- Acrylic paints: Titanium White, Cerulean Blue, Sap Green, Emerald Green, Mars Black, Burnt Umber
- Large flat brush (1-2 inch)
- Medium filbert brush
- Small round detail brush
- Palette knife (optional for texture)
- Water cup and paper towels
- Chalk or pastel pencil for sketching
Step 1: Setting the Scene
-
Prepare the sky gradient:
Begin by loading your large flat brush with Titanium White and a touch of Cerulean Blue. Starting from the horizon line (about one-third up from the bottom), lay down diagonal sweeping strokes moving upward toward the top left corner. -
Deepen the blue:
As you move toward the top left corner of the canvas, gradually mix in more Cerulean Blue. The sky should transition from a pale, almost white blue near the horizon to a richer, standard sky blue at the top corner, mimicking a wide-open sky. -
Add hint of clouds:
While the paint is still wet, use a clean, dry brush or a rag to lift a little paint or swirl in pure white in the upper left area to create soft, diffused cloud shapes. -
Paint the background greens:
Switch to Sap Green mixed with a lot of White. Paint the horizon area under the sky using diagonal strokes that mirror the direction of your sky strokes. This creates the distant fairway. -
Suggest the rough:
In the bottom third of the canvas, layer in darker greens (Sap Green mixed with a little Emerald) using vertical, choppy strokes to suggest tall grass and rough terrain. -
Create the distant tree line:
Mix Emerald Green with a touch of Black to make a deep forest green. Using a medium filbert brush or the edge of a flat brush, dab in a jagged tree line along the right side of the horizon. Keep these shapes loose and indistinct.
Uneven arm thickness?
If the arms look bulky, wait for the black to dry fully. Then, ‘cut in’ with the background sky color to thin them down and reshape the silhouette from the outside.
Step 2: The Golfer Silhouette
-
Dry the background completely:
Before sketching the figure, ensure the background layer is bone dry. This prevents your sketch lines from digging into wet paint and keeps the black silhouette crisp. -
Sketch the posture:
Using a piece of chalk or a pastel pencil, lightly sketch the outline of the golfer. Focus on the ‘finish’ position: hips turned, back heel lifted, and arms following through high over the shoulder. -
Fill the body shape:
Load a medium brush with Mars Black. Begin filling in the torso and legs of the figure. Establish the solid mass first before worrying about the finer edges. -
Refine the clothing folds:
While the black is wet, you can create subtle texture by brushing in slightly different directions where fabric would fold, particularly around the waist and armpit, though the goal is a solid silhouette. -
Detail the shoes and legs:
Switch to a smaller brush to define the shoes. Ensure the left foot is planted firmly and the right heel is raised, showing the clear transfer of weight in the swing. -
Paint the arms:
Carefully paint the arms extended upward. Pay attention to the triangle shape created by the elbows and shoulders; this negative space is crucial for a realistic swing posture.
Step 3: Final Details
-
Add the golf club:
With your smallest round detail brush and slightly thinned black paint, draw the shaft of the club extending from the hands. Keep the line straight and confident. Add the club head at the end of the shaft. -
Paint the flying ball:
About three inches to the right of the club head, add a small white dot for the golf ball. To make it look like it’s in motion, you can smudge the trailing edge slightly with your finger. -
Ground the figure with shadows:
Mix a dark green-black using your leftover silhouette paint and some green. Paint a cast shadow extending from the golfer’s feet to the left, anchoring him to the ground. -
Enhance the foreground grass:
Using a small flat brush and dark green paint, flick upward rapid strokes along the very bottom edge of the canvas to create distinct blades of grass in the immediate foreground. -
Add the signature:
Allow the silhouette to dry completely before signing your name in the bottom corner with a contrasting color like white or light gray.
Add dimensional light
Mix a tiny drop of white into your black. Add subtle highlights to the golfer’s right shoulder and thigh to give the silhouette just a hint of 3D volume.
Step back and admire the powerful movement captured in your finished piece


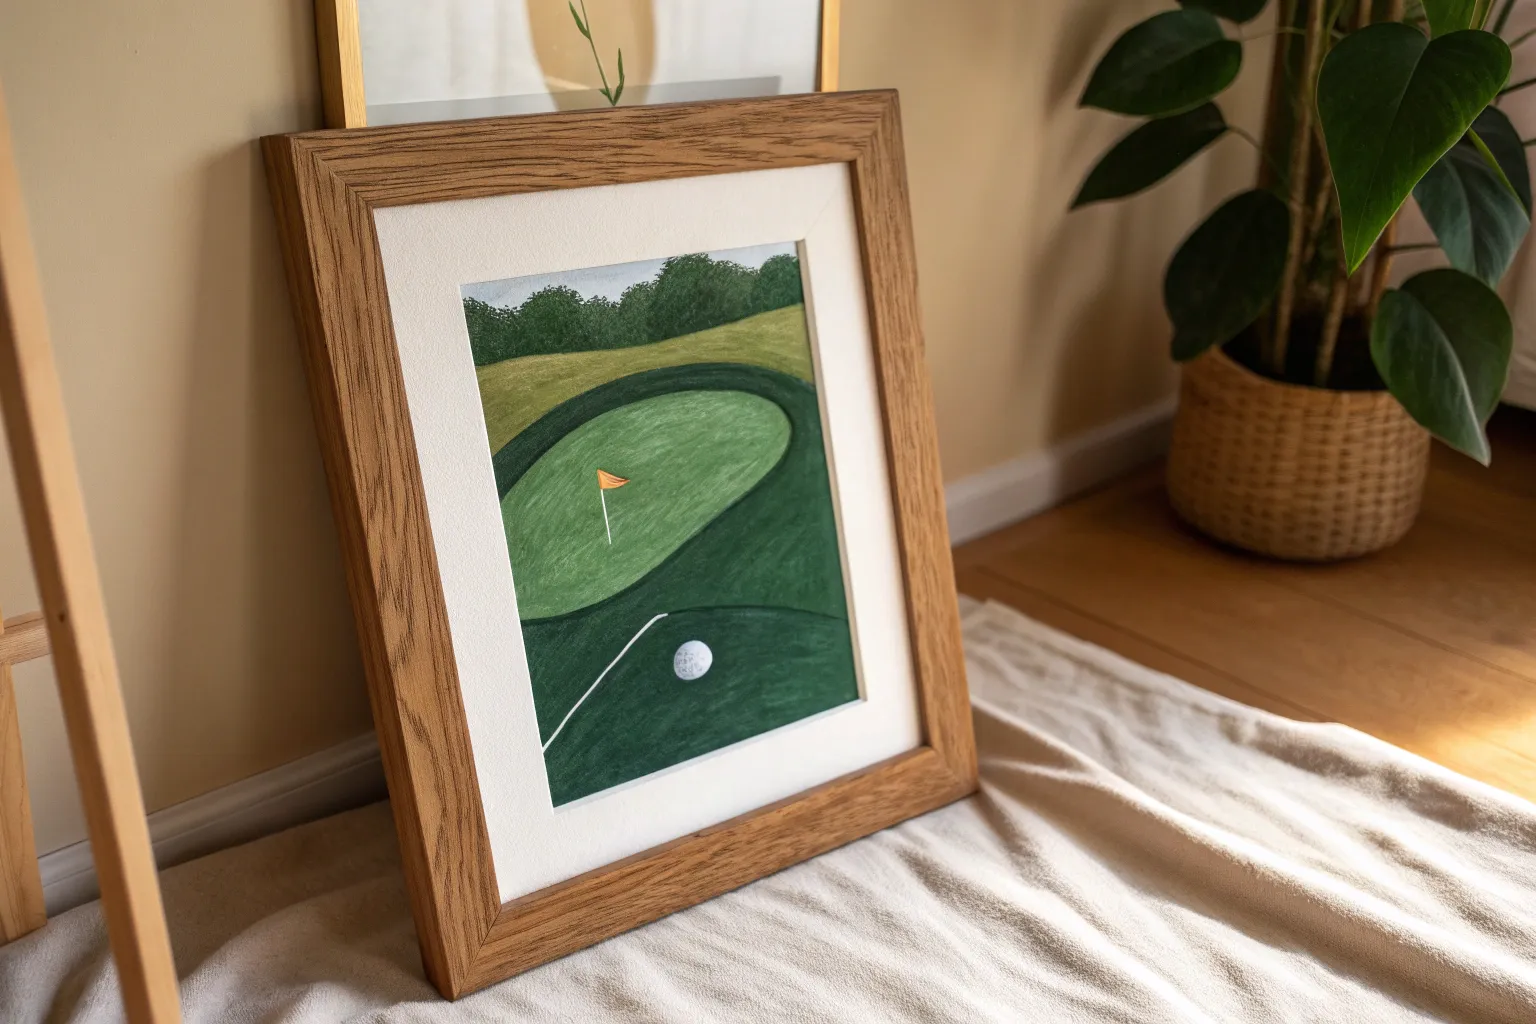
View From the Tee Box Looking Down the Hole
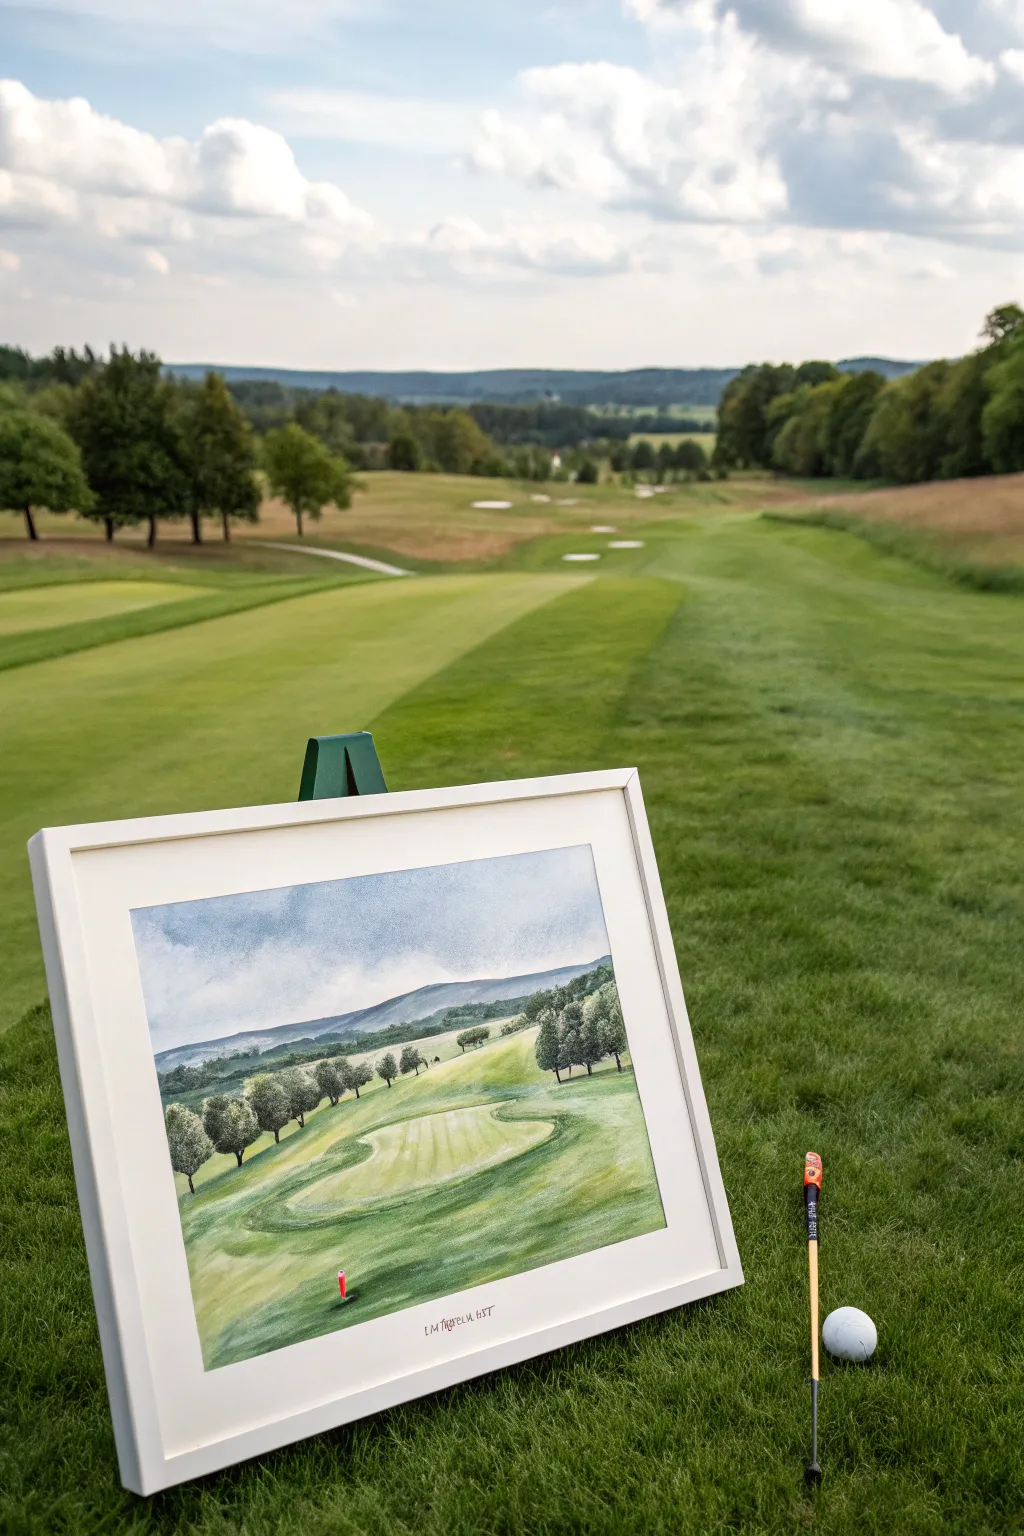
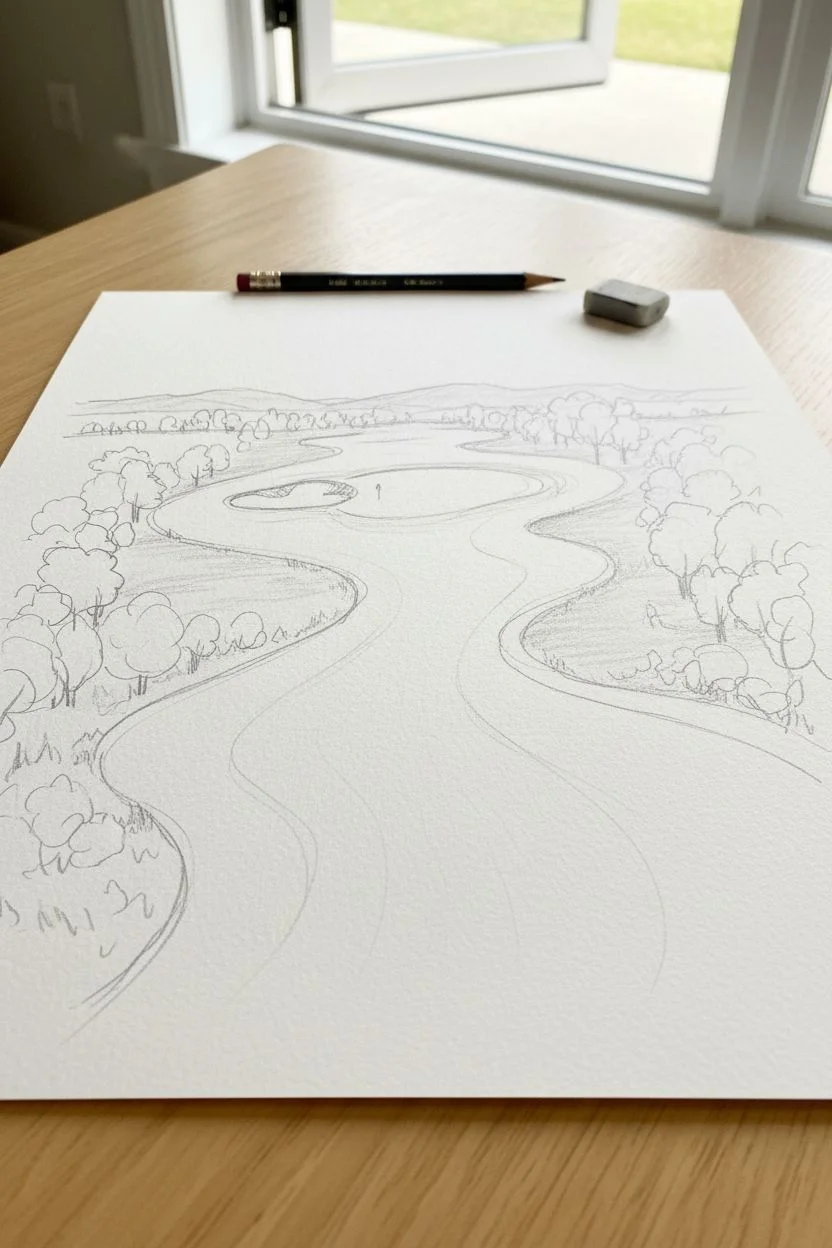
Capture the serene depth of a golf course landscape with this detailed watercolor and pencil study. By combining soft washes for the sky and hills with precise pencil work for the trees, you’ll recreate the inviting view from the tee box.
Detailed Instructions
Materials
- Hot press watercolor paper (140 lb)
- Watercolor paint set (greens, blues, ochre, touches of red)
- Round watercolor brushes (sizes 4, 8, and 12)
- Colored pencils (various olive and forest greens, dark grey)
- HB graphite pencil for sketching
- Masking fluid (optional)
- White mat board and frame
- Easel for outdoor painting (plein air setup)
Step 1: Sketching the Layout
-
Establish the horizon:
Begin by lightly drawing a horizon line about one-third of the way down from the top of your paper using an HB pencil. This high horizon line emphasizes the vastness of the fairway rather than the sky. -
Map the fairway:
Sketch the curving shapes of the fairway using sweeping, organic lines. Note how the mowed grass creates distinct zones of color; outline the darker rough versus the lighter fairway. -
Place the trees:
Lightly mark the positions of the tree lines on both the left and right sides. Keep these shapes loose for now, focusing on their height relative to the distant hills. -
Detail the bunker:
Sketch the kidney-shaped sand trap or green area in the middle separation. Ensure the perspective flattens it slightly to show distance.
Muddy Greens?
If your greens look dull, avoid only mixing black to darken them. Instead, mix red into green to create rich, natural shadows without killing the color vibrancy.
Step 2: Watercolor Washes
-
Painting the sky:
Wet the sky area with clean water first. Drop in a mix of Cerulean Blue and a touch of gray for a cloudy, overcast look, leaving some white paper showing for the brightest clouds. -
Distant hills:
Once the sky is damp but not soaking, paint the distant ridge with a cool, muted blue-violet. This atmospheric perspective pushes the mountains into the background. -
Base layer for grass:
Apply a very light wash of Sap Green mixed with Yellow Ochre over the entire grassy area. This provides a warm undertone for the sunlit grass. -
Fairway striping:
While the base layer is dry, mix a slightly darker green. Paint broad, horizontal bands across the fairway to mimic the mowing patterns seen on golf courses. -
Deepening the rough:
For the rough grass on the sides, use a mix of Hookers Green and Burnt Sienna to create a richer, darker shade. Apply this loosely around the edges of the fairway.
Step 3: Details & Pencil Work
-
Building tree volume:
Using a size 4 brush, dab in the foliage of the trees using dark forest green paints. Keep the edges ragged to look like leaves. -
Shadow definition:
Once the paint is completely dry, use a dark grey or indigo watercolor mix to paint the cast shadows leaning to the right of the trees. -
Enhancing with colored pencil:
I like to sharpen the details here with colored pencils. Use a dark green pencil to add texture to the tree canopies, using small circular motions. -
Refining the fairway:
Use a light olive pencil to define the edges of the mowing strips and the central green feature, giving crisp boundaries that paint sometimes misses. -
Adding the flag:
With a fine point brush or red pen, add the tiny red flagstick in the foreground area. This small pop of red is crucial for scaling the image. -
Signature script:
Write the location or hole name in a stylized, architectural script at the bottom center of the painting.
Add Texture
Take a dry brush with opaque white gouache and lightly scuff it over the sand trap areas to create a gritty, sandy texture that contrasts with the soft grass.
Step 4: Finishing Touches
-
Reviewing values:
Step back and check your contrast. If the foreground looks too light, glaze over it with another layer of transparent green watercolor to ground the image. -
Framing:
Mount your finished piece behind a crisp white mat board and place it in a simple white frame to letting the greens pop.
Place your framed masterpiece on a stand near the course or in your office to enjoy the view all year round
BRUSH GUIDE
The Right Brush for Every Stroke
From clean lines to bold texture — master brush choice, stroke control, and essential techniques.
Explore the Full Guide
Mini Series of Iconic Golf Course Elements
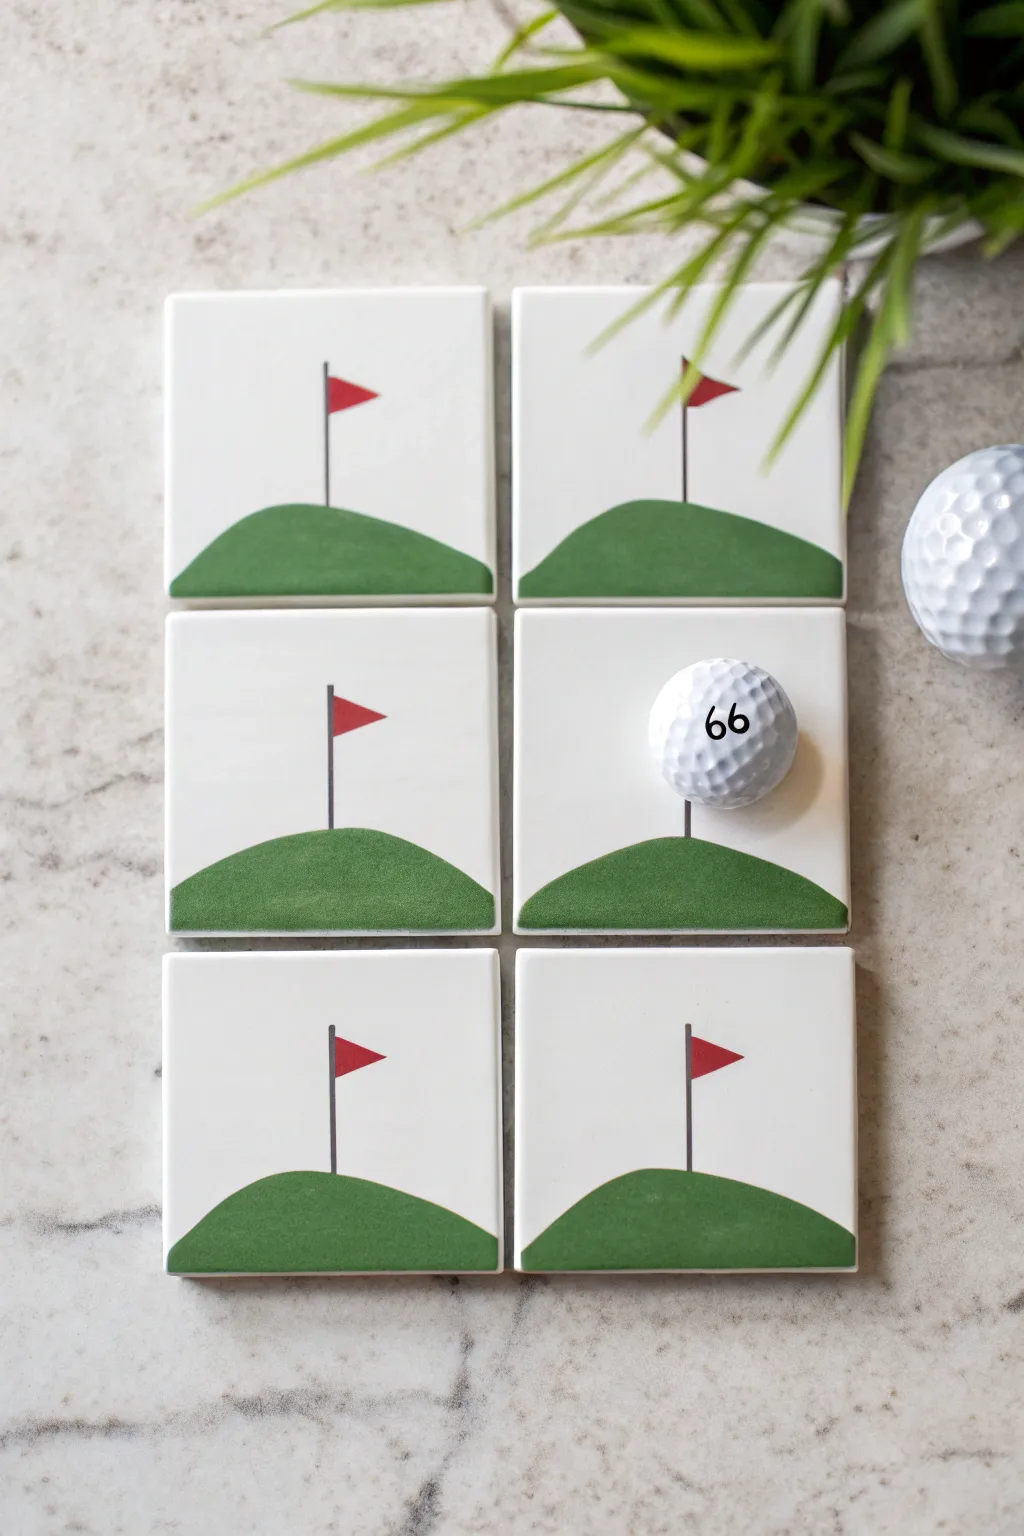
Create a charming set of golf-themed coasters perfect for the clubhouse or your coffee table. These six identical hand-painted tiles feature a crisp, minimalist design of a green hill and flag that looks professional yet is surprisingly simple to execute.
How-To Guide
Materials
- 6 white square ceramic tiles (4×4 inches)
- Peel-and-stick vinyl or painter’s tape
- Compass or round object for tracing
- Craft knife (X-Acto)
- Cutting mat
- Ceramic or multi-surface acrylic paint (Jungle Green, Bright Red, Black)
- Flat shader brush (size 6 or 8)
- Fine liner brush (size 0 or 00)
- Rubbing alcohol
- Clear spray sealant (glossy finish)
- Cork backing sheets
Step 1: Preparation & Stenciling
-
Clean the Surface:
Wipe down all six ceramic tiles thoroughly with rubbing alcohol and a lint-free cloth. This quick step removes oily fingerprints and ensures your paint adheres perfectly to the slick surface. -
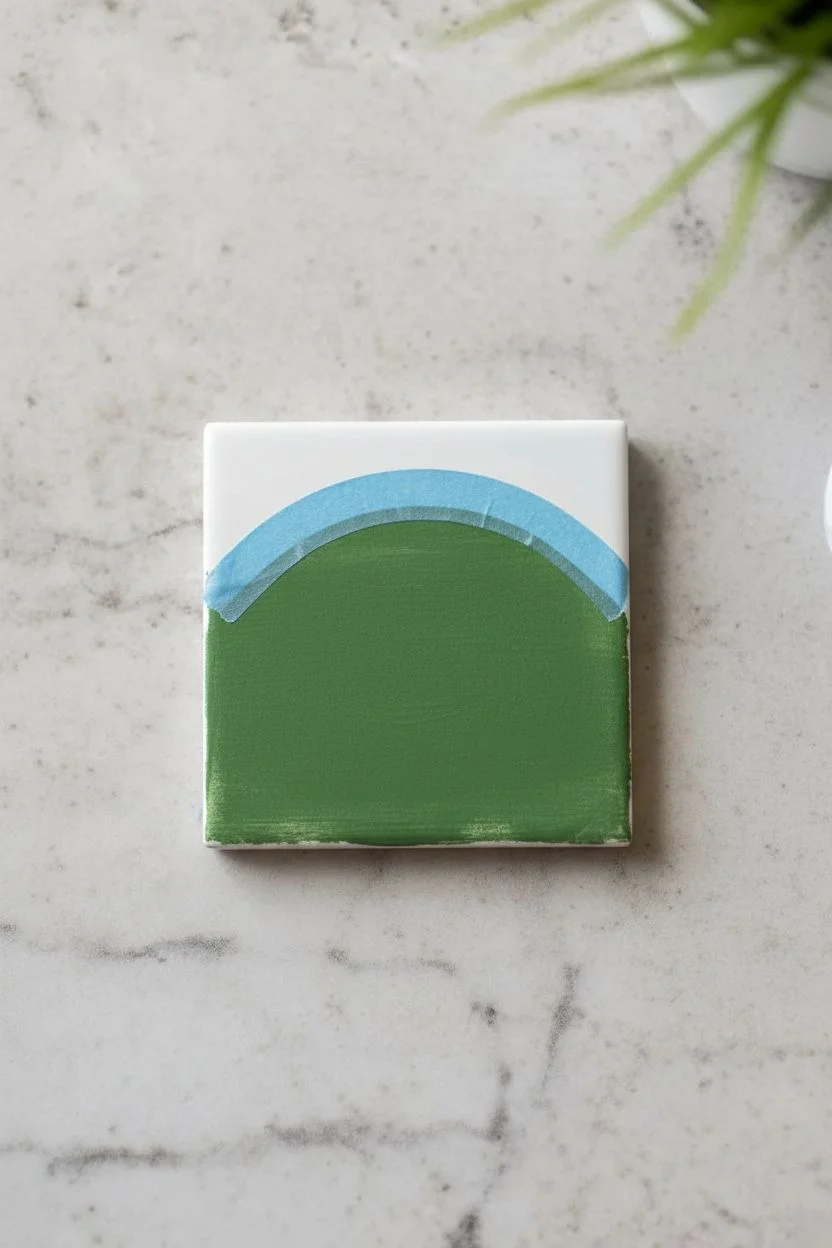
Design the Hill Stencil:
To get identical hills on every coaster, create a stencil. Place a strip of vinyl or wide painter’s tape onto your cutting mat. Use a compass to draw a gentle arc that spans the width of your tile, roughly 4 inches wide. -
Cut the Arc:
Carefully cut along your curved line using a craft knife. You need the top part of the tape (the negative space) to mask off the sky area later. -
Apply the Mask:
Position the vinyl stencil on the bottom third of your first tile. Press down firmly along the curved edge to prevent paint bleed. Repeat this process for all six tiles to ensure uniformity.
Uneven Lines?
If your hand shakes while painting the thin flagpole, use a ruler as a guide or lay a piece of tape vertically to mask the line perfectly.
Step 2: Painting the Greens
-
Base Coat of Green:
Load your flat shader brush with Jungle Green paint. Apply smooth, horizontal strokes to fill in the area below the tape stencil. -
Opacity Check:
Allow the first coat to dry for about 15-20 minutes. If the white tile shows through, apply a second coat for a solid, opaque look. -
Reveal the Edge:
While the second coat is still slightly tacky (but mostly dry), carefully peel away the vinyl stencil at a sharp angle. This helps keep that hill line crisp and sharp. -
Clean Up:
If any paint bled under the tape, use a damp toothpick or a cotton swab dipped in alcohol to gently scrape it away immediately.
Custom Yardage
Personalize the flags by using a white gel pen or fine brush to paint a specific number on the red triangle, representing a favorite hole or special date.
Step 3: Adding the Flag Details
-
Draft the Flagpole:
Once the green hill is fully dry, lightly mark the position for your flagpole with a pencil. I find centering it horizontally makes the design feel balanced. -
Paint the Pole:
Using your fine liner brush and black paint, draw a thin, straight vertical line starting from the top of the hill. Extend it upwards about 1.5 inches. -
Draw the Flag Outline:
At the top of the pole, paint a small triangle pointing to the right using the very tip of your liner brush and red paint. -
Fill the Flag:
Carefully fill in the red triangle. Use just enough paint to cover the white without creating a thick ridge. Let the black and red details cure for at least 1 hour.
Step 4: Finishing Touches
-
Seal the Design:
Take the tiles to a well-ventilated area. Spray a light, even coat of clear glossy sealant over the entire surface to protect the paint from moisture and scratches. -
Second Coat:
Let the first coat dry according to the spray can’s instructions, then apply a second coat for durability. -
Add Backing:
Flip the dry tiles over. Peel and stick a square of cork backing to the underside of each tile. This protects your furniture and stops the coaster from sliding. -
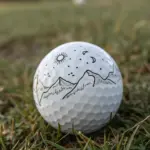
Optional Decoration:
For a fun display element, you can rest a real golf ball on one of the coasters when not in use, adding a playful 3D element to your flat artwork.
Your stylish golf coaster set is now ready to host drinks while you recount your best rounds


Have a question or want to share your own experience? I'd love to hear from you in the comments below!