I love how a simple circle drawing can turn into a tiny, satisfying “world” with just a few lines and a little shading. If you’re craving easy wins for sketchbook pages or bullet journal spreads, these ideas keep everything contained, cute, and totally doable.
Minimal Mountain Range and Rising Moon
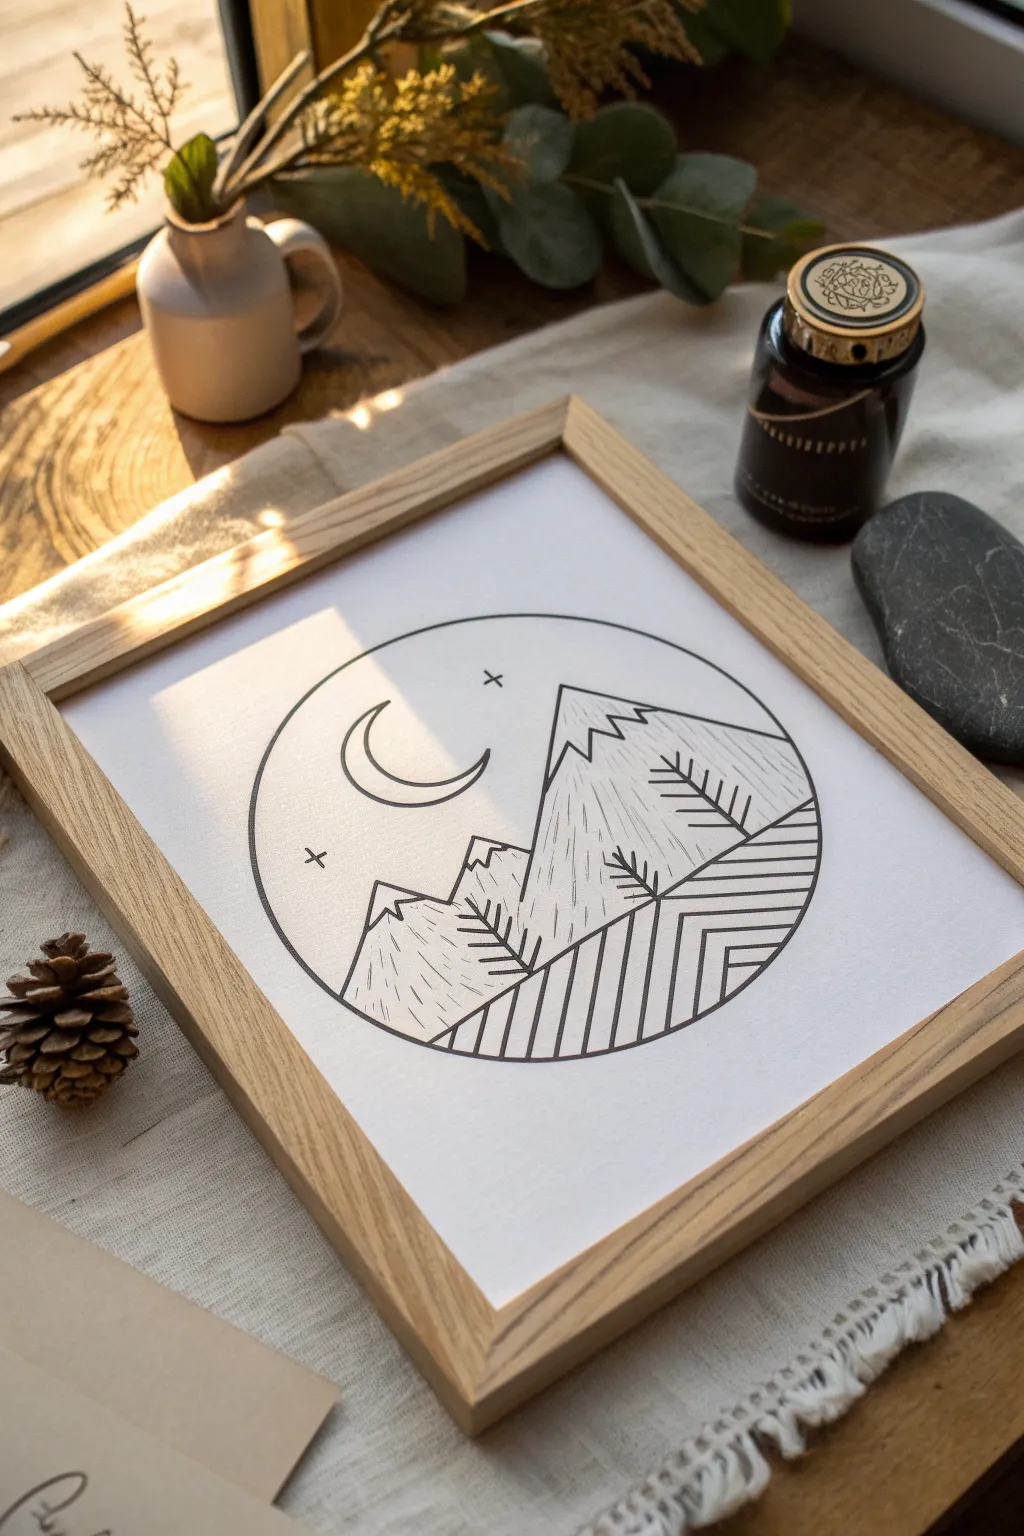
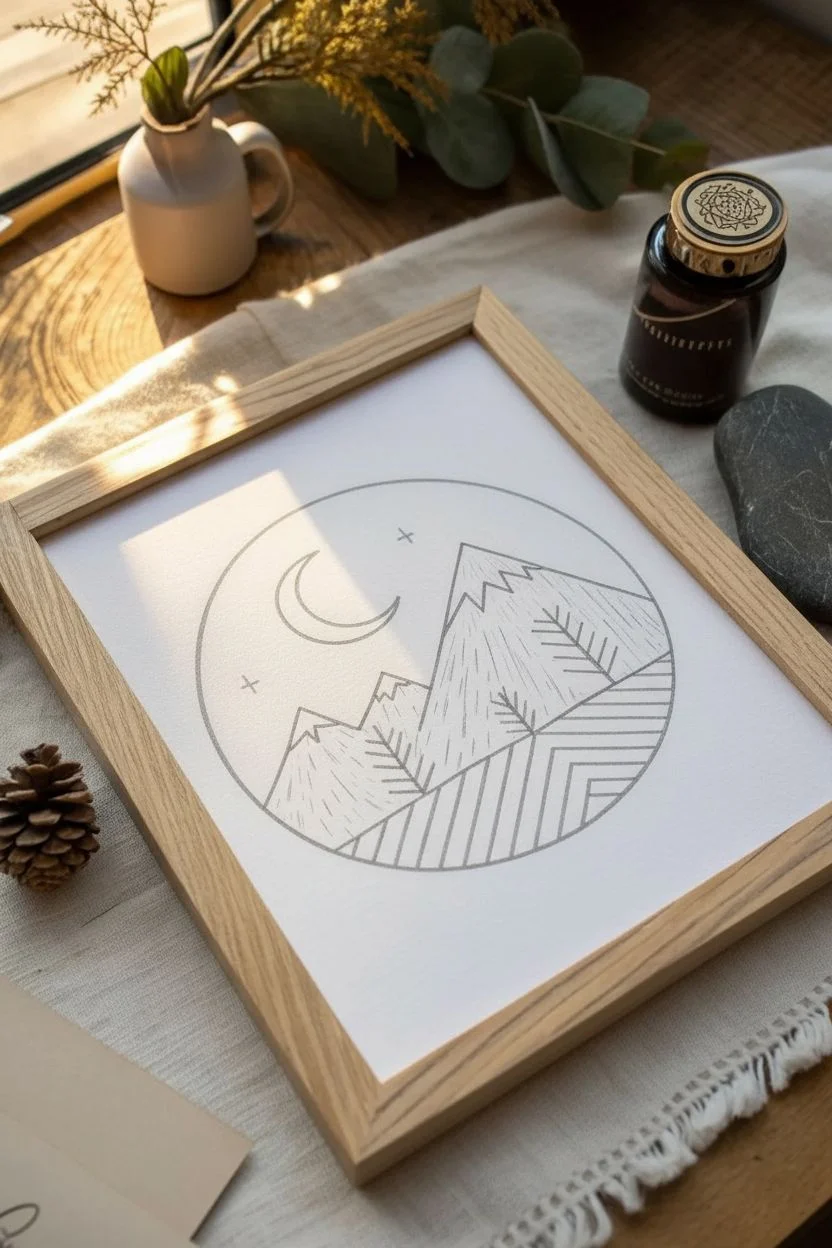
This minimalist ink drawing captures the serenity of a moonlit mountain range using simple geometric shapes and clean lines. Enclosed in a perfect circle, the balance of negative space and structured patterns creates a modern, calming piece that looks beautiful in a wooden frame.
Step-by-Step
Materials
- High-quality white drawing paper or cardstock
- Compass or a perfectly round object to trace (approx. 5-6 inches diameter)
- Pencil (HB or H for light lines)
- Eraser (kneaded eraser preferred)
- Fine liner pens (sizes 0.3mm, 0.5mm, and 0.8mm)
- Ruler or straight edge
- Light wood frame (square)
Step 1: Planning and Structure
-
Establish the Boundary:
Start by finding the center of your paper. Use your compass to draw a perfect circle lightly in pencil. This will define the boundaries of your entire composition, so make sure it’s centered where you want the final art to sit. -
Draft the Horizon:
Using your ruler, lightly draw a horizontal line across the circle, situated about one-third of the way up from the bottom. This separates the foreground from the mountains. -
Sketch the Peaks:
Draw three triangles for the mountain peaks. Place the largest peak on the right side, extending almost to the top curve. Draw a medium peak on the left, overlapping the large one slightly, and a smaller peak tucked in the lower left foreground. -
Add Snow Caps:
Near the top of each triangle, sketch zigzag lines to indicate snow-capped summits. Keep these irregular and jagged to contrast with the straight lines of the mountains themselves. -
Position the Celestial Elements:
In the upper left quadrant of the sky, sketch a crescent moon. Add two small ‘x’ marks or simple crosses in the sky to represent twinkling stars, balancing the negative space.
Step 2: Inking the Outlines
-
Trace the Circle:
Switch to your thickest fine liner (0.8mm). Carefully trace the main outer circle. I find it helps to rotate the paper as I draw to keep the curve smooth and consistent. -
Define the Mountains:
Using the same 0.8mm pen, outline the main triangle shapes of the mountains. Stop your lines where the mountains meet the horizon line or overlap each other. -
Ink the Moon:
Carefully outline your crescent moon and the small star crosses. Keep these lines crisp and sharp. -
Draw the Snow Caps:
Switch to a slightly thinner pen (0.5mm) to ink the jagged snow caps. The slightly thinner line weight helps distinguish the texture from the main mountain outlines.
Clean Circles
If you don’t have a compass, trace the inside of a roll of masking tape or a small bowl. Use a 0.8mm pen for the circle’s outline to hide minor wobbles.
Step 3: Detailing and Texture
-
Create Mountain Texture:
With your finest pen (0.3mm), draw vertical, dashed lines running down the body of the mountains. Keep these lines underneath the snow caps, suggesting vertical rock faces or shadows. -
Draw Simplified Trees:
Along the slope of the right mountain and in the valley between peaks, draw stylized evergreen trees. Use a vertical central line with downward-angled geometric branches. Keep them simple and stiff to match the design style. -
Section the Foreground:
Move to the bottom third of the circle (below your original horizon line). Divide this area into three vertical sections using two vertical lines. -
Fill the Left Foreground:
In the left section of the foreground, draw diagonal stripes sloping downwards from right to left using the 0.5mm pen. -
Fill the Center Foreground:
In the middle section, draw purely vertical stripes. Ensure the spacing is consistent with the diagonal lines you just drew. -
Fill the Right Foreground:
In the final right section, create a chevron or arrow pattern pointing upward. This variation adds visual interest to the ‘ground’ and leads the eye upward.
Slipping Ruler?
If your ruler slips while drawing the parallel lines in the foreground, stick a small piece of masking tape to the back of the ruler to provide grip.
Step 4: Finishing Touches
-
Let the Ink Set:
Wait at least 15 minutes to ensure the ink is completely dry. While it looks dry instantly, smudging happens easily during erasing. -
Erase Sketches:
Gently erase all underlying pencil marks with your kneaded eraser. Roll the eraser over the paper rather than scrubbing hard to preserve the black lines. -
Mount and Frame:
Center your artwork in the light wood frame. If your paper is smaller than the frame, use a white mat board to give it a professional gallery look.
Now you have a serene piece of geometric nature art ready to display on your desk or wall


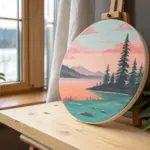
Simple Sunset Gradient Over the Ocean
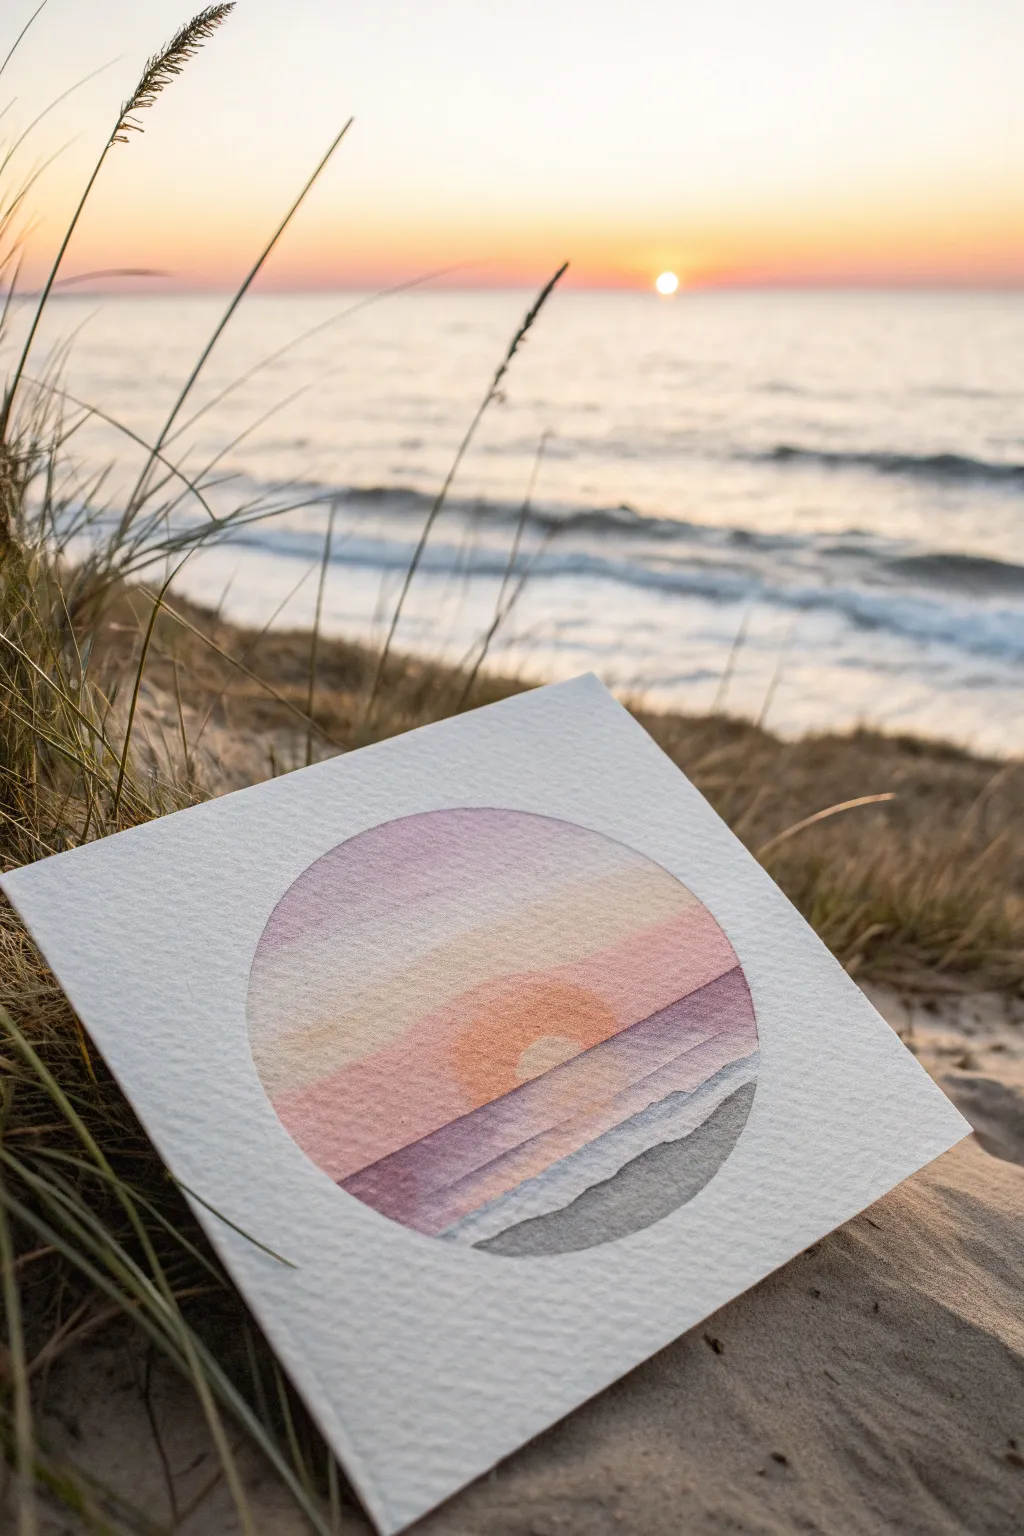
Capture the serene beauty of golden hour with this soft, layered watercolor project. Using the wet-on-dry technique, you’ll build gentle bands of pastel colors to form a peaceful ocean horizon within a perfect circle.
How-To Guide
Materials
- Cold press watercolor paper (cut to a square)
- Watercolor paints (pastels: pink, peach, violet, muted blue/grey)
- Compass or circular object (like a mug) for tracing
- Pencil (HB or lighter)
- Kneadable eraser
- Flat shader brush (approx. size 6 or 8)
- Round detail brush (small)
- Masking tape (optional)
- Clean water jar
- Paper towels
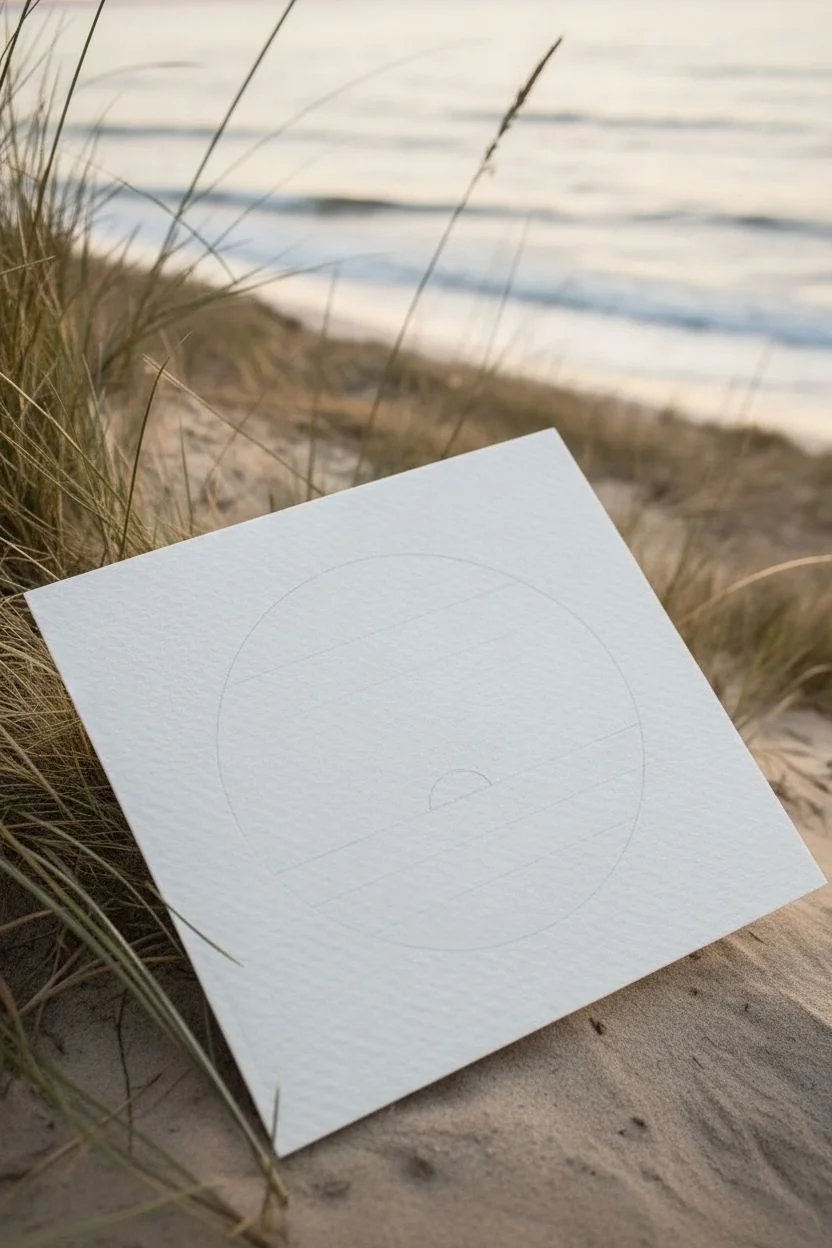
Step 1: Preparation & Outline
-
Cut the Paper:
Begin by cutting a piece of cold press watercolor paper into a small square, roughly 5×5 or 6×6 inches. The texture of cold press paper adds loveliness to the final wash. -
Draw the Circle:
Center your compass or circular object on the paper. Lightly trace a perfect circle using your pencil. Keep the line faint so it won’t show through transparent watercolor layers later. -
Sketch Horizon Lines:
Inside the circle, sketch very faint horizontal lines to guide your gradients. You don’t need a ruler; freehand adds organic charm. Place the horizon line slightly below the center. Add a small semi-circle sticking out of the water for the setting sun.
Step 2: Painting the Sky
-
Mix Your First Wash:
create a very watery, pale peach or light pink mix on your palette. You want this first layer to be almost transparent. -
Paint the Top Band:
Using your flat brush, fill the top third of the circle with this pale wash. Work carefully along the curved edge of the circle outline to keep the shape crisp. -
Add the Second Layer:
While the first layer is drying, mix a slightly stronger pink-orange shade. Once the top is touch-dry, paint a horizontal band just below it, slightly overlapping the previous color to create a soft transition. -
Paint the Sun:
Switch to a smaller round brush. Carefully paint the semi-circle sun shape using a warm orange tone. Leave this area relatively distinct against the surrounding sky. -
Lower Sky Gradient:
Continue adding horizontal bands as you move down toward the horizon line, shifting your color mix to a deeper mauve or soft violet. Ensure each band dries slightly before adding the next if you want distinct lines, or work wet-into-wet for a blurrier look.
Uneven Watermark Lines?
If you get unwanted hard edges (blooms) inside a color band, control the water on your brush better. Dab the brush on a paper towel before painting to ensure it’s damp, not dripping.
Step 3: Painting the Ocean
-
Establish the Horizon:
For the water directly under the sun, mix a muted purple wash. Paint a horizontal band that defines the horizon line, keeping it straight across the circle. -
Layer the Waves:
As you move down the water section, paint consecutive bands of color, mimicking waves. Vary the width slightly to suggest perspective. -
Shift to Cool Tones:
Transition your palette from purple to a muted blue-grey as you reach the bottom of the circle. This grounding color represents the shoreline or deeper water. -
Darken the Foreground:
Paint the final, bottom-most shape in the circle with your darkest grey-blue mix. I like to make this edge slightly wavy to mimic the foam hitting the sand.
Layering Pro-Tip
Let the sun layer dry completely before painting the sky around it. If the orange sun is still wet, the purple sky paint will bleed into it, turning the sun muddy brown.
Step 4: Finishing Touches
-
Clean Up Edges:
Check the perimeter of your circle. If you painted outside the lines, you can carefully dab it with a damp clean brush to lift the color, or wait for it to fully dry and use opaque white gouache to correct the edge. -
Erase Pencil Marks:
Once the painting is 100% bone dry (touch it with the back of your hand to check for coolness), gently dab a kneadable eraser over the pencil outline to lift the graphite. -
Flatten the Artwork:
If the paper has buckled from the water, place the dry artwork under a heavy book overnight to flatten it out beautifully.
Now you have a tranquil sunset scene that fits right in the palm of your hand


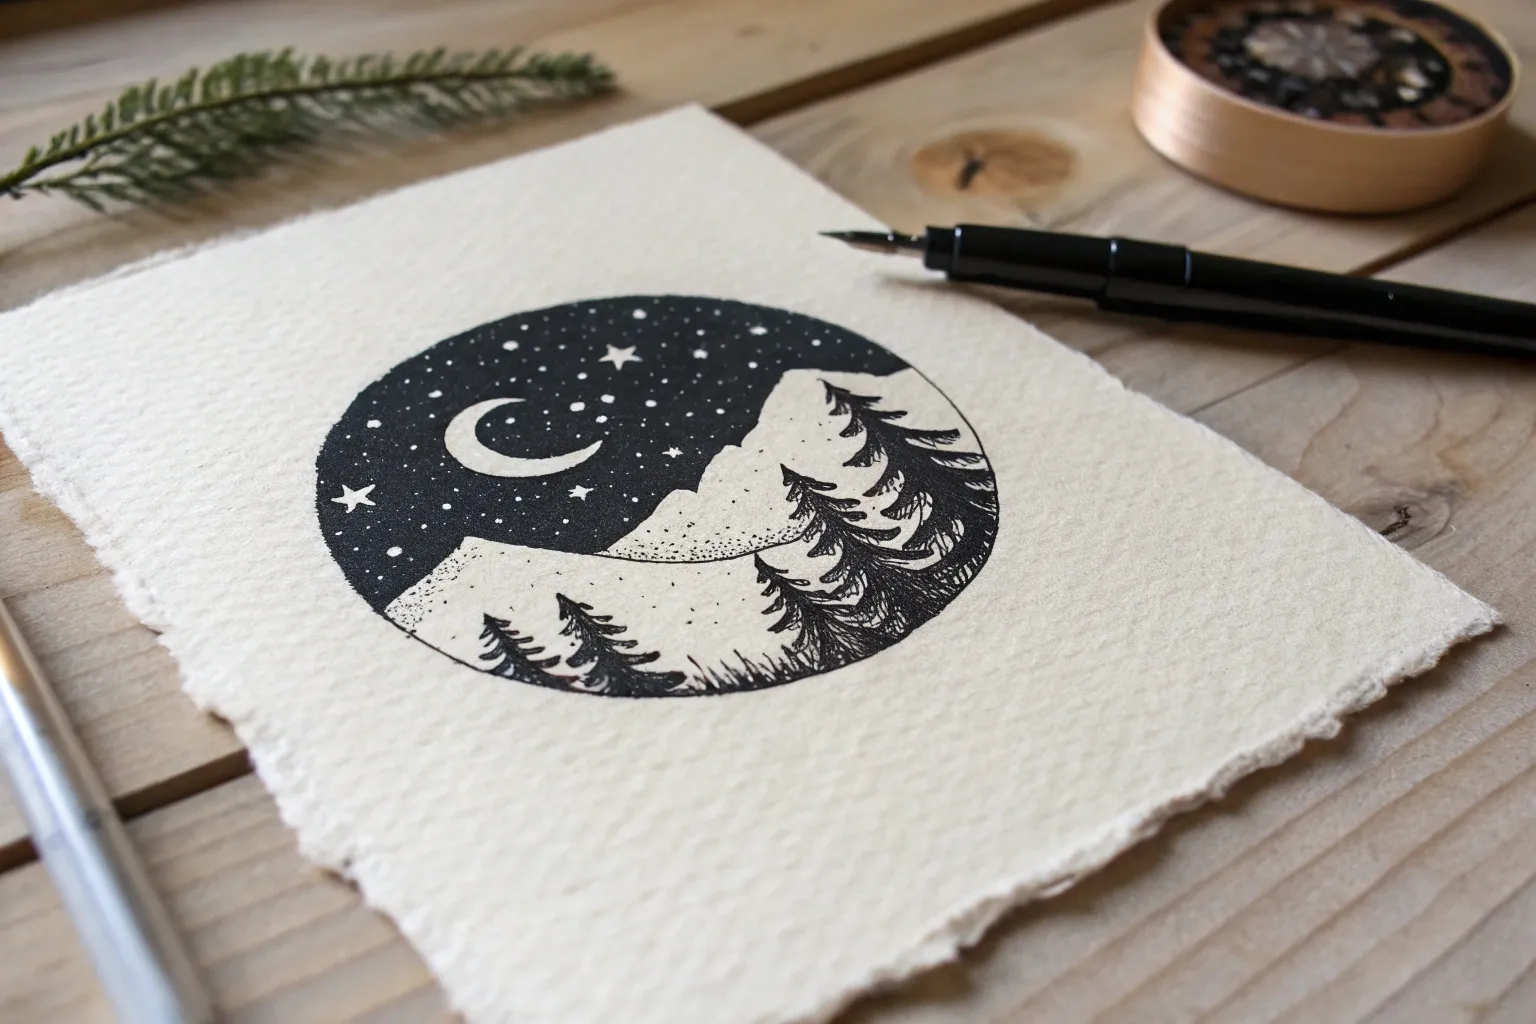
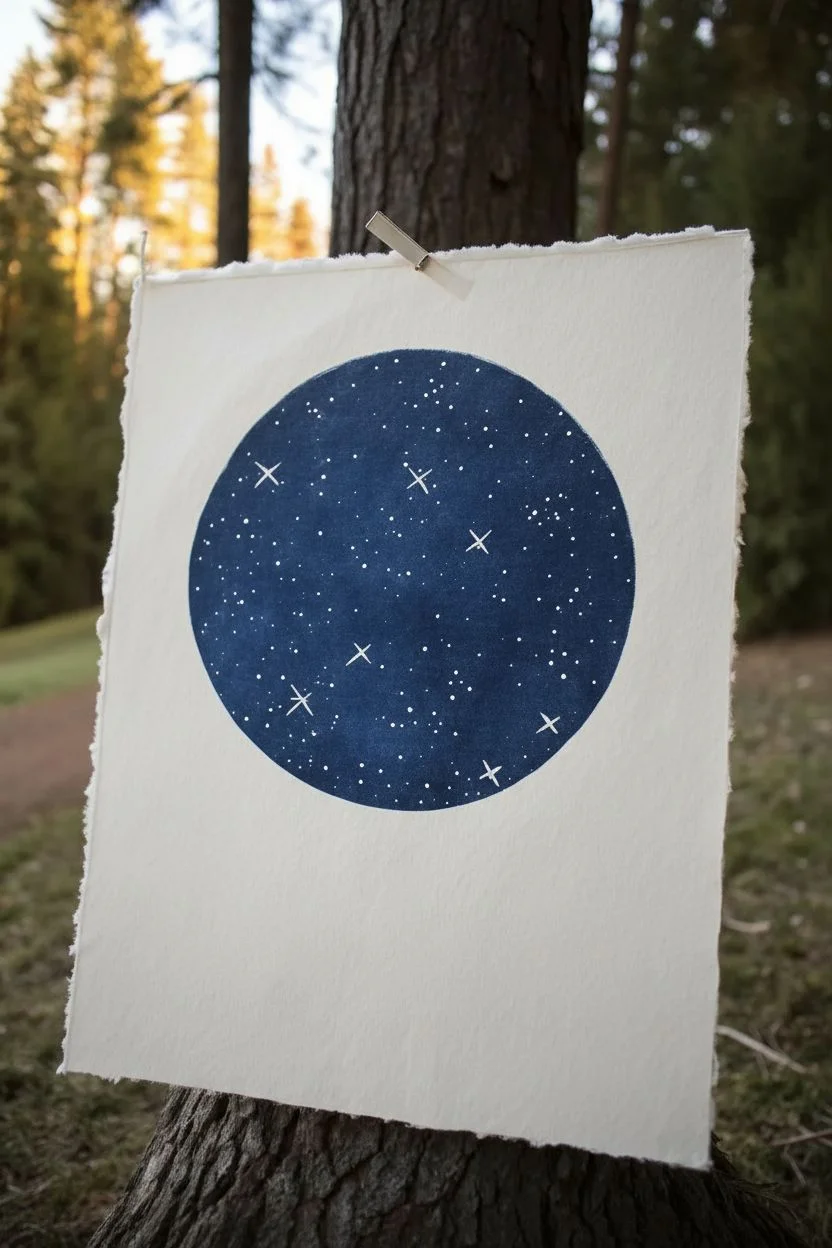
Night Sky Circle With Stars and a Crescent Moon
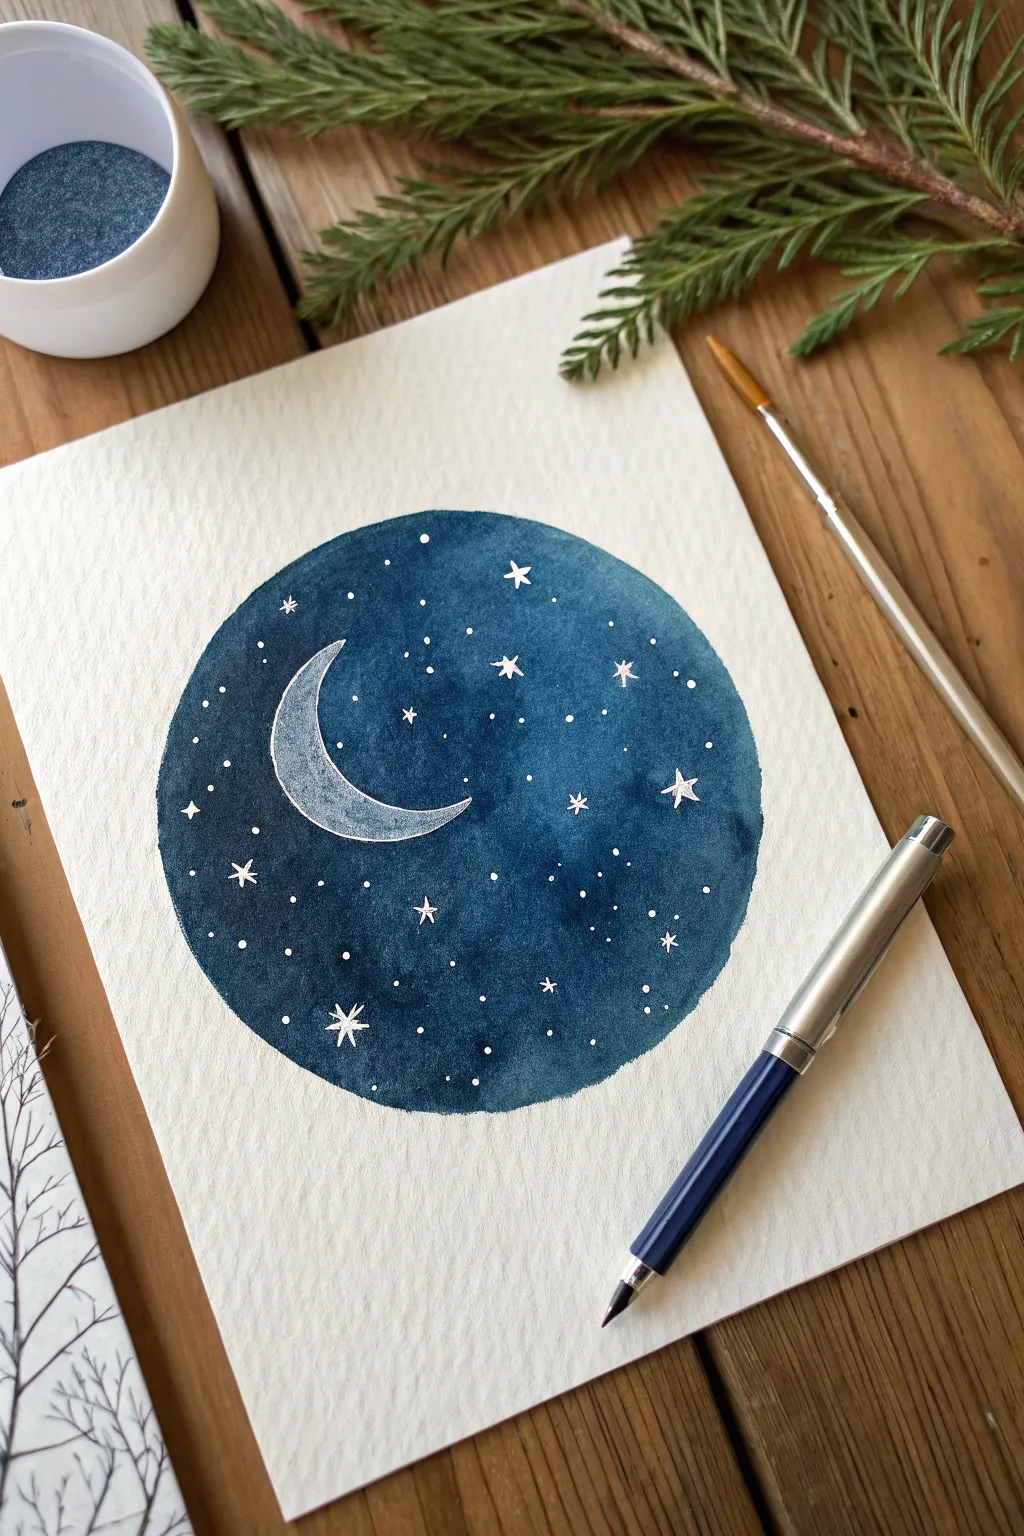
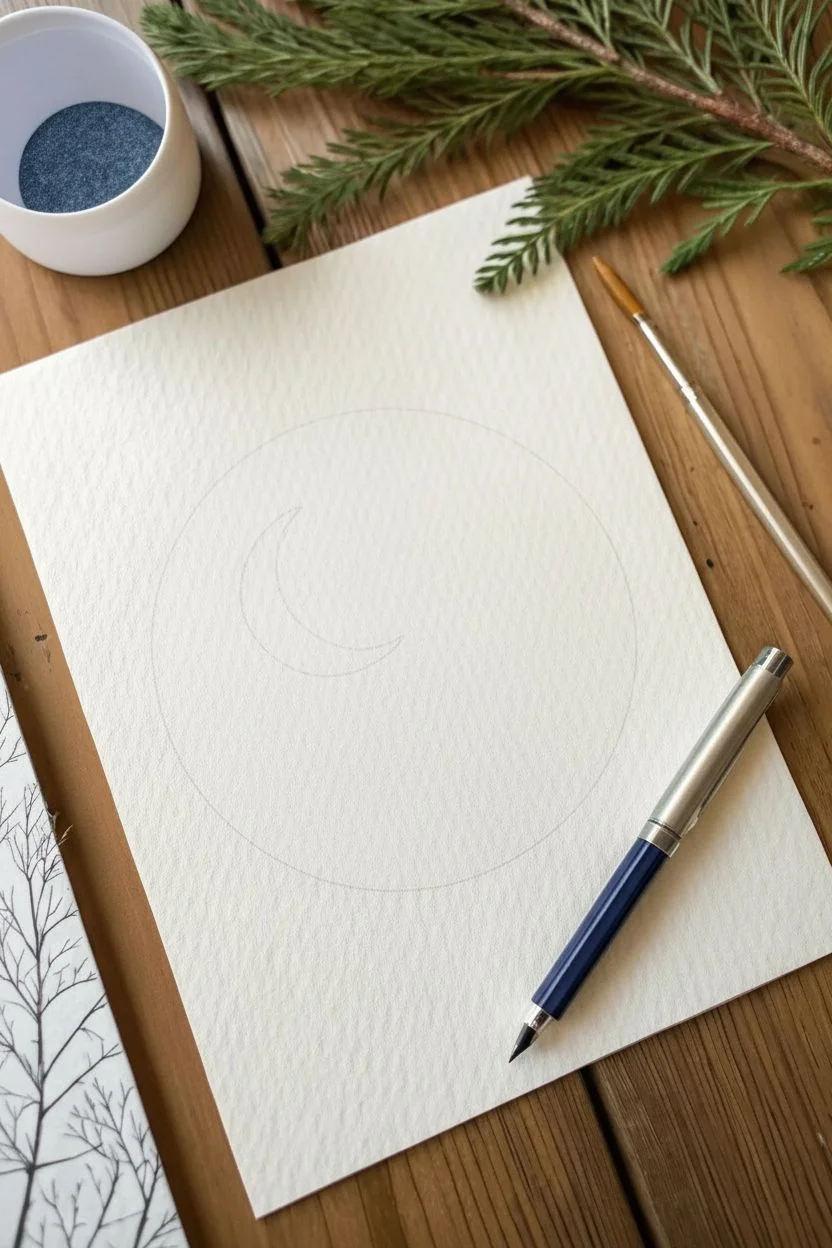
Capture the magic of a starry evening with this simple yet striking watercolor project. The deep indigo circle acts as a portal into a calm night sky, featuring a delicate crescent moon and scattering of twinkling stars.
Step-by-Step Guide
Materials
- Cold press watercolor paper (textured)
- Small round object to trace (approx. 4-5 inches)
- Pencil and eraser
- Deep indigo or Prussian blue watercolor paint
- Round watercolor brush (size 6 or 8)
- White gel pen (e.g., Gelly Roll or Posca)
- White gouache or white ink (optional for highlights)
- Clean water and paper towel
Step 1: Sketching the Base
-
Trace the circle:
Find a circular object, like a small bowl or large lid, and place it in the center of your watercolor paper. Lightly trace around it with a pencil to create your boundary. -
Add the moon:
Inside the left side of your circle, sketch a crescent moon shape. Keep your pencil lines extremely light so they don’t show through the final paint. -
Refine the shape:
Ensure the points of the crescent moon are sharp and the curve feels natural.
Wet Edge Technique
Keep the edge of your blue paint wet as you fill the circle. If an edge dries mid-painting, you’ll get a hard line called a ‘bloom’ that interrupts the smooth sky.
Step 2: Painting the Night
-
Prepare the paint:
Mix a generous amount of deep blue watercolor paint. You want a saturated mixture—something like Indigo or Prussian Blue works perfectly here. -
Outline carefully:
Dip your brush in the paint and carefully outline the crescent moon first. This creates a barrier so you don’t accidentally paint inside it. -
Fill the background:
Work your way around the rest of the circle, filling the negative space with the deep blue wash. -
Create texture:
While the paint is still wet, you can drop in slightly more concentrated pigment in random spots to create subtle cloud-like variations in the night sky color. -
Let it dry completely:
Wait for the blue paint to dry fully. If the paper feels cool to the touch, it’s still damp. Patience is key here to prevent bleeding.
Golden Glow Upgrade
Instead of white, use metallic gold watercolor or a gold paint pen for the stars and moon outline. This adds a warm, magical fantasy feel to the piece.
Step 3: Adding Celestial Details
-
Paint the moon:
Dilute a tiny bit of your blue paint with a lot of water to make a very pale, watery wash. Carefully fill in the crescent moon shape. -
Create moon texture:
While the moon is damp, you can dab a clean, dry brush or paper towel on it to lift slight pigment, giving it a glowing, cratered texture. -
Outline the moon:
Once the moon and background are totally dry, use your white gel pen to outline the crescent moon shape crisply. -
Draw primary stars:
Use the white gel pen to draw several larger, 5-pointed twinkling stars scattered across the blue background. -
Fill with stardust:
Add tiny dots in clusters between the larger stars to create the look of distant galaxies and stardust. -
Vary dot sizes:
I find that mixing tiny pin-prick dots with slightly larger round dots makes the sky look deeper and more realistic. -
Add highlights:
If you have white gouache, add a tiny dab to the very center of your largest stars to make them shine brighter.
Frame your mini masterpiece or use it as a stunning handmade card design


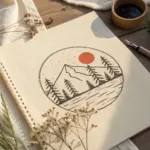
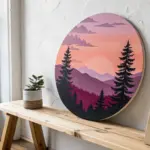
Pine Tree Silhouette Against a Starry Background
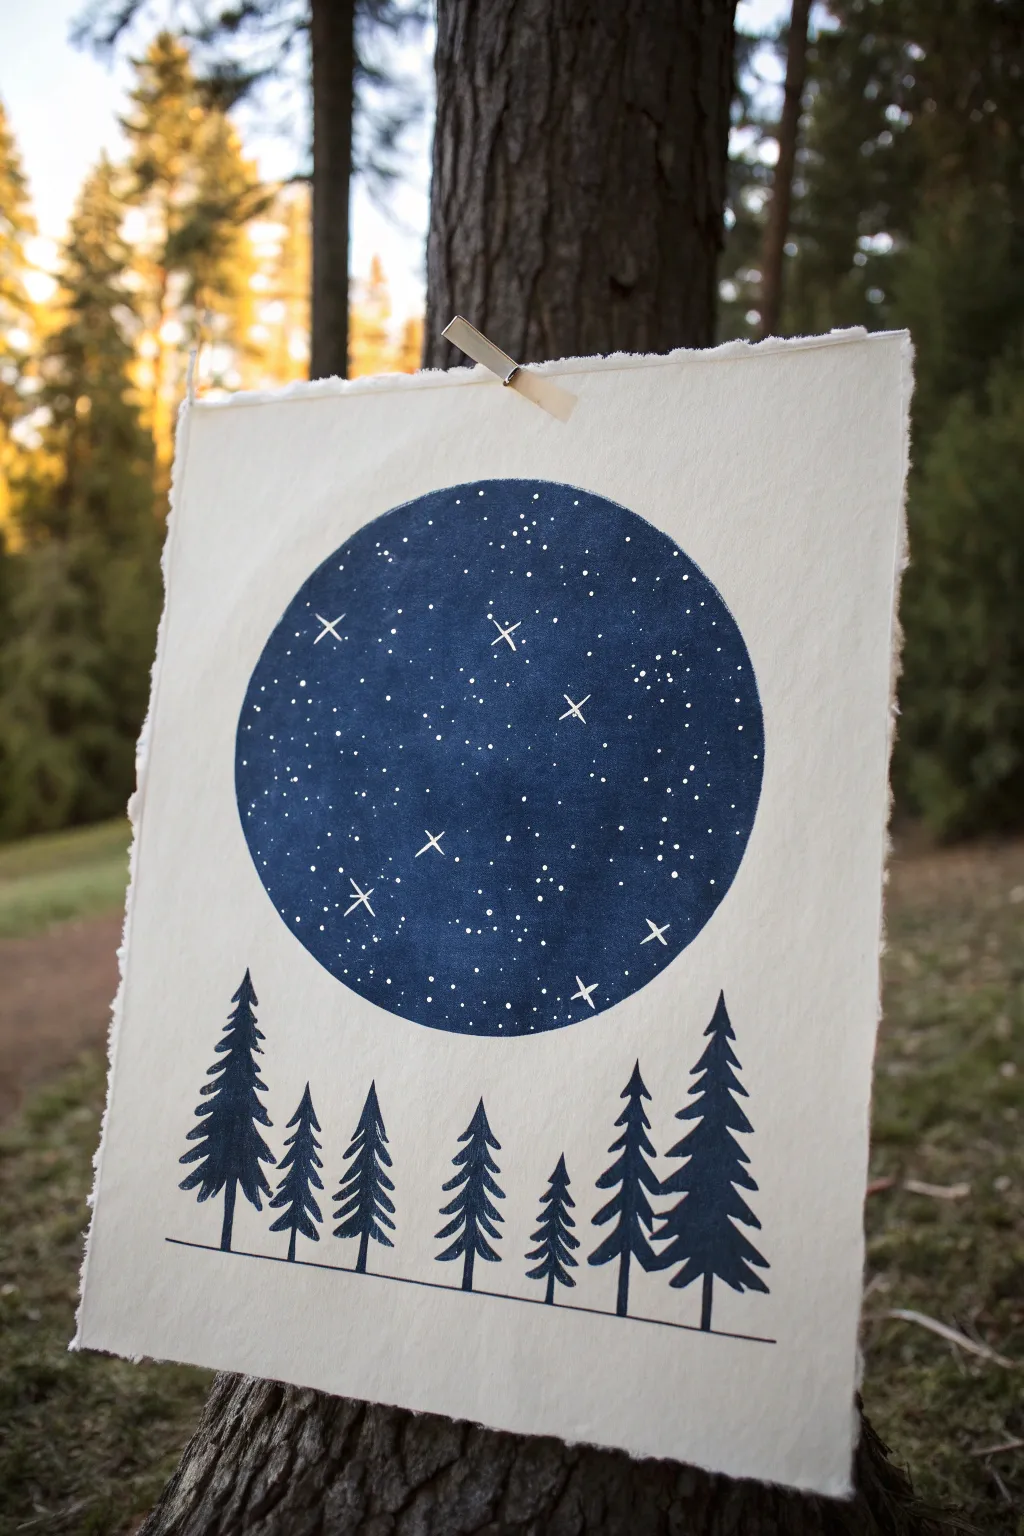
This gorgeous, mystical piece combines the sharp geometry of a perfect circle with the organic, rugged shapes of a pine forest. The stark contrast between the deep indigo sky and the textured off-white paper creates a stunning focal point that feels both modern and timeless.
How-To Guide
Materials
- High-quality watercolor paper or printmaking paper with deckled edges
- Compass or a large circular object to trace (approx. 5-6 inches diameter)
- Pencil and eraser
- Deep indigo or navy blue gouache paint (or acrylic)
- White gel pen (size 08 or 10) or fine tip white paint marker
- Flat shader brush (medium size)
- Fine liner brush (size 0 or 00) for tree details
- Ruler
- Painter’s tape or masking fluid (optional)
Step 1: Creating the Celestial Sphere
-
Prepare the paper:
Begin with a piece of heavy, textured paper. If you want that authentic rustic look shown in the photo, you can carefully tear the edges of your paper using a ruler as a guide to create a ‘deckled’ effect. -
Outline the circle:
In the upper center of your page, use a compass or trace around a bowl to lightly draw a perfect circle. Keep your pencil pressure very light so it doesn’t show through later. -
Mix your night sky color:
Prepare your deep indigo gouache or acrylic paint. You want a consistency that is creamy and opaque but fluid enough to spread evenly. I sometimes mix a tiny touch of black into my blue to get that midnight depth. -
Fill the circle:
Using your flat shader brush, carefully paint the interior of the circle. Start by edging the perimeter with the brush tip for a crisp line, then fill in the center. -
Layer for opacity:
Let the first coat dry completely. If the paper texture is showing through too much or the color looks streak, apply a second coat for a solid, velvety finish. -
Dry completely:
Ensure the blue circle is bone dry before proceeding to the stars, otherwise the white ink might bleed or turn light blue.
Step 2: The Starfield
-
Add distant stars:
Using a white gel pen or paint marker, start by dotting small, simple points of light randomly across the blue circle. Vary the density slightly to make it look natural. -
Create major stars:
Select 5-7 spots to draw larger, brighter stars. Draw a small cross shape (+) and then draw an ‘X’ shape through the center of it to create an eight-pointed glimmer, or keep it simple with four points. -
Add variance:
Return to your field of stars and make some of the simple dots slightly larger than others. This variation in size creates a sense of depth in your galaxy.
Uneven Circle Edges?
If painting a perfect circle by hand is tricky, use masking fluid to block out the circle shape first, or cut a stencil from acetate and sponge the paint in
Step 3: The Forest Floor
-
Establish the horizon:
Several inches below your blue moon, use a ruler to lightly draw a straight horizontal line across the width of the paper where the trees will stand. -
Mark tree positions:
Lightly mark vertical lines where you want each tree to stand. Vary the heights—some should reach up toward the circle, while others stay lower. Aim for an odd number of trees, like seven or nine, for a balanced composition. -
Paint the trunks:
Switch to your fine liner brush and the same indigo paint used for the sky. Paint thin vertical lines for the tree trunks, extending from your horizon line up to your marked heights. -
Start the branches:
Starting at the top of a trunk, paint small, downward-slanting dashes. Make the strokes very short at the peak. -
Widen the trees:
As you work your way down the trunk, gradually widen your strokes. Pine trees have a triangular silhouette, so the branches should get progressively longer toward the base. -
Texture the foliage:
Don’t make the trees solid triangles; leave small gaps between branches to let the paper show through. Use quick, flicking motions with your brush to mimic needles. -
Anchor the scene:
Once all trees are painted, use your ruler and the fine brush to go over the horizon line one last time with the dark blue paint, connecting the base of all the trunks with a clean, solid line.
Add a Glow
Before adding stars, dry-brush a tiny amount of lighter blue or diluted white in the center of the dark circle to create a subtle, glowing nebulae effect
Hang your finished piece with a simple wooden clip or frame it to bring a quiet moment of nature into your room

PENCIL GUIDE
Understanding Pencil Grades from H to B
From first sketch to finished drawing — learn pencil grades, line control, and shading techniques.
Explore the Full Guide
Tiny Cabin on a Hill in a Circle Frame
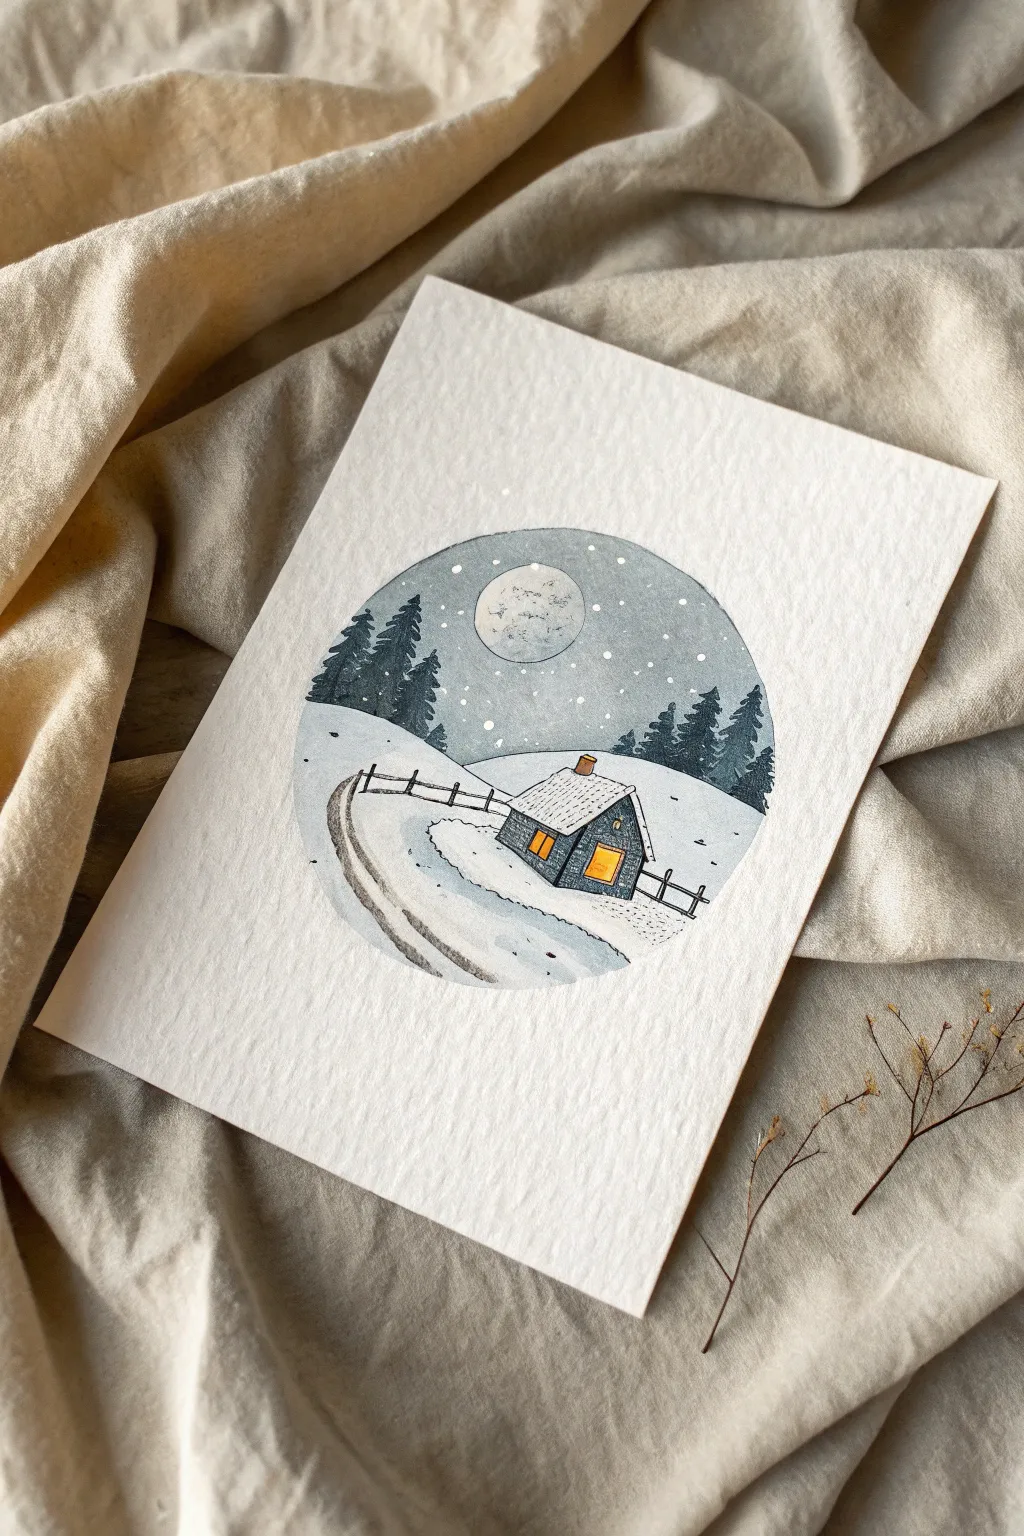
Capture the serene stillness of a snowy evening with this charming circular watercolor illustration. The high-contrast warm windows against the cool blue-grey landscape make for a cozy, inviting scene perfect for holiday cards.
Step-by-Step Tutorial
Materials
- Cold press watercolor paper (300 gsm)
- Compass or circular object to trace (approx. 3-4 inches)
- Masking fluid (optional)
- Watercolors: Payne’s Gray, Indigo, Burnt Sienna, Yellow Ochre
- Fine liner pens (Black, 0.1 and 0.3 sizes)
- White gel pen or white gouache
- Pencil and eraser
- Round watercolor brushes (sizes 2 and 4)
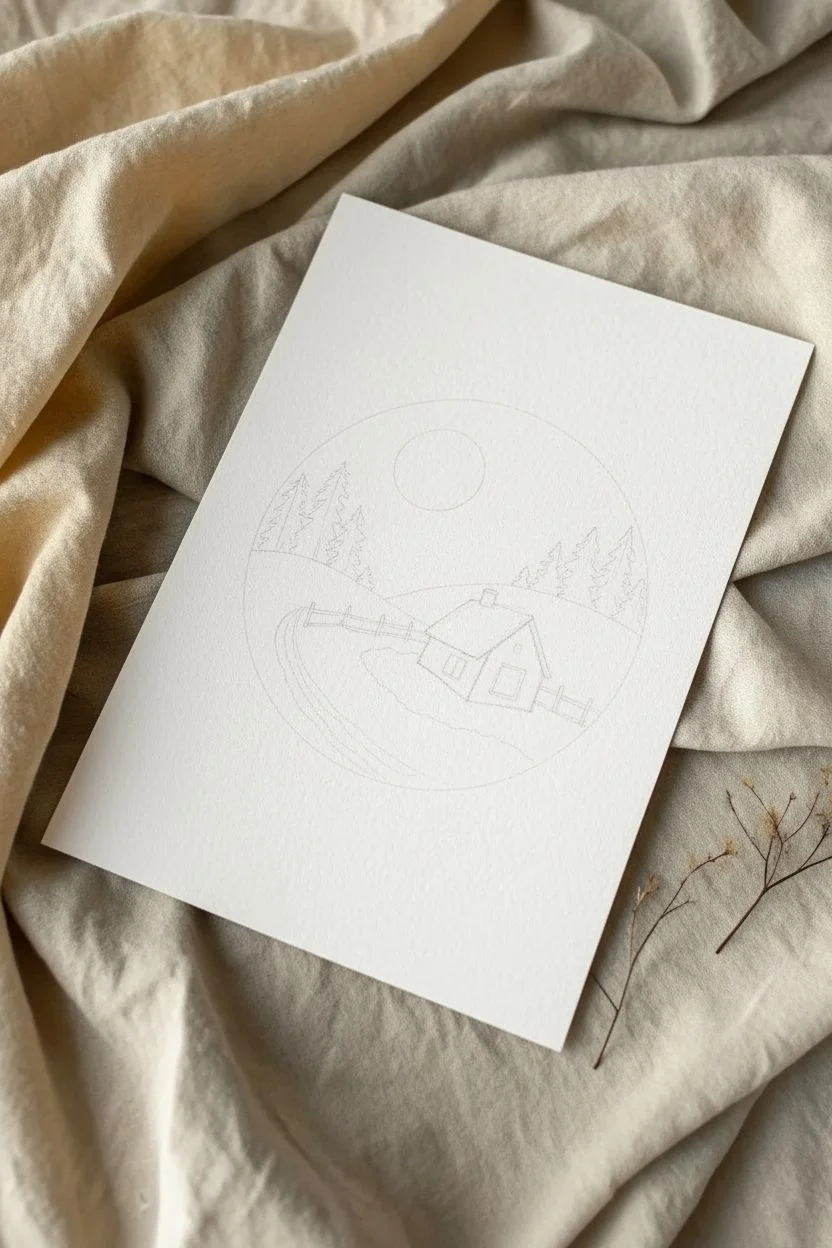
Step 1: Planning and Sketching
-
Create the boundary:
Begin by drawing a perfect circle in the center of your paper using a compass or by lightly tracing a round object like a mug rim or masking tape roll. -
Establish the horizon:
Sketch a gently sloping line across the lower third of the circle to create the snowy hill foreground. -
Place the cabin:
Draw a small, boxy cabin structure sitting on the slope. Add a pitched roof and a chimney. Keep the perspective simple; a slightly angled view adds depth. -
Add landscape details:
Lightly sketch in the fence line trailing away from the cabin and indicate the curved path leading up to it. Mark the position of the moon in the upper sky area. -
Define the trees:
Sketch the triangular shapes of pine trees on the horizon line behind the cabin, varying their heights for a natural look.
Step 2: Painting the Scene
-
Paint the sky base:
Mix a watery wash of Payne’s Gray. Carefully paint the sky area, leaving the moon circle completely white (unpainted). -
Deepen the sky:
While the first layer is still damp, drop in slightly darker Indigo near the top edge and around the trees to create a gradient effect. Let this dry completely. -
Paint the moon:
Use a very diluted, pale gray wash to add texture to the moon. Dab it on lightly, leaving some white highlights for craters. -
Color the cabin:
Paint the walls of the cabin with a saturated dark gray or blue-gray. I like to leave the window squares unpainted for now to keep them bright later. -
Add warmth:
Once the cabin walls are dry, fill the window spaces with a bright Yellow Ochre or diluted orange to mimic glowing candlelight. -
Paint the trees:
Using a concentrated mix of Indigo and Payne’s Gray (less water), paint the pine trees. Use the tip of your brush to flick outward, creating jagged pine needle textures. -
Shadow the snow:
Mix a very watery, pale blue-gray. Paint the shadow along the path (the tire tracks) and the shadowed side of the hill to give the white snow dimension.
Uneven Circles?
If you struggle to paint a perfect circle edge, apply masking tape (or liquid masking fluid) around the outer perimeter before painting. Peel it off at the end for a crisp border.
Step 3: Inking and Details
-
Outline the cabin:
Using your 0.1 fine liner, carefully outline the cabin structure, the roof tiles, and the brick texture on the chimney. -
Texture the walls:
Add tiny vertical hatching lines on the cabin walls to suggest wood or stone texture, being careful not to obscure the yellow windows. -
Draw the fence:
Ink the fence posts and horizontal rails. Keep the lines somewhat loose and organic rather than using a ruler. -
Define the trees:
Add subtle ink scribbles to the dark watercolor trees to reinforce their pointy shape and add density. -
Bring the snow to life:
With a white gel pen or opaque white gouache, dot tiny snowflakes all over the sky and overlapping onto the trees. -
Roof details:
Add a dusting of ‘snow’ to the cabin roof using the white gel pen, stippling dots to make it look accumulated. -
Final touches:
Use your eraser to clean up the original circle pencil line if it’s still visible, leaving a crisp, clean edge to your miniature world.
Add Magic
Mix a tiny amount of metallic silver or pearlescent watercolor into your white gouache for the snowflakes. The snow will shimmer subtly when catch the light.
Now you have a peaceful winter sanctuary captured in a perfect circle, ready to frame or gift
One-Point Perspective Road Disappearing Into the Distance
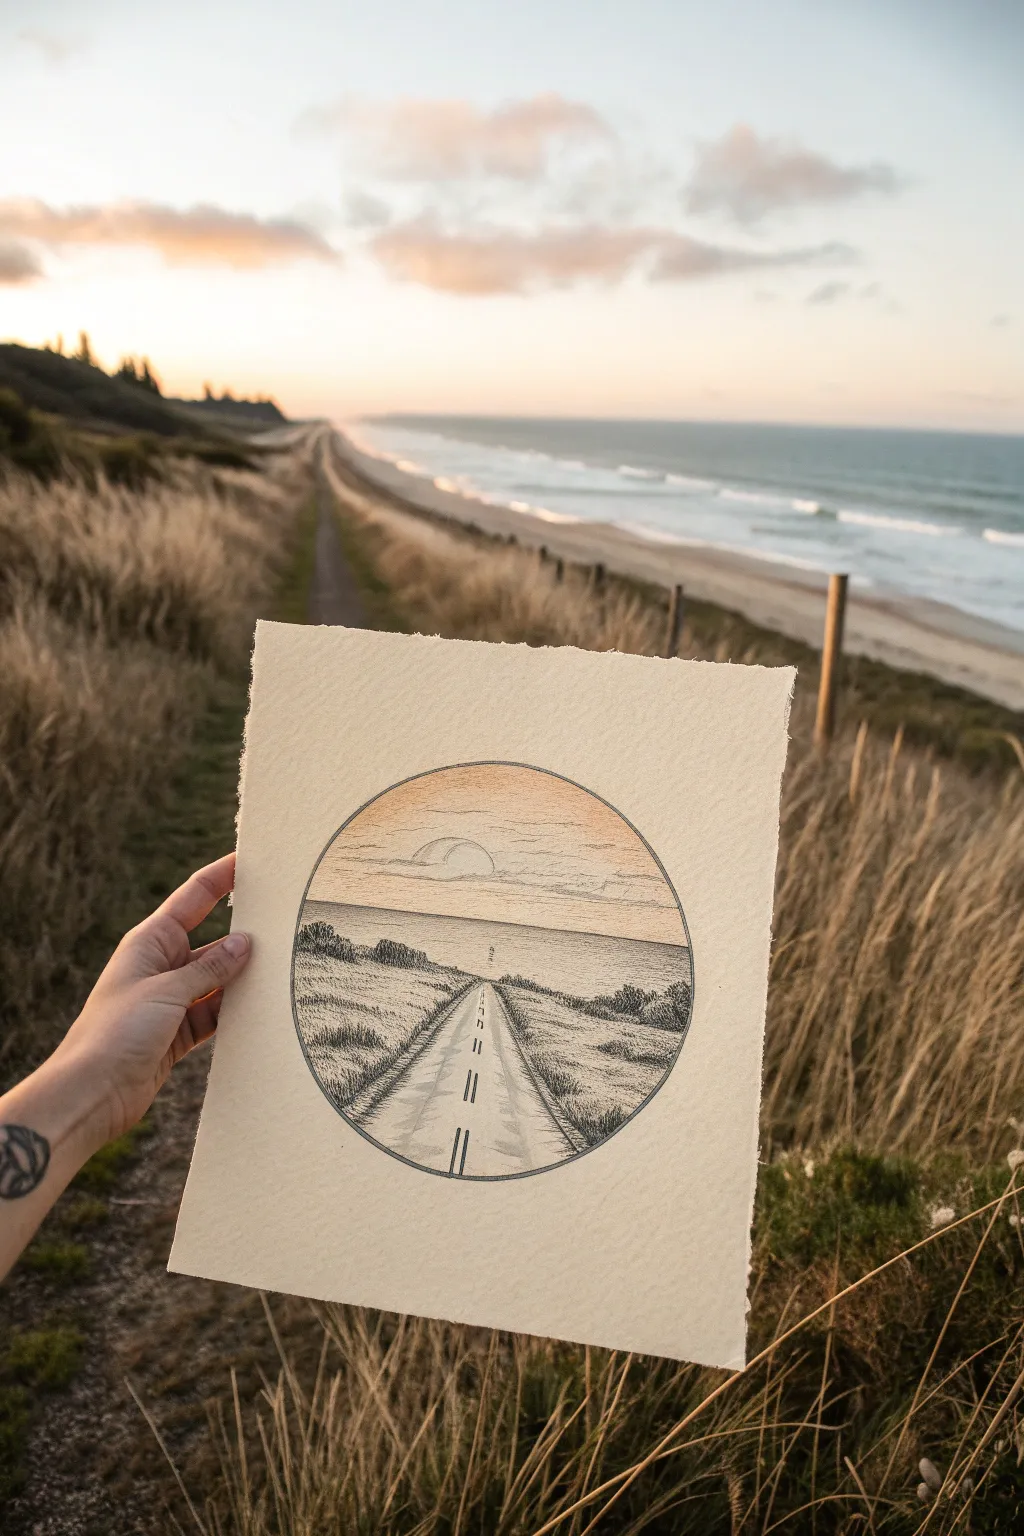
Capture the serene beauty of a quiet coastal highway disappearing into a sunset with this elegant ink and colored pencil piece. By framing the landscape within a perfect circle, you create a focused, porthole-like view that emphasizes the dramatic pull of one-point perspective.
How-To Guide
Materials
- Textured fine art paper (heavyweight, cold press watercolor paper recommended)
- Drawing compass or circular object to trace
- Pencil (HB or H for light sketching)
- Fine liner pens (0.05, 0.1, and 0.3 sizes, black ink)
- Colored pencils (Peach, Light Orange, Cream, White, Warm Grey)
- Ruler
- Eraser (kneaded eraser preferred)
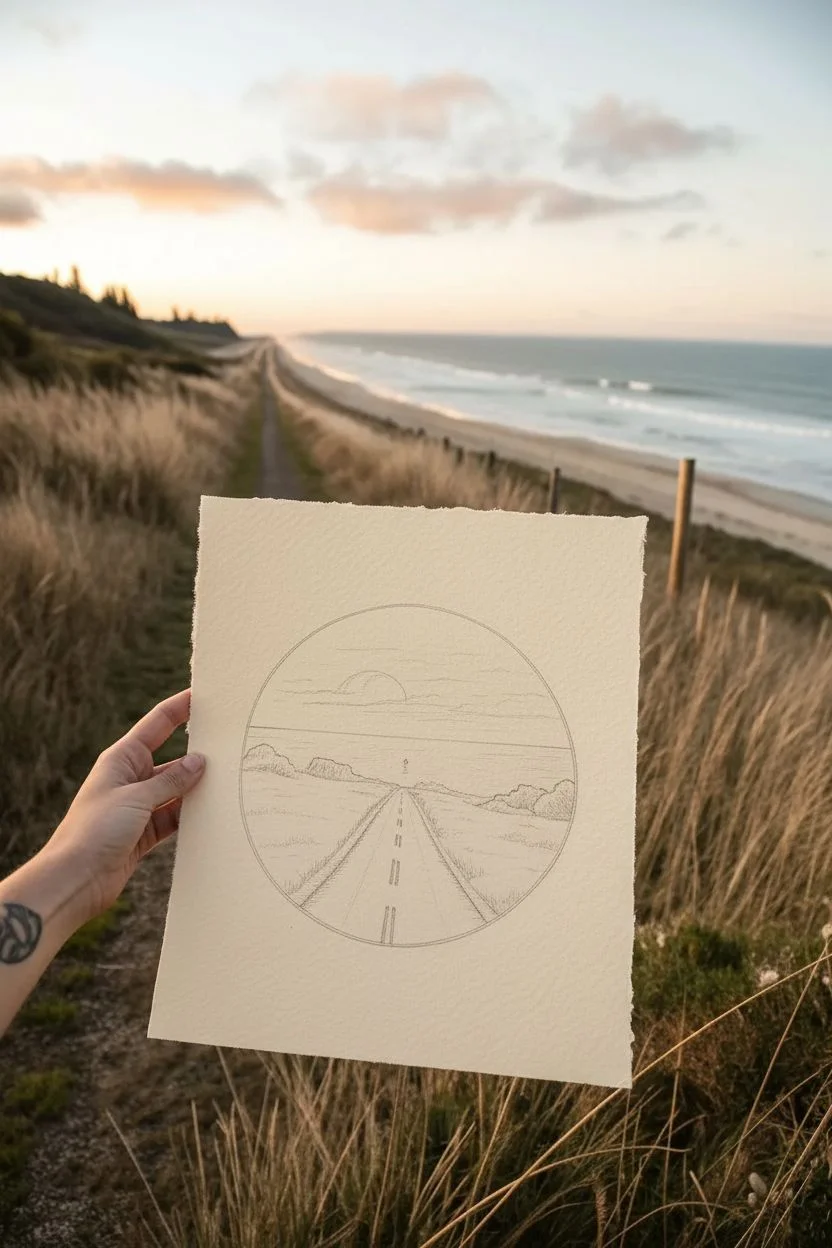
Step 1: Setting the Scene
-
Create the boundary:
Begin by drawing a perfect circle in the center of your paper using a compass. Since the paper has a lovely texture, press lightly so you don’t groove the surface. -
Establish the horizon:
Using a ruler, lightly draw a horizontal line across the circle, placing it just slightly above the center point. This will separate your ocean from the sky. -
Draft the vanishing point:
Mark a tiny dot exactly in the middle of your horizon line. This is your vanishing point where the road will disappear. -
Sketch the road:
From the bottom edge of the circle, draw two lines that angle inward and meet at your vanishing point. Keep the base of the road relatively wide to create a strong sense of depth. -
Add landscape elements:
Sketch low, rolling hills on either side of the road. On the left, bring the hill closer to the foreground; on the right, keep it slightly lower to reveal the ocean view behind it. -
Sun placement:
Draw a small semi-circle resting on the horizon line slightly to the left of the center. Add faint horizontal cloud shapes just above the horizon to break up the sky.
Step 2: Inking the Details
-
Outline the circle:
Switch to your 0.3 fine liner to carefully trace the main circular border. Go slowly to maintain a smooth, continuous curve. -
Define the horizon and road:
Use a 0.1 pen for the horizon line and the edges of the road. This thinner line weight helps these elements recede into the distance. -
Draw road markings:
Add the double yellow lines down the center of the road. Draw the dashes larger and further apart at the bottom, making them tiny and close together as they reach the horizon. -
Texture the grassy hills:
Using a 0.05 pen, start adding texture to the hills. Use short, vertical hatching strokes to mimic tall roadside grass. I find it works best to cluster these strokes near the road edge and the bottom of the circle. -
Add darker values:
Create depth in the vegetation by adding denser stippling or cross-hatching in the shadow areas, particularly where the hills meet the ground. -
Detail the ocean:
For the water on the right, draw very fine, straight horizontal lines. Don’t fill the whole space; leave gaps to suggest light reflecting off the waves.
Uneven Circle?
If your hand-traced circle is wobbly, use a compass or trace a roll of masking tape. If drawing freehand, rotate the paper constantly as you draw short, connecting arcs.
Step 3: Soft Color Application
-
Erase pencil guides:
Wait for the ink to be completely dry, then gently lift away your initial pencil sketch with a kneaded eraser. -
Base sky gradient:
Take your cream colored pencil and shade the entire sky area lightly. Keep the pressure very even to avoid harsh strokes. -
Warm sunset tones:
Layer a soft peach or light orange color starting from the horizon line and fading upwards. The color should be most intense right around the setting sun. -
Define the sun and clouds:
Use a white pencil to burnish (press firmly) the sun shape, blending it slightly with the surrounding peach tones. Adding a touch of grey to the undersides of the clouds gives them volume. -
Shadow the road:
Lightly shade the asphalt road with warm grey. Apply slightly more pressure on the outer edges of the lane, leaving the center lighter to suggest a crowned road surface reacting to the light. -
Final touches:
Reinforce the circle’s border if needed and add any final ink dots to the grass for extra texture.
Golden Hour Glow
To make the sunset pop, use a blending stump (tortillon) with a tiny bit of baby oil to smooth the colored pencil pigment. It creates a paint-like seamless gradient.
Now you have a tranquil miniature landscape captured perfectly in a circle.
BRUSH GUIDE
The Right Brush for Every Stroke
From clean lines to bold texture — master brush choice, stroke control, and essential techniques.
Explore the Full Guide
Easy Desert Doodle With Cactus and Sun
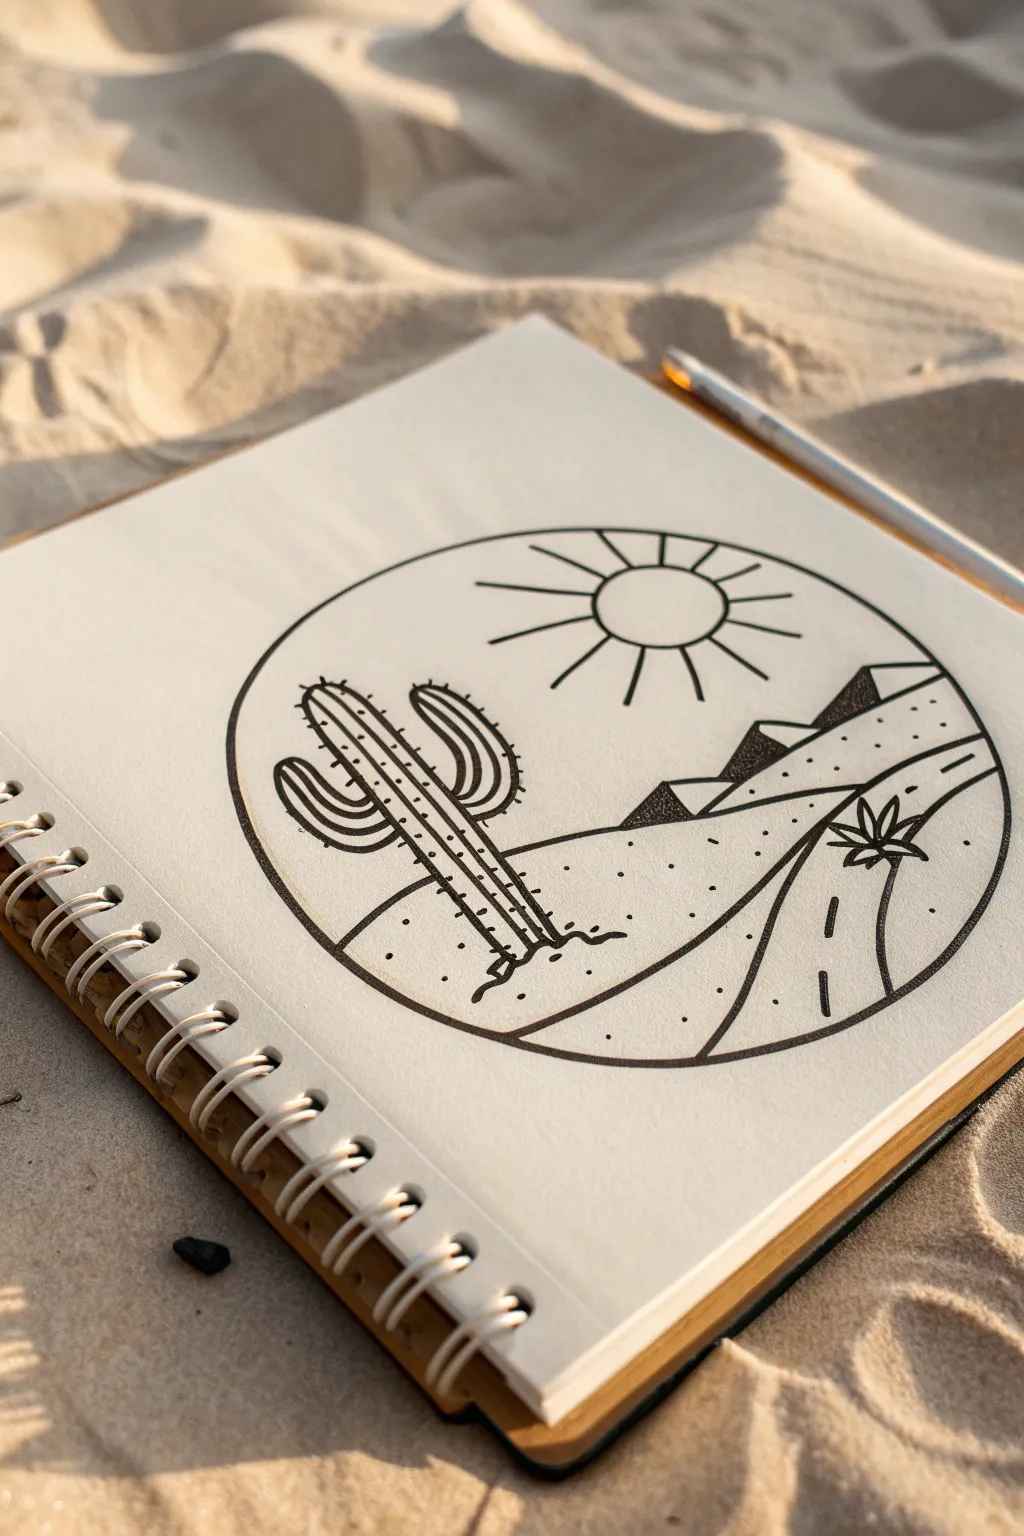
Capture the heat of the desert with this crisp, circular line drawing featuring a towering cactus and rolling dunes. The clean black ink lines against the stark white page create a striking contrast, using simple stippling to add subtle depth to the sands.
Step-by-Step Tutorial
Materials
- Sketchbook with smooth, thick paper
- Compass or circular object (for tracing)
- Pencil (HB or lighter)
- Eraser
- Fine liner pen (0.3mm or 0.5mm)
- Thicker marker (0.8mm or 1.0mm) for the border
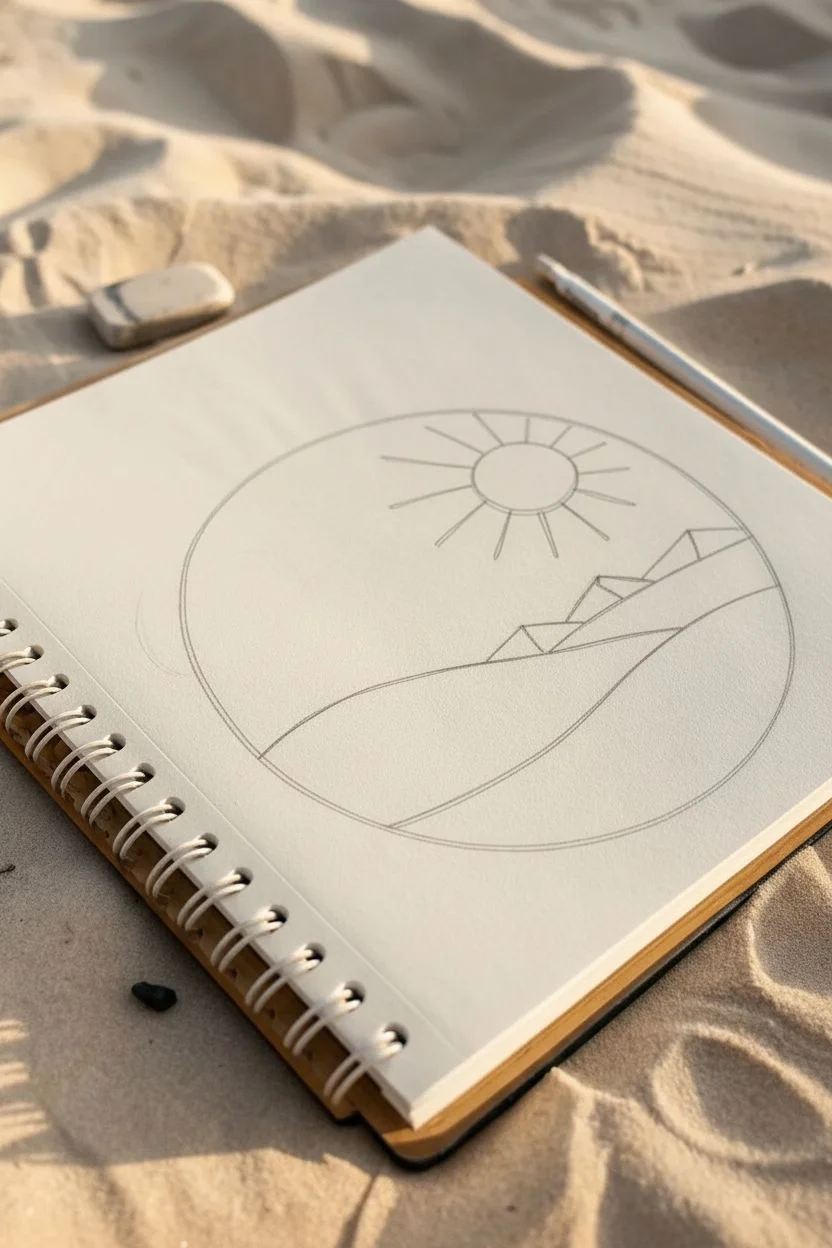
Step 1: Setting the Scene
-
Draw the boundary:
Start by drawing a perfect circle in the center of your page. You can use a compass or trace around a bowl or lid to get that crisp edge. Keep this pencil line light so it’s easy to ink over later. -
Sketch the horizon:
About a third of the way up from the bottom, sketch a rolling line across the circle to create your first sand dune. Add a second curving line below it that flows towards the bottom right to create depth in the landscape. -
Add the mountains:
Behind the top dune, draw geometric, triangular shapes to represent mountains or distant pyramids. Vary their sizes slightly, making sure they don’t touch the very top of the circle. -
Place the sun:
In the upper sky area, draw a smaller circle for the sun. Add straight lines radiating outward for the rays. I like to keep the rays contained within the main circle boundary for a cleaner look.
Wobbly Circle?
If you struggle to draw the outer circle freehand with ink, put your circular object back over your pencil line and trace around it with the pen for a flawless edge.
Step 2: The Cactus & Vegetation
-
Outline the cactus stem:
On the left side of the composition, draw a tall, cylindrical shape rising from the dunes. Give it a slightly rounded top. -
Add the arms:
Draw two curved arms on the cactus—one branching out to the left and curving up, and another on the right side doing the same. Make the connections smooth and organic. -
Detail the ribs:
Draw vertical lines running down the length of the main stem and along the curves of the arms to create the ribbed texture typical of iconic cacti. -
Draw the small agave:
On the right side of the foreground dune, sketch a small, star-shaped plant with pointed leaves radiating from a center point. This adds a nice balance to the large cactus on the left.
Step 3: Inking the Lines
-
Ink the main circle:
Using your thicker marker (0.8mm or 1.0mm), carefully trace over the main outer circle. A steady hand is key here; try to move from your elbow rather than your wrist for a smoother curve. -
Outline main elements:
Switch to your standard fine liner (0.5mm) and ink the outlines of the cactus, the dunes, the mountains, and the sun. Don’t worry about the shading yet, just get the solid shapes defined. -
Refine the cactus details:
Carefully ink the vertical ribs inside the cactus. Along the outer edges and the ribs, add tiny, short perpendicular strokes to represent the spines. Keep these small and uniform. -
Define the sun rays:
Trace the sun and its rays with the fine liner. Ensure the lines stop cleanly at the border of the main circle.
Make It Pop
Varying line weight makes a huge difference. Use a bold 1.0mm pen for the outer circle and cactus outline, but switch to a delicate 0.1mm for the stippling and sun rays.
Step 4: Shading & Texture
-
Stipple the mountains:
To make the mountains distinct from the dunes, use stippling (tiny dots). Densely pack dots on one side of each triangle to simulate shadow, fading them out towards the light source. -
shade the dunes:
Add texture to the sand dunes by placing scattered dots. Keep the dots sparse in the open areas but cluster them slightly near the contour lines to suggest sloping sand. -
Detail the road dashes:
If you want the lower dune to look like a desert road, add small dashed lines following the curve of the path on the right side. -
Clean up:
Once the ink is completely dry—give it a full minute just to be safe—erase all your underlying pencil marks to reveal the sharp black and white contrast.
Now you have a perfect slice of desert scenery to keep warm in your sketchbook
Curled-Up Cat in a Circle Pose
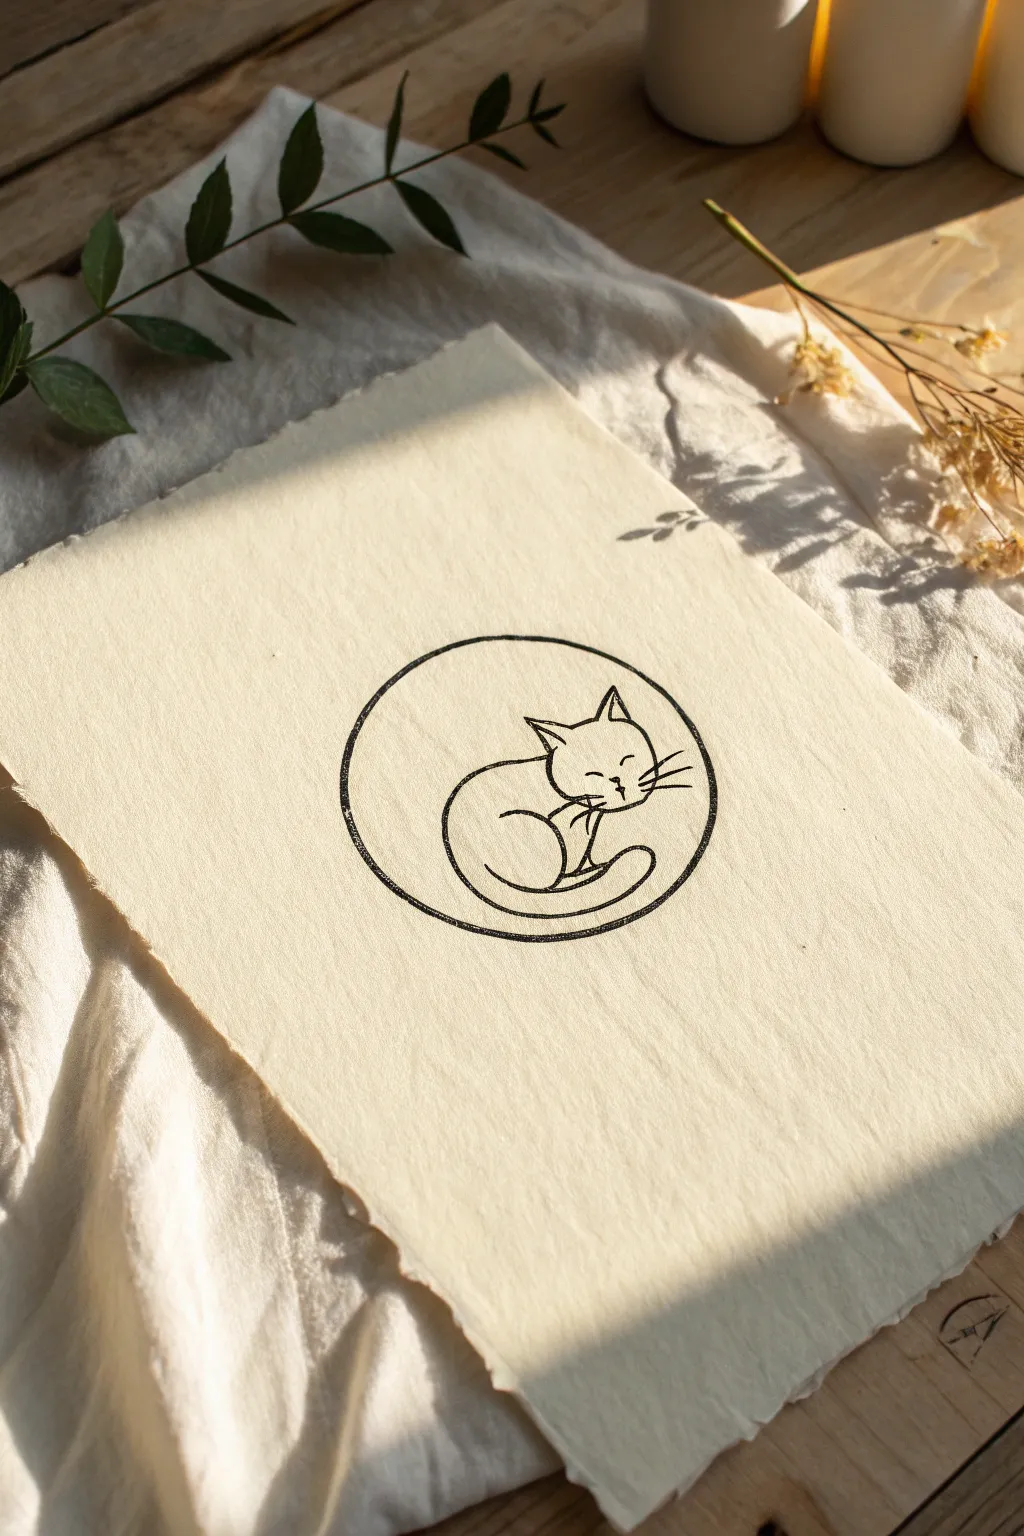
This charming illustration captures the serene essence of a sleeping cat using just a few simple lines confined within a perfect circle. The minimalist black ink on textured, cream-colored paper creates a warm, rustic aesthetic perfect for greeting cards or wall art.
Step-by-Step Guide
Materials
- Cream-colored textured paper (deckled edge optional)
- Black fine liner pen (size 0.5 or 0.8)
- Pencil (HB or 2H)
- Compass or a circular object to trace (approx. 3-4 inches diameter)
- Soft eraser
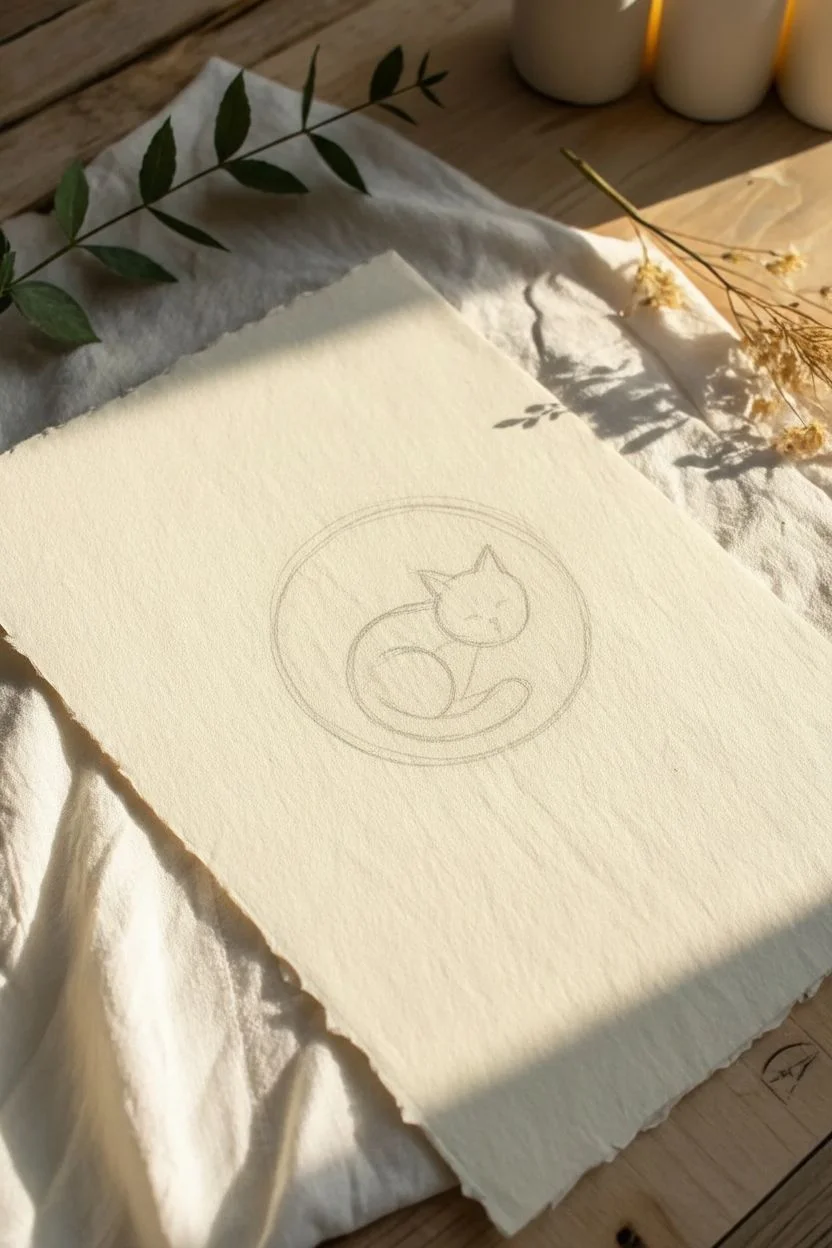
Step 1: Planning the Layout
-
Position your paper:
Select a piece of cream, textured paper. If you want that rustic look shown in the photo, you can carefully tear the edges against a ruler to create a faux-deckled edge beforehand. -
Draw the boundary circle:
Using a compass or by tracing a round object like a jar lid or mug, lightly draw a perfect circle in the center of your page with your pencil. Keep the pressure light so it can be erased or inked over cleanly later. -
Rough in the cat’s shape:
Visualize the cat’s body as a large bean shape resting at the bottom of the circle. Lightly sketch a curve for the back and a smaller oval for the head area.
Step 2: Sketching the Details
-
Outline the head:
Refine the head shape. It should be slightly tilted downwards. Add two triangular shapes for the ears, keeping them relatively pointy and upright. -
Define the body curve:
Draw the curve of the cat’s back. This line should follow the curvature of your outer circle closely but not necessarily touch it yet. -
Add the tail:
Sketch a swooping tail that wraps around the bottom of the cat’s body. The tail helps complete the circular composition, creating a visual flow from the body to the front paws. -
Indicate the paws:
Draw a small curve under the chin to suggest tucked-in front paws. This is a crucial detail for that ‘loaf’ position cats love. -
Sketch the face:
Mark two small, curved lines for closed, happy eyes. Add a tiny ‘Y’ shape for the nose and mouth in the center of the face.
Textured Paper Tip
Using cold-press watercolor paper provides that lovely toothy texture visible in the reference photo, holding ink beautifully.
Step 3: Inking the Drawing
-
Ink the outer circle:
Take your black fine liner (a 0.8mm works well for a bold look). Carefully trace the main perimeter circle. If your hand shakes a little, don’t worry—the slight wobble adds to the hand-drawn charm. -
Ink the cat’s outline:
Trace your pencil lines for the cat’s body. Use smooth, confident strokes. I find it helps to pull the pen towards you rather than pushing it away. -
Add the facial features:
Switch to a slightly thinner nib (like a 0.5mm) if you have one, or use a very light touch for the eyes, nose, and mouth to keep them delicate. -
Draw the whiskers:
Add three quick, horizontal flicks on each cheek for whiskers. Make sure they extend outwards past the face line.
Make it a Gift Tag
Punch a small hole at the top of the paper effectively turning your sketch into a custom gift tag.
Step 4: The Final Touches
-
Let the ink dry:
Wait at least 5-10 minutes for the ink to set completely. This is vital to prevent smudging your crisp lines. -
Erase pencil marks:
Gently erase all the underlying pencil sketches. Hold the paper taut with one hand while erasing to keep the paper from buckling. -
Assess the line weight:
Look at your drawing. If you want the outer circle to frame the cat more boldly, go over that specific line one more time to thicken it slightly.
Now you have a peaceful feline sketch that brings a sense of calm to any space


Whale Tail and Moon Over Minimal Waves
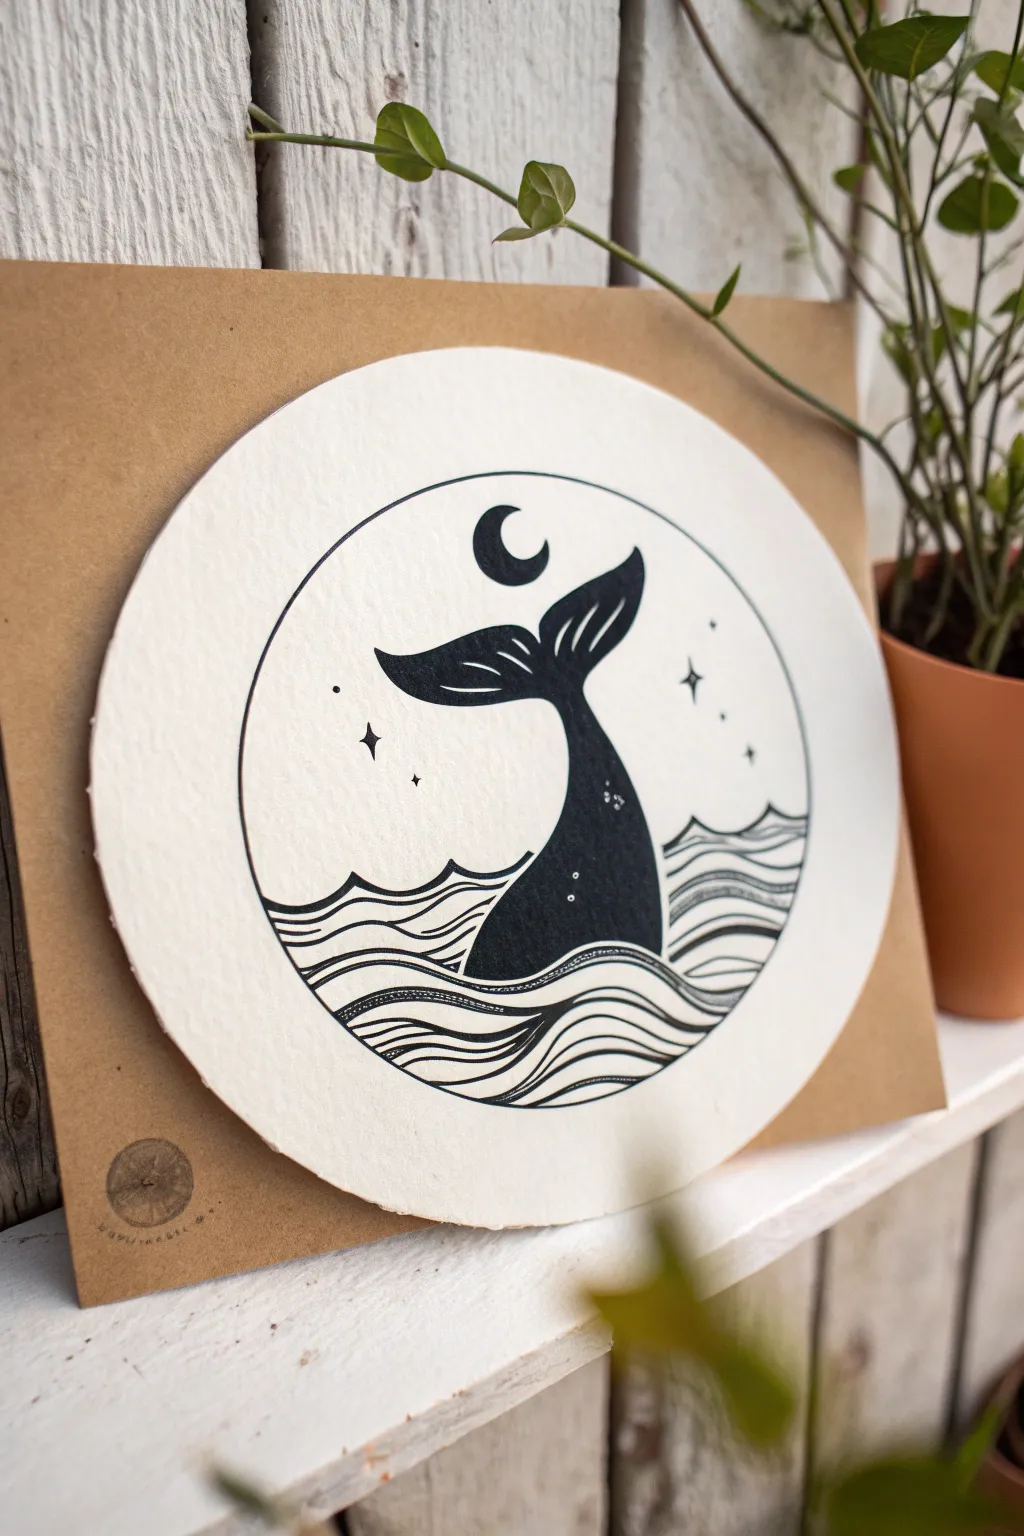
Capture the serenity of the ocean with this elegant monochrome drawing. Using simple lines and stark contrast on circular paper, you’ll create a stylized scene perfect for modern coastal decor.
How-To Guide
Materials
- Circular watercolor paper or mixed media paper (deckled edge optional)
- Brown cardstock or kraft paper for backing
- Pencil (HB or H)
- Eraser
- Fine liner pen (01 or 03 size, black waterproof ink)
- Brush pen or thick marker (black, for filling large areas)
- Circle stencil or compass (optional)
- Mounting tape or glue stick
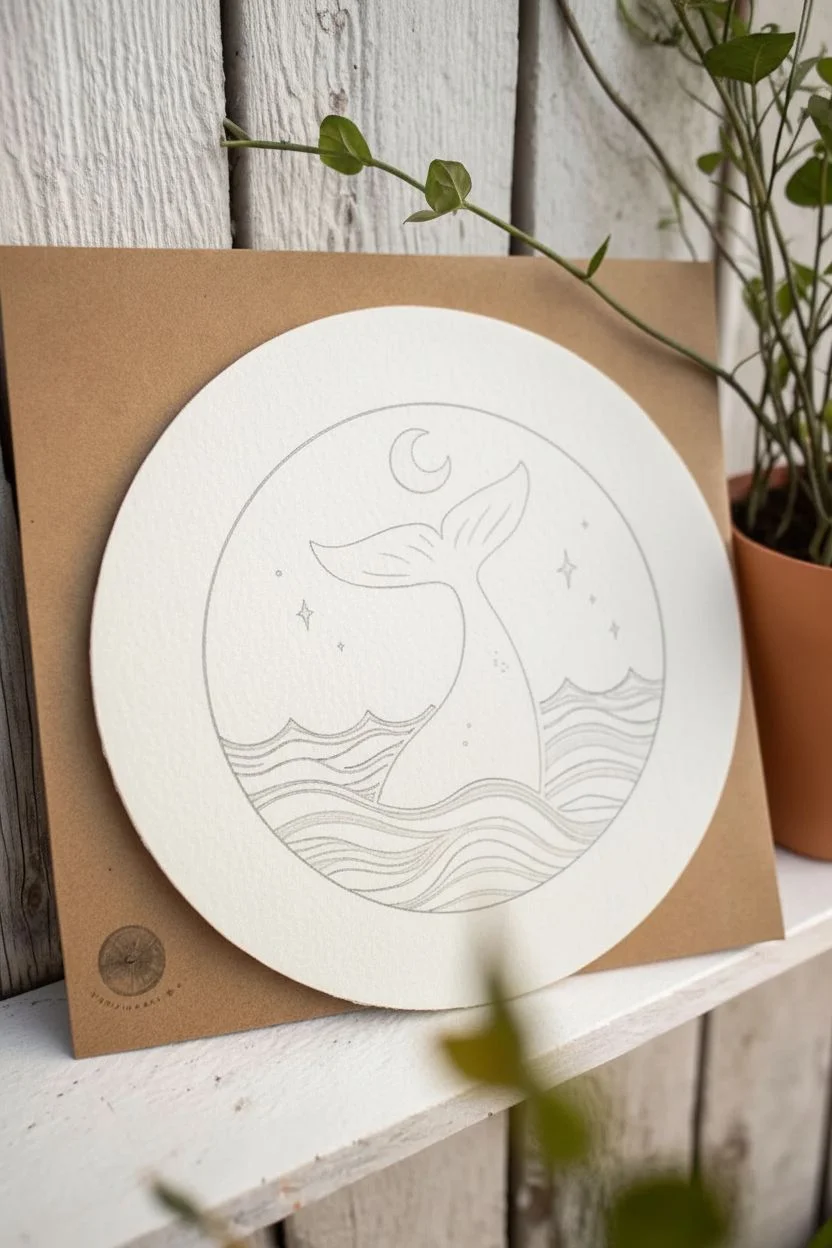
Step 1: Planning the Composition
-
Set the boundary:
Begin by lightly tracing a circle on your paper about an inch and a half smaller than the paper’s actual edge. This inner circle will act as the frame for your drawing. -
Sketch the horizon:
About one-third of the way up from the bottom of your inner circle, sketch a gentle, wavy line to establish the water’s surface. -
Outline the tail:
Draw the whale tail breaking the water’s surface in the center. Start with a curved, tapered stalk rising up, then flare out into the two flukes. The shape should resemble a graceful letter ‘Y’ with curved tops. -
Add celestial details:
Directly above the tail’s center, sketch a small crescent moon facing inward. Whatever feels balanced to you works best, but centering it creates a nice symmetry. -
Place the stars:
Mark the positions for four to five stars around the tail. Use small dots initially to check the balance before committing to the 4-point star shape.
Clean Lines Pro-Tip
To keep your hand from smudging the wet ink while drawing the waves, place a scrap piece of paper under your drawing hand as a protective shield.
Step 2: Inking the Design
-
Ink the frame:
Carefully trace over your circle boundary line with your fine liner pen. Take your time here; rotating the paper as you draw can help keep the curve smooth. -
Define the tail:
Outline the whale tail shape with your fine liner. Include the small details, like the ridges on the underside of the flukes. -
Fill the silhouette:
Switch to your brush pen or thick marker to color in the body of the tail. Leave the fluke ridges uncolored for now to create definition. -
Detail the flukes:
Go back with your fine liner to add thin lines inside the uncolored fluke ridges, following the curve of the tail. -
Add texture dots:
If you want a bit of texture, use a white gel pen or simply leave tiny specs of white paper uncolored near the base of the tail to look like glistening water drops.
Level Up: Gold Accents
Use a metallic gold leaf pen or paint to fill in the crescent moon and the stars instead of black ink. It adds a magical shimmer against the matte black.
Step 3: Drawing the Waves
-
Create primary waves:
Draw the main wave lines extending from the tail to the circle’s edge. Use flowing, organic lines that dip and rise slightly. -
Build the pattern:
Fill the area below the surface line with repeating wavy lines. Vary the spacing slightly—some close together, some further apart—to create movement. -
Add decorative fills:
Select a few specific bands of waves to fill with texture. I like to use tiny stippling dots or short, dashed lines within certain wave stripes to add visual interest without overwhelming the piece. -
Ink the sky elements:
Fill in the crescent moon with solid black ink. Then, carefully draw the 4-point stars (diamond shapes with curved sides) and add a few tiny dots as distant stars.
Step 4: Finishing Touches
-
Erase guidelines:
Wait until the ink is completely dry—give it a few minutes to be safe. Then, gently erase all pencil marks. -
Prepare the backing:
Take your sheet of brown cardstock. It creates a warm, rustic contrast against the white paper. -
Mount the artwork:
Apply mounting tape or a thin layer of glue to the back of your circle drawing and press it firmly onto the center of the brown cardstock.
Enjoy the calm atmosphere this beautiful monochrome piece brings to your space
Easy Crystal Cluster on a Small Hill
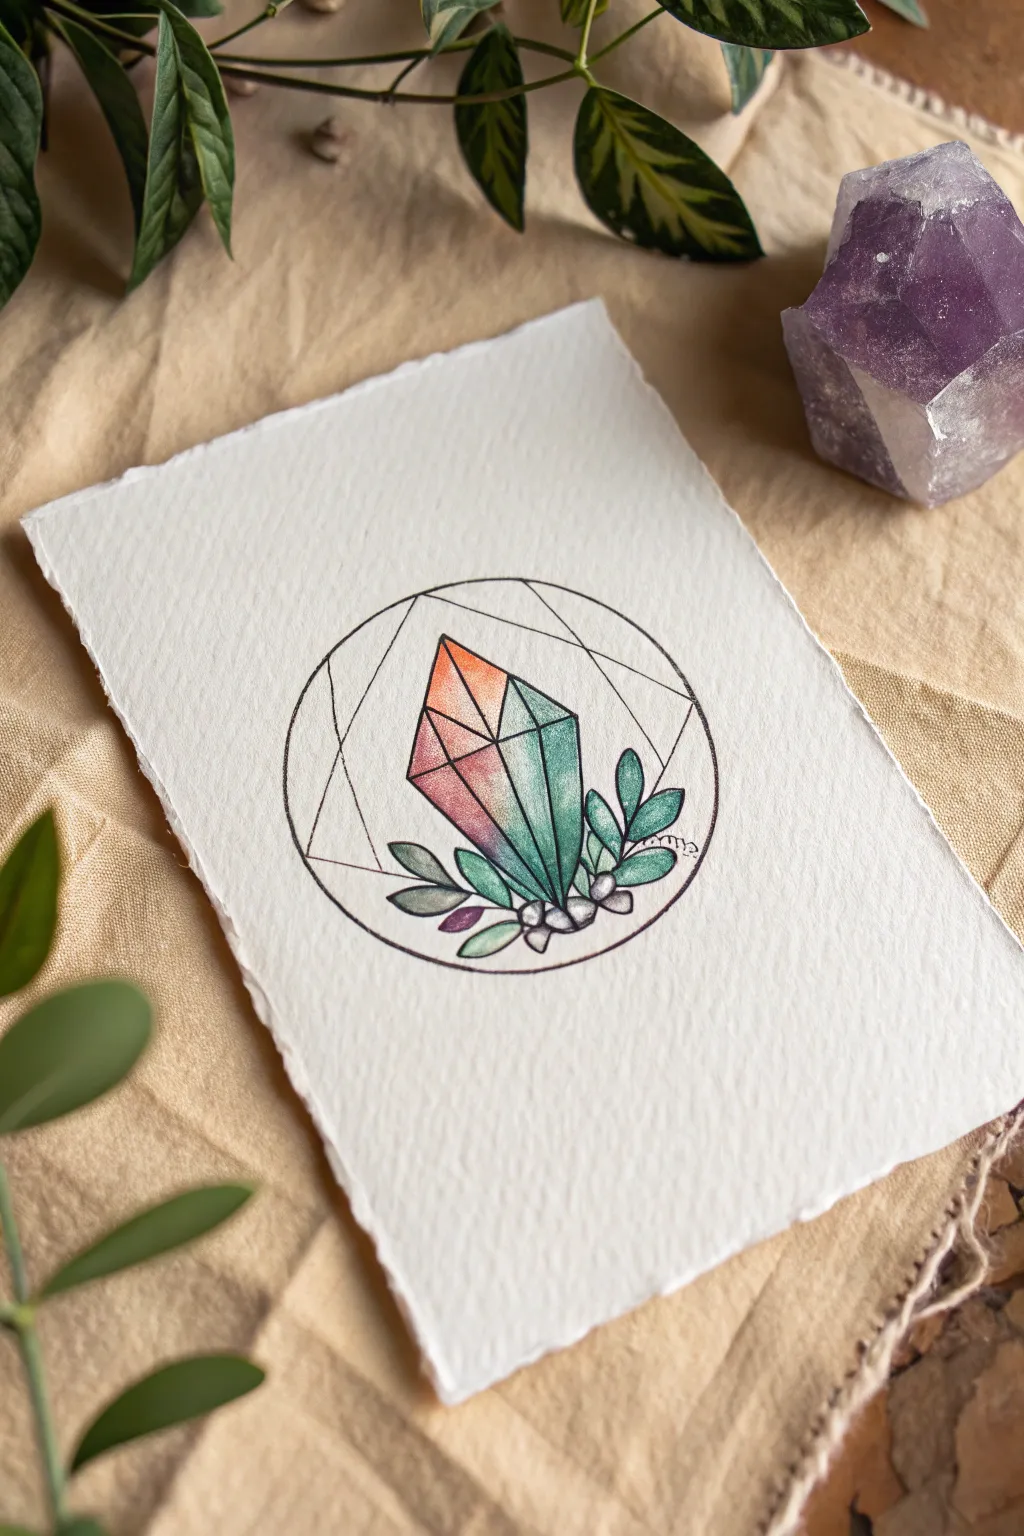
Using fine lines and soft watercolor gradients, create this mystical little crystal cluster nestled within a geometric circle. The finished piece combines the precision of ink geometry with organic botanical elements for a magical, earthy aesthetic.
Detailed Instructions
Materials
- Cold press watercolor paper (deckle edge optional)
- Fine liner pen (black, 0.1mm and 0.3mm)
- Pencil (HB) and eraser
- Compass or circle stencil
- Watercolor paints (teal, violet, orange, green, paynes gray)
- Small round watercolor brush (size 2 or 4)
- Ruler
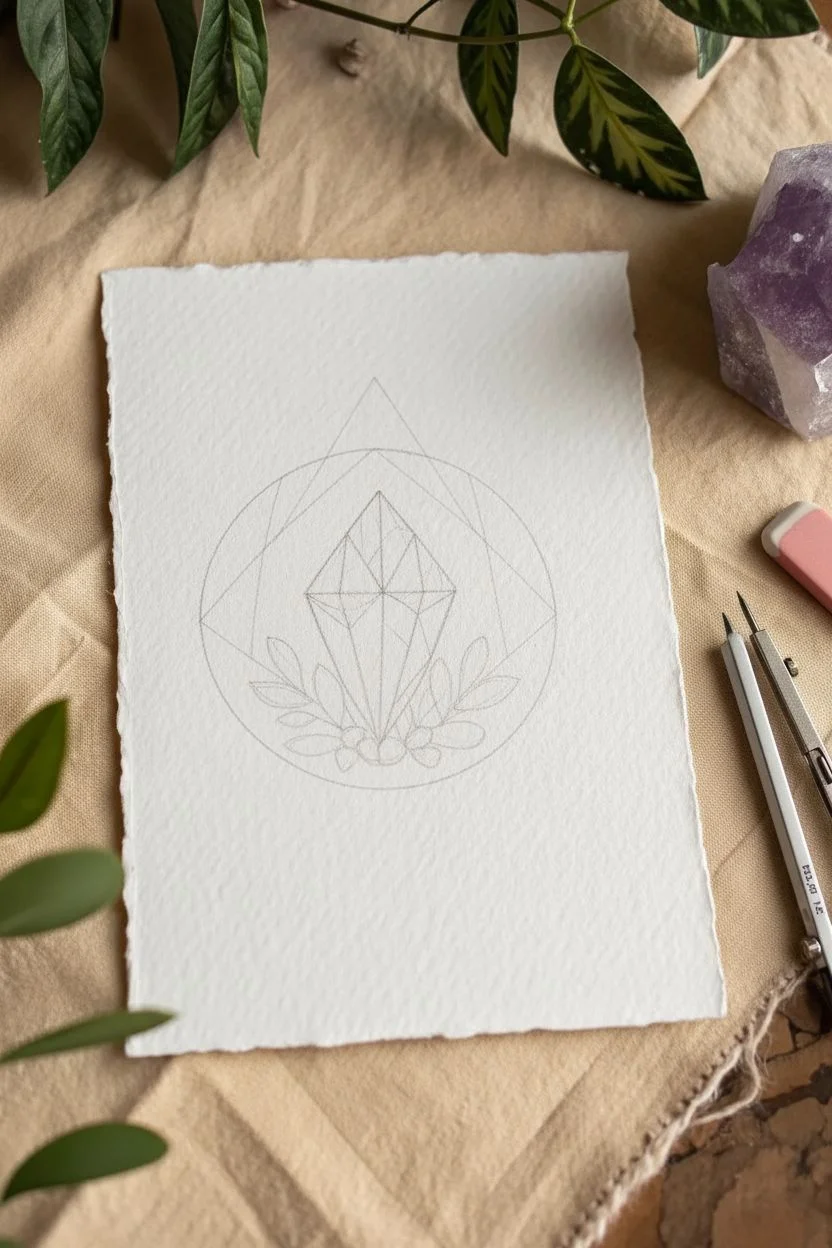
Step 1: Drawing the Structure
-
Establish the boundary:
Begin by lightly tracing a circle in the center of your paper using a compass or stencil. This circle will frame your entire composition, so place it thoughtfully. -
Draft the central crystal:
Sketch the main crystal shape in the center. Start with a large, vertical diamond-like shape that has a pointed top and a slightly wider base. Add internal lines to define the facets, creating a central ridge. -
Add the base elements:
At the bottom of the crystal, draw several small, irregular ovals to represent pebbles or rocks. These anchor the crystal so it doesn’t look like it’s floating. -
Sketch the foliage:
Draw simple, small leaves sprouting from behind the rocks and the base of the crystal on both sides. Keep the leaf shapes smooth and almond-like to contrast with the sharp crystal angles. -
Draw geometric accents:
Using a ruler, add the geometric lines inside the circle background. Draw a triangle shape that intersects with the circle’s curve, creating a frame behind the crystal.
Wet-on-Wet Magic
For the smoothest crystal gradient, pre-wet the shape with clean water before dropping in color. Tilt the paper to help the pigments blend naturally.
Step 2: Inking the Design
-
Outline the main circle:
Switch to your 0.3mm fine liner. Carefully trace over your pencil circle. For a more organic look, you can sketch short, connecting strokes rather than one continuous rigid line. -
Ink the crystal and plants:
Ink the outline of the crystal, the rocks, and the leaves. Use the 0.1mm pen for the internal facet lines of the crystal to keep them delicate. -
Ink decorative lines:
Go over your ruler lines in the background. Be careful to stop your pen line when it hits the crystal or leaves, creating the illusion that the drawing is in the foreground. -
Erase pencil marks:
Once the ink is completely dry—give it a few minutes to be safe—gently erase all the underlying pencil sketches to leave a clean black and white design.
Step 3: Adding Color
-
Paint the first crystal facet:
Start with the right side of the main crystal. Load your brush with a watery teal or turquoise and paint the right facet. -
Create the gradient:
While the teal is still slightly damp, introduce a warm orange or pink at the very top of the left facet, blending it down into a violet or darker pink near the bottom. This creates that magical, multi-colored look. -
Paint the leaves:
Mix a muted green tone. Paint the leaves, varying the intensity of the green slightly between leaves to create depth. I find that leaving a tiny sliver of white paper unpainted on one side of a leaf acts as a nice highlight. -
Color the rocks:
Use a very dilute wash of Paynes gray or light purple for the rocks at the base. Keep this very pale so they don’t distract from the crystal. -
Add texture:
Once the first layer of crystal paint is dry, you can add a tiny bit of darker paint (like indigo) to the bottom corners of the facets to suggest shadow and volume.
Metallic Accents
Once fully dry, trace the geometric background lines with a gold or silver gel pen to give the artwork a mystical, tarot-card vibe.
Step 4: Finishing Touches
-
Review contrast:
Check if your leaves need more definition. If the green dried too light, add a second coat to the lower half of the leaves. -
Stipple shading:
Take your 0.1mm pen again. Add tiny stipple dots at the bottom of the crystal facets and at the base of the leaves where they meet the rocks. This stippling adds a grittier, more realistic texture.
Display your mystical crystal illustration in a small frame or use it as a centerpiece for a greeting card
Stippling and Dot Work Gradient Inside a Circle
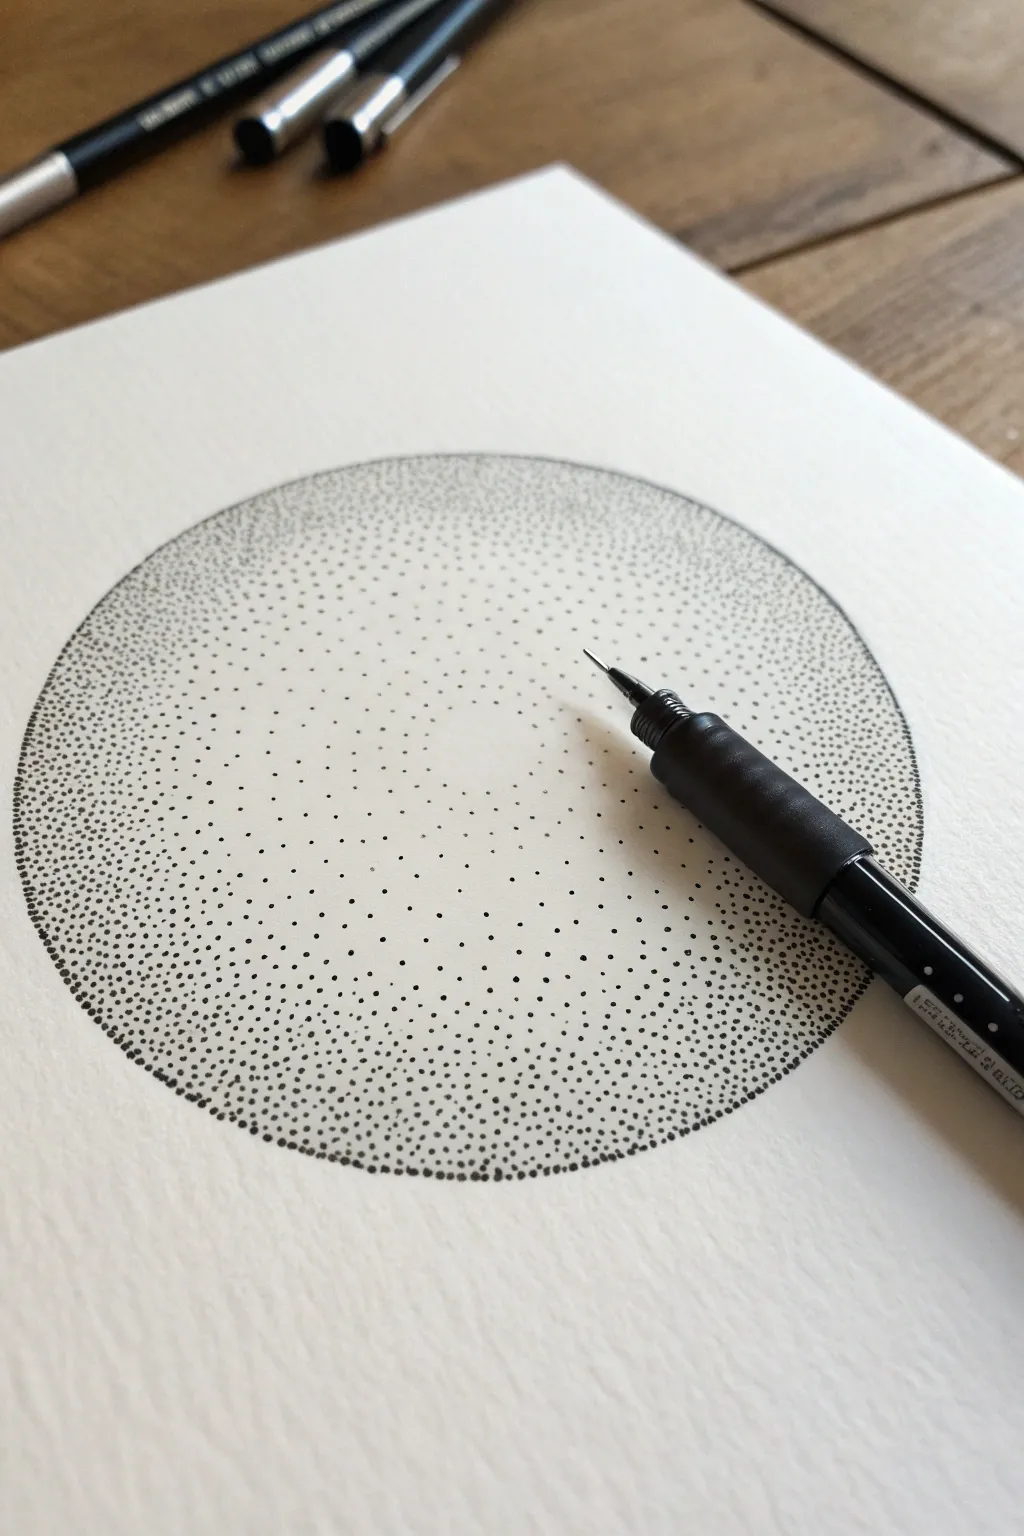
Master the meditative art of stippling to transform a simple flat circle into a three-dimensional sphere. Using nothing but tiny ink dots, you will create a stunning gradient that tricks the eye with volume and depth.
How-To Guide
Materials
- High-quality watercolor paper or bristol board (smooth or vellum finish)
- Fine liner pen (size 0.05 or 0.1 for details)
- Fine liner pen (size 0.3 or 0.5 for darker areas)
- Compass or a circular object to trace (approx. 3-4 inches diameter)
- HB pencil
- Kneaded eraser
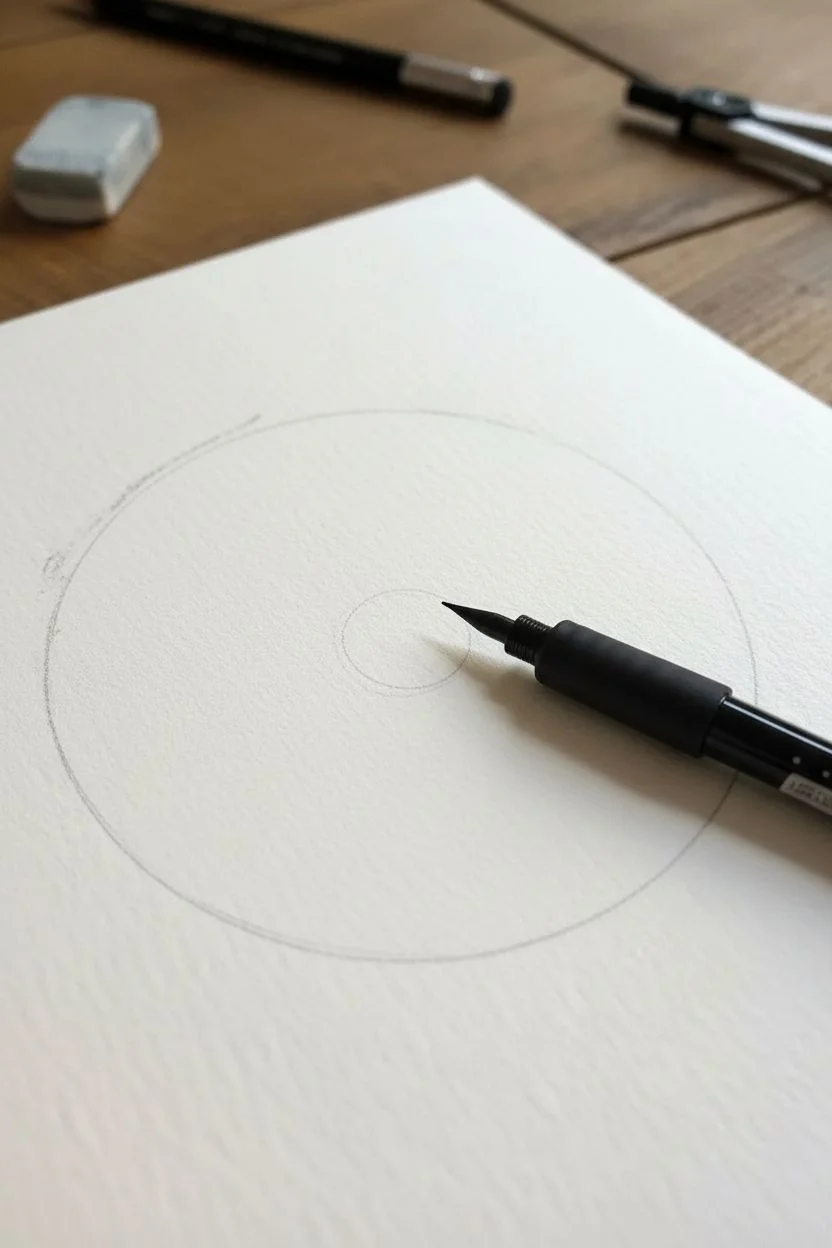
Step 1: Preparation & Outline
-
Prepare your workspace:
Ensure you have a flat, stable surface with good lighting. Stippling requires patience and a steady hand, so comfort is key. -
Draw the base circle:
Using your compass or a circular object, lightly draw a perfect circle in the center of your paper with the HB pencil. -
Lighten the guide:
Take your kneaded eraser and gently dab or roll it over the pencil line until it is barely visible. The goal is to have a guide that won’t trap graphite under the ink later. -
Plan your light source:
Decide where the light is hitting the sphere. In the reference image, the highlight is slightly off-center to the upper right, meaning the darkest shadows will be on the bottom left edge.
Wrist Saver Tip
Keep your hand relaxed! If you tense up, your dots will turn into small dashes or ticks. Hold the pen vertically and tap lightly to ensure perfect round points every time.
Step 2: The First Layer
-
Start the perimeter:
With your finer pen (0.05 or 0.1), begin placing dots along the very edge of your pencil guide. Keep them somewhat spaced out initially; this defines the shape without creating a solid line. -
Establish the gradient zone:
Begin adding dots freely inside the circle, concentrating slightly more density near the edges and leaving the center area very sparse. -
Avoid patterns:
Try to tap randomly. The human brain loves patterns, so if you start making rows or grids of dots, consciously break the rhythm to keep the texture organic. -
Preserve the highlight:
Leave a circular area somewhat off-center almost completely blank. This white space is crucial for the 3D effect.
Step 3: Building Intensity
-
Deepen the shadows:
Switch to your slightly thicker pen (0.3 or 0.5) if you want to speed up the process, or stick to the fine one for smoother transitions. Focus entirely on the side opposite your imaginary light source. -
Layering the crescent:
Visualize a crescent moon shape on the shadow side of the sphere. Increase the number of dots here significantly so the white paper starts to disappear. -
Working inward:
Gradually move your stippling from the dark edge toward the bright center. As you move inward, space the dots further and further apart to create a soft, grey transition. -
Correcting the edge:
Go back over the outer perimeter. The edge needs to be crisp and defined by a high concentration of dots so the sphere doesn’t look fuzzy. -
Managing the mid-tones:
The area between the dark shadow and the bright highlight is your ‘mid-tone’. Add scattered dots here carefully. I find it helps to step back occasionally to see if the transition looks sudden or smooth.
Add a Cast Shadow
Make the sphere float! Add a horizontal oval of stippling underneath your sphere, darkest right under the object and fading out, to create a realistic cast shadow on the ‘table’.
Step 4: Final Details
-
Check for gaps:
Look closely at the darkest areas. If you see large white specs that disrupt the shadow, fill them with tiny precision dots using the 0.05 pen. -
Softening the highlight:
If the highlight looks too stark or like a hard cutout, add a few extremely sparse, tiny dots around its perimeter to feather it into the rest of the drawing. -
Erase pencil marks:
Once the ink is 100% dry (give it a few minutes to be safe), gently erase any remaining visible pencil guidelines. -
Final assessment:
View your artwork from a distance. The dots should blend together visually to look like a smooth tonal gradient rather than individual points.
Now that you’ve mastered the basics of volume through stippling, you can apply this technique to any shape you can imagine


Have a question or want to share your own experience? I'd love to hear from you in the comments below!