If you love painting horses, you already know they’re equal parts elegance and power—and that’s exactly what makes them so fun to capture on canvas. Here are some horse painting ideas I come back to again and again when I want something beautiful, achievable, and full of personality.
Classic Horse Head Portrait in Three-Quarter View
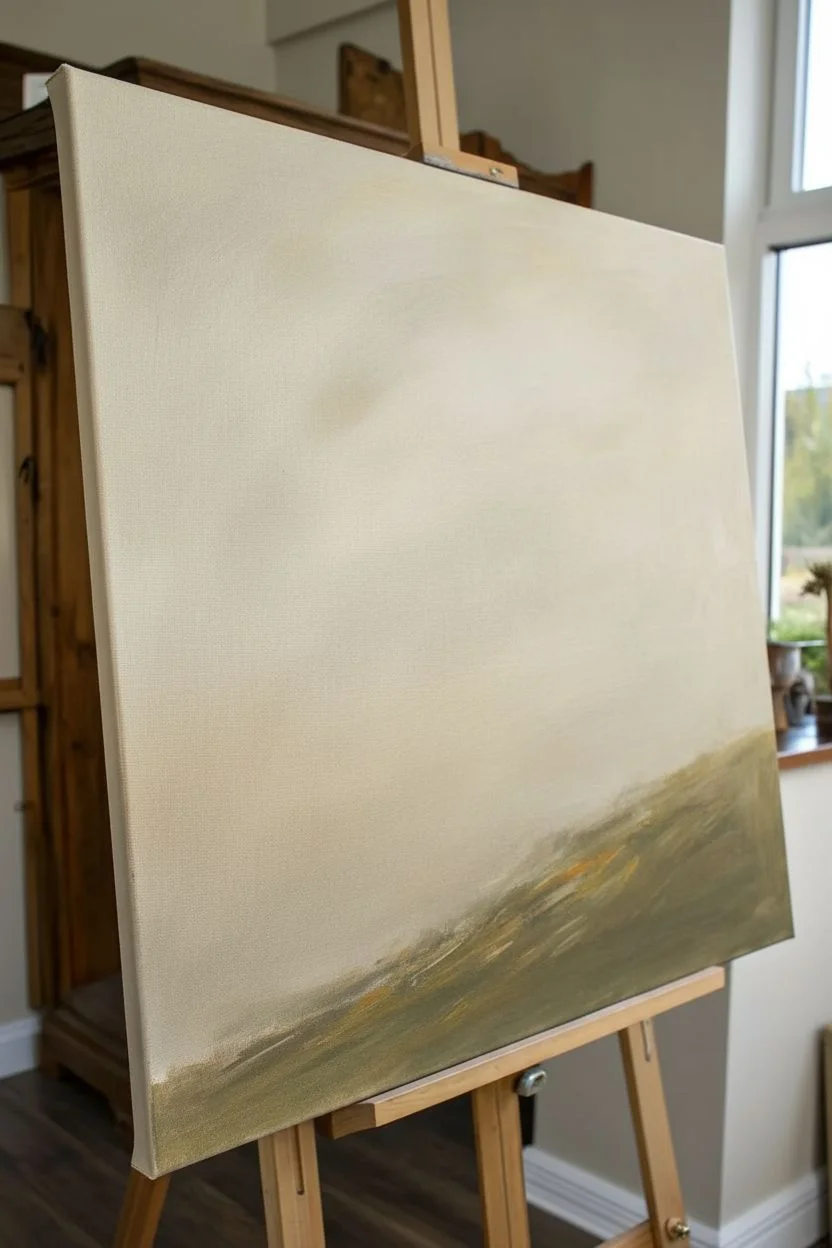
Capture the graceful elegance of a classic equestrian portrait by working directly onto raw, unprimed linen. The natural beige texture of the fabric serves as both the background and the highlights, giving the finished piece a timeless, organic feel.
Step-by-Step
Materials
- Raw linen canvas (stretched)
- Acrylic paints (Burnt Umber, Raw Sienna, Black, Titanium White, Yellow Ochre)
- Fabric medium or matte medium
- Assorted brushes (filbert sizes 4 & 8, rigger or liner brush)
- Willow charcoal
- Clean rag or paper towels
- Palette
- Water container
Step 1: Sketching the Structure
-
Prepare the surface:
Since we are painting on raw linen, ensure the fabric is taut. You won’t be gessoing the background, as the fabric weave is part of the aesthetic. If you’re nervous about paint absorption, apply a clear matte medium over the area where the horse will be painted. -
Map the proportions:
Use a stick of willow charcoal to lightly sketch the basic shapes. Start with a large circle for the cheek (masseter muscle) and a longer, tapered shape for the muzzle. Draw the neck line sweeping down from the poll. -
Refine the outline:
Connect your shapes to form the horse’s profile. Pay close attention to the delicate curve of the nostril and the placement of the eye, which should sit high on the head, roughly in line with the ear base. -
Check angles:
Use the handle of your brush to check the angle of the nose bridge and the neck. This portrait relies on accurate anatomy, so take your time adjusting the charcoal lines before committing to paint. Wipe away excess charcoal dust with a dry rag.
Paint Bleeding?
If paint spreads into the linen weave uncontrollably, your paint is too wet. Use less water or mix in more fabric medium to increase viscosity and control the flow.
Step 2: Blocking and Shading
-
Mix the base shadow:
Create a thin, fluid mix of Burnt Umber and a touch of Black. You want this to be semi-transparent, almost like a glaze, to let the linen texture show through. -
Define the darks:
Paint the darkest anatomical features first: the inside of the nostril, the pupil of the eye, the deep shadow under the jawline, and the inner ear. This anchors your drawing. -
Establish the mid-tones:
Switch to a Raw Sienna and Burnt Umber mix. Using a size 8 filbert brush, gently scumble paint onto the cheek, neck, and muzzle. Use a very dry brush technique here—rubbing the paint into the weave rather than layering it thickly. -
Build the muscle structure:
I like to use the direction of my brushstrokes to follow the muscle form. Sweep the brush in curves around the cheekbone and down the neck to suggest volume and strength. -
Refine the eye:
The eye is the soul of the portrait. Paint the iris carefully, leaving a tiny spot of raw canvas or adding a small dot of Titanium White for the catchlight to bring it to life.
Step 3: Detailing and Highlights
-
Add warmth:
Mix Yellow Ochre with a bit of your fabric medium. Glaze this warmer tone over the bridge of the nose, the top of the cheek, and the upper neck to create a sense of sunlit coat. -
Paint the blaze:
For the white marking on the nose, mix Titanium White with a tiny dot of Raw Sienna so it isn’t stark white. Paint the blaze, keeping the edges slightly soft where the white hair meets the brown coat. -
Deepen the shadows:
Go back in with your darkest brown-black mix. Strengthen the separation between the head and neck, and define the creases around the muzzle and eye socket for dramatic contrast. -
Create texture with the mane:
Switch to a liner or rigger brush. With thinned black-brown paint, use quick, flicking motions to establish the mane. Vary the length and direction of the hairs to make it look natural and windswept. -
Add facial hair details:
Using the same liner brush, add very subtle whiskers around the muzzle and chin. These should be incredibly fine lines. -
Final highlights:
Mix a pale cream color. Add subtle highlights to the brow bone, the prominent cheek muscle, and the top rim of the nostril. Blend these out quickly so they don’t look like stripes. -
Clean up edges:
If you smudged paint onto the background, careful dabbing with a damp cloth can sometimes lift it. Otherwise, accept the painterly look—it adds to the charm.
Antique Finish
Once fully dry, lightly gently sand the painted areas with fine-grit sandpaper. This distressing technique exposes the linen threads, instantly aging the artwork.
Step back and admire how the raw linen works harmoniously with your painting to create a rustic masterpiece.


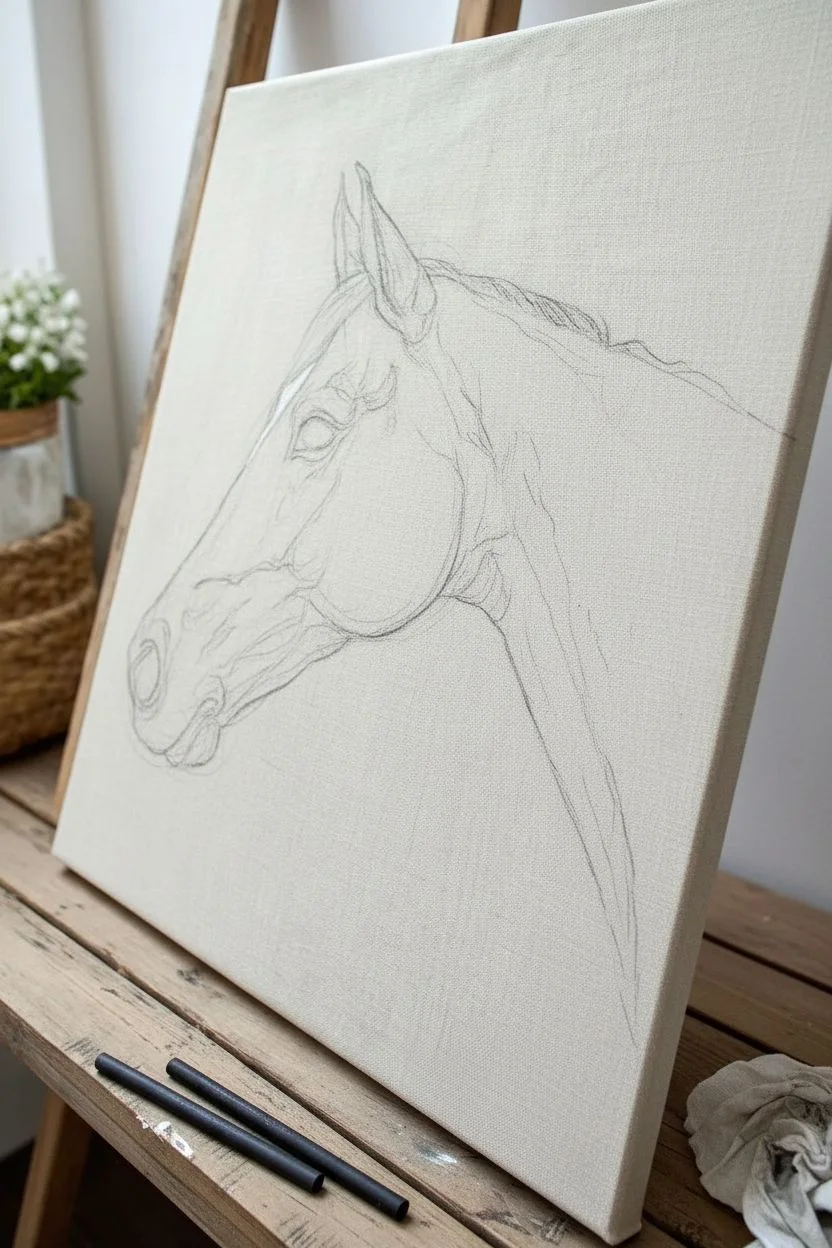
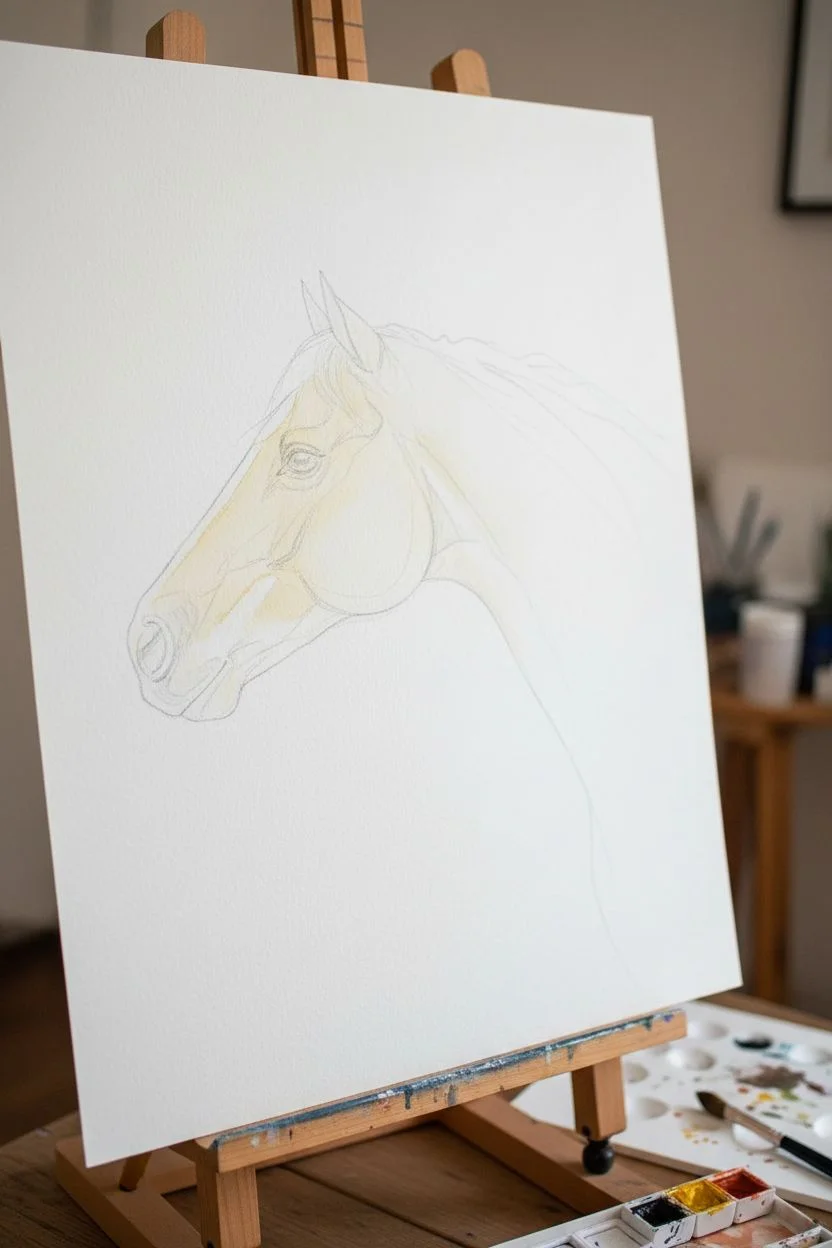
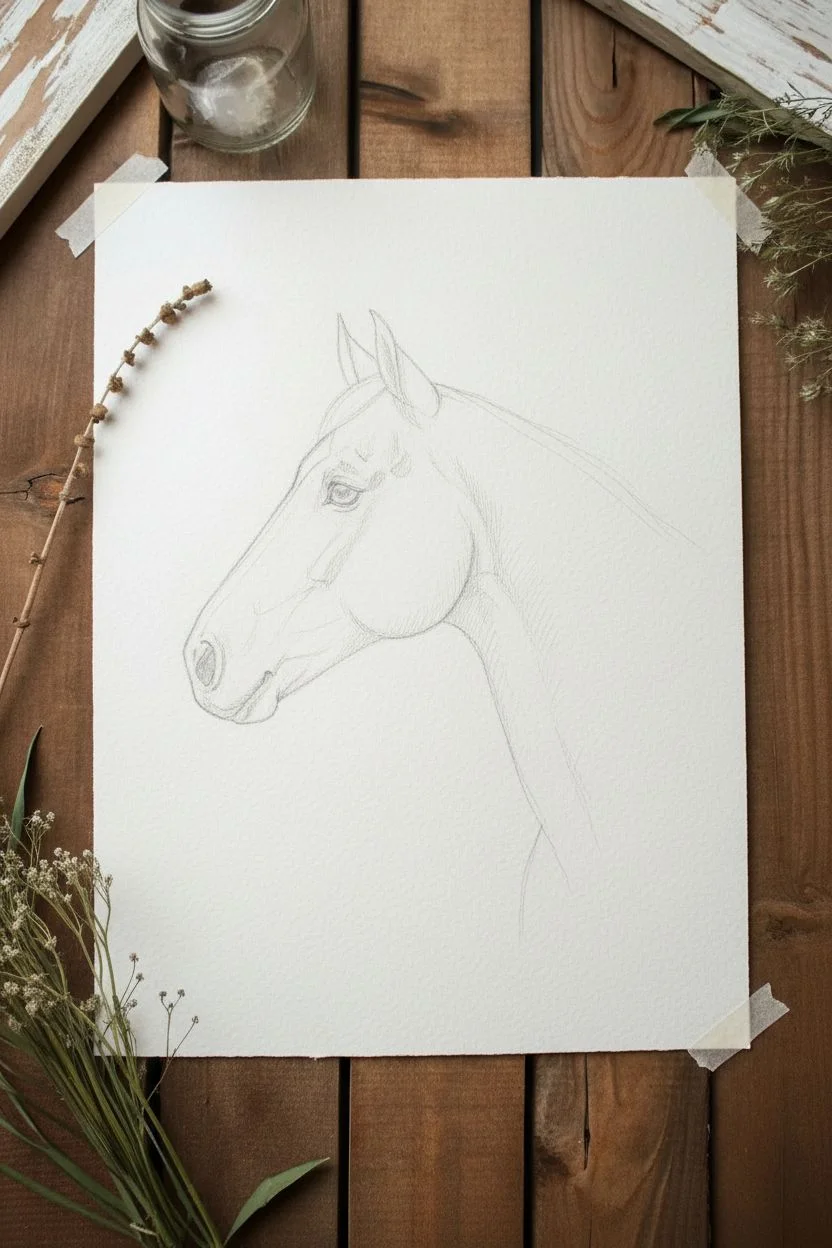
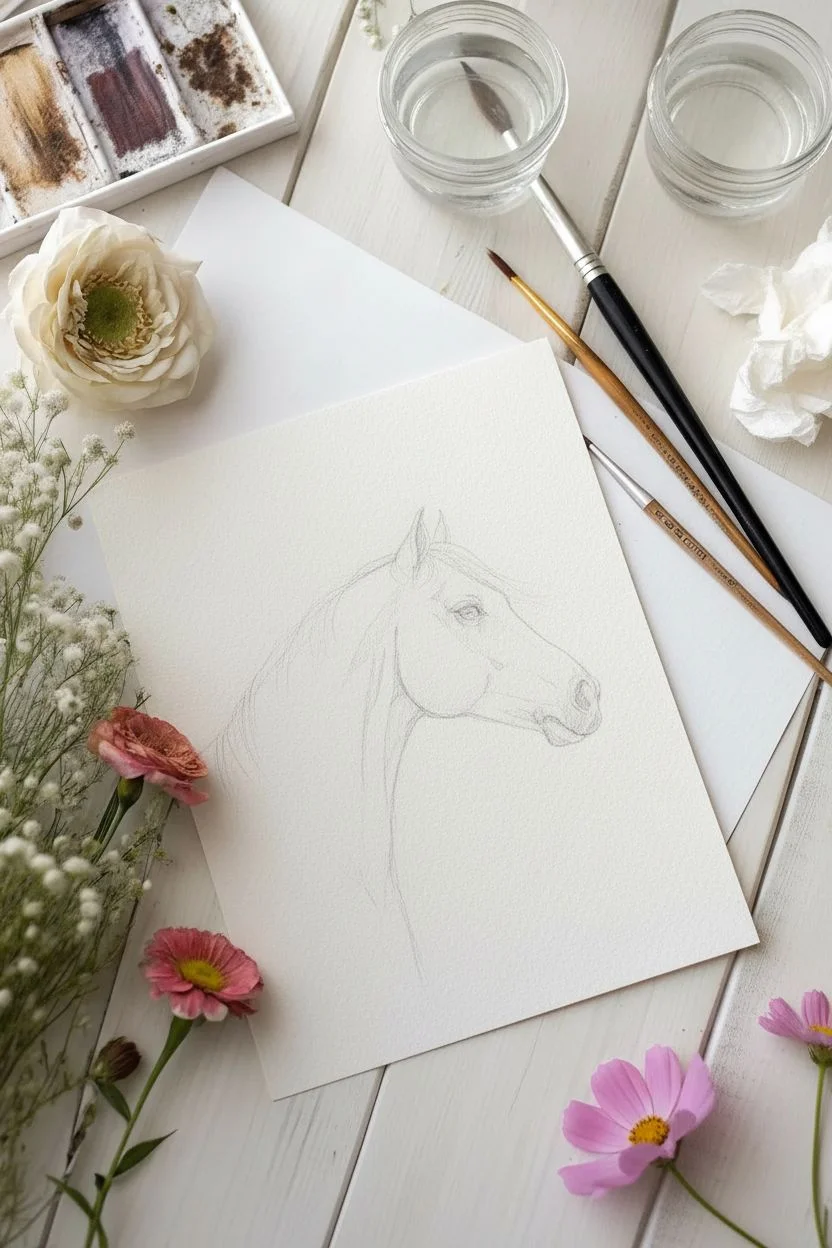
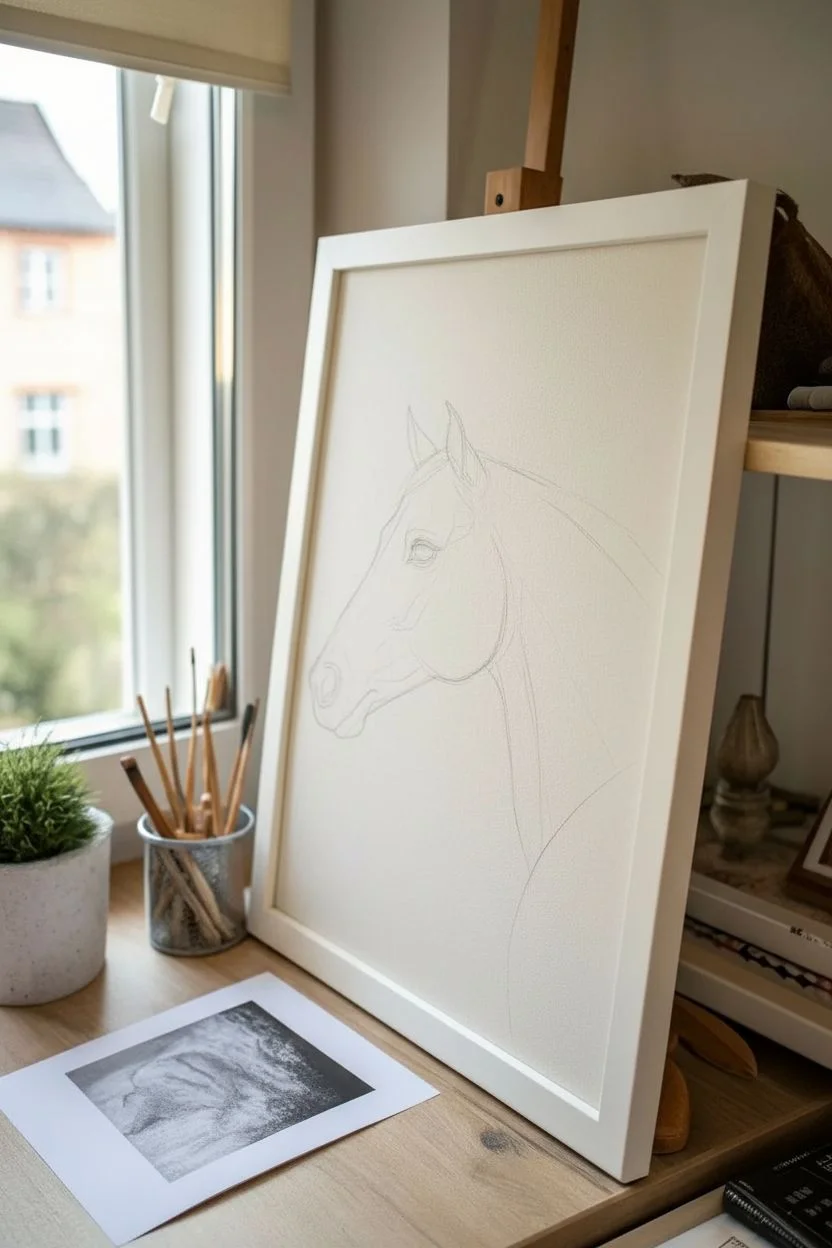
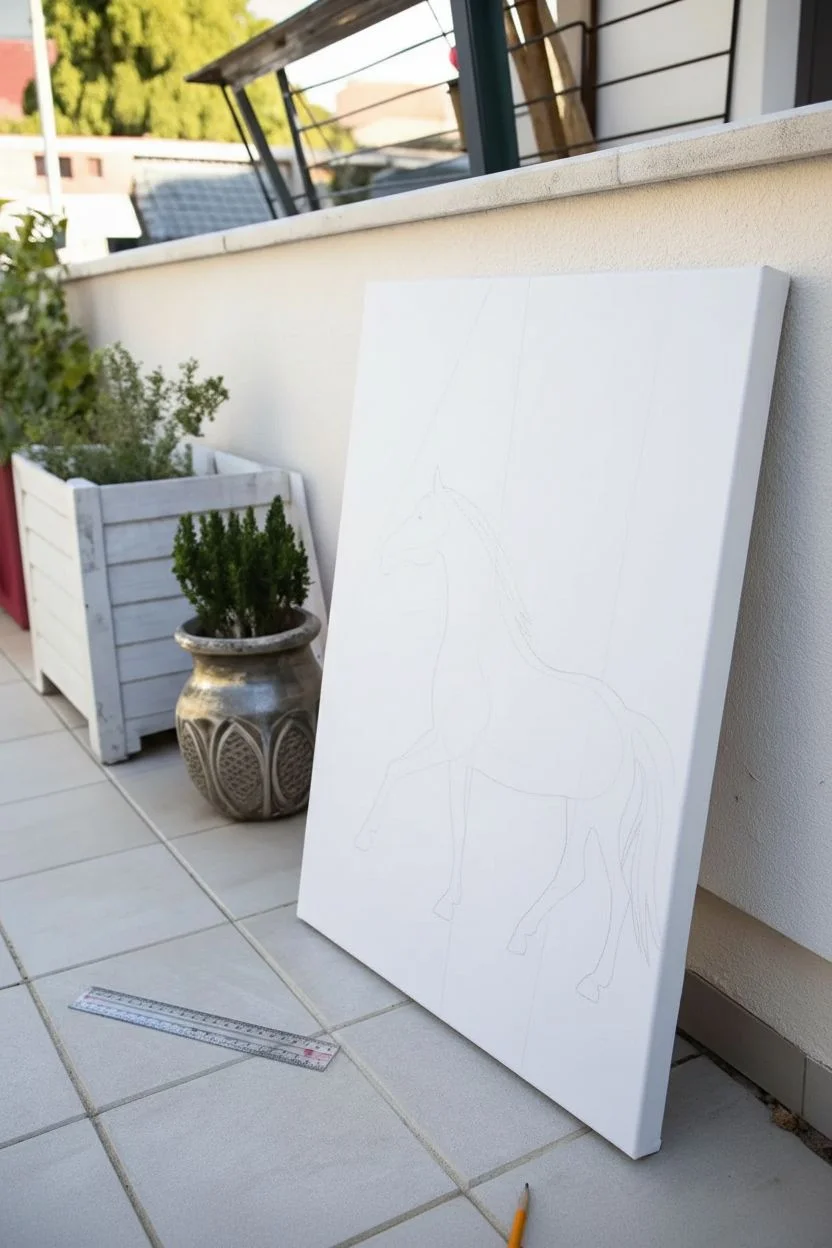
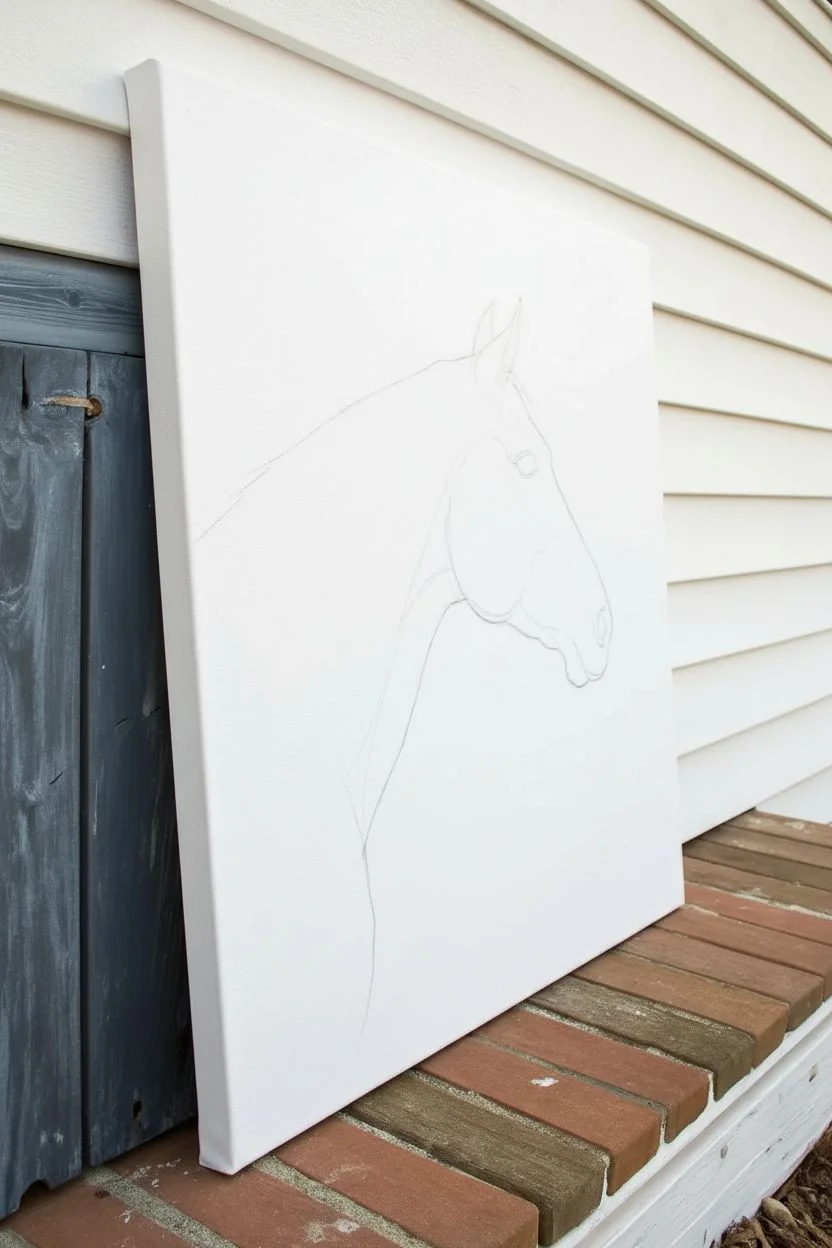
Side Profile Study for Clean Anatomy Practice
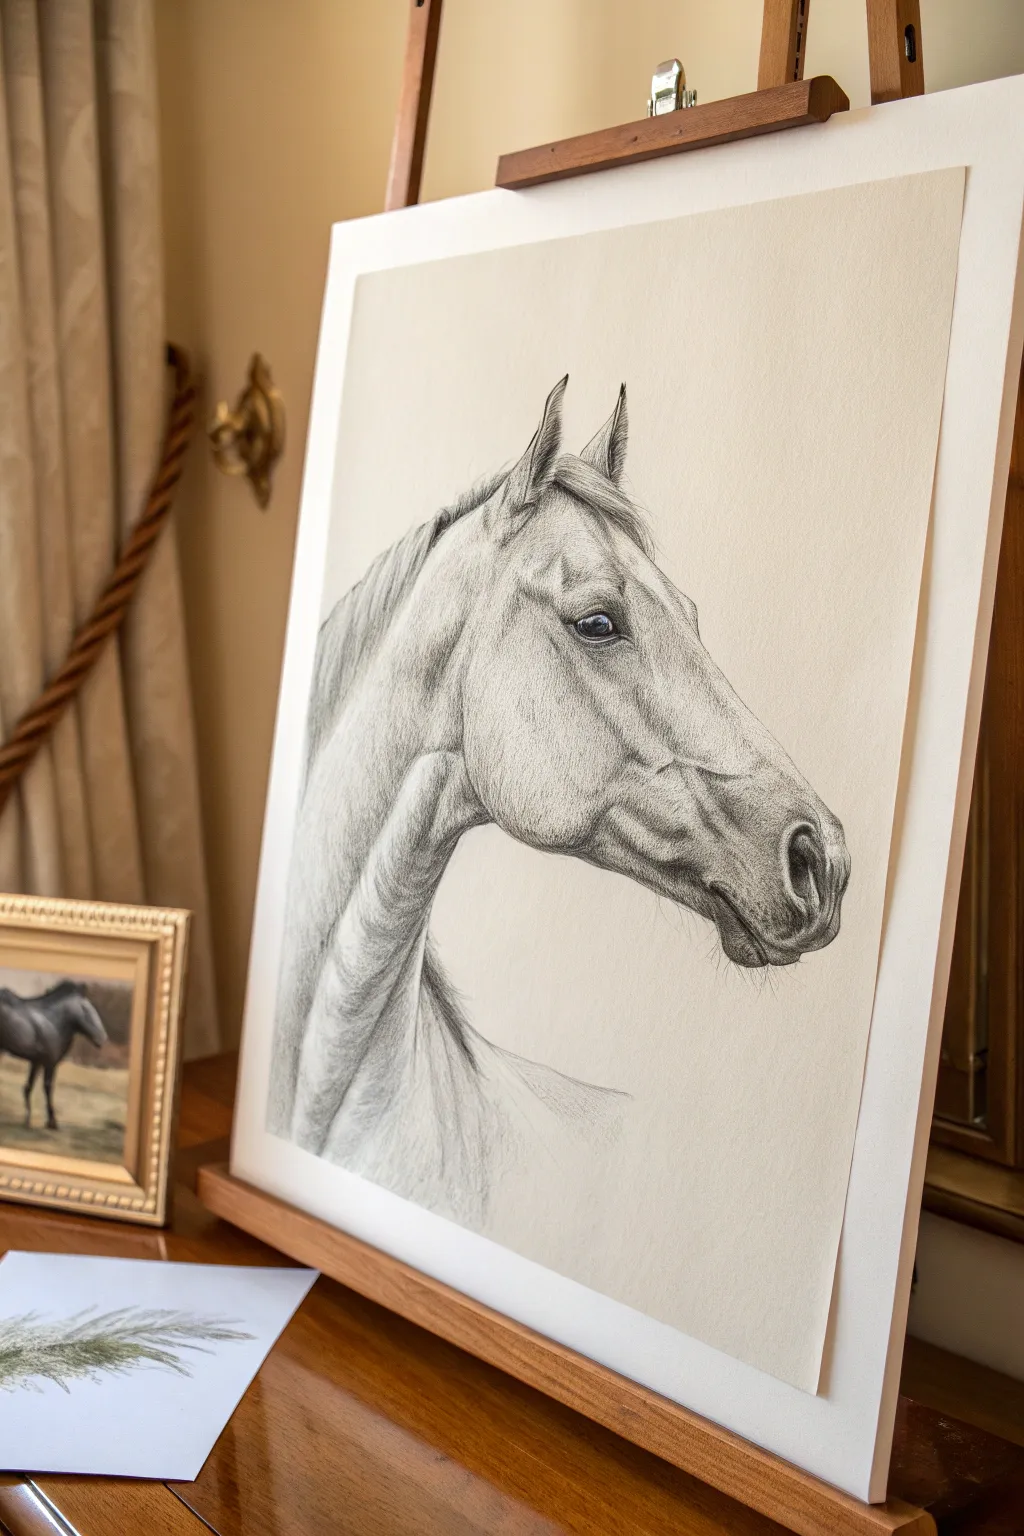
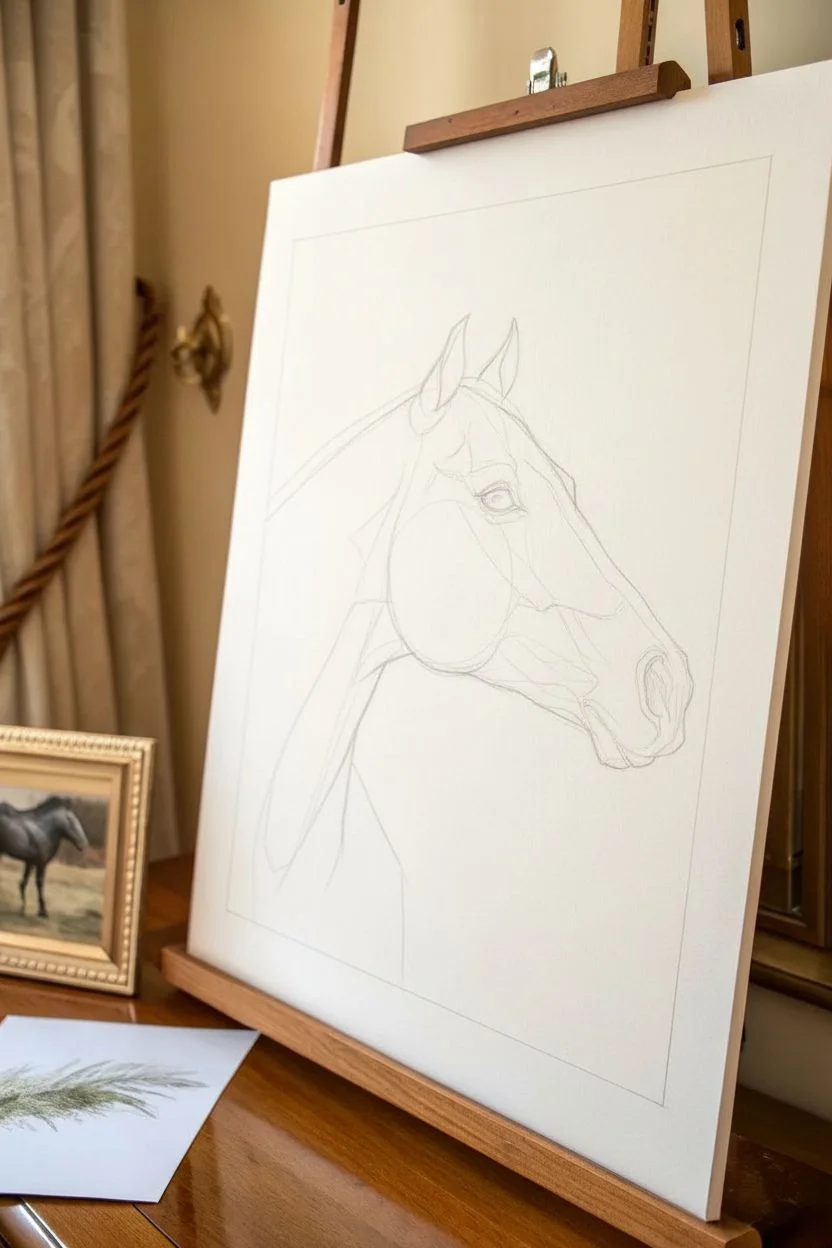
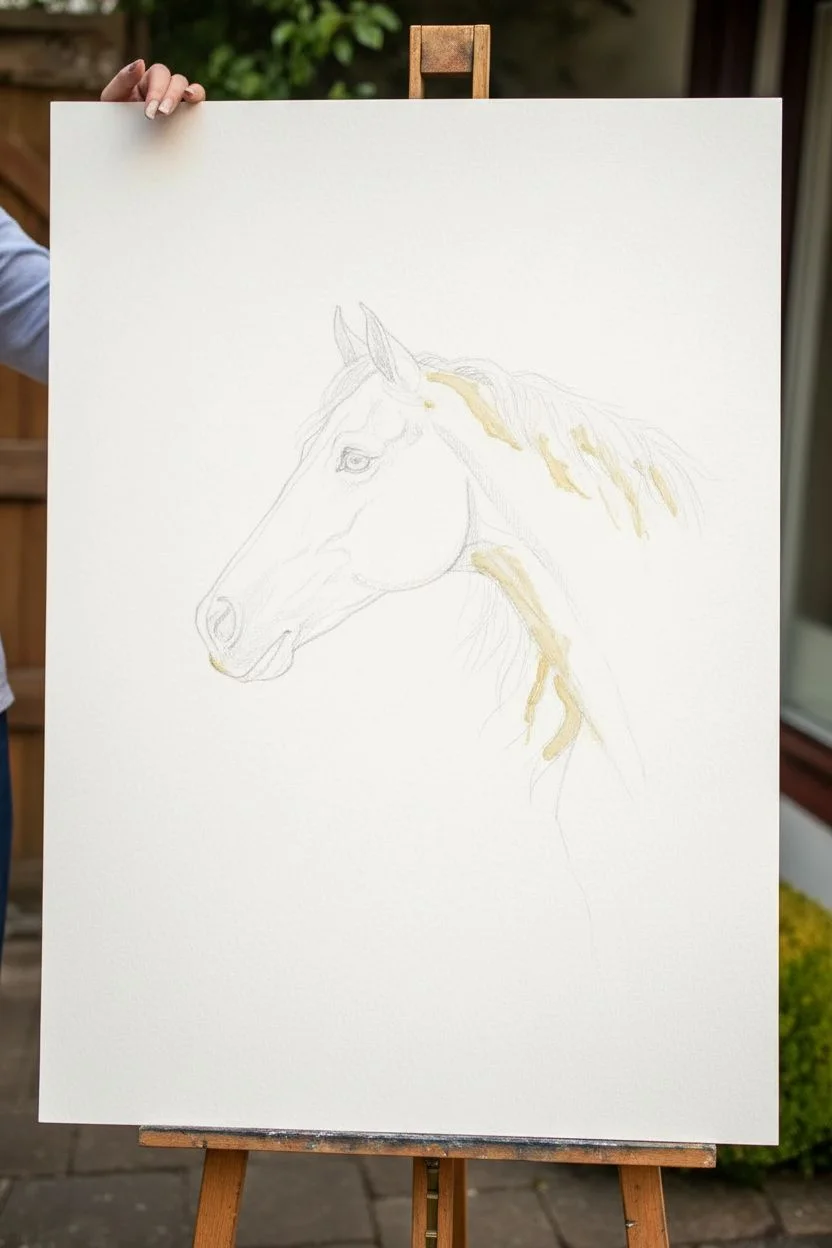
Master the art of equine anatomy with this elegant side-profile study that focuses on structure and texture. Using simple graphite on toned paper, you will learn to build up lifelike muscle definition and softly flowing mane details.
How-To Guide
Materials
- Cream or off-white drawing paper (smooth or vellum finish, approx. 11×14 inches)
- Graphite pencil set (HB, 2B, 4B, 6B)
- Kneaded eraser
- Precision eraser or eraser stick
- Blending stump (tortillon)
- Soft tissue or chamois cloth
- Sheet of scrap paper (to rest your hand on)
- Tabletop easel or drawing board
Step 1: Planning the Anatomy
-
Establish the envelope:
Begin with a very light HB pencil grip. Sketch a loose ‘envelope’ shape that encompasses the entire head to ensure it fits comfortably on your paper, leaving plenty of negative space around the edges. -
Block in major shapes:
Break the head down into simple geometric forms. Use a circle for the cheek (masseter muscle), a tapering wedge for the muzzle, and a triangle for the neck base. Keep these lines faint so they disappear later. -
Detail the profile line:
Refine the outline of the face. Pay close attention to the subtle dip of the nose bridge, the flare of the nostril, and the strong curve of the jawline. -
Place the features:
Position the eye carefully—it sits high on the head, roughly aligned with the ear base. Sketch the ear shapes, ensuring they feel rooted in the skull, not just pasted on top.
Step 2: Developing Form and Shading
-
Map the shadow shapes:
Switch to a 2B pencil. Lightly outline the areas where the shadows fall, such as under the jaw, the hollow of the cheek, and inside the ears. -
Apply the base tone:
Using the side of your lead, lay down a soft, uniform layer of graphite over the shadowed areas. Use a tissue or chamois to gently smooth this base layer so no pencil strokes are visible. -
Sculpt the cheek:
Darken the area under the cheekbone with a 4B pencil to make the round muscle pop. Gradient this shadow upwards, fading it as it reaches the highlight on the cheek’s center. -
Define the muzzle:
The muzzle has complex, velvety skin. Use short, hatching strokes to create texture around the mouth and nostril. Press firmly with a 6B pencil inside the nostril for the darkest darks, creating depth. -
Draw the eye:
The eye is the soul of the portrait. Outline the eyelids, leaving a tiny pure white spot for the catchlight. Fill the pupil with 6B graphite, and shade the iris with radiating lines.
Smudge Prevention
Graphite smudged across your cream paper is hard to fix. Always keep a clean sheet of scrap paper under your drawing hand to protect your work as you move across the page.
Step 3: Refining Texture and Mane
-
Model the neck muscles:
The neck isn’t flat; it’s a series of strong cords. Use directional shading that follows the muscle flow (down and back) to suggest the brachiocephalic muscle running from behind the ear down the neck. -
Contour the jaw:
Strengthen the shadow under the jawline to separate the head from the neck. I often use a blending stump here to push the graphite deep into the paper tooth for a rich, matte look. -
Sketch the forelock:
Draw the hair falling between the ears. Instead of individual hairs, draw clumps or ribbons of hair first, shading the ‘valleys’ between the clumps. -
Flow the mane:
Extend the mane down the neck backbone. Keep your strokes loose and sweeping. Vary the pressure—start firm at the root and flick the pencil up to taper the ends. -
Refine the ear details:
Add fluffy texture inside the ear using short, curved strokes. Darken the outer rim of the ear to make it stand out against the background.
Tint the Paper
For an antique look, lightly wash your paper with strong tea or diluted coffee and let it dry completely flat before you begin your sketch.
Step 4: Final Polish
-
Lift out highlights:
Take your kneaded eraser and shape it into a point. Gently dab or stroke the paper to lift graphite off the brightest areas: the brow bone, the top of the nose bridge, and the curve of the cheek. -
Add vascular details:
For a hyper-realistic touch, lightly sketch the subtle vein pattern often visible on a horse’s face, particularly near the cheek and nose. Keep these edges very soft. -
Clean up edges:
Use your precision eraser to clean up the outside silhouette, ensuring a crisp separation between the horse and the creamy paper background. -
Deepen contrast:
Do one final pass with your 6B pencil. Re-darken the deepest shadows (nostril, pupil, under-jaw) to ensure the full range of values is present.
Step back and admire how the interplay of light and shadow captures the quiet strength of your subject


Flowing Mane Study With Big Brushstrokes
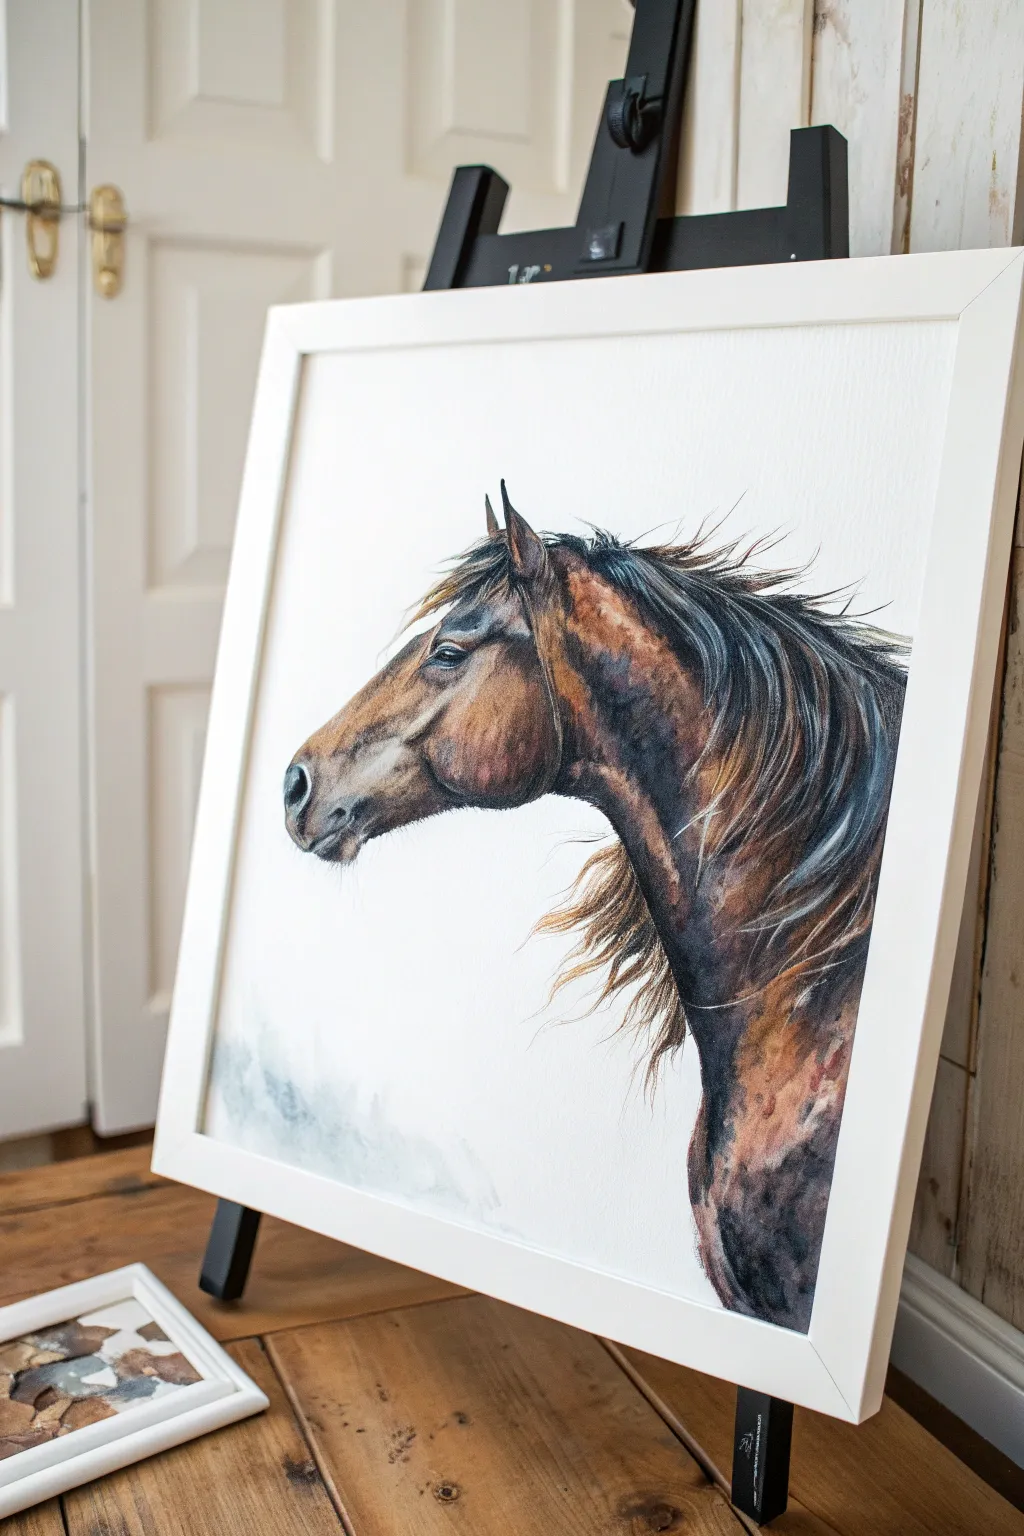
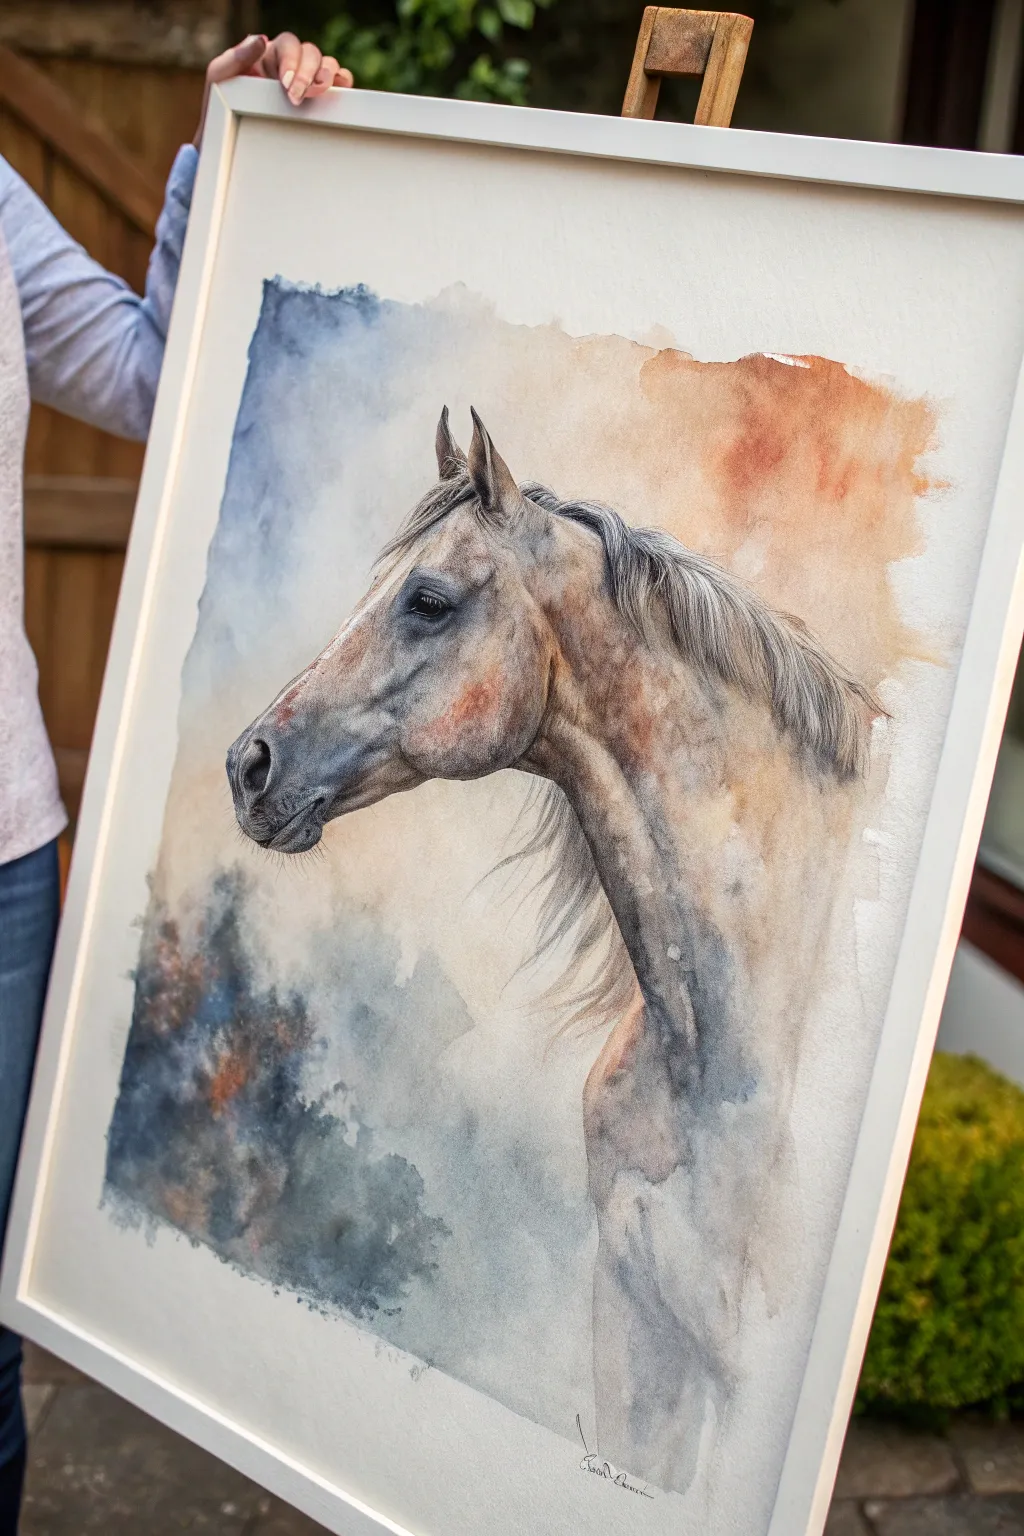
Capture the untamed spirit of a horse with this stunning watercolor portrait that balances realistic muscle definition with free-flowing movement. The contrast between the detailed face and the windswept mane creates a dynamic composition that feels alive on the canvas.
Step-by-Step Tutorial
Materials
- High-quality watercolor paper (cold press, at least 300gsm)
- Watercolor paints (Burnt Sienna, Raw Umber, Ultramarine Blue, Paines Grey, Yellow Ochre, Alizarin Crimson)
- Round brushes (sizes 4, 8, and 12)
- Rigger or liner brush for fine hairs
- Pencil (HB) and kneaded eraser
- Masking fluid (optional)
- Two water containers
- Paper towels
- White or natural wood frame for finishing
Step 1: Sketching and Foundation
-
Outline the profile:
Begin with a light pencil sketch of the horse’s head in profile. Focus on the triangular shape of the head, the curve of the cheeky jowl, and the strong arch of the neck. Keep lines faint so they don’t show through the transparent paint later. -
Marking key features:
Lightly indicate the position of the eye, the nostril, and the direction of the mane flow. Don’t draw every hair; just map out the major clumps and the wind direction. -
Underpainting the warm tones:
Mix a watery wash of Yellow Ochre and a touch of Burnt Sienna. Apply this loosely to the sunlit areas of the face: the top of the nose, the cheekbone, and the upper neck. Let this first layer dry completely.
Brush Control Pro-Tip
For the most dynamic mane, hold your brush at the very end of the handle. This loosens your wrist and creates fluid, unpredictable strokes that look more like real hair than tight, controlled lines.
Step 2: Building Muscle and Form
-
Defining the face:
Using a size 8 brush and a mix of Burnt Sienna and Raw Umber, start sculpting the facial muscles. Paint wet-on-dry to get harder edges around the muzzle and jawline, leaving the lighter underpainting visible for highlights. -
Deepening the shadows:
Mix Ultramarine Blue with Burnt Umber to create a rich, cool dark tone. Apply this to the underside of the jowl and the deep hollows of the neck to create three-dimensional volume. -
The eye detail:
Switch to a size 4 brush. Paint the eye using almost pure Paines Grey or black, leaving a tiny speck of white paper for the catchlight. Add a wash of brown around the eye socket to set it into the skull. -
Nostril and muzzle:
Paint the nostril using your darkest darks, softening the upper edge with a damp brush so it blends into the skin. Add subtle grey-blue touches to the muzzle to suggest velvety skin texture.
Level Up: Color Harmony
Mix a tiny amount of Alizarin Crimson into your browns for the nose and ear areas. This subtle warmth hints at the blood flowing beneath the thin skin, making the animal look alive.
Step 3: The Flowing Mane
-
Mapping the mane’s base:
With a large round brush (size 12), lay down broad, sweeping strokes of Burnt Sienna and Raw Umber where the mane meets the neck. Follow the curve of the neck muscles. -
Adding cool movement:
While the base is still slightly damp, drop in strokes of Ultramarine Blue mixed with Paines Grey. This introduces the dark, sleek look of the hair and adds color complexity. -
Creating the windswept look:
I like to dampen the paper slightly where the mane extends outward. Use quick, confident flicks of the brush to pull the paint out into wispy strands that fade into the white background. -
Defining individual strands:
Once the broad shapes are dry, use a rigger or liner brush with a dark, inky mix to paint distinct, thin hairs flowing over the neck and face. Vary your pressure to make lines that taper elegantly. -
The forelock:
Don’t forget the hair between the ears. Use the same flicking motion to paint the forelock blowing backward, maintaining continuity with the wind direction.
Step 4: Texture and Finishing Touches
-
Lower chest texture:
For the lower neck and chest area shown at the bottom, use a sponge or a scumbling technique with a dry brush to create a mottled, textured appearance that fades out softly. -
Highlight recovery:
If you’ve lost some highlights, you can gently lift clear water off with a stiff brush or use a touch of white gouache mixed with yellow ochre for sun-kissed strands in the mane. -
Final assessment:
Step back and check your contrast. Reinforce the darkest darks in the deep neck shadows and the inner ear to ensure the form pops against the white paper. -
Framing:
Once absolutely dry, erase any remaining pencil marks. Mount the painting in a simple white frame to mimic the clean gallery look of the reference image.
Hang your finished piece in a well-lit spot where the dynamic brushstrokes can catch the eye and inspire admiration


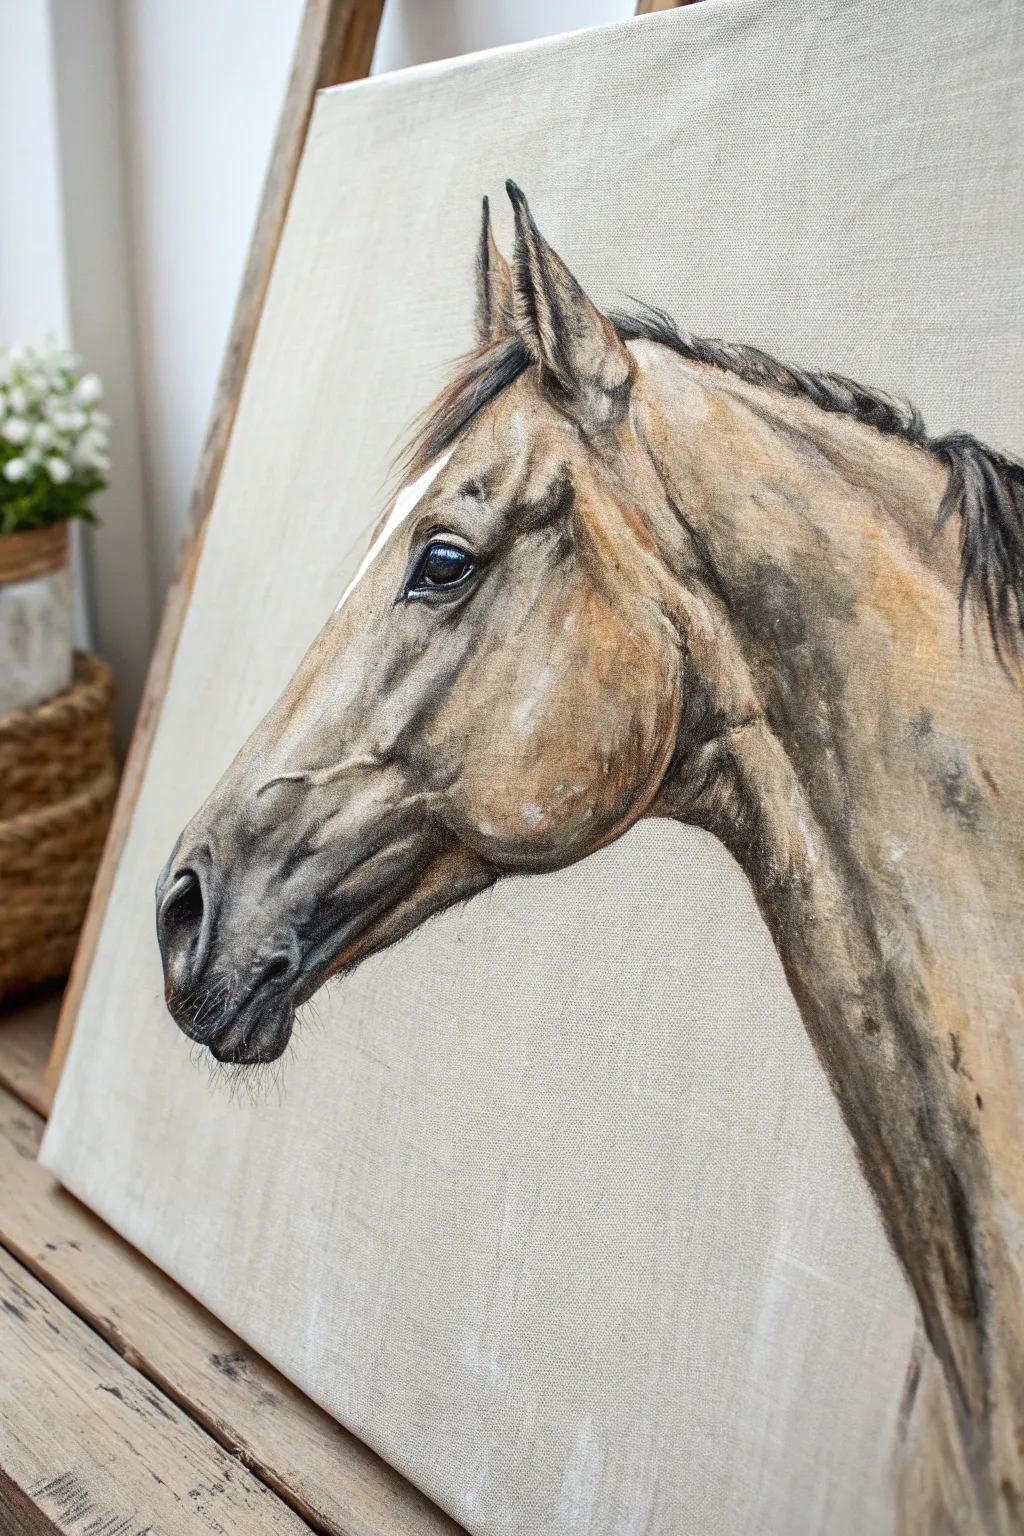
Paint a Chestnut Coat With Warm Earth-Tone Mixing
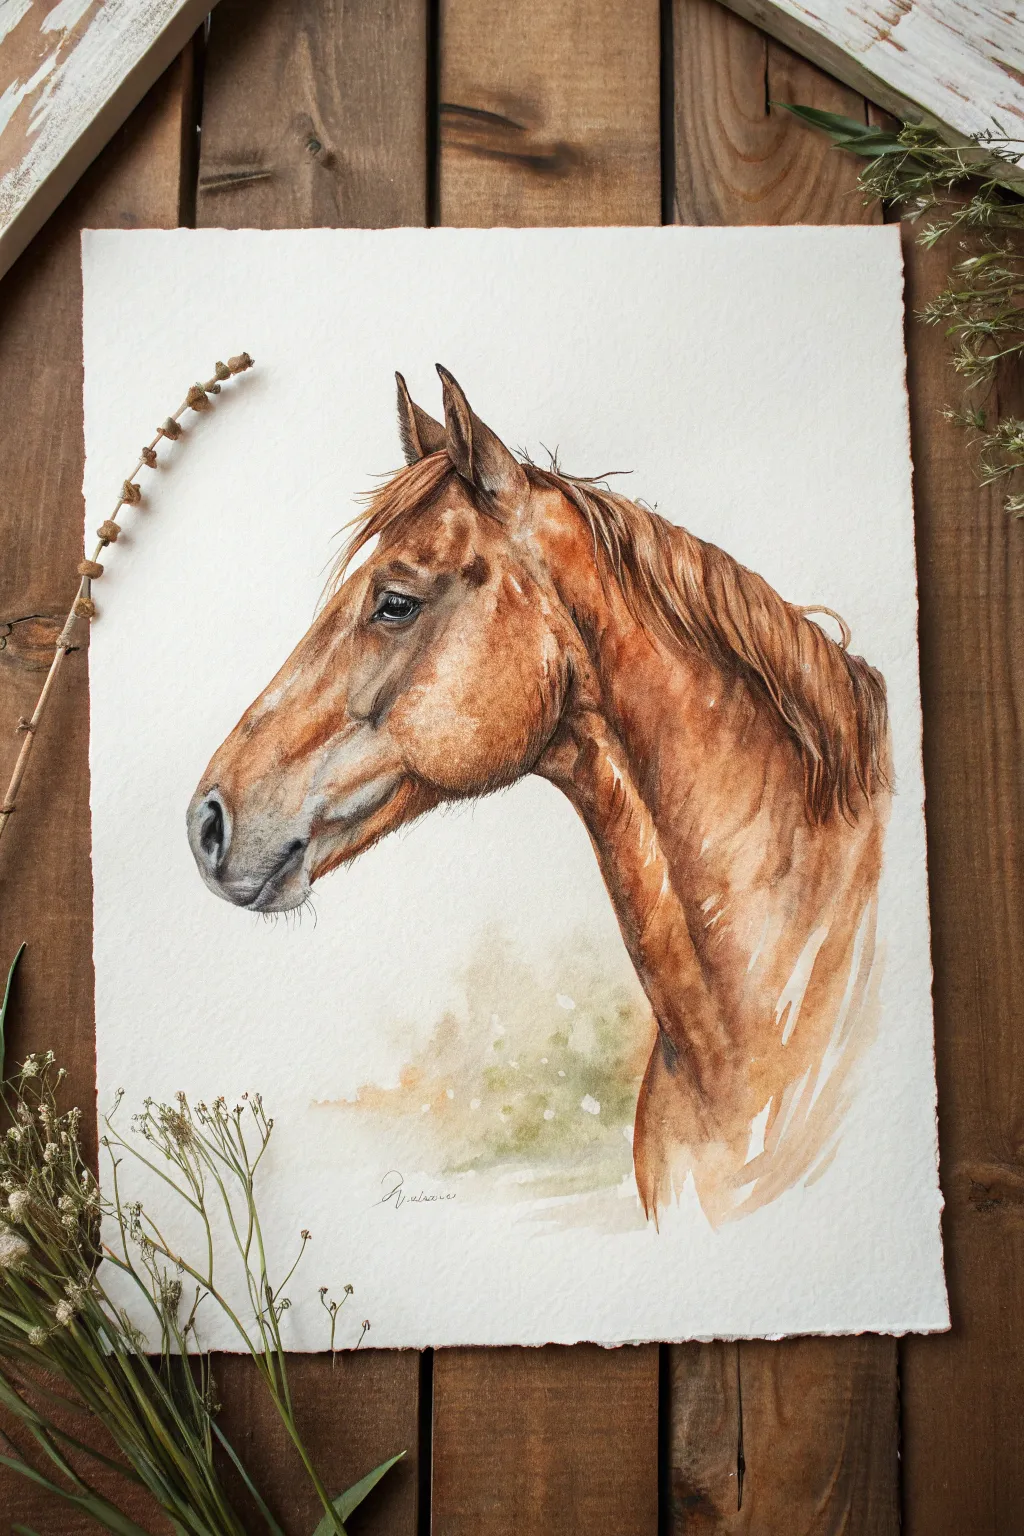
Capture the warmth and elegance of a chestnut horse in profile with this focused watercolor tutorial. You will build up glowing layers of burnt sienna and umber to create a realistic coat texture while keeping the bottom edges soft and atmospheric.
Step-by-Step Guide
Materials
- High-quality watercolor paper (Cold Press or Rough texture, approx. 300 gsm)
- Watercolor paints: Burnt Sienna, Burnt Umber, Yellow Ochre, Ultramarine Blue, Lamp Black (or Payne’s Grey)
- Round watercolor brushes (Size 4, 8, and a fine liner brush for details)
- Pencil (HB) and kneaded eraser
- Two jars of water
- Paper towels
- Masking tape or drawing board
Step 1: Preparation & Sketching
-
Outline the profile:
Begin with a light pencil sketch of the horse’s head. Focus on getting the proportions correct: the long slope of the nose, the prominent cheekbone (zygomatic arch), and the triangular shape of likely alert ears. Keep pencil lines faint so they don’t show through the transparent watercolor layers later. -
Mark shadows and highlights:
Lightly outline where the darkest shadows will fall—around the eye, inside the nostril, under the jaw—and map out highlight areas on the bridge of the nose and cheek that needs to remain the white of the paper.
Step 2: Base Layers & Warmth
-
First wash:
Mix a watery solution of Yellow Ochre with a touch of Burnt Sienna. Apply this wash over the entire horse, avoiding the eye and the brightest highlight on the nose bridge. This underlying yellow glow is crucial for that ‘chestnut’ radiance. -
Define the mid-tones:
While the paper is still slightly damp (but not soaking), drop in a stronger mix of Burnt Sienna onto the cheek, neck, and upper nose. Allow the paint to bloom slightly for a soft transition, but keep the edges near the muzzle crisp. -
Cooling the snout:
For the greyish muzzle area, mix a very dilute wash of Ultramarine Blue and a tiny bit of Burnt Umber. Apply this to the nose tip and mouth area, blending it gently into the surrounding brown coat so there isn’t a harsh line.
Pro Tip: Lost & Found Edges
Keep the hard edges for the face profile and eye, but let the mane and neck shadow blur out. This contrast draws the viewer’s focus directly to the horse’s expression.
Step 3: Building Form & Texture
-
Deepen the shadows:
Mix Burnt Umber with a little Ultramarine Blue to create a rich, dark brown. Paint the shadow under the cheekbone, the hollow above the eye, and the underside of the jawline. This step establishes the structural 3D form of the head. -
Painting the eye:
Switch to a smaller brush (size 4). Paint the eye using a dark mix of Burnt Umber and Lamp Black. Leave a tiny speck of white paper for the catchlight, which gives the horse life. Soften the edges around the eye socket with a damp brush. -
Modeling the ears:
Paint the ears using Burnt Sienna on the light-facing sides and your dark brown mix for the inner shadows. Pay attention to the sharp, dark rim often seen on horse ears. -
Layering the coat:
Once the underlayers are dry, use a technique called glazing. Apply thin, transparent layers of Burnt Sienna over the mid-tones to intensify the color saturation. I find this creates a depth you just can’t get in a single layer.
Troubleshooting: Muddy Colors?
If your chestnut brown looks dull or muddy, you may be over-mixing on the palette. Let the colors mix partially on the paper instead for a vibrant, optical blend.
Step 4: Detailing the Mane & Texture
-
Base strokes for the mane:
With a size 8 brush, paint the general shape of the mane using a mix of Burnt Umber and Burnt Sienna. Follow the direction of hair growth, pressing down at the start of the stroke and lifting off at the end for tapering. -
Fine hair details:
Using your fine liner or the tip of a small round brush, add individual strands of hair in both the mane and forelock. Use darker paint for shadows between clumps of hair and lighter, watery paint for wispy flyaways. -
The tactile muzzle:
Add tiny dots and very fine whiskers around the muzzle using the liner brush and a diluted black-brown mix. These should be delicate and barely visible. -
Softening the neck:
At the bottom of the neck where the portrait fades out, use clean water to soften the paint edge. Create a blurred, atmospheric look that suggests the body continues without painting it fully.
Step 5: Background & Final Touches
-
Atmospheric background wash:
Mix a very pale gray-green using Ultramarine Blue and a touch of Yellow Ochre. Apply a loose, abstract wash behind the lower neck area to ground the subject, letting the paint fade into the white paper. -
Refining contrasts:
Step back and assess your values. If the cheekbone doesn’t pop enough, darken the shadow underneath it. Ensure the nostril is the darkest point on the face. -
White gouache highlights (Optional):
If you lost your highlights during painting, use a tiny amount of white gouache or a white gel pen to reclaim the sparkle in the eye or a glistening wet spot on the nostril. -
Sign and dry:
Allow the painting to dry strictly flat to prevent water pooling. Once completely dry, erase any remaining stray pencil lines gently.
Enjoy the process of bringing this noble creature to life on your paper, layer by glowing layer
BRUSH GUIDE
The Right Brush for Every Stroke
From clean lines to bold texture — master brush choice, stroke control, and essential techniques.
Explore the Full Guide
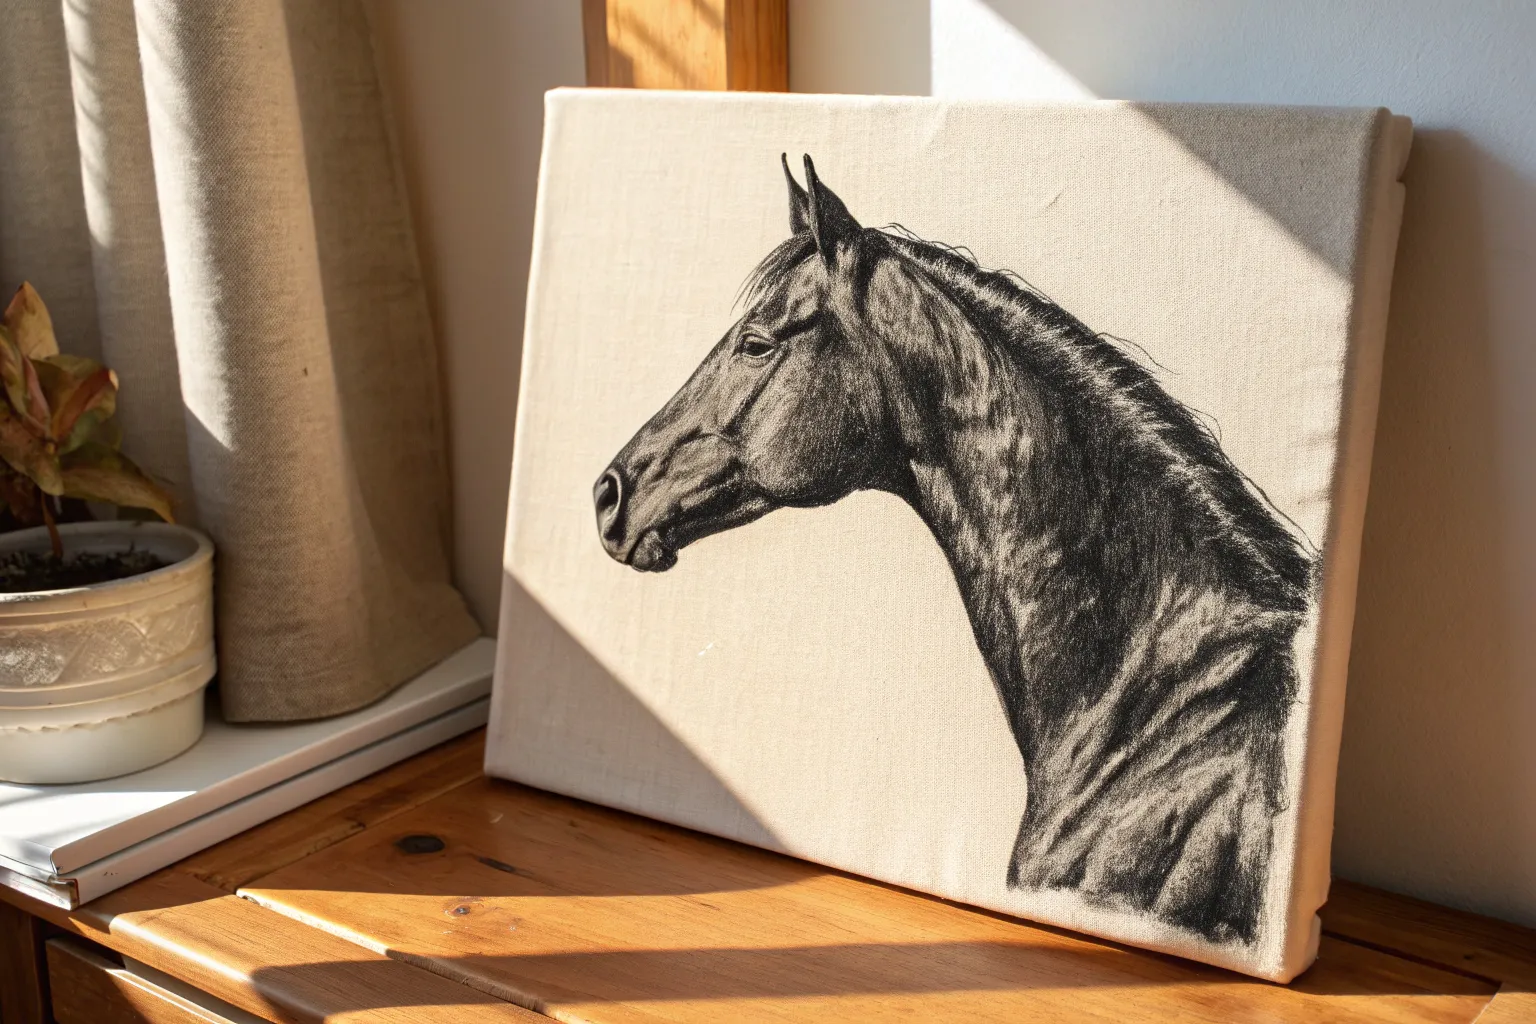
Black Horse With Cool Blue-Purple Highlights
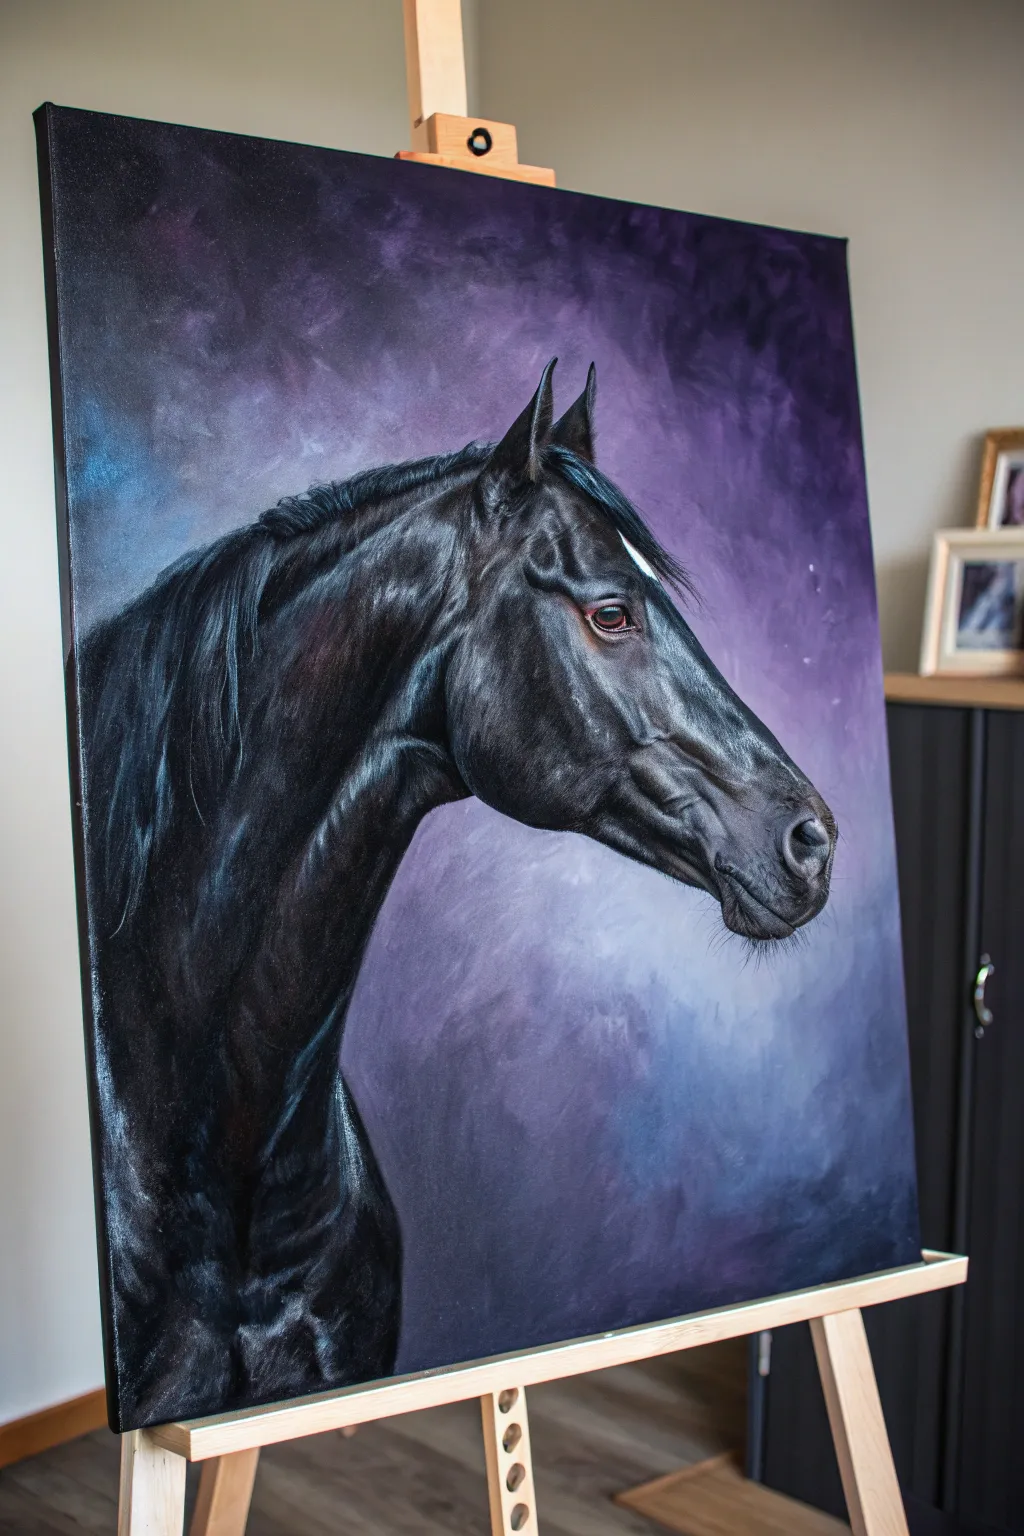
Capture the elegance and power of a black horse with this detailed acrylic painting tutorial. The striking interplay of cool blue and purple ambient light against the dark coat creates a moody, atmospheric masterpiece perfect for any equestrian lover’s wall.
Step-by-Step
Materials
- Large stretched canvas (e.g., 24×30 inches)
- Acrylic paints: Mars Black, Titanium White, Ultramarine Blue, Dioxazine Purple, Burnt Umber, Alizarin Crimson
- Assorted synthetic brushes: large flat shader, medium filbert, lush round, fine liner
- Slow-drying medium or retarder (essential for blending)
- Palette knife and palette
- Charcoal stick or soft pencil
- Water cups and paper towels
- Easel
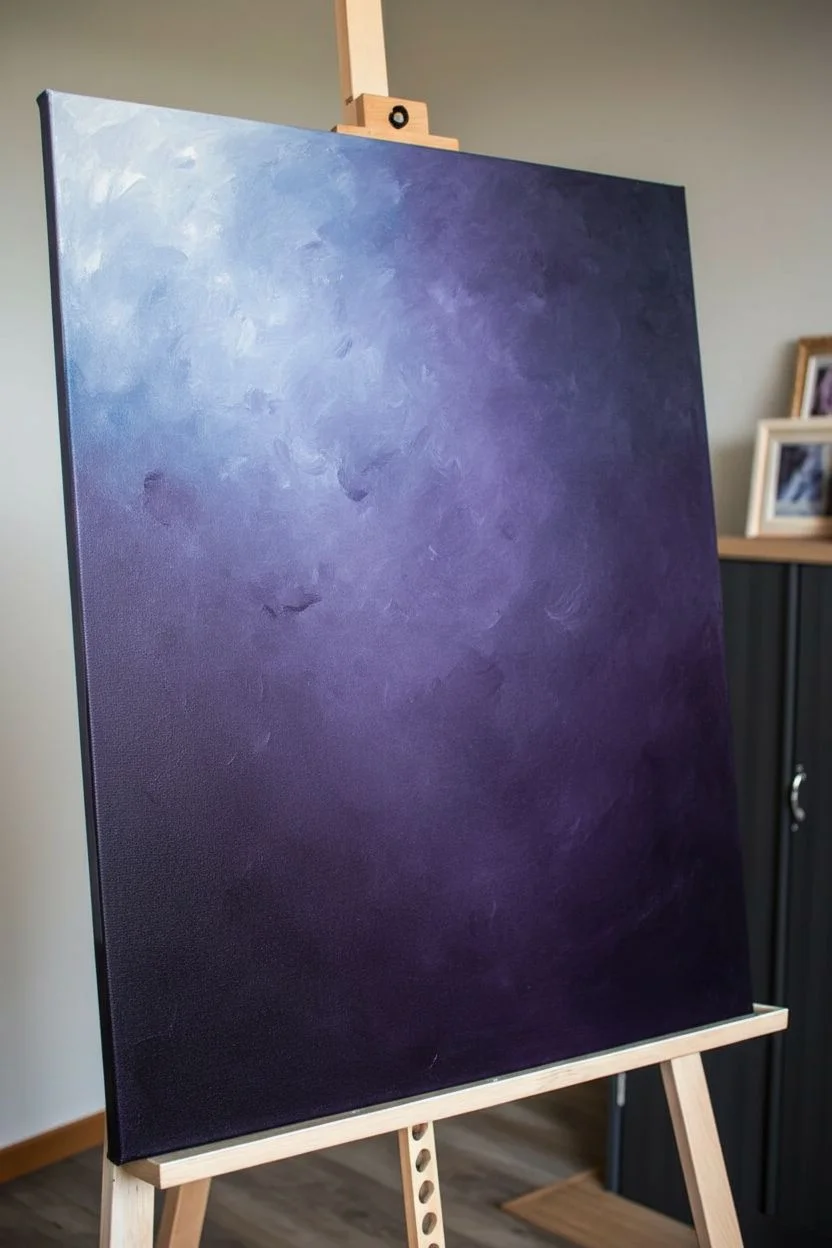
Step 1: The Atmospheric Background
-
Prime with a dark base:
Start by covering your entire canvas with a dark, muted wash. Mix Mars Black with a touch of Dioxazine Purple and water to create a thin, dark violet-grey layer. Let this dry completely to establish a moody undertone. -
Establish the gradient:
Visualize the light source coming from the top left. Mix Titanium White with increasing amounts of Dioxazine Purple and a hint of Ultramarine Blue. Paint the upper left corner lighter, transitioning into deeper, richer purples as you move toward the bottom right. -
Create texture:
While the background paint is still wet, use a dry, clean brush to scumble the edges where colors meet. This creates that cloud-like, misty texture seen behind the horse. Don’t overblend; you want visible, painterly strokes. -
Deepen the corners:
Glaze the bottom right corner with a mixture of Mars Black and Dioxazine Purple to create a vignette effect, ensuring the viewer’s eye stays refocused on the center.
Step 2: Anatomy and Underpainting
-
Sketch the silhouette:
Using a charcoal stick or white chalk, lightly sketch the outline of the horse. Pay close attention to the arch of the neck, the triangular shape of the ears, and the strong jawline. Profile views rely heavily on accurate proportions. -
Block in the darks:
Using a large flat brush, fill in the horse’s shape with a solid coat of Mars Black mixed with a tiny bit of Burnt Umber. The umber adds a natural warmth that prevents the black from looking like a flat hole on the canvas. -
Map the shadow shapes:
Once the base is dry, identify where the deepest shadows lie—under the jaw, inside the ears, and along the front of the neck. Reinforce these areas with pure Mars Black.
Troubleshooting: Flat Black?
If the coat looks flat, you likely used pure black too much. Mix blues, purples, and burnt umber into your blacks. True black should only exist in the deepest crevices.
Step 3: Building Form with Cool Highlights
-
Mix your highlight palette:
The secret to painting a black horse isn’t using grey, but utilizing cool tones. Create three highlight mixtures: a dark blue-grey (Black + White + Ultramarine), a mid-tone purple-grey (Black + White + Dioxazine Purple), and a lighter icy blue. -
Apply the first highlight layer:
Using a medium filbert brush and your dark blue-grey mix, paint the broad planes of muscle on the neck and cheek. Follow the direction of the hair growth with your strokes to suggest fur texture. -
Define the facial structure:
Switch to a smaller round brush. Use the mid-tone purple-grey mix to sculpt the intricate muscles around the muzzle, the bridge of the nose, and the prominent cheekbone. I find that lifting the brush at the end of each stroke mimics the taper of horse hair perfectly. -
Develop the eye:
Paint the eye area with care. Use Burnt Umber for the iris, adding a tiny dot of Alizarin Crimson for life. Outline the eye with jet black, and place a tiny, sharp stroke of icy blue on the eyeball itself to create a wet, glossy reflection. -
Enhance the mane:
Thicken your paint slightly. Use a long flat brush to pull strokes down from the crest of the neck to create the mane. Start with deep blue-blacks and layer lighter blue highlights on top to show movement and distinct locks of hair. -
Refine the nostrils and mouth:
Use your darkest black to define the nostril holes and the line of the mouth. Highlight the rim of the nostril and the upper lip with your lightest grey mix to make them pop forward.
Pro Tip: Directional Stroking
Always paint your brushstrokes in the direction the hair grows on the animal. Use short strokes for the face and long, sweeping strokes for the neck and mane.
Step 4: Final Glazing and Details
-
Add the ‘shark fin’ vein:
A key detail in realistic horse portraits is the vascularity. Use a fine liner brush and a glaze of your mid-tone grey to subtly paint the veins on the face, specifically the one running down the cheek. -
Brightest specular highlights:
Mix Titanium White with a tiny speck of Blue. Apply this sparingly to the highest points: the brow bone, the wetness of the nostril, and the glossiest part of the shoulder muscle. -
Blend harsh edges:
If any muscle transitions look too sharp, take a clean, dry soft brush and gently feather the edges while the paint is tacky. This creates a smooth, velvety coat appearance. -
The whiskers:
Using a liner brush with thinned black paint, flick quick, confident strokes near the muzzle and chin to create fine whiskers. Add a few light grey ones for dimension. -
Unified atmosphere glaze:
Finally, mix a very transparent glaze of Dioxazine Purple and glazing medium. lightly brush this over the shadowed side of the neck to harmonize the horse with the purple background.
Step back and admire the deep, reflective coat you’ve created, bringing a majestic presence into the room.
Full-Body Standing Horse in a Simple Field Scene
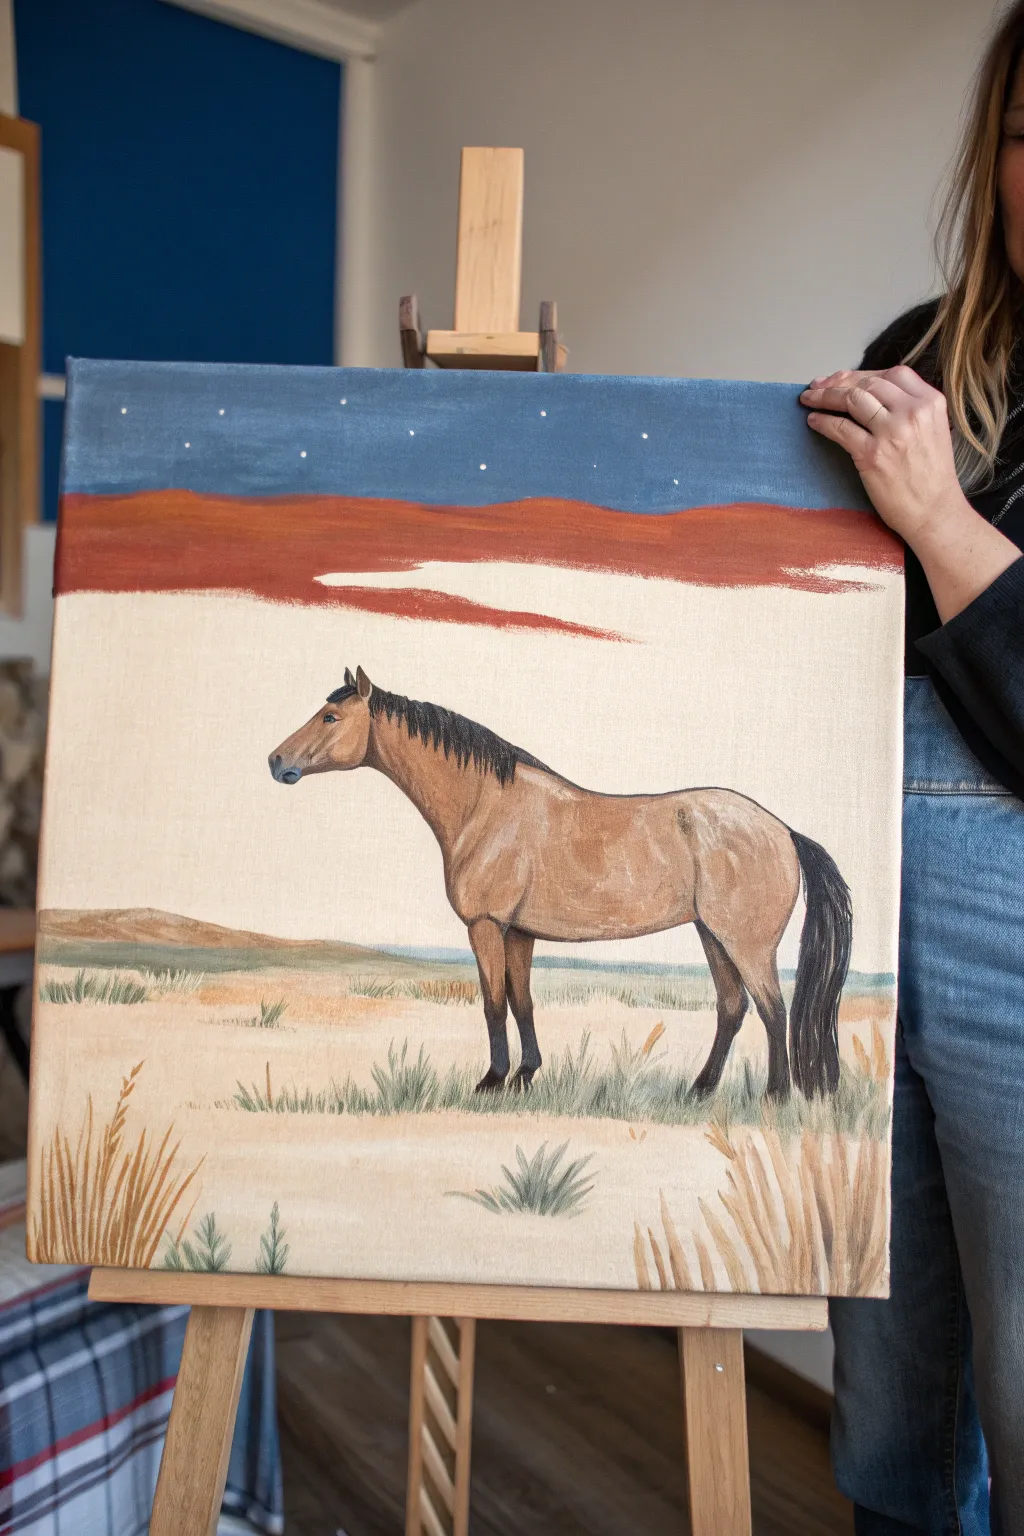
Capture the quiet beauty of a lone horse against a stylized desert backdrop in this serene acrylic painting. With its blend of earthy tones and a whimsical, starry sky, this project balances realistic animal portraiture with a graphic landscape style.
Step-by-Step Tutorial
Materials
- Square stretched canvas (approx. 16×16 or 20×20 inches)
- Acrylic paints (Titanium White, Yellow Ochre, Burnt Sienna, Burnt Umber, Mars Black, Prussian Blue, Chromium Oxide Green)
- Flat brushes (1-inch for background washes)
- Round brushes (sizes 2, 4, and 6 for detailing)
- Fine liner brush (size 0 or 00)
- Pencil and eraser
- Palette and water container
- Paper towels
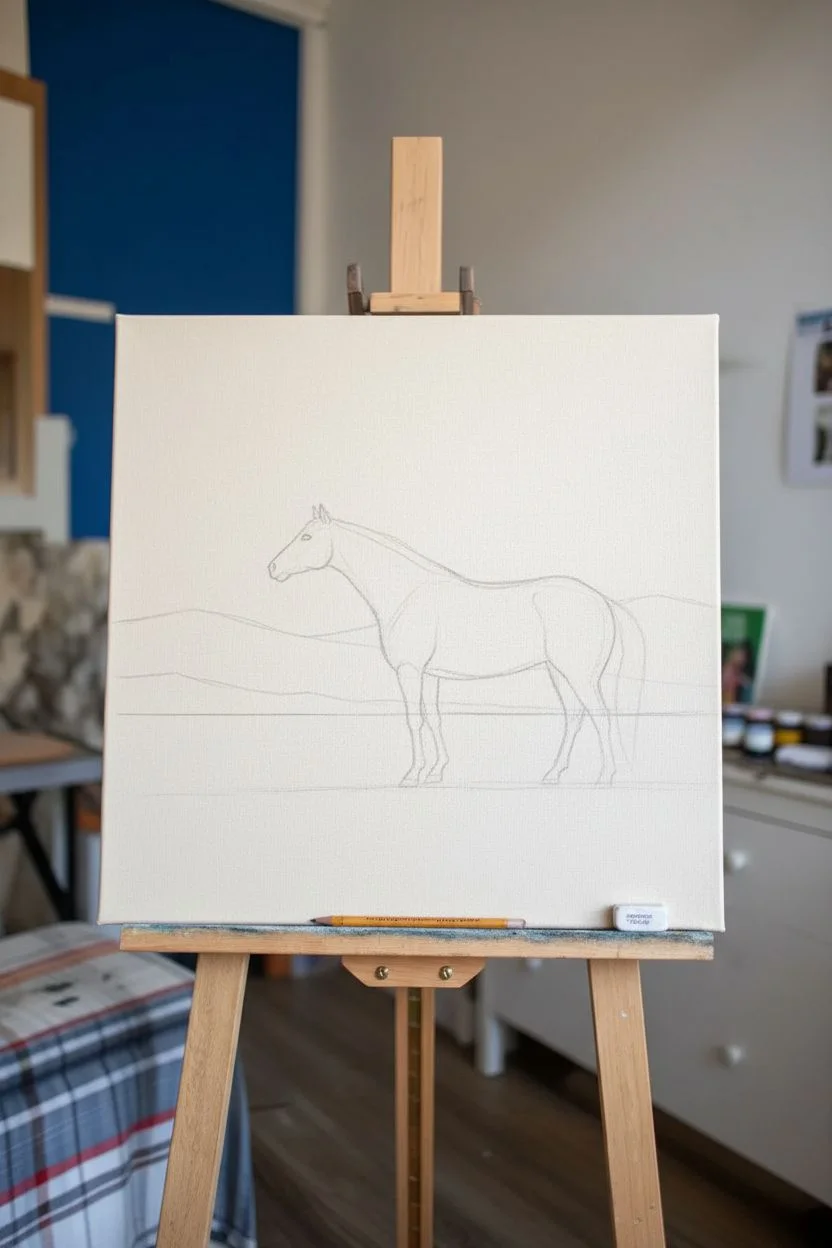
Step 1: Planning and Sketching
-
Map out the horizon:
Begin by lightly sketching your horizon lines. Draw a low line for the foreground field about a quarter of the way up the canvas. Above that, sketch the rolling shapes of the red hills, leaving the top third of the canvas open for the sky. -
Sketch the horse silhouette:
In the center of the canvas, sketch the outline of the horse. Focus on getting the proportions right: a sturdy neck, a sloping shoulder, and strong legs. Don’t worry about details like eyes or mane yet; just establish the main shape.
Hooves Look Floating?
If the horse doesn’t look grounded, mix a transparent glaze of Burnt Umber and water. Paint a small, horizontal shadow directly under each hoof to ‘plant’ it.
Step 2: Painting the Backdrop
-
Block in the sky:
Mix Prussian Blue with a touch of Titanium White and a tiny dot of Black to create a deep, dusty twilight blue. Apply this to the top section of the canvas using your broad flat brush, keeping the strokes horizontal. -
Add the stars:
While the sky is drying, dip the very end of a small brush handle or a toothpick into pure Titanium White. Gently dot small stars across the blue field. I like to vary the spacing so it doesn’t look too grid-like. -
Paint the red hills:
Mix Burnt Sienna with a little Red (or just use a reddish-brown earth tone). Paint the band of hills below the sky. Use a slightly watered-down consistency to let the canvas texture show through slightly, creating a sandstone look. -
Establish the clouds:
Using a clean brush and creamy Titanium White (warm it slightly with a dot of Yellow Ochre), paint the striking white cloud shapes that cut horizontally across the red hills. This graphic element separates the sky from the land.
Step 3: Painting the Foreground
-
Base coat the field:
Mix a large amount of Titanium White with very small amounts of Yellow Ochre and Burnt Sienna to make a pale, sandy cream color. cover the entire bottom section of the canvas, painting around your horse sketch. -
Add distant variation:
While the base is still slightly tacky, mix a pale olive tone (Green + White + Ochre) and gently sweep it into the horizon line area to suggest distant vegetation.
Try a New Coat
Change the horse’s coat color to personalize it! Swap the ochre base for Burnt Sienna for a chestnut, or heavy grey and white for a dappled grey horse.
Step 4: Painting the Horse
-
Base color the coat:
Mix a ‘buckskin’ color using Yellow Ochre, White, and a touch of Burnt Sienna. Paint the entire body of the horse with this flat color, avoiding the mane, tail, and lower legs. -
Add shadows and muscle definition:
Darken your base mixture with a little Burnt Umber. Using a size 4 round brush, glaze shadows under the belly, along the neck muscle, and at the stifle (the rear leg joint) to give the horse volume. -
Highlights:
Add more White to your original base mix. Paint highlights on the top of the rump, the shoulder, and the cheekbone where the light would naturally hit. -
Paint the points:
Switch to Mars Black (or a very dark Grey). Carefully paint the mane, tail, and the lower legs. For the mane, use short, directional strokes to mimic hair texture. -
Facial details:
Using your fine liner brush and black paint, carefully define the eye, nostril, and muzzle. Use a tiny dot of white in the eye to bring life to the face.
Step 5: Final Landscape Details
-
Paint the tall grasses:
Mix a golden-brown color (Ochre + Burnt Sienna). Using a liner brush, flick swift, upward strokes in the immediate foreground corners to create dry desert grasses. -
Add green scrub:
Mix a desaturated sage green. Paint small, spiky clumps of grass near the horse’s hooves and scattered in the mid-ground. Keep the bottom of these clumps darker to ground them. -
Final touches:
Review the painting. If the horse’s hooves look like they are floating, add a tiny bit of dark shadow directly underneath them to plant the animal firmly on the ground.
Step back and admire the peaceful solitude of your desert scene

PENCIL GUIDE
Understanding Pencil Grades from H to B
From first sketch to finished drawing — learn pencil grades, line control, and shading techniques.
Explore the Full Guide
Trotting Horse Gesture Painting for Movement
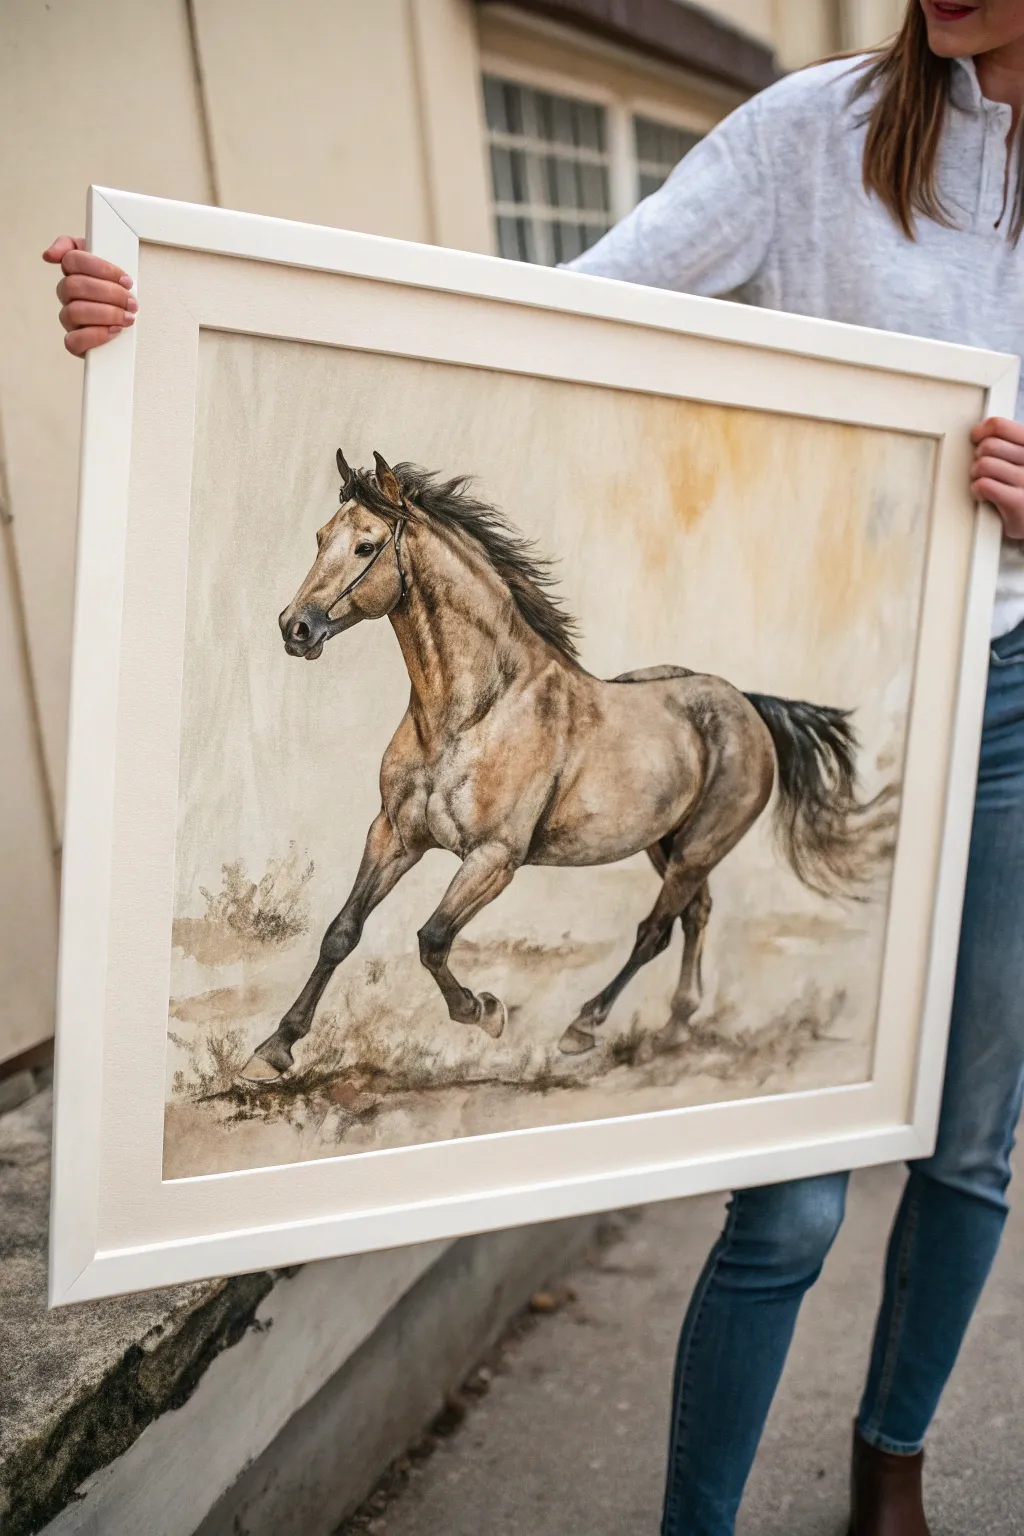
Capture the fluid elegance of a trotting horse with this detailed watercolor study that emphasizes movement and muscular structure. By layering warm ochres and cool shadows, you will create a sense of depth and life that practically gallops off the page.
How-To Guide
Materials
- High-quality cold press watercolor paper (300 gsm)
- Watercolor paints (Yellow Ochre, Burnt Sienna, Burnt Umber, Ultramarine Blue, Lamp Black)
- Soft charcoal pencil or graphite pencil (2B or 4B)
- Round watercolor brushes (Size 4, 8, and a larger wash brush)
- Masking fluid (optional)
- Clean water and paper towels
- Wooden frame with matte board for finishing
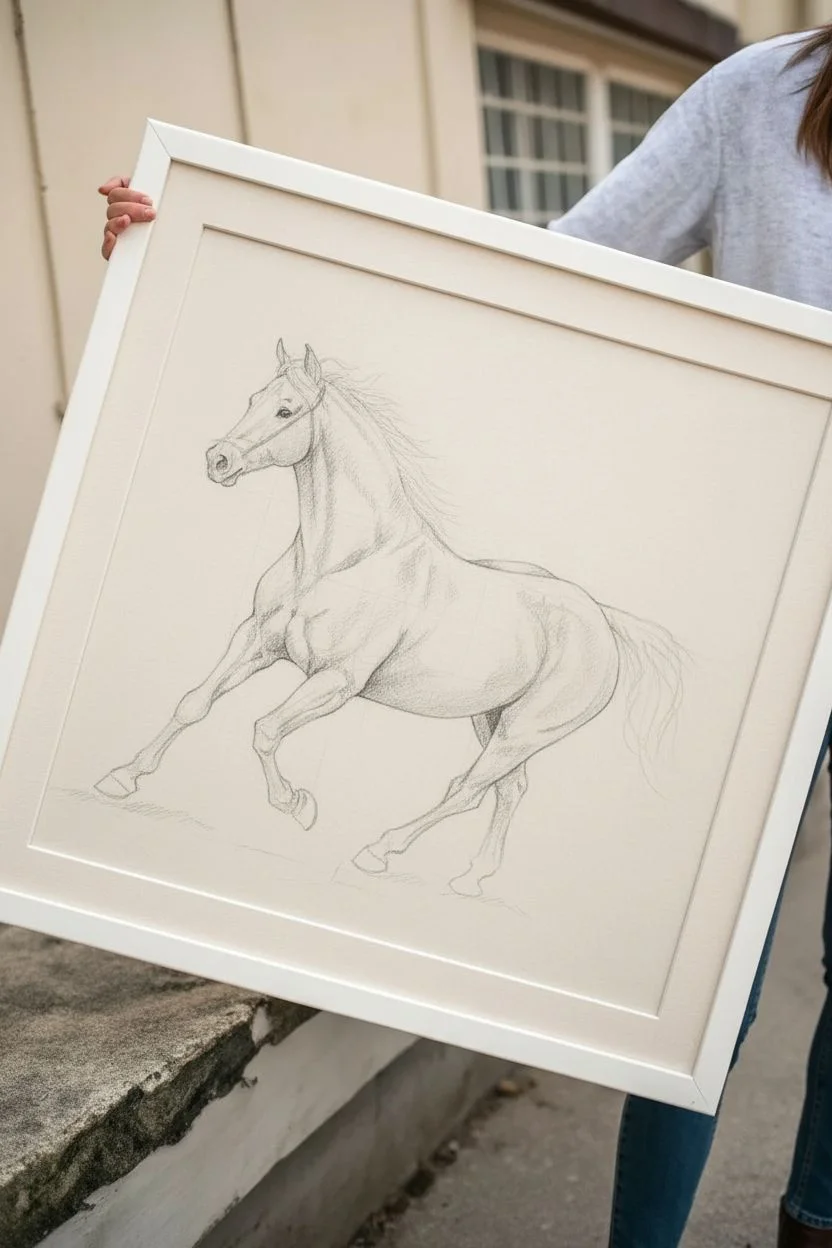
Step 1: Drafting the Form
-
Establish the gesture:
Begin with a very light charcoal or graphite sketch to map out the horse’s movement. Focus on the ‘line of action’ running from the poll distinctively down through the spine and out the tail. -
Refine the anatomy:
Flesh out the shapes of the shoulder, barrel, and hindquarters. Pay special attention to the leg positions; the front right leg is lifted high in a classic trot, while the back legs provide the push. -
Detail the head:
Carefully draw the profile of the head, ensuring the eye placement is correct and the ears are perked forward. Add the bridle details lightly now so you can paint around them later.
Step 2: The First Washes
-
Wet-in-wet base:
Lightly wet the entire body of the horse with clean water. Do not soak it, just dampen the surface until it has a slight sheen. -
Apply the coat color:
Mix a diluted wash of Yellow Ochre with a tiny touch of Burnt Sienna. Drop this color onto the wet paper, letting it bloom naturally. Leave the muzzle and lower legs unpainted for now. -
Background atmosphere:
While the horse is drying, take your large wash brush and apply a very watery mix of Yellow Ochre and a hint of grey to the background. Keep strokes loose and vertical to suggest a dusty field without distracting detail. -
Define the ground:
Add touches of Burnt Umber and grey near the hooves to ground the figure. Use dry-brush techniques here to mimic the texture of dirt and kicked-up dust.
Keeping it Loose
Work quickly in the initial stages. If you overwork the wet-on-wet layers, the painting loses its fresh, energetic quality. Let the water do the work for you.
Step 3: Building Muscle and Depth
-
Developing shadows:
Once the base layer is completely dry, mix a shadow color using Burnt Umber and a touch of Ultramarine Blue. Paint the shadows under the jaw, behind the shoulder blade, and along the underbelly. -
Softening edges:
I like to keep a clean, damp brush handy to soften the edges of these shadow shapes immediately. This prevents the muscle structure from looking too rigid or cut-out. -
Darkening the points:
Using a stronger mix of Burnt Umber and Lamp Black, carefully paint the lower legs (the points). Fade this dark color upward into the lighter leg color using a damp brush to create a smooth gradient. -
Facial details:
Switch to your size 4 brush. Paint the eye dark brown, leaving a tiny speck of white paper for the highlight. Darken the muzzle and nostrils with grey-black washes.
Muddy Colors?
If your shadows look dull or muddy, you likely overmixed the brown and blue on the palette. Mix them loosely so hints of the pure colors still show through.
Step 4: Mane, Tail, and Finishing Touches
-
Flowing mane:
Load your brush with a dark black-brown mix. Paint the mane using quick, flickering strokes that follow the direction of the wind to enhance the feeling of forward motion. -
The tail:
Paint the tail with long, sweeping curves. Allow the bristles of the brush to split at the end of the stroke to create the look of individual hairs flying in the breeze. -
Bridle work:
Use a fine liner brush and black paint (or a dark charcoal pencil) to crisp up the lines of the bridle. Keep these lines very thin and delicate. -
Enhancing contrast:
Look over the painting for areas that need more definition. Maybe deepen the shadow in the flank or add a few charcoal marks over the dry paint to re-establish the sketchier, artistic feel. -
The white accents:
If you lost any highlights on the coat or tack during painting, you can use a tiny amount of opaque white gouache to bring them back. -
Framing:
Once fully dry, mount your artwork behind a cream or off-white mat board and place it in a light wood or white frame to complement the earthy tones of the horse.
Hang your masterpiece where the light can catch the subtle washes and enjoy the dynamic energy it brings to the room
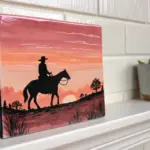
Rearing Horse Silhouette Against a Sunset Gradient
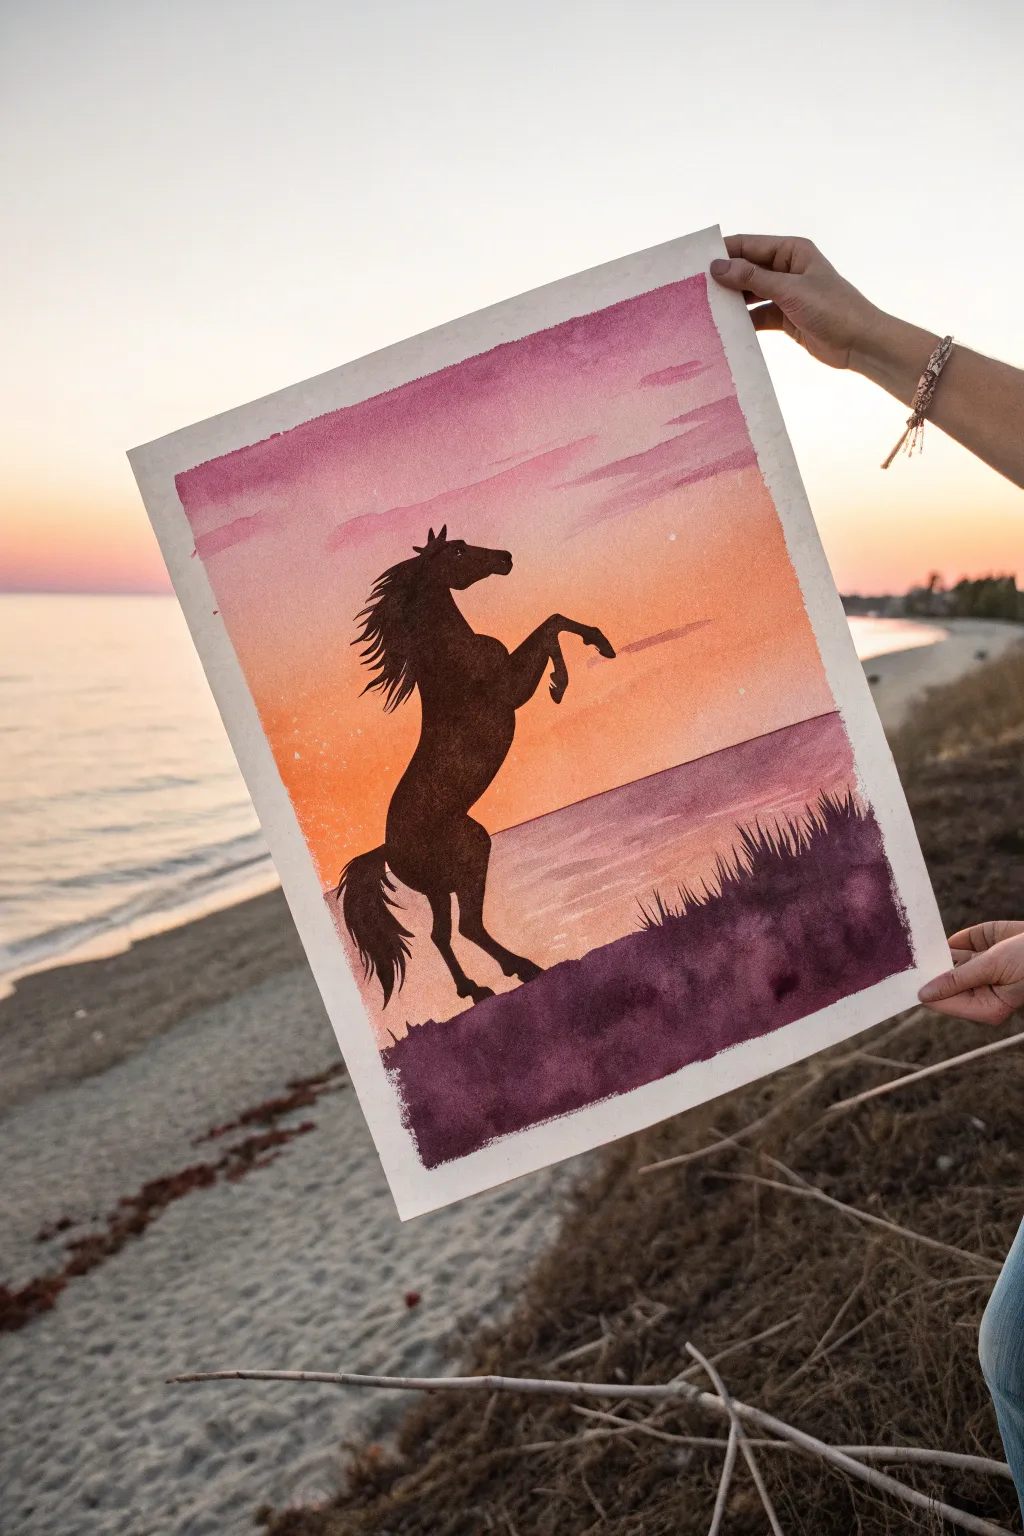
Capture the untamed beauty of a wild horse rearing against a vibrant evening sky with this dramatic silhouette painting. Using a warm gradient background and a bold, dark foreground, you’ll create a striking contrast that feels like a perfect summer sunset frozen in time.
Step-by-Step Guide
Materials
- Watercolor paper (cold press, heavy weight, approx. 9×12 inches)
- Painter’s tape or masking tape (approx. 1 inch width)
- Watercolor or gouache paints (Magenta, Orange, Deep Purple, Black)
- Flat wash brush (large)
- Round detail brushes (medium and fine)
- Pencil and eraser
- Paper towels
- Jar of clean water
- Palette or mixing tray
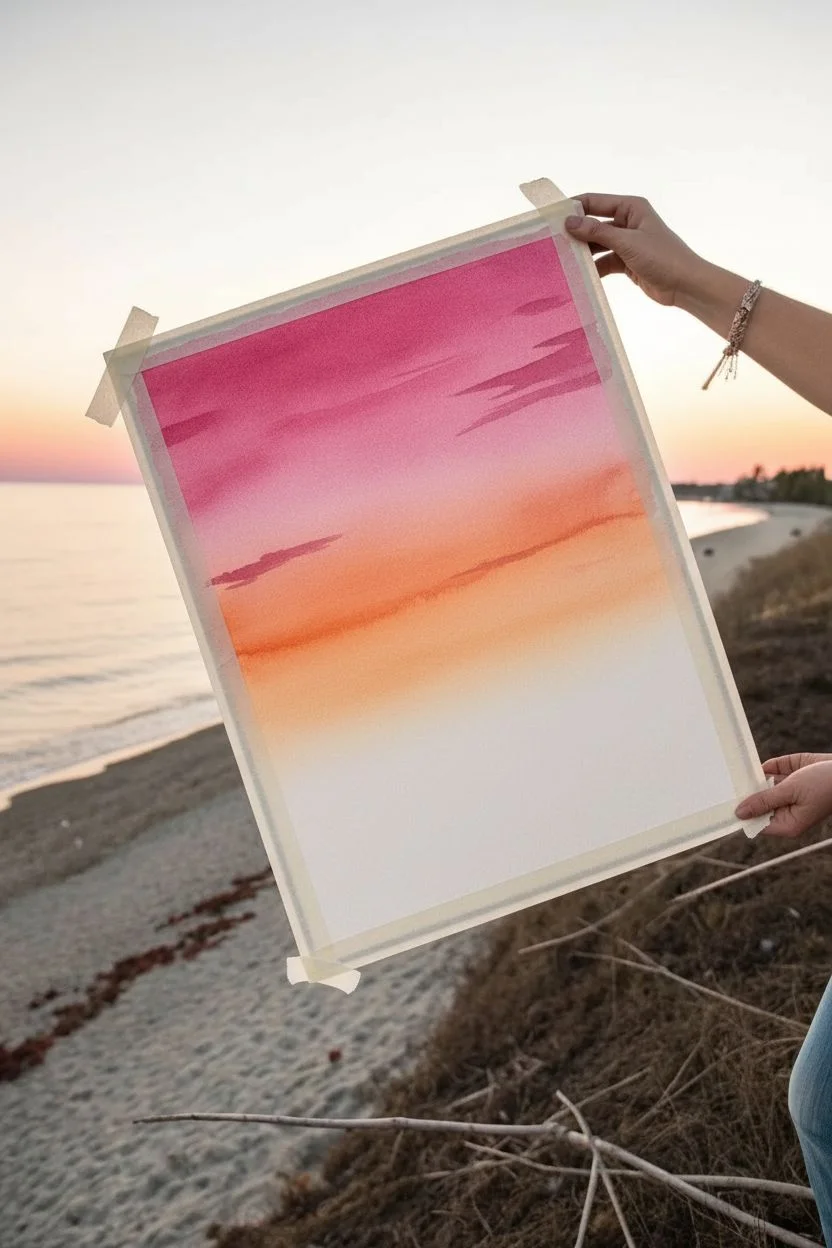
Step 1: Preparing the Sky Gradient
-
Tape the borders:
Begin by taping down all four edges of your watercolor paper to a rigid board or your work surface. This creates the crisp white border seen in the final piece and prevents the paper from buckling when wet. -
Mix your sunset colors:
Prepare two main pools of color on your palette: a vibrant magenta-pink for the upper sky and a warm, glowing orange for the horizon. Keep the paint fluid but pigmented. -
Paint the upper sky:
Using a large flat wash brush, apply the magenta paint to the top third of the paper. Use broad, horizontal strokes to ensure smooth coverage. -
Blend in the orange:
While the magenta is still damp, load your brush with the orange paint. Start painting from the middle section down towards the horizon line, slightly overlapping with the pink to create a seamless gradient blend. -
Refine the transition:
Clean your brush slightly and run it horizontally across the area where the pink and orange meet to soften the transition. I like to let the colors bleed naturally a bit here for an atmospheric look. -
Add cloud details (optional):
If you want the subtle cloud streaks seen in the example, use a slightly deeper concentration of the pink while the paper is still wet and dash in a few horizontal lines near the top.
Pro Tip: Masking Fluid
For a super crisp horizon line, run a strip of tape across the horizon before painting the sky. Remove it later to paint the water.
Step 2: Establishing the Horizon
-
Define the water line:
About two-thirds of the way down the paper, paint a straight horizontal line to separate the sky from the water. You can use a ruler if you need a guide, or lightly sketch it with a pencil first. -
Paint the water:
Mix a muted purple tone by combining your magenta with a touch of deep purple water. Fill the area below the horizon line with this color, keeping the tone somewhat lighter than the solid ground will be later. -
Let everything dry:
This is crucial—allow the entire background (sky and water) to dry completely before proceeding. You can use a hairdryer on a low setting to speed this up.
Step 3: The Silhouette Foreground
-
Sketch the outline:
Lightly sketch the outline of the rearing horse and the grassy hill. Position the hill in the bottom right corner, sloping upwards, and place the horse’s back hooves firmly on the slope. -
Paint the grassy hill:
Switch to a deep purple or black paint. Fill in the hill shape first, creating the ground for your horse. Use upward flicking motions with a smaller brush along the top edge to create the texture of grass blades. -
Outline the horse:
Using a fine round brush and solid black paint (gouache works great here for opacity), carefully trace the outline of the horse’s body, head, and legs. -
Fill the silhouette body:
Fill in the main body of the horse with solid black. Ensure the coverage is opaque; you don’t want the sunset colors showing through the animal. -
Detail the mane and tail:
With your finest brush, add the flowing mane and tail. Use quick, confident strokes that taper at the ends to mimic hair blowing in the wind. -
Refine the hooves and legs:
Pay close attention to the shape of the hooves and the bend of the legs. The front legs should be tucked and expressive, capturing the energy of the rear. -
Final touches:
Check for any light spots in your black silhouette and fill them. If you want a starry effect, you could flick a tiny amount of white paint in the sky, though the example keeps it clean. -
The reveal:
Once the black paint is bone dry, slowly and carefully peel away the painter’s tape at a 45-degree angle to reveal your clean white borders.
Level Up: Metallic Touch
Mix a tiny bit of gold watercolor or ink into the horizon line orange to make the sunset shimmer when the light hits it.
Hang your masterpiece near a window to let the natural light enhance those warm sunset hues.


Horse Portrait With a Soft Floral Frame
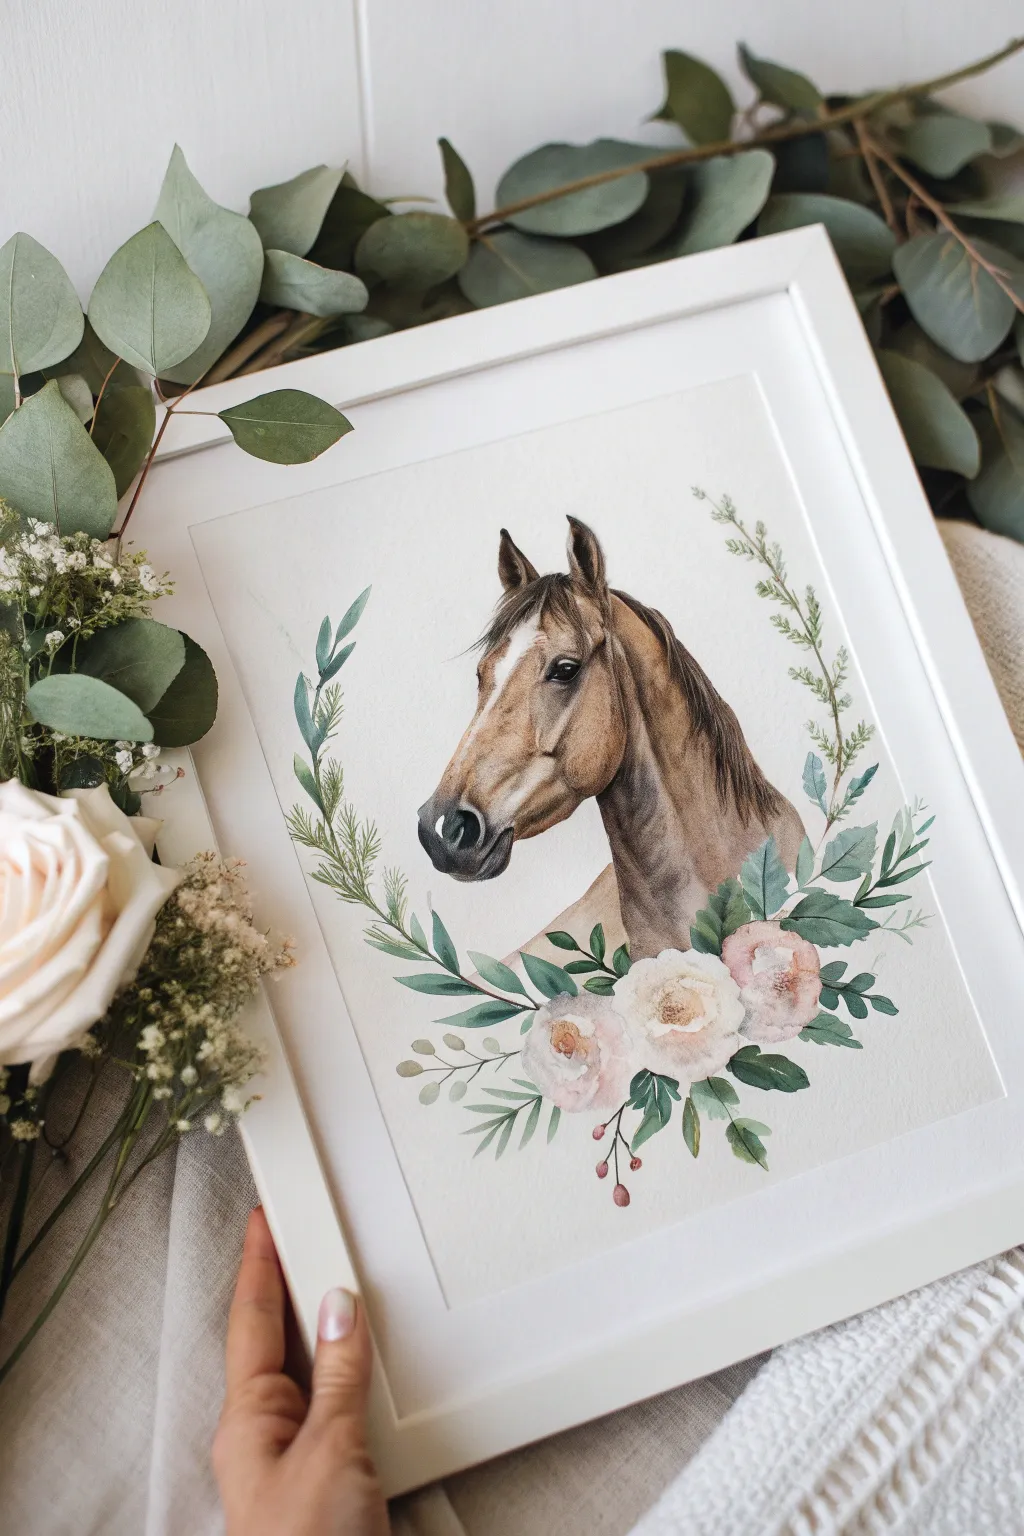
This elegant watercolor project combines the noble profile of a horse with a delicate, framing wreath of soft roses and greenery. It captures a gentle, romantic aesthetic perfect for a nursery or sophisticated gallery wall, balancing realistic animal portraiture with loose botanical elements.
Step-by-Step Tutorial
Materials
- Cold press watercolor paper (300 gsm)
- Watercolor paints (Burnt Sienna, Raw Umber, Sepia, Payne’s Grey, Sap Green, Alizarin Crimson, Yellow Ochre)
- Round brushes (sizes 2, 6, and 10)
- Pencil (HB or 2H)
- Kneaded eraser
- Painter’s tape
- Drawing board
- White gouache or white gel pen
- Jar of clean water
- Paper towels
Step 1: Sketching the Composition
-
Secure your paper:
Tape your watercolor paper down to a board using painter’s tape to prevent buckling when the water is applied. -
Draft the horse’s profile:
Using a light hand and an HB pencil, sketch the outline of the horse’s head facing left. Focus on the main shapes: the slope of the nose, the rounded cheek, and the triangular ears. -
Add facial details:
Lightly mark the placement of the eye, the nostril, and the white blaze running down the forehead. Keep these lines very faint so they don’t show through the paint later. -
Outline the wreath:
Sketch a U-shape curving under the horse’s neck. Draw rough circles for the three main roses at the bottom center and guide lines extending upward for the greenery branches.
Step 2: Painting the Horse
-
First wash of color:
Mix a watery wash of Burnt Sienna with a touch of Yellow Ochre. Using a size 10 brush, apply this base color to the horse’s coat, carefully avoiding the white blaze on the nose and the eye area. -
Building depth:
While the first layer is still slightly damp, introduce a mix of Burnt Sienna and Raw Umber to the shadowed areas: under the jawline, behind the cheekbone, and inside the ears. -
Defining the facial features:
Once the base is dry, use a size 2 brush and a dark mix of Sepia and Payne’s Grey to carefully paint the eye, leaving a tiny speck of white paper for the highlight. Paint the nostril with this same dark mixture. -
Adding the mane:
Mix a dark brown using Sepia. With a size 6 brush, use quick, sweeping strokes to paint the mane falling down the neck and the forelock between the ears. -
Deepening shadows:
Glaze a transparent layer of Raw Umber over the neck and cheek to curve the form. I like to soften any hard edges with a clean, damp brush. -
Refining details:
Add fine hairs and texture with the smallest brush, and define the muzzle area with a soft grey wash.
Muddy Fur Fix
If your horse’s coat looks muddy, let it dry completely. Gently lift excess pigment with a damp, clean brush or sponge, then glaze over with a pure, transparent color like Burnt Sienna.
Step 3: Creating the Floral Wreath
-
Painting the roses:
dilute Alizarin Crimson heavily with water to create a very pale pink. Paint the loose shapes of the roses using a ‘wet-on-wet’ technique, dropping slightly darker pink into the centers while the paper is wet. -
Defining rose petals:
Once the first rose layer is dry, use a slightly thicker pink mix to paint curved, C-shaped strokes to suggest overlapping petals. -
Base greenery:
Mix Sap Green with a touch of blue for a cool eucalyptus tone. Paint the main stems curving up the sides of the horse. -
Adding leaves:
Use the size 6 brush to press and lift, creating leaf shapes along your stems. Vary the green shades by adding more yellow or blue to your mix for visual interest. -
Connecting elements:
Tuck dark green leaves in and around the roses to make the pale flowers pop. Add small sprigs of filler greenery or berries using reddish-brown paint. -
Final highlights:
Use white gouache or a gel pen to touch up the catchlight in the horse’s eye or add tiny accents to the center of the flowers.
Gold Leaf Accent
Once the painting is completely dry, apply small touches of gold leaf to the centers of the roses or the tips of the eucalyptus leaves for a shimmering, elegant finish.
Once the paper is fully dry, remove the tape to reveal your crisp edges and frame your masterpiece
Loose Watercolor Horse With Drips and Blooms

Capture the gentle spirit of a horse with this delicate watercolor portrait that balances precise sketching with soft, loose washes. The combination of a detailed grey profile and fading floral elements creates a dreamy, illustrative quality perfect for framing.
Step-by-Step
Materials
- Cold press watercolor paper (300 gsm)
- Watercolor paints (Payne’s Grey, Raw Sienna or Burnt Ochre, Sepia, soft Pink/Rose)
- Round brushes (Size 8 for washes, Size 2 or 0 for details)
- HB pencil and kneaded eraser
- Jars of clean water
- Paper towels
Step 1: Sketching the Foundation
-
Outline the profile:
Begin with a light HB pencil sketch. Start with the slope of the nose and the strong curve of the jaw. Keep your lines faint so they don’t overpower the translucent paint later. -
Add facial features:
Refine the eye placement, ensuring it sits high on the head with a gentle, downward-cast expression. Sketch the nostril with a teardrop shape and outline the ears, keeping them alert. -
Suggest the mane:
Draw loose, sweeping lines to indicate the flow of the mane down the neck and the forelock between the ears. Don’t draw every hair; just map out the general direction. -
Check proportions:
Step back and check your drawing. The neck should look muscular but elegant. Use a kneaded eraser to lighten any lines that became too dark during sketching.
Muddy colors?
If your grey and ochre mixes look muddy, let the first layer dry completely before glazing the second color on top, rather than mixing them wet-on-wet.
Step 2: Painting the Horse
-
First wash of grey:
Mix a very watery puddle of Payne’s Grey. With your size 8 brush, apply a light wash over the face and neck, carefully avoiding the eye area and the white highlight on the cheek. -
Introduce warmth:
While the grey is still damp, drop in touches of watered-down Raw Sienna or Burnt Ochre on the cheek, neck, and near the ears. This creates that lovely ‘flea-bitten’ grey effect and adds life to the skin. -
Define the shadows:
Switch to a slightly thicker mixture of Payne’s Grey. Paint the darker areas under the jawline, the inside of the ears, and the shadows of the neck muscles to build dimension. -
Paint the eye:
Using your smallest brush and a concentrated dark grey or Sepia, carefully paint the eye. Leave a tiny speck of white dry paper for the reflection to give the horse a spark of life. -
Refine the nostril and mouth:
Use the dark grey mix to define the nostril and the line of the mouth. Soften the edges with a clean, damp brush so the transition isn’t too harsh. -
Create the mane texture:
Mix Sepia with a little grey. Using the tip of your brush, flick quick strokes following your pencil guides. Vary the pressure to create thick and thin lines that mimic hair. -
Add loose background washes:
Load a large brush with very watery Raw Sienna or a peachy tone. Loosely sweep this color behind the mane and neck, letting it bleed out into the white paper for an abstract, unfinished look.
Softening Edges
To get that velvety look on the horse’s nose, run a clean, slightly damp brush along the edge of your wet paint. This pulls the pigment out gently.
Step 3: Floral Details and Finishing Touches
-
Sketch the flowers:
Lightly sketch a few tall, thin stems rising from the bottom right, overlapping the horse’s neck slightly. -
Paint the stems:
With a mix of Green and a touch of Grey (to desaturate it), use a fine liner or small round brush to paint delicate, wavy stems. -
Add bloom accents:
Dot in small circles using a soft Pink or Rose color at the tops of the stems. Keep these loose and suggestive rather than botanically perfect. -
Connect the elements:
Allow the bottom of the horse’s neck to fade out into the white paper. You can use clean water to soften the edge where the neck ends and the flowers begin. -
Splatter texture:
Load a brush with watery Raw Sienna or gold paint. Tap the handle against another brush to create small splatters around the mane and background for an organic feel. -
Final assessment:
Once everything is fully dry, erase any visible pencil marks that detract from the softness. Darken the pupil or nostril if the paint dried too light.
Step back and admire the gentle expression you’ve captured in your horse portrait
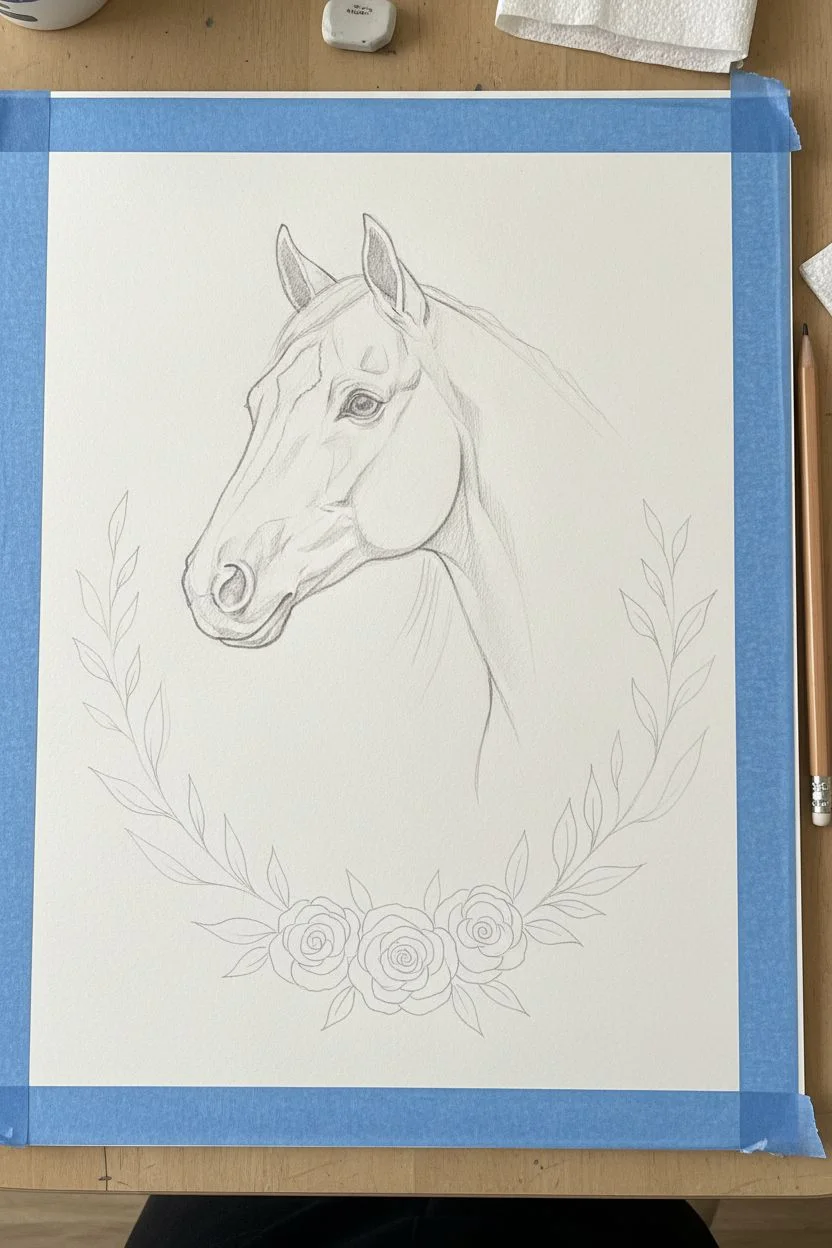
Limited Palette Horse Painting in Monochrome Values
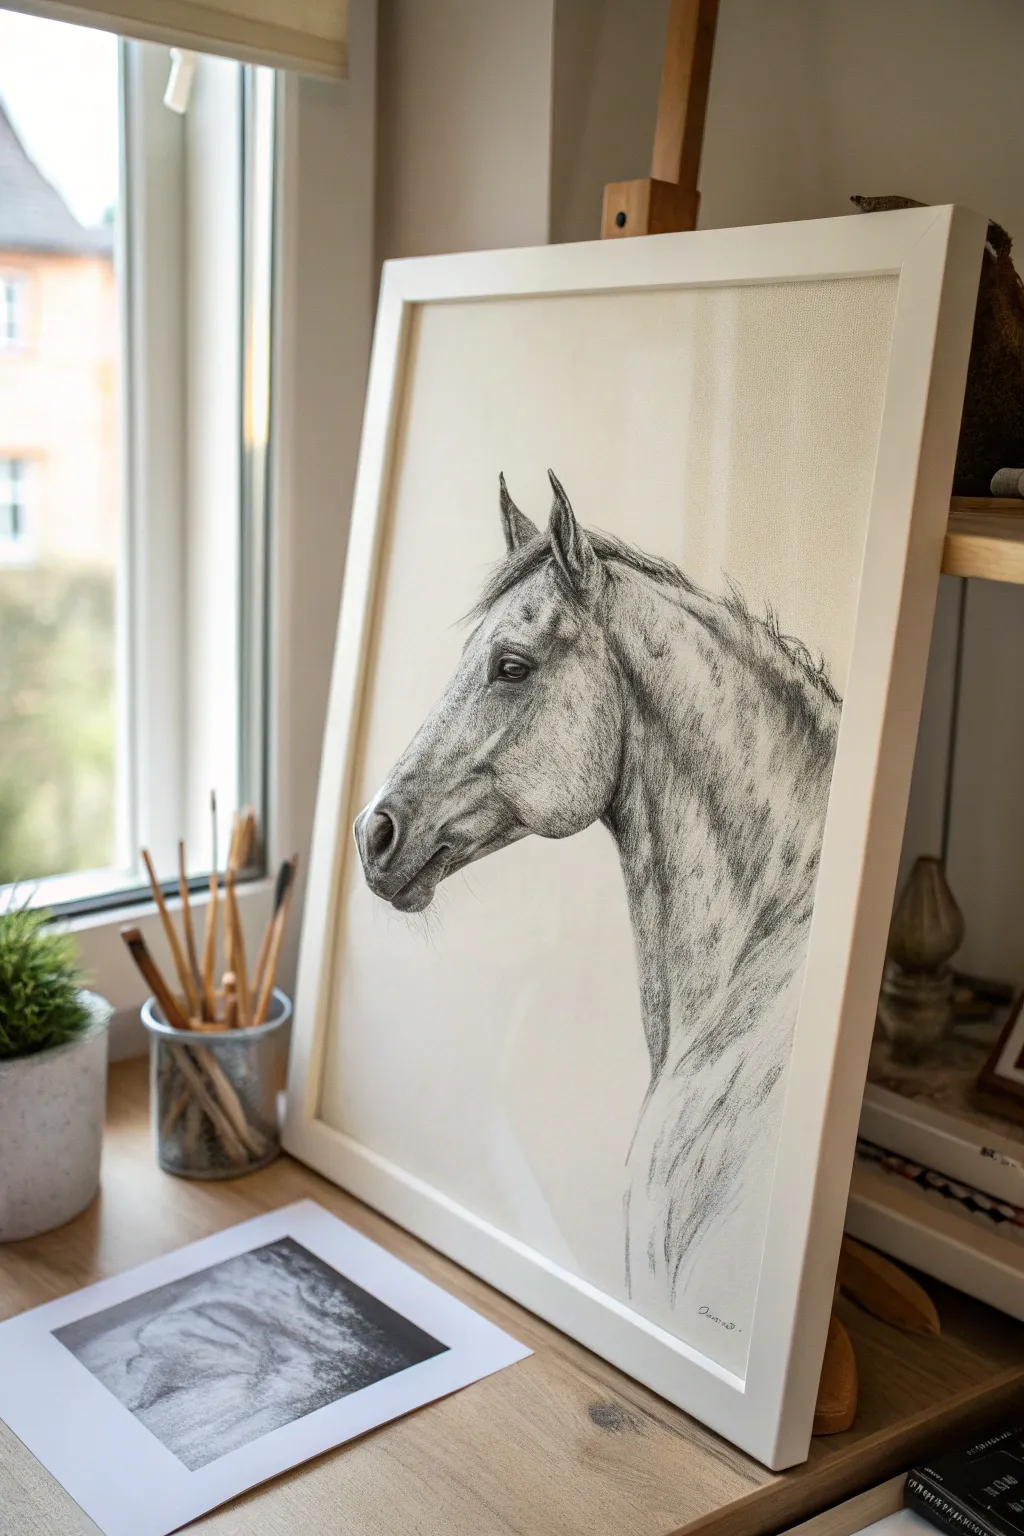
Capture the quiet strength of a horse in profile with this elegant monochrome study. Using charcoal on toned paper creates a timeless look that emphasizes form and texture without the distraction of color.
How-To Guide
Materials
- Cream or off-white toned drawing paper (vellum surface)
- Willow charcoal sticks (thin and medium)
- Charcoal pencils (soft, medium, hard)
- White pastel pencil or white charcoal pencil
- Kneaded eraser
- Blending stump or tortillon
- Artist tape
- Workable fixative spray
- Drawing board or easel
- Framing mat and frame (optional)
Step 1: Preparation & Outline
-
Secure the paper:
Tape your cream-toned paper securely to a drawing board or easel. Using toned paper gives you a mid-tone immediately, so you only need to push the darks and lift the highlights. -
Establish the envelope:
Using a hard charcoal pencil with a light hand, sketch the general ‘envelope’ or shape of the horse’s head. Focus on the angle of the nose versus the neck. -
Refine proportions:
Mark the key landmarks: the eye placement, the nostril, the curve of the cheekbone (zygomatic arch), and the ear position. Keep these initial lines very faint so they disappear later. -
Contour drawing:
Commit to the outline more firmly now. Draw the specific curves of the muzzle, the dip of the nose, and the flow of the mane down the neck.
Keep it Clean
Place a piece of scrap paper under your drawing hand. This prevents natural hand oils from touching the paper and stops you from accidentally smudging your work as you move across the page.
Step 2: Shading & Form
-
Lay in mid-tones:
Take a stick of willow charcoal and gently shade the shadow areas—under the jaw, the neck muscle indentations, and the hollow above the eye. -
Soft blending:
Use a soft cloth or your finger to rub the charcoal into the paper. This creates a soft, grey base tone that suggests the horse’s underlying muscle structure without harsh lines. -
Deepen the blacks:
Switch to a soft charcoal pencil to add the darkest values. Focus on the pupil of the eye, the deep recess of the nostril, and the darkest shadows under the jawline. -
Define the eye:
The eye brings the portrait to life. Ensure you leave a tiny spot of the paper showing for the reflection, or plan to add it later with white. Darken the eyelids and lashes significantly. -
Texture the coat:
I like to use short, directional strokes with a medium charcoal pencil to mimic the direction of hair growth. Observe how the hair swirls on the cheek versus how it flows down the neck. -
Sculpt the muzzle:
Use the kneaded eraser to lift out charcoal on the velvety part of the nose. This subtractive method helps create the soft, fleshy texture of the muzzle.
Step 3: Details & Highlights
-
Develop the mane:
Don’t draw every single hair. Instead, group sections of the mane together using broad strokes of charcoal, then add a few flyaway strands for realism. -
Add highlights:
Using your white pastel pencil or white charcoal, add distinct highlights. Focus on the bridge of the nose, the bony prominence above the eye, and the sheen on the neck muscles. -
Refine the contrast:
Look at the junction where the jaw meets the neck. Ensure there is enough contrast here to separate the head from the neck visually. -
Blend the transitions:
Use a blending stump to soften the transition between your white highlights and the smoky charcoal shadows. You want the form to turn gradually, not abruptly. -
Final textural touches:
Add subtle speckling or small dots on the coat if you want a dapple effect, simply by pressing the charcoal tip lightly and smudging slightly.
Muddy Greys?
If your highlights look grey instead of white, you’ve likely layered white charcoal over heavy black charcoal. Clean the area with an eraser first, then apply the white directly to the paper.
Step 4: Review & Finish
-
Check values:
Step back from your drawing. Does it need more depth? If the drawing feels flat, darken your darkest shadows one last time. -
Clean up edges:
Use your eraser to clean up the background around the profile. A crisp edge along the nose and forehead makes the drawing pop. -
Fixative:
Once satisfied, spray with a workable fixative to prevent the charcoal dust from smudging or falling off. -
Framing:
Place the artwork in a simple white frame with a mat to echo the clean, gallery aesthetic shown in the reference image.
Enjoy the sophisticated simplicity of your new charcoal horse portrait as it adds a touch of equestrian grace to your room
Palette-Knife Style Horse for Bold Texture
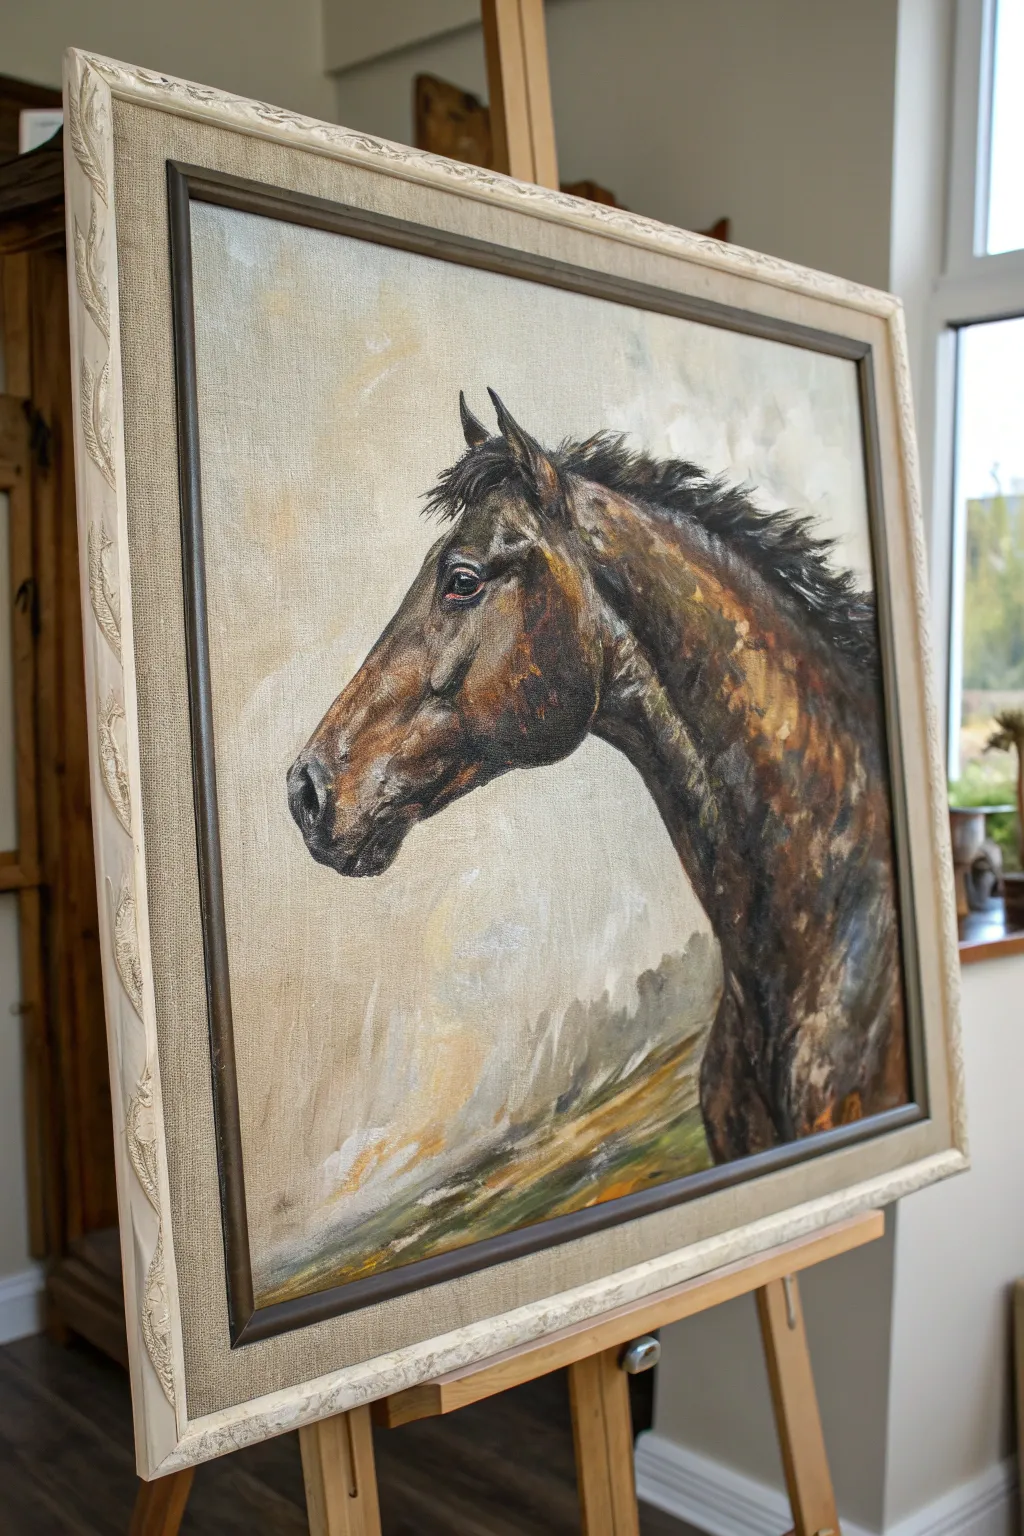
Capture the muscular grace of a dark horse in profile, using rich browns and expressive strokes to bring the subject to life against a misty background. This project combines classic portraiture with a textured, painterly approach that emphasizes light and form.
Step-by-Step Tutorial
Materials
- Canvas board or stretched canvas (16×20 or similar)
- Oil paints or heavy body acrylics (Burnt Umber, Raw Sienna, Ultramarine Blue, Titanium White, Black, Alizarin Crimson)
- Assorted flat and filbert brushes (sizes 4, 8, and 12)
- Painting knife (diamond or teardrop shape) for texture
- Palette for mixing
- Linen liner frame (optional, for finishing)
- Easel
- Odorless mineral spirits or painting medium (if using oils)
Step 1: Creating the Atmosphere
-
Establish the background tone:
Begin by covering the entire canvas with a thin, muted wash. Mix Titanium White with a tiny touch of Raw Sienna and Burnt Umber to create a creamy, warm grey. Apply this loosely, allowing the brushstrokes to remain visible for an atmospheric effect. -
Add subtle clouds:
While the base is still wet (or using a glazing medium if using acrylics), introduce hints of cooler grey near the bottom left and warmer cream tones near the top right. Blend these softly to suggest a misty, overcast sky, keeping the center area relatively neutral where the horse will be. -
Suggest the landscape:
At the very bottom of the canvas, paint diagonal sweeps of olive green and ochre to hint at a grassy slope. Keep these strokes energetic and undefined; we want the focus to remain sharp on the horse’s head.
Palette Knife Technique
Don’t overmix paints on the palette. Let colors marbleize on the palette knife so when you apply them, streaks of pure pigment create vibrant, unexpected fur textures.
Step 2: Blocking the Form
-
Sketch the outline:
Using a thin detail brush and watered-down Burnt Umber, lightly sketch the profile of the horse. Focus on the triangular shape of the head, the curve of the thick neck, and the placement of the ear. -
Identify darks and lights:
Squint at your reference to see the main shadow shapes. Block in the darkest areas—under the jaw, the back of the neck, and the nostril—using a mix of Burnt Umber and Ultramarine Blue, which creates a rich, chromatic black. -
Fill the mid-tones:
Mix a warm mid-tone brown using Burnt Umber and a touch of Alizarin Crimson. Fill in the rest of the horse’s face and neck, bridging the gap between your dark shadows and the highlights to come.
Step 3: Building Texture and Detail
-
Model the facial structure:
Switch to a smaller filbert brush. Using a lighter brown mixed with Raw Sienna, carve out the cheekbone and the bridge of the nose. Follow the direction of the muscle and bone structure with your strokes. -
Paint the eye:
Carefully render the eye using your dark mixture, but leave a tiny speck of canvas bare or add a dot of white for the catchlight. Ensure the area around the eye feels soft and fleshy by blending the edges slightly. -
Detail the muzzle:
Deepen the nostril with pure black or your darkest dark mix. Add soft grey highlights around the muzzle and lips to give them a velvety, soft texture typical of horses. -
Layer the neck muscles:
I like to use a palette knife here for added dimension. Mix varying shades of deep brown and russet, then drag the knife downwards along the neck to mimic the flow of the mane and muscles. -
Create the mane:
Using a dry flat brush or the edge of your palette knife with dark paint, flick short, choppy strokes upward and backward from the crest of the neck to create a wind-blown, textured mane.
Level Up: The Eye
Add a tiny touch of cerulean blue to the highlight in the horse’s eye. This cool tone contrasts beautifully with the warm browns and makes the eye look glassy and alive.
Step 4: Refining and Finishing
-
Add high-contrast highlights:
Mix Titanium White with a little Yellow Ochre. Apply small, sharp highlights on the wet look of the eye, the sheen of the cheekbone, and the top of the ear. -
Enhance color variation:
Glaze very thin layers of Alizarin Crimson or Burnt Sienna over the mid-tones of the neck to give the coat a rich, warm glow that suggests vitality. -
Soften edges:
Check the edges where the horse meets the background. Soften the back of the neck and the lower chest area so they recede slightly, keeping the sharpest focus on the face. -
Frame selection:
To match the reference look, mount your finished piece in a frame with a wide, neutral linen liner and a carved, distressed white or cream outer moulding.
Step back and admire the powerful, soulful expression you have captured on canvas
Abstract Color Wash Horse Emerging From the Background
Capture the majestic spirit of a horse with this watercolor project, where realistic details seamlessly blend into abstract washes of color. The technique uses a wet-on-wet approach to let the subject feel as though it is emerging from a misty, dreamlike atmosphere.
Detailed Instructions
Materials
- High-quality watercolor paper (cold press, 300gsm or heavier, large format)
- Watercolor paints (burnt sienna, yellow ochre, ultramarine blue, burnt umber, Payne’s grey, alizarin crimson)
- Pencil (HB) for sketching
- Kneadable eraser
- Masking fluid and an old brush or applicator
- Round watercolor brushes (sizes 4, 8, and a large wash brush)
- Rigger or liner brush for fine hairs
- Palette for mixing
- Water containers and paper towels
Step 1: The Foundation
-
Sketch the profile:
Begin with a light pencil sketch of the horse’s head and neck. Focus on getting the proportions correct, especially the placement of the eye, nostril, and jawline. Keep your lines faint so they won’t show through the transparent watercolor layers. -
Protect the highlights:
Using masking fluid and an old brush, carefully apply fluid to the brightest highlights. This includes the catchlight in the eye, the sheen on the nostril, streaks in the mane, and potential white markings on the forehead. Let this dry completely before painting.
Tip: Gravity is Your Friend
Keep your board taped to a moveable surface. Tilting the paper while the background wash is wet creates natural, unpredictable drips that look effortless.
Step 2: Atmospheric Washes
-
Prepare the paper:
Lightly mist the background areas with clean water, avoiding the detailed face area for now. You want the paper damp but not soaking wet to encourage soft diffusion. -
Apply the warm wash:
Mix a watery wash of burnt sienna and yellow ochre. Apply this to the upper right corner behind the neck and mane, letting it bleed softly outwards. Tilt the board slightly to let gravity help the pigment drift. -
Introduce the cool tones:
While the paper is still reactive, mix ultramarine blue with a touch of Payne’s grey. Apply this to the lower left area (below the muzzle and neck), creating a moody, shadowy contrast to the warm upper section. -
Soften edges:
Use a clean, damp brush to soften the edges where the background washes meet the white of the paper. You want a vignetted look that fades out rather than ending abruptly.
Troubleshooting: Bloom
If cauliflower-like blooms appear (backruns), it means you added water to drying paint. Embrace them as texture in the background, or lift them out with a stiff damp brush.
Step 3: Building Form & Detail
-
First layer on the horse:
Mix a pale tea-consistency wash of burnt sienna and grey. Apply this over the horse’s face and neck to establish the base tone, leaving areas lighter around the cheekbone and muzzle for volume. -
Define the shadows:
While the first layer is drying, mix a stronger shadow color using burnt umber and ultramarine. Paint the shadows under the jaw, behind the cheekbone, and in the deep recesses of the neck muscle. -
Detail the eye:
Switch to a smaller number 4 brush. With a concentrated mix of burnt umber and black (or Payne’s grey), carefully paint the dark pupil and iris, working around the masked highlight. -
Work on the muzzle:
Using a grey-blue mix, add texture to the muzzle. Use small, dabbing strokes to suggest the soft, velvety skin around the nose and lips. Deepen the nostril with your darkest darks. -
Create the mane texture:
For the mane, don’t paint individual hairs yet. Paint mass shapes of grey and brown, following the direction of hair growth. Let the color fade out towards the tips to blend with the background.
Step 4: Refinement and Finish
-
Deepen facial contrast:
Glaze another layer of reddish-brown over the cheek and jaw to warm up the skin tone. I find this helps the horse look alive rather than flat. -
Enhance the mane:
Use a rigger or liner brush now. specific darker strokes over the dried mane wash to suggest individual strands. Allow some strands to fly loose into the background washes. -
Connect figure to ground:
Add some loose, splashed texture to the bottom of the neck using the dark blue-grey mix. This creates that ’emerging’ effect where the body dissolves into the abstract splash. -
Remove masking:
Once the painting is bone dry to the touch, gently rub away the masking fluid. Soften any harsh edges of the now-white highlights with a damp brush if they look too stark. -
Final touches:
Assess the values. If the eye needs more life, add a tiny glaze of blue or brown to the iris. Sign your work at the bottom.
Step back and admire the balance between the precision of the face and the freedom of the surrounding color
Vibrant Pop Color Horse With Unexpected Palettes
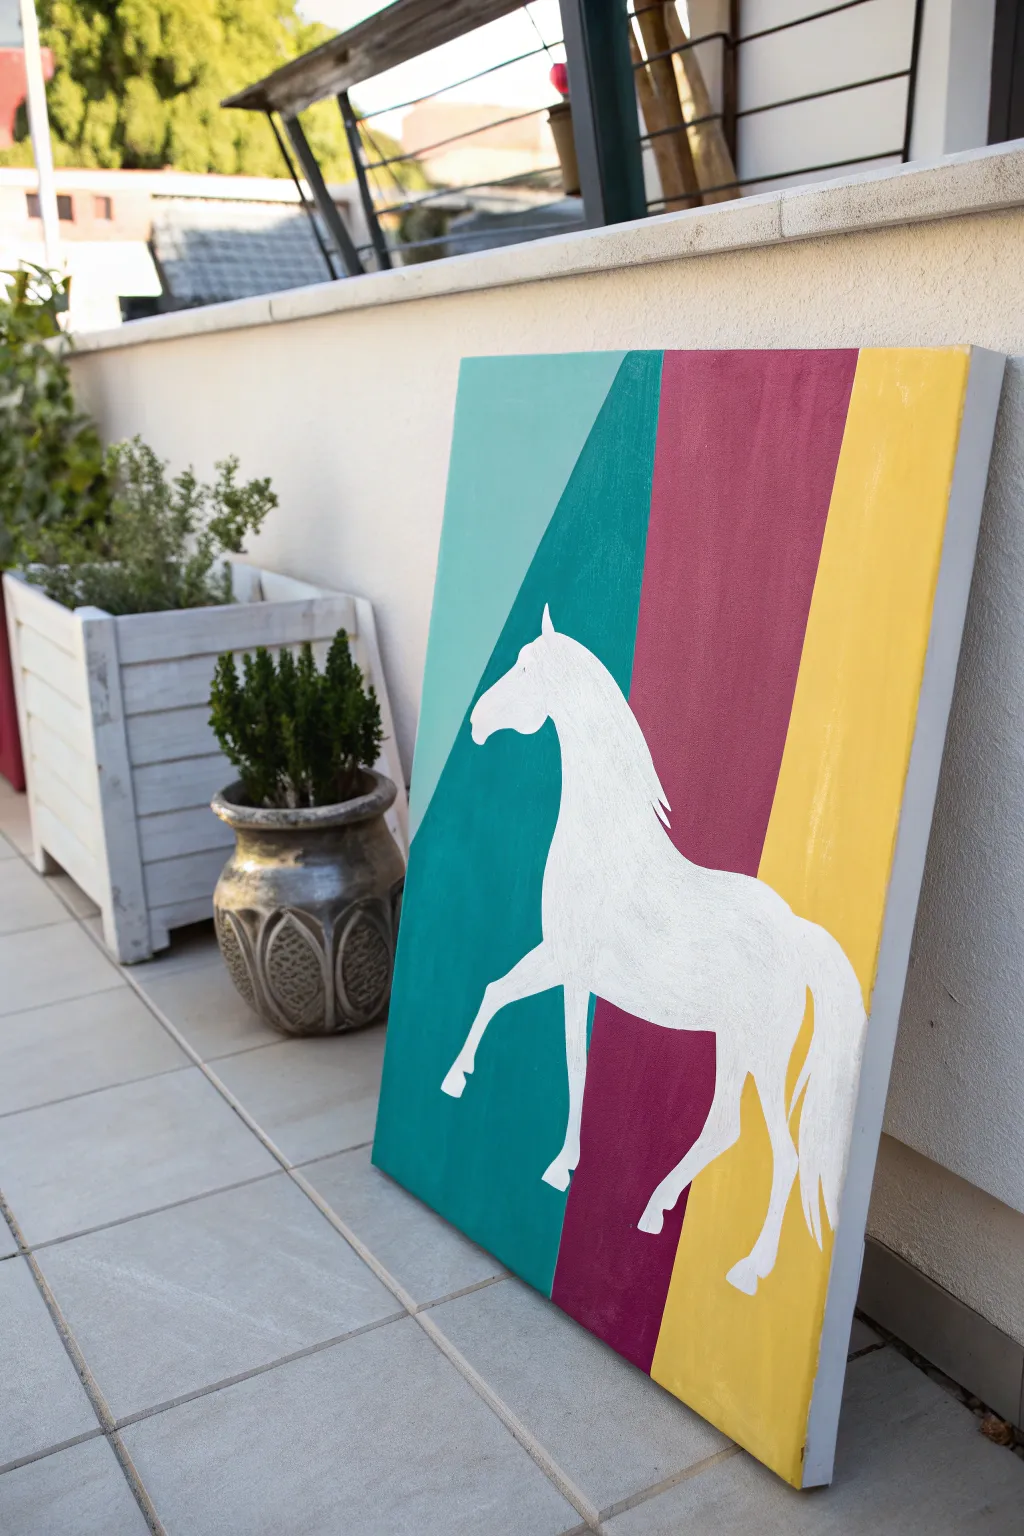
Bring a modern, equestrian flair to your space with this striking canvas project featuring bold geometric blocks and a pristine white silhouette. This piece relies on sharp lines and an unexpected color palette of teal, burgundy, and yellow to create a contemporary look.
How-To Guide
Materials
- Large rectangular canvas (approx. 24×30 inches)
- Acrylic paints: White, Teal/Light Blue, Dark Turquoise, Burgundy, Sunshine Yellow
- Painter’s tape or masking tape (various widths helpful)
- Pencil and eraser
- Flat paintbrushes (wide for background, medium/small for details)
- Horse silhouette stencil or reference image
- Palette or paper plate
- Ruler or straight edge
Step 1: Planning the Layout
-
Prepare your canvas:
Start with a clean, primed canvas. If necessary, give it a base coat of white acrylic paint to ensure the surface is smooth and bright. Let this dry completely before moving on. -
Sketch the geometric zones:
Using a ruler and a pencil, lightly draw the diagonal and vertical lines that will separate your color blocks. In the reference image, the canvas is divided into four distinct zones, with angles sloping downward from left to right. -
Outline the horse:
Lightly sketch the horse silhouette in the center of the canvas. It should overlap all the color zones. If you aren’t confident in freehand drawing, you can print a silhouette, cut it out, and trace it lightly onto the canvas.
Clean Lines Pro-Tip
To prevent paint bleeding under tape, brush a tiny bit of the *base* color (or clear matte medium) over the tape edge first to seal it.
Step 2: Painting the Background
-
Mask the first section:
Apply painter’s tape along the pencil line separating the far-left section (the light teal triangle) from the adjacent section. Press the edges down firmly to prevent paint bleed. -
Paint the light teal triangle:
Fill in the upper-left triangle with a light teal or mint green paint. Use a wide flat brush for smooth coverage. Paint right over your pencil sketch of the horse for now—we will layer the white on top later. -
Mask and paint the turquoise zone:
Once the first section is dry to the touch, move your tape to protect the dried edge. Paint the second section—the large angled block—using a deep turquoise or dark teal acrylic. -
Create the burgundy stripe:
Tape off the central vertical section. Apply a coat of rich burgundy or maroon paint. This dark, warm tone creates a critical contrast against the cool blues and bright yellow. -
Fill the final yellow section:
Tape the final edge and fill the remaining right-hand section with a bright, opaque sunshine yellow. You may need two coats here, as yellow can be a bit translucent. -
Remove tape and dry:
Carefully peel off all tape while the paint is still slightly tacky to get the sharpest lines. Allow the entire background to dry completely, ideally overnight, so the colors don’t lift when painting the horse.
Level Up: Metallic Touch
Instead of plain white for the horse, try using a pearlescent white or a metallic silver paint to make the silhouette catch the light.
Step 3: Creating the Silhouette
-
Re-establish the outline:
If your background paint covered your initial sketch too heavily, lightly re-draw or re-trace the horse silhouette over the dried color blocks. Use a white charcoal pencil if regular graphite is hard to see on the dark sections. -
Fill the silhouette:
Using a medium flat brush, begin filling in the horse shape with pure titanium white paint. Start from the center and work outward toward the edges. -
Refine the edges:
Switch to a smaller brush to carefully paint the contours of the horse’s legs, mane, and face. Crisp edges are key to the ‘pop’ effect against the geometric background. -
Build opacity:
The first coat of white will likely look streaky over the dark burgundy and teal sections. Let it dry, then apply a second (and potentially third) coat of white until the horse is solid and opaque. -
Add subtle texture (optional):
I like to add very subtle strokes of pale grey or diluted white on top of the solid white to mimic the flow of the mane and tail, giving the flat silhouette just a hint of movement. -
Paint the gallery edges:
For a professional finish, extend the geometric color lines around the sides of the canvas so the pattern continues when viewed from an angle.
Hang your finished masterpiece in a well-lit area to let those vibrant colors energize the room
Double Exposure Horse Head With a Running Horse Inside
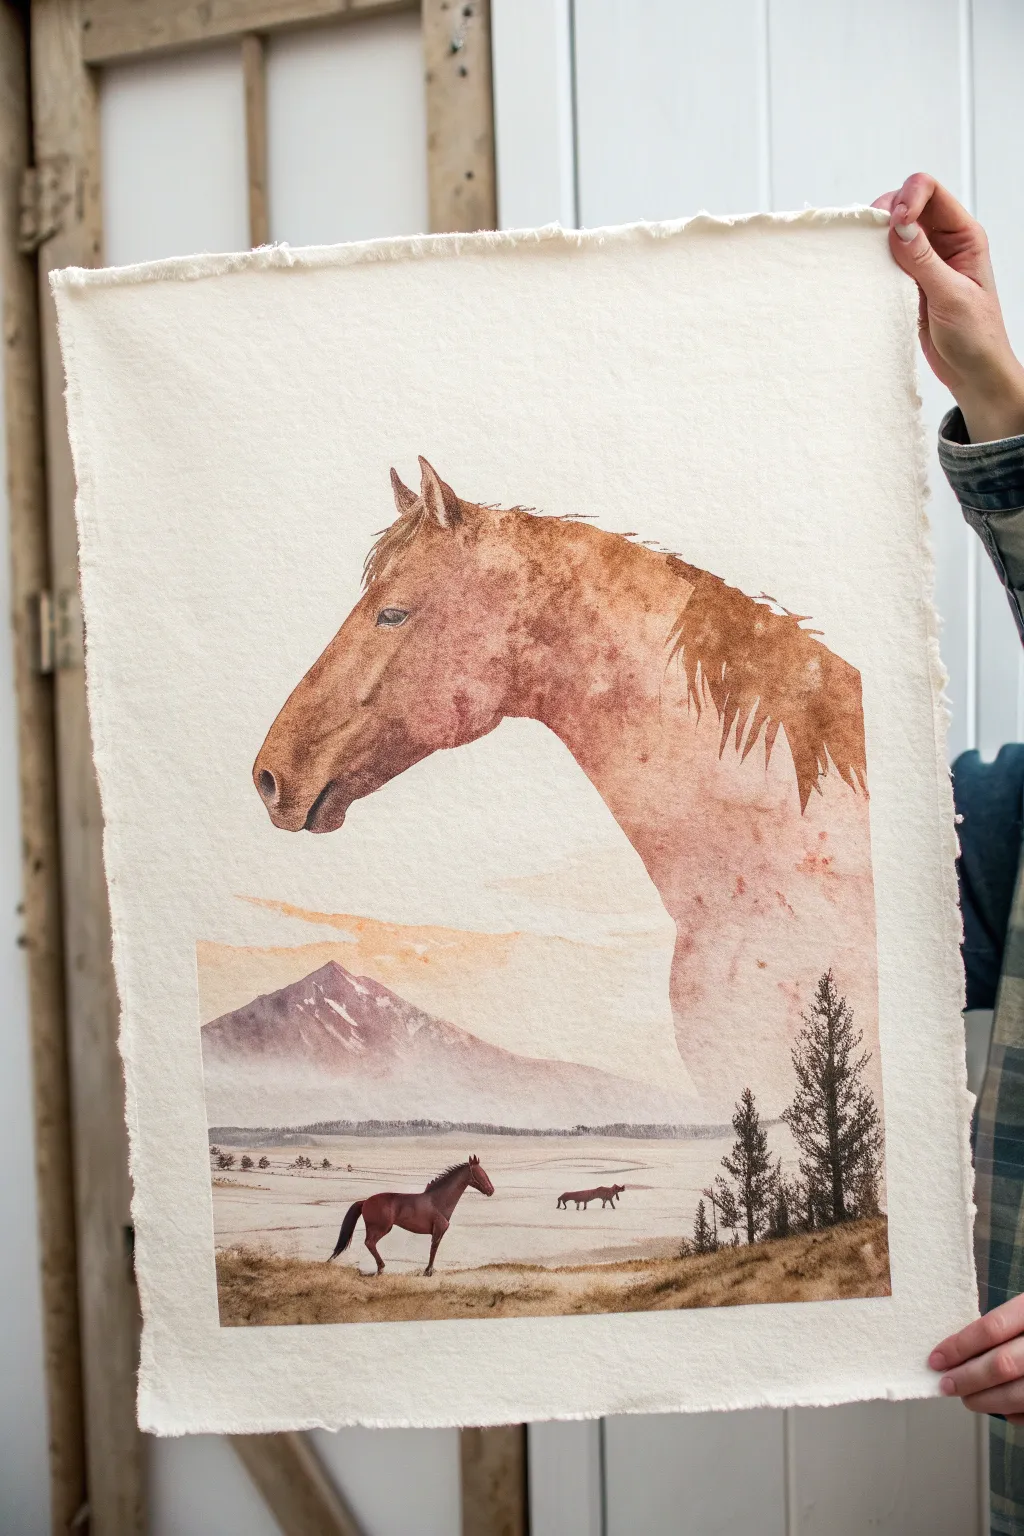
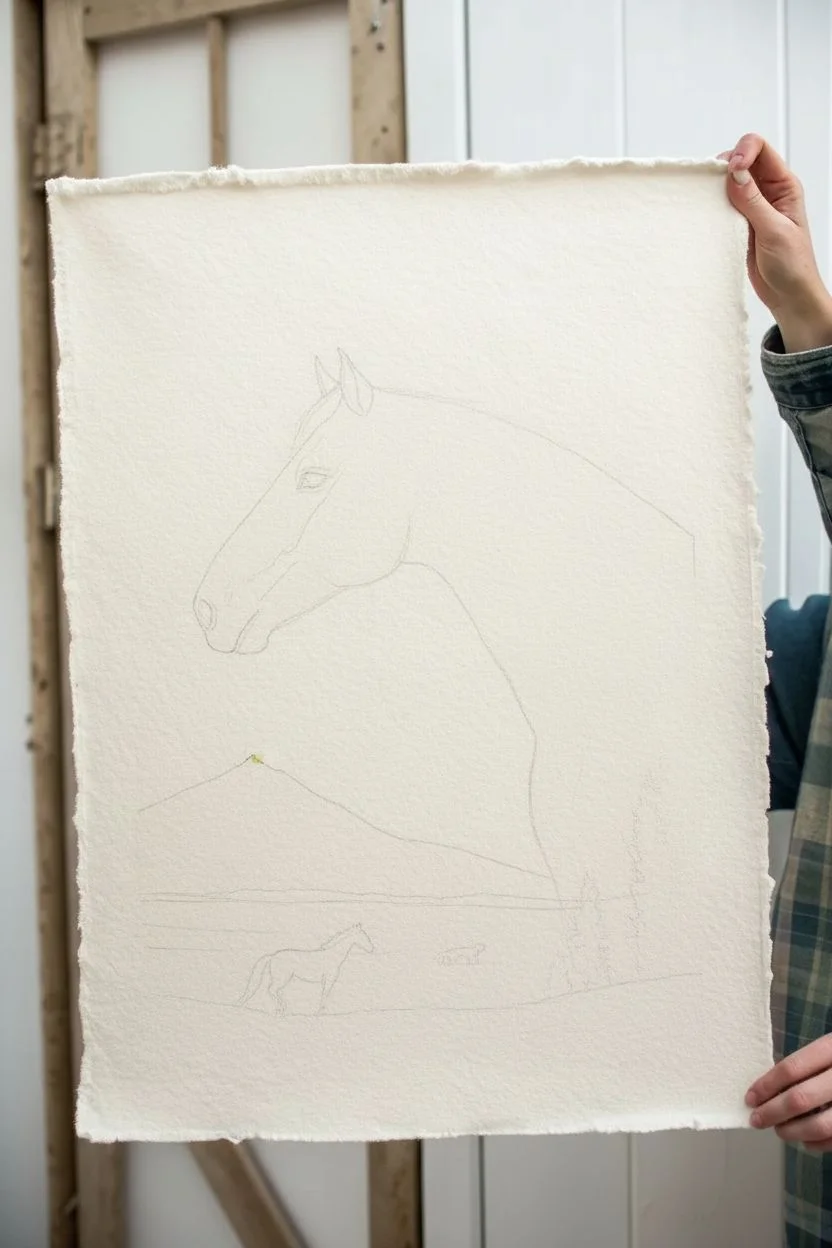
This captivating project merges two perspectives, overlaying a vast, misty landscape inside the striking silhouette of a horse profile. The technique uses the texture of high-quality deckle edge paper to enhance the rustic, natural feel of the reddish-brown watercolor tones.
Step-by-Step Guide
Materials
- Heavyweight cold-press watercolor paper with deckle edge (approx. 300gsm)
- Watercolor paints (Burnt Sienna, Red Oxide, Payne’s Grey, Indigo, Yellow Ochre)
- Masking fluid
- Pencil (H or HB for light lines)
- Round watercolor brushes (sizes 2, 6, and 10)
- Flat wash brush
- Eraser (kneaded)
- Paper towels
- Clean water jars
Step 1: Drafting the Composition
-
Outline the main silhouette:
Begin by lightly sketching the large profile of the horse’s head and neck. Focus on capturing the curve of the jaw and the slope of the nose. Do not draw the bottom edge of the neck yet; let it fade downwards where the landscape will be. -
Sketch the internal landscape:
Within the lower neck area, lightly sketch the horizon line about a third of the way up from the bottom. Draw the triangular peak of the mountain and the small figures of the running horses in the foreground. -
Mask the highlights:
Apply a thin layer of masking fluid to the tiny areas that need to remain pure white, specifically the snow on the mountain peak and perhaps a tiny glint in the main horse’s eye.
Muddy Colors?
If the mountain purple mixes badly with the orange sky, ensure the sky layer is 100% dry before painting the mountain. Use a hair dryer on cool if you are impatient.
Step 2: Painting the Horse Portrait
-
Base wash for the head:
Mix a watery wash of Burnt Sienna with a touch of Yellow Ochre. Using your size 10 brush, fill in the top portion of the horse’s head (ears, forehead, and cheek), keeping the edges crisp. -
Add definition while wet:
While the first wash is still damp, drop in concentrated Red Oxide or Burnt Umber near the ears, the mane line, and the shadow under the jawbone to create instant volume. -
Paint the eye and nose detailing:
Switch to a size 2 brush. Using a darker mix of Burnt Umber and Indigo, carefully paint the eye, leaving the highlight clear. add the nostril detail with the same dark tone. -
Create the mane texture:
Using a semi-dry brush technique with a rich brown mix, flick the brush downwards along the neck to suggest the mane hair. I like to let these strokes be a bit loose to contrast with the smooth face. -
Fade into the sky:
As you paint down the neck, dilute your paint significantly with water. Allow the brown of the neck to fade seamlessly into a very pale wash that will become the ‘sky’ of your landscape scene.
Step 3: Creating the Interior Landscape
-
Paint the sunset sky:
Just above the mountain sketch, paint a soft, horizontal wash of pale orange or salmon pink to suggest a sunset, blending it upwards into the fading neck color. -
Mountain wash:
Once the sky is dry, mix a purplish-grey using Payne’s Grey and a tiny bit of red. Paint the mountain silhouette, letting it be darker at the peak and washing it out with clear water as it reaches the base to create mist. -
Foreground plains:
For the flat ground, use a very dilute wash of Yellow Ochre and Burnt Sienna. Paint horizontal strokes to mimic the flat plains, leaving some paper white to represent light hitting the ground. -
Remove masking fluid:
Determine that the paper is bone dry, then gently rub away the masking fluid from the mountain peak to reveal the snow.
Pro Tip: Soft Transitions
To get the ‘double exposure’ look effectively, keep the middle section (where the neck fades into sky) very wet. Let gravity pull the pigment down for a natural gradient.
Step 4: Final Details
-
Paint the miniature horses:
Using your smallest brush and a dry consistency of dark brown paint, carefully fill in the silhouettes of the running horses. Keep their legs thin and delicate. -
Add trees to the right:
On the right side of the landscape, paint vertical pine trees using a dark green-black mix. Tap the tip of the brush to create the texture of pine needles. -
Ground the scene:
Add a slightly darker, grassy texture to the immediate foreground at the bottom of the paper to give the running horses something to stand on. -
Refine the edges:
Check the outer silhouette of the large horse head. If edges look too ragged where they shouldn’t be, use a slightly damp, clean brush to smooth them out.
Step back and admire how the two worlds merge into one cohesive image
Negative Space Horse With a Clean, Modern Background
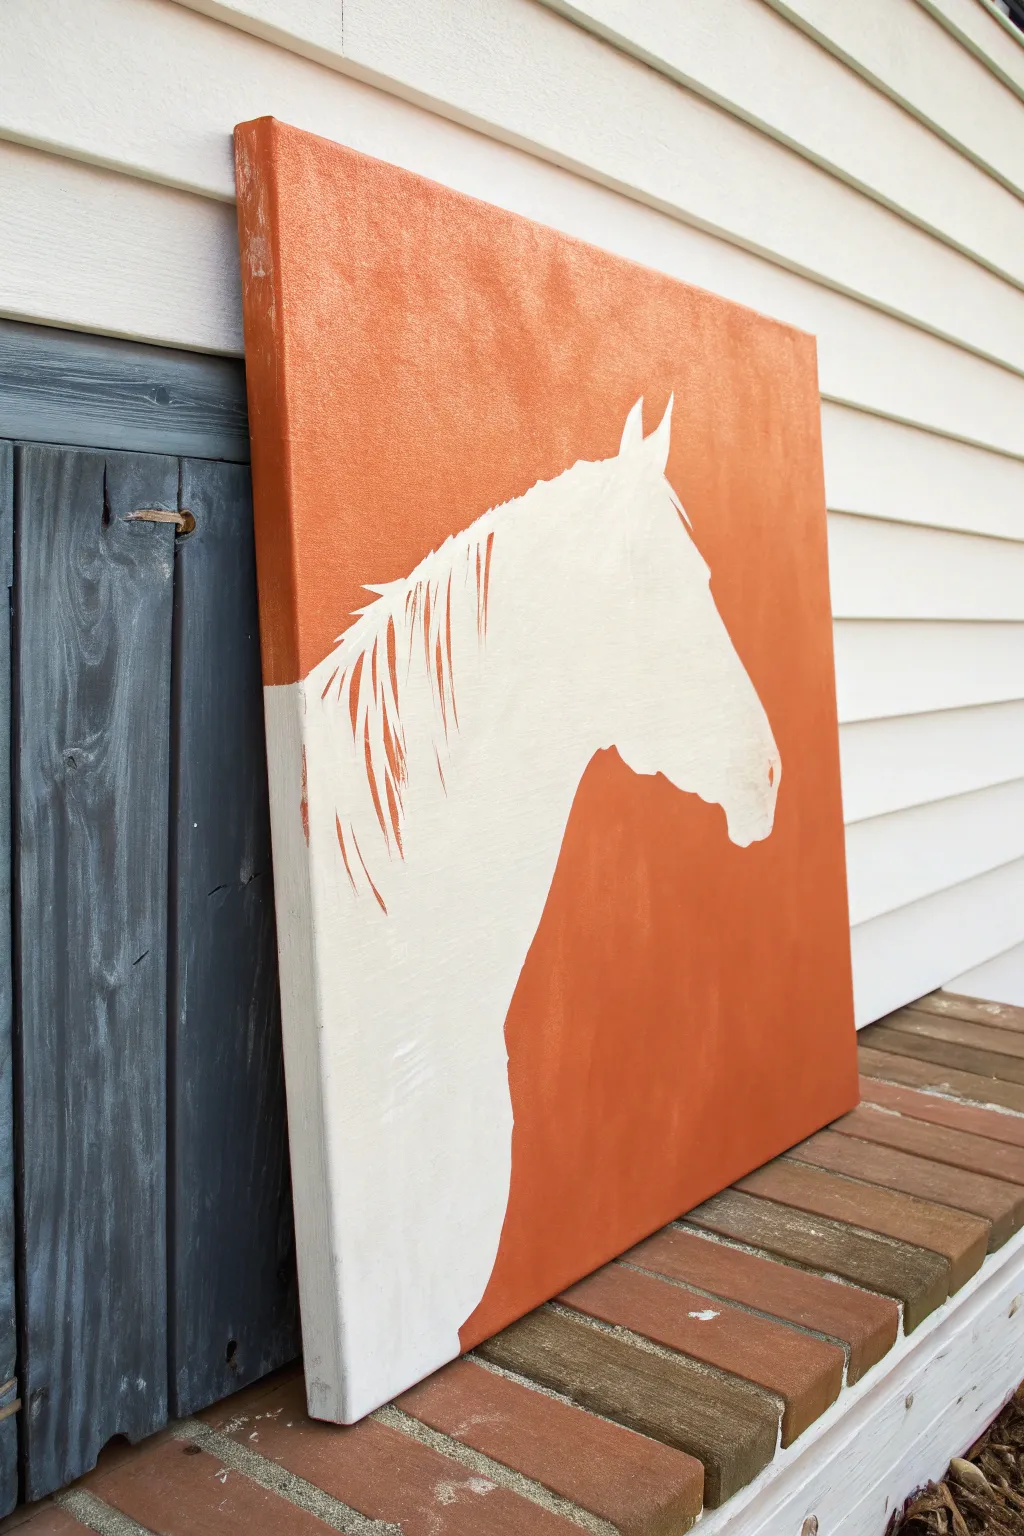
This project creates a bold, modern statement piece by defining a horse’s silhouette through negative space. By surrounding a crisp white profile with a textured terra cotta background, you achieve a sophisticated look that pops against any wall.
Step-by-Step Guide
Materials
- Large square gallery-wrapped canvas (18×18 or 24×24 inches recommended)
- White acrylic paint (heavy body or gesso)
- Terra cotta or burnt orange acrylic paint
- Large flat paintbrush (2-3 inch)
- Medium round brush
- Small liner or detail brush
- Pencil
- Tracing paper or projector (optional)
- Painter’s tape or masking fluid (optional)
- Water cup and palette
Step 1: Preparation & Sketching
-
Prime the Surface:
Start with a clean slate. Even if your canvas is pre-primed, apply two even coats of white acrylic paint or gesso to the entire surface. This ensures the white silhouette will be bright and opaque later on. -
Dry Thoroughly:
Allow the base coat to dry completely. It must be bone dry before you sketch, or the pencil will dig into the soft paint. -
Outline the Profile:
Using a pencil, lightly sketch the outline of the horse’s head and neck. Position the profile slightly off-center for a dynamic composition, ensuring the neck extends all the way to the bottom edge of the canvas. -
Refine the Details:
Pay special attention to the nose, chin, and ears. Keep the lines clean. If you aren’t confident in free-handing, you can project an image onto the canvas and trace the shadow. -
Plan the Mane:
Sketch the general flow of the mane. You don’t need to draw every individual hair, just the main shapes where the white space will cut into the colored background.
Edge Master Tip
Work the brush away from the line. Place your brush tip on the pencil line and pull the paint outward into the background. This prevents paint from pooling and bleeding over your edge.
Step 2: Painting the Negative Space
-
Mix Your Color:
Prepare a generous amount of your terra cotta or burnt orange paint. I prefer to mix in a tiny drop of white or yellow oxide to give the color more dimension and prevent it from looking too flat. -
Cut In the Edges:
Using your medium round brush, carefully paint the orange color *around* the outside of your pencil sketch. This ‘cutting in’ process defines the edge of the horse. -
Detail the Mane:
Switch to your small liner brush for the mane area. Paint the orange wedges between the locks of hair. This is where the negative space effect is most crucial; the orange paint sculpts the white hair. -
Fill the Background:
Once the delicate edges are defined, use the large flat brush to fill in the rest of the background space with your orange paint. -
Create Texture:
Instead of smoothing the paint perfectly, use a cross-hatch or stippling motion with the large brush. This creates the subtle, mottled texture seen in the reference image, adding visual interest to the large colored area. -
Paint the Sides:
Don’t stop at the edge! Carry the orange paint around the sides and top of the deep canvas. Continue the white section on the bottom or side where the horse’s neck extends off the canvas.
Step 3: Finishing Touches
-
Assess Opacity:
Let the first coat of orange dry. If the white canvas shows through too much, apply a second coat to the background, careful not to mess up your crisp edges. -
Clean Up Lines:
If any orange paint accidentally crossed into the white silhouette, wait for it to dry, then use a small brush with white paint to crisp up the line. -
Add Subtle Detail:
Using a very dilute grey or off-white, you can add tiny, faint suggestions of muscle definition or an eye within the white silhouette, though keeping it purely flat white is a powerful stylistic choice. -
Protect the Work:
Once the painting is fully cured (give it at least 24 hours), apply a matte or satin varnish to seal the surface and unify the sheen of the different paint layers.
Metallic Accent
For a glamorous twist, mix a copper or bronze metallic medium into your orange paint. The subtle shimmer will catch the light and make the texture really stand out.
Hang your new masterpiece in a well-lit area to let the stark contrast truly shine
Expressive Mixed-Media Horse With Collage Texture
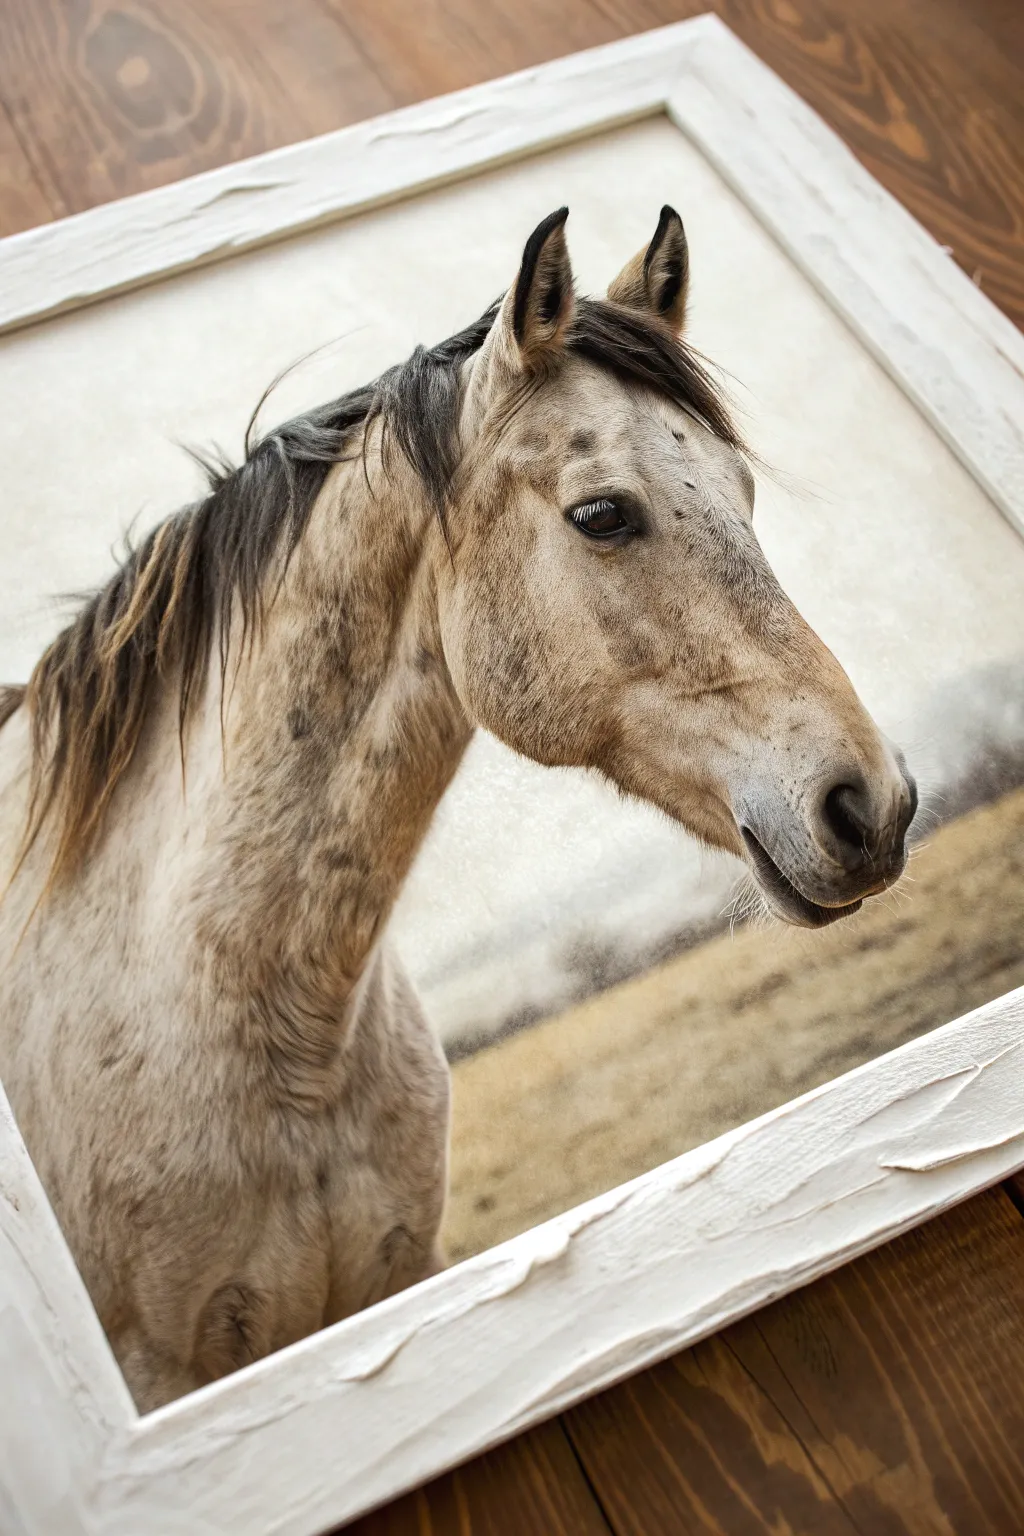
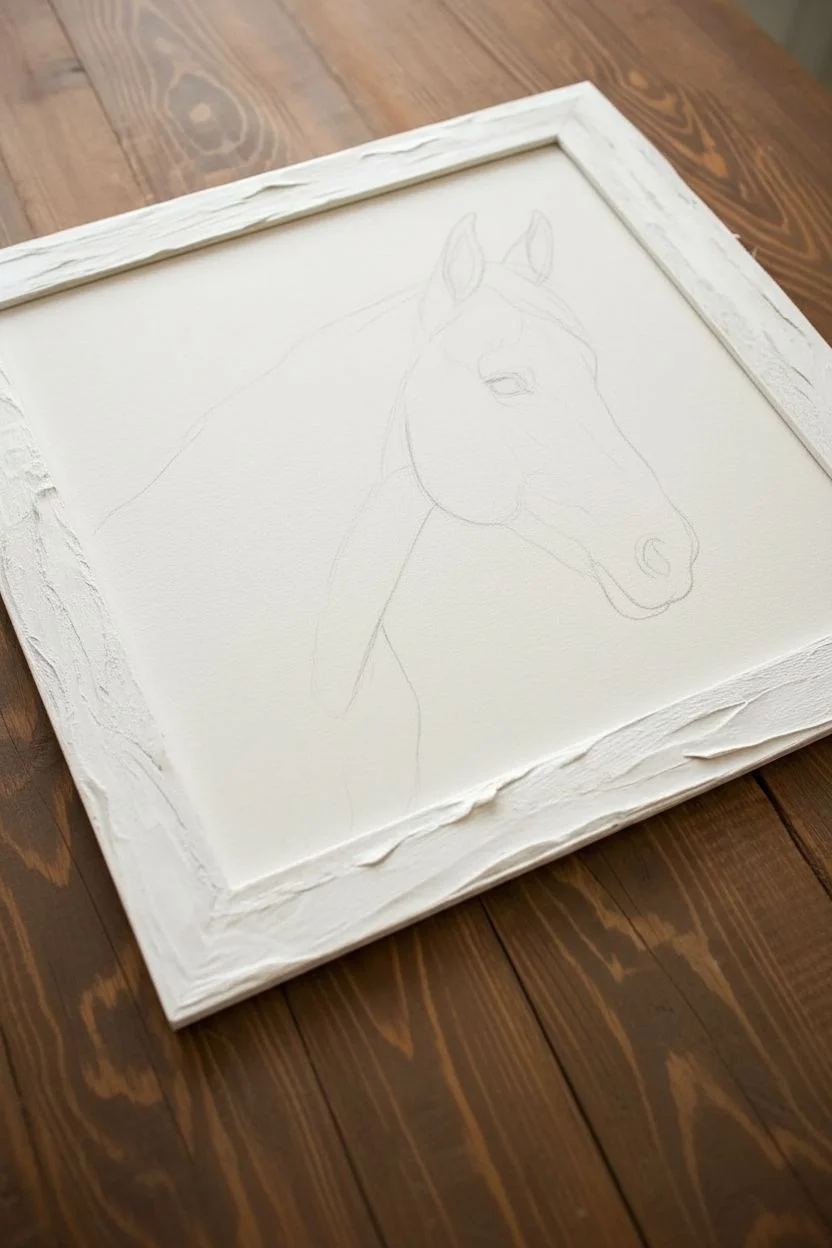
Capture the gentle spirit of a horse with this realistic acrylic painting project that focuses on soft fur textures and subtle color layering. The piece is finished with a custom-painted, heavily textured white frame that adds a rustic, gallery-style charm to your artwork.
Detailed Instructions
Materials
- Canvas board or stretched canvas (16×20 or similar)
- Acrylic paints (Titanium White, Burnt Umber, Raw Sienna, Yellow Ochre, Mars Black, Burnt Sienna)
- Wide wooden frame (flat profile)
- Modeling paste or heavy structure gel
- Gesso
- Palette knife
- Variety of brushes: 1-inch flat, filbert brushes (sizes 4, 8), fine liner brush
- Reference photo of a horse profile
- Pencil and eraser
- Water container and palette
Step 1: Preparing the Canvas and Frame
-
Texture the Frame:
Before you start painting, prepare your frame. Apply a thick layer of modeling paste or structure gel directly onto the wooden frame using a palette knife. Spread it unevenly, creating raised ridges and valleys to mimic rough-hewn wood or plaster. -
Prime the Frame:
Allow the texture paste to dry completely (this may take several hours). Once dry, coat the entire frame with white gesso or Titanium White acrylic paint. Apply two coats for opaque coverage, letting the first coat dry before applying the second. -
Sketch the Subject:
On your canvas, lightly sketch the outline of the horse’s head and neck. Pay close attention to proportions: the length of the nose, the curve of the jowl, and the placement of the eye. Keep your pencil lines light so they don’t show through the paint.
Fixing Muddy Colors
If your shadows look muddy or grey, you may be over-blending. Let the layer dry completely, then re-apply fresh, unmixed shadow color on top for cleaner definition.
Step 2: Painting the Background and Base
-
Create the Background:
Mix Titanium White with a tiny touch of Burnt Umber to create a creamy, off-white background. Paint the entire area around the horse. Near the bottom, blend in some Raw Sienna and Burnt Umber while the paint is wet to suggest a blurry, distant landscape horizon. -
Base Coat the Horse:
Mix a base color for the horse using Titanium White, Yellow Ochre, and a drop of Burnt Sienna. Paint the entire horse silhouette with this flat color to establish a warm undertone.
Pro Tip: Soft Fur
Use a dry ‘mop’ brush to lightly tap over wet paint boundaries. This softens hard lines instantly, creating a velvety fur texture without needing to paint every single hair.
Step 3: Developing Form and Detail
-
Blocking in Shadows:
Mix a darker shadow tone using Burnt Umber and a touch of Mars Black. Using a filbert brush, gently block in the major shadow areas: under the jawline, around the muzzle, inside the ears, and along the neck muscles. -
Blending Practice:
While the shadow paint is still slightly damp, use a clean, dry brush to feather the edges into the base coat. This creates the soft, rounded appearance essential for realistic animal portraits. -
Speckling and Dapples:
Create the ‘flea-bitten’ or speckled texture. Dilute some dark grey (White + Black) with water or glazing medium. Using an old bristle brush/toothbrush, lightly spatter or stipple tiny dots across the neck and cheek. -
Painting the Eye:
Use a small round brush with Mars Black for the eye. Leave a tiny spot of raw canvas or add a speck of pure Titanium White afterward for the reflection, which brings the horse to life. Paint the skin around the eye dark grey. -
Defining the Muzzle:
Darken the muzzle area with a wash of Mars Black and Burnt Umber. While wet, lift out a little paint on the nostril rim to show the highlight. Use a fine liner to add tiny whiskers with diluted white or grey paint.
Step 4: Painting the Mane
-
Hair Base Layer:
Mix a dark brown-black shade. Using a flat brush turned on its edge, paint long, sweeping strokes starting from the crest of the neck and flowing downwards. Follow the natural growth direction of the hair. -
Adding Highlights:
Mix a lighter ochre or tan color. Use a fine liner brush to paint individual strands on top of the dark mane base. Focus these lighter hairs where the light would naturally hit the top layers of the mane. -
Forelock Details:
Don’t forget the forelock between the ears. Use the same technique—dark base strokes followed by lighter, individual detail hairs—ensuring they drape naturally over the forehead.
Step 5: Final Assembly
-
Checking Values:
Step back from your painting. I find it helpful to squint at the canvas to see if the contrast is strong enough. If the horse looks too flat, glaze more Burnt Umber into the deepest shadows. -
Varnishing:
Once the painting is fully dry (wait at least 24 hours), apply a satin or matte varnish to protect the surface and unify the sheen of the paints. -
Framing:
Place your finished canvas into the custom-textured white frame. Secure it from the back using framing points or offset clips.
Hang your new masterpiece in a well-lit spot to let those subtle textures and the rustic frame truly shine.


Have a question or want to share your own experience? I'd love to hear from you in the comments below!