
Dark paintings are where mood gets to do the talking—heavy shadows, tiny highlights, and a whole lot of mystery. If you’re craving ideas that feel cinematic, gothic, or quietly unsettling, these are my go-to starting points in the studio.
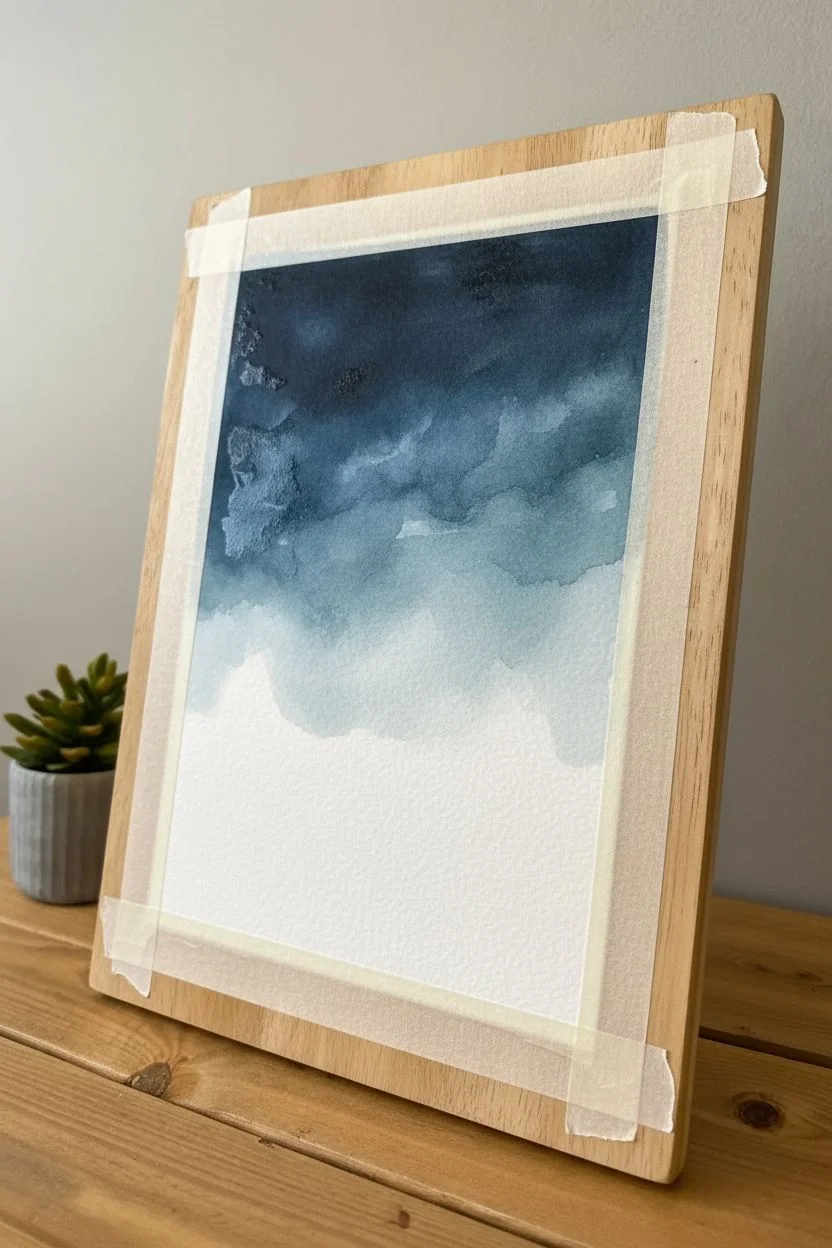
Moonlit Night Sky With Glowing Halo
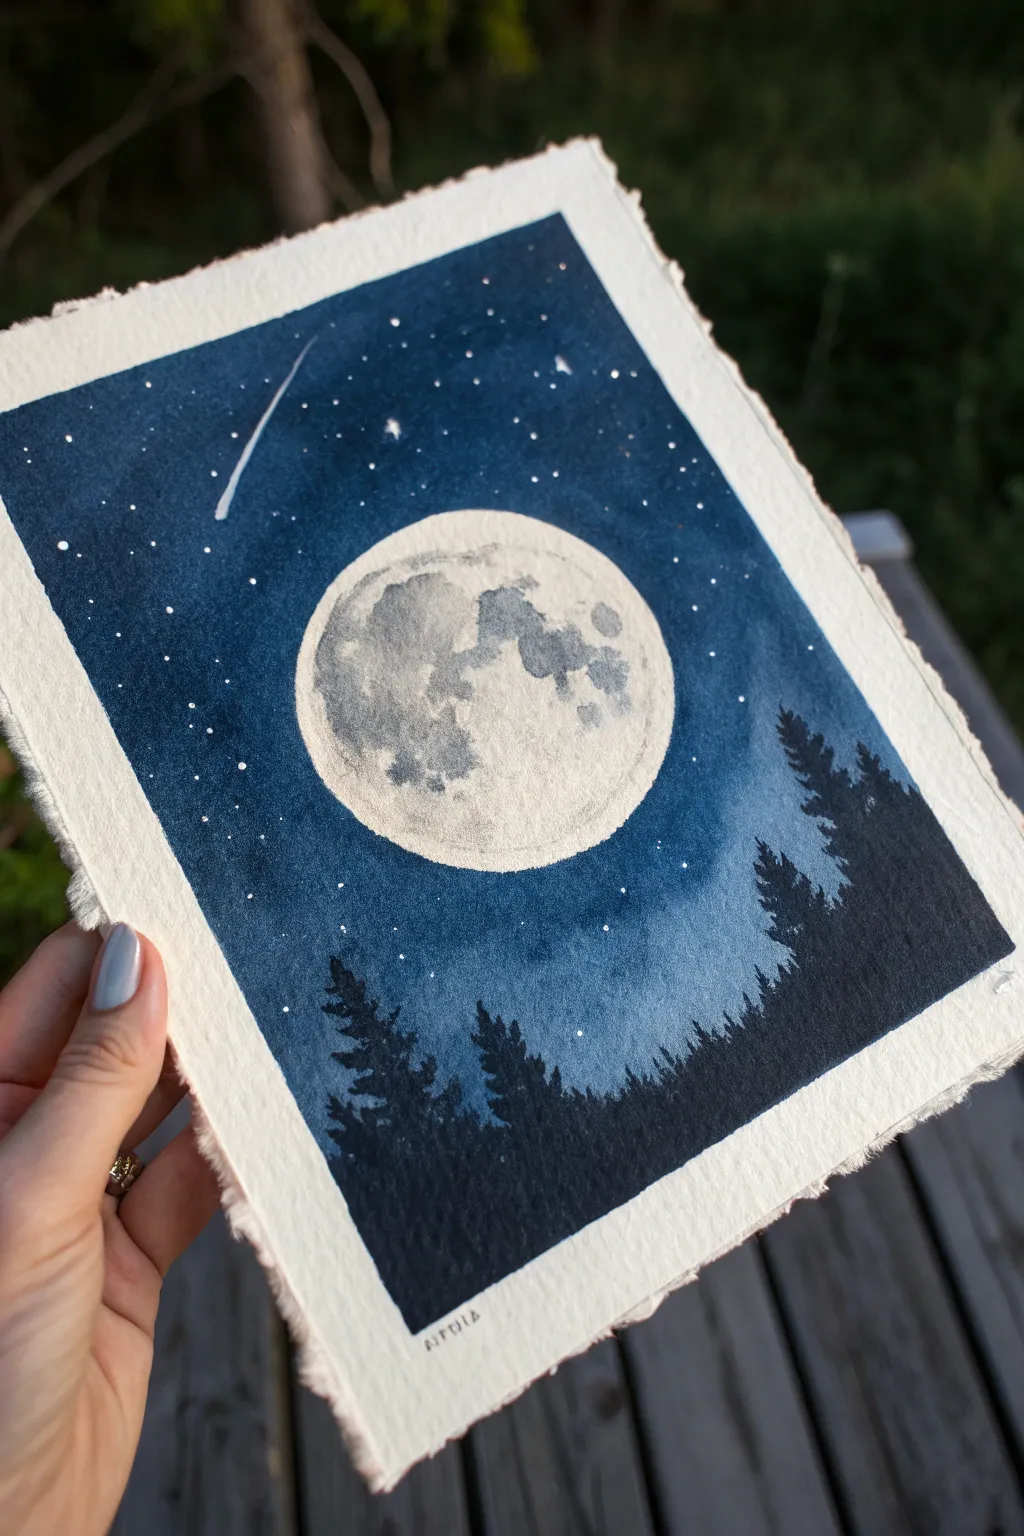
Capture the magic of a silent night with this stunning indigo watercolor painting, featuring a luminous full moon and silhouetted forest. The textured deckle-edge paper adds a rustic, artisanal feel that perfectly complements the serene atmosphere of the piece.
Step-by-Step
Materials
- Cold press watercolor paper (deckle edge recommended, or tear your own)
- Masking tape or fluid (optional for moon)
- Watercolor paints: Indigo, Prussian Blue, Lamp Black, Payne’s Grey
- White gouache or white gel pen
- Round brushes: Size 8 (for wash) and Size 2 (for details)
- Flat shader brush (size 1/2 inch)
- Clean water jars
- Palette
- Paper towels
- Pencil (HB) and eraser
- Round object for tracing (like a small jar lid)
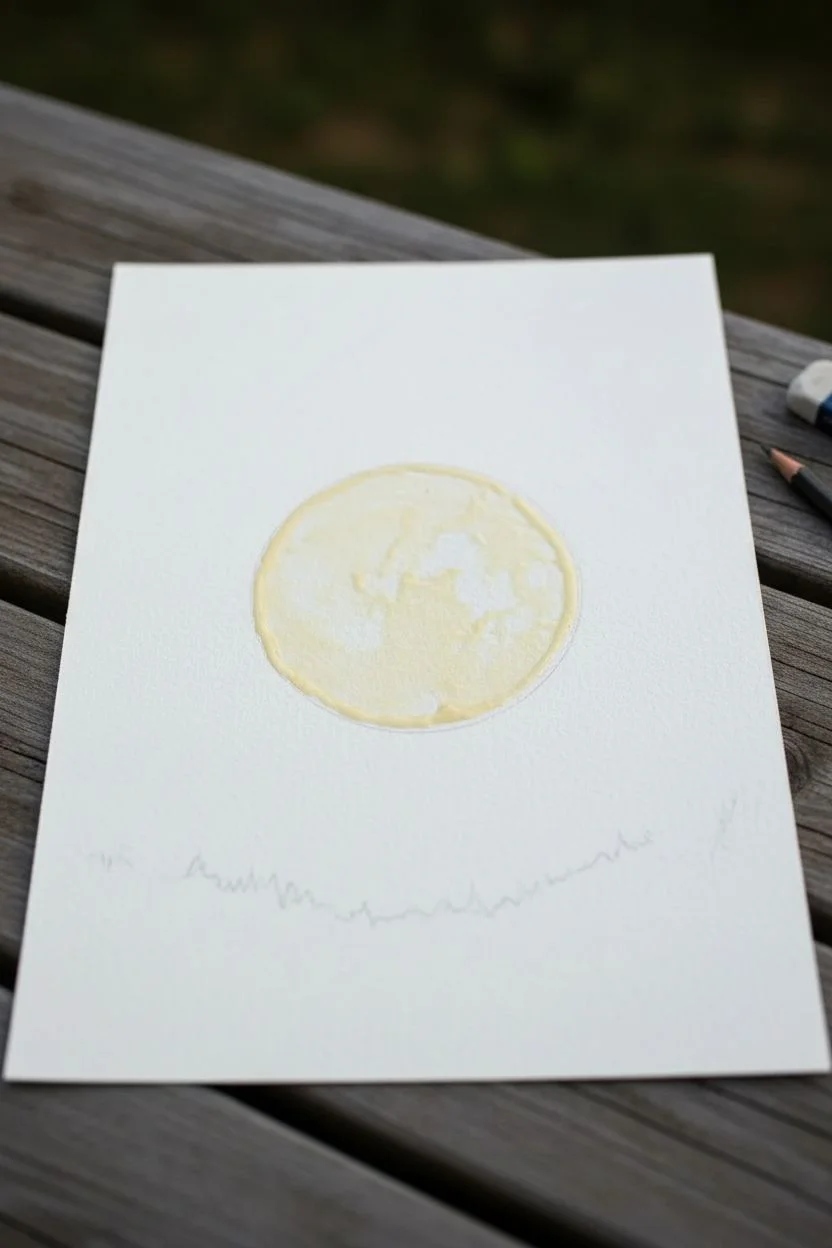
Step 1: Preparation and Sketching
-
Trace the moon:
Center your round object on the watercolor paper, slightly above the vertical midpoint. Lightly trace a perfect circle with your pencil. Keep the line faint so it disappears under the paint later. -
Map the horizon:
Very lightly sketch a rough, uneven line near the bottom third of the paper to mark where the treetops will begin. This doesn’t need to be precise, just a guide for your composition. -
Masking method (Option A):
If you are using drawing gum or masking fluid, carefully fill in the entire moon circle now. Let it dry completely until it is tacky and firm to the touch. -
Manual method (Option B):
If you don’t have masking fluid, you will simply need to paint carefully around your pencil line. I find painting with clean water just outside the circle first helps create a soft barrier.
Step 2: Creating the Night Sky
-
Pre-wet the sky:
Using your large round brush, wet the entire sky area with clean water. Do not wet the moon circle itself. The paper should be glistening but not forming puddles. -
First wash of blue:
Load your brush with a diluted Indigo or Prussian Blue. Start painting from the top corners, working your way down. The wet paper will help the pigment spread softly. -
Building the halo:
As you approach the moon circle, rinse your brush so it holds less pigment. Paint carefully around the moon, letting the blue fade into white paper about 2mm from the pencil line to create a natural glow. -
Deepening the corners:
While the paper is still damp, drop concentrated Indigo and a touch of Black into the top corners and edges of the paper. This vignette effect draws the eye toward the center. -
Let it dry completely:
It is crucial to let this first layer bone dry. You can use a hairdryer on a low setting if you are impatient, but air drying usually yields smoother results.
Pro Tip: The Halo Effect
To enhance the glow, gently lift pigment around the moon using a clean, damp brush after the sky dries. This creates a softer, hazier transition than painting around it.
Step 3: Painting the Moon
-
Remove masking (if used):
If you used masking fluid, gently rub it away with your finger or a rubber cement pickup tool to reveal the pristine white circle. -
Base shadow layer:
Mix a very watery, pale grey using Payne’s Grey and plenty of water. Paint random, organic shapes inside the moon to represent the maria (craters and seas), leaving plenty of white paper showing. -
Softening edges:
Immediately after placing a grey shape, use a clean, damp brush to soften one side of the blotch. This prevents hard edges and makes the craters look distant and spherical. -
Adding texture:
While the grey patches are still slightly damp, drop in tiny pinpricks of darker grey for deeper craters. Keep the contrast relatively low; the moon should look bright compared to the heavy sky.
Troubleshooting: Cauliflowers
If you see water blooms (cauliflower edges) in your sky, you likely added water to paint that was already drying. Hide these textures by darkening the area with a second layer of indigo.
Step 4: Silhouettes and Stars
-
Mixing the darkest dark:
Create a rich, opaque mixture of Indigo and Lamp Black. It needs to be thick, almost like cream, to cover the background wash effectively. -
Base tree layer:
Using the flat shader brush or large round brush, fill in the solid black mass at the very bottom of the paper up to your horizon guideline. -
Painting tree tips:
Switch to your Size 2 detail brush. Paint vertical lines extending up from the black base to establish tree trunks. Then, use a dabbing motion to create jagged pine branches coming off the trunks. -
Varying heights:
Make sure your trees are different heights. Place taller trees on the sides and shorter ones toward the middle to frame the moon further. -
Splatter stars:
Cover the bottom trees with a scrap piece of paper. Load a stiff brush or toothbrush with white gouache and flick the bristles to spray tiny white dots across the blue sky. -
The shooting star:
Using the white gouache or a gel pen, draw a swift, thin line in the upper left corner. Make the head of the comet slightly thicker and let the tail taper off into nothingness. -
Final highlights:
Add a few intentional, larger stars using the tip of your detail brush and white gouache. You can also add tiny white highlights to the very tips of the tallest trees for a frosted look.
Now you have a serene piece of night sky art ready to frame or gift


Silhouetted Pines Against a Stormy Night
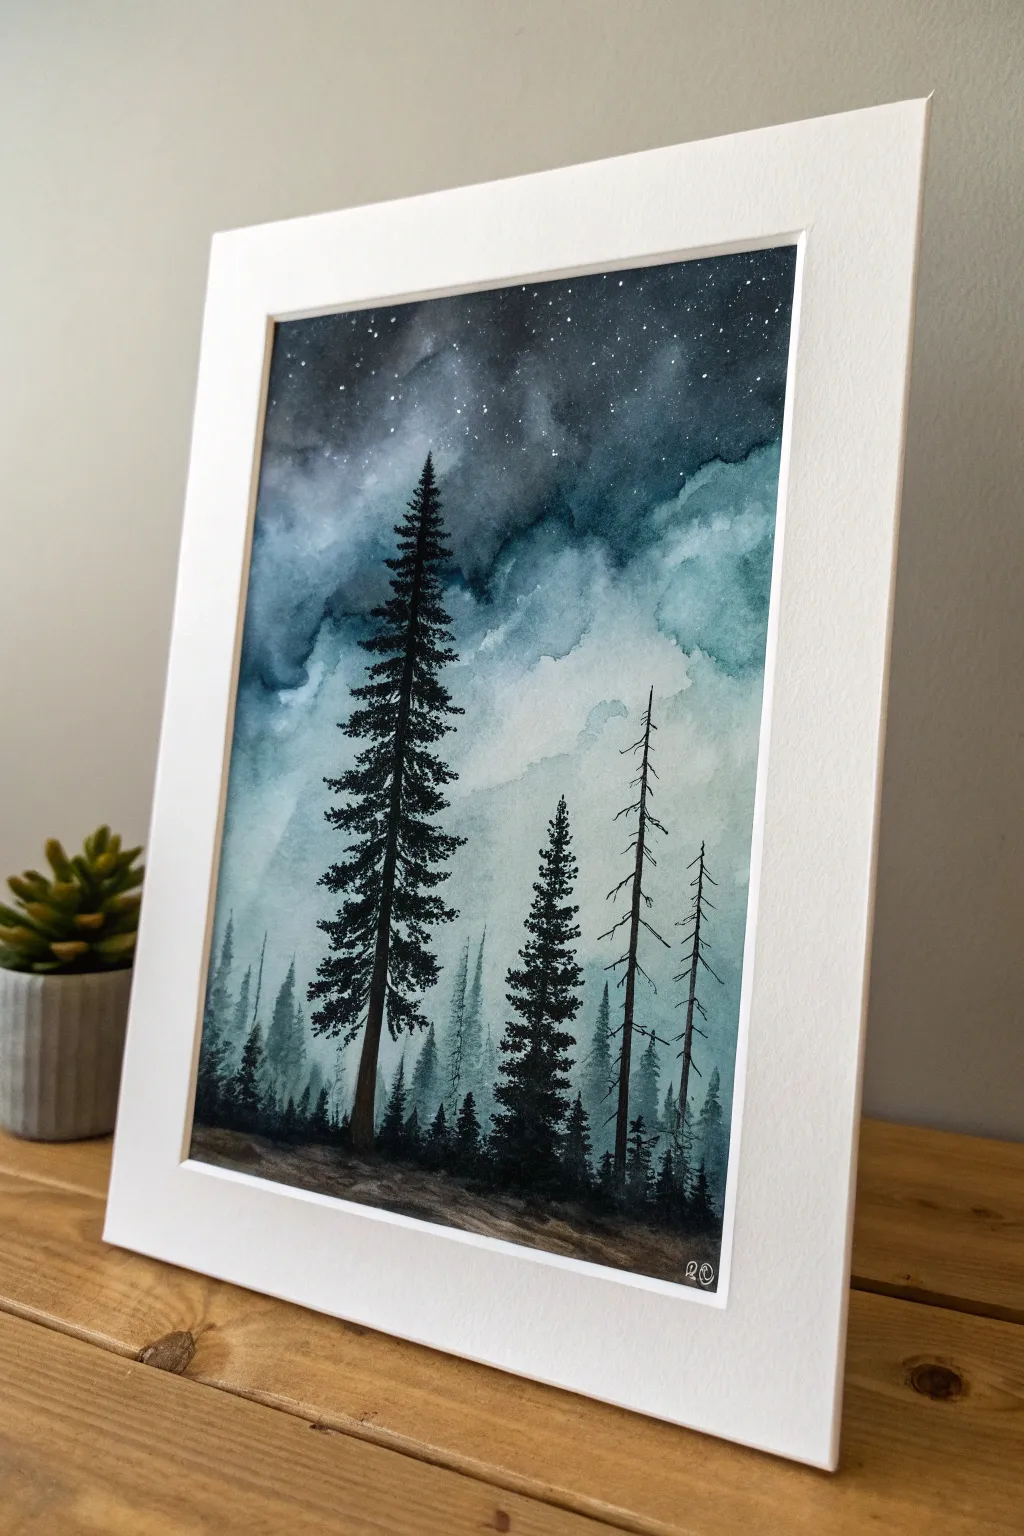
Capture the moody beauty of a forest at twilight with this watercolor project. By layering deep blues and blacks, you’ll create a dramatic stormy sky that serves as the perfect backdrop for stark, silhouetted pine trees.
Step-by-Step Guide
Materials
- Cold Press Watercolor Paper (300gsm)
- Watercolor paints: Indigo, Payne’s Grey, Prussian Blue, Lamp Black
- White Gouache or White Gel Pen
- Round brushes (sizes 8 and 12 for washes)
- Rigger or Liner brush (for fine branches)
- Small Round brush (size 2 or 4 for trees)
- Masking tape
- Drawing board
- Paper towels
- Two jars of water
Step 1: Setting the Scene
-
Preparation:
Begin by taping your watercolor paper securely to a board using masking tape. Ensure the tape is pressed down firmly to create a crisp white border later. -
Sky Mixes:
Prepare your sky colors on the palette. You want a very dark, concentrated mix of Indigo and lamp black for the top, and a slightly diluted Prussian Blue for the middle sections. -
Wet-in-Wet Base:
Using your largest clean brush, wet the entire top two-thirds of the paper with clean water. The paper should glisten but not have standing puddles.
Muddy Clouds?
If your sky colors are turning grey or muddy, you are overworking the paper. Lay the color down once, let it bleed, and step away. Don’t scrub back and forth.
Step 2: Painting the Stormy Sky
-
Dark Gradient:
Start applying the darkest Indigo/Black mix at the very top edge. Tilt your board slightly so the paint flows downward naturally. -
Creating Clouds:
add the Prussian Blue mix below the dark edge, letting the colors bleed together. Use a dabbing motion with a damp brush to lift slightly lighter areas, suggesting cloud formations. -
The Rolling Fog:
As you move lower towards the horizon line, dilute your paint significantly with water. You want a pale, misty gray-blue at the bottom of the sky area to look like rolling fog. -
Drying Time:
This is crucial: Let the sky layer dry completely. If the paper is cool to the touch, it is still wet. Use a hairdryer on a low setting if you need to speed this up.
Sharper Silhouettes
For the blackest, sharpest trees, wait until the background is totally dry. Use paint with a honey-like consistency, not watery, to prevent bleeding.
Step 3: Adding the Stars
-
Star Splatter:
Dilute a small amount of white gouache with water until it has a milky consistency. Load a small brush or toothbrush and gently tap it over the dark upper sky to create stars. -
Specific Stars:
If you want brighter, specific stars, use a white gel pen or a fine brush with thicker gouache to place individual dots.
Step 4: The Distant Forest
-
Ghost Trees:
Mix a very watery, pale grey-blue. Using a size 4 brush, paint faint, small tree shapes along the horizon line. These are your ‘background’ trees sitting in the mist. -
Mid-Ground Shapes:
Using a slightly darker grey (less water, more pigment), paint a second row of jagged tree tops slightly lower than the first set. This creates instant depth. -
Ground Base:
Paint a dark, uneven strip at the very bottom of the paper using Payne’s Grey to establish the forest floor.
Step 5: The Foreground Pines
-
Main Tree Trunk:
Load your size 4 brush with thick, creamy Lamp Black. Paint a straight vertical line for the trunk of the large hero tree on the left, starting thin at the top and widening at the base. -
Adding Foliage:
Starting at the top of the trunk, use the tip of the brush to dab small, downward-sloping branches. As you move down the tree, make the branches wider and denser. -
Texture Variation:
Leave small gaps between the branches so sky peeks through; a solid black triangle won’t look realistic. -
Secondary Trees:
Paint the smaller pine tree in the middle using the same technique but slightly shorter. -
Dead Snags:
Switch to your Rigger or Liner brush. Paint two thin, erratic vertical lines on the right side. Add tiny, jagged branches coming off them to represent dead, leafless trees.
Step 6: Final Details
-
Rooting the Trees:
Use the black paint to darken the ground beneath the trees, blending their trunks seamlessly into the earth so they don’t look like they are floating. -
The Reveal:
Ensure the painting is 100% bone dry. Carefully peel off the masking tape at a 45-degree angle to reveal your clean white border.
Frame your moody landscape with a simple white mat to enhance the contrast between the border and the dark sky


Dark Ocean With a Thin Moon Reflection
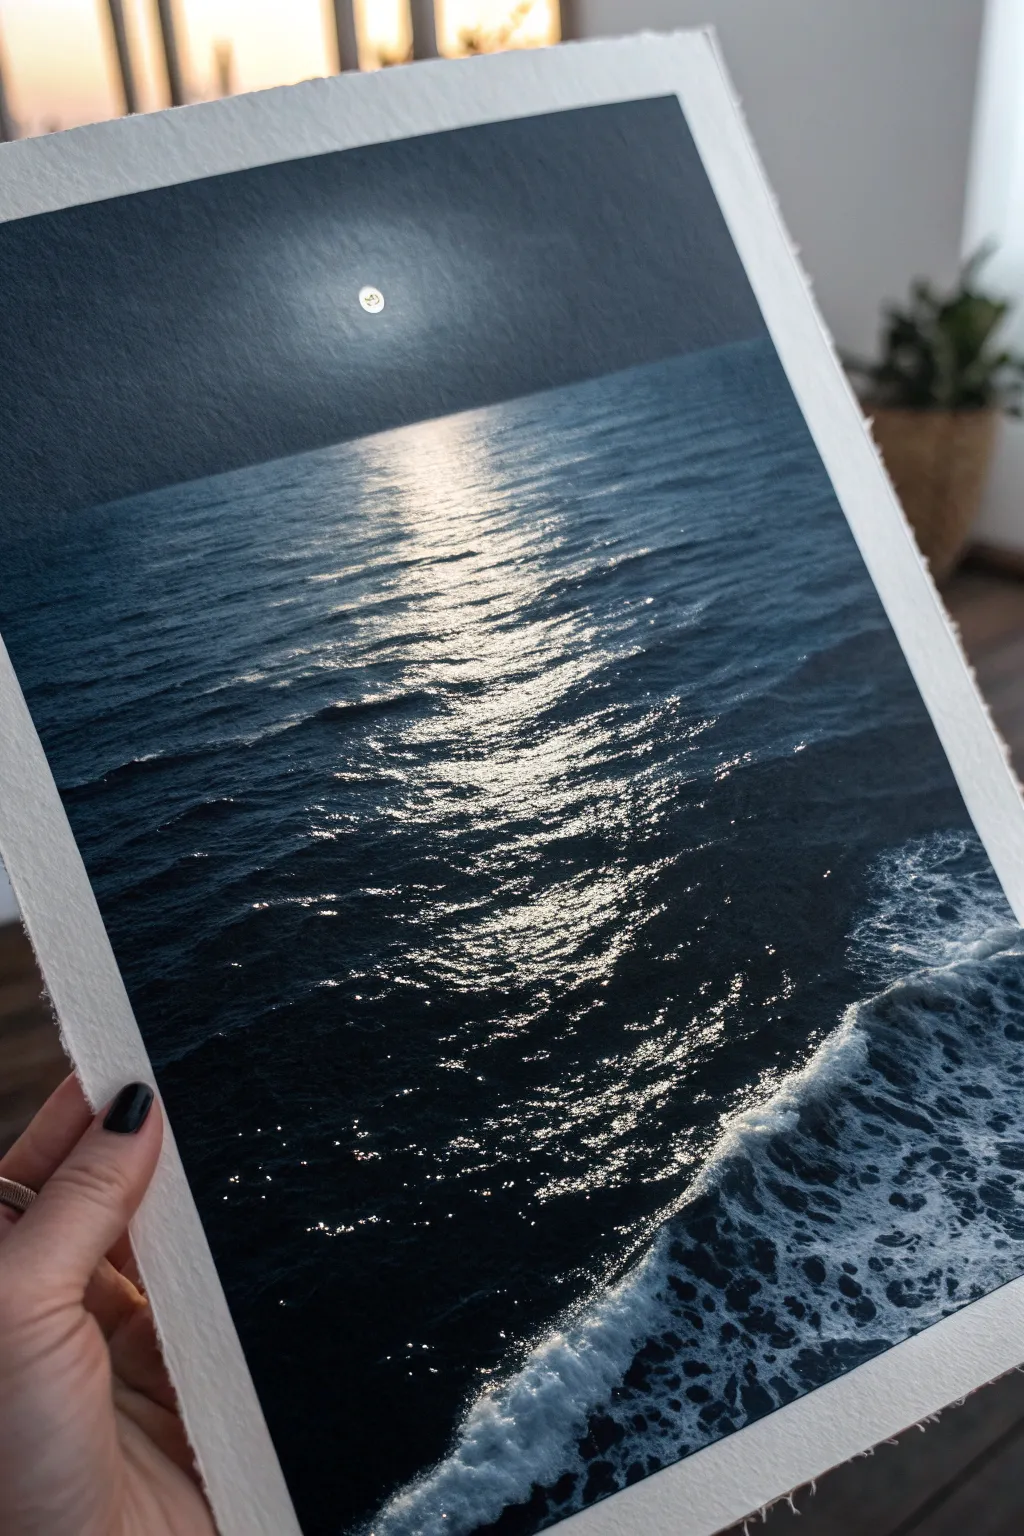
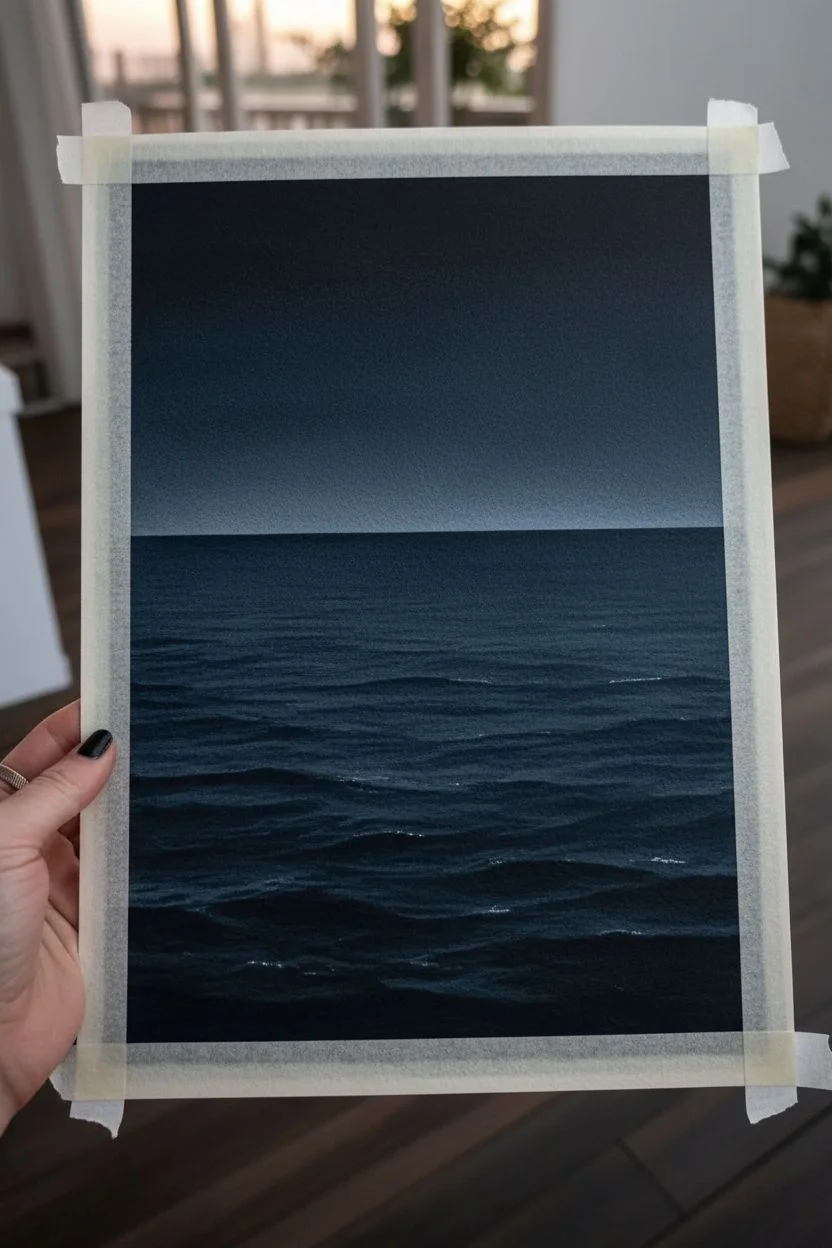
Capture the serene yet powerful mystery of the ocean at night with this deep blue and silver study. This painting focuses on the interplay between deep shadows and the brilliant, scattered light of a full moon reflecting on moving water.
Step-by-Step Tutorial
Materials
- Heavyweight watercolor paper or mixed media paper (300gsm+)
- Masking tape
- Acrylic paints: Carbon Black, Phthalo Blue (or Prussian Blue), Titanium White
- Large flat brush or sponge brush
- Medium round brush
- Fine liner brush (size 0 or 00)
- White gel pen or opaque white paint marker (optional)
- Small sea sponge or scrunched tissue
- Mixing palette
- Water cups
Step 1: Setting the Atmosphere
-
Prepare your canvas:
Tape down all four edges of your paper to a flat board with masking tape. This creates that crisp, professional white border seen in the example image and prevents the paper from buckling under heavy washes. -
Mix the midnight hue:
Create your base color by mixing a large amount of Phthalo Blue with Carbon Black. You want a very deep, almost black navy. It should be rich and dark but still distinguishable from pure black. -
Paint the sky gradient:
Using a large flat brush, paint the top third of the paper. Start with the darkest mix at the very top edge. As you move down toward the horizon line, mix in a tiny drop of white or just use slightly more water to lighten the sky imperceptibly near the horizon. -
Establish the horizon:
Paint a straight horizontal line across the paper to separate sky from sea. Ensure this line is crisp. Fading the sky slightly into this line helps create atmospheric depth. -
Block in the ocean base:
Continue with your dark navy mix to fill the rest of the paper below the horizon line. I like to use horizontal strokes here to mimic the natural movement of water, even at this base stage.
Dry Brush Secret
Wipe most paint off your brush onto a paper towel before hitting the canvas. This ‘dry brush’ leaves textured, broken lines perfect for distant water.
Step 2: Creating the Reflection
-
Map the light path:
While the base is drying, visualize a vertical column down the center of the water where the moon’s light will hit. This shouldn’t be a solid line but a general zone of brightness. -
Start the shimmer:
Mix a light steel blue (Titanium White with a touch of your navy mix). Using a dry brush technique, lightly drag the brush horizontally across the central column of the water. Let the texture of the paper break up the paint; don’t paint solid lines. -
Build intensity:
Gradually add more white to your mix. Apply this brighter tone over the previous layer, focusing more narrowly toward the center of the reflection path. Keep your strokes horizontal and jagged. -
Add the moon:
In the sky area, place a small, perfect circle of pure Titanium White. It should sit relatively high in the sky, centered above your reflection path. -
Create the halo:
Dry brush a very faint, translucent circle of pale grey around the moon to give it a glowing effect, softening the hard edge against the dark sky.
Texture Boost
Mix a little baking soda into your white paint for the foreground foam. It adds a gritty, physical texture that makes the crashing wave look 3D.
Step 3: Detailing the Waves
-
Define wave structures:
Switch to your medium round brush and pure black paint. Paint subtle shadows under the illuminated ripples in the water. This contrast makes the white highlights pop. -
Intensify sparkles:
Using your fine liner brush or a white gel pen, add tiny, pure white dots and short dashes in the very center of the reflection path. These represent the brightest glints of moonlight catching the peaks of the waves. -
Introduce the foreground wave:
In the bottom right corner, map out a large, diagonal crashing wave shape using a mid-tone grey-blue. This breaks the composition and adds drama. -
Texture the foam:
Use a small sea sponge or scrunched-up tissue dipped in Titanium White to dab along the crest of the foreground wave. Keep the texture bubbly and irregular to look like sea foam. -
Refine the foam patterns:
With a fine brush, pull small tendrils of white paint from the foamy crest down into the dark water, creating the lacy pattern of receding water. -
Final highlights:
Add a few final, sharp highlights of pure white on the top edge of the foreground foam to show where the moonlight hits it most directly. -
The reveal:
Wait until the painting is completely bone-dry. Carefully peel away the masking tape at a 45-degree angle to reveal your clean edges.
This brooding seascape is now ready to add a touch of mysterious elegance to your wall.


Chiaroscuro Portrait With One Harsh Light Source
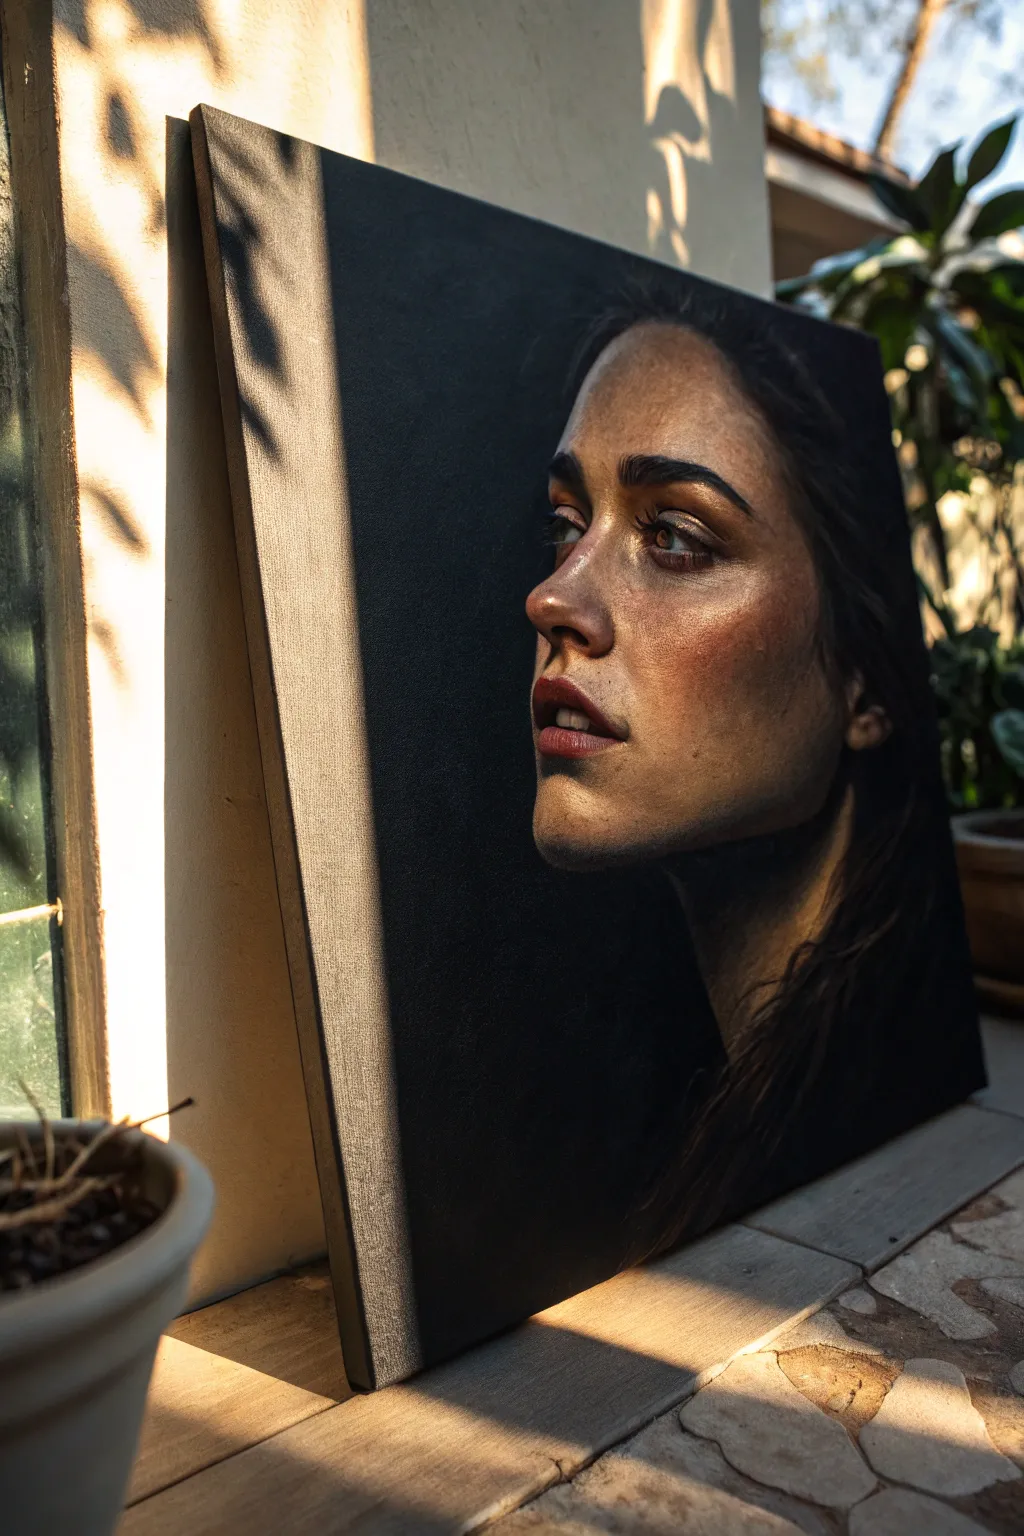
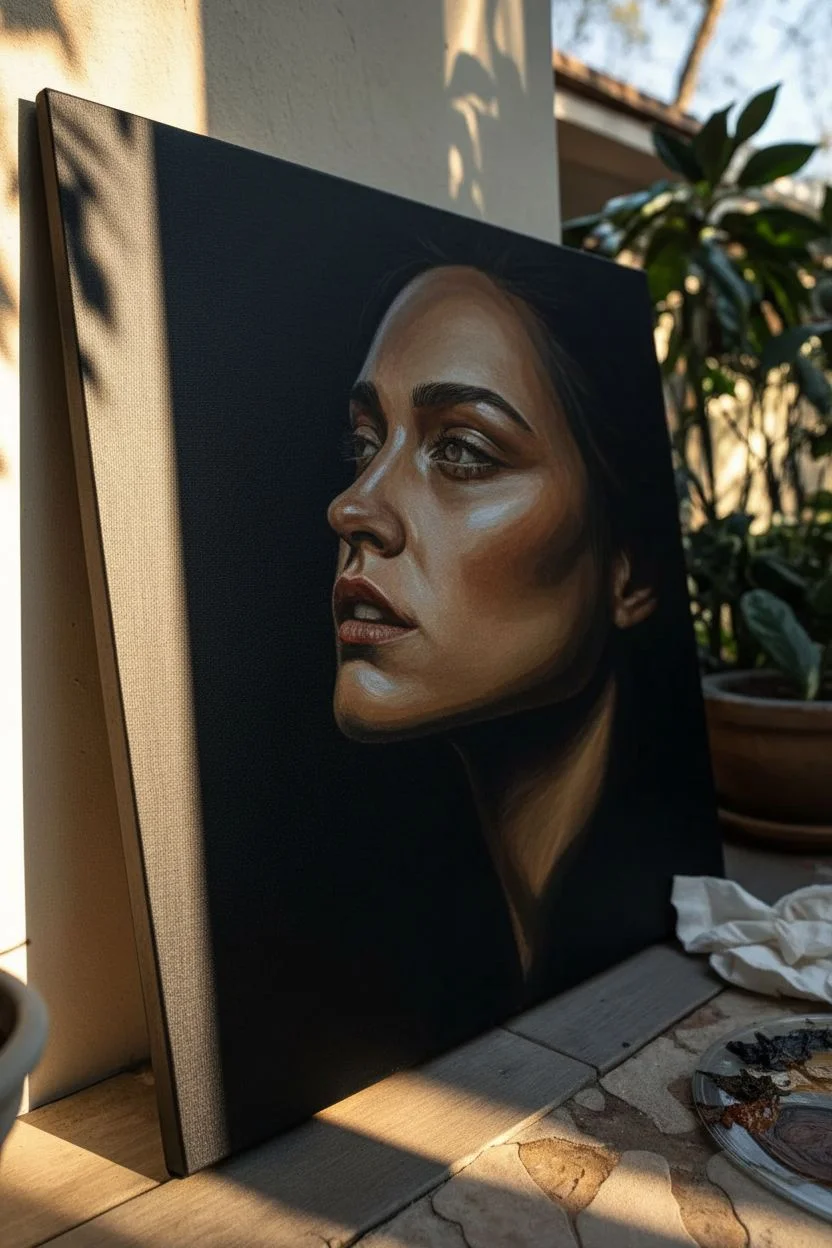
Capture the intense drama of a single light source striking a subject’s face against a void-like background. This tutorial guides you through building a hyper-realistic oil portrait that emphasizes texture, glowing skin tones, and deep shadow.
Detailed Instructions
Materials
- Stretched canvas (16×20 or 18×24 inches)
- Black gesso or black acrylic paint
- Oil paints (Titanium White, Burnt Umber, Yellow Ochre, Alizarin Crimson, Cadmium Red, Ultramarine Blue, Ivory Black)
- Liquin or similar drying medium
- Assorted synthetic filbert brushes (Sizes 2, 4, 8)
- Fine detail liner brush (Size 0)
- Large flat brush for background
- Palette knife
- Glass or disposable palette
- Paper towels
- Charcoal pencil (white or gray)
Step 1: Preparation and Underpainting
-
The Void Background:
Begin by priming your entire canvas with two coats of black gesso or matte black acrylic paint. Let each coat dry completely. This creates that deep, infinite background instantly and saves you from painting around the face later. -
Establishing the Sketch:
Using a white charcoal pencil, lightly sketch the outline of the profile. Focus heavily on the placement of the eye, the slope of the nose, and the parting of the lips. Keep lines faint so they don’t show through the oil layers. -
Mapping the Light:
Mix a thin wash of Burnt Umber and Liquin. Paint in the shadow areas of the face—the side of the nose, under the chin, and the hair. Wipe away paint with a rag where the brightest highlights will be to reveal the black gesso, creating a ‘negative’ map of your values.
Muddy Skin Tones?
If skin looks gray or dirty, you likely mixed black into your flesh tones. Only use black for the background. Darken skin using Burnt Umber and Blue instead.
Step 2: Building Skin Tones & Structure
-
The Base Shadow Tone:
Mix Burnt Umber, a touch of Alizarin Crimson, and Ultramarine Blue to create a deep, cool shadow color. Apply this to the neck and the side of the face fading into the dark background. -
Mid-tone Application:
Create a warm mid-tone using Yellow Ochre, Burnt Umber, and a hint of Titanium White. Block in the cheek, the forehead, and the bridge of the nose. Use a size 8 filbert brush to keep strokes broad and confident. -
Connecting the Values:
Blend the edges between your shadow tone and mid-tone while the paint is wet. Use a clean, dry brush to gently feather darker areas into lighter ones, establishing the curve of the cheekbone. -
Warming the Complexion:
Glaze a mixture of Cadmium Red and medium over the cheek area and tip of the nose. This adds the flushed, lifelike blood flow appearance beneath the skin. -
Defining the Features:
Switch to a size 4 filbert. Darken the nostrils and the corners of the mouth with a mix of burnt umber and black. Be careful not to make outlines; think in terms of small shapes of shadow.
Step 3: Refining Details and Texture
-
The Eye:
Paint the iris using varied browns and ochres. The sclera (white of the eye) shouldn’t be pure white; mix white with a tiny dot of blue and grey. Add a sharp, crisp reflection dot in the eye to bring it to life. -
Lips and Teeth:
Paint the lips with Alizarin Crimson and white, keeping the lower lip fuller and lighter. For the teeth, use a grey-white mix—pure white will look fake. Soften the edges of the lips so they don’t look pasted on. -
Freckles and Texture:
I like to spatter or stipple tiny dots of watered-down Burnt Umber across the nose and cheeks for authentic skin texture. Use a very old, frayed brush for this irregular pattern. -
The Jawline Transition:
Ensure the transition from the lit chin to the shadowed neck is sharp but natural. This edge defines the bone structure. The light should fall off rapidly here.
Pro Tip: Soft Edges
Don’t hard-outline the face. Let the shadow side of the face blur and ‘disappear’ into the black background. This ‘lost edge’ creates volume.
Step 4: Highlights and Final Polish
-
Brightest Highlights:
Mix Titanium White with a tiny amount of Yellow Ochre. Apply this thick impasto paint to the bridge of the nose, the forehead, and just above the lip. This mimics the harsh sunlight hitting the skin. -
Subtle Hair Indication:
Using your liner brush and very thin paint, drag a few loose strands of hair from the darkness into the light on the forehead and neck. Keep these minimal; let the black background do the heavy lifting for the rest of the hair. -
Merging Background:
Take fresh Ivory Black oil paint and re-paint the background area immediately touching the face. Blend this wet black slightly into the shadow side of the face for a seamless ‘lost edge’ effect. -
Final Check:
Step back five feet. Check if the highlights pop enough against the deep shadows. Add one final dab of pure white to the moistest part of the lower lip.
Allow the painting to dry for several weeks before varnishing to protect that deep black finish
BRUSH GUIDE
The Right Brush for Every Stroke
From clean lines to bold texture — master brush choice, stroke control, and essential techniques.
Explore the Full Guide
Bare Branches Reaching Like Claws
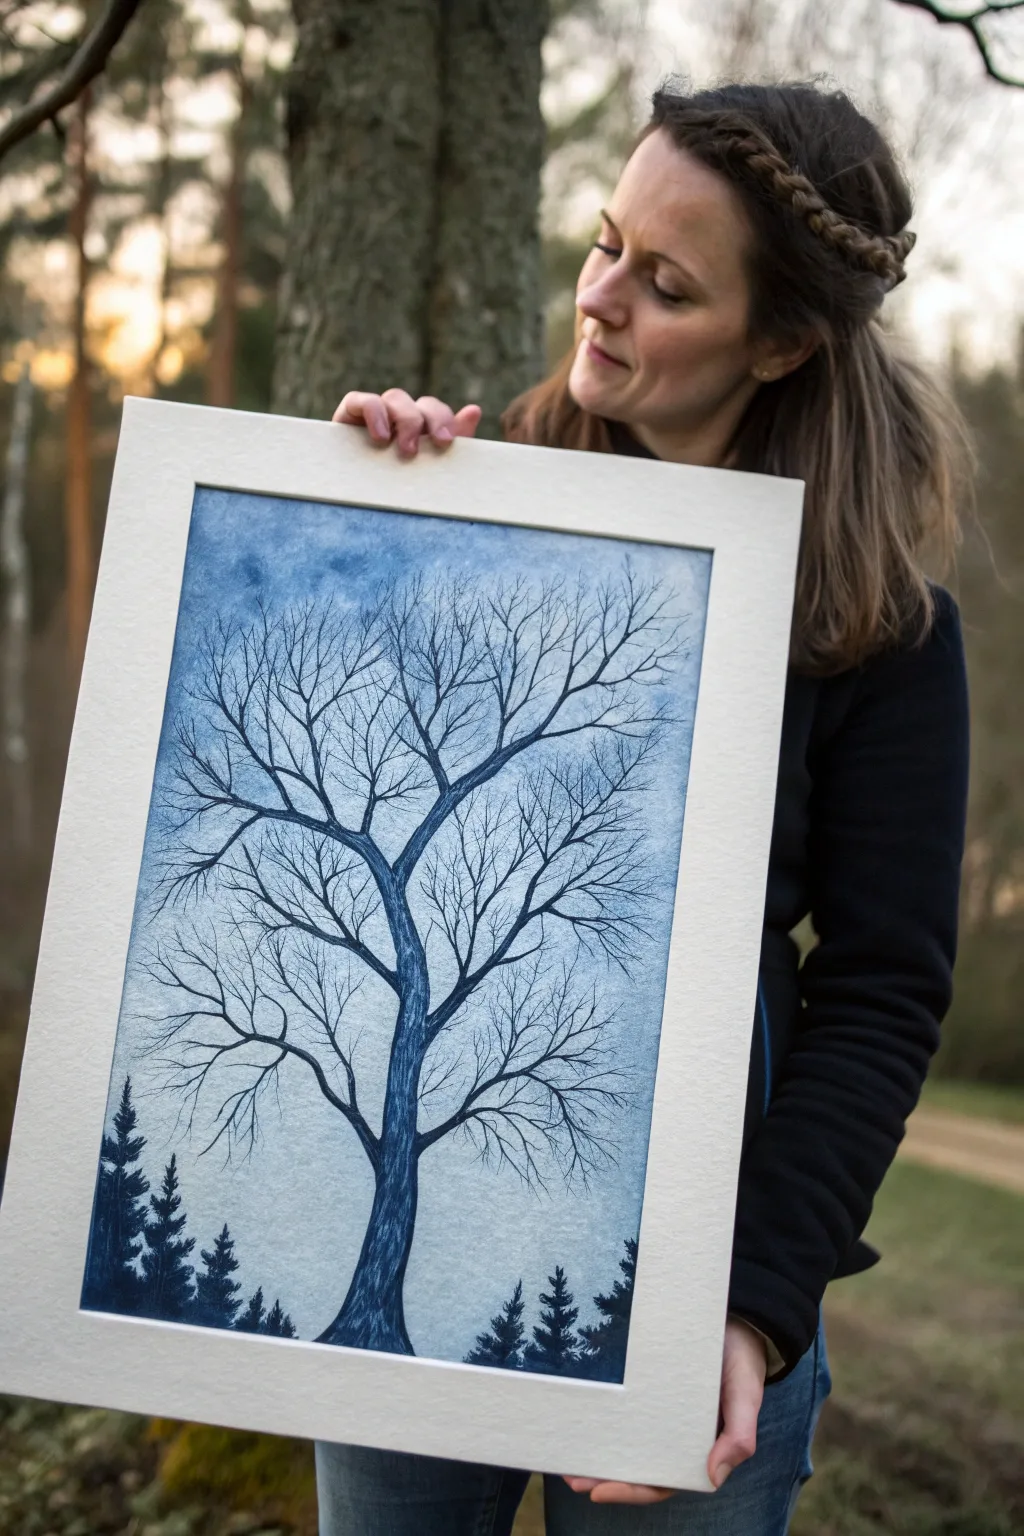
Capture the stark beauty of winter with this monochromatic study of bare trees against a fading sky. Using a limited palette of deep indigo and soft denim blues, this project focuses on intricate line work and atmospheric gradients to create a moody, hauntingly elegant piece.
Step-by-Step Guide
Materials
- Cold press watercolor paper (140lb/300gsm)
- Indigo or Payne’s Grey watercolor paint
- Prussian Blue watercolor paint
- Large flat wash brush (1 inch)
- Round brush (size 6 or 8)
- Fine liner or rigger brush (size 0 or 1)
- Clean water and mixing palette
- Painter’s tape or masking tape
- Drawing board
- Paper towels
Step 1: Setting the Atmosphere
-
Prepare your surface:
Begin by taping down your watercolor paper to a board on all four sides. This not only creates a clean, crisp border for framing later but also prevents the paper from buckling as we apply the initial washes. -
Mix the sky gradient:
Prepare two pools of paint: a very watery, pale mix of Prussian Blue for the lower sky, and a slightly more saturated mix for the upper atmosphere. You want these to be quite transparent. -
Wet-on-wet technique:
Use your large flat brush to wet the entire surface of the paper with clean water until it glistens but isn’t dripping. This is crucial for a smooth, dreamlike background. -
Apply the background wash:
Start at the top with your saturated blue mix, brushing horizontally. As you move down the paper, switch to the paler mix, letting gravity help bleed the colors together naturally for a soft gradient. -
Add subtle texture:
While the wash is still damp, you can dab a clean, crumpled paper towel lightly in a few random spots near the top to suggest faint, distant cloud cover. Let this background layer dry completely before moving on.
Step 2: Structuring the Giant
-
Mix the tree color:
Create a rich, dark mixture using Indigo or Payne’s Grey. The consistency should be like milk—fluid enough to flow off the brush, but dark enough to stand out against the background. -
Draft the trunk:
Using your medium round brush, start from the bottom center of the page. Paint the trunk with an upward stroke that curves slightly to the left, tapering the width as you go higher. I like to keep the edges slightly organic rather than perfectly straight. -
Add texture to the bark:
Before the trunk dries fully, drop in tiny amounts of highly concentrated Indigo along the shadowed side (usually the right) to give the tree volume and a cylindrical appearance. -
Split the main branches:
About halfway up the paper, branch the trunk into two or three main limbs. Ensure these are thick enough to support the network of twigs you’ll add later. -
Create the secondary limbs:
Switch to a smaller round brush. Extend branches outward and upward from the main limbs. Remember that branches generally get thinner the further they grow from the trunk.
Pro Tip: Branch Flow
Always paint branches growing ‘out’ from the trunk, pulling the brush toward the tips. This naturally tapers the line as you lift the brush.
Step 3: The Fine Details
-
Switch to the rigger brush:
For the characteristic ‘claw-like’ look, switch to your finest liner or rigger brush. This tool holds enough paint for long strokes but maintains a needle-sharp point. -
Paint the twig network:
Fill the upper canopy with fine lines. Use a shaky hand intentionally here; nature rarely moves in straight lines. Let the twigs cross over each other to create density. -
Refine the reaching ends:
Ensure the very tips of the branches taper off into nothingness. These fine ends should reach almost to the top and sides of the masked border. -
Anchor the composition:
At the very bottom of the paper, paint a small silhouette of a distant forest line using your darkest Indigo mix. Keep these trees small and jagged to emphasize the massive scale of your central tree. -
Final touches:
Inspect the main trunk. If it looks too flat, use the fine liner to add vertical striations suggesting rough bark texture using your darkest paint mix. -
The reveal:
Allow the painting to dry completely—if the paper feels cool to the touch, it’s still damp. Once dry, carefully peel away the tape at a 45-degree angle to reveal your crisp white borders.
Level Up: Misty Depth
Before painting the foreground tree, paint a faint, watery grey tree silhouette in the background. This creates a ghost tree effect and adds atmospheric depth.
Frame your masterpiece in a simple white mat to let the deep blues resonate.
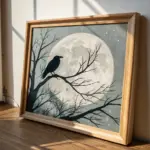
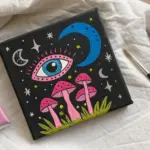
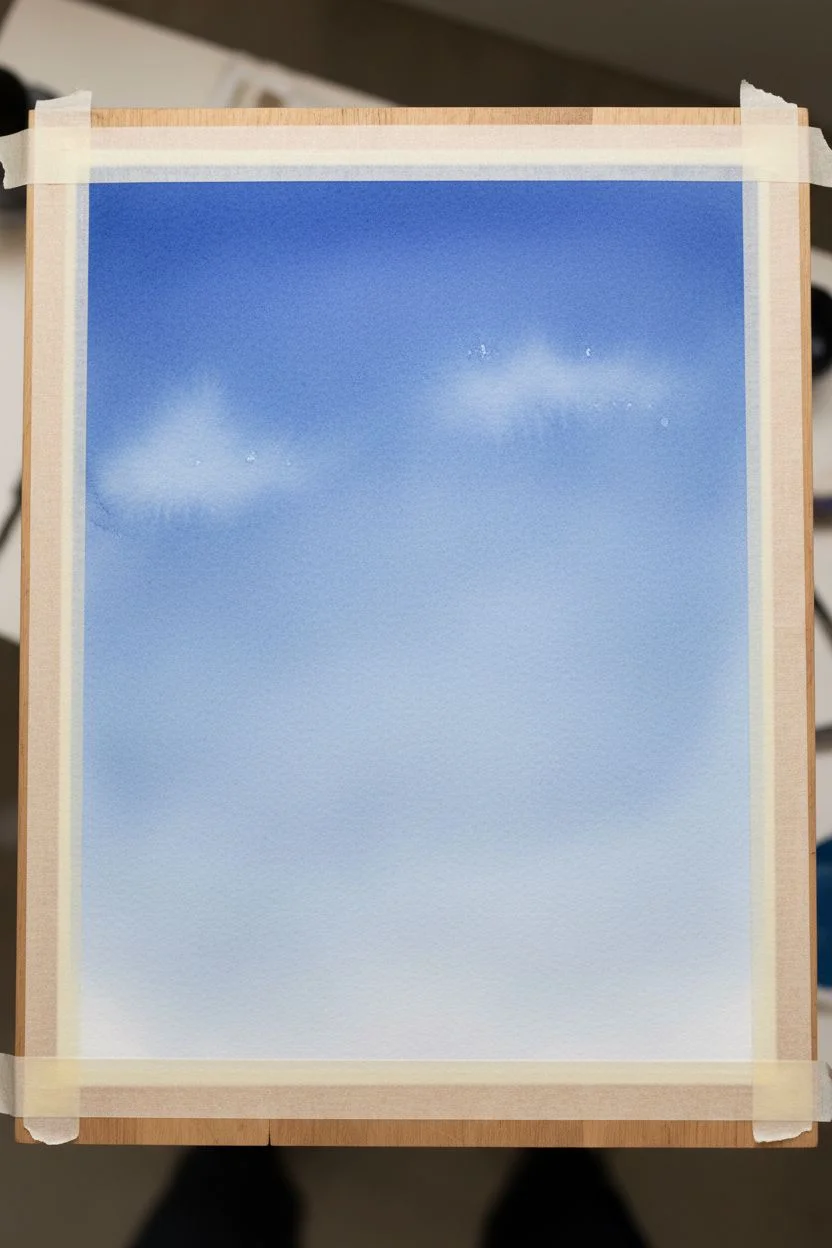
Raven on a Fence in a Winter Dusk
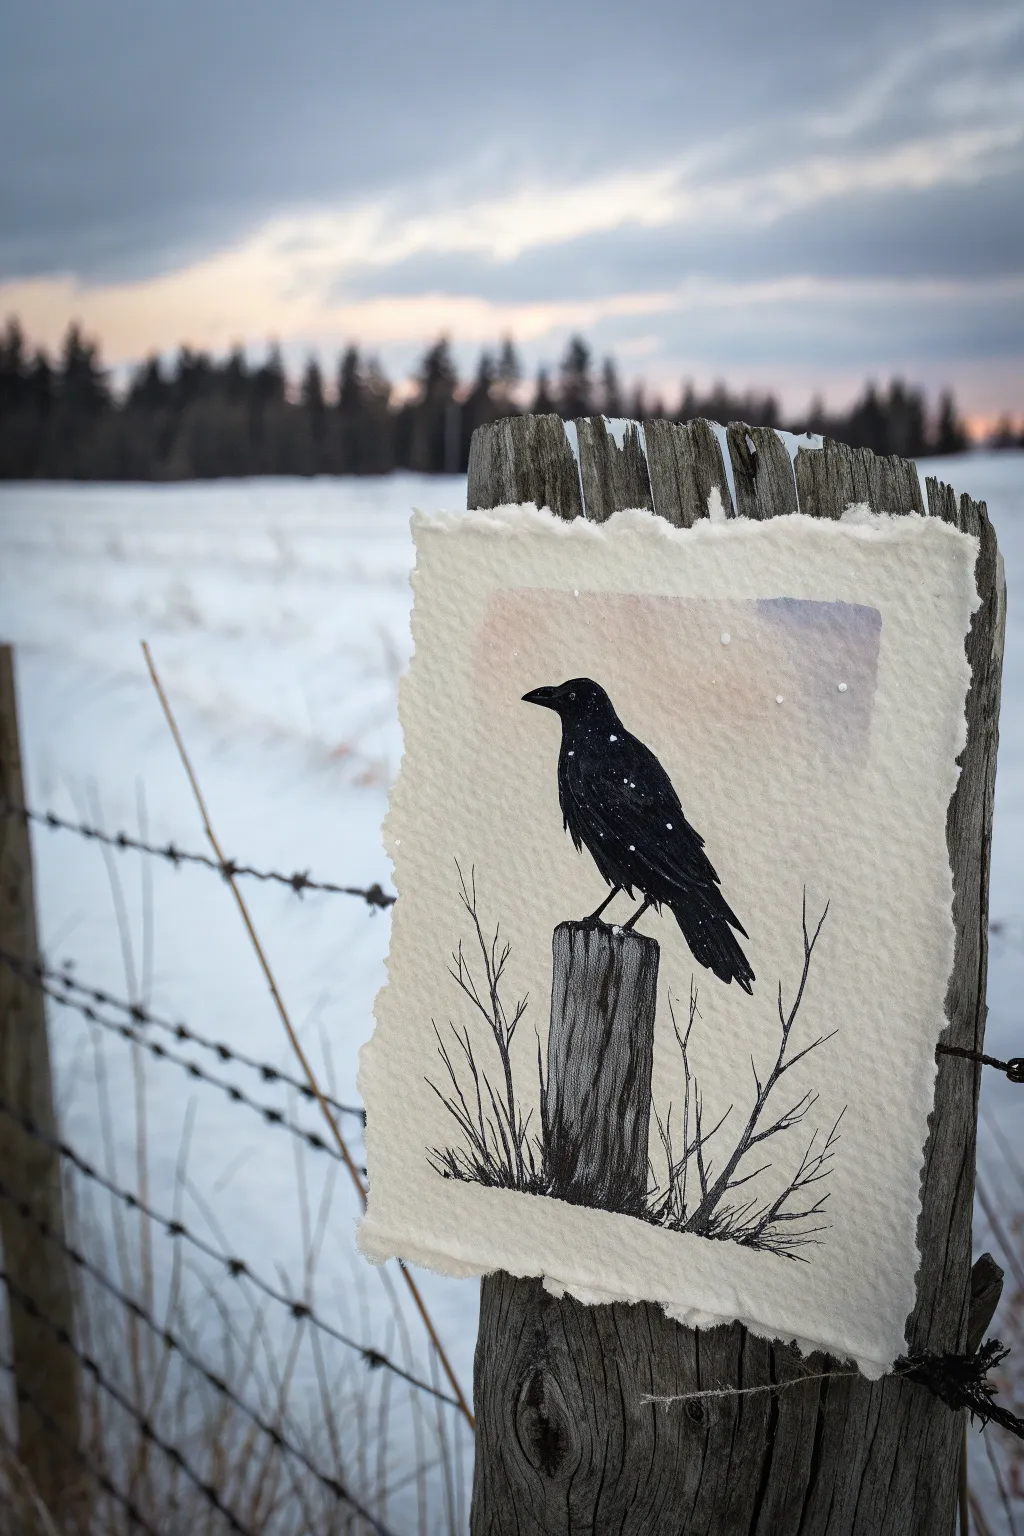
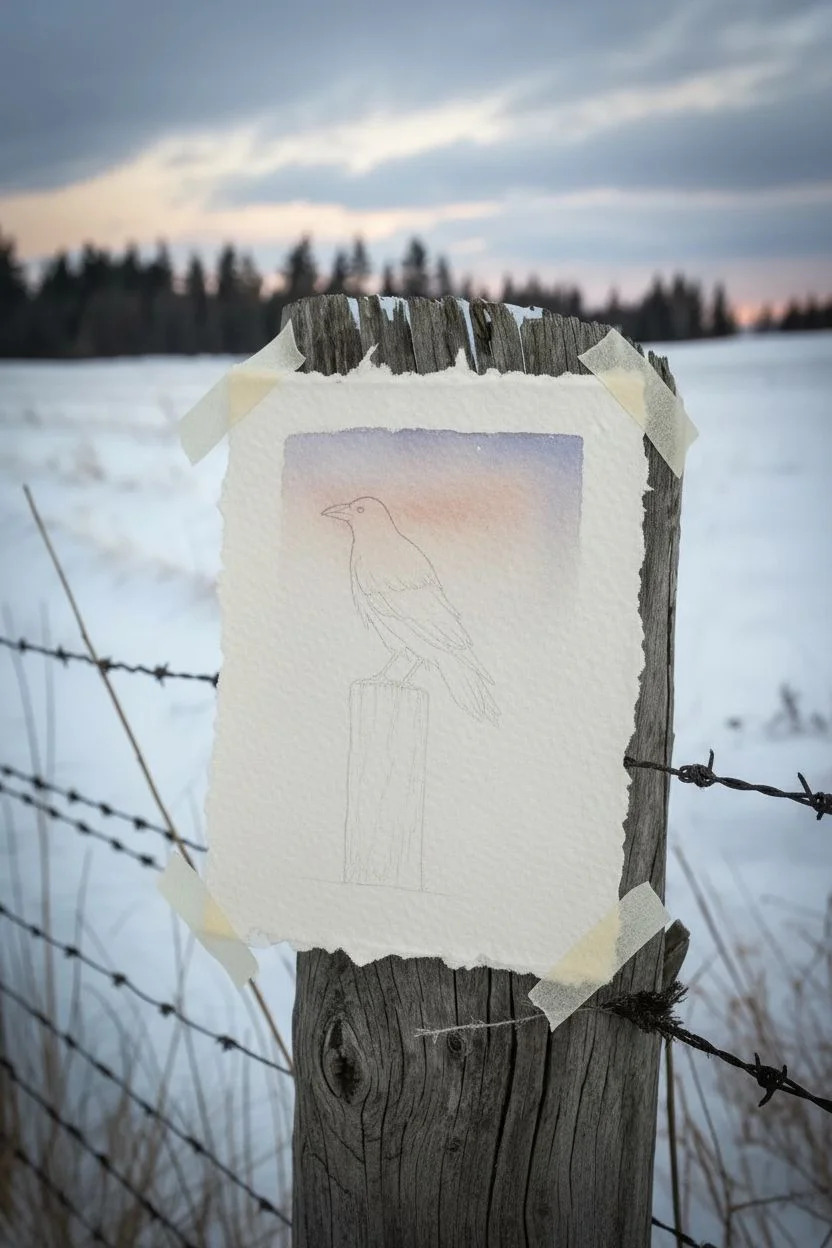
Capture the quiet solitude of winter with this mixed-media illustration featuring a stoic raven perched against a pastel sky. The combination of stark black ink and soft watercolor washes on deckle-edge paper creates a beautifully rustic, handmade aesthetic.
Step-by-Step Guide
Materials
- Heavyweight cold-press watercolor paper with deckle edges
- Watercolors (indigo, payne’s grey, muted pink/peach)
- Black India ink or waterproof fine liner pens (0.1, 0.3, and 0.5 sizes)
- White gouache or white gel pen
- Small round brushes (size 2 and 4)
- Pencil and kneaded eraser
- Masking tape
- Drawing board
Step 1: Setting the Scene
-
Prepare the Paper:
Select a piece of heavy watercolor paper with rough, torn edges (deckle edge) to match the rustic look. Tape the paper down to your board, leaving the ragged edges exposed if possible, or tape just the corners to keep it flat. -
Sketch the Composition:
Using a hard pencil (like a 2H), lightly sketch the outline of the fence post at the bottom center. Then, draw the simple silhouette of the raven perched on top. Keep lines faint so they don’t show through the sky later. -
Mix the Sky Colors:
Prepare a watery wash of a muted pink or peach tone and a separate wash of diluted indigo or violet. You want these to be very transparent to mimic the winter twilight.
Step 2: Background Wash
-
Wet the Sky Area:
With a clean brush, apply clean water to the rectangular area where the sky will be. Do not wet the bird or the post; work around your pencil sketch carefully. -
Apply the Gradient:
While the paper is damp, drop the pink wash into the lower horizon area of the rectangle. Immediately add the indigo wash to the top, letting them bleed together gently in the middle. The goal is a soft transition, not a hard line. -
Soften the Edges:
I like to use a damp, clean brush to feather the outer edges of the rectangle slightly so it doesn’t look too rigid, though the main color block should remain somewhat geometric. -
Dry Completely:
Let the background layer dry fully before moving on to the ink work. If the paper is cool to the touch, it’s still wet.
Uneven Snow Splatter?
If your snow splatters are too large or gloppy, test the consistency of your gouache on a scrap paper first. It should be the consistency of heavy cream before flicking.
Step 3: Inking the Raven
-
Outline the Silhouette:
Using a 0.3 waterproof pen or a fine brush dipped in India ink, carefully outline the raven. Focus on the sharp beak and the shaggy feathers at the throat. -
Fill with Darkness:
Fill in the body of the raven with solid black. Leave absolutely no white paper showing through the bird’s form to give it weight and presence. -
Add Texture Details:
Once the black ink is dry, use a slightly lighter grey ink or very diluted white gouache to add subtle indications of wing feathers. You don’t need much—just a hint of separation near the wing tip.
Deckle Edge Trick
Can’t find deckle-edge paper? Fold standard watercolor paper, crease it sharply, wet the fold with a brush, and slowly tear it along a ruler for that rough look.
Step 4: The Fence Post & Foreground
-
Draw the Post Outline:
Sketch the rough, weathered sides of the wooden post using a 0.5 pen. Make the lines shaky and organic to represent old wood. -
Texture the Wood:
Use vertical hatching lines to create the wood grain. Vary the length and thickness of your strokes to suggest deep cracks and weathering. -
Add Dry Weeds:
From the base of the post, use your thinnest pen (0.1) to flick quick, upward strokes. These represent the dormant winter grass and twigs poking through the snow. -
Branch Details:
Extend a few longer, jagged branches up the sides of the post. Keep these sparse and angular to enhance the stark, wintry mood.
Step 5: Winter Accents
-
Create Snow on the Post:
If you didn’t leave the top of the post white, use opaque white gouache to paint a small cap of snow where the bird’s feet grip the wood. -
Falling Snow:
Dip a toothbrush or a stiff bristle brush into watered-down white gouache. Flick the bristles with your thumb to create a splatter of fine ‘snow’ over the raven and the colored sky. -
Specific Snowflakes:
Use a white gel pen to place specific, larger snowflakes on the raven’s dark feathers for high contrast. -
Final Inspecton:
Check your edges. If the ‘ground’ area needs definition, add a very faint wash of light blue-grey under the weeds to suggest shadow on the snow, then let everything dry.
Display your moody winter scene on a small easel or mount it on a rustic board to complete the atmosphere

PENCIL GUIDE
Understanding Pencil Grades from H to B
From first sketch to finished drawing — learn pencil grades, line control, and shading techniques.
Explore the Full Guide
Ghostly Figure Emerging From a Dark Wash
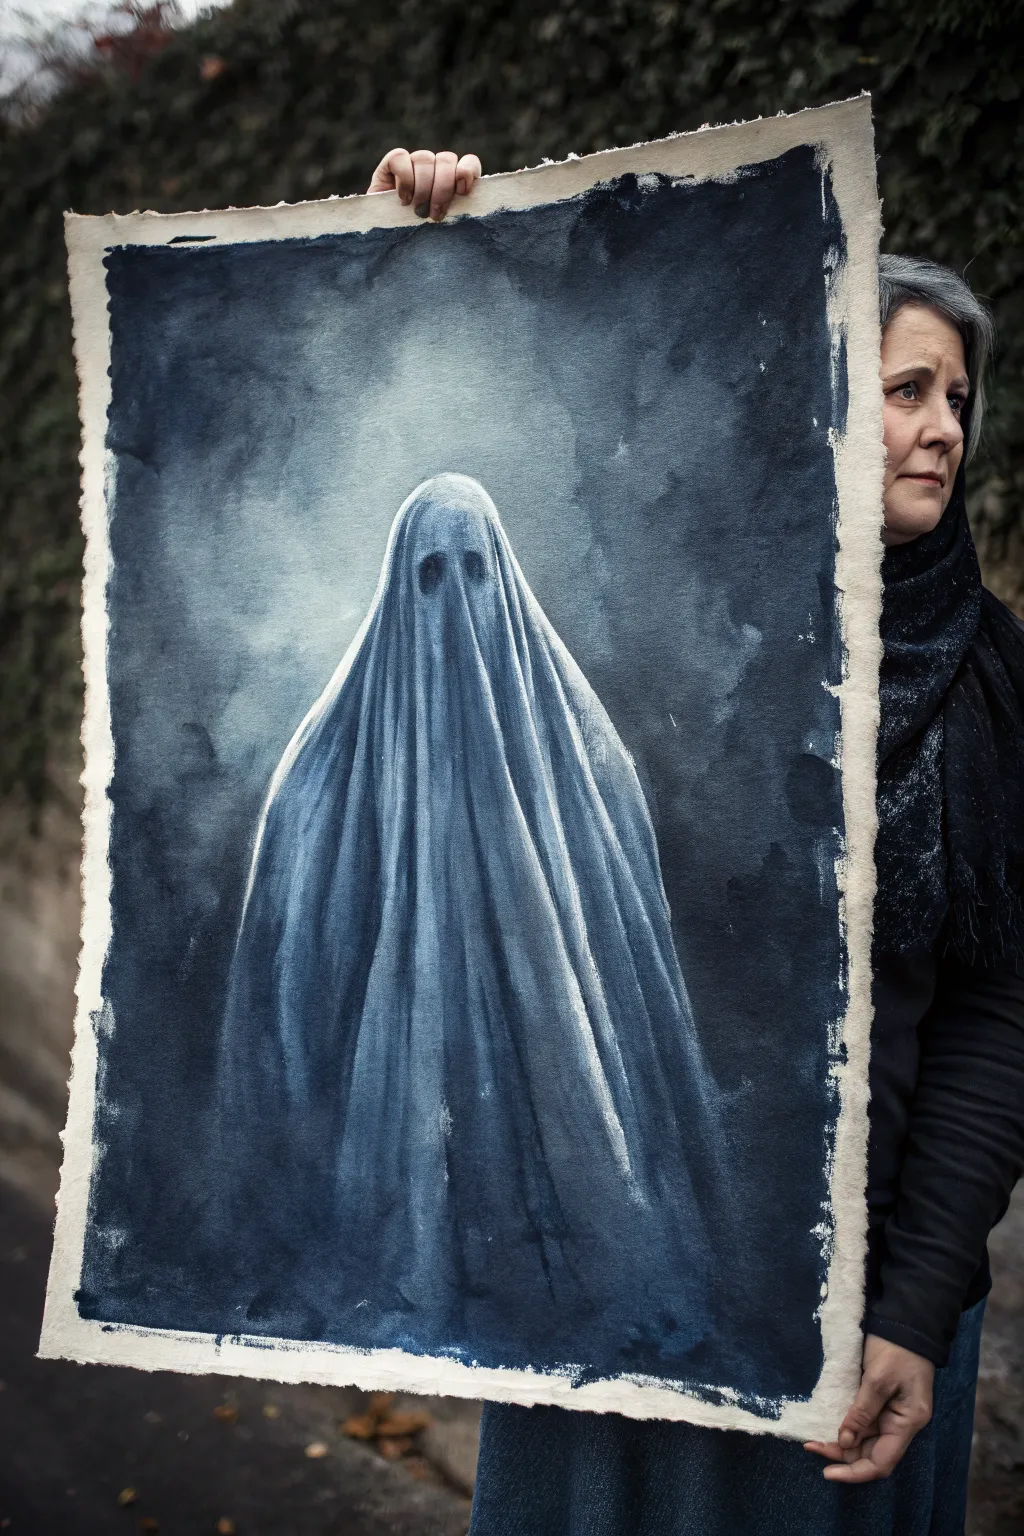
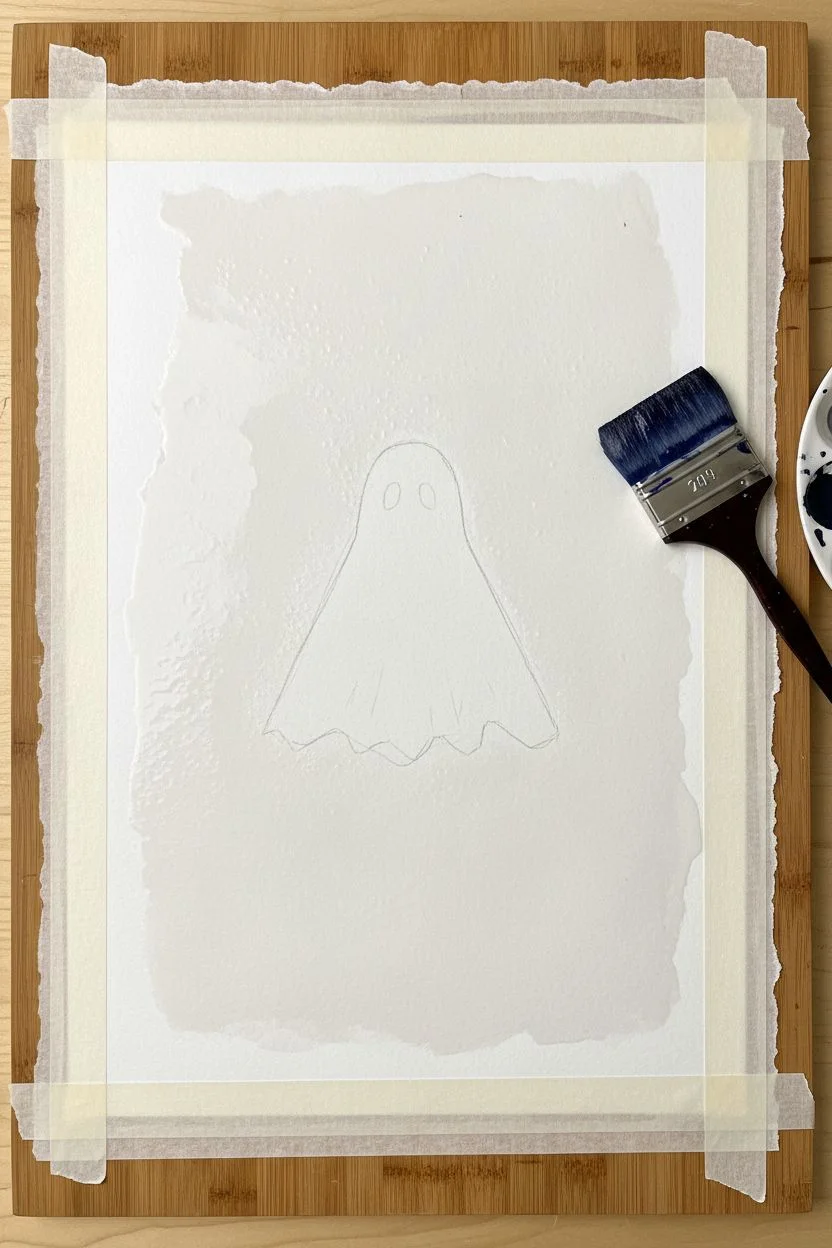
Summon a hauntingly beautiful presence with this monochromatic study in shadow and light. Using deep indigo watercolors on heavy rag paper, you’ll learn to build atmospheric layers that allow a ghostly figure to emerge organically from the darkness.
How-To Guide
Materials
- Heavyweight watercolor paper (300lb is ideal, rough texture)
- Indigo watercolor paint (tube preferred for richness)
- Payne’s Grey watercolor paint
- Large flat wash brush (2-3 inch)
- Medium round brush (size 8-10)
- Small detail brush (size 2-4)
- Masking fluid (optional)
- Clean water and jar
- Painting board and masking tape
- Paper towels or cotton rag
- Sea sponge for texture
Step 1: Preparation and Sketching
-
Paper Selection:
Choose a large sheet of thick watercolor paper with deckled edges if possible to match the rustic look. If your paper is standard, you can carefully tear the edges against a ruler to create that raw border. -
Secure the Surface:
Tape your paper down to a rigid board using masking tape, leaving about a 1-inch border from the torn edge to create a natural white frame. -
Outline the Figure:
Lightly sketch the contour of the draped sheet figure in the center. Don’t worry about small folds yet; just focus on the triangular silhouette and the rounded head shape. -
Masking (Optional):
If you struggle with preserving white space, apply masking fluid to the main ghostly figure. However, for a softer look like the original, I prefer to simply paint carefully around the shape.
Step 2: Creating the Atmosphere
-
Mixing the Dark Wash:
Squeeze a generous amount of Indigo and a touch of Payne’s Grey onto your palette. Mix with water to create a strong, inky puddle. -
The Wet-on-Wet Background:
Using clean water and your large flat brush, wet the entire background area around the ghost figure. The paper should be glistening but not holding puddles. -
Applying the Background Color:
While the paper is wet, load your large brush with the dark Indigo mix. Apply it broadly to the background, starting from the corners and working inward. -
Softening Edges:
As you approach the ghost outline, switch to a smaller brush to carefully guide the dark paint up to the pencil line, letting the color bleed slightly outwards into the wet background for a smoky effect. -
Adding Texture:
While the background is still damp, dab a dry sea sponge or crumpled paper towel randomly into the dark paint to lift subtle clouds of color, creating that misty atmosphere. -
Drying Time:
Let this background layer dry completely. This is crucial for the sharp contrast of the ghost.
Uneven Wash?
Don’t panic if the background dries with ‘cauliflower’ back-runs. In this spooky context, those blooms look like magical mist or smoke. Embrace the accident.
Step 3: Sculpting the Ghost
-
Defining the Eyes:
Mix a concentrated, almost black Indigo. With your small detail brush, paint two vertical ovals for the hollow eye sockets. Soften the bottom edges slightly with water so they don’t look like cartoon dots. -
Vertical Folds – First Pass:
Using a diluted wash of Indigo (medium tone), use your medium round brush to paint long, vertical strokes starting from the ‘head’ down to the bottom. -
Creating Depth:
Imagine the fabric draping over shoulders. Add darker lines in the recesses between folds, leaving the ‘peaks’ of the folds pure white or very light gray. -
Blending the Drapery:
Use a clean, damp brush to soften the hard edges of your fold lines. You want the shadows to look like soft fabric, not stripes. -
Deepening Shadows:
Once the first layer of folds is dry, go back in with a darker mix. Reinforce the deepest shadows, particularly under the ‘chin’ area and near the bottom hem. -
The Halo Effect:
To make the figure pop, take a clean, slightly damp brush and lift a tiny bit of the dark background pigment right along the outer edge of the ghost’s head, creating a faint, glowing outline. -
Bottom Integration:
Allow the bottom of the sheet to fade into the darkness. Add a few horizontal, jagged strokes of dark paint at the hem to suggest the fabric is tattered or fading into the void.
Add a Celestial Touch
Flick a stiff toothbrush loaded with white acrylic ink over the dried dark background to create accidental stars or spirit orbs around the figure.
Step 4: Final Touches
-
Border Work:
Use a nearly dry brush with dark pigment to create the rough, uneven border edge seen in the reference. Stipple the paint along the tape line for a distressed look. -
Evaluate Contrast:
Step back. Identify any areas in the background that dried too light and apply a second glaze of Indigo if necessary. -
Final White Highlights:
If you lost any bright whites on the highest points of the folds, use a small amount of white gouache or white ink to reclaim those highlights.
Now step back and admire how simple shadows can create such a compelling presence
Deep Space Void With Sparse Stars and Nebula Smear
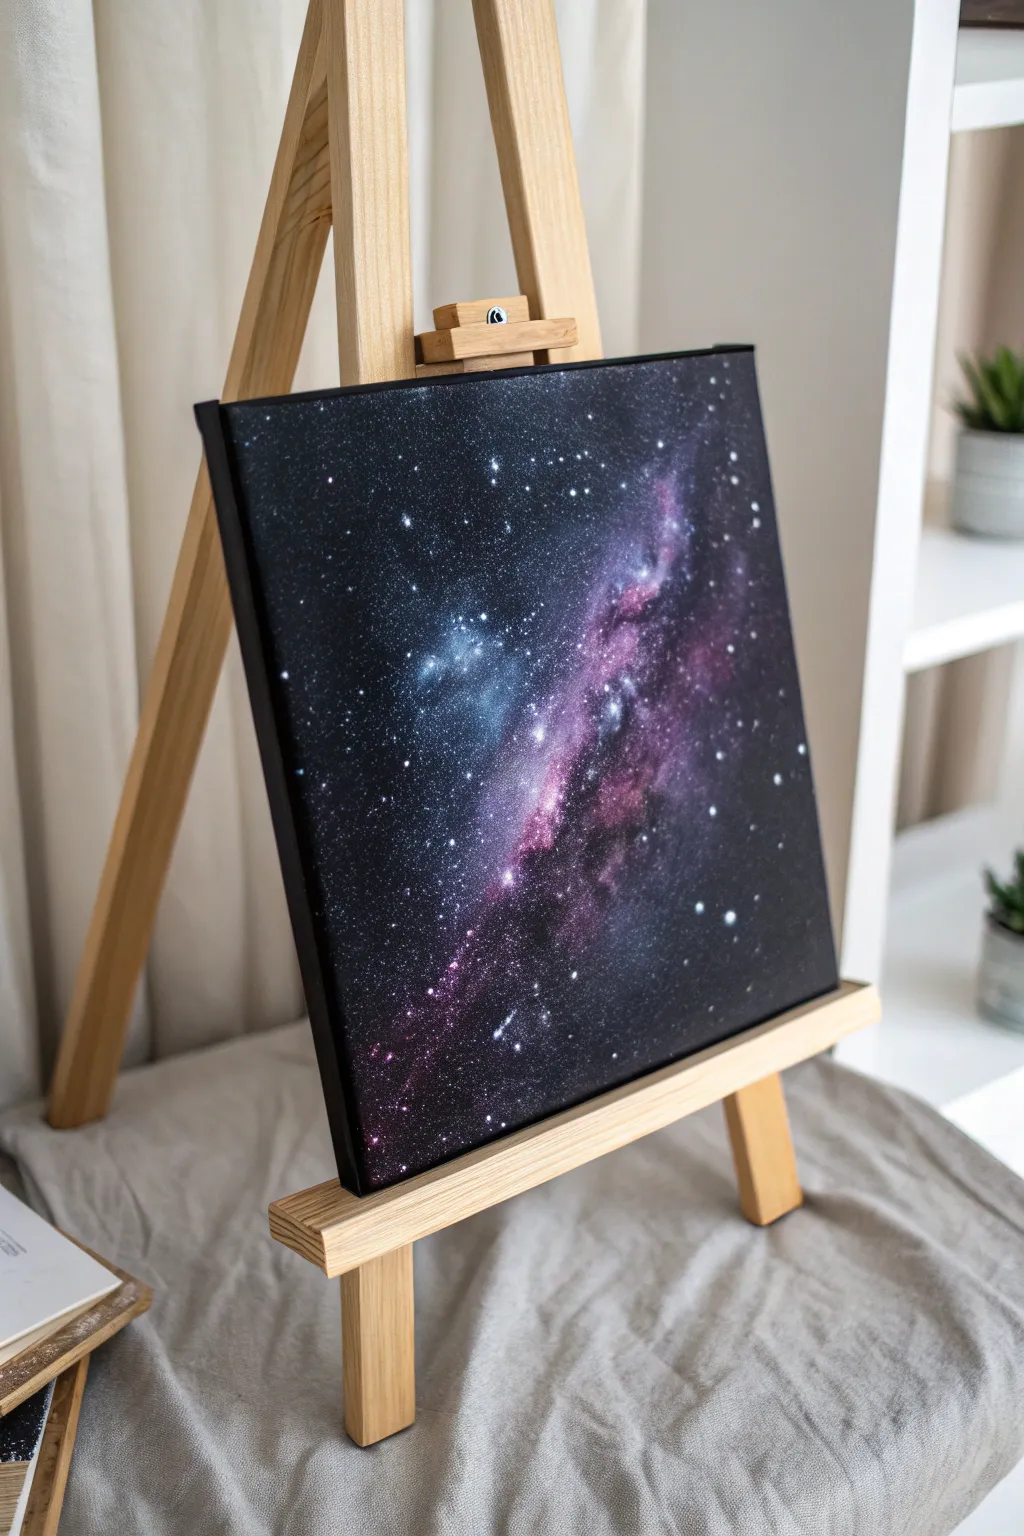
Capture the infinite beauty of deep space with this moody, celestial painting. The stark contrast between the inky black void and the soft, glowing nebula smear creates a sophisticated piece that draws the eye without overwhelming a room.
Step-by-Step Guide
Materials
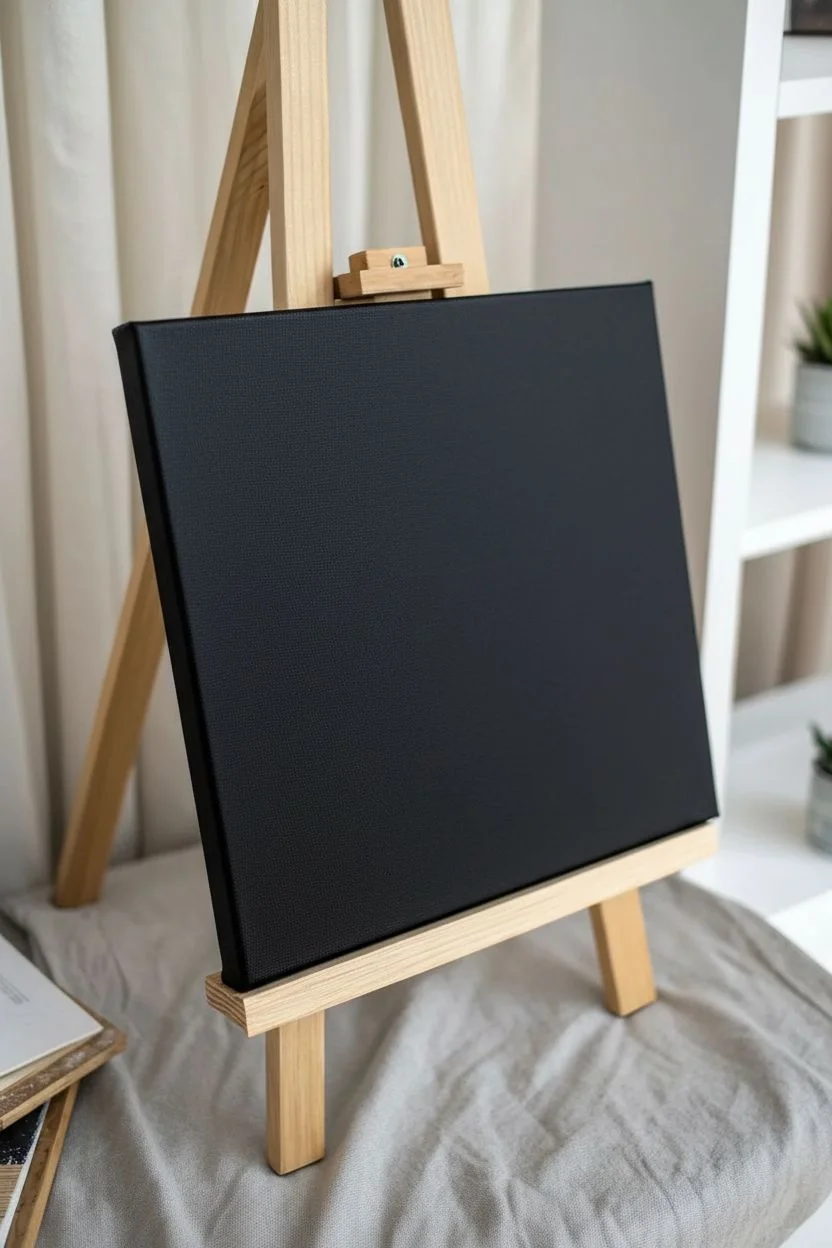
- Square stretched canvas (black primed, or paint it yourself)
- Acrylic paints: Carbon Black, Titanium White, Dioxazine Purple, Magenta, Phthalo Blue
- Large flat brush or foam brush
- Medium soft round brush
- Old toothbrush or stiff fan brush (for stars)
- Sponge or scrunched tissue paper
- Cup of water and paper towels
- Palette or paper plate
Step 1: Preparing the Void
-
Prime the surface:
If your canvas is white, start by covering the entire surface with a solid coat of Carbon Black. Use a large flat brush or foam brush to ensure full coverage, including the sides. -
Double check density:
Let the first coat dry completely. If you can see any white canvas peeking through the weave, apply a second coat of black to ensure a deep, opaque void. -
Dry thoroughly:
Wait until the black background is completely bone-dry before proceeding. This prevents your galaxy colors from becoming muddy grey.
Don’t Over-mix
When sponging the nebula colors, don’t tap too many times in one spot. Over-tapping blends the acrylics too much, turning vibrant cosmic clouds into a flat, muddy purple stripe.
Step 2: Building the Nebula
-
Map the shape:
Visualize a diagonal line moving from the bottom left to the top right. This will be the path of your nebula cloud. -
Base layer of deep blue:
Mix a tiny amount of Titanium White into Phthalo Blue. Using a dry sponge or scrunched tissue, lightly dab this dark blue in a diagonal cloud formation near the center. -
Soften the edges:
While the blue is still tacky, use a dry, clean brush to gently swirl the edges outward, fading them into the black background. -
Adding the purple core:
Mix Dioxazine Purple with a touch of white. Sponge this color directly over the center of the blue patch, keeping the area slightly smaller than the blue layer. -
Highlighting with magenta:
Create a brighter pink using Magenta and White. Dab this sporadically through the center of the purple band to create depth and ‘hot spots’ within the gas cloud. -
Blending techniques:
If the colors look too separated, lightly tap over the transition areas with a slightly damp sponge to blur the lines. -
Atmospheric dust:
Take a very dry brush with a tiny amount of your darkest blue-grey mix. Lightly scumble separate faint clouds in the distant corners away from the main nebula.
Add a Constellation
Personalize the piece by arranging the larger hand-painted stars into your zodiac sign or a recognizable constellation like Orion or the Big Dipper hidden in the galaxy.
Step 3: Creating the Starfield
-
Prepare the spatter paint:
Mix Titanium White with water until it reaches the consistency of heavy cream or ink. It needs to be fluid enough to fly off a brush. -
Test the consistency:
Perform a test flick on a scrap piece of paper or cardboard. If the drops are too big, the paint is too thick; if it’s too misty, it’s too thin. -
Flick the stars:
Load an old toothbrush or stiff brush with the thinned white paint. Used your thumb to flick the bristles, spraying tiny dots across the canvas. -
Focus the density:
Concentrate more spatter near the bright nebula band where star formation would be active, and keep the black corners sparser. -
Hand-painting major stars:
Use your smallest detail brush or a toothpick to manually dot a few larger, brighter stars. Place a few of these directly in the nebula cloud. -
Cross-stars:
I like to select one or two major stars and carefully drag a tiny cross shape through them to create a twinkling lens flare effect. -
Final glow:
Mix a very translucent glaze of white and water. Lightly glaze over the brightest stars in the nebula to give them a hazy, glowing halo.
Allow the spatter to dry completely before sealing your cosmic creation with a gloss varnish to make the colors pop


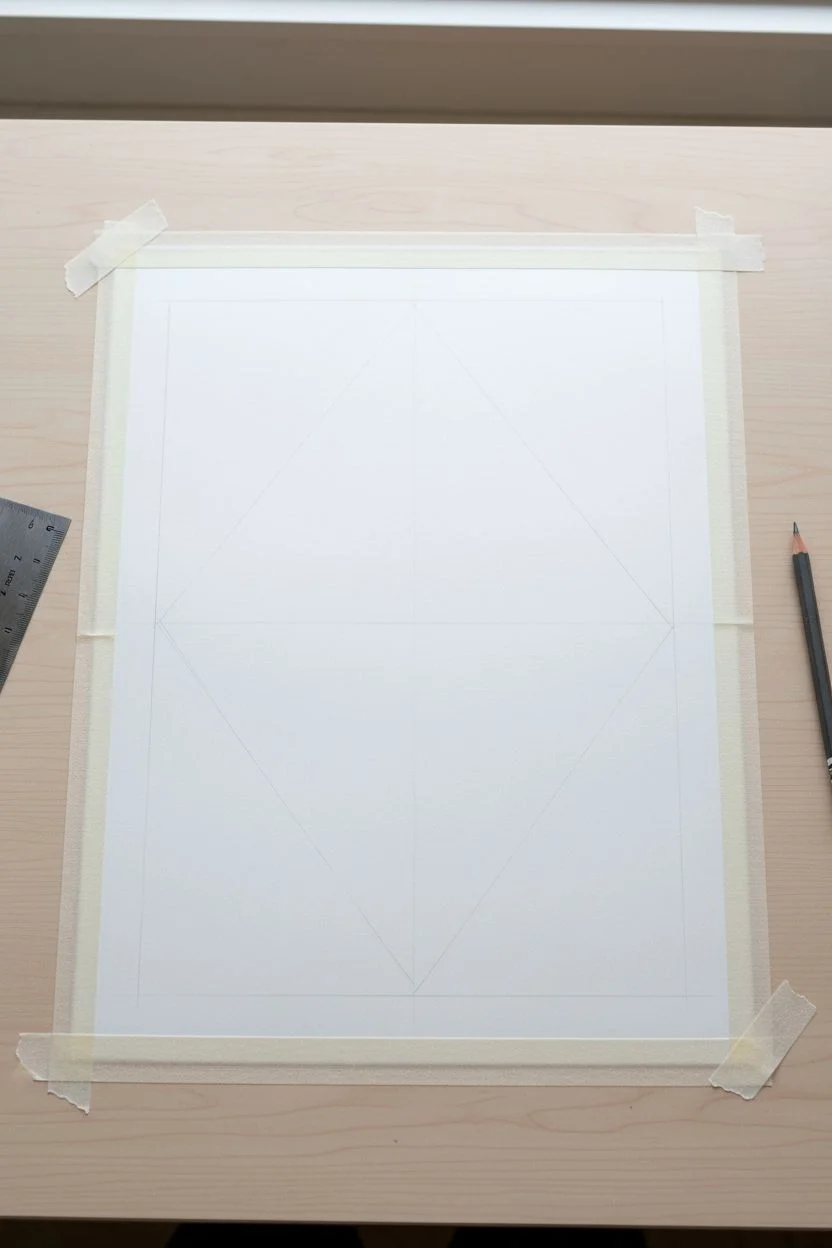
Night Scene Inside a Geometric Frame
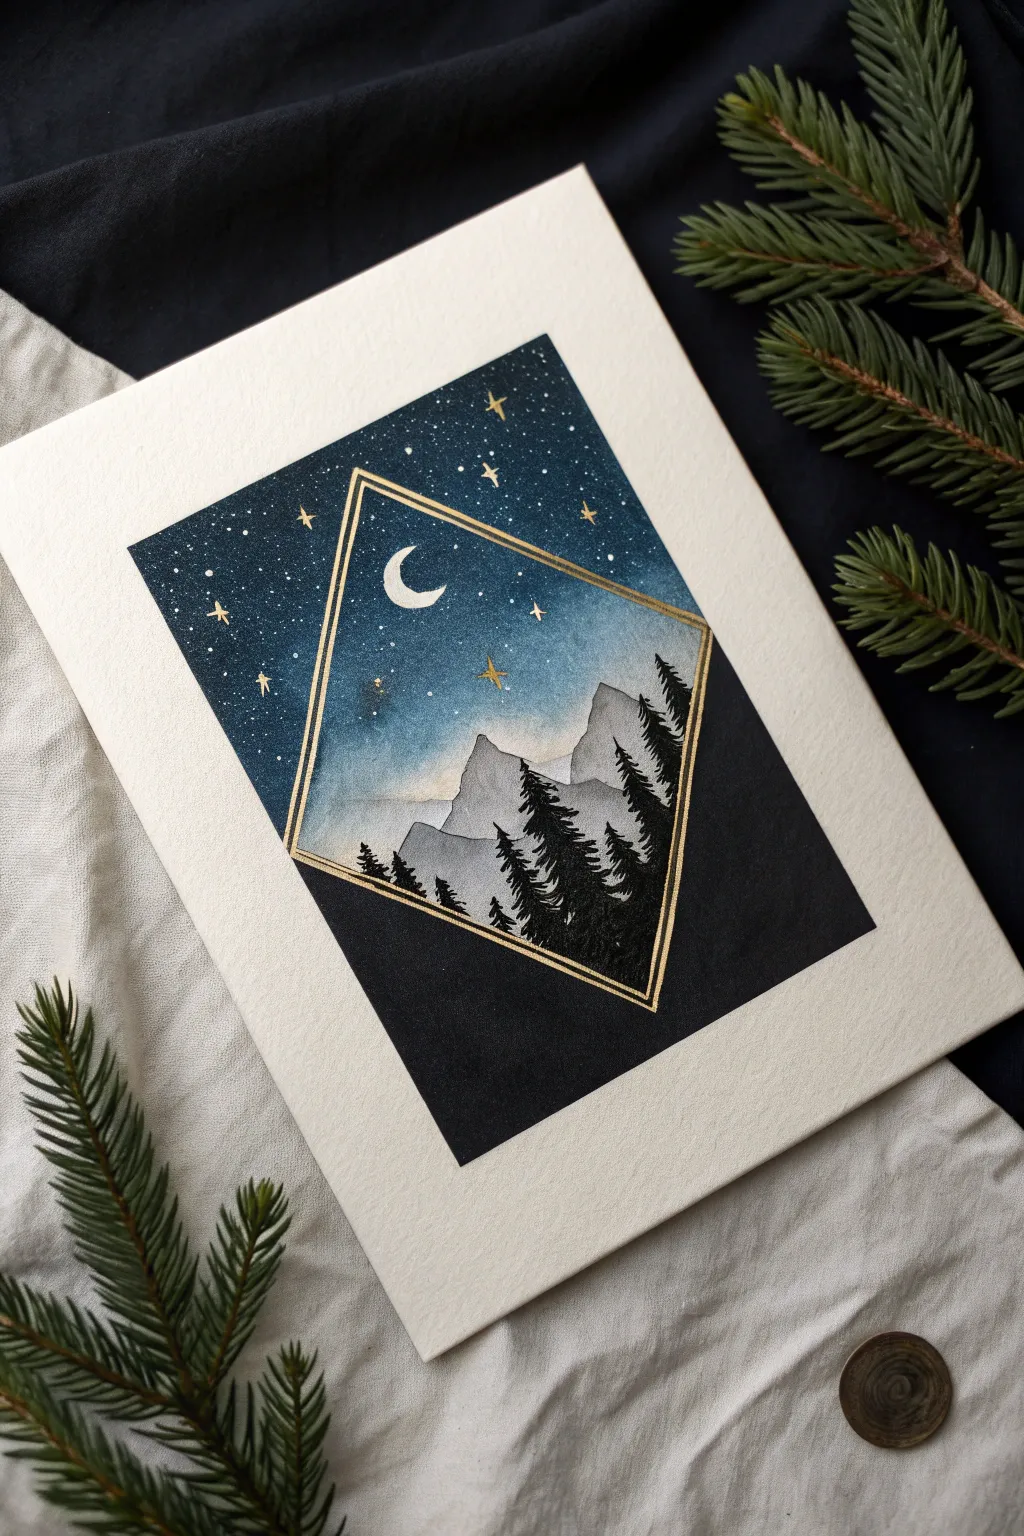
Capture the magic of a crisp winter evening by framing a delicate landscape within a striking geometric border of gold. This project combines the deep, moody tones of the night sky with sharp, graphical lines for a piece that feels both classic and modern.
Step-by-Step Tutorial
Materials
- Cold press watercolor paper (block or taped down)
- Watercolor paints (Indigo, Payne’s Grey, Black, Prussian Blue)
- White opacity paint (gouache or acrylic ink)
- Gold metallic paint or gold pen
- Ruler
- Pencil and eraser
- Masking tape or Washi tape
- Small round brushes (sizes 0, 2, and 4)
- Fine liner brush for details
Step 1: Setting the Structure
-
Define the boundaries:
Begin by deciding on the overall size of your painting. Lightly sketch a large rectangle in the center of your paper to serve as the outer boundary. Use a ruler to ensure your lines are perfectly straight. -
Create the diamond frame:
Inside your rectangle, draw a diamond shape. The top and bottom points of the diamond should be centered, while the side points should touch the vertical edges of your outer rectangle. Keep your pencil pressure very light so the lines don’t show through later. -
Masking (Optional but Recommended):
If you struggle with straight edges, you can apply masking tape along the *outer* edges of the large rectangle. This ensures a crisp finish when you peel it off at the very end.
Star Control
Cover the mountain section with a scrap of paper before splattering white paint for the stars. This keeps the ‘snow’ strictly in the sky area and off the dark trees.
Step 2: Painting the Sky
-
Wet-on-wet technique:
Using clean water, wet the upper triangular section of the diamond shape. Avoid getting water on the lower mountain section yet. This prepares the paper for a smooth gradient. -
Applying the deep blue:
Load your brush with a mix of Indigo and Prussian Blue. Start painting from the very top point of the diamond, depositing the most pigment there. Let gravity help pull the color down. -
Creating the fade:
As you move lower into the diamond shape, clean your brush slightly and blend the blue downwards so it fades into a lighter, watery wash near the horizon line. This creates the glow of the night sky. -
Spattering stars:
While the sky is still damp (or dry, for sharper stars), dip a toothbrush or stiff brush into white gouache or ink. Gently flick the bristles to spray tiny white dots across the dark blue area. -
Adding the moon:
With a fine brush and white gouache, carefully paint a crescent moon in the upper left quadrant of the sky. Make sure your white is opaque enough to stand out against the blue.
Level Up: Cosmic Dust
Mix a tiny amount of iridescent medium into your night sky blue. It will be invisible from straight on, but will shimmer magically when viewed from an angle.
Step 3: The Mountains and Trees
-
Painting the mountains:
Mix a very watery grey using Payne’s Grey. Paint the distant mountain peaks just below your sky fade. The edges should be somewhat jagged to mimic rocky terrain. -
Adding dimension:
Once the first mountain layer is dry, paint a second, slightly darker layer of mountains in front of them to create depth. I find that staggering the peaks makes the range look more realistic. -
Painting the foreground trees:
Switch to your smallest brush and load it with thick Black or concentrated Payne’s Grey. Paint the silhouettes of pine trees rising from the bottom of the diamond. -
refining tree details:
Ensure the tree tops are sharp and pointy. Use a stippling motion to create the texture of pine needles on the branches. -
The outer darkness:
Now, fill in the four triangular corners outside the diamond but inside your main rectangle. Use solid black or an extremely dark Indigo. Paint carefully right up to the pencil line of the diamond.
Step 4: The Golden Touch
-
Connect the lines:
Wait until the painting is completely bone-dry. Using a gold metallic pen or a fine liner brush with gold paint, draw the diamond outline. This line separates the inner scene from the outer darkness. -
Double the frame:
Add a second, parallel gold line just inside the first one to give the frame visual weight and elegance. -
Adding larger stars:
Use your gold medium to add a few larger, four-pointed ‘compass’ stars in the sky. Place them strategically to balance the composition. -
Highlighting elements:
Add tiny gold highlights to the tips of a few trees or distant mountain peaks for a magical shimmer. -
Final reveal:
If you used masking tape around the outer border, peel it away slowly at a 45-degree angle to reveal your clean, sharp edges.
Place this piece on a small easel or frame it to bring a touch of serene winter wonder to your bookshelf
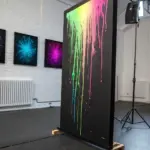
Abstract Darkness With Scratched Light and Hidden Symbols
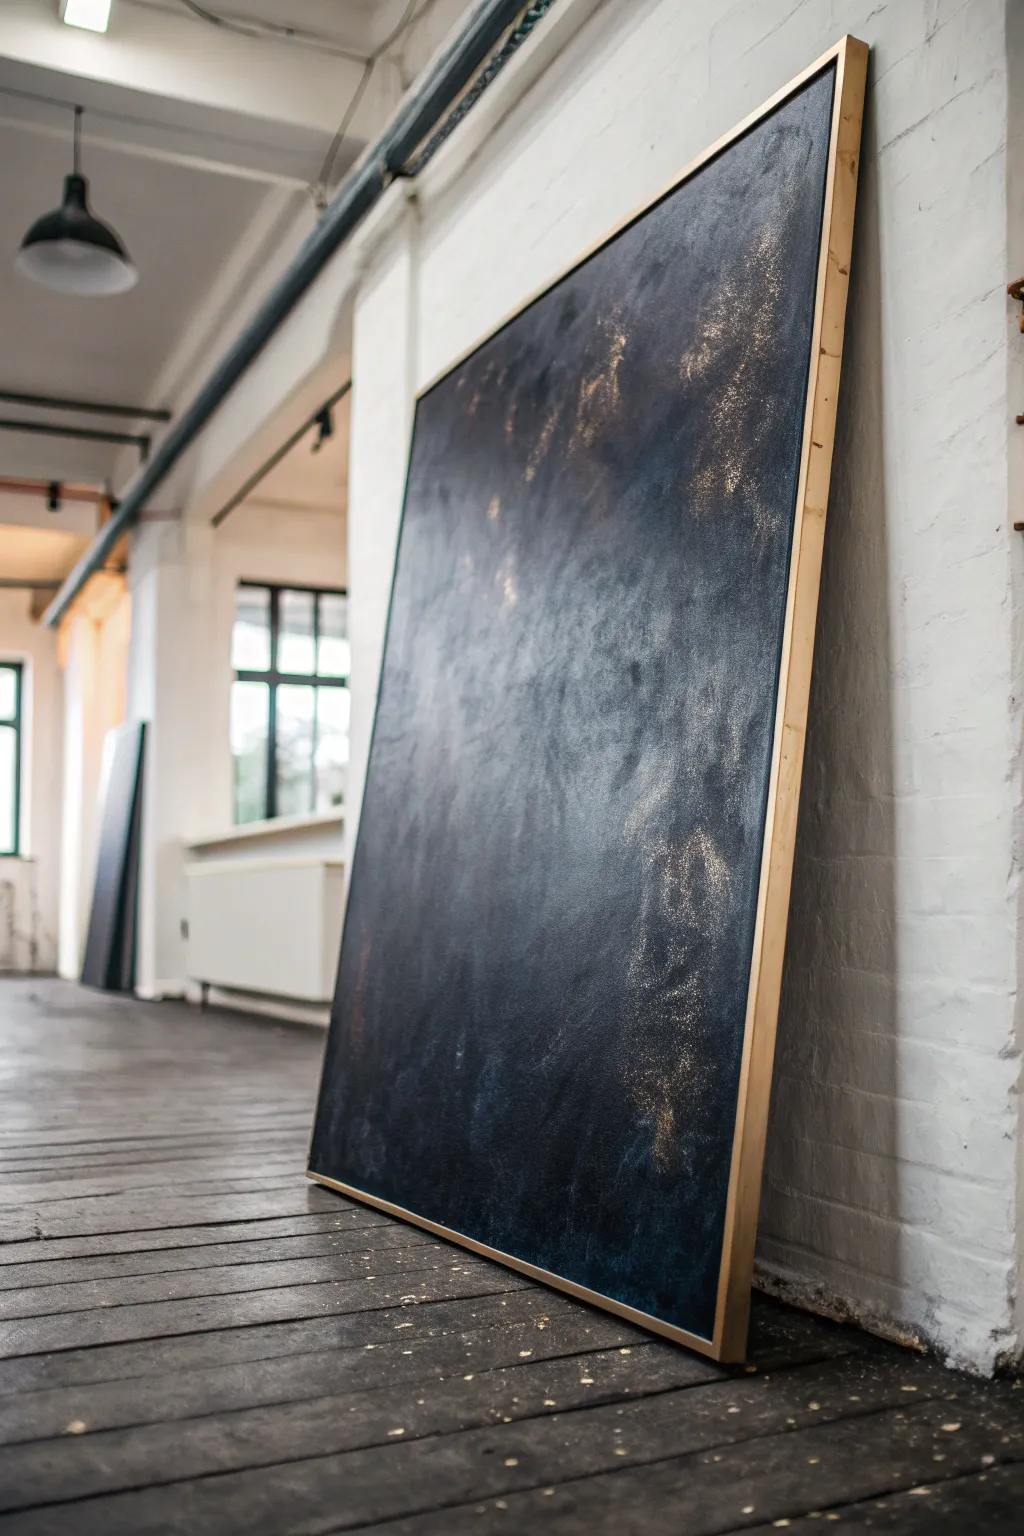
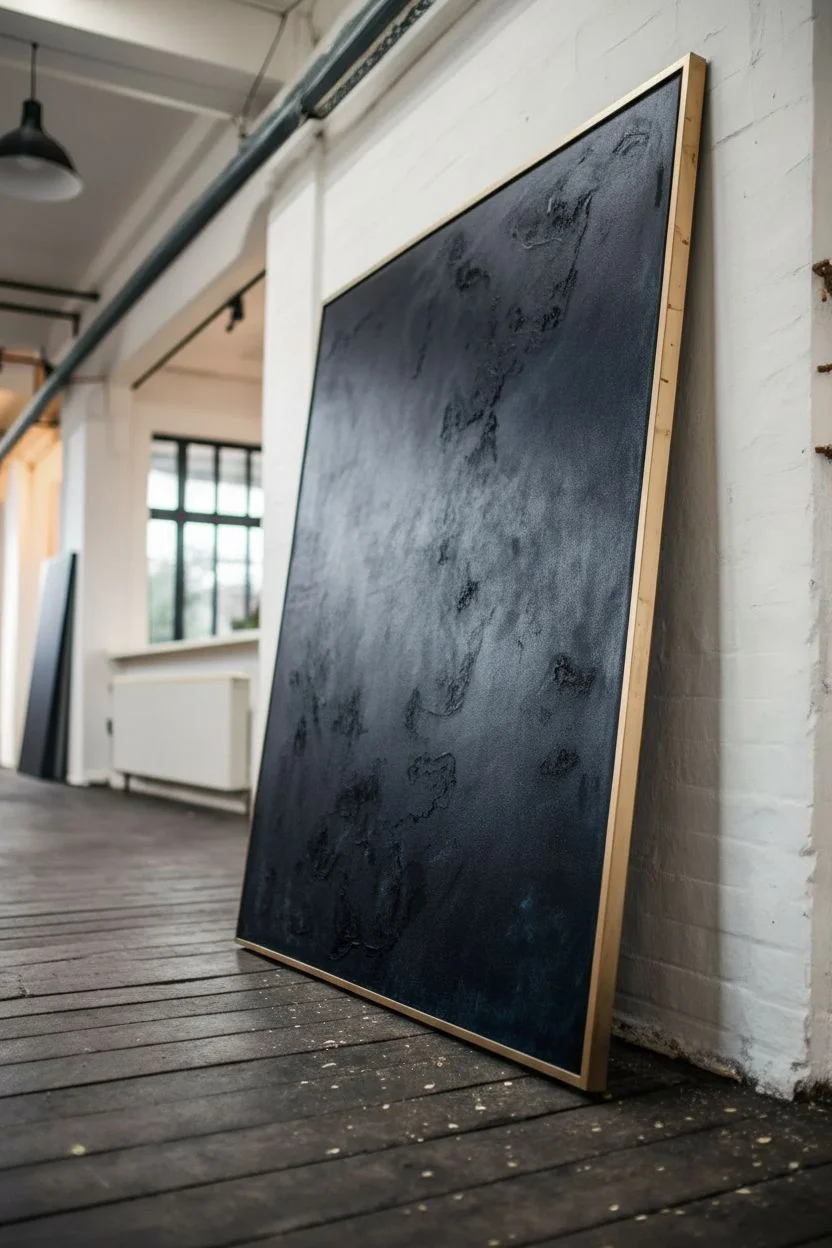
Embrace the beauty of deep, atmospheric darkness with this large-scale abstract piece. By layering midnight hues and adding subtle metallic stardust, you’ll create a moody masterpiece that feels both expansive and grounding.
Step-by-Step Guide
Materials
- Large stretched canvas (e.g., 30×40 inches or larger)
- Black gesso
- Mars Black acrylic paint (heavy body)
- Prussian Blue or Payne’s Grey acrylic paint
- Metallic Gold or Bronze acrylic paint
- Fine glitter dust or mica powder (gold/bronze)
- Large flat paintbrush (2-3 inches)
- Natural sea sponge
- Spray bottle with water
- Floating frame (light wood)
- Drop cloth
- Matte varnish (spray or brush-on)
Step 1: Setting the Darkness
-
Prime the surface:
Begin by coating your large canvas with black gesso. Even if you plan to paint it black later, black gesso provides a toothy, matte foundation that absorbs light better than white canvas, giving the final piece more depth. -
Establish the base coat:
Once the gesso is dry, mix a large amount of Mars Black with a touch of Prussian Blue. Apply this across the entire canvas using your large flat brush. Don’t worry about perfect smoothness; slight brushstrokes add character. -
Add texture layers:
While the base is still slightly tacky, dab a natural sea sponge into pure Mars Black. Stipple this randomly over the surface to create subtle, organic texture that isn’t visible from afar but adds richness up close.
Step 2: Creating the Galaxy
-
Introduce deep blues:
Mix a glaze using Prussian Blue and a generous amount of water or glazing medium. It should be semi-transparent. -
Apply the color wash:
Brush the blue glaze into the center areas of the canvas, pushing it toward the edges but leaving the corners darkest. The black underneath should still shadow through. -
Blend with water:
Mist the canvas lightly with your spray bottle to encourage the blue glaze to bleed and feather into the black naturally. I like to tilt the canvas slightly here to let gravity help the blending process. -
Dry thoroughly:
Let these dark layers dry completely. This might take a few hours depending on how much water was used.
Pro Tip: Depth Control
Mix a tiny drop of red into your black paint for the deepest shadows. Pure black can look flat, but a warm black recedes further visually, adding infinite depth.
Step 3: The Stardust Effect
-
Prepare the metallics:
Put a small amount of metallic gold or bronze paint on your palette. Add a drop of water to make it fluid but not runny. -
Sponge the nebulas:
Using a clean, dry area of your sea sponge, pick up a tiny bit of metallic paint. Offload most of it onto a paper towel until the sponge seems almost dry. -
Apply the metallic drift:
Gently drag the dry sponge vertically across specific sections of the canvas, focusing on the right side as seen in the inspiration image. You want a ‘scratched’ or ‘swept’ look, not solid blobs. -
Add the shimmer:
While the metallic paint is wet, pinch a small amount of gold mica powder or fine glitter dust and blow it gently onto the wet gold areas. This creates that ethereal, scattered star effect. -
Soften the edges:
If any gold area looks too harsh, use a dry, soft brush to feather the edges outward, blending the metallic sheen into the dark void.
Level Up: Resin Rivers
For a glassy, high-end finish, pour a thin layer of clear art resin over just the metallic sections. The contrast between matte black and glossy gold is stunning.
Step 4: Finishing and Framing
-
Seal the work:
Once completely dry (wait at least 24 hours), seal the painting with a matte varnish. A glossy finish would reflect too much light and ruin the deep, velvety effect of the black paint. -
Inspect the frame:
Ensure your light wood floating frame is clean and free of splinters. The contrast between the raw pine color and the dark art is crucial for this look. -
Mount the canvas:
Place the canvas into the floating frame. There should be a small, even gap between the canvas edge and the frame structure. -
Secure the back:
Turn the assembly over on a soft surface and screw the canvas into the frame from the back using the appropriate offset clips or screws provided with your frame kit.
Lean your finished piece against a textured wall to let its moody atmosphere transform the entire room


Have a question or want to share your own experience? I'd love to hear from you in the comments below!