When I’m craving loose, expressive color, I always come back to drip painting—it’s pure movement, pure mood, and a little bit of beautiful chaos. Here are my favorite drip painting ideas that let gravity do the heavy lifting, from super simple setups to full-on wow pieces.
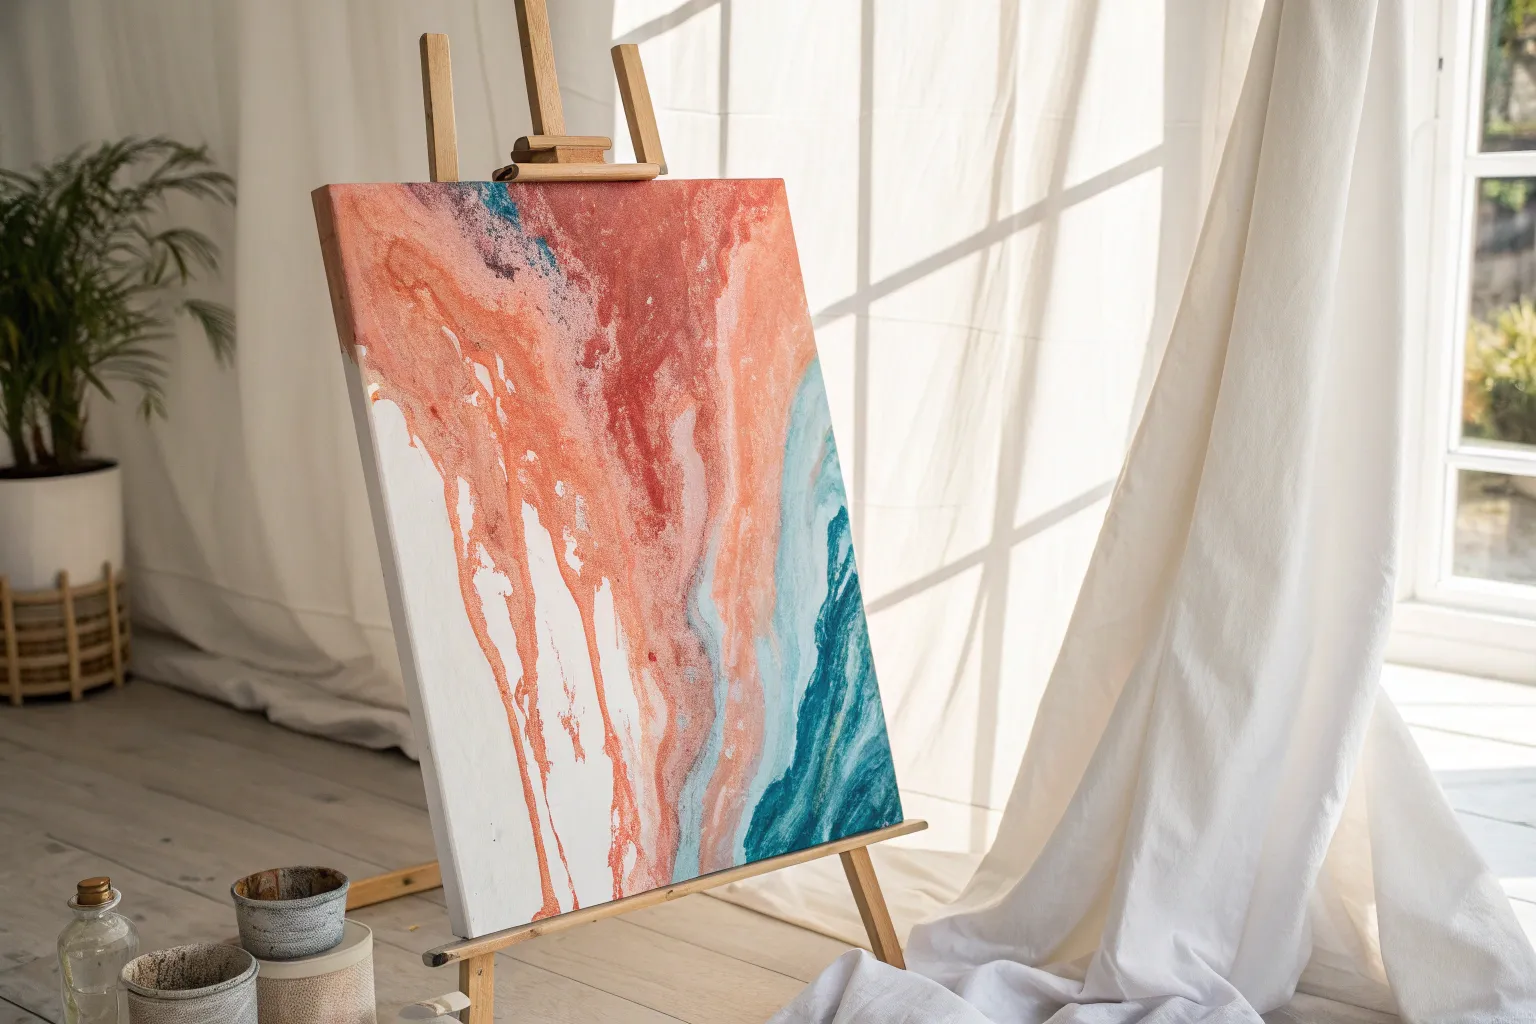
Classic Tilt-and-Drip Abstract Canvas
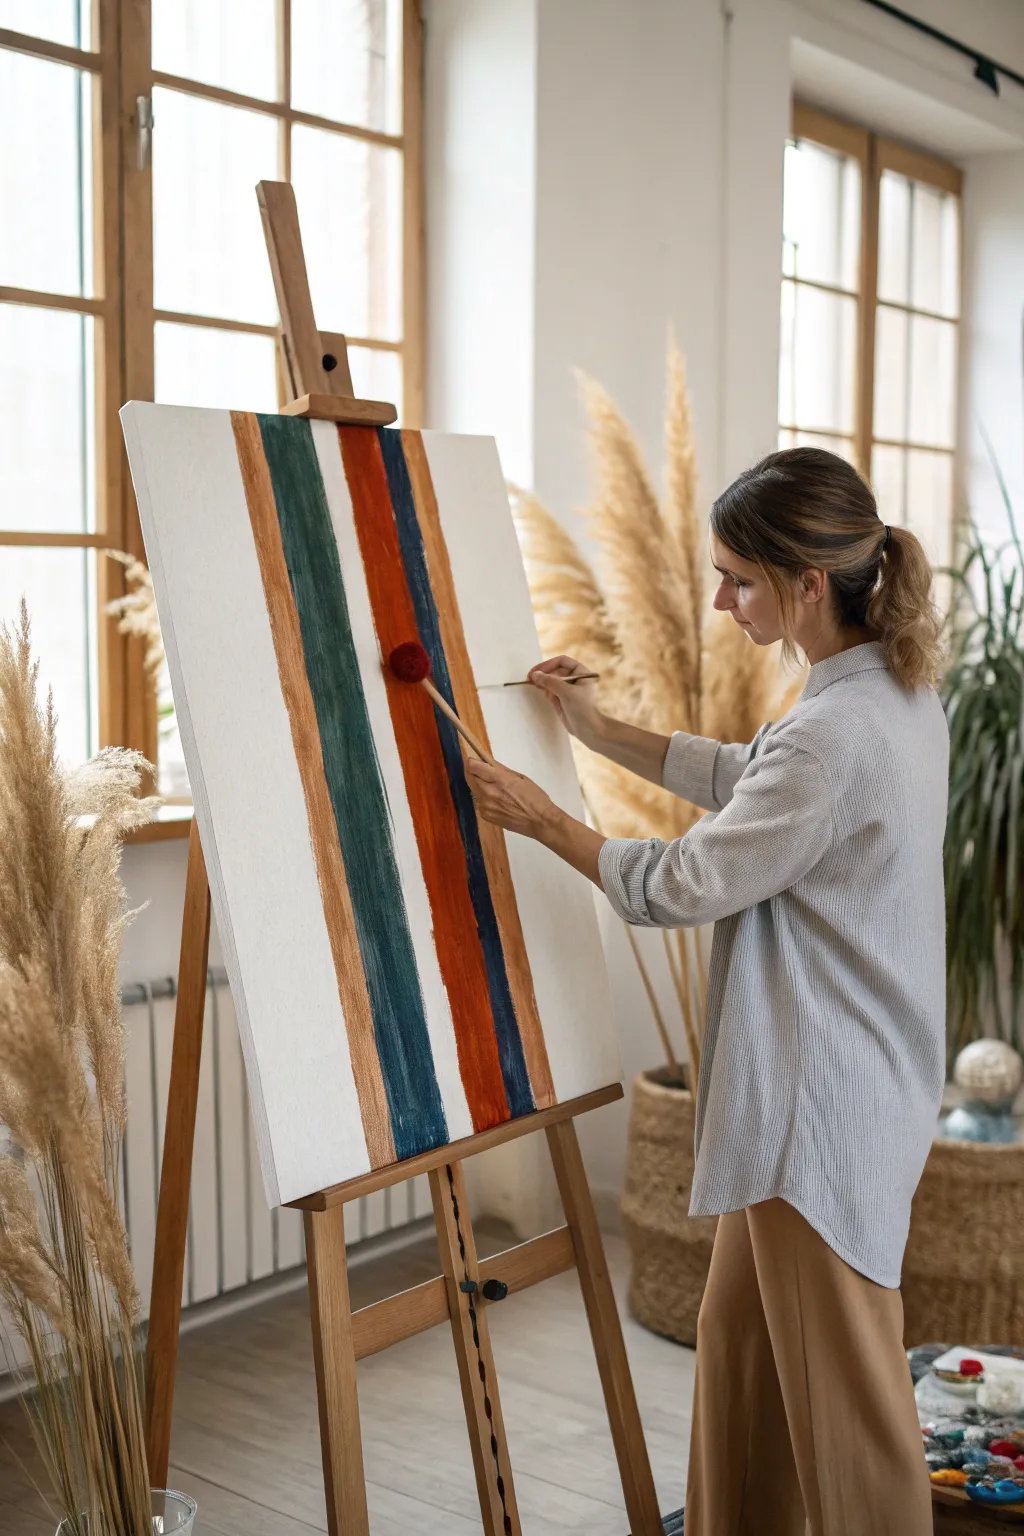
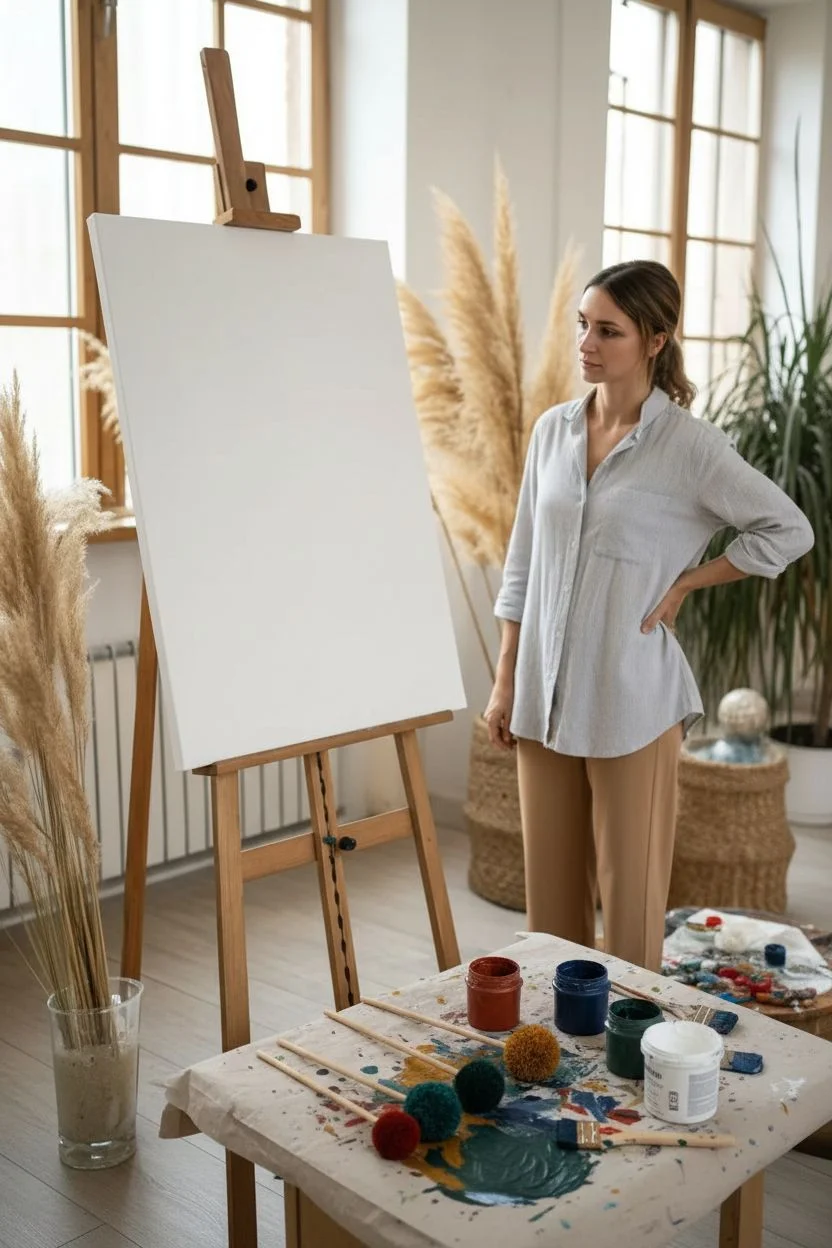
Embrace gravity and bold color blocking with this modern abstract art project. By layering vertical bands of rich earth tones and utilizing a unique application tool, you’ll create a structured yet organic piece perfect for minimalist interiors.
Step-by-Step
Materials
- Large rectangular canvas (approx. 24×36 or larger)
- Heavy body acrylic paints (Ochre/Gold, Deep Teal/Hunter Green, Rust Red, Navy Blue)
- White gesso or white acrylic paint for the base
- Wide flat brush (2-3 inch)
- Wooden dowels or sticks
- Large sponge daubers or pom-poms (to attach to sticks)
- Glue gun (if making custom daubers)
- Easel
- Drop cloth
- Painter’s tape or straight edge (optional)
Step 1: Canvas Preparation
-
Prime the Surface:
Begin by applying a generous coat of white gesso or white acrylic paint to your entire canvas using a wide flat brush. This ensures a bright, consistent background that makes the colored stripes pop. -
Dry Completely:
Allow the base coat to dry fully. It needs to be matte and non-tacky before you begin the color application to prevent muddiness. -
Create Your Tools:
While the background dries, prepare your special drip tools. If you don’t have large sponge daubers, glue a dense craft pom-pom or a piece of sponge to the end of a wooden dowel. This mimics the tool shown in the image and allows for a unique, soft drag texture. -
Set Up Safety:
Place a drop cloth under your easel. Since we are working with gravity-assisted drips, paint will likely pool at the bottom.
Drip Control
If paint is too runny and spreading sideways, let it sit on the palette for 5 minutes to thicken, or mix in a gel medium for better body.
Step 2: Painting the Stripes
-
Mix Your First Color:
Start with the Ochre or Metallic Gold shade. Mix the heavy body acrylic with a tiny amount of pouring medium or water just to loosen it slightly—it should still be thick, but fluid enough to move. -
Load the Dauber:
Dip your sponge stick heavily into the paint mixture. You want it fully saturated so it holds a good amount of pigment. -
Apply the First Stripe:
Starting at the very top edge of the canvas, press the sponge against the surface and slowly drag it downwards in a straight line. Let the excess paint pool and naturally run ahead of your tool. -
Encourage the Drip:
If the paint stops moving, reload your tool and gently re-apply over the same path, or lightly tap the stick to release more paint. The goal implies controlled chaos—straight lines with organic edges. -
Add the Green Band:
Leave a wide white gap next to your first stripe. Using a fresh dauber and the Deep Teal or Hunter Green paint, repeat the process. Drag from top to bottom, letting gravity help pull the paint into a thick, textured vertical line. -
Introduce Warmth:
Next to the green, apply the Rust Red stripe. This vibrant color acts as the focal point. Ensure this stripe is parallel but don’t worry if the edges aren’t ruler-straight; the hand-painted look is key. -
Layering the Dark Tone:
Apply the final dark Navy or Black stripe overlapping or adjacent to the Rust Red. I find that placing darks next to lights creates the best visual contrast. -
Outer Gold Accent:
Add one final thin stripe of the Ochre/Gold on the far outer edge to balance the composition.
Step 3: Refining and Drying
-
Check the Flow:
Step back and observe your drips. If a line looks too patchy, carefully run your loaded tool down it one more time while it’s still wet. -
Manage the Bottom Edge:
Paint will likely pool at the bottom frame. You can choose to wipe this clean with a rag for a crisp edge, or let it drip off onto the drop cloth for a raw, artistic finish. -
Vertical Drying:
Leave the canvas on the easel to dry vertically. This ensures the drips freeze in their downward motion rather than flattening out. -
Touch Up Background:
Once the colored stripes are touch-dry, inspect the white spaces. If any accidental splatters landed in the negative space, paint over them carefully with a small brush and white paint.
Metallic Luxe
Once fully dry, apply gold leaf foil over the ochre stripes for a high-end, crinkled texture that catches the light.
Hang your finished abstract piece in a well-lit area to highlight the texture and vertical movement of your work


Simple Rainbow Drip Stripes
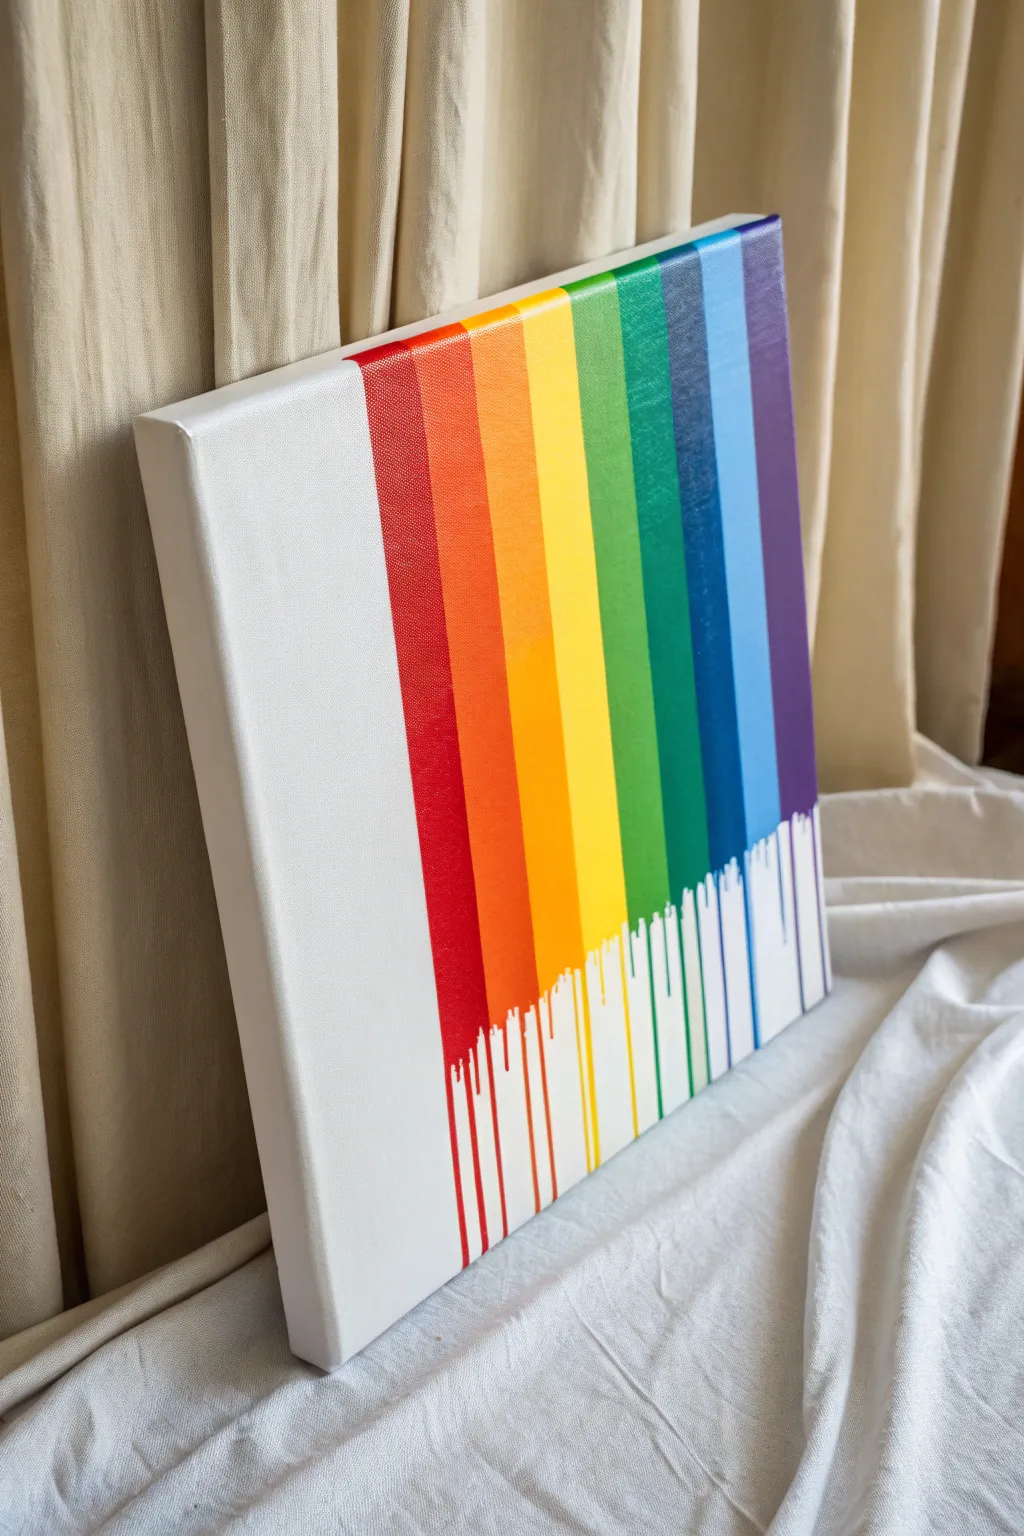
This vibrant piece combines clean, geometric lines with the playful unpredictability of drip art. The result is a striking contrast between the crisp, solid white background and the melting spectrum of rainbow colors cascading down the canvas.
How-To Guide
Materials
- Stretched canvas (rectangular, medium size)
- Acrylic paints (Red, Orange, Yellow, Green, Teal/Dark Green, Blue, Purple)
- Painter’s tape or masking tape (1-inch width)
- White acrylic paint (heavy body is best)
- Flat paintbrush (1-inch width)
- Small round detail brush (optional)
- Ruler or straight edge
- Pencil
- Water cup and paper towels
- Drop cloth or plastic sheet
Step 1: Preparation & Base Coat
-
Prepare your workspace:
Lay down your plastic sheet or drop cloth. This project involves deliberate dripping, so protecting your table is essential to avoid a colorful mess later. -
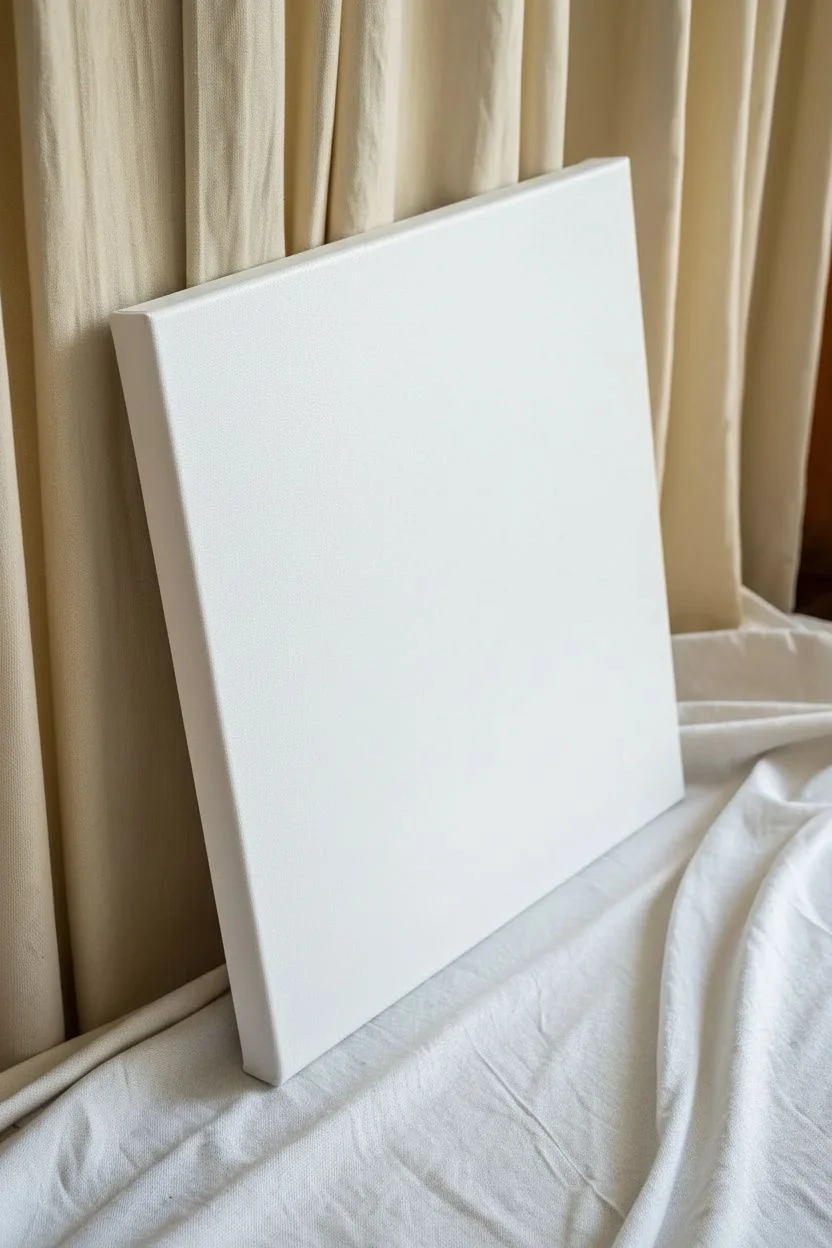
Prime the canvas:
Apply an even coat of white acrylic paint over the entire canvas, including the sides. While most canvases come pre-primed, a fresh coat ensures a bright, uniform background. -
Let it dry completely:
Wait for the white base to dry thoroughly. If the paint feels cool to the touch, it still needs more time. A completely dry surface is crucial for clean tape lines.
Step 2: Creating the Structure
-
Measure the stripes:
Decide on the width of your rainbow stripes. Using a ruler and pencil, lightly mark vertical guides where your color bands will go. Leave a significant portion of the left side (about 40%) plain white for negative space. -
Tape the boundaries:
Apply painter’s tape vertically along your pencil marks to define the straight edges of the color block. You want a distinct rectangular block of stripes, so tape off the left and right boundaries firmly. -
Seal the tape edges:
To prevent color bleed, brush a very thin layer of white paint over the edge of the tape where it meets the canvas. This seals any tiny gaps and ensures crisp lines.
Bleeding Lines?
If paint bleeds under tape, wait for it to dry fully. Then, use a small brush and white paint to careful touch up the jagged edge and restore the straight line.
Step 3: Painting the Rainbow
-
Plan your palette:
Squeeze out your rainbow colors: red, orange, yellow, bright green, teal, blue, and purple. arranging them in order helps visualize the gradient before you start. -
Paint the red stripe:
Starting from the left edge of your taped section, paint a vertical stripe of red. extend this stripe about 3/4 of the way down the canvas, stopping abruptly in a straight horizontal line. -
Add orange and yellow:
Immediately next to the red, paint the orange stripe, followed by the yellow. Keep the bottom edge roughly aligned horizontally, but don’t worry about perfection there—the drips will hide it. -
Complete the spectrum:
Continue painting vertical stripes with green, teal, blue, and purple until the block is filled. The paint should be thick and opaque for the best visual impact. -
Remove the tape:
While the paint is still slightly tacky but not wet, carefully peel off the vertical tape strips. Pull the tape away from the paint at a 45-degree angle to reveal sharp edges.
Gravity Assist
To make drips run faster and straighter without adding too much water, gently tap the bottom edge of the canvas on your table surface to jiggle the paint downward.
Step 4: The Drip Technique
-
Prepare paint for dripping:
Mix a small amount of water or pouring medium into each paint color individually. You want a consistency similar to heavy cream—fluid enough to run, but pigmented enough to be bold. -
Prop up the canvas:
Lean your canvas against a vertical surface like a wall or easel. Ensure it is standing upright so gravity can do the work. -
Start the red drips:
Load a brush with your thinned red paint. Gently touch the bottom edge of the solid red block, allowing excess paint to pool and naturally trickle down the white space. -
Control the flow:
If a drip stops too high, add a tiny bit more paint to the head of the drip. I like to let some drips run all the way off the canvas edge while others stop midway for variety. -
Continue across colors:
Move to orange, yellow, and so on. Be careful not to let the wet drips from different colors cross paths, or they might turn muddy. Work slowly across the spectrum. -
Refine the top edge:
Once the drips are flowing, inspect the horizontal line where the solid block meets the drips. You can use a small brush to smooth out the transition so it looks like the paint is melting seamlessly. -
Final dry:
Leave the canvas vertically to dry completely. Drips are thicker than normal brushstrokes, so give this several hours or even overnight to fully set.
Once dry, hang your masterpiece to bring a modern splash of color to your room


Q-Tip Dot Drips for a Kid-Friendly Start
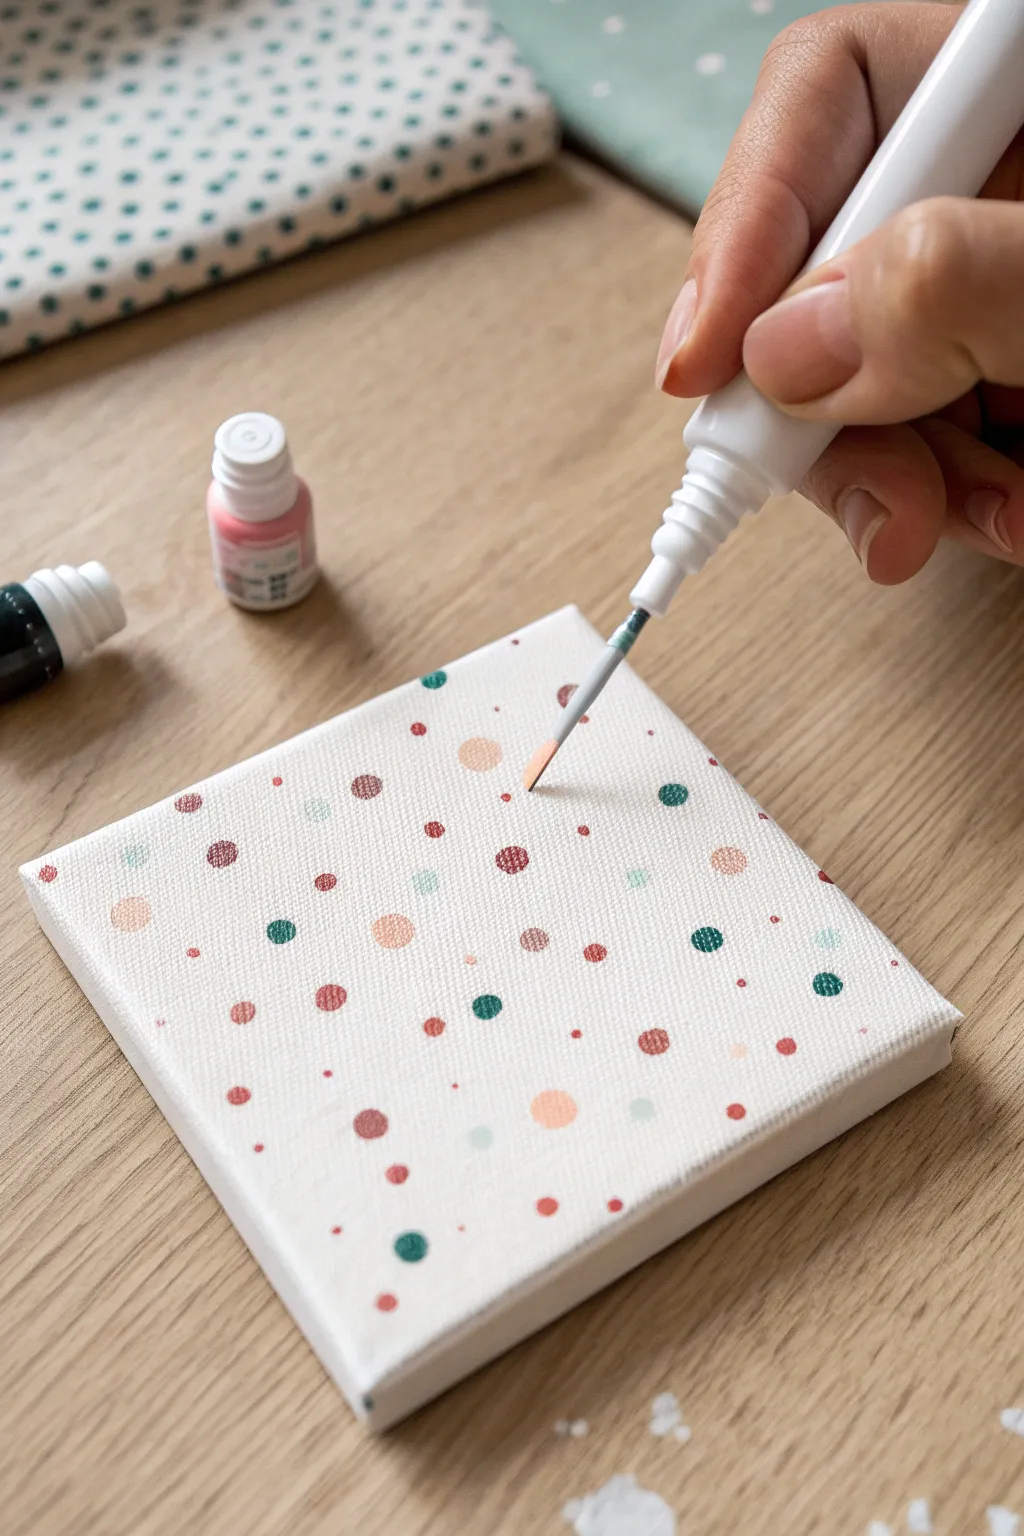
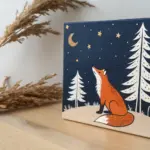
Create a charming, bubbly piece of minimal art with this delightful dot-painting technique. Using soft pastel tones and a precision applicator, you’ll build a random, confetti-like pattern that feels whimsical and modern.
Detailed Instructions
Materials
- Small square canvas (approx. 4×4 inches)
- Acrylic paints in teal, maroon, soft pink, and peach
- Fine-point applicator bottles or writer tips
- Small paintbrush (for corrections)
- Paper towel
- Palette or small tray for testing colors
Step 1: Preparation
-
Prepare your canvas:
Ensure your small canvas is clean and dust-free. If it isn’t pre-primed, apply a coat of white gesso and let it dry completely to create a smooth, bright surface for your dots. -
Load the applicators:
Pour your acrylic paints into squeeze bottles with fine writer tips. This tool is crucial for getting those raised, perfect circles shown in the image, rather than flat brushstrokes. -
Test the flow:
Before touching the canvas, practice squeezing a few dots onto a paper towel. You want the paint to flow smoothly without spurting air bubbles.
Oops! Pointy Dots?
If your dots keep forming sharp peaks, your paint is too thick. Mix in a drop of pouring medium or flow improver to help it self-level into a smooth dome.
Step 2: Creating the Base Layer
-
Start with Teal:
Begin with your teal paint. Gently squeeze the bottle while holding it vertical to the canvas to deposit small, round dots randomly across the surface. -
Spacing is key:
Keep the dots widely spaced for now. Imagine you are creating a constellation; leave plenty of white space for the other colors to join in later. -
Vary the sizes:
Try to keep most teal dots relatively uniform, but allow for slight natural variations in size to keep the organic look. -
Add the Maroon accents:
Switch to the maroon or dark red color. Place these darker dots in the larger gaps between your teal dots. -
Create clusters:
Occasionally place a maroon dot somewhat near a teal one—avoiding a perfectly rigid grid makes the pattern feel more playful and dynamic.
Step 3: Building Density
-
Introduce Pink:
Take your soft pink applicator and begin filling in the remaining white areas. The canvas should start looking fuller now. -
Watch for smears:
Be careful where you rest your hand. Since the earlier dots might still be wet and raised, I usually hover my hand or use a mahl stick for support. -
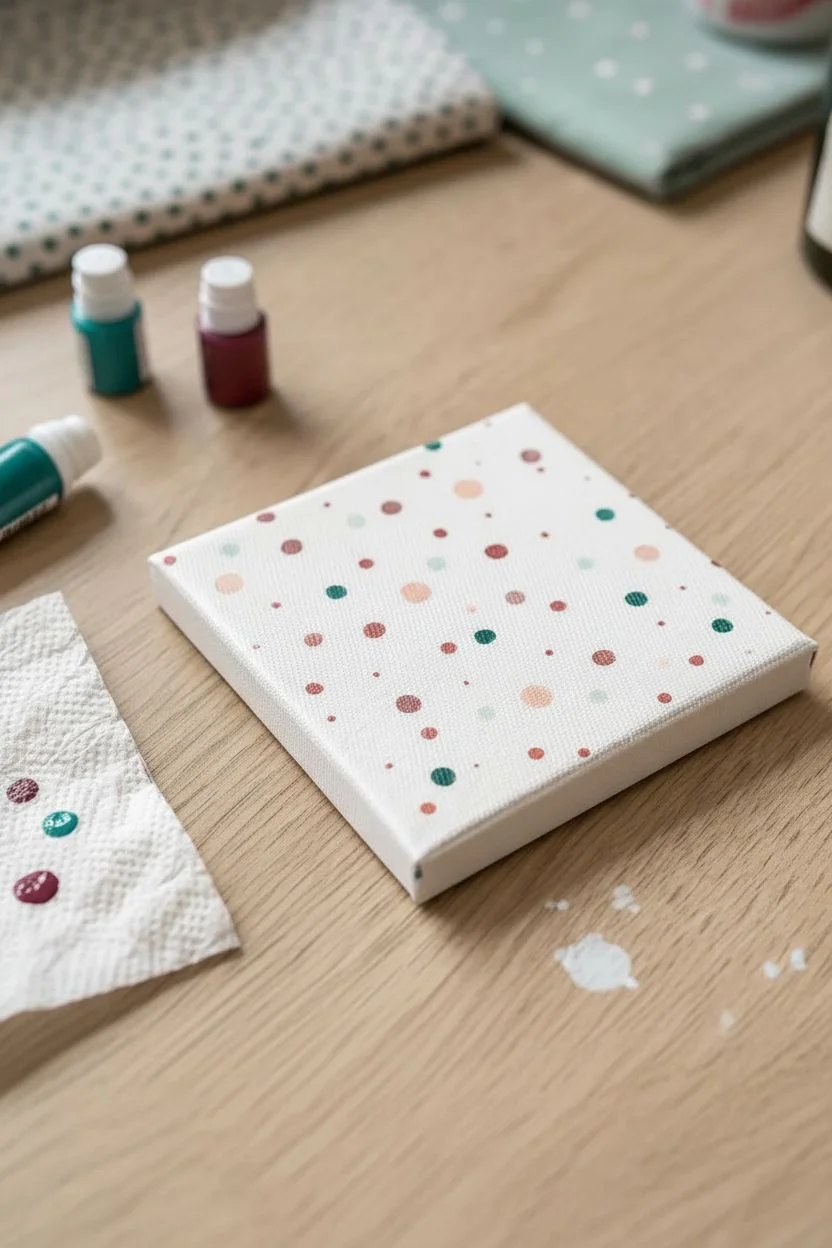
Apply Peach tones:
Finally, use the peach color shown in the image. Look for empty pockets of white space and deposit these final dots to balance the color composition. -
Micro-dots:
To add depth, squeeze tiny ‘micro-dots’ of peach or pink in very small gaps. These pin-prick sized dots add a lovely texture to the background.
Make it Sparkle
Once fully dry, carefully add a tiny dot of metallic gold or silver paint to the center of the largest dots for a layered, jewelry-like effect.
Step 4: Finishing Touches
-
Check the edges:
Don’t forget to place a few dots right near the edge of the canvas (or even wrapping slightly over) so the pattern doesn’t feel contained or boxed in. -
Review balance:
Step back and squint at your canvas. If any area looks too empty, add a small dot there. If an area is too dark, add a pastel dot to lighten it. -
Correcting shapes:
If a dot has a severe point or ‘Hershey’s Kiss’ peak, gently tap the bottom of the canvas on the table to help the paint settle and flatten slightly. -
Level drying:
Place the canvas on a perfectly flat surface to dry. Because the dots are thick, they may slide if dried at an angle. -
Patience is required:
Allow at least 24 hours for the paint to cure completely. The center of the dots takes much longer to dry than the surface skin.
Display your cheerful spotted canvas on a desk easel or as part of a miniature gallery wall.


Pipette “Rain” Lines for Controlled Drips
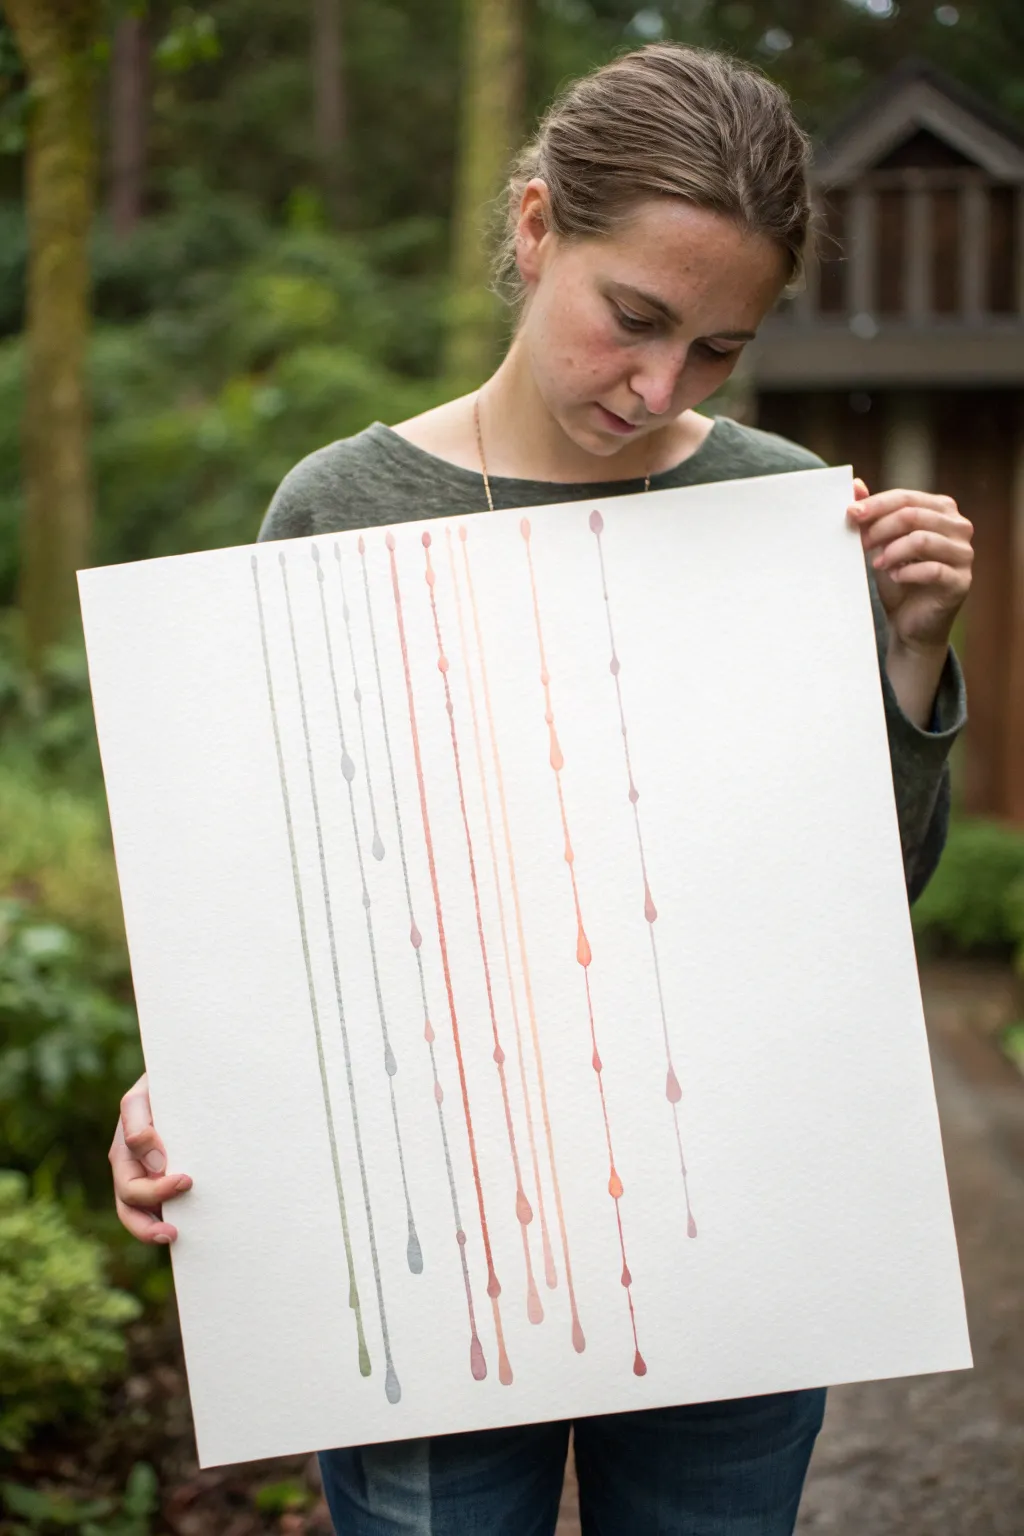

Create a serene and modern piece of abstract art using the simple force of gravity and a few earthy tones. This technique results in delicate, vertical lines that pool and bead beautifully, mimicking the gentle path of rain on a windowpane.
Step-by-Step Guide
Materials
- Large sheet of cold-press watercolor paper (at least 18×24 inches)
- Liquid watercolors or high-flow acrylic paints
- Color palette: Sage green, warm grey, muted peach, terracotta, ochre
- Plastic pipettes or eye droppers
- Cups or jars for mixing paint
- Water for diluting
- Large drawing board or stiff cardboard backing
- Masking tape or painter’s tape
- Easel or wall space to prop the board vertically
- Drop cloth or old newspapers
Step 1: Preparation
-
Secure the Paper:
Tape your large sheet of watercolor paper securely to a rigid backing board. Use masking tape along all four edges to prevent the paper from buckling when it gets wet. -
Prepare the Workspace:
Set up your workspace so the board can stand vertically. You will need gravity to do most of the work here, so lean your board against a wall or easel at a steep angle, nearly 90 degrees. -
Protect the Floor:
Place a drop cloth or layers of newspaper directly underneath your board to catch the paint run-off. This project can get drippy, and you want to focus on the art, not the mess. -
Mix the Colors:
Pour your liquid watercolors or high-flow acrylics into separate jars. If the pigment is too thick, dilute it with water until it has the consistency of fluid ink or milk. Test the flow on a scrap piece of paper first.
Drips running crooked?
Check your easel level! If lines veer sideways, your board isn’t level. You can also lightly draw vertical pencil guides beforehand and steer the drip along them with the pipette tip.
Step 2: Creating the Drips
-
Load the Pipette:
Squeeze the bulb of your first pipette and draw up a generous amount of the sage green paint. I find it helpful to fill the pipette about halfway to ensure a steady stream. -
Start the First Line:
Position the pipette tip at the very top edge of the paper on the far left. Slowly squeeze the bulb to release a drop, letting gravity pull it down the page. -
Control the Flow:
As the bead of paint travels down, gently squeeze more paint to feed the line if it starts to run dry. If you want a bead or ‘pause’ point in the line, stop squeezing for a second and let the paint pool slightly before continuing. -
Varying Line Length:
Let some lines run all the way off the bottom of the page, while letting others stop naturally just before the edge to create a final, heavy droplet. -
Switching Colors:
Pick up a fresh pipette for your next color, perhaps a warm grey. Position it about an inch or two to the right of your first line to maintain spacing. -
Creating Rhythm:
Continue adding vertical lines, alternating between your earthy tones—peach, terracotta, and ochre. Keep the spacing relatively consistent, but don’t worry about perfection; organic looking gaps add character. -
Managing Speed:
If a drip is moving too fast, you can tilt the board slightly back to a flatter angle to slow it down. This gives you more control over where the paint pools. -
Adding Volume:
For thicker lines, go back over an existing wet track with another drop of the same color. The new paint will follow the path of least resistance, thickening the line without making it messy. -
Creating ‘Beads’:
To create the distinct ‘beads’ seen in the reference image, pause your hand as the drip moves, or add a tiny extra drop of paint directly onto a wet section of the line to make it bulge slightly.
Step 3: Finishing Touches
-
Check for Gaps:
Step back and look at your composition. If there are large empty spaces, add a thin, pale line of a neutral color like light grey or diluted peach to balance the visual weight. -
Let the Paint Settle:
Allow the excess paint to finish dripping off the bottom edge. Use a paper towel to gently blot the droplets that gather on the tape at the bottom so they don’t wick back up the paper. -
Dry Flat (Optional):
Once the drips have stopped moving but are still wet, you can carefully lay the board flat. This freezes the ‘pools’ of paint in place, creating darker, saturated spots as they dry. -
Full Drying Time:
Let the artwork dry completely, preferably overnight. The pooled areas will take much longer to dry than the thin lines. -
Remove Tape:
Once bone dry, carefully peel away the masking tape at a 45-degree angle to reveal the crisp white border.
Add metallic sparkle
Mix a small amount of metallic gold ink or iridescent medium into one of your colors. These shimmering lines will catch the light beautifully against the matte earthy tones.
Hang your minimalist masterpiece in a bright spot to enjoy the calming vertical rhythm you have created
BRUSH GUIDE
The Right Brush for Every Stroke
From clean lines to bold texture — master brush choice, stroke control, and essential techniques.
Explore the Full Guide
Splat-Then-Drip Action Painting Layers

Embrace gravity and kinetic energy with this striking vertical drip painting. By combining controlled pours with spontaneous splatters, you’ll create a piece that feels both structured and wildly energetic, perfect for lengthening the look of a hallway or narrow wall space.
Step-by-Step Tutorial
Materials
- Large, long rectangular stretched canvas
- Acrylic paints (Titanium White, Burnt Sienna, Orange, Navy Blue, Black)
- Pouring medium or water (for thinning)
- Plastic cups or condiment squeeze bottles
- Large drop cloth or tarp
- Stiff bristle brush (for flicking)
- Easel or a surface to lean the canvas against (optional but helpful for the drip phase)
- Painter’s tape or cups to prop up the canvas
Step 1: Preparation and Base Layer
-
Set the scene:
Since this project involves messy splattering, take it outdoors if the weather permits, laying down a large drop cloth on a flat area of grass or patio. -
Premix your paints:
Prepare your acrylics in separate cups. You want a fluid consistency specifically for the drip colors (Burnt Sienna and Orange); mix them with a pouring medium or water until they flow like heavy cream. -
Keep splatters thicker:
For the splatter colors (Navy Blue, Black, and brighter Orange), keep the paint slightly thicker than the drip mix so the dots hold their shape upon impact. -
Prime the surface:
If your canvas isn’t pre-primed, apply a generous coat of Titanium White and let it dry completely to ensure the colors pop against a clean background.
Paint puddling up?
If your dots are merging into puddles, your paint is too thin. Add a pea-sized amount of heavy body acrylic to the mix to stiffen it up for distinct droplets.
Step 2: The Controlled Drip
-
Position for gravity:
Prop one short end of the canvas up significantly higher than the other, or lean it vertically against a wall or easel protected by plastic. -
The primary pour:
Start with the Burnt Sienna mixture. Slowly pour a small puddle at the very top edge of the canvas and let gravity pull a stream of paint all the way down. -
Guide the flow:
If the paint strays or stops, you can tilt the canvas manually to guide the line straight down, aiming for parallel tracks rather than crossing streams. -
Add secondary colors:
Repeat the pouring process with the Orange paint, creating lines that run parallel to the darker brown ones. -
Vary the width:
Try pouring a little faster or using a wider nozzle for some stripes to create variation in line thickness. -
Let it travel:
Allow the paint to run entirely off the bottom edge of the canvas to create that seamless, endless line effect. -
Level it out:
Once you are happy with your vertical stripes, carefully lay the canvas flat on the drop cloth to lock the drips in place so they don’t widen or warp.
Metallic sheen
Swap the burnt sienna for a metallic bronze or copper paint. The shimmer adds a sophisticated industrial vibe that catches the light beautifully.
Step 3: The Splatter Action
-
Load the brush:
Dip a stiff-bristled brush into your Navy Blue paint; don’t overload it, or you’ll get massive blobs instead of fine spray. -
The flicking technique:
Stand over the canvas and use your thumb to pull back the bristles, flicking paint across the surface for a fine mist of dots. -
Add high-impact drops:
For larger dots like the black ones shown, dip a brush handle or stick into the paint and let individual drops fall onto specific areas. -
Layer the colors:
Continue splattering with small amounts of Orange and Burnt Sienna to visually tie the background speckles to the main stripes. -
Mind the negative space:
Try to concentrate some splatters near the stripes while leaving other areas mostly white to maintain a breathable composition. -
Final drying check:
Inspect the canvas for any large puddles that might need extra time to dry. I find that leaving it flat in the sun speeds up the process significantly.
Hang your new masterpiece vertically to create a stunning sense of height in any room
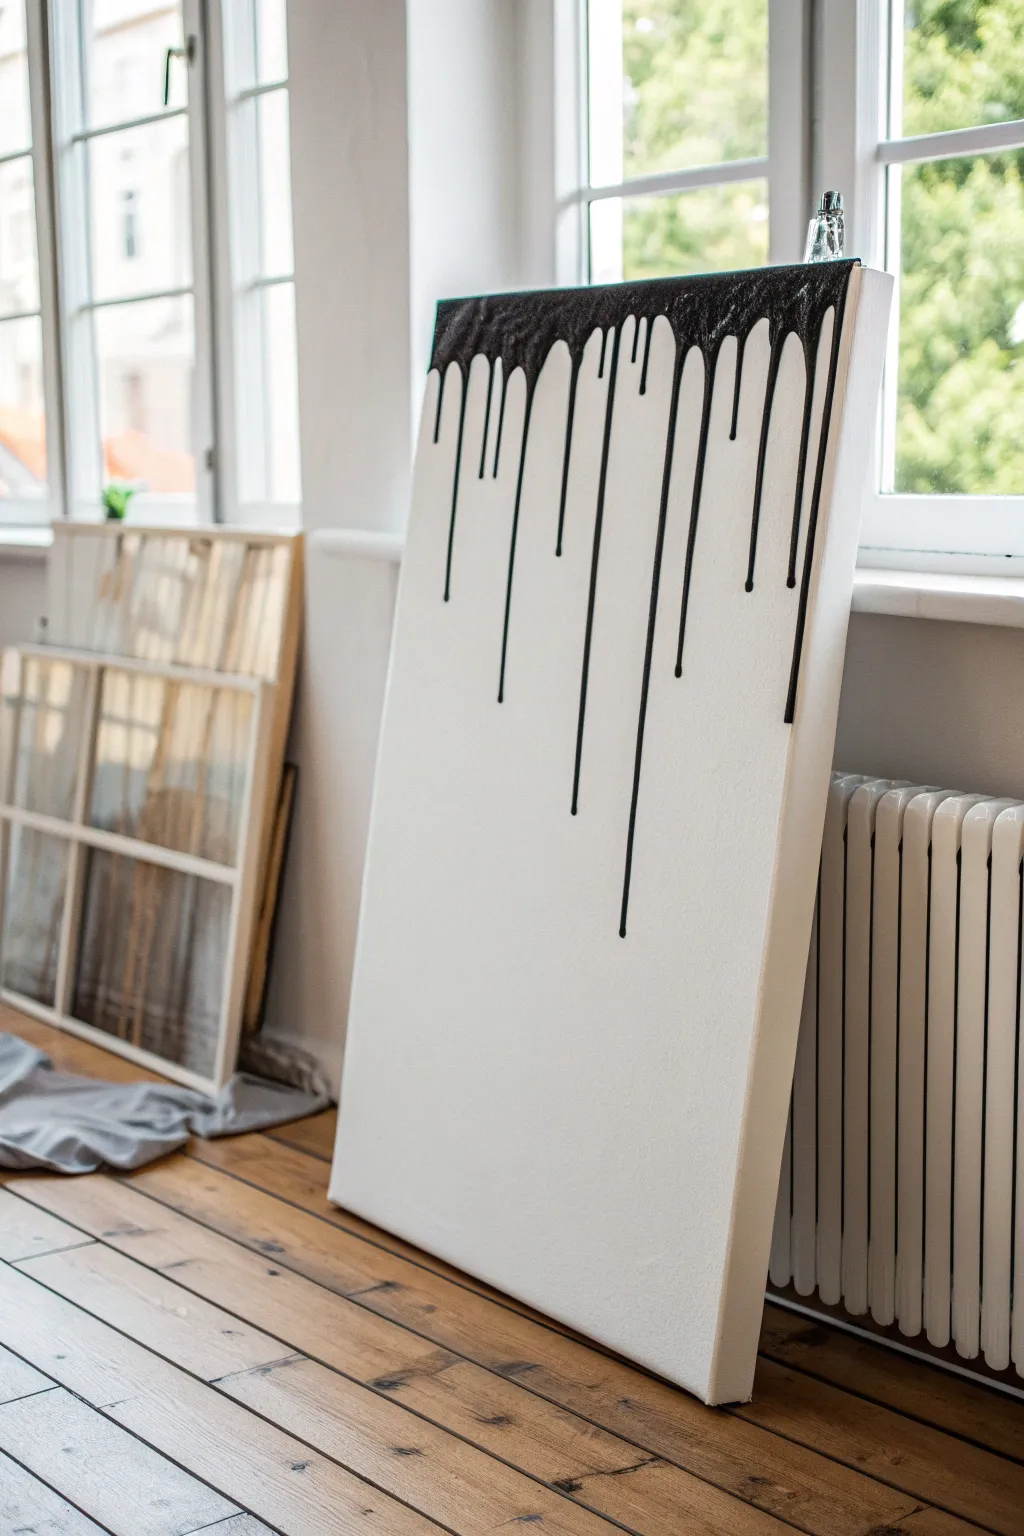
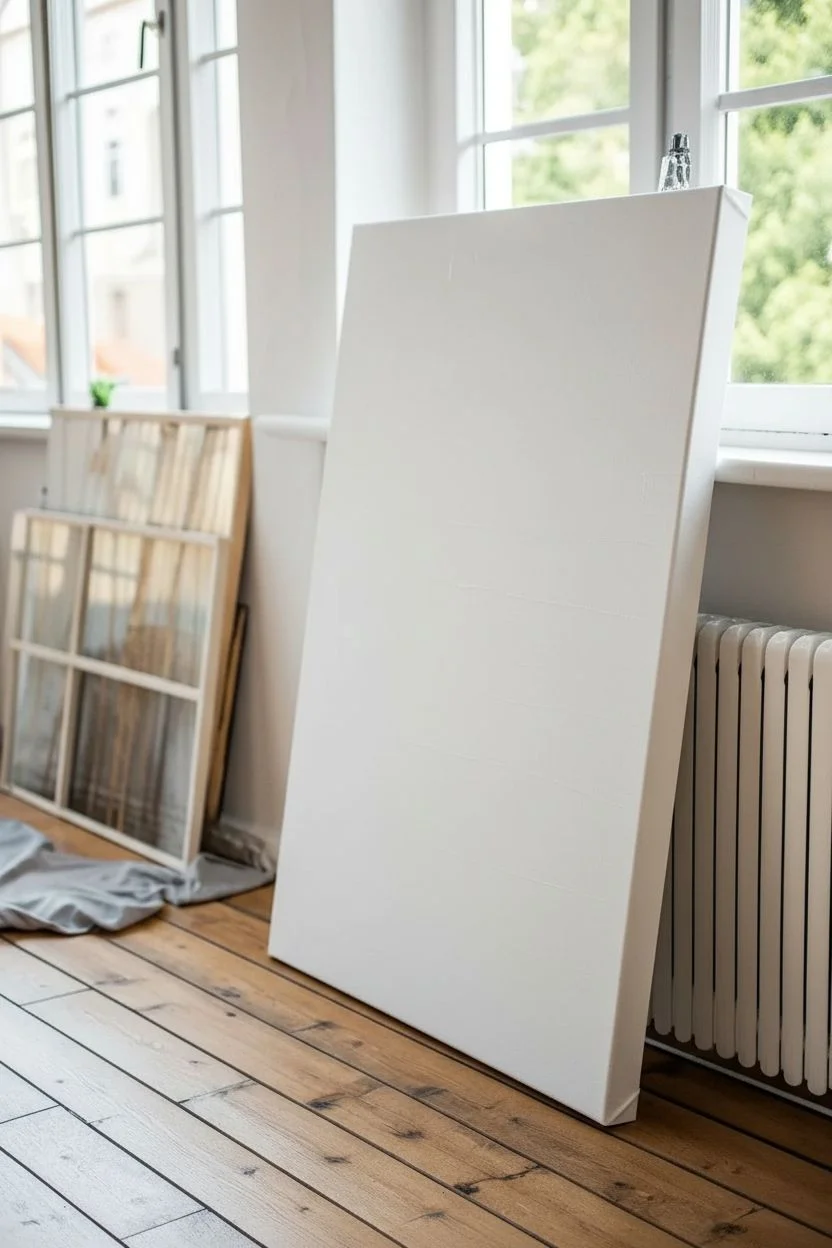
Monochrome Drips for a Minimal, Inky Look
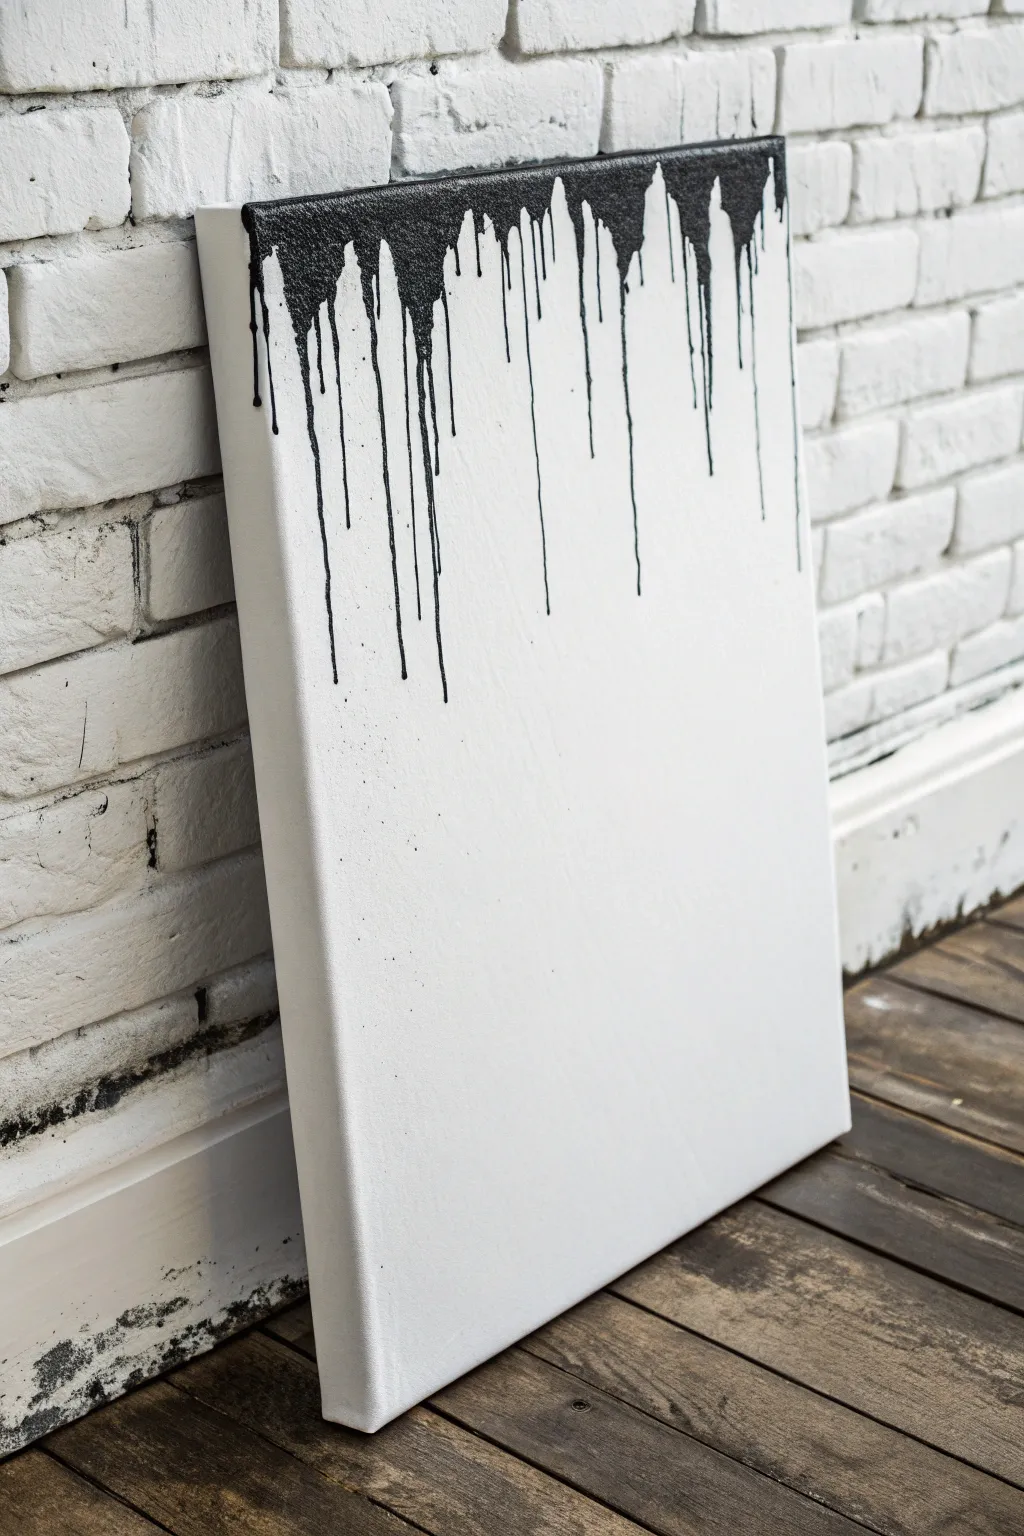
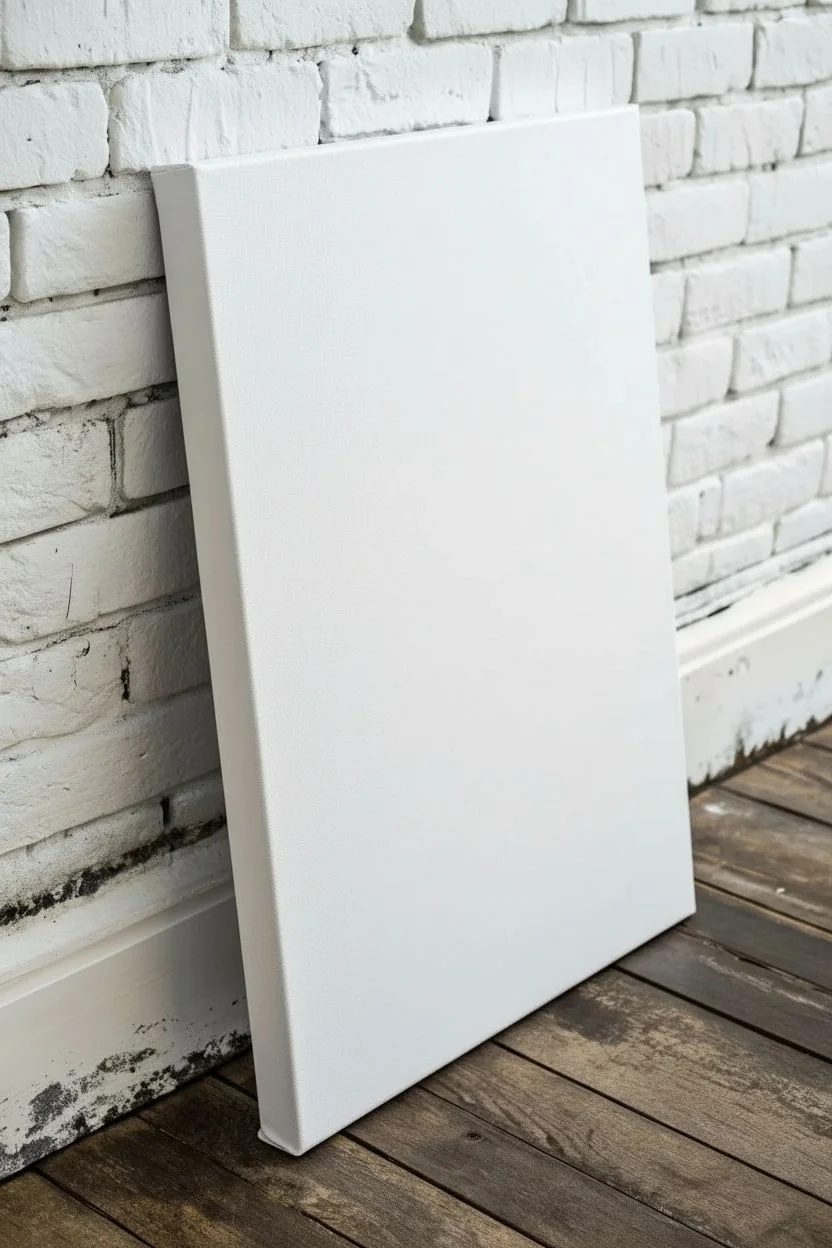
Embrace the stark beauty of high contrast with this monochrome drip project. By combining a textured black upper edge with long, uncontrolled drips against pristine white, you’ll create a modern statement piece that feels both edgy and sophisticated.
Step-by-Step
Materials
- Rectangular stretched canvas (e.g., 16×20 or 18×24 inches)
- Titanium white acrylic paint or gesso
- Mars Black acrylic paint (heavy body preferred)
- Pouring medium or water (to thin the black paint)
- Wide flat paintbrush (2-3 inch)
- Palette knife or small spoon
- Drop cloth or large plastic sheet
- Cup for mixing
- Spray bottle with water (optional)
- Masking tape (optional for side edges)
Step 1: Base Preparation
-
Prepare your workspace:
Lay down your drop cloth or plastic sheet on a flat surface. This project gets messy, so ensure you have plenty of room to work without worrying about spills. -
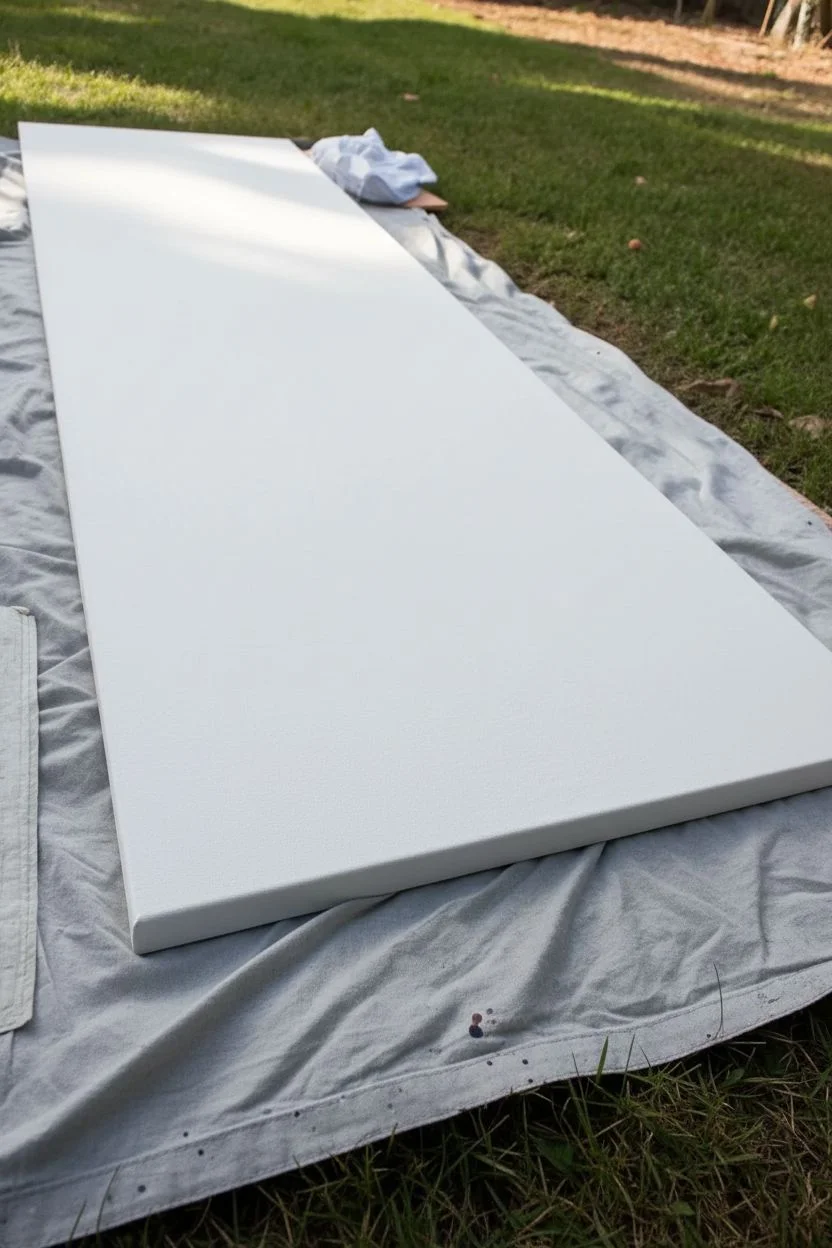
Prime the canvas:
Even if your canvas is pre-primed, apply a fresh coat of Titanium White acrylic paint or gesso using your wide flat brush. This ensures a uniform, bright white background. -
Smooth the surface:
Work the white paint in long, even strokes from top to bottom. You want a smooth surface so the drips can travel easily later. -
Paint the edges white:
Don’t forget to coat the sides of the canvas with white paint for a professional, gallery-wrapped finish. -
Let the base dry:
Allow the white base coat to dry completely. It must be dry to the touch so the black paint doesn’t mix with it and turn gray.
Drips Stopping Too Soon?
If your paint trails are running out of steam halfway down, your mix is likely too thick. Add a few drops of water or flow improver to your black mix to reduce friction.
Step 2: Creating the Drips
-
Prop up the canvas:
Lean your canvas vertically against a wall or easel protected by plastic. The angle is crucial; a steeper angle creates faster, straighter drips. -
Mix your black paint:
In a mixing cup, combine Mars Black acrylic paint with a pouring medium or a small amount of water. You want a consistency similar to heavy cream—fluid enough to run but thick enough to hold its color opacity. -
Apply the top border:
Using a palette knife or spoon, scoop a generous amount of the black mixture and gently spread it along the very top edge of the canvas face. -
Build the texture:
Dab the paint along this top strip to create a slightly bumpy, textured look rather than a smooth line. This mimics the organic feel of ink gathering before it falls. -
Initiate the drips:
Add more paint to specific spots along the top edge where you want a drip to form. Let gravity do the heavy lifting as the excess paint naturally pools and begins to slide down. -
Encourage flow:
If a drip is stuck or moving too slowly, I find a gentle tap on the back of the canvas often dislodges it. Alternatively, lightly mist the area directly below the paint with a spray bottle to break the surface tension. -
Vary the lengths:
Add varying amounts of paint to different sections. Larger pools of paint will travel further down the canvas, while smaller amounts will stop shorter, creating visual variety. -
Detail the top edge:
Ensure the very top physical edge of the canvas (the thickness) is coated in black as well, connecting seamlessness to the drips on the front. -
Monitor the drying process:
Watch the drips for the first 10-15 minutes. If a drip is getting too close to the bottom and you want to preserve the white space, lay the canvas flat immediately to stop the flow.
Step 3: Final Touches
-
Check for opacity:
Once the paint begins to set but isn’t fully dry, check if the black looks too transparent in the drip tails. You can carefully re-trace a drip with a small round brush if needed, though natural translucency is often beautiful. -
Clean up stray splatter:
If unwanted micro-splatters landed on the white area, wait for them to dry, then carefully touch them up with a small dab of white paint. -
Allow for full cure:
Let the painting dry undisturbed for at least 24 hours. Thick drips take much longer to dry than thin layers, so be patient before moving it. -
Seal the artwork:
Once fully cured, apply a matte or satin varnish spray to protect the surface and unify the sheen of the black and white paints.
Pro Tip: Gravity Control
Don’t just lean the canvas; rotate it! Tipping the canvas slightly left or right while the paint is wet creates curved, organic drips instead of perfectly straight lines.
Hang your new monochrome masterpiece in a well-lit area to let the stark contrast truly shine

PENCIL GUIDE
Understanding Pencil Grades from H to B
From first sketch to finished drawing — learn pencil grades, line control, and shading techniques.
Explore the Full Guide
Metallic Accent Drips Over a Dark Background
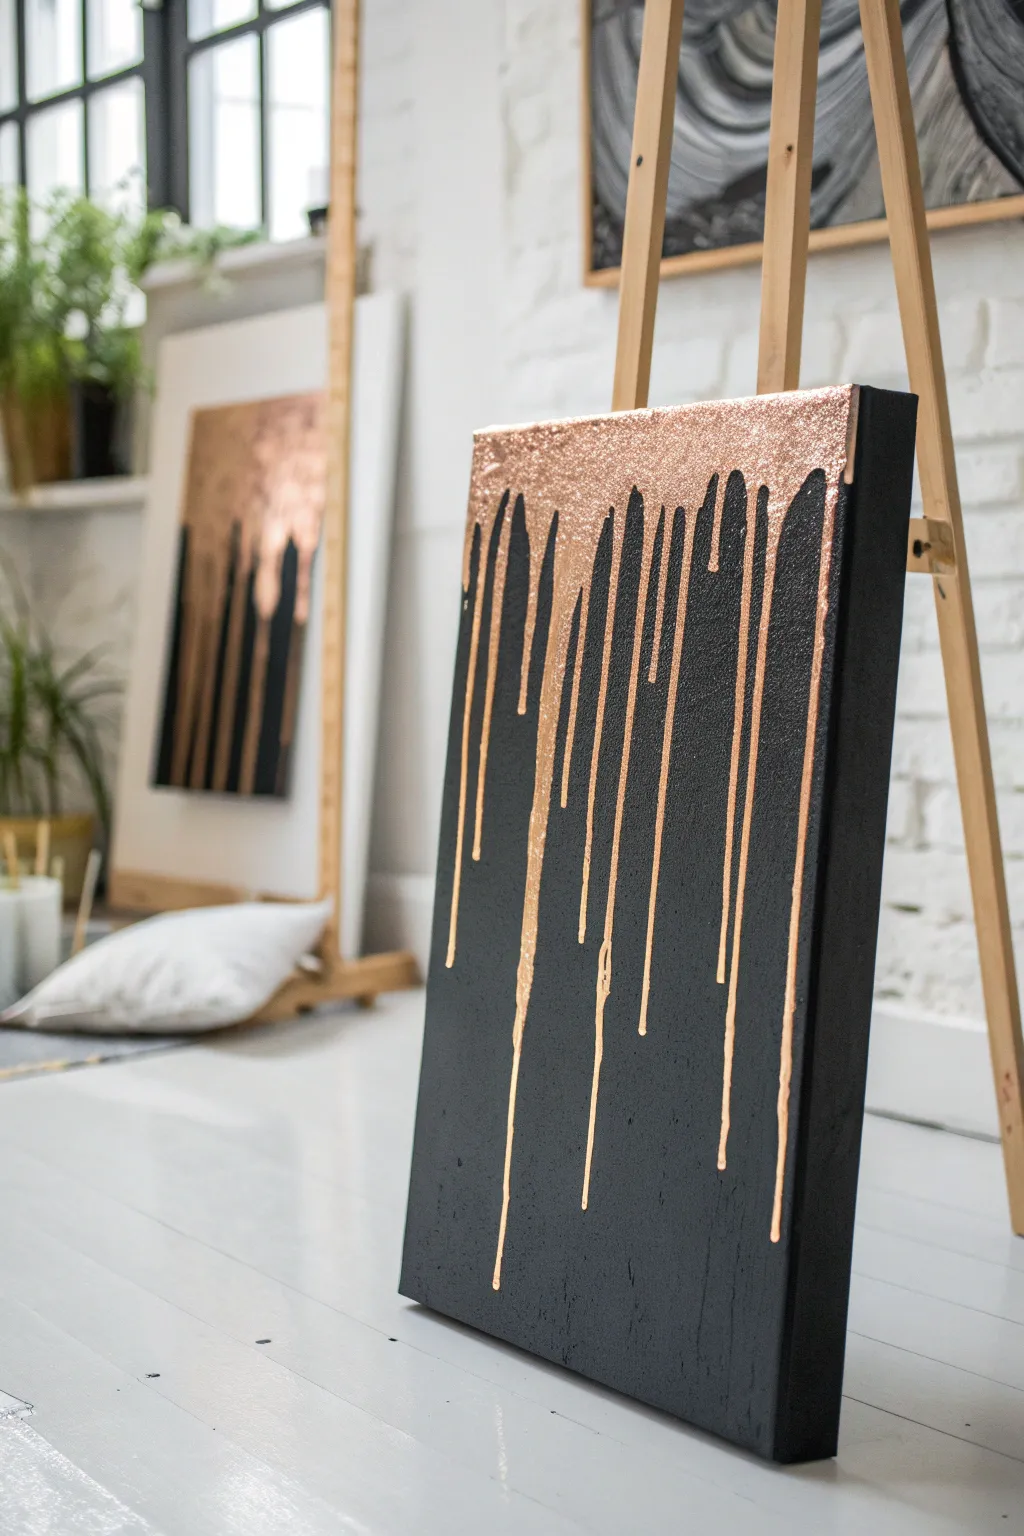
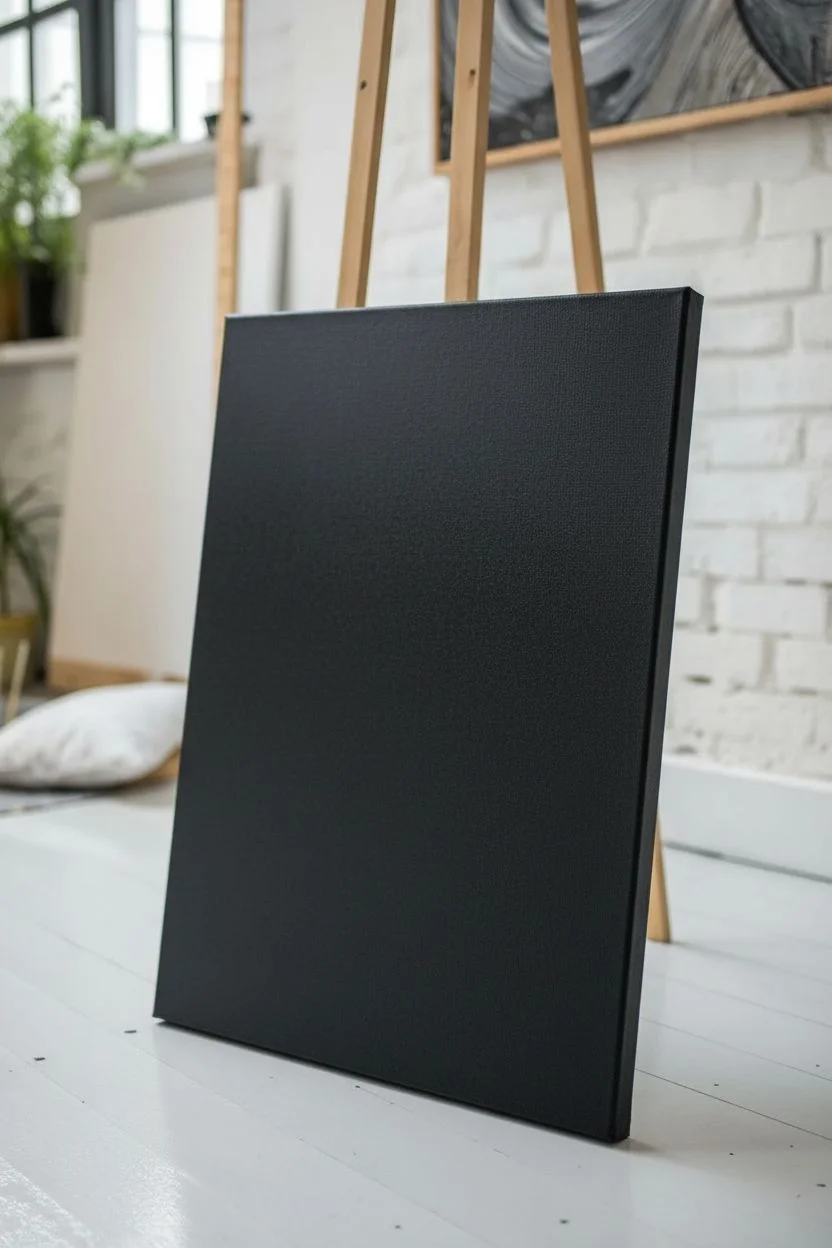
Create a striking piece of modern art by combining the deep, matte elegance of black with the shimmering luxury of metallic copper. This project uses a thick, textured medium to create drips that literally stand out from the canvas, catching the light in a sophisticated way.
Detailed Instructions
Materials
- Stretched canvas (rectangular, medium to large size)
- Black acrylic paint (matte finish)
- Wide flat paintbrush
- Metallic copper or rose gold acrylic paint
- Textile medium or pouring medium (optional, for flow)
- Coarse metallic glitter (copper/rose gold)
- PVA glue or clear gloss medium
- Palette knife or popsicle stick
- Small cup for mixing
- Drop cloth or old newspapers
Step 1: Preparation & Base Coat
-
Prepare your workspace:
Lay down your drop cloth or newspapers. This project involves dripping paint, so you’ll want to protect your floor and table surfaces thoroughly. -
Paint the background:
Squeeze a generous amount of matte black acrylic paint onto the canvas. Using your wide flat brush, spread the paint evenly across the entire surface. -
Cover the edges:
Don’t forget to paint the sides of the canvas black as well. This creates a professional, gallery-wrapped look so you won’t need a frame later. -
Let it dry completely:
Allow the black base coat to dry fully. If the canvas shows any white spots or streaks, apply a second coat for a solid, opaque finish.
Drips won’t move?
If your glitter mix is too thick to run, spritz the top of the canvas lightly with water from a spray bottle. The added moisture will help lube the path for the paint.
Step 2: Creating the Metallic Drip
-
Mix the metallic base:
In a small cup, mix your metallic copper paint with a bit of PVA glue or gloss medium. The glue acts as a binder for the glitter we will add next. -
Add texture:
Pour a generous amount of coarse metallic glitter into your paint mixture. You want a thick, sludge-like consistency—thick enough to hold texture but fluid enough to move slowly. -
Adjust consistency:
If the mixture is too stiff, add a tiny drop of water or pouring medium. If it’s too runny, add more glitter. It needs to be heavy. -
Position the canvas:
Prop your canvas upright against a wall or easel. Ensure it is leaning at a slight angle, not perfectly vertical, to control the speed of the drips. -
Apply the top edge:
Using a palette knife or a spoon, scoop the glitter mixture and generously slather it along the very top edge of the canvas face. -
Initiate the drips:
Gently push some of the mixture downward with your tool to encourage gravity to take over. Create uneven blobs—some large, some small—to vary the drip widths. -
Guide the flow:
Watch as the heavy mixture starts to travel down the black background. If a drip stops too high, you can carefully add a little more mixture to the top of that specific stream to push it further. -
Vary the lengths:
Aim for asymmetry. I like to encourage a few drips to go almost to the bottom, while keeping others short and clustered near the top for visual interest. -
Refine the top edge:
Once the drips are flowing, smooth out the very top rim of the canvas so it looks intentional and finished, rather than just messy. -
Check for side runs:
Ensure the mixture isn’t dripping down the sides of the canvas unless you want that look. Wipe away any unwanted side drips with a damp cloth immediately.
Step 3: Finishing Touches
-
Add extra sparkle:
While the drips are still wet, gently sprinkle a pinch of dry glitter onto the wettest parts of the drips to maximize the light reflection. -
Dry flat or upright:
If the drips are moving too fast, lay the canvas flat to stop them. If you are happy with the movement, leave it upright but keep an eye on it for 15 minutes. -
Long drying time:
Because the glitter mixture is thick, let the painting cure for at least 24 hours. The outside may feel dry while the underneath is still wet. -
Seal (Optional):
Once fully cured, you can carefully brush a clear gloss varnish over just the metallic drips to lock in the glitter and prevent shedding.
Level Up: Dual Tone
Try mixing silver and gold glitter in separate cups. Pour them side-by-side at the top for a stunning mixed-metal gradient effect as they drip down together.
Hang your shimmering new masterpiece in a well-lit area to watch the copper texture dance against the dark background
Outlined Drips for a Bold Graphic Finish
Achieve a striking, modern look with this high-contrast painting that freezes the motion of dripping paint in time. By carefully outlining and filling your drips rather than pouring them, you create a controlled, clean aesthetic perfect for minimalist interiors.
Detailed Instructions
Materials
- Large pre-stretched canvas (e.g., 24×36 inches)
- Titanium White acrylic paint (high opacity)
- Mars Black acrylic paint (high viscosity preferred)
- Wide flat brush (2-3 inches) for background
- Medium round brush (size 6 or 8) for outlining
- Small liner brush (size 2) for sharp tips
- Pencil (HB or 2B)
- Eraser
- Palette or paper plate
- Ruler or straight edge (optional)
- Water cup and paper towels
Step 1: Preparing the Base
-
Prime the Surface:
Even if your canvas came pre-primed, apply a fresh coat of Titanium White acrylic paint over the entire surface. This ensures a bright, uniform background that will make the black pop later. -
Smooth the Texture:
Use your wide flat brush and long, horizontal strokes to minimize brush marks. If you want an ultra-smooth finish, you can lightly sand the canvas with fine-grit sandpaper once this first coat is dry. -
Apply a Second Coat:
Once the first layer is completely dry to the touch, apply a second coat of white paint. Paint the edges of the canvas as well for a professional, gallery-wrapped look. -
full Dry Time:
Let the white background cure completely. I prefer to leave it overnight to ensure there is absolutely no moisture left, which prevents the pencil sketching phase from digging into the paint.
Step 2: Sketching the Design
-
Mark the Horizon:
Lightly trace a line or series of reference marks along the very top edge of the canvas face. This will be the source of your drips. -
Draft the Longest Drips:
Using your pencil with very light pressure, draw the vertical lines for your longest drips first. Vary their lengths significantly; some should reach past the halfway point of the canvas, while others stay high. -
Shape the Teardrops:
At the bottom of each vertical line, sketch a rounded, bulbous teardrop shape. This gives the illusion of heavy liquid gathering before it falls. -
Connect the Top:
Draw curved, U-shaped connections between the vertical lines at the top edge. These negative spaces represent the paint clinging to the top before gravity pulls it down. -
Refine the Flow:
Go back and thicken the vertical lines slightly so they aren’t just stick figures. Real drips taper; they should be slightly thinner in the middle and wider at the top and bottom. -
Review the Composition:
Step back and look at your sketch. Ensure you have a nice variety of thick and thin drips, and that the spacing creates an interesting rhythm across the canvas.
Use a Mahl Stick Idea
To keep your hand steady without smudging wet paint, rest your hand on a clean ruler spanning the canvas (bridged over the wet area) while painting detailed lines.
Step 3: Painting the Contrast
-
Outline the Shapes:
Load your medium round brush with Mars Black paint. Carefully trace over your pencil lines, creating a crisp outer edge for the drip pattern. -
Sharpen the Ends:
Switch to your small liner brush to navigate the tight curves at the top connections and the very bottom rounded tips of the long drips. Precision is key here for that graphic effect. -
Fill the Top Block:
Using a slightly larger brush, fill in the solid block of black along the top edge of the canvas. Ensure you paint the top side of the canvas black as well, so the artwork continues around the frame. -
Fill the Drips:
Systematically fill in the rest of the outline with black paint. Work slowly to keep the paint opaque and solid. -
Check for Opacity:
Acrylic black can sometimes streak. If you see the white canvas peeking through, wait for the first layer of black to dry and apply a second coat. -
Clean Up Edges:
If you accidentally engaged in unsteadiness and went outside the lines, wait for the black to dry completely. Then, use a small brush and your white background paint to ‘erase’ the mistake. -
Final Inspection:
Look at the canvas from the side to check for glossy or matte inconsistencies. If the sheen is uneven, you might consider a final layer of varnish.
Add Color Dimension
For a pop art twist, paint a thin, vibrant neon shadow line along one side of every black drip. This creates a 3D effect that jumps off the wall.
Hang your new masterpiece in a well-lit spot to let the stark contrast create a focal point in the room


Masking-Tape Resist Drips for Clean Geometrics
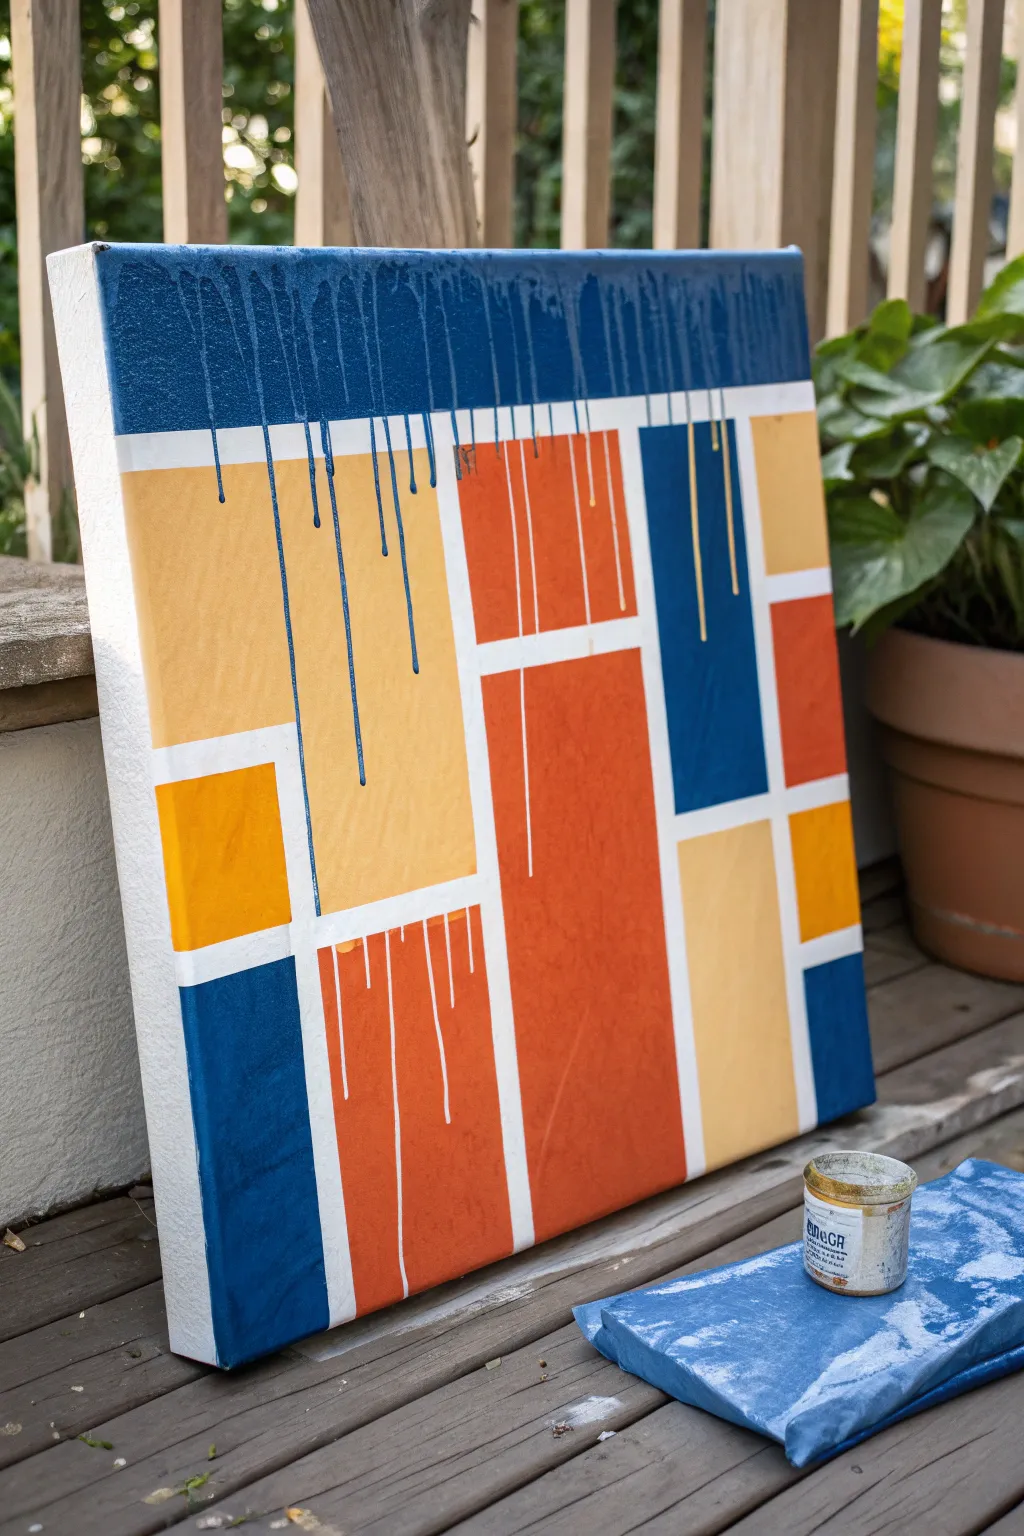
Combine structured modern art with organic flow in this vibrant abstract project. By using masking tape to create crisp geometric boundaries and letting thin paint cascade down the surface, you achieve a beautiful contrast between rigid blocks and freeform movement.
Step-by-Step
Materials
- Stretched canvas (square or rectangular)
- Painter’s tape or dedicated masking tape (various widths)
- Acrylic paints (Navy Blue, Burned Orange/Rust, Bright Yellow-Orange, Cream/Pale Yellow)
- White acrylic paint (for blocking)
- Small jars or cups for mixing
- Water
- Flat paintbrushes
- Pipette, syringe, or small squeeze bottle (optional)
- Drop cloth or newspapers
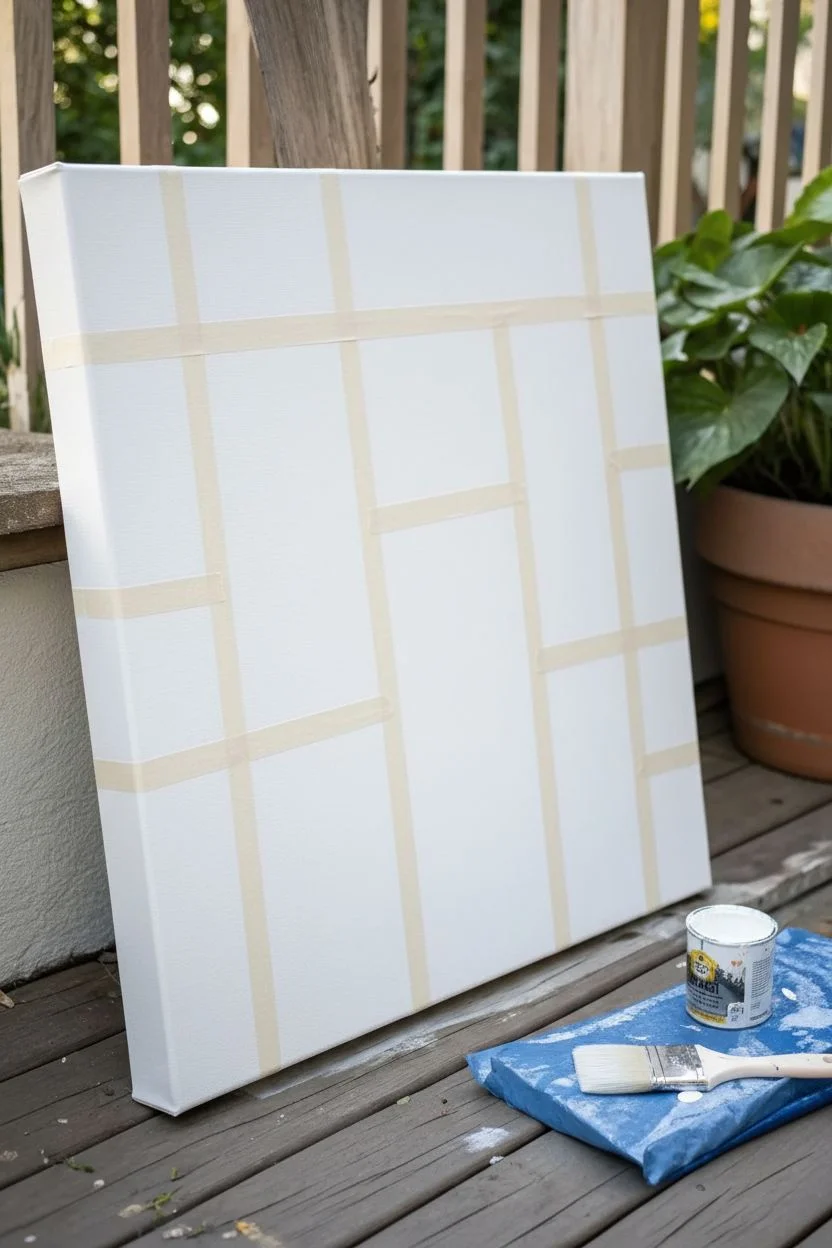
Step 1: Planning and Taping
-
Prime the background:
Begin by painting your entire canvas with a solid coat of white acrylic paint. This ensures your final grid lines will be crisp and bright white. Let this base layer dry completely before touching it with tape. -
Map out the grid:
Apply strips of masking tape across the canvas to create your geometric design. Create a mix of vertical and horizontal lines to form rectangles of varying sizes. Press the edges of the tape down firmly with your fingernail or a credit card to prevent bleed-under. -
Seal the tape edges:
Paint a very thin layer of white paint over the edges of your tape. This clever trick seals the tape; if any paint bleeds under, it will be white on white, keeping your future colored lines razor sharp.
Step 2: Color Blocking
-
Select your palette:
Prepare your colors: a deep navy blue, a vibrant rust orange, a sunny yellow-orange, and a soft cream. Place them in separate cups. -
Paint the first section:
Choose a few non-adjacent rectangles for your navy blue. Fill them in using a flat brush, painting away from the tape edge when possible to minimize lifting. -
Apply warm tones:
Move on to the rust orange color, filling in large vertical sections. The contrast between the cool blue and warm orange is key to this look. -
Fill remaining blocks:
Finish the geometric base by painting the remaining squares with the yellow-orange and cream tones. Ensure every white space between the tape is covered. -
Second coat:
Acrylics can sometimes look streaky after one pass. Apply a second coat to any colors that look uneven or translucent to get that solid, bold finish. -
The reveal:
I prefer to remove the tape while the paint is still slightly tacky, but not wet. Carefully peel back the tape at a 45-degree angle to reveal your crisp white grid lines.
Bleeding Lines?
If paint bled under the tape despite sealing, wait for it to fully dry. Then, use a small flat brush and white paint (or a white paint pen) to carefully touch up lines.
Step 3: Creating the Drips
-
Prepare the workspace:
This part gets messy. Prop your canvas vertically against a wall or easel, ensuring you have a drop cloth underneath to catch the runoff. -
Thin the paint:
In separate cups, mix your original paint colors with water. You want a consistency similar to heavy cream or melted ice cream—fluid enough to run, but pigmented enough to show up. -
Start the top drip:
Load a brush or a pipette with the watered-down navy blue. Apply it generously along the very top edge of the canvas (or specifically over the top blue section), allowing gravity to pull streams of paint down across the artwork. -
Control the flow:
Watch the drips as they travel. If they stop too soon, add a drop of water to the track. If they are moving too fast, lay the canvas flat to pause the motion. -
Mid-section drips:
For the orange and yellow sections lower down, carefully apply the thinned paint just at the top edge of those specific colored blocks. Let these drips run over the blocks below them for a layered effect. -
Add white drips:
Mix a small amount of thinned white paint. Using a small brush, create a few selective white drips running over the colored sections, particularly the orange and blue areas, to add dimension. -
Let it settle:
Once you are happy with the arrangement of the drips, leave the canvas upright for a few minutes to ensure they finish traveling, then lay it flat to dry completely overnight.
Level Up: Texture
Mix a distinct texture medium or fine sand into one of your block colors (like the orange) before painting. This creates a tactile contrast against the smooth drips.
Hang your new masterpiece in a well-lit area to let those vibrant blocks and organic drips energize the room
String Pull Drips for Webby, Threaded Texture
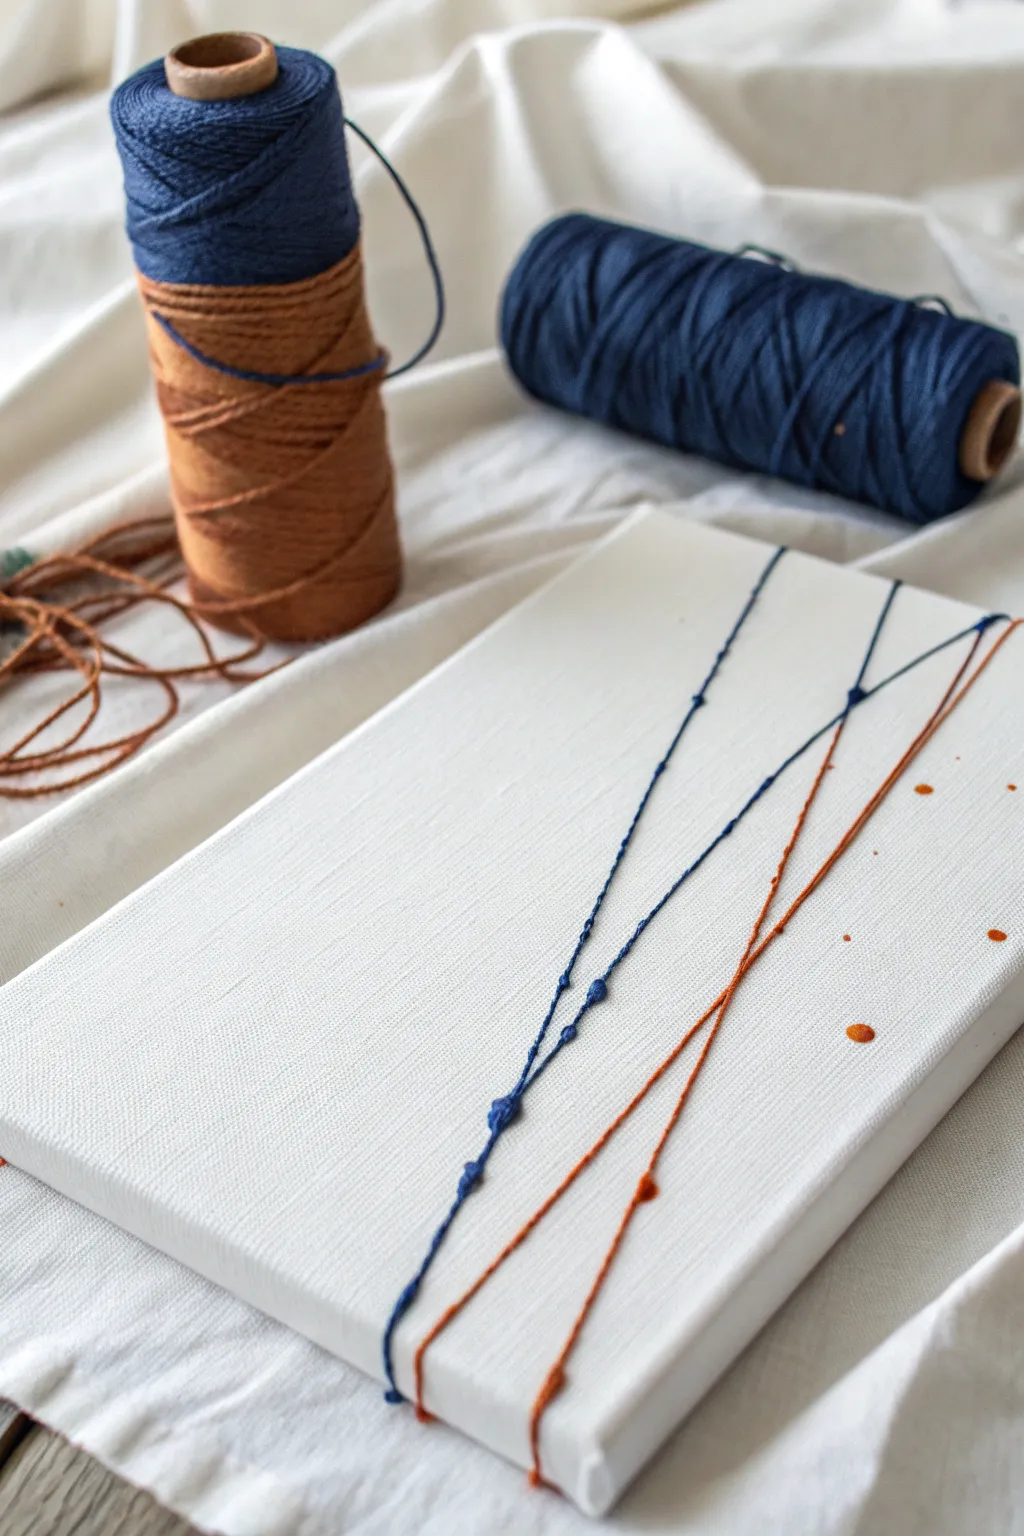
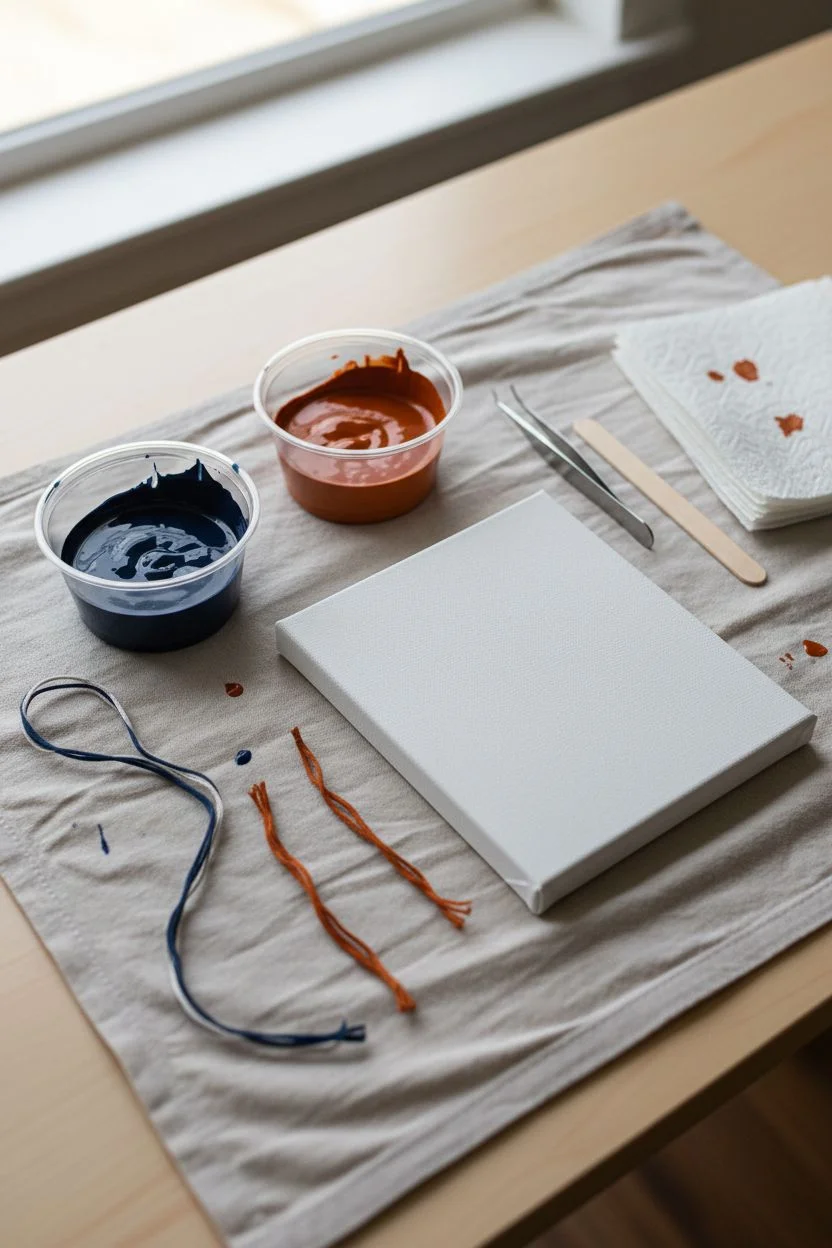
This elegant and restrained project combines the texture of real thread with the fluidity of paint drips. It creates a modern, geometric look using negative space and carefully placed lines of color.
Detailed Instructions
Materials
- Small rectangular stretched canvas (e.g., 5×7 or 6×8 inches)
- Dark navy blue acrylic paint
- Terracotta or rust orange acrylic paint
- Cotton twine or embroidery floss (medium thickness)
- Small mixing cups or palette
- Water for thinning paint
- Tweezers (optional, for precise placement)
- Paper towels
- Protective work surface
Step 1: Preparation & Mixing
-
Prepare your workspace:
Lay down a protective covering on your table. Since this involves paint-soaked string, things can get a little messy despite the minimalist result. -
Mix the blue paint:
In a small cup, mix your navy blue acrylic paint with a very small amount of water. You want a consistency that is fluid enough to soak into the string but thick enough to leave a solid mark. -
Mix the orange paint:
Repeat the process with the rust orange paint. Aim for the texture of heavy cream so it doesn’t run uncontrollably. -
Cut your strings:
Cut three lengths of string. One needs to be long enough to stretch diagonally across the canvas with overhang (for the blue), and two shorter ones for the orange accents.
Knotty Texture
To get the bumpy texture shown in the blue line, tie tiny knots in the string every few inches before dipping it in paint.
Step 2: Creating the Blue Line
-
Soak the main string:
Submerge your longest string completely into the navy blue paint mixture. Use a craft stick or teaspoon to ensure it is fully saturated. -
Remove excess paint:
Gently lift the string and run it between your thumb and forefinger (wearing gloves can help here) to strip off the dripping excess. The string should be wet, but not gloopy. -
Create knots (optional):
For extra texture as seen in the reference, you can tie a few small overhand knots in the string before placing it, or simply allow the paint to clump naturally. -
Position the first anchor:
Lay the blue string diagonally across the canvas, starting from the bottom left edge. -
Create the Y-shape:
Arrange the upper part of the string so it splits or veers off. In the example, a second piece of blue string is joined to the first to create a ‘Y’ shape near the top right. -
Press gently:
Once you like the arrangement, gently press the string down onto the canvas surface to ensure the paint transfers securely.
Step 3: Adding the Orange Accents
-
Soak the orange strings:
Dip your two shorter strings into the rust orange paint mixture, ensuring they are well-coated. -
Clean the strings:
Stripping the excess paint is crucial here; too much paint will ruin the fine line effect. -
Place the first orange line:
Lay the first orange string parallel to the blue line, slightly to its right. Let it start from the bottom edge and extend upward. -
Place the second orange line:
Position the second orange string next to the first one. I like to let these lines waver slightly rather than pulling them perfectly straight for a more organic feel. -
Check contact:
Lightly tap the strings down with a dry finger or tweezers to ensure good contact with the canvas weave.
Spackled Lines?
If your lines are spotty after lifting the string, use a fine liner brush with the matching paint to gently connect the gaps.
Step 4: Finishing Touches
-
Add paint droplets:
Dip a toothpick or the end of a paintbrush into the rust orange paint. -
Place the drops:
Carefully touch the tool to the canvas to create small, deliberate dots scattered around the right side of the strings. -
Create the ‘bleed’ spots:
To mimic the look of the reference where the paint pools slightly, you can add a tiny extra drop of paint directly onto parts of the string that are already on the canvas. -
Dry partially:
Let the strings sit on the canvas for about 10-15 minutes. This allows the paint to soak into the canvas surface. -
Remove the strings:
Very carefully peel the strings off the canvas, pulling straight up to avoid smearing the lines. -
Final dry:
Allow the finished piece to dry flat for at least 24 hours to ensure the thicker spots of paint cure completely.
Hang your minimalist masterpiece in a bright spot where the subtle textures can catch the light


Have a question or want to share your own experience? I'd love to hear from you in the comments below!