Doodling is my favorite low-pressure way to keep my hand moving and my brain relaxed. Here are a bunch of doodle ideas you can pull out anytime you need quick, cute sketches to fill a page or decorate your notes.
Tiny Icon Doodle Library
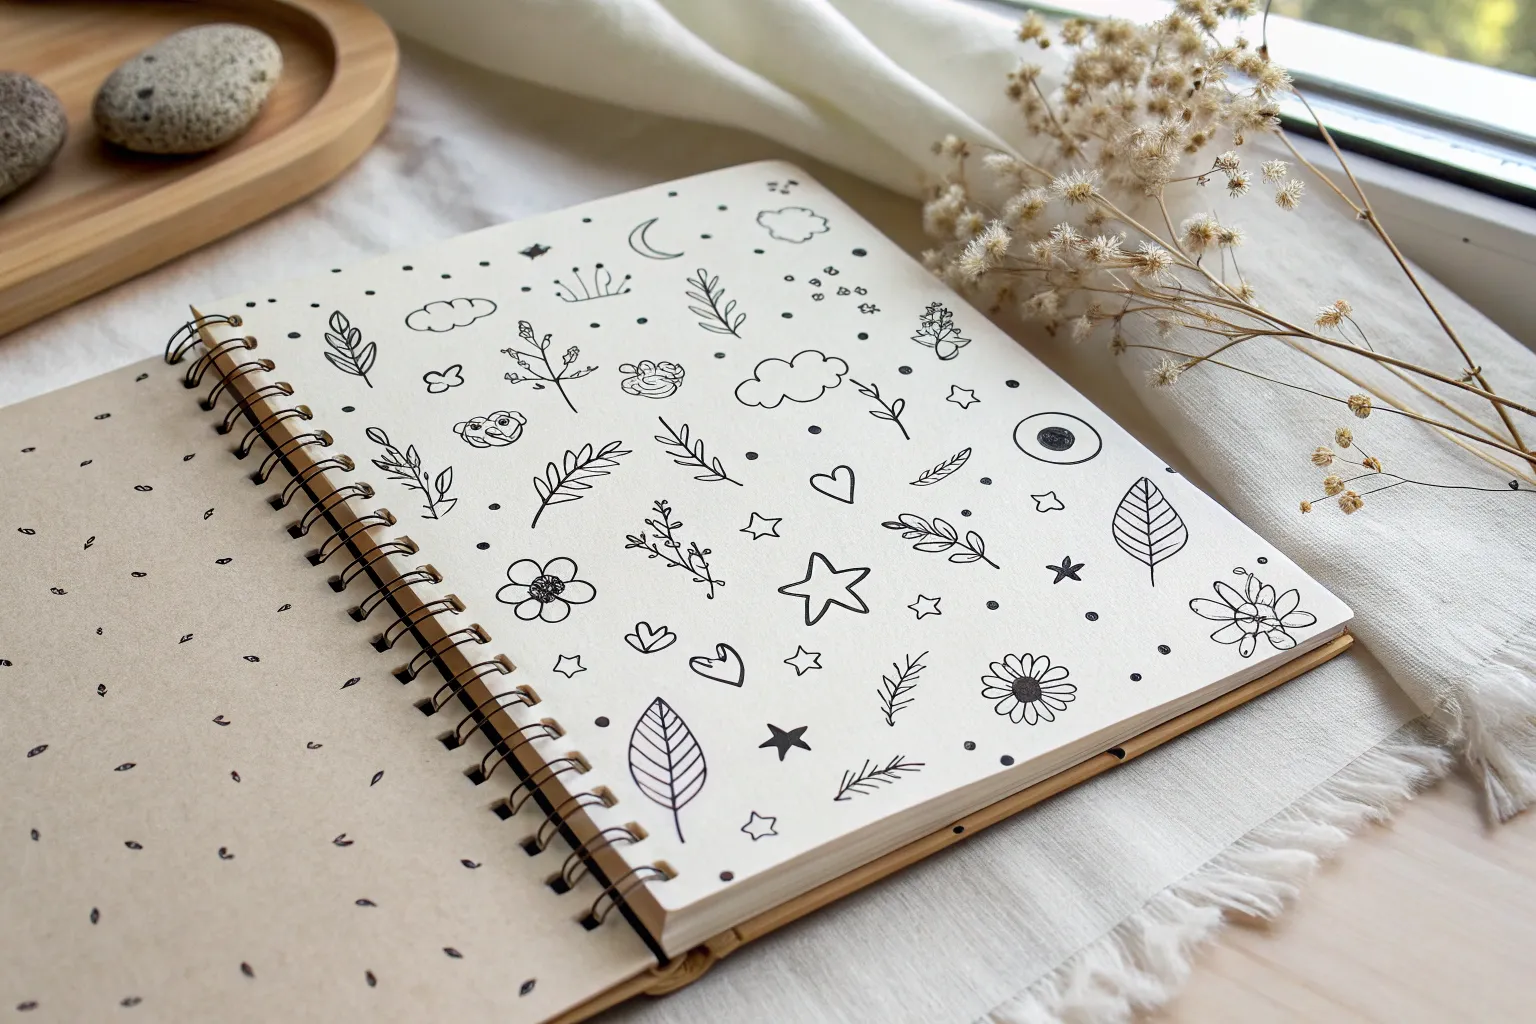
Transform a blank journal page into a charming reference sheet of tiny, minimal icons perfect for future spreads. This clean, grid-based layout turns simple line art into a satisfying collection of symbols ranging from celestial bodies to botanical elements.
Step-by-Step Tutorial
Materials
- Dot grid journal or notebook
- Technical drawing pen (0.1mm or 0.3mm nib)
- Pencil (HB or H)
- Eraser
- Ruler (optional, but helpful for alignment)
Step 1: Planning the Layout
-
Observe the grid:
Open your notebook to a fresh dot grid page. Notice how the existing dots form a perfect matrix for aligning small drawings without needing to measure everything. -
Define the columns:
Mentally divide your page into about 5 or 6 vertical columns. You don’t need to draw lines; just use the dot grid to keep spacing consistent between each icon. -
Pencil placement (optional):
If you’re nervous about spacing, lightly mark the center point for each doodle with a pencil. Aim for a grid of roughly 8 rows by 6 columns.
Step 2: Drawing Top Row Icons
-
Start with geometry:
Begin at the top right with a simple five-pointed star outline. Keep the lines crisp and unconnected at the center. -
Add nature elements:
To the left of the star, draw a tiny branch with three leaves. Use single strokes for the stem and small loops for leaves. -
Draw the hearts:
Continue left with a simple outline heart. Next to it, draw a standard rectangle envelope shape with a ‘V’ flap. -
Create variation:
For the envelope variations on the next row, try an open envelope flap or a back-view envelope with lines crossing in the middle.
Keep it Loose
Don’t strive for machine-perfect symmetry. Slight wobbles in the lines give these doodles their hand-drawn, cozy charm.
Step 3: Adding Celestial & Weather Elements
-
Draw stars and planets:
Scatter different star styles throughout the upper middle section. Try a filled-in five-point star, and a simple four-point sparkle star. -
Create clouds:
On the right side, stack a few cloud variations. Draw a simple fluffy cloud outline, and below it, a single curved line representing a minimal cloud form. -
Add the moon:
Towards the bottom left, draw a crescent moon. Ensure the curves are smooth and the tips are sharp. -
Include rain:
Draw a bold, black teardrop shape near the bottom right to represent a droplet or rain.
Create Categories
dedicate rows to specific themes: a row of just weather icons, a row of just plants, and a row of just travel symbols for better organization.
Step 4: Botanical Doodles
-
Doodle simple flowers:
Near the bottom, draw a five-petal daisy with a small circle center. I like to keep the petals rounded and roughly equal in size. -
Add complex florals:
Try a slightly more detailed flower with a scribbled center (resembling an aster or dandelion) and a four-petal flower with a cross in the middle. -
Draw leaves:
Include standalone leaves. Draw a simple pointed oval with a center vain line, or a stem with two leaves attached. -
Sketch the mushroom:
In the middle-left area, draw a small mushroom cap with a short stem. You can shade the underside of the cap black for contrast.
Step 5: Filling the Gaps
-
Add playful objects:
Fill remaining spots with fun items: a lightbulb with a filament scribble, a small balloon on a string, or a paper airplane. -
Draw the faces:
Include circular icons with faces. Recreate the smiling face with a flower crown or the simple fruit shapes like a peach. -
Balance the ink:
Review your grid. If an area looks too light, utilize solid black fills on small details—like the center of a flower or a star—to add visual weight. -
Erase guidelines:
Once the ink is completely dry (give it a full minute to avoid smudges), gently erase any pencil marks you made for spacing.
Now you have a handy reference library right in your journal for decorating future weekly spreads


Easy Stars, Sparkles, and Dot Bursts
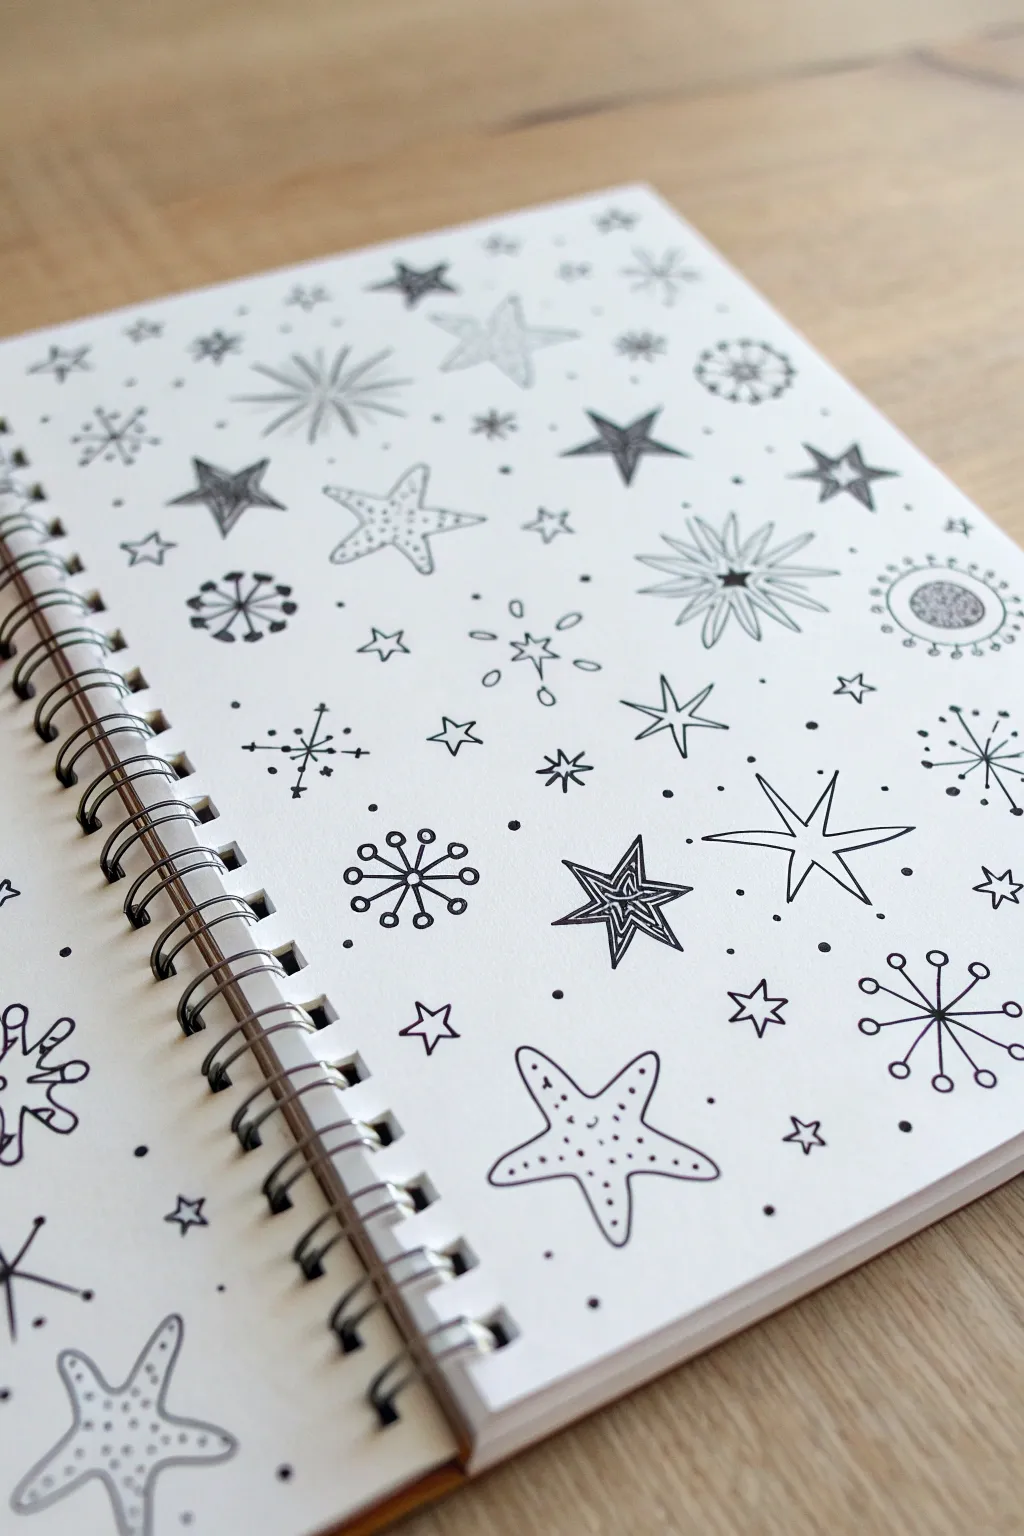
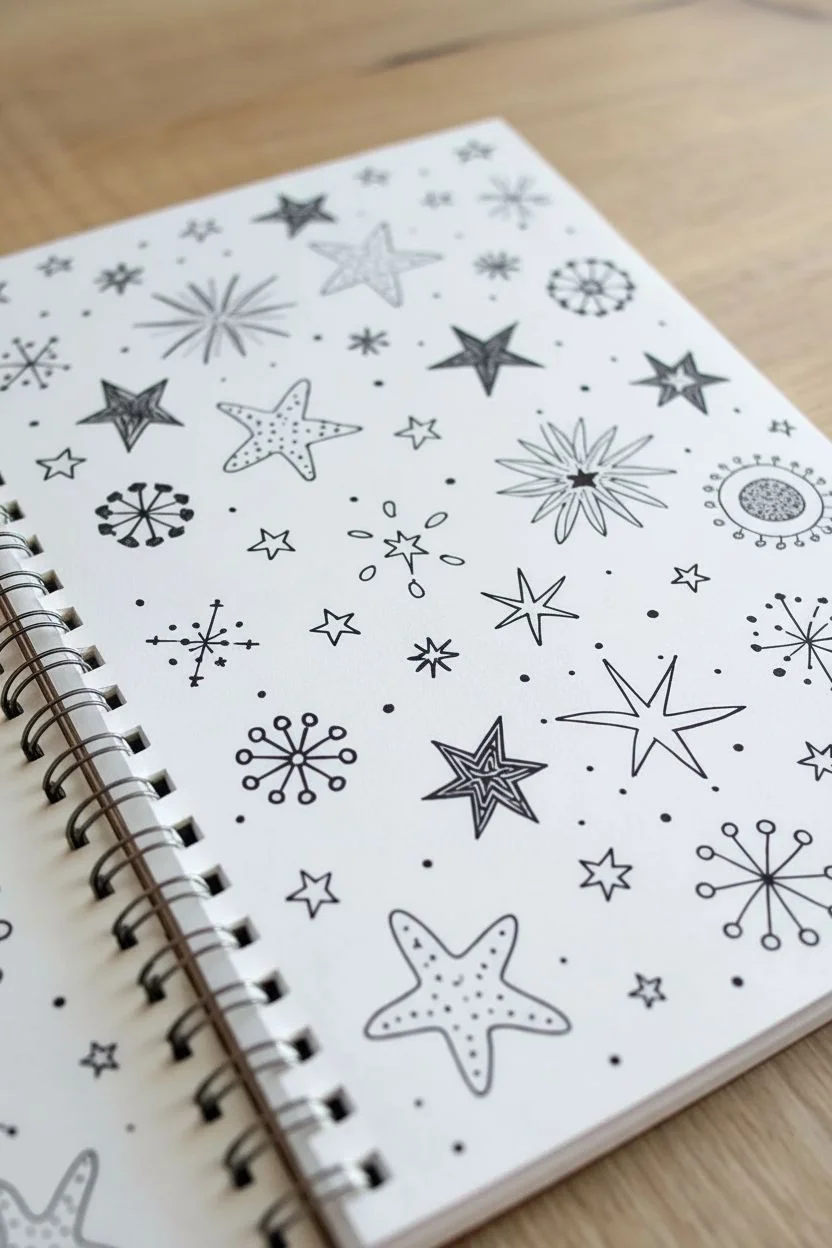
Fill a notebook page with a galaxy of hand-drawn stars, sparkles, and radiant bursts using just a single black pen. This relaxing doodle project combines simple geometric shapes to create a complex, constellation-like pattern that looks impressive but is incredibly easy to start.
Step-by-Step Guide
Materials
- Spiral-bound sketchbook or notebook (unlined or dot grid preferred)
- Fine-liner pen (black, 0.3mm or 0.5mm tip)
- Smooth surface for drawing
Step 1: Setting the Constellations
-
Start with classic five-point stars:
Begin by scattering a few solid, traditional five-point stars around the page. Draw these by making a continuous line without lifting the pen, or by outlining the shape and filling it in loosely with scribble lines for texture. -
Add open-center stars:
Draw large, five-pointed star outlines but leave the insides empty. For variety, place small dots inside these open stars to give them a textured, ‘cookie-cutter’ look. -
Create the ‘North Star’ shape:
Draw a four-pointed star with long vertical and horizontal points. Curve the lines inward slightly as they meet the center point to create an elegant, concave silhouette. -
Design radiate bursts:
Draw a central dot or small circle. From this center, draw straight lines radiating outward like spokes on a wheel. Vary the lengths, making some lines shorter and others longer for a dynamic effect. -
Sketch multi-layered stars:
Draw a small five-point star. Then, draw a larger outline around it, mimicking the shape but leaving a gap between the two lines. Add internal lines connecting the inner points to the outer points for a geometric feel.
Ink Flow Tip
Keep a scrap piece of paper nearby to test your pen. If the ink flows too heavily, your tiny stippled dots might bleed into blobs.
Step 2: Adding Whimsy and Detail
-
Draw rounded starfish shapes:
In the open spaces, sketch soft, rounded five-point shapes that resemble starfish. Make the arms slightly chubby and curved. Fill the interior with tiny stippled dots for shading. -
Create retro atomic bursts:
Draw three lines crossing at a central point (like an asterisk). At the end of each line, draw a small open circle or solid dot. I like to mix these up by making some endpoints solid and others hollow. -
Add ‘Flower’ bursts:
Start with a solid black center dot. Draw long, thin oval loops radiating from it. Add a straight line going through the center of each loop to make them look like petals or rays of light. -
Incorporate simple cross sparkles:
Fill smaller gaps with simple crosses. Draw a vertical line and a horizontal line crossing in the middle. Sometimes add diagonal lines between them for an eight-pointed sparkle. -
Draw circle-and-spoke designs:
Draw a small circle. Draw lines extending outward from the rim. Add another circle element, like a ring of dots, around the outside of the spokes to create an intricate emblem.
Add Metallic Magic
Once the black ink is fully dry, trace over select stars or fill in the ‘open’ centers with a gold or silver gel pen for a pop of shimmer.
Step 3: Filling the Void
-
Scatter tiny filler elements:
Look for the negative space between your larger designs. Draw tiny, single five-point stars—just the simple kind you learned in grade school—to act as background noise. -
Add micro-dots:
To make the page feel dense and magical, gently tap the pen tip to create stippled dots around the clusters of stars. This mimics the look of distant galaxies. -
Include loose asterisks:
Quickly sketch six-pointed asterisks (*) in the remaining medium-sized gaps. Keep your wrist loose so they look energetic rather than stiff. -
Draw floating circles:
Place small, open circles randomly throughout the composition. These act like bubbles or planets and break up the sharp angles of the stars. -
Review and balance:
Step back and look at the whole page. If one area looks too empty, drop in a small ‘North Star’ or a cluster of dots to balance the visual weight.
Now you have a stunning page of celestial doodles ready to spark your next creative idea


Hearts With Personality


Fill your sketchbook with a charming collection of hearts, giving each one its own unique personality through simple line work and patterns. This practice page explores texture and variety, turning basic heart shapes into a cohesive and playful doodle spread.
Step-by-Step
Materials
- Dotted or blank journal/sketchbook
- Fine liner pen (01 or 03 size, black)
- Thicker felt tip pen or marker (black)
- Pencil (optional for sketching)
Step 1: Setting the Composition
-
Visualize the layout:
Before putting pen to paper, look at your blank page. You want to space the hearts somewhat randomly but evenly, avoiding large empty gaps. Imagine a loose grid where items are slightly offset from one another. -
Light pencil sketch (optional):
If you’re nervous about placement, lightly sketch the basic outlines of about 15-20 hearts of varying sizes using a pencil. Keep your wrist loose; these shouldn’t be perfect geometrical shapes.
Uneven shapes?
Don’t correct wobbly lines! Imperfections give doodles their character. If a shape looks wonky, simply re-trace the line loosely to make it look intentional.
Step 2: Creating the Focal Hearts
-
Draw the main outlines:
Using your fine liner, ink the outlines of the largest 3-4 hearts first. Place one near the center and others towards the corners to anchor the page. -
Add vertical hatching:
Pick a medium-sized heart on the left side. Fill the left lobe (or the whole shape) with rough, vertical lines. Leave small gaps between lines to create texture rather than a solid block of black. -
Create the ‘stitch’ pattern:
For a large heart in the center area, draw the outline first. Then, fill the interior with short, vertical dash marks arranged in loose rows, mimicking a simple running stitch or rain pattern. -
Stipple a heart:
Choose another medium heart outline. Inside, add tiny dots (stippling) concentrated near the bottom point and edges, getting sparser toward the top to suggest volume. -
Draw a double-heart:
Draw a medium heart, and then immediately draw a smaller heart inside it. This ‘heart-within-a-heart’ adds a nice graphic element.
Creative Twist
Try using a different color for the interior patterns, like red or pink, while keeping the main outlines black for a pop of color.
Step 3: Unique Design Details
-
The broken heart detail:
Draw a heart outline, then draw a jagged, zigzag line horizontally across the middle. Add short vertical lines inside the top half only to emphasize the ‘broken’ or split texture. -
Solid filled accents:
Using your thicker marker or pen, completely fill in one or two hearts to create bold focal points. I find that placing a solid black heart near the bottom left balances the lighter doodles above. -
Patterned fill:
For the largest heart (likely at the bottom), fill the interior with tiny, mini-hearts instead of lines or dots. Keep these mini-hearts orientated in the same direction for a uniform look. -
Radiating energy:
Draw a small, simple heart. Add short, straight lines radiating outward from the outline to give it a ‘glowing’ or ‘shining’ effect.
Step 4: Filling the Gaps
-
Add floating mini-hearts:
Look for empty white spaces between your main designs. Draw tiny, solid black hearts in these gaps. These act like confetti and tie the whole page together. -
Include simple outlines:
Scatter a few plain, unadorned heart outlines in the remaining spaces. Vary their angles slightly so they look like they are tumbling. -
Draw tiny solid hearts:
Use the very tip of your pen to add the smallest solid hearts, almost like heavy dots, to fill tight corners. -
Review contrast:
Step back and look at the spread. If one area looks too light, darken a line or thicken an outline on a heart in that section to add visual weight. -
Erase pencil lines:
Once the ink is completely dry (wait at least a minute to prevent smudging), gently erase any visible pencil sketch lines.
Now you have a lively page of unique hearts ready to be used in cards or bullet journals


Cute Cloud and Weather Doodles

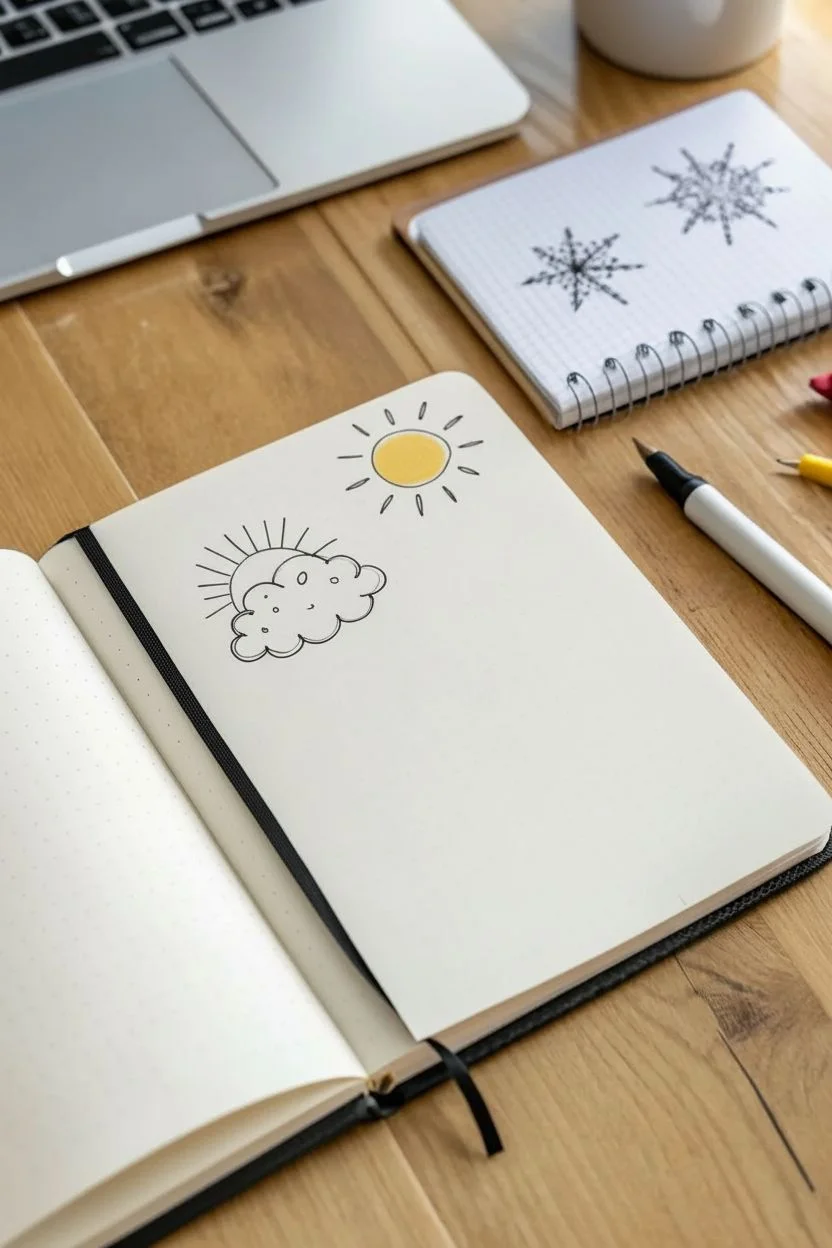
Brighten up your bullet journal or sketchbook with this charming collection of weather-themed doodles. Using simple lines and minimal color, you’ll create a playful set of icons ranging from sunny rays to rainy days.
Step-by-Step Guide
Materials
- Dotted or blank notebook
- Fine liner pen (black, 0.3mm or 0.5mm)
- Grey marker or brush pen
- Yellow marker or colored pencil
- Pencil
- Eraser
Step 1: Sunny Days
-
Map out the layout:
Start by lightly penciling the rough positions of your six weather icons to ensure they are spaced evenly on the page. Leave plenty of breathing room between each doodle. -
Draw the main sun:
For the solitary sun icon at the top center, draw a loose, organic circle in ink. Don’t worry about making it perfect; a slightly wobbly line adds character. -
Add inner details:
Inside the first circle, draw a smaller crescent shape on the left side to give the sun some dimension. -
Radiate the rays:
Draw short, straight lines radiating outward from the sun. Alternate between slightly longer and shorter lines for a dynamic look. -
Start the cloudy sun:
For the icon on the left, draw a cloud shape using a series of connected bumps or scallops for the bottom and sides. -
Add the sun behind:
Draw a semicircle peeking out from the top left of your cloud. Fill this semicircle with vertical hatching lines for texture. -
Finish the cloudy sun rays:
Add straight rays extending from the semicircle, similar to your first sun but fanning out only from the visible part.
Loose Lines
Don’t connect every line perfectly. Leaving small gaps between cloud bumps can make doodles feel airier and more hand-drawn.
Step 2: Stormy Elements
-
Sketch the fluffy clouds:
To the right of the cloudy sun, draw two small, overlapping cloud shapes. Keep the lines curvy and soft. Add a small spiral or swirl inside one cloud for a whimsical touch. -
Strike with lightning:
Below the fluffy clouds, draw a jagged lightning bolt shape. It should look like a sharp letter ‘Z’ with an extra zig-zag. -
Detail the bolt:
Add two small dots inside the top section of the lightning bolt and a small line in the bottom section to give it a comic-book style texture. -
Create the rain cloud:
Central on the page, draw a larger cloud. Make the outline slightly bolder or double up the line in spots to suggest heaviness. -
Decorate the rain cloud:
Inside this cloud, draw small circles of varying sizes. This ‘bubble’ texture makes the cloud look full of water. -
Let it rain:
Beneath the bubbly cloud, draw teardrop shapes falling downwards. Arrange them in a loose pattern, varying the angles slightly to simulate movement.
Step 3: Rainbows & Finishing Touches
-
Draw the rainbow arches:
In the bottom right, draw a large arch. Inside it, draw two smaller concentric arches to create three distinct bands. -
Texture the rainbow:
Leave the outer and inner bands plain for now. In the middle band, draw small vertical tick marks all the way around the arch. -
Add color accents:
Using your yellow marker, color in the inner band of the rainbow and the crescent shape inside your first sun doodle. -
Apply grey shadows:
Take a grey marker and add subtle shadows. Outline the outer band of the rainbow and add a shadow line to the left side of the lightning bolt. -
Erase guidelines:
Once the ink is completely dry, gently erase any pencil marks you made in the beginning to clean up the page.
Ink Smearing?
If your black fineliner smears when you add marker color, let the black ink dry for at least 5-10 minutes before coloring.
Now you have a playful page of weather doodles ready to track the forecast or decorate your next journal entry.

PENCIL GUIDE
Understanding Pencil Grades from H to B
From first sketch to finished drawing — learn pencil grades, line control, and shading techniques.
Explore the Full Guide
Coffee and Tea Cup Doodles


Capture the warmth of a relaxing morning with this delightful doodle of three patterned mugs. Using simple black ink lines and tiny pops of pink, you will create a charming coffee-themed spread perfect for any bullet journal.
Step-by-Step
Materials
- Dotted bullet journal or drawing paper
- Fine liner pen (black, approx. 0.3mm or 0.5mm)
- Thicker marker or brush pen (black) for filling
- Pink or dusty rose highlighter/marker
- Pencil and eraser for sketching
Step 1: Planning the Layout
-
Position the mugs:
Visualize a triangle shape on your page. Sketch three ovals lightly with your pencil: one larger oval near the top center, and two slightly smaller ovals below it, spaced apart to the left and right. -
Define the shapes:
From each oval rim, draw the body of the mugs. Give the top mug a slightly tapered cylindrical body. The bottom left mug can be a bit shorter and wider, while the bottom right mug should look like a standard tea cup, slightly rounded. -
Add handles:
Sketch a large C-shaped handle on the left side of the top mug. For the bottom right cup, draw a curved handle on the right side. The bottom left mug is handle-free in this design.
Fixing Smudges
If you accidentally smudge wet ink, turn it into a shadow! Add light gray marker or cross-hatching to that side of the mug to disguise the mistake as shading.
Step 2: Inking the Top Mug
-
Outline the rim and body:
Using your fine liner, trace over your pencil sketch. Draw a double line for the rim to give it thickness. Draw the sides and curved bottom, adding a second curved line near the bottom for a base detail. -
Draw the heart design:
In the center of the mug, draw a heart shape. Inside that heart, draw a slightly smaller heart. Fill the space between the two heart outlines with diagonal hatching lines. -
Add polka dots:
Scatter small black dots around the rest of the mug’s body, keeping them random but evenly spaced. -
Fill the coffee:
Use your thicker black marker to fill in the oval opening of the mug, leaving a tiny sliver of white at the top edge to simulate a reflection on the liquid. -
Add steam and leaves:
Above the mug, draw two simple leaf outlines and a floating heart shape to represent steam rising.
Step 3: Inking the Bottom Left Mug
-
Draw the basic structure:
Ink the rim with a double line just like the first mug. Outline the slightly tapered body. -
Create the zig-zag pattern:
Draw two horizontal lines across the upper middle section. Between these lines, draw a zig-zag line. Place a small dot inside each upward triangle created by the zig-zag. -
Add horizontal stripes:
Fill the bottom third of the mug with three or four curved parallel lines to create a striped texture. -
Finish with leaves:
Draw three leaf shapes sprouting from the left side of the mug, as if they are floating or part of the aroma. -
Fill the liquid:
Color in the coffee inside the rim with your black marker, remembering to leave that little white highlight.
Make It Glossy
Use a white gel pen to add tiny dots or lines on top of the black coffee liquid after it dries. This makes the surface look wet and shiny.
Step 4: Inking the Bottom Right Cup
-
Outline the cup:
ink the rim and the rounded body of this tea cup. Draw the handle on the right side, filling it with a simple cross-hatch or checkerboard pattern. -
Decorate with loops:
Across the middle of the cup, draw a loopy, cursive-style line that creates small loops. Add tiny dots above and below the line for extra detail. -
Stripe the base:
Draw a horizontal band near the bottom of the cup and fill it with vertical stripes. -
Draw heart steam:
Instead of normal steam lines, draw two heart outlines rising from this cup to emphasize the cozy vibe. -
Darken the tea:
Fill the inside of the rim with black ink for the tea.
Step 5: Final Details
-
Clean up sketches:
Wait at least a minute for the ink to fully dry, then gently erase all your pencil guidelines. -
Add scattered elements:
Draw tiny floating hearts and small V-shapes or dots in the empty spaces between the mugs to tie the composition together. -
Apply color accents:
Using your pink marker, carefully color in the scattered floating hearts. Leave the patterns on the mugs black and white for contrast.
Now you have a charming page of warm drinks to remind you to take a break.
Moon, Planets, and Cosmic Bits
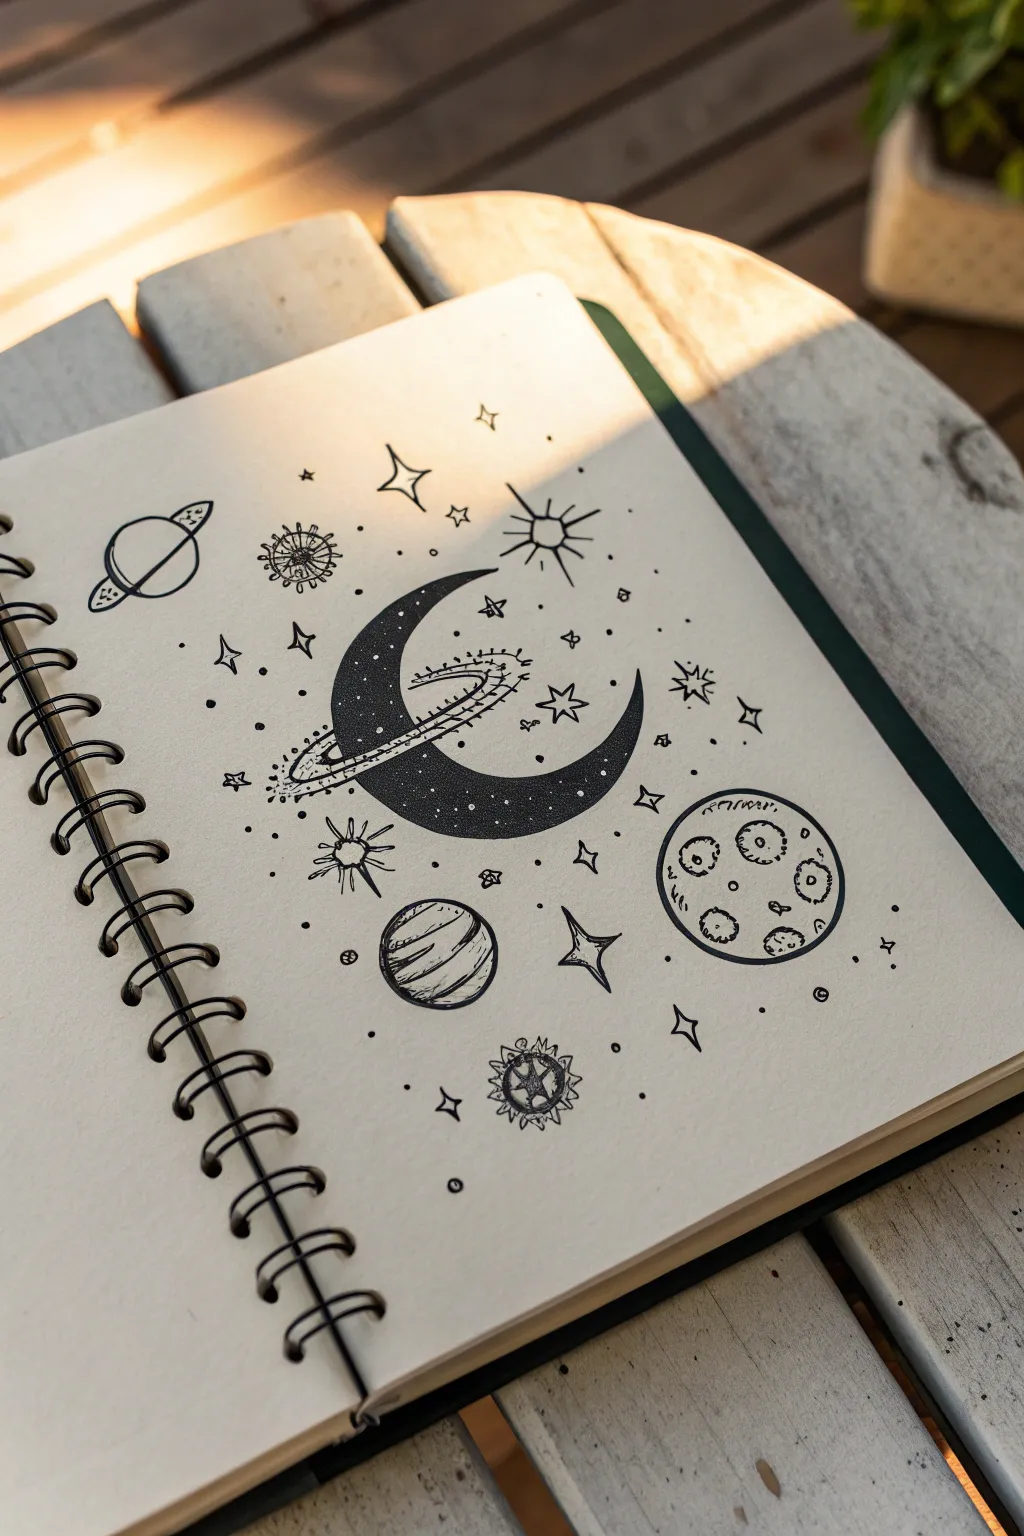
Capture the magic of the cosmos with this charming collection of hand-drawn space elements. Featuring a stylized crescent moon centerpiece surrounded by playful planets and twinkling stars, this layout uses bold ink lines and stippling to create a dreamy, retro-astronomy vibe.
Detailed Instructions
Materials
- Spiral-bound sketchbook (cream or off-white paper recommended)
- Fine liner pen (01 or 03 size, black)
- Thicker marker or brush pen (black) for filling
- Pencil (HB or 2B)
- Soft eraser
- Ruler (optional)
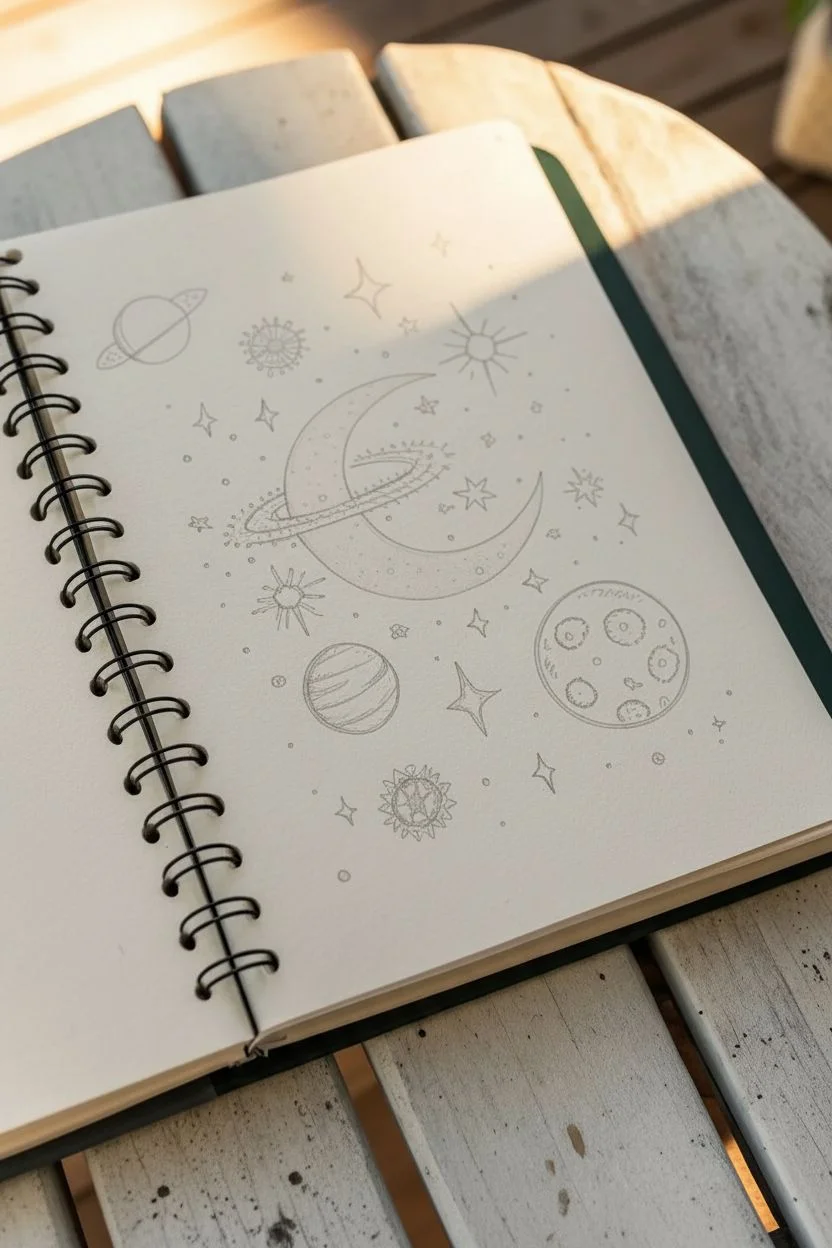
Step 1: Planning the Cosmos
-
Pencil Sketching the Centerpiece:
Begin by lightly sketching a large ‘C’ shape in the center of your page to form the crescent moon. Make it prominent, as this anchors the entire composition. -
Adding the Lunar Ring:
Sketch an elongated oval wrapping around the middle of the crescent moon. Erase the part of the oval that goes ‘behind’ the moon to create a Saturn-like ring effect. -
Placing Major Planets:
To the bottom right, sketch a medium circle for a cratered moon. To the bottom left, add a smaller circle with diagonal stripes for a gas giant planet. In the top left, draw a small planet with a ring. -
Scattering Celestial Bodies:
Fill the empty spaces with a variety of star shapes—simple crosses, four-pointed stars, and small circles. Add a sun-like burst in the top center and a few more complex starbursts near the edges.
Smudge Prevention
Work from the top left of the page to the bottom right (if right-handed) to avoid dragging your hand through wet ink. Place a scrap paper under your drawing hand for safety.
Step 2: Inking the Foundations
-
Outlining the Crescent:
Using your fine liner, trace over the crescent moon shape. Keep your hand steady to ensure a smooth, continuous curve. -
The Planetary Ring:
Ink the ring around the moon. Instead of a solid line, try breaking it up slightly or adding a second, thinner inner line to give it dimension and a ‘dusty’ feel. -
Detailing the Dusty Trail:
Add tiny dashes and dots along the ring’s path to simulate space debris and stardust. -
Inking the Large Planet:
Outline the large circle in the bottom right corner. Draw several smaller circles inside it to represent craters, varying their sizes for a natural look. -
Striped Planet Details:
Ink the smaller planet on the bottom left. Draw curved diagonal lines across it to suggest atmospheric bands, but don’t fill them in yet.
Step 3: Adding Texture and Contrast
-
Filling the Crescent:
Use your thicker marker or brush pen to fill the crescent moon completely black. Be careful around the area where the ring crosses in front; leave a tiny white gap if needed to separate the black moon from the line work of the ring. -
Stippling the Dark Side:
Once the black ink is dry, use a white gel pen (if you have one) or leave negative space during the filling process to create tiny white speckles inside the black moon, mimicking distant stars. -
Texturing the Craters:
Go back to the cratered moon. Use stippling (tiny dots) inside the craters to create shadow and depth. Concentrate the dots on one side of each crater to suggest a light source. -
Shading the Striped Planet:
Add hatch marks (short, parallel lines) to the edges of the striped planet to make it look spherical rather than flat. -
Inking the Stars:
Go over your pencil sketches for the scattered stars. For the four-pointed stars, curve the lines inward slightly to give them a sharp, twinkling appearance.
Add Some Magic
Use a metallic gold or silver gel pen to add accents to the rings and stars. The shimmer will catch the light and give your cosmic doodle a premium feel.
Step 4: Finishing Touches
-
Adding Cosmic Dust:
Randomly place tiny dots and small unfilled circles throughout the empty background space. This ‘noise’ fills the gaps and connects the larger elements. -
Defining the Sun:
Ink the sunburst at the top with sharp, triangular rays. You can add a small face or keep it geometric based on your preference. -
Final Cleanup:
Wait at least 5-10 minutes for all ink to be completely dry. Then, gently erase all remaining pencil guidelines to reveal the crisp black lines.
Now you have a stunning page of cosmic doodles ready to inspire your next journal spread
BRUSH GUIDE
The Right Brush for Every Stroke
From clean lines to bold texture — master brush choice, stroke control, and essential techniques.
Explore the Full Guide
Simple Ocean and Sea Creature Doodles
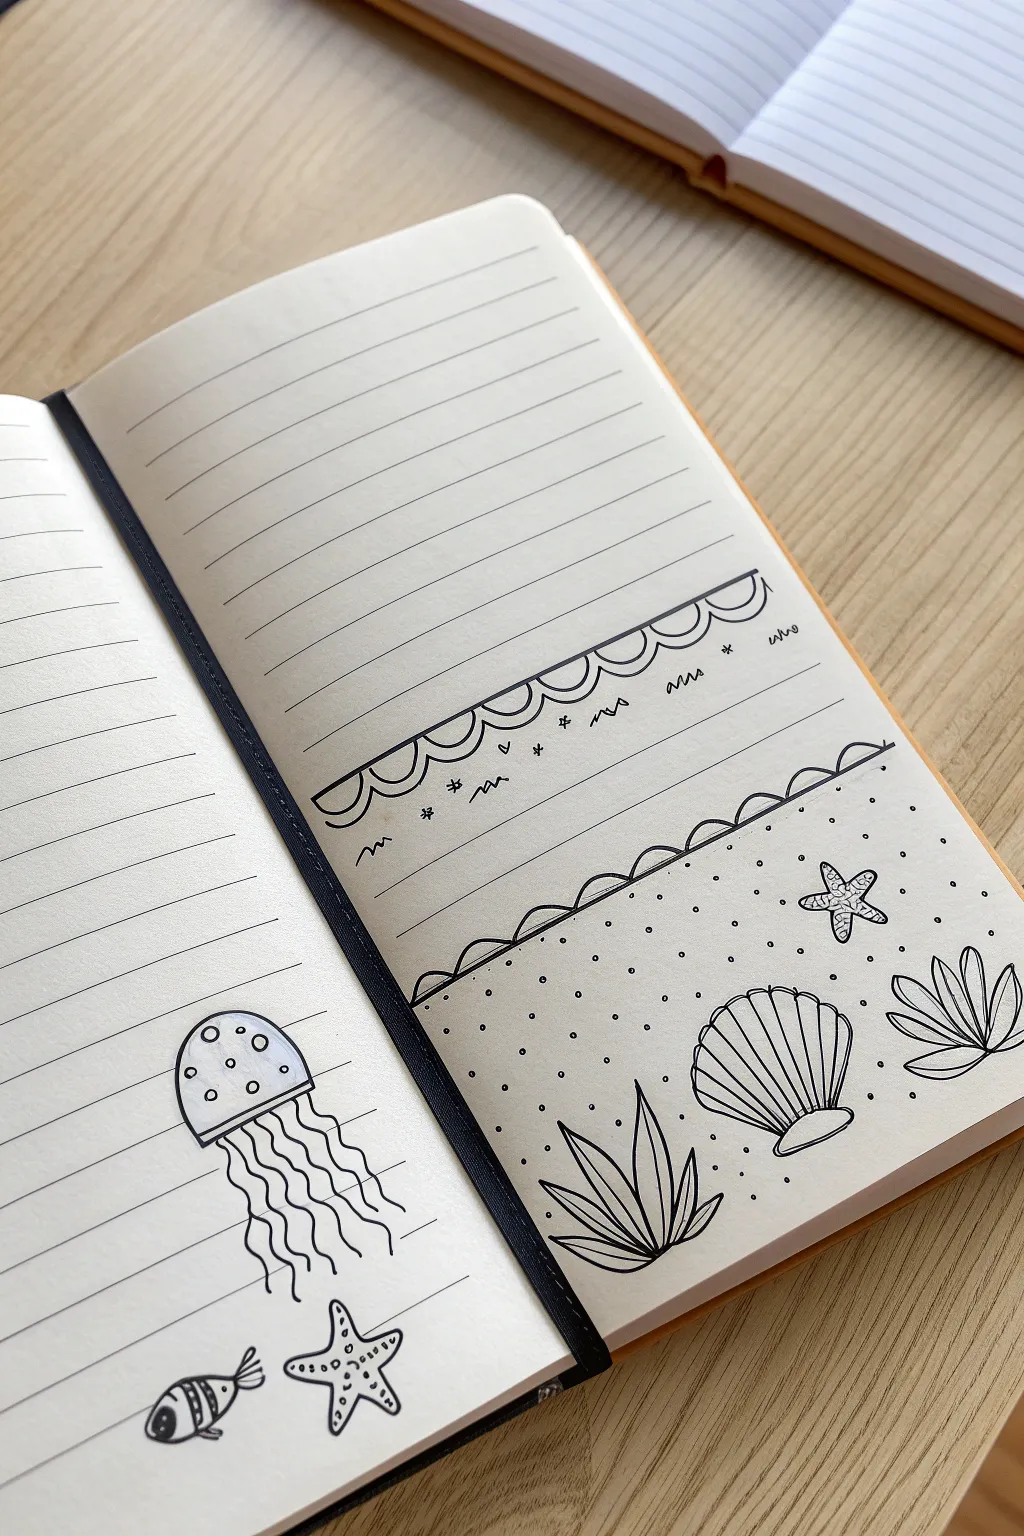
Transform a plain lined notebook into a charming seascape with these whimsical doodle borders and characters. This project uses simple lines and repetitive patterns to create a relaxing ocean theme perfect for journaling or note-taking.
How-To Guide
Materials
- Lined notebook
- Fine liner pen (black, size 0.3 or 0.5)
- Pencil (HB or H for sketching)
- Eraser
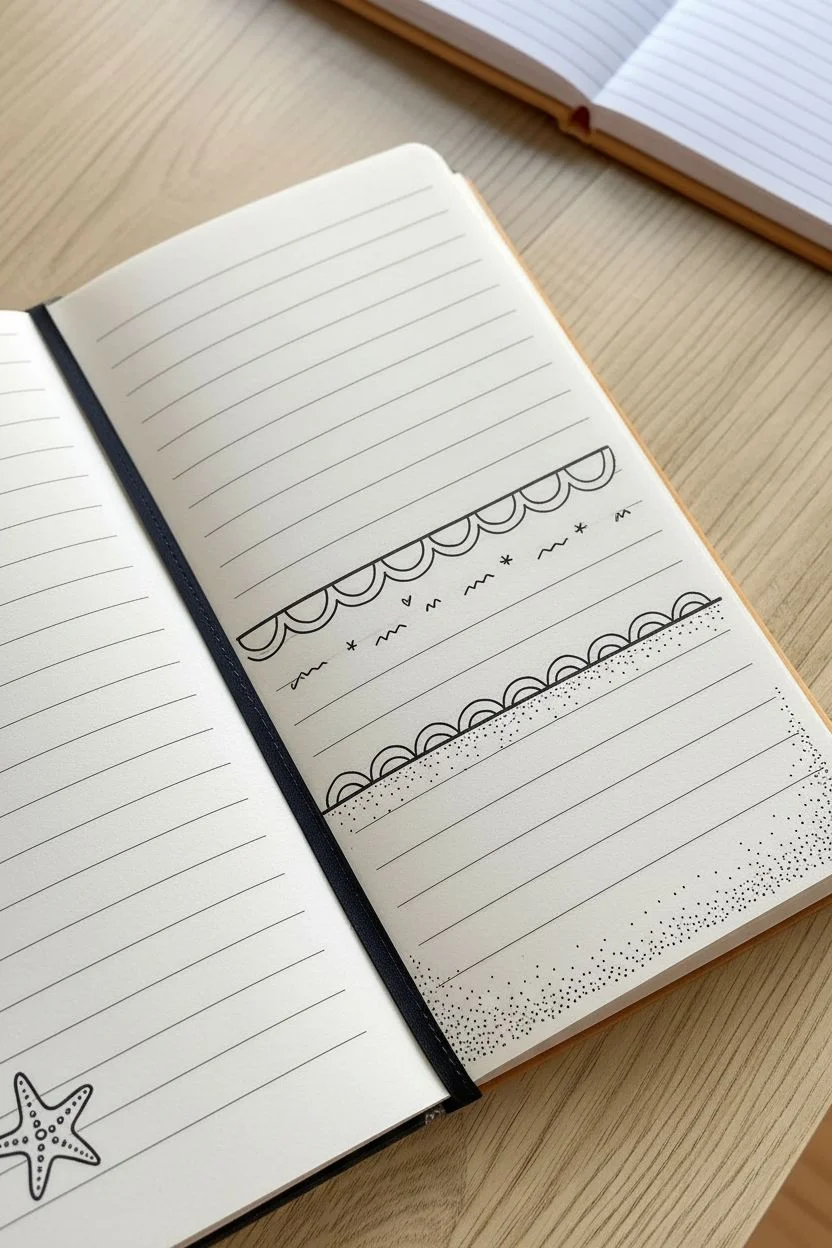
Step 1: Setting the Scene: Bottom Border
-
Establish the horizon line:
Count about 8-10 lines up from the bottom of the right-hand page. Draw a straight horizontal line across the page using one of the existing notebook lines as your guide. -
Create the wave pattern:
Above your horizon line, draw a series of connected semicircles (scallops) to create a stylized wave border. Keep these fairly consistent in size. -
Double the waves:
Draw a second, slightly smaller semi-circle inside each of the first waves to give the border a bit of depth and dimension. -
Add detail to the sand:
Beneath the wave line, fill the ‘sand’ area with small, scattered dots. Concentrate the dots slightly more near the bottom and around where your larger doodles will go to suggest texture.
Use The Lines
Don’t fight the notebook lines! Use them as built-in rulers for your borders and to keep your standing elements, like sea plants, level.
Step 2: Doodling the Sea Life
-
Outline the seashell:
In the bottom right area of the sand, draw a classic scalloped seashell shape. Start with a wide fan shape and close it at the bottom with a small, flat oval for the hinge. -
Detail the shell:
Draw vertical lines radiating from the bottom hinge to the top edges of the fan to create the ridges of the shell. -
Draw the sea plant:
To the left of the shell, draw a sea plant. Start from a central point and draw 3-5 pointed, leaf-like shapes fanning upwards and outwards. Add a single line down the center of each leaf for veins. -
Add a starfish:
Above the shell, near the water line, draw a simple five-pointed starfish. I like to keep the arms slightly rounded for a softer look. -
Texture the starfish:
Fill the starfish with tiny, erratic squiggles or small dots to give it a rough, organic texture different from the smooth shell. -
Complete the corner:
In the far bottom right corner, tuck in another small plant shape, showing just three leaves fanning out, as if it’s growing off the page.
Uneven Waves?
If your scalloped waves end up uneven, don’t erase constantly. Varying sizes look more natural, like real ocean swells!
Step 3: Upper Border & Left Page Details
-
Create the top border:
Move up about 5-6 lines from your first wave border. Draw another scalloped line across the page to mirror the water pattern below. -
Decorate the top border:
Inside each scallop of this upper border, simply draw a second semi-circle. -
Add floating elements:
Underneath this top border, sketch tiny floating squiggles resembling seagrass and small ‘x’ or star shapes to fill the empty space lightly. -
Start the jellyfish:
On the left-hand page, near the bottom third, draw a dome shape for the jellyfish body (the bell). Add a straight line across the bottom rim to close the shape. -
Add jellyfish spots:
Decorate the bell with a few small circles of varying sizes to suggest transparency and pattern. -
Draw the tentacles:
Drawing freely, create 5-7 wavy lines descending from the bottom of the bell. Let them wiggle naturally and vary slightly in length. -
Sketch the fish:
Below the jellyfish, draw a small oval fish. Add a triangle for the tail fin and a tiny dot for the eye. -
Stripe the fish:
Draw vertical stripes across the fish’s body, shading every other stripe black for contrast. -
Draw the final starfish:
Next to the fish, add one more small starfish. Decorate its center with small dots.
Now you have a serene little ocean scene frame for your daily thoughts
Mini Animal Faces and Paws
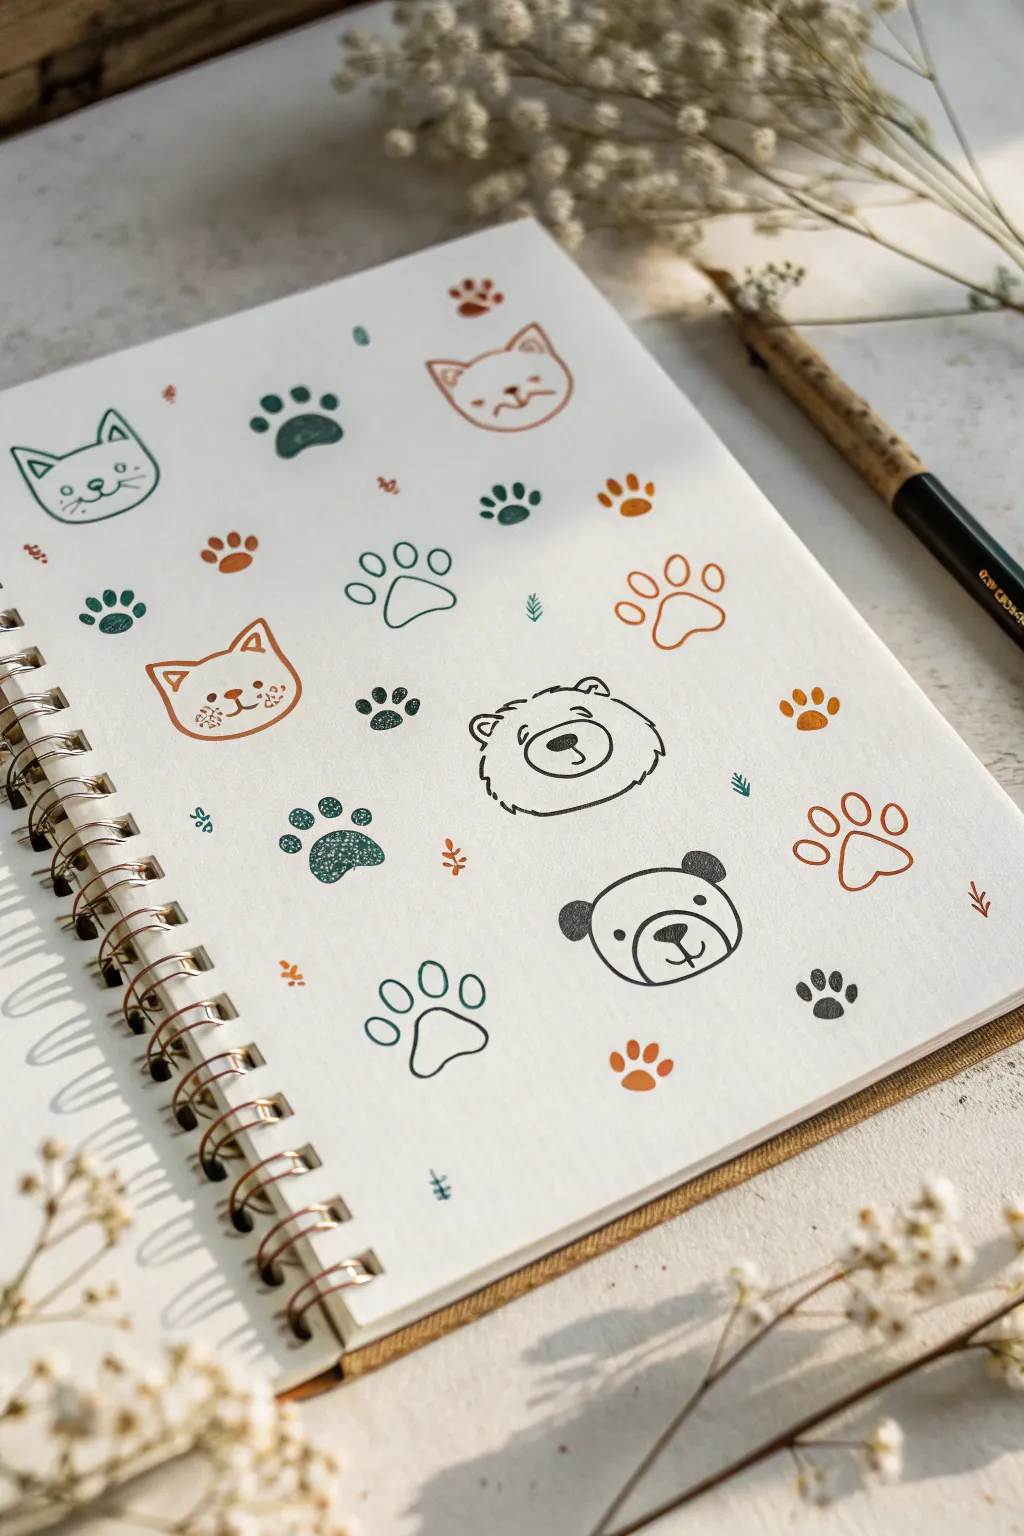
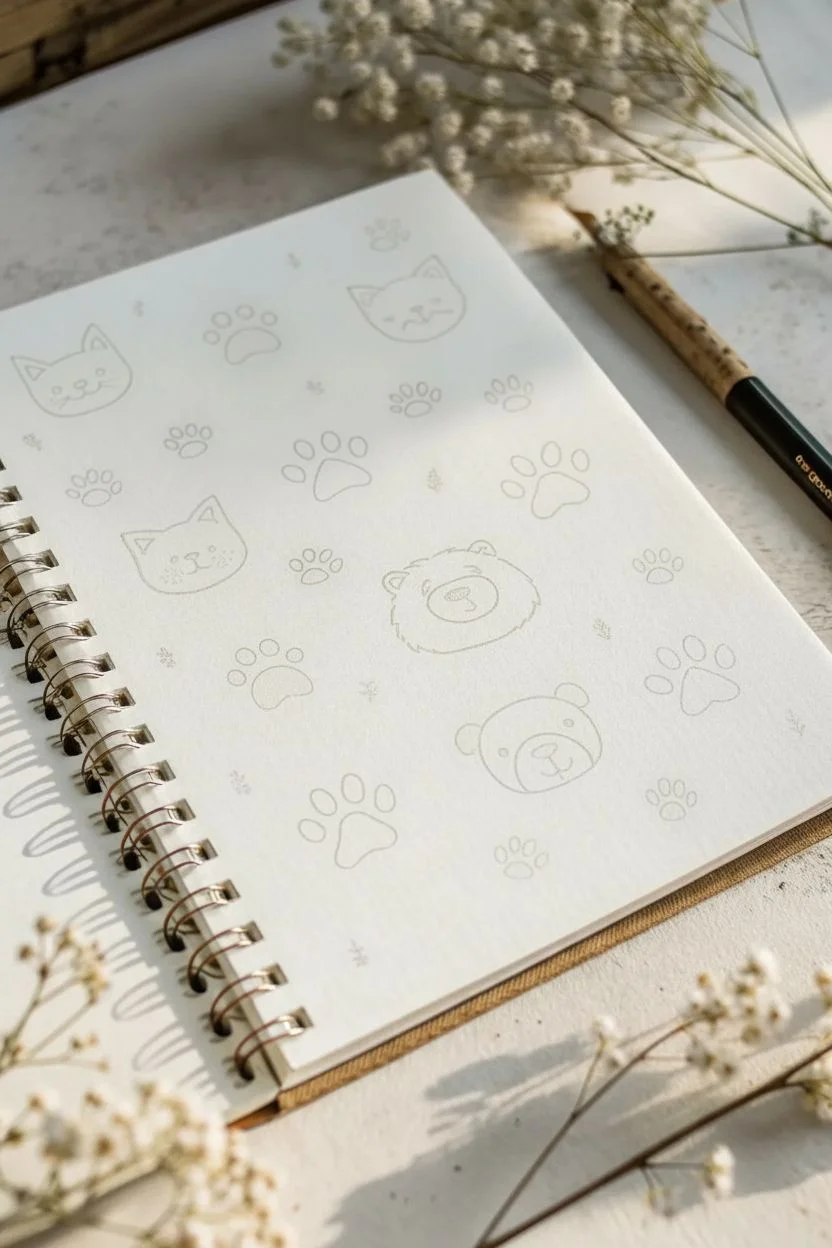
Create a charming, scattered pattern of simple animal faces and paw prints that feels like playful confetti on the page. This approachable doodle project uses a limited color palette of earth tones to turn a blank sketchbook page into a cohesive and adorable work of art.
Step-by-Step Tutorial
Materials
- Spiral-bound sketchbook or drawing paper
- Fine-liner pens (black, size 0.3 or 0.5)
- Colored felt-tip pens or markers (rust orange, dark teal/green, grey)
- Pencil (HB or H)
- Soft eraser
Step 1: Planning the Layout
-
Visualize the spacing:
Before drawing ink lines, lightly map out where your main elements will go with a pencil. Imagine an invisible grid, but keep it loose so the placement looks random and organic rather than rigid. -
Place the anchor animals:
Sketch light circles or ovals for the animal heads first. Aim for five to six main faces scattered evenly across the page—some near the edges and some central. Leave plenty of white space between them. -
Fill gaps with paws:
In the spaces between the faces, lightly sketch positions for paw prints. Vary their rotation so they look like tracks walking in different directions.
Ink Consistency
Keep your hand pressure light when drawing the outlines. Consistent line weight makes the doodles look intentional and polished, like a printed pattern.
Step 2: Drawing Animal Faces
-
Outline the cat faces:
Using your chosen pens, start inking the cats. Draw a simple U-shape for the head, flattening the top slightly, and add triangular ears. I like to switch colors here—try a dark green for one cat and a rust orange for another. -
Add cat features:
Draw two small dots for eyes and a tiny nose connected to a mouth. Don’t forget whiskers—three short lines on each cheek give them personality. -
Outline the bear faces:
For the bears, draw a wider, rounder shape with small semi-circle ears on top. Use black or dark grey for a classic teddy bear look. -
Detail the bear snouts:
Draw an oval in the lower center of the face for the snout area. Inside, place a solid dark nose and a small line curving down for the mouth. Add small dot eyes above the snout. -
Create the panda:
Draw a similar head shape to the bear but fill the ears in solid black. Add dark patches around the eyes to distinguish it as a panda.
Make it a Mood Tracker
Draw the faces without mouths first. Each day, fill in a face with an expression that matches your mood to create a monthly tracker log.
Step 3: Adding Paw Prints
-
Draw solid paws:
Scattered around the page, draw small solid paw prints. A central rounded triangle with three or four smaller toes above it works perfectly. Use the rust and dark green markers to fill these in completely. -
Draw outline paws:
To add visual variety, draw some paw prints just as outlines without filling them in. Use fine-liners in matching colors (teal, orange, black) for these. -
Vary sizes:
Make some prints slightly larger and others tiny to create depth and interest.
Step 4: Final Details
-
Sprinkle tiny elements:
Look for any awkward empty spaces. Fill these with tiny, simple motifs like miniature leaves, dots, or tiny flowers using your finest pen tip. -
Erase pencil guides:
Wait until the ink is completely dry—give it a few minutes to be safe. Gently erase all your initial pencil sketches to reveal the clean, crisp artwork. -
Assess balance:
Step back and look at the color distribution. If one area looks too heavy with orange or green, add a tiny dot or sprig of the opposing color to balance it out.
Enjoy flipping through your sketchbook to see these happy little faces gazing back at you


Friendly Ghosts and Little Monsters
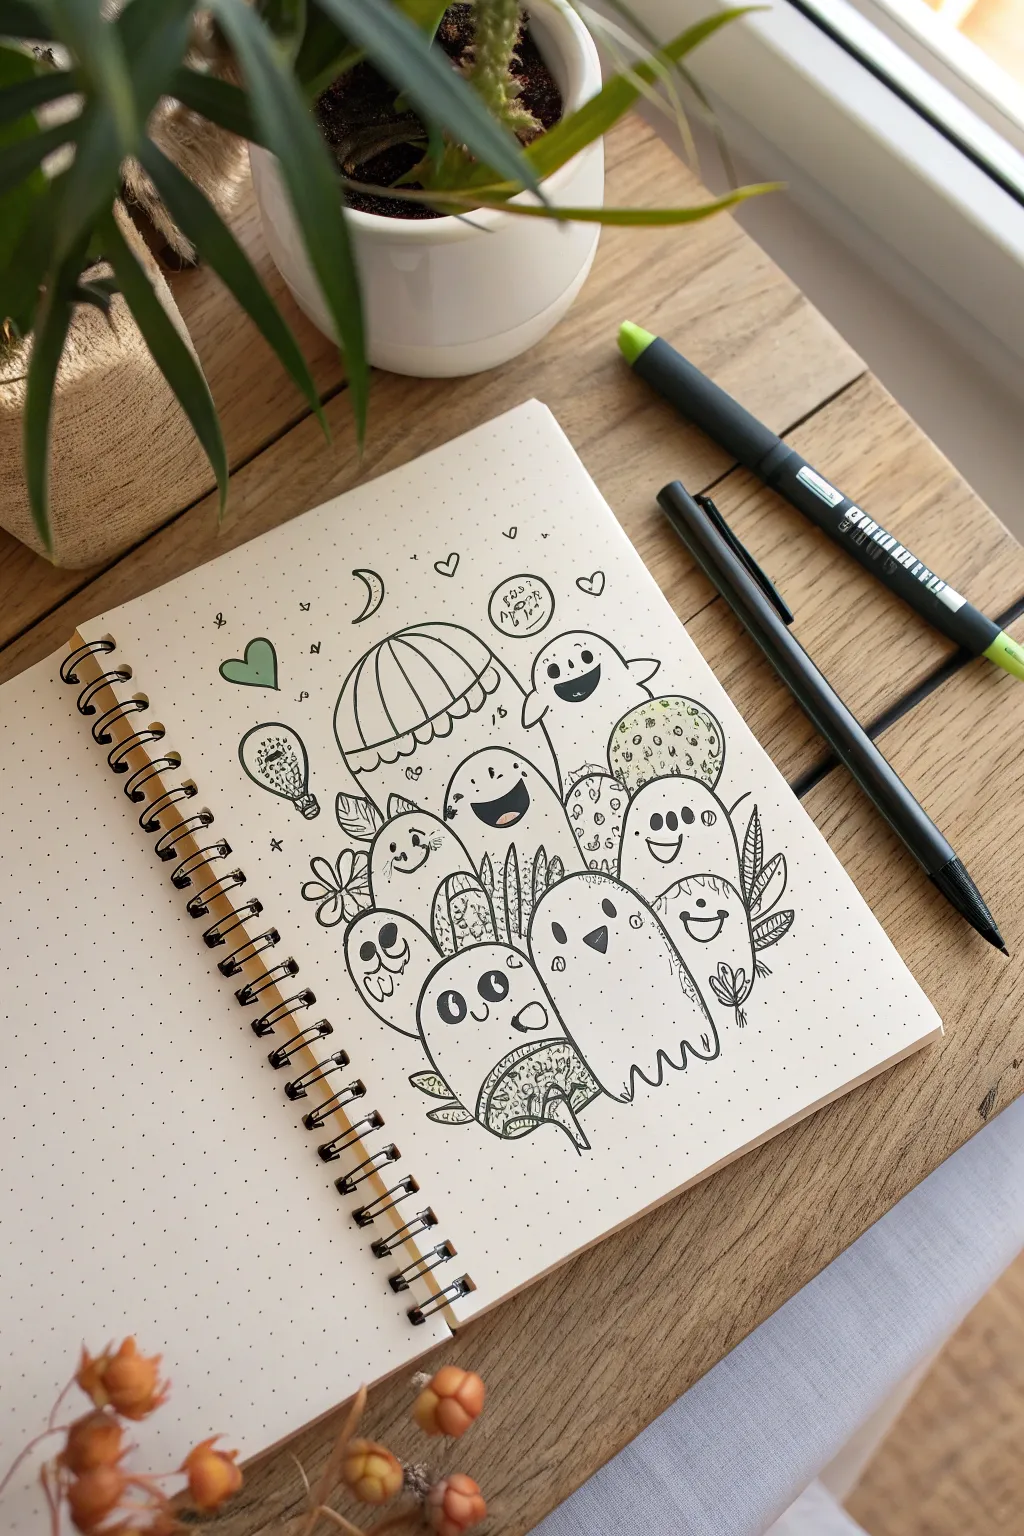

Embrace the spooky-sweet vibes with this charming cluster of rounded ghosts and little monsters drawn in simple black ink. This dottgrid notebook spread features playful characters huddled together, accented with celestial motifs and gentle nature elements for a cozy, not creepy, feel.
How-To Guide
Materials
- Dotted grid notebook or journal
- Fine liner pen (black, 0.3mm or 0.5mm)
- Brush pen or thicker marker (black) for filling areas
- Light green highlighter or pastel marker
- Pencil and eraser (for sketching)
Step 1: Sketching the Composition
-
Map out the shapes:
Start lightly with a pencil. In the center of your page, draw a tight cluster of overlapping oval and gumdrop shapes. These will be the bodies of your ghosts and monsters. Vary the heights to create a dynamic group photo feeling. -
Add the balloon:
Near the top left of your cluster, sketch a large, rounded hot-air balloon shape attached to the group. It should look like it’s floating just behind the characters. -
Fill in the gaps:
Look for empty spaces between your main ghost bodies. Sketch in smaller, partial curves to represent characters peeking out from the back, ensuring the cluster feels dense and cozy.
Smudge Alert
Work from top-left to bottom-right (if right-handed) to avoid dragging your hand through wet ink. If using a gel pen, verify it’s dry before erasing.
Step 2: Inking the Characters
-
Outline the main ghosts:
Using your fine liner, carefully trace over your pencil lines for the ghost bodies. Keep your lines smooth and continuous. For the bottom ghost on the right, draw a wavy, scalloped line for its hem so it looks like a classic sheet ghost. -
Draw the faces:
Giving each character a personality is the best part. I like to mix it up: draw some with wide, open-mouthed smiles and simple dot eyes, and others with happy, curved eyes. Give the large central ghost a big, toothless grin. -
Fill in the darks:
Switch to your thicker marker or brush pen to color inside the open mouths. This high contrast makes the expressions pop instantly against the white paper. -
Detail the Balloon:
Ink the outline of the hot air balloon. Draw vertical stripes down the balloon’s body and add a scalloped edge near the bottom rim.
Make It Yours
Change the accessories to fit the season! Swap the leaves for holly in winter, or turn the floating balloon into a birthday cake for a celebration page.
Step 3: Adding Textures and Nature Elements
-
Doodle the leaves:
In the spaces between the characters, draw small, simple leaves and botanical sprigs. Some can be simple ovals with a center line, while others can be fern-like branches. -
Add character patterns:
Choose two or three characters to give texture. Stipple (add tiny dots) to the top of one ghost’s head, and add small ‘v’ shapes or speckles to the body of another to imply fur or texture. -
The tiny house:
On the bottom-most character, draw a tiny, whimsical mushroom-style house directly on its belly. Using fine lines, add a door, a window, and roof shingles.
Step 4: Atmospheric Details & Color
-
Draw floating elements:
Surround the main cluster with small doodles to fill the white space. Add a crescent moon, a floating heart, tiny sparkles, and a small speech bubble with unintelligible scribbles or a cute phrase. -
Ink the mini balloon:
To the left of the group, draw a miniature hot air balloon floating independently, adding a tiny basket underneath. -
Erase pencil lines:
Once the ink is completely dry—give it a full minute just to be safe—gently erase all your underlying pencil sketches. -
Apply green accents:
Take your light green highlighter. Color in the single floating heart on the left. Then, very selectively, color a few of the textured characters (like the stippled one) and the mushroom house roof. -
Final touches:
Add a few final stray dots or ‘dust motes’ around the perimeter of the drawing to integrate the doodle into the dot grid background.
Now you have a page full of friendly little companions to keep your notes company
Cozy Home Object Doodles


Capture the warmth of a quiet afternoon with these charming line art illustrations. This beginner-friendly sketchbook spread features simple yet elegant household objects drawn in crisp black ink, perfect for practicing perspective and detailing.
Step-by-Step Guide
Materials
- Sketchbook with smooth, heavy paper
- Fine-liner pen (0.3mm or 0.5mm, black)
- Pencil (HB or 2B)
- Soft eraser
- Ruler (optional)
Step 1: Planning and Layout
-
Lightly sketch positions:
Begin with a pencil to map out where each object will live on the page. Place a tall, vertical shape for the lamp in the center, a small square near the top right for the frame, and a rounded pot shape to the right of the lamp. -
Add foliage placeholders:
To the left of the lamp, sketch a simple curved line for the leaf sprig. Inside the pot shape, draw loose, upward-reaching lines to indicate where the plant stems will go.
Step 2: Drawing the Vintage Lamp
-
Outline the lampshade:
Switch to your fine-liner. Draw a trapezoid for the lampshade, keeping the bottom edge wider than the top. Add a slight curve to the bottom line to show roundness. -
Add shade segments:
Draw vertical lines curving slightly with the form of the shade, creating panels. These don’t have to be perfectly spaced; a sketchy quality adds character. -
Create the fringe detail:
At the bottom edge of the shade, add a band of decorative patterns. Draw tiny scallops or loops, followed by short, vertical strokes to mimic hanging fringe or tassels. -
Draw the lamp stand:
Draw a central vertical line for reference, then sketch the lamp’s neck and body. Use bulbous, turning wood shapes—narrow at the neck, widening at the base. -
Finish the base:
Anchor the lamp with a wide, tiered base. Draw concentric oval shapes at the bottom to give it stability and dimension.
Keeping Ink Clean
Place a scrap piece of paper under your drawing hand as you work. This prevents oils from your skin transferring to the paper and stops you from smudging wet ink.
Step 3: Drawing the Decorative Frame
-
Structure the frame:
Define the outer rectangle of the picture frame first, then draw a smaller rectangle inside it to create the matting and border. -
Mitred corners:
Connect the corners of the inner rectangle to the outer rectangle with diagonal lines to suggest a wooden frame construction. -
Insert the artwork:
In the center space, doodle a tiny, simple botanical sprig. Keep it minimal—just a stem with a few small leaves.
Add Texture
Use stippling (tiny dots) on the shaded side of the lamp base or inside the pot to create simple, effective shadows without needing grey markers.
Step 4: Drawing the Potted Plant
-
Define the pot:
Ink the outline of the pot. Give it a slightly cylindrical shape that tapers toward the bottom, ensuring the rim is an open oval. -
Stripe pattern:
Decorate the pot with horizontal stripes. Follow the curvature of the bottom of the pot with your lines to reinforce the 3D rounded form. -
Grow the stems:
Draw multiple stems emerging from the pot’s opening. Vary their lengths and directions for a natural look. -
Leaf details:
Add small, oval-shaped leaves along the stems. Cluster them slightly denser near the tips of the branches.
Step 5: Finishing Touches
-
Left-side foliage:
Return to the far left doodle. Ink a single, elegant stem that curves gracefully. Add pairs of larger, veined leaves symmetrical along the stem. -
Erase guidelines:
Once the ink is completely dry (give it a full minute just to be safe), gently erase all your initial pencil sketches. -
Refine lines:
Look over your work. You can thicken the outer contours of the objects slightly to make them pop off the page more distinctively.
Now you have a cozy collection of home accents permanently preserved in your sketchbook


Have a question or want to share your own experience? I'd love to hear from you in the comments below!