If you’re craving fresh Easter face painting inspiration, I’ve got you—think bunnies, chicks, and sweet little Easter eggs in the prettiest spring shades. These ideas range from super-quick party designs to more detailed “wow” looks you can take your time with.
Classic Full-Face Easter Bunny Mask
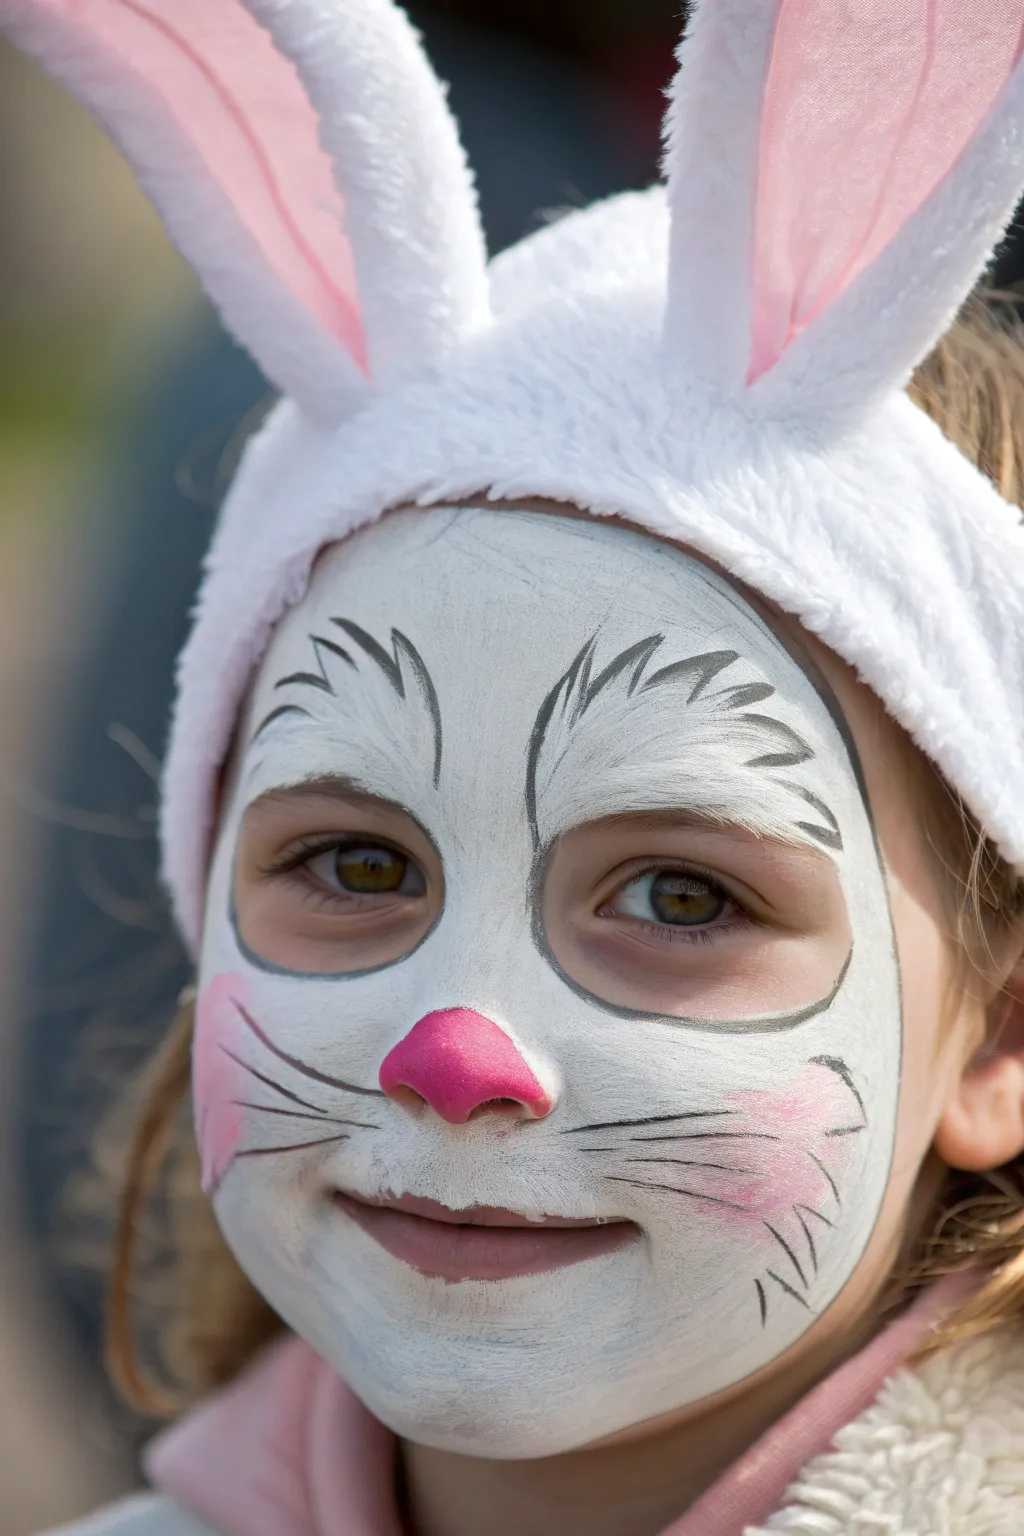
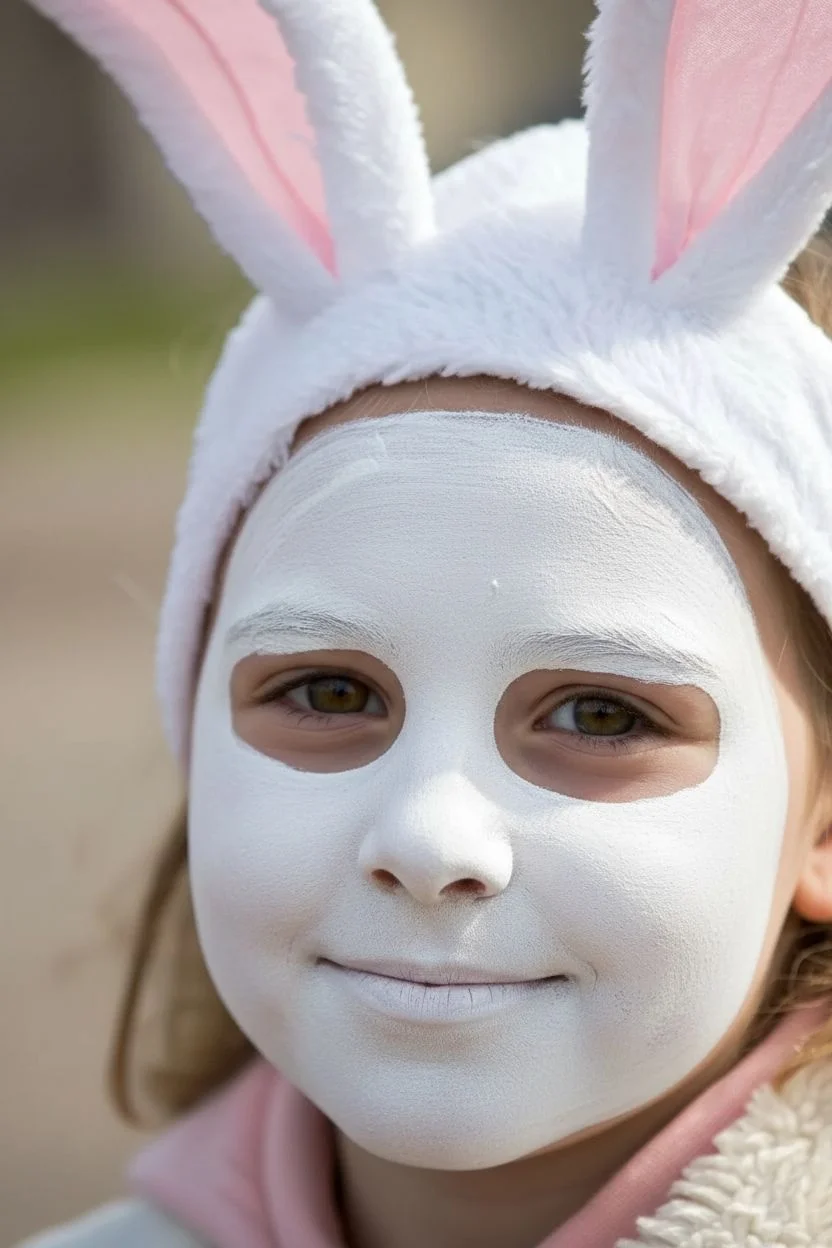
Transform little ones into the Easter Bunny with this classic, full-face design featuring soft fur textures and sweet pink details. The finished look pairs perfectly with fluffy ears for a complete holiday costume.
Step-by-Step Guide
Materials
- White face paint (water-activated)
- Pink face paint (bright rose tone)
- Black face paint (for outlining)
- High-density face painting sponge
- Round brush (size 3 or 4)
- Fine liner brush (size 0 or 1)
- Small cup of water
- Soft towel for mistakes
Step 1: The Base Layer
-
Outline the Shape:
Visualize a mask shape that covers the forehead, circles under the eyes, and covers the nose, upper lip, and chin. Using a slightly damp sponge loaded with white paint, pat out the perimeter of this shape first. -
Fill in with White:
Continuing with your sponge, fill in the entire mask area with an opaque layer of white. Use a stippling motion (rapid tapping) rather than dragging the sponge to get a solid, even finish without streaks. -
Clean the Edges:
While the paint is still damp, wipe away any stray marks outside your desired mask shape with a wet wipe or damp cloth to keep the silhouette clean. -
Smooth the Coverage:
Check for any patchy areas where skin shows through. Lightly dab a second layer of white over the nose and cheeks if needed to ensure bright, solid coverage.
Patchy White Paint?
If the white base looks streaky, your sponge is likely too wet. Squeeze it out thoroughly, load more paint until it feels tacky, and stipple over the streaks.
Step 2: Adding Features & Details
-
Create the Pink Nose:
Load a round brush with bright pink paint. Paint a rounded triangle shape on the tip of the nose, extending slightly onto the nostrils. -
Rosy Cheeks:
Clean your sponge or use a fresh corner with a very small amount of pink paint. Gently dab soft, diffused pink circles on the apples of the cheeks, blending the edges into the white base. -
Outline the Eyes:
Switch to a thin round brush with black paint. Carefully draw a thin line under the lower eyelid, extending slightly outward at the corners. -
Draw the Arches:
Paint two large, dramatic arches above the eyebrows using black paint. These should start near the inner eye corner and curve high onto the forehead. -
Add Fur Texture to Brows:
Along the top of your black arches, use quick, flicking brushstrokes to create small triangles or spikes that mimic tufts of fur. -
Define the Muzzle:
With your fine liner brush and black paint, draw a vertical line from the base of the nose to the center of the upper lip. -
Outline the Mouth:
Paint the upper lip with a soft pink or follow the child’s natural lip line with a thin black outline, curving the corners up slightly for a smile.
Step 3: Finishing Touches
-
Add Whiskers:
Using the fine liner brush and black paint, draw three long, sweeping whiskers on each cheek, starting from the muzzle area and flicking outward towards the ears. -
Create Whisker Pores:
Add a few small black dots on the white muzzle area, right where the whiskers originate. -
Detail the Cheeks:
Use the liner brush to add small, jagged fur details along the lower outer edges of the cheeks to give the mask a more organic, furry appearance. -
Highlight the Nose:
I like to take a tiny dot of white paint and place it on the upper curve of the pink nose to create a ‘shiny’ highlight effect. -
Final Dry Time:
Ask the model to keep their face relatively still for about one minute to ensure the fine black lines dry completely without smudging.
Add Some Sparkle
Before the white paint dries completely, sprinkle a pinch of cosmetic-grade iridescent glitter over the cheeks and forehead for a magical, shimmering bunny look.
Now just add a pair of fuzzy ears and your adorable bunny is ready for the egg hunt


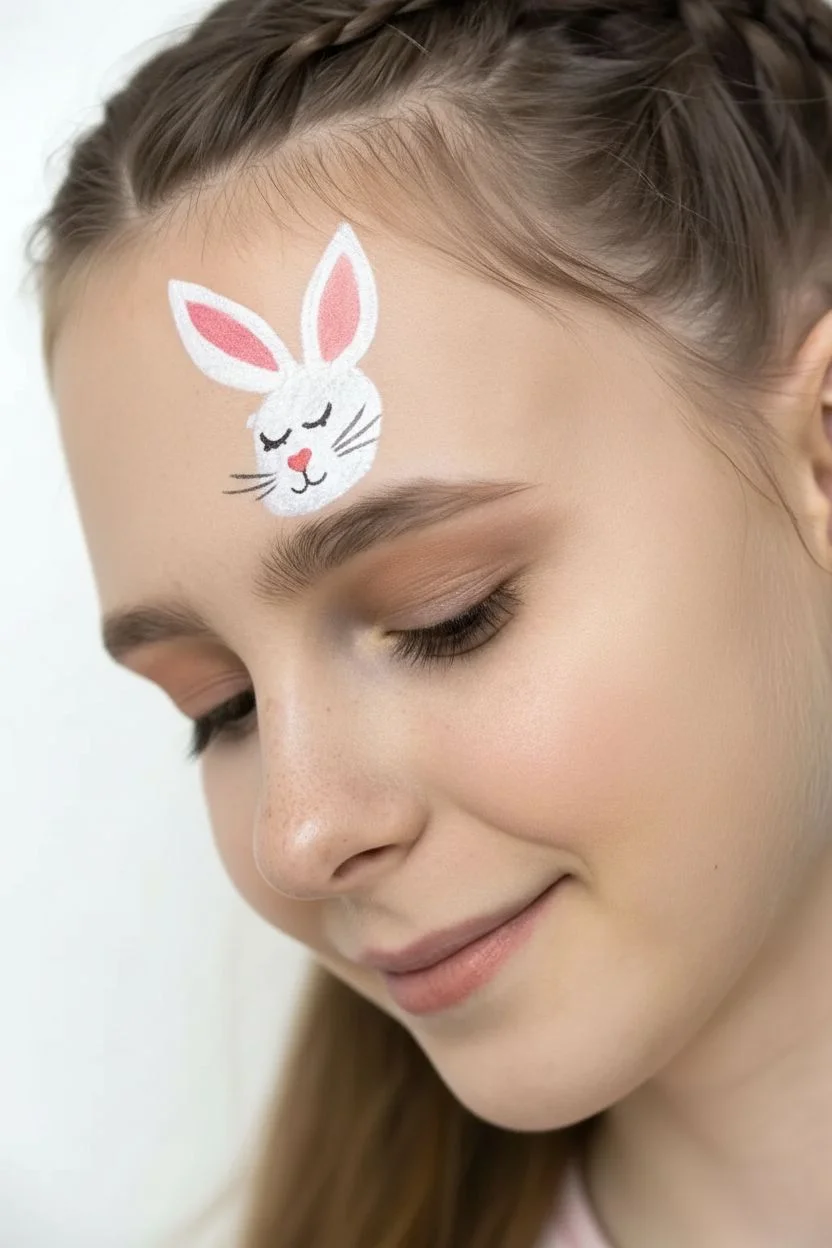
Quick Bunny Nose, Buck Teeth, and Whiskers
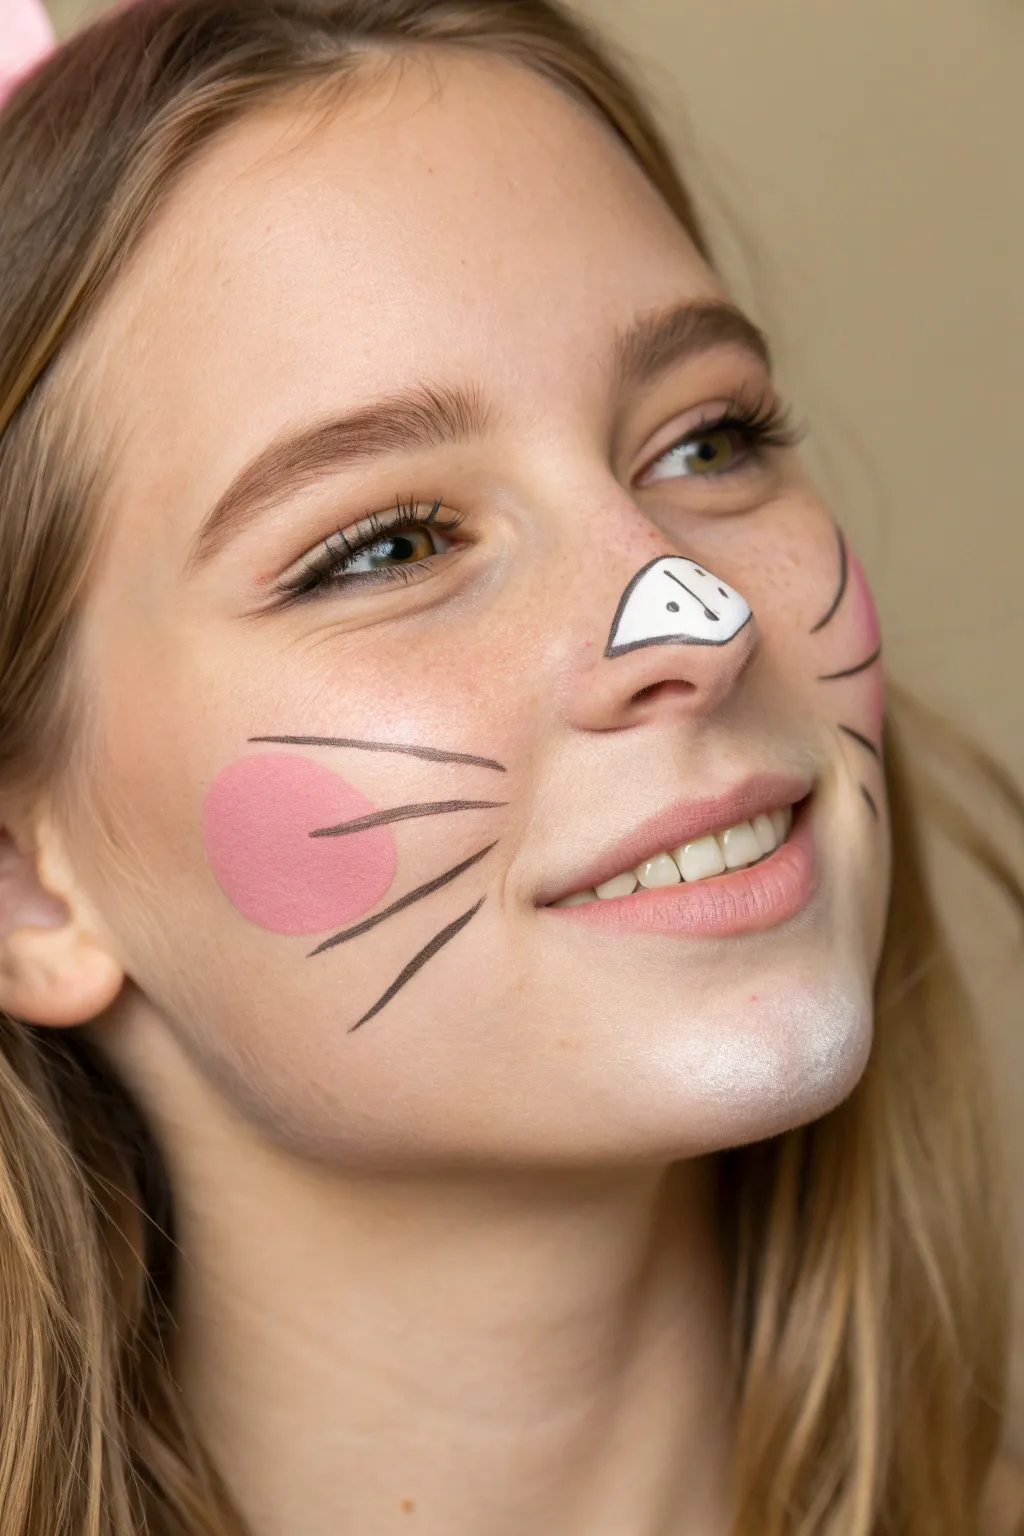
Transform into an adorable bunny in minutes with this easy-to-follow face painting guide. This design features classic pink cheeks, crisp black whiskers, and a cute button nose that perfectly captures the Easter spirit.
How-To Guide
Materials
- White face paint (water-activated)
- Pink face paint or blush
- Black face paint (water-activated) or black eyeliner pencil
- Round synthetic brush (size 2 or 4)
- Fine liner brush (size 0 or 1)
- Makeup sponge
- Cup of water
- Paper towels
Step 1: Rosy Cheeks & Chin
-
Prep the sponge:
Begin by dampening a makeup sponge slightly and loading it with a soft pink face paint. Alternatively, if you have a cream blush, that works beautifully too. -
Create the cheek circles:
Gently press the pink-loaded sponge onto the apple of the cheek to create a distinct, round circle. Repeat this on the other cheek, trying to keep them symmetrical. -
Soften the edges:
If the circle feels too harsh, lightly tap the edges with a clean corner of the sponge to blend it just a tiny bit into the skin while keeping the round shape defined. -
Highlight the chin:
Load a clean section of your sponge with white face paint. Looking at the chin area, dab a soft, cloudy patch of white right in the center to mimic a fluffy bunny chin. -
Blend the chin highlight:
Gently tap the edges of the white patch on the chin so it fades naturally into the skin tone rather than looking like a solid block.
Wobbly Lines?
Rest your pinky finger on the model’s chin or cheek (use a dry spot!) to anchor your hand. This stabilizes your brush for crisp, confident whiskers.
Step 2: The Bunny Nose
-
Outline the nose shape:
Using a size 2 round brush loaded with white paint, paint a rounded triangular shape on the tip of the nose. The top should curve over the bridge slightly, and the bottom should sit just above the nostrils. -
Fill it in:
Fill the shape completely with the white paint. You might need a second coat for opacity, but I like to let the first layer dry for about 30 seconds before adding more. -
Outline in black:
Switch to your fine liner brush and black paint. Carefully trace the outer edge of the white nose shape with a thin, steady line to define it. -
Add nose details:
Inside the white nose area, paint two tiny vertical tick marks or dots near the top center. Then, add a small vertical line at the bottom center of the nose shape to suggest the cleft.
Pro Tip: Whisker Flow
For the sharpest whiskers, mix your black paint to an ink-like consistency. Too much water makes it drip; too little makes the brush drag and skip.
Step 3: Whiskers & Details
-
Plan the whisker placement:
Visualize where your whiskers will go. They should start from the outer edge of the pink cheek circles and flare outwards across the cheekbone. -
Paint the top whisker:
Using the fine liner brush loaded with inky black paint (make sure it’s not too watery), paint a long, thin stroke starting from the pink circle and sweeping outward toward the ear. -
Paint the middle whisker:
Paint a second line just below the first, angling it slightly more downward so they fan out. -
Paint the bottom whisker:
Add the third whisker below the middle one, angling it down towards the jawline to complete the fan shape. -
Taper the ends:
As you finish each whisker stroke, lift the brush pressure quickly at the end to create a sharp, tapered point rather than a blunt stop. -
Repeat on the other side:
Paint the three corresponding whiskers on the opposite cheek, aiming for symmetry in length and angle. -
Add floating whiskers:
For extra detail, you can add two smaller, curved black lines further back on the cheek near the ear if you want to extend the look, though the main three are essential. -
Final check:
Step back and check for balance. If any black lines look faint, carefully go over them one last time to ensure they are bold and crisp.
Now you have a charming bunny face ready for any egg hunt or spring celebration


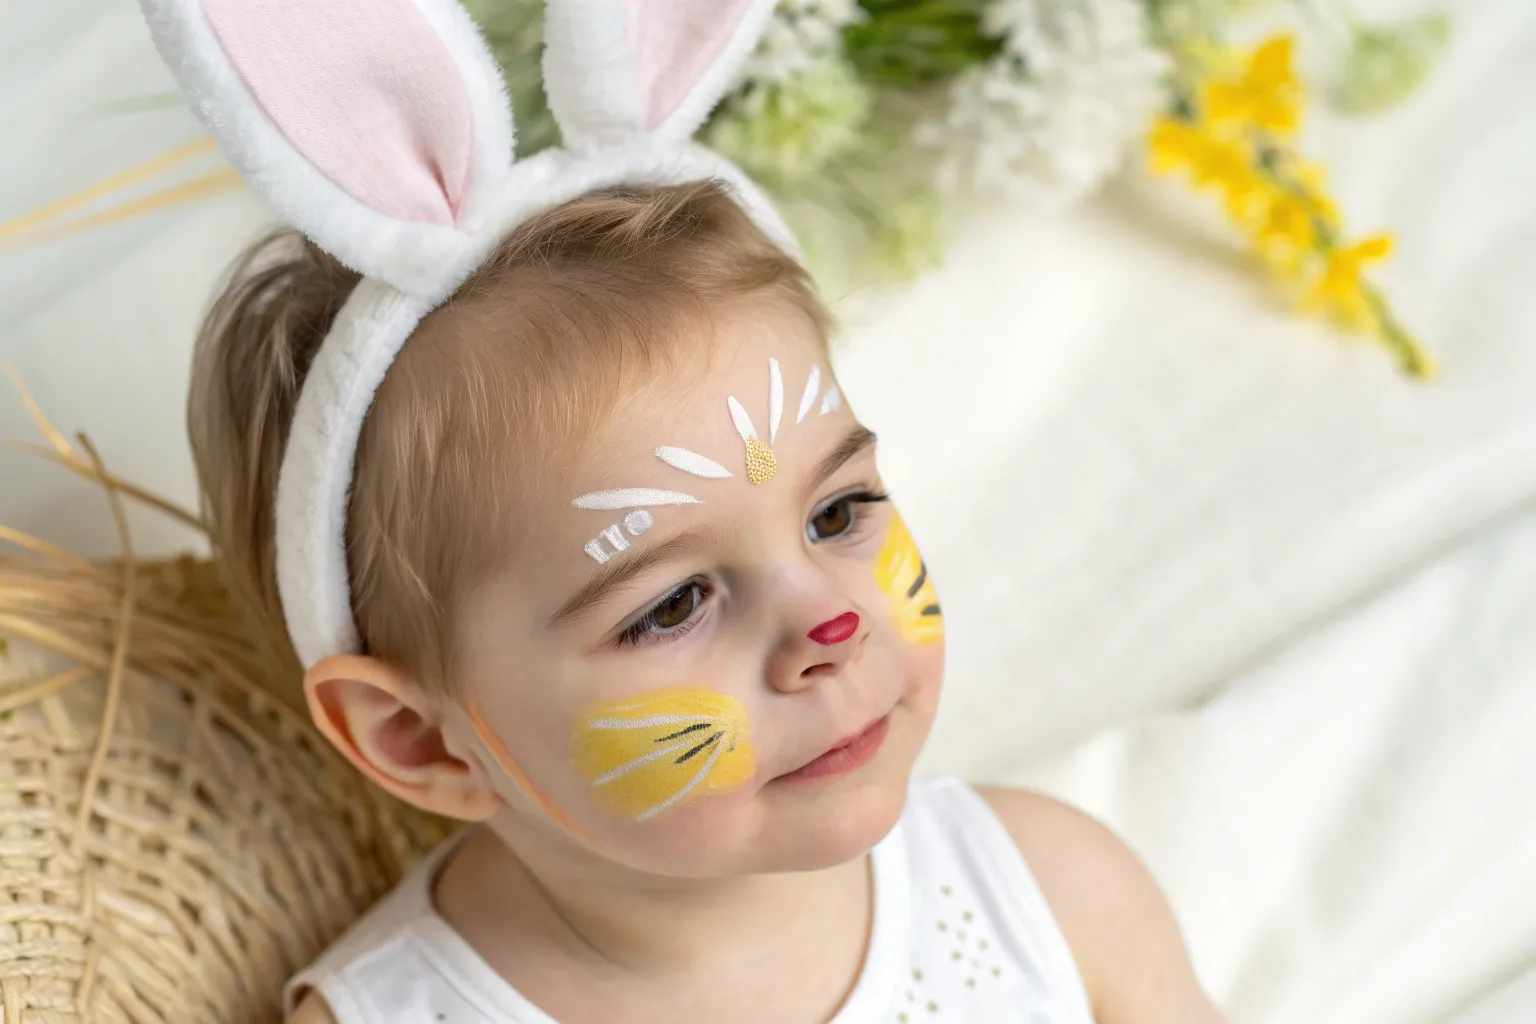
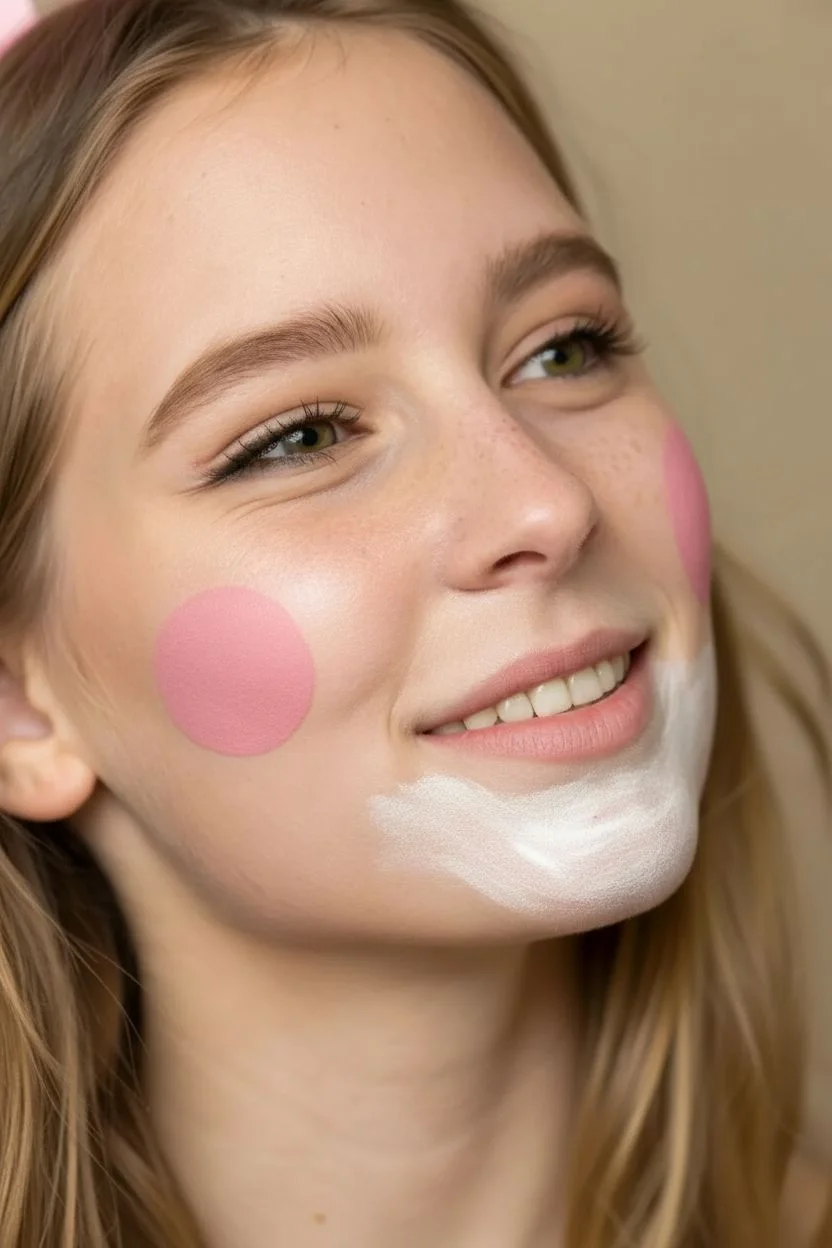
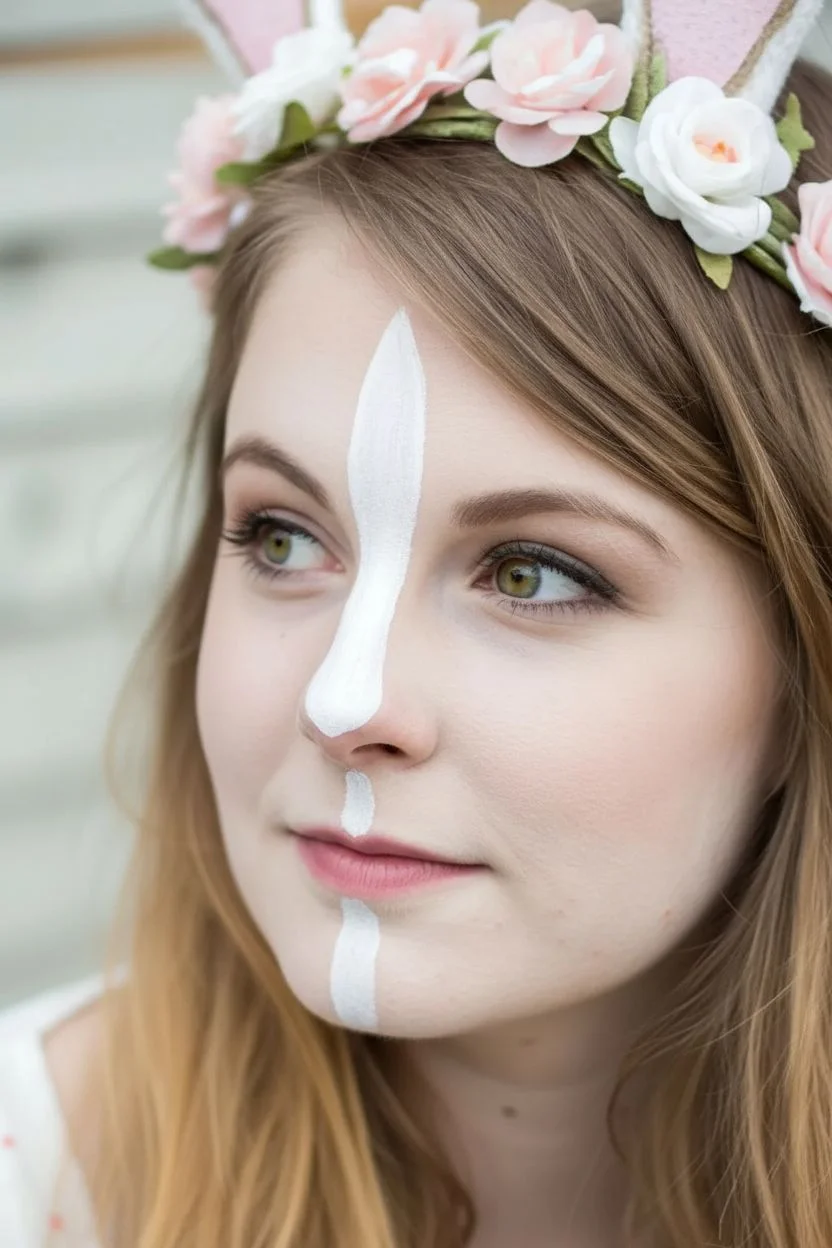
Bunny Cheeks With Blushy Pastel Highlights
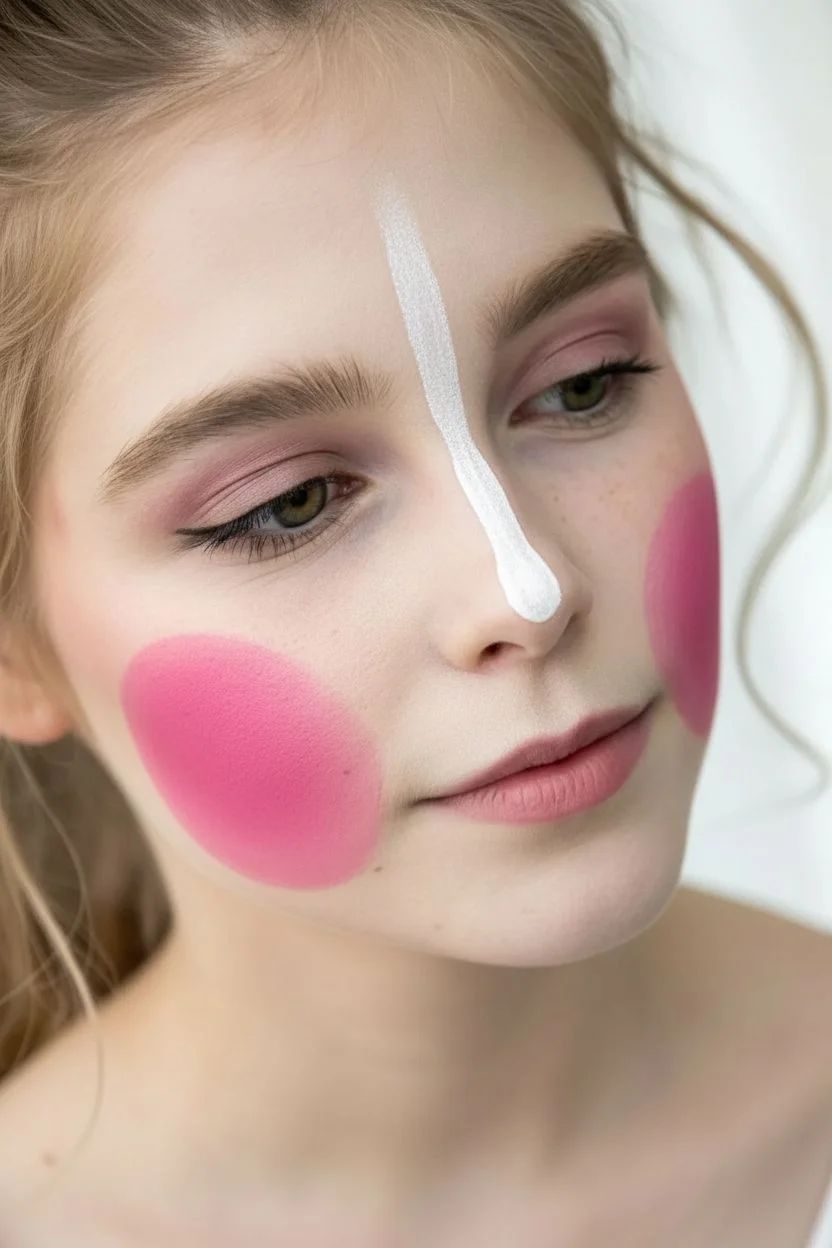
Transform into the sweetest Easter bunny with this delicate and dreamy face paint design. This look focuses on soft, rosy cheeks and whimsical details, creating an angelic bunny appearance perfect for spring celebrations.
Step-by-Step
Materials
- White face paint
- pale pink face paint
- Soft pink blush (powder or cream)
- Black face paint or fine eyeliner pen
- Makeup sponges or blush brush
- Fine round brush (size 1 or 2)
- Medium round brush (size 4)
- Pink eyeshadow
- Setting spray (optional)
Step 1: Base & Blush
-
Prep the skin:
Start with a clean, dry face. If the skin is dry, apply a very light moisturizer and let it absorb fully before beginning the painting process. -
Apply eye makeup:
Using a soft eyeshadow brush, sweep a gentle pink eyeshadow across the eyelids. Blend it slightly upward toward the brow bone for a soft, diffused look. -
Create the rosy cheeks:
Load a blush brush or sponge with soft pink blush. Apply it generously to the apples of the cheeks, blending outwards towards the temples. You want a distinct, round flush that serves as the background for the whiskers. -
Highlight the nose bridge:
Using a makeup sponge or your finger, lightly dab a bit of white paint down the center of the nose bridge to create a subtle highlight before the linework begins.
Soft Focus Tip
Use a damp makeup sponge to pat over the white nose stripe immediately after painting it. This removes hard edges and creates a fur-like softness.
Step 2: Bunny Features
-
Paint the nose bridge:
Take a medium round brush loaded with creamy white paint. Draw a single stroke starting from between the eyes and ending just above the tip of the nose. -
Blend the nose highlight:
Before the white paint dries completely, tap the edges gently with a clean finger or sponge to soften the line, integrating it with the skin. -
Create the bunny nose:
Dip a small round brush into black face paint. Carefully paint just the very tip of the nose, creating a soft inverted triangle or oval shape. -
Texture the nose:
For a realistic touch, dab the black paint lightly to create a slightly textured, animal-skin effect rather than a solid block of color. -
Add the whiskers:
Using a fine liner brush and black paint (or a liquid eyeliner pen for precision), draw three thin whiskers on each cheek. Start from the center of the cheek and flick outward quickly to get tapered ends.
Add Some Sparkle
Before the white paint on the ears dries, tap on some iridescent cosmetic glitter. It adds a magical shimmer that catches the spring sunlight perfectly.
Step 3: Forehead Ears & Details
-
Outline the ears:
Load a medium round brush with white paint. On the forehead above one eyebrow, paint a long, curved tear-drop shape to form the outline of a bunny ear. -
Fill the ear shape:
Repeat on the other side, filling in the white shapes solidly. Ensure the texture looks slightly fluffy by dabbing the edges if desired. -
Add pink centers:
Once the white base is tacky or dry, use a smaller brush with pale pink paint to fill the center of each ear, leaving a distinct white border around the outside. -
Paint cheek spots:
Dip the handle end of a paintbrush into white paint. Gently dot it over the pink blush areas on the cheeks to create whimsical freckles. -
Decorate the forehead:
Add a few more white dots clustered near the base of the bunny ears on the forehead to tie the design together. -
Final touches:
Check for symmetry. I like to step back at this point to ensure the whiskers and ears look balanced, adding small adjustments if needed.
Pair this sweet look with a flower crown or white headband to complete your bunny transformation


Peekaboo Bunny on the Forehead With Spring Flowers
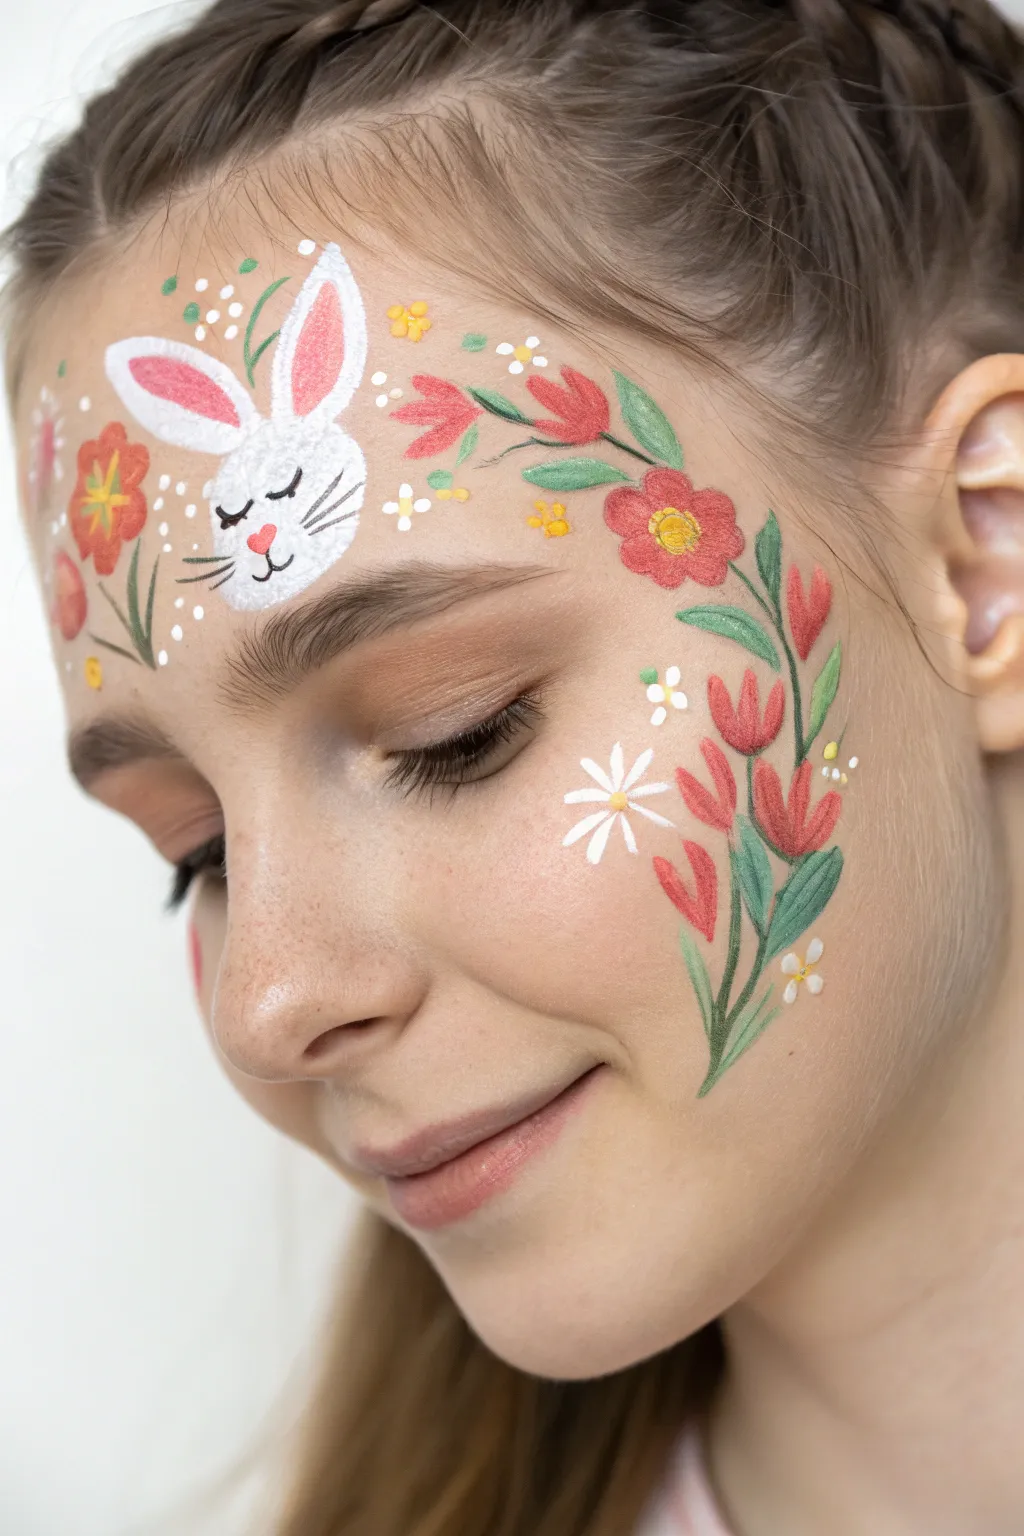
Celebrate Easter with this delicate and whimsical face paint design that frames the face with vibrant blooms and a sweet peekaboo bunny. Soft red tulips and touches of greenery create a floral crown effect that feels fresh and festive.
Step-by-Step Tutorial
Materials
- Face paint pallet (white, light pink, red, black, grassy green, yellow)
- Small round brush (size 2 or 3)
- Medium round brush (size 4 or 5)
- Pointed petal brush or filbert brush
- Water cup
- Paper towels or sponge for cleanup
Step 1: Painting the Bunny
-
Outline the head:
Load your medium round brush with white face paint. Just above the center of the eyebrows, paint a rounded shape for the bunny’s head. It doesn’t need to be a perfect circle; a soft oval works beautifully. -
Add the ears:
Using the same brush, paint two long, petal-shaped ears extending upwards from the top of the head. I like to curve one slightly for a bit of personality. -
Inner ear details:
Switch to a smaller round brush and load it with light pink paint. Carefully fill in the center of each ear, leaving a clean white border around the edges. -
Bunny face features:
With a fine detail brush and black paint, draw two small curved lines for closed, sleeping eyes with tiny eyelashes. Add three thin whiskers on the right cheek. -
Finishing the nose:
Clean your detail brush and pick up a tiny amount of red or dark pink. Paint a small heart or triangle for the nose right between the eyes and add a little curved mouth line below it.
Step 2: Creating the Floral Swoops
-
Tulip placement:
Load a petal brush or medium round brush with red paint. Start on the left temple (viewer’s left) and press down to create teardrop shapes that meet at a point, forming a tulip bud. -
Right side flourish:
Move to the right side of the face. Paint a series of red tulips flowing from the eyebrow area down toward the cheekbone. Vary the sizes, making the ones near the temple slightly larger. -
Adding definition:
Mix a tiny bit of white into your red to create a softer pink-red highlight. Add a quick streak to the center of each tulip petal to give them dimension and roundness. -
Yellow centers:
For the open flowers, dab a small yellow circle in the center using the tip of a round brush. You can dot a tiny bit of white in the middle of the yellow for extra sparkle.
Fixing Smudges
If black lines smudge onto white areas, wait for it to fully dry. Then, use a damp Q-tip to lift the mistake before repainting with white.
Step 3: Leaves and Vines
-
Greenery stems:
Load a thin round brush with grassy green paint. Connect your red flowers with sweeping, thin vine lines. Let the lines flow naturally along the curve of the temple and cheek. -
Leaf details:
Press your brush down harder and lift quickly to create pointed leaves attached to the vines. Nestle them between the flowers to fill any gaps. -
Adding contrast:
If you have a darker green, add a thin line down the center or one side of the larger leaves to imply a vein and create depth.
Pro Tip: Tear Drops
For perfect leaves, practice the ‘press and lift’ technique on your arm first. Heavy pressure makes the base; lifting creates the sharp tip.
Step 4: Magical Accents
-
Daisy accents:
Using white paint and a small round brush, add a simple five-petal daisy on the cheek amongst the red flowers. Put a yellow dot in the center. -
Tiny filler flowers:
Scatter groups of three small yellow dots around the forehead area to mimic tiny wildflowers or pollen. -
Snowflakes or stars:
Paint tiny white asterisks or stars near the bunny and scattered around the floral design to add a magical, sparkling touch. -
The final dots:
Finish by adding clusters of tiny white dots—groups of three work best—around the perimeter of the design to soften the edges and bring everything together.
Now you have a bouncy bunny design perfect for an Easter parade or spring picnic
BRUSH GUIDE
The Right Brush for Every Stroke
From clean lines to bold texture — master brush choice, stroke control, and essential techniques.
Explore the Full Guide
Sunny Easter Chick Beak-and-Cheeks Design
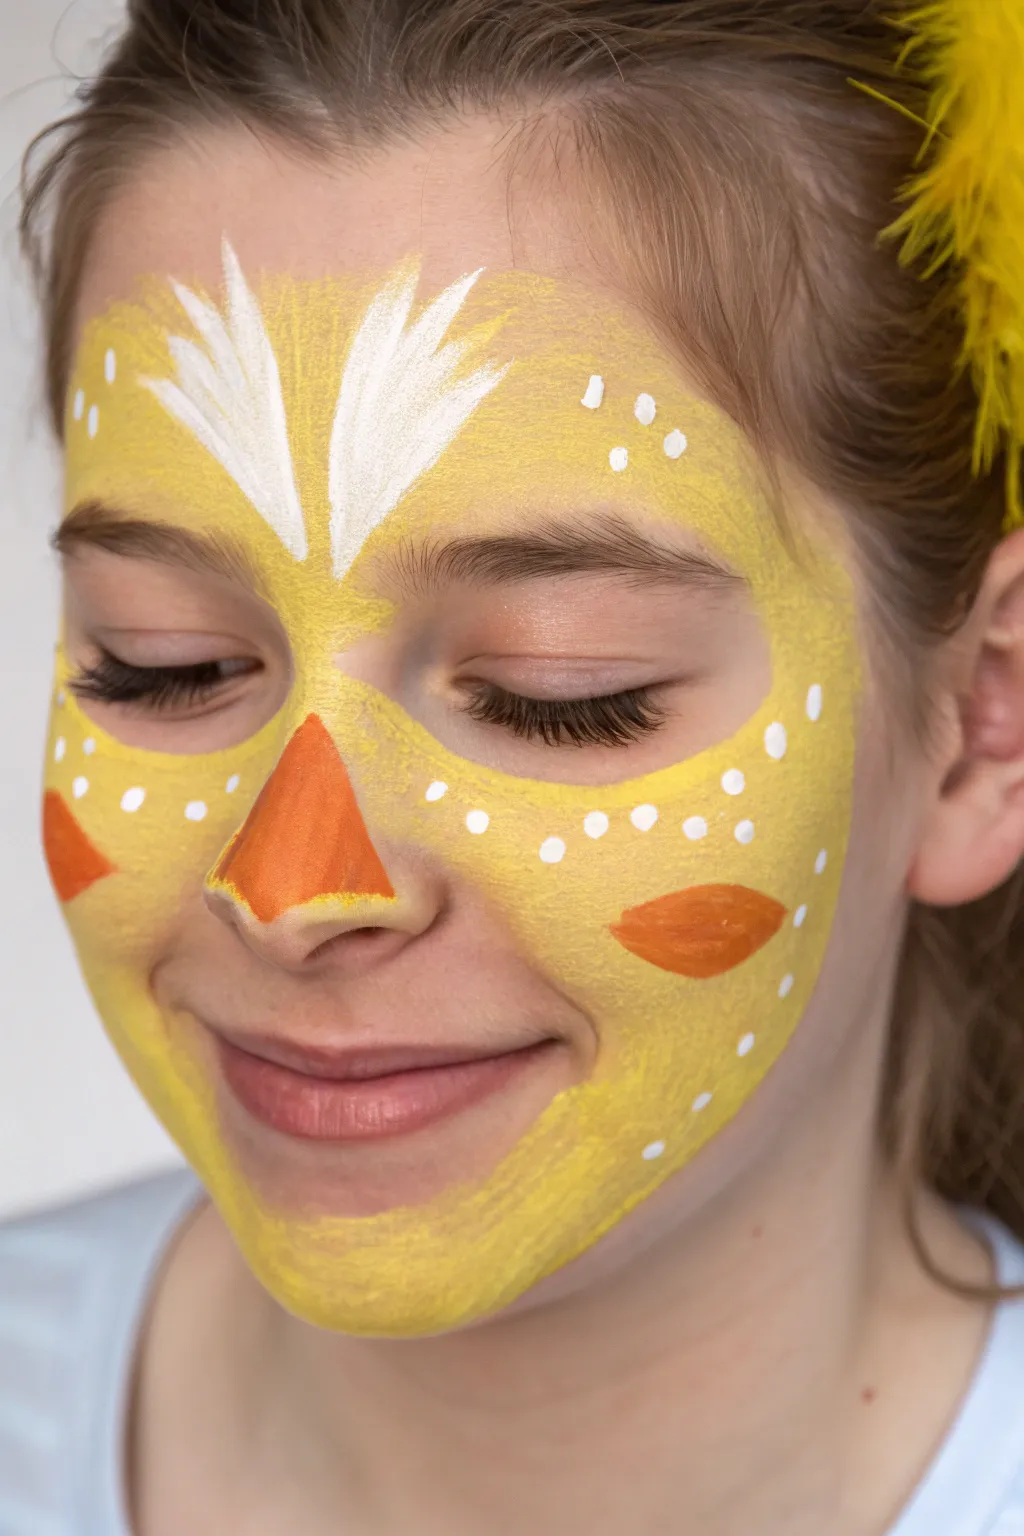
Transform a little face into a cheerful spring chick with this bright and relatively simple face painting design. It features a bold yellow mask, fluffy white forehead feathers, and cute geometric orange accents for a playful Easter look.
How-To Guide
Materials
- High-quality face paint: Bright Yellow
- High-quality face paint: White
- High-quality face paint: Bright Orange
- Face painting sponge (high density)
- Medium flat brush (approx. size 6 or 8)
- Small round detail brush (size 2 or 3)
- Cup of clean water
- Paper towels or cloth
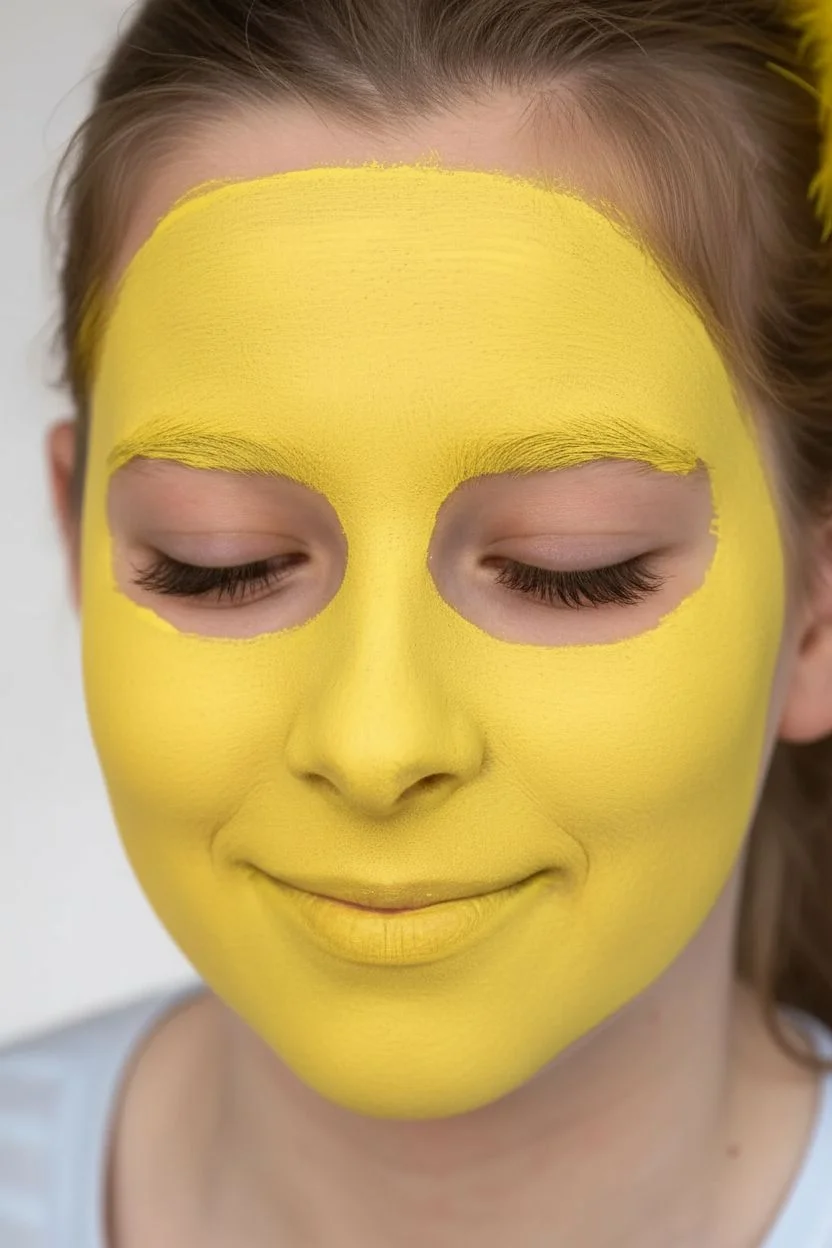
Step 1: Laying the Golden Base
-
Prepare the sponge:
Dampen your high-density sponge slightly and swirl it into the bright yellow face paint to build up a creamy, opaque consistency. -
Map the forehead:
Start by dabbing the yellow paint across the entire forehead, extending from temple to temple. Keep the top edge somewhat organic or rounded. -
Cover the eyes and cheeks:
Continue sponging the yellow paint gently down over the eyelids (ask the model to close their eyes softly) and across both cheeks. -
Define the lower edge:
Bring the yellow sponge down to cover the nose and the area just above the upper lip. Shape the bottom edge along the jawline and chin, rounding it off for a soft, mask-like effect rather than painting the entire neck. -
Smooth the coverage:
Go back over any patchy areas with the sponge to ensure a solid, even coat of yellow. The texture should look soft and consistent.
Step 2: Feathering the Forehead
-
Load the flat brush:
Rinse your brush or grab a clean medium flat brush. Load it well with white face paint, ensuring the bristles are coated but not dripping. -
Start the center feathers:
Position the brush right between the eyebrows. I like to press down and flick upward and outward to create two distinct, fluffy wing-like shapes. -
Fill the feather shapes:
Use the flat edge of the brush to fill in these white shapes, making them opaque against the yellow background. They should curve outward toward the temples. -
Add texture:
Using the very tip or edge of the brush, add little jagged flick marks on the top edges of the white shapes to simulate the texture of feathers.
Uneven Yellow Base?
Yellow can be notoriously sheer. If it looks streaky, let the first layer dry completely before dabbing (not dragging) a second layer on top.
Step 3: Adding the Beak & Cheeks
-
Paint the nose triangle:
Switch to a clean brush loaded with bright orange paint. Paint a distinct triangle shape directly onto the nose tip, with the point travelling up the bridge of the nose. -
Refine the beak:
Fill in the orange triangle completely. Ensure the bottom edge sits just above the nostrils for comfort. -
Create cheek markings:
On the apple of each cheek, paint a horizontal, elongated diamond or leaf shape using the same orange paint. These act as stylistic rosy cheeks. -
Balance the placement:
Step back for a second to meaningful check that the cheek markings are roughly symmetrical on either side of the face.
Add Some Sparkle
While the paint is still slightly damp, puff a tiny bit of cosmetic-grade iridescent glitter over the white feather area for a magical finish.
Step 4: Dotted Details
-
Switch to the detail brush:
Load your smallest round detail brush with fresh white paint. The consistency should be inky to get clean dots. -
Dot the cheeks:
Add a series of small white dots across the cheeks and nose bridge area. Vary the spacing slightly to keep it looking playful. -
Highlight the forehead:
Place a few scattered white dots above the eyebrow area on the yellow background to mimic light catching on feathers. -
Decorate the perimeter:
Finish by adding a few final dots near the outer edges of the mask shape on the temples and chin for a completed, whimsical look. -
Final check:
Look over the design one last time. If the orange beak needs a second coat for vibrancy, add it now before the child runs off to play.
This sunny design is sure to bring a smile to everyone’s face on Easter morning
Tiny Chick Badge on One Cheek
Brighten up any spring celebration with this adorable, simple chick face paint design. This sweet little badge sits perfectly on one cheek, surrounded by playful purple polka dots for a festive Easter look.
Step-by-Step Guide
Materials
- High-quality face paint palette (Yellow, White, Orange, Black, Purple)
- Round synthetic brush (size 4 or 6)
- Fine liner brush (size 0 or 1)
- Small cup of clean water
- High-density sponge (optional, for dabbed background)
- Biodegradable glitter (optional)
Step 1: Painting the Chick Base
-
Outline the shape:
Dip your medium round brush into the white face paint. On the fleshy apple of the cheek, draw a bold white outline in the shape of a fat teardrop or egg. -
Add the tuft:
At the very top of your white outline, add three small points to create the little tuft of feathers on the chick’s head. -
Fill with yellow:
Clean your brush thoroughly and load it with bright yellow paint. Carefully fill inside the white outline, leaving the white border visible. -
Create the wings:
Using the same yellow, paint a small, curved triangle shape on the right side of the chick’s body to suggest a tiny wing flapping. -
Smooth the texture:
If the yellow looks streaky, I like to gently dab it with a slightly damp sponge or finger to create a softer, almost fluffy texture.
Step 2: Adding Features and Details
-
Paint the beak:
Switch to a smaller brush or the tip of your round brush. Load it with orange paint and place a small, sideways triangle in the center of the face for the beak. -
Add polka dots:
While you have the orange paint, add three small dots near the bottom of the chick’s belly to represent texture or feathers. -
Draw the eyes:
Using your fine liner brush and black paint, draw two small ovals just above the beak. Make them lean slightly inward for a cute expression. -
Add eye highlights:
This is the magic step. Dip the very tip of a clean thin brush—or use the non-brush end—into white paint and place a tiny dot inside each black eye oval. -
Define the outline:
Go back over your initial white outline if it got smudged by the yellow. A crisp, thick white border really makes this design pop.
Clean Edges Secret
Use a wet wipe wrapped tightly around your finger to clean up any wobbly edges on your white background before filling it with yellow.
Step 3: The Decorative Background
-
Prepare the purple:
Load a medium round brush with a soft lilac or purple paint. Ensure the consistency is creamy, not too watery, to prevent drips. -
Place the main dots:
Press the tip of the round brush gently onto the skin to create perfect circles. Place 4-5 dots randomly floating around the chick. -
Vary dot sizes:
Reload your brush with slightly less pressure to create smaller dots in the gaps between the larger ones, filling out the halo effect. -
Balance the composition:
Step back slightly to check the balance. Add a dot or two near the cheekbone or jawline to ensure the chick feels centered within the pattern. -
Optional glitter:
Before the purple dots fully dry, you can tap a tiny bit of cosmetic glitter onto them for extra sparkle.
Add an Easter Egg
Instead of purple dots, paint tiny colorful oval shapes around the chick to make it look like it’s surrounded by mini Easter eggs.
Now you have a spring-ready design that is sure to bring a smile to everyone’s face

PENCIL GUIDE
Understanding Pencil Grades from H to B
From first sketch to finished drawing — learn pencil grades, line control, and shading techniques.
Explore the Full Guide
Rainbow Arch With a Bunny Silhouette
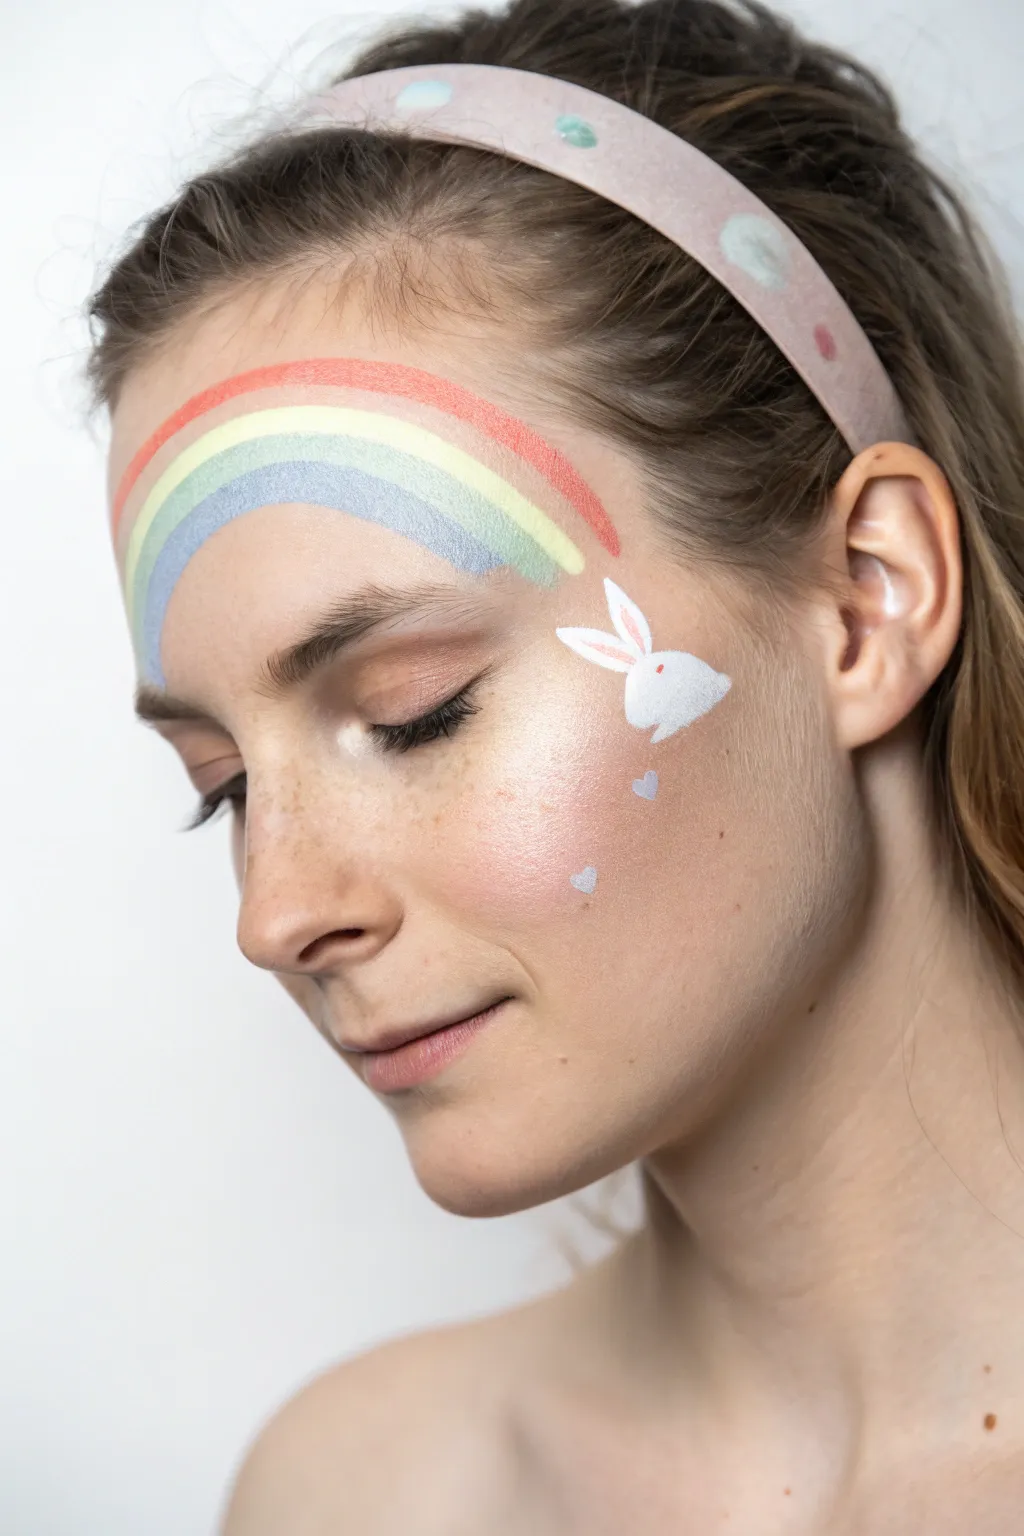
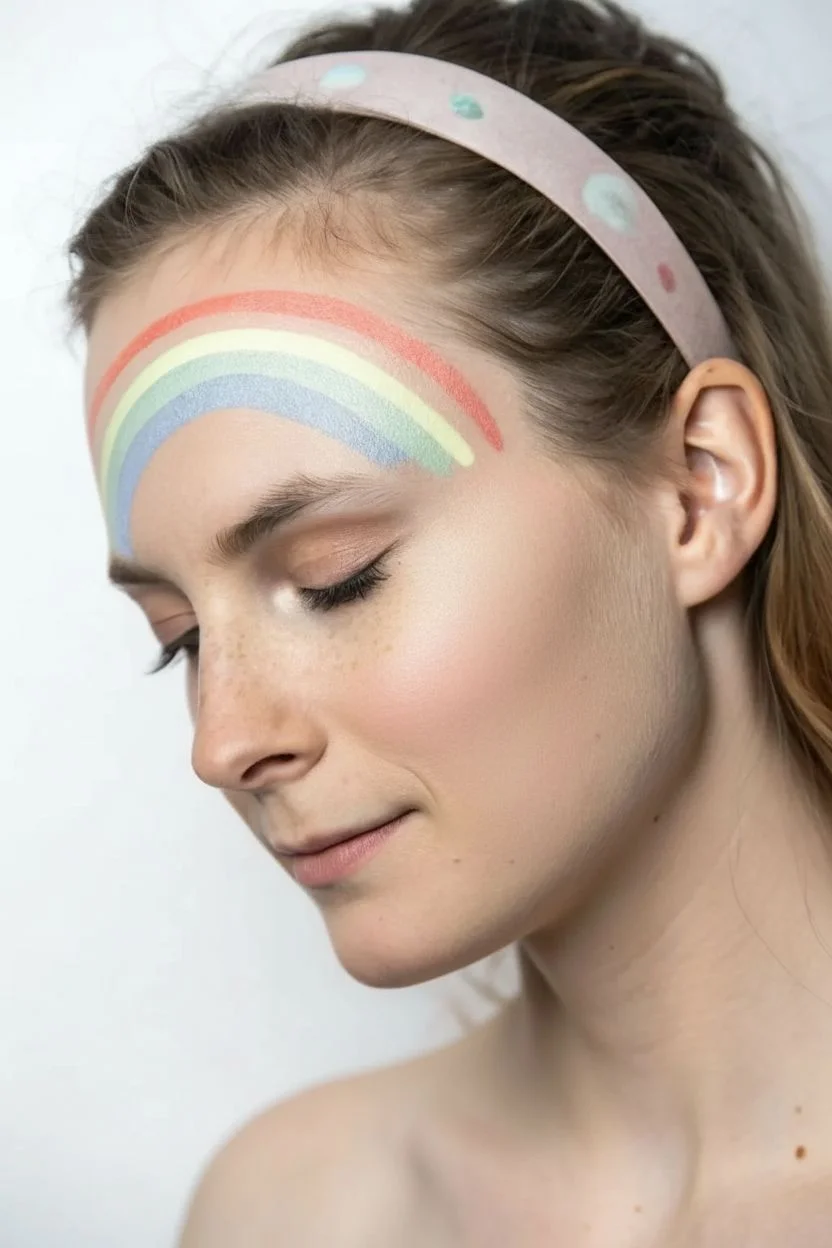
Capture the magic of Easter with this delicate and dreamy design featuring a soft rainbow arch and a charming bunny silhouette. It’s a perfect balance of color and elegance, ideal for spring festivals or holiday photos.
How-To Guide
Materials
- Face paint split cake (rainbow spectrum: red, orange, yellow, green, blue)
- White highly pigmented face paint
- Flat brush (3/4 inch or 1 inch)
- Small round brush (size 2 or 3)
- Detail brush (size 0 or 1)
- Holographic cosmetic glitter (optional)
- Spray water bottle
- Sponge or soft cloth
Step 1: Painting the Rainbow Arch
-
Load the brush:
Start by lightly misting your rainbow split cake with water. Using your flat brush, swipe back and forth across the colors until the paint has a creamy, opaque consistency on the bristles. -
Position the brush:
Ideally, place the red or warm side of the brush facing up towards the hairline and the blue or cool side facing down towards the brows. Position the brush slightly off-center on the forehead. -
Create the arch:
In one smooth, confident motion, sweep the brush from the top of the left eyebrow, curving up across the forehead and ending near the temple. Try to keep consistent pressure to ensure all colors transfer evenly. -
Feather the ends:
If the ends of the rainbow look too blunt, you can gently tap them with a slightly damp sponge or clean finger to soften the edges while the paint is still wet.
Smooth Arches
To get a perfect rainbow curve, rotate your wrist as you move across the forehead rather than moving your whole arm. This creates a natural arc.
Step 2: Creating the Bunny Silhouette
-
Prep the white paint:
Clean your brush or switch to a small round brush. Load it thoroughly with white face paint, ensuring the consistency is thick enough to cover the skin tone without being runny. -
Outline the head:
On the upper cheekbone, just below the end of your rainbow, paint a small, rounded oval shape for the bunny’s head. -
Add the ears:
From the top of the rounded head, pull two elongated petal shapes upward towards the rainbow. Make one ear slightly curved for a playful look. -
Fill in the shape:
Fill in the outline of the head and ears completely with white paint. Ensure the coverage is solid and bright. -
Paint the body detail:
Add a tiny, curved suggestion of a body or neck below the head, tapering it off into nothingness to keep the design floating and airy.
Step 3: Adding Delicate Details
-
Add the eye:
Once the white paint is mostly dry, take your finest detail brush with a tiny amount of red or pink paint. Place a single small dot on the bunny’s face for the eye. -
Inner ear detail:
With the same pink-loaded brush, swift a very thin line inside the center of each ear to give them depth and a soft, realistic touch. -
Paint falling hearts:
Using a very light blue or lavender paint and your small round brush, press down gently to create tiny heart shapes floating down from the bunny’s chin area. -
Vary the heart placement:
I like to vary the size of these hearts slightly, painting one near the jawline and another smaller one lower down to mimic falling confetti or magic dust. -
Optional glitter accents:
While the hearts are still slightly damp, carefully dab a tiny bit of holographic glitter onto them for a magical shimmer. -
Apply highlighter (Optional):
For an ethereal glow, lightly sweep a powder highlighter on the cheekbone around the bunny, avoiding the painted areas.
Level Up: Fluffy Texture
Instead of a solid white silhouette, use a stippling motion with a nearly dry brush to give the bunny a furry, textured edge.
Step back and admire your sweet, spring-inspired creation that is ready for any Easter celebration
One-Stroke Bunny and Daisy Combo
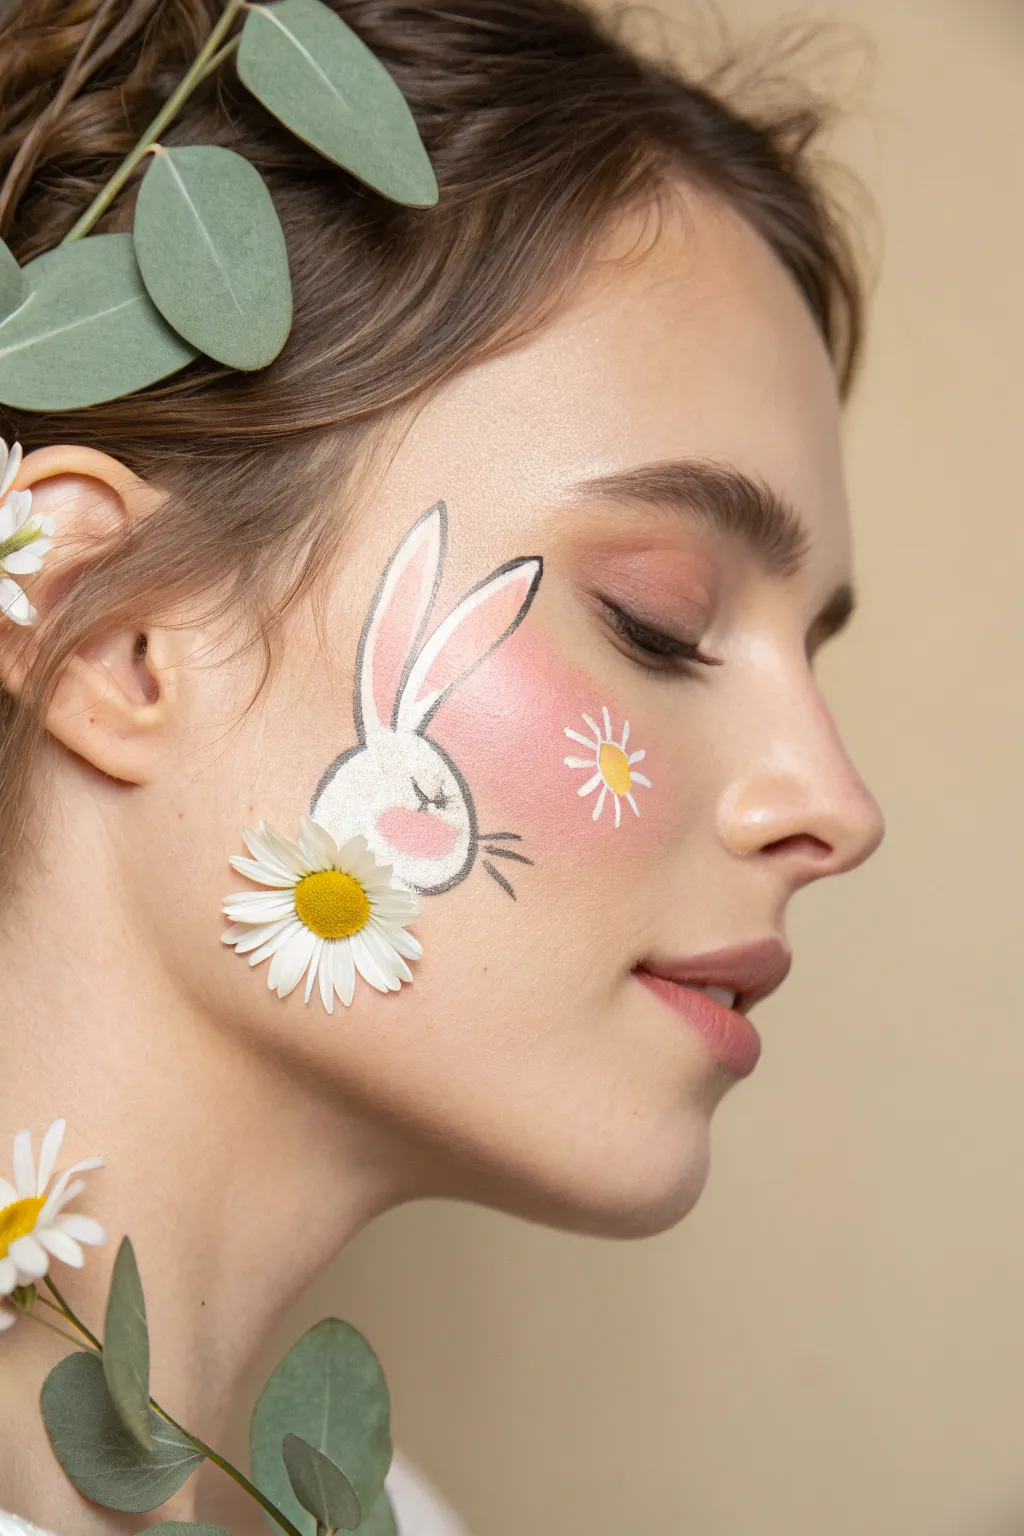
Create a delicate and dreamy Easter look with this soft bunny profile design accented by fresh florals and painted details. This tutorial guides you through sketching a sweet rabbit silhouette and pairing it with sunny daisies for a nature-inspired face paint style.
Detailed Instructions
Materials
- White face paint
- Light pink face paint or blush
- Black face paint or fine brush-tip eyeliner
- Yellow face paint
- Small round brush (size 1 or 2)
- Medium filbert brush
- Cosmetic glue or spirit gum (skin-safe)
- Fresh small daisy with stem removed
- Eucalyptus sprigs (optional, for hair)
- Setting spray (optional)
Step 1: Prepping the Canvas
-
Base Glow:
Begin with clean, moisturized skin. Apply a sheer foundation or tinted moisturizer if desired to even out the skin tone while keeping a natural texture. -
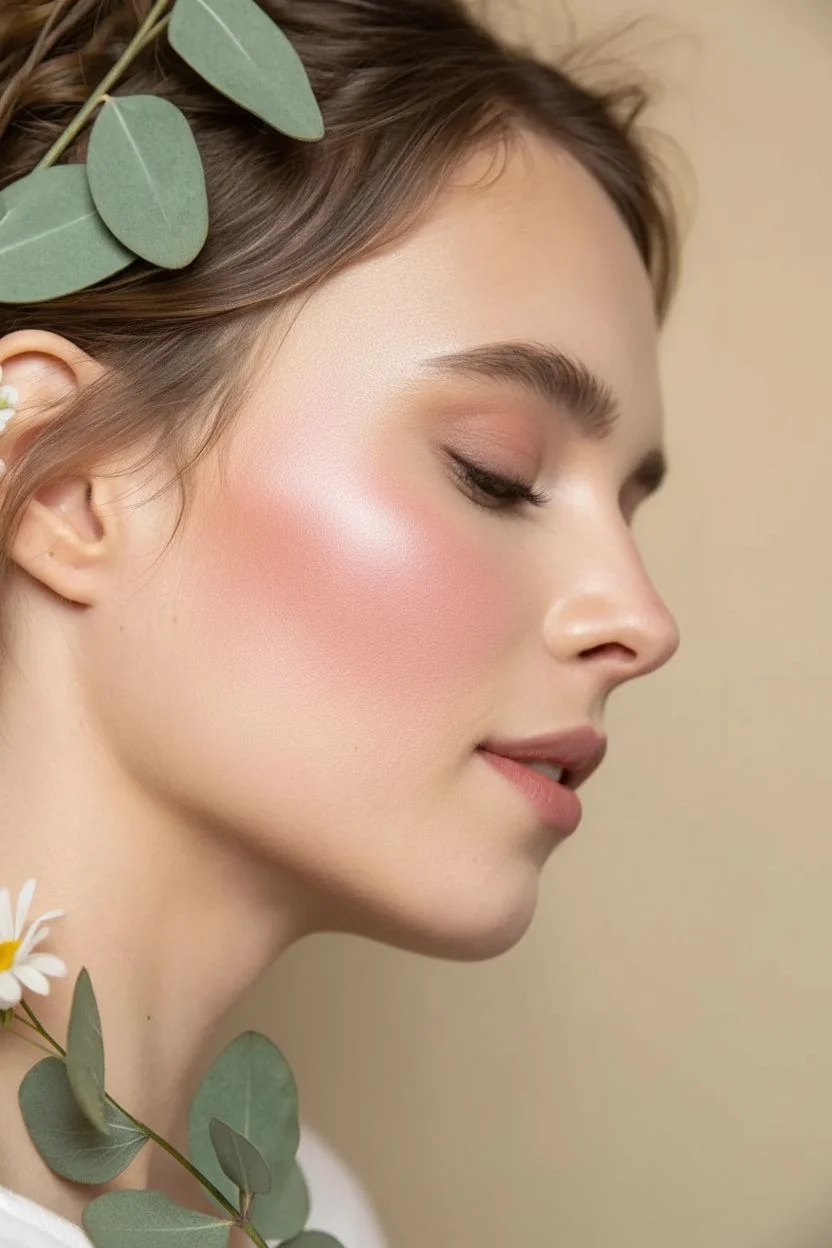
Rosy Flush:
Using a fluffy brush, swirl a generous amount of pink blush onto the apple of the cheek, extending slightly upward toward the temple. This creates a soft, warm background on which the white paint will pop.
Pro Tip: Line Weight
For the bunny outline, try slightly thinning your black face paint with water until it has an ink-like consistency. This helps the brush glide smoothly over the skin for uninterrupted lines.
Step 2: Painting the Bunny
-
White Base Shape:
Load a medium filbert brush with creamy white face paint. On the lower cheek area, paint a rounded shape for the bunny’s head. -
Ears Up:
From the top of the head shape, paint two long, petal-like strokes extending upward toward the eye. Make them slightly curved to give them a lively, perked-up appearance. -
Pink Inner Ears:
Once the white is dry to the touch, take a small brush with pale pink paint. Carefully fill the center of the ear shapes, leaving a crisp white border around the edges. -
Bunny Blush:
Add a small oval of pink on the bunny’s cheek area to mimic a cute blush effect. -
Outline Work:
Switch to a very fine round brush loaded with black paint (or use a brush-tip eyeliner). With a steady hand, outline the entire bunny shape. Keep the line weight thin and delicate. -
Facial Features:
Paint a small closed eye with eyelashes using the black liner. Add a tiny nose and a few short, wispy whiskers extending from the bunny’s cheek.
Step 3: Adding Floral Details
-
Painted Daisy Center:
Near the bunny’s nose, but further back on the cheekbone, paint a small yellow circle for the center of a painted daisy. -
Painted Petals:
Using a small round brush and white paint, create simple tear-drop strokes radiating from the yellow center to form the flower petals. -
Real Daisy Prep:
Prepare a fresh daisy by trimming the stem flush with the back of the flower head so it sits flat. -
Adhering the Flower:
Apply a small dot of skin-safe adhesive (like spirit gum or lash glue) to the back of the real daisy. Wait a moment for it to become tacky. -
Placement:
Press the flower gently onto the skin, positioning it right at the base of the bunny’s neck, as if the bunny is wearing a floral collar.
Level Up: Glitter Accents
Dab a tiny bit of cosmetic glitter gel onto the center of the painted daisy or lightly dust the bunny’s white fur with shimmer powder for a magical, sparkling finish.
Step 4: Final Touches
-
Eyelashes & Brows:
Groom the model’s eyebrows with a spoolie. Coat the eyelashes with mascara to define the eyes without overpowering the delicate cheek art. -
Hair Accents:
For the complete look, tuck a few sprigs of eucalyptus or other greenery into the hair behind the ear. -
Set the Look:
Mist the face lightly with a setting spray to help the paint and blush last longer without smudging.
Now you have a charming, nature-inspired face paint design perfect for any spring celebration


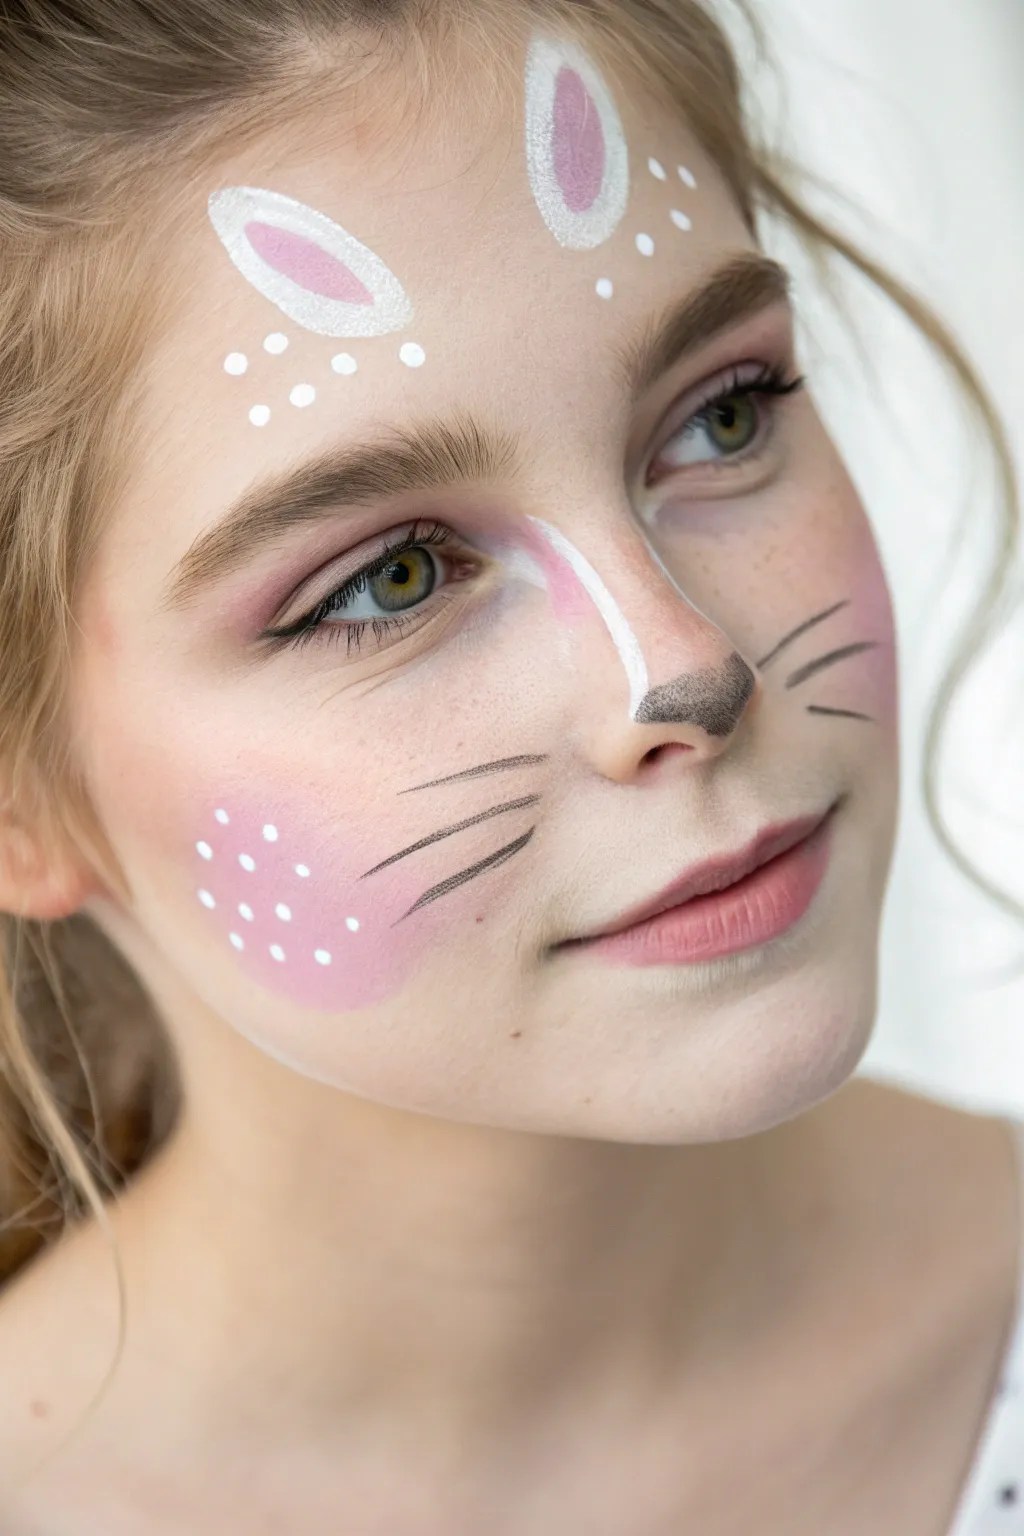
Bunny Crown Look With a Floral Headband
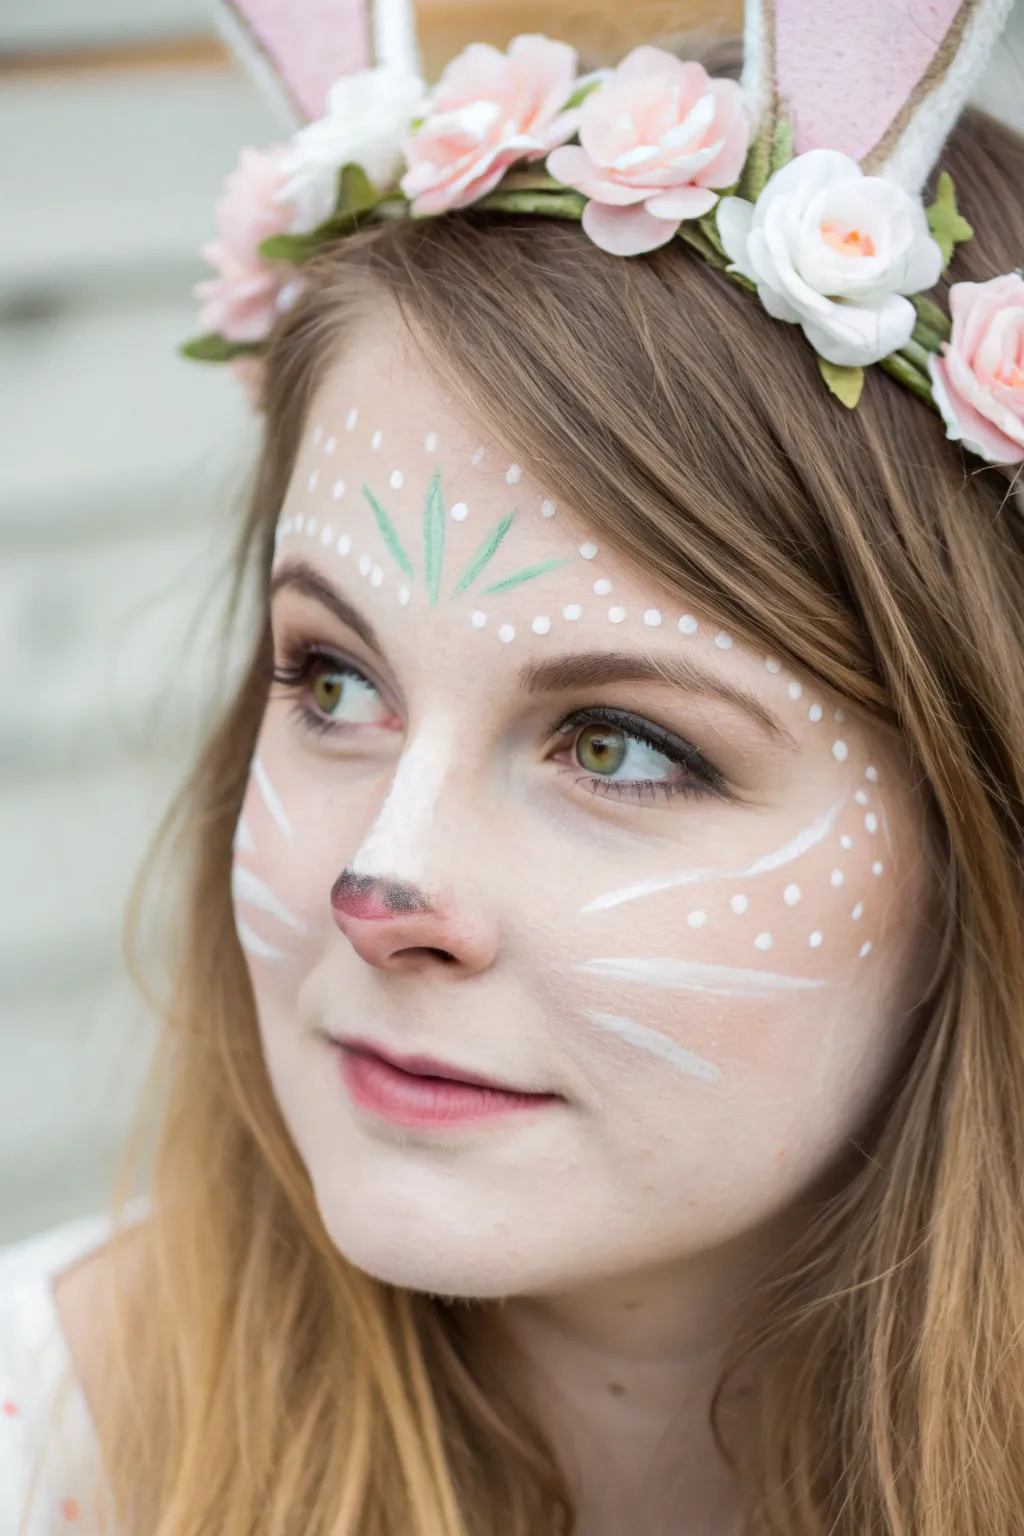
Transform yourself into a gentle forest creature with this delicate face paint design that pairs perfectly with a floral crown. The look combines soft fawn-like spotting with bunny whiskers and sweet floral accents for an enchanting Easter style.
Detailed Instructions
Materials
- White face paint (water-activated or cream)
- Black face paint
- Light pink or mauve face paint
- Light green face paint
- Makeup sponges or high-density wedges
- Round brush (size 2 or 3)
- Fine liner brush (size 0 or 1)
- Floral headband with bunny ears
- Cup of water
- Paper towels
Step 1: Base and Bridge
-
Prep the canvas:
Start with a clean, dry face. Tie back hair to keep it clear of the forehead and cheeks, making sure your workspace is ready for painting. -
Highlight the nose bridge:
Load a sponge or a medium round brush with white face paint. Starting from between the eyebrows, stroke downwards to the tip of the nose to create a solid white highlighted stripe. -
Blend the edges:
While the paint is still slightly tacky, gently pat the edges of the white nose stripe with a clean finger or sponge to soften them into the natural skin tone, avoiding harsh lines.
Dotting Perfection
For perfectly round white dots every time, dip the back end of your paintbrush handle into the paint and stamp it onto the skin.
Step 2: Nose and Whiskers
-
Pink nose base:
Using a small round brush loaded with pink or mauve paint, fill in the very tip of the nose, covering the nostrils and the underside of the nose tip. -
Define the nose opacity:
If the pink looks translucent, wait a moment for it to dry and dab on a second layer for a solid, cute button nose effect. -
Add nose shading:
Take a barely damp brush with a tiny amount of black paint. Gently feather it onto the very top edge of the pink nose area to create a soft, gradient shadow. -
Paint the whiskers:
Load a round brush with white paint. Starting near the nose on the cheek, pull three long, sweeping strokes outward towards the ears on each side. Press down at the start and lift up at the end to taper them.
Step 3: Forehead Details
-
Center the design:
Locate the center of the forehead just above the eyebrows. Using your light green paint and a fine liner brush, paint a central leaf shape pointing straight up. -
Add side leaves:
Paint two more simple leaf shapes fanning outwards from that central point, creating a small three-leaf spray. -
Dot the brow line:
Switch back to white paint on a small round brush or the handle end of a brush. Create a row of white dots that follows the curve of the eyebrows, arching over the green leaves. -
Create the second row:
Add a second row of dots slightly above the first one, staggering them so they sit in the spaces between the dots below. -
Expand the pattern:
Continue adding small white dots upward toward the hairline, spacing them out more as you go higher to create a magical, scattered effect.
Sparkle Upgrade
While the white paint on the forehead is still wet, lightly press cosmetic-grade iridescent glitter onto the dots for magical sparkle.
Step 4: Cheek Accents and Finish
-
Cheek spots:
On the outer cheekbones, above the whiskers, dab three or four distinct white dots to mimic the look of a fawn. -
Eye definition:
Apply a simple black eyeliner to the upper lash line to define the eyes without overpowering the delicate face paint. -
Mascara touch:
Add a coat of mascara to open up the eyes, giving that wide-eyed, innocent animal look. -
Lip color:
Apply a soft, natural pink lip balm or stain. Keep it subtle to let the nose and whisker painting stand out. -
Final check:
Look over the design for symmetry. If any white dots look too faint, carefully tap a little more fresh white paint over them. -
Crown it:
Place the floral bunny ear headband gently on the head, positioning it so the flowers frame the dotted forehead design perfectly.
You are now ready to hop through the garden with a look that captures the spirit of spring


Have a question or want to share your own experience? I'd love to hear from you in the comments below!