If you want your fall decor to feel cute, chic, and totally you, girl pumpkin painting ideas are where it’s at. I love how a few paints and playful details can turn an ordinary pumpkin into something sweet, stylish, and full of personality.
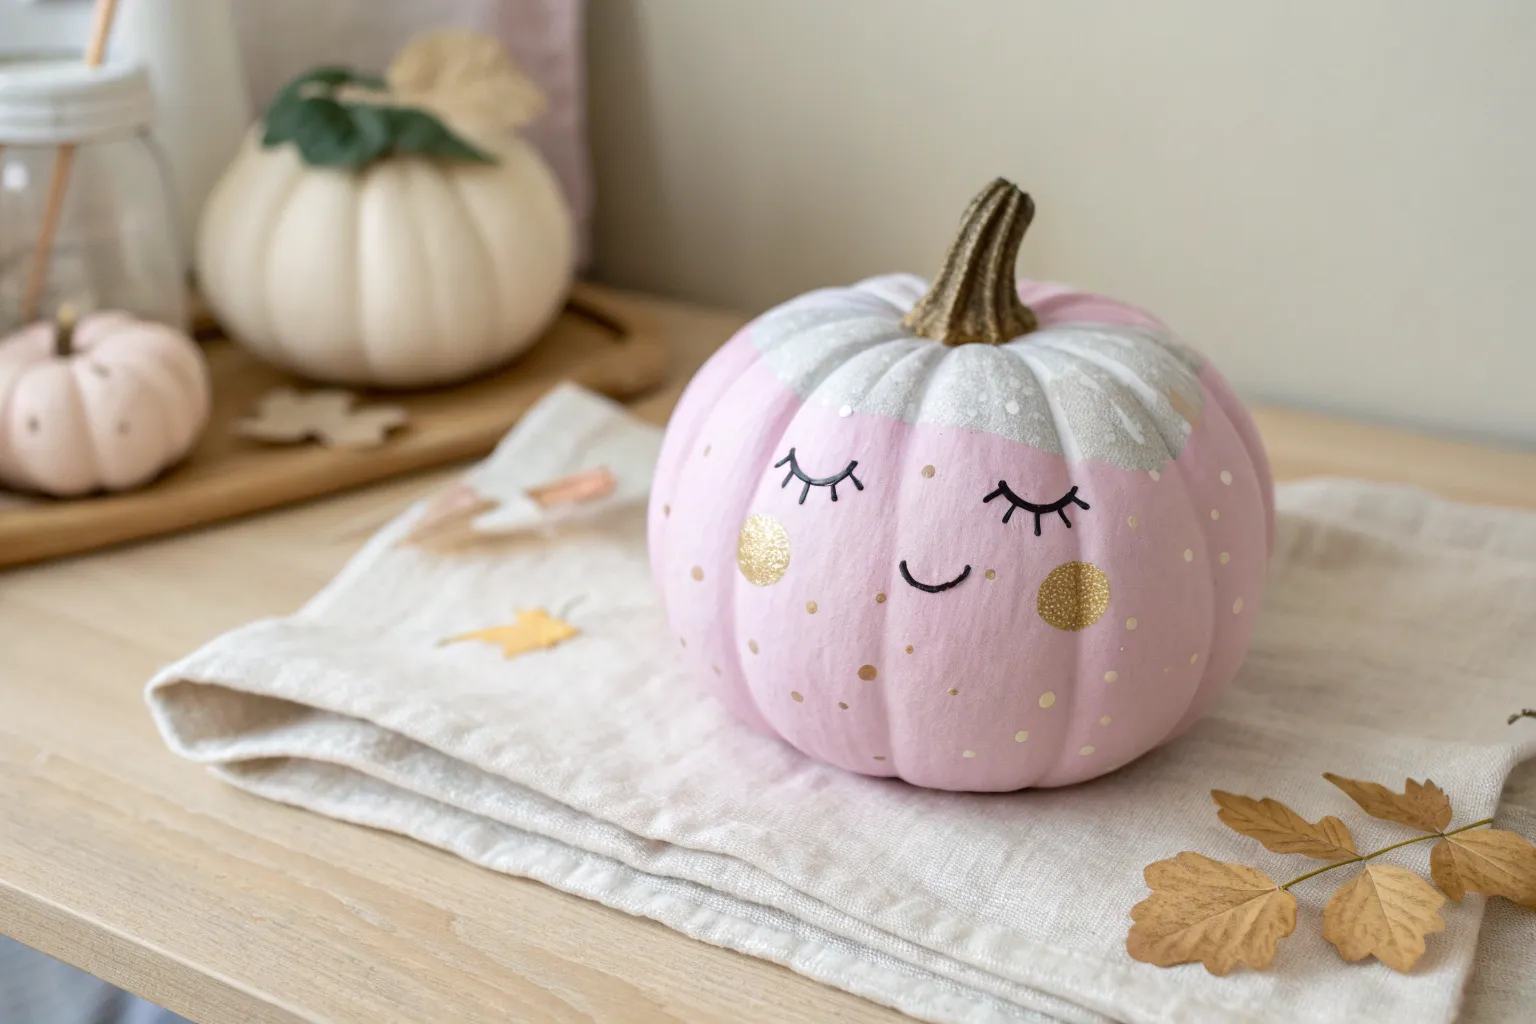
Classic Girly Face Pumpkin With Lashes and Blush
Transform a plain pumpkin into an adorable sleeping beauty with just a few strokes of paint. This project features long, dramatic lashes, sweet rosy cheeks, and freckles for a charmingly feminine touch that looks perfect on a mantel or porch.
Step-by-Step Tutorial
Materials
- Medium-sized pumpkin (real or faux)
- Pale pink or cream acrylic craft paint (base coat)
- Black acrylic paint or black paint pen
- Bubblegum pink acrylic paint
- Small round paintbrush (size 2 or 4)
- Fine liner brush (size 0 or 00) or extra-fine paint pen
- Sponge pouncer or small blush brush
- Gold craft paint (for stem)
- Clear matte sealer spray (optional)
- Damp cloth for clean up
Step 1: Base Preparation
-
Clean the surface:
Beginning with a clean slate is crucial. Wipe down your pumpkin thoroughly with a damp cloth to remove any dirt or oils. If using a real pumpkin, make sure it is completely dry before proceeding. -
Paint the base coat:
Apply your pale pink or cream acrylic paint over the entire surface of the pumpkin. Use long, even strokes following the vertical ribs of the pumpkin for the smoothest finish. -
Let it dry completely:
Allow the first coat to dry for roughly 20-30 minutes. If the underlying orange color is still showing through, apply a second or third coat until you have a solid, opaque finish. -
Gild the stem:
While the body dries, carefully paint the stem with gold acrylic paint. This adds a chic, polished accent that elevates the look. You might need two coats here to cover the natural brown or green thoroughly.
Step 2: Painting the Features
-
Plan the placement:
Before committing with paint, lightly visualize where the eyes and mouth will go. The eyes should sit roughly halfway down the pumpkin’s face. -
Draw the eyelid curve:
Using a fine liner brush dipped in black paint (or a black paint pen for easier control), draw two downward-curving arcs for the closed eyelids. Aim for symmetry, placing them evenly on either side of the center line. -
Thicken the lash line:
Go back over the main curve of the eyelid slightly to thicken the line, tapering it so it’s thinner at the inner corners and thicker towards the outer edges. -
Add the center lashes:
Start painting the eyelashes from the center of the eyelid. Paint short, straight lines extending downward and slightly outward. -
Fan out the lashes:
Continue adding lashes as you move toward the outer corners, making them slightly longer and more curved as you go. This creates that fluttery, feminine look. -
Paint the lips outline:
Below the eyes, centered vertically, paint the outline of a small mouth. Draw a ‘cupid’s bow’ shape for the top lip and a simple curve for the bottom lip using your black liner. -
Fill the lips:
Once the black outline is dry, load a small brush with your brighter pink paint and carefully fill in the lips. I usually find it safer to wait for the black to fully dry to avoid smudging pink into gray. -
Add lip detail:
After the pink lip fill is dry, re-trace the black outline if needed, and add a thin horizontal line through the center to separate the upper and lower lips.
Wobbly Lines?
If you’re nervous about painting smooth curves on a bumpy pumpkin surface, use a pencil to lightly sketch the features first. You can easily erase mistakes before painting.
Step 3: Adding Charming Details
-
Create the cheeks:
Dip a sponge pouncer or a small round brush into the pink paint. Blot it on a paper towel first to remove excess paint, then gently stamp round circles on the pumpkin’s ‘cheeks’ below and slightly outside the eyes. -
Add freckles:
Using your finest brush or the tip of a paint pen, add a scattering of tiny black dots across the nose area and cheeks. Vary the spacing to make them look natural. -
Paint nose dots:
Place two slightly larger dots right in the center between the eyes and mouth to suggest a tiny, cute nose. -
Highlight the cheeks (Optional):
For extra dimension, you can add a tiny dot of white paint to the upper corner of the pink cheek circles to mimic a highlight. -
Seal the artwork:
Once absolutely everything is dry—give it a few hours just to be safe—lightly mist the face with a clear matte sealer to protect your design from chipping or peeling.
Make It 3D
Glue on actual false eyelashes from the drugstore instead of painting them for a fun, textured pop. Use clear craft glue for a secure hold.
Now you have a sweet, serene pumpkin decoration ready to add a touch of whimsy to your fall display


Spa Day Girl Pumpkin With Face Mask and Headband
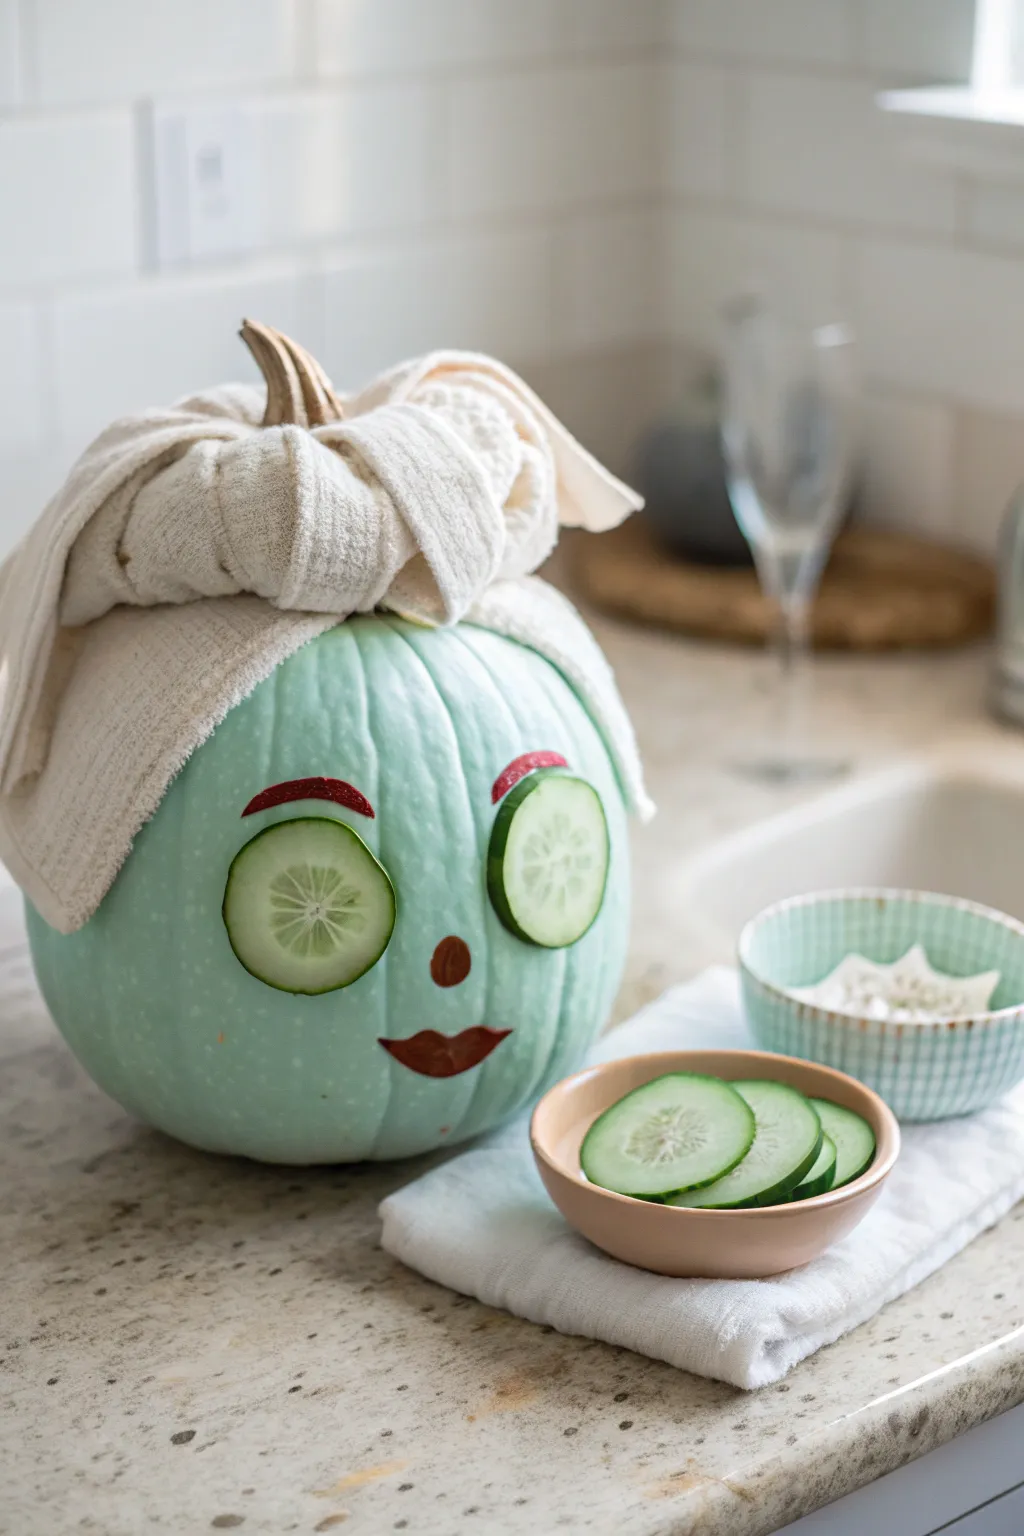
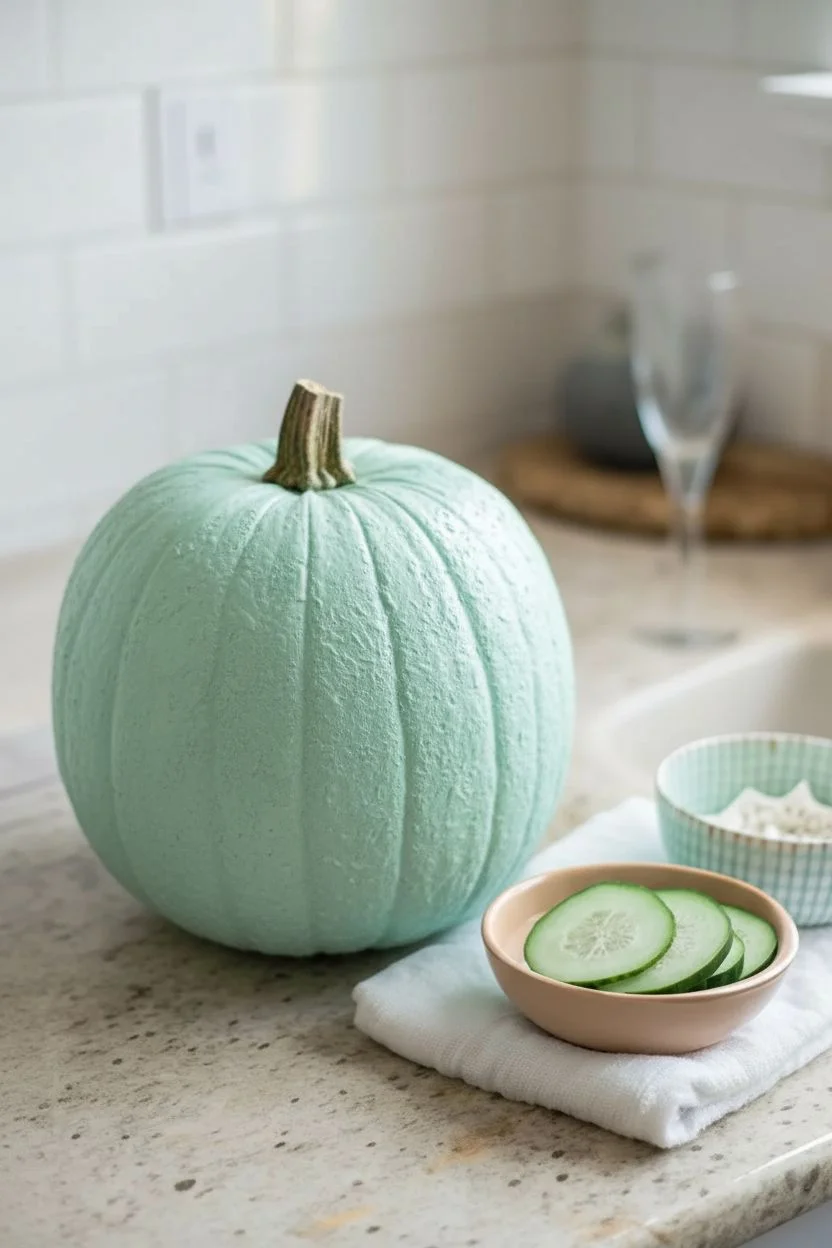
Treat your porch to a moment of zen with this hilarious spa-themed pumpkin that radiates relaxation. With its cool minty hue, cucumber eyes, and towel turban, this self-care squash is a refreshing departure from spooky jack-o’-lanterns.
Step-by-Step
Materials
- Medium-sized pumpkin (real or faux)
- Light teal or mint green acrylic paint
- Deep red or burgundy acrylic paint
- Sea sponge or large flat paintbrush
- Small round detail brush
- Fresh cucumber
- Knife and cutting board
- Toothpicks
- Small cream or white hand towel or tea towel
- Safety pins or masking tape (optional)
Step 1: Setting the Base
-
Clean the surface:
Before painting, wipe down your pumpkin with a damp cloth to remove any dirt or oils. If you are using a real pumpkin, ensure it is completely dry before moving on to paint. -
Apply the face mask color:
Squeeze a generous amount of light teal or mint green acrylic paint onto a palette. Using a sea sponge or a large flat brush, apply the paint over the entire pumpkin, avoiding the stem. -
Build opaque coverage:
The first layer might be a bit streaky, which is normal. Let it dry completely for about 20 minutes, then apply a second coat to get that thick, creamy ‘face mask’ look. I find that stippling with a sponge creates a nice texture resembling a real clay mask.
Freshness Factor
Fresh cucumber slices will wilt after a day. For a permanent decoration, print a photo of cucumber slices on cardstock or paint wooden discs to look like veggies.
Step 2: Creating the Features
-
Outline the eyebrows:
Once the base coat is fully dry to the touch, dip your small round detail brush into the deep red paint. Carefully paint two arched eyebrows about one-third of the way down the pumpkin face. -
Add the nose:
Using the same red paint or a slightly brownish-red mix, dab a small, simple dot in the center of the face to represent a nose. -
Paint the lips:
Below the nose, paint a classic lipstick shape. Keep the lines crisp and defined. -
Create the eyes:
Slice two thick rounds from a fresh cucumber. They should be substantial enough to hold their shape but not so heavy that they slide off easily. -
Attach the cucumbers:
Insert a toothpick halfway into the center of where one eye should go. Press a cucumber slice firmly onto the protruding toothpick. Repeat for the second eye, placing it symmetrically.
Paint Not Sticking?
Waxy pumpkin skins can resist acrylics. If your paint beads up, lightly sand the surface with fine-grit sandpaper or spray it with a matte primer first.
Step 3: The Spa Wrap
-
Prepare the towel:
Take your small hand towel or tea towel and fold it lengthwise until it is a manageable strip, roughly 4-5 inches wide. -
Anchor the towel:
Place the center of the folded towel against the back of the pumpkin, right at the base of the stem. -
Wrap the front:
Bring the two ends of the towel forward, crisscrossing them in front of the stem. Pull them snug so the towel conforms to the pumpkin’s shape. -
Tuck and secure:
Tuck the loose ends of the towel underneath the wrapped portion on top of the pumpkin. You want it to look like a twisted hair turban. -
Final adjustments:
Fluff the towel loops to give it volume. If the towel feels slippery or loose, use a safety pin hidden in the folds or a piece of masking tape on the underside to keep it perfectly in place. -
Verify the look:
Step back and check the expression. If the cucumber eyes are blocking the nicely painted eyebrows, gently adjust the toothpicks to lower the eyes slightly.
Enjoy your refreshingly calm creation as it brings a peaceful vibe to your autumn decor


Unicorn Girl Pumpkin With a Painted Horn and Florals
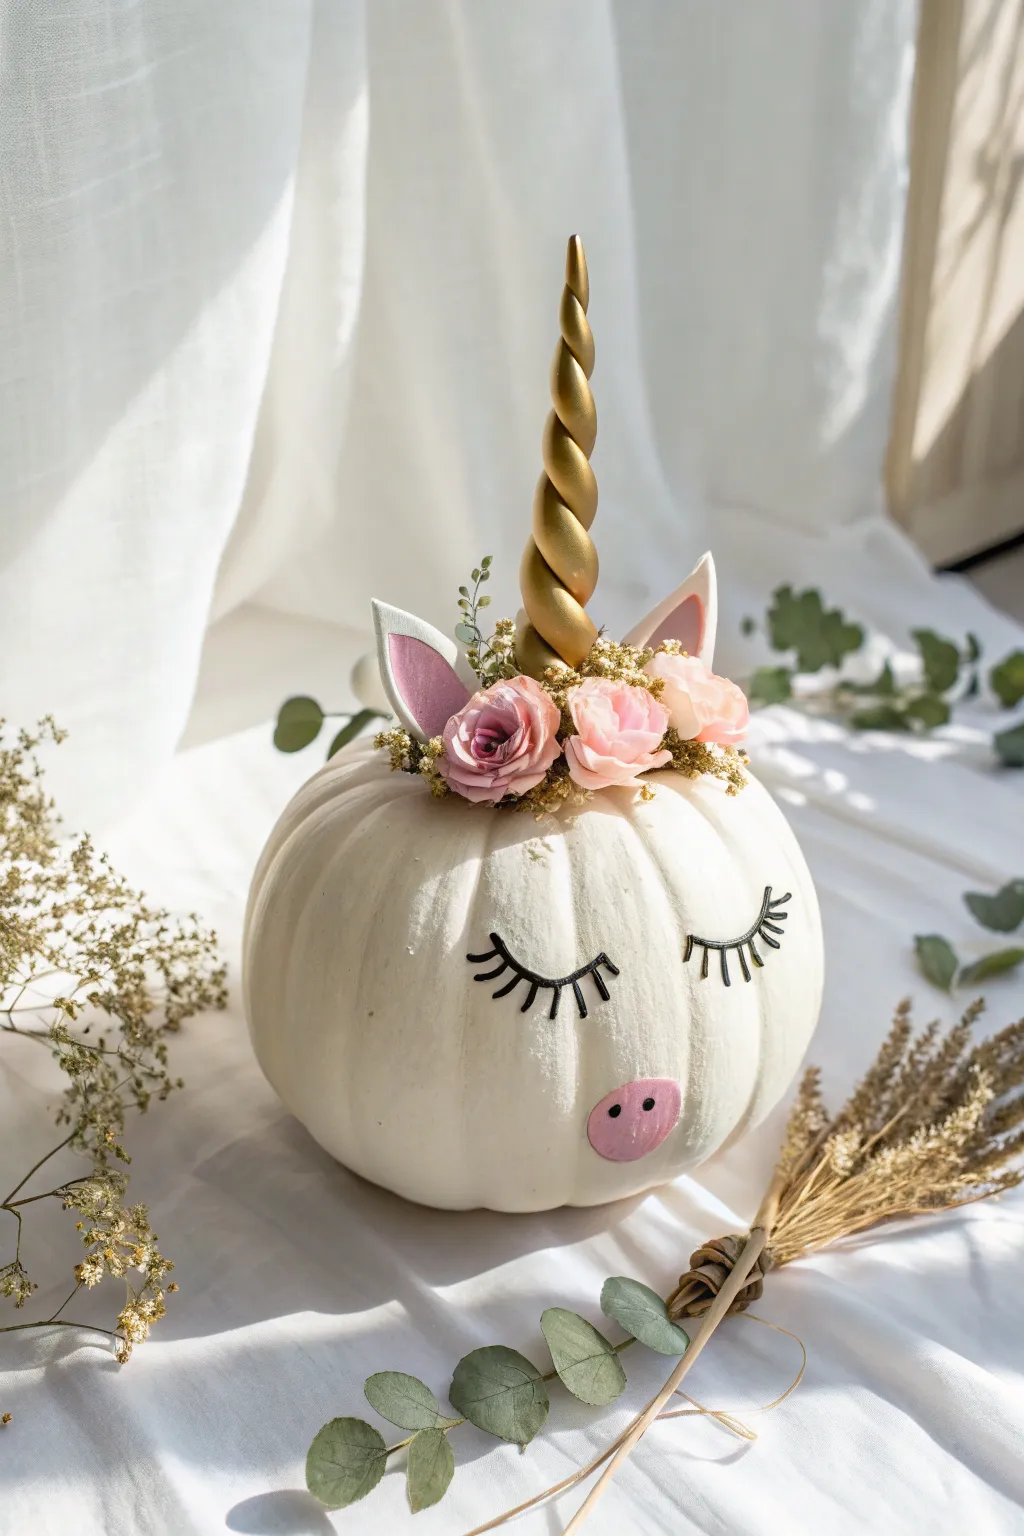
Transform a simple white pumpkin into an enchanting unicorn character complete with a golden spiral horn and a crown of soft roses. This whimsical, no-carve project combines elegant floral elements with playful painted details for a truly magical autumn centerpiece.
Detailed Instructions
Materials
- White craft pumpkin (medium size)
- Gold polymer clay or air-dry clay
- Gold acrylic paint (metallic finish)
- White & pink felt sheets
- Artificial roses (small, pink and mauve)
- Artificial baby’s breath or small filler flowers
- Black adhesive vinyl or black paint marker
- Pink adhesive vinyl or pink acrylic paint
- Hot glue gun and glue sticks
- Scissors
- Paintbrushes
- Wooden skewer or strong wire
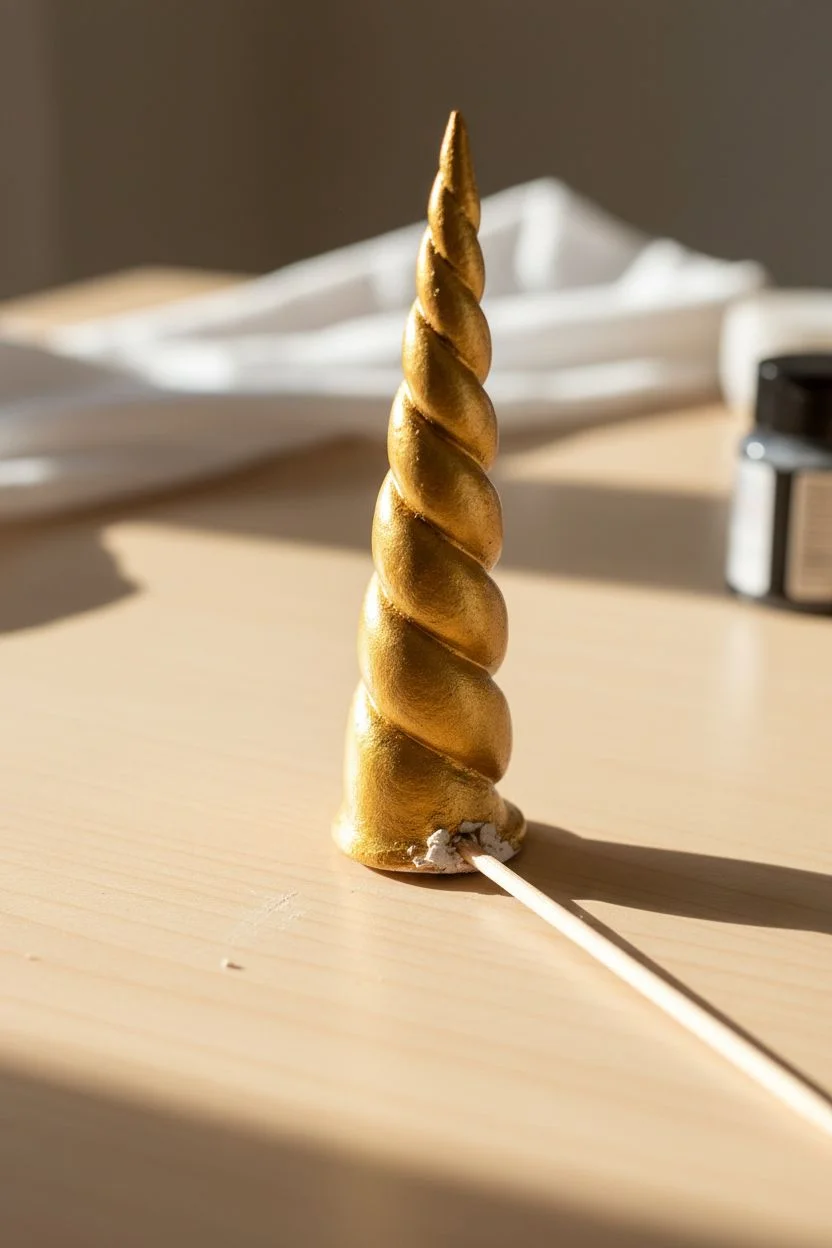
Step 1: Sculpting the Horn
-
Roll the Clay:
Begin by taking a generous amount of polymer or air-dry clay. Roll it into a long, tapered glowing snake shape—one end should be significantly thicker than the other. -
Twist the Shape:
Starting from the wider base, twist the clay upon itself to create that classic spiral unicorn horn texture. Ensure it tapers nicely to a point at the top. -
Add Structural Support:
Insert a wooden skewer or a sturdy piece of wire into the bottom of the horn while the clay is still soft. This will act as an anchor to stick into the pumpkin later. -
Dry and Paint:
Allow the clay to harden completely according to the package instructions. Once solid, paint the entire horn with metallic gold acrylic paint for a regal shine.
Step 2: Creating the Ears
-
Cut the Outer Ears:
Using the white felt, cut out two identical pointed ear shapes. You can sketch a template on scrap paper first to ensure they are symmetrical. -
Cut the Inner Ears:
Cut two slightly smaller ear shapes from the pink felt. These will be the inner part of the unicorn’s ears. -
Assemble the Ears:
Hot glue the pink felt pieces directly onto the center of the white felt pieces. Pinch the bottom corners of each ear together slightly and secure with a dot of glue to give them a curved, 3D shape.
Horn Wobbling?
If the horn feels heavy or unstable, don’t rely on just the skewer. Add a generous ring of hot glue directly to the base where the clay meets the pumpkin skin for extra stability.
Step 3: Face & Details
-
Apply the Eyelashes:
Cut two closed-eye shapes with long, sweeping lashes from black adhesive vinyl. I find vinyl gives a cleaner line than paint here, but you can also carefully hand-paint these with a black paint marker. -
Position the Eyes:
Stick the vinyl lashes onto the front of the pumpkin, spaced evenly apart about halfway down the face. Press firmly to ensure good adhesion. -
Create the Snout:
Cut a small oval from pink adhesive vinyl (or use paint) and two tiny black dots for nostrils. Stick this oval near the bottom center of the pumpkin to form a cute snout.
Sparkle Upgrade
For a magical touch, lightly brush liquid glitter over the pink inner ears and the rose petals. You can also paint the stem gold before covering it with flowers.
Step 4: Assembly
-
Attach the Horn:
Push the skewer of your dried golden horn into the very top center of the pumpkin near the stem. If the stem is hard, you might need to pre-drill a small hole or glue the horn alongside the stem. -
Glue the Ears:
Hot glue the assembled felt ears on either side of the horn. They should sit slightly back so they peak out from behind the flowers we will add next. -
Arrange the Main Blooms:
Select your largest artificial roses. Apply hot glue to their bases and arrange them around the base of the horn, covering the bottom of the ears and the horn’s connection point. -
Add Filler Flowers:
Tuck small sprigs of artificial baby’s breath or greenery into the gaps between the roses. This adds texture and hides any visible glue. -
Final Adjustments:
Check for any loose elements and secure them with extra glue. Fluff the flowers and adjust the angle of the ears if needed.
Place your adorable unicorn pumpkin in a sunny spot to let that golden horn catch the light


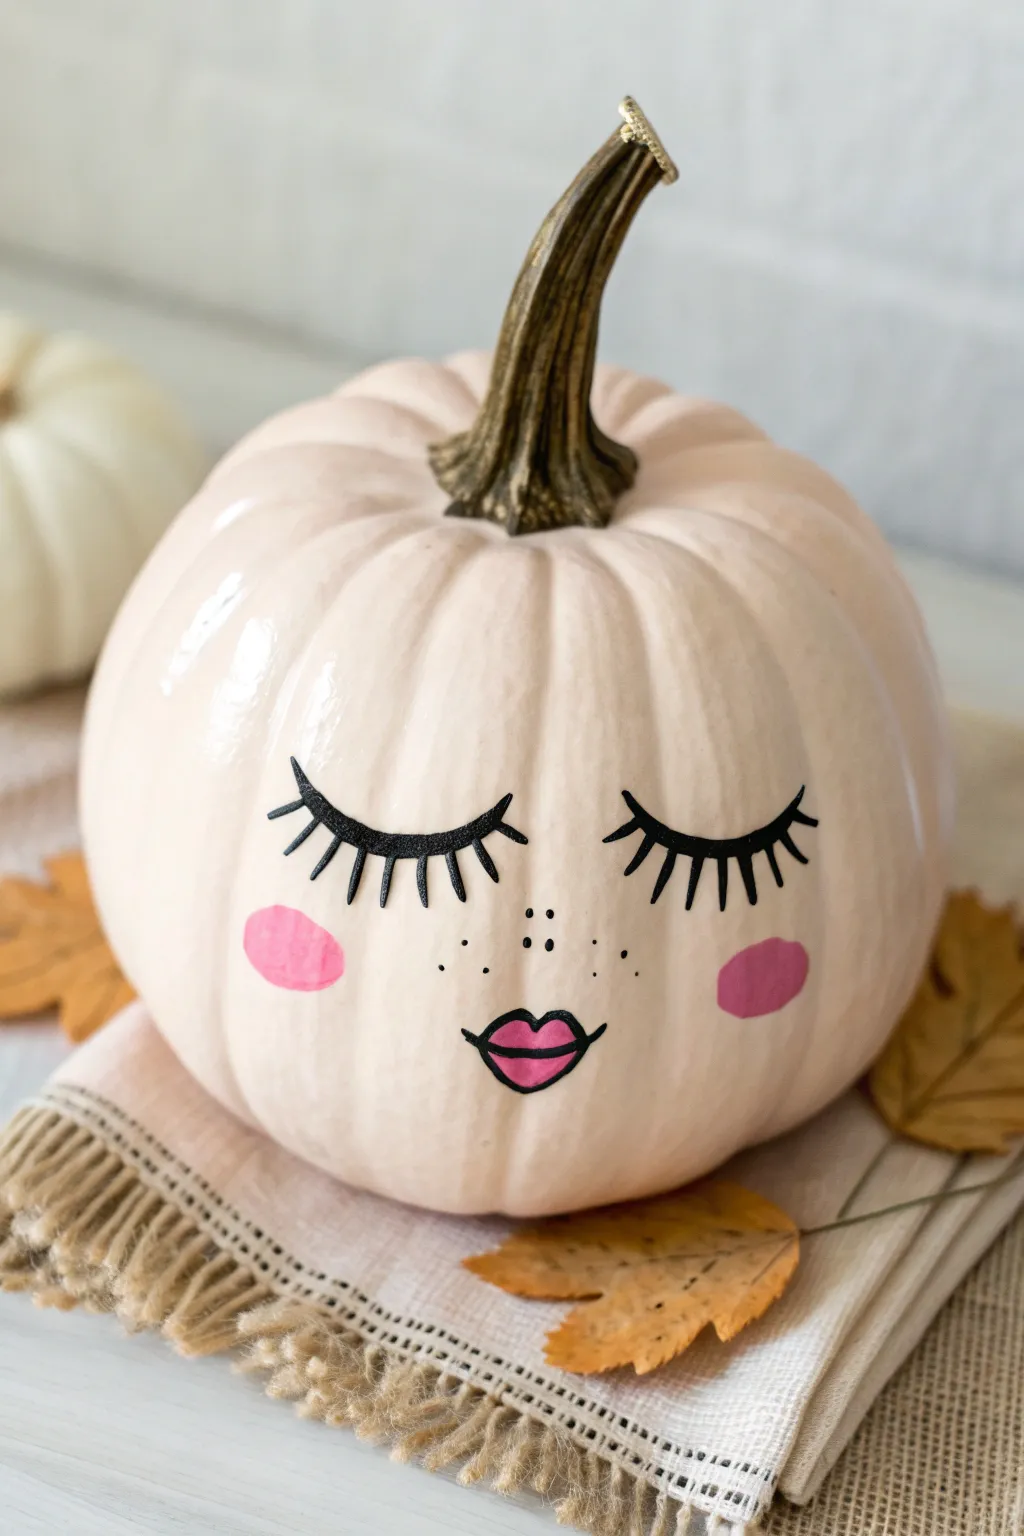
Mixed-Media Glam Girl Pumpkin With Rhinestone Accents
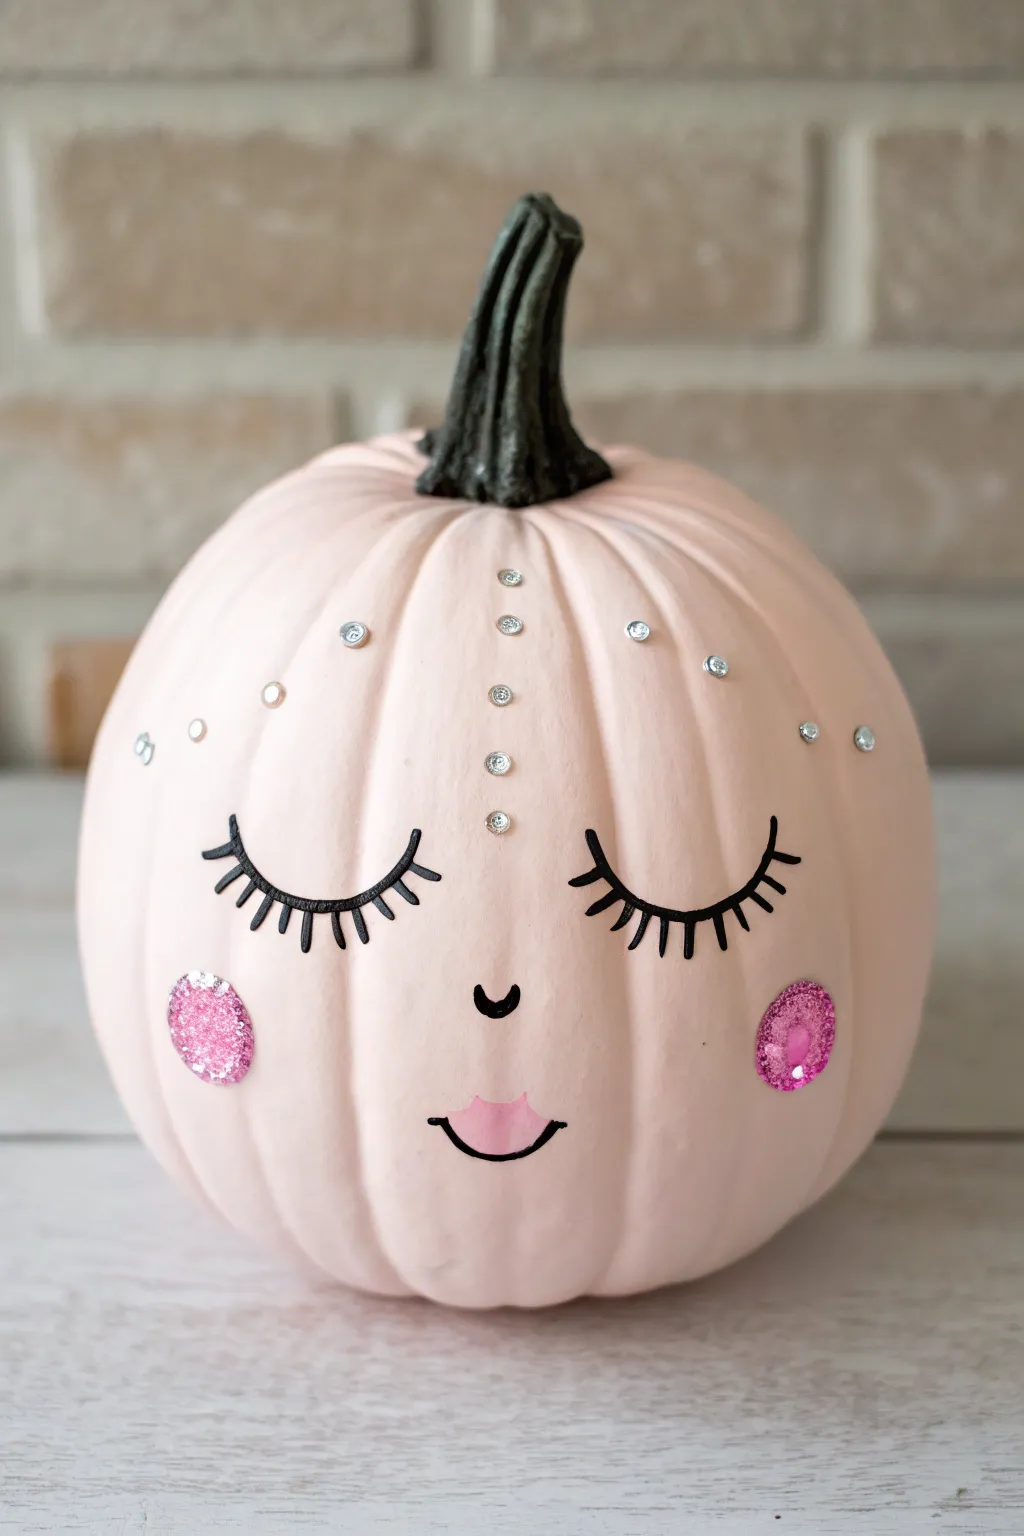
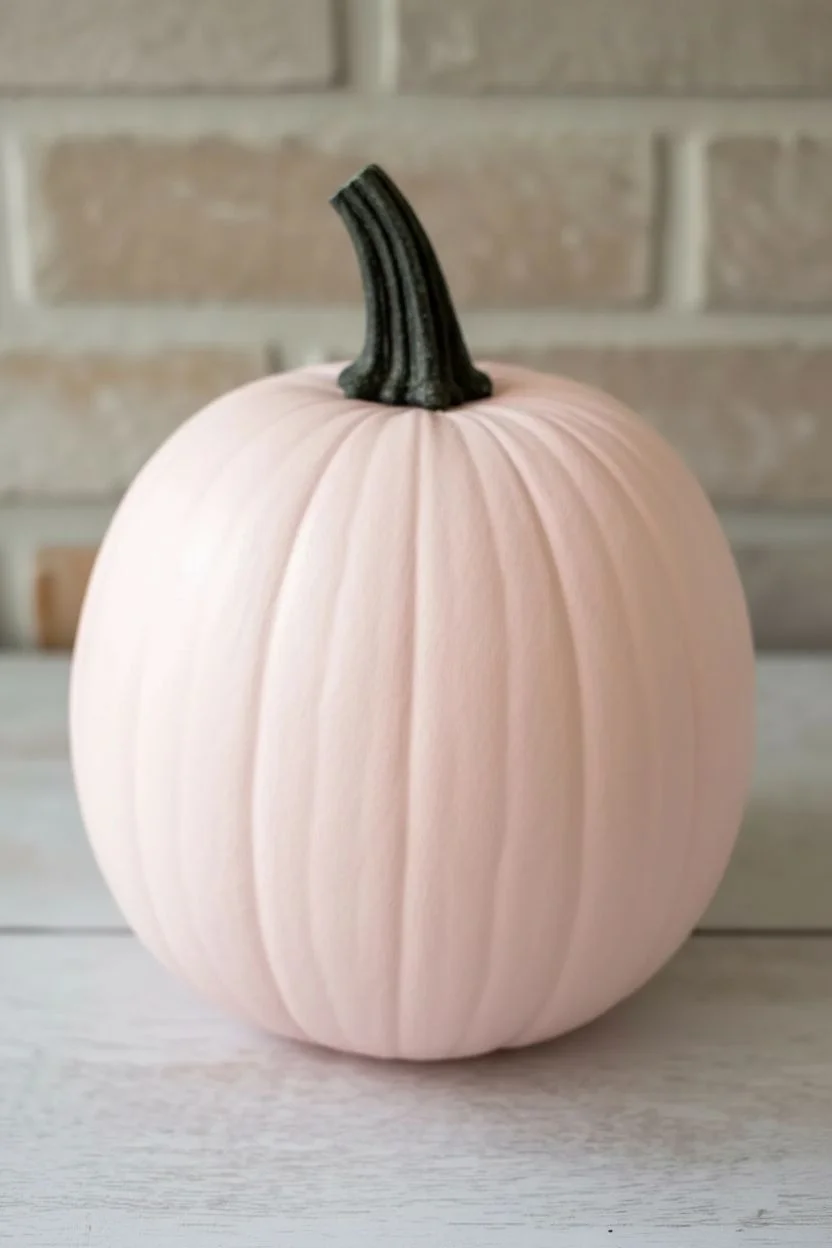
Transform an ordinary pumpkin into a charming character with soft pink paint and sparkling accents. This project combines simple painting techniques with mixed-media touches like rhinestones and glitter to create a sweet, sleeping face that adds a touch of elegance to your fall decor.
Step-by-Step Guide
Materials
- Medium-sized pumpkin (real or faux)
- Pale pink acrylic craft paint (matte finish)
- Black acrylic paint or black paint pen
- Dark pink or rose acrylic paint
- Chunky pink glitter
- Small clear rhinestones (various sizes)
- Mod Podge or craft glue
- Foam brush
- Fine detail paintbrush
- Small round paintbrush
- Pencil
- Paper plate or palette
Step 1: Base Coat Application
-
Clean the surface:
Before you begin, wipe down your pumpkin with a damp cloth to remove any dirt or oils. If using a real pumpkin, dry it thoroughly. A clean surface ensures the paint adheres smoothly without bubbling. -
Apply the first pink layer:
Squeeze a generous amount of pale pink acrylic paint onto your palette. Using a foam brush, apply an even coat over the entire pumpkin, working from the top near the stem down to the base. Don’t worry if the orange peeks through slightly; coverage builds up. -
Let it dry completely:
Allow the first coat to dry for at least 30-45 minutes. It should feel dry to the touch, not tacky. -
Add subsequent coats:
Apply a second and possibly third coat of pink paint until the coverage is completely opaque and solid. I find that three thin coats usually look better than two thick, gloopy ones. Let the final coat dry for an hour.
Step 2: Painting the Features
-
Sketch the face:
Lightly sketch the facial features onto the dried pink surface using a pencil. Draw two wide arches for closed eyes, a tiny ‘u’ for the nose, and a small mouth shape. This guides your brush placement. -
Paint the eyelashes:
Using a fine detail brush and black acrylic paint (or a black paint pen for better control), carefully trace over your pencil arches. Add several long, curved lashes extending downward from each arch. -
Add the nose:
With the very tip of your detail brush, paint the small nose. It’s just a tiny, simple curve right in the center of the face. -
Create the lips:
Mix a small amount of dark pink paint with a white or lighter pink to get a soft rose color. Fill in the lip shape. Once the pink is dry, outline the bottom edge with a very thin black line to define a smile.
Uneven Glitter?
If glitter looks patchy, wait for the first glue layer to dry, then dab more glue on bald spots and re-sprinkle. A second layer adds nice dimension.
Step 3: Adding the Sparkle
-
Prep the cheeks:
Identify two round spots on the cheeks for the blush area. Use a small round brush to dab a circle of Mod Podge or craft glue onto these spots. -
Glitter the cheeks:
While the glue is wet, sprinkle chunky pink glitter generously over the adhesive circles. Tap off the excess glitter gently onto a piece of paper. -
Plan rhinestone placement:
BEFORE glueing, decide where your ‘freckles’ or forehead sparkles will go. Place small dots of glue randomly above the eyebrows and across the forehead area. -
Attach the rhinestones:
Using tweezers or a wax pencil, pick up individual clear rhinestones and press them into the glue dots. Vary the placement to look organic rather than perfectly symmetrical. -
Define the stem:
If your pumpkin stem got painted pink, or if you want a bolder look, paint the stem a dark green or black to contrast nicely with the pastel body. -
Final drying time:
Set the pumpkin aside in a safe, dust-free area to let all the glue and detail paint cure completely overnight.
Pro Tip
For super crisp eyelashes without shaky hand anxiety, use a black fine-tip permanent marker or paint pen instead of a brush and wet paint.
Now you have a softly glamorous centerpiece ready to brighten up any corner of your home


Have a question or want to share your own experience? I'd love to hear from you in the comments below!