Whenever I’m out of sketchbook pages (or just feeling fidgety), my hand turns into my favorite little canvas. These hand doodles ideas are quick to try, easy to build on, and made to flow with the natural shapes of your fingers, knuckles, and wrist.
Tiny Stars and Moons Across Knuckles
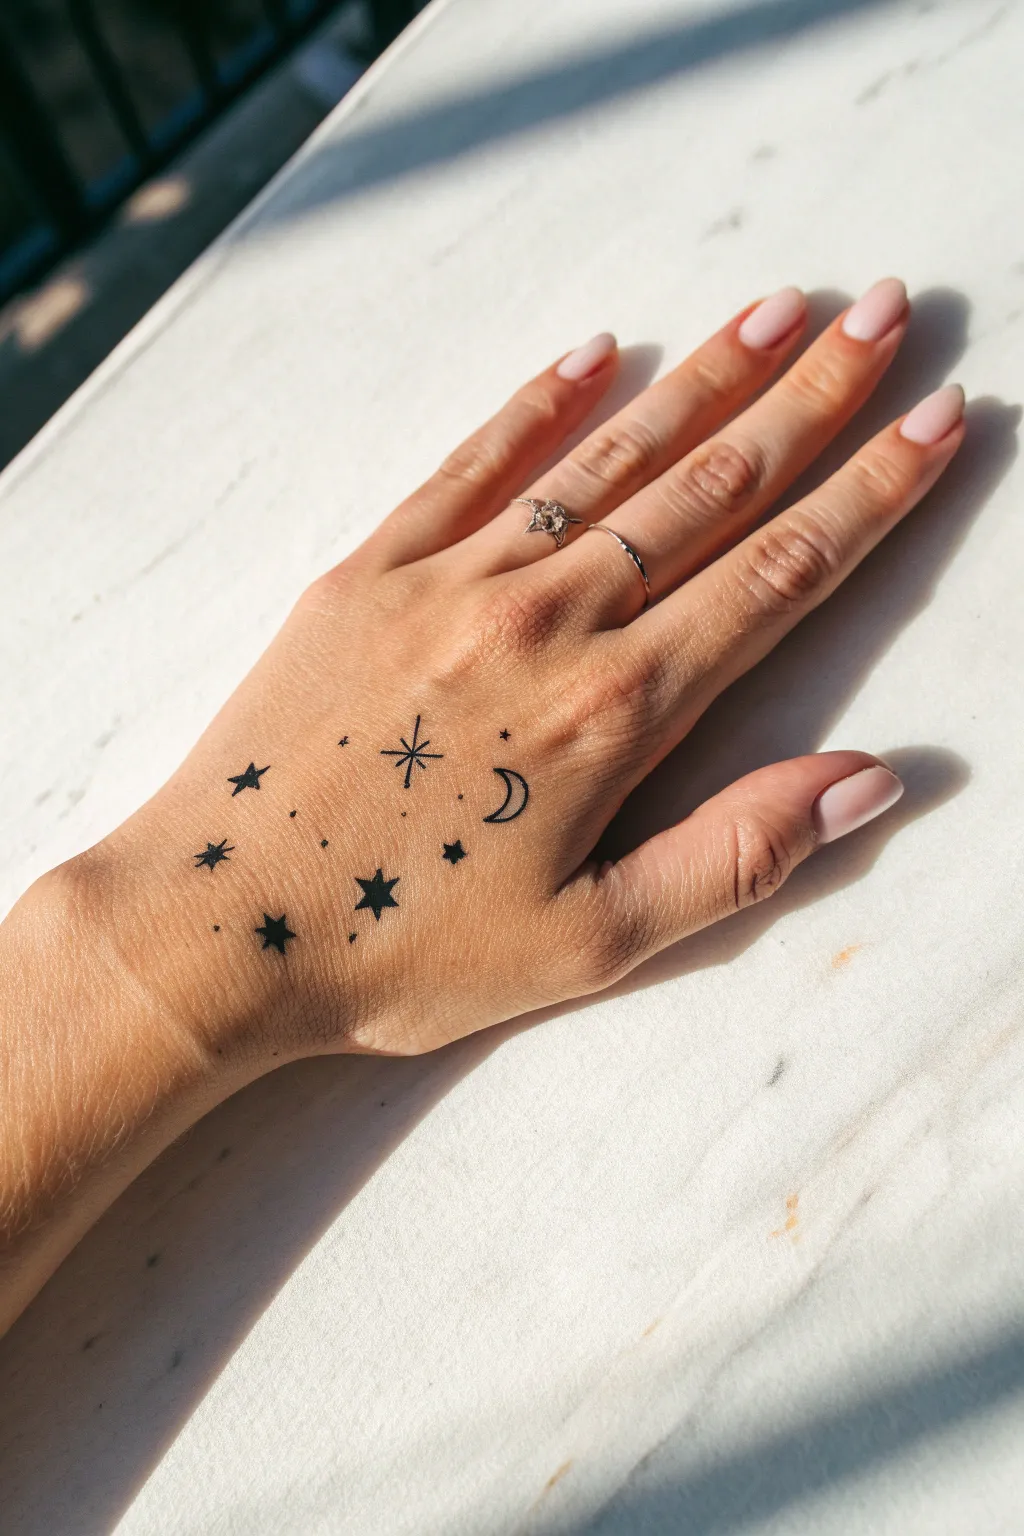

Transform the back of your hand into a small galaxy with this delicate arrangement of stars, moons, and scattered stardust. The look is minimal yet enchanting, using simple black ink to create a constellation that feels like temporary jewelry.
How-To Guide
Materials
- Fine tip black skin-safe marker or tattoo pen (0.5mm or smaller)
- Medium tip black skin-safe marker (for filling)
- Micellar water or rubbing alcohol
- Cotton pads
- Setting powder (optional)
Step 1: Preparation and Planning
-
Clean the canvas:
Start by wiping the back of your hand with a cotton pad soaked in micellar water or rubbing alcohol. This removes natural oils and lotions, ensuring your ink stays crisp and doesn’t smudge immediately. -
Dry thoroughly:
Wait about a minute for the skin to be completely dry to the touch before uncapping your pen. -
Visualize the placement:
Hold your hand out flat. Imagine an invisible oval shape on the back of your hand where the design will sit. You want the cluster of stars to look random but balanced, mostly centered but drifting slightly toward the pinky side.
Smudge Alert
If you smudge a star while drawing, turn it into a ‘shooting star’ by adding a trailing line, or wipe it quickly with a wet Q-tip before it dries.
Step 2: Drawing the Main Icons
-
Place the crescent moon:
Using your fine tip marker, draw a small ‘C’ shape near the base of the ring finger knuckle. Close the shape with a smaller inner curve to create a crescent moon. Leave it as an outline for now. -
Draw the North Star:
To the left of the moon, slightly lower, draw a simple cross. Then, draw a tiny ‘X’ through the center of that cross. Extend the vertical lines slightly more than the horizontal ones to give it that classic twinkling star look. -
Add the first solid star:
Below the North Star, draw a small five-pointed star outline. This will be the largest star in the cluster. I find it easiest to draw the outline first and then fill it in carefully with the medium tip marker for a solid black look. -
Create the lower star:
Move diagonally down and to the left from your central star. Draw another five-pointed star, slightly smaller than the previous one. Fill this one in completely as well. -
Add the wrist star:
Near the wrist, roughly aligned with your pinky finger’s tendon, draw a tiny five-pointed star. Keep this one quite small and fill it solid black. -
Draw the upper left star:
Position one final five-pointed star up towards the index finger side, balancing out the composition. Make this one medium-sized and fill it in.
Step 3: Adding Details and Stardust
-
Sprinkle distinct dots:
Switch back to your finest tip marker. Place 3-4 deliberate, slightly larger dots in the empty spaces between your main stars. These shouldn’t be microscopic; they represent distant planets. -
Add micro-dust:
Now, very lightly tap the tip of the pen against your skin to create tiny specks around the larger stars. Group two or three specks together in open areas to mimic star clusters. -
Draw a tiny diamond:
Find a small gap, perhaps near the moon, and draw a tiny four-pointed diamond shape (a rhombus) filled in black. It adds variety to the shapes. -
Review the balance:
Look at your hand from a distance. If a spot feels too empty, add a single tiny dot there. Avoid overfilling; negative space is key to this delicate look. -
Clean up edges:
If any star points look dull or rounded, use the very tip of your fine marker to carefully flick the ink outward, sharpening the points.
Cosmic Colors
Use a white gel pen to add tiny highlights inside the black stars or outline the crescent moon for a glowing, dimensional effect.
Step 4: Setting the Design
-
Let it dry:
Keep your hand relatively still for at least 5 minutes to prevent the fresh ink from transferring to clothes or skin. -
Apply powder:
To make the doodle last longer and look less like fresh ink, lightly dust a translucent setting powder over the area with a fluffy brush. -
Seal it (optional):
For all-day wear, you can spray a light layer of liquid bandage or hairspray over the design from about 10 inches away.
Enjoy your personal constellation as it twinkles with every hand gesture you make


Simple Hearts on Fingertips and Nails
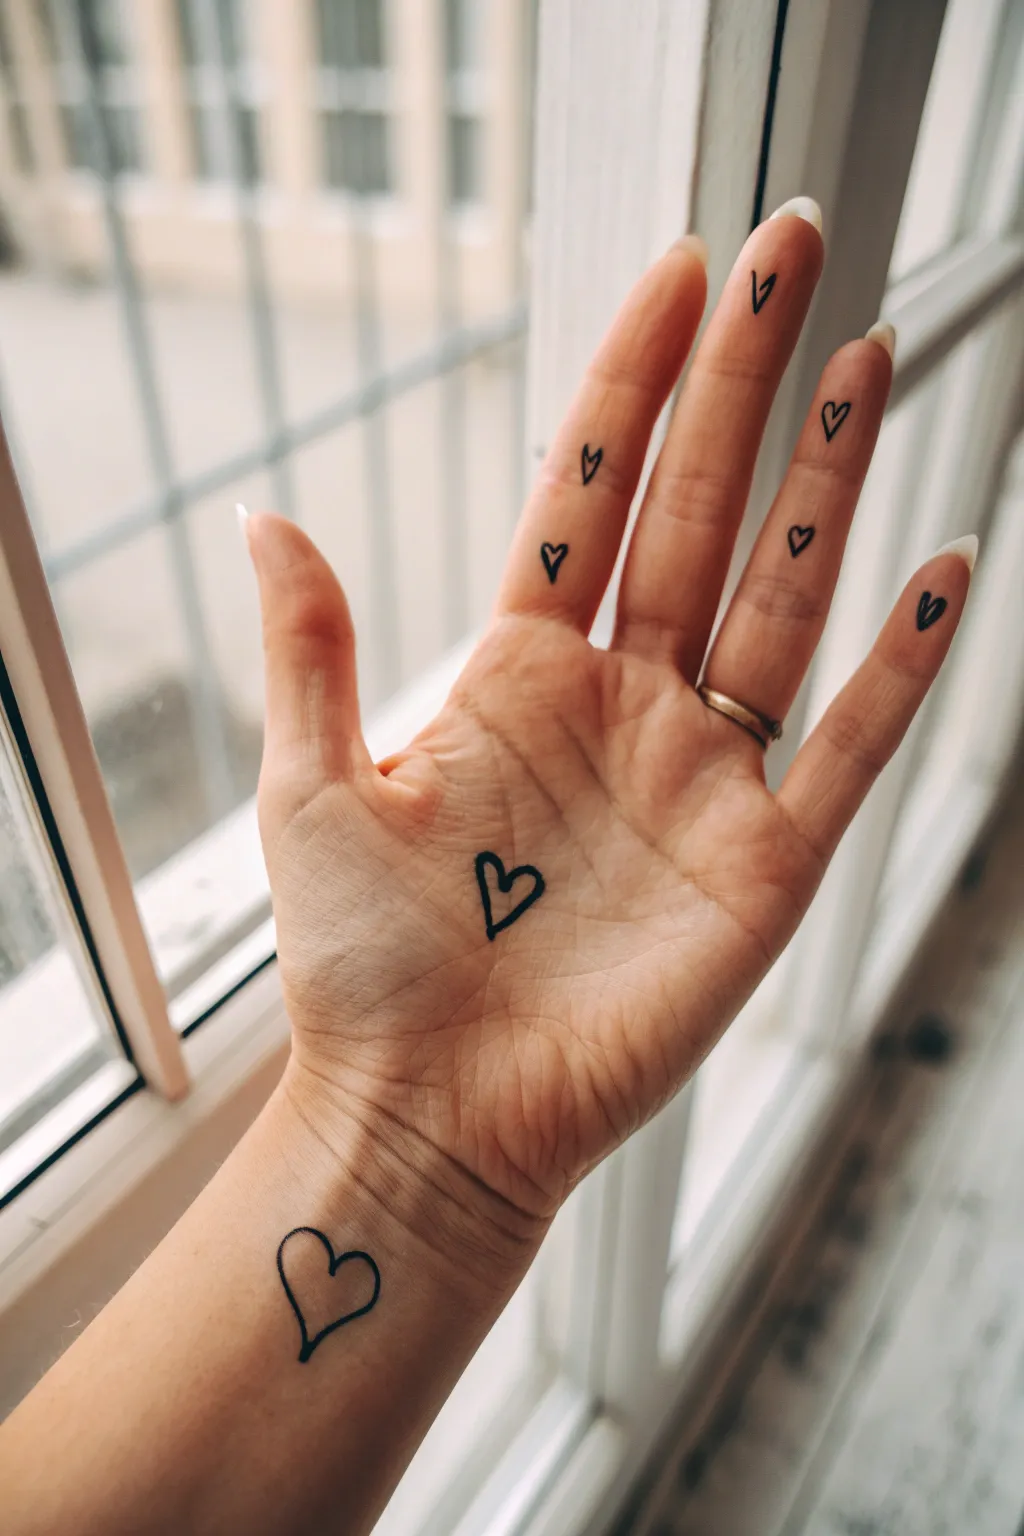
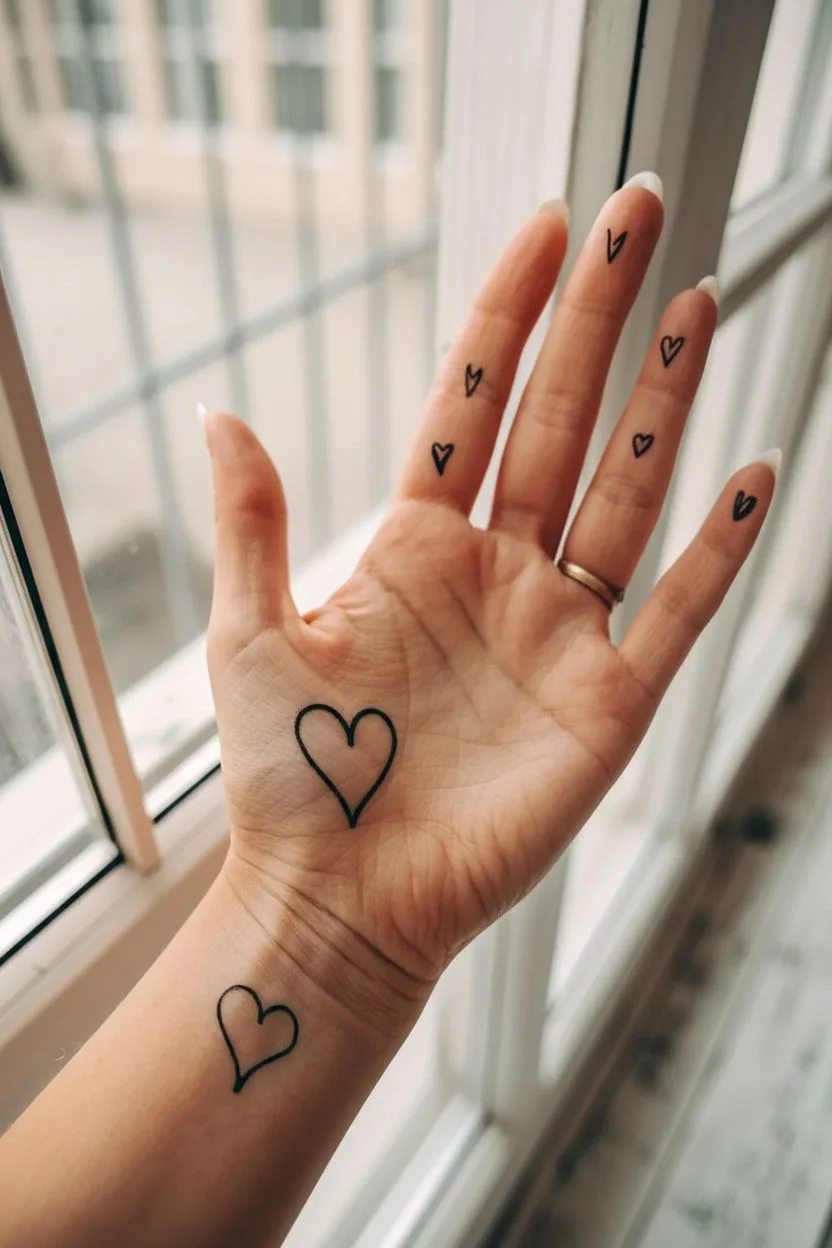
Transform your hand into a canvas with this charming and minimalist doodle design featuring scattered hearts. Using simple black lines, this project creates a whimsical, tattoo-like aesthetic that climbs from wrist to fingertips.
Step-by-Step Guide
Materials
- Fine-point black skin-safe marker (e.g., cosmetic eyeliner pen or skin-safe tattoo marker)
- Micellar water or makeup remover (for corrections)
- Cotton swabs
- Hand lotion (optional, solely for prep)
Step 1: Preparation and Positioning
-
Clean the canvas:
Start by washing your hands thoroughly with soap and water to remove any oils or lotions, as markers adhere best to dry, clean skin. Dry them completely with a towel. -
Base hydration:
If your skin is very dry, apply a very light layer of lotion and let it fully absorb for at least 10 minutes until the skin feels matte, not slippery. -
Practice drawing:
Before touching ink to skin, sketch a few simple hearts on a piece of scrap paper to get a feel for the continuous line motion you’ll be using.
Style Secret
Use a liquid eyeliner with a felt tip rather than a ballpoint pen. The ink flows smoother over skin texture and creates a much bolder, tattoo-like black line.
Step 2: The Wrist Statement
-
Locate the wrist placement:
Find the spot on your inner wrist just below the heel of your hand. This will be the home for the largest heart design. -
Draw the left curve:
Using your fine-point marker, start at the top center point of the heart. Draw a smooth, rounded curve downwards to the left, tapering into a bottom point. -
Complete the outline:
Return to the top starting point and draw a matching curve to the right, meeting the bottom point to close the shape. -
Refine the line weight:
Go over the outline once more if needed to ensure the black line is solid and unbroken, but keep the inside of the heart empty.
Oops, Smudged?
If you make a mistake or a line gets wobbly, dip a pointed cotton swab in micellar water to gently erase just that specific section without ruining the whole design.
Step 3: The Palm Centerpiece
-
Center the palm heart:
Open your hand flat. Identify the slightly fleshy center of your palm, which naturally crinkles when you close your hand slightly. -
Draft the shape:
Draw a medium-sized heart here, slightly smaller than the one on your wrist. -
Thicken the lines:
For this specific heart, go over the outline two or three times to make it bolder than the others. I find this helps it stand out as the focal point amidst the palm lines.
Step 4: Fingertipdetails
-
Start with the index finger:
Move to your index finger. Near the middle knuckle (the second joint down), draw a tiny, delicate heart. -
Add a second index heart:
Draw another small heart slightly higher up on the same finger, near the top joint, slightly off-center for a scattered look. -
Decorate the middle finger:
On the middle finger, place a single small heart right on the pad of the uppermost section, just below the fingernail. -
Accent the ring finger:
Move to the ring finger. Draw one tiny heart on the middle phalanx (the section between the two joints). -
Complete the middle finger:
Return to the middle finger and add a second heart lower down, near the base knuckle. -
Detail the pinky:
Finally, draw a small heart on the pinky finger’s top section to balance the composition. -
Scatter check:
Look at your hand as a whole. The hearts should look somewhat random, like falling confetti, rather than perfectly aligned in rows. -
Set the ink:
Allow the ink to dry completely for about 2-3 minutes without closing your hand to prevent smudging.
Enjoy your temporary hand art and capture a photo against a bright window for the full effect


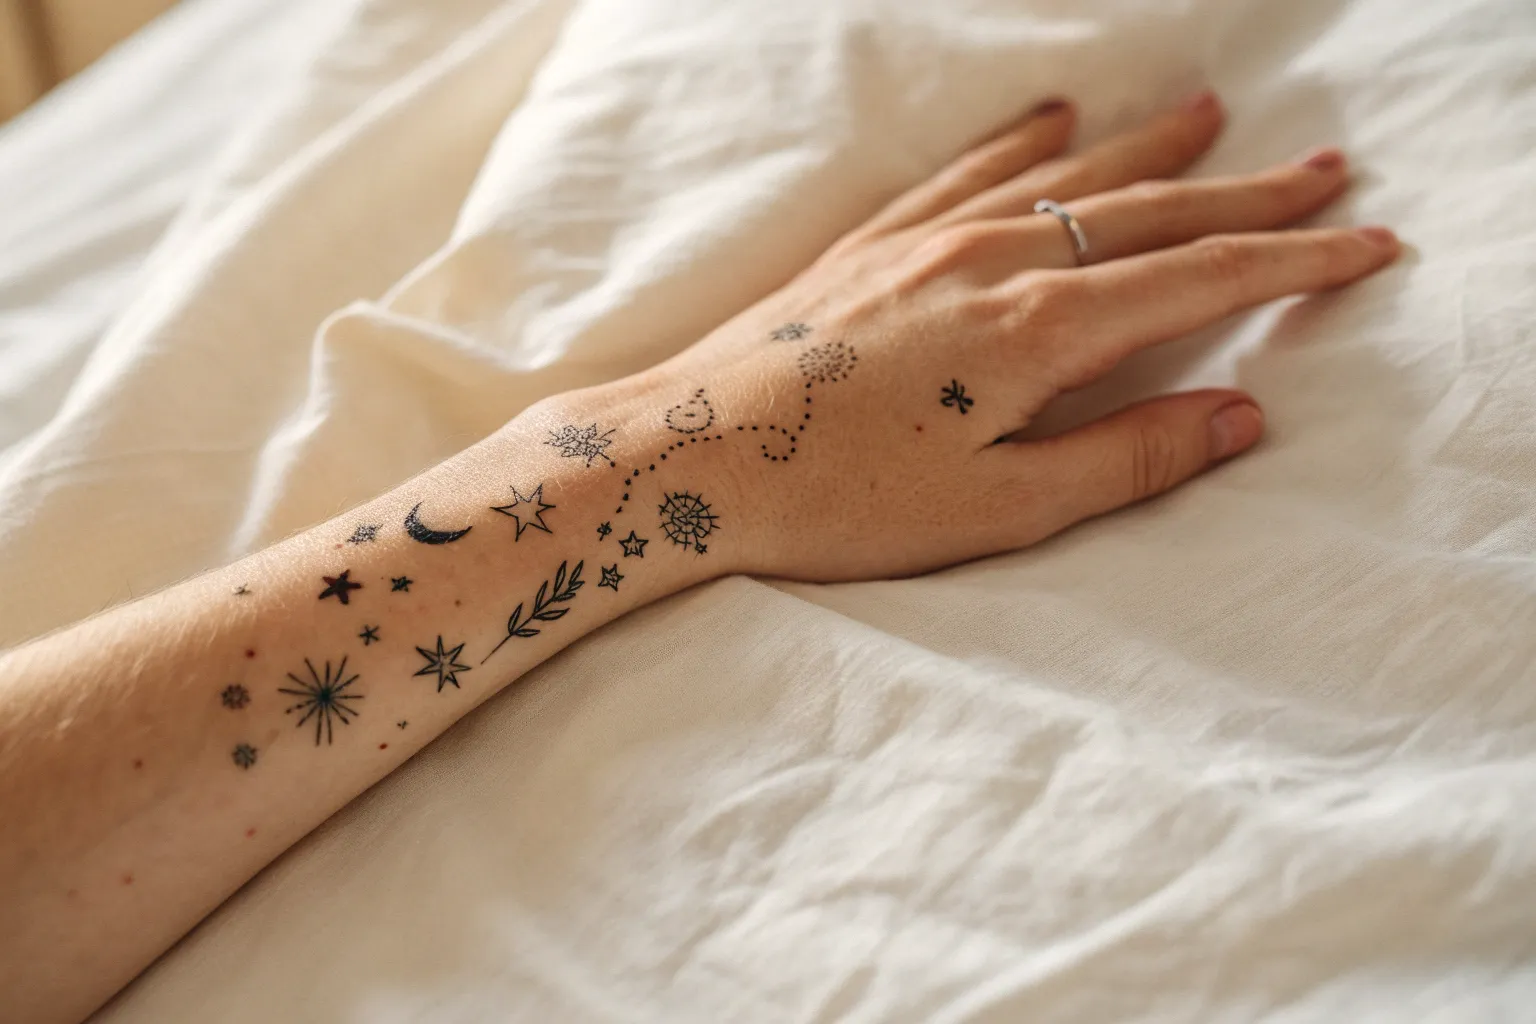
Vine Wraps Around Thumb and Wrist
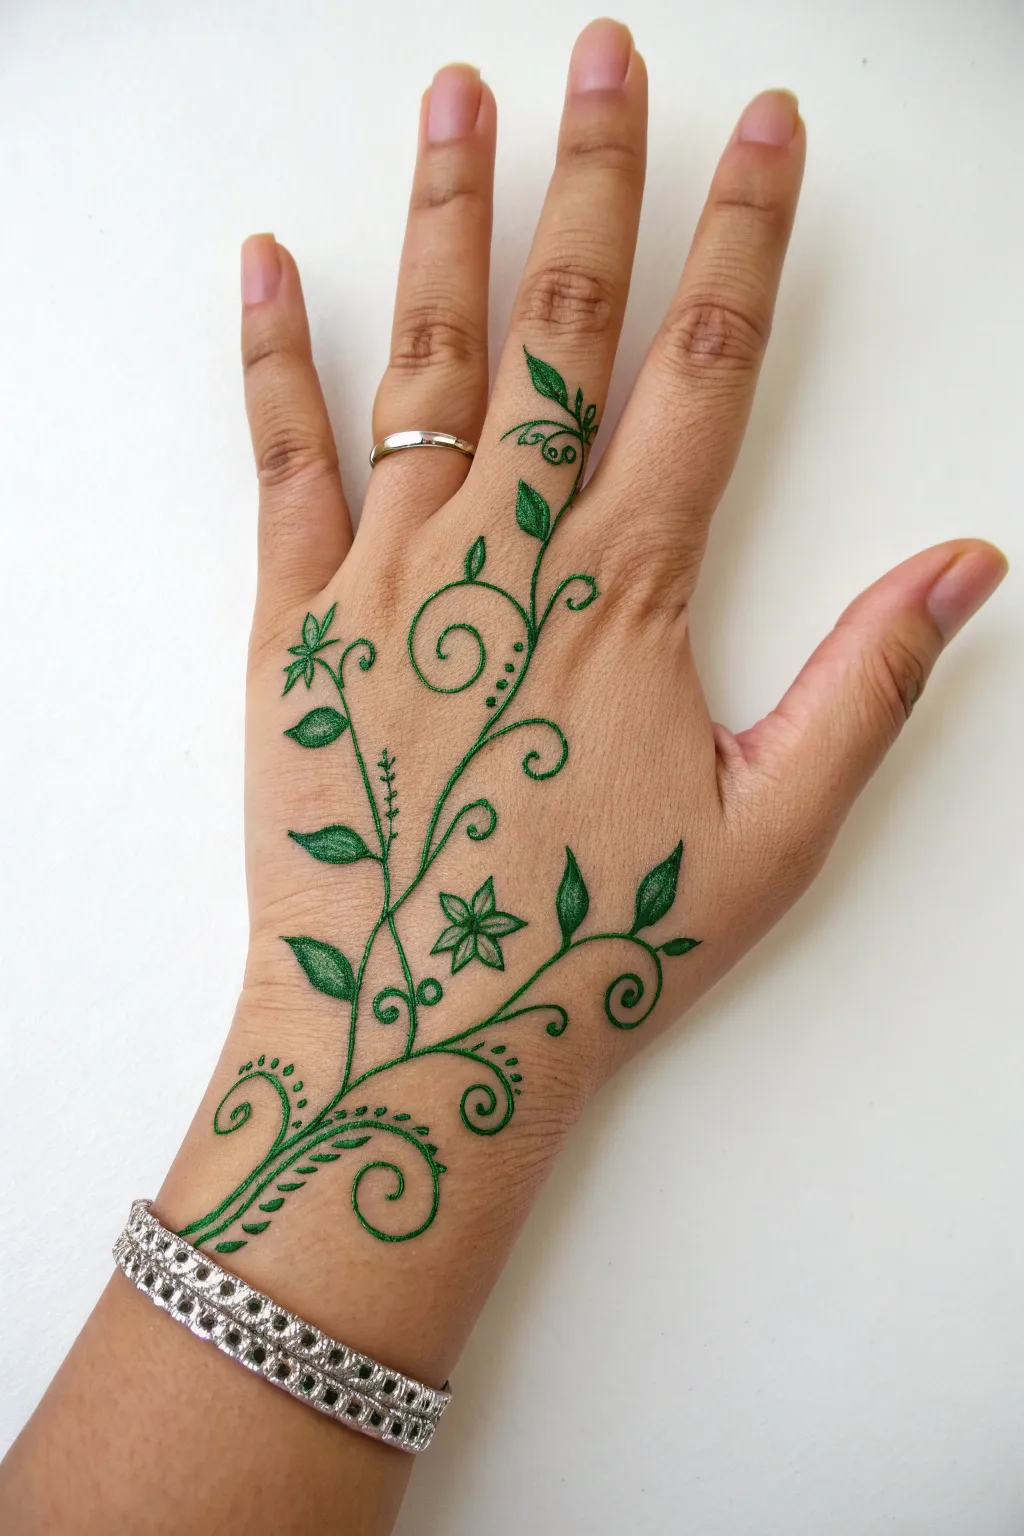
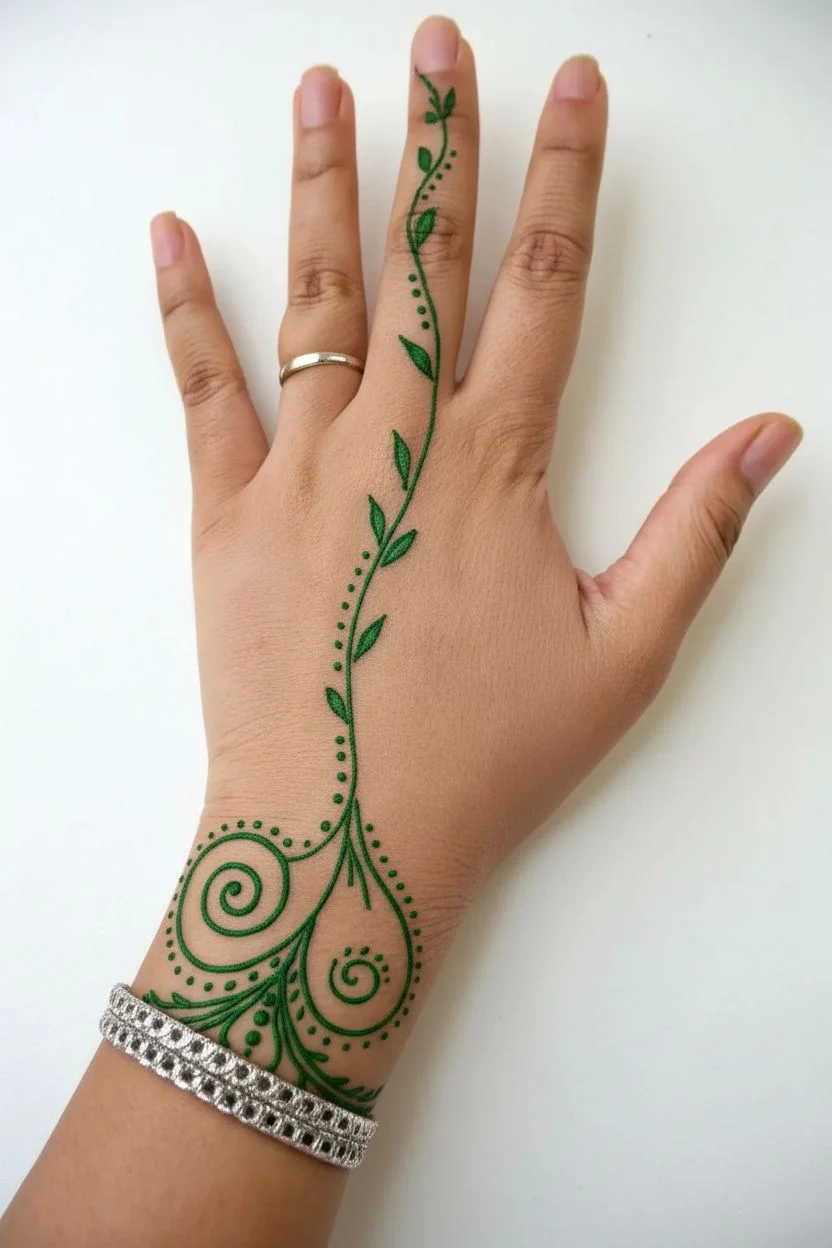
This elegant body art design features a climbing green vine that creates a natural, flowing look from the wrist up to the middle finger. The delicate swirls and leaves mimic organic growth, making it a perfect, temporary accessory for nature lovers.
How-To Guide
Materials
- Green fine-tip body art pen, tattoo marker, or henna cone (emerald green shade)
- Skin-safe rubbing alcohol or soap and water
- Cotton pads
- Setting powder or hairspray (optional, for longevity)
Step 1: Preparation & Foundation
-
Clean surface:
Begin by cleaning the back of your hand and wrist thoroughly with soap and water or a cotton pad soaked in rubbing alcohol. Removing natural oils ensures the ink adheres crisply and lasts longer. -
Start at the wrist:
Locate a starting point on your inner wrist, slightly off-center towards the thumb side. Draw a long, slightly curved line extending diagonally upward across the back of the hand towards the base of the middle finger. -
Extend the main stem:
Continue that main line up the center of the middle finger, stopping just below the fingernail. This will serve as the spine for your vine. -
Base swirls:
At the very bottom of your stem (on the wrist), draw two large spiral curls branching outward—one curling left and one curling right—to anchor the design. -
Add lower details:
Along the curve of those base swirls, add series of small dots or tiny dash marks following the curve to create a decorative, feathered effect.
Smudged Ink?
If you make a mistake or smudge a line, quickly dip a cotton swab in rubbing alcohol or makeup remover to erase the error before it dries fully.
Step 2: Adding Flora & Flourishes
-
Draw the lower leaves:
Move slightly up the main stem on the back of the hand. Draw two pointed, almond-shaped leaves branching out to the left side. -
Shade the leaves:
Using tiny, dense stippling or soft hatching strokes with your pen, fill in these leaves so they appear solid green but have a bit of texture. -
Add right-side swirls:
Opposite the leaves, draw a large, playful swirl branching out to the right side of the hand. Add a smaller swirl slightly above it. -
Create the central flower:
In the open space near the center of the hand (between the leaves and swirls), draw a simple five-petaled flower. Keep the petals pointed like a star. -
Fill the flower:
Shade the inside of the flower petals, leaving a tiny lighter spot in the center of each petal if possible for dimension. -
Add middle leaves:
Draw two more leaves further up the hand, closer to the knuckles. Place one on the right side and one on the left, alternating their positions. -
Draw thumb-side details:
On the left side of the main vine (towards the thumb), add a small branch topped with a three-pointed star-flower and a curling tendril.
Add Some sparkle
For a festival look, apply small dabs of skin-safe glitter glue to the center of the swirls and the middle of the star-flower once the green ink is dry.
Step 3: Finger Details & Finishing
-
Decorate the knuckle area:
As the vine crosses the large knuckle, add two tight, symmetrical swirls branching off the main stem—one curling left, one right. -
Embellish the finger stem:
On the middle finger section, draw a small leaf pointing casually to the left. -
Finger swirls:
Above that leaf, add a delicate, loopy swirl that wraps slightly around the side of the finger. -
Top leaves:
Near the top knuckle of the middle finger, draw two small leaves growing upwards. -
Final tip flourishes:
Finish the design just below the nail bed with a final tiny curl and a small leaf tip. -
tiny accents:
Look over the whole design. Add tiny dots along the spine of the vine in empty spaces to bridge gaps and add intricacy. -
Set the design:
Allow the ink to dry completely without touching it. I find that lightly dusting with setting powder or a spritz of hairspray helps keep the edges sharp for the day.
Enjoy showing off your new botanical accessory designed with your own hand

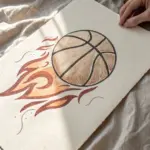
Cloud Puffs and Lightning Bolts on Fingers
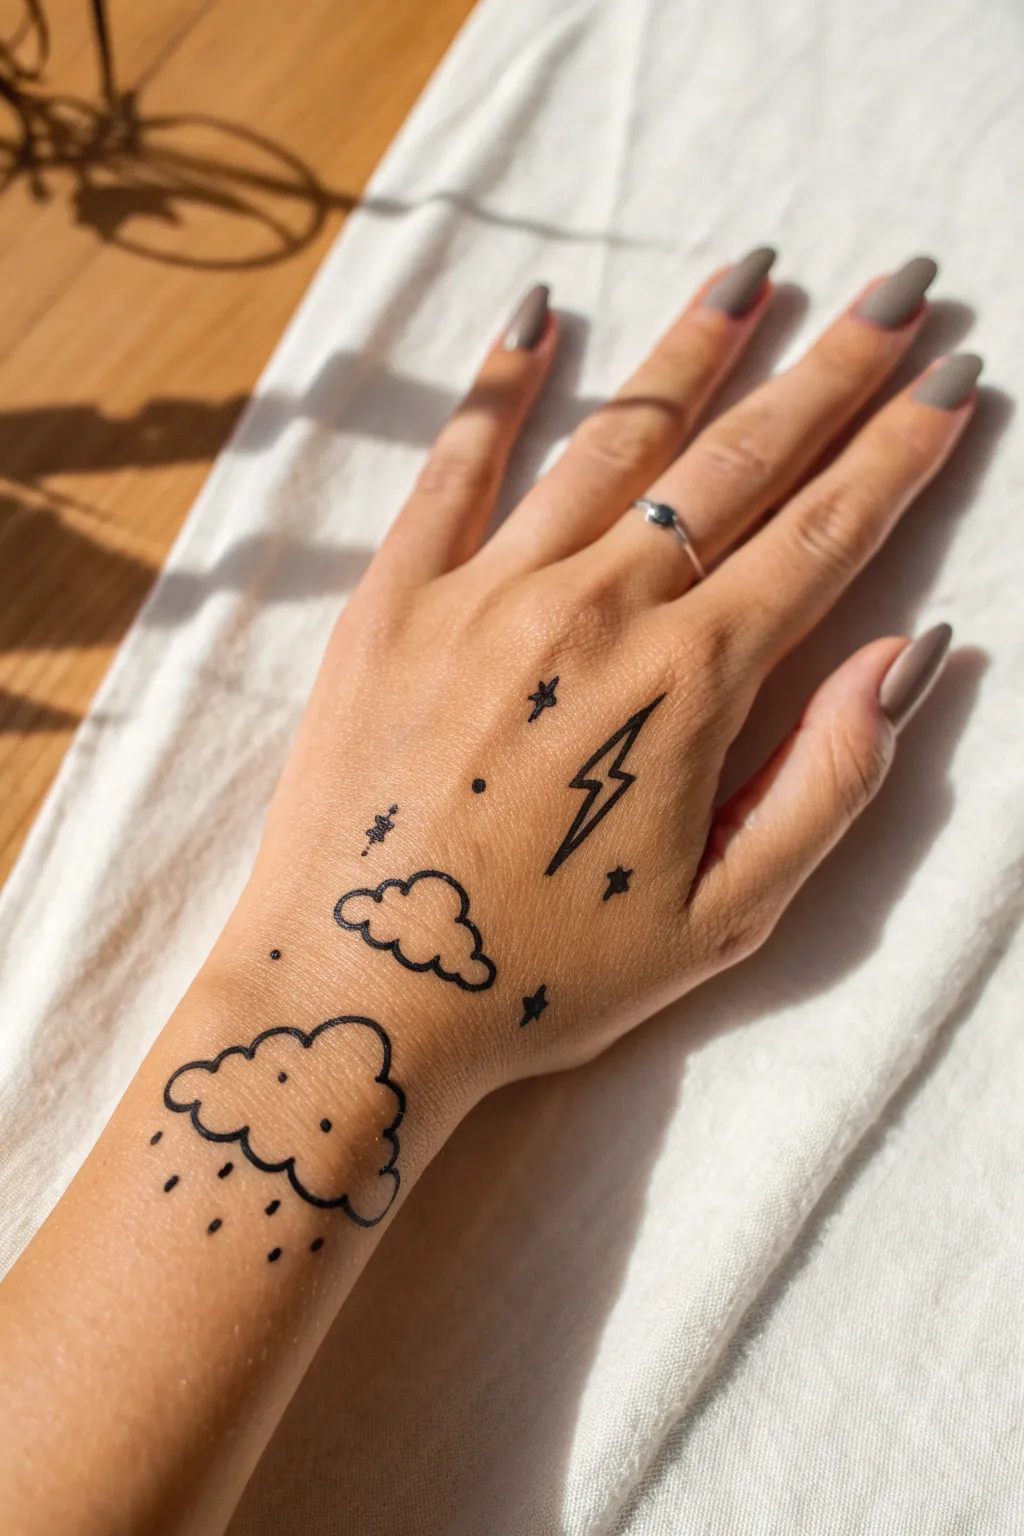
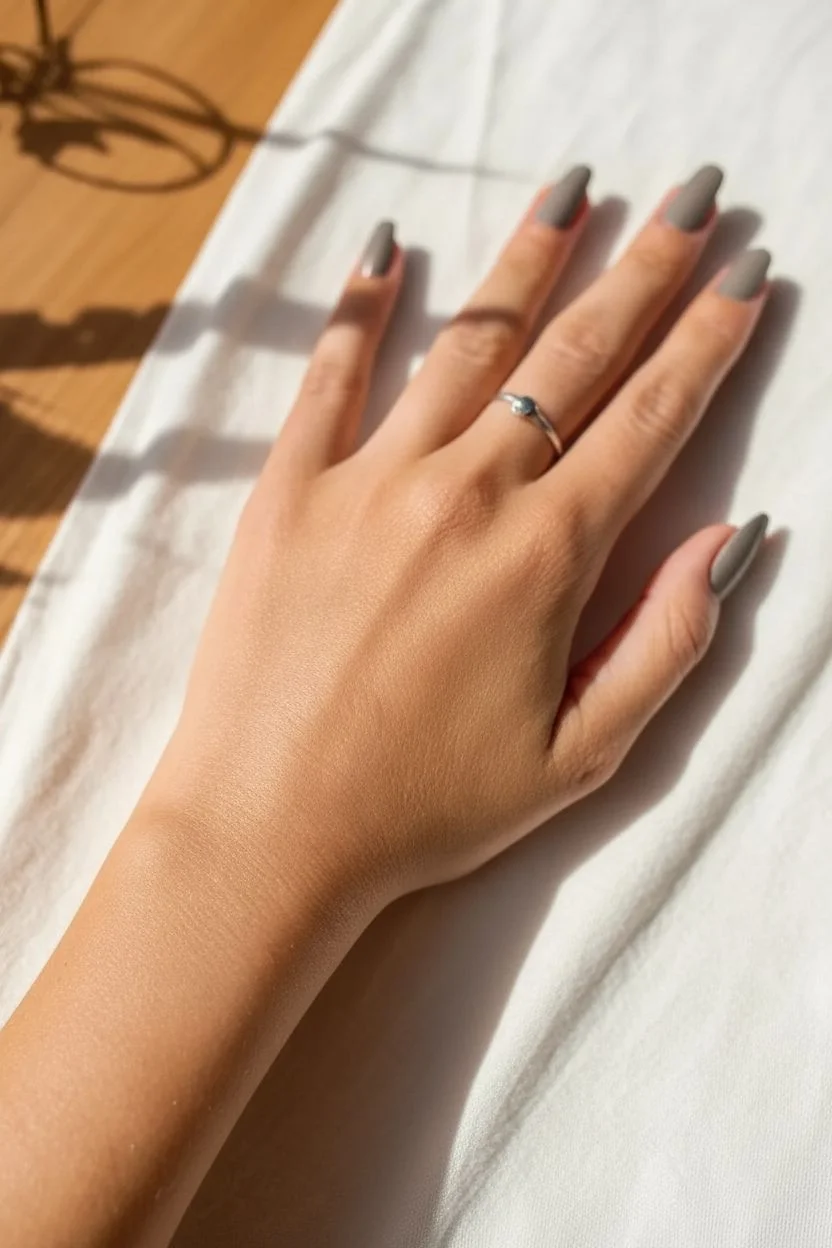
Transform your hand into a whimsical canvas with this doodle design featuring fluffy clouds, striking lightning, and tiny celestial details. Using bold black ink against bare skin creates a tattoo-like aesthetic that is perfect for festivals or just a creative afternoon.
Step-by-Step Tutorial
Materials
- Fine-point black body art marker or tattoo pen (e.g., Bic BodyMark)
- Grey nail polish (taupe or ‘greige’ shade)
- Clear top coat nail polish
- Soft cloth or towel
- Rubbing alcohol
- Cotton rounds
Step 1: Preparation & Base
-
Clean the canvas:
Start by washing your hands thoroughly with soap and water to remove oils, then dry them completely. -
Prep the skin:
Swipe the back of your hand and wrist area with a cotton round dipped in rubbing alcohol. This ensures the ink adheres crisply without smudging. -
Apply nail color:
Before drawing, apply two coats of a taupe-grey nail polish to your nails. Let them dry fully so you don’t smudge them while doodling.
Anchor Your Hand
To keep shaky lines at bay, rest the side of your drawing palm solidly against a table surface while sketching on the back of your other hand.
Step 2: Drawing the main elements
-
Placement strategy:
Visualize the layout: you’ll want the largest cloud near the wrist, a smaller cloud in the center of the hand, and a lightning bolt near the index finger knuckle. -
Draw the wrist cloud:
Starting about two inches above your wrist bone, draw the bottom line of the large cloud. Keep the line slightly wavy rather than perfectly straight. -
Fluff up the cloud:
Add the puffy top section using a series of connected ‘U’ shapes or scallops. Vary the size of the scallops to make it look organic. -
Sketch the center cloud:
Move up to the middle of the back of your hand. Replicate the cloud shape but make this one slightly smaller and more horizontal than the wrist cloud. -
Outline the lightning bolt:
Near the base of your index finger and thumb, draw a jagged lightning bolt shape. Start with the top zig-zag, angling it downwards towards the wrist. -
Thicken slightly:
Go over the lightning bolt outline one more time to make the lines just a fraction bolder than the clouds.
Step 3: Adding texture and details
-
Add cloud definition:
Inside the large wrist cloud, tap two or three tiny dots near the center to give it a little texture. -
Create rain:
Below the large wrist cloud, draw about six to eight small vertical dashes or dots falling downwards to mimic rain. -
Texture the small cloud:
Repeat the texturing process for the center cloud, adding just one or two dots inside the shape. -
Draw the main star:
In the open space between the two clouds, draw a small four-pointed star or cross shape. Add a tiny dot at the end of each point for a stylized look. -
Add a solid star:
Above the lightning bolt, near the knuckle, draw a tiny 5-point star and fill it in completely so it’s solid black. -
Fill in the gaps:
Scatter 2-3 tiny solid black dots (like distant planets) in the negative space around the lightning bolt. -
Draw the lower star:
Place a second filled-in 5-point star below the lightning bolt to balance the composition.
Ink Bleeding issues?
If the ink starts feathering into fine lines on your skin, your hands might be too warm or lotiony. Wipe down again with alcohol and cool your hands under cold water.
Step 4: Finishing touches
-
Check for gaps:
Scan the design for any lines that didn’t take fully to the skin. I like to carefully re-trace any weak spots with a very light hand. -
Dry time:
Allow the ink to dry for at least 5 minutes before touching anything or rolling down sleeves. -
Protect the nails:
Finish with a clear top coat on your nails to keep the manicure glossy and chip-free.
Enjoy your temporary sky-themed body art for the day

PENCIL GUIDE
Understanding Pencil Grades from H to B
From first sketch to finished drawing — learn pencil grades, line control, and shading techniques.
Explore the Full Guide
Sticker-Bomb Mini Icons Across the Back of Your Hand
Transform your palm into a living sketchbook with this eclectic mix of tiny, sticker-style icons. This playful design combines cosmic symbols, nature motifs, and abstract shapes in black ink with striking pops of red for a cohesive, busy-but-balanced look.
Detailed Instructions
Materials
- Fine-tip black ink tattoo pen or skin-safe marker (0.5mm)
- Red ink tattoo pen or skin-safe marker
- Makeup remover or micellar water (for corrections)
- Cotton swabs
- Setting powder or translucent loose powder
- Hairspray (optional sealer)
Step 1: Preparation & Mapping
-
Prep the canvas:
Wash your hand thoroughly with soap and water to remove any oils, which can make the ink smudge or not adhere properly. Dry completely before starting. -
Establish the center:
Start right in the middle of your palm. Draw a simple red heart outline, then carefully fill it in with your red marker. This will be the anchor point for the entire scatter pattern. -
Add the central text:
Directly beneath the red heart, using your black fine-tip pen, write the word ‘Hand’ in a simple, casual print font. Keep the letters small and neat.
Step 2: Core Palm Icons
-
Draw the ‘Rabbit’ hand:
To the right of the central heart, sketch a small hand making a peace sign or rabbit shadow puppet gesture. Use clean, thin lines for the fingers. -
Create the geometric eye:
Below the ‘Hand’ text, simply to the left, draw a small circle within a circle to create a target or stylized eye shape. -
Sketch the flower cluster:
Move slightly down and to the left. Draw a five-petaled flower with a simple circular center. Add a second, smaller flower nearby to start building density. -
Scatter the stars:
Around these central motifs, draw three different types of stars: a classic five-point outline star, a solid black star, and a few simple asterisks. Varying the styles adds visual interest. -
Insert filler dots:
Take your red marker and dot small clusters of red points in the empty spaces between your main drawings. This mimics the look of confetti and ties the red heart into the rest of the design.
Smudge Patrol
Hand skin moves constantly! If lines bleed into creases, quickly dab with a cotton swab dipped in micellar water, then dry the area completely before redrawing.
Step 3: Wrist & Lower Palm Extension
-
Draw the crescent moon:
Move down towards your wrist on the left side. Draw a clear crescent moon outline. Next to it, add a small sparkle or cross-star. -
Create the sun motif:
At the very center of your wrist, draw a small circle with varied lengths of rays extending outward to create a sun. I like to keep the rays thin and straight for a clean look. -
Add botanical elements:
Scatter small leaf sprigs and vine shapes in the gaps around the wrist. Draw a single curved line with small leaves branching off both sides. -
Incorporate abstract symbols:
Draw symbols like peace signs inside circles, jagged ‘lightning’ shapes, and small outlined hearts near the base of the palm.
Longevity Hack
To make your faux-tattoos last through hand washing, apply a layer of liquid bandage over the finished, dry design. It creates a waterproof shield.
Step 4: Finger Details
-
Decorate the index finger:
On the index finger, draw a series of small dots and circles that graduate in size, trailing up towards the fingertip. Add a small doodle, like a planet or face, near the top joint. -
Adorn the middle finger:
For the middle finger, create a vertical line of small geometric shapes—dots, dashes, and tiny crosses. This elongates the look of the finger. -
Ring finger jewelry style:
Draw a ring-like band or a trailing vine that wraps slightly around the visual front of the ring finger. Add a small cross or star at the knuckle. -
Pinky minimalist dots:
Keep the pinky simple with a vertical row of solid black dots ending in a small flower or starburst near the nail.
Step 5: Finishing Touches
-
Fill the gaps:
Step back and look at your hand as a whole. Identify any accidental large empty spaces. Fill them with tiny micro-doodles: single dots, tiny plus signs, or small red hearts. -
Set the ink:
Once the ink is fully dry, lightly dust your hand with translucent setting powder to take away any shine and help the ink stay longer. Optionally, a quick spritz of hairspray can seal it for the day.
Enjoy showing off your intricate, temporary masterpiece until it’s time to wash it away
Clean Geometric Bands Like Ink Rings
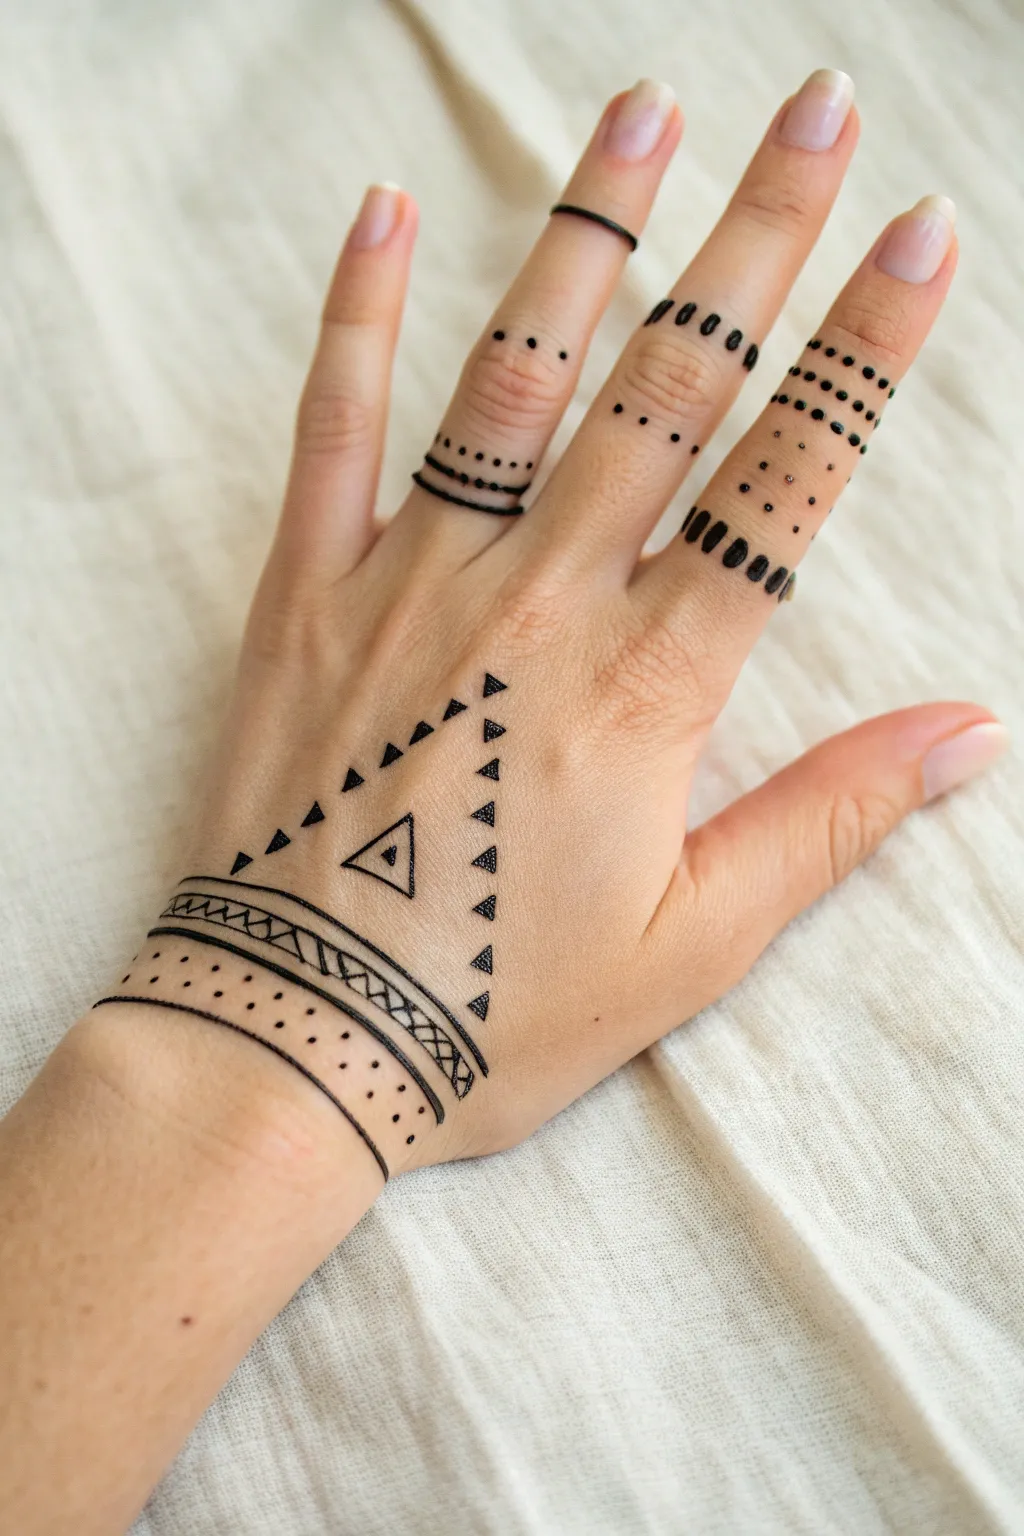
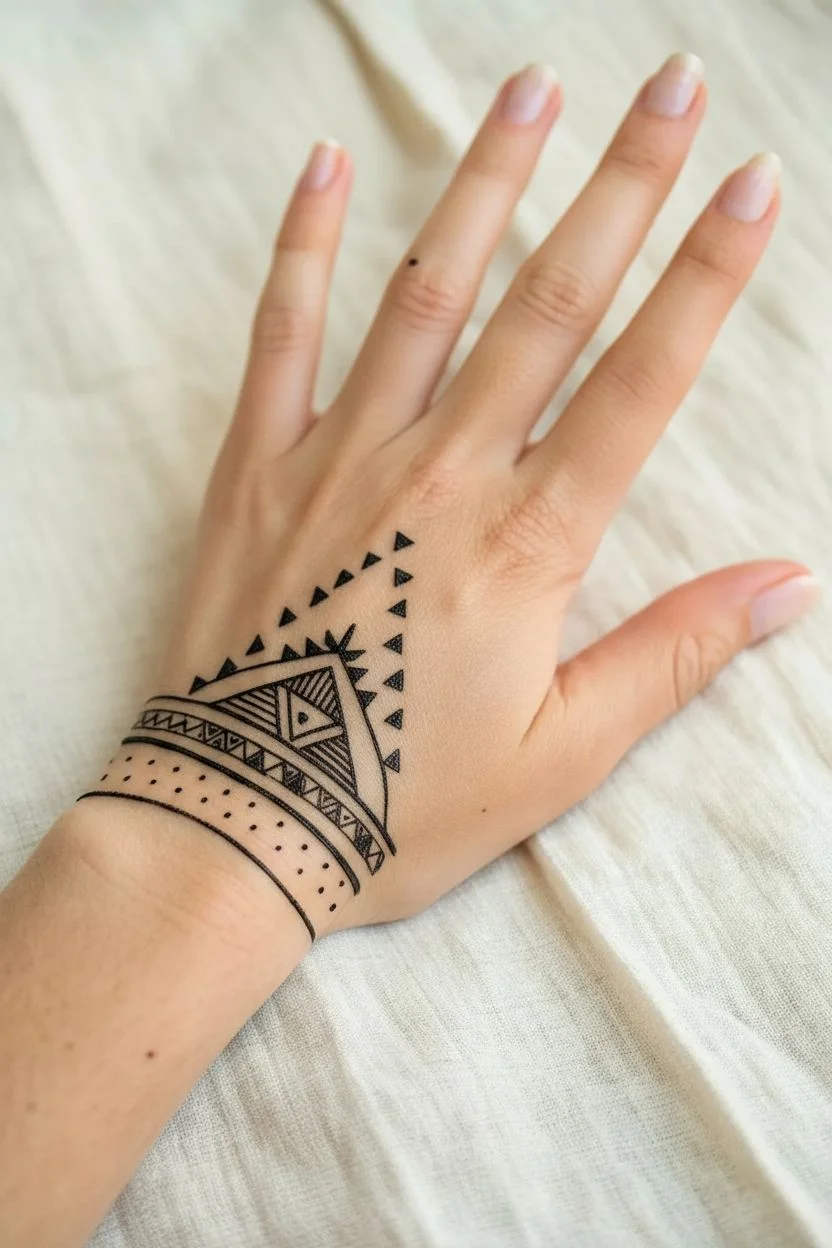
Achieve the edgy, precise look of permanent ink without the commitment using this geometric hand doodle design. It features clean bracelet bands on the wrist and delicate ring-like patterns on the fingers for a modern, minimalistic aesthetic.
Step-by-Step Tutorial
Materials
- Fine-liner pen (black, 0.3mm or 0.5mm tip)
- Ultra-fine liner pen (black, 0.05mm or 0.1mm tip)
- Skin-safe temporary tattoo marker or body art pen (alternative to standard pens)
- Makeup remover wipes or micellar water (for cleanup)
- Translucent setting powder (optional)
Step 1: The Wrist Cuff Base
-
Establish the anchor line:
Start by drawing a solid black line horizontally across your wrist, right where the hand meets the arm. This serves as the foundation for the entire cuff. -
Draw the lower border:
About half an inch below your first line, draw a second parallel line. Try to keep the spacing consistent as you wrap around the visible part of the wrist. -
Add the cuff details:
Inside the band created by the two lines, draw a third line closer to the top border. In the wider gap remaining below, add small, evenly spaced dots all the way across. I find tapping the pen vertically helps keep dots round. -
Create the geometric zigzag:
Above your very first anchor line, draw another line about a quarter-inch up. Fill this new channel with a zigzag pattern triangles pointing up and down. -
Fill the details:
Inside the upward-pointing triangles of your zigzag, add three or four tiny horizontal hatch lines. Leave the downward-pointing triangles empty for contrast.
Smudge Prevention
Keep a piece of paper under your drawing hand to act as a barrier. This stops oils from your skin from smearing the ink while you work on delicate finger details.
Step 2: The Triangle Feature
-
Outline the main shape:
Visualize a large triangle on the back of your hand. Using small, solid black triangles as ‘dots,’ create the two side borders of this shape, pointing from the wrist cuff toward the middle knuckle. -
Orient the border triangles:
Ensure the flat base of each small triangle faces the inside of the large imaginary triangle shape, with points facing outward. -
Add the centerpiece:
In the center of the large triangle space, draw a small, open triangle. Outline it again to create a double border. -
Detail the center:
Place a single solid black dot right in the middle of your double-bordered center triangle.
Metallic Touch
Trace the inner triangle or select dots with a gold or silver gelly roll pen. The metallic ink adds a stunning ‘jewelry’ effect that catches the light.
Step 3: Finger Ring Accents
-
decorate the index finger:
On the middle segment of the index finger, draw three parallel lines that curve slightly to mimic a ring. Add small dots between the top two lines. -
Add the knuckle accent:
Just above the knuckle closest to the hand on the index finger, place two simple dots. -
Style the middle finger ring:
On the middle segment of your middle finger, draw two widely spaced parallel lines. Between them, draw short, thick vertical dashes—like a dashed road line but heavier. -
Add upper details:
Above the dashed band on the middle finger, place a row of three simple dots. -
Design the ring finger stack:
The ring finger gets the most complex stack on the middle segment. Start with two rows of close-together dots at the top. -
Continue the ring finger pattern:
Below the dots, add a very thin line, then a row of tiny dots, and finally a thicker solid line at the bottom to ground the stack. -
Detail the pinky finger:
On the pinky’s middle segment, draw a thick ‘dashed’ band similar to the middle finger, but make the dashes slightly thicker and closer together. -
Finish the pinky layout:
Above the dashed band, create a square grid of dots (three rows of three) for a structured, pointillism look. -
Set the design:
Let the ink dry completely for at least 5 minutes. If you want it to last longer, lightly dust it with translucent setting powder.
Now you have a stunning piece of geometric body art that looks crisp and stylish for any occasion
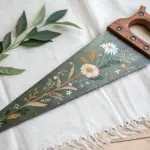
BRUSH GUIDE
The Right Brush for Every Stroke
From clean lines to bold texture — master brush choice, stroke control, and essential techniques.
Explore the Full Guide
Zentangle Patchwork on the Back of the Hand
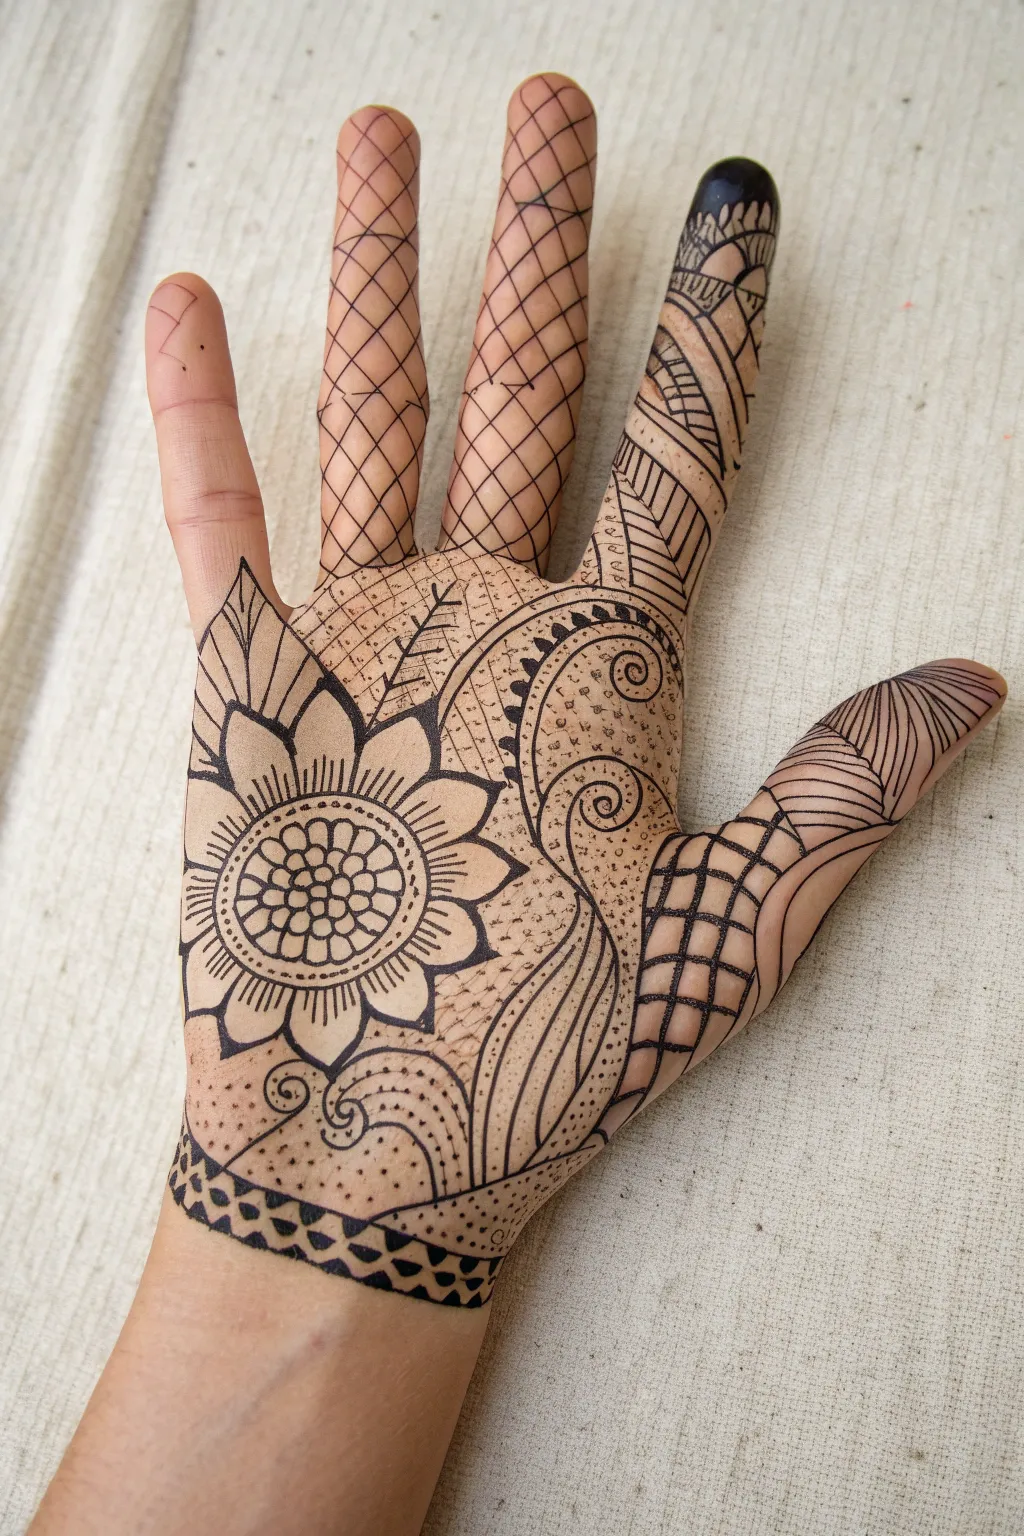
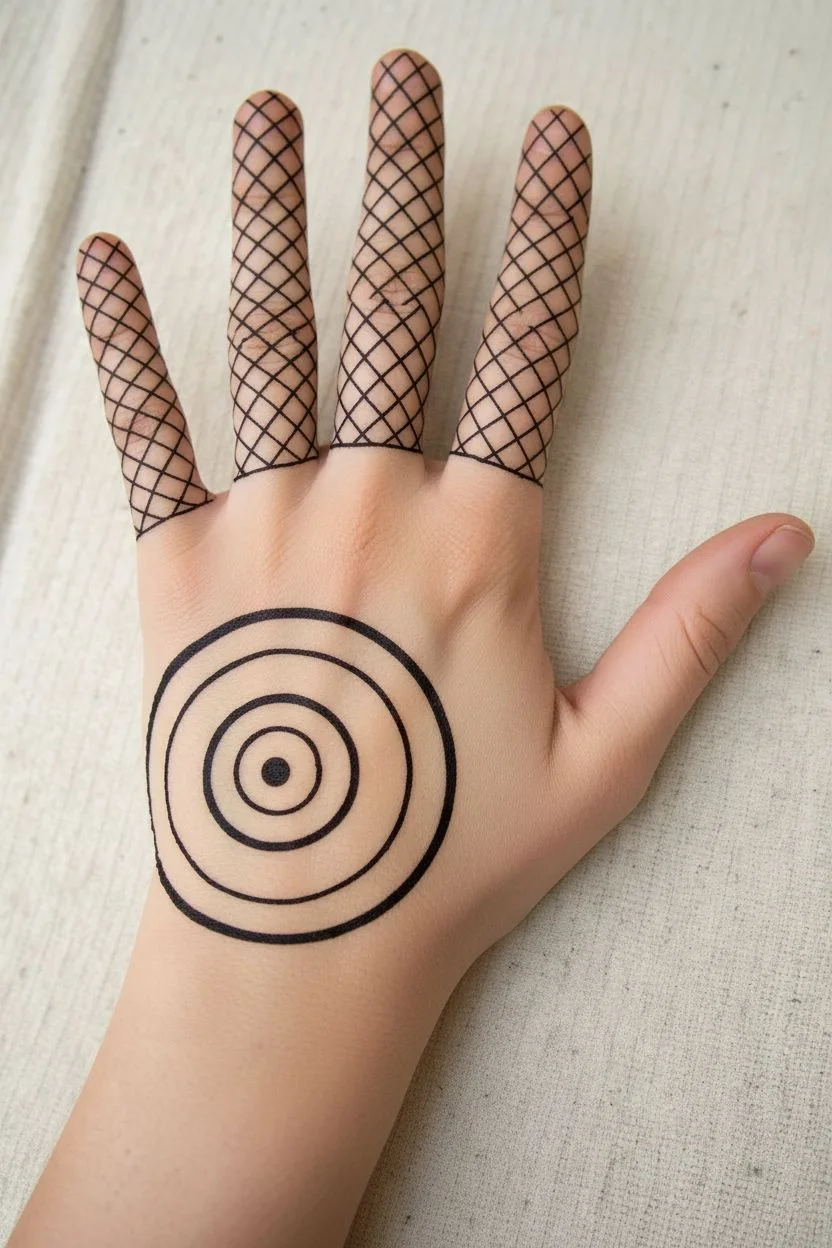
Transform your palm into a canvas with this intricate, tattoo-inspired doodle art. Featuring mix-and-match patterns like fishnet grids, a bold floral mandala, and swirling paisley motifs, this design looks stunningly complex but is built from simple, repetitive strokes.
Step-by-Step
Materials
- Fine-point black skin-safe marker (e.g., cosmetic ink, tattoo pen, or high-quality henna cone)
- Micellar water or rubbing alcohol (for skin prep)
- Cotton pads
- A steady hand
Step 1: Preparation & Mapping
-
Prep the canvas:
Begin by cleaning your palm thoroughly with a cotton pad dipped in rubbing alcohol or micellar water to remove natural oils. This ensures the ink flows smoothly and lines stay crisp without bleeding. -
Anchor the flower:
Locate the fleshy mound at the base of your thumb. Draw a small circle here as the center of your main flower. Add two progressively larger circles around it to create the flower’s core.
Smudge Prevention
Rest your hand on a paper towel while drawing to absorb sweat. Work from the center outward or left-to-right (if right-handed) to avoid dragging your hand through wet ink.
Step 2: Drawing the Floral Focal Point
-
Fill the center:
Inside the core circles, draw tiny, tightly packed circles (like seeds) in the innermost ring. For the next ring, draw small, uniform petals or scallops. Leave the outermost ring plain for now as a border. -
Petal structure:
Extend large, pointed leaf-shaped petals outward from the core. Aim for about 8-10 petals that fan out towards the center of the palm and wrist. Make the tips sharp and the bodies wide. -
Petal details:
Add dimension to the flower by drawing a straight line down the center of each petal. Then, shade the base of each petal slightly where it meets the center to create depth. -
Leafy accents:
Tuck a few pointed leaves behind the main petals, specifically pointing towards the pinky side of the wrist to balance the composition.
Step 3: Finger Patterning
-
Middle & Ring netting:
Move to the middle and ring fingers. Draw a diagonal grid (fishnet pattern) covering the entire length of these fingers. I find drawing all diagonal lines in one direction first, then crossing them, keeps the spacing consistent. -
Index finger geometry:
On the index finger, create zones of patterns. At the base, draw diagonal stripes. At the knuckle, switch to a chevron or triangle pattern. At the tip, add curved scallops. This variety adds visual interest. -
Thumb grids:
Draw a flowing, curved line along the length of the thumb. On the outer side of this line, fill the space with a warped checkerboard pattern that follows the curve of the thumb joint. -
Thumb tip lines:
On the tip of the thumb, draw fine, curved lines radiating from the nail bed, following the natural contour of the print.
Level Up: Color Pop
Once the black ink is fully dry, use colored skin-safe markers or gel pens to fill in specific elements like the flower petals or the checkerboard squares for a vibrant look.
Step 4: Connecting & Texturing
-
Main swirl motif:
Draw a large, bold double-line curve starting from the webbing of the thumb, sweeping down towards the center of the wrist. Cap it with a spiral curl. -
Paisley filler:
Inside the large curve you just created, add smaller paisley shapes and swirls. Fill the negative space with tiny stippling dots to create a shaded, textured effect. -
Wrist band:
Define the bottom of the design at the wrist crease with a thick horizontal band. Fill this band with a triangle or zigzag pattern, heavily shading the negative space with black for contrast. -
Background texture:
In the open areas of the palm (between the flower and finger patterns), add very faint, scattered dots (stippling). This connects the separate elements without making the design look cluttered. -
Final definition:
Go back over the main outlines—specifically the outer edges of the flower and the main swirl—to thicken them slightly. This difference in line weight makes the design pop.
Now you have a temporary masterpiece ready to show off or wash away whenever you please
All-Seeing Eyes on Knuckles and Finger Joints
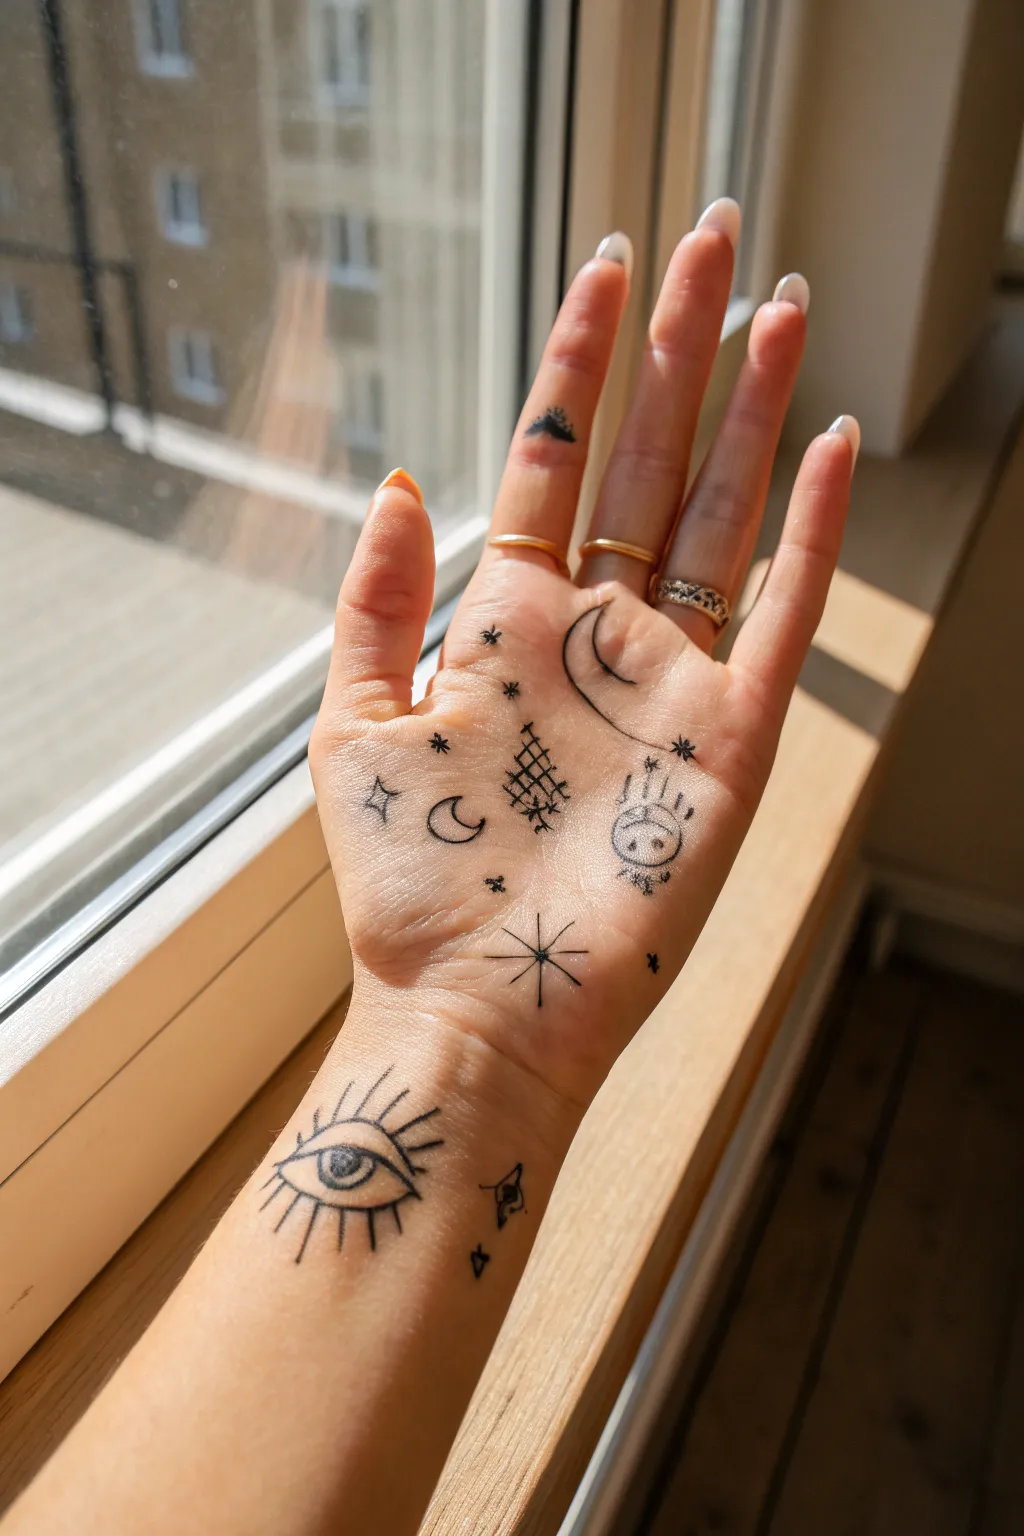

Transform your hand into a canvas of celestial symbols and mystical imagery using this simple doodle guide. This tutorial breaks down the placement of an all-seeing eye, crescent moons, and constellations for a delicate, whimsical look that resembles stick-and-poke tattoos.
Step-by-Step Tutorial
Materials
- Fine-point black ink pen (skin-safe graphic marker or cosmetic eyeliner)
- Micellar water or makeup remover (for corrections)
- Cotton swabs
- Setting spray (optional, for longevity)
Step 1: Wrists & Base
-
Draw the all-seeing eye:
Start on the inner wrist, just below the heel of your hand. Draw a wide, almond-shaped eye outline. Add a perfect circle for the iris in the center, and a smaller filled-in circle for the pupil. -
Add the lashes:
Radiate straight lines outwards from the top and bottom of the eye. Make the top lashes slightly longer and thicker than the bottom ones for a stylized effect. -
Add detail accents:
To the right of the eye, draw a tiny, imperfect triangle and a small geometric doodle that looks like a miniature eye or seed pod.
Smudge Control
Hands sweat naturally! If your pen bleeds into the skin creases, switch to a waterproof liquid eyeliner pen for sharper, longer-lasting lines that won’t feather.
Step 2: Palm Constellations
-
Create the sunburst:
Move up to the fleshy part of the palm near the wrist. Draw a central cross, then add diagonal lines through the center to create an eight-point star or sunburst. -
Draw the grid pattern:
In the center of the palm, sketch a small, tilted diamond shape composed of a cross-hatch grid pattern. Extend a few loose lines from the bottom to make it look like a hanging net or dreamcatcher. -
Add the crescent moon:
To the left of the grid (near the thumb pad), draw a small, simple outline of a crescent moon facing inward. -
Sketch the sparkling star:
Above the small moon, draw a four-pointed star. This is done by drawing a cross with tapered, curved edges rather than straight lines. -
Doodle the tiny face:
On the opposite side of the palm (under the pinky finger knuckle), draw a small circle with two dots for eyes and a straight line for a mouth. Add three vertical lines above it like hair or rays. -
Fill the gaps:
Scatter tiny asterisks (simple stars) and small dots in the empty spaces between your main drawings to connect the design together.
Step 3: Fingers & Finishing Touches
-
Draw the large crescent:
Place a larger crescent moon right at the base of your middle and ring fingers. I find it looks best if the curve hugs the natural crease of the finger joint. -
Add the finger mountain:
On the middle finger, just above the first knuckle crease, draw a tiny black triangle to represent a mountain peak or arrowhead. -
Accessorize:
This look is heavily complemented by jewelry. Stack thin gold rings on the middle and ring fingers to frame your doodles. -
Set the ink:
Let the ink dry completely for at least five minutes. If you want it to last for a photo shoot, lightly mist with hairspray or makeup setting spray.
Pro Tip
Keep your hand relaxed and slightly open while drawing. Stretching the skin too tight will distort the shapes when you relax your hand back to a natural position.
Now you have a hand full of magic ready to be shown off or photographed


Mini Everyday Objects Scattered Like Lucky Charms
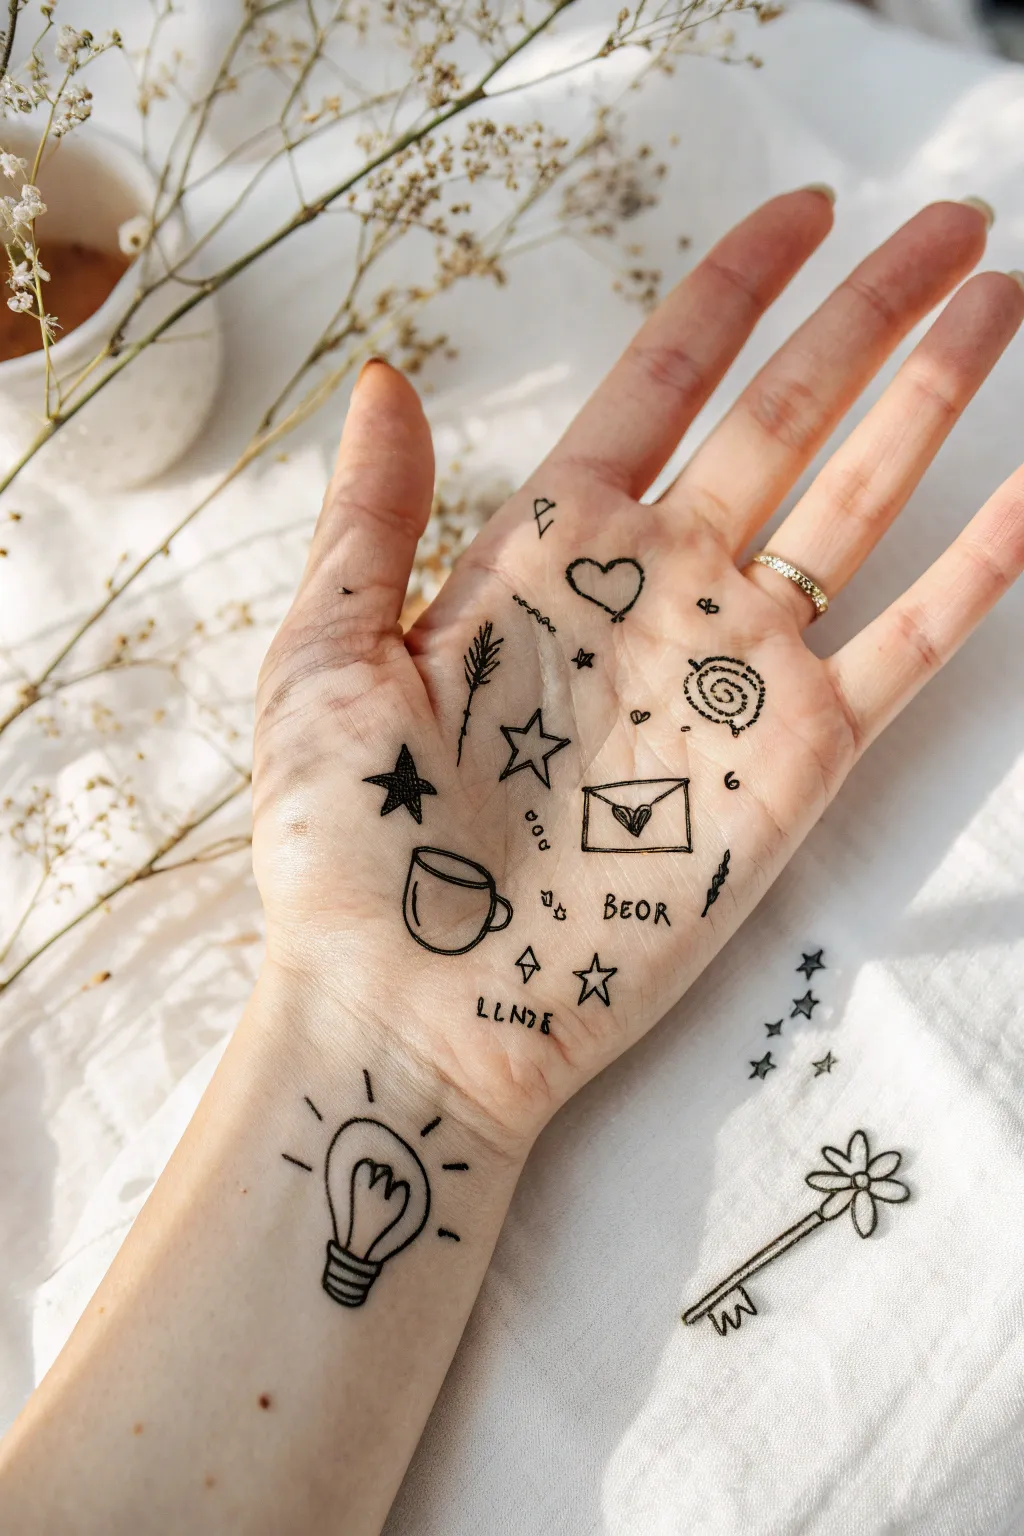
Turn your hand into a temporary canvas with this scattered collection of tiny, meaningful symbols that resemble a handful of lucky charms. This playful, impermanent art style uses simple linework to create a personal constellation of everyday objects right on your skin.
Step-by-Step Tutorial
Materials
- Fine-tip black cosmetic marker or skin-safe tattoo pen
- Micellar water or makeup remover (for corrections)
- Cotton swabs
- Your own hand (palm and inner wrist)
- Setting spray (optional, for longevity)
Step 1: Prepping the Canvas
-
Clean and dry:
Start by washing your hands thoroughly with soap and water to remove any natural oils or lotion. Dry your palm completely, as any moisture will make the ink bleed or fade quickly. -
Test your pen:
Scribble a tiny tester line on your wrist to check the ink flow. You want a consistent, dark line without pressing too hard, which can tickle or irritate the skin.
Smudged Lines?
Work from the center of your palm outward to avoid rubbing your hand over wet ink. If a smudge happens, quickly dab it with a cotton swab dipped in micellar water.
Step 2: Drawing the Centerpiece Icons
-
Draft the heart:
Begin near the center of your palm, slightly towards the fingers. Draw a simple, open outline of a heart. It doesn’t need to be symmetrical; a slightly sketched look adds charm. -
Sketch the snail shell:
Below the ring finger, draw a tight spiral creating a snail shell or cinnamon roll shape. Keep the lines spaced enough so they don’t blur together when you flex your hand. -
Add the envelope:
Move lower towards the heel of your hand. Draw a small rectangle, then add a ‘V’ shape inside to form the envelope flap. I like to fill in a tiny heart right at the seal for extra detail. -
Create the coffee mug:
On the thumb side of your palm, sketch a simple cylinder with a curved handle. Add a curved line near the rim to give the cup some dimension.
Make it Last
Apply a light dusting of translucent setting powder over the dried ink, followed by a quick spritz of hairspray or makeup setting spray to seal the design.
Step 3: Adding Celestial Elements
-
Inking the solid star:
Between the coffee mug and envelope, draw a five-pointed star. Fill this one in completely with black ink to create a bold focal point among the outlines. -
Outline the open stars:
Scatter two or three open-outline stars around the palm. Place a larger one near the center and a smaller twinkling star near the wrist crease. -
Draw the wheat stalk:
Near the center of the palm, draw a thin vertical line. Add small diagonal dashes coming off the top section to resemble a stalk of wheat or lavender.
Step 4: Wrist and Finger Details
-
The lightbulb moment:
Move down to your inner wrist. Draw a large lightbulb shape—a circle tapering into a threaded base. Add a zigzag inside for the filament and short dash lines around the outside for ‘light’ rays. -
The skeleton key:
To the right of the wrist (or on paper nearby if you want to practice), draw a long stem with a flower-shaped handle at the top and simple teeth at the bottom. -
Lettering:
Add small text elements if desired. In the image, ‘BEOR’ and ‘LLNJE’ are written in tiny, casual capital letters near the palm’s heel.
Step 5: Finishing Touches
-
Filler details:
Look for empty spaces on your palm. Fill them with tiny dots, miniature hearts, and little sparkle symbols to connect the larger drawings. -
Let it set:
Keep your hand flat and open for at least 5 minutes to let the ink dry completely without smudging in your palm creases.
Now you have a handful of charming art to brighten your day
Negative-Space Doodles Using Your Skin as Highlights
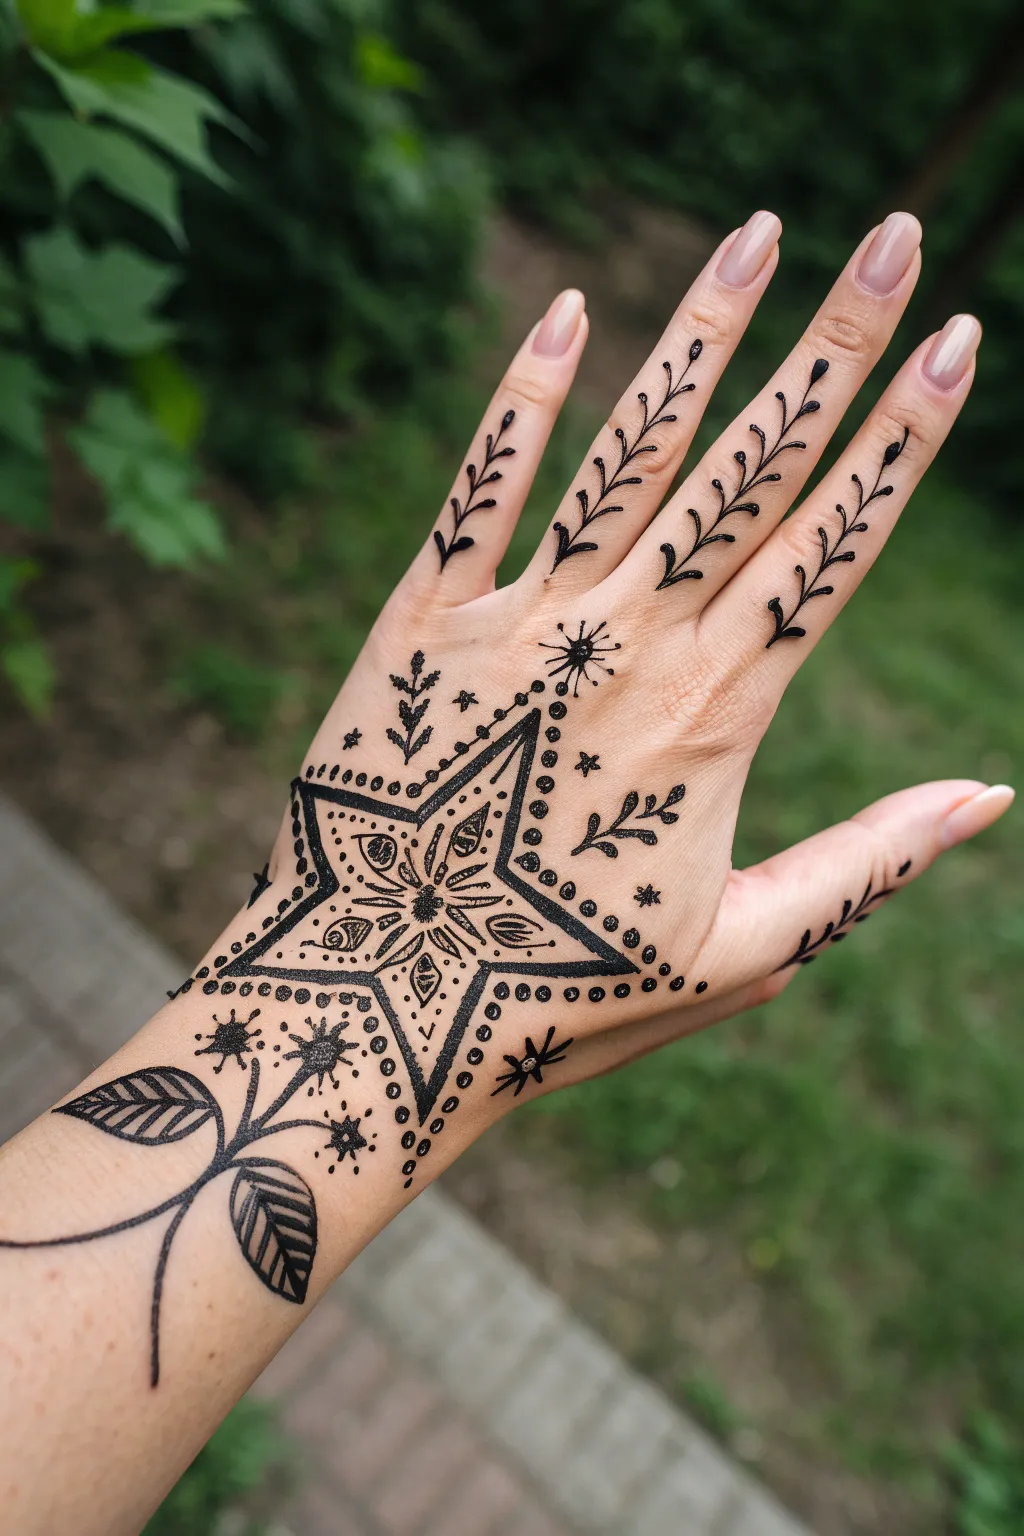
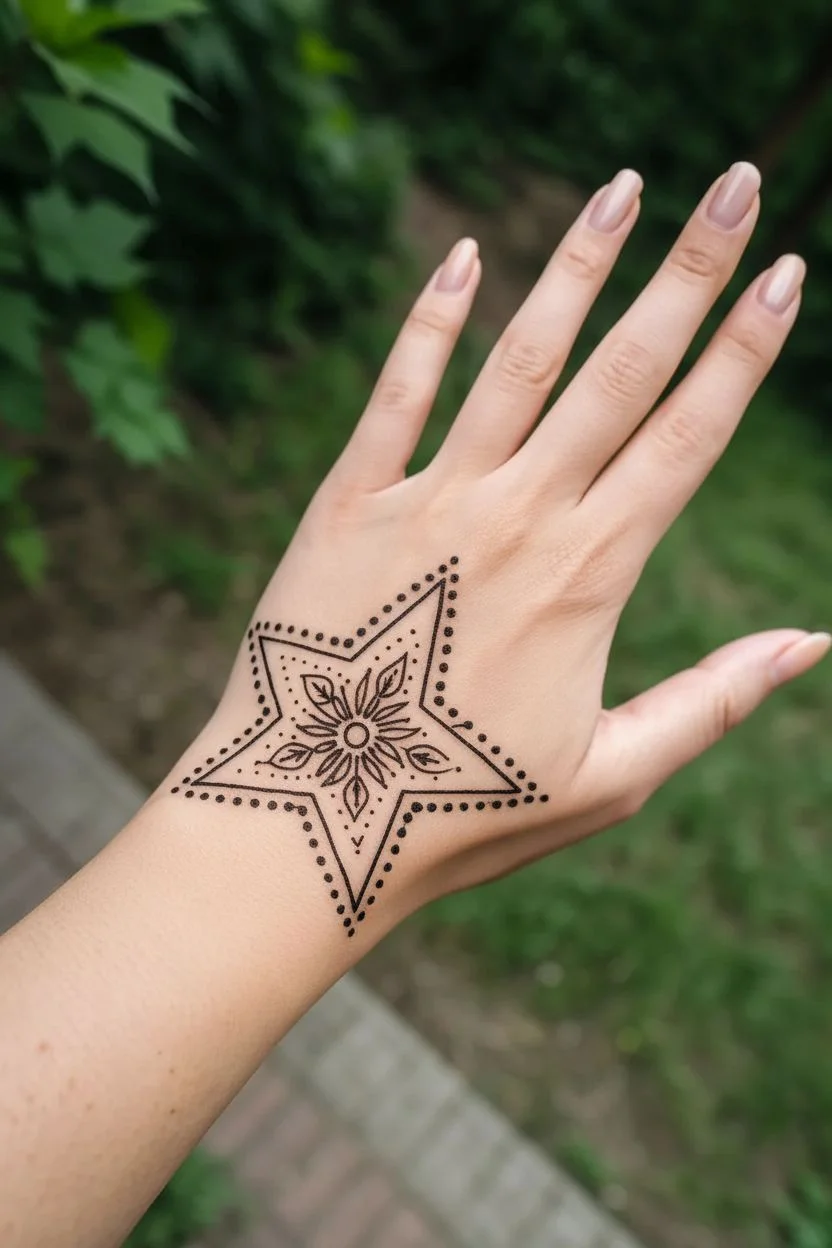
Transform your hand into a celestial canvas with this striking design that combines bold geometric shapes with organic vine details. The central star creates a dramatic focal point, utilizing negative space to make the skin itself shine through as the highlight.
How-To Guide
Materials
- Fine-point black body art marker or henna cone
- Rubbing alcohol and cotton pad (for skin prep)
- Skin-safe setting powder or hairspray (optional)
- Micellar water and Q-tips (for corrections)
Step 1: Preparation & Central Framework
-
Prep the canvas:
Start by cleaning the back of your hand thoroughly with rubbing alcohol and a cotton pad. This removes natural oils and ensures your ink stays crisp and lasts longer. -
Draw the star outline:
Find the center of the back of your hand. Draw a five-pointed star shape using a medium thickness line. Try to keep the points relatively symmetrical, but don’t stress over geometric perfection. -
Add first inner detail:
Inside each point of the star, draw a smaller ‘V’ shape pointing outward. This creates a smaller, inner star shape. Draw a small circle in the very center where all lines would converge. -
Create the sunburst center:
From that central circle, draw lines radiating outward toward the inner corners of the star. It should look like a flower or sunburst exploding from the middle. -
Fill the petal detail:
Inside the diamond shapes created by the radiating lines, add tiny dots or small leaf shapes. This adds density to the center pattern without turning it into a solid black blob.
Steady Hand Trick
Rest your drawing wrist on a solid surface or stabilize it with your other hand’s pinky finger while drawing fine details to stop shaky lines.
Step 2: Adding Depth & Borders
-
Thicken the main outline:
Go back to your original outer star outline. Draw a second line parallel to it on the outside, creating a double border. Fill the space between these two lines with solid black ink for a bold, graphic look. -
Add the dotted halo:
Around the entire perimeter of your bold star, place small, evenly spaced dots. This ‘halo’ effect softens the hard edges of the star and integrates it with the skin. -
Draw corner flourishes:
In the negative space between the star’s points, add small decorative elements like tiny asterisks (starbursts) or simple dots to fill the gaps naturally.
Step 3: Finger Vines & Wrist Leaves
-
Start the finger vines:
Select the index, middle, ring, and pinky fingers. Starting near the knuckle of each finger, draw a single, thin vertical line extending up toward the nail bed. -
Add leaves to vines:
Along each vertical line, draw pairs of small, curved leaves branching outward. I find it easiest to work from the bottom knot up to the tip, making the leaves slightly smaller as you reach the fingernail. -
Detail the thumb:
On the thumb, draw a similar vine pattern, but curve it slightly to follow the natural contour of the digit. -
Create wrist structure:
Move down to the wrist area below the star. Sketch two long, curved stems that cross over each other, extending down towards your forearm. -
Draw the large leaves:
Attached to these stems, draw three large, prominent leaves. Outline the leaf shape first, then draw a central vein down the middle. -
Fill wrist leaves:
Fill these larger leaves with diagonal hatching lines. Keep the spacing consistent to create a shaded texture rather than filling them in solid black. -
Final foliage:
Add smaller sprigs or tiny flowers around the base of the wrist stems to balance the visual weight of the large star above.
Smudge Rescue
Mistake made? Dip a Q-tip in micellar water or rubbing alcohol and erase delicately while the ink is still fresh. Don’t rub hard!
Step 4: Finishing Touches
-
Review and refine:
Look over the entire design. If any lines look shaky, carefully thicken them to smooth out the edge. Add extra dots in empty spaces if the design feels unbalanced. -
Set the design:
Once the ink is completely dry to the touch, you can lightly dust it with translucent setting powder or a quick mist of hairspray to prevent smudging throughout the day.
Enjoy your temporary celestial tattoo and watch how the design moves beautifully with your hand gestures


Have a question or want to share your own experience? I'd love to hear from you in the comments below!