If you’re craving a cozy project that feels equal parts fall and fresh, flower pumpkin painting is my go-to. I love how a simple pumpkin turns into a little canvas for floral motifs, whether you’re keeping it sweet and simple or going full garden-party drama.
Classic Daisy Repeat on an Orange Pumpkin
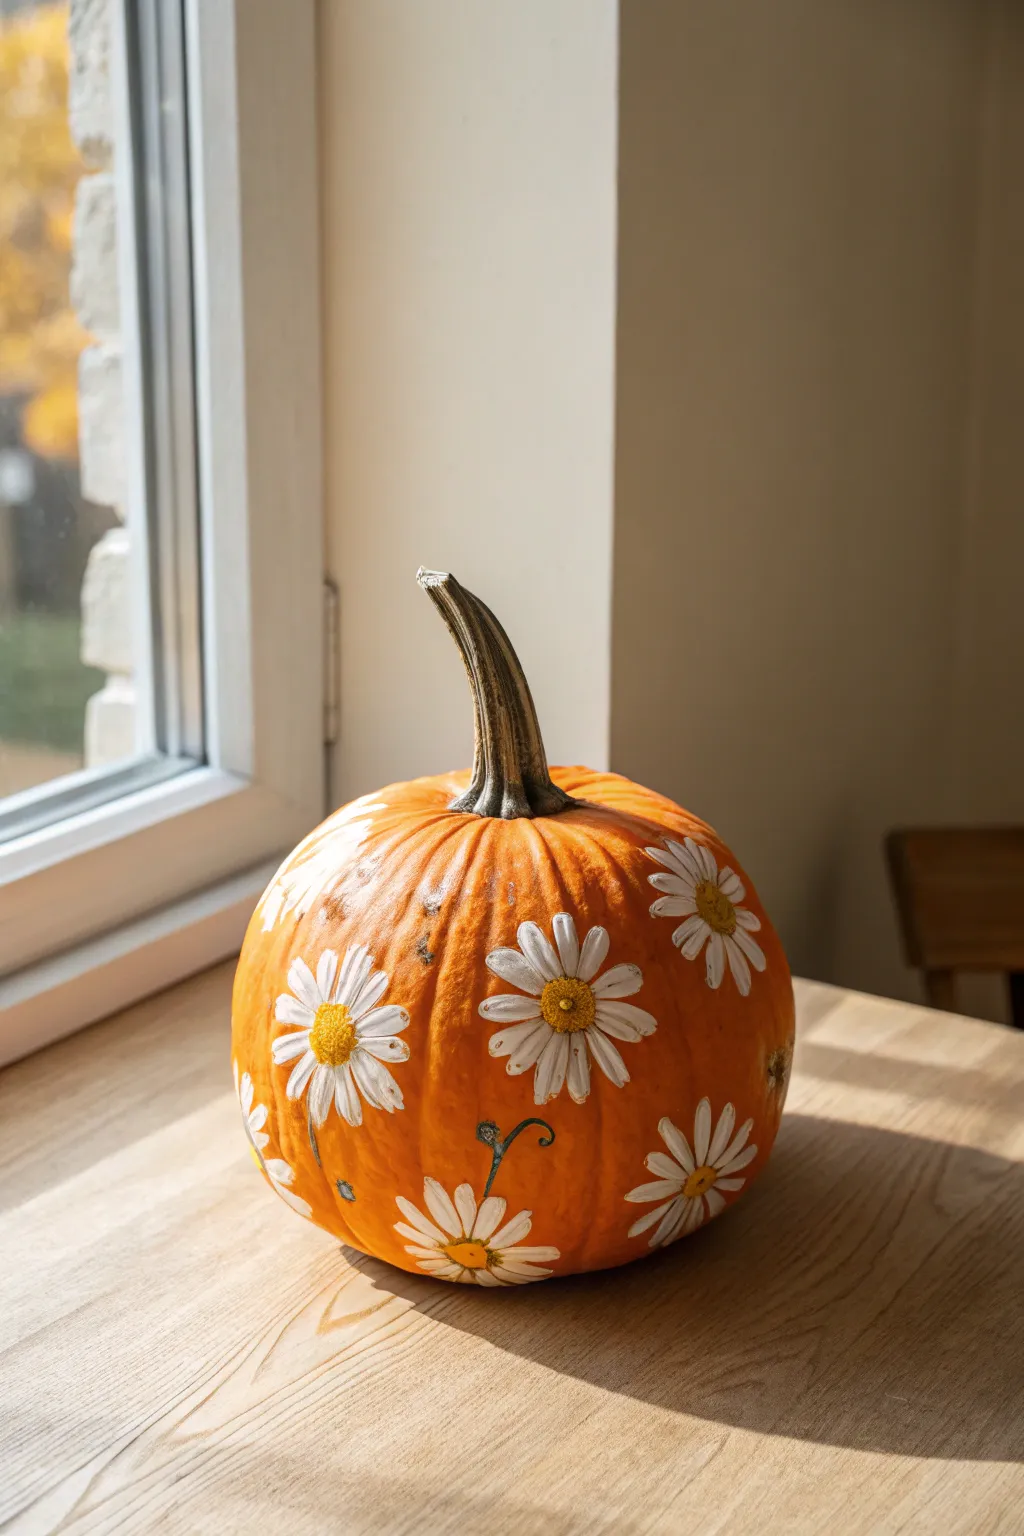
Bring a touch of cottagecore charm to your fall decor with this cheerful painted pumpkin. The bright white daisies pop beautifully against the natural orange skin, creating a simple yet striking design that feels like a sunny autumn afternoon.
Detailed Instructions
Materials
- Medium-sized orange pumpkin (real or faux)
- White acrylic paint (high opacity)
- Yellow ochre or golden yellow acrylic paint
- Burnt umber or dark brown acrylic paint
- Sage green acrylic paint (optional for stems)
- Round paint brush (size 6 or 8)
- Fine detail brush (size 0 or 1)
- Palette or paper plate
- Paper towels
- Cup of water
- Damp cloth for surface prep
Step 1: Preparation
-
Clean the Surface:
Before you begin, wipe your pumpkin down thoroughly with a damp cloth to remove any dirt or oils. The paint will adhere much better to a clean, dry surface. If using a real pumpkin, make sure it’s room temperature. -
Plan Your Placement:
Visualize where your flowers will go. It’s best to scatter them randomly rather than in a stiff grid. Aim for odd numbers and vary the height so some look like they are drifting off the bottom or top edges.
Fixing Sheer Petals
If your white paint looks streaky or transparent, let it dry fully and paint a second layer. Don’t rush and pile wet paint on wet paint—it’ll just get lumpy.
Step 2: Painting the Base Petals
-
Load Your Brush:
Squeeze out a generous amount of white acrylic paint. Load your round brush (size 6 or 8) fully so the bristles are coated but not dripping. -
Paint the First Petal:
Choose a spot for your first flower. Press the brush down gently to create the wide part of the petal, then pull it inward toward the center while lifting pressure to create a tapered point. -
complete the Circle:
Rotate your pumpkin or your hand slightly and repeat the stroke to create a second petal next to the first. Continue this ‘press-pull-lift’ motion in a circle until you have a full flower shape. Don’t worry if they aren’t perfectly symmetrical; nature rarely is. -
Create Partial Flowers:
For a natural look, paint some flowers that appear to be ‘falling off’ the edges or tucking into the pumpkin’s vertical ribs. Paint just three or four petals for these side-view blooms. -
Fill the Pumpkin:
Continue adding white flower silhouettes all around the pumpkin. Leave enough orange space between them so the design doesn’t feel cluttered. I like to step back every few flowers to check the balance. -
Second Coat (If Needed):
Let the white paint dry for about 10-15 minutes. If the orange pumpkin skin is showing through too much, apply a second coat of white over the petals to make them opaque and crisp.
Add a Bee Friend
Use black and yellow paint to add a tiny, thumbprint-sized bumblebee resting on one of the petals for an adorable hidden detail.
Step 3: Adding Details & Centers
-
Mix the Center Color:
While the white dries completely, prepare your yellow center color. A straight yellow can look too flat, so try mixing a tiny dot of brown into your yellow to create a warm, golden mustard tone. -
Paint the Centers:
Using a clean round brush, dab a circle of your yellow mix into the center of each white flower. Make the center large and prominent, touching the base of the petals. -
Add Texture with Stippling:
To make the centers look realistic, take your fine detail brush and dip it into the brown paint. Gently stipple (dot) tiny specks along the bottom edge of the yellow center to create a shadow effect. -
Highlight the Centers:
Clean the detail brush and dip it into pure white or a very pale yellow. Add tiny dots to the top edge of the yellow centers. This simple highlight gives the center a 3D, domed appearance. -
Paint Subtle Stems:
With your fine liner brush and sage green paint, add very thin, wispy stems to just a few of the flowers. Don’t connect every flower; floating blooms often look more whimsical. A slight curve in the stem adds movement. -
Petal Definition:
If you want extra depth, mix a very watery grey or diluted brown. Use the fine brush to paint extremely thin lines between overlapping petals to separate them visually.
Step 4: Finishing Touches
-
Cleanup Edges:
Scan your pumpkin for any stray paint marks or petals that look uneven. You can tidy up edges with a little bit of water on a brush or by scraping gently with a fingernail if the paint is semi-dry. -
Dry and Seal:
Allow the entire pumpkin to dry for at least an hour. If you plan to put this pumpkin outside, consider brushing on a layer of clear matte acrylic sealer to protect your artwork from moisture.
Place your finished masterpiece on a sunny windowsill or porch step to welcome the season


Bold Sunflower Bloom Wrap
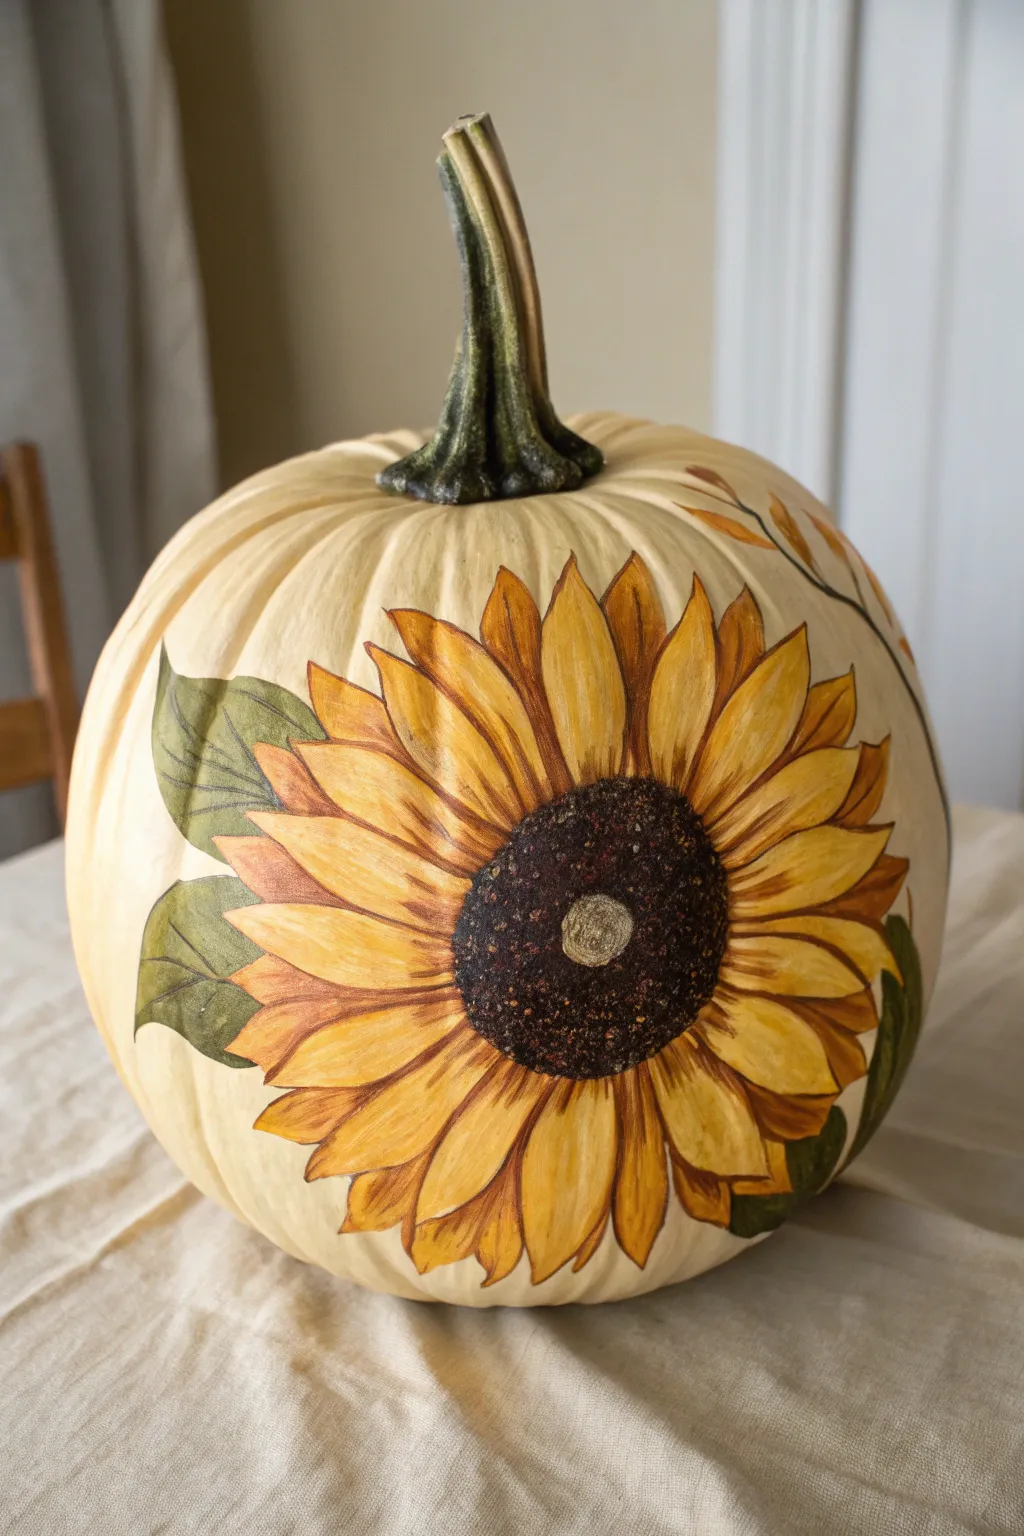
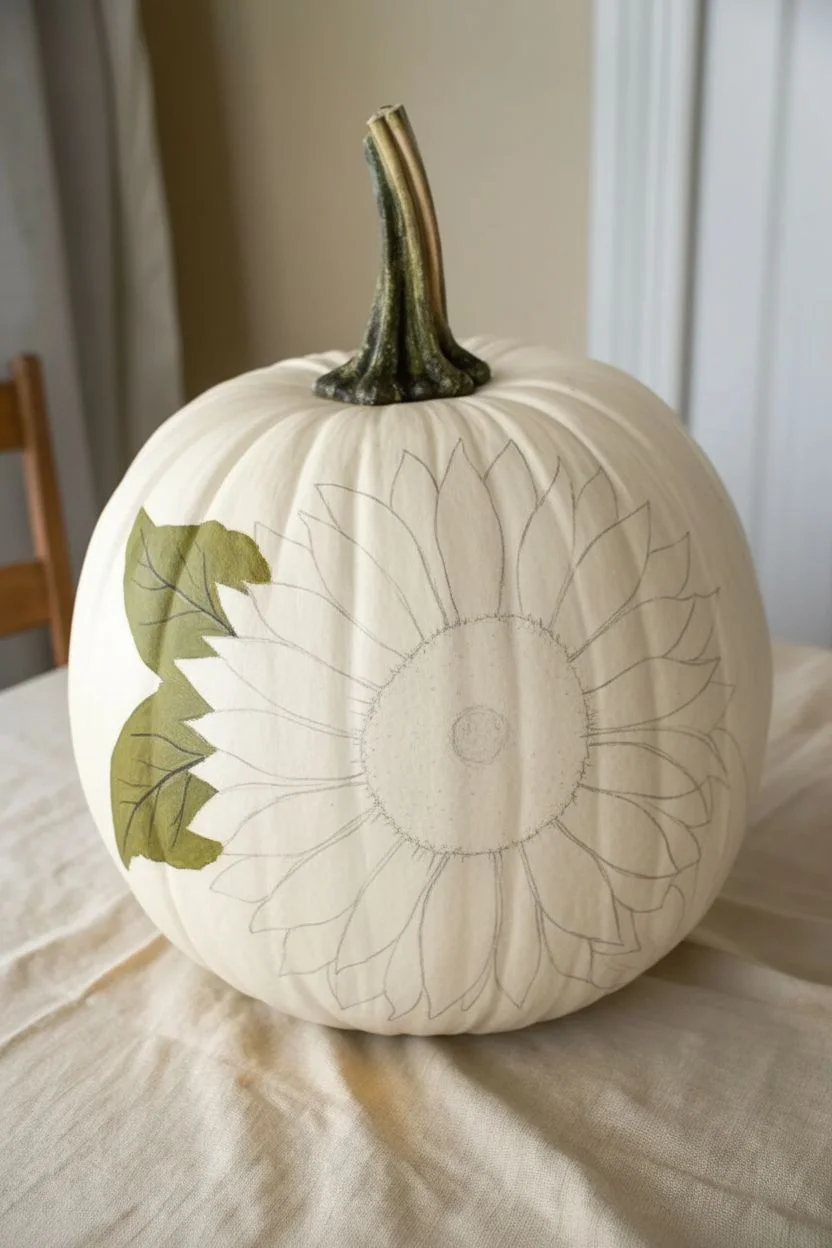
Transform a simple white pumpkin into a stunning piece of autumn decor with this bold, hand-painted sunflower design. The large, wrapping bloom creates a beautiful focal point that features rich golden hues and detailed petals that seem to hug the pumpkin’s curves.
How-To Guide
Materials
- Medium-sized white craft pumpkin (faux) or real white pumpkin (cleaned)
- Acrylic paints: Cadmium Yellow, Yellow Ochre, Burnt Sienna, Burnt Umber, Dark Green, Olive Green, Titanium White, Black
- Pencil (light sketching)
- Round synthetic brushes (sizes 2, 4, and 8)
- Fine liner brush (size 0 or 00)
- Palette or paper plate
- Cup of water and paper towels
- Clear matte acrylic sealer spray (optional)
Step 1: Base Sketch & Center
-
Clean and Position:
Begin by wiping down your pumpkin surface to ensure it is free of dust or oils. Decide where you want your main bloom to sit; positioning it slightly off-center and wrapping around the side creates a more dynamic look than placing it dead center. -
Sketch the Core:
Using a pencil very lightly, draw a large circle for the sunflower’s center. Don’t worry about perfect symmetry; a natural flower has organic irregularities. -
Outline Petals:
Sketch the first row of petals radiating out from the center circle. Make these petals fairly wide and pointed at the tips. Add a second row of petal tips peeking out from behind the first row to add depth. -
Add Leaves:
Draw two large, pointed leaves extending from the left side of the flower, following the curve of the pumpkin. -
Base Leaf Color:
Mix Olive Green with a touch of Burnt Umber to dull it slightly. Fill in the leaf shapes with your size 8 brush, ensuring smooth coverage. -
Leaf Veins:
While the green is drying, mix a darker shade using Dark Green and a tiny bit of Black. Use your liner brush to paint thin, central veins and branching vein lines on the leaves for realistic texture.
Uneven Paint Coverage?
Yellow paint is notoriously transparent. If your petal base looks streaky, paint a layer of white or mixture of yellow/white first, let it dry, and then apply your bright yellow on top for better opacity.
Step 2: Painting the Petals
-
Yellow Base Coat:
Load your size 8 brush with Cadmium Yellow. Fill in all the petals with a solid coat of paint. You may need two coats here if your yellow is transparent; let the first coat dry completely before adding the second. -
Adding Warmth:
While the yellow is still slightly tacky, mix Yellow Ochre with a tiny drop of water. Apply this to the base of each petal where it meets the center, blending outward about halfway up the petal. -
Defining Edges:
Take your size 4 brush and some Burnt Sienna. Carefully outline each petal to separate them. Use a ‘flicking’ motion from the base of the petal upward to create natural-looking striations and shadow lines. -
Deepening Shadows:
For the petals in the back row (the ones tucked behind nicely), add a little more Burnt Sienna shading to make them recede visually. This creates that lovely 3D layered effect. -
Highlighting:
Mix Titanium White with Cadmium Yellow to make a pale buttery color. Paint thin highlights along the tips and one side of the front-row petals to simulate sunlight hitting the bloom.
Step 3: The Center & Details
-
Dark Center Base:
Fill the large center circle with pure Burnt Umber. Ensure you paint right up to the edges of your yellow petals. -
Stippling Texture:
Once the brown is dry, dip an old, scruffy brush or a sponge into Black paint. Dab off the excess, then lightly stipple (poke repeatedly) around the outer edge of the brown circle to create a fuzzy, textured border. -
Inner Ring Detail:
Mix Burnt Sienna with a little Red (or orange). Stipple a ring just inside the black edge you just painted. This transition of color mimics the tiny florets found in real sunflowers. -
The Very Center:
Paint a small, irregular circle in the very middle using a mix of Green and White for that unripe seed look often seen in fresh sunflowers. I like to keep this quite subtle. -
Final Petal Check:
Use your liner brush and watered-down Burnt Umber to crispen up any lines where the petals overlap. Add a few extra fine lines radiating from the center onto the petals for extra detail. -
Finishing Touches:
Paint a thin, trailing vine or stem if you have empty space on the side, using your Olive Green mix. Let the entire pumpkin dry overnight. -
Seal It Up:
If you plan to display this outdoors or keep it for years, apply a light coat of clear matte acrylic sealer spray to protect your artwork.
Pro Tip: Natural Flow
Don’t fight the pumpkin’s ribs! Use the natural grooves of the pumpkin to guide leaves or petal curves. If a petal falls into a groove, let the shadow naturally deepen there for an organic look.
Now you have a gorgeous, everlasting bloom that captures the warmth of the harvest season


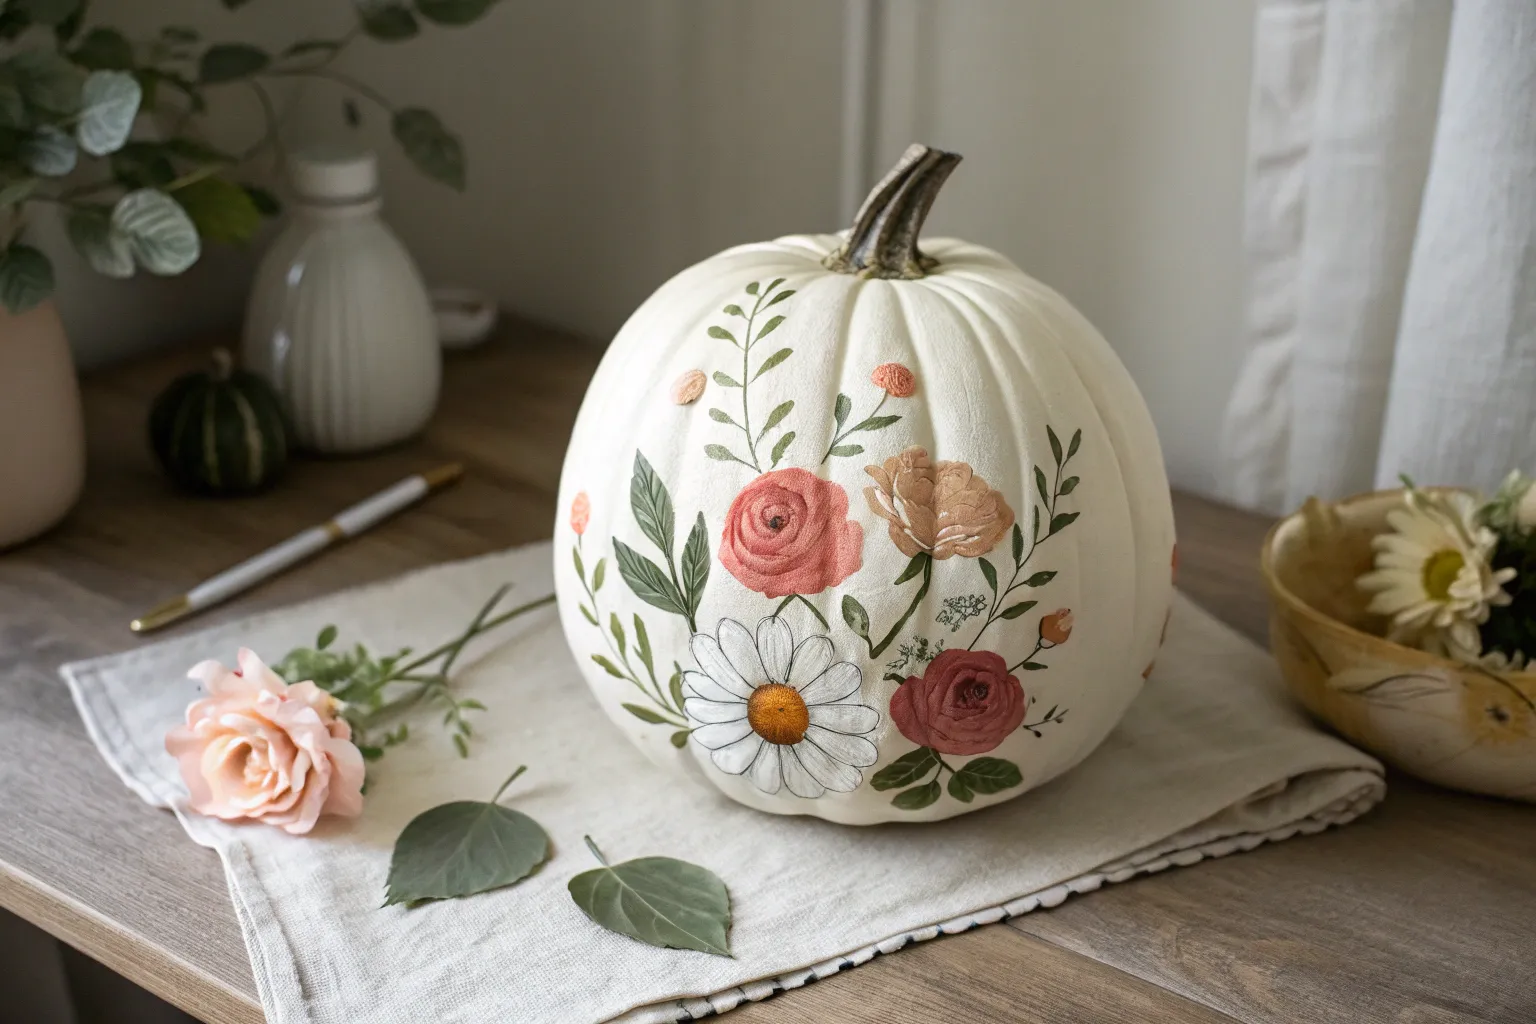
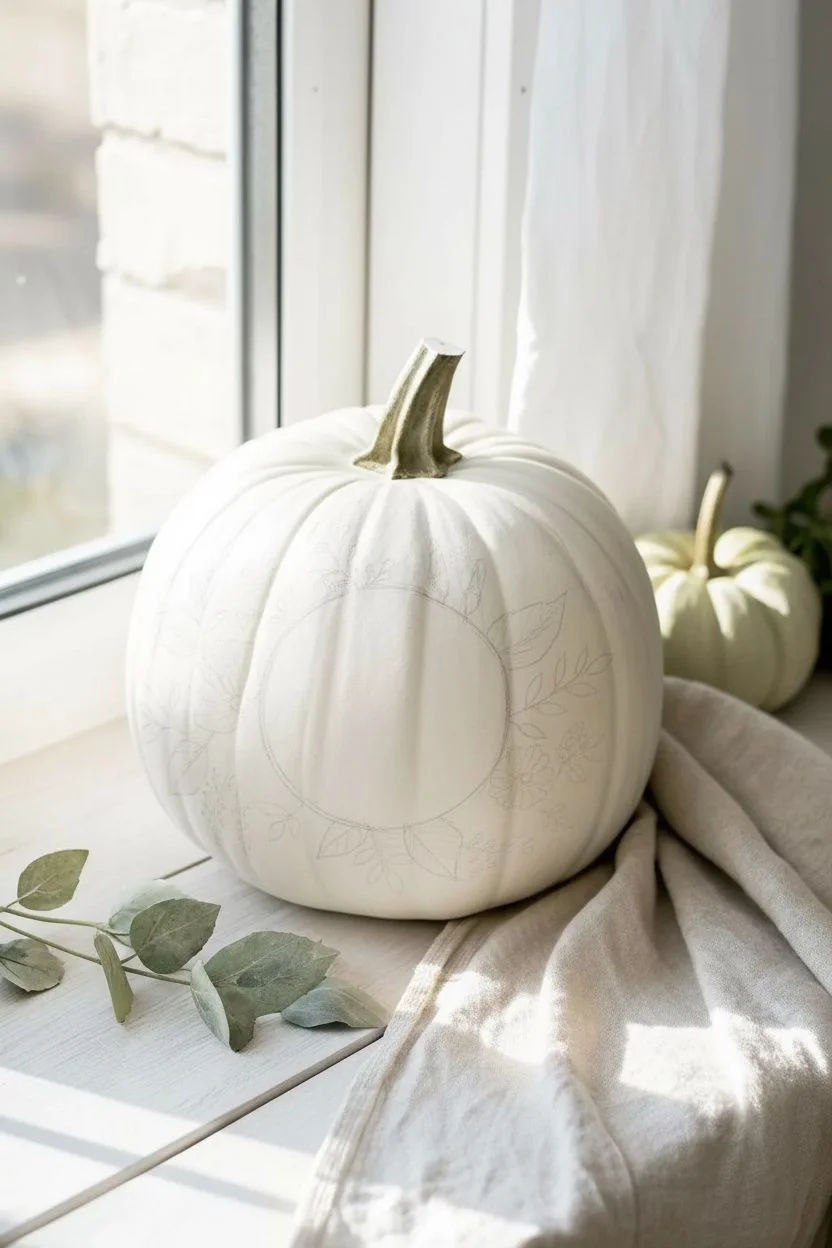
Loose Rose Swirls in Warm Neutrals
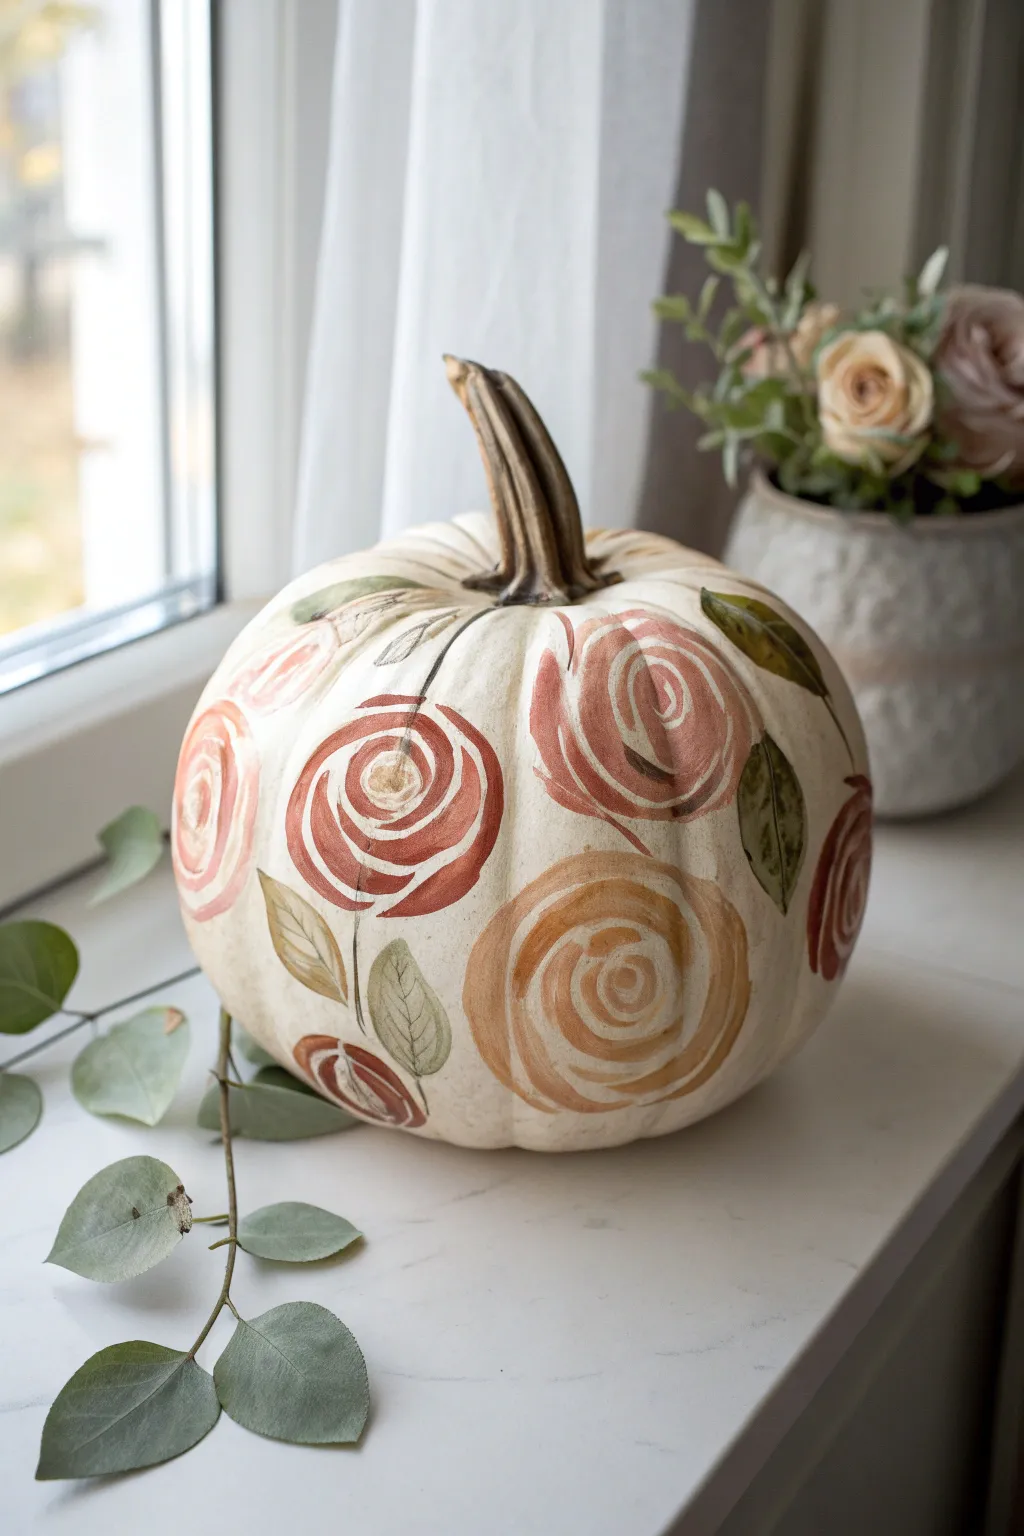
Transform a plain white pumpkin into an elegant autumn centerpiece with loose, folk-art inspired florals. This project focuses on warm, earthy neutrals like terracotta, peach, and soft gold to create a cozy, sophisticated look suitable for the entire harvest season.
Step-by-Step Tutorial
Materials
- Medium-sized faux or real white pumpkin
- Acrylic craft paints: Terracotta, Blush Pink, Mustard Yellow/Gold, Olive Green, Burnt Umber, White
- Medium round brush (size 6 or 8)
- Small round or liner brush (size 2 or 4)
- Paper plate or palette
- Cup of water and paper towels
- Matte spray sealer (optional)
Step 1: Preparation and Planning
-
Prepare the surface:
If using a real pumpkin, wash it with a mild bleach solution and dry completely to prolong its life. For faux pumpkins, simply wipe away any dust with a damp cloth. -
Set up your palette:
Squeeze out nickel-sized amounts of your main floral colors: Terracotta, Blush Pink, and Mustard Yellow. Add a dollop of White to create lighter tints as you work. -
Visualize placement:
Before painting, visualize where your largest blooms will go. Aim for odd numbers—three or five large roses spaced unevenly around the pumpkin creates the most natural composition.
Uneven Swirls?
Don’t panic if your swirls aren’t perfect circles. Wobbly, uneven strokes actually look more like real rose petals. If a blob gets too big, let it dry and paint white over it to reshape.
Step 2: Painting the Roses
-
Start the center:
Load your medium round brush with Terracotta paint. Choose a spot for your first flower and paint a small, imperfect ‘C’ shape or a comma stroke in the center. -
Build the inner petals:
Rotate your brush slightly and paint another curved stroke hugging the first one, but not touching it. Keep the paint wet and fluid. -
Expand outward:
Continue adding curved strokes around the center, making them gradually larger and looser as you move outward. Leave small gaps of the white pumpkin background showing between strokes to define the petals. -
Vary the pressure:
Press down harder on the belly of the brush at the start of the stroke and lift up as you taper off. This variation creates that lovely organic petal shape. -
Mix colors on the pumpkin:
Without cleaning your brush thoroughly, pick up a tiny bit of White or Blush Pink. Swirl this into the outer petals of your Terracotta rose to create dimension and light. -
Repeat with other colors:
Using the same swirling technique, paint a second large rose using your Mustard Yellow or Blush Pink. I like to let the colors mix slightly on the brush for a cohesive color story. -
Add smaller buds:
Fill in some of the empty spaces with smaller, tighter rose buds. These can be just 3-4 simple swirl strokes in various shades of your palette.
Color Harmony Tip
To make the palette feel unified, mix a tiny dot of your main Terracotta color into both the yellow and pink paints. This ‘mother color’ technique ties all the shades together beautifully.
Step 3: Adding Leaves and Stems
-
Mix the green:
Mix your Olive Green with a tiny touch of Burnt Umber to create a muted, earthy foliage color that matches the warm florals. -
Paint simple stems:
Switch to your smaller liner brush. Paint thin, curved lines connecting some of the smaller buds or trailing off from the main blooms. Keep these lines delicate. -
Add leaf shapes:
Using the medium brush again, press down and lift to create almond-shaped or teardrop leaves extending from the flowers. Tuck them close to the rose petals. -
Detail the leaves:
While the green leaves are still slightly wet, you can drag a clean, dry brush through the center or add a tiny line of darker green to suggest a central vein. -
Refining the design:
Step back and look at the pumpkin from a distance. If a flower looks too solid, add a few strokes of white or a lighter shade on top to break it up and add highlights.
Step 4: Finishing Touches
-
Dry completely:
Allow the acrylic paint to dry fully. This usually takes about 20-30 minutes depending on how thick your paint application was. -
Seal the work (optional):
If you plan to keep this pumpkin on a porch or reuse a faux pumpkin next year, give it a light coat of matte spray sealer to protect the design from scratches and moisture.
Place your painted masterpiece on a windowsill or mantel to enjoy the warm autumn vibes


Whimsical Wildflower Scatter Pattern
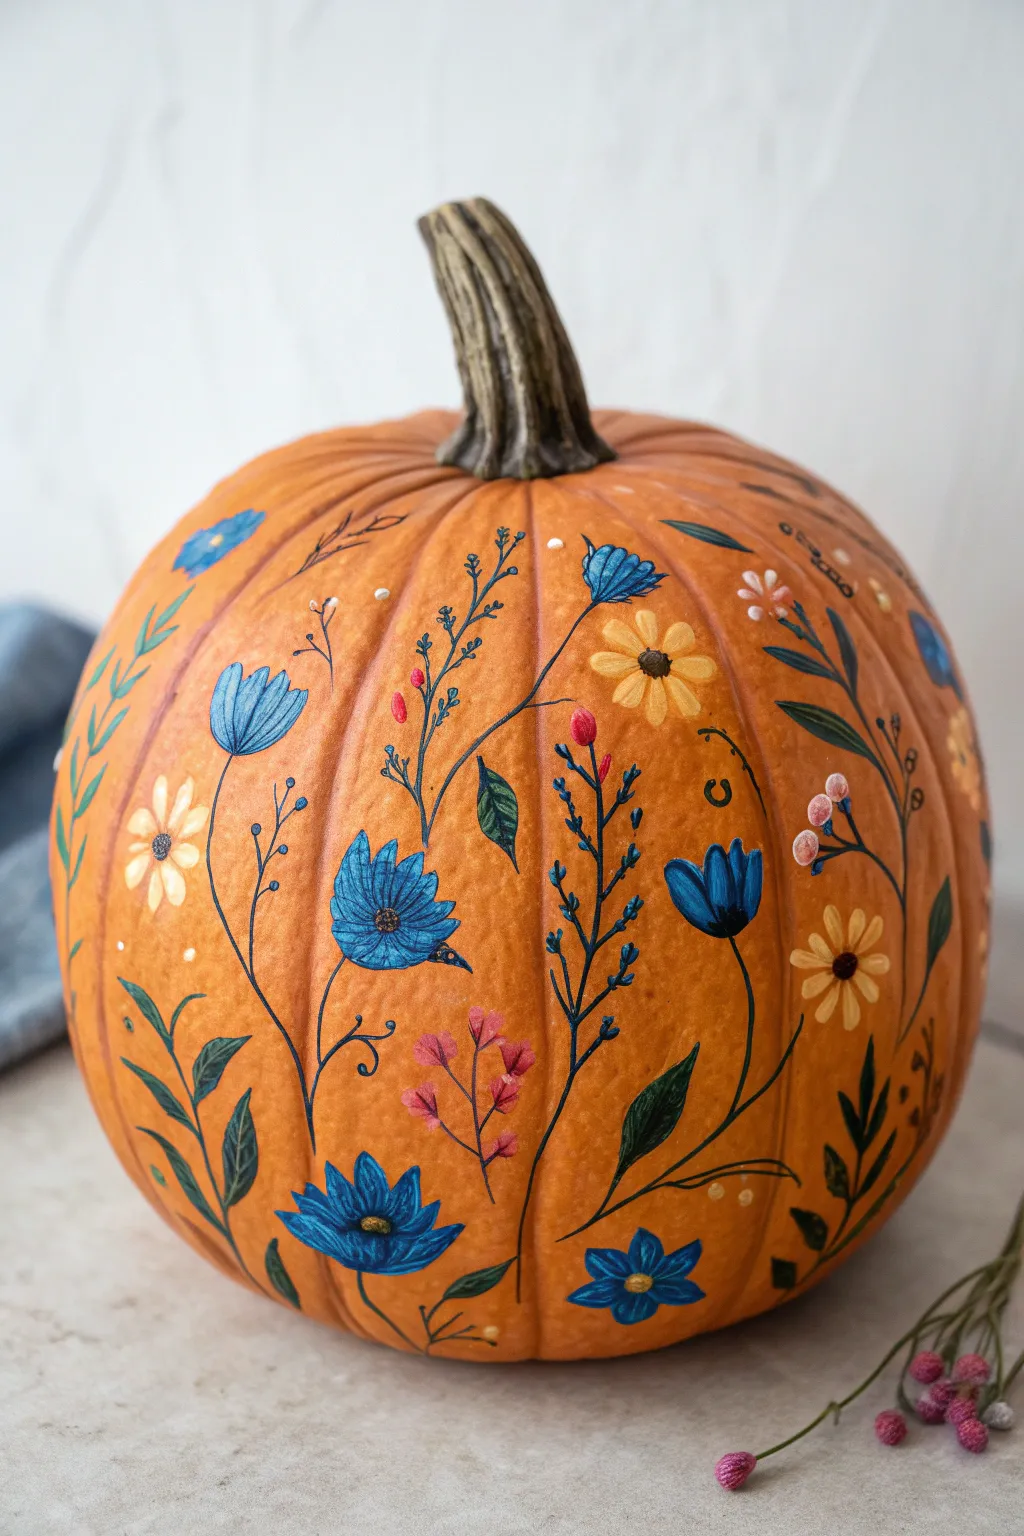
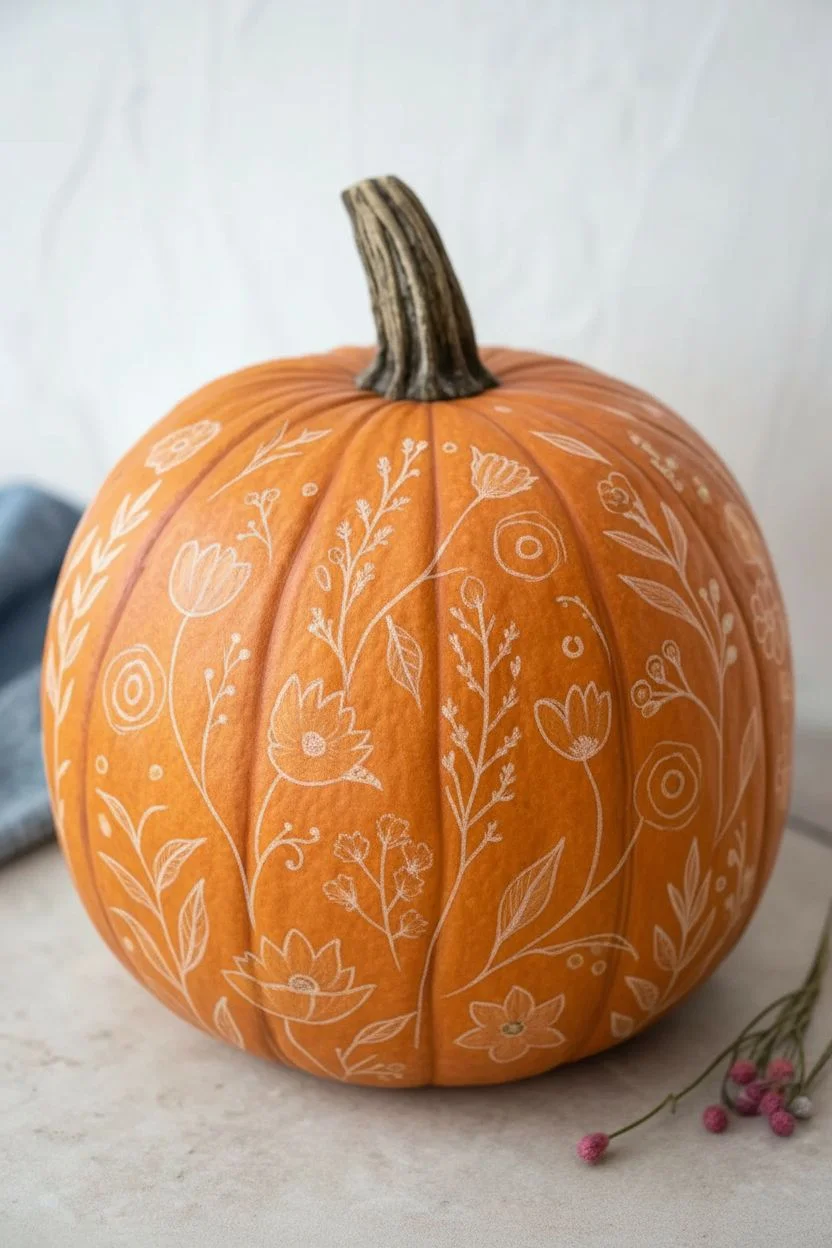
Transform a classic orange pumpkin into a delicate botanical canvas with this wildflower scatter pattern. The deep blue cornflowers and sunny yellow daisies create a sophisticated, meadow-inspired look that feels like an illustrated storybook brought to life.
Step-by-Step Guide
Materials
- Medium-sized orange pumpkin (real or faux)
- Acrylic craft paints (matte finish)
- Paint colors: Navy blue, sky blue, golden yellow, pale yellow, forest green, sage green, coral pink, white
- Round paintbrushes (Size 0, 2, and 4)
- Fine liner brush (Size 00 or 000)
- Pencil or chalk pencil (white)
- Palette or paper plate
- Paper towels and water cup
- Matte spray sealer (optional)
Step 1: Planning the Layout
-
Clean the surface:
Wipe down your pumpkin with a damp cloth to remove any dirt or oils. If you are using a real pumpkin, ensure it is completely dry before you start sketching. -
Sketch main placements:
Using a white chalk pencil or a very light pencil touch, lightly sketch the location of the largest flowers first. Avoid drawing tight details; just mark small circles or ovals where the main blue and yellow blooms will sit. -
Map the flow:
Lightly draw curved lines for the stems. Aim for an organic motion where stems curve upward from the base, utilizing the pumpkin’s natural ribs to guide the vertical flow but allowing branches to cross over them for a natural look.
Step 2: Painting the Blooms
-
Base coat the blue flowers:
Load a size 4 round brush with a mix of sky blue and navy. Paint the larger, cup-shaped flowers. Start from the base of the flower and flick upward to create petal shapes. -
Layering the blue petals:
While the base is drying, use pure sky blue to add highlights on the tips of the petals. I like to add a tiny touch of white to the very edges to make them pop against the orange skin. -
Base coat yellow flowers:
Using golden yellow, paint the round daisy shapes. Use small, dab-like strokes for the petals, radiating outward from a central point. You may need two coats here since yellow can sometimes be transparent. -
Add dimension to daisies:
Mix a little white into your pale yellow and add smaller petals on top of the golden yellow base layer once it’s dry. This creates a fluffy, multi-dimensional look. -
Paint the centers:
For the yellow daisies, dot the center with dark brown or black. For the blue flowers, use a dark navy or black at the base where the petals meet the stem. -
Add accent buds:
Scatter small groups of coral pink dots or teardrop shapes around the larger blooms. These represent small berries or unopened buds.
Fixing Shaky Lines
If your stems look wobbly, don’t wipe them! Let the green dry completely, then use a tiny bit of orange paint (matched to the pumpkin skin) to reshape the edges of the line neatly.
Step 3: Stems and Foliage
-
Draw the main stems:
Switch to your fine liner brush (00 or 000). Load it with inky foliage green paint (add a drop of water to improve flow). Trace over your sketched stem lines with smooth, confident strokes. -
Add delicate branches:
From the main stems, pull out tiny, hair-thin branches that will hold smaller leaves or buds. Keep your hand loose to prevent shaky lines. -
Paint larger leaves:
Use a size 2 brush and forest green to paint the larger, lance-shaped leaves near the bottom of the stems. Press down to widen the stroke and lift up to create a sharp point. -
Detail the fern sprigs:
Create fern-like filler foliage using a darker sage green. Paint a central line and add tiny distinct notches on either side. These act as great ‘filler’ for empty spaces on the pumpkin.
Pro Tip: Flow Improver
Mix a tiny drop of water or glazing medium into your green paint for the stems. Inky paint flows off a liner brush much smoother, creating long, unbroken tendrils.
Step 4: Fine Details
-
Add vein details:
Using your finest liner brush and a very dark green or black, paint a central vein down the middle of the larger leaves and the blue flower petals for an illustrative touch. -
Create white accents:
Dip the back end of your paintbrush (the handle) into white paint. Dot tiny clusters of white around the floral arrangement to look like baby’s breath or scattered pollen. -
Final check:
Step back and look at the pumpkin from a distance. If any areas look too sparse, add a floating leaf or a small blue bud to balance the composition. -
Seal the work:
Once the paint is fully cured (give it a few hours), lightly mist the pumpkin with a matte sealer spray to protect your artwork from moisture.
Now you have a stunning, garden-inspired centerpiece that captures the beauty of late summer wildflowers.
BRUSH GUIDE
The Right Brush for Every Stroke
From clean lines to bold texture — master brush choice, stroke control, and essential techniques.
Explore the Full Guide
Maximalist Botanical Full Coverage
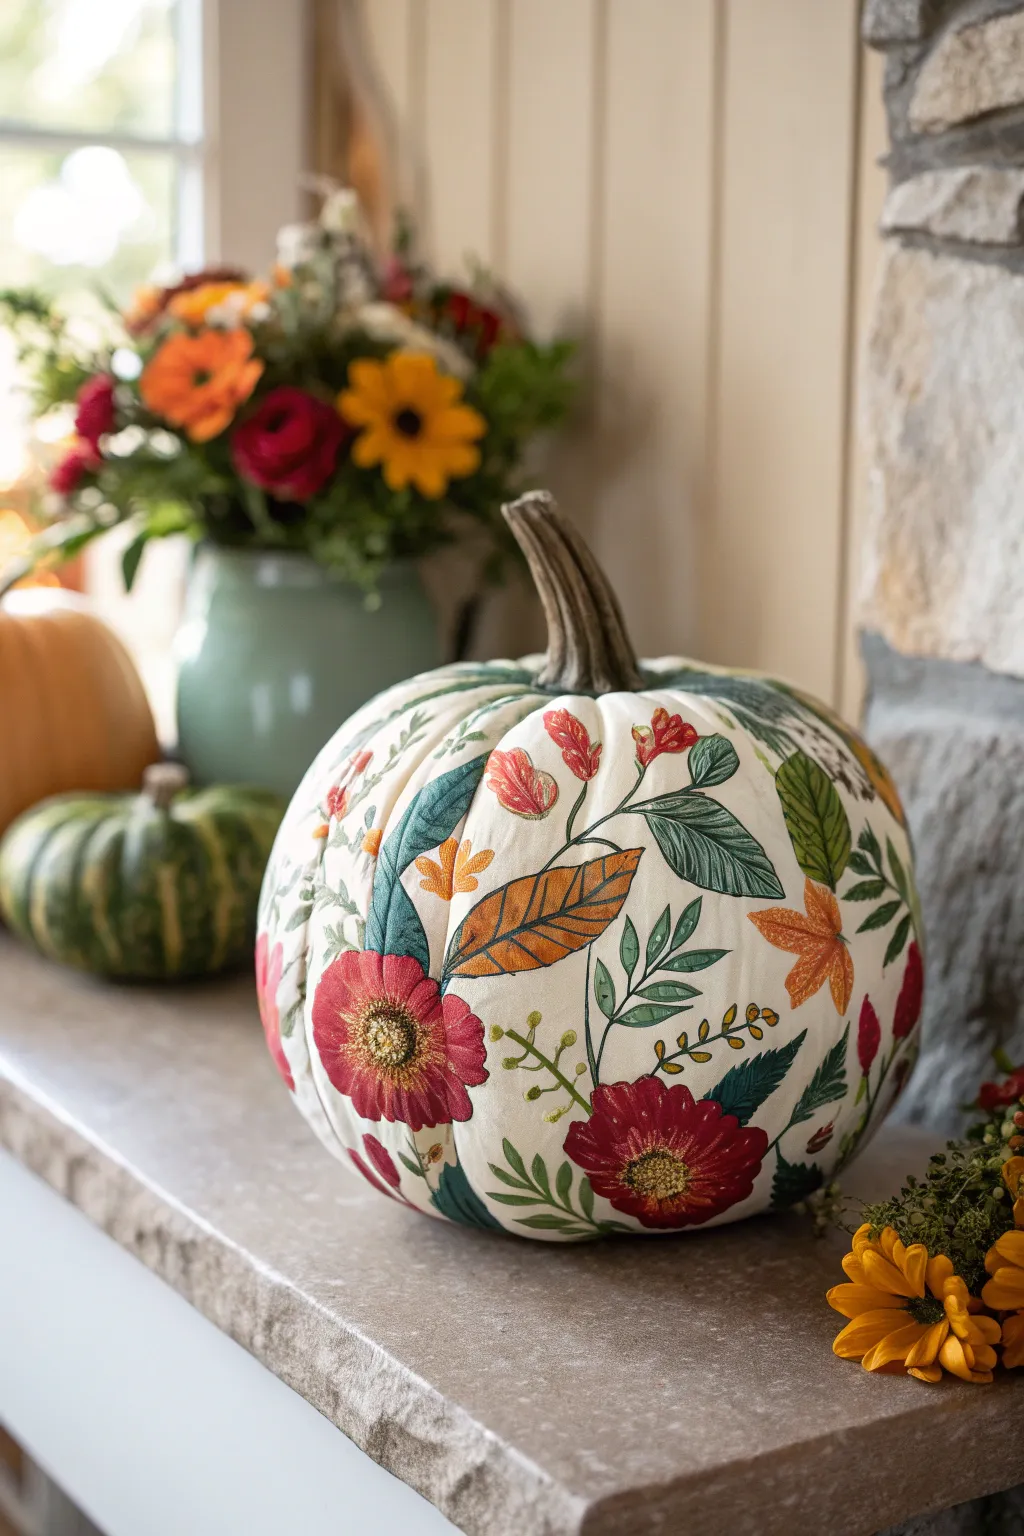
Transform a smooth white pumpkin into a lush, maximalist garden with this rich botanical painting technique. The design features a stunning contrast between creamy white skin and deep jewel tones like garnet red, forest sage, and burnt amber.
Detailed Instructions
Materials
- White craft pumpkin (or a smooth, cleaned real white pumpkin)
- Acrylic paints: Cream, deep red (garnet), burnt orange, sage green, deep teal/emerald, mustard yellow, brown
- Gesso (if using a real pumpkin)
- Assorted brushes: Round #4 and #6 (for petals/leaves), Liner #0 or #1 (for stems/details)
- Pencil for sketching
- Palette or wax paper
- Water cup and paper towels
- Matte sealant spray
Step 1: Preparation & Base
-
Prepare the surface:
Clean your pumpkin thoroughly with a damp cloth to remove any dust or oils. If you are using a real pumpkin, you can apply a thin coat of clear gesso to help the acrylic paint adhere better, though paint sticks well to faux pumpkins directly. -
Base coat touches:
If your pumpkin has any blemishes or isn’t a true creamy white, apply a light wash of cream acrylic paint all over to create a uniform canvas. Let this dry completely before sketching.
Brush Control Trick
For steady thin lines on the curved surface, rest your pinky finger against the dry part of the pumpkin to anchor your hand while using the liner brush.
Step 2: Mapping the Design
-
Outline main blooms:
Using a pencil very lightly, sketch the placement of your largest flowers first. Space them irregularly around the pumpkin’s curve rather than in a straight line to encourage an organic, natural flow. -
Add large foliage:
Sketch in the large, curving leaves tucking behind the flowers. These should follow the natural ribs of the pumpkin slightly but also cross over them to create depth. -
Fill the gaps:
Draw smaller filler elements like autumn oak leaves, sprigs of berries, and tiny vine offshoots in the empty spaces. The goal is ‘maximalist,’ so try to fill about 70-80% of the surface.
Gilded Edge Upgrade
After sealing, use a gilding pen or liquid gold leaf to outline just the edges of the red flowers or leaf veins for a luxurious, metallic touch.
Step 3: Painting the Florals
-
Block in the reds:
Load your #6 round brush with deep red paint. Fill in the petals of the large flowers. Don’t worry about shading yet; just get a solid, opaque base layer down. -
Paint the amber leaves:
Switch to your burnt orange paint and block in the smaller, autumnal leaves. I like to keep the edges slightly crisp here to contrast with the rounder flowers. -
Layer the greens:
Mix a deep teal with a touch of green to get that rich foliage color. Paint the large, broad leaves using long, sweeping strokes that mimic the curve of the leaf. -
Add sage accents:
Use a lighter sage green for secondary stems and smaller leaves to create variation in your greenery palette. -
Mustard details:
Dot in the mustard yellow for the flower centers and small berry clusters that float between the main elements.
Step 4: Refining Details
-
Add texture to flowers:
Once the red base is dry, take a slightly lighter red or dark pink and dry-brush fine lines radiating from the center of the petals outward. This mimics the texture of a poppy or hibiscus. -
Crosshatching centers:
Using your liner brush and a dark brown or black, add tiny stippled dots or a crosshatch pattern over the dry yellow centers of the flowers. -
Leaf veining:
Mix a darker version of your teal (add a tiny dot of black or dark blue). With the liner brush, carefully paint the central vein and side veins on the large green leaves. -
Outline work:
This step is optional but impactful: Use a very thinned-down dark green or brownish-black to loosely outline some leaves and petals. It gives the piece a botanical illustration feel. -
Stem connections:
Connect your floating elements with fine vine lines using the liner brush. Ensure the vines curve gracefully, avoiding sharp angles.
Step 5: Finishing Touches
-
Darken the stem:
Paint the pumpkin’s main stem a realistic brownish-grey. Add vertical streaks of lighter tan to highlight the ribs of the stem. -
Final inspection:
Rotate the pumpkin and look for any unintended white gaps. Fill them with tiny green sprigs or orange dots. -
Seal the artwork:
Once the paint is fully cured (give it at least an hour), spray the entire pumpkin with a matte clear coat to protect your handiwork from moisture and chipping.
Place your masterpiece on a mantel or dining table to enjoy the sophisticated autumn vibes all season long
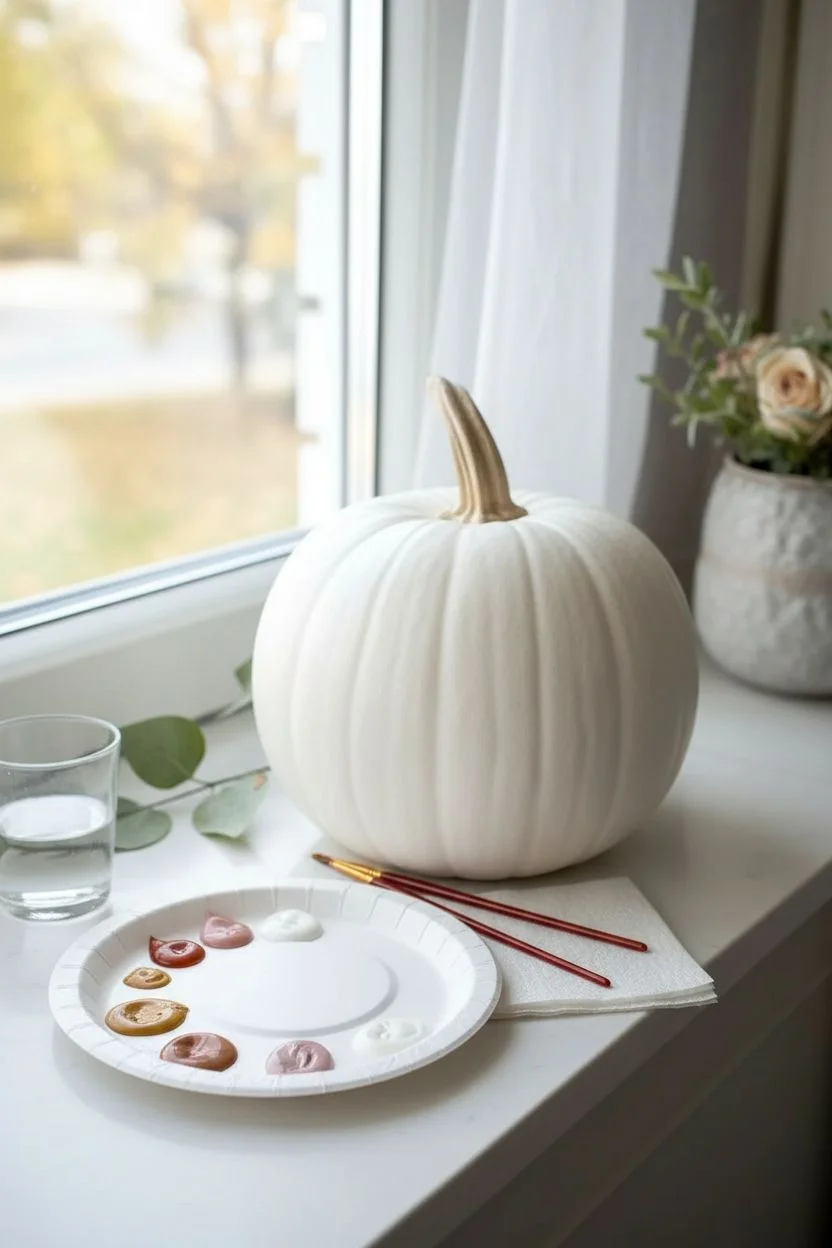
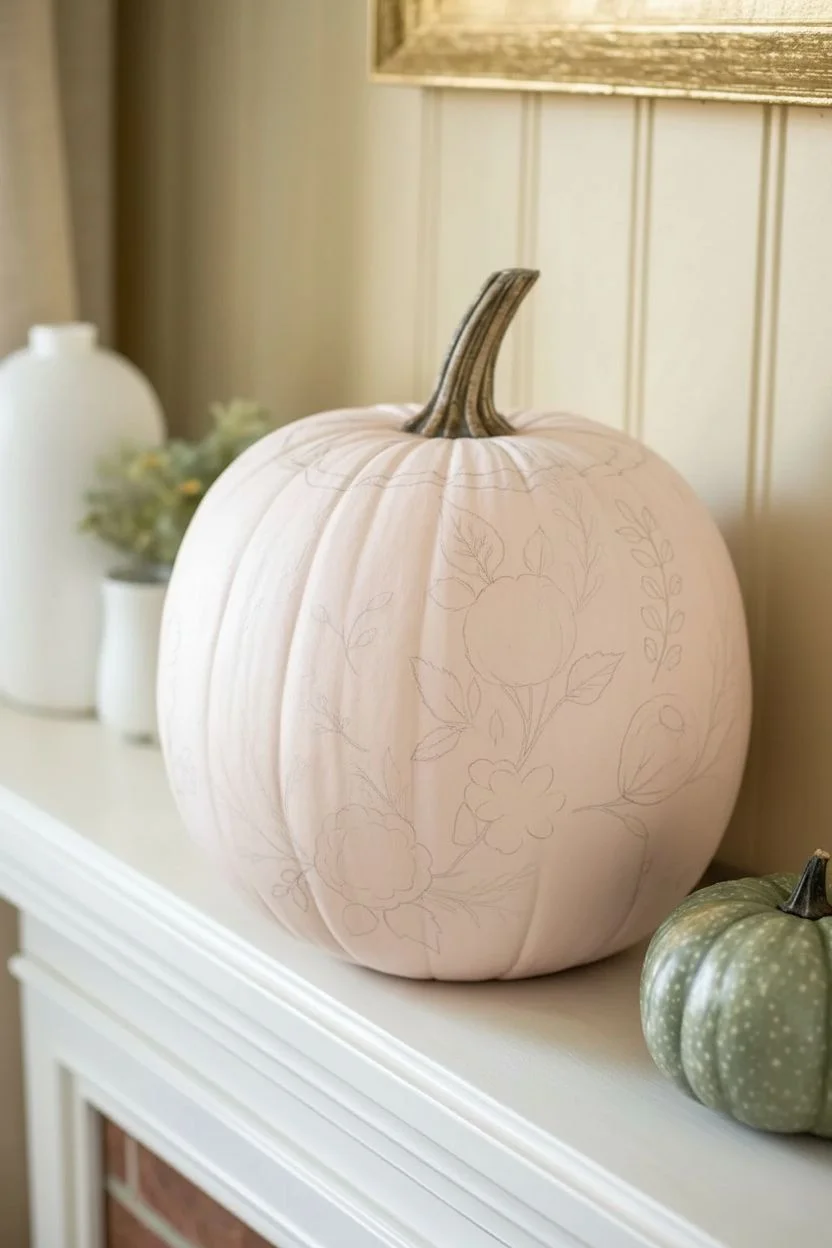
Soft Pastel Florals on a White Pumpkin
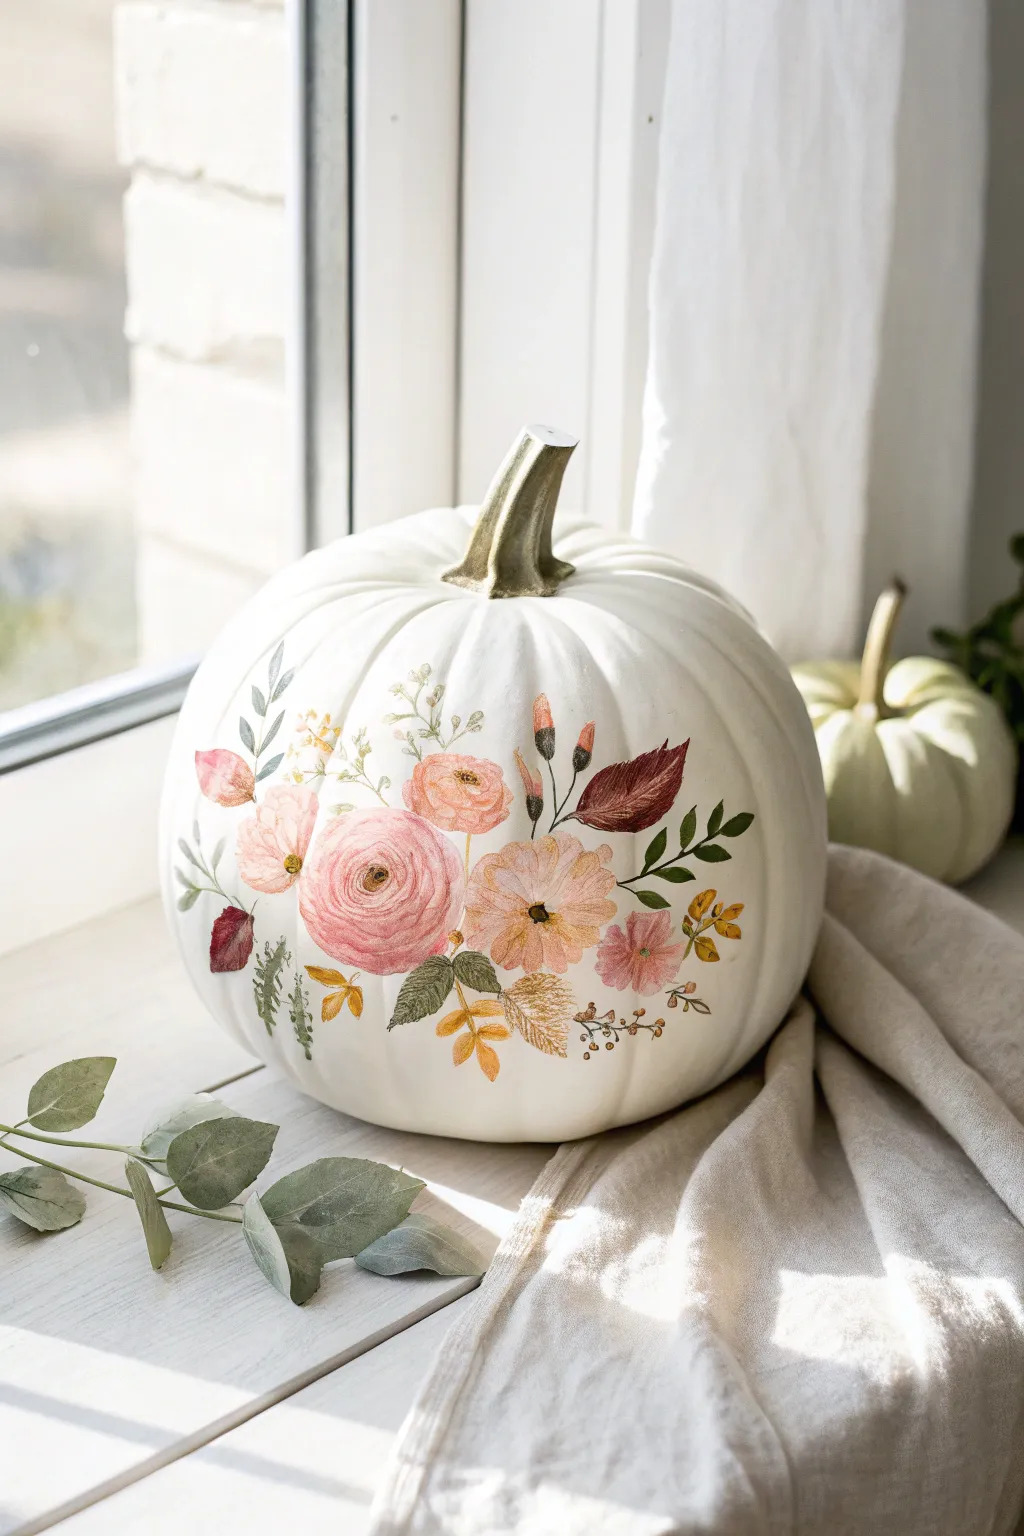
Transform a plain white pumpkin into a cottage-core masterpiece using soft washes and delicate brushwork. This project captures the romantic feel of a vintage botanical illustration directly on your autumn decor.
How-To Guide
Materials
- White or cream pumpkin (faux craft pumpkin recommended)
- Acrylic paints (Soft Rose, Peach, Muted Green, Deep Burgundy, Burnt Sienna, Antique White)
- Textile medium or glazing medium
- Set of soft synthetic brushes (Round #2, #4, and #6, plus a fine liner)
- Pencil (H or HB)
- Palette or wax paper
- Paper towels
- Matte spray varnish sealant
Step 1: Preparation & Layout
-
Surface Prep:
Clean your white pumpkin thoroughly with a damp cloth to remove any dust or oils. If you are using a faux pumpkin with a shiny plastic finish, lightly buff the surface with fine-grit sandpaper to help the paint adhere. -
Mix Your Medium:
To achieve that translucent, watercolor look seen in the image, mix your acrylic paints with a glazing medium or textile medium. Aim for a 1:1 ratio—the paint should be fluid and slightly transparent, not thick and opaque. -
Sketch the Focal Point:
Using a light pencil, sketch a large circle slightly off-center on the pumpkin face for the main rose. Don’t worry about perfection; this is just a placeholder guide. -
Plan the Arrangement:
Lightly draw curving lines extending outward from your central flower to map out where the stems, smaller buds, and leaves will flow. This ensures your composition feels balanced.
Pro Tip: Sheer Layers
Transparency is key. If your paint is too opaque, wipe your brush on a damp paper towel before dipping into pigment. It’s easier to add color than remove it.
Step 2: Painting the Blooms
-
Base the Main Rose:
Load a #6 round brush with your diluted Soft Rose mixture. Paint loose, C-shaped strokes in a circular pattern, starting from the center and working outward. Leave small gaps of white space between strokes to define the petals. -
Add Depth to Center:
While the base is still slightly tacky, mix a tiny bit of Deep Burgundy into your rose color. Using a #4 brush, deepen the very center of the rose with tighter C-strokes to create a focal point. -
Create Companion Flowers:
Using Peach mixed with a touch of Antique White, paint two or three smaller, simpler 5-petal flowers around the main rose. Keep the edges soft and feathery rather than perfect circles. -
Layering Petals:
Once the first layer is dry to the touch, glaze a second, very sheer layer of pigment over parts of the petals to create shadows where petals overlap. -
Detailing Flower Centers:
Use the tip of a small brush to dot the centers of the peach flowers with dark brown or black. Allow the paint to bleed slightly for a natural look.
Step 3: Leaves & Foliage
-
Mixing Greens:
Create two shades of green on your palette: one sage-like green (green + white + tiny bit of brown) and one deeper forest green. This variation adds realism. -
Painting Large Leaves:
With the #4 brush, press down and lift up to create almond-shaped leaves near the base of the flowers. Use the sage green for these to keep the look soft. -
Adding Ferns and Sprague:
Switch to your fine liner brush. Paint delicate, thin stems extending outward. Add tiny, rhythmic dashes along these stems to mimic fern fronds or lavender sprigs. -
Autumn Accents:
Introduce warmth by painting a few leaves in Burnt Sienna or Deep Burgundy. These darker accents anchor the light florals and tie the design to the fall season. -
Golden Touches:
Mix a mustard yellow or light gold color. Paint small clusters of berries or tiny filler flowers in the gaps between the larger blooms to fill out the bouquet.
Level Up: Decoupage Trick
Not confident painting? Print vintage floral clip art on thin tissue paper. Cut closely and adhere with Mod Podge for an identical look with zero brush skills.
Step 4: Finishing Details
-
Refining Edges:
Step back and look at the composition. If any flower looks too ‘blobby,’ use a fine liner brush with slightly darker paint to outline just a few petal edges to define the shape. -
Stem Connection:
Ensure all flowers and leaves are visually connected to a stem. Use the thinnest brush to draw faint, trailing lines connecting floating elements back to the main cluster. -
Stem Finishing:
Don’t forget the actual pumpkin stem! Paint it with a wash of gold or a muted metallic bronze to complement the elegant floral design. -
Sealing:
Let the pumpkin dry for at least 24 hours. Once fully cured, spray with a matte clear coat to protect your work and unify the sheen of the paint.
Place your elegant floral pumpkin near a window to catch the light and enjoy the romantic autumn vibes

PENCIL GUIDE
Understanding Pencil Grades from H to B
From first sketch to finished drawing — learn pencil grades, line control, and shading techniques.
Explore the Full Guide
Moody Dark Base With Bright Flowers
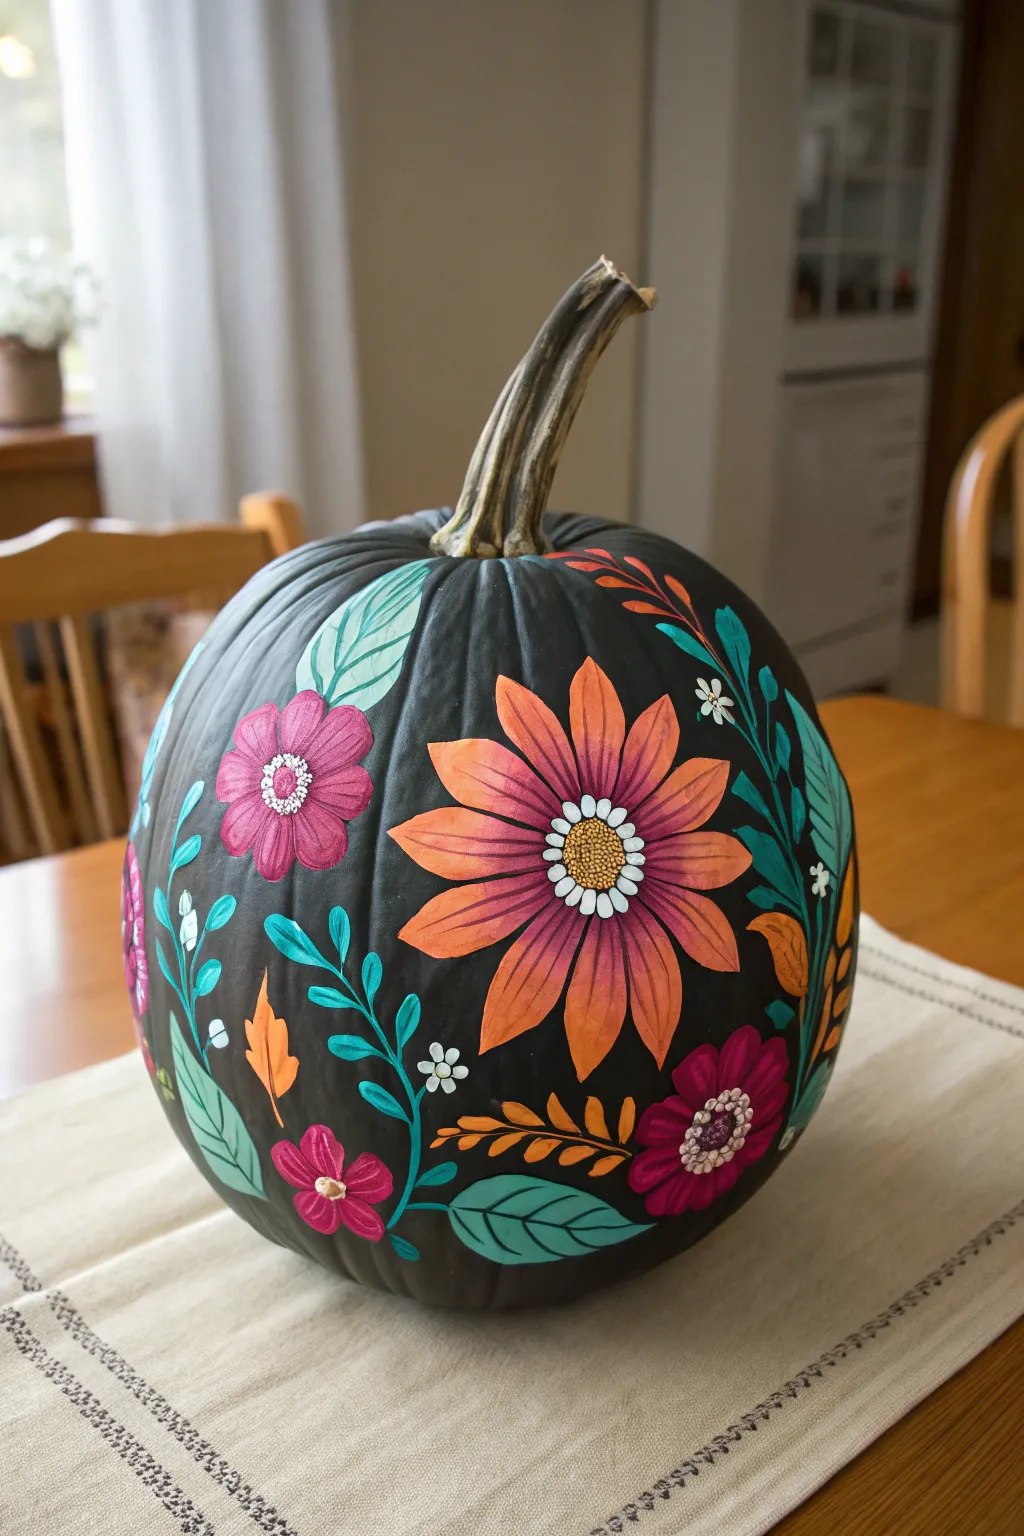
Transform a simple pumpkin into a stunning piece of folk art by pairing a moody, matte black base with vibrant pops of teal, coral, and magenta. This project balances bold contrast with delicate floral details for a sophisticated autumn centerpiece.
Step-by-Step Tutorial
Materials
- Faux pumpkin (rounded shape)
- Matte black spray paint or acrylic chalk paint
- Posca paint pens (medium and fine tips: white, teal, pink, orange)
- Acrylic craft paints (teal, coral orange, magenta, mustard yellow, forest green)
- Assorted brushes (flat shader, round #4, fine liner)
- Pencil for sketching
- Matte clear sealer spray
Step 1: Setting the Stage
-
Prep the Surface:
Begin by wiping down your pumpkin with a damp cloth to remove any dust or oils. If you are using a real pumpkin, ensure it is completely dry; for a faux pumpkin, just a quick wipe is sufficient. -
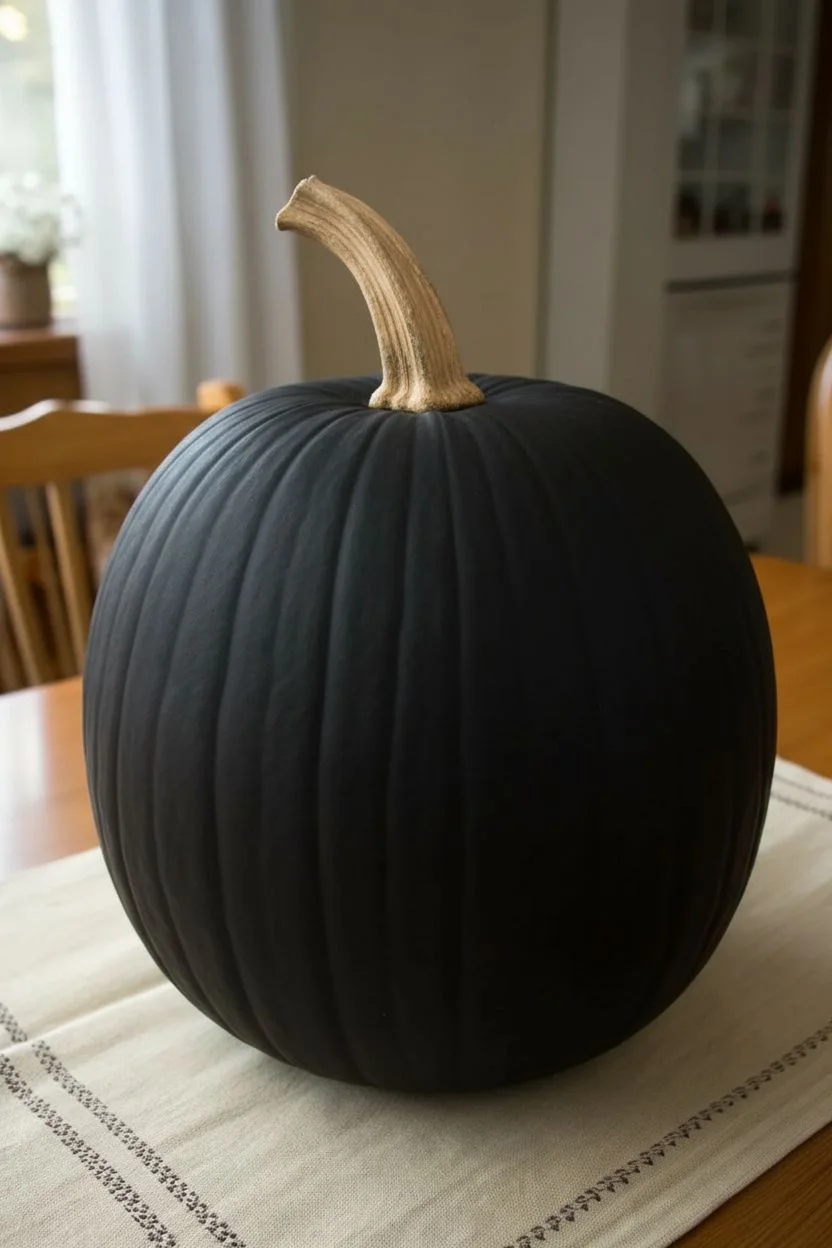
Create the Moody Base:
Apply two coats of matte black spray paint to the entire pumpkin, including the base. If you prefer brush-on paint, chalk paint works wonderfully here for that ultra-matte finish. Allow complete drying between coats so the surface is velvety smooth. -
Preserve the Stem:
While painting the base, lightly mask off the stem with hazy tape if you want to keep its natural color, or paint carefully around it. The natural beige/brown stem provides a nice grounding contrast to the black skin.
Prime for Pop
Black backgrounds eat color! Paint a layer of white primer specifically where your flowers will go before adding the bright colors to ensure true vibrancy.
Step 2: Sketching and Blocking
-
Draft the Design:
Using a standard pencil or a white charcoal pencil, lightly sketch large circle placements for your main flowers. I find it helpful to vary the sizes—one large focal bloom and several medium ones spread around the sides. -
Map the Foliage:
Draw sweeping, curved lines connecting the flower placements to represent vines. Add leaf shapes branching off these curves to create a flowing, organic composition that wraps around the pumpkin’s shape. -
Base Coat the Large Flower:
Mix a bright coral-orange acrylic paint. Using a flat shader brush, paint the large petals of the main daisy-like flower. Don’t worry about shading yet; just get a solid, opaque layer down. You might need two coats for vibrancy against the black. -
Paint Secondary Blooms:
Switch to a magenta or deep pink shade. Paint the petals of the medium-sized rosettes or round flowers. Use a round brush to dab the paint on, mimicking rounded petal shapes. -
Fill in the Leaves:
With a teal or minty green paint, fill in your larger leaf sketches. The cool tone of the leaves will make the warm floral colors pop intensely.
Gilded Edges
Trace just the tips of the orange flower petals with a metallic gold paint pen. It adds a subtle shimmer that catches candlelight beautifully.
Step 3: Adding Detail and Dimension
-
Layering the Petals:
Once the orange base is dry, mix a slightly lighter peach or yellow-orange. Paint a smaller, inner stroke inside each orange petal to create a gradation effect, giving the flower depth. -
Center Details:
Use a mustard yellow or brown paint to create the large center circle of the main flower. Stipple the paint with the tip of your brush to give it a textured, pollen-like appearance. -
Leaf Veining:
Using a fine liner brush and darker green paint (or a green paint pen), draw the central veins and delicate branching lines inside your teal leaves. This illustrative style adds sharpness to the design. -
Small Filler Flowers:
In the negative spaces between large blooms, paint tiny 4-petal flowers using white or very pale blue. These little accents prevent the design from feeling too heavy. -
Vine Flourishes:
Take a teal or light blue paint pen and draw additional fern-like sprigs and curly vines extending from your main clusters. These fine lines are much easier to control with a pen than a brush.
Step 4: Highlights and Finishing Touches
-
White Accents:
This is the ‘magic’ step. Use a fine-tip white paint pen to outline the very edges of the flower centers and add tiny dot clusters in the middle of the magenta flowers. The white makes the colors leap off the black background. -
Petal Definition:
Add very thin, sketchy outlines or separation lines between petals using a dark purple or black fine liner brush if they blended together too much. -
Adding Texture Dots:
Dot tiny white circles around the larger flower centers to mimic stamens. Group three small white dots in open black areas for a whimsical filler pattern. -
Final Inspection:
Rotate the pumpkin and check for any patchy areas. Because black absorbs light, you want your colors to be fully opaque. Touch up layers if the background is showing through. -
Seal the Art:
Once the paint is completely cured (give it a few hours), spray the entire pumpkin with a matte clear sealer. This protects your handiwork from chipping and keeps that lovely flat finish intact.
Place your dark floral pumpkin on a woven runner and enjoy the dramatic flair it brings to your seasonal decor.
Minimal Line-Art Flowers With Paint Pens
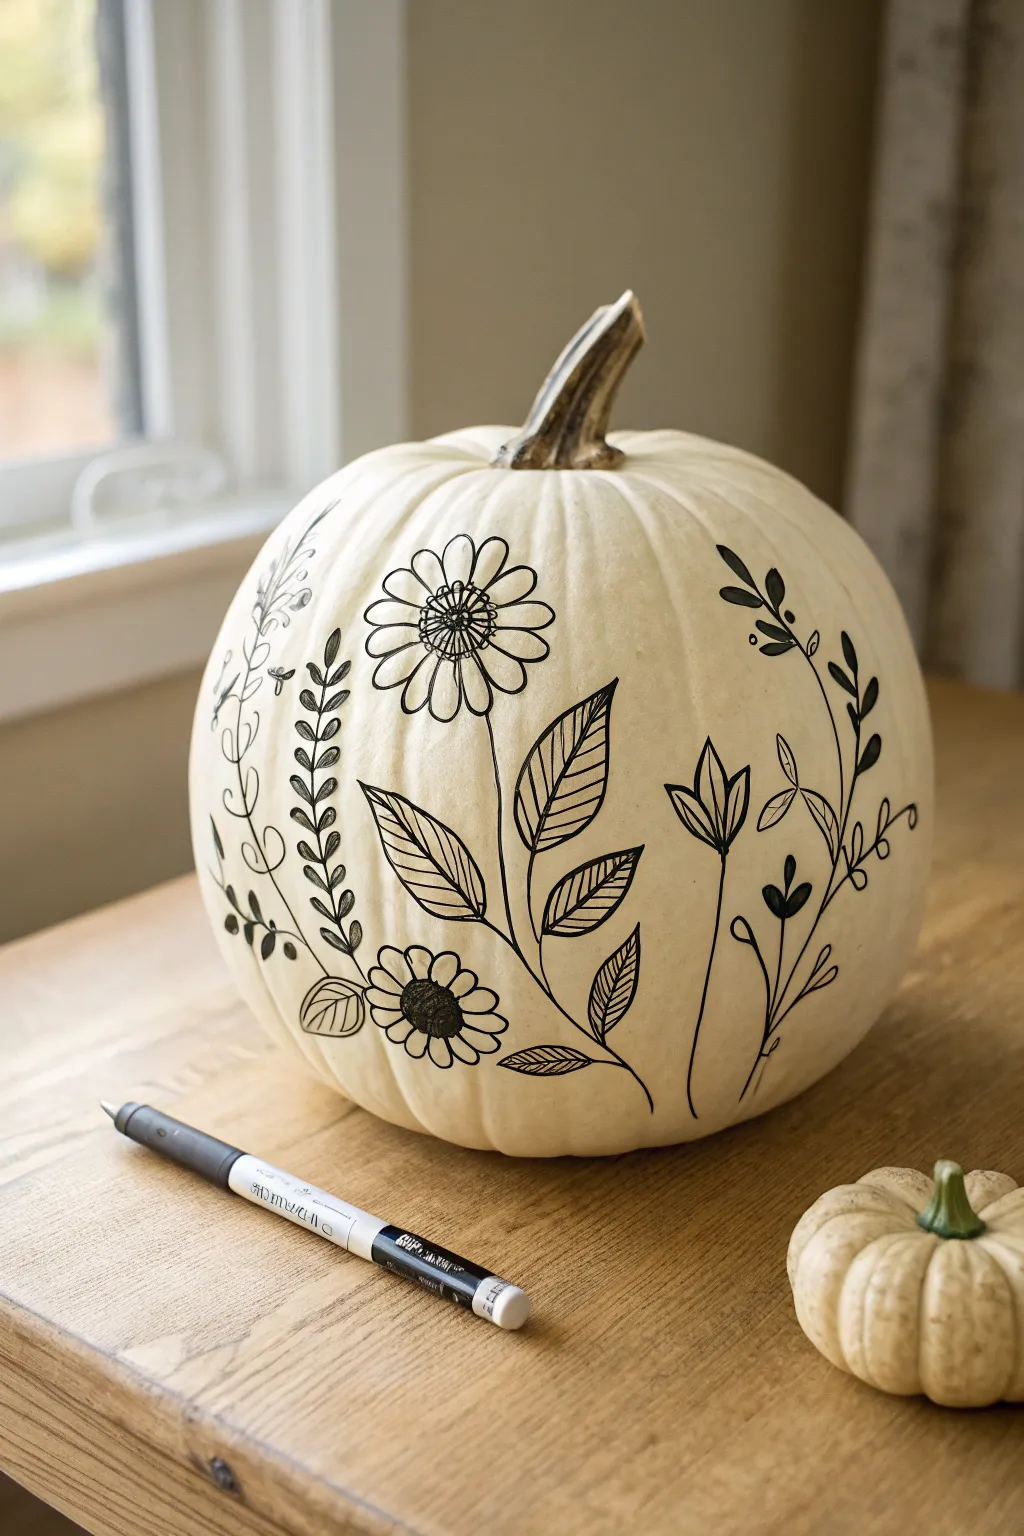
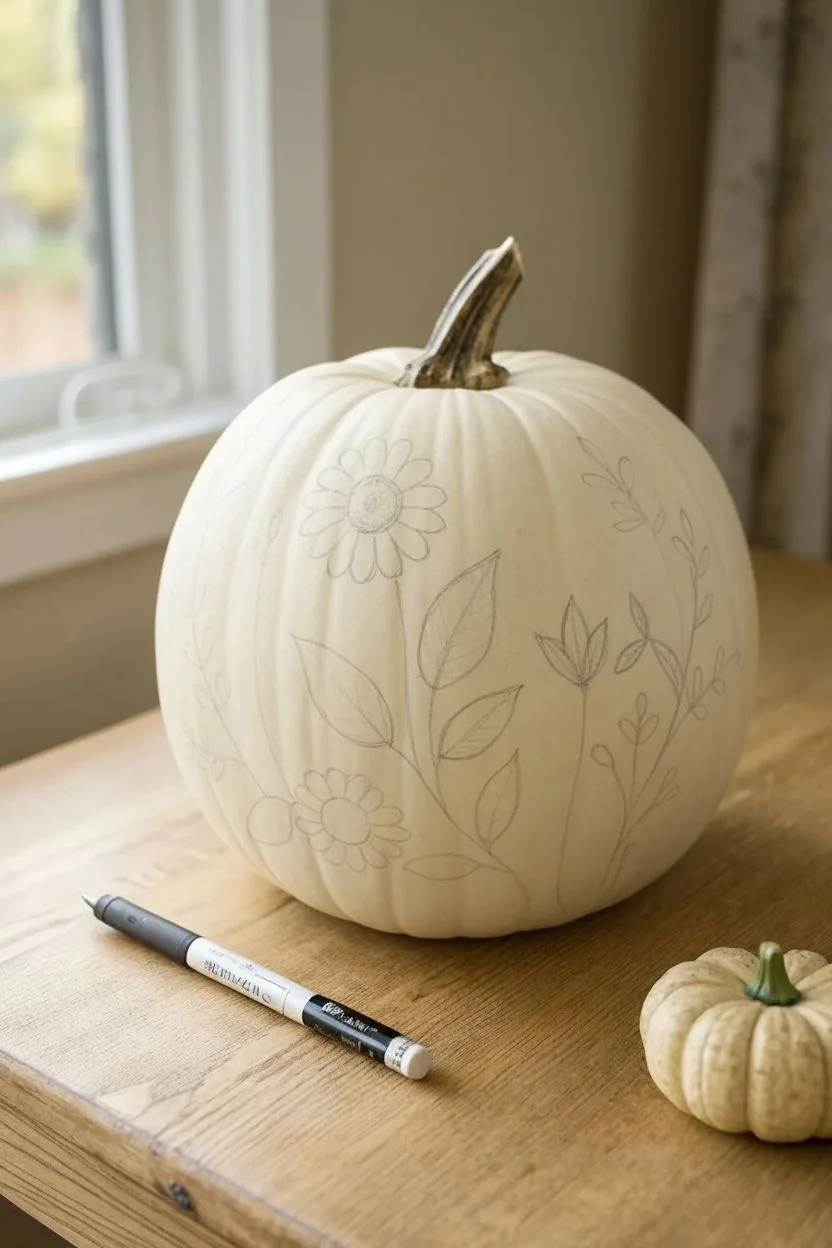
Embrace simplicity this autumn with a project that transforms a stark white pumpkin into a canvas for delicate botanical illustrations. Using just a single black paint pen, you’ll create elegant, high-contrast wildflowers that mimic the look of a vintage sketchbook page.
Detailed Instructions
Materials
- Medium or large white pumpkin (real or faux)
- Black paint pen (fine tip/bullet tip)
- Pencil (HB or lighter)
- Eraser
- Paper towel or damp cloth
- Scrap paper for testing
Step 1: Preparation & Planning
-
Surface Prep:
Ensure your pumpkin is completely clean and dry. If using a real pumpkin, wipe it down with a damp cloth to remove any dirt or field residue. For faux pumpkins, a quick dusting is usually sufficient to help the ink adhere properly. -
Test Driving:
Before touching the pumpkin, practice your floral shapes on scrap paper. Sketch out a few daisies, leaf sprigs, and winding vines to get comfortable with the shapes you want to transfer. -
Initial Sketch:
Lightly sketch your main focal flowers onto the pumpkin using a pencil. You don’t need to draw every detail; just mark the circles for flower centers and lines for major stems to establish your composition.
Prime the Pen
Shake your paint pen vigorously before starting and press the nib on scrap paper until ink flows smoothly. This prevents sudden blobs on your pumpkin.
Step 2: Drawing the Focal Blooms
-
Central Flower Center:
Start with the large daisy-like flower near the upper center. Use your black paint pen to draw a small circle, then fill it with a grid or cross-hatching pattern to create texture for the pistil. -
Petal Formation:
Draw the petals radiating outward from the center. Keep them simple and slightly rounded at the tips. Don’t worry about perfection; some natural variation adds character to the illustration. -
Lower Bloom:
Move lower down the pumpkin face and draw a second, smaller flower. For this one, darken the center completely with black ink to create visual weight and contrast against the white skin. -
Connecting Stems:
Draw long, sweeping lines to connect your blooms. Let the lines follow the natural curvature of the pumpkin’s ribs, which helps the drawing feel integrated with the object’s shape.
Metallic Touch
After the black ink dries, trace a few leaf veins or flower centers with a gold paint pen for a subtle, elegant shimmer.
Step 3: Adding Foliage & Fillers
-
Drawing Leaves:
Add large leaves to the main stems. Draw the outline first—a pointed oval shape works best—and then add a central vein line down the middle of each leaf. -
Leaf Detailing:
Fill the leaves with diagonal hatching lines. Keep the spacing relatively consistent to give them a stylized, graphic appearance. -
Fern Sprigs:
On the left side of your composition, draw a vertical stem. Add small, tear-drop shaped leaves on opposite sides of the stem, getting smaller as you reach the top, resembling a fern or olive branch. -
Structural Branching:
Balance the right side by drawing a taller, thinner branch that curves upward. This will serve as the base for more delicate buds and leaves. -
Adding Buds:
Along this right-side branch, draw small tulip-shaped buds. Create these by drawing a ‘U’ shape and closing the top with a zigzag or a few points. -
Dark Accents:
Identify a few small leaves or buds in your composition and color them in completely black. This solid black balances the open line work and the hatched textures.
Step 4: Refining the Composition
-
Checking Balance:
Step back and look at the pumpkin from a distance. If there are large empty white spaces that feel unbalanced, sketch in a few curling tendrils or simple curved lines. -
Adding Whimsy:
Draw faint, squiggly lines extending from the ends of your main branches to mimic climbing vines. These wispy lines soften the edges of the design. -
Drying Time:
Allow the paint pen ink to dry completely. This usually takes about 10-15 minutes depending on the brand, but be careful not to smudge it with your hand while working on other areas. -
Cleanup:
Once you are absolutely certain the ink is dry, gently erase any visible pencil marks. Use a soft eraser and light pressure to avoid scratching the paint.
Place your finished masterpiece near a window or on a mantle to enjoy the crisp, modern contrast of your handiwork


Metallic Accents on Petals and Leaves
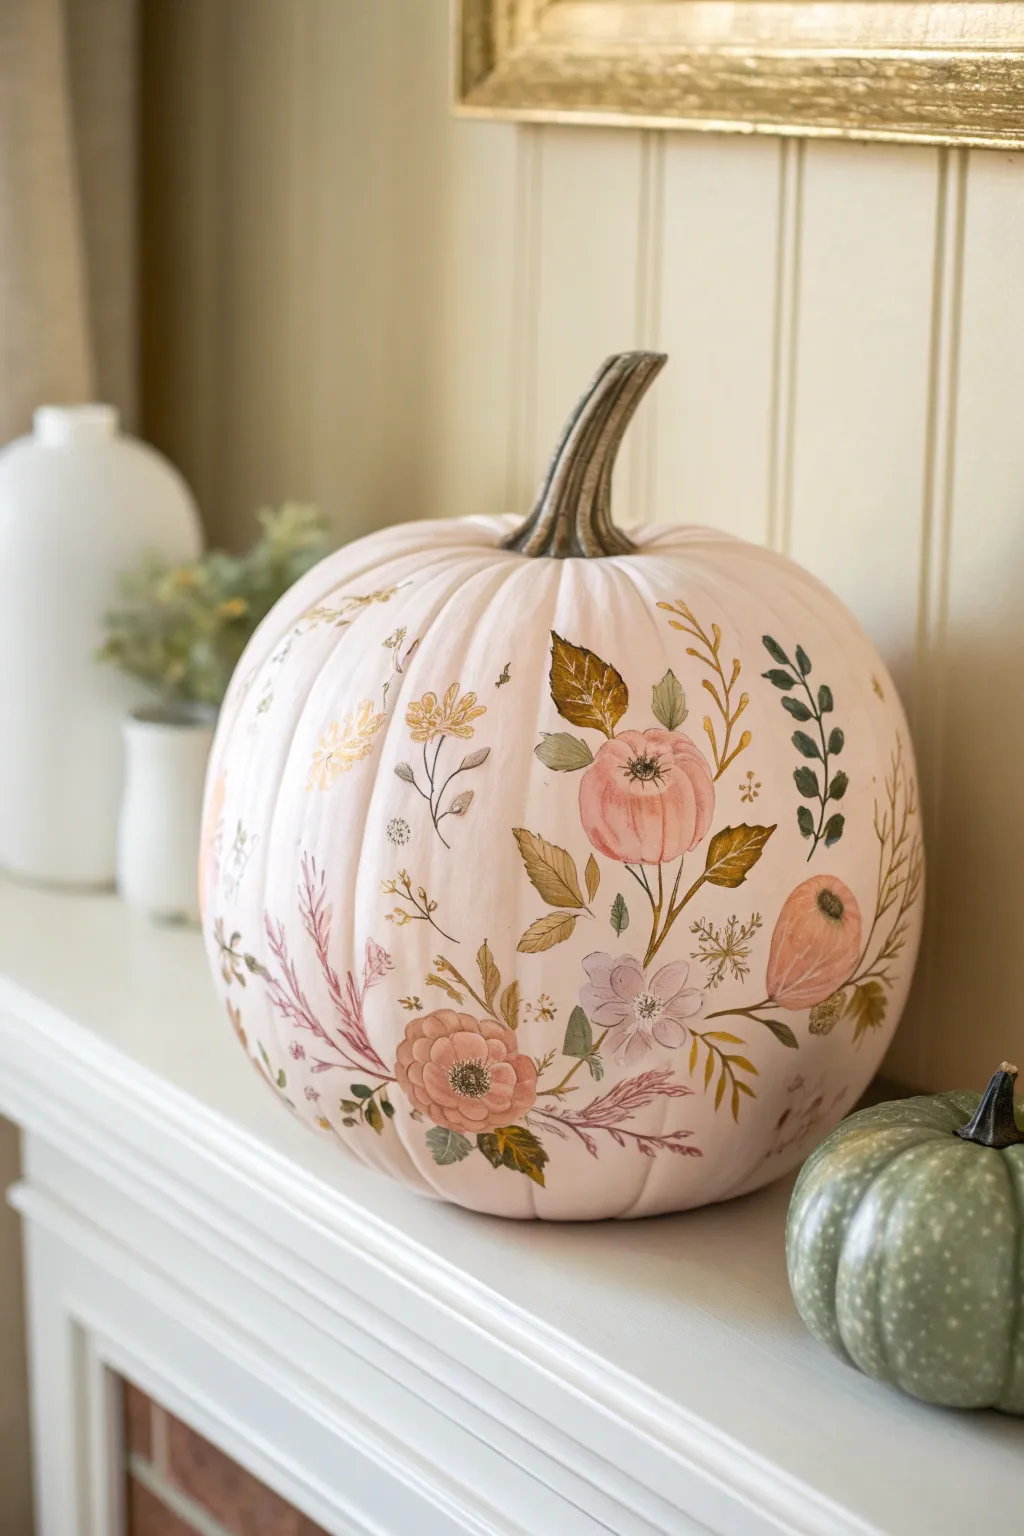
Transform a simple pumpkin into a delicate work of art featuring soft floral illustrations and subtle metallic touches. This elegant design combines muted pinks, sage greens, and gold accents for a sophisticated autumn centerpiece.
Detailed Instructions
Materials
- Large faux or real pumpkin (pale pink or creamy white)
- Acrylic paints (pale pink, deep rose, sage green, olive green, burnt umber, white, gold metallic)
- Fine detail brushes (sizes 0, 1, and 2)
- Round brush (size 4)
- Pencil
- Palette or mixing plate
- Paper towels
- Clear matte sealer spray
Step 1: Preparation and Base
-
Clean the surface:
Wipe your pumpkin down thoroughly with a damp cloth to remove any dust or oils. If using a real pumpkin, dry it completely before starting. -
Apply base coat (optional):
If your pumpkin isn’t already the desired pale blush shade, mix white acrylic paint with a tiny drop of red and a touch of yellow ocher. Apply two thin coats with a larger brush, letting it dry fully between layers. -
Map out the design:
Lightly sketch the placement of your main flowers using a pencil. I like to group three larger blooms as the focal points and let vines trail outward from there.
Step 2: Painting the Florals
-
Mix your flower colors:
Create a gradient of pinks on your palette. You’ll need a very pale blush for highlights, a medium dusty rose for the main petals, and a deeper mauve for shadows. -
Base the main blooms:
Using the size 4 round brush, paint the basic round shapes of your large flowers in the medium dusty rose shade. Keep the edges soft and slightly irregular to mimic real petals. -
Add petal definition:
While the base is still slightly tacky, use the deeper mauve on a smaller brush to define the center of the flower and the separation between petals. Blend gently outward. -
Highlight the petals:
Dip your brush into the pale blush mix and stroke the outer edges of the curled petals. This gives the flower volume and a dimensional, rounded look. -
Detail the centers:
Once the flower bodies are dry, use the size 0 brush with dark brown or black to stipple tiny dots in the center. Add fine lines radiating outward for stamens.
Brush Control Secret
For those super fine stems, thin your paint slightly with water until it has an ink-like consistency. This helps the paint flow smoothly off the liner brush without skipping.
Step 3: Leaves and Greenery
-
Mix leaf shades:
Prepare a sage green (green + white + tiny bit of black) and an olive tone (green + yellow + brown). Having two shades creates depth in your foliage. -
Paint main stems:
With a fine liner brush and thinned brown paint, draw delicate, curving stems connecting your flowers. Let them meander naturally along the pumpkin’s ribs. -
Add large leaves:
Paint larger, broad leaves near the base of the blooms using the olive mixture. Use a single stroke method: press the brush down to widen the stroke and lift up to create a point. -
Fill with sprigs:
Switch to your sage green and paint smaller, fern-like sprigs and vine leaves extending into the empty spaces. Keep these airy and light. -
Incorporate dried foliage:
Use a golden-brown shade to paint a few ‘dried’ leaves or seed pods. This adds that essential autumnal texture to the bouquet.
Gilded Texture
Instead of liquid gold paint, try using gold leaf sizing and small flakes of gold leaf on a few leaves for a rich, textured metallic finish that really pops.
Step 4: Metallic Accents and Finishing
-
Add gold highlights:
Dip a fine brush into metallic gold paint. Carefully outline just one side of a few select leaves and add tiny touches to the flower centers. The key is subtlety—don’t outline everything. -
Paint delicate gold sprigs:
Paint entirely gold, wispy branches weaving behind the main floral arrangement. These should look like faint background foliage catching the light. -
Review and refine:
Step back and look at the composition. If a spot looks too empty, add a small falling petal or a tiny bud. -
Seal the artwork:
Allow the paint to cure for at least 24 hours. Once dry, lightly mist the painted areas with a clear matte sealer to protect your handiwork from scratches.
Now you have a stunning, hand-painted centerpiece that captures the romantic side of the season
Folk-Art Flower Bands Around the Pumpkin
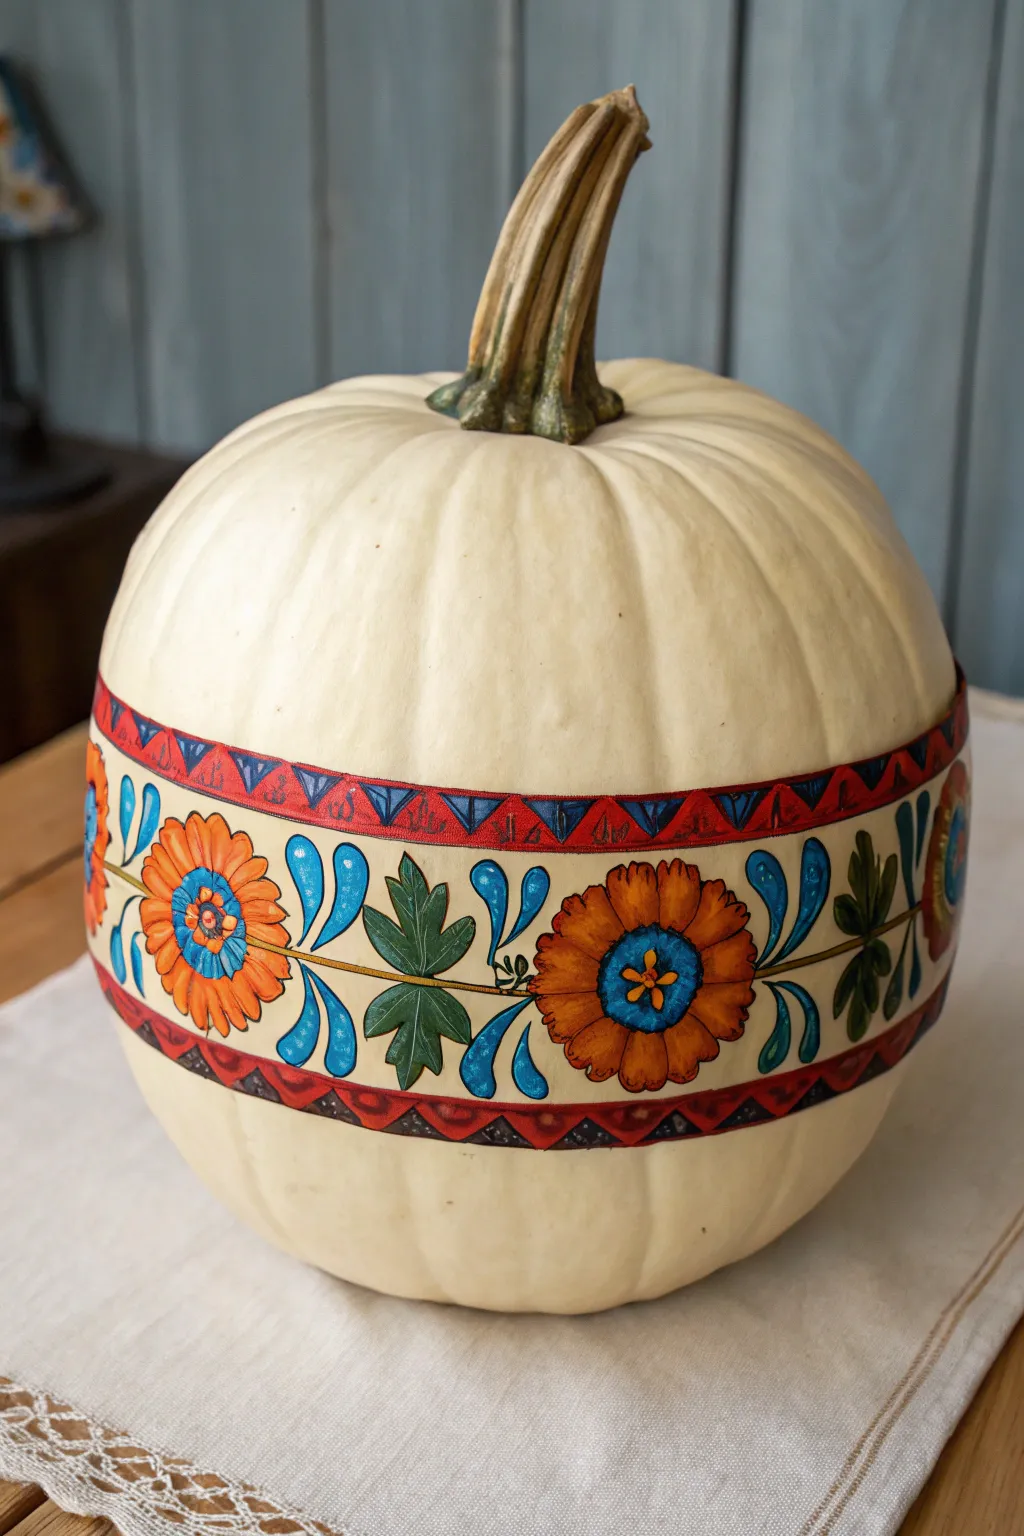
Transform a simple white pumpkin into an elegant centerpiece with this European-inspired folk art design. The structured band of vibrant flowers and geometric borders creates a striking contrast against the pale skin, perfect for a sophisticated autumnal display.
How-To Guide
Materials
- Medium-sized white pumpkin (real or high-quality faux)
- Acrylic craft paints (burnt orange, mustard yellow, bright blue, deep royal blue, forest green, deep red, black)
- Round synthetic brushes (sizes 2 and 4)
- Fine liner brush (size 0 or 00)
- Flexible sewing measuring tape
- Pencil
- Painter’s tape or masking tape (approx. 1/2 inch width)
- Matte or satin spray sealer
Step 1: Planning and Base Structure
-
Clean and Prep:
Before starting, wipe down your pumpkin surface thoroughly to remove any dirt or waxy residue. If you are using a real pumpkin, ensure it is completely dry; for faux pumpkins, a quick wipe with rubbing alcohol helps the paint adhere better. -
Measure the Band:
Find the widest part of the pumpkin’s circumference. Using your flexible measuring tape, mark a central line around the middle with a pencil. -
Define the Borders:
Measure about 2 inches up from your center line and 2 inches down from it. Mark these spots and lightly connect them to create two parallel rings around the pumpkin. This 4-inch wide band will house your main floral design. -
Mask the Edges:
Apply painter’s tape just outside these top and bottom lines. This ensures your main band stays crisp and prevents your border painting from wandering too far up or down the pumpkin.
Uneven Surface?
Pumpkins have natural ridges that distort straight lines. Instead of fighting them, let your horizontal vine and border bands gently dip and rise with the pumpkin’s ribs for an organic look.
Step 2: Painting the Main Floral Motifs
-
Draft the Flowers:
Lightly sketch four to five large circular flower shapes evenly spaced within the band. Connect them with a simple horizontal vine line running through the center. -
Base Coat the Petals:
Using your size 4 round brush, fill in the large flower shapes with burnt orange paint. Don’t worry about petal details yet; just establish the solid color silhouette. You may need two coats for opacity. -
Add the Centers:
Once the orange is dry, paint a distinct circle in the center of each flower using bright blue. Add a smaller, darker royal blue ring inside that, leaving a tiny spot for a yellow center dot later. -
Paint the Leaves:
Between each flower, paint a three-pronged leaf shape using forest green mixed with a tiny touch of black to deepen it. These leaf clusters should look like stylized maple leaves. -
Add Decorative Flourishes:
Using the size 2 brush and bright blue paint, add teardrop shapes floating near the leaves and flowers. These classic folk-art strokes should curve inward toward the main vine. -
Detail the Petals:
Mix a little mustard yellow into your orange paint to create a lighter shade. Use this to paint individual petal shapes on top of the orange base, giving the flower texture and separation.
Antique the Look
Once the paint is totally dry, lightly brush a watered-down brown glaze (or diluted burnt umber paint) over the entire design and wipe it back immediately with a cloth for an aged, vintage finish.
Step 3: Creating the Geometric Borders
-
Remove the Tape:
Carefully peel off the painter’s tape. You should now see the empty space above and below your floral band where the borders will go. -
Paint the Red Stripes:
Paint a solid deep red stripe, about half an inch thick, framing the top and bottom of your floral section. Use a flat brush if you have one, or carefully outline and fill with your round brush. -
Add Triangle Details:
Inside the red stripes, paint small, repeating inverted triangles using royal blue paint. Space them rhythmically so they look like a sawtooth pattern. -
Highlight the Triangles:
If I feel the blue is disappearing into the red, I like to outline the triangles thinly with black or add a tiny dot of white inside each one to make them pop.
Step 4: Fine Lining and Finishing
-
Outline the Florals:
Switch to your fine liner brush and thinned black paint (add a drop of water to make it flow like ink). Carefully outline each flower petal, the blue centers, and the green leaves. -
Define the Vine:
Go over the central connecting vine with a thin black line. Add tiny perpendicular lines or ‘thorns’ along the vine for extra detail. -
Add Final Accents:
Place a bright mustard yellow dot in the very center of the blue flower eyes. You can also add tiny white highlights to the blue teardrops for a glossy look. -
Touch Up Background:
Examine the creamy background space within the band. If any paint smudged, touch it up with an off-white or cream color that matches your pumpkin’s skin. -
Seal the Work:
Allow the pumpkin to dry for at least 24 hours. For longevity, especially if displaying outdoors, spray the entire painted area with a clear matte sealer.
Place your finished pumpkin on a woven runner to complete the cozy cottage aesthetic
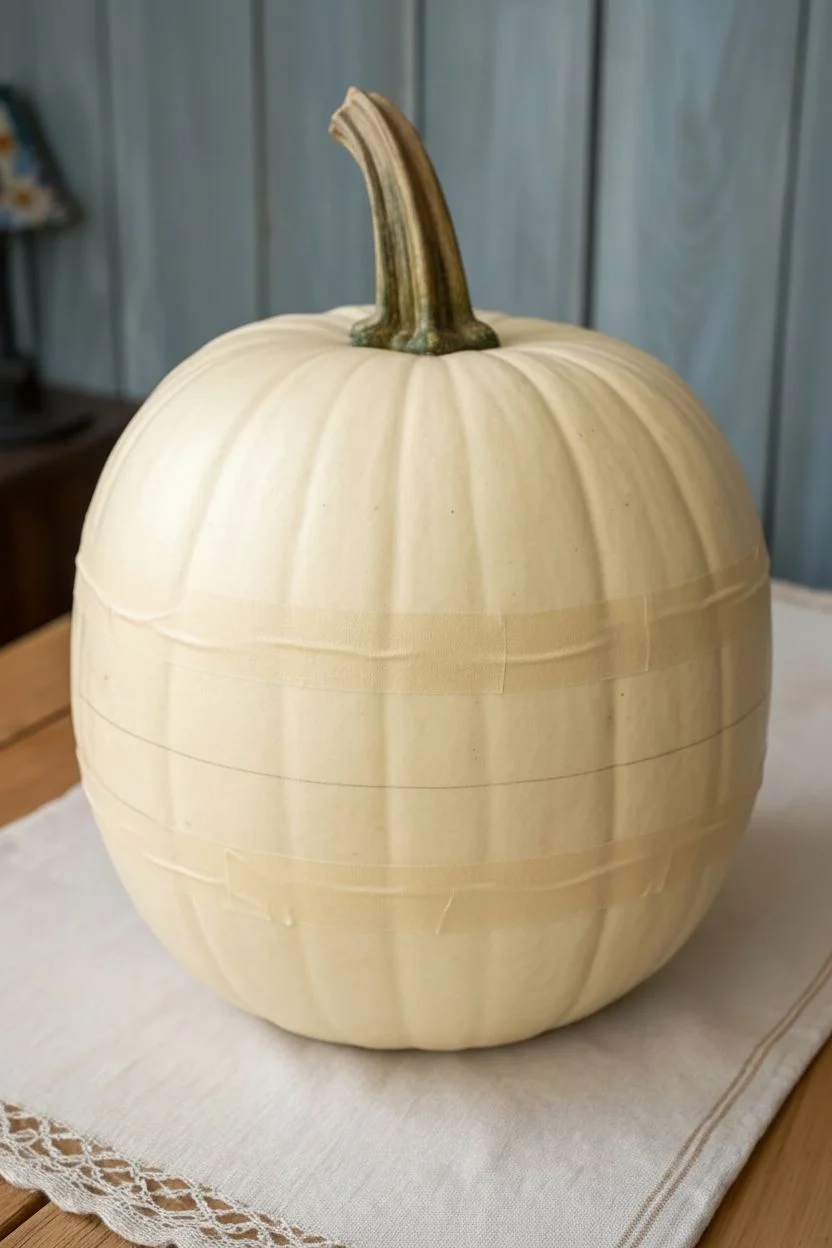
Raised Textured Petals With Thick Paint
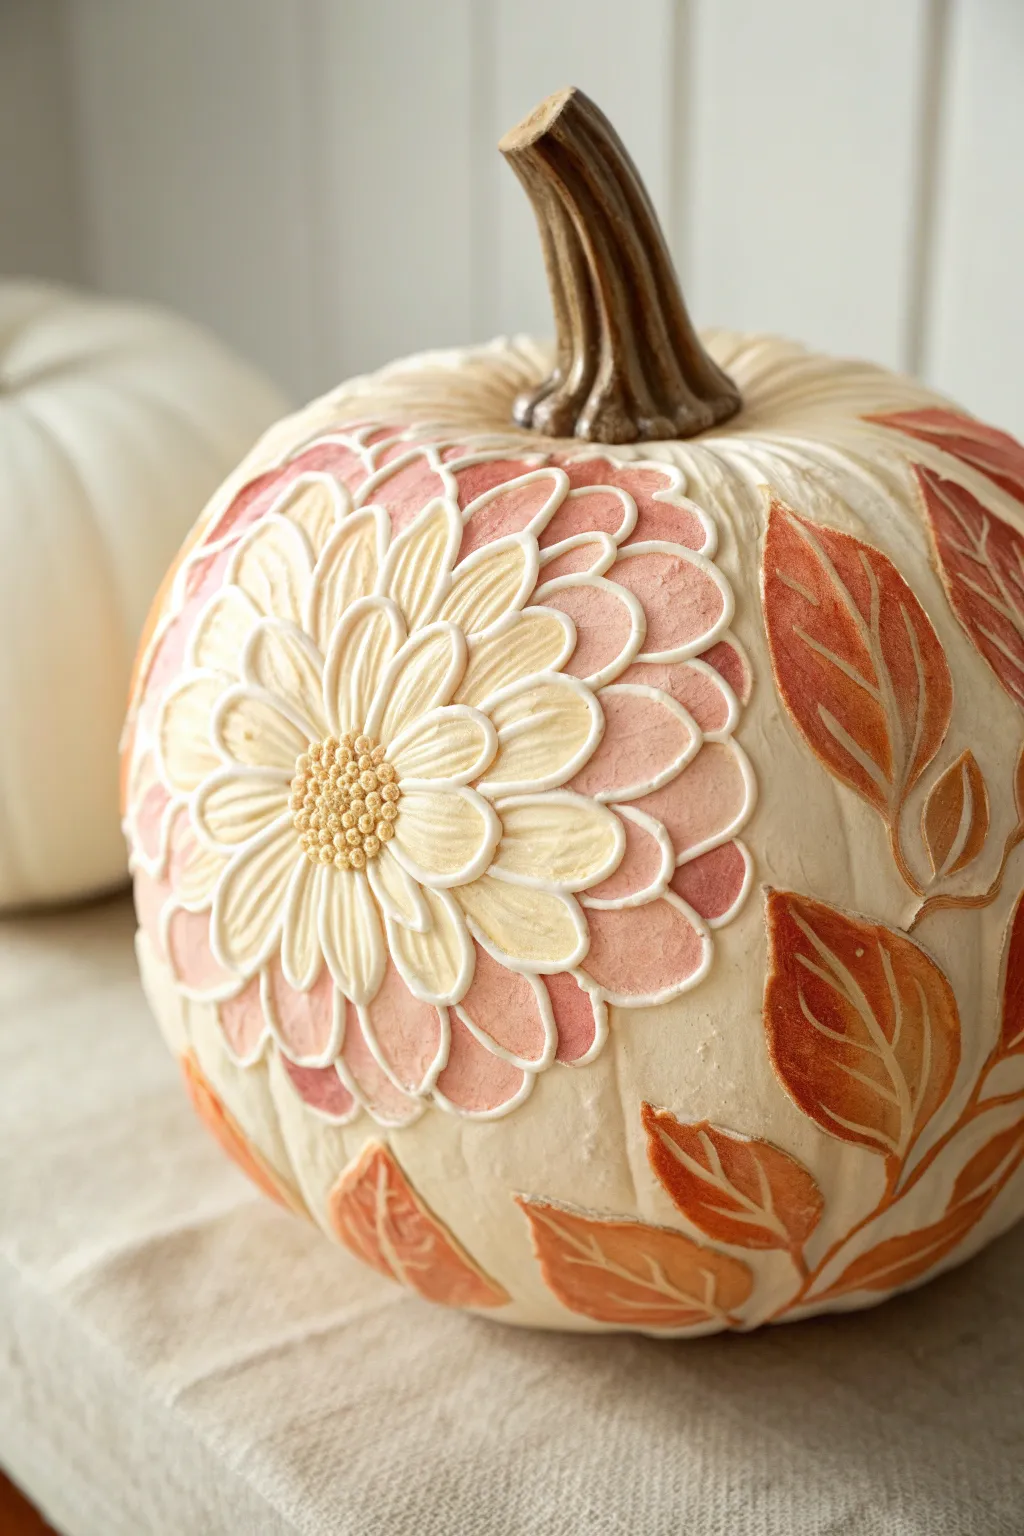
Transform a simple white pumpkin into a tactile work of art with this technique that mimics the look of sugar cookies or ceramic relief. By using a thickened medium or dimensional paint, you can build up layers of petals and leaves that stand out beautifully against the pale background.
Step-by-Step
Materials
- Faux white pumpkin (medium size)
- White or cream dimensional fabric paint (or heavy body acrylic mixed with modeling paste)
- Acrylic paints (pale yellow, soft coral, blush pink, terracotta orange)
- Piping bags or small squeeze bottles with precision tips
- Small round paintbrushes (sizes 2 and 4)
- Palette or paper plate
- Pencil for sketching
- Matte spray sealer (optional)
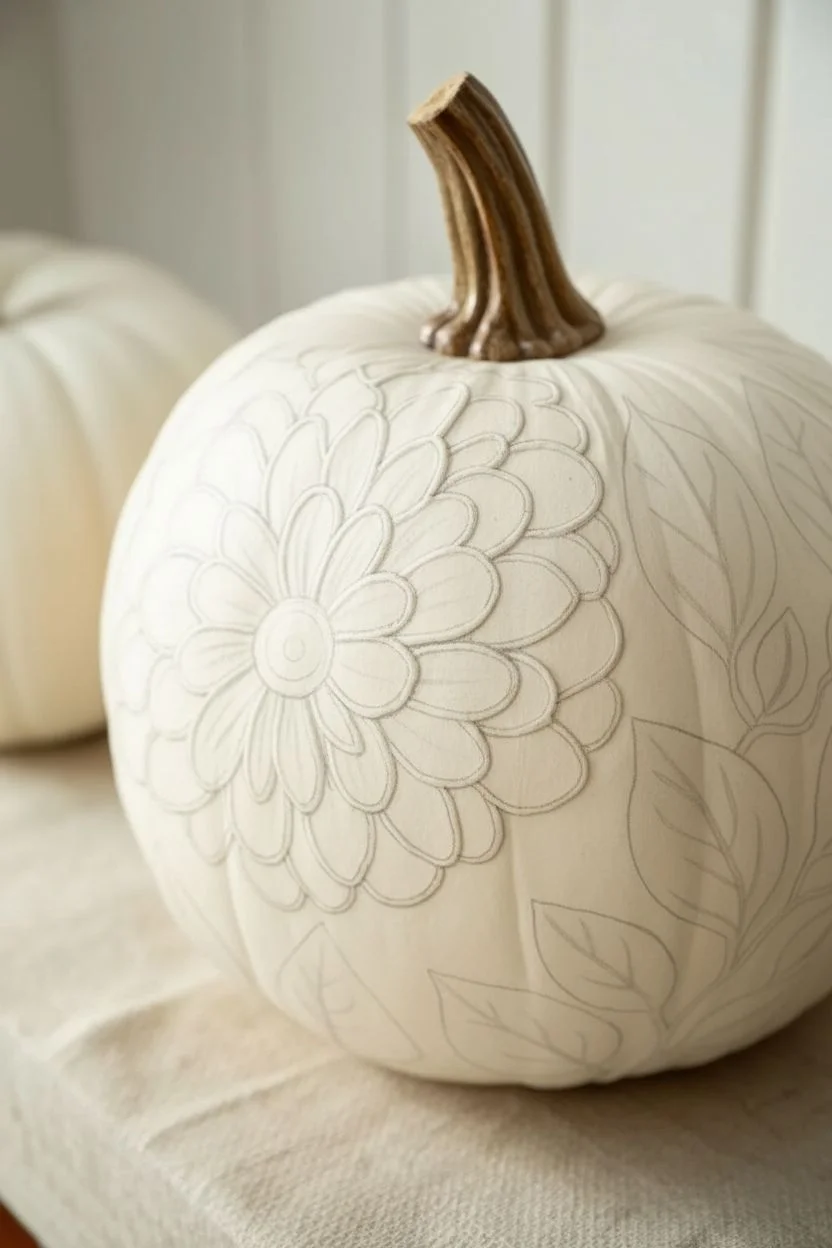
Step 1: Planning and Outlining
-
Clean the surface:
Wipe down your pumpkin with a damp cloth to remove any dust or oils. Let it dry completely to ensure your materials adhere properly. -
Sketch the flower placement:
Using a light pencil mark, locate the center of the pumpkin where you want your main flower to sit. Draw a small circle for the flower center, about the size of a quarter. -
Draw the petal guides:
Sketch radiating layers of petals extending outward from the center. Start with a small inner ring of short petals, then draw two or three progressively larger rings of longer, rounded petals. Don’t worry about perfection; organic shapes look more natural. -
Outline the leaves:
Sketch several large, almond-shaped leaves floating around the flower. Draw a central vein down the middle of each leaf.
Step 2: Creating Raised Texture
-
Prepare your piping medium:
If using heavy body acrylic mixed with modeling paste, scoop the mixture into piping bags or squeeze bottles now. If using dimensional fabric paint, shake the bottle well to remove air bubbles. -
Pipe the petal outlines:
Start with the innermost petals. Squeeze the bottle gently to create a steady, raised white line over your pencil sketches. The line should be about 1/8 inch thick to create that distinct ‘cookie icing’ ridge. -
Outline the leaves:
Continue using the white dimensional paint to trace the outlines of the leaves and the central vein lines. Keep the pressure consistent for smooth, raised borders. -
Create the center texture:
For the flower’s center, pipe many small, tight dots clustered together. This mimics the pollen center of a chrysanthemum or daisy. -
Allow the outlines to cure:
This is crucial: Let the raised outlines dry completely. Depending on the product used, this could take anywhere from 2 to 6 hours. They must be hard to the touch so they act as a dam for the interior color.
Smooth Moves
If your piped lines have pointy peaks when you lift the nozzle, dip a clean brush in water and gently pat the peak down while the paint is still wet.
Step 3: Adding Color and Depth
-
Mix the petal gradient:
Prepare a gradient of colors on your palette: a creamy pale yellow, a soft blush pink, and a deeper coral-pink. -
Fill the inner petals:
Using a small brush, paint inside the dried outlines of the smallest inner petals using the pale yellow. Use enough paint to create a slightly thick, opaque look, but try not to run over the white raised borders. -
Paint the middle petals:
Transition to the blush pink for the middle ring of petals. I like to blend a tiny bit of the yellow into the base of these petals while the paint is wet for a softer transition. -
Finish the outer petals:
Fill the largest, outermost petals with the coral-pink shade. This creates a lovely ombre effect radiating from the center. -
Paint the leaves:
Mix a terracotta orange color. Carefully fill in the leaf shapes. For dimension, you can paint one side of the leaf vein slightly darker than the other. -
Detail the center:
Once the center dots are dry, lightly dry-brush them with a golden-yellow hue to make the texture pop. -
Add highlights:
Mix a tiny amount of white into your leaf color and petal colors. Add very subtle streaks to the tops of the dried painted areas to simulate light catching the raised surface. -
Final cure:
Allow the entire pumpkin to dry overnight. If desired, mist with a matte sealer to protect your raised design.
Metallic Magic
Once the paint is fully dry, gently rub a gold wax paste over the raised white outlines. It catches the texture and gives the pumpkin a high-end ceramic look.
This textured centerpiece is now ready to bring a touch of warm elegance to your seasonal display
Floral Wreath Around a Hand-Lettered Initial
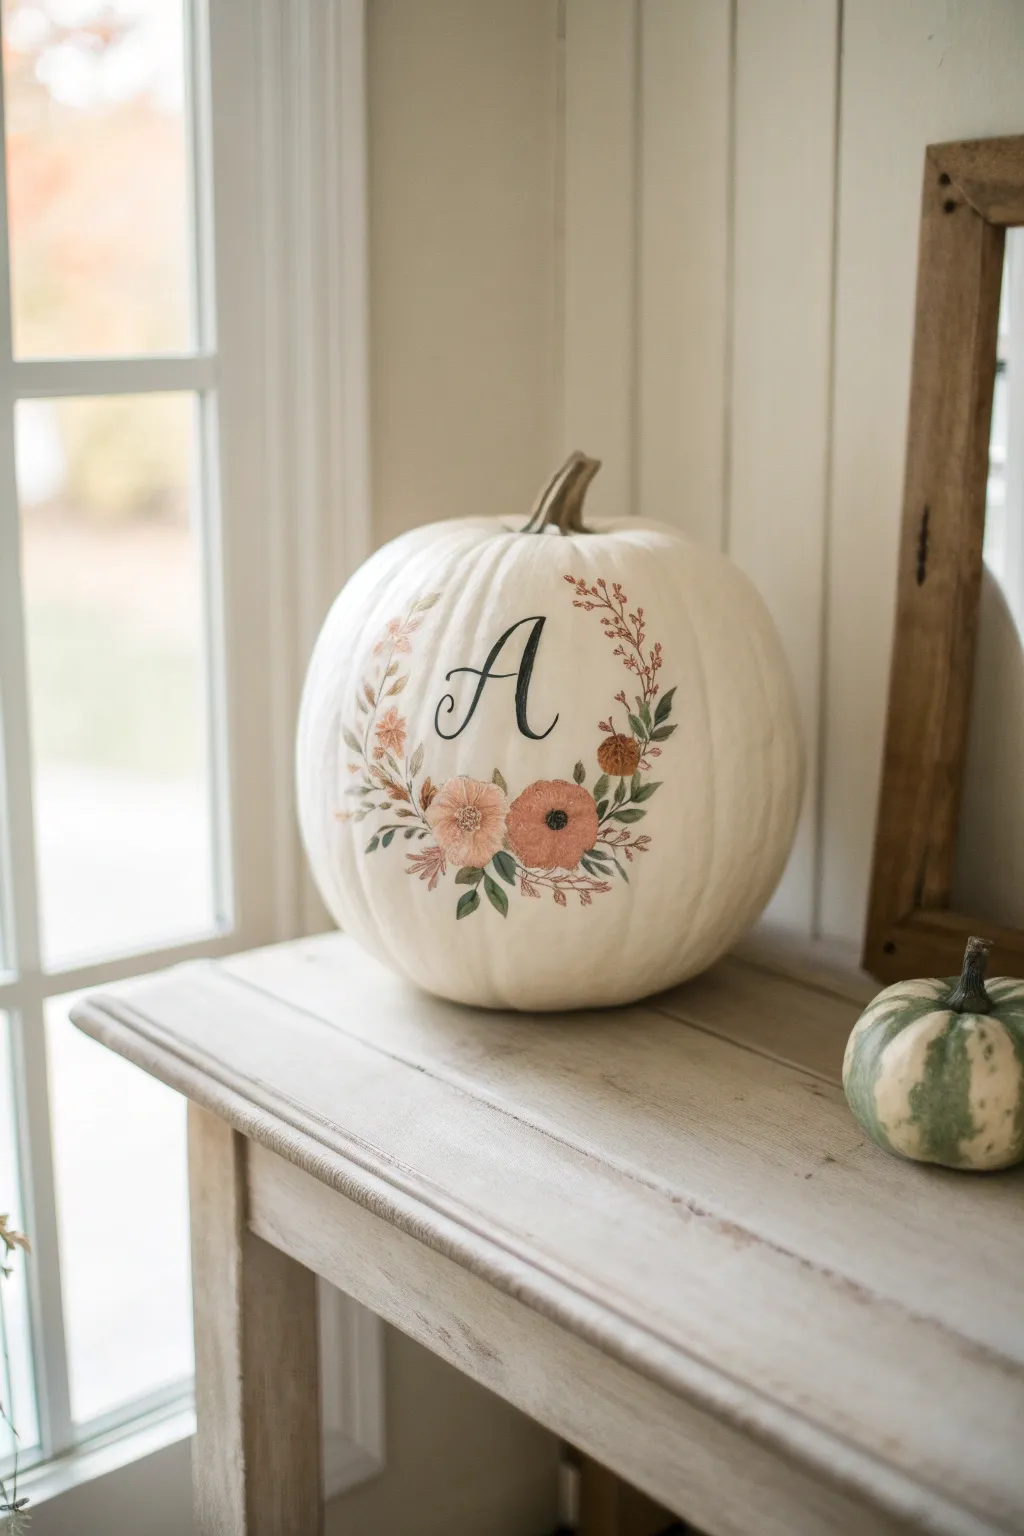
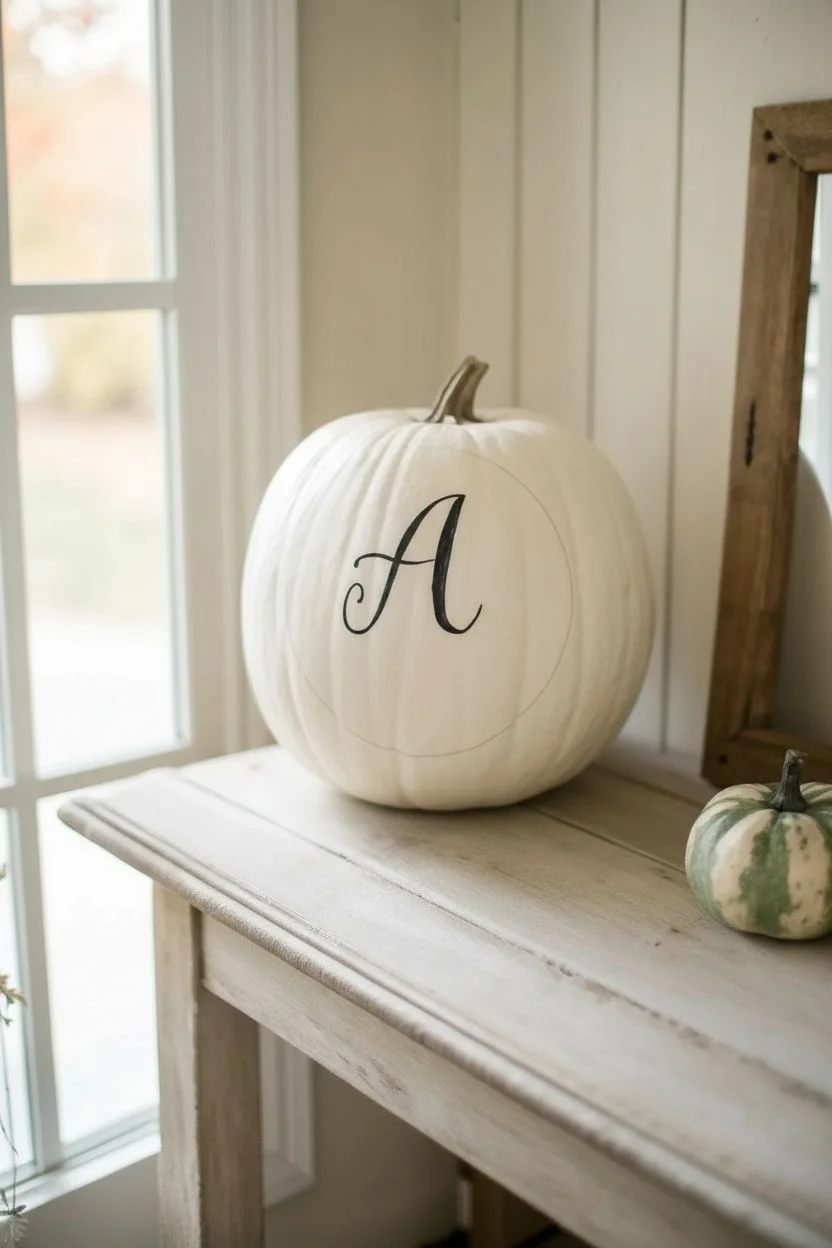
Transform a simple white pumpkin into an elegant piece of fall decor with this personalized hand-lettering project. The gentle crescent of rusty blooms framing a bold initial creates a sophisticated look that pairs perfectly with modern farmhouse or cottage aesthetics.
Step-by-Step Tutorial
Materials
- Large white artificial pumpkin (smooth surface works best)
- Pencil
- Eraser
- Fine-grit sandpaper (optional)
- Multi-surface acrylic paints (sage green, deep olive, peach/blush, rust orange, dark brown)
- Black paint marker or black acrylic paint
- Fine liner brush (size 0 or 1)
- Small round brush (size 2 or 4)
- Palette or small plate
- Water cup and paper towels
- Clear matte sealer spray (optional)
Step 1: Preparation & Lettering
-
Clean the surface:
Wipe down your white pumpkin with a damp cloth to remove any dust or oils. If the surface feels very slick or glossy, I find that lightly scuffing the front face with fine-grit sandpaper helps the paint adhere much better. -
Map out the design:
Using a pencil, very lightly sketch your chosen initial in the center of the pumpkin. Aim for a classic script or calligraphy style. Draw a loose semi-circle shape around the bottom half of the letter to guide where your floral wreath will sit. -
Paint the initial:
Using a black paint marker or a liner brush dipped in black acrylic craft paint, carefully trace over your pencil sketch for the letter ‘A’ (or your chosen initial). -
Refine the lines:
Thicken the downstrokes of the letter—where your pen would naturally move downward—to create a faux-calligraphy look. Keep the upstrokes thin and delicate. Let the black paint dry completely before moving on.
Pro Tip: Brushing Styles
Don’t overthink the flowers! Loose, imperfect dabs of paint often look more organic and artistic than perfectly painted petals. Let the brush texture show.
Step 2: Painting the Main Flowers
-
Start with the center blooms:
Mix a soft peach or blush tone on your palette. Using your small round brush, paint a circular, ruffled shape directly below the letter for the primary flower. -
Add secondary blooms:
Load your brush with a rusty orange color. Paint a second similar flower head next to the peach one, slightly overlapping or nestling it close. -
Create smaller buds:
Using a lighter wash of the peach paint, dab small, uneven circles further out along your pencil guide to represent smaller buds or filler flowers. -
Add flower centers:
Once the flower base coats are dry to the touch, use a very small dot of dark brown or black paint in the center of the rust and peach flowers to create the stamen area.
Step 3: Adding Greenery & Details
-
Paint the stems:
Switch to your fine liner brush and load it with deep olive green paint. Draw thin, wispy stems extending from the flowers outward, following the curve of your original pencil guide. -
Add large leaves:
Near the base of the main flowers, paint larger, teardrop-shaped leaves using a sage green color. Press down on the brush to widen the leaf and lift up to create a sharp point. -
Incorporate sprigs:
Using the liner brush and the rust color again, paint delicate, thin branches extending upward on the sides. Add tiny dots along these branches to mimic berries or dried buds. -
Layer foliage:
Balance the design by adding smaller fern-like leaves in the deep olive tone. Let these overlap slightly with the lighter leaves for depth. -
Refine the details:
Use your finest brush to add tiny white or light pink highlights to the flower petals if they look too flat.
Level Up: Metallic Accent
After the paint dries, trace the very edge of just one side of your initial with a metallic gold paint pen for a subtle, shimmering shadow effect.
Step 4: Finishing Touches
-
Erase guidelines:
Check thoroughly to ensure all paint is completely dry. Gently use your eraser to remove any visible pencil marks from your initial sketch. -
Seal the work:
If you plan to place the pumpkin on a porch or near a window, spray a light coat of clear matte sealer over the painted area to prevent fading or chipping.
Now you have a charming personalized accent piece ready to grace your entryway table or mantle for the entire harvest season
Coordinated Flower Pumpkin Set in a Stack
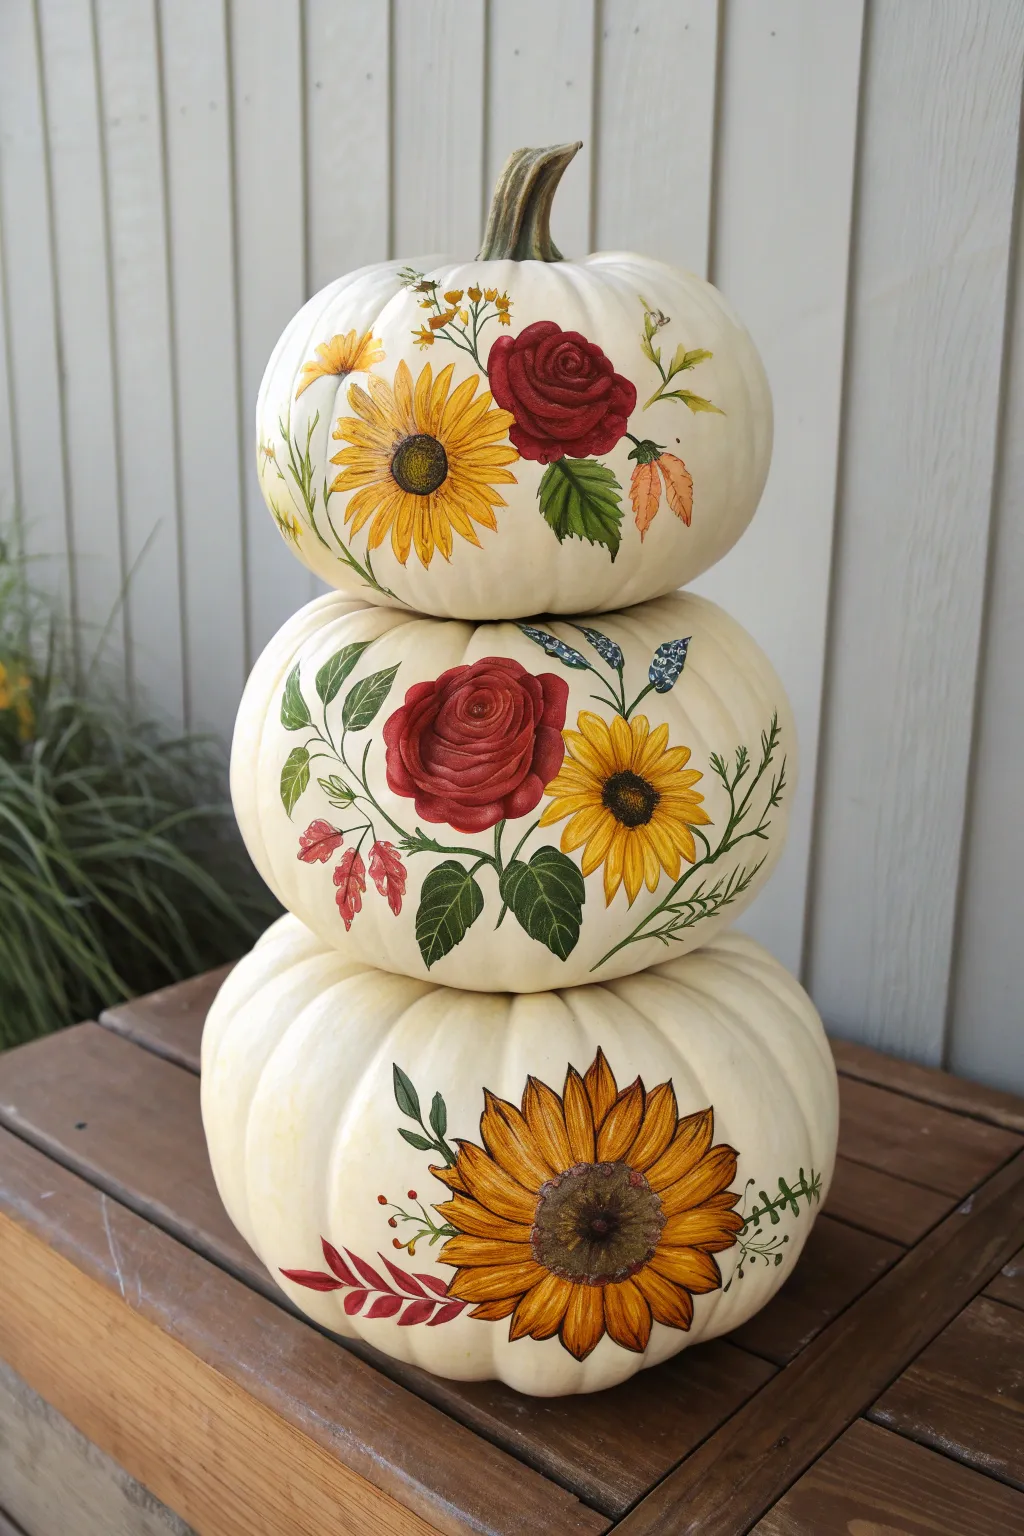
Transform three plain white craft pumpkins into a stunning vertical floral display with this stacked painting project. Featuring rich red roses and sunny sunflowers, this design brings a sophisticated harvest touch to your seasonal decor.
Step-by-Step Tutorial
Materials
- 3 white craft pumpkins (small, medium, large)
- Acrylic craft paints (Deep Red, Crimson, Golden Yellow, Mustard, deep Green, Lime Green, Brown, White)
- Set of acrylic brushes (fine liner, small round, small flat shader)
- Graphite transfer paper
- Pencil
- Palette or paper plate
- Water cup and paper towels
- Clear matte acrylic sealer spray
- Optional: Hot glue gun (for stability)
Step 1: Preparation & Planning
-
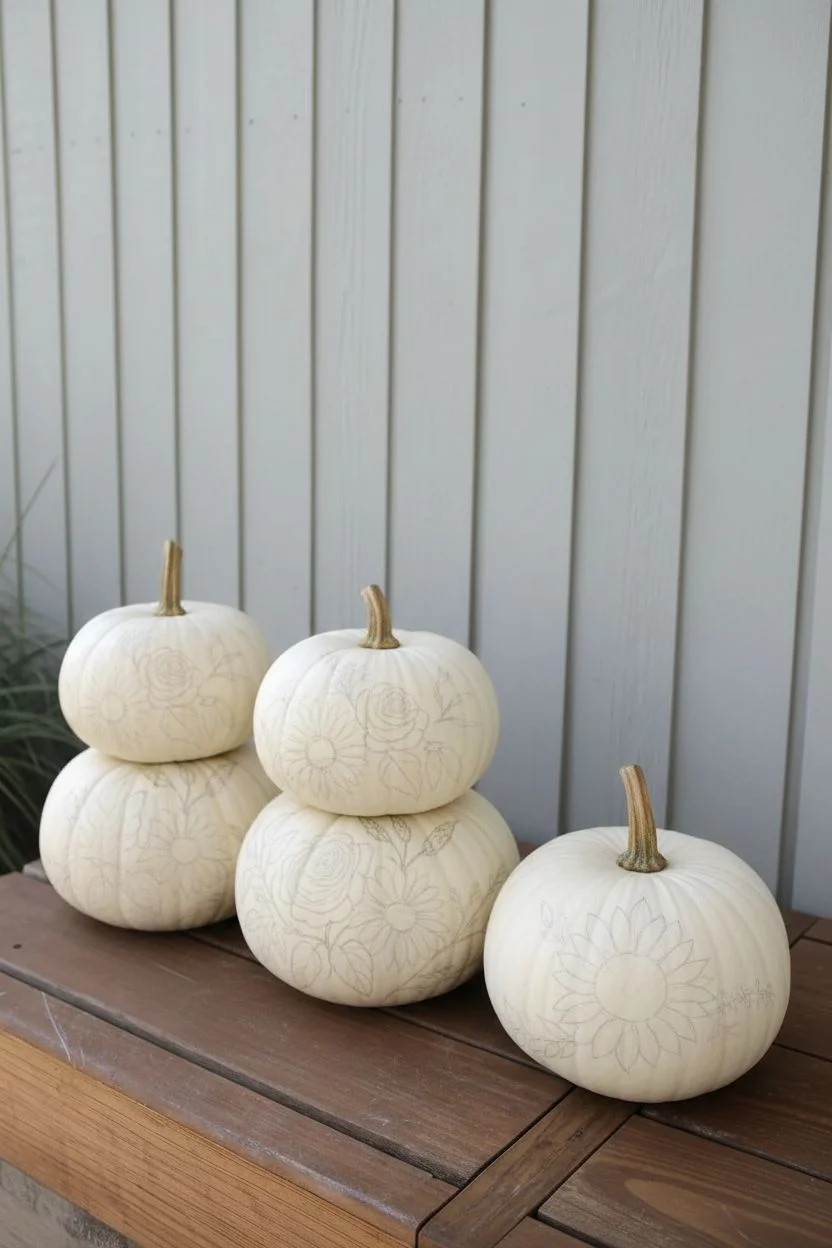
Clean and stack:
Begin by wiping down your white pumpkins with a damp cloth to remove any dust or manufacturing residue. Stack them to find the most stable arrangement, placing the largest at the bottom and the smallest at the top. -
Mark the face:
While stacked, lightly mark the ‘front’ center of each pumpkin with a pencil tick mark. This ensures your floral designs will align vertically when you paint them. -
Sketch the layout:
Unstack the pumpkins. Using the photos as a guide, lightly sketch your floral placement directly onto the surface. The top tier gets a rose and sunflower cluster, the middle features a central rose with side sunflower, and the base is anchored by a large, dramatic sunflower.
Step 2: Painting the Base Layers
-
Block in sunflowers:
Start with the large bottom pumpkin. Mix Golden Yellow with a touch of White for opacity. Paint the petal shapes of the large sunflower, working from the center outward. I find it helpful to paint the petals furthest back first, then layer the forward ones. -
Base coat the roses:
Moving to the middle and top pumpkins, block in the general round shape of the roses using Deep Red. Don’t worry about petal detail yet; just establish the silhouette. -
Add foliage foundations:
Using your medium Green, paint the leaf shapes and stems connecting the flowers. Include the trailing vines on the middle tier and the upward-reaching leaves on the top tier. -
Let it dry:
Allow all base coats to dry completely for about 20 minutes. If the white pumpkin shows through, apply a second coat for solid coverage.
Brush Control Pro Tip
For the fine veins on leaves, thin your acrylic paint with a drop of water until it has an ink-like consistency. This helps the paint flow smoothly off the liner brush without skipping.
Step 3: Adding Details & Dimension
-
Define sunflower centers:
For the sunflower centers, stipple (dab) a mix of Brown and Black paint in the middle. While wet, blend slightly outward into the yellow petals to create depth. -
Highlight sunflower petals:
Load a small round brush with Mustard yellow and add thin lines along the center of each sunflower petal. Add tiny highlights of White on the tips of the petals to make them pop. -
Sculpt the roses:
Mix a lighter shade of red (Crimson plus a tiny bit of White). Use a small flat shader brush to create C-shaped strokes inside your red base circles, mimicking the unfolding petals of a rose. -
Deepen rose shadows:
Use a very watery mix of dark Brown or purple to glaze into the deepest crevices of the rose centers, adding dramatic contrast. -
Detail the leaves:
Switch to your fine liner brush. Mix Lime Green with a little White to paint the veins on your leaves. Add tiny serrated edges to the rose leaves for realism. -
Add accent flora:
Paint the small filler details: the reddish-brown autumn leaves on the top and bottom tiers, and the delicate blue buds on the middle tier. -
Refine edges:
Use a liner brush with slightly watered-down dark paint to outline key petals and leaves very faintly if you want a more illustrative look.
Level Up Your Display
Add preserved moss or faux autumn berries in the gaps between the stacked pumpkins. This hides the connection points and adds beautiful texture to the vertical arrangement.
Step 4: Finishing Touches
-
Enhance the stem:
If your top pumpkin has a plastic-looking stem, paint it with a mix of Brown and Green, adding streaks of tan for a realistic, dried texture. -
Seal the artwork:
Once the paint is fully cured (at least 24 hours), take the pumpkins outside and spray them with a clear matte acrylic sealer to protect your work from scratches. -
Final assembly:
Re-stack your pumpkins. For a permanent display, run a ring of hot glue between the layers to secure them together.
Place your completed floral stack on a porch or entryway table to welcome guests with hand-painted charm


Have a question or want to share your own experience? I'd love to hear from you in the comments below!