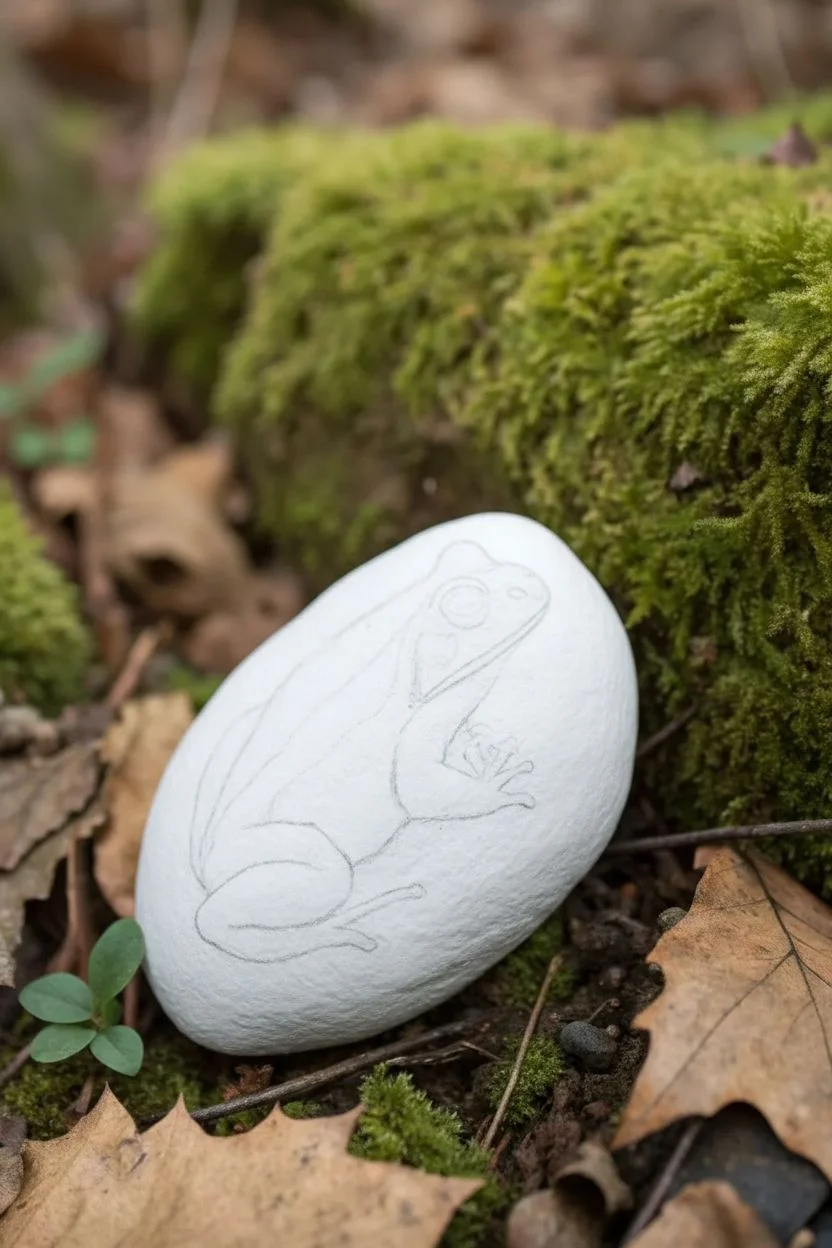
Frog rock painting is one of those projects that instantly makes a plain stone feel alive in your hand. Whether you love cute cartoons or crave realistic details, there’s a froggy style here that’ll fit your mood and skill level.
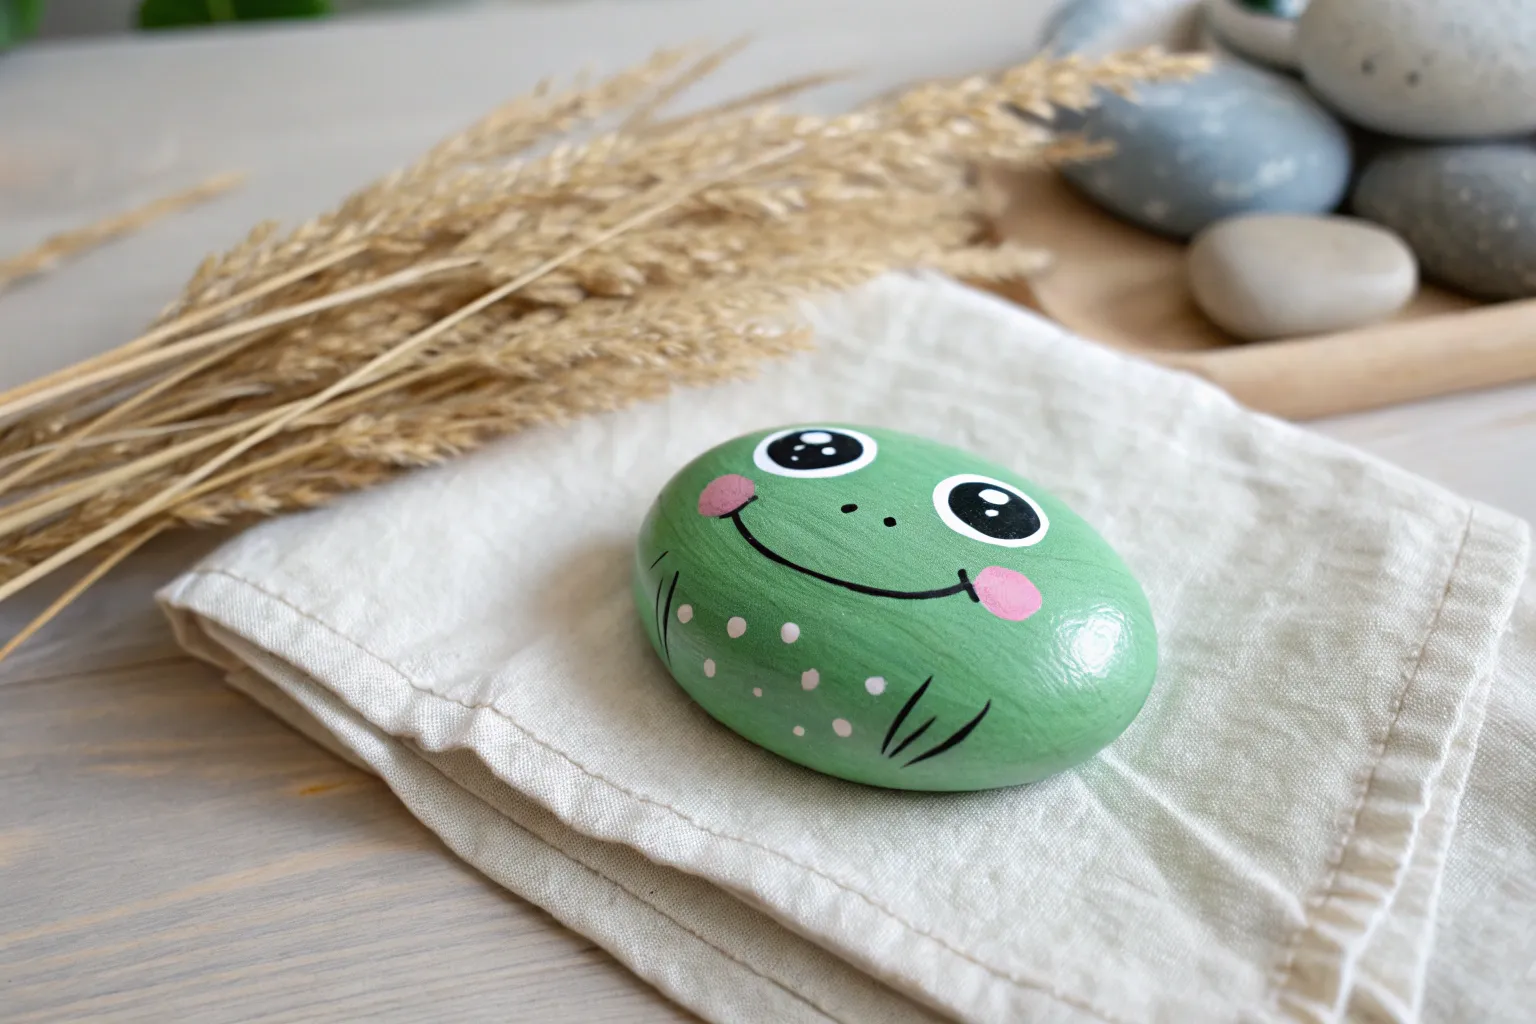
Classic Green Garden Frog
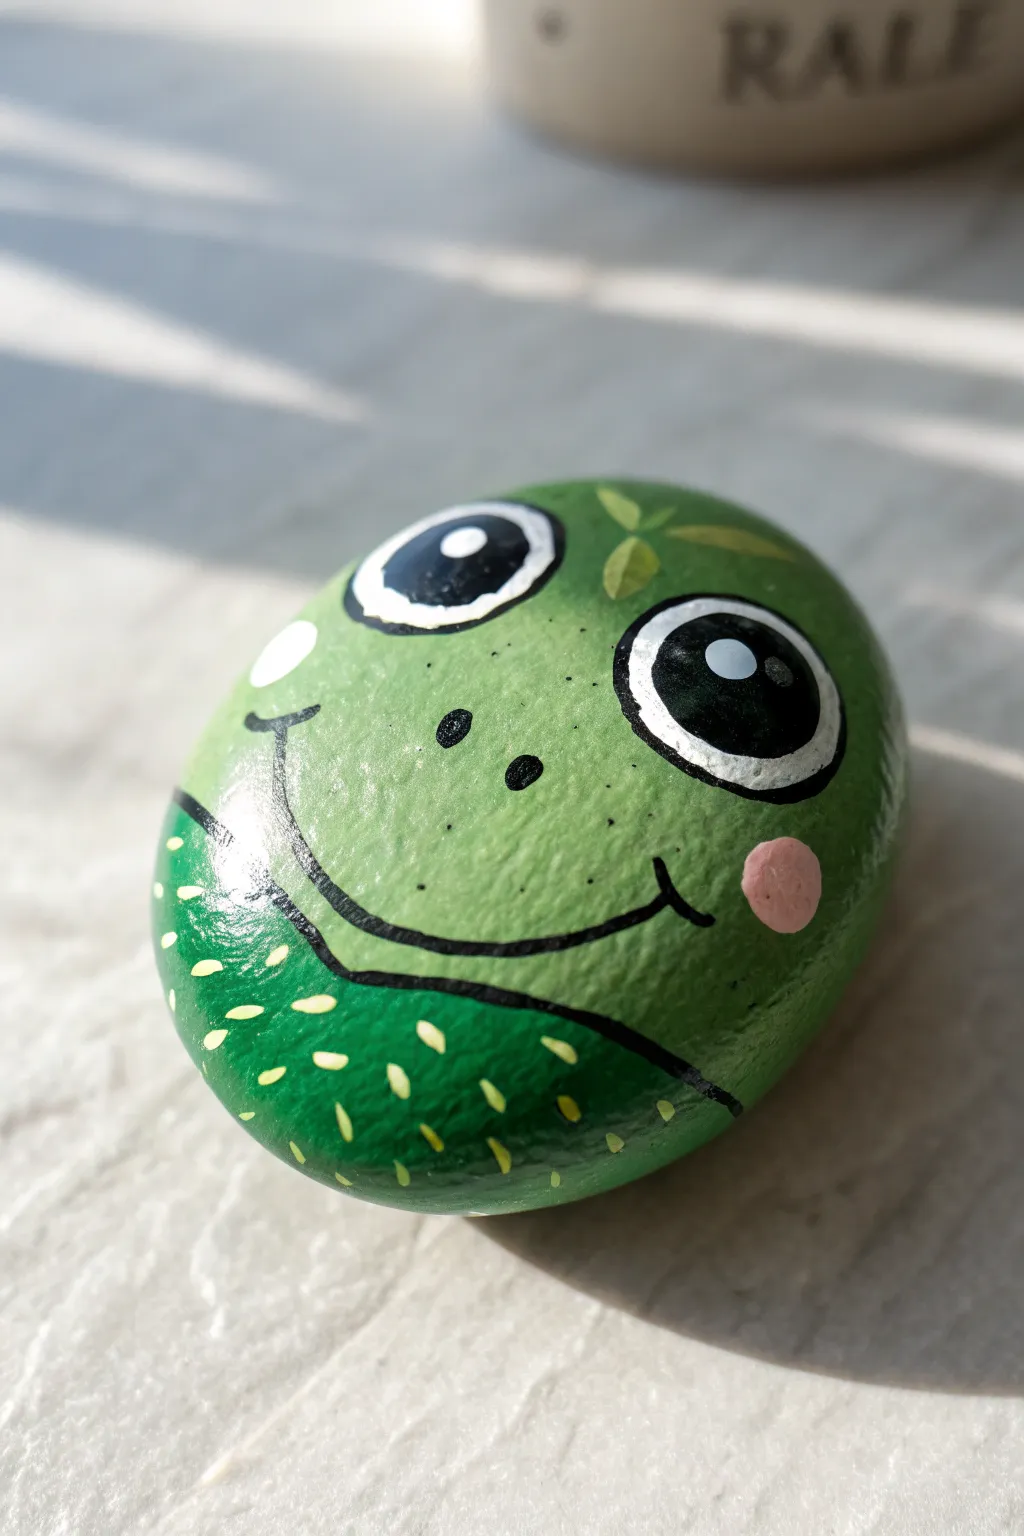
Transform a smooth, round stone into this adorable smiling frog complete with rosy cheeks and wide, curious eyes. This classic garden friend is perfect for hiding among your flower pots or using as a charming paperweight to brighten your desk.
Step-by-Step
Materials
- Smooth, round river rock (approx. palm-sized)
- Acrylic paint (Light green, White, Black, Soft Pink)
- Flat paintbrush (medium size)
- Fine detail paintbrush (liner brush)
- Dotting tool or toothpick
- Pencil (optional)
- Matte or Gloss varnish/sealer
Step 1: Base Coat
-
Clean Your Canvas:
Before starting, ensure your rock is completely clean and dry. Wash it with mild soap and water to remove any dirt or oils that might prevent the paint from sticking. -
Green Foundation:
Using your medium flat brush, coat the entire top surface of the rock with light green acrylic paint. Long, smooth strokes work best here. -
Second Layer:
Allow the first coat to dry fully to the touch. Apply a second coat of green to ensure solid, opaque coverage so no rock color shows through.
Uneven Coverage?
If your green base coat looks streaky, don’t keep brushing wet paint. Let it dry completely, then sponge on the next layer for a textured, even finish.
Step 2: Face Features
-
Sketching the Outline:
If you’re nervous about freehand painting, lightly sketch two large circles for eyes and a wide U-shape for the mouth using a pencil directly on the dry green paint. -
Painting the Whites:
Load a smaller brush with white acrylic paint. Fill in the two large eye circles near the top of the rock. You might need two layers to make the white really pop against the green. -
Cheeky Details:
While the eyes dry, mix a tiny bit of white with pink (or use a soft pink straight from the tube). Paint two small, soft circles on the cheeks, positioned slightly lower and wider than the eyes. -
Adding Pupils:
Once the white eye circles are completely dry, use black paint to add large round pupils. Position them looking slightly upward and to the right for a playful expression. -
Highlighter Dots:
Dip the very tip of a brush handle or a dotting tool into white paint. Add a tiny white reflection dot inside each black pupil to bring the frog to life.
Step 3: Line Work & Details
-
Designing the Smile:
Switch to your finest detail liner brush and black paint. Carefully paint a thin, wide smile connecting the area smoothly between the cheeks. -
Adding the Nose:
Just above the center of the smile, add two tiny black dots or short dashes for the nostrils. -
Eyelashes:
Using the same fine liner brush, flick three small, curved lines extending from the top outer corner of each eye to create cute eyelashes. -
Freckles:
Take a toothpick or a very fine tool dipped in black paint. Gently tap three or four tiny speckles inside each pink cheek circle. -
Webbed Feet Outline:
At the very bottom edge of the rock, outline two simple webbed feet shapes using black paint. Imagine drawing three connected humps for each foot. -
Filling the Feet:
You can leave the feet as outlines for a sketchy look, or lightly fill them with a slightly darker green if you want more contrast, though the simple outline is classic.
Add a Crown
Turn this into a fairytale prince by painting a small yellow three-pointed crown hovering just above the eyes.
Step 4: Finishing Touches
-
Final Inspection:
Check over your rock for any smudges or areas that need a touch-up. I always look for stray brushstrokes to clean up with a bit of green paint. -
Sealing the Art:
Once the paint is 100% dry (give it a few hours or overnight), apply a coat of clear varnish. This protects your frog from weather if it’s living in the garden.
Find a cozy spot in your garden for this cheerful little amphibian to sit and smile at passersby


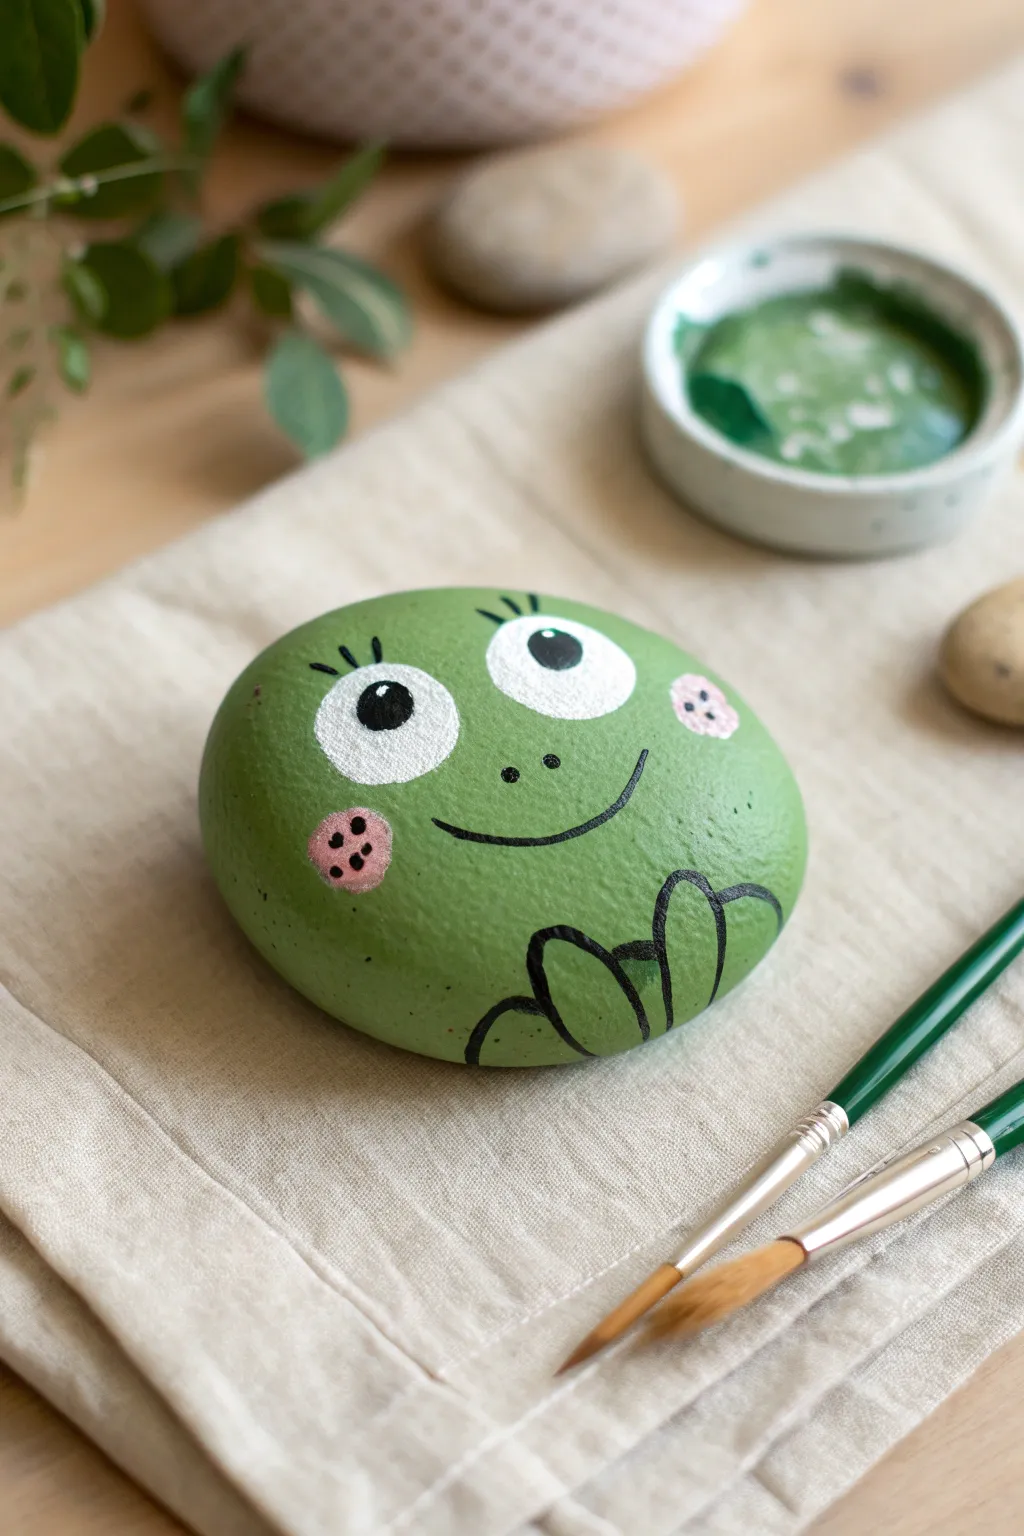
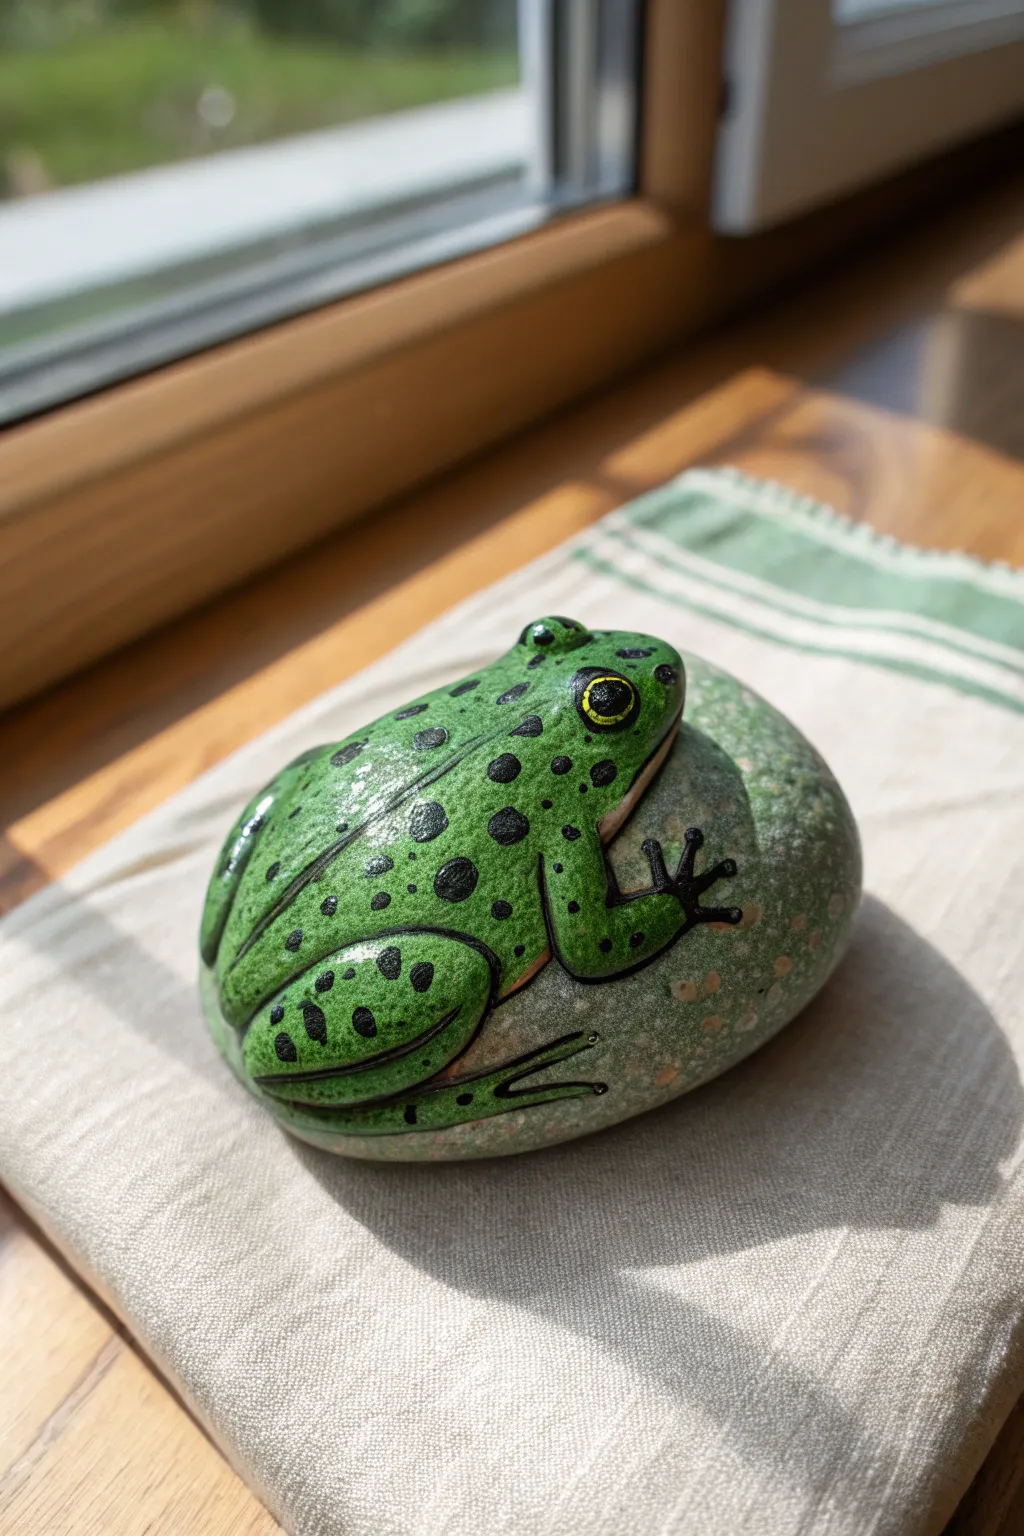
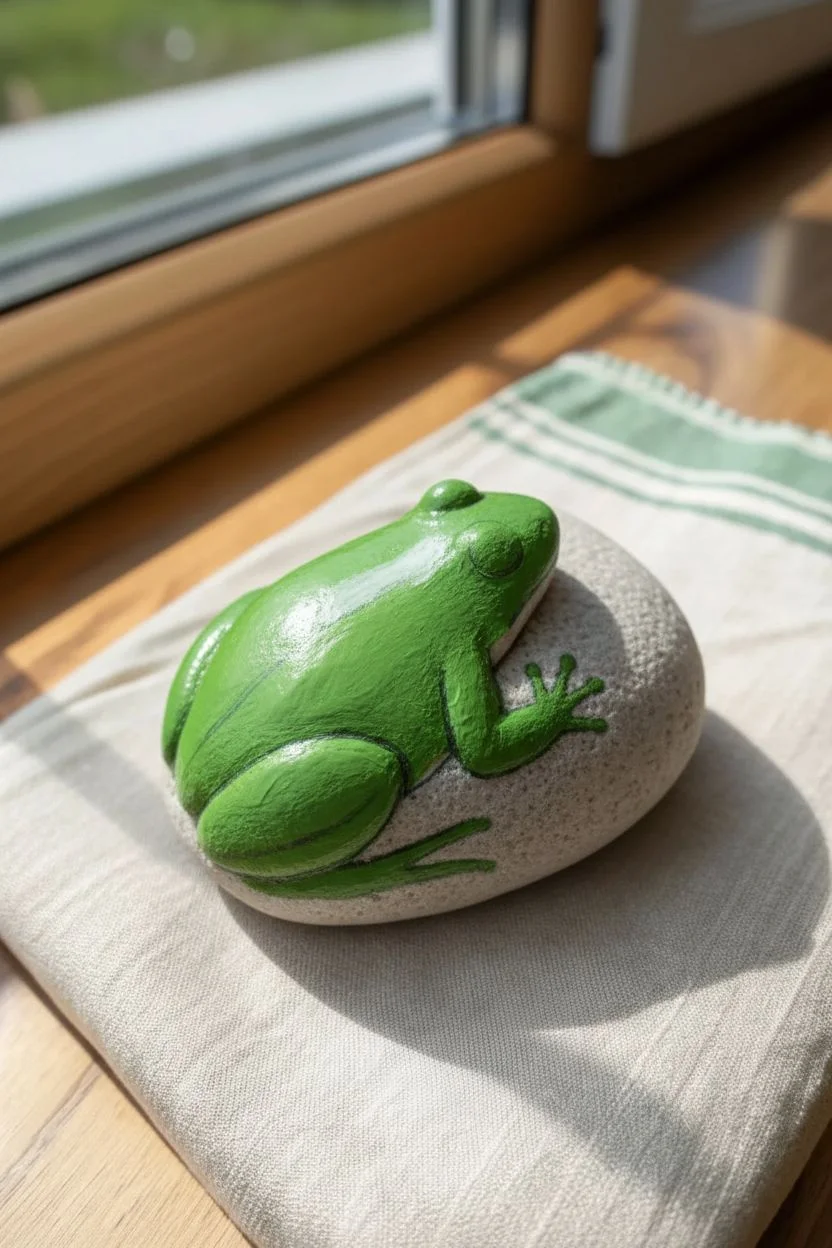
Cute Wide-Eyed Cartoon Frog
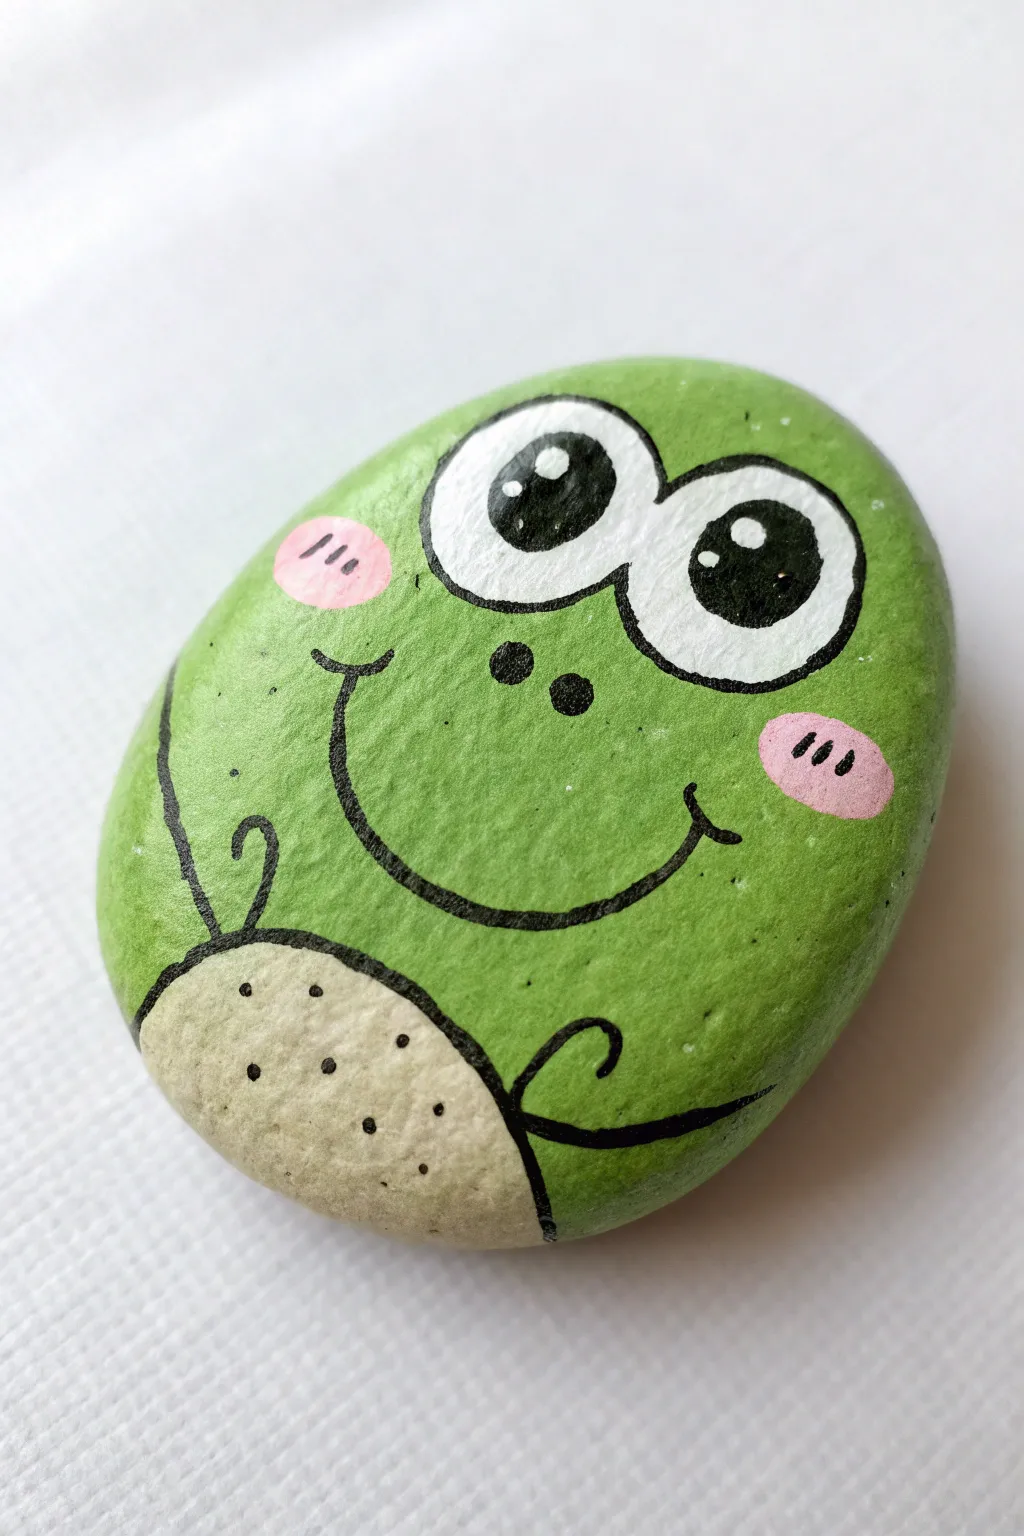
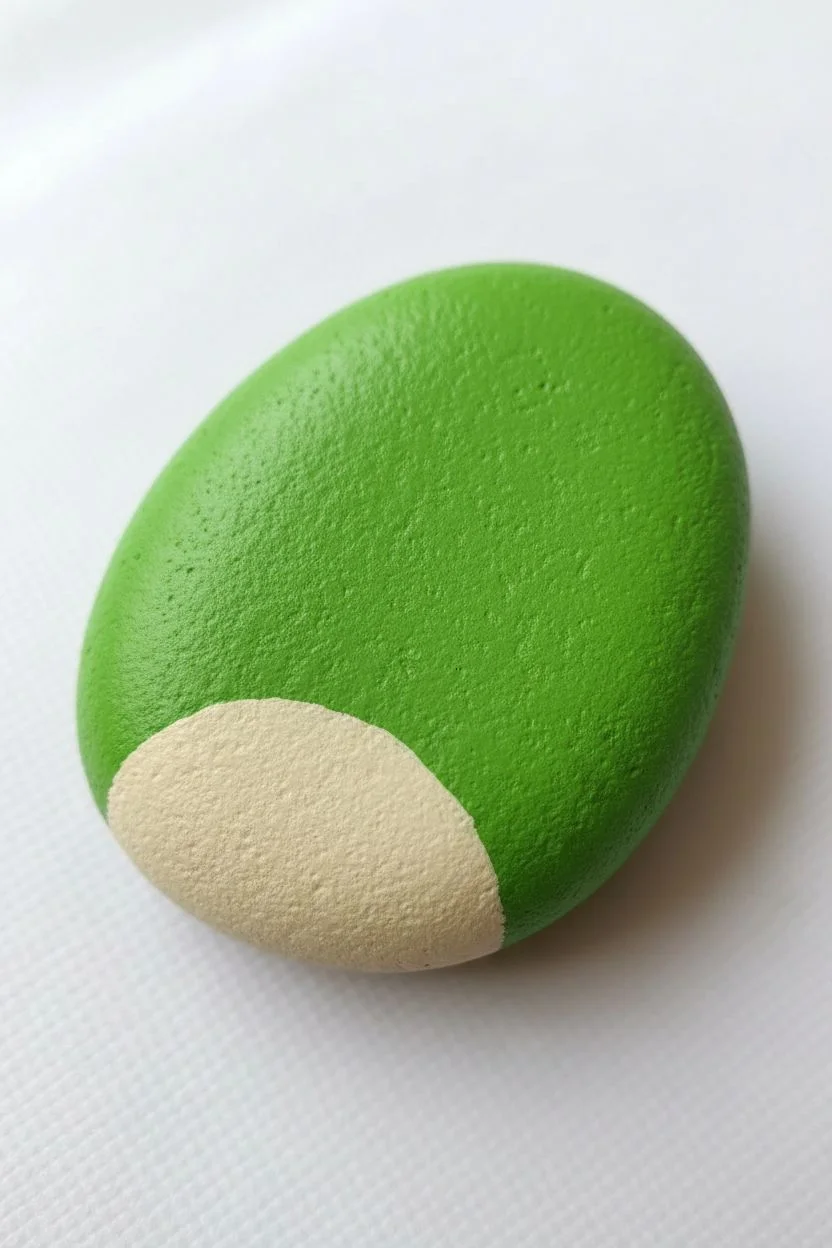
Turn a simple smooth stone into an adorable amphibian friend with this easy-to-follow rock painting guide. The finished piece features a vibrant green frog with oversized eyes and a charming, speckled belly that looks great in any garden.
Step-by-Step Tutorial
Materials
- Smooth, oval-shaped rock
- Acrylic paints (bright green, cream/beige, white, pink, black)
- Flat paintbrush (medium size)
- Fine detail paintbrush or liner brush
- Black paint pen (extra fine tip) or permanent marker
- Dotting tool or toothpick
- Clear acrylic sealer (glossy or matte)
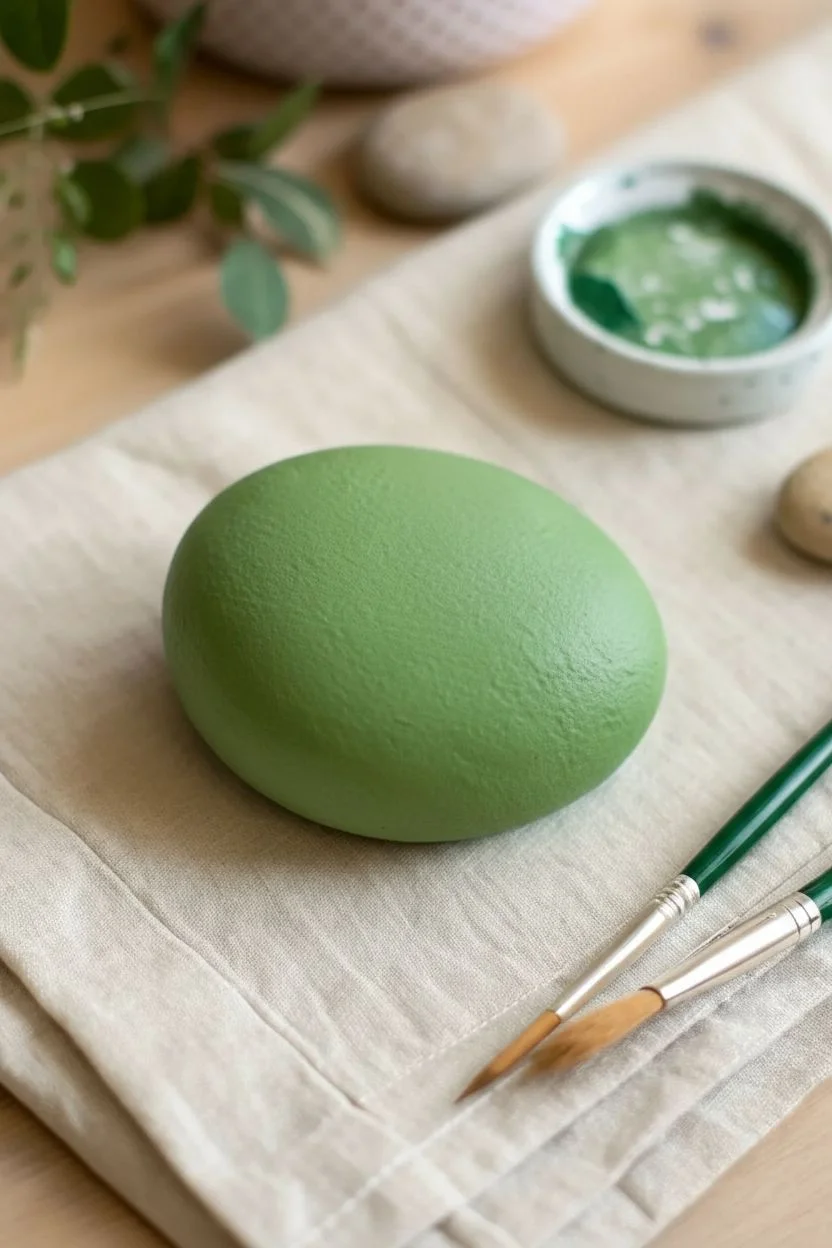
Step 1: Base Coating
-
Clean the canvas:
Begin by washing your rock thoroughly with soap and water to remove any dirt or oils, then let it dry completely. -
Green foundation:
Paint the entire top surface of the rock with a bright green acrylic paint. Depending on your paint’s opacity, you might need two or three coats for solid coverage, letting each layer dry in between. -
Create the belly:
Once the green is dry, use a cream or beige paint to create a semi-circle shape at the bottom of the rock. This will be the frog’s tummy.
Paint Lifting?
If your paint pen lifts the acrylic paint underneath, the base layer isn’t dry enough. Wait longer or use a light touch permanent marker instead.
Step 2: Mapping the Features
-
Outline the eyes:
Near the top of the rock, paint two large, connected white circles for the eyes. They should dominate the upper half of the face for that cute cartoon look. -
Cheeky details:
Dip a small brush into pink paint and add two oval blush marks on either side of the face, placed slightly lower than the eyes. -
Refining the white:
If the green shows through the white eyes, add a second coat of white paint to ensure they are bright and opaque.
Make it 3D
Glue small googly eyes over the painted eyes for a hilarious 3D effect that kids will especially love.
Step 3: Line Work and Expression
-
Outline the eyes:
Using a black paint pen or a very fine brush with black paint, carefully trace around the perimeter of the two large white eyes. -
Draw the pupils:
Inside the white eye circles, draw two large black circles for pupils. Place them slightly cross-eyed or looking in a specific direction to add personality. -
Adding the shine:
Using the smallest dotting tool or a toothpick, place a tiny white dot inside each black pupil to create a ‘catchlight’ reflection. -
The big smile:
Draw a wide, U-shaped smile using your black pen. Connect the corners of the mouth near the pink cheeks. -
Nose and cheek details:
Add two small black dots between the eyes for the nose, and three tiny hatch marks inside each pink cheek patch.
Step 4: Body Details
-
Tummy outline:
Outline the cream-colored belly shape with your black liner pen to separate it cleanly from the green body. -
Drawing the arms:
Sketch thin, curved black lines coming from the sides of the belly to represent the frog’s spindly arms and hands resting on its stomach. -
Belly speckles:
I like to use a fine tip marker or the very tip of a small brush to dot tiny black speckles randomly across the cream belly area for texture. -
Final touches:
Check your lines and touch up any shaky areas. Ensure the black paint is fully dry before moving to the final step to avoid smearing. -
Seal the deal:
Apply a coat of clear acrylic sealer over the entire rock to protect your artwork from weather and chipping.
Place your finished frog in a flower pot or give it as a cheerful gift to a friend


Top-Down Frog With Splayed Webbed Feet
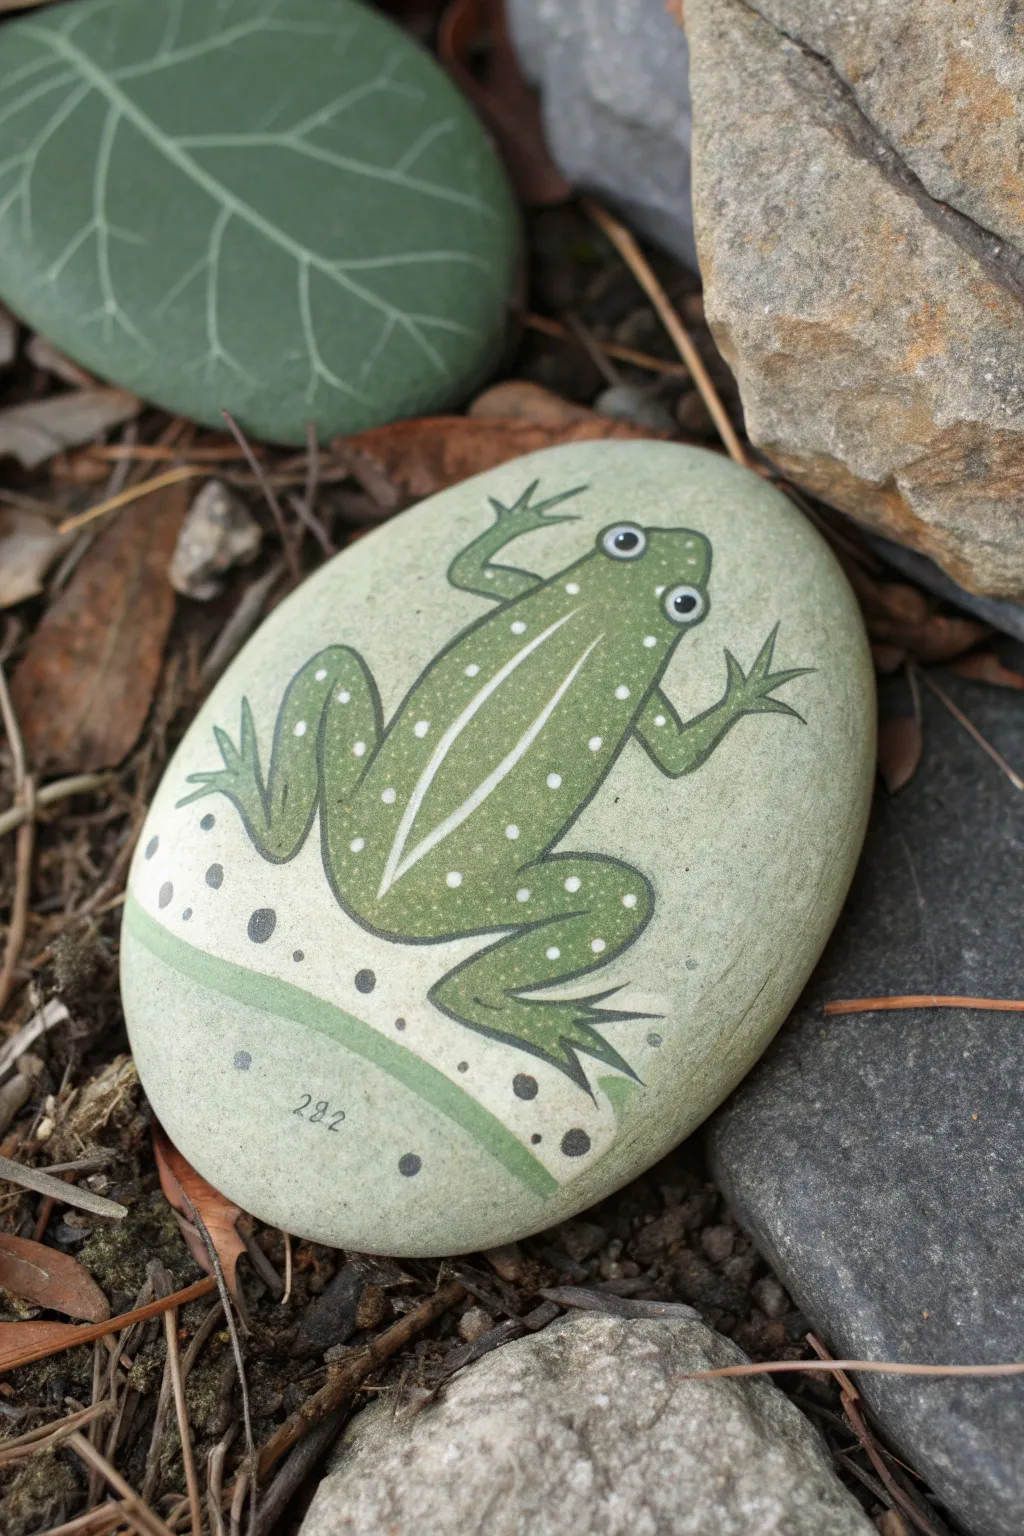
This charming nature-inspired project captures a classic green frog mid-leap as seen from above. With its distinctive white spotting and splayed webbed feet, this design turns a simple oval stone into a delightful garden accent.
Step-by-Step Guide
Materials
- Smooth, oval river rock (light grey base color ideal)
- Acrylic paints (Olive green, light grass green, white, black, grey)
- Fine detail paintbrushes (Sizes 0 and 00)
- Small flat shader brush
- Pencil for sketching
- Palette for mixing
- Spray varnish or sealant
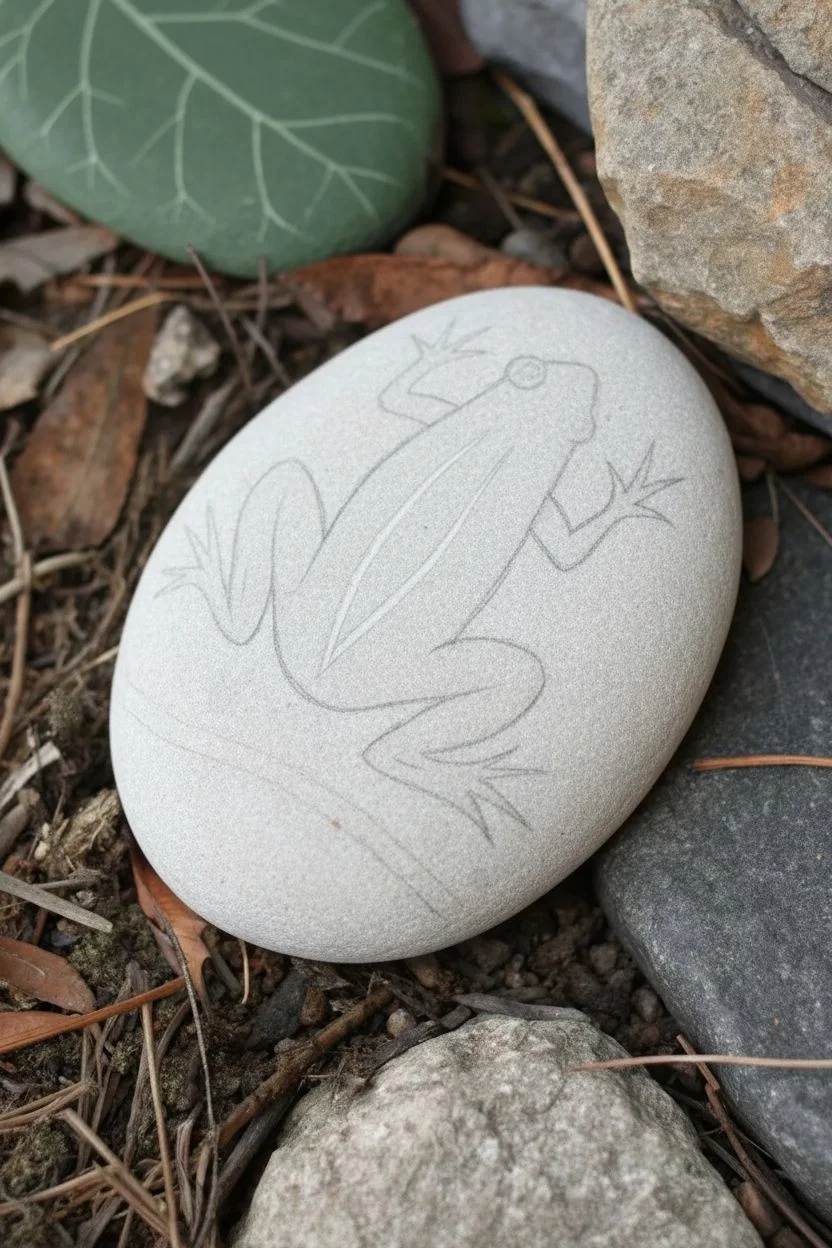
Step 1: Preparation and Sketching
-
Clean your canvas:
Before starting, ensure your rock is scrubbed clean with soap and water and completely dry. A smooth surface is key for this detailed design. -
Base sketch:
Using a light pencil, sketch the outline of the frog’s body. Start with a long teardrop shape for the torso in the center of the rock. -
Adding limbs:
Lightly draw the rear legs bent deeply at the knees, splaying outwards. Sketch the front arms reaching forward near the head area. -
Webbed details:
Refine the feet by drawing distinct, pointed toes. The back feet should look large and webbed, while the front hands are slightly smaller and more delicate.
Steady Hand Pro Tip
Rest your pinky finger on the dry part of the rock while painting fine lines. This anchors your hand and stops shakes for perfect outlines.
Step 2: Painting the Body
-
Mixing the greens:
Mix an olive green with a touch of white to create a soft, natural base color for the frog’s skin. -
Filling the shape:
Use a small brush to fill in the entire frog silhouette with your mixed green shade. Apply two thin coats for opaque coverage, letting the first dry before adding the second. -
The dorsal stripe:
Once the green base is dry, mix a lighter, yellowish-green. Carefully paint a thin stripe running from the top of the head down the center of the back. -
Outlining the spine:
With a very fine liner brush and thinned white paint, outline the light green dorsal stripe on both sides to make it pop.
Step 3: Details and Definition
-
Black outlining:
Using your finest brush (size 00) and black paint, carefully outline the entire frog. Keep your hand steady to create clean, thin lines around the toes and limbs. -
Inner details:
Add definition lines inside the legs to show the folds of the skin where the limbs bend. -
Spotting the skin:
Dip the tip of a toothpick or a dotting tool into white paint. Gently add small, random dots all over the frog’s green body for texture. -
Creating the eyes:
Paint two small circles at the top of the head using white paint. Once dry, add smaller black pupils in the center of each white circle. -
Eye highlights:
Place a tiny white dot reflecting light inside each black pupil to bring the frog to life.
Paint Too Thick?
If your fine lines look clumpy, thin your black acrylic with a drop of water. Ink-like consistency flows much smoother from a liner brush.
Step 4: Grounding the Scene
-
Ground shadow wash:
Mix a very watery light grey or dirty white wash. Paint a soft, irregular patch beneath and around the frog to suggest the ground, rather than leaving the bare rock. -
Shadow accents:
While the wash is still damp, add a few darker grey spots or pebbles near the frog’s feet to integrate it into the ‘ground’. -
Bottom border:
Paint a subtle, light green swooping line or band near the bottom of the rock to frame the composition nicely. -
Finishing touches:
Add a few tiny black speckles on the ground wash to mimic dirt or sand texture. -
Sealing:
Allow the rock to cure for at least 24 hours. Finish with a spray varnish to protect your artwork from the elements.
Now you have a wonderfully detailed amphibian friend that won’t hop away when you approach


Frog Face Close-Up on a Pebble
Transform a simple smooth stone into an adorable frog character with this easy-to-follow rock painting guide. The result is a vibrant, palm-sized friend featuring big expressive eyes and a charming stippled texture.
Detailed Instructions
Materials
- Smooth oval river rock (palm-sized)
- Acrylic paints: Light green, dark emerald green, white, black, pink, yellow
- Paintbrushes: Wide flat brush (for base coats), fine detail liner brush
- Pencil (optional for sketching)
- Dotting tool or toothpick
- Clear acrylic sealer (spray or brush-on)
- Palette or paper plate
- Water cup and paper towels
Step 1: Base and Body
-
Clean the canvas:
Begin by scrubbing your rock with soap and water to remove any dirt or oils. Let it dry completely in the sun or with a hair dryer before you start painting. -
Apply the main green:
Mix a bright, leafy green color. Using your wide flat brush, paint the top two-thirds of the rock’s face. You may need two coats for full opacity, allowing the first to dry before applying the second. -
Create the lower jaw:
Switch to a darker emerald green shade. Paint the bottom third of the rock, creating a slightly curved boundary where it meets the lighter green to suggest a jawline or chin. -
Separate the sections:
Once the green layers are dry to the touch, use a fine liner brush and black paint to draw a thin, curved line separating the light green top from the dark green bottom. This defines the mouth area.
Smoother Circles
Struggling with round eyes? Trace a bottle cap or large button with a pencil lightly onto the rock before painting to get perfect circles every time.
Step 2: Face and Features
-
Outline the eyes:
Visualize two large circles near the top of the rock. Using white paint and a medium round brush, paint these large oval shapes. I find it easiest to start in the center and spiral outward to keep the shape round. -
Refine the eye shape:
Once the white is dry, take your fine liner brush with black paint and carefully outline the white ovals. Make the line slightly thick to give a cartoonish pop. -
Add pupils:
Paint large black circles inside the white ovals, leaving a ring of white visible. Position them slightly toward the center to give the frog a focused, friendly look. -
Spark of life:
Dip the handle end of a paintbrush or a dotting tool into white paint. Add a single white dot in the upper right quadrant of each black pupil for a reflective highlight. -
Draw the smile:
Using the black liner brush, extend the mouth line upwards at the corners into a wide, happy U-shape. Add small tick marks at the very ends for cheeks. -
Nose and blush:
Paint two small black dots between the eyes for nostrils. Then, mix a soft pink and paint a small circle on the right cheek area for a rosy blush.
Step 3: Details and Finishing
-
Add the eyebrows:
Above the eyes, paint a small sprout or leaf shape using a slightly lighter or yellowish-green tone as a decorative forehead detail. -
Texture the top:
Create texture on the upper light green area by adding tiny black speckles. You can do this by flicking a stiff toothbrush or carefully dotting with a very fine point. -
Detail the chin:
On the dark green lower section, paint small, dashed yellow or light green lines. Scatter them randomly to mimic the texture of frog skin. -
Highlight the cheeks:
Add a few white dots or a small white patch on the left side of the face to simulate light hitting the shiny, moist skin of a frog. -
Seal the artwork:
Let the rock dry overnight. Once cured, apply a coat of clear acrylic sealer or varnish to protect the paint from chipping and to give the rock a polished, wet look.
Shaky Lines?
If your black outlines look jittery, try thinning your black paint with a tiny drop of water. Ink-like consistency flows better from liner brushes.
Place your finished frog in a garden pot or on a sunny windowsill to bring a smile to anyone who spots it
BRUSH GUIDE
The Right Brush for Every Stroke
From clean lines to bold texture — master brush choice, stroke control, and essential techniques.
Explore the Full Guide
3D Illusion Crouching Frog Using Highlights and Shadows
Transform a smooth river rock into a startlingly lifelike amphibian with clever shading and vibrant greens. This project relies on layering and careful highlighting to create a 3D illusion that makes the frog look ready to hop right off the stone.
Step-by-Step Tutorial
Materials
- Smooth, oval river rock (dark grey or black is best)
- Acrylic paints (Titanium White, Mars Black, Sap Green, Phthalo Green, Cadmium Yellow, Yellow Ochre)
- Fine detail brushes (size 00 or 000)
- Small flat brush (size 2 or 4)
- Water container and palette
- Pencil or white chalk pencil
- Matte or satin varnish
Step 1: Sketching and Base Layers
-
Clean Your Canvas:
Begin by washing your stone thoroughly with soap and water to remove any dirt or oils. Let it dry completely. A dark stone works best for this design as it creates natural shadows, but you can also paint a lighter stone black if needed. -
Draft the Shape:
Using a white chalk pencil or a very light graphite pencil, sketch the outline of the crouching frog. Focus on the large oval for the body and the protruding bumps for the eyes. Don’t worry about the legs just yet; get the main body mass centered on the rock. -
Block in the Base Color:
Mix a medium green using Sap Green and a touch of Cadmium Yellow. Paint the entire silhouette of the frog with your flat brush. This layer might be streaks at first; let it dry and apply a second coat for solid opacity.
Fixing Flatness
If your frog looks flat, deepen the shadows under the legs and belly with pure black, and add brighter white highlights to the top ridges.
Step 2: Defining Form and Color
-
Add the Underbelly:
Mix Yellow Ochre with a significant amount of White to create a creamy pale yellow. Paint the lower jaw area passing under the eye and sweeping down towards where the front leg will be. Soften the edge where it meets the green with a damp brush to create a gradient. -
Create the Dorsal Stripes:
Combine Phthalo Green with a little White to make a bright, electric green. Paint two broad stripes running down the frog’s back. These usually start near the eyes and curve down the spine. -
Darken the Flanks:
Use pure Phthalo Green or mix a dark green with a tiny dot of Black. Apply this to the sides of the frog and the areas between the bright dorsal stripes to start building dimension. -
Define the Legs:
Paint the rear leg folded against the body using your medium green mix. The knee should jut out slightly. Paint the front arm extending downward, ending in long, slender toes spreading onto the bare rock.
Lily Pad Base
Paint a simple green lily pad shape underneath your frog on the rock instead of leaving the background plain stone for a pond scene effect.
Step 3: Detailing and Texture
-
Paint the Leg Markings:
Using thin black paint, add the Tiger-stripe markings on the rear legs. These should curve around the form of the leg to emphasize its roundness. -
Detail the Eye:
Paint a solid black circle for the eye socket first. Inside, paint a smaller gold circle. Once dry, add a black pupil in the center and a tiny white reflection dot at the top edge to simulate wetness. -
Add Deep Shadows:
Dilute some black paint slightly to make an inky wash. Detail the creases where the legs meet the body and the deep shadow underneath the throat area. This separation is crucial for the 3D effect. -
Ear and Skin Texture:
Behind the eye, paint a circular ‘tympanum’ (ear) in a darker green with a black outline. Then, using a tiny brush, stipple small black dots along the side of the body where the green meets the yellow belly. -
Refine the Toes:
The toes are delicate. Paint them with a mix of yellow-green, and tip each toe with a tiny gold highlight. Add very thin black lines underneath the toes on the rock itself to cast a shadow.
Step 4: Highlights and Finishing Touches
-
Brighten the Spine:
Mix a very pale lime green (mostly White with a touch of Yellow and Green). delicately dry-brush the very top of the back stripes and the tops of the knee joints. I find this really makes the anatomy pop. -
White Speckling:
With a fine detail brush, add tiny white dots randomly across the green back. These mimic the moist, reflective texture of frog skin. -
Final White Outline:
To enhance the separation from the dark rock, add a very thin, broken white line along the upper ridge of the mouth and the top edge of the back leg. -
Cast Shadows:
Mix a glaze of black and water. Paint a translucent shadow on the stone directly under the frog’s belly and legs. This grounds the artwork so it doesn’t look like a sticker floating in space. -
Seal the Work:
Once the paint is fully cured (give it at least 24 hours), apply a coat of satin or gloss varnish. A Gloss finish is particularly good here as it mimics the wet look of an amphibian.
Place your finished frog in a garden pot or near a pond where it might surprise a sharp-eyed visitor
Speckled Frog Skin Texture With Dots and Spots
Transform a smooth, rounded stone into a charming garden friend with this realistic speckled frog painting project. The design uses natural green tones and detailed spotting to create a convincing illusion of a frog resting peacefully on a rock.
Step-by-Step
Materials
- Smooth, oval-shaped river rock (palm-sized)
- Acrylic paints: Bright green, forest green, yellow, white, black
- Paintbrushes: Flat brush (for base), fine liner brush (for details)
- Dotting tool or toothpick
- Pencil for sketching
- Matte or satin acrylic sealer/varnish
- Palette or paper plate
- Water cup and paper towels
Step 1: Preparation and Base Shape
-
Clean the canvas:
Wash your rock thoroughly with soap and water to remove any dirt or grease. Dry it completely before starting. -
Sketch the outline:
Using a pencil, lightly sketch the oval shape of the frog’s body on top of the rock. Draw two bumps near the front for the eyes and sketch the folded hind legs tucked against the sides. -
Mix the base green:
Create a vibrant leafy green by mixing your bright green paint with a tiny touch of yellow. This will be the main body color. -
Paint the body:
Fill in the frog’s body shape with the mixed green paint. You may need two coats for full opacity, letting the paint dry between layers. Leave the rock’s natural color visible around the edges to serve as the ‘ground’ the frog is sitting on. -
Add dimension:
While the green is still slightly wet, blend a small amount of white into the center of the back to create a highlight. Then, add a touch of forest green to the lower edges of the body for shadow.
Natural Stone Integration
Don’t paint the entire rock. Leaving the bottom raw stone creates a 3D illusion, making the frog look like it’s sitting *on* the rock rather than *being* the rock.
Step 2: Adding Texture and Limbs
-
Define the legs:
Using a smaller brush and the base green color, paint the front legs extending slightly forward and the distinct folded shape of the back legs. -
Create the speckled texture:
This is the crucial step for realism. Take an old toothbrush or a stiff bristled brush, dip it lightly in diluted forest green paint, and flick tiny specks over the frog’s green back. -
Add larger spots:
Switch to your fine liner brush or a dotting tool. Paint distinct, larger black spots randomly across the back and legs. Vary the sizes significantly—some should be dots, others larger ovals. -
Stipple the skin:
To enhance the texture, add tiny dots of a lighter yellow-green in between the black spots. This mocks the warty texture of frog skin.
Paint Looking Flat?
If the frog looks cartoonish, your green is too solid. Sponge on a slightly lighter yellow-green in the center of the back before adding spots to create volume.
Step 3: Details and Outlines
-
Paint the eyes:
Paint two bold yellow circles on the eye bumps you sketched earlier. Let them dry completely. -
Add pupils:
Paint a horizontal oval pupil in black inside each yellow eye circle. Add a tiny white reflection dot to the top corner of the black pupil to bring the frog to life. -
Outline the body:
Using your finest liner brush and black paint, carefully outline the entire frog. Keep the line thin but distinct to separate the frog from the rock beneath. -
Define the limbs:
Paint the crease lines where the back legs fold against the body. Add the toes on the front and back feet, giving them slight bulbous tips. -
Add grounding shadows:
Mix a very watery black or dark grey wash. Paint a thin shadow directly on the bare rock underneath the frog’s belly and toes to make it look like it is resting on the surface.
Step 4: Finishing Touches
-
Highlight the wet skin:
Add thin white streaks or curves along the top of the back leg and the brow ridge. I like to keep these subtle, just enough to make the frog look moist. -
Correct the edges:
If any green paint went outside the lines, use a clean damp brush to wipe it away, or paint over it with a color that matches your rock. -
Seal the artwork:
Once the paint is fully cured (give it at least 24 hours), apply a coat of matte or satin varnish. A glossy finish works too if you want an extra ‘wet’ amphibian look.
Place your finished frog in a potted plant or near a garden pond to surprise your visitors

PENCIL GUIDE
Understanding Pencil Grades from H to B
From first sketch to finished drawing — learn pencil grades, line control, and shading techniques.
Explore the Full Guide
Toad-Inspired Frog Rock With Bumpy “Warts”
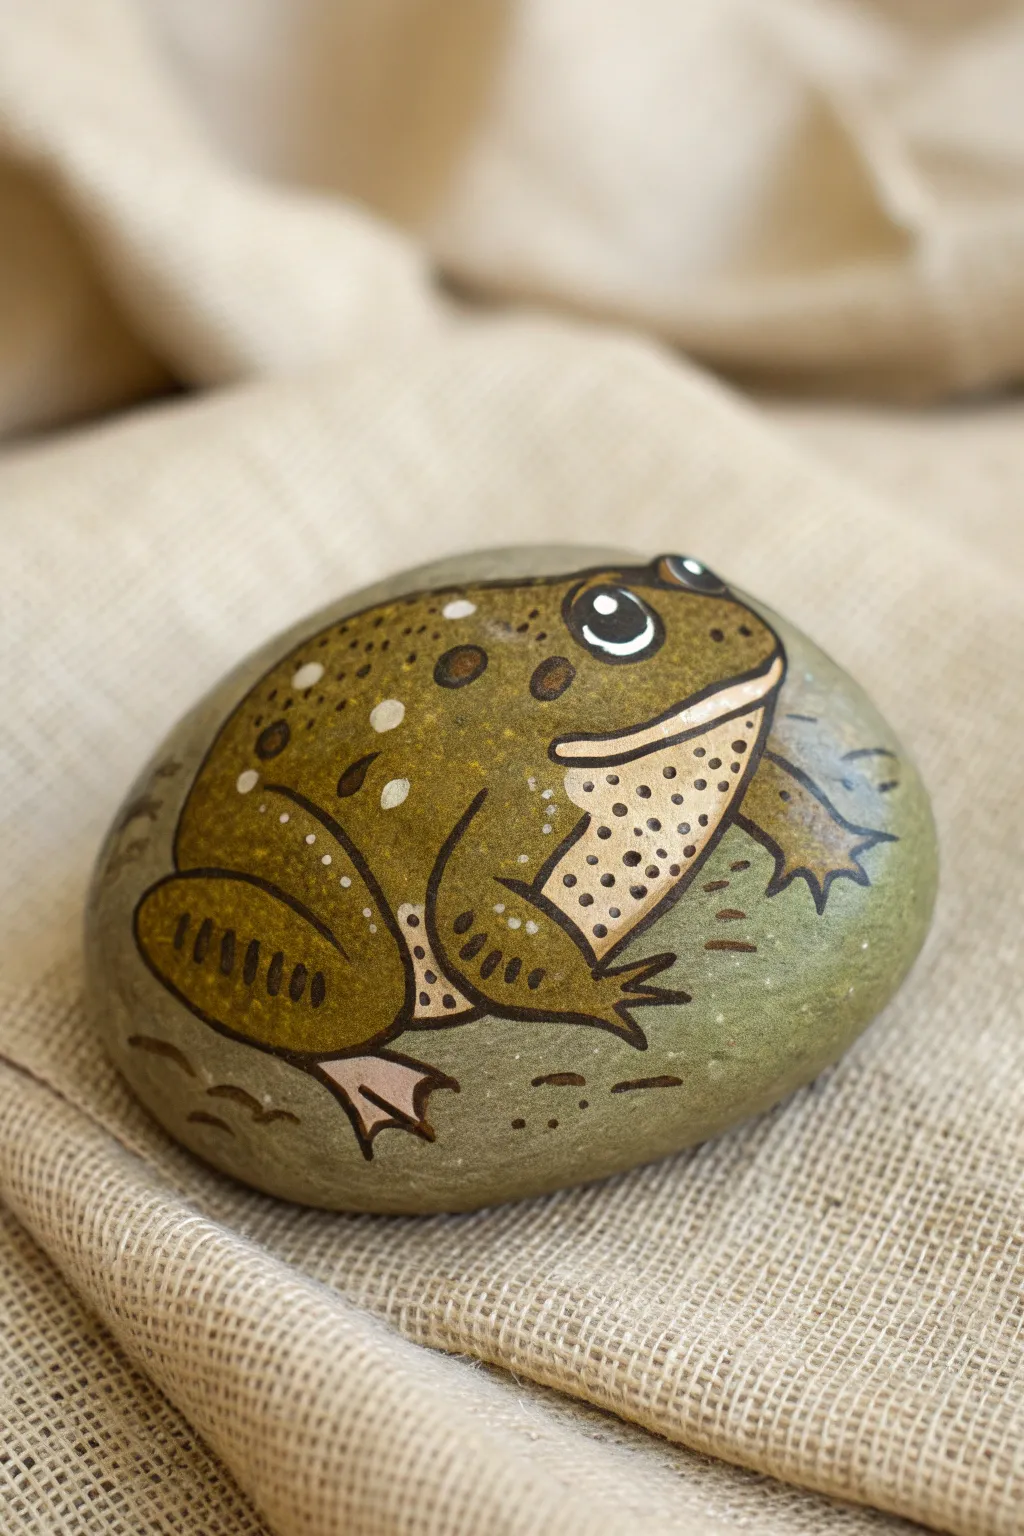
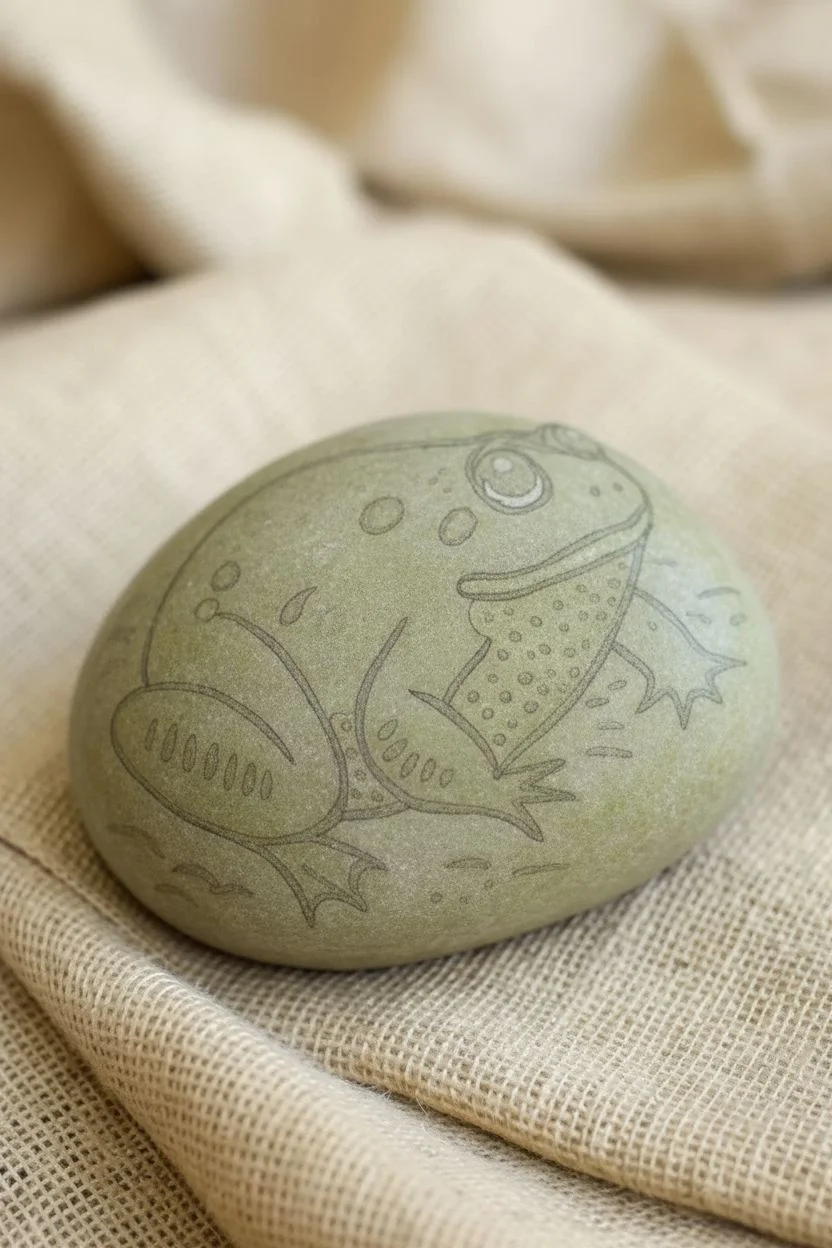
Capture the earthy charm of a garden toad with this realistic rock painting project that focuses on texture and pattern. The design features a wonderfully bumpy appearance achieved through clever shading and stippling, all set on a smooth river stone.
How-To Guide
Materials
- Smooth, oval river rock (palm-sized)
- Acrylic paints (olive green, dark brown, cream/beige, white, black, light pink)
- Small round paintbrushes (sizes 0, 1, and 2)
- Detail liner brush (size 00 or 000)
- Pencil for sketching
- Palette or mixing plate
- Water cup and paper towels
- Clear acrylic sealer (matte or satin spray)
Step 1: Base and Sketch
-
Clean the canvas:
Start by scrubbing your chosen rock with soap and water to remove any dirt or grit. Let it dry completely in the sun or use a hairdryer to speed things up. -
Paint a background base:
Mix a diluted wash of olive green and a touch of gray to create a subtle background color. Paint the entire top surface of the rock lightly so the natural stone texture still shows through a bit. Let this dry. -
Sketch the outline:
Using a pencil, lightly draw the oval shape of the toad’s body, slightly angled on the rock. Add the large, bulbous eye socket near the top right and the curve of the back leg. -
Define the belly:
Mark the separation line between the dark back and the light underbelly. This line should sweep from the mouth area down towards the rear leg.
Step 2: Blocking Colors
-
Fill the upper body:
Load a size 2 brush with olive green mixed with a tiny drop of brown. Fill in the toad’s head, back, and legs, carefully painting around the eye and the belly area. -
Paint the belly:
Use a creamy beige or off-white paint to fill in the throat and belly section. You might need two layers here to ensure it looks opaque against the darker stone. -
Add the eye base:
Paint the circular eye shape with pure white. Once dry, block in a large black pupil, leaving a small sliver of white at the top or side for the highlight base. -
Detail the foot:
I find it helpful to mix a pale pinkish-brown for the rear foot that tucks under the body. Paint the small webbed shape peeking out at the bottom.
Wobbly Lines?
If your black outlines look shaky, thin your paint with a drop of water until it flows like ink. Use your pinky finger as a pivot point on the table for stability.
Step 3: Texturing the Toad
-
Apply the major spots:
Mix a dark brown paint. Using a size 1 brush, dab irregular oval shapes onto the green back. Make a few large ones near the center and smaller ones towards the edges. -
Create the warts:
To make the ‘warts’ pop, use a very light green or cream color. Dot this color directly inside or next to the dark brown spots. This creates a raised, 3D illusion. -
Stipple the belly:
Switch to your smallest liner brush. Dip it in the dark brown paint and create tiny stippled dots across the cream belly area, concentrating them near the jawline. -
Outline the body:
With a steady hand and thin black paint (ink consistency helps here), outline the entire toad. Define the separation between the legs and the body clearly. -
Refine the mouth:
Draw a long, sweeping black line for the mouth, separating the green head from the cream jaw. Ensure the line curves slightly upward at the corner for a natural expression.
Pro Tip: 3D Warts
For realistic bumps, paint a dark crescent shadow on the bottom of each wart and a tiny white highlight on the top edge. This creates instant volume.
Step 4: Final Details
-
Highlight the eye:
Add a crisp, tiny white dot inside the black pupil to bring the toad to life. This catchlight is crucial for personality. -
Add back highlights:
Mix a lighter olive green and add thin, curved strokes on the upper back and top of the legs to suggest light hitting the moist skin. -
Paint the cast shadow:
Dilute some black or dark grey paint with water to make a glaze. Paint a transparent shadow on the rock just underneath the toad’s body and feet to ground it. -
Line the legs:
On the hind leg, add vertical dashed lines in dark brown to mimic the texture of folded skin. -
Seal the artwork:
Allow the paint to cure overnight. Spray the rock with a matte or satin sealer to protect the paint from weather and chipping.
Place your little toad among the garden plants for a delightful surprise for visitors
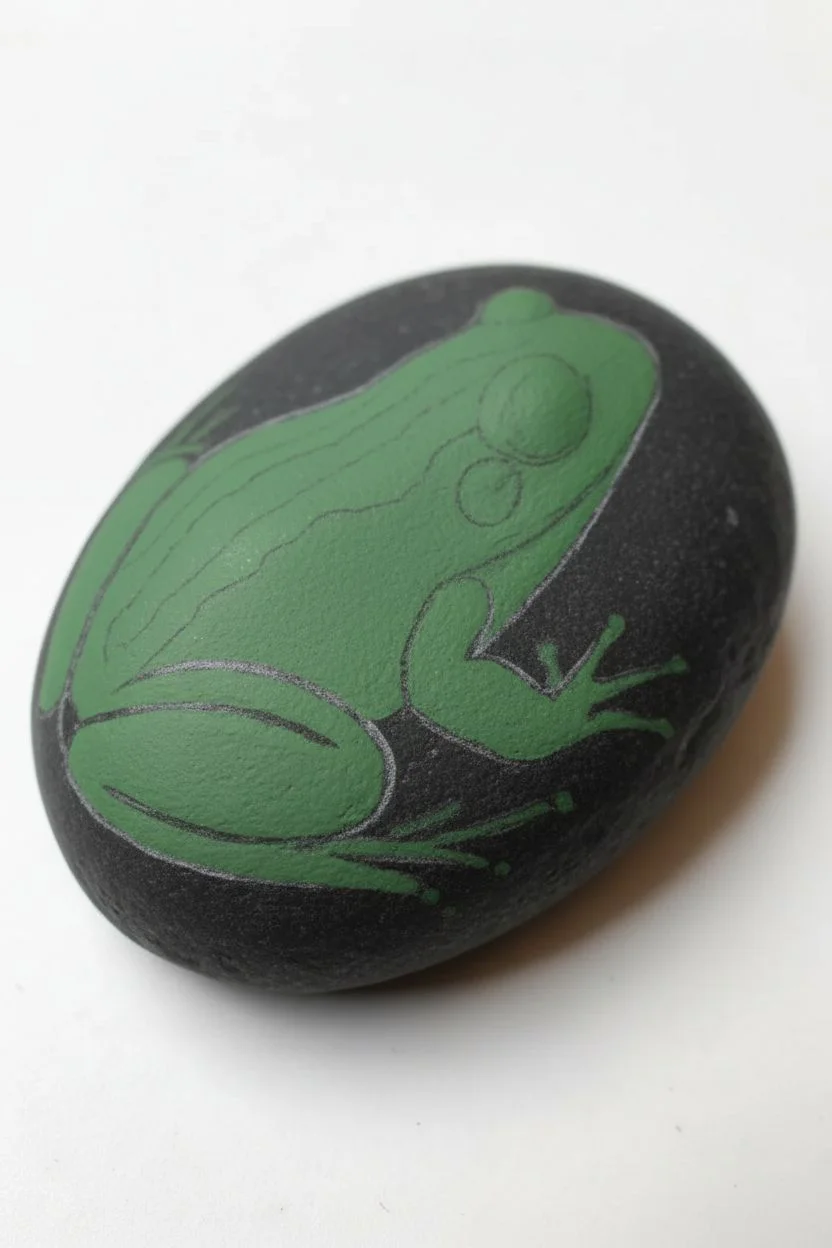
Lily Pad Base Rock for a Pond-Style Display

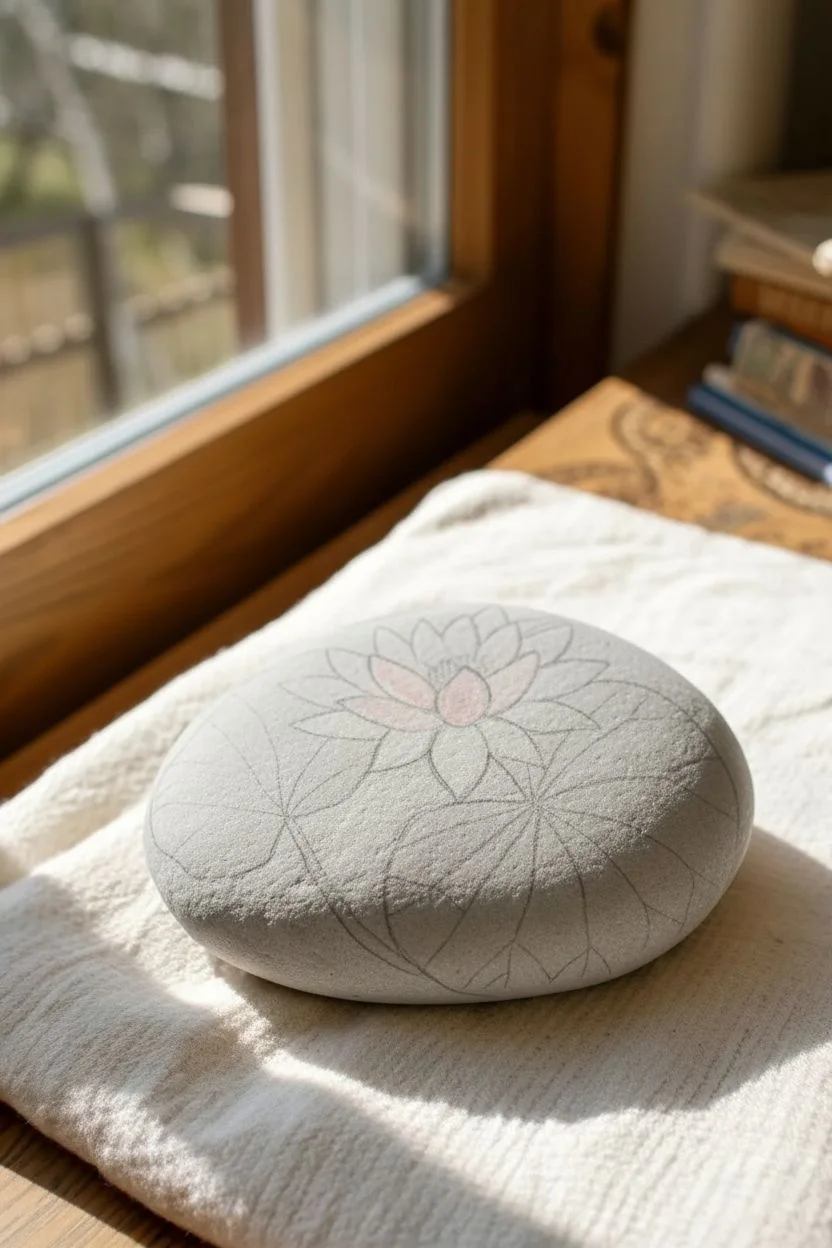
Transform a smooth, round stone into a tranquil pond scene featuring a delicate lotus flower resting on vibrant lily pads. This elegant design uses the natural color of the rock as water, creating a beautiful organic base for your frog rock garden.
Step-by-Step Tutorial
Materials
- Large, smooth oval river rock (cleaned and dried)
- Acrylic paints: Titanium White, Light Pink, Sap Green, Dark Green, Yellow, Orange
- Fine liner brush (size 0 or 00)
- Flat shader brush (small)
- Graphite transfer paper or soft pencil for sketching
- Water cup and paper towels
- Glossy spray varnish or sealant
Step 1: Preparation & Sketching
-
Clean surface:
Begin by scrubbing your rock with soap and water to remove any dirt or oils, then let it dry completely in the sun. -
Assess the shape:
Hold the rock to determine the best orientation; you want a relatively flat, wide surface for the main lily pad area. -
Outline the pads:
Using a soft pencil, lightly sketch two large oval shapes for the lily pads. They can overlap slightly or touch at the edges. -
Sketch the flower:
Draw the central lotus flower sitting on top of the pads. Start with a U-shape for the center petal and fan out pointed petals on either side. -
Add detail lines:
Sketch the prominent veins radiating from the center of the lily pads and the thin stems connecting them.
Wet-on-Wet Blending
For softer petal gradients, apply the pink paint while the white base is still slightly damp. This helps blur the transition without harsh lines.
Step 2: Painting the Base Colors
-
Block in green:
Mix a natural Sap Green. Use your flat brush to fill in the lily pads, carefully painting around the flower shape. -
Opacity check:
Acrylics can be translucent. If the rock’s color shows through too much, let the first coat dry and apply a second layer of green for solid coverage. -
Paint petals white:
Fill in the lotus flower petals with pure Titanium White. This serves as a bright base for the pink gradients later. -
Paint the stem:
Use your liner brush and a mix of green with a touch of brown or yellow to paint the stem curving downward.
Paint Looking Chalky?
If your green looks dull or chalky, mix in a tiny drop of gloss medium or varnish into the paint before applying. It adds immediate richness.
Step 3: Adding Detail & Dimension
-
Shade the pads:
Mix a darker green shade. Paint along the outer edges of the lily pads and gently blend inward to create a curved, dimensional look. -
Petal gradient:
Mix a very light pink wash. While the white paint is dry, gently glaze the bottom half of the inner petals, fading to white at the tips. -
Deepen the center:
Add a slightly darker pink or magenta right at the very base of the central petals to give the flower depth. -
Flower center:
Dab small dots of yellow and orange in the very center of the flower to represent the stamens. -
Draw the veins:
Using your finest liner brush and dark green (or black mixed with green), paint thin veins radiating from the lily pad centers to the edges. -
Refine outlines:
Outline the petals very faintly with a grey or diluted black mix to separate them clearly from the background. -
Highlighting:
Add tiny streaks of lighter green or yellow-green on the high points of the lily pads to suggest sunlight hitting the leaves.
Step 4: Finishing Touches
-
Cleanup:
If any paint went outside the lines onto the raw stone, use a damp Q-tip to wipe it away quickly or paint over it with a grey matching the rock. -
Dry completely:
Allow the rock to sit undisturbed for at least 24 hours to ensure all layers of paint are fully cured. -
Seal the work:
Spray the rock with a glossy varnish. This makes the colors pop and creates a ‘wet’ look appropriate for a water scene.
Place your finished lily pad rock in a sunny spot or pair it with a small frog figurine for a delightful garden display


Frog Rock Family Group for a “Pond” Cluster
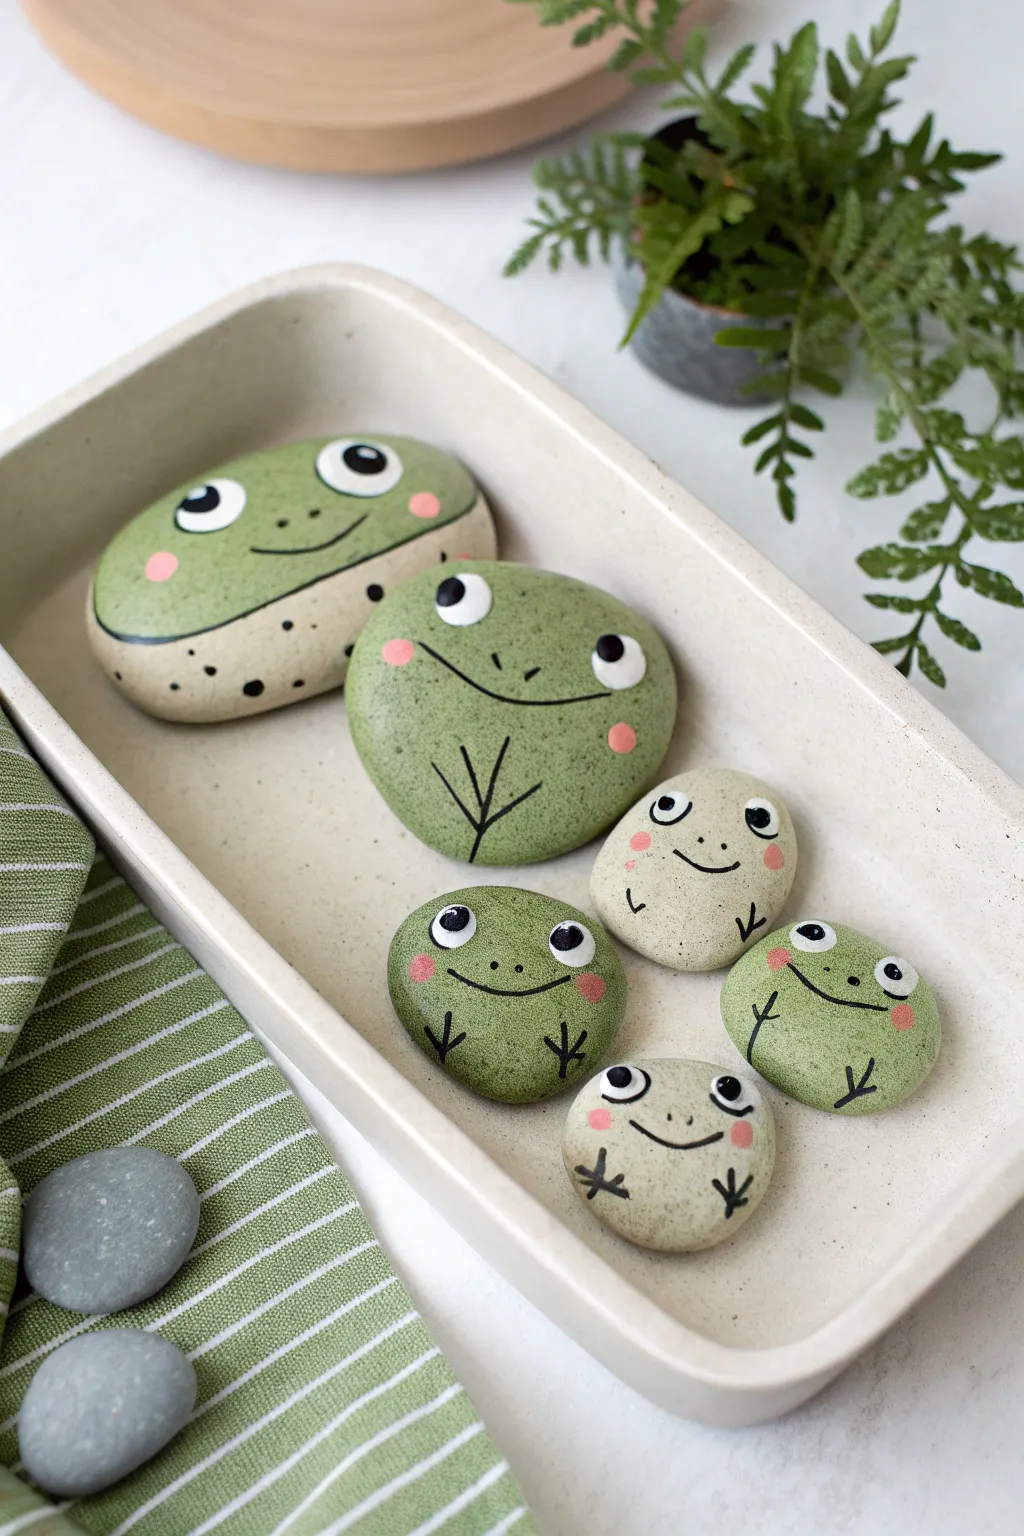
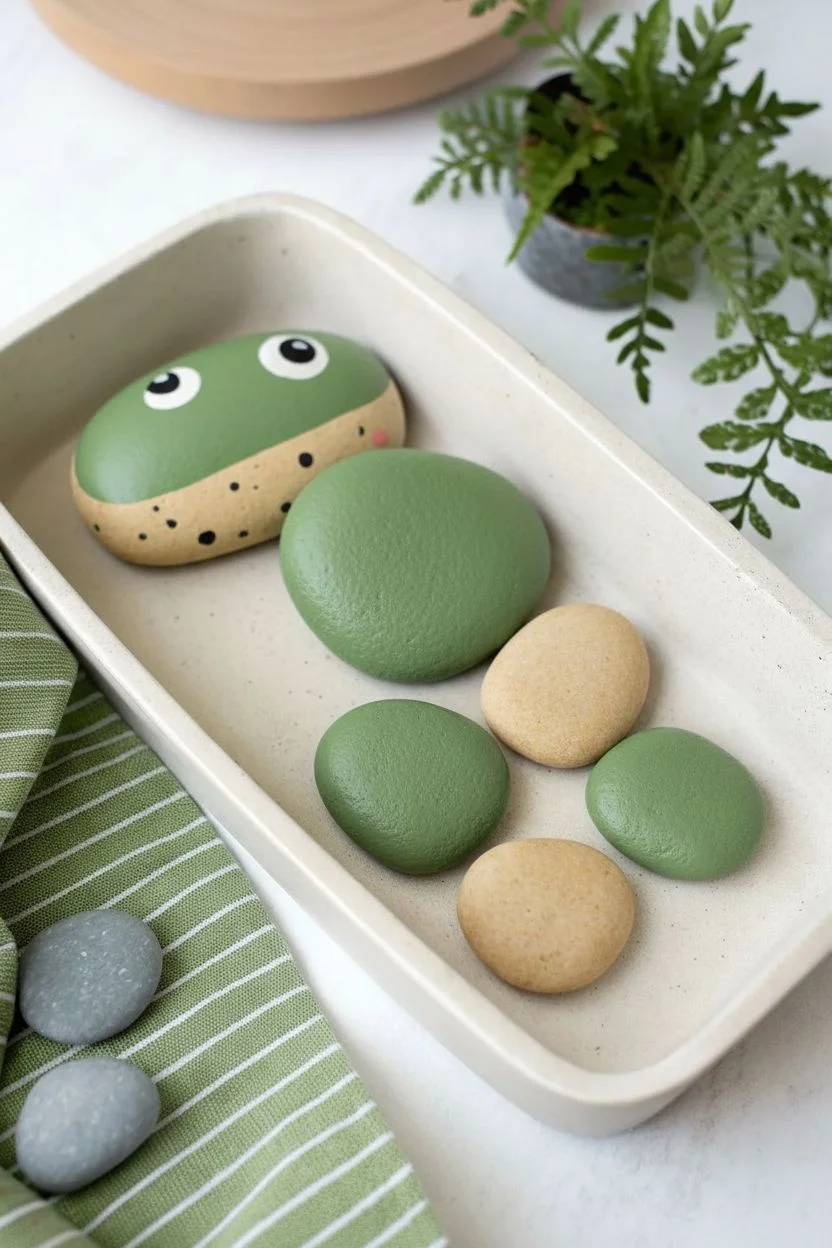
Create your own adorable pond cluster with this charming family of rock frogs, featuring a mix of green and natural stone tones. This project is perfect for using up various sizes of smooth river stones to build a character-filled group.
Detailed Instructions
Materials
- Smooth river rocks (various sizes, oval shapes)
- Acrylic paint (sage green, leaf green, warm beige, white, pale pink)
- Black acrylic paint or extra-fine Posca paint pen
- Paintbrushes (flat shader, fine liner, small round)
- Dotting tool or toothpick
- Matte sealer or varnish spray
- Pencil
- Palette for mixing
Step 1: Base Painting
-
Select your stones:
Choose about 5-6 smooth, oval-shaped rocks in graduating sizes to represent a family. Wash them thoroughly with soapy water and let them dry completely before starting. -
Paint the large prominent frog:
For the largest frog, paint the top two-thirds of the rock with a leaf green acrylic paint. Leave the bottom third natural or paint it a warm beige if the rock is too dark. Create a curved line where the two colors meet to suggest a belly. -
Paint solid green frogs:
Select two or three medium-sized rocks and paint their entire surface with a solid sage green or leaf green. You may need two coats for opaque coverage, allowing drying time in between. -
Paint the beige frogs:
For the remaining smaller rocks, paint the entire surface a warm cream or beige color to create variety in your frog species. This light base creates a nice contrast in the group. -
Add texture to the large frog:
On the largest bicolor frog, use the handle end of a paintbrush or a dotting tool dipped in black paint to add small, random spots along the beige belly area for texture.
Uneven Coverage?
If your green paint looks streaky, don’t keep brushing wet paint. Let the first coat dry fully (about 15 mins), then apply a second thin layer perpendicular to the first.
Step 2: Detailed Features
-
Sketch the faces:
Lightly sketch the placement of eyes and mouths with a pencil. Position the eyes wide apart near the top edge of each rock for that classic amphibian look. -
Paint the eye whites:
Using a small round brush and white acrylic paint, fill in large circles for the eyes. These frogs feature prominent, slightly bulging eyes, so don’t be afraid to make them big. -
Create the pupils:
Once the white paint is fully dry, use a black paint pen or fine brush to add medium-sized black circles inside the white. Position them looking slightly upward or to the side for personality. -
Add rosy cheeks:
Dip a small round brush or sponge dabber into pale pink paint. Gently stamp or paint small circles just below and outside the eyes on every frog to give them a flushed, friendly appearance. -
Drying check:
Ensure the cheek paint and eye layers are completely dry before moving on to the fine line work to prevent smudging.
Step 3: Line Work and Finishing
-
Draw the mouths:
Using your extra-fine black paint pen or a liner brush, draw a wide, shallow ‘U’ shape for the mouth connecting the cheek areas. Add tiny vertical ticks at the ends of the smile for a classic cartoon grin. -
Add nose details:
Place two tiny dots or short dashes between the eyes for nostrils. Keep these very subtle and centered. -
Draw the legs:
For the smaller solid-colored frogs, draw simple stick-figure legs. Create a ‘V’ shape branching into three toes on the bottom left and right of the rock face to simulate sitting legs. -
Detail the large frog’s chest:
On the largest frog, outline the separation between the green top and beige belly with a thin black line to define the body segments clearly. -
Add eye highlights:
Dip a toothpick into white paint and place a tiny dot near the top edge of each black pupil. This ‘catchlight’ brings the character to life. -
Seal the artwork:
Once all paint is cured (usually 24 hours), spray the rocks with a matte varnish. This protects the paint from chipping and gives them a unified, professional finish.
Perfect Circles
For perfectly round eyes without a steady hand, use the flat end of a pencil or a foam pouncer dipped in paint as a stamp, then refine the edges with a brush.
Arranging these little characters in a shallow dish creates an instant conversation piece for your home or garden padding
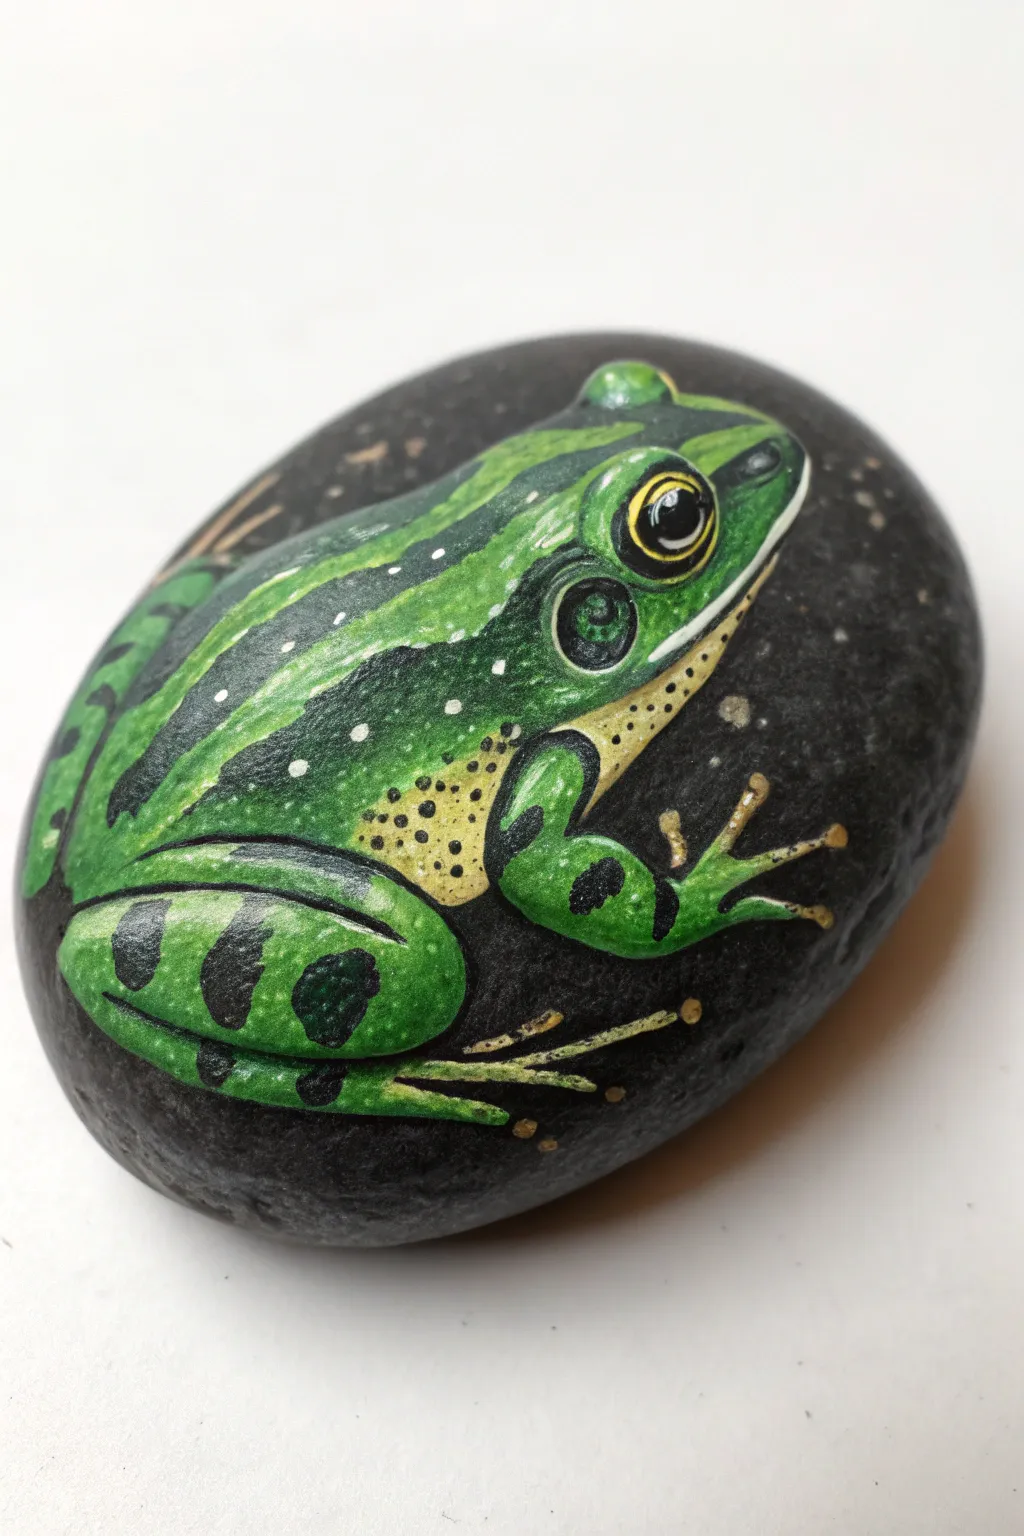
Frog Rock in Natural Habitat Colors
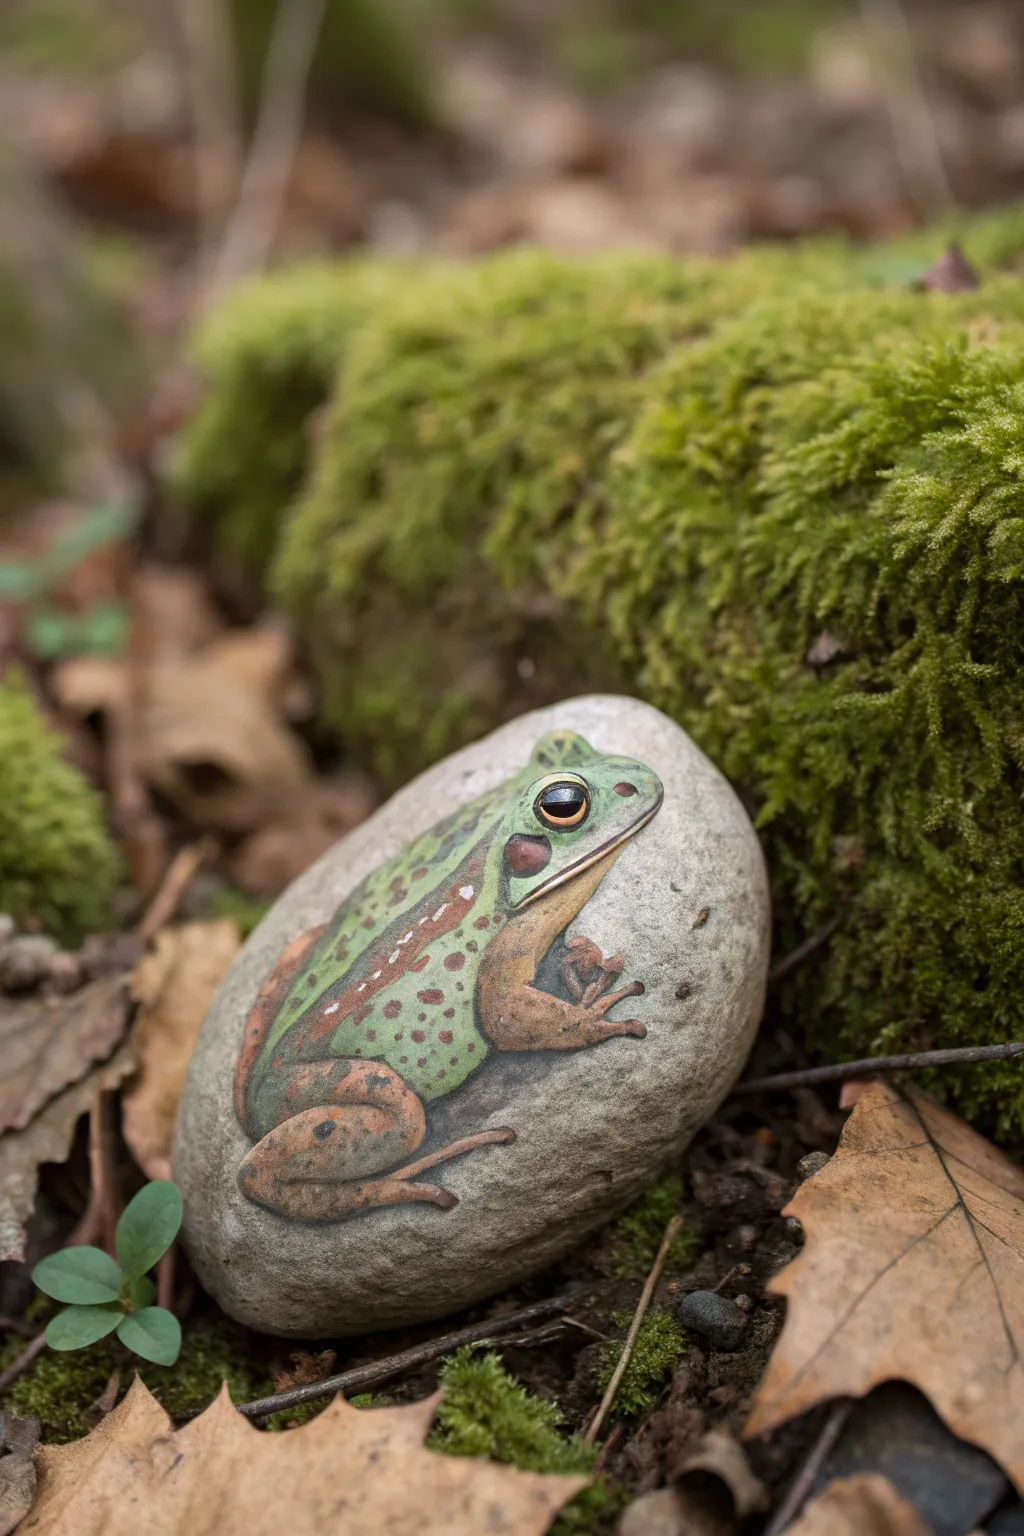
Capture the essence of the forest floor with this detailed rock painting project. By layering semi-transparent glazes of green and brown over an opaque base, you’ll create a lifelike wood frog that seems ready to hop right off the stone.
Step-by-Step Guide
Materials
- Smooth, oval river rock (palm-sized, light grey)
- Acrylic paints (Titanium White, Sap Green, Burnt Sienna, Raw Umber, Black, Yellow Ochre)
- Pencil (HB or 2B) and eraser
- Fine liner brush (size 0 or 00)
- Small flat brush (size 2 or 4)
- Small round brush (size 1 or 2)
- Glazing medium or water for thinning
- Matte spray varnish
Step 1: Preparation and Sketching
-
Clean the canvas:
Scrub your chosen rock with a bit of soap and warm water to remove any dirt or oils. Let it dry completely in the sun or with a hairdryer before starting. -
Outline the body:
Using a light pencil, sketch a large oval shape on the rock for the frog’s body. The orientation should follow the natural curve of the stone. -
Define the limbs:
Add the bent rear leg tucked against the body and the smaller front arm extended slightly forward. Don’t worry about tiny details like toes yet; focus on getting the proportions of the limbs right. -
Detail the head:
Sketch the triangular shape of the head, marking a circle for the eye and a line for the mouth ridge. -
White base coat:
Paint the entire silhouette of the frog with Titanium White. This opaque primer layer is crucial because acrylics can appear dull on grey stone; the white makes future colors pop.
Wet-on-Wet Blending
Work quickly while the green and tan paints are still wet. Blending them directly on the rock creates a smoother gradient than layering dry paint.
Step 2: Applying Base Colors
-
First green layer:
Mix Sap Green with a touch of White. Apply this to the top of the head and the back, fading it out as you reach the sides. -
Adding leg tones:
Mix White with Burnt Sienna and a tiny bit of Yellow Ochre to create a tan, fleshy color. Paint the legs and the underbelly area, blending slightly where it meets the green on the back. -
Define the ridges:
While the paint is still tacky, use a damp brush to soften the transition between the green back and the tan legs so there are no hard lines.
Chalky Colors?
If your dried acrylics look dull on the grey rock, you skipped the white base coat! Repaint the silhouette in white and let dry before trying color again.
Step 3: Detailing and Texturing
-
Eye placement:
Paint the circle of the eye with a solid black. Once dry, add a thin gold or copper ring around the pupil, and a tiny white dot for the reflection to bring it to life. -
The mask stripe:
Using Raw Umber, paint the distinct dark ‘mask’ stripe that runs from the nose through the eye and down towards the shoulder. This acts as a shadow and defines the face. -
Spotting technique:
Mix a watery brown wash using Burnt Sienna. I find it easiest to use a fine liner brush here to dab irregular spots across the green back and the tan legs. -
Back stripes:
Add two faint, thin stripes running down the center of the back using a lighter shade of your tan mix. These don’t need to be perfect straight lines. -
Deepening shadows:
Use thinned Raw Umber to glaze shadows underneath the legs and where the limbs tuck against the body to create dimension.
Step 4: Finishing Values
-
Highlighting skin:
Mix a very pale green-white and add tiny highlights to the top of the ridges on the back and the knees. This simulates moist, shiny skin. -
Grounding shadow:
Mix a transparent grey wash (Black + Water). Paint a thin shadow underneath the frog directly on the rock surface to make it look like it is sitting *on* the stone, rather than painted flat. -
Seal the work:
Once absolutely dry (give it a few hours), spray the rock with a matte varnish. Avoid glossy finishes if you want a natural, camouflaged look.
Place your finished piece in the garden near some moss to see if you can trick a passerby
Poison Dart Frog Patterns With Bold Color Blocking

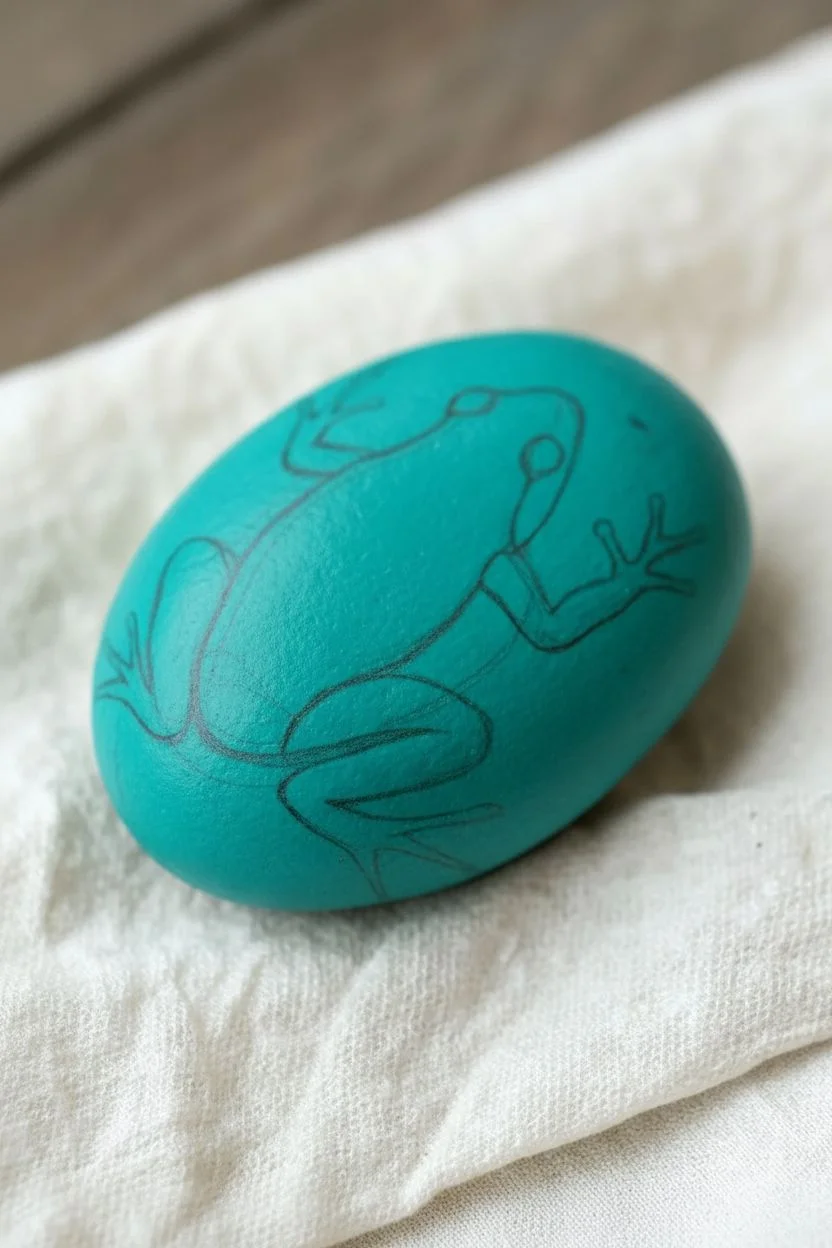
Capture the dangerous beauty of the rainforest with this striking poison dart frog design. The bold contrast between the yellow, magenta, and turquoise creates an eye-catching piece that looks like it just hopped onto the stone.
Step-by-Step
Materials
- Smooth, oval river rock (cleaned and dried)
- Acrylic paints (Teal/Turquoise, Bright Yellow, Magenta/Pink, Black, White)
- Pencil for sketching
- Fine liner brushes (sizes 0 and 00)
- Medium flat brush
- Small round brush
- Gloss varnish or sealant
Step 1: Base and Background
-
Prep the surface:
Ensure your rock is completely clean of dirt and oil to help the paint adhere properly. -
Paint the background:
Using a medium flat brush, coat the entire top surface of the rock with a vibrant teal or turquoise acrylic paint. You may need two coats for full opacity, letting the first dry completely before adding the second. -
Sketch the outline:
Once the background is bone-dry, lightly sketch the frog’s outline with a pencil. Draw an oval shape for the body slightly off-center, pointing diagonally. Add the angular shapes for the legs extending outward.
Clean Lines Pro Tip
Slightly thin your black paint with a drop of water for the outlining work. Ink-like consistency flows better off a liner brush for sharper edges.
Step 2: Blocking in Color
-
Fill the body:
Load a small round brush with bright yellow paint. Fill in the main body oval carefully, avoiding the areas where the legs will attach. This yellow needs to be very opaque, so apply a second coat if the teal shows through. -
Check opacity:
Hold the rock up to the light to ensure your yellow layer is solid; streaks here will distract from the bold pattern later. -
Paint the legs:
Using magenta or bright pink paint, fill in the leg shapes. Connect them smoothly to the yellow body, but don’t worry about a perfect blend yet—we will cover the join with black markings. -
Add the toes:
Switch to a fine liner brush and the same pink paint to extend the thin, distinct toes at the ends of the legs. Some toes should curl slightly to look like they are gripping surfaces.
Level Up: Metallic Pop
Use metallic gold paint for the yellow dashes in the background instead of plain yellow. It catches the light beautifully when displayed outdoors.
Step 3: Details and Markings
-
Outline the frog:
With your finest brush and black paint, carefully outline the entire frog shape. Keep your hand steady to create a smooth, consistent line width. -
Create the back stripes:
Paint bold, thick black stripes running lengthwise down the yellow back. These should taper slightly at the ends. -
Add body spots:
In the yellow spaces between stripes, dot small, irregular black spots to mimic the frog’s natural texture. -
Detail the legs:
Paint random black shapes and spots onto the pink legs. I find that varying the size of these spots makes the pattern look more organic and natural. -
Define the eye:
Paint a solid black oval at the front of the head for the eye. Once dry, add a tiny dot of white paint near the top edge for a realistic highlight.
Step 4: Finishing Touches
-
Add radiating lines:
Using the yellow paint and a liner brush, add curved dash marks around the frog on the teal background. These represent movement or radiating energy. -
Bottom gradient:
If desired, blend a little pink into the teal at the very bottom edge of the rock to create a soft, colorful shadow effect. -
Final inspection:
Check for any uneven edges or places where the background needs a touch-up with teal paint. -
Seal the work:
Once the paint is fully cured (give it a few hours), apply a coat of gloss varnish to protect the artwork and make the colors pop.
Enjoy displaying this brilliant splash of color in your garden or on your desk
Frog Pun or “Ribbit” Lettering Integrated Into the Design


Bring a sense of calm to your garden or desk with this minimal but charming rock painting design. Using a smooth, neutral stone as your canvas, you’ll combine precise lettering with a cute cartoon frog for a peaceful finish.
Step-by-Step
Materials
- Smooth, oval-shaped river rock (white or beige usually works best)
- Acrylic paint pens (dark green, light/sage green, black, cream/pale yellow, white)
- Pencil and eraser
- Clear spray sealer or varnish (matte or satin finish)
- Fine liner brush (optional, if not using pens for details)
- Mild soap and water
Step 1: Preparation and Sketching
-
Clean the surface:
Begin by washing your stone thoroughly with mild soap and water to remove any dirt or oils. Let it dry completely before starting, as any moisture will prevent the paint from sticking. -
Plan the layout:
Using a pencil, lightly sketch the words ‘RIBBIT’ on the top line, ‘AND’ in the middle, and ‘RELAX’ on the bottom. Center the text but leave slightly more room on the right side for the frog. -
Sketch the motifs:
Draw a simplified frog shape on the right side, sketching an oval body and a smaller head shape. Add a simple branch with leaves curving along the left side of the text.
Uneven Ink Flow?
If paint pens skip on rough stone, press the tip on paper to reactivate flow, then dot the paint onto the rock rather than dragging.
Step 2: Lettering the Quote
-
Outline the letters:
Using a dark green paint pen (fine tip), carefully trace over your penciled letters. Ensure the lines are clean and distinct. -
Thicken the strokes:
Go back over the vertical lines of each letter to create a faux-calligraphy look. Thickening the downstrokes adds a nice weight to the serif font style. -
Add decorative dots:
Take a lighter sage green or lime green pen and add three small dots in a triangular formation to the left of the word ‘AND’ to balance the spacing. -
Refine the edges:
Check your lettering for any jagged edges. I find that doing a second pass once the first layer is dry makes the green much more opaque and crisp.
Step 3: Painting the Frog
-
Base coat the body:
Fill in the frog’s main body shape with a medium-green paint pen. Do not color over the stomach area yet. Let this layer dry completely. -
Paint the belly:
Use a cream or pale yellow paint pen to fill in the oval tummy patch. You might need two layers here to cover the rock’s natural color fully. -
Add the legs:
Draw the back legs folded against the body using the same medium-green. They should look like little triangles tucked against the sides. -
Outline the frog:
Once the green base is dry, use a very fine dark green or black pen to outline the entire frog body, separating the legs from the torso for definition. -
Draw the face:
Using a white pen, make two small circles for eyes. Once dry, add black dots for pupils. Use a thin black or dark green liner to draw a simple curved smile. -
Add the sprout:
Draw a tiny stem sprouting from the top of the frog’s head with two small heart-shaped leaves at the tip.
Pro Tip: Better Sketching
Use a white charcoal pencil instead of standard graphite for sketching; it wipes off easily with a damp cloth and doesn’t smudge dark.
Step 4: Final Details and Sealing
-
Color the left branch:
Trace your pencil sketch for the branch on the left side using a dark green pen. Fill in the leaves solidly. -
Clean up sketch lines:
Wait until every part of the paint is bone dry. Gently erase any visible pencil marks from your initial sketch. -
Check opacity:
Look over the rock one last time. If the rock’s texture assumes too much prominence through the paint, dab another layer on the frog or letters. -
Seal the rock:
Place the rock in a well-ventilated area and spray it with a clear matte or satin sealer. This protects the paint from chipping and weather damage if placed outside.
Place this peaceful little rock somewhere you see daily to remind yourself to take a breakage and relax


Have a question or want to share your own experience? I'd love to hear from you in the comments below!