Whenever my drawings feel a little flat, I come back to perspective—it’s the fastest way to make a page feel like you could step right into it. Here are my go-to perspective drawing ideas (from super classic to delightfully weird) so you can practice depth without getting bored.
One-Point Perspective Hallway
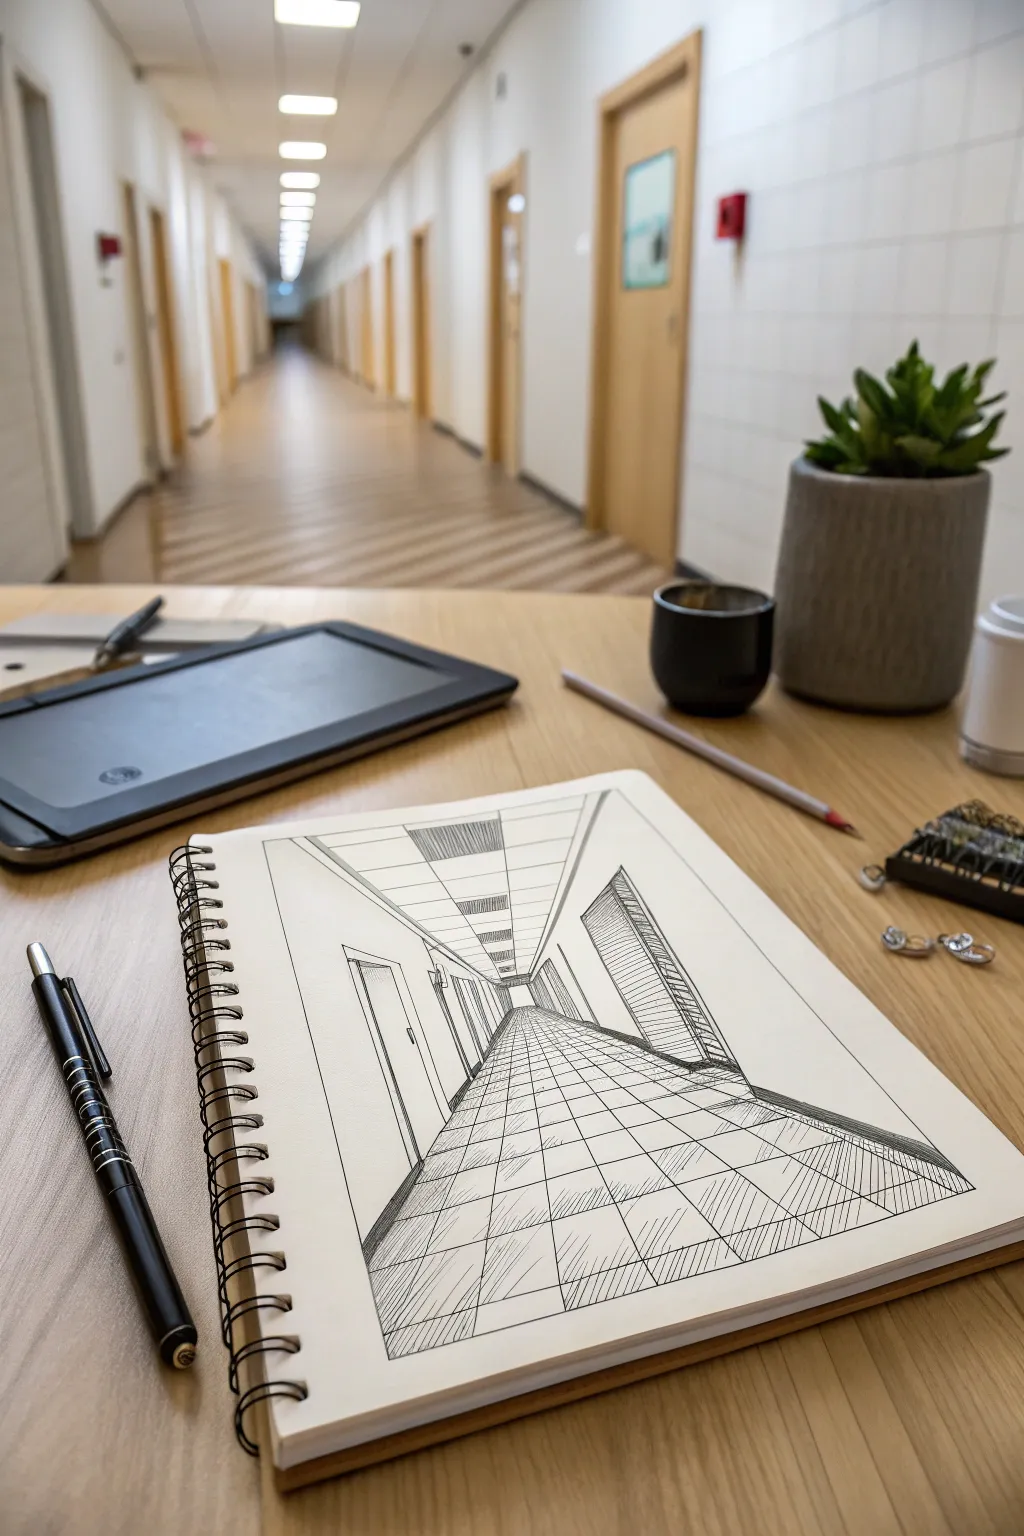
Master the art of depth with this classic one-point perspective study of a long, vanishing hallway. This exercise uses clean ink lines and strategic hatching to create a convincing architectural space that draws the viewer’s eye straight to the center.
Step-by-Step Guide
Materials
- Spiral-bound sketchbook (A4 or similar size)
- HB or 2H graphite pencil (for initial layout)
- Fine liner pen (0.3mm or 0.5mm, black ink)
- Ruler or straight edge
- Eraser
Step 1: Setting the Perspective Grid
-
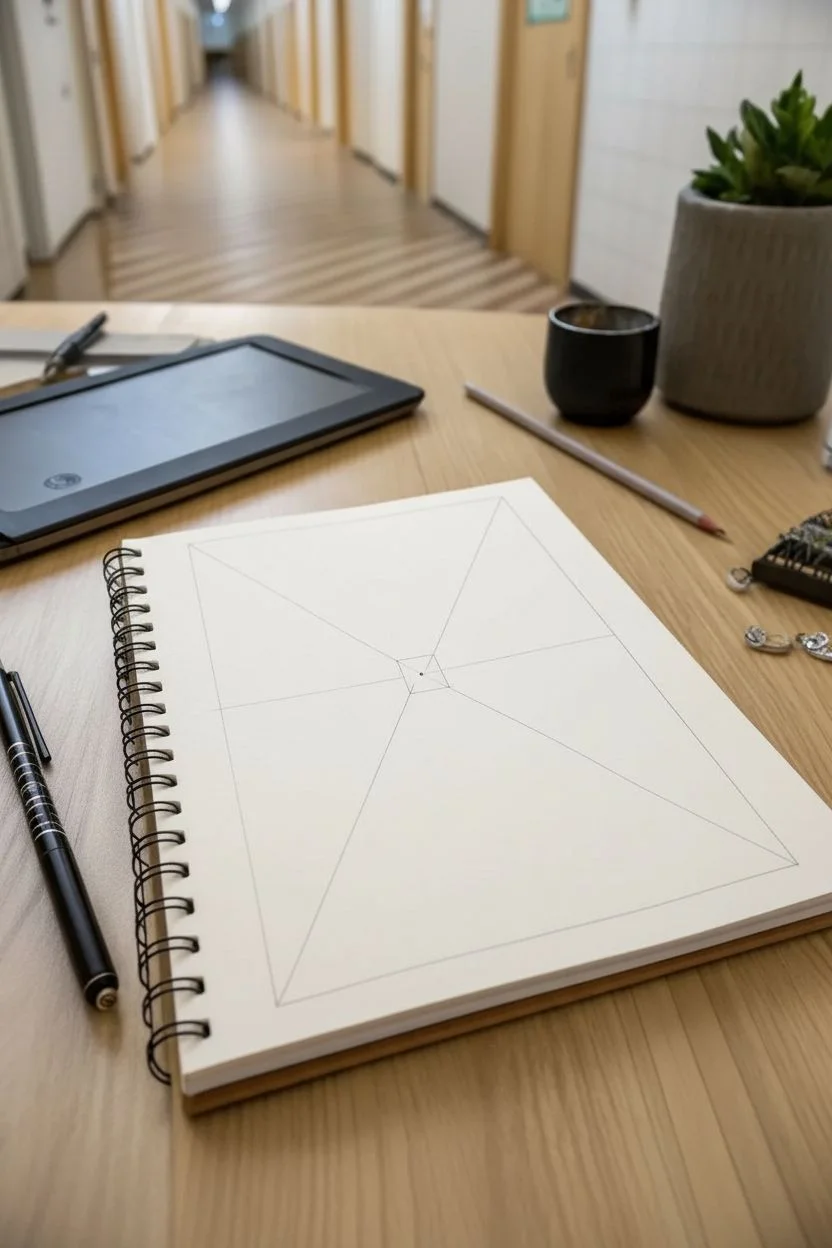
Establish the horizon:
Begin by drawing a faint horizontal line straight across the middle of your page using your pencil and ruler. This is your horizon line/eye level. -
Place the vanishing point:
Mark a small dot directly in the center of your horizon line. Every diagonal line in this drawing will converge to this single point. -
Draw the back wall:
Center a small rectangle around the vanishing point. This rectangle represents the far end of the hallway. -
Create the main corridor lines:
From each corner of that small central rectangle, draw diagonal lines extending outwards toward the corners of the paper. These define the floor, ceiling, and side walls.
Wonky Angles?
If your doors look like they are falling over, check your verticals. All vertical lines must be perfectly parallel to the side edge of your paper, never tilted.
Step 2: Refining Architectural Details
-
Sketch the ceiling tiles:
Draw faint lines radiating from the vanishing point along the ceiling to create rows for lights or tiles. Add horizontal lines that get closer together as they approach the center to suggest depth. -
Add door frames:
On the left wall, sketch vertical lines for door frames. Remember, the tops and bottoms of the doors must angle downwards toward your vanishing point. -
Detail the right wall:
On the right wall, sketch a large rectangular shape suggestive of a window or bulletin board. Use the same perspective rule: vertical lines stay vertical, horizontal lines go to the vanishing point. -
Grid the floor:
Draw lines radiating from the vanishing point along the floor. These will become the grout lines between your floor tiles. -
Complete the floor tiles:
Add horizontal lines across the floor. Space them widely at the bottom of the page and make them increasingly narrow as they recede into the distance.
Step 3: Inking and Finishing
-
Ink the main structure:
Switch to your fine liner pen. Carefully trace over the main structural lines of the walls, ceiling, and floor grid, using your ruler for crisp edges. -
Ink the doors and windows:
Go over the door frames on the left and the feature on the right wall. You can double up the lines slightly to give the frames thickness. -
Add texture to the floor:
Use light, diagonal hatching strokes inside some of the floor tiles. Vary the direction of the hatching in alternating tiles to simulate reflection or texture. -
Shade the right wall feature:
Apply dense horizontal hatching to the large detailed area on the right wall to make it stand out against the lighter walls. -
Suggest ceiling details:
Ink the ceiling squares. Use very light vertical hatching inside the rectangular light fixtures to give them a distinct tone. -
Deepen the perspective:
Add extra weight to the lines closest to the viewer (at the bottom and sides of the page) and keep lines near the vanishing point thinner. I find this subtle line weight variation makes the depth pop. -
Clean up:
Once the ink is completely dry, gently erase all underlying pencil marks to reveal a clean, sharp architectural drawing.
Pro Tip: Depth of Field
Make lines at the bottom of the page thicker and darker than lines near the center. This atmospheric perspective trick instantly adds realistic depth.
Now you have a structured, precise sketch that perfectly captures the illusion of endless space


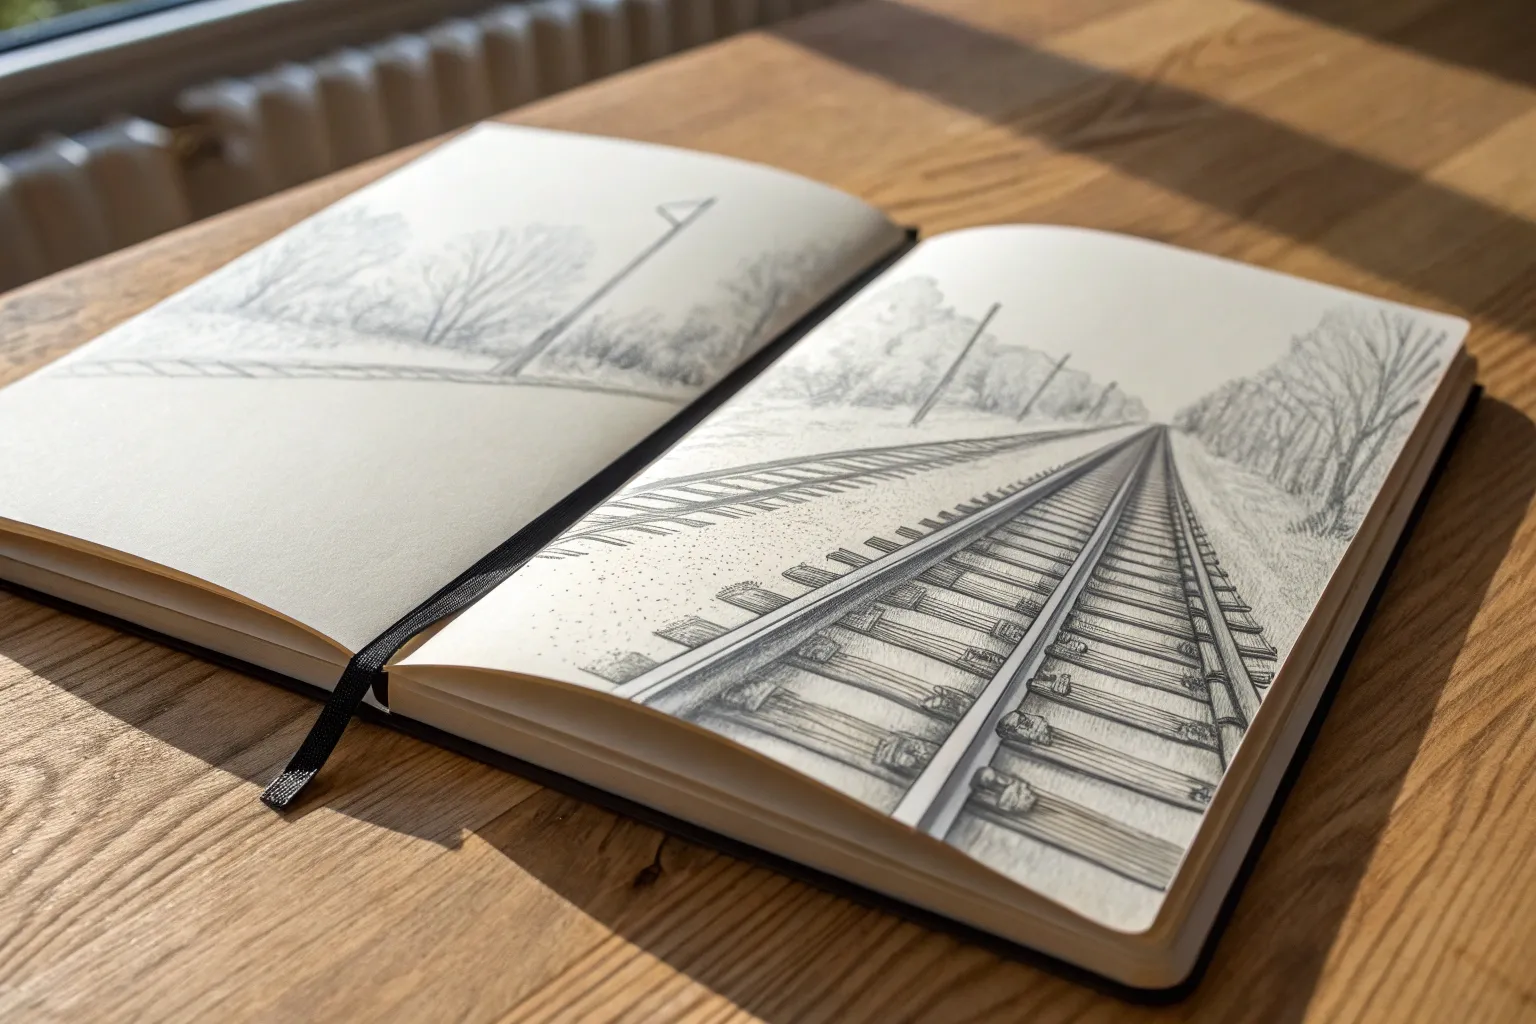
Railroad Tracks in One-Point Perspective
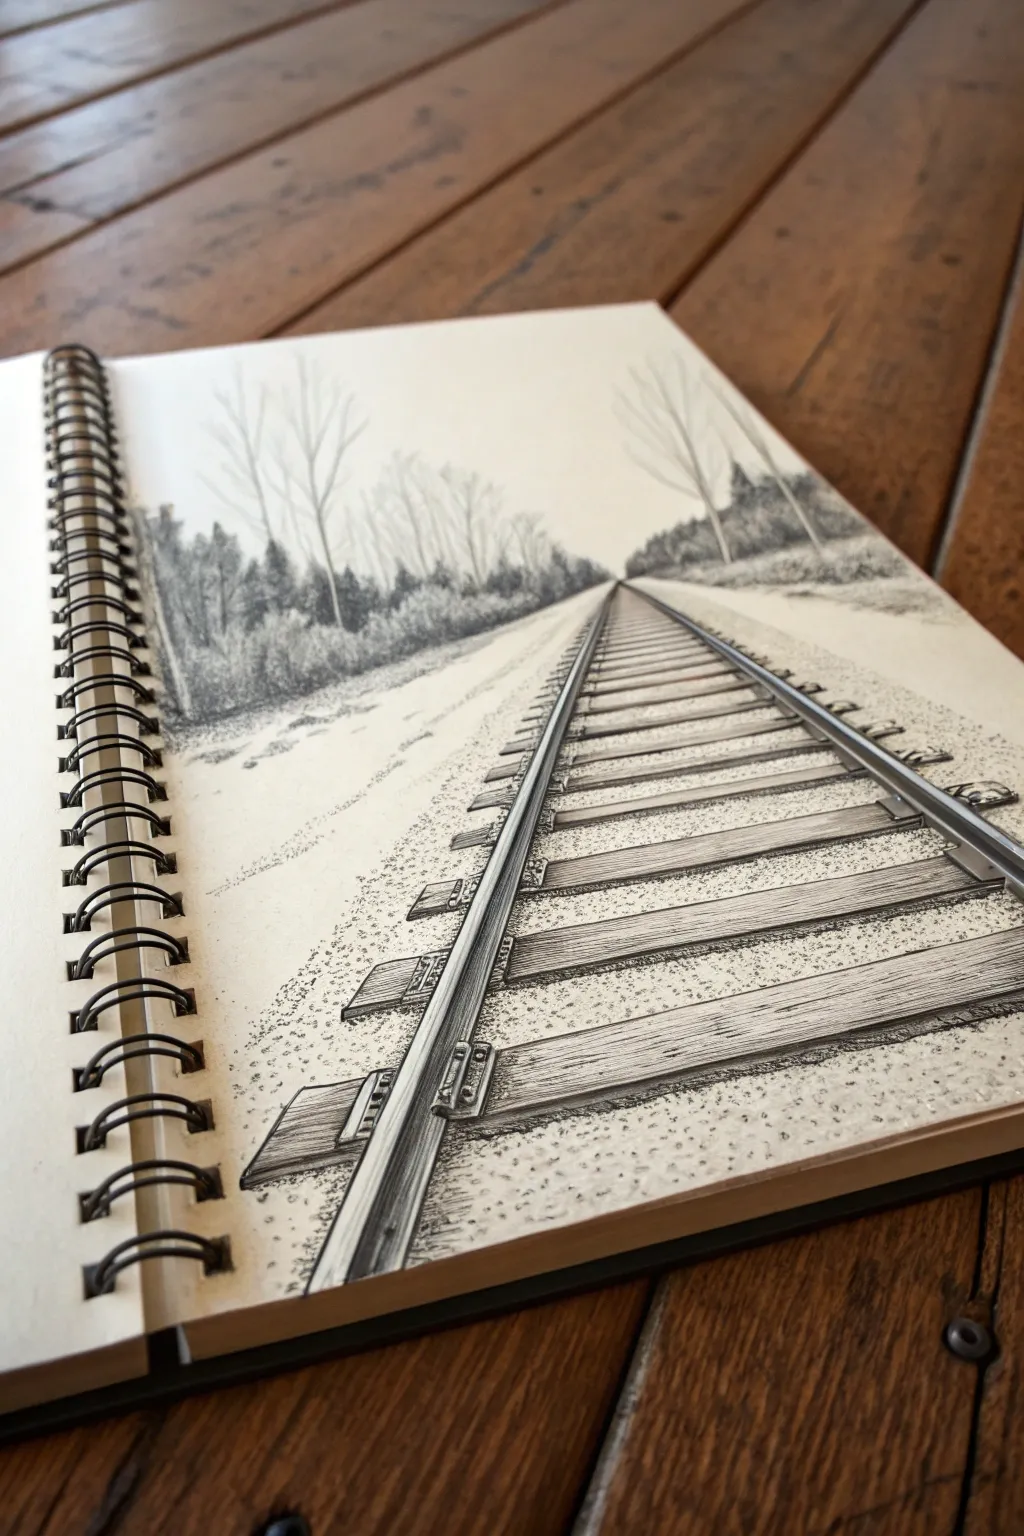

This classic exercise is the perfect introduction to one-point perspective, creating a striking illusion of depth using simple lines and shading. The finished sketch captures a quiet, rural atmosphere with detailed gravel texture and stark, receding trees.
Step-by-Step Guide
Materials
- Spiral-bound sketchbook (smooth or vellum surface)
- H or HB pencil for initial layout
- Fine liner pens (sizes 0.1, 0.3, and 0.5)
- Ruler or straight edge
- Eraser (kneaded preferred)
Step 1: Setting the Horizon
-
Establish the horizon line:
Begin by lightly drawing a horizontal line across your page about two-thirds of the way up. This represents your eye level. -
Mark the vanishing point:
Place a small dot in the center of your horizon line. This single point will guide all your receding lines. -
Draft the rails:
Using your ruler, draw two diagonal lines starting from the vanishing point and extending outward to the bottom left and right corners of the page. These are the outer edges of your metal rails. -
Add rail thickness:
Draw parallel lines just inside those first diagonals to give the metal rails some visible thickness and weight.
Ties Look Wrong?
If ties look like a ladder, check your spacing. The gaps between ties must shrink drastically as they approach the horizon, not just stay uniform.
Step 2: Laying the Ties
-
Sketch the first railroad tie:
Draw a horizontal rectangular shape connecting the two rails near the bottom of the page. This is your closest, largest tie. -
Create receding ties:
Continue drawing horizontal ties up toward the vanishing point. The key is to make them progressively thinner and closer together as they move away from you. -
Detail the tie edges:
Extend the ends of the wooden ties slightly past the metal rails on both sides, keeping the perspective consistent. -
Ink the main structure:
Switch to your 0.5 pen. Outline the rails and the wooden ties. Use ruler assistance for the long rails, but freehand the wood for a more organic texture.
Step 3: Texturing and Environment
-
Wood grain texture:
Use a 0.1 pen to add horizontal strokes on the wooden ties. I like to keep these loose and slightly wavy to mimic weathered wood grain. -
Metal rail shading:
Add vertical shading lines along the sides of the metal rails with the 0.3 pen to make them look dimensional and metallic. -
Hardware details:
Draw small rectangular plates and bolts where the wood meets the metal. These small mechanical details add realism. -
Stippling the gravel:
Start adding dots (stippling) between the ties and along the sides of the track. Cluster the dots densely near the rails and disperse them as you move outward. -
Drawing the tree line:
Using the 0.3 pen, sketch vertical, scribbly strokes along the horizon line to create a distant forest. Make trees taller on the sides and shorter near the vanishing point. -
Adding specific trees:
Draw a few distinct, bare branch structures on the left and right foreground. Keep the branches thin and reaching upward. -
Refining the ground:
Add more texture to the ground beside the tracks. Use short, scratchy horizontal marks to suggest uneven dirt or snow patches. -
Final contrast check:
Use your 0.5 pen to darken the shadowed areas under the rails and the densest part of the distant treeline to pop the depth. -
Clean up:
Once the ink is completely dry, gently erase all pencil guidelines to reveal your crisp architectural drawing.
Make it Winter
Leave the tops of the ties and rails perfectly white and only shade the sides. It creates a ‘snow-capped’ effect perfect for holiday cards.
With practice, you will start seeing vanishing points in every landscape you visit


Simple Room Box in One-Point Perspective
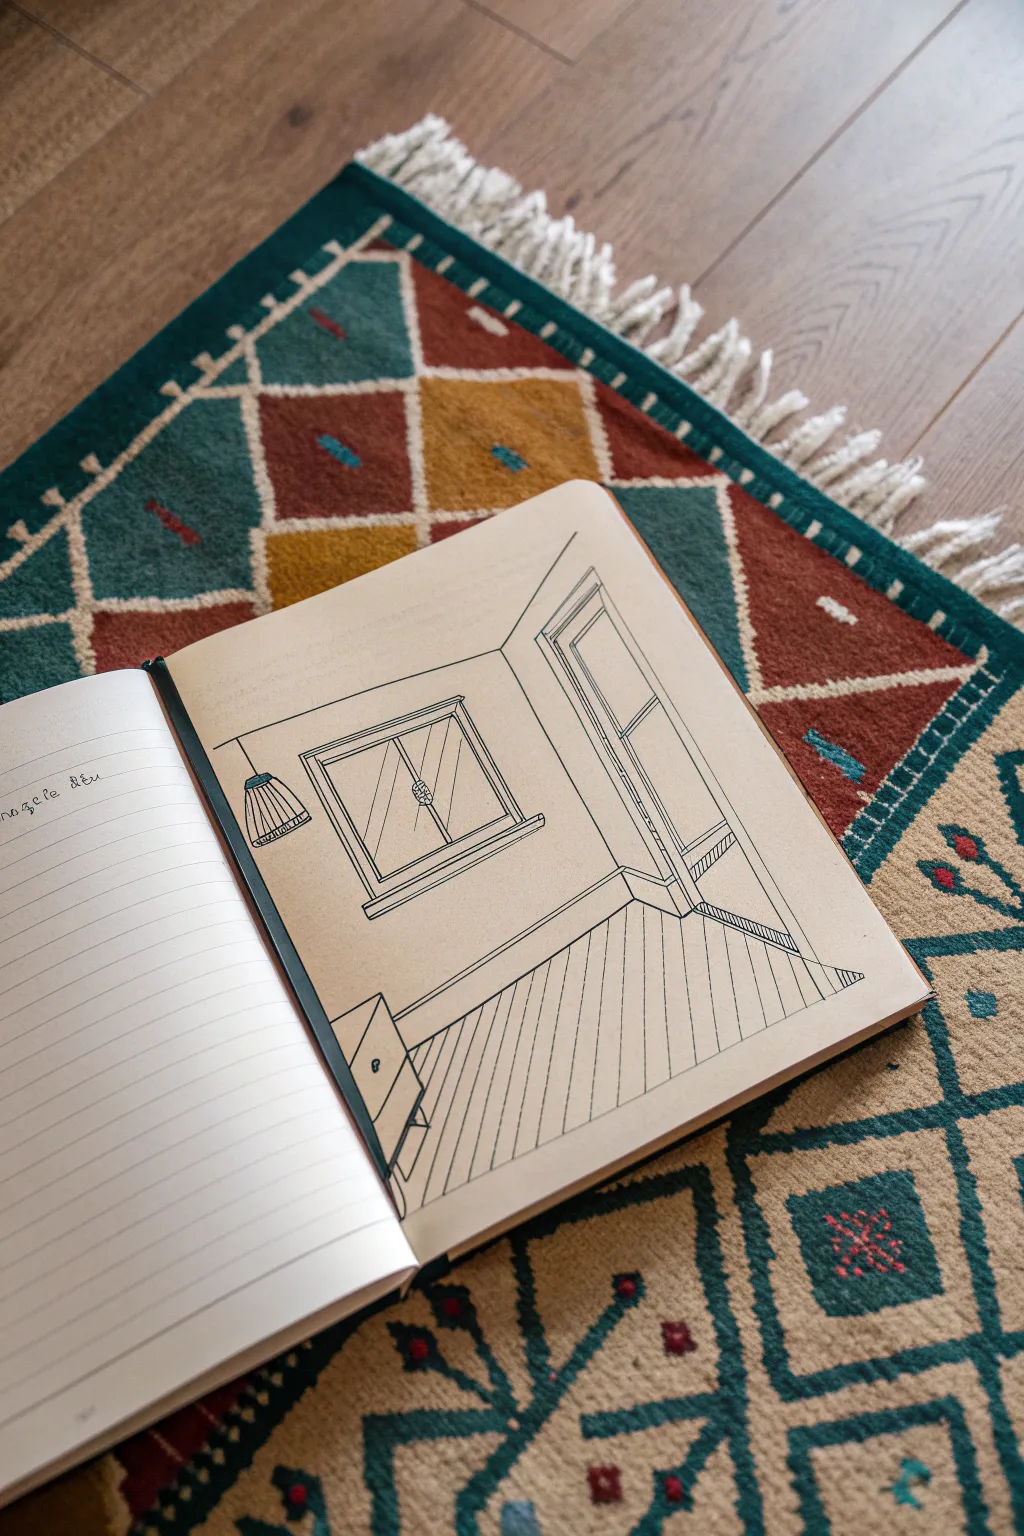
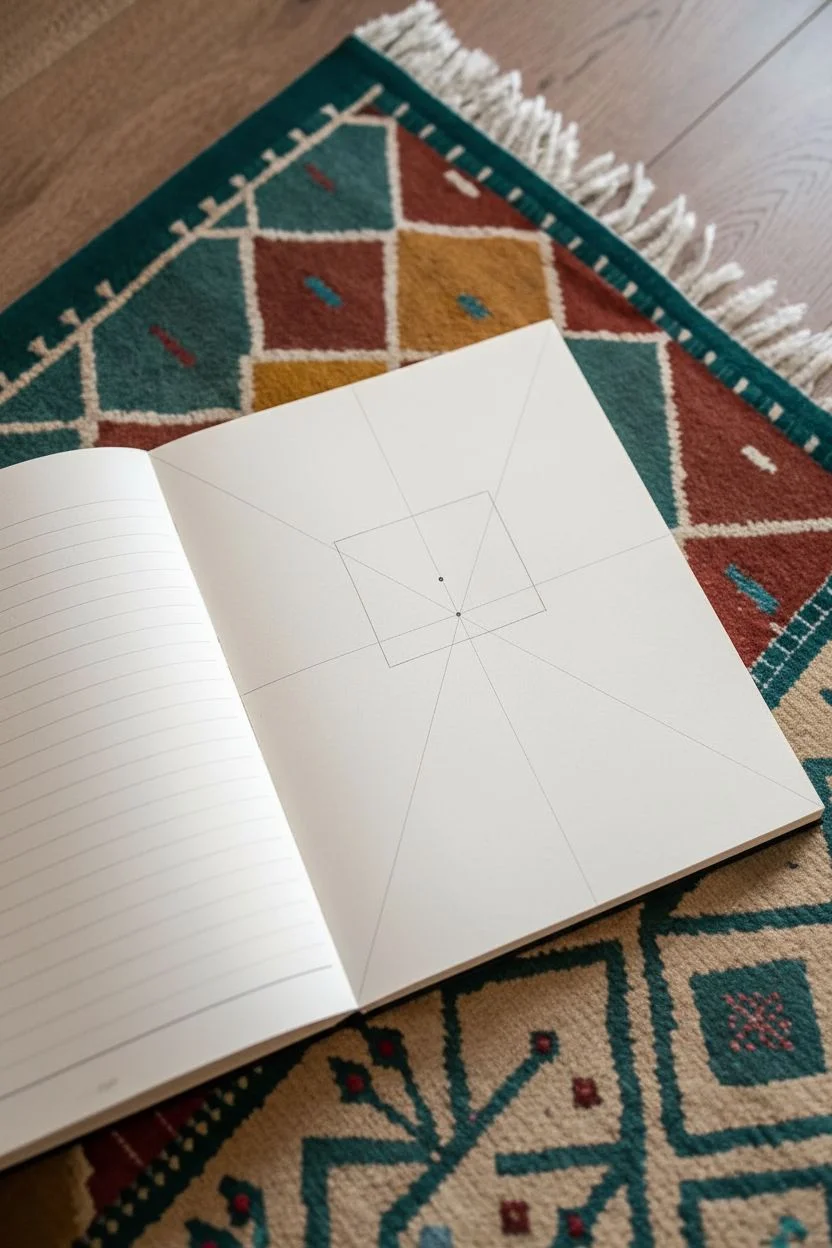
Learn to construct a cozy interior scene using basic perspective rules in your sketchbook. This drawing captures a simple room corner with a window and doorway, rendered in clean ink lines for a minimalist architectural look.
Step-by-Step Tutorial
Materials
- Sketchbook with cream or off-white paper (medium weight)
- HB or 2B pencil for guidelines
- Eraser
- Ruler or straight edge
- Fine liner pen (black, 0.3mm or 0.5mm)
- Thicker marker (optional, for light fixture accent)
Step 1: Setting the Structure
-
Establish the horizon:
Start by lightly drawing a horizontal line across the middle of your page with your pencil. This represents your eye level. -
Placing the vanishing point:
Mark a single dot on your horizon line. For this specific composition, place it slightly to the left of the center. All converging lines will travel to this single point. -
Draw the back wall:
Sketch a rectangle or square that frames your vanishing point. The size of this rectangle determines the depth of your room. -
Create the side walls:
Draw diagonal lines extending from the vanishing point through the four corners of your back wall rectangle, continuing out to the edges of the paper. These orthogonals create the ceiling, floor, and side walls.
Clean Lines Pro-Tip
When inking long floorboards, lock your wrist and move your entire arm from the shoulder. This keeps lines straighter than pivoting from your wrist.
Step 2: Adding Architectural Details
-
Drafting the door:
On the right wall, draw vertical lines for the sides of the door frame. Connect the top of these verticals to the vanishing point to get the correct angle for the top of the door frame. -
Adding depth to the door:
Draw a second set of lines just inside the first to create the thickness of the door jamb, following the same perspective rules. -
Positioning the window:
On the back wall (the flat rectangle), draw a smaller square or rectangle for the window. Since this wall is facing you directly, these lines are perfectly horizontal and vertical, not angled. -
Detailing the window frame:
Add a double line around your window square for the frame. Draw a simple center vertical bar and a horizontal bar to divide the panes. -
Adding the windowsill:
Draw a thin horizontal rectangle projecting slightly below the window frame for the sill. Give it a tiny bit of 3D form by angling the side edges slightly inward. -
Sketching the baseboard:
Draw a guideline along the bottom of the visible walls. Remember, the line on the right wall must angle toward your vanishing point.
Step 3: Furnishing and Inking
-
Adding the floorboards:
Using your ruler, radiate lines from the vanishing point across the floor area. I find spacing them wider as they get closer to the viewer helps enhance the feeling of depth. -
Placing the nightstand:
In the bottom left corner, pencil in a simple box shape. The front face is flat, while the side receding into the room angles toward the vanishing point. -
Hanging the light:
Draw a vertical line down from the ceiling on the left side. Sketch a trapezoid shape for the shade, adding vertical stripes for texture. -
Inking the main lines:
Switch to your fine liner pen. Carefully trace over your pencil lines for the walls, window, door, and furniture. Use a ruler for straight edges to keep it crisp. -
Inking the floor and details:
Ink the floorboards and the texture on the lampshade. Add a small pop of color to the lamp collar if you have a colored marker. -
Cleaning up:
Wait for the ink to dry completely to avoid smudging. Gently erase all your initial pencil guidelines and the vanishing point.
Level Up: Light & Shadow
Pick a light source direction (like the window) and add simple hatching shadows on the opposite side of the furniture to ground the objects.
Now you have a perfectly constructed interior space ready for more decor ideas


Two-Point Perspective Street Corner
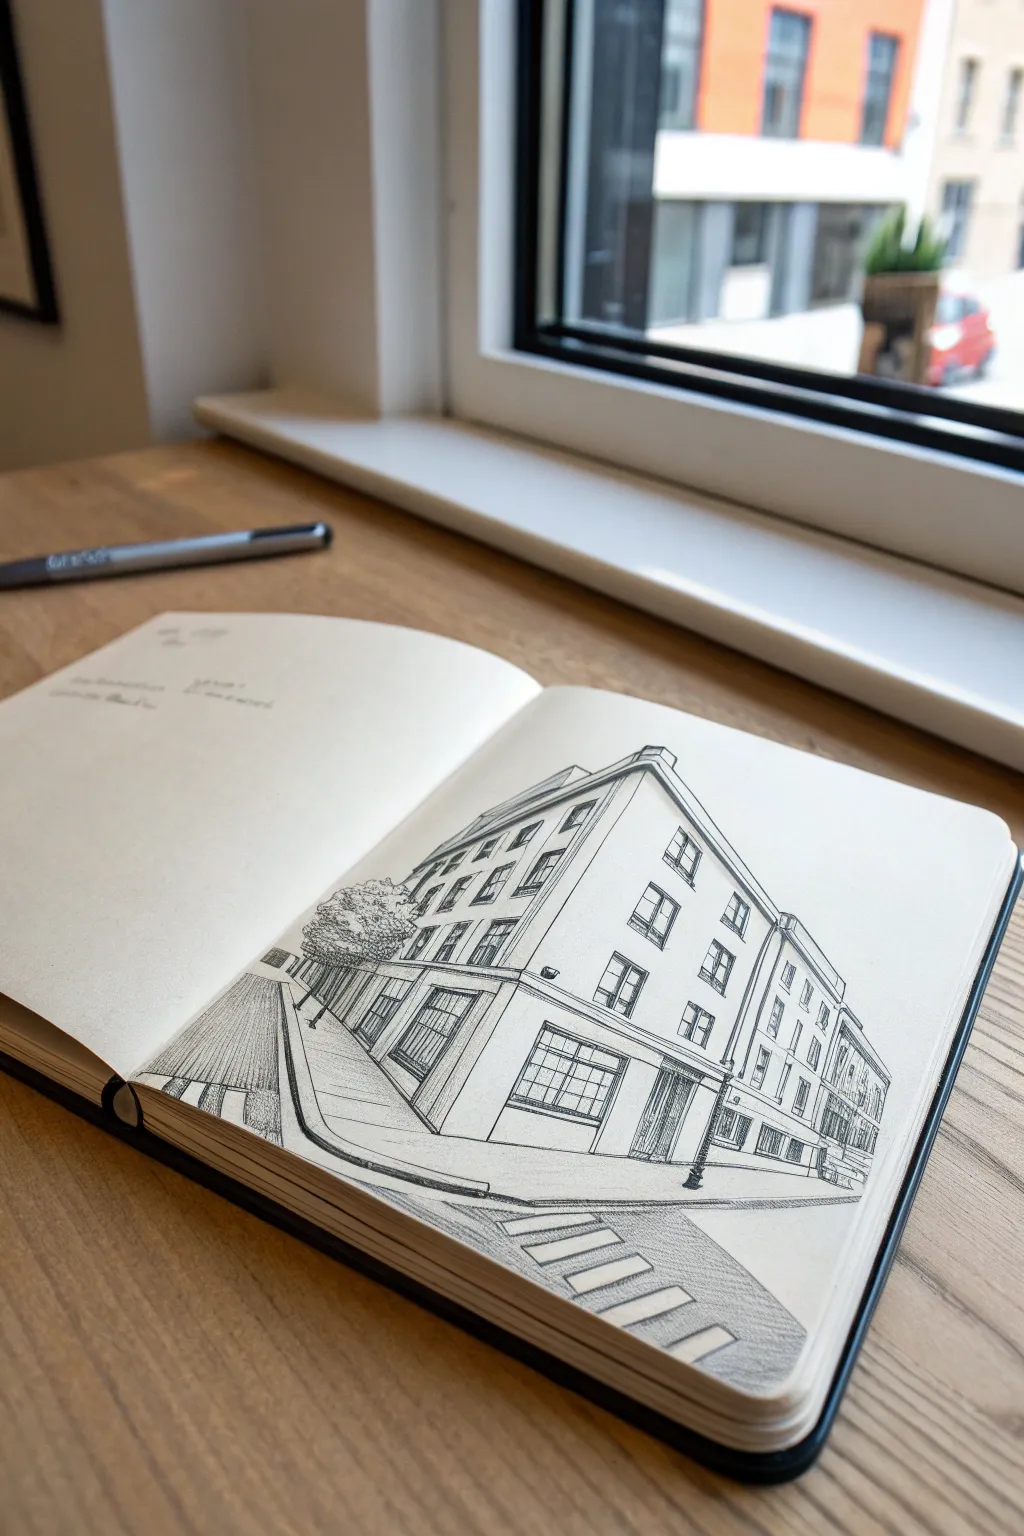
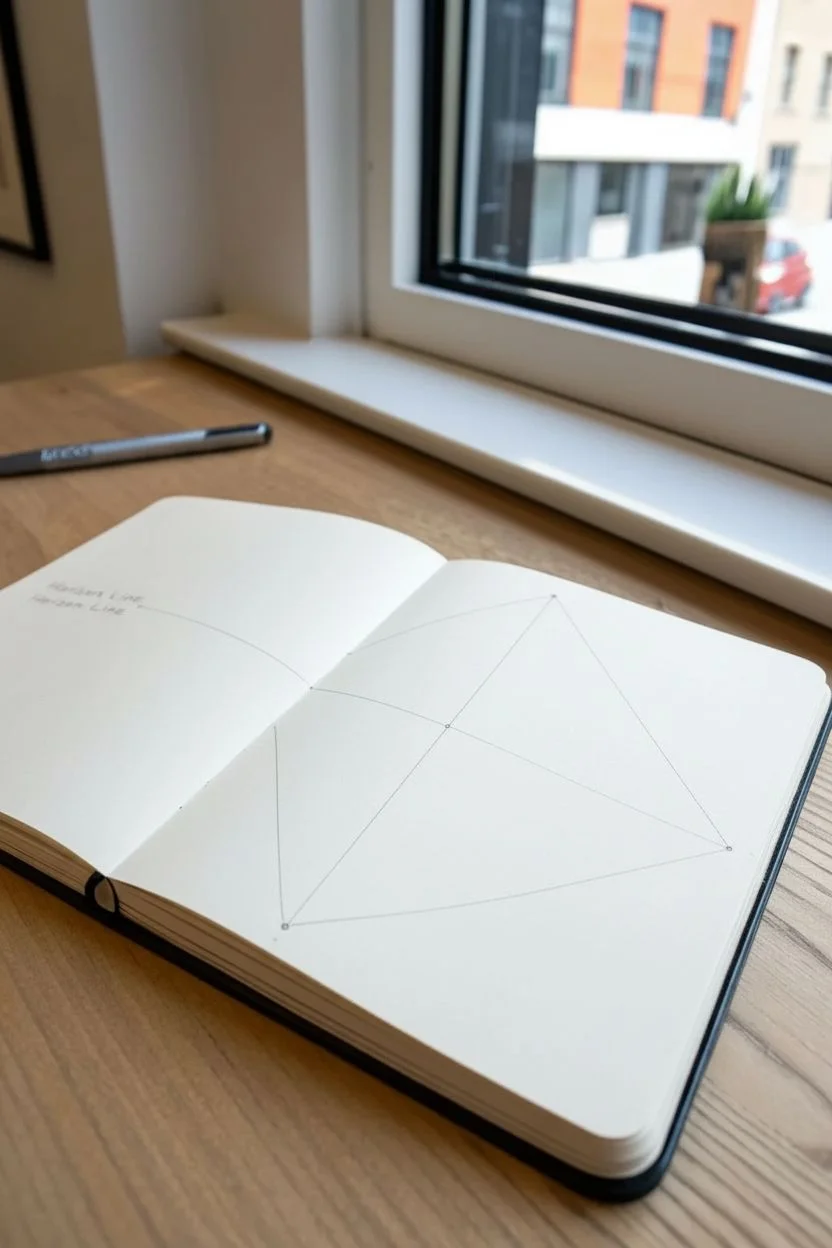
Capture the classic charm of urban architecture with this precise yet lively street corner sketch. Using two-point perspective, you will learn to construct believable height and depth, turning a flat page into a bustling city intersection.
Step-by-Step Guide
Materials
- A5 Sketchbook (smooth or mixed media paper preferred)
- Mechanical pencil (HB or 2B) for layout
- Fine liner pen (0.3mm or 0.5mm, black)
- Ruler or straight edge
- Eraser
Step 1: Setting the Structure
-
Establish the horizon line:
Begin by lightly drawing a straight horizontal line across the middle of your page with your pencil; this is your Eye Level or Horizon Line. -
Mark vanishing points:
Ideally, your vanishing points would be far off the page to avoid distortion, but for this exercise, place two small dots on the far left and far right edges of your horizon line. -
Draw the corner vertical:
Draw a vertical line roughly in the center of the page, extending above and below the horizon line. This represents the corner edge of the main building closest to viewer. -
Connect to vanishing points:
From the top and bottom of your central vertical line, draw light guidelines connecting back to both the left and right vanishing points to create the building’s exterior walls.
Step 2: Refining the Architecture
-
Define the building width:
Draw two more vertical lines on either side of the central corner to determine how long the building faces are on the left and right streets. -
Section off the floors:
Divide the vertical height of your building into three sections for the ground floor, middle floors, and roofline, ensuring these horizontal divisions angle back to the respective vanishing points. -
Add the roof pitch:
Sketch a triangular peaked roof on the right-facing wall, and a smaller connecting roof block on the left side to give the building character. -
Place window columns:
Draw faint vertical guidelines to space out where your windows will go, keeping the gaps narrower as they recede further away from the central corner. -
Sketch window outlines:
Using your perspective guidelines, block in the rectangular shapes of the windows on all floors, keeping the tops and bottoms aligned with the vanishing points.
Clean Lines
Keep your ruler handy for the long structural lines, but freehand the smaller details like bricks or leaves to prevent the drawing from looking too rigid.
Step 3: Inking and Details
-
Ink the main structure:
Switch to your fine liner pen. Confidently trace over your pencil lines for the main roof, corner, and base of the building, allowing for slight imperfections to keep the sketch organic. -
Detail the windows:
Ink the window frames, drawing the inner panes. I like to thicken the shadows on the top and right sides of the frames slightly to suggest depth. -
Add the ground floor storefronts:
Draw detailed large windows and a door on the ground floor, adding horizontal lines for the window panes to suggest a retail space. -
Create the sidewalk:
Draw the curb line mirroring the base of the building. Add a crosswalk in the foreground using angled rectangles that follow the perspective of the street. -
Add street furniture:
Sketch in a small street lamp on the right corner and a hint of a tree on the far left side to frame the composition. -
Texture the surfaces:
Use hatching (parallel lines) to shade the side of the building that would be in shadow, and add faint lines on the street and sidewalk to suggest pavement texture. -
Clean up:
Once the ink is completely dry, gently erase all your pencil guidelines and the horizon line to reveal your clean architectural study.
Add Atmosphere
Use a light grey marker or a watercolor wash to add a sky and cast shadows on the street. This instantly separates the building from the background paper.
You now have a crisp, architectural sketch that perfectly captures the depth of a city street corner

PENCIL GUIDE
Understanding Pencil Grades from H to B
From first sketch to finished drawing — learn pencil grades, line control, and shading techniques.
Explore the Full Guide
Two-Point Perspective House Block
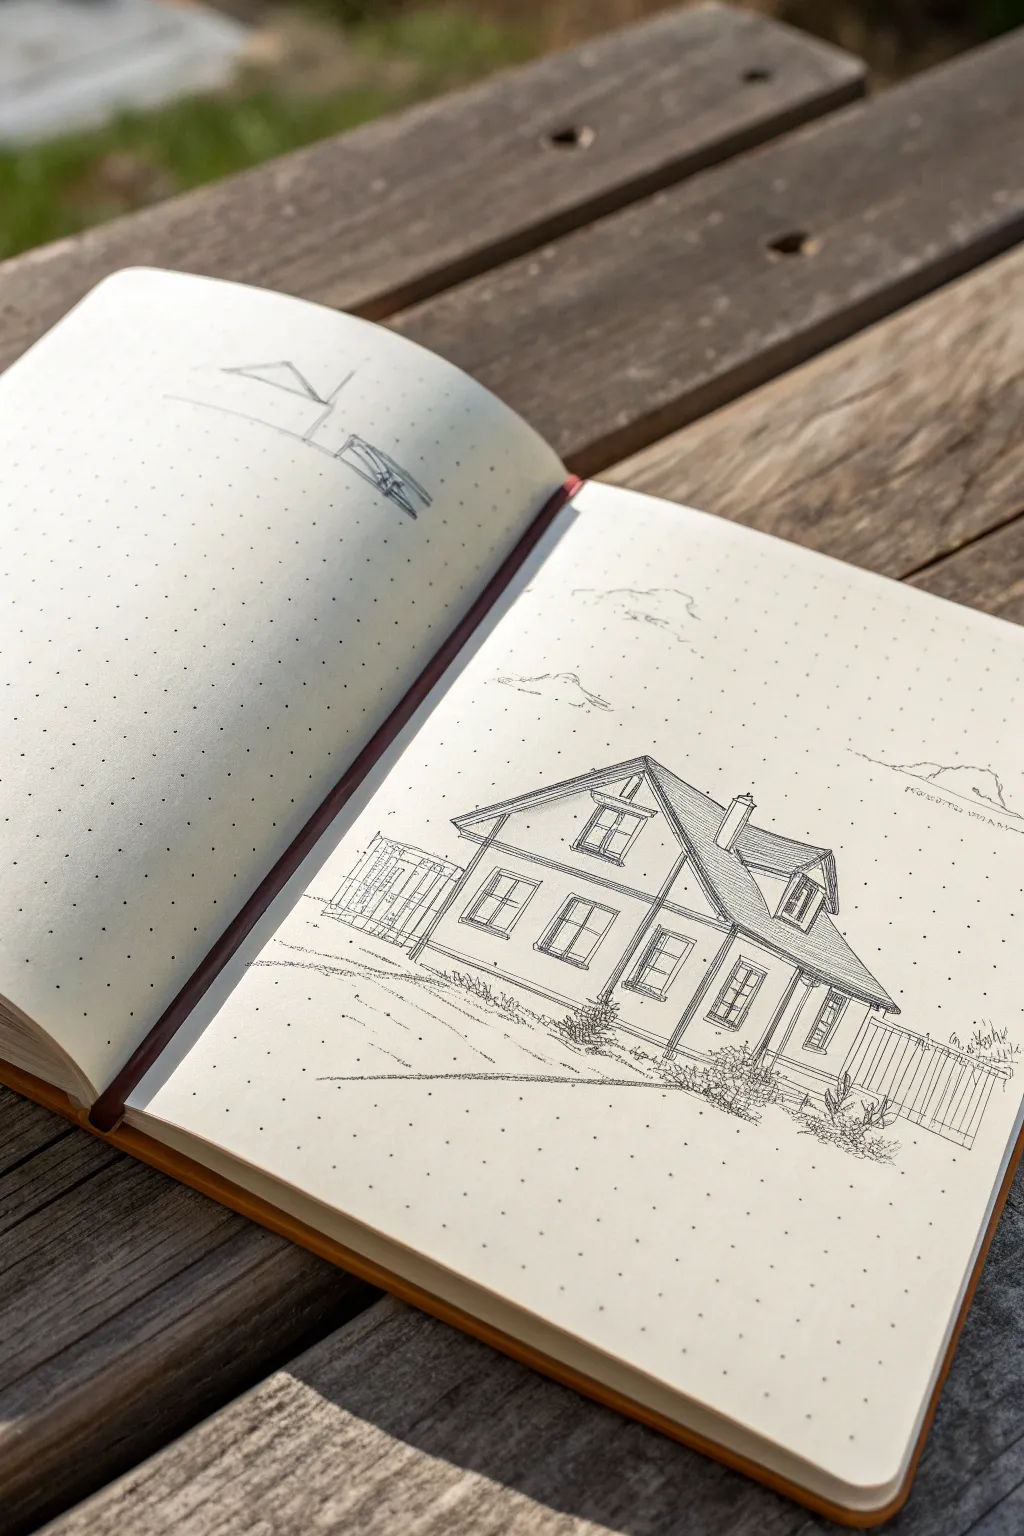

Learn to capture the charm of a classic suburban home using two-point perspective. This tutorial guides you through sketching a detailed house on dot-grid paper, balancing structural precision with loose, artistic line work.
How-To Guide
Materials
- Dot-grid notebook (A5 size works well)
- Mechanical pencil (HB or 2B)
- Fine liner pen (0.3mm or 0.5mm, black)
- Ruler or straight edge
- Eraser
Step 1: Setting the Structure
-
Establish the Horizon:
Begin by drawing a faint horizontal line straight across your page, roughly one-third of the way up from the bottom. This is your horizon line where the sky meets the ground. -
Place Vanishing Points:
Mark two vanishing points (VPs) on your horizon line. Place one at the far left edge of your page and the other at the far right edge to minimize distortion. -
Draw the Vertical Corner:
Draw a vertical line slightly to the right of the center of your page. This line represents the nearest corner of the house and sets the height for the rest of the structure. -
Connect to VPs:
Lightly draw lines from the top and bottom of your central vertical line to both the left and right vanishing points. These ‘orthogonal’ lines create the basic walls of your house. -
Define Widths:
Determine how wide the house is by drawing two vertical lines on either side of the center corner line. Keep them between the top and bottom orthogonal lines you just drew.
Distorted Angles?
If the house looks warped or too sharp, your vanishing points are likely too close together. Try placing them off the page (on scrap paper taped to your desk) for realism.
Step 2: Adding the Roof and Extensions
-
Find the Roof Center:
To center the roof peak, draw an ‘X’ inside the left wall rectangle (corner to corner). Draw a vertical line straight up through the center of that X. -
Pitch the Roof:
Decide how tall your roof should be on that center line, then connect that point down to the top corners of your left wall to create the triangular gable shape. -
Extend the Ridge:
From the peak of the gable, draw a line toward the right vanishing point. This creates the ridge of the roof. End it where it aligns vertically with the back right wall. -
Add the Dormer:
Sketch a smaller vertical box popping out of the main roof slope on the right side. Use the same vanishing points to angle its tiny roof and window opening correctly. -
Sketch the Chimney:
Place a rectangular block on the roof ridge. Ensure its vertical lines are perfectly straight and its side lines recede to the vanishing points.
Step 3: Detailing and Inking
-
Outline Window Grids:
Lightly pencil in rectangular shapes for windows on both visible walls. Remember, vertical sides stay straight up and down, while the tops and bottoms slant toward the respective vanishing points. -
Refine Frames:
Give the windows depth by drawing a second, smaller rectangle inside each one to represent the frame thickness. -
Add Decorative Timbers:
Sketch the decorative timber framing (the diagonal and horizontal beams) on the upper gable end. -
Ink the Main Lines:
Switch to your fine liner pen. Trace over your final structural lines with a steady hand. I like to let the ink stop just short of intersecting corners sometimes to keep the drawing feeling airy. -
Draw the Fence:
Using the ruler, extend lines from the house base toward the VPs to guide the fence height. Sketch in vertical pickets, letting them get closer together as they move away from the viewer. -
Add Texture Details:
Use broken, scratchy lines to suggest wooden siding or shingles on the roof. Don’t outline every single shingle; just hint at the texture. -
Ground the House:
Scribble some loose, organic shapes along the base of the house and fence to represent bushes and grass. This hides the straight bottom lines and makes the house sit naturally. -
Include Sky Elements:
Draw faint, wavy lines in the sky area to suggest minimal clouds, and perhaps a distant hill line in the background. -
Clean Up:
Wait for the ink to be completely dry, then gently erase all your pencil guides, horizon lines, and vanishing points.
Level Up: Shadow Play
Add hatching to the side of the house facing away from your imagined light source. Consistent shading adds instant 3D volume and pops the house off the page.
You have constructed a perfectly proportioned home without lifting a hammer
Kitchen Counters With Vanishing Points
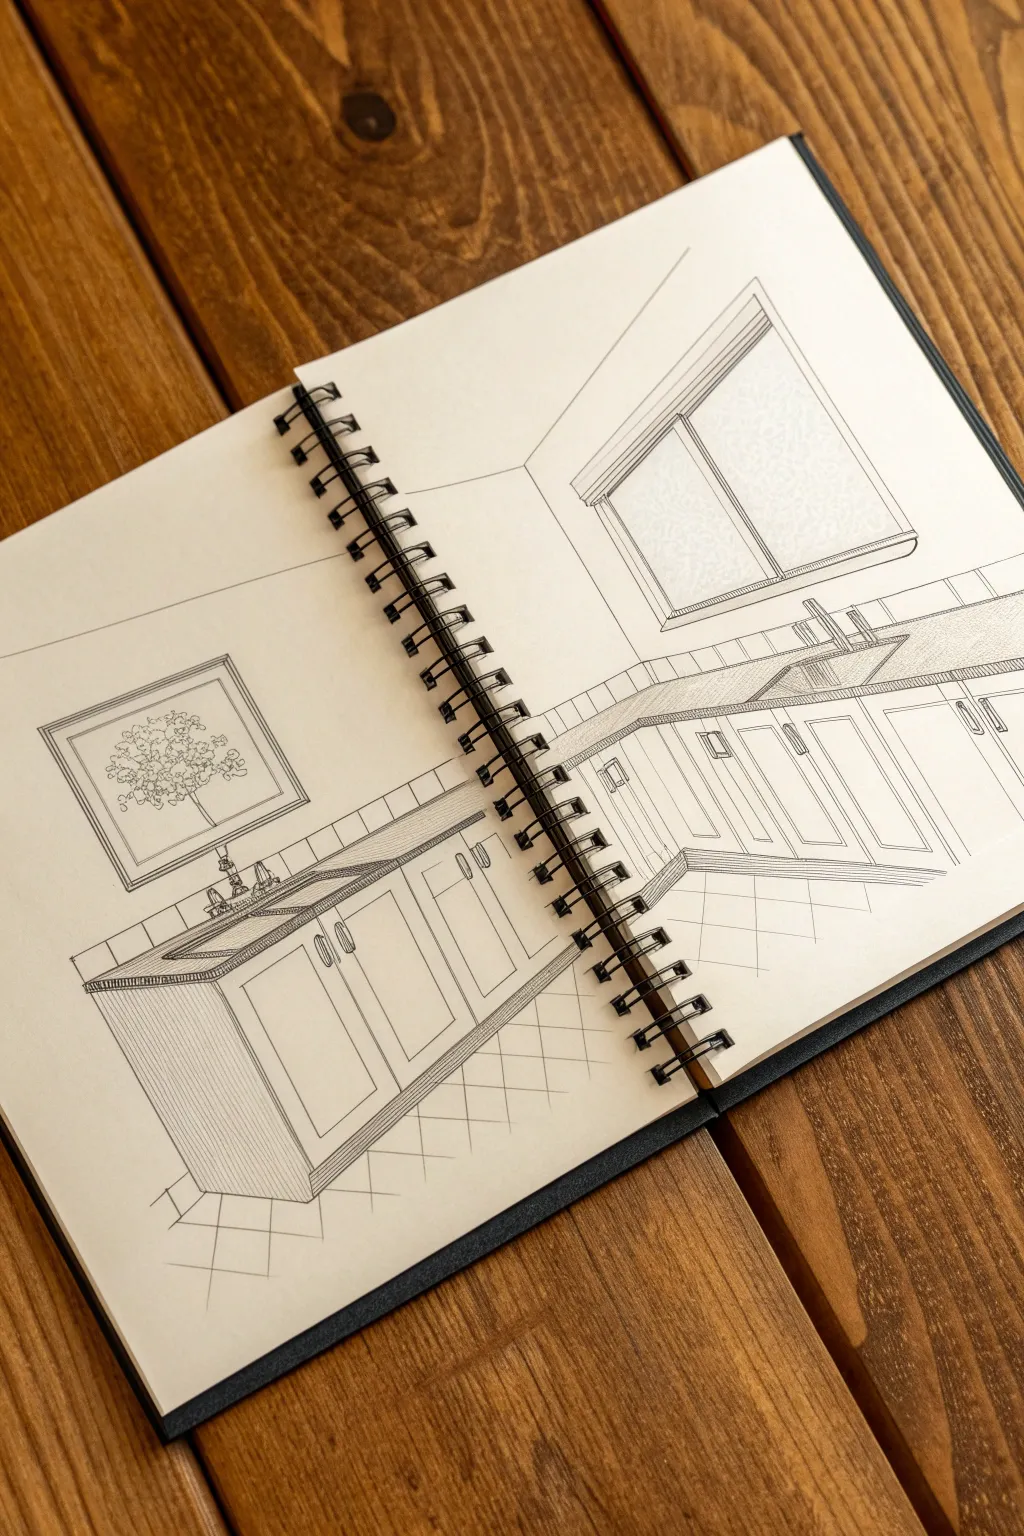

This tutorial guides you through creating an airy, dimensional kitchen interior using the fundamentals of two-point perspective directly in your sketchbook. You will build a convincing corner scene with clean linework, capturing details like cabinet framing and window depth.
Step-by-Step
Materials
- Sketchbook with smooth, heavy paper
- HB or H graphite pencil (for construction lines)
- Fine liner pens (0.1mm, 0.3mm, and 0.5mm)
- Long clear ruler (12-inch or longer)
- Kneaded eraser
Step 1: Setting the Perspective Framework
-
Establish the horizon line:
Since this is a two-point perspective drawing, start by lightly drawing a straight horizon line (eye level) across both pages of your open sketchbook. Place it slightly above the vertical center. -
Locate the vanishing points:
Mark two vanishing points on your horizon line. For this specific angle, place the left vanishing point (LVP) far off the left edge (imagine it extended past the book) and the right vanishing point (RVP) on the far right edge of the page. -
Draw the corner vertical:
Draw the main vertical line representing the corner of the room where the walls meet. Position this line slightly to the right of the spiral binding so the corner isn’t lost in the book’s gutter. -
Connect to vanishing points:
From the top and bottom of your corner vertical line, draw light construction lines back to your LVP and RVP. This creates the basic ‘box’ of the room’s floor and ceiling lines.
Wobbly Lines?
If your ruled lines look too stiff, try ‘breaking’ the line occasionally or overshooting corners slightly. This architectural sketching technique adds character and stops it from looking like a CAD drawing.
Step 2: Structuring the Counters and Cabinets
-
Define the counter height:
Mark the height of the countertop on your central corner line. Draw lines from this mark toward both vanishing points to establish the top edge of the cabinets along both walls. -
Add counter depth:
Draw a second set of lines slightly below the first counter lines to create the thickness of the countertop slab. Then, draw the front face of the cabinets by dropping vertical lines where you want the cabinets to end. -
Block in the cabinet doors:
Divide the lower cabinet space into vertical sections for doors. Remember that as objects get closer to the vanishing points, they should appear narrower. This foreshortening is key to realism. -
Sketch the upper details:
On the left wall, lightly box in a square area for the framed artwork. On the right wall, block out the window shape, ensuring the top and bottom lines of the window frame recede correctly toward the Right Vanishing Point.
Step 3: Refining Details and Inking
-
Detail the cabinet moldings:
Inside each cabinet door rectangle, draw a smaller rectangle to represent the recessed panels (shaker style). Connect the corners of the inner and outer rectangles with short diagonal lines. -
Add hardware and sink:
Draw small vertical rectangles for handles on the cabinet doors. On the right counter, sketch an angled rectangle for the sink basin and a simple arched shape for the faucet. -
Draw the window depth:
Give the window frame dimension by adding inner lines that conform to the perspective. Sketch a simple landscape or texture inside the window pane area. -
Draft the floor tiles:
Create a grid on the floor. Draw lines radiating from the vanishing points to create the tile rows, and horizontal-ish lines that get closer together as they recede to create the cross-pattern. -
Start the inking process:
Switch to your 0.3mm fine liner. Carefully trace over your definitive object lines—the cabinets, counter edges, and window frame. Use the ruler for long straight edges to keep them crisp. -
Vary line weight:
I prefer using a thicker 0.5mm pen for the main outlines of the furniture and the nearest corner to make them pop. Use a delicate 0.1mm pen for the wood grain texture, floor tiles, and the loose sketch inside the picture frame. -
Add texture and shading:
Use vertical hatching (closely spaced lines) on the side of the cabinet closest to the viewer to suggest shadow. Add subtle scribbles inside the picture frame to suggest foliage. -
Clean up:
Once the ink is completely dry, gently erase all graphite construction lines with your kneaded eraser, revealing the clean perspective structure beneath.
Perspective Pro Tip
Keep your vertical lines perfectly straight up and down (perpendicular to the horizon). If verticals start to tilt, the room will look like it is falling over.
Now you have a technically accurate kitchen view that balances architectural precision with hand-drawn charm
BRUSH GUIDE
The Right Brush for Every Stroke
From clean lines to bold texture — master brush choice, stroke control, and essential techniques.
Explore the Full Guide
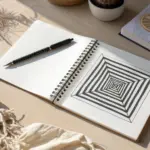
Staircase Repetition in Perspective
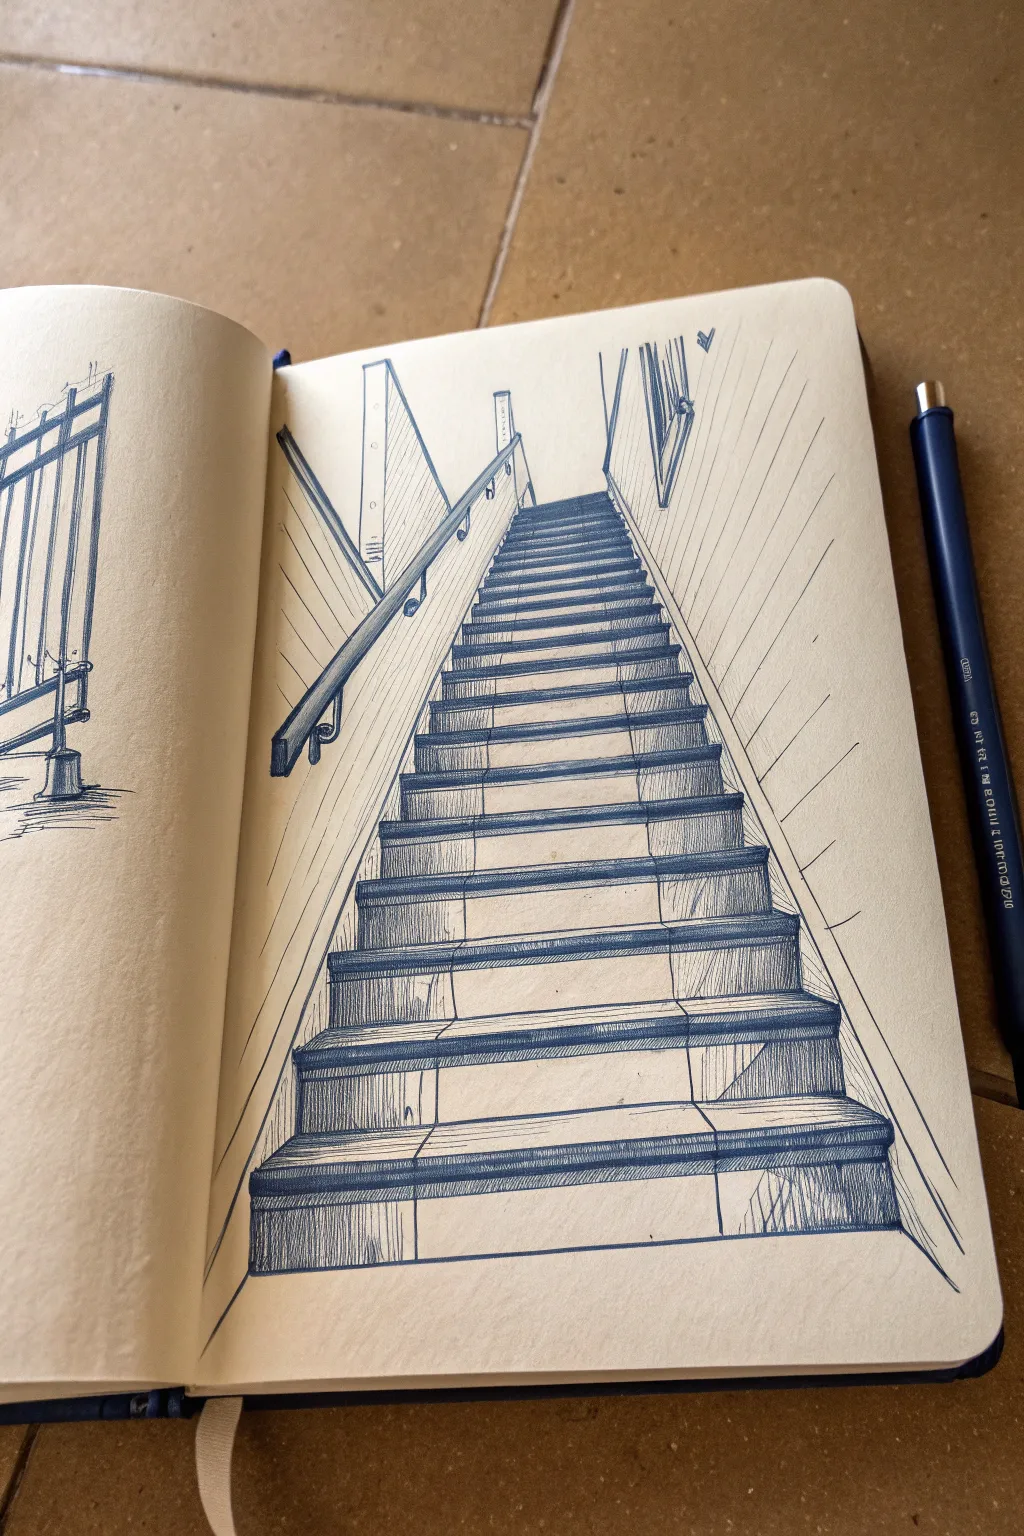
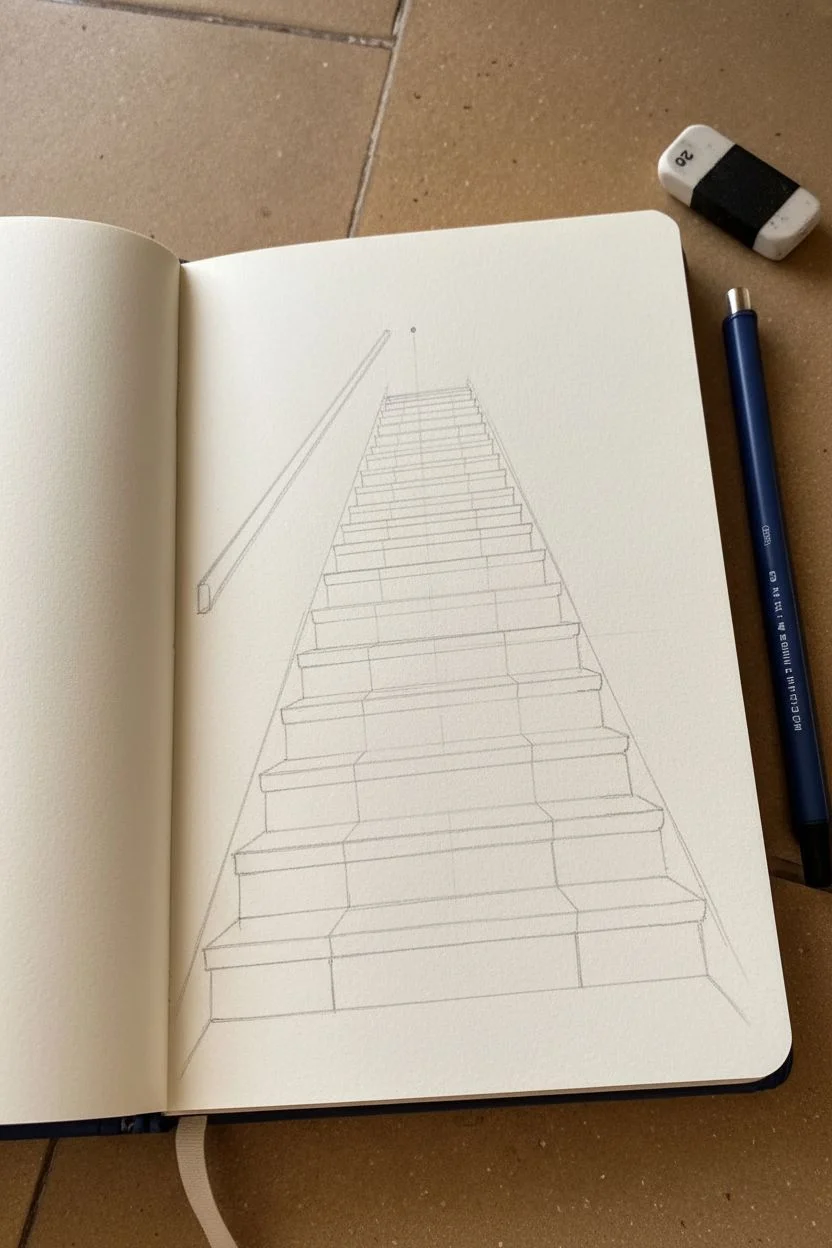
Master the art of linear perspective with this striking, minimalist pen drawing of a steep staircase. The project focuses on creating depth using repetitive lines and a strong vanishing point, resulting in a sketch that feels like you could walk right into it.
Step-by-Step Guide
Materials
- Sketchbook (heavyweight paper preferred)
- Pencil (HB or 2B)
- Eraser
- Blue gel pen or fine liner (0.5mm)
- Ruler or straight edge
Step 1: Setting the Perspective Framework
-
Establish the Vanishing Point:
Start by lightly marking your vanishing point near the top-center of your page. This imaginary dot will guide almost all your angled lines. Draw a light horizon line through it if that helps visualize eye level. -
Outline the Stairwell Walls:
Using your pencil and ruler, draw two long diagonal lines radiating from near the vanishing point down toward the bottom corners of the page. These represent the base of the walls where they meet the stairs. -
Define the Step Heights:
Lightly sketch horizontal lines between your diagonal guides. Start at the bottom with wider spacing and gradually decrease the distance between lines as you move upward. This spacing change is crucial for the illusion of depth. -
Add Vertical Risers:
Connect your horizontal tread lines with short vertical lines to form the ‘risers’ of the stairs. Ensure these verticals are perfectly straight up and down, not slanted.
Wobbly Lines?
If your straight lines curve, don’t over-correct mid-stroke. Instead, embrace the ‘shaky’ style and go over the line again loosely. It adds character often seen in urban sketching.
Step 2: Adding Details and Handrails
-
Sketch the Left Handrail:
Draw a diagonal line parallel to the left wall slope, floating slightly above the stairs. Add small vertical posts attaching it to the wall at regular intervals, getting smaller as they recede and following the perspective lines. -
Draft the Upper Structure:
At the top of the stairwell, sketch the vertical door frames or hallway edges. These should be vertical lines on either side of that central vanishing area. -
Refine the Wall Texture:
Lightly indicate the direction of the wall paneling or siding. On the right wall, these diagonal lines should angle sharply towards the vanishing point.
Step 3: Inking the Structure
-
Ink the Main Stair Lines:
Grab your blue gel pen. Carefully trace the horizontal edges of the steps (the treads) and the vertical risers. Use a ruler if you want a crisp architectural look, or freehand it for a sketchier vibe. -
Detail the Step Edges:
Add a second, very close horizontal line to the nose of each step. This creates a small highlight strip that suggests the thickness of the material. -
Ink the Handrail:
Go over your handrail sketch with the pen. Pay attention to the attachment brackets—small loops or circles add a nice mechanical detail here. -
Define the Step Sides:
Draw the diagonal lines that connect the edges of the steps on the left and right sides. These are the skirting boards or stringers.
Spacing Cheat Sheet
If step spacing is hard, draw a diagonal line through the corners of your first few steps. Where that diagonal intersects your perspective lines tells you exactly where the next step goes.
Step 4: Shading and Texture
-
Hatch the Risers:
This is the most repetitive but satisfying part. Fill in the vertical face of each step (the riser) with tight vertical hatching lines. This creates a shadow value that separates the vertical face from the horizontal tread. -
Enhance Depth with Contrast:
Make your hatching denser on the steps closest to you (at the bottom). As the stairs go up, you can space the hatching slightly or use less pressure to suggest atmospheric perspective. -
Shade the Side Walls:
On the right wall, draw long, diagonal hatching lines that follow your perspective guides toward the vanishing point. This emphasizes the tunnel-like feeling. -
Add Floor Texture:
Add subtle vertical scratches or wood grain lines on the horizontal treads of the first few large steps. I prefer to keep these loose so the drawing doesn’t look too rigid. -
Shadow the Overhangs:
To make the steps pop, add a slightly darker line or a tiny shadow beneath the nose of each tread immediately on the riser below it. -
Final Cleanup:
Once the ink is completely dry—give it a full minute—gently erase all your pencil guides. Check for any broken lines in your perspective focused at the top and close them up if needed.
Step back and enjoy the convincing depth you’ve created with just a few simple lines and shading
Fence Posts Receding in Perspective
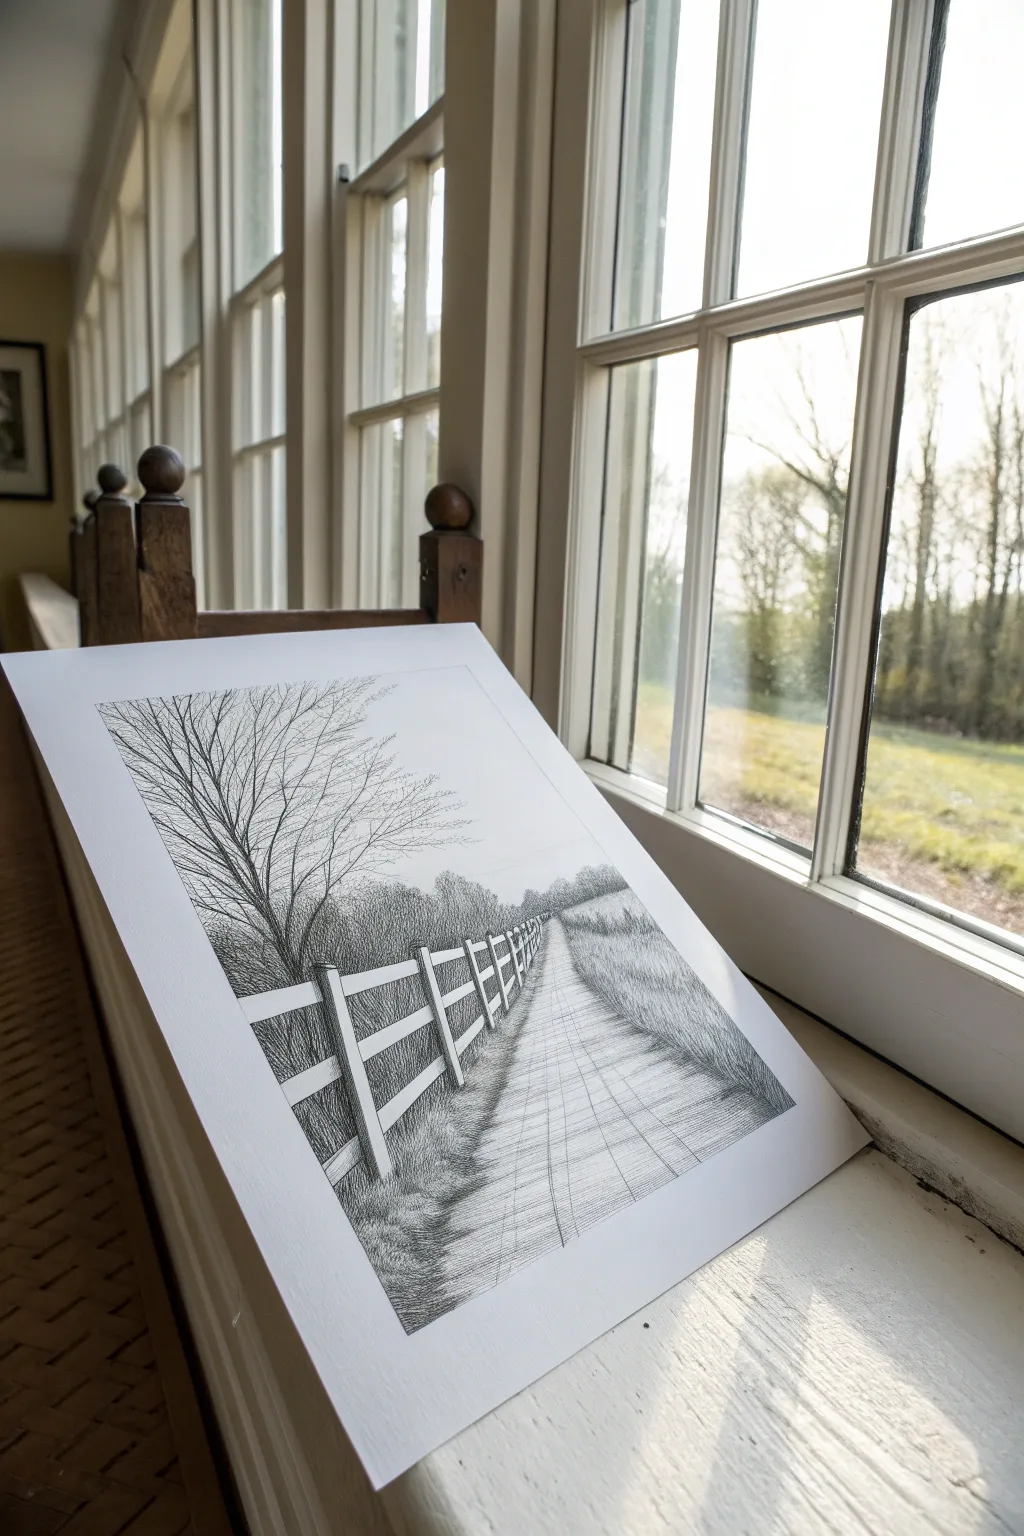
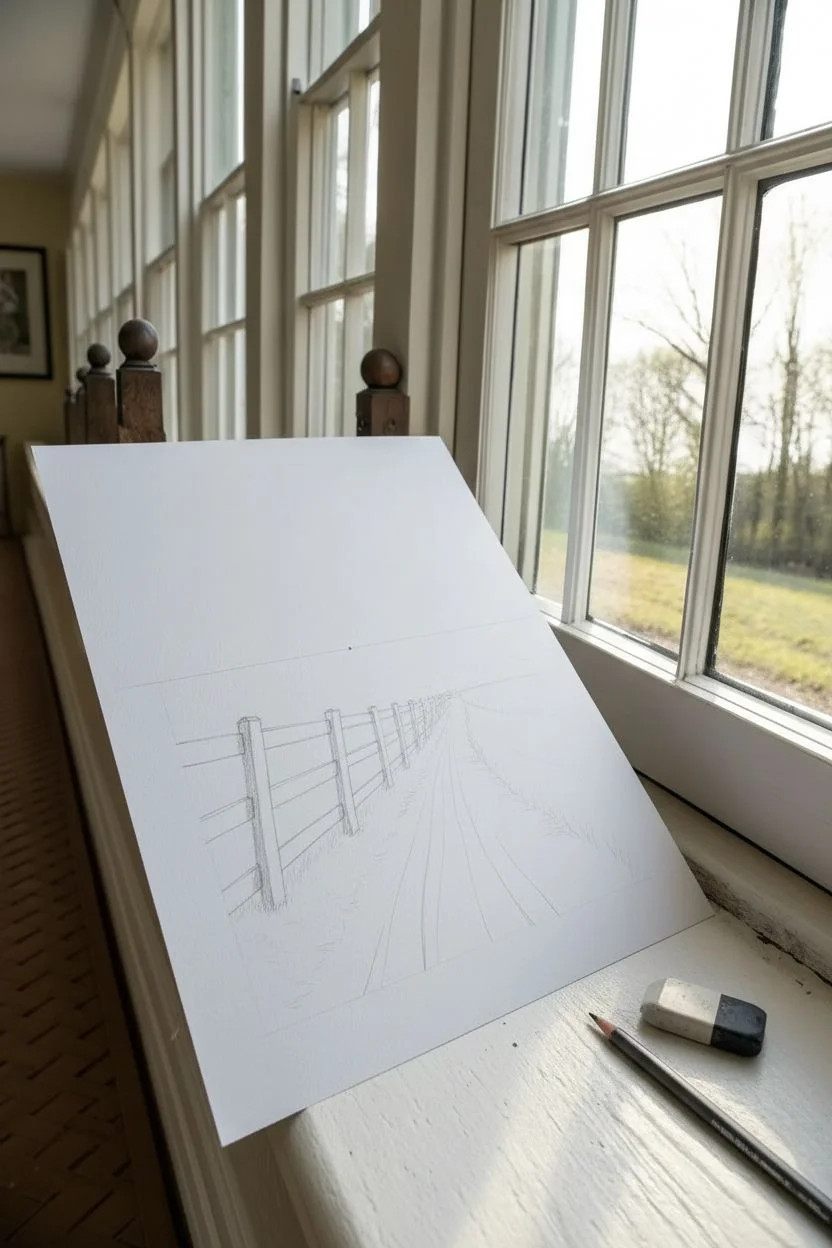
This detailed pen-and-ink drawing captures the serene feel of a country walk while serving as an excellent exercise in one-point perspective. You’ll build depth by drawing a white plank fence that recedes dramatically toward a distant vanishing point, balanced by textured grasses and a gentle tree silhouette.
Step-by-Step Tutorial
Materials
- High-quality drawing paper (Bristol board or smooth mixed media)
- HB or 2H graphite pencil (for initial sketch)
- Ruler or straight edge
- Fine liner pens (sizes 0.05, 0.1, 0.3, and 0.5)
- Kneaded eraser
Step 1: Setting the Perspective Framework
-
Establish the horizon line:
Begin by lightly drawing a horizontal line across your paper, positioned slightly below the vertical center. This will be your eye level. -
Mark the vanishing point:
Place a small dot on the horizon line, somewhat right of the center. All your receding lines will converge here. -
Draw the path boundaries:
Using your ruler, draw two diagonal lines that start wide at the bottom of the page and meet exactly at your vanishing point. This creates the basic shape of the walkway. -
Outline the fence guides:
To the left of the path, draw two more converging lines leading to the vanishing point: one for the top of the fence posts and one for the bottom. Add two more parallel converging lines in between for the horizontal rails. -
Pencil vertical posts:
Sketch the vertical fence posts. The first post in the foreground should be the tallest and widest. As you move toward the horizon, space the posts closer together and make them progressively thinner to create the illusion of depth.
Uneven Spacing?
If your fence posts look bunched up or too spread out, use ‘visual measuring.’ The second post should appear about 2/3 the distance of the first gap. Reduce this gap size progressively.
Step 2: Inking the Structural Elements
-
Outline the fence posts:
Switch to a 0.3 pen. Carefully ink the outlines of the posts and horizontal rails. Keep your lines clean, but don’t worry if they aren’t machine-perfect; a little wobble adds rustic character. -
Detail the wood grain:
With a finer 0.1 pen, draw very subtle vertical lines often broken or dashed, inside the fence posts and horizontal rails to suggest wood texture. -
Add separation lines:
Use the 0.3 pen to draw the connections where the rails meet the posts, ensuring the rails appear to pass through or behind the vertical posts. -
Establish the tree trunk:
On the left side, behind the fence, sketch the main trunk of a deciduous tree using a 0.5 pen for a strong silhouette. Let the branches taper finely as they reach upward.
Step 3: Texturing and Shading
-
Create the path texture:
Using a 0.05 pen, draw horizontal cross-hatching lines across the path. Keep the lines wider apart in the foreground and extremely dense in the distance to reinforce the perspective. -
Draw foreground grass:
On the right side of the path, use short, upward flicks with a 0.1 pen to create tall grasses. Vary the direction slightly to make it look natural. -
Shade the distant foliage:
For the treeline on the horizon, use tight, scribbly circular motions with a 0.1 pen. This creates a soft, dense texture that contrasts with the sharp fence lines. -
Add shadows to the fence:
Determine your light source (usually from above and slightly to one side). Use fine hatching on the shadowed side of the fence posts to give them dimension. -
Texture the left bank:
Use denser, darker stippling or cross-hatching behind the fence to represent shadowed undergrowth. This dark background is crucial because it makes the white fence rails pop. -
Refine the tree canopy:
Extend the fine branches of your main tree. I find that using a shaky hand here actually helps create more organic, realistic twigs. -
Final clean up:
Once the ink is completely dry—give it a solid few minutes—gently erase all your pencil guidelines with the kneaded eraser to reveal the crisp ink work.
Atmospheric Depth
Make foreground lines thicker (0.5mm) and background lines thinner (0.05mm). This line weight variation instantly pushes distant objects back.
Take a step back to admire how your precise lines have created a convincing pathway into the distance


Three-Point Perspective Looking Up at Buildings
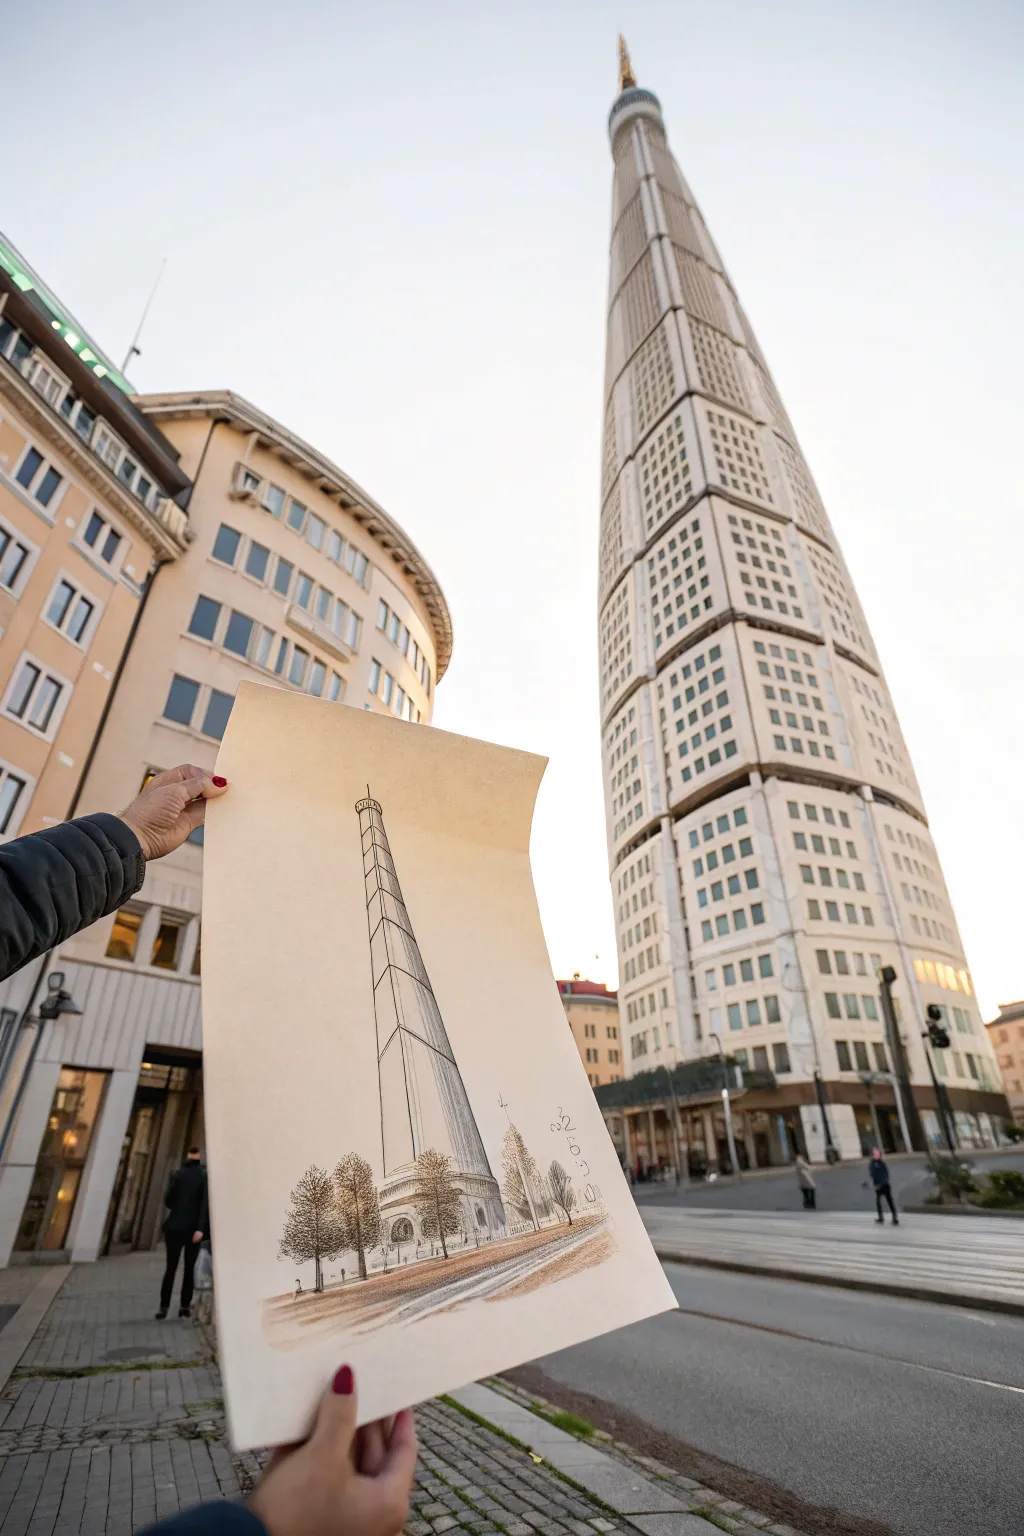
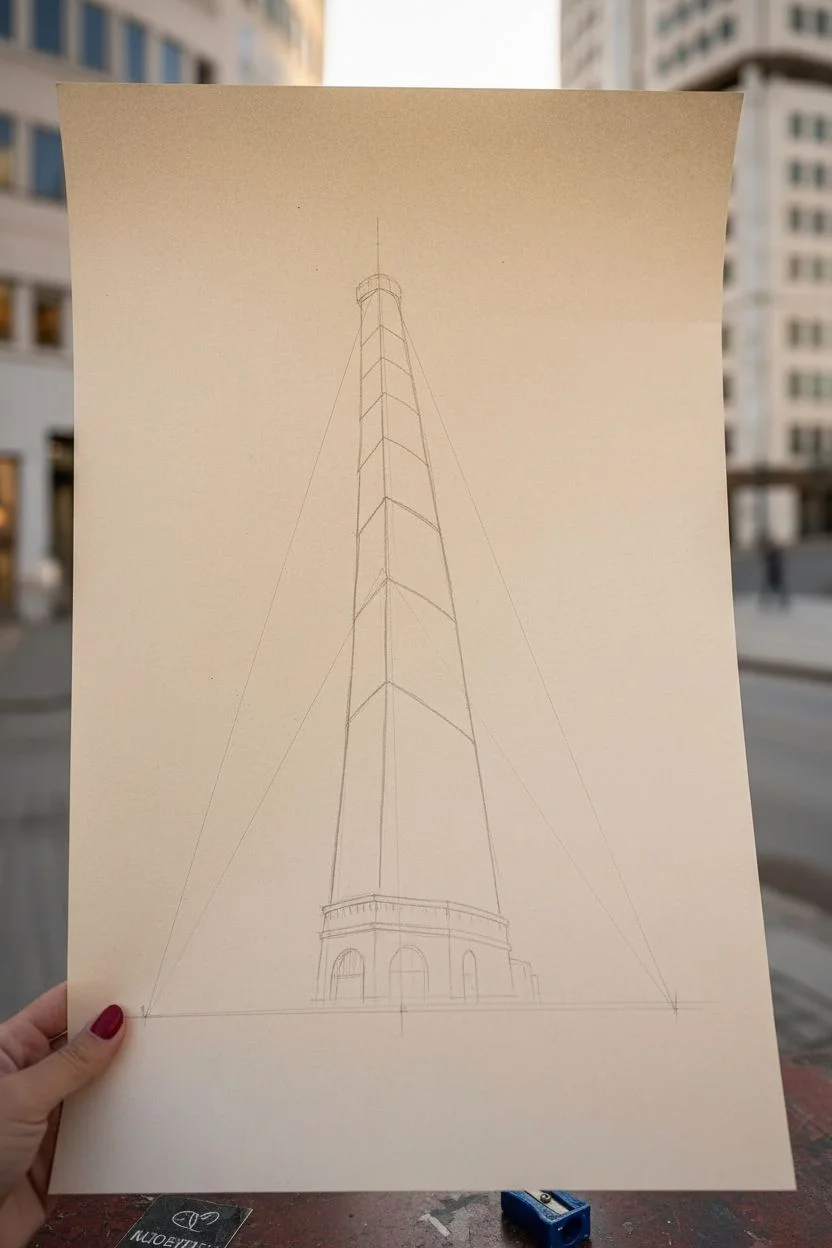
Capture the dizzying scale of a skyscraper with this three-point perspective study, specifically designed to emphasize verticality. This project creates a dramatic, stylized architectural rendering that mimics the feeling of standing at the base of a giant tower looking straight up into the sky.
How-To Guide
Materials
- Heavyweight drawing paper (smooth or vellum finish)
- H lead pencil for initial guidelines
- HB or 2B pencil for distinct outlines
- Fine liner pen (0.3mm or 0.5mm, black)
- Colored pencils (warm ochre/brown tones for base, grey for shading)
- Ruler or straight edge (at least 12 inches)
- Kneaded eraser
- Pencil sharpener
Step 1: Drafting the Perspective Framework
-
Establish the horizon line:
Begin by drawing a very faint horizon line low on your paper. Since we are looking up, most of the drawing will happen above this line. -
Place the vanishing points:
Mark two vanishing points on your low horizon line, far apart near the edges of the paper. Place a third vanishing point high up, centered above them—this top point will create the vertical convergence. -
Draw the central vertical axis:
Draw a faint line connecting the center of your horizon line directly to your top vanishing point. This acts as the spine of your tower. -
Block in the main sections:
Using your ruler, lightly sketch the main vertical edges of the tower. These lines must angle inward toward that top vanishing point, making the building look tapered as it rises. -
Add horizontal segments:
Divide the tower into its major tiered sections. For these horizontal lines, angle the left side toward your left vanishing point and the right side toward your right vanishing point to create volume.
Step 2: Refining the Architecture
-
Develop the base:
Sketch the ground-level entrance structure. I like to use slightly curved arches here to give the building a traditional foundation before it shoots upward. -
Create the grid pattern:
Lightly draw a grid on the face of each tower section to represent windows. Ensure vertical grid lines aim at the top point and horizontal lines aim at the respective side points. -
Detail the spire:
Refine the very top of the tower into a needle-like point or antenna, keeping the lines tight and converged. -
Add environmental context:
Sketch a row of trees near the base. Keep them small relative to the building to emphasize the massive scale of the architecture.
Distortion trouble?
If the building looks too twisted, your side vanishing points are too close together. Move them further off the page (taping paper to a wider table helps) to flatten the perspective.
Step 3: Inking and Coloring
-
Ink the structural lines:
Go over your final pencil lines with a fine liner pen. Use a ruler for the long vertical edges to keep them crisp, but sketch the trees freehand for organic contrast. -
Erase guidelines:
Once the ink is completely dry, gently remove all faint construction lines and vanishing points with a kneaded eraser. -
Apply base shading:
Use a grey pencil to lightly shade the side of the tower that would be facing away from the light source. Use vertical strokes to reinforce height. -
Add warmth to the ground:
Color the ground and the base of the tower with warm ochre or brown colored pencils. Apply the color in sweeping horizontal strokes near the bottom. -
Texture the trees:
Use a darker brown or grey to scribble texture into the tree canopies, making sure they look dense against the light building. -
Enhance shadows:
Deepen the shadows specifically under the eaves of each tiered section to make the segments pop out dimensionally.
Add atmospheric depth
Make the lines at the very top of the tower slightly thinner and lighter than the base. This ‘atmospheric perspective’ makes the top feel physically further away in the sky.
Now you have a dynamic architectural drawing that captures the impressive scale of looking skyward
Three-Point Perspective Rooftops From Above

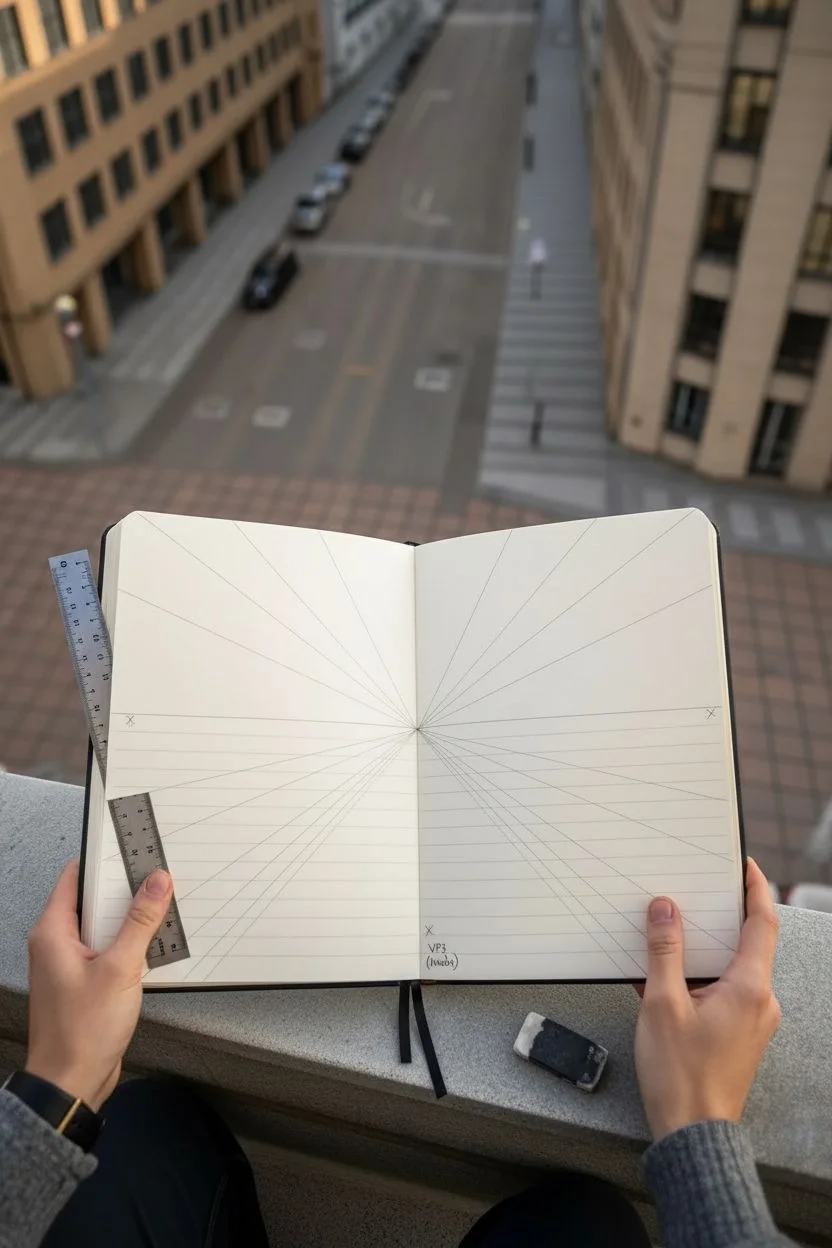
Capture the dizzying height of a city street with this dynamic three-point perspective study. Using an open sketchbook format adds a sense of immediacy to this architectural landscape, focusing on the dramatic vertical lines plunging toward the street below.
Detailed Instructions
Materials
- A4 or A5 Sketchbook (heavyweight paper preferred)
- Graphite pencils (2H for guidelines, HB and 2B for sketching)
- Fine liner pens (0.1mm, 0.3mm, and 0.5mm)
- Long ruler (12-inch or longer)
- Eraser (kneaded)
- Red colored pencil or thin marker (optional prop)
Step 1: Setting the Perspective Framework
-
Establish the horizon line:
Begin by lightly drawing a horizon line very high on your page—technically, it would be above the top edge of the sketchbook for this view, so visualize it floating just above the paper’s edge. -
Place vanishing points:
Visualize two vanishing points far off to the left and right on that horizon line. These will control the horizontal angles of the rooftops and windows. -
Mark the third vanishing point:
Place a third vanishing point deep at the bottom center of the page spread. This is the ‘nadir’ point where all vertical lines will converge, creating the illusion of looking down. -
Draw the central canyon:
Sketch the main street lines converging toward a slightly off-center point near the bottom. This defines the road surface and the base of your buildings.
Extended Ruler Trick
For vanishing points that fall off the page, tape your sketchbook to a large table and mark the points on the table surface with masking tape to align your ruler.
Step 2: Blocking in Major Structures
-
Outline the left building mass:
On the left heavy page, block in the large corner building. Its vertical walls should angle slightly inward toward your bottom vanishing point, not go straight down. -
Structure the rooftops:
Draw the roof shapes on the left. Use the left and right vanishing points to determine the angles of the roof ridges and eaves. -
Block the right building mass:
Draft the structures on the right side page. Include the prominent tower shape, ensuring its vertical sides also taper toward that bottom center point. -
Add distant depth:
Sketch smaller block shapes further ‘down’ the street to represent the distant buildings, making them significantly smaller to emphasize the scale.
Distorted Angles?
If buildings look like they are falling over, your vertical lines are likely tilting too much. Check that they all converge toward one specific center point at the bottom.
Step 3: Refining Architectural Details
-
Detail the left facade:
Using your ruler, lightly grid out the window placements on the left building. Remember that windows get vertically shorter as they go down the page due to foreshortening. -
Sketch the tower features:
Add the specific architectural details to the right-side tower, such as the spire and the arched windows, keeping your lines loose but verifying angles. -
Define the street level:
Draw the sidewalk lines and curb edges. These lines are crucial for showing the flow of the street deep into the distance. -
Add texture indications:
Lightly sketch roof tiles on the major surfaces using diagonal hatching that follows the plane of the roof.
Step 4: Inking and Finishing
-
Ink the main structural lines:
Switch to a 0.5mm pen for the closest building edges. I prefer to break the lines slightly rather than drawing solid walls, as it keeps the sketch feeling lively. -
Ink the details:
Use a finer 0.1mm pen to ink the windows, roof tiles, and distant buildings. The thinner line weight helps push those elements into the background. -
Enhance the shadows:
Add hatching to the sides of buildings that would be in shadow (typically one side of the street versus the other) to separate the planes. -
Draw the clouds:
Sketch very loose, organic cloud shapes at the top of the right page to break up the empty sky space. -
Erase guidelines:
Once the ink is completely dry, gently erase all your pencil construction lines to reveal the crisp perspective.
This dramatic angle transforms a simple street scene into a thrilling architectural dive that pulls the viewer’s eye straight down the page
Curved Fish-Eye Perspective Room
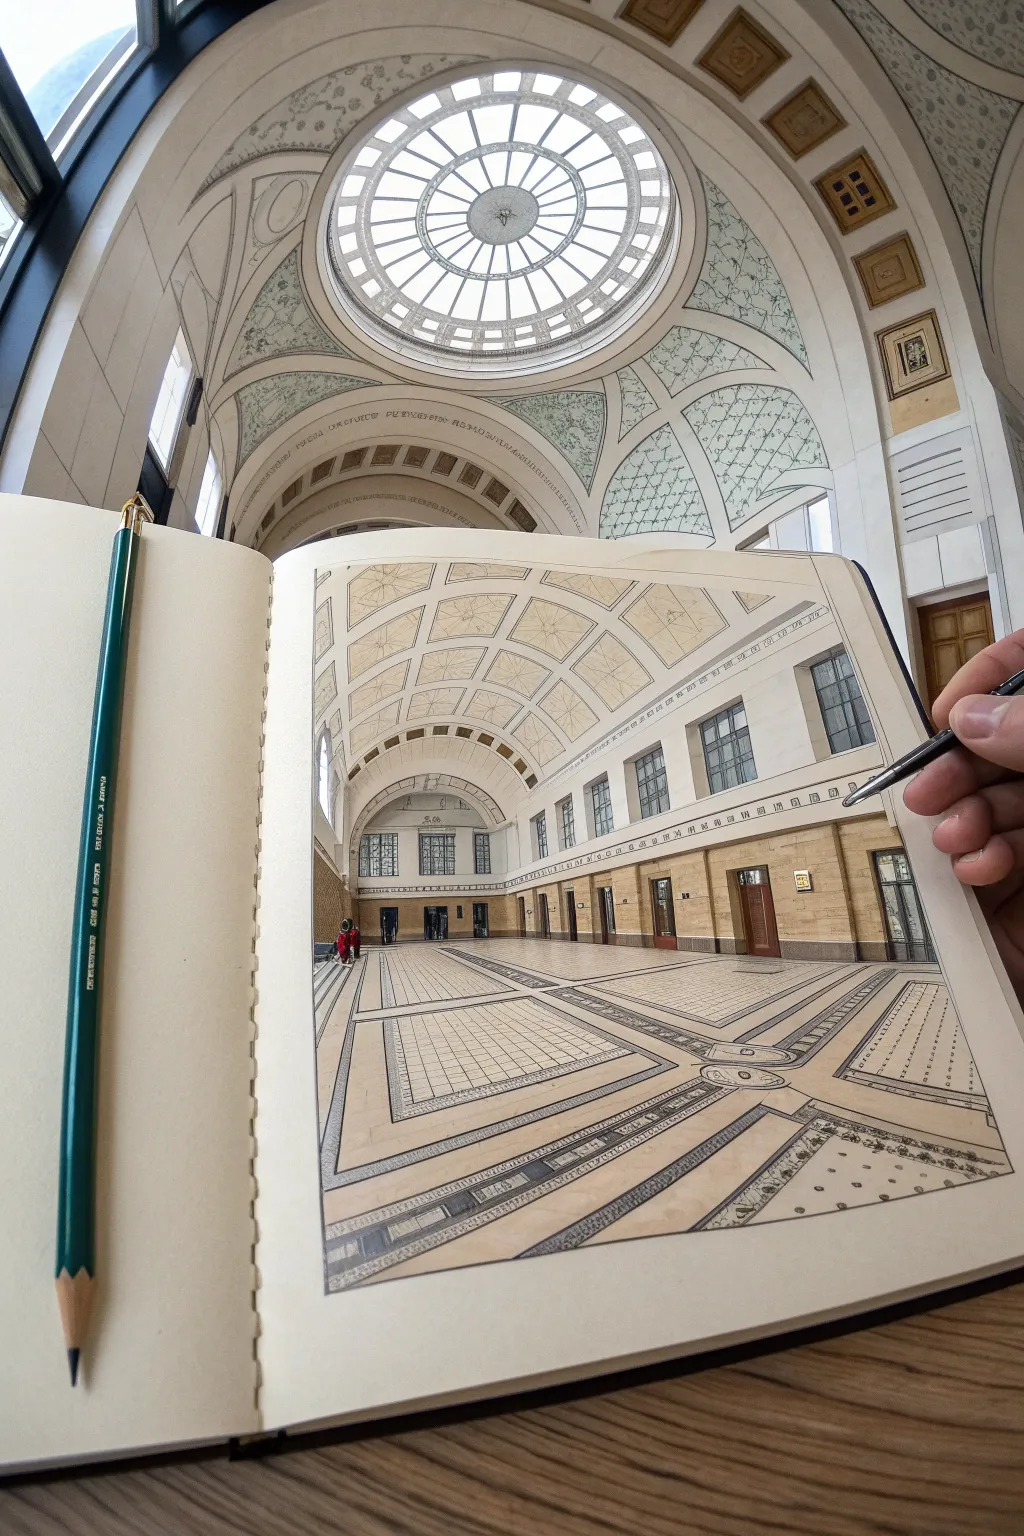
Capture the sweeping grandeur of architecture by bending the rules of linear perspective with this five-point or fish-eye approach. This drawing translates a massive, domed interior into a dynamic, spherical composition that feels like you’re stepping right into the page.
Step-by-Step Tutorial
Materials
- A4 or A5 Sketchbook (smooth heavyweight paper)
- Graphite pencils (HB, 2B, 4B)
- Fine liner pens (0.1mm, 0.3mm, 0.5mm, black)
- Ruler or straight edge
- French curve or flexible curve ruler
- Eraser (kneaded)
- Light warm gray marker or watercolor wash
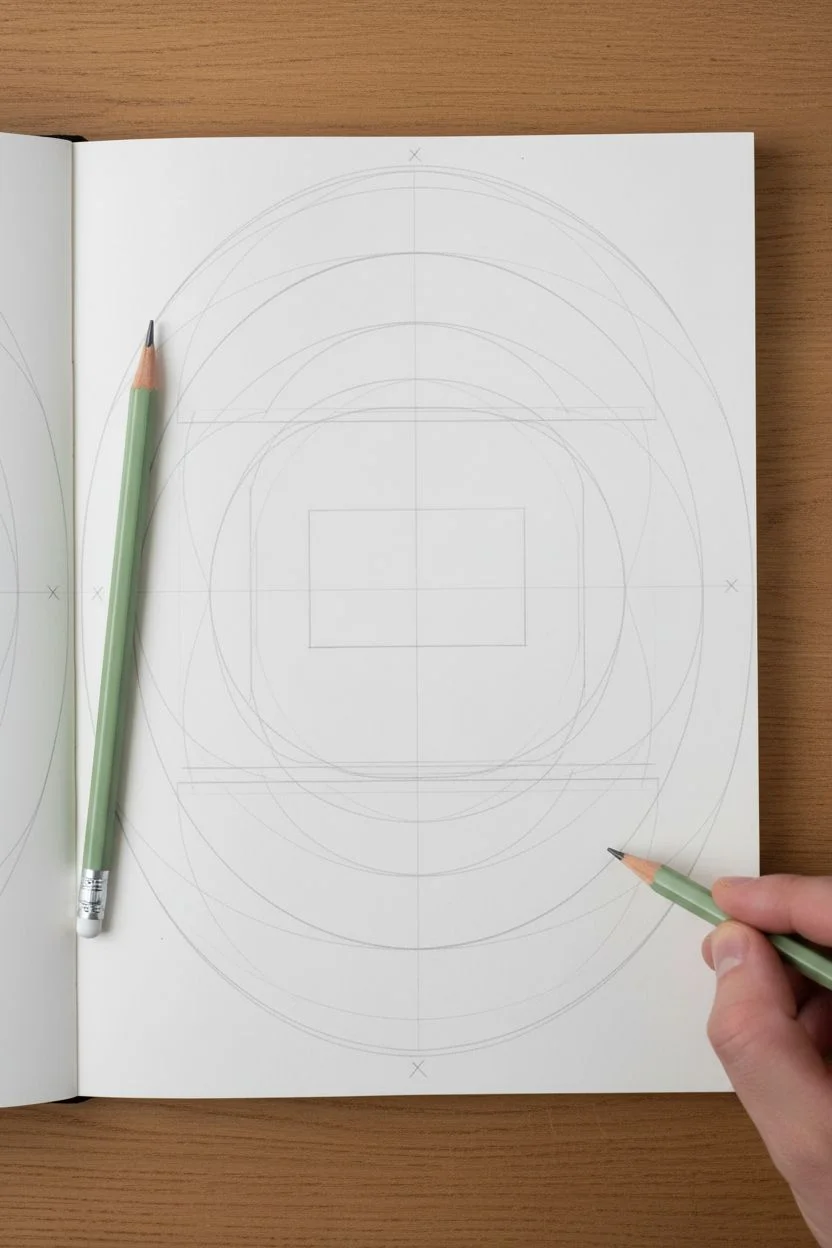
Step 1: Setting the Spherical Grid
-
Establish the horizon:
Begin by lightly drawing a horizontal line across the middle of your page. This is your eye level. Mark a vanishing point at the far left and another at the far right edge of your paper. -
Create the central axis:
Draw a vertical line straight down the center. Mark a third vanishing point at the very top of this line and a fourth at the very bottom. -
Sketch the major curves:
This is the fish-eye effect. Instead of straight lines connecting to vanishing points, draw arcs. Connect the top point to the left/right points with curved lines to form the ceiling grid. Do the same for the floor, curving lines from the bottom point to the sides. -
Define the back wall:
In the center of your grid, sketch a standard rectangle that will serve as the flat back wall of the hallway. This anchors the distortion around a stable center.
Step 2: Constructing the Architecture
-
Block in the side pillars:
Using your vertical curves as guides, lightly pencil in the vertical divisions for the pillars or wall sections along the hallway. These should get closer together as they recede toward the center. -
Draw the ceiling coffers:
Follow the overhead grid curves to create the rectangular patterns on the ceiling. I find it helpful to start with the larger shapes near the top edge of the paper and work inward. -
Map the floor tiling:
Similar to the ceiling, sketch the large geometric patterns on the floor. Ensure the lines curve significantly near the bottom of the page to exaggerate that wide-angle lens look. -
Add the arched windows:
On the side walls, sketch the arched tops of the windows. Remember, the tops of these arches should follow the flow of your perspective grid lines.
Curve Control
Struggling to draw smooth long curves? Don’t use your wrist. Lock your wrist and move your entire arm from the shoulder to create sweeping, confident arcs.
Step 3: Inking and Detailing
-
Outline main structures:
Switch to a 0.5mm fine liner. Go over the main structural lines—the pillars, the floor borders, and the ceiling beams. Keep your hand loose to maintain smooth curves. -
Detail the coffered ceiling:
Use a finer 0.1mm pen for the intricate details inside the ceiling squares. This contrast in line weight pushes the heavy beams forward and the decorative insets back. -
Refine the windows:
Ink the window frames on the right wall. Add vertical hatching lines to suggest the depth of the mullions. -
Texture the floor:
Carefully ink the tile patterns on the floor. Use broken lines or very light pressure for the grid inside the main floor shapes so they don’t overpower the drawing. -
Add the distant details:
Ink the small doorways and tiny figures at the far end of the hall. Keeping these very small emphasizes the scale of the room.
Atmospheric Depth
Make lines in the foreground (edges of the page) thicker and darker. Make lines near the center back wall thinner and lighter to create instant aerial perspective.
Step 4: Shading and Finishing
-
Erase pencil guides:
Once the ink is completely dry, gently erase all graphite grid lines and construction sketches. -
Add basic shadows:
Take your 2B pencil and lightly shade the side walls and the interior of the window recesses. Imagine the light coming from the ceiling and windows. -
Enhance depth with markers:
Use a light warm gray marker to add a wash over the floor tiles and the lower walls. This gives the stone a solid, warm feel. -
Final shading touches:
Use a 4B pencil to darken the deepest shadows, specifically inside the doorways at the end of the hall and under the floor molding. This high contrast makes the drawing pop.
Now you have a dynamic architectural study that bends reality beautifully.


Have a question or want to share your own experience? I'd love to hear from you in the comments below!