When I’m craving a quick, satisfying holiday project, 4th of July rock painting is my go-to—small canvas, big impact. Grab a handful of smooth stones and let’s turn them into tiny red, white, and blue celebrations you can display, gift, or tuck into your summer décor.
Classic Stars and Stripes Wraparound
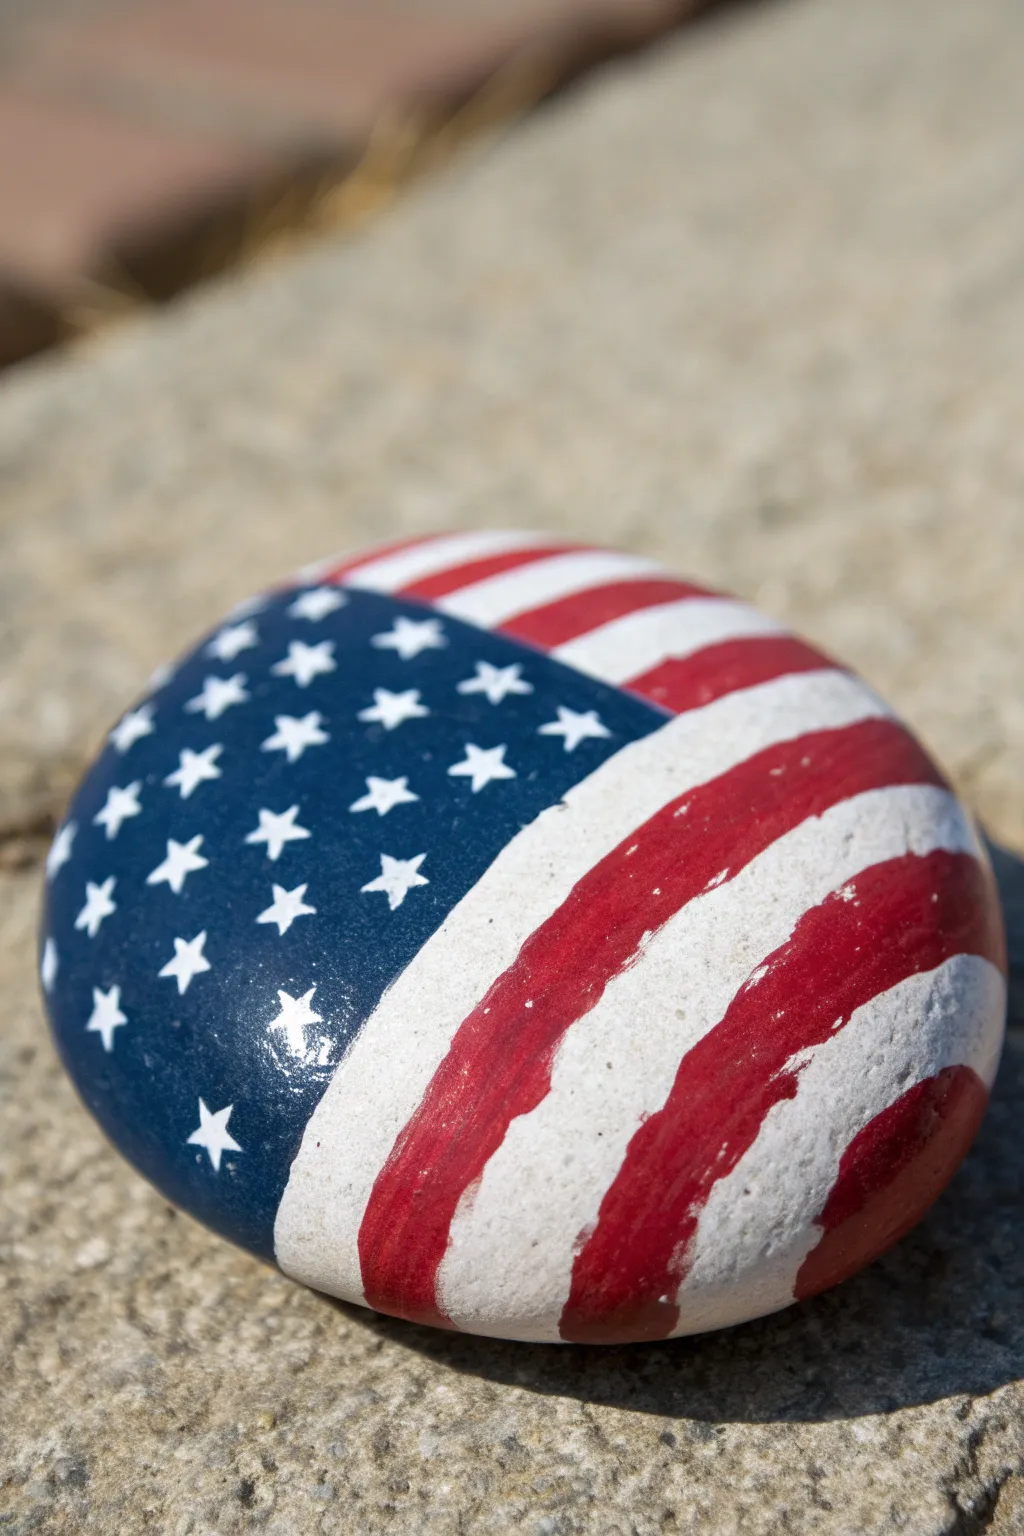
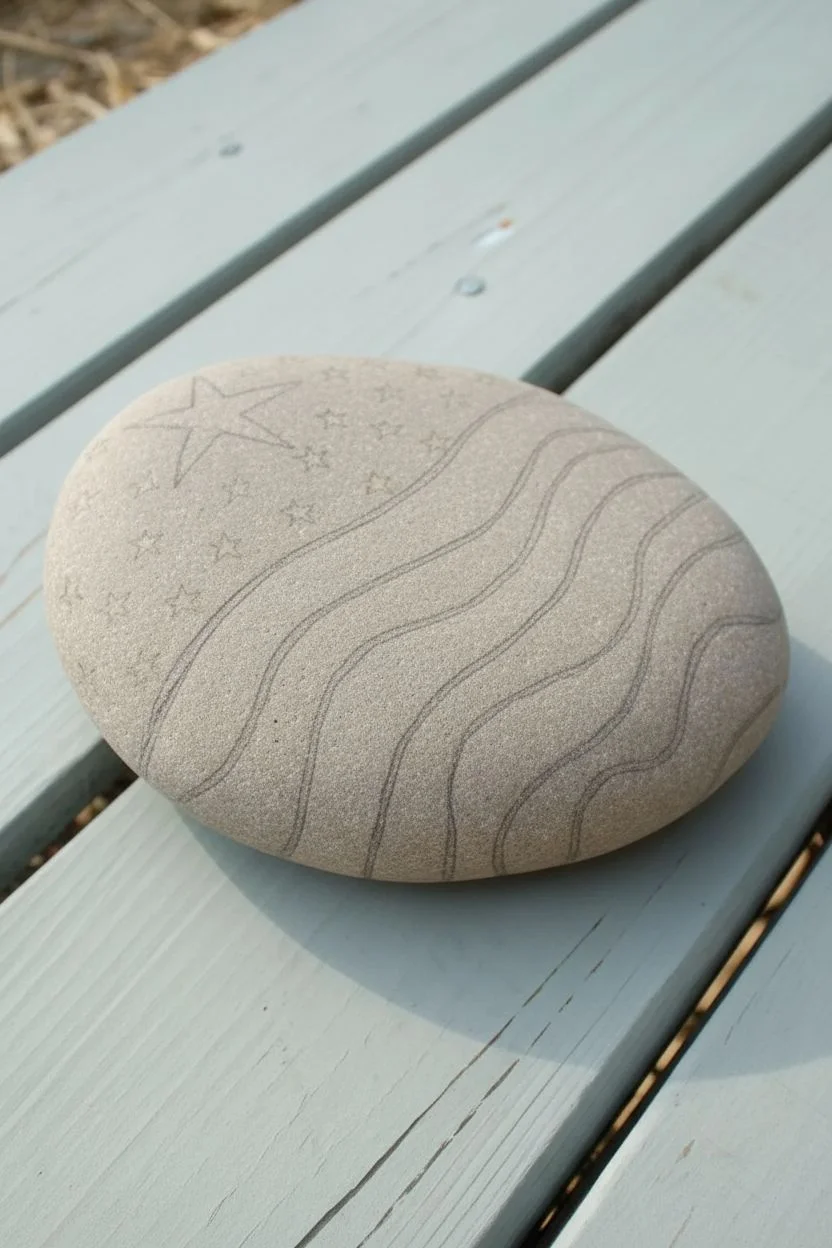
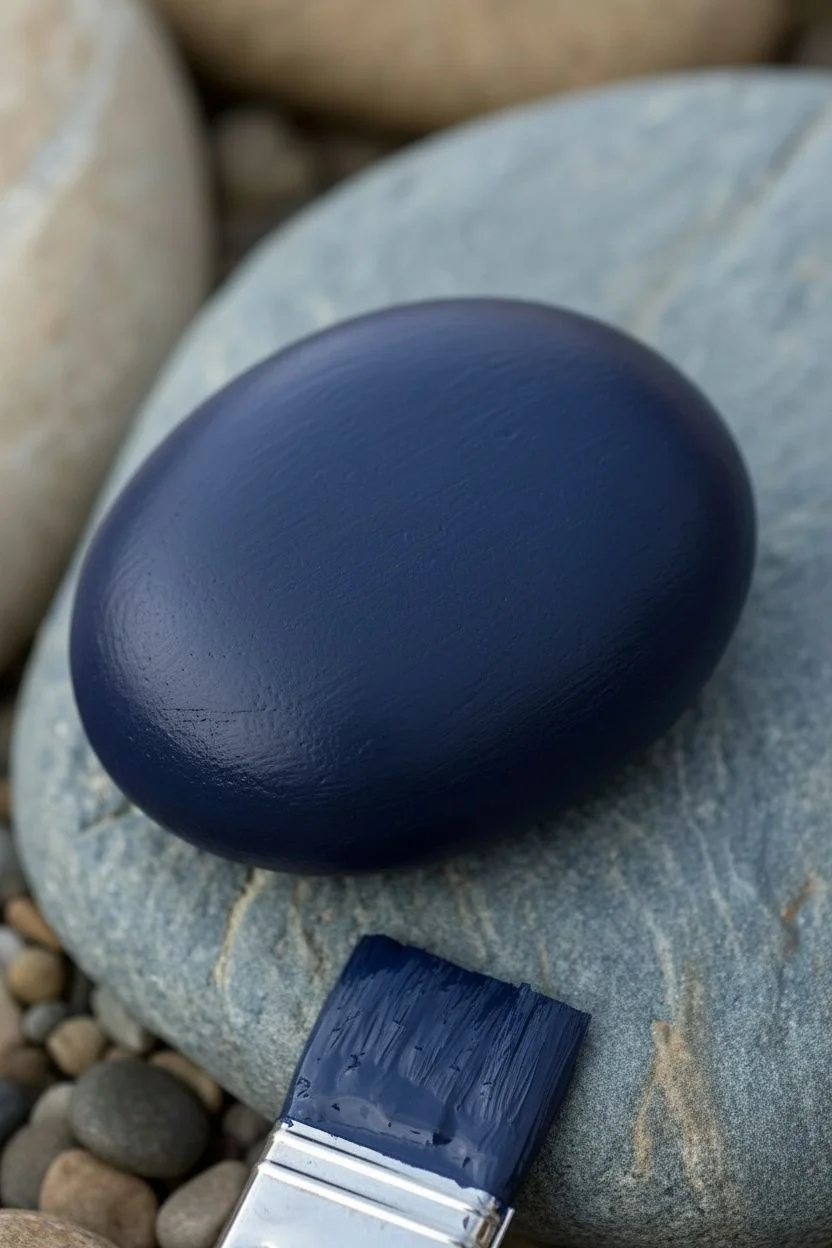
Capture the patriotic spirit of Independence Day with this beautifully simple rock painting project. The natural curves of a smooth river stone give the stars and stripes a wonderful, wind-blown waving effect that looks great in any garden.
How-To Guide
Materials
- Smooth, rounded river rock (palm-sized)
- Acrylic paints: Navy Blue, Bright Red, Titanium White
- Flat shader brush (size 4 or 6)
- Small round detail brush (size 0 or 1)
- Pencil for sketching
- Clear acrylic sealer (spray or brush-on)
- Water cup and paper towels
Step 1: Preparation & Base Coat
-
Clean your canvas:
Start by scrubbing your rock with warm soapy water to remove any dirt or oils. Let it dry completely in the sun or use a hairdryer to speed things up. -
Prime the surface:
Paint the entire top surface of the rock with a layer of Titanium White. This ensures your red and blue colors will pop against the dark stone. Let this base coat dry fully. -
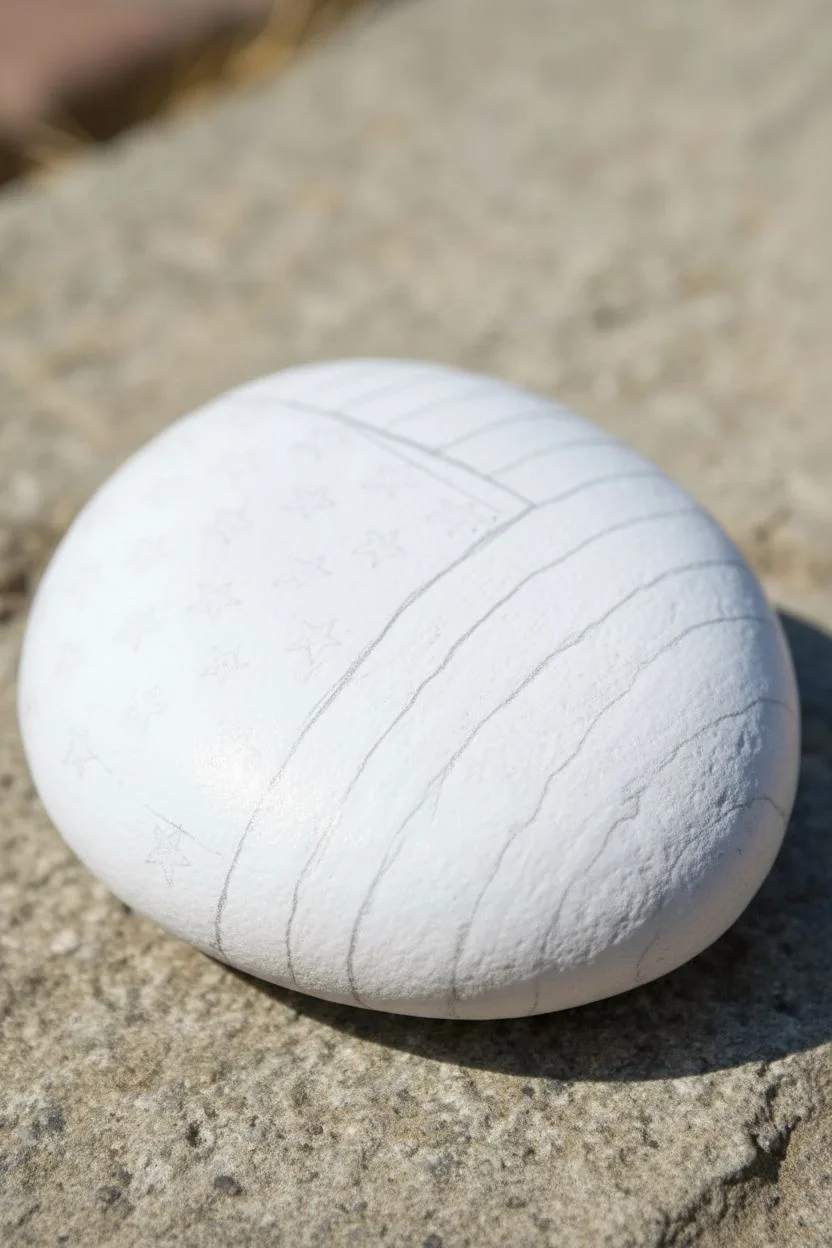
Sketch the layout:
Lightly sketch a curved line separating the blue field from the stripes. The line should curve with the rock’s shape, occupying roughly the top-left third. -
Outline the stripes:
Still using your pencil, draw curved lines for the stripes flowing away from the blue section. Don’t make them perfectly straight; follow the contour of the stone to create movement.
Use a Toothpick
Struggling with tiny star points? Dip a toothpick in white paint and gently drag the paint outward from a center dot to create sharp, precise star tips.
Step 2: Painting the Field & Stripes
-
Paint the blue field:
Using your flat shader brush, fill in the sketched upper-left section with Navy Blue paint. Carefully follow your curved pencil line. -
Check coverage:
If the blue looks streaky, let the first coat dry and apply a second coat for a deep, solid color. -
Start the red stripes:
Clean your flat brush thoroughly. Dip it into Bright Red and paint the red stripes, skipping spaces for the white stripes. Let the bristles naturally fan out slightly to create soft edges. -
Refine the white stripes:
Since you already base-coated the rock white, your white stripes are mostly done. However, I like to go back with fresh white paint to crispen up the edges between the red and white for a cleaner look. -
Let it set:
Allow the main block colors to dry completely before moving on to the stars. This prevents the white stars from turning pink or light blue if they mix with wet base layers.
Fixing Wobbly Stripes
If your red stripe bleeds into the white, wait for it to dry completely. Then, use opaque white paint to ‘erase’ the mistake and reshape the line.
Step 3: Adding the Stars
-
Load the detail brush:
Switch to your smallest round brush (size 0 or 1). Thin your Titanium White paint slightly with a drop of water so it flows smoothly off the tip. -
Plan star placement:
Visualize a stagger pattern for the stars. Instead of painting full stars immediately, place tiny white dots where the center of each star will be to ensure even spacing. -
Paint the first stars:
Start painting small 5-point stars over your guide dots. Use tiny, flicking motions outward from the center dot for sharp points. -
Fill the gaps:
Continue filling the blue field with stars. It’s okay if the stars near the edges of the blue section ‘fall off’ or are only partially visible; this adds to the wraparound effect. -
Second coat for brightness:
White over dark blue often dries somewhat transparent. Once the first layer of stars is dry, dab a second tiny bit of white in the center of each star to make them shine.
Step 4: Finishing Touches
-
Clean up edges:
Inspect the point where the blue field meets the red stripes. Use your detail brush to touch up any messy intersections with the appropriate color. -
Dry thoroughly:
Let the rock sit undisturbed for at least an hour (or overnight) to ensure all layers are bone dry. -
Seal the artwork:
Apply a clear acrylic sealer. A spray sealer is easiest for avoiding brush strokes, but a brush-on gloss varnish works well too. This protects your patriotic rock from weather and chipping.
Now you have a durable piece of Americana ready to brighten up your porch or garden path.


Waving Flag Ribbon Design
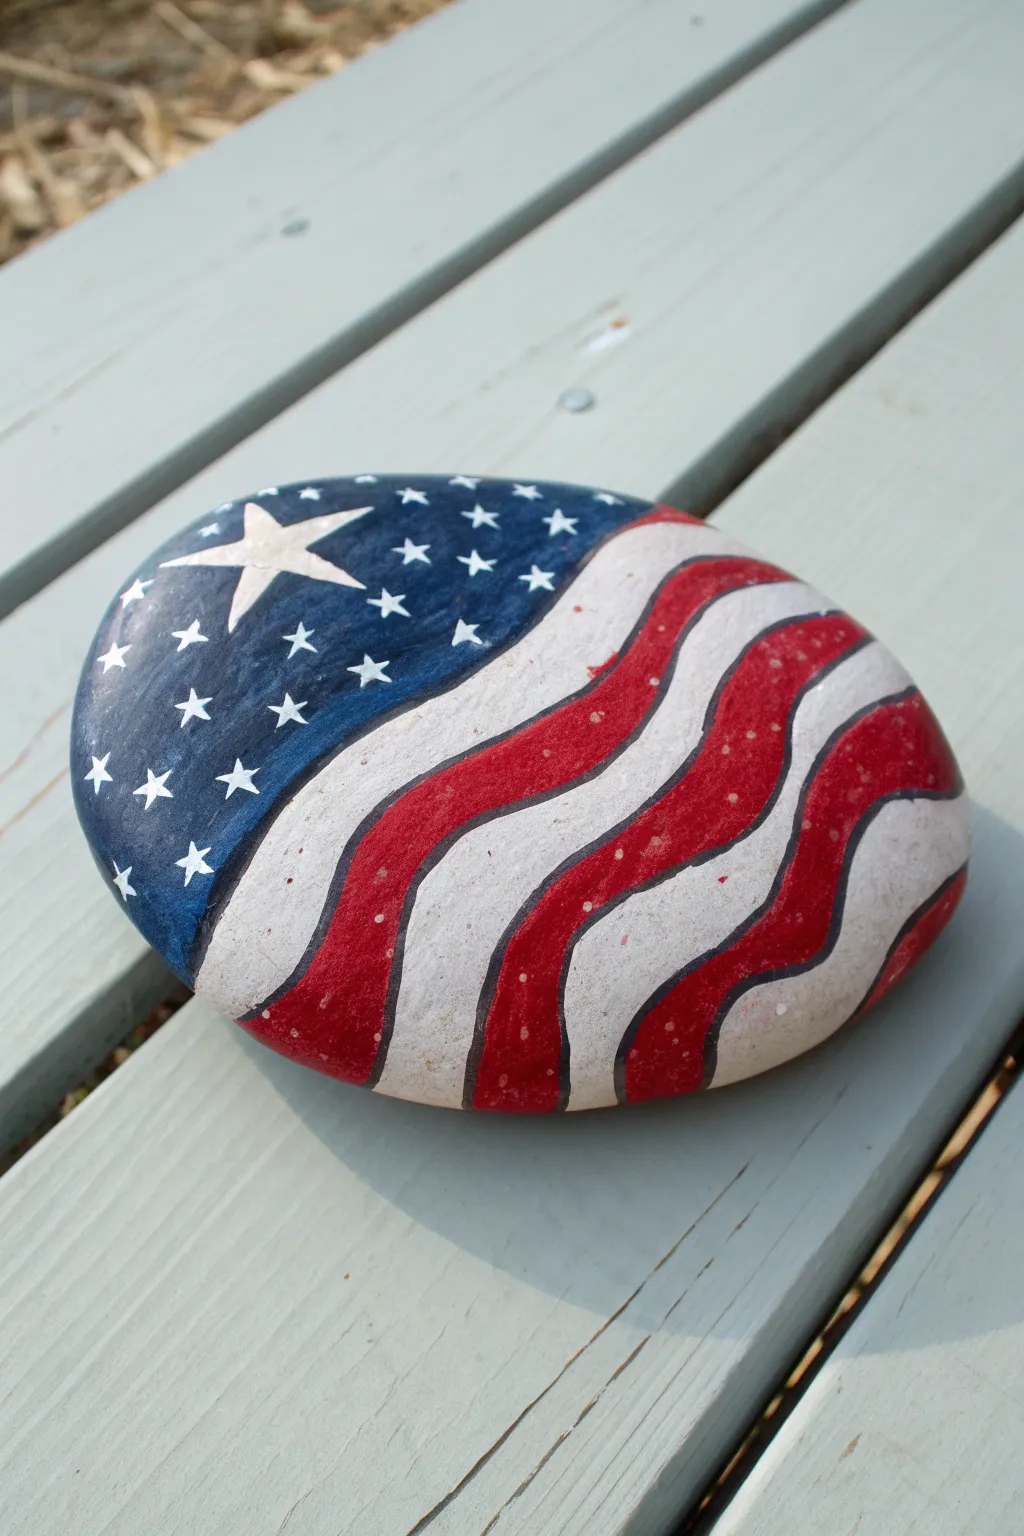
Capture the movement of a flag waving in the summer breeze with this striking rock painting design. The ribbon-style stripes create a fluid sense of motion, making this patriotic stone a standout decoration for your Fourth of July celebrations.
Step-by-Step
Materials
- Smooth, oval river rock (medium to large size)
- Acrylic paints: Navy Blue, Bright Red, Titanium White, Black
- Flat shader brushes (medium and small)
- Fine liner brush (size 0 or 00)
- Pencil/chalk pencil or fine-tip paint marker
- Clear acrylic sealer (spray or brush-on)
- Paper towels and water cup
Step 1: Preparation and Base Sketch
-
Clean Your Canvas:
Begin by scrubbing your rock with warm, soapy water to remove any dirt or oils that might prevent paint adhesion. Let it dry completely in the sun. -
Prime the Surface (Optional):
If your rock is very dark, you might want to paint a thin layer of white acrylic over the top surface. This helps your red and blue colors pop, though painting directly on the natural stone works too for a rustic look. -
Mark the Union:
Visualize a curved line separating the upper left corner from the rest of the rock. Using a pencil, lightly sketch this curved boundary where the blue field of stars will sit. -
Establish the Waves:
Sketch the waving stripes. Instead of straight lines, draw fluid, S-curved lines flowing from the blue section to the right edge. Ensure the widths of the stripes are roughly consistent as they undulating across the surface.
Step 2: Painting the Flag Colors
-
Paint the Blue Field:
Load a medium flat brush with Navy Blue paint. Fill in the upper left section you marked earlier, carefully following the curved edge. You may need two coats for opaque coverage. -
Fill the White Stripes:
Before starting the red, paint the alternate stripes white. Using Titanium White, fill in every other ribbon section. Don’t worry about perfect edges yet, as the outline will clean them up later. -
Apply the Red Stripes:
Once the white is dry, paint the remaining stripes with Bright Red. Follow the curves carefully. I find that two thin coats of red are better than one thick coat to avoid brush streaks. -
Dry Time:
Allow the base colors to dry completely before moving on to the details. This prevents the colors from bleeding into your crisp lines.
Steady Hands
Rest your pinky finger on a dry part of the rock while painting the thin black outlines. This stabilizes your hand for smoother curves.
Step 3: Adding Stars and Details
-
Outline the Stripes:
This step makes the design pop. Using a fine liner brush and thinned black paint, carefully trace the lines between the red and white stripes. Keep your hand steady and the line width consistent. -
Paint the Main Star:
In the blue field, identifying a spot near the top left for the largest star. Use a small flat brush or liner brush to paint a five-pointed white star. It acts as a focal point. -
Add Smaller Stars:
Dip the very tip of your liner brush or a toothpick into white paint. Dot small stars scattered throughout the rest of the blue section. For better definition, use tiny brush strokes to give them points rather than just round dots. -
Refine the Edges:
Check the perimeter of your painted area. If the paint edges look ragged against the bare rock, use a clean brush with a tiny bit of water or paint to smooth the boundary line. -
Highlight the Large Star:
Once the large star is dry, you can add a second coat of white to the center to make it shine brighter against the dark blue background. -
Final Inspection:
Look over the entire rock for any smudges or areas where the black outline might have skipped. Touch up as necessary.
Make It Sparkle
Mix a tiny pinch of silver glitter into your final coat of clear sealer or sprinkle fine glitter on the wet blue paint for a festive 4th of July shimmer.
Step 4: Finishing Up
-
Seal the Artwork:
To protect your rock from the elements, apply a clear acrylic sealer. A spray sealer works best to avoid smearing the black lines, but a brush-on varnish works if applied gently. -
Let it Cure:
Follow the instructions on your sealer bottle for drying times. Usually, letting it sit for 24 hours ensures it is fully weather-resistant.
Set this beautiful stone on your porch railing or in a garden bed to show off your patriotic spirit all summer long


Bold USA Lettering Rock
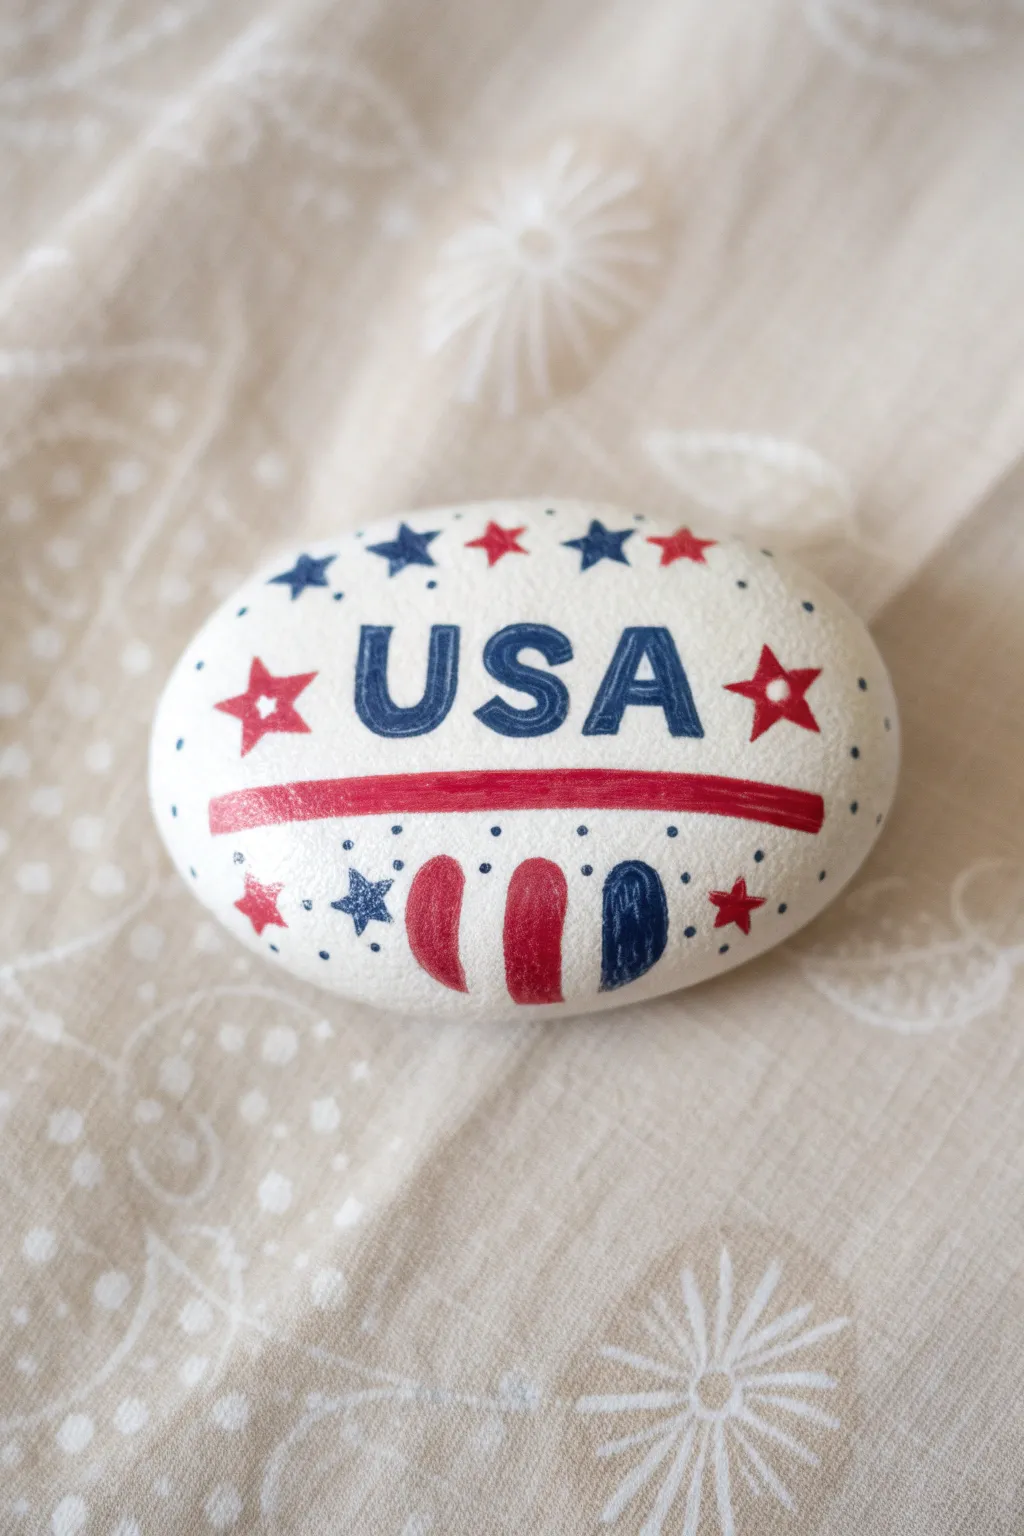
Show off your patriotic spirit with this clean and striking rock design that puts the USA front and center. The bold lettering combined with simple stars and stripes creates a festive decoration perfect for your Fourth of July display.
How-To Guide
Materials
- Smooth, oval-shaped river rock
- White acrylic paint
- Navy blue acrylic paint or paint marker
- Red acrylic paint or paint marker
- Wide flat paintbrush
- Fine detail paintbrush or fine-tip paint pens
- Clear sealant spray (gloss or matte)
- Pencil and eraser
Step 1: Preparation and Base Coat
-
Clean the surface:
Begin by scrubbing your rock with warm soapy water to remove any dirt or oils. Let it dry completely before starting. -
Apply the white base:
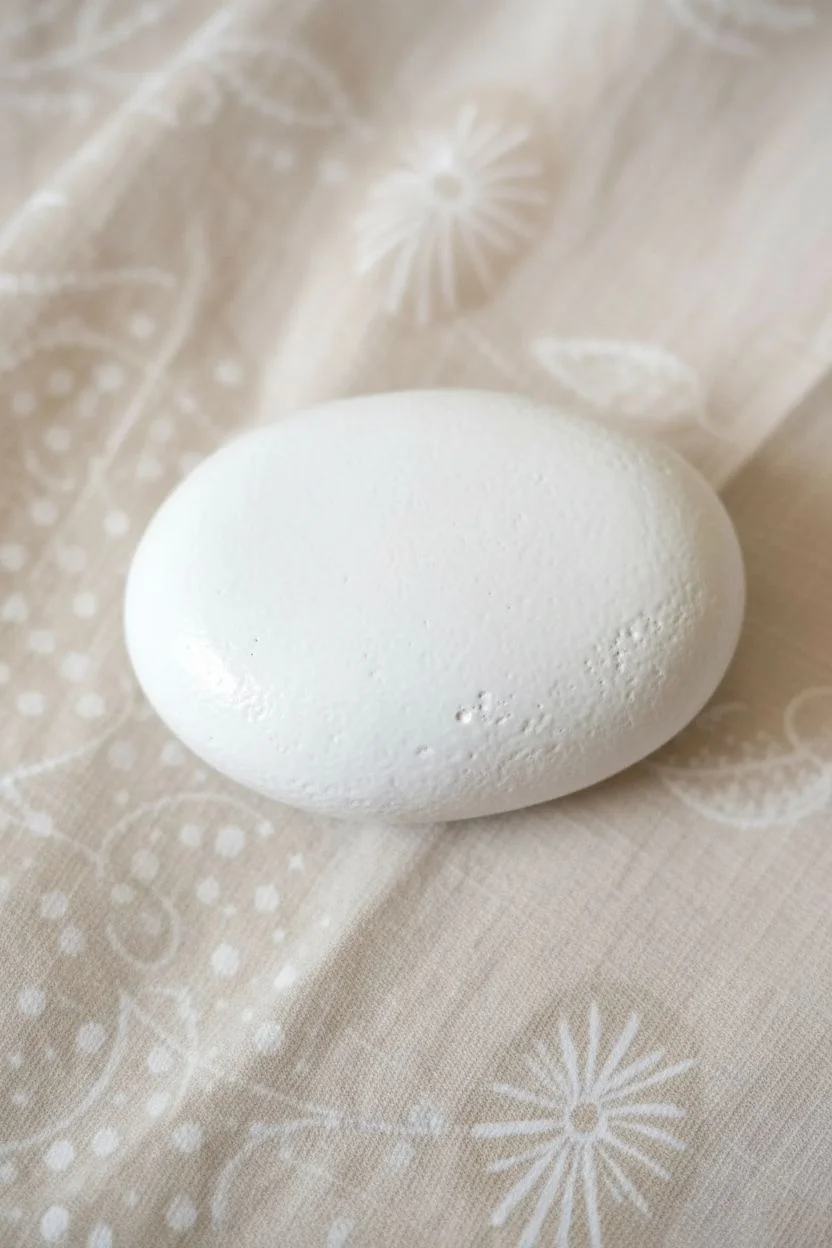
Using a wide flat brush, paint the entire top surface of the rock with white acrylic paint. You want a solid, opaque background. -
Dry and repeat:
Allow the first layer to dry fully. If the rock’s natural color shows through, apply a second or third coat of white until the finish is crisp and even.
Fixing Wobbly Lines
If your letter edges aren’t sharp, wait for the blue to dry fully. Then, use a white paint pen to carefully trace along the outside edge to clean it up.
Step 2: Lettering the Design
-
Sketch the layout:
Once the white base is bone dry, use a pencil to lightly sketch the letters ‘USA’ across the center. Keep them simple, bold, and evenly spaced. -
Outline the letters:
Using a fine paintbrush loaded with navy blue paint, or a navy blue paint pen, carefully trace the outline of your sketched letters. -
Fill in the blue:
Fill in the bodies of the letters with the same blue. Work slowly to keep the edges sharp and straight. -
Add the underline:
Paint a thick red line directly underneath the ‘USA’ text. Curve it slightly to follow the contour of the rock’s shape for a nicer flow.
Step 3: Adding Decorative Details
-
Top stars placement:
Above the text, map out a small arch of stars. Aim for about four or five stars following the top curve of the stone. -
Paint the top stars:
Alternate colors for these stars. Paint the center one red, then blue on either side, and red again on the outer edges. -
Side stars:
Add a slightly larger, prominent red star to the immediate left and right of the ‘USA’ text to frame the word. -
Bottom shapes:
Beneath the red underline, paint three thick, vertical stroke marks resembling balloon or petal shapes. Paint the left two red and the right one blue. -
Filling the gaps:
Look for empty white spaces around the bottom and sides. Add smaller stars in blue and red to balance the composition. -
Final dots:
I like to take a very fine tip tool, like a toothpick or the end of a paintbrush, to add tiny blue dots throughout the background for extra texture.
Add some sparkle
Before the clear sealant dries, sprinkle a very small amount of silver or iridescent glitter over the stars to make them catch the sunlight.
Step 4: Finishing Touches
-
Cleanup:
Check for any pencil marks that might still be visible and gently erase them if the paint is completely cured. -
Seal the deal:
To protect your artwork from weathering, spray the rock with a clear acrylic sealer. Use light bursts in a well-ventilated area. -
Drying time:
Let the sealant dry according to the can’s instructions, usually overnight, before placing it in your garden or on your porch.
Place this bold creation on your walkway to greet guests with festive cheer


“Happy 4th of July” Script Stone


Celebrate Independence Day with this bold and festive rock painting project featuring a deep blue background and crisp white lettering. Accented with cheerful red and white stars, this smooth stone serves as a perfect holiday decoration or a kind gift for a neighbor.
Step-by-Step Tutorial
Materials
- Smooth, oval river rock (medium size)
- Acrylic paint: Navy Blue, Titanium White, Bright Red
- Paintbrushes: Flat brush (for base coat), Fine liner brush (for details)
- White paint pen or ultra-fine brush (for text)
- Dotting tool or toothpick
- Spray sealer (glossy or matte)
- Pencil (optional)
Step 1: Preparing the Canvas
-
Clean the Stone:
Begin by washing your rock with warm, soapy water to remove any dirt or oils that might prevent the paint from sticking. -
Dry Completely:
Let the rock dry fully in the sun or use a hairdryer to speed up the process before applying any paint. -
Apply the Base Coat:
Using a flat brush, paint the entire top surface of the rock with a rich Navy Blue acrylic paint. -
Second Layer:
Once the first coat is dry to the touch, apply a second coat of blue to ensure solid, opaque coverage without any streaks showing through. -
Full Drying Time:
Allow the base coat to dry completely for at least 30 minutes; painting text on wet paint will cause smudging.
Clean Up Smudges
If you make a mistake with the white text, let it dry completely, then paint over the error with a tiny bit of the navy blue background color.
Step 2: Text and Typography
-
Sketch the Layout:
Lightly pencil in your lettering to ensure the spacing works. Write ‘HAPPY’ near the top, ‘4TH’ below it, followed by ‘OF’, and finally ‘JULY’ at the bottom. -
Paint ‘HAPPY’:
Using a white paint pen or a very fine liner brush loaded with titanium white, carefully trace over your pencil lines for ‘HAPPY’, using slightly stylized capital letters. -
Add ‘4TH’:
Paint the ‘4TH’ centered just below the first word. You can make these characters slightly larger or bolder for emphasis. -
Center the Middle:
Paint the word ‘OF’ in smaller letters right in the center, keeping the alignment balanced. -
Finish the Text:
Complete the phrase by painting ‘JULY’ at the bottom, curving the baseline slightly to match the rock’s shape if you like. -
Touch Ups:
Go back over any letters that look thin with a second pass of white to make them pop against the dark blue.
Step 3: Stars and Accents
-
Draw Red Stars:
Dip a fine brush into bright red paint and create small, simple five-point stars. Place about three or four of these randomly around the text. -
Add White Stars:
Clean your brush and switch to white paint to create a few more small stars, filling in some of the larger gaps. -
Create Large Dots:
Using the larger end of a dotting tool or the back end of a paintbrush, add a few red dots around the perimeter of the stone. -
Add Fine Details:
Switch to a smaller dotting tool or a toothpick to place tiny white accent dots scattered throughout the background like distant stars. -
Let it Cure:
Allow all the detailed work to dry completely. I usually give it at least an hour to ensure the thick dots don’t smear. -
Seal the Rock:
Finish by spraying the rock with a clear acrylic sealer to protect the paint from chipping and to give it a nice finished sheen.
Sparkle Finish
Mix a tiny amount of fine silver glitter into your white paint for the stars, or use a glitter topcoat spray for extra festive shine.
Place your finished rock on a porch step or garden path to share some holiday spirit with everyone who passes by
BRUSH GUIDE
The Right Brush for Every Stroke
From clean lines to bold texture — master brush choice, stroke control, and essential techniques.
Explore the Full Guide
Fireworks Burst Dot Art
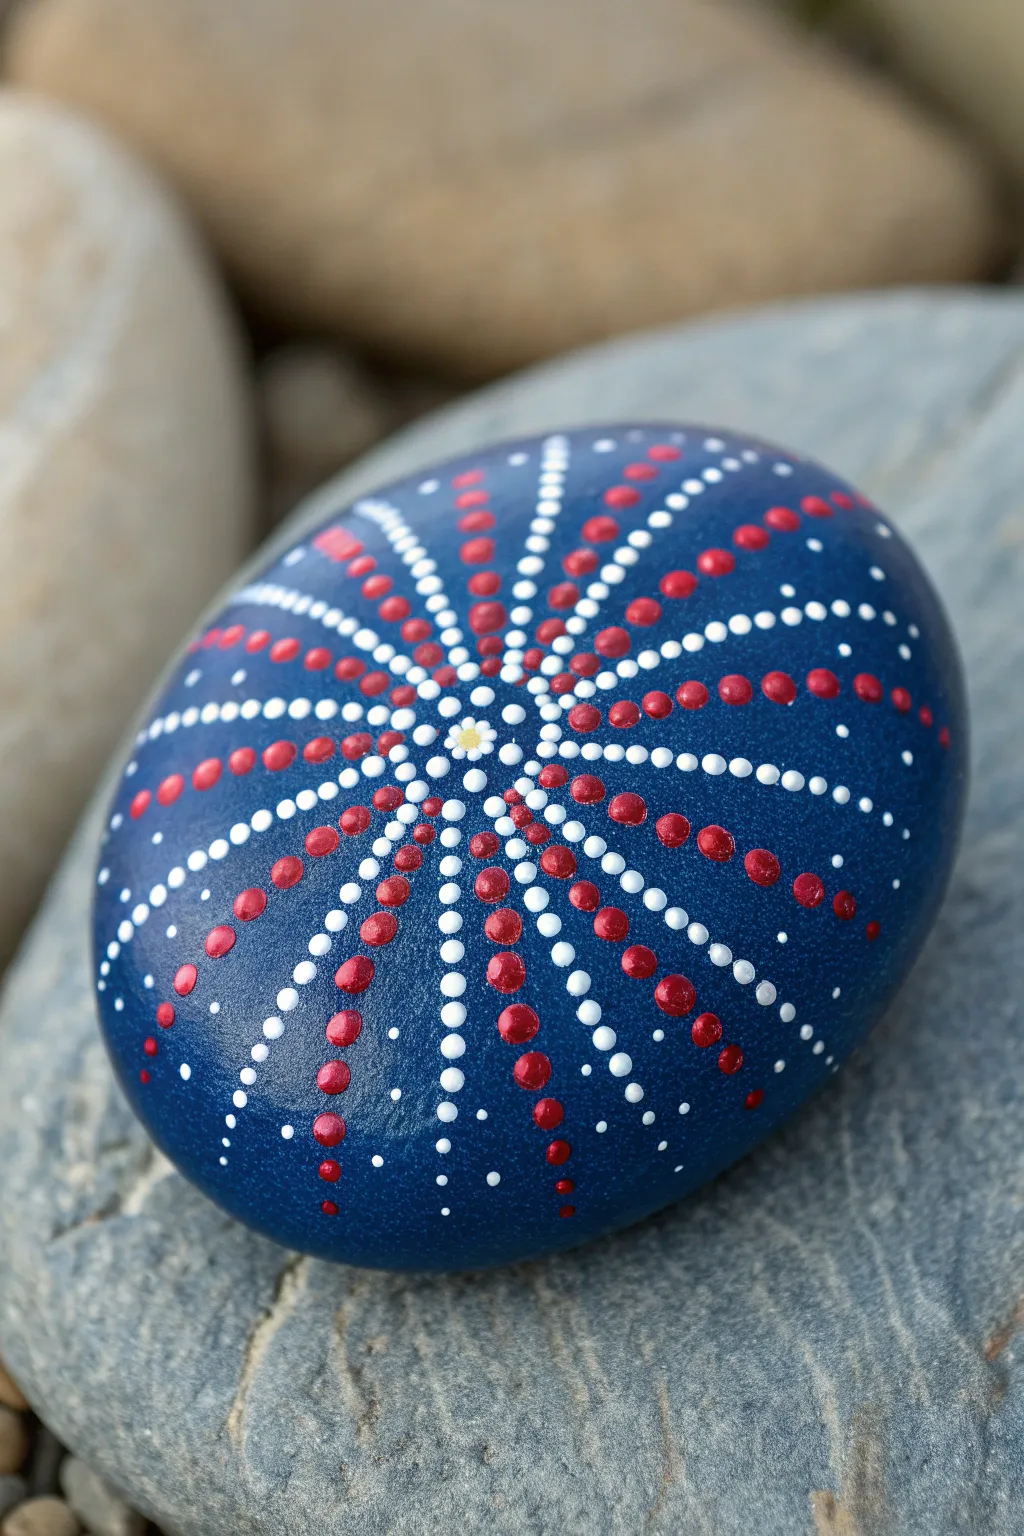
Explosions of patriotic color come to life on this smooth stone, capturing the magic of a Fourth of July sky. This dot art design uses simple tools to create an intricate, symmetrical burst pattern that radiates energy.
Step-by-Step Guide
Materials
- Smooth, oval river rock (approximately palm-sized)
- Dark navy blue acrylic paint
- Bright white acrylic paint
- True red acrylic paint
- Yellow acrylic paint (small amount)
- Flat paintbrush (for base coat)
- Dotting tool set (various sizes) or DIY alternatives (toothpick, pencil eraser, paintbrush ends)
- Acrylic sealer (spray or brush-on)
- Palette or paper plate
Step 1: Preparation and Base
-
Clean the Stone:
Begin by washing your rock with warm, soapy water to remove any dirt or oils. Let it dry completely before starting. -
Apply the Base Coat:
Load your flat brush with dark navy blue paint. Cover the entire top surface of the rock. -
Ensure Opacity:
Let the first coat dry for about 15 minutes. If the rock’s natural color shows through, apply a second coat for a deep, solid night-sky background.
Step 2: Creating the Center Burst
-
The Central Dot:
Using a medium-sized dotting tool, place a single yellow dot right in the visual center of the rock. This is your anchor point. -
First White Ring:
Dip a smaller dotting tool into white paint. Place a tight circle of small white dots immediately surrounding the central yellow dot. -
Second White Ring:
Create a second ring of slightly larger white dots around the first one. Try to stagger these dots so they sit in the ‘valleys’ of the previous ring. -
Red Ring Introduction:
Switch to red paint and a medium dotting tool. Create a third ring, placing red dots directly aligned with the white dots from the second ring to start forming outward rays.
Paint Consistency Tip
If your dots leave peaks or ‘Hershey Kiss’ tips, your paint is too thick. Mix in a drop of water or pouring medium to help the dots settle flat and smooth.
Step 3: Building the Radiating Arms
-
Establish the Main Rays:
Visualize the rock as a clock or a compass. Begin creating long lines of dots radiating outward from the center. Alternate between lines of white dots and lines of red dots. -
Graduating Dot Sizes:
As you move outward along the red rays, gradually increase the size of your dotting tool. The dots should start small near the center and get larger toward the rock’s edge. -
Creating the White Rays:
Between every red ray, create a white ray. Keep these dots consistently small and crisp to create contrast against the bolder red lines. -
Refining the Pattern:
Ensure you have roughly 12 to 16 main rays total (split between red and white) radiating symmetrically from that center cluster. -
Filling the Gaps:
As the main rays spread apart near the outer edges, you will see triangular gaps of blue space. Add short, partial rows of smaller white dots in these spaces to fill the void without touching the main rays.
Add Some Sparkle
Mix a tiny amount of glitter medium into your white paint or top the wet red dots with fine loose glitter for a firework effect that truly shimmers in the sun.
Step 4: Finishing Touches
-
Outer Edge Detailing:
Where the rock curves downward, let your dot trails fade out naturally. I like to add tiny ‘dust’ dots of white at the very ends of the red rays to simulate fading sparks. -
Correction Check:
Look over your design. If any dots merged or look messy, wait for them to dry completely, paint over them with the navy base color, and re-dot. -
Full Cure:
Allow the entire stone to dry for at least 24 hours. Dot art involves thick paint, so the surface may feel dry while the center of the dots is still wet. -
Seal the Artwork:
Once fully cured, apply a clear acrylic sealer. A glossy finish works best here to make the dots look like wet enamel.
Now you have a permanent firework display that captures the excitement of the holiday
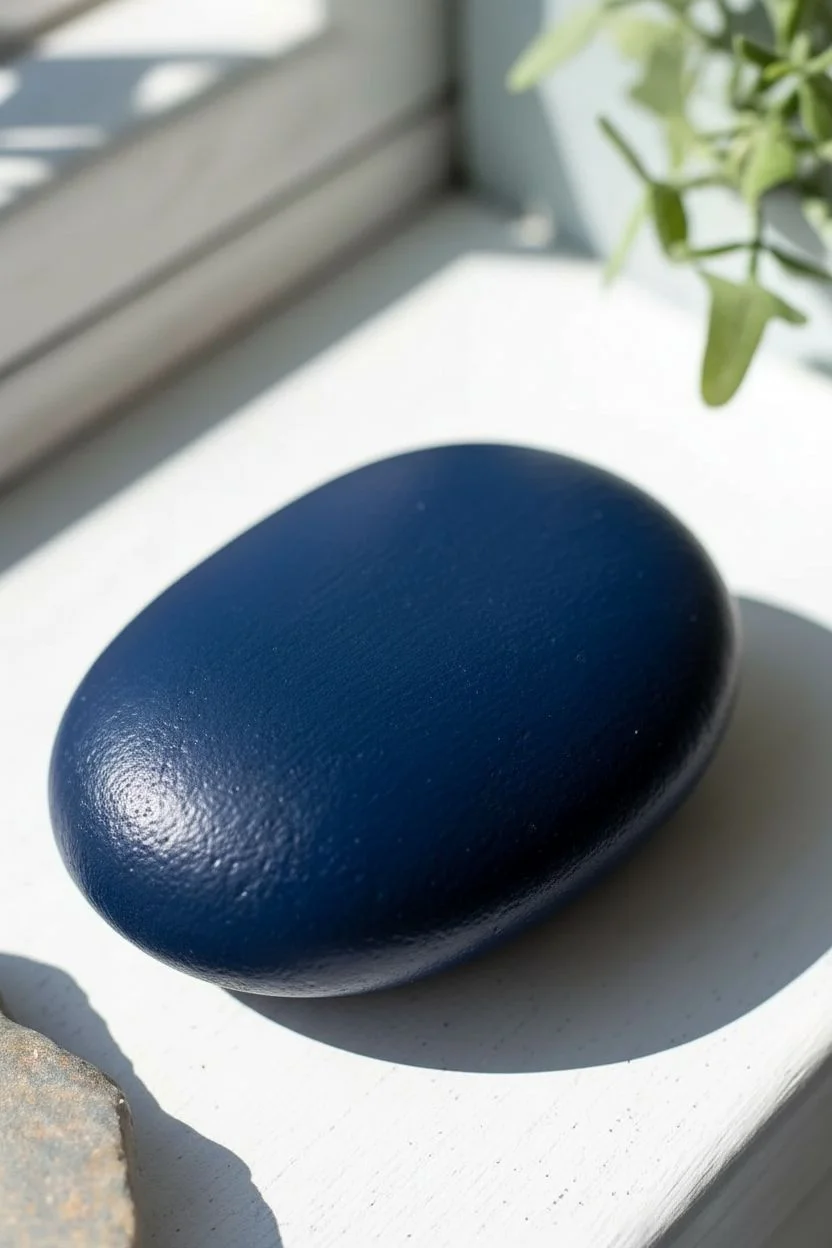
Star-Spangled Blue Field Mini Rocks
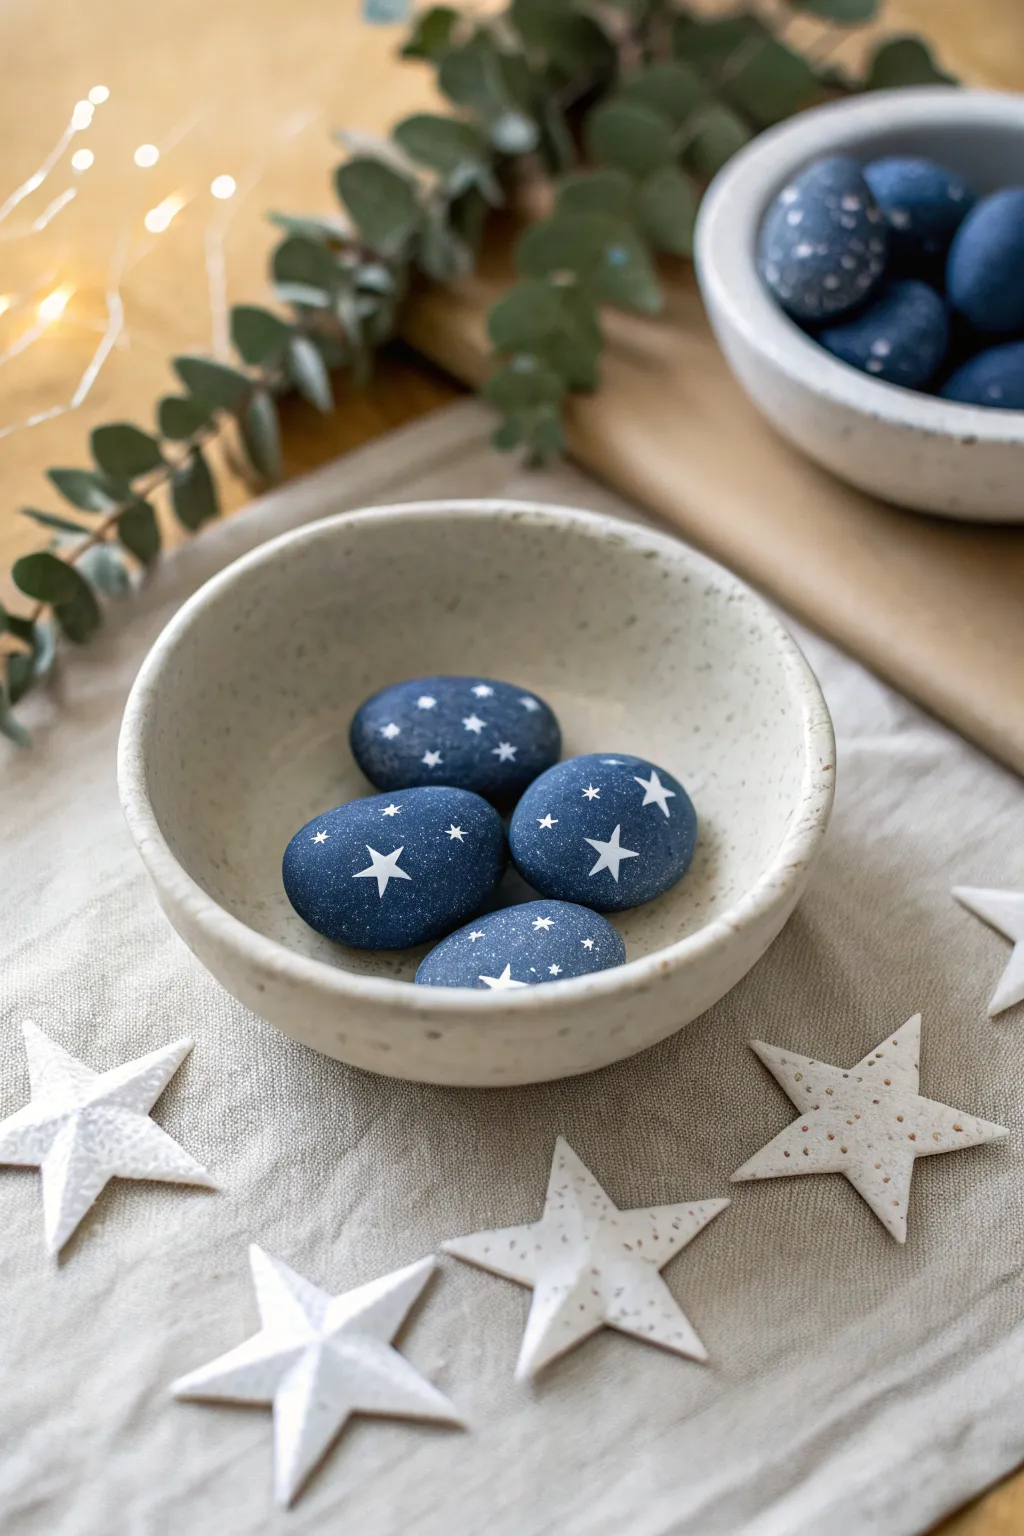
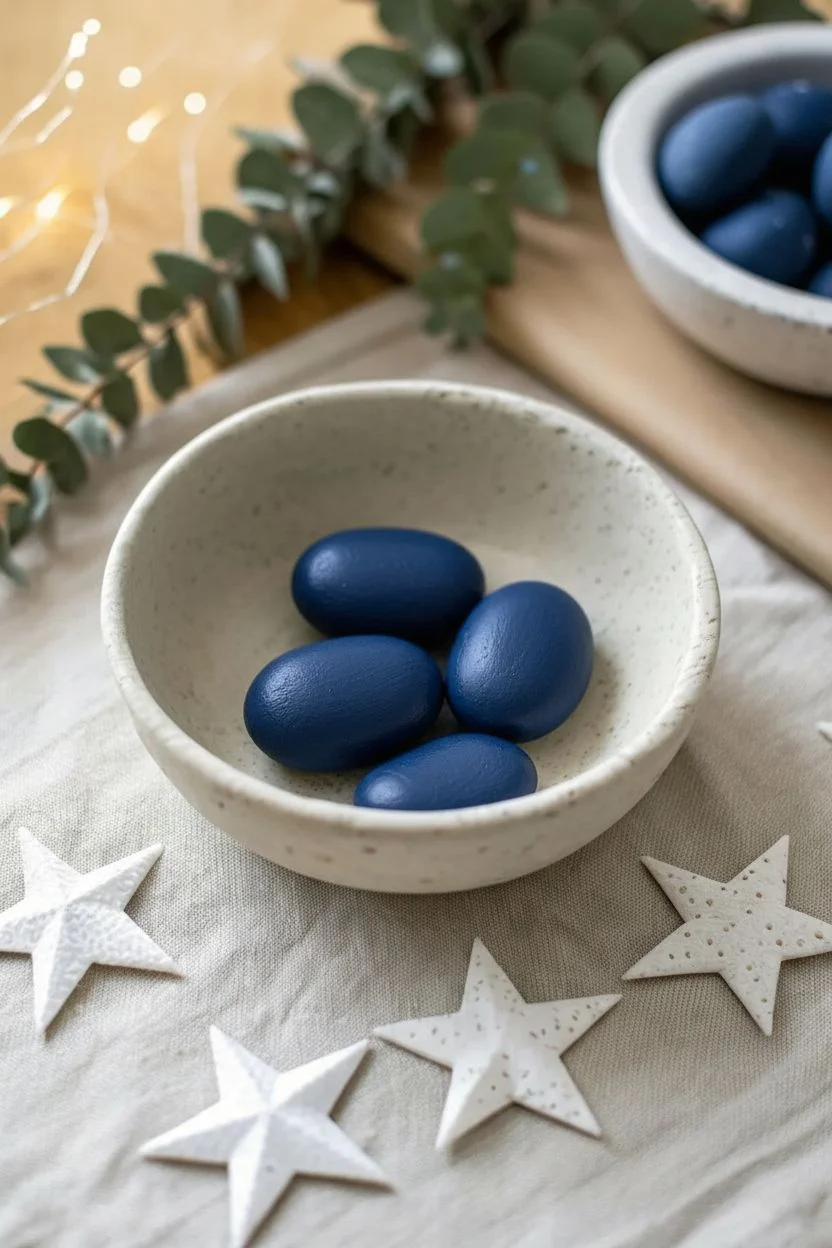
Capture the magic of a clear night sky on smooth river stones with this elegant rock painting project. Using a deep, matte blue base and crisp white stars, these decorative pebbles create a sophisticated patriotic accent perfect for your Fourth of July table setting.
Detailed Instructions
Materials
- Smooth, oval river rocks (dark gray or black natural color works best)
- Deep navy blue acrylic paint (matte finish)
- White acrylic paint (high opacity)
- Wide flat paintbrush
- Fine detail liner brush (size 00 or 0)
- White paint pen (extra fine tip) or a toothpick
- Star-shaped mini stamps (optional)
- Matte sealant spray or varnish
- Palette or small dish for mixing
- Water cup and paper towels
Step 1: Preparing the Canvas
-
Clean and Dry:
Start by thoroughly washing your river rocks with warm soapy water to remove any dirt or oils. Let them dry completely, ideally in the sun, to ensure the paint adheres properly. -
Prime with Base Coat:
Using your wide flat brush, apply a layer of deep navy blue acrylic paint to the top surface of the rock. Don’t worry about the bottom yet; just focus on the visible area. -
Check Coverage:
Let the first coat dry for about 15-20 minutes. If the natural rock color is showing through, apply a second coat of navy blue for a rich, opaque finish. -
Buff the Finish:
Once the blue base is fully dry, inspect it for any brush strokes. If you want a super smooth look like the photo, you can lightly sand the paint with very fine sandpaper before adding the final blue layer.
Uneven Stars?
If hand-painting stars is tricky, cut a small star shape out of masking tape to use as a stencil. Dab white paint gently inside the tape for a perfect shape every time.
Step 2: Creating the Stars
-
Planning the Layout:
Visualize where your largest stars will go. The rocks in the image feature one or two prominent five-pointed stars alongside smaller ones. You can lightly mark center dots with a white charcoal pencil if you need a guide. -
Painting Large Stars:
Dip your fine detail liner brush into white acrylic paint. Paint a simple five-pointed star shape. I find it easiest to paint an upside-down ‘V’ first, then cross the arms. -
Refining the Shape:
Go back over your large stars to fill in the body and sharpen the points. The lines should be crisp and solid white. -
Adding Medium Stars:
Using the very tip of your brush or a small star stamp, add a few medium-sized stars around the main focal point. Keep them scattered randomly. -
Creating Tiny Stars:
Switch to a white paint pen or dip a toothpick into white paint. Dot the empty blue spaces with tiny specks to represent distant stars. -
Micro-Details:
For extra depth, draw tiny ‘plus’ signs (+) with the paint pen or toothpick in the background. This mimics the twinkling effect seen in the reference photo.
Add Cosmic Texture
Before sealing, flick an old toothbrush dipped in watered-down white paint over the rocks. This creates a fine mist of ‘galaxy dust’ for a realistic night sky effect.
Step 3: Sealing and Finishing
-
Allow to Cure:
Let your star designs dry completely. This is crucial because smudging a white star onto the blue background is hard to fix. Give it at least an hour. -
Apply Sealer:
To achieve the stone-like texture shown in the image, use a matte varnish or spray sealant. Glossy finishes will reflect too much light and ruin the soft look. -
Spray Technique:
Hold the spray can about 12 inches away and apply a light mist coat. Don’t soak the rock, or the paint might run. -
Second Coat:
Once the first mist coat is dry to the touch, apply a slightly heavier second coat of matte sealer to protect your artwork from chipping. -
Painting the Underside:
If these will be handled or placed in a clear bowl, flip them over once the top is cured and repeat the blue base coat and sealing process on the bottom.
Now you have a stunning set of patriotic stones ready to be displayed in a bowl or scattered across your holiday table

PENCIL GUIDE
Understanding Pencil Grades from H to B
From first sketch to finished drawing — learn pencil grades, line control, and shading techniques.
Explore the Full Guide
Flag Heart on a Smooth Stone
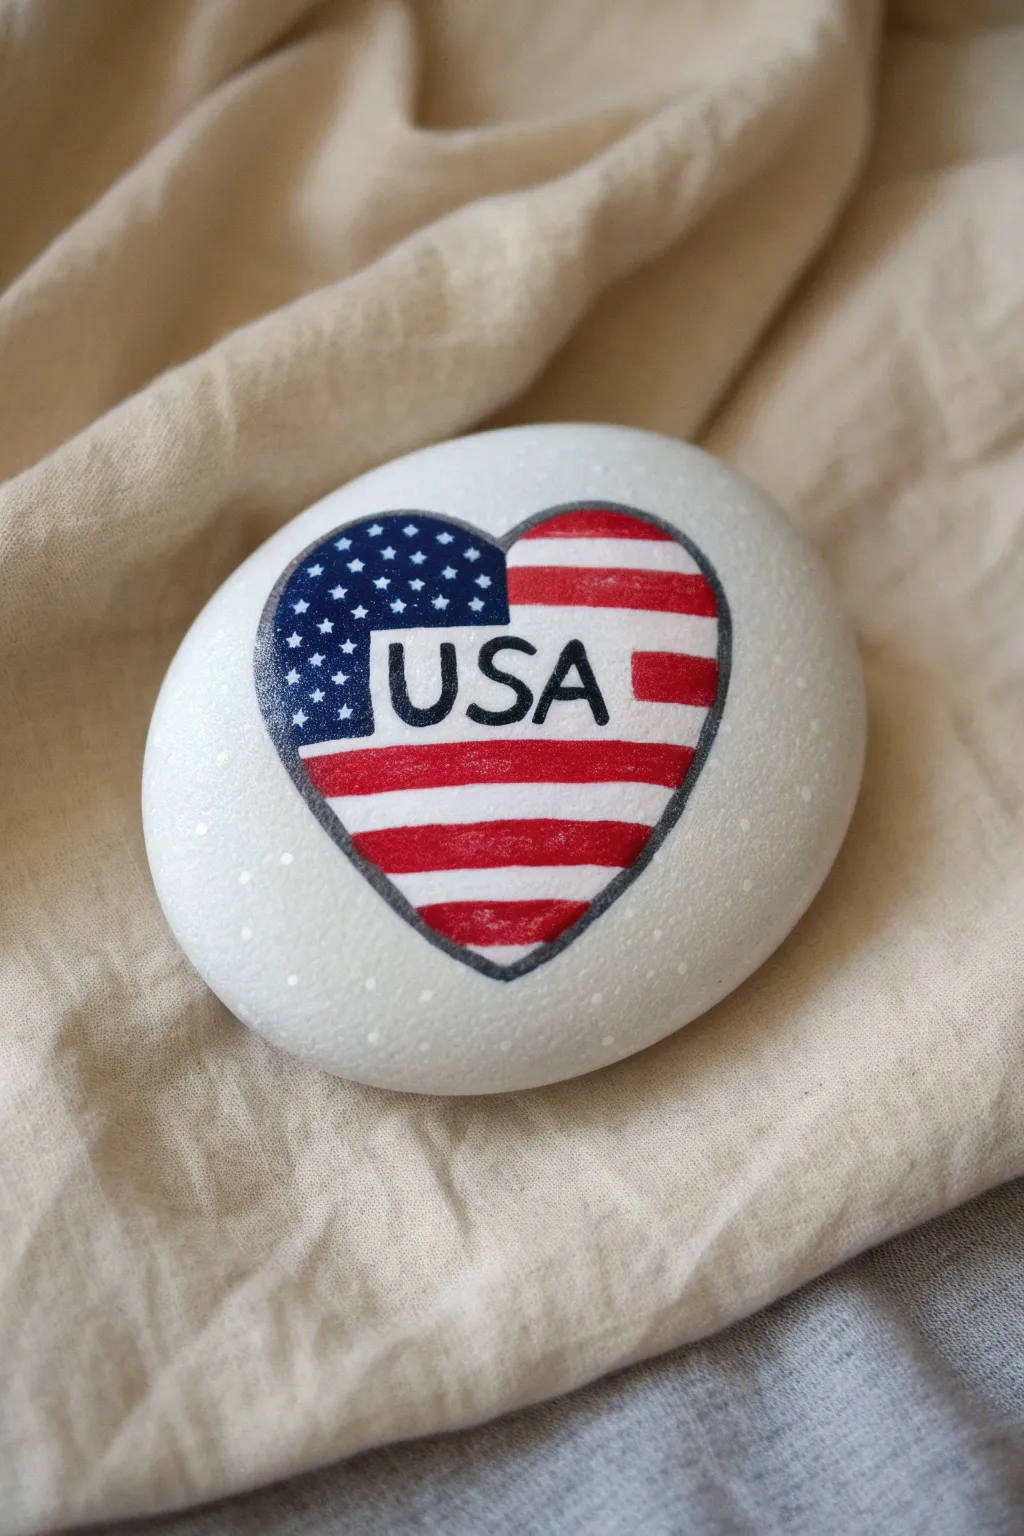
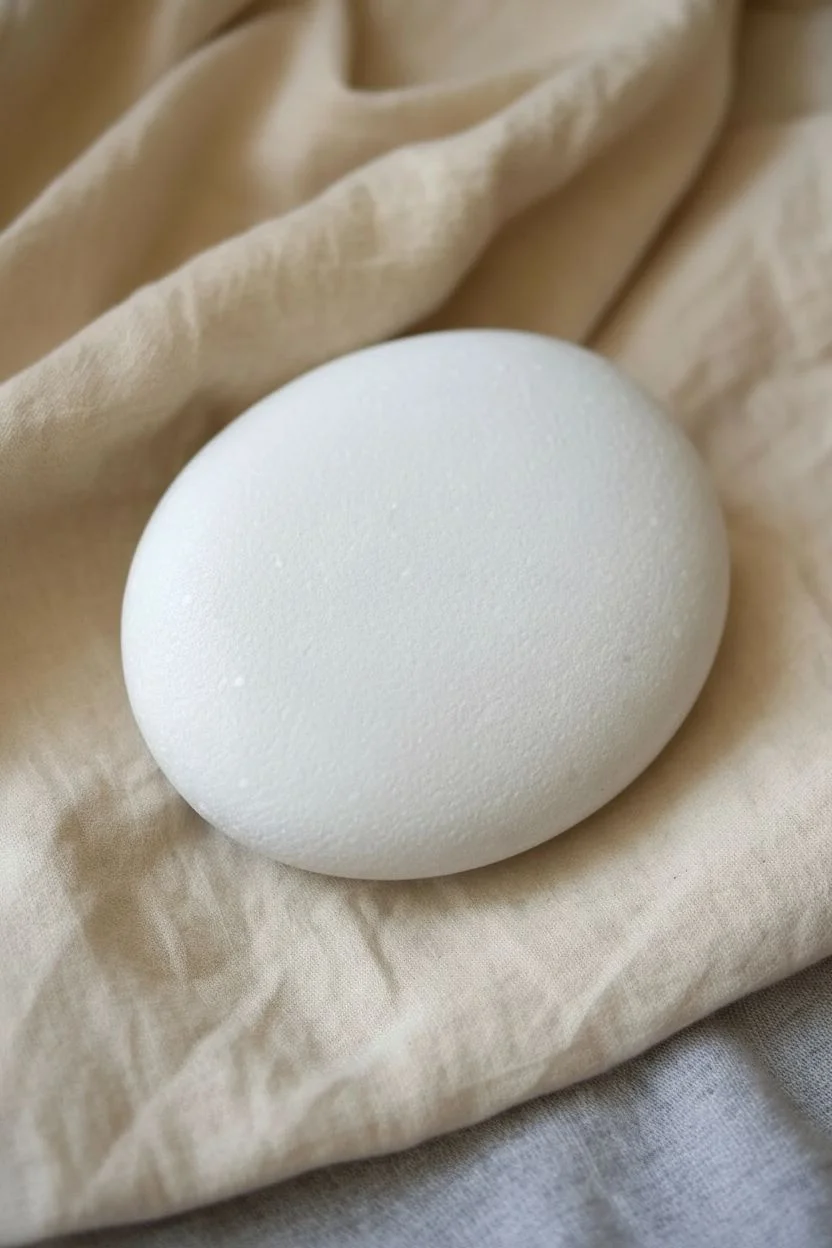
Celebrate national pride with this beautifully simple rock painting project featuring a classic flag motif inside a heart. The crisp lines and bold colors on a smooth white stone make for a striking decoration or a thoughtful Independence Day gift.
Step-by-Step Guide
Materials
- Smooth, oval river rock (medium size)
- White acrylic paint or gesso
- Red acrylic paint
- Navy blue acrylic paint
- Black acrylic paint or fine-line paint pen
- Flat paint brushes (various sizes)
- Fine-detail liner brush
- Pencil for sketching
- Spray sealer (matte or gloss)
- Optional: Painters tape
Step 1: Base Preparation
-
Clean the surface:
Before starting, ensure your rock is completely free of dirt and oils by washing it with warm soapy water and letting it dry fully. -
Apply the base coat:
Paint the entire top surface of the rock with white acrylic paint. You may need two to three coats to get a solid, opaque coverage where the stone’s natural color doesn’t show through. -
Create the speckled texture:
Once the white base is dry, add a subtle texture. I like to take a stiff brush with a very small amount of white paint and lightly stipple or dab over the surface to create a tiny bit of relief or speckling, mimicking the stone’s natural texture shown in the photo.
Step 2: Drafting the Design
-
Sketch the heart:
Using a light pencil touch, draw a symmetrical heart shape in the center of the stone. Make sure it’s large enough to hold the text and flag details. -
Outline the sections:
Draw the boundaries for the blue canton (the top left section of the heart) and lightly sketch horizontal lines for the stripes across the rest of the heart. -
Create the text box:
In the center of the heart, sketch a rectangular box or simply reserve a space where the letters ‘USA’ will go. This ensures you don’t accidentally paint stripes through your letters. -
Sketch the letters:
Lightly write ‘USA’ in the center reserved space. Aim for a clean, sans-serif block font.
Bleeding Lines?
If paint bleeds under tape or your hand slips, wait for the mistake to dry completely. Then, paint over it with the background white color before re-doing the line.
Step 3: Painting the Colors
-
Paint the blue field:
So carefully fill in the upper left section of the heart with navy blue acrylic paint. Use a small flat brush for the edges to keep them crisp. -
Paint the red stripes:
Using a steady hand and a small flat brush, paint the red stripes. Remember to skip over the white stripes and the central area reserved for the text. -
Clean up edges:
If your red or blue paint bled slightly, use a clean brush with white paint to tidy up the stripes and the edges of the central text box once the colors are dry. -
Outline the heart:
Mix a dark grey or use black paint with a very fine liner brush to trace the outer edge of the heart. This creates a definable border that separates the design from the white stone.
Make it Sparkle
Mix a tiny pinch of white or silver iridescent glitter into your final coat of sealer for the white stripes to give the flag a subtle, celebratory shimmer.
Step 4: Details & Finishing
-
Lettering:
Using black paint and your finest liner brush (or a black paint pen for easier control), carefully fill in the ‘USA’ letters you sketched earlier. -
Adding stars:
Dip the tip of a toothpick or a very fine dotting tool into white paint. Gently dot rows of stars onto the dry navy blue section. Don’t worry about perfect star shapes; tiny dots read effectively as stars at this scale. -
Final border touch-up:
Review the black outline around the heart. If it looks uneven, go over it one last time to ensure a smooth, continuous line. -
Let it cure:
Allow the rock to sit undisturbed for at least 24 hours to ensure all layers of paint are completely cured. -
Seal the artwork:
Finish by spraying the stone with a clear acrylic sealer. A matte finish looks natural, while gloss will make the colors pop like polished ceramic.
Now you have a durable piece of patriotic decor that can brighten up your garden or porch
Gingham Picnic Checks With Tiny Stars

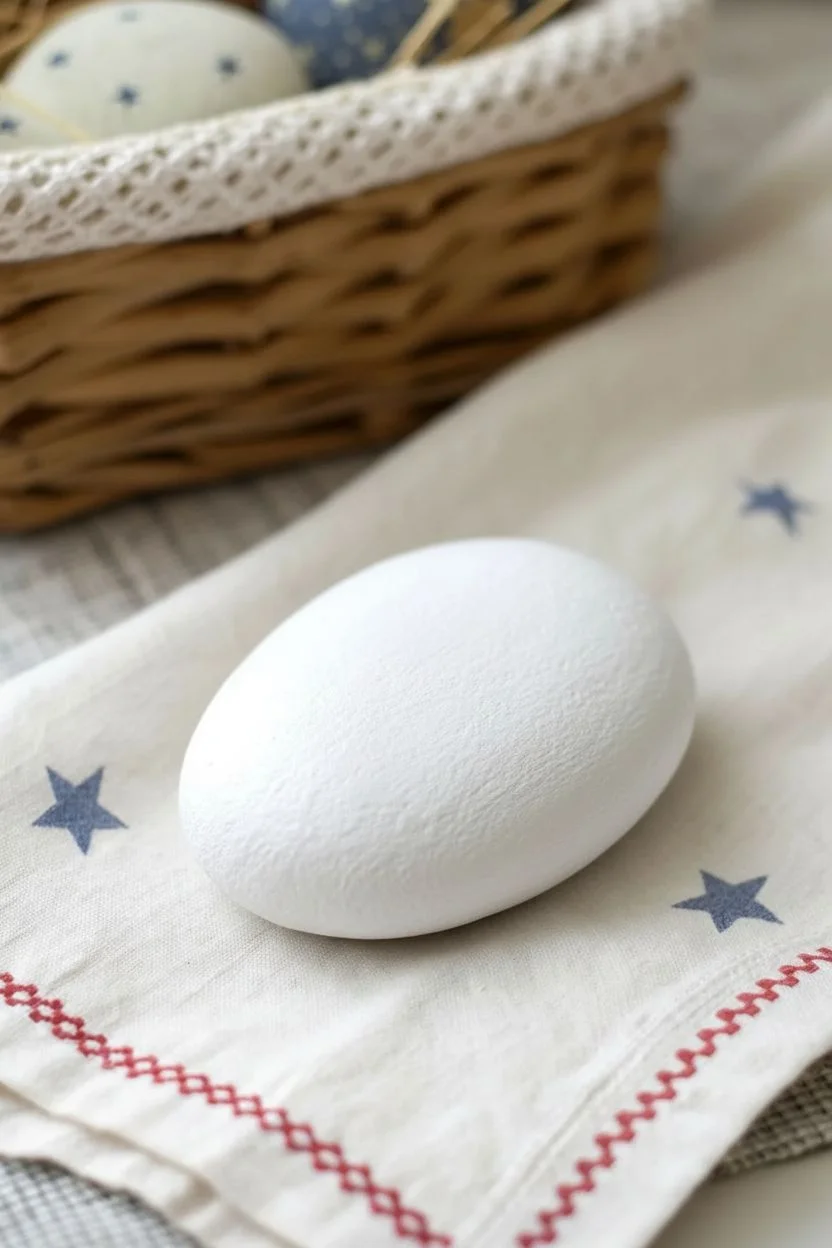
Bring the charm of a classic picnic tablecloth to your garden decor with this plaid-inspired rock painting. The delightful mix of red gingham checks and tiny blue stars creates a wonderfully nostalgic Americana design that captures the spirit of summer celebrations.
Step-by-Step Guide
Materials
- Smooth, oval river rock (clean and dry)
- White acrylic paint (matte base)
- Red acrylic paint
- Navy blue acrylic paint
- Flat shader brush (small to medium)
- Fine liner brush or detail brush
- Tracing paper (optional)
- Pencil
- Ruler or straight edge
- Acrylic glazing medium or water
- Matte or satin spray sealant
Step 1: Preparation & Base Coat
-
Clean the surface:
Start by washing your rock with warm soapy water to remove any dirt or oils. Let it dry completely before you begin painting, as moisture can ruin the base coat. -
Apply the white base:
Using a medium flat brush, paint the entire top surface of the rock with white acrylic paint. You want a solid, opaque background, so don’t be afraid to apply a second coat if the stone’s natural color shows through after the first layer dries. -
Let it cure:
Allow the white base to dry thoroughly. It needs to be completely touch-dry so that your grid lines don’t smudge into the white paint in the next phase.
Step 2: Creating the Grid
-
Sketch the vertical lines:
Lightly draw a set of evenly spaced vertical lines across the rock using a pencil and a flexible ruler or straight edge. The spacing should be wide enough to create discernible squares. -
Add horizontal lines:
Draw horizontal lines perpendicular to your first set, creating a grid of squares or slightly elongated rectangles across the surface. Keep your pencil pressure light so the graphite doesn’t muddy the red paint later. -
Mix a translucent red:
On your palette, mix a small amount of red acrylic paint with glazing medium or a drop of water. You want a consistency that is semi-transparent, like a watercolor wash, to mimic the lighter intersecting areas of fabric.
Wobbly Stripes?
If you struggle with straight lines on a curved rock, use thin washi tape or painter’s tape to mask off your stripes. Press edges down firmly to prevent bleed-under.
Step 3: Painting the Gingham Pattern
-
Paint vertical stripes:
Using your flat shader brush and the watered-down translucent red mixture, fill in every other vertical column. Paint consistently in one direction and let this layer dry completely. -
Paint horizontal stripes:
Once the verticals are dry, use the same translucent red mix to paint every other horizontal row. Where the horizontal and vertical stripes overlap, the color will naturally appear darker, creating that classic gingham check effect. -
Deepen the intersections:
To make the pattern pop, take your full-strength, opaque red paint (undiluted) and paint small squares exactly where the vertical and horizontal red stripes intersect. This emphasizes the woven look. -
Touch up white squares:
If any red paint strayed into the white squares, use a small brush and white paint to clean up those edges. Sharp, crisp corners make the plaid look much more realistic.
Vintage Fabric Idea
To gently age your rock and make it look like antique fabric, lightly dry-brush a tiny amount of cream or beige paint over the finished, dry surface.
Step 4: Adding the Stars
-
Plan star placement:
I like to visualize where the stars will sit so the spacing feels random but balanced. You’re aiming for the intersection points or the white squares to provide good contrast. -
Paint the star shape:
Dip a fine liner brush into navy blue acrylic paint. Carefully paint small five-pointed stars scattered across the design. Start by drawing a tiny ‘A’ shape and crossing the arms if that helps you form the shape. -
Vary the angles:
Rotate the rock slightly as you paint each star so they aren’t all facing perfectly straight up. This gives the fabric pattern a sense of movement and whimsical charm. -
Refine star points:
Go back over your stars with a tiny bit more blue paint to sharpen the points. The stars should look crisp against the red and white background.
Step 5: Finishing Touches
-
Dry completely:
Set the rock aside in a safe, dust-free spot to dry. The thicker areas of red paint might take a little longer than the thin wash layers. -
Seal the artwork:
To protect your handiwork from weather or scratches, apply a coat of matte or satin spray sealant. Spray in a well-ventilated area using light, even misting passes.
Place your finished gingham rock on a picnic table or tuck it into a flower pot for a sweet seasonal accent


Bald Eagle Silhouette Over Flag Stripes
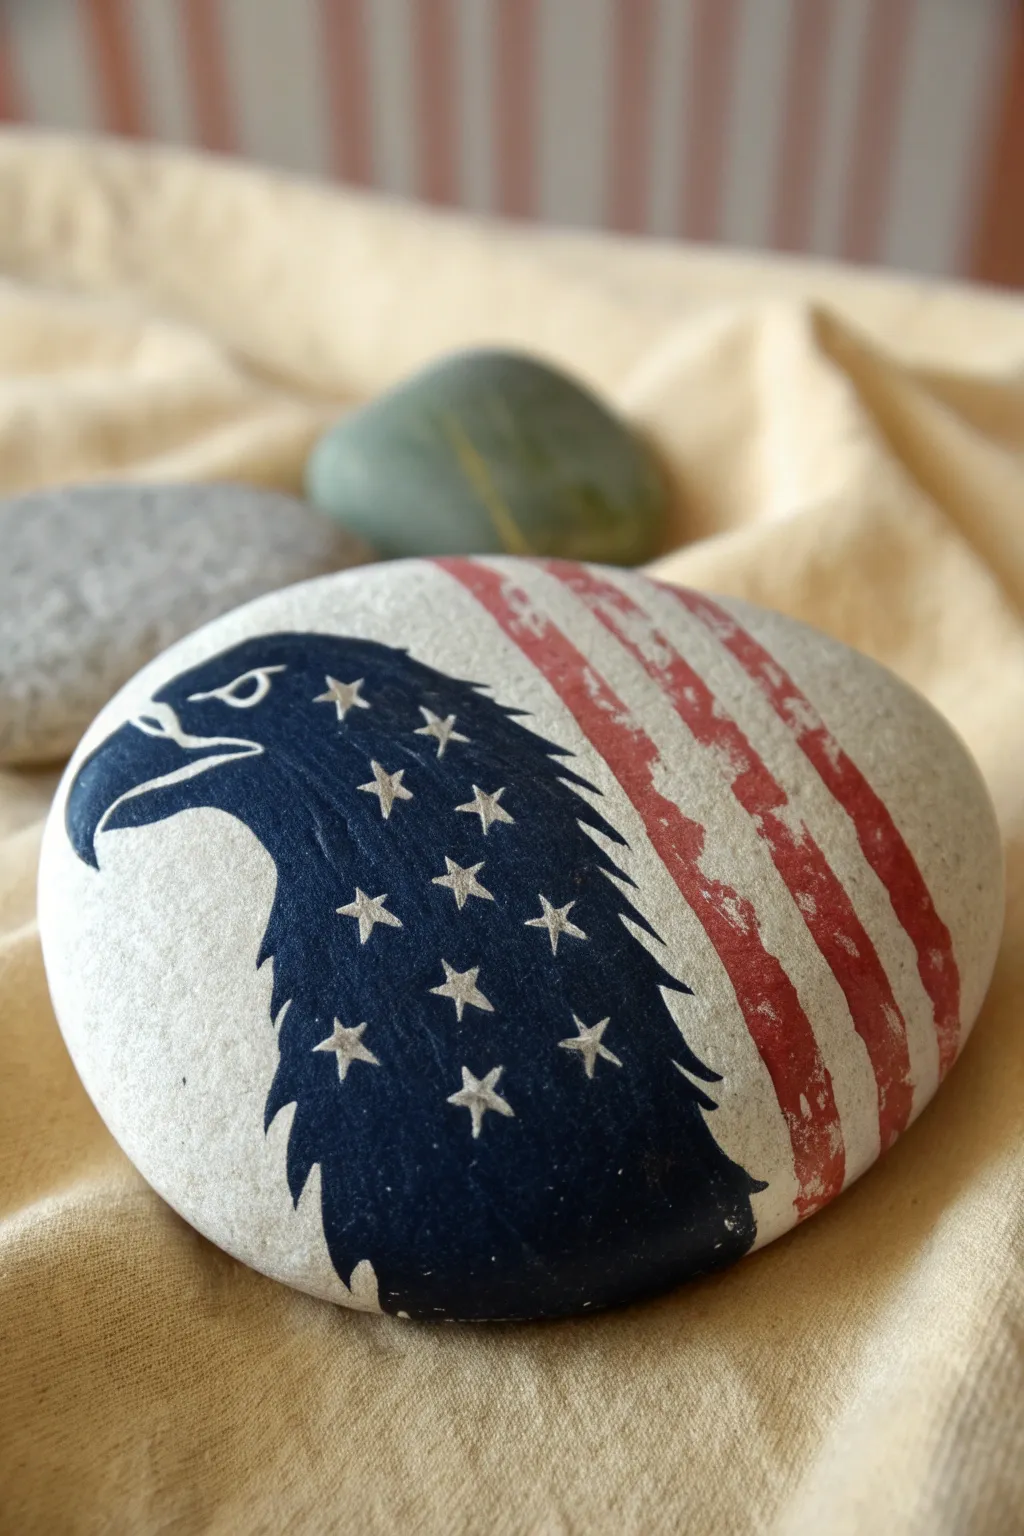
This patriotic rock design combines the majestic profile of a bald eagle with the classic elements of the American flag. By using a distressed stripe technique and a sharp silhouette, you create a sophisticated yet rustic look perfect for Independence Day decor.
Step-by-Step Tutorial
Materials
- Smooth, oval river rock (medium to large size)
- White acrylic paint (matte finish)
- Navy blue acrylic paint
- Red acrylic paint
- Pencil
- Fine liner paintbrush (size 0 or 00)
- Small flat shader brush
- White paint pen (extra fine tip) or a very fine brush
- Clear acrylic sealer (matte or satin)
- Sandpaper (optional, for distressing)
Step 1: Base Coat Prep
-
Clean the surface:
Begin by washing your rock with soapy water and scrubbing it well to remove any dirt or oils, then let it dry completely. -
Apply base white:
Paint the entire top surface of the rock with matte white acrylic paint. You will likely need 2-3 coats to achieve full opacity. -
Ensure smoothness:
Let each coat dry thoroughly before adding the next so the surface is perfectly smooth for the details to come.
Fixing Wobbly Lines
If your silhouette edges look shaky, wait for the blue to dry fully. Then, use a white paint pen to trace along the outside of the blue shape to sharpen the line.
Step 2: Painting the Stripes
-
Sketch the layout:
Lightly sketch the general curve where the stripes will go on the right side of the rock using a pencil. -
Paint the red stripes:
Using your flat shader brush and red paint, create curved stripes following the rounded shape of the rock. -
Create a distressed look:
Don’t worry about making the red lines perfectly solid; applying the paint slightly dry or thinly allows some white to show through, giving it that vintage, weathered texture visible in the photo. -
Let it cure:
Allow the red stripes to dry completely before you begin sketching the eagle, ensuring you don’t smudge the red into the white areas.
Adding Texture
For a truly rustic look, once the paint is fully dry, lightly scuff the red stripes with fine-grit sandpaper to reveal more of the white base underneath.
Step 3: The Eagle Silhouette
-
Outline the eagle:
Using a pencil, lightly draw the silhouette of the eagle’s head and neck on the left side of the rock. The beak should curve downward, and the back of the neck should feature jagged, feather-like points. -
Refine the beak:
Pay special attention to the beak area; note how the top beak hooks over the bottom one. Sketch lines to separate the beak from the face area. -
Paint the blue field:
Load your fine liner brush with navy blue paint. Carefully outline the pencil sketch first to establish crisp edges. -
Fill the silhouette:
Fill in the rest of the eagle’s neck and head with the navy blue paint, but be careful to leave the beak area white. -
Detail the feathers:
On the back curve of the neck, use the very tip of your brush to pull small, sharp points outward to mimic the texture of feathers. -
Add beak details:
Using the same navy blue and your finest brush, paint the thin line separating the upper and lower beak, the nostril detail, and the outline of the beak itself. -
Paint the eye:
Paint the simple eye shape within the blue area using your white paint pen or a tiny brush with white paint. It should be an angled teardrop shape for a focused expression. -
Add the pupil:
Once the white eye is dry, place a tiny dot of blue in the center for the pupil.
Step 4: Adding Stars & Finish
-
Place the stars:
Using a white paint pen (which I find much easier for this step than a brush), draw small five-pointed stars scattered across the blue neck area. -
Vary star orientation:
Rotate the stars slightly as you go to make the pattern look natural and dynamic rather than rigid. -
Clean up edges:
Look over your design one last time. If any red or blue slip-ups occurred, touch them up with a bit of white paint. -
Seal the rock:
Finish by applying a coat of clear matte or satin sealer to protect your artwork from chipping and fading.
Now you have a stunning piece of patriotic art that looks great displayed on a porch or hidden for a neighbor to find
Patriotic Florals With Star Centers
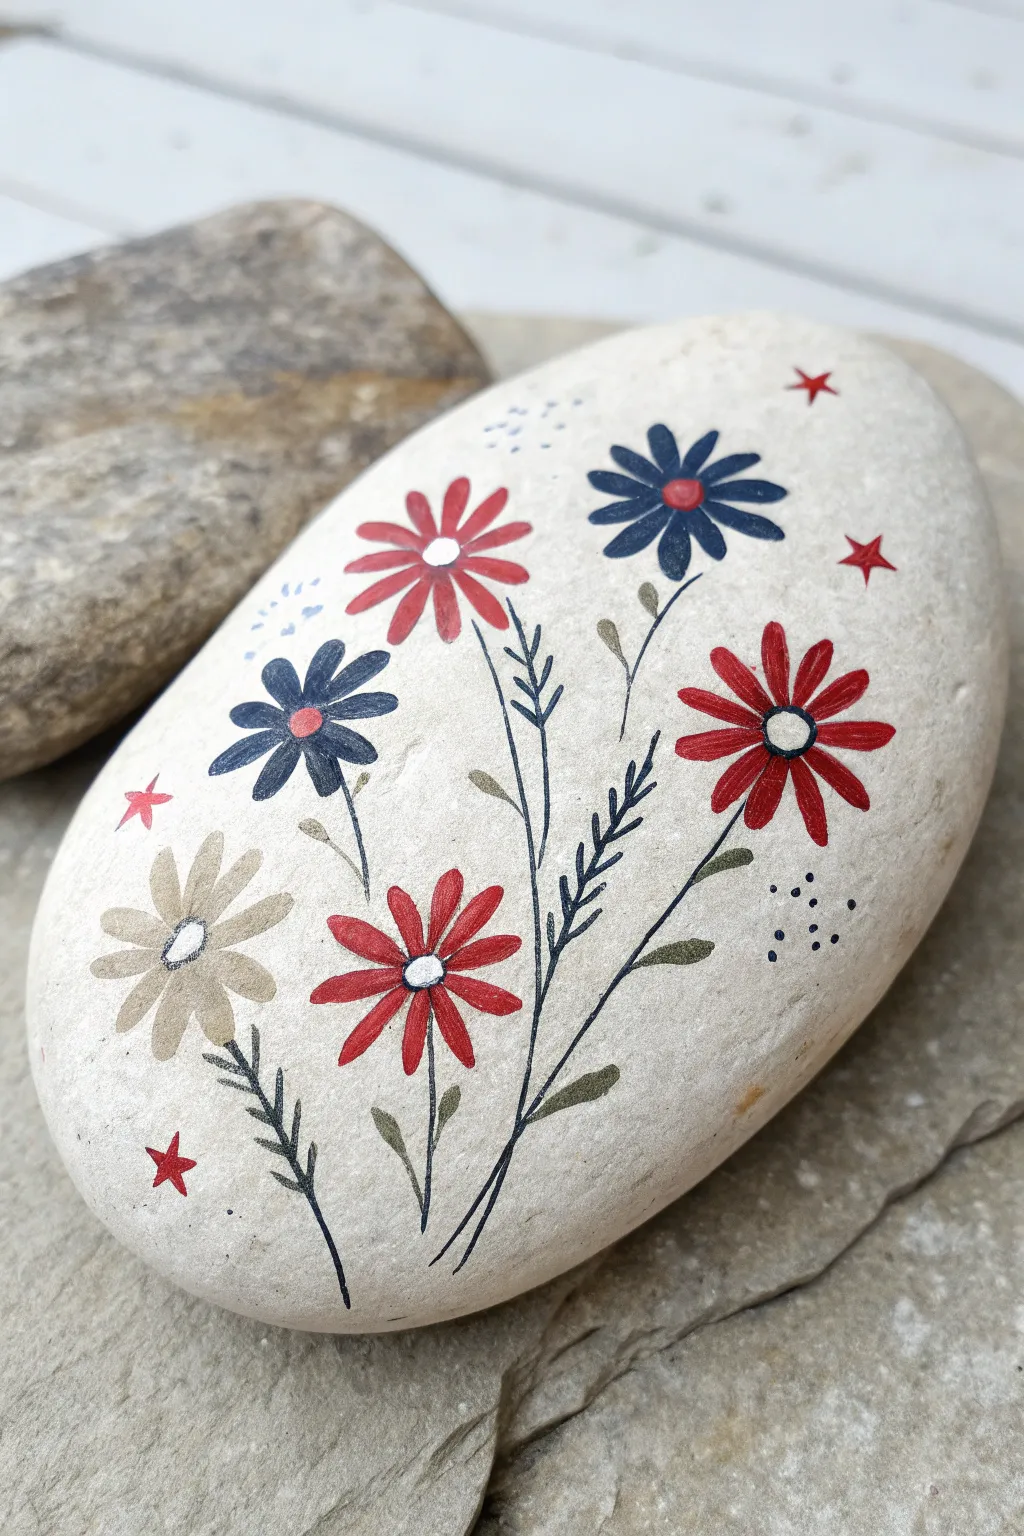

Capture the spirit of Independence Day with a delicate bouquet of wildflowers painted on a smooth river stone. The mix of navy blue, bright crimson, and soft beige flowers creates a vintage-inspired aesthetic perfect for holiday decor.
Step-by-Step
Materials
- Smooth, oval-shaped river rock (white or very light grey)
- Acrylic paints: Navy blue, bright red, beige/tan, olive green, dark green, and white
- Fine detail brushes (size 0 and 00)
- Small round brush (size 1)
- Dotting tool or toothpick
- Pencil for sketching
- Clear acrylic sealer (matte or satin finish)
Step 1: Preparation & Sketching
-
Clean the canvas:
Start by washing your stone with warm soapy water to remove any dirt or oils. Let it dry completely before painting. -
Plan your bouquet:
Using a pencil, lightly sketch the layout of your stems. Draw three or four main curved lines radiating from the bottom center to establish where your flowers will sit. -
Mark flower centers:
Lightly draw small circles at the ends of your stems where the flower heads will go. This helps ensure your composition stays balanced before you commit with paint.
Brush Control Tip
For the ultra-thin stems, slightly wet your liner brush and thin the paint with a tiny drop of water. Ink-like consistency flows better for fine lines.
Step 2: Painting the Blooms
-
Paint the red flowers:
Starting with the bright red acrylic, use your small round brush to paint the petals for the two largest flowers. Use simple, elongated tear-drop strokes radiating from the center circle. -
Paint the blue flowers:
Switch to navy blue and paint two smaller flowers. I like to make the blue petals slightly shorter and rounder than the red ones for visual variety. -
Add the neutral bloom:
Create the beige flower near the bottom left using the same petal technique. This neutral tone helps ground the brighter patriotic colors. -
Fill the centers:
Once the petals are dry, use a dotting tool or the back of a brush to add the centers. Place white dots in the red and beige flowers, and a red dot in the navy blue flowers.
Step 3: Stems & Foliage
-
Draw the main stems:
Using your finest liner brush and dark green or black paint, carefully trace over your initial pencil lines for the stems. Keep these lines extremely thin and delicate. -
Add olive leaves:
With the olive green paint, add small, simple leaves attached to the main stems. Keep them sparse to maintain the airy feel of the design. -
Create wheat-style sprigs:
Using the dark green or black paint again, add a few decorative sprigs that look like wheat or fern fronds. Use tiny V-shapes stacking up a central line. -
Anchor the bouquet:
At the very bottom where the stems converge, add small, dark fern-like details to make the bunch look gathered.
Shaky Hands?
If you struggle with painting tiny stars, try using a fine-point acrylic paint marker or a stencil instead of a brush for sharper points.
Step 4: Details & Finishing
-
Outline the centers:
Use a very fine touch with black paint to outline the round flower centers. This crisp detail makes the flowers pop. -
Add the stars:
Paint small, five-pointed stars in the empty spaces using red paint. Scatter them around the flowers to fill any gaps in the composition. -
Dot details:
Using your smallest dotting tool or a toothpick, add clusters of tiny blue dots near the top left and black dots near the bottom right for texture. -
Final dry:
Allow the entire rock to dry for at least an hour to ensure the paint is fully set. -
Seal the artwork:
Apply a coat of clear acrylic sealer. A matte finish looks very natural on river rocks, but gloss will make the colors shine brighter.
Place your finished patriotic stone on a porch railing or garden path to celebrate the holiday with charm
Butterfly Wings in Stars and Stripes
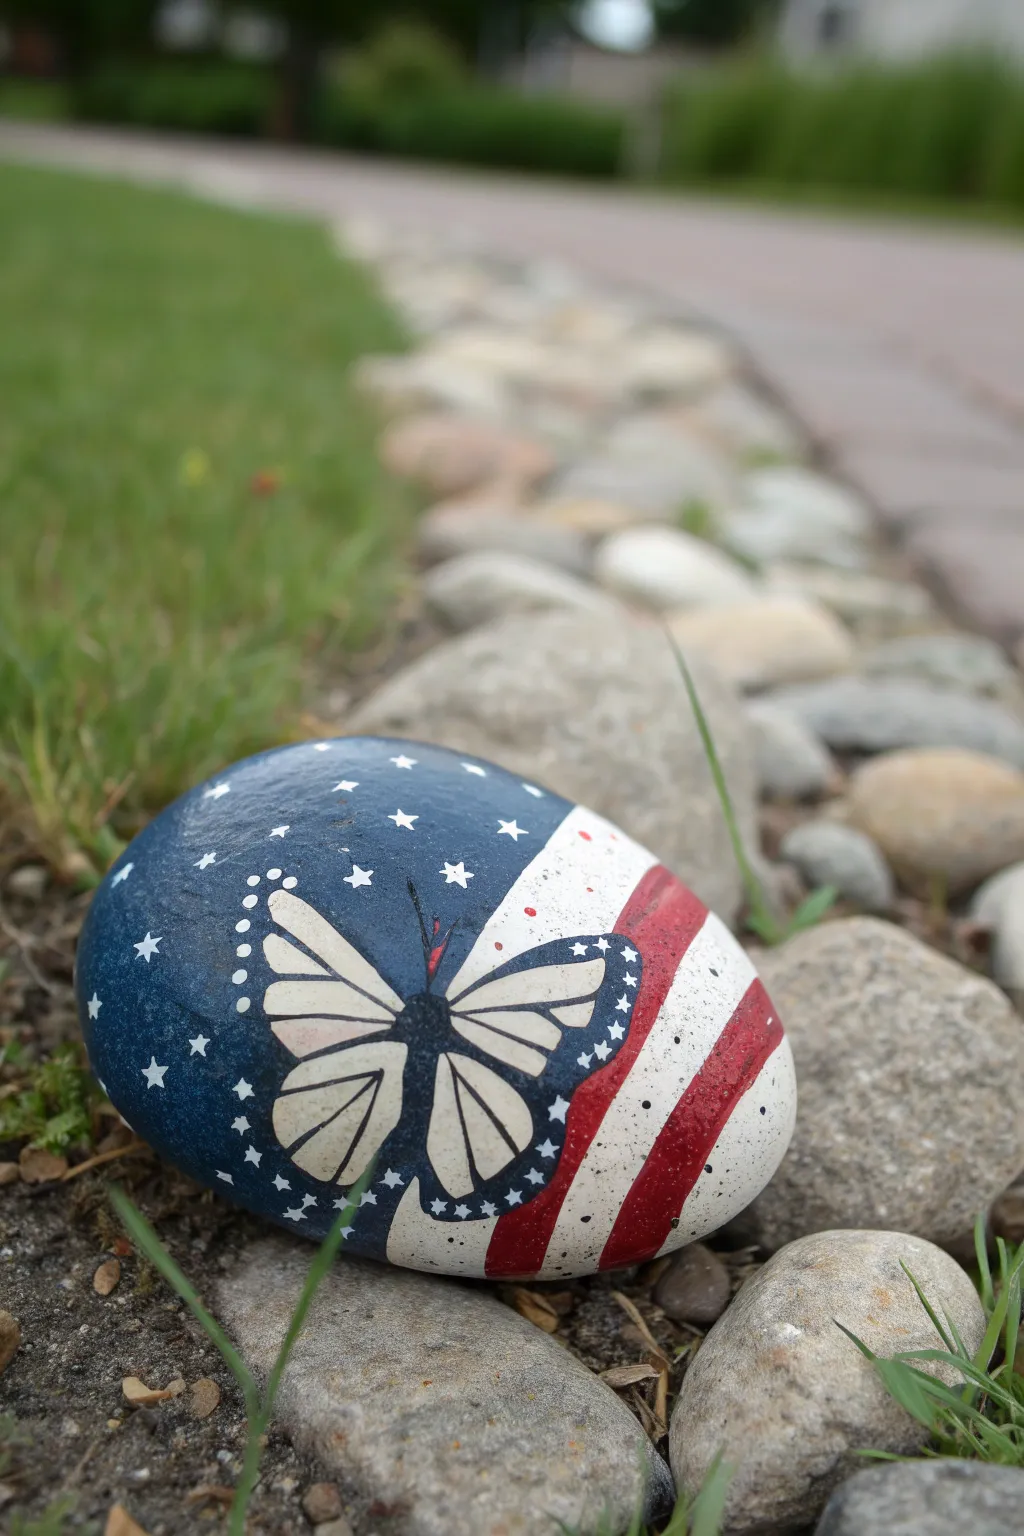
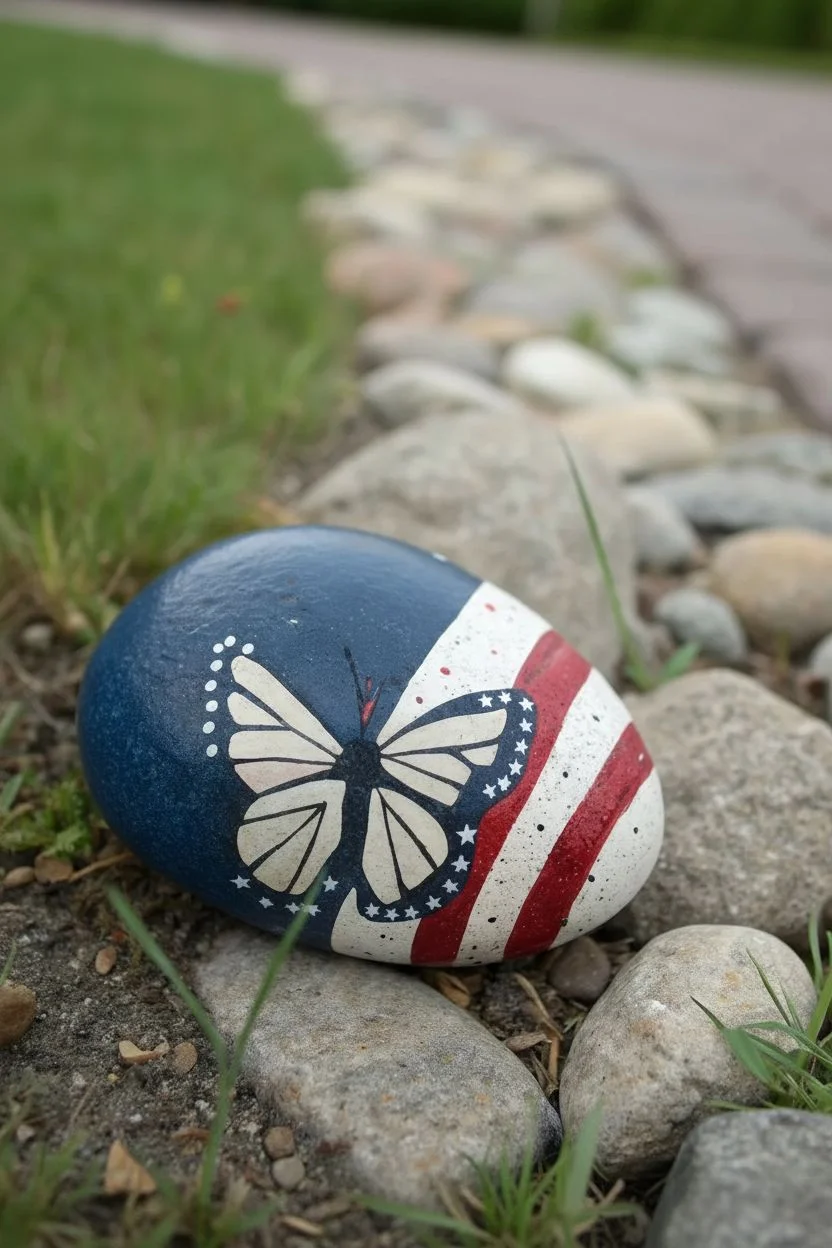
Transform a smooth garden stone into a symbol of freedom with this intricate butterfly design set against the American flag. The split-design features a starry blue field on the left and classic red and white stripes on the right, united by a delicate butterfly silhouette.
Step-by-Step Guide
Materials
- Smooth, oval-shaped river rock (cleaned and dried)
- Acrylic paints: Navy Blue, Bright Red, Titanium White, Black
- Pencil (for sketching)
- Fine detail paintbrushes (0 or 00 size)
- Medium flat paintbrush
- Dotting tool or toothpick
- Clear acrylic sealer (spray or brush-on)
Step 1: Setting the Background
-
Clean Your Canvas:
Begin by scrubbing your rock with warm, soapy water and drying it completely. A clean surface ensures the paint adheres properly and lasts longer. -
Base Coat:
Paint the entire top surface of the rock with Titanium White. This acts as a primer and ensures your red and blue colors will pop. Let this dry completely before moving on. -
Sketching the Zones:
Lightly trace a diagonal swooping line across the rock with a pencil. This line will separate the blue field from the stripes later on. Also, lightly sketch the outline of a butterfly in the center, positioning the body along that diagonal line. -
Painting the Blue Field:
Using your navy blue paint and a medium brush, carefully fill in the upper-left section of the rock, painting around the left wing of your pencil-sketched butterfly. Keep the edge smooth. -
Adding the Stripes:
On the lower-right white section, use a steadier hand to paint wavy red stripes. Follow the contour of the rock’s shape. Leave spaces of the white base coat visible between the red stripes to create the flag pattern.
Steady Hand Tip
Rest your pinky finger on the dry part of the rock while painting fine lines (like the veins). This anchors your hand and reduces shaking significantly.
Step 2: The Patriotic Butterfly
-
Defining the Shape:
Outline the entire butterfly shape—wings and body—with a thin liner brush and black paint. This establishes the boundaries for your detailed work. -
Inner Wing Color:
Paint the inside of the wing sections with a very pale cream or off-white color. It should be slightly distinct from the bright white stripes to add depth to the insect. -
Wing Veins:
Using your finest brush (size 00 is best here), carefully paint thin black lines inside the wings to create the vein structure. Start from the body and pull the stroke outward toward the wing edges. -
Thickening the Borders:
Go back over the outer edges of the wings with black paint, making the drawn border significantly thicker. This mimics the distinctive look of a Monarch butterfly. -
Painting the Body:
Fill in the central body and head of the butterfly with solid black paint. Add two very fine, curved antennae extending from the head. -
Wing Decoration:
Along the thick black borders of the wings, use a toothpick or small dotting tool to add tiny white dots. This detail brings the butterfly to life and ties it into the starry theme.
Add Some Sparkle
Mix a tiny amount of glitter medium into the white paint for the stars or the butterfly wings to make the design shimmer in the sunlight.
Step 3: Starry Details & Finish
-
Painting Stars:
On the dry navy blue background, use a very fine brush to paint small, five-pointed white stars. Scatter them randomly but evenly. -
Adding Micro-Stars:
To fill empty spaces in the blue field without overcrowding, use a dotting tool to add tiny single white dots representing distant stars. -
Antennae Highlight:
If you want a pop of color, add a microscopic touch of red near the base of the antennae, just like in the reference photo. -
Clean Up:
Check the edges of your painting. If the red stripes or blue field look jagged, use a clean brush with the background color to tidy up the lines. -
Sealing the Art:
Once the paint is absolutely dry (give it at least an hour), apply a coat of clear acrylic sealer. This protects your artwork from weather if you choose to display it outdoors.
Place this little piece of patriotism in your garden or on your porch to welcome guests with summer spirit
Negative Space Star Cutouts on Blue
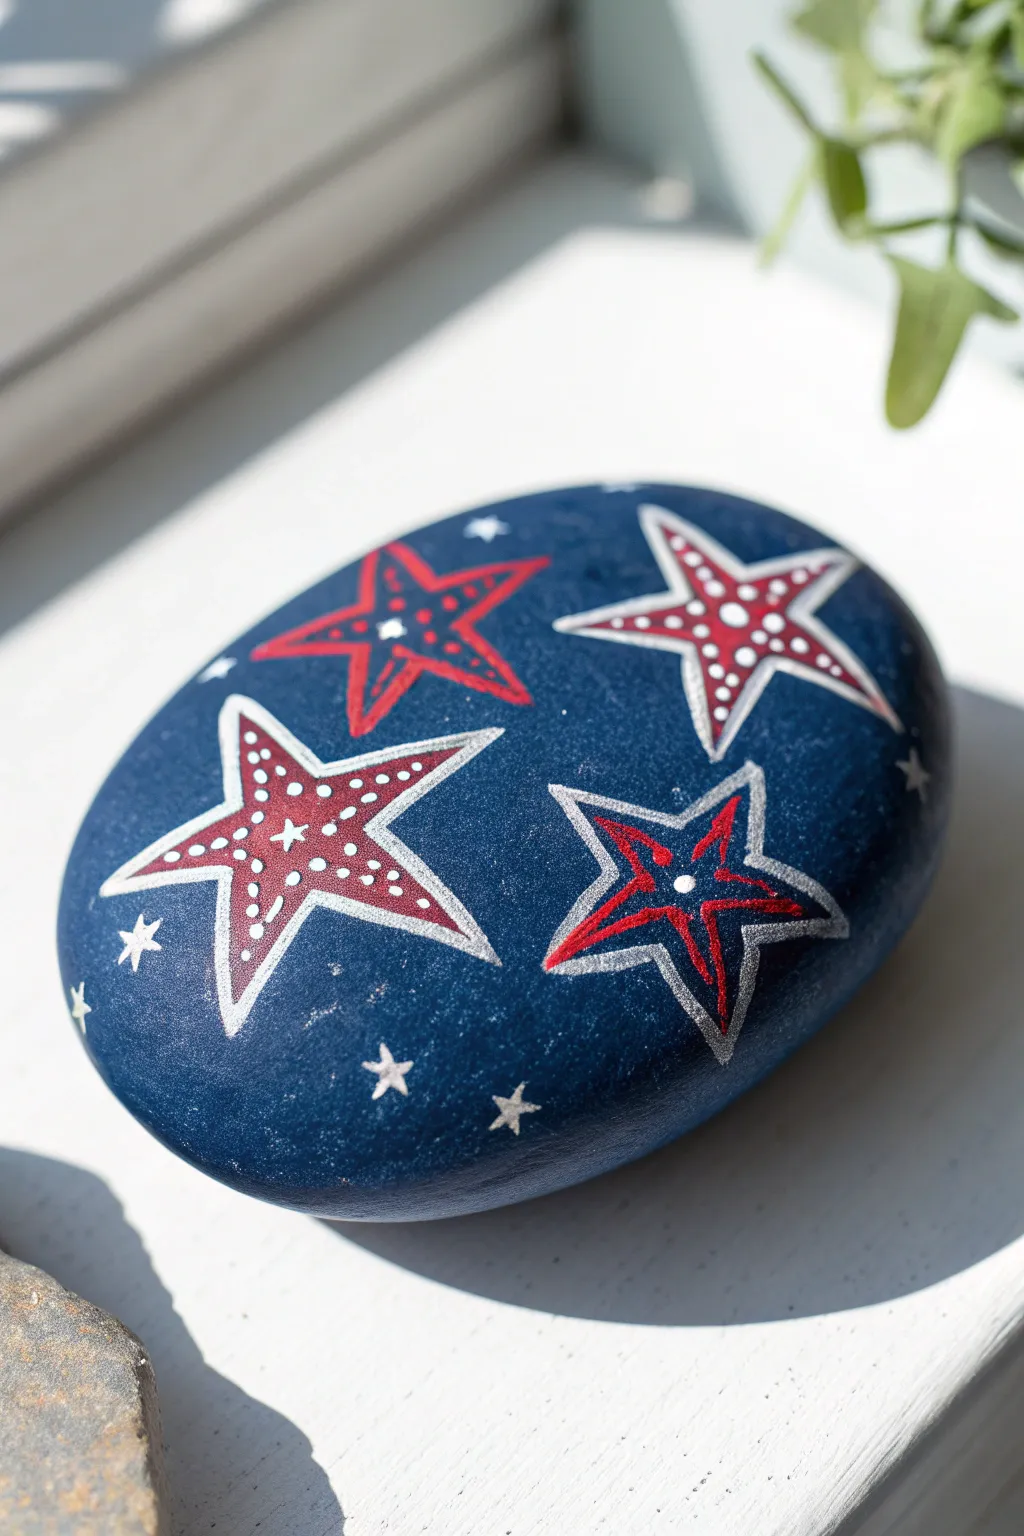
This deep blue stone features a constellation of hand-painted stars that pop with red, white, and silver details. The design combines simple shapes with intricate dotwork for a finished piece that feels both rustic and celebratory.
Step-by-Step Guide
Materials
- Smooth, oval river rock (approximately palm-sized)
- Deep navy blue acrylic paint
- Bright white acrylic paint or paint pen
- Red acrylic paint or paint pen
- Silver metallic paint pen (fine tip)
- Flat paintbrush (medium)
- Detail paintbrush (0 or 00 size)
- Clear acrylic sealer (glossy spray or brush-on)
- Pencil for sketching (optional)
Step 1: Setting the Stage
-
Clean the surface:
Before putting brush to stone, wash your rock thoroughly with soap and water to remove any dirt or oils, then let it dry completely in the sun. -
Apply the base coat:
Using your flat medium brush, paint the entire top surface of the rock with a deep navy blue acrylic paint. -
Build opacity:
Allow the first layer to dry to the touch, then apply a second coat of blue to ensure a rich, opaque background with no rock showing through. -
Let it cure:
Set the rock aside until the blue base is bone dry; painting details on wet paint will result in muddy colors.
Paint Pen Pro-Tip
Store your paint pens horizontally when not in use. Before drawing, pump the nib on a scrap piece of paper to get the ink flowing smoothly without unexpected blobs.
Step 2: Stenciling the Stars
-
Draft the layout:
Lightly sketch four large, five-pointed stars onto the blue surface using a pencil, angling them slightly differently to create movement. -
Outline in silver:
Trace over your pencil lines using a fine-tip silver metallic paint pen to create the crisp outer shape of each large star. -
Outline the inner stars:
Inside each silver star outline, draw a smaller star shape using a red paint pen or a fine brush with red paint, leaving a small gap between the red and silver lines. -
Fill the centers:
Fill in the centers of the red stars completely with red paint, ensuring a solid, vibrant color.
Fixing Wobbly Lines
If a line goes crooked, don’t wipe it! Let it dry completely, then touch it up with the base coat navy blue paint. It works like an eraser for acrylics.
Step 3: Adding the Details
-
Create the white borders:
For the largest star on the left, use a white paint pen to draw a V-shape inside each red point, effectively creating a white internal border. -
Detail the second star:
Similarly, take the upper-right star and add white dashed lines or dots inside the red points to give it a stitched appearance. -
Add central dots:
Place a single, bright white dot in the very center of the red stars using the tip of a paintbrush handle or a dotting tool. -
Highlight the red fields:
Using your finest detail brush or a white gel pen, add tiny white speckles or micro-dots inside the red areas of the largest stars for texture. -
Create the mini-stars:
In the open blue spaces between the large stars, paint tiny silver or white five-pointed stars to fill the void. -
Sprinkle the background:
Add very small dots of white or silver around the edges of the rock to simulate distant stars within the galaxy.
Step 4: Finishing Touches
-
Review and refine:
Check your lines for sharpness, touching up any silver outlines or red fills that look uneven. -
Dry completely:
Wait at least an hour for all layers of paint and ink to dry fully before sealing. -
Seal the artwork:
Apply a coat of clear acrylic sealer—I prefer a spray for an even finish without brushstrokes—to protect the paint and give the rock a polished gleam.
Place this starry stone on your porch or windowsill to showcase your patriotic spirit all summer long
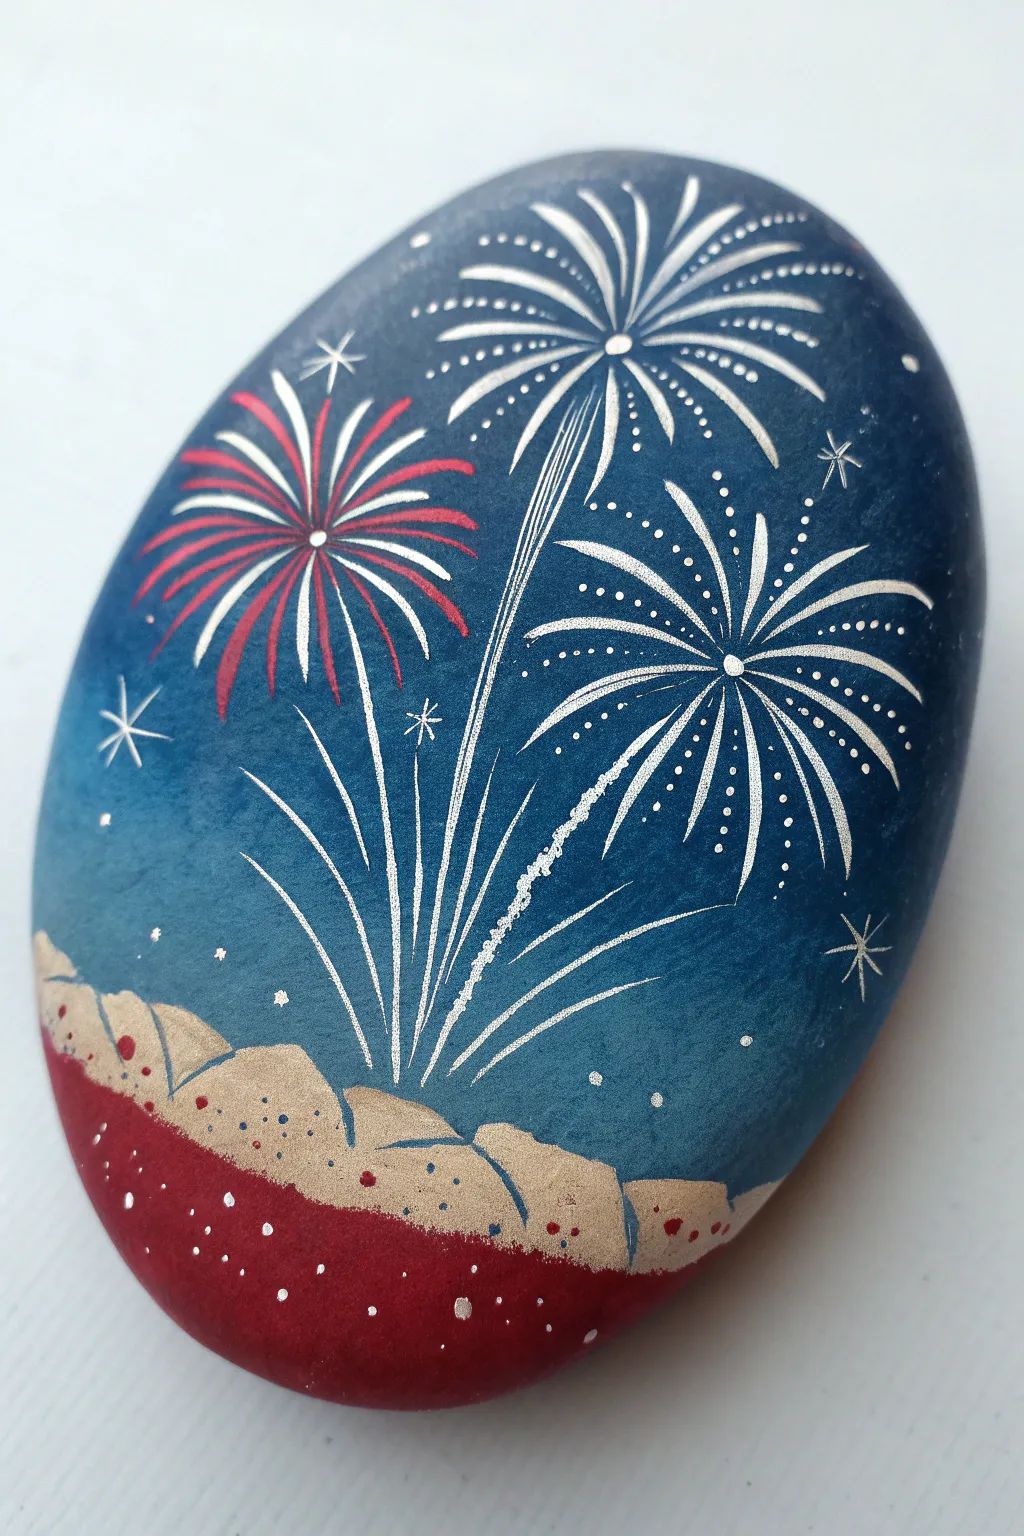
Ombre Sky With Layered Fireworks

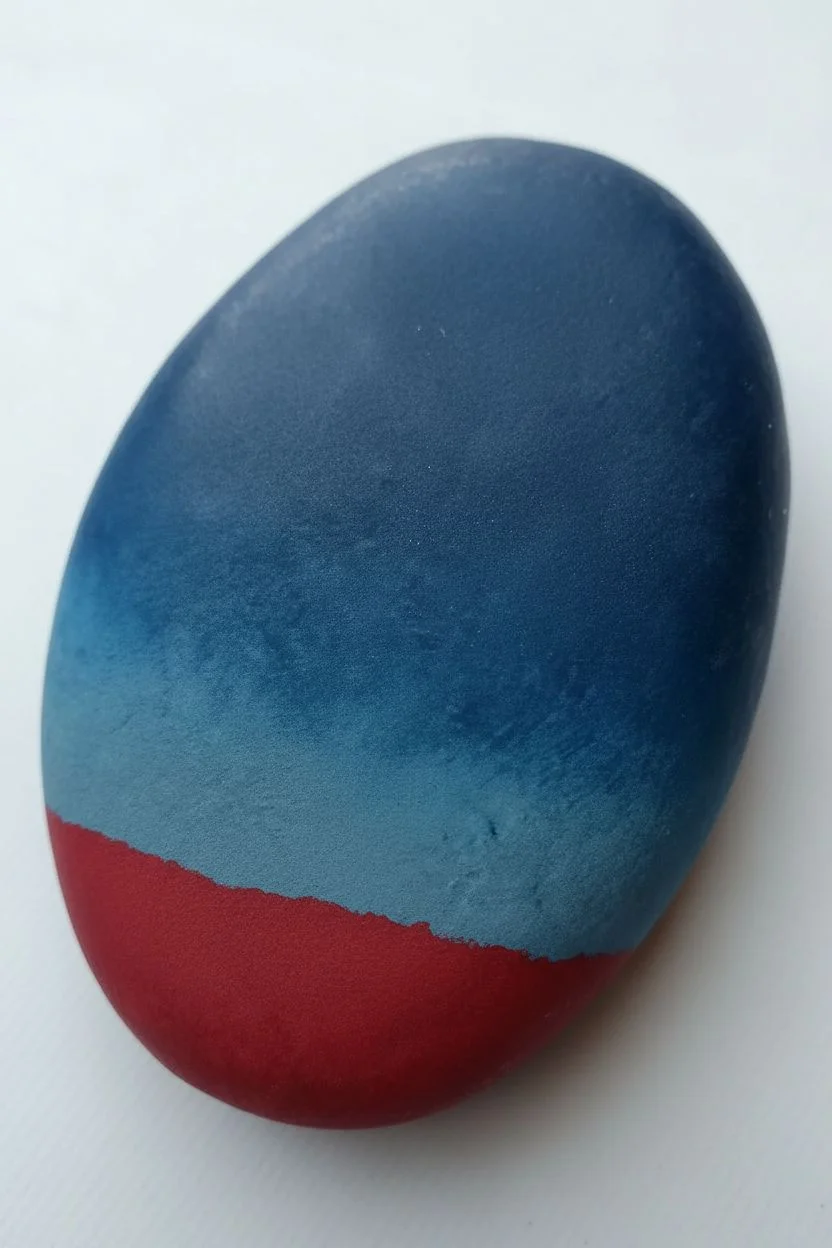
Capture the magic of Independence Day with this layered landscape design featuring exploding fireworks over sandy dunes. The deep blue gradient sky provides the perfect backdrop for crisp white and red bursts.
How-To Guide
Materials
- Smooth oval river rock
- Acrylic paints: Navy blue, light blue, white, red, metallic gold or sand color
- Flat paint brushes (medium and small)
- Fine liner brush (0 or 00 size)
- Dotting tool or toothpick
- Acrylic paint markers (optional: white, red)
- Spray sealer or varnish
Step 1: Setting the Scene
-
Clean and Prep:
Begin by scrubbing your rock with soap and water to remove any dirt or oils. Let it dry completely before starting to ensure the paint adheres properly. -
Base Gradient:
Mix navy blue with a tiny touch of black to create a deep midnight blue. Paint the top 3/4 of the rock with this dark shade. -
Ombre Effect:
While the dark blue is still slightly wet, blend a lighter blue towards the bottom of the sky area. Use a damp brush to smooth the transition between the dark top and lighter horizon line. -
Red Foundation:
Paint the bottom curved section of the rock with a solid coat of deep red paint. This will act as the ground later on. -
Dry Time:
Allow the base layers to dry completely. If the blue looks streaky, apply a second coat for opacity.
Step 2: Creating the Landscape
-
Painting Dunes:
Using a sand or metallic gold color, paint bumpy, irregular hill shapes right above the red section, overlapping slightly onto the blue sky. Create 3-4 distinct ‘dune’ shapes. -
Adding Shadows:
Mix a tiny bit of brown into your sand color. Paint thin shadow lines on the bottom left side of each dune bump to give them dimension. -
Ground Texture:
Use a dotting tool or the tip of a small brush to add tiny dots of red and white over the red ground area and the sandy dunes for texture.
Uneven Lines?
If your firework lines are too thick or shaky, switch to a white acrylic paint pen (0.7mm tip). It offers much more control than a brush for beginners.
Step 3: Fireworks Display
-
Planning Centers:
Imagine where your three main fireworks will go. Place three tiny white dots in the sky to mark the center of each explosion. -
Shooting Trails:
Using your finest liner brush and white paint thinned slightly with water, paint long, curved lines shooting up from the dunes toward the center dots. These are the smoke trails. -
Main Bursts:
From each center dot, flick your liner brush outward to create the main ‘spokes’ of the fireworks. Keep your hand loose to get tapered lines. -
Secondary Bursts:
Add smaller, shorter lines in between the main spokes to make the fireworks look full and explosive. -
Red Accents:
On the left firework distinctively, paint red lines directly over or next to the white spokes to create a two-tone effect. -
Dotted Details:
Use a toothpick or tiny dotting tool to add rows of white dots along the spokes of the two right-side fireworks for a glittering effect. -
Starry Sky:
Fill the empty blue space with small white stars. Draw simple crosses for larger stars and tiny dots for distant ones.
Add Sparkle
Mix a pinch of fine silver glitter into your clear sealer, or paint over the white fireworks with iridescent glitter paint for a real shimmering effect.
Step 4: Finishing Touches
-
Highlighting:
Add a few extra bright white strokes to the center of the fireworks where the light would be most intense. -
Sealing:
Once the paint is fully cured (give it a few hours), spray the rock with a clear varnish or sealer to protect your artwork from chipping.
Now you have a festive piece of decor perfect for your Fourth of July celebration table


Have a question or want to share your own experience? I'd love to hear from you in the comments below!