
If you love the look of a messy, colorful studio, turning that vibe into a cake is ridiculously satisfying. Here are my favorite paint cake ideas—from classic splatter effects and drippy paint to artsy details that look straight off a working palette.
Classic Paint Splatter Cake
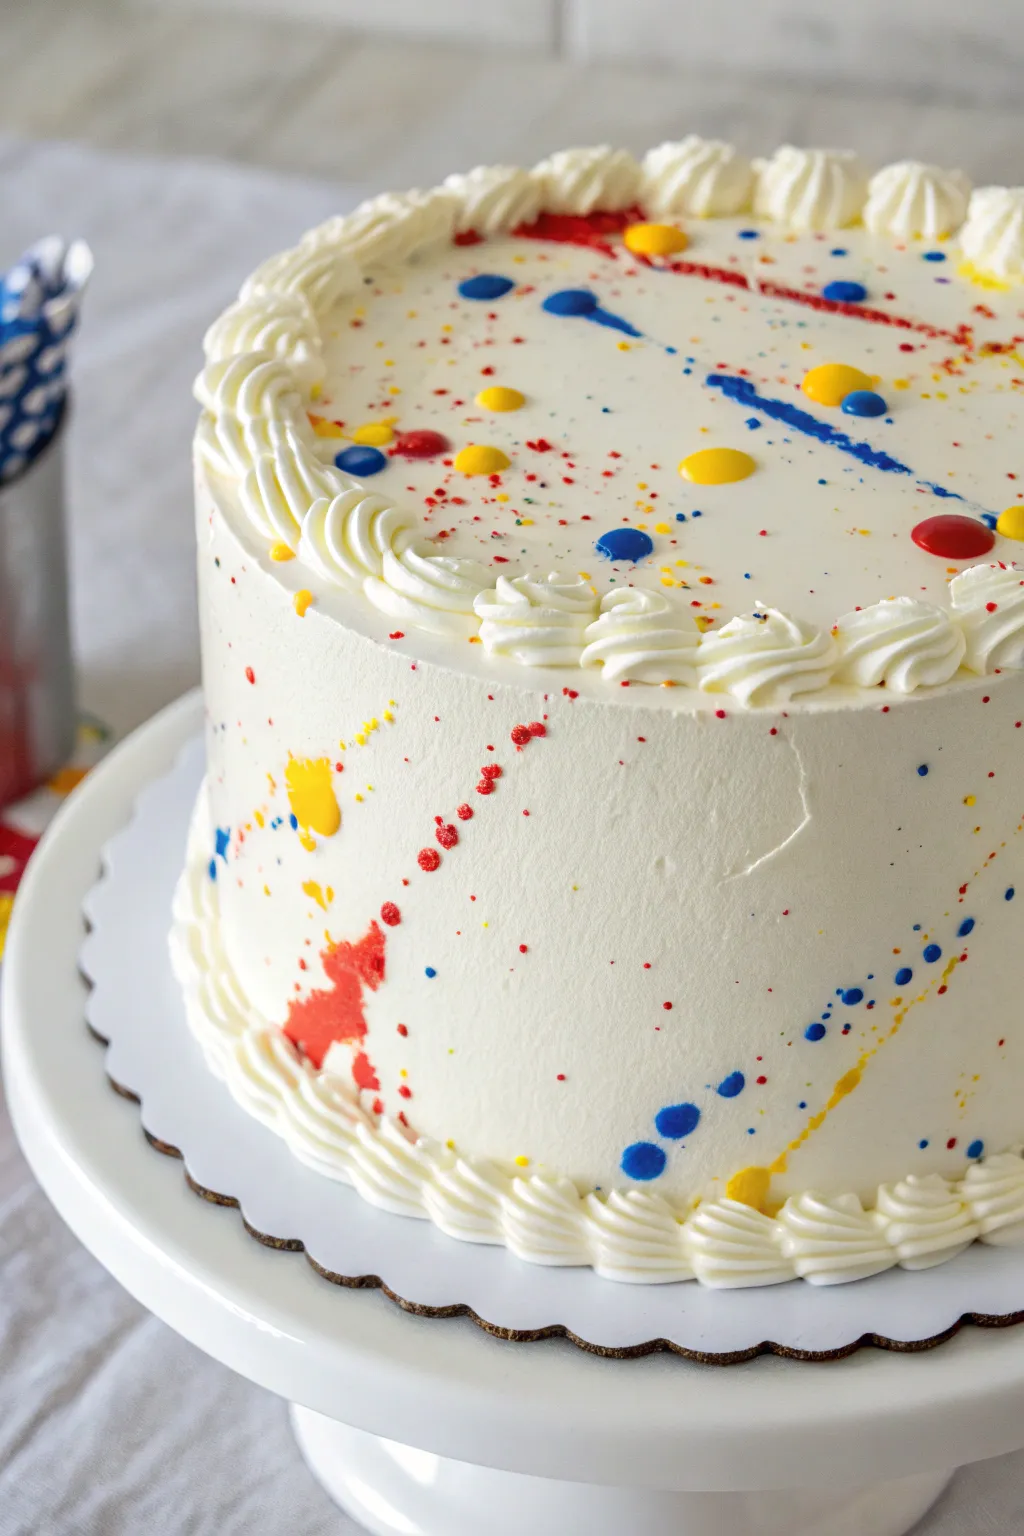
Transform a simple dessert into an edible masterpiece with this vibrant splatter paint design. Using colored chocolate or candy melts, this technique creates an energetic, abstract look that pops against a pristine white buttercream canvas.
Step-by-Step
Materials
- Pre-baked round cake (3 layers recommended)
- White buttercream frosting (Swiss Meringue or American)
- Candy melts or white chocolate (Red, Blue, Yellow)
- Heavy cream or vegetable oil (for thinning)
- Offset spatula
- Cake turntable
- Bench scraper / Cake smoother
- Piping bag with large star tip (e.g., Wilton 1M or 2D)
- New, food-safe paintbrushes (various sizes)
- Parchment paper or drop cloth (for protecting surfaces)
- Small microwave-safe bowls
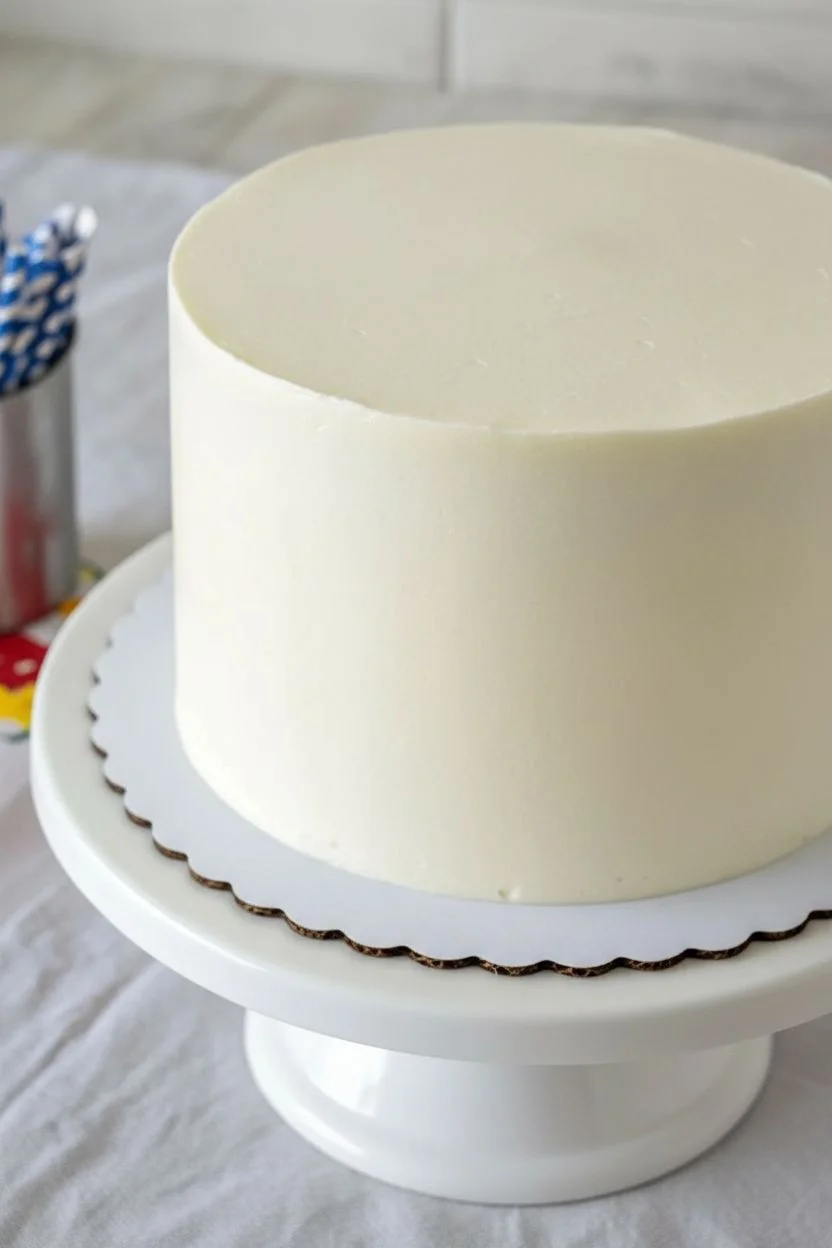
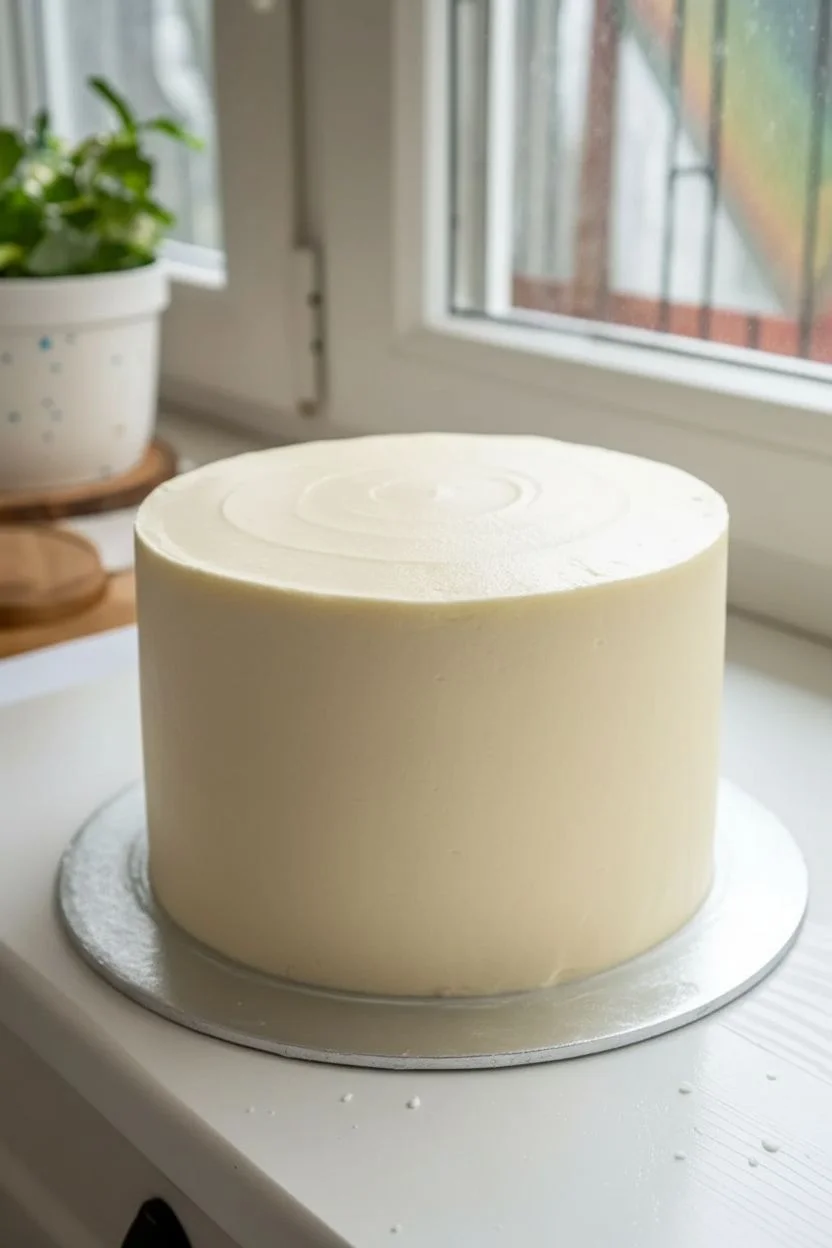
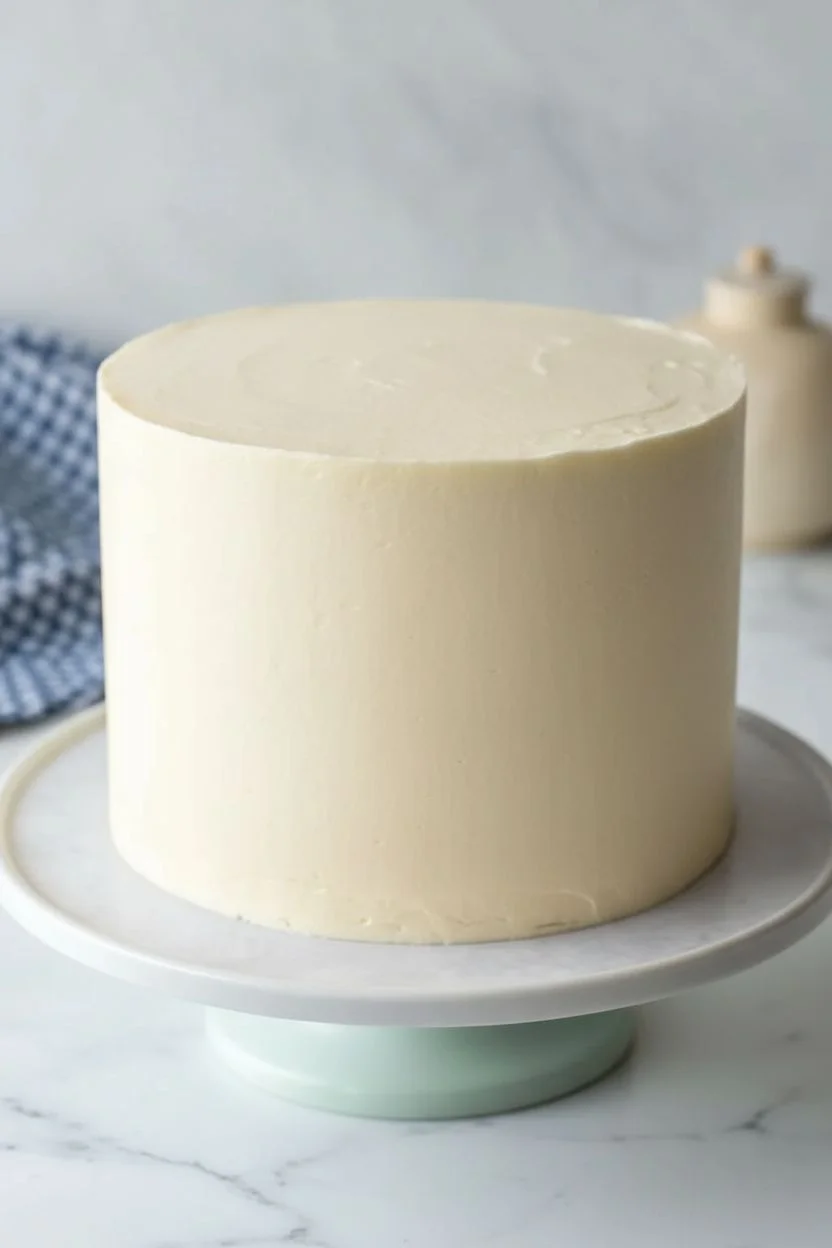
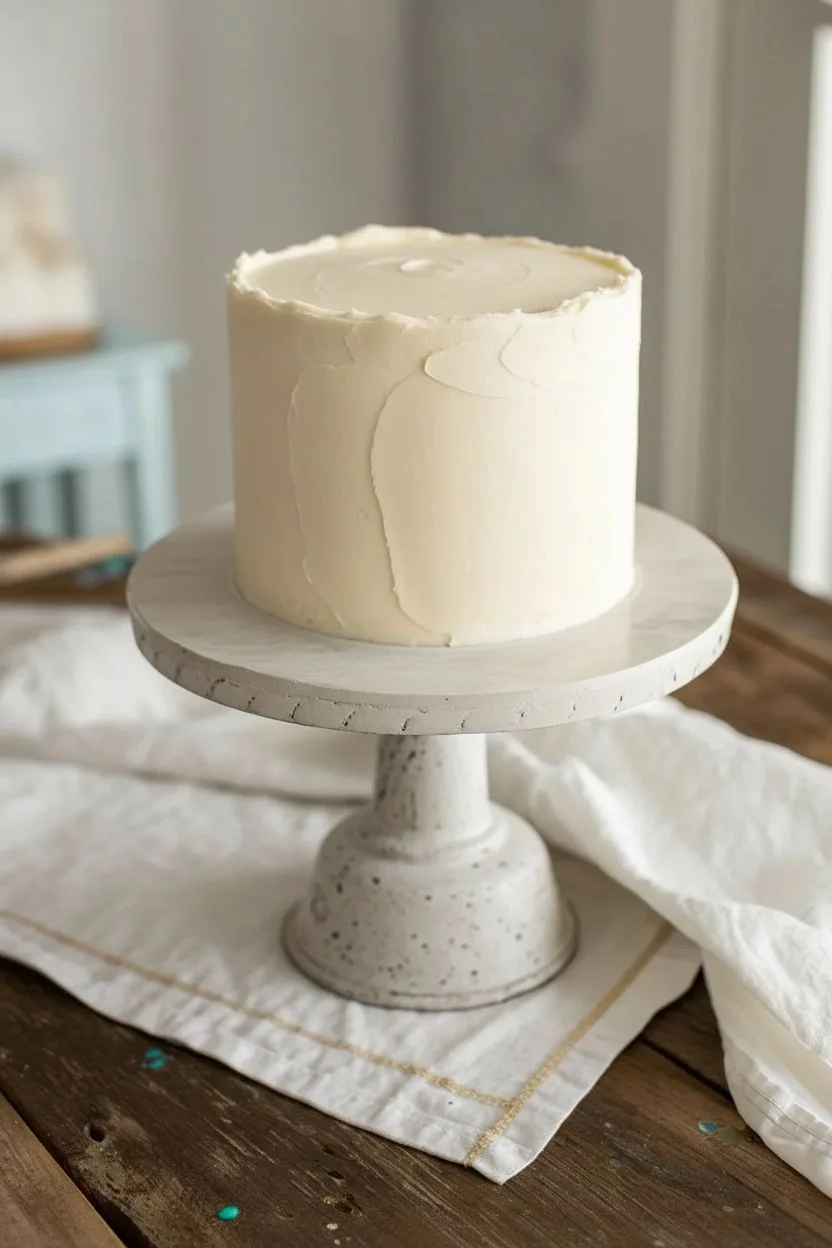
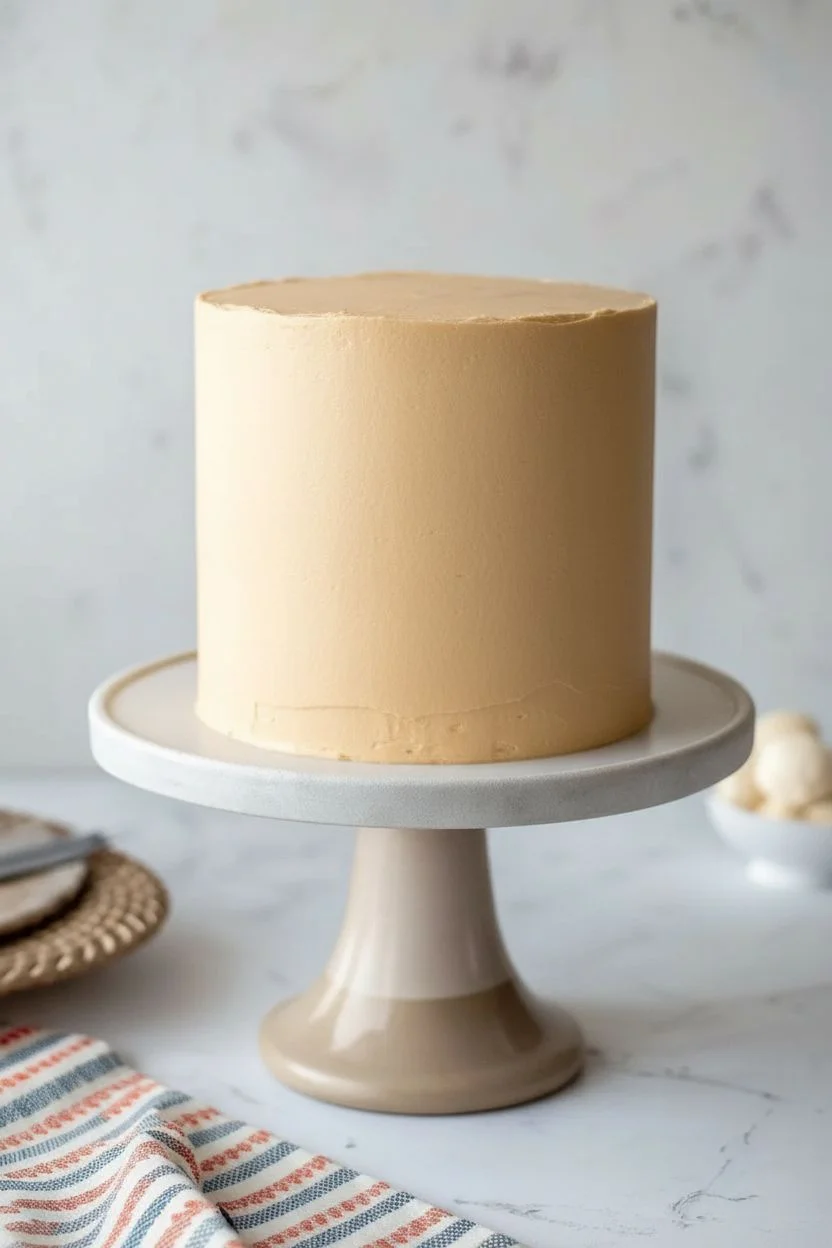
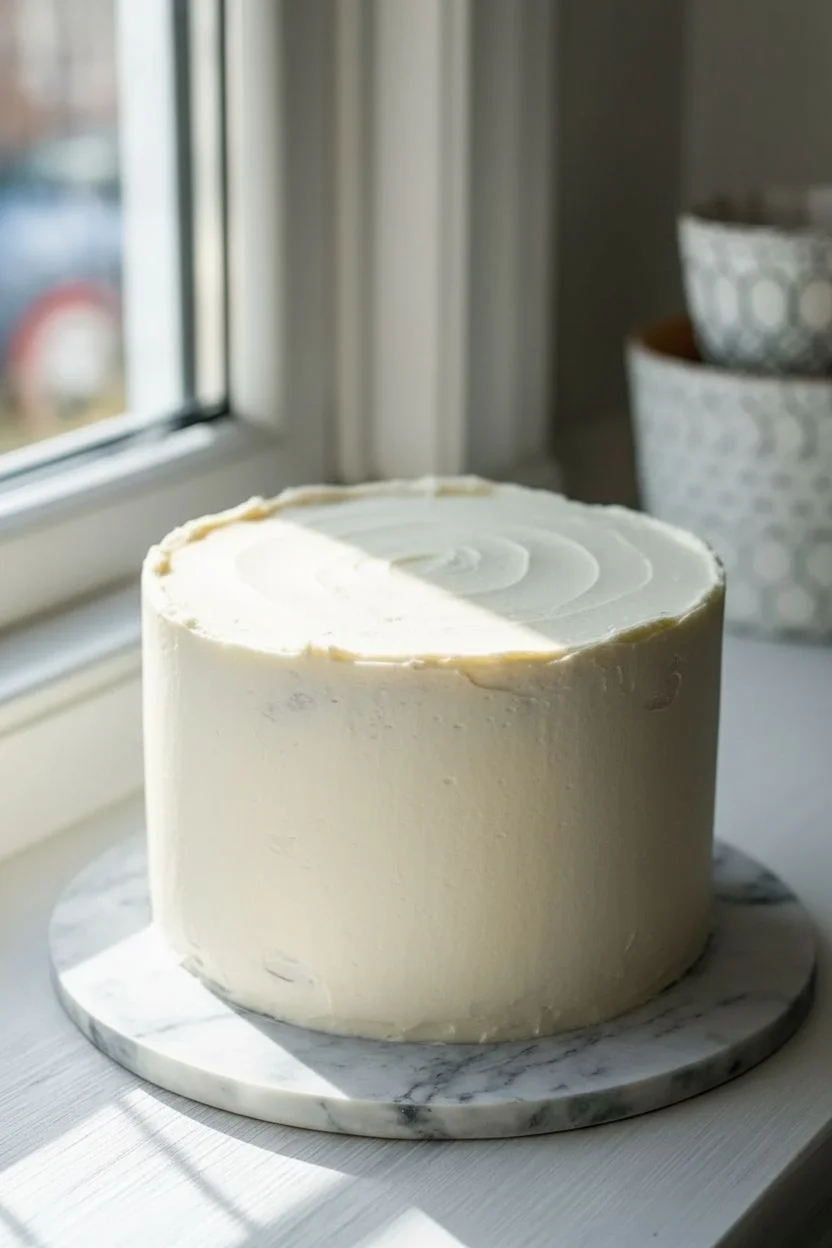
Step 1: The Canvas
-
Stack and Fill:
Begin by leveling your cake layers. Place the bottom layer on a cake board and pipe a dam of buttercream around the edge before filling the center. Repeat with the remaining layers. -
Crumb Coat:
Apply a thin layer of buttercream over the entire cake to trap any crumbs. Use your offset spatula to spread it evenly, then chill in the fridge for 20 minutes until firm. -
Final Coat Application:
Apply a generous amount of white buttercream to the top and sides of the cake. This layer needs to be thick enough to be smoothed perfectly. -
Smooth the Sides:
Hold a bench scraper vertically against the side of the cake while slowly spinning the turntable. Apply gentle, consistent pressure to scrape away excess frosting and create a sleek, smooth wall. -
Crisp Edges:
Using your offset spatula, gently pull the frosting ridges that formed at the top edge towards the center of the cake to create a sharp, flat top. Chill the cake for at least 30 minutes to ensure the surface is firm for splattering.
Pro Tip: Temperature Matters
Make sure your cake is thoroughly chilled before starting. Cold buttercream helps the chocolate ‘paint’ set quickly upon contact.
Step 2: Prepare the Paint
-
Melt the Chocolate:
Place red, blue, and yellow candy melts into separate small microwave-safe bowls. Heat in 30-second intervals, stirring in between, until completely smooth. -
Thin Consistency:
The melted chocolate will likely be too thick to splatter well. Stir in a teaspoon of heavy cream or vegetable oil at a time until the mixture reaches a fluid, paint-like consistency. It should drip easily off a spoon. -
Test the Texture:
Dip a brush into one color and flick it onto a piece of parchment paper. If it creates nice droplets and streaks rather than clumps, it’s ready. If I feel it’s still too thick, I add just a drop more oil. -
Protect Your Area:
This process gets messy. Lay down parchment paper or a plastic tablecloth under your cake stand and potentially behind the cake to catch errant flying chocolate.
Step 3: The Splatter Technique
-
Primary Colors:
Starting with blue, dip a clean brush into the mixture. hold the brush near the cake and tap the handle firmly with your finger or another brush handle to launch droplets onto the side of the cake. -
Create Movement:
Vary your distance and the force of your tap. Hard taps create long streaks and larger splashes, while gentle flicks create a fine mist of dots. Rotate the cake stand often. -
Layering Colors:
Repeat the process with the red mixture. Aim for some empty white spaces and try to cross over existing blue splatters to create depth. -
Bright Accents:
Finish with yellow splatters. Since yellow is lighter, ensure you get some nice large droplets on the top surface of the cake for visibility. -
Top Surface Detail:
For the top, hold the brush directly overhead and give a sharp downward shake to create defined round drips and a few directional lines across the surface.
Troubleshooting: Clumpy Paint
If the chocolate seizes or clumps while splattering, it cooled down too much. Microwave it for 5-10 seconds to loosen it back up.
Step 4: Finishing Touches
-
Clean the Board:
Use a damp paper towel or a small knife to carefully clean any chocolate splatter off the exposed cake board before piping the border. -
Prepare Piping Bag:
Fill a piping bag fitted with a large star tip (like a 1M) with the remaining white buttercream. -
Bottom Border:
Pipe a classic shell border around the base. Squeeze the bag to form a bulb, release pressure, and pull away quickly to form a tail, overlapping the next shell slightly. -
Top Border:
Repeat the shell or rope piping technique around the top rim of the cake. This frames your splatter art and gives the cake a finished, bakery-quality look. -
Final Set:
Place the cake back in the refrigerator for 15 minutes to let the chocolate splatters set completely firmly before serving.
Enjoy slicing into your modern art creation and seeing the smiles it brings


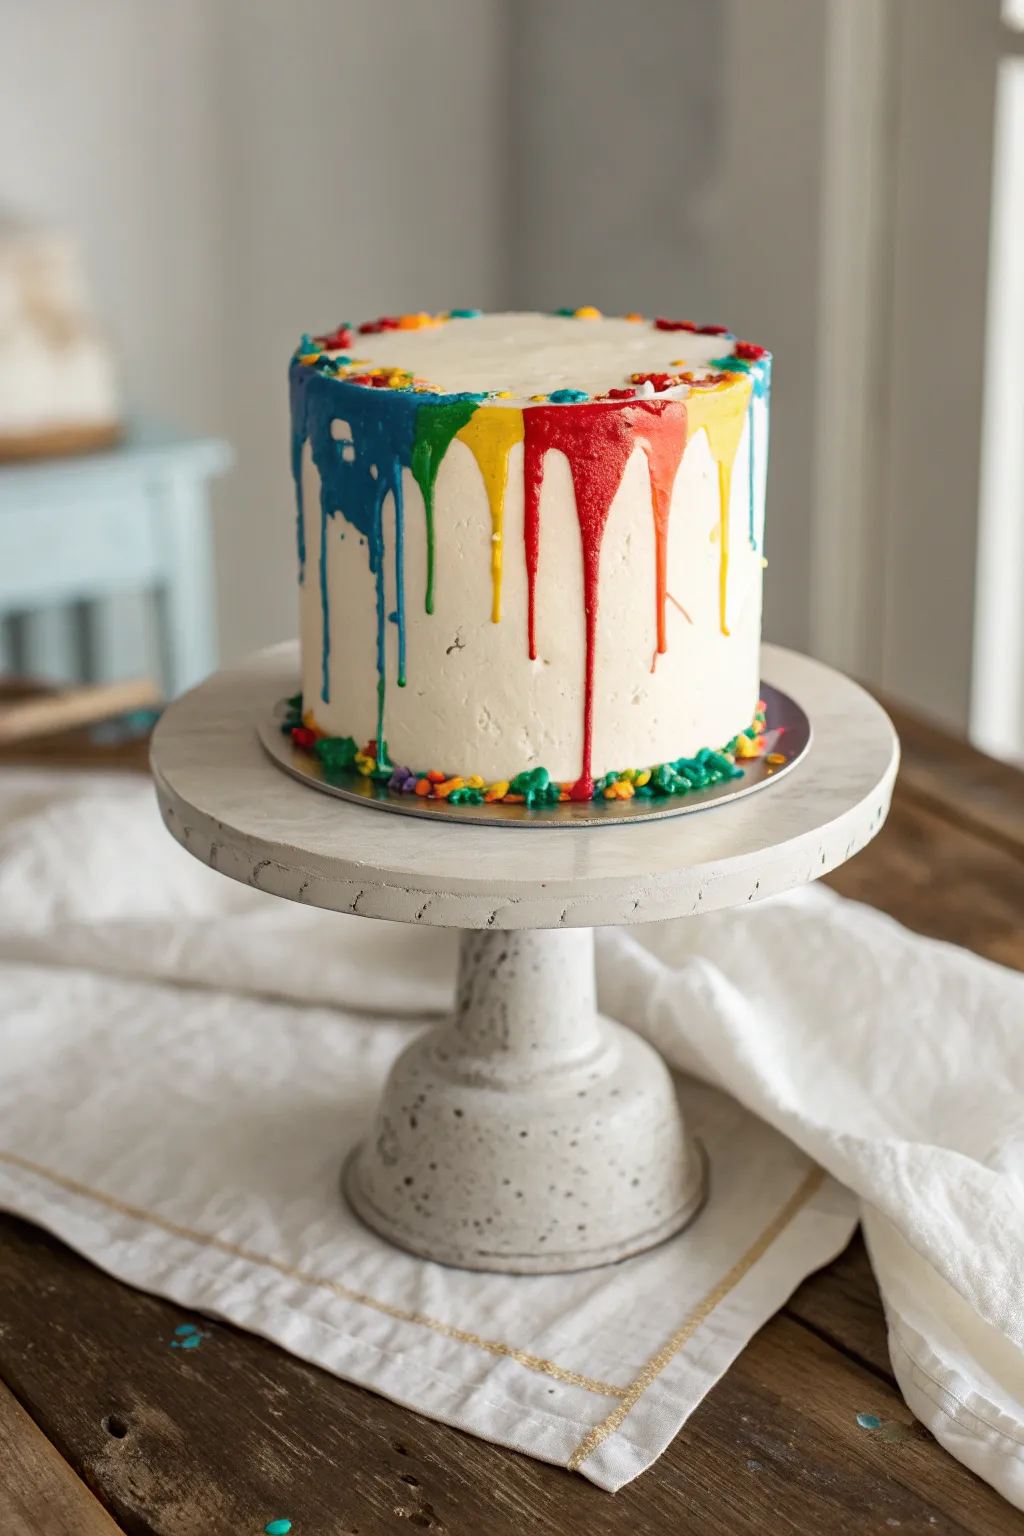
Rainbow Drip Paint Cake
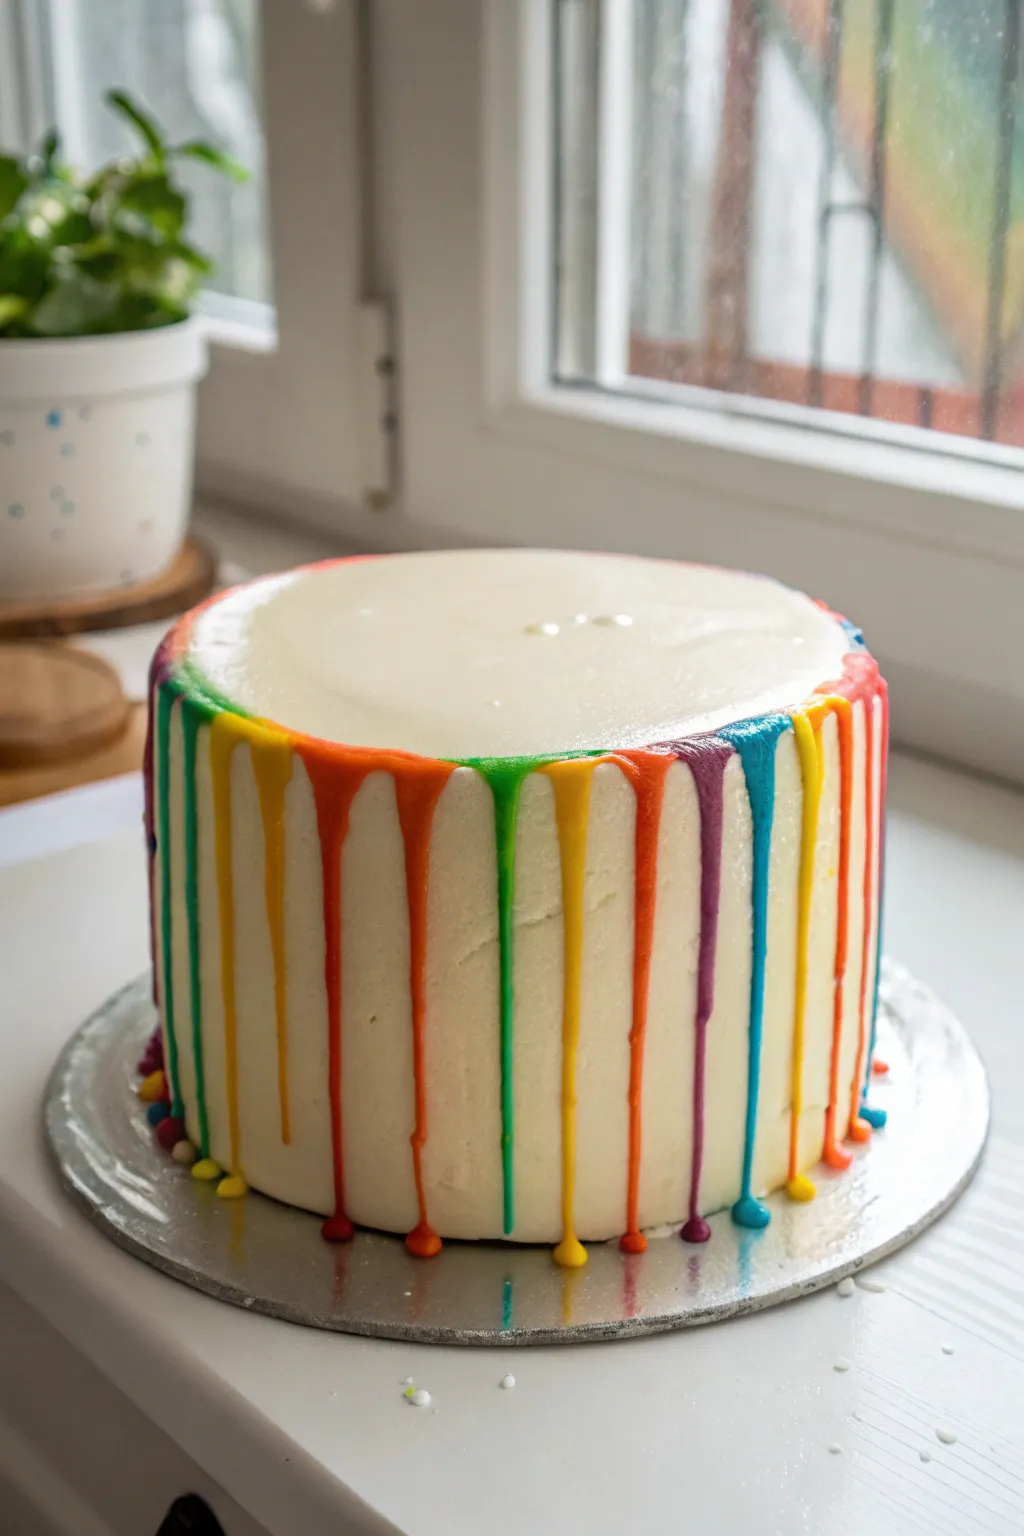
This vibrant cake features a pristine white canvas dramatically interrupted by cascading drips of rainbow colors, creating an edible work of modern art. The contrast between the sleek buttercream and the glossy, colorful drips makes for a celebratory centerpiece that looks professionally patisserie-made but is achievable at home.
Step-by-Step Tutorial
Materials
- 3-4 layer round vanilla sponge cake (6 or 8 inch)
- White buttercream frosting (Swiss meringue or American)
- White chocolate chips or white candy melts
- Heavy cream (if using real chocolate)
- Gel food coloring (Red, Orange, Yellow, Green, Blue, Purple)
- Cake scraper/smoother
- Offset spatula
- Cake turntable
- 6 small bowls
- 6 small spoons or piping bags
- Pastry bag with round tip (optional)
- Sprinkles (optional, for base)
- Cake board
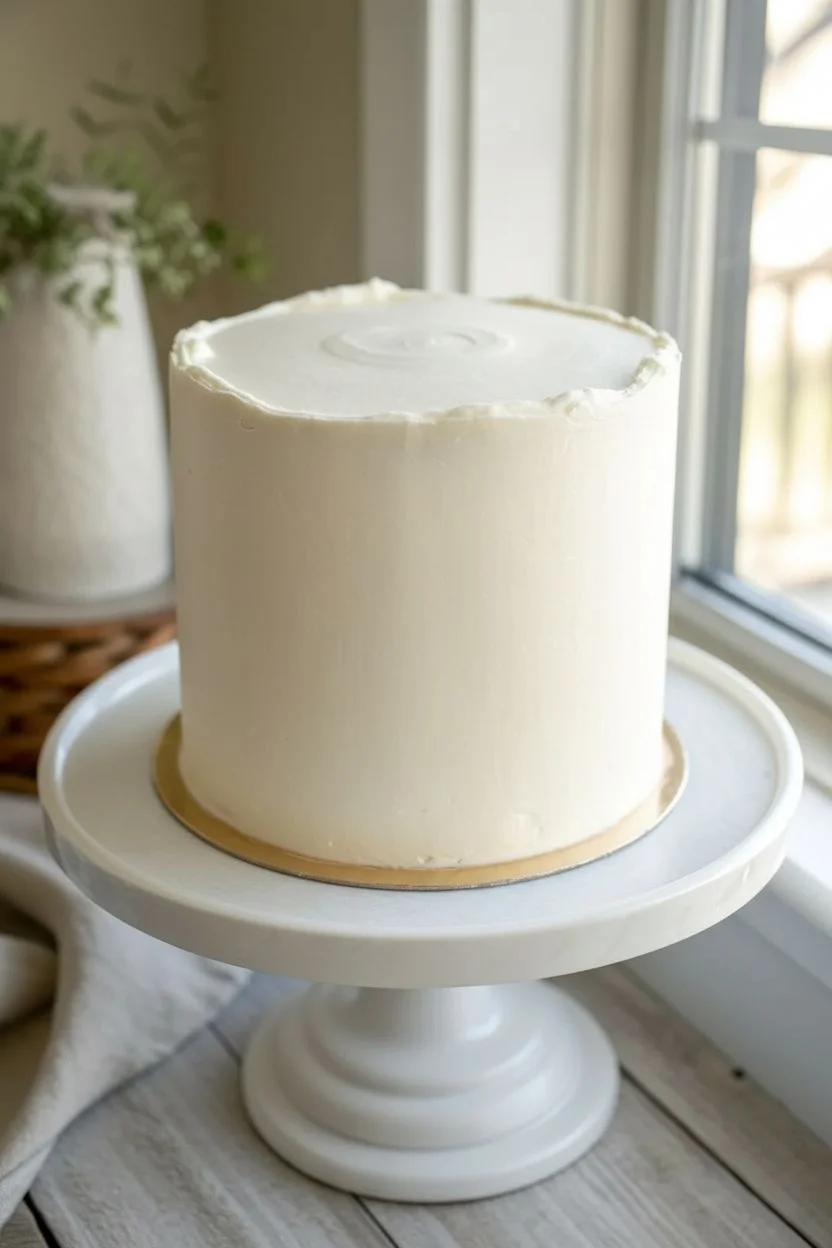
Step 1: The Blank Canvas
-
Stack and Fill:
Begin by leveling your sponge cake layers. Place the first layer on your cake board and apply an even layer of buttercream. Repeat this process until all layers are stacked. -
Crumb Coat:
Apply a thin layer of buttercream over the entire cake to trap any loose crumbs. This doesn’t need to be perfect; it just needs to cover the sponge. Chill the cake in the fridge for 20 minutes until firm. -
Final Coat Application:
Apply a generous, thick layer of white buttercream over the chilled crumb coat. Use an offset spatula to get the frosting onto the top and sides. -
Smooth the Sides:
Hold your cake scraper vertically against the side of the cake. Spin the turntable while holding the scraper steady to remove excess frosting and create a perfectly smooth, straight wall. -
Sharp Edges:
For the top edges, gently pull the excess buttercream that has pushed up past the top rim inward toward the center of the cake using your offset spatula. Aim for a sharp, flat top. -
Chill:
Place the fully frosted cake back into the refrigerator. It is crucial that the cake is very cold before adding the warm drips to control their flow.
Drip Too Runny?
If drips run too fast, your ganache is too hot or the cake isn’t cold enough. Chill the cake longer and let the ganache sit for 5 mins to thicken.
Step 2: Color Preparation
-
Make the Ganache Base:
Combine your white chocolate chips and heavy cream in a microwave-safe bowl. Heat in 15-second intervals, stirring vigorously in between, until completely smooth and fluid. I find a ratio of 3:1 (chocolate to cream) usually works well for drips. -
Divide and Conquer:
Pour the white ganache equally into six small bowls. -
Add Color:
Add a drop of gel food coloring to each bowl—one color per bowl—to create your red, orange, yellow, green, blue, and purple mixtures. Stir until the color is uniform. -
Consistency Check:
Test the consistency. The ganache should be pourable but not like water. If it’s too thick, add a tiny drop of warm cream. If too thin, let it cool for a few minutes to thicken.
Neon Brights
Swap standard white chocolate for bright white candy melts. They are naturally whiter than chocolate, making the added gel colors pop with vivid intensity.
Step 3: The Artistic Drip
-
Start the Sequence:
Remove the cold cake from the fridge. Using a spoon or a small piping bag, take a small amount of the red ganache. -
The First Drip:
Gently push a small blob of red ganache over the top edge of the cake so it runs down the side. Control the length of the drip by how much ganache you push over the edge. -
Continue the Spectrum:
Immediately move to the orange ganache. Place a drip right next to the red one, leaving just a tiny bit of white space between them so they don’t muddily merge. -
Work Around the Perimeter:
Continue this process with yellow, green, blue, and purple, repeating the rainbow sequence all the way around the cake. -
Vying Lengths:
For a natural look, vary the amount of ganache slightly for each color so the drips fall to different lengths—some stopping halfway, others reaching the board. -
Top Edge Border:
As you create the drips, ensure a small amount of color remains on the very top rim of the cake, creating a thin, colorful border that frames the white top. -
Clean Up:
If any drips hit the cake board and pool too much, you can gently wipe them away with a small paper towel wrapped around a knife tip, or leave them for a ‘paint splash’ effect. -
Final Set:
Return the cake to the fridge for at least 15 minutes to let the chocolate drips set firm before serving.
Now you have a stunning, multicolored centerpiece ready to slice and share.


Buttercream Brushstroke Cake
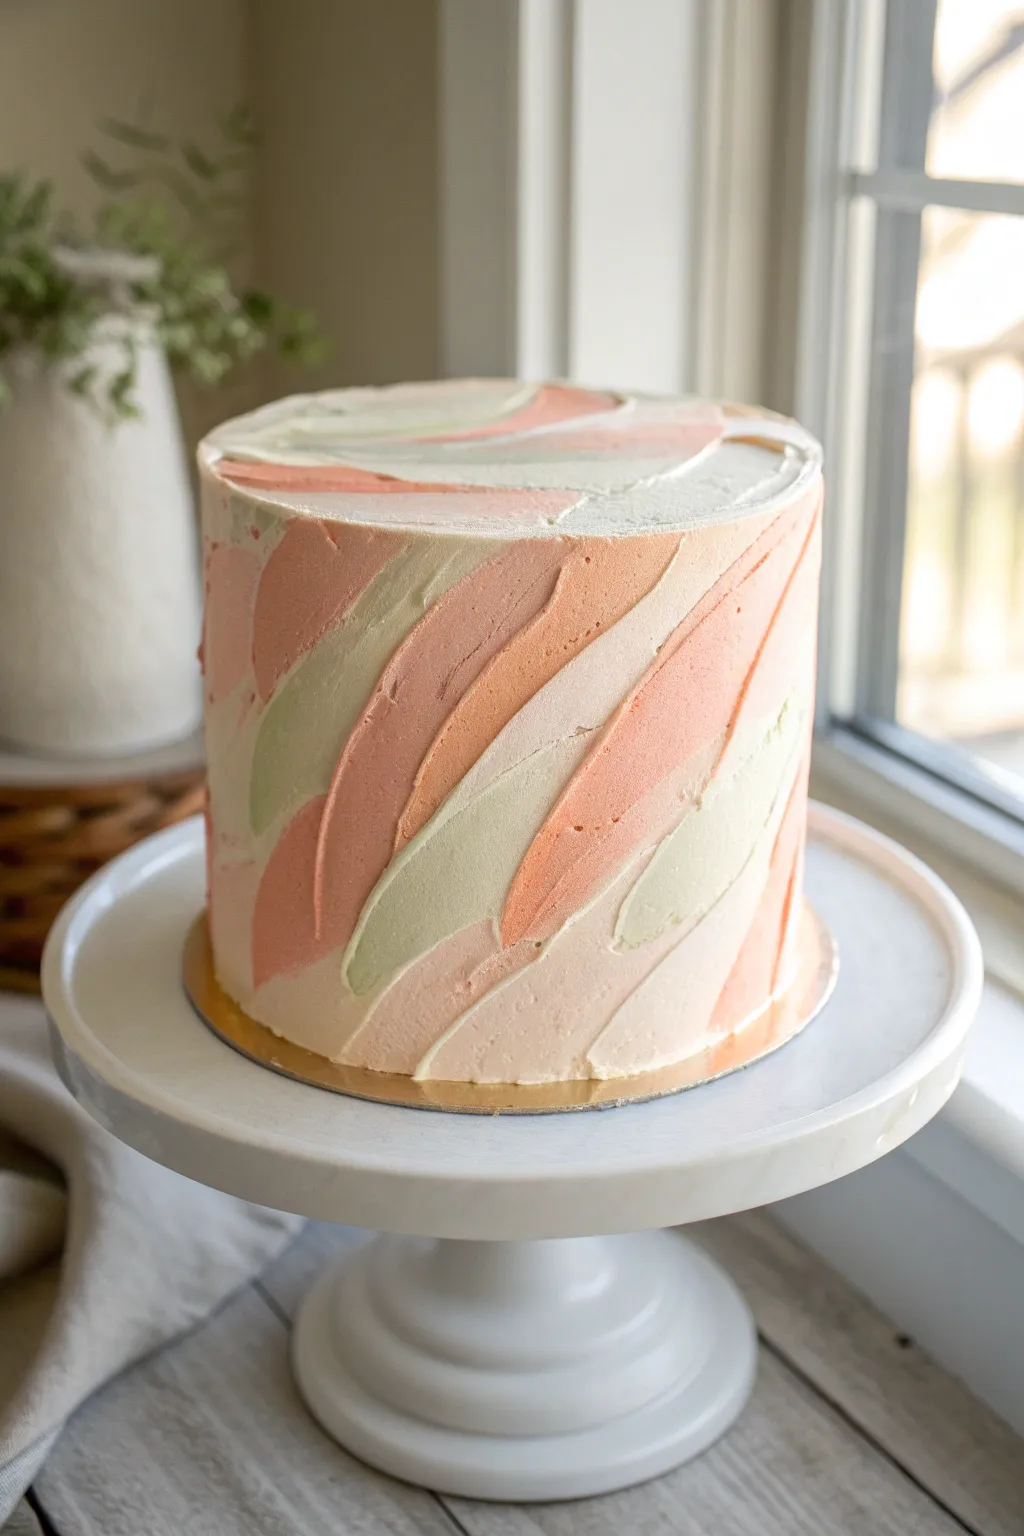
Transform a simple frosted cake into an edible canvas using this elegant buttercream painting technique. Featuring soft, sweeping strokes of peach, sage, and cream, this design mimics the texture of an oil painting for a sophisticated and modern finish.
Step-by-Step Guide
Materials
- Three 6-inch round cake layers (cooled)
- Swiss Meringue Buttercream (4-5 cups)
- Gel food coloring (Peach, Coral, Moss Green/Sage)
- Offset spatula (small)
- Bench scraper or cake smoother
- Turntable
- Cake board (cardboard round)
- 4 small mixing bowls
- Piping bags (optional, but helpful for initial crumb coat)
Step 1: Preparation and Base Coat
-
Stack and Fill:
Place your first cake layer on the cake board centered on your turntable. Apply a generous layer of white buttercream, spread evenly, and top with the second layer. Repeat until all three layers are stacked. -
Crumb Coat:
Apply a thin layer of white buttercream all over the exterior of the cake to lock in any loose crumbs. Use your bench scraper to smooth it out thinly. -
Chill:
Place the cake in the refrigerator for at least 20 minutes until the crumb coat is firm to the touch. -
Final Base Layer:
Frost the chilled cake with a thicker, final coat of white buttercream. Use the bench scraper to get smooth, straight sides, and drag the top edges inward for a sharp corner. -
Refreeze:
This serves as your canvas, so chill the cake again for about 30 minutes. It is crucial that this base layer is very cold and hard so the colored swipes don’t blend into it.
Chilling is Key
If your base coat starts to soften or mix with your colored strokes, stop immediately and refrigerate the cake for 15 minutes before continuing.
Step 2: Color Elements
-
Divide Buttercream:
While the cake chills, divide your remaining buttercream into four small bowls. -
Mix Sage Green:
Add a very small drop of moss green coloring to the first bowl. Mix thoroughly for a muted, earthy sage tone. -
Mix Soft Peach:
For the second bowl, use a tiny amount of peach gel color to create a pastel blush shade. -
Mix Deep Coral:
In the third bowl, add a slightly larger amount of coral or orange-pink coloring to create a darker accent shade that contrasts with the blush. -
Keep One White:
Leave the fourth bowl as plain white or ivory buttercream to add brightness to the design.
Add Metallic Paint
Mix edible gold dust with a few drops of vodka or lemon extract. Use a fine brush to paint thin gold lines along the edges of a few buttercream swipes.
Step 3: Creating the Palette Knife Effect
-
Load the Spatula:
Take your small offset spatula and scoop a small dollop of the deep coral buttercream onto the back of the tip. -
First Swipe:
Starting near the bottom of the chilled cake, gently press the buttercream against the surface and drag the spatula upward and diagonally to the right. Lift the spatula away smoothly as you reach the middle height to create a tapered tail. -
Clean and Switch:
Wipe your spatula clean on a paper towel. Pick up the sage green color and make a similar diagonal swipe next to or slightly overlapping the first one. -
Layering Colors:
Continue adding swipes around the bottom half of the cake, alternating between peach, sage, coral, and white. Vary the starting heights slightly for an organic look. -
Upper Tier Swipes:
Once the bottom feels established, begin a second visual row of swipes starting from the middle of the cake and dragging up toward the top rim. I like to overlap the bottom of these new strokes over the tails of the lower ones. -
Texture Check:
Don’t overwork the strokes. The beauty lies in the ridges and imperfections left by the spatula, which catch the light. -
Top Surface:
For the top of the cake, apply small dollops of alternating colors near the rim. Gently swipe them inward toward the center in a curved motion. -
Final Chill:
Once you are happy with the coverage and pattern, place the cake back in the fridge to set the painted details before serving.
This artistic technique creates a stunning centerpiece that looks far more complicated than it actually is


Impasto Palette-Knife Texture Cake
Bring the texture of an oil painting to your dessert table with this stunning impasto-style cake. Using buttercream as your medium and a palette knife as your brush, you’ll create bold, abstract swipes of color that look almost too artistic to eat.
How-To Guide
Materials
- 3-4 layers of pre-baked round cake cakes (6 or 8 inch)
- Swiss Meringue Buttercream (large batch)
- Gel food coloring (teal, warm terracotta, mustard yellow, light peach)
- Offset spatula (large and small)
- Metal cake scraper
- Metal artist palette knives (assorted shapes, especially trowel shape)
- Cake turntable
- Cardboard cake rounds
- Several small mixing bowls
Step 1: Preparation and Base Coat
-
Level and Stack:
Begin by leveling your chilled cake layers to ensure a flat top. Place the first layer on a cardboard cake round secured with a dab of buttercream. Apply a layer of filling, smooth it out, and repeat until all layers are stacked. -
Crumb Coat:
Apply a thin layer of uncolored buttercream all over the cake to trap any loose crumbs. Use your bench scraper to smooth it down, making it as straight as possible. Chill in the fridge for 20 minutes until firm. -
Final Coat Application:
Once the crumb coat is set, apply a thick, generous layer of your white base buttercream. You want this layer substantial enough to hold the shape but not excessive. -
Smooth the Canvas:
Use your metal cake scraper held at a 45-degree angle against the side of the cake while spinning the turntable. Create a perfectly smooth cylinder with sharp edges. Chill the cake again for at least 30 minutes; a cold, firm surface is crucial for the painting technique.
Cold Canvas Trick
A thoroughly chilled base coat is non-negotiable. If the base is soft, your palette knife will dig into the cake rather than gliding over it to create texture.
Step 2: Mixing the Palette
-
Divide Buttercream:
While the cake chills, separate a portion of your remaining buttercream into four small bowls. Leave about half of the remaining frosting white. -
Create the Colors:
Mix your gel colors. Aim for a muted, modern palette rather than neon primary colors. For the teal, use a drop of blue with a tiny touch of green and black. For the terracotta, mix orange with a little brown or red. Create a mustard tone and a pale peach as well. -
Texture Check:
Ensure your colored buttercream is soft and spreadable. If it’s too firmly chilled, microwave it for just 3-5 seconds and stir vigorously to remove air bubbles. Smooth buttercream allows for those clean, painterly swipes.
Adding Dimensions
For a glamorous touch, mix gold luster dust with a tiny drop of vodka or lemon extract and paint delicate metallic edges on the ridges of the dried buttercream swipes.
Step 3: Painting the Cake
-
Load the Palette Knife:
Take a metal palette knife—I prefer a medium-sized trowel shape for this—and scoop up a generous amount of the terracotta buttercream on the back of the blade. -
First Swipe:
Identify a spot on the cold cake. Place the knife against the surface and apply gentle pressure while pulling the knife diagonally upward and to the right. Lift the knife away at the end of the stroke to create a feathered edge. -
Clean and Repeat:
Wipe your palette knife clean on a paper towel. Load it with the teal color next. Apply a swipe near the first one, perhaps overlapping slightly or angling it in a complementary direction. -
Layering Colors:
Continue adding swipes around the cake in a random, organic pattern. Introduce the mustard yellow and pale peach tones to balance the darker colors. -
Adding Negative Space:
Don’t forget to use plain white buttercream as a ‘color’ too. Adding fresh white swipes over the colored areas adds depth and makes the design look like authentic impasto layering. -
Top Surface Decoration:
Bring the design onto the top of the cake. Apply horizontal or slightly curved swipes of color, working from the outer edge inward, maintaining that thick, textured look. -
Refining the Edges:
Inspect the point where the top and sides meet. If the top edge looks too messy, use a clean palette knife to gently pull any protruding buttercream inward, or purposely add a swipe that wraps over the edge for continuity. -
Final Chill:
Once you are happy with the composition, place the cake back in the refrigerator for 15 minutes to let the painted texture firm up before serving.
Step back and admire your edible masterpiece, knowing no two slices will look exactly the same
BRUSH GUIDE
The Right Brush for Every Stroke
From clean lines to bold texture — master brush choice, stroke control, and essential techniques.
Explore the Full Guide
Edible Painter’s Palette Topper
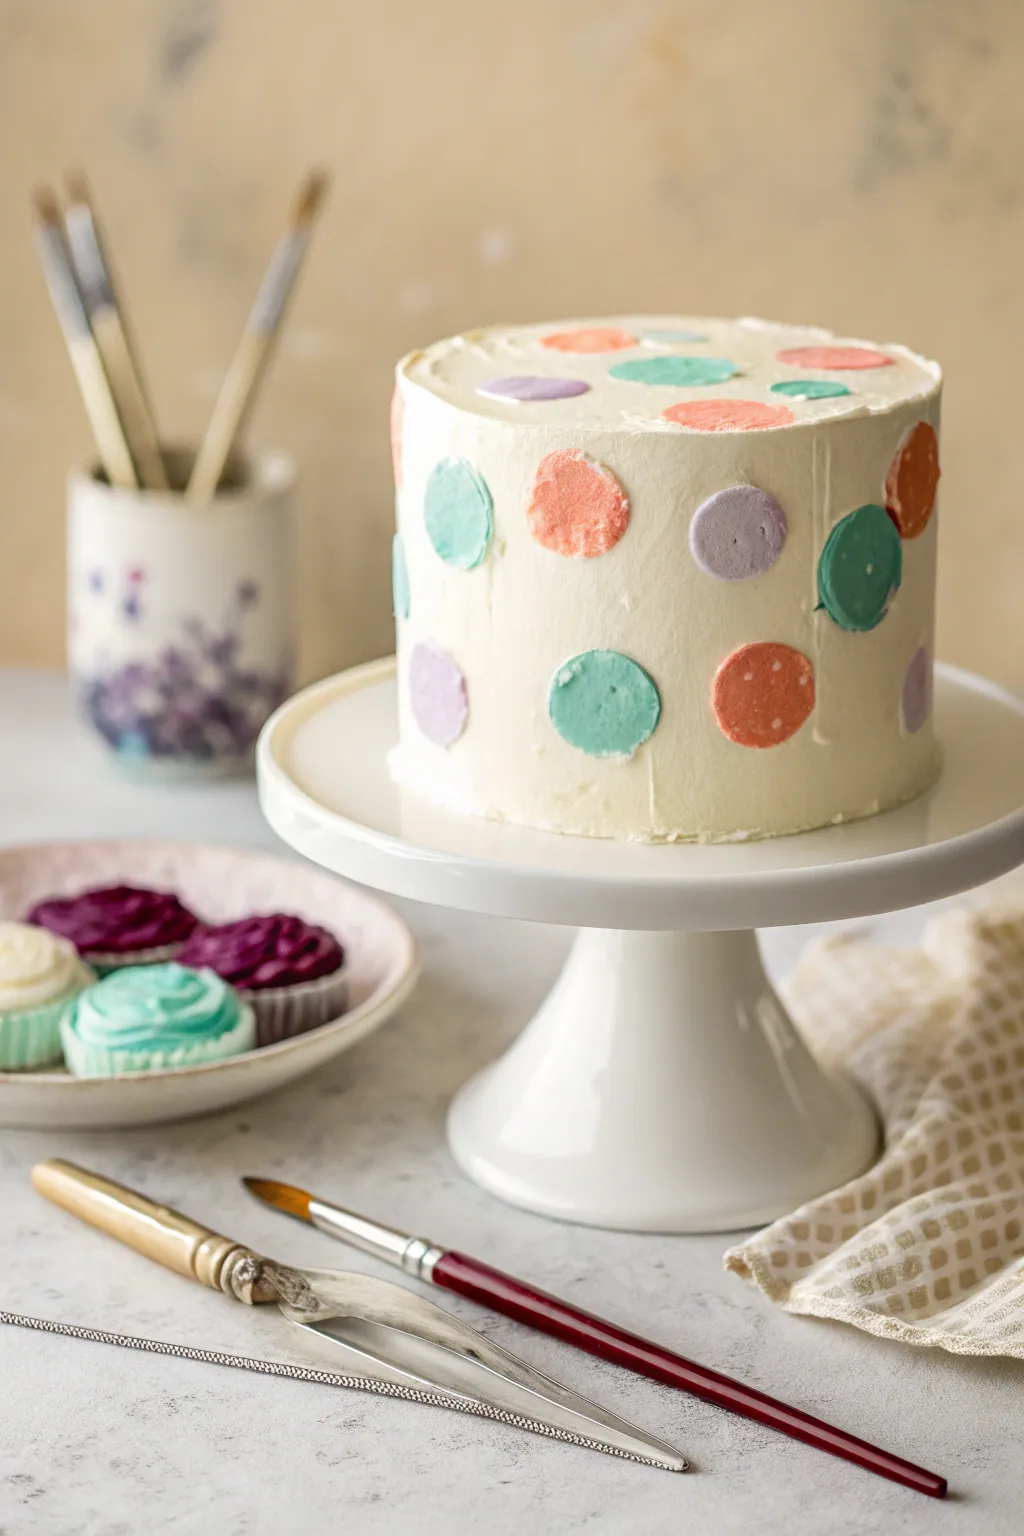
Transform a simple frosted cake into a modern art piece with this textured, painterly technique. Large, imperfect dots of colored buttercream create a playful, dimensional look that mimics an artist’s messy palette.
Step-by-Step
Materials
- 8-inch round layer cake, chilled
- Vanilla buttercream (white for base coat)
- Small bowls for color mixing
- Gel food coloring (teal, coral pink, lavender, deep orange)
- Straight icing spatula or offset spatula
- Small round piping tips (optional)
- Clean, food-safe artist palette knives or small spoons
- Piping bags (optional)
- Turntable (helpful but not essential)
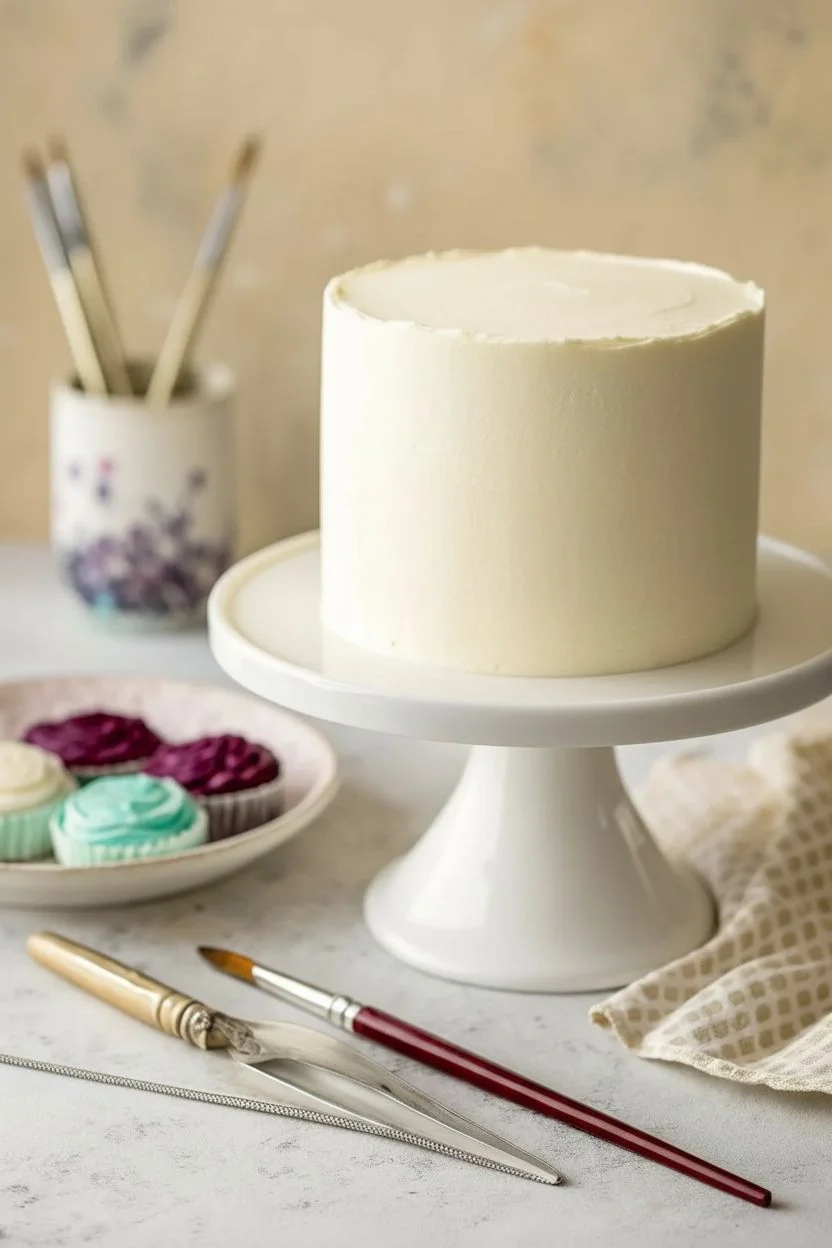
Step 1: Base Preparation
-
Frost the Canvas:
Begin by covering your stacked cake with a smooth, even layer of white vanilla buttercream. Use your bench scraper to get the sides relatively straight, but don’t stress over razor-sharp edges. -
Chill Thoroughly:
Place the cake in the refrigerator for at least 30 to 45 minutes. The base frosting needs to be firm to the touch so the colored dots set on top rather than blending into the white background.
Clean Edges Trick
If you want very round dots but struggle with a palette knife, dip your finger in cornstarch and gently tap the piped frosting mound flat. The starch prevents sticking.
Step 2: Mixing the Palette
-
Divide the Buttercream:
Separate your remaining frosting into four small bowls. You won’t need much of each color—about 1/4 cup per shade is usually plenty. -
Create the Hues:
Tint the bowls using gel food coloring to create a soft teal, a vibrant coral, a muted lavender, and a deeper burnt orange. Aim for a slightly muted, pastel-adjacent palette rather than neon brights. -
Load the Colors:
Transfer each color into a small piping bag. If you don’t have bags, you can simply use spoons, but piping bags give you better control over the portion size of each dot.
Step 3: Applying the Polka Dots
-
Pipe the First Dot:
Starting on the side of the cold cake, pipe a quarter-sized mound of coral frosting. It doesn’t need to be flat yet, just a nice dollop of icing. -
Smear Technique:
Take a clean palette knife or the back of a small spoon. Place it gently in the center of the dollop and lightly press down, swirling slightly or pulling to one side to flatten it into a rough circle. -
Create Texture:
Instead of smoothing it perfectly, leave a few ridges or a slight impasto texture on the surface of the dot. This enhances that hand-painted oil painting aesthetic. -
Add Variation:
Move a few inches away and repeat with a different color, like the teal or lavender. Vary the height on the cake side so the pattern feels random and organic rather than a strict grid. -
Spacing Matters:
Continue adding dots around the circumference, leaving ample white space between them. The negative space is just as important as the color for this design. -
Decorate the Top:
Don’t forget the top surface. Pipe and flatten 5-6 dots across the top of the cake, ensuring colors are distributed evenly so no two identical shades are right next to each other.
Metallic Accent
Once the colored dots are firm and chilled, mix gold luster dust with a drop of vodka. Paint a thin gold rim around one side of each dot for a glam pop.
Step 4: Refining the Details
-
Check for Gaps:
Step back and look at the cake from a distance. If there are large empty patches, add smaller dots to balance the composition. -
Clean Tool Edges:
Between colors, I find it crucial to wipe the palette knife clean on a paper towel. This prevents muddying the colors and keeps each dot distinct and vibrant. -
Overlap Optionally:
For a more layered look, you can let the first round of dots crust over slightly in the fridge (about 10 minutes), then add a second layer where a few new dots slightly overlap the old ones. -
Final Chill:
Return the finished cake to the refrigerator for 20 minutes to set the painted dots before serving. This ensures the design won’t smear if you need to move the cake.
Serve this artistic creation with a side of extra cupcakes decorated with your leftover frosting palette colors
Paint Puddle and Splat Accents
Transform a simple frosted cake into a vibrant masterpiece with this playful paint drip technique. Featuring bold, melted drips in primary colors that cascade down smooth buttercream, this project mimics the fun of spilled paint puddles for a striking, artistic finish.
Step-by-Step Guide
Materials
- One 6 to 8-inch round cake (3-4 layers tall)
- Vanilla buttercream frosting (enough to fill and coat)
- White chocolate melts or white candy melts
- Heavy cream (optional, for thinning ganache)
- Gel food coloring (Red, Orange, Yellow, Green, Royal Blue)
- Small squeeze bottles or disposable piping bags
- Offset spatula
- Bench scraper or icing smoother
- Assorted rainbow sprinkles
- Small bowls for mixing colors
- Cake turntable (recommended)
- Cake board
Step 1: Base Preparation
-
Stack and fill:
Begin by stacking your cake layers on a sturdy cake board, spreading an even layer of buttercream between each one to secure them. -
Apply the crumb coat:
Spread a thin layer of buttercream over the entire cake to trap any loose crumbs. Place the cake in the refrigerator for about 15-20 minutes until the frosting feels firm to the touch. -
Frost the final coat:
Apply a thick, generous layer of white buttercream over the chilled crumb coat. Use your offset spatula to spread it evenly across the top and sides. -
Smooth the sides:
Using a bench scraper held perpendicular to the turntable, smooth the sides of the cake as you rotate it. Aim for a clean, flat surface, as this white canvas will make your colors pop. -
Sharp edges:
Clean up the top edge of the cake by gently pulling any excess frosting toward the center with your spatula. Chill the cake again for at least 30 minutes to ensure the surface is cold and firm.
Temperature Check
Make sure your cake is very cold before dripping! If the cake is warm, the chocolate will run all the way to the bottom plate instead of stopping midway.
Step 2: Creating the Paint Drips
-
Melt the chocolate:
Place your white chocolate melts into a microwave-safe bowl. Heat in 20-second intervals, stirring thoroughly between each burst until completely smooth. -
Adjust consistency:
If the chocolate is too thick to drip naturally, stir in a teaspoon of warm heavy cream at a time. I like to test the consistency by lifting a spoon; it should flow like thick paint, not water. -
Divide the ganache:
Separate the melted white chocolate mixture into five small bowls. -
Color the drips:
Add a drop of gel food coloring to each bowl—one for red, orange, yellow, green, and blue. Stir gently to incorporate the color without adding too many air bubbles. -
Fill the applicators:
Pour each colored ganache into its own piping bag or small squeeze bottle. If using bags, snip a very small hole at the tip. -
Test a drip:
Before committing to the cake, do a quick test drip on the side of a glass or bowl to check if the speed is right.
Step 3: Decorating
-
Start the blue drip:
Starting at the top edge of the chilled cake, gently squeeze a small amount of blue ganache so it runs down the side. Vary the pressure to create drips of different lengths. -
Continue the rainbow:
Move next to the blue section and apply the green drips, followed by yellow, red, and orange. Allow the colors to slightly overlap or touch at the top rim to create a cohesive ‘spilled paint’ look. -
Cover the top edge:
Once the drips are done, use the remaining colored ganache to fill in the top rim of the cake slightly, blending the colors where they meet so there is no white gap between the drip start and the top surface. -
Add sprinkle border:
While the drips are setting but still slightly tacky at the bottom (or using a fresh dab of buttercream), gently press mixed rainbow sprinkles along the bottom edge of the cake. -
Top accents:
Scatter a small pinch of sprinkles on the top of the cake, focusing on the areas where the colors transition. -
Final Chill:
Place the finished cake back in the fridge for 10 minutes to let the chocolate drips set completely firm.
Drips Too Thick?
If your chocolate hardens or thickens while you work, pop the squeeze bottle in a bowl of warm water for a few seconds to loosen it back up.
Slice into your colorful creation and enjoy the beautiful contrast of bright drips against white frosting

PENCIL GUIDE
Understanding Pencil Grades from H to B
From first sketch to finished drawing — learn pencil grades, line control, and shading techniques.
Explore the Full Guide
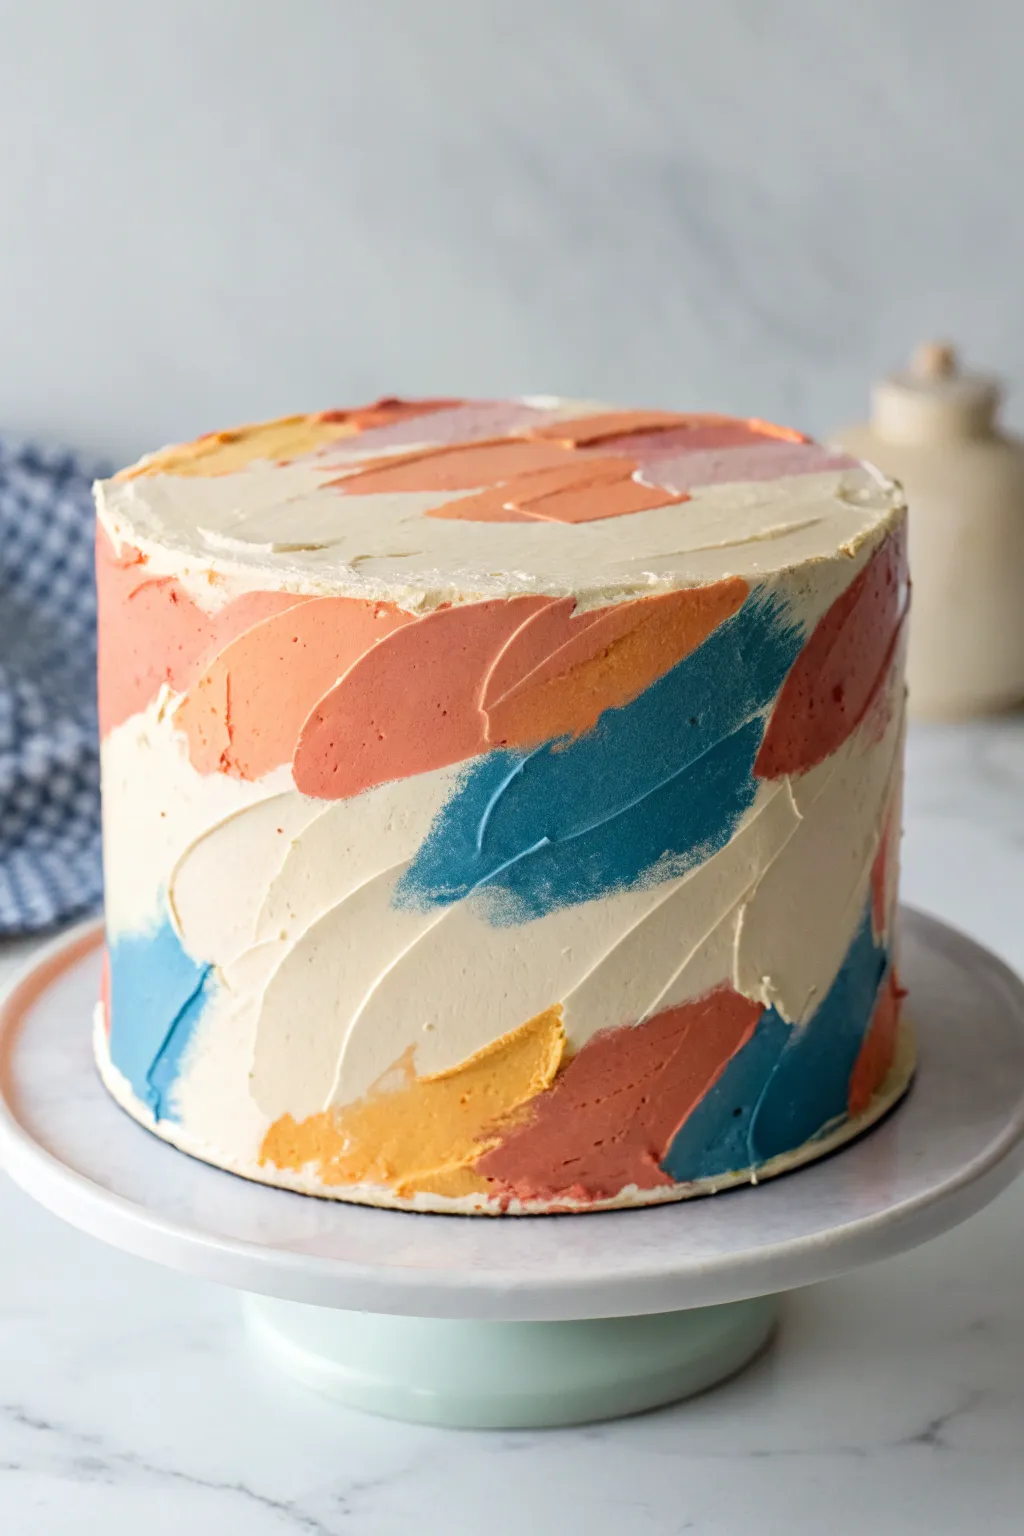
Abstract Color-Block Paint Cake
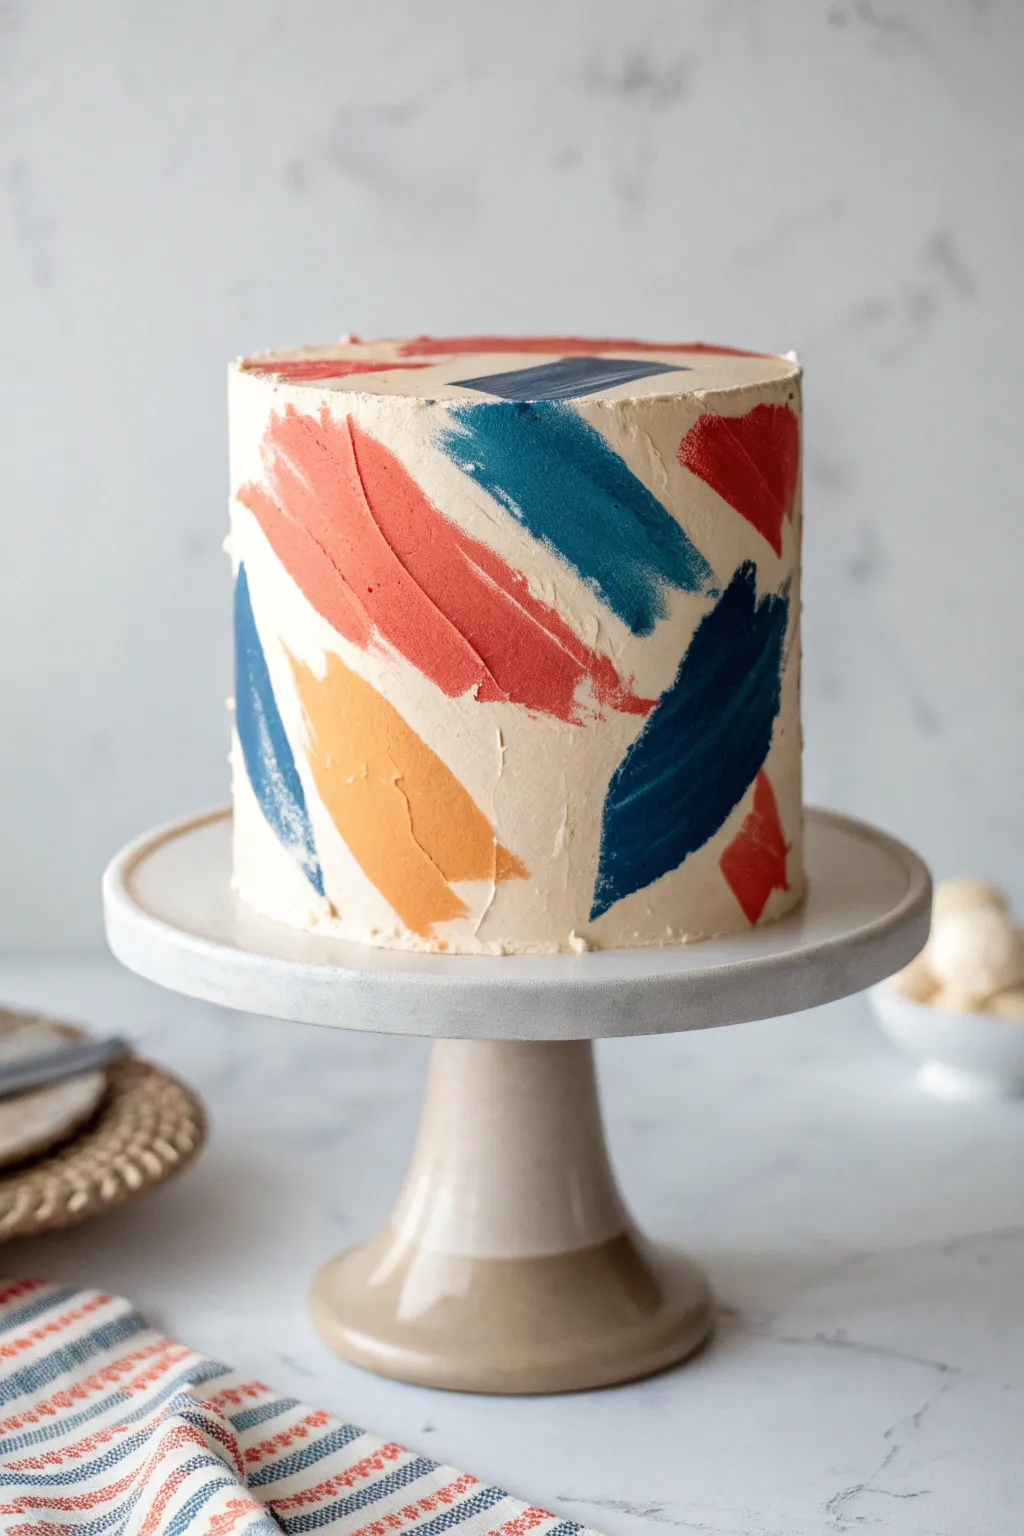
Transform a simple cake into a modern art masterpiece with this bold, abstract brushstroke technique. Using a palette of muted terracotta, teal, and navy against a smooth beige canvas creates a striking design that looks intentional and artistic, yet is surprisingly forgiving to execute.
How-To Guide
Materials
- 3-layer 6-inch cake (chilled)
- Swiss Meringue Buttercream (base: beige/sand)
- Buttercream for colors (terracotta, teal, navy blue, burnt orange, deep red)
- Gel food coloring
- Offset spatula (small and large)
- Bench scraper / Cake smoother
- Small palette knives or food-safe paint brushes
- Piping bags (optional)
- Turntable
- Parchment paper
Step 1: Base Preparation
-
Mix the base color:
Start by tinting your main batch of buttercream to a warm beige or ‘sand’ color. Use a tiny drop of brown and a pinprick of yellow gel coloring to achieve that natural, creamy off-white tone. -
Crumb coat:
Apply a thin layer of your beige buttercream over the chilled cake layers to lock in all crumbs. Smooth it out roughly and chill for 20 minutes until firm. -
Final coat application:
Apply a thick, generous layer of the beige buttercream all over the cake. You want quite a bit of frosting here so you can scrape it back to a smooth finish. -
Smooth the sides:
Using your bench scraper held at a 45-degree angle against the cake, rotate the turntable to smooth the sides. Aim for sharp, straight edges and a flat top. -
Hard chill:
This is crucial: place the cake in the fridge for at least 30-45 minutes. The base must be completely firm to the touch before we start ‘painting,’ or the colors will muddy together.
Clean Edges Professional Tip
For the most textured, painterly look, don’t stir your colored buttercream too much before applying. A slightly aerated texture creates beautiful ridges in the brushstroke.
Step 2: Mixing the Art Palette
-
Create the teal:
While the cake chills, mix your accent colors. For the teal, combine blue with a touch of green and a tiny bit of black to deepen it. -
Mix the terracotta:
For the rusty red-orange, mix orange with a dot of brown and a small amount of red. It should look earthy, not neon. -
Mix the navy:
Create the deep navy by adding plenty of royal blue and a drop of black or purple to darken it significantly. -
Create the burnt orange:
Make a lighter orange shade, muted slightly with a tiny bit of the beige base buttercream to keep the palette cohesive.
Step 3: Applying the Brushstrokes
-
Test on parchment:
Before touching the cake, practice your stroke technique on a piece of parchment paper. I like to load a small offset spatula or palette knife and practice the ‘smear’ motion to see how the color trails off. -
Apply the first stroke:
Take a nickel-sized dollop of terracotta buttercream on the back of a small offset spatula or palette knife. Place it gently against the chilled cake. -
The smear technique:
In one confident motion, drag the spatula diagonally upward (or downward) while applying slight pressure. Lift the spatula away cleanly at the end of the stroke to create that feathered, painted look. -
Clean tools:
Wipe your spatula completely clean between every single color change and every new stroke. Any residue will ruin the clean look of the next smear. -
Layering the teal:
Apply a teal stroke next, perhaps going in a slightly different diagonal direction. It’s okay if it slightly overlaps a previous color, as this adds dimension. -
Add the navy depth:
Place a few strokes of the dark navy blue. Keep these sparse to prevent overpowering the lighter colors; they act as contrast points. -
Fill gaps with burnt orange:
Look for empty beige spaces and fill a few with the lighter burnt orange strokes. Vary the length—some should be long, others short and punchy. -
Address the top edge:
Don’t forget the top rim. Allow some strokes to travel up the side and just barely break the top edge for an organic feel, or add a flat stroke directly onto the top surface. -
Check balance:
Step back and look at the cake from a distance. If one side feels too heavy with color, add a small stroke of a lighter shade to the opposite side to balance it out. -
Final chill:
Once you are happy with the design, pop the cake back in the fridge for 15 minutes to set the painted strokes before serving.
Smear Rescue
If you mess up a stroke or dislike the shape, gently scrape it off with a cold knife. Since you chilled the base coat hard, the color should lift off without damaging the beige underneath.
Now you have a stunning, gallery-worthy dessert that proves cake decorating is truly an art form
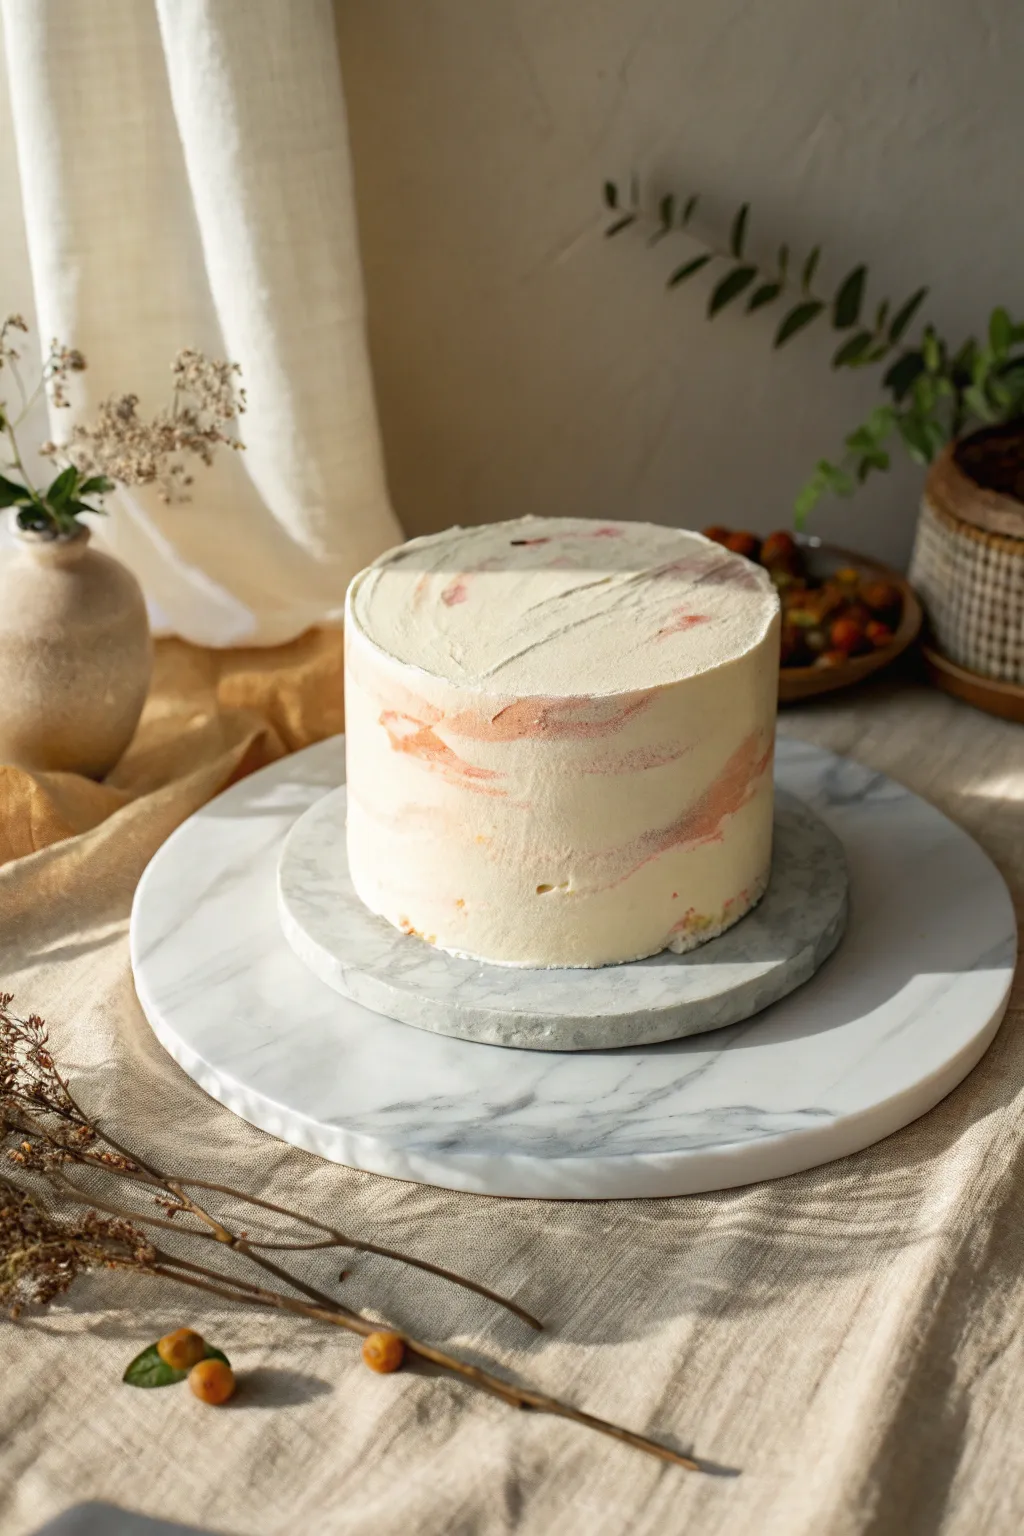
Marbled Paint-Swirl Cake
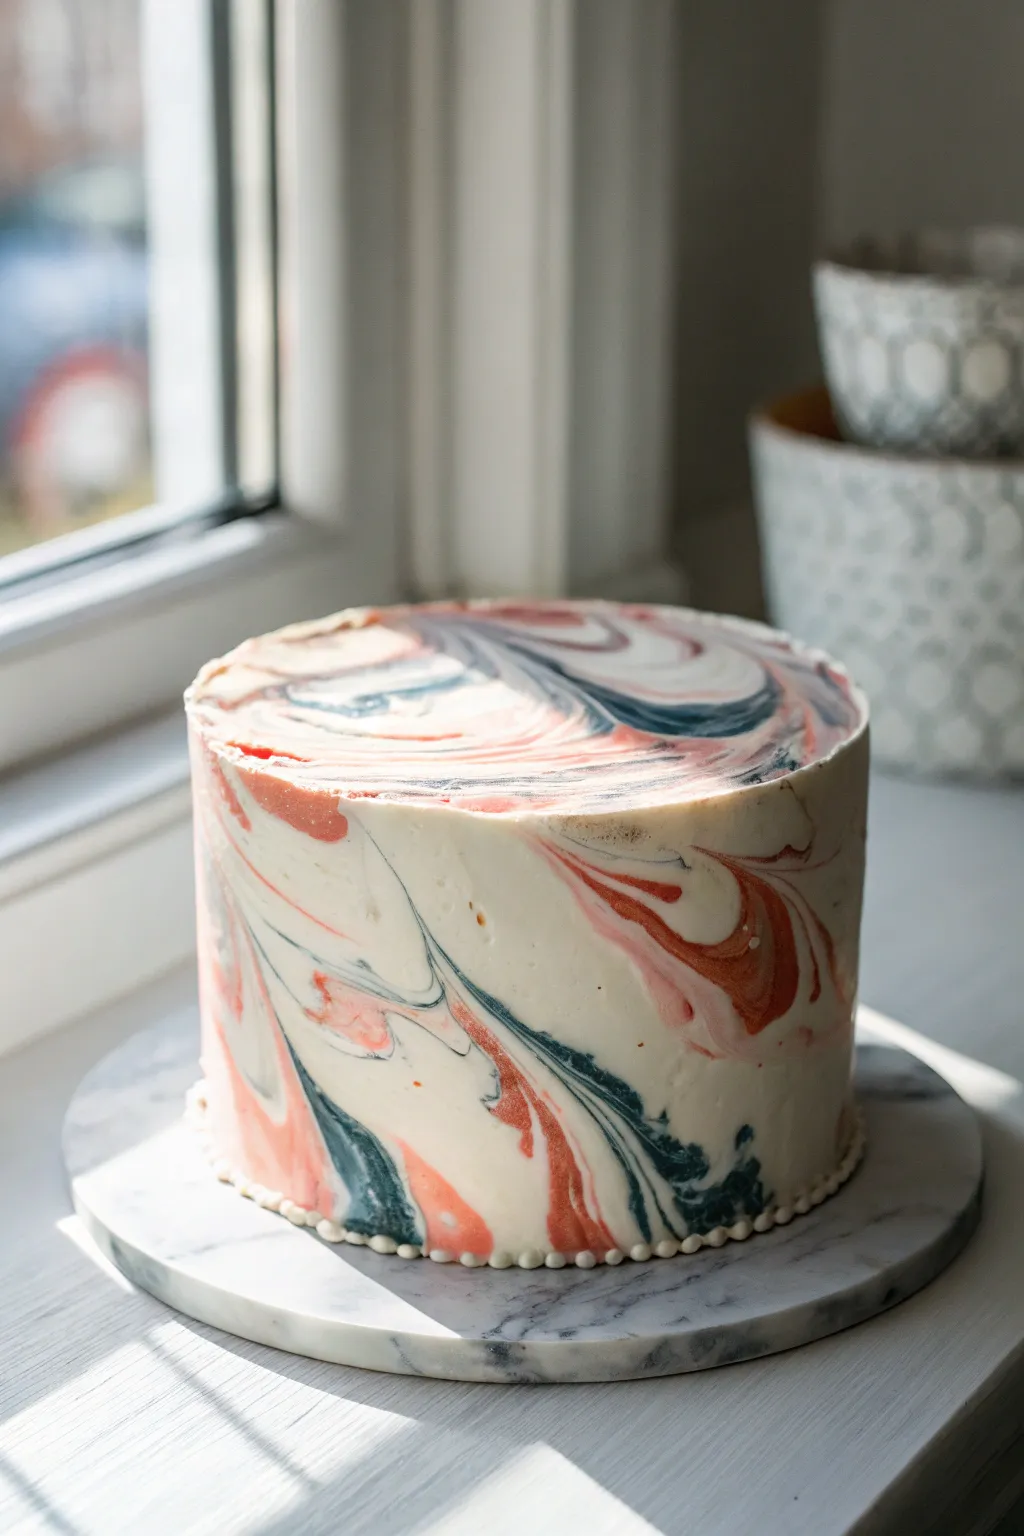
Achieve a sophisticated, modern art look with this mesmerizing marbled cake design. By gently blending coral and slate blue buttercream, you create fluid swirls that mimic the elegance of natural stone or poured paint.
Step-by-Step Guide
Materials
- Three round cake layers (cooled)
- Swiss meringue buttercream (large batch)
- Gel food coloring (coral/peach, navy blue, teal)
- Offset spatula
- Bench scraper (tall metal or acrylic)
- Rotating cake turntable
- Small bowls for color mixing
- Piping bags (optional)
- Cake board
Step 1: Preparation & Base Coat
-
Stack and fill:
Begin by stacking your cooled cake layers on a cake board, filling each layer evenly with your plain white buttercream. -
Crumb coat:
Apply a thin layer of white buttercream over the entire cake to trap any loose crumbs. Use your bench scraper to smooth it out roughly. -
Chill:
Place the cake in the refrigerator for about 20-30 minutes until the crumb coat is firm to the touch. -
Mix your palette:
While the cake chills, divide a small portion of your remaining buttercream into two bowls. Tint one bowl a soft coral-peach and the other a deep slate blue (mix navy with a touch of teal). Keep the majority of your buttercream white.
Clean Swirls Tip
For defined veins of color rather than a blurry mix, use firmer, cooler buttercream. If the frosting gets too soft or warm, pop the cake in the fridge for 10 mins mid-process.
Step 2: Creating the Marble Effect
-
Apply the base frosting:
Remove the cake from the fridge. Apply a thick, generous layer of the plain white buttercream all over the sides and top. Do not smooth it perfectly yet. -
Add color dollops:
Using an offset spatula or the back of a spoon, randomly apply distinct blobs and smears of the coral and slate blue buttercream all around the sides and top of the cake. -
Start the swirl:
Take your tall bench scraper and hold it vertically against the side of the cake. Begin rotating the turntable while keeping the scraper stationary. -
Drag and blend:
As you rotate, the scraper will naturally drag the colored blobs into the white base, creating horizontal streaks. Don’t over-blend immediately. -
Vertical movement:
To get the wavy, organic marbling seen in the photo, gently wiggle the scraper up and down slightly as you spin the turntable. -
Clean and repeat:
Stop occasionally to wipe off your bench scraper. A clean tool defines the colors better; a dirty one will just turn everything muddy grey. -
Refine the pattern:
If there are large gaps of white, add small dabs of color and smooth over them again until you achieve a balance of negative space and fluid color. -
Marble the top:
Dollop small amounts of color on the top surface. Hold your offset spatula flat and sweep it gently across the top in a ‘C’ motion or spiral to swirl the colors together. -
Sharp edges:
Clean your scraper one last time. Gently pull the excess buttercream sticking up around the top edge inward toward the center of the cake to create a sharp, flat top edge.
Gilded Edge
Mix metallic gold luster dust with a drop of vodka or lemon extract. Use a fine detail brush to paint thin gold lines along the edges where the colored swirls meet the white.
Step 3: Finishing Touches
-
Inspect the finish:
Check the smoothness of the separation between colors. If the paint-swirl looks too jagged, do one final, very light pass with a warm metal scraper. -
Pipe the border:
Fill a piping bag fitted with a small round tip with plain white buttercream. -
Add beading:
Pipe a delicate pearl or bead border around the very bottom edge of the cake where it meets the board to hide the seam. -
Final chill:
Refrigerate the completed cake for at least 30 minutes to set the design before serving or transporting.
This elegant technique turns dessert into a centerpiece that looks almost too beautiful to slice


Paint Stroke Stripe Cake
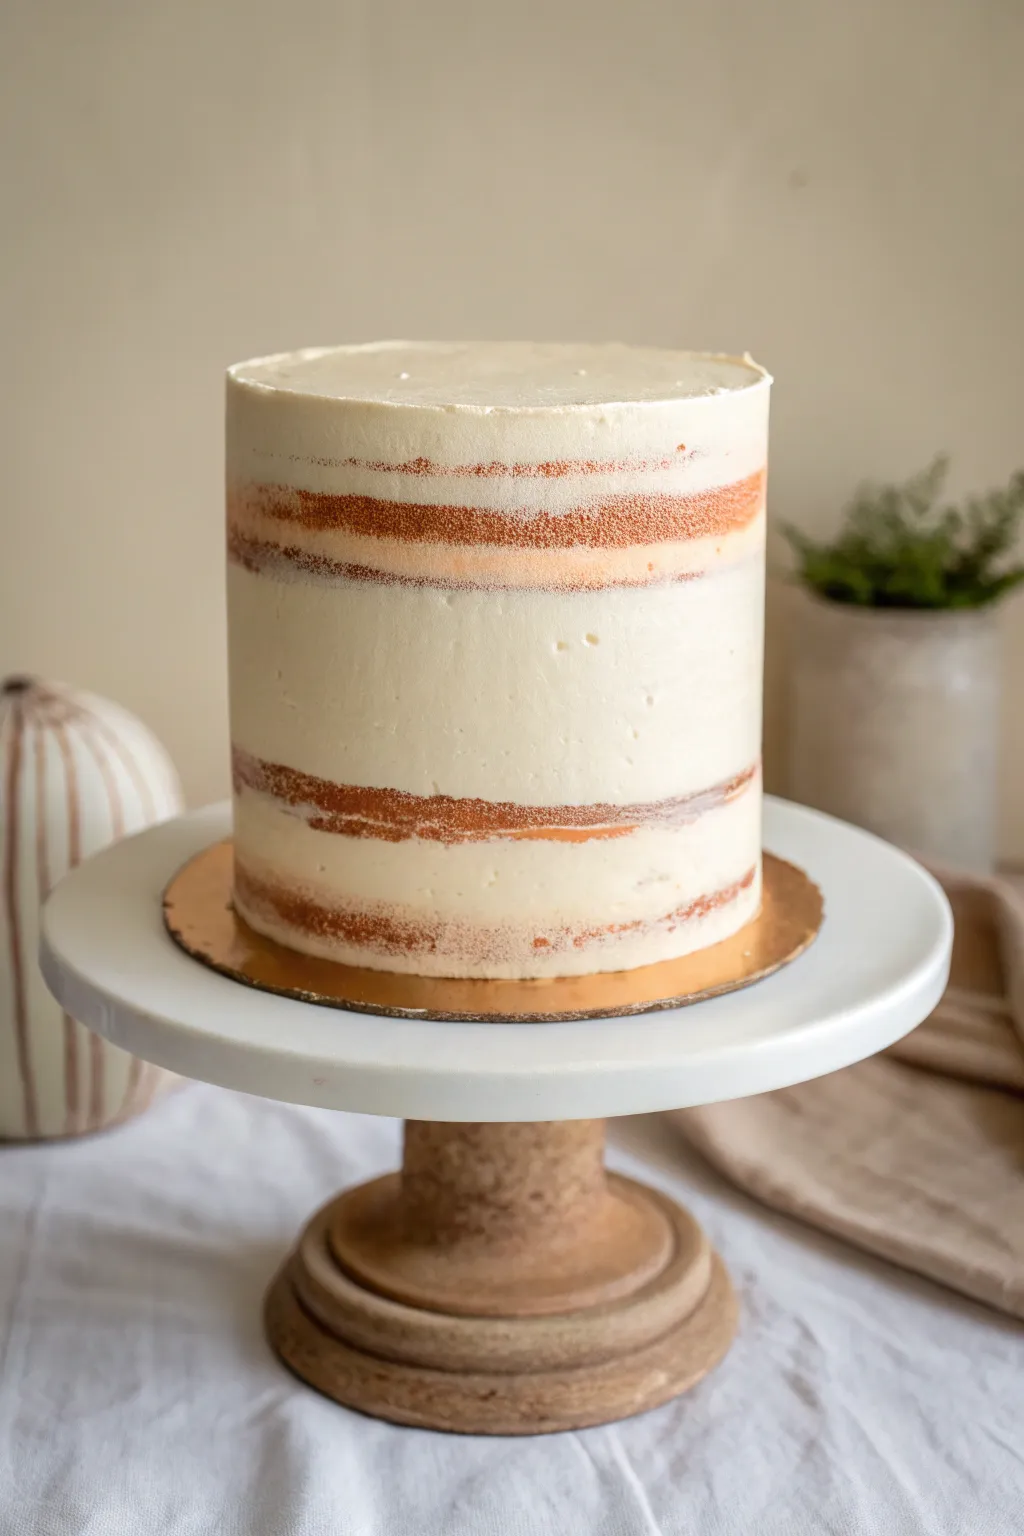
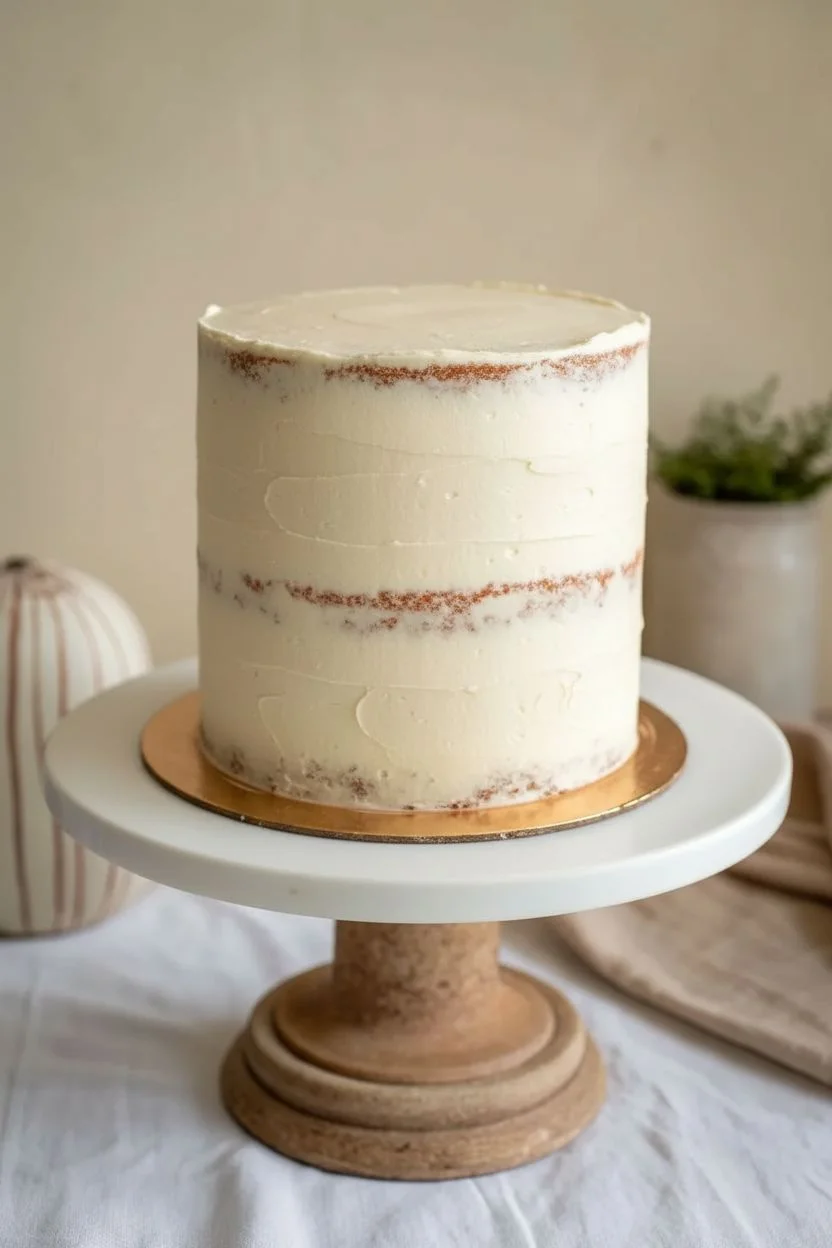
Achieve a sophisticated, understated elegance with this striped semi-naked cake design. By carefully layering buttercream and scraping away specific sections, you create a beautiful peek-a-boo effect that mimics broad, horizontal paint strokes.
Detailed Instructions
Materials
- Three or four layers of round cake (6-inch or 8-inch diameter)
- Batch of vanilla Swiss meringue buttercream
- Cake turntable
- Large offset spatula
- Metal bench scraper (tall enough for the cake height)
- Piping bag with large round tip (optional)
- Cardboard cake round
- Cake stand
Step 1: Stacking and Crumb Coating
-
Prepare the base:
Center your first layer of cake on a cardboard round, adhering it with a small dab of buttercream to keep it steady. Place this entire setup onto your turntable. -
Fill the layers:
Spread an even layer of buttercream on top of the first cake layer. Repeat the stacking and filling process with your remaining layers, ensuring the stack remains straight. -
Invert the top layer:
Place the final cake layer upside down. This puts the flat bottom of the baked cake on top, giving you sharp edges and a level surface to work with. -
Apply the crumb coat:
Using your offset spatula, apply a very thin layer of buttercream all over the cake to trap any loose crumbs. Smooth it lightly with the bench scraper. -
Chill the cake:
Place the cake in the refrigerator for at least 20-30 minutes. This sets the crumb coat firmly, creating a stable canvas for the final design.
Clean Scraper Trick
Wipe your bench scraper completely clean after every single pass. Built-up frosting on the tool will drag across your design and ruin the clean lines.
Step 2: Creating the Paint Stroke Effect
-
Apply the base frosting:
Once chilled, apply a thick, generous layer of buttercream to the sides of the cake. I prefer to pipe this on for even thickness, but a spatula works too. -
Initial smoothing:
Hold your metal bench scraper vertically against the side of the cake. Rotate the turntable to smooth the icing into a solid, cylindrical wall. -
Identify your stripes:
Decide where you want your ‘paint stroke’ exposures to be. In the example, there is a wide band of icing in the middle, framed by exposed cake bands above and below. -
Scrape the reveal zones:
Using the edge of your offset spatula or scraper, firmly press into the icing where you want the cake to show through. Rotate the stand while maintaining pressure to remove the bulk of the frosting in that specific horizontal band. -
Refine the edges:
Switch back to your tall bench scraper. Hold it lightly against the cake and spin the turntable. This will smooth the remaining thick bands of icing and clean up the ‘exposed’ areas without recovering them. -
Adjust the texture:
If the exposed areas look too messy, scrape a tiny bit more off to reveal the cake layer. The goal is a semi-transparent look, not completely bare cake. -
Level the top edge:
You likely have a crown of buttercream sticking up around the top rim. Gently pull these edges inward across the top of the cake with your offset spatula to create a sharp, flat top. -
Final chill:
Pop the cake back into the fridge for 15 minutes to set the design before moving it. -
Transfer to stand:
Carefully slide an offset spatula under the cardboard base and lift the cake onto your final display stand.
Patching Holes
If you accidentally scrape too deep and gouge the cake, just dab a little fresh buttercream into the hole and re-smooth with the scraper. It’s very forgiving.
This technique turns a simple frosting job into a textured, artistic centerpiece that invites everyone to take a slice
Paint-Splattered Cake Board Styling
This elegant cake design mimics the soft, blended look of an oil painting on canvas, using buttercream as the medium. The result is a minimalist yet striking centerpiece featuring gentle sweeps of coral, blush, and cream that look effortlessly chic.
How-To Guide
Materials
- 3-layer round cake (6-inch or 8-inch)
- Swiss meringue buttercream (large batch)
- Gel food coloring (Peach, Coral, Soft Pink)
- Large offset spatula
- Small offset spatula or palette knife
- Bench scraper
- Turntable
- Cake board
- Small mixing bowls
Step 1: Base Preparation
-
Crumb coat:
Begin with your chilled, stacked cake layers. Apply a thin layer of plain white buttercream all over the cake to lock in any crumbs. -
Chill the crumb coat:
Place the cake in the refrigerator for about 15-20 minutes until the buttercream feels firm to the touch. -
Final coat application:
Apply a thick, generous layer of white buttercream over the chilled crumb coat. Use your offset spatula to ensure even coverage on the top and sides. -
Smooth the sides:
Hold a bench scraper vertically against the side of the cake while rotating the turntable. Scrape until you have a smooth, clean canvas. Don’t worry about razor-sharp edges just yet; a slightly rustic top edge works well for this artistic style. -
Chill again:
Return the cake to the fridge for at least 30 minutes. It is crucial that this base layer is very firm so the colors we add later sit on top rather than blending immediately into the white.
Pro Tip: Temperature Matters
Make sure your colored buttercream helps are soft and room temperature while your base cake is cold. This temperature difference prevents muddying.
Step 2: Color Mixing
-
Divide buttercream:
While the cake chills, separate small amounts of remaining buttercream into three small bowls. -
Create the palette:
Tint the first bowl a soft peachy-coral. Tint the second a very pale blush pink. Leave the third bowl either plain white or tint it a darker terracotta for contrast. Keep the colors muted and pastel for that watercolor effect.
Level Up: Metallic Accent
Mix a tiny amount of edible gold dust with vodka or lemon extract and use a fine brush to paint thin gold splatters or rim edges for luxury.
Step 3: Painting the Cake
-
Apply color splotches:
Take your chilled cake out. Using a small offset spatula or a palette knife, apply random dabs and smears of your colored buttercream onto the sides of the cake. Focus on the middle section or create a diagonal flow. -
Smear technique:
Don’t press too hard. You want the colored buttercream to sit slightly raised on the surface initially. Add a little bit of the coral, followed by the blush, overlapping them slightly. -
The scrape clean:
This is the pivotal moment. Take your clean metal bench scraper and hold it against the side of the cake, just like when smoothing the base coat. -
Rotate and smooth:
Gently rotate the turntable while holding the scraper steady. The scraper will drag the colored splotches, stretching them out into long, painterly streaks. -
Evaluate the look:
Stop and check your design. If the colors have blended too much into the background, you can add fresh dabs of color on top and scrape again gently. -
Touching up:
If I feel a spot is too empty, I like to use a small palette knife to manually feather in a bit more color without doing a full scrape, preserving some texture. -
Top surface styling:
Don’t forget the top. Add tiny smears of the leftover colored buttercream near the rim and gently pull them inward with your offset spatula.
Step 4: Finishing Touches
-
Final smooth:
Give the cake one last very gentle pass with the scraper if you want a seamless finish, or leave the texture slightly raised for a more impasto oil-painting look. -
Final chill:
Place the finished cake back in the fridge to set the painted strokes firmly before moving it to your display board. -
Plating:
Transfer the chilled cake carefully onto your marble cake stand or board, ensuring it is centered.
Step back and admire your edible art piece before slicing into those beautiful layers
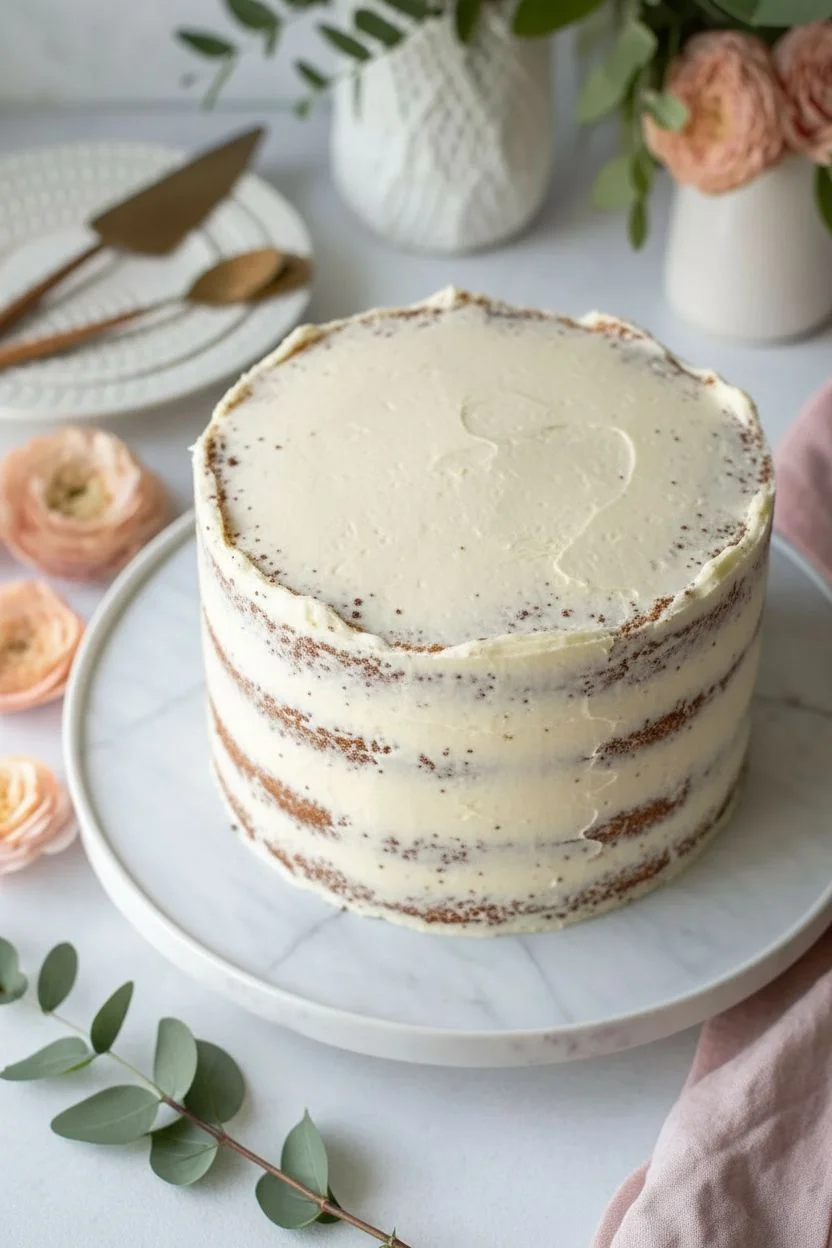
Paint Mixing Palette Smear Cake
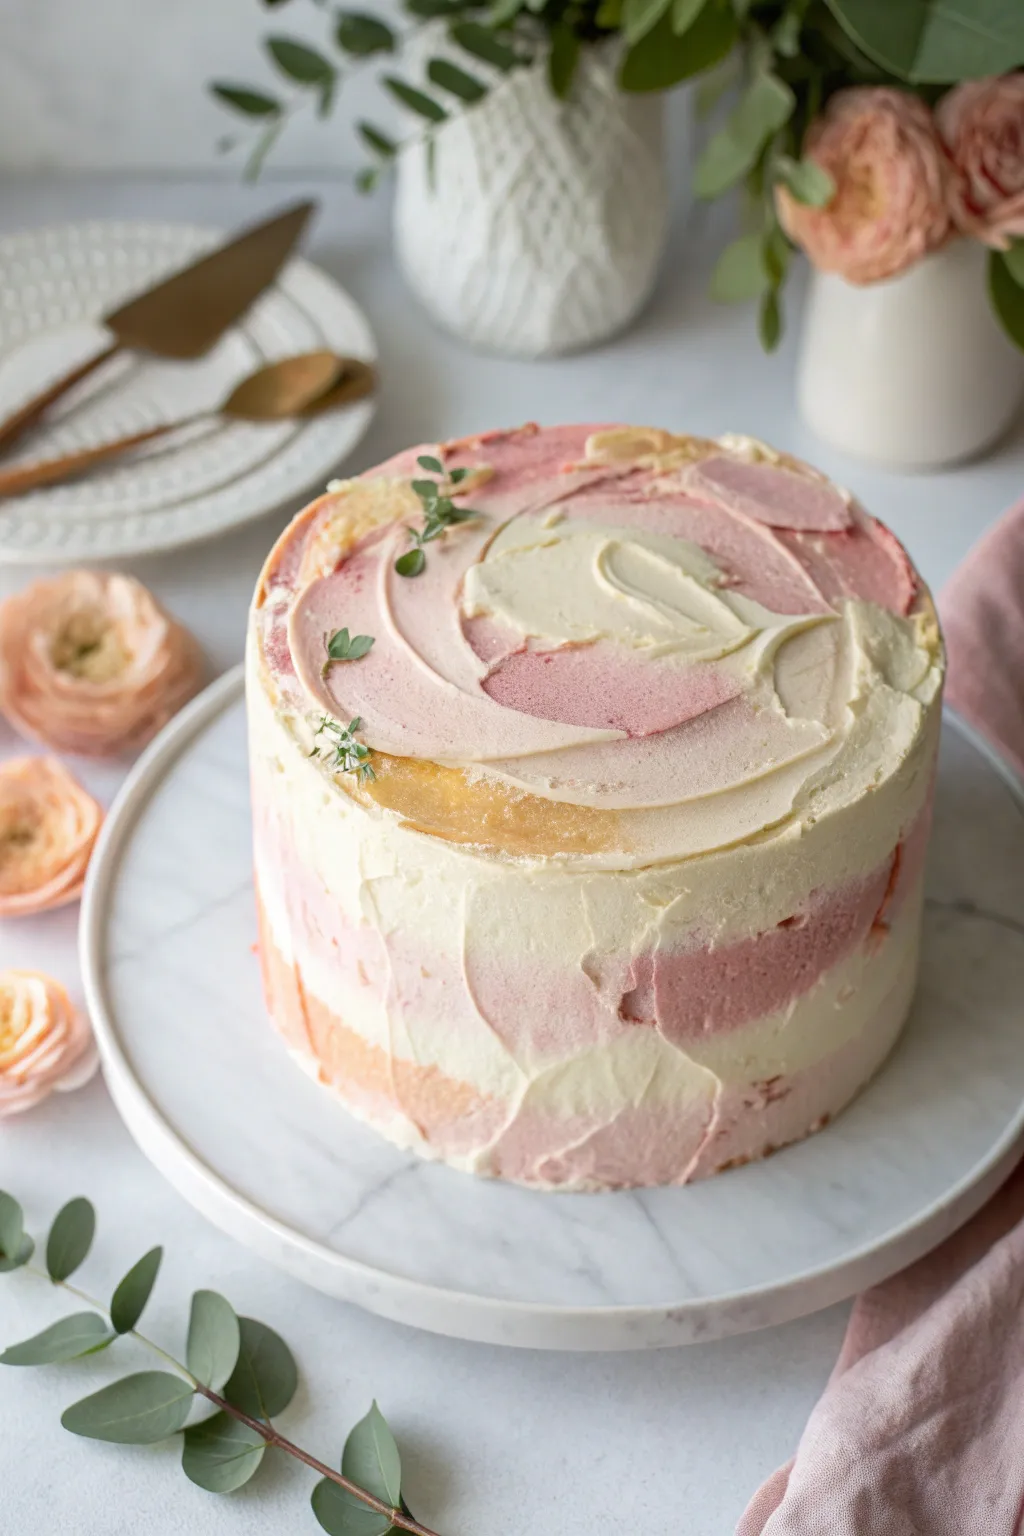
This stunning cake design mimics an artist’s mixing palette, blending swirls of soft blush, creamy peach, and ivory buttercream for a dreamy aesthetic. The organic, textured finish makes every slice a masterpiece and is surprisingly forgiving for beginner decorators.
Step-by-Step Tutorial
Materials
- Three or four 8-inch round cake layers (baked and cooled)
- Swiss Meringue Buttercream (3-4 batches)
- Gel food coloring (Soft Pink, Peach, Ivory)
- Offset spatula (small and large)
- Bench scraper or icing smoother
- Turntable
- Piping bags (optional)
- Small bowls for mixing colors
- Fresh eucalyptus sprigs and thyme for garnish
- Cake board
Step 1: Base Construction
-
Level the layers:
Using a serrated knife, trim the tops of your cooled cake layers to ensure they are perfectly flat. This level foundation is crucial for straight sides later on. -
Stack and fill:
Place a dab of buttercream on your cake board to secure the first layer. Spread an even layer of plain buttercream filling, top with the next sponge, and repeat until all layers are stacked. -
Crumb coat:
Apply a thin, messy layer of plain buttercream over the entire exterior to trap any loose crumbs. Use your bench scraper to smooth it slightly, then chill the cake for at least 30 minutes until firm to the touch.
Temperature Matters
Make sure your cake is well-chilled before the final coat. A cold base prevents the layers from sliding while you press and drag the frosting colors.
Step 2: Color Mixing
-
Divide the buttercream:
Separate your remaining buttercream into four small bowls. Keep the largest portion (about 40%) white/natural ivory. -
Create the palette:
Tint one bowl a soft dusty rose, another a warm peach, and the third a very pale blush. Add the gel coloring sparingly on the tip of a toothpick—you want pastel, watercolor tones, not saturated brights. -
Texture prep:
Ensure your buttercream is silky smooth. If it has air bubbles, use a rubber spatula to paddle it back and forth in the bowl to knock out the air.
Step 3: The Palette Smear Technique
-
Apply the base blobs:
Take your offset spatula and apply random, thick dollops of different colored buttercream all around the sides of the chilled cake. Alternate colors and leave some gaps. -
Fill the gaps:
Fill the remaining spaces with the plain ivory buttercream. It doesn’t need to be smooth yet; just ensure the cake is fully covered with a thick layer of frosting. -
Initial smoothing:
Hold your bench scraper vertically against the side of the cake. Rotate the turntable while keeping the scraper stationary to begin blending the blobs together. Do not over-scrape yet. -
Add artistic smears:
Inspect the sides. Where the colors look too separated, add a small smear of a contrasting color using the tip of your spatula, overlapping existing patches. -
Final side smoothing:
Run the bench scraper around the cake again. The goal is to smooth the surface while dragging the colors into one another, creating that ‘paint mixed on a palette’ look. Stop before the colors turn muddy. -
Clean the edges (mostly):
You will likely have a crown of buttercream sticking up around the top edge. For this look, we want to keep some of that raw texture, but gently pull any excessively large flaps inward toward the center.
Metallic Touch
Mix a tiny amount of edible gold dust with vodka/lemon extract. Use a fine brush to paint the very edges of the textured ridges for a luxe finish.
Step 4: Top Decoration
-
Top surface application:
Apply dollops of pink, peach, and ivory on the top surface of the cake, similar to how you did the sides. -
Create the swirl:
Using the back of a large tablespoon or an offset spatula, press gently into the frosting on top. Rotate the turntable while dragging your tool in a spiral motion or large sweeping arcs. -
Enhance texturing:
I find that lifting the spatula slightly as you finish a stroke creates beautiful, organic peaks that catch the light. -
Chill to set:
Place the cake back in the fridge for about 20 minutes to let the design firm up before adding the final touches. -
Garnish placement:
Select delicate sprigs of fresh thyme and eucalyptus. Inspect the top for natural ridges in the frosting and nestle the greenery gently into these curves. -
Final review:
Step back and check the overall balance. If a spot looks too bare, press a small, single thyme leaf into the buttercream for a subtle detail.
Slice into your beautiful creation and enjoy the merging of art and dessert


Have a question or want to share your own experience? I'd love to hear from you in the comments below!