If you’re craving easy Halloween canvas painting that still looks totally display-worthy, you’re in the right place. These ideas are beginner-friendly on purpose, so you can relax, play with spooky shapes, and end up with art that screams Halloween decor without the stress.
Minimalist Floating Ghost
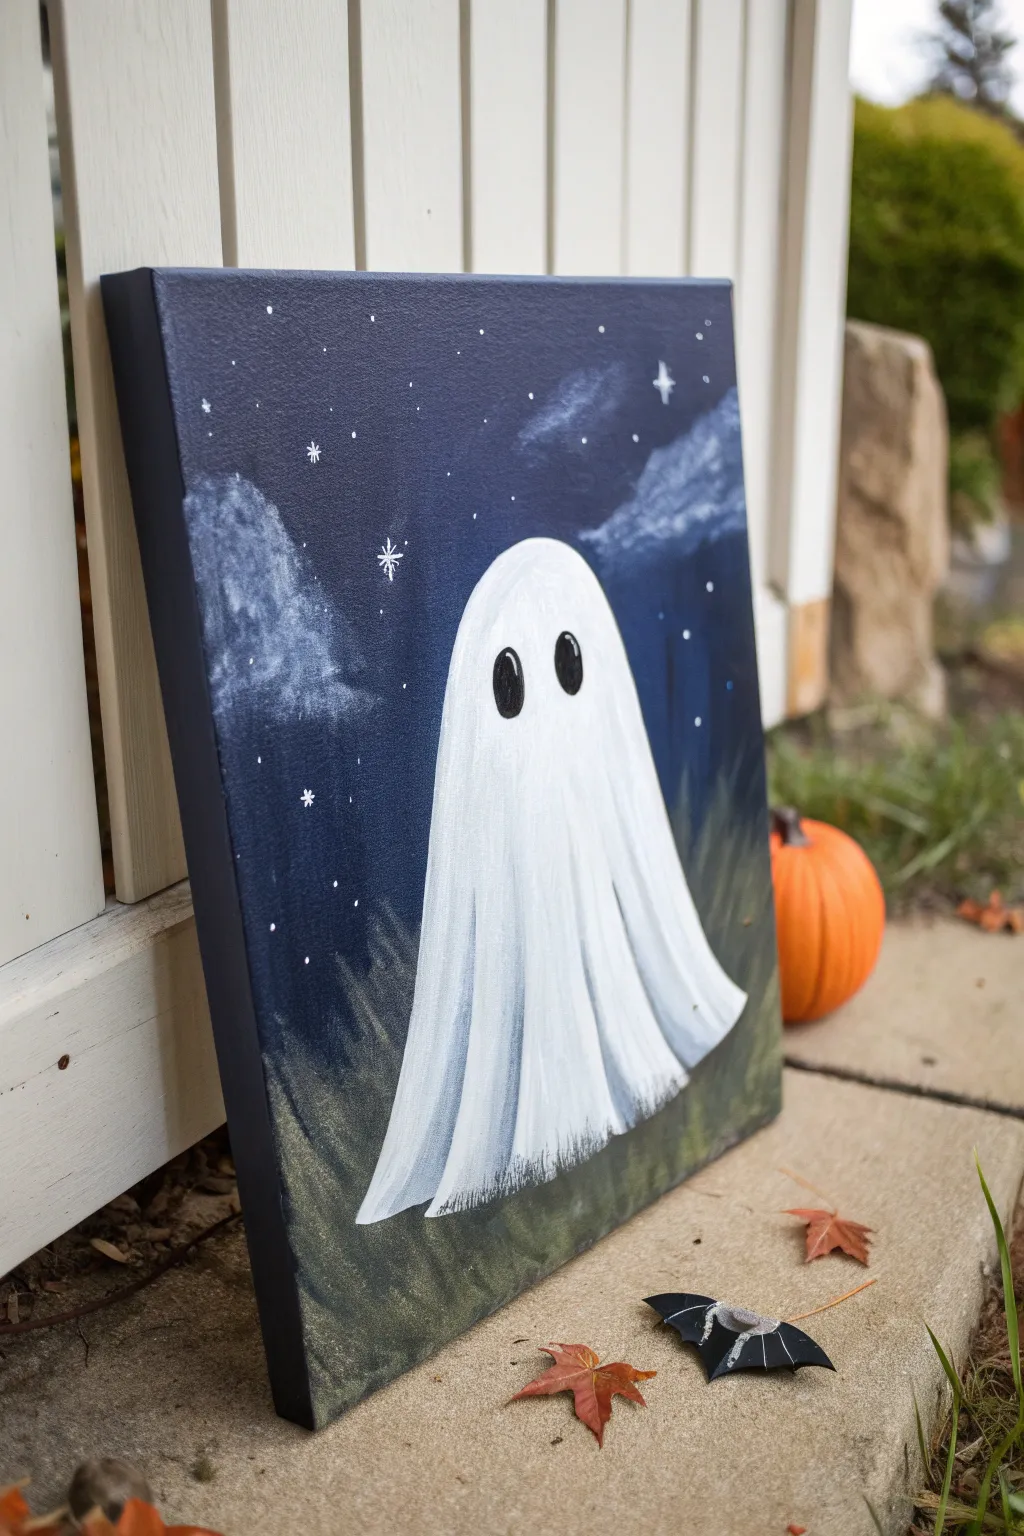
Capture the whimsy of a classic Halloween spook with this charming canvas painting. Featuring a simple sheet ghost floating against a starry night sky, this project is perfect for beginners looking to add a touch of spectral fun to their decor.
How-To Guide
Materials
- Canvas (8×10 or similar rectangular size)
- Acrylic paint: Dark Blue (Navy or Prussian), Black, White, Dark Green
- Large flat brush (for background)
- Medium filbert brush (rounded tip for ghost)
- Small round detail brush
- Regular sponge or sea sponge
- Palette or paper plate
- Cup of water and paper towels
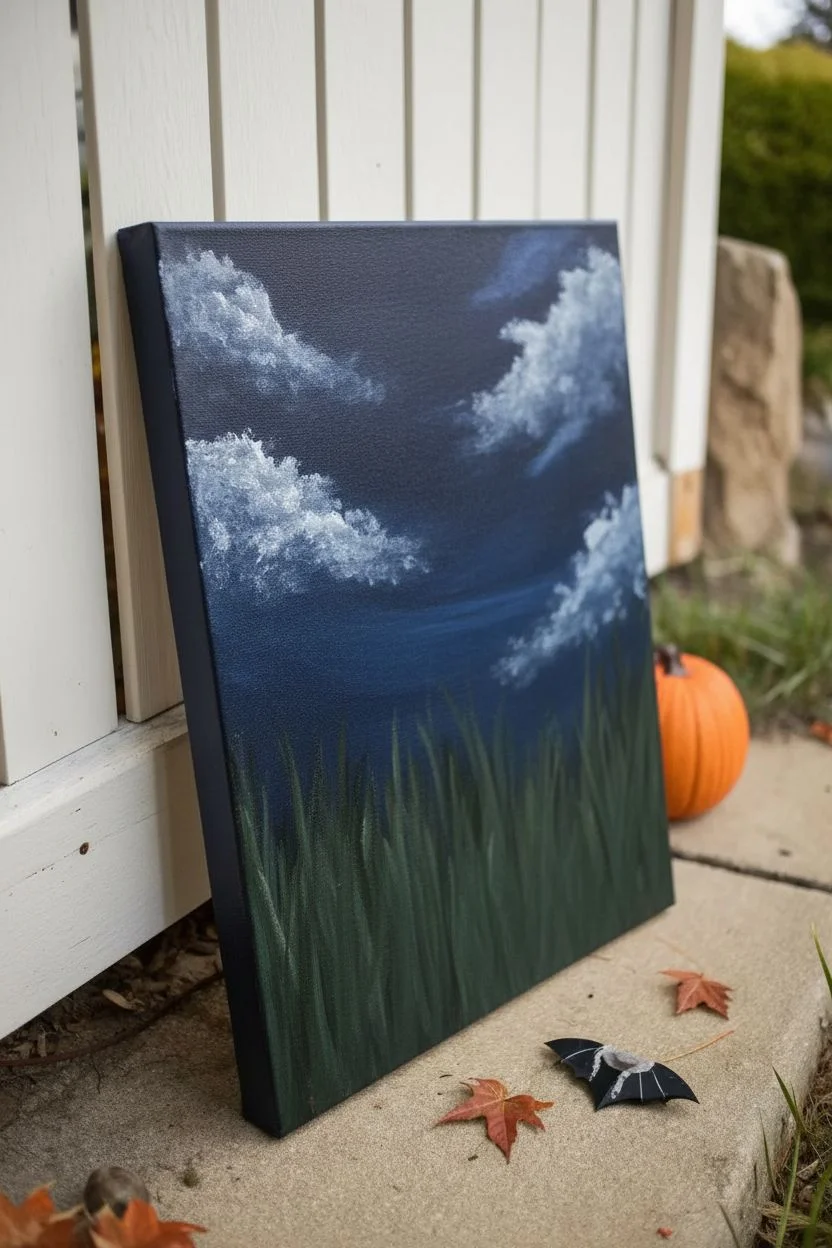
Step 1: Setting the Night Scene
-
Prepare the background color:
Mix a small amount of black into your dark blue paint to create a deep, midnight blue shade. You want it dark enough to contrast with the ghost but not purely black. -
Paint the sky:
Using your large flat brush, cover the upper two-thirds of the canvas with this midnight blue mixture. Ensure you paint the sides of the canvas as well for a polished, finished look. -
Add the grassy ground:
For the bottom third, mix dark green with a tiny bit of black to desaturate it. Paint this across the bottom, blending it slightly upward into the blue sky while the paint is still wet to create a soft horizon line. -
Texture the grass:
While the green is tacky, use dry brush strokes or a dab of lighter green to create vertical flicking motions upward, suggesting tall blades of grass in the darkness. -
Create misty clouds:
Dampen a sponge slightly and dip it into a tiny amount of white paint. Dab off the excess on a paper towel until it’s almost dry, then gently press ‘clouds’ into the blue sky area to create a spooky, foggy atmosphere.
Paint Opacity Tip
If your white paint looks streaky over the dark blue, let it dry fully and add a second coat rather than piling wet paint on wet paint.
Step 2: Summoning the Ghost
-
Outline the shape:
Once the background is completely dry, use a small round brush with thinned white paint to lightly sketch the outline of your ghost. Aim for a rounded dome head and a flowing, uneven skirt at the bottom. -
Fill the base coat:
Using a medium filbert brush, fill in the ghost shape with solid white paint. You may need two coats to ensure the dark blue background doesn’t show through. -
Add folds and dimension:
Mix a tiny drop of black or blue into white paint to make a very light grey. Use this to paint vertical, curved lines starting from the ‘shoulders’ down to the hem, mimicking folds in fabric. -
Refine the transparency:
For a wispy effect at the bottom of the ghost, lightly drag your white brush downward into the grass area so the paint streaks and fades out naturally. -
Paint the eyes:
Load your small round brush with pure black paint. Paint two vertical ovals for the eyes. I find placing them slightly higher on the head makes the ghost look cuter and more curious.
Step 3: Magical Details
-
Add sparkler stars:
Using your smallest detail brush and pure white paint, create a few large stars. Paint a cross shape, then add smaller diagonal lines in the center to create a twinkling effect. -
Sprinkle distant stars:
Dip an old toothbrush or stiff brush into watered-down white paint. Use your thumb to flick the bristles, spraying tiny specks of white ‘stars’ across the blue sky area. -
Highlight the ghost:
Add a crisp line of pure white on the top of the ghost’s head and the edges of the folds to make it pop against the dark background. -
Final touches:
Check your grass area. If the ghost looks too ‘stuck’ on top, paint a few tiny blades of dark grass overlapping the very bottom edge of the white sheet.
Glow In The Dark
Mix glow-in-the-dark medium into your white paint for the final coat on the ghost body so it lights up when the lights go out.
Set your spectral friend on a mantle or shelf to watch over your Halloween festivities


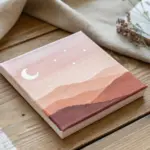
Bats Across a Full Moon

Create a spooky yet serene Halloween atmosphere with this acrylic painting featuring silhouetted bats fluttering across a giant, glowing full moon. The striking contrast between the bright moon and the deep, misty purple night sky makes this a standout piece for your seasonal decor.
Step-by-Step
Materials
- Square stretched canvas (e.g., 10×10 or 12×12 inches)
- Acrylic paints: Navy Blue, Black, White, Deep Purple, Grey
- Large flat brush (1 inch)
- Medium round brush
- Fine liner brush (size 0 or 00)
- Small sponge or stippling brush
- Circle template (large bowl or compass)
- Pencil
- Palette and water cup
- Paper towels
Step 1: Setting the Scene
-
Outline the moon:
Center your circular object (like a bowl) on the canvas to trace the moon. Position it slightly higher than dead center so you have room for the treeline below. Trace it lightly with a pencil. -
Paint the night sky background:
Using your large flat brush, paint the area outside the circle with Navy Blue. At the very top, mix a tiny bit of Black into the Navy for a deeper sky. -
Blend the misty horizon:
As you move toward the bottom third of the canvas (below the moon line), blend Deep Purple into your Navy Blue while the paint is still wet to create a smooth transition. -
Add the fog effect:
Near the very bottom, before the paint dries, mix a little white into the purple to create a lighter, misty lavender hue. This gradient from dark navy top to hazy purple bottom gives the painting depth. -
Fill the moon base:
Paint the inside of your moon circle with a solid coat of Titanium White. You might need two layers to ensure it’s completely opaque and bright.
Uneven Moon Edge?
If your sky paint overlapped your moon circle messy, wait for it to fully dry. Then, re-paint the edge of the moon with white paint to clean up the circle’s shape.
Step 2: Creating the Moon Texture
-
Mix moon shadow colors:
Prepare a very light grey paint on your palette. If you only have dark grey, mix it with plenty of white until it’s barely off-white. -
Sponge on craters:
Dip a small sponge or a dry stippling brush into the light grey. Blot most of the paint off on a paper towel until the brush is almost dry. -
Create surface texture:
Gently dab the grey sponge onto the white moon in random cloud-like patterns to mimic craters. Focus these darker areas slightly more on the left side to suggest shadow, keeping the right side brighter. -
Soften the edges:
If any crater edges look too sharp, use a clean, slightly damp brush to gently feather them into the white background.
Add a Glow Effect
Mix a tiny drop of white into water (very thin). Glaze heavily around the outside edge of the moon onto the blue sky to create a glowing halo effect.
Step 3: The Forest and Stars
-
Paint the distant tree line:
Using black paint, create a jagged horizon line at the bottom. On the right side, paint simple triangular shapes to form tall pine trees rising up into the purple sky. -
Add foreground grass:
Fill in the bottom inch of the canvas with solid black. Use a smaller brush to flick upward strokes along the top edge of this black strip to look like tall grass blades. -
Paint spooky branches:
On the left side, use your fine liner brush to paint bare, spindly trees rising from the grass. Make the branches crooked and thin, reaching up toward the moon. -
Add the stars:
Using a small brush or a toothpick, dot tiny white stars into the navy sky area. Add a few ‘twinkle’ stars by painting small crosses with elongated vertical lines.
Step 4: Bats in Flight
-
Outline the bat shapes:
With your smallest brush and slightly watered-down black paint, carefully outline the silhouettes of bats inside the moon area. Vary their sizes to show distance. -
Fill the silhouettes:
Fill in the bat shapes with solid black paint. Position the largest bat near the center and smaller ones trailing behind or higher up. -
Add detail to wings:
For the larger bats, add tiny scalloped edges on the bottom of the wings to make them look realistic rather than just simple triangles. -
Painting bats outside the moon:
Don’t forget to add one or two bats flying outside the moon’s glow, over the purple sky area or near the trees, to integrate the whole scene. -
Final touches:
Check your blacks; if the moon background shows through your bats, apply a second coat of black once the first is dry for a crisp silhouette.
Now you have a hauntingly beautiful moonlit scene ready to display for Halloween


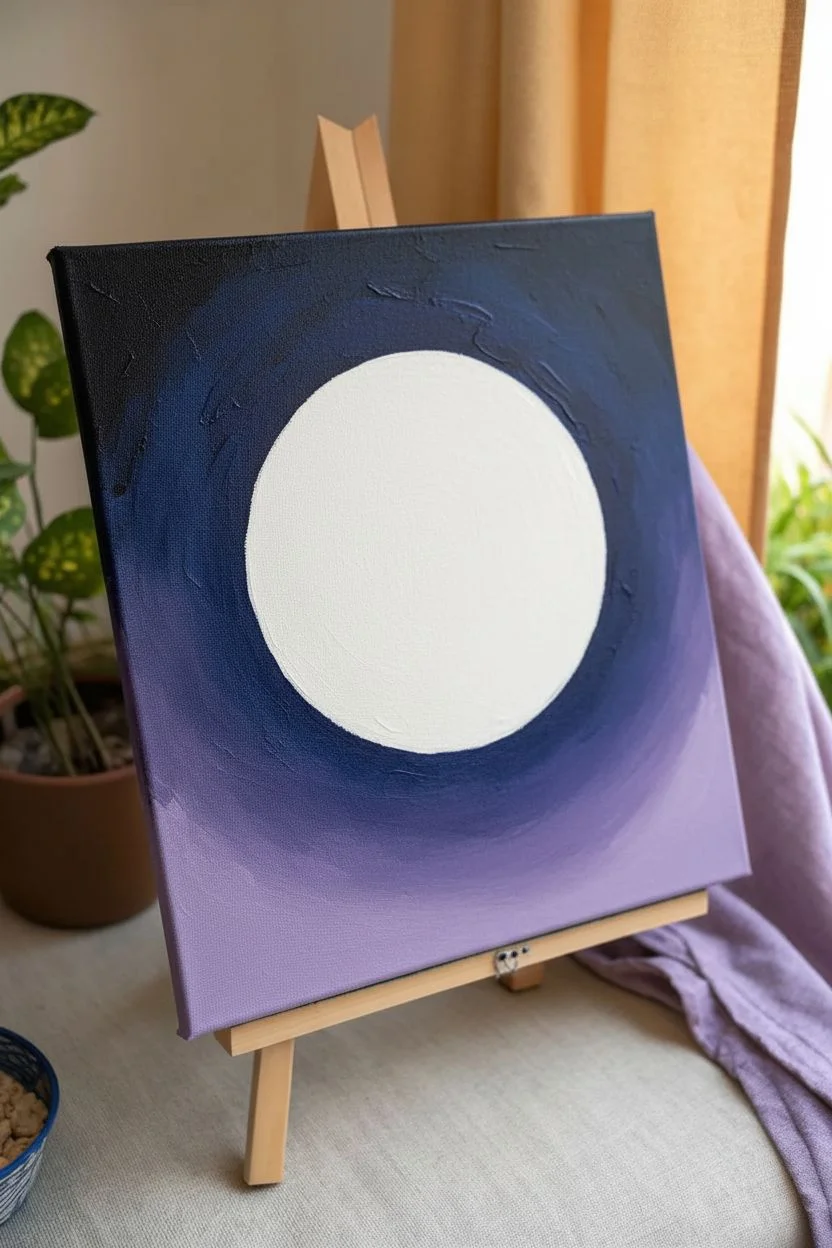
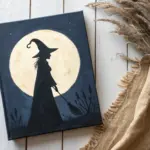
Witch Hat in Moonlight

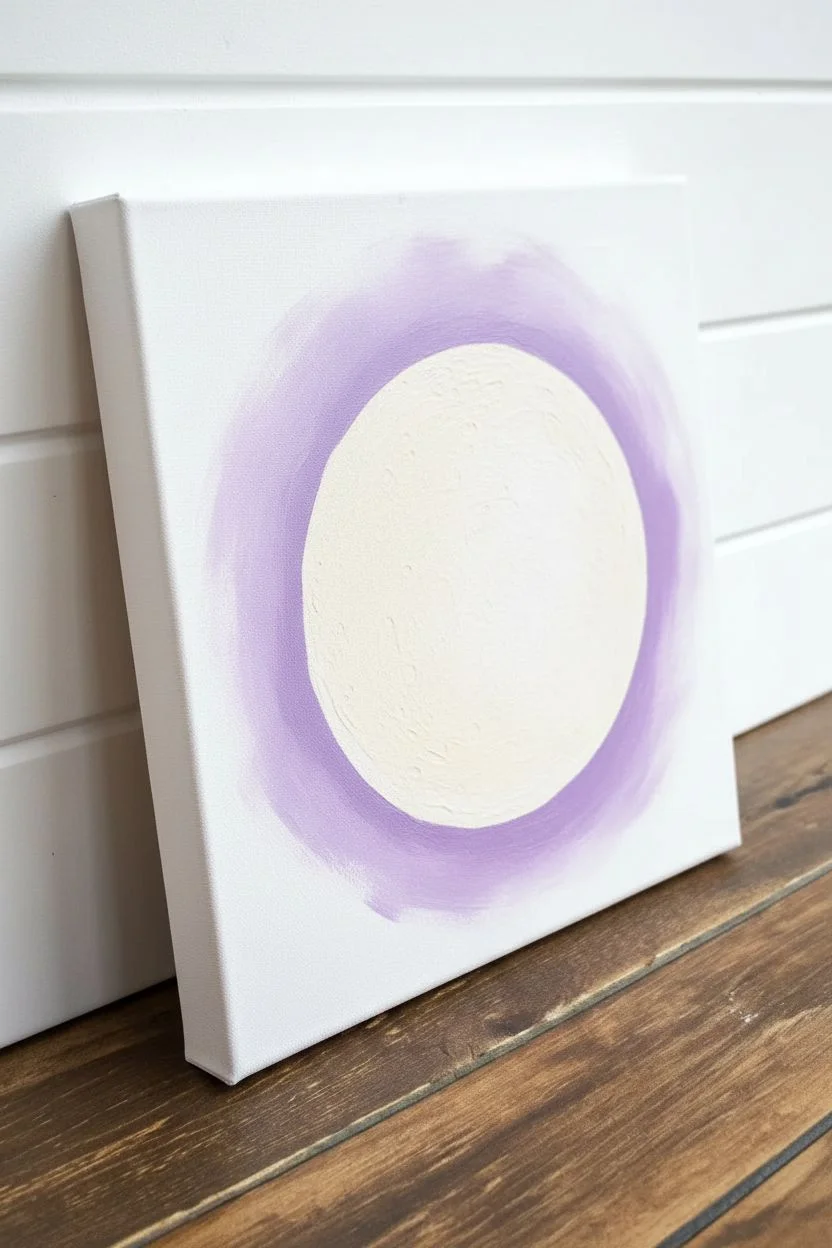
Capture the magic of Halloween night with this striking silhouette painting featuring a classic witch’s hat set against a glowing full moon. The deep purple sky and crisp black details create a spooky yet sophisticated atmosphere perfect for seasonal decor.
Detailed Instructions
Materials
- Square stretched canvas (e.g., 8×8 or 10×10 inches)
- Acrylic paints: Black, White, Purple (Violet), Dark Blue (optional for mixing)
- Yellow or Gold acrylic paint (for buckle)
- Circular object for tracing (plate, bowl, or lid)
- Pencil
- Flat shader brush (approx. 1 inch)
- Medium round brush
- Fine liner brush
- Water cup and paper towels
Step 1: Setting the Scene
-
Trace the Moon:
Place your circular object (like a small plate or plastic lid) slightly off-center on the canvas. Using a pencil, lightly trace the circle to define where your moon will be. Don’t press too hard, as you want the graphite lines to be easily covered by paint. -
Paint the Moon Base:
Mix a tiny drop of yellow or black into a large amount of white paint to create an off-white, moon-like shade. Fill in the circle you just traced using a round brush. It doesn’t need to be perfect yet, as we will add texture later. -
Create Moon Texture:
While the moon is still slightly wet, dip your brush into a very light grey (white with a speck of black). Dab this gently inside the moon shape to create craters and shadows. Keep the center brighter and the edges slightly darker to make it look spherical. -
Start the Inner Glow:
Mix a light shade of purple by combining your violet paint with plenty of white. Paint a ring around the outside of your dried moon. Blend this outward slightly, but keep it distinct from the darker sky to come.
Starry Splatter
Instead of painting every star by hand, dip an old toothbrush in watered-down white paint. Run your thumb over the bristles to flick a fine mist of stars across the sky.
Step 2: Painting the Sky
-
Apply the Mid-Tone Purple:
Using your medium round brush or a smaller flat brush, apply a medium shade of purple around the light purple glow you just created. Blend the edges where the two colors meet while the paint is still wet to create a smooth gradient. -
Darken the Edges:
For the outer corners and edges of the canvas, use your darkest purple paint. If you want it even darker (like a true night sky), mix a tiny touch of black or dark blue into the purple. Paint the remaining white canvas space. -
Blend the Sky:
Use a clean, slightly damp brush to smooth out the transition between the dark corners and the lighter center. I find that working in circular motions helps blur the lines nicely. Don’t forget to paint the sides of the canvas so it looks finished from all angles. -
Add Stars:
Once the sky is completely dry, use a fine liner brush or a toothpick to dot tiny white stars onto the purple and black areas. For larger twinkling stars, paint a small cross shape with extended vertical lines.
3D Magic
After the painting is dry, glue a small piece of real fabric or ribbon over the painted hat band, or stick a tiny craft rhinestone onto the buckle for extra sparkle.
Step 3: The Witchy Silhouette
-
Sketch the Hat:
With the background fully dry, lightly sketch the outline of a witch’s hat with a pencil. Position it so the tip of the hat overlaps the moon. Give the hat a crooked, bent feel at the top for character. -
Fill in the Hat:
Using your black acrylic paint and a medium brush, fill in the entire hat shape. Ensure form the brim to the tip is opaque; you may need a second coat of black once the first one dries to block out the moon behind it completely. -
Paint the Hill:
Below the hat, paint a sloping black hill that curves upwards. This grounds the image and provides a base for the hat to rest on. -
Add the Hat Band:
Create the band on the hat using a dark grey paint (mix black and white). Paint a curved line across the base of the cone part of the hat. This subtle highlight separates the brim from the hat’s body. -
Detail the Buckle:
With your fine liner brush and yellow or gold paint, create a small square buckle on the grey band. Add a tiny black dot in the center of the yellow square to create the illusion of the belt hole.
Step 4: Final Details
-
Add Spooky Trees:
On the black hill, use your finest brush (or a permanent black marker if painting feels too risky) to draw tiny, spindly trees on either side of the hat. Keep the branches crooked and bare. -
Texture the Grass:
Along the top ridgeline of the black hill, use the tip of a dry brush to flick tiny upward strokes. This simulates wild grass growing against the moonlight. -
Final Retouching:
Check the opacity of your black silhouette. If any moon or purple sky shows through the hat or hill, apply one final thin coat of black to make the shadow truly solid.
Hang your finished masterpiece on the wall and enjoy the spooky ambiance it brings to your home for the holiday season


Black Cat on a Pumpkin
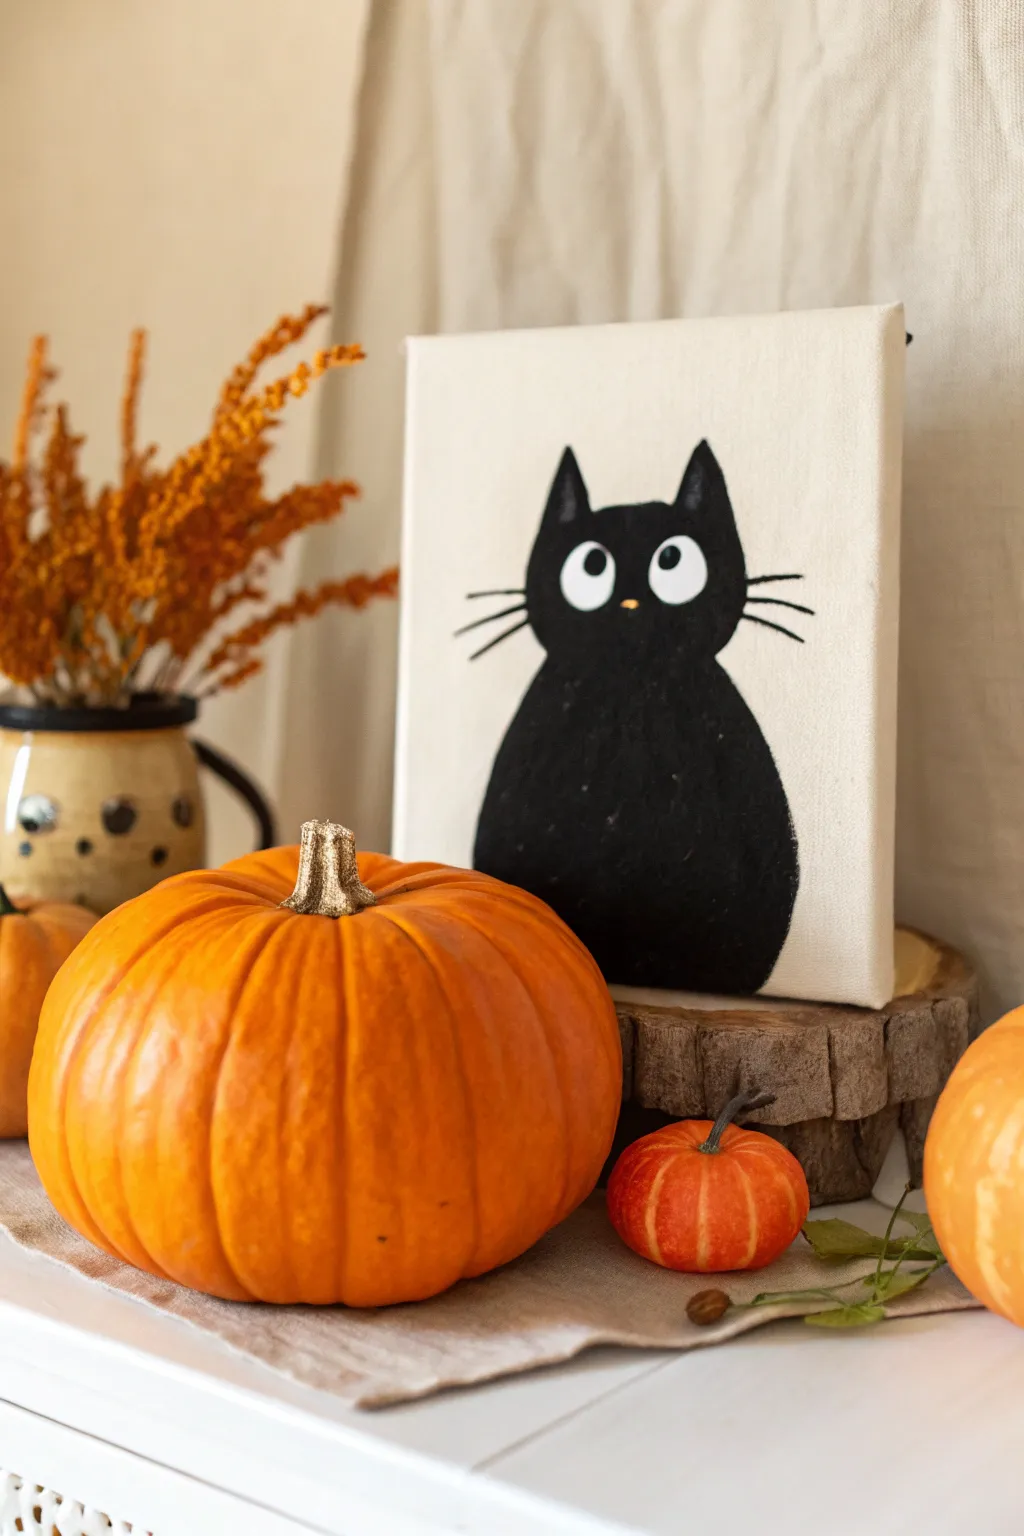

Capture the playful side of Halloween with this delightfully simple black cat portrait. Its graphic shape and expressive eyes make it a perfect beginner project that evokes a touch of spookiness without being scary.
Step-by-Step
Materials
- Small stretched canvas (white)
- Acrylic paint: Black, White, tiny amount of Orange/Yellow (optional)
- Pencil and eraser
- Medium round brush
- Small fine liner brush
- Palette or paper plate
- Cup of water and paper towels
Step 1: Sketching the Shape
-
Define the body:
Begin by lightly sketching a large gumdrop or mound shape that takes up the bottom two-thirds of your canvas. This will be the cat’s main body. -
Add the head:
On top of the body shape, sketch a slightly smaller circle or oval for the head. It should merge seamlessly with the body shape below, creating a snowman-like silhouette but without a defined neck indentation. -
Draw the ears:
Add two pointed triangles on top of the head circle. Keep them relatively tall and pointy for that alert feline look. -
Refine the outline:
Go over your sketch to combine the head and body into one continuous, smooth shape. Erase any internal lines where the shapes overlap so you have a single solid outline.
Paint Consistency
Does your black paint look streaky? Mix a tiny drop of water into it on your palette. It helps the paint flow into the canvas weave for a smoother, darker finish.
Step 2: Painting the Base
-
Fill in the black:
Squeeze out a generous amount of black acrylic paint. Using your medium round brush, carefully outline the entire shape first to get a crisp edge. -
Color the interior:
Fill in the rest of the body with smooth strokes of black paint. Don’t worry about texture yet; just aim for solid, opaque coverage. -
Check for gaps:
Canvas often has a texture that can show white speckles. I usually do a second quick coat while the paint is still tacky to ensure a deep, dark black. -
Let it dry completely:
This is crucial. The black base must be 100% dry before adding the white eyes, or the colors will turn gray and muddy. Take a break for 15-20 minutes.
Make it Sparkle
Mix black glitter into the paint for the body or gloss varnish the eyes after they dry to make them look wet and shiny like real glass beads.
Step 3: Adding the Face
-
Map out the eyes:
Once the black is dry, use your pencil to very lightly trace two large circular shapes side-by-side on the upper part of the head. Large eyes give it that surprised, cute look. -
Paint the eye whites:
Using a clean brush and white paint, fill in the circles. You might need two layers of white to cover the black background fully so it looks bright and opaque. -
Add the pupils:
Once the white is dry, take a small dot of black paint. Place the pupils slightly off-center or looking upward to give the cat a goofy or curious expression. -
Paint a tiny nose:
Right between and slightly below the eyes, dip a fine brush (or even a toothpick) into a tiny bit of orange or pink paint and make a microscopic dot for the nose. -
Create the whiskers:
Switch to your finest liner brush with slightly watered-down black paint. Flick three quick, confident lines outward from each cheek area. Keep them distinct and floating just outside the face.
Place your new feline friend on a shelf or mantel to watch over your halloween festivities
BRUSH GUIDE
The Right Brush for Every Stroke
From clean lines to bold texture — master brush choice, stroke control, and essential techniques.
Explore the Full Guide
Simple Spiderweb Corner
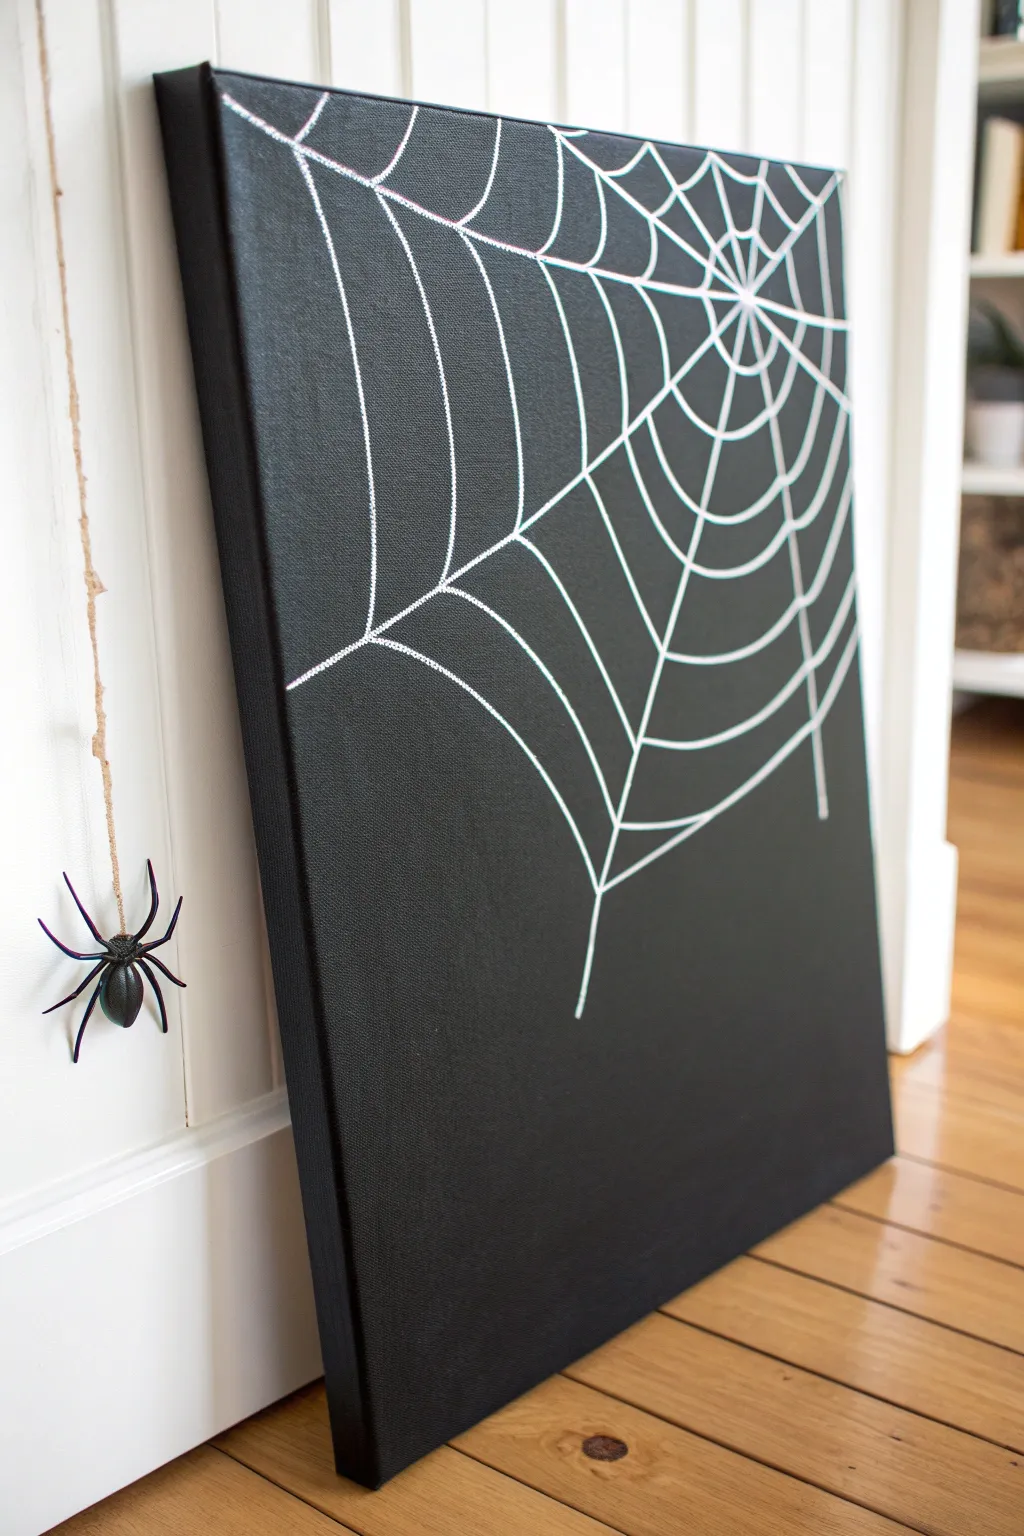
This sleek and modern Halloween decoration combines a stark black canvas with delicate metallic linework for a sophisticated spooky touch. The asymmetrical design draws the eye upward, while a hanging spider adds a playful 3D element to your display.
Step-by-Step Tutorial
Materials
- Rectangular stretched canvas (e.g., 16×20 inch)
- Black acrylic paint (matte or satin finish)
- Silver metallic paint pen (fine tip) or silver acrylic paint with a liner brush
- Large flat paintbrush or sponge brush
- Ruler or straight edge
- Chalk or a white charcoal pencil (optional)
- Plastic toy spider
- Jute twine or string
- Hot glue gun and glue sticks
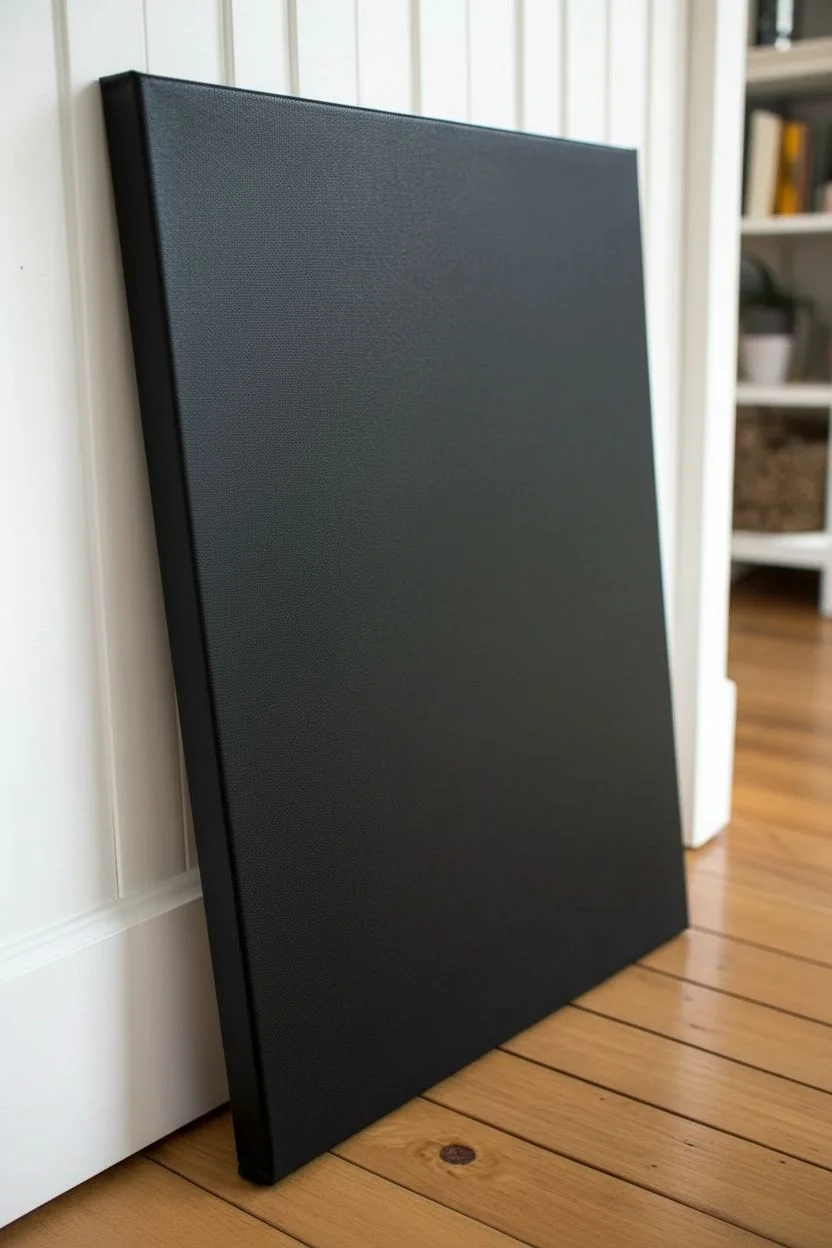
Step 1: Preparing the Canvas
-
Base Coat Application:
Begin by covering the entire front and sides of your canvas with black acrylic paint using a large flat brush. -
Smooth Finish:
Apply the paint in long, even strokes to minimize texture. If the canvas white still peeks through after the first coat, let it dry completely and apply a second coat for solid coverage. -
Drying Time:
Allow the black base to dry fully before moving on to the web design. This prevents the silver marker from clogging or the paint from smearing.
Paint Pen Precision
If using a paint pen, test it on scrap paper frequently. Just pump the tip once or twice to keep the silver flow opaque.
Step 2: Drafting the Web
-
Establish the Center Point:
Visualize a focal point for your web in the upper right corner, slightly off the canvas edge. This imaginary point is where all your radial lines will converge. -
Draw Radial Lines:
Using a ruler and faint chalk (or going straight in with your silver pen if you are confident), draw straight lines radiating outward from that corner point across the canvas. -
Spacing the Spokes:
Create about 7 to 9 main ‘spokes’ for the web. Vary the spacing slightly so it doesn’t look too mathematically perfect—nature is rarely perfectly symmetrical. -
Extend to Edges:
Ensure these radial lines extend all the way to the bottom and left edges of your design area, anchoring the web to the canvas boundaries.
Wobbly Lines?
Don’t worry if your scallops aren’t perfect curves. Real spiderwebs have glitches and uneven strands, which adds to the spooky realism.
Step 3: Weaving the Web
-
Start the Cross-Lines:
Beginning near the top corner ‘center,’ draw curved lines that connect two radial spokes. These little scallops create the classic web shape. -
Work Outward:
Continue drawing these curved connecting lines, moving further away from the corner. Maintain a consistent curve direction—they should all dip slightly inward toward the center. -
Applying Metallic Ink:
Trace over your chalk guides (or draw freely) with the silver metallic paint pen. Shake the pen well before starting to ensure the ink flows brightly. -
Vary Line Weights:
I like to press just a little harder on the intersections where lines meet to create small ‘knots’ of webbing, giving the painting a bit more visual weight. -
Clean Up:
Once the silver ink is completely dry, gently wipe away any visible chalk guidelines with a slightly damp cloth or a soft eraser.
Step 4: Adding the Spider
-
Prepare the Spider:
Take a small plastic toy spider and cut a length of jute twine long enough to hang it at your desired height alongside the canvas. -
Attach String:
Use a small dab of hot glue to secure one end of the twine to the back or abdomen of the plastic spider. -
Position the Hang:
Determine where you want the spider to hang relative to the painting. It looks great dangling freely just off the side of the canvas. -
Secure to Wall or Canvas:
You can either tape the string to the back of the canvas so it hangs down the side, or attach it to the wall molding above, as shown in the inspiration photo.
Prop your new masterpiece against a wall or on a mantle for an instant minimalistic haunt
Spooky Bare Tree Silhouette
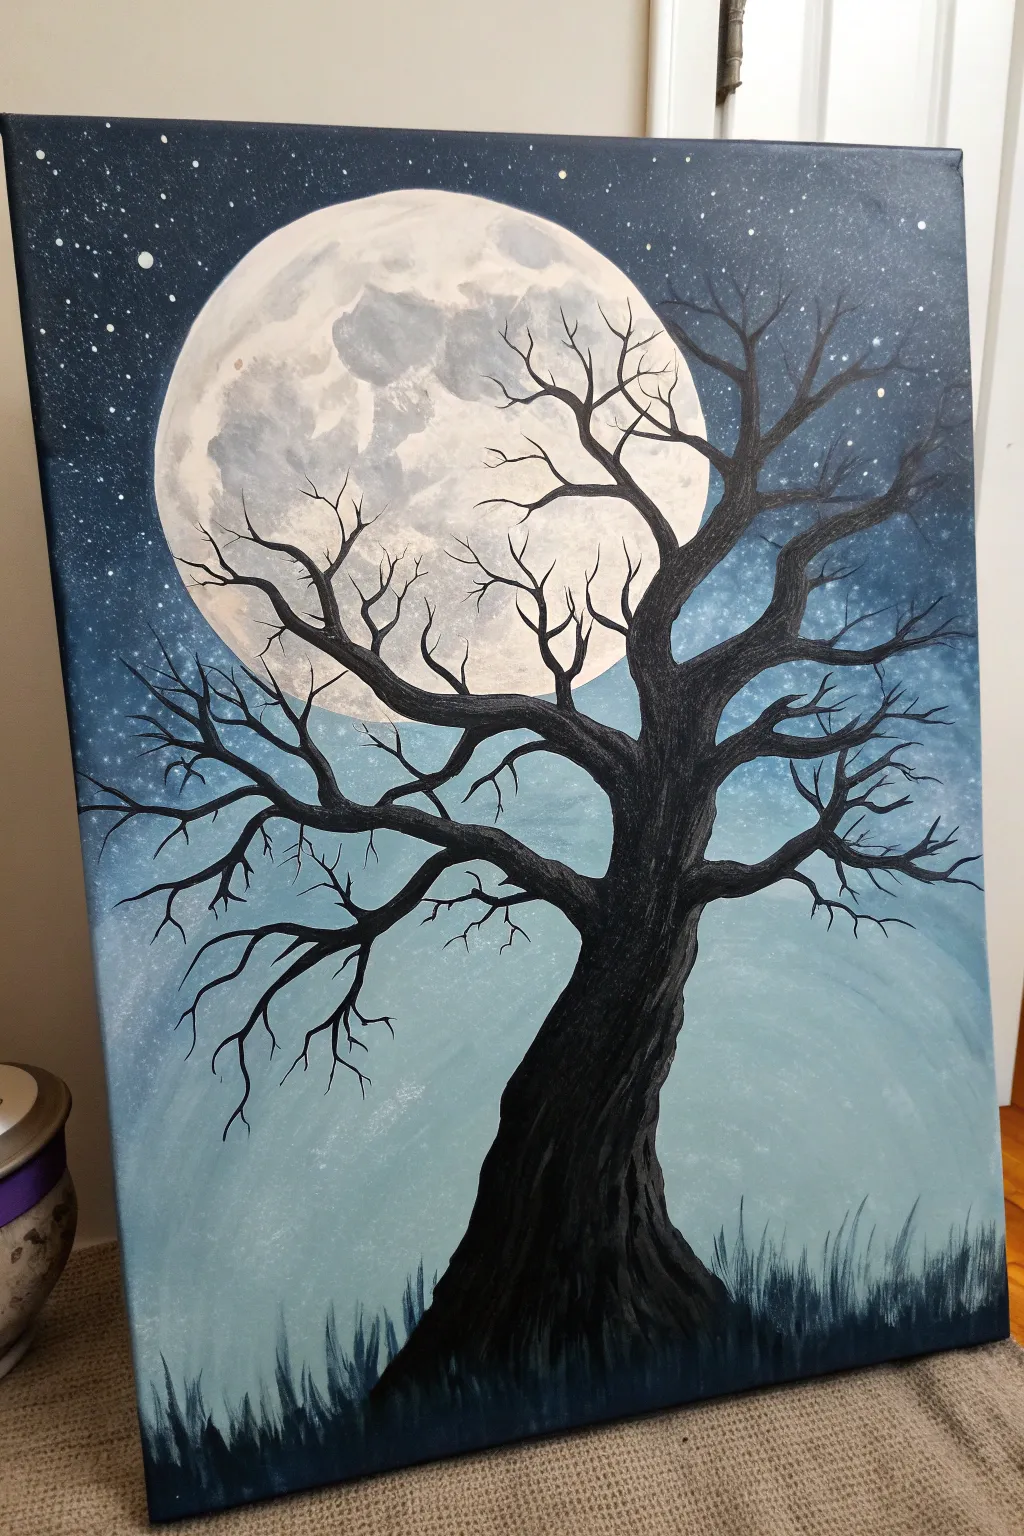
This captivating canvas evokes the eerie calmness of a Halloween night with a striking silhouette of a gnarled tree set against a vast, starry sky. The oversized, textured moon adds a dramatic focal point that glows with realistic crater details.
How-To Guide
Materials
- Canvas (rectangular, portrait orientation)
- Acrylic paints: Black, Titanium White, Phthalo Blue (or similar deep blue), Navy Blue
- Large flat brush or wash brush
- Medium round brush
- Small liner brush or detail brush
- Round sponge or circular stencil (optional)
- Small sea sponge or crumpled paper towel
- Cup of water and paper towels
- Palette or paper plate
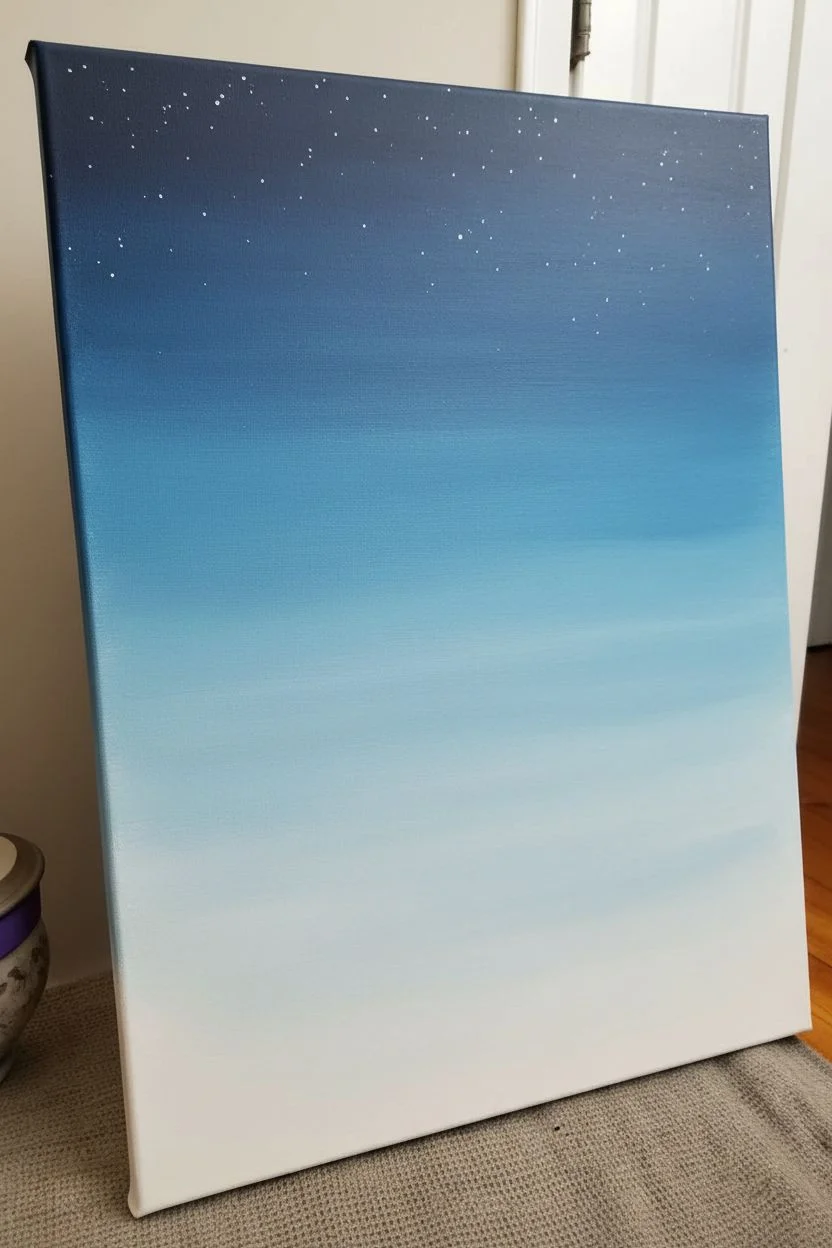
Step 1: Setting the Night Scene
-
Prepare the gradient sky:
Start with your large flat brush. Mix a dark navy blue with a touch of black and paint the very top quarter of the canvas, painting in smooth horizontal strokes. -
Blend downward:
Without cleaning your brush fully, dip into plain Phthalo Blue. Blend this into the dark section, working your way down the canvas to about the halfway point. The sky should gradually get lighter. -
Create the misty horizon:
Mix a light blue by adding plenty of Titanium White to your blue. Paint the bottom half of the canvas, blending it seamlessly into the mid-blue above. The area near the bottom edge should be the lightest, almost a hazy white-blue. -
Add the stars:
While the sky is drying, thin down some white paint with a little water until it’s inky. Load a brush (or toothbrush) and gently flick the bristles to splatter tiny stars across the top darker section of the sky.
Moon Magic
Make the moon glow by dry-brushing a faint halo of white paint around its outer rim onto the blue sky background.
Step 2: Painting the Textured Moon
-
Outline the moon:
Wait for the sky to be dry to the touch. Mix a very light grey or off-white. Using a round object as a guide or freehanding, paint a large circle in the upper left quadrant. -
Fill the base:
Fill in the circle with Titanium White. It doesn’t need to be perfectly opaque; a little transparency adds to the atmospheric effect. -
Create craters:
Mix a light grey paint. Use a small sea sponge or a crumpled piece of paper towel to gently dab texture onto the moon’s surface. Focus the grey splotches in cloud-like formations to mimic lunar maria. -
Highlight the edges:
Go back with pure white on a small brush and tap it along the brightest edges of your craters to give them dimension.
Make It 3D
Glue small plastic bats or a tiny owl onto the branches for a mixed-media element that pops off the canvas.
Step 3: Sculpting the Tree Silhouette
-
Draft the trunk shape:
Load your medium round brush with pure black paint. Start at the bottom center of the canvas and paint a wide, sturdy trunk base that tapers as it reaches the middle of the canvas. -
Curve the trunk:
Give the trunk a slight lean or curve to the right, making it look aged and weathered. I like to twist my brush slightly as I pull up to create natural bark-like irregularities on the edges. -
Add major branches:
Branch out from the top of the trunk. Paint three or four thick main branches that reach upwards and outwards. Let them twist and turn rather than growing perfectly straight. -
Create secondary branches:
Switch to a smaller brush. From each main branch, pull out thinner branches that split into ‘Y’ shapes. Allow some to overlap the moon for a great depth effect. -
Detail the twigs:
Use your finest liner brush with slightly thinned black paint (add a drop of water for better flow). Paint tiny, spindly twigs extending from the branch tips. -
Add bark texture:
Mix a dark grey (black with a tiny dot of white). Lightly dry-brush vertical streaks quickly up the trunk and main branches to suggest rough bark texture caught in the moonlight.
Step 4: Finishing Touches
-
Ground the tree:
At the very bottom of the canvas, paint a dark, uneven strip of black to represent the ground. -
Paint the grass:
Using the small liner brush or a fan brush turned sideways, flick upward strokes of black paint from the bottom edge to create tall, wild grass silhouettes. -
Vary the grass height:
Make sure the grass blades are different lengths and directions for a natural, unkempt look.
Step back and admire your spooky lunar landscape, perfect for setting a mysterious mood

PENCIL GUIDE
Understanding Pencil Grades from H to B
From first sketch to finished drawing — learn pencil grades, line control, and shading techniques.
Explore the Full Guide
Candy Corn Trio
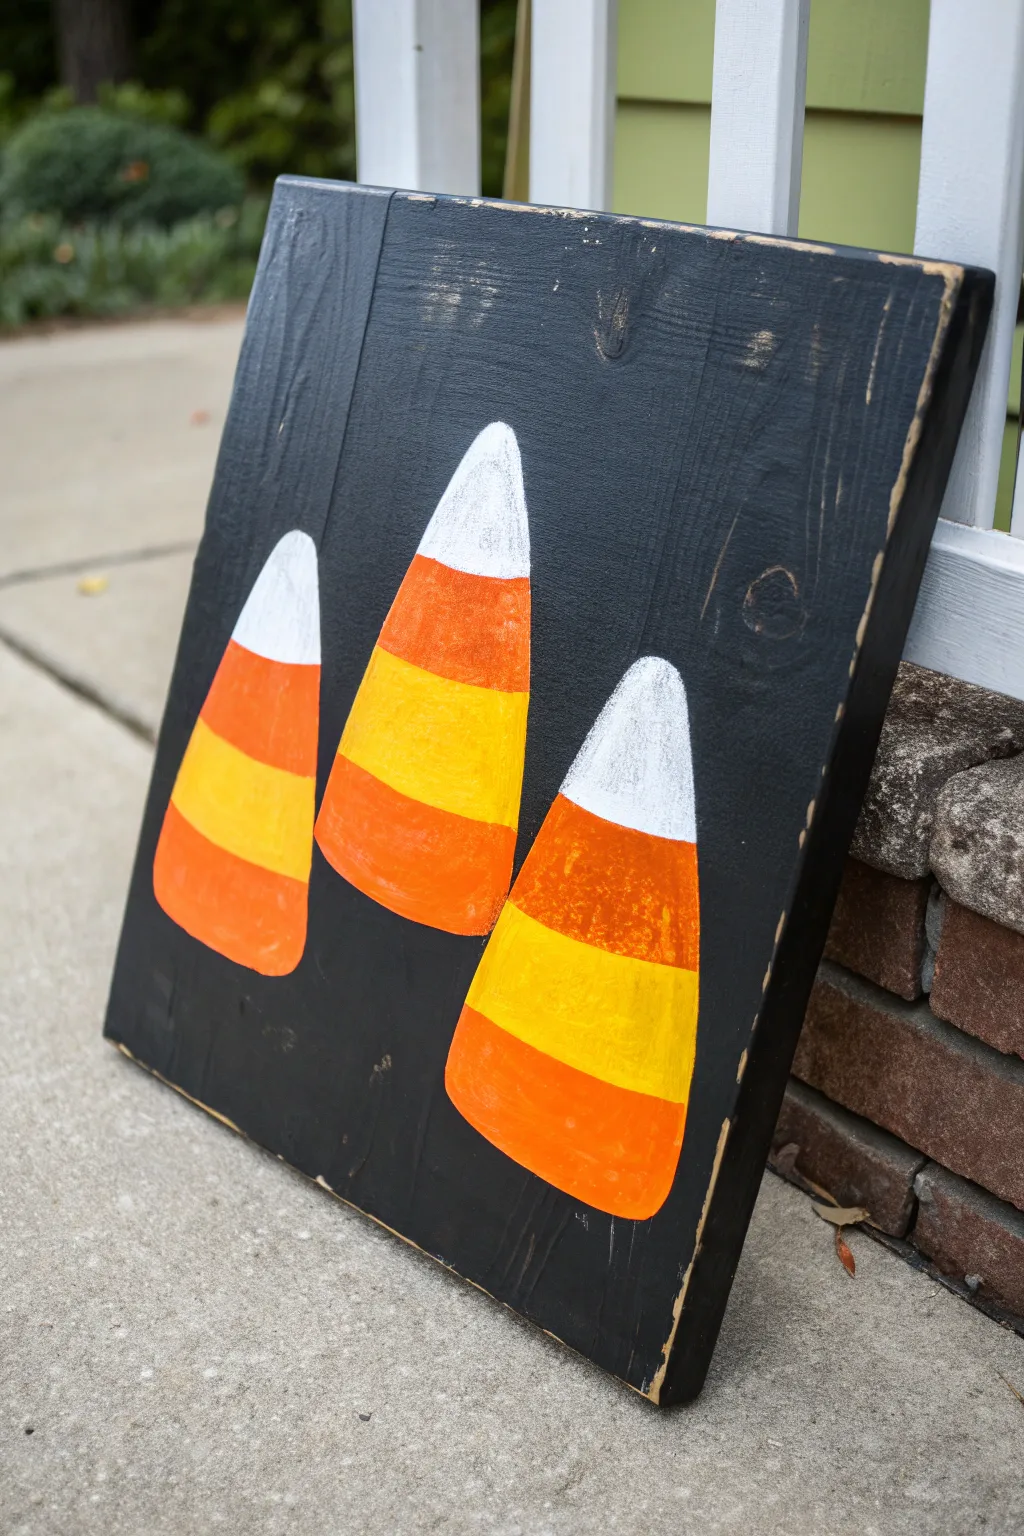
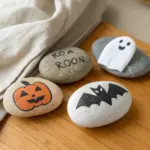
Embrace the charm of farmhouse style with this simple yet striking candy corn painting on wood. The distressed black background makes the vibrant orange, yellow, and white candies pop, perfect for adding a touch of whimsy to your fall porch decor.
Step-by-Step Guide
Materials
- Square wood panel or canvas (approx. 12×12 or 16×16 inches)
- Black acrylic paint (matte finish)
- White acrylic paint
- Orange acrylic paint
- Yellow acrylic paint
- Medium flat paintbrush
- Small round paintbrush for details
- Sandpaper (medium grit, around 100-150)
- Pencil or white chalk
- Ruler (optional)
- Paper plate or palette
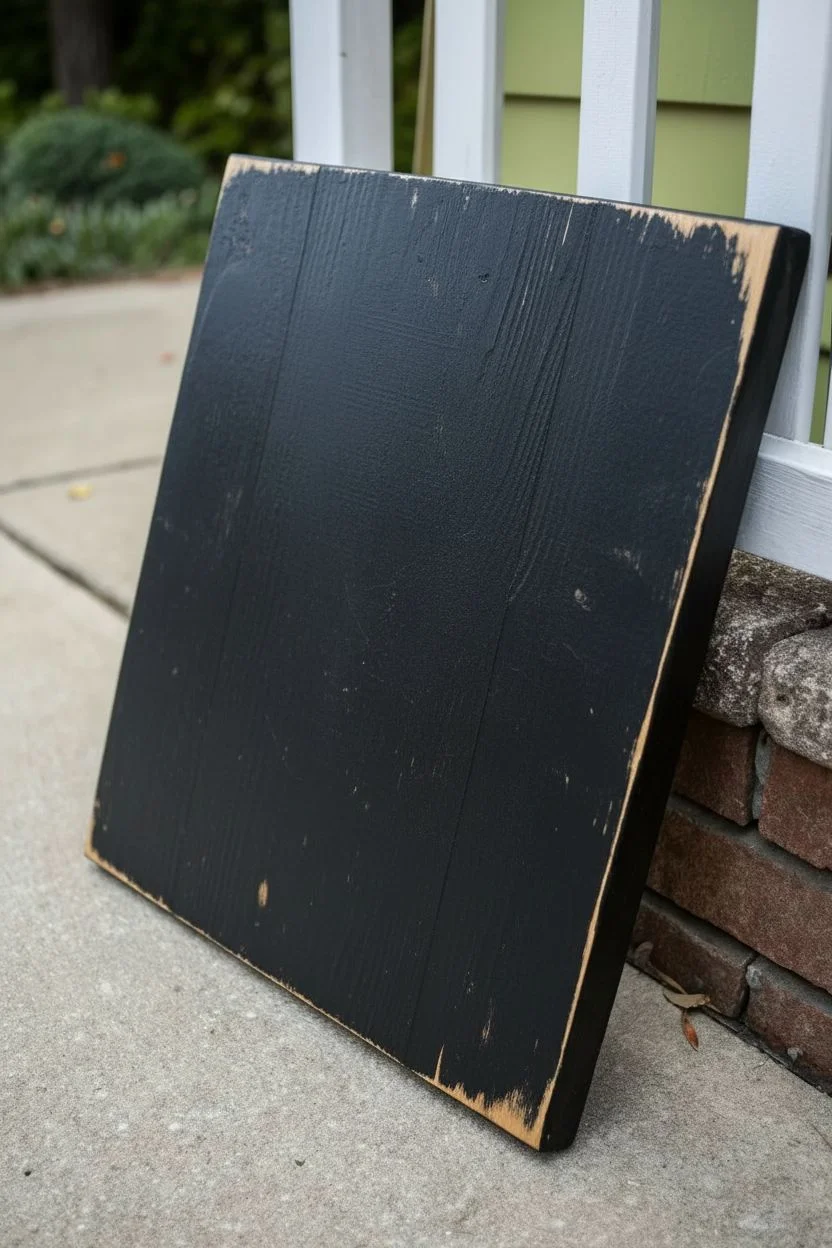
Step 1: Preparing the Background
-
Base coat:
Begin by painting your entire wood panel with the black acrylic paint. Use a flat brush and apply the paint in smooth strokes, following the grain of the wood if visible. -
Ensure coverage:
Check for any light spots. If the wood grain is showing through too much, let the first coat dry completely and apply a second coat for a solid, opaque black surface. -
Distress the edges:
Once the black paint is bone dry, take your sandpaper and gently rub along the edges and corners of the board. You want to sand away the black paint just enough to reveal the raw wood underneath, giving it that aged, rustic look. -
Add surface wear:
For extra character, lightly scuff a few random spots on the flat surface of the board as well, particularly near where the corners might naturally get bumped. -
Clean up:
Wipe the board down with a barely damp cloth or dry tack cloth to remove all the sanding dust before you start painting the design.
Step 2: Drafting the Design
-
Sketch the shapes:
Using a pencil or a piece of white chalk, lightly sketch the outlines of three large triangles. I find it helpful to start with the center triangle to ensure balanced spacing. -
Round the corners:
Soften the sharp points of your triangles. Round off the top tip and curve the bottom corners slightly so they look like distinctive candy corn shapes rather than geometric pyramids. -
Divide the sections:
Draw two slightly curved horizontal lines across each triangle to divide them into three sections: a small top tip, a middle band, and a bottom base.
Chalk It Up
Use white chalk for sketching on the black background. It’s visible while you work but wipes away easily with a damp Q-tip later without leaving graphite smudges.
Step 3: Painting the Candy Corn
-
Paint the tips:
Start with white paint for the top section of each candy corn. Use your smaller brush to carefully fill in the rounded tips. -
Color the center:
For the middle section, apply a generous coat of orange paint. Don’t worry if the edges touch the white slightly; a tiny bit of overlap can actually help blend the sections later. -
Different variations:
Notice in the reference picture that some candy corns have a yellow middle and orange bottom, while others are reversed. For variety, paint the middle band of your center candy corn yellow instead of orange. -
Fill the bottoms:
Paint the bottom section of the outer candy corns yellow. For the center candy corn with the yellow middle, paint its bottom section orange. -
Adjust opacity:
Acrylic yellows and oranges can sometimes be translucent against a black background. Let the first layer dry and apply a second coat to make the colors bright and opaque. -
Refine the edges:
Using a steady hand and a small brush, tidy up the outer edges of your candy corns where the paint meets the black background to ensure crisp, clean shapes. -
Blend the transitions:
If you want a softer look, while the paint is still slightly wet, gently feather the brush where two colors meet to create a subtle transition rather than a hard line. -
Final touches:
Inspect your work for any stray brushstrokes or thin spots. Add a final touch of white to the very tips if they picked up any orange or yellow during the process.
Glitter & Glow
Mix a pinch of fine iridescent glitter into your white paint for the tips, or apply a coat of glow-in-the-dark medium over the white sections for a spooky night effect.
Place your finished sign on the front porch or lean it on a mantle to welcome the Halloween season
Big-Eyed Mummy Wraps
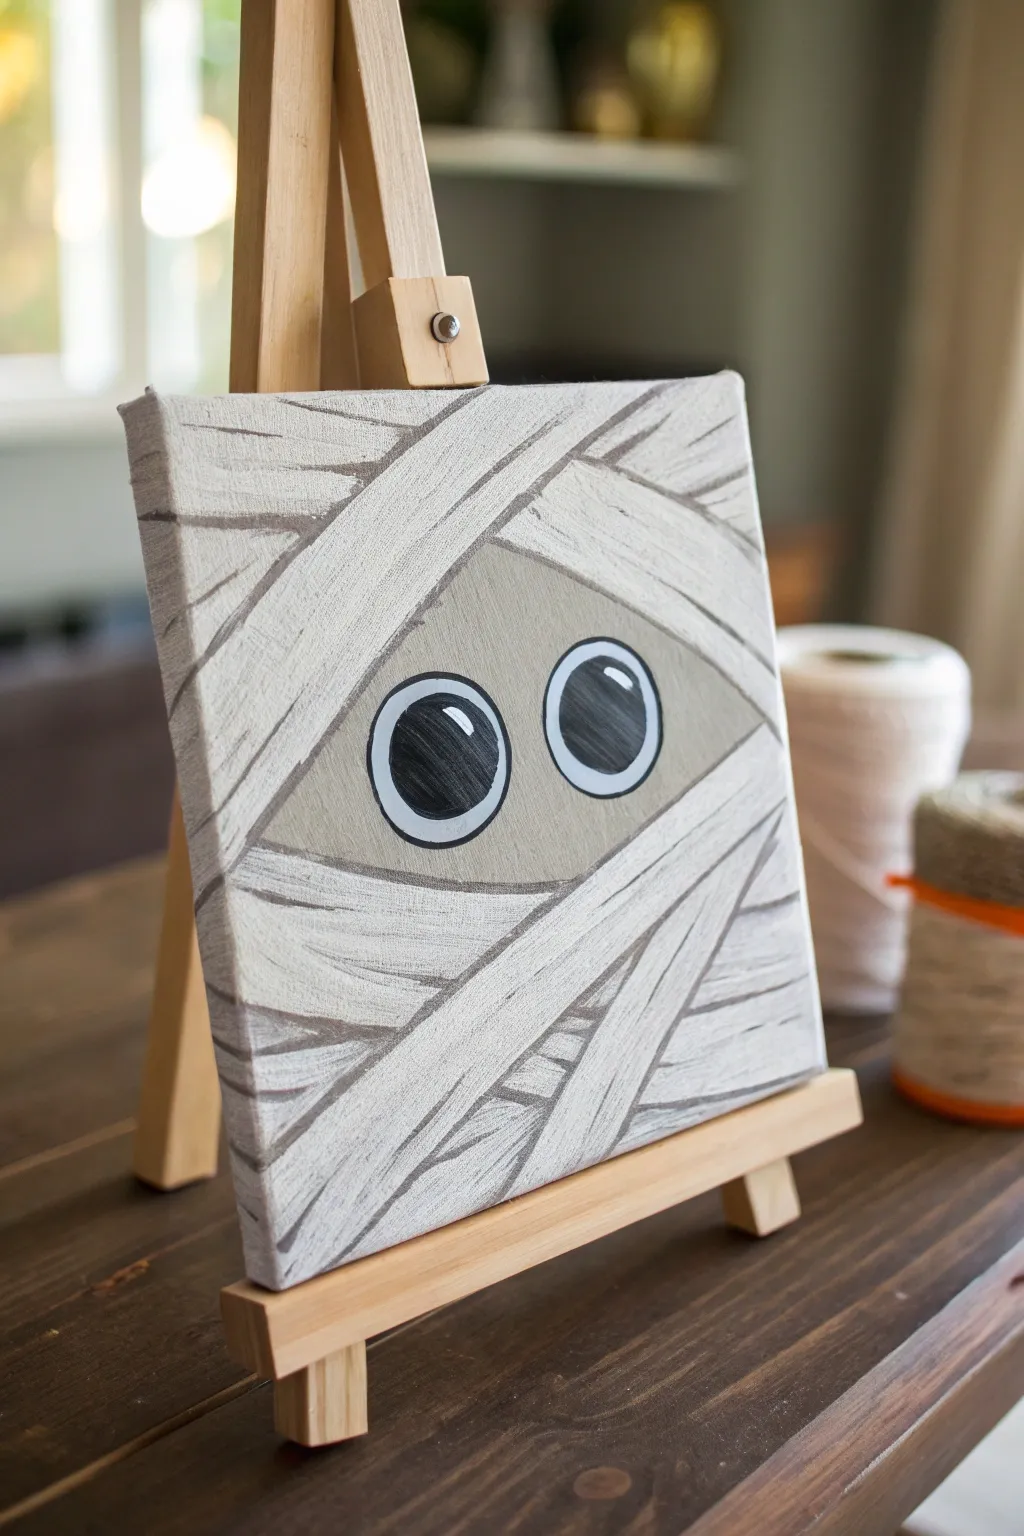
This adorable mummy painting relies on clever layering and geometric simplicity to create a spooky yet cute Halloween decoration. By focusing on diagonal lines and crisp edges, you’ll build up depth to make the bandages look like they are truly wrapping around those oversized eyes.
Step-by-Step Tutorial
Materials
- Square canvas (approx. 8×8 or 10×10 inches)
- Acrylic paints: Titanium White, Lamp Black, Unbleached Titanium (or light beige/grey)
- Flat shader brush (medium size, approx. 1/2 inch) for bandages
- Small round brush for details
- Pencil for sketching
- Compass or round objects to trace (like a large bottle cap)
- Ruler or straight edge
- Cup of water and palette
Step 1: Setting the Background
-
Base Color:
Start by mixing a ‘mummy skin’ tone. Combine white with a drop of black and a touch of the Unbleached Titanium to get a muted, stony grey-beige. -
Full Coverage:
Use your larger flat brush to paint the entire surface of the canvas with this base color. Paint the sides of the canvas too for a finished look. -
Deep Dry:
Allow this base layer to dry completely. Since we will be painting crisp white lines over it, any wetness here will muddy up your bandages.
Fixing Wobbly Lines
If your bandage lines aren’t straight, don’t worry! Use painter’s tape to mask off the areas you want to keep grey. Paint the white, let it dry, peel the tape, then move to the next section.
Step 2: Sketching the Design
-
Eye Placement:
Using a pencil, lightly draw a rectangular ‘window’ in the middle of the canvas where the mummy’s face will peek through. -
Perfect Circles:
Inside that window area, trace two large circles for the eyes using a bottle cap or compass. Position them slightly close together for a cute, confused expression. -
Mapping Bandages:
Use a ruler to lightly sketch the bandage lines. These should act as diagonal stripes that crisscross over the rest of the canvas, framing the eye window you just drew.
Glow in the Dark
Mix glow-in-the-dark medium into your white paint for the eyes. When the lights go out, just the staring eyes will float in the darkness for a spooky surprise.
Step 3: Painting the Face
-
White Sclera:
Switch to your small round brush and fill in the large eye circles with pure Titanium White. You may need two coats to make them opaque against the grey background. -
Adding Pupils:
Once the white is dry, paint large black circles inside, leaving a fair amount of white visible. Makes them look wide and staring. -
The Sparkle:
Add a small white dot or oval highlight in the upper right quadrant of each black pupil. This brings the character to life instantly. -
Outlining:
With a very steady hand or a black paint pen, outline the white outer edge of the eyes to make them pop against the grey skin tone.
Step 4: Wrapping the Mummy
-
First White Layer:
Load your flat shader brush with Titanium White. Paint the bandage strips you sketched earlier. Follow the diagonal lines carefully. -
Creating Texture:
Don’t make the white too perfect. I like to leave faint streaks in the brushstrokes; these striations mimic the texture of fabric cloth. -
Opacity Check:
If the grey background shows through too much, apply a second coat of white to the bandages, but continue keeping your brushstrokes moving in the direction of the wrap. -
Shadow Mixing:
Mix a very small amount of black into your white paint to create a light grey shadow color. -
Defining Edges:
Using a thin brush and your light grey mix, paint thin lines along the bottom edge of each bandage strip. This convinces the eye that the bandages are layered on top of each other. -
Accentuate Overlap:
Where one bandage crosses *over* another, darken the shadow line slightly right at the intersection to show depth. -
Outer Edging:
Take a very diluted grey or a watered-down black and paint faint, thin outlines along the edges of the bandages to separate them visually from the background skin. -
Final Touches:
Check your edges. If any grey paint from the ‘skin’ area looks messy near the bandages, touch it up with your original base color mix for a clean finish.
Display your mummy on a miniature easel for the perfect Halloween shelf décor


Misty Tombstones at Night
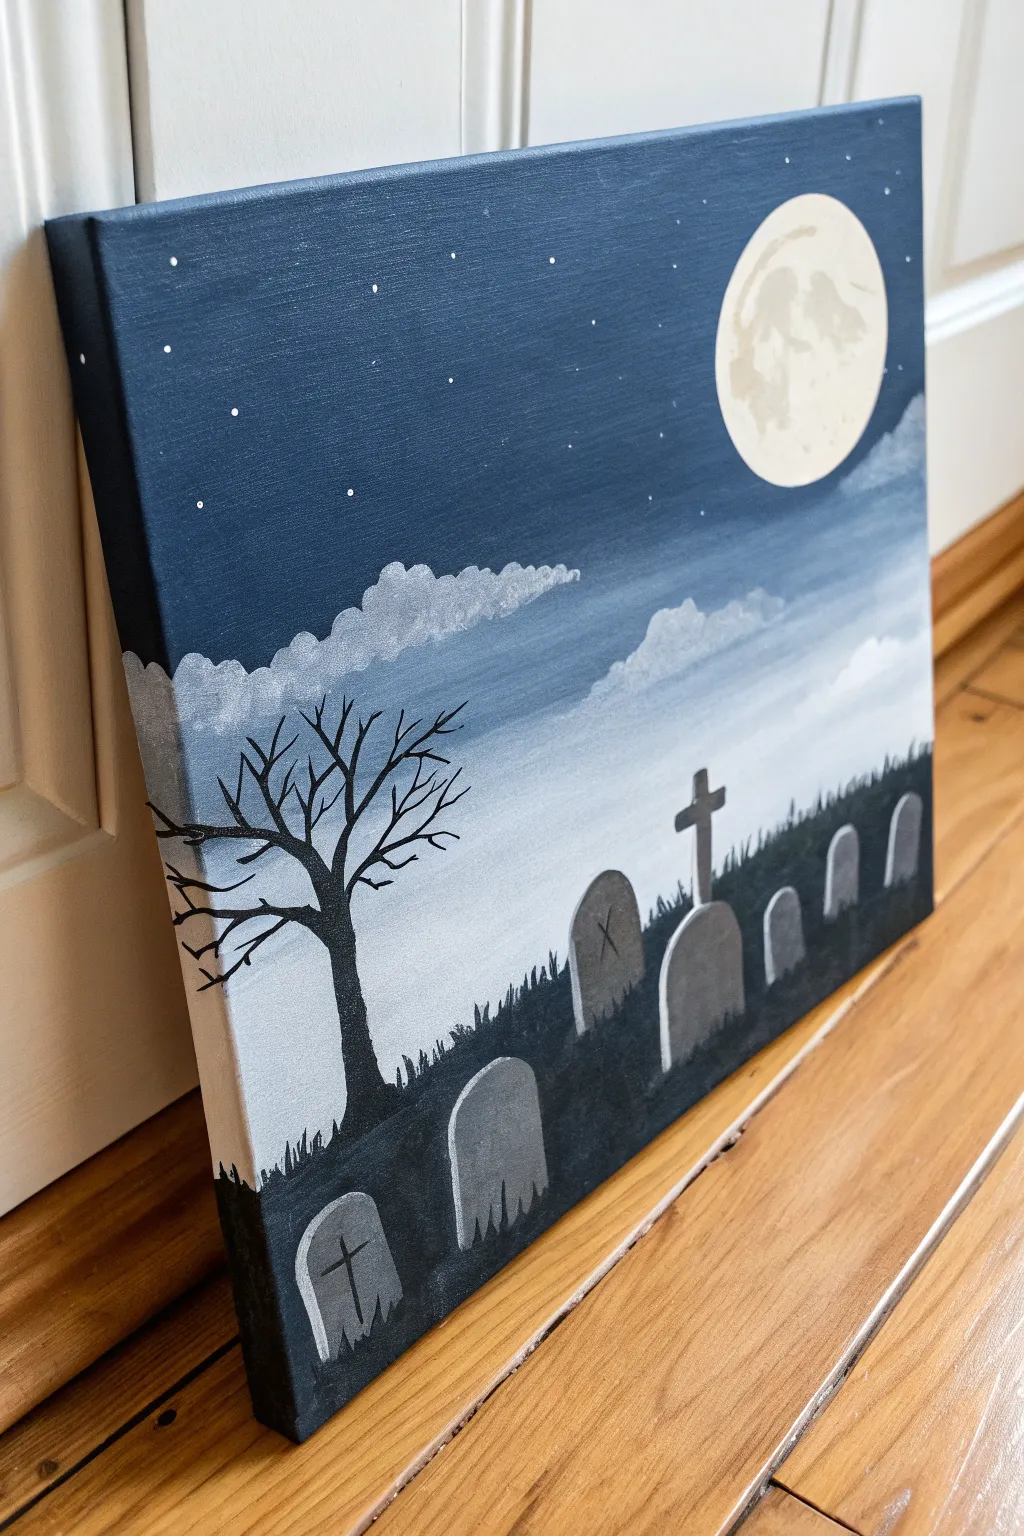
Capture the eerie stillness of a misty Halloween night with this striking acrylic canvas painting. By layering cool blues and stark silhouettes, you’ll create a foggy atmosphere that makes the tombstones and barren tree pop.
How-To Guide
Materials
- Rectangular canvas (e.g., 11×14 or 16×20 inches)
- Acrylic paints: Navy Blue, Phthalo Blue (or primary blue), Titanium White, Mars Black
- Large flat brush (1-inch width)
- Medium flat brush
- Small round detail brush
- Medium filbert brush (rounded tip)
- Cup of water
- Paper towels
- Palette or paper plate
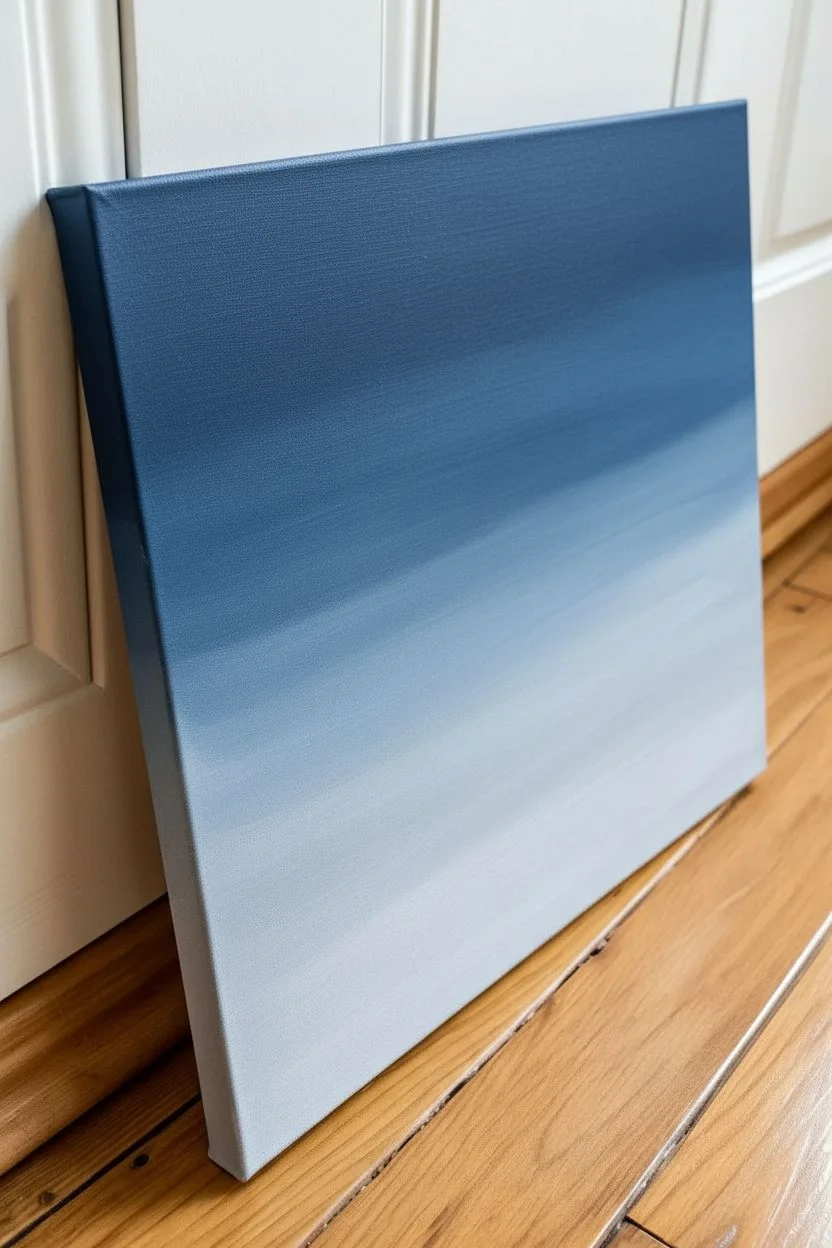
Step 1: Setting the Midnight Sky
-
Establish the background gradient:
Begin by squeezing out plenty of Navy Blue, Phthalo Blue, and White onto your palette. Using your large flat brush, apply pure Navy Blue to the top third of the canvas, ensuring you paint the top and side edges for a finished look. -
Blend downward:
Without cleaning the brush completely, pick up some Phthalo Blue and blend it into the Navy Blue as you move down the canvas. The goal is a seamless transition from deep midnight to a lighter blue. -
Create the misty horizon:
Mix a substantial amount of White with a tiny touch of blue to make a very pale grey-blue. Paint the bottom third of the canvas with this shade, blending it upwards into the mid-blue tone. Use long, horizontal strokes to ensure the gradient looks smooth and foggy. -
Let it dry completely:
Allow the background to dry fully before moving on. If the paint is wet, your next layers will turn muddy.
Tape Trick
For perfectly crisp edges on your tombstones, use small pieces of masking tape or painter’s tape to outline the shapes before painting them grey.
Step 2: The Moon & Clouds
-
Paint the full moon:
Mix a warm off-white using mostly White with the tiniest speck of yellow or brown if you have it (or just stick to pure White for simplicity). Use a medium filbert brush or a round object to trace a circle in the upper right corner, then fill it in solid. -
Add moon craters:
While the moon is still slightly tacky, use a small brush with a very light grey mix to dab irregular blotches onto the moon’s surface. Keep this subtle; you want texture, not dark spots. -
Form the clouds:
Using a dry filbert brush or an old, scruffy brush, tap pure White paint across the middle section where the sky transitions colors. Use a dabbing motion to create fluffy, irregular cloud tops. -
Soften the clouds:
Wipe most of the paint off your brush and lightly drag the bottom edges of your clouds downward and sideways. This blends them into the misty background, giving them that wispy, ghost-like appearance.
Glow Up
Mix a tiny amount of glow-in-the-dark medium into your white paint for the moon and the distinct stars to make your painting come alive when the lights go out.
Step 3: Tombstones & Grass
-
Paint the distinct tombstone shapes:
Mix a mid-tone grey using Black and White. With a medium flat brush, paint several tombstone shapes along the bottom third of the canvas. Vary the shapes (rounded tops, crosses, rectangles) and space them out irregularly for visual interest. -
Add dimension to the stones:
Mix a slightly lighter grey. Paint the left side and top edge of each tombstone with this lighter color to simulate moonlight hitting them. -
Fill the grassy foreground:
Switch to pure Black paint and your medium flat brush. Fill in the entire bottom area around the base of the tombstones, creating a solid silhouette for the ground. -
Create grass blades:
Using the tip of a small brush or the edge of a flat brush, flick upward short strokes from the black foreground into the misty background area. Do this around the tombstones to make them look like they are sitting in overgrown grass. -
Detail the stones:
Using a thin liner brush and watered-down black paint, add small cracks or simple cross symbols onto the grey faces of the tombstones.
Step 4: The Spooky Tree & Stars
-
Draft the tree trunk:
On the left side of the canvas, use black paint to create a slightly crooked tree trunk. Make the base wider and taper it as you go up. -
Branch out:
Extend branches from the trunk using a small round brush. Remember that branches should get thinner the further they preserve from the trunk. I like to make them jagged and angular rather than smooth curves for a spookier effect. -
Add fine twigs:
Use the very tip of your smallest brush to add tiny twigs coming off the main branches. Let some overlap the clouds and the background. -
Sprinkle the stars:
Dip a toothbrush or a stiff bristle brush into watered-down White paint. Hold it over the dark blue sky area and flick the bristles with your thumb to spray tiny stars. Be careful not to spray firmly over your tree or foreground. -
Highlight specific stars:
Use your smallest brush to manually dot a few larger, brighter stars in the darkest part of the sky.
Sign your name in the corner and find the perfect spot to display your haunted landscape
Glowing Eyes in the Bushes
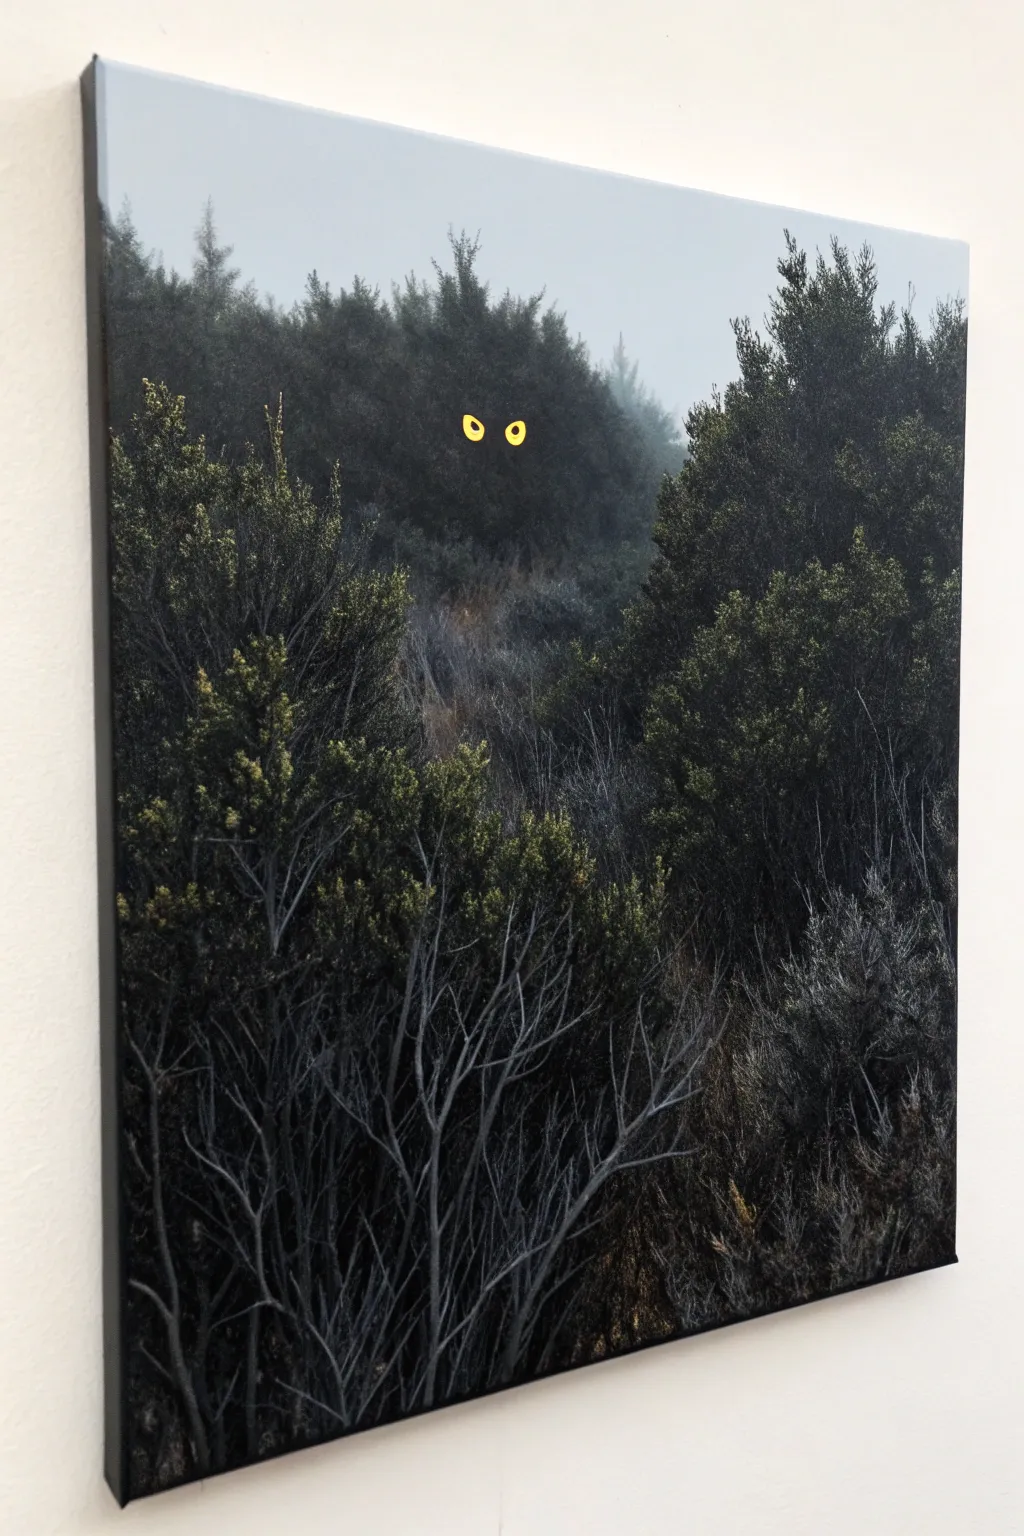
Transform a dark, moody landscape into a spooky Halloween scene with nothing more than a few strokes of paint. This project uses a technique of painting directly onto a thrifted or store-bought landscape print to add an unsettling, glowing gaze.
Step-by-Step Guide
Materials
- Thrift store landscape canvas or dark forest art print
- Acrylic paint: Bright Yellow
- Acrylic paint: Black
- Small round detail brush (size 1 or 2)
- Small flat brush (optional)
- Pencil or white chalk pencil
- Paper plate or palette
- Cup of water and paper towels
Step 1: Preparation & Planning
-
Select the right canvas:
Find a canvas or framed print that features a dense, dark area of foliage. Forests, thickets, or misty tree lines work best for hiding the creature. -
Choose the perfect spot:
Look for a shadowy recess in the painting’s composition, preferably near the upper center, where eyes would naturally peer out. -
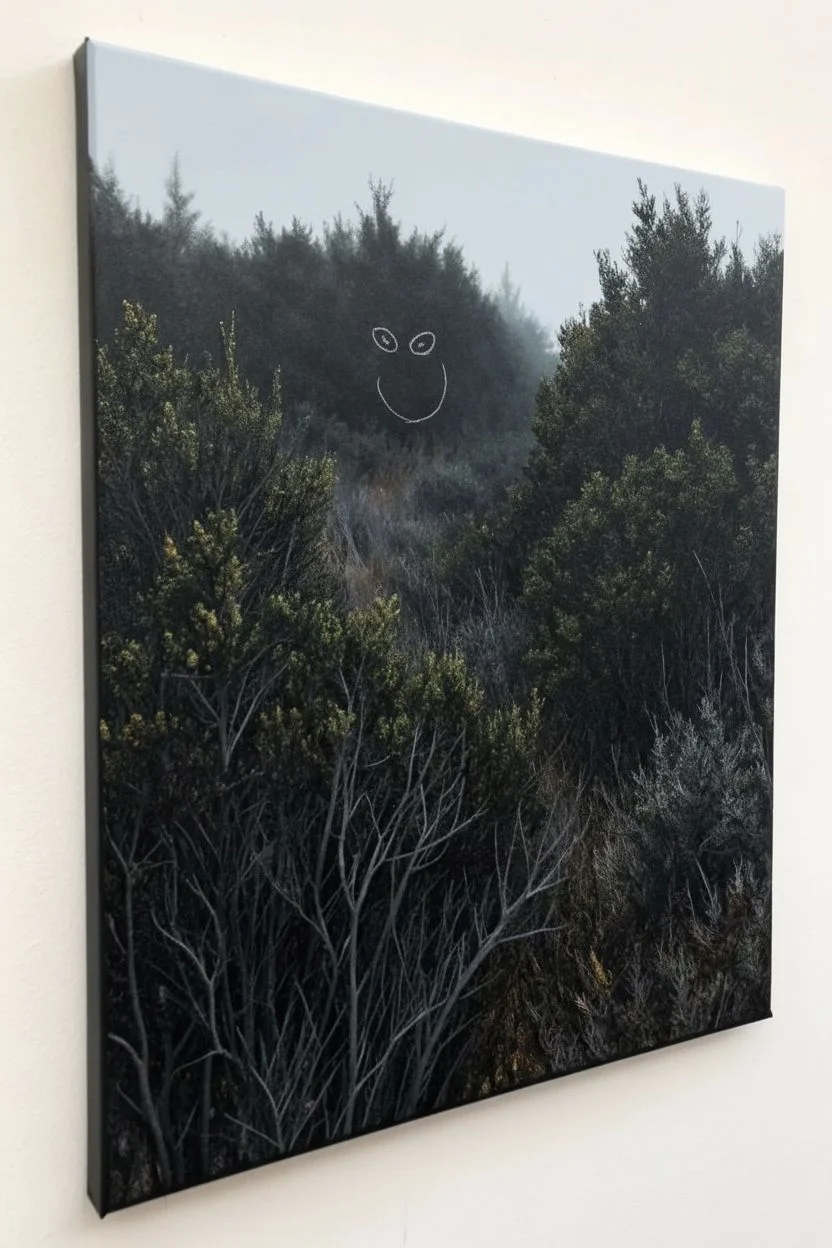
Draft the eyes:
Using a white chalk pencil or very lightly with a regular pencil, sketch two small oval shapes in your chosen dark spot. Angle them slightly inward to create a menacing or focused expression. -
Check the scale:
perspective is key here. Ensure your sketched eyes are small enough to look like they belong to a creature hiding deep in the distance, rather than floating in the foreground.
Uneven or Shaky Lines?
If your pupil slits are wobbly, use a black permanent marker or paint pen instead of a brush. It gives you much more control over fine details on top of dried paint.
Step 2: Painting the Glow
-
Base coat the eyes:
Load your small round brush with bright yellow paint. Carefully fill in the oval shapes you sketched. -
Ensure opacity:
If your landscape background is very dark, the first layer of yellow might look greenish or transparent. Let it dry completely and add a second coat for a solid, bright pop. -
Refine the edges:
Use the tip of your brush to crisp up the edges of the ovals. You want a sharp contrast against the blurry background foliage. -
Create the pupils:
Once the yellow is fully dry to the touch, switch to black acrylic paint. -
Paint vertical slits:
Instead of round pupils, paint thin vertical slits in the center of each yellow oval. This gives the creature a predatory, cat-like appearance. -
Adjust the gaze:
Make sure both pupils are centered or looking in the same direction so the creature doesn’t look cross-eyed.
Pro Tip: Make it Glow
For a true spooky effect, use glow-in-the-dark acrylic paint over your yellow layer. The eyes will charge in the light and shine when the room goes dark.
Step 3: Blending & Integration
-
Mix a shadow color:
Mix a tiny amount of black with a drop of water to create a translucent wash, or use the dark color from the original canvas if you are color-matching. -
Soften the bottom edge:
Very carefully dab a tiny bit of dark paint at the bottom curve of the yellow eyes to make them look like they are sitting behind the leaves, not just stickers on top. -
Add foreground detailed (optional):
If the eyes look too exposed, mix a dark grey or black similar to the bushes. Paint a few thin, jagged lines overlapping the bottom or sides of the eyes to simulate twigs blocking the view. -
Step back and assess:
Walk away from the canvas to see how the eyes read from a distance. They should be the focal point without overpowering the mood. -
Final touches:
If the yellow isn’t glowing enough, add a tiny dot of white mixed with yellow to the very top highlight of the eye.
Now you have a piece of subtle horror art that rewards anyone observing closely enough to spot the creature in the dark
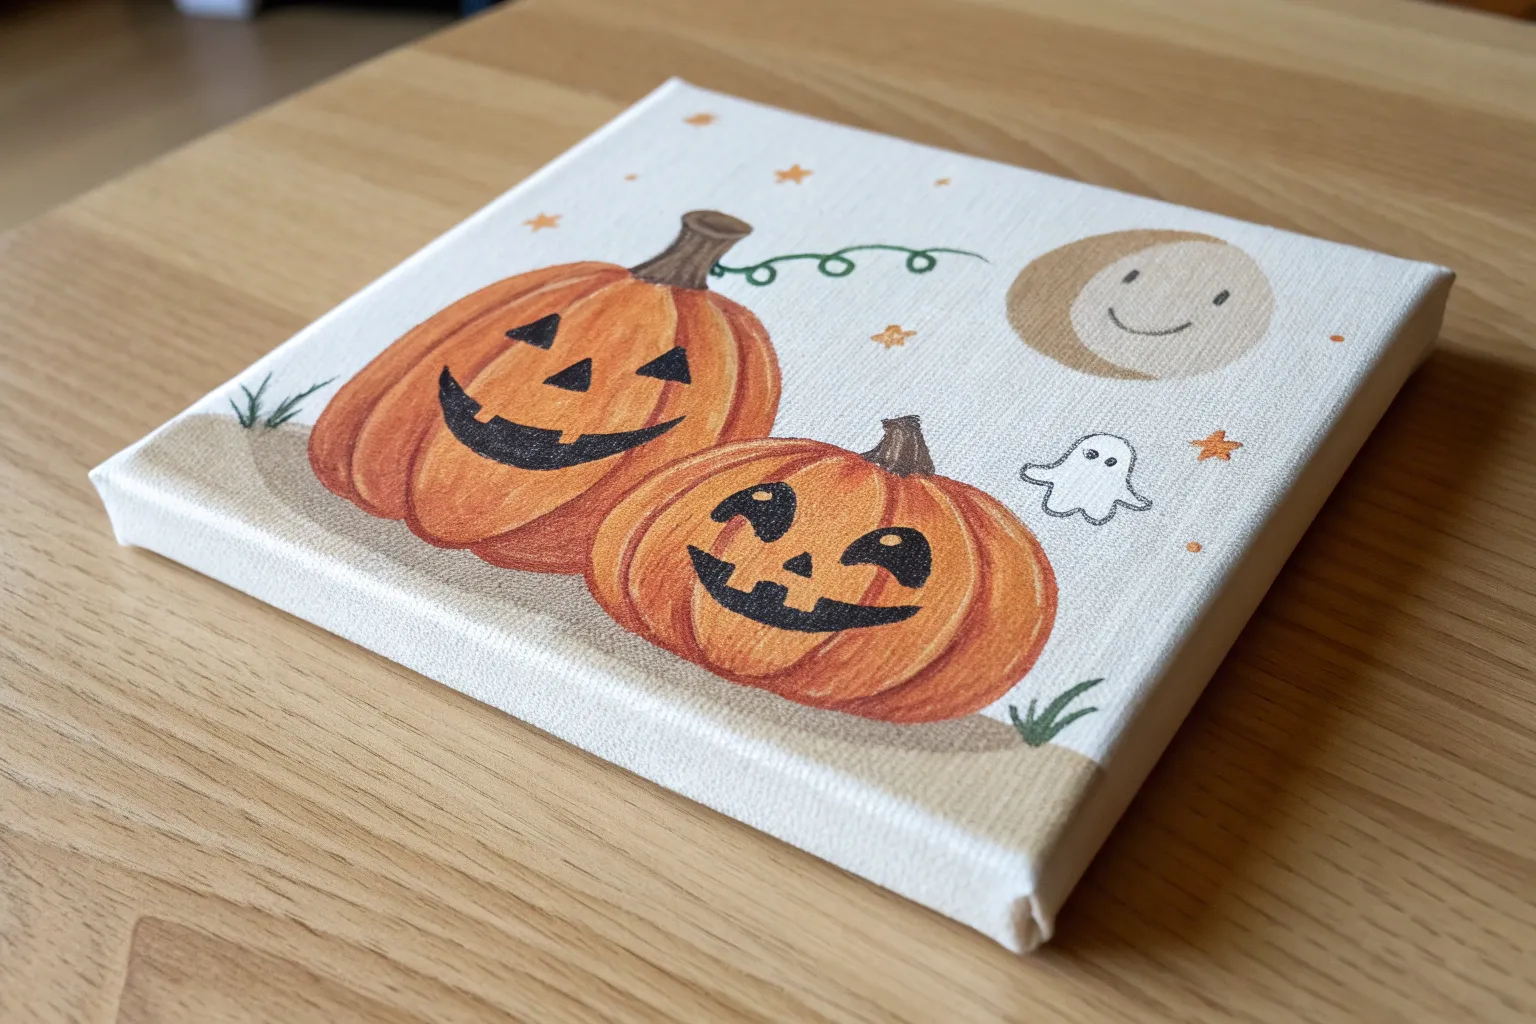
Ghosts Popping Out of Pumpkins

This charmingly minimal canvas painting features a classic white ghost floating against a deep, dark sky illuminated by faint golden glimmers. It’s a quick and accessible art project that adds a touch of friendly spookiness to any Halloween display.
How-To Guide
Materials
- Small rectangular canvas (black or white)
- Black acrylic paint
- White acrylic paint
- Metallic gold acrylic paint
- Flat brush (medium)
- Small round detail brush
- Palette or paper plate
- Water cup
Step 1: Set the Scene
-
Prepare the Background:
Start by coating your entire canvas with black acrylic paint. Use a medium flat brush and ensure you cover the sides as well for a finished look. -
Create Texture:
While the black base is still slightly wet, I sometimes dab a tiny bit of dark grey or a lighter black mix in random spots to give the night sky some depth, rather than a flat color. -
Dry Completely:
Let the background layer dry fully before moving on. This prevents your white ghost paint from turning grey.
Step 2: Summon the Ghost
-
Outline the Shape:
Using white paint and a smaller brush, lightly sketch the outline of a tall, domed ghost shape in the center of the canvas. Keep the bottom edge wavy or ragged. -
Fill the Body:
Fill in the ghost outline with white paint. You don’t need it to be perfectly opaque yet; a slightly streaky look adds a nice spectral quality. -
Layer the White:
Once the first white layer is dry to the touch, add a second coat to brighten the ghost. Focus the brightest white near the top of the head. -
Feather the Bottom:
Use a dry brush technique at the bottom of the ghost, lightly dragging the white paint downward to create a wispy, fading effect where the ghost meets the darkness.
Ghost opacity tip
Don’t fight the streaks! Vertical brushstrokes on the ghost’s body mimic the flow of a sheet, adding realism without needing perfect blending.
Step 3: Add Details & Magic
-
Paint the Face:
Switch to your small detail brush and black paint. Paint two vertical ovals for eyes and a slightly larger oval for the mouth to create a surprised expression. -
Golden Glitter:
Dip a small brush into metallic gold paint. Gently dot small specks around the ghost to represent distant stars or magic dust. -
Paint the Bat:
In the upper right corner, use the gold paint to outline and fill a simple bat silhouette or a floating autumn leaf. The gold contrasts beautifully against the matte black. -
Add Dimension:
If the gold looks too flat, you can mix a tiny drop of orange into it and add subtle highlights to the bat’s wings. -
Highlight the Ghost:
Take a very small amount of grey or diluted black paint and add a thin shadow line along one side of the ghost to make it look like it has volume. -
Final Touches:
Check your background for any spots that need a black touch-up, especially near the ghost’s edges, to make the white really pop. -
Seal (Optional):
Once everything is perfectly dry, you can apply a matte or satin varnish to protect your spooky masterpiece.
Add a glow
Mix a tiny drop of water into your white paint and glaze around the ghost’s head to create a soft, glowing aura against the black sky.
Set your new spectral friend on a shelf with some pumpkins and enjoy the handmade Halloween vibes
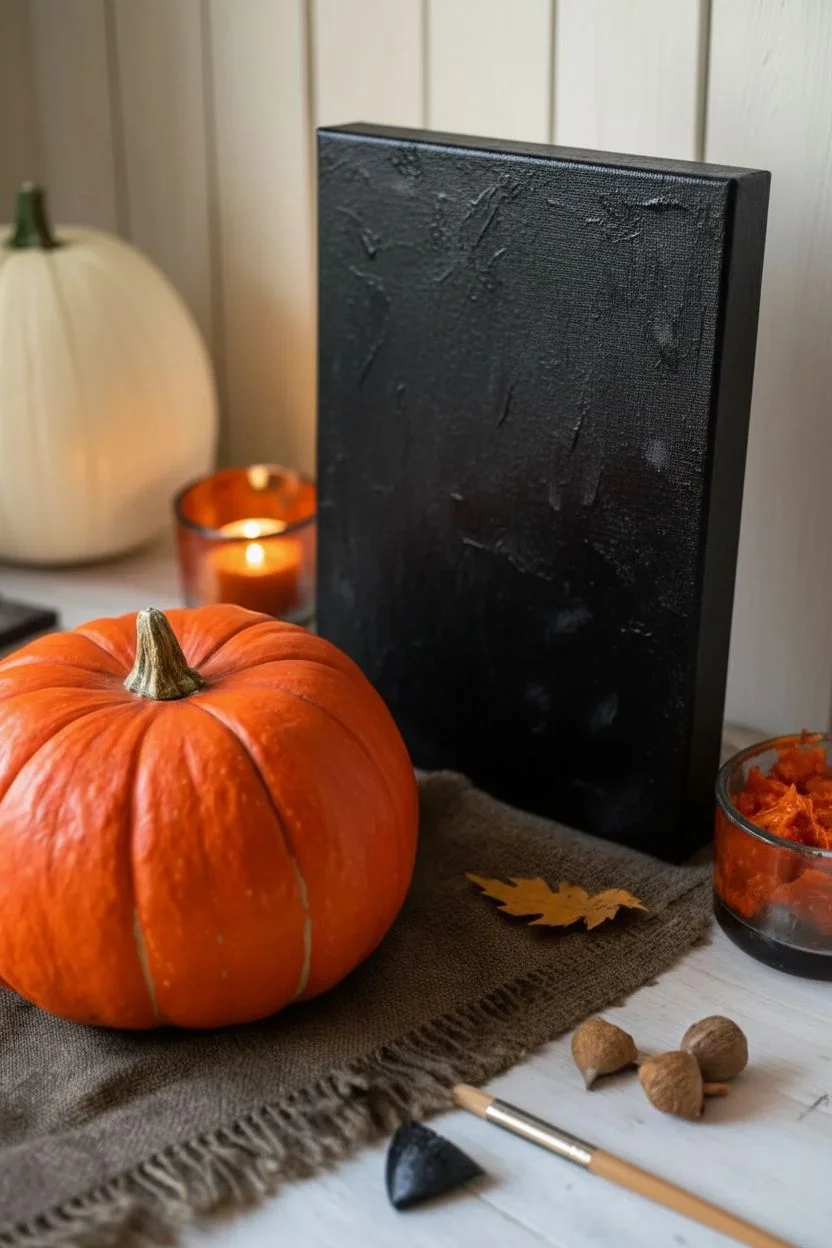
Bold “BOO” With Drippy Paint
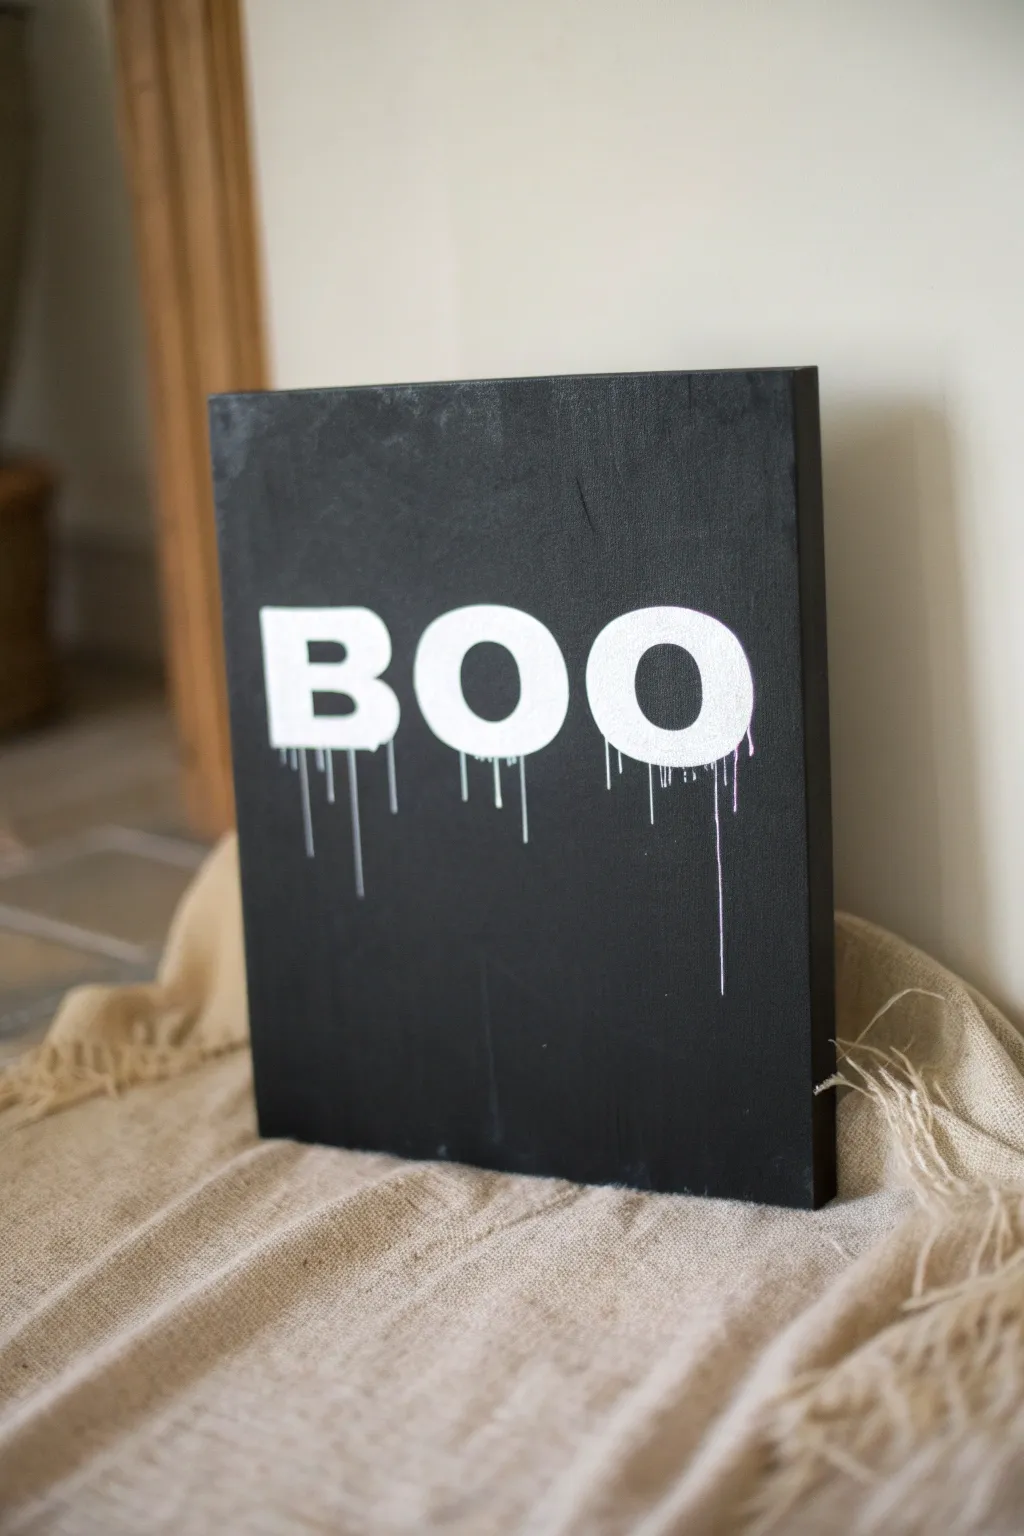
Create a striking piece of minimalist Halloween decor with this high-contrast canvas art. The bold white letters against a stark black background get an eerie twist with intentional paint drips that look like melting wax or slime.
Detailed Instructions
Materials
- Square stretched canvas (e.g., 12×12 inches)
- Black acrylic paint (matte finish recommended)
- White acrylic paint (heavy body or standard)
- Large flat paintbrush or foam brush
- Medium round paintbrush
- Small detail brush
- Pencil
- Ruler
- Water cup
- Clean rag or paper towels
- Letter stencils (optional)
Step 1: Setting the Stage
-
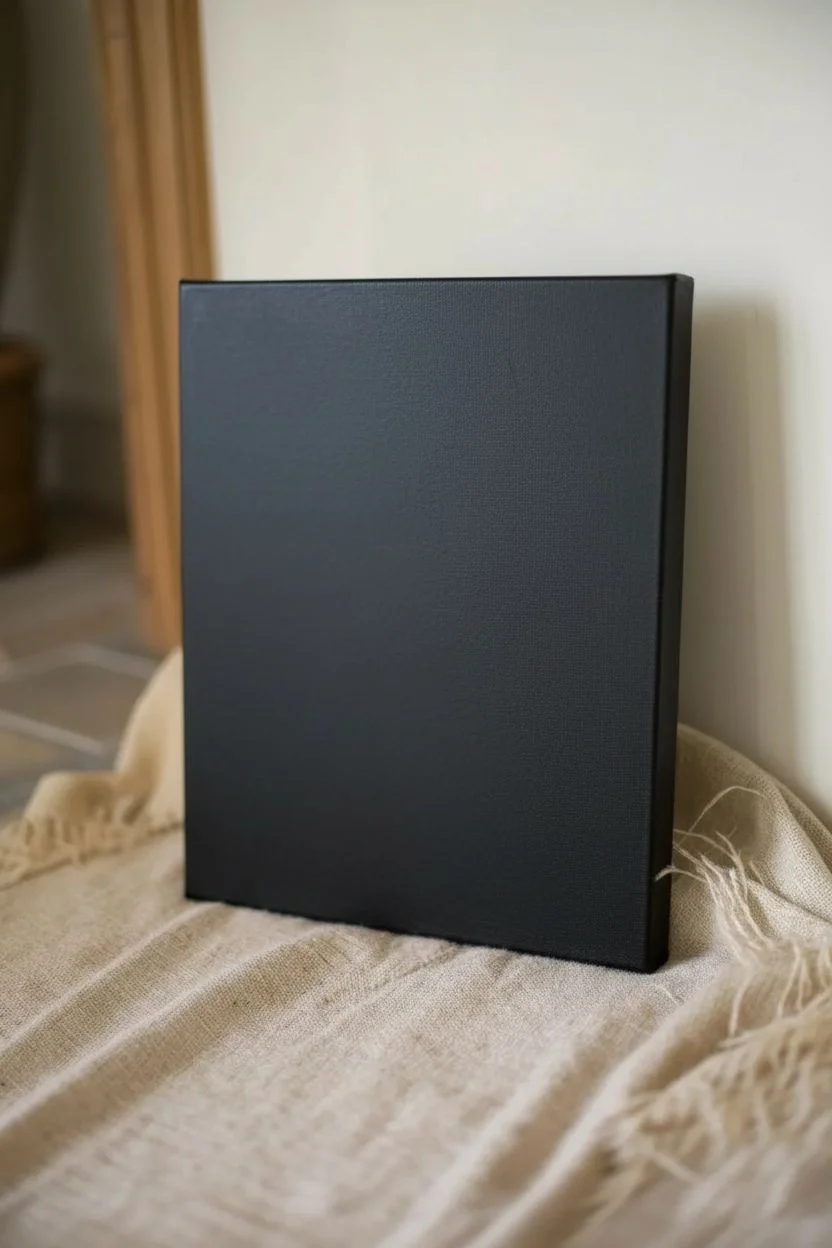
Prepare your canvas base:
Begin by coating your entire canvas with black acrylic paint. Use a large flat brush or foam brush to ensure smooth, even coverage. -
Paint the edges:
Don’t forget to paint the sides of the canvas black as well for a polished, finished look that doesn’t require a frame. -
Apply a second coat:
Once the first layer is touch-dry, inspect it for streaks. Apply a second coat of black paint if necessary to achieve a solid, opaque background. -
Let it dry completely:
Allow the black background to dry fully before moving on to the white paint. This prevents the colors from mixing and turning gray.
Drip Disaster?
If a drip goes crooked or too far, wait for it to dry completely. Then, use black paint and a small brush to paint over the mistake and reshape the line
Step 2: Drafting the Design
-
Measure your spacing:
Using a ruler, lightly mark the horizontal center of your canvas to ensure your word stays straight. -
Sketch the letters:
With a pencil, lightly draw the outline of the word “BOO” in large, block-style letters. Position them centrally, leaving equal space on the left and right sides. -
Refine the shapes:
Go over your sketch to ensure the curves of the ‘B’ and ‘O’s are rounded and the lines are thick enough to make a bold statement. -
Check proportionality:
Step back and look at your sketch from a distance to make sure the letters are relatively the same height and width before committing with paint.
Glow Up
Swap standard white acrylic for glow-in-the-dark paint for the final top coat. The drips will eerily illuminate when the lights go out
Step 3: Painting and Dripping
-
Fill in the letters:
Using a medium round brush and white acrylic paint, carefully fill in the outlines of your letters. Use smooth strokes to keep the edges crisp. -
Layer the white paint:
White paint over a black background often requires two or three coats. Let the paint dry slightly between layers until the white is bright and solid. -
Prepare for the drip effect:
Load a generous amount of watery white paint onto a small detail brush. You can mix a tiny drop of water into your white paint to make it flow better. -
Initiate the drips:
Place your loaded brush at the bottom edge of a letter. Gently press down and let gravity pull the excess paint downward to form a natural drip. -
Vary the lengths:
Create drips of different lengths—some short, some long—to make the effect look organic and spooky. I find that random spacing looks best rather than a uniform pattern. -
Add connecting drips:
For the curved letters like ‘O’, add a few drips that start slightly up the curve, not just at the very center bottom point. -
Refine the lines:
If a drip looks too thick or stops abruptly, use the tip of your detail brush to carefully extend it into a fine point. -
Final touches:
Check for any uneven edges on your main letters and touch them up with white paint to ensure a sharp contrast against the black.
Place this moody masterpiece on a mantle or shelf to bring a sophisticated scare to your home.
Tape-Resist Halloween Stripes

Bring a modern touch to your Halloween decor with this graphic, tape-resist stripe painting. The bold color palette of oranges, purples, and blacks is perfectly accented by simple bat silhouettes for a festive finish.
Step-by-Step Guide
Materials
- Rectangular stretched canvas (e.g., 12×12 or 16×20)
- Painter’s tape or masking tape (in varying widths if possible)
- Acrylic craft paints (purple, orange, black, white, brown)
- Foam brushes or flat acrylic brushes
- Black cardstock or stiff felt
- Scissors and pencil
- Craft glue or hot glue gun
- Ruler (optional)
Step 1: Prepping the Canvas
-
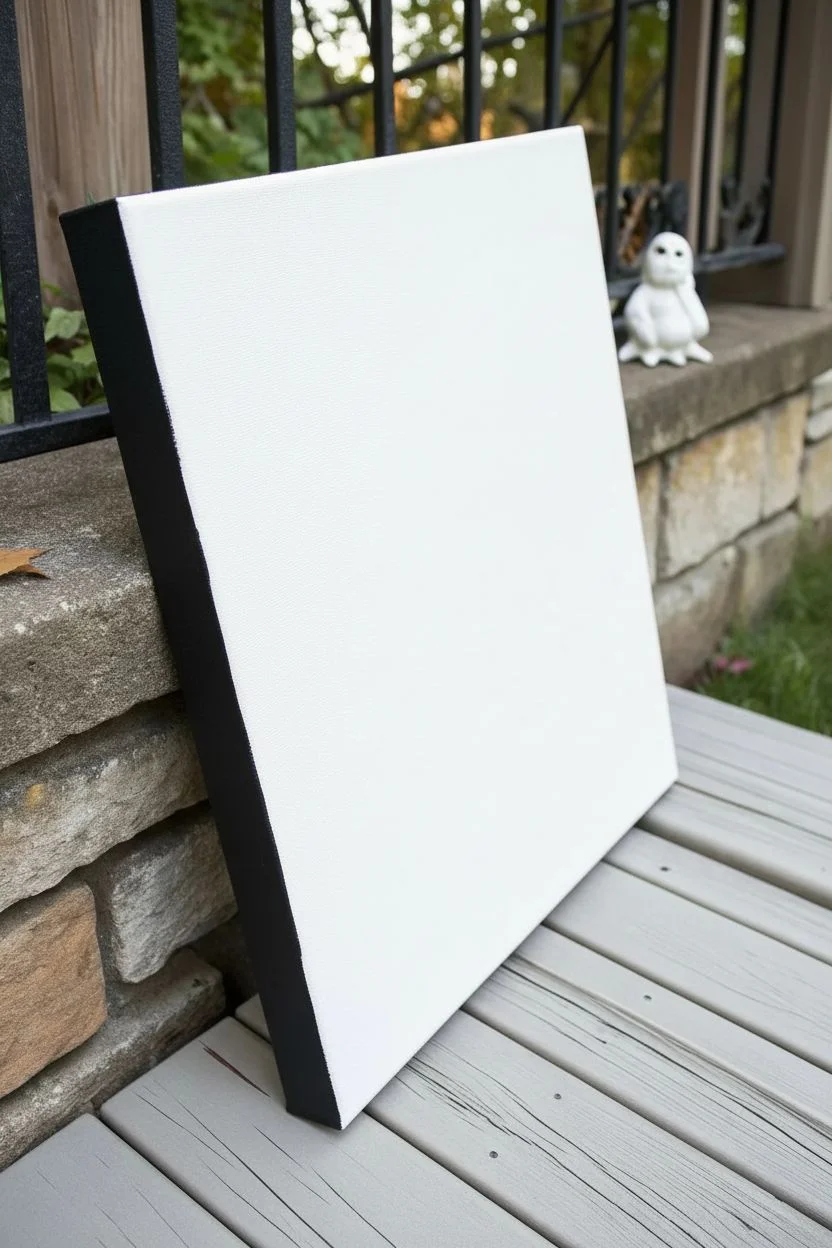
Paint the background base:
Before you begin striping, paint the entire front surface of your canvas white. This ensures your white stripes will be crisp and bright later on, without needing to paint them individually. -
Let it cure:
Allow the white base coat to dry completely. If the canvas feels cool to the touch, it still needs more time; tape applied too early will peel up the paint. -
Paint the edges:
Take your black acrylic paint and carefully coat all four outer edges of the canvas. Extending the black slightly onto the front face creates a nice ‘frame’ effect, though the stripes will eventually cover most of the front edge.
Clear Coat Trick
Before adding color, paint a thin layer of white over the tape edges. This seals the tape so any bleed is invisible white-on-white.
Step 2: Creating the Stripes
-
Apply the first tape lines:
Place horizontal strips of painter’s tape across the canvas. Since the background is white, anywhere you place tape will remain white in the final design. -
Vary the spacing:
Don?t worry about perfect measurements. Leave gaps of varying widths between the tape strips?some wide for bold colors, others narrow for accent stripes. -
Seal the edges:
Run your fingernail or a credit card firmly along the edges of every piece of tape. This is the secret to preventing paint from bleeding underneath. -
Plan your palette:
Decide on a repeating or random pattern using your Halloween colors. For this look, aim for a mix of orange, purple, black, and a deep brown. -
Start painting the gaps:
Using a flat brush or foam brush, fill in the exposed canvas areas between the tape. I find it helpful to paint away from the tape edge rather than toward it to minimize bleed. -
Add texture (optional):
For the orange stripes, you can mix a tiny drop of brown into the orange on your palette, creating a subtle, streaky texture that resembles wood grain or pumpkin skin. -
Double check coverage:
Verify that your dark colors (black and brown) are fully opaque. If they look streaky, let the first coat dry for 10 minutes and apply a second coat.
Peeling Too Soon?
If paint lifts with the tape, the layers are likely too thick and bonded. Score the tape edge lightly with a craft knife before peeling.
Step 3: Finishing Touches
-
The reveal:
Once the paint is dry to the touch but not fully cured (usually about 20-30 minutes), carefully peel off the painter’s tape slowly at a 45-degree angle. -
Touch up lines:
If any paint bled under the tape, use a very small detail brush and some white paint to tidy up the edges of your stripes. -
Create the bats:
Draw simple bat silhouettes about 2 to 3 inches wide onto black cardstock or stiff felt. You’ll need two bats for this design. -
Cut them out:
Using sharp scissors, carefully cut out your bat shapes. Try to keep the edges smooth for a professional look. -
Attach the bats:
Apply a dab of craft glue or hot glue to the center of the bat’s body. Place them on the canvas?one on an upper orange stripe and one on a lower purple stripe. -
Add dimension:
Gently fold the bat wings upward slightly so they lift off the canvas, creating a 3D shadow effect.
This vibrant stripe art is now ready to add a pop of color to your porch or mantel
Glow-Star Silhouette Night Scene
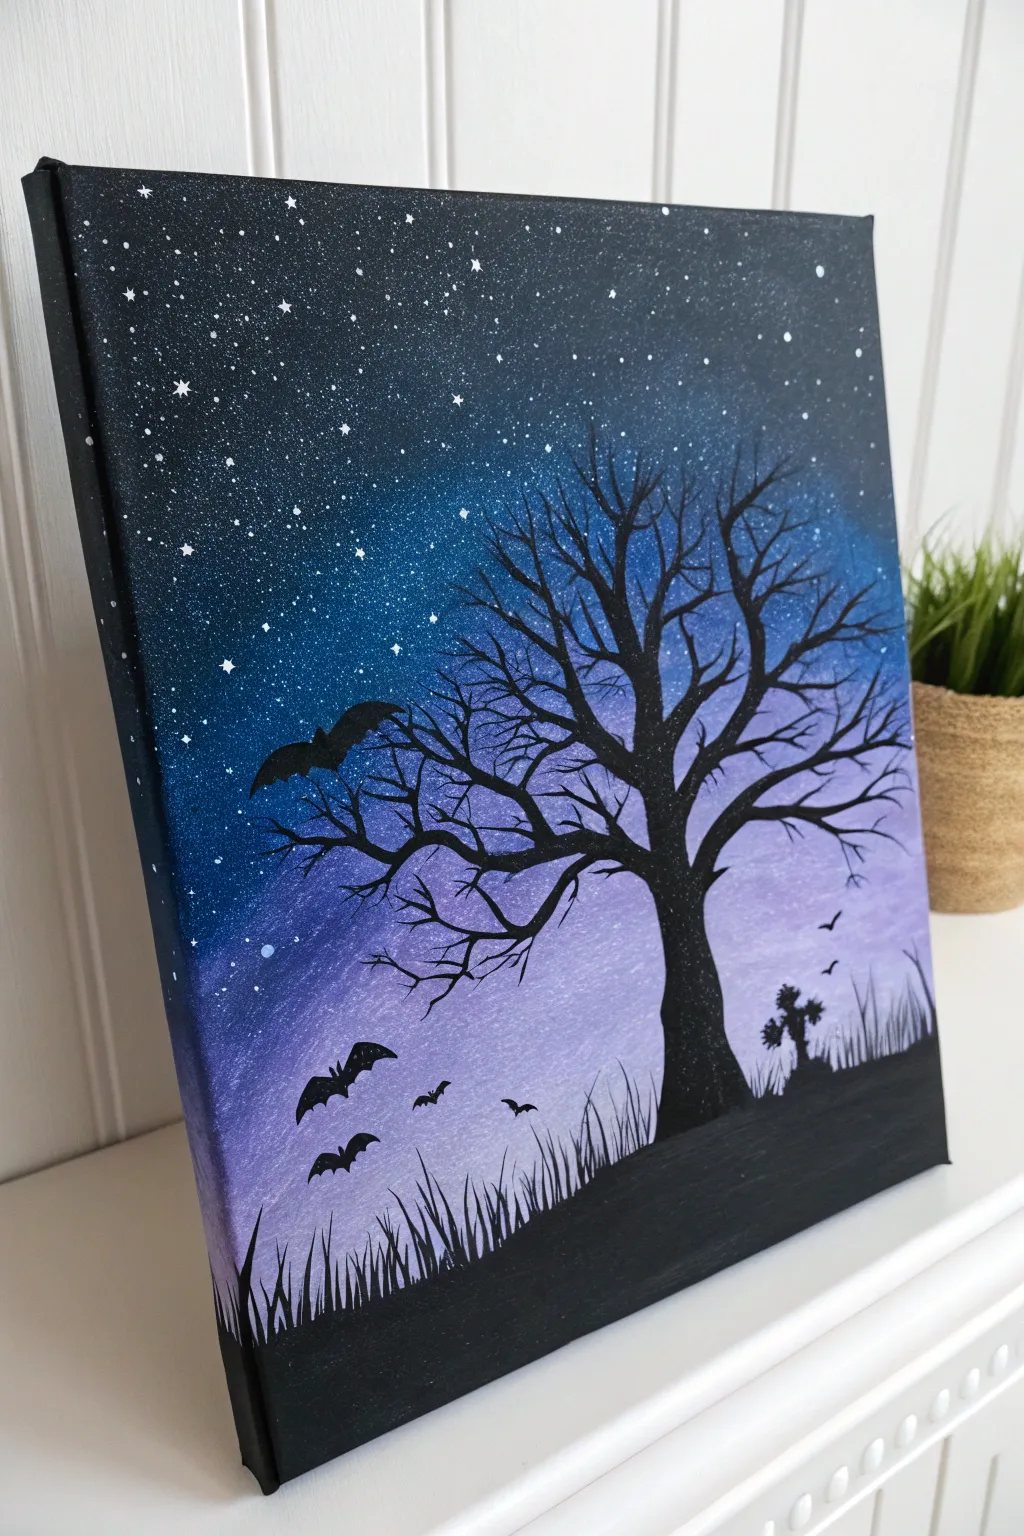

Capture the spooky serenity of Halloween with this glowing night scene. Featuring a gradient sky filled with twinkling stars and classic silhouettes, this painting strikes the perfect balance between eerie and beautiful.
Step-by-Step Tutorial
Materials
- Stretched canvas (e.g., 10×12 inches)
- Acrylic paints: Navy Blue, Purple (Violet), White, Black
- Flat shader brush (large)
- Round detail brush (small)
- Old toothbrush or fan brush
- Cup of water
- Paper towels
- Palette or paper plate
Step 1: Painting the Gradient Sky
-
Start with the darkest tones:
Begin at the very top of your canvas with navy blue paint. Use your large flat brush to cover the top third of the canvas, ensuring you paint around the edges to give it a finished look. I find slightly wetting the brush helps the acrylic flow smoother. -
Introduce the purple:
Without cleaning your brush thoroughly, dip into your purple paint. Apply this color below the navy blue, blending upward where the two colors meet. Use long, horizontal strokes to create a seamless transition. -
Lighten the horizon:
Mix a substantial amount of white into your violet paint to create a soft lavender. Paint the bottom third of the background with this lighter shade, blending it up into the darker purple. -
Perfect the blend:
While the paint is still slightly wet, use a clean, slightly damp brush to lightly stroke back and forth across the transition lines between your blue, purple, and lavender sections. -
Let it dry completely:
Allow the background gradient to dry fully. This is crucial before moving to the stars, or your galaxy might turn into a muddy smudge.
Step 2: Creating the Starry Night
-
Prepare the star paint:
Water down a small amount of white acrylic paint until it has the consistency of heavy cream or ink. -
Splatter the stars:
Dip an old toothbrush or stiff bristle brush into the thinned white paint. hold it over the canvas and run your thumb across the bristles to flick tiny speckles onto the dark blue and purple areas. -
Add larger stars:
Use the tip of your smallest detail brush or a toothpick to manually dot a few larger, brighter stars in the navy section. -
Create star bursts:
Select two or three of your larger dots and carefully paint tiny crosses over them. This creates a twinkling ‘star burst’ effect.
Star Splatter Mess?
Did you accidentally flick a huge blob of white paint? Turn it into a distinct moon or a larger ghost figure to hide the mistake, or quickly wipe it with a wet Q-tip.
Step 3: Painting the Silhouettes
-
Paint the ground:
Switch back to your flat brush and load it with black paint. Create a rolling hill shape at the bottom of the canvas, covering the lavender area completely. -
Draft the tree trunk:
Using a smaller round brush and black paint, draw a thick, gnarled trunk rising from the right side of your hill. Make the base wider and taper it as you go up. -
Add the branches:
Extend branches outward from the trunk. Remember that branches get thinner as they move away from the tree. Use a very light hand and almost rigger-like strokes for the finest twigs at the ends. -
Grow the grass:
Use the tip of your detail brush to flick short, quick upward strokes along the top of the black hill. Vary the lengths and directions slightly to make the grass look wild and unkempt. -
Add the graveyard details:
Paint a small, cross-shaped grave marker nestled in the grass on the right side. You can make it slightly crooked to add character. -
Paint the bats:
In the open sky on the left, paint simple ‘M’ shapes with extended wings for distant bats. Make one larger than the others to create a sense of depth. -
Final touches:
Check your silhouettes for opacity. If the background color shows through the black, wait for it to dry and apply a second coat of black to make the shadows solid and bold.
Make It Glow
Mix glow-in-the-dark medium into your white paint for the stars and the lighter purple sections. When the lights go out, your spooky scene will actually shine.
Hang your spooky masterpiece on the wall and enjoy the ghostly ambiance you’ve created

Have a question or want to share your own experience? I'd love to hear from you in the comments below!