Markers are my favorite shortcut to bold color and instant confidence—especially when you want something that looks finished fast. Here are a bunch of easy marker art ideas you can try in your sketchbook today, from classic go-tos to a few playful curveballs.
Simple Fruit With Glossy Highlights
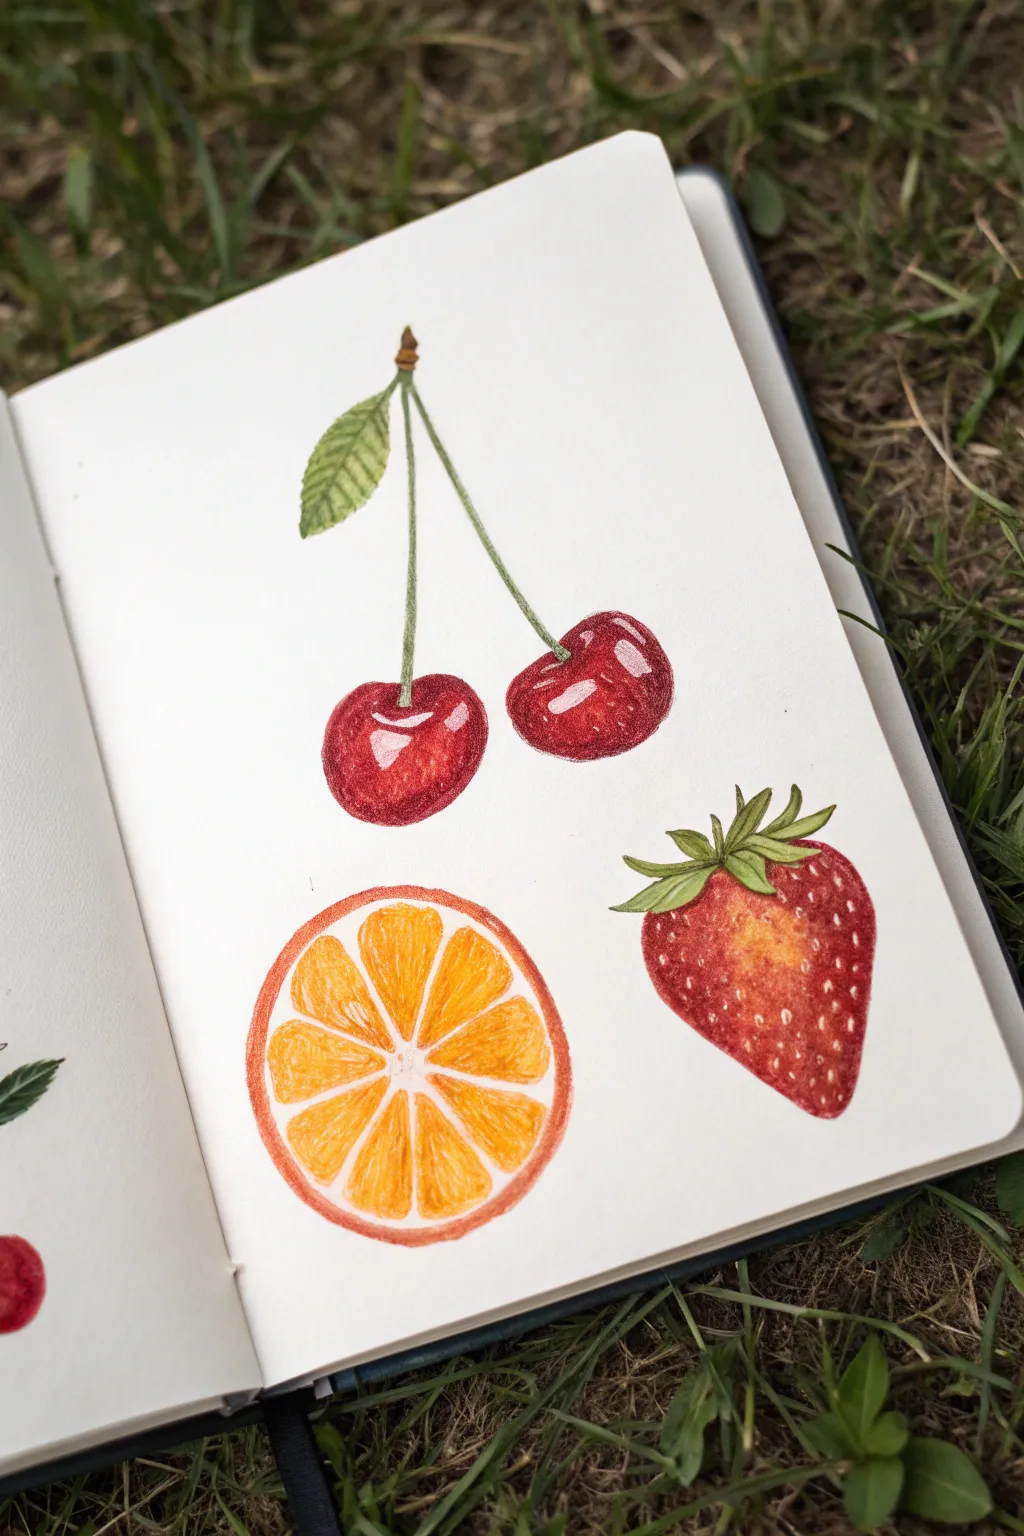
Capture the juicy freshness of summer fruits with these vibrant marker illustrations featuring bold highlights. This project teaches you how to render realistic textures like citrus pulp and shiny cherry skins using simple layering techniques.
How-To Guide
Materials
- Alcohol-based markers (red, deep red, orange, yellow-orange, green, olive green)
- White gel pen or opaque white paint marker
- Pencil (HB or H)
- Eraser
- Heavyweight sketchbook paper or marker cardstock
- Fine liner pen (optional, brown or gray)
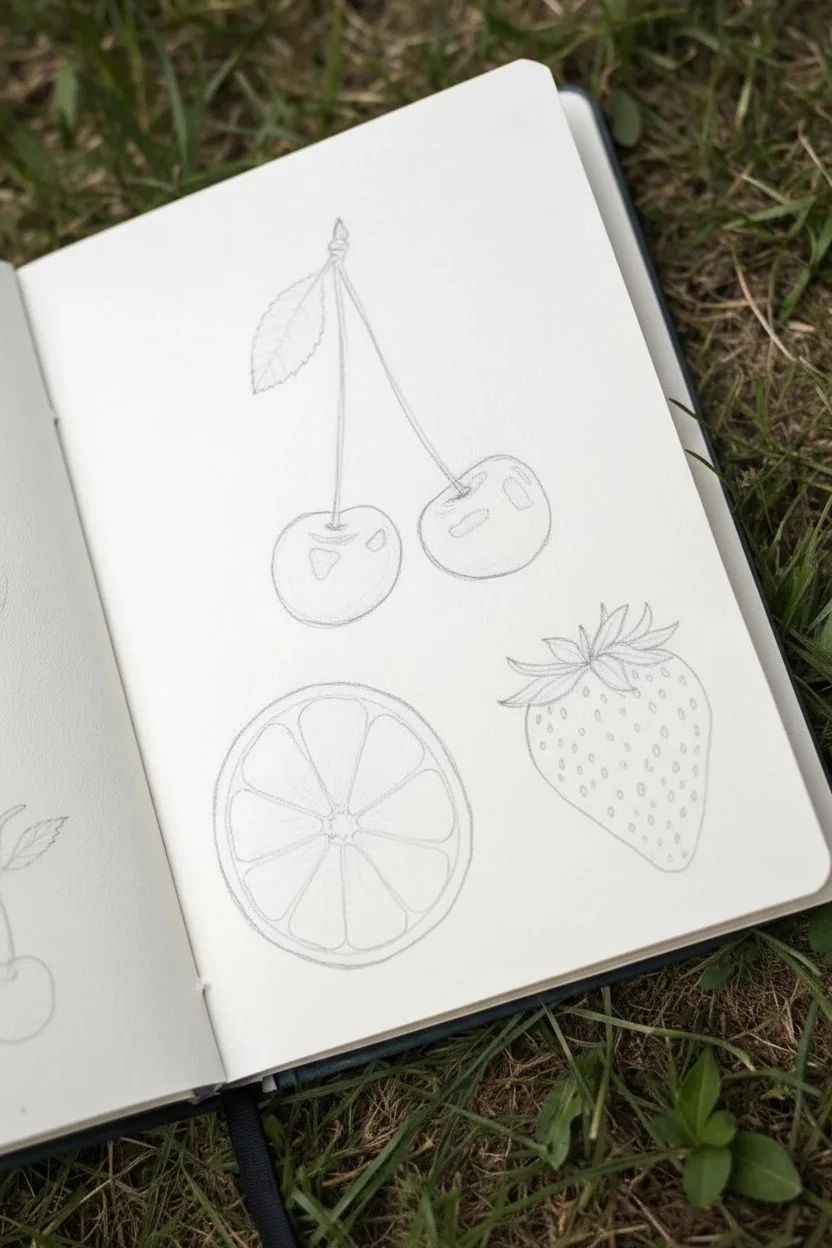
Step 1: Sketching the Shapes
-
Outline the cherries:
Start by drawing two small overlapping circles for the cherries. Add a V-shape connecting them for the stems, and draw a single, pointed oval leaf attached to the top of the stem junction. -
Orange slice placement:
Below the cherries to the left, sketch a perfect circle for the orange slice. Draw a slightly smaller circle inside to define the rind, then divide the inner circle into eight triangular segments. -
Strawberry silhouette:
To the right, draw a rounded triangle shape for the strawberry. Top it with a leafy cap, drawing several jagged, star-like leaves pointing in different directions. -
Refining outlines:
Go over your sketch lightly with an eraser so the graphite is barely visible. This prevents the pencil lead from smearing once we apply the ink.
Preserve the White
Markers are transparent, so you can’t color white over red easily. Plan your highlights first and draw around them, or rely heavily on a high-opacity paint pen for the final touches.
Step 2: Coloring the Cherries
-
Base layer:
Fill the cherry shapes with a bright red marker. Leave a small, kidney-bean-shaped area completely white on the upper left side of each cherry to serve as the main highlight. -
Deepening the shadows:
Use a deep red or burgundy marker to color the bottom right edges of the cherries, blending upward into the bright red to create a sense of roundness. -
Stem and leaf:
Color the stems with a light olive green. For the leaf, use a brighter green, adding small diagonal strokes to suggest veins. Add a tiny brown touch at the very top where the stems join. -
Crisp white highlights:
Once the ink is dry, use your white gel pen to sharpen the edges of the reserved white spots. Add a second, smaller reflection line near the bottom edge of the cherry to enhance the glossy effect.
Step 3: Rendering the Orange Slice
-
Rind and pith:
Outline the outer edge of the circle with a reddish-orange marker. Leave the thin ring between the skin and the pulp completely white to represent the pith. -
Pulp segments:
Fill each triangular segment with a yellow-orange marker. Leave tiny, thin white gaps between the segments to separate them. -
Pulp texture details:
Take a slightly darker orange marker and make small dots and short dashes inside the segments near the outer edge. This mimics the texture of juice vesicles. -
Central definition:
Ensure the very center point where the segments meet remains white, radiating outward like a starburst.
Add a Drop Shadow
Ground your floating fruit by adding a very light gray wash underneath each item. Keep the edges soft to suggest they are sitting on a surface rather than floating in space.
Step 4: Finishing with the Strawberry
-
Strawberry gradient:
Start coloring the berry body with a yellowish-red or coral tone in the center, blending into a deeper, rich red at the edges. This makes the center look plump and protruding. -
Leafy green cap:
Color the leaves at the top with olive and grass greens. Use the darker green to add shadows where the leaves overlap or tuck under. -
Seed placement:
With the white gel pen, dot small seeds all over the red surface. Try to stagger them rather than placing them in perfect rows. -
Final highlights:
Add a few white glossy streaks on the upper left shoulder of the strawberry, near the leaves, to show that the skin is smooth and taut.
Now you have a page of fruit that looks fresh enough to pick


Easy Flowers Using Basic Shapes
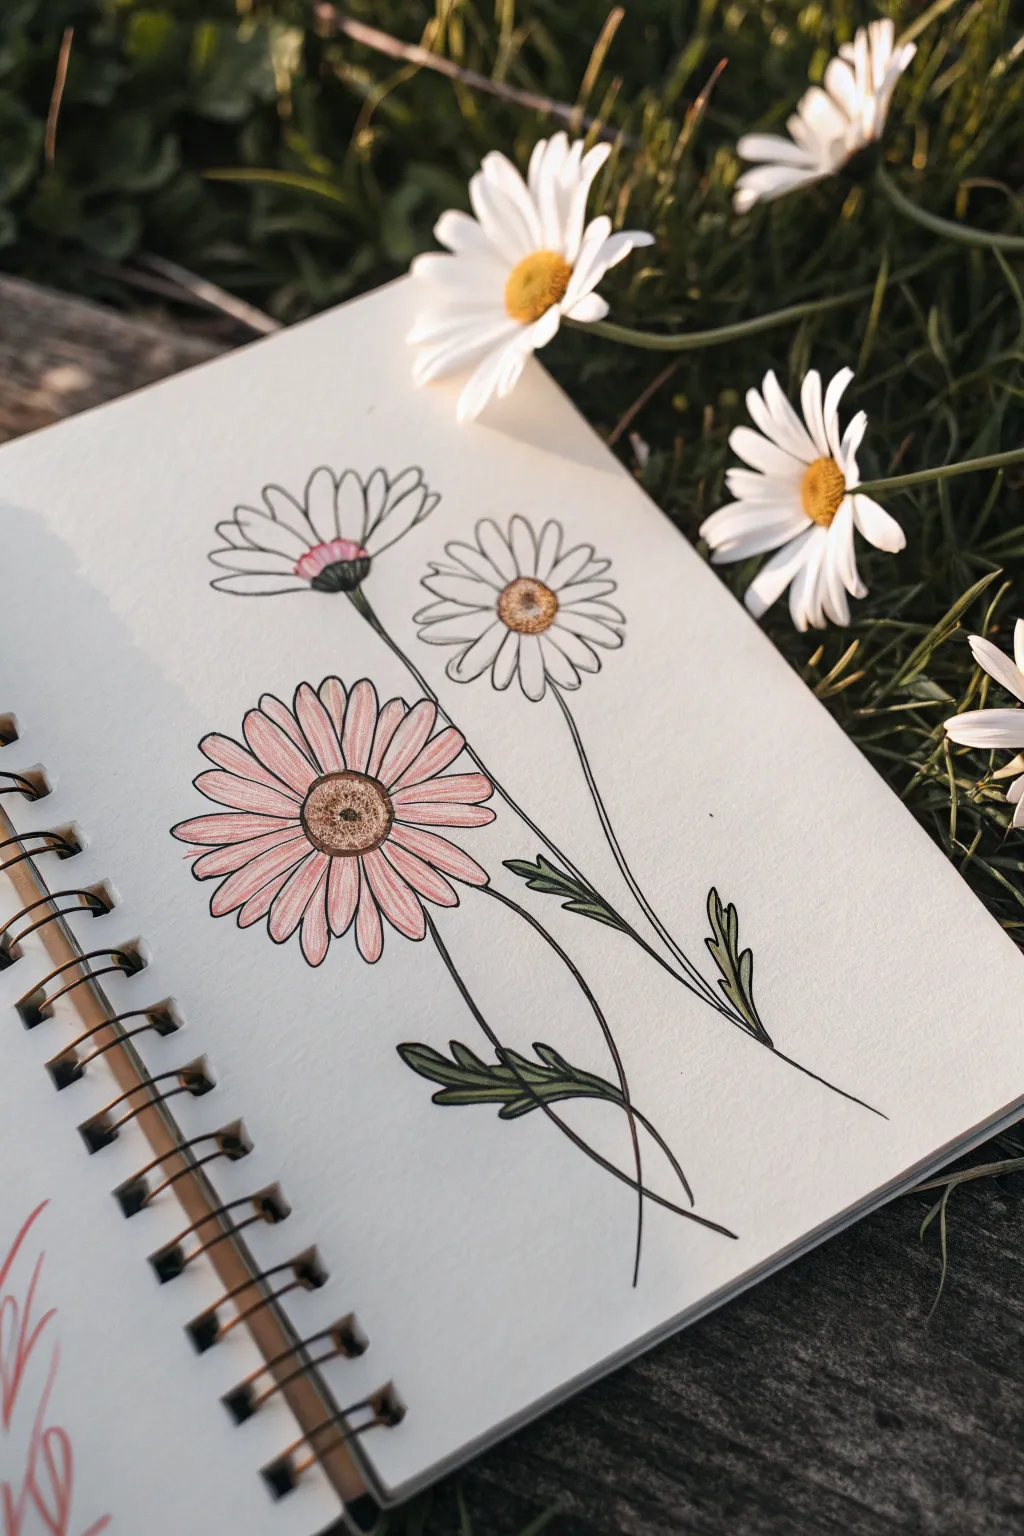
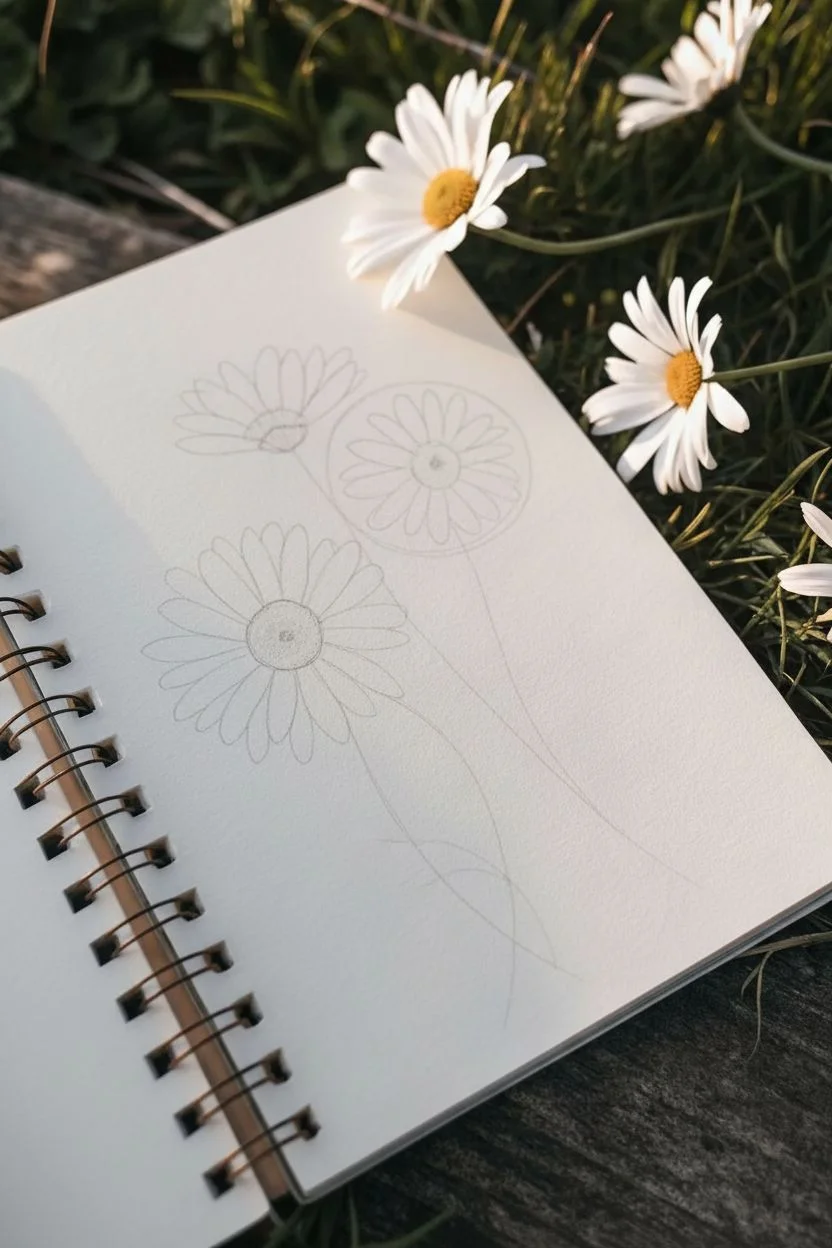
Capture the delicate beauty of a summer meadow with this simple mixed-media sketch. Combining fine ink lines with soft marker shading creates a lovely, illustrative style that pops off the page.
Detailed Instructions
Materials
- Sketchbook or heavyweight drawing paper
- Pencil (HB or H)
- Eraser
- Fine-tip black drawing pen (micropen, 0.3mm or 0.5mm)
- Alcohol markers or watercolor markers (Pale Pink, Golden Yellow, Olive Green)
Step 1: Penciling the Basics
-
Establish the centers:
Begin by lightly sketching three small ovals to represent the flower centers. Place two near the top right and left, and one slightly larger one lower down and to the left for the main pink flower. -
Draw the stems:
From the bottom of each oval, draw long, gently curving lines downwards. Let them cross over each other naturally to gather at the bottom of the page. -
Map out petal length:
Sketch a very faint circle around each center to act as a guideline for how long your petals will be. This ensures your flowers look symmetrical. -
Sketch the petals:
Fill in the petals using long, narrow U-shapes. For the top-left flower, angle the petals upward as if the flower is facing the sky. For the other two, radiate the petals evenly around the center.
Don’t Smudge!
Wait at least 5 minutes after inking before erasing pencil lines. If using alcohol markers, use thick paper or place a scrap sheet behind your page to prevent bleed-through.
Step 2: Inking the Outlines
-
Outline the centers:
Switch to your fine-tip black pen. Carefully trace the centers, keeping the lines slightly jittery or adding small dots to suggest texture. -
Ink the petals:
Trace your petal shapes. Don’t worry about perfect smoothness; a little wobble adds organic character. Add small folds or creases at the tips of a few petals for realism. -
Define the stems and leaves:
Go over your stem lines. At the bottom section, draw jagged, leafy shapes sprouting from the stems. These should be narrow and slightly irregular. -
Erase pencil guides:
Once the ink is completely dry—give it a minute to be safe—gently erase all your underlying pencil sketches so the page looks clean.
Step 3: Adding Color
-
Color the pink daisey:
Take your pale pink marker and fill in the petals of the lower large flower. Start from the center and flick the color outward, leaving the very tips slightly lighter if possible. -
Add pink accents:
On the top-left flower (the side-view one), add just a touch of pink at the very base of the petals where they meet the stem. -
Color the centers:
Use a golden yellow or ochre marker for the flower centers. I like to dab the marker tip repeatedly rather than coloring smoothly to mimic pollen texture. -
Shade the centers:
If you have a slightly darker brown or orange, add a small crescent of shadow on one side of the yellow centers to give them dimension. -
Color the greenery:
Fill in the stems and leaves with an olive green marker. Use a confident, single stroke for the thin stems to keep the line crisp.
Add a Glow
Use a white gel pen to add tiny highlight dots to the yellow centers or the edges of the pink petals. It makes the flowers look sun-kissed.
Step 4: Final Details
-
Strengthen inner lines:
Go back with your black pen and add tiny lines radiating from the center into the petals. This enhances the drawing’s depth. -
Texture the centers:
Add stippling (small dots) with your pen over the dried yellow marker. Concentrate the dots on one side to reinforce the shadow. -
Detail the leaves:
Draw a central vein line down the middle of your green leaves, but keep it broken or partial so it doesn’t look too rigid.
Now you have a charming botanical sketch ready to brighten up your journal


Cute Cacti and Succulents
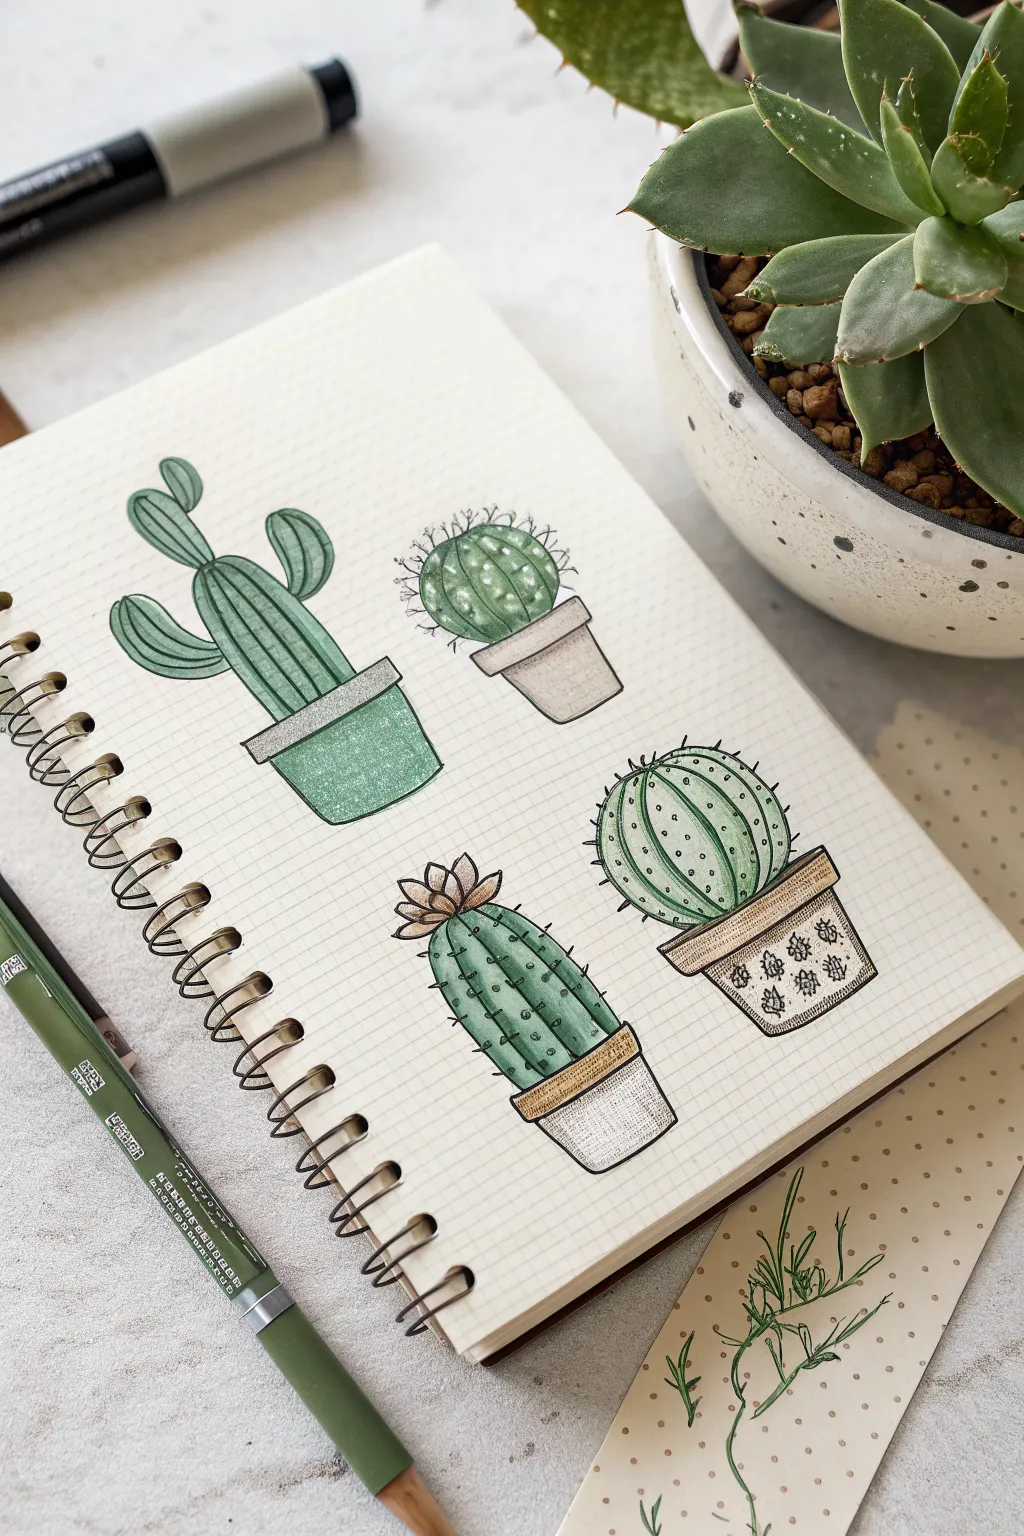
Bring the calming vibes of the desert into your sketchbook with this set of four charming potted cacti. Using simple geometric shapes and basic shading techniques, you’ll create a lively page of greenery that looks professional but is surprisingly easy to draw.
Step-by-Step Tutorial
Materials
- Grid or dot grid sketchbook
- Pencil (HB or H for light sketching)
- Eraser
- Black fineliner pen (0.3mm or 0.5mm)
- Green markers in light, medium, and dark shades
- Beige or brown marker for pots
- White gel pen (optional for highlights)
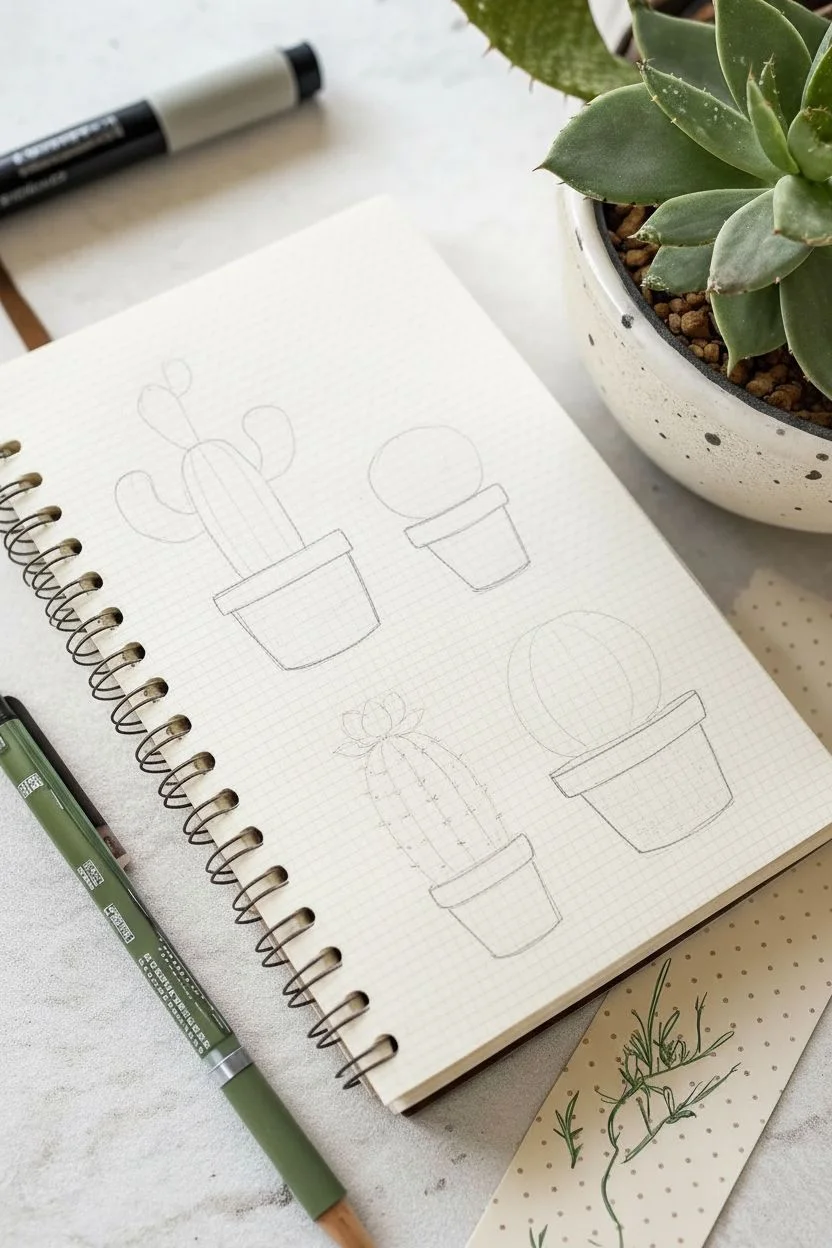
Step 1: Planning composition
-
Map out the grid:
Visualize your page divided into four equal quadrants. Using a light pencil, mark the center points where each pot will sit to ensure they are spaced evenly. -
Sketch the pot shapes:
Lightly pencil in the pots first. For the top-left, draw a simple cylinder. For the top-right and bottom-left, draw slightly tapered bucket shapes with a rim. For the bottom-right, sketch a wider, bowl-like pot with a distinct rim.
Step 2: Drawing the Saguaro (Top Left)
-
Outline the body:
Sketch a tall, central column rising from the pot. Add two curved arms on either side—one lower on the left and one higher on the right—giving it that classic cactus silhouette. -
Add vertical ribs:
Draw vertical lines following the curve of the cactus body and arms to represent the ribs. Let these lines curve slightly with the form to create volume. -
Ink the outline:
Go over your pencil lines with the black fineliner. Keep your hand steady for the long vertical lines. -
Color and shade:
Fill the cactus with a medium green marker. Once dry, go over the right side of the main column and the underside of the arms with the same marker or a slightly darker shade to add depth.
Ink Smearing?
Wait at least 2-3 minutes after inking your outlines before erasing pencil marks or coloring. Fineliner ink can smudge easily if it isn’t completely dry.
Step 3: Drawing the Round Cactus (Top Right)
-
Create the circle:
Draw a perfect circle resting just inside the rim of your second pot. -
Add texture details:
Instead of solid lines, draw broken, curved vertical lines to suggest segments. Add small tick marks or dots along these imagined lines to represent spines. -
Ink and add spines:
Trace the circle and pot with your fineliner. Draw tiny, spiky hairs sticking out from the top and sides of the circle to give it a fuzzy texture. -
Coloring:
Color the sphere with a lighter green. Leave a small patch uncolored or lighter near the top center to act as a highlight, making it look round.
Highlight Hack
Forgot to leave white space for highlights? Use a white gel pen after the marker ink is fully dry to add shiny spots or accent the needles.
Step 4: Drawing the Columnar Cactus (Bottom Center)
-
Sketch the column:
Draw a thick, rounded cylinder shape. Top it with a small, flower-like shape consisting of several pointed petals. -
Detailing the ribs:
Draw vertical lines down the body. Along these lines, place small ‘v’ shapes or dots at regular intervals for the needles. -
Inking the flower:
Ink the main body and the flower on top. The flower petals can be simple pointed ovals. -
Color application:
Use a teal-green marker for the body. Color the flower a dusty pink or light brown. Add a stripe of darker green down one side of each rib for shadow.
Step 5: Drawing the Barrel Cactus (Bottom Right)
-
Form the round body:
Sketch a wide, squat circle sitting in the bowl-shaped pot. -
Curved segments:
Draw curved lines radiating from the top center down to the pot rim, like the sections of a pumpkin. -
Adding distinct spines:
Along the vertical ribs, draw small clusters of short lines or stars to represent sharp spines. Ink these carefully. -
Pot patterns:
Decorate the rim of this pot with a simple geometric pattern or small flower motifs before coloring. -
Final shading:
Color the cactus with a fresh green. Enhance the roundness by darkening the edges near the pot and leaving the center lighter.
Now you have a delightful botanical collection that never needs watering


One-Line Drawing With Marker
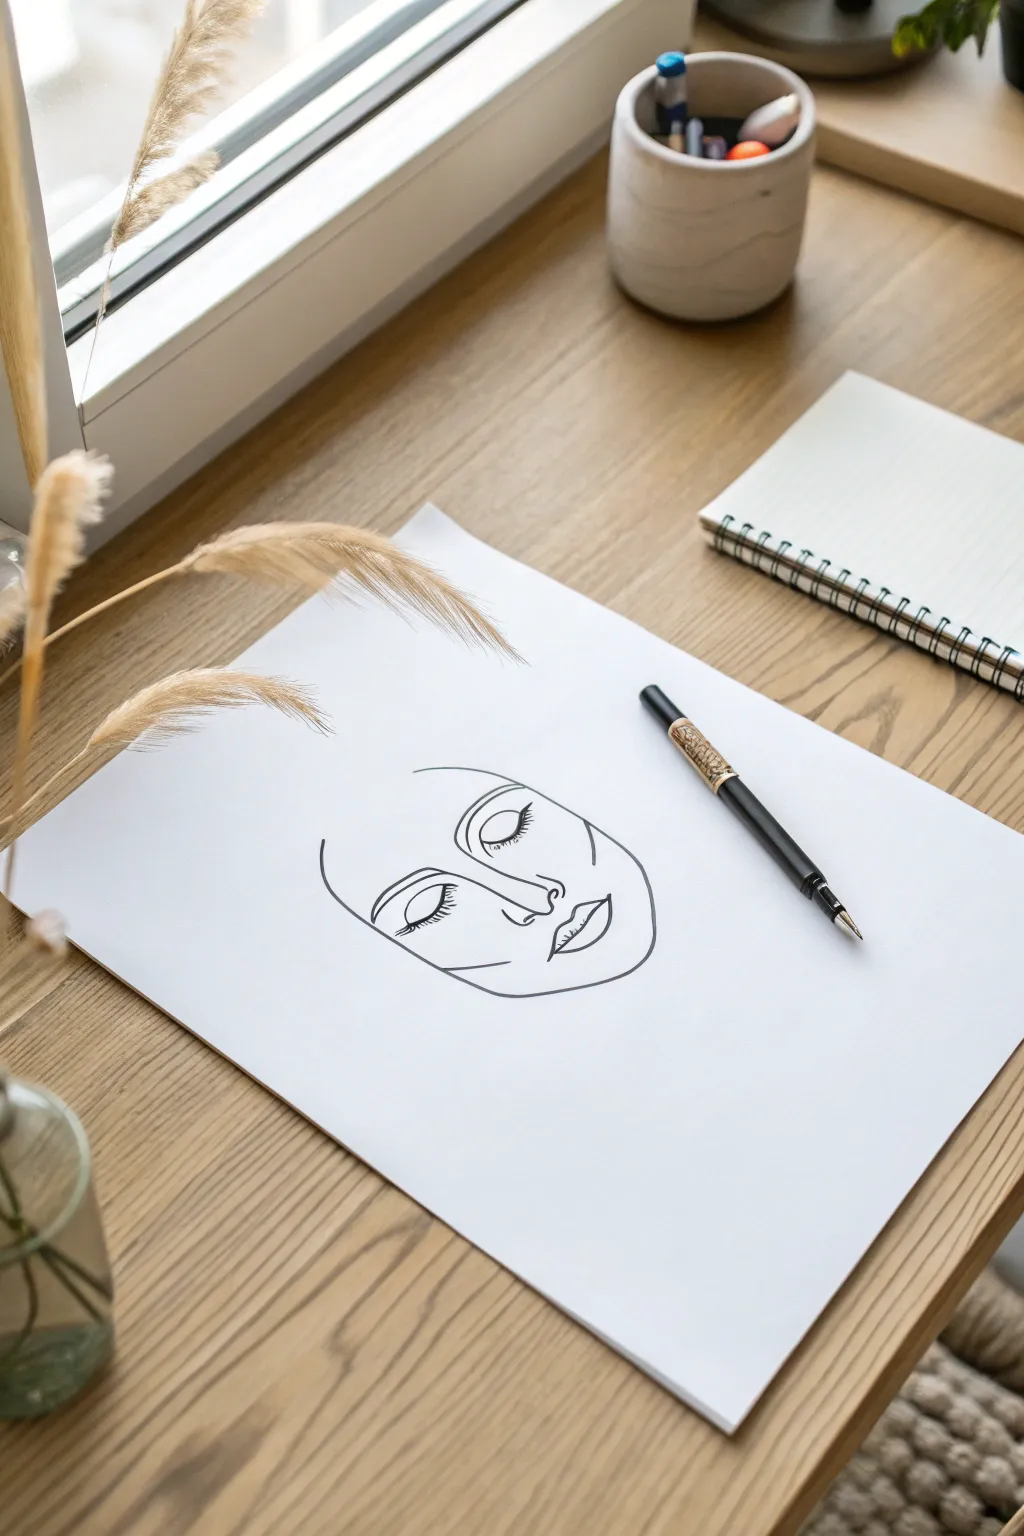
Embrace the elegance of simplicity with this one-line drawing exercise that captures facial features in a fluid, minimalist style. This project mimics the trending aesthetic of abstract line art, turning a single continuous motion into a sophisticated portrait.
How-To Guide
Materials
- High-quality white drawing paper or cardstock (A4 size)
- Black fine-point marker or drawing pen (0.5mm or 0.8mm)
- Pencil (HB or lighter)
- Soft eraser
- Reference photo of a face (optional)
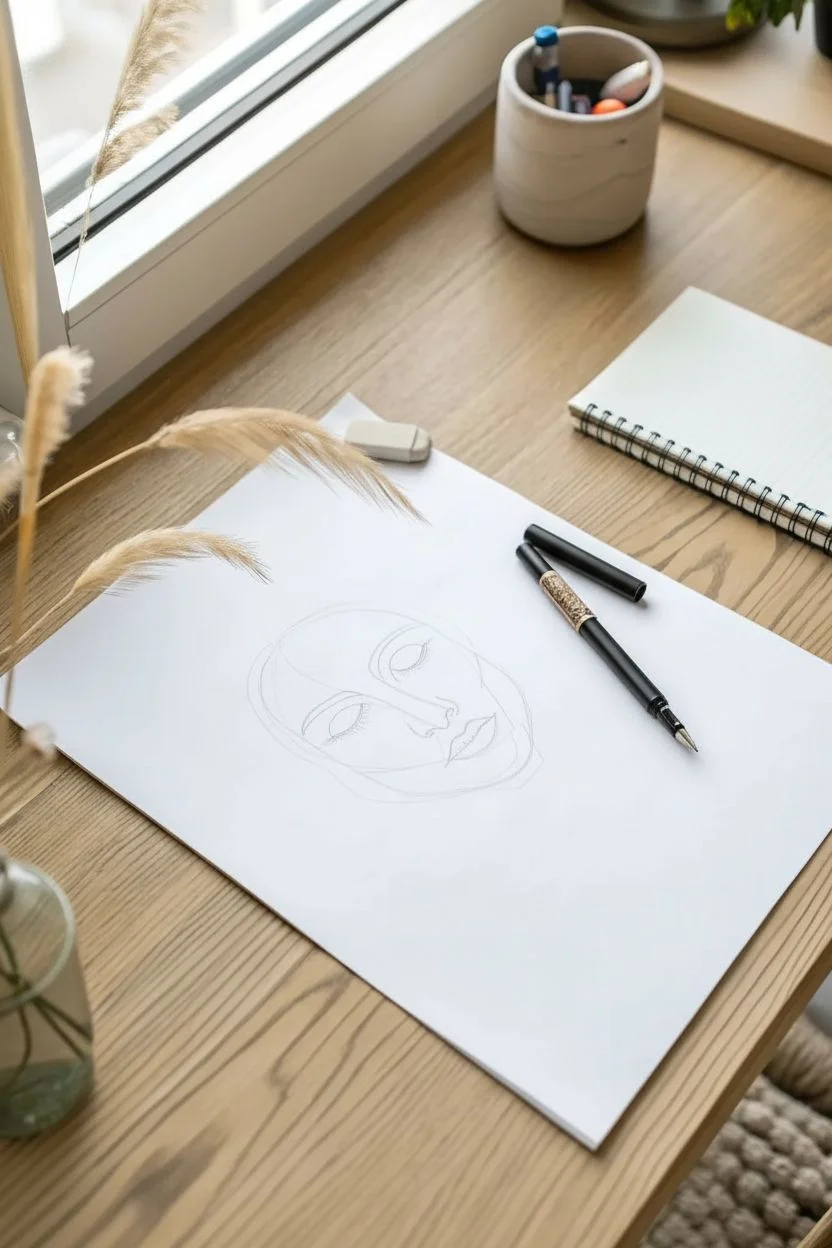
Step 1: Planning and Sketching
-
Analyze the shapes:
Before putting ink to paper, study the reference image. Notice how the features aren’t fully enclosed shapes but rather suggestive curves. The goal isn’t anatomical perfection but creating a pleasing flow. -
Lightly sketch the nose:
Using your pencil with very light pressure, start in the center of the page. Draw an ‘L’ shape for the nose bridge, curving around the bottom to suggest a nostril. -
Add the eyes:
Sketch the eyes as closed, sweeping arches. Place the left eye slightly lower than the right if you want a tilted, dreamy perspective like the example. Include small dashes for lashes. -
Outline the lips:
Below the nose, sketch the lips. Keep them simple—a cupid’s bow on top and a fuller curve on the bottom. Don’t connect every line; leave small gaps for a breezy feel. -
Draft the face contour:
Draw the jawline and cheek. Instead of a full circle, start near the left temple, sweep down past the cheekbone, curve under the chin, and stop halfway up the right side. -
Refine the flow:
Look at your pencil sketch. Identify where lines can connect. In true continuous line art, you don’t lift the pen, but for this ‘faux’ one-line style, we just want it to *look* fluid. Adjust curves to be smoother.
Step 2: Inking the Design
-
Prepare your marker:
uncap your black fine-point marker. Test it on a scrap piece of paper to ensure the ink flows smoothly without skipping. -
Start with the left eye:
Begin inking at the inner corner of the left eye (the viewer’s left). Draw the arch of the eyelid in one confident swoop. Add the vertical dashes for eyelashes quickly. -
Connect to the nose:
From the brow bone area of that left eye, draw a line extending down to form the bridge of the nose. Keep your wrist loose. -
Define the nose tip:
Curve the line around the tip of the nose and create the nostril shape. This is a focal point, so keep the line clean. -
Ink the right eye:
Move to the right eye. Draw the closed eyelid arch. If you want to connect it to the nose like a true one-line drawing, draw a faint line from the nose bridge across the brow, or simply lift the pen and start the eye separately for a cleaner look. -
Draw the lips:
Ink the top lip first, emphasizing the center dip. Then draw the bottom lip line. I find it helpful to ink the center line of the mouth last to anchor the expression. -
Create the face shape:
Start the outer face contour near the left eye. Draw a long, smooth curve down the cheek, rounding the chin, and sweeping up the right side. Taper the line off naturally; don’t just stop abruptly. -
Add inner details:
Draw the additional curved line under the left eye that suggests the cheekbone or eye socket depth. This adds dimension without shading.
Practice Makes Fluid
Before the final paper, practice the continuous motion in the air with your hand. This muscle memory helps your actual lines look confident and unshakey.
Step 3: Finishing Touches
-
Let the ink set:
Wait at least 5-10 minutes for the marker ink to dry completely. This prevents smudging during the next step. -
Erase pencil marks:
Gently glide your soft eraser over the entire drawing to remove the initial sketch lines. Hold the paper taut with your other hand to avoid crinkling it. -
Thicken select lines:
To add visual interest, go back over certain curves—like the underside of the chin or the lash line—to make them slightly thicker. This creates a calligraphy-like effect.
Wobbly Lines?
Don’t scrap it! If a line isn’t perfectly smooth, thicken it slightly to even out the wobble. Varied line weight actually makes the art look more professional.
Frame your minimalist masterpiece in a simple wooden frame or clip it to a clipboard for instant modern decor

PENCIL GUIDE
Understanding Pencil Grades from H to B
From first sketch to finished drawing — learn pencil grades, line control, and shading techniques.
Explore the Full Guide
Mini Icon Doodle Grid
Transform a blank page into a charming gallery of miniature icons with this structured yet playful doodle grid. It’s a fantastic exercise for practicing simple shapes and color combinations, resulting in a cohesive and satisfying piece of marker art.
Step-by-Step
Materials
- Dotted or blank journal/sketchbook paper
- Black fine liner pen (0.3mm or 0.5mm)
- Ruler
- Pencil and eraser
- Dual-tip art markers or colored pencils (yellow, orange, red, pink, light blue, teal, green, purple, gold)
Step 1: Setting the Stage
-
Map out the grid:
Start by lightly sketching a grid of squares using your pencil and ruler. Based on the reference, aim for a layout of 4 columns and 6 rows. Each square should be roughly 1.5 inches (or 3-4 cm) wide, leaving a small gap between each one for a neat, tiled look. -
Ink the borders:
Once you are happy with the spacing, carefully trace over your pencil grid lines with a black fine liner. Go slowly to keep the lines straight, or use your ruler again with the pen if you prefer a sharper edge. -
Erase guidelines:
Wait a moment for the ink to dry completely to avoid smudging, then gently erase all remaining pencil marks to reveal your crisp, empty frames.
Ink Smearing?
If your fine liner smears when you color over it, switch the order! Lay down your marker colors first, let them dry, and then draw your black outlines on top for a crisp finish.
Step 2: Drawing Nature Icons
-
Sketch the floral trio:
In the top left square, draw three simple stems. Add a leaf to the center one, a cone-shape flower to the left, and a small bud to the right. Keep the shapes basic and geometric. -
Create the mushrooms:
For the mushroom icons (top center row and bottom row), draw simple cap-and-stem shapes. Give one a tall, slender stem with a textured cap, and the other a classic stout toadstool shape with spots. -
Draw the stylized flower:
In the top right square, draw a central point and radiate simple, pointed petals outward to create a starburst-style flower. -
Add the pine tree:
In the bottom row, draw a simple triangular pine tree shape. Add small circles inside for ornaments or texture and a small rectangle for the trunk.
Theme It Up
Customize your grid by choosing a specific theme for all icons, like ‘Breakfast Foods,’ ‘Travel Essentials,’ or ‘Autumn Leaves’ to make a cohesive monthly cover page.
Step 3: Drawing Celestial & Sky Icons
-
Cluster the stars:
Fill two separate boxes (second row) with clusters of stars. In one box, draw four classic five-point stars. In the other, mix four-point sparkles with five-point stars for variety. -
Draw the sun:
In the third row, draw a circle with short lines radiation outward. Add a cute smiley face inside the circle for extra personality. -
Sketch the moon and stars:
Next to the sun, draw a crescent moon shape accompanied by two small stars. -
Add a sunburst:
In the fourth row, create a more dramatic sun or starburst with longer, thinner rays extending from a small center circle. -
Create a rainbow:
Draw three simple arches nesting inside each other. At the base of the arches, draw fluffy cloud shapes to anchor the rainbow.
Step 4: Drawing Hearts & Patterns
-
Scatter mini hearts:
In the top row (second box), draw a confetti-like scatter of tiny hearts, varying their rotation slightly. -
Draw single hearts:
Use the remaining spaces to draw single, larger hearts. Place them centrally in their boxes. You can tilt them slightly or keep them upright for visual interest. -
Draw a happy daisy:
In the fourth row, draw a flower with a round center and long, loop-like petals all around. Add a small face to the center if you like.
Step 5: Adding Color
-
Color the hearts:
Use your coral, pink, and purple markers to fill in the heart icons. For the scattered hearts, stick to a single red or deep pink tone. -
Brighten the sky icons:
Use yellow for the sun, moon, and starbursts. Use a teal or light blue marker for the star clusters to make them pop against the white paper. -
Fill in nature elements:
Color the mushroom caps red or pink. Use teal for the pine tree and the leaf in the first box. I like to use a soft brown or tan for the rainbow arches and mushroom stems to keep the palette earthy. -
Final ink details:
Once the color is down, use your fine liner to add any tiny details that might have been lost or need emphasis, like the spots on the mushroom or the face on the sun.
Now you have a delightful collection of miniature art pieces bringing life to your notebook.
Cartoon Animals With Big Shapes
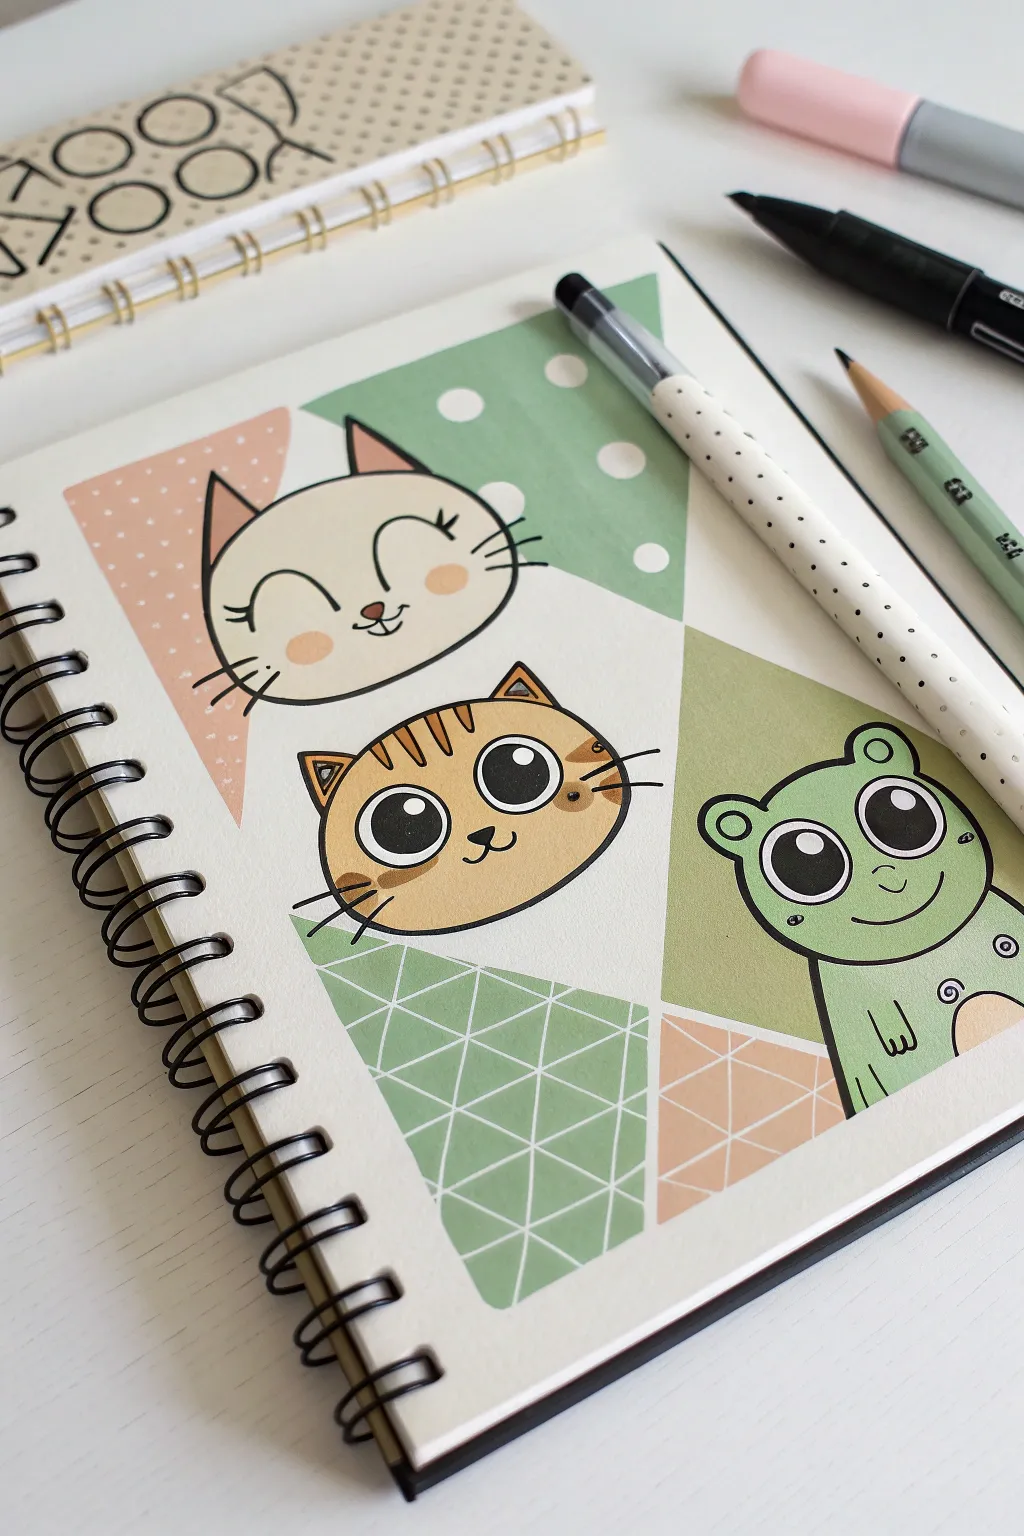
Combine simple geometric backgrounds with adorable cartoon faces for a modern, playful sketchbook page. This project uses bold triangles and soft pastels to create a structured yet whimsical layout perfect for beginners.
Step-by-Step
Materials
- Sketchbook or marker paper
- Pencil and eraser
- Black fineliner pen (0.5mm or 0.8mm)
- Alcohol markers (peach/pink, mint green, white, beige, orange/brown)
- White gel pen
- Ruler
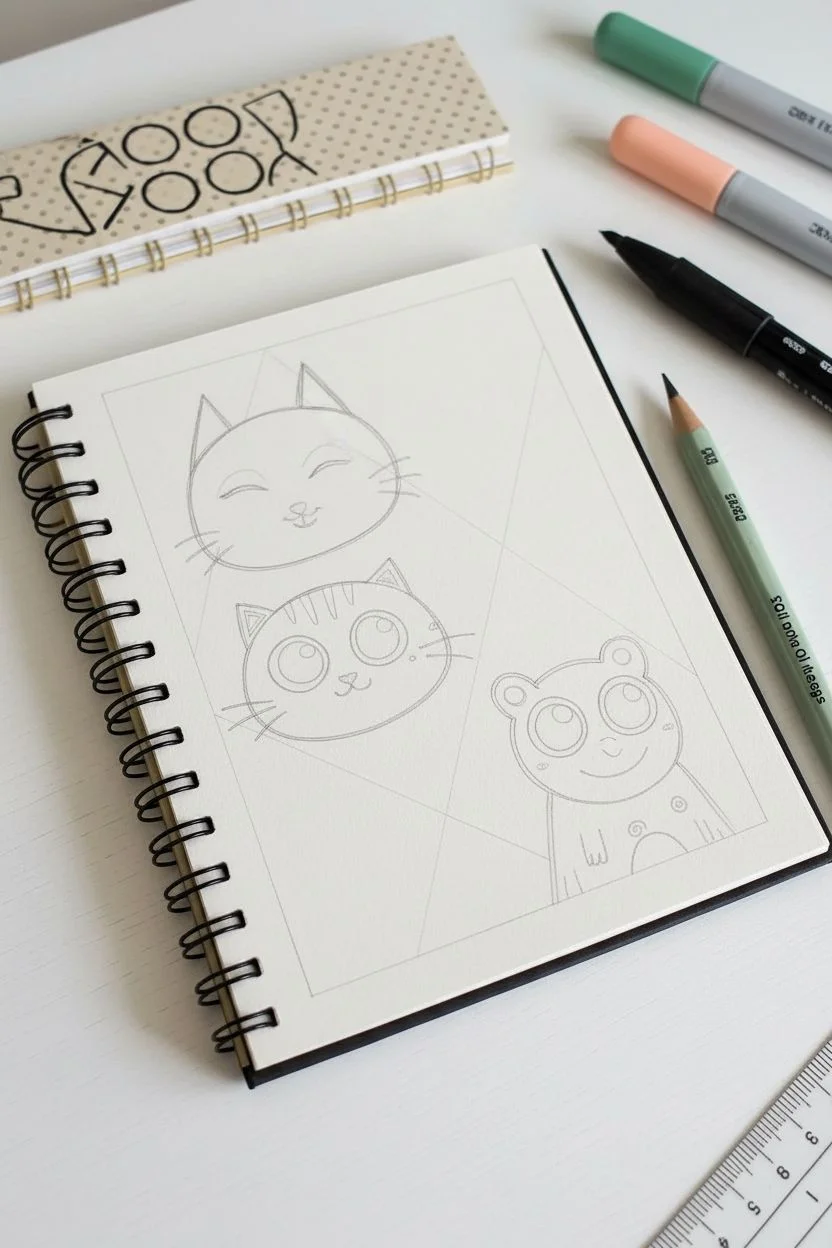
Step 1: Setting the Scene
-
Draft the grid:
Use a ruler and pencil to lightly draw a large rectangle in the center of your page to frame the artwork. -
Divide the space:
Draw two diagonal lines dividing the rectangle into four large triangular sections, creating an ‘X’ shape across the frame. -
Sketch the characters:
Lightly sketch the outlines of three character heads: a cat in the top triangle, a tabby cat in the center (overlapping the intersection), and a frog in the right-hand triangle. Keep the shapes round and simple.
Clean Edges
For perfectly straight edges on your background triangles, place a piece of masking tape or washi tape along your pencil lines before coloring.
Step 2: Coloring the Backgrounds
-
Color the top triangle:
Using a mint green marker, fill in the top triangular section behind the white cat, being careful to work around the cat’s head outline. -
Color the left triangle:
Fill the left triangular section with a soft peach or salmon pink marker. Again, stop at the edge of the cat’s head outline. -
Color the bottom sections:
Use a darker sage green for the bottom-left triangle section and the right-hand triangle section covering the frog’s body. -
Add secondary accents:
Fill the very bottom-right corner triangle with the same peach tone used on the left to balance the composition.
Mix It Up
Swap the animals for different creatures like a bear, bunny, or fox, but keep the color palette to just three or four shades for a cohesive look.
Step 3: Bringing Characters to Life
-
Color the tabby cat:
Fill the center cat’s face with a warm beige or light orange marker. Leave the eyes white for now. -
Color the frog:
Color the frog using a bright lime green marker, ensuring consistent coverage over the face and body shape. -
Add cheek details:
Use a pink marker to add small circular blush spots to the white cat’s cheeks. -
Detail the tabby:
Add dark brown stripes to the top of the tabby cat’s head and small whisker spots on the cheeks.
Step 4: Inking and Patterning
-
Outline the characters:
Trace over your pencil sketches with a black fineliner. Use smooth, confident strokes for the outer edges of the heads. -
Draw facial features:
Ink the eyes and mouths. For the top cat, draw simple curved lines for closed happy eyes. For the others, draw large circles and fill the pupils black, leaving small white highlights. -
Add whiskers and details:
Draw three whiskers on each side of the cats faces and add small spiral details or belly markings to the frog. -
Create the polka dots:
Since coloring around small circles is hard, wait for the mint green background to dry, then use a white gel pen or opaque white paint marker to draw large, evenly spaced polka dots. -
Create the geometric netting:
On the bottom-left dark green section, use your white gel pen and a ruler to draw a grid of intersecting white lines, creating a triangular pattern. -
Pattern the peach section:
Add tiny, subtle white dots or small ‘v’ shapes to the pink triangle on the left for texture. -
Final clean up:
Wait for all ink to dry completely, then gently erase any visible pencil guidelines to leave a crisp finish.
Now you have a charming page of animal friends that looks professionally designed
BRUSH GUIDE
The Right Brush for Every Stroke
From clean lines to bold texture — master brush choice, stroke control, and essential techniques.
Explore the Full Guide
Neurographic Lines and Color Cells
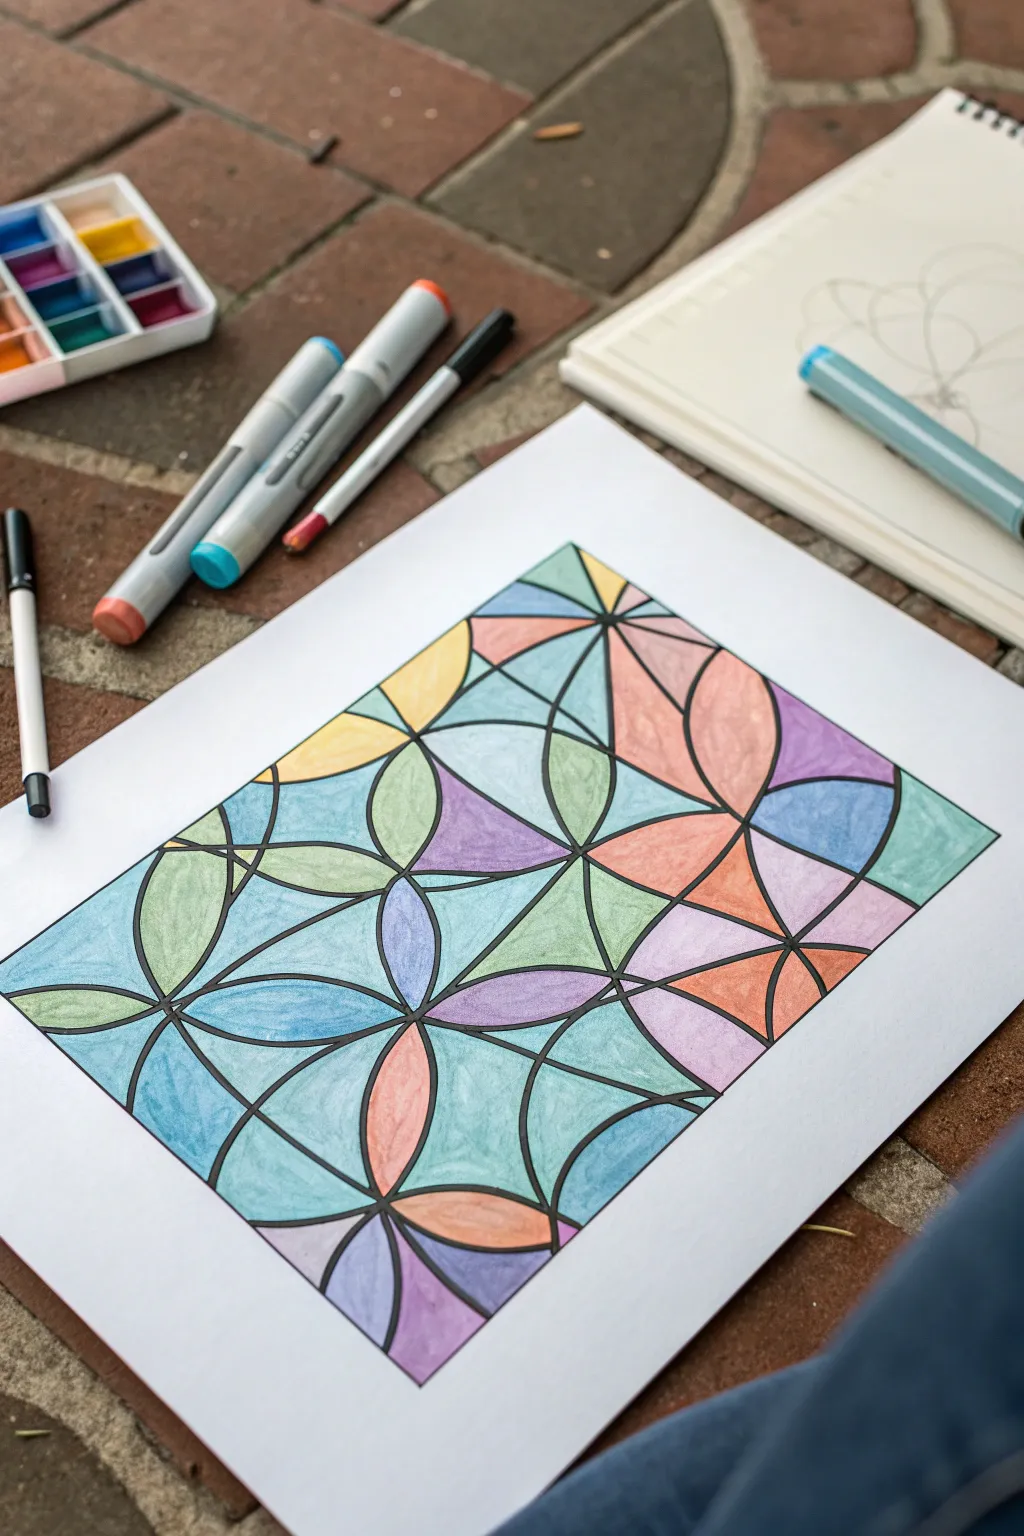
This soothing geometric project transforms simple intersecting circles into a vibrant, stained-glass mosaic. With its bold black outlines and soft, harmonizing color palette, it creates a structured yet relaxing art piece perfect for beginners.
Detailed Instructions
Materials
- White mixed media or heavy drawing paper
- Compass for drawing circles (or circular objects to trace)
- Black fine-liner pen (0.5mm to 0.8mm)
- Pencil and eraser
- Ruler or straight edge
- Dual-tip alcohol markers (shades of blue, green, purple, peach, and yellow)
- Scrap paper (to test colors)
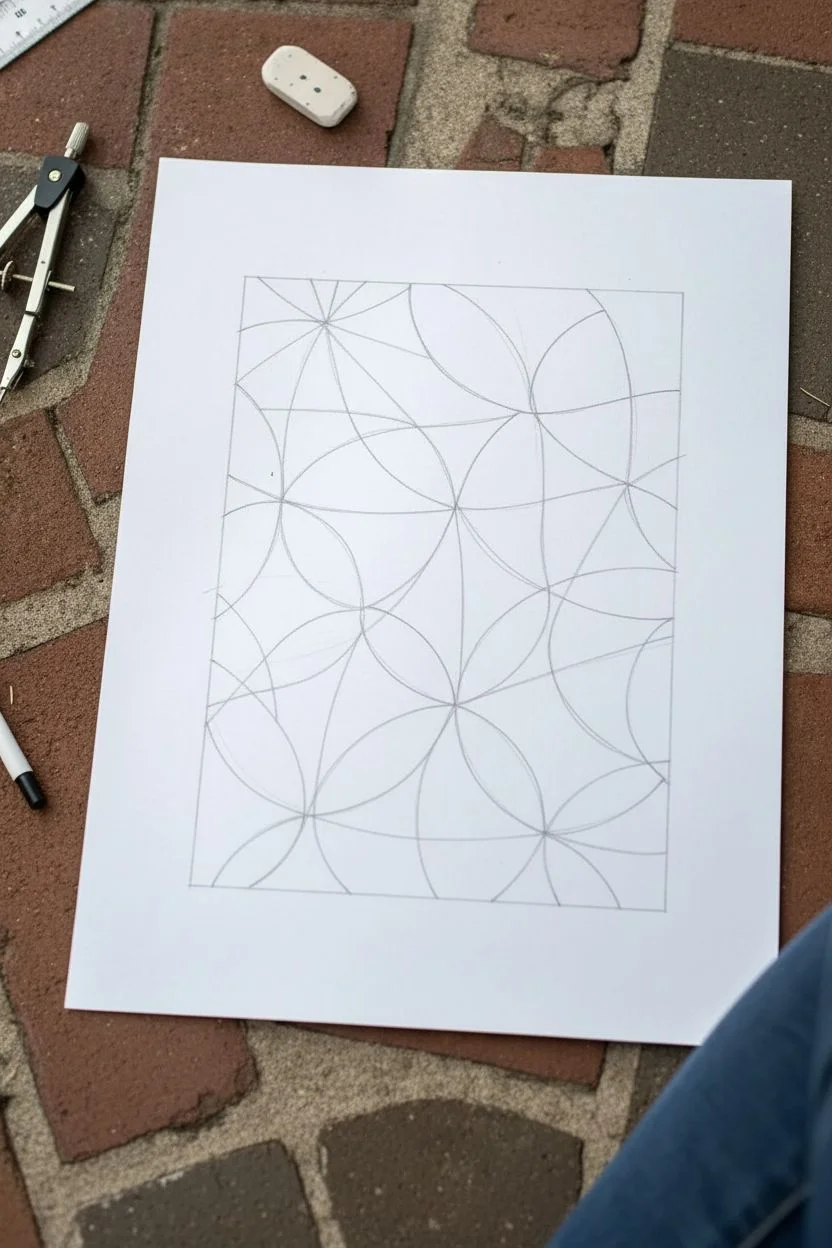
Step 1: Drafting the Grid
-
Establish the Border:
Begin by drawing a large rectangle on your paper using a ruler and pencil. This will frame your composition and give the geometric pattern a clean, defined edge. -
Draw the Central Circle:
Set your compass to a medium radius (about 1.5 to 2 inches). Place the point near the center of your rectangle and draw the first circle. -
Create the Flower of Life Pattern:
Place your compass point anywhere on the edge of the first circle and draw a second circle. For the third circle, place the compass point at the intersection where the first two circles meet. -
Expand the Grid:
Continue this pattern outward, always placing the compass point at the intersection of two previous circles. Fill the entire rectangular space with this interlocking grid. -
Clean Up the Edges:
Once the grid is drawn, erase any pencil lines that extend outside your initial rectangle border, leaving a clean, contained pattern.
Uneven marker streaks?
Work quickly while the ink is still wet to blend strokes seamlessly. Coloring in small, circular motions rather than straight lines also helps avoid streakiness.
Step 2: Inking the Lines
-
Outline the Curves:
Take your black fine-liner pen and carefully trace over all the curved pencil lines inside the rectangle. Keep your hand steady and move slowly for the smoothest arcs. -
Define the Frame:
Use a ruler and the black pen to ink the rectangular border, creating a crisp boundary for your artwork. -
Erase Guidelines:
Wait a few moments for the ink to dry completely. Gently erase all remaining pencil marks to reveal a clean black-and-white framework.
Compass slipped?
Don’t panic—just turn that accidental line into a new geometric element. You can ink over it and color it as a unique ‘fractured’ part of the design.
Step 3: Adding Color
-
Select a Palette:
Choose a limited color palette to maintain harmony. This example uses cool tones (blues, teals, purples) accented with warm peaches and soft yellows. -
Base Color Application:
Start filling in the ‘petals’ formed by the intersecting circles. Use the broad tip of your alcohol markers to lay down smooth blocks of color. -
Distribute Colors:
Try not to put the same color in adjacent shapes. I find it helpful to jump around the page, filling in all the teal sections first, then moving to purple, to ensure a balanced spread. -
Layering for Texture:
Alcohol markers are great for layering. Go over certain sections a second time to deepen the shade or create subtle gradients within a single shape. -
Highlighting Edges:
Pay close attention to the edges near the black lines. Using the fine tip of your marker here ensures you don’t accidentally bleed color into a neighboring cell. -
Final Touches:
Review your work for any white gaps. Fill in any tiny missed spots to give the piece a solid, professional finish.
Enjoy the calming rhythm of filling in your symmetric creation and admire how the colors interact.
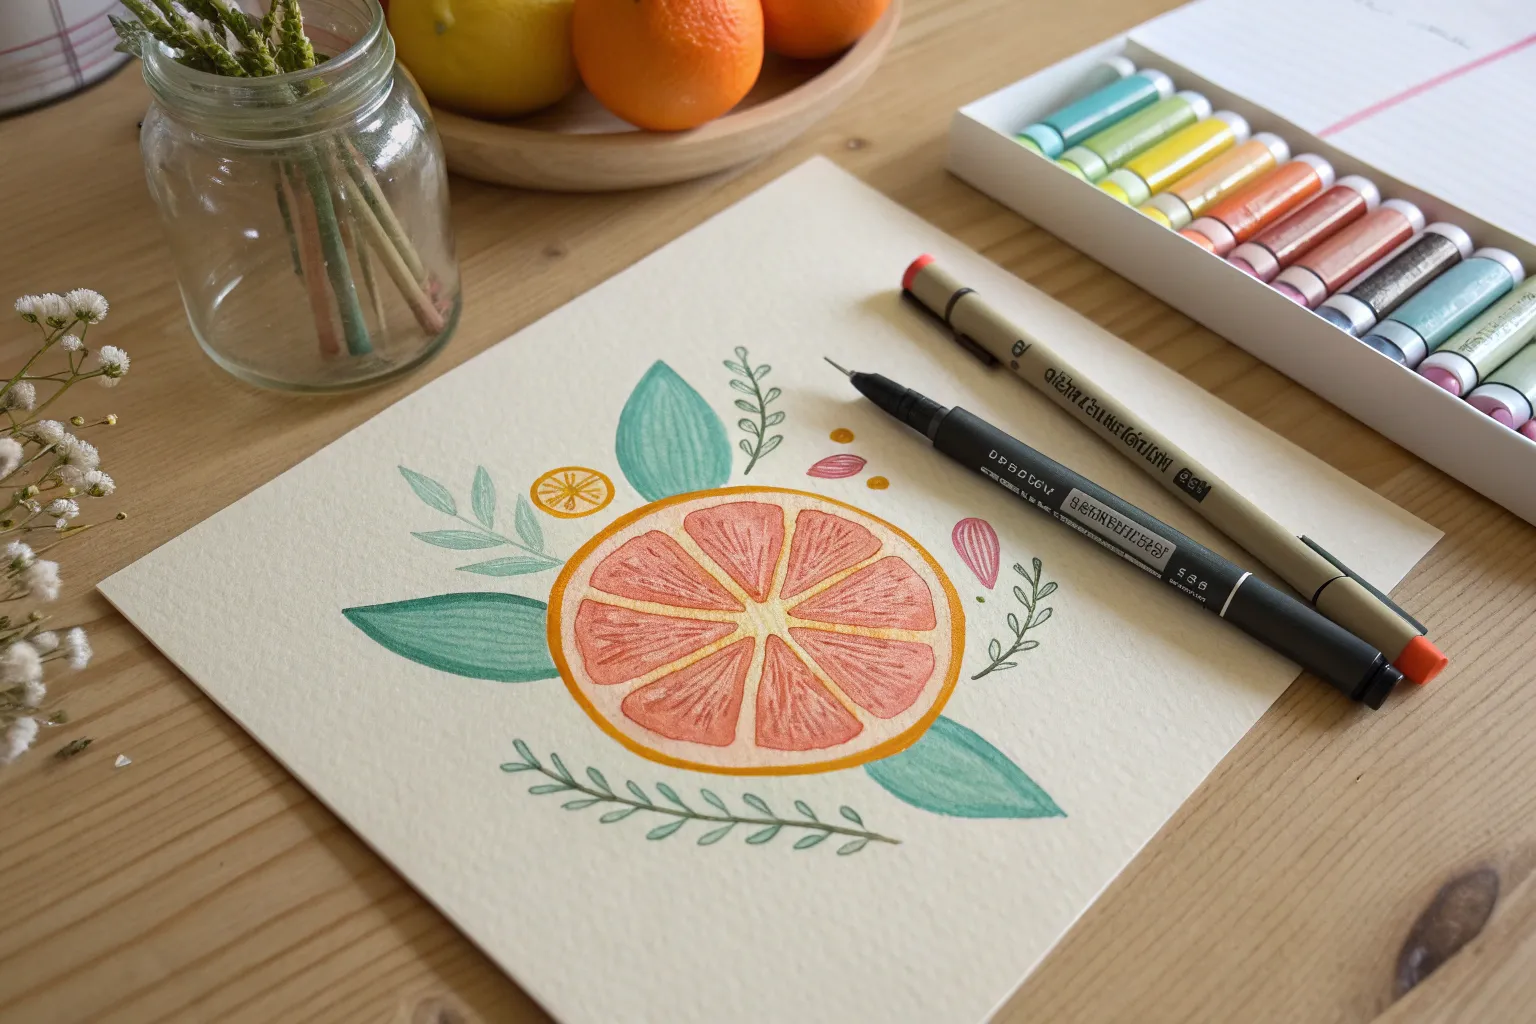
Simple Still Life: Mug and Fruit
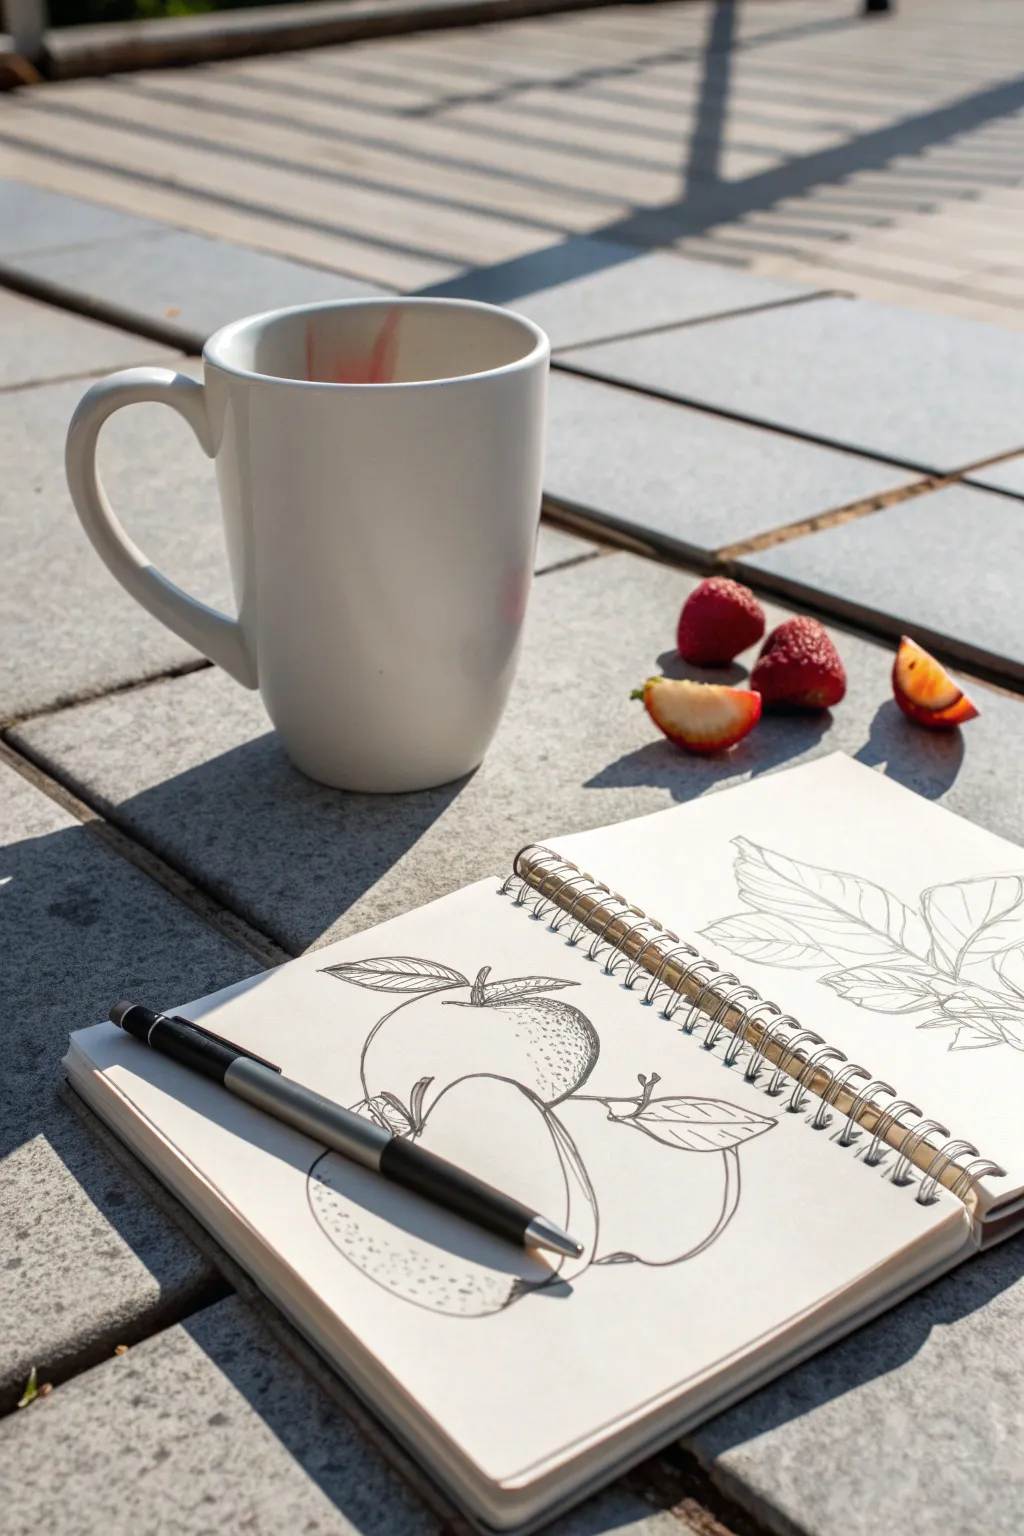
Capture the simple beauty of nature with this minimalist line art tutorial. Using just a fine liner and a sketchbook, this project focuses on clean contours, subtle stippling, and botanical forms to create a relaxed, observational study.
Step-by-Step Guide
Materials
- Spiral-bound sketchbook (heavyweight paper preferred)
- Fine liner pen (black, 0.3mm or 0.5mm)
- Mechanical pencil and eraser (for preliminary sketching)
- Fresh fruit for reference (optional, but helpful)
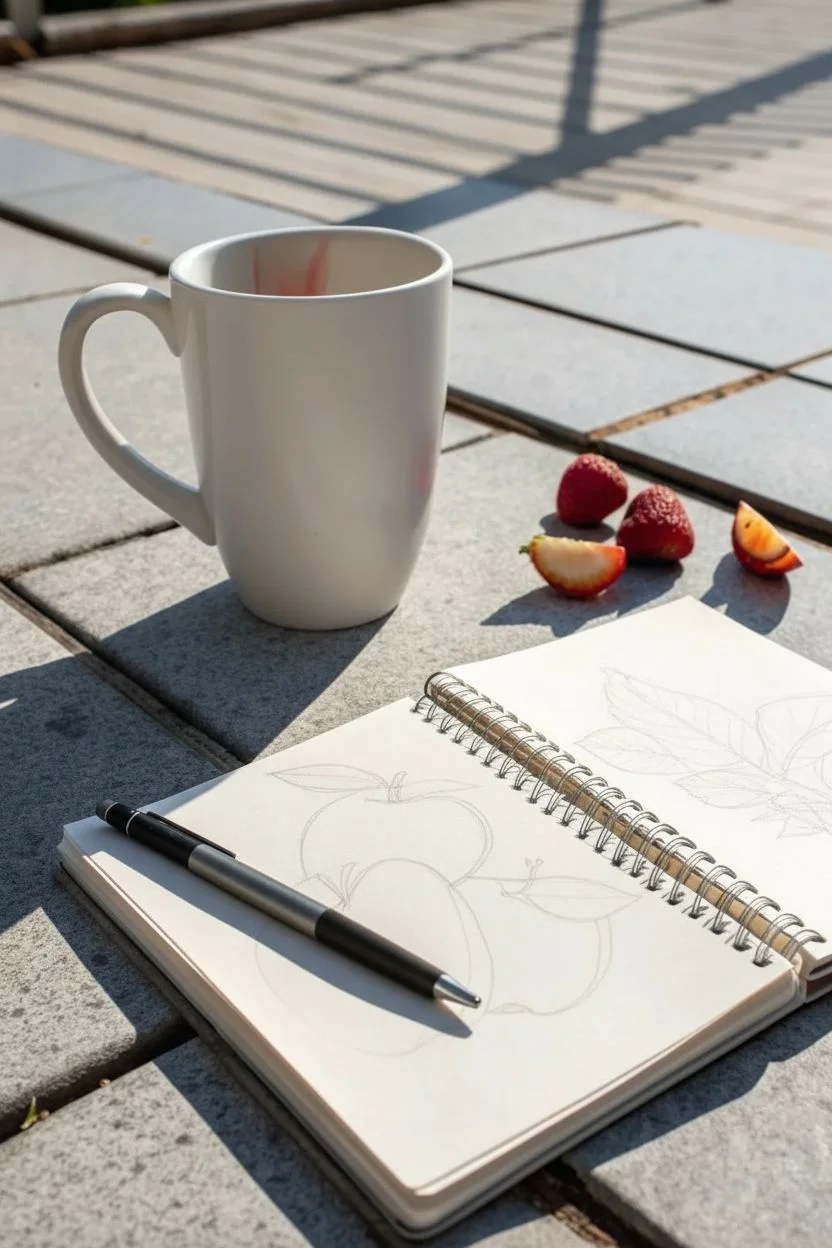
Step 1: Planning the Composition
-
Observe your subject:
Begin by looking closely at your fruit references. Notice how the round forms of the fruit interact with the flatter, veined shapes of the leaves. -
Light pencil outlines:
Using a mechanical pencil with a light touch, sketch two overlapping circles or ovals in the foreground to establish the main fruit shapes. Don’t worry about perfect circles; organic shapes look more natural. -
Add leaf placements:
Lightly sketch the general direction and size of the leaves behind and to the side of the fruit. Think of them as broad, flat shapes fanning out from the stems. -
Refine the contours:
Go back over your pencil lines to define the specific dips where the stems attach to the fruit. Create a slight indentation at the top of each fruit shape.
Pen Pressure Tip
Vary your pressure while drawing the leaves. Press harder near the stem and lift off as you reach the leaf tip for a dynamic, tapering line.
Step 2: Inking the Fruit
-
Start the main outlines:
Switch to your fine liner pen. I prefer starting with the fruit in the very front. Draw a smooth, confident line over your pencil sketch, breaking the line slightly where the leaf overlaps. -
Draw the stems:
Ink the short, woody stems emerging from the indentations you sketched earlier. Add a tiny bit of thickness to them so they don’t look like single stray lines. -
Add texture with stippling:
To give the fruit volume without heavy shading, use stippling (tiny dots). Concentrate a cluster of dots near the top curve of the fruit and along the shadowed bottom edge. -
Detailing the skin:
If your fruit has a cleft or a crease, suggest it with a broken line or a row of small dots rather than a solid hard line. This keeps the look delicate.
Step 3: Inking the Botanical Elements
-
Outline the leaves:
Draw the outer edges of the leaves. Use a slightly wavy motion with your pen to mimic the natural, imperfect edge of the foliage. -
Draw the central veins:
Draw a single line down the center of each leaf, following its curvature. This anchors the leaf’s direction. -
Add secondary veins:
Branching off from the center vein, draw lighter, angled lines for the secondary veins. Keep these lines swift and tapering toward the edges. -
Connect the elements:
Ensure all stems connect logically to a branch or main vine, even if parts are hidden behind the fruit.
Add a Splash of Color
Use a watercolor brush marker in a pale green or peach tone to add a single ‘shadow shape’ of color behind the drawing for a modern pop.
Step 4: Final Touches
-
Enhance the contrast:
Look for areas where shadows would naturally fall, like where a leaf sits behind a fruit. Strengthen the line weight there by going over it once more. -
Erase pencil marks:
Wait at least five minutes for the ink to dry completely to avoid smudging. Then, gently erase all visible pencil guidelines. -
Assess and adjust:
Step back and look at your composition. If an area feels too empty, add a few more stipple dots for balance.
Enjoy your fresh, botanical sketch as a reminder to find art in everyday objects


Tiny Mushrooms With Speckles
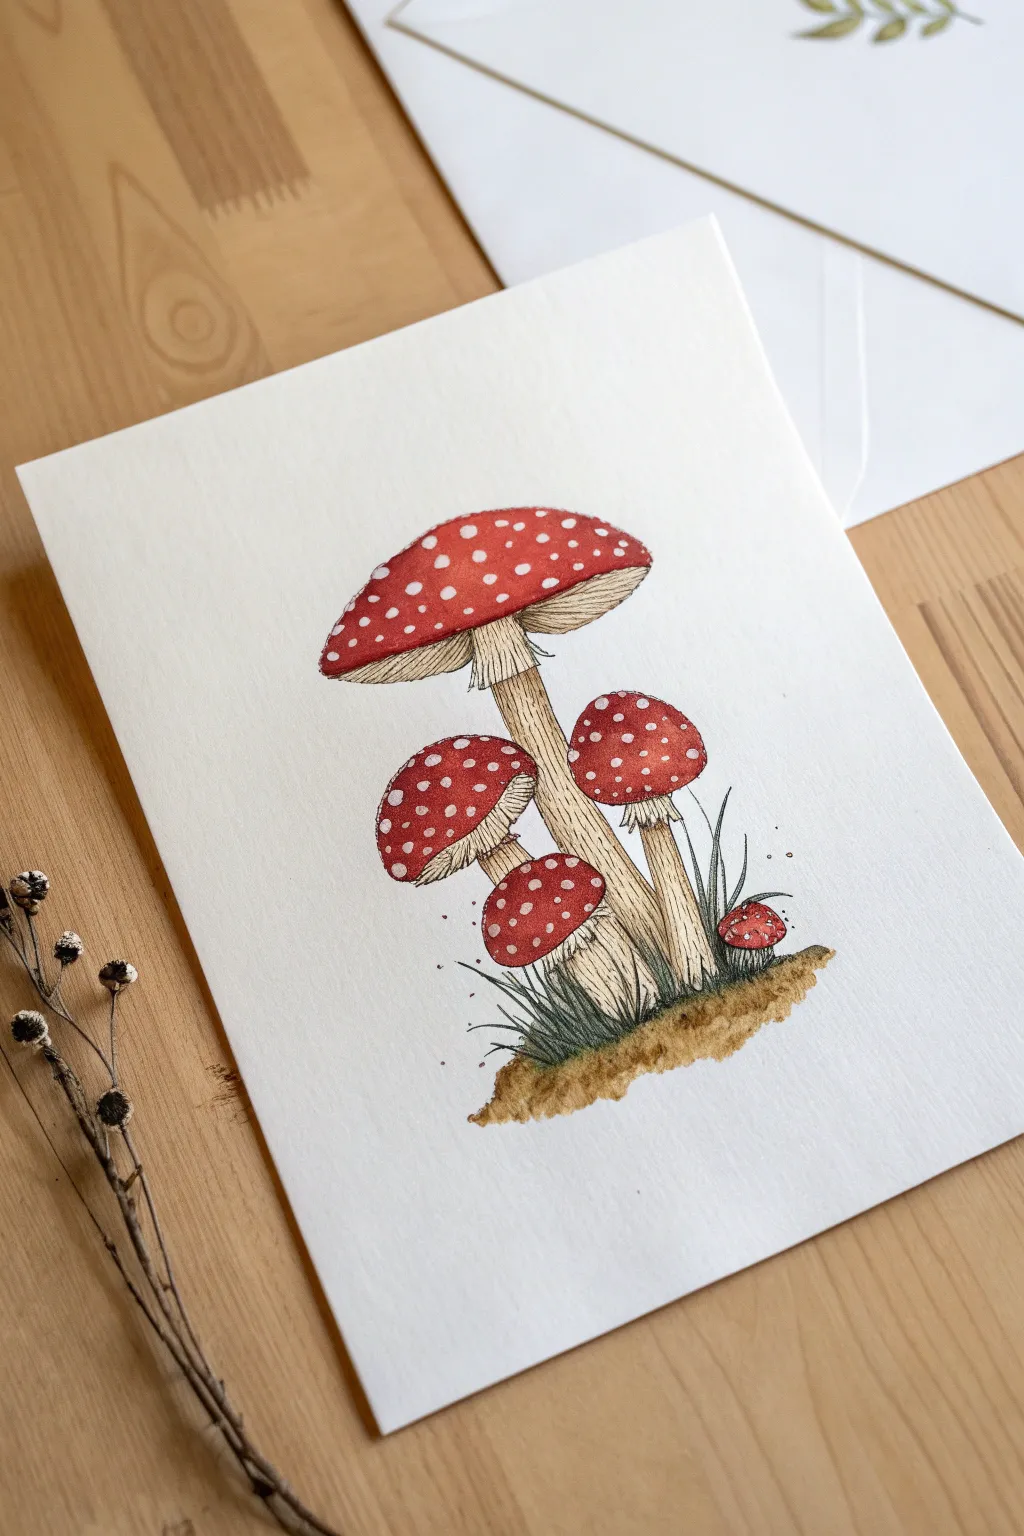
Capture the charm of the forest floor with this delightful mushroom illustration. Using a combination of fine liners and markers, you’ll create a classic Amanita muscaria family perfect for a handmade greeting card or framed art.
How-To Guide
Materials
- Heavyweight mixed media paper or cardstock (white)
- Fine liner pens (black, sizes 01 and 03)
- Alcohol-based markers (Red, Beige/Sand, Warm Grey, Olive Green, Brown)
- White gel pen or opaque white paint marker
- Pencil and eraser (for sketching)
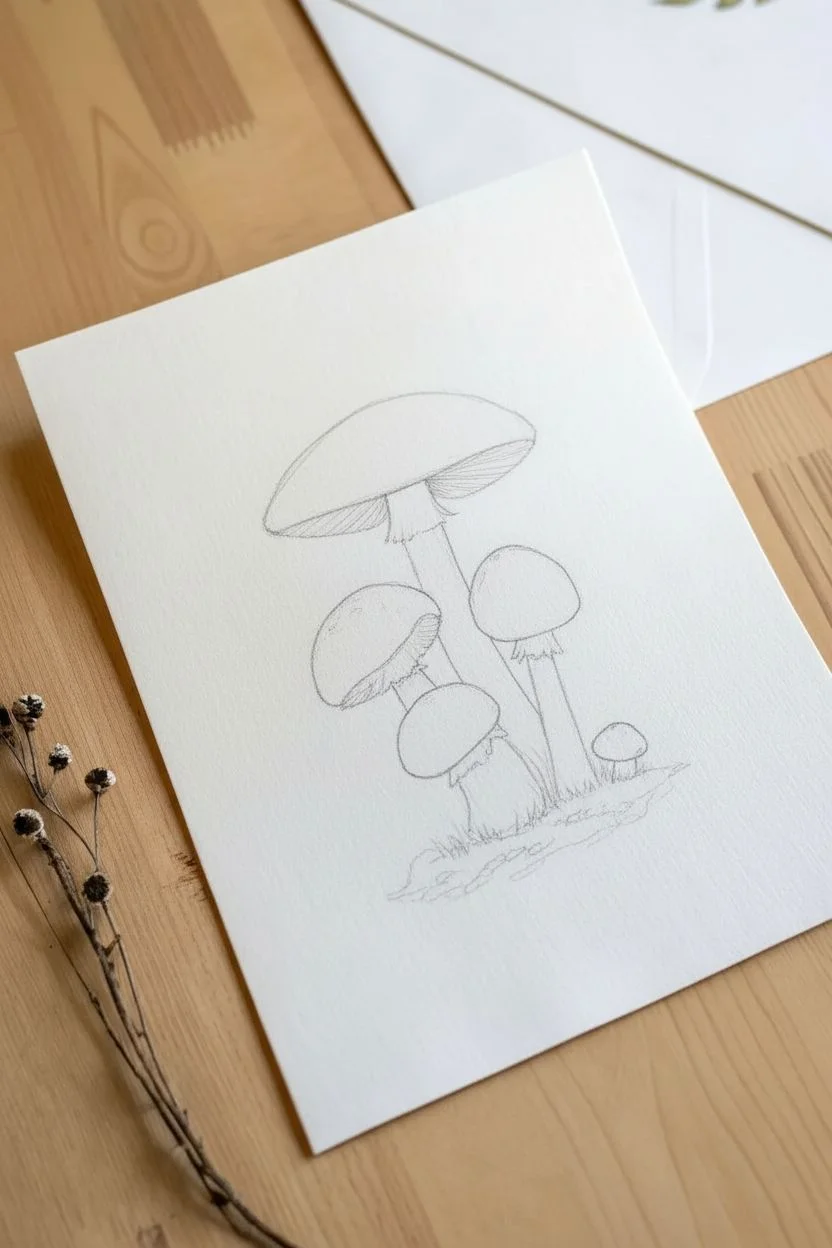
Step 1: Sketching the Composition
-
Outline the caps:
Begin by lightly sketching the shapes of the mushroom caps with a pencil. Draw a large, wide dome near the top center for the main mushroom. Add two smaller, rounder caps below it to the left and right. -
Add a tiny sprout:
Draw the smallest, button-like mushroom emerging from the ground on the far right. -
Connect the stems:
Sketch thick, sturdy stems extending downwards from each cap. Give them a slight curve to make them look organic, ensuring they all converge into a small mound at the base. -
Detail the skirts:
Add the ‘skirt’ or ring of tissue on the upper part of the stems, just under the caps. These should look a bit ragged and textured.
Step 2: Inking the Details
-
Draw the main lines:
Using a 03 fine liner, carefully trace over your pencil outlines for the caps and the main sides of the stems. Keep your hand relaxed to create slightly wavering, natural lines rather than perfect geometric curves. -
Texturize the gills:
Switch to a finer 01 pen. Underneath the caps, draw very fine, closely spaced lines radiating from the stem to the edge of the cap to represent the gills. -
Add stem texture:
Use the 01 pen to add vertical striations along the length of the stems. These lines shouldn’t be continuous; break them up to suggest fibrous texture. -
Create the grassy base:
At the bottom, draw short, upward flicks with the pen to simulate blades of grass and moss around the base of the stems. -
Clean up:
Once the ink is completely dry, gently erase all remaining pencil marks.
Bleed-Proofing Pro Tip
Place a scrap piece of paper underneath your cardstock while coloring. Alcohol markers can bleed through, and this protects your work surface.
Step 3: Adding Color
-
Color the caps:
Take your red marker and fill in the mushroom caps. Aim for a smooth, solid application. If you have two shades of red, use the darker one near the edges for a rounded, 3D effect. -
Tint the stems:
Lightly color the stems with a beige or sand-colored marker. Leave some areas white or very pale to act as highlights, emphasizing the cylindrical shape. -
Shadow the gills:
Go over the gill area (under the cap) with a very light warm grey marker to deepen the shadow while letting the ink lines show through. -
Ground the image:
Use a brown marker to dab in the earthy soil at the very bottom. Blend this into the bottom of the stems slightly. -
Greenery accents:
Use an olive green marker to color the grass blades at the base, blending them slightly with the brown earth tones.
Level Up: Vintage Vibe
Make the paper look aged before you start drawing by lightly staining it with tea or diluted coffee for a classic botanical illustration feel.
Step 4: Finishing Touches
-
Apply the spots:
Wait until the red marker is fully dry. Using a white gel pen or paint marker, carefully dot white spots onto the red caps. Vary the sizes—some large, some tiny—to make it look realistic. -
Add final speckles:
For a whimsical touch, tap a few tiny dots of black ink or dark brown marker floating around the base of the mushrooms to suggest spores or dirt particles.
Now you have a charming woodland scene ready to share with a friend
Simple Butterfly With Symmetry Trick
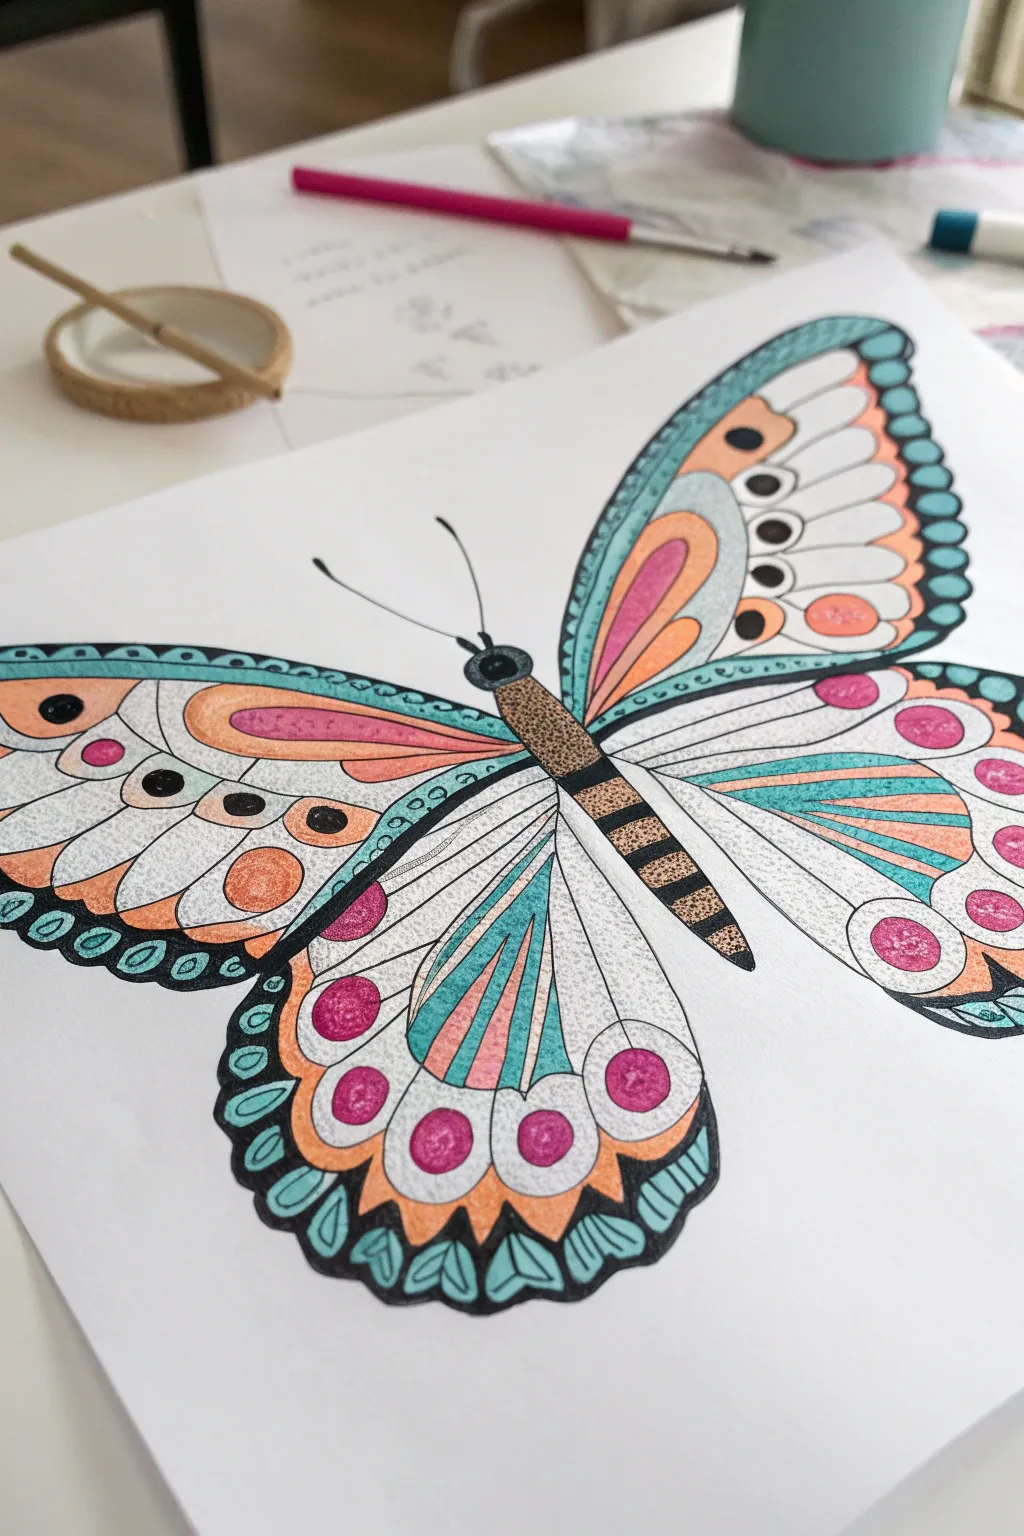
Create a stunningly symmetrical butterfly that combines bold outlines with delicate, repetitive patterns for a relaxing art session. This project uses a limited color palette of teal, salmon, and pink to create a cohesive and vibrant finished piece.
Step-by-Step Guide
Materials
- White cardstock or heavy drawing paper
- Fine tip black drawing pen (0.5mm or 0.8mm)
- Thicker black marker (for filling)
- Alcohol-based markers or high-quality felts in teal/light blue, salmon/orange, magenta/pink, and tan/brown
- Pencil and eraser
- Ruler (optional for symmetry)
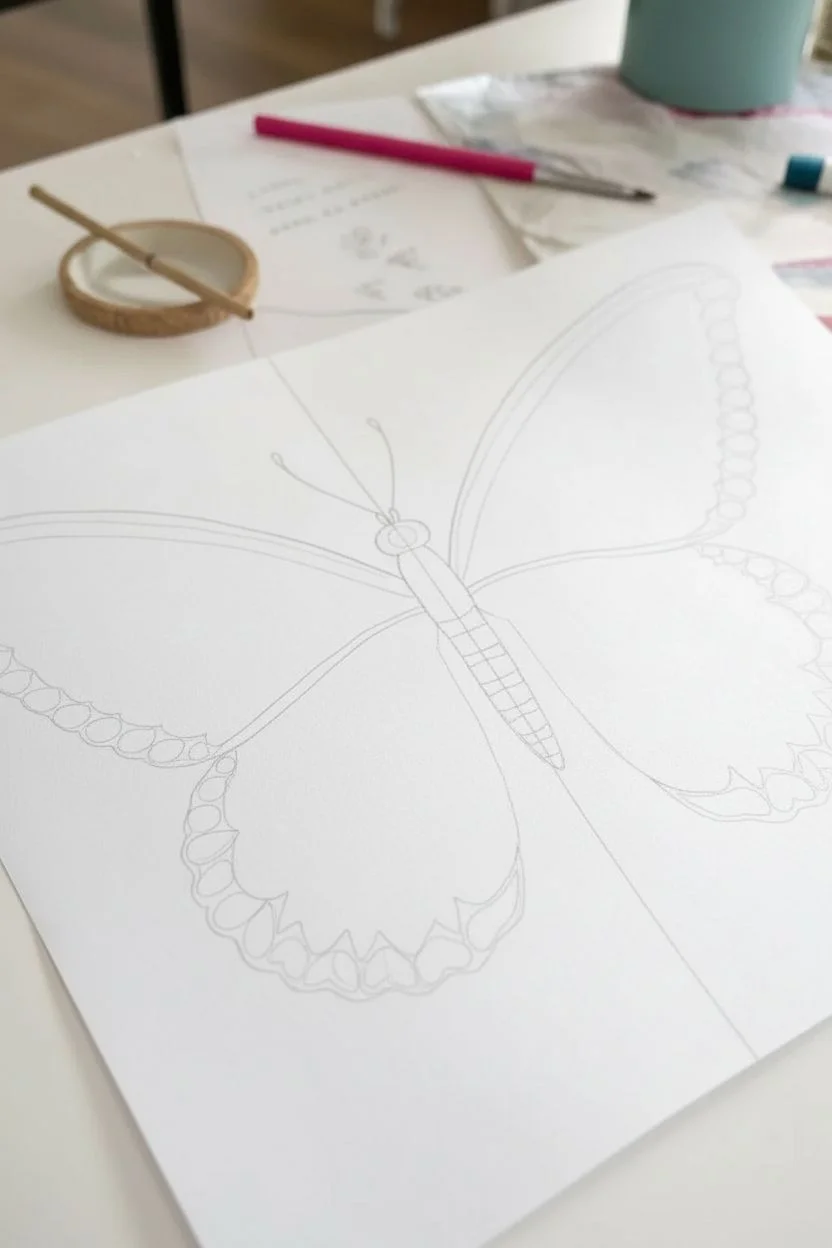
Step 1: Sketching the Bones
-
Draft the center line:
Start by lightly drawing a vertical line down the center of your page with a pencil. This will act as your anchor for symmetry. -
Outline the body:
Draw the butterfly’s body along the center line. Create a small oval for the head, a slightly longer thorax, and a long, tapered abdomen. Sketch two curving antennae extending from the head. -
Shape the upper wings:
Sketch the large upper wings on either side. They should curve outward and upward, reaching higher than the head, with a rounded triangular shape. -
Shape the lower wings:
Draw the lower wings extending from the bottom of the upper wings down to the abdomen’s tip. Give them a scalloped bottom edge to add interest.
Step 2: Inking & Patterning
-
Ink the main outlines:
Use your fine tip black pen to trace your pencil lines. Once the ink is completely dry, gently erase the pencil marks so your canvas is clean. -
Divide the wings:
Inside the upper wings, draw a long, curving teardrop shape that mimics the outer wing shape. This creates a border area and an inner panel for different patterns. -
Create the scalloped borders:
Along the outer edges of all four wings, draw a scalloped line to create a border strip. Divide this strip into small sections or ‘cells’ that we will color later. -
Draw the wing veins:
In the lower wings, draw radiating lines explicitly fanning out from the body to the wing edges. These will serve as sections filled with different colors. -
Add detail shapes:
Draw circles, teardrops, and smaller ovals within the wing sections. Look specifically at the lower wings and add a row of large circles near the bottom edge. -
Detail the body:
Draw horizontal stripes across the abdomen. Leave the thorax (middle section) clear for a textured stippling effect later.
Zen Tip: The Fold Trick
Struggling with symmetry? Sketch one side of the butterfly in pencil, fold the paper down the center line, and trace the design onto the other side using a bright window or light box.
Step 3: Coloring
-
Fill the teal accents:
Take your teal or light blue marker. Color the outer scalloped borders of the upper wings and alternating stripes in the lower wings. -
Add warmth with salmon:
Use the salmon or orange marker to fill large curving sections in the upper wing and the background of the lower wing’s circle border. This warm tone contrasts beautifully with the teal. -
Pop with pink:
Select your magenta or deep pink marker. Fill in the small circular details you drew earlier, specifically the spots on the lower wings and accents in the upper wings. -
Color the body:
Use a tan or light brown marker to color the abdomen stripes. For the thorax, use the same color as a base before we add texture.
Level Up: Metallic Pop
Trace over the veins or the circular spots with a gold or silver gel pen. The metallic sheen adds a luxurious, jewelry-like quality to the wings that catches the light beautifully.
Step 4: Final Details
-
Stipple shading:
With your fine black pen, add tiny dots (stippling) inside the uncolored white sections of the wings. Concentrate the dots near the edges to create a gradient shadow effect. -
Texture the body:
Stipple heavily over the tan thorax section with your black pen to make it look fuzzy and textured compared to the smooth wings. -
Darken the dividing lines:
Go back over your main structural lines with the thicker black marker if needed to make the sections pop. -
Solid black accents:
Fill in the alternate stripes on the abdomen with solid black ink. Also, fill any small negative spaces or dots in the outer wing borders to add high contrast. -
Review symmetry:
Take a moment to look for any spots you missed on one side. I usually find a tiny circle or stripe I forgot to color, so do a quick final check to ensure balance.
Enjoy the calming process of filling in these repetitive patterns and watch your vibrant creature come to life
Shadow-Only Drawing for Instant Depth
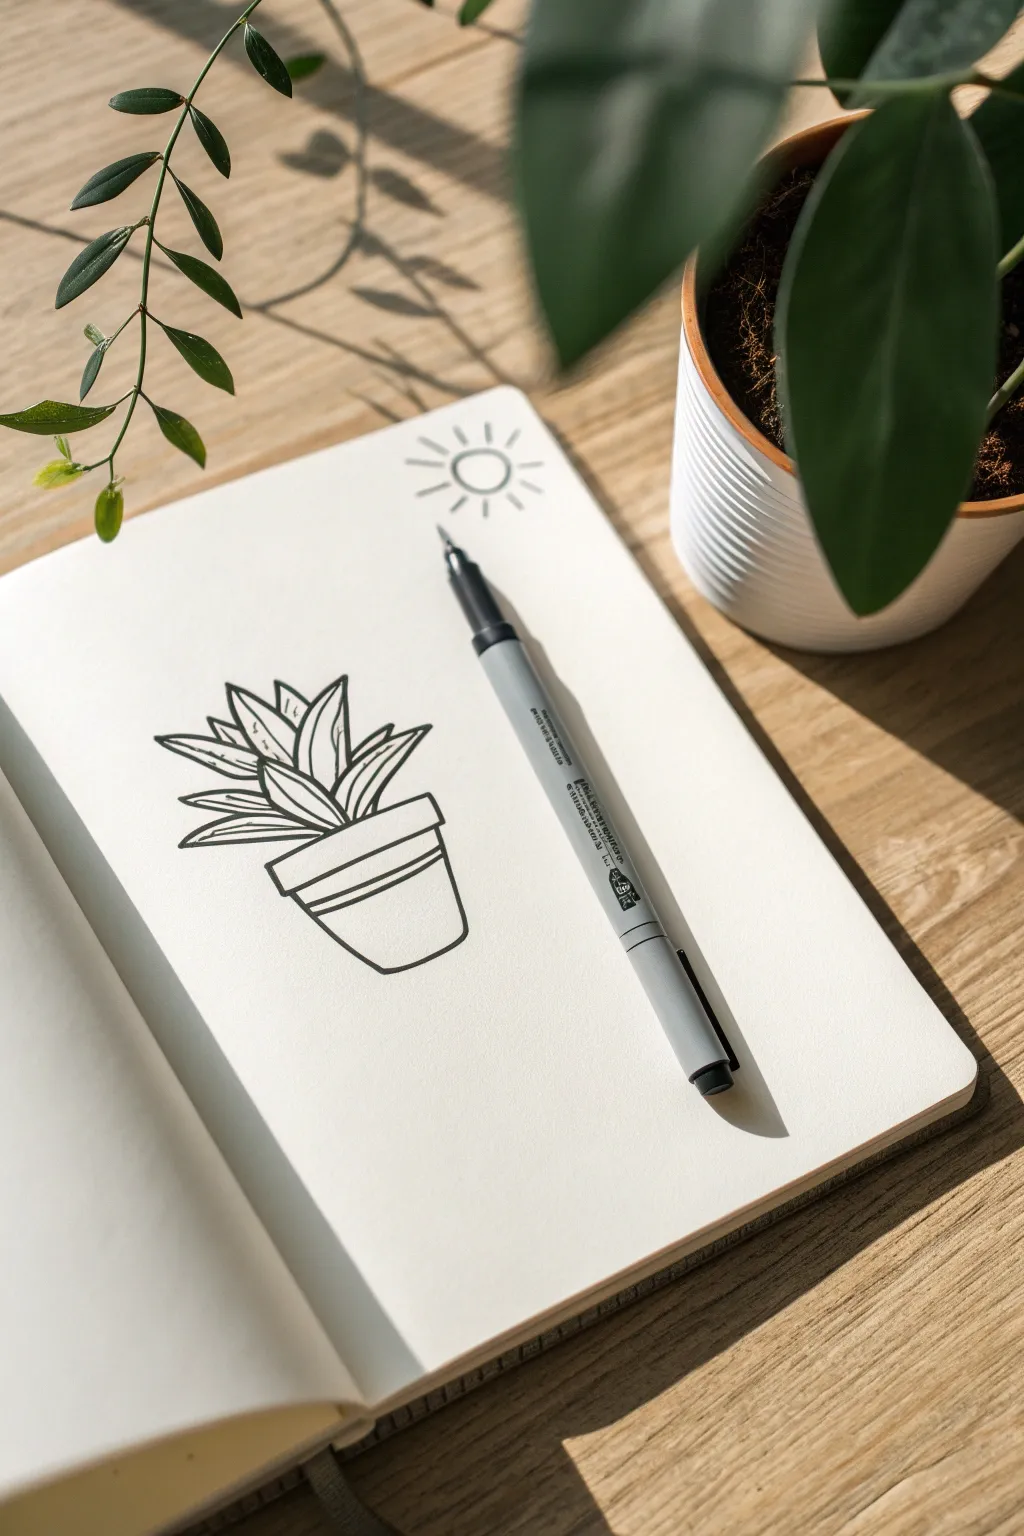
Capture the minimalist charm of a potted snake plant with this clean, bold line drawing. Using varying line weights and confident strokes creates a modern illustration that pops off the page without needing a single drop of color.
How-To Guide
Materials
- White sketchbook or heavy drawing paper
- Fine liner pen (0.5mm or 0.8mm)
- Pencil (HB or 2B)
- Soft eraser
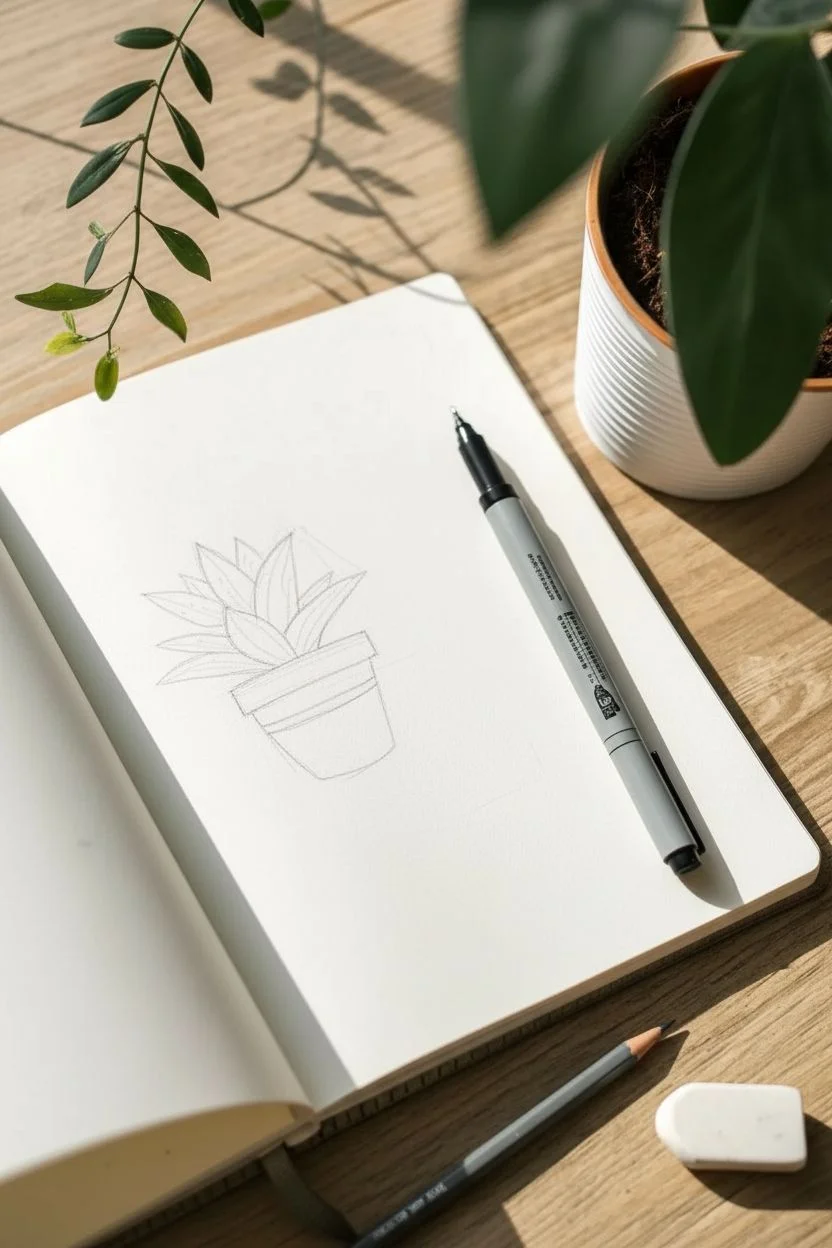
Step 1: Drafting the Shapes
-
Sketch the pot rim:
Start by lightly sketching a slightly curved horizontal rectangle near the bottom center of your page. This will become the rim of your plant pot. -
Form the pot body:
Draw two diagonal lines angling inward from the bottom corners of the rim. Connect them at the bottom with a curved line that mirrors the curve of the rim. -
Add pot details:
Sketch a stripe or band across the middle of the pot body. This simple detail adds visual interest and breaks up the empty space. -
Outline the center leaf:
Begin the plant by drawing a tall, spear-shaped leaf rising directly from the center of the pot. Make the tip pointed and the base slightly wider. -
Add side leaves:
Sketch two or three smaller, angled leaves on either side of the central one. Vary their heights and angles to make the plant look organic rather than perfectly symmetrical. -
Detail the leaf patterns:
Inside each leaf shape, lightly sketch a central spine line. Then, add gentle, curving lines running specifically along one side of the spine to suggest the snake plant’s distinctive variegation. -
Position the sun icon:
In the top right corner of your page, lightly sketch a small circle with short lines radiating outward to represent a stylized sun.
Step 2: Inking & Refining
-
Trace the pot outline:
Switch to your fine liner pen. Trace over your pencil sketch for the pot, pressing firmly to create a confident, solid line. -
Thicken the pot rim:
Give the rim of the pot a slightly heavier line weight by going over it a second time or tilting your pen. This grounds the drawing. -
Ink the main leaves:
Carefully outline the exterior shape of each leaf. I find it helpful to rotate the sketchbook slightly to get the best angle for these long, smooth curves. -
Add inner details:
Draw the internal spine lines of the leaves. Keep these lines slightly thinner than the outer contours if possible. -
Create texture:
Ink the small, curved variegation lines inside the leaves. Keep your hand loose here; these don’t need to be perfectly uniform. -
Ink the sun:
Go over the sun icon in the corner. Keep the circle slightly imperfect for a hand-drawn feel, and make the rays short and snappy. -
Check for gaps:
Look closely where lines meet—especially where leaves overlap the pot rim. Connect any small gaps to ensure the artwork looks polished. -
Erase guidelines:
Wait at least five minutes for the ink to dry completely. GENTLY erase all underlying pencil marks to reveal the crisp black and white contrast.
Smudge Prevention
Is your ink smearing when you erase? Wait longer! Different papers absorb ink at different speeds. Test a corner before erasing the whole drawing.
Add Dimension
To simulate a shadow without shading, simply thicken the lines on the right side of the pot and underneath the leaves to mimic a light source.
Now you have a striking piece of botanical art that celebrates simplicity
Sticker-Style Outlines With Thick Border
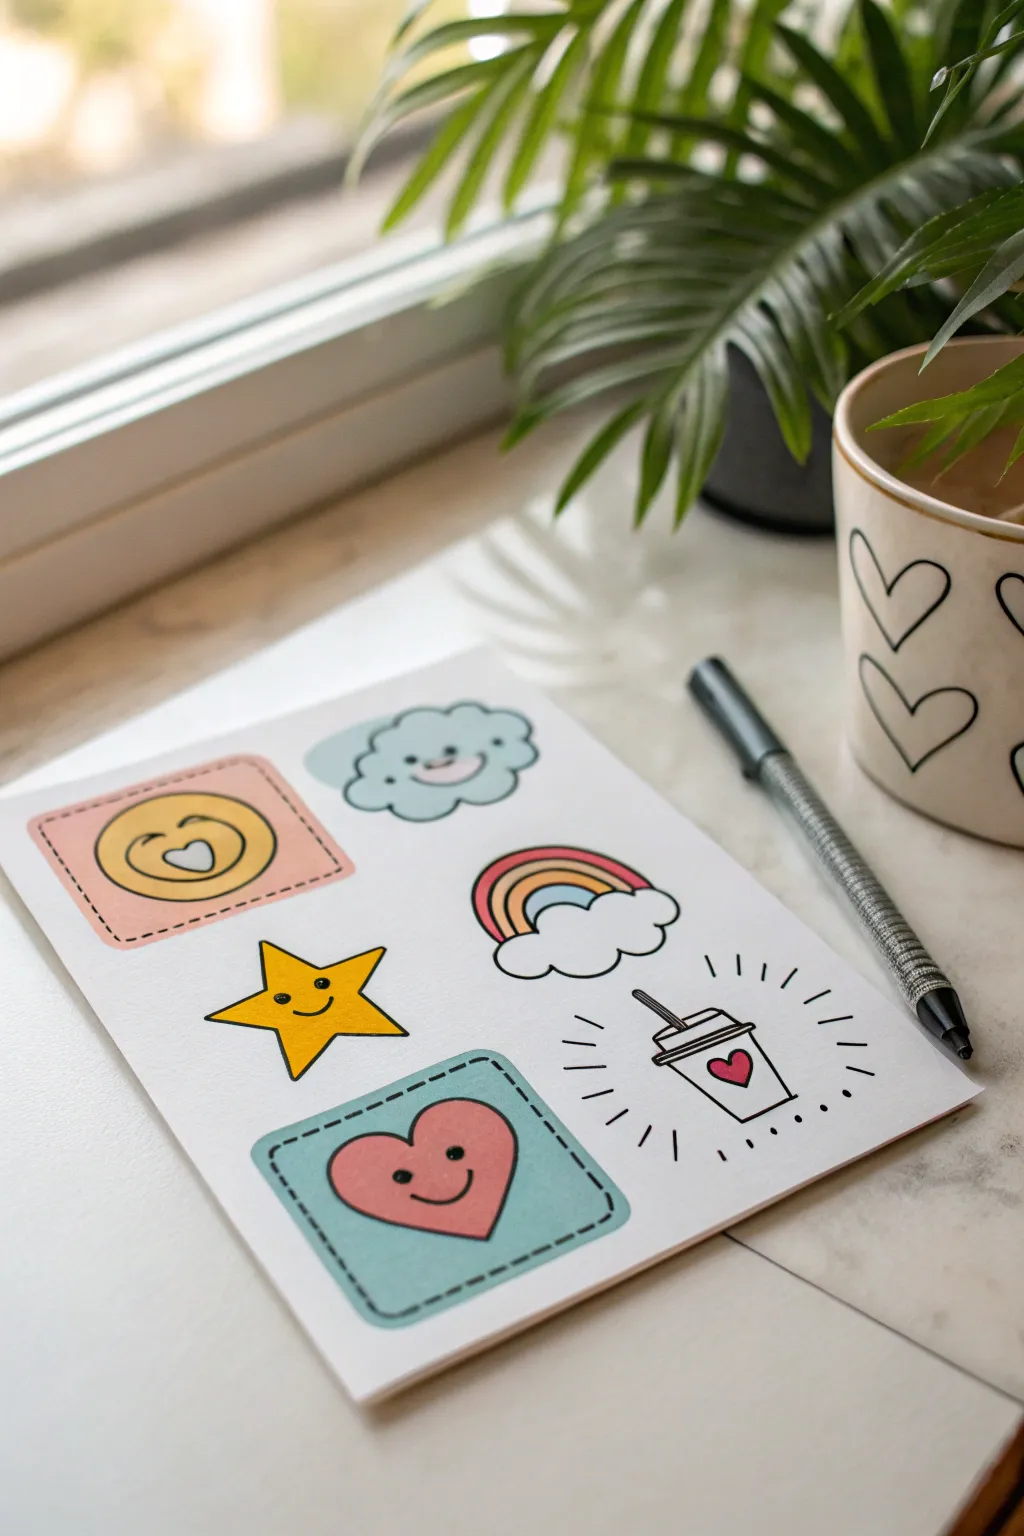
Turn a simple piece of paper into a collection of charming, sticker-style illustrations using bold lines and bright markers. This project mimics the look of die-cut stickers by adding thick borders and dashed lines around colorful, happy motifs.
Detailed Instructions
Materials
- White cardstock or heavy drawing paper
- Fine-liner pen (black, 0.5mm or 0.8mm)
- Thick black marker or brush pen
- Alcohol-based markers (yellow, pink, teal, orange)
- Pencil and eraser
- Ruler (optional)
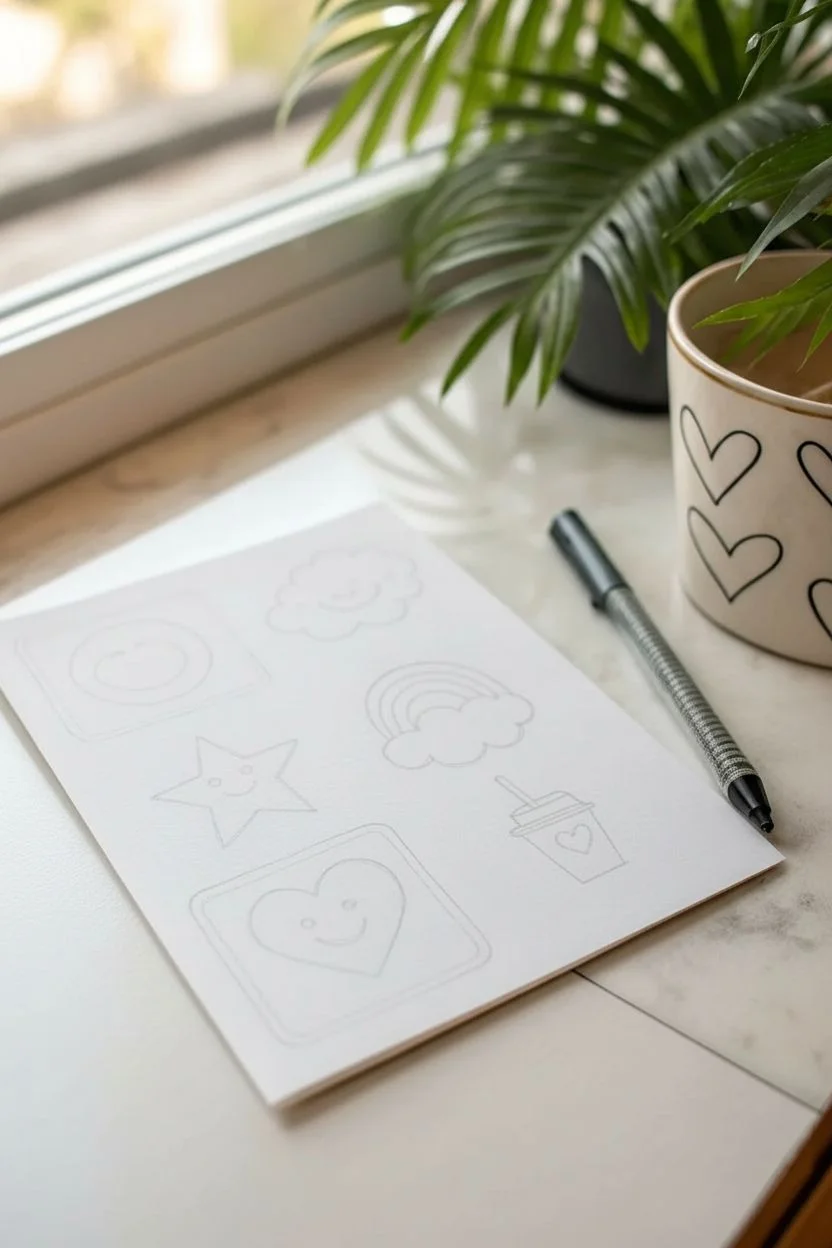
Step 1: Planning and Sketching
-
Layout the page:
Start with a piece of white cardstock. Visualize where you want your six designs to go, ensuring they are spaced out evenly to leave room for the decorative borders later. -
Sketch the square bases:
Lightly sketch two rounded squares with a pencil—one in the top left and one in the bottom center. These will serve as background patches for the smiley face and the heart. -
Outline the central motifs:
Inside the top square, sketch a large circle. inside the bottom square, sketch a simple heart shape. Keep your pencil pressure light so it erases easily later. -
Sketch the floating icons:
In the remaining empty spaces, sketch your other four designs: a fluffy cloud, a five-pointed star, a small rainbow with clouds, and a coffee cup with a lid and straw.
Bleeding Lines?
If your black fineliner runs when you color over it, ensure it’s waterproof (like a pigment liner). Alternatively, color the shapes first and add black outlines last.
Step 2: Inking the Designs
-
Draw the main lines:
Using your fine-liner, trace over your pencil sketches. For the coffee cup, use a ruler if you want perfectly straight sides, though a hand-drawn look adds charm. -
Add facial features:
Give personality to your objects. Add small black dot eyes and simple curved smiles to the cloud, star, and the heart on the blue square. For the top yellow smiley, draw squinting curves for eyes. -
Thicken the outlines:
Go back over the exterior lines of your main shapes (like the star and the cloud) with a slightly thicker pen stroke to make them pop against the white paper. -
Erase pencil marks:
Wait a moment for the ink to dry completely, then gently erase all your initial pencil sketches to keep the artwork clean.
Make Them Real
Draw these directly onto white adhesive label paper or sticker paper. Once finished, cut them out leaving a narrow white border to create actual custom stickers.
Step 3: Adding Color
-
Color the square backgrounds:
Use a light pink marker to fill in the top square behind the smiley face. Use a teal or light blue marker for the bottom square behind the heart. Color carefully around the central shapes so they remain white for now. -
Fill in the yellow icons:
Color the smiley face and the star with a bright yellow marker. I usually apply two coats if the first pass looks a bit streaky. -
Color the remaining details:
Use a soft blue for the cloud. Color the rainbow stripes in pink, yellow, and teal. Add a small pink heart to the center of the coffee cup. -
Finish the big heart:
Color the heart on the teal square with a warm pink or coral marker.
Step 4: The Sticker Effect
-
Create the dashed borders:
Around the pink and teal background squares, draw a dashed line using your fine-liner. Keep the dashes evenly spaced and just inside the edge of the color block to verify that ‘sewn patch’ look. -
Add radiance lines:
Draw small burst lines radiating outward from the coffee cup to give it energy. Add short dashes around the cloud as well to make it feel fluffy. -
Review and refine:
Check your drawing for any gaps. If you want the sticker look to be even stronger, you can re-trace the very outermost perimeter of every colored shape with your thickest marker to simulate a die-cut edge.
Your page is now filled with cheerful, faux-sticker art that looks ready to be peeled and stuck
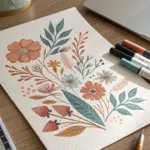
Double-Doodle Mirror Page
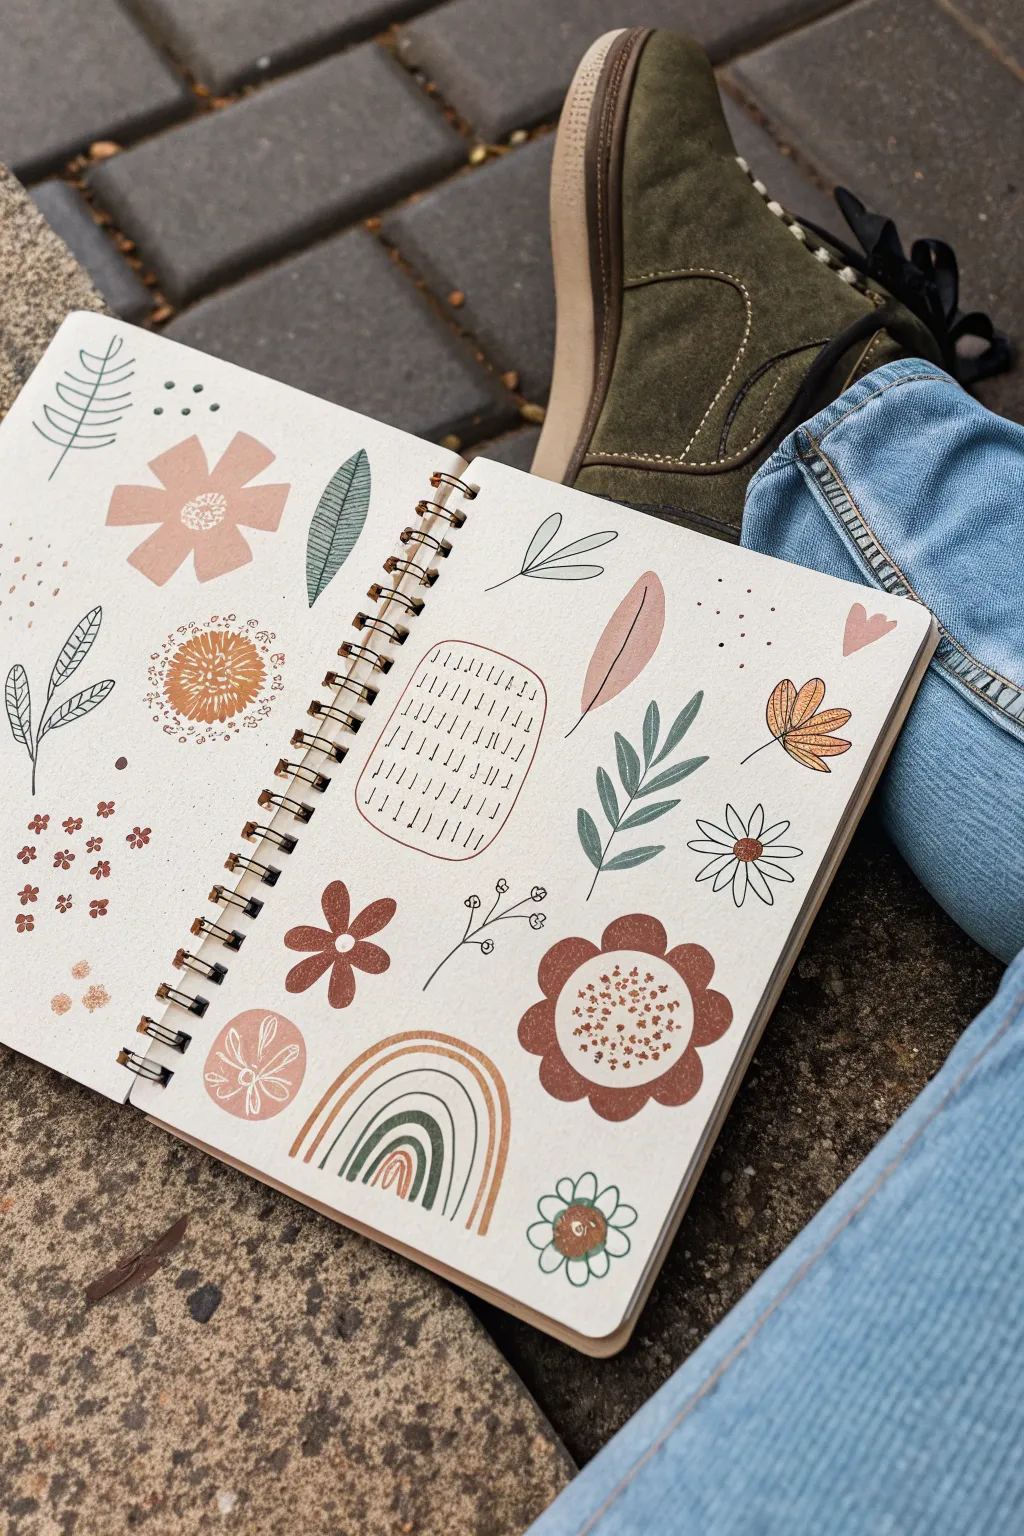
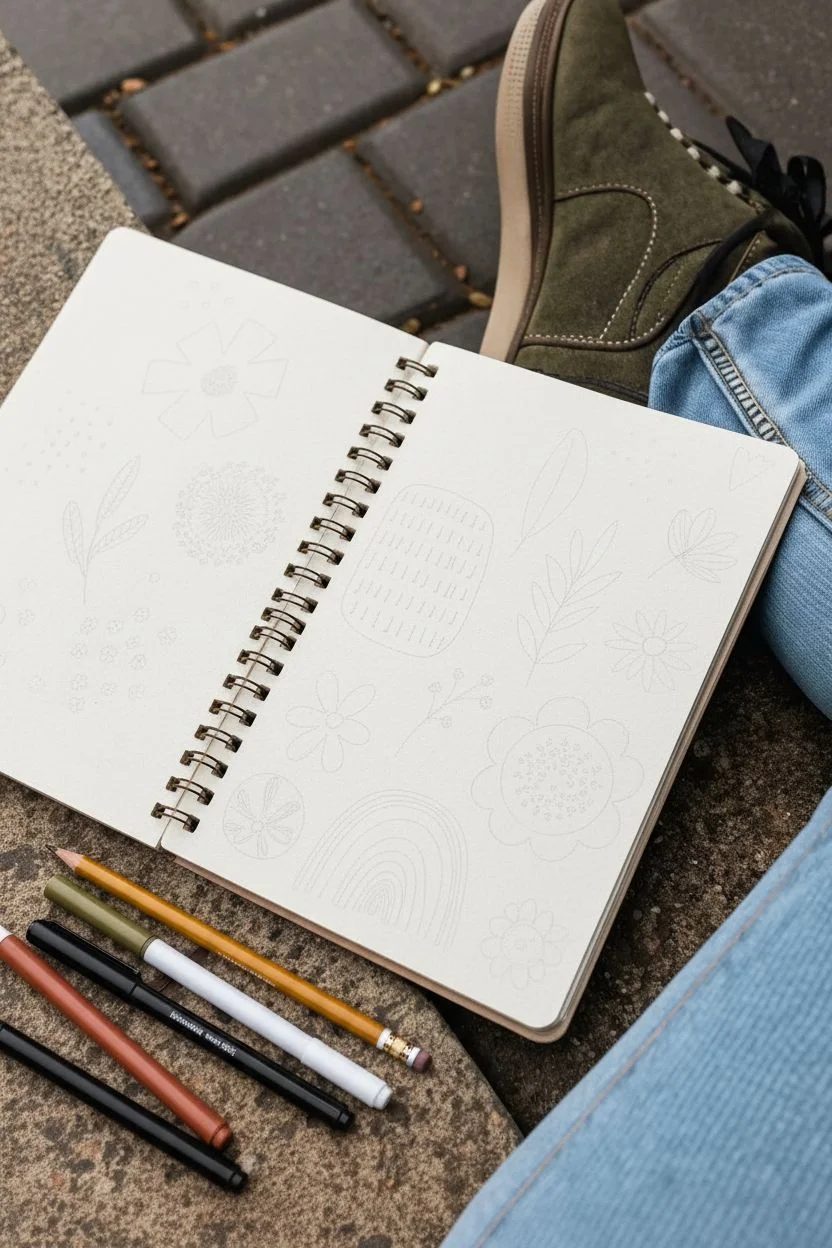
Embrace the relaxing rhythm of simple shapes and earthy tones with this double-page sketchbook spread. This project combines loose botanical drawings with abstract patterns to creates a cohesive, warm aesthetic perfect for unwinding.
Step-by-Step Tutorial
Materials
- Spiral-bound sketchbook (mixed media or heavy drawing paper)
- Neutral-toned brush markers (terracotta, olive green, blush pink, mustard)
- Fine-point black fineliner pen (0.3mm or 0.5mm)
- White gel pen (optional for highlights)
- Pencil and eraser (for rough sketching)
Step 1: Setting the Scene
-
Select your palette:
Before putting pen to paper, choose 4-5 earthy markers. Aim for a mix of warm terracotta, muted sage or olive green, a soft blush pink, and a golden mustard yellow to replicate the bohemian vibe shown. -
Map out the composition:
Lightly sketch the placement of your largest elements first. Place the large flower on the bottom right and the rainbow shape on the bottom middle-left to anchor the page.
Step 2: Drawing the Base Shapes
-
Create the large floral block:
Using a dark terracotta or brown marker, draw a large flower shape with rounded petals on the bottom right page. Fill it in completely, leaving a circular negative space in the center. -
Add the stylized rainbow:
On the bottom left of the right-hand page, draw a simple arch rainbow. Alternate between thick marker lines in terracotta and olive, and leave gaps for thin black pen lines later. -
Draw the cross-hatch patch:
In the upper-middle of the right page, draw a rounded rectangular blob using a thin outline of reddish-brown. We will fill this with a pattern later. -
Sketch the geometric flower:
On the top left page, use your blush pink marker to draw a bold, five-petaled flower shape. I like to keep the edges slightly squared off for a modern look. -
Add the spiky bloom:
Create a circular textured flower on the left page using mustard yellow. Instead of a solid fill, use small, radiating dashes to create a fuzzy, pollen-like texture.
Keep it Imperfect
Don’t stress about perfect symmetry. The charm of this style comes from wiggly lines and slightly uneven petal shapes.
Step 3: Adding Line Work and Details
-
Outline the large flower center:
Return to your large bottom-right flower. Use a different color, like beige or cream, to fill the center circle, then use your brown marker to add tiny speckles inside it. -
Detail the rainbow:
Using your black fineliner, draw simple arches in the negative spaces you left within the rainbow shape to define the separating lines. -
Fill the geometric patch:
Inside the rounded rectangle drawn earlier, use the fineliner to draw rows of small vertical dashes. Keep the spacing loose and hand-drawn. -
Draw the olive branch:
With the olive green marker, draw a stem with simplistic, pointed oval leaves ascending the center of the right page. -
Create the daisy:
Near the olive branch, use the black fineliner to draw a classic daisy shape. Draw a small circle center and loop long, thin petals around it. Color the center with a dot of yellow or brown. -
Add the floating leaf:
Draw a single, large, detached leaf shape near the top of the right page using blush pink. Add a thin black line down the center for the vein.
Marker Bleed Issues?
If your markers bleed through the paper, place a scrap sheet of cardstock underneath the page you are working on to protect the next sheet.
Step 4: Final Flourishes
-
Draw line-art botanicals:
Fill the empty white spaces on the left page with purely black line drawings. Sketch a tall stem with veined leaves on the far left and delicate twigs with tiny buds. -
Add floating elements:
Scatter small details around the larger drawings to balance the composition. Use small clusters of dots, tiny hearts, and groups of mini-flowers using the terracotta marker. -
Texturize the geometric bloom:
Go back to the pink geometric flower on the top left. Use a white gel pen or a darker marker to add a stippled or cross-hatched center for interest. -
Incorporate abstract shapes:
Draw a small circle with a simple flower inside it on the bottom right corner. Keep the lines wiggly and imperfect. -
Review and refine:
Step back and look at the spread as a whole. If any area feels too white, add a few stray dots or a tiny falling leaf to tie the pages together.
Now you have a charming, gallery-worthy doodle page that celebrates simple forms and natural colors


Have a question or want to share your own experience? I'd love to hear from you in the comments below!