If you ever get stuck on what to draw, eyes are my favorite little “infinite practice” subject because you can study them realistically or push them into pure imagination. Here are a bunch of eye drawing ideas I use in my own sketchbook—starting with classic fundamentals and sliding into the fun, weird stuff.
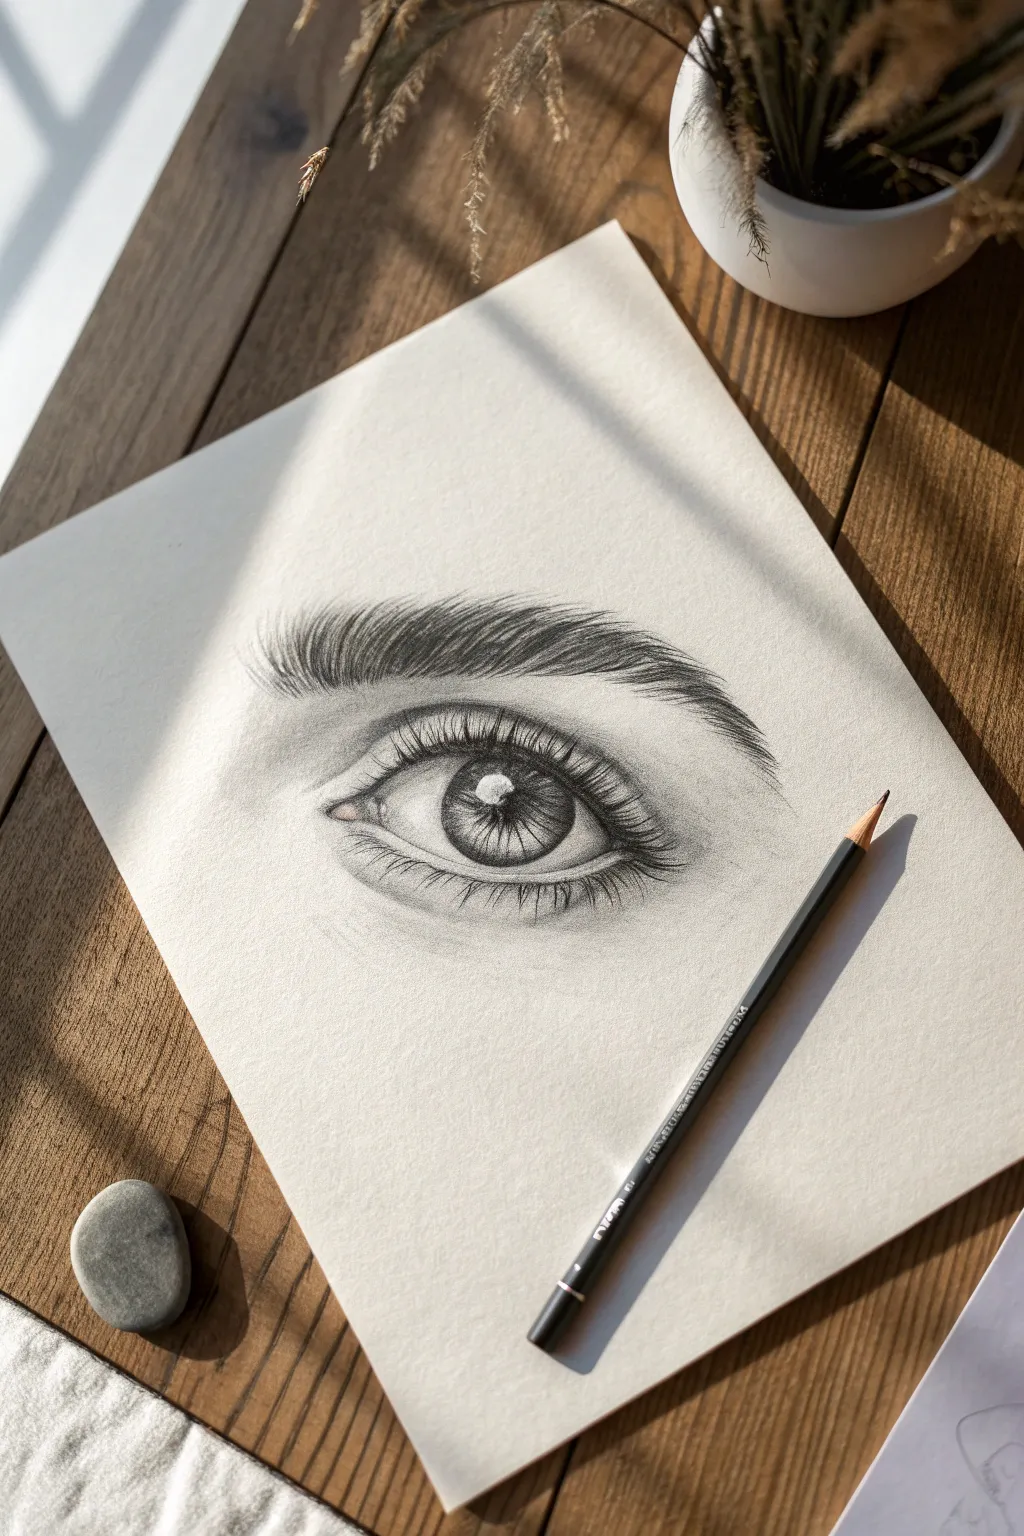
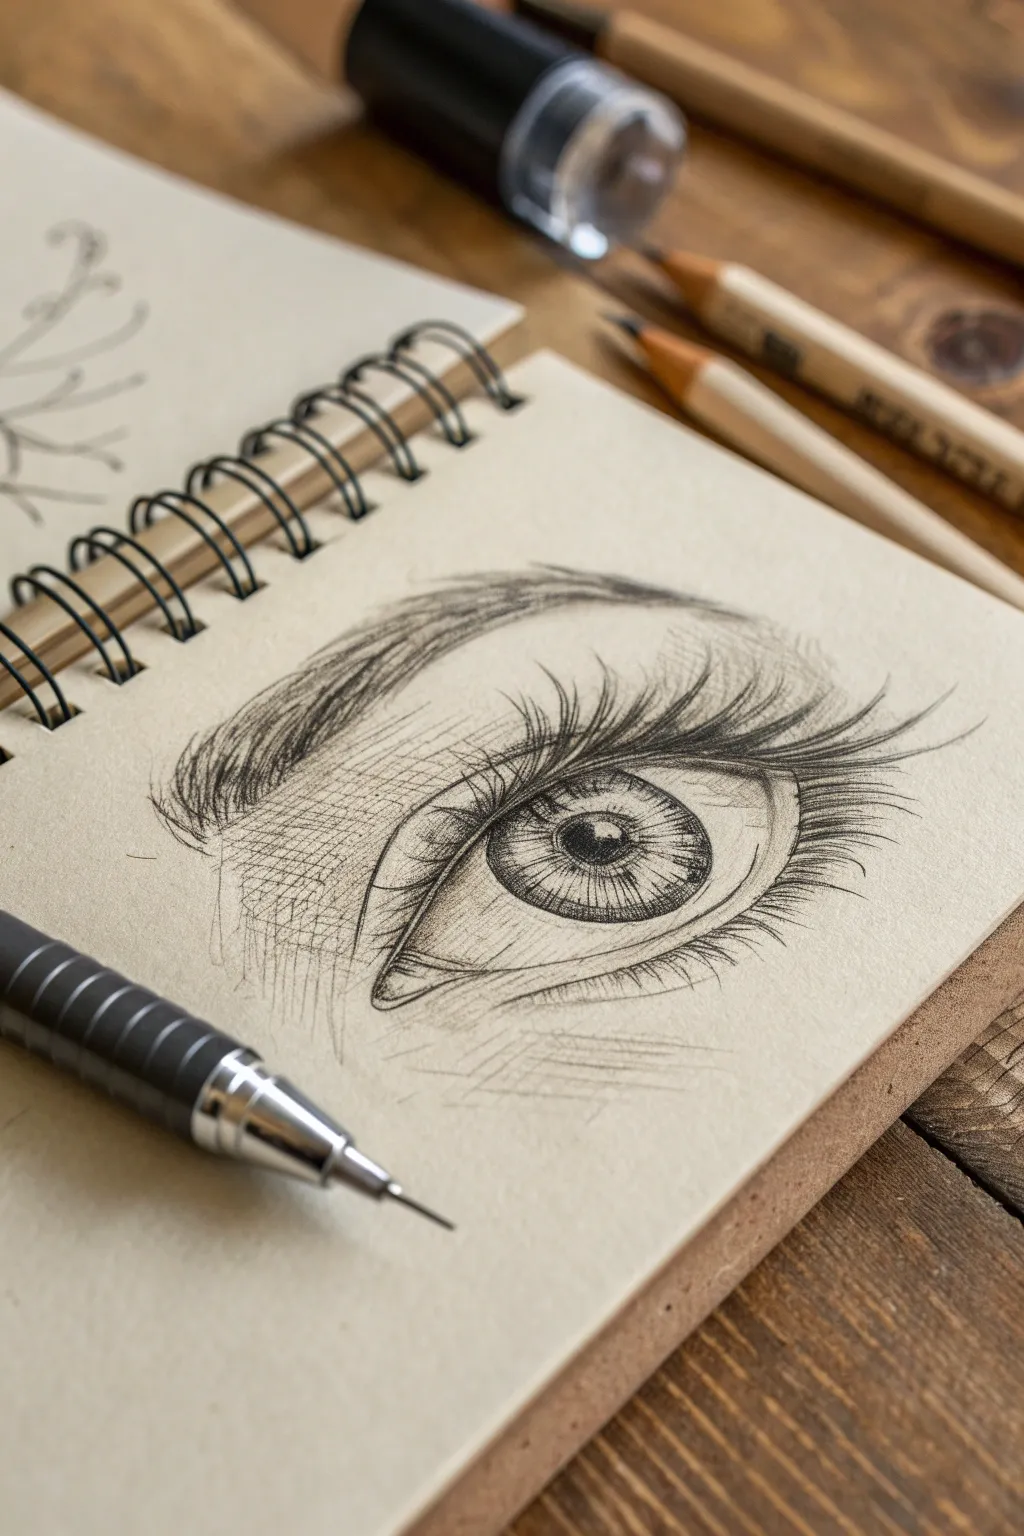
Front-Facing Realistic Eye Study
Master the fundamentals of realistic portraiture with this detailed study of a front-facing eye. By focusing on tonal values and delicate textures, you’ll transform simple graphite lines into a soulful, lifelike gaze that seems to pop off the page.
How-To Guide
Materials
- Smooth bristol or drawing paper
- Graphite pencils (HB, 2B, 4B, 6B)
- Mechanical pencil (0.5mm HB or 2B)
- Kneaded eraser
- Blending stump or tortillon
- Precision eraser (rendering stick)
- Soft tissue or cotton swab
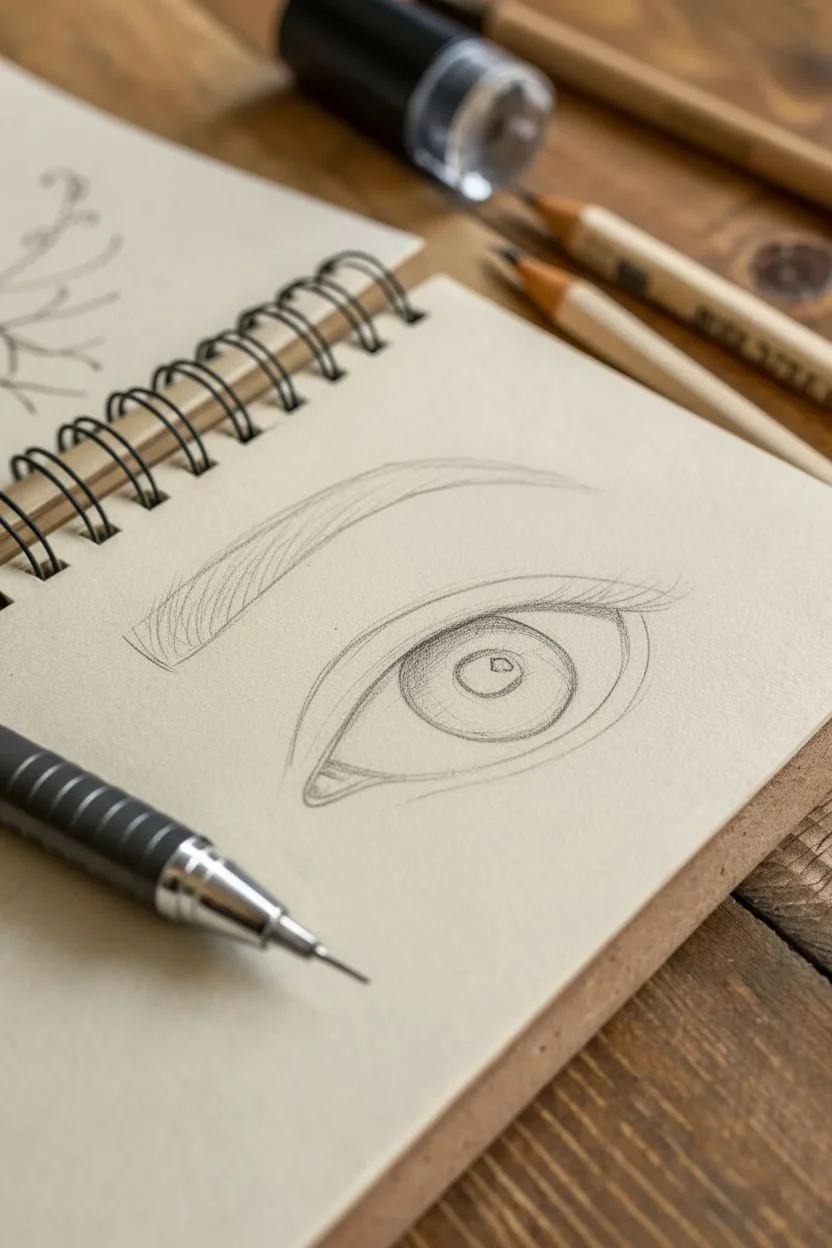
Step 1: Structural Outline
-
Establish the shape:
Begin with a light HB pencil to sketch the almond shape of the eye. Don’t worry about perfection yet; focus on the curve of the upper lid, which is usually more arched than the lower lid. -
Place the iris and pupil:
Draw a perfect circle for the iris, letting the top portion be slightly cut off by the upper eyelid to create a relaxed expression. Mark the pupil in the direct center. -
Plan the highlight:
Before adding any shading, lightly outline a small, irregular shape within the pupil and iris area to reserve the white of the paper for the reflection. -
Define the tear duct:
Sketch the small triangular curve of the tear duct on the inner corner, leaving a tiny gap between the eyeball and the skin flap.
Keep It Sharp!
For crisp, realistic eyelashes and iris details, keep your pencil extremely sharp. Rotate the pencil slightly every few strokes to maintain a fine point.
Step 2: Iris and Pupil Detailing
-
Darken the pupil:
Using a 4B or 6B pencil, fill in the pupil completely solid black, being extremely careful to preserve the sharp edges of your reflected highlight. -
Radiating iris lines:
With a sharp 2B pencil or mechanical pencil, draw fine lines radiating outward from the pupil toward the outer rim of the iris, like spokes on a wheel. -
Layering iris texture:
Darken the outer ring of the iris (the limbal ring) with a 4B pencil. Create depth by shading the upper third of the iris darker, as if the eyelid is casting a shadow. -
Detailed fibers:
I like to use a sharp mechanical pencil here to add random squiggly lines and varying pressures within the iris to mimic the intricate muscle fibers.
Step 3: Shading the Sclera and Skin
-
Eyeball curvature:
The white of the eye is never purely white. Use a blending stump with residual graphite or a very light HB shading to add grey tones to the corners of the eyeball, making it look spherical. -
Cast shadow:
Add a distinct shadow just under the upper eyelid, falling onto the eyeball. This grounds the eye and prevents it from looking flat. -
Eyelid creases:
Sketch the crease of the upper eyelid above the eye. Shade the skin area between the crease and the lash line, keeping the crease itself defined but soft. -
Developing the skin tone:
Lightly shade the skin surrounding the eye, blending smoothly with a tissue to eliminate harsh pencil strokes. Leave the waterline (the rim of the lower lid) mostly white.
Smudge Control
To prevent your hand from dragging graphite across the white paper, place a clean scrap sheet of paper under your drawing hand while you work.
Step 4: Lashes and Eyebrows
-
Mapping the lashes:
Using a mechanical pencil or very sharp 4B, draw lashes starting from the root on the eyelid rim. Use a flicking motion: press down at the start and lift off quickly at the tip for a tapered end. -
Curving the hairs:
Ensure the lashes curve naturally. The upper lashes should clump slightly together in small triangles, sweeping upward and outward. -
Lower lashes:
Draw the lower lashes shorter and thinner, originating from the outer edge of the waterline, not the inside of the eye. -
Eyebrow foundation:
Lightly outline the eyebrow shape. Draw hair strokes in the direction of growth—upward at the inner corner, then gradually angling sideways toward the tail. -
Thickening the brow:
Layer darker strokes (4B) over lighter ones (HB) to build realistic density. Ensure the hairs overlap rather than sitting in perfect rows. -
Final highlights:
Use your precision eraser or the edge of a kneaded eraser to lift tiny bits of graphite in the iris and on the wet waterline to create a moist, glistening effect.
Take a moment to admire the depth you’ve created before signing your new masterpiece


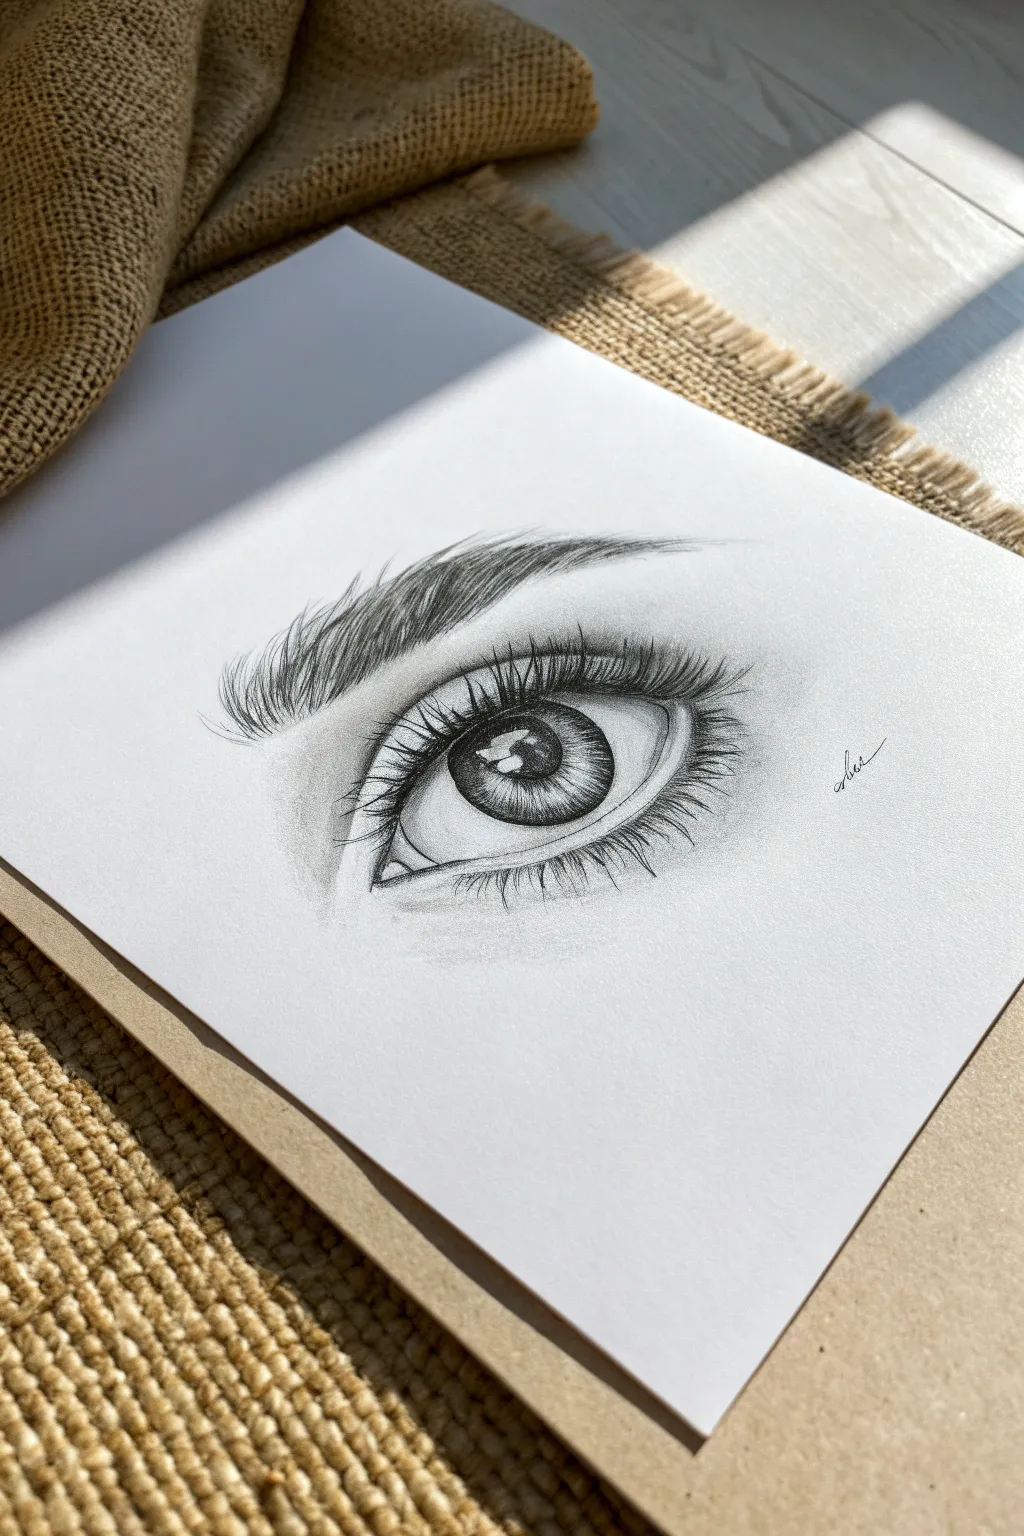
Sclera Shading for a Rounded Eyeball
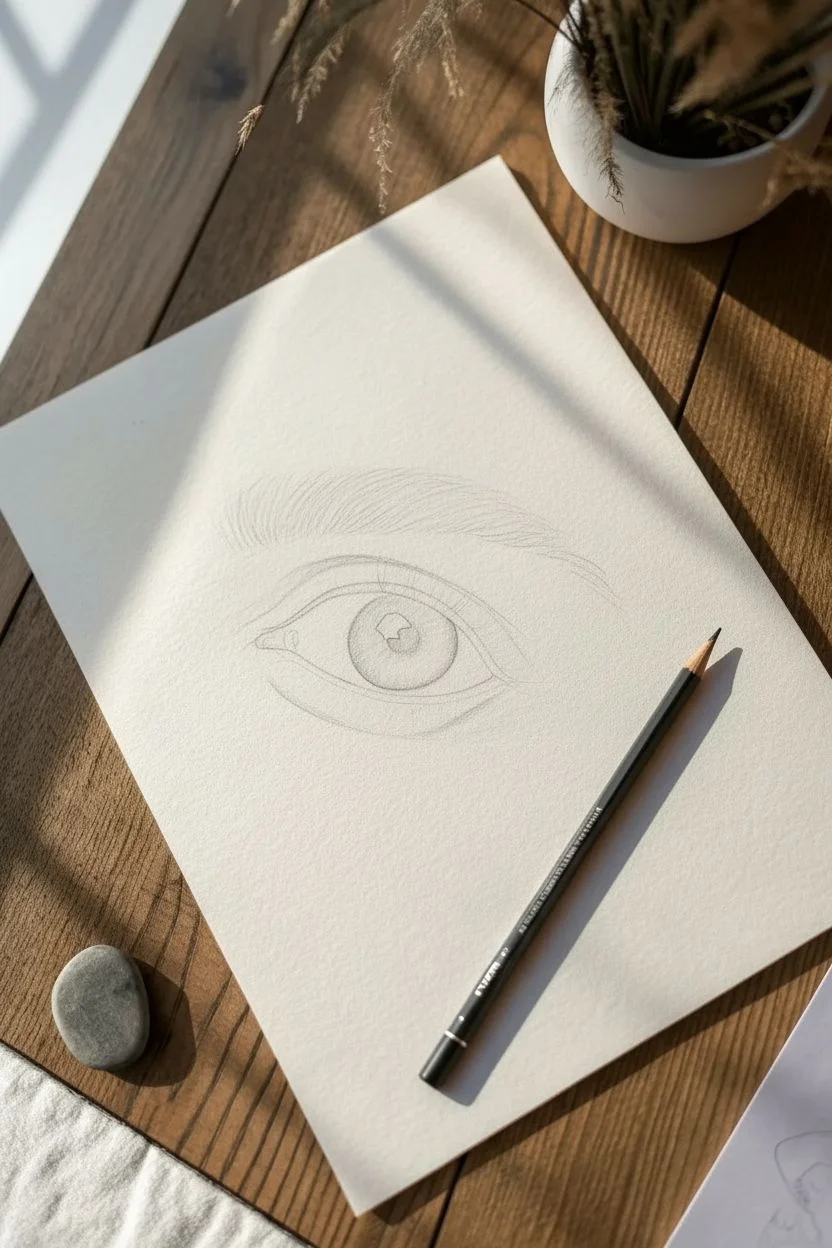
This tutorial guides you through sketching a stunningly realistic human eye, focusing on capturing the spherical nature of the eyeball through careful shading. The result is a soft, expressive drawing with life-like depth and delicate lash details.
How-To Guide
Materials
- High-quality drawing paper (smooth or slight grain)
- Graphite pencils (HB, 2B, 4B, 6B)
- Kneaded eraser
- Precision eraser or eraser stick
- Blending stump (tortillon) or soft tissue
- Sharpener
Step 1: Structural Outline
-
Establish the Basic Shape:
Start with a light HB pencil to draw the almond shape of the eye. Don’t make it perfectly symmetrical; the inner corner (tear duct) should dip slightly lower than the outer corner. Lightly sketch a circle in the center for the iris, leaving the top portion slightly covered by the upper eyelid. -
Define the Iris and Pupil:
Find the center of your iris circle and draw a smaller, dark circle for the pupil. Immediately map out a small, irregular shape for the highlight—this reflection is crucial for realism, so mark it early to preserve the white of the paper. -
Outline the Tear Duct:
Detail the inner corner by drawing a small, fleshy curve for the caruncle (the pink area). This shouldn’t be a sharp point but rather a soft, rounded nook. -
Mark the Crease:
Draw a curved line above the upper lash line to indicate the eyelid crease. This line should follow the curve of the eye shape but taper off as it moves toward the outer edge.
Step 2: Shading the Iris and Pupil
-
Darken the Pupil:
Using a 4B or 6B pencil, fill in the pupil completely solid black, being extremely careful not to smudge into your highlight area. -
Create Iris Texture:
Switch to a 2B pencil. Draw radial lines extending from the pupil outward toward the edge of the iris, like spokes on a wheel. Vary the length and pressure to create a fibrous texture. -
Deepen the Shadow:
Since the upper eyelid casts a shadow, shade the top third of the iris quite darkly. This grounds the eye and prevents it from looking startled. -
Define the Outer Rim:
Darken the outer ring (limbus) of the iris. It shouldn’t be a harsh thin line, but a soft, blurry transition into the white of the eye.
Preserve the Highlight
If your main highlight gets smudged gray, use a white gel pen or opaque white paint for a crisp, wet-looking reflection.
Step 3: Sclera and Skin Shading
-
Shade the ‘Whites’:
This is the ’rounded eyeball’ technique. The sclera isn’t flat white. Lightly shade the corners of the eyeball (left and right) with an HB pencil, blending inwards. The whitest part should be near the iris but not directly touching the edge. -
Cast the Lid Shadow:
Add a soft horizontal band of shadow right under the upper eyelid, extending across the white of the eye. This emphasizes that the lid sits on top of a sphere. -
Detail the Waterline:
Draw the lower rim of the eyelid (the waterline). This is a strip of skin between the eye and the lower lashes. Keep this area mostly light to look wet, reflecting light. -
Shade the Skin:
Using a blending stump or a side-stroke technique, add soft shading to the upper eyelid crease and the under-eye area. I personally like to smooth this out significantly to contrast with the sharp detail of the iris.
Soften the Edges
Skin doesn’t has hard outlines. Use a clean blending stump to soften the outer corner where the upper and lower lids meet.
Step 4: Lashes and Brows
-
Map the Eyebrow:
Lightly outline the brow shape. For the hairs, use a sharp 2B pencil and flick the pencil upward and outward, following the natural growth direction. The hairs near the nose grow upward, while the tail hairs grow sideways. -
Layer the Brows:
Go over the brow again with a 4B pencil to add density and darker hairs in the middle of the brow, giving it volume. -
Start the Top Lashes:
Using a sharp 4B pencil, draw the upper eyelashes. Remember, lashes don’t stick straight up; they curve downward slightly first, then swoop up. Group some lashes together to jagged peaks for a natural look. -
Reflect Lashes:
Draw a faint reflection of the upper lashes inside the highlight of the eye. This tiny detail adds immense realism. -
Add Lower Lashes:
Draw the lower lashes shorter and sparser than the top ones. Ensure they originate from the outer edge of the lower lid skin, not strictly from the waterline. -
Final Contrast Check:
Step back and check your values. Deepen the darkest shadows in the crease and pupil with your 6B pencil to make the drawing pop off the page.
Take a moment to admire the depth in your shading, noting how the shadows give the eye a convincing spherical form


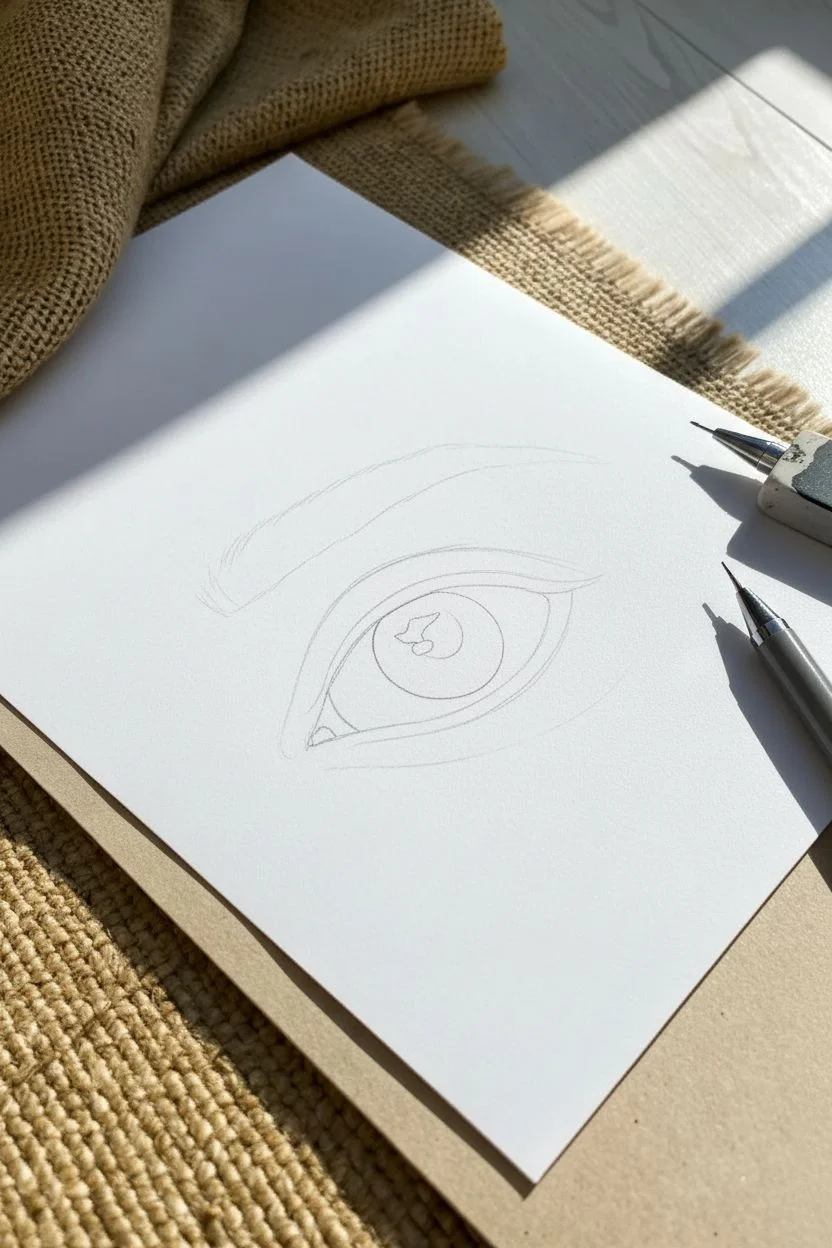
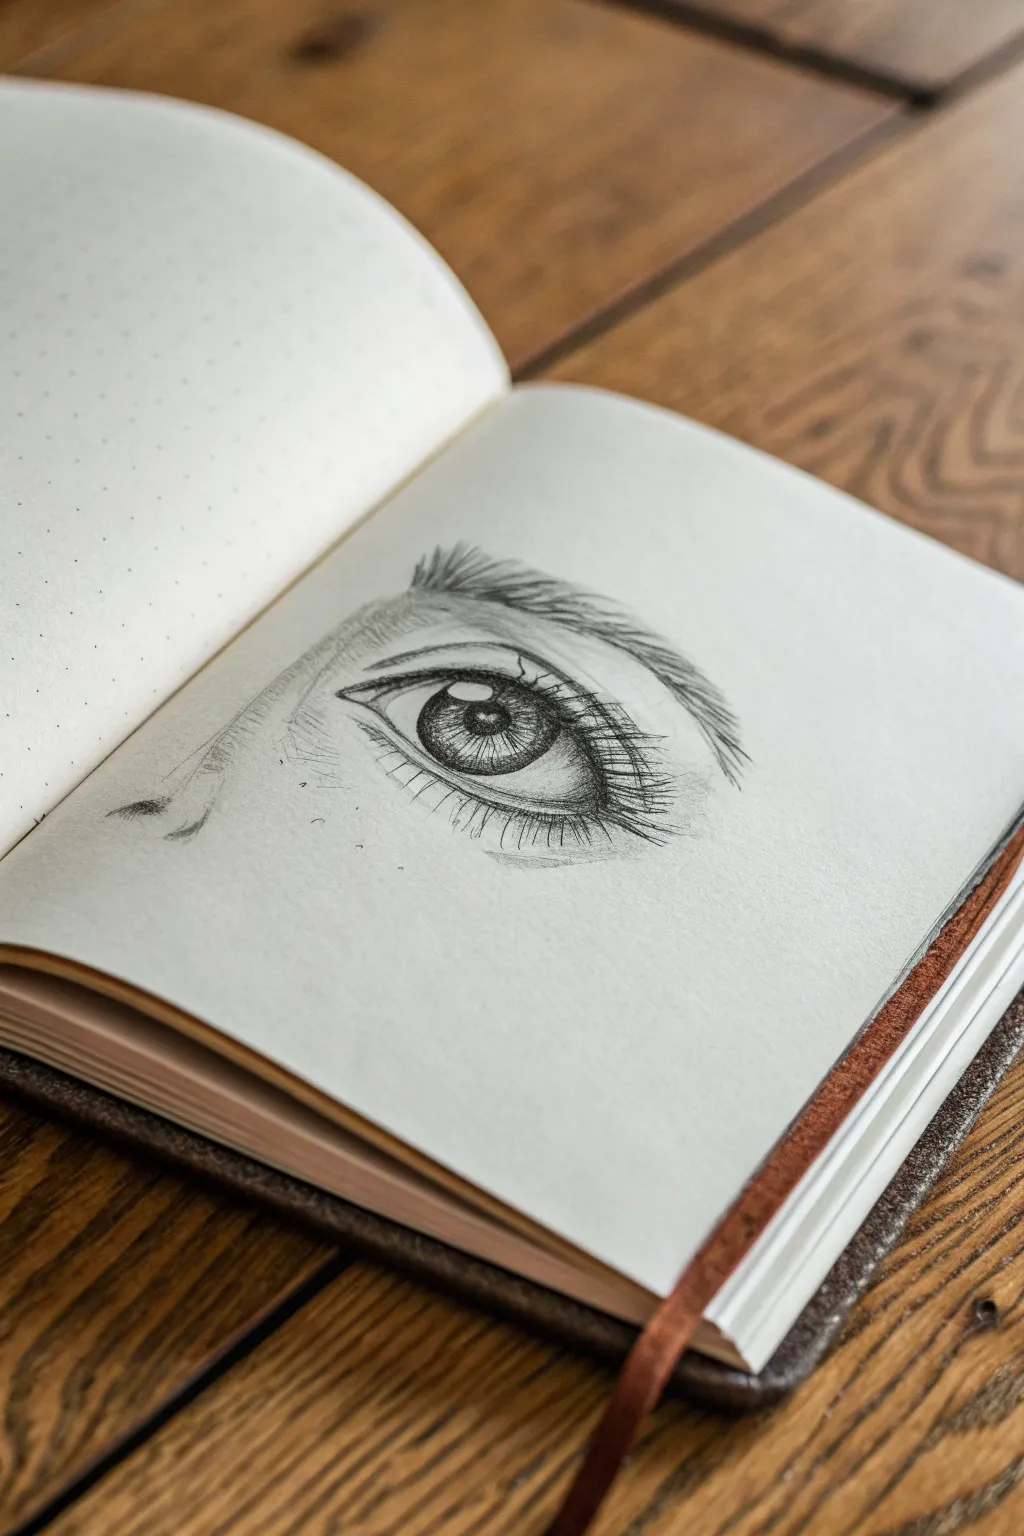
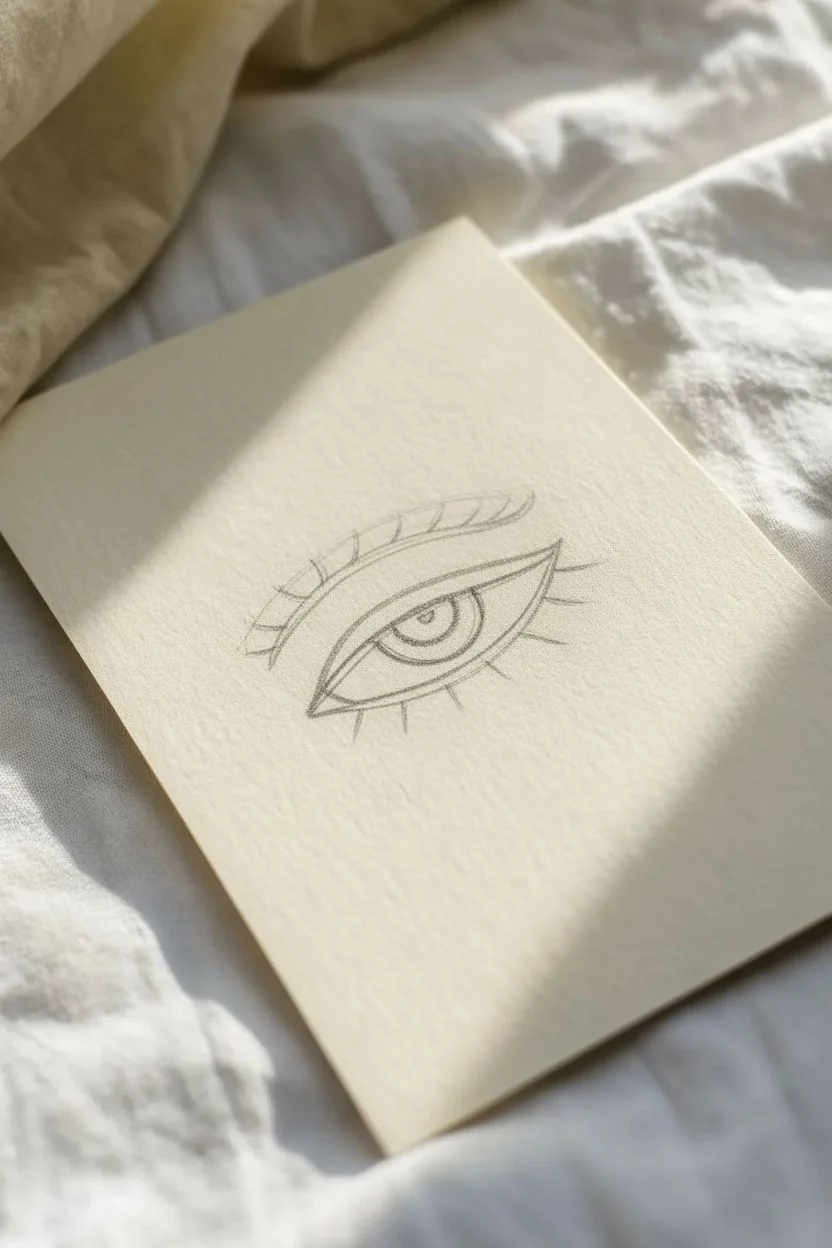
Upper Lid Crease and Lid Thickness
Learn to capture the subtle depth and texture of the human eye with this focused pencil on toned paper tutorial. Steps emphasize building the heavy upper lash line and the delicate fold of the eyelid crease for a lifelike result.
Step-by-Step
Materials
- Tan or cream-toned sketchbook paper
- Pencil (HB for outlines)
- Mechanical pencil (0.5mm or 0.3mm, 2B or 4B lead)
- Pencil sharpener
- Kneaded eraser
- Blending stump (optional)
Step 1: Structural Outlines
-
Draft the Sclera:
Begin with a light touch using your HB pencil. Sketch the almond shape of the eye opening, making sure the inner corner (the lacrimal caruncle) dips slightly lower than the outer corner. Keep these lines very faint. -
Place the Iris:
Draw a perfect circle for the iris. Note that in a relaxed gaze, the top third of the iris is usually hidden by the upper eyelid, so don’t draw the full circle at the top. -
Define the Crease:
This acts as the anchor for the drawing. Sketch a distinct arch well above the eye opening. It should follow the curve of the upper lid but extend further out on both sides. -
Mark the Pupil and Highlight:
Place a smaller circle in the absolute center of the iris for the pupil. Immediately reserve a small, irregular rectangle or square shape near the pupil for the reflection (catchlight) so you don’t accidentally shade over it.
Uneven Lashes?
If lashes look like a picket fence, group their tips. Draw 2-3 hairs that converge at the top to form a triangular point. Real lashes naturally clump together this way.
Step 2: Shading and Depth
-
Darken the Pupil:
Switch to your mechanical pencil for precision. Fill in the pupil with solid, dark pressure, leaving the catchlight strictly white. -
Rim the Iris:
Trace the outer edge of the iris with a thicker, darker line. This limbal ring adds immediate contrast. -
Spoke the Iris:
Draw tiny, radiating lines from the pupil outward and from the outer ring inward. These should look like the spokes of a wheel but organic and uneven. -
Create the Lid Shadow:
Shade the upper portion of the iris (just under the top lid) quite darkly. The eyelid naturally casts a shadow here, which adds dimension. -
Hatch the Skin:
Using light cross-hatching, add texture to the skin surrounding the eye. I like to focus this hatching near the nose bridge and under the brow bone to suggest curvature. -
Define the Waterline:
Draw a parallel line just inside the bottom eyelid rim. This narrow strip is the waterline; keeping it lighter than the lash line below it creates the ‘wet’ look.
Add Wetness
Use a white gel pen or a very sharp white charcoal pencil to add a tiny dot of highlight to the lower waterline or the tear duct. It instantly makes the eye look moist and alive.
Step 3: Lashes and Brows
-
Start the Upper Lashes:
Begin close to the outer corner. Press hard at the root of the lash on the eyelid line, then flick your wrist upward and outward rapidly to create a tapered, wispy end. -
Vary Lash Direction:
As you move toward the inner corner, change the angle. The lashes should become shorter and stand more upright, rather than sweeping out to the side. -
Layer the Lashes:
Don’t just draw a single row. Add ‘rogue’ lashes that cross over others and originate slightly above the main lash line to thicken the fringe. -
Add Lower Lashes:
Sketch the lower lashes much more sparsely. These should originate from the outer edge of the waterline, not inside it. Make them short and slightly clumped together. -
Sketch the Eyebrow Outline:
Lightly map the shape of the brow above the crease. Follow the natural bone structure you hinted at earlier. -
Fill the Brow Hairs:
Use the same flicking motion as the lashes. Draw short, individual hairs following the direction of growth—upward at the start of the brow, then smoothing out horizontally toward the tail. -
Deepen the Crease:
Return to that upper lid crease line. Go over it with the mechanical pencil, making it dark and sharp in the middle but slightly softer at the ends. -
Final Contrast Check:
Review your drawing. Darken the roots of the upper lashes one last time to make the eye pop against the paper tone.
Step back and admire the intense gaze you have created on the page


Eyelashes With Clumps and Curved Flow
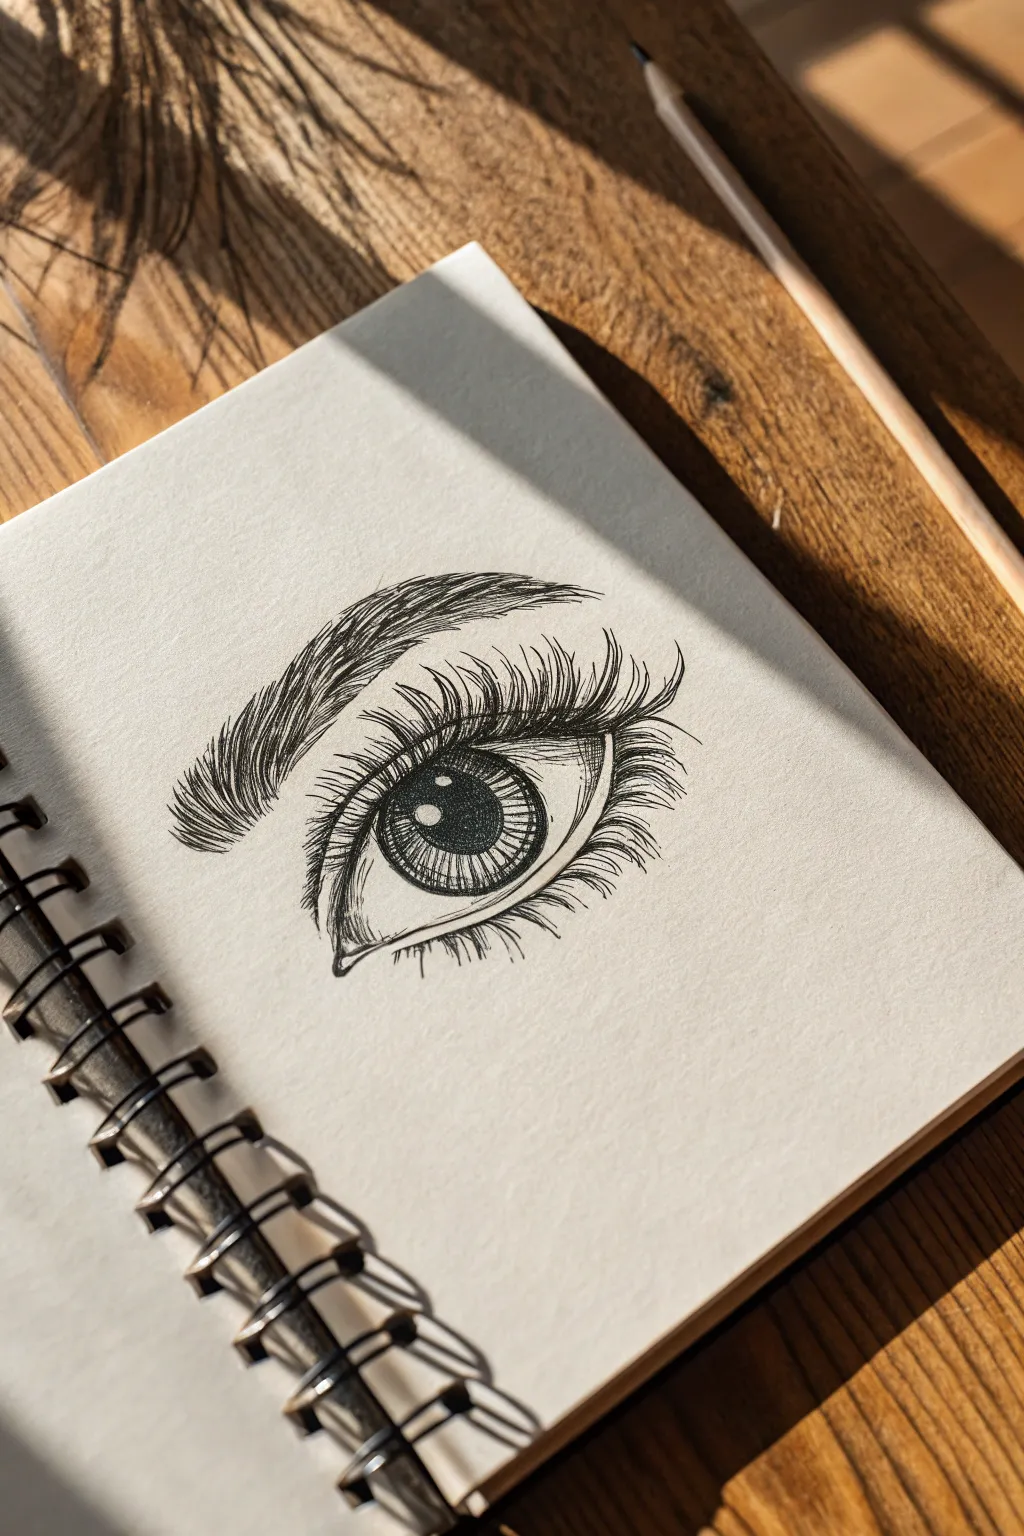
This tutorial guides you through creating a striking, high-contrast eye drawing that emphasizes dramatic, curved lashes and textured brows. Using fineliners, you’ll learn to build up depth through cross-hatching and decisive line work to achieve that clean, illustrative look.
Step-by-Step Guide
Materials
- Spiral-bound sketchbook (smooth or mixed media paper)
- Graphite pencil (HB or 2B)
- Black fineliner pen (0.1mm)
- Black fineliner pen (0.3mm or 0.5mm)
- Kneaded eraser
Step 1: Sketching the Foundation
-
Outline the eye shape:
Start with your pencil, drawing a gentle almond shape for the eye. Keep the inner corner slightly dipped and the outer corner lifting upward. Don’t press too hard; these lines are just guides. -
Position the iris:
Draw a large circle for the iris. Since the eye is looking slightly upward or straight on, the top part of the circle should be slightly cut off by the upper eyelid. -
Mark the pupil and highlights:
Place a smaller circle in the absolute center for the pupil. Immediately draw distinct shapes for the light reflections—one larger oval near the top left of the pupil and a smaller dot near the bottom right. These must stay white. -
Map the eyelash curves:
Lightly sketch the flow of the eyelashes. Instead of straight lines, draw curved guides that swoop outward from the eyelid rim. I like to group them slightly to anticipate the clumping effect later. -
Outline the eyebrow:
Sketch the eyebrow shape well above the eye. Start thick near the nose bridge and taper it into a thinner tail as it arches over the outer corner.
Flick Your Wrist
Don’t draw lashes slowly. Plant the pen firmly at the root and flick your wrist quickly upward. Speed creates the natural taper at the tip of the hair.
Step 2: Inking the Details
-
Trace the main contours:
Switch to your thicker fineliner (0.3mm or 0.5mm). Carefully trace the upper eyelid line, making it significantly thicker than the lower lid line to simulate the shadow of the lashes. -
Fill the pupil:
Using the same pen, fill in the pupil completely black, being extremely careful to preserve the white highlight shapes you marked earlier. -
Detail the iris texture:
Switch to the 0.1mm fineliner. Draw fine lines radiating from the pupil outward toward the edge of the iris, like spokes on a wheel. Leave a little gap around the pupil itself to create depth. -
Add iris shading:
Darken the outer ring of the iris with short, inward strokes. Cross-hatch slightly in the upper half of the iris to show the shadow cast by the eyelid. -
Draw the lower waterline:
Define the waterline on the bottom lid by drawing a second, thinner line parallel to the eyeball. This small gap is crucial for realism.
Shaky Lines?
If your contour lines look wobbly, accept it! Go over them once more to thicken the line intentionally. A variable line weight often looks more artistic than a perfect wire.
Step 3: Lashes and Brows
-
Start the upper lashes:
Using the thicker pen again, draw the upper lashes. Use quick, flicking motions from the exact distinct root of the lash, curving upward and outward. The stroke should taper at the end. -
Create the ‘clumped’ look:
Instead of evenly spacing every hair, draw two or three lashes distinct at the root but converging at the tips to form triangles. This creates that specific stylized effect. -
Add lower lashes:
Switch back to the thinner 0.1mm pen. Draw the lower lashes coming from *below* the waterline, not inside it. Make these shorter, sparser, and curved downward. -
Texture the eyebrow:
For the brow, use short, quick strokes that follow the hair growth direction. Near the nose, stroke upward; as you move to the arch, stroke diagonally; at the tail, stroke almost horizontally. -
Build brow density:
Go over the bottom edge of the eyebrow with a second layer of strokes to create a darker, defined underside, leaving the top edge slightly fluffier. -
Final clean up:
Wait at least five minutes for the ink to dry completely. Gently erase all visible pencil guidelines with your kneaded eraser to leave a crisp black-and-white finish.
Step back and admire the contrast you’ve created with just simple ink lines on paper

PENCIL GUIDE
Understanding Pencil Grades from H to B
From first sketch to finished drawing — learn pencil grades, line control, and shading techniques.
Explore the Full Guide
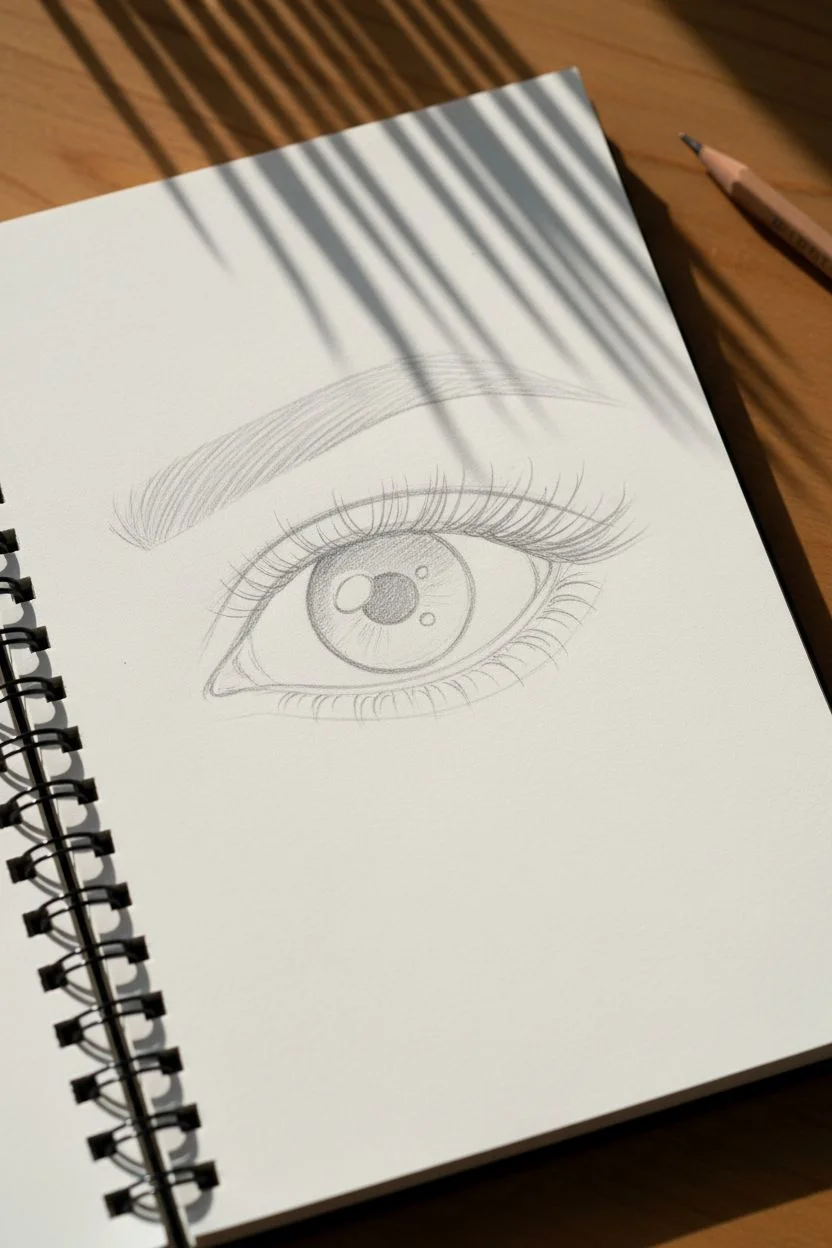
Three-Quarter View Eye Angle Practice
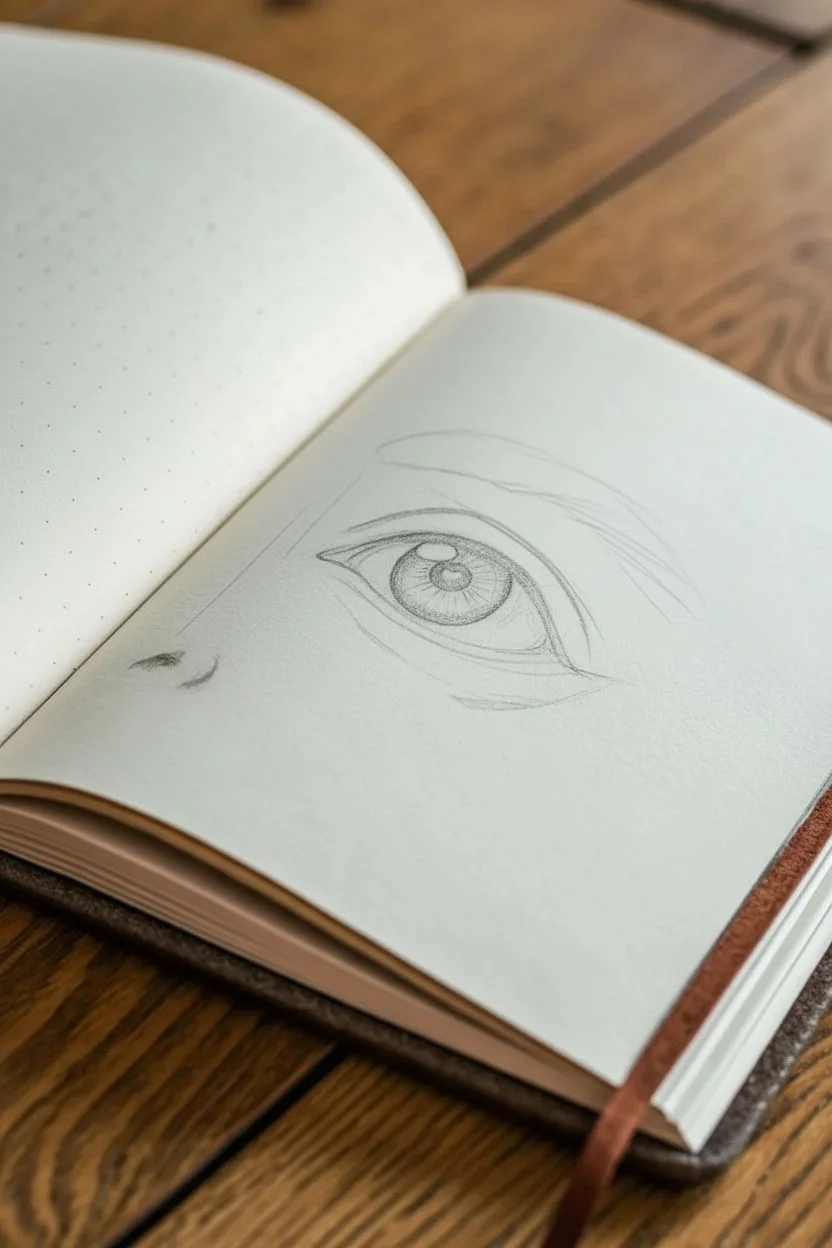
This classic pencil sketch captures the depth and nuance of a human eye from a distinct three-quarter angle. By focusing on intricate shading and lash details, you’ll create a captivating study that feels both lifelike and artistically expressive.
Step-by-Step Tutorial
Materials
- Dotted or grid notebook (or plain drawing paper)
- H pencil (for initial layout)
- 2B pencil (for general shading)
- 4B or 6B pencil (for deepest shadows/pupil)
- Kneaded eraser
- Fine-point mechanical pencil (optional for lashes)
- Blending stump or tissue
Step 1: Structural Layout
-
Establish the angle:
Begin with your H pencil, using light pressure. Since this is a three-quarter view, draw a faint, slightly curved diagonal line to indicate the brow ridge’s angle. This helps orient the eye correctly on the page. -
Outline the nose bridge:
Sketch a soft curve descending from the left side (for a right eye) to suggest the bridge of the nose. This negative space is crucial for defining the eye’s socket depth. -
Create the eye shape:
Draw the basic almond shape of the eye. Because of the angle, the inner corner (tear duct) should be more visible and somewhat pinched, while the outer corner is foreshortened and rounded. -
Add the iris and pupil:
Place the iris circle within the eye shape. In this view, it won’t be a perfect circle but slightly oval. Draw the small pupil in the center, leaving a tiny white rectangle or circle overlapping the pupil and iris for the catchlight. -
Mark the eyelids:
Sketch the upper eyelid crease parallel to the upper lash line. It should be more prominent on the outer edge. Add a faint line for the lower lid to give the eyeball rim thickness.
Lash curvature tip
Don’t draw straight lines for lashes. Use a ‘J’ motion, pressing down at the root and flicking up quickly to create a natural taper at the tip.
Step 2: Shading and Depth
-
Darken the pupil:
Switch to your 4B or 6B pencil. Fill in the pupil solidly, making it the darkest point on the page, but carefully preserve that bright white highlight. -
Detail the iris:
Using the 2B pencil, draw radiating lines from the pupil outward to the iris edge like bicycle spokes. Darken the outer ring of the iris to create a limbal ring. -
Shade the eyeball:
The ‘white’ of the eye isn’t truly white. Lightly shade the corners of the sclera with an H pencil, keeping the center nearest the iris bright to make the form look spherical. -
Define the crease:
Deepen the shadow in the upper eyelid crease. This line should be thickest and darkest on the outer edge, fading as it moves toward the nose bridge. -
Contour the skin:
Add light shading around the nose bridge and under the brow bone. Use a blending stump here to soften the graphite into a smooth skin texture.
Level Up: Reflection
Instead of a simple white dot, draw a tiny window pane shape in the pupil catchlight to simulate the reflection of a light source like a window.
Step 3: Fine Details
-
Draw the upper lashes:
Using a sharp 2B or mechanical pencil, flick curved lines upward from the upper lash line. I find it helps to group them in small clumps rather than spacing them perfectly evenly. -
Add lower lashes:
Sketch shorter, more delicate strokes for the lower lashes. Ensure they curve outward and originate from the outer rim of the lower lid, not inside the water line. -
Texture the eyebrow:
Sketch the eyebrow hairs using quick, short accumulation strokes. Follow the natural growth direction—upward at the start, then angling outward toward the temple. -
Deepen contrast:
Go back in with your softest pencil (4B/6B) to reinforce the darkest areas: the lash roots, the pupil, and the deepest part of the crease. -
Add skin imperfections:
For realism, lightly dot a few freckles or pores on the nose bridge and cheek area. Keep these very subtle and random. -
Final highlights:
Use the kneaded eraser to lift pigment from the center of the lower lid rim (the water line) to make it look wet and reflective.
Now you have a striking, realistic eye study that demonstrates excellent understanding of facial anatomy and lighting
Winking Eye for Instant Character
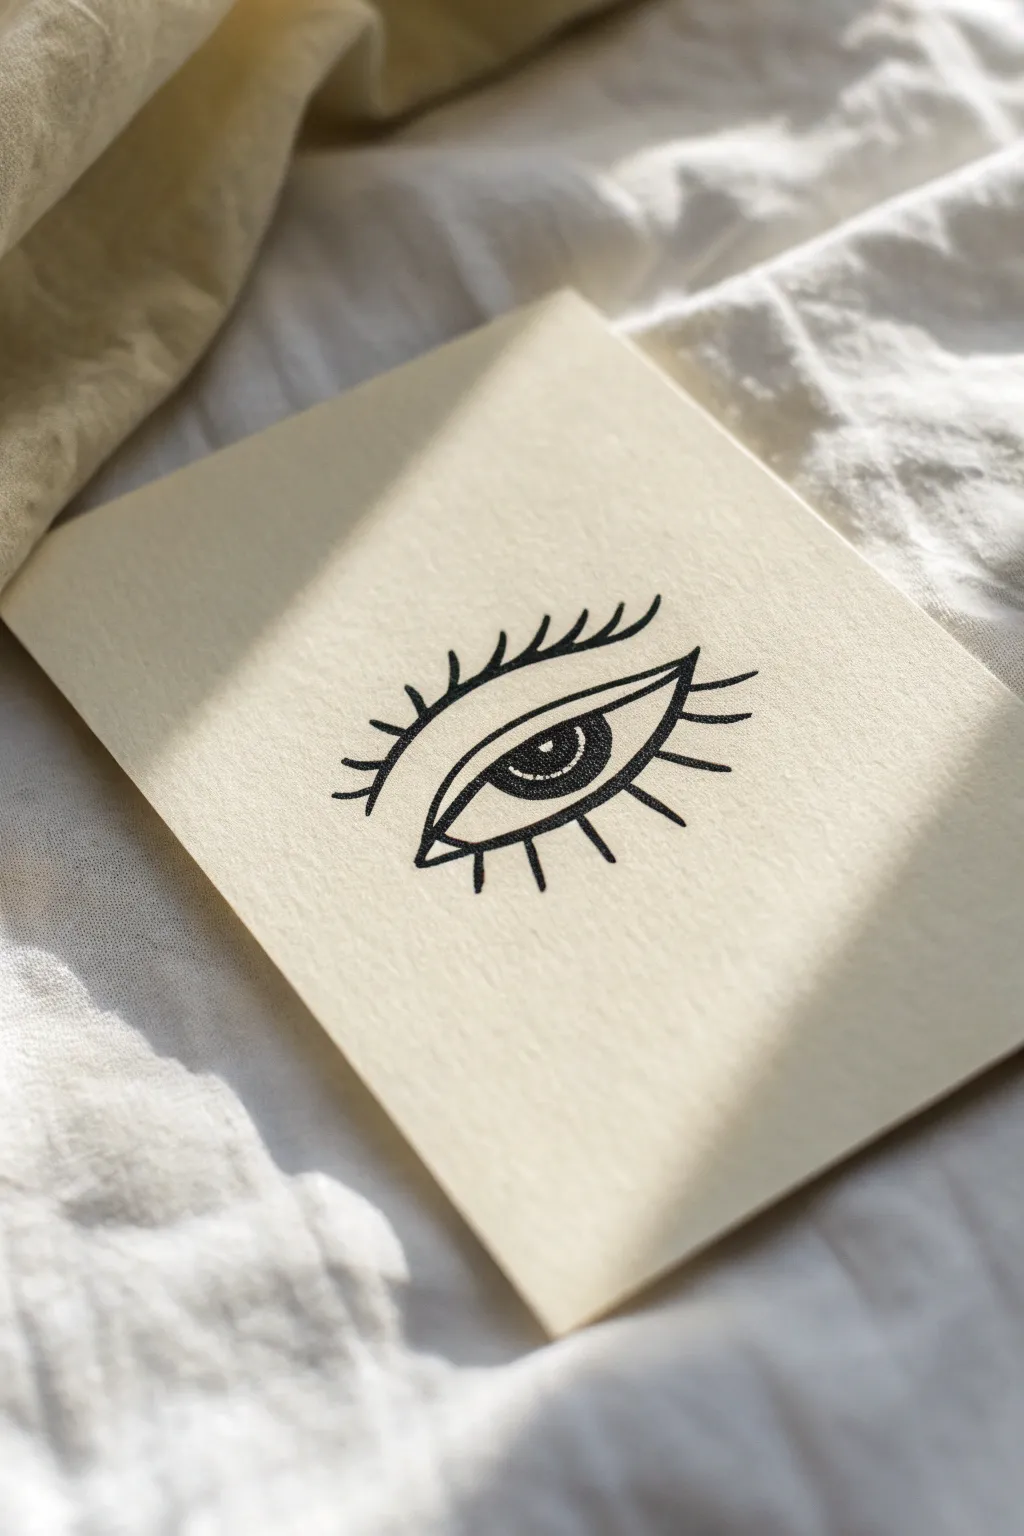
Create a striking piece of minimalist art with this stylized eye drawing. Reminiscent of classic linocut prints, this project uses bold lines and negative space on cream cardstock to achieve a sophisticated, modern look.
Step-by-Step Tutorial
Materials
- Cream or off-white textured cardstock (A5 or 5×7 inch)
- HB pencil
- Soft eraser
- Black drawing pen (fine tip, 0.3mm or 0.5mm)
- Black brush pen or broad marker
Step 1: Sketching the Base Shape
-
Position your paper:
Start by orienting your cream cardstock vertically or slightly tilted for a casual feel. Locate the visual center of the page, as this is where the eye will anchor the composition. -
Draft the upper lid:
Using your HB pencil with very light pressure, sketch a wide, gentle arch. This curve should dip slightly on the left and rise towards the right before tapering down. -
Draw the lower lid:
Sketch a flatter curve underneath to connect the corners of the eye. Instead of a perfect almond shape, let the bottom line be slightly straighter to give it that stylized, graphic appearance. -
Add the crease:
Draw a secondary arch floating just above the upper lid line. Mirror the curve of the first line, but keep it slightly shorter on both ends to represent the eyelid crease. -
Outline the iris:
Place a circle in the center of the eye shape. Since the eye is relaxed, the top third of the circle should be hidden by the upper lid, creating a heavy-lidded look.
Confident strokes
For the eyelashes, practice the ‘flick’ motion on a scrap piece of paper first. Speed creates smoother, more natural tapers than moving slowly.
Step 2: Refining the Details
-
Define the pupil:
Inside your iris shape, draw a smaller circle for the pupil. Leave a tiny, irregular shape near the top left of the pupil blank to serve as the highlight or catchlight. -
Map out the lashes:
Lightly mark where the eyelashes will go. Focus on the upper lid first, drawing small tick marks that radiate outward. Unlike realistic lashes, these should be fairly straight and spaced apart. -
Add lower lashes:
Repeat the process for the lower lid, but make these tick marks significantly shorter and more sparse than the top ones.
Shaky lines?
If your lines look jittery, don’t worry. Go over them once more to slightly thicken the line. This intentional ‘weight’ often hides minor wobbles.
Step 3: Inking and Finishing
-
Trace the main outlines:
Switch to your fine-tip black drawing pen. Carefully trace over your pencil lines for the eyelids. I find it helpful to pull the pen towards me for smoother curves. -
Thicken the upper lash line:
Use the brush pen or go over the line multiple times to thicken the upper eyelid significantly. This adds weight and mimics the look of eyeliner. -
Ink the iris and pupil:
Fill in the pupil completely black, avoiding the highlight area. For the iris, use stippling (tiny dots) or very short, dense lines to create texture, making it darker near the top edge. -
Draw the bold lashes:
Using confident, quick strokes, ink the eyelashes. Press down slightly at the base of the lash and lift up as you flick outward to create a tapered point. -
Detail the crease:
Ink the floating crease line. Keep this line slightly thinner than the main lash line to maintain hierarchy in the drawing. -
Add texture (optional):
If you want a more vintage print look, add a few tiny, random dots inside the white of the eye or around the edges to mimic paper grain or ink splatter. -
Erase pencil marks:
Wait at least 5-10 minutes for the ink to dry completely. Gently erase all underlying pencil sketches to clean up the artwork.
Now you have a chic, graphic eye illustration perfect for framing or gifting to an art lover
BRUSH GUIDE
The Right Brush for Every Stroke
From clean lines to bold texture — master brush choice, stroke control, and essential techniques.
Explore the Full Guide
Crying Eye With Tear Trails
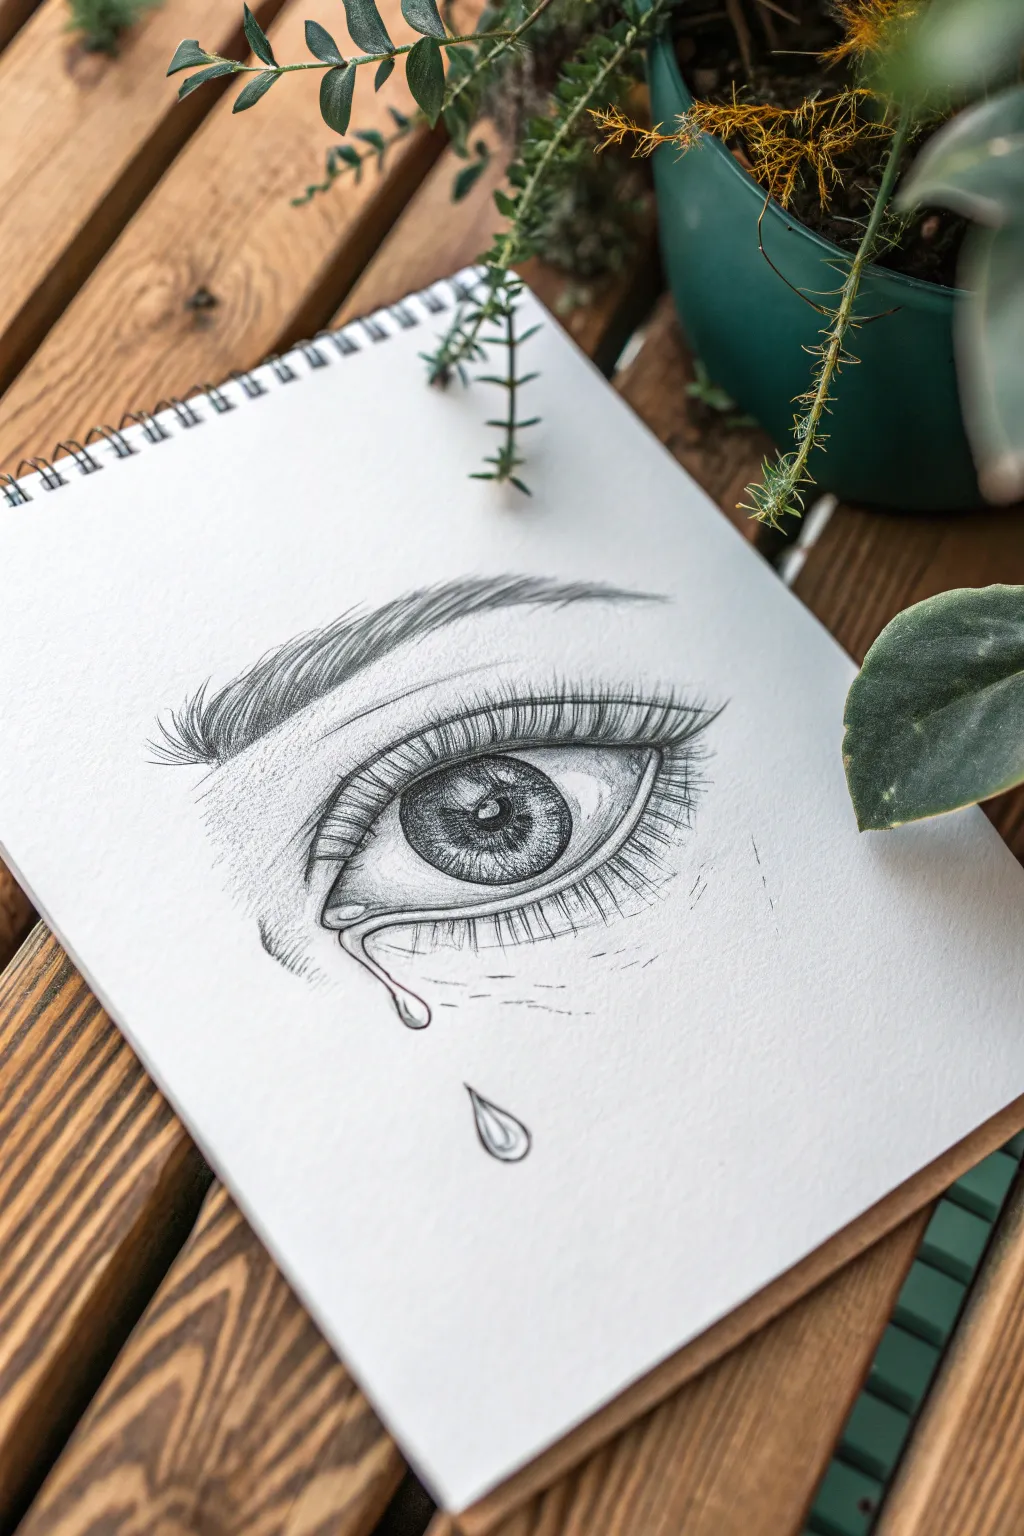

Capture deep emotion with this pencil sketch of a tearful eye, focusing on realistic textures and delicate shading. The finished piece features intricate lash details and convincing tear trails that bring the drawing to life.
Step-by-Step Guide
Materials
- H pencil (for initial sketching)
- 2B or 4B pencil (for shading and details)
- Spiral-bound sketchbook or heavy drawing paper
- Kneaded eraser
- Fine-tip blending stump or cotton swab
- Sharpener
Step 1: Basic Structure
-
Outline the eye shape:
Start lightly with your H pencil. Draw an almond shape for the eye, keeping the inner corner slightly lower than the outer corner. The upper lid line should be more curved than the lower one. -
Add the iris and pupil:
Draw a perfect circle within the almond shape for the iris. The top third should be slightly covered by the upper eyelid. inside that, place a smaller circle for the pupil, centered but leaving room for a highlight. -
Mark the highlight:
Before you do any shading, lightly outline a small rectangular or organic shape near the top left of the pupil. This white space is crucial for making the eye look wet and glossy. -
Sketch the eyelids:
Draw a crease line parallel to the top of the eye to indicate the upper eyelid fold. Add a softer, fainter line below the eye for the lower lid structure. -
Block in the eyebrow:
Lightly sketch the general arch shape of the eyebrow above the crease. Don’t draw individual hairs yet; just establish the thickness and direction of the brow.
Step 2: Shading and Depth
-
Darken the pupil:
Switch to your 2B pencil and fill in the pupil completely black, being extremely careful not to smudge into your highlight area. -
Detail the iris:
Draw tiny spokes radiating from the pupil outward toward the edge of the iris. Darken the outer ring of the iris to create a limbal ring. -
Shade the eyeball:
The white of the eye isn’t purely white. Lightly shade the corners of the eyeball and just under the upper lid to create a spherical form, leaving the center bright. -
Define the skin texture:
Use light, directional hatching around the eye socket and brow bone. I like to keep these pencil strokes visible rather than blending them fully for a sketchier artistic look. -
Fill the eyebrows:
Using short, flicking strokes, fill in the eyebrow shape. Follow the natural growth direction of hair: upward near the nose, flattening out across the arch, and downward at the tail.
Uneven Shading?
If your shading looks too scratchy, lightly rub the graphite with a clean cotton swab or blending stump to soften the gradient without losing texture.
Step 3: Lashes and Tears
-
Draw upper lashes:
Press down and flick upward with a sharp 2B pencil. The lashes should curve outward and clump slightly together. Make them longest near the outer corner. -
Add lower lashes:
Draw shorter, thinner strokes for the bottom lashes. Space them out more than the top ones and ensure they originate from the outer rim of the waterline, not inside the eye. -
Outline the tears:
Draw a wobbly, organic line brimming over the lower waterline. Create a tear trail dripping down, ending in a droplet shape, and add a separate falling tear below it. -
Render the tears:
Shading is key for liquid. Darken the edges of your tear drop outlines but leave the centers mostly white to catch the light. Add a tiny shadow underneath the falling tear to show it lifts off the skin. -
Enhance contrast:
Go back in with your darkest pencil (4B) and re-darken the pupil, the upper lash line, and the deepest shadows in the iris. -
Add reflection to the tear:
Inside the largest teardrop, draw a tiny replica of the lashes or a small highlight shape to mimic reflection, making the liquid look transparent. -
Clean up highlights:
Use the edge of your kneaded eraser to lift out any graphite that smudged into the eye’s highlight or the brightest part of the tear.
Make it Pop
Use a white gel pen or white charcoal pencil for the final highlights in the eye and on the tear drops to create an ultra-realistic wet look.
Now you have a compelling, emotional sketch that captures a moment of sadness perfectly
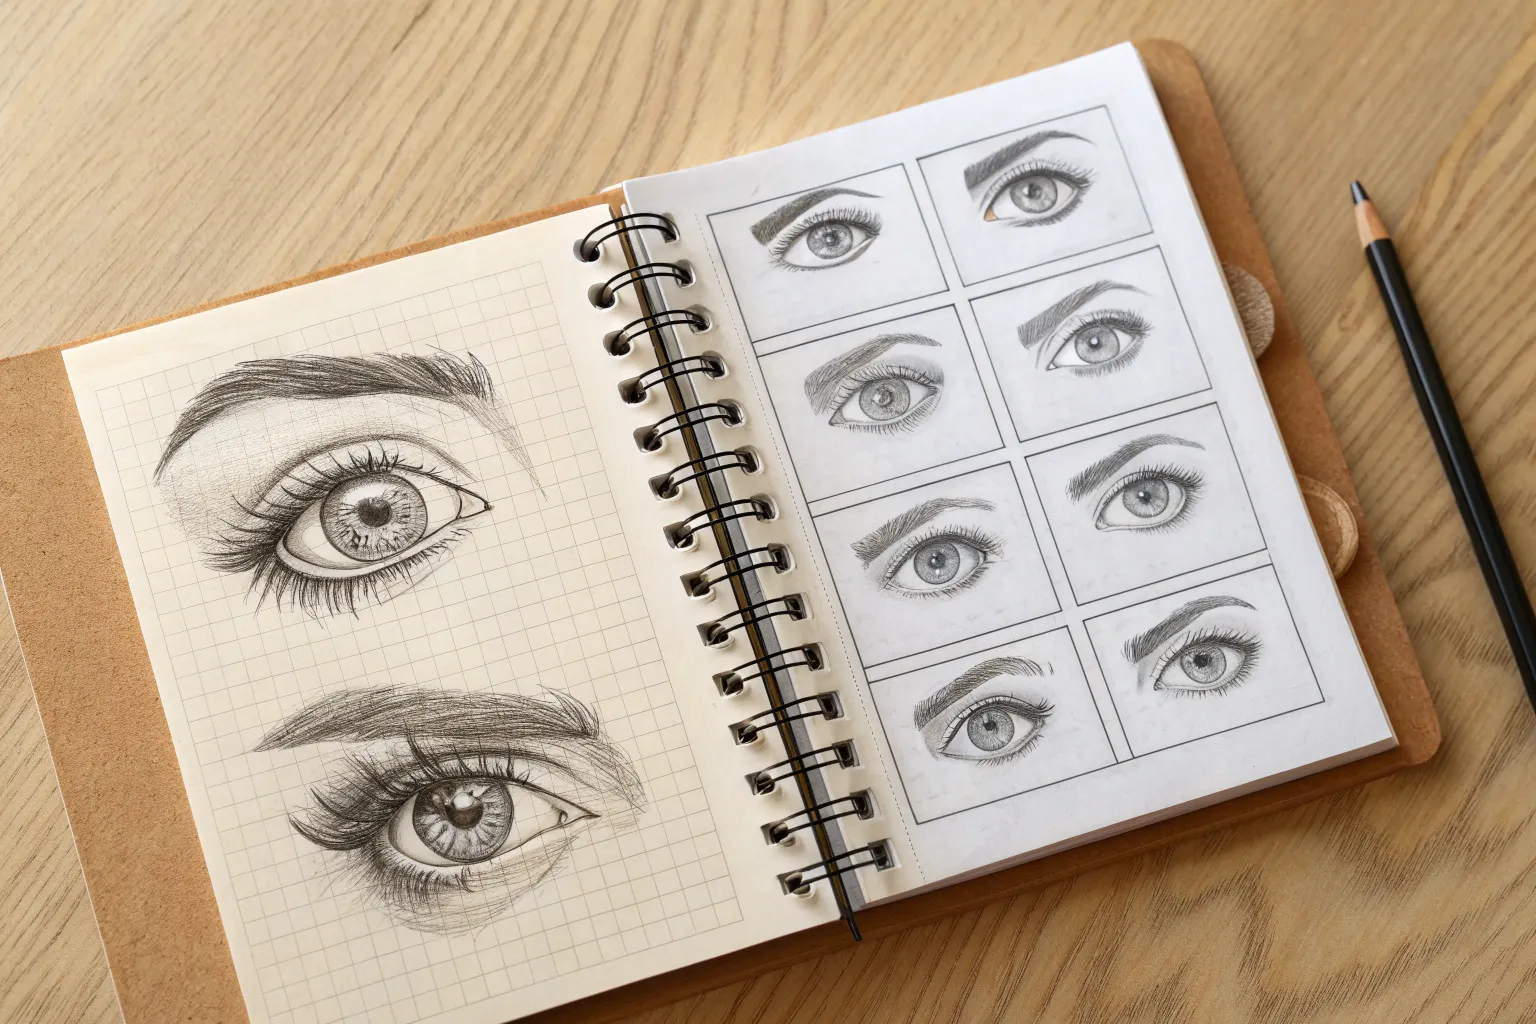
Eye Expression Mini-Grid
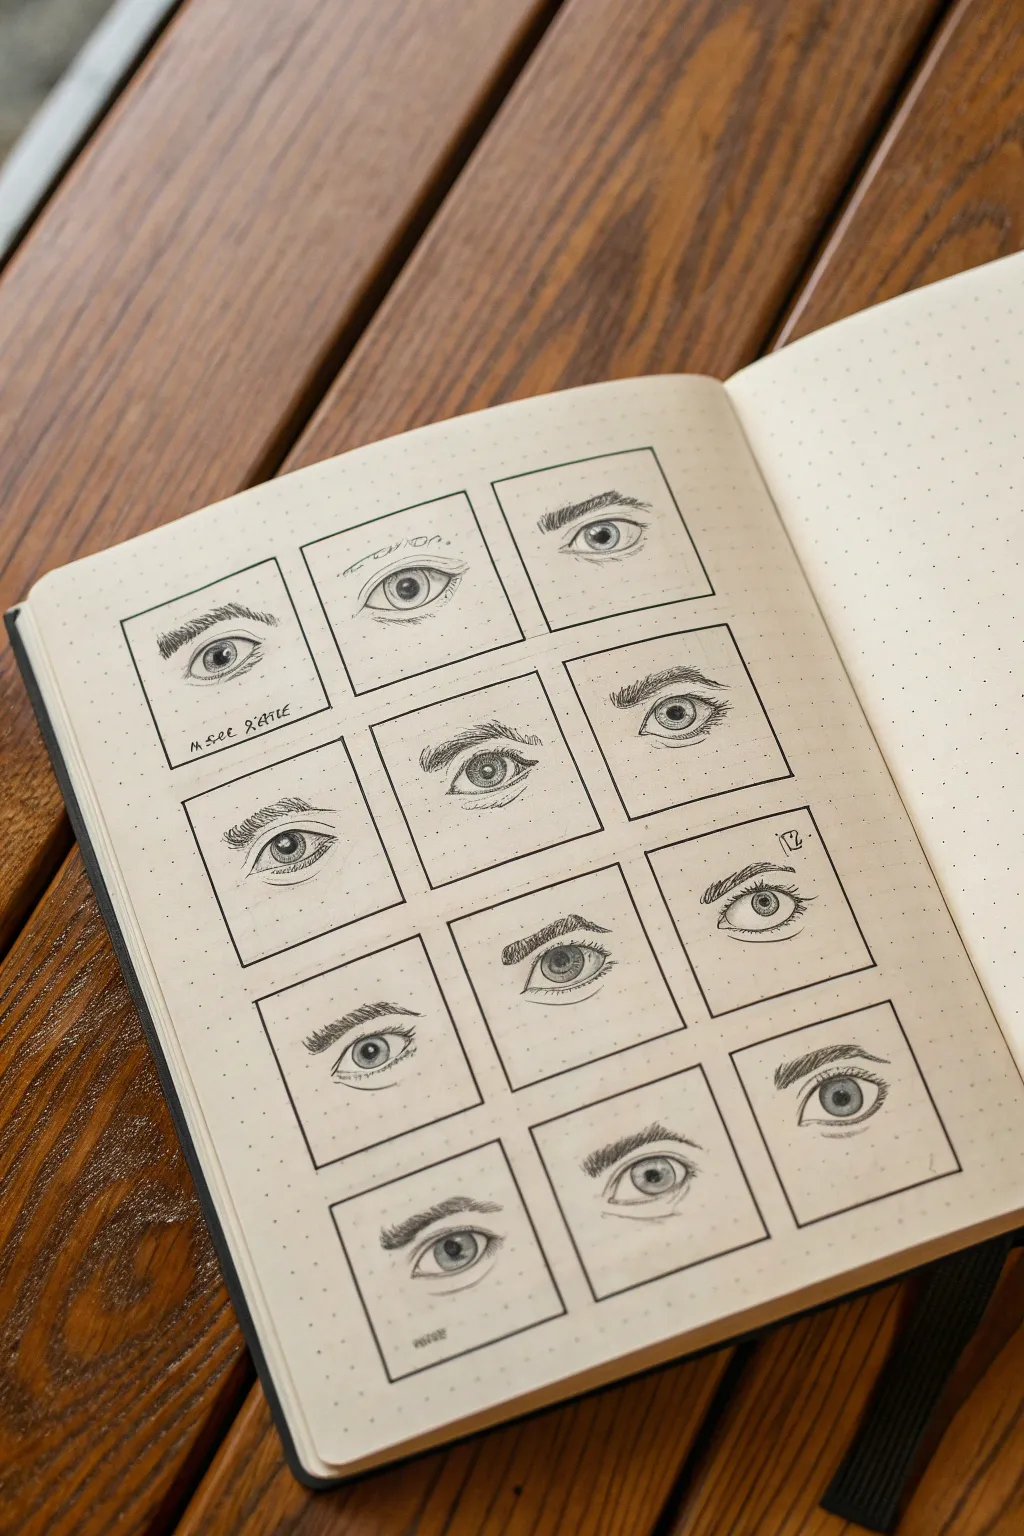
This detailed study transforms a simple sketchbook page into a gallery of expressive eyes, capturing subtle variations in shape and emotion. By breaking down the daunting task of drawing eyes into small, manageable squares, you create a visually striking collection that doubles as excellent practice.
How-To Guide
Materials
- Dotted grid sketchbook or journal
- Ruler
- Fine liner pen (black, 0.3mm or 0.5mm)
- Graphite pencils (HB for sketching, 2B/4B for shading)
- Mechanical pencil (optional for fine details)
- Kneaded eraser
- Blending stump or cotton swab
Step 1: Setting the Stage
-
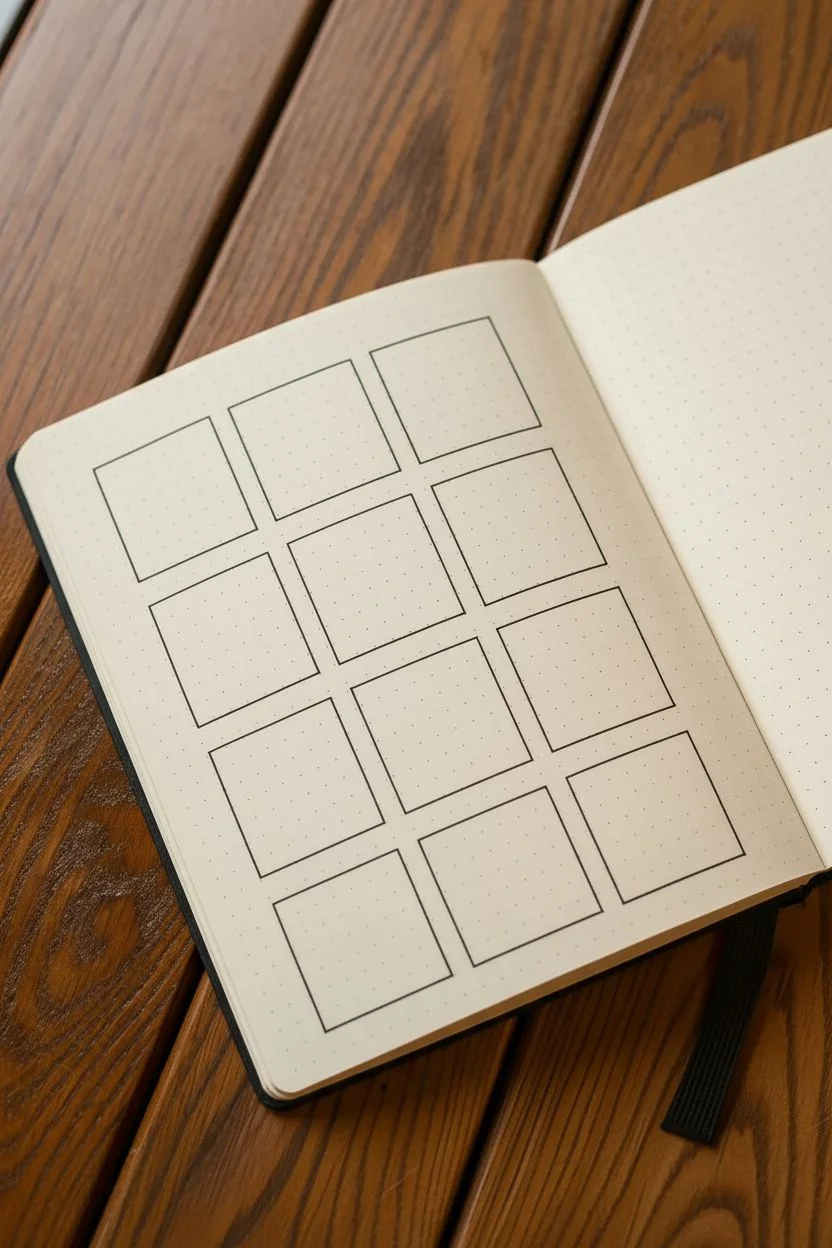
Map out the grid:
Begin by counting the dots on your journal page to evenly space your squares. You’ll need a layout of 4 rows and 3 columns. Using a ruler and a graphite pencil, lightly mark out twelve equal squares, leaving a small margin of white space between each one to let the drawings breathe. -
Ink the frames:
Once you are satisfied with the spacing, go over your pencil lines with a black fine liner pen. Keep your hand steady and hold the ruler firmly to ensure crisp, clean borders. I prefer to ink these boxes first so I have a definitive boundary for my sketches. -
Clear guidelines:
Wait a moment for the ink to dry completely to avoid smudging, then gently erase the graphite guidelines, leaving you with twelve empty frames ready for drawing.
Uneven Eyes?
If one eye looks wonky, don’t erase the whole thing. Check the placement of the iris first; centering it usually fixes the gaze instantly.
Step 2: Structure and Shape
-
Outline the upper lids:
Sketching lightly with an HB pencil, draw the curve of the upper eyelid in each box. Vary the curvature—make some arched high for a wide-eyed look, and others flatter for a relaxed or tired expression. -
Define the lower lids:
Add the lower eyelid lines. Notice how connecting them at the corners creates different eye shapes, like almond, round, or hooded eyes. Don’t press too hard; these lines should remain delicate. -
Place the irises:
Draw the circles for the irises. Experiment with placement: center some for a direct gaze, tuck others partially under the upper lid for a relaxed look, or shift them to the side to suggest the subject is looking away. -
Mark the pupils:
In the center of each iris, draw a smaller black circle for the pupil. Keep the size consistent with the lighting you imagine—smaller for bright light, larger for dim. -
Suggest the eyebrows:
Lightly sketch the general shape of an eyebrow above each eye. Vary the distance from the eye and the arch shape to drastically change the expression from neutral to surprised or intense.
Step 3: Detailing and Shading
-
Detail the iris:
Switch to a sharper pencil or mechanical pencil. Draw tiny lines radiating from the pupil outward to the edge of the iris to create texture. Leave a small, unshaded white spot for the catchlight (reflection) to make the eye look wet and alive. -
Shade the eyeball:
Eyes aren’t flat white. Lightly shade the corners of the sclera (the white part) and under the upper eyelid using a 2B pencil. This adds spherical volume to the eyeball. -
Define the crease:
Darken the eyelid crease above the eye. A deeper, darker line here creates depth, especially for deep-set eyes, while a lighter line works for monolid or hooded shapes. -
Render the lashes:
Add eyelashes with quick, curved flicks of your pencil. Start from the eyelid rim and flick outward. Group them slightly rather than drawing picket-fence spikes. Remember, lower lashes are usually shorter and sparser. -
Fill in eyebrows:
Using short, hair-like strokes, fill in the eyebrow outlines. Follow the natural direction of hair growth—upward at the inner corner, then sweeping sideways and down toward the tail. -
Deepen the contrast:
Take a 4B pencil and darken the pupil and the outer ring of the iris. Add more shadow under the upper lid and lash line to make the eye pop against the page. -
Refine highlights:
Check your catchlights. If they got smudged, use the edge of a kneaded eraser to lift the graphite and restore the crisp white highlight. -
Add skin texture:
Optionally, add very faint lines underneath the eye or at the corners to suggest skin folds or expression lines, giving the drawing more maturity and realism.
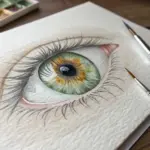
Adding Color
Use watercolor pencils for the iris. A tiny touch of blue, hazel, or green creates a stunning focal point against the graphite sketch.
Now you have a compelling reference sheet of expressions that captures the window to the soul


Simple Cartoon Eyes With Big Highlights
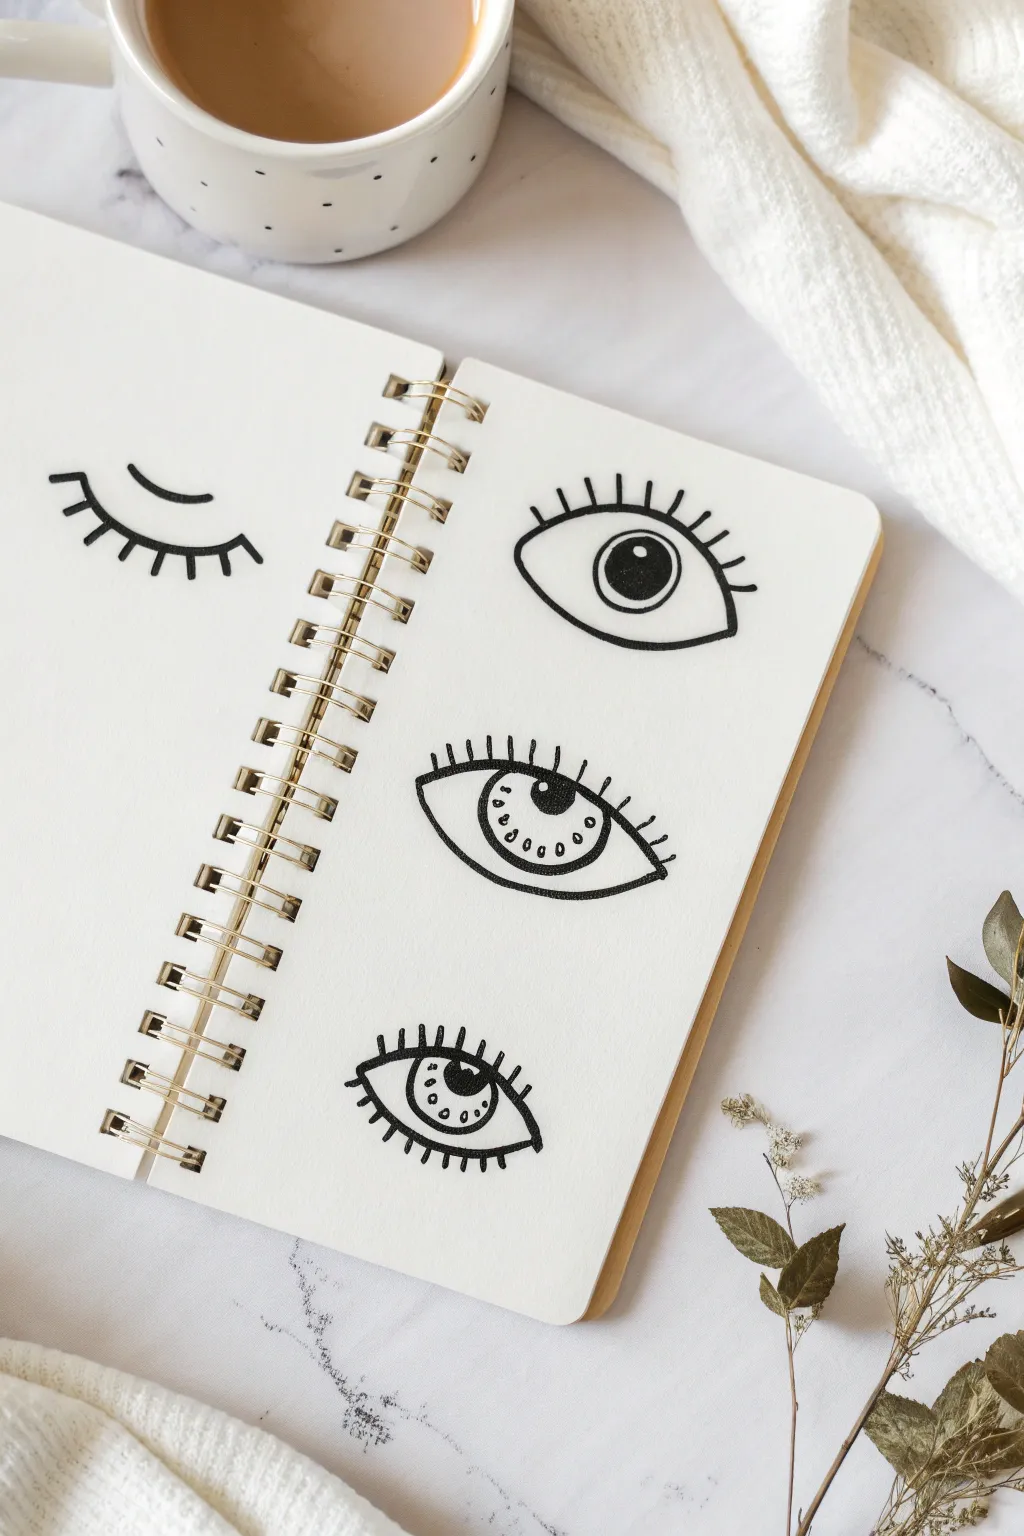

These high-contrast, graphic eyes are perfect for adding personality to your sketchbook or journal pages. The stark black ink against the creamy paper creates a striking, modern look that is surprisingly simple to achieve.
Detailed Instructions
Materials
- Spiral-bound sketchbook with smooth, heavyweight paper
- Fine liner pen (0.5mm) for details
- Thicker black marker or felt-tip pen (0.8mm or 1.0mm) for filling
- Pencil (HB or 2H)
- Soft eraser
- Ruler (optional, for spacing)
Step 1: Preparation & Layout
-
Prepare your page:
Open your sketchbook to a fresh, clean page. Ensure the surface is flat and comfortable for drawing. -
Sketch the center line:
Using your pencil very lightly, draw a vertical axis down the center of the right page if you want perfect alignment, though eyeballing it often adds charm. -
Mark vertical spacing:
Make three small tick marks where you want the center of each eye to sit, keeping equal distance between them so the page looks balanced.
Ink Bleeding?
If your marker bleeds or feathers, switch to a pigment liner or archival ink pen. These are designed to sit on top of the paper fibers rather than soaking in rapidly.
Step 2: Drawing the Closed Eye
-
Sketch the curve:
On the left page (or wherever you choose), lightly pencil a gentle, downward-curving U-shape for the closed eyelid. -
Add the eyebrow:
Float a smaller, inverted curve just above the eyelid line to suggest an eyebrow. -
Ink the main lines:
Trace over your pencil lines with your thicker black marker, keeping the pressure steady for a smooth, bold line. -
Draw the lashes:
Using the same marker, draw short, straight lines radiating downward from the main eyelid curve. Start from the center and fan them out slightly towards the edges.
Step 3: Drawing the Open Eye (Top)
-
Outline the shape:
Pencil in an almond shape for the top eye on the right page. Make the top arch higher than the bottom curve. -
Place the iris:
Draw a large perfect circle inside the almond shape. It should touch or nearly touch both the top and bottom lids. -
Define the pupil and highlight:
Inside the iris, draw a smaller circle for the highlight near the top left roughly, then a larger circle for the pupil. -
Ink the outline:
Go over the almond shape with your marker. I find it helps to rotate the notebook slightly to get the smoothest curve. -
Fill the pupil:
Carefully color in the pupil with black ink, leaving the highlight circle completely white. -
Add lashes:
Draw distinct, straight lashes on the upper lid only, spacing them out evenly.
Shiny Highlights
To make the eyes look extra glossy, add a second, smaller dot of white gel pen inside the black pupil area after the black ink has fully dried.
Step 4: Drawing the Decorative Eyes (Middle & Bottom)
-
Sketch the middle eye:
Create another almond shape below the first. This one can be slightly wider. -
Detail the middle iris:
Draw a large semi-circle for the iris. Instead of a solid fill, draw a smaller black pupil at the top and add a ring of tiny dots around the bottom edge of the iris. -
Add double lashes:
When inking this eye, add lashes to both the top and bottom lids. The bottom lashes should be slightly shorter. -
Sketch the bottom eye:
Draw the final eye shape at the bottom. Make the iris a full circle this time. -
Create the bottom pupil pattern:
Inside this iris, draw a central black pupil with a white highlight dot. Surround this with a ring of small circles or dots for a decorative effect. -
Final Inking:
Trace all remaining pencil lines with your marker. Ensure the decorative dots are clearly defined and not smudged. -
Erase guidelines:
Once the ink is completely dry (give it a good minute or two), gently erase all underlying pencil sketch lines.
Now you have a page of expressive eye doodles ready to be expanded into full characters or kept as a stylish pattern study


Have a question or want to share your own experience? I'd love to hear from you in the comments below!