Whenever I want a subject that’s instantly bold and expressive, I reach for skeleton drawings—they’re perfect for practicing structure and storytelling at the same time. Here are a bunch of skeleton drawing ideas you can riff on, from classic studies to playful, weird little scenes.
Skull Study With Light and Shadow
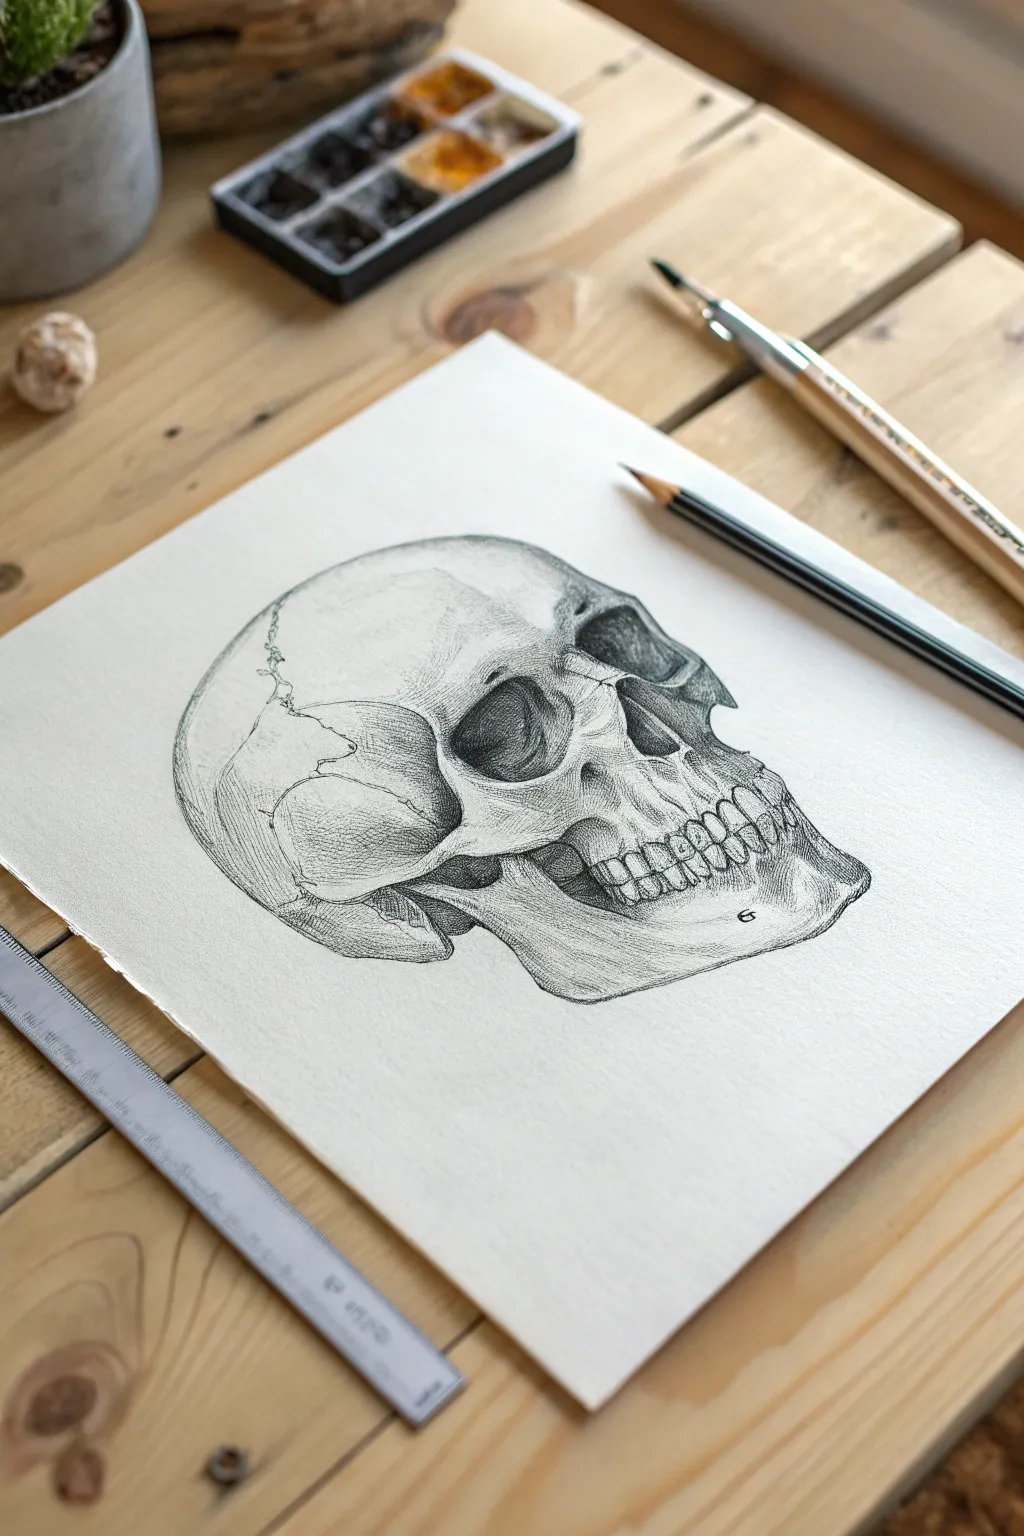
This project captures the timeless elegance of a human skull using refined pencil techniques, focusing deeply on anatomical structure and the interplay of light and shadow. The result is a smooth, highly realistic study that emphasizes form through subtle graduation and crisp line work.
Step-by-Step Tutorial
Materials
- High-quality drawing paper (smooth or vellum finish)
- Graphite pencils (HB, 2B, 4B, and 6B)
- Mechanical pencil (0.5mm HB) for fine details
- Kneaded eraser
- Blending stump or tortillon
- Ruler (for checking proportions)
- Artist sketching tape (optional)
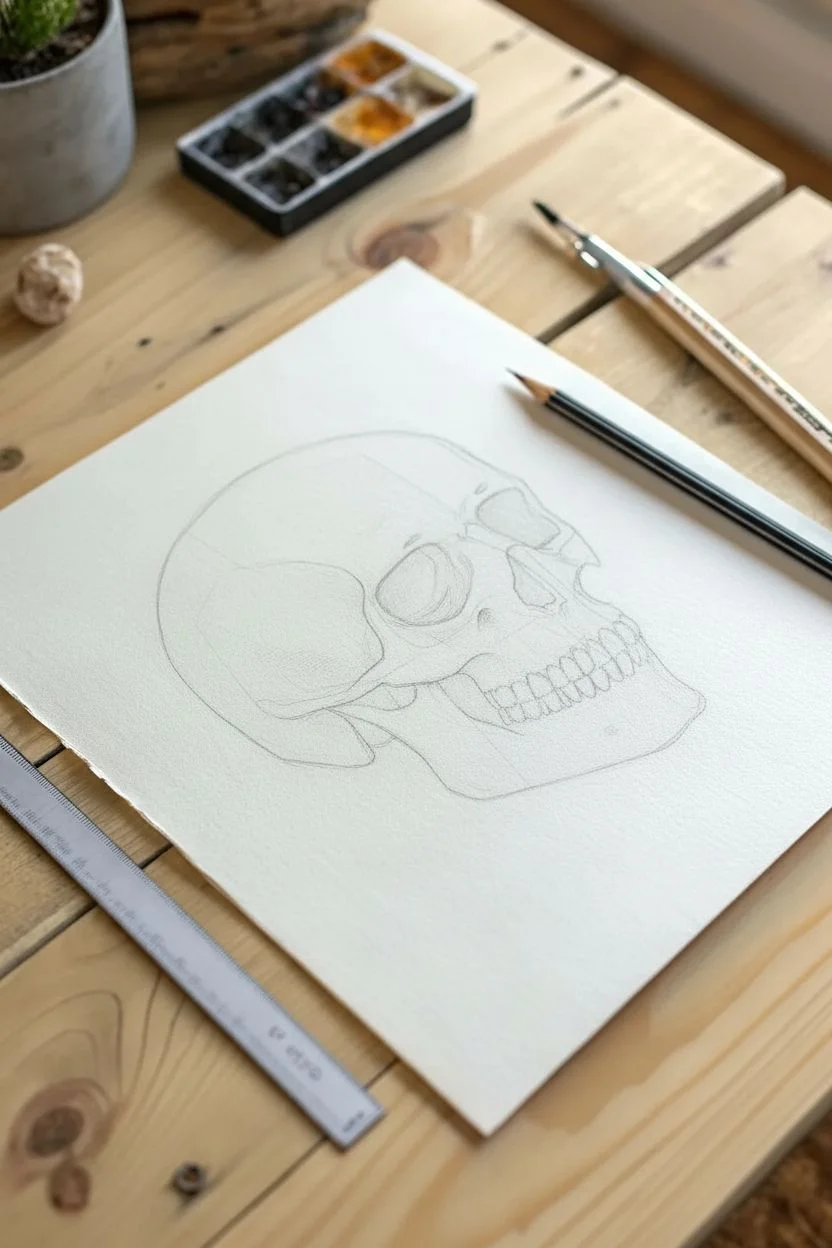
Step 1: Basic Shape Construction
-
Establish the cranial mass:
Begin by lightly sketching a large, slightly elongated circle to represent the cranium (the brain case). Use an HB pencil with very light pressure. -
Map the facial block:
Attach a box-like shape to the lower front of your circle to represent the maxilla (upper jaw) and mandible (lower jaw). angle it downwards to the left. -
Define the eye socket:
Draw the orbital cavity (eye socket) as a rounded, sunken shape. Notice it isn’t a perfect circle but slightly squared off at the corners. -
Locate key features:
Mark horizontal lines to align the bottom of the eye socket, the nasal cavity, and the center line where the teeth will eventually meet.
Step 2: Refining the Contour
-
Outline the zygomatic arch:
Sketch the cheekbone (zygomatic arch) which creates a bridge below the eye socket, connecting to the ear area. This is crucial for giving the skull depth. -
Shape the nasal cavity:
Draw the upside-down heart shape of the nasal opening. Pay attention to the small bone protruding at the top center of this cavity. -
Draft the jawline:
Refine the mandible’s shape, ensuring the chin protrudes slightly and the jaw angle is well-defined near the back of the skull. -
Add cranial sutures:
Lightly trace the squiggly, organic lines of the coronal and squamous sutures along the side of the head. These shouldn’t be dark yet, just placement guides.
Hatch With The Curve
When applying shading lines (hatching), always curve your strokes to match the object’s surface. Straight lines on a round skull will flatten it instantly.
Step 3: The Dental Arch
-
Block in the teeth:
Instead of drawing individual teeth immediately, draw the curved cylinder shape of the gum line first. -
Divide the teeth:
Mark vertical lines to separate the incisors, canines, and premolars. Remember that perspective makes the teeth further back appear narrower. -
Detail the roots:
Sketch the root humps above the upper teeth to show how they sit within the bone.
Fixing “Floating” Teeth
If teeth look like they are floating, darken the gum line area slightly and verify the root swellings in the maxilla above them to anchor them in bone.
Step 4: Shading and Rendering
-
Core shadows first:
Using a 2B or 4B pencil, fill in the darkest areas: inside the eye socket, the nasal cavity, and the gap beneath the cheekbone. -
Create the mid-tones:
Switch to an HB pencil. Apply soft hatching across the cranium’s side, curving your strokes to follow the roundness of the bone. -
Model the teeth:
Shade the teeth individually, focusing on the small shadows between them. Keep the biting surfaces lighter to show highlights. -
Deepen the contrast:
I like to go back in with a 6B pencil here to punch up the darkest blacks in the eye socket and under the jaw for dramatic effect. -
Refine texture:
Add subtle pitting and texture to the bone surface using tiny dots or scumbling (circular motions) with the mechanical pencil. -
Final clean-up:
Use your kneaded eraser to lift off any smudges around the outside borders and to tap in highlight points on the brow ridge and cheekbone.
Step back and admire the solid, three-dimensional form you’ve built from simple lines


Full-Body Skeleton in Neutral Standing Pose
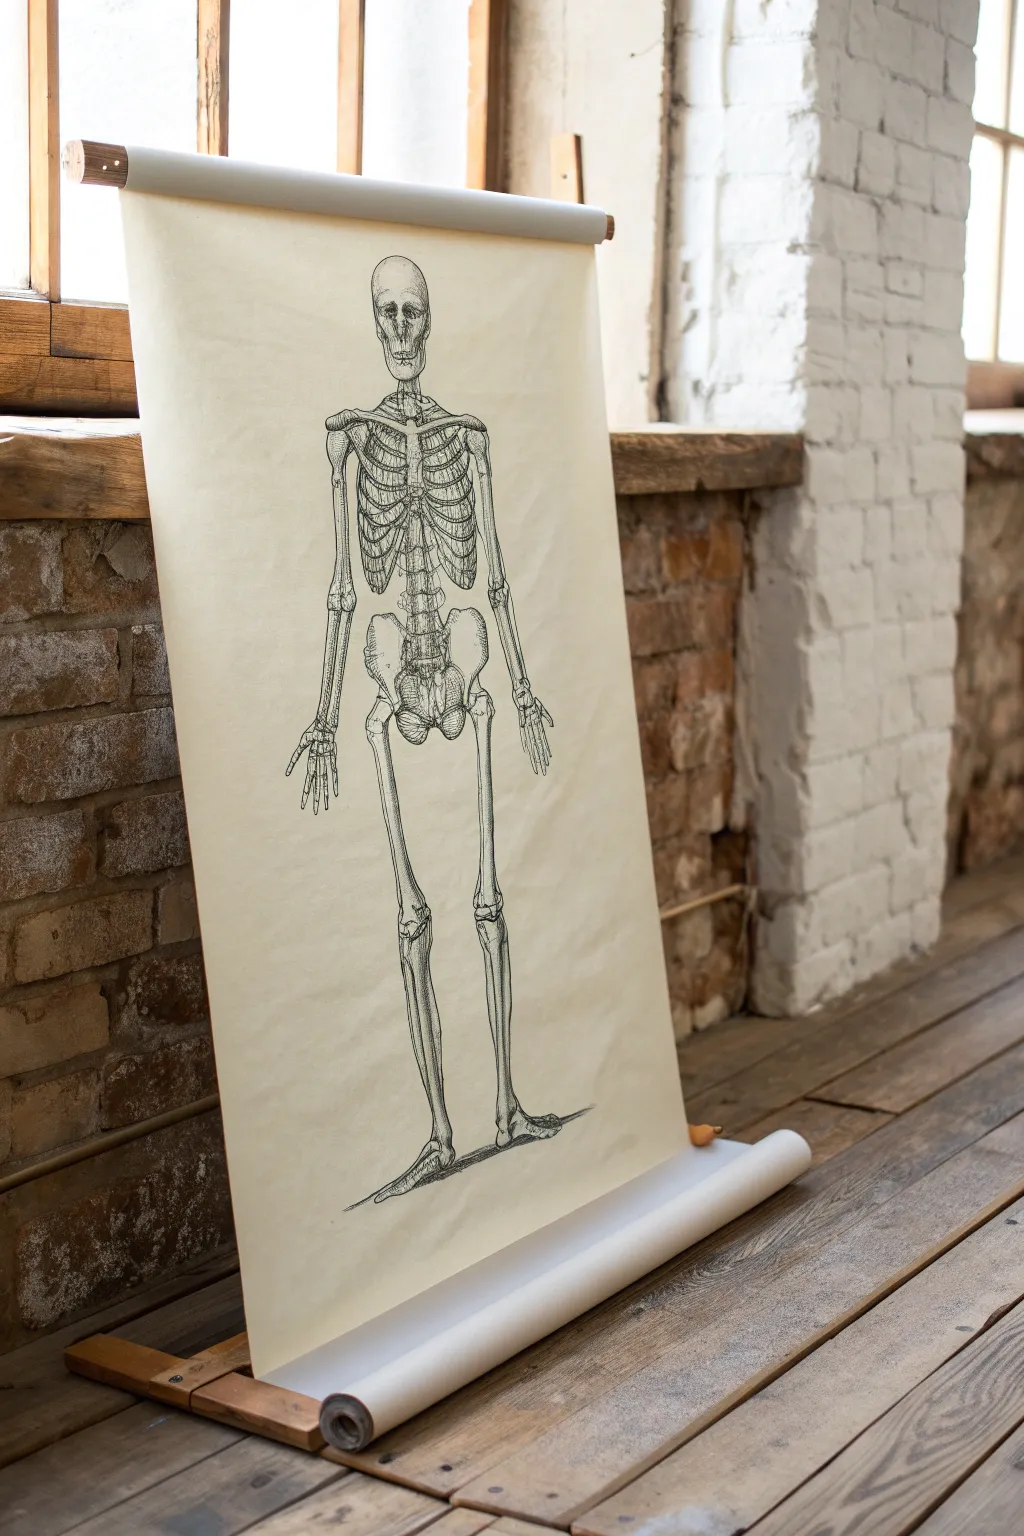
Capture the eerie elegance of vintage medical illustrations with this detailed full-body skeleton drawing on hanging scroll paper. The finished piece combines precise anatomical line work with the rustic charm of aged paper for a striking, life-sized art display.
Step-by-Step
Materials
- Large roll of cream or off-white drawing paper (approx. 24″ wide)
- Wooden dowels (2) matching the paper width
- HB graphite pencil
- Kneadable eraser
- Fine liner pens (0.1mm, 0.3mm, 0.5mm)
- Ruler or straight edge
- Anatomy reference photos
- Masking tape
- Wooden base stand (optional for display)
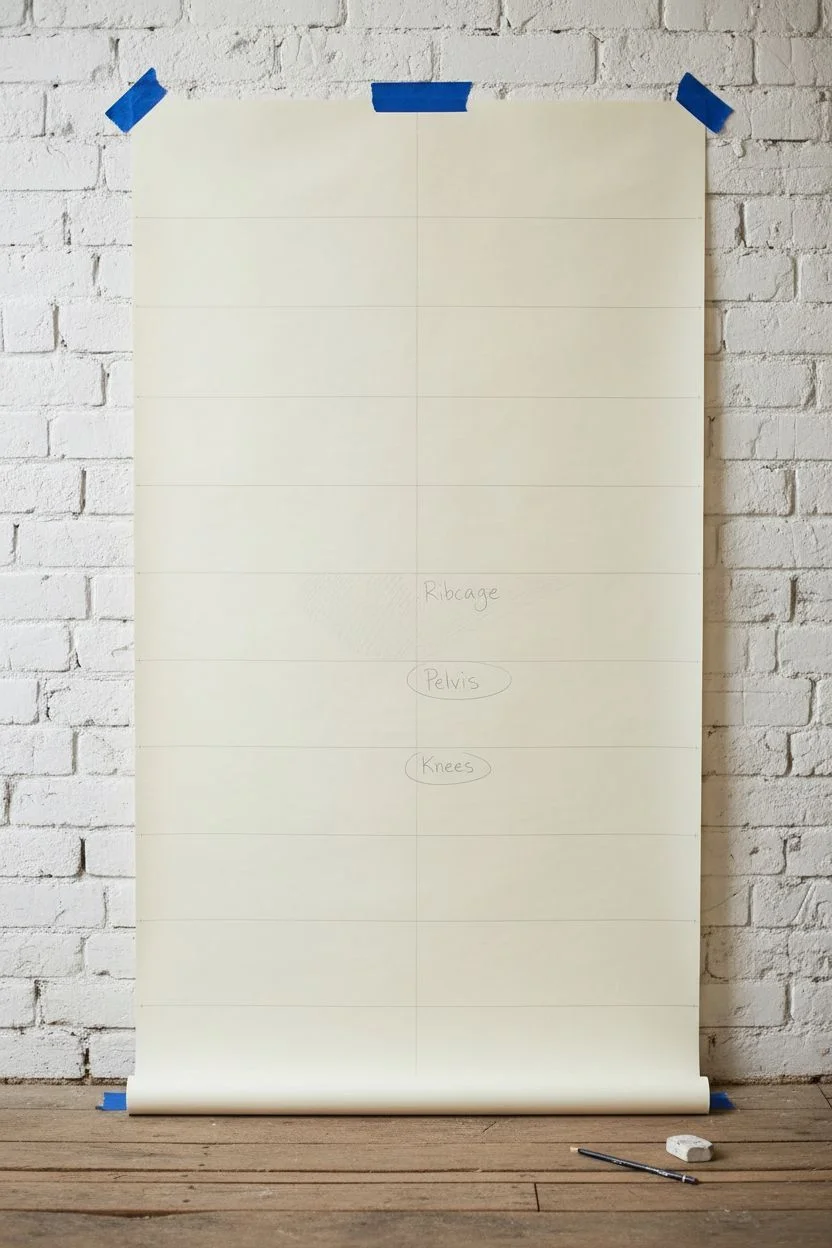
Step 1: Setting the Proportion
-
Prepare the canvas:
Cut a length of your cream paper roll that is roughly 4-5 feet long to accommodate the full figure. Tape the corners to a flat wall or large table to keep it steady while you work. -
Mark the total height:
Using your HB pencil, draw a faint vertical centerline down the middle of the paper. Mark the top of the skull and the bottom of the feet, leaving about 6 inches of margin at both ends. -
Divide into heads:
Divide the space between your top and bottom marks into eight equal sections. This classical ‘eight heads’ proportion rule ensures your skeleton won’t look squat or stretched. -
Locate major landmarks:
Mark the pelvic bone area at the halfway point (the 4th line from the top). The knees should fall roughly on the 6th line, and the ribcage should occupy the second section.
Step 2: Sketching the Framework
-
Block in the skull:
Draw an oval for the cranium in the top section, adding a smaller, squared shape below it for the jaw. Don’t worry about eye sockets yet; just get the silhouette right. -
Construct the ribcage:
Sketch an egg-like shape for the ribcage starting below the neck. It should be wider at the bottom than the top. Lightly indicate the sternum down the center. -
Outline the pelvis:
Draw a butterfly or bowl shape for the pelvis. Pay attention to the crests of the hip bones, ensuring they are slightly wider than the ribcage. -
Add limb guides:
Use simple straight lines to represent the humerus, radius, ulna, femur, tibia, and fibula. Mark small circles where the joints (shoulders, elbows, wrists, knees, ankles) will be. -
Flesh out the bones:
Thicken your stick-figure lines into bone shapes. Remember that the femur curves slightly inward, and the forearm bones (radius and ulna) run parallel when the palms face forward.
Anatomy Pro-Tip
For realistic rib cages, remember the bottom ribs are ‘floating’ and don’t attach to the sternum. Drawing them slightly shorter creates an accurate silhouette.
Step 3: Detailed Inking
-
Start the skull details:
Switch to a 0.3mm fine liner. Draw the eye sockets, nasal cavity, and teeth. Use broken lines for the sutures on the skull to simulate a natural, fused bone texture. -
Define the ribs:
Carefully ink each rib, ensuring they curve around the ‘egg’ form you sketched. I find it helpful to start with the connection at the spine and wrap them forward to the sternum. -
Complex joints:
Use the 0.1mm pen for delicate areas like the carpals (wrist bones) and tarsals (ankle bones). These are clusters of small, pebble-like shapes that require precision. -
Body contours:
Outline the long bones of the legs and arms with the 0.5mm pen for visual weight. Keep your lines slightly shaky or organic rather than perfectly straight to mimic natural bone structure. -
Adding texture:
Use very fine hatching marks with the 0.1mm pen to create shading in the hollows of the pelvis, eye sockets, and between the ribs. This creates depth and that vintage engraving look. -
The feet perspective:
Since the skeleton is standing, draw the feet bones splayed slightly outward and angled down to match the perspective shown in the reference image.
Smudge Control
Work from top to bottom (or left to right if right-handed) when inking to prevent your hand from dragging through wet ink and ruining the crisp lines.
Step 4: Finishing Touches
-
Erase pencil lines:
Wait at least 30 minutes for the ink to fully cure. Gently roll your kneadable eraser over the entire drawing to lift the graphite without damaging the paper surface. -
Ground shadow:
Add a small, scribbled shadow beneath the feet using the 0.5mm pen. This grounds the figure so it doesn’t look like it’s floating in space. -
Scroll assembly:
Fold the top and bottom edges of the paper over the wooden dowels. Secure the back with glue or strong tape to create the scroll mechanism. -
Mount and display:
Place the bottom dowel into the designated slots of your wooden base stand, or attach a string to the top dowel to hang it on a wall.
Step back and admire how the stark black ink on cream paper brings your anatomical study to life, ready for display.


Ribcage and Spine Skeleton Study
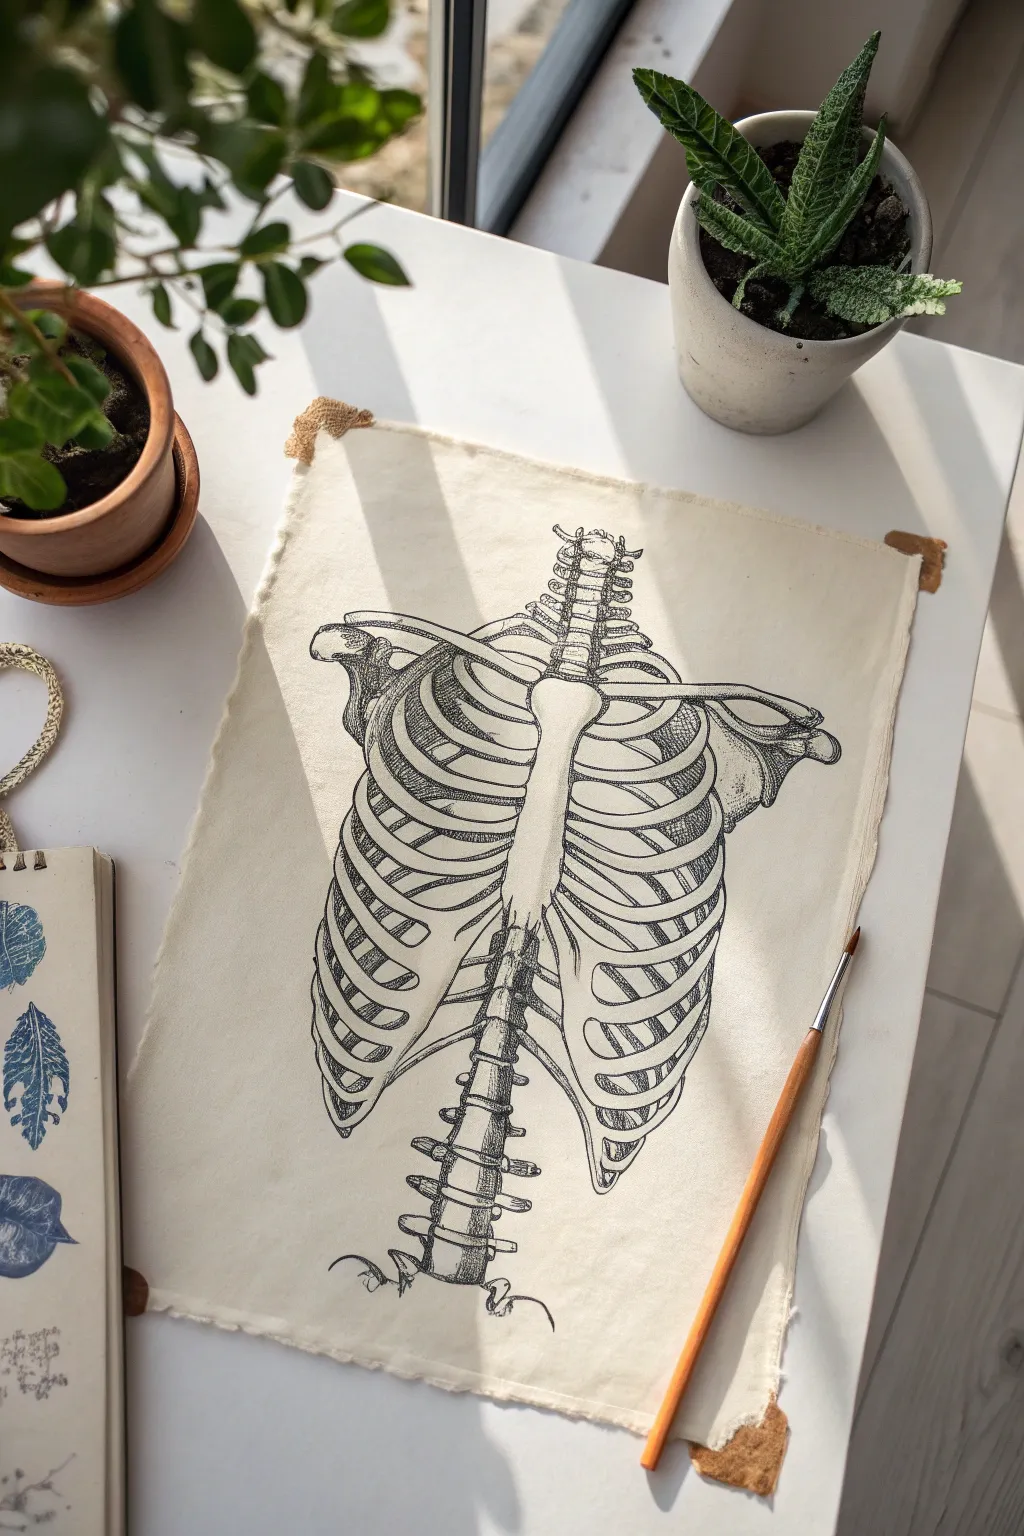
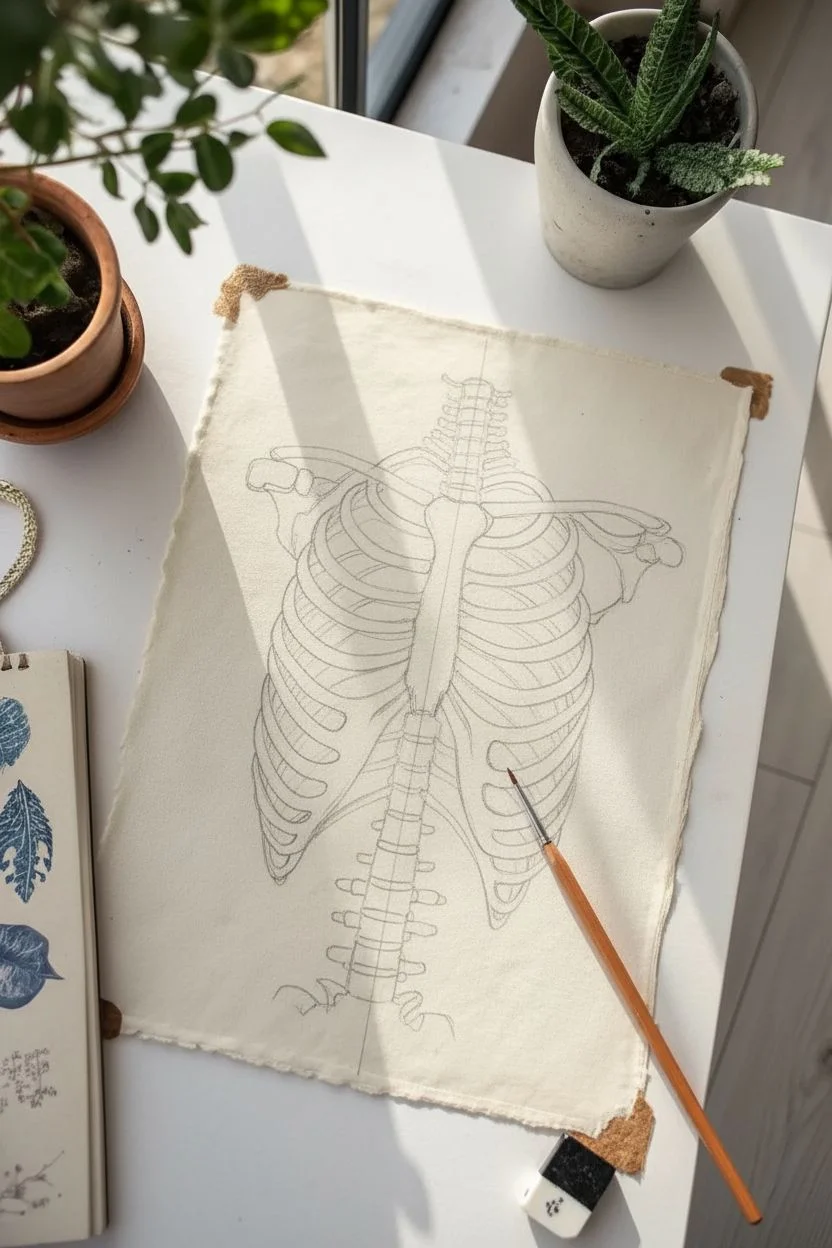
Capture the delicate complexity of human anatomy with this vintage-inspired ribcage study. Drawn directly onto raw canvas, this project combines precise scientific illustration techniques with a rustic, textured presentation.
Step-by-Step
Materials
- Unbleached cotton canvas or heavy linen fabric (approx. A4 size)
- Fine liner pigment pens (0.1mm, 0.3mm, 0.5mm) or dip pen with India ink
- Pencil (HB or 2B)
- Kneaded eraser
- Reference image of a human ribcage (anterior view)
- Ruler
- Masking tape or clips (to secure fabric)
- Small flat paintbrush (optional, for ink washes)
Step 1: Preparation and Sketching
-
Prepare the fabric:
Cut a piece of unbleached canvas to your desired size, leaving an extra inch on all sides. Don’t worry about clean edges; the raw, frayed look is part of the aesthetic. Gently pull a few threads from the sides to enhance this effect. -
Secure the surface:
Tape the canvas taut onto a drawing board or hard surface. Fabric can slip, so ensuring it is flat and secure is crucial for accurate linework. -
Establish the centerline:
Using your pencil and ruler, lightly draw a vertical line down the center of the canvas. This will represent the spine and sternum, acting as the anchor for symmetry. -
Block in major shapes:
Sketch the sternum (breastbone) as a tie-shaped form near the top center. Then, mark the horizontal lines for the clavicles (collarbones) extending outward from the top of the sternum. -
Map the rib curves:
Lightly sketch the general oval shape of the ribcage. Within that oval, draw guidlines for the individual ribs, noting how they curve downward from the spine and wrap around to the front. Remember that the lower ribs float and don’t attach directly to the sternum. -
Refine the vertebrae:
Sketch the visible vertebrae of the spine. Start with the cervical vertebrae above the ribcage and continue with the lumbar vertebrae below the ribs. Keep these as simple blocky shapes for now.
Step 2: Inking the Structure
-
Outline the clavicles and sternum:
Switch to a 0.3mm fineliner. Carefully trace the outline of the collarbones and the sternum. Use a slightly broken line technique to suggest the texture of bone rather than a perfect, smooth plastic look. -
Draw the ribs:
Ink the ribs one by one, starting from the top. Pay close attention to the spacing between them (intercostal spaces). The ribs should look like flattened, curved bands, not simple tubes. -
Detail the spine:
Outline the vertebrae segments above and below the ribcage. Add the small, bony protrusions (transverse processes) that stick out the sides. I find going slow here helps capture the knobby texture of the spine. -
Erase pencil marks:
Once the main outlines are completely dry (give it at least 15 minutes to avoid smudging), gently dab—don’t rub—with a kneaded eraser to lift the graphite guide lines.
Ink Bleeding Control
If ink bleeds into the fabric grain, sketch lightly first with a pencil, then apply a thin layer of clear matte medium or gesso over the sketch area before inking.
Step 3: Shading and Texture
-
Establish light source:
Decide on a light source, typically from the top left. This means shadows will fall on the right side and under the curves of the bones. -
Begin hatching:
Using a 0.1mm pen, start hatching (drawing closely spaced parallel lines) on the shadowed sides of the ribs. This creates depth and makes the bones look cylindrical. -
Deepen the interior:
The inside of the ribcage (the back wall seen through the front ribs) should be darker. Use cross-hatching (overlapping lines) here to push those back ribs into the distance. -
Texture the bone ends:
Add small stippling dots or tiny scratches near the ends of the bones and where the ribs meet the sternum to suggest porous bone texture. -
Darken the darkest areas:
Switch to a 0.5mm pen to darken the deepest crevices, specifically under the armpit area and the gaps where the spine meets the ribs. High contrast will make the drawing pop. -
Optional ink wash:
If you want a softer shadow, use a very slightly damp brush to pull a tiny bit of wet ink from your lines into the shadow areas, or use a diluted grey marker. -
Final assessment:
Step back and look for balance. Strengthen any outer lines, particularly around the scapula and lower spine, to give the drawing a solid weight.
Pro Tip: Line Weight
Vary your line weight! Use thicker lines for the bottom edges of bones (shadow side) and thinner, broken lines for the top edges where light hits.
Now you have a striking anatomical study ready to be pinned up or framed in a shadowbox


Skull and Crossbones Icon
Recreate this classic pirate symbol with a textural twist by drawing a bold skull and crossbones on rugged, deckle-edged paper. The contrast of crisp black ink against the organic, creamy surface creates an artifact-like quality that is perfect for spooky decor.
Detailed Instructions
Materials
- Handmade or cold-press watercolor paper with deckle edges
- Pencil (HB or 2B)
- Kneaded eraser
- Fine liner pen (0.5mm)
- Thick black marker or brush pen
- Ruler (optional)
Step 1: Planning the Composition
-
Paper placement:
Begin by positioning your sheet of textured paper on a flat surface. Handmade paper often has a ‘right’ side with more texture, so choose the side that appeals to you most. -
Rough guidelines:
Using your pencil very lightly, draw a vertical center line to help with symmetry. Add a horizontal line about one-third of the way down; this marks where the eyes will sit. -
Sketch the cranium:
Draw the upper dome of the skull first. Keep the shape somewhat rounded but slightly flattened at the temples for a more anatomical look. -
Define the cheekbones:
Below the cranium, sketch two protruding curves for the cheekbones. They should flare out slightly before curving back in towards the jaw area. -
Add the jaw outline:
Sketch a U-shaped jaw hanging below the cheekbones. Don’t worry about the teeth just yet; focus on getting the overall silhouette of the skull balanced.
Ink Bleed Prevention
Handmade paper is very absorbent. Test your marker on a scrap piece first to check for bleeding. If it feathers, switch to a pigment liner.
Step 2: Sketching the Features
-
Eye sockets:
Draw two large, somewhat irregular ovals for the eye sockets along your horizontal guideline. I like to make them slightly asymmetrical to give the skull expression. -
Nasal cavity:
Between and slightly below the eyes, sketch the nose cavity. Think of an upside-down heart shape or two teardrops joined at the top. -
Mapping the crossbones:
Below the skull, lightly sketch two intersecting diagonal lines to form an ‘X’. These will be the core of your crossbones. -
Fleshing out the bones:
Draw the outline of the bones around your ‘X’ guide. Make the ends bulbous and heart-shaped, typical of cartoon bones, but keep the shafts relatively straight. -
Positioning check:
Step back and look at your pencil sketch. Ensure the skull is centered above the crossed bones and that the proportions feel right before you commit to ink.
Tea Staining
Before drawing, lightly brush the paper with strong black tea or coffee and let it dry. This adds an authentic, aged pirate map aesthetic.
Step 3: Inking and Detailing
-
Outline the skull:
Switch to your thick black marker or brush pen. Trace over your pencil lines for the outer skull shape, varying your pressure slightly to create line weight interest. -
Fill the darks:
Color in the eye sockets and the nasal cavity completely black. Leave small white specks or scratches if you want a weathered, aged look. -
Draw the teeth:
Switch to your finer 0.5mm pen for the teeth. Draw a row of small, rectangular shapes along the upper jaw, then a matching set on the lower jaw, adding small roots or gaps between them. -
Cracks and texture:
Using the fine liner, add a jagged crack line on the forehead or near the temples. Add small stippling dots near the cheekbones to suggest depth and shadow. -
Ink the crossbones:
Use the thicker marker again to outline the crossbones. Ensure the lines are bold so they stand out as much as the skull itself. -
Refine the bone intersections:
Where the bones overlap, distinct lines are key. Ensure the bone in the foreground clearly passes over the one in the background by stopping the back bone’s lines at the intersection. -
Final shading:
Add small hatch marks or shading lines on the underside of the bones and the bottom of the skull to ground the drawing and give it volume. -
Clean up:
Allow the ink to dry completely—handmade paper can be absorbent and slow-drying. Once safe, gently erase all visible pencil guidelines with your kneaded eraser.
Display your eerie creation alongside some candles or greenery to complete the atmospheric vignette

PENCIL GUIDE
Understanding Pencil Grades from H to B
From first sketch to finished drawing — learn pencil grades, line control, and shading techniques.
Explore the Full Guide
Smiling Cartoon Skull With Big Eyes
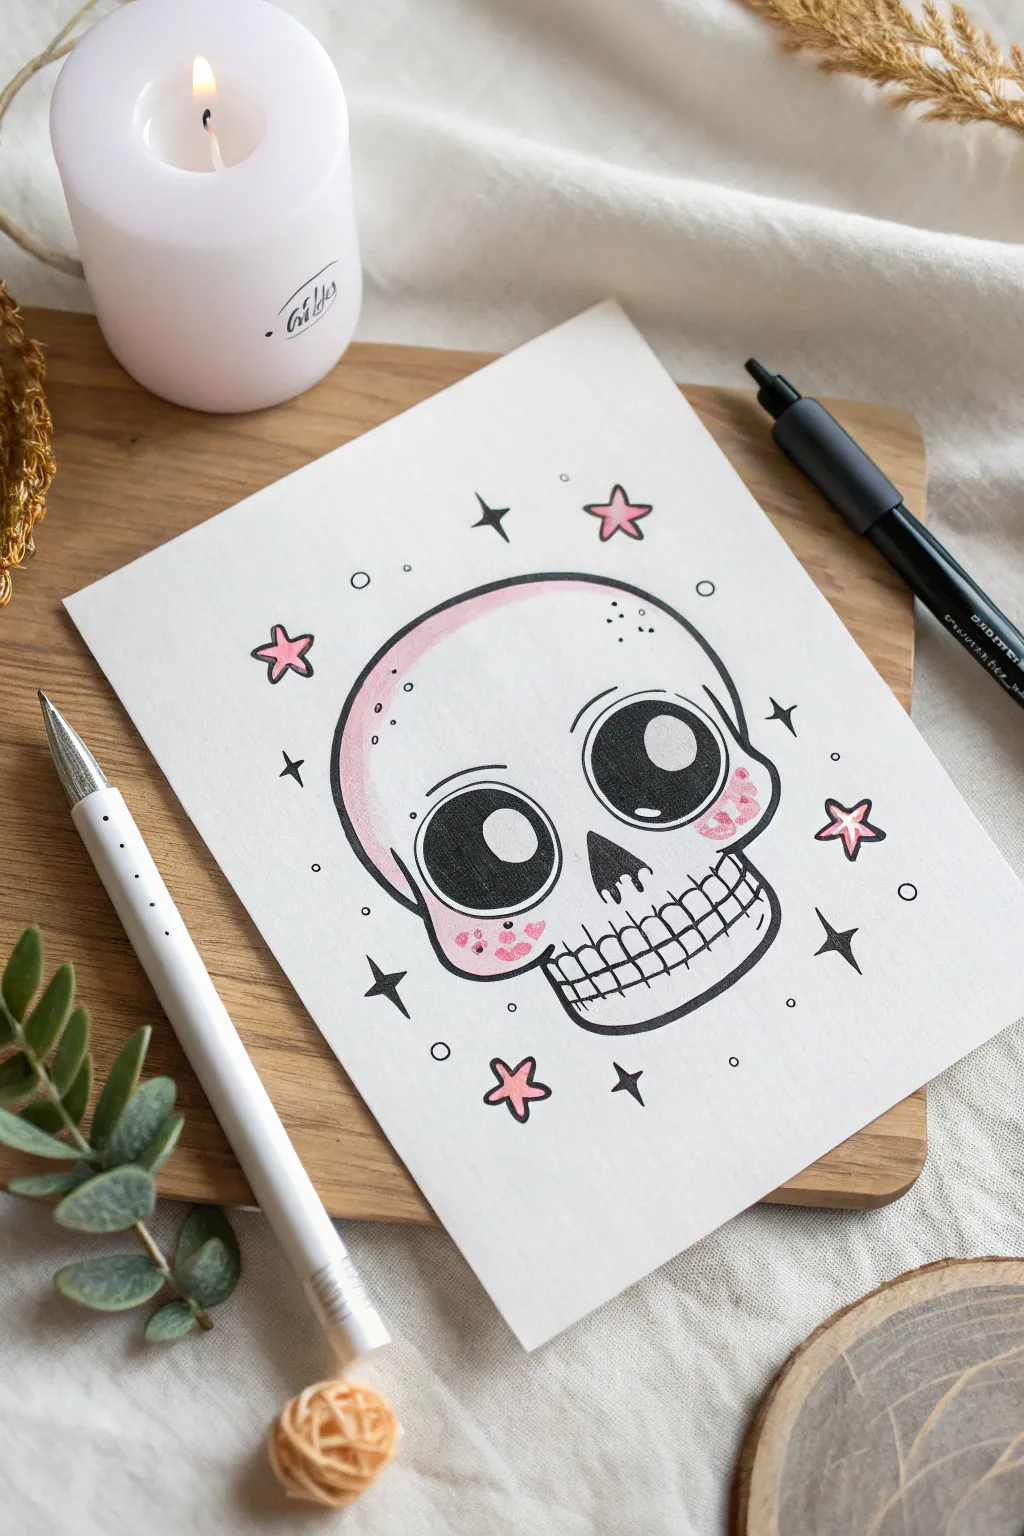
Embrace the spooky-cute aesthetic with this charming cartoon skull illustration. Featuring oversized eyes, rosy cheeks, and twinkling decorative stars, this easy-to-follow doodle is perfect for adding a touch of whimsy to your sketchbook or Halloween cards.
How-To Guide
Materials
- White cardstock or heavy drawing paper
- Pencil (HB or 2H suitable for light sketching)
- Black fineliner pen (0.5mm or 0.8mm)
- Black marker or brush pen (for filling large areas)
- Pink colored pencil or pastel highlighter
- Eraser
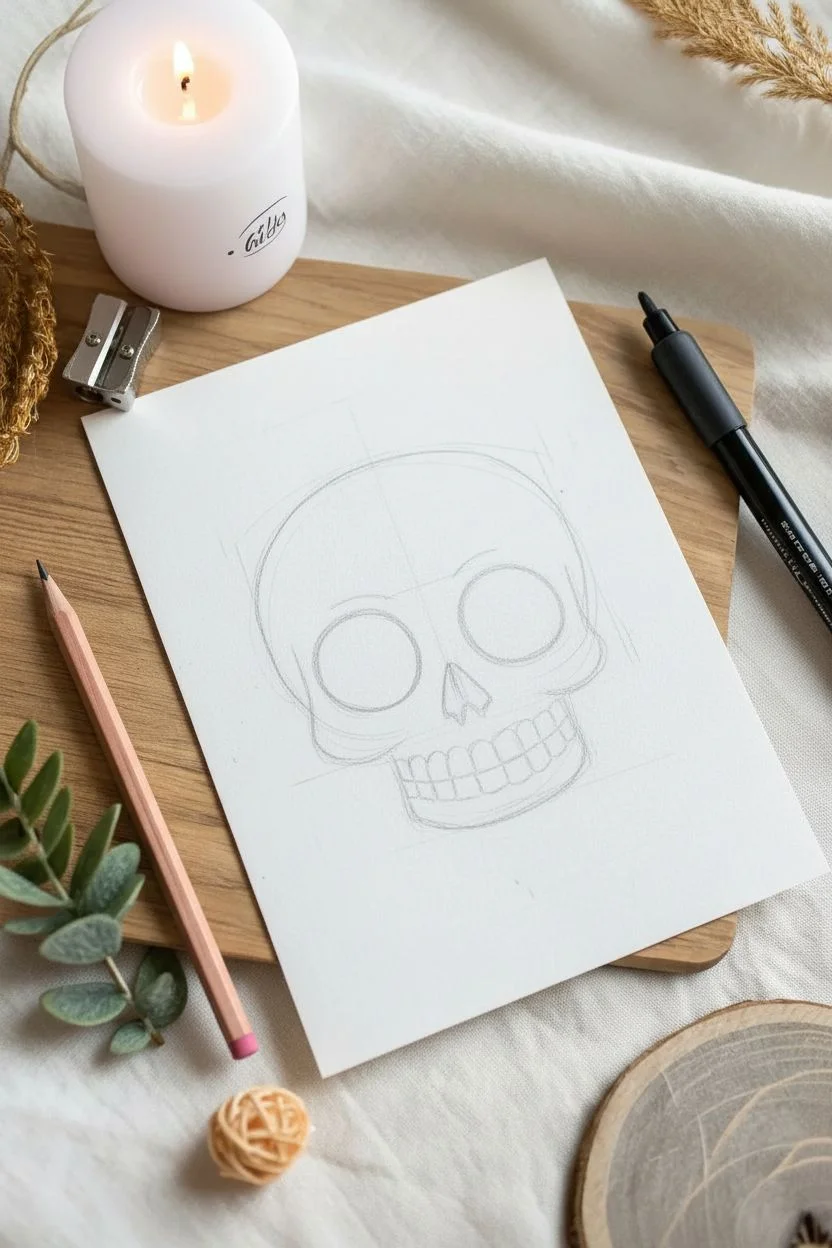
Step 1: Sketching the Outline
-
Map out the head shape:
Start lightly with your pencil. Draw a large, rounded dome for the top of the skull. As you come down the sides, curve inwards slightly to define the cheekbones before widening just a bit again. -
Define the jaw:
Connect the sides at the bottom with a squared-off U-shape for the upper jaw area. Keep the lines soft and rounded to maintain that cute cartoon style. -
Place the eye sockets:
Draw two very large, slightly oval circles in the middle of the face. They should take up a significant portion of the face to achieve that “big eyes” look. Leave a small gap between them for the nose. -
Add the nose cavity:
In the space between and slightly below the eyes, sketch an inverted heart shape or a soft triangle with rounded corners for the nasal cavity.
Clean Lines Secret
For smoother curves on the skull, draw from your shoulder rather than just your wrist. This locks your hand and creates much steadier, continuous arcs.
Step 2: Adding Details & Inking
-
Draw the teeth:
Sketch a horizontal line near the bottom of the jaw. Add small vertical lines to create a grid-like pattern for the teeth. Curve the horizontal line slightly upwards at the ends to give the skull a subtle smile. -
Refine the eyes:
Inside the large eye sockets, draw large circles for the pupils. Leave a smaller circle in the upper right or left of each pupil uncolored—this will be the white highlight or “catchlight.” -
Create cheek details:
Lightly sketch curved lines under the eyes to emphasize the cheekbones. You can also mark where the rosy spots will go later. -
Ink the main outlines:
Take your black fineliner and trace over your pencil lines. Use a confident, steady hand. I like to make the outer contour of the skull just slightly thicker than the interior details for visual weight. -
Add line accents:
Add small, short strokes—like little creases—above the eye sockets and near the temples to give depth to the bone structure without making it look scary. -
Fill the dark areas:
Switch to your thicker black marker. Fill in the pupils (carefully avoiding the white highlights) and the nose cavity. This high contrast makes the drawing pop immediately. -
Erase pencil marks:
Once the ink is completely dry—give it a minute or two to prevent smudging—gently erase all your underlying pencil sketches.
Step 3: Color and Decoration
-
Add pink accents:
Using a pink colored pencil, gently shade the top curve of the skull. Keep the pressure light to create a soft gradient that fades into the white. -
Rosy cheeks:
Color small circular patches on the cheekbones with the same pink pencil. You can draw tiny little hearts or dots inside these pink areas for extra texture. -
Draw the stars:
Scatter 5-point stars around the skull using your fineliner. Draw varied sizes—some larger, some tiny—to create a magical atmosphere. -
Add sparkle details:
Fill in the gaps between stars with small four-pointed starbursts (just two crossed lines) and tiny open circles or dots. -
Color the stars:
Select a few of the larger 5-point stars and color them in with your pink pencil to tie the color palette together. -
Final touches:
Add a few tiny dots (stippling) on the upper forehead of the skull with your fineliner to suggest texture.
Smudge Alert
If your fineliner smears when erasing pencil lines, waiting longer isn’t enough? Try dabbing the eraser straight down first to lift graphite before rubbing.
Now you have a delightfully spooky drawing ready to decorate your space
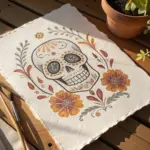
Dancing Skeleton With Exaggerated Motion
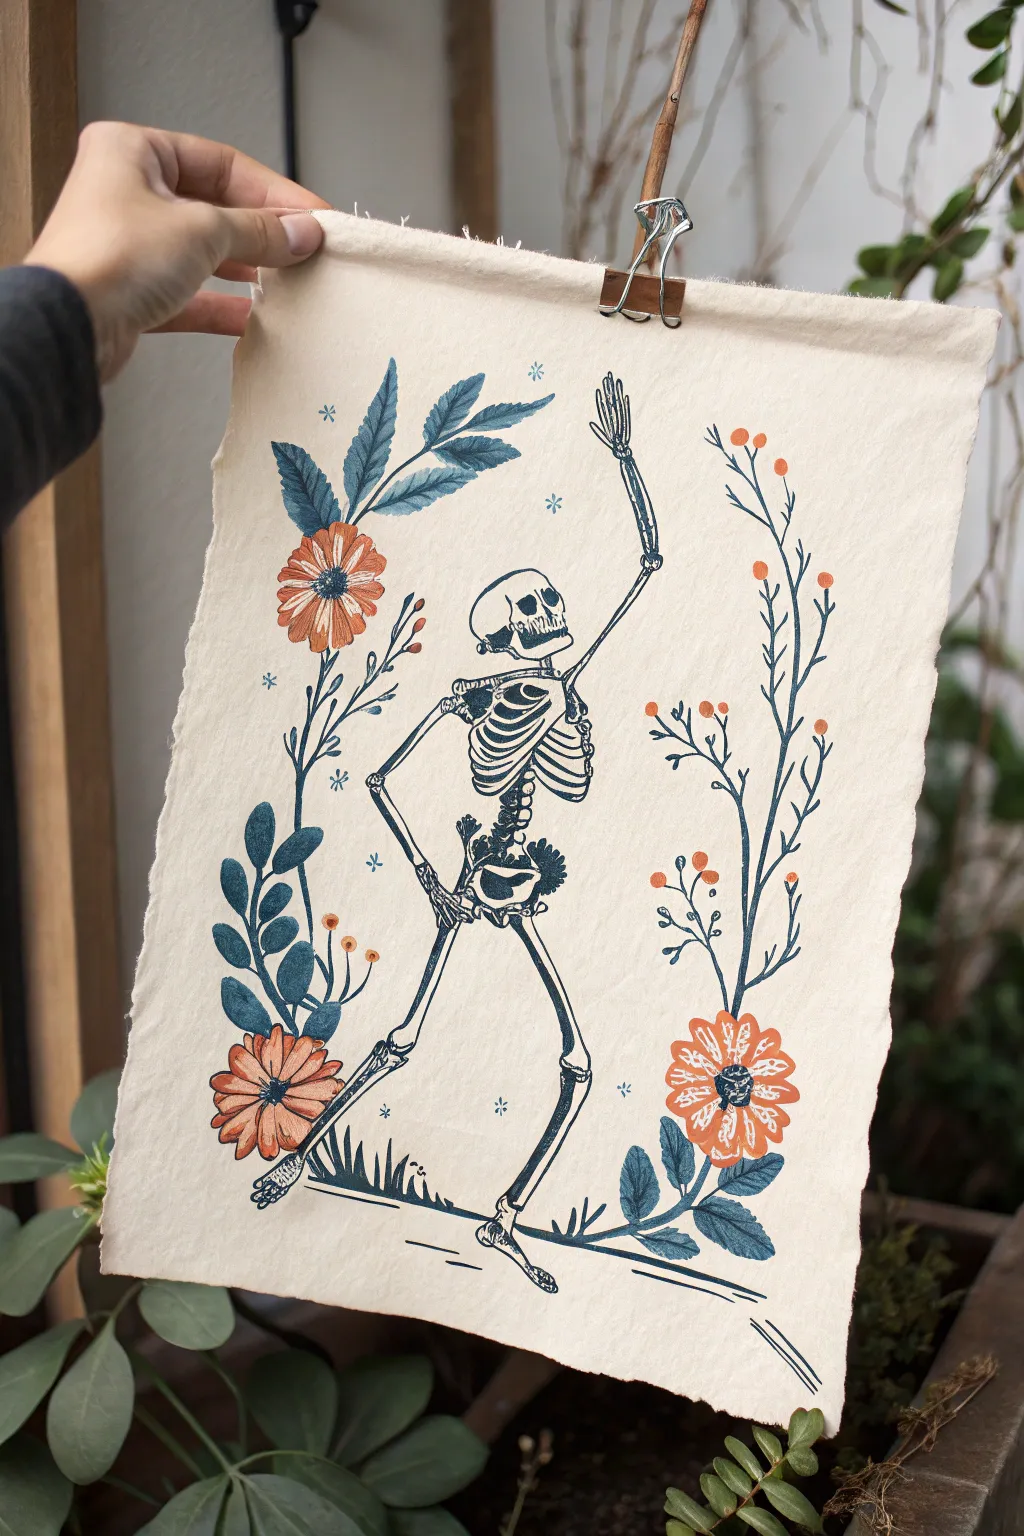
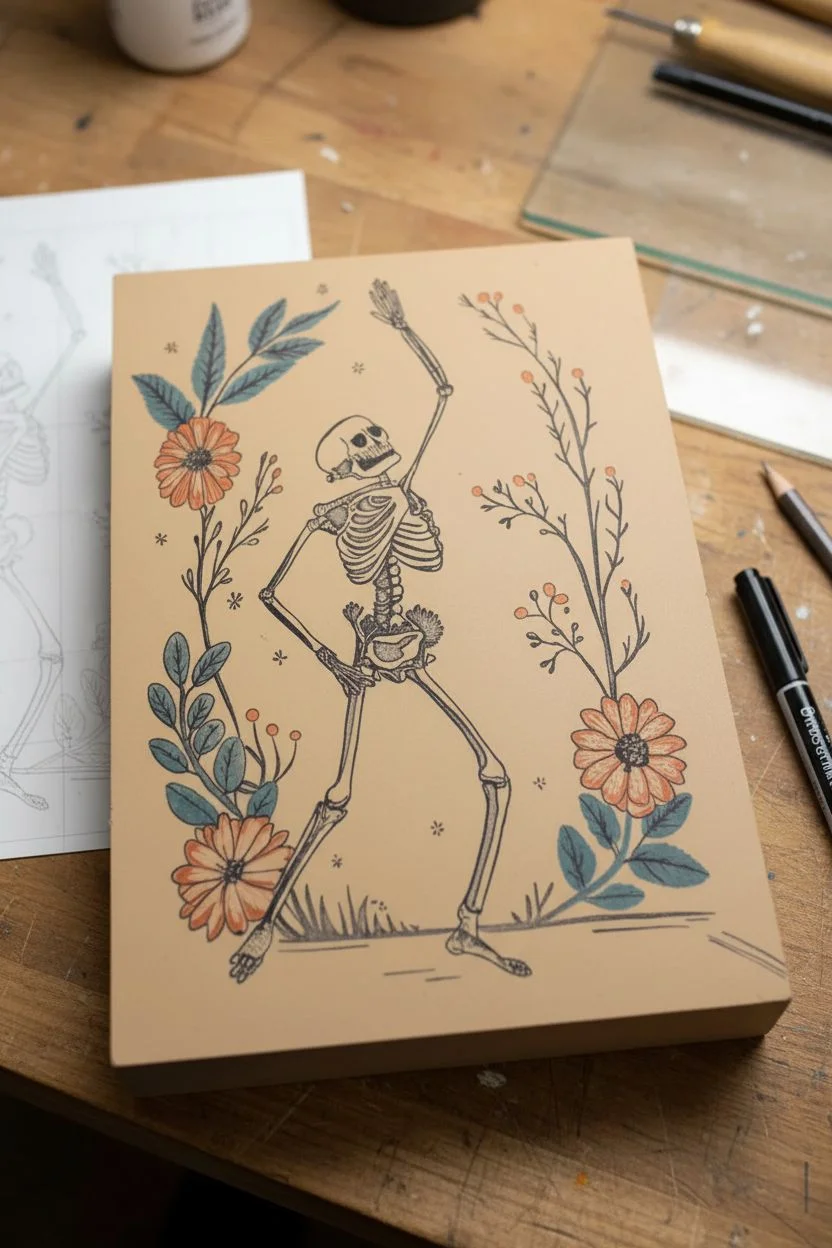
This whimsical project captures the joy of movement with a folk-art inspired skeleton surrounded by botanical elements. You’ll learn to carve and print a two-color design on handmade paper, creating a piece that feels both vintage and lively.
Step-by-Step Guide
Materials
- Soft linoleum block (at least 8″x10″)
- Linoleum carving tools (V-gouge and U-gouge)
- Block printing ink (Navy Blue and Burnt Orange)
- Brayer (rubber roller)
- Handmade or cold-press watercolor paper with deckled edges
- Tracing paper and soft pencil (2B or 4B)
- Barren or large wooden spoon for burnishing
- Glass or acrylic sheet for ink rolling
- X-Acto knife
Step 1: Design and Transfer
-
Sketch the skeleton:
Begin by sketching your skeleton figure on plain paper. Focus on the exaggerated pose—one arm thrown high, legs mid-stride—to capture the feeling of a jig. Keep the ribcage and spine details simplified for easier carving later. -
Add botanical borders:
Draw the surrounding flora. Add large daisies near the feet and waist, and tall, spindly branches reaching up the sides. Include scattered small starbursts to fill the negative space. -
Trace the design:
Place tracing paper over your sketch and trace every line with a soft pencil. Because block printing reverses the image, flip your tracing paper over and rub the back to transfer the graphite onto your linoleum block. Alternatively, use carbon paper for a cleaner transfer. -
Secure the lines:
Go over the faint graphite lines on the block with a permanent marker. This prevents the design from smudging while you carve and helps you clearly see what needs to remain raised.
Step 2: Carving the Block
-
Outline fine details:
Start with your smallest V-gouge tool. Carefully carve along the outlines of the skeleton’s ribs, the delicate finger bones, and the thin stems of the plants. Always carve away from your body for safety. -
Clear negative space:
Switch to a wider U-gouge to clear away the larger background areas. You don’t need to make the background perfectly smooth; leaving some texture creates that charming ‘chatter’ characteristic of hand-printed work. -
Separate the color elements:
For this two-color print, you have two options. You can carve two separate blocks (one for blue, one for orange), or use the ‘reduction’ method. However, for this specific look, I prefer the ‘jigsaw’ method: carefully cut the linoleum block itself with an X-Acto knife to separate the orange flowers from the blue skeleton and leaves.
Patchy Ink Coverage?
If your print looks salty or speckled, your paper might be too dry or rough. Try dampening the paper slightly more or switch to a smoother printmaking paper like Rives BFK.
Step 3: Inking and Printing
-
Prepare the paper:
If using handmade paper with a heavy texture, lightly mist it with water from a spray bottle and blot it between towels. Damp paper accepts ink much better than bone-dry paper. -
Roll out the blue ink:
Squeeze a small line of navy blue ink onto your glass slab. Roll the brayer back and forth until you hear a sticky, velcro-like sound. This indicates the perfect ink consistency. -
Ink the main body:
Roll the blue ink onto the skeleton and leaf sections of your carved (and separated) block. Ensure an even coat without flooding the fine lines of the ribcage. -
Ink the flowers:
Clean your brayer or use a second one to roll the burnt orange ink. Apply this to the separated flower pieces you cut out earlier. -
Reassemble the puzzle:
carefully place the inked linoleum pieces back together on your work surface like a jigsaw puzzle so they form the complete rectangular image again. -
Position the paper:
Align your paper over the block. Once the paper touches the inked surface, do not shift it, or the image will blur. Drop it straight down. -
Burnish the print:
Using a barren or the back of a wooden spoon, rub the back of the paper firmly in small circles. Apply significant pressure, focusing especially on the detailed skeletal areas to ensure a crisp transfer. -
The reveal:
Slowly peel one corner of the paper up to check coverage. If it looks spotty, lay it back down carefully and burnish more. When ready, pull the paper completely off to reveal your dancing skeleton.
Pro Tip: Registration
Trace the outline of your full block onto a piece of scrap paper and tape it to your table. Use this as a guide to reassemble your inked ‘jigsaw’ pieces perfectly every time.
Step 4: Finishing Touches
-
drying time:
Oil-based inks can take a few days to fully cure, while water-soluble inks dry within an hour. Hang the print using clips, as shown in the inspiration photo, or lay it flat in a safe, dust-free area. -
Add hand-painted details:
If any orange center details were too small to carve, you can add small dots of orange paint with a fine brush directly onto the dried print to finish the flower centers.
Now you have a spirited piece of art that brings a touch of macabre joy to your wall.
BRUSH GUIDE
The Right Brush for Every Stroke
From clean lines to bold texture — master brush choice, stroke control, and essential techniques.
Explore the Full Guide
Friendly Waving Skeleton Character
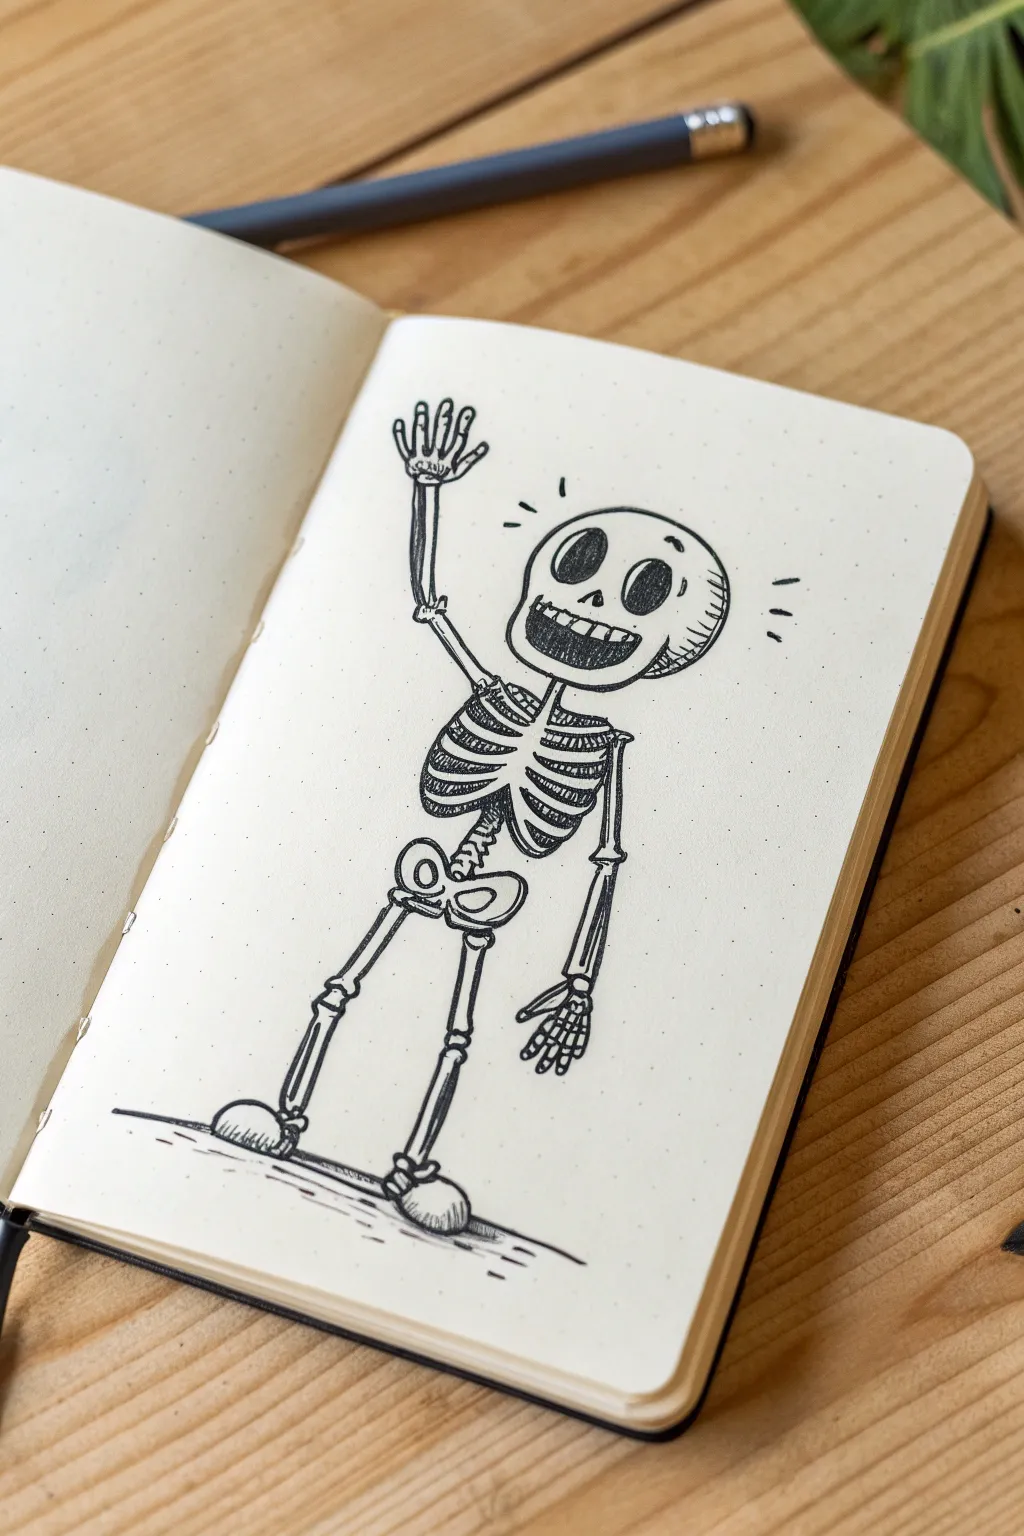

Bring some spooky joy to your sketchbook with this easygoing skeleton character. Drawn with clean ink lines on dotted paper, this happy pile of bones features a charming smile and a casual wave that makes him feel like an instant friend.
Step-by-Step
Materials
- Dotted or blank sketchbook suitable for ink
- Pencil (HB or 2B) for sketching
- Eraser
- Fine liner pen (01 or 03 size)
- Thicker graphic pen or marker (05 or 08 size) for filling in dark areas
Step 1: Drafting the Basic Structure
-
Map out the head:
Start by sketching a large, slightly squashed circle for the skull. It doesn’t need to be perfect; a loose oval shape gives it character. -
Place the spine and hips:
Draw a curved line coming down from the skull for the spine. At the bottom of this line, sketch a butterfly or peanut shape to represent the pelvis/hip bone. -
Sketch the ribcage:
Add the ribcage shape chest-high on your spine line. Think of this as an inverted egg shape that gets slightly wider over the ‘chest’ area. -
Position the legs and feet:
Draw two stick lines extending down from the hip bone for the legs. At the bottom, add simple semi-circles for the feet/shoes. -
Position the arms:
Sketch the arm lines. Have the left arm (viewer’s left) reaching straight up in a wave, and the right arm hanging loosely at the side.
Smudged Ink?
If your hand smears the ink while drawing, slip a scrap piece of paper under your drawing hand. It acts as a shield, protecting your wet lines while you work on other details.
Step 2: Refining the Bones
-
Define the skull features:
Inside the skull shape, sketch two large ovals for eye sockets. Below them, draw a small triangular nose cavity. Add a wide, curved ‘U’ shape for the jawline to create an open smiling mouth. -
Detail the ribs:
Flesh out the ribcage by drawing horizontal bands across the chest area. Leave a gap in the center for the sternum/spine. -
Thicken the limbs:
Go over your stick-figure limbs, turning them into bones. Sketch knobby ends where the knees and elbows connect to imply joints. -
Add fingers:
For the waving hand, draw five distinct bony fingers spread out wide. For the hanging hand, just draw the basic finger shapes pointing downward.
Accessorize Him
Give your skeleton character personality by adding a top hat, a bowtie, or holding a trick-or-treat bucket in his non-waving hand.
Step 3: Inking and Finishing
-
Outline the head:
Switch to your fine liner pen. Carefully trace the outline of the skull. Add a few small hatched lines on the right side of the skull to suggest shadow and volume. -
Fill the face:
Using your thicker pen, color in the eye sockets and nose completely black. Leave a tiny white dot in each eye for a reflective highlight—this brings him to life. -
Draw the teeth:
Inside the open mouth, draw a horizontal line and small vertical dashes to create teeth, then fill the background of the mouth black. -
Ink the spine and ribs:
Trace the rib bones carefully. Use your thick pen to fill in the dark spaces *between* the ribs, which makes the white bones pop against the shadows. -
Ink the waving arm:
Draw the arm bones with clean lines. Add a small cuff-like detail at the wrist before drawing the spread fingers. -
Complete the lower body:
Ink the pelvis, leg bones, and feet. Add small rounded shapes at the ankles and knees to define the joints clearly. -
Add motion lines:
To emphasize the wave, draw three small dashes near the waving hand. Add similar ‘radiating’ lines near the head to show excitement or surprise. -
Ground the figure:
Draw a few casual horizontal lines under the feet so the skeleton isn’t floating in space. -
Erase and clean up:
Wait for the ink to become completely touch-dry, then gently erase all your pencil guides to reveal the crisp black and white drawing.
Now you have a charming skeletal friend waving back at you from the page
Skeleton Hands Making a Heart
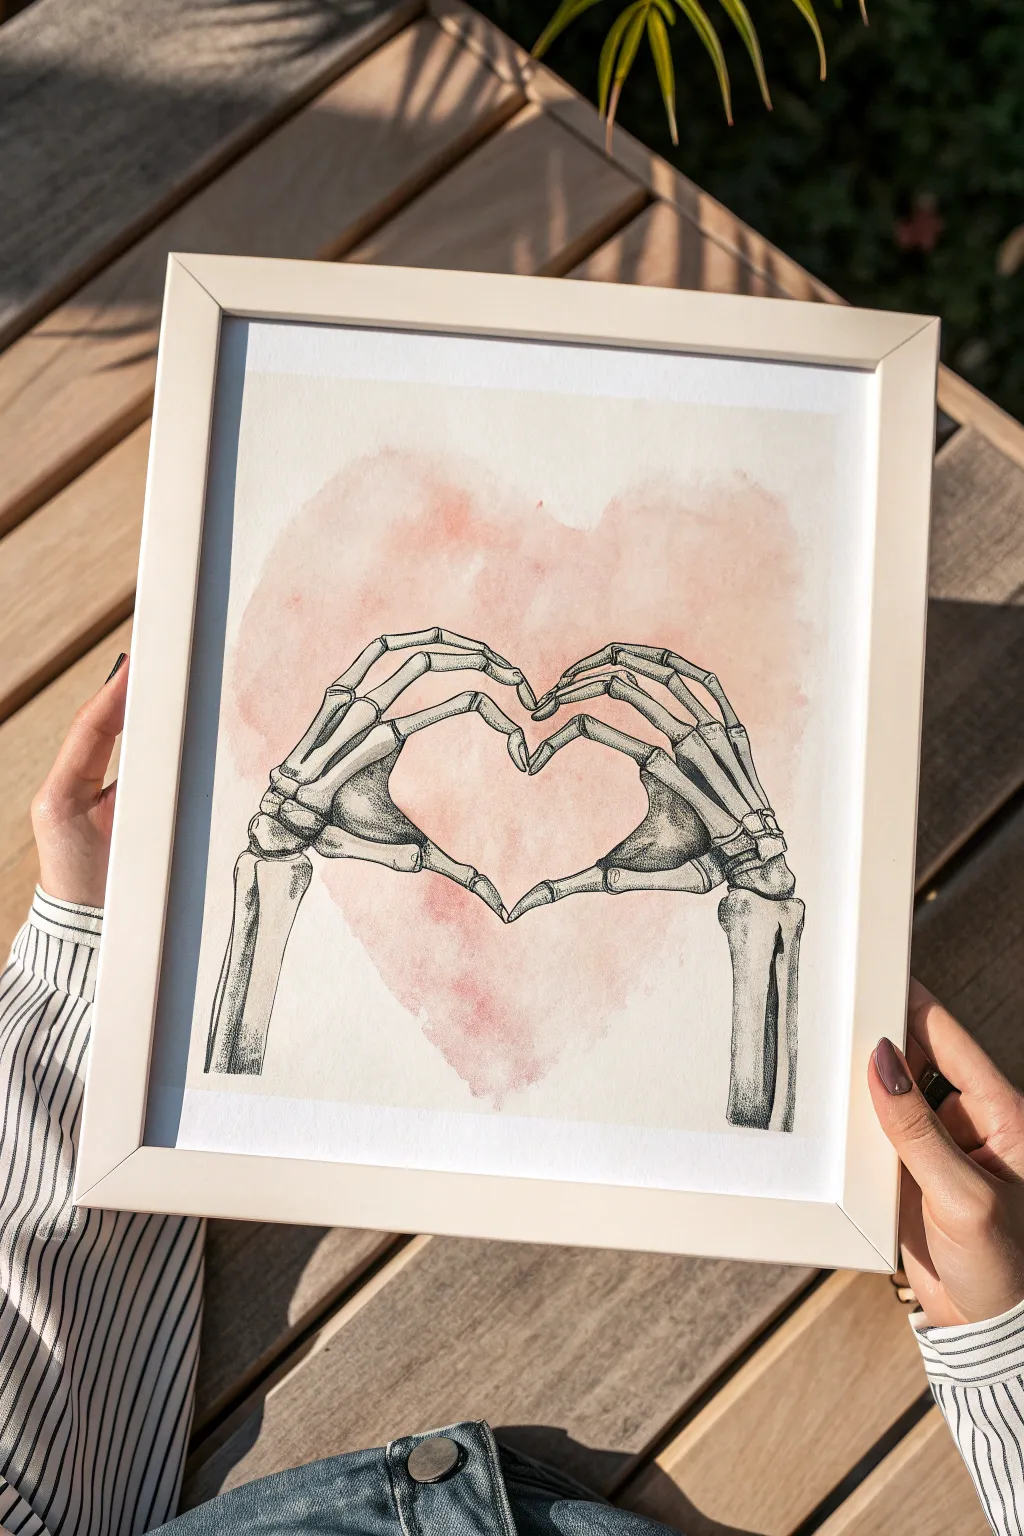
This striking piece combines soft watercolor textures with precise ink work to create a romantic yet gothic statement. The dusty pink heart background perfectly offsets the intricate, anatomical details of the skeleton hands making a heart gesture.
Step-by-Step Guide
Materials
- Heavyweight watercolor paper (300gsm/140lb)
- Watercolor paints (Alizarin Crimson, Burnt Sienna, or similar muted reds)
- Soft round watercolor brush (size 10 or 12)
- Fine liner pens (sizes 0.1, 0.3, and 0.5)
- Graphite pencil (HB or H)
- Kneaded eraser
- Paper towels
- Jar of water
- White or light wood frame (optional)
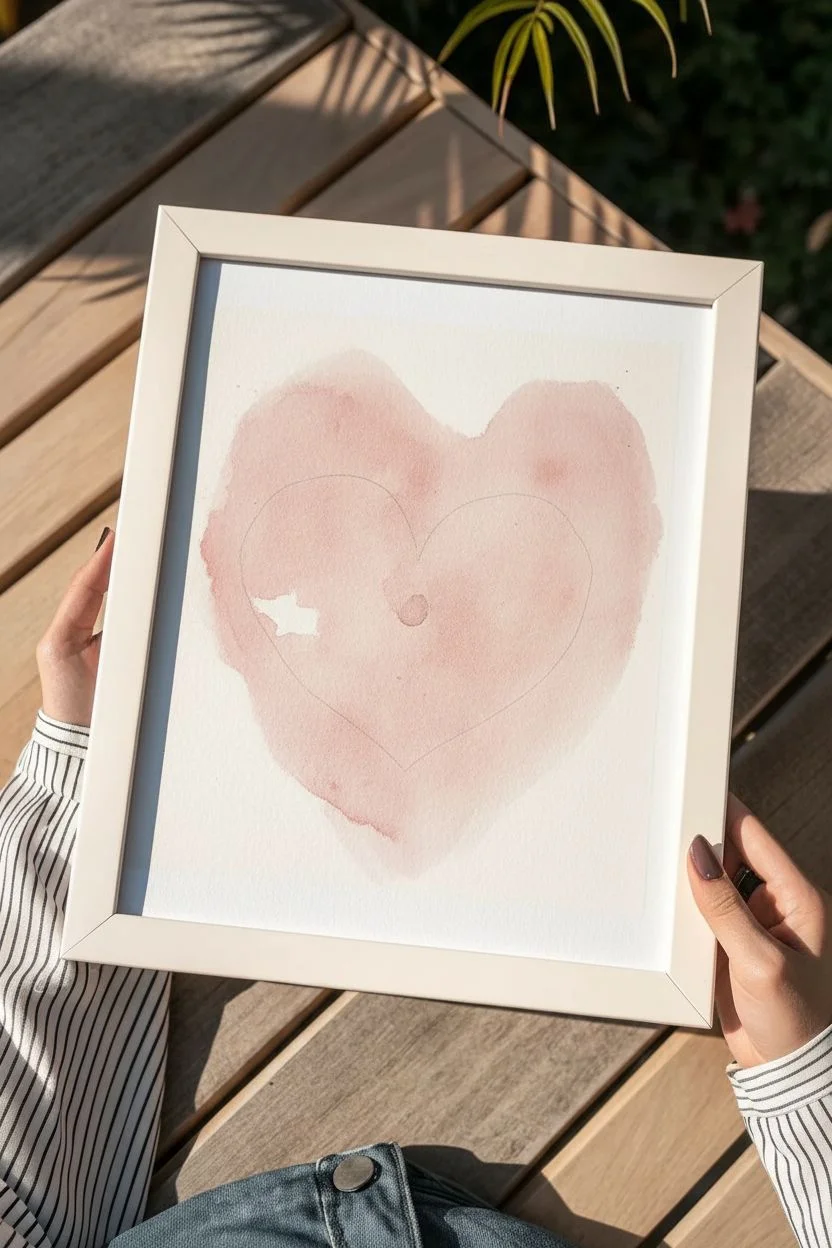
Step 1: Painting the Watercolor Heart
-
Prepare the wash:
Mix your watercolor paint to create a dusty rose color. You’ll want a balance of crimson with a touch of brown to avoid it looking too bright or candy-like. Aim for a medium transparency—enough water to flow, but enough pigment to show texture. -
Sketch the heart guide:
Very lightly sketch a large, loose heart shape in the center of your paper. This doesn’t need to be perfect; it’s just a boundary guide for your paint. -
Apply the wash:
Using your large round brush, coat the heart area with clean water first (wet-on-wet technique), then drop in your mixed pigment. Let the color bloom and spread naturally. -
Refine the edges:
While the paint is still wet, soften the edges of the heart so they aren’t razor-sharp. You want a dreamy, cloud-like silhouette. -
Create texture:
Dab a few spots with a crumpled paper towel to lift pigment, creating lighter patches. Conversely, drop a slightly more concentrated mix into the center for depth. Let this dry completely before moving on.
Bone Texture Tip
Don’t draw straight lines for bones. Use slightly wobbly, broken lines to suggest the pitted, uneven surface of natural skeletal material.
Step 2: Sketching the Anatomy
-
Basic hand structure:
Using your pencil, lightly map out the wrist bones (carpals) at the bottom left and right. Draw two lines extending up for the radius and ulna on each side. -
Metacarpals placement:
Sketch the five long bones of the palm (metacarpals) fanning out from the wrist. Remember, unlike flesh hands, there is clear spacing between these bones. -
Positioning the fingers:
Draw the finger bones (phalanges). The thumbs should point downward to form the bottom point of the inner heart shape, while the index fingers curve to touch at the top, completing the heart silhouette. -
Refining the joints:
Go back over your sketch and define the knuckles. Bone joints are bulbous and slightly wider than the shafts of the bones. Ensure the tips of the fingers look tapered but bony, not fleshy.
Step 3: Inking and Detailing
-
Initial outline:
Take your 0.3 pen and trace over your pencil sketch. Keep your lines confident but arguably a little shaky or organic to mimic the texture of bone. -
Erase pencil marks:
Once the ink is fully dry, gently use the kneaded eraser to lift all visible graphite lines. -
Add core shadows:
Switch to the 0.5 pen for the darkest areas. Fill in the gaps between the bones and the deep shadows where the bones overlap or curve away from the light source. -
Stippling technique:
Using the 0.1 pen, begin stippling (creating tiny dots) near the edges of the bones. Concentrate the dots heavily near the outlines and disperse them as you move toward the center of the bone. -
Defining curvature:
Add small, curved hatching lines around the cylindrical parts of the finger bones to give them volume. This makes them look round rather than flat. -
Texture details:
Draw tiny cracks or fissures on the larger arm bones and knuckles using your finest pen. This adds age and realism to the skeleton. -
Deepen the contrast:
Do a final pass with your 0.3 pen to darken the areas where the fingers touch, emphasizing the contact points of the heart gesture.
Add a Glow Effect
Use a white gel pen to add tiny highlights on the most prominent knuckles or bone ridges to make the skeleton pop against the pink background.
Frame your spooky yet sweet masterpiece in a simple light-colored frame to let the delicate artwork shine.


Skeleton Hand Peace Sign Close-Up
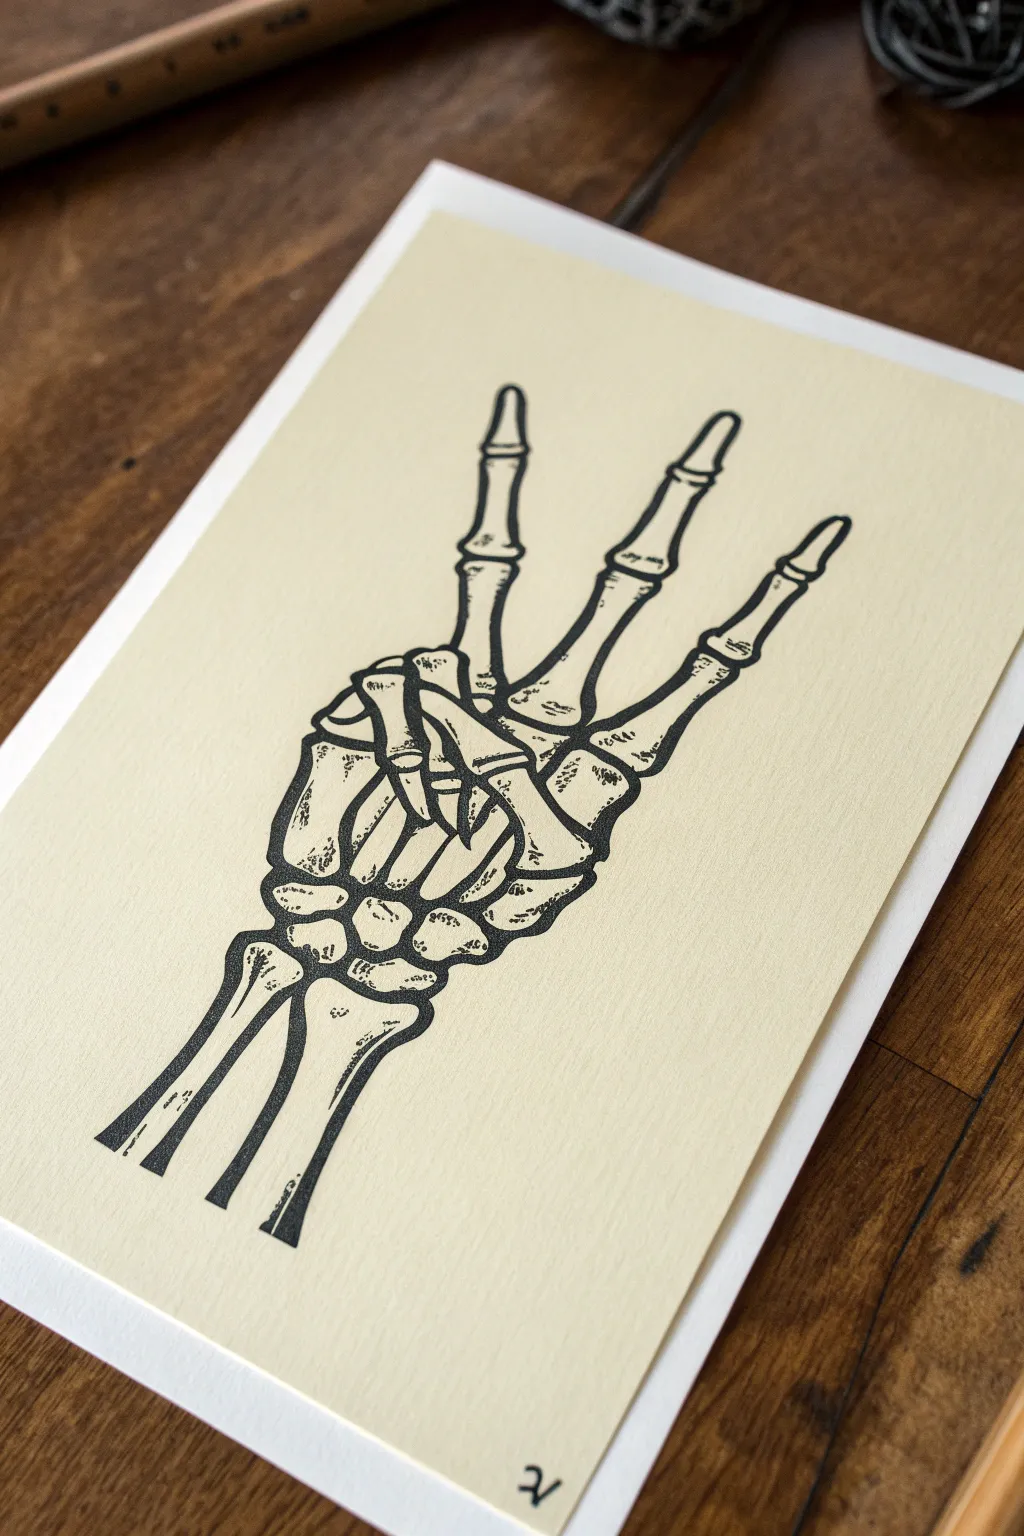
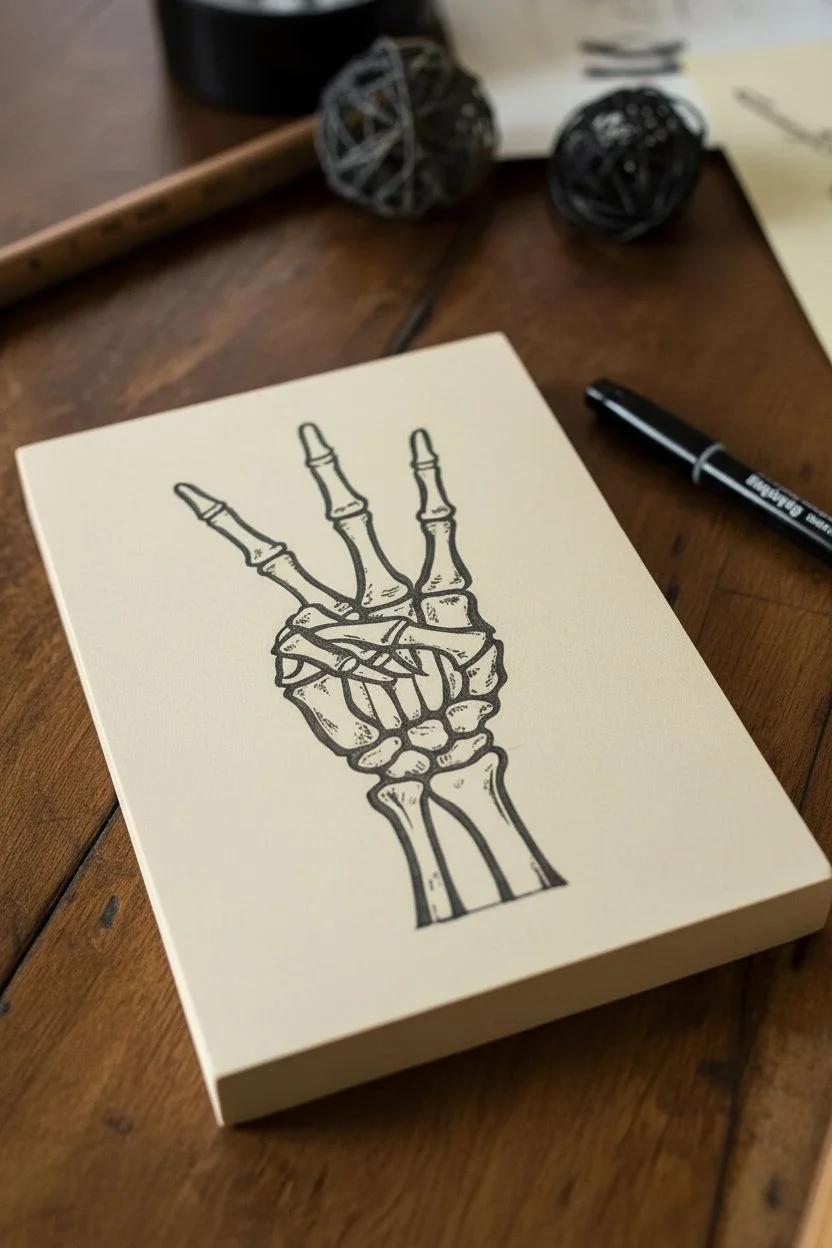
Capture the stark, graphic beauty of anatomy with this skeleton hand lino print project. Using simple carving tools, you’ll create a bold black-on-cream design that mimics the look of vintage medical illustrations.
Step-by-Step
Materials
- Soft-cut linoleum block (4×6 inch)
- Linoleum cutter set (V-gouge and U-gouge)
- Black block printing ink (water-soluble)
- Baren or clean wooden spoon for burnishing
- Brayer (rubber roller)
- Cream or ivory cardstock paper
- Pencil (HB or softer)
- Tracing paper
- Ink tray or piece of glass/plexiglass
- Fine-grit sandpaper (optional)
Step 1: Design & Transfer
-
Prepare the Image:
Start by sketching the skeleton hand on a piece of paper the same size as your block. Focus on the pose: three fingers extended (index, middle, ring) and the thumb tucked over the curled pinky finger. -
Refine the Anatomy:
Simplify the bones into clear segments. Don’t worry about perfect realism; instead, define the knuckles and phalanges with strong outlines that will be easy to carve around. -
Transfer to Block:
Use the graphite transfer method to get your image onto the lino block. Trace your drawing onto tracing paper, flip it over (pencil side down) onto the block, and rub the back firmly to transfer the graphite. -
Reinforce Lines:
Go over the faint graphite lines on the lino block with a permanent marker or dark pencil. This ensures you won’t lose your guide while carving.
Keep it Sharp
Strop your lino cutters on a piece of leather or denim every 15 minutes. Sharp tools are safer and leave much cleaner edges without tearing the linoleum.
Step 2: Carving the Block
-
Outline Carving:
Attach your finest V-gouge blade. Carefully carve along the very outer edges of your marker lines. You want to cut *away* from the black line, leaving the skeleton raised. -
Detailing the Bones:
Carve the white negative spaces between the finger bones and the carpal bones of the wrist. Be precise here; these gaps define the skeleton structure. -
Adding Texture:
Look closely at the reference. Notice the small black tick marks and shading on the bones? Leave small islands of lino uncarved within the white bone areas to create that textured, aged look. -
Clearing Backgrounds:
Switch to a wider U-gouge to clear away the large open space sounding the hand. Carve in varying directions if you want a textured background, or smooth it out completely for a clean look. -
The Radius and Ulna:
Carve out the space between the two arm bones at the bottom. Ensure the separation is distinct so the arm doesn’t look like a single block. -
Proofing the Block:
Place a piece of scrap paper over the block and rub it with a crayon or charcoal stick. This ‘rubbing’ will show you if there are any high spots in the background that need to be carved down further.
Step 3: Inking & Printing
-
Prepare the Ink:
Squeeze a small line of black block printing ink onto your inking tray. Use the brayer to roll it out until you hear a consistent ‘velcro’ zipper sound, indicating the ink is tacky and even. -
Ink the Block:
Roll the brayer over your carved block. Apply thin, even layers. I prefer to roll in multiple directions—up/down and then diagonal—to ensure all the raised ridges are fully coated. -
Position the Paper:
Carefully align your cream cardstock over the inked block. Once the paper touches the ink, do not shift it, or the image will smudge. -
Burnishing:
Using a baren or the back of a wooden spoon, apply firm pressure in a circular motion over the back of the paper. Focus especially on the detailed bone areas to transfer the ink solidly. -
The Reveal:
Slowly peel the paper back from one corner. Watch closely to ensure the ink has transferred black and crisp. If it looks spotty, lay it back down carefully and burnish that spot again. -
Drying:
Place the print face-up in a safe, dust-free area. Allow water-soluble ink to dry for at least an hour, or oil-based ink for a few days. -
Signing:
Once dry, use a pencil to sign your work or add a small monogram at the bottom, just like the original inspiration piece.
Go Metallic
Swap the black ink for gold or copper block printing ink on black cardstock. The metallic sheen gives the skeletal bones a luxurious, gothic vibe.
Frame your spooky yet stylish print and hang it where it can command attention.
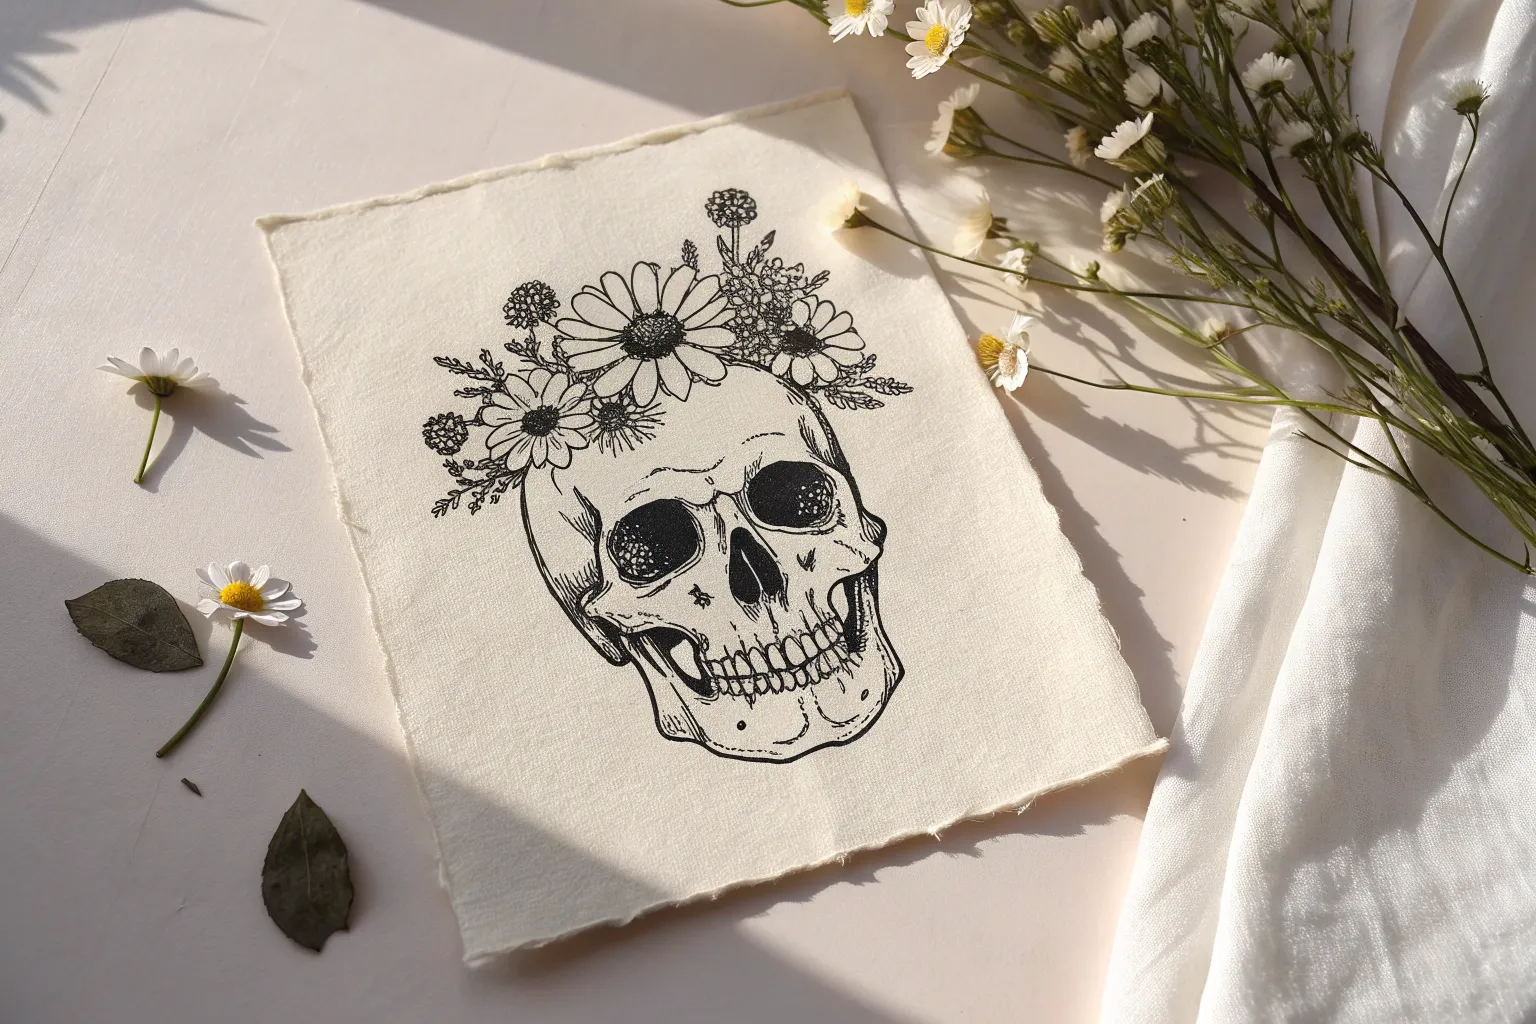
Skull With a Flower Crown
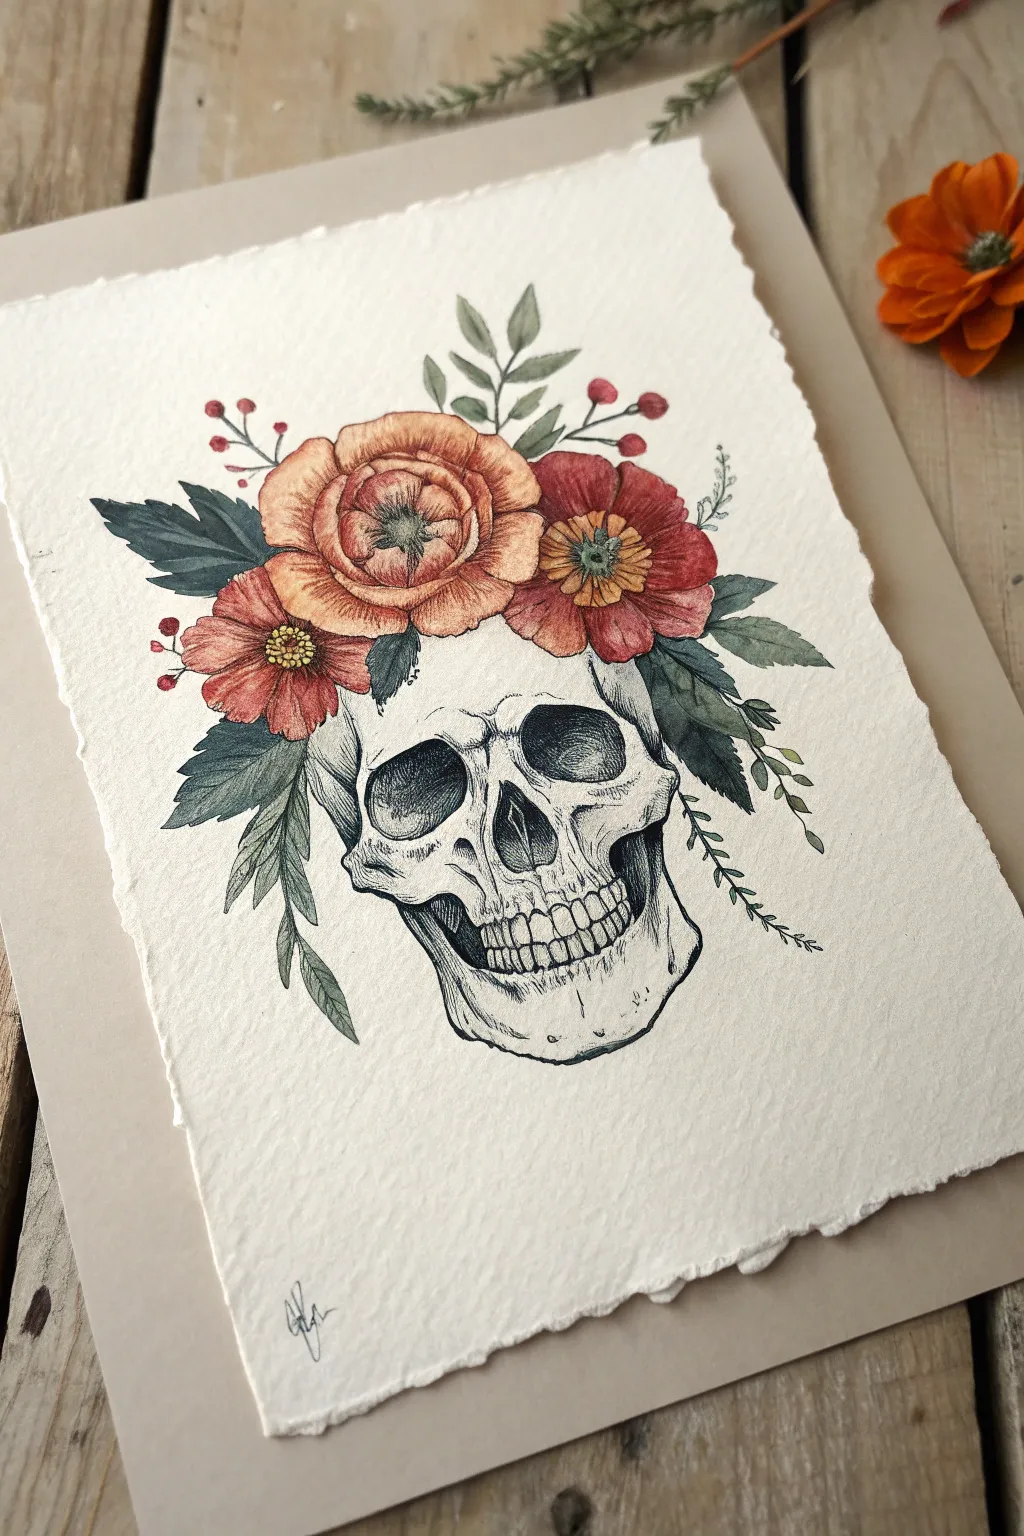
This striking illustration combines the delicate beauty of watercolor florals with the stark structure of a pen-and-ink skull. The contrast between the soft, warm blooms and the intricate monochrome bone creates a balanced, slightly gothic yet romantic aesthetic perfect for wall art.
Step-by-Step Tutorial
Materials
- Cold-press watercolor paper (300 gsm, heavy texture)
- Fine liner pens (sizes 0.1, 0.3, and 0.5, waterproof archival ink)
- Watercolor paints (Rust Orange, Crimson Red, Sap Green, Deep Green, Yellow Ochre)
- Pencil (HB or 2H)
- Kneaded eraser
- Round watercolor brushes (size 2 and 4)
- Water cups and paper towels
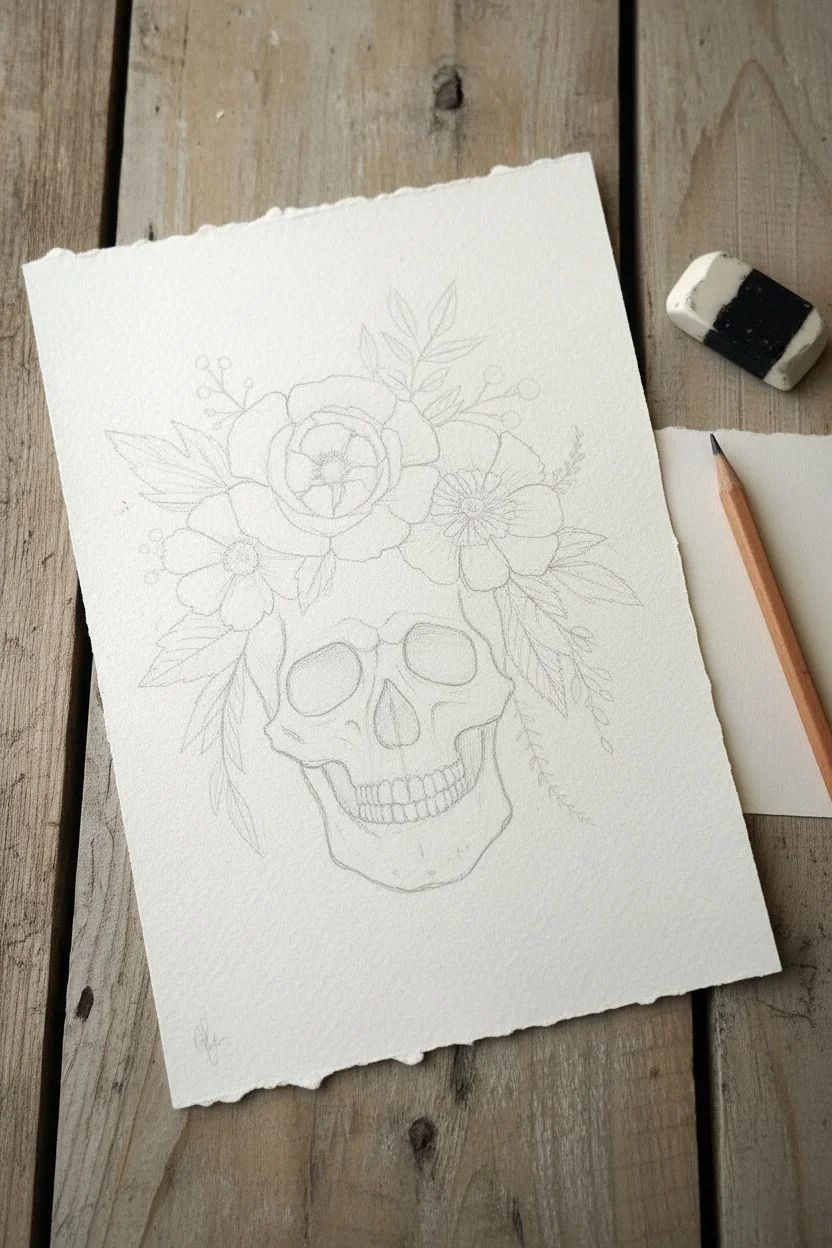
Step 1: Sketching the Composition
-
Establish the Skull Shape:
Begin with a light pencil sketch of the skull in the lower center of your paper. Focus on the main cranium shape and the jawline first, ensuring the jaw is slightly angled to the right for a natural look. -
Detail the Face:
Sketch the eye sockets as large, slightly irregular ovals. Add the triangular nasal cavity and outline the teeth row, keeping individual teeth rough for now. -
Outline the Florals:
Draw three large circles overlapping the top of the skull to mark the main flowers. Use a larger central circle for the rose and two flanking circles for the poppy-style blooms. -
Add Greenery:
Sketch leaves extending outward from beneath the flowers. Include different shapes: broad, jagged leaves on the left, and delicate sprigs of berries or smaller leaves trailing down on the right.
Step 2: Inking the Structure
-
Define the Skull:
Using a 0.3 fine liner, carefully trace your skull pencil lines. Use broken or shaky lines for cracks and sutures to add texture to the bone. -
Darken the Cavities:
Switch to a 0.5 pen or brush pen to fill in the eye sockets and nasal cavity. Leave small white specks or stippling near the edges to suggest depth rather than a flat black void. -
Detailing the Teeth:
With the 0.1 pen, outline the teeth. Add tiny vertical lines near the gum line of each tooth to show root structure and separation. -
Inking the Flowers:
Ink the floral outlines with the 0.1 pen. For the central rose, use concentric, wavy petals. For the side flowers, draw distinct, separate petals radiating from a center point. -
Adding Shading:
Use stippling (tiny dots) along the cheekbones, temples, and under the flower crown to create shadow on the skull. The denser the dots, the darker the shadow.
Stippling Patience
Don’t rush the stippling on the skull shadows. Slow, deliberate dots create a smooth gradient, whereas fast tapping leads to messy ‘tails’ on your dots.
Step 3: Watercolor Application
-
Base Layer for Rose:
Mix a diluted Rust Orange and apply a light wash to the central rose. Keep the center slightly darker and the outer petals lighter. -
Touching up the Poppies:
Paint the side flowers with Crimson Red. While the paint is still wet, drop a tiny bit of darker red near the flower centers to let it bleed naturally outward. -
Painting the Leaves:
Use a mix of Sap Green and a touch of black or blue for a muted, vintage green tone. Paint the broad leaves, varying the intensity of the green for visual interest. -
Small Details:
Use Yellow Ochre for the centers of the red flowers. Paint the small berries with a bright red or orange using the very tip of your size 2 brush. -
Shadows on Bone:
Mix a very watery grey or diluted brown. Glaze this lightly over the shadowed areas of the skull (eye sockets, jawline) to give the bone some dimension without overpowering the ink work.
Muddy Watercolors?
If your flower colors are bleeding into the skull, you are painting too wet. Let the flower section dry completely before adding the grey shading to the bone.
Step 4: Refining and Finishing
-
Deepening Floral Shadows:
Once the first layer is dry, add a second, more concentrated layer of paint to the crevices between petals to verify volume. -
Leaf Texture:
After the green paint is fully dry, use your 0.1 pen to draw veins on the leaves. Keep the lines thin and delicate. -
Enhancing Contrast:
Go back over your darkest shadows in the skull with the 0.3 pen if the watercolor wash faded them. Reinforce the contact shadow where the flowers sit on the bone. -
Optional Deckle Edge:
If you didn’t start with deckled paper, you can carefully tear the edges of your paper against a ruler to create that ragged, vintage look shown in the reference.
Sign your work with a small flourish in the corner and frame it to add a touch of elegant darkness to your room
Skull and Roses Dramatic Arrangement
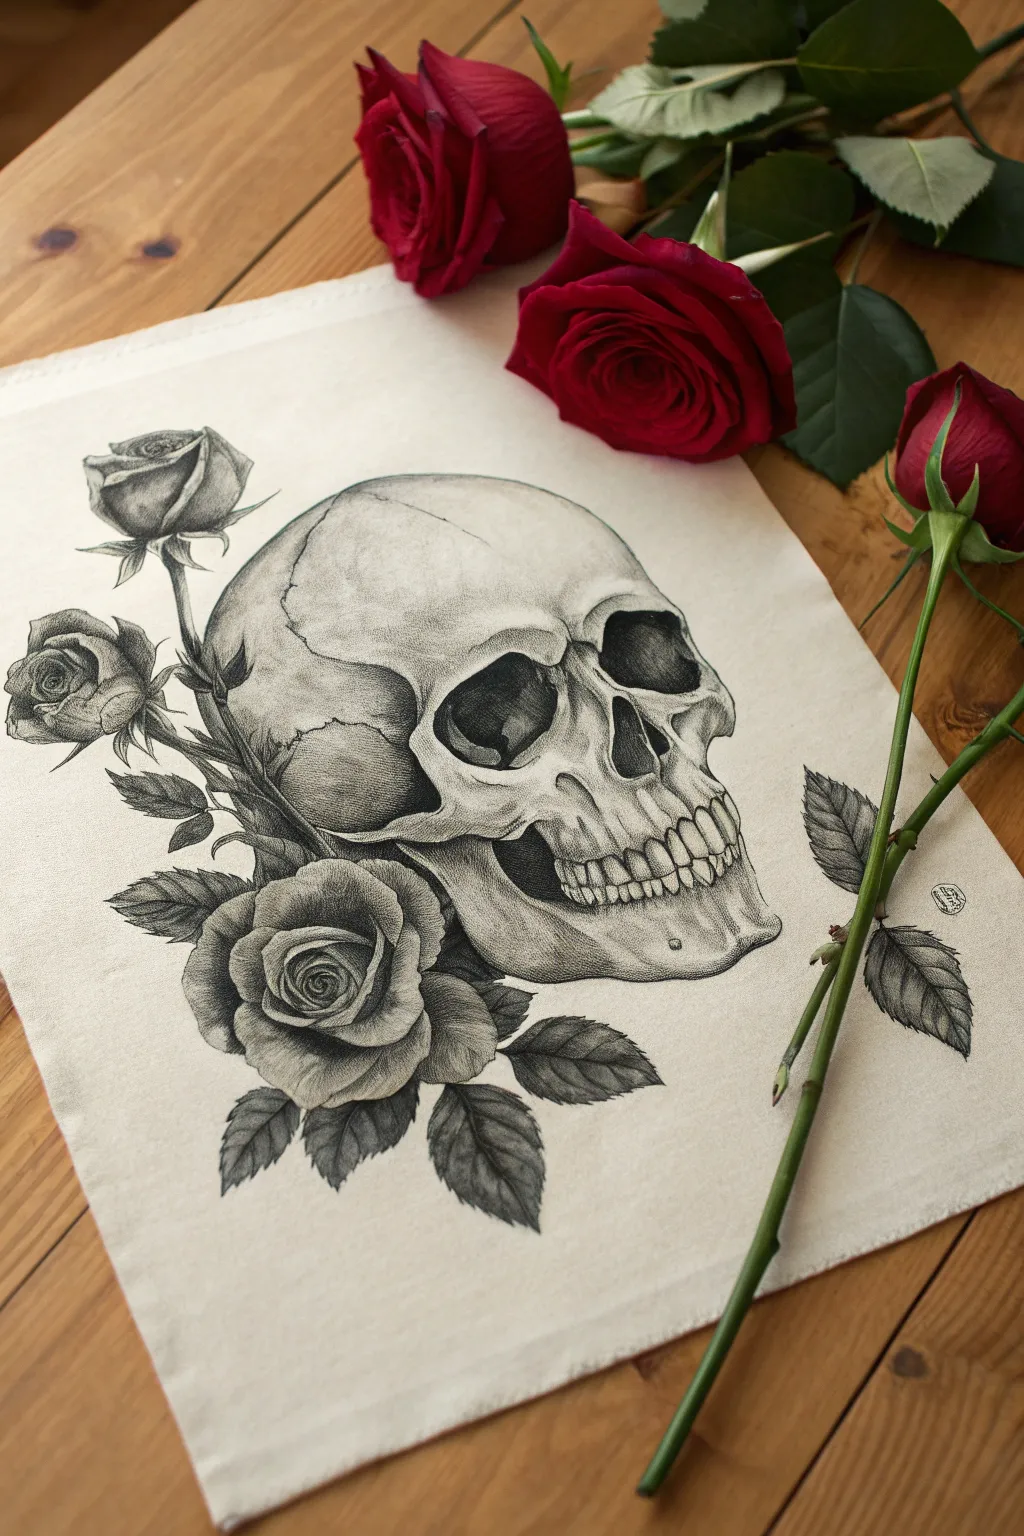
This striking monochromatic drawing captures the eternal dance between life and death through the classic pairing of a weathered skull and blooming roses. Using careful shading and texture techniques, you’ll create a piece with deep contrast and realistic volume.
Step-by-Step
Materials
- High-quality hot press watercolor paper or bristol board (smooth surface)
- Graphite pencils (HB, 2B, 4B, 6B)
- Fine liner pens (0.05mm, 0.1mm, 0.3mm) – optional for stippling effect
- Kneaded eraser
- Precision mechanical eraser
- Blending stumps or tortillons
- Ruler (opaque)
- Workable fixative spray
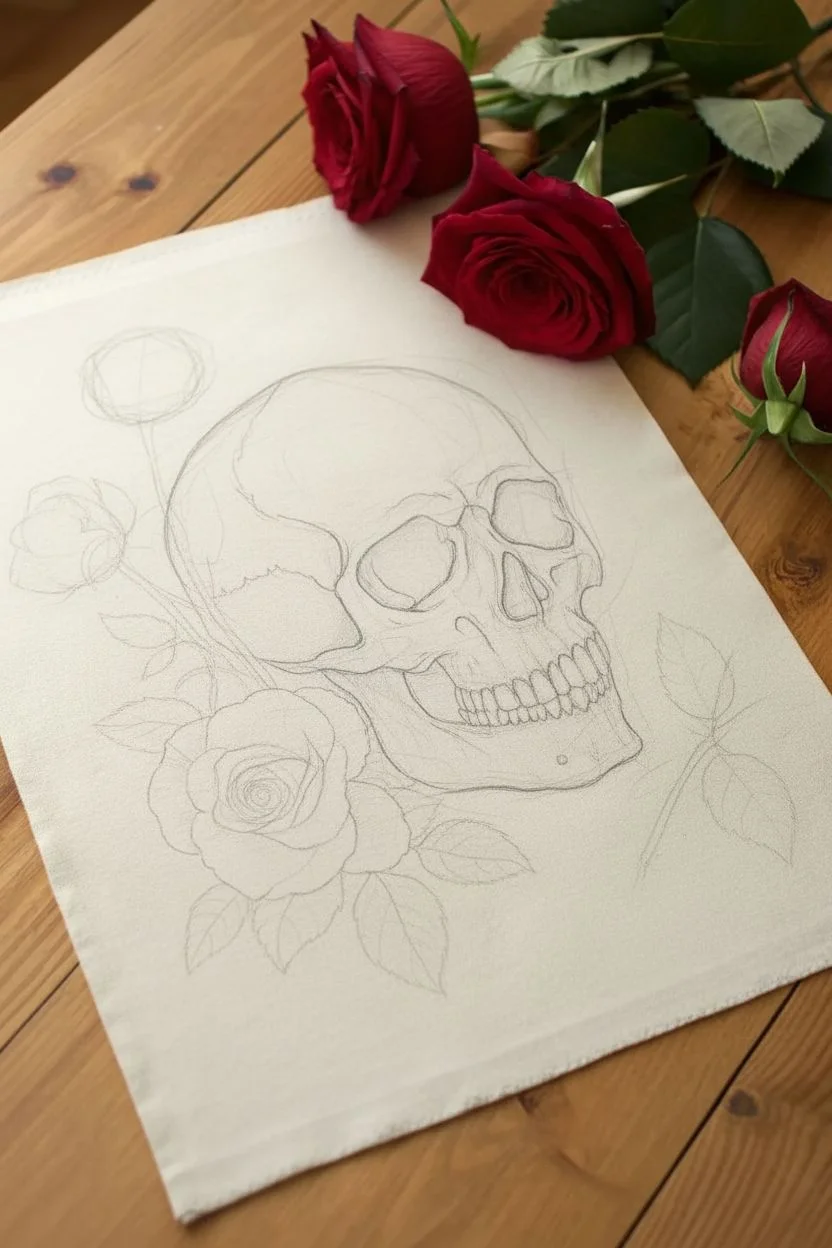
Step 1: Structural Sketching
-
Basic Shapes:
Start with a light HB pencil to block out the large cranium circle and the jaw area. Map out where the three main rose elements will sit: one large bloom at the chin, a bud near the temple, and another stem rising behind the skull. -
Refining the Skull:
Define the eye sockets (orbits) and the nasal cavity. These aren’t perfect circles; give them their irregular, organic shapes. Sketch the zygomatic arches (cheekbones) and the maxilla (upper jaw). -
Teeth Placement:
Lightly draw the gum line and individual teeth. Don’t make them too uniform—vary the sizes slightly for realism. Remember, the roots of the teeth curve upward into the skull. -
Rose Architecture:
Sketch the center spirals of the main rose. Build the petals outward, ensuring they overlap naturally. Add the stems and prickly leaves, paying attention to the serrated edges.
Bone Texture Secret
Don’t blend the skull too smoothly! Use stippling (tiny dots) or cross-hatching to build shadows. This mimics the pitted texture of real bone much better than a smooth smear.
Step 2: Developing the Skull
-
Deepest Shadows:
Switch to a 4B or 6B pencil (or 0.3mm pen) to fill in the eye sockets and nasal cavity. These should be the darkest points of the drawing to create depth. -
Cranium Texturing:
Using a 2B pencil, start shading the roundness of the skull. I like to use tiny, circular motions or stippling (dots) here to mimic the porous texture of bone rather than smooth blending. -
Suture Lines:
Draw the squiggly suture lines on the side of the skull. Keep these lines fine but broken, not a solid continuous streak. -
Jaw and Cheekbones:
Darken the area under the cheekbone to make it pop forward. Shade the depression at the temple to show the hollow anatomy underneath. -
Teeth Detail:
Use a mechanical pencil or sharp HB for the teeth. Shade near the gum line and between teeth, leaving the centers white for highlights.
Step 3: Rendering the Roses
-
Main Rose Core:
Start at the tight center of the bottom rose. Use strong shadows between the tightly packed petals to show depth. -
Petal Gradients:
Petals curl. To show this, shade dark at the base of a petal and fade to white at the curled edge. A blending stump is perfect for smoothing these transitions. -
Upper Buds:
Repeat the process for the buds on the left. Since they are tighter, the shadows will be sharper and the highlights smaller. -
Leaf Veins:
Draw a central vein for each leaf. Shade one half of the leaf slightly darker than the other to imply it is angled towards the light. -
Stem Texture:
Add small thorns and vertical lines along the stems to give them a woody texture. Shade one side of the cylinder form to give it roundness.
Muddy Shadows?
If your heavy shading looks shiny or grey instead of black, you’ve burnished the graphite. Switch to a carbon pencil or charcoal for the absolute darkest pits to reduce the shine.
Step 4: Final Atmosphere
-
Clean Up:
Use your kneaded eraser to lift off any smudges on the white background. The contrast between the clean paper and dark graphite is crucial. -
Highlight Retrieval:
Take a precision eraser and lift out tiny highlights on the brow ridge, the tips of the rose petals, and the shiniest part of the teeth. -
Enhancing Contrast:
Do a final pass with your darkest pencil (6B). Darken the deepest crevices where the roses touch the skull to visually separate the two elements. -
Sealing:
Lightly mist the drawing with workable fixative in a well-ventilated area to prevent the graphite from smearing over time.
Now step back and admire the dramatic balance of organic life and skeletal structure you have captured on the page
Skeleton With Headphones and Music Vibes
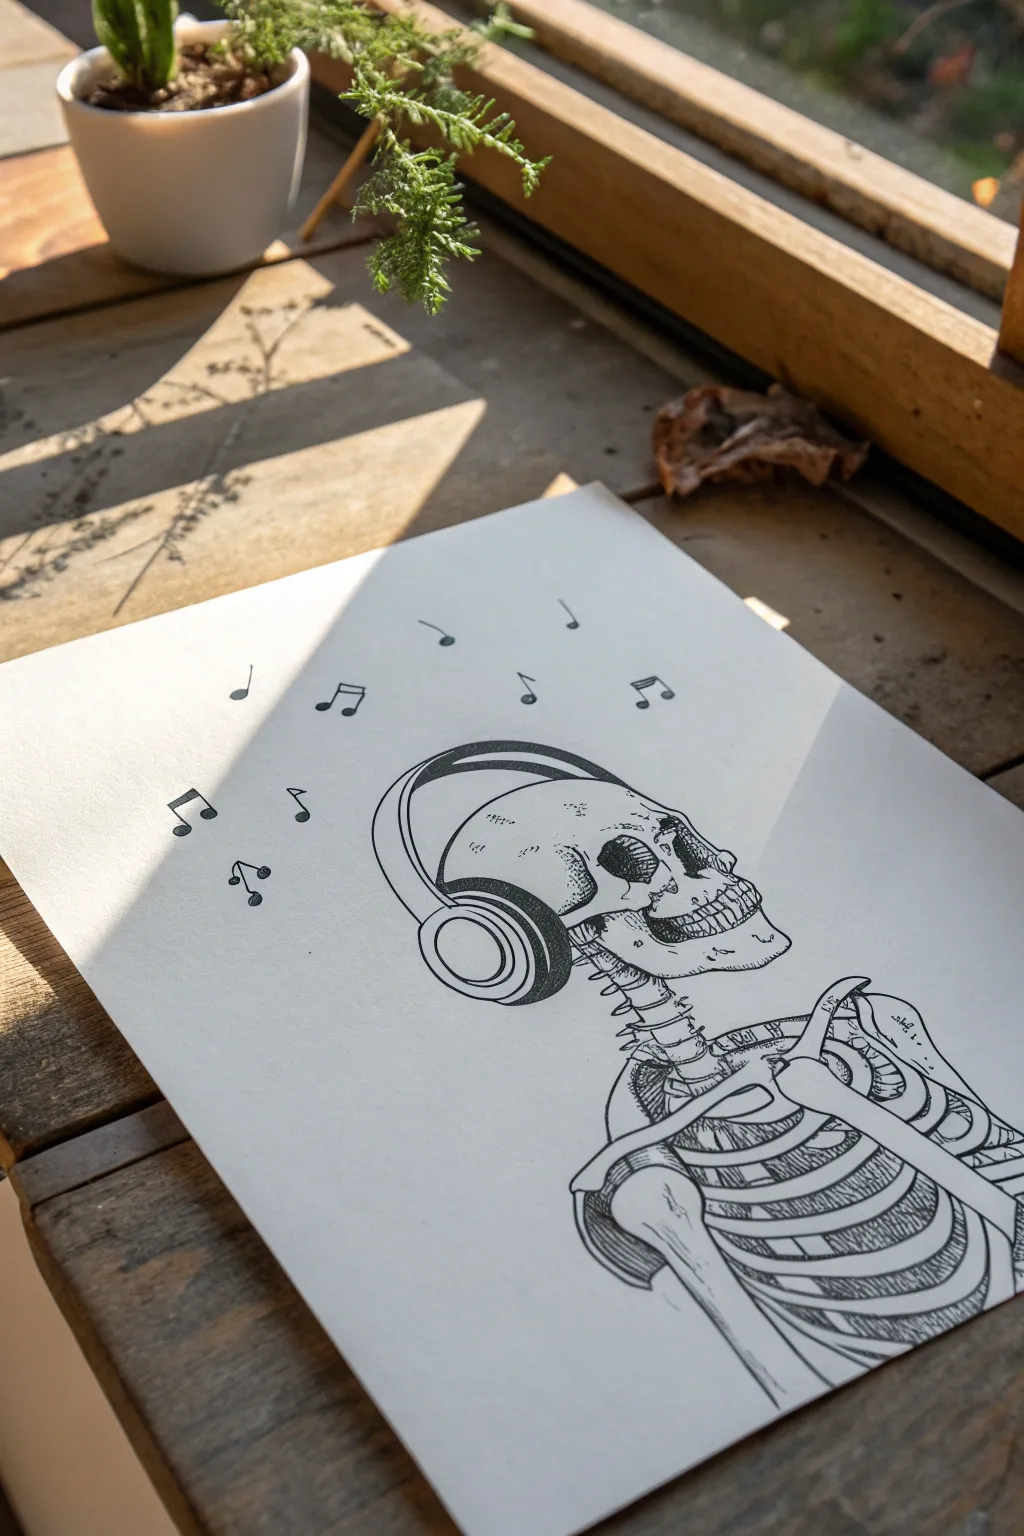
Bring some rhythm to the afterlife with this cool, illustrative sketch of a skeleton jamming out. Using classic ink techniques like stippling and hatching, you’ll create a character that feels both spooky and soulful.
How-To Guide
Materials
- High-quality bright white sketching paper (smooth surface)
- HB graphite pencil for sketching
- Kneaded eraser
- Fine liner pens (sizes 0.1mm, 0.3mm, and 0.5mm)
- Ruler (optional for alignment)
Step 1: Laying the Foundation
-
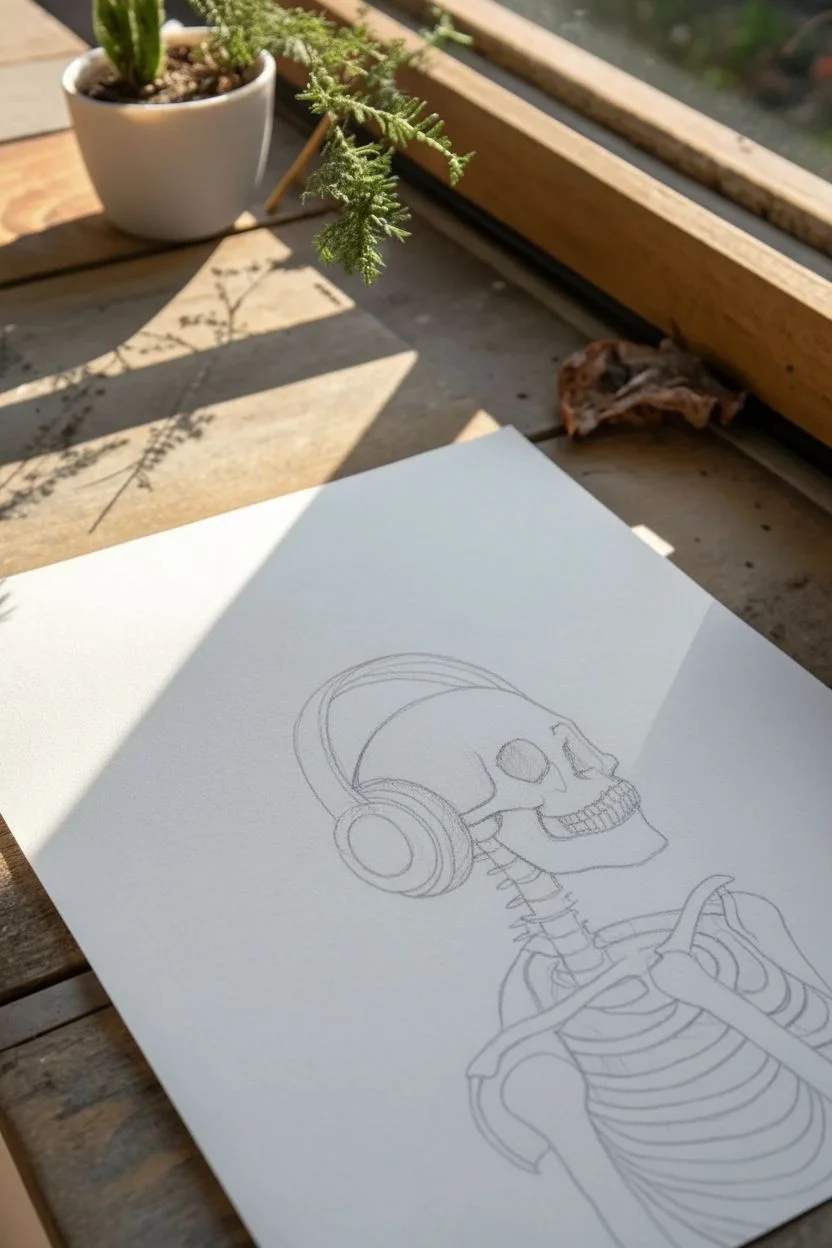
Basic Shapes:
Start lightly with your HB pencil. Draw a rounded oval for the skull’s cranium and a smaller, squared-off shape below it for the jaw. Don’t press too hard; these are just guides. -
Headphone Placement:
Sketch a large C-shape curve over the top of the skull to represent the headphone band. Add oval shapes on the sides where the ear cups will sit, covering the area where ears would be. -
Spine and Shoulders:
Draw a gently curved line extending down from the base of the skull for the spine. Sketch horizontal lines across it for the ribs, wrapping them around to suggest a 3D ribcage. Add the collarbone and the top of the humerus (arm bone) on the right side. -
Arm Positioning:
Sketch the arm bone extending downward. The pose in the reference has the hand (or lack thereof) tucked near the chest, so angle the arm slightly inward. -
Refining the Face:
Detail the eye sockets; they should be large, irregular ovals. Add the nasal cavity (an upscale-down heart shape) and sketch the teeth. The teeth don’t need to be perfect rectangles—give them slight variations.
Ink Smudge Savior
Smudged the ink? Turn it into a ‘spirit orb’ or texture! Use a white gel pen to cover the mistake, then draw over it once dry.
Step 2: Inking the Outlines
-
Tracing the Skull:
Switch to your 0.3mm fine liner. Carefully go over your pencil lines for the skull’s outline. Use a slightly shaky or broken line in places to give the bone an aged, natural texture. -
Inking the Headphones:
Outline the headphones with a smoother, cleaner line to contrast with the bone texture. Draw the inner and outer circles of the ear cup clearly. -
Defining the Ribs:
Ink the spine and ribcage. Pay attention to how the ribs curve around the back; draw the back section of the ribs slightly closer together to show perspective. -
Teeth Details:
Use a 0.1mm pen for the teeth. Draw the separation lines between them, but don’t close every shape fully at the root—it looks more realistic if they merge slightly into the jaw. -
Erase Guidelines:
Once the ink is completely dry (give it a few minutes to avoid smudging), gently erase all your pencil marks with the kneaded eraser.
Level Up: Color Pop
Keep the skeleton monochromatic but color the headphones a bright neon red or blue using markers for a striking modern contrast.
Step 3: Shading and Texture
-
Darkening the Sockets:
Fill in the eye sockets and nasal cavity with the 0.5mm pen for solid blacks. Leave tiny edges of white or use cross-hatching near the rims to show depth. -
Stippling the Skull:
I find stippling really meditative here. Using the 0.1mm pen, add clusters of tiny dots on the top of the forehead and around the temples. The dots should be denser where the shadow is darker. -
Hatching the Bones:
Use fine, parallel lines (hatching) to shade the underside of the cheekbone and the jaw. Apply curved hatching lines on the ribs to emphasize their cylindrical shape. -
Headphone Cushions:
Add shading to the ear cup cushions. Use closely spaced curved lines to suggest the soft material, leaving a strip of white in the middle for a highlight. -
Shadowing the Neck:
Add deeper shadows under the jawline and between the vertebrae using cross-hatching (overlapping lines) to make the head pop forward.
Step 4: Final Touches
-
Adding the Music:
Draw various musical notes (eighth notes, quarter notes) floating upward from the headphones. Vary their sizes and angles to make them look like they are drifting. -
Solidifying Blacks:
Fill in the heads of the musical notes with solid black ink. Ensure the stems are crisp and straight. -
Review and Refine:
Step back and look at the contrast. If the drawing feels too flat, add a few more dots or lines to the darkest shadow areas to increase the drama.
Now you have a funky piece of art that proves music really is in your bones
Skeleton With Sunglasses and Attitude
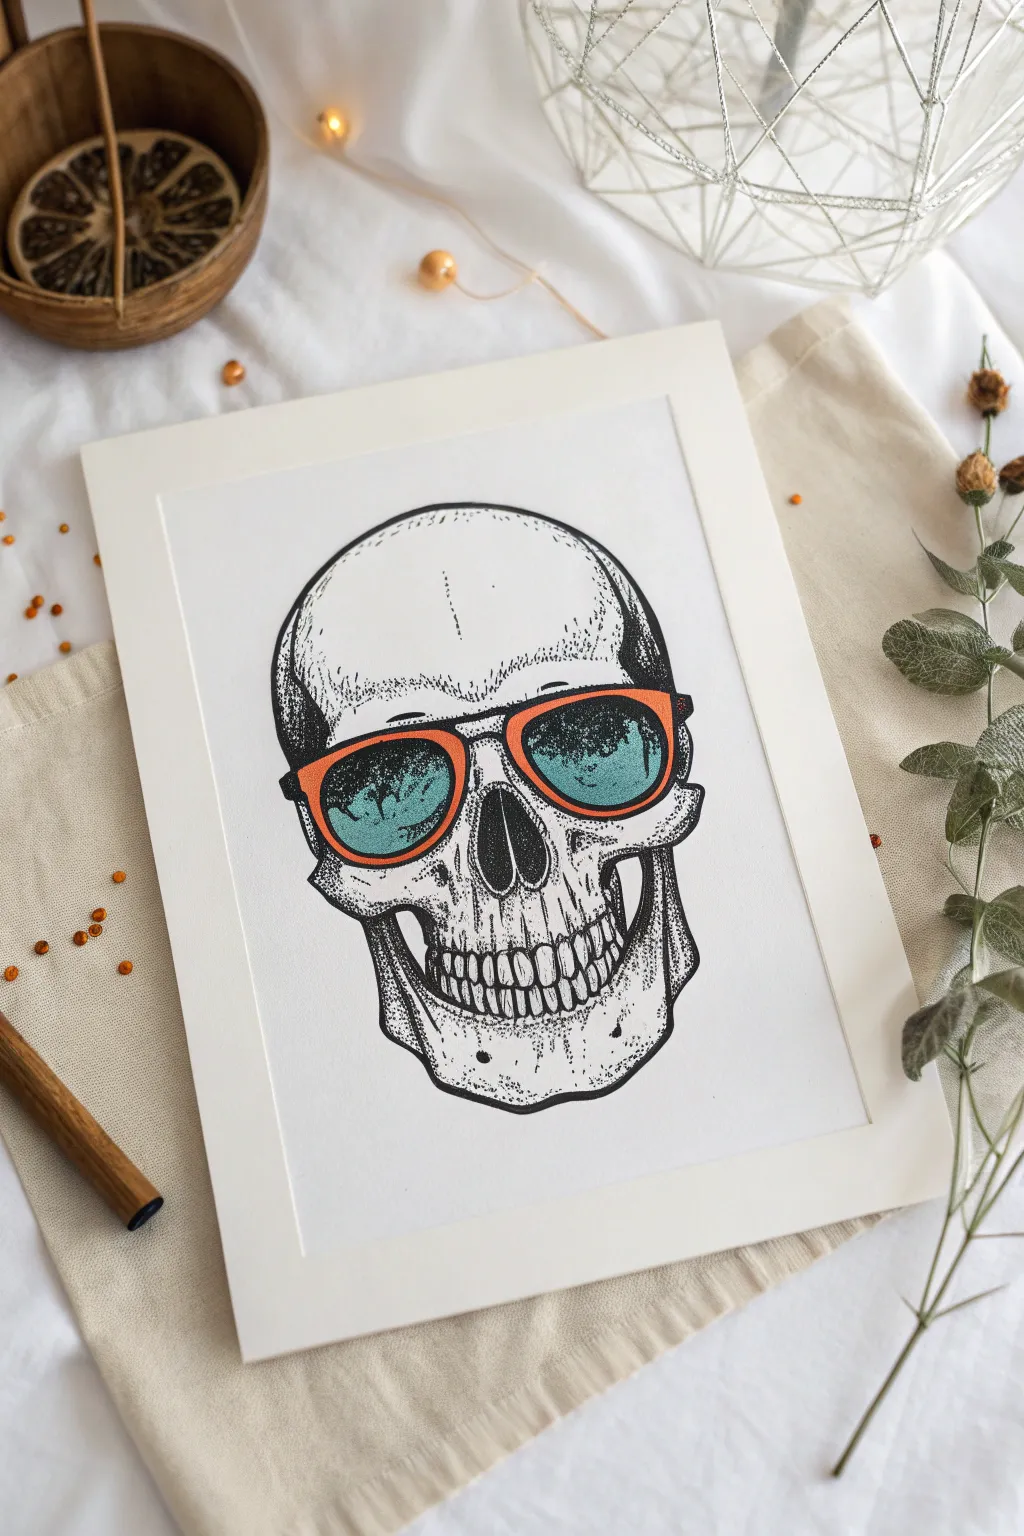
Capture a cool, edgy vibe with this pen and ink illustration of a grinning skull sporting colorful sunglasses. Using fine liners and stippling techniques creates rich texture and depth, contrasting beautifully with the pop of color in the shades.
Detailed Instructions
Materials
- Smooth bristol board or high-quality drawing paper
- HB pencil and eraser
- Fine liner pens (sizes 005, 01, 03, and 05) in black
- Orange alcohol-based marker or colored pencil
- Teal/Cyan alcohol-based marker or colored pencil
- White gel pen (optional for highlights)
Step 1: Sketching the Structure
-
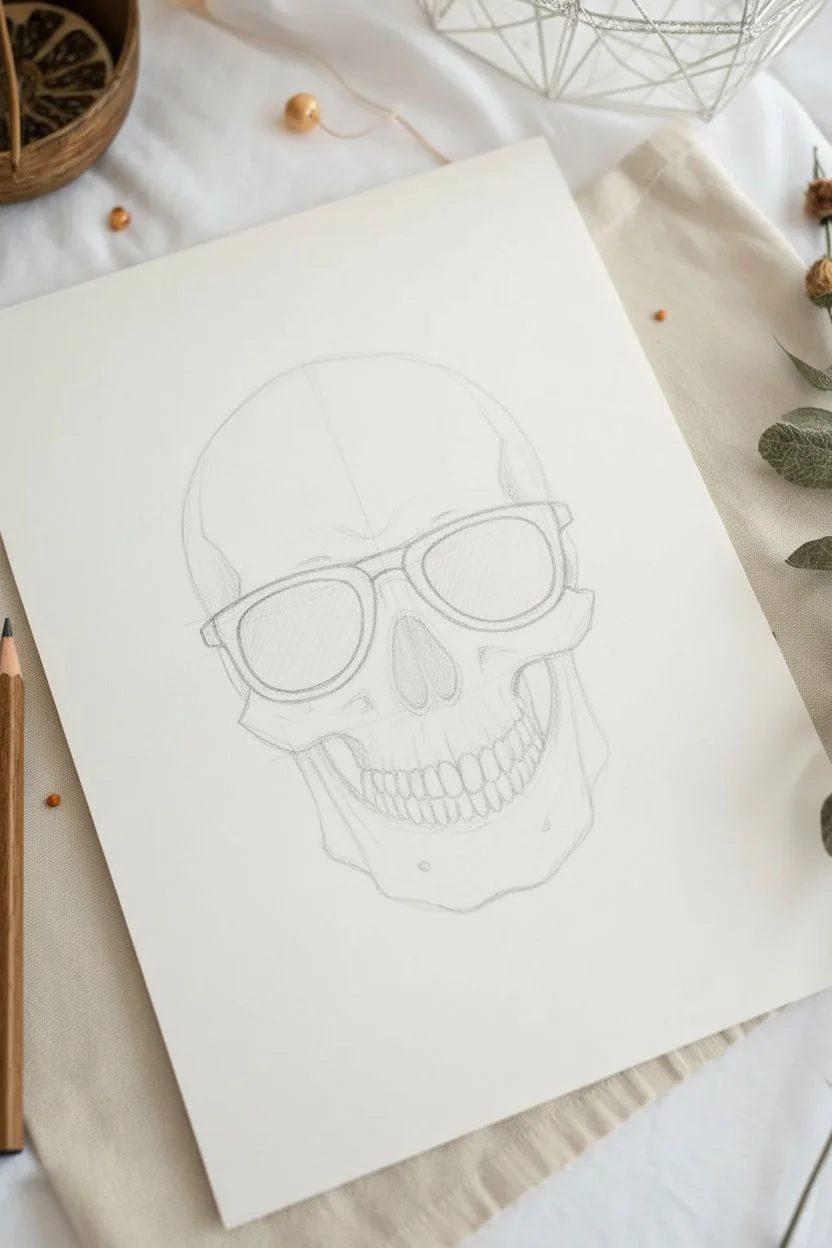
Basic Cranium Shape:
Begin by lightly sketching a large, rounded dome shape for the top of the cranium using your HB pencil. Keep your pressure extremely light so lines can be erased later. -
Jaw and Cheekbones:
Extend the drawing downward to form the cheekbones and the upper maxilla. The jaw should be slightly narrower than the cranium, tapering down to a squared-off chin. -
Placing the Sunglasses:
Draw the outline of the wayfarer-style sunglasses right across the eye sockets. They should sit prominently on the nose bridge area. Make the frames thick and distinct. -
Nose and Teeth:
Sketch the upside-down heart shape of the nasal cavity just below the glasses. Below that, lightly map out the row of upper teeth and the lower mandible, ensuring the teeth curve naturally with the jaw.
Patience Creates Depth
Don’t rush stippling! Holding the pen vertically prevents ‘tails’ on your dots. Dense dots create deep shadow; sparse dots create highlights.
Step 2: Inking the Outlines
-
Main Outlines:
Switch to an 03 or 05 fine liner. Carefully trace over your pencil lines for the main outline of the skull, including the top dome and the jawline. Use confident, slightly broken strokes to suggest bone texture rather than a perfectly smooth line. -
Sunglasses Outline:
Use a steady hand to ink the frames of the sunglasses. The outer rim should be bold. I like to keep the line defining the lens slightly thinner. -
Nose Cavity:
Fill in the nasal cavity with solid black ink, leaving a tiny sliver of white or using a stippling gradient at the edges to show depth inside the bone. -
Teeth Definition:
Switch to a finer pen (01) to outline the individual teeth. Keep the lines near the gums slightly heavier and the spaces between teeth distinct but thin.
Step 3: Shading with Stippling
-
Mapping Shadow Areas:
Look at the reference to see where shadows fall—mainly on the sides of the cranium, under the cheekbones, and around the jaw connection. -
Initial Stippling:
Using your 005 or 01 pen, begin placing dots in the darkest shadow areas. Keep the dots dense where the shadow is deepest (like the side of the temple) and spread them out as you move toward the light. -
Building Gradient:
Continue dotting patiently. The transition from dark to light should be seamless. Creating a smooth gradient takes time, so don’t rush this step or your dots might turn into dashes. -
Cracks and Texture:
Add fine, wandering lines on the forehead and cheekbones to simulate cracks and surface imperfections in the bone. Use the 005 pen for these delicate details. -
Jaw Shading:
Add heavy stippling under the cheekbones and around the chin to define the volume of the jaw. This contrast makes the skull look three-dimensional. -
Refining Edges:
Go back over the outer edges of the skull with your 03 pen, thickening the line weight in shadow areas (like the bottom of the jaw) to give the drawing weight.
Level Up: Reflection
Draw a tiny scenic reflection (like palm trees or a beach) inside the sunglasses lenses to give the piece a hidden narrative.
Step 4: Adding Color
-
Coloring the Frames:
Take your orange marker or colored pencil and fill in the frames of the sunglasses. If using marker, do this quickly to ensure even coverage without streak marks. -
Coloring the Lenses:
Fill the lens area with teal or cyan. For a reflective look, you can leave a small white area untouched, or color it solid and add white on top later. -
Lens Details:
To make the glasses look reflective, use your fine liner to add a few stippled dots or a horizon line reflection inside the colored lens area. -
Final Cleanup:
Wait for all ink and marker to dry completely. Gently erase any remaining pencil sketches to leave a crisp, clean illustration. -
Optional Highlights:
If you have a white gel pen, add tiny highlights to the corner of the sunglasses frames or the highest point of the skull for extra pop.
Frame your edgy masterpiece in a simple mount to let the details truly shine
Skeleton Playing an Instrument
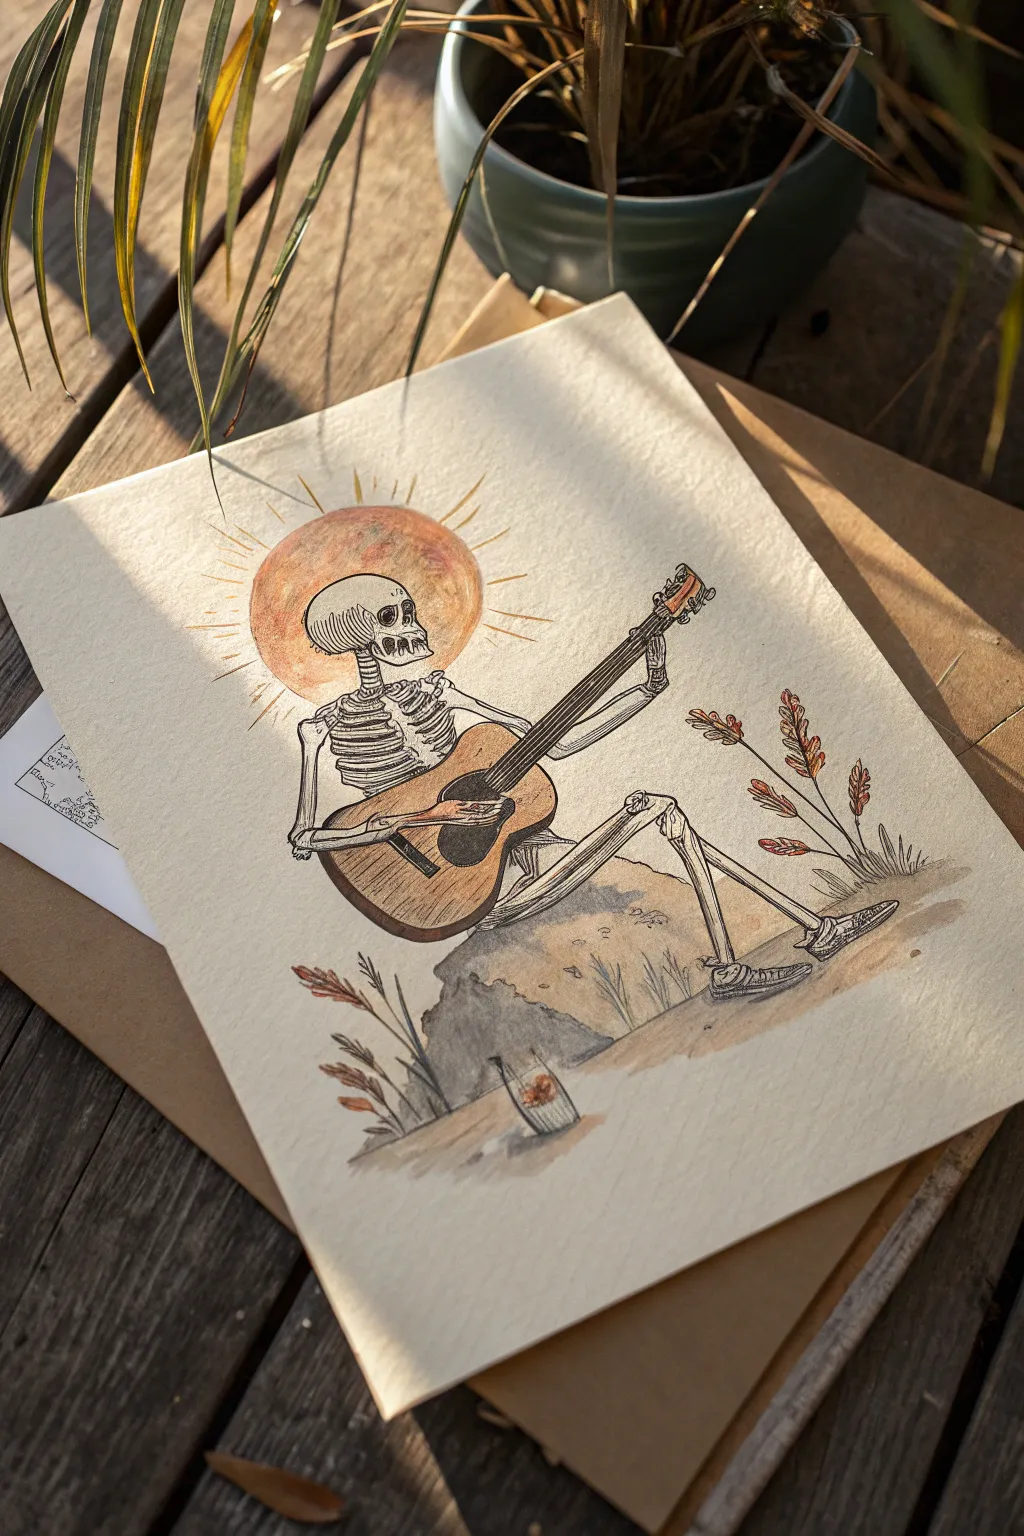
Capture the laid-back vibes of the afterlife with this charming mixed media piece featuring a skeleton strumming a guitar under a warm sun. Combining delicate ink linework with soft watercolor washes, this project creates a rustic and whimsical illustration perfect for music lovers.
Step-by-Step Guide
Materials
- Cold press watercolor paper (medium texture)
- Pencil (HB or H)
- Kneadable eraser
- Waterproof fineliner pens (black, sizes 01 and 03)
- Watercolor paints (Yellow Ochre, Burnt Sienna, Burnt Umber, Paynes Grey, Sap Green)
- Small round brushes (size 2 and 4)
- White gel pen (optional)
- Cup of water and paper towels
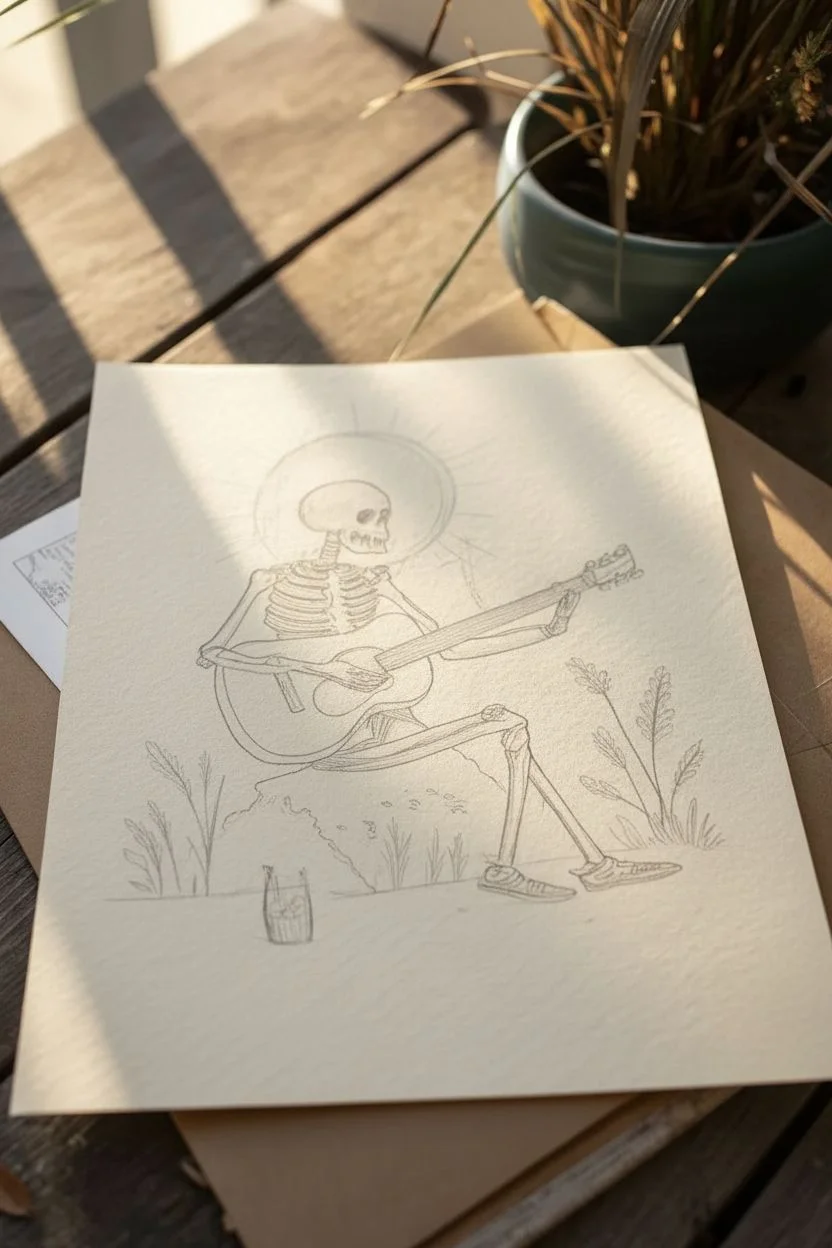
Step 1: Sketching the Bones
-
Compose the scene:
Begin by lightly sketching the main shapes to establish placement. Draw a circle for the sun in the upper left-center area and a rough oval shape below it for the torso. Block out the large triangular shape of the rock base. -
Outline the skeleton’s head:
Refine the skull shape inside the sun area. Draw a rounded cranial dome and a distinct jawline. Add large, hollow eye sockets gazing toward the right side of the page and a triangular nose cavity. -
Draft the torso and arms:
Sketch the ribcage using curved horizontal lines connected to a central sternum. Position the arms so they are interacting with the guitar; the left arm should curve around the guitar body, while the right arm extends down the neck of the instrument. -
Place the guitar:
Draw the acoustic guitar diagonally across the skeleton’s lap. Focus on getting the proportions of the body and the long neck correct relative to the skeleton’s size. Don’t worry about strings yet, just the main outline and sound hole. -
Add legs and environment:
Sketch the leg bones (femur, tibia, fibula) in a seated position. One leg can be bent with a foot flat, the other extended slightly. Add the rough outline of the rock beneath the skeleton and sketch in a few sprigs of grass or wheat to the right and bottom left.
Bone Texture Pro-Tip
When inking ribs or long bones, add tiny stippling dots or short hatch marks near the joints. This suggests porous bone texture and adds professional depth.
Step 2: Inking the Details
-
Ink the guitar:
Using your 03 fineliner, trace the outline of the guitar first to establish the foreground. Draw the six tuning pegs at the top and carefully line the circular sound hole. -
Detail the skeleton:
Switch to a finer 01 pen for the bones. Use slightly shaky or broken lines to give the bones an aged, organic texture. Pay attention to the individual vertebrae in the neck and the separation between the ribs. -
Ink the skull features:
Fill in the eye sockets and nose cavity with solid black ink, leaving tiny specks of white for depth if you like. Add small cracks or sutures to the skull for character. -
Draw the strings:
Very carefully draw the six strings of the guitar running from the bridge to the tuning pegs. You might want to use a ruler here, or just go freehand for a sketchier look. -
Outline the environment:
Ink the rock with jagged, uneven lines to suggest a stone texture. Ink the surrounding plants and the circle of the sun behind the head. Erase all pencil lines once the ink is completely dry.
Level Up: Golden Hour
Mix a small amount of metallic good watercolor or ink into the sun halo wash. It will give the piece a subtle, shimmering glow when the light hits the paper.
Step 3: Watercolor Washes
-
Paint the sun halo:
Mix a watery wash of Yellow Ochre with a touch of Burnt Sienna. Paint the circle behind the head, letting the color unevenly pool near the edges for a textured, radiant look. Add small radiating lines with the brush tip while wet. -
Color the guitar:
Paint the body of the guitar with a warm brown like Burnt Sienna. Make the sides slightly darker to show dimension. Paint the fretboard a dark brown or black. -
Shadow the bones:
Instead of painting the bones white, use a very diluted gray wash (lots of water mixed with a tiny drop of black or Payne’s Grey). Add shadows only on the undersides of the ribs, arms, and legs to give them form. -
Paint the rock:
Use a mix of Paynes Grey and Burnt Umber to create a stone color. Apply this to the rock shape, dabbing color in some areas and leaving others lighter to simulate a rough surface. -
Warm up the foliage:
Paint the plant sprigs using red-browns and dull greens. The goal is a dried, autumnal feel rather than bright spring green. -
Ground the scene:
Add a light wash of brown along the bottom of the paper to ground the rock and plants, so the figure isn’t floating in space. -
Final touches:
Once everything is dry, you can use a white gel pen to add highlights to the guitar body or to clean up any bone edges that got too dark.
Now step back and admire your soulful skeletal musician, ready to play an eternal encore
Skeleton Sitting on a Tombstone at Dusk
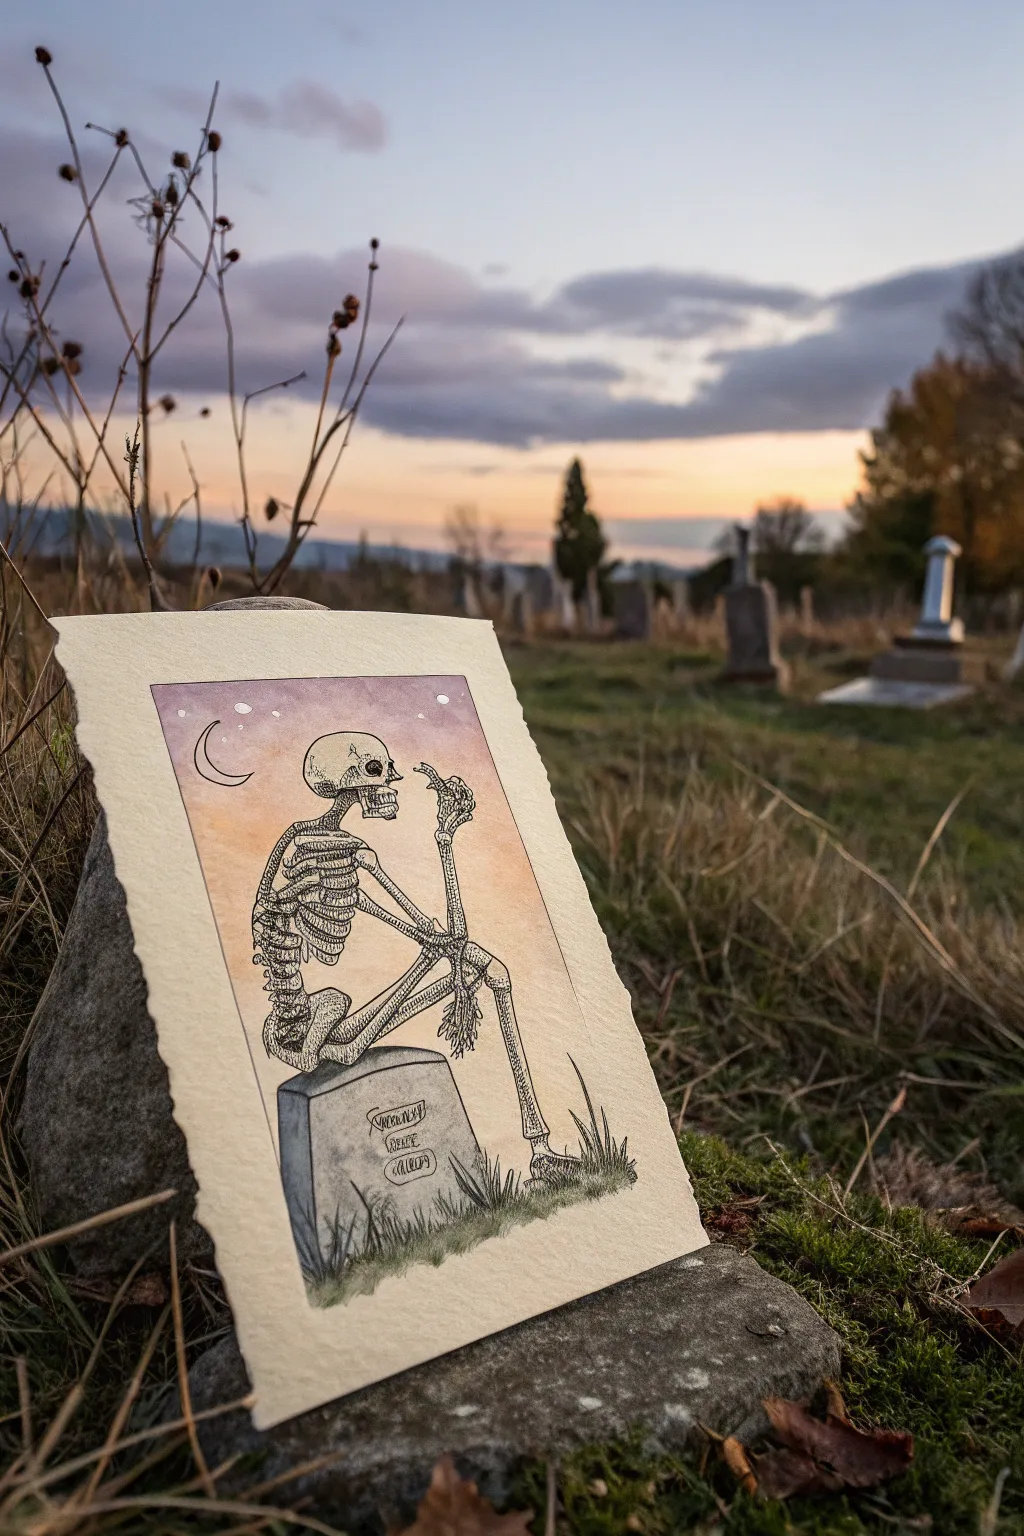
This atmospheric illustration captures a contemplative skeleton resting on a tombstone against a soft sunset gradient. By combining precise ink stippling with a gentle watercolor wash, you’ll create a piece that feels both spooky and surprisingly peaceful.
How-To Guide
Materials
- Cold press watercolor paper (deckled edge optional)
- Fine liner pens (sizes 005, 01, and 05)
- Watercolor paints (Yellow Ochre, Alizarin Crimson, Paynes Grey, Sap Green)
- Soft round watercolor brush (size 6 or 8)
- Pencil (HB)
- Kneaded eraser
- Ruler
- Masking tape (low tack)
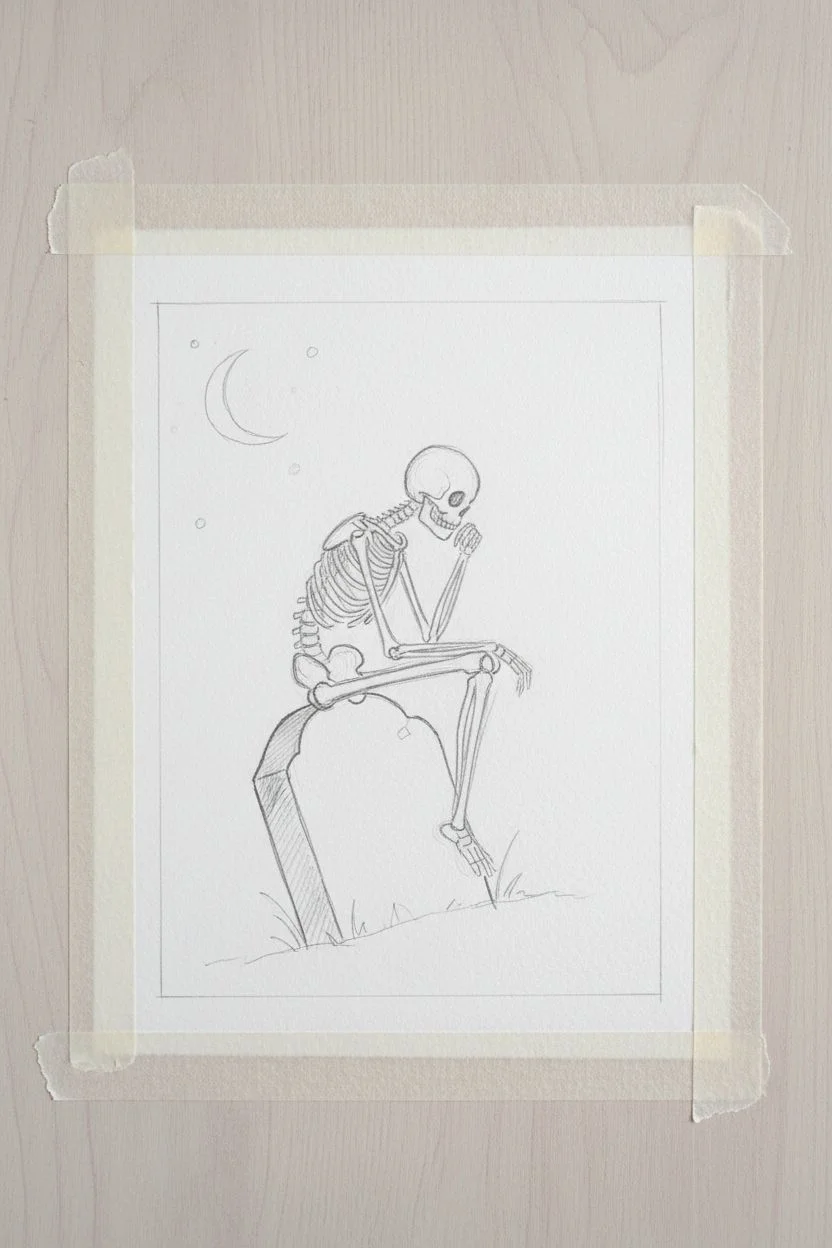
Step 1: Sketching the Bones
-
Define the borders:
Start by lightly drawing a rectangular border in the center of your paper. This frames the scene. Keep your lines faint so they can be erased later or covered by ink. -
Block in the tombstone:
Draw the tombstone first to establish the ground plane. It should be an angled rectangle with a slightly rounded top, positioned in the lower-left center of the frame. -
Position the skeleton:
Sketch the skeleton’s posture using simple stick figures and ovals. The spine is curved, leaning forward, with elbows resting on knees. The skull should be turned slightly to the right. -
Refine the anatomy:
Flesh out the skeletal details. Draw the ribcage, individual vertebrae, and the long bones of the arms and legs. Don’t worry about perfection; a slightlystylized, organic look works well here. -
Add background elements:
Sketch a crescent moon in the upper left corner and a few small circles for stars. Add wisps of grass at the base of the tombstone.
Step 2: Inking the Details
-
Outline the skeleton:
Using your 01 fine liner, carefully trace over your pencil lines for the skeleton. Use broken or slightly wavering lines for old bones rather than perfectly smooth strokes. -
Stippling the shadows:
Switch to the 005 pen for shading. I find that stippling—creating shadows with hundreds of tiny dots—gives the bone a fantastic texture. Concentrate dots under the ribs, in the eye sockets, and between the vertebrae. -
Detail the tombstone:
Ink the outline of the stone. Use vertical hatching lines on the side of the stone to give it depth and form. Add a few cracks or chips for character. -
Lettering the stone:
Use the 005 pen to write the inscription. Keep the lettering loose and slightly shaky to mimic aged carving. You can use nonsense scribbles or actual words. -
Inking the grass:
Use quick, upward flicking motions with the 01 pen to create the grass blades at the base. Make sure some overlap the bottom of the stone.
Smudged Ink?
If your pen smears when adding watercolor, stop immediately. Your pen might not be waterproof. Let it dry 24 hours or switch to pigment-based liners like Micron or Copic.
Step 3: Adding the Sunset Wash
-
Erase pencil lines:
Once the ink is completely dry (wait at least 15 minutes to prevent smudging), gently erase all visible pencil marks with your kneaded eraser. -
Preparing the gradient:
Mix a watery wash of Yellow Ochre and a separate wash of Alizarin Crimson. You want these colors to be transparent and subtle. -
Painting the sky:
Start at the bottom of the sky area (behind the skeleton) with the yellow wash. While it’s still wet, paint the top of the sky with the crimson wash, drawing it down to meet the yellow. -
Blending the colors:
Let the two colors merge in the middle to create a soft orange transition. Be careful to paint around the white of the skeleton and the moon. -
Painting the stone:
Mix a very dilute wash of Paynes Grey. Apply this to the tombstone. Add a second layer of grey to the shaded side for dimension. -
Final foliage touches:
Use a touch of Sap Green mixed with a little grey to paint the grass at the bottom. Keep it loose and allow it to fade out at the edges.
Deckle Those Edges
To get the ragged paper look shown in the photo, fold your paper repeatedly along the cut line, wet the crease with water, and carefully tear it by hand.
Now you have a timeless memento mori piece ready to display or gift to a fellow spooky soul


Have a question or want to share your own experience? I'd love to hear from you in the comments below!