I love turning plain canvas shoes into tiny wearable paintings that feel like they were made just for you. These painting shoes ideas start with the classics and build into more artsy, unexpected designs—so you can pick what fits your style and skill level.
Simple Floral Vines
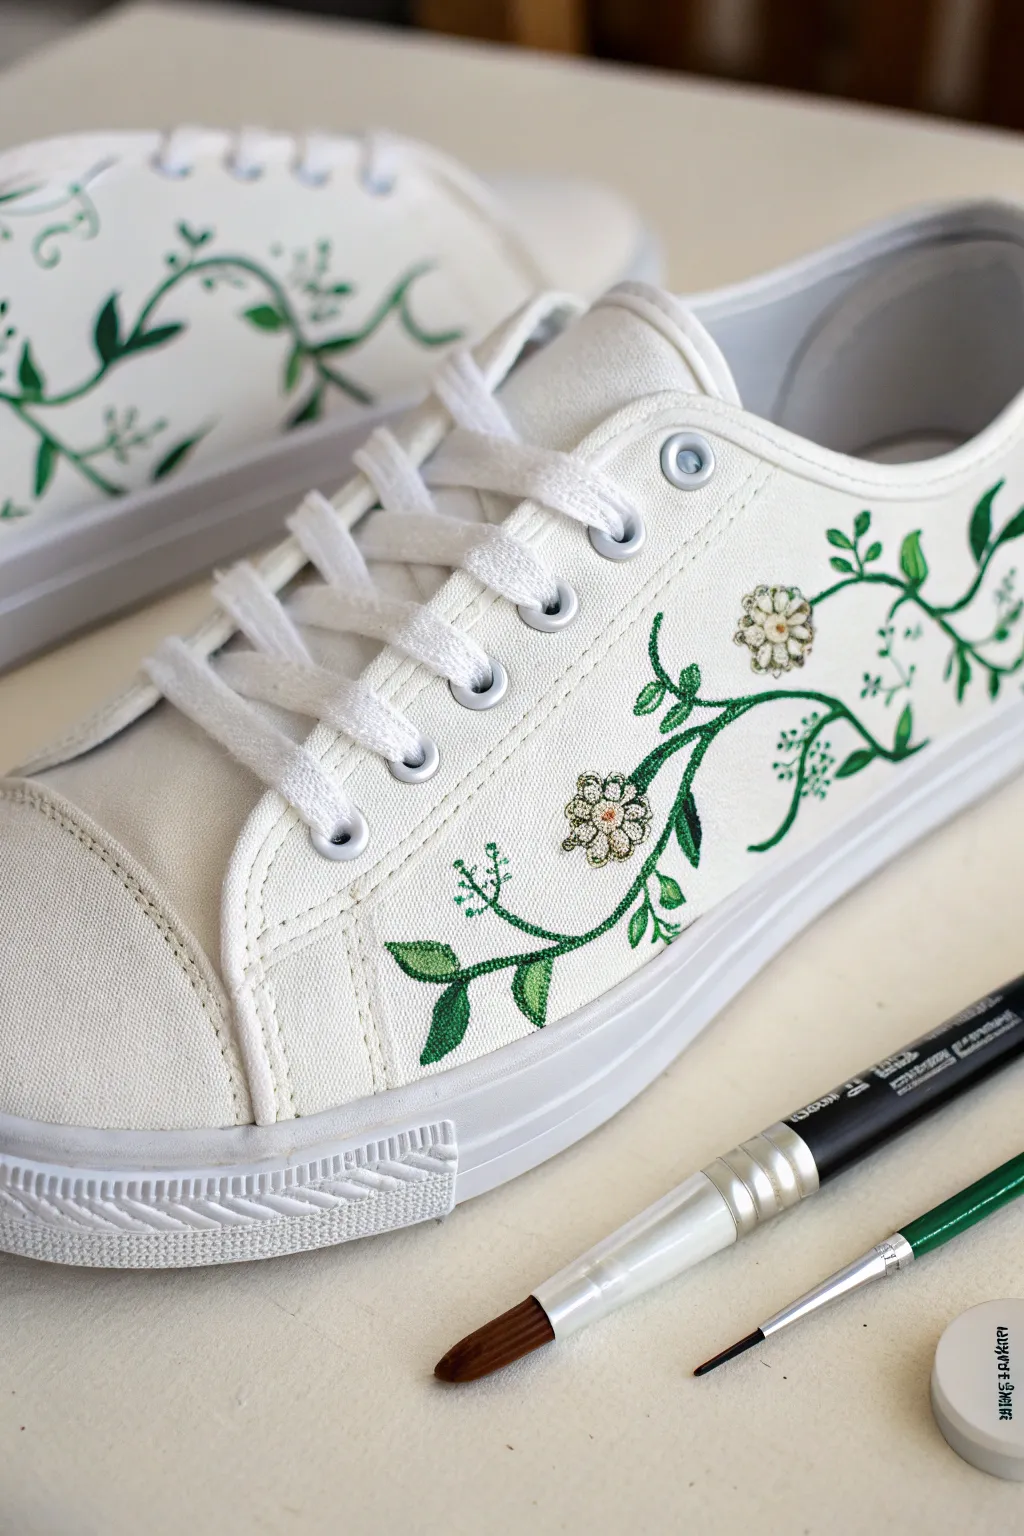
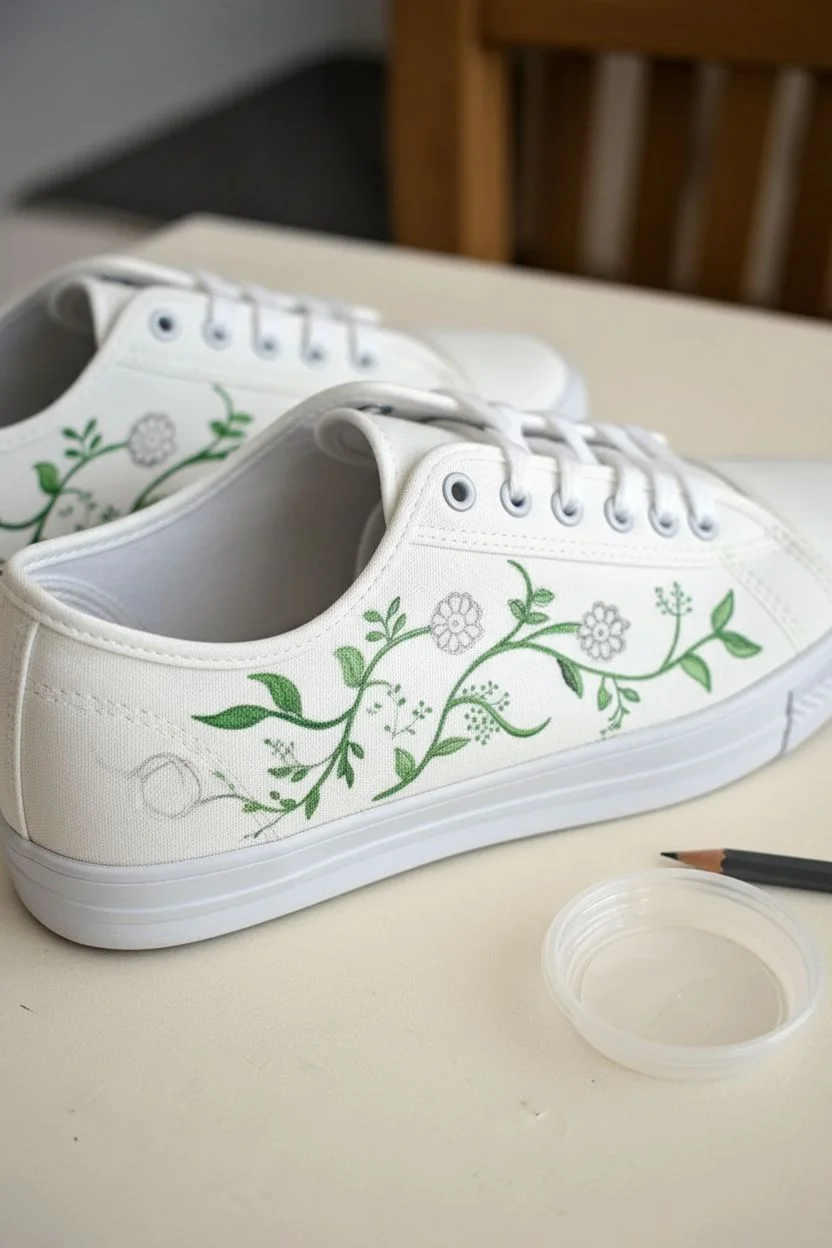
Transform basic white canvas sneakers into a garden walk with this delicate and approachable design. Featuring wandering green vines and petite blossoms, this project uses simple strokes to create an elegant, nature-inspired look perfect for spring.
How-To Guide
Materials
- White canvas sneakers
- Fabric medium (mix with acrylics)
- Acrylic paints: Dark Green, Leaf Green, White, Cream/Beige
- Fine liner brush (size 00 or 0)
- Small round brush (size 1 or 2)
- Pencil (HB or lighter)
- Palette or mixing dish
- Water cup
Step 1: Preparation and Sketching
-
Clean the Surface:
Ensure your sneakers are clean and dry. If they are brand new, give them a quick wipe with a slightly damp cloth to remove any manufacturing dust. -
Prep the Laces:
Remove the shoelaces completely. This gives you unobstructed access to the side panels and tongue, preventing accidental paint splatters on the laces. -
Plan the Vine Flow:
Using a light pencil, gently sketch the main spine of your vine. Start from the bottom edge of the sneaker near the heel and draw a wavy, organic line that curves upward toward the lace eyelets. -
Sketch Leaves and Flowers:
Along your main vine line, lightly mark where your leaves will sit. Add small circles to indicate where the main three or four flower heads will be placed.
Smooth Lines Tip
Add a tiny drop of water to your paint mix for the thin vine lines. Ink-like consistency flows better off a liner brush than thick paint.
Step 2: Painting the Greenery
-
Mix Your Medium:
Mix your acrylic paints with fabric medium according to the bottle instructions (usually 1:1 or 2:1). This is crucial to prevent the paint from cracking when you walk. -
Paint the Vine Stem:
Load your fine liner brush with dark green paint. Carefully trace over your pencil line for the main stem. Keep your hand steady but allow the line to vary slightly in thickness for a natural look. -
Add Secondary Branches:
Using the same dark green, paint thinned, shorter branches extending off the main vine. These should be wispy and delicate. -
Base Coat the Leaves:
Switch to your small round brush. Paint the leaf shapes using the dark green mixture. Press down at the base of the leaf and lift as you pull outward to create a sharp tip. -
Add Leaf Highlights:
While the dark green is still slightly tacky, I like to mix a little leaf green or white into the dark green and add a highlight to one side of each leaf for dimension. -
Create Tiny Sprigs:
Use the very tip of your liner brush to add minuscule dots and twig-like lines in dark green near the flower placements, mimicking baby’s breath or fern buds.
Fixing Mistakes
Smudged green on white canvas? Don’t wipe it! Let it dry completely, then paint over the mistake with white acrylic to act as “correction fluid.”
Step 3: Blossoms and Details
-
Paint Flower Petals:
Using the cream or beige paint mixed with fabric medium, paint five or six small, rounded petals for each flower. Use the tip of your round brush to dab these shapes. -
Layering White:
Once the cream base is dry, add a smaller dab of pure white in the center of the petals to make them pop against the white canvas background. -
Detail the Centers:
With a clean liner brush, dip into the dark green (or a mix of green and brown if you have it) and stipple tiny dots into the very center of each flower. -
Outline the Petals:
This step makes the design look illustrated. Very carefully outline each flower petal using your thinnest liner brush and the dark green paint. -
Connect the Flowers:
Ensure every flower looks attached to the main vine. Draw small green stems connecting the base of the flower heads to the nearest branch. -
Final Inspection:
Look over the shoe for any pencil marks that are still visible. If the paint is fully dry, gently erase them. Touch up any green lines that look too faint. -
Heat Set:
Allow the shoes to dry for at least 24 hours. Then, use a hair dryer on high heat for a few minutes over the design to heat-set the fabric medium.
Now you have a custom pair of sneakers that brings a touch of the garden with you wherever you walk


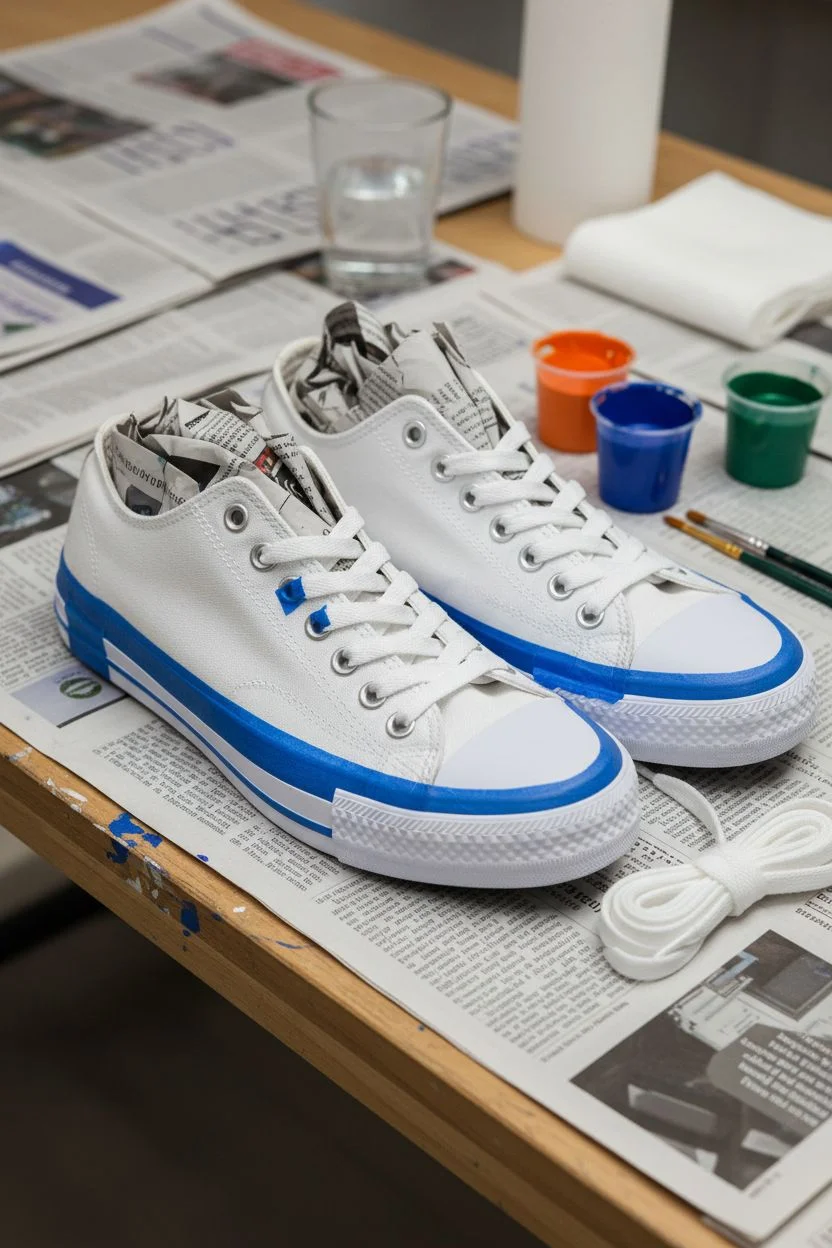
Ombre Fade Panels
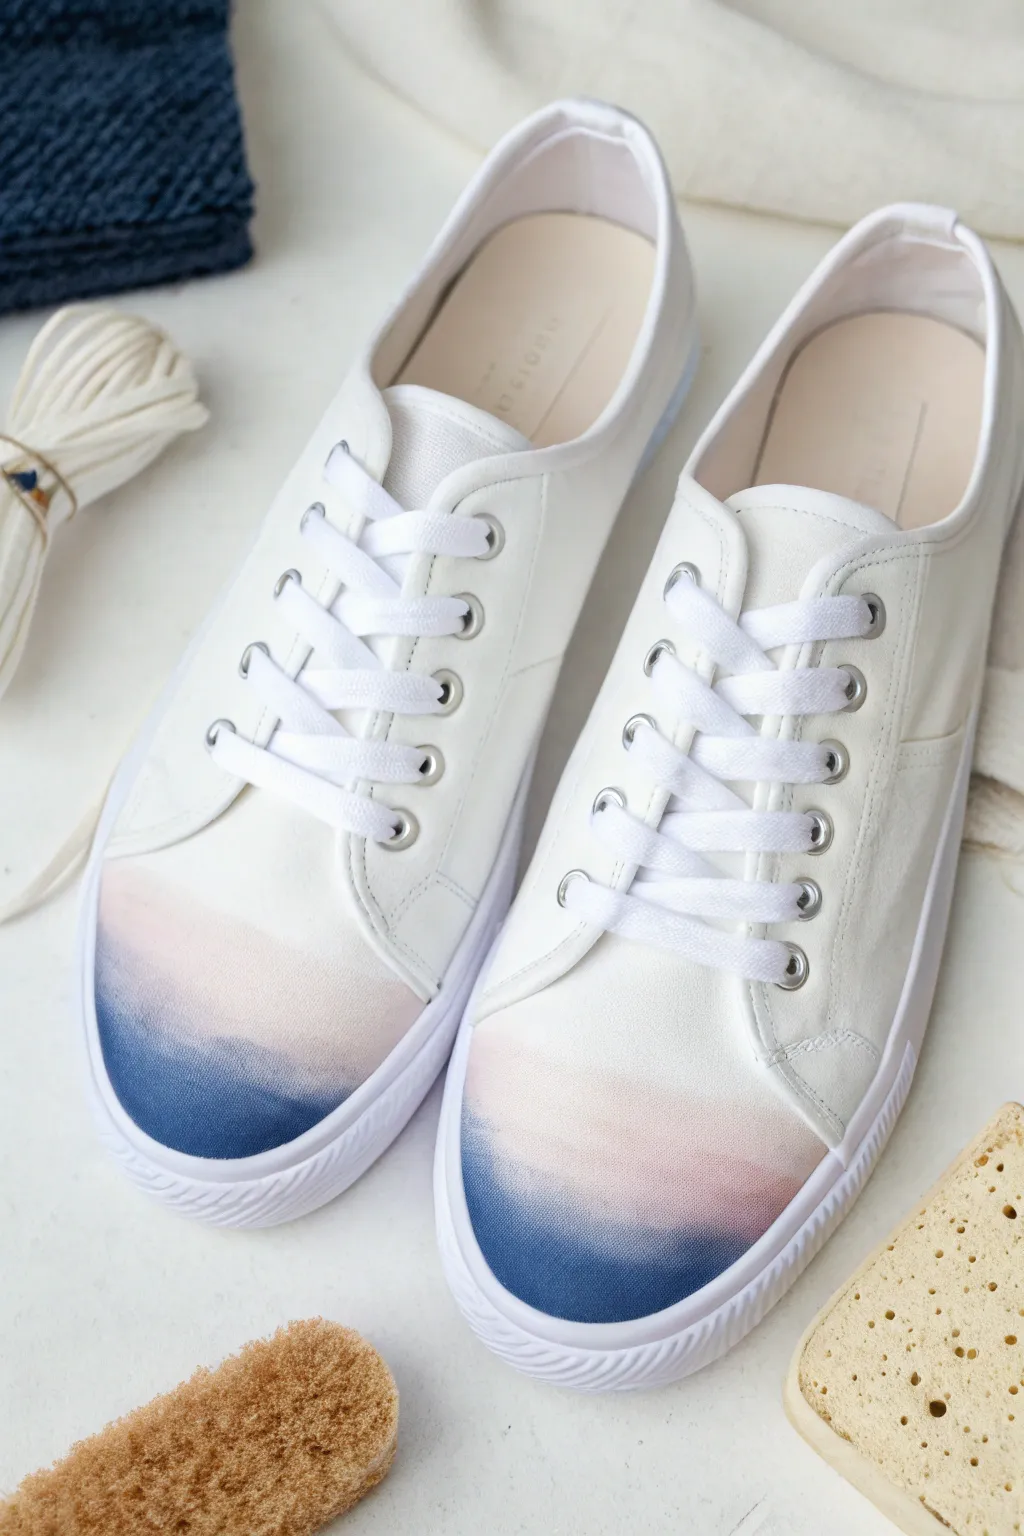
Transform plain white canvas shoes into a wearable work of art by adding a dreamy ombre fade to the toe panels. This soft gradient blends deep ocean blue into blush pink, creating a subtle sunset effect that looks professionally dyed but is easily achieved with fabric paint.
Step-by-Step Guide
Materials
- White canvas sneakers
- Fabric medium
- Acrylic paint (navy blue, royal blue, white, blush pink)
- Small flat paintbrush
- Small sponge brush or cosmetic wedge
- Painter’s tape or masking tape
- Small mixing palette or plastic lid
- Cup of water
- Paper towels
Step 1: Preparation and Masking
-
Clean the canvas:
Ensure your shoes are brand new or freshly cleaned and fully dry. If they are new, I sometimes wipe the toe area with a slightly damp cloth to remove any factory sizing or dust that might repel paint. -
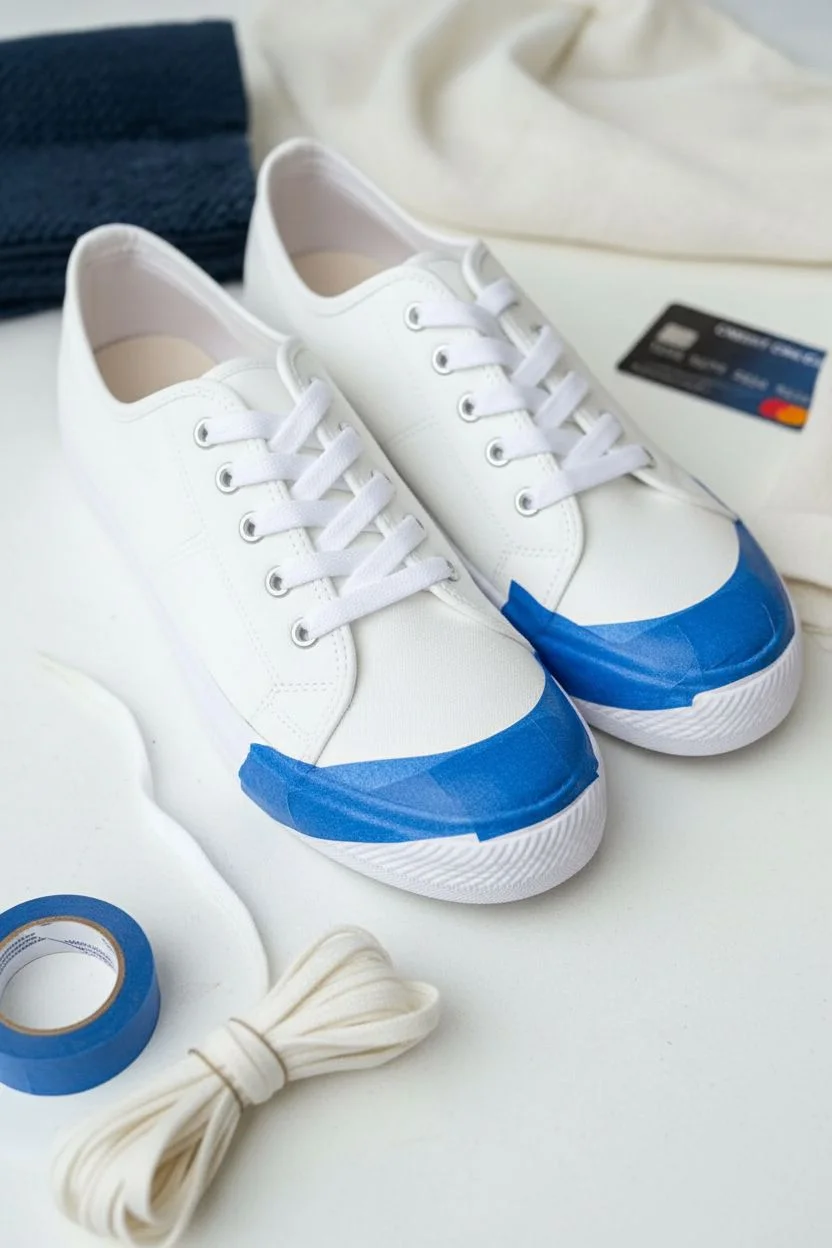
Tape the boundaries:
Carefully apply painter’s tape along the stitching that separates the toe cap from the rest of the shoe. Use your fingernail or a credit card to press the tape edge down firmly so paint doesn’t bleed underneath. -
Protect the soles:
Run a second strip of tape along the rubber sole at the bottom of the toe area. This keeps your rubber foxing bright white and clean while you work. -
Remove laces:
Take the laces out completely. Even though you aren’t painting near the eyelets, this prevents accidental smudges and makes the shoes easier to handle.
Step 2: Mixing and Base Coat
-
Prepare the fabric medium:
Mix your acrylic paints with fabric medium according to the bottle instructions (usually a 1:1 or 2:1 ratio). This step is crucial because it keeps the paint flexible so it won’t crack when you walk. -
Create a gradient palette:
On your palette, lay out your mixed paints: the deep navy, the royal blue, the blush pink, and pure white. Create a transitional color by mixing a little royal blue with white. -
Dampen the canvas:
Dip your clean brush in water and blot it slightly, then brush clear water over the entire toe cap area. You want the fabric damp but not soaking wet; this helps the colors bleed into each other more naturally.
Uneven Blending?
If the gradient looks choppy, the paint was likely too dry. Re-wet the area slightly with a damp brush and add a tiny drop of water to your paint to reactivate the blending process.
Step 3: Painting the Gradient
-
Apply the darkest blue:
Start at the very bottom edge near the rubber sole. Using a flat brush, apply a horizontal strip of the darkest navy blue paint, covering about the bottom half-inch of the toe cap. -
Add the mid-tone blue:
Immediately above the navy, apply a strip of the royal blue. While the paint is still wet, use a slightly damp brush to gently feather the boundary where the two blues meet. -
Transition to pink:
Wash your brush thoroughly. Apply the blush pink paint in a strip above the blue. Leave a tiny gap between the blue and pink at first, then gently work them together using the sponge or brush to create a soft, purplish transition zone. -
Fade to white:
For the top section near the laces, use the white paint (mixed with fabric medium) or very watered-down pink. Blend this downward into the blush pink so the color seems to vanish into the shoe’s original canvas. -
Refine the blend:
Take a slightly damp cosmetic wedge or sponge. Lightly dab (stipple) along the transition lines. This removes brush strokes and creates that sprayed-on, airbrushed look. -
Check symmetry:
Place the shoes side-by-side. Make sure the horizon line of the blue paint is at roughly the same height on both toes.
Sparkle Finish
Mix a small amount of fine silver fabric glitter into the fabric medium topcoat for a subtle shimmer that catches the sunlight, making the ocean effect look glistening and wet.
Step 4: Finishing Touches
-
Allow to dry:
Let the paint dry for at least 24 hours. The colors may lighten slightly as they dry. -
Remove the tape:
Once the paint is dry to the touch, carefully peel away the painter’s tape. Pull it away at a sharp 45-degree angle to ensure a crisp line. -
Heat set the paint:
To make the design permanent and washable, heat set the paint. Use a hairdryer on high heat for a few minutes, or toss the shoes in a dryer (inside a pillowcase) on high heat for 20 minutes. -
Re-lace:
Put your laces back in, and your custom ombre kicks are ready for a walk.
Enjoy walking around in your custom footwear that captures the serene beauty of a coastline sunset

Polka Dots in Two Sizes
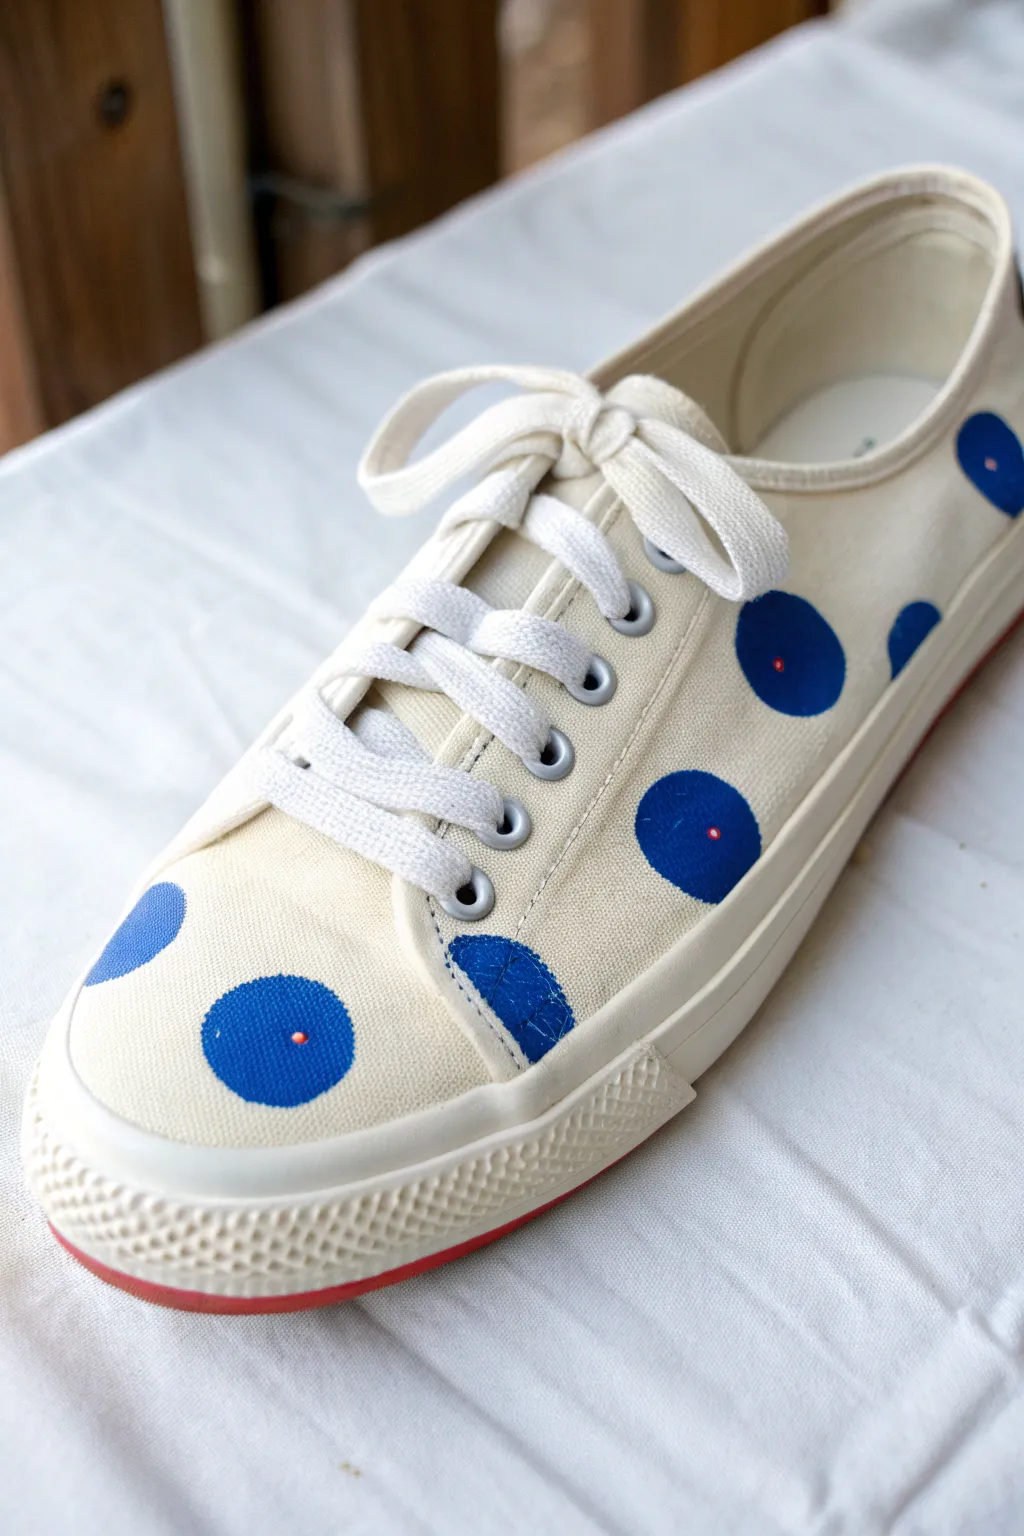
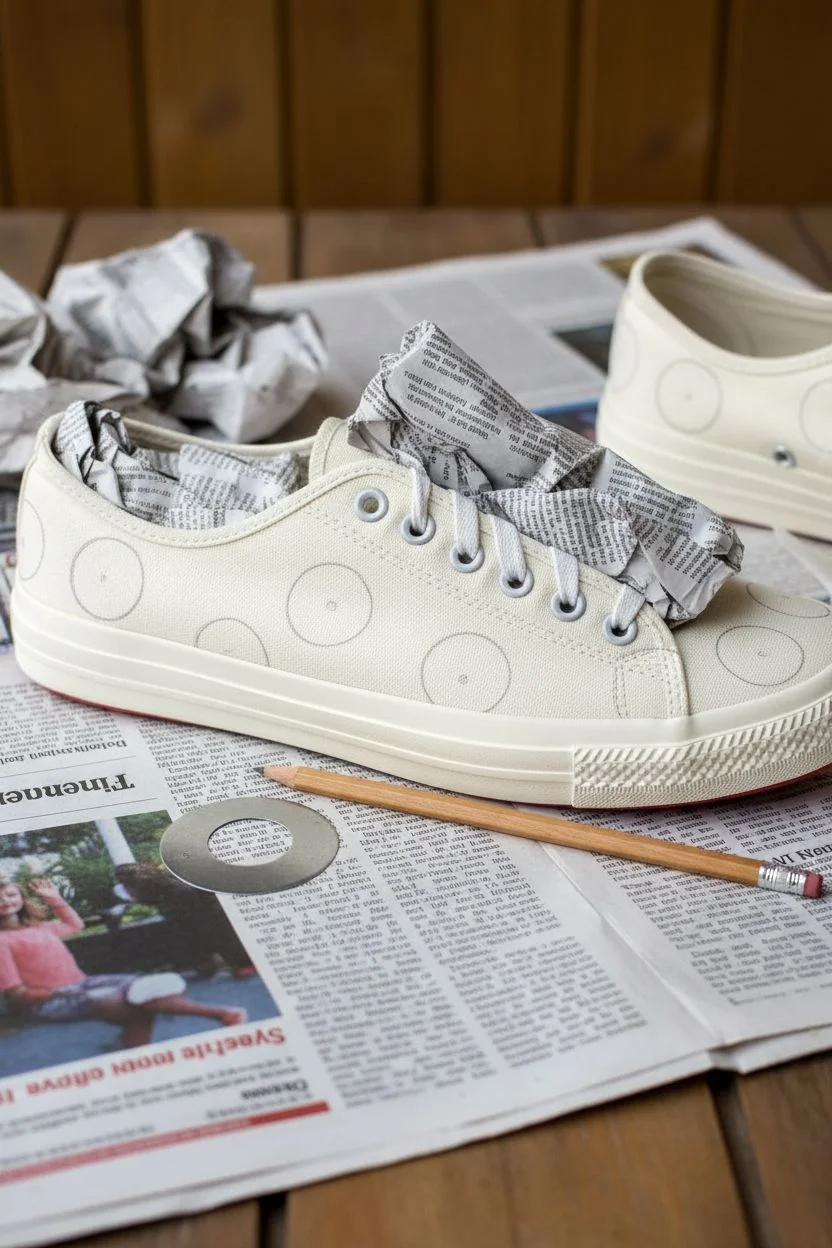
Transform plain canvas sneakers into statement footwear with these oversized, playful polka dots. The combination of bold royal blue circles featuring delicate, contrasting red centers creates a retro-modern look that’s surprisingly easy to achieve.
Step-by-Step Tutorial
Materials
- Canvas sneakers (cream or off-white)
- Blue fabric paint (royal or cobalt)
- Small round paintbrush (size 4 or 6)
- Red puffy paint or dimensional fabric paint (fine tip applicator)
- Cardboard scraps
- Pencil
- Circular stencils or household lids (approx. 1.5 inch diameter)
- Masking tape
- Newspaper or drop cloth
Step 1: Preparation & Planning
-
Prep the workspace:
Begin by covering your work surface with newspaper or a drop cloth to protect it from spills. Remove the shoelaces completely from both shoes to ensure you have a clear, uninterrupted surface for painting. -
Stuff the shoes:
Tightly stuff the toe box and main body of the shoe with scraps of newspaper or plastic bags. This creates a firm surface against the canvas, making it much easier to paint smooth shapes without the fabric buckling. -
Map out your pattern:
Using a pencil, lightly plan where your dots will go. Aim for a random but balanced spacing, leaving about an inch of negative space between circles. Don’t be afraid to let some circles ‘fall off’ the edge of the shoe onto the sole or near the laces for a dynamic look. -
Trace the circles:
Position your circular stencil or a small lid (like a large bottle cap) over your planned spots. Trace the outline lightly with a pencil. I find it helpful to press firmly on the stencil to keep it from slipping on the curved surface of the shoe.
Clean Edges Hack
If you have shaky hands, use circle stickers or adhesive vinyl as a reverse stencil. Stick them on, paint over the hole, and peel away while wet for perfect rounds.
Step 2: Painting the Base Dots
-
Outline in blue:
Dip your round brush into the royal blue fabric paint. Carefully paint along the inside edge of your pencil marks first. This creates a barrier and helps keep your circle edges crisp. -
Fill the centers:
Once the perimeter is defined, fill in the rest of the circle with smooth, even strokes. Apply the paint generously enough to cover the canvas texture, but not so thick that it globs. -
Handle the edges:
For the dots that go over seams or near the rubber sole, use the very tip of your brush. If a dot crosses onto the rubber foxing tape (the side of the sole), you can either paint it or wipe it away immediately for a clean cutoff line; the example shows painted sections stopping cleanly at the rubber. -
Check for opacity:
Let the first coat dry for about 20 minutes. If the blue looks streaky or the cream canvas shows through too much, apply a second thin coat of blue paint to solidify the color. -
Dry completely:
Allow the blue dots to dry fully before moving on. This usually takes at least 1-2 hours depending on your paint brand. The surface should be dry to the touch.
Step 3: Adding the Micro-Details
-
Prepare the red accent:
Take your red dimensional or puffy paint. Test the flow on a piece of scrap paper first to ensure no air bubbles cause it to splatter. -
Center the dots:
Carefully place a single, tiny drop of red paint directly in the visual center of each dried blue circle. Hold the bottle vertical to get a perfect round bead. -
Maintain consistency:
Try to keep the pressure consistent so all the red center dots are roughly the same size. They should be just barely raised for a bit of texture. -
Final drying time:
Dimensional paint takes much longer to cure than standard acrylic. Set the shoes in a safe, dust-free place and let them dry undisturbed for at least 24 hours. -
Re-lace appropriately:
Once everything is fully cured, re-lace your sneakers. The crisp white laces against the cream canvas and bold blue dots really pop.
Fixing Smudges
Accidentally got blue paint on the rubber sole? Don’t panic. Use a Q-tip dipped in rubbing alcohol or nail polish remover to wipe it off before it fully dries.
Step out in style knowing your custom kicks are truly one of a kind


Clean Stripes With Tape
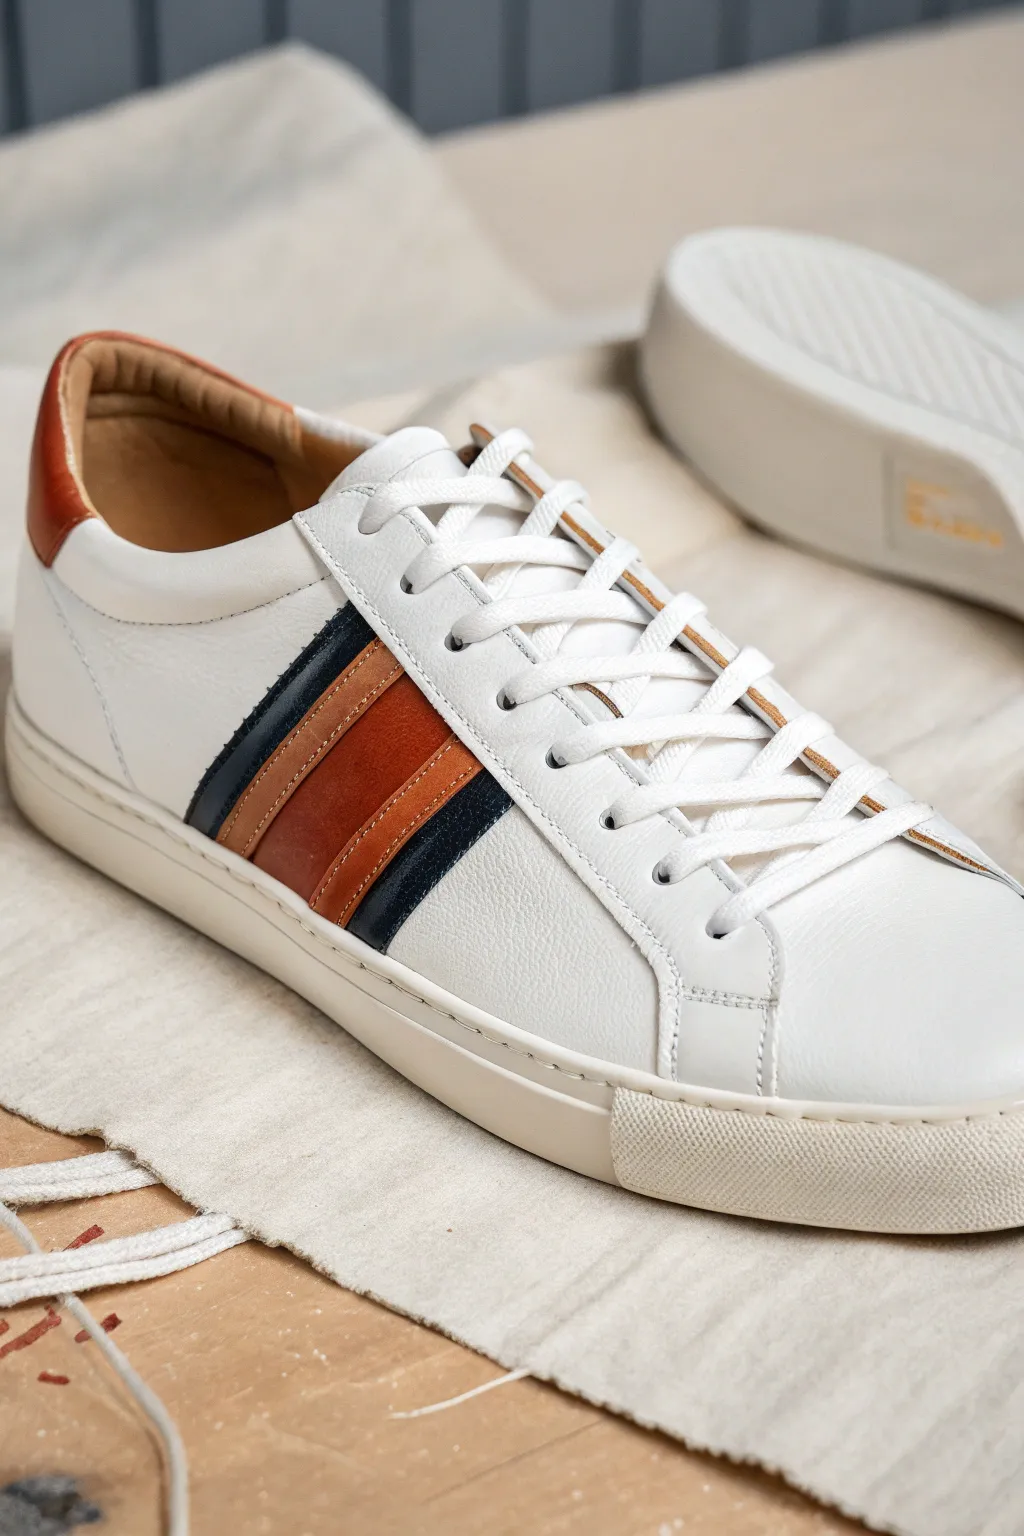
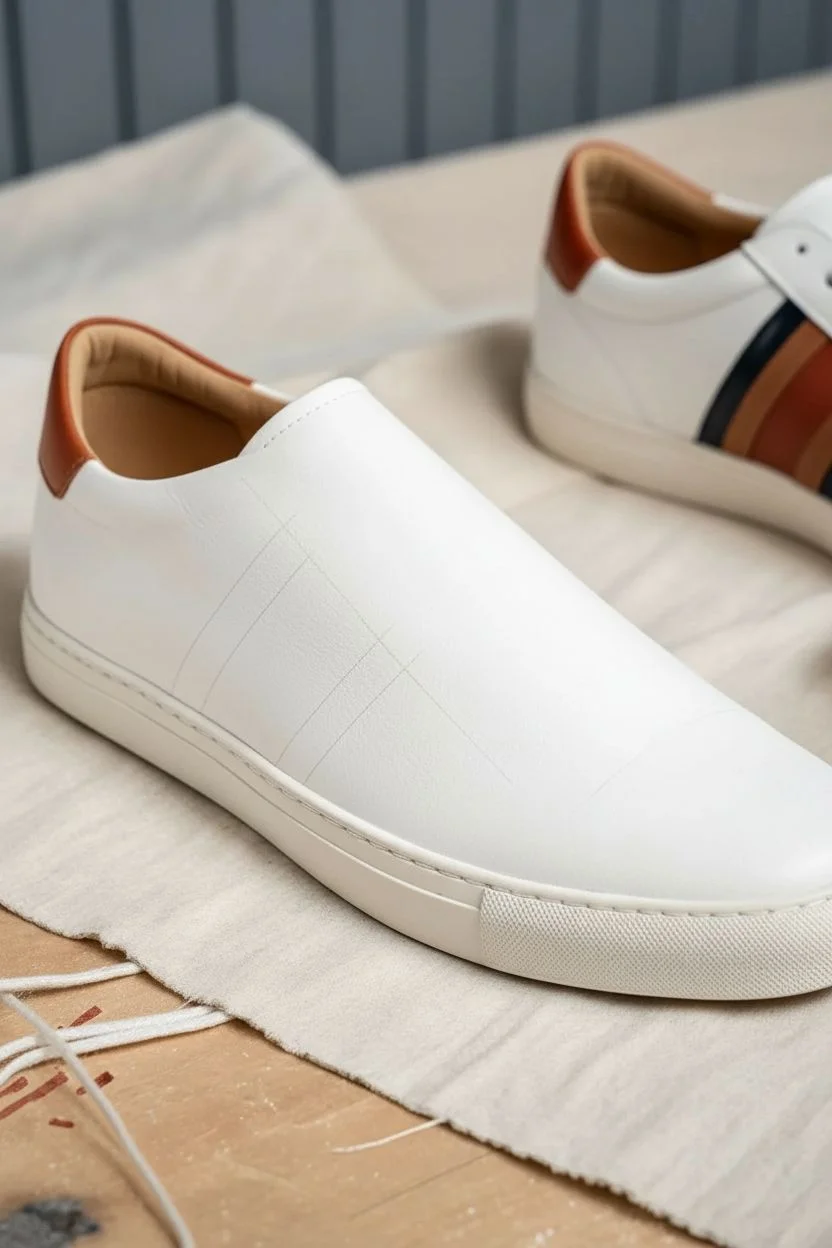
Elevate a plain pair of white leather sneakers with this sophisticated, retro-inspired stripe design. Using masking tape ensures crisp, professional lines that create a timeless look suitable for any casual outfit.
Detailed Instructions
Materials
- White leather sneakers
- Leather preparer/deglazer (or acetone)
- Cotton rounds or balls
- High-quality painter’s tape or masking tape
- Angelus leather paint (Navy Blue, Dark Brown/Cognac, Light Tan/Vachetta)
- Flat shader paintbrushes (small and medium sizes)
- Acrylic Finisher (Matte or Satin)
- Hairdryer or heat gun (optional)
- Ruler (flexible)
- Pencil
Step 1: Prep Work
-
Clean the Surface:
Before laying down any paint, you must remove the factory finish. Apply leather preparer or acetone to a cotton round and scrub the side area where the stripes will go. The leather might feel slightly tacky or look duller once the protective coating is removed. -
Remove Laces:
Take the laces off completely. This gives you unobstructed access to the side panels and prevents accidental paint splatter on the laces. -
Plan the Stripes:
Using a flexible ruler and a light pencil, mark the angle of your stripes. Aim for a diagonal slant that complements the shoe’s stitching. Lightly sketching the outer boundaries first helps you visualize the placement.
Bleeding Lines?
If paint bleeds, dip a Q-tip in acetone and very gently rub the excess away. Be precise—acetone removes everything!
Step 2: Taping and Layout
-
Apply Base Tape:
Place a long strip of painter’s tape along the pencil line you just drew. This will be the upper boundary of your top stripe. Press the edge down firmly with your fingernail to prevent bleed-through. -
Define the First Stripe:
Place a second piece of tape parallel to the first, leaving a gap about 1/2 inch wide. This exposed gap will become your top navy blue stripe. -
Create the Spacers:
To keep the white gaps between colors consistent, I like to use thin strips of tape as spacers. Lay down a thin strip (about 1/8 inch) right next to your navy stripe gap to mask off the white leather that will separate the colors. -
Tape the Remaining Areas:
Repeat the taping process for the two lower stripes. Create a wide gap for the middle brown stripe (make this one slightly wider if you want it to be the focal point) and another thinner gap for the bottom navy stripe. -
Seal edges:
Run your finger or a plastic smoothness tool over every single tape edge. The tighter the seal, the crisper your lines will be.
Add Texture
For a luxury feel, use a stippling sponge on the brown stripe’s last coat to mimic a textured suede or tumbled leather look.
Step 3: Painting
-
Paint the Navy Stripes:
Dip your small flat brush into the Navy Blue leather paint. Apply a thin, even layer to the top and bottom exposed strips. Don’t glob it on; thin layers are key. -
Paint the Center Stripe:
Clean your brush or grab a fresh one. Mix your Dark Brown and Light Tan paints to create a rich cognac color for the center stripe. Apply the first coat carefully. -
Dry and Repeat:
Allow the first coat to dry for 15-20 minutes, or speed it up with a hairdryer on low heat. Apply 2-3 additional coats to each color until the finish is solid and opaque. -
Remove Tape Carefully:
This is the satisfying part. While the final coat is just slightly tacky (not fully cured yet), slowly peel back the tape at a 45-degree angle. Pulling while wet helps prevent the paint from cracking at the edges. -
Touch Up:
Inspect your lines. If any paint bled under the tape, use a toothpick or a tiny brush with white paint to clean up the edges.
Step 4: Finishing
-
Let it Cure:
Let the shoes sit undisturbed for at least 24 hours so the paint can bond fully to the leather. -
Seal the Work:
Apply a thin layer of Matte or Satin Acrylic Finisher over the painted area. This protects the design from scuffs and water damage. -
Re-lace:
Once the finisher is dry to the touch, lace your sneakers back up. Your custom kicks are ready to wear.
Now you have a bespoke pair of sneakers that look professionally designed and totally unique to you
BRUSH GUIDE
The Right Brush for Every Stroke
From clean lines to bold texture — master brush choice, stroke control, and essential techniques.
Explore the Full Guide
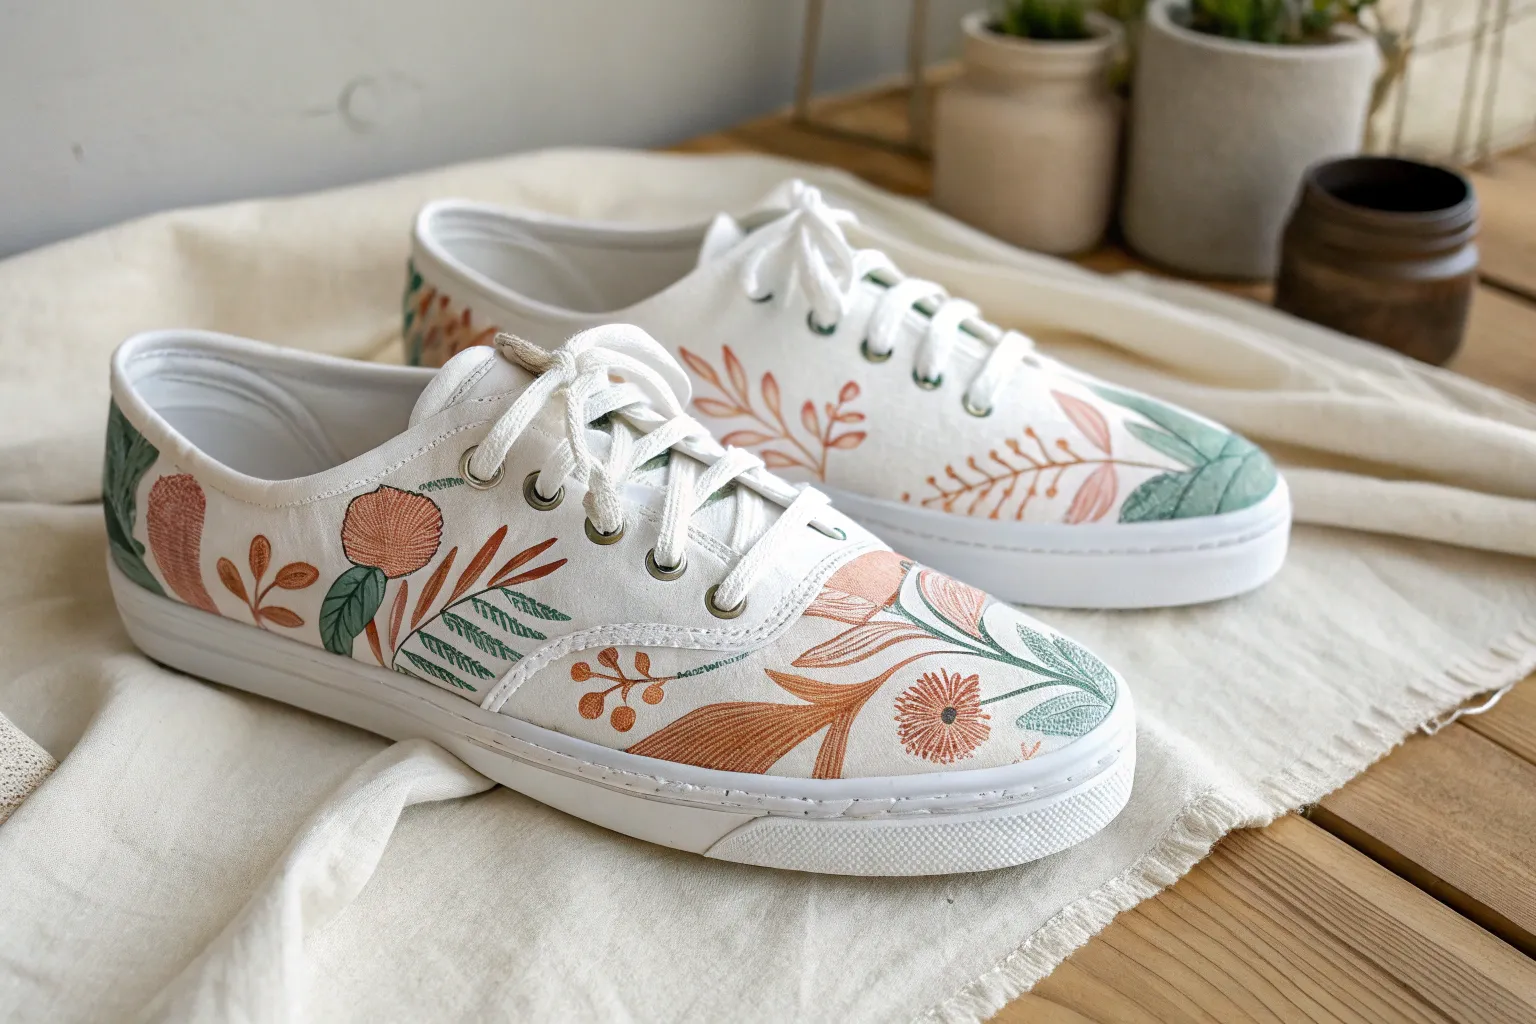
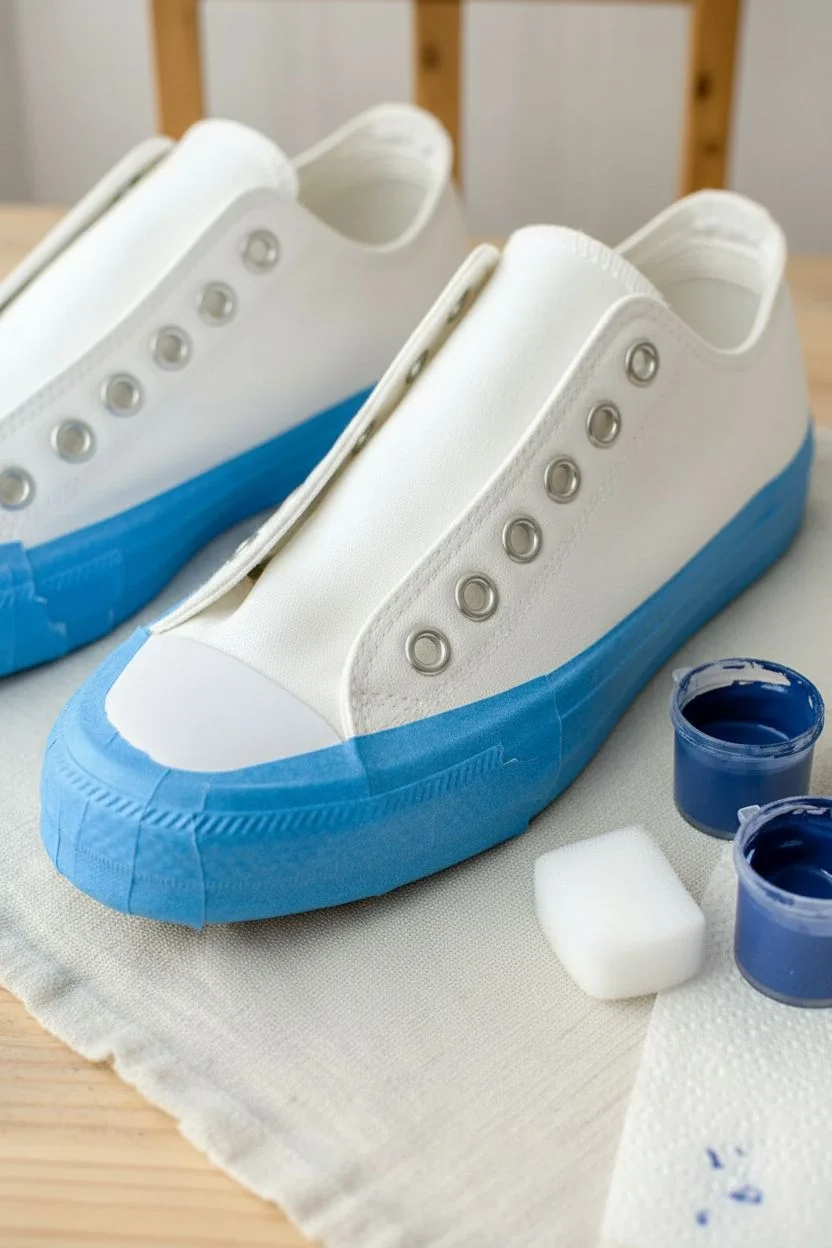
Color-Blocked Toe and Heel
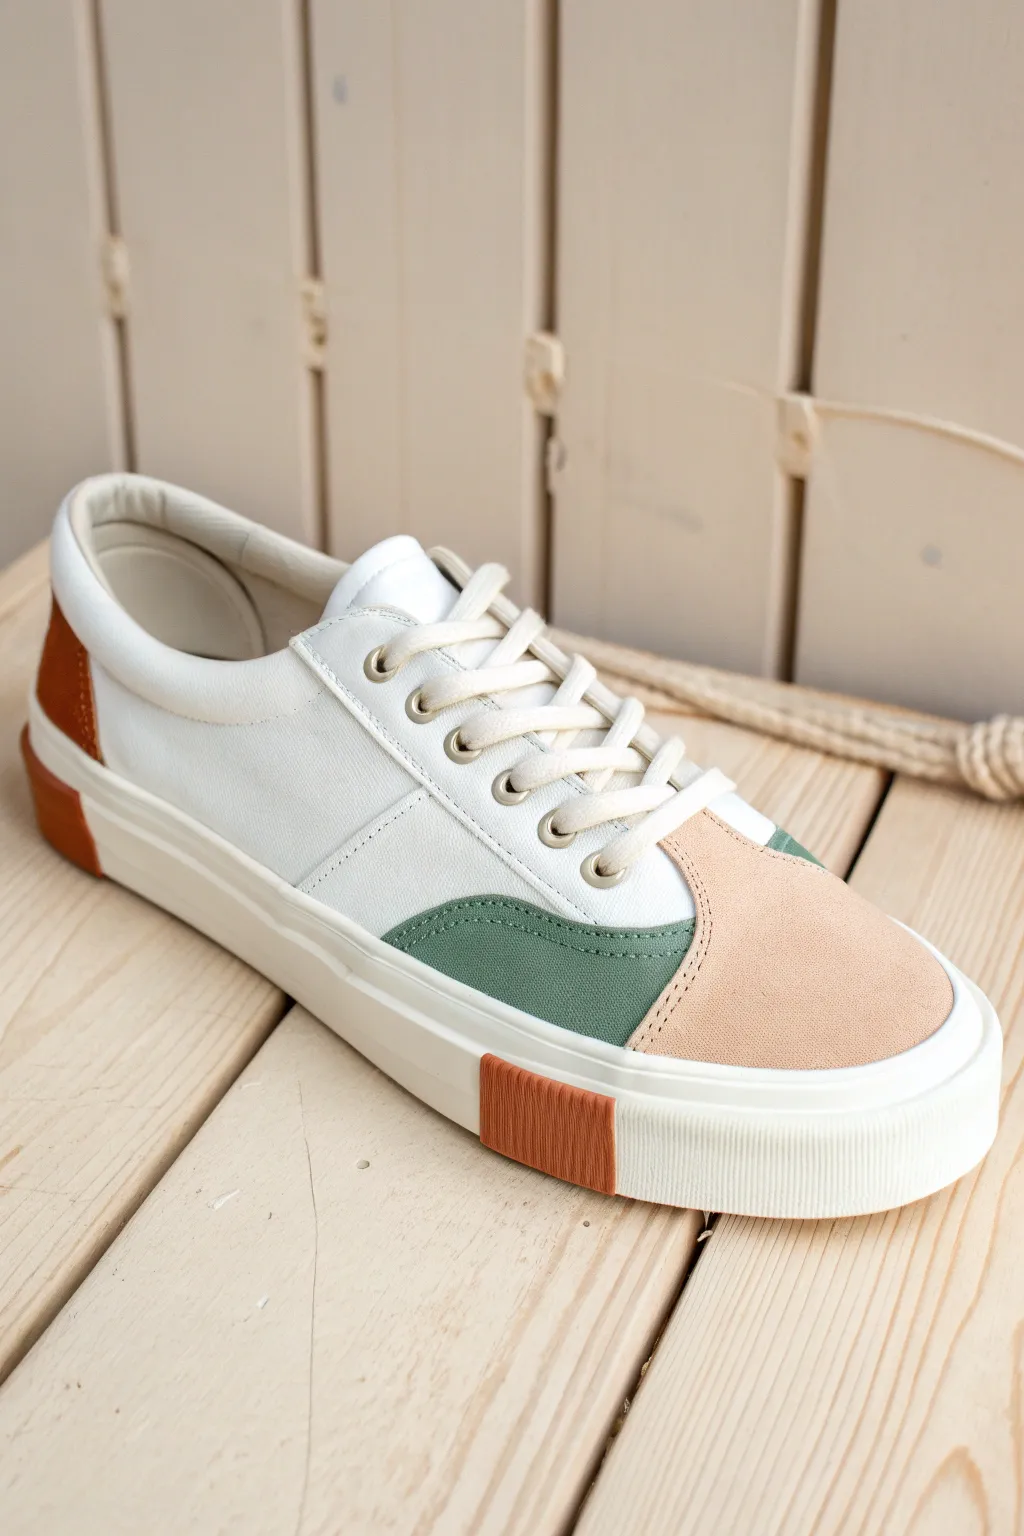
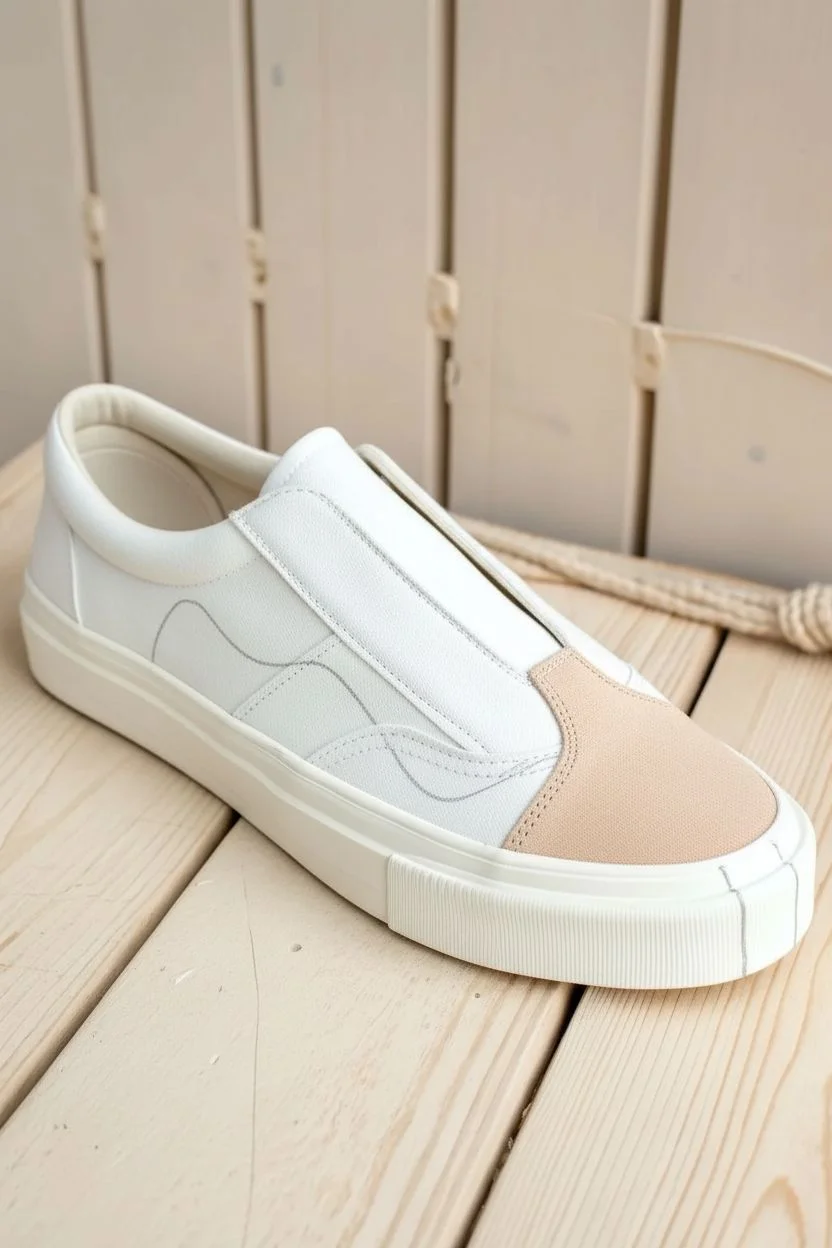
Transform plain white canvas sneakers into a modern style statement with this color-blocked design featuring earthy sage greens and warm rust accents. The clean lines and unique sole-painting detail give these shoes a high-end, custom look that feels effortlessly cool.
Step-by-Step Guide
Materials
- White canvas sneakers
- Angelus leather paint (or high-quality acrylics mixed with GAC-900)
- Fabric painting medium (if not using specific leather/fabric paint)
- Painter’s tape (frog tape works well for crisp lines)
- Assorted small paintbrushes (flat and angled shaders)
- Rubbing alcohol and cotton rounds
- Pencil
- Ruler
- Acetone or preparer (for rubber soles)
- Matte finisher or sealer
Step 1: Preparation & Planning
-
Clean the surface:
Before you start, remove the laces to keep them pristine. Wipe down the entire shoe, especially the rubber sole area, with rubbing alcohol or a mild deglazer to remove any factory finish or oils that might repel paint. -
Map the side swoops:
Using a pencil, lightly sketch the curved shape on the side panel. Start the line at the stitching near the eyelets and curve it gently downwards to meet the rubber sole, creating a wave-like section for the green paint. -
Mark the toe cap:
Identify the natural seam where the canvas toe cap meets the main body of the shoe. You won’t need to draw here, as you’ll simply follow this existing stitching line for the beige section. -
Outline the rubber accent:
On the rubber midsole near the toe, measure a rectangular block about 1.5 inches wide. Sketch vertical lines straight down from the canvas edge to the bottom of the sole to mark the rust-orange block.
Heat Set For Durability
For maximum longevity on canvas, run a hairdryer over the painted fabric sections for a few minutes after drying. This helps bond the acrylic polymers to the fibers.
Step 2: Painting the Canvas
-
Tape the edges:
Apply painter’s tape carefully along the rubber sole edge where you don’t want paint. Also tape off the dividing line for your green side-panel swoop to ensure a razor-sharp edge. -
Mix the green shade:
Mix a muted sage green color. I find adding a tiny drop of grey to forest green helps achieve that sophisticated, earthy tone seen in the example. -
Paint the side panel:
Apply the green paint to the sketched side area. Use a flat brush to work the paint into the canvas weave, brushing away from your tape line to prevent bleeding under the edge. -
Apply the beige toe:
Switch to a clean brush and apply a soft beige or sand color to the entire toe cap area. Be precise around the stitching where it meets the green section; a small angled brush is perfect for getting right up to the seam. -
Paint the heel tab:
Move to the back of the shoe and paint the vertical heel strip in a deep rust or burnt orange color. This balances the design visually with the front details. -
Let it dry:
Allow the first coat to dry for about 20 minutes. Apply a second or third coat as needed until the colors are solid and opaque.
Step 3: Rubber & Details
-
Prep the rubber block:
For the rectangle on the sole, wipe that specific spot firmly with acetone to slightly roughen the rubber surface for better adhesion. -
Tape the block:
Place vertical strips of tape on either side of your marked rectangle on the sole to isolate the area. -
Paint the sole accent:
Using the same rust-orange paint used on the heel, fill in the rectangular block on the textured rubber toe bumper. Dab the paint on rather than stroking to get it into the vertical grooves of the sole texture. -
Clean up edges:
Once the paint is tacky but not fully dry, carefully peel away all your painter’s tape at a 45-degree angle. If any paint bled through, scratch it off gently with a toothpick while it’s still soft. -
Seal the deal:
After the shoes have dried for at least 24 hours, apply a matte finisher over the painted areas to protect against scuffs and water. This is crucial for the rubber section to prevent peeling. -
Re-lace and finish:
Thread your laces back through the eyelets once everything is completely cured.
Texture Twist
Mix a 1:1 ratio of suede additive and paint for the beige toe cap. It will dry with a soft, fuzzy texture that mimics real suede leather.
Step out in your new custom kicks and enjoy the compliment
Black-and-White Doodle Shoes
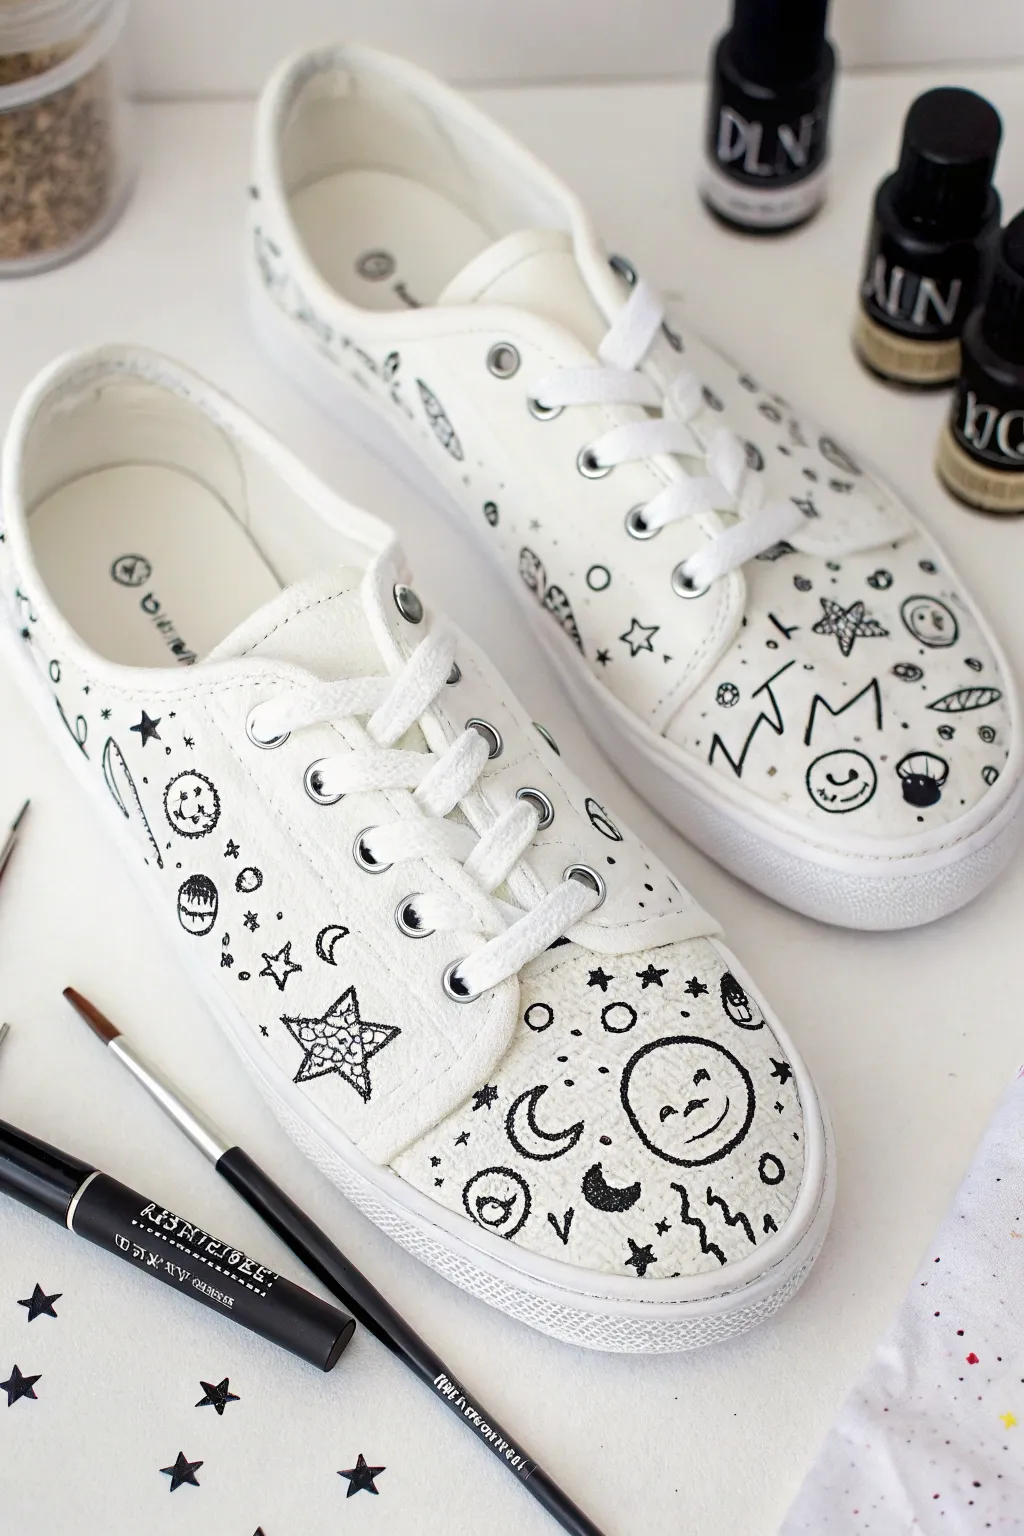
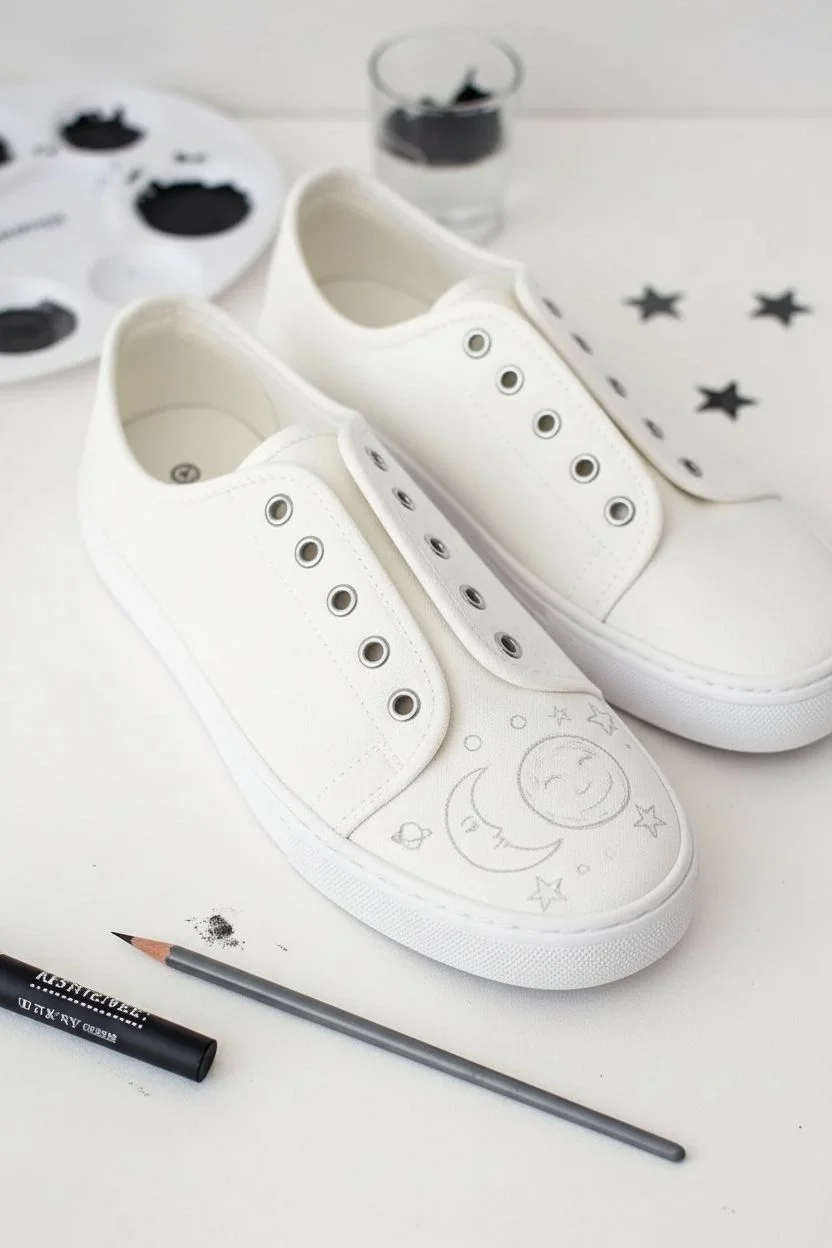
Transform plain white canvas sneakers into a wearable sketchbook with this playful black-and-white doodle design. Featuring moons, stars, and abstract shapes, this project is perfect for beginners who want to dip their toes into fabric art without worrying about complex color mixing.
Detailed Instructions
Materials
- Clean white canvas sneakers
- Fabric medium
- Black acrylic paint (or dedicated fabric paint)
- Fine liner brush (size 0 or 00)
- Small round brush (size 1 or 2)
- Black fabric marker (optional, for finer details)
- Pencil
- Palette or small dish
- Water cup and paper towels
- Hair dryer (optional)
Step 1: Preparation and Planning
-
Prep the surface:
Before you start, ensure your sneakers are clean and completely dry. If they are brand new, give them a quick wipe with a damp cloth to remove any factory starch or coating that might repel paint. -
Remove laces:
Unlace the shoes completely. This allows you to paint the tongue and eyelet areas easily without getting paint on the laces or creating awkward gaps. -
Sketch the major elements:
Using a pencil very lightly, sketch out the largest focal points first. Based on the reference, draw a large crescent moon and a cratered full moon on the toe box area. Keep the pencil pressure light so the graphite doesn’t smudge. -
Fill in the gaps:
Around your main moon shapes, lightly pencil in supporting elements like five-pointed stars, small planets, and squiggly lightning bolts. Don’t worry about perfection; the doodle style thrives on a loose, hand-drawn look.
Stubborn Pencil Lines?
If your pencil sketches are still visible after painting, gently dab them with a kneaded eraser. Avoid standard pink erasers, which can smear graphite into the white canvas.
Step 2: Painting the Outline
-
Mix your paint:
On your palette, mix equal parts black acrylic paint and fabric medium. This ensures the paint remains flexible on the canvas and won’t crack when you walk. If using ready-made fabric paint, just shake the bottle well. -
Test your flow:
Dip your fine liner brush into the paint. Test a line on a piece of scrap paper or fabric first. You want the paint to flow smoothly like ink, not clump up. -
Outline the toe box:
Start with the graphics on the toe cap area. Carefully trace over your pencil lines for the large moon face and the crescent moon. Use the very tip of the brush for crisp lines. -
Add texture marks:
Inside the full moon, add small dots and craters to give it character. For the crescent moon, I like to thicken the line weight slightly on the outer curve to give it visual weight.
Step 3: Filling the Sides
-
Work on the sides:
Move to the outer panels of the shoe. Paint a variety of stars—some open outlines, some filled in solid, and some with internal patterns like dots or webbing. -
Incorporate abstract doodles:
Fill the negative space with smaller, abstract shapes. Add zig-zags, small spirals, circles with dots inside, and floating geometric shapes like triangles. -
Create density variation:
Try to vary the spacing of your doodles. Cluster some shapes closer together near the sole and let them spread out more as they move up toward the laces, creating a nice drifting effect. -
Paint the heel area:
Don’t forget the back! Continue the pattern around the heel counter. Simple shapes like repeated dots or tiny stars work well here since the surface curves sharply.
Glow Up
Mix glow-in-the-dark pigment into your white paint and fill in the stars or moon craters. The shoes will look black and white by day, but light up green at night.
Step 4: Refinement and Finishing
-
Add tiny details:
Once the main shapes are painted, use your finest brush or a fabric marker to add the smallest details, like the ‘stitching’ lines on the stars or tiny speckles in the background void. -
Check for consistency:
Look at both shoes together. They don’t need to match perfectly, but the density of the doodles should feel balanced. Add a few extra small stars or dots if one side looks too empty. -
Let it cure:
Allow the paint to air dry completely for at least 24 hours. If you’re impatient like me, you can carefully use a hair dryer to speed up the surface drying, but a deep cure happens over time. -
Heat set the paint:
Once fully dry, heat set the design according to your fabric medium’s instructions. Usually, this involves a few minutes with a hot iron (use a pressing cloth!) or tossing them in a hot dryer cycle. -
Re-lace:
Thread your clean white laces back into the sneakers, being careful not to scratch the fresh paint near the eyelets.
Lace up your new custom kicks and enjoy walking in your own personal galaxy

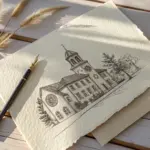
PENCIL GUIDE
Understanding Pencil Grades from H to B
From first sketch to finished drawing — learn pencil grades, line control, and shading techniques.
Explore the Full Guide
Mini Mandalas on the Sides
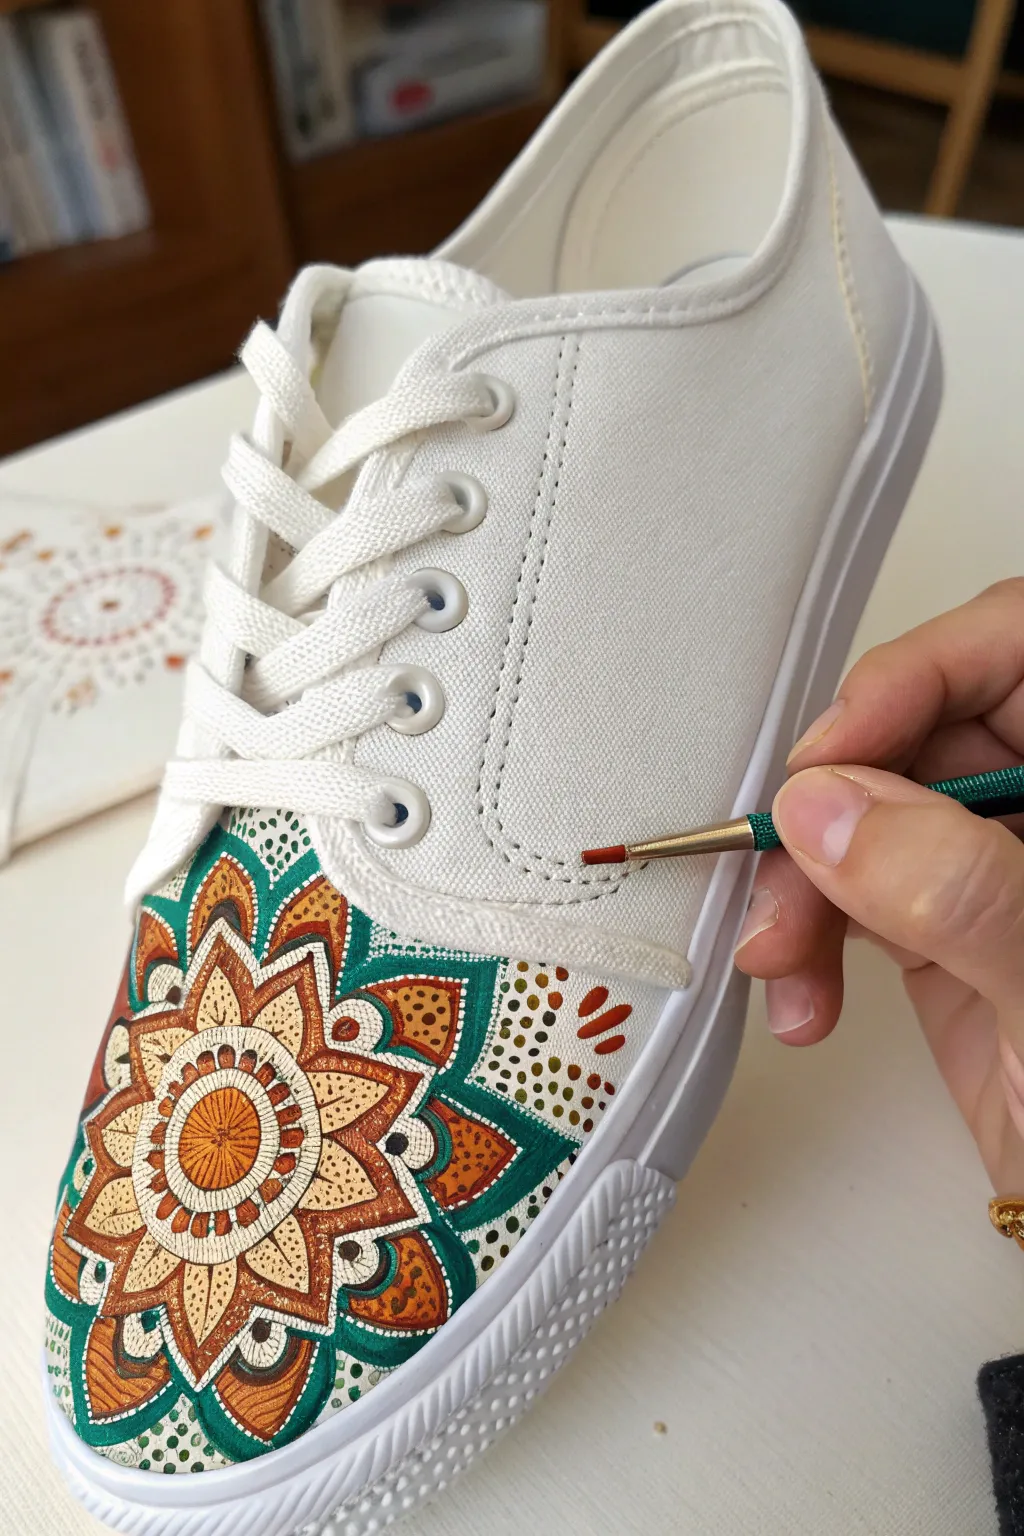
Transform a plain white canvas shoe into a wearable masterpiece with this intricate mandala design. Featuring earthy browns, vibrant teals, and delicate stippling, this project turns footwear into a striking statement of bohemian style.
Step-by-Step
Materials
- White canvas sneakers (clean and dry)
- Fabric medium (to mix with acrylics) or fabric paints
- Acrylic paints: Burnt Sienna, Orange, Teal/Dark Green, Beige/Cream, White, Gold (metallic)
- Set of fine liner brushes (sizes 000, 00, and 0)
- Pencil (HB or lighter) or disappearing fabric marker
- Palette for mixing
- Water cup and paper towels
- Waterproofing spray or sealant for fabric
Step 1: Preparation & Base Outline
-
Prep the surface:
Ensure your sneakers are completely clean. If they are new, I sometimes give them a quick wipe with a damp cloth to remove any factory starch, then let them dry fully. -
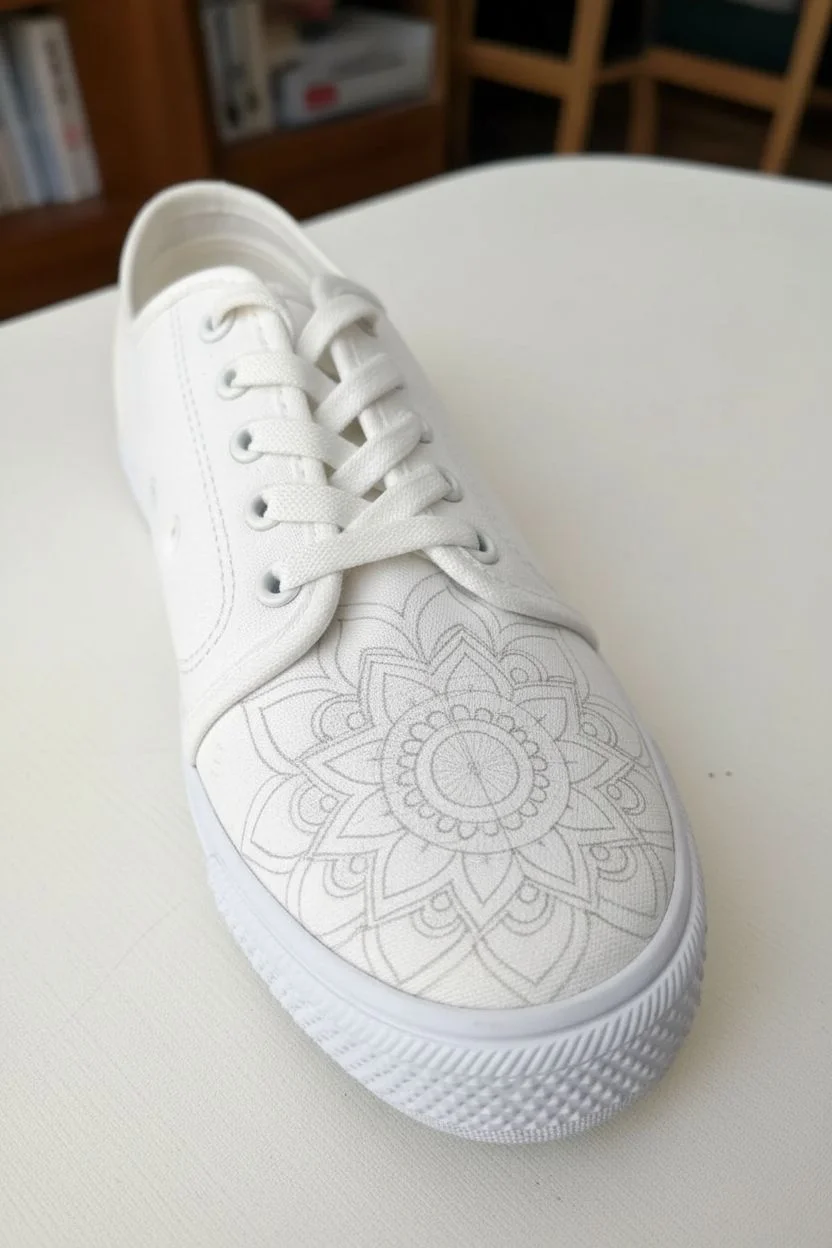
Map the center:
Locate the toe box area where you want the main mandala to sit. Use a pencil to lightly mark a center point near the middle of the toe cap. -
Sketch the primary circles:
Lightly sketch three concentric circles radiating from your center point. These don’t need to be perfect, but they will serve as the skeleton for your flower petals. -
Draw the main petals:
Sketch a layer of large, pointed petals extending from the outermost circle. Aim for symmetry, creating about 8-10 main petals that wrap around the curve of the shoe.
Step 2: Painting the Core Design
-
Paint the center:
Mix a warm orange with a touch of Burnt Sienna. Fill in the very center circle of your mandala carefully. -
Add the inner ring:
Use a beige or cream color to fill the ring immediately surrounding the orange center. Apply two thin coats if needed for opacity. -
Outline the geometric details:
Switch to your finest brush (size 000). Using dark brown paint (mixed with fabric medium), outline the petals and the internal geometric shapes within the beige ring. -
Fill the secondary petals:
Paint the larger, pointed petals with a mix of beige and light gold. Leave a small gap between the outline and the fill color to keep the design crisp. -
Introduce the teal contrast:
Using a rich teal or dark green, paint the negative spaces between the main petals. This dark background will make the lighter petal colors pop.
Unsteady Hands?
Rest your painting wrist on a steady object, like a book or a block of wood, to stabilize your hand while doing the fine detail work.
Step 3: Detailing & Stippling
-
Layer the petal details:
Inside the large beige petals, paint a smaller, inner petal shape using Burnt Sienna or a rust-orange color. This creates a layered, dimensional look. -
Add metallic accents:
Dip a size 0 brush into metallic gold paint. Add small dots or lines along the center of the petals to catch the light. -
Start the stippling effect:
This is the signature look of this design. Load a fine brush with dark green paint and create a cluster of tiny dots fading out from the teal sections onto the white canvas. -
Expand the dot work:
Repeat the stippling process with Burnt Sienna and Gold paints. Create trails of dots that float away from the main mandala design, softening the edges. -
Add rim details:
Carefully paint a line of small, evenly spaced dots along the stitching line of the shoe’s toe cap using the Burnt Sienna paint, just like in the reference image.
Add Sparkle
For extra flair, mix a tiny amount of fine glitter into your fabric medium and apply it over the dried teal sections for a subtle shimmer.
Step 4: Finishing Touches
-
Refine the lines:
Go back over any fuzzy outlines with your darkest brown paint. A sharp, consistent outline is key to the mandala style. -
Clean up borders:
If any paint strayed where it shouldn’t, use a slightly damp, clean brush to gently lift it while wet, or cover it with white paint once dry. -
Let it cure:
Allow the paint to dry for at least 24 hours. If your fabric medium requires heat setting, use a hair dryer or an iron (with a cloth barrier) according to the bottle instructions. -
Seal the deal:
Apply a waterproofing spray or fabric sealant over the entire shoe to protect your hard work from dirt and moisture.
Step out in style knowing you are wearing a truly unique piece of art on your feet
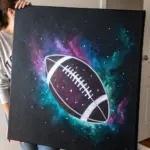
Galaxy Night Sky Shoes

Transform a plain pair of white sneakers into a breathtaking window to the universe with this galaxy-themed painting project. The design features a seamless fade from deep midnight blue to vibrant violet, accented by a scattering of sparkling stars.
Step-by-Step
Materials
- White canvas sneakers (Converse style)
- Painter’s tape or masking tape
- Acrylic paints (Navy Blue, Violet/Purple, White)
- Textile medium (mixing medium for fabric)
- Small sponge or foam pouncer
- Fine detail paintbrush (size 0 or 00)
- Old toothbrush
- Cup of water
- Paper towels
- Fabric sealant spray (optional)
Step 1: Preparation
-
Remove Laces:
Start by completely unlacing both shoes. This ensures you can paint the tongue fully and prevents you from accidentally staining the laces with acrylic paint. -
Masking Off:
Use painter’s tape to carefully cover the rubber soles and the rubber toe cap. Press the edges of the tape down firmly with your fingernail to prevent paint from sneaking underneath. -
Mix Your Medium:
Mix your acrylic paints with the textile medium according to the bottle’s instructions (usually a 1:1 or 2:1 ratio). This step is crucial because it keeps the paint flexible so it won’t crack when you walk.
Bleeding Lines?
If paint seeps under the tape onto the rubber, wipe it immediately with a wet cloth. If dried, nail polish remover on a Q-tip works wonders to clean it up.
Step 2: Creating the Galaxy Base
-
Apply the Base Blue:
Start with your darkest navy blue. Dip a small sponge into the paint and dab it onto the upper back heel area and the top near the eyelets. Don’t cover the whole shoe; leave irregular gaps for the lighter colors. -
Adding Violet Tones:
While the blue is still slightly wet, load your sponge with the violet paint. Dab this into the empty white spaces and overlap it slightly with the blue edges to create a blended transition. -
Blending the Gradient:
Use a clean part of the sponge to soften the lines where the blue and violet meet. You want a cloudy, nebulous look rather than distinct stripes of color. -
Deepening Shadows:
If the blue looks too light, go back in with a second layer of navy on the edges to create depth. The contrast between the dark space and the brighter nebula is what makes the design pop. -
Painting the Tongue:
Don’t forget the tongue area! Pull it forward and sponge your gradient colors onto it, ensuring the design flows naturally from the sides of the shoe. -
Let it Dry:
Allow the base layer to dry completely. Acrylics on canvas dry relatively fast, but give it at least 20-30 minutes so your stars don’t smear into the background colors.
Step 3: Stars and Details
-
Prepare White Paint:
Pour a small amount of white paint onto your palette. It works best for stars if it’s slightly thinned with a drop of water, giving it an ink-like consistency. -
Splatter Method:
Dip an old toothbrush into the thinned white paint. Hold the brush over the shoe and run your thumb across the bristles to flick a fine mist of tiny white specks across the galaxy background. -
Control the Chaos:
I prefer to do the splatter step outdoors or over a cardboard box to avoid painting my table. Check the density of stars and add more flicks to the darker blue areas for better contrast. -
Hand-Painting Large Stars:
Using your fine detail brush, paint a few larger, designated stars. Draw a simple four-point cross shape or a small diamond to represent brighter stars. -
Adding Constellations:
If you like, connect a few of the larger dots with very thin lines to create subtle constellation patterns, or just add a few solid white dots to vary the star sizes. -
Clean Up:
Once the paint is fully dry, carefully peel away the painter’s tape. If any paint bled onto the rubber, you can scratch it off gently or use a Q-tip with a little rubbing alcohol. -
Sealing the Deal:
To protect your artwork from rain and dirt, spray the canvas areas with a clear fabric sealant or waterproofing spray in a well-ventilated area. -
Final Touch:
Once the sealant is dry, re-lace your shoes with crisp white laces to contrast against the dark galaxy print.
Cosmic Glow Up
Mix a tiny amount of glow-in-the-dark pigment into your white paint for the stars. Your shoes will charge in the sun and light up at night.
Enjoy walking on stars with your custom galaxy footwear


Paint Splatter With a Clean Base
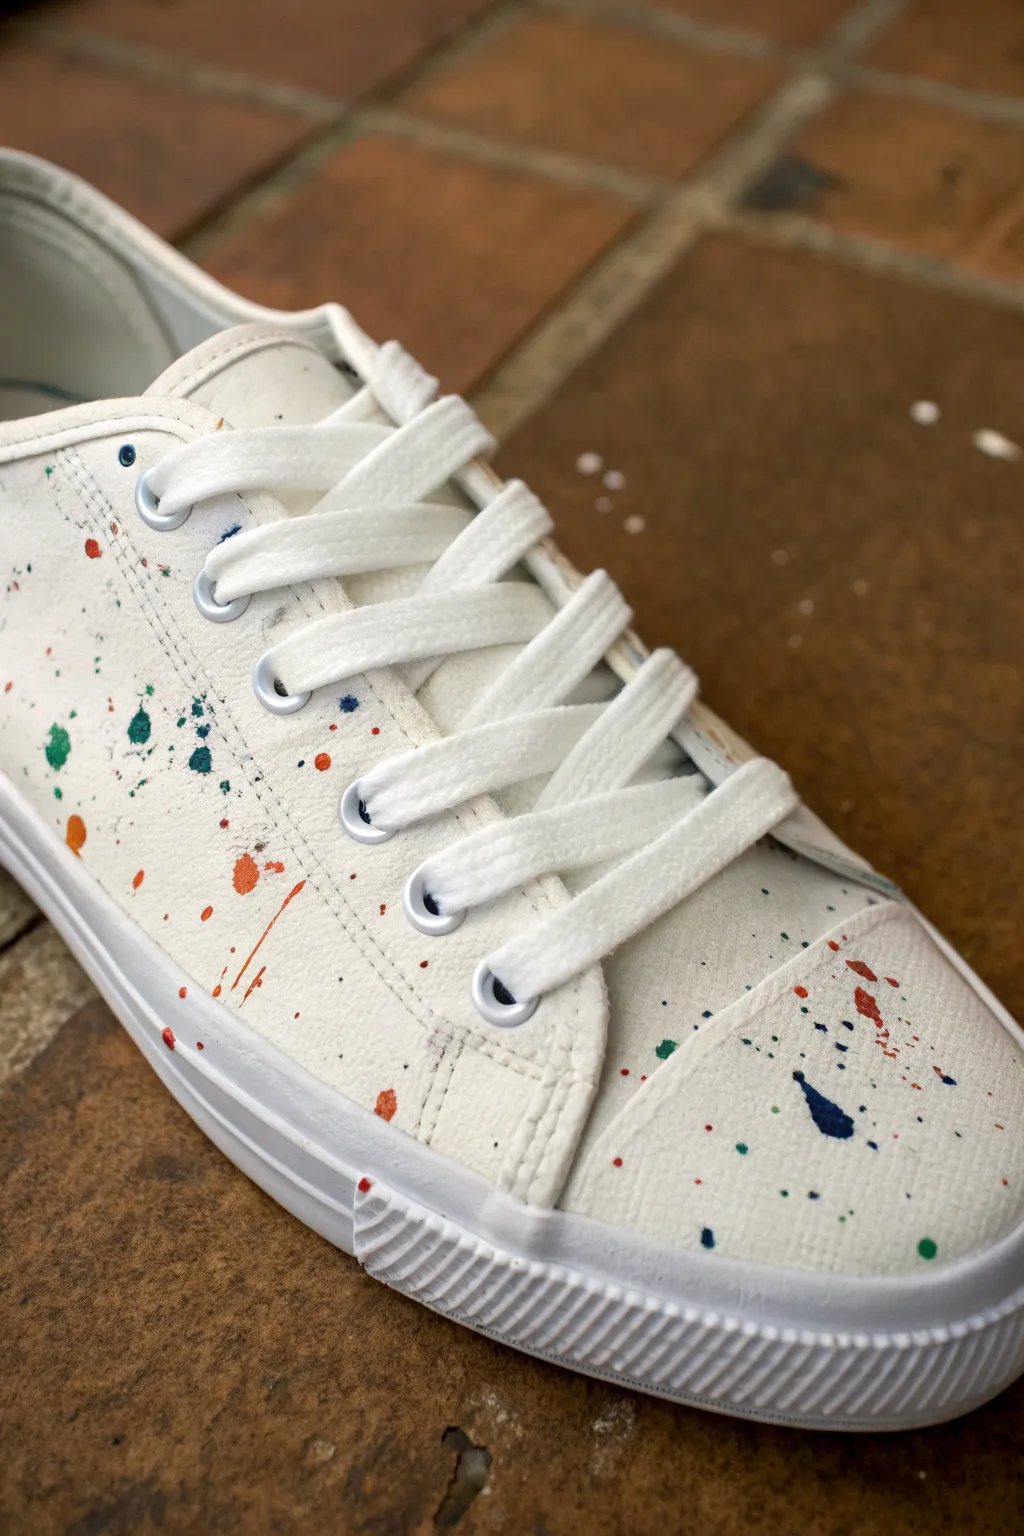
Transform a pair of basic white canvas sneakers into an artistic statement with this controlled splatter technique. The result combines the chaotic energy of Jackson Pollock with a clean, minimalist aesthetic that keeps the focus on the vibrant bursts of color.
Step-by-Step Guide
Materials
- White canvas sneakers
- Fabric paint (or acrylic paint mixed with fabric medium)
- Small stiff-bristled brushes or toothbrushes
- Painter’s tape or masking tape
- Newspaper or a drop cloth
- Small cups or palette for mixing
- paper towels
- Water
Step 1: Preparation
-
Remove Laces:
Begin by completely unlacing both shoes. This is crucial for keeping that crisp, clean look—no one wants unintentional paint flecks on their fresh white laces. Set the laces aside in a safe place. -
Stuff the Shoes:
Crumple up old newspaper or plastic bags and stuff them firmly inside each shoe until the canvas is taut. This not only prevents paint from seeping inside but also creates a better surface for the paint to land on. -
Mask the Soles:
Carefully apply painter’s tape along the rubber foxing tape (the rubber sidewall of the sole). Press the tape edge firmly against the canvas line to ensure no paint bleeds underneath. Cover the toe cap if you want that area to remain pristine, though the example project lets splatters hit the toe area. -
Cover the Eyelets:
If your shoes have metal eyelets you want to keep shiny, place small squares of tape over them. I find it easier to just wipe them off quickly later, but taping is safer. -
Prepare the Workspace:
Lay down a generous amount of newspaper or a drop cloth. Splatter painting is inherently messy, and the droplets will travel further than you expect.
Fixing Overspray
Did paint get on the rubber sole? Don’t panic. While the paint is still wet, a q-tip dipped in rubbing alcohol or warm soapy water will wipe it right off the rubber.
Step 2: Mixing & Testing
-
Mix Paints:
Squeeze your chosen colors into small cups. For this look, use a bright orange, a deep royal blue, and a forest green. If using standard acrylics, mix them 1:1 with fabric medium to prevent cracking. -
Adjust Consistency:
Add a few drops of water to your paint mix. You want a consistency similar to heavy cream or melted ice cream—fluid enough to fly off the brush, but thick enough to hold an opaque dot. -
Practice Your Flick:
Before hitting the shoe, practice on a piece of scrap paper. Dip your brush, pull the bristles back with your thumb, and release. -
Test the Tap Method:
Alternatively, load a brush with paint and tap the handle against another brush handle or your finger over the paper. This often creates larger, more distinct droplets compared to the fine mist of a toothbrush.
Pro Tip: Variance
Use different tools for different dot sizes. A toothbrush makes a fine mist, while a stiff, round paintbrush loaded with watery paint creates those satisfyingly large, round drops.
Step 3: Applying the Splatters
-
First Color Layer:
Start with your first color (e.g., orange). Dip the brush and use your preferred flicking method to send droplets onto the canvas. Aim for an uneven distribution—clusters of spots look more natural than a perfect grid. -
Rotate the Shoe:
Turn the shoe frequently to hit the sides, heel, and tongue area. Don’t forget the back strip. Ensure the density of the splatter varies across the surface. -
Let it Set Briefly:
Wait about 5-10 minutes before switching colors. This prevents wet droplets from running into each other and turning into a brown muddy mess. -
Second Color Layer:
Repeat the process with the blue paint. Try to aim for some empty white spaces to balance the composition. Vary the distance of your hand from the shoe; closer means smaller, intense dots, while further away creates a wider, lighter spray. -
Third Color Layer:
Finish with the green accents. Use this final color sparingly to fill in any gaps without overcrowding the design. The white canvas needs to remain the dominant background. -
Check for Blobs:
If a large, unwanted glob lands on the canvas, you can leave it for texture or carefully dab it with the corner of a paper towel to lift the excess paint.
Step 4: Finishing Touches
-
Initial Dry:
Allow the shoes to sit undisturbed for at least 24 hours. Resist the urge to touch the paint, as the outside skins over faster than the center dries. -
Remove Tape:
Once the paint is dry to the touch, slowly peel off the masking tape from the soles. If any paint leaked through, gently scrape it off the rubber with a fingernail or a damp magic eraser. -
Heat Set:
To make the design permanent and washable, blast the shoes with a hair dryer on high heat for a few minutes, or toss them in a dryer on high (inside a pillowcase) for 15 minutes. -
Re-Lace:
Thread your crisp white laces back through the eyelets. The contrast between the clean laces and the splattered canvas really makes the design pop.
Step into your new custom kicks and enjoy the splash of color you’ve added to your wardrobe
Seasonal Leaves and Berries
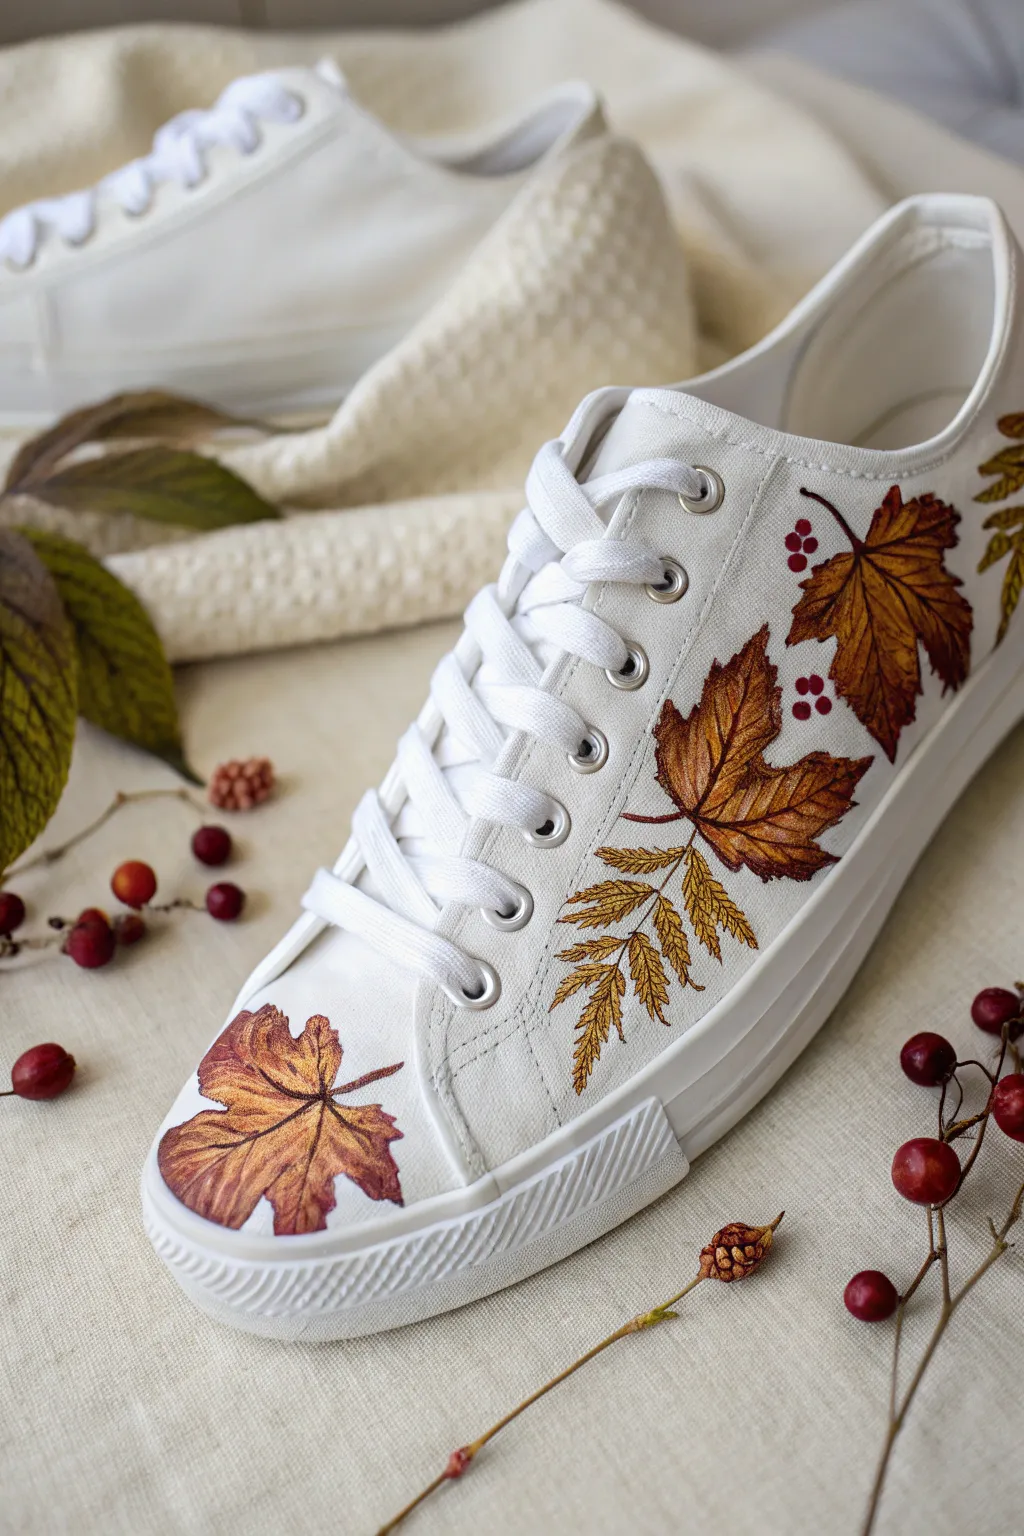
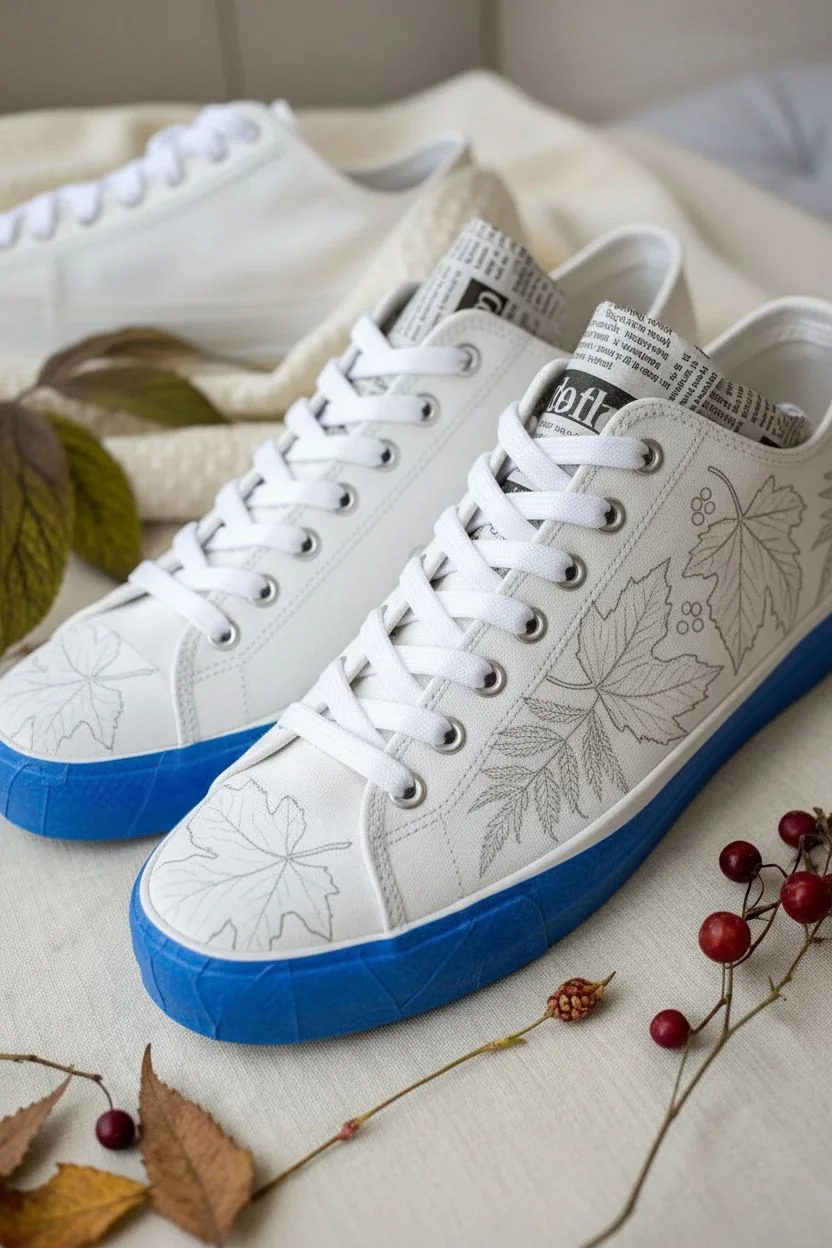
Transform plain white sneakers into a celebration of fall foliage with this detailed botanical shoe painting project. Featuring crisp maple leaves, delicate fern fronds, and tiny red berries, this design brings the warmth of autumn to your every step.
Step-by-Step Tutorial
Materials
- White canvas sneakers (clean and dry)
- Fabric medium
- Acrylic paints (burnt orange, mustard yellow, dark brown, crimson red, white, olive green)
- Small round brushes (sizes 0, 1, and 2)
- Fine liner brush (size 00 or 000)
- Pencil for sketching
- Cardboard or newspaper (to stuff shoes)
- Palette or small plate
- Water cup
- Paper towels
- Masking tape (for soles)
Step 1: Preparation and Layout
-
Stuff the shoes:
Begin by packing the inside of your sneakers tightly with newspaper or cardboard. This creates a solid surface to paint on and prevents the fabric from collapsing while you work. -
Protect the soles:
Apply masking tape carefully along the rubber sole edge where it meets the canvas. This ensures your paint lines stay clean and prevents any accidental smudges on the white rubber. -
Sketch the toe leaf:
Using a light pencil, draw the outline of a large maple leaf centered on the toe cap of the shoe. -
Sketch the side foliage:
Move to the outer side panel of the shoe. Sketch two smaller maple leaves diagonally rising toward the heel. -
Add filler details:
Between the heel leaves and the laces, sketch a fern-like frond with small, pinnate leaves. Dot in small clusters of 3-4 berries near the maple stems to fill negative space. -
Prepare the paint mix:
Mix your acrylic paints with fabric medium according to the bottle’s ratio (usually 1:1 or 2:1). This is crucial to prevent the paint from cracking when you walk.
Step 2: Painting the Base Layers
-
Base coat the maple leaves:
Mix burnt orange with a touch of mustard yellow. Using a size 2 brush, fill in the maple leaf shapes on the toe and sides. Don’t worry about shading yet; just get solid, even coverage. -
Base coat the fern:
Switch to a mustard yellow color mixed with a tiny bit of olive green. Carefully paint the individual leaflets of the fern frond. -
Paint the berries:
Load a size 1 round brush with crimson red. Dab gently to fill in the berry clusters you sketched earlier, keeping them round and distinct. -
First drying phase:
Let this base layer dry completely. I like to give it about 15-20 minutes, or use a hairdryer on a cool setting if you’re impatient.
Smooth Operator
Work in thin layers rather than one thick blob. Thick paint tends to crack on flexible shoes. Two thin coats will always look better and last longer.
Step 3: Detailing and Dimension
-
Add leaf shadows:
Mix a darker rust color using burnt orange and a drop of brown. Apply this to the edges of the maple leaves and near the center where the veins will go to create depth. -
Create leaf highlights:
Mix mustard yellow with a tiny bit of white. Lightly dry-brush the centers of the maple leaf lobes to make them look dimensional and sun-kissed. -
Detail the fern:
Using the same rust mix, add tiny veins or shadows to the base of each small fern leaflet with your 00 brush. -
Outline the shapes:
Thin down your dark brown paint slightly with water. Using your finest liner brush, carefully outline the maple leaves to sharpen their jagged edges. -
Draw the veins:
With the liner brush and dark brown paint, draw the central vein and branching veins on each maple leaf. Keep lines thin and tapered at the ends. -
Berry highlights:
Dip the very tip of a clean toothpick or fine brush into white paint. Place a tiny dot on the upper right curve of each red berry to create a ‘shine’ effect. -
Heat set:
Once fully dry (give it 24 hours), remove the tape. If your fabric medium requires it, heat set the design with an iron (no steam) or a hairdryer on high heat.
Seasonal Switch-Up
Swap the colors for different seasons! Use bright greens for spring, or icy blues and silver for a winter frost theme on the exact same leaf pattern.
Lace up your new custom kicks and enjoy the crunch of leaves under your feet
Stencil Layers With Pop Colors
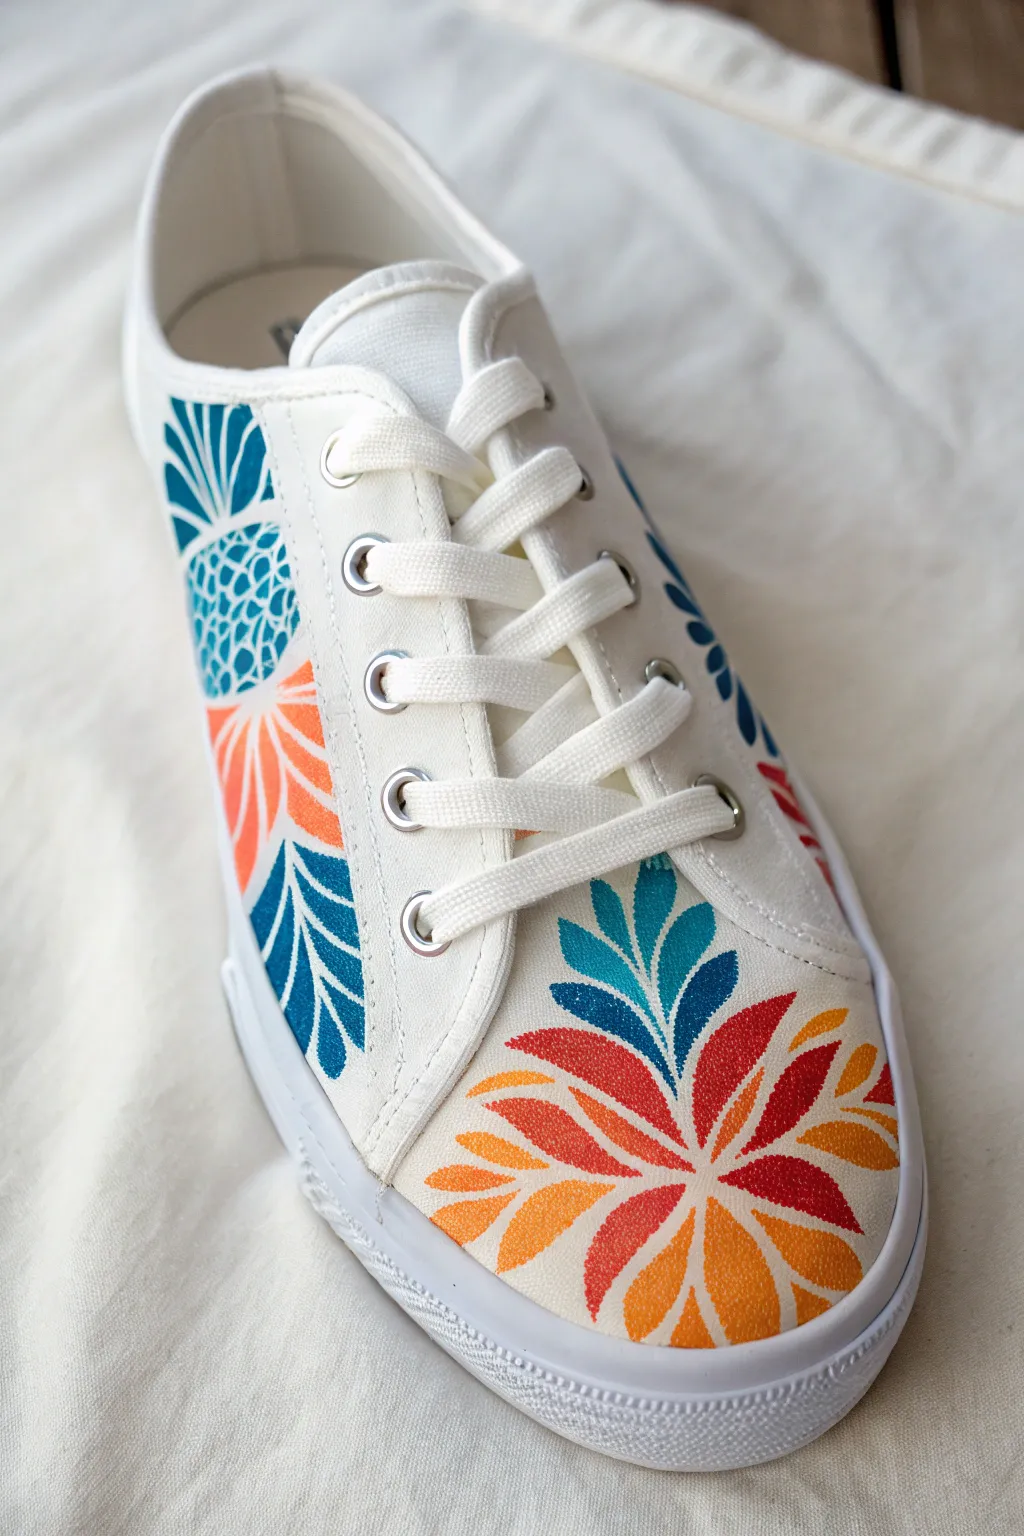
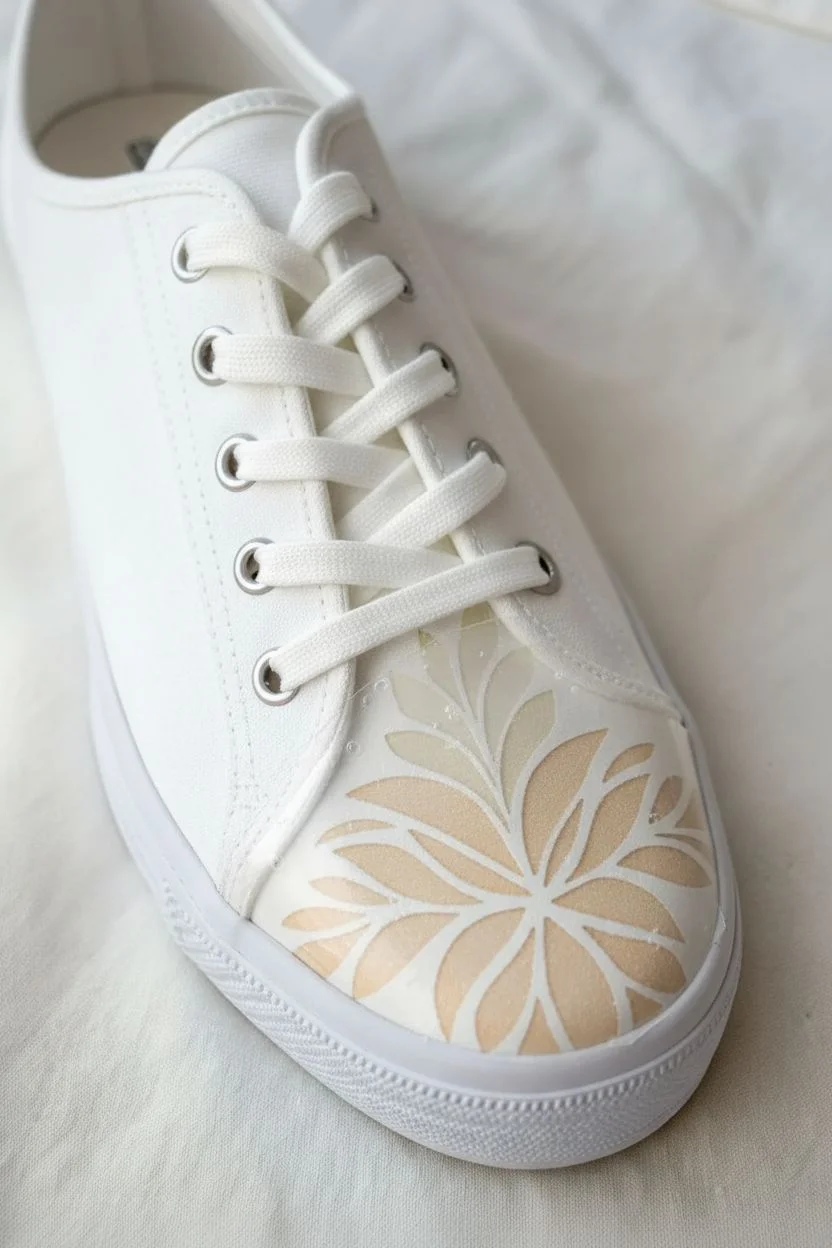
Transform plain white canvas sneakers into a vibrant statement piece using simple stenciling techniques and brilliant pop colors. This floral design combines teal, burnt orange, and deep red patterns to create a symmetrical, radiating effect across the toe box and sides.
Step-by-Step Guide
Materials
- White canvas sneakers
- Fabric medium
- Acrylic paints (teal, burnt orange, bright red, deep blue)
- Adhesive stencil film or low-tack painter’s tape
- Hobby knife (X-Acto)
- Small stencil brushes or cosmetic sponges
- Fine detail brush (size 0 or 00)
- Hairdryer (optional)
- Waterproof sealant spray
Step 1: Preparation & Masking
-
Prepare the canvas:
Remove the laces from your sneakers to ensure you have full access to the tongue and eyelets. If the shoes are new, give the canvas a quick wipe with a damp cloth to remove any factory sizing, then let them dry completely. -
Mix your blooming medium:
Mix your acrylic paints with fabric medium according to the bottle instructions (usually a 1:1 or 2:1 ratio). This ensures the paint flexes with the shoe while walking instead of cracking. -
Plan the toe design:
Cut a piece of adhesive stencil film large enough to cover the toe cap. Sketch a radiating flower design directly onto the backing paper: start with a center point near the sole and draw petal shapes expanding outward like a fan. -
Cut the primary stencil:
Carefully cut out the petal shapes using your hobby knife. Retain the ‘negative’ space (the film that goes around the petals) as this will be your main stencil. -
Applied placement:
Peel the backing and smooth the adhesive stencil firmly onto the toe of the shoe. Pay extra attention to the edges of the cutouts to prevent paint bleed.
Sticky Situation
If you don’t have stencil film, wide masking tape works! Lay strips overlapping on a cutting mat, cut your shape, and transfer it to the shoe as one piece.
Step 2: Applying the Pop Colors
-
Start the gradient:
Pour small amounts of your mixed teal, orange, and red paints onto a palette. Using a wedge sponge or stencil brush, lightly dab the orange paint into the lower/outer petals of your design. -
Transitioning hues:
While the orange is still tacky, switch to a fresh sponge area and apply the bright red to the adjacent petals. Blend slightly where the colors might touch to create a soft transition. -
Adding cool tones:
Complete the center or upper petals with the teal paint. Use a pouncing motion rather than brushing back and forth; this pushes paint into the canvas weave without forcing it under the stencil edges. -
Side panel masking:
While the toe dries, create a second stencil for the side of the shoe. Draw a simpler leaf or palm frond shape on fresh film and cut it out. -
Painting the sides:
Apply the side stencil and paint these leaves using a deep blue and teal mix. I like to keep the heaviest pigment at the base of the leaf and fade it out slightly toward the tips. -
Peel and reveal:
Once the paint is dry to the touch (use a low-heat hairdryer to speed this up), carefully peel away the stencil film. Pull it back at a sharp angle to keep lines crisp.
Step 3: Refining and Sealing
-
Connecting the pattern:
With a fine detail brush, freehand any small connecting lines or center points of the flower that the stencil bridges might have blocked. This makes the design look cohesive. -
Clean up edges:
If any paint bled under the stencil, use a tiny amount of white acrylic paint on your detail brush to touch up the canvas and sharpen the petal outlines. -
Create texture:
To mimic the textured look in the photo, you can use the very tip of a stiff brush to stipple tiny dots of a slightly lighter shade onto the petals, giving them depth. -
Heat setting:
Allow the paint to cure for 24 hours. After that, heat set the paint by blowing hot air from a hairdryer over the design for a few minutes. -
Protective finish:
Take the shoes outside and spray them with a thin, even coat of waterproof sealant spray to protect your artwork from dirt and rain. -
Re-lace:
Once the sealant is fully dry, lace your sneakers back up. Bright white laces provide a great contrast to your colorful new design.
Glitter Glam
Mix a tiny amount of fine fabric glitter into your final layer of sealant or topcoat for a subtle shimmer that catches the light as you walk.
Now you are ready to step out in style with your custom, colorful footwear artistry


Have a question or want to share your own experience? I'd love to hear from you in the comments below!