If you’ve ever stared at a clear batch of resin and thought, “Okay… what color story are we telling today?” you’re in good company. Here are my favorite resin color ideas—from classic crowd-pleasers to the kind of unexpected combos that make a piece look like it has its own little universe inside.
Classic Black and White Contrast
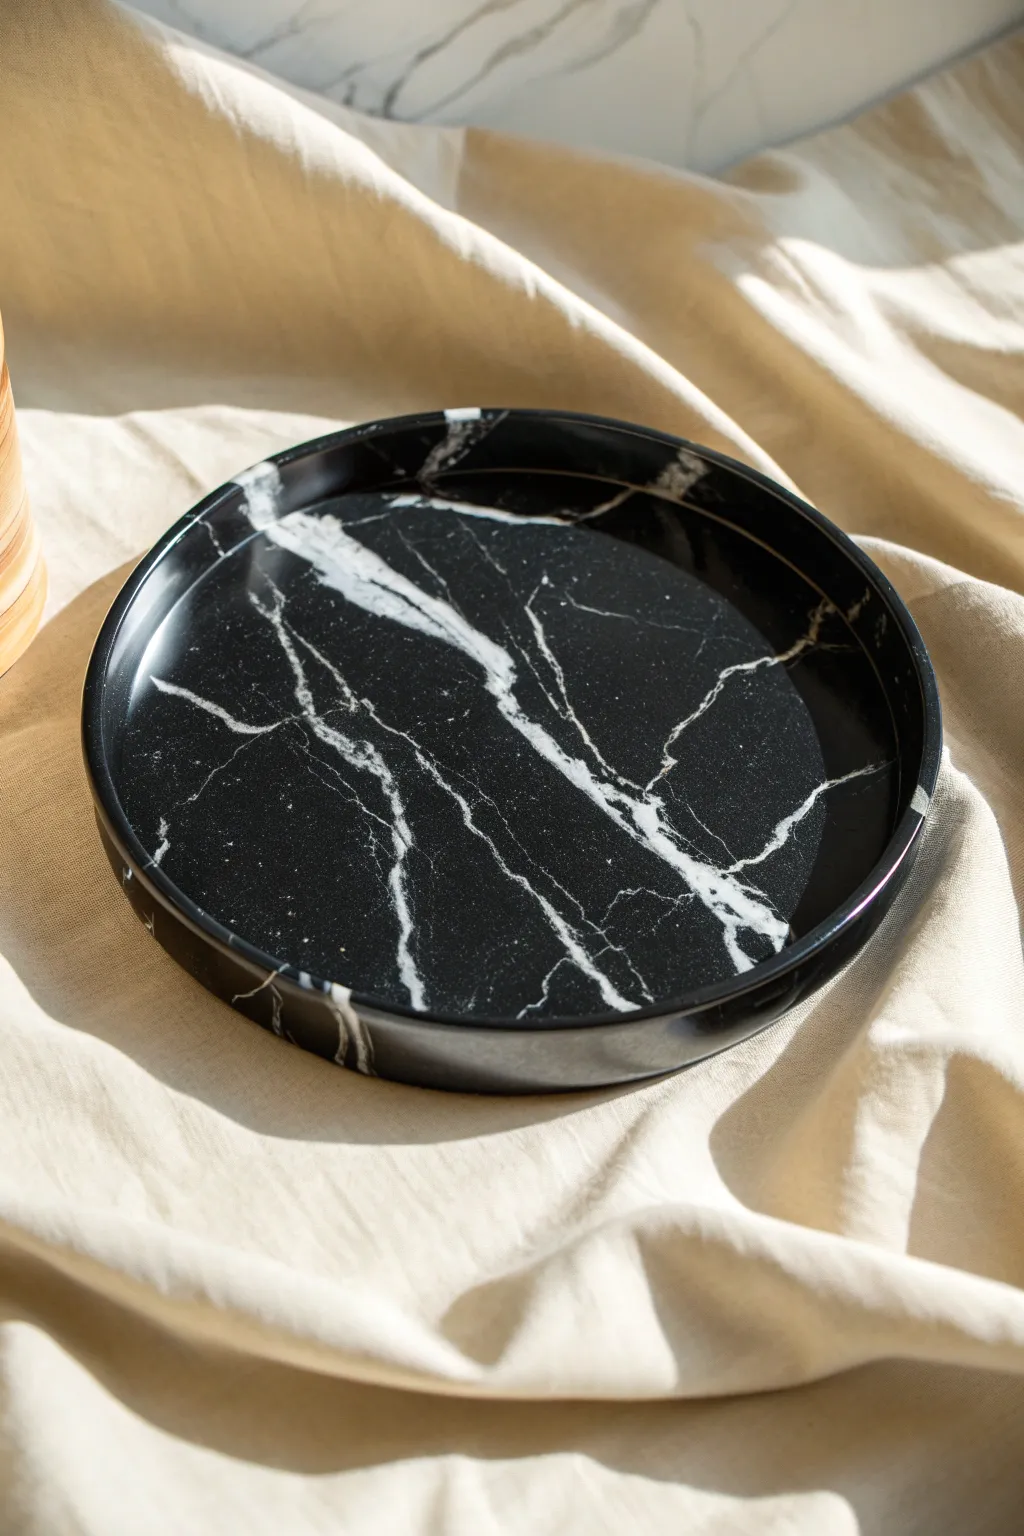

Achieve the sophisticated look of polished black marble without the weight or cost of stone. This project uses high-contrast resin pouring techniques to create striking white veins against a deep, glossy obsidian background.
How-To Guide
Materials
- Epoxy resin (casting or coating resin)
- Black opaque resin pigment (paste or liquid)
- White opaque resin pigment
- Medium round silicone mold (tray or coaster size)
- Heat gun or torch
- Mixing cups and stir sticks
- Toothpick or fine detail tool
- Isopropyl alcohol in a spray bottle
- Gloves and workspace protection
Step 1: Preparation & Mixing
-
Prepare the Workspace:
Ensure your work surface is completely level, covering it with plastic sheeting to catch drips. Clean your silicone mold thoroughly with masking tape to remove any dust or lint. -
Mix the Resin:
Measure equal parts of resin and hardener according to your brand’s instructions. Stir slowly and steadily for at least 3 minutes, scraping the sides and bottom of the cup to ensure a complete chemical blend. -
Separate Batches:
Pour about 90% of your mixed resin into a larger cup and keep the remaining 10% in a smaller cup. The larger portion will be your black base. -
Tint the Black Base:
Add a generous amount of black pigment to the larger cup. You want a solid, opaque onyx color, so mix thoroughly until no streaks of clear resin remain. -
Tint the White Veins:
Add white pigment to the smaller cup. Aim for a high opacity here as well so the white stands out against the dark background without becoming grey. -
Degas the Resin:
Let the mixed cups sit for about 2-3 minutes to allow larger air bubbles to rise to the surface naturally.
Natural Lines
Avoid straight lines or perfect circles. Real marble veins are erratic. Try shaking your hand slightly while drizzling the white resin to create organic trembles.
Step 2: Pouring & Veining
-
Pour the Black Base:
Slowly pour the black resin into the center of your silicone mold. Allow it to spread naturally to the edges. If needed, tilt the mold slightly to ensure full coverage. -
Initial Pop:
Pass a heat gun or torch quickly over the surface of the black resin to pop any surface bubbles. Be careful not to overheat the mold itself. -
Draw the Primary Veins:
Dip a stir stick into the white resin and drizzle thin, jagged lines across the surface of the black resin. Try to connect one side of the mold to the other for a natural stone look. -
Create Depth:
I like to wait about 5-10 minutes for the resin to thicken slightly before the next step. Then, use a toothpick to drag through the white lines, pulling them into finer wisps and creating organic fractures. -
Feather the Edges:
Gently blow on the white lines with a straw or use a heat gun on a low setting to push the white pigment slightly, feathering the edges into the black for a softer transition. -
Add Fine Details:
Dip a toothpick into the white resin again and add very tiny, disconnected vein fragments near the larger lines to mimic natural mineral deposits. -
Final Torch:
Do one last very quick pass with your torch to remove bubbles created during the veining process.
Step 3: Curing & Finishing
-
Cover and Cure:
Place a dust cover (like a cardboard box) over the mold to protect it while it cures. Let it sit undisturbed for 24-48 hours, depending on your resin’s specifications. -
Demold:
Gently peel the silicone mold away from the cured resin. The tray should be hard and glossy. -
Sand Sharp Edges:
Check the rim of the tray for any sharp edges or raised resin lips. Use fine-grit sandpaper (around 400 grit) to smooth these down if necessary. -
Polish (Optional):
If you sanded the edges, apply a tiny amount of polishing compound or a thin layer of topcoat resin to restore the shine.
Gilded Edge
Once cured and demolded, use a gold leaf pen to paint the top rim of the tray to add an extra layer of luxury to the black and white palette.
Place your sleek new tray on a coffee table or vanity to instantly elevate the space with modern elegance


Jewel Tone Geode Layers
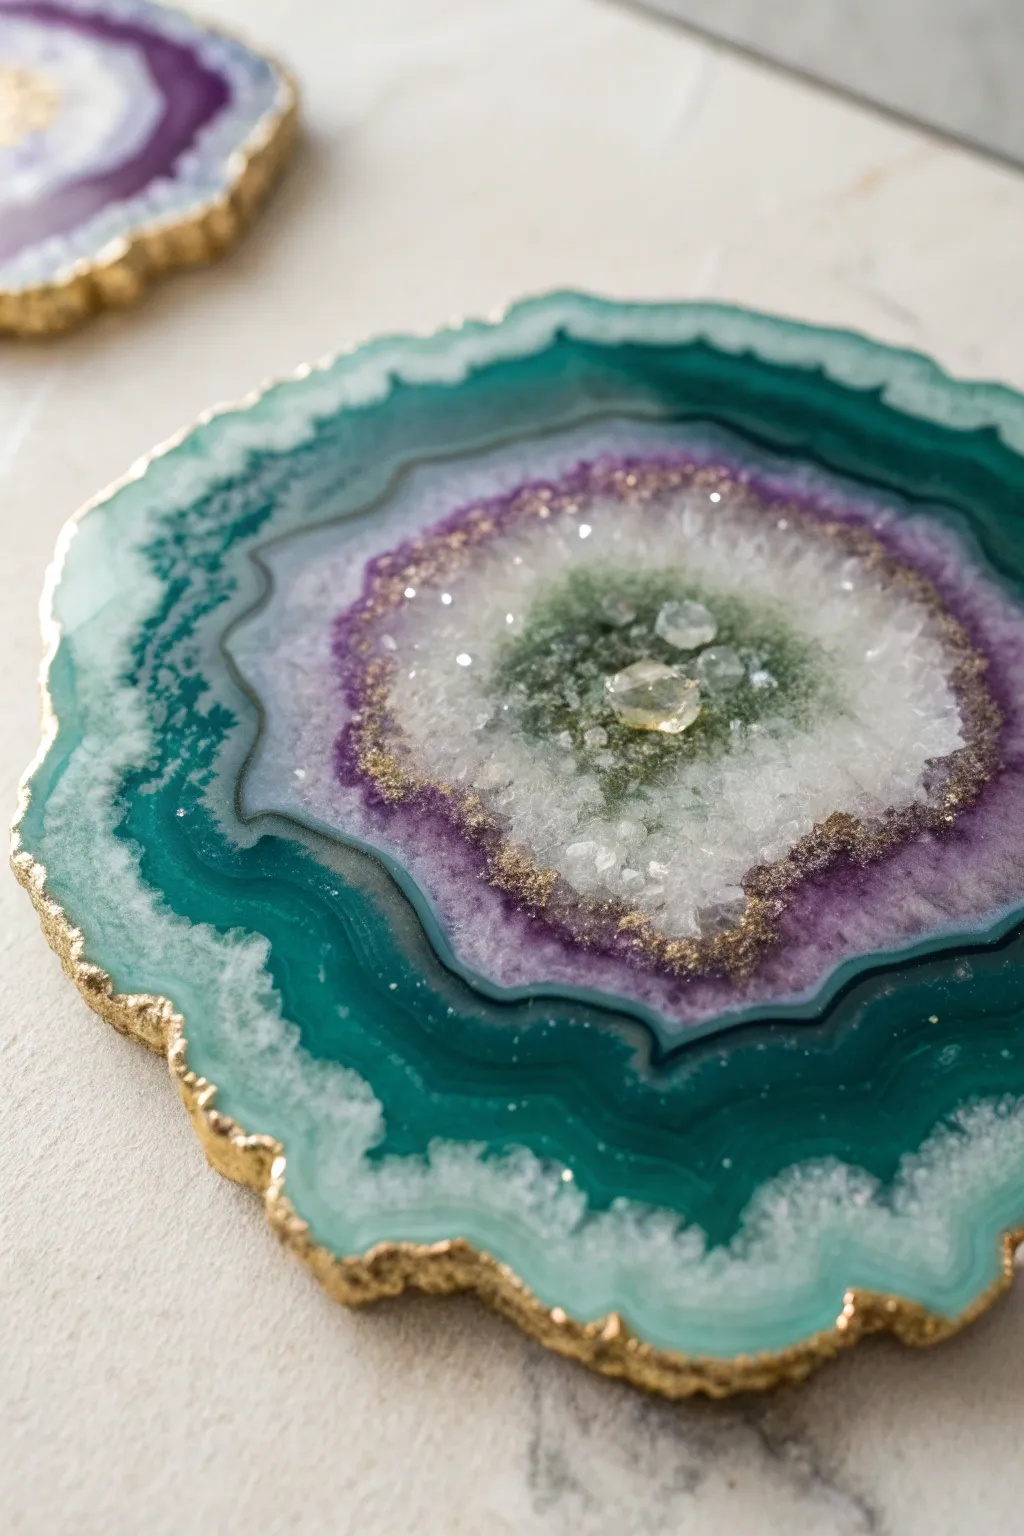
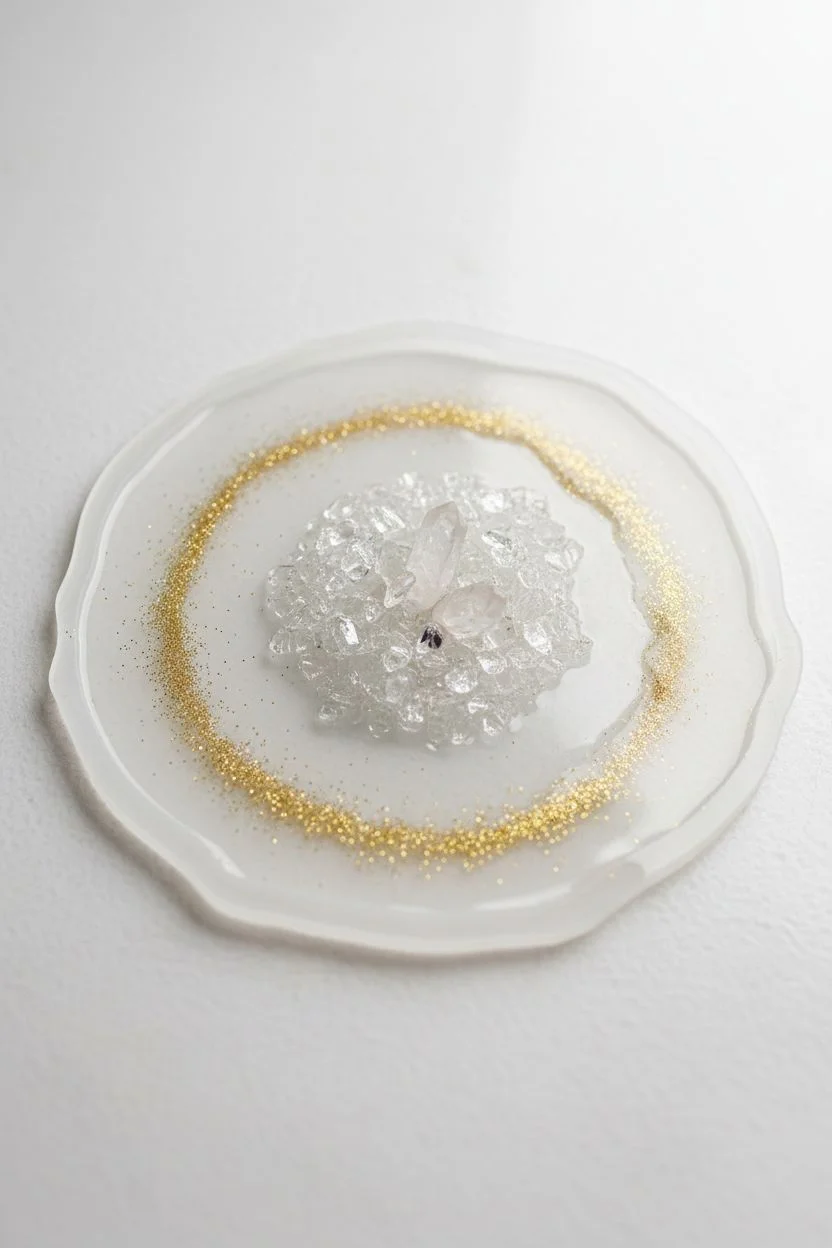
These stunning geode-inspired coasters blend rich jewel tones of turquoise and amethyst with sparkling crystal centers for a luxurious finish. The organic, layered design mimics natural agate slices, complete with a brilliant gold-gilded edge.
Detailed Instructions
Materials
- Two-part casting resin (art resin)
- Silicone geode mold (irregular shape)
- White alcohol ink or opaque pigment paste
- Teal or turquoise mica powder
- Deep violet or purple mica powder
- Fine gold glitter
- Crushed decorative glass or clear quartz chips
- Gold leaf paint or liquid gilding
- Fine paintbrush
- Mixing cups and stir sticks
- Heat gun or torch
- Resin tape (optional for cleaning)
Step 1: Preparation & Center
-
Prepare the Workspace:
Set up in a dust-free, well-ventilated area. Level your working surface perfectly, as even a slight tilt will ruin the concentric ring effect. Clean your silicone mold with tape to remove any lingering dust. -
Mix Clear Resin:
Mix a small batch of clear resin according to the manufacturer’s ratio. Stir slowly for at least 3 minutes to minimize bubbles. -
Create the Core:
Pour a small pool of clear resin directly into the very center of the mold. This will act as the window for your crystals. -
Add Texture:
Place a mound of crushed glass or quartz chips into the wet center pool. Arrange a few larger pieces in the middle for that authentic crystal-growth look. -
Gild the Core:
Sprinkle a tiny pinch of fine gold glitter around the immediate perimeter of the crushed glass to create a transition zone.
Step 2: Pouring the Color Rings
-
Mix Color Batches:
Divide your remaining resin into four cups. Tint one with deep teal mica, one with violet mica, one with opaque white, and leave one semi-translucent with just a hint of grey or pearl. -
Pour the Purple Ring:
Starting just outside the crushed glass center, carefully pour a thin ring of the violet resin. Let it naturally flow slightly into the cracks of the glass. -
Layer the White:
Pour a thin line of white resin around the purple ring. The white often acts as a separator and helps define the other colors. -
Create the Teal Band:
Pour your deep teal/turquoise resin around the white ring. This should be your widest band of color to establish the primary hue. -
Add Translucency:
Pour the semi-translucent grey or pearl mix around the teal. This creates the ‘quartz’ band found in real agates. -
Final Outer Rim:
Finish by pouring a ring of teal or a lighter turquoise mix right up to the edge of the mold. If you need to fill the mold more, add clear resin to this outer edge. -
Blend Borders (Optional):
If the lines look too rigid, use a toothpick to gently swirl the boundary between colors just a tiny amount. Don’t overmix, or you will lose the geode banding.
Muddy Colors?
Resin colors blend if they are too fluid. Let your mixed resin sit in the cup for 10-15 mins to thicken slightly before pouring distinct rings.
Step 3: Curing & Finishing
-
Remove Bubbles:
Wait about 10 minutes for bubbles to rise, then quickly pass a heat gun or torch over the surface. Be careful not to overheat the silicone mold. -
Cover and Cure:
Place a box over the coaster to prevent dust from settling. Allow the resin to cure fully, usually 24 to 48 hours depending on your brand. -
Demold:
Gently peel the silicone mold away from the cured resin. The edges will be naturally irregular, which is perfect for this style. -
Smooth the Edge:
If any resin has formed a sharp lip on the back, use a fine-grit sandpaper to smooth it down. Wipe away the dust with a damp cloth. -
Apply Gold Edge:
Shake your liquid gilding or gold leaf paint well. Using a fine brush, paint the textured outer edge of the coaster. I prefer to let the brush slip slightly onto the top surface to emphasize the rocky shape. -
Final Seal (Optional):
Once the paint is dry, you can brush a very thin layer of clear resin over the gold paint to protect it from wear, though this isn’t strictly necessary.
Level Up: 3D Depth
Draw distinct lines with a gold paint marker on the cured first layer, then pour a clear topcoat. This creates a floating gold vein effect.
Now you have a set of elegant, gemstone-inspired coasters ready to impress guests or gift to friends


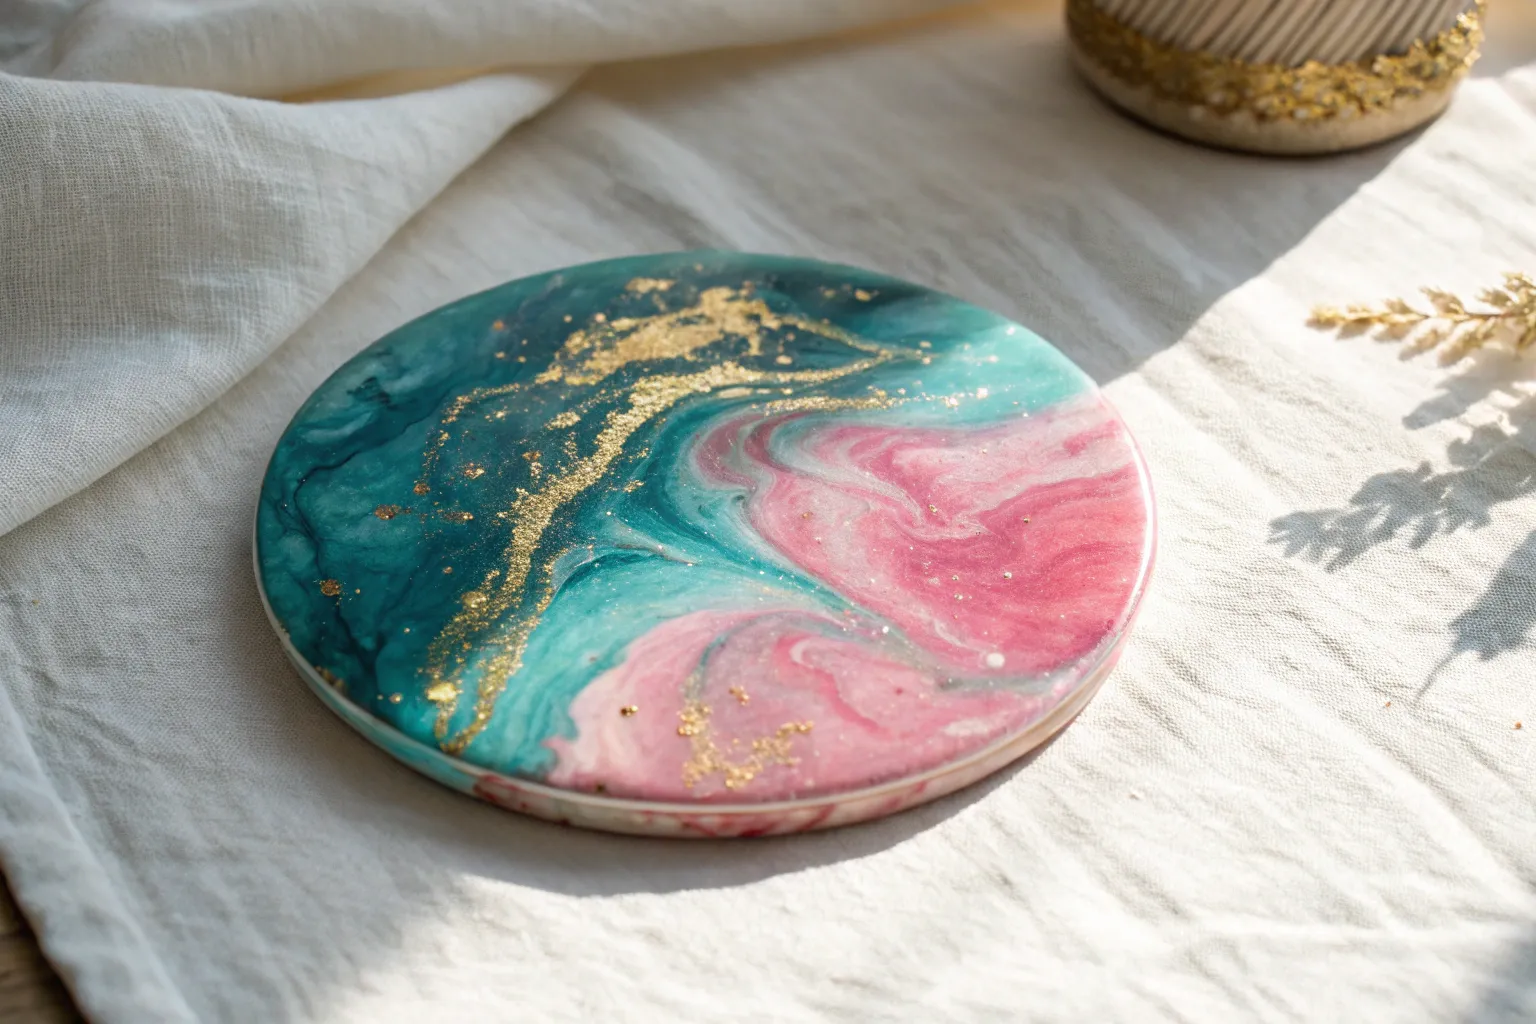
Sunset Ombre Fade
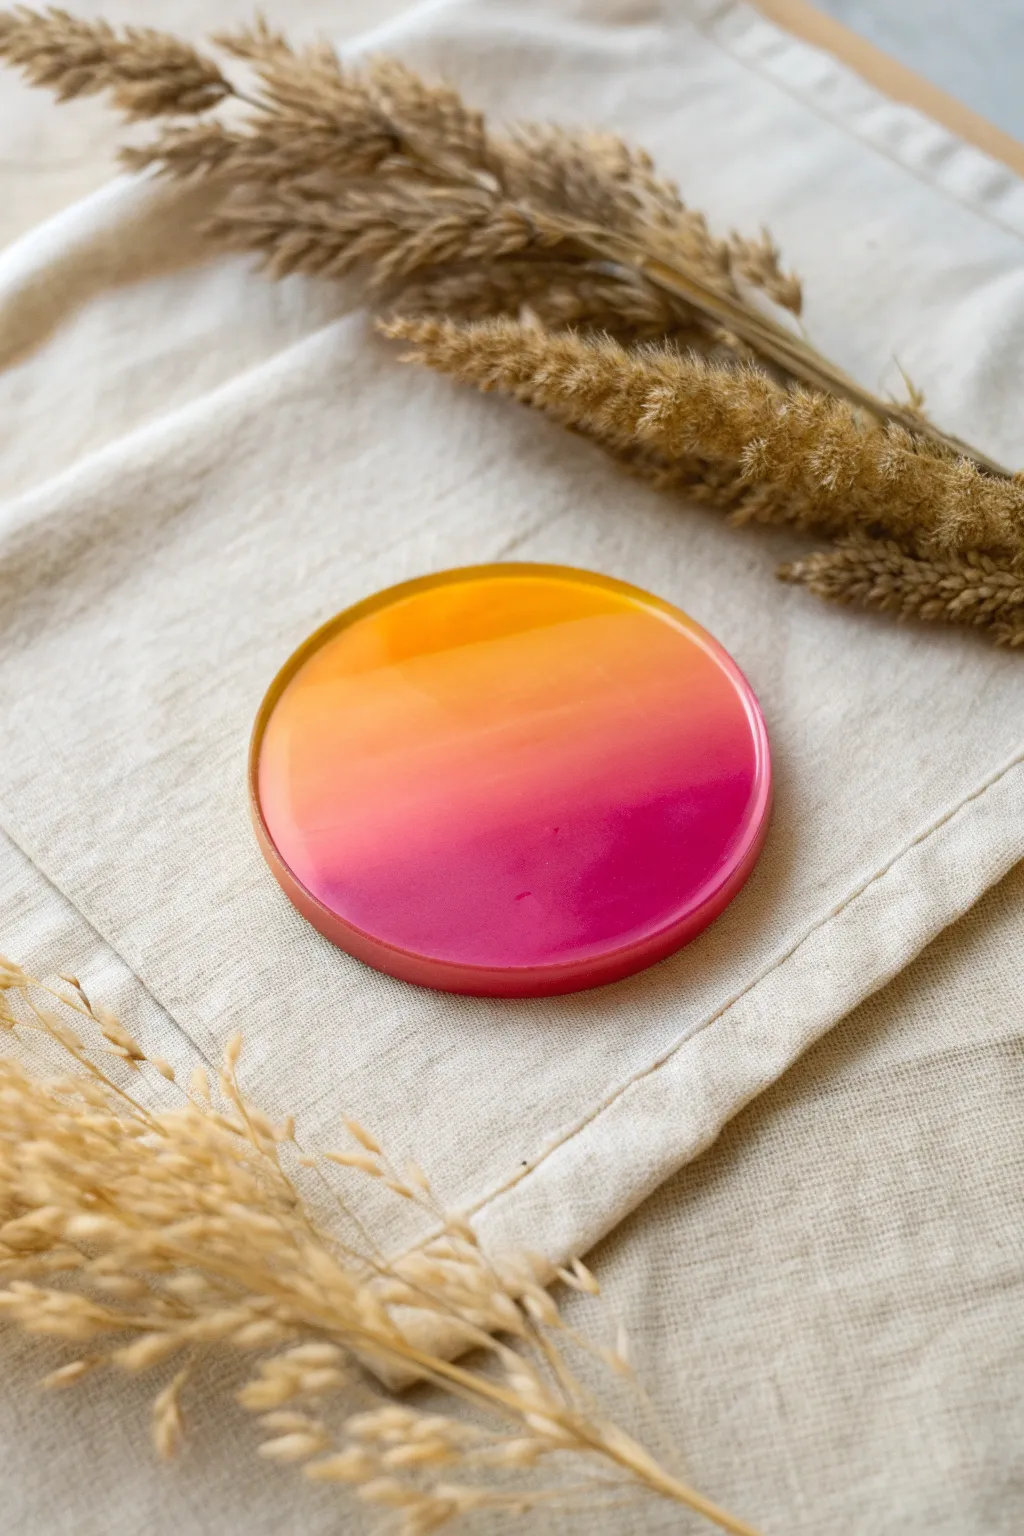

Capture the warmth of a setting sun with this vibrant resin coaster featuring a seamless transition from amber yellow to deep magenta. This project uses a deliberate layering technique to achieve distinct horizontal bands that melt beautifully into one another.
Step-by-Step Tutorial
Materials
- Two-part epoxy resin (casting resin)
- Round silicone coaster mold (approx. 4 inches)
- Resin dyes or alcohol inks (Yellow, Orange, Magenta)
- Mixing cups (3 small, 1 large)
- Stirring sticks
- Heat gun or torch
- Gloves and protective eyewear
- Level working surface
Step 1: Preparation & Mixing
-
Prepare your workspace:
Ensure your table is perfectly level, as resin will pool to one side if it’s tilted, ruining the straight ombre lines. Cover the surface with plastic or a silicone mat. -
Mix the base resin:
Measure out enough two-part epoxy resin to fill your mold according to the manufacturer’s ratio (usually 1:1 by volume). Stir slowly for 3-5 minutes until clear and stripe-free. -
Divide the batch:
Pour the mixed resin equally into three separate small cups. These will become your three gradient colors. -
Tint the yellow layer:
Add yellow resin dye or alcohol ink to the first cup. Use just enough to get a vibrant, translucent amber tone. Stir thoroughly. -
Create the orange middle:
In the second cup, mix orange dye. If you don’t have orange, mix mostly yellow with a drop of magenta or red. Aim for a sunset orange that sits visually between your yellow and pink. -
Mix the magenta base:
In the third cup, add magenta or deep pink dye. This color should be the most saturated to anchor the bottom of the design.
Step 2: The Pouring Technique
-
Pour the yellow section:
Tilt your silicone mold slightly by propping up the bottom edge with a stirring stick—this is a crucial trick. Pour the yellow resin into the elevated ‘top’ third of the mold. -
Pour the magenta section:
Pour the dark magenta resin into the opposite, lower end of the mold. Don’t worry if they don’t touch yet; we want them to settle into their zones first. -
Add the middle channel:
Pour the orange resin directly into the empty space in the center. Carefully remove the prop under the mold so it sits flat again. -
Blend the seams:
Let the resin self-level for a moment. If the lines are too harsh, gently drag a toothpick just across the very surface where the colors meet to blur the transition slightly. -
Pop bubbles:
Pass a heat gun or torch quickly over the surface to pop any rising air bubbles. Don’t linger too long to avoid overheating the resin or mold. -
Monitor the drift:
Watch the coaster for about 10 minutes. If one color starts overtaking the others, you can gently tilt the mold manually to correct the drift before it starts to gel.
Soften the Blend
For a softer gradient, wait 10-15 mins after mixing before pouring. Thicker resin travels slower, preventing colors from muddying.
Step 3: Curing & Finishing
-
Cover and cure:
Place a box or dust cover over the mold to prevent dust particles from landing in the sticky surface. Let it cure undisturbed for 24 hours. -
Demold the coaster:
Once fully hardened, gently peel the silicone mold away from the edges and pop the coaster out. It should feel solid and not tacky. -
Inspect the edges:
Check the rim for any sharp edges or raised resin lips. I find a quick pass with fine-grit sandpaper smooths these out perfectly. -
Optional top coat:
If the surface has any imperfections or you want extra depth, mix specifically a small amount of clear resin and pour a thin dome coat over the top.
Golden Hour Sparkle
Mix ultra-fine gold mica powder into just the orange middle section for a shimmering ‘sunlight’ band effect.
Now you have a stunning piece of functional decor that brings a permanent sunset to your coffee table


Galaxy Purples With Inky Black
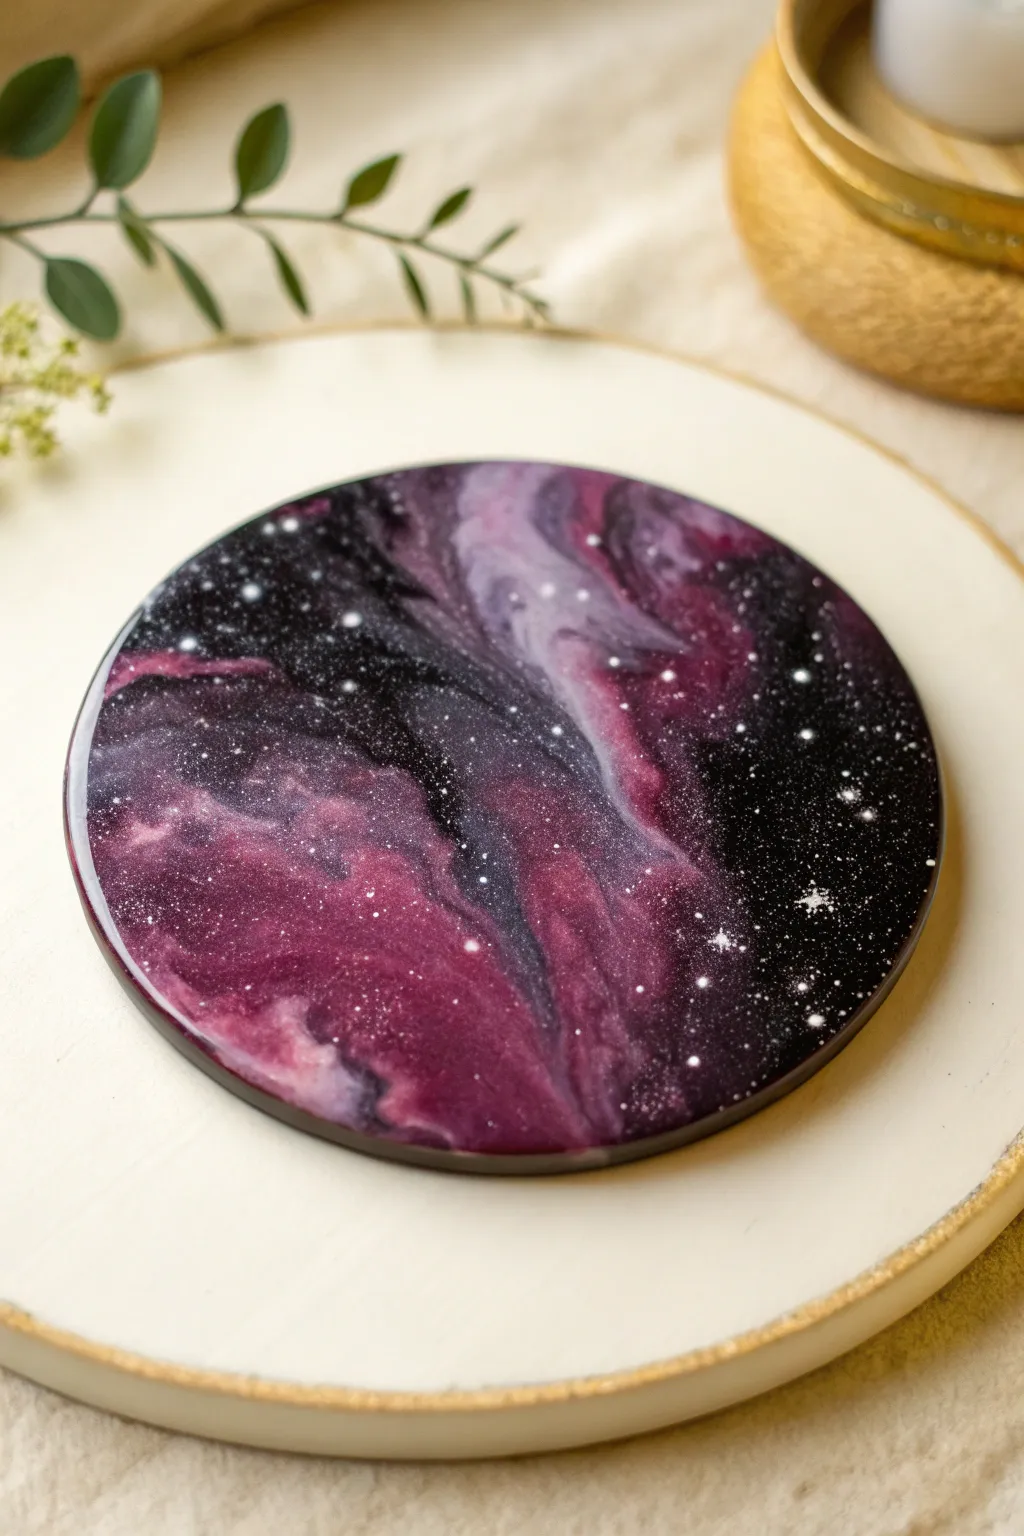
Capture the mysteries of deep space in a glossy resin casting with this dramatic galaxy-style coaster. Swirling violet and magenta pigments against a jet-black background create a stunning nebula effect, finished with delicate constellations of stars.
Step-by-Step Guide
Materials
- Epoxy resin (casting resin)
- Round silicone coaster mold (approx. 4 inches)
- Resin pigments: Inky Black, Deep Purple, Magenta/Fuchsia, White
- Metallic mica powder: Pearl White or Silver
- Heat gun or torch
- Mixing cups and stir sticks
- Toothpicks or a fine dotting tool
- Old toothbrush (for splatter)
- White acrylic paint or opaque white pigment paste
- Gloves and protective mat
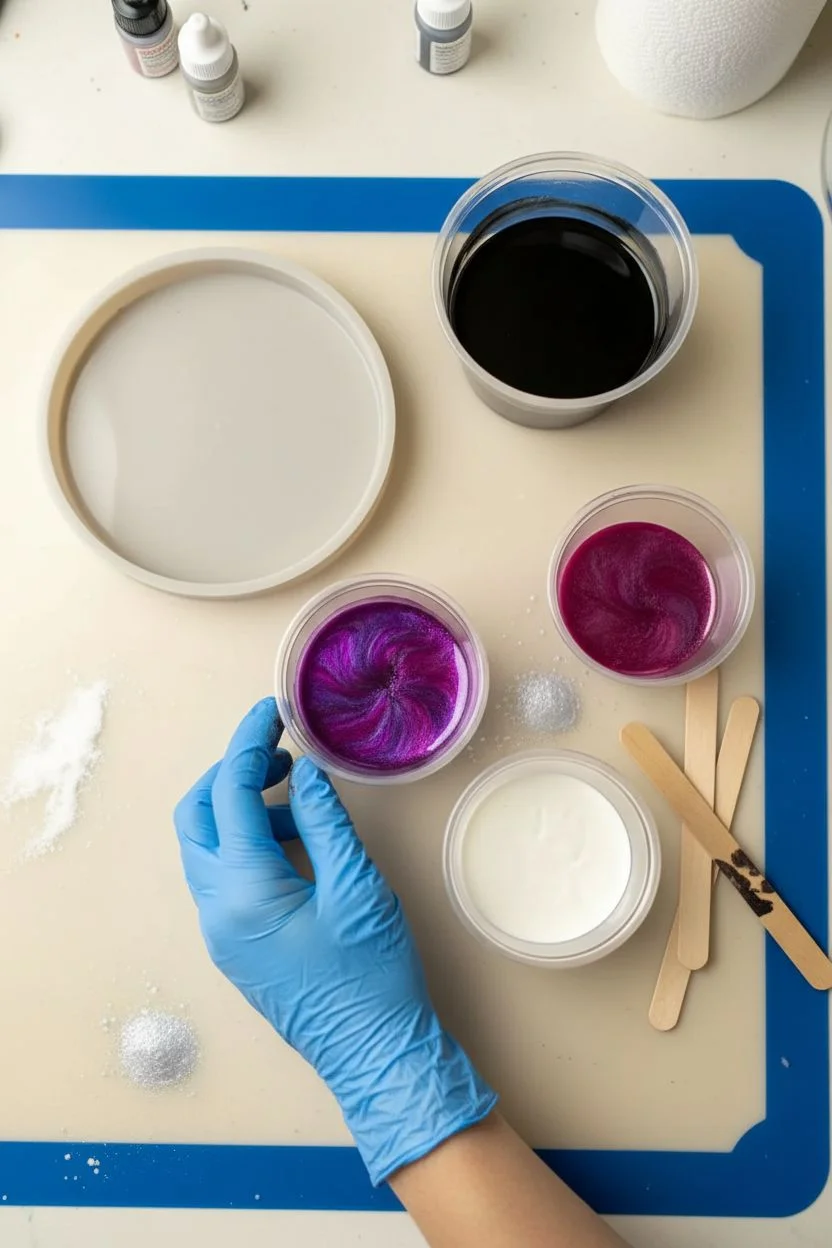
Step 1: Preparation & Mixing
-
Prepare your workspace:
Ensure your working surface is completely level and covered with a silicone mat or plastic sheet. Put on your gloves to protect your hands from sticky resin. -
Mix the resin base:
Measure and mix your epoxy resin according to the manufacturer’s instructions. Stir slowly and scrape the sides to avoid introducing too many bubbles. -
Divide the resin:
Pour the mixed resin into four smaller cups. Make the ‘black’ cup the largest portion (about 40% of your total volume).
Step 2: Coloring the Nebulas
-
Create the midnight black:
Mix opaque black pigment into the largest cup. It needs to be rich and fully opaque to provide that deep space background. -
Mix the colors:
Tint the other two cups with deep purple and magenta respectively. I like to add a tiny pinch of pearl mica to these colors to give them a subtle shimmer within the gas clouds. -
Make the highlight white:
In the final small cup, mix opaque white pigment. This will be used sparingly for bright nebula highlights and later for the stars.
Starry Depth
For a 3D effect, mix fine silver glitter into the initial black pour. Then, do the white splatter on top. This creates stars that look ‘deep’ inside the resin versus on the surface.
Step 3: Pouring the Galaxy
-
Pour the black base:
Pour the black resin into the mold, focusing on the outer edges and leaving some negative space in the center, though it will naturally flow inward. -
Add color streams:
Pour ribbons of the deep purple and magenta through the center and slightly into the black areas. Don’t overthink the shape; organic curves look best. -
Add white highlights:
Drizzle very thin lines of the white resin right next to the purple and magenta streams. This creates the intense light typically seen at the heart of a nebula. -
Blend the cosmos:
Use a heat gun on a low setting to gently push the colors around. The heat creates cells and lacing where the white meets the colors. -
Refine with a stick:
If the heat gun blew the design out too much, use a clean toothpick to swirl the colors back into tighter formations, marbling the black into the purple.
Add a Planet
Before the resin fully cures, drop a small, flat-backed rhinestone or a tiny clear marble into a black area to simulate a bright planet or moon reflecting the nebula light.
Step 4: Creating Striations
-
Check for bubbles:
Pass your torch or heat gun quickly over the surface again to pop any rising air bubbles. -
Let it settle:
Wait about 10-15 minutes for the resin to thicken slightly. This prevents the stars from sinking to the bottom immediately.
Step 5: Stardust Finish
-
Prepare the star paint:
Put a small dab of white acrylic paint or highly pigmented white resin on a palette. It should be fluid but opaque. -
Flick the stars:
Dip an old toothbrush into the white paint. Run your thumb across the bristles to flick tiny speckles onto the curing resin surface to create distant stars. -
Add larger stars:
Dip a toothpick into the white paint and gently touch the surface in a few deeper black areas to create prominent, larger stars. -
Cure:
Cover the mold with a dust cover (like a cardboard box) and let it cure fully for 24-48 hours. -
Demold:
Gently peel back the silicone mold to reveal your glossy galaxy piece. -
Optional coat:
If surface tension caused the resin to pull away from the edges, you can apply a clear topcoat (doming) for a perfect glass-like finish.
Now you have a piece of the universe right on your table, ready to catch the light
BRUSH GUIDE
The Right Brush for Every Stroke
From clean lines to bold texture — master brush choice, stroke control, and essential techniques.
Explore the Full Guide
Emerald and Copper Luxe Combo
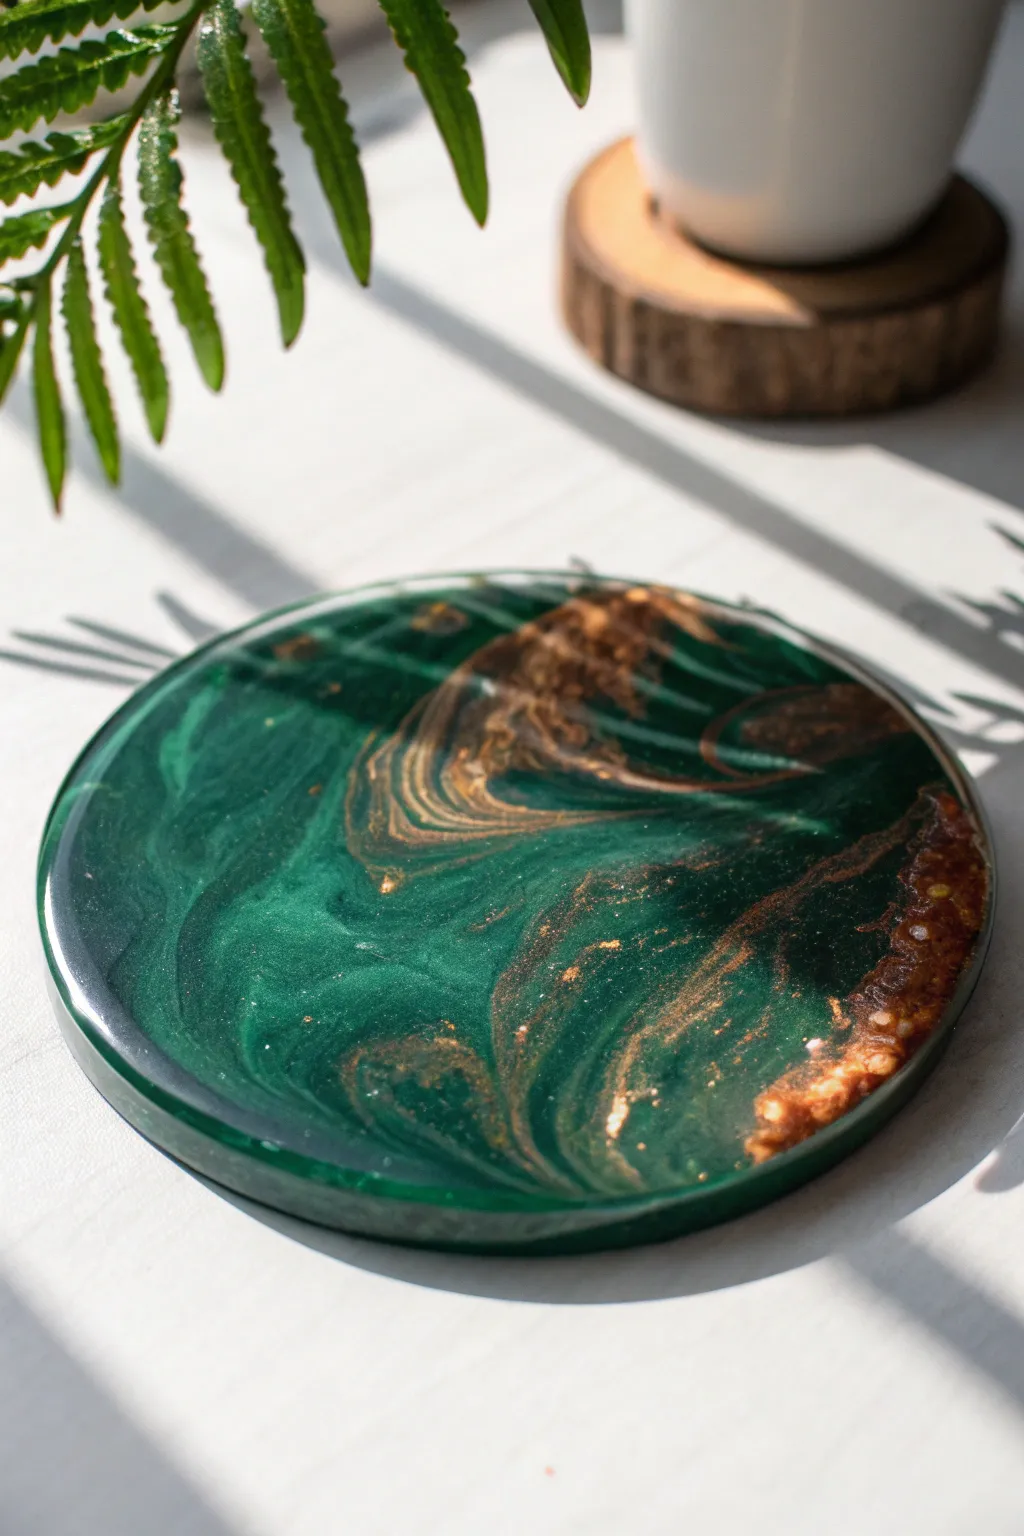
Capture the elegance of deep gemstones with this stunning resin project featuring rich emerald hues swirled with striking metallic copper. The finished piece glossy, durable, and boasts a sophisticated marble-like effect that looks incredibly high-end.
Detailed Instructions
Materials
- Epoxy resin (casting resin suitable for molds)
- Round silicone coaster mold
- Emerald green mica powder or alcohol ink
- Metallic copper pigment powder or alcohol ink
- Copper flakes or foil
- Measuring cups and mixing sticks
- Heat gun or torch
- Gloves and respirator mask
- Plastic cups for dividing resin
Step 1: Preparation & Mixing
-
Safety check:
Before opening your bottles, ensure you are in a well-ventilated area and put on your nitrile gloves and respirator mask. -
Measure the resin:
Calculate the volume needed for your specific mold. Pour equal parts of resin (Part A) and hardener (Part B) into a measuring cup, or follow the specific ratio on your brand’s packaging. -
Mix thoroughly:
Stir the mixture slowly but deliberately for about 3-5 minutes. Scrape the sides and bottom of the cup to ensure no unmixed hardener remains, as this causes sticky spots. -
Divide the batch:
Pour the mixed resin into two smaller cups. You will want about 70% of the resin for the green base and 30% for the copper accent. -
Tint the emerald:
Add a generous amount of emerald green mica powder to the larger cup. Stir well until the color is opaque and shimmering. I like to hold it up to the light to check for transparency. -
Tint the copper:
Mix metallic copper pigment into the smaller cup. For extra texture, you can also stir in some fine copper flakes at this stage.
Muddy Colors?
If your green and copper keep blending into a brown mess, let the green resin sit in the cup for 10-15 mins to thicken slightly before pouring the copper accent.
Step 2: Pouring & Swirling
-
Clean the mold:
Use a piece of tape to lift any dust or lint specs out of your silicone mold to ensure a flawless surface. -
Base pour:
Pour the emerald green resin into the mold first. Fill it almost to the top, but leave a tiny bit of room so it doesn’t overflow when you add the accent color. -
Add the copper:
Pour the copper resin in a thin stream. You can pour it in a circular motion or in random wavy lines across the green surface. -
Pop bubbles:
Pass a heat gun or torch quickly over the surface to pop any air bubbles that have risen to the top. -
Create the swirl:
Using a clean mixing stick or toothpick, gently drag it through the resin to marble the colors. Don’t overmix, or the colors will turn muddy; just a few sweeping motions work best. -
Add metallic edge:
If you want that concentrated copper look seen in the photo, carefully sprinkle extra copper flakes along one edge of the mold and gently push them down into the wet resin.
Step 3: Curing & Demolding
-
Cover and wait:
Place a box or dust cover over the mold to protect it from falling particles. Let it sit undisturbed for 24-48 hours depending on your resin’s cure time. -
Check hardness:
Gently touch the center (with a glove on) to ensure it is rock hard and not tacky before attempting to remove it. -
Demold:
Peel the silicone mold back from the edges of the coaster and push from the bottom to release your artwork. -
Sand edges:
If the back edge is sharp or uneven, use fine-grit sandpaper to smooth it down. -
Add edge detail:
For a final touch of luxury, use a gold or copper leafing pen to color the vertical side edge of the coaster.
Level Up: Depth
Pour a thin layer of clear resin first and let it get tacky. Then pour your colored swirls on top. This creates a mesmerizing ‘floating’ 3D depth effect.
Once fully cured, your coaster is ready to add a splash of sophisticated color to your coffee table
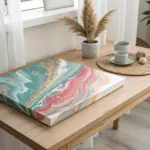
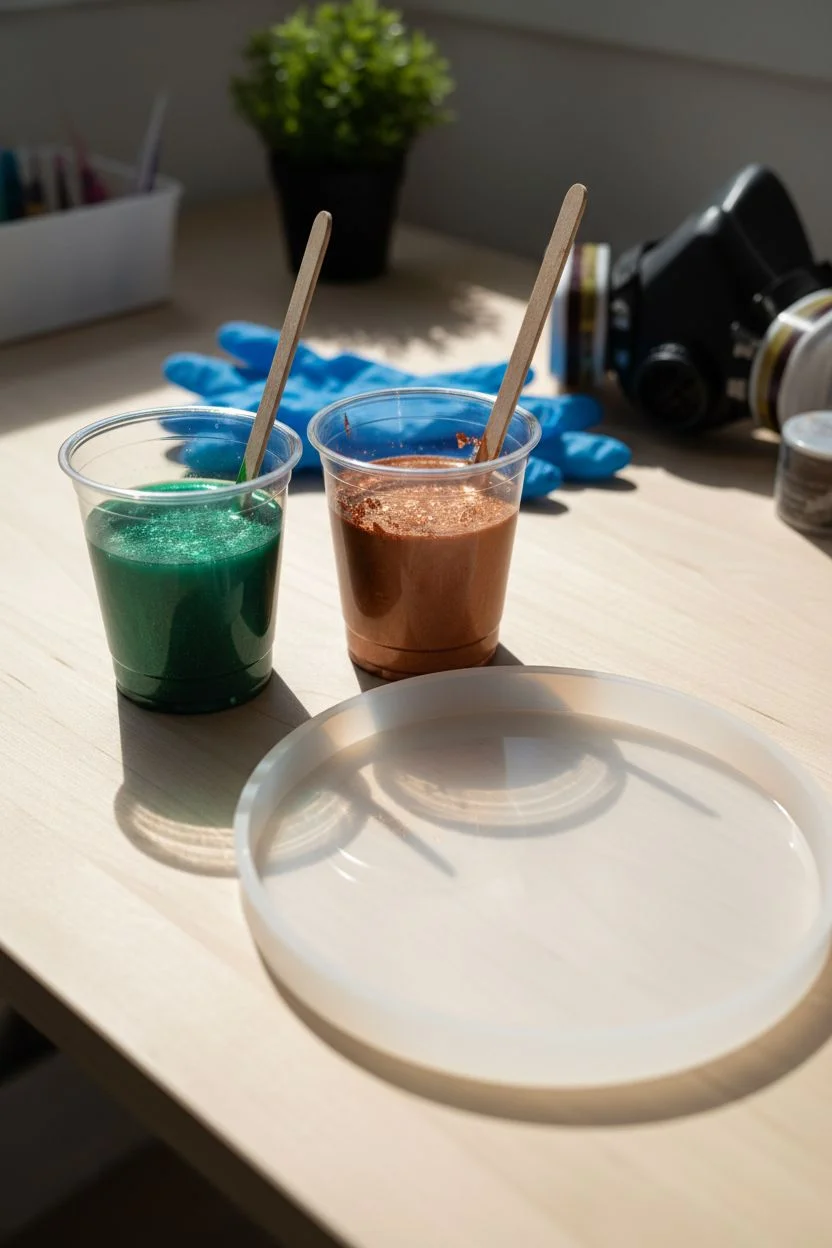
Botanical Greens With Milky White Swirls
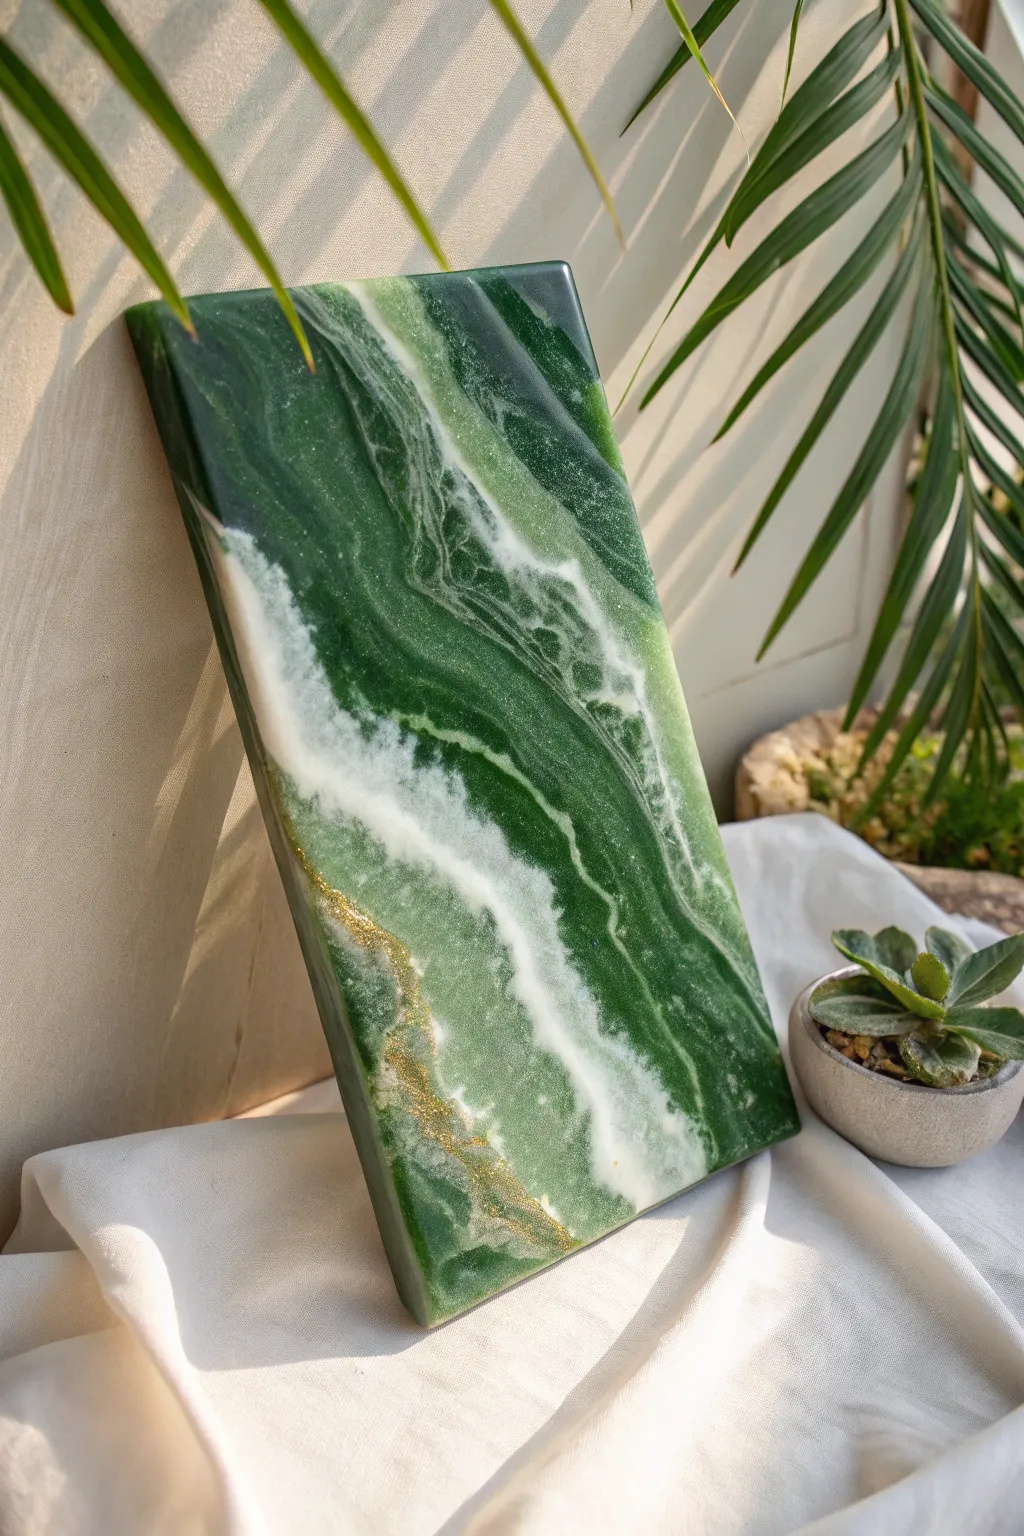
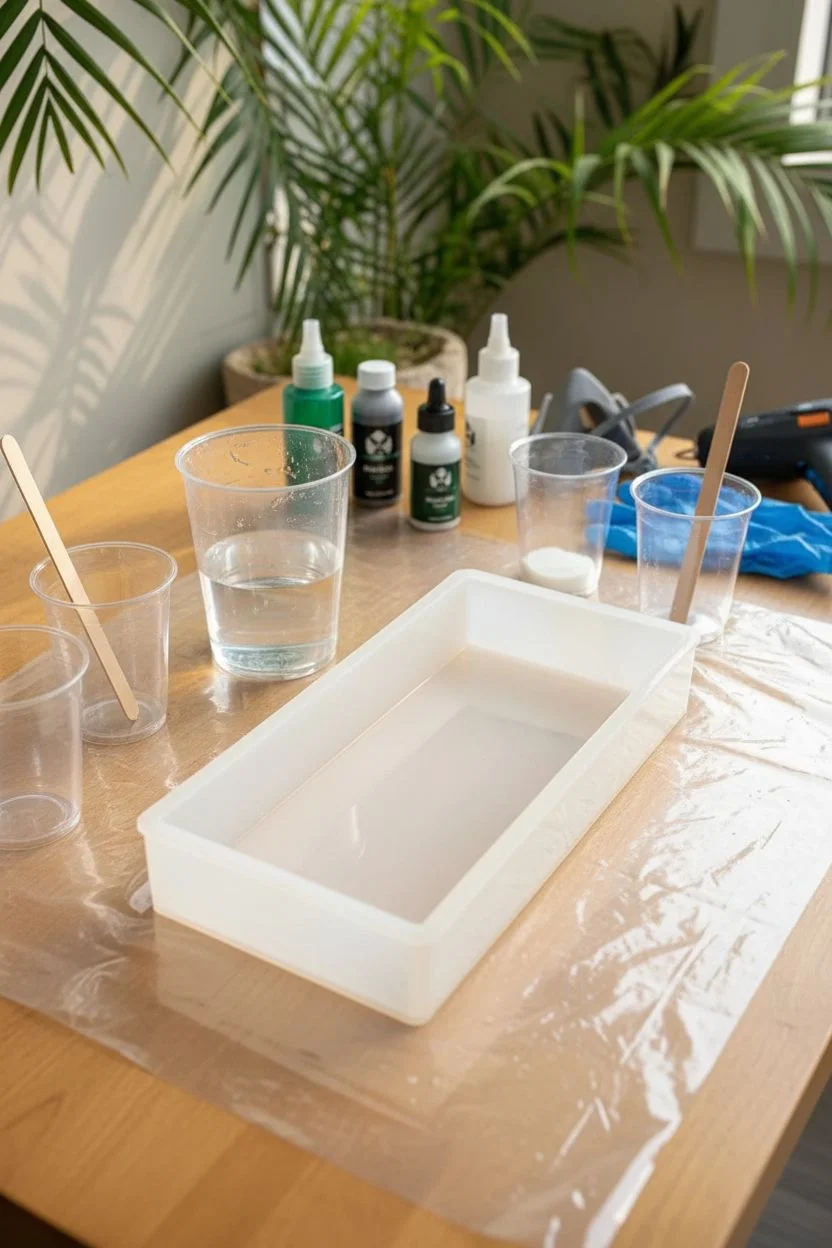
Create a stunning faux-stone masterpiece that captures the elegance of deep emerald jade and drifting clouds. This resin project balances rich botanical greens with creamy white waves and subtle gold veins for a luxurious, organic look.
Step-by-Step Guide
Materials
- Epoxy resin (casting or coating resin, 1:1 ratio)
- Rectangular silicone mold (or a taped-up wooden panel)
- Emerald green mica powder
- Forest green alcohol ink
- Opaque white pigment paste
- Fine gold glitter or gold pigment powder
- Heat gun or torch
- Mixing cups and stir sticks
- Gloves and respirator mask
- Plastic drop sheet
Step 1: Preparation & Mixing
-
Workspace Setup:
Ensure your workspace is level, dust-free, and well-ventilated. Lay down a plastic drop sheet to catch drips, and have all your tools within arm’s reach. -
Mold Prep:
Clean your silicone mold thoroughly with masking tape to remove any dust particles. If pouring onto a board, ensure edges are taped tightly to create a dam. -
Resin Mixing:
Calculate the volume needed for your mold. Mix your epoxy resin and hardener according to the manufacturer’s instructions. Stir slowly for at least 3-4 minutes to minimize bubbles.
Cel-ebration
To get those lacy ‘cells’ in the white waves, add one drop of silicone oil to your white resin cup before pouring. Heat gently to activate.
Step 2: Color Creation
-
Dividing the Batch:
Split your mixed resin into four separate cups. Reserve about 40% for the darkest green, 30% for a lighter green/translucent mix, 20% for the white, and 10% for the gold accent. -
Deep Green Mix:
In the largest cup, mix a generous amount of emerald mica powder and a drop of forest green alcohol ink to create a rich, opaque base color. -
Translucent Accent:
In the second green cup, use just a tiny pinch of green mica or a single drop of ink. You want this layer to remain semi-transparent to create depth. -
Milky White:
Mix the opaque white pigment paste into the third cup. Stir well until it is solid white; this needs to be heavy enough to sink and create effects. -
Gold Veining:
Mix the fine gold glitter or powder into the smallest cup. Ensure it is saturated enough to create distinct metallic lines.
Step 3: The Pouring Technique
-
Base Pour:
Start by pouring the dark green resin diagonally across the mold, leaving irregular gaps. Don’t worry about perfect coverage yet. -
Adding Depth:
Pour the translucent green mix into the gaps you left and alongside the dark green. This variation mimics natural stone. -
Creating the Swirls:
Pour ribbons of the white resin through the greens. Do not over-pour; thick lines will spread out. Focus on diagonal movement. -
Gold Accents:
Drizzle thin veins of the gold mixture along the edges of the white lines. I prefer to keep these lines very thin for a delicate look. -
Blending:
Gently use your heat gun on a low setting to push the colors slightly. Heat helps the white lace outward and blend organically with the greens. -
Bubble Removal:
Pass a torch or heat gun quickly over the entire surface to pop air bubbles. Be careful not to scorch the resin or the mold. -
Waiting Game:
Let the resin sit for 10-15 minutes. As it thickens, the white might sink or cell up, creating beautiful natural patterns. -
Final Adjustments:
Check for any stubborn bubbles or dust. If the design has shifted too much, you can gently drag a clean stir stick through to redefine a swirl.
Functional Art
Before the resin fully hardens (at the ‘gel’ stage), embed gold cabinet handles into the sides to turn this art piece into a luxury serving tray.
Step 4: Curing & Demolding
-
Resting Phase:
Cover the piece with a dust cover (like a cardboard box) and let it cure undisturbed for 24-48 hours usually, or based on resin brand. -
Demolding:
Once fully hard, gently peel the mold away from the resin. If you used a taped wooden board, remove the tape. -
Edge Finishing:
The edges might be sharp. Sand them lightly with fine-grit sandpaper, or paint the edges with a gold leaf pen for a framed look. -
Top Coat (Optional):
If surface imperfections exist, pour a clear, thin top coat of resin over the cured piece for a glass-like finish.
Now you have a timeless piece of faux-stone art that brings the calming energy of nature into your home

PENCIL GUIDE
Understanding Pencil Grades from H to B
From first sketch to finished drawing — learn pencil grades, line control, and shading techniques.
Explore the Full Guide
Bloom White Cells Over a Bold Base
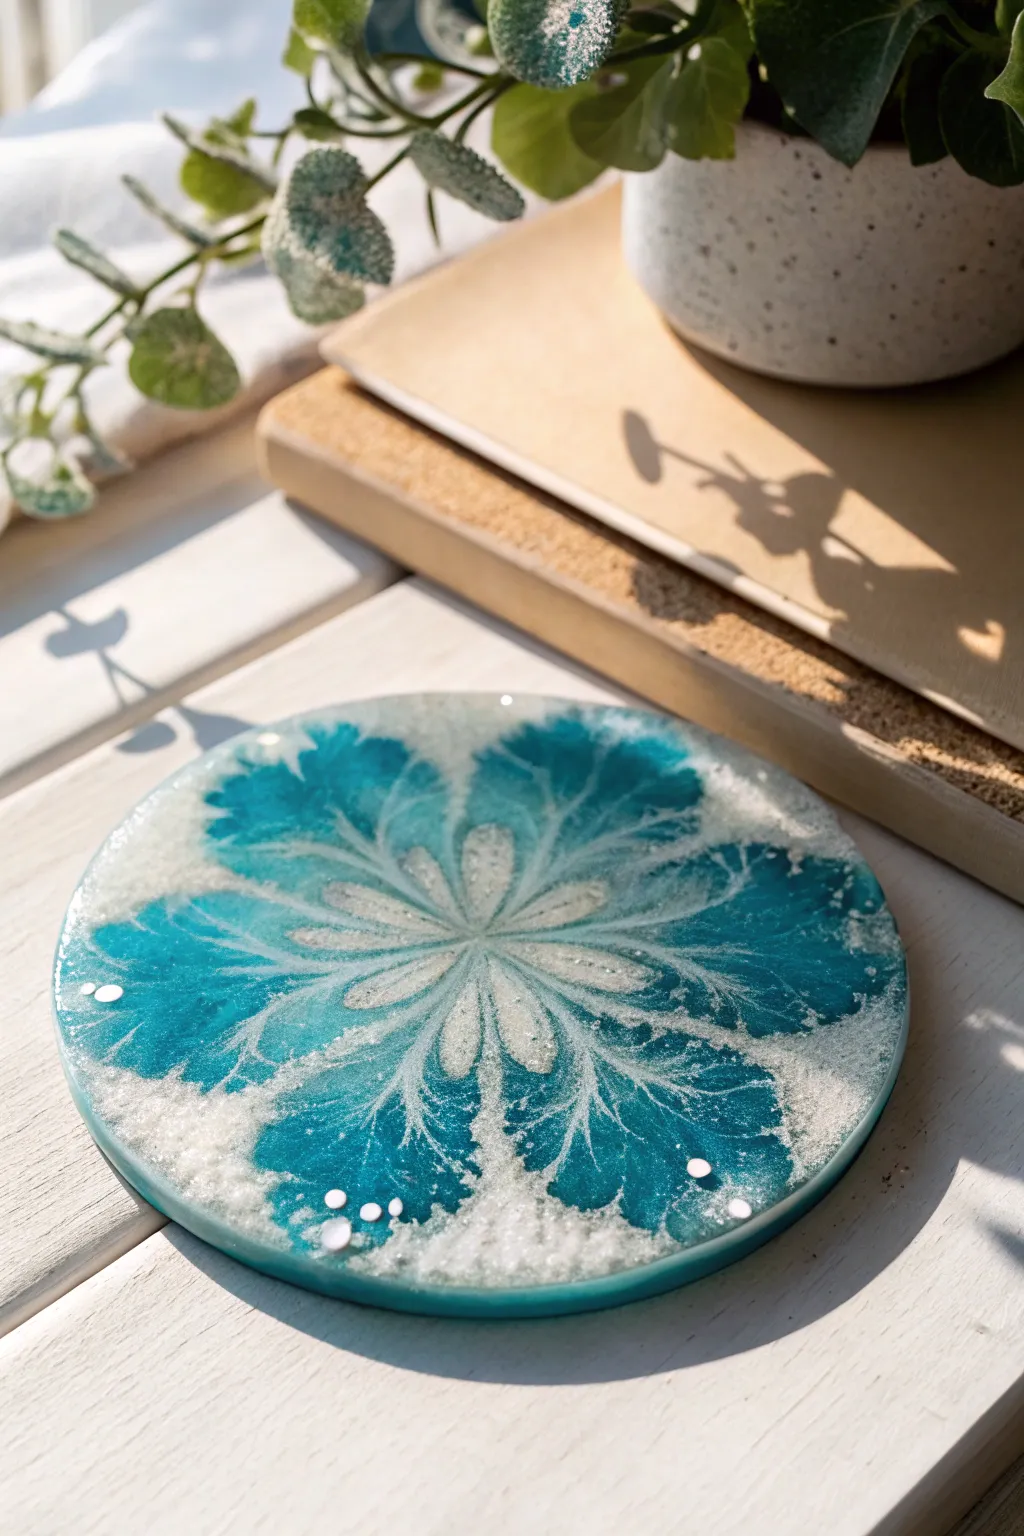
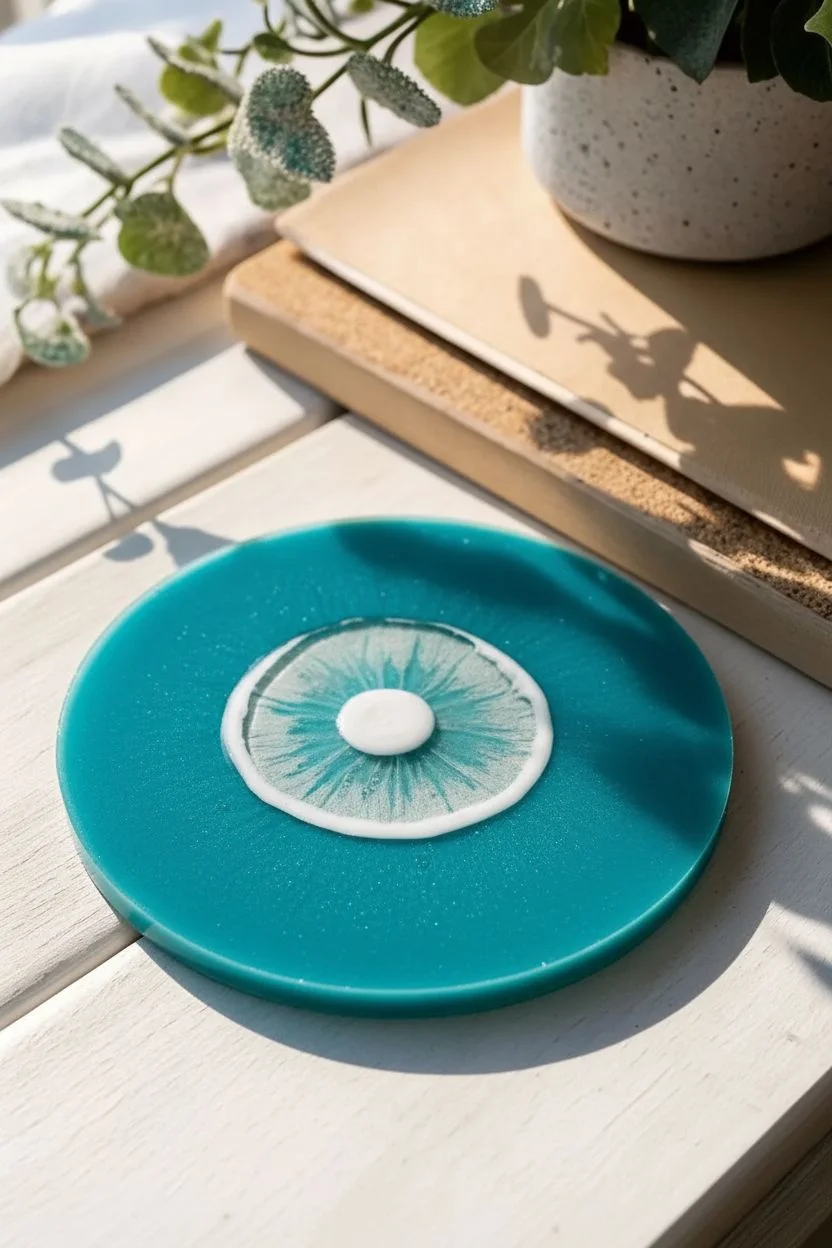
Capture the delicate beauty of a frozen flower with this stunning resin coaster project. By layering opaque white pigment over a vibrant teal base, you’ll create intricate lacing and petal-like structures that seem to bloom right before your eyes.
Step-by-Step Tutorial
Materials
- High-viscosity epoxy resin (1:1 ratio)
- Teal mica powder or alcohol ink
- Opaque white pigment paste (specifically for blooms)
- Silicone round coaster mold
- Mixing cups and stirring sticks
- Heat gun or torch
- Piping bag (optional)
- Toothpick or needle tool
- Nitrile gloves
- Protective work surface
Step 1: Preparation & Base Pour
-
Surface Prep:
Begin by cleaning your silicone mold with masking tape to vibrant any dust or lint, as these will show up in your final clear finish. -
Mixing Resin:
Measure and mix your resin according to the manufacturer’s instructions. For this bloom technique, a slightly thicker resin works best to hold the shape of the petals. -
Coloring the Base:
Pour about 70% of your mixed resin into a separate cup and tint it with the teal mica powder. Mix until the color is rich and there are no dry powder clumps. -
Creating the Center:
Leave a small portion of clear resin aside. You can add a tiny bit of glitter or crushed glass to this part if you want a sparkling center, though plain clear works beautifully too. -
Mixing the White:
Mix a small amount of resin with your opaque white pigment paste. This mixture needs to be highly opaque to create strong cells, so don’t be shy with the pigment. -
Pouring the Base:
Pour the teal resin into your mold, filling it about halfway. Let it spread naturally to the edges.
Step 2: Creating the Bloom
-
Layering the Clear:
Gently pour a puddle of your clear resin directly into the center of the teal base. This clear puddle acts as a pillow for the white pigment to float on. -
Adding the White:
Pour a smaller puddle of your opaque white mixture right into the center of the clear puddle. You want a bullseye effect: Teal base, clear center, white dot. -
Applying Heat:
Briefly pass a heat gun or torch over the surface to pop any bubbles. Be careful not to overheat, which can cure the resin too quickly. -
Blowing the Petals:
Using a straw or just your breath, blow the white pigment outward from the center towards the edges of the mold. Rotate the mold as you blow to create even petals. -
Creating Lacing:
As you blow the white over the teal, the difference in density should start creating beautiful lacing and cells. Let the resin rest for a moment to allow the cells to develop. -
Drawing the Shape:
Take a toothpick or needle tool and drag it through the resin. Start from the outer edge of a petal and drag inward toward the very center. Wipe the tool after each drag. -
Refining the Center:
Repeat this inward dragging motion all around the coaster. This pulls the pattern into a cohesive flower shape and creates that distinct starburst center. -
Swirling the Core:
I like to finish by gently swirling the very center point with the toothpick to create a neat spiral core where all the petals meet.
Pigment Density is Key
For better cells, your white pigment paste must be heavier/desner than the base colors. Specific casting white pastes work best for this effect.
Step 3: Curing & Demolding
-
Final Bubble Check:
Do one last check for stubborn bubbles, popping them with a toothpick rather than heat now, to avoid disturbing your delicate pattern. -
Covering:
Place a clean box or dome over the mold to protect it from dust while it cures. Leave it undisturbed for at least 24 hours. -
Demolding:
Once fully hard, carefully peel the silicone mold away from your coaster. -
Edge Finishing:
The edges might be sharp. Sand them lightly with fine-grit sandpaper or paint the rim with a gold or silver leaf pen for a polished look.
Add a Jeweled Center
After the main cure, glue a small rhinestone or crystal cluster into the center indentation for an extra touch of glamour.
Enjoy your unique bloom coaster, perfect for bringing a touch of floral elegance to your coffee table


Have a question or want to share your own experience? I'd love to hear from you in the comments below!