When I’m stuck on what to draw, I come back to windows because they’re built-in frames for storytelling. Here are my favorite window drawing ideas, from sketching windows on paper to creating playful designs directly on glass.
Snowflake Frost Window Doodles
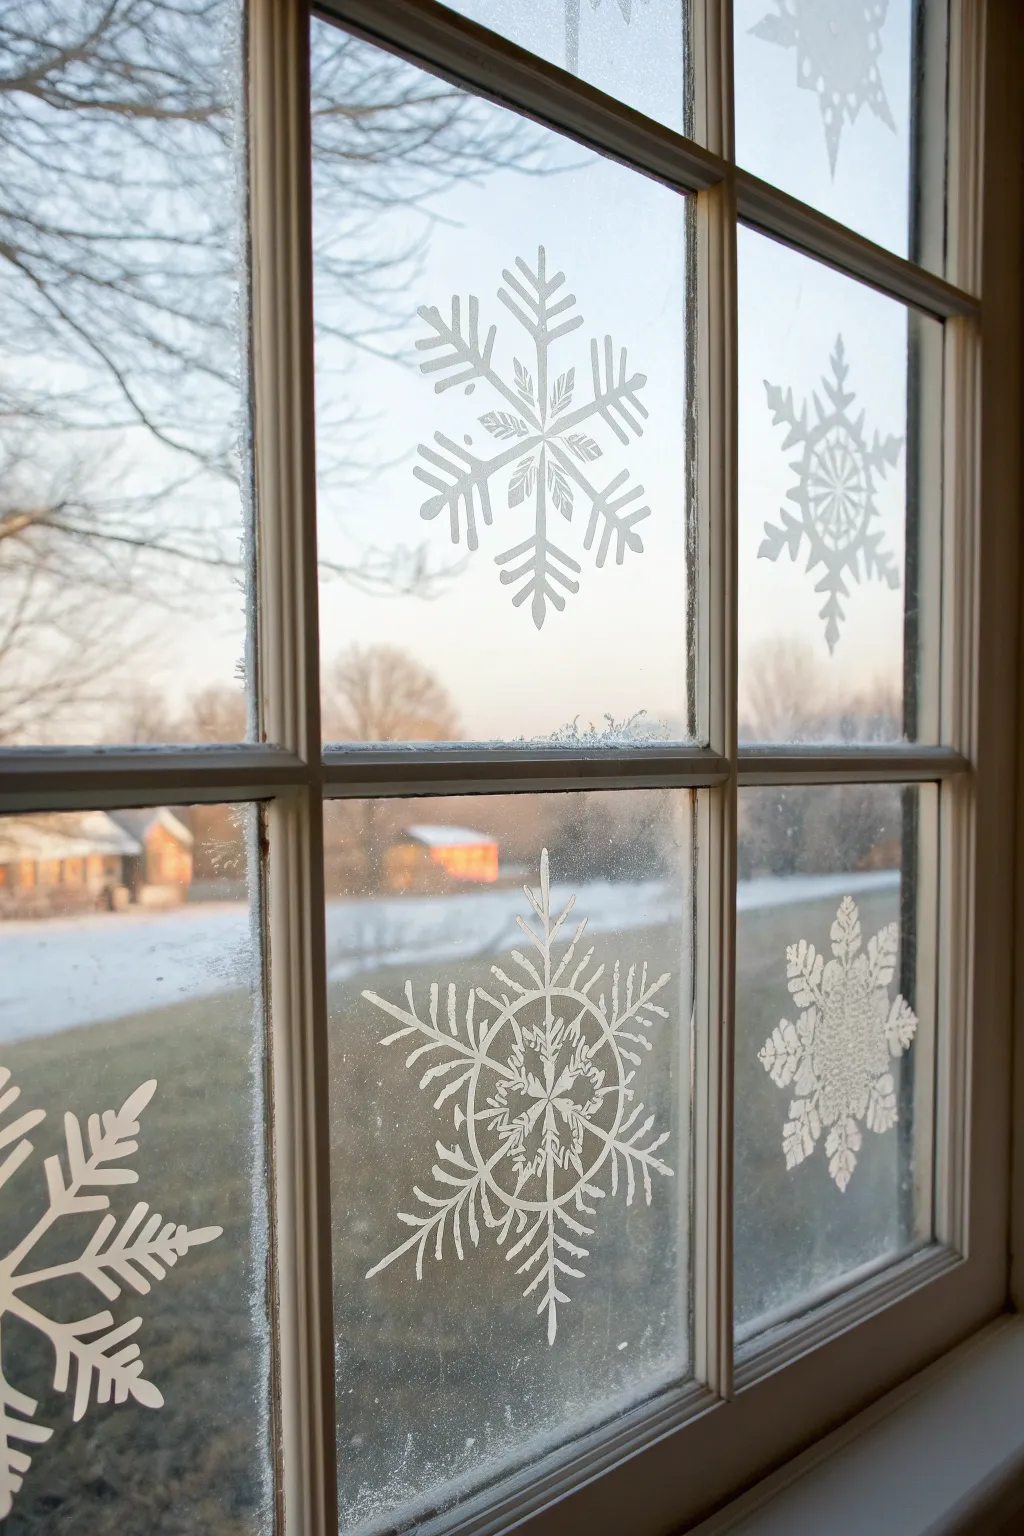
Transform your windows into a winter wonderland with these intricate, frost-like snowflake doodles. Using simple white window markers, this project adds a cozy, handmade touch to your view while beautifully framing the outdoors.
Step-by-Step Tutorial
Materials
- White liquid chalk markers (fine and broad tips)
- Glass cleaner
- Lint-free cloth or paper towels
- Ruler or straight edge (optional)
- Scrap paper for practice
- Cotton swabs (for corrections)
Step 1: Preparation & Planning
-
Clean surface:
Thoroughly clean the inside of your window pane with glass cleaner. Any dust or grease will prevent the chalk marker from adhering smoothly. -
Dry completely:
Wipe the glass with a lint-free cloth to ensure it is perfectly dry and streak-free before you begin drawing. -
Prime the marker:
Shake your chalk marker well. Press the nib down on a piece of scrap paper until the white ink flows consistently. Do not press the nib directly onto the glass to start the flow, as it might run. -
Draft on paper:
Before touching the glass, sketch a few six-sided snowflake skeletons on paper to get a feel for the symmetry you want to achieve.
Step 2: Drawing the Snowflakes
-
Establish the center:
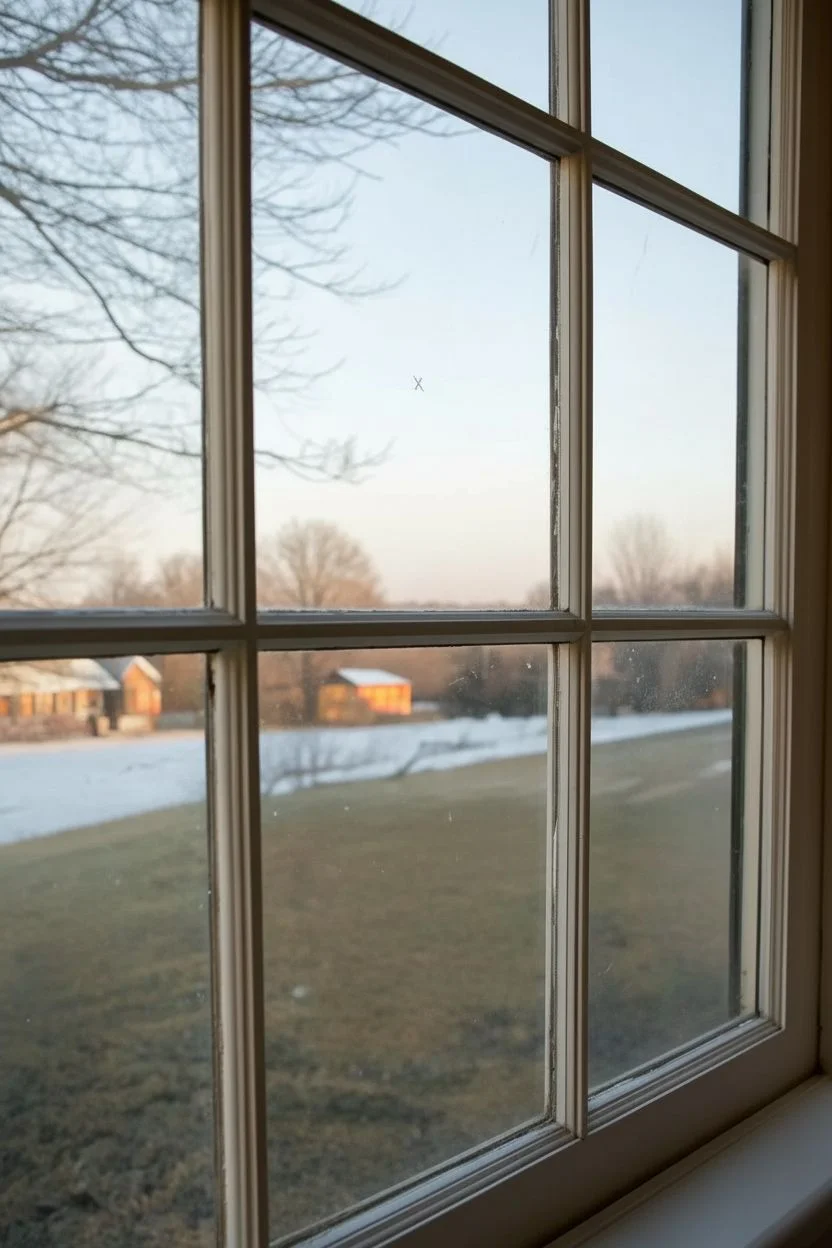
Choose a spot on the window pane for your first large snowflake. Draw a small, simple dot or an ‘X’ to mark the center point. -
Draw the skeleton:
Draw three straight lines intersecting at your center point to create a six-spoked star. Keep the lines roughly equal in length. -
Add primary branches:
For the classic snowflake look seen in the top center pane, draw V-shapes pointing outward on each of the six spokes. Place these about halfway down each line. -
Detail the tips:
At the very end of each spoke, add a smaller V-shape or a arrow-head shape to cap off the lines. -
Create inner details:
Near the center hub, draw tiny diamond shapes or smaller lines connecting the spokes to add density to the middle of the flake. -
Faux-frost texture:
Some of the snowflakes in the image have a thicker, almost painted look. Go back over your main structural lines with a broader tip marker to thicken them up.
Use a Paper Guide
Tape your paper sketch on the OUTSIDE of the glass facing in. You can then simply trace the lines from the inside for perfect symmetry without guessing.
Step 3: Creating Variety
-
The webbed flake:
For the intricate snowflake shown in the bottom right, start with the same six-spoke base but connect the spokes with scalloped or curved lines to create a ‘web’ effect. -
Leafy styles:
Try drawing the radiating arms to look like fern fronds or feather shapes, with many small, angled lines coming off the main stem. -
Placement strategy:
Scatter large, detailed snowflakes in the center of the panes and allow portions of other flakes to ‘cut off’ at the edges of the window frame, as seen on the far left. -
Add falling snow:
Fill the empty negative space between the large flakes with simple dots or tiny asterisks to mimic distant falling snow.
Ink Not Flowing?
If the marker streaks or stops, the tip might be dry. Press it onto scrap cardboard to pump more ink; never pump directly on vertical glass or it will drip.
Step 4: Clean Up & Finish
-
Correct mistakes:
If a line goes astray, quickly dampen a cotton swab and wipe it away. I find it’s best to fix errors immediately while the chalk is wet. -
Refine edges:
Once the main drawing is dry (about 5-10 minutes), use a clean, dry cotton swab to gently sharpen any blurry edges or points. -
Final check:
Step back a few feet to look at the overall composition. Add any final dots or extra branches to balance the design visually.
Enjoy your cozy, custom-designed winter view from the warmth of your home


Cozy Winter Village Along the Sill

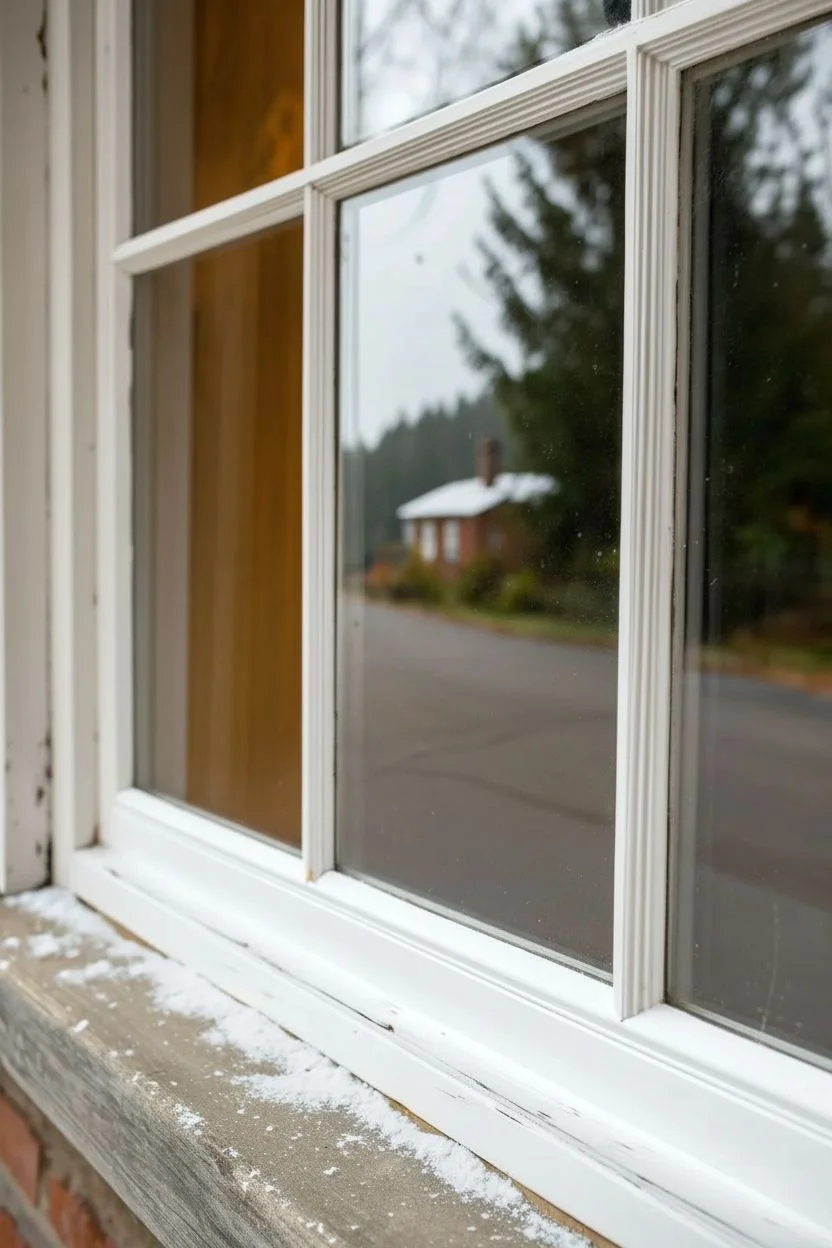
Transform your view into a charming winter wonderland with this delicate white window illustration. Using liquid chalk or acrylic markers, you’ll create a cozy silhouette village that looks magical from both inside and out.
How-To Guide
Materials
- White liquid chalk marker (medium tip)
- White liquid chalk marker (fine tip)
- Glass cleaner
- Lint-free cloth or paper towels
- Paper and pencil (for sketching)
- Masking tape (optional)
- Ruler
Step 1: Preparation & Planning
-
Clean surface:
Begin by thoroughly cleaning the window pane with glass cleaner and a lint-free cloth. Any dust or grease will prevent the marker ink from adhering smoothly. -
Sketch concept:
On a piece of paper, sketch out a rough layout of your village. You’ll want a mix of evergreen trees, simple house shapes, and bare winter trees. Don’t worry about perfection; this is just a guide. -
Establish the horizon:
Decide where your ground line will sit. In the reference image, the snow drifts rest right along the bottom of the glass, curving gently upward.
Clear View Tip
Tape your sketch on the OUTSIDE of the glass facing in. This lets you trace the design directly onto the inside surface without guessing or freehanding.
Step 2: Drawing the Base Layer
-
Outline the hills:
Using the medium tip marker, draw the rolling snow hills at the bottom of the pane. Create gentle humps rather than a flat line to simulate snowdrifts. -
Fill the ground:
Color in the area below your hill outline completely. You may need two coats for opaque coverage; let the first layer dry for a minute before applying the second to avoid streaking. -
Add tiny details:
Once the white hill is dry, switch to your fine tip marker. Draw tiny vertical lines or little cross-hatch weeds sticking out of the top of the snowdrift to add texture.
Step 3: Constructing the Village
-
Draw house outlines:
Start drawing the main structures. Use the medium tip to outline simple house shapes—squares with triangle roofs. Vary the sizes; a taller, narrow house on one pane and a squat cottage on another adds interest. -
Define windows:
Inside your house outlines, draw grid patterns for windows. Keep the lines crisp. You can leave the rest of the house transparent (glass) or fill it in white, leaving the windows clear. The example shows unfilled houses with white outlines. -
Add chimneys:
Don’t forget small rectangles on the roofs for chimneys. This small detail makes the houses feel much cozier.
Level Up: Frosty Depth
Dab a dry sponge into a little white acrylic paint and lightly tap it along the bottom edge of the glass to create a realistic, fading foggy frost effect.
Step 4: Adding Flora & Atmosphere
-
Draw evergreen trees:
Place evergreen trees next to the houses. Start with a vertical line for the trunk, then use swooping, downward-curving strokes from the top down to create the tiered branches. -
Create bare trees:
For contrast, draw a deciduous tree. Start with a thicker trunk and branch out into thinner and thinner Y-shapes. The fine tip marker works best for the delicate upper twigs. -
Fill the forest:
Add smaller, simplified tree shapes in the background or on the edges of the hills to create depth. These can just be simple triangles or zig-zag lines.
Step 5: Final Flourishes
-
Add falling snow:
Using the medium tip marker, press down gently to create round dots scattered across the upper part of the window. Vary the pressure to create different snowflake sizes. -
Refine the edges:
Step back and look at your composition. If any lines look shaky, go over them once more with the fine tip marker to sharpen the edges. -
Clean up:
If you made any mistakes or smudges, wait for the ink to dry completely, then gently scratch it off with your fingernail or a dry cotton swab.
Now you can enjoy a perfect white Christmas view regardless of the weather outside


Big Wreath Centerpiece
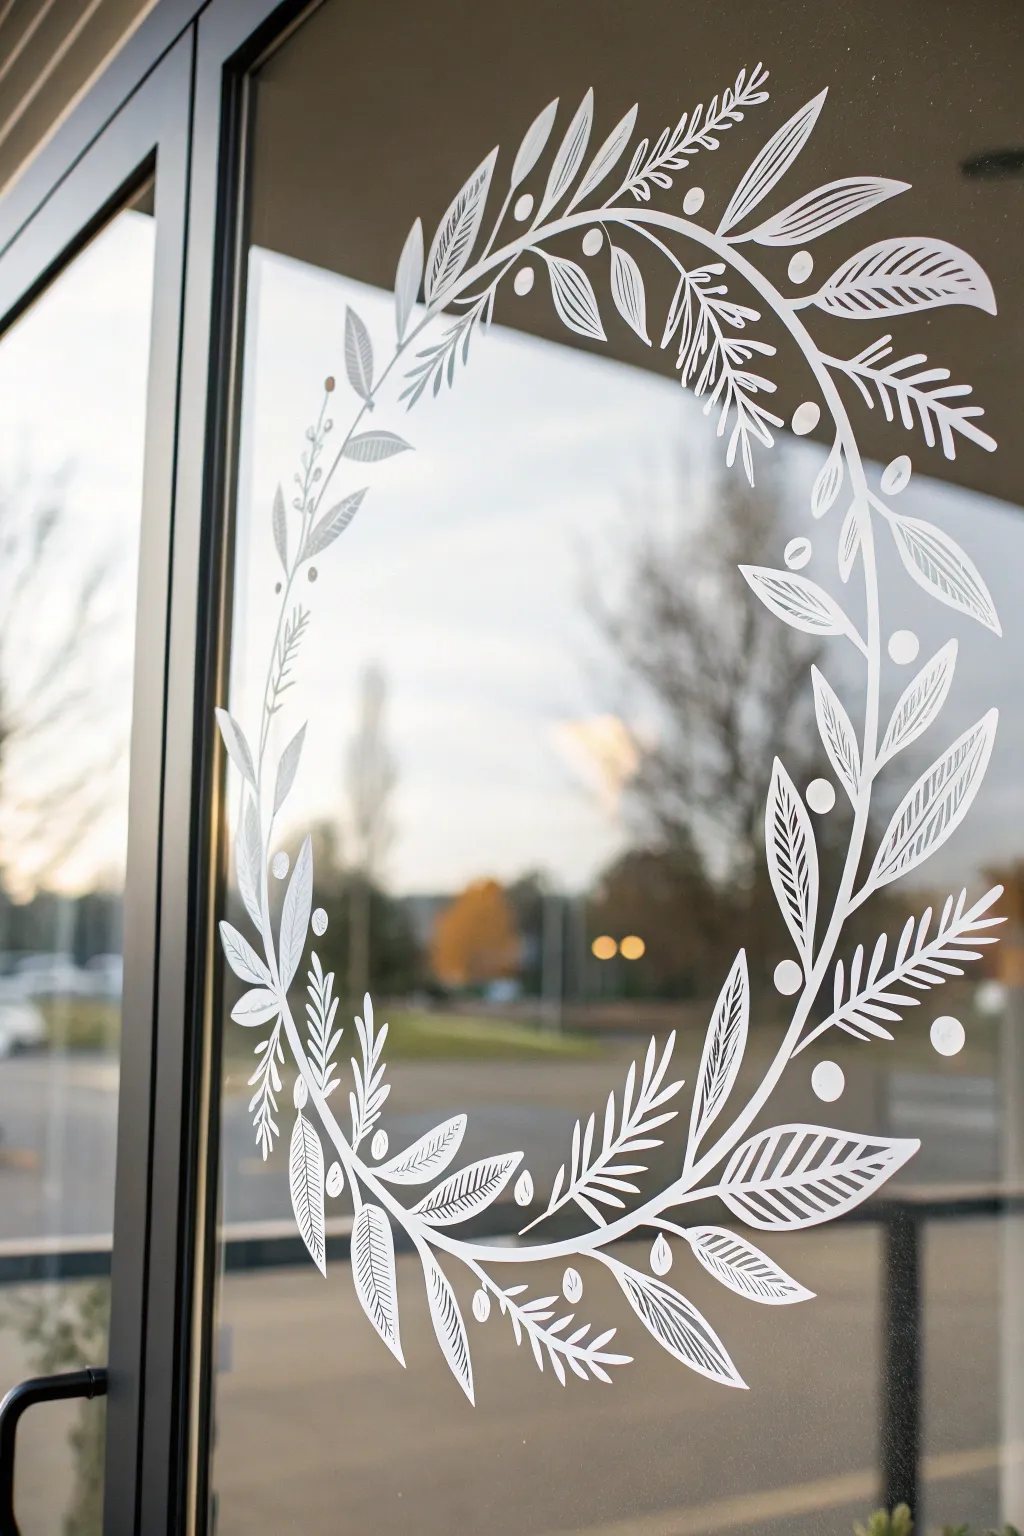
Transform your glass door or window into a welcoming focal point with this elegant, oversized botanical wreath. Using simple white ink, you’ll create a stunning contrast against the outdoors that mimics the look of etched glass.
Step-by-Step Guide
Materials
- White liquid chalk marker (broad tip)
- White liquid chalk marker (fine tip)
- Glass cleaner
- Lint-free cloth or paper towels
- Paper plate or large circular object (optional, for tracing)
- Microfiber cloth (for erasing)
- Tape measure
- Masking tape
Step 1: Preparation & Mapping
-
Clean the Surface:
Begin by thoroughly cleaning the glass surface with glass cleaner and a lint-free cloth. Any dust or grease will prevent the marker from flowing smoothly and adhering properly. -
Find Center:
Measure the width of your window pane to find the center point. Mark this barely-visible spot with a tiny dot using your fine-tip marker. -
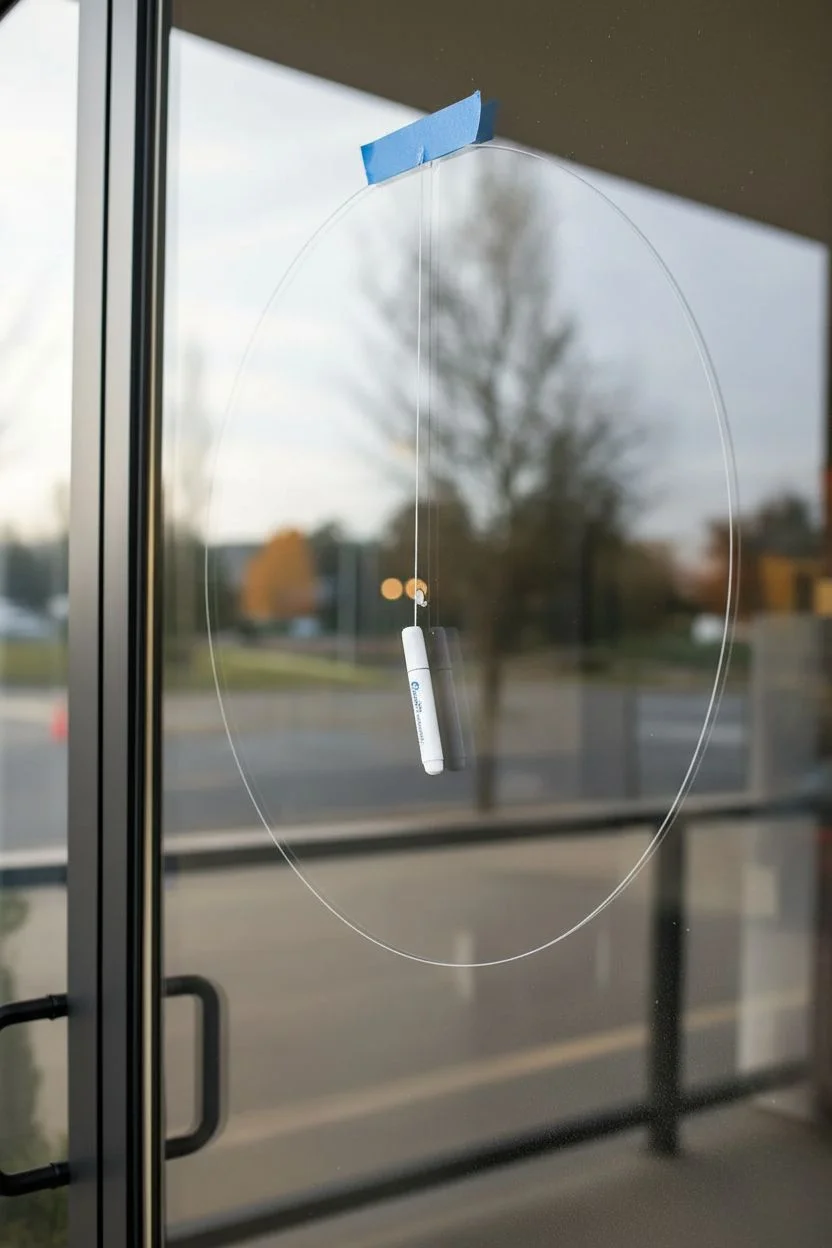
Create a Guide Circle:
To ensure your wreath is perfectly round, you need a guide. If you have a large circular object like a platter, tape it up temporarily. Alternatively, tie a string to a pencil and tape the other end to your center point to lightly trace a faint circle. -
Prime Your Markers:
Shake your chalk markers vigorously. Press the tip down on a piece of scrap paper until the white ink flows fully into the nib. I always test the flow on paper before touching the glass to avoid drips.
Use a Steady Hand
Rest your drawing hand on a clean, dry microfiber cloth against the glass while you work. This lets you glide smoothly without smudging your previous work.
Step 2: Drawing the Base Structure
-
Draw the Main Stem:
Using the broad-tip marker, trace over your guide circle. Don’t worry about making it a perfect continuous line; sketch it as two or three long, curving stems that overlap slightly at the bottom and top. -
Thicken the Curves:
Go back over your main stem lines to add varying thickness. Make the bottom of the stems (near the 6 o’clock position) slightly thicker to visually ‘anchor’ the weight of the wreath. -
Erase Guidelines:
Once your main white stems are dry, carefully wipe away any faint guide marks underneath or inside the circle using a damp Q-tip or a tight corner of your microfiber cloth.
Step 3: Adding Foliage
-
Start with Large Leaves:
Switch to your fine-tip marker. Draw large, almond-shaped leaves extending outwards from the main stem. Place them symmetrically in some spots and randomly in others for a natural feel. -
Add Leaf Details:
Inside each large leaf, draw a central vein line. Then, add diagonal hash marks or V-shapes to create the intricate vein texture shown in the image. -
Incorporate Pine Sprigs:
In the gaps between the large leaves, draw sprigs of pine. Draw a central line first, then use quick, short strokes to add the needles flaring out. -
Draw Fern Fronds:
Add diversity by drawing long, slender fern-like leaves. These should have a long spine with many small, simple oval leaves attached closely together. -
Fill the Inner Circle:
Don’t forget the inside of the wreath. Draw smaller versions of leaves and sprigs pointing inward toward the center of the glass to make the wreath look full and lush.
Fixing Drips
If the marker drips, let it dry completely before fixing. Wet ink smears into a ghosty mess, but dry chalk ink flakes off cleanly with a dry paper towel.
Step 4: Finishing Touches
-
Add Berries:
Draw small circles attached to the main stems by tiny lines. Group them in clusters of three or leave them as single berries. Fill these circles in completely with the white ink. -
Check for Balance:
Step back about five feet from the window. Look for any large empty gaps in the foliage arrangement. -
Fill the Gaps:
Use the fine-tip marker to add wispy, curved lines or tiny buds in those empty spaces. These delicate fillers add movement to the design. -
Clean Up Edges:
Inspect your lines. If any edges look fuzzy or you made a smudge, wrap a slightly damp paper towel around your finger to sharpen the edges once the ink is fully dry. -
Final Polish:
Gently wipe the glass around the outside of the wreath to remove any fingerprints or smudges left by your hand while drawing.
Enjoy the cozy, festive atmosphere your hand-drawn wreath brings to the view


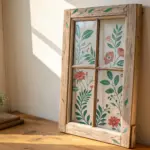
Botanical Line Art on Clear Glass
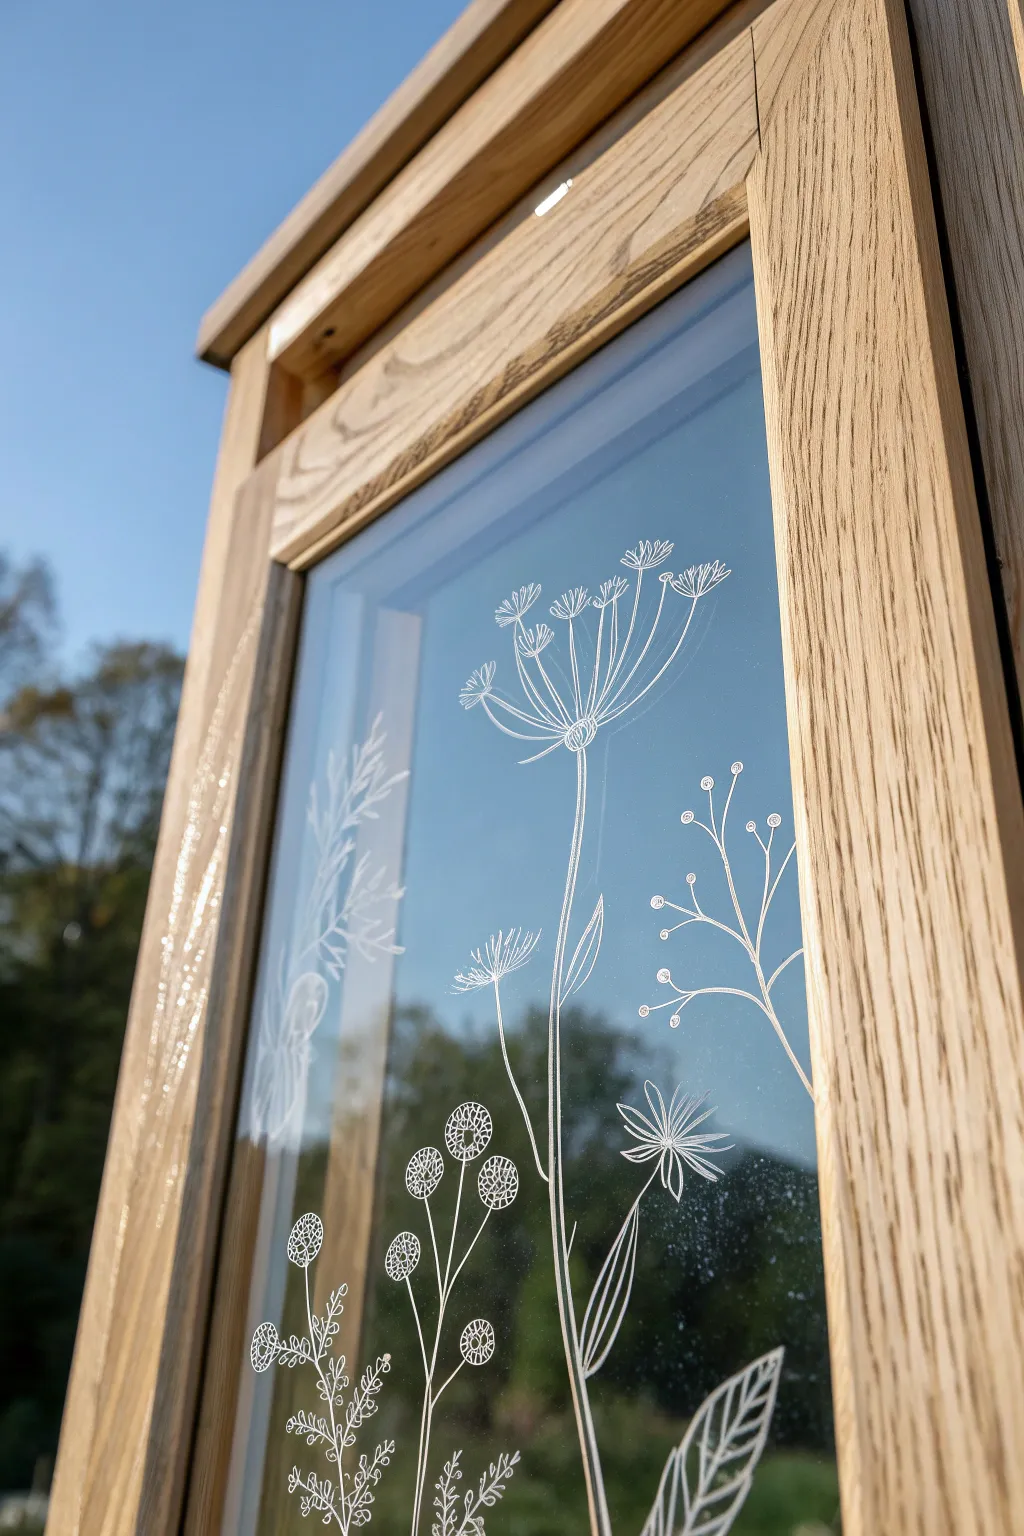

Transform a simple pane of glass into a delicate piece of nature-inspired art using white line work that seems to float in mid-air. This project captures the airy elegance of wildflowers, creating a sophisticated display that lets the natural world shine through.
Step-by-Step Tutorial
Materials
- Glass pane (repurposed window or framed glass)
- White oil-based paint marker (fine and medium tip)
- Rubbing alcohol
- Lint-free cloth
- Printed botanical templates or sketches
- Painter’s tape
- Glass cleaner
- Scrap paper for testing
- Wooden frame (oak or similar light wood)
- Cotton swabs
Step 1: Preparation and Cleaning
-
Surface selection:
Begin by selecting your glass surface; an old wooden window sash works beautifully for a rustic look, but a simple glass float frame is also perfect. -
Initial clean:
Wipe down both sides of the glass thoroughly with standard glass cleaner to remove heavy dust and grime. -
Degreasing the surface:
Take a lint-free cloth dampened with rubbing alcohol and wipe the side of the glass you intend to draw on. -
Drying:
Allow the alcohol to evaporate completely, ensuring no streaks or fibers remain, as oils can prevent the marker ink from adhering properly. -
Selecting your design:
Choose botanical line arg images featuring tall stems, umbellifers (like Queen Anne’s Lace), and delicate leaves to match the aesthetic. -
Placement strategy:
Arrange your paper templates on the *back* side of the glass to plan your composition, varying heights for visual interest. -
Securing the guide:
Once satisfied with the layout, tape the paper patterns securely to the reverse side of the glass using painter’s tape.
Step 2: Drawing the Botanicals
-
Priming the marker:
Shake your white oil-based paint marker vigorously, then press the nib on scrap paper until the ink flows smoothly and consistently. -
Outline the main stems:
Start by tracing the long, central stems of your tallest flowers, using a steady hand to create smooth, continuous lines. -
Adding texture to stems:
For thicker stems, avoid just coloring them in; instead, draw parallel lines to mimic the fibrous texture of plant stalks. -
Drawing the umbels:
Move to the flower heads. For Queen Anne’s Lace types, draw the radiating ‘spokes’ extending outward from the center point. -
Detailing the blooms:
At the end of each spoke, add tiny clusters of dots or small dashes to represent the individual florets. -
Leaf work:
Switch to leaves, keeping your lines light. Use simple triangular shapes with internal veins for a stylized botanical look. -
Adding seed heads:
Include some circular seed pods (like the globe thistle shapes in the image) by drawing textured circles with cross-hatching inside. -
Creating depth:
Go back over key areas like the base of the stems or leaf junctions to slightly thicken the lines, adding subtle visual weight. -
Cleaning edges:
If you make a mistake or a line gets wobbly, quickly moisten a cotton swab with rubbing alcohol and erase the error before it cures.
Pro Tip: Line Variation
Use a fine point marker for the flower petals and a medium point for the main stalks. This contrast prevents the drawing from looking flat.
Step 3: Finishing and Display
-
Final drying:
I prefer to let the ink cure undisturbed for at least 24 hours to ensure it becomes scratch-resistant. -
Removing the template:
Peel away the painter’s tape and remove the paper templates from the back of the glass. -
Backside cleaning:
Give the non-painted side of the glass one final polish with glass cleaner to remove any tape residue or fingerprints. -
Mounting:
Place your glass back into its wooden frame if it was removed, or set up your window sash in an area with good backlighting.
Troubleshooting: Streaky Ink
If the marker creates translucent streaks, let the first layer dry completely (about 10 mins) before tracing over it again for opacity.
Now you have a serene, transparent garden that captures the light and brings a sophisticated touch of nature indoors
BRUSH GUIDE
The Right Brush for Every Stroke
From clean lines to bold texture — master brush choice, stroke control, and essential techniques.
Explore the Full Guide
One-Line Portraits on the Window

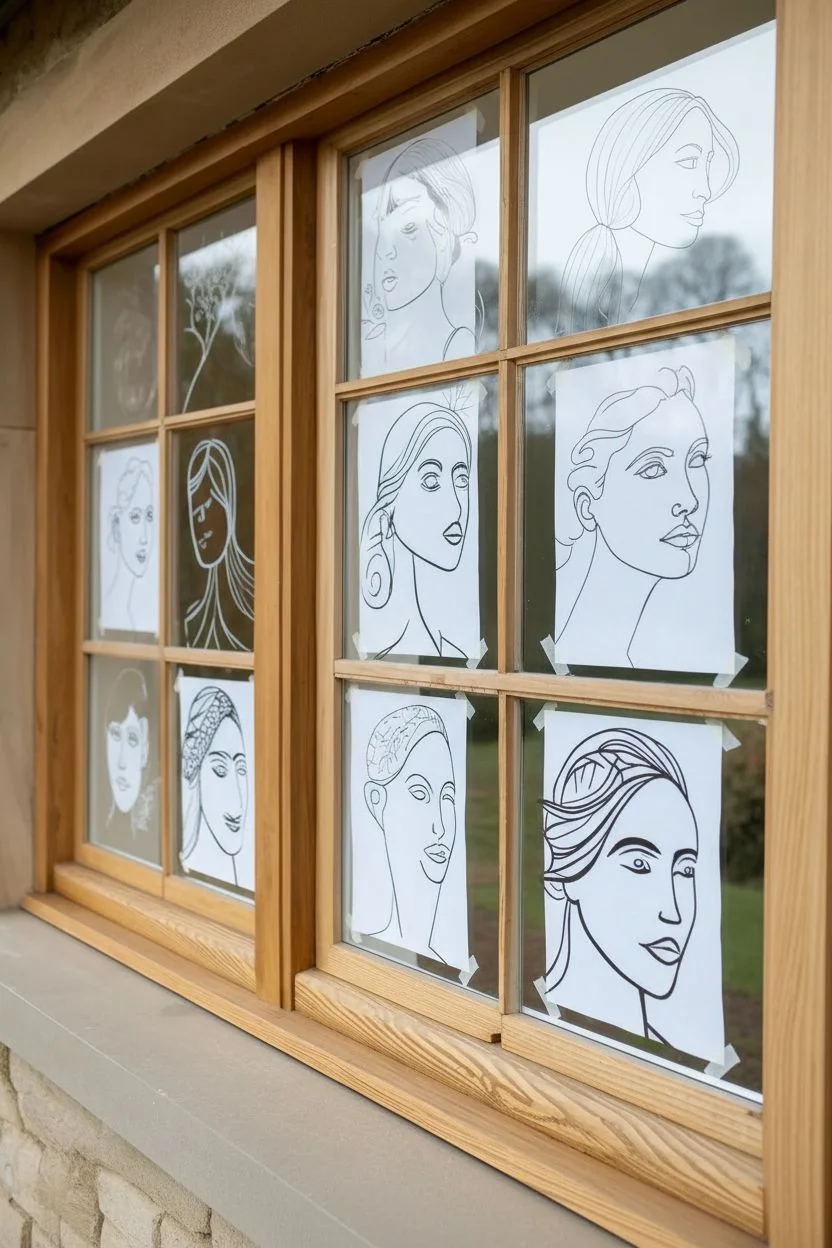
Transform ordinary glass panes into a gallery of fluid, continuous-line portraits that catch the light beautifully. This elegant, minimalist project uses white chalk markers to create stylized faces that add artistic flair without blocking your view.
Step-by-Step
Materials
- White liquid chalk marker (medium bullet tip ideal)
- Glass cleaner
- Lint-free cloth or paper towels
- Paper and pencil for sketching
- Tape (masking or painter’s tape)
- Cotton swabs (for corrections)
- Ruler or tape measure (optional)
Step 1: Preparation & Design
-
Clean the surface:
Begin by thoroughly cleaning your window panes with glass cleaner and a lint-free cloth. Any dust or grease will prevent the chalk marker from adhering smoothly and can cause skipped lines. -
Measure the panes:
Measure the dimensions of a single window pane. You will need to create your paper templates to fit within these specific boundaries. -
Sketch the concepts:
On paper cut to size, lightly sketch out different face profiles. Focus on simple, flowing lines. Think about swooping hair, elongated necks, and defined noses. Don’t worry about perfection; aim for a relaxed, artistic vibe. -
Refine the lines:
Go over your pencil sketches with a dark marker on the paper. This high contrast is crucial because it makes the design much easier to see through the glass when you tape it up. -
Test placement:
Hold your paper sketches up to the window to decide which face goes on which pane. I like to alternate the direction the faces are looking to create a balanced composition across the whole window.
Step 2: Transferring the Art
-
Secure the template:
Tape your first paper template securely to the *outside* of the window pane, facing inward. Ensure it is flat against the glass so the lines don’t appear distorted. -
Prime the marker:
Shake your white chalk marker vigorously. Press the tip down on a scrap piece of paper repeatedly until the white ink flows fully into the nib. Do not do this directly on the window to avoid drips. -
Trace the outline:
Standing inside, begin tracing the dark lines from your template onto the glass. Use a steady hand and try to keep your pressure consistent to maintain an even line thickness. -
Maintain flow:
Try to draw in long, continuous strokes rather than short, sketchy ones. This mimics the ‘one-line’ drawing style and looks much cleaner on glass. -
Add hair details:
When drawing hair, use lighter pressure or faster strokes to give the lines a sense of movement. The pictured examples use wavy lines to suggest volume without shading.
Fixing Smudges
Ink smeared while drawing? Wait for it to dry completely, then scrape the mistake away gently with a fingernail or credit card edge before wiping clean.
Step 3: Finishing Touches
-
Let it set:
Allow the chalk ink to dry for a minute or two. It usually dries quickly, turning from slightly translucent to opaque white. -
Check for gaps:
Step back and look for any areas where the ink might be thin. You can carefully re-trace over these sections, but wait until the first layer is fully dry to avoid lifting the paint. -
Clean up edges:
If you made any slips or have uneven lines, dampen a cotton swab with a little water or glass cleaner. Use it like an eraser to tidy up specific points. -
Repeat the process:
Move your templates to the next panes, or swap in new designs. Tape, trace, and repeat until all your window sections are filled with portraits. -
Remove templates:
Once you have finished tracing all designs, go outside and peel off the paper templates. This is the magic moment when the white lines pop against the background scenery. -
Final polish:
Check the glass for any fingerprints or smudges from your hand resting on the window. Gently wipe around the drawings with a clean, dry cloth.
Seasonal Styles
Change the vibe by adding seasonal elements like holly wreaths in winter or floral crowns in spring directly onto the portraits’ hair.
Enjoy the sophisticated, gallery-like atmosphere these simple sketches bring to your room
Classic Four-Pane Window Sketch
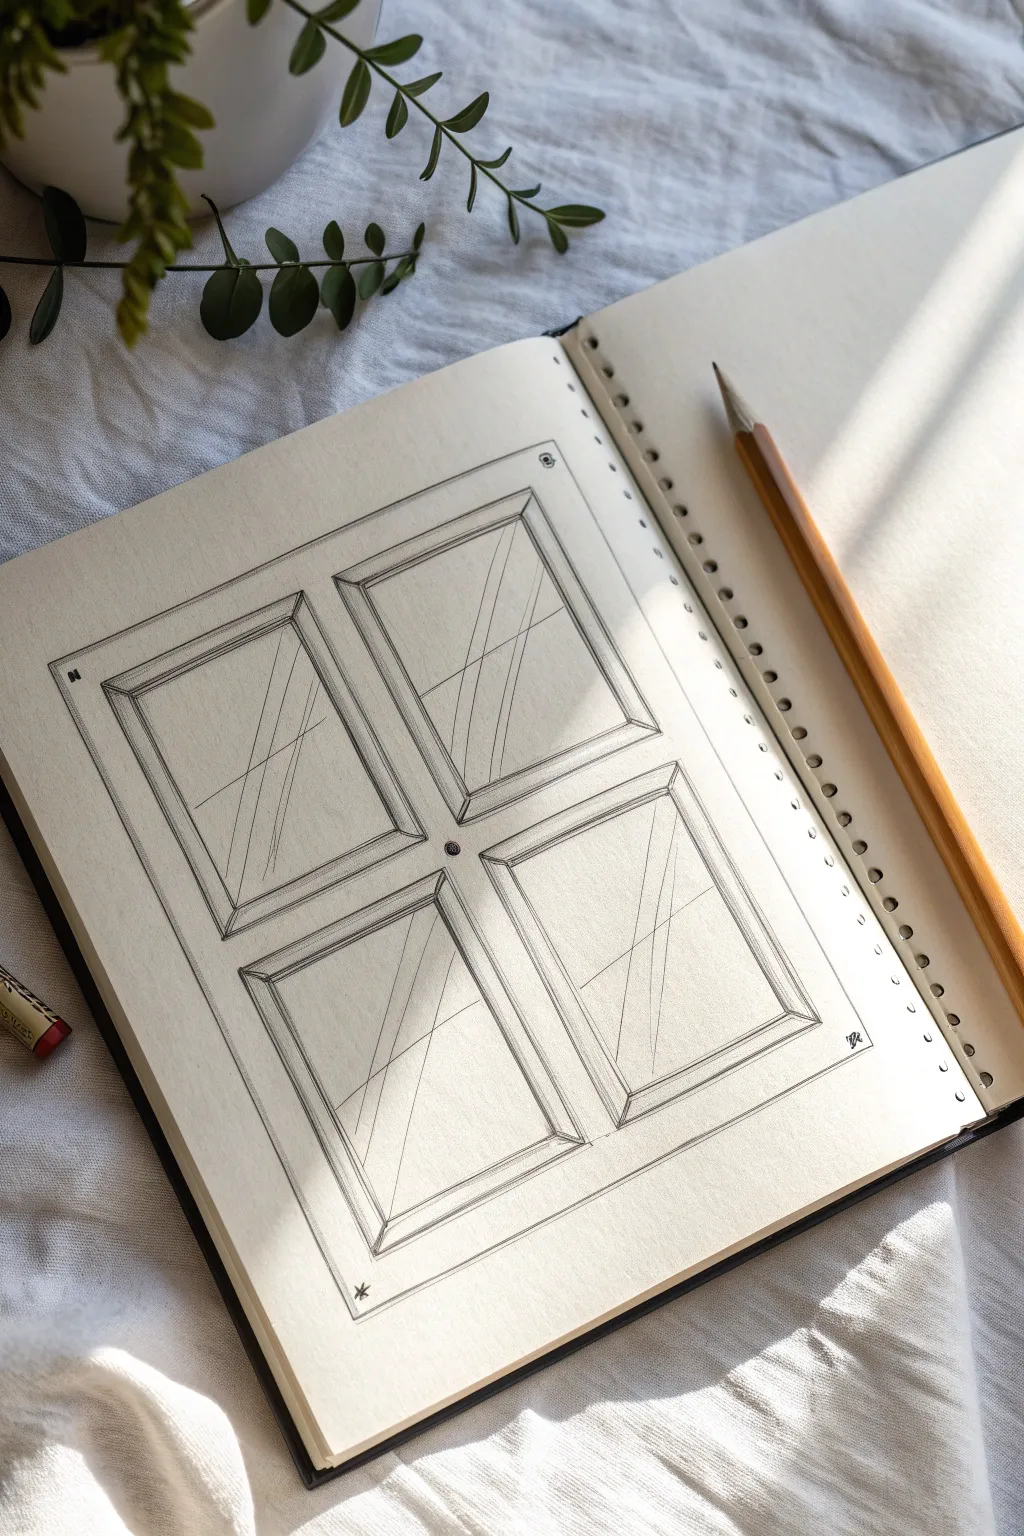
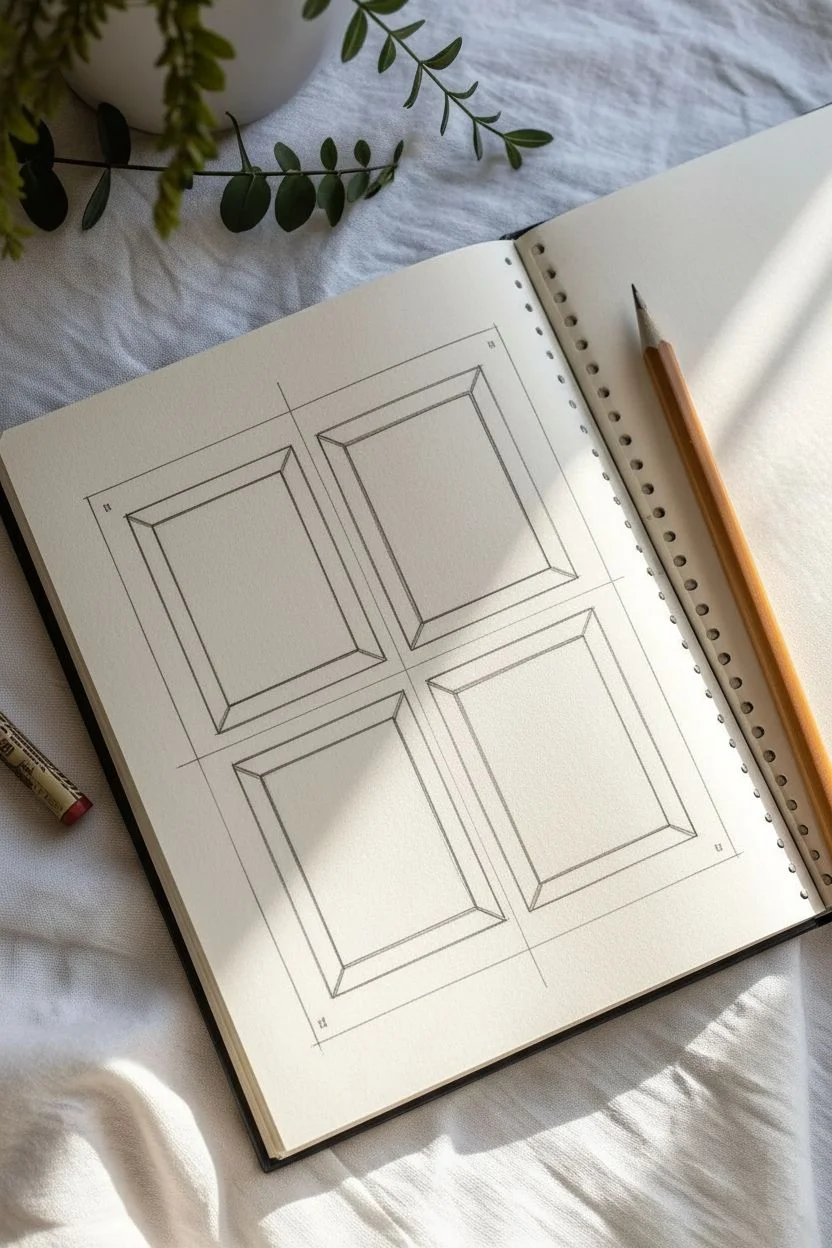
This minimalist pencil study captures the clean geometry of a traditional four-pane window frame with elegant precision. The drawing focuses on depth and perspective, using simple linework to create the illusion of three-dimensional molding and glass reflections.
Step-by-Step Guide
Materials
- Spiral-bound sketchbook with smooth paper
- HB graphite pencil (for initial layout)
- 2B graphite pencil (for darker lines and shading)
- Ruler or straight edge
- Kneaded eraser
- Pencil sharpener
Step 1: Laying the Foundation
-
Define the Outer Perimeter:
Begin by drawing a large, perfect rectangle centered on your page. Use your ruler to ensure the lines are straight and the corners meet at 90-degree angles. This will act as the outer boundary for the entire window assembly. -
Create the Center Mullions:
Divide the large rectangle into four equal quadrants. Draw a vertical line straight down the center and a horizontal line across the middle. These lines represent the central cross-piece (or mullion) that separates the four panes. -
Thicken the Frame:
To give the window substance, draw a second, smaller rectangle inside each of the four quadrants you just created. Leave a consistent gap of about 3-5mm between these new lines and your original grid lines. This gap creates the thickness of the wooden frame. -
Establish the Beveled Edges:
Connect the corners of your outer quadrant lines to the corresponding corners of the inner rectangles with short diagonal lines. This simple step instantly creates the look of a beveled, three-dimensional frame profile.
Wobbly Lines?
If your ruler slips, don’t erase the whole line. Turn the mistake into a wood grain texture or a ‘worn’ edge. Architectural sketches often benefit from slight character imperfections.
Step 2: Adding Depth and Detail
-
Refine the Linework:
Switch to your 2B pencil or press slightly harder with your HB. Go over the internal rectangles—the ones representing the actual glass area—to make them crisp and distinct. -
Shade the Inner Depths:
To enhance the 3D effect, add very subtle shading to the inner beveled edges. Imagine the light is coming from the top right; shade the bottom and left inside edges of each pane slightly darker to simulate shadow. -
Draw Reflection Lines:
Lightly sketch two or three long diagonal lines across the ‘glass’ areas. These lines shouldn’t be perfect; make them slightly broken or faint to suggest light reflecting off a transparent surface. -
Add Structural Details:
Sketch a small circle or dot in the very center where the vertical and horizontal mullions intersect. This represents the joinery or a decorative pin holding the frame together. -
Accentuating the Outer Frame:
Draw an additional border around the very outside of your initial large rectangle. Connect corners diagonally again to give the entire outer casing the same beveled, 3D treatment as the individual panes.
Pro Tip: Depth Perception
Make the bottom bevel of each pane slightly thicker than the top one. This trick of perspective simulates looking slightly down at the window, increasing realism instantly.
Step 3: Finishing Touches
-
Clean Up Intersections:
Use your kneaded eraser to gently lift any graphite smudges or construction lines that extended too far past the corners. The goal is a look that is clean and architectural. -
Enhance Contrast:
Darken the deepest recesses of the frame. I find that deepening the lines where the beveled wood meets the glass really makes the drawing pop off the page. -
Add Corner Accents:
In the four outermost corners of the main frame, add tiny decorative symbols or letters (like ‘N’ for North or small stars) to give the drawing a technical, blueprint-like aesthetic. -
Suggest Sunlight:
Gently erase across part of the drawing in a diagonal swath if you want to mimic the effect of strong sunlight washing out part of the image, as seen in the reference photo. -
Final Sharpening:
Give your pencil a fresh sharpen and go over the outermost perimeter one last time with a confident, single stroke to frame your work definitively.
Now you have a structured, architectural sketch that serves as a perfect practice piece for perspective and shading

PENCIL GUIDE
Understanding Pencil Grades from H to B
From first sketch to finished drawing — learn pencil grades, line control, and shading techniques.
Explore the Full Guide
Arched and Round Window Variations
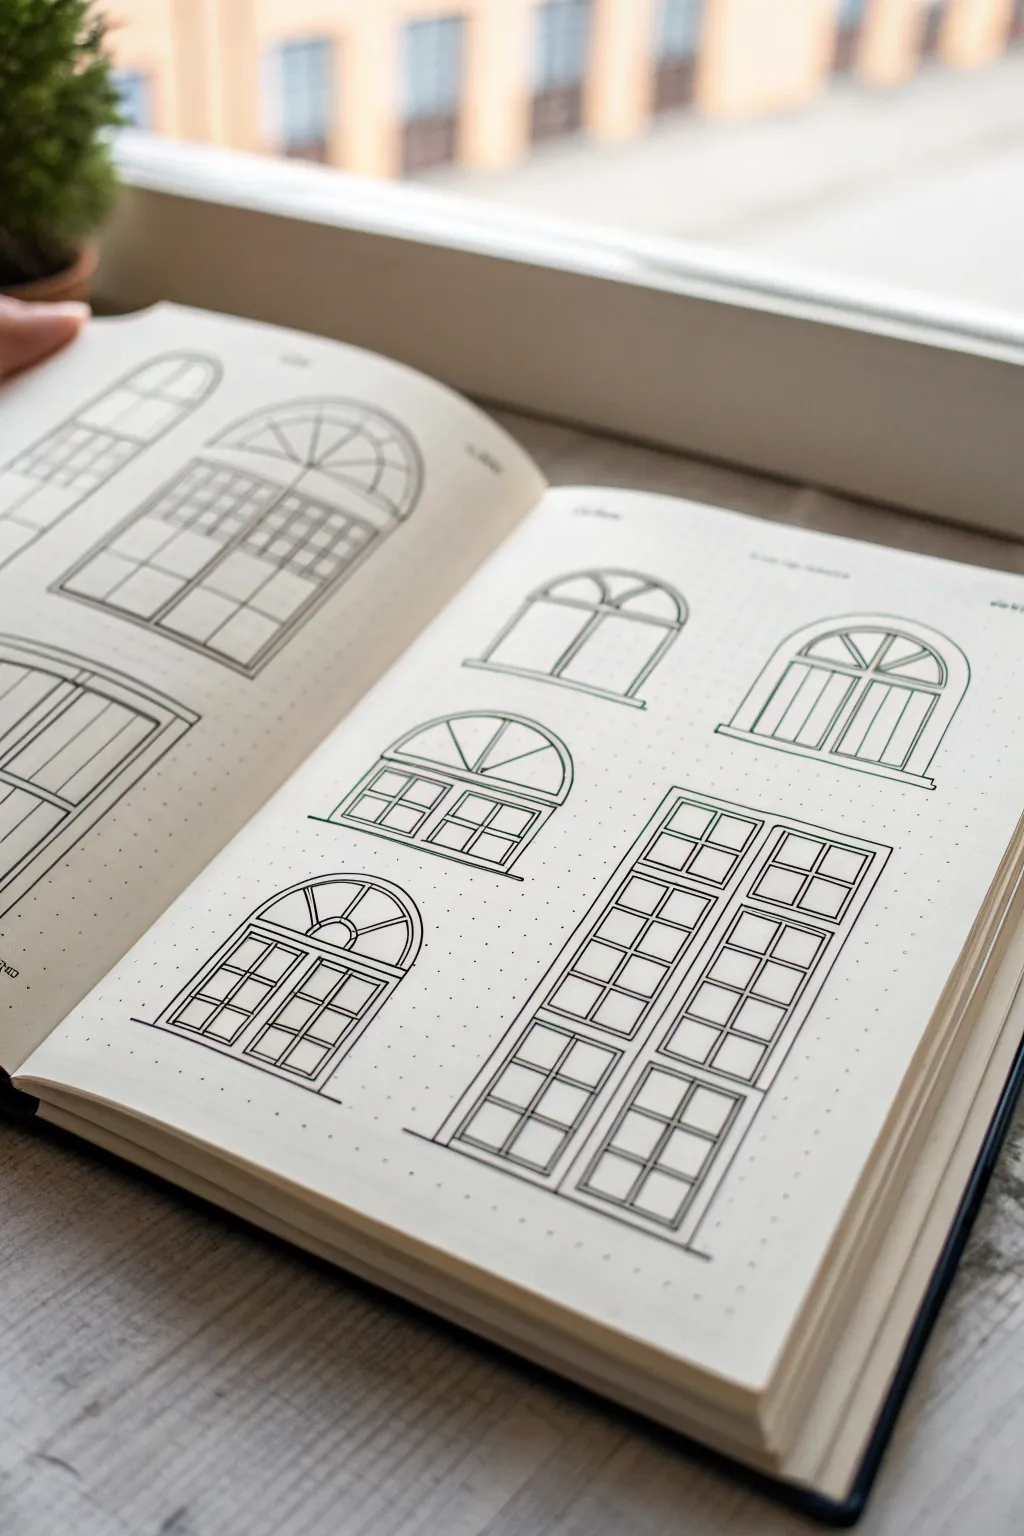
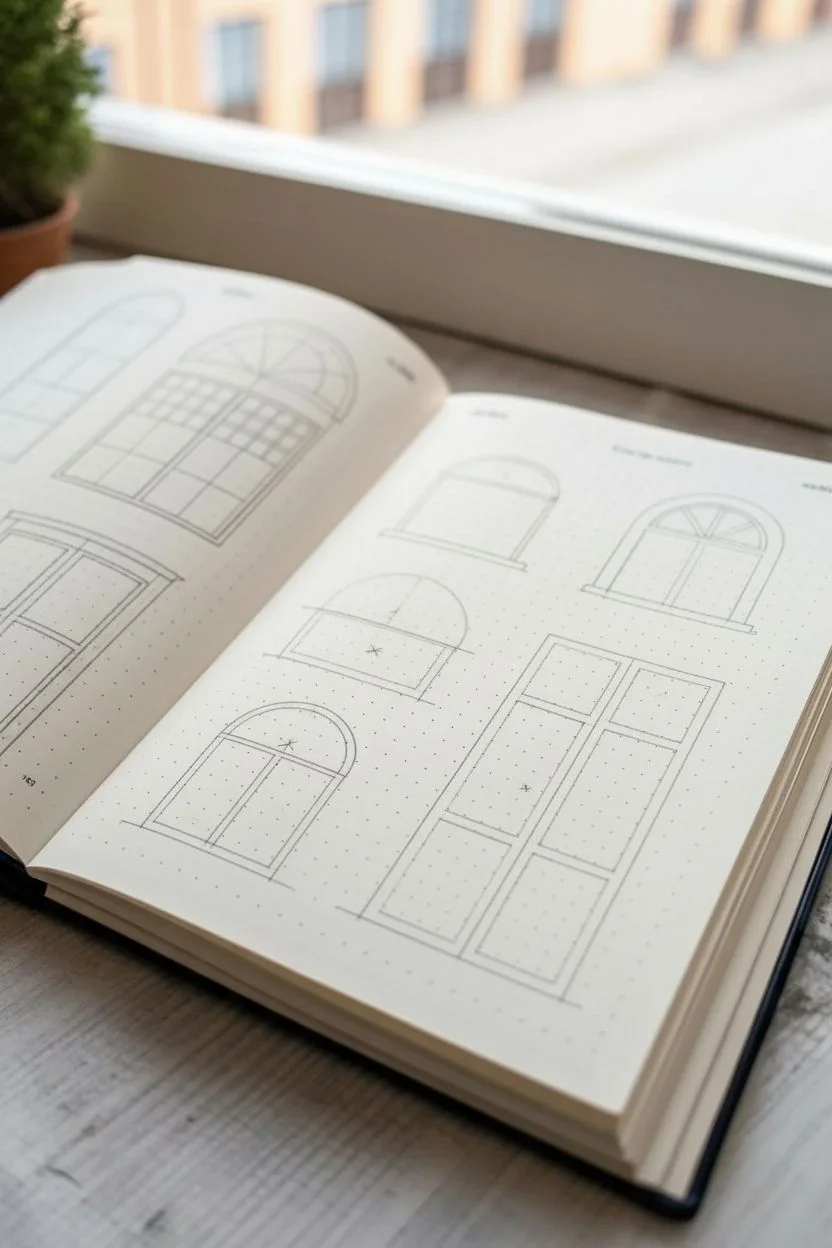
Capture the elegance of classical architecture with these precise arched window sketches. Using a dot grid notebook helps maintain symmetry and consistent proportions without needing complex measurement tools.
Step-by-Step
Materials
- Dot grid notebook or sketchbook
- Fine liner pen (black, 0.3mm or 0.5mm)
- Pencil (HB or H)
- Eraser
- Ruler (clear plastic ruler works best)
- Reference images of windows (optional)
Step 1: Planning and Layout
-
Set your layout:
Open your dot grid notebook to a fresh spread. Decide on the layout for your collection; the example uses a mix of five distinct window styles spread across the right page. -
Draft the baselines:
Using a pencil and ruler, lightly mark the bottom horizontal lines for each window. Use the dots to ensure they are level and spaced evenly. -
Mark widths and heights:
Count the dots to establish the width of each window. Mark the center point of each width—this will be crucial for creating the perfect arch later. -
Define the rectangular sections:
For windows with a square base, draw the vertical sides up to where the curve will begin. Keep your pencil pressure light so these lines are easy to erase or adjust.
Step 2: Constructing the Arches
-
Sketch the primary curves:
Starting from the top of your vertical lines, freehand the structural arch. Aim for the peak of the curve to hit exactly above your center mark. -
Add concentric details:
To give the window frames depth, sketch a second, slightly smaller arch inside the first one. For heavy frames, add a third line outside the original arch. -
Create the panes:
Divide the interior space. For the fan-style tops, draw lines radiating from the bottom center of the arch to the outer curve. I like to use the ruler for the straight radiating lines to keep them crisp. -
Draft the grid work:
For the lower rectangular sections, draw your horizontal and vertical muntins (the grid bars). Use the grid dots to ensure exact spacing between panes.
Wobbly Arches?
If freehand drawing arches is difficult, use a circle stencil or a compass. Place the metal point on your center line to get a perfect curve.
Step 3: Inking and Definition
-
Ink the outer frames:
Switch to your fine liner pen. Trace over the main structural outlines first. Move your arm, not just your wrist, to get smoother curves on the arches. -
Refine the inner details:
Carefully ink the inner window panes and grid lines. If you want a visual hierarchy, use a slightly thinner nib (like a 0.1mm) for these inner details compared to the outer frame. -
Add the sills:
Draw the window sills at the bottom. Extend the lines slightly past the width of the frame to create a realistic ledge overhang. -
Double up lines:
Go back over specific lines to add weight. Notice how the tall French door on the right has a double outline to indicate a thicker frame. -
Clean up:
Wait at least five minutes for the ink to dry completely to avoid smudging. Then, gently erase all underlying pencil marks.
Add Color
Use a light grey marker to trace just inside the left and top edges of the glass panes. This creates a quick, realistic ‘glass’ reflection effect.
Step 4: Depth and Finishing
-
Check line weights:
Review your drawing. If the architectural molding looks too flat, thicken the lines on the bottom and right sides of each shape to suggest a subtle shadow. -
Add subtle hatching:
For a more advanced look, add very fine diagonal hatching on just the glass panes or the recessed parts of the frame. -
Closing check:
Compare your windows for symmetry one last time. Adjust any wobbles with a confident, slightly thicker line correction if needed.
Now you have a stunning collection of architectural elements ready to decorate your journal spreads
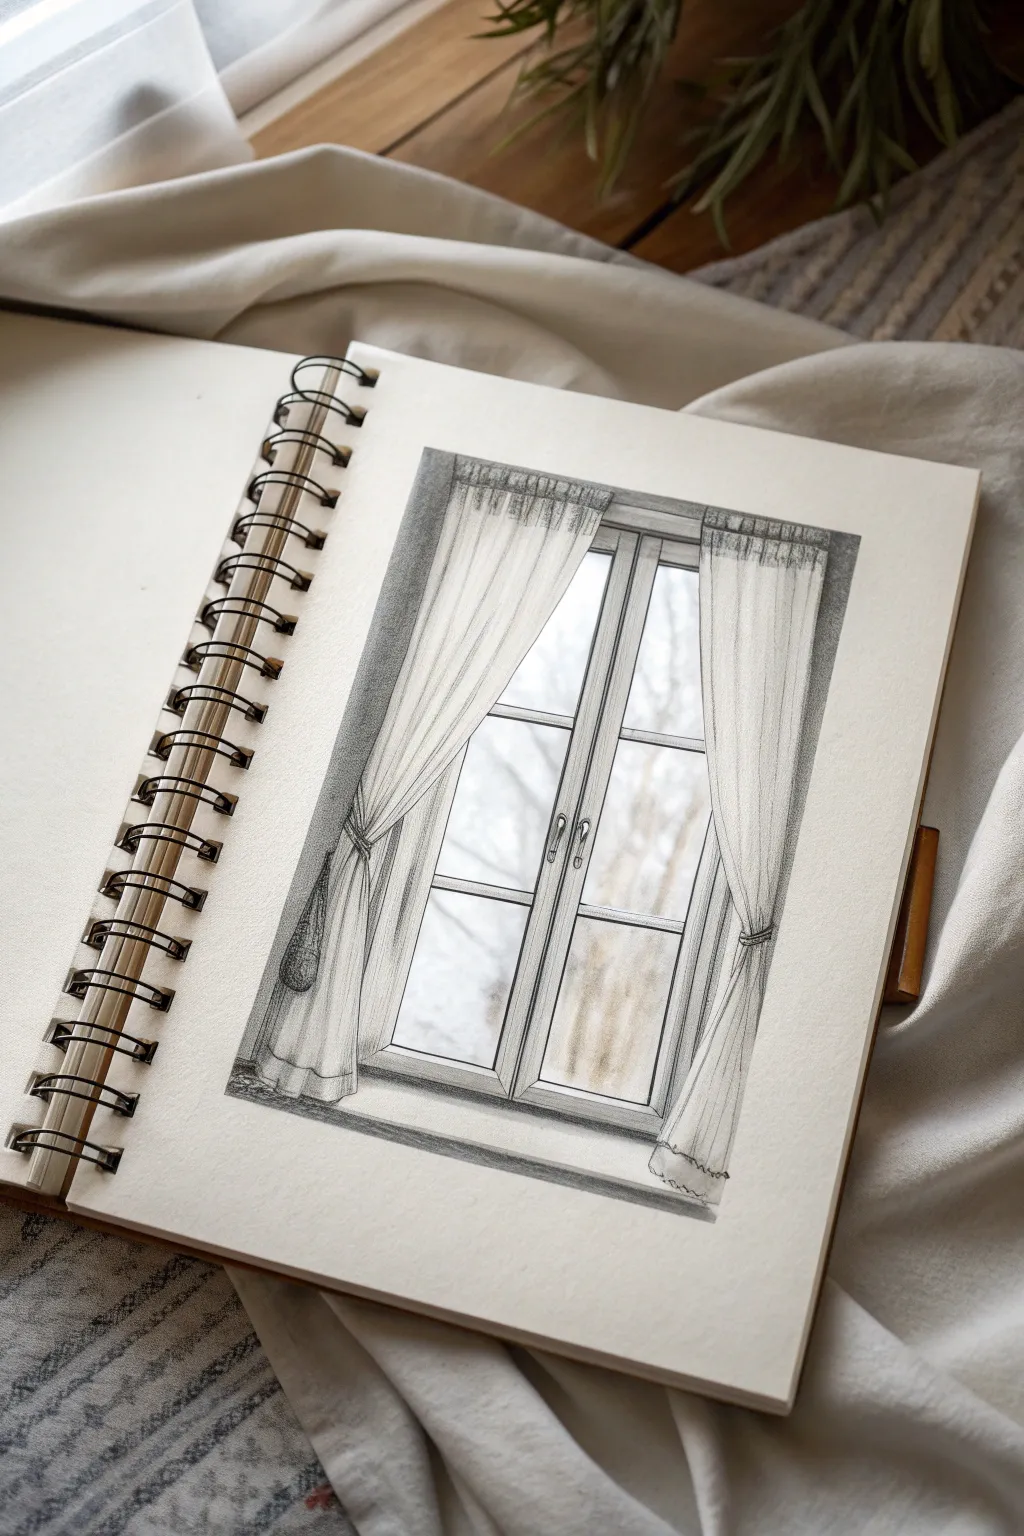
Curtains and Soft Interior Details

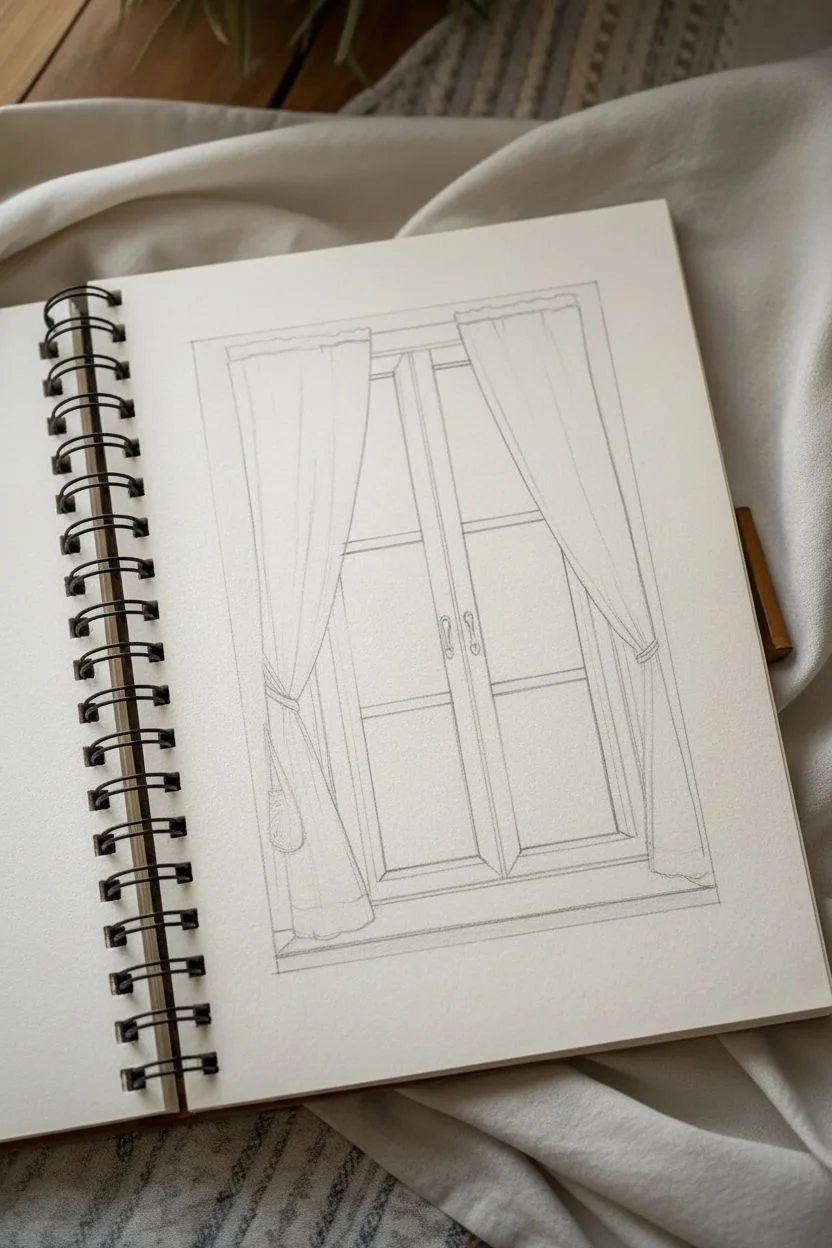
This tutorial guides you through sketching a classic double casement window draped in flowing curtains, emphasizing the soft texture of fabric against rigid glass. The result is a serene, elegant graphite study that captures light and fold details beautifully.
How-To Guide
Materials
- Spiral-bound sketchbook (medium tooth paper)
- Graphite pencils (HB for sketching, 2B and 4B for shading, 6B for deep darks)
- Kneaded eraser
- Precision white eraser stick (optional, for highlights)
- Ruler or straight edge
- Blending stump or tortillon
- Tissue or chamois for smoothing
Step 1: Basic Structure
-
Define the Frame:
Begin by lightly drawing a large vertical rectangle in the center of your page using an HB pencil and a ruler. This will be the outer boundary of your window frame. -
Create the Casement:
Inside your main rectangle, draw a thick vertical line down the exact center to separate the two window panes. Add slightly thinner lines inside the outer rectangle to give the frame thickness and depth. -
Add Grid Details:
Draw horizontal lines across both panes to create the muntins (the grid bars). In this reference, there is one main horizontal bar slightly above the middle, and another lower down, creating a classic pane look. Keep your pressure light. -
Sketch Curtain Outline:
Lightly sketch the draped shape of the curtains. Start the lines from the very top of the frame, letting them curve gently inward and then pool or flare slightly at the bottom. Don’t worry about folds yet; just get the silhouette right.
Eraser Edge Trick
Cut a regular white eraser with a craft knife to get a razor-sharp edge. Use this ‘fresh’ corner to erase thin, crisp white lines for fabric folds.
Step 2: Refining the Drawing
-
Detail the Rod and Rings:
At the top of the frame, sketch a simple curtain rod or track. Draw small, gathered ruffles where the fabric meets the rod to imply pleating. -
Draw Fold Lines:
Within your curtain silhouette, draw long, flowing S-curves that follow the fabric from top to bottom. These guide lines will become your deep folds later. Notice how the fabric bunches at the tie-back point. -
Add Hardware:
Sketch the small window handles on the center vertical frame bar. These usually look like small, curved levers. Place them symmetrically if the window opens outward from the center. -
Curtain Tie-Backs:
Draw the tie-backs cinching the curtains about two-thirds of the way down. This should pinch the fabric inward, creating tension lines that radiate out from the tie.
Step 3: Shading and Texture
-
Establish Light Source:
Decide that your light is coming from outside (behind the window). This means the window frame itself will be silhouetted or darker than the bright glass. -
Shade the Curtains:
Switch to a 2B pencil. Shade the recessed areas of the folds you mapped out earlier. Use vertical strokes that follow the direction of the fabric. Leave the tops of the folds white to represent highlights. -
Deepen Fabric Shadows:
Use a 4B pencil to darken the deepest creases, especially near the tie-backs and the top pleats. This high contrast is what makes the fabric look soft and three-dimensional. -
Frame Rendering:
Shade the window frame with a steady, medium grey tone. Pay attention to the cast shadows where the curtains overlap the frame. I like to keep the edges crisp here to contrast with the soft fabric. -
Outside Atmosphere:
Very lightly shade the glass area to suggest a view outside. Instead of drawing specific trees, use vague, soft vertical shapes and smudging to imply blurred branches or a winter scene visible through the glass. -
Add Texture to the Wall:
Around the window frame, create a dark, textured background using a 6B pencil. Use cross-hatching or scumbling to make a dark wall tone; this pushes the white curtains forward visually.
Smudged Paper?
If your hand is dragging graphite across the white paper, place a clean scrap sheet of paper under your drawing hand to act as a shield while you work.
Step 4: Final Touches
-
Blend for Softness:
Use a blending stump to gently smooth out the graphite on the curtains. Be careful not to smudge your dark wall background into the crisp white areas of the drapes. -
Lift Highlights:
Take your kneaded eraser and dab it along the ridges of the curtain folds to lift off graphite and restore bright white highlights. This creates a sheen on the fabric. -
Sharpen Details:
Re-inforce the outlines of the window panes and the handles with a sharp HB or 2B pencil. Clean up any smudges on the windowsill area. -
Grounding Shadow:
Add a dark, horizontal shadow underneath the windowsill. This grounds the entire structure and adds weight to the bottom of the composition.
Step back and admire how the contrast between the dark frame and light fabric brings your window sketch to life


Have a question or want to share your own experience? I'd love to hear from you in the comments below!