When you’re making Father’s Day art as a daughter, the sweetest ideas are the ones that quietly say “this is us.” I pulled together these dad and daughter painting concepts so you can create something heartfelt—whether you’ve got 20 minutes or a whole afternoon to paint.
Watercolor Father’s Day Card From Daughter
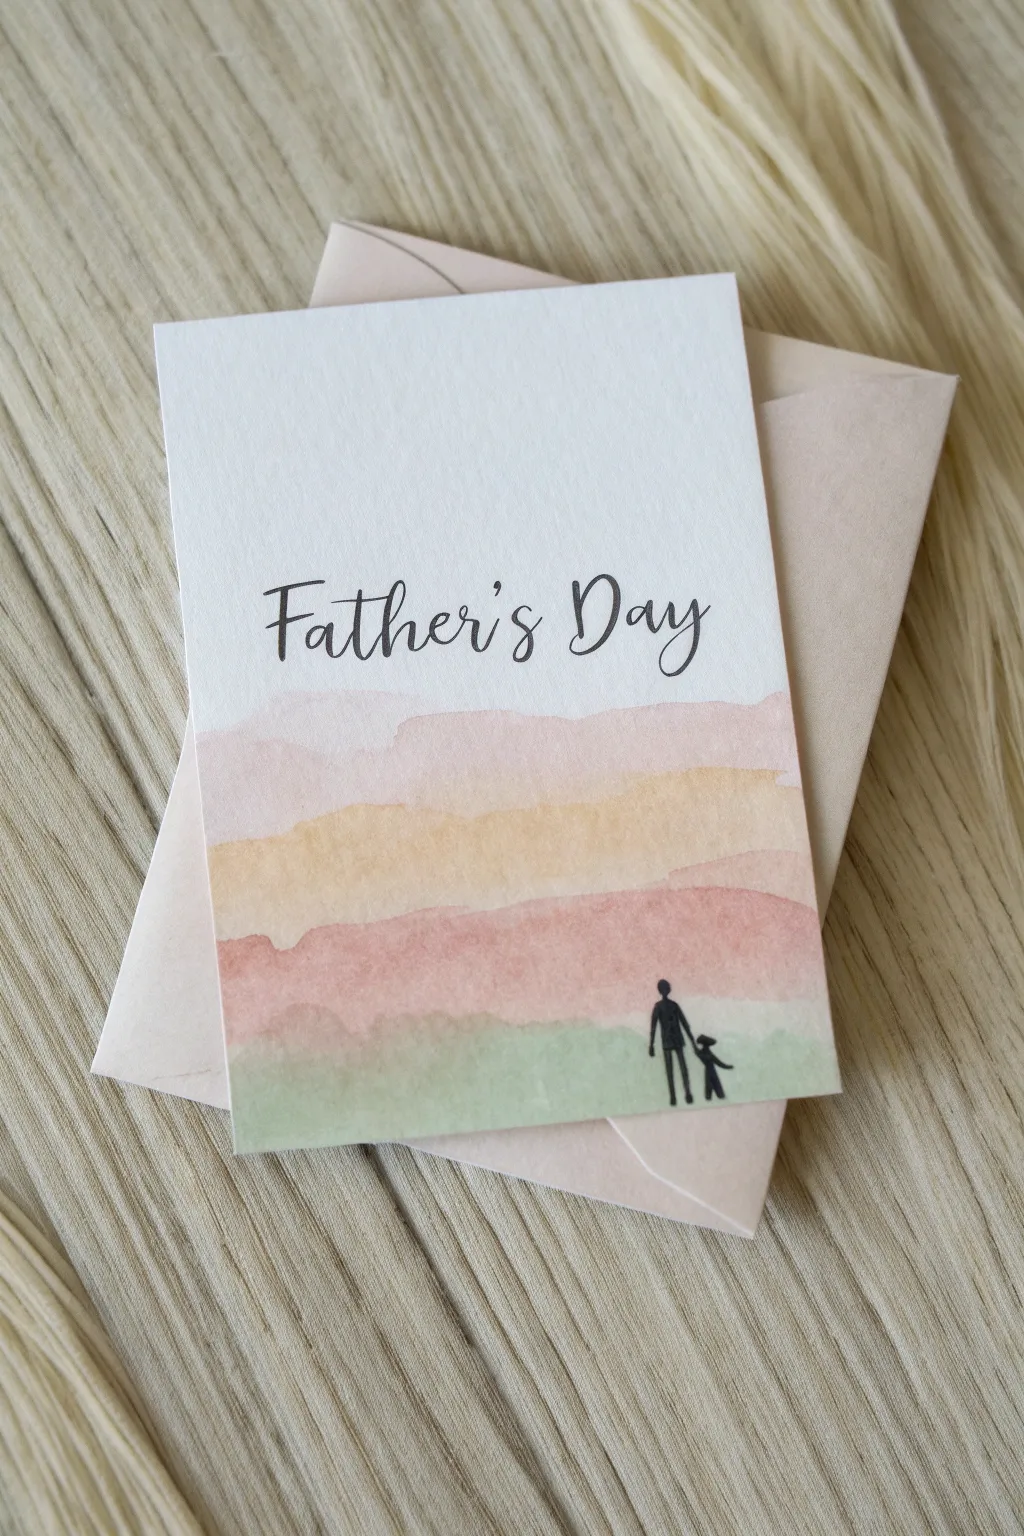
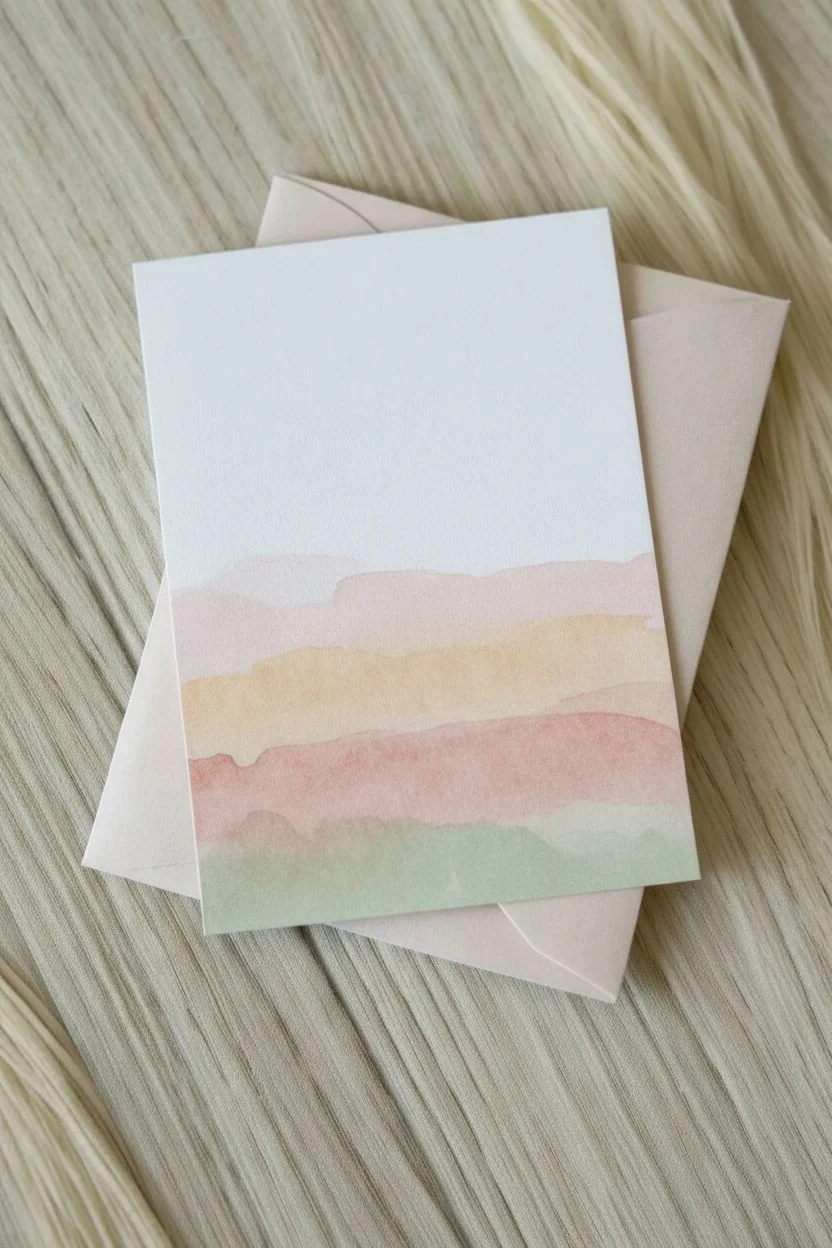
This elegant Father’s Day card features a serene, layered landscape painted in soft pastel watercolors, creating a tranquil backdrop for a sweet silhouetted scene. The beauty lies in its simplicity, using gentle washes of color to suggest distant hills and a grassy foreground.
Step-by-Step Guide
Materials
- Cold press watercolor paper (cut to card size)
- Watercolor paints (pastel pink, peach/orange, sage green)
- Flat watercolor brush (size 6 or 8)
- Small round detail brush (size 0 or 1)
- Black ink pen or fine black marker
- Pencil and eraser
- Paper towel
- Water cups
- Matching envelope (optional)
Step 1: Painting the Landscape Layers
-
Prepare your palette:
Mix your colors before starting. You’ll need watery, dilute mixtures of soft pink, a warm peachy-orange, and a muted sage green. Keep them light to maintain that pastel aesthetic. -
First pink wash:
Using your flat brush, load up the diluted pink paint. Paint a horizontal, slightly wiggly strip across the middle of the card. Let the top edge be distinct, but add a little water to fade the bottom edge out. -
Soften the edges:
While the pink layer is still damp (not soaking), dip your brush in clean water and soften the bottom edge so it will blend seamlessly into the next color later. -
Adding the peach layer:
Once the pink layer is semi-dry (cool to the touch but not shiny), load the brush with the peach/orange mixture. Paint another horizontal strip just below the pink one, letting them slightly overlap to create a blended transition. -
Create the mountain texture:
To mimic the rugged look of distant hills, wiggle your brush slightly as you pull it across the paper for the top edge of this peach layer. This irregularity adds natural charm. -
Layering the deeper pink:
Mix a slightly more saturated version of your original pink. Paint a third strip below the peach layer. This creates atmospheric perspective, making the landscape feel deeper. -
The green foreground:
Finish the bottom section of the card with your sage green mixture. Apply this wash all the way to the bottom edge of the paper, ensuring it blends gently with the pink layer above it. -
Complete drying:
Set the card aside to dry completely. The paper must be bone dry before you add any ink, otherwise the lines will bleed and fuzzy up.
Wet-on-Dry Edges
For those crisp mountain ridges shown in the image, ensure the layer above is 100% dry before painting the next color below it. This prevents the colors from bleeding together.
Step 2: Adding Details and Lettering
-
Pencil guidelines:
Lightly sketch the position for your text in the white space at the top. Also, lightly mark where the silhouettes will stand in the green section. -
Calligraphy practice:
I always recommend practicing the phrase ‘Father’s Day’ on a scrap piece of paper first to get the spacing right before committing to the final card. -
Inking the text:
Using your black ink pen or marker, write ‘Father’s Day’ in a flowing, modern script font. Vary your pressure to get thick downstrokes and thin upstrokes if you’re using a brush pen. -
Outline the silhouettes:
Switch to your finest pen or the small detail brush with black paint. Carefully outline the small figures of the father and child holding hands in the bottom right corner. -
Fill in the figures:
Fill in the outlines with solid black. Be very careful near the edges to keep the shapes recognizable—make sure the clasped hands are clearly defined. -
Final touches:
Wait for the ink to fully dry. Once safe, gently erase any visible pencil guidelines from the text or the figures. -
Flattening the card:
If your watercolor paper has buckled slightly from the water, place the finished, dry card under a heavy book overnight to flatten it out perfectly.
Metallic Accent
Trace the top edge of the landscape layers with a very fine gold paint pen. It adds a subtle shimmer that catches the light and makes the card look professionally printed.
Slide this handmade masterpiece into a matching envelope and watch his face light up


Handprint Heart Hug for Dad
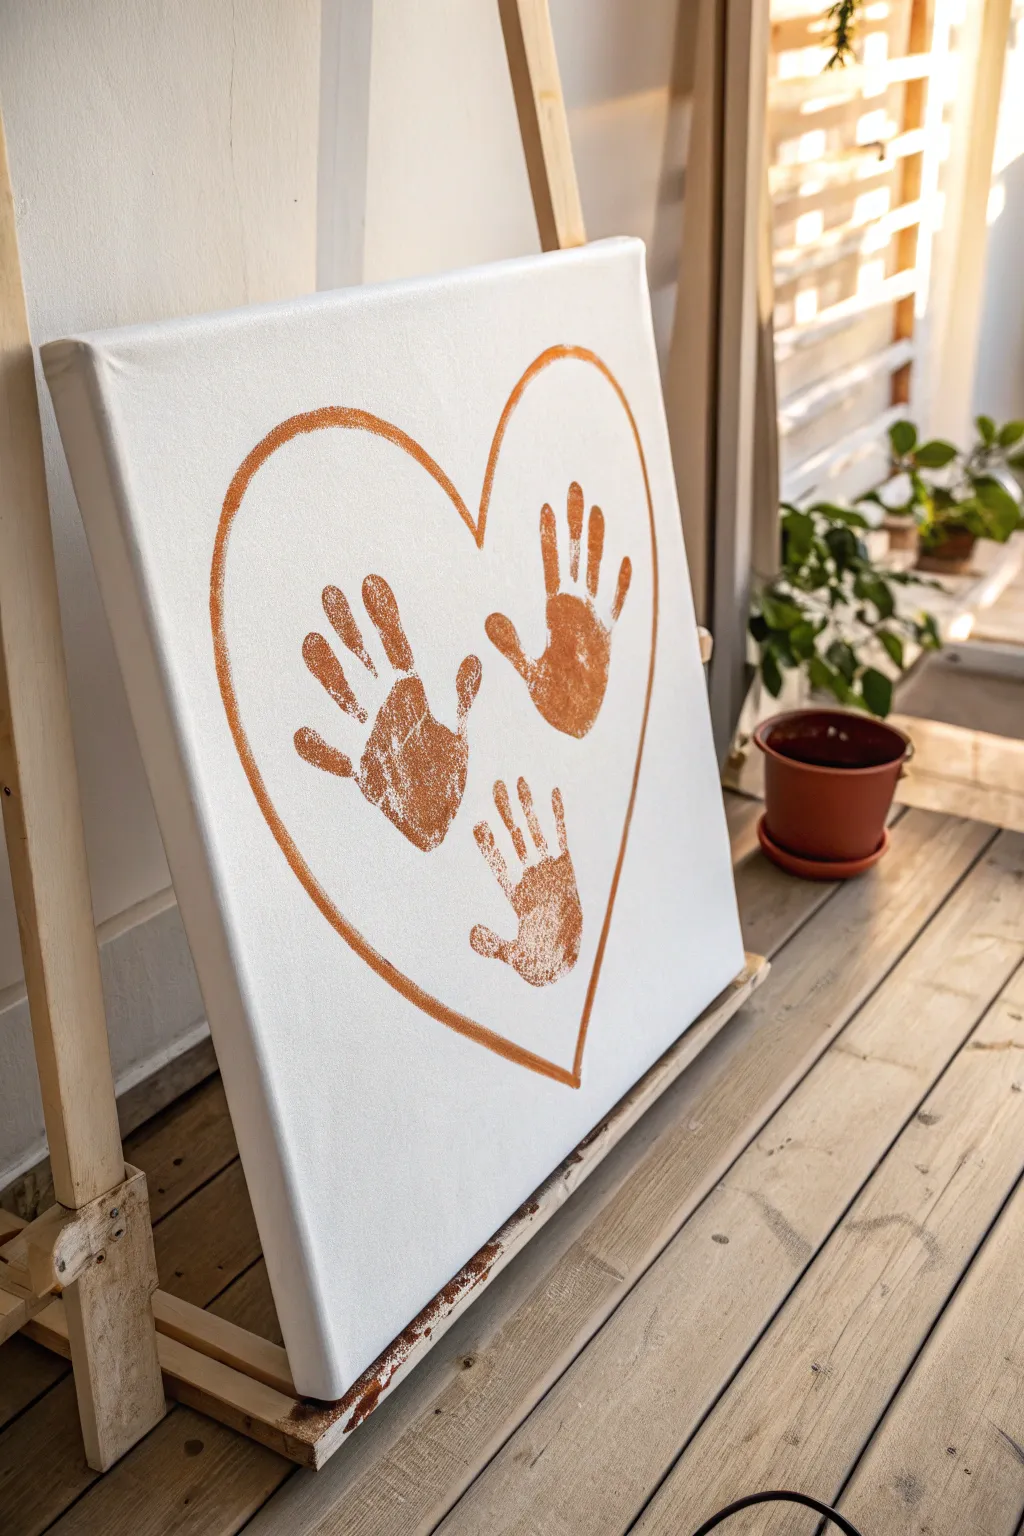
Create a minimalist and heartwarming keepsake using nothing but a canvas, a single paint color, and your family’s hands. This project features three distinct handprints nestled inside a simple heart outline, making it a perfect, clean-looking gift for Dad that captures a moment in time.
Detailed Instructions
Materials
- Stretched white canvas (square or rectangular)
- Acrylic paint (copper, burnt sienna, or bronze)
- Medium round paintbrush
- Paper plate or palette
- Pencil (optional for sketching)
- Baby wipes or damp paper towels
- Newspaper or drop cloth
Step 1: Preparation and Setup
-
Prepare the workspace:
Lay down newspaper or a drop cloth on a flat surface or floor. If you are using an easel like in the photo, ensure the canvas is stable. -
Ready the canvas:
Wipe the canvas with a dry cloth to remove any dust. If you want the ultra-clean white background shown, ensure your canvas is pre-primed or give it a coat of white gesso first. -
Plan the layout:
Visualizing where the heart will go is crucial. You want it large enough to comfortably fit three handprints without them overlapping too much. -
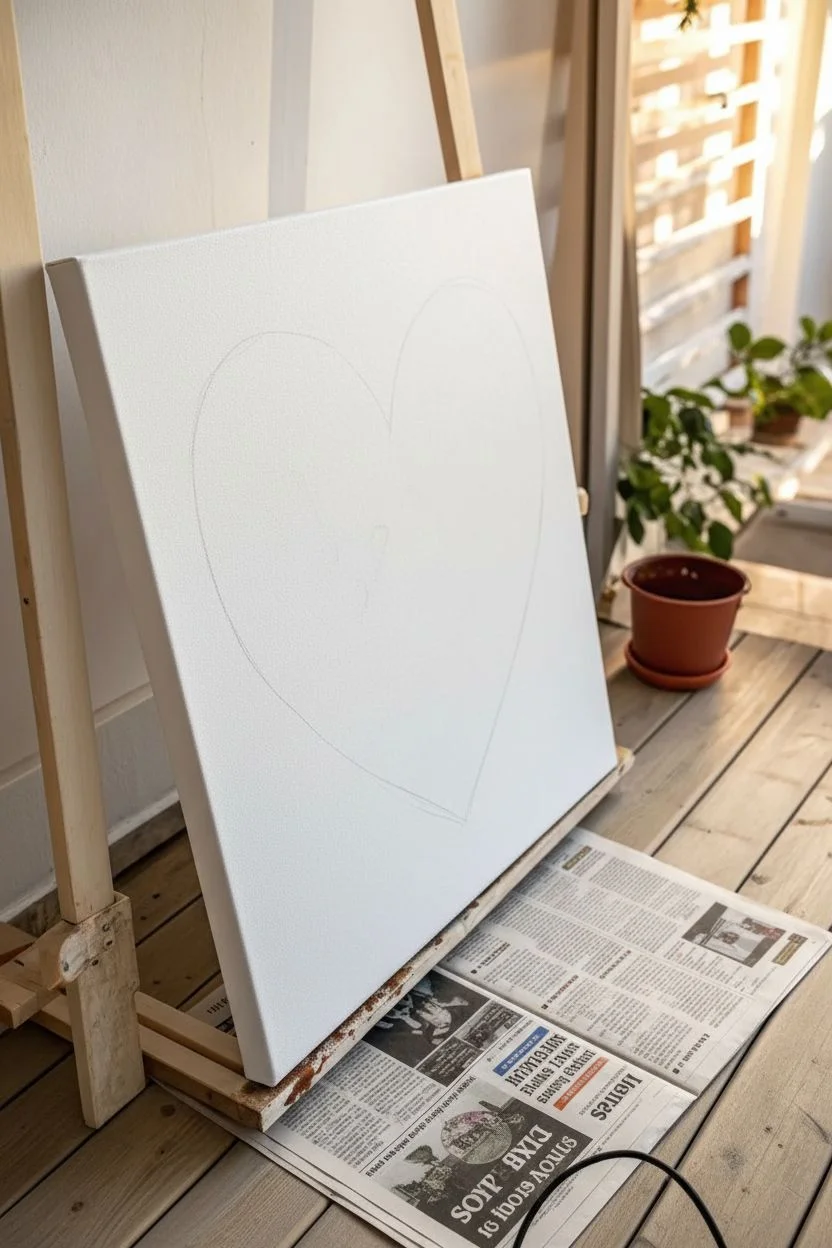
Sketch the heart (optional):
If you aren’t confident freehanding the heart with paint, lightly sketch the outline with a pencil first. Keep the lines very faint so they don’t show through the paint later.
Step 2: Painting the Outline
-
Mix your paint:
Squeeze a generous amount of your chosen copper or brown acrylic paint onto the paper plate. If the paint is too thick, add a tiny drop of water to make it flow better for lines. -
Start the heart curve:
Dip your medium round paintbrush into the paint. Start at the top center dip of the heart and pull the brush upwards and outwards to the left. -
Complete the left side:
Continue the curve down to the bottom point. Don’t worry if the line isn’t mechanically perfect; the slight texture adds to the hand-painted charm. -
Paint the right side:
Return to the top center and paint the right curve, bringing it down to meet the bottom point. I find it helps to stand back once to check symmetry before the paint dries. -
Refine the line:
Go over the heart outline one more time if needed to ensure the color is solid and the line thickness is relatively consistent. -
Let the outline dry:
Allow the heart outline to dry completely before starting the handprints to avoid accidental smudging.
Stamp Success
Apply paint to hands using a foam brush rather than dipping. This prevents globs and ensures the distinct lines of the fingerprints show up clearly on the canvas.
Step 3: Adding the Handprints
-
Prepare for printing:
Spread a fresh layer of the same paint color onto your palette. It needs to be wide enough to fit a hand. -
Coat the first hand:
Paint the palm and fingers of the largest hand (perhaps an older child) using a brush or sponge. This ensures even coverage better than dipping the hand directly. -
Place the first print:
Position the hand on the left side of the heart, fingers pointing slightly upward and outward. Press down firmly on the palm and each finger. -
Lift carefully:
Lift the hand straight up off the canvas to avoid smearing the print. Use a baby wipe to clean the hand immediately. -
Print the second hand:
Repeat the process with the next hand size. Place this print on the upper right side of the heart, balancing the composition. -
Print the smallest hand:
Coat the smallest hand with paint. Position this print in the lower center space, filling the gap between the first two. -
Touch up lightly:
If a print is too faint in a critical spot, you can carefully dab a little paint with your finger to fill it in, but try to keep the natural texture visible.
Date It
Use a thin black permanent marker or a fine liner brush to write the name and age of each child next to their handprint, or add the year subtly at the bottom corner.
Step 4: Finishing Touches
-
Clean up edges:
Check the white space around the heart. If you got any stray paint marks, cover them with a tiny dab of white acrylic paint. -
Final drying:
Let the entire canvas dry flat for at least 24 hours to ensure the thicker areas of the handprints are fully set.
Once dry, this clean and modern piece is ready to be displayed on an easel or hung on the wall as a timeless reminder of how small those hands once were
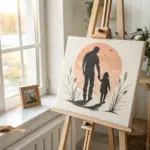


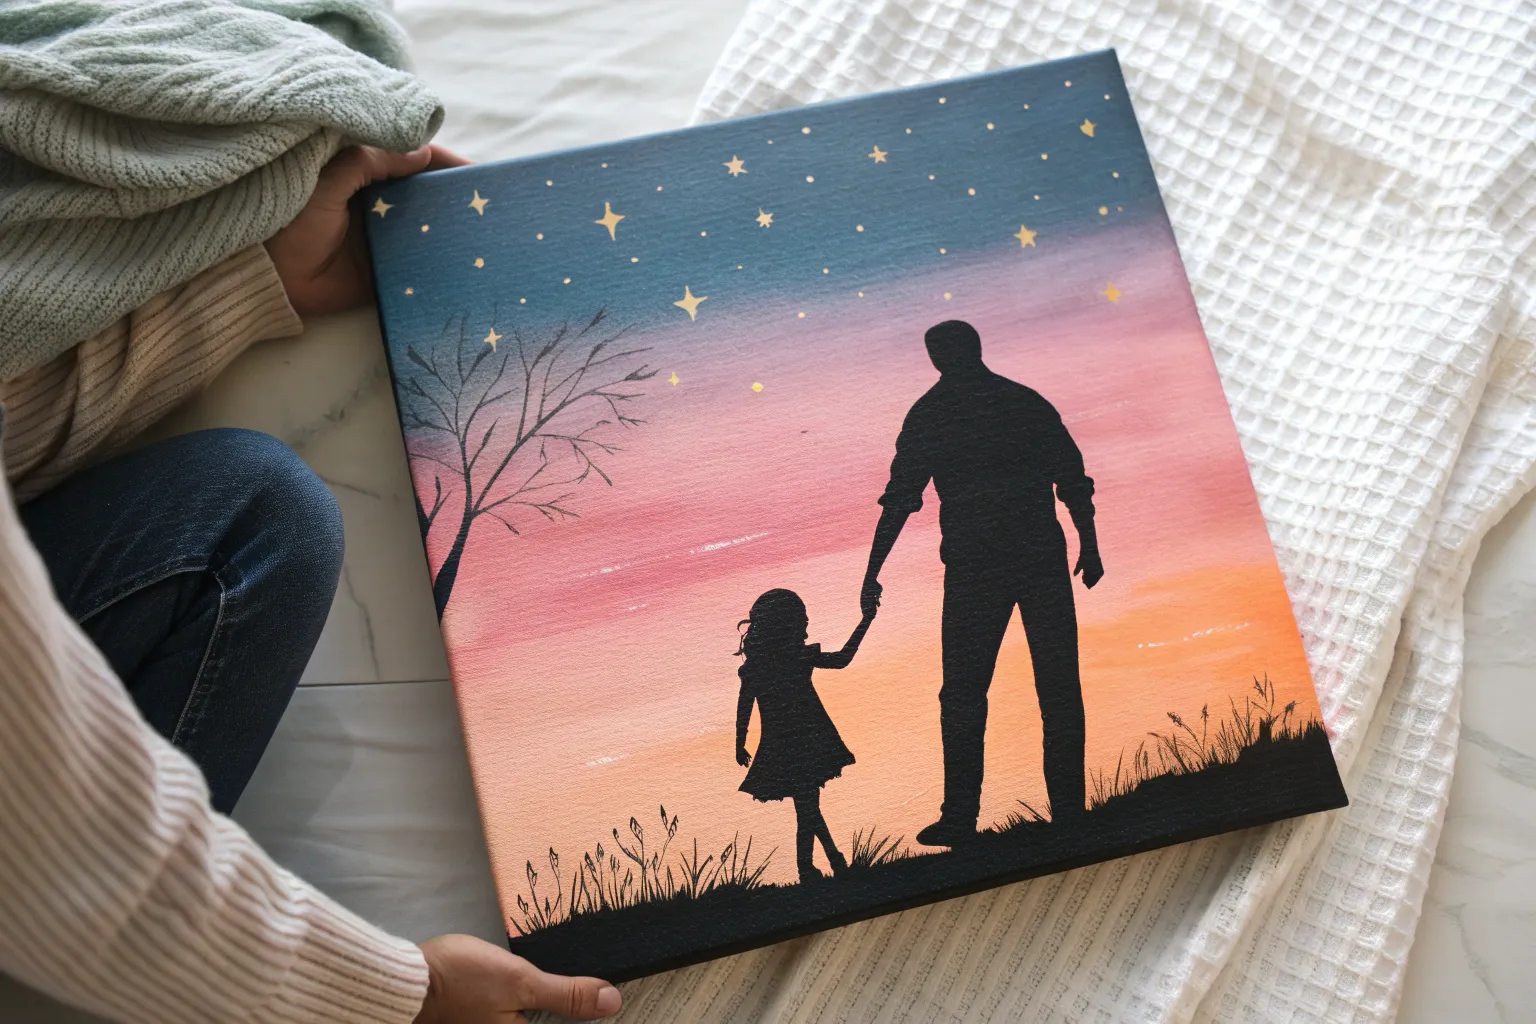
Classic Sunset Silhouette Holding Hands
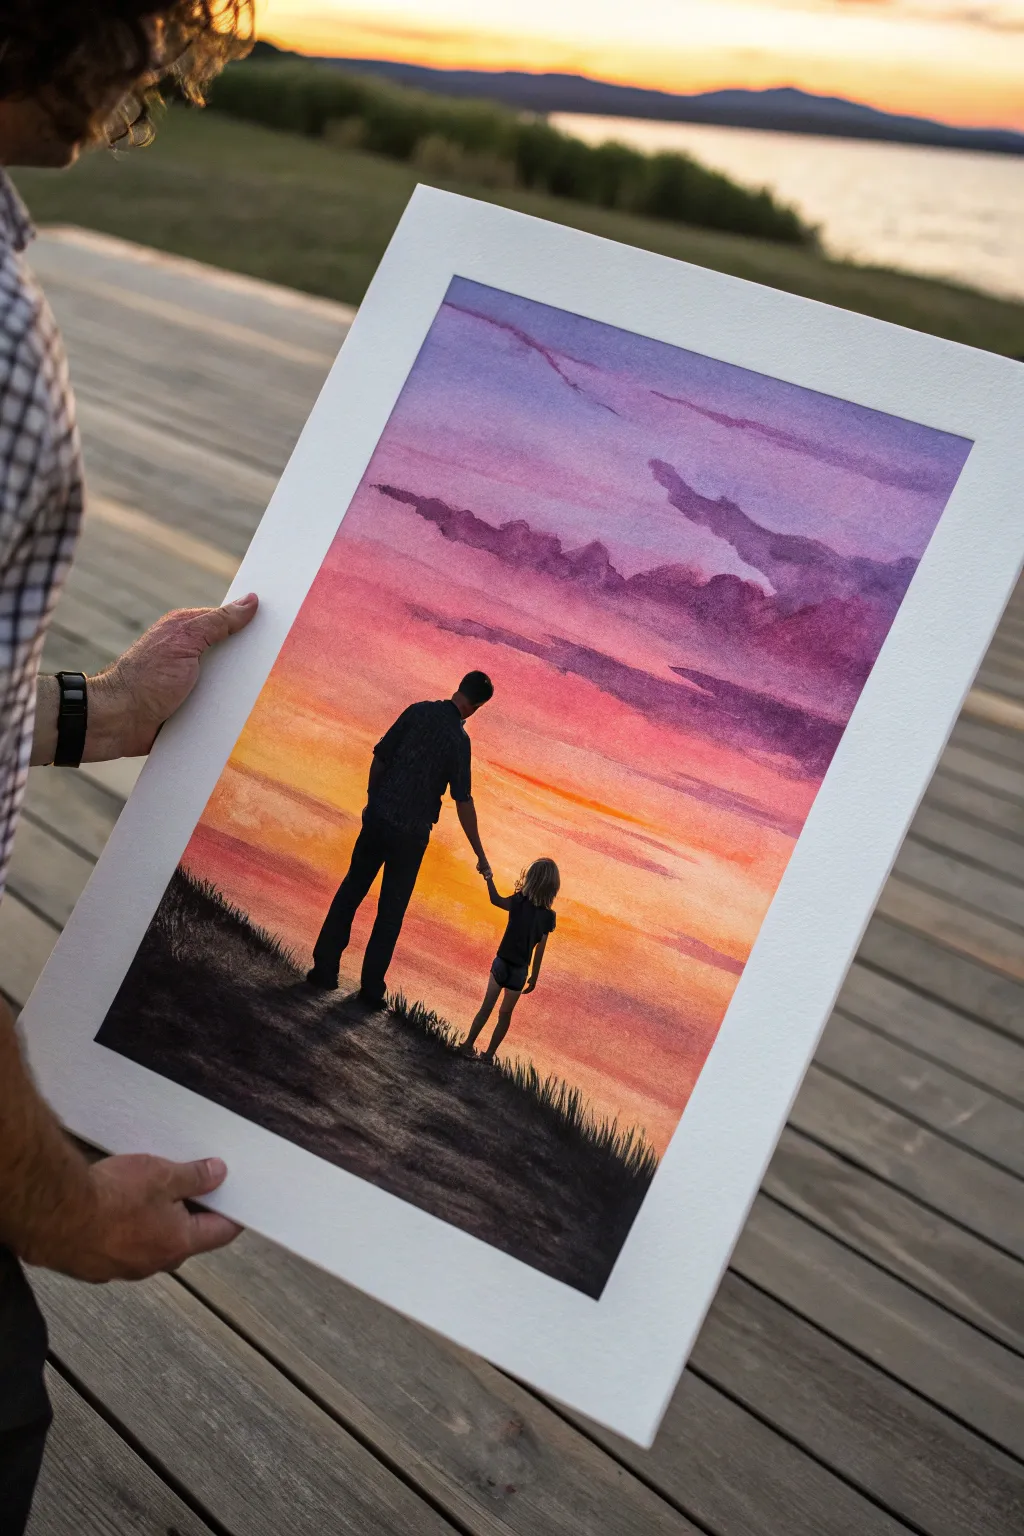
Capture a tender moment between father and daughter with this stunning watercolor silhouette painting. Using a wet-on-wet technique for the sky creates a dreamy, seamless transition of colors that perfectly frames the heartfelt figures.
Step-by-Step Guide
Materials
- High-quality watercolor paper (140lb/300gsm cold press recommended)
- Watercolor paints (Indigo, Purple, Magenta, Alizarin Crimson, Orange, Yellow Ochre)
- Black gouache or waterproof black ink
- Pencil (HB or H)
- Masking tape
- Large flat wash brush (1 inch)
- Round watercolor brushes (sizes 4 and 8)
- Fine liner brush (size 0 or 00)
- Mixing palette
- Two jars of water
- Paper towels
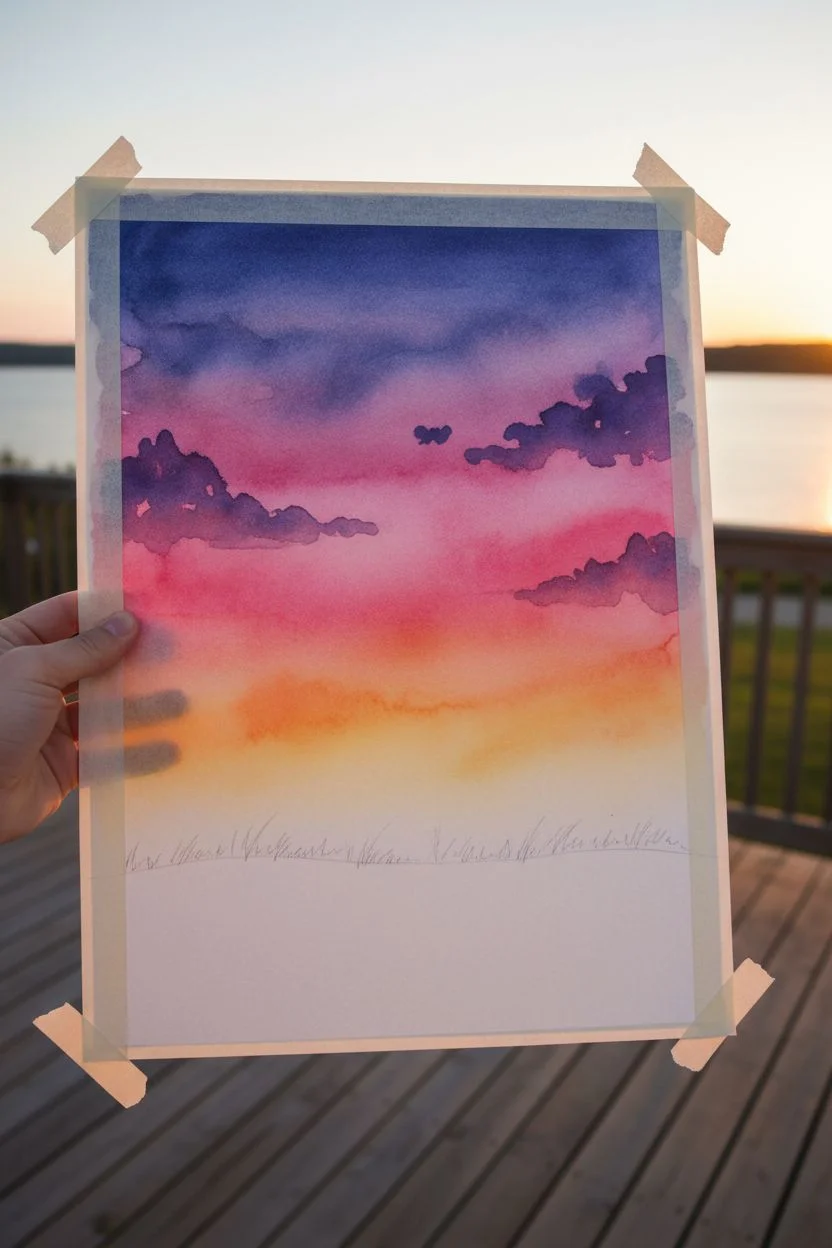
Step 1: Preparing the Sky Gradient
-
Secure the paper:
Begin by taping down all four edges of your watercolor paper to a board or table with masking tape. This creates a crisp white border and prevents buckling when the paper gets wet. -
Sketch the horizon:
Lightly sketch a low, uneven horizon line about one-third of the way up from the bottom. This will be the grassy hill, so it doesn’t need to be perfectly straight. -
Pre-wet the sky area:
Using your large flat brush and clean water, thoroughly wet the entire paper area above your horizon line. You want a consistent sheen, not puddles. -
Apply the cool tones:
While the paper is still wet, load a large round brush with a mix of indigo and purple. Paint broad, horizontal strokes across the very top of the paper, letting the color bleed downwards slightly. -
Transition to warmth:
Quickly clean your brush and pick up magenta. Blend this into the bottom edge of the purple, then transition into orange as you move further down the page. -
Paint the horizon glow:
Finish the gradient near the horizon line with yellow ochre or a warm yellow. Blend it gently upward into the orange section for a glowing sunset effect. -
Add cloud textures:
While the sky is damp (not soaking), mix a thicker solution of purple and indigo. Dab irregular cloud shapes into the upper sky. The damp paper will soften the edges naturally. -
Let it dry completely:
Allow the background layer to dry fully. This is crucial; if you paint over it too soon, the silhouette will bleed.
Bleeding Lines?
If your black silhouette bleeds into the sky, the background wasn’t dry enough. Wait longer next time, or use a hair dryer on a low, cool setting to speed up the process.
Step 2: Painting the Silhouette
-
Sketch the figures:
Once the sky is bone dry, lightly sketch the outlines of the father and daughter holding hands. Keep the drawings simple, focusing on the overall shape rather than internal details. -
Outline the father:
Using your size 4 round brush and black gouache (or ink), carefully outline the father’s figure. Gouache is opaque and works perfectly to cover the background colors. -
Fill in the father:
Fill in the father’s shape with solid black. Use smooth strokes to ensure an even, matte finish without streaks. -
Paint the child:
Switch to a smaller brush if needed to outline and fill the child’s figure. Pay attention to the negative space between their legs and where their hands join. -
Refine the edges:
Use your fine liner brush to clean up any rough edges on the figures, particularly around the heads and the joined hands. -
Create the ground:
Paint the ground completely black, following your original horizon line sketch. Ensure the feet of the figures connect solidly with the ground. -
Add grass texture:
While the ground paint is still wet, use the fine liner brush to flick tiny, upward strokes along the top edge of the hill to simulate blades of grass against the sunset. -
Final drying:
Let the black paint dry completely. Gouache can smudge if touched while damp, so give it plenty of time. -
Reveal the border:
Carefully peel away the masking tape. Pull the tape away from the center of the painting at a 45-degree angle to keep the paper from tearing.
Make it Personal
Customize the silhouettes to match the recipients! Add specific details like a baseball cap, pigtails, or even a family dog sitting beside them.
Frame this beautiful sunset scene to create a timeless Father’s Day gift he will cherish forever


Dad Lifting Daughter in the Air
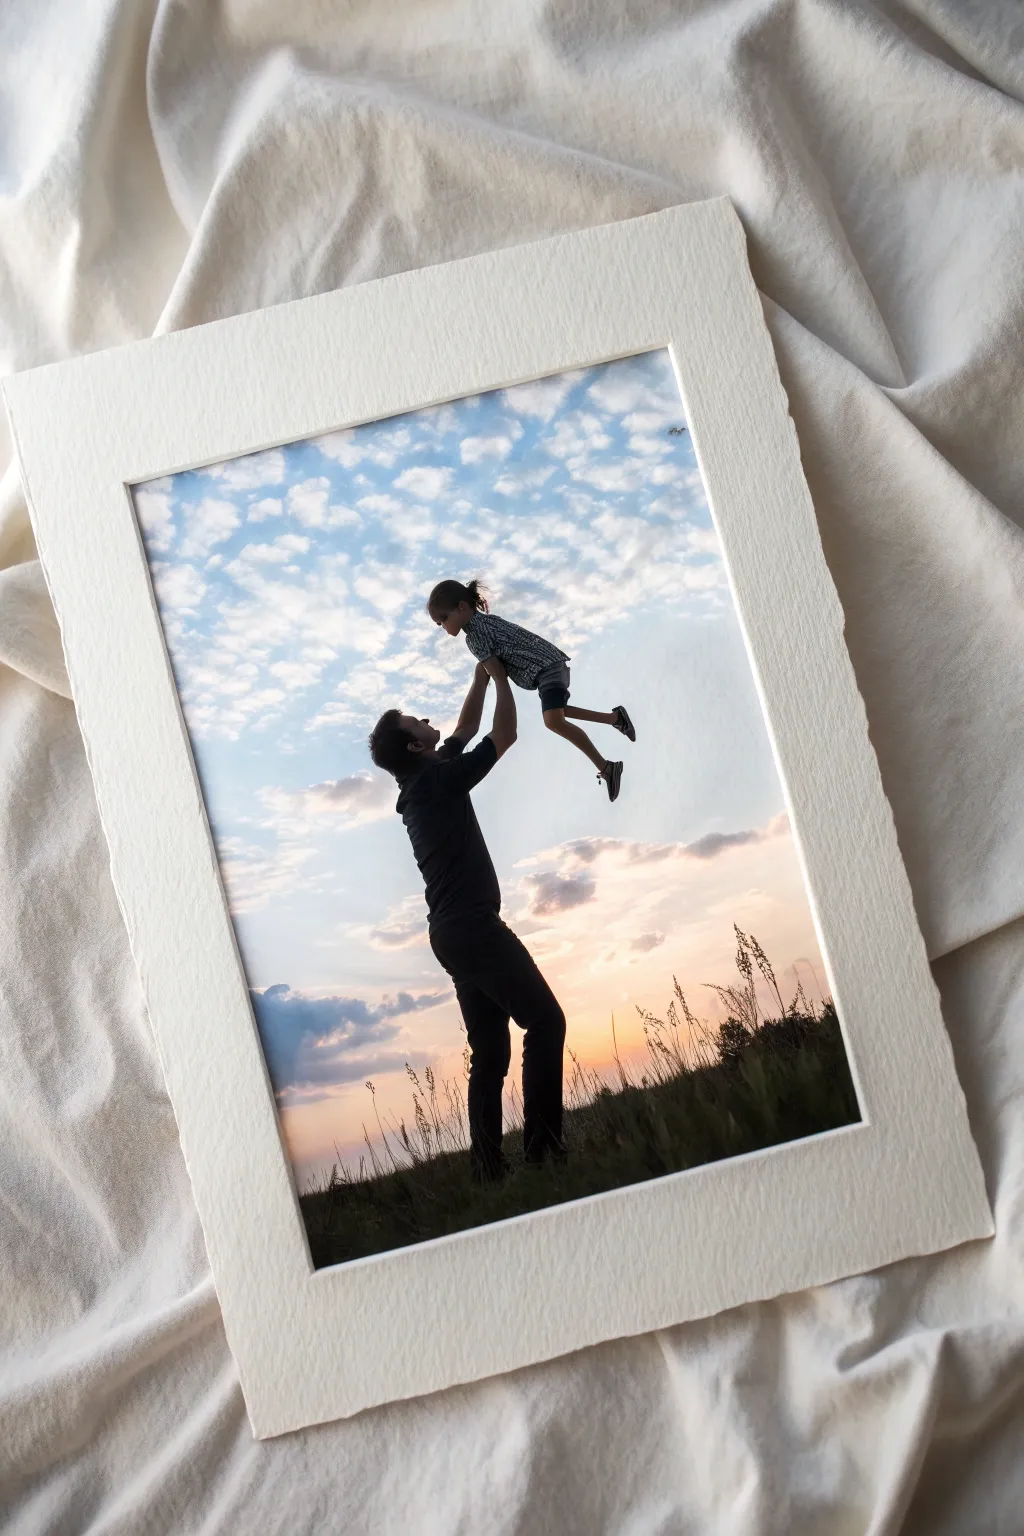
Capture a fleeting moment of joy with this elegant mixed-media project that transforms a favorite photo into art. By combining a classic silhouette photograph with high-quality textured paper and a torn-edge finish, you’ll create a timeless piece perfect for gifting.
How-To Guide
Materials
- High-quality photo paper (matte finish)
- Heavyweight textured watercolor paper or cardstock (cream or off-white)
- Inkjet printer
- Metal ruler
- Craft knife
- Self-healing cutting mat
- Double-sided archival tape or photo mounting squares
- Silhouette photo of father and daughter (digital file)
Step 1: Preparing the Image
-
Select the perfect photo:
Choose a digital photo where the subjects are backlit, creating a natural silhouette against a bright sky. If needed, increase the contrast and lower the shadows in a photo editor to make the figures solid black. -
Adjust the sky tones:
Enhance the saturation of the blues and oranges in the sky to ensure they pop against the dark silhouette. A slightly vibrant sunset or cloud pattern works best for emotional impact. -
Size your canvas:
Open a new document in your editing software sized slightly smaller than your textured watercolor paper. Position the photo in the center, leaving a generous white border if you plan to print directly, or size the image to its own dimensions if printing separately. -
Print the image:
Load your matte photo paper into the printer. Print the image using the highest quality setting to ensure crisp edges on the silhouette and smooth gradients in the clouds. -
Allow to dry:
Let the print sit untouched for at least 15 minutes to ensure the deep black ink of the silhouette is fully set and won’t smudge during handling.
Make It Look Ancient
Use a specialized ‘deckle edge’ ruler for an even easier tear. If the paper is thick, pre-crease the fold line several times before tearing.
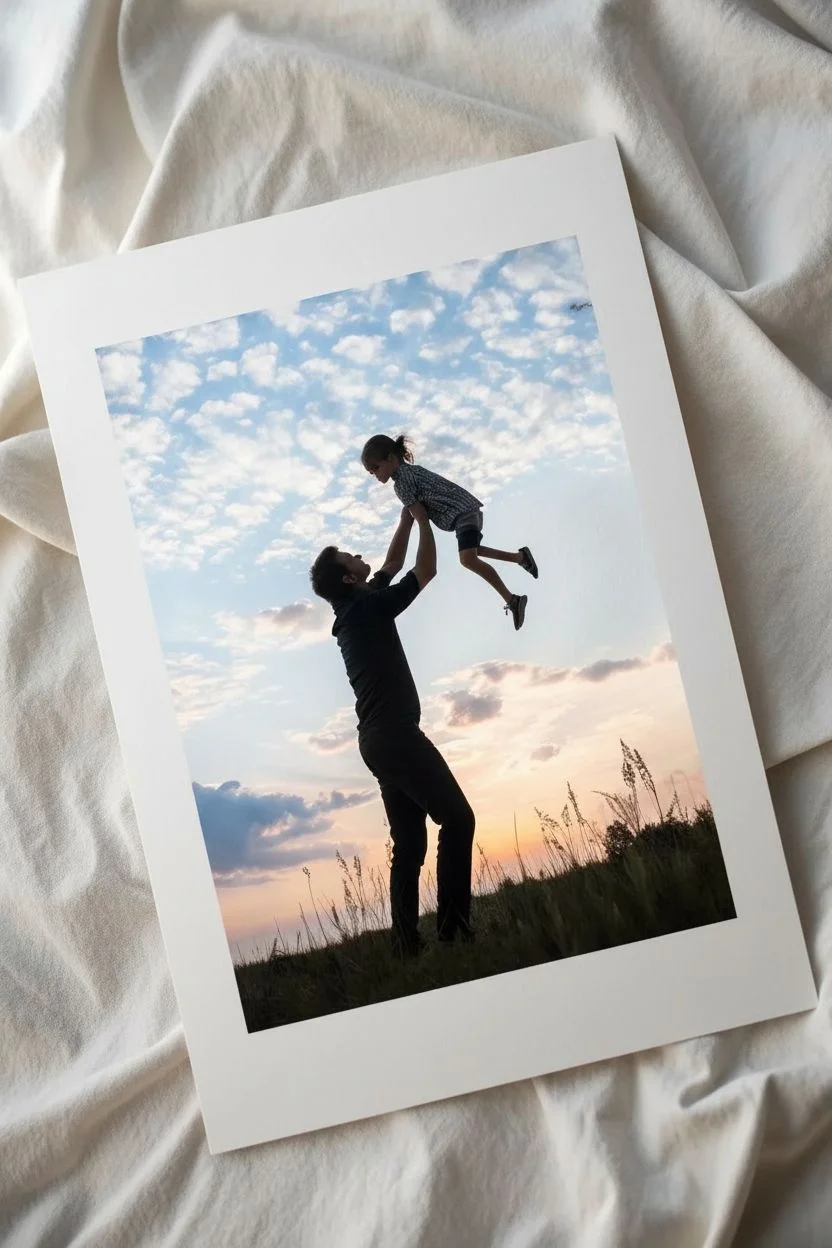
Step 2: Creating the Deckled Edge
-
Position the ruler:
Place your metal ruler along the edge of the printed image, determining exactly where you want the border to end. I like to leave about a quarter-inch of white space around the visible photo part if resizing. -
Score the paper:
Instead of cutting all the way through, lightly dampen the intended tear line with a wet brush or run a bone folder along the ruler’s edge to weaken the fibers. -
Tear the edge:
Firmly holding the ruler down, pull the excess paper upward and toward you against the straight edge. This creates the soft, fibrous ‘deckled’ look seen in fine art prints. -
Repeat on all sides:
Continue this tearing process on all four sides of the print. Don’t worry if it looks slightly irregular; that organic texture adds to the handmade charm. -
Check the fit:
Place your torn print onto the center of the larger, heavyweight textured paper to ensure the proportions look balanced.
Step 3: Mounting and Finishing
-
Prepare the backing:
Take your large sheet of heavyweight textured paper. This will act as the mat. If it needs resizing, feel free to use the same tearing technique on its outer edges for a cohesive look. -
Apply adhesive:
Flip your photo print over. Apply archival double-sided tape or mounting squares to the back corners and the center. Avoid liquid glue, which can cause the paper to ripple. -
Center the image:
Carefully hover the photo over the backing paper. Use a ruler to measure the margins if you want perfection, or eyeball it for a more relaxed feel. -
Press into place:
Once satisfied with the placement, press down firmly on the corners and center to adhere the photo to the backing. -
Flatten the artwork:
Place the mounted piece under a heavy book for an hour or so. This ensures both papers bond flatly together without curling. -
Final inspection:
Check the edges for any loose fibers that are distracting and gently pluck them away, leaving only the nice soft fringe.
Tear Doesn’t Look Fuzzy?
If the edge tears too cleanly like a cut, the paper might be too dry. Lightly paint a thin line of water along the ruler’s edge, wait 30 seconds, then tear.
This sophisticated, heartfelt keepsake is now ready to be framed or gifted as is
BRUSH GUIDE
The Right Brush for Every Stroke
From clean lines to bold texture — master brush choice, stroke control, and essential techniques.
Explore the Full Guide
Father-Daughter Hug Outline Drawing
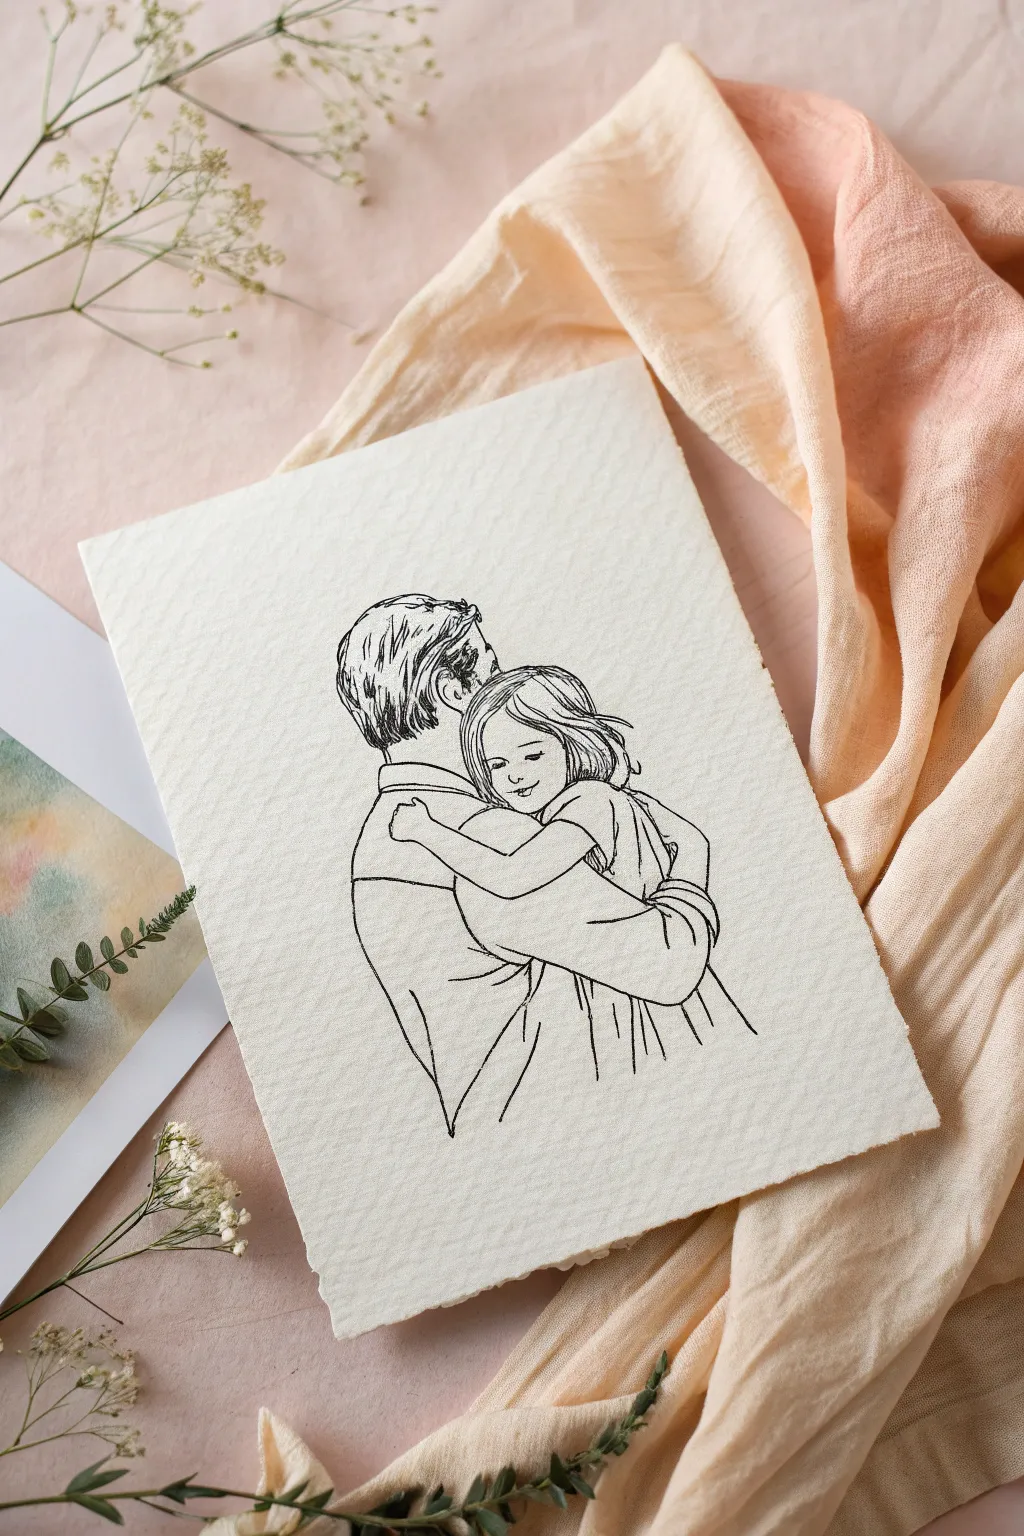
Capture the tender connection between father and daughter with this elegant, minimalist line drawing. Using textured paper and simple ink work, you’ll create a sophisticated piece of art that looks like a professional illustration but is surprisingly achievable for beginners.
Step-by-Step Tutorial
Materials
- Textured watercolor paper or handmade cotton paper (cold press)
- Fine liner pens (sizes 0.1, 0.3, and 0.5)
- Pencil (HB or 2H)
- Kneaded eraser
- Reference photo of a hug
- Ruler (optional)
- Drafting tape
Step 1: Preparation and Sketching
-
Paper Selection:
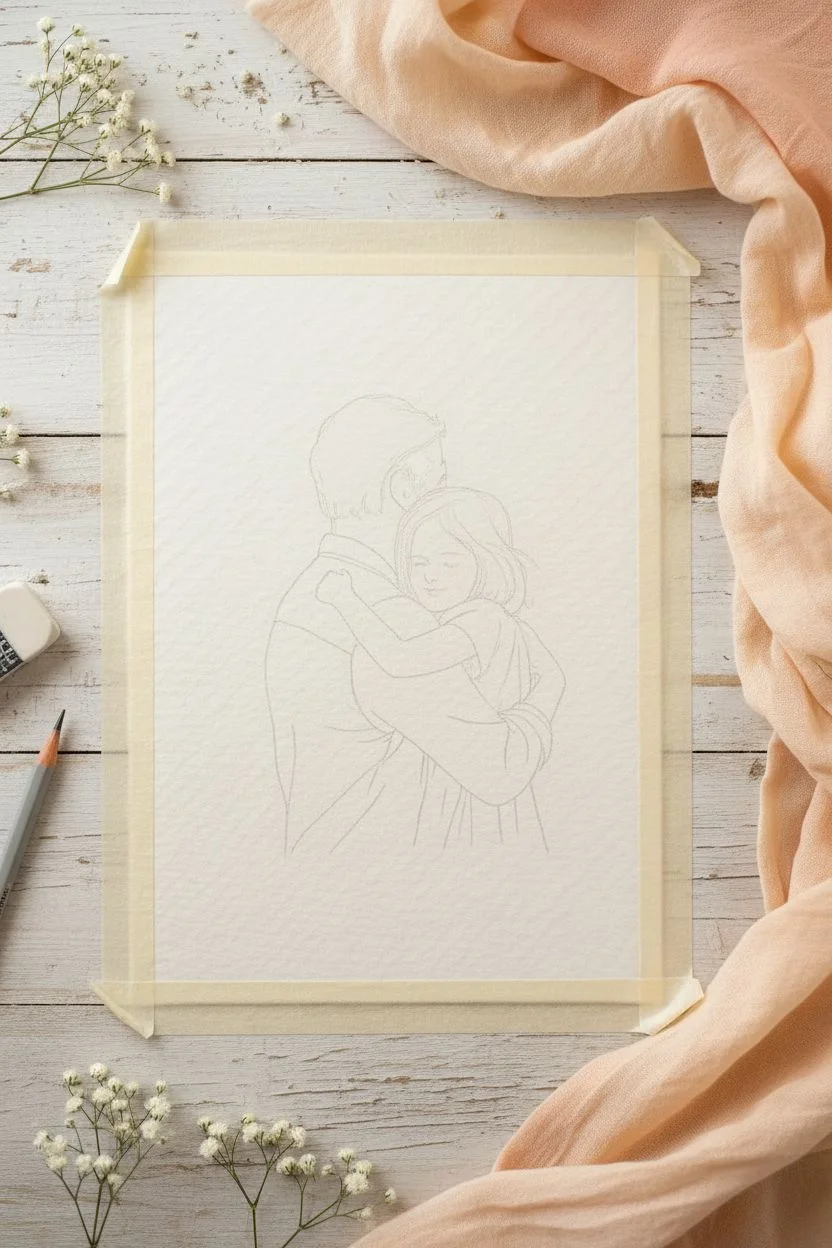
Choose a high-quality paper with visible texture. Cold press watercolor paper or handmade cotton paper works best to give that rustic, artisanal look shown in the photo. -
Secure the Paper:
Tape down the corners of your paper to a flat surface using drafting tape. This prevents the paper from shifting while you sketch and draw. -
Analyze the Composition:
Look closely at the reference image. Notice how the figures are centered but slightly towards the bottom to allow breathing room at the top. The focus is entirely on the embrace, with no background details. -
Outline the Basic Shapes:
Using your HB pencil with a very light hand, sketch two ovals for the heads. The father’s head should be slightly higher and larger, with the daughter’s head tucked under his chin. -
Block in the Bodies:
Lightly sketch the shoulders and arms. Focus on the interlocking shapes—the curve of the daughter’s arm wrapping around the father’s neck is a key emotional element. -
Refine the Faces:
Add the facial profiles. For this style, keep details minimal. Focus on the daughter’s peaceful expression—a simple curved line for the closed eye and a small smile. -
Add Hair Details:
Sketch the flow of the hair. For the father, use short, directional strokes. For the daughter, draw longer, sweeping lines that suggest movement and texture.
Step 2: Inking and Definition
-
Begin Inking – The Contours:
Switch to your 0.3 fine liner. Start by tracing the main outer lines of the figures: the father’s back, the daughter’s arm, and the profile of her face. -
Detailing the Eyes:
Use the thinnest pen (0.1) for delicate facial features like the daughter’s eyelashes and nose. A lighter touch here prevents the face from looking heavy. -
Hair Texture – Father:
Returning to the 0.3 or 0.5 pen, fill in the father’s hair. Don’t color it solid black; instead, use dense, short hatching lines to suggest volume and shadow while leaving some white space for highlights. -
Hair Texture – Daughter:
Draw the daughter’s hair explicitly with long, fluid strokes. I generally start from the part line and flick the wrist outward to keep the lines tapered and natural. -
Clothing Folds:
Add creases to the clothing using the 0.1 pen. Focus on where the fabric bunches—under the armpit and near the elbow bend. Keep these lines broken and light. -
Deepen Shadows:
Use the 0.5 pen to re-trace and thicken areas where shadows would naturally fall, such as under the chin or where the arms overlap, to add depth to the drawing. -
Erase Sketches:
Let the ink dry completely for at least 30 minutes. Once dry, gently roll a kneaded eraser over the entire drawing to lift the pencil guides without damaging the paper texture. -
Final Assessment:
Step back and look at your drawing. If certain lines feel too thin against the textured paper, carefully go over them one last time to ensure visual weight.
Use a Light Table
If you aren’t confident in freehand drawing, print a photo of a hug, place it under your paper on a light table (or sunny window), and lightly trace the main contours before inking.
Add a Splash of Color
For a subtle upgrade, use diluted watercolor to add a faint blush to their cheeks or a soft pastel wash to the clothing, keeping it loose to maintain the sketch aesthetic.
Frame this delicate piece in a simple wood frame to modify a desk or bedside table with a reminder of love
Heart-Shaped Window Sky for Dad
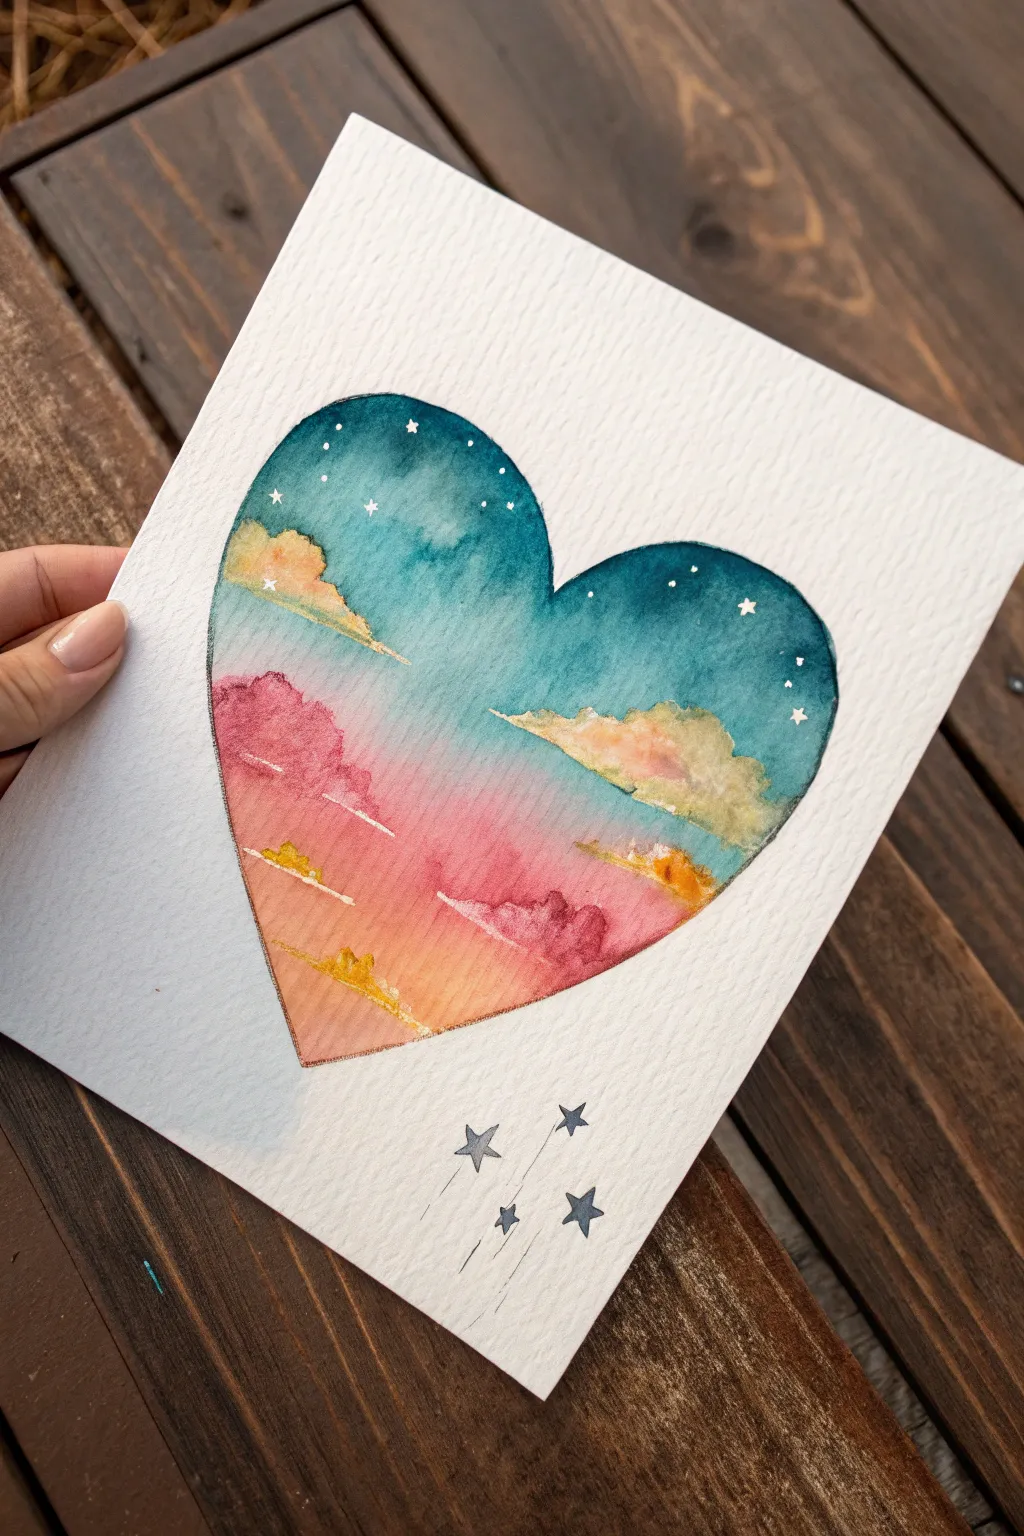
Capture the magic of a twilight sky within a simple heart shape, featuring dreamy clouds and sparkling stars. This watercolor project is a wonderful way to gift Dad a piece of serene, starry beauty he can cherish.
Detailed Instructions
Materials
- Cold press watercolor paper (300 gsm recommended)
- Watercolor paints (Teal/Indigo, Pink, Orange/Yellow, faint Yellow)
- Round watercolor brushes (Size 4 and Size 8)
- White gel pen or gouache
- Pencil and eraser
- Masking fluid (optional) or white gouache later
- Fine liner pen (grey or black)
- Jar of water & paper towels
Step 1: Sketching & Preparation
-
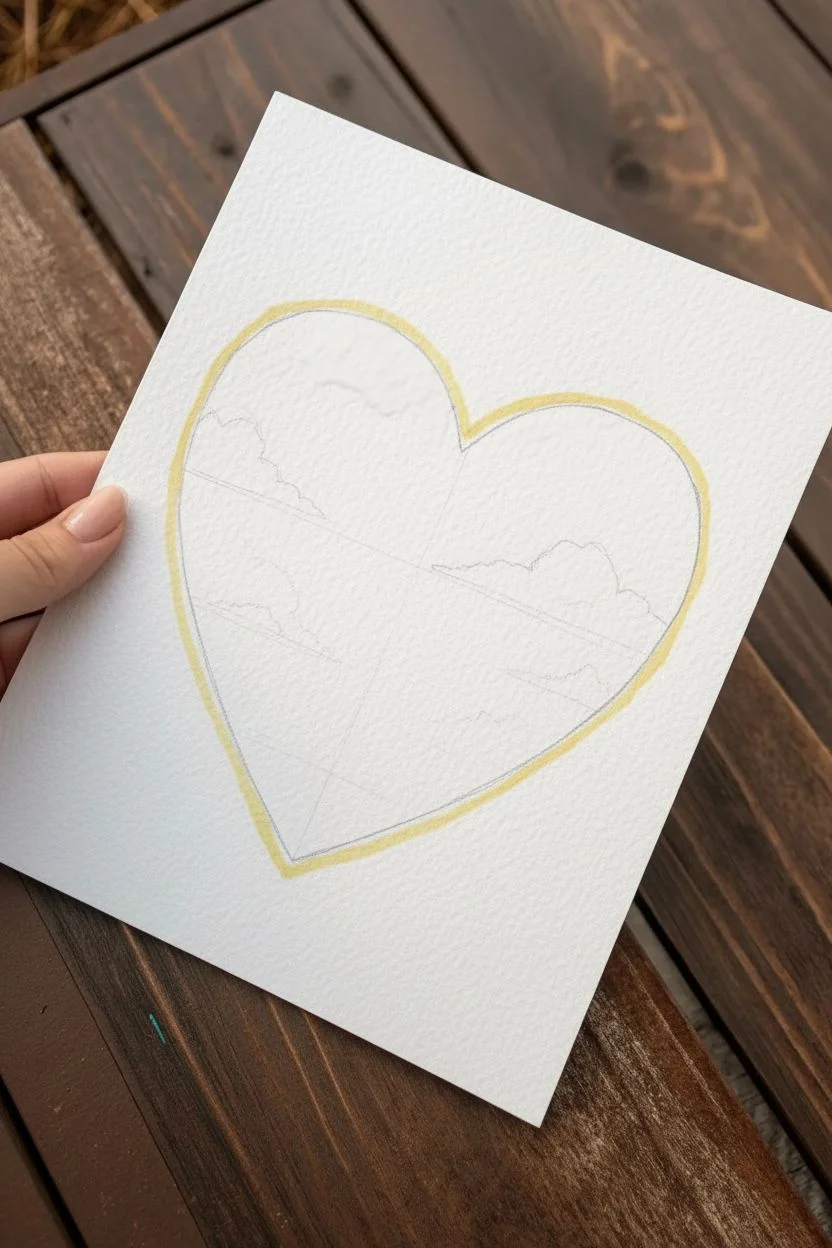
Draw the outline:
Begin by lightly sketching a large heart in the center of your watercolor paper. Keep the pencil lines faint so they can be easily erased or covered later. -
Mark the horizon:
Very lightly sketch a few diagonal lines inside the heart to guide where your clouds and color transitions will go. This helps separate the blue sky area from the sunset area. -
Protect the borders:
If you struggle with staying inside lines, you can apply a thin layer of masking fluid around the outside edge of the heart, though freehand painting works well for a softer look.
Cloud Lifting Trick
To make clouds look fluffy, use a clean, damp brush or paper towel to ‘lift’ paint off the paper while it’s still wet, revealing the white cloud highlights.
Step 2: Painting the Sky Gradient
-
Wet the paper:
Using your larger clean brush, apply a light coat of clean water strictly inside the heart shape. You want the paper glistening but not puddling. -
Apply the teal top:
Load your brush with a deep teal or indigo blue. Touch the wet paper at the very top curves of the heart, letting the paint bloom downwards naturally. -
Blend downwards:
While the blue is still wet, clean your brush slightly and pull the pigment down towards the middle, fading it out as you reach the center. Add a touch of water to soften the edge. -
Introduce the pinks:
On the lower middle section, drop in a soft pink or coral color. Allow it to touch the fading blue edge slightly to create a purplish transition, but keep the colors distinct enough to show a horizon. -
Add the sunset glow:
At the very bottom point of the heart, paint a warm orange or golden yellow. Blend this upwards into the pink layer to complete the gradient background. -
Let it dry completely:
This base layer needs to be 100% dry before adding clouds. I usually wait about 15-20 minutes or use a hair dryer on a low setting.
Muddy Colors?
If your blue and orange turn brown where they meet, let the blue layer dry completely before adding the orange. Or, use a strip of pink in between as a buffer.
Step 3: Creating Clouds & Details
-
Paint the first cloud layer:
Using a smaller brush, mix a saturated pink-red color. Paint fluffy, organic cloud shapes on the left side, overlapping the pink and orange background. -
Add dimension:
While the pink clouds are damp, drop a tiny bit of darker purple or red at their bottom edges to give them shadow and volume. -
Paint golden clouds:
Mix a yellow-ochre or gold tone. Paint jagged, sweeping cloud shapes on the right side and near the bottom, letting them interact with the blue sky area for contrast. -
Refine the edges:
Use a damp, clean brush to soften the top edges of some clouds, making them look wispy and windblown rather than solid shapes. -
Layer overlapping clouds:
Once the first clouds are semi-dry, add smaller, defined cloud streaks across the middle using a mix of your sunset colors to create depth. -
Dry again:
Ensure the cloud layer is completely dry to touch before moving to the stars.
Step 4: Final Touches
-
Draw the stars:
Using a white gel pen or thin brush with white gouache, add tiny crosses and dots in the dark teal section of the sky to represent twinkling stars. -
Add shooting stars:
Below the heart on the white paper, draw three or four simple star shapes using a grey or black fine liner or a very fine brush with diluted paynes grey. -
Draw motion lines:
Add thin vertical lines trailing down from the grey stars to give the impression of falling or shooting stars. -
Outline the heart (optional):
If you want a crisper look, you can very gently outline the heart’s edge with a fine pencil or pen, though leaving it as a paint edge is beautiful too.
Now you have a stunning window into a peaceful sky ready to brighten Dad’s day

PENCIL GUIDE
Understanding Pencil Grades from H to B
From first sketch to finished drawing — learn pencil grades, line control, and shading techniques.
Explore the Full Guide
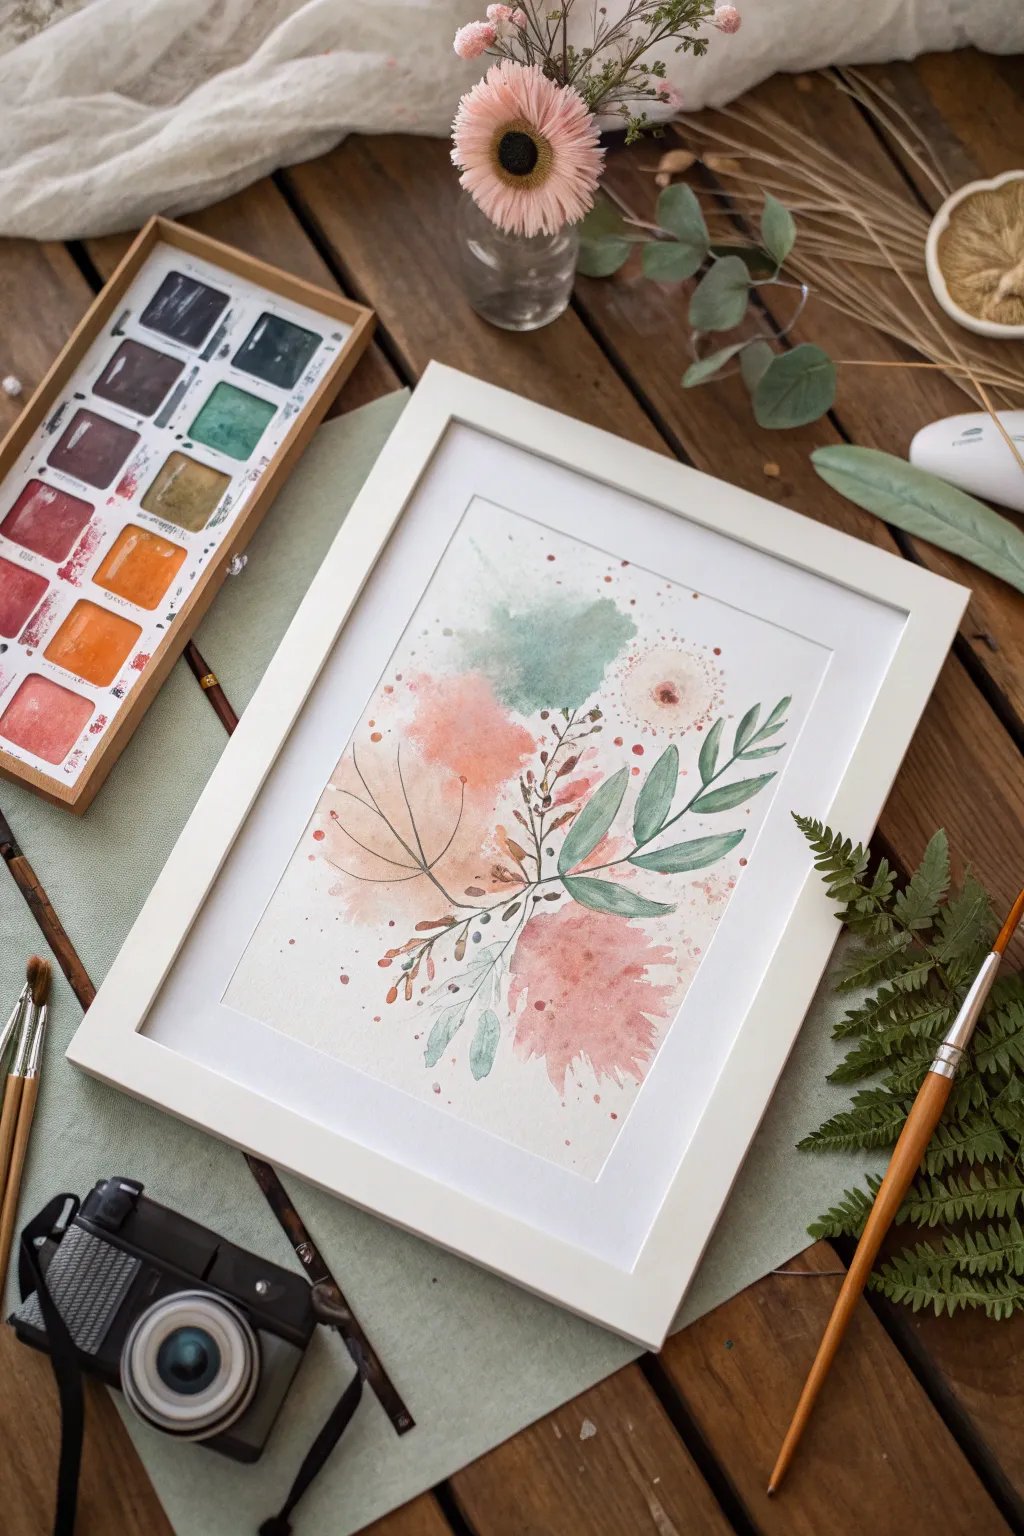
“I Love You, Dad” Lettering With Florals
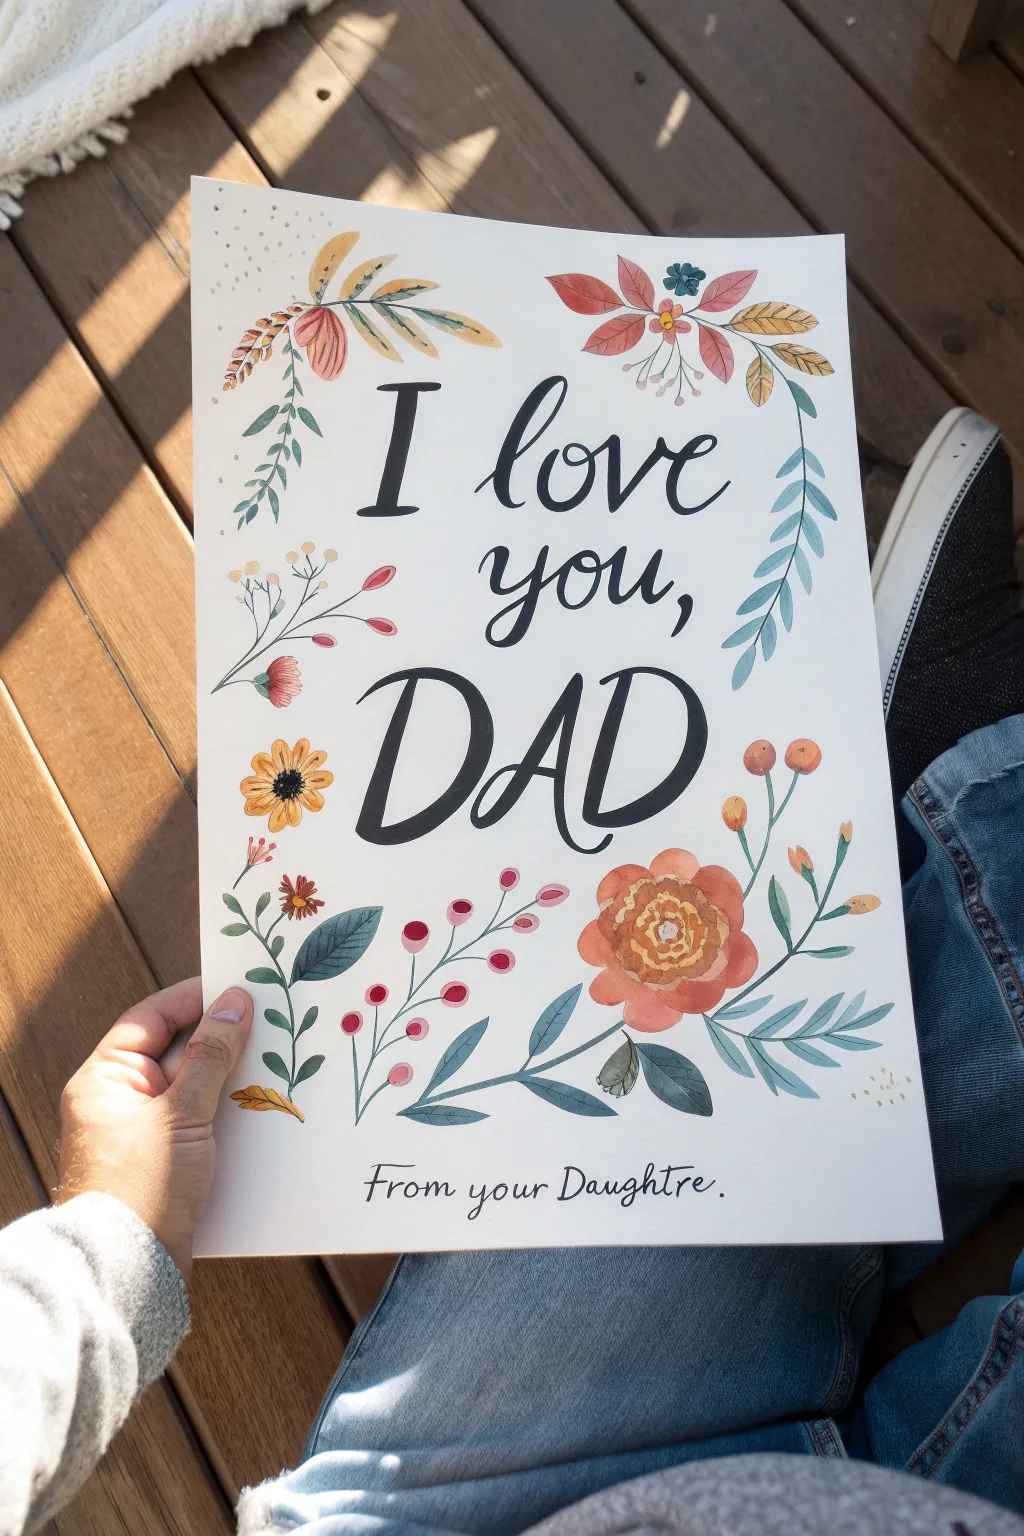
This heartfelt project combines elegant calligraphy with a loose, whimsical watercolor floral border to create a keepsake print your dad will cherish. The soft color palette and hand-painted details give it a charming, personal touch that looks wonderful framed or pinned to his workspace.
Step-by-Step
Materials
- High-quality watercolor paper (140lb/300gsm, cold press)
- Black calligraphy brush pen or waterproof fine liner
- Watercolor paint set (focus on earthy oranges, sage greens, and muted reds)
- Round watercolor brushes (sizes 2 and 6)
- HB Pencil and kneaded eraser
- Ruler
- Cup of water and paper towels
Step 1: Planning and Sketching
-
Prepare your paper:
Start with a clean sheet of watercolor paper. If you plan to frame this, trim it to a standard size like 8×10 or 9×12 inches first to save frustration later. -
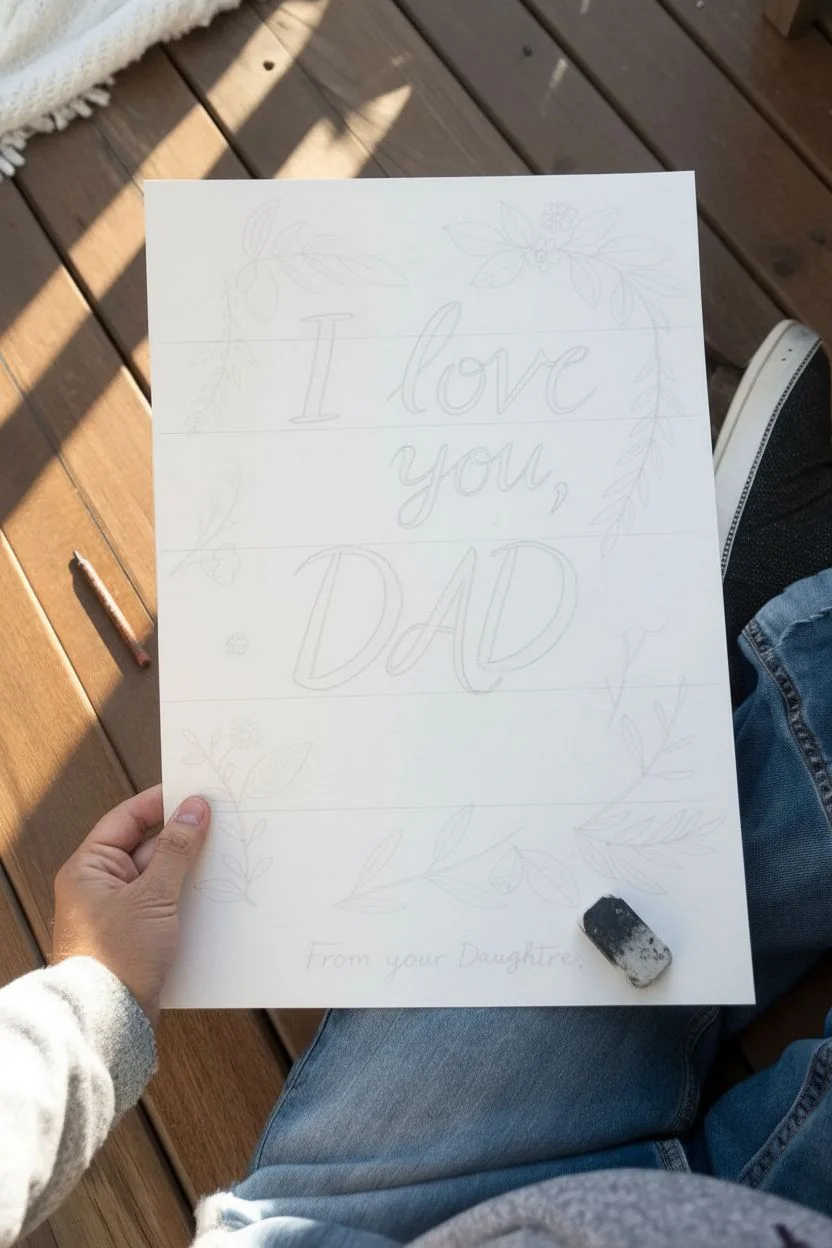
Draft the guidelines:
Using a ruler and pencil, lightly draw horizontal baselines for your text. You’ll need three main lines: one high up for ‘I love’, one slightly lower for ‘you,’, and a larger space in the center for the prominent ‘DAD’ lettering. -
Sketch the text:
Lightly sketch the words. Use a cursive, flowing script for ‘I love you,’ and a bold, sans-serif or bold script style for ‘DAD’. Leave plenty of negative space around the edges for your flowers. -
Sign the bottom:
At the very bottom, lightly pencil in ‘From your Daughter.’ Make sure to check your spelling carefully at this stage before committing to ink.
Step 2: Inking the Lettering
-
Ink the main script:
Using your black brush pen, trace over your pencil lines for ‘I love’ and ‘you,’. Apply more pressure on the downstrokes to create thick lines and lift up for thin upstrokes. -
Bold the focal word:
For ‘DAD’, use the brush pen to create thick, confident letters. If you are using a fine liner, you may need to draw the outline of the letters and fill them in to get that substantial, bold weight. -
Finish the signature:
Ink the bottom signature with a thinner, more delicate line to keep it subtle compared to the main message. -
Erase guidelines:
Wait until the ink is completely dry—really give it a moment—and then gently erase all your pencil guides with a kneaded eraser to avoid damaging the paper surface.
Fixing Smudges
Did you smudge the ink? Don’t panic. Turn the mistake into a falling leaf or a small flower bud by painting over it with opaque paint or gouache.
Step 3: Painting the Florals
-
Mix your palette:
Prepare your watercolor paints. You want a cohesive, modern palette: muted coral/orange, a deep dusty red, a few shades of sage/blue-green for leaves, and a mustard yellow. -
Paint the main blooms:
Start with the largest flowers first to anchor the composition. I usually place a large orange poppy-style flower near the bottom right and a smaller one on the left. Use a wet-on-dry technique, layering translucent petals. -
Add secondary flowers:
Add the smaller red clusters and yellow buds. Place them somewhat symmetrically—if you put a red cluster in the top right, place one near the bottom left to balance the eye. -
Paint the foliage:
Using your size 6 brush and sage green paint, create sweeping vines. Press the belly of the brush down and lift as you drag to create leaf shapes that taper at the end. Frame the text with these leaves. -
Add detail leaves:
Switch to a darker blue-green and paint different leaf shapes—some broad and rounded, others fern-like and thin—to create variety in the foliage texture. -
Connect the elements:
Use your size 2 brush to paint thin stems connecting your floating flowers to the main vines. Ensure the composition feels connected rather than like isolated stickers.
Make It Sparkle
Once the watercolor is fully dry, outline just the flower petals with a fine-tip metallic gold pen to give the card a premium, professional finish.
Step 4: Adding Details
-
Embellish the flower centers:
Once the main flower shapes are dry, use a contrasting color (like dark brown or deep red) to dab small dots or lines in the centers of the orange and yellow flowers. -
Add berries and buds:
Paint tiny red or orange berries at the ends of some of your green vines. These small pops of color help fill empty white space without overcrowding the design. -
Sprinkle gold accents:
If you have metallic watercolor or a gold gel pen, add tiny dots or ‘pollen’ specks floating around the floral clusters for a bit of magic. -
Final review:
Step back and look at your piece. If any areas look too sparse, add a small green leaf or a tiny bud to balance it out.
Allow the entire painting to dry flat overnight before placing it in a frame to gift to your dad
Painted Portrait From a Favorite Photo
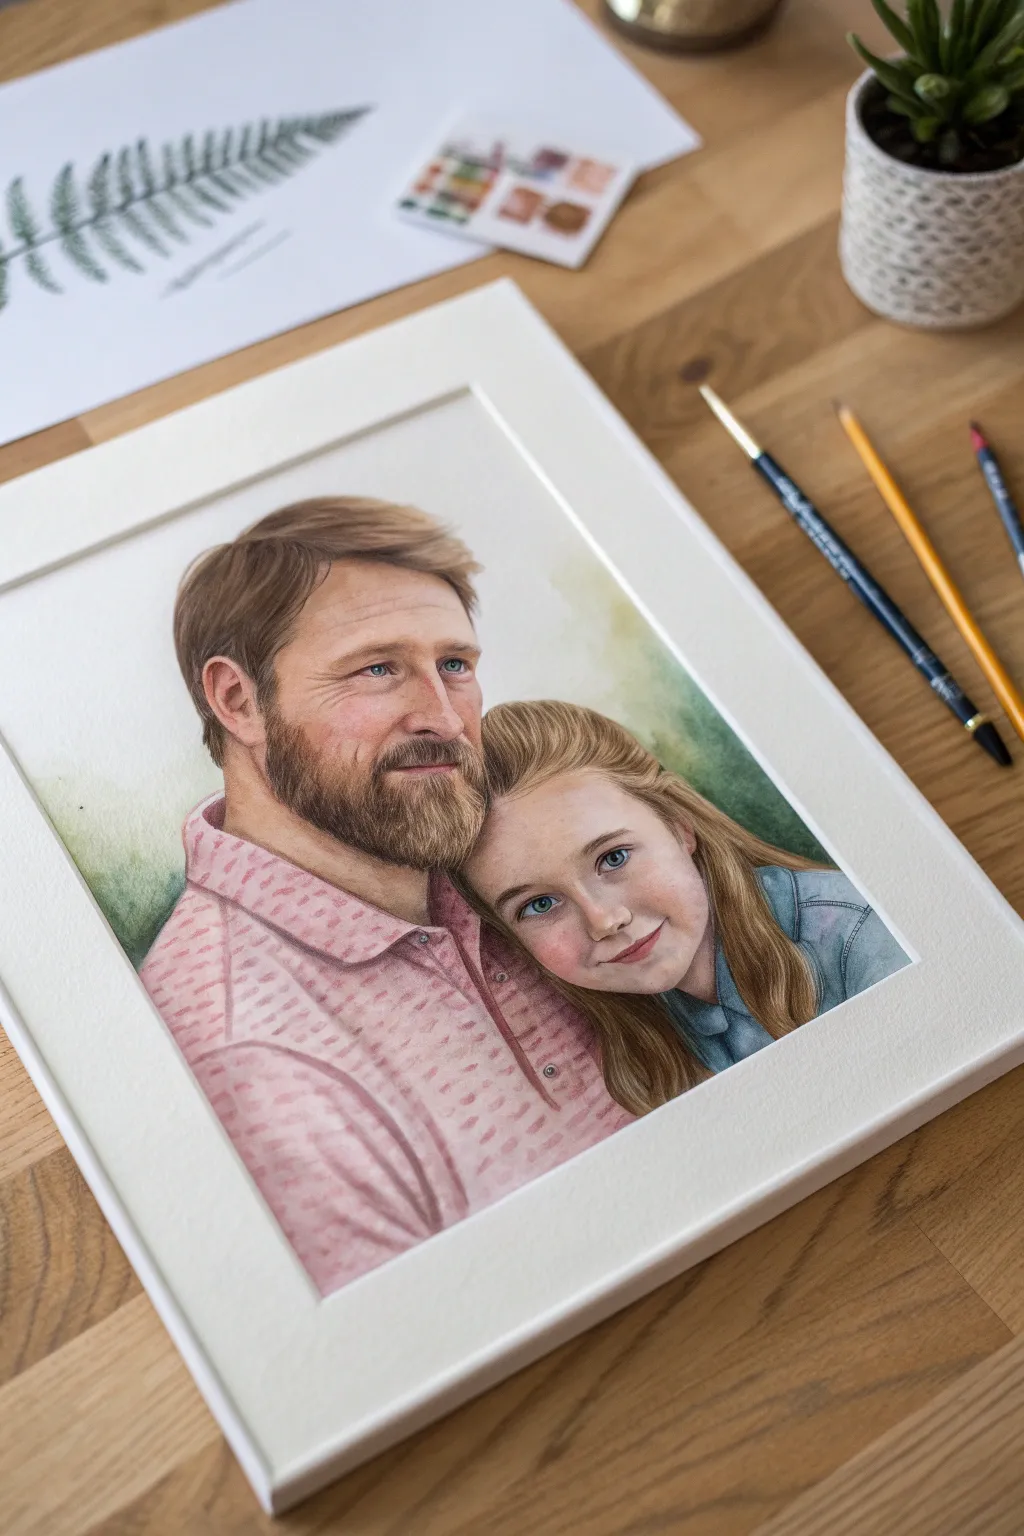
Capture the tender bond between father and daughter with this realistic watercolor portrait project. Using soft washes and careful layering, you will transform a favorite photograph into a cherished keepsake that features lifelike skin tones and gentle textures.
Step-by-Step Tutorial
Materials
- High-quality watercolor paper (cold press, 300gsm/140lb)
- Watercolor paints (pans or tubes)
- Pencil (HB or 2H for sketching)
- Kneaded eraser
- Pointed round brushes (Sizes 2, 4, 6 and a detail 00)
- Masking tape
- Clean water jars
- Paper towels
- Reference photo
- White gel pen or gouache (for highlights)
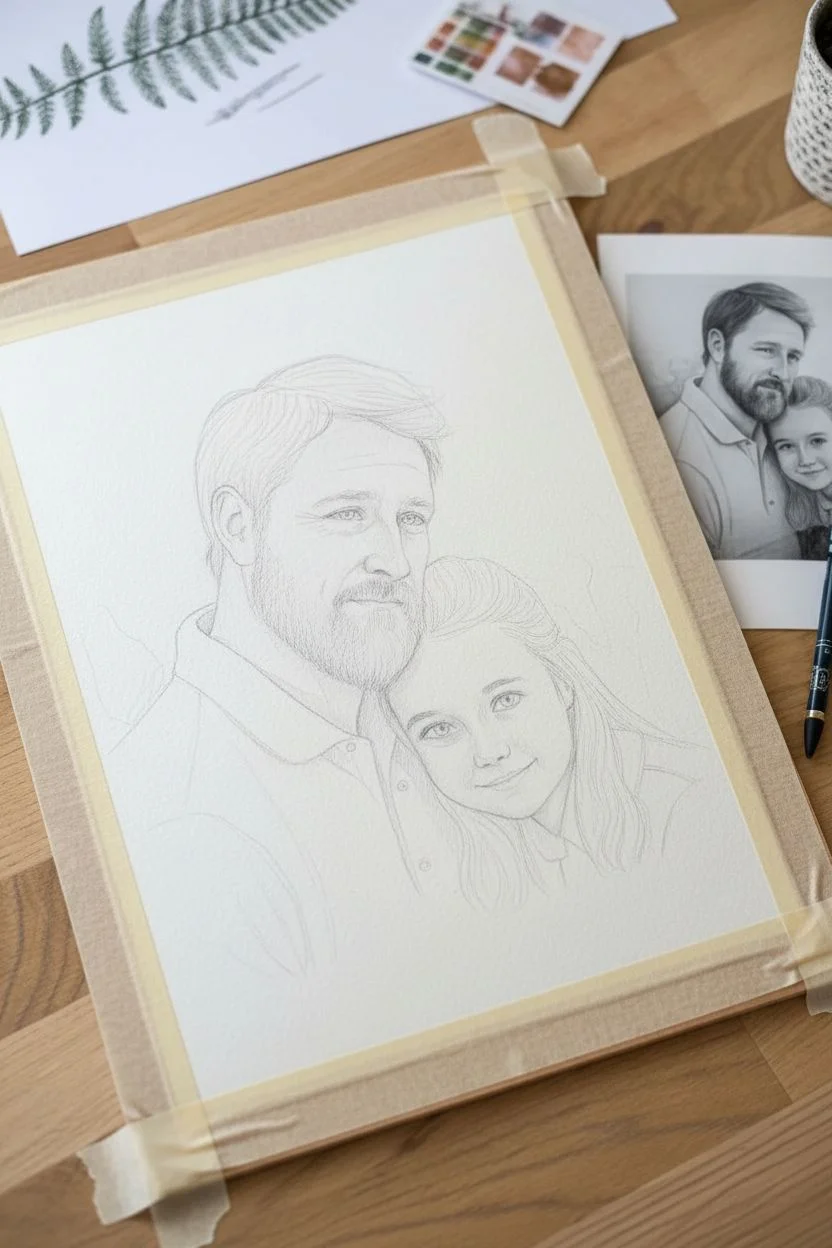
Step 1: Preparation and Sketching
-
Prepare your workspace:
Tape your watercolor paper down to a board using masking tape to prevent warping. Ensure you have good lighting and your reference photo is printed out or displayed clearly nearby. -
Lightly sketch the outlines:
Using a 2H pencil, carefully sketch the contours of the faces, hair, and clothing. Focus on getting the proportions correct, particularly the alignment of the eyes and the angle where the daughter’s head rests on the shoulder. -
Refine facial features:
Refine the sketch by adding key details like the shape of the nose, mouth, and the direction of hair growth. Keep lines very faint so they don’t show through the transparent watercolor later. -
Protect highlights:
Identify the brightest spots on the faces, such as the glint in the eyes or the tip of the nose, and leave them blank. You can gently lighten your pencil sketch with a kneaded eraser before painting.
Muddy Colors?
If skin tones look dirty, you may be overworking the paint while it’s damp. Let layers dry completely before glazing over them. Keep your water jar clean and change it often.
Step 2: Painting Skin Tones
-
Mix base skin tones:
Create a pale wash for the skin using Yellow Ochre, a touch of Cadmium Red, and plenty of water. Test the color on a scrap piece of paper first to ensure it’s not too saturated. -
Apply the first wash:
Paint a very wet, light wash over the face areas, avoiding the eyes and the brightest highlights. Let this initial layer dry completely. -
Add warm shadows:
Mix a slightly darker skin tone using Burnt Sienna and Alizarin Crimson. While the paper is dry, paint the shadow areas underneath the chin, around the eyes, and beside the nose to build dimension. -
Layer rosy cheeks:
Dilute a bit of Rose Madder or red and gently glaze the cheeks and the tip of the nose for a healthy, flushed look. Soften the edges with a clean, damp brush so there are no harsh lines.
Step 3: Hair and Beard Details
-
Block in hair base color:
I usually start with a light wash of Yellow Ochre or Raw Sienna for blonde/brown hair. Paint the general shape of the hair without worrying about individual strands yet. -
Build hair texture:
Once the base is dry, use a smaller brush (Size 2 or 4) with a darker brown mix (such as Burnt Umber) to paint sweeping strokes that follow the direction of hair growth. -
Create the beard texture:
For the father’s beard, use short, directional strokes with a fine brush. Layer lighter browns first, then go back in with darker shades to create depth and volume near the jawline. -
Deepen shadows:
Add the darkest values in the hair partings and behind the ears using a mix of Ultramarine Blue and Burnt Umber for a rich, near-black tone.
Pro Tip: Softening Edges
To avoid harsh lines on skin, use the ‘wet-on-dry’ technique but immediately run a clean, damp brush along the edge of your stroke to feather the color out seamlessly.
Step 4: Clothing and Final Details
-
Paint the shirt base:
Mix a soft pink for the father’s shirt and apply a flat wash. For the daughter’s denim jacket, use a diluted Indigo or Cobalt Blue wash. -
Add shirt pattern:
Once the pink base is 100% dry, use a fine brush to dab on the darker reddish-pink pattern. Keep the marks loose and impressionistic rather than perfectly geometric. -
Detail the eyes:
Switch to your smallest brush (00). Carefully paint the irises (blue/green here) and the pupils. Leave a tiny speck of white paper for the catchlight, or add it later with white gouache. -
Enhance clothing folds:
Paint darker values into the folds of the shirt and the denim jacket to make the fabric look three-dimensional. Adding a few lines of stitching on the denim adds realism. -
Background wash:
Wet the background area around the figures with clean water. Drop in soft greens and yellows for a blurred, bokeh-style background that keeps the focus on the subjects.
Once dry, frame your artwork with a crisp white mat to make the colors truly sing for a heartfelt gift


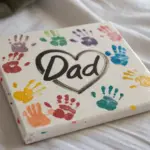
Father-Daughter Initials in a Painted Heart
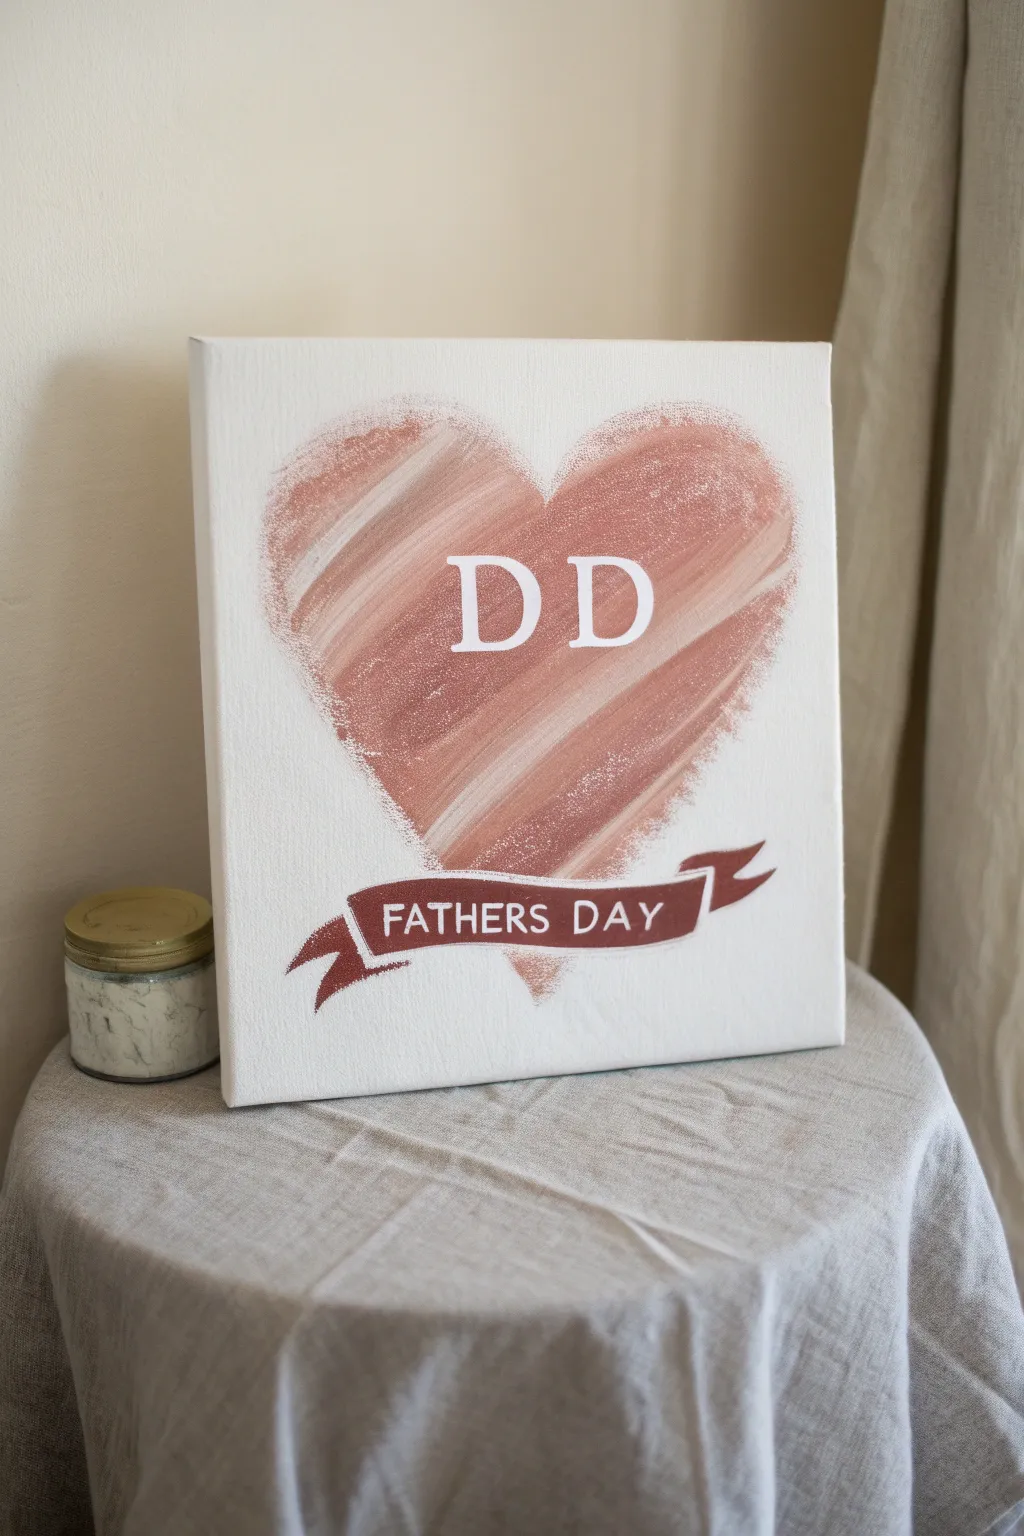
This minimalist yet heartwarming project features a large, textured heart painted in soft, dusty rose tones with bold initials in the center. The classic banner design adds a vintage touch, making it a timeless Father’s Day keepsake that looks professional but is surprisingly simple to achieve.
How-To Guide
Materials
- Square stretched canvas (approx. 10×10 or 12×12 inches)
- Acrylic paint: Dusty rose/terracotta, white, dark maroon/brown
- Wide flat brush (1-2 inch) for texture
- Medium round brush
- Small liner brush or white paint pen
- Stencil vinyl or contact paper (optional but recommended for text)
- Pencil
- Paper plate or palette
- Painters tape or masking tape
Step 1: Preparing the Base
-
Surface Prep:
Begin by wiping down your canvas with a clean, dry cloth to remove any dust that might interfere with paint adhesion. -
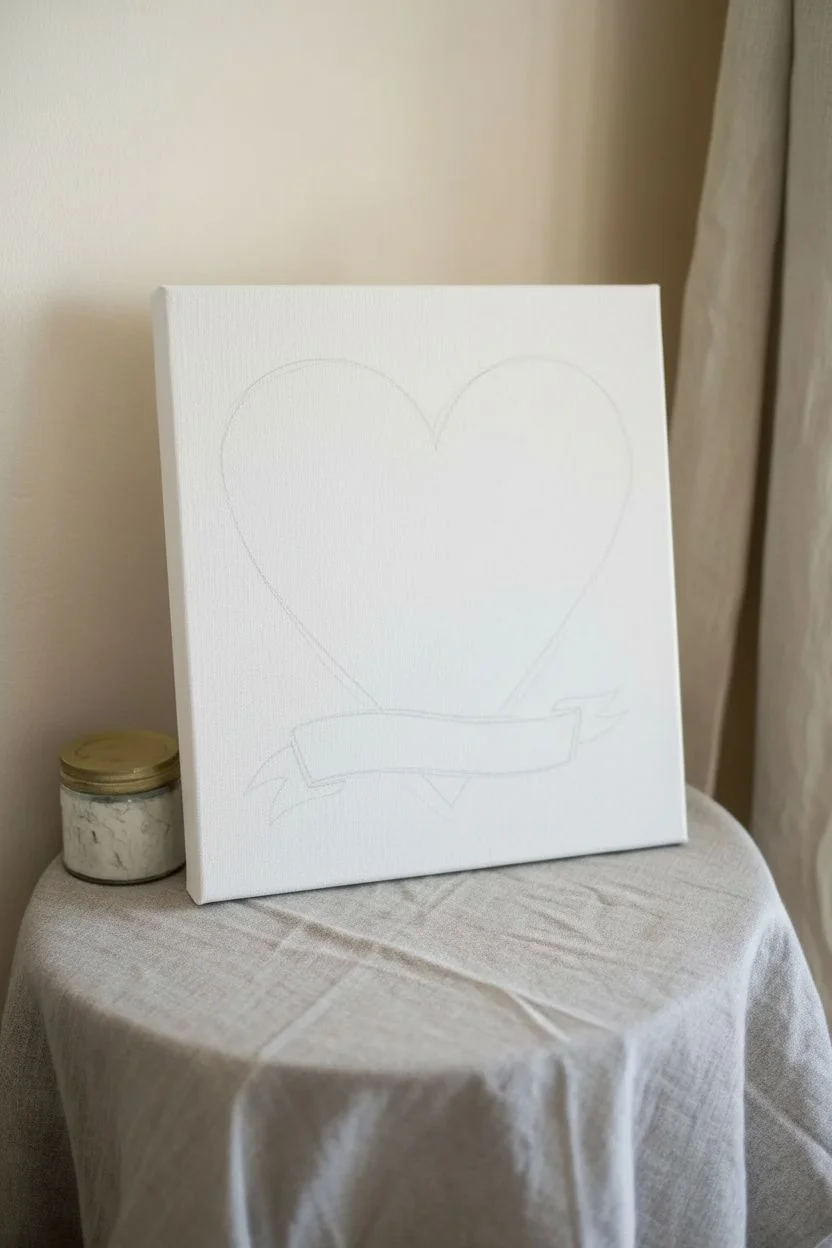
Drafting the Heart:
Using a pencil, very lightly sketch a large, wide heart shape in the center of the canvas. Keep the lines faint so they don’t show through the brush strokes later. -
Drafting the Banner:
Below the heart, sketch a waving banner shape. Draw a central rectangle that dips slightly, with ribbon tails folding back and out on either side.
Step 2: Painting the Heart
-
Mixing Texture Colors:
Squeeze out your dusty rose paint and a separate dollop of white. Do not fully mix them; having streaks of white and pink on your brush creates the dimensional look. -
Initial Brush Strokes:
Load your wide flat brush heavily. Start from the top left curve of the heart, sweeping diagonally downward toward the center point. -
Creating the Texture:
Repeat the motion on the right side, sweeping diagonally down to meet the first stroke. The key is to lift the brush at the end of the stroke to create a feathered, dry-brush edge. -
Filling the Shape:
Continue filling in the heart shape using these diagonal, sweeping motions. Allow some of the white canvas texture to peek through at the edges for a rustic feel. -
Adding Highlights:
While the paint is still wet, pick up a tiny bit of pure white on your dirty brush and add a few accent streaks following the same diagonal path. -
Drying Time:
Let the heart dry completely. Since the paint is applied somewhat thickly for texture, give it at least 20-30 minutes.
Uneven Edges?
If your heart edges look too messy, don’t over-paint. A messy, dry-brush edge is part of the charm! If needed, dab a little white gesso around the outside to clean the shape.
Step 3: Adding the Letters
-
Placement Planning:
While the heart dries, plan your initials. If you are using stencils, position the ‘D’s (or your chosen initials) centrally within the heart. -
Painting the Initials:
Use white acrylic paint or a broad white paint pen to fill in the letters. If painting by hand, use a medium round brush and steadiness. -
Second Coat:
White paint often looks translucent over darker colors. Apply a second coat to the letters once the first is dry to ensure they pop against the rose background.
Text Hack
Struggling with hand-lettering? Print the text in your favorite font, rub pencil graphite on the back of the paper, tape it to the canvas, and trace over the letters to transfer them.
Step 4: The Banner Detail
-
Painting the Banner Base:
Using your dark maroon or deep brown paint, fill in the banner shape you sketched earlier. Use a medium brush for the main area. -
Refining Edges:
Switch to a smaller brush to sharpen the points of the ribbon tails and the sharp corners where the ribbon ‘folds’ behind the main section. -
Adding Banner Text:
Once the dark banner paint is fully dry, use a fine liner brush or a fine-point white paint pen to write ‘FATHERS DAY’ across the center strip. -
Highlighting the Ribbon:
Add a very thin white line along the top edge of the banner to give it a 3D effect and separate it visually from the heart background. -
Final Cleanup:
Erase any visible pencil marks gently. If you smudged any white paint, do small touch-ups with your background rose color.
Step back and admire the warm, textured love you’ve captured on canvas for Dad
Night Sky “My Hero” Dad Painting
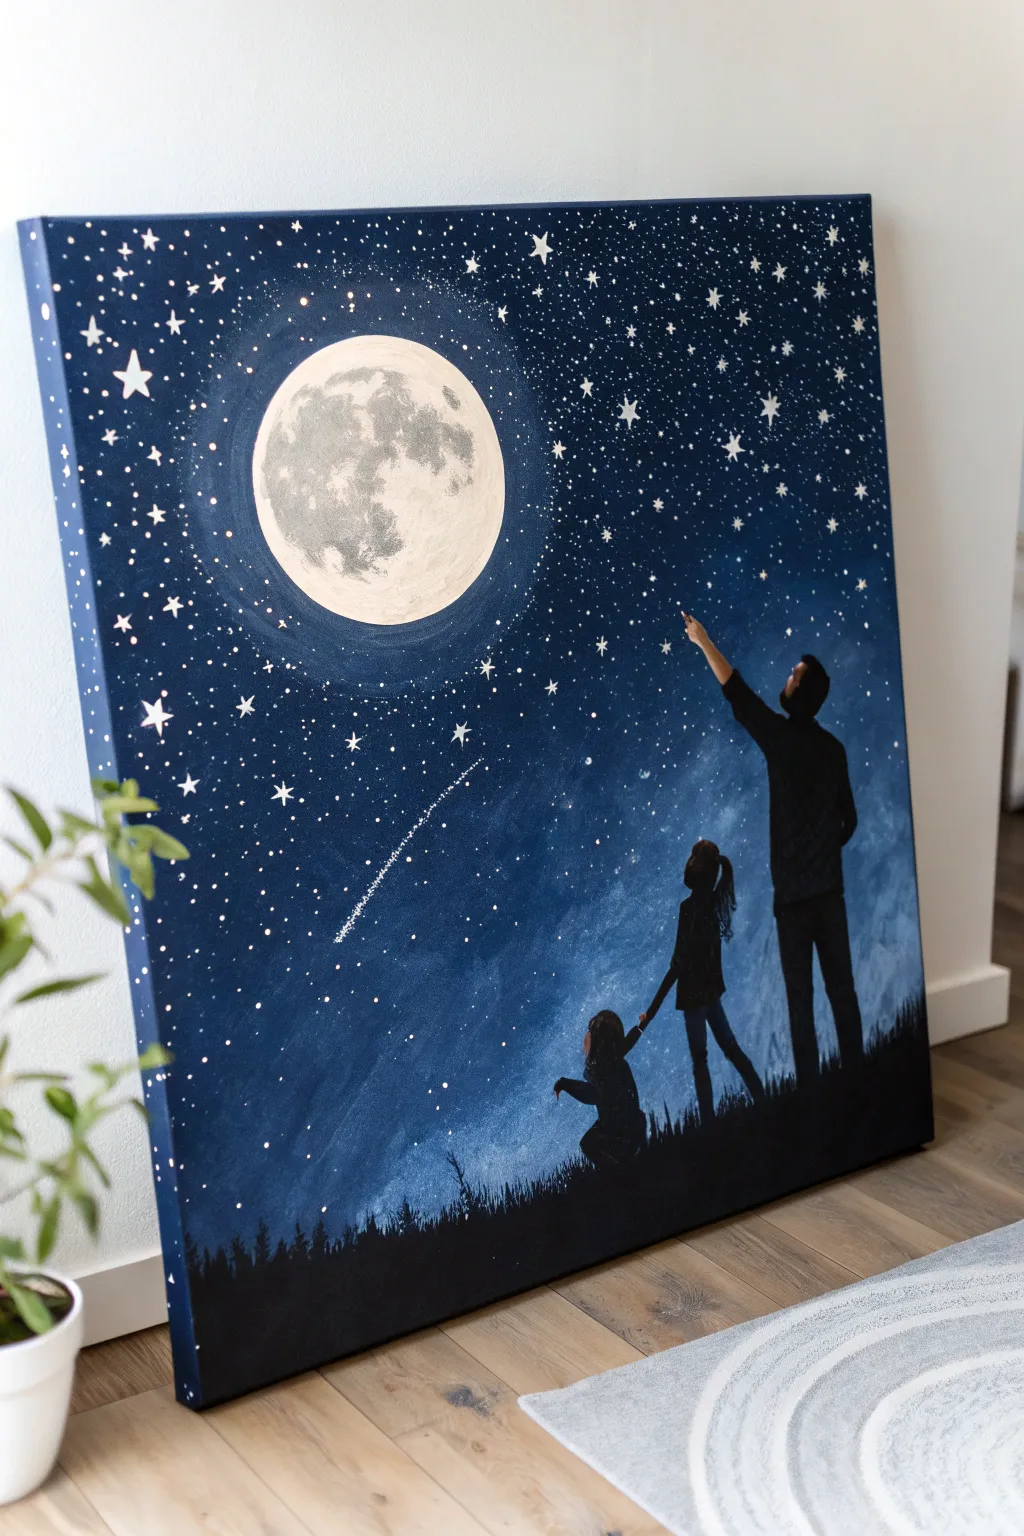
Immortalize a special bond under a vast, celestial canopy with this striking night sky painting. Featuring a highly detailed moon and heartwarming family silhouettes, this artwork makes a deeply personal Father’s Day tribute that captures the magic of stargazing together.
Step-by-Step Guide
Materials
- Large rectangular canvas (approx. 24×30 inches)
- Acrylic paints: Carbon Black, Titanium White, Prussian Blue or Phthalo Blue, Dioxazine Purple, Silver/Grey
- Large flat brush or sponge applicator
- Small/medium round brushes
- Fine liner brush (size 0 or 00)
- Old toothbrush (optional for splattering)
- Circular stencil or bowl (approx. 6-inch diameter)
- Pencil
- Paper plate or palette
- Cup of water and paper towels
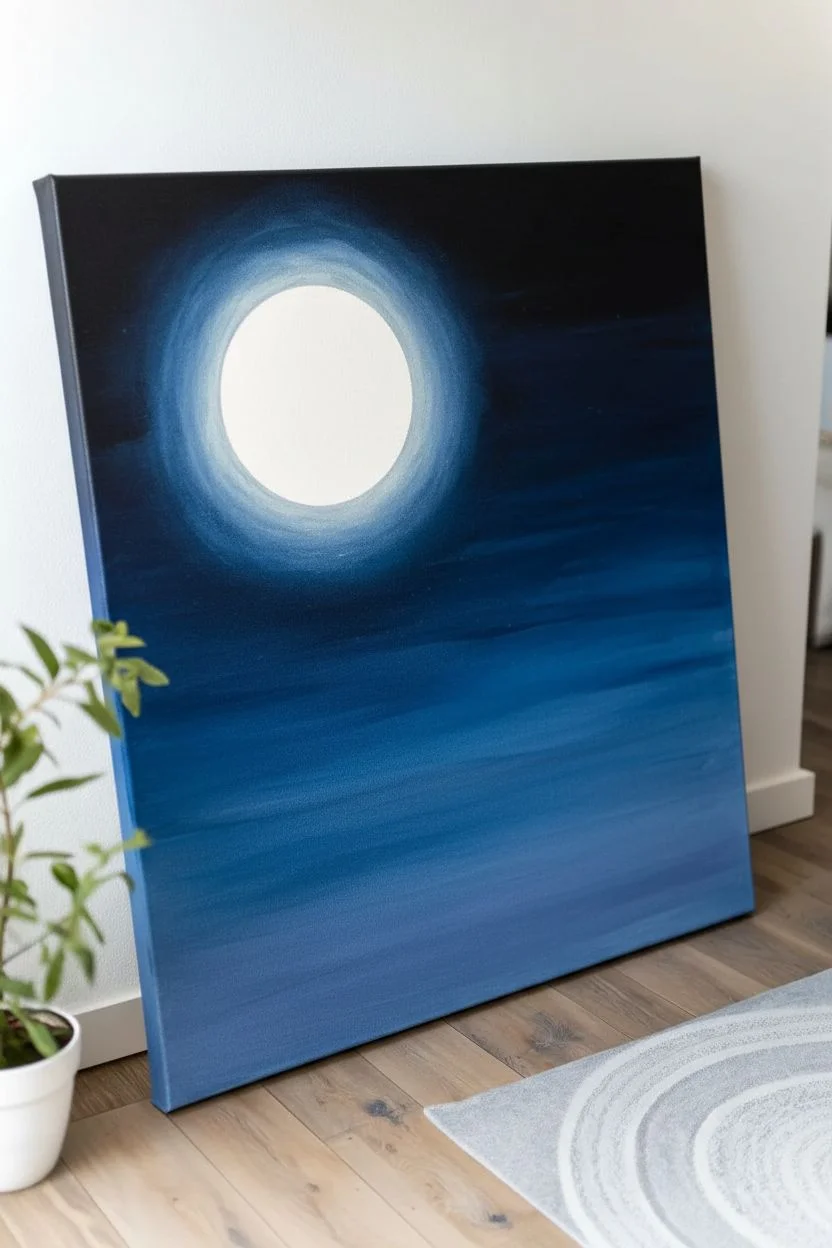
Step 1: Setting the Celestial Stage
-
Trace the moon:
Place your circular object or bowl in the upper-left quadrant of the canvas. Lightly trace around it with a pencil to mark the moon’s position, ensuring you leave plenty of space below for the family figures. -
Create the midnight gradient:
Start by mixing a deep midnight blue using Prussian Blue and a touch of Black. Apply this darkest shade to the top and bottom corners of the canvas using your large flat brush. -
Blend the sky:
Gradually mix in more blue and a hint of purple as you move toward the center. While the paint is still wet, blend it smoothly into the edges of your moon circle, but don’t paint inside the circle just yet. -
Add the moonglow:
Mix a lighter blue shade by adding some White to your blue. Paint a soft, hazy ring around the outside of your pencil circle to create a glowing atmospheric effect around the moon. -
Refine the background:
Ensure the entire canvas is covered, blending the colors wet-on-wet so there are no harsh lines between the deep outer corners and the lighter celestial center. Let this background layer dry completely.
Fixing Wobbly Stars
If your hand-painted stars look messy, wait for the white to dry completely. Then, use your dark blue background color to carefully ‘cut in’ and reshape the star points.
Step 2: Painting the Moon and Stars
-
Fill the moon base:
Paint the inside of your moon circle with a solid coat of Titanium White. You might need two layers to ensure it’s opaque against the dark canvas. -
Detail the craters:
Mix a light grey using White and a tiny dot of Black. Using a small round brush or even a crumpled piece of paper towel, dab textured grey patches onto the moon to resemble craters and maria (the dark spots). -
Add moon highlights:
I like to go back in with pure White on the right side of the craters to give them dimension and roundness. -
Paint larger stars:
Using your fine liner brush and white paint, carefully hand-paint several five-pointed stars scattered across the sky, varying their sizes for interest. -
Splatter the galaxy:
Dilute a bit of white paint with water until it’s inky. Dip an old toothbrush into it and flick the bristles with your thumb to spray a mist of tiny stars across the entire sky. -
Create the shooting star:
With the liner brush, paint a slightly larger star in the lower-left area and drag a dotted, trailing tail upwards behind it to create movement.
Step 3: Creating the Silhouettes
-
Draft the horizon:
Use the black paint to fill in a rolling hill at the very bottom of the canvas. Keep the edge slightly uneven to look like grassy terrain. -
Sketch the figures:
Lightly sketch the outlines of the father and daughters with a pencil or white chalk first. Position the father on the right pointing up, a child in the middle holding his hand, and a smaller child seated on the left. -
Paint the father:
Fill in the father’s silhouette with solid Carbon Black. Pay distinct attention to the profile of the face and the extended arm pointing toward the stars. -
Paint the children:
Fill in the two children figures with black. Ensure the connection between their hands and the ground looks grounded and solid. -
Add grassy details:
Using the tip of your smallest brush or a fan brush, flick small upward strokes along the horizon line to create the texture of tall grass surrounding the figures.
Personalize the Silhouettes
Customize the silhouette shapes to match your family! Add a family dog, change the hair lengths, or add a silhouette of a telescope for an astronomy-loving dad.
Allow the entire painting to dry overnight before gifting this beautiful starry tribute to Dad
Fingerprint Stars With Dad and Daughter Names
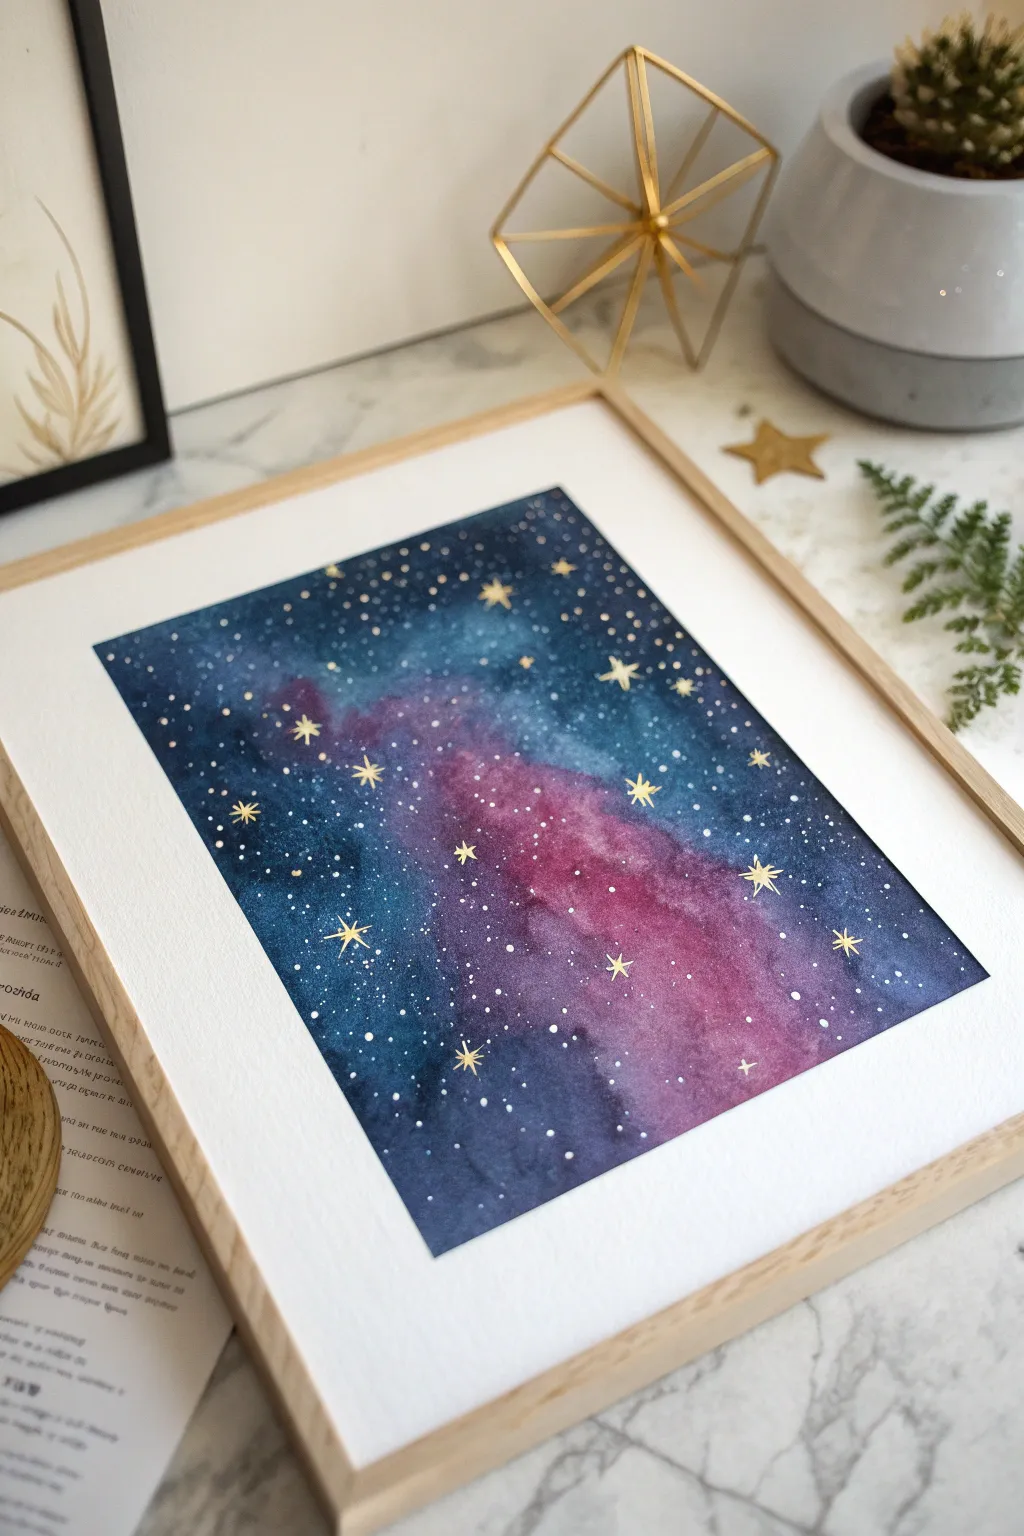
Create a stunning galaxy-themed art piece that looks sophisticated but is surprisingly beginner-friendly. This tutorial guides you through blending watercolor washes to creating that magical cosmic depth, perfect for framing as a heartfelt gift.
Step-by-Step
Materials
- Cold press watercolor paper (300gsm)
- Watercolor paints (Indigo, Prussian Blue, Payne’s Gray, Magenta, Purple)
- Clean water jar
- Large flat brush or mop brush
- Round brushes (size 4 and 8)
- White opacity marker or white gel pen
- Gold paint pen or metallic gold watercolor
- Paper towels
- Masking tape
- Hardboard or table surface
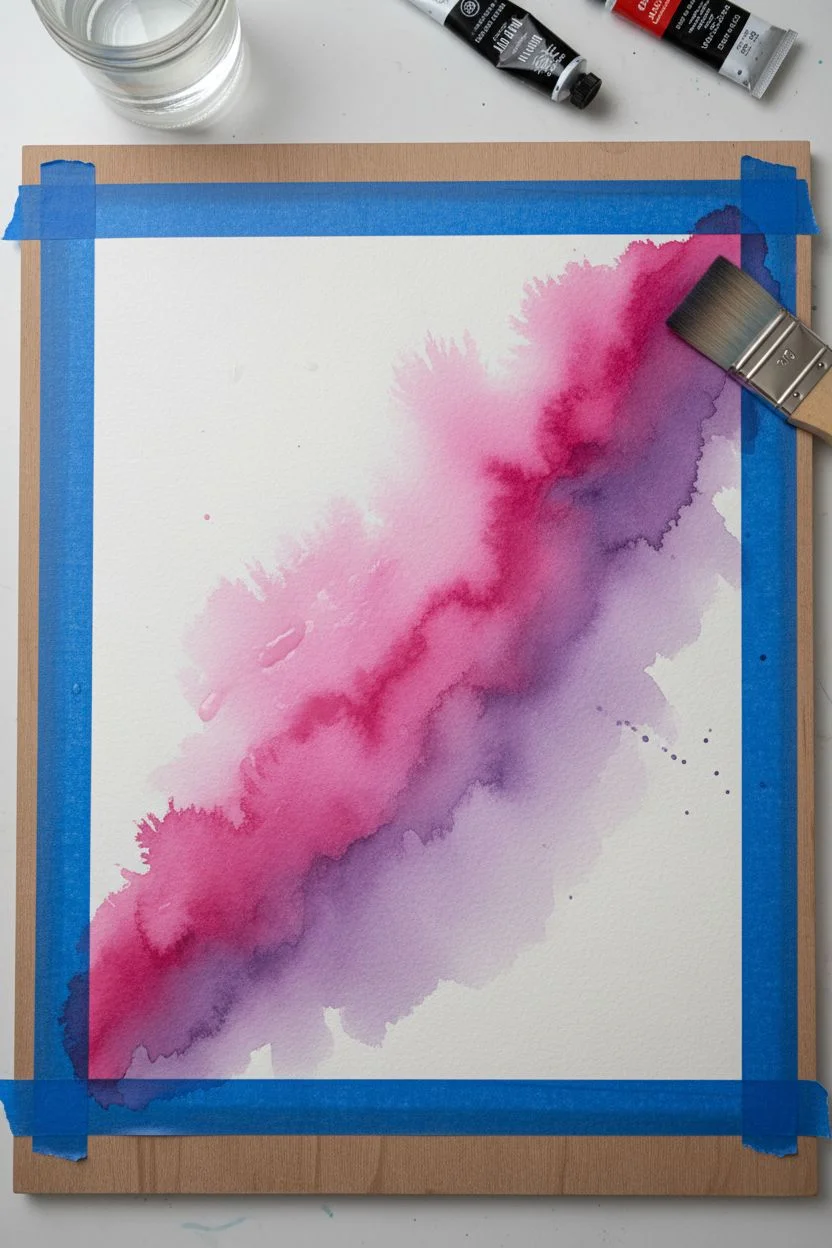
Step 1: Preparing the Base
-
Secure the paper:
Tape down all four edges of your watercolor paper to a hardboard or table using masking tape. This creates a crisp white border and prevents the paper from buckling when wet. -
Wet-on-wet technique:
Using your large flat brush, apply a generous coat of clean water across the entire surface of the paper until it has a glossy sheen. -
Initial color laydown:
While the paper is still wet, drop in patches of Magenta and Purple in a diagonal band from the bottom right towards the center. Let the colors bleed naturally.
Step 2: Building the Cosmos
-
Adding deep blues:
Load your brush with Indigo or Prussian Blue. Apply this dark color to the corners and edges of the paper, working your way inward. -
Creating the transition:
Gently blend the dark blue edges into the pink/purple center. I find it helpful to use a clean, slightly damp brush to soften the boundries where the colors meet so there are no hard lines. -
Deepening the contrast:
While the paint is still damp but not dripping, dot Payne’s Gray or a very concentrated dark blue into the outermost corners to create a vignette effect. -
Lifting color:
If the center has become too dark, dab it gently with a crumpled paper towel to lift some pigment and reveal a lighter, cloud-like nebula effect. -
First drying phase:
Allow this base layer to dry completely. The paper must be bone-dry before proceeding to the next step to prevent markers from bleeding.
Cosmic Cloud Tip
Keep the center of your paper slightly wetter than the edges. This forces the dark pigment to pool on the outside, naturally creating a glowing center effect.
Step 3: Adding the Stars
-
Splatter technique:
Load a wet brush with white gouache or diluted white acrylic. Tap the handle of the brush against another brush over the painting to create a fine mist of white stars. -
Drawing tiny stars:
Using your white gel pen or paint marker, manually add distinct white dots in empty areas to balance the composition. -
Gold accents:
Shake your gold paint pen well. Draw several four-pointed or eight-pointed stars scattered throughout the galaxy, varying their sizes for interest. -
Adding distinct gold dots:
Intersperse small gold dots amongst the white splatter to add warmth and shimmer to the night sky. -
Personalizing the stars:
For the specific Father’s Day touch from the article theme, select two larger gold stars and carefully write a tiny name or initial next to them if desired.
Level Up: Salt Texture
Sprinkle table salt onto the painting while the blue watercolor is still wet. Let it dry completely, then brush it off to create amazing starburst textures.
Step 4: Finishing Touches
-
Final drying:
Let all ink and paint dry completely for at least 30 minutes. -
The reveal:
Slowly peel away the masking tape at a 45-degree angle, pulling away from the painting area to ensure a clean, crisp edge. -
Framing:
Place the artwork into a light wooden frame with a mat board to replicate the clean, modern look of the example image.
Now you have a captured piece of the universe ready to gift or hang on your wall
Paint Dad’s Pet With a Daughter Note
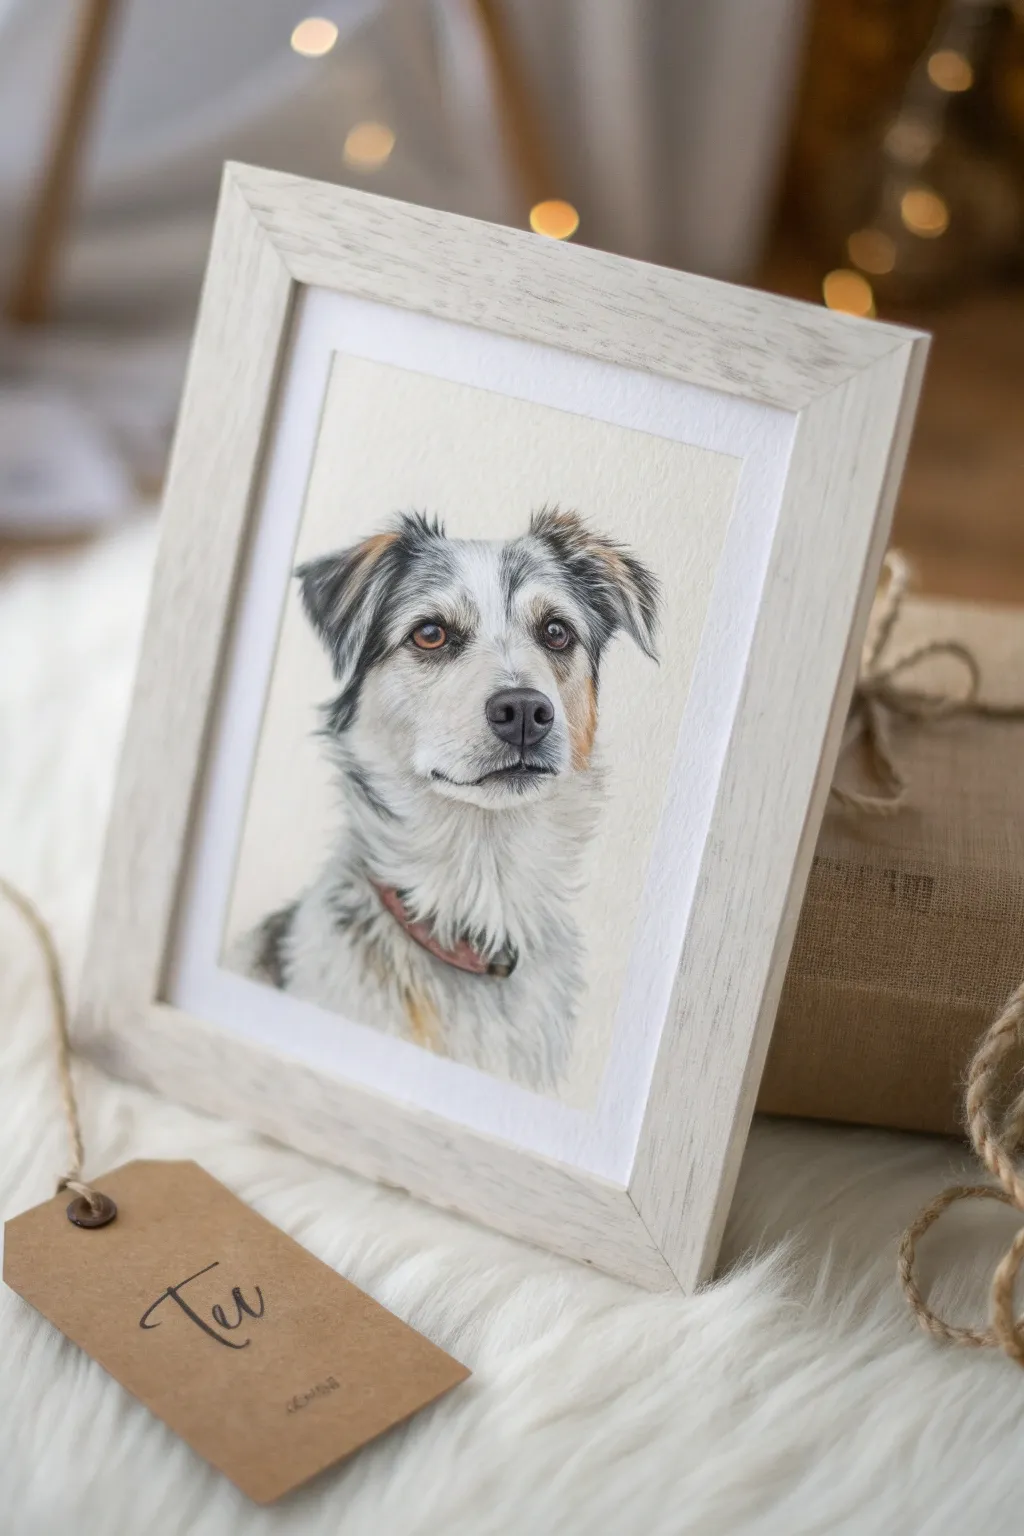
Immortalize your dad’s beloved four-legged companion with a soft, realistic portrait that captures their unique personality. This detailed colored pencil or pastel drawing sits beautifully in a rustic white frame, making it a heartfelt Father’s Day keepsake he’ll treasure forever.
Step-by-Step
Materials
- High-quality photo reference of the pet
- Heavyweight textured drawing paper (Bristol vellum or pastel paper)
- Set of artist-grade colored pencils or pastel pencils
- HB graphite pencil and kneaded eraser
- Blending stumps or tortillons
- White gel pen or gouache (for highlights)
- Ruler
- Light-colored distressed wood frame (5×7 or 8×10)
- White mat board (if not included with frame)
- Brown kraft gift tag and twine
- Black ink pen
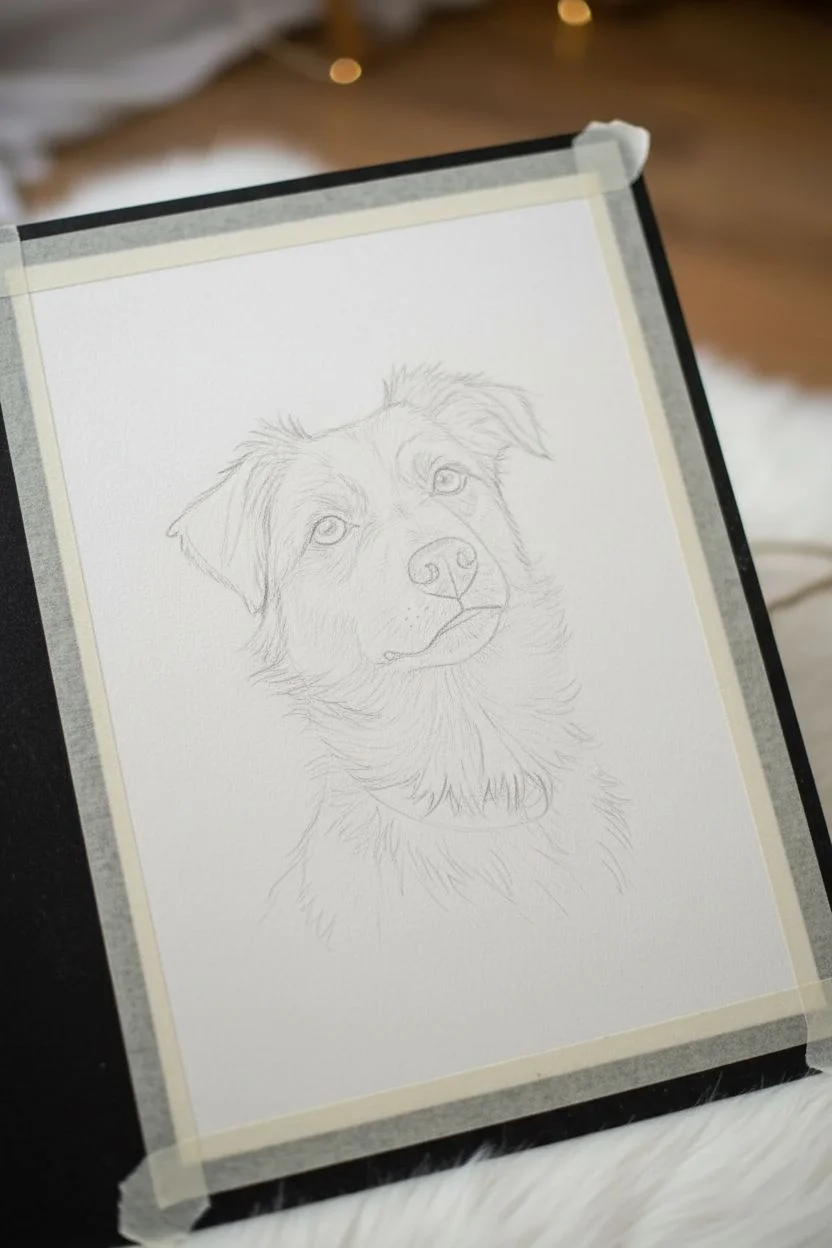
Step 1: Sketching the Foundations
-
Select the reference:
Choose a clear, high-resolution photo of the dog where the eyes and fur texture are visible. A slightly angled ‘three-quarter’ view, like in the example, adds dimension. -
Prepare the paper:
Cut your textured paper to fit the mat opening of your chosen frame. Tape down the edges to a hard board to keep it flat while you work. -
Outline the basics:
Using a sharp HB pencil, lightly sketch the basic shapes of the dog’s head. Focus on the triangular ears, the snout alignment, and the eye placement. -
Refine the features:
Tighten up the sketch by marking the direction of the fur growth. Lightly outline distinct color patches, like the mask around the eyes or spots on the chest. -
Lift the graphite:
Before adding color, gently roll your kneaded eraser over the sketch. You want the lines just visible enough to guide you, but faint enough not to show through lighter fur.
Fixing Muddy Colors
If fur colors look muddy, you may be blending too much. Stop blending and layer sharp, distinct strokes of pure color over the top to regain texture.
Step 2: Layering the Fur
-
Start with the eyes:
Begin by coloring the eyes. Layer warm browns and ambers, pressing firmly for the pupil. Leave a tiny speck of raw white paper for the catchlight to make them look alive. -
Base layer for fur:
Apply the lightest underlying colors first—creams, pale grays, or tans—using soft shading strokes. Don’t worry about texture yet; just establish the color zones. -
Build darker values:
Switch to mid-tone grays and browns. Start adding directional strokes that mimic the length of the fur, especially around the ears and neck ruff. -
Detail the nose:
Fill in the nose with dark charcoal gray or black. Use a blending stump to smooth it out, creating a leathery, wet look rather than a fuzzy texture. -
Create fur texture:
Sharpen your pencils to a fine point. Create individual hairs by layering short, quick strokes over your base layers, following the growth direction you sketched earlier. -
Deepen the shadows:
Add depth by darkening the areas under the ears, beneath the chin, and around the collar. This contrast makes the head pop off the page. -
Add the collar:
Draw the collar in a contrasting color, like the muted red shown here. Add simple shading to suggest the curve around the neck and the metallic loop.
Step 3: Finishing Touches & Framing
-
The whiskers:
Use a very sharp dark gray pencil for whiskers against light fur. For whiskers over dark patches, use a white gel pen or thin white gouache. -
Final highlights:
Enhance the brightest spots—the wetness of the nose and the sparkle in the eyes—with your white highlight tool. -
Clean up:
Use the kneaded eraser to pick up any stray pigment smudges on the background, keeping the white space around the portrait pristine. -
Frame the art:
Once sealed and dry, mount the artwork behind the mat and place it into the distressed wooden frame. -
Create the tag:
Write a simple name or message (like ‘Dad’ or the dog’s name) on a brown luggage tag in calligraphy script. -
Attach the tag:
Tie the tag to the corner of the frame or the gift wrapping using rustic jute twine for a cohesive, natural presentation.
Make it 3D
Make the nose look wet by adding a tiny dab of clear gloss varnish or clear nail polish on the nose area only after the drawing is fully framed.
Now you have a timeless tribute to his best friend that captures a specific moment of connection
Abstract Background With Father-Daughter Silhouette Cutout
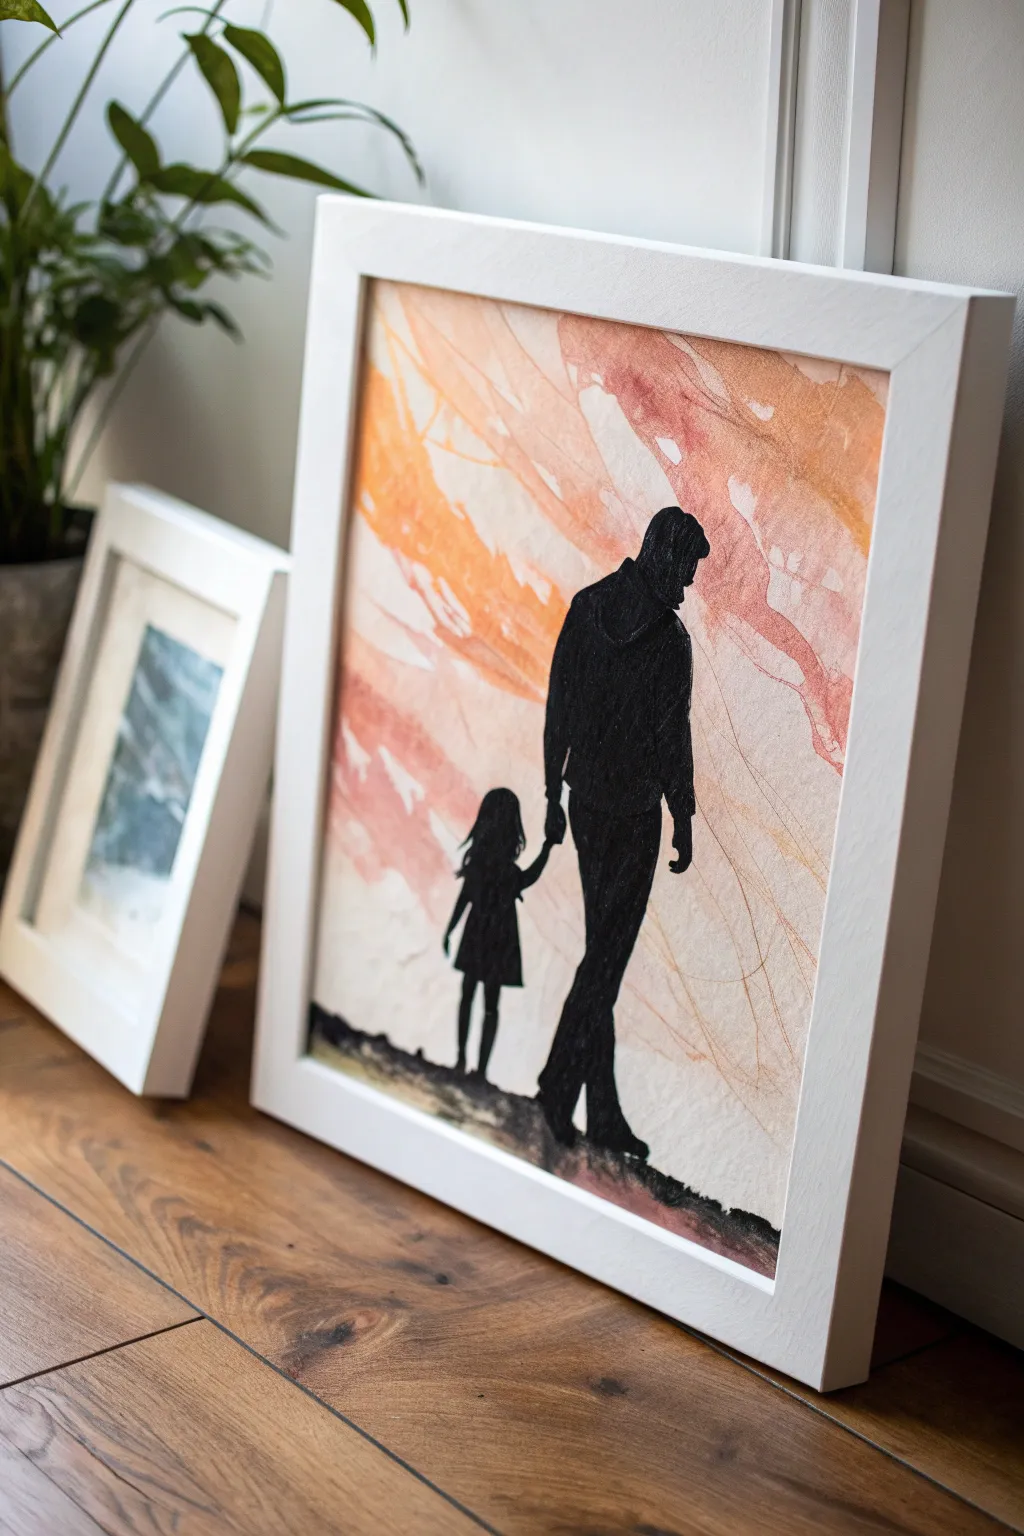

This heartwarming piece combines the soft, fluid beauty of watercolor with the sharp contrast of a black silhouette to capture a tender moment between father and daughter. The warm background tones evoke a sunset walk, creating a nostalgic keepsake perfect for Father’s Day.
Detailed Instructions
Materials
- Heavyweight watercolor paper (140lb/300gsm)
- Watercolor paints (shades of orange, peach, crimson, and yellow)
- Wide flat wash brush (about 1 inch)
- Round watercolor brush (size 6 or 8)
- Black acrylic paint or black India ink
- Fine liner brush or black fine-point paint marker
- Pencil and eraser
- Painter’s tape or masking tape
- Cardboard or painting board
- Silhouette reference photo
- White or light wood frame (square format)
Step 1: Setting the Scene: Abstract Background
-
Secure your paper:
Begin by taping your watercolor paper down to a sturdy board using painter’s tape. This prevents the paper from buckling when it gets wet and creates a clean border around the edges. -
Prepare the palette:
Mix your background colors. You’ll need a watery mix of pale yellow, a vibrant orange, and a dusty rose or light crimson. Keep plenty of water nearby to dilute the pigments. -
Wet-on-wet technique:
Using your large flat brush, apply a layer of clean water across the entire paper surface. It should be glistening and damp, but not forming puddles. -
Lay the base wash:
While the paper is wet, load your brush with the pale yellow and sweep it diagonally across the top left corner, letting it diffuse softly. -
Add warmth:
Introduce the orange tones in broad, diagonal strokes moving from the top left toward the bottom right. The wet paper will help the edges blur naturally. -
Deepen the hues:
While the surface is still damp, dab the crimson or dusty rose color into the orange areas to create depth and texture reminiscent of clouds or sunset streaks. -
Create texture:
For that interesting, mottled look seen in the example, try lifting a little pigment with a crumpled paper towel or splattering a few drops of clean water onto the drying paint. I find this adds a lovely organic feel. -
Let it dry completely:
This is crucial. Walk away and let the background dry fully, preferably for a few hours. The paper must be bone-dry before you start the silhouette.
Pro Tip: Masking Fluid
For super sharp edges, paint the silhouette area with masking fluid before doing the background wash. Rub it off later to reveal white paper, then paint black.
Step 2: Creating the Silhouette
-
Identify the placement:
Ideally, position your figures in the lower right third of the paper. This creates a balanced composition where they are walking ‘into’ the scene. -
Draft the outline:
Lightly sketch the outline of the father and daughter using a pencil. If drawing isn’t your strong suit, print a photo of a silhouette, cut it out, and trace lightly around it. -
Define the ground:
Sketch a rough, uneven line beneath their feet to represent the ground. It doesn’t need to be straight; a little jaggedness looks more like natural terrain. -
Outline with ink:
Using your fine liner brush or a black paint marker, carefully trace over your pencil lines to establish the sharp edges of the figures. -
Fill the figures:
Switch to acrylic paint or India ink for a solid, opaque black. Fill in the bodies completely, ensuring no background color shows through. -
Refine the details:
Pay special attention to small details like the hand-holding, the hair, and the hooded jacket. Use the finest brush tip to keep these edges crisp. -
Paint the ground:
Fill in the ground area below their feet. Instead of a solid block, use a dry-brush technique near the bottom edge to simulate grass or dirt texture. -
Final texture check:
If the black looks streaky after the first coat dries, apply a second thin layer of acrylic to ensure a true, deep silhouette. -
Frame the piece:
Once fully dry, remove the tape carefully. Mount the artwork in a square white or light wood frame to complement the airy feel of the painting.
Level Up: Personal Touch
Use a real photo of the dad and child as the silhouette reference. Tracing their actual profiles makes the gift incredibly personal and recognizable.
This custom silhouette captures a fleeting moment in time that he will cherish forever
Triptych of Growing Up With Dad
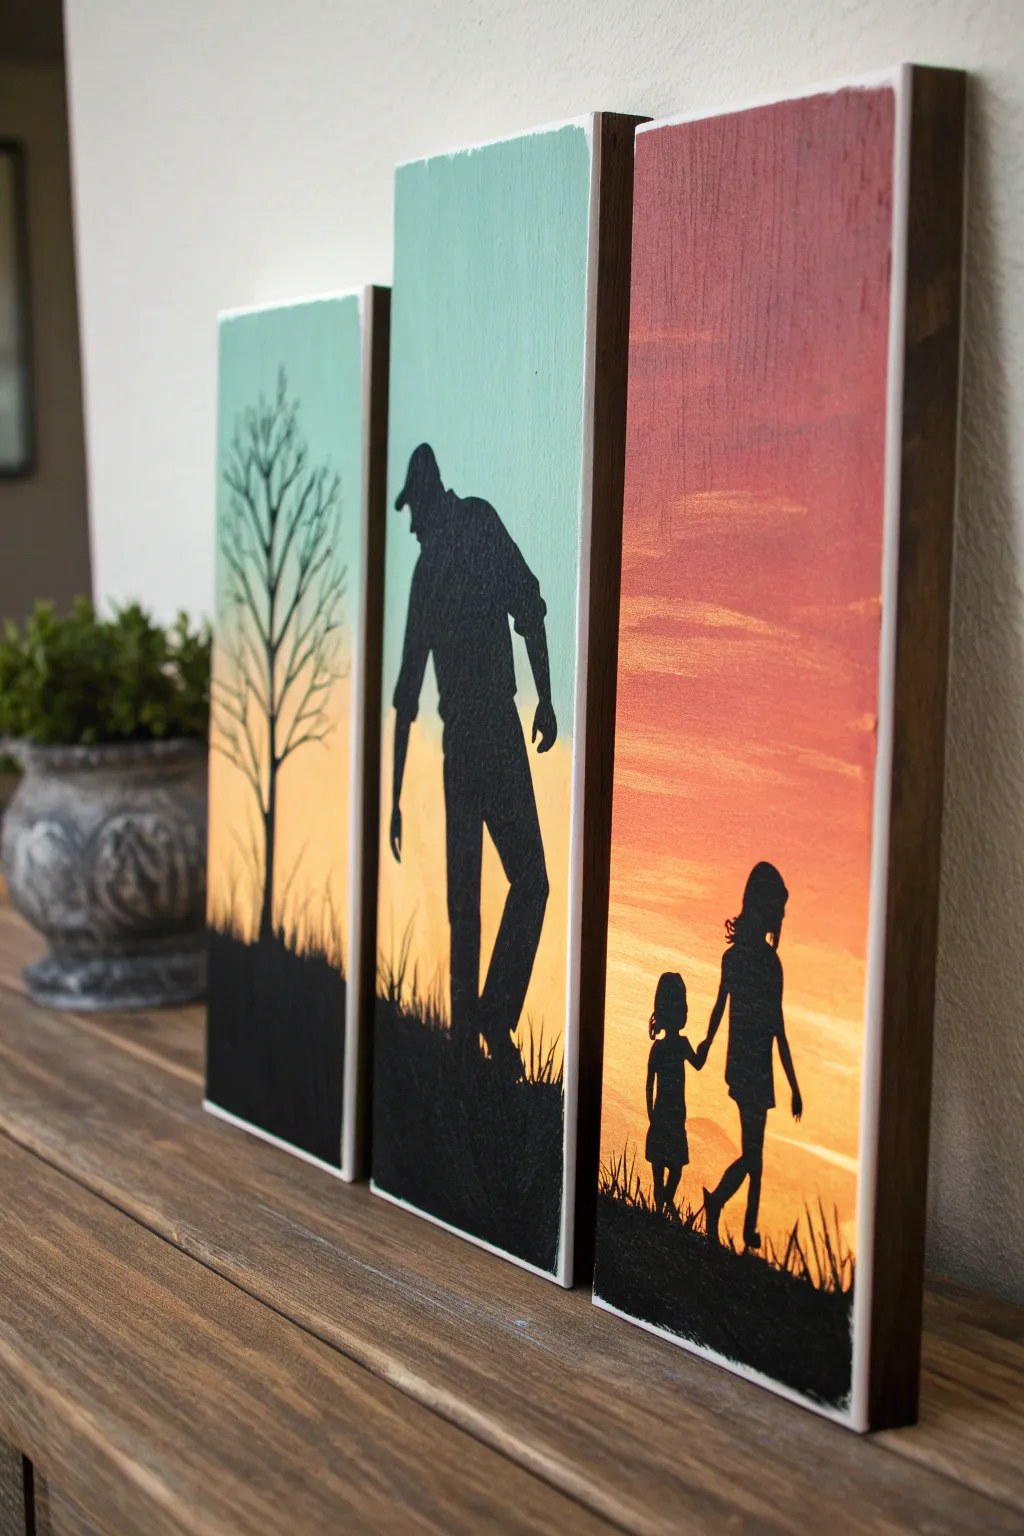
This stunning three-piece wood block set tells a heartwarming story of fatherhood through simple silhouettes against a vibrant sunset sky. The triptych format creates a continuous horizon line across the separate panels, making it a sophisticated and meaningful gift for Dad’s office or den.
Step-by-Step Tutorial
Materials
- Three tall, rectangular wood blocks (approx. 1×6 inch common board, cut to 12-14 inches)
- Sandpaper (medium and fine grit)
- Acrylic craft paints: Teal/Mint, White, Yellow, Orange, Deep Red, Black
- Paintbrushes: 1-inch flat brush (for gradients), small round detail brush (size 0 or 1)
- Masking tape or painter’s tape
- Pencil
- Carbon paper (optional)
- Water cup and paper towels
- Matte or satin spray sealant
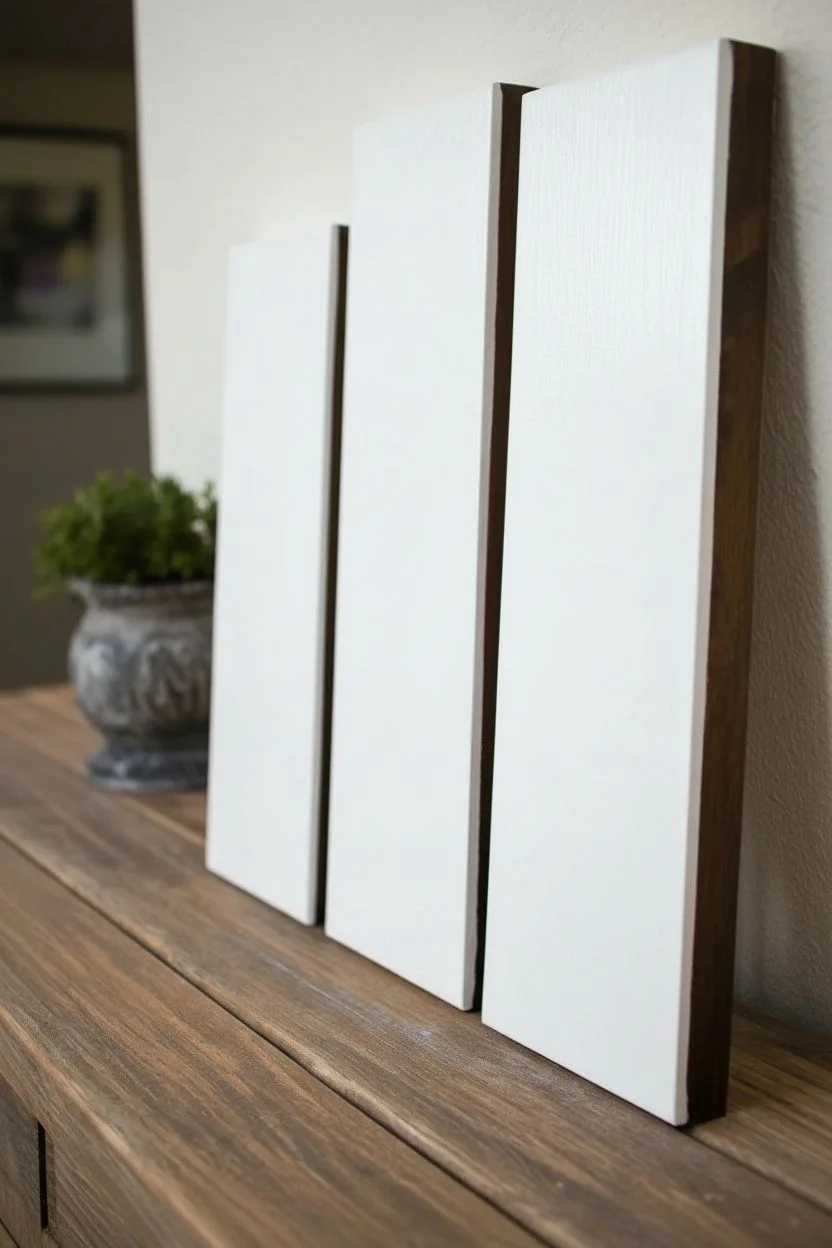
Step 1: Preparing the Canvas
-
Prepare the wood:
Begin by sanding your three wood blocks until they are perfectly smooth. Pay special attention to the front face and edges to prevent splinters. Wipe away all dust with a tack cloth or slightly damp paper towel. -
Prime the surface:
Apply a base coat of white acrylic paint to the front surface of each board. This priming step ensures your sunset colors will pop and not soak dully into the wood grain. Let this dry completely. -
Arrange the triptych:
Lay your three boards side-by-side on your work surface, leaving a tiny gap between them. You want to paint them simultaneously to ensure the horizon lines and color gradients match perfectly across the set.
Uneven Blending?
If your sky gradient looks streaky, use a dry, soft brush to lightly sweep horizontally over the transition areas while the paint is still tacky to soften the lines.
Step 2: Painting the Sunset Gradient
-
Start the sky colors:
Squeeze out your teal, yellow, orange, and red paints. Using a wide flat brush, start at the very top of all three boards with the teal or mint green paint. Paint about one-quarter of the way down. -
Blend the transition:
Before the teal dries, pick up some yellow paint on your brush without fully cleaning it. Blend the yellow into the bottom edge of the teal to create a soft transition. Continue the yellow section down to just below the midpoint of the boards. -
Add warmth:
Switch to orange paint, blending it upwards into the wet yellow paint. Work quickly to keep the paint wet for smoother blending. I find horizontal strokes work best here to mimic cloud layers. -
Deepen the horizon:
Finish the bottom quarter of the sky with deep red, blending it into the orange above. Leave the very bottom inch or two unpainted or dark, as this will be covered by the black silhouette ground later. Allow the gradient to dry fully.
Make it Personal
Customize the silhouettes to match your real family! Add a family dog to the scene or adjust the number and height of the children to represent actual siblings.
Step 3: Creating the Silhouettes
-
Draft the horizon:
Lightly pencil a jagged, uneven line across the bottom of all three boards to represent the grassy ground. Make sure the line connects visually from one board to the next. -
Sketch the figures:
On the left panel, sketch a bare tree. On the center panel, draw the outline of a father walking. On the right panel, sketch two children holding hands. If you aren’t confident drawing freehand, print out silhouettes and transfer them using carbon paper. -
Paint the ground:
Using black acrylic paint and a medium brush, fill in the ground area below your pencil line on all three boards. Ensure the black coverage is solid and opaque. -
Fill the center silhouette:
Switch to your small round detail brush. Carefully outline the father figure on the center board with black paint, then fill in the center. Take your time around the details like the cap brim and swinging arm. -
Paint the children:
Move to the right panel and paint the children’s silhouettes. Use the very tip of your brush for fine details like hair wisps and small hands connecting. -
Detail the tree:
On the left panel, paint the tree trunk and extend branches upward into the teal sky area. Use extremely light pressure to make the tips of the branches thin and delicate. -
Add grass texture:
Using a dry, small brush with a tiny amount of black paint, flick short, quick strokes upward from the ground line. This creates the illusion of grass blades overlapping the sunset background.
Step 4: Finishing Touches
-
Refine edges:
Check the sides of your wood blocks. You can either leave the messy paint runs for a rustic look, sand them down to raw wood, or paint the sides a solid dark brown or black for a framed appearance. -
Seal the artwork:
Once the black paint is completely cured (give it a few hours), spray the entire set with a clear matte or satin sealant. This protects the paint from dust and UV fading over time.
Now you have a timeless tribute to Dad that captures the warmth of family memories
Negative Space Splash Dad-and-Daughter Art
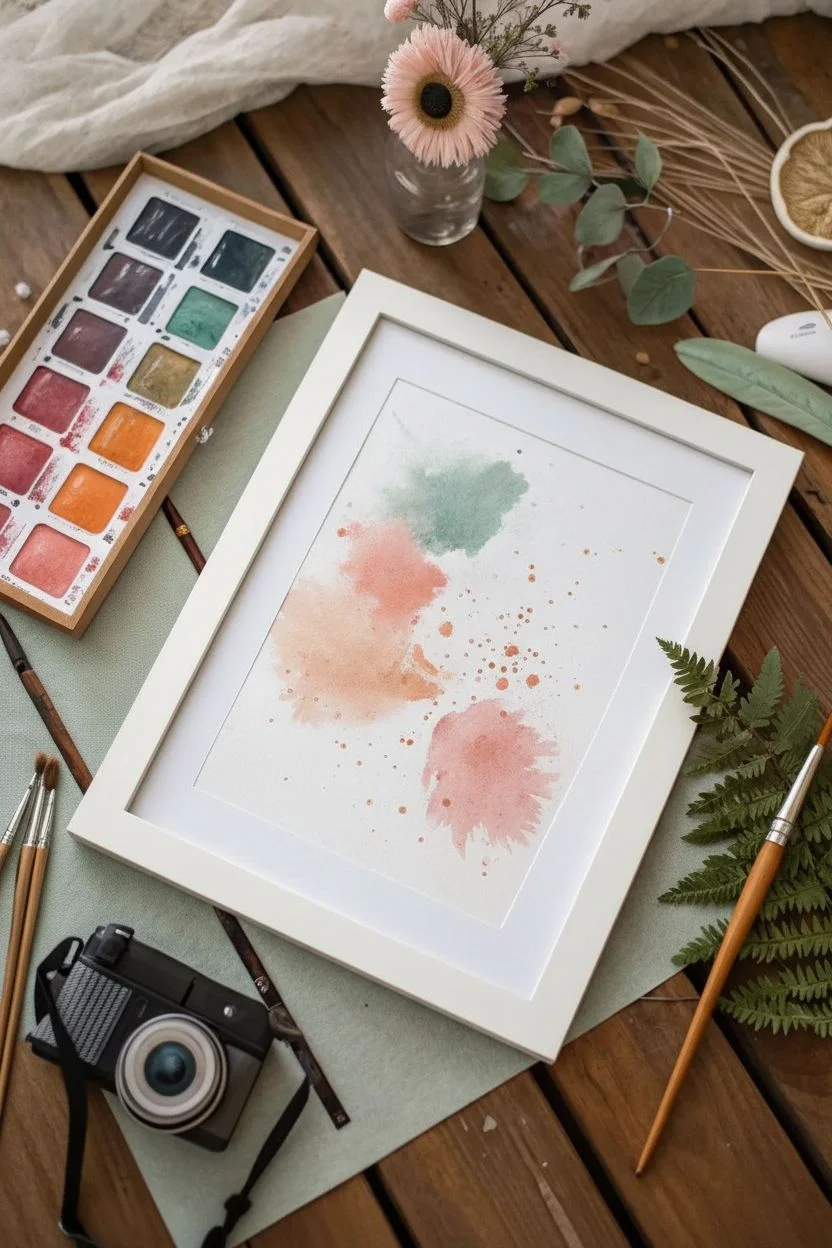
This elegant project combines loose, wet-on-wet watercolor washes with precise botanical illustrations to create a modern, nature-inspired piece perfectly suited for gifting. The soft pastel palette of peach, sage green, and muted pink creates a calming backdrop for delicate leaf and berry details.
How-To Guide
Materials
- Cold-press watercolor paper (300gsm is ideal)
- Watercolor paint set (focus on Oxide Red, Sap Green, Burnt Sienna, and Payne’s Gray)
- Round watercolor brushes (Size 10 for washes, Size 0 or 1 for details)
- Pencil (HB or H)
- Kneaded eraser
- Paper towels
- Clean water jar
- White or light wood frame with matting
Step 1: Creating the Background Atmosphere
-
Prepare the paper:
Begin by taping down your watercolor paper to a board or table using painter’s tape. This prevents buckling and ensures the clean edges needed for framing later. -
Sketch the composition:
Lightly sketch a loose, circular or oval arrangement in the center of the page. Don’t draw the final leaves yet; just mark the general zones where you want your color splashes to sit. -
Mix your first wash:
Load your Size 10 brush with plenty of water and a small amount of peach or muted pink paint. The mixture should be very watery for a translucent effect. -
Apply the first splash:
Touch the wet brush to the paper in the lower-right area of your composition. Let the paint bloom naturally. Don’t try to paint a specific shape; focus on creating a soft, organic cloud of color. -
Add the green wash:
While the pink area is still slightly damp (but not puddling), rinse your brush and pick up a watery sage green. Apply this to the top-center area, allowing the edges to gently touch and bleed into the pink section slightly. -
Create the third zone:
Mix a warm, muted orange or terracotta shade. Apply this to the left side of the composition, completing the triangular balance of the colored background. I find that leaving some white space between the colors keeps the piece feeling airy. -
Add splatter texture:
Load a smaller brush with a slightly more concentrated version of your reddish-orange paint. Tap the handle against your finger to flick tiny droplets across the colored areas. This adds energy and texture to the washes. -
Patience is key:
Let the background dry completely. You cannot start the detailed line work until the paper is bone dry, or your crisp lines will blur into the background washes.
Step 2: Foliage and Details
-
Outline the main stem:
Switch to your fine detail brush (Size 0 or 1). Mix a dark, earthy green-brown using Sap Green and a touch of Burnt Sienna or Payne’s Gray. Paint a central, thin stem curving upwards through the middle of the colored splashes. -
Paint the broad leaves:
Using a slightly larger brush (Size 4 or 6), paint distinct, almond-shaped green leaves branching off the right side of the main stem. Use a single stroke, pressing down and lifting up, to get a nice tapered shape. Paint these on top of the dried color washes. -
Add transparency details:
Once the green leaves are dry, use your fine liner brush to draw a delicate vein down the center of each leaf using a darker green shade. -
Draw the skeletal leaves:
On the left side (over the peach wash), switch back to your finest brush. Instead of filling in leaves, draw only the outline and veins of a large leaf shape. This ‘skeletal’ look creates a beautiful contrast with the solid green leaves. -
Add berry clusters:
Mix a reddish-brown color. Along the lower stems, paint tiny clusters of oval berries. Connect them to the main branch with hair-thin lines. -
Create the abstract flower:
In the upper right area, paint a loose, circular shape representing a seed head or dandelion puff. Use small dots and short dashes in a radial pattern rather than outlining a solid circle. -
Incorporate surrounding movement:
Add a few floating petals or small drifting leaves around the main arrangement to give the impression of a gentle breeze blowing through the foliage. -
Final dry and frame:
Allow all the detail work to dry for at least an hour. Once dry, carefully peel off the tape, erase any visible pencil marks, and place the artwork into your matted frame.
Wait for the Bloom
Work ‘wet-in-wet’ for the background splashes. Drop clean water on the paper first, then touch pigment to it. Let the water do the work of spreading the paint for softer edges.
Fixing Hard Edges
If your background wash dries with harsh, unwanted lines, scrub the edge gently with a clean, damp brush to reactivate the paint and soften it back into the paper.
This serene botanical piece makes a sophisticated gift that looks professionally composed but relies on simple, relaxing techniques


Have a question or want to share your own experience? I'd love to hear from you in the comments below!