
If you love color, detail, and that little hit of sparkle, diamond painting is such a satisfying way to make art without overthinking it. Here are my favorite diamond painting ideas—starting with the classic crowd-pleasers and slowly drifting into the extra-fun, slightly unexpected stuff.
Stained Glass Butterfly Look

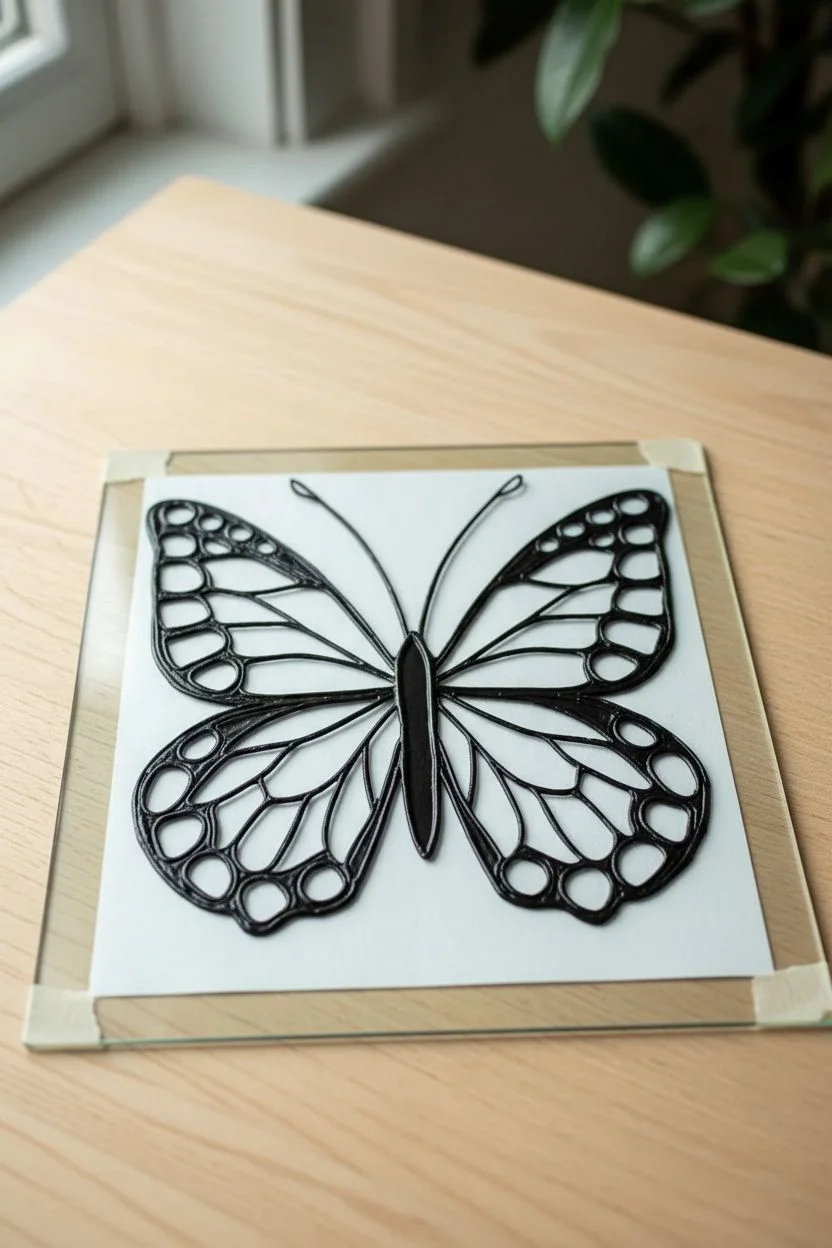
Capture the luminous beauty of stained glass without the complicated soldering by creating this striking framed butterfly. Using a clever combination of transparent paints and relief outliner, you’ll achieve a radiant, translucent effect that glows beautifully when placed on a windowsill.
Step-by-Step Tutorial
Materials
- Square black shadow box frame (approx. 8×8 inches)
- Glass pane (from the frame) or clear acrylic sheet
- Black relief outliner or glass contour paste
- Glass paints or high-quality alcohol inks (magenta, purple, teal, amber, orange)
- Fine detail paintbrush
- White or cream crinkled texture paper (or vellum)
- Paper template of a butterfly
- Masking tape
- Isopropyl alcohol and lint-free cloth
- Black craft wire (20 gauge) for antennae
- Hot glue gun or strong craft adhesive
Step 1: Preparation & Outlining
-
Clean surface:
Remove the glass pane from your shadow box frame. Clean it thoroughly with isopropyl alcohol and a lint-free cloth to remove any oils or fingerprints, as these inhibit paint adhesion. -
Secure template:
Place your butterfly line art template on a flat surface. Position the clean glass directly over it and secure the corners with small pieces of masking tape so the image doesn’t shift. -
Trace outlines:
Using the black relief outliner, carefully trace the main lines of the butterfly wings. Apply steady, even pressure to the tube to create raised, consistent lines that mimic lead caming. -
Fill details:
Continue tracing the smaller interior shapes and circular details on the wing edges. If you make a mistake, wipe it away immediately with a cotton swab or let it dry and peel it off later. -
Create the body:
Fill in the central body section of the butterfly completely with the black outliner or a thick layer of black glass paint to make it opaque and solid. -
Dry completely:
Allow the outline to dry fully according to the manufacturer’s instructions, typically 12 to 24 hours. The lines must be hard to the touch before you add color.
Master the Flow
Work from the center of the butterfly outward. This prevents your hand from accidentally smudging wet paint or lines you’ve already completed on the outer edges.
Step 2: Adding Color & Transparency
-
Start with upper wings:
Dip your fine brush into magenta glass paint. Fill the upper inner sections of the wings, gently pushing the paint up against the black relief lines without going over them. -
Blend transitions:
While the magenta is wet, introduce purple paint into adjacent sections. I like to slightly overlap the colors in the middle cells to create a soft gradient effect. -
Lower wing coloring:
Isolate the lower wing sections using amber and orange tints. Apply the lighter amber near the center and transition to deeper orange towards the edges for depth. -
Detail accents:
Use teal and light blue paints to fill the small circular cells along the outer edges of the wings. These cool tones create a beautiful contrast against the warm main colors. -
Check transparency:
Lift the glass slightly (keeping it flat) to check for uneven spots or bubbles. Pop bubbles with a pin while the paint is wet to ensure a smooth, glass-like finish. -
Dry paint:
Let the painted glass cure completely in a dust-free area. This usually takes at least 24 hours for a durable, hard finish.
Gap Control
If paint leaks under a black line, let it dry completely. Then, use a craft knife to gently scrape the excess paint off the glass without damaging the black outline.
Step 3: Mounting & Assembly
-
Prepare backing:
Cut a sheet of crinkled texture paper or vellum to fit the inside of your shadow box frame. This adds a subtle, cloudy texture behind the clear glass. -
Shape antennae:
Cut two lengths of black craft wire, roughly 3 inches long. Gently curve them with your fingers to create natural-looking antennae shapes. -
Attach antennae:
Flip the dried glass over. Use a tiny dot of strong adhesive or hot glue to attach the wire antennae to the back of the painted butterfly head, positioning them so they extend upward. -
Mount glass:
Clean the front of the painted glass one last time. Place it into the frame, ensuring the painted side is protected inside the shadow box. -
Insert backing:
Place the textured paper behind the glass, then secure the frame backing board in place. The paper will diffuse light through the colored sections beautifully.
Place your finished piece near natural light to see the vibrant colors come to life


Bejeweled Bird With Floral Accents
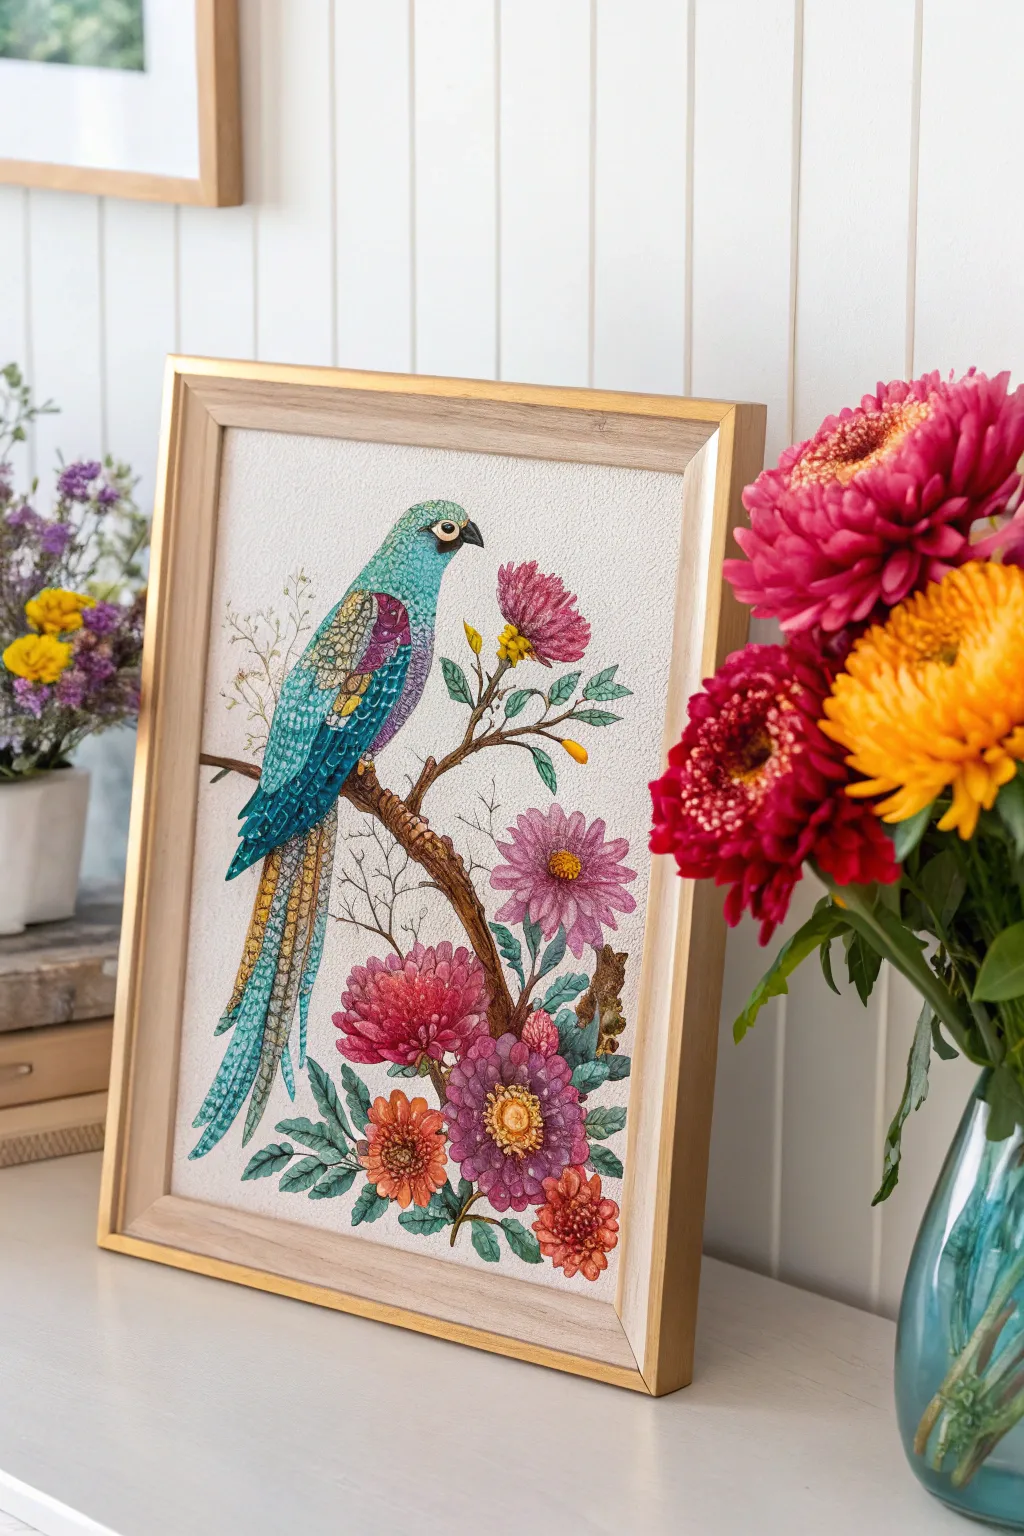
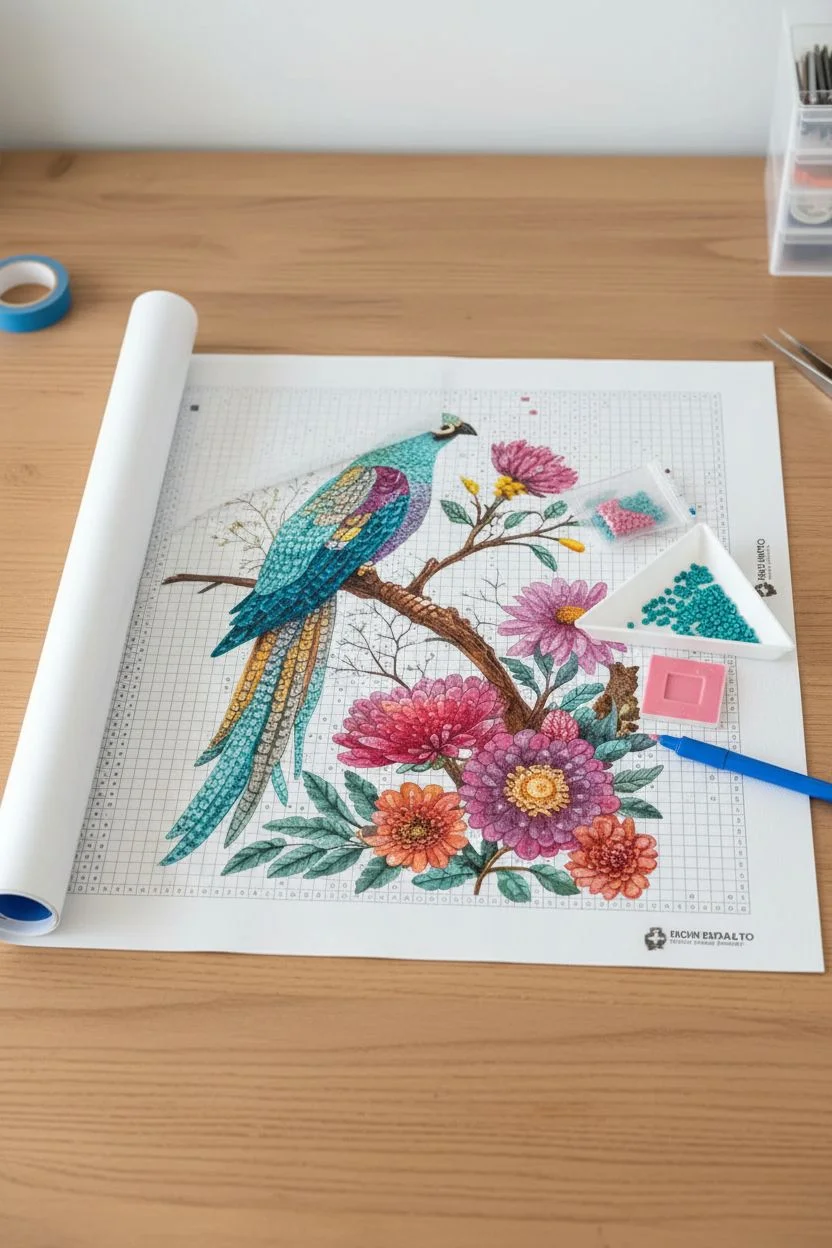
Bring the vibrancy of the rainforest indoors with this stunning diamond painting project featuring a jeweled parrot perched among blooming florals. This intermediate-level design combines intricate color blocking with delicate shading to create a textured, shimmering masterpiece perfect for brightening any room.
Detailed Instructions
Materials
- High-quality adhesive canvas pre-printed with the ‘Bejeweled Bird’ chart
- Round or square resin drills (diamonds) in specified color palette (teal, indigo, mauve, gold, coral, emerald tones)
- Diamond painting pen with single and multi-placer tips
- Pink wax or blue tac for the applicator pen
- Drill sorting tray with funnel spout
- Tweezers (specifically fine-point)
- Drafting tape or washi tape
- Light pad (highly recommended for intricate sections)
- Wooden frame (light oak finish) and mounting board
- Sealer (glossy or matte finish)
Step 1: Setting the Stage
-
Flatten the canvas:
Unroll your canvas and lay it on a flat, clean surface. If it curls, place heavy books on the comers overnight to flatten it out completely before starting. -
Organize your workstation:
Sort your drill packets by number or symbol. I find it helpful to pour the most commonly used background colors into separate small containers for easy access. -
Peel back the film:
Locate the top-left corner of the canvas. Generally, peel back only a small 4×4 inch section of the protective plastic film to keep the rest of the adhesive fresh and dust-free. -
Prepare your tools:
Press the tip of your diamond painting pen into the wax pad to load it. Make sure there is just enough wax to grab the drill without leaving residue.
Sticky Situation?
If a section of canvas loses its stickiness, use a tiny dab of fabric glue or specialized diamond painting adhesive. Let it get tacky before placing the drill.
Step 2: Creating the Focal Point
-
Start with the parrot’s eye:
Begin placing drills at the parrot’s eye and beak area. This is the most detailed section, requiring precise placement of black, white, and pale yellow drills to create that lifelike glint. -
Fill the head plumage:
Transition to the bright teal and aqua drills for the head. Work in small clusters, ensuring the drills sit tightly against one another to avoid gaps. -
Outline the wing structure:
Move down to the wing. Use the darker indigo and purple drills to define the edges of the feathers first, creating a visual boundary for the lighter interior colors. -
Detail the wing patterns:
Fill in the intricate wing scales with golds, purples, and lighter blues. Pay attention to the directional shifts in color that mimic the sheen of feathers. -
Complete the tail feathers:
Flow down into the long tail feathers. These require long, trailing lines of teal and gold drills. A multi-placer tool works wonders here for the straighter sections of the tail.
Step 3: Developing the Floral Scene
-
Build the branch:
Switch to your earth tones. Use various shades of brown and warm bronze drills to create the textured appearance of the wooden branch the parrot rests on. -
Populate the large blooms:
T tackle the prominent pink and mauve chrysanthemums. I like to work from the center yellow seeds outward to the petal tips to maintain the flower’s radial symmetry. -
Add accent flowers:
Fill in the smaller coral and orange flowers near the bottom. These brighter pops of color balance the cool tones of the bird. -
Insert foliage:
Place the emerald and sage green drills for the leaves. Ensure the points of the leaves are sharp by placing drills precisely at the symbol edges. -
Fill the background:
Once the main subjects are done, fill in the creamy off-white background. Using a checkerboard pattern (placing a drill every other spot, then filling gaps) helps keep lines straight.
Add Extra Sparkle
Swap out the standard resin drills for ‘AB’ (Aurora Borealis) drills on the bird’s wing and tail feathers. Their iridescent coating catches light beautifully.
Step 4: Finishing and Framing
-
Check for loose drills:
Run your hand gently over the completed canvas to feel for any loose or raised drills. Press them down firmly or replace them if the adhesive seems weak. -
Seal the artwork:
Apply a thin, even layer of sealant over the entire canvas using a soft flat brush to lock the diamonds in place and add a unified shine. -
Trim the edges:
Carefully trim the excess canvas border using scissors or a craft knife, cutting close to the diamond edge but leaving enough margin for framing if needed. -
Mount and frame:
Place the finished piece into a light oak frame to complement the organic tones of the branch, securing the back firmly.
Step back and admire how the light catches every facet of your vibrant avian artwork


Mandalas for Calm, Steady Dotting
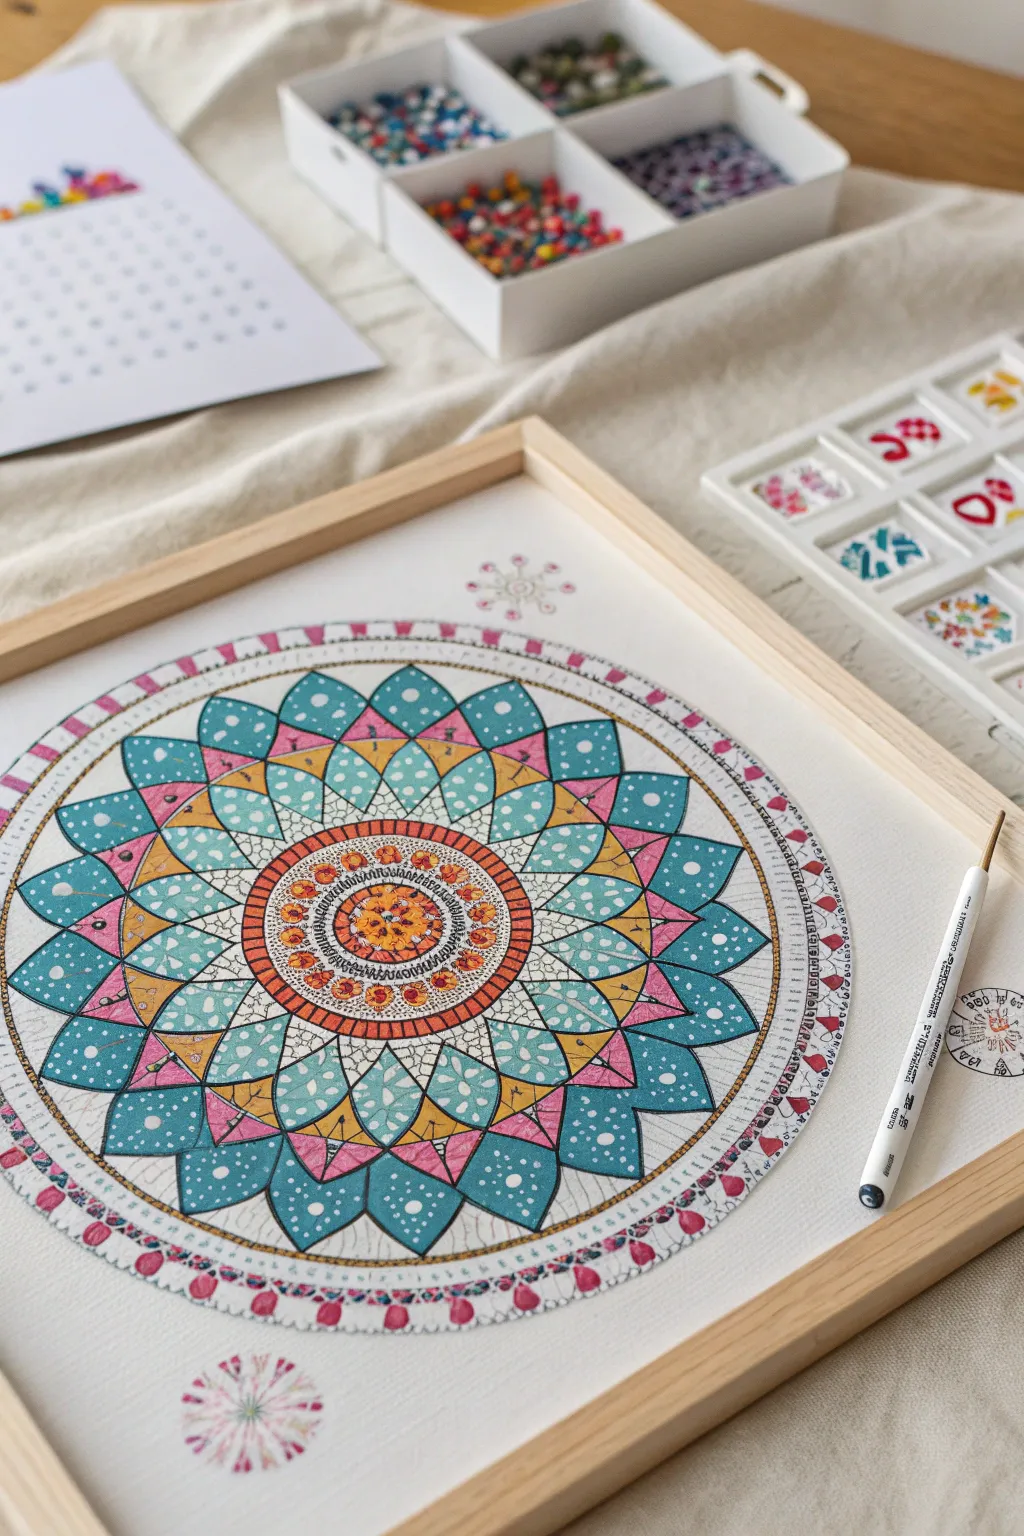
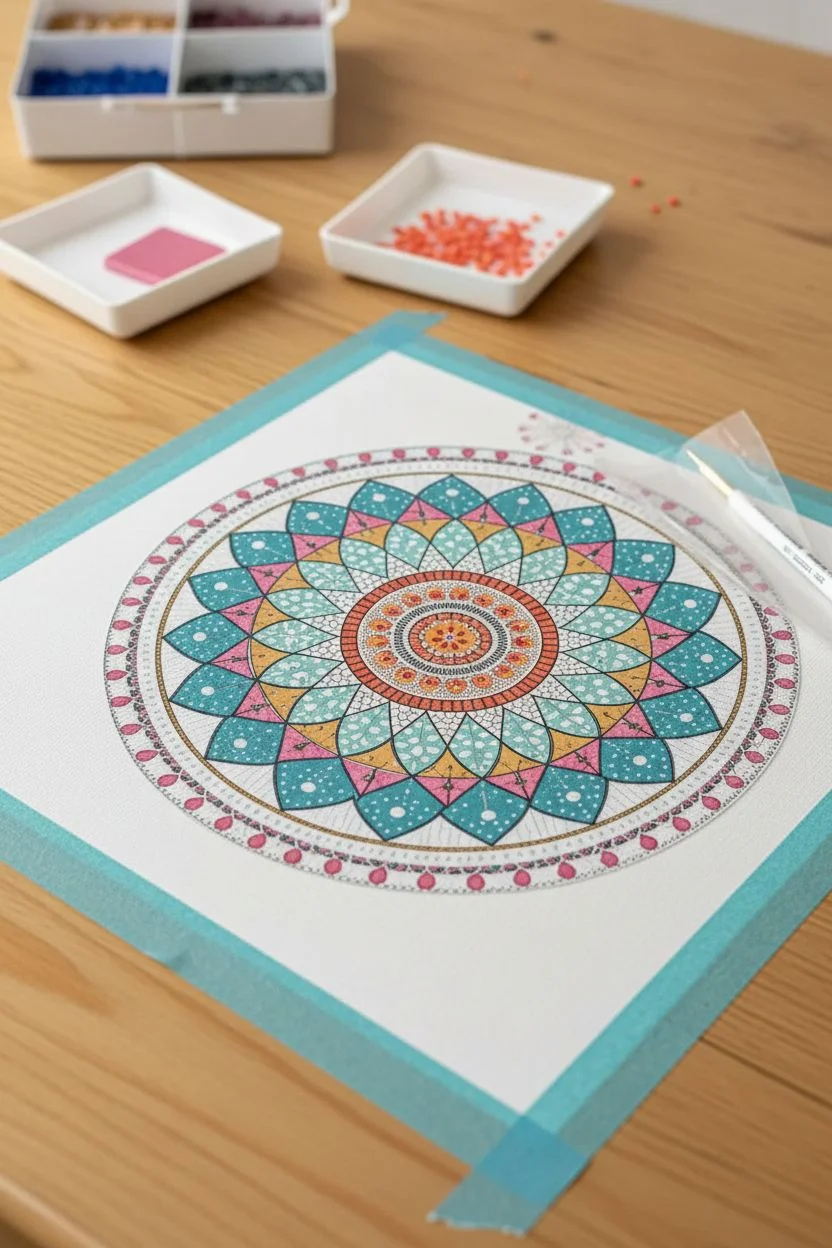
This project brings the meditative symmetry of a mandala to life with the sparkle of diamond painting. The final piece features a harmonious palette of teals, corals, and soft yellows, set within a light wood frame that perfectly complements the artwork’s calming energy.
How-To Guide
Materials
- Pre-printed mandala canvas (approx. 30×30 cm)
- Round diamond drills (teal, light blue, coral, dark pink, yellow, orange, white)
- Diamond painting pen/stylus
- Wax pad or blue tack
- Sorting trays for drills
- Square light wood frame (without glass for easier display)
- Washi tape or masking tape
- Sealant (optional, like Mod Podge Super Gloss)
Step 1: Preparation and Setup
-
Flatten the Canvas:
If your canvas arrived rolled, lay it flat on a clean table. Place heavy books on the corners for a few hours or overnight to remove any curl, ensuring a smooth working surface. -
Tape the Corners:
Secure the corners of your canvas to your work surface using painter’s tape or washi tape. This prevents the canvas from shifting while you work and keeps the edges neat. -
Peel Back the Film:
Carefully peel back a small section of the protective plastic film—don’t remove the whole thing at once. Start from the center or one corner to keep the adhesive sticky and dust-free. -
Organize Your Colors:
Select the colors needed for the section you are working on. Pour a small amount of the orange and coral drills into your sorting tray and shake it gently side-to-side to align the diamonds flat side down.
Step 2: Applying the Diamonds
-
Begin at the Center:
Start this mandala from the very center rosette. Dip your stylus tip into the pink wax pad to pick up a small amount of wax, which will help grab the drills. -
Fill the Inner Circle:
Pick up an orange drill and place it precisely on its corresponding symbol in the center. Continue filling this central medallion with orange and yellow drills, working in a circular motion. -
Radiate Outwards:
Move to the next ring surrounding the center. Switch to coral and dark pink drills. I find it easiest to complete one full color ring before switching to the next hue to maintain symmetry. -
Work the Petal Layer:
Focus on the large, teal lotus-style petals. This is a larger area, so you might want to use a multi-placer tip on your pen if you have one, allowing you to place 3-5 drills at a time. -
Add Accents:
Pay attention to the white dots or smaller detail work inside the teal petals. Place these singular contrasting drills carefully to ensure they stand out against the blue background. -
Complete the Outer Ring:
The final outer border features a delicate pattern of small pink and coral accents. Work your way around the circumference methodically, rotating the canvas if needed to reach comfortably.
Sticky Situation?
If a section of canvas loses its stickiness, use a tiny dot of diamond painting glue or clear tacky glue on the back of the drill before placing it down.
Step 3: Finishing Touches
-
Check for Gaps:
Once all diamonds are placed, inspect the canvas under a bright light. Look for any missing drills or crooked rows. Use the tip of your stylus or a pair of tweezers to nudge any stray diamonds into alignment. -
Roll to Secure:
Place the protective plastic film back over the finished artwork. Use a rolling pin or a specialized diamond painting brayer to roll firmly over the canvas. This ensures every diamond is fully adhered to the glue. -
Seal the Artwork (Optional):
To make your mandala last longer, apply a thin layer of brush-on sealant. This prevents diamonds from popping off over time and adds a unified gloss finish. Let it dry completely for 24 hours. -
Trim the Canvas:
Using sharp scissors or a craft knife and ruler, trim the excess white canvas border. Leave just enough edge to fit securely into your frame recess. -
Frame Your Piece:
Remove the backing from your light wood frame. Insert the canvas carefully, ensuring the mandala is centered. Replace the backing and secure the clips. Display it on a desk or hang it on a wall to enjoy your sparkling creation.
Checkerboard Trick
For large areas of one color, place diamonds in a checkerboard pattern first (every other spot). Filling in the gaps later straightens the lines considerably.
Now you have a shimmering mandala that serves as a permanent reminder of your peaceful crafting time


Slim Bookmark With an Ombre Fade
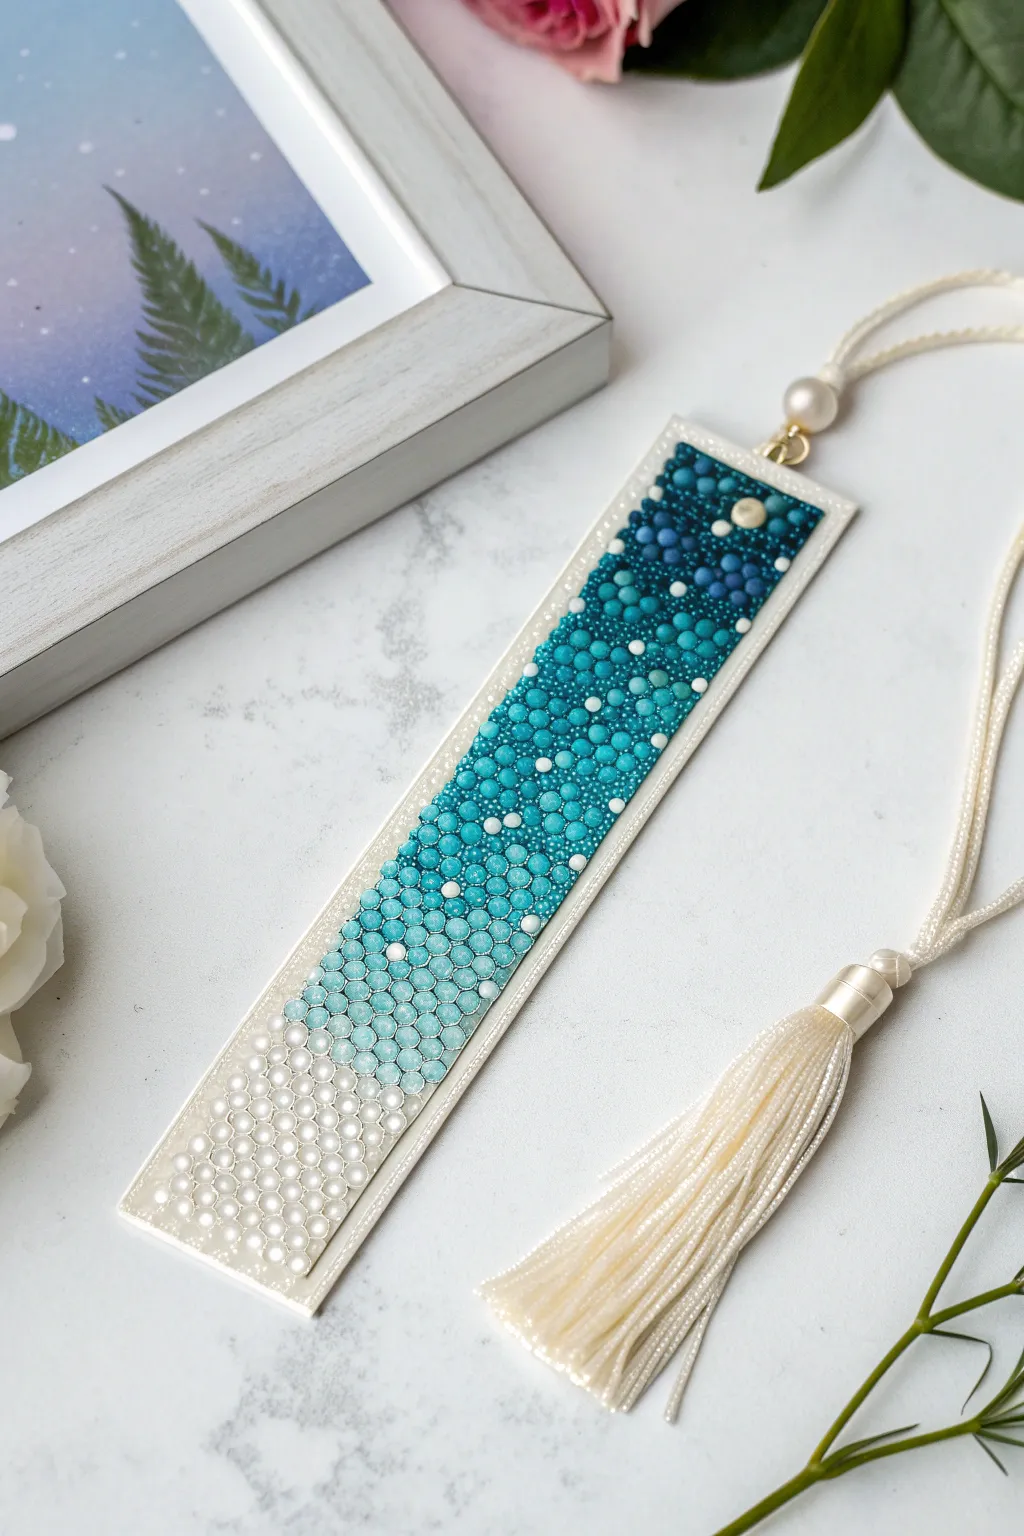
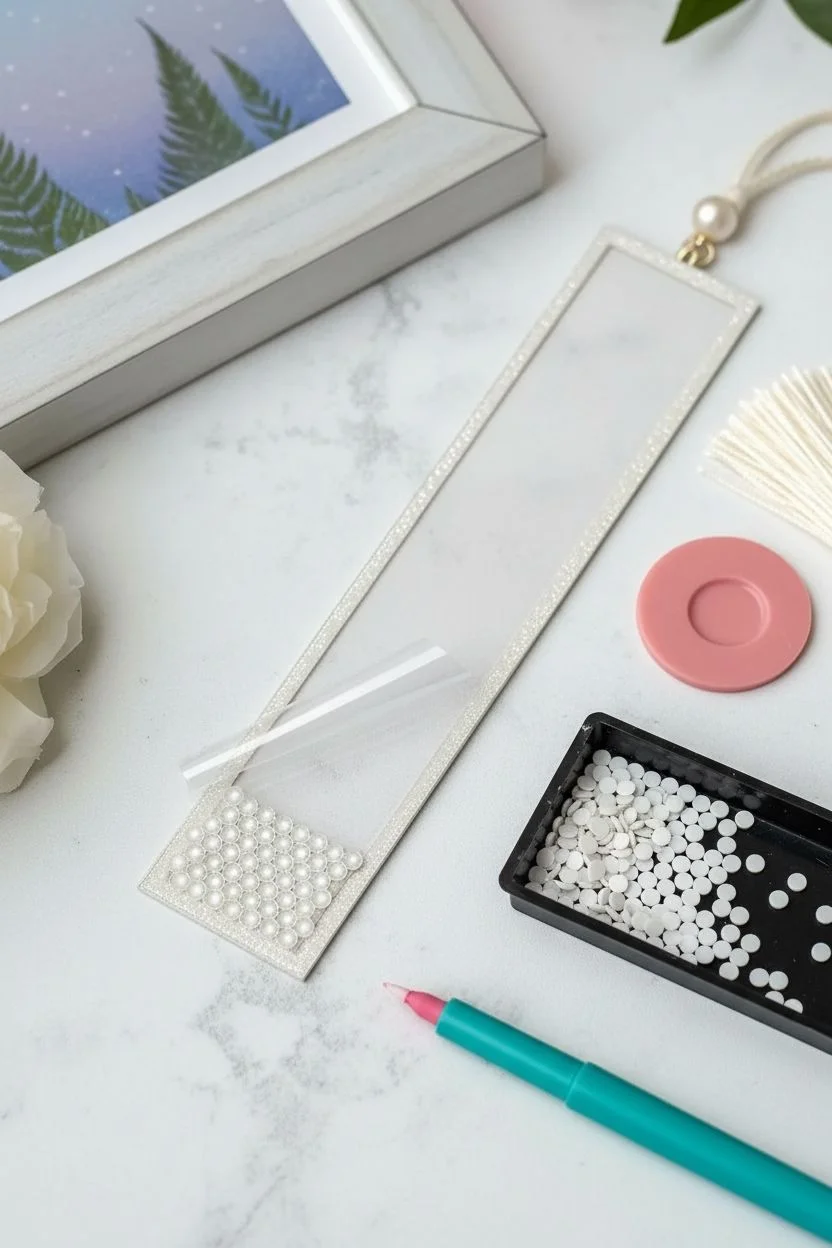
Capture the serene transition of ocean waves with this sparkling diamond painting bookmark. The design features a smooth ombre fade from pearlescent white into deep turquoise, accented by a silky tassel.
How-To Guide
Materials
- Blank acrylic or plastic bookmark base (rectangular)
- Diamond painting drills (round): Pearl White, Light Aqua, Turquoise, Dark Teal, White (for accents)
- Diamond painting pen/stylus
- Pink wax pad
- Sorting tray
- Double-sided adhesive sheet or diamond painting glue
- Sealant (glossy Mod Podge or diamond painting sealer)
- Cream or white tassel with cord
- Tweezers
- Strong craft glue (E6000 or similar)
Step 1: Preparation & Base setup
-
Prepare the adhesive surface:
If your bookmark blank isn’t pre-glued, cut a piece of double-sided adhesive sheet to match the exact dimensions of the rectangular area. Peel off one side and press it firmly onto the bookmark base, smoothing out any air bubbles. -
Reveal the canvas:
Peel back the protective top layer of the adhesive just about an inch from the bottom. This prevents dust from settling on the upper sticky parts while you work from the bottom up. -
Set up your tools:
Dip the tip of your diamond painting pen into the pink wax to create a tacky surface for picking up drills. Pour a small amount of the Pearl White drills into your sorting tray and shake gently to align them flat side down.
Uneven Rows?
If your rows start drifting, use a credit card edge to firmly push them back into alignment while the glue is still tacky. Check alignment every few rows.
Step 2: Creating the Gradient
-
Start with the lightest shade:
Begin at the very bottom of the bookmark. Pick up the Pearl White drills one by one and place them in neat, straight horizontal rows. Fill approximately the bottom 25% of the bookmark with solid white. -
Refine alignment:
Use the straight edge of your sorting tray or a ruler to gently push the rows down, ensuring they are tightly packed and straight. -
Introduce the first transition:
As you move upward, begin mixing in a few Light Aqua drills scattered among the white rows. This creates a speckled transition zone rather than a harsh line. -
Shift to Light Aqua:
Gradually increase the density of the Light Aqua drills until you are filling solid rows with just this color. Continue this for the next section of the bookmark. -
Blend into Turquoise:
Repeat the blending technique: introduce Turquoise drills sparsely into the Light Aqua section, slowly increasing their frequency as you work your way up. -
Fill the mid-section:
Transition fully to the vibrant Turquoise color for the middle-upper section. The goal is a seamless visual flow from light to dark. -
Create the darkest zone:
Near the top, blend in your Dark Teal drills. Fill the final top portion primarily with this deep shade to anchor the design. -
Add ‘star’ accents:
To mimic the look in the photo, take a few pure White or Pearl drills and scatter them randomly into the darker teal sections. These act like tiny stars or bubbles catching the light.
Step 3: Finishing Touches
-
Inspect and adjust:
Look over the entire piece for any gaps or crooked drills. Use tweezers to nudge beads into place or fill empty spots. -
Roll it out:
Place the protective plastic sheet back over the finished artwork. Use a small brayer roller or a rolling pin to press down firmly, ensuring all drills are securely adhered to the glue. -
Apply sealant:
Brush a thin, even layer of high-gloss sealant over the diamonds. I find this prevents them from popping off during use and gives shorter drying time. -
Allow to cure:
Let the sealant dry completely according to the bottle instructions, usually around 12-24 hours. -
Attach the hardware:
Locate the hole at the top of the bookmark. Thread the loop of your cream tassel through the hole. -
Secure the tassel:
Pull the tail of the tassel through its own loop and tighten gently to secure it like a luggage tag knot. Add a tiny dab of clear craft glue to the knot if you want extra security.
Multiplying Tip
Use a multi-placer tip on your pen to place 3-5 drills at once for the solid color sections. It speeds up the process and keeps lines straighter.
Now you have a shimmering, functional piece of art to save your place in your next adventure
BRUSH GUIDE
The Right Brush for Every Stroke
From clean lines to bold texture — master brush choice, stroke control, and essential techniques.
Explore the Full Guide
Partial-Drill Design With a Sparkly Focal Point
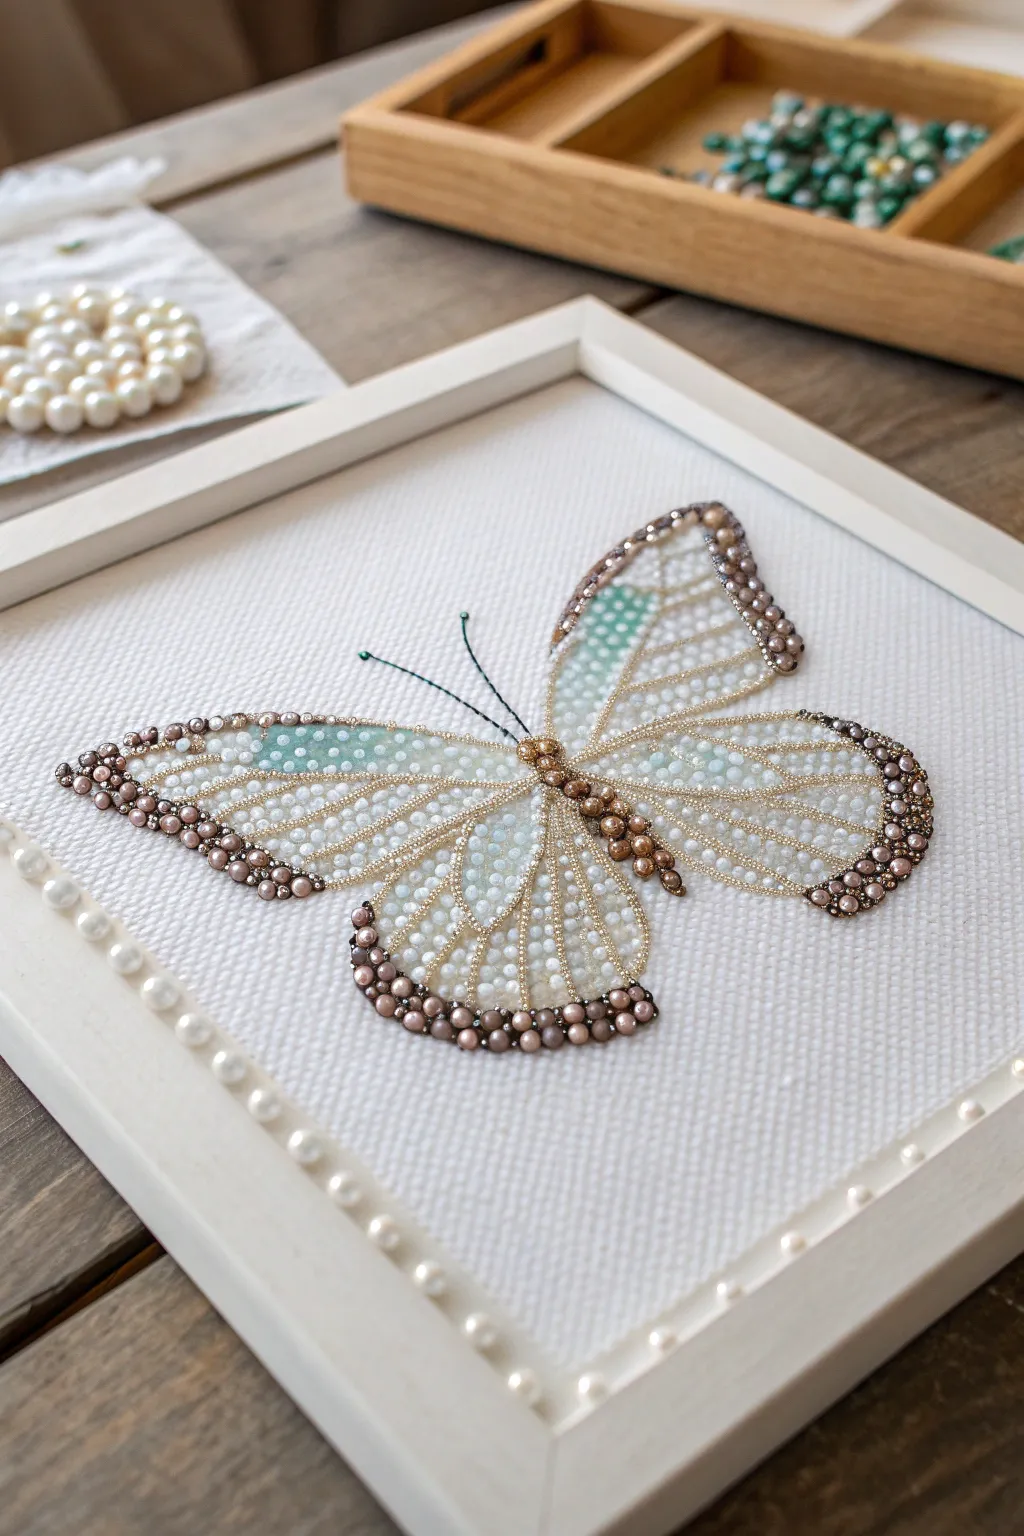

This elegant project combines the precision of diamond painting with the texture of bead embroidery to create a stunning, dimensional butterfly. The result is a sophisticated piece of wall art where delicate seed beads and lustrous pearls come together on crisp white canvas to form shimmering wings.
Step-by-Step Tutorial
Materials
- White pre-stretched canvas or canvas board (8×8 or 10×10 inches)
- White wooden shadow box frame
- Butterfly outline template or transfer paper
- High-tack jewelry glue or strong craft adhesive
- Wax pencil or rhinestone picker tool
- Metallic gold seed beads (size 11/0)
- Champagne or dusty pink pearl beads (3mm and 4mm)
- White, clear, and pale teal seed beads or round drills
- Thin black wire for antennae
- Small pearls for frame border (optional)
- Tweezers
- Small bead trays
Step 1: Preparation & Outline
-
Prepare the canvas:
Begin with a clean white canvas. If using a standard stretched canvas, ensure it fits your frame beforehand. Lightly sketch your butterfly outline in the center, or use transfer paper to trace a template. Keep the lines very faint so they won’t show through the pale beads later. -
Define the veins:
Start by laying down the structural lines of the wings. Apply a thin line of adhesive along the main veins of the butterfly wings. Using your wax pencil, carefully place the metallic gold seed beads in single file lines to create the framework. -
Outline the wings:
Continue with the gold seed beads, outlining the entire perimeter of all four wing sections. This golden border will contain the rest of your beadwork and give the piece a defined shape.
Step 2: Filling the Wings
-
Start with the teal accents:
Locate the upper sections of the top wings where the soft teal color appears. Apply a small amount of glue and fill these small triangular areas with pale teal seed beads or drills. Pack them tightly for a solid block of color. -
Add translucent filler:
Move to the empty spaces between the gold ‘veins.’ Use clear or white AB (Aurora Borealis) drills here. These reflect light beautifully and create an airy, delicate texture. Place them individually rather than dumping them to maintain precision. -
Create the wing tips:
For the outer edges of the wings, switch to your larger pearls. Use the dusty pink or champagne pearls (3mm) to create a scalloped border along the bottom edges of the lower wings and the tips of the upper wings. This adds significant weight and visual interest. -
Refine the border:
Nestle smaller metallic beads between the larger pearls along the edge to smooth out the transition. This mixed-size technique makes the edges look organic rather than blocky. -
Construct the body:
For the thorax and abdomen (the central butterfly body), use a line of the medium-sized bronze or champagne pearls. Start with slightly larger beads at the top and taper to smaller ones at the tail to mimic a natural shape.
Sticky Situation?
If glue strings appear across your beads as you work, wait for them to dry completely. Once hard, use fine-point tweezers to snip and peel them away without smudging the bead surface.
Step 3: Details & Framing
-
Attach the antennae:
Cut two short lengths of thin black wire, about 1.5 inches each. Add a tiny dab of strong glue at the top of the butterfly’s head and tuck the wire ends underneath the top bead. Use tweezers to gently curve them outward. -
Top the antennae:
Dip the very tips of the wire into glue and slide a tiny green or teal seed bead onto the end of each antenna for a finished look. -
Inspect the work:
Look closely at the wings for any gaps where the canvas shows through too noticeably. I usually use a single gold seed bead to fill any awkward empty spaces, which adds a little extra sparkle. -
Prepare the frame:
While the butterfly dries completely, turn your attention to the frame. Remove the glass if possible, or clean it thoroughly. Determine the spacing for the decorative pearl border. -
Decorate the matting:
Apply dots of glue at regular intervals (about 1 inch apart) along the inner edge of the frame or the mat board. Place a single large white pearl on each dot. This echoes the pearls in the butterfly and ties the whole piece together. -
Final assembly:
Once all glue is cured (wait at least 4-6 hours), gently place the canvas into the shadow box frame. Check that no loose beads fall off; if they do, re-glue them immediately.
Level Up: Velvet Touch
Swap the plain canvas background for a piece of stretched velvet fabric in cream or pale grey. The texture contrast between plush velvet and hard glass beads looks incredibly luxurious.
Hang your shimmering creation in a spot that catches the morning light to see the full spectrum of sparkles


Have a question or want to share your own experience? I'd love to hear from you in the comments below!