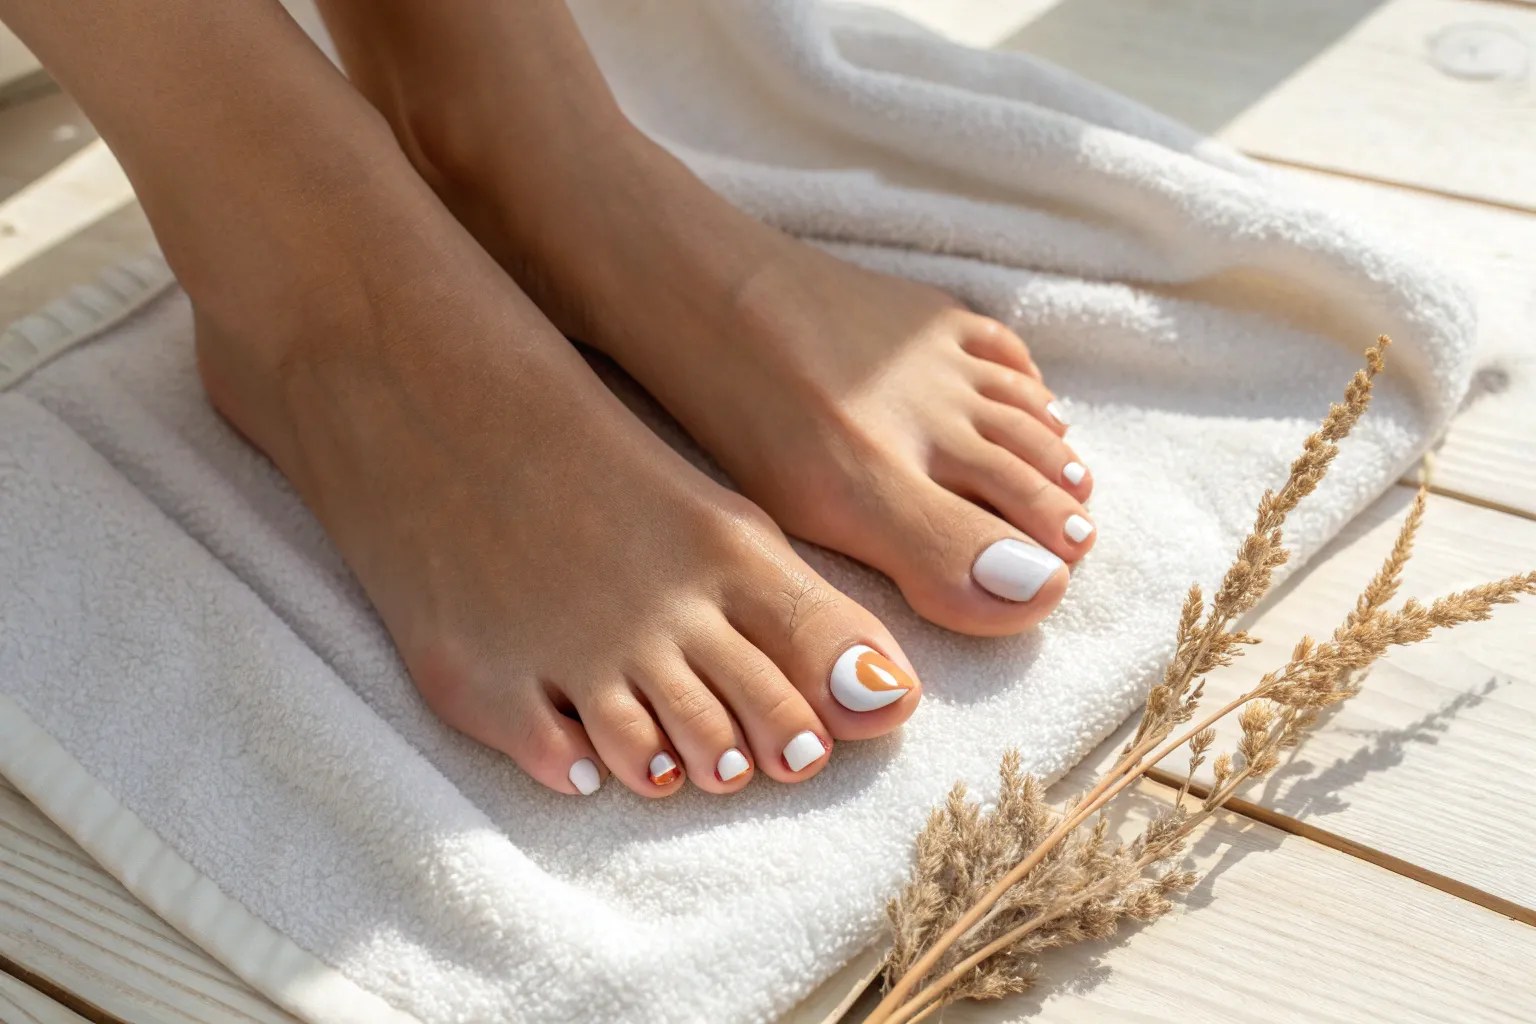
When I’m craving a tiny, satisfying canvas, I go straight to painted toes—they’re small, forgiving, and weirdly addictive to decorate. Here are my favorite painted toes ideas, starting with the classics and drifting into artsy, unexpected little toe masterpieces.
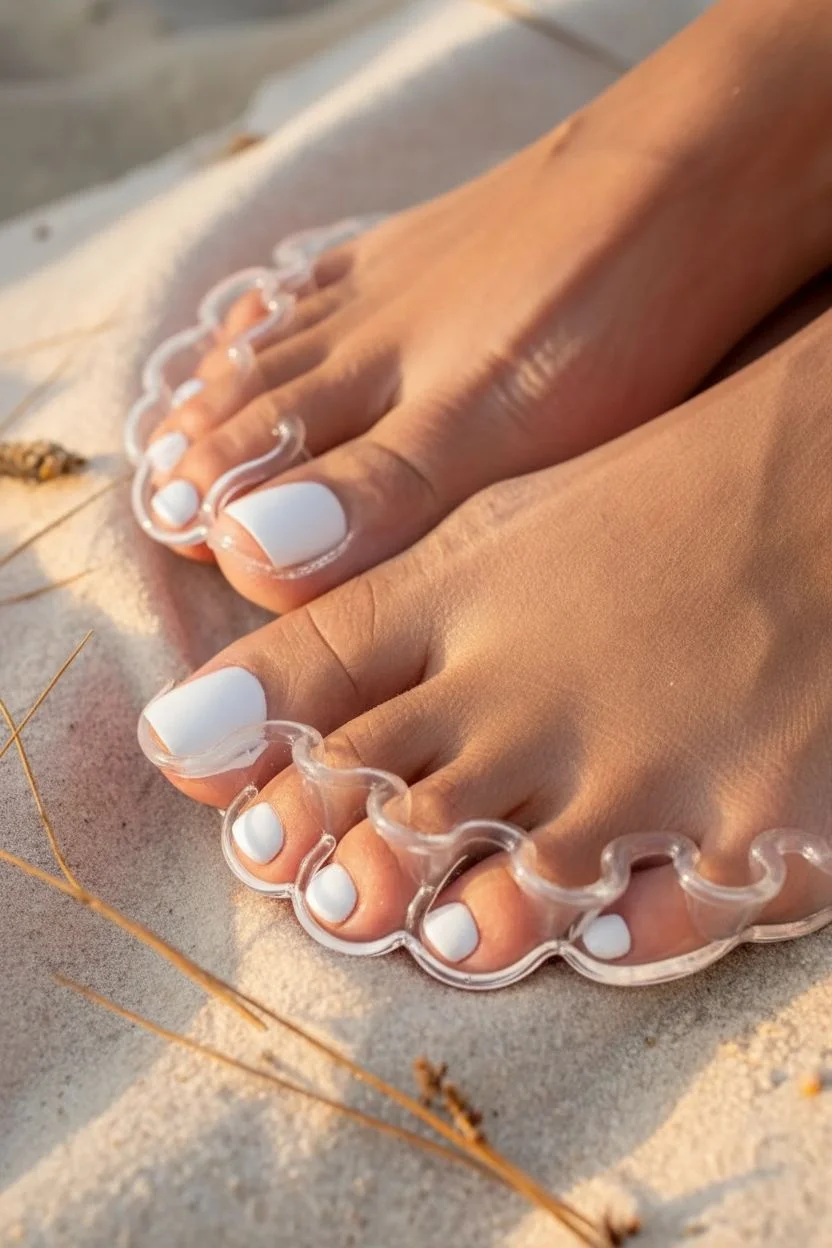
Classic White French Tips
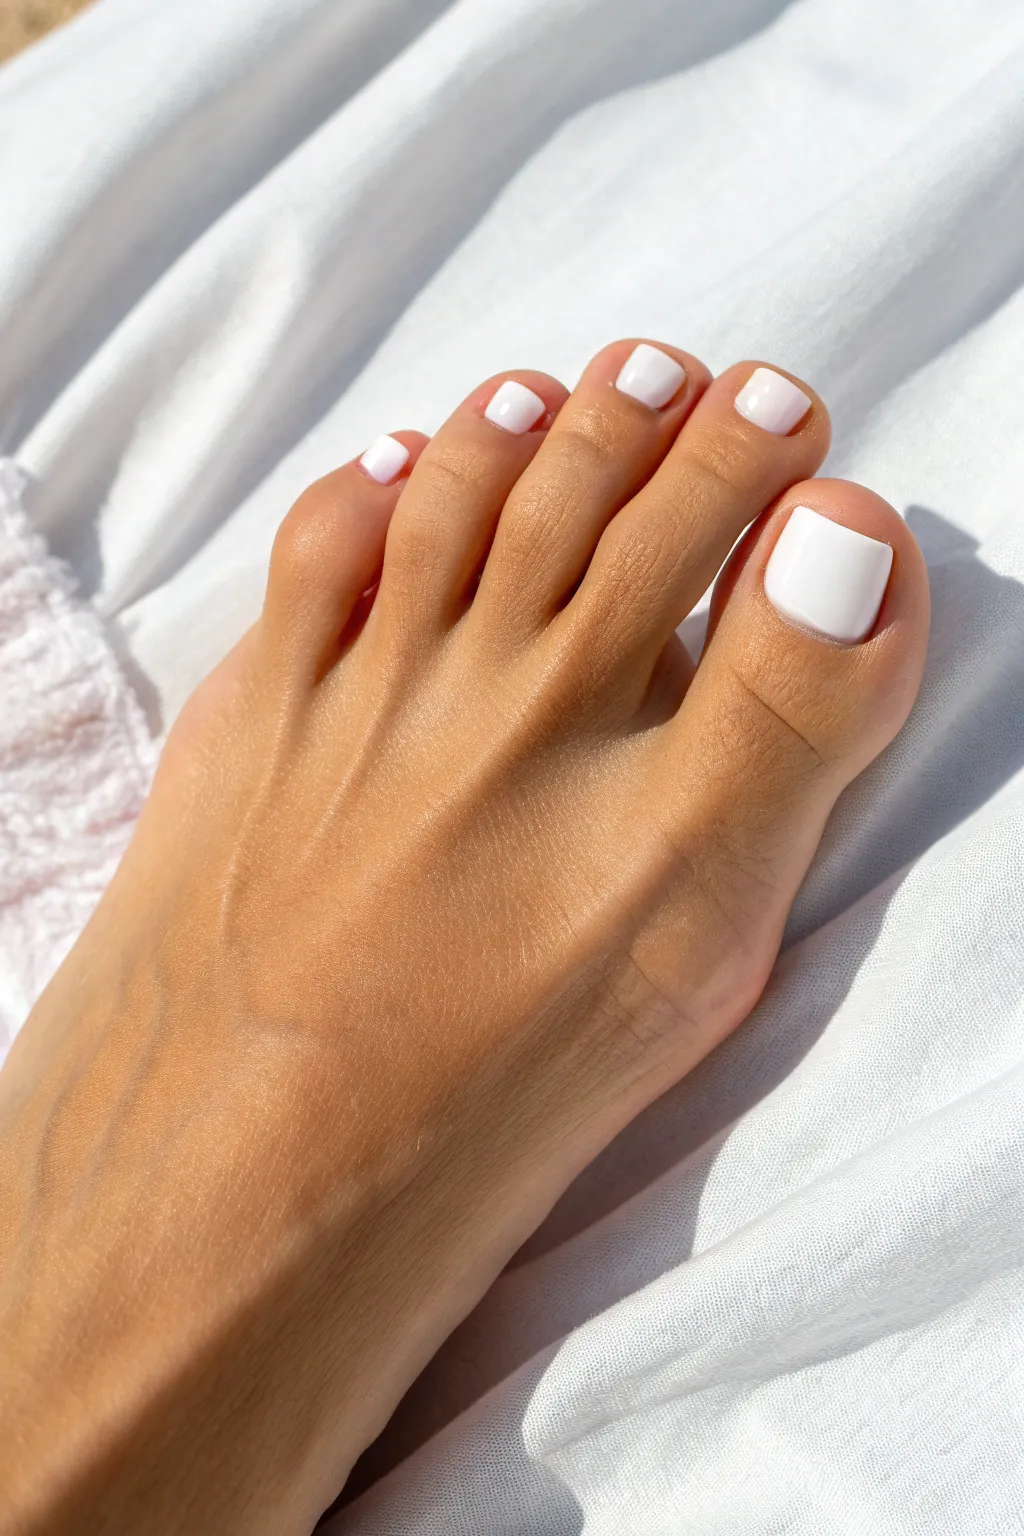
Achieve that ultra-clean, high-contrast aesthetic that looks incredible against sun-kissed skin. While this look mirrors the brightness of a French tip, it commits to a full-coverage application for a modern, monochromatic finish.
Detailed Instructions
Materials
- Opaque white nail polish
- Ridge-filling base coat
- High-gloss top coat
- Nail clippers
- Glass or emery nail file
- Buffing block
- Cuticle pusher
- Toe separators
- Angled cleanup brush
- 100% Acetone
Step 1: Preparation & Shaping
-
Clean slate:
Remove any old polish completely with acetone to ensure no color bleeds through the white. -
Soak and soften:
Soak your feet in warm, soapy water for about 5 to 10 minutes to soften the cuticles. -
Trim length:
Clip the toenails straight across. Keep the length moderate—short enough to be tidy, but long enough to see the shape. -
Shape the edges:
File the rough edges into a ‘squoval’ shape—mostly square with gently rounded corners. -
Tidying cuticles:
Gently push back your cuticles with your pusher tool. A clean nail bed is essential for white polish, as it highlights any ragged skin. -
Buffing the surface:
Lightly buff the surface of every toenail. White polish tends to show ridges, so you want the smoothest canvas possible here. -
Dehydrate:
Wipe each nail with a cotton pad soaked in acetone or alcohol to remove dust and natural oils.
Step 2: Painting
-
Separation:
Insert toe separators to keep each toe distinct and prevent accidental smudges. -
Base layer:
Apply a coat of ridge-filling base coat. This is my secret weapon for white pedicures; it fills uneven texture closer to the surface. -
First white coat:
Apply a thin layer of white polish. Don’t worry if this first pass looks streaky or translucent; just focus on keeping the edges neat. -
Drying time:
Wait at least two full minutes. White polish is often thicker and needs extra time to set between layers or it will drag. -
Second white coat:
Pick up a slightly larger bead of polish. Place it near the cuticle (without touching skin) and push it gently toward the base before pulling straight down. -
Floating the brush:
Glide the brush over the nail rather than pressing down. This ‘floating’ technique helps the opaque pigment self-level. -
Edge wrapping:
Swipe the brush horizontally across the very tip (free edge) of the nail to seal the color.
Pro Choice: Pure Whites
Look for a polish labeled ‘opaque’ or ‘creme.’ Avoid sheer or pearl finishes, as they won’t give you that bold, solid block of color shown in the photo.
Step 3: Finishing Touches
-
Cleanup duty:
Dip your angled brush into acetone and carefully trace around the cuticle line to sharpen the edges. This makes the polish look like it was applied by a pro. -
Top coat:
Once the white is dry to the touch, apply a generous layer of high-gloss top coat to get that shiny, gel-like appearance. -
Hydration:
Finish by massaging cuticle oil into the skin around the nails to rehydrate after the acetone exposure.
Troubleshooting: Chalkiness
Does the white look thick or chalky? Your bottle might be old. Add 2 drops of nail polish thinner (not remover!) to restore the smooth consistency.
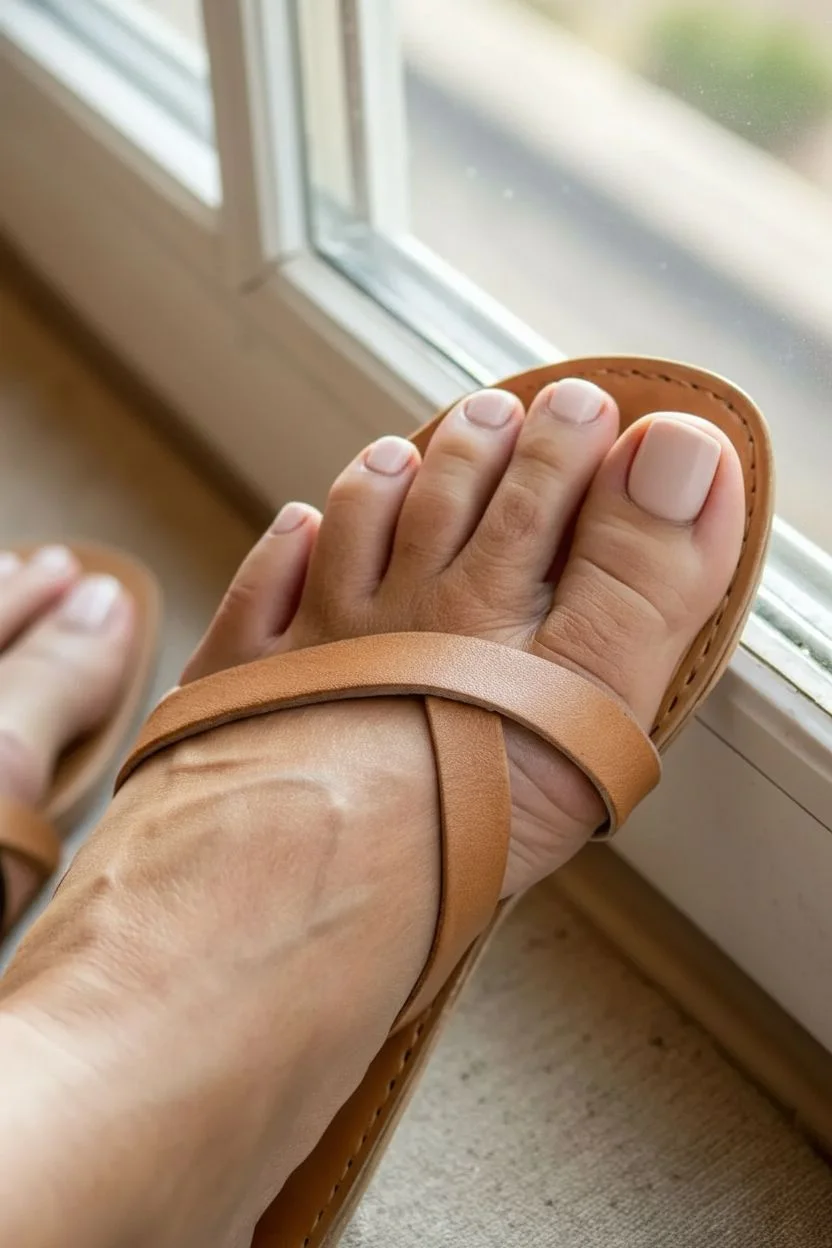
Enjoy your fresh, crisp pedicure that pairs perfectly with open-toed sandals


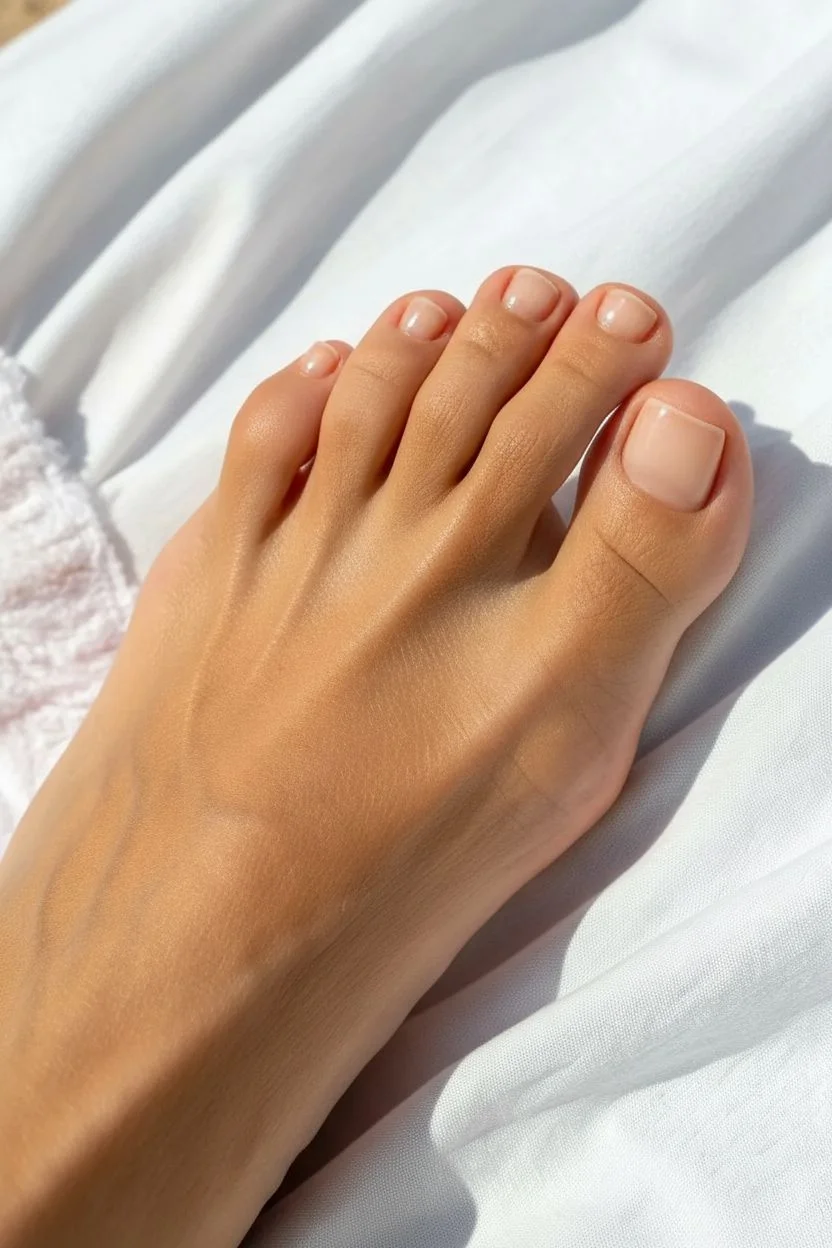
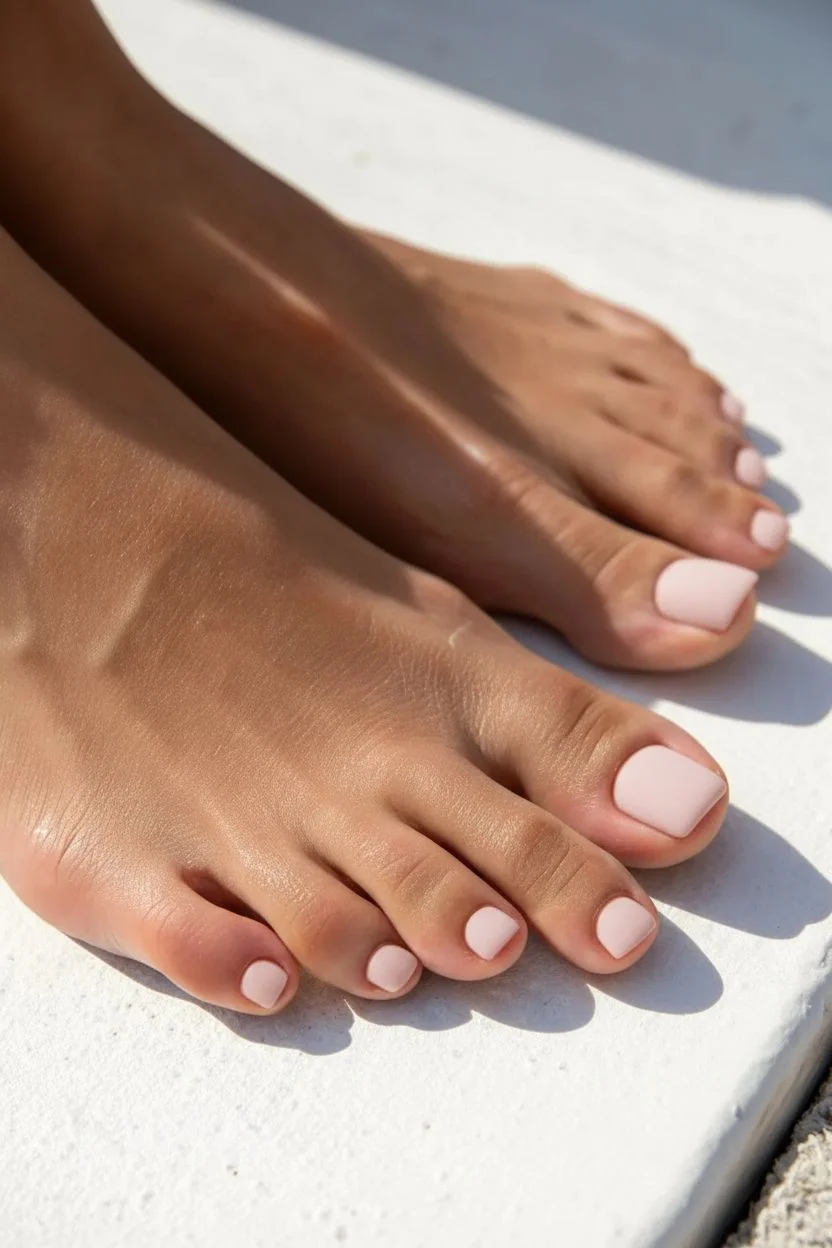
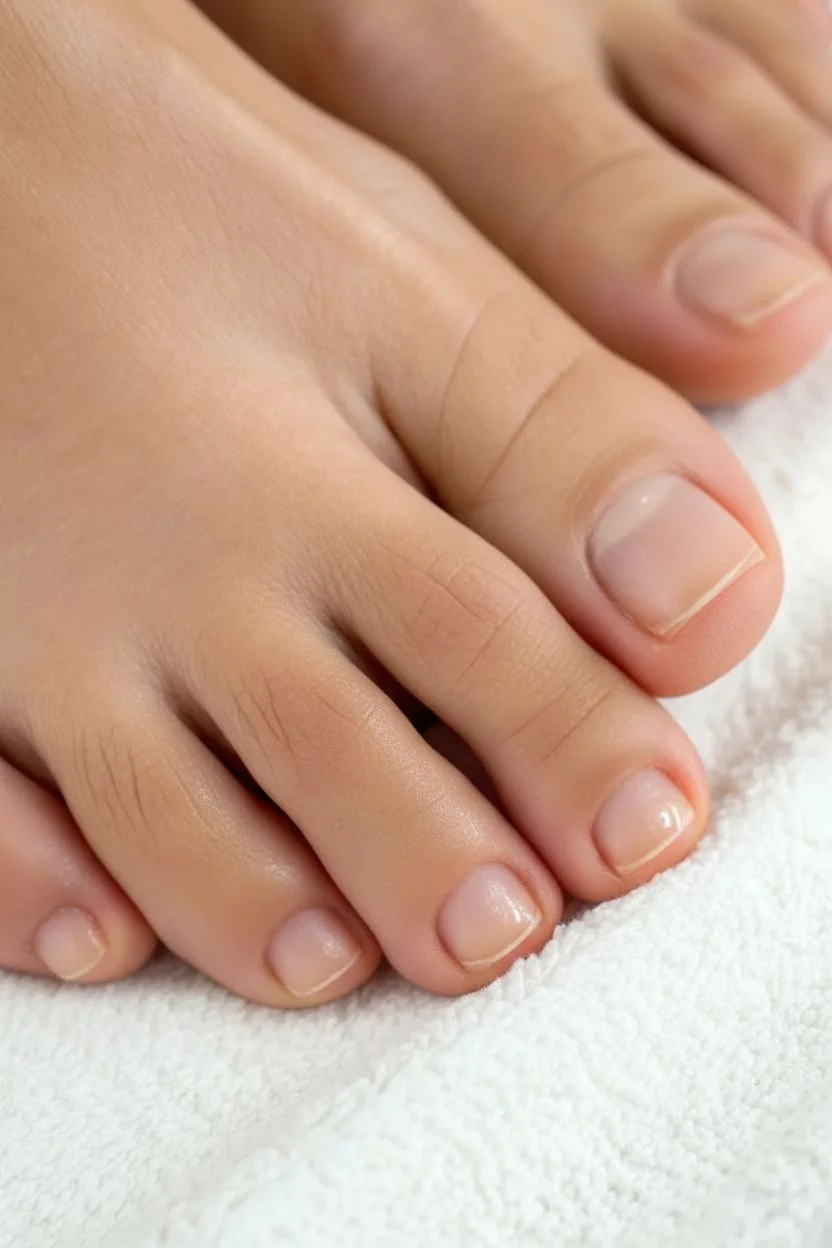
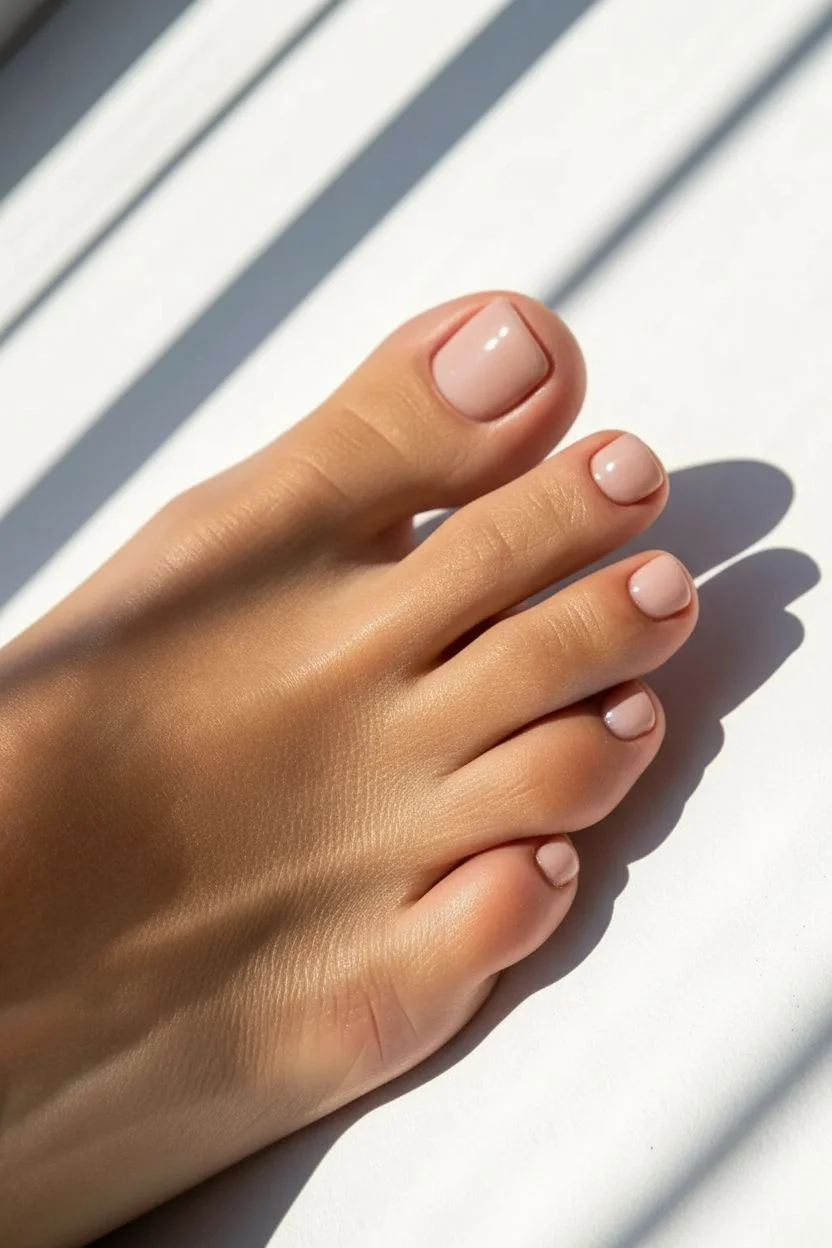
Soft Nude With Glossy Shine


For an effortlessly chic look that works in any season, this soft nude pedicure offers a clean, sophisticated finish. The barely-there blush tone combined with a high-shine top coat creates a ‘your nails but better’ vibe that is incredibly flattering on all skin tones.
Step-by-Step Tutorial
Materials
- Cotton pads
- Non-acetone nail polish remover
- Nail clippers
- Glass nail file
- Cuticle softener or remover
- Orange stick or cuticle pusher
- Nail buffer block
- Isopropyl alcohol or rubbing alcohol
- Base coat (bonding formula recommended)
- Pastel pink or nude nail polish
- High-gloss top coat
- Cuticle oil
Step 1: Preparation & Shaping
-
Clean slate:
Begin by removing any old polish thoroughly. Even if you don’t have polish on, give the nails a quick wipe with remover to eliminate oils. -
Soak and soften:
Soak your feet in warm water for about 5-10 minutes. This softens the cuticles and makes prep work much safer and easier. -
Trim and shape:
Use clippers to trim the toenails straight across to prevent ingrown nails. The look in the photo features a soft ‘squoval’ shape, so slightly round the sharp corners with your glass file. -
Careful cuticle work:
Apply a drop of cuticle softener to the base of each nail. Let it sit for a minute, then gently push back the cuticles with an orange stick. Avoid cutting the cuticles unless there are hangnails. -
Surface smoothing:
Lightly buff the surface of each nail plate. This is crucial for nude polishes, as they tend to highlight ridges. A smooth base ensures that glassy reflection later. -
Dehydrate the plate:
Wipe every nail down with a cotton pad soaked in isopropyl alcohol. This removes dust and oils, ensuring your base coat adheres perfectly for long wear.
Streak-Free Nudes
For sheer colors, try a matte base coat instead of a shiny one. The matte texture provides ‘tooth’ for the polish to grip, significantly reducing streakiness on that first layer.
Step 2: Base & Color Application
-
Foundation layer:
Apply a thin, even layer of base coat. I find that a sticky or bonding base coat works best to grip the color. -
The first coat:
Shake your nude-pink polish well. Apply the first coat very thinly. Nudes can be streaky, so don’t worry about full opacity yet; just focus on getting clean, even edges. -
Wait time:
Let this first layer dry for at least 2 to 3 minutes. Patience here prevents dragging the first layer when you apply the second. -
Building opacity:
Apply a second coat of color. This time, float the brush gently over the nail rather than dragging it hard. Cap the free edge (the tip of the nail) to prevent premature chipping. -
Assess coverage:
Look closely at the coverage. Some sheer nudes might need a very thin third coat to get that creamy, consistent look shown in the image. If so, apply it now. -
Tidy up:
Dip a small cleanup brush or the edge of an orange stick in polish remover. Carefully trace around the cuticles to remove any polish that flooded the skin.
Step 3: The Glossy Finish
-
Seal the deal:
Select a high-gloss, gel-effect top coat. Apply a generous layer over the color, ensuring you don’t press too hard with the brush. -
Cap again:
Run the brush along the very edge of the toenail again. This seals the color layers in a protective clear shell. -
Dry properly:
Allow the toes to dry completely. Since there are multiple layers, give it at least 20-30 minutes before putting on socks or shoes. -
Replenish moisture:
Once dry to the touch, brush a generous amount of cuticle oil onto the skin surrounding the nail, massaging it in to rehydrate the area after the acetone exposure.
Glazed Donut Upgrade
To elevate this simple look, rub a tiny amount of white chrome powder over the tack-free top coat, then seal again. It creates a subtle, pearlescent shimmer.
Enjoy your fresh, polished look that brings a touch of elegance to any outfit


Solid Red Statement Toes
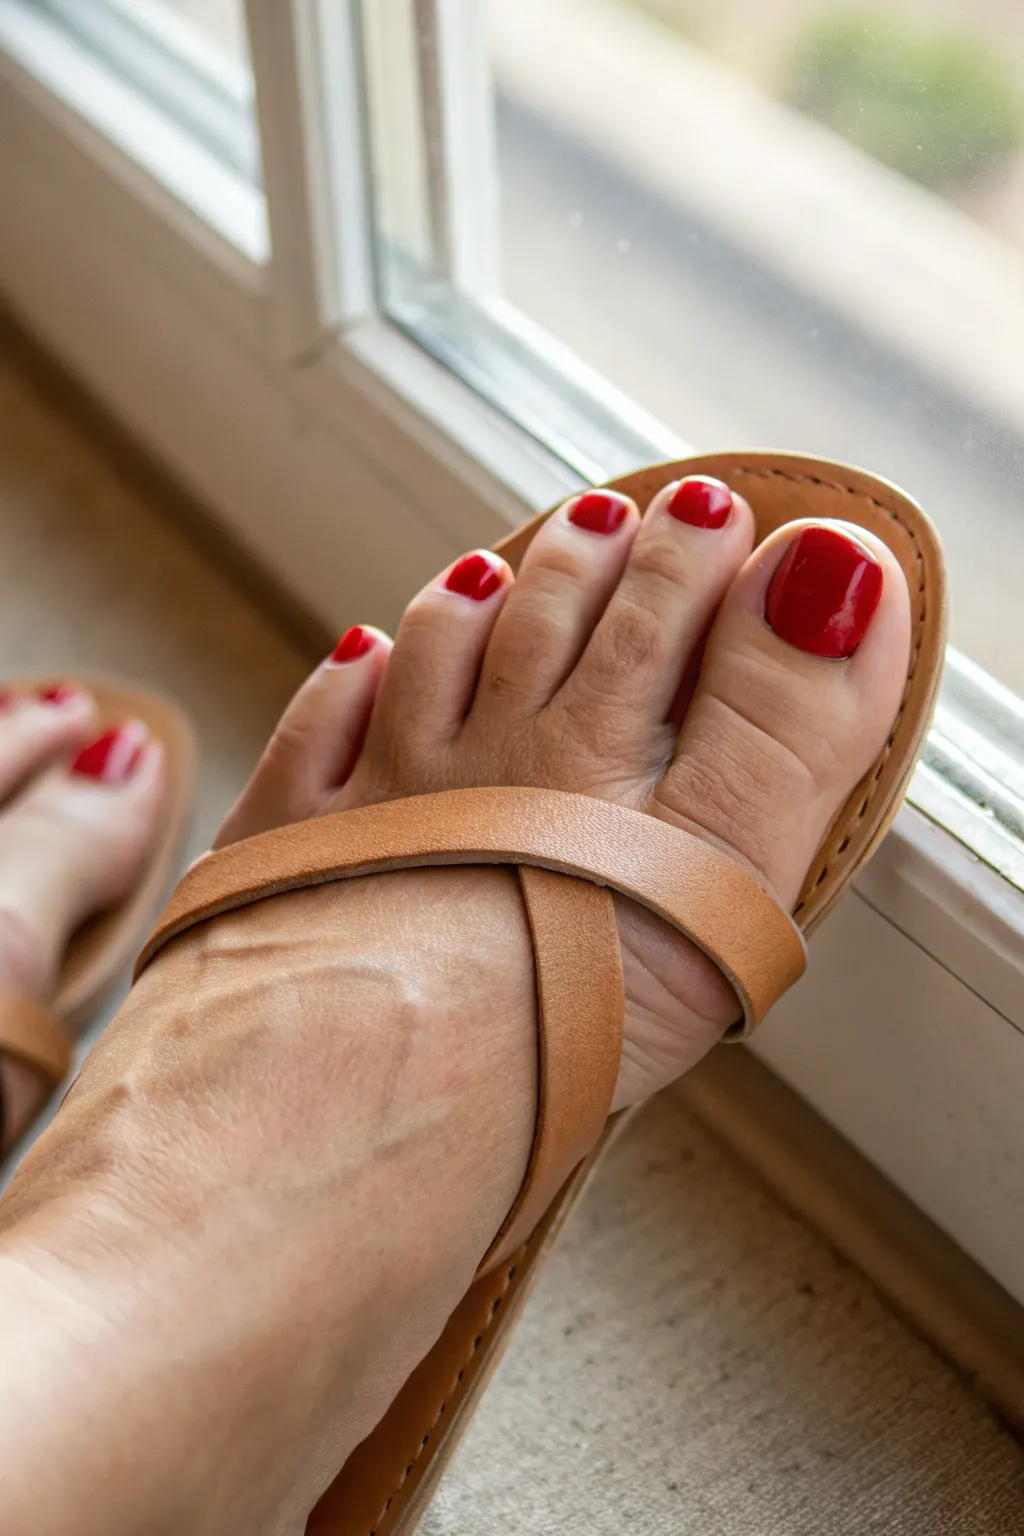
Embrace timeless elegance with this solid red statement look that pairs perfectly with summer sandals. The high-gloss finish and vibrant cherry hue create a polished, sophisticated appearance that never goes out of style.
Step-by-Step Guide
Materials
- Nail polish remover
- Cotton pads
- Nail clippers
- Glass nail file
- Cuticle softener or remover gel
- Orange stick or cuticle pusher
- Base coat (ridge-filling recommended)
- Classic cherry red nail polish
- High-gloss top coat
- Cuticle oil
- Toe separators (optional)
- Rubbing alcohol
- Small cleanup brush
Step 1: Preparation
-
Clear the Canvas:
Start by removing any old polish completely using a non-acetone remover if possible, ensuring the nail plate is perfectly clean. -
Shape the Nails:
Trim your toenails straight across to prevent ingrown edges. Aim for a length that just meets the tip of your toe. -
Refine the Edges:
Use a glass file to gently smooth the rough edges left by the clippers. File in one direction to avoid splintering the nail layers. -
Corner Check:
Very slightly round off the sharpest corners of the nail so they don’t snag on socks or shoes, but verify the main shape remains square-oval. -
Soak and Soften:
Soak your feet in warm water for about 5-10 minutes to soften the skin, or apply a dedicated cuticle remover gel around the nail perimeter. -
Push Back Cuticles:
Gently push back the specific cuticle skin using an orange stick. This creates a larger, cleaner surface area for the red polish. -
Final Cleanse:
Swipe each nail with a cotton pad dipped in rubbing alcohol. This removes oils and residue, ensuring the polish adheres perfectly.
Step 2: Painting
-
Separate Toes:
Insert toe separators or weave a rolled tissue between your toes to keep them from touching while you work. -
Apply Base Coat:
Paint a thin, even layer of base coat on every nail. I find a ridge-filling base creates the smoothest surface for solid colors like red. -
First Red Coat:
Dip your brush into the red polish. Place a bead near the cuticle without touching it, then push slightly toward the skin before pulling the brush straight down the center. -
Fill the Sides:
Stroke down the left and right sides of the nail to cover the remaining space. Cap the free edge by running the brush along the very tip. -
Dry Time:
Allow this first coat to dry for at least two full minutes. It might look slightly streaky, but don’t worry—the next coat fixes that. -
Second Red Coat:
Apply a second coat of red polish using the same three-stroke method (center, side, side) to achieve full opacity and depth of color. -
Clean Mistakes:
While the polish is still wet, dip a small angled brush in remover and carefully trace around the cuticle line to clean up any stray red marks on the skin.
Pro Tip
For a truly professional finish, leave a microscopic gap—about the width of a hair—between the polish and your cuticle. This prevents lifting and keeps the edge looking crisp.
Step 3: Finishing Touches
-
Glossy Top Coat:
Once the red is tacky-dry, apply a generous layer of high-gloss top coat. This seals the color and gives that wet-look shine seen in the photo. -
Protect the Tips:
Don’t forget to cap the free edge with the top coat as well, which significantly extends the life of your pedicure. -
Hydrate:
Wait until the nails are fully dry to the touch, then massage a drop of cuticle oil into the skin around each nail to rehydrate the area.
Level Up
Add a subtle dimension by using a slightly darker red on just the big toe, or add a single tiny rhinestone at the base of the big toe for a hidden sparkle.
Now recreate this bold look and enjoy showing off your perfectly polished toes all season long


Milky Pastel Pedicure
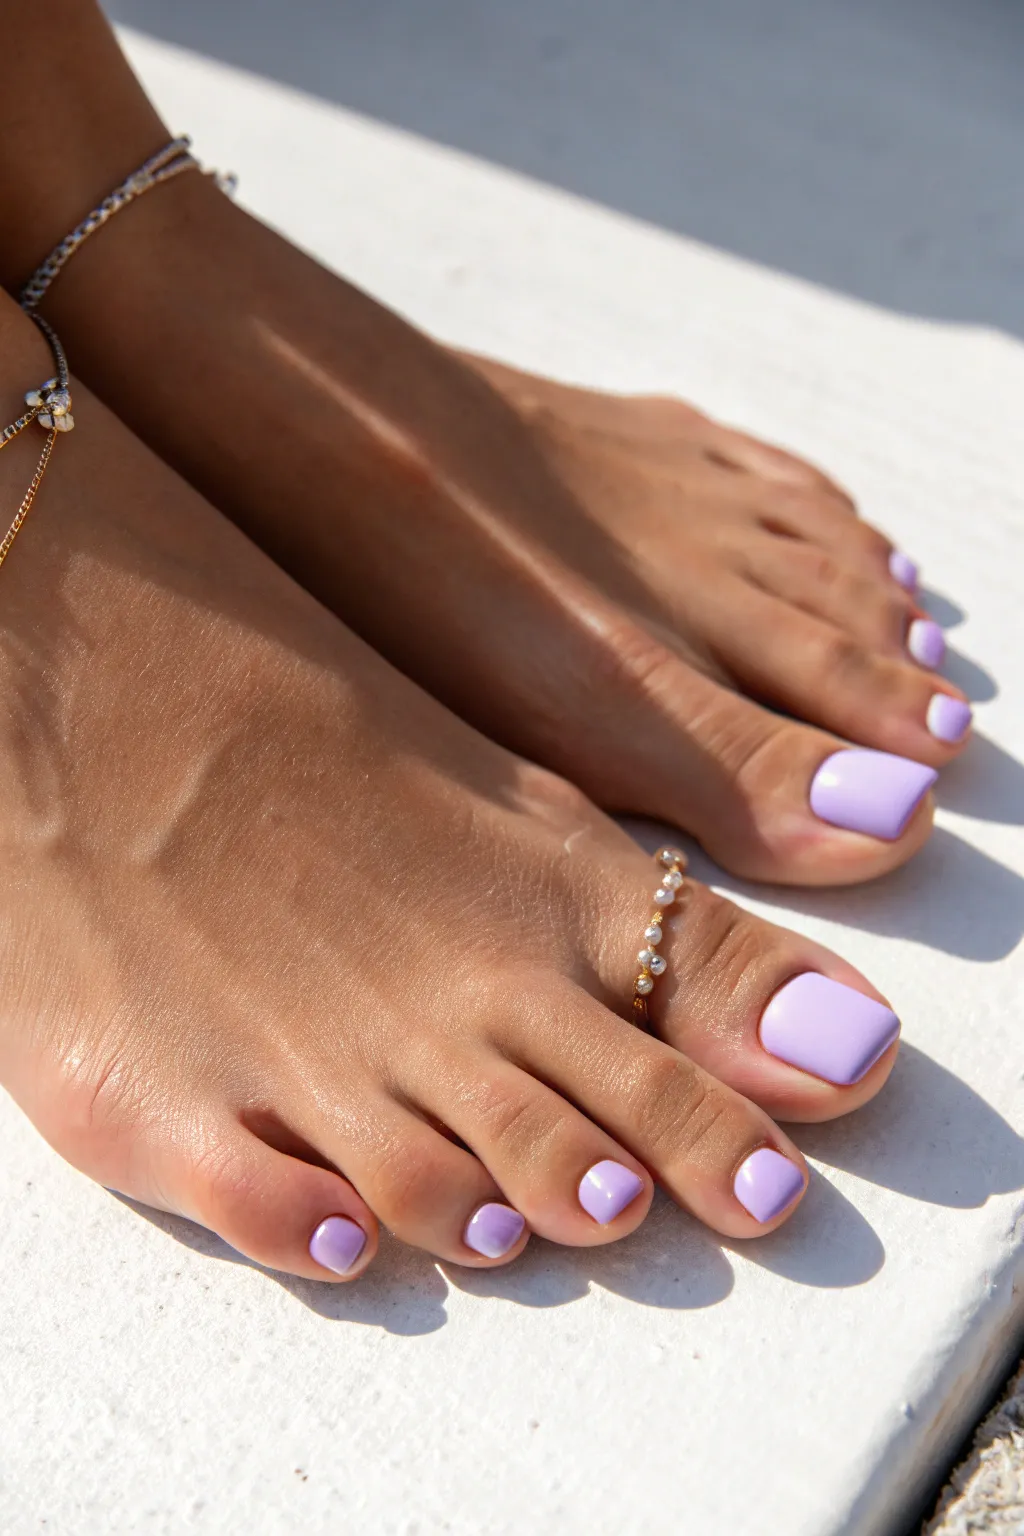
Embrace a soft, feminine aesthetic with this milky pastel lilac pedicure that radiates summer elegance. The creamy, opaque finish pairs beautifully with gold jewelry for a look that is both playful and sophisticated.
Step-by-Step Tutorial
Materials
- Nail polish remover
- Cotton pads
- Nail clippers
- Glass nail file
- Cuticle softener or remover
- Orange wood stick or cuticle pusher
- Buffing block
- Toe separators
- Base coat
- Milky pastel lilac nail polish (opaque creme finish)
- High-gloss top coat
- Cuticle oil
- Optional: Gold toe ring and anklet
Step 1: Prep and Shape
-
Clean Slate:
Begin by removing any old polish with nail polish remover and a cotton pad, ensuring the nail plate is completely clean and free of oils. -
Soak and Soften:
Soak your feet in warm water for about 5-10 minutes to soften the skin and cuticles, making them easier to work with. -
Trim Length:
Use nail clippers to trim your toenails straight across. For the big toe, aim for a slightly square shape with rounded corners to match the photo’s aesthetic. -
File to Perfection:
Take your glass file and gently shape the free edge. Focus on smoothing the corners so they aren’t sharp, creating a soft ‘squoval’ shape. -
Cuticle Care:
Apply a drop of cuticle softener to the base of each nail. Let it sit for a minute, then gently push back the cuticles using an orange wood stick. -
Surface Buffing:
Lightly run a buffing block over the surface of each nail. This removes ridges and creates a slightly textured surface for better polish adhesion. -
Final Cleanse:
Wipe the nails down one last time with polish remover or alcohol to remove any dust or leftover cuticle product.
Step 2: The Lavender Application
-
Separate Toes:
Insert toe separators to keep your toes spaced apart; this prevents accidental smudging while you paint. -
Base Coat:
Apply a thin, even layer of base coat to every nail. I always double-check that this is fully dry before moving to color, as it prevents staining. -
First Color Coat:
Dip your brush into the milky lilac polish. Apply a thin first coat down the center of the nail, then stroke down the sides. Don’t worry if it looks slightly streaky; pastel formulas often need two coats. -
Dry Time:
Wait at least 2-3 minutes for the first coat to dry securely. Pastels can drag if you layer them too quickly. -
Second Color Coat:
Apply a second coat of the lilac polish. This layer should provide full opacity and that rich, creamy look seen in the image. Cap the free edge by running the brush along the tip. -
Cleanup:
Dip a small brush or an orange stick wrapped in cotton into remover to clean up any polish that strayed onto the skin or cuticles.
Smooth Operator
Pastel polishes can be streaky. Roll the bottle between your hands instead of shaking it to prevent air bubbles, ensuring a creamy, smooth application.
Step 3: Finish and Accessorize
-
Glossy Seal:
Once the color is tacky-dry, apply a generous layer of high-gloss top coat. This protects the pedicure and gives it that wet, jelly-like shine. -
Hydrate:
After the nails are completely dry to the touch, massage cuticle oil into the skin around the nails to rehydrate the area. -
Jewelry Styling:
To fully recreate the look, add a delicate gold toe ring with pearl accents to the second or third toe. -
Anklet Addition:
Finish by clasping a dual-chain gold anklet around your ankle for a luxurious summer vibe.
Sun-Kissed Glow
Before taking photos of your fresh pedi, rub a light shimmer oil or moisturizer onto your feet to make the skin glow and the pastel pop.
Now you have a perfectly polished, pastel look ready for open-toed shoes
BRUSH GUIDE
The Right Brush for Every Stroke
From clean lines to bold texture — master brush choice, stroke control, and essential techniques.
Explore the Full Guide
One Accent Big Toe, Simple Rest
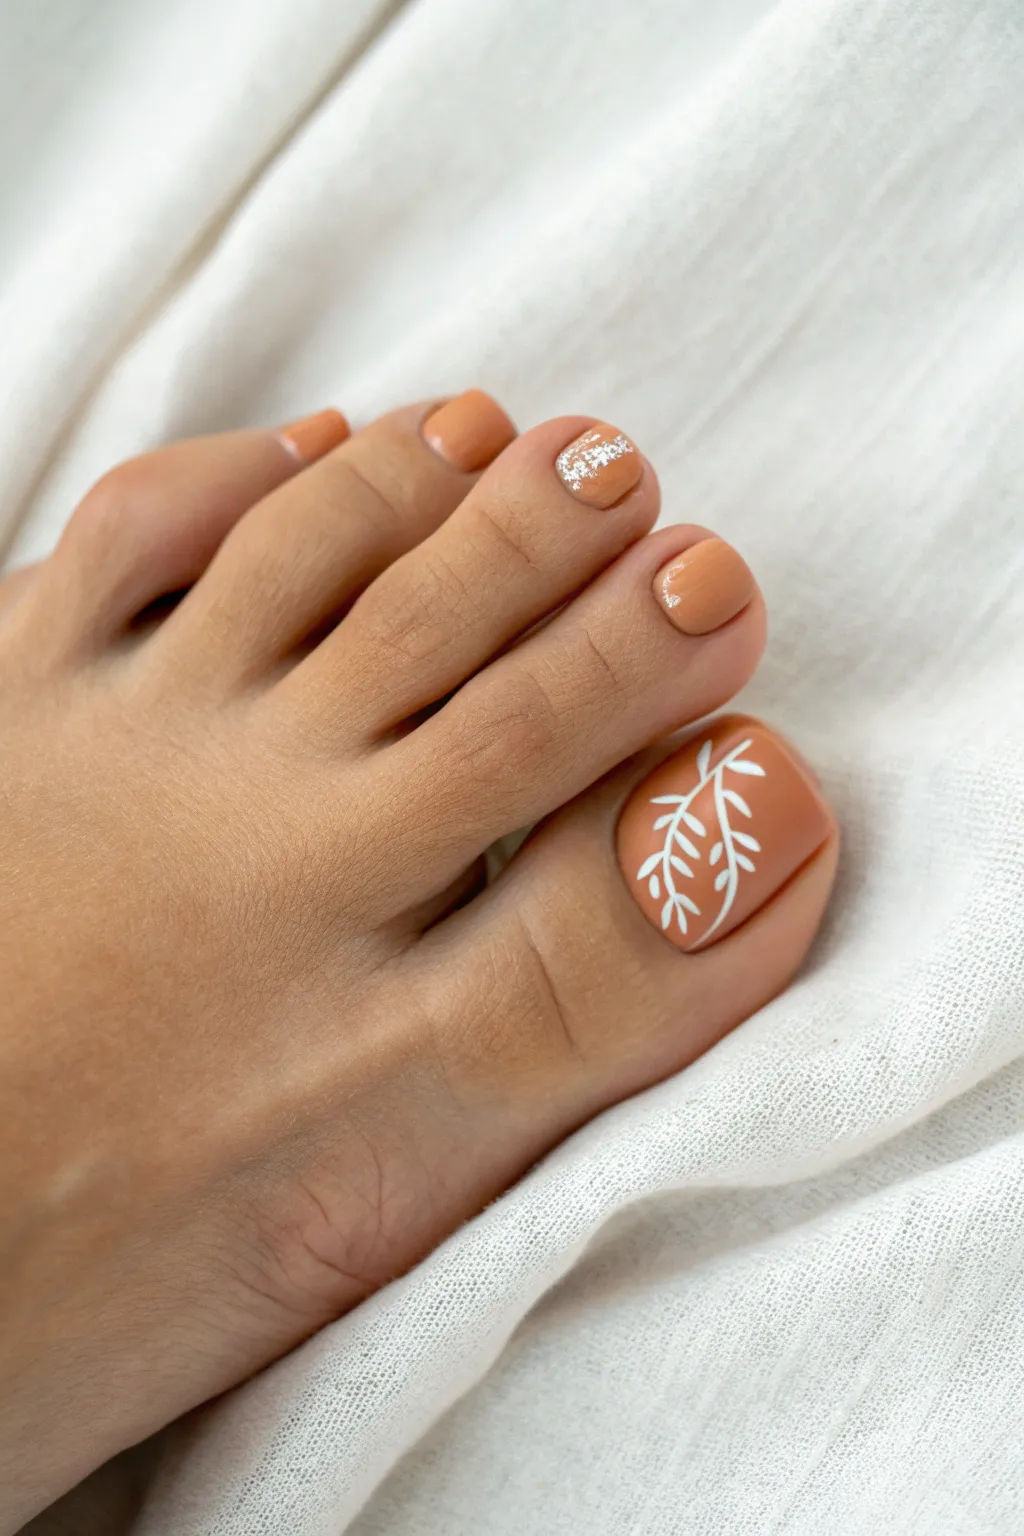

Embrace earthy elegance with this warm terracotta pedicure featuring delicate white botanical art. The design keeps things minimal on the smaller toes while making the big toe a canvas for a lovely, hand-painted leafy vine.
Detailed Instructions
Materials
- Terracotta or warm burnt orange nail polish
- Opaque white nail art polish or acrylic paint
- Silver glitter top coat or loose silver glitter
- Base coat
- Glossy top coat
- Fine detail liner brush (size 00 or 000)
- Small dotting tool (optional)
- Cotton pads and acetone for cleanup
Step 1: Base Preparation
-
Clean Slate:
Begin by removing any old polish thoroughly. Trim and file your toenails to your desired shape, keeping the edges slightly rounded to prevent ingrown nails. -
Cuticle Care:
Gently push back your cuticles. If necessary, carefully nip away any hangnails, but try to keep the cuticle area intact for a cleaner painted line. -
Base Layer:
Apply a thin, even layer of base coat to all ten toes. This prevents staining and helps the color adhere better.
Clean Lines
If your leaves look thick or gloopy, your brush has too much polish. Wipe it clean and reload just the very tip.
Step 2: Applying Color
-
The First Coat:
Paint all your toenails with the terracotta orange shade. Start with a stripe down the center, then fill in the sides. -
Opacity Check:
Let the first coat dry for about two minutes. Don’t worry if it looks slightly streaky; the second coat will fix it. -
The Second Coat:
Apply a second layer of the terracotta color to ensure full opacity and a rich, deep hue. Allow this to dry completely before starting any art.
Gold Swap
Swap the white leaves and silver glitter for gold metallic paint to give this look a warmer, autumnal vibe.
Step 3: The Big Toe Accent
-
Load the Brush:
Dip your fine liner brush into the white polish. Wiping excess polish off on the bottle neck helps keep the tip sharp. -
Main Stem:
On the big toe, paint a thin, curving line starting from the bottom corner near the cuticle, sweeping diagonally up toward the opposite top corner. -
Leaf Placement:
Starting near the bottom of the stem, paint small, almond-shaped leaves branching off the main line. Keep your pressure light. -
Filling the Vine:
Continue adding pairs of leaves as you move up the stem. I find it easiest to stagger them slightly rather than placing them perfectly opposite each other. -
Final Leaf Tip:
Add a single, small leaf at the very tip of your main vine line to finish the organic shape. -
Refine Edges:
Go back over any leaves that look too faint, adding just a touch more white to make the design pop.
Step 4: The Glitter Detail
-
Select the Accent:
Choose the middle toe (second or third toe) for a subtle sparkle accent. You want this to look incidental, not overwhelming. -
Dab the Glitter:
Using a brush dipped in silver glitter polish, gently dab a small amount near the center or base of that chosen toe. -
Feather Out:
Lightly feather the glitter outward so it isn’t a solid clump but rather a delicate dusting of sparkle.
Step 5: Finishing Touches
-
Sealing the Art:
Once the white leaves are completely dry to the touch, float a generous bead of glossy top coat over the big toe. Floating means gliding the liquid over the nail without the brush bristles dragging the art. -
Gloss the Rest:
Apply the glossy top coat to all remaining toes to seal in the color and glitter. -
Cleanup:
Dip a small angled brush or cotton swab in acetone and carefully clean up any polish that may have gotten onto the skin around the nail beds. -
Hydrate:
Finish by massaging cuticle oil into the skin around your toes to rehydrate the area for a photo-ready look.
Enjoy showing off your sophisticated botanical pedicure in your favorite open-toed sandals
Tiny Daisy Big Toe Detail
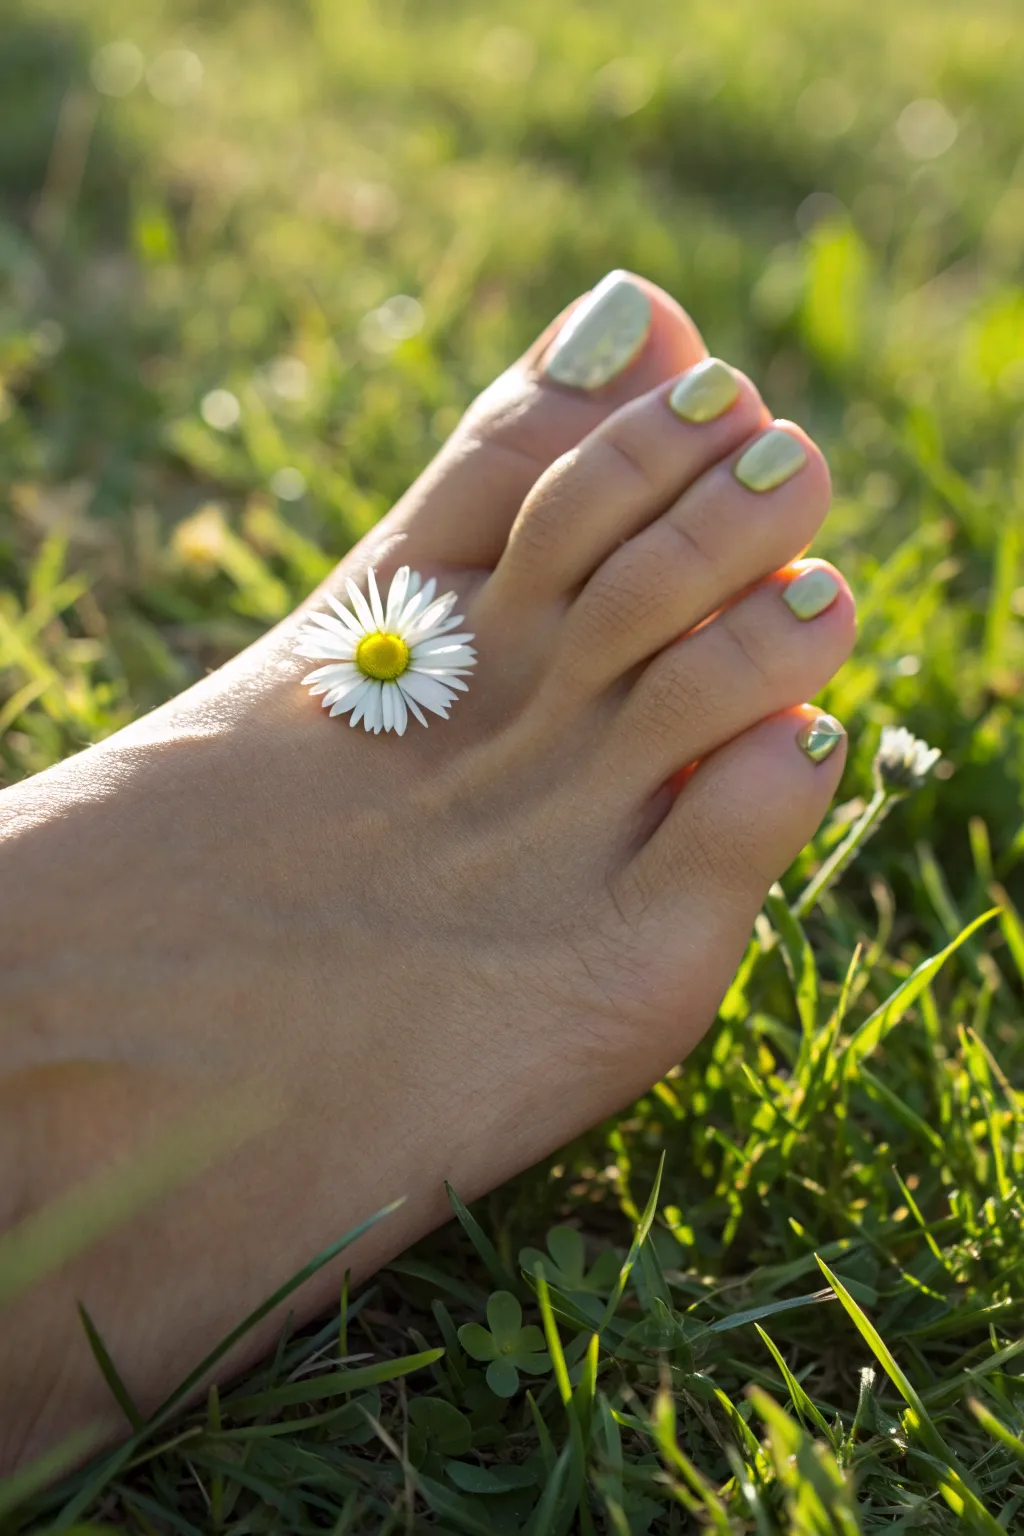
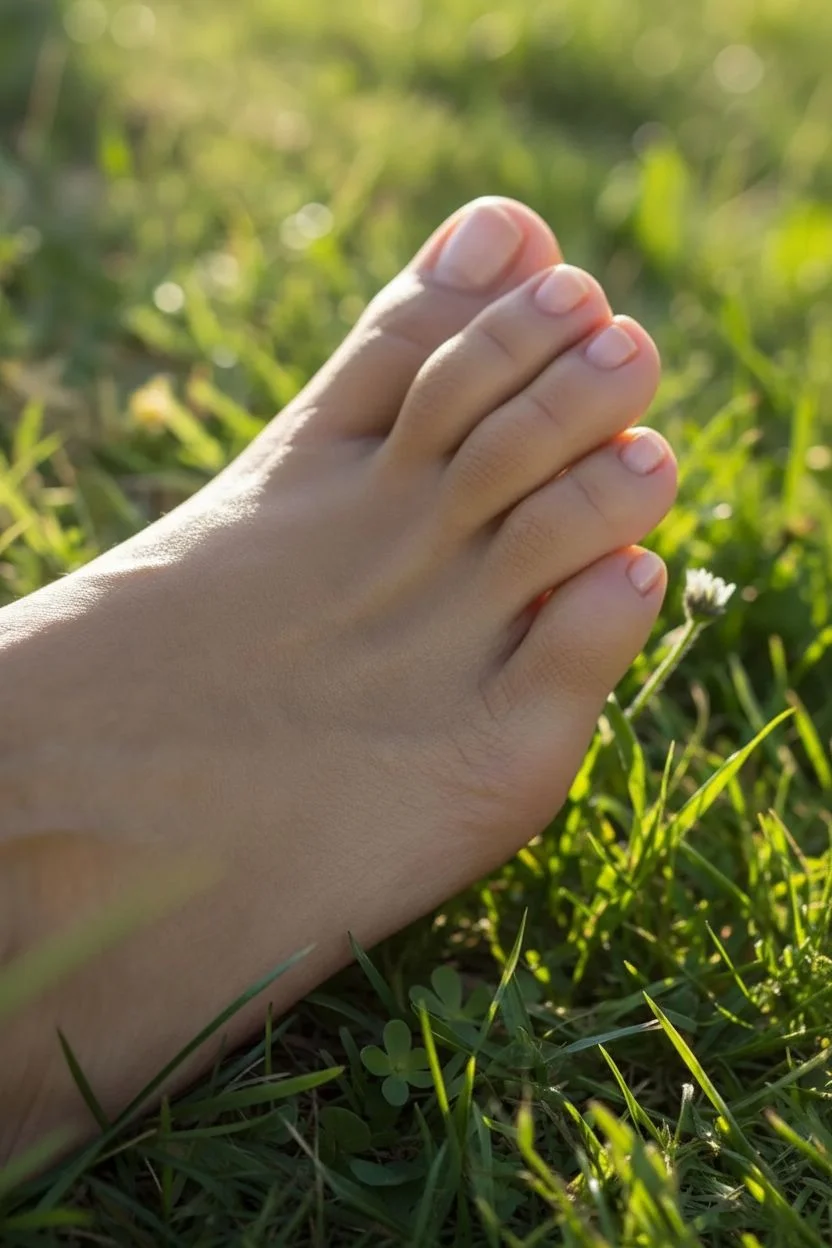
Capture the essence of a sunlit meadow with this fresh and elegant pedicure design. Featuring a metallic pale green polish that catches the light beautifully, this look is finished with a delicate real flower accent for a whimsical touch.
How-To Guide
Materials
- Nail polish remover
- Cotton pads
- Nail clippers and file
- Orange stick or cuticle pusher
- Base coat
- Metallic sage green or pale gold nail polish
- High-gloss top coat
- Small fresh daisy (harvested with a short stem)
- Small scissors
- Skin-safe eyelash glue or cosmetic adhesive (optional)
Step 1: Preparation & Care
-
Clean the Canvas:
Begin by thoroughly removing any old polish from your toenails using a non-acetone remover to prevent drying out the nail plate. -
Shape and Trim:
Trim your toenails straight across to prevent ingrown nails, then gently file the corners to soften them slightly. Aim for a neat, short length as seen in the photo. -
Cuticle Maintenance:
Soak your feet in warm water for 5-10 minutes to soften the skin. Gently push back the cuticles using an orange stick to create a clean, wide surface for painting. -
Prime the Surface:
Apply a single, even layer of base coat to every nail. I find this creates a barrier against staining and helps the metallic pigment adhere smoothly.
Pro Tip: Stroke Management
Metallic polishes show brush strokes easily. Keep your brush parallel to the nail and use long, confident pull-through motions from cuticle to tip to minimize streaks.
Step 2: Applying the Color
-
First Coat Application:
Dip your brush into the metallic sage green polish. Start with the big toe, placing a bead of polish near the cuticle and pulling it straight down the center. -
Filling the Sides:
Without re-dipping if possible, swipe down the left and right sides of the big nail to cover it completely. Repeat this process for the smaller toes, using just enough polish to cover in 1-2 strokes. -
Drying Time:
Allow the first coat to dry for at least 2-3 minutes. Metallic polishes can be unforgiving with brush strokes if you drag a second coat over wet polish. -
Second Coat for Depth:
Apply a second thin coat of the green polish to intensify the metallic shimmer and ensure full opacity. Pay attention to capping the free edge of the nail to prevent chipping. -
Cleanup:
If any polish drifted onto the skin, dip an angled brush or a cotton swab in remover and clean up the edges while the polish is still tacky.
Step 3: Finishing Touches & Styling
-
Seal the Deal:
Apply a glossy top coat over all nails. This enhances the shine of the metallic particles and smooths out the surface texture. -
Prepare the Floral Accent:
While the nails are drying completely, select a very small, fresh daisy. Using small scissors, trim the stem off completely so the flower head sits flat. -
Placement Strategy:
Ideally, this look is for a photoshoot or relaxation. Identify the spot on top of your foot, just below the toes, where the skin is smoothest. -
Securing the Flower:
For a temporary photo look, the natural moisture of the flower might hold it. For longer wear, dab a tiny dot of skin-safe eyelash glue on the back of the daisy center. -
Final Position:
Gently press the daisy onto the skin between the big toe and second toe knuckle. Press down lightly for ten seconds to secure it. -
Hydration:
Apply a light moisturizer or cuticle oil to the skin around the toes (avoiding the fresh polish) to get that glowing, healthy skin look shown in the image.
Troubleshooting: Streaky Finish
If the metallic finish looks uneven or streaky after the second coat, try a matte top coat first to level the texture, followed by a glossy top coat to bring back the shine.
Enjoy the shimmering, nature-inspired beauty of your fresh pedicure as you step out into the grass

PENCIL GUIDE
Understanding Pencil Grades from H to B
From first sketch to finished drawing — learn pencil grades, line control, and shading techniques.
Explore the Full Guide
Polka Dots on Painted Toes
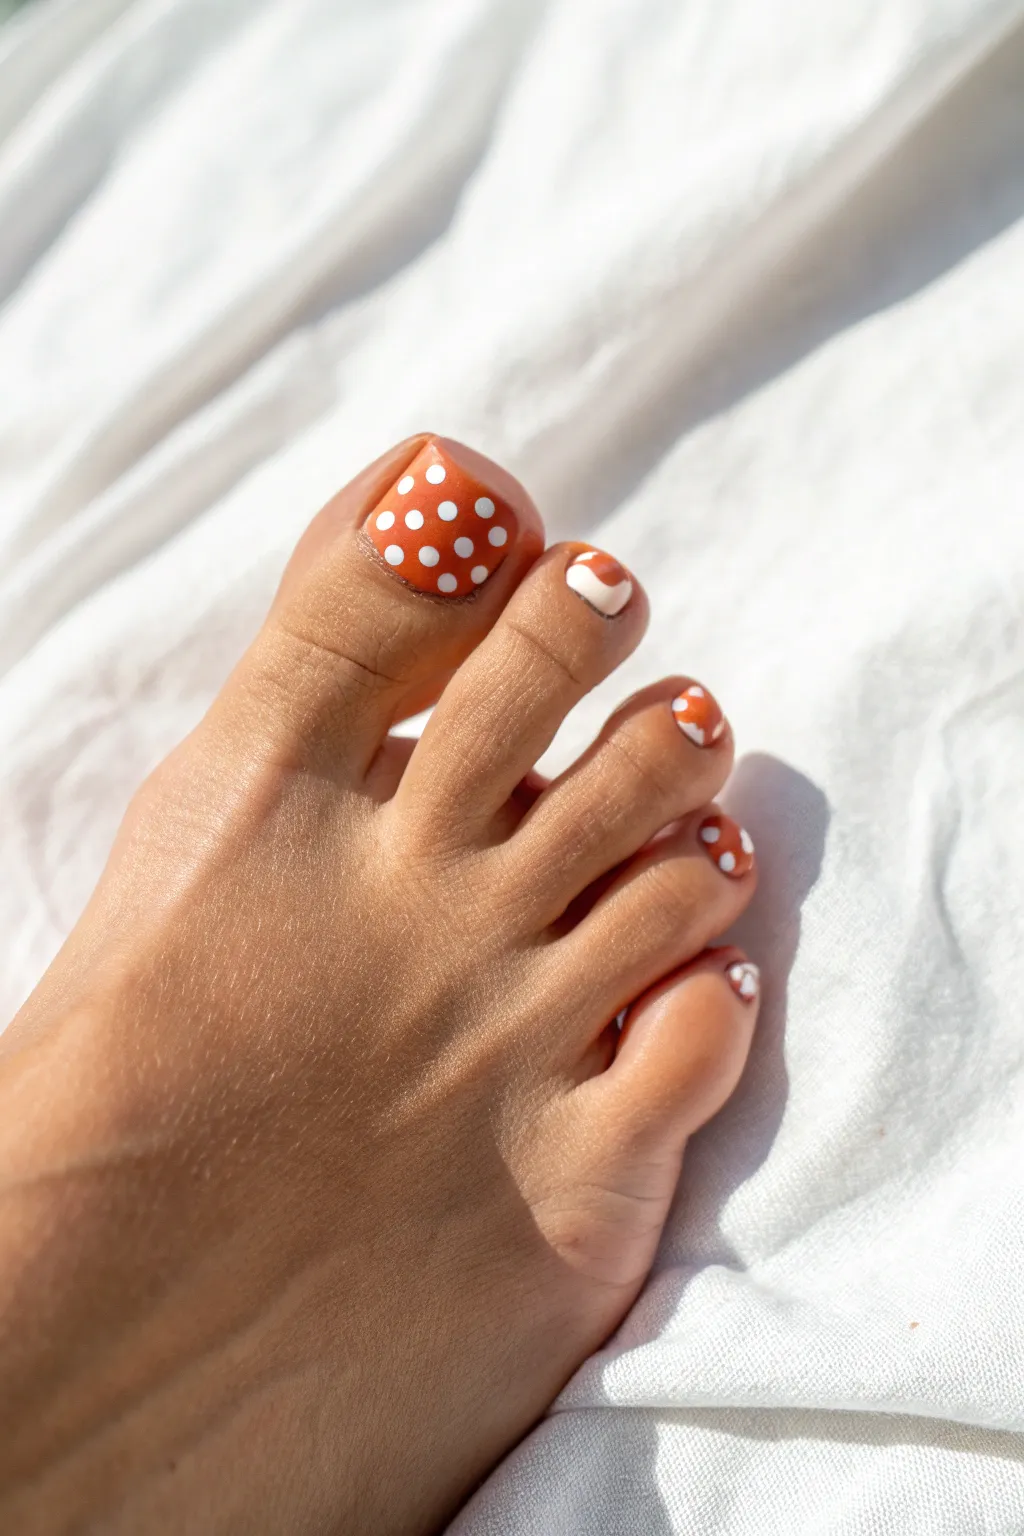
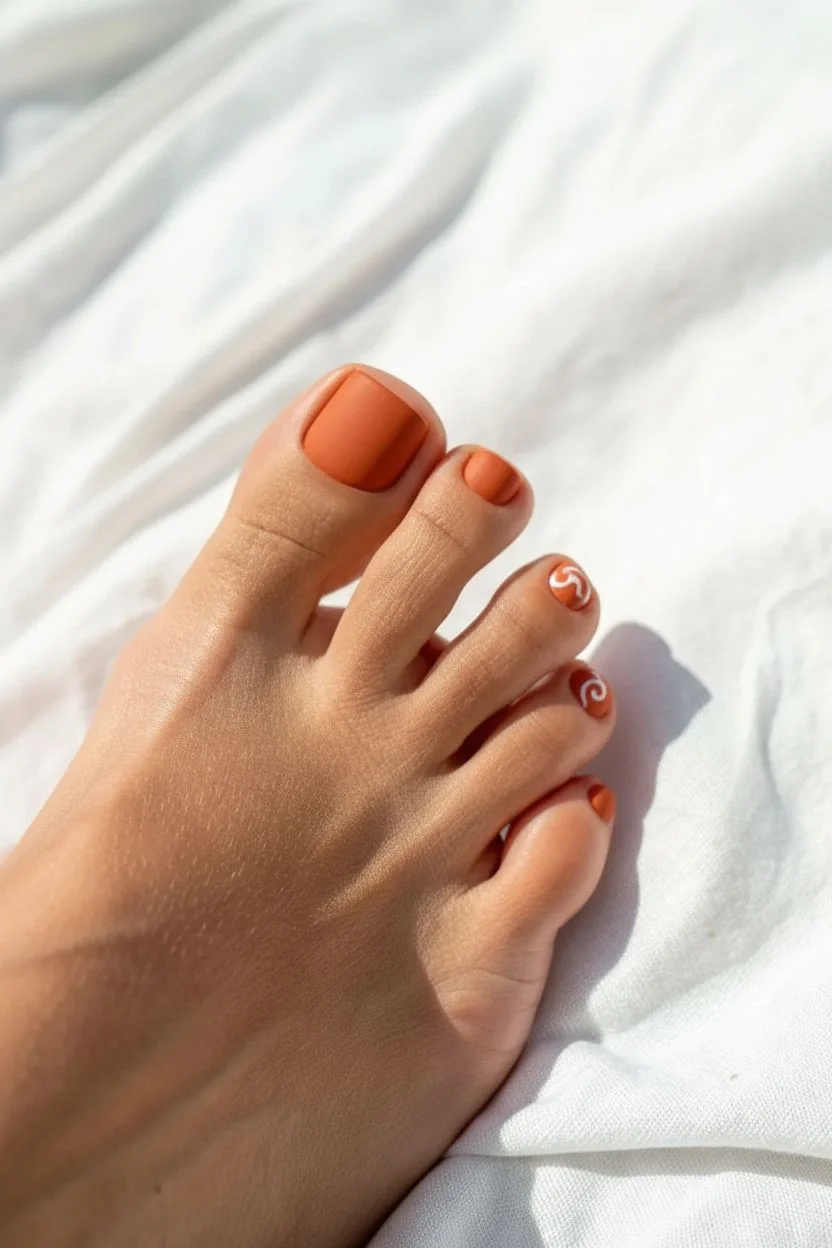
Embrace a playful retro vibe with this warm, burnt-orange pedicure featuring crisp white polka dots. It creates a fun yet sophisticated look perfect for adding a pop of pattern to your summer style.
Step-by-Step Guide
Materials
- Base coat
- Burnt orange or terracotta nail polish
- Opaque white nail polish
- Dotting tool (medium size)
- Toothpick or fine detail brush
- High-gloss top coat
- Nail polish remover
- Cleanup brush or cotton swabs
- Toe separators (optional)
Step 1: Preparation and Base Color
-
Prep the canvas:
Begin with clean, dry nails. Remove any old polish and shape your toenails straight across with a file, gently rounding the corners to prevent ingrown nails. -
Apply base coat:
Paint a thin, even layer of base coat on all ten toes. This crucial step protects the nail plate from staining and helps the polish adhere for longer wear. -
First coat of color:
Apply your burnt orange or terracotta polish to all toes. Don’t worry if it looks slightly streaky on the first pass; thin layers dry faster and last longer. -
Second coat for opacity:
Once the first layer is dry to the touch, apply a second coat of the terracotta color. This should provide full, rich coverage. Let this base color dry completely—I usually wait about 10-15 minutes to ensure the surface is hard enough for nail art.
Clean Dots Trick
Clean your dotting tool tip after every 2-3 dots. Dried gummy polish on the tool creates uneven, messy circles rather than crisp dots.
Step 2: Creating the Polka Dots
-
Prepare the white polish:
Place a few drops of opaque white nail polish onto a piece of foil or a plastic lid to create a small palette. -
Start on the big toe:
Dip your medium-sized dotting tool into the white polish puddle. You want a decent bead of polish on the tip, but not so much that it will drip. -
Create the central column:
Press the tool gently onto the center of your big toe nail to make your first dot. Continue creating a vertical line of dots down the center of the nail, leaving equal spacing between them. -
Fill in the sides:
Add rows of dots on either side of your central column. For a classic polka dot look, offset these side dots so they sit in the spaces between the central dots, creating a diagonal pattern. -
Handle the edges:
If you have space near the cuticle or side walls, add partial dots (half-circles) to make the pattern look like it continues off the nail. -
Decorate the smaller toes:
For the smaller toes, the surface area is limited. You can either place a single dot near the base or cuticle, or carefully fit 2-3 tiny dots using a smaller tool or a toothpick depending on the nail size. -
Alternative small toe design:
Looking closely at the style, you might opt for a variation on the second toe: paint a white curved block or simple swirl if you want to mix up the pattern, though simple dots work just as well.
Color Swap
Try a sheer nude base with neon dots for a modern look, or use a matte top coat instead of glossy for a velvety finish.
Step 3: Finishing Touches
-
Dry grid:
Allow the white dots to dry completely. This is the most important patience test; if you brush top coat over wet dots, they will smear into the orange background. -
Apply top coat:
Float a generous bead of high-gloss top coat over the nails. Try to glide the brush over the surface without dragging the bristles hard against the design. -
Seal the free edge:
Run the brush horizontally across the very tip of each toenail to cap the free edge, which significantly extends the life of your pedicure. -
Clean up:
Dip a small cleanup brush or cotton swab into nail polish remover and carefully wipe away any stray polish that may have landed on the skin or cuticles.
Now you are ready to show off your sophisticated and cheerful toes in your favorite open-toed sandals
Micro Florals Across All Toes
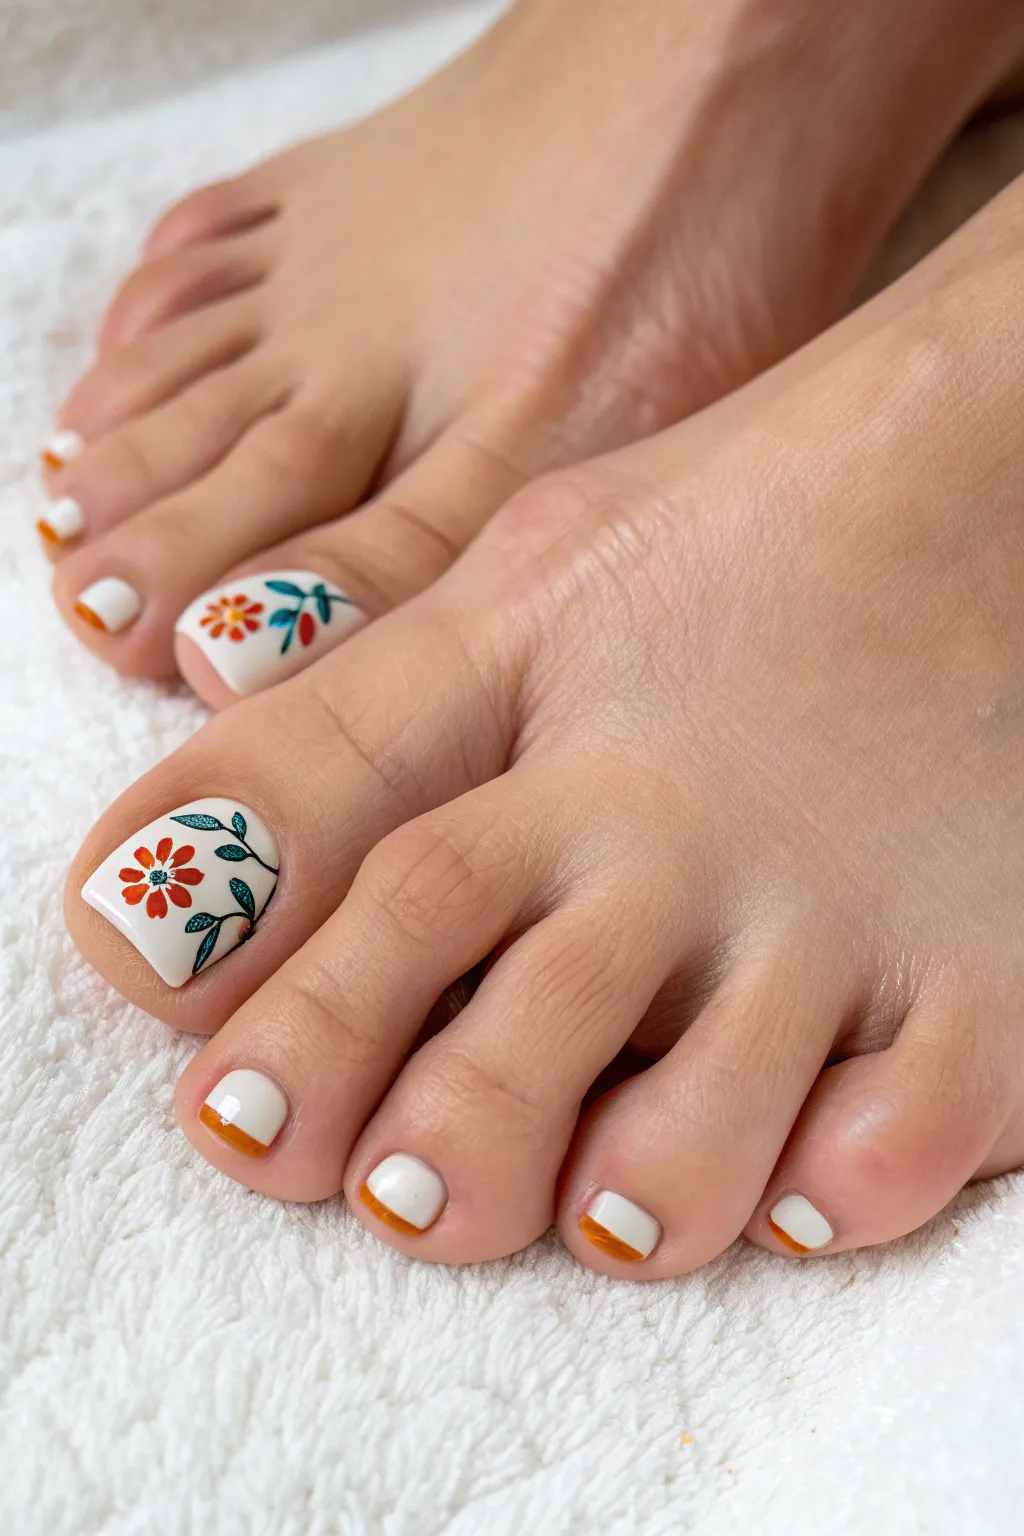

Bring the freshness of an orchard to your toes with this crisp, white-based pedicure featuring delicate orange micro-floral art. The clean white backdrop makes the vibrant orange blossoms and green vines pop, while the matching orange-tipped accent nails tie the whole look together beautifully.
Step-by-Step Tutorial
Materials
- White opaque nail polish (gel or regular)
- Vivid orange nail polish
- Deep green nail polish
- Teal or blue-green nail polish (for leaf accents)
- Base coat
- High-gloss top coat
- Fine detail nail art brush (00 or 000 size)
- Dotting tool (small)
- Clean-up brush dipped in acetone
Step 1: Preparation & Base Color
-
Prepping the canvas:
Begin by cleaning your nails thoroughly. Push back the cuticles gently and wipe the nail surface with alcohol or remover to banish any oils, ensuring your polish adheres perfectly. -
Protective base:
Apply a thin, even layer of your favorite base coat to all ten toes. Let this dry completely to prevent staining and create a smooth surface. -
White foundation (Big Toe):
Paint the entire surface of your big toenails with two thin coats of opaque white polish. Allow the first coat to dry before applying the second to avoid streaks. -
White foundation (Small Toes):
For the smaller toes, apply the same white polish, but cover about 80% of the nail, leaving just a sliver of natural nail at the cuticle if you prefer a ‘grown out’ look, or paint the whole nail white for full coverage. Let dry fully.
Smudged Your Art?
If you accidentally smear a vine, don’t redo the whole nail. Use a tiny brush with white polish to ‘erase’ the mistake, let it dry, and repaint the line.
Step 2: Painting the Floral Big Toe
-
Starting the center flower:
Using your dotting tool dipped in orange polish, place five small dots in a circle near the center-left of the big toenail. These will form your main flower petals. -
Connect the petals:
Take your fine detail brush and gently drag the wet polish from the center of each dot inward toward a middle point. This creates that classic teardrop petal shape. -
Adding a second blossom:
Repeat the previous step to create a partial flower near the top or bottom edge of the nail, implying the pattern continues off the edge. -
Flower centers:
Once the orange petals are tacky or dry, use a clean dotting tool with a tiny amount of white or very light blue to place a single dot in the absolute center of your flowers. -
Primary vines:
Switch to your deep green polish and the detail brush. Paint thin, curving lines extending from the flowers. I like to keep my hand relaxed here so the vines look organic rather than stiff. -
Adding leaves:
Along the green vines, press down gently with your brush to create small leaf shapes. Taper the pressure as you lift the brush to make pointed tips. -
Teal accents:
For depth, clean your brush and use the teal shade to add a few secondary leaves or highlight one side of the existing green leaves.
Pro Tip: Custom Colors
Mix a drop of white into your green polish on a piece of foil to create a lighter sage shade. Use this for highlights on the leaves to add 3D depth and realism.
Step 3: The Orange-Tipped Small Toes
-
Planning the tip:
On the smaller toes that are painted white, you will now create the orange French tip. The goal is a thin, crisp strip of color at the free edge. -
Painting the strip:
Dip your fine liner brush into the orange polish. Carefully paint a horizontal line across the very top flat edge of the white polish. -
refining the edge:
If the line looks shaky, dip a clean angled brush in acetone and gently swipe across the bottom of the orange line to sharpen it. -
Final check:
Ensure all toes have a consistent look. If any orange paint got onto the skin, remove it now with your clean-up brush.
Step 4: Sealing the Look
-
Drying time:
Wait at least 10-15 minutes for the detailed art to dry. This is crucial; rushing this step smears the design. -
Top coat application:
Float a generous bead of glossy top coat over each nail. Don’t drag the brush bristles directly on the nail art; let the liquid glide over it. -
Cap the free edge:
Run the brush horizontally along the tip of each toenail to seal the layers and prevent premature chipping.
Now you have a refreshing and artistic pedicure perfect for sunny days and open-toed sandals


Simple Diagonal French Tips
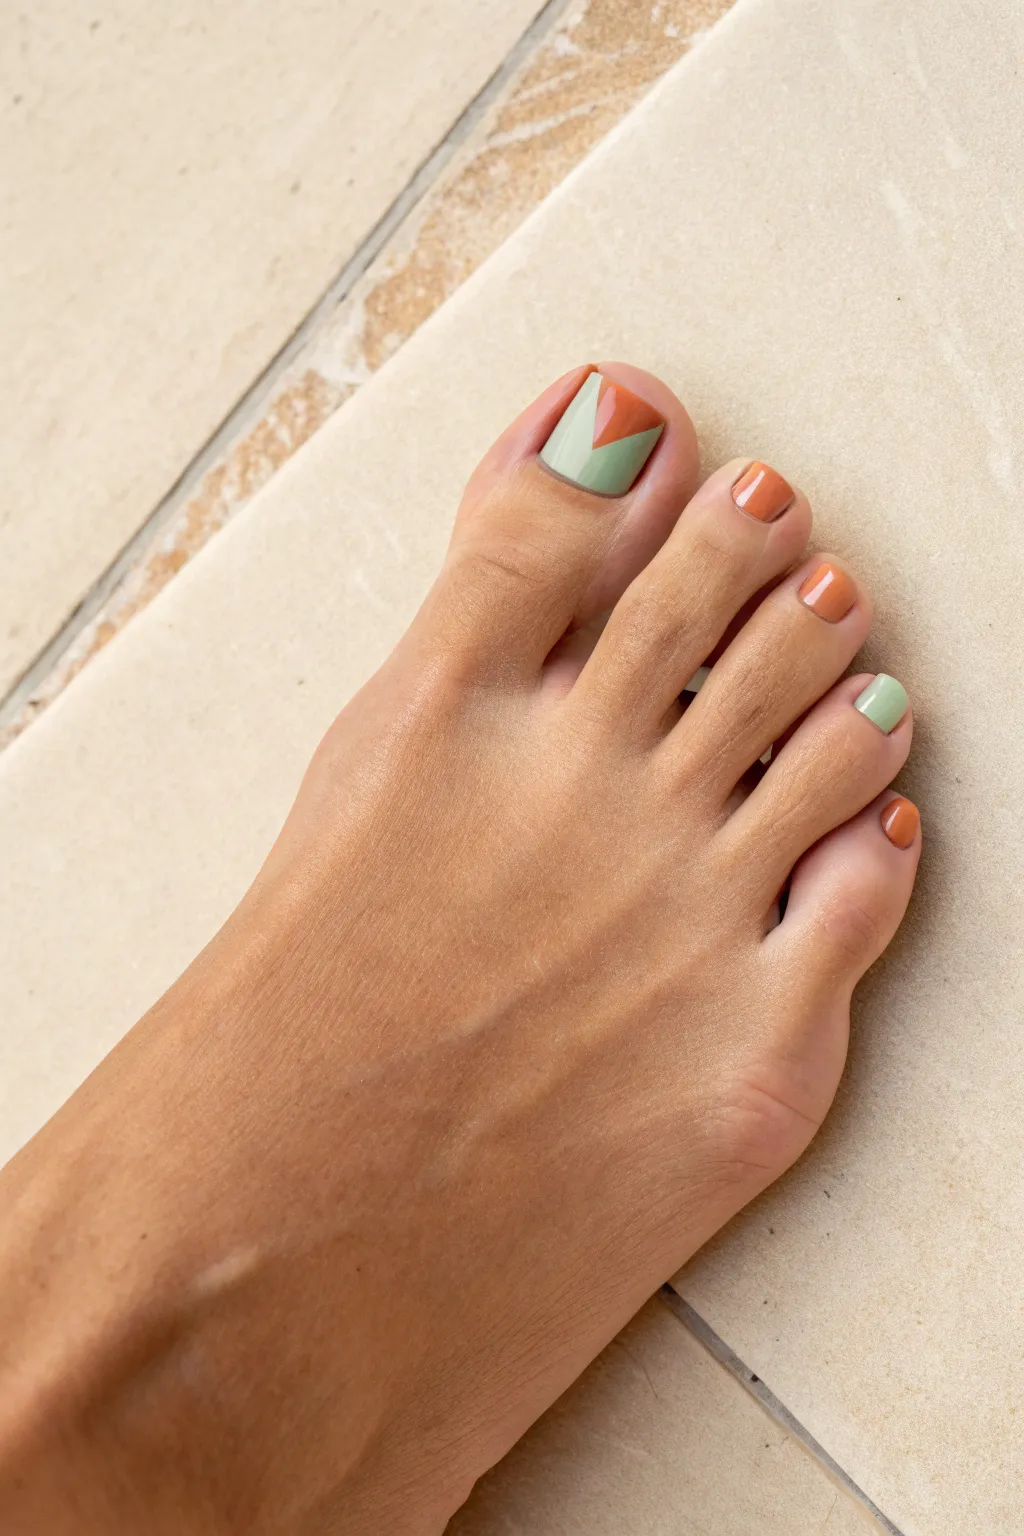

Elevate your pedicure with this chic, modern design featuring a striking geometric accent nail. The soft interplay between muted sage green and warm terracotta orange creates an earthy yet sophisticated look perfect for any season.
Step-by-Step
Materials
- Base coat nail polish (clear)
- Sage green nail polish (cream finish)
- Terracotta or burnt orange nail polish (cream finish)
- Small detail brush or striping tape
- Paper towel or palette for polish
- Clean-up brush or cotton swab
- Nail polish remover
- Top coat (high gloss)
Step 1: Preparation
-
Clean the slate:
Start by removing any old polish thoroughly. Wash and dry your feet to ensure oils don’t interfere with the polish adhesion. -
Shape and buff:
Trim your toenails straight across and file the corners slightly to prevent snagging. Briefly buff the surface of each nail to create a smooth canvas. -
Apply base coat:
Apply a thin, even layer of clear base coat to all ten toenails. This protects the nail plate from staining and helps the color last longer.
Step 2: The Accent Nail
-
Paint the first triangle:
Using the broad side of the sage green polish brush, paint a diagonal line starting from the top left corner of the big toe down towards the cuticle area on the right side. Fill in this upper right section with sage green. -
Refine the line:
If the edge isn’t perfectly straight, use a small detail brush dipped in the sage polish to sharpen that diagonal line immediately. -
Let it tack up:
Allow this sage section to dry until it feels tacky but solid, usually about 5-8 minutes, to prevent smearing the next color. -
Add the terracotta triangle:
Now, take your terracotta polish. Create a smaller triangle that intersects with the sage green. Start the line from the cuticle area and pull the brush diagonally upward to form a ‘V’ shape where the colors meet. -
Clean the negative space:
The design includes a ‘naked’ triangular sliver of natural nail (or clear base) between the cuticle and the paint. Use a clean-up brush dipped in remover to tidy up this negative space if any paint strayed into it. -
Second coat for opacity:
Once the first layer is dry, carefully apply a second thin coat of both the sage and terracotta over their respective areas to ensure rich, opaque color.
Wobbly Lines?
If painting straight lines freehand is tricky, place a piece of striping tape or scotch tape on the dried base coat to act as a stencil for your triangles
Step 3: The Remaining Toes
-
Second toe color:
Paint the second toe (the index toe) fully with the terracotta polish. Keep your brush strokes vertical and steady. -
Middle toe color:
Paint the middle toe with the terracotta polish as well, ensuring you cover the entire nail plate evenly. -
Fourth toe color:
Switch to the sage green polish for the fourth toe. Two thin coats are usually better than one thick coat here. -
Pinky toe color:
Finish the color application by painting the smallest toe with the terracotta polish. Use just the tip of the brush to avoid flooding the cuticles.
Add Some Sparkle
Place a thin line of gold metallic striping tape or a sheer stroke of gold glitter polish right where the green and orange meet for a glam finish
Step 4: Finishing Touches
-
Clean up edges:
Dip a small angle brush or cotton swab into nail polish remover. Carefully trace around the cuticles and skin edges to remove any accidental polish marks. -
Seal with top coat:
I like to wait at least 10 minutes before this step. Apply a generous layer of glossy top coat over every nail. Float the brush over the geometric design so you don’t drag the colors into each other. -
Cap the free edge:
Run the brush horizontally across the very tip of each toenail to seal the color and prevent premature chipping.
Enjoy your fresh, artistic pedicure that pairs beautifully with sandals
Two-Tone Color Block Toes
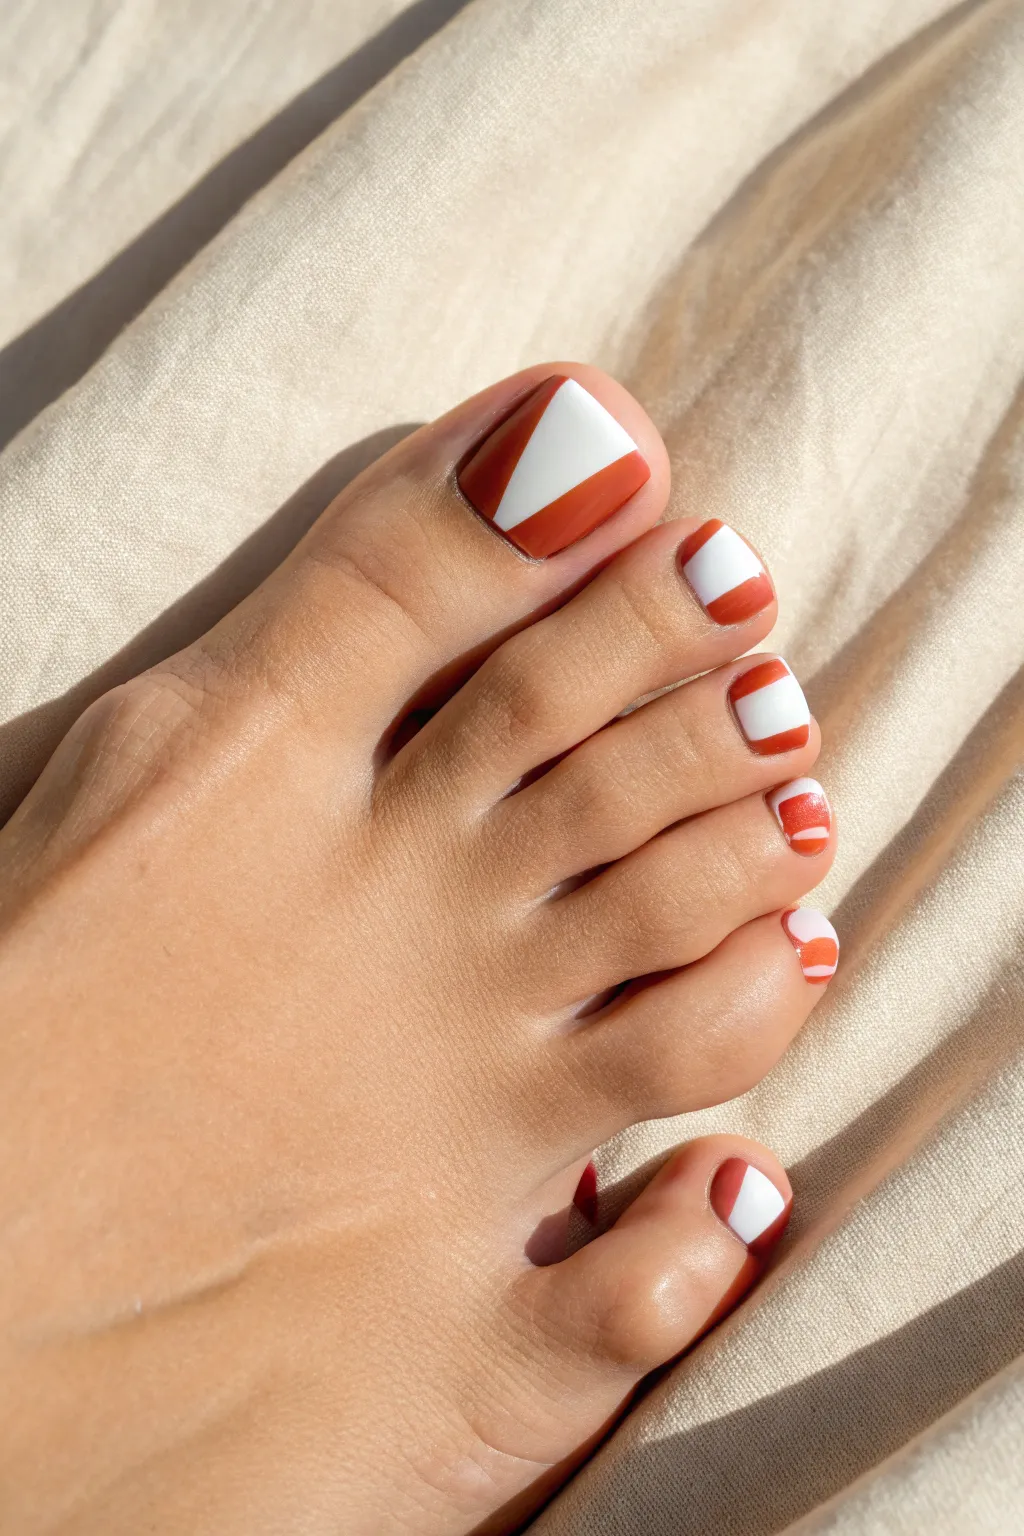

Elevate your summer sandal game with this sophisticated two-tone geometric design. By combining stark white with warm terracotta orange in crisp angular blocks, you create a look that feels both retro-chic and thoroughly modern.
Detailed Instructions
Materials
- Terracotta or burnt orange nail polish
- Opaque white nail polish
- Base coat
- High-gloss top coat
- Striping tape or detailing nail art brush
- Acetone or nail polish remover
- Small cleanup brush or Q-tip
- Cotton pads
Step 1: Preparation
-
Clean and Prep:
Begin with completely clean nails. Remove any old polish with acetone to ensure the nail plate uses a fresh surface. -
Shape the Nails:
File your toenails into a soft square shape. This geometric art looks best on a slightly flattened edge rather than a round one. -
Base Coat Application:
Apply a thin, even layer of base coat to all ten toes. This prevents staining, especially from the orange pigment, and helps the design last longer.
Step 2: Creating the Big Toe Design
-
Map the Triangle:
On your big toe, visualize a large white triangle pointing toward the base of the nail. You can use pieces of striping tape to mark this off if you don’t trust your freehand skills. -
Painting the White Center:
Fill the center triangular area with your opaque white polish. Don’t worry if the edges aren’t razor-sharp yet; we can refine them. -
Adding Terracotta – Left Side:
With the terracotta polish, carefully paint the left corner of the nail, creating a diagonal line that borders the white triangle. I find using a thin detailing brush helps get that line crisp. -
Adding Terracotta – Right Side:
Repeat the process on the right side, painting the remaining corner terracotta. You should now have a white V-shape sandwiched between two orange triangles. -
Second Coat for Depth:
Once the first layer is dry to the touch, apply a second coat of both colors to ensure full opacity and vibrancy.
Clean Lines Hack
If your hand isn’t steady, use scotch tape as a stencil. Stick it to your skin first to reduce stickiness so it doesn’t peel up your base coat.
Step 3: Painting the Smaller Toes
-
Design Variation Strategy:
For the smaller toes, the design simplifies to color-blocked bands rather than triangles. We will alternate or vary the placement slightly for visual interest. -
Second Toe Base:
Paint the bottom half (near the cuticle) of the second toe with white polish. -
Second Toe Tip:
Paint the top edge of the second toe with the terracotta shade, creating a straight horizontal line where the colors meet. -
Middle Toe Variation:
Switch it up for the middle toe. Paint the cuticle area with terracotta and the tip with white, or stick to the previous pattern if you prefer uniformity. -
Fourth Toe Detail:
The fourth toe is often tiny, so a single swoop of white across the middle with orange tips works well. Keep the brush steady. -
Pinky Toe Accent:
On the smallest toe, try a simple diagonal split or a horizontal block, depending on how much nail space you have available.
Change the Vibe
Swap the terracotta for a deep navy blue or an olive green while keeping the white blocks for a completely different seasonal aesthetic.
Step 4: Finishing Touches
-
Cleanup Time:
Dip a small cleanup brush into acetone and carefully trace around the cuticles to remove any stray polish on the skin. This step is crucial for that professional salon look. -
Seal the Deal:
Apply a generous layer of high-gloss top coat over every nail. Move the brush lightly to avoid smearing the dividing lines between the white and orange. -
Dry Completely:
Let the nails sit for at least 15-20 minutes to ensure the thick layers of the color blocking harden fully before putting on socks or shoes. -
Replenish Moisture:
Once dry, massage a drop of cuticle oil into the skin around the nails to rehydrate after the acetone usage.
Enjoy your striking, graphic pedicure that looks like modern art right on your feet
Thin Stripe Minimalist Toes
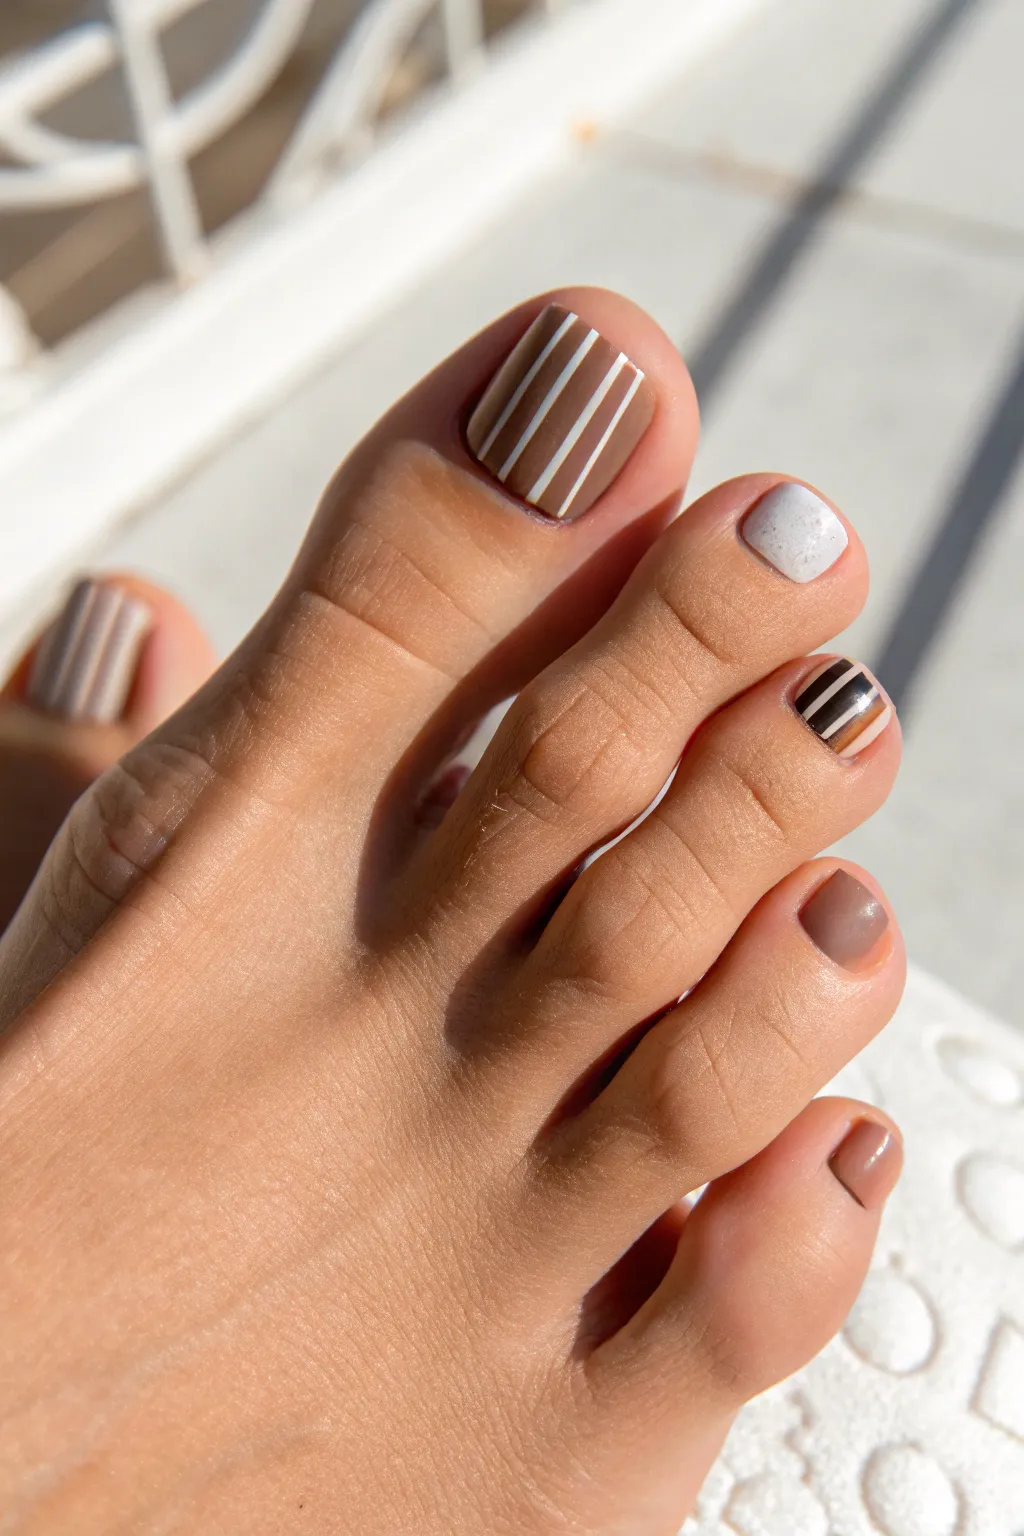
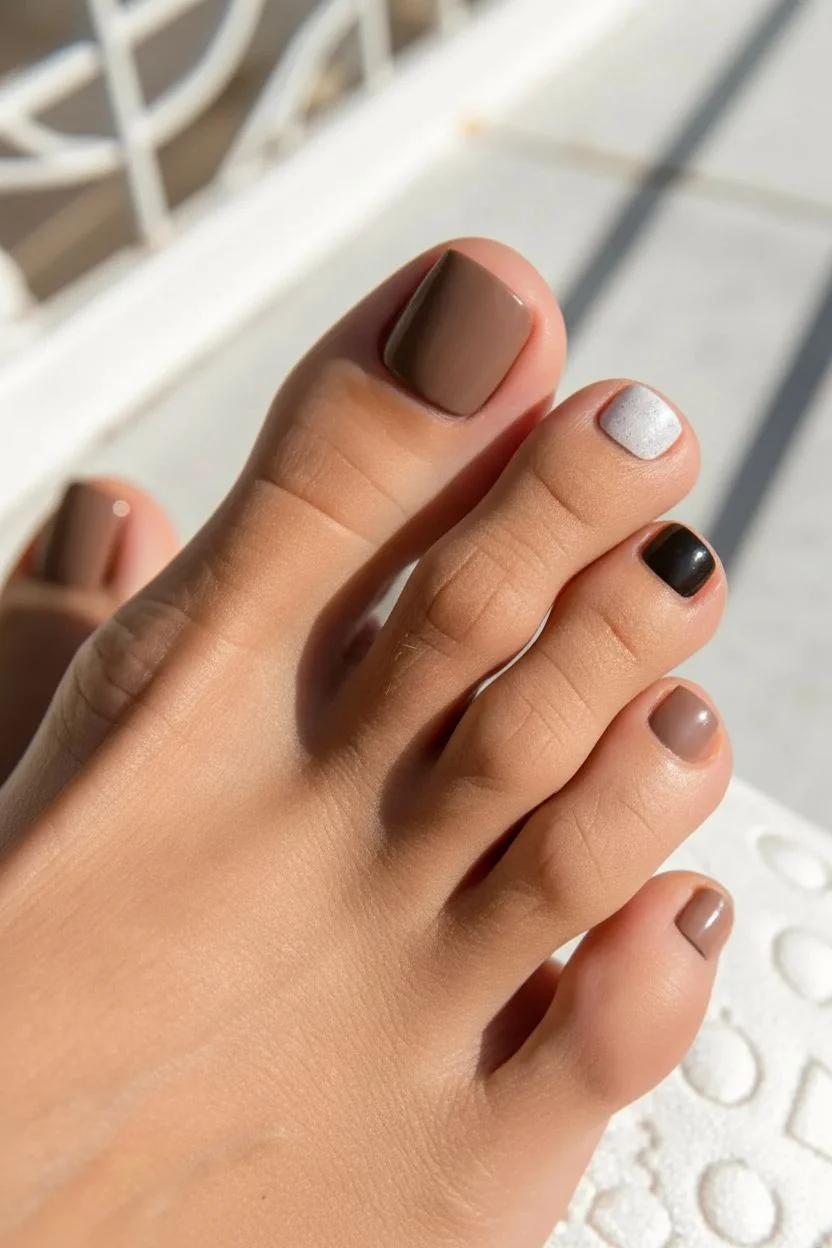
Achieve a sophisticated, modern look with this coffee-inspired pedicure featuring precise striping and alternating accent nails. The combination of warm mocha tones, crisp white lines, and subtle textures creates a minimalist design that feels both cozy and chic.
Step-by-Step Tutorial
Materials
- Mocha brown nail polish (creme finish)
- Opaque white nail polish (for striping)
- Textured white or soft silver glitter polish
- Dark chocolate or black nail polish
- Camel or latte-colored nail polish
- Soft taupe nail polish
- Base coat
- Glossy top coat
- Fine liner nail art brush
- Nail polish remover and cleanup brush
Step 1: Preparation & Base Colors
-
Prep the canvas:
Begin by cleaning your toenails thoroughly with polish remover to ensure a grease-free surface. Push back your cuticles gently for a clean line near the skin. -
Apply base coat:
Paint a thin layer of base coat on all five toes to protect the nail plate and help your manicure last longer. Let this dry completely. -
Paint the big toe:
Apply two coats of the mocha brown creme polish to your big toe. Ensure full opacity and let it dry fully, as this will be the base for your stripes. -
Paint the second toe:
Coat the second toe (index toe) with the textured white or soft silver glitter polish. This serves as a bright, clean accent against the darker tones. -
Paint the middle toe:
Apply the dark chocolate or black polish to the middle toe. This dark base will make the lighter stripes pop later on. -
Paint the fourth toe:
Use the soft taupe polish for the fourth toe. This neutral shade bridges the gap between the dark and light elements of the design. -
Paint the pinky toe:
Finish the base colors by painting the pinky toe with a single coat of the same soft taupe or mocha shade used previously. Sometimes I just use the mocha here for simplicity.
Step 2: Detailed Striping
-
Load your liner brush:
Dispense a small pool of opaque white polish onto a palette or piece of foil. Dip your fine liner brush in, ensuring the bristles are coated evenly but not dripping. -
Stripe the big toe:
carefully paint thin, vertical lines down the length of the big toe. Space them evenly to let the mocha base show through. -
Refine the lines:
If your lines are looking faint, go over them a second time very lightly once the first layer is tacky, but usually one solid pass is cleaner. -
Clean the brush:
Thoroughly clean your liner brush with acetone before switching colors for the next toe. -
Start the middle toe design:
On the dark base of the middle toe, paint two vertical stripes using the opaque white polish. These should be quite thin. -
Add dimension:
Using the camel or latte-colored polish and a clean liner brush, add a vertical stripe right next to or between the white lines on the middle toe. -
Check for gaps:
Inspect the stripes near the cuticle and free edge. Extend the lines fully so the design doesn’t look floating.
Steady Hands Hack
Anchor your pinky finger against your foot or the floor while painting. This creates a stable pivot point, making it much easier to draw perfectly straight vertical lines.
Step 3: Finishing Touches
-
Clean up edges:
Dip an angled cleanup brush into acetone and carefully trace around the cuticles to remove any polish that strayed onto the skin. -
Dry time:
Allow your nail art to dry for at least 10-15 minutes. This step is crucial so you don’t smear the crisp lines with your top coat. -
Apply top coat:
Float a generous bead of glossy top coat over each nail. Use a light touch to glide over the stripes without dragging the brush bristles on the design. -
Seal the free edge:
Run the brush horizontally along the very tip of each toenail to cap the free edge and prevent premature chipping.
Smudged Stripes?
If you smear a line while applying top coat, don’t panic. Add a tiny dot of the base color over the smudge to camouflage it, effectively turning the error into a geometric accent.
Enjoy your beautifully striped pedicure, perfect for open-toed sandals and sunny days
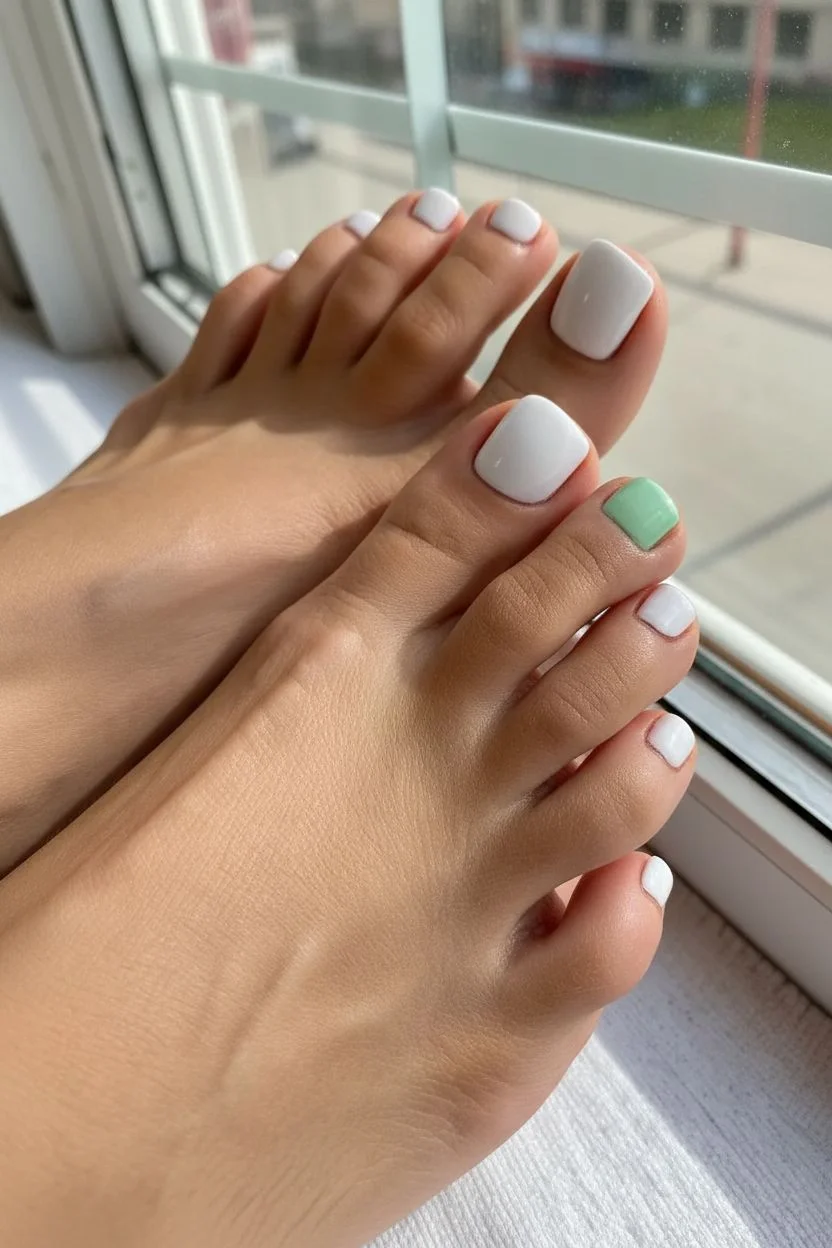
Glitter Fade on Big Toes
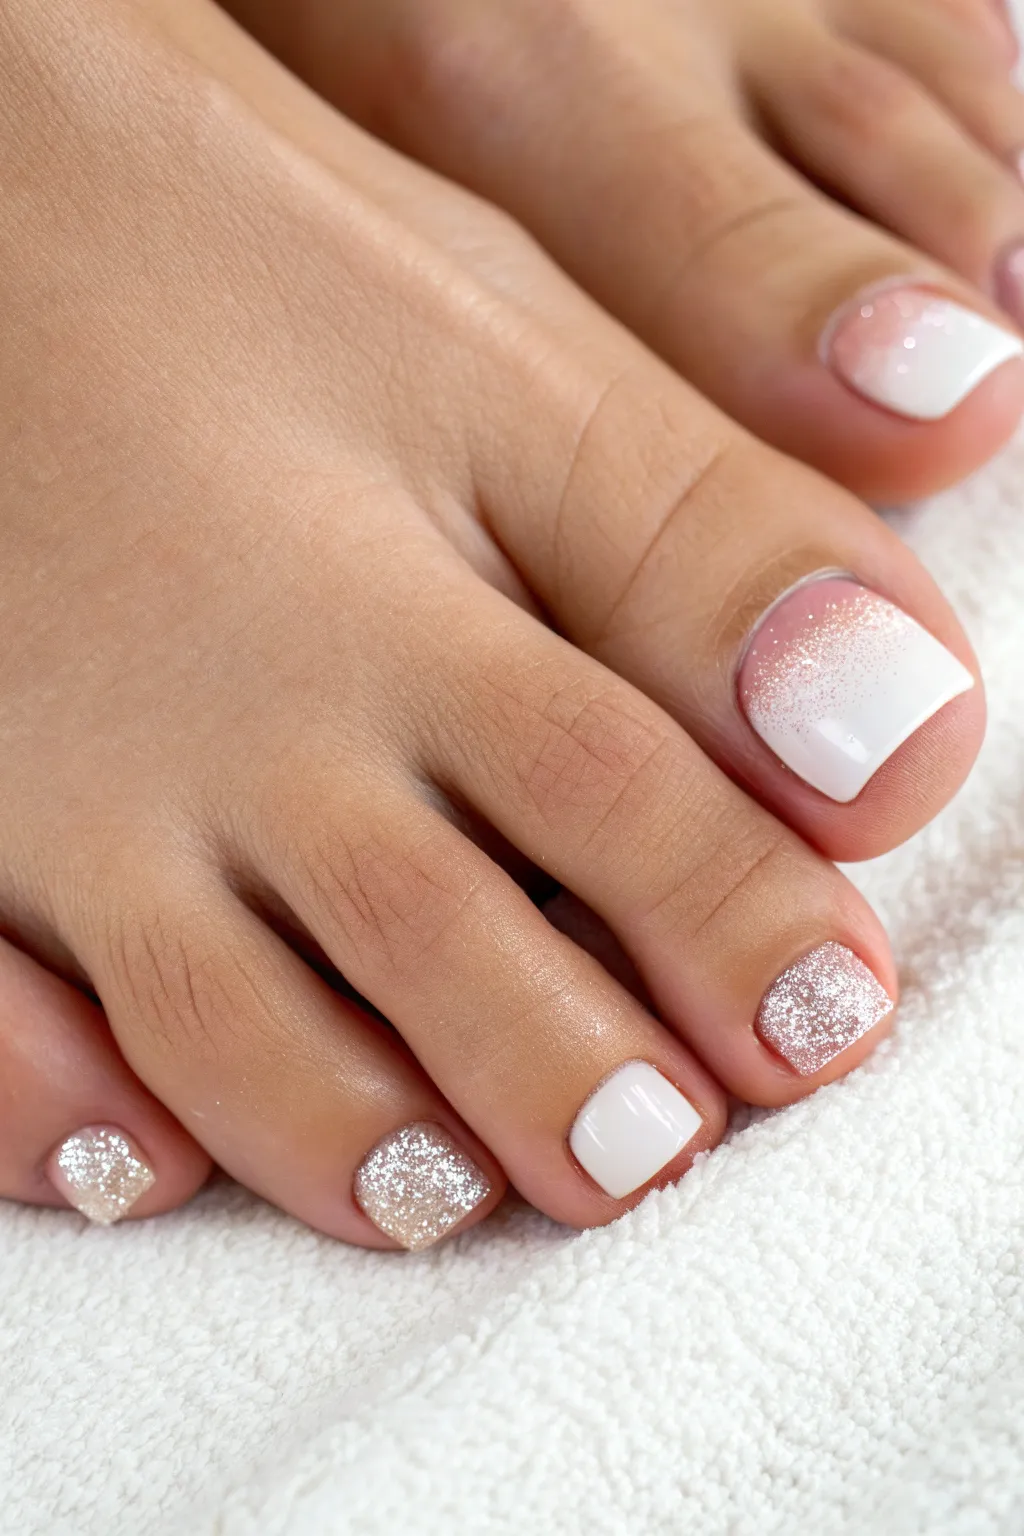
This elegant pedicure combines the classic cleanliness of white polish with the whimsy of sparkling glitter. The star of the show is the big toe’s ombre fade, transitioning softly from pink to white with a dusting of shimmer.
Detailed Instructions
Materials
- White gel polish
- Sheer nude-pink gel polish
- Silver or champagne glitter gel polish
- Fine loose glitter (optional, for extra sparkle)
- Base coat
- Top coat (glossy)
- UV/LED Lamp
- Ombre sponge or nail art brush
- Lint-free wipes
- Rubbing alcohol or cleanser
- Toe separators
Step 1: Preparation
-
Clean and Shape:
Begin by removing any old polish. Trim your toenails straight across and file the edges to smooth any sharp corners. Push back your cuticles gently for a clean canvas. -
Buff the Surface:
Lightly buff the surface of each nail to remove natural shine. This helps the gel adhere better and last longer. Wipe away the dust with a lint-free wipe soaked in cleanser. -
Apply Base Coat:
Apply a thin layer of base coat to all ten toenails. Be careful not to flood the cuticles. Cure under your LED/UV lamp according to the manufacturer’s instructions.
Sponge Savvy
Dampen your makeup sponge slightly before dabbing the polish. A dry sponge can absorb too much product and leave a textured, bubbly finish.
Step 2: Solid Color Application
-
Paint the Middle Toe:
For the middle toe, apply a coat of solid white gel polish. Keep the layers thin to prevent wrinkling. Cure the first coat. -
Second White Coat:
Apply a second coat of white to the middle toe for full opacity. Ensure the color is even and smooth before curing again. -
Apply Full Glitter Nails:
On the second t, fourth, and little toes, apply your chosen silver or champagne glitter polish. I like to dab the glitter on rather than brushing to get denser coverage. -
Build Glitter Opacity:
Cure the first glitter layer, then apply a second coat if needed to cover any bare spots. Cure once fully satisfied with the sparkle density.
Step 3: The Big Toe Fade
-
Apply Nude Base:
On the big toe, apply two coats of your sheer nude-pink polish over the entire nail, curing between each coat. This creates a natural, healthy look for the nail bed. -
Create White Tip:
Paint the bottom third of the big toe (the free edge) with white polish. Don’t worry about a perfect line; we will blend it. -
Blend the Transition:
Using a small ombre sponge or a blending brush, gently tap the line where the white meets the pink. Work smoothly upward to fade the white into the pink. Cure briefly to set the fade. -
Second Blend Layer:
Repeat the sponge or brush blending process with a little more white if necessary to strengthen the tip color while keeping the transition soft. Cure again. -
Add Glitter Gradient:
Dip a fine nail art brush into your glitter polish. Lightly brush it over the transition area where the pink meets the white, concentrating the sparkles near the cuticle and fading them down towards the white tip. -
Refine the Sparkle:
If you want more intensity, sprinkle a tiny bit of loose fine glitter onto the wet gel layer before curing. This adds texture and depth to the fade. -
Final Cure:
Once you are happy with the glitter placement on the big toe, give it a full cure under the lamp.
Crystal Accent
For a glamorous upgrade, place tiny Swarovski crystals along the cuticle line of the white middle toe before applying your final top coat.
Step 4: Finishing Touches
-
Top Coat Application:
Apply a generous layer of glossy top coat to all toes. This seals the design and smooths out any texture from the glitter. -
Seal the Edges:
Run the brush along the free edge of each nail to ‘cap’ it, which helps prevent chipping. -
Final Cure and Cleanse:
Cure for the full recommended time (usually 60 seconds LED). If your top coat has a sticky inhibition layer, wipe it off with alcohol. -
Hydrate:
Finish by massaging cuticle oil into the skin around your nails to rehydrate and make your pedicure look salon-fresh.
Now you have a sparkling, professional-looking pedicure perfect for open-toed shoes
Confetti Sparkle Topcoat Look


Embrace a playful yet sophisticated look with this festive pedicure design that combines a classic nude base with a burst of colorful sparkle. The design features a delicate glitter gradient reminiscent of fairy dust, topped with cheerful confetti dots for a party-perfect finish.
Step-by-Step Tutorial
Materials
- Nude or beige opaque nail polish (cream finish)
- Fine champagne or light gold glitter polish
- Multi-colored confetti glitter topper (with medium-sized hexagonal glitters)
- Clear base coat
- High-gloss top coat
- Small detailing brush or dotting tool
- Orange wood stick or toothpick
- Nail polish remover
- Cleanup brush
Step 1: Preparation and Base
-
Prep the canvas:
Begin by removing any old polish and shaping your toenails. Gently push back the cuticles to create a clean, open surface for the glitter gradient. -
Apply base coat:
Swipe a thin layer of clear base coat over each nail. This protects the natural nail plate and helps the nude polish adhere smoothly. -
Paint the first nude layer:
Apply your chosen nude or beige cream polish. Start down the center of the nail, then fill in the sides. Keep the layer thin to prevent bubbling. -
Apply the second coat:
Once the first layer is touch-dry, apply a second coat of the nude polish to ensure full opacity. The goal is a solid, creamy background that makes the glitter pop.
Placement Pro Tip
Don’t relying on the polish brush for the large confetti! Using a toothpick allows you to deliberately place colors so you don’t end up with three blue dots clumped together.
Step 2: Adding the Glitter Fade
-
Load the fine glitter:
Take your fine champagne or gold glitter polish. Wipe most of the product off the brush on the bottle neck so you have very little polish left on the bristles. -
Create the gradient base:
Dab the fine glitter polish heavily at the cuticle area. Then, gently drag the brush downwards about halfway down the nail to gently fade the sparkles out. -
Refine the fade:
I find it helpful to use a clean brush to feather the edge of the glitter if the line looks too harsh. You want a seamless transition from sparkle to nude. -
Repeat on all toes:
Apply this champagne gradient to all ten toes, keeping the heaviest concentration of sparkle right at the base of the nail.
Step 3: Confetti Placement
-
Prepare the confetti:
Pour a small puddle of your multi-colored confetti polish onto a piece of foil or a palette. This makes it easier to pick out specific colors. -
Pick and place dots:
Dip a dotting tool or the tip of a toothpick into the puddle to pick up individual colorful hexagon glitters. -
Cluster the confetti:
Place the larger colored glitters primarily near the cuticle area, layering them over the fine gold glitter base you just created. -
Create a scattering effect:
Place a few stray confetti pieces slightly lower down the nail, mixing up the colors (blue, pink, orange, yellow) so they look randomly scattered like falling confetti. -
Fill gaps:
Check for any empty spots near the cuticle line and fill them with smaller glitter specs to create a dense, rich look at the base. -
Let the glitter set:
Allow the glitter placement to dry for a few minutes. Glitter polish can be thick, so giving it extra time prevents it from dragging when you apply the top coat.
Level Up: Matte Magic
For a modern twist, apply a matte top coat instead of glossy. The contrast between the flat finish and the sparkling glitter creates a unique, trendy texture.
Step 4: Finishing Touches
-
Clean up the edges:
Dip a small cleanup brush into nail polish remover and carefully trace around the cuticle line and sidewalls to remove any stray glitter or rogue polish. -
Seal with top coat:
Apply a generous layer of high-gloss top coat. Make sure to float the brush over the glitter to avoid smearing the design. -
Smooth the texture:
If the confetti feels bumpy, wait for the first layer of top coat to dry and apply a second layer to encapsulate the glitter fully for a smooth, glass-like surface. -
Hydrate:
Once fully dry, apply cuticle oil to the skin around the nails to rehydrate and make the pedicure look salon-fresh.
Enjoy showing off your festive toes that look like a party waiting to happen
Matte Base With Glossy Details
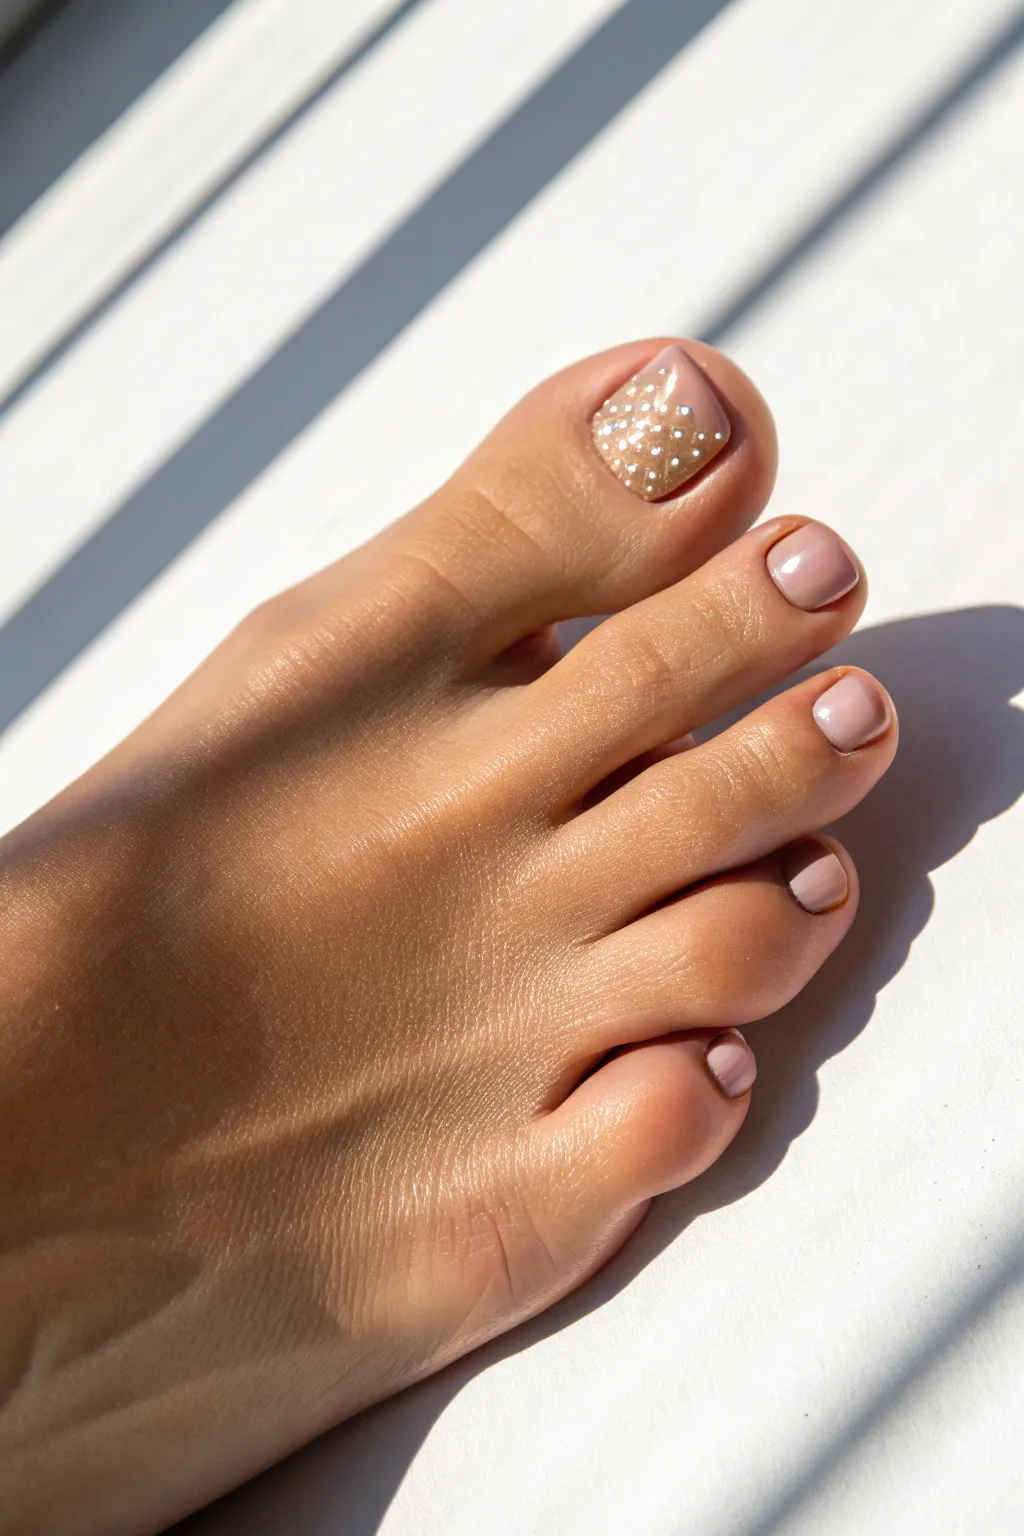
Elevate a classic nude pedicure with a touch of subtle glamour on the big toe. This look combines a creamy beige polish with a delicate, scattered glitter accent that catches the sunlight beautifully without being overwhelming.
Step-by-Step Guide
Materials
- Nude or beige nail polish (opaque finish)
- Sheer nude nail polish (optional)
- Clear base coat
- High-gloss top coat
- White glitter polish (with varying dot sizes) or loose white glitter dots
- Fine nail art brush or dotting tool (if using loose glitter)
- Nail file and buffer
- Cuticle pusher and nipper
- Acetone or polish remover
- Clean-up brush
Step 1: Prep & Prime
-
Clean the canvas:
Start by removing any old polish completely. Wash your feet and dry them thoroughly to ensure no oils remain on the nail plate. -
Shape the nails:
Using a nail file, shape your toenails into a soft square or rounded shape, mirroring the natural curve of your toe. Keep the edges smooth to prevent snagging. -
Buff and smooth:
Lightly buff the surface of each nail to remove ridges and create a smooth texture for the polish to adhere to. -
Cuticle care:
Gently push back your cuticles. If necessary, trim any loose hangnails, but be careful not to cut live tissue. -
Apply base coat:
Apply a thin layer of clear base coat to all ten toenails. This protects the nail from staining and helps the manicure last longer. Let this layer dry completely.
Step 2: Color Application
-
Paint the smaller toes:
Take your opaque nude beige polish and apply the first coat to the four smaller toes. Keep the layers thin to avoid bubbling. -
Second coat for smaller toes:
Once the first coat is dry to the touch, apply a second coat of the nude beige to ensure full, opaque coverage. -
Base for the big toe:
For the accent nail on the big toe, apply a very thin coat of the nude polish. If you have a sheer nude, I prefer using that here to give the glitter a floating effect. -
Layering opacity:
If the base on the big toe looks too streaky, add a second thin coat, but keep it slightly more translucent than the other toes if possible.
Glitter Bumps?
If the glitter feels rough, apply a thicker layer of top coat or a specialized ‘glitter grabber’ top coat first to fill gaps before the final gloss layer.
Step 3: Glitter Detailing
-
Prepare the glitter:
If using a glitter polish, give the bottle a good roll between your palms. If using loose glitter, pour a small amount onto a palette or piece of foil. -
Apply glitter placement:
Using the brush from the bottle (or a sponge for denser packing), dab the white glitter polish onto the big toe. Focus on spreading the dots evenly. -
Manual placement (Optional):
For precision like the photo, dip a fine brush or dotting tool into clear polish, pick up individual white glitter dots, and place them randomly on the nail. -
Check density:
Ensure there is a mix of small and tiny dots scattered across the entire surface of the big toenail without overcrowding them. -
Smooth the surface:
If the glitter pieces are sticking up, gently tap them down with your finger once the polish is tacky but not wet.
Golden Hour Glow
Swap the white glitter dots for holographic or gold foil flakes to give the look a warmer, sun-kissed vibe perfect for summer evenings.
Step 4: Finishing Touches
-
Seal with top coat:
Apply a generous layer of high-gloss top coat over every nail. This is crucial for the big toe to smooth out the texture of the glitter. -
Double seal (Optional):
If the glitter on the big toe still feels rough after the first layer of top coat dries, add a second layer for a glass-like finish. -
Clean up edges:
Dip a small clean-up brush into acetone and carefully trace around the cuticles and sidewalls to remove any stray polish or glitter. -
Hydrate:
Once the polish is bone dry, apply cuticle oil to the skin around the nails to rehydrate and give the pedicure a salon-fresh look.
Enjoy your chic and subtle pedicure that adds just the right amount of sparkle to your step
Ombre Sunset Painted Toes
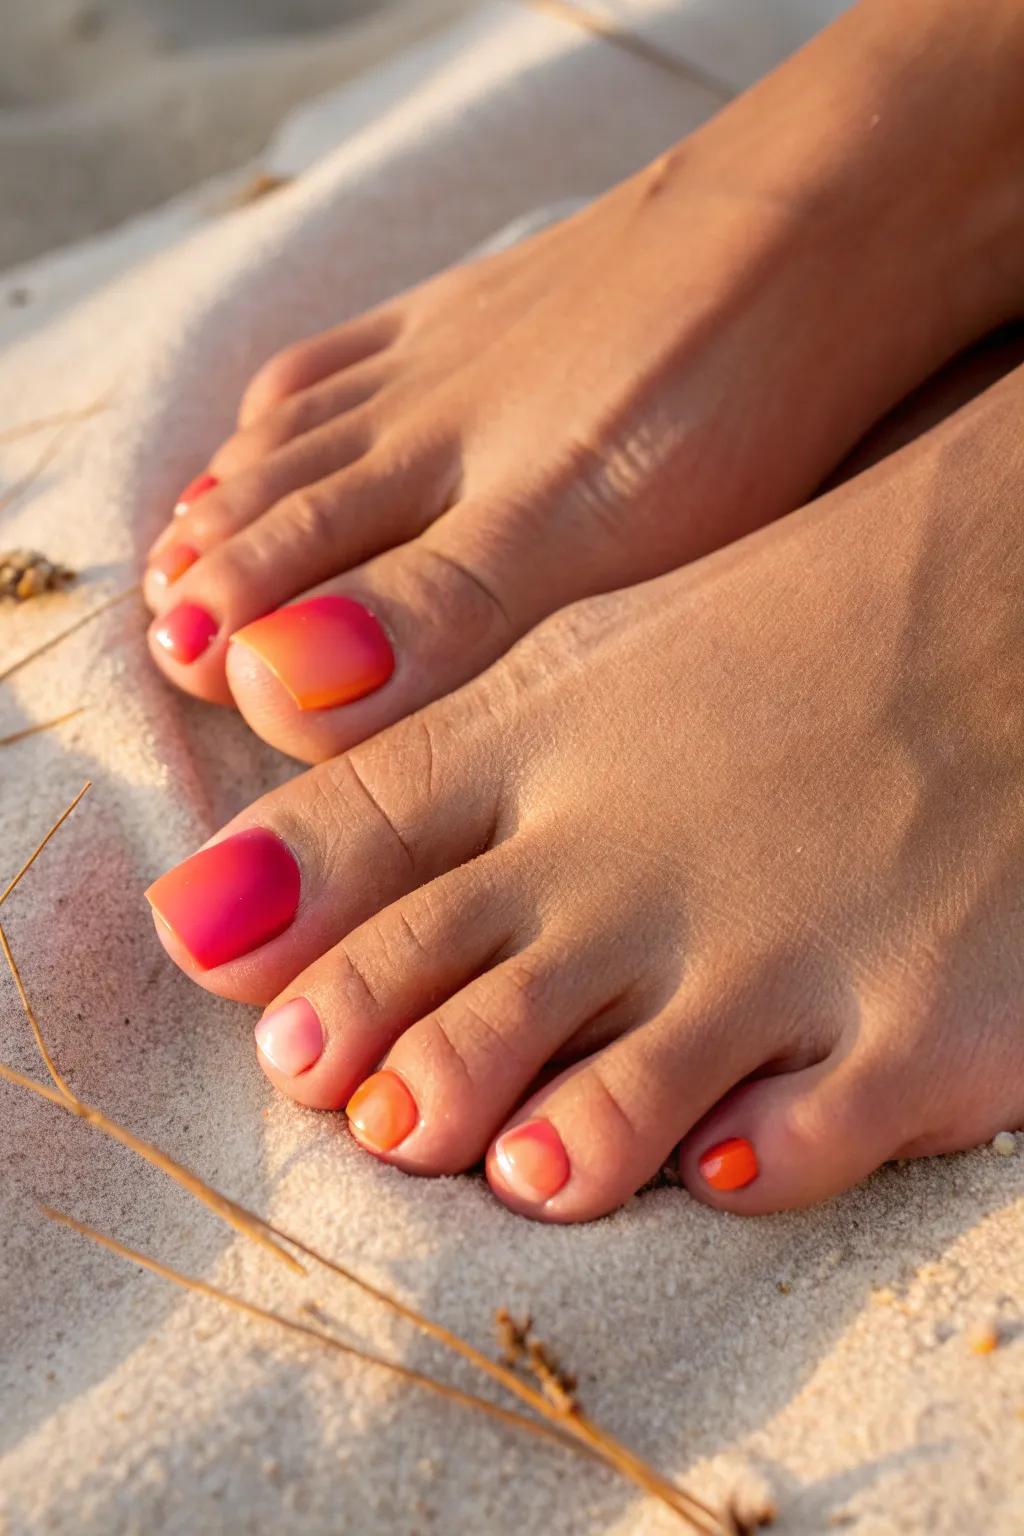
Capture the warmth of golden hour right on your toes with this stunning ombre look. By blending vibrant pinks, fiery oranges, and soft peaches, you’ll create a seamless sunset effect that glows against the sand.
Detailed Instructions
Materials
- Base coat nail polish
- High-quality white nail polish (opaque)
- Bright hot pink nail polish
- Vibrant orange nail polish
- Soft peach or coral nail polish
- Makeup sponges (latex-free wedges work best)
- Liquid latex or cuticle barrier cream
- High-gloss jelly top coat
- Clean-up brush or cotton swabs
- Acetone or nail polish remover
- Toe separators
Step 1: Preparation and Base
-
Prep the canvas:
Begin by removing any old polish and shaping your toenails. Gently buff the surface to ensure it’s smooth, as ridges can make the gradient look uneven. -
Separate and protect:
Insert toe separators to keep your toes from smudging each other. Apply a thin layer of liquid latex around the skin of each toenail to make the messy sponge process easier to clean up later. -
Base coat application:
Apply a single layer of clear base coat to protect your natural nails from staining. -
The white foundation:
Paint all your toenails with two thin coats of opaque white polish. Let this dry completely. The white base pop makes the neon gradient colors appear much more vibrant.
Bubbles in the blend?
Sponing often creates tiny bubbles. Don’t panic; apply your top coat generously while the gradient is still slightly wet. The top coat will settle into the texture and smooth out the bubbles perfectly.
Step 2: Creating the Gradient
-
Prepare the sponge:
Take a makeup sponge wedge. Paint a stripe of hot pink polish directly onto the flat edge of the sponge. -
Layer the colors:
Immediately below the pink stripe on the sponge, paint a stripe of the vibrant orange polish. Overlap the edges slightly where the colors meet to start the blending process. -
Add the final tone:
Finish loading the sponge with a stripe of the soft peach color at the bottom. The width of these stripes should roughly match the length of your big toenail. -
Transfer to the big toe:
Align the sponge with your big toenail so the pink is at the cuticle (or vice versa, depending on your preference) and firmly press down. -
Dabbing technique:
Using a rapid up-and-down dabbing motion, bounce the sponge on the nail. Move it slightly left and right to blur the lines between colors. -
Build opacity:
The first layer will look sheer and bubbly; allow it to dry for a minute. Reload your sponge with fresh polish and repeat the dabbing process until you reach full opacity. -
Gradient variations:
For the smaller toes, you might not fit all three colors. I like to switch it up here—try using just pink and orange on one toe, and orange to peach on another for a playful, mixed look. -
Repeat on small toes:
Sponge the chosen color combinations onto the remaining toes, ensuring you reload the sponge frequently so it doesn’t dry out and stick to the nail.
Step 3: Finishing Touches
-
Remove barriers:
Once you are satisfied with the color blend, carefully peel off the liquid latex using tweezers. -
Detail cleanup:
Dip a small, angled brush into acetone and carefully clean up any polish that made it onto the skin or cuticles to create a crisp, professional line. -
Smooth it out:
Apply a generous layer of high-gloss top coat while the polish is still slightly tacky. This is crucial as it melts the spongy texture into a smooth, glass-like finish. -
Dry time:
Allow the pedicure to dry fully for at least 30 minutes before putting on closed-toe shoes to prevent denting your new sunset art.
Add a golden hour sparkle
Before the top coat, lightly sponge a sheer gold glitter polish just at the blurred line where the orange meets the pink. It mimics the glistening of sunlight on water.
Enjoy showing off your warm, glowing toes on your next beach day or open-toe occasion
Ocean Blues Mix-and-Match Toes
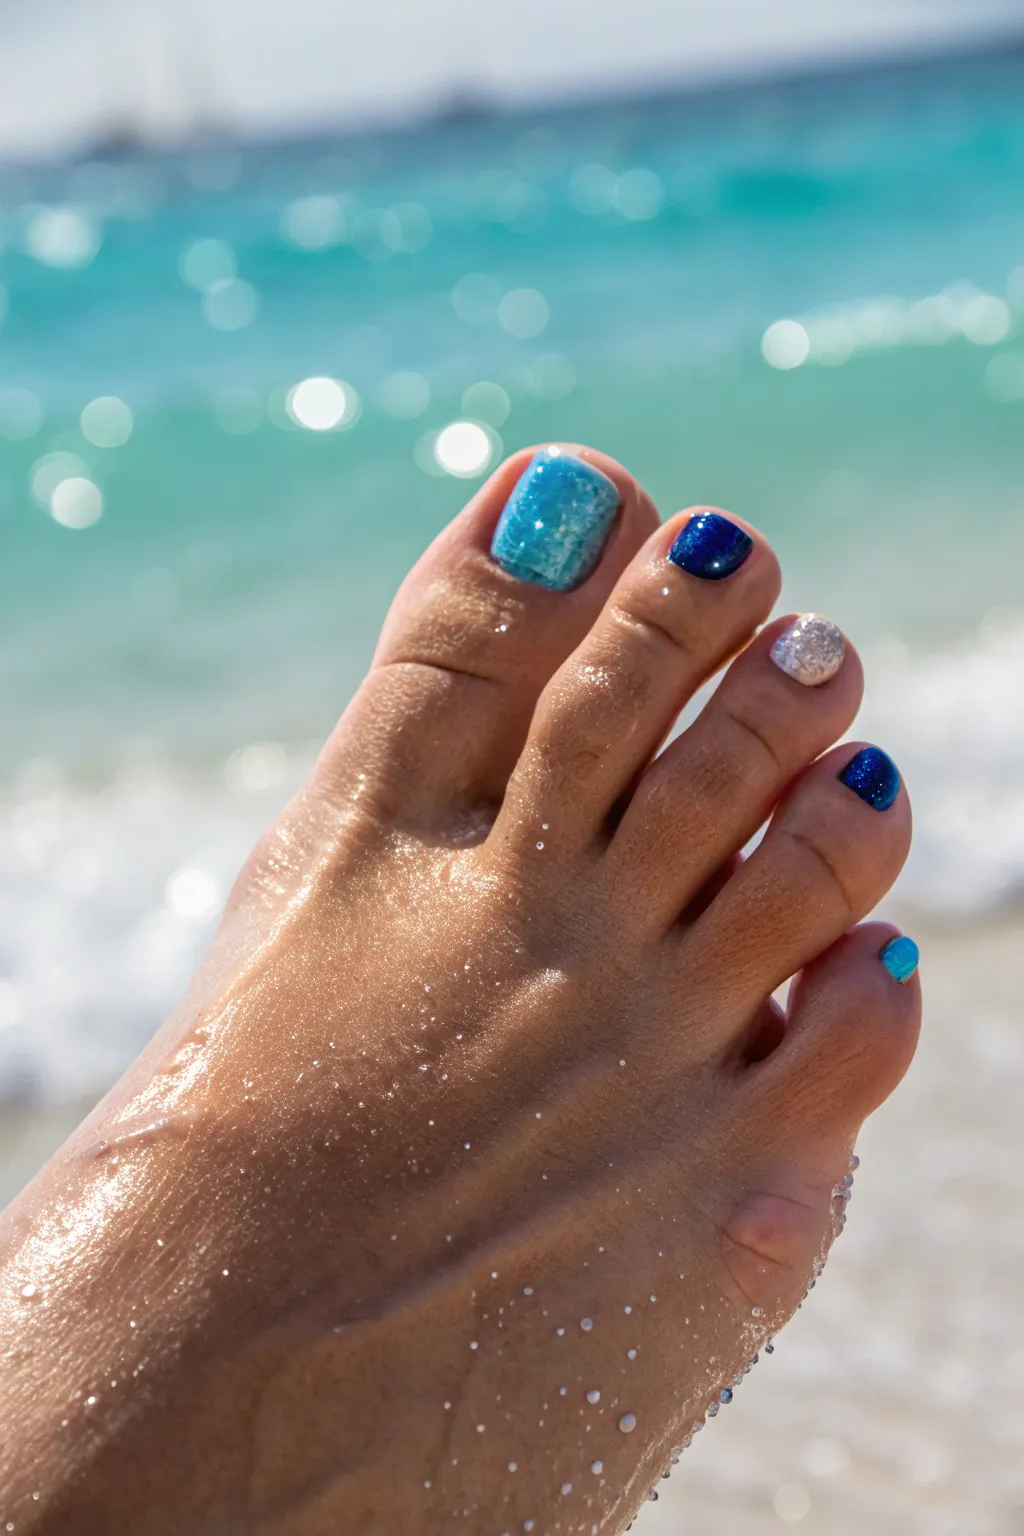

Capture the shimmering essence of tropical waters right on your toes with this vacation-ready look. By alternating deep royal blues, sparkling turquoise, and dazzling silver, you create a playful mix-and-match style that perfectly mimics the sea and surf.
Step-by-Step Tutorial
Materials
- Base coat nail polish
- Turquoise glitter polish (semi-sheer)
- Deep royal blue shimmer polish
- Silver glitter polish (dense)
- Bright teal cream polish
- High-gloss top coat
- Nail file and buffer
- Cuticle stick/pusher
- Clean-up brush dipped in acetone
- Nail polish remover
- Cotton pads
- Toe separators (optional)
Step 1: Preparation & Base
-
Prepare the canvas:
Start with clean, dry feet. Remove any old polish completely using a cotton pad and remover to ensure your fresh colors pop true to shade. -
Shape and buff:
Trim your toenails straight across and gently round the corners with a file to prevent snagging. Briefly buff the surface of the nails to help the polish adhere better. -
Cleanse the nail plate:
Wipe each nail one last time with a little remover or rubbing alcohol to eliminate any oils from lotions or skin. -
Apply base coat:
Paint a thin layer of clear base coat on every toenail. This protects your nails from staining, especially important when using deep blues and teals.
Glitter Removal Hack
Glitter polish is tough to remove. Soak a cotton ball in remover, place it on the nail, wrap the toe in foil for 5 minutes, and wipe it away cleanly.
Step 2: The Big Toe: Aqua Sparkle
-
First coat of turquoise:
Using your sparkly turquoise polish, apply a thin, even layer to your big toe. Don’t worry if it looks slightly sheer at first; glitter polishes build up dimension. -
Build the opacity:
Once the first layer is dry to the touch, apply a second coat of the turquoise glitter. Focus on floating the brush over the nail rather than dragging it to keep the glitter distribution even. -
Optional third coat:
If I want extra depth like the photo, I sometimes add a third very thin coat to make the sparkle really dense and opaque.
Step 3: The Accent Nails: Deep Blue & Silver
-
Paint the second toe:
Take your deep royal blue shimmer polish and apply it to the second toe (the one next to the big toe). Be careful near the cuticles as dark colors show mistakes easily. -
Paint the fourth toe:
Skip the middle toe for now. Apply the same deep royal blue color to your fourth toe. You want a solid, opaque coverage here, so two coats are usually best. -
Apply silver to the middle toe:
On the third toe, apply your dense silver glitter polish. This acts as the ‘breaking wave’ highlight in between the ocean blues. -
Layering the silver:
Glitter can be tricky; dab the silver polish on slightly rather than stroking it to pack as much sparkle onto the nail as possible.
Smooth as Glass
Glitter polishes dry gritty. Apply a thicker layer of top coat (or even two layers) to fill in the gaps and get that wet, glassy beach look.
Step 4: Finishing Touches: Teal & Top Coat
-
Paint the pinky toe:
For the tiny pinky toe, use the bright teal cream polish. It adds a pop of playful color to finish the gradient. Use just the corner of the brush if your pinky nail is small. -
Clean up edges:
Dip a small angled brush or a cuticle stick wrapped in cotton into acetone. Carefully trace around the skin edges of each nail to clean up any errant polish. -
Apply top coat:
Once all colors are dry, apply a generous layer of high-gloss top coat to every nail. This seals the glitter texture so it feels smooth against socks or sand. -
Seal the free edge:
Run the top coat brush horizontally along the very tip of each toenail to prevent premature chipping.
Now you are ready to step out with a sparkling pedicure that rivals the beauty of the ocean
Abstract Swirls on Big Toes
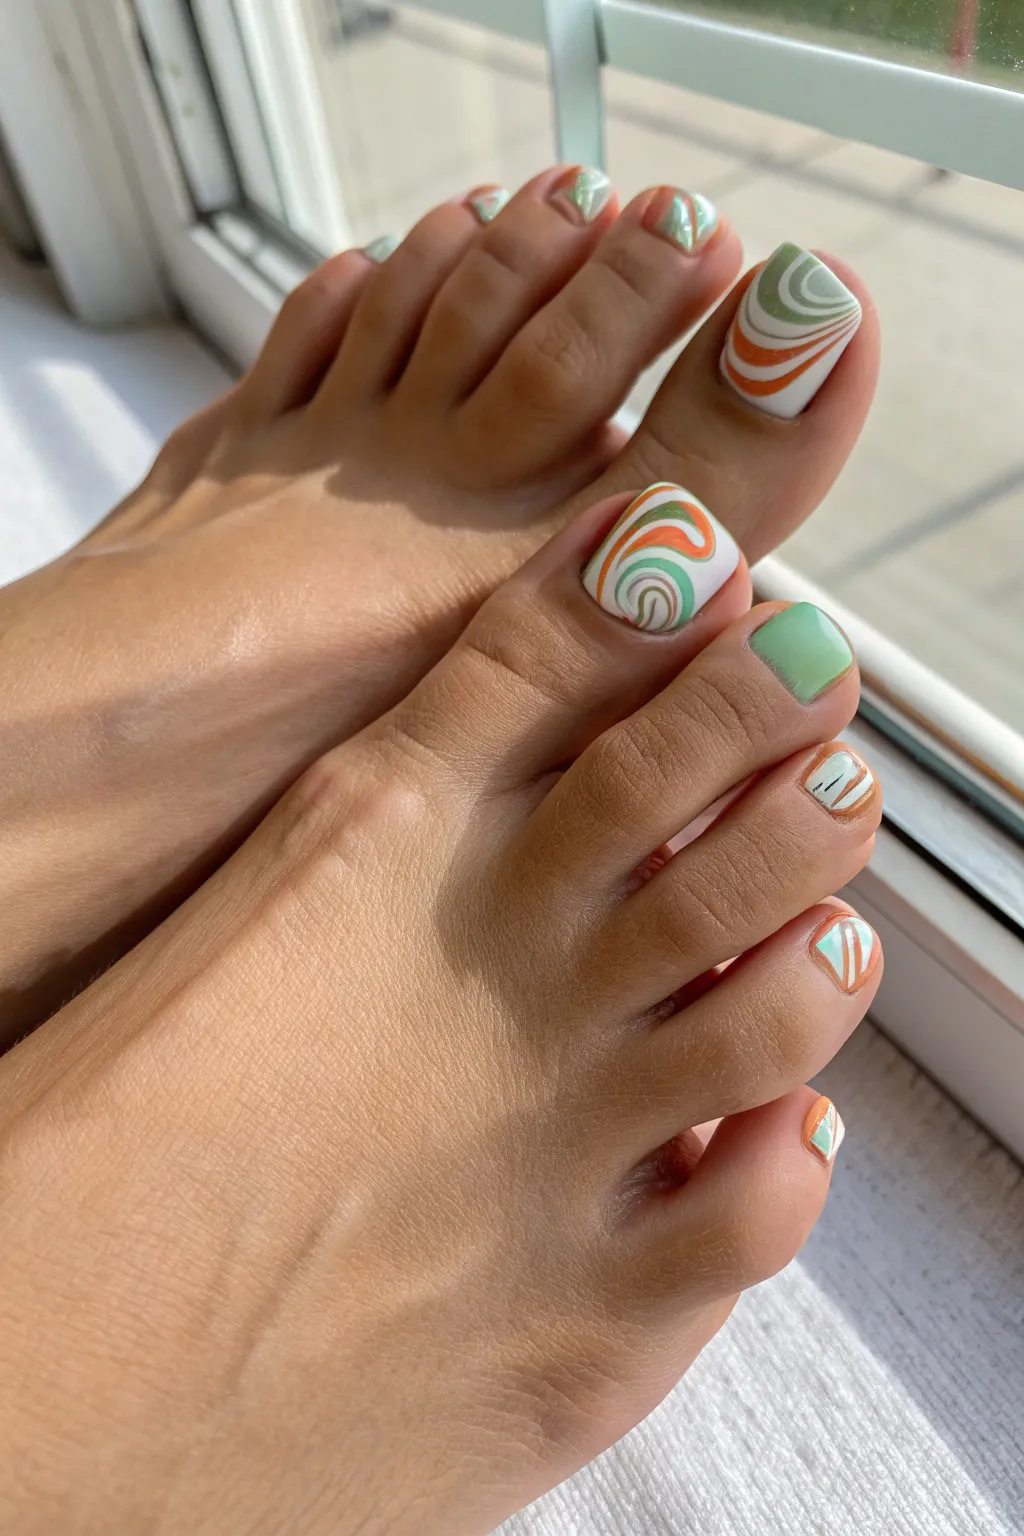
Embrace a groovy, retro-inspired look with this abstract swirl pedicure that mixes vibrant orange, sage green, and crisp white. The design features a statement big toe with flowing, organic curves paired with minimalist geometric accents on the smaller toes for a balanced, artistic finish.
Step-by-Step Guide
Materials
- White crème nail polish (opaque base)
- Pastel sage green nail polish
- Burnt orange or terracotta nail polish
- Mint green nail polish
- Detailing nail art brush (long, thin striper)
- Base coat
- Glossy top coat
- Acetone and cleanup brush
- Cotton pads
Step 1: Base Prep & Coating
-
Prep the canvas:
Begin by removing any old polish and shaping your toenails. Push back the cuticles to ensure a clean area for painting, which will help your abstract design look professional and last longer. -
Apply base coat:
Apply a single, even layer of base coat to all ten toes to protect the nail plate and prevent staining. -
Paint the foundation:
Apply two coats of opaque white polish to your big toes, second toes, fourth toes, and pinky toes. Let the first coat dry completely before adding the second to avoid streaks. -
Accent toe color:
For the middle toe (or whichever toe you prefer as a solid accent), apply two coats of the mint green polish for a refreshing pop of solid color.
Step 2: The Big Toe Statement
-
Map the first curve:
Using your detailing brush dipped in burnt orange polish, start at the base of the big toe cuticle. Draw a thick, swooping curve that arches up toward the left side of the nail. -
Add sage contrast:
Clean your brush and switch to the sage green polish. Paint a similar curved line right next to the orange one, following its shape closely but leaving a tiny sliver of white space between them if you have steady hands. -
Create the center swirl:
With the mint green polish, create a tighter swirl in the center of the white space. Think of it like a topographic map line that loops back on itself. -
Fill the gaps:
Go back in with the orange and sage colors to add smaller, echo lines inside the larger curves. Vary the thickness—some lines should be bold, others delicate wisps. -
Refine the edges:
If any lines look shaky, use the very tip of your brush to smooth them out. The beauty of abstract art is that it doesn’t need to be geometrically perfect, just fluid.
Pro Tip: Floating Method
When applying top coat over nail art, use the ‘floating’ technique. Keep the brush parallel to the nail and let the bead of polish do the work so bristles don’t drag the design.
Step 3: Minimalist Details
-
Stripe the second toe:
This design usually keeps the second toe simple to balance the big toe. If you painted it white earlier, leave it plain or add a tiny vertical green stripe near the edge for subtle continuity. -
Geometric fourth toe:
On the fourth toe (painted white), take your detailing brush with the orange polish. Draw two short, diagonal lines near the cuticle area. -
Add a dark accent:
Using a very dark green or black (or mixing your green with a touch of black), add a tiny, thin line intersecting the orange diagonals on the fourth toe for a graphic touch. -
Pinky toe detail:
For the tiny pinky toe, create a miniature version of the big toe’s design. Just a single swoop of mint green and a small dash of orange is enough due to the limited surface area.
Level Up: Matte Finish
Transform the vibe from retro-glossy to modern-chic by using a matte top coat instead. It makes the abstract shapes look like a printed fabric pattern.
Step 4: Finishing Touches
-
Cleanup time:
Dip a small cleanup brush or an angled eyeliner brush into acetone. Carefully trace around the cuticles and skin to remove any polish that strayed outside the lines. -
Seal only when dry:
Wait at least 10-15 minutes for the thick layers of nail art to dry. I prefer to wait a bit longer here because dragging top coat over wet artwork can smear your beautiful swirls. -
Apply top coat:
Float a generous bead of glossy top coat over each nail. Don’t press down with the brush; let the liquid glide over the surface to smooth out any texture from the painted layers.
Now you have a gallery-worthy masterpiece right on your feet, perfect for open-toed shoes and sunny days
Geometric Triangle Toe Art
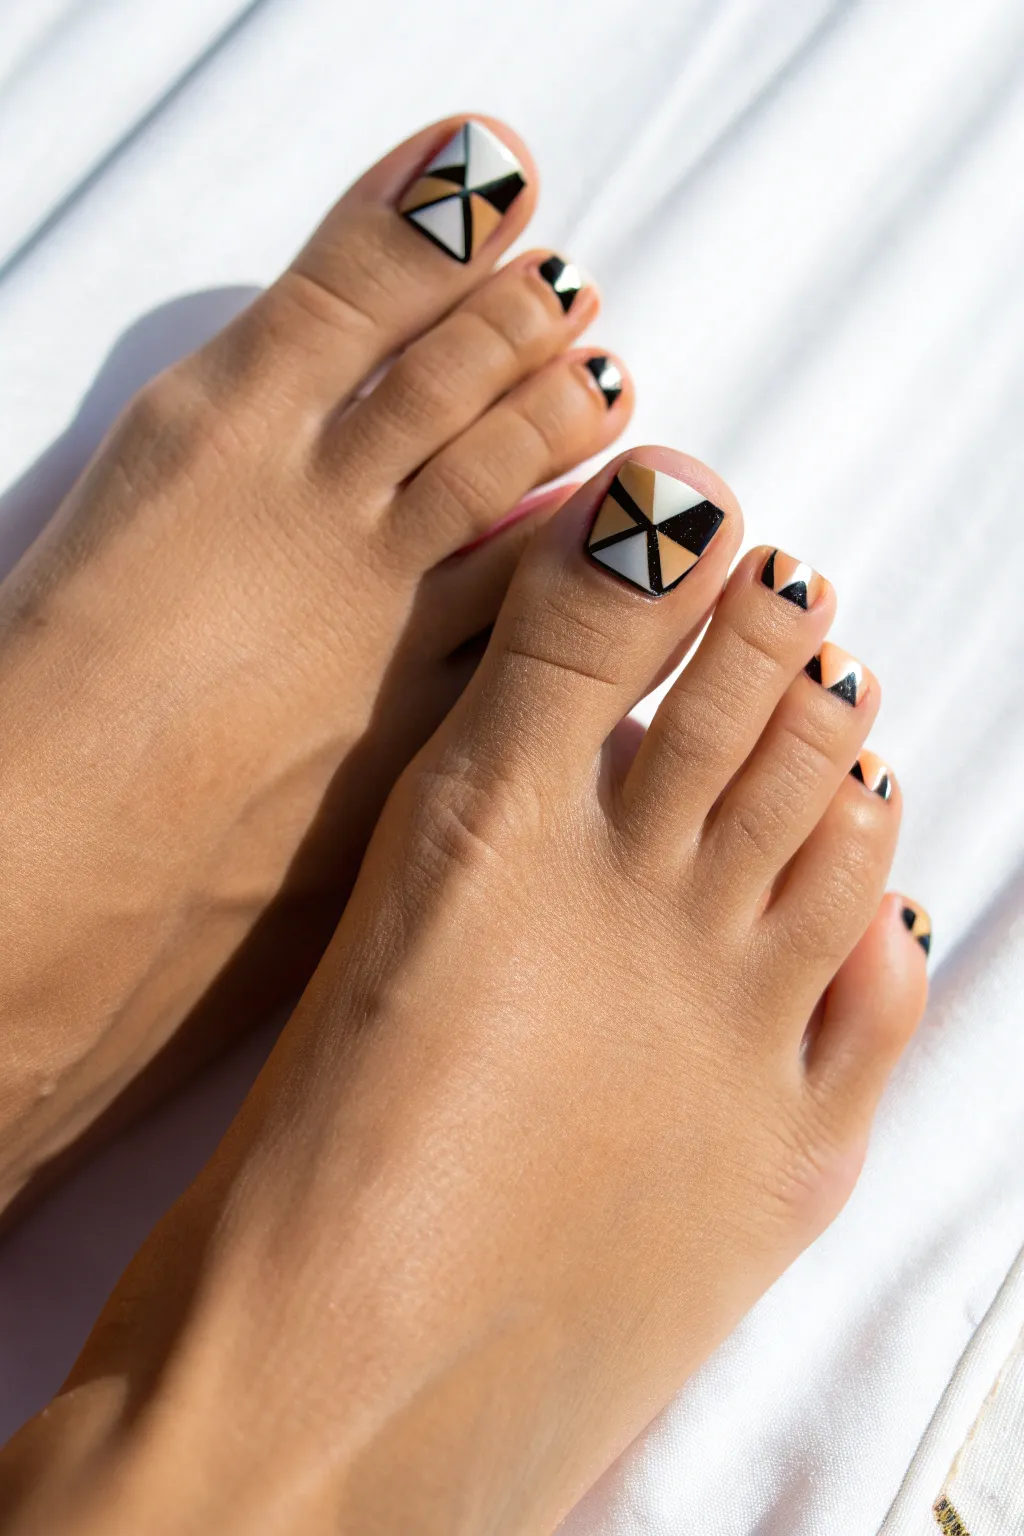
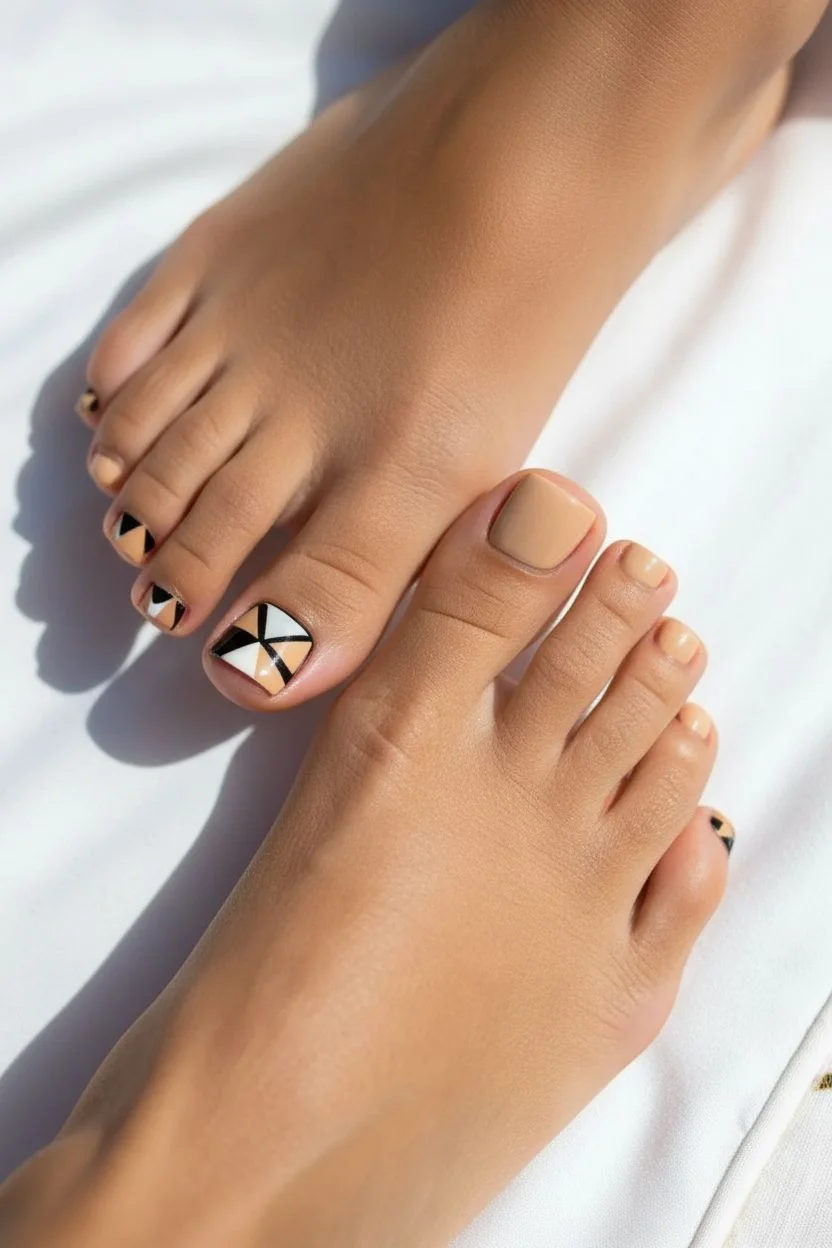
Embrace a crisp, minimalist aesthetic with this striking geometric nail art that plays with negative space and sharp angles. The design combines black, white, and nude triangles to create a sophisticated mosaic effect that looks incredibly high-effort but is achievable with patience.
How-To Guide
Materials
- Nude or beige base coat polish
- Opaque white nail polish
- High-gloss black nail polish
- Fine nail art liner brush
- Fast-drying top coat
- Acetone and clean-up brush
- Nail prep supplies (file, buffer, alcohol)
Step 1: Preparation & Base
-
Shape and Prep:
Begin by filing your toenails into a soft square shape to provide a good canvas for the geometric lines. Buff the surface lightly and wipe down with alcohol to remove oils. -
Base Color Application:
Apply two thin coats of a creamy nude or beige polish that matches your skin tone or the desired neutral shade seen in the design. Let this dry completely, as you’ll be painting precise lines over it.
Step 2: Big Toe Masterpiece
-
Mapping the Center:
On your big toe, visualize a large square or diamond shape centered on the nail. Using your black polish and a fine liner brush, paint a thin ‘X’ that will serve as the intersection point for your triangles. -
Defining the Outline:
Connect the tips of your ‘X’ with straight black lines to create a box frame. This separates your design area from the nude base around the edges. -
Filling the White Segments:
Select two opposite triangles within your ‘X’ design (for example, top and bottom, or diagonal opposites). Carefully fill these in with opaque white polish using the liner brush. -
Adding Nude & Black Contrast:
Leave one of the remaining triangles as the exposed nude base coat. Paint the final triangle solid black to create a bold anchor for the design. -
Refining the Lines:
Once the filled sections are dry, go back over the black dividing lines with your liner brush to ensure they are crisp, consistent, and sharp. I find holding my breath for a second helps steady my hand here.
Tape It Off
Struggling with straight lines? Use thin striping tape to mask off the triangles before painting. Remove the tape while the polish is still wet for crisp edges.
Step 3: Smaller Toes Design
-
Simplified Geometry:
For the smaller toes, you won’t need the full four-part distinct mosaic. Instead, aim for a single corner accent. -
Drawing the Divider:
Paint a single diagonal black line cutting across the top corner of the nail. -
Filling the Accent:
Fill the small triangle created at the corner with either white or black polish, alternating colors on different toes for variety. -
Optional Detail:
If you have enough space on a toe, you can bisect that corner triangle with another line and add a tiny speck of the third color (nude or white) to mimic the big toe’s complexity.
Metallic Twist
Swap the nude triangle for a gold or silver foil polish. This adds a subtle shimmer that catches the sunlight and elevates the geometric look.
Step 4: Finishing Touches
-
Cleanup:
Dip a small angled brush in acetone and carefully clean up any polish that may have strayed onto the cuticles or skin. -
Sealing the Deal:
Wait at least 10-15 minutes for the thick geometric layers to dry. Apply a glossy top coat, floating the brush over the nail to avoid dragging the black lines into the white sections.
Now you have a gallery-worthy pedicure that brings a modern edge to any open-toe shoe
Playful Mini Icons on Toes
Bring a touch of cosmic charm to your toes with this sweet and simple pastel pedicure. Featuring a soft mint base with a delicate star icon and a rainbow of coordinating sorbet shades, this look is perfect for sunny days.
Step-by-Step Tutorial
Materials
- Mint green nail polish
- Pale pink nail polish
- Peach or coral nail polish
- Butter yellow nail polish
- Base coat
- Top coat (glossy)
- Black nail art Striper brush or fine detail brush
- Mustard yellow or gold nail polish (for the star fill)
- Nail polish remover
- Cleanup brush or Q-tips
- Toe separators
Step 1: Preparation & Base Color
-
Prepare the canvas:
Start with clean, dry nails. If you have any old polish, remove it completely. Shape your toenails with a file, gently rounding the corners to prevent ingrown nails. -
Separate and protect:
Insert toe separators to keep your toes from touching each other while you paint. Apply a thin layer of base coat to every nail to protect the nail plate and extend the life of your pedicure. -
Paint the big toe:
Apply two coats of mint green polish to your big toenails. Use thin, even layers, allowing the first coat to dry slightly before applying the second for full opacity. -
Paint the rainbow:
Moving to the other toes, paint the second toe (index) a pale pink. For the third toe, use the peach or coral shade to add warmth. -
Finish the littles:
Paint the fourth toe a bright butter yellow. Finally, finish the pinky toe with a soft pink shade, similar to the second toe but perhaps slightly warmer if you have a variety of pinks. -
Let it set:
Allow all the base colors to dry completely. This is crucial because painting a design on wet polish will cause smudging. I like to wait at least 15 minutes here.
Starry Shortcut
Struggle with painting tiny shapes? Use a small star-shaped nail sticker or decal instead, then seal it with two layers of top coat for a smooth finish.
Step 2: Detailing the Star
-
Outline the star:
Dip a very fine striping brush into black polish. On the center of the big toe, carefully draw the outline of a five-pointed star. Start with an upside-down ‘V’ for the top point. -
Complete the shape:
Connect the lines to form the side and bottom arms of the star. Keep the lines as thin as possible for a crisp, illustrative look. -
Refine the lines:
If any lines look shaky or disconnected, gently go over them again with the striper brush to ensure the star shape is closed and defined. -
Fill with color:
Using a small detail brush, pick up a tiny amount of mustard yellow or gold polish. Carefully dab this into the center of your star outline. -
Spread the fill:
Use the tip of the brush to gently push the yellow polish toward the black outline, being careful not to cover the black lines themselves.
Level Up: Cosmic Clusters
Add tiny white dots or micro-glitter around the star on the big toe to create a subtle galaxy effect that twinkles in the sunlight.
Step 3: Finishing Touches
-
Cleanup time:
While the artwork dries, dip a clean angled brush or a Q-tip into nail polish remover. Carefully wipe away any polish that may have gotten onto the skin around your cuticles. -
Seal the design:
Once the star is dry to the touch, apply a generous layer of clear top coat over the big toe. Float the brush over the nail rather than dragging it to avoid smearing the black lines. -
Seal the rest:
Apply the top coat to all the smaller toes as well to give them a high-gloss finish and smooth out any brush strokes. -
Final dry:
Sit back and let your pedicure cure completely before putting on shoes or socks. Adding a drop of cuticle oil once dry will keep the skin looking hydrated.
Now your feet are ready to step out in playful, summery style
Negative Space Line Art Toes
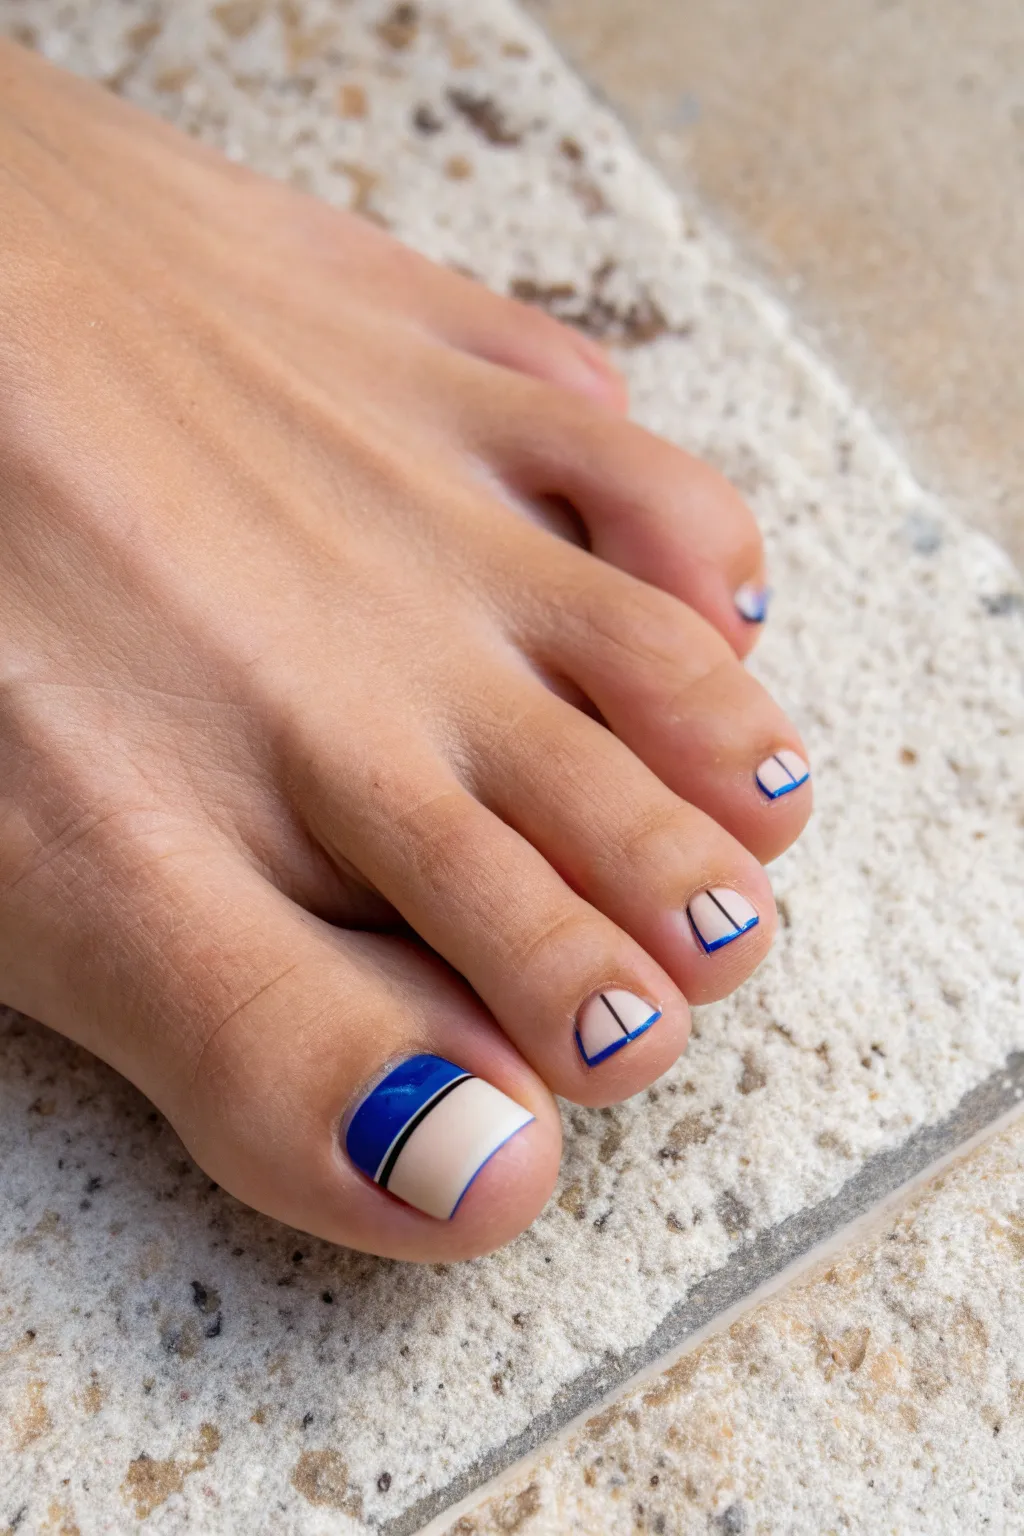
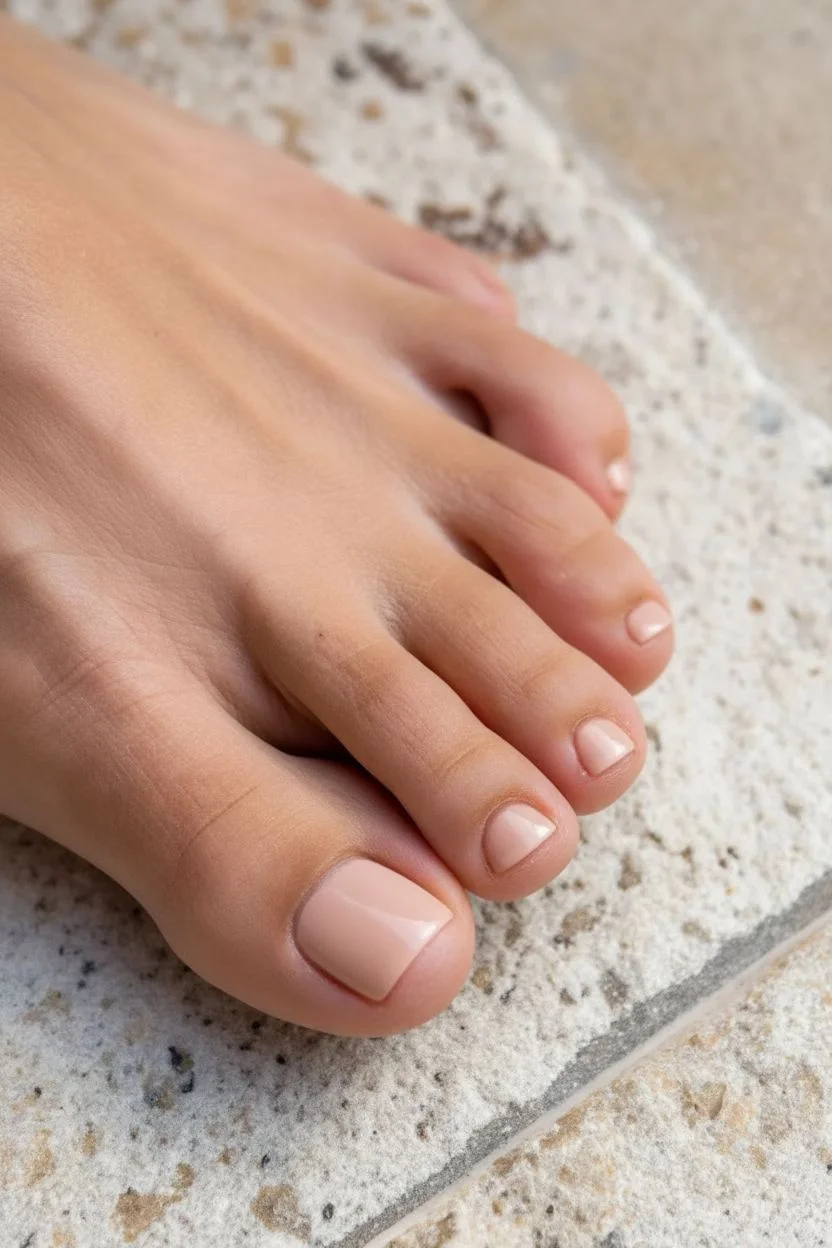
This chic pedicure design combines crisp geometric lines with negative space for a modern, architectural look. The striking contrast between royal blue, black, and a soft nude base makes it an eye-catching choice for open-toed shoes.
Step-by-Step
Materials
- Sheer nude or beige nail polish
- Royal blue nail polish
- Black nail art striper or fine liner brush
- Base coat
- Glossy top coat
- Clean-up brush
- Acetone or nail polish remover
- Optional: Striping tape for straighter lines
Step 1: Preparation & Base
-
Prep the canvas:
Begin by removing any old polish and shaping your toenails. Since this design relies on clean lines, a square shape with slightly rounded corners works beautifully to complement the geometric theme. -
Apply base coat:
Paint a thin layer of clear base coat on all toes to protect the nail plate and ensure your design lasts longer. -
Apply nude background:
Apply one or two coats of a sheer nude or beige polish. This acts as your ‘negative space’ background, unifying the look while letting natural nail tones peek through slightly. Let this dry completely before moving on.
Wobbly Lines?
If your hand shakes, anchor your pinky finger against your foot for stability. Alternatively, use striping tape as a stencil: apply it, paint over it, and peel it off immediately while wet.
Step 2: Designing the Big Toe
-
Block the bottom corner:
On the big toe, use your royal blue polish to paint a solid diagonal block at the base of the nail. Start from the cuticle line and paint diagonally upwards towards the side wall. -
Refine the blue edge:
Ensure the top edge of this blue block is straight. If you aren’t confident with freehanding, piece of striping tape can act as a guide here to get that razor-sharp line. -
Draw the black divider:
Dip a fine liner brush into black polish. Draw a thin, solid black line right next to the blue block, leaving a tiny gap of nude space between the blue and black if you want extra detail, or placing it directly adjacent as a border. -
Create the top border:
Using the royal blue polish and a fine brush, carefully outline the very tip of the nail or create a thin diagonal line near the free edge if you want to frame the negative space, though the main focus is that bold base design.
Pro Tip: Brush Choice
Don’t use the brush from the bottle for the fine lines. A dedicated long, thin ‘striper’ brush holds enough paint for a continuous line but is thin enough for precision.
Step 3: Detailing the Smaller Toes
-
Outline the base:
For the smaller toes, the design shifts to a framed look. Dip your fine liner brush into the royal blue polish. -
Create the blue box:
Paint a straight line across the base of the nail (near the cuticle) and two short lines going up the sides. You are essentially creating a ‘U’ shape or an open box at the bottom of the nail. -
Add the center stripe:
Switch to your black striper brush. Draw a single, vertical black line right down the center of the nail, starting from the cuticle and extending about halfway up the nail. -
Clean up edges:
It’s easy to get polish on the skin when working on small toes. Dip a clean-up brush in acetone and gently wipe away any stray marks around the cuticles to crisp up the box shapes.
Step 4: Finishing Touches
-
Let the artwork set:
Allow all the detailed line work to dry for at least 5-10 minutes. Rushing this step can smudge your crisp black lines. -
Seal with top coat:
Apply a generous layer of glossy top coat. Float the brush over the nail rather than dragging it to prevent smearing the black and blue designs. -
Final moisture:
Once the top coat is dry to the touch, apply cuticle oil to rehydrate the skin around your nails for a salon-quality finish.
Now you are ready to show off your sophisticated, gallery-worthy toes


Have a question or want to share your own experience? I'd love to hear from you in the comments below!