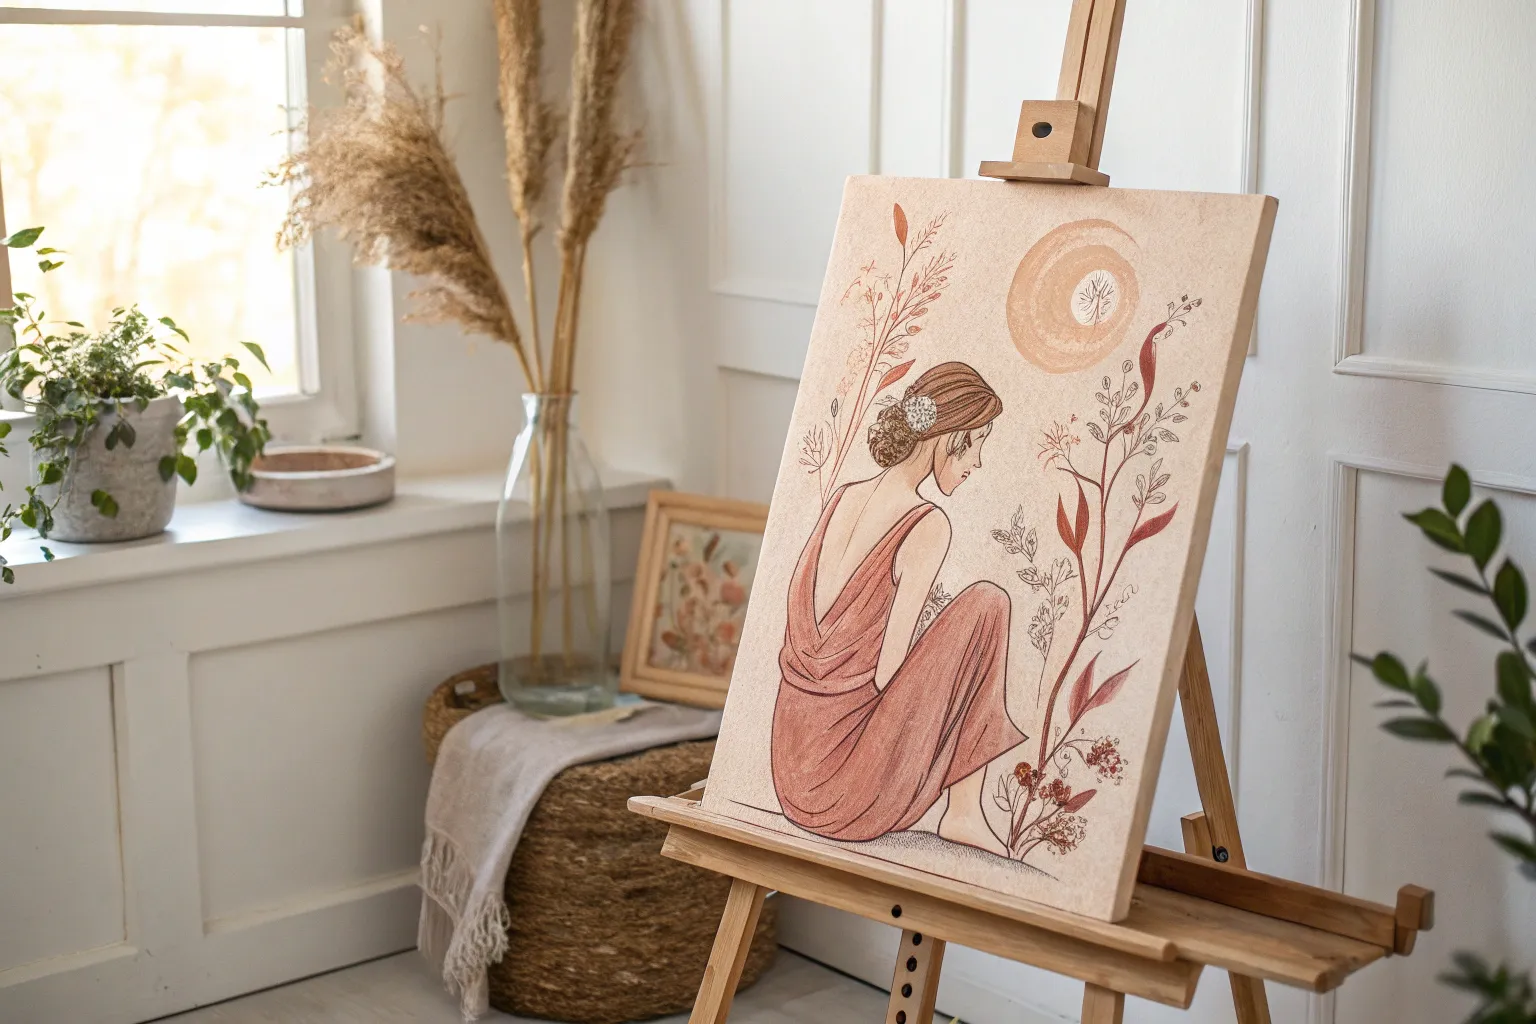
If you’re craving fresh girl canvas painting ideas, you’re in the right place—female figures are such a fun mix of story, mood, and style. I love how a single girl on canvas can go from sweet and simple to bold and mysterious just by changing color, texture, or a few key details.
Girl With a Bold Red Lip Pop
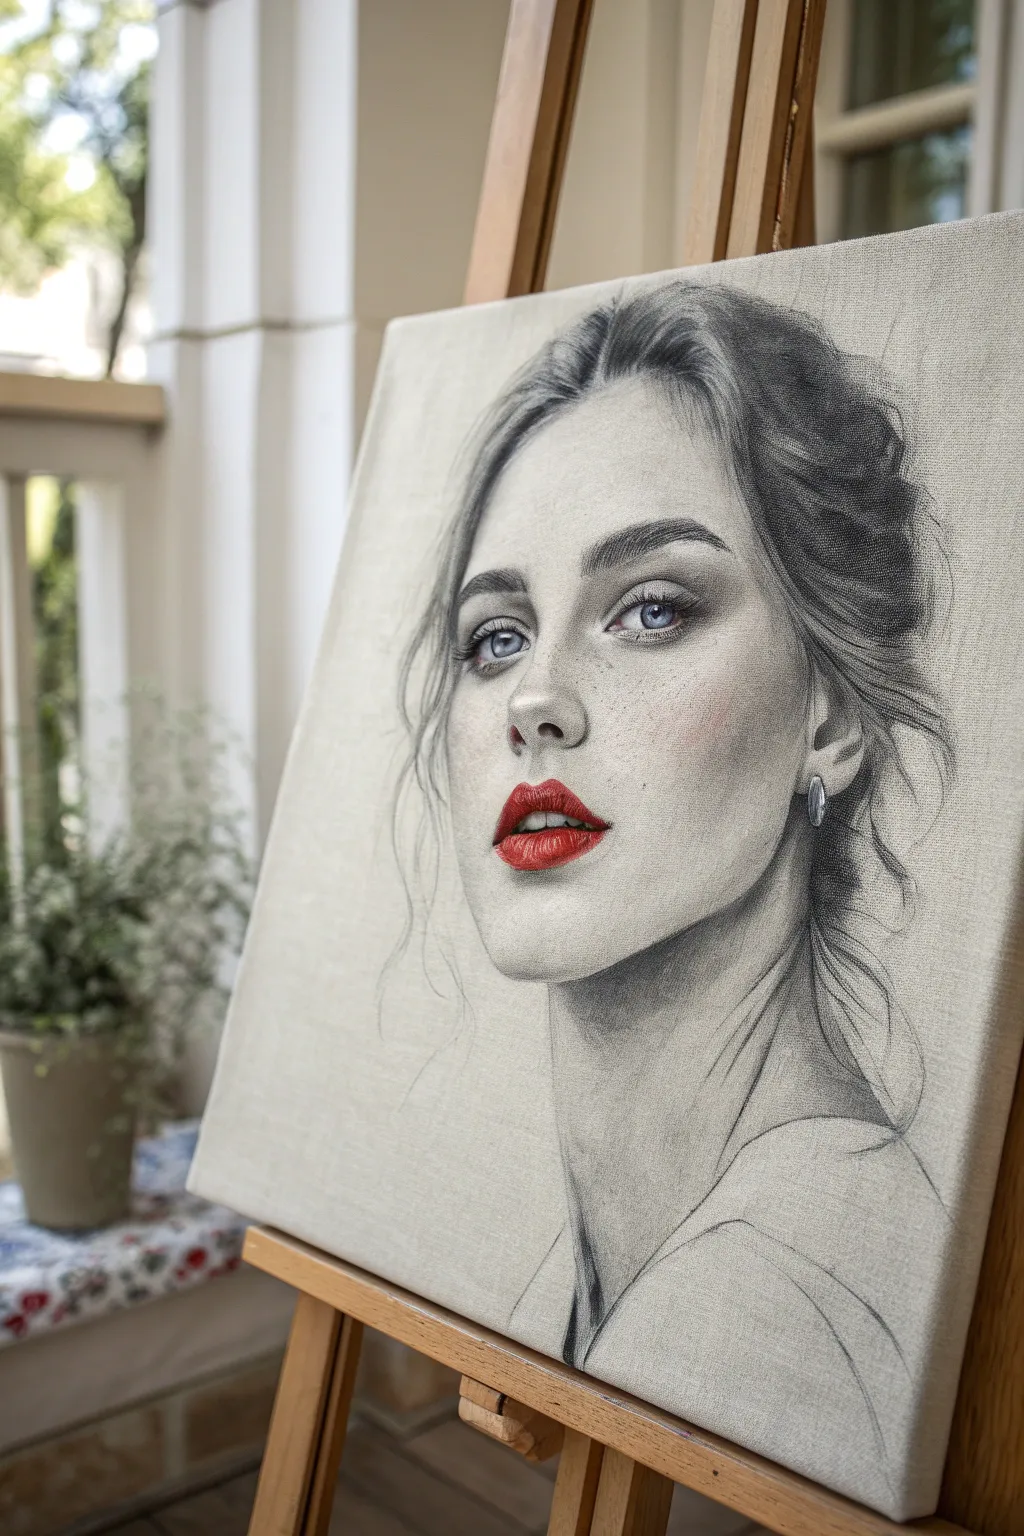
This stunning portrait balances classical charcoal sketching techniques with a modern pop of acrylic color. The contrast between the soft, greyscale shading and the vibrant, glossy red lips creates a captivating focal point that brings the subject to life on canvas.
Step-by-Step
Materials
- Primed stretched canvas (medium grain)
- Charcoal pencils (Soft, Medium, Hard)
- Willow charcoal sticks
- White pastel pencil or white charcoal pencil
- Kneaded eraser and stick eraser (specifically ‘Tombow Mono Zero’)
- Blending stumps (tortillons) and soft synthetic brushes
- Workable fixative spray
- Heavy body acrylic paint (Cadmium Red, Alizarin Crimson, Titanium White)
- Small round detail brush (size 0 or 1)
- Clear gloss varnish (optional for lips)
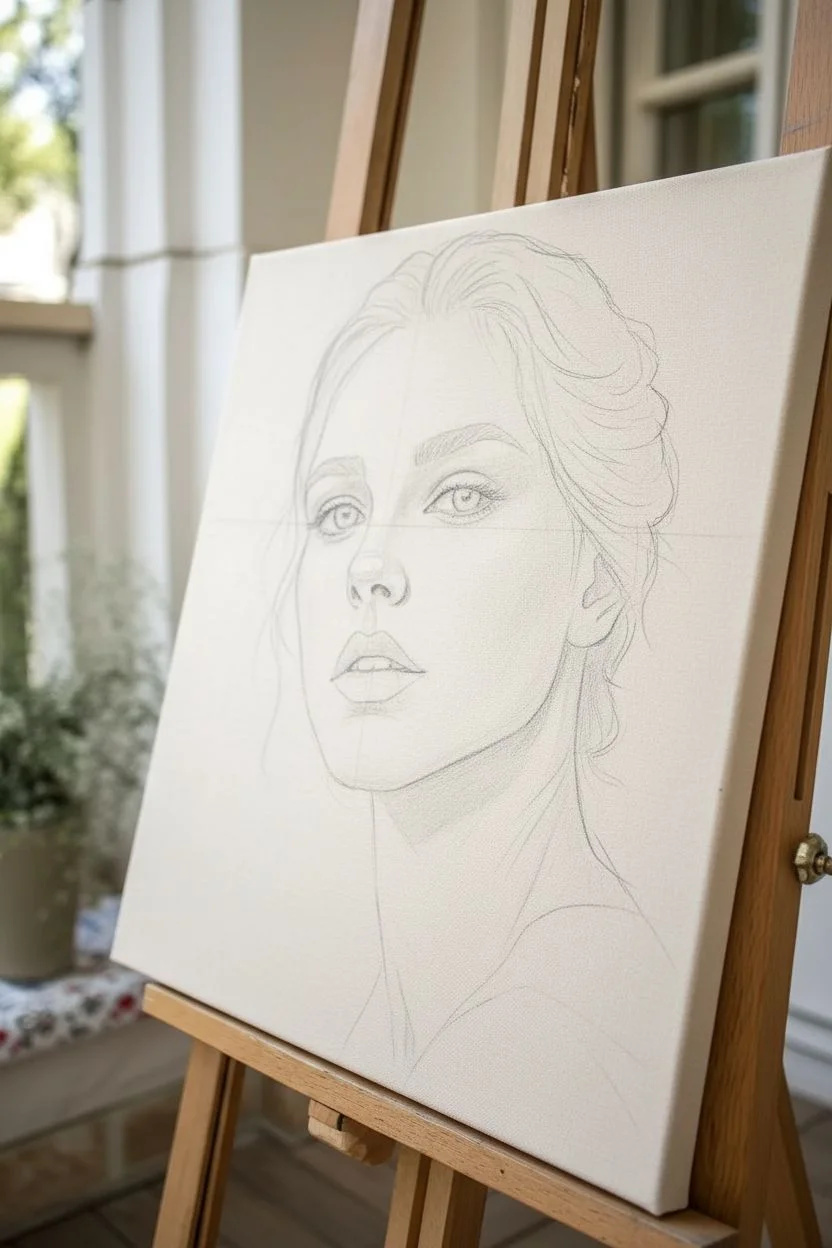
Step 1: Laying the Foundation
-
Prepare the canvas:
Begin with a standard primed canvas. Since canvas has a texture that can eat up pencil detail, give it a light sanding with fine-grit sandpaper to smooth out the tooth just a little, making it friendlier for charcoal work. -
Map the proportions:
Using a hard charcoal pencil or a lightly applied HB graphite pencil, sketch the basic oval of the face. Mark horizontal guidelines for the eyes, nose, and mouth to ensure symmetry. Keep these lines faint so they don’t show later. -
Define the features:
Refine the outline of the eyes, the bridge of the nose, and the shape of the lips. Pay close attention to the hair’s flow, sketching loose, sweeping lines to indicate the major locks and bun shape rather than individual strands.
Step 2: Shading and Depth
-
Establish core shadows:
Using a willow charcoal stick, broadly block in the darkest areas—the hair, the side of the neck, and the deep shadows under the jawline. Willow charcoal moves easily, so don’t worry about perfection yet. -
Blend the skin tones:
Take a soft blending stump or a clean, dry makeup brush. Gently smudge the willow charcoal you just applied to pull the shadows across the face for a smooth, mid-tone grey. Leave the forehead, nose bridge, and cheeks lighter. -
Deepen the eyes:
Switch to a medium charcoal pencil. Darken the pupils and the upper lash line. Use a lighter touch for the iris, leaving a small circle of white canvas reserved for the catchlight reflection. -
Sculpt the nose and cheeks:
Return to the blending stump (dirty with charcoal dust) to sculpt the subtle shadow on the side of the nose and under the cheekbone. Avoid drawing hard outlines for the nose; rely on shading to define the form. -
Detail the hair:
Use a soft charcoal pencil to add directional strokes into the hair mass. Focus on the roots and where the hair tucks behind the ear. I find using a stick eraser to lift out highlights in the hair creates amazing volume. -
Refine the ear and jewelry:
Sketch the ear with careful attention to the cartilage folds. If drawing the earring, clear out the charcoal with an eraser first, then define the edges sharply to simulate metal.
Muddy Paint Fix
If your red paint turns grey, the charcoal wasn’t sealed enough. Stop immediately, let it dry, spray fixative again, and apply a fresh layer of opaque red to cover the smudge.
Step 3: Adding the Pop of Color
-
Seal the sketch (Crucial Step):
Because you are about to use wet paint on charcoal, you must spray the area around the lips and eyes with a light coat of workable fixative. Let it dry completely for 15 minutes to prevent the charcoal from muddying your red paint. -
Base coat for the lips:
Mix Alizarin Crimson with a tiny touch of Titanium White acrylic. Using a size 1 round brush, carefully fill in the lip shape. Keep the paint relatively thin for this first layer. -
Add the vibrant red:
Once the base is dry, apply pure Cadmium Red to the main body of the lips. This gives that punchy, bold color seen in the reference. -
Create lip volume:
Mix a darker red (crimson + a dot of black or green) for the corners of the mouth and the line where the lips meet. Blend this gently into the red. -
The glossy highlight:
Using pure Titanium White on the tip of your smallest brush, dot a sharp highlight on the bottom lip and a smaller one on the cupid’s bow. This simulates the ‘wet’ lipstick look. -
Hint of blue eyes:
Dilute a tiny amount of blue acrylic or watercolor paint. Very carefully glaze the iris area you left light grey. Keep this subtle; you want a tint, not a cartoonishly blue eye.
Level Up: Texture
Apply clear gloss medium or varnish ONLY over the red lips once the painting is fully dry. It creates a physical shine that mimics real lip gloss.
Step 4: Final Touches
-
Add freckles:
Sharpen a hard charcoal pencil to a needle point. lightly tap uneven, random dots across the nose and cheeks. Vary the pressure so some are dark and some are barely visible. -
Enhance highlights:
Use a white pastel pencil or white charcoal to add soft glow to the tip of the nose, the brow bone, and the chin. This brings the charcoal drawing forward. -
Clean up stray lines:
Use a kneaded eraser to lift any accidental smudges on the background canvas, keeping the negative space clean to contrast with the portrait.
Step back and admire how the striking color brings a modern energy to your classical sketch


Girl in a Wide-Brim Hat With Deep Shadows
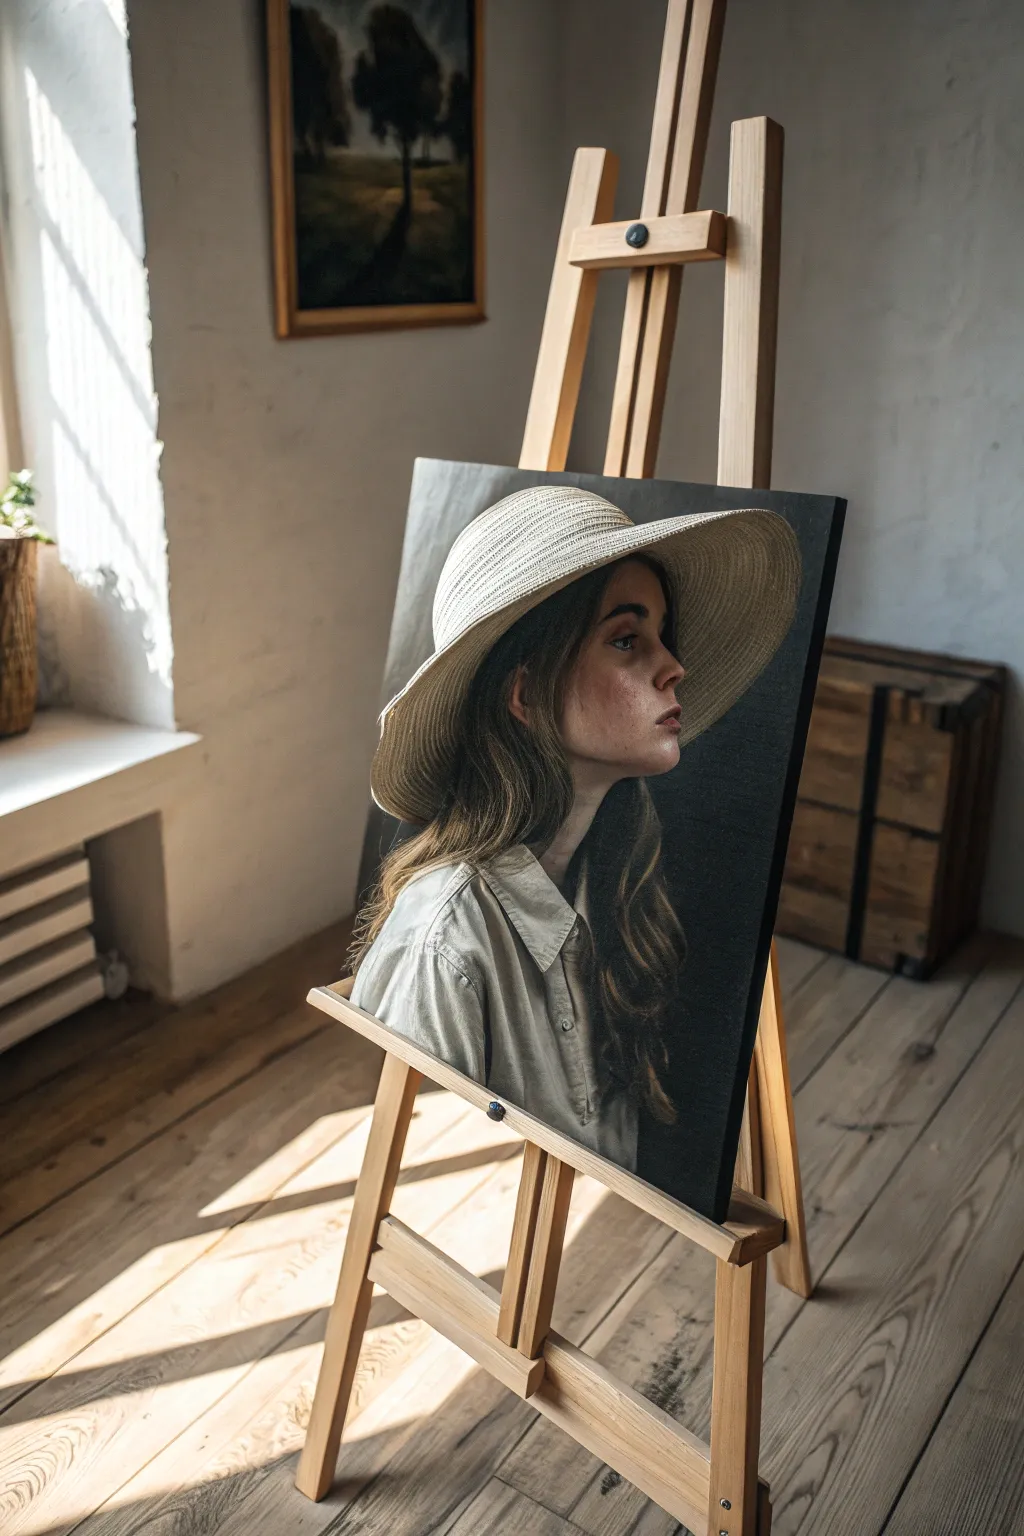
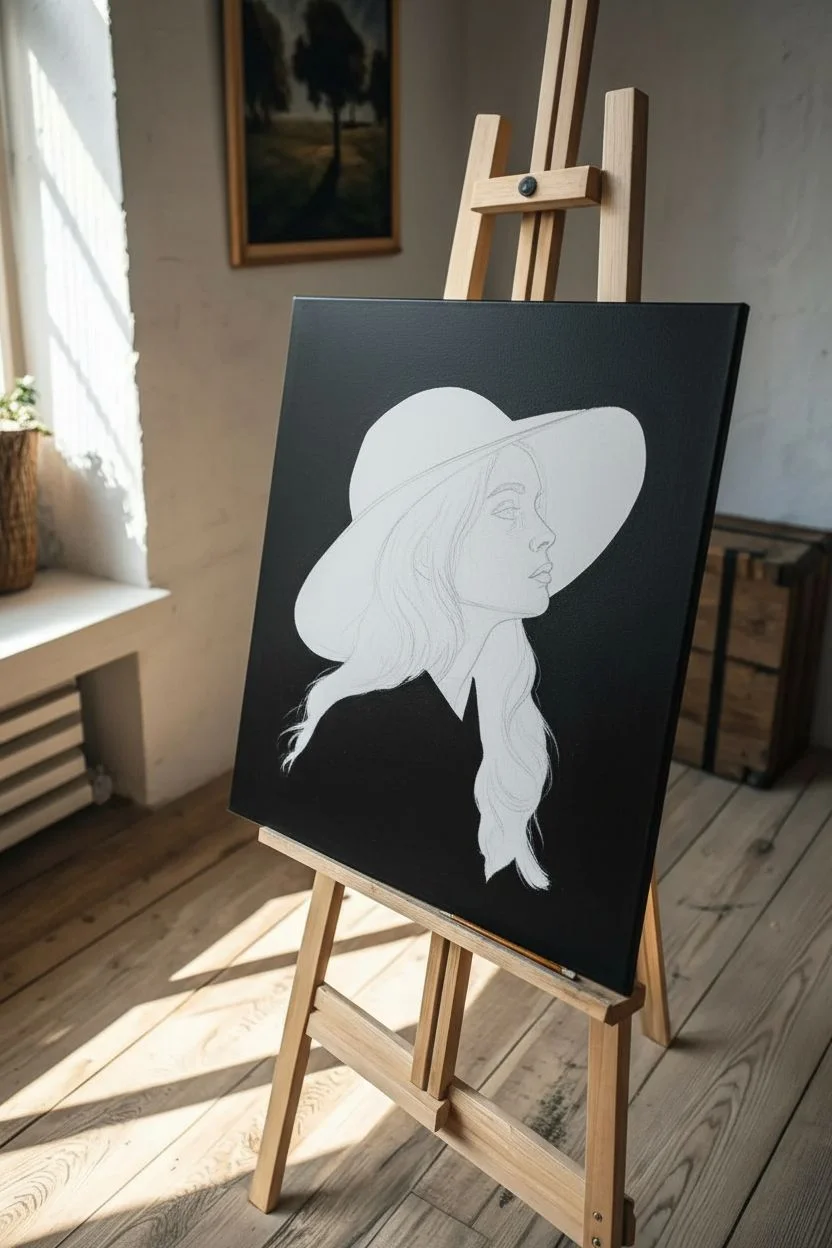
Capture the delicate beauty of a sun-drenched profile against a stark, dramatic void with this photorealistic portrait project. The contrast between the soft textures of the straw hat and the deep black background creates a mesmerizing depth that draws the viewer straight to the subject’s gaze.
How-To Guide
Materials
- Large square canvas (e.g., 20×20 or 24×24 inches)
- Acrylic paints (Heavy Body): Mars Black, Titanium White, Burnt Umber, Yellow Ochre, Cadmium Red Medium, Ultramarine Blue, Raw Sienna
- Gesso (if canvas isn’t pre-primed)
- Assorted synthetic brushes: large flat brush (for background), filbert brushes (sizes 4-8), thin liner brush
- Pencil (HB or H) and eraser
- Mixing palette
- Slow-drying medium or retarder (optional, to help with blending)
- Reference photo of a profile in a hat
- Easel
Step 1: Preparation and Sketching
-
Prime the Surface:
Begin with a clean, smooth canvas. Apply two coats of white gesso if your canvas feels too rough, sanding lightly between coats. A smooth surface is crucial for achieving realistic skin textures later on. -
Establish the Backdrop:
Because the background is such a dominant, pure black, paint it first to establish your contrast values. Use Mars Black and a large flat brush to cover the entire negative space, carefully painting *around* the silhouette of where the girl will be. It serves as an excellent ‘cut-out’ guide for your sketch. -
Draft the Silhouette:
Once the black background is bone dry, lightly sketch the profile of the girl, the large brim of the hat, and the collar of the shirt in the remaining white space. Pay close attention to the angle of the nose and the curve of the hat’s brim.
Step 2: The Face and Skin Tones
-
Mix Base Skin Tones:
Create a mid-tone flesh color using Titanium White, a touch of Yellow Ochre, and a tiny amount of Cadmium Red. I find that adding just a speck of Burnt Umber helps ground the color so it doesn’t look too pink. -
Apply the Shadow Map:
Look closely at the reference. Identify where the hat brim casts a shadow over the upper forehead and eyes. Mix a darker skin tone using Burnt Umber and a hint of Ultramarine Blue and block in these shadow areas first. -
Painting the Light:
Using your mid-tone mix, fill in the cheek, nose, and chin. While the paint is still wet, blend the edges into the shadow areas you just painted to create a soft transition. -
Refining Features:
Switch to a smaller filbert brush. Use a mix of Cadmium Red and Burnt Umber for the lips, keeping the edges soft. For the eye, use dark greys rather than pure black to keep it looking natural within the shadow. -
Adding Highlights:
Mix Titanium White with a very small amount of the flesh tone. Apply this to the bridge of the nose, the top of the cheekbone, and the tip of the chin where the light hits strongest.
Clean Edges Trick
For the ultra-sharp line between the black background and the hat, use masking tape. Paint over the tape edge with black first to seal it, then peel for a crisp line.
Step 3: Hair and Clothing
-
Blocking in Hair:
Paint the hair mass with a dark brown base (Burnt Umber + Black). Don’t worry about individual strands yet; focus on the shape of the hair falling over the shoulder. -
Hair details:
Using a thin liner brush and a lighter brown (Burnt Umber + White + Yellow Ochre), paint loose, flowing strokes to suggest waves. Focus these details mostly where the light catches the hair, leaving the shadowed areas dark. -
Shirt Base Construction:
Paint the shirt with a light grey-beige tone. Don’t use pure white; use a mix of White and a tiny dot of Raw Sienna/Black. This allows you to add brighter white highlights later. -
Creating Clothing Folds:
Mix a darker grey tone. Paint the shadows within the folds of the shirt, following the gravity of the fabric. Blend the edges of these shadows for a soft fabric look.
Adding Atmosphere
Glaze a very thin, transparent layer of Burnt Sienna over the shadowed parts of the face after it dries. This adds a warm, glowing ‘subsurface scattering’ effect.
Step 4: The Straw Hat Texture
-
Hat Base Layer:
Cover the hat area with a flat coat of Raw Sienna mixed with White. This flat beige color will serve as the shadow color between the straw weaves. -
Weaving Texture:
Mix a lighter cream color (mostly White with a touch of Yellow Ochre). Using a small round brush or a fan brush used on its edge, paint short, rhythmic horizontal dashes across the brim to simulate the straw weave. -
Rim Highlights:
Use almost pure Titanium White to paint the very edge of the hat brim where the sunlight is catching it. This sharp line separates the hat from the dark background. -
Final Contrast Check:
Step back from the easel. If the black background looks patchy, apply a second coat of Mars Black to ensure a velvety, void-like finish that makes the portrait pop.
Hang your finished canvas in a spot with good lighting to let those carefully painted highlights truly shine


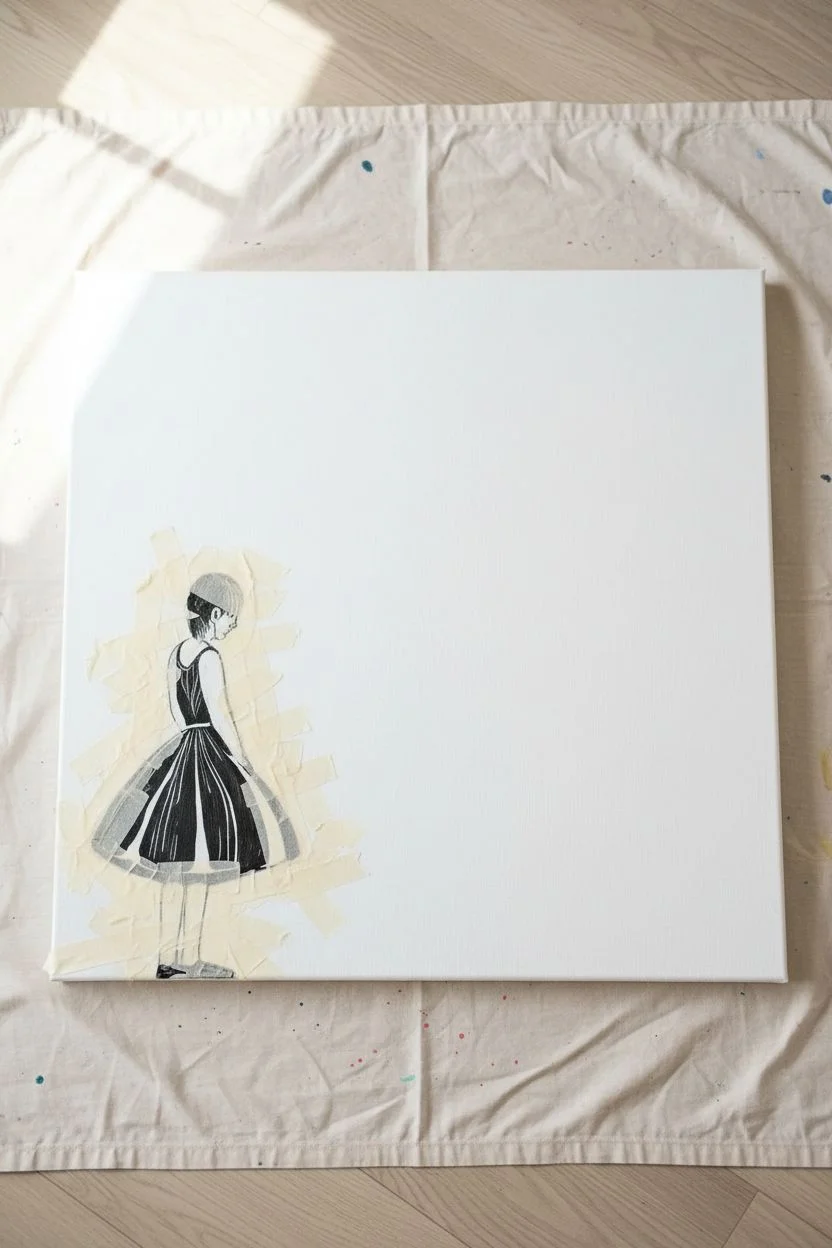
Girl Holding an Umbrella in Gentle Rain
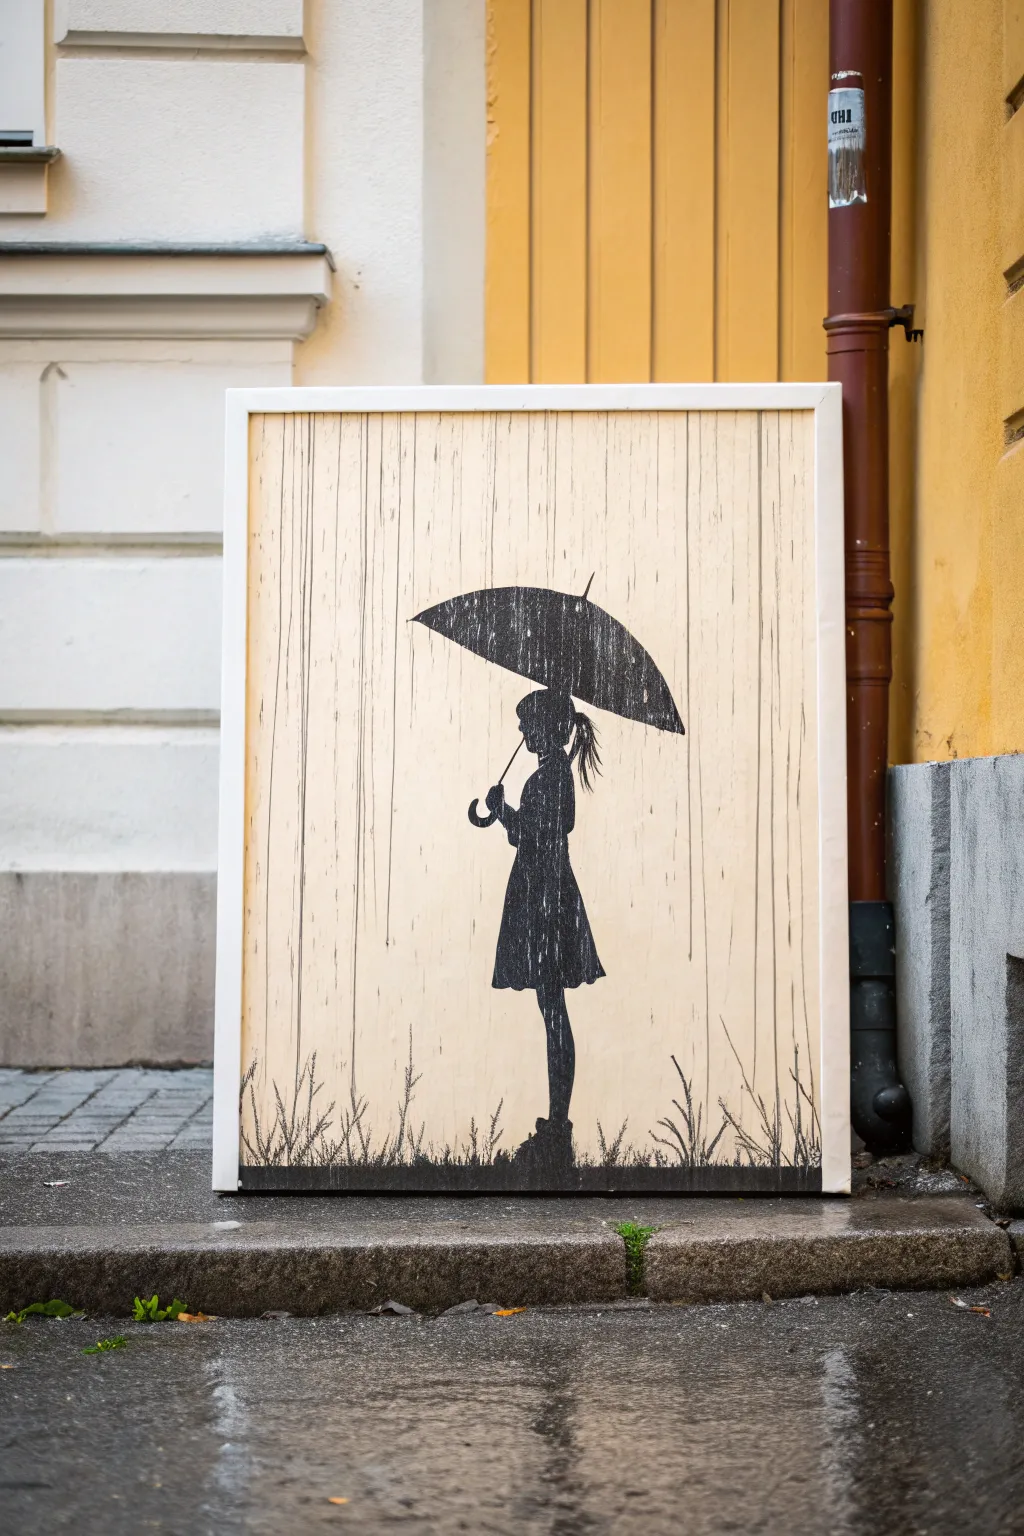

This striking canvas project combines the raw, organic look of wood grain with the stark contrast of a black silhouette. It captures a peaceful moment of a girl standing amidst gentle rain, creating an atmospheric piece that looks far more complex than it actually is.
Step-by-Step
Materials
- Rectangular stretched canvas (medium to large size)
- Beige or light cream acrylic paint
- Raw sienna or light brown acrylic paint (for wood grain)
- Black acrylic paint
- Wide flat brush (2-3 inch)
- Fan brush or stiff bristle brush
- Fine liner brush (size 0 or 00)
- Ruler or straight edge
- Pencil and eraser
- Tracing paper (optional)
- Masking tape or painter’s tape
- White or light gray paint marker (optional for rain details)
Step 1: Creating the Faux Wood Background
-
Base Coat Application:
Begin by covering your entire canvas with a solid coat of beige or light cream acrylic paint. Ensure the coverage is opaque and even, painting the sides of the canvas as well for a finished look. Let this layer dry completely. -
Mixing the Glaze:
Mix a small amount of raw sienna or light brown paint with water or glazing medium to create a translucent wash. You want this to be quite fluid so it drags easily across the canvas surface. -
Simulating Wood Grain:
Using a wide flat brush or even a stiff bristle brush, drag distinct vertical streaks of your brown glaze from the very top to the bottom of the canvas. Keep your hand steady but allow for natural variation in pressure. -
Adding Texture:
While the brown glaze is still wet, I like to take a clean, dry brush and run it through the paint vertically again. This lifts some pigment and creates those fine, hair-like lines that mimic real wood fibers. -
Defining Planks (Optional):
To enhance the effect shown in the example, use a ruler and a slightly darker brown mix to paint very thin, faint vertical lines spaced a few inches apart. This suggests the background is made of individual wooden boards.
Step 2: Drafting and Painting the Silhouette
-
Sketching the Subject:
Once the background is bone dry, lightly sketch the outline of the girl and the umbrella using a pencil. If you aren’t confident drawing freehand, print a template and use tracing paper to transfer the shape onto the canvas. -
Blocking in the Shape:
Load a round brush with opaque black acrylic paint. Start by carefully outlining your pencil marks to establish crisp edges for the silhouette. -
Filling the Form:
Fill in the body of the girl and the umbrella with solid black. Use smooth strokes to ensure the background wood texture doesn’t show through too aggressively, applying a second coat if needed. -
Refining Details:
Switch to a fine liner brush to handle delicate areas. Use this for the girl’s fingers holding the handle, the tip of the umbrella, and the strands of hair falling from her ponytail.
Wobbly Rain Lines?
If painting straight lines is difficult, use the edge of a ruler as a guide, or use a permanent fine-tip marker instead of a brush for better control.
Step 3: Adding Atmosphere and Rain
-
Grounding the Figure:
With black paint and a small brush, create a dark strip at the very bottom of the canvas. Use upward, flicking strokes to simulate grass blades and weeds growing around her feet. -
Creating the Rain effect:
Mix a very watery grey or black wash. Using a fine liner brush and a ruler (or just a steady hand), paint long, dangerously thin vertical lines starting from the top of the canvas. -
Intersecting the Umbrella:
Stop the rain lines when they hit the top of the umbrella, but continue them below the umbrella rim to show the rain falling in the background behind her. -
Weathering the Umbrella:
To make the umbrella look wet and textured like the photo, dry brush a tiny bit of white or light grey vertically over the black black umbrella shape. This scratchy texture mimics rain hitting the fabric. -
Adding Splatter (Optional):
For a final touch of realism, you can flick a toothbrush with watered-down white paint near the bottom grass to create the illusion of mist or splashes. -
Final Inspection:
Step back and check your contrast. If the rain lines are too faint, re-trace them carefully. Ensuring the black silhouette is solid and dark provides the necessary pop against the textured background.
Create Depth
Let the black paint fade slightly at the figure’s feet rather than painting a hard line. This makes her look like she is standing in deep grass.
Hang your finished piece in a cozy corner to bring a moody, artistic atmosphere to the room


Girl on a Swing Against a Dreamy Sky
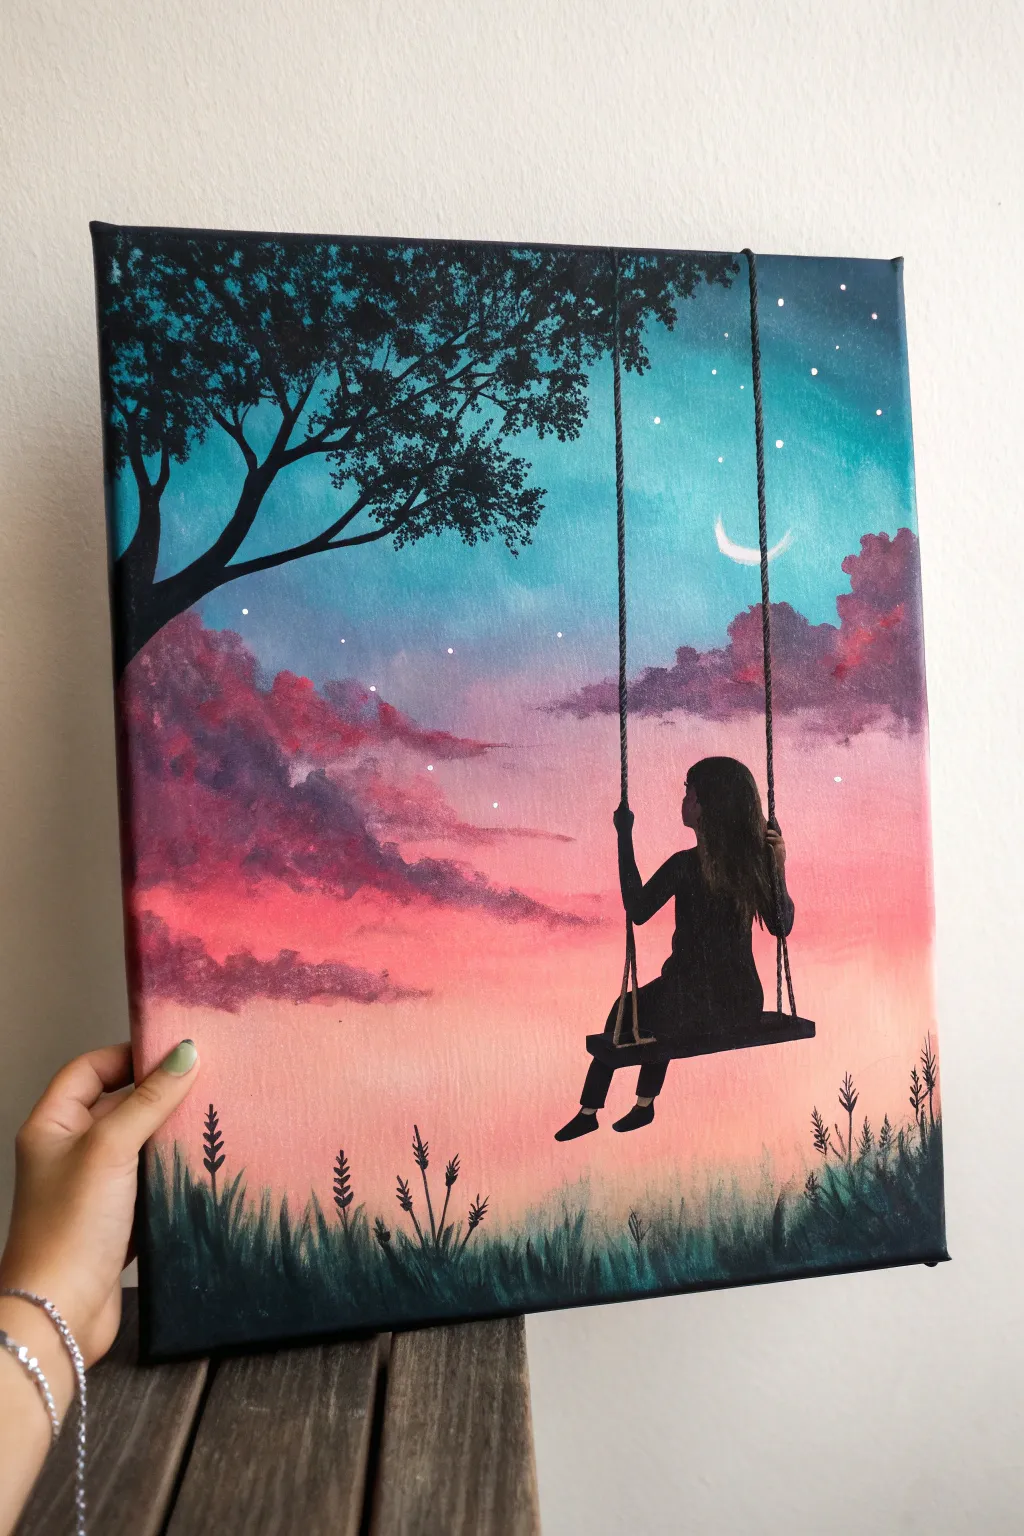
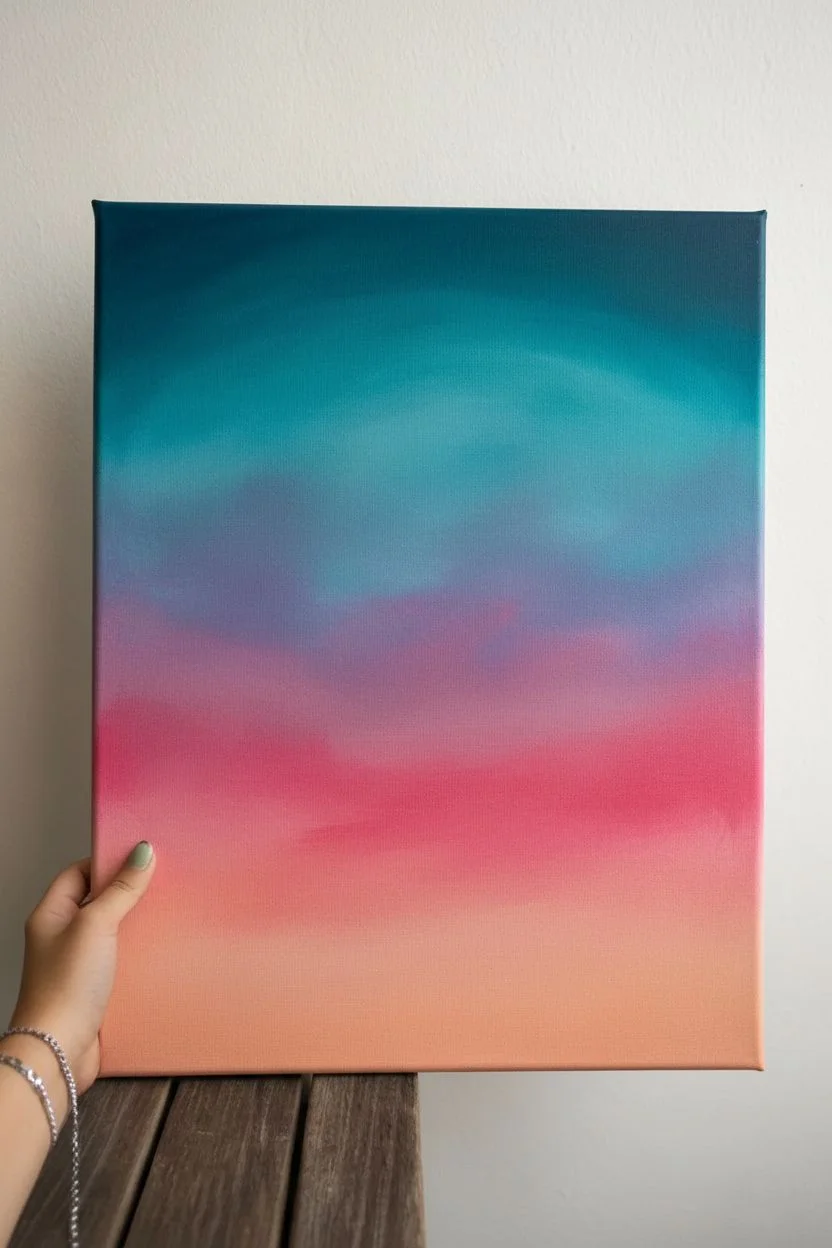
Capture the serene feeling of dusk with this beautiful canvas painting featuring a girl swinging against a vibrant, dreamy sky. The blend of soft pinks, purples, and teals creates a magical backdrop for the crisp black silhouettes.
Detailed Instructions
Materials
- Stretched canvas (e.g., 11×14 or similar)
- Acrylic paints: Teal/Turquoise, Titanium White, Purple/Violet, Magenta/Pink, Orange, Black
- Large flat brush for blending
- Medium round brush
- Small liner brush (size 0 or 00)
- Pencil
- Palette
- Cup of water and paper towels
- Small piece of rope or thick string (optional for texture)
- Glue (if using real rope)
Step 1: Creating the Gradient Sky
-
Prepare the top section:
Start by loading your large flat brush with a teal or turquoise paint. Apply this color horizontally across the top third of the canvas, ensuring solid coverage right up to the edges. -
Blend downwards:
While the teal is still wet, mix a little white into it to lighten the shade slightly. Continue painting downwards, blending the lighter teal into the darker section to create a soft transition. -
Add the middle tones:
Clean your brush thoroughly. Mix a soft purple using violet and white. Apply this below the teal section, gently blending the border where the two colors meet. Since they are complementary and might muddy, ensure your brush strokes are light and you don’t over-mix on the canvas. -
Create the sunset glow:
Move lower on the canvas with a mix of magenta and white, blending it into the purple. Finally, for the lowest part of the sky (just above where the grass will be), use a pale orange or peach tone (mix orange with plenty of white) to simulate the setting sun’s glow. -
Refine the gradient:
With a clean, slightly damp brush, sweep horizontally back and forth across the transition lines to smooth out any harsh stripes. Let this background layer dry completely before moving on.
Clean Lines Hack
For perfectly straight swing ropes, place a strip of masking tape along where you want the rope to be, paint over the edge, and peel it off while wet.
Step 2: Painting the Clouds and Stars
-
Block in cloud shapes:
Using a medium round brush and a darker shade of magenta or purple, dab in rough cloud shapes on the left and right sides. Keep the edges fluffy and irregular rather than smooth. -
Add dimension to clouds:
Dip one corner of your brush into a slightly lighter pink and dab over the tops of your cloud shapes. This highlighting gives them volume and makes them look like they are catching the last light of the day. -
Paint the moon:
With a small brush and pure white paint, carefully draw a thin crescent moon in the upper right quadrant of the teal sky. -
Scatter the stars:
Using the tip of your smallest liner brush or a toothpick, dot tiny specks of white paint across the upper teal and purple sections to create stars. Vary the pressure to make some stars slightly larger than others.
Step 3: Adding the Silhouettes
-
Sketch the outlines:
Once the background is bone dry, lightly sketch the silhouette of the tree branch in the top left corner, the grass along the bottom, and the girl on the swing in the center right. Keep pencil pressure light to avoid denting the canvas. -
Paint the tree branch:
Load a round brush with black paint. Fill in the tree trunk and main branch on the top left. Extend smaller twigs outwards, twisting your brush slightly as you pull away to create natural, tapered ends. -
Dab in the leaves:
Switch to an old, scruffy brush or a sponge. Dip it in black paint and dab it around the branches to create the look of dense foliage silhouettes against the sky. -
Paint the swing seat:
With a flat brush and black paint, fill in the rectangular seat of the swing. Ensure the lines are straight and sharp. -
Detail the figure:
Carefully fill in the girl’s silhouette with black. Use your smallest liner brush for delicate areas like her hair strands, hands gripping the rope, and feet. I find it helpful to anchor my hand on a dry part of the canvas for stability here. -
Create the ropes:
You can either paint the ropes with a steady hand using a liner brush and black paint or, for a 3D effect, glue actual pieces of black-painted string or twine from the top of the canvas down to the swing seat. -
Anchor the ropes:
If painting, ensure the ropes go all the way off the top edge of the canvas so the swing looks suspended from above. Add small knots where the rope meets the seat board.
Muddy Sky?
If your gradient colors turn brown where they meet, let the first color dry completely. Then, apply a thin glaze of the second color over the edge.
Step 4: Finishing Touches
-
Paint the grass base:
Along the very bottom edge, paint a solid black or very dark green strip to serve as the ground. -
Add grass blades:
Using the liner brush, flick upwards quickly from the bottom black strip to create individual blades of grass. Vary the height and direction to make it look organic. -
Include plant details:
add a few taller stalks with small leaves or seed heads (like lavender or wheat silhouettes) poking up higher than the rest of the grass on the sides. -
Final check:
Step back and check your silhouettes for opacity. If the colorful background shows through the black anywhere, apply a second coat of black paint to make the shadows solid and crisp.
Hang your new masterpiece on the wall and enjoy the peaceful atmosphere it brings to the room
BRUSH GUIDE
The Right Brush for Every Stroke
From clean lines to bold texture — master brush choice, stroke control, and essential techniques.
Explore the Full Guide
Girl in a Field With Wildflower Highlights
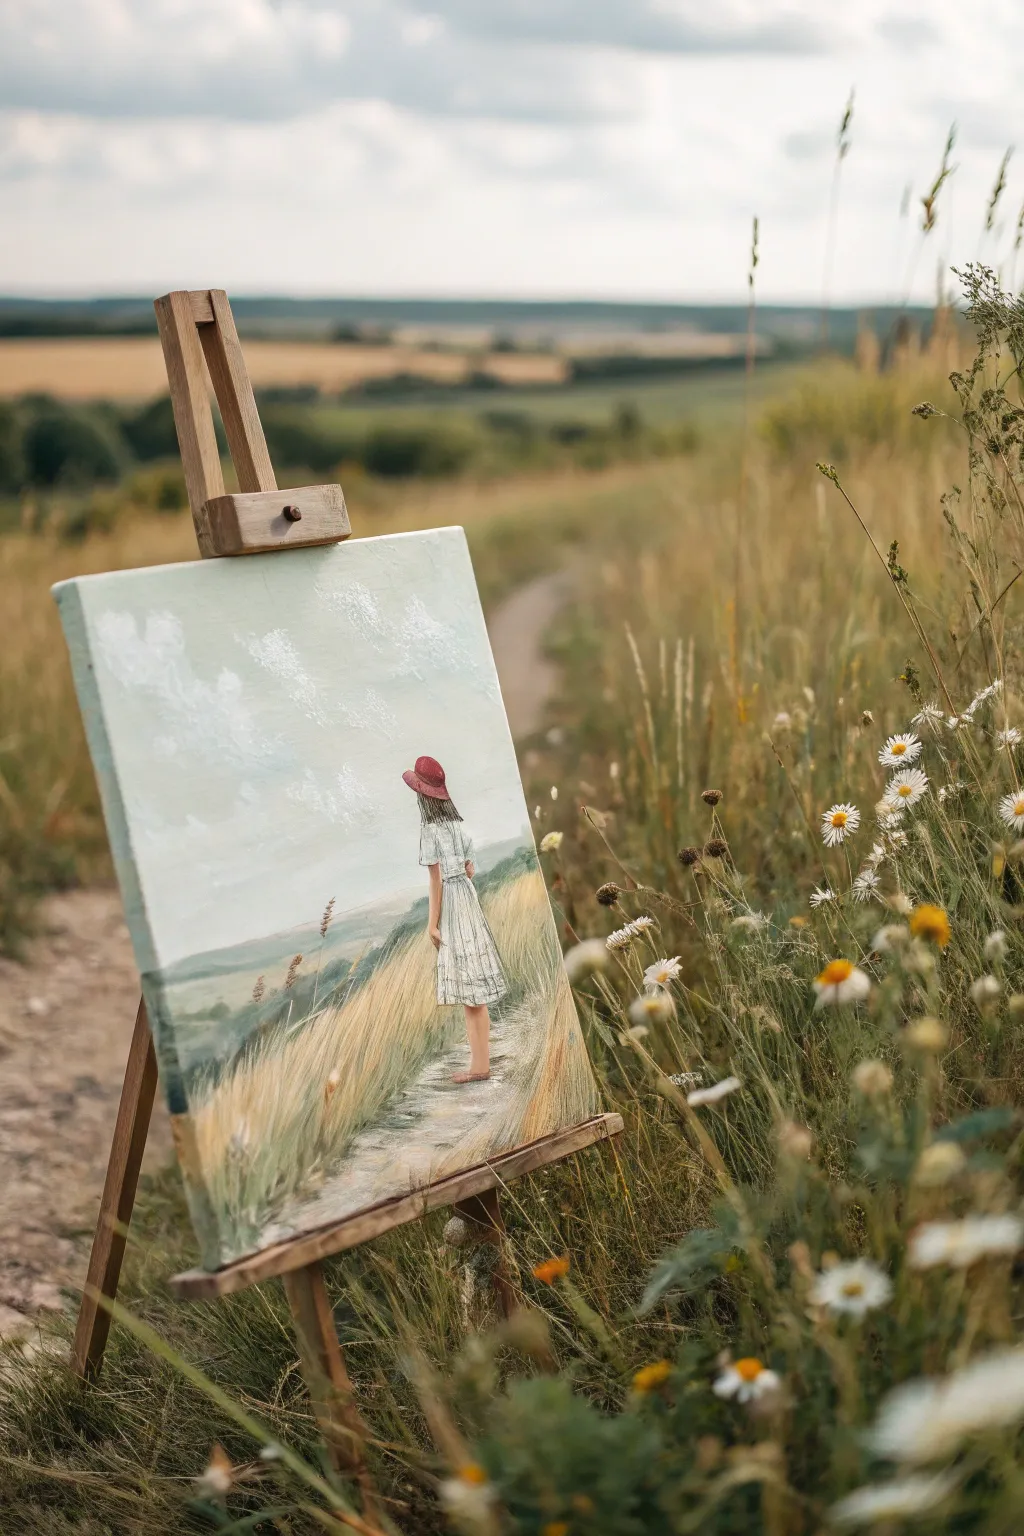
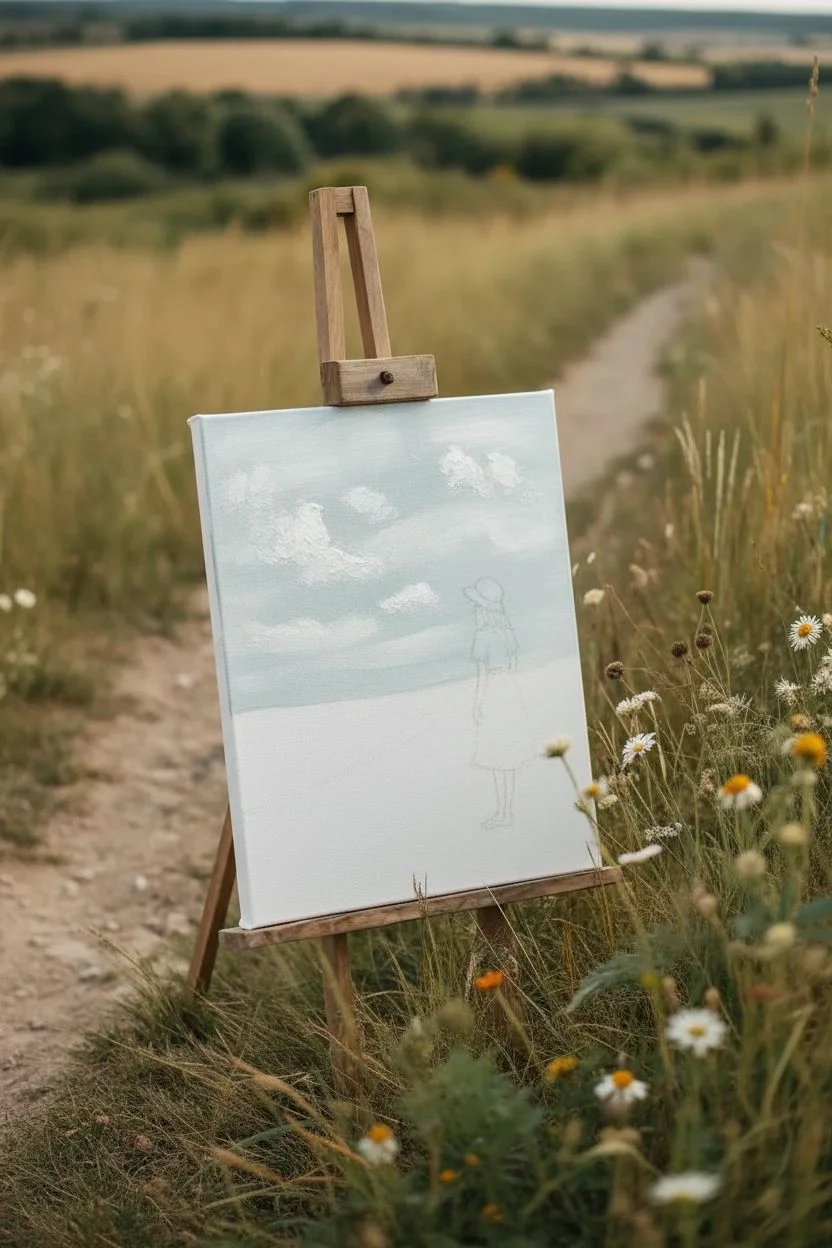
Capture the serene beauty of a solitary moment in nature with this lovely acrylic painting. The soft, muted palette and gentle brushstrokes create a nostalgic atmosphere, while the figure of the girl invites the viewer to step into the landscape and breathe in the fresh air.
Step-by-Step Guide
Materials
- Canvas (rectangular, portrait orientation)
- Acrylic paints (Titanium White, Burnt Umber, Yellow Ochre, Sap Green, Cerulean Blue, Alizarin Crimson, Paynes Grey)
- Set of brushes (1-inch flat, medium filbert, lush round, fine detailed liner)
- Palette and palette knife
- Water cup and paper towels
- Pencil for sketching
- Easel (optional, but helpful)
Step 1: Planning and Sky
-
Initial Sketch:
Lightly sketch the horizon line about one-third of the way up from the bottom of the canvas. Outline the winding path leading from the bottom right towards the center, and sketch the basic silhouette of the girl standing on the path. Keep lines faint so they don’t show through later. -
Mixing Sky Tones:
On your palette, mix a large amount of Titanium White with a tiny touch of Cerulean Blue and a pinhead of Paynes Grey. You want a very pale, overcast sky color, not a bright sunny blue. -
Painting the Sky Base:
Using a 1-inch flat brush, cover the entire sky area with your pale mix. Use broad, horizontal strokes. While the paint is still wet, blend in slightly more white near the horizon line to create atmospheric perspective. -
Adding Cloud Textures:
With a round brush and pure Titanium White, stipple in soft, fluffy cloud shapes. Don’t overblend; let the texture of the paint sit on the surface slightly to mimic the fluffiness of cumulus clouds.
Soft Edges Secret
To get that dreamy look, gently dry-brush over hard edges between the hills and sky before the paint fully cures.
Step 2: Landscape and Middle Ground
-
Distant Hills:
Mix Sap Green with a good amount of White and a touch of Cerulean Blue to desaturate it. Paint the distant rolling hills along the horizon. The color should be soft and hazy to make them look far away. -
Middle Ground Grasses:
As you move closer to the foreground (below the horizon but behind the girl), deepen your green mix with less white and a touch of Yellow Ochre. Block in the grassy fields on either side of the path. -
Defining the Path:
Mix Titanium White with a small amount of Burnt Umber and Paynes Grey to create a soft, dusty grey-brown. Paint the path using horizontal strokes that get slightly wider as they come toward the bottom of the canvas.
Seasonal Shift
Change the mood by altering the palette; use burnt oranges and rusts for the grass to create an autumn scene.
Step 3: The Figure
-
Blocking the Dress:
Paint the girl’s dress using Titanium White with just a hint of grey for shadows. Use vertical strokes to suggest the flow of the fabric. Keep the edges slightly soft to maintain the painterly feel. -
Dress Details:
Switch to a liner brush and thin down some dark grey paint. Add very subtle vertical lines to suggest folds in the skirt and the cinched waist. I like to keep these lines broken and loose rather than rigid outlines. -
Painting the Hat:
Mix Alizarin Crimson with a little Burnt Umber for a muted reddish-brown. Paint the wide-brimmed hat. Add a darker version of this mix on the underside of the brim to create depth and shadow. -
Hair and Skin:
Paint her hair flowing down her back using Burnt Umber and Paynes Grey. Add pale highlights of light brown where the light hits. For the visible legs and arms, use a mix of White, Yellow Ochre, and a tiny dot of Red for a natural skin tone.
Step 4: Foreground Textures
-
Tall Golden Grasses:
Load a liner brush or the edge of a flat brush with Yellow Ochre and Titanium White. Flick upward strokes starting from the bottom of the canvas and overlapping the path and the bottom of the girl’s dress. This grounds her in the scene. -
Layering Colors:
Add variety to the grass by mixing in some Burnt Umber for shadowed areas and pure White for sun-bleached tips. Vary the height and direction of your strokes to make it look wild and windswept. -
Foreground Detail:
In the immediate foreground corners, use slightly darker greens and browns to act as a visual frame. You can dab the brush to suggest seed heads or wildflowers among the tall grass. -
Final Highlights:
Step back and assess your painting. Add final touches of pure white to the brightest part of the clouds and the shoulders of the dress to emphasize the light source coming from above.
Allow your painting to dry completely before displaying it on a mini easel to mimic the inspiration photo.
Girl With a Scarf Framing the Eyes
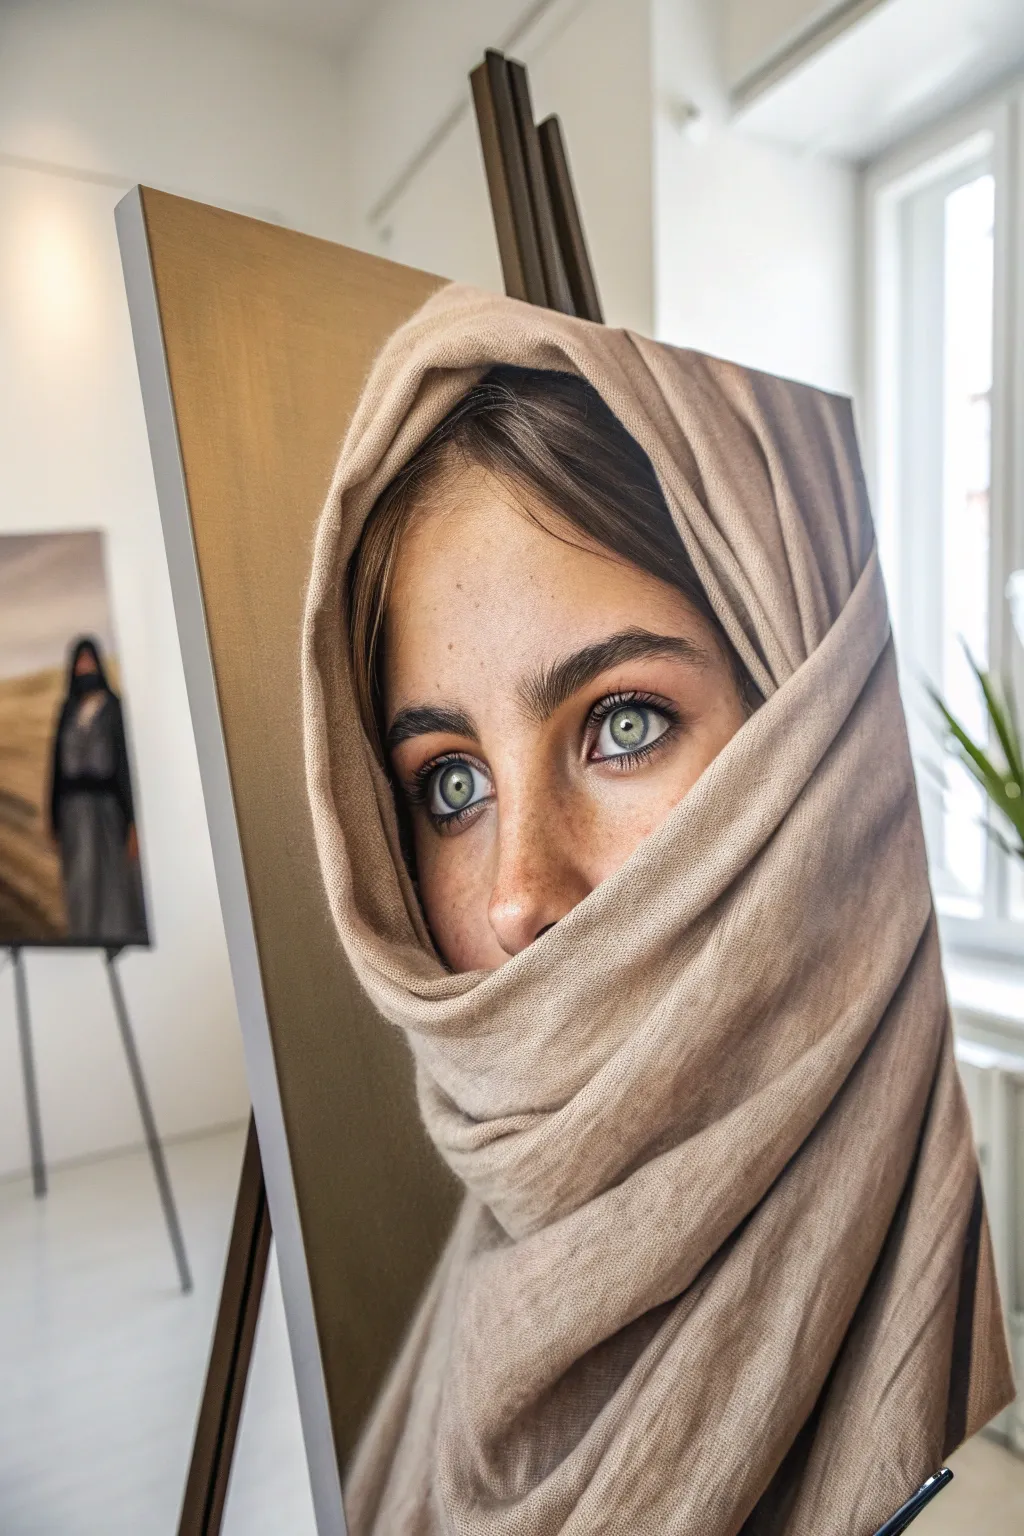
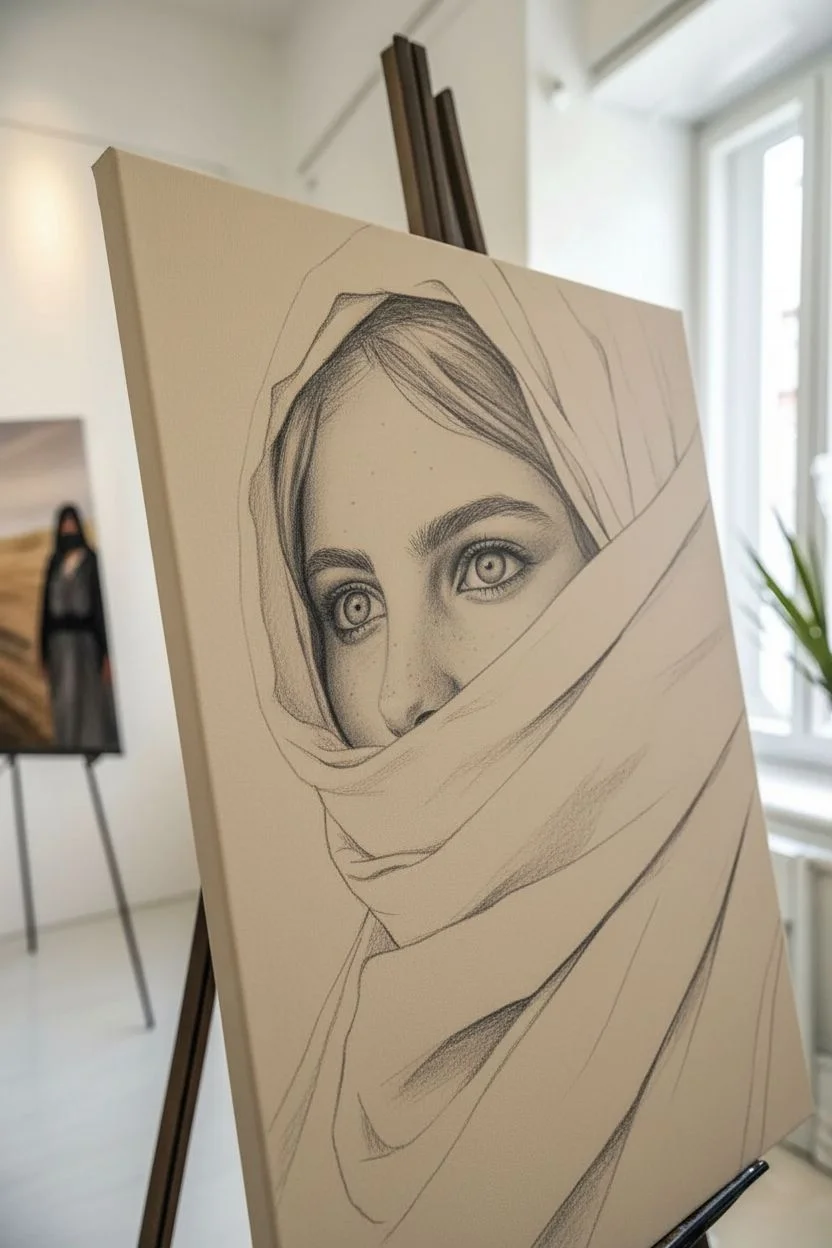
This captivating project plays with dimensionality by using a trompe-l’œil effect where the subject’s scarf appears to wrap around the physical canvas. Focus intensely on the eyes and the soft texture of the fabric to create a portrait that feels like it’s looking right through the viewer.
How-To Guide
Materials
- High-quality stretched canvas (portrait orientation)
- Acrylic paints (Titanium White, Burnt Umber, Yellow Ochre, Ultramarine Blue, Alizarin Crimson, Raw Sienna)
- Oil paints (optional, for final blending layers)
- Variety of synthetic brushes (filbert, round, and a very fine liner brush)
- Reference photo of subject in a scarf
- Graphite transfer paper or projector
- Soft charcoal pencil
- Matte medium or blending gel
- Easel
Step 1: Preparation and Sketching
-
Select your reference:
Choose a high-resolution photo where the subject is wrapped in a scarf. Crop the image so the face is off-center or partially obscured, focusing on the eyes. -
Prime the surface:
Ensure your canvas is smooth. Apply an extra coat of gesso and sand it lightly once dry to create a surface suitable for fine detail work. -
Outline the composition:
Using a projector or grid method, sketch the main features lightly with a charcoal pencil. Pay close attention to where the scarf folds overlap the face. -
Map the shadows:
Lightly shade in the darkest areas under the eyebrows, the nostrils, and the deep creases of the scarf to establish your values early on.
Textural Depth Tip
Mix a heavy body gel medium into your paint for the scarf’s highlighted folds. The actual physical ridges of paint will catch the room’s light, mimicking real fabric texture.
Step 2: Painting the Face
-
Mix skin tones:
Create a base palette using White, Yellow Ochre, and a touch of Alizarin Crimson. Mix a shadow tone by adding Burnt Umber and a tiny bit of Blue. -
Block in facial planes:
Apply the mid-tones to the forehead and bridge of the nose. Keep the paint relatively thin at this stage so you can adjust the warmth later. -
Define the eyes:
This is crucial. Paint the whites of the eyes (sclera) using an off-white gray, never pure white. Paint the irises with layers of color, starting dark and adding lighter radial lines. -
Add catchlights:
Place a single, crisp dot of pure Titanium White in each pupil. This instantly brings the portrait to life. -
Refine skin texture:
Using a small stippling brush, dab on subtle freckles or pores using a watered-down raw sienna. I like to soften these immediately with a clean, dry brush so they look natural. -
Deepen the shadows:
Glaze a thin layer of transparent brown over the areas where the scarf casts a shadow on the forehead and nose bridge to seat the face behind the fabric.
Step 3: Creating the Fabric Texture
-
Base coat the scarf:
Mix a large amount of beige or taupe paint. Cover all fabric areas with a solid, flat coat. Don’t worry about texture yet. -
Model the folds:
Using a filbert brush, paint the darker valleys of the folds with a mix of your base color and Burnt Umber. Keep edges soft where the fabric curves. -
Add weave texture:
To mimic the knitted look, use a dry-brush technique. Dip a stiff brush in a lighter highlight shade, wipe most of it off, and drag it horizontally and vertically across the ‘fabric’ peaks. -
Wrap the edge:
Continue painting the scarf pattern over the physical side of the canvas. This trick creates the illusion that the canvas itself is draped in cloth. -
Enhance the contact points:
Where the scarf touches the skin, use a fine liner brush to paint tiny loose fibers or fuzz. This blurs the hard line between skin and cloth, increasing realism.
Level Up: Mixed Media
Instead of painting the entire scarf, glue actual beige cheesecloth or thin linen to the canvas edges and paint over it to blend it seamlessly into the painted face.
Step 4: Final Details
-
Check values:
Step back from the easel. Ensure the eyes are the highest contrast point. Darken the lashes or brighten the waterline if needed. -
Highlight the forehead:
Add a soft highlight to the center of the forehead and the bridge of the nose to make the face appear to push forward through the scarf opening. -
Varnish and seal:
Once fully cured (wait several days for acrylics, longer for oils), apply a satin varnish to unify the sheen of the skin and the matte texture of the fabric.
Hang your masterpiece at eye level where the gaze will follow viewers around the room

PENCIL GUIDE
Understanding Pencil Grades from H to B
From first sketch to finished drawing — learn pencil grades, line control, and shading techniques.
Explore the Full Guide
Girl in an Abstract Floral Crown
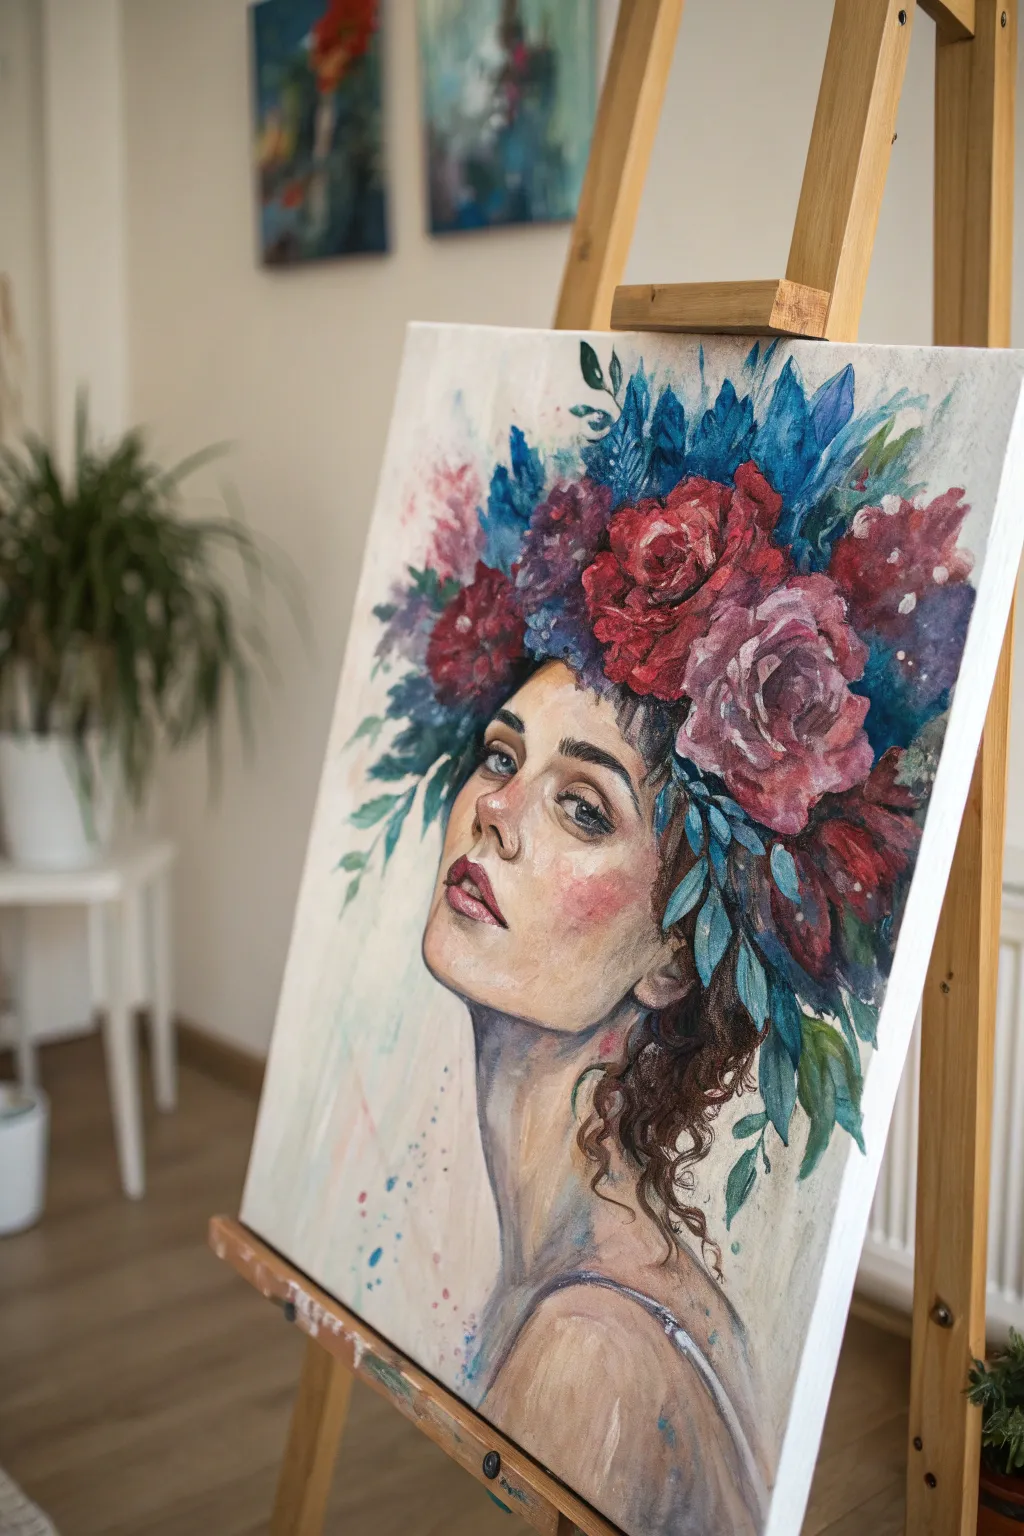
Capture the ethereal beauty of this muse adorned with a crown of blooming red and blue petals. This advanced acrylic project combines realistic portrait techniques with abstract, loose floral elements for a striking composition.
Step-by-Step
Materials
- Stretched canvas (16×20 or larger)
- Acrylic paints (Titanium White, Burnt Umber, Yellow Ochre, Alizarin Crimson, Cadmium Red, Phthalo Blue, Ultramarine Blue, Sap Green)
- Assorted brushes (Large flat, medium filbert, lush round watercolor-style synthetics, small liner)
- Pencil (HB) and eraser
- Water spray bottle
- Mixing palette
- Paper towels
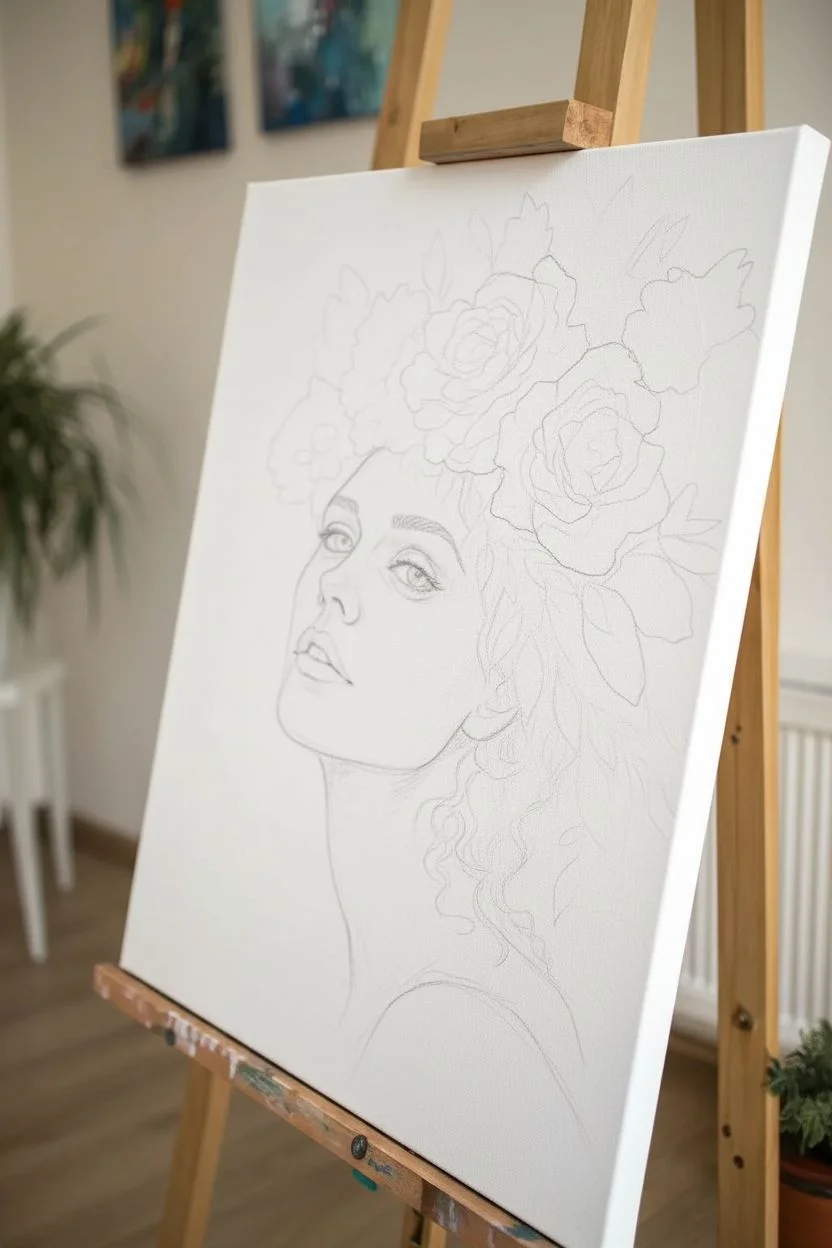
Step 1: Sketching the Muse
-
Rough placement:
Begin with a pencil sketch to establish the composition. Draw a loose oval for the head, tilting it slightly back. Ensure you leave significant negative space at the top and right for the large floral crown. -
Refining facial features:
Sketch the facial features with precision. Place the eyes looking upward and slightly to the left. The nose should be delicate and upturned, and the lips slightly parted. Keep your lines light so they don’t show through the paint later. -
Mapping the hair and crown:
Outline the hairline near the forehead, sketching loose, curly tendrils falling down the neck. Above the forehead, sketch irregular shapes representing the basic mass of the flowers and leaves without worrying about petals yet.
Skin Tone Trouble?
If skin looks too orange, add a tiny touch of blue to neutralize it. If it looks too chalky, you’ve used too much white; add a glaze of red/yellow to warm it up.
Step 2: Painting the Skin Tones
-
Base skin mixture:
Mix a mid-tone flesh color using White, a touch of Yellow Ochre, and a tiny dot of Red. Apply this to the shadowed side of the face (the right side) and the neck. -
Adding highlights:
Lighten your mix with more White and paint the illuminated areas: the forehead, the bridge of the nose, the left cheek, and the chin. Blend wet-on-wet where the light meets the shadow for a smooth transition. -
Deepening shadows:
Mix Burnt Umber with a little Alizarin Crimson for warm shadows. Apply this under the jawline, in the hollow of the neck, and around the eye sockets to create depth. -
Blushing the cheeks:
Glaze a very watered-down red over the cheekbones to give her a natural flush. I find that using your finger to smudge this layer helps keep it soft and organic. -
Detailing the features:
Use a small round brush to paint the eyes. Use Phthalo Blue mixed with white for the irises, adding a sharp white highlight to make them look alive. Paint the lips with a mix of Alizarin Crimson and White, keeping the edges soft.
Watercolor Effect
To get the soft, washed-out look on the blue leaves, mist that area of the canvas lightly with water before applying the acrylic paint.
Step 3: Building the Floral Crown
-
Establishing the flower base:
Switch to your larger filbert brush. Paint loose, dark red blobs for the roses and deep blue shapes for the surrounding foliage. Don’t focus on detail; just block in the color masses. -
Defining the roses:
Mix Cadmium Red with a little White. Paint C-shaped strokes over the dark red bases to suggest rose petals unfurling. Keep the center of the flowers darker. -
Adding the blue foliage:
Using Phthalo Blue and Ultramarine, paint leaf-like strokes sticking out from the crown. Use a wet brush to let the edges feather out, mimicking a watercolor effect. -
Layering lighter petals:
Mix a pale pink-red and add highlights to the tips of the rose petals. This contrast creates the volume needed for the flowers. -
Integrating the hair:
Mix Burnt Umber with a touch of Blue for a dark brown. Using a small liner brush, paint curly strands of hair escaping from under the crown, overlapping the neck and ears.
Step 4: Atmosphere and Finishing Touches
-
Softening the background:
For the background, use a wash of very diluted white and slight hints of blue. Paint loosely around the figure, intentionally leaving brushstrokes visible for a painterly texture. -
Adding drips and splatters:
To achieve that artistic ‘messy’ look, water down some blue and pink paint. Flick your brush near the bottom of the canvas and let tiny drips run down the neck and background. -
Enhancing the leaves:
Mix a teal color (Green + Blue + White) and add detailed, smaller leaves poking out between the large red flowers. These act as accents to break up the mass. -
Final highlights:
Add pure white highlights to the tip of the nose, the gloss of the lip, and the brightest edges of the blue leaves.
Step back and admire the soulful expression you’ve captured through brushwork and color
Girl Whose Dress Turns Into a Color Pour
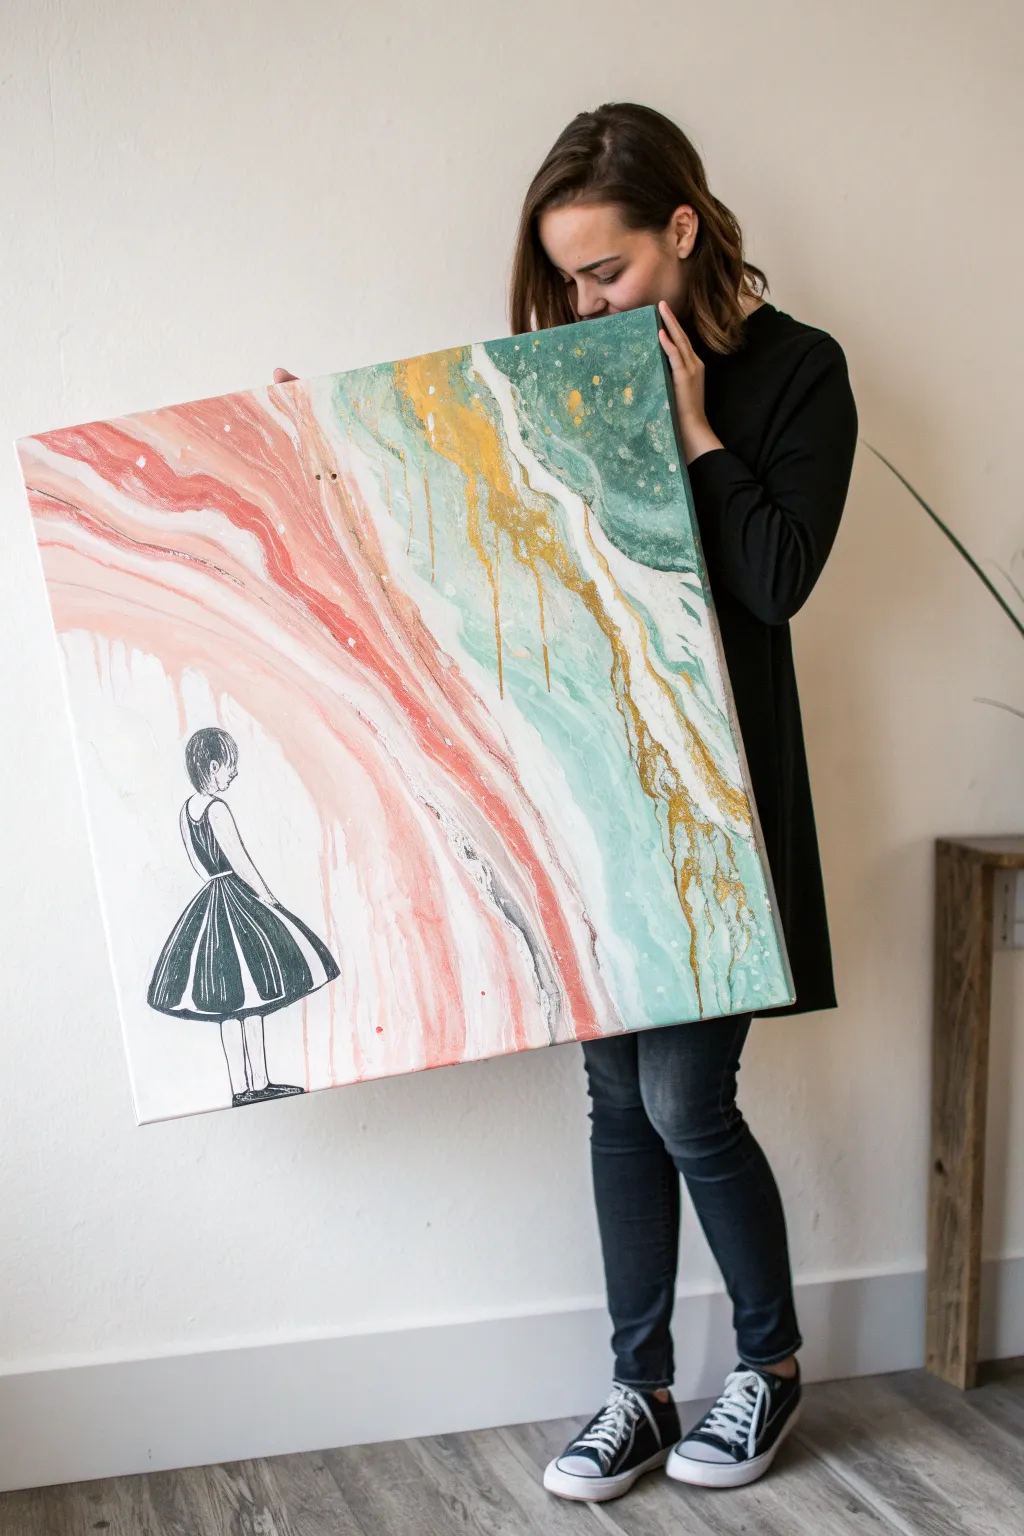
This captivating mixed-media piece blends delicate fine-line illustration with bold, abstract fluid art. By letting a sketched figure’s dress transform into a sweeping landscape of flowing acrylics, you create a surreal and movement-filled masterpiece.
Detailed Instructions
Materials
- Large square gallery-wrapped canvas (approx. 24×24 inches or larger)
- Acrylic paints (Titanium White, various shades of pink/coral, teal/emerald green, gold metallic)
- Pouring medium (Liquitex or Floetrol)
- Black archival ink pen or fine-tip black paint marker
- Pencil and eraser
- Masking tape or liquid masking fluid
- Plastic cups for mixing
- Stir sticks
- Hairdryer (optional for moving paint)
- Clear varnish spray (matte or satin)
- Carbon transfer paper (optional)
Step 1: Planning and Sketching
-
Prepare the canvas:
Start with a clean, gessoed canvas. I strongly recommend laying down a drop cloth, as this project will get messy. -
Outline the figure:
In the bottom left corner, lightly sketch the figure of a girl with her back turned. Focus on her posture and the bodice of the dress. The skirt should flare out, but leave the top edge of the skirt open where it will meet the paint pour. -
Detail the drawing:
Using your black ink pen or paint marker, ink over your pencil lines for the girl’s body, hair, and the top portion of the dress. Fill in the darker areas of the dress with vertical shading lines to create texture, but stop abruptly where the ‘color explosion’ will begin. -
Protect the drawing:
Cover your inked drawing completely with masking tape or carefully apply liquid masking fluid. This is crucial because the fluid paint will flow downwards, and you want the figure to stay crisp black and white.
Step 2: Mixing the Colors
-
Create the pouring mix:
In separate cups, mix your acrylic paints with the pouring medium. A standard ratio is 1 part paint to 2 parts medium, but check your bottle’s instructions. You want a consistency like warm honey. -
Prepare the palette:
Mix a light coral/pink, a medium salmon pink, a soft teal, a deep emerald green, and a metallic gold. Also, prepare a large cup of titanium white mixed with pouring medium. -
Check density:
Ensure the white paint is just slightly thinner than the colors, as this will help the colors float on top or mix organically.
Paint Getting Muddy?
If your pinks and greens are mixing into brown, you’re manipulating the canvas too much. Tilt less and pour separate ribbons of white between contrasting colors as a barrier.
Step 3: The Pouring Process
-
Apply the white base:
Pour the white mixture across the upper right diagonal half of the canvas and near the area where the ‘skirt’ would be. Tilt the canvas to coat these areas evenly. -
Pour the color ribbons:
Begin pouring ribbons of your colored paints. Start near the girl’s waistline (over the masking) and pour diagonally upwards towards the top right corner. Alternate between warm pinks and cool greens, separating them with thin lines of white or gold. -
Tilt and manipulate:
Gently tilt the canvas to stretch the paint bands. You want them to look like fabric flowing in the wind. I like to let gravity do most of the work here to keep the lines organic. -
Add metallic accents:
Drizzle fine lines of the gold metallic paint through the green and pink sections. The gold tends to expand slightly, creating beautiful veins. -
Refine the flow:
If you want wispy, dripping effects (like in the reference), use a hairdryer on a low, cool setting to gently blow the edges of the paint downwards or outwards. -
Create the drip effect:
Allow some of the paint to naturally run down in vertical drips on the left side, mimicking the texture of rain or melting fabric.
Pro Tip: Sharp Lines
Burnish the edges of your masking tape with a spoon or fingernail before pouring. This prevents paint from bleeding under the tape and ruining the sketch.
Step 4: Finishing Touches
-
Dry thoroughly:
Let the painting sit undisturbed on a level surface. This thick paint can take 24 to 48 hours to dry completely. Do not touch it. -
Reveal the figure:
Once the paint is fully cured, very carefully peel away the masking tape or rub off the masking fluid to reveal your crisp black and white drawing underneath. -
Integrate the edges:
Use a small brush with a tiny bit of the colored paint to touch up the transition point where the ink drawing meets the poured paint, blending them so the dress looks like it is truly turning into liquid color. -
Varnish:
Seal the entire canvas with a spray varnish to unify the sheen of the ink and the acrylic pour.
Hang your new masterpiece in a bright room to catch the metallic shimmer in the dress


Girl With a Galaxy Silhouette Fill
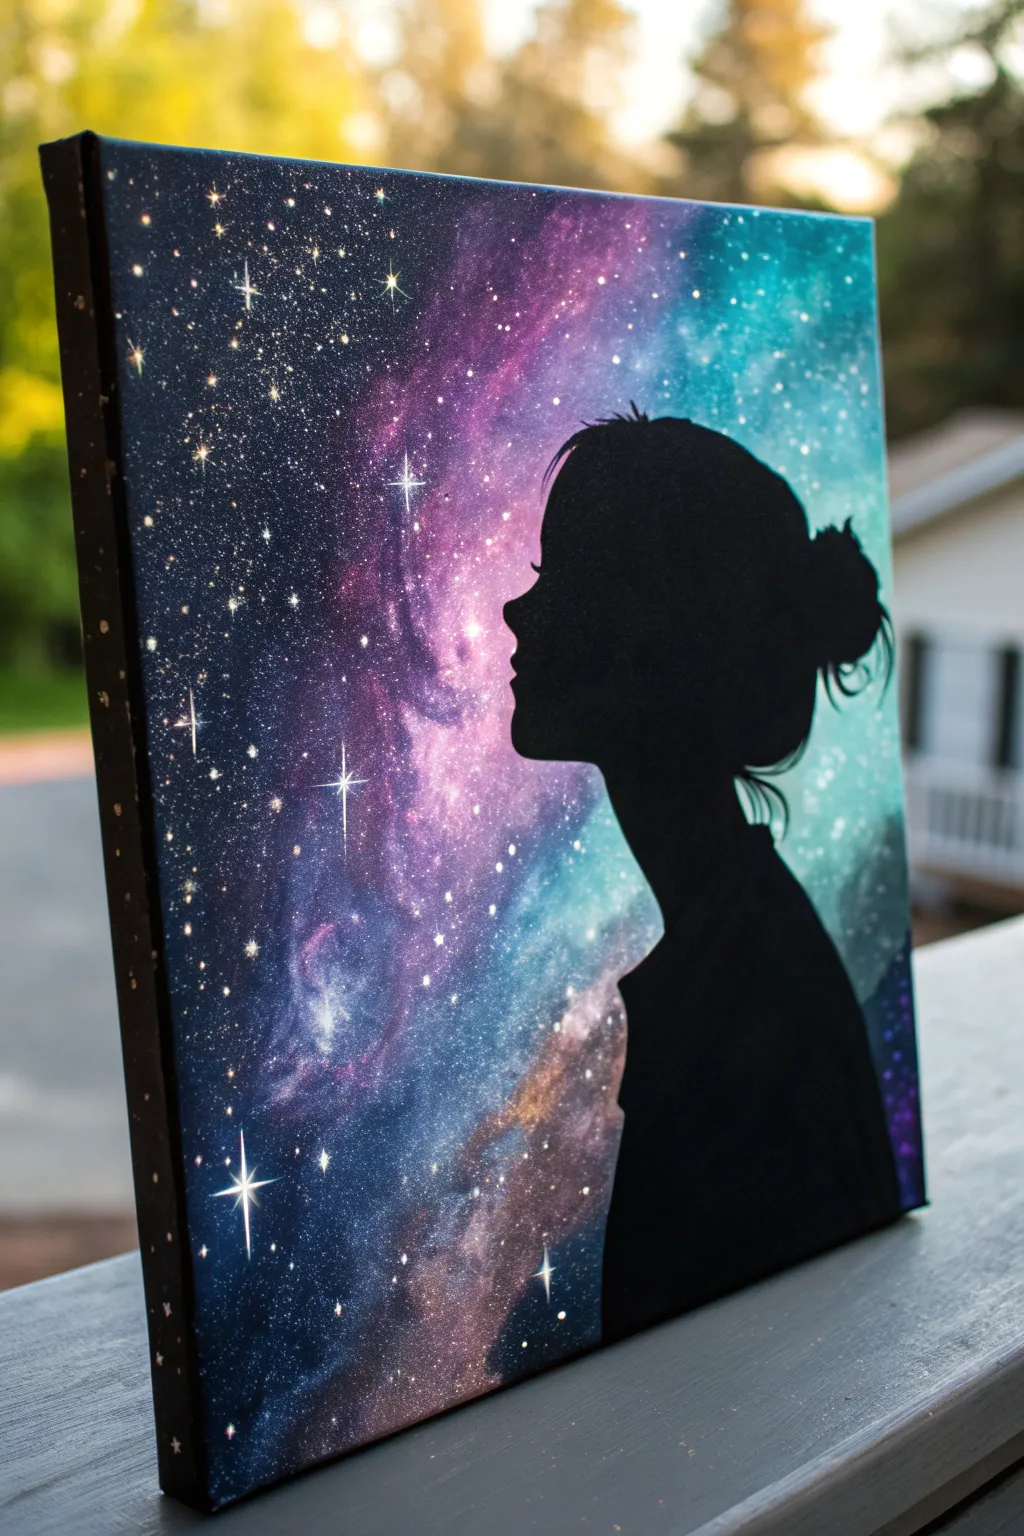
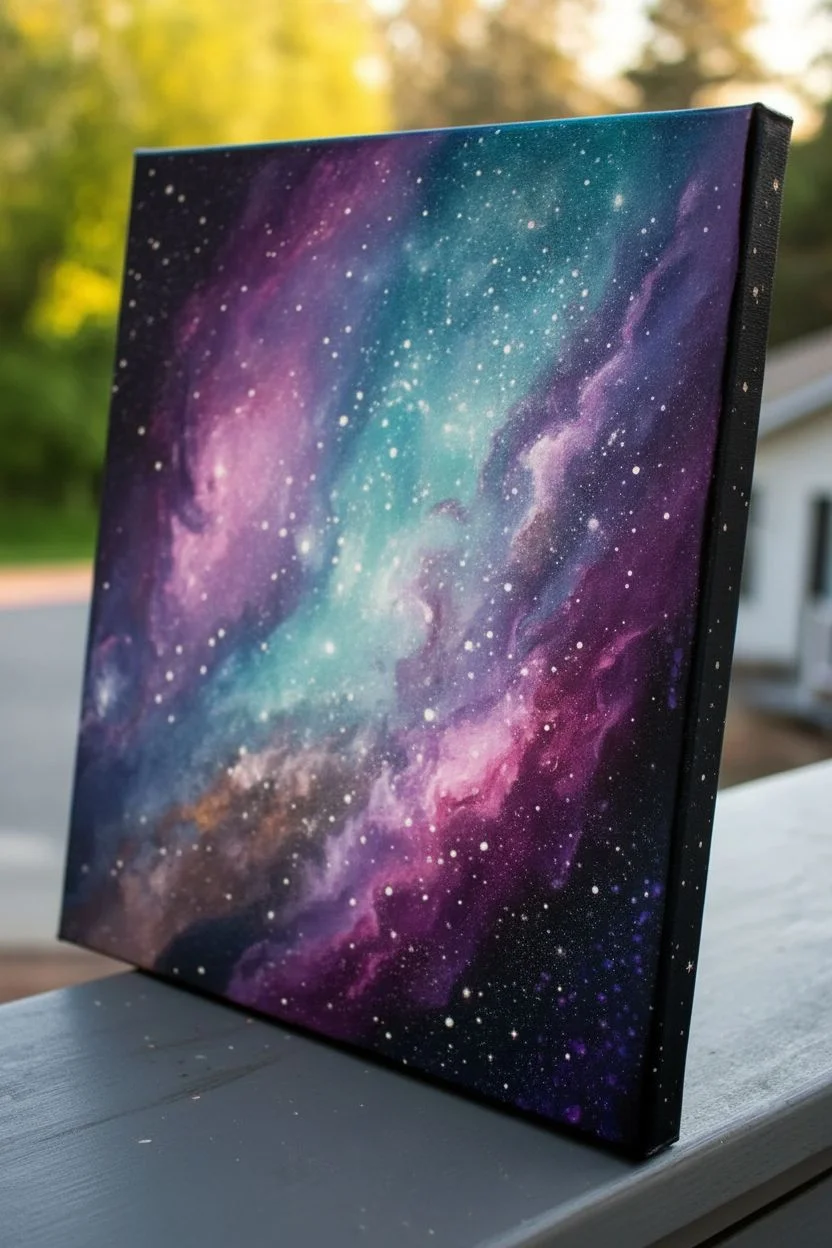
Capture the infinite wonder of the cosmos inside a simple silhouette with this stunning canvas project. The contrast between the deep, vibrant galaxy nebulas and the stark black profile creates a mesmerizing piece that looks far more complex than it actually is.
How-To Guide
Materials
- Stretched canvas (11×14 or similar)
- Black acrylic paint (matte or satin)
- Acrylic paints: Violet, Phthalo Blue, Teal, Magenta, Titanium White
- Sponges (kitchen sponge cut into pieces or sea sponge)
- Stiff bristle brush (e.g., old toothbrush)
- Fine liner brush
- Flat brush (1 inch)
- Pencil
- Carbon transfer paper (optional)
- Printed silhouette template
Step 1: Creating the Galaxy Background
-
Prep the canvas:
Start by giving your entire canvas a coat of black acrylic paint if you want a darker, deeper space look, or leave it white if you want more vibrant, neon nebula colors. Let this base coat dry completely. -
Sponge the first layer:
Cut a kitchen sponge into manageable chunks. Dip a piece into your darkest blue or violet paint. Dab off the excess on a paper towel—you want a dry texture, not a wet globs. -
Build the nebula structure:
Lightly pounce the sponge onto the canvas in diagonal, cloud-like formations. Don’t cover the whole canvas; leave dark spaces for depth. This establishes the shape of your galaxy. -
layering bright colors:
Switch up your colors. Use a fresh sponge piece for the teal and magenta. Overlap these slightly with the dried blue sections to create natural blending. I find that working while the previous layer is slightly tacky helps the colors merge softly. -
Adding highlights:
Mix a tiny amount of Titanium White with your teal or pink to create a milky highlight color. Dab this into the center of your colored clouds to make them glow. -
Repeat and refine:
Continue layering darks and lights until you are happy with the vibrancy. The key is multiple thin, dry layers rather than one thick wet coat.
Step 2: Adding the Stars
-
Flick technique:
Dilute a small amount of white acrylic paint with water until it has an ink-like consistency. -
Creating the starfield:
Dip a stiff bristle brush or an old toothbrush into the watery white paint. Hold it near the canvas and run your thumb across the bristles to flick tiny specks of ‘stars’ across the galaxy. -
Varying star sizes:
Flick lighter in some areas and heavier in the brighter nebula sections to mimic real star clusters. -
Painting large stars:
Using your fine liner brush, add a few larger, distinct stars. Create cross shapes (four points) on the brightest stars to create a twinkling effect, placing them strategically in the light clusters.
Paint Consistency Pro-Tip
Does your splatter look like blobs instead of stars? Your white paint is likely too thick. Add water drop by drop until it flows like heavy cream for perfect, fine mist stars.
Step 3: Painting the Silhouette
-
Dry check:
Ensure your galaxy background is 100% dry before proceeding. Touching wet paint will ruin your sharp silhouette lines. -
Transfer the design:
Place your printed silhouette template over the canvas. Slide carbon paper underneath or trace the outline firmly so it indents the paint, creating a guide for you to follow. -
Outline carefully:
Use your fine liner brush and black acrylic paint to carefully trace the outline of the girl’s face and hair bun. Focus on getting clean, smooth curves on the nose and lips. -
Fill in the shape:
Switch to a flat brush to fill in the large body of the silhouette. Apply two coats of black paint to ensure the colorful background doesn’t show through. -
Refine the hair:
Go back with the liner brush and add wisps of hair escaping the bun or at the nape of the neck. These tiny details make the silhouette look realistic rather than like a stiff cutout. -
Shoulder detail:
Feather the bottom edge of the silhouette slightly into the darkness if you want it to fade out, or keep a hard edge at the bottom of the canvas for a clean finish. -
Final touches:
Check your edges. If any galaxy paint overstepped the silhouette area, the black fill covered it. If you accidentally painted black over a star you wanted to keep, just wait for the black to dry and dot it back in.
Level Up: Glitter Glaze
Once the painting is fully dry, brush a clear glitter glaze or holographic topcoat just over the colorful nebula parts (avoiding the black silhouette) for a shimmering 3D effect.
Hang your masterpiece on the wall and enjoy the peaceful view of the universe captured within a single moment
Girl Portrait With Textured Mixed-Media Dress
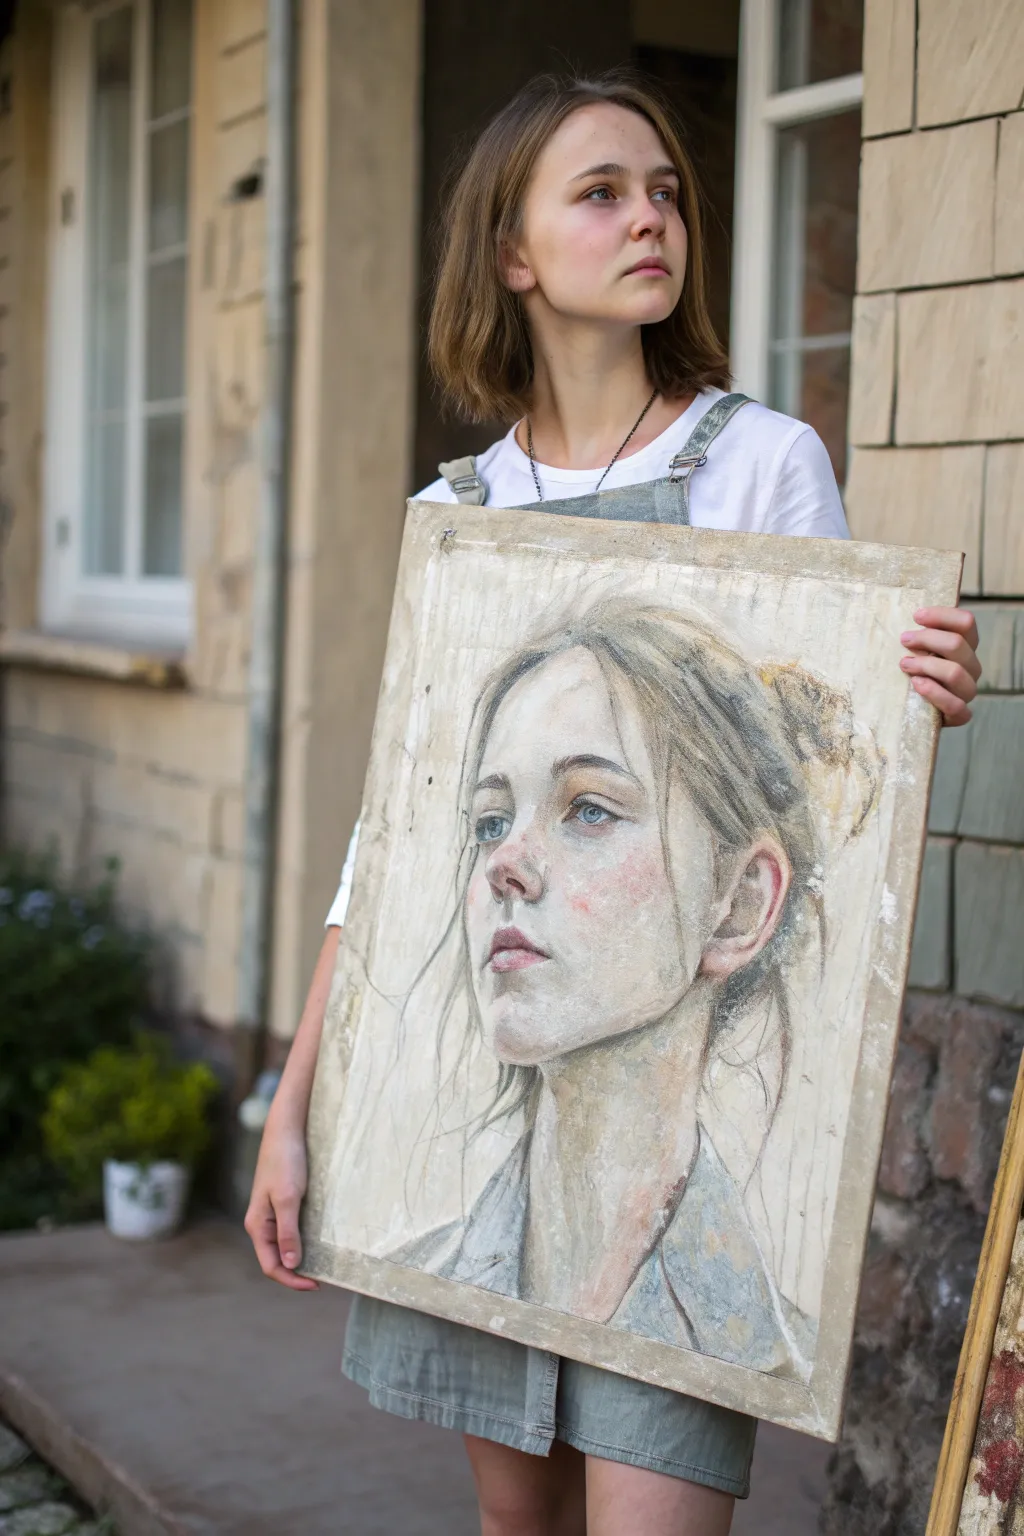
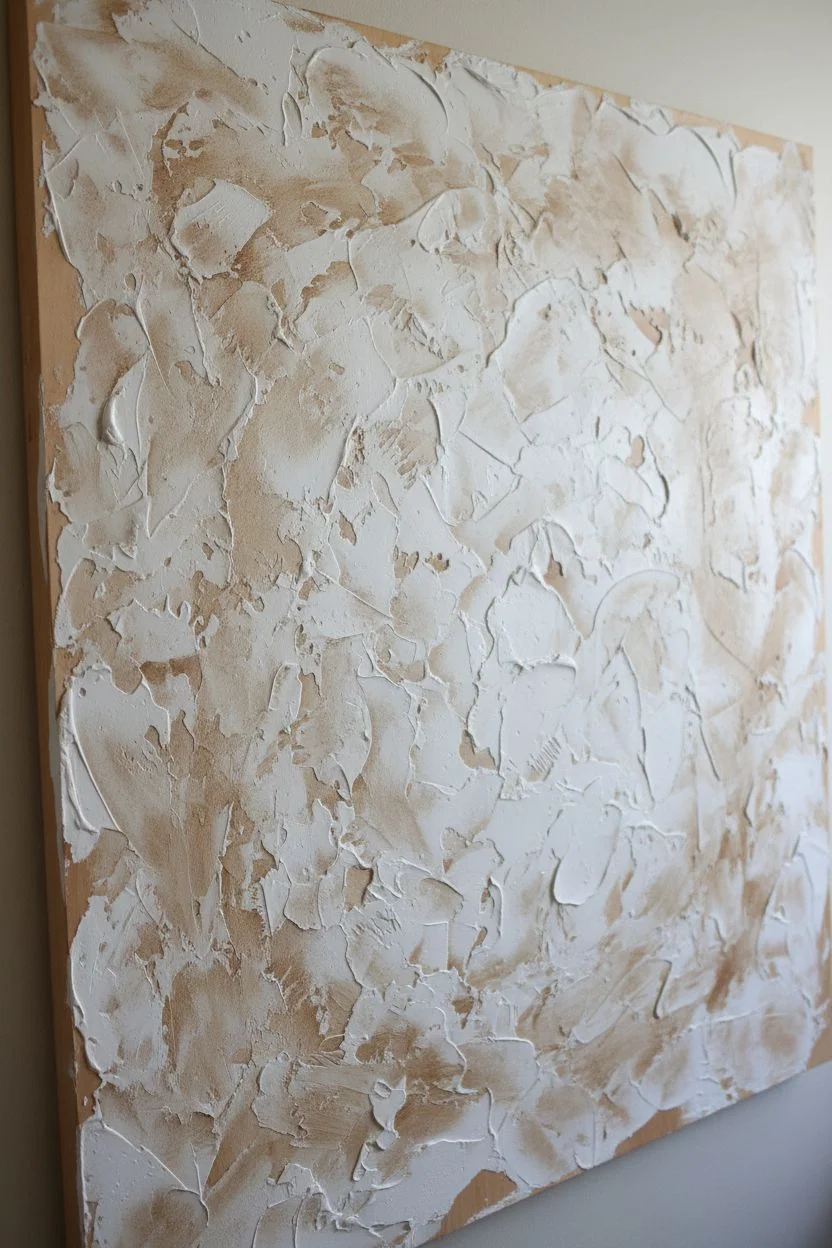
Capture the timeless beauty of a fresco painting with this mixed-media portrait project. By layering gesso, acrylics, and charcoal, you will create a stunningly weathered, soulful piece that looks like it was rescued from an ancient wall.
Step-by-Step Tutorial
Materials
- Large wooden panel or heavy-duty canvas (approx. 24×30 inches)
- White Gesso and Modeling Paste
- Acrylic paints (Titanium White, Raw Umber, Yellow Ochre, Paynes Grey, Alizarin Crimson)
- Charcoal vine sticks and pencils (soft grade)
- Soft pastels (pale pink, cream, light blue)
- Wide flat synthetic brushes and palette knives
- Fine detail brushes
- Workable fixative spray
- Fine-grit sandpaper
- Matte medium
Step 1: Preparing the Aged Surface
-
Build the texture:
Begin by applying a generous layer of white gesso mixed with a small amount of modeling paste to your board or canvas. Use a palette knife to spread it unevenly, creating ridges and smooth patches to simulate an old wall surface. -
Create distressing:
While the texture layer is still semi-wet, gently scrape into it with a stiff brush or the edge of a card to create subtle scratches and imperfections. -
Apply the base tone:
Once fully dry, mix a wash of Raw Umber and a touch of Yellow Ochre with plenty of water. Brush this over the entire surface and immediately wipe it back with a rag, letting the color settle into the textures for an antique look.
Charcoal Smudging?
If charcoal muddies your paint too much, seal the drawing with clear matte medium before painting. Apply it gently with a sponge to avoid smearing lines.
Step 2: Drafting the Portrait
-
Initial sketch:
Use a vine charcoal stick to loosely sketch the outline of the face. Focus on the tilt of the head and the placement of the eyes, keeping your lines light and easily adjustable. -
Refining features:
Switch to a charcoal pencil to define the eyes, nose, and mouth more clearly. Don’t worry about harsh lines; the mixed media approach relies on softness. -
Fix the sketch:
Spray a light coat of workable fixative over the sketch to prevent the charcoal from muddying your paint layers too much in the next step.
Step 3: Painting the Skin Tones
-
Mixing the flesh tone:
Create a pale, desaturated flesh tone using Titanium White, a tiny drop of Yellow Ochre, and a speck of Alizarin Crimson. The goal is a porcelain-like, almost greyish hues rather than vibrant skin. -
Blocking in highlights:
Apply this pale mix to the forehead, cheeks, and chin using a wide flat brush. I prefer to use a dry-brush technique here, dragging the paint lightly so the textured background shows through in spots. -
Adding warmth:
Glaze a very watered-down Alizarin Crimson over the cheeks, nose, and lips to introduce a soft blush. Blend the edges with a clean, damp brush to ensure no hard lines remain. -
Defining shadows:
Mix Paynes Grey with a lot of white and a touch of Raw Umber for the shadows under the chin, in the eye sockets, and around the hair line. Apply this sparingly to sculpt the face.
Add Gold Leaf
Apply bits of gold leaf to the background texture or the hair accessories. The metallic shine contrasts beautifully with the matte, distressed finish.
Step 4: Details and Hair
-
Painting the eyes:
Use a small detail brush with watered-down Paynes Grey and blue for the irises. Keep them glassy and somewhat transparent. Add a sharp dot of pure white for the reflection. -
Creating hair volume:
Wash in the general shape of the hair with a mix of Raw Umber and Paynes Grey. Keep the paint thin. -
Adding hair texture:
Once the wash is dry, use charcoal pencils and white pastel to draw individual strands, focusing on the loose tendrils framing the face and the bun. -
The collar detail:
Sketch the shirt collar simply with charcoal, then fill it with a rough wash of blue-grey acrylic. Let streaks of the background show through to suggest denim or rough cotton.
Step 5: Final Weathering
-
Sanding back:
Take your fine-grit sandpaper and very gently sand over areas of the painting, particularly the edges of the hair and the clothing. This reveals the texture underneath and integrates the portrait into the ‘wall’. -
Pastel highlights:
Use soft pastels to punch up the highlights on the nose tip, cheekbones, and forehead. Smudge these slightly with your finger for a powdery finish. -
Final charcoal accents:
Re-darken the lash line and the deepest shadows of the hair with charcoal to regain contrast lost during sanding. -
Seal the work:
Finish with a spray varnish or a carefully applied layer of matte medium to protect the charcoal and pastel layers without adding shine.
Hang your textured portrait in a spot with good natural light to let the surface details truly shine


Have a question or want to share your own experience? I'd love to hear from you in the comments below!