If you’re craving that messy, moody grunge vibe but still want projects that feel totally doable, you’re in the right headspace. These easy grunge painting ideas are all about bold contrast, happy accidents, and designs that look cooler when they’re not perfect.
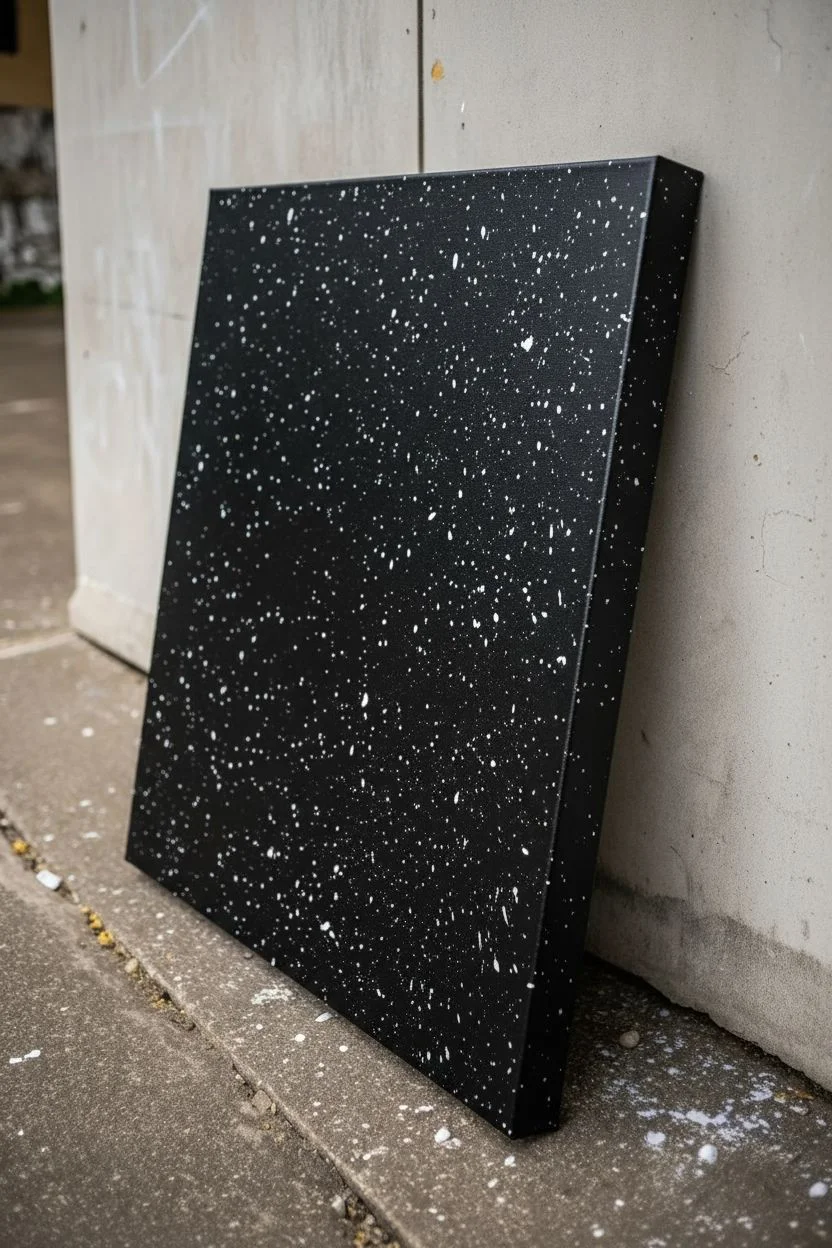
Black Background With Neon Drips
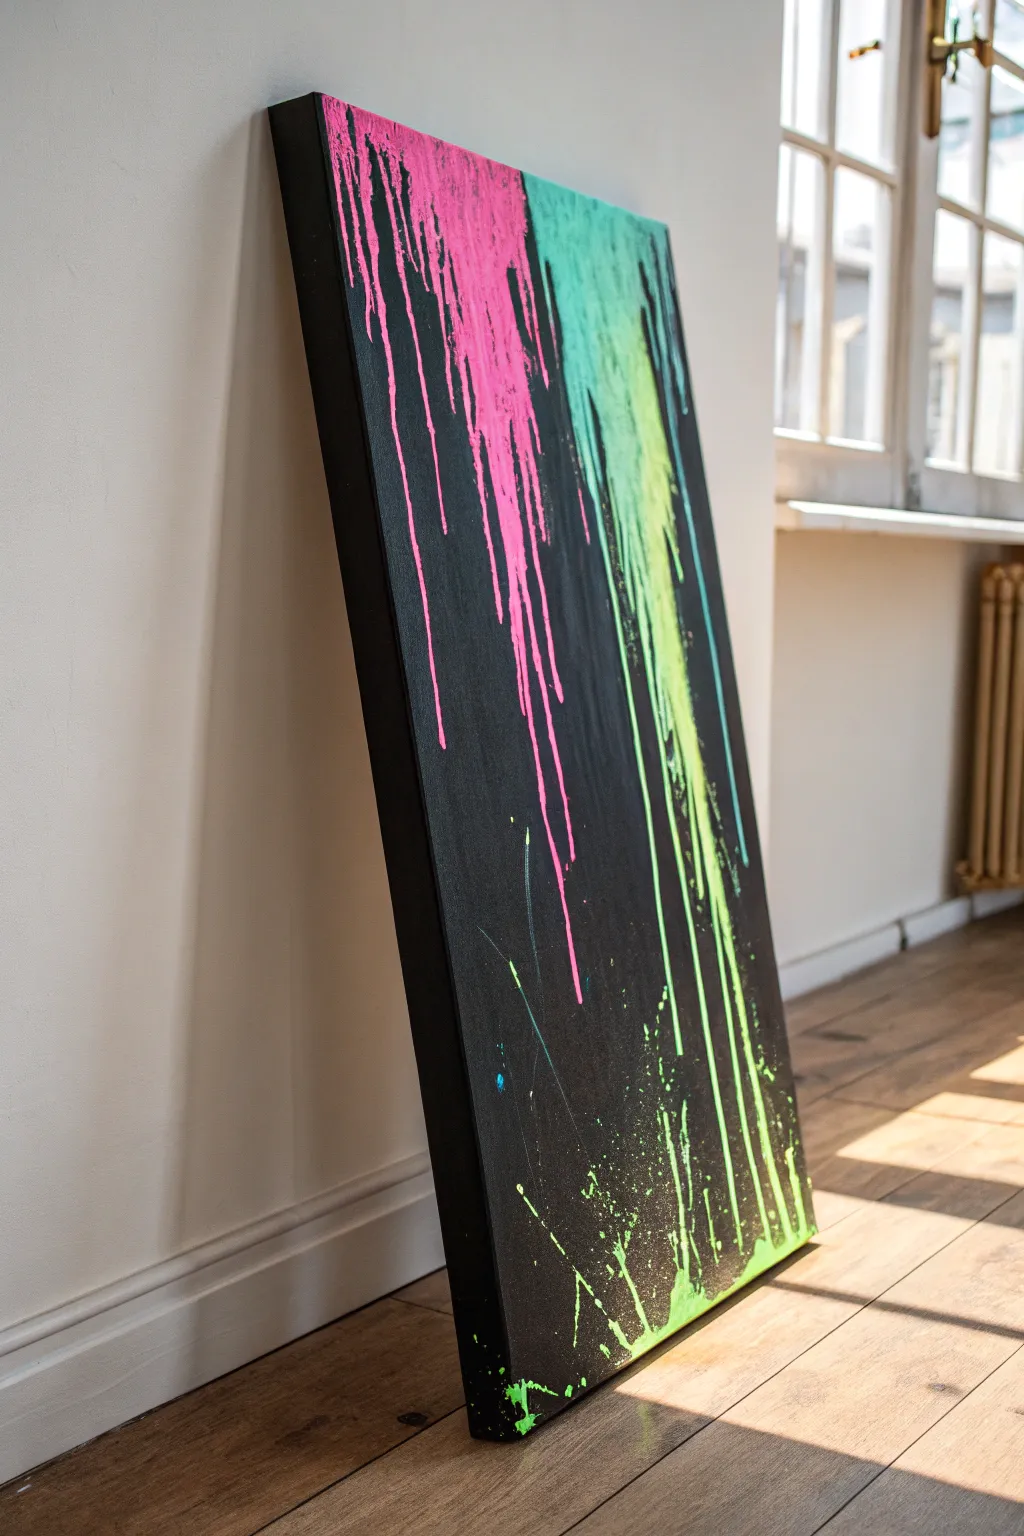
Create a bold, modern focal point for any room with this high-contrast painting. By utilizing gravity and fluid neon paints against a stark black background, you can achieve an edgy, chaotic look that still feels remarkably polished.
How-To Guide
Materials
- Large stretched canvas (vertical orientation)
- Black acrylic paint (matte finish recommended)
- Neon pink fluid acrylic paint
- Neon green fluid acrylic paint (or neon lime)
- Small splash of neon teal/turquoise acrylic paint
- Large flat paintbrush or foam roller
- Pouring medium (optional, but helpful for flow)
- Plastic cups or squeeze bottles
- Drop cloth or cardboard to protect floors
- Water spray bottle (optional)
Step 1: Setting the Stage
-
Surface Prep:
Begin by laying down a drop cloth in a well-ventilated area. This project can get messy, so ensure your floor and surrounding walls are protected. -
Base Coat Application:
Using a large flat brush or a foam roller, cover the entire front and sides of your canvas with black acrylic paint. I find that a matte black absorbs light better and makes the neon pop more intensely. -
Drying Time:
Let the black base coat dry completely. If you can see the white canvas texture showing through, apply a second coat to ensure a deep, opaque background. -
Paint Consistency:
While the background dries, prepare your neon colors. If you are using standard tube acrylics, mix them with a pouring medium or a very small amount of water in plastic cups. You want the consistency of heavy cream so it runs but doesn’t instantly turn watery.
Drips stopping too soon?
If paint stops midway, it’s too thick or the canvas isn’t vertical enough. Mist with water to reactivate flow, or tilt the canvas forward to let gravity pull harder.
Step 2: Creating the Drips
-
Positioning:
Once dry, prop your canvas upright against a wall protected by plastic or cardboard. It needs to be nearly vertical for gravity to do the work properly. -
Apply Pink:
Start with your neon pink mixture. Pour a generous amount along the top left edge of the canvas, allowing it to pool slightly on the rim before it tips over. -
Controlled Tipping:
Watch the paint begin to travel down. If it’s moving too slowly, gently tap the top of the canvas frame or tilt the canvas slightly forward to encourage momentum. -
Add Green:
Move to the right side of the canvas and repeat the process with the neon green paint. Pour it along the top edge, slightly overlapping the center area if you want blending, or keeping them separate for distinct blocks of color. -
Add Teal Accents:
While the green is still wet, add a few smaller pours of the teal/turquoise right next to or on top of the green to create depth and varying tones in the drip lines. -
Gravity’s Work:
Step back and let the paint run all the way down. The natural variation in paint thickness will cause some lines to stop midway while others race to the bottom.
Step 3: Grunge Details
-
Create Splatter:
Dip a smaller brush into the neon green paint. Flick the bristles towards the bottom right of the canvas to create the upward-splashing effect seen in the reference. -
Add Chaos:
For finer speckles, load a toothbrush with paint and run your thumb over the bristles, aiming at the black empty spaces near the bottom. This adds that gritty, grunge texture. -
Encourage Pooling:
If the drips at the bottom look too neat, add a little extra paint directly to the bottom edge and blow on it with a straw to force it upward slightly, mimicking a splash impact. -
Drying Phase:
Allow the painting to sit undisturbed for at least 24 hours. The thick drips will take much longer to cure than the thin later. -
Final Check:
Inspect the painting for any areas where the black background might have been scratched or smudged. Touch up with a small brush and black paint if necessary to keep the negative space pristine.
Glow Up
Swap standard neon acrylics for UV-reactive blacklight paints. Your artwork will look cool during the day, but will glow intensely under a blacklight at night.
Hang your new masterpiece in a well-lit area where that neon contrast can really shine


Melting Smiley Face
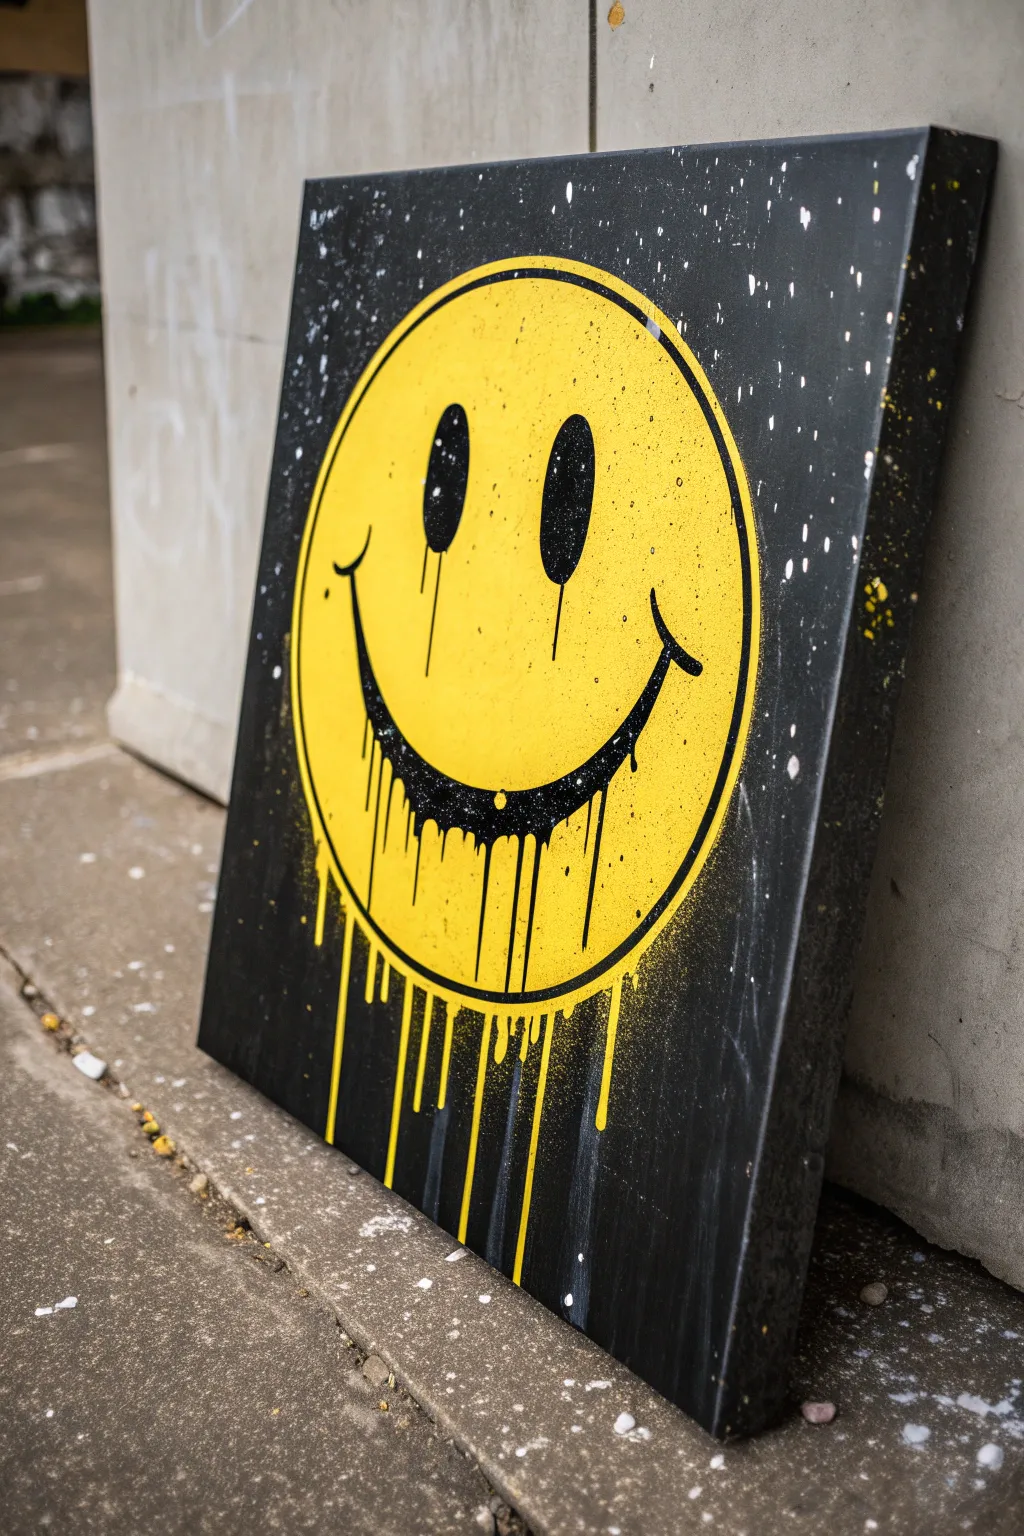
Capture the raw energy of street art with this bold, high-contrast canvas project. By utilizing controlled drips and splatters, you’ll transform a classic icon into a gritty, urban masterpiece that looks like it was pulled straight from a city wall.
Step-by-Step Guide
Materials
- Square stretched canvas (e.g., 20×20 inches)
- Black acrylic paint (matte finish)
- Bright yellow acrylic paint (opaque)
- White acrylic paint (for splatters)
- Large flat paintbrush
- Round paintbrush (medium size)
- Fine detail paintbrush
- Compass or round object for tracing (large dinner plate)
- Pencil
- Water spray bottle
- Drop cloth or plastic sheeting
Step 1: Setting the Stage
-
Prepare the workspace:
Since this project involves dripping and splattering paint, cover your entire work area with a drop cloth or old newspapers to protect your floors. -
Base coat application:
Use your large flat brush to paint the entire canvas with matte black acrylic paint. Ensure you cover the sides of the canvas for a professional finish. -
Second layer:
Once the first coat is dry, apply a second layer of black paint to ensure full opacity. You don’t want any white canvas showing through. -
Starry splatter:
Before painting the smiley, create the background texture. Dilute a small amount of white paint with water. Dip a stiff brush or toothbrush in it and flick it across the black background to create a field of tiny stars. -
Let it cure:
Allow the black background and white splatters to dry completely before moving on. This prevents the yellow paint from becoming muddy later.
Drips Too Short?
If your paint isn’t running very far down the canvas, mix in a few drops of pouring medium or simply add more water. The mix needs to be quite thin to flow.
Step 2: Forming the Icon
-
Trace the circle:
Place a large circular object (like a dinner plate) or use a compass to lightly draw a large circle in the center of the canvas with a pencil. -
Sketch the face:
Inside the circle, sketch two tall ovals for the eyes and a wide U-shape for the smile. Add small ‘tick marks’ at the ends of the smile to give it that classic grin. -
Paint the yellow base:
Fill in the circle with bright yellow paint, carefully painting around the eyes and mouth zones. Use a medium round brush for the edges and a larger brush for the center. -
Layering for pop:
Yellow is notoriously translucent, so you will likely need 2-3 coats. Let each layer dry just to the touch before adding the next one for maximum brightness. -
Fill the features:
Once the yellow is dry, use your black paint to fill in the oval eyes and the smile line. Make the lines crisp and defined. -
Outline the circle:
Trace the outer edge of the yellow circle with a thin line of black paint to separate it sharply from the background.
Make it Neon
Swap the standard yellow acrylic for a fluorescent neon yellow paint. Under a blacklight, the face will glow intensely against the dark background!
Step 3: The Grunge Effect
-
Distress the yellow:
Before we start the big drips, lightly sponge a tiny bit of diluted black paint onto random spots of the yellow face to make it look weathered and dirty. -
Prepare the drip mix:
Mix a separate batch of yellow paint with water until it reaches the consistency of heavy cream or ink. -
Gravity is key:
Prop the canvas up vertically. Load a brush with the watery yellow mix and press it against the bottom edge of the smiley face circle. -
Encourage the run:
Let the paint run down the black canvas naturally. For longer drips, I find adding a quick spritz of water from a spray bottle directly on the drip helps it travel further. -
Eye drips:
Repeat this process with watery black paint at the bottom of the eyes, allowing small, subtle tears to run down the yellow cheeks. -
Mouth drips:
Create several black drips running down from the grin line. Let these overlap with the yellow drips below for a chaotic, layered look. -
Final splatters:
Flick a small amount of yellow paint around the edges of the circle to integrate the subject with the spacy background. -
Dry and seal:
Leave the painting vertical until all drips are completely dry; otherwise, they might pool weirdly. Seal with a clear matte varnish if desired.
Hang your edgy creation on the wall and enjoy the rebellious vibe it brings to the room.


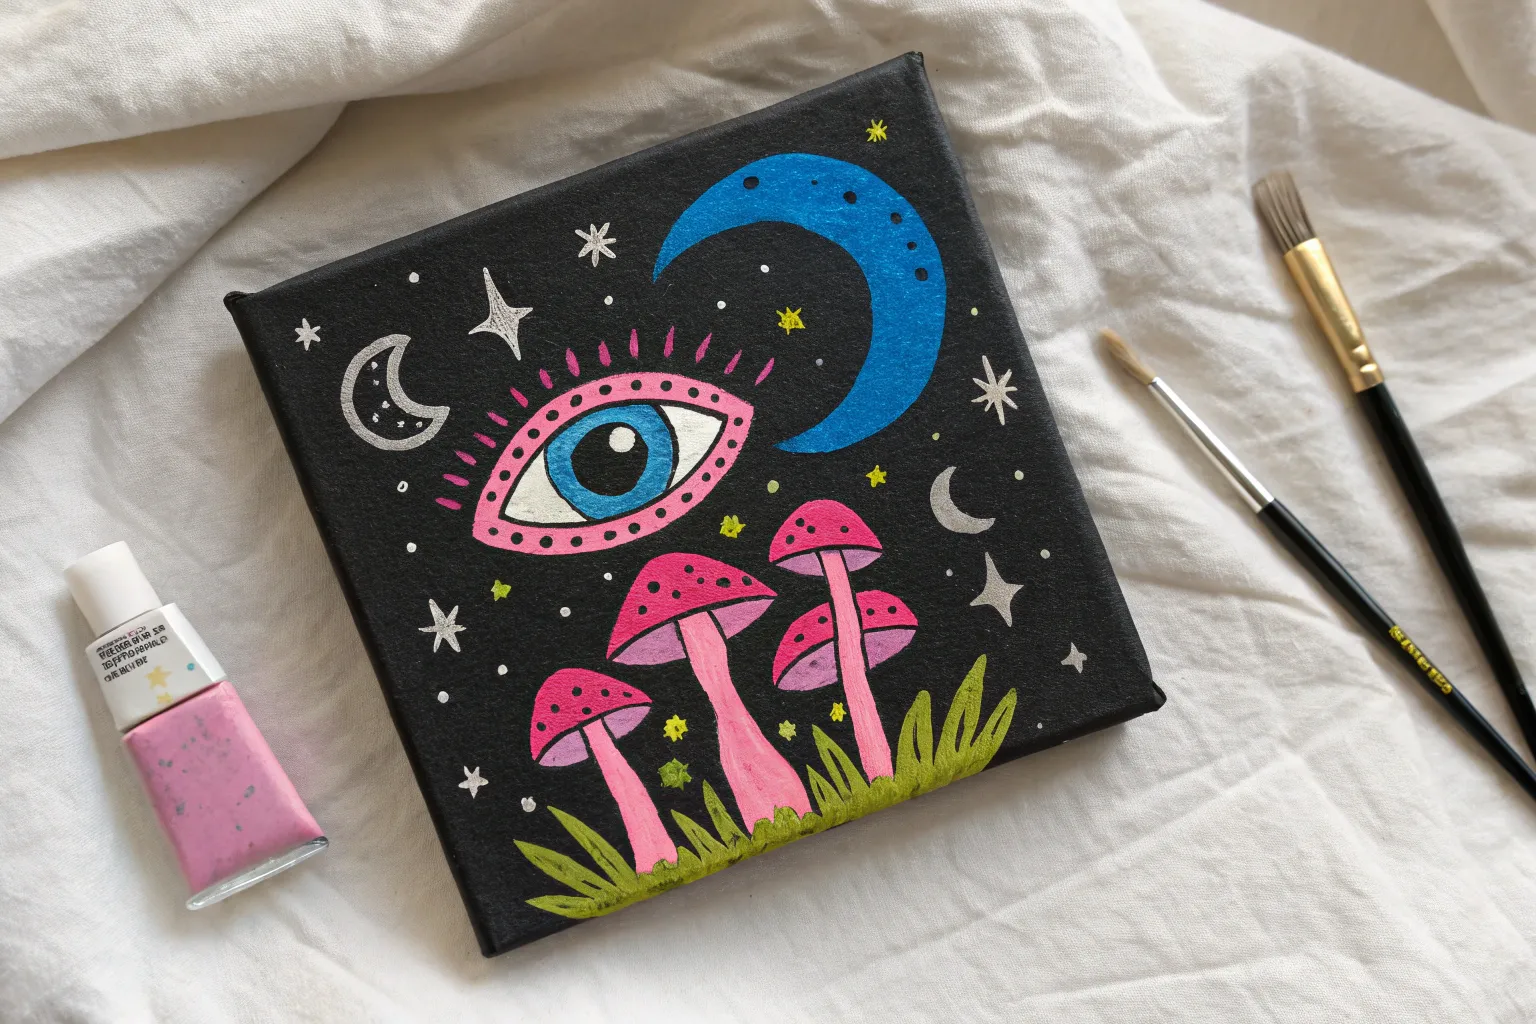
Moon And Stars On Deep Black
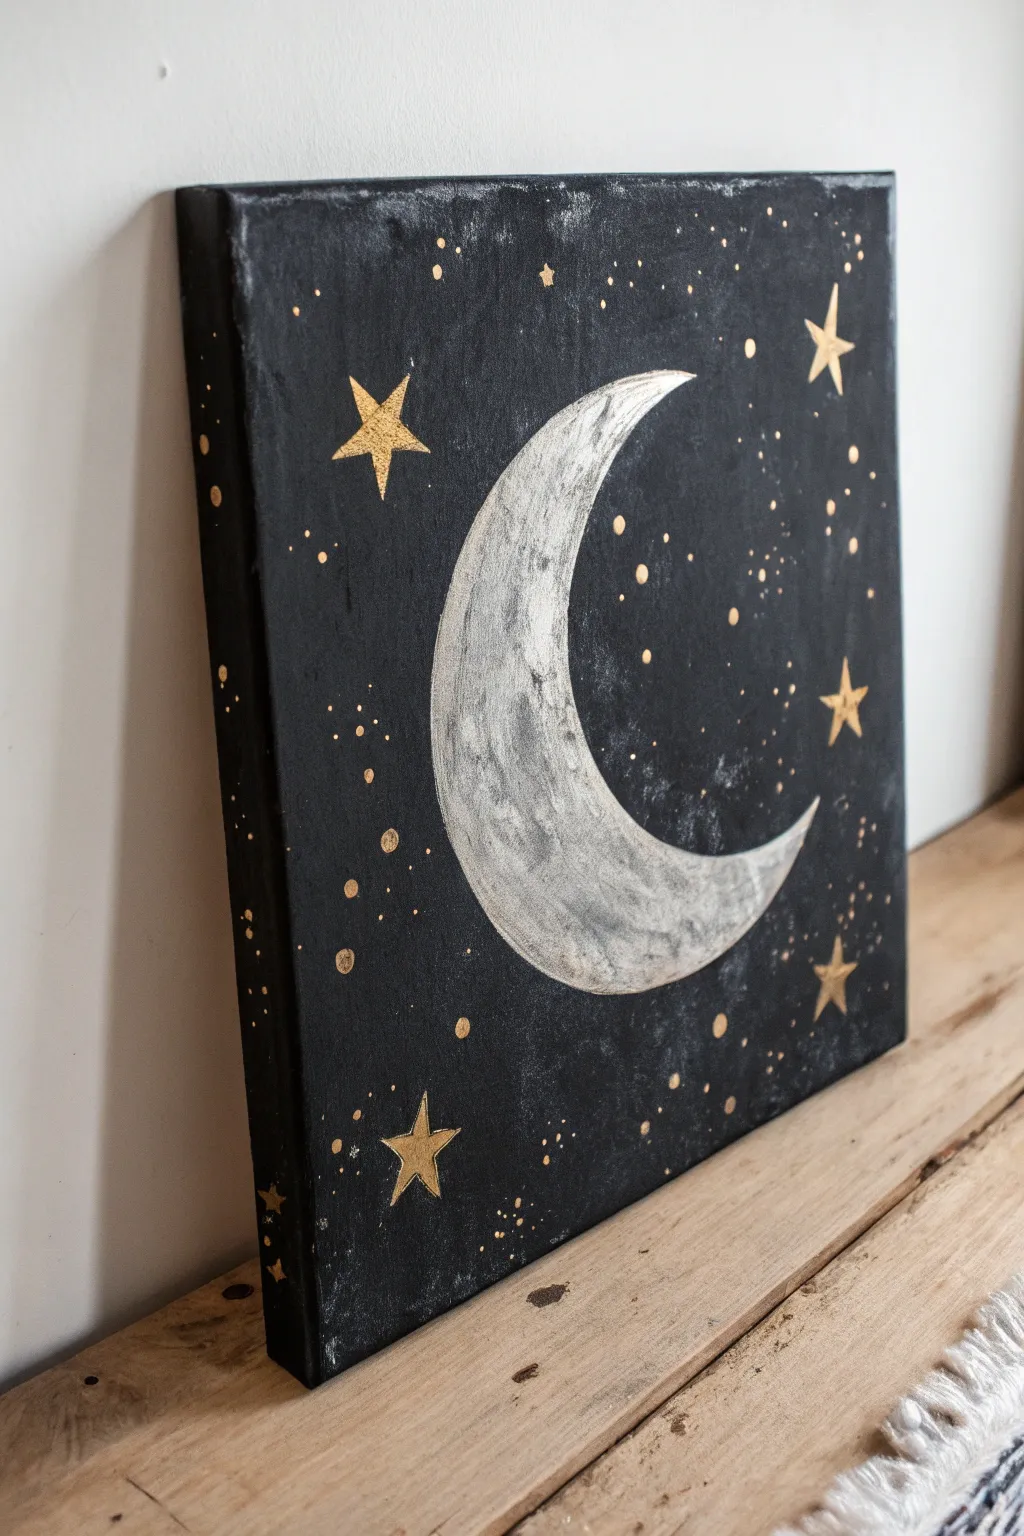
This striking project combines the deep, textured darkness of infinite space with the metallic shimmer of the night sky. The intentionally imperfect, grunge-style background makes the crisp silver moon and golden stars pop beautifully on your wall.
Detailed Instructions
Materials
- Square canvas (10×10 inches or similar)
- Black acrylic paint
- Silver metallic acrylic paint
- Gold metallic acrylic paint
- Medium flat brush
- Small round detail brush
- Old toothbrush or stiff bristle brush
- Pencil
- Paper plate or circular object (for tracing)
- Palette or paper plate for mixing
Step 1: Setting the Background
-
Prepare the workspace:
Lay down some newspaper or a drop cloth, as the splatter technique later can get a bit messy. Set up your canvas and paints within easy reach. -
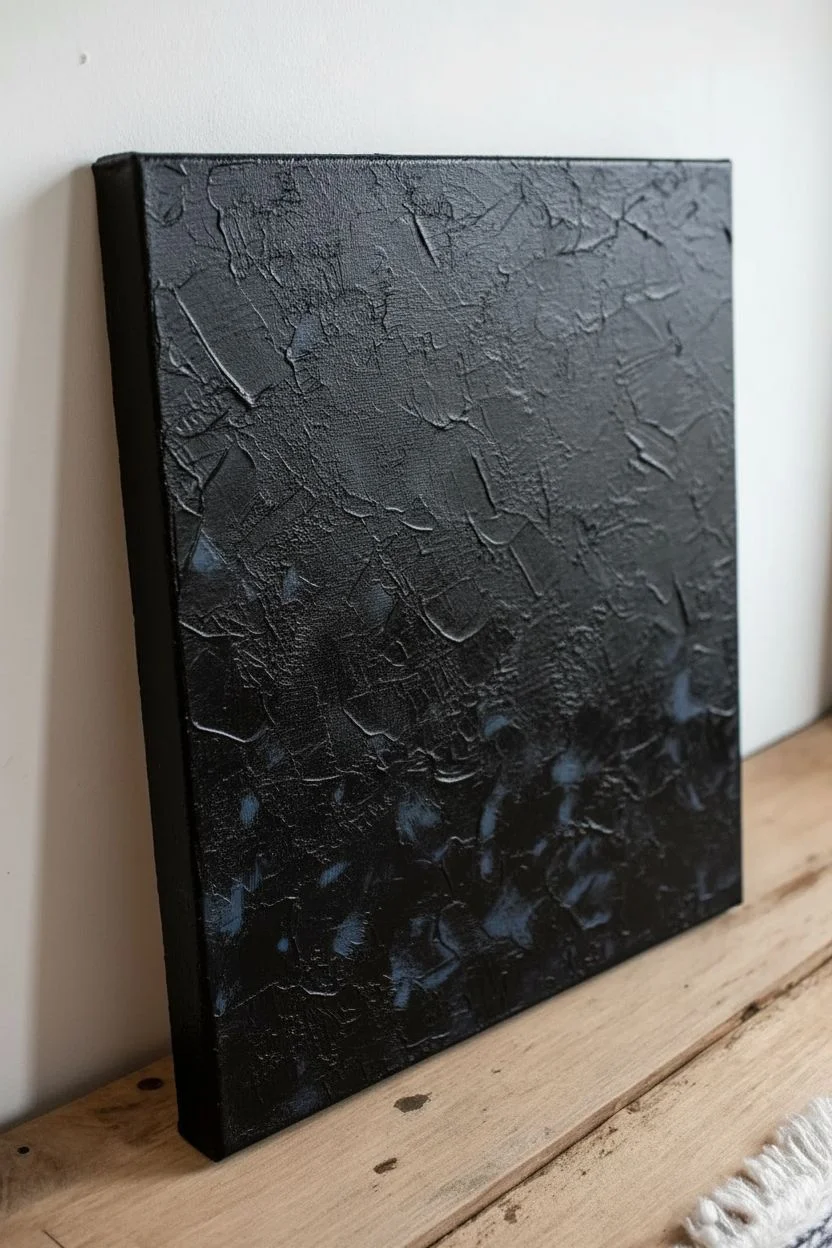
Create the base texture:
Using your medium flat brush, apply a generous layer of black acrylic paint to the entire canvas. Don’t smooth it out perfectly; use varied, crisscross strokes to build up slight ridges and texture. -
Add grunge depth:
While the first layer is still tacky, dab a tiny amount of grey or very dark blue into the black on your palette. Dry brush this sporadically over parts of the black canvas to create a subtle, uneven ‘grunge’ appearance. -
Paint the edges:
Don’t forget to wrap your black paint around the sides of the canvas. This gives the piece a professional, finished look without needing a frame. -
Let it dry completely:
Wait for the background to dry fully. Since the paint is textured, this might take a little longer than usual—about 20 to 30 minutes.
Make It Shine
For extra dimension, mix a tiny bit of white paint into your silver for the brightest part of the moon’s curve. It creates a pseudo-3D lighting effect.
Step 2: Painting the Moon
-
Sketch the moon shape:
Once the black paint is dry, use a pencil to lightly sketch a large C-shape for the crescent moon. You can trace a paper plate for the outer curve to get it smooth. -
Freehand the inner curve:
Sketch the inner curve of the crescent freehand, tapering the ends to sharp points. It doesn’t need to be geometrically perfect; a little wobble adds character. -
Base coat the moon:
Fill in the crescent shape with your silver metallic paint using the flat brush. You may need two coats to get full opacity over the black background. -
Add lunar texture:
While the silver is wet, mix a tiny drop of black into a bit of silver to make a dark grey metallic shade. Use the small round brush to dab and swirl this darker mix onto the moon’s surface to mimic craters and shadows.
Step 3: Adding the Stars
-
Map out the large stars:
Dip your small round brush into the gold metallic paint. Choose 3 to 5 spots for your largest stars and paint simple five-pointed star shapes. -
Refine the star points:
Go back over your large stars to sharpen the tips. I find pulling the brush outward from the center helps create closer, sharper points. -
Add medium stars:
Paint smaller, solid circles scattered randomly around the moon. these represent distant stars that are brighter than the background dust. -
Create background clusters:
Using the very tip of your small brush or the back end of the paintbrush handle, dot tiny specks of gold in clusters. Grouping them creates the illusion of milky ways or galaxies. -
Splatter the stardust:
Dilute a small mount of gold paint with a drop of water. Dip an old toothbrush or stiff brush into it, point it at the canvas, and run your thumb over the bristles to flick tiny gold specks across the void. -
Add side details:
Continue a few stars or gold specks onto the sides of the canvas so the galaxy wraps around the artwork. -
Final touches:
Check your moon and larger stars. If the metallic paint looks streaky, add a final light coat to smooth them out before letting everything cure.
Splatter Control
If you accidentally splatter gold paint onto your finished silver moon, just wait for it to dry and then carefully paint a touch of silver over the mistake.
Hang your new celestial painting in a cozy corner and enjoy the starry vibes


Spiderweb Corner With Splatter
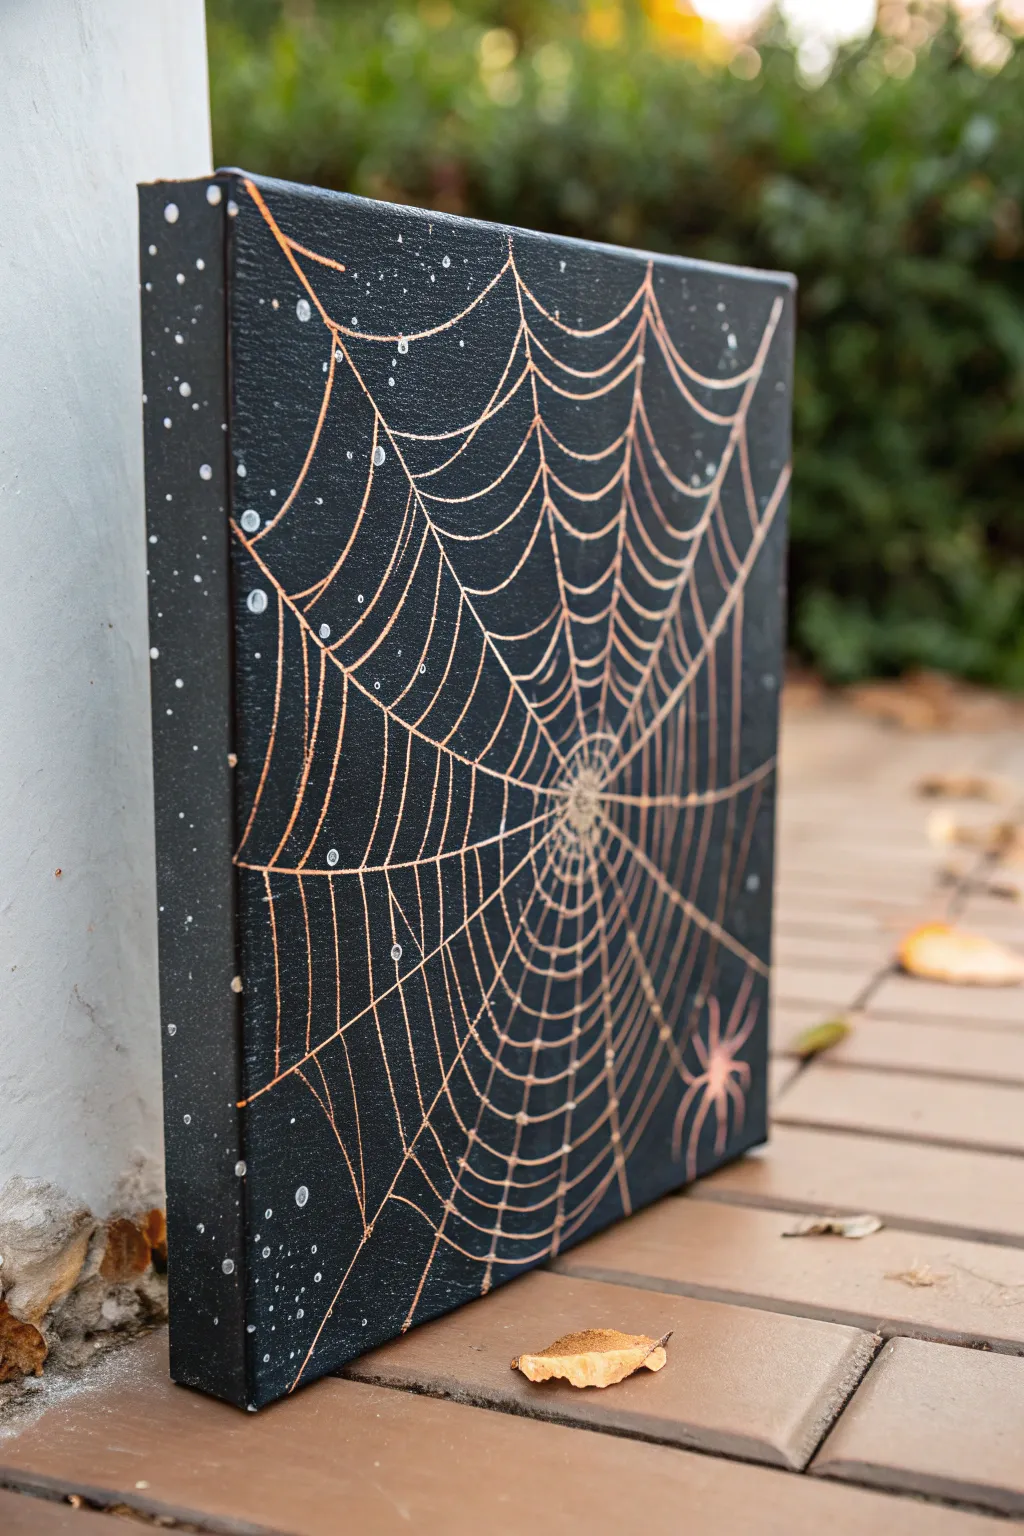
This striking canvas project combines dark, moody grunge elements with metallic elegance. By layering a bronze spiderweb over a matte black background, perfectly accented with subtle white splatters, you’ll create a piece of spooky art that feels both modern and timeless.
Step-by-Step Tutorial
Materials
- Square stretched canvas (8×8 or 10×10 inches)
- Black acrylic paint (matte finish preferred)
- Metallic bronze or copper acrylic paint
- Metallic fine-tip paint pen (bronze/copper) or a very fine liner brush
- Old toothbrush
- White or light grey acrylic paint
- Wide flat brush
- Small round brush
- Pencil
- Ruler
Step 1: The Dark Foundation
-
Base Coat:
Begin by covering your entire canvas with black acrylic paint. Use a wide flat brush to ensure smooth, even coverage. -
Check the Edges:
Don’t forget to paint the sides of the canvas! This ensures the artwork looks finished from every angle, even without a frame. -
Second Layer:
Once the first coat is dry to the touch, apply a second coat of black to get a truly opaque, deep background. Let this dry completely before moving on.
Steady Hand Trick
Rest your pinky finger on a dry part of the canvas while painting the thin web lines. This creates an anchor and stabilizes your hand for smoother strokes.
Step 2: Weaving the Web
-
Planning the Center:
Decide on a focal point for your web. In the project image, the center is offset to the right. Lightly mark this spot with a pencil. -
Drawing Radial Lines:
Using a ruler and pencil, lightly draw straight lines radiating outward from your center point to the edges of the canvas, like spokes on a bicycle wheel. -
Connecting the Strands:
Start near the center and sketch curved ‘u’ shapes connecting the radial lines. Continue these scallops outward, making them larger as they get further from the center. -
Painting the Structure:
Load a fine liner brush with metallic bronze paint (or prepare your paint pen). Carefully trace over your pencil radial lines first. -
Filling the Web:
Next, trace the curved connector lines. Try to keep your hand steady, but don’t worry if the lines vary slightly in thickness—organic imperfections make webs look more realistic.
Step 3: Atmospheric Details
-
Adding the Spider:
In the bottom right corner, sketch a small oval for the spider’s body. Paint this with the same metallic bronze. -
Spider Legs:
Paint eight spindly legs extending from the body. Make the front two and back two slightly longer for a natural look. -
Preparing the Splatter:
Dilute a small amount of white or light grey paint with a drop of water until it has an inky consistency. -
Splatter Technique:
Dip an old toothbrush into the watered-down paint. Hold it near the left edge of the canvas (where the spine would be if it were a book). -
Applying the Stars:
Run your thumb across the bristles to flick tiny specks of paint onto the black edge and slightly onto the web itself. I find aiming away from the main web keeps the focus sharp. -
Larger Dots:
Use the tip of a paintbrush handle dipped in white paint to add just a few slightly larger ‘stars’ or dust motes among the splatter. -
Final Drying:
Let the metallic paint and splatters dry undisturbed for at least an hour to prevent smudging.
Make It 3D
Add tiny dots of silver glitter glue or clear 3D paint at the intersections of the web strands to simulate morning dew drops catching the light.
Hang your new metallic masterpiece in a corner to catch the light and add a touch of gothic charm to your room
BRUSH GUIDE
The Right Brush for Every Stroke
From clean lines to bold texture — master brush choice, stroke control, and essential techniques.
Explore the Full Guide
Mushroom With Wavy Background
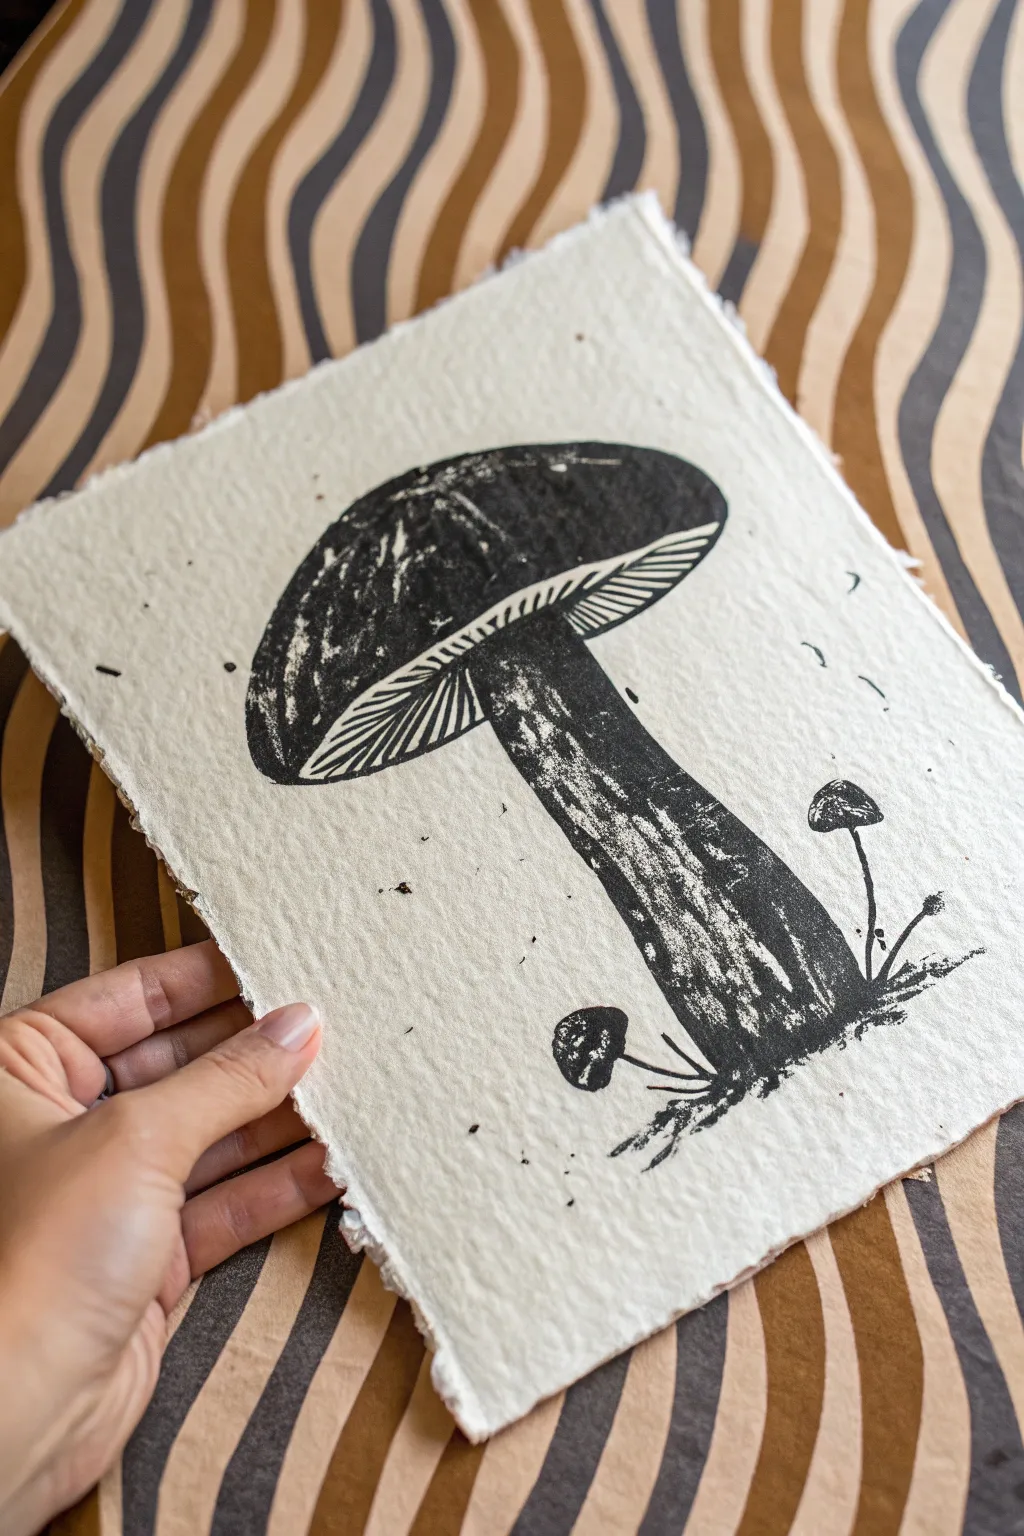
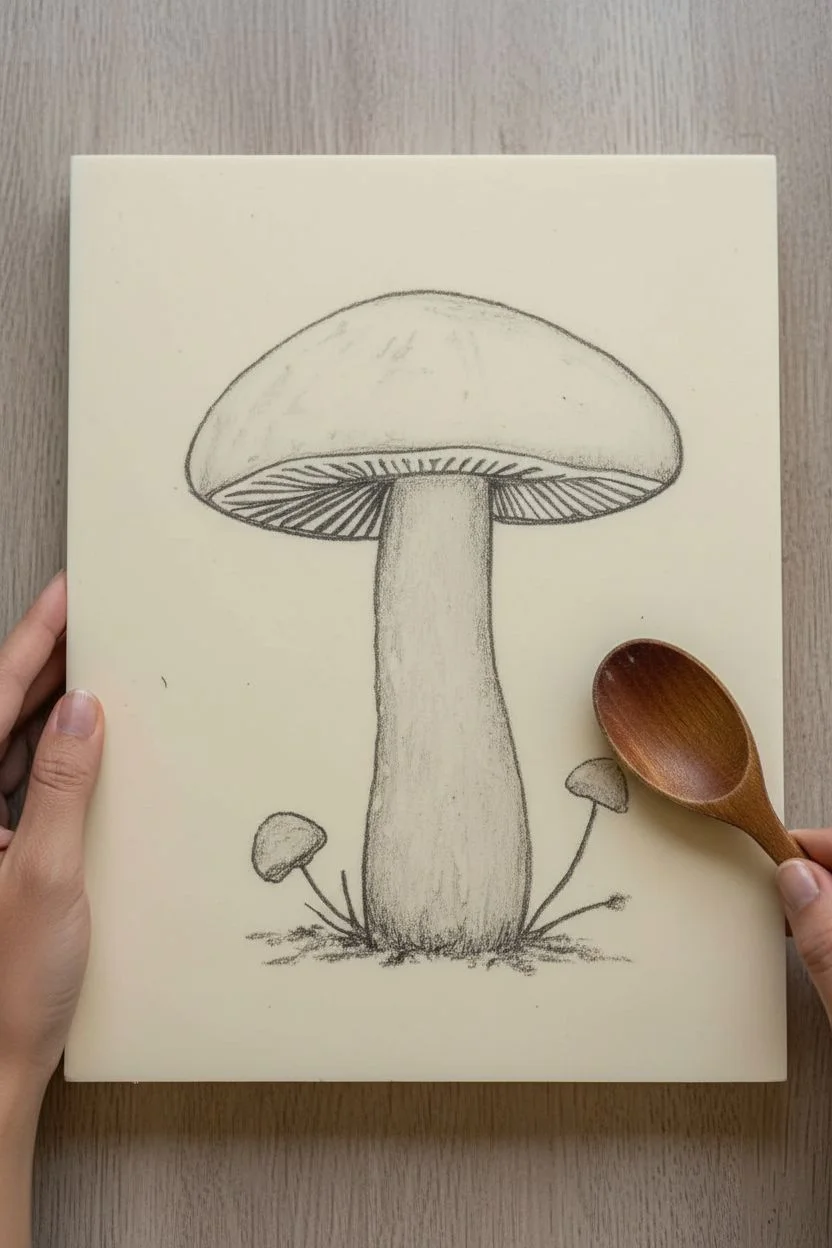
Capture the organic charm of the forest floor with this bold, monochromatic mushroom block print. The slightly uneven ink transfer on textured handmade paper gives it a perfect vintage, grunge feel.
Step-by-Step
Materials
- Soft linoleum block (e.g., Speedball Speedy-Carve) or rubber block
- Linoleum cutter tool with assorted blades (V-gouge and U-gouge)
- Block printing ink (black, oil-based or water-soluble)
- Brayer (rubber roller)
- Handmade paper with deckled edges (e.g., khadi paper or cotton rag paper)
- Pencil
- Tracing paper
- Wooden spoon or baren
- Inking plate or piece of glass/acrylic
Step 1: Design & Transfer
-
Sketch the mushroom:
Begin by sketching your mushroom design on a plain piece of paper. Draw a large, wide cap tilted slightly to the right, a thick, sturdy stem, and two tiny sprout mushrooms near the base. -
Refine the details:
Add the gills under the cap using radiating lines. Simplify the textures on the stem; block printing relies on bold contrast, so think in terms of positive and negative space. -
Trace the design:
Place tracing paper over your sketch and trace the lines with a soft lead pencil (like a 2B or 4B). Go over the lines heavily. -
Transfer to the block:
Flip the tracing paper pencil-side down onto your carving block. Rub the back of the paper firmly with the back of a spoon or your fingernail to transfer the graphite image onto the rubber surface.
Step 2: Carving the Block
-
Outline the main shape:
Using a small V-gouge blade, carefully carve along the outer outline of the mushroom to define the shape. Always carve away from your body for safety. -
Carve the gills:
Switch to a fine carving tip. Carve the radiating lines for the gills under the cap. Remember, the parts you carve away will remain white, and the raised parts will be black. -
Texture the cap:
For the top of the cap, leave most of it raised (uncarved) so it prints solid black. However, create some texture by making small, shallow gouges near the left edge to simulate light hitting the curved surface. -
Detail the stem:
Carve vertical, slightly wavy lines down the stem. Don’t remove all the material; leave plenty of raised areas to create that gritty, shadowed look shown in the reference. -
Remove the background:
Use a larger U-gouge to clear away the background rubber surrounding the mushroom. You don’t need to make it perfectly smooth; deeper is generally better to avoid stray ink marks. -
Clean up stray bits:
Brush away any rubber crumbs and inspect your block. If there are small ridges in the negative space that you don’t want printing, trim them down.
Pro Tip: Deckled Edge
If you don’t have handmade paper, tear the edges of regular printmaking paper against a ruler to create a soft, fibrous ‘deckle’ edge look.
Step 3: Inking & Printing
-
Prepare the ink:
Squeeze a small line of black block printing ink onto your inking plate. I like to listen for a specific sound here—roll the brayer back and forth until the ink sounds ‘sticky’ or like sizzling velcro. -
Ink the block:
Roll the brayer over your carved block. Apply a thin, even layer. Roll in multiple directions to ensure coverage, but be careful not to flood the fine lines in the gills. -
Position the paper:
Ideally, place your handmade paper on a flat surface. Carefully lower the inked block onto the center of the paper, or conversely, lay the paper gently on top of the inked block face-up. -
Apply pressure:
Using a baren or the back of a wooden spoon, rub the back of the paper (or the block) in circular motions. Apply firm, consistent pressure over the entire image area. -
Focus on dark areas:
Spend a little extra time rubbing the solid black areas of the cap and stem to ensure a deep transfer, but don’t worry if it’s not perfect—the texture makes the charm. -
The reveal:
Slowly peel one corner of the paper back to peek at the impression. If it looks too light, lay it back down carefully and rub more. Once satisfied, pull the paper completely off the block. -
Add stray marks (optional):
If your print is too clean, you can actually dab a tiny bit of ink on the uncarved background areas of the block and lightly press them onto the paper to create those little ‘noise’ speckles seen in the photo. -
Dry properly:
Oil-based inks can take days to dry fully, while water-soluble ones dry quickly. Hang your print or lay it flat in a safe place until the ink is completely set.
Troubleshooting: White Spots
Salty or speckled prints mean you didn’t use enough ink or pressure. Add slightly more ink to your brayer next time, but keep layers thin.
Now you have a striking piece of botanical art ready to be framed or gifted
Spray-Style Dots And Stencil Shapes
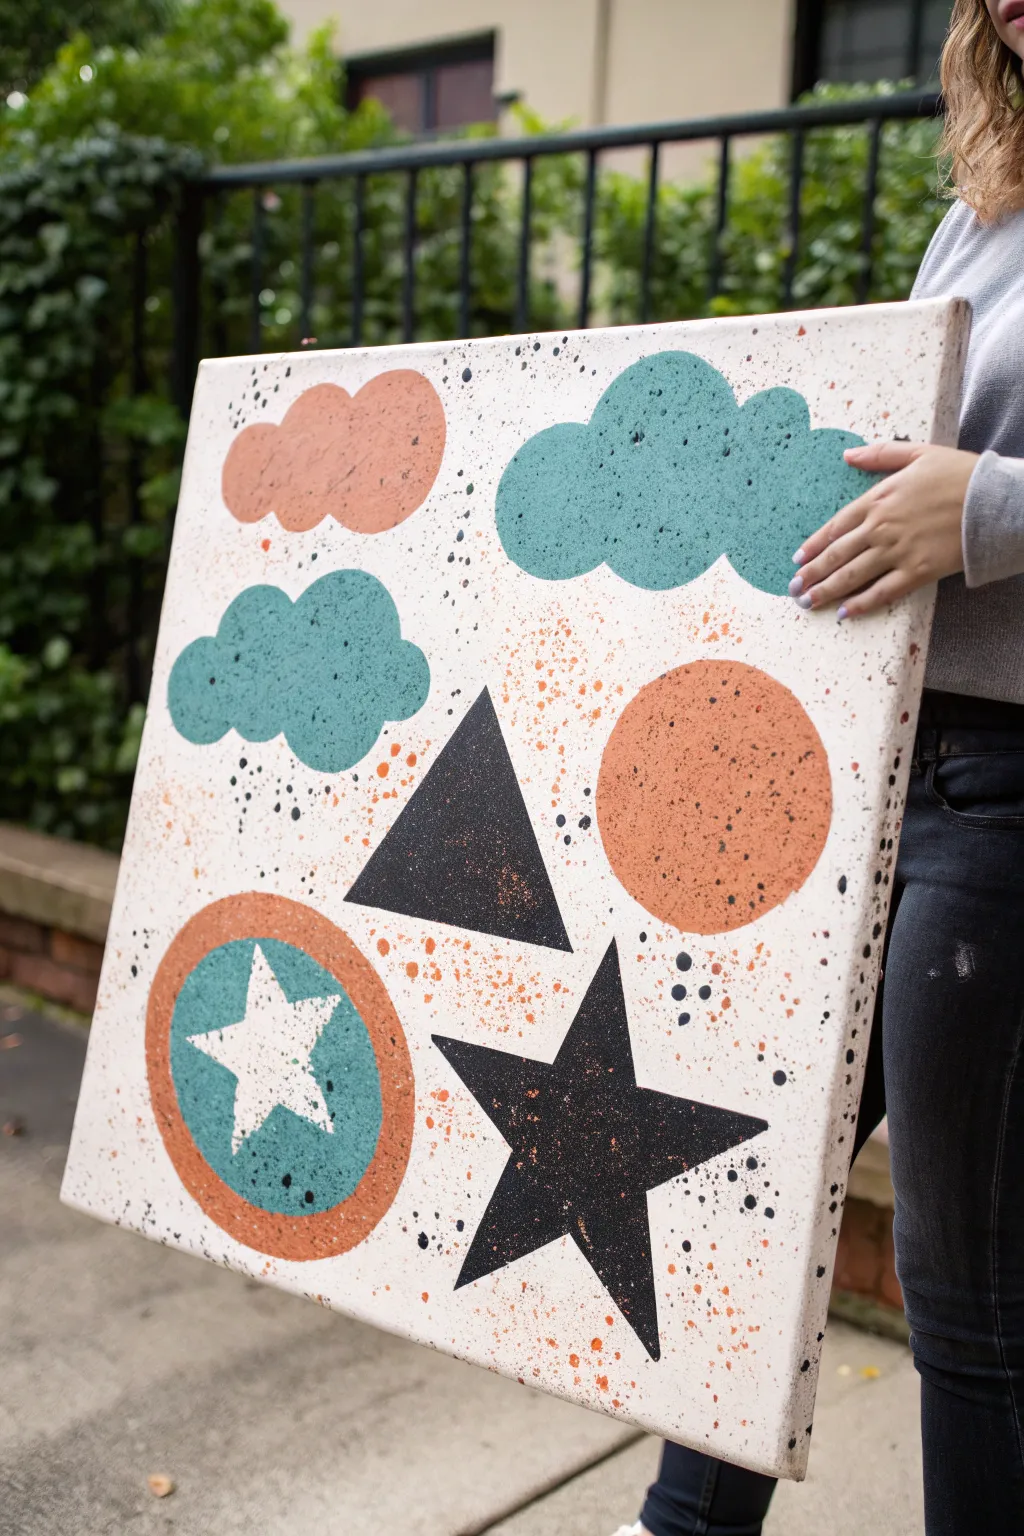
Embrace the playful chaos of grunge art with this vibrant, speckled canvas featuring geometric shapes and fluffy clouds. The combination of crisp stenciled edges and loose, splatter-style spray painting creates a dynamic contrast that is both modern and retro.
Step-by-Step Tutorial
Materials
- Square stretched canvas (approx. 20×20 inches or similar)
- Acrylic spray paint (Black, Teal, Burnt Orange)
- Adhesive vinyl sheets or stencil film
- Cutting mat
- Craft knife (e.g., X-Acto) or digital cutting machine
- Transfer tape (if using vinyl)
- Drop cloth or cardboard box (for spray protection)
- Painter’s tape
- Gloves and mask (for safety)
Step 1: Preparation & First Layer
-
Prepare your workspace:
Since spray paint travels, set up your workspace outdoors or in a very well-ventilated area. Lay down a large drop cloth or set up a cardboard box shield to catch overspray. -
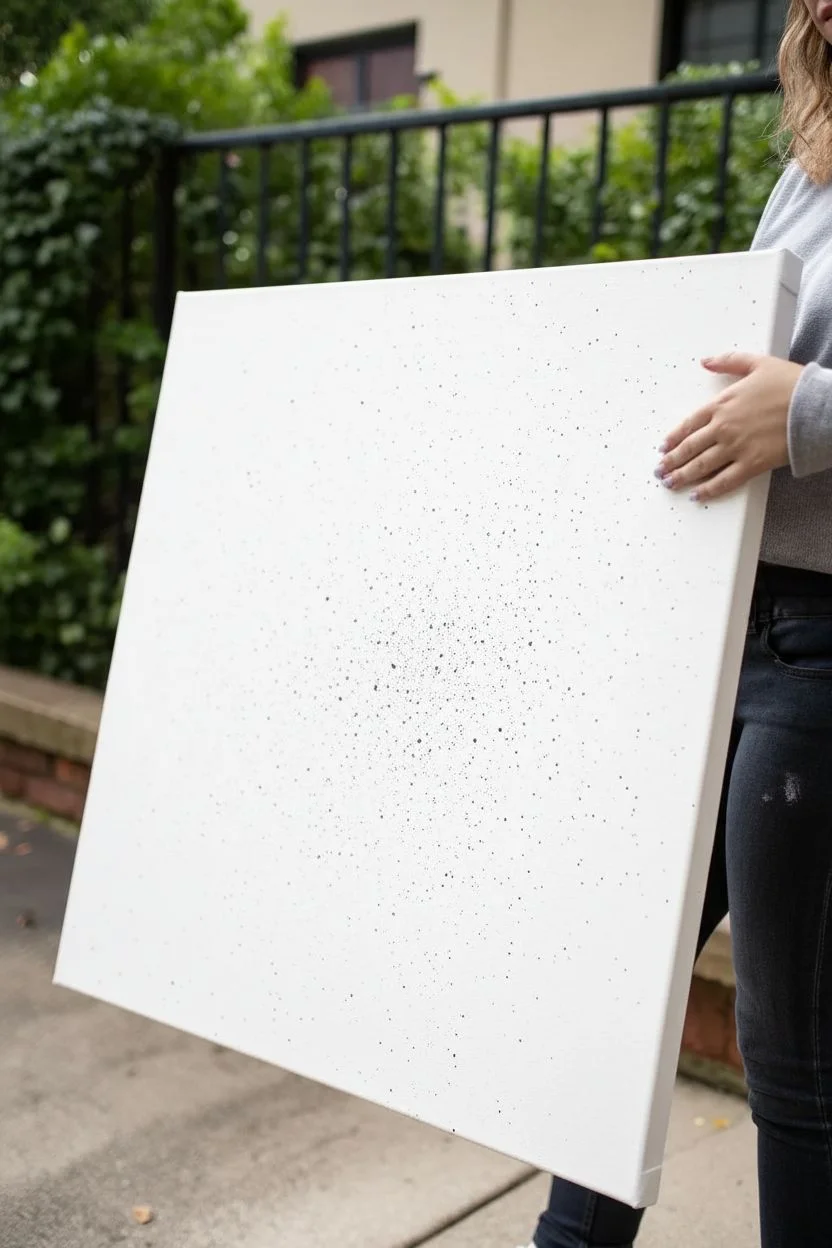
Create the base splatter:
Before adding any shapes, we want to create that subtle background texture. Shake your black spray paint can vigorously for at least a minute. -
Apply background speckles:
Stand back about two feet from the white canvas. Instead of a full spray, press the nozzle very lightly and sporadically to ‘spit’ paint onto the surface, creating tiny black dots rather than a solid coat. Let this dry for about 15 minutes.
Control the Flow
To get that “sputtery” grunge texture, depress the spray nozzle only halfway. This reduces pressure and causes the paint to spit droplets.
Step 2: Designing & Cutting Stencils
-
Sketch your shapes:
On your stencil film or vinyl backing, draw out your shapes: two clouds (one large, one small), a large circle, a triangle, a five-pointed star, and a ring shape. -
Design the negative star:
For the special circular element in the bottom left, draw a circle, and then draw a star shape exactly in the center of it. This will create a ‘negative space’ star later. -
Cut out the stencils:
Using a craft knife and cutting mat, carefully cut out the interior of your shapes. You acturally want the *negative* space here—the surrounding sheet is what will mask the white canvas. -
Alternative: Reverse masking:
Actually, looking closely at the project, it uses *positive* masks for the blank areas and *negative* stencils for the colored areas. For this specific look, cut out holes in a large sheet of paper or vinyl where you want the shapes to be painted.
Bleeding Edges?
If paint bleeds under your stencil, wait for it to dry completely, then use a white paint marker or small brush with gesso to touch up the lines.
Step 3: Painting the Shapes
-
Position the circle stencil:
Place your stencil material over the canvas so only the large circle area is exposed. Ensure the rest of the canvas is completely covered with paper or tape to prevent color contamination. -
Texture the circle:
Using the Burnt Orange spray paint, apply the color using that same ‘spitting’ or light misting technique to create a textured, stone-like appearance rather than a flat fill. Let it dry to the touch. -
Paint the clouds:
Move to the cloud shapes. Mask off everything else and expose the cloud cutouts. Use the Teal spray paint here. Again, spray lightly to maintain that speckled, grunge aesthetic. Include some orange speckles over the teal while the stencil is still on for added depth. -
Execute the top-left cloud:
For the orange cloud, repeat the masking process but switch back to your Burnt Orange paint. I like to let this dry briefly before removing the mask to ensure crisp edges. -
Create the black geometrics:
Mask off the triangle and the large star areas. Use the Black spray paint for these. Since black is heavy, go very light with your spray bursts to keep the texture consistent with the lighter colors.
Step 4: Complex Layering
-
Tackle the star-circle:
For the bottom-left element, this requires two steps. First, place a solid star sticker (a positive mask) directly onto the white canvas. -
Apply the ring stencil:
Place a circular stencil opening centered over that star sticker. Now, spray the area with Teal paint. -
Add the orange border:
While the circle mask is still in place, lightly mist the outer edge of the circle with Burnt Orange to create that reddish rim effect seen in the reference. -
Reveal the star:
Once the paint is tacky but almost dry, carefully peel up the star sticker from the center to reveal the white canvas underneath.
Step 5: Final Details
-
Add global splatter:
Remove all main stencils so the full design is visible. Take your Burnt Orange and Black cans and add a final, very sparse layer of splatter over the entire piece to tie the shapes together. -
Inspect and clean:
Check for any large unwanted drips. If you find one, dab it gently with a paper towel while wet, or wait for it to dry and splatter white paint over it to camouflage it. -
Seal the work:
Once the canvas has dried for at least 24 hours, apply a clear matte UV-resistant spray varnish to protect the colors from fading.
Hang your new geometric masterpiece in a bright room to let those speckled textures really pop

PENCIL GUIDE
Understanding Pencil Grades from H to B
From first sketch to finished drawing — learn pencil grades, line control, and shading techniques.
Explore the Full Guide
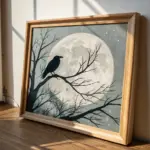
Crumpled-Paper Print Grunge Layer
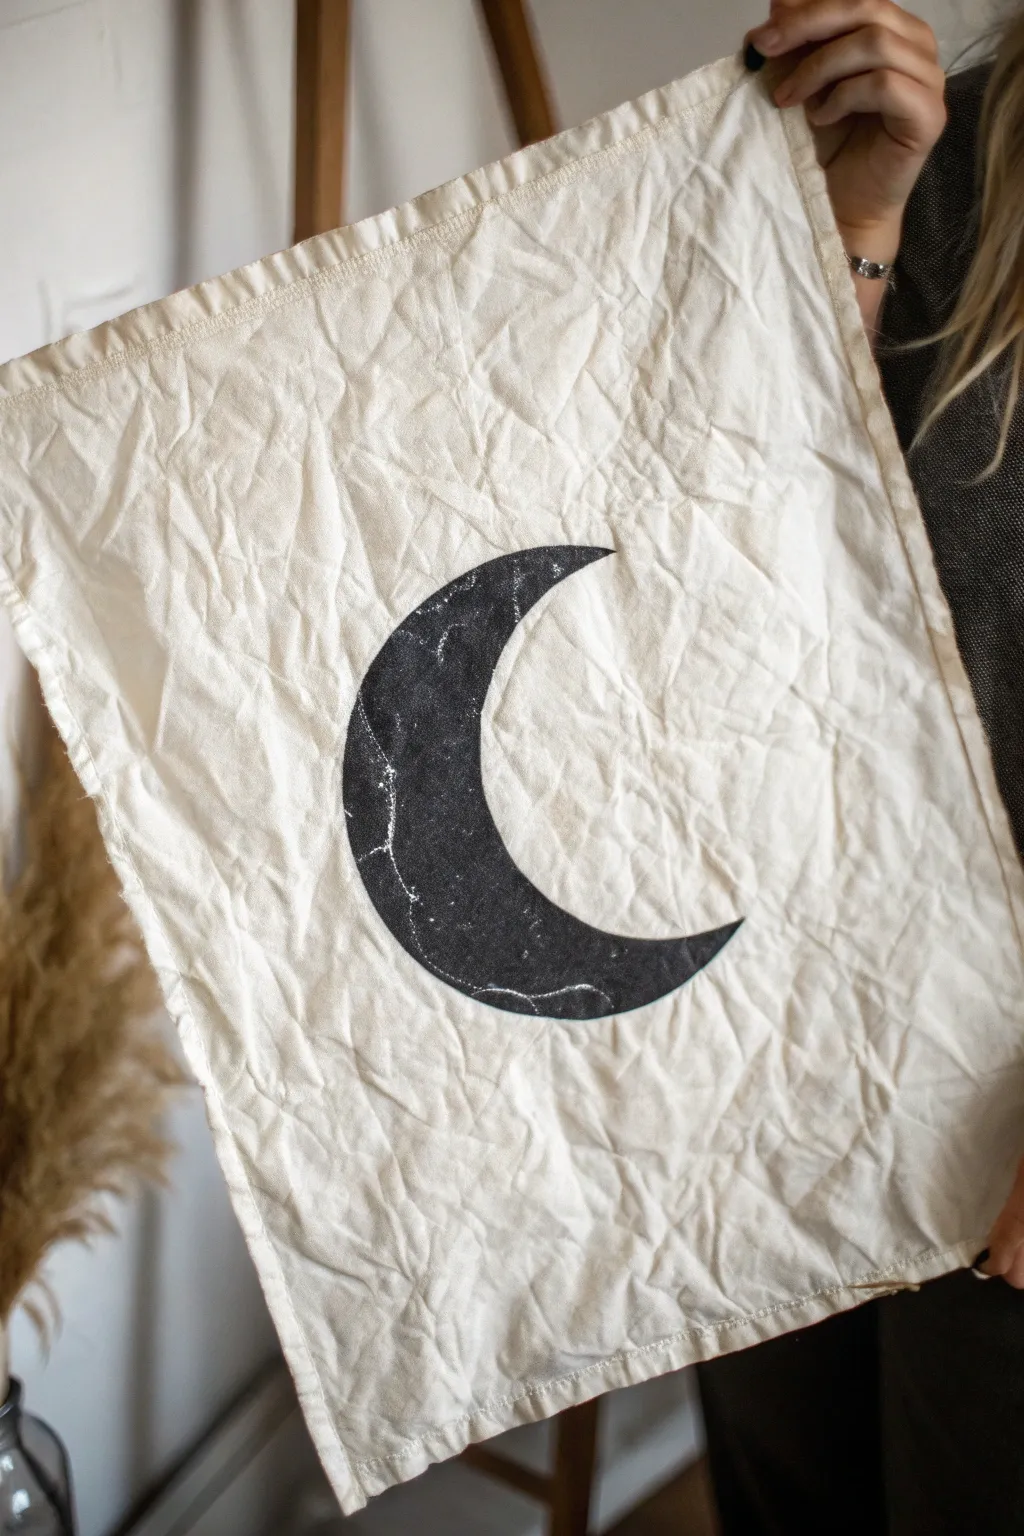
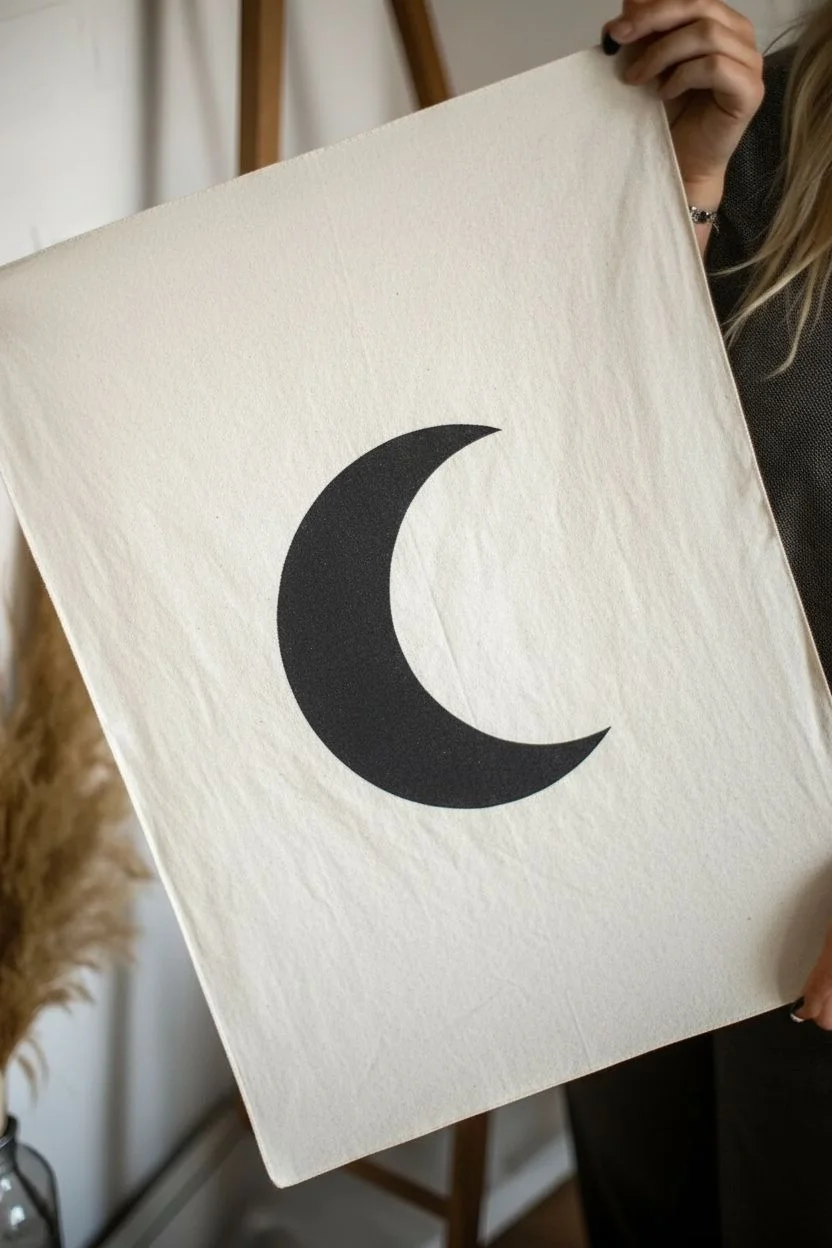
Embrace the imperfect beauty of grunge aesthetics with this striking moon print on textured fabric. By intentionally wrinkling the material and using a block-printing inspired technique, you’ll create a piece that feels ancient and worn right from the start.
How-To Guide
Materials
- Square piece of cotton or linen fabric (off-white or cream)
- Black fabric paint or screen printing ink
- Freezer paper or stencil film
- Iron
- Hobby knife (X-Acto)
- Small foam pouncer or sponge brush
- Cardboard or protective surface
- Pencil
- Scissors
Step 1: Preparation & Stencil Creation
-
Source your fabric:
Cut your cotton or linen fabric into a square shape. Don’t worry about hemming the edges just yet; raw edges can add to the grunge look, or you can sew a simple hem later if you prefer a cleaner border. -
Pre-wash the fabric:
Wash and dry your fabric to remove any sizing chemicals. This ensures the paint adheres properly and sinks into the fibers rather than sitting on top. -
Prepare the design:
Draw a simple crescent moon shape onto the dull side of a piece of freezer paper. Make sure your moon is large enough to be the focal point of the fabric square. -
Cut the stencil:
Using a sharp hobby knife, carefully cut out the crescent moon shape. You will be using the outer ‘negative’ space as your stencil, so keep that part intact. -
Iron the stencil:
Place your fabric flat on a heat-safe surface. Position the freezer paper stencil, shiny side down, onto the fabric. Use a hot iron (no steam) to adhere the paper to the fabric, ensuring the edges of the moon shape are completely sealed.
Paint Bleeding?
If paint bleeds under the stencil, your iron wasn’t hot enough or you used too much paint. Ensure a tight seal and use a ‘dry brush’ technique.
Step 2: Creating the Grunge Texture
-
Protect your surface:
Place a piece of cardboard underneath your fabric layer to prevent paint from bleeding through to your table. -
Apply the paint foundation:
Pour a small amount of black fabric paint onto a palette. Dip your foam pouncer into the paint and dab off the excess—you want a thin, even coat, not a gloopy one. -
Fill the shape:
Begin dabbing the paint inside the stencil area. Tap gently along the edges of the freezer paper to ensure a crisp line, then fill in the center of the crescent. -
Add texture marks:
While the paint is still wet, you can create a distressed look. I like to blot parts of the wet paint with a crumpled paper towel to lift some pigment away, creating white ‘noise’ inside the black shape. -
Let it set:
Allow the paint to dry completely. This usually takes about an hour, depending on how thick your paint application is. -
Remove the stencil:
Once dry, carefully peel away the freezer paper to reveal your crisp crescent moon.
Step 3: Distressing the Fabric
-
Wet the fabric:
Take your painted fabric piece and lightly mist it with water, or dunk it quickly and wring it out so it is damp but not dripping. -
Crumple aggressively:
Ball the damp fabric up tightly in your hands. Twist it, squeeze it, and scrunch it to create deep, random creases throughout the material. -
Dry in a ball:
Leave the fabric balled up to dry for a few hours. This helps ‘set’ the wrinkles into the fibers. -
Unfurl and finish:
Gently open the fabric ball. Do not iron it! Let it finish air drying while laid out loosely. The result is a permanently textured, crinkled surface that mimics old parchment or worn canvas. -
Final touches:
If you want the wrinkled look with slightly more structure, you can steam the fabric from a distance without touching the iron to it, just to relax the hardest creases slightly.
Tea Stain Aging
Before painting, soak your white fabric in strong black tea or coffee for 30 minutes. This turns the bright white into an antique beige.
Hang your textured moon print on a wall or sew it onto a cushion for an instant touch of mysterious grunge style


Have a question or want to share your own experience? I'd love to hear from you in the comments below!