When the air turns crisp and the cider comes out, I start craving fall festival face painting designs that are cute, fast, and totally season-specific. Here are my go-to autumn looks—starting with the classics everyone asks for, then sliding into some artsy surprises once you’re warmed up.
Classic Pumpkin Cheek Pop
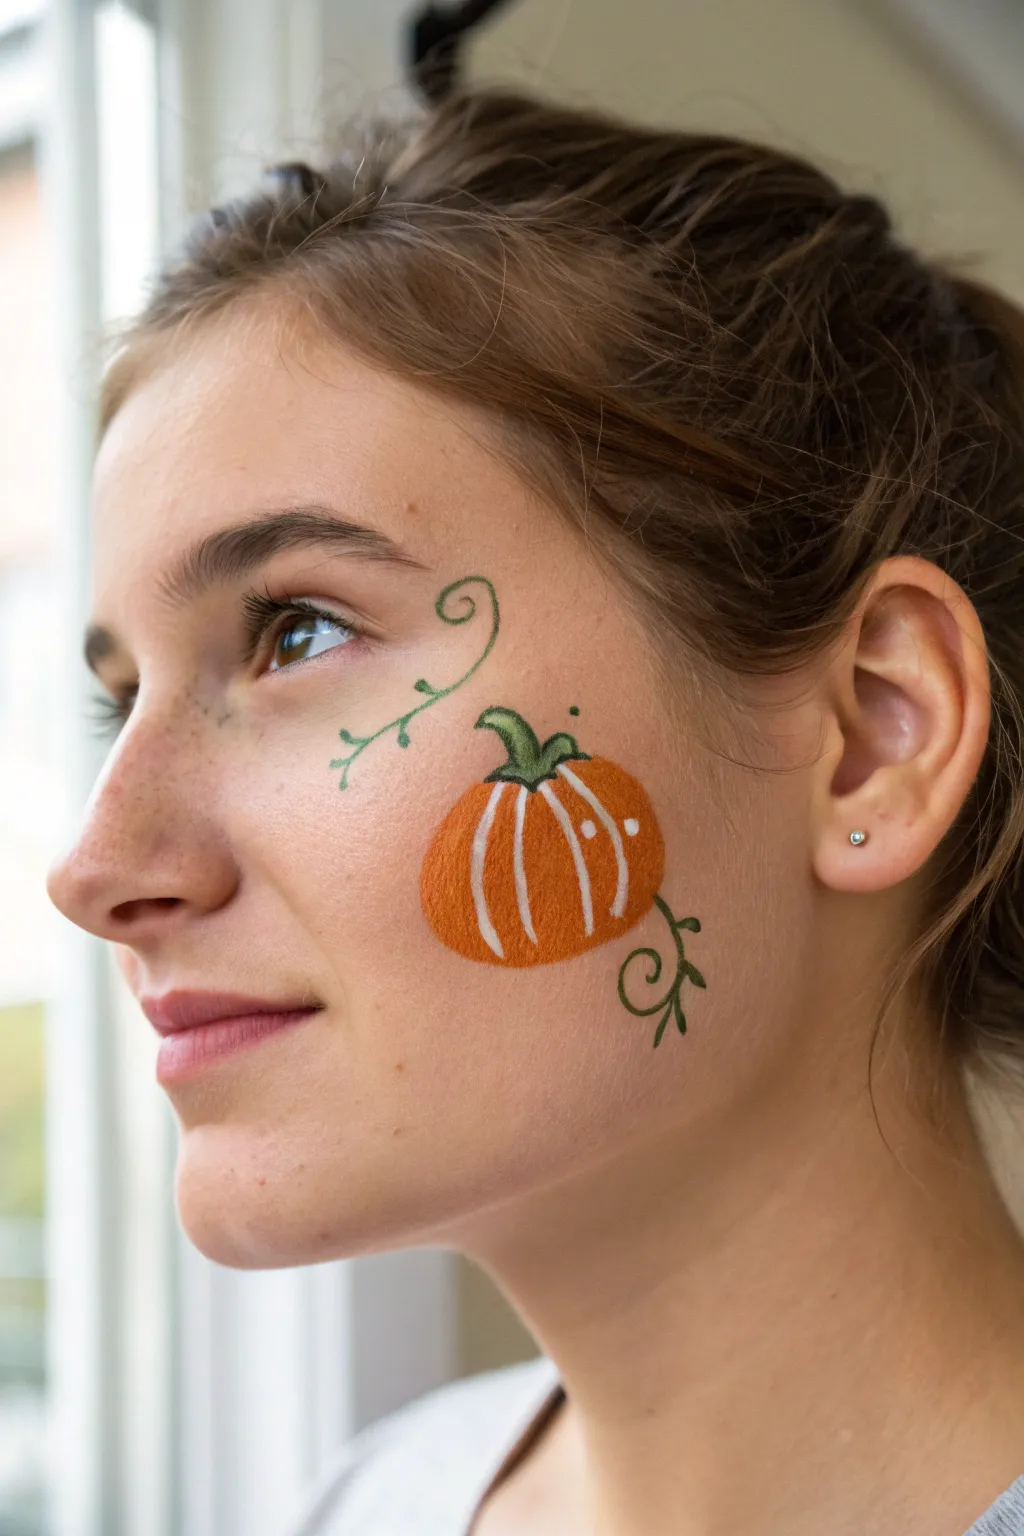
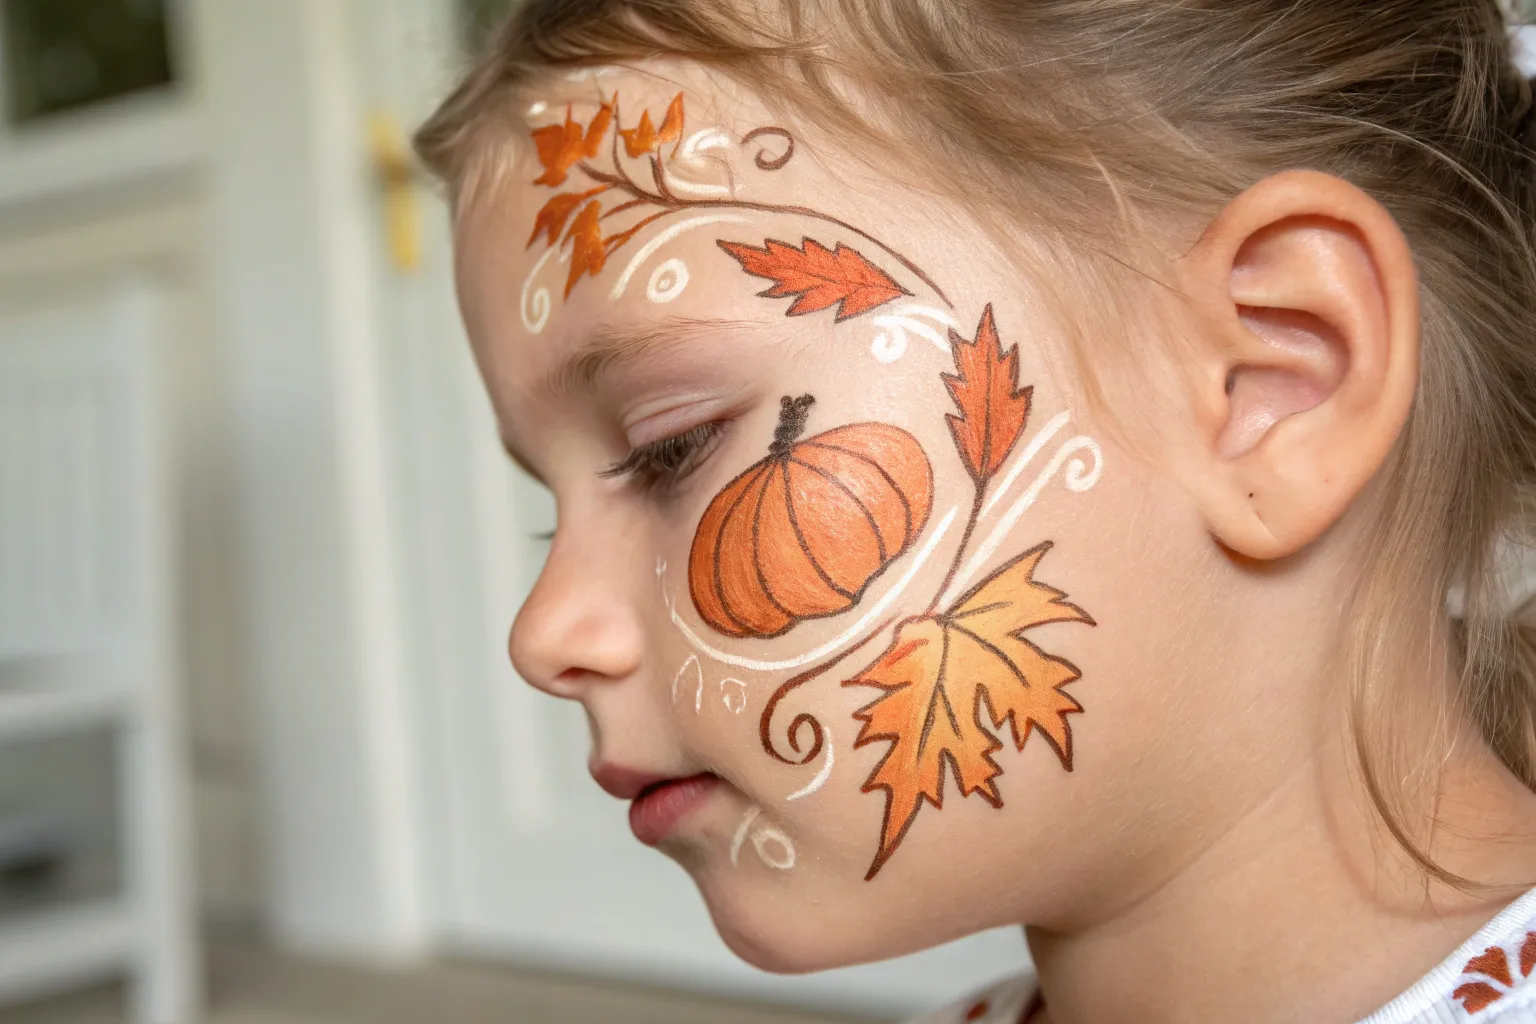
This whimsical little design captures the essence of a fall harvest in a sweet, subtle way without covering the entire face. It features a plump, textured orange pumpkin nestled on the cheekbone, accented with delicate swirling green vines that frame the eye and jawline.
How-To Guide
Materials
- Orange face paint (creamy consistency recommended)
- Dark green face paint
- Light green face paint (or white to mix)
- White face paint for highlights
- Round brush (size 4 or 6) for the pumpkin body
- Fine liner brush (size 1 or 2) for vines and details
- Small cup of water
- Paper towels or sponge
Step 1: Painting the Pumpkin Base
-
Positioning:
Visualize where you want the pumpkin to sit. For this look, aim for the high part of the cheekbone, leaving enough space above for eye vines and below for the jawline flourish. -
Initial Shape:
Load your medium round brush with bright orange paint. Start by painting a central oval shape—this will be the middle segment of your pumpkin. -
Building Width:
On either side of your central oval, paint two slightly curved c-shapes that hug the center. These represent the outer ribs of the pumpkin. -
Filling In:
Gently fill in any gaps between your segments with more orange paint to create a solid, rounded base. I like to keep the edges slightly scalloped to mimic a real pumpkin’s texture. -
Stem Structure:
Switch to a smaller brush loaded with dark green paint. Create a short, sturdy stalk coming out from the top center of the orange shape. -
Stem Base:
Widen the base of the green stem slightly where it meets the orange fruit, adding a tiny leaf-like spur on the right side for a natural look.
Step 2: Adding Details and Vines
-
White Highlights:
Clean your fine liner brush and load it with opaque white paint. Paint thin, curved vertical lines following the natural indents of the pumpkin segments. -
Light Reflections:
Add two small white dots on the upper right side of the pumpkin to create a ‘shiny’ highlight effect, making the fruit look plump and 3D. -
Upper Vine:
Reload your fine liner brush with a lighter green (or mix your dark green with a touch of white). Start from the top of the pumpkin stem and swirl a thin vine upwards toward the temple. -
Upper Curl:
Finish the upper vine with a tight spiral curl, adding tiny budding leaves along the stem. -
Lower Vine:
Create a second vine extending from the bottom right of the pumpkin, curving down towards the jawline. -
Leaf Accents:
Add small, teardrop-shaped leaves to the lower vine, alternating sides as you go down. -
Dots for Texture:
Using the very tip of your brush and dark green paint, place a single tiny dot floating above the pumpkin stem for extra whimsy. -
Final Check:
Step back and assess balance. You can touch up the orange edges if needed, but keep the paint application light to avoid cracking.
Crisp Lines Secret
For specific fine lines like the vine spirals, dilute your green paint slightly more than usual. An ink-like consistency flows off the brush smoother than thick paint.
Add Some Sparkle
Before the orange paint fully dries, lightly tap cosmetic-grade gold or copper glitter onto the center of the pumpkin for a magical, festive shimmer.
This charming cheek art is perfect for hayrides and brings a festive touch to any autumn outfit


Smiling Jack-o’-Lantern Mask
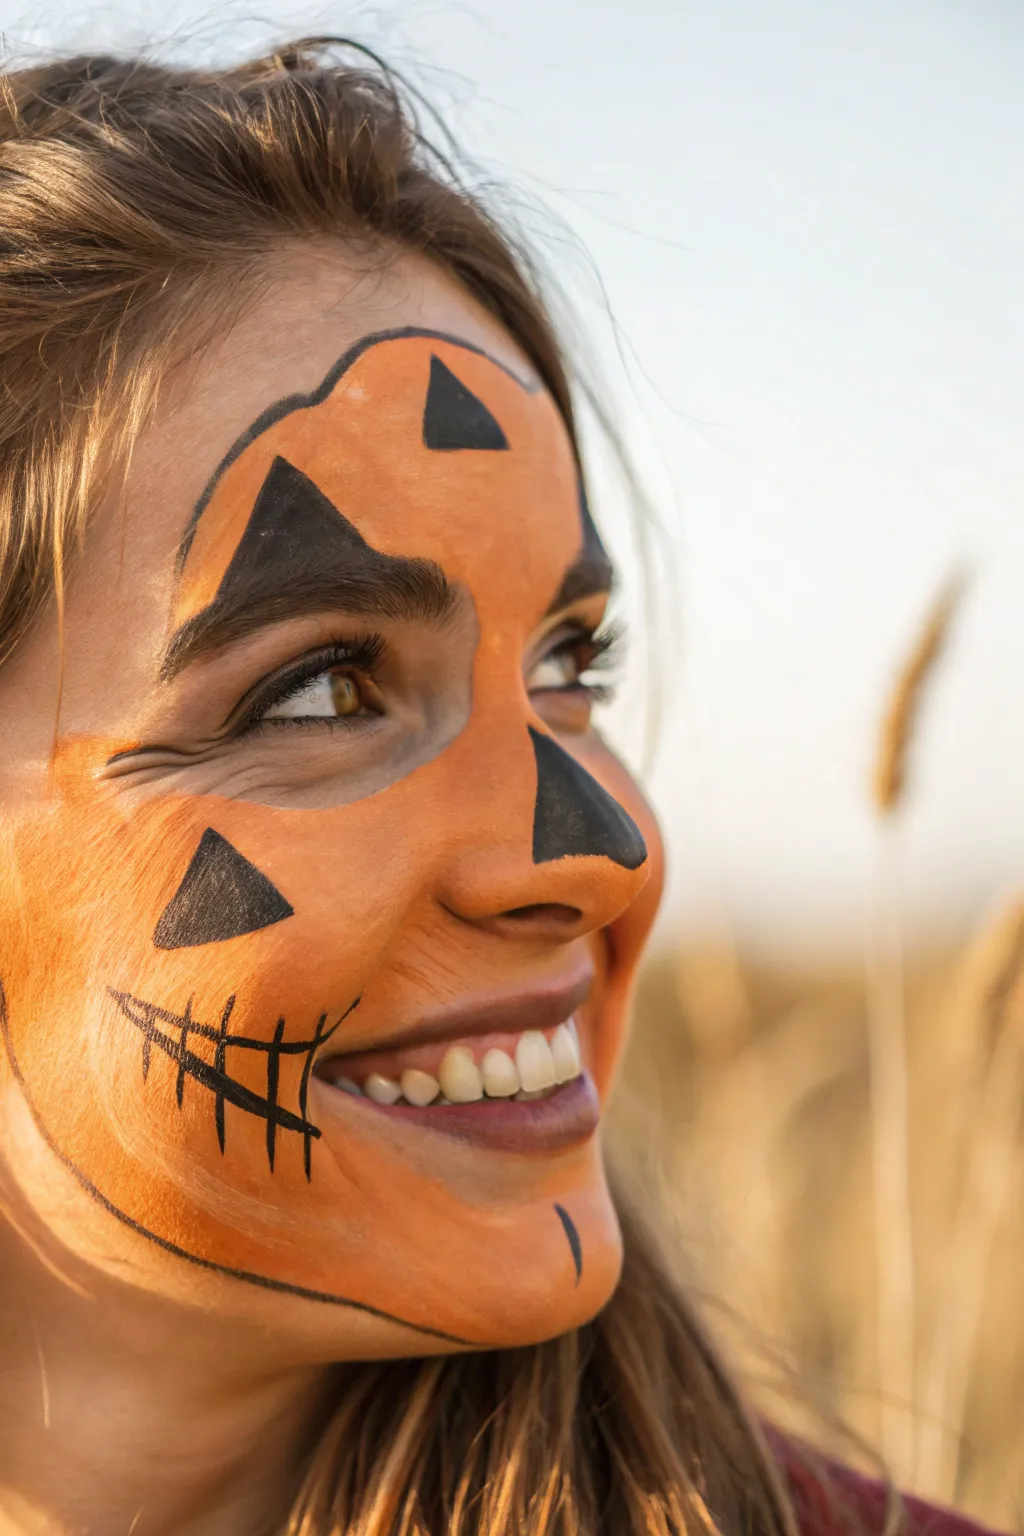
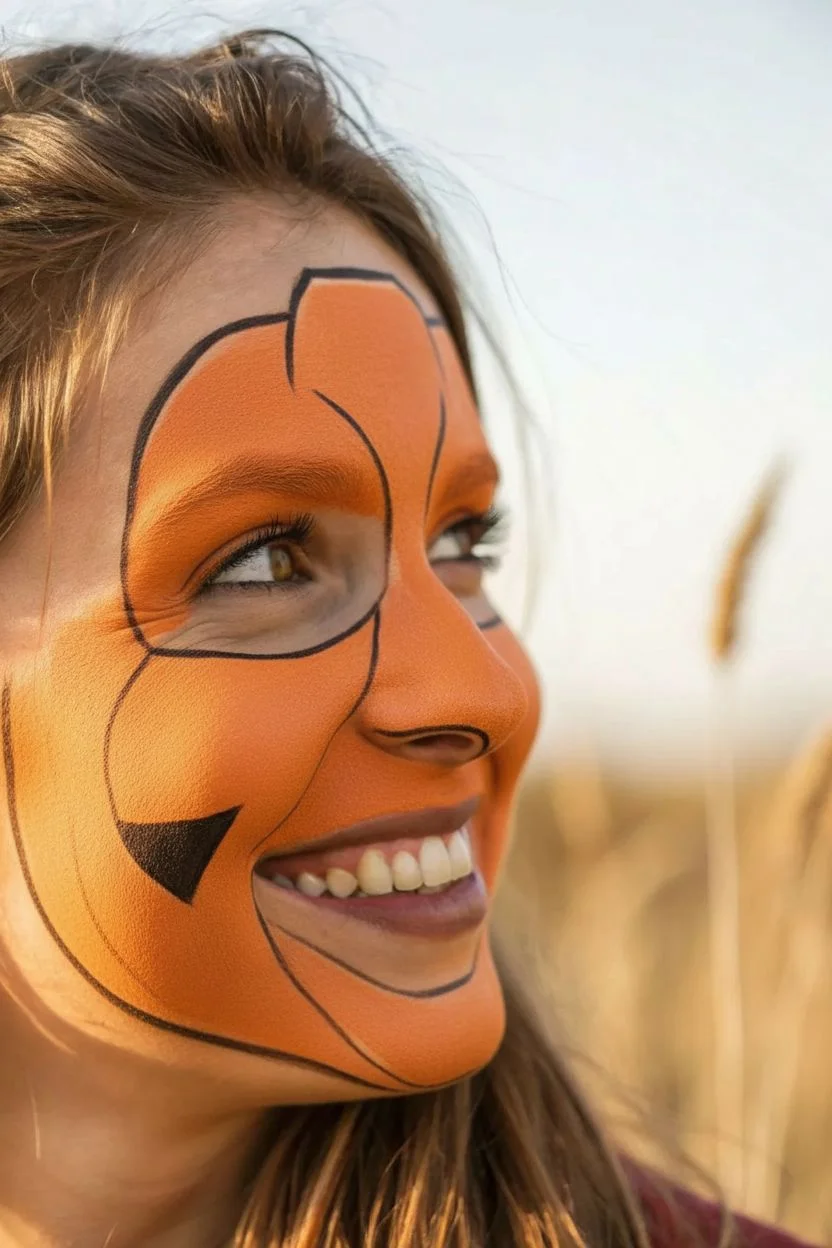
Capture the spirit of the harvest with this classic pumpkin design that transforms the upper face into a cheerful jack-o’-lantern. Using vibrant orange and crisp black detailing, this half-mask look is perfect for fall festivals and leaves the mouth free for easy smiling and snacking.
Step-by-Step Tutorial
Materials
- High-quality face paint (bright orange)
- High-quality face paint (black)
- Flat brush (medium width)
- Small round detail brush (size 1 or 2)
- Face painting sponge (high density)
- Cup of clean water
- Paper towels
Step 1: The Pumpkin Base
-
Outline the Shape:
Load a small round brush with watered-down orange paint. Sketch the perimeter of the pumpkin mask directly onto the face. Start at the top of the forehead for the stem bump, curve down past the temples, and swoop around the cheeks, bypassing the mouth area entirely. -
Sponge Preparation:
Dampen your face painting sponge slightly—it should be moist but not dripping. Rub it firmly into the orange cake to build up a creamy, opaque load of pigment. -
Fill the Base:
Using a patting or stippling motion, press the orange sponge inside your outline. Cover the forehead, eyelids, nose bridge, and upper cheeks. Avoid dragging the sponge, as this can create streaks; patting ensures solid coverage. -
Refine the Edges:
While the sponge work is invaluable for speed, use your flat brush loaded with orange to tidy up the perimeter lines and fill in tight areas near the eyes and nose that the sponge might have missed. -
Check Density:
Inspect the orange coverage. If skin is showing through too clearly, wait a moment for the first layer to dry and pat on a second light layer for true pumpkin vibrance.
Step 2: Geometric Details
-
Forehead Triangles:
Load your medium round brush with black paint. Create two triangles on the forehead, just above the eyebrows. Paint the outlines first, then fill them in solidly. -
Nose Triangle:
Paint a black triangle on the nose. Position it so the base sits across the bridge of the nose and the point aims upward between the eyes, or reverse it for a classic look. Ensure the black is opaque. -
Cheek Triangles:
Add a smaller black triangle on the cheekbone area to mimic the carved vents or additional features often found on stylized pumpkins.
Fixing Smudges
If black paint drips onto the orange, wait for it to dry completely. Once dry, use a damp cotton swab to lift the mistake, then pat fresh orange over the spot.
Step 3: Defining the Character
-
Outer Outline Part 1:
Switch to your thinnest round detail brush loaded with inky black paint. Start tracing the very outer edge of the orange mask. I like to vary the line thickness slightly—pressing harder on curves—to give it an organic, carved feel. -
Outer Outline Part 2:
Continue the outline under the cheeks and across the bottom edge. Keep your hand steady but don’t worry about perfection; bumpy lines look like real pumpkin skin. -
Inner Eye Outline:
Carefully trace under the lower lash line if the model is comfortable, connecting the orange mask to the eyes for a seamless look. -
Eyebrow Integration:
Paint over the natural eyebrows with black if they aren’t fully covered by the triangles, or outline them subtly to incorporate them into the design.
Add Dimension
Mix a tiny bit of white into your orange to create a highlight color. Paint thin curved lines at the top of the ‘pumpkin’ sections to make it look round and glossy.
Step 4: The Stitch Smile
-
Smile Line:
On one cheek (or both, if preferred), paint a long, curved black line extending horizontally from the corner of the mouth area outwards across the orange paint. -
Vertical Stitches:
Using the very tip of your detail brush, make small vertical hash marks crossing the smile line. Space them somewhat unevenly to look like a stitched or roughly carved pumpkin mouth. -
Final Touches:
Add a tiny vertical tick mark at the chin or very bottom of the mask outline to suggest the bottom center of the gourd.
Now you have a festive, lightweight mask design that is ready for the pumpkin patch


Falling Leaves Eye Sweep
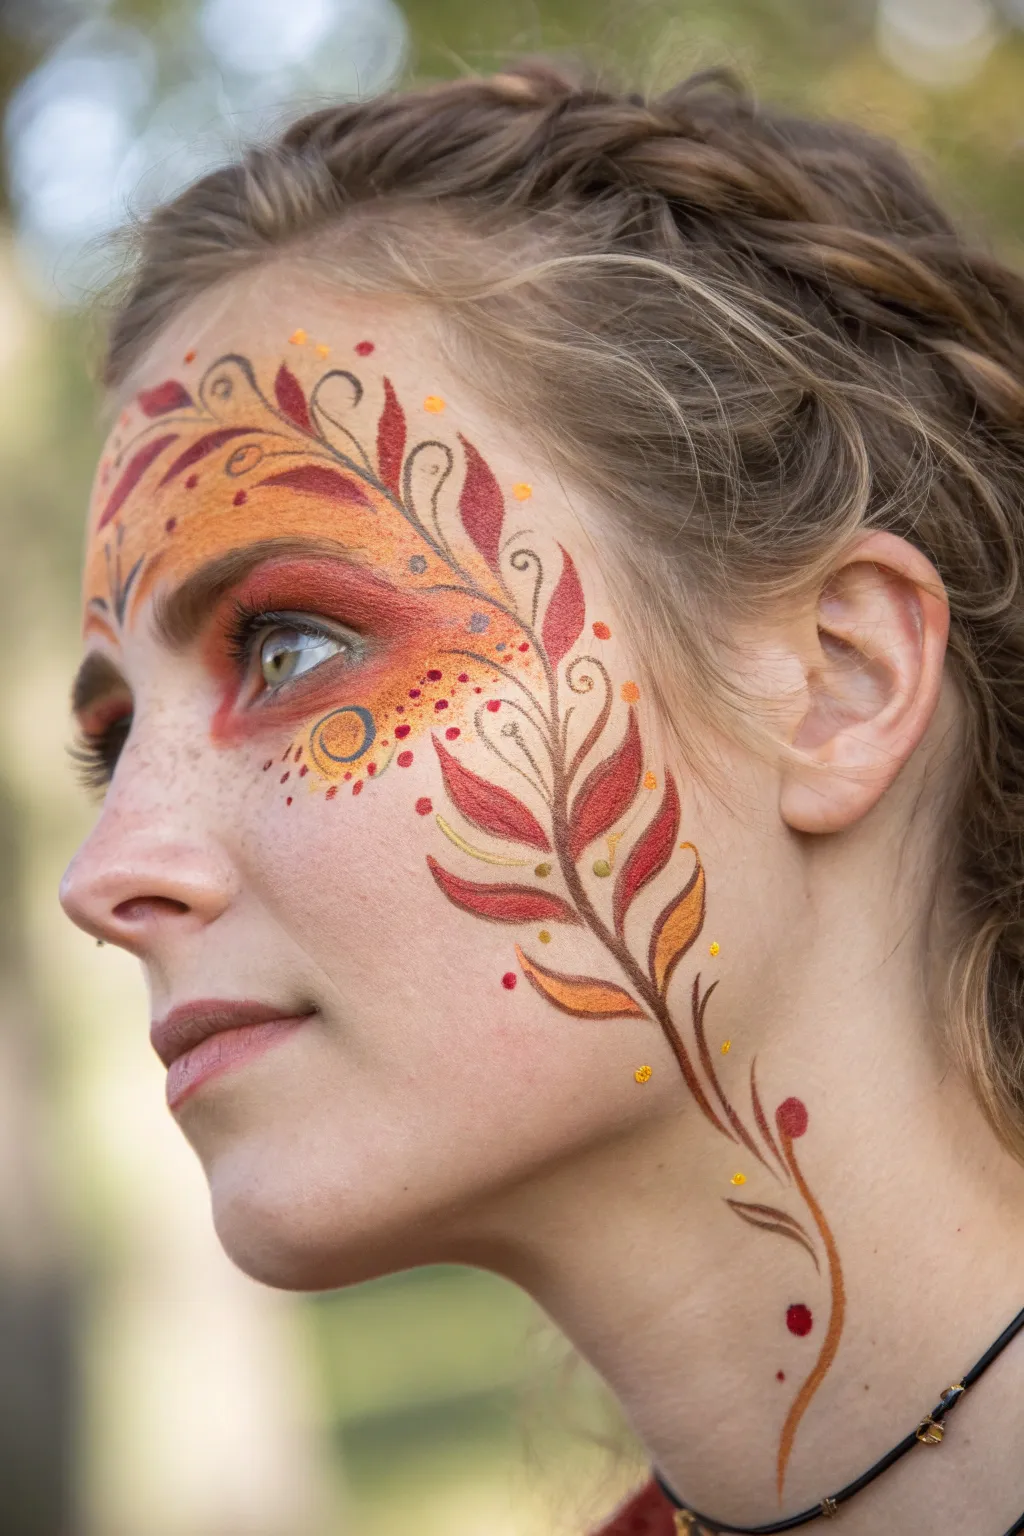
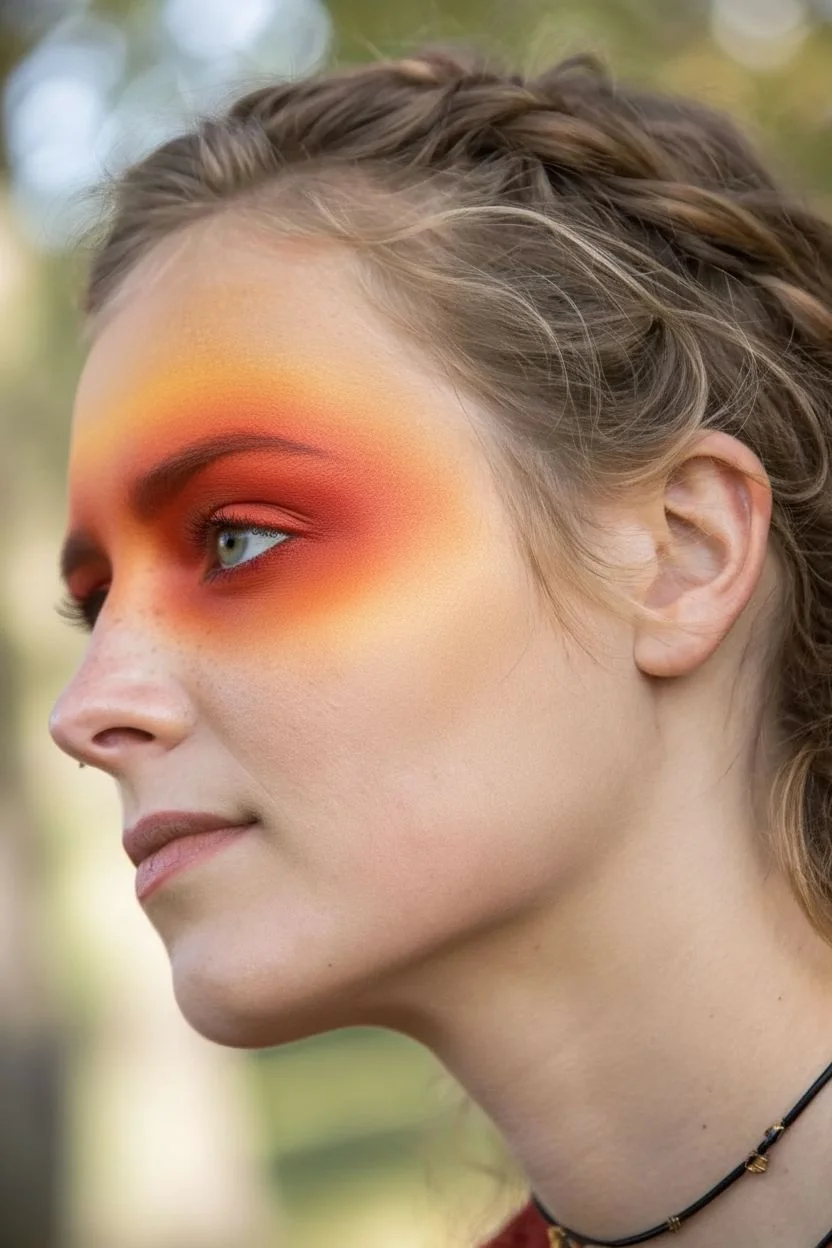
Capture the essence of the changing season with this elegant, sweeping face paint design that frames the eye with fiery leaves and delicate vines. The look combines soft, blended eyeshadow techniques with crisp linework to create a sophisticated, nature-inspired mask.
Step-by-Step Guide
Materials
- Face painting cakes (red, burnt orange, yellow, brown, white)
- Matte eyeshadows (red, rust orange, warm brown)
- Face painting round brushes (size 2 and size 4)
- Fine liner brush (size 0 or 1)
- Fluffy eyeshadow blending brush
- High-density sponge
- Gold cosmetic glitter (optional)
- Setting spray
Step 1: Setting the Background
-
Prep the canvas:
Begin with a clean, dry face. If the skin is oily, a light dusting of translucent powder can help the paint adhere better. -
Establish the eye base:
Using a fluffy eyeshadow brush, sweep a vibrant burnt orange eyeshadow all over the left eyelid and extend it outward past the temple. -
Deepen the crease:
Blend a deep red or rust-colored shadow into the crease of the eye and the outer corner to add dimension and warmth. -
Create the gradient forehead:
Load a sponge with yellow and orange face paint. Gently dab this onto the forehead above the left eyebrow, blending it down towards the eye makeup to create a soft, sunset-like transition.
Clean Lines Only
If your swirl lines look shaky, try thinning your brown paint slightly with water until it has an ink-like consistency for smoother flow.
Step 2: Painting the Foliage
-
Outline the main stem:
With a fine liner brush and brown face paint, draw a long, sweeping S-curve starting from the temple, curving down the cheekbone, and trailing off onto the neck. -
Draft the forehead leaves:
Switch to a size 2 round brush loaded with deep red paint. Create teardrop shapes flowing upwards from the eyebrow onto the forehead, mimicking windblown leaves. -
Add cheek leaves:
Along the main brown stem on the cheek, paint sharp, elongated leaf shapes using red and orange paint. I like to alternate colors for visual interest. -
Blend the colors:
Before the paint fully dries, drag a slightly damp clean brush through the center of the leaves to blend the red and orange together, creating a natural gradient. -
Detail the leaf veins:
Using your finest liner brush and a dark brown paint, carefully draw thin central veins inside the larger leaves on the cheek. -
Add neck details:
Extend the design by painting a few small, simple bud shapes or tiny leaves at the very end of the vine on the neck.
Gilded Edges
For a magical finish, lightly outline the top edge of the red leaves with liquid gold liner or press gold glitter onto the wet paint.
Step 3: Ornamental Flourishes
-
Paint delicate swirls:
Load a liner brush with watered-down brown paint. Add fine, curly tendrils and swirls branching off the main leaves on the forehead and cheek. -
Incorporate the sun accent:
Under the outer corner of the eye, use a small brush to paint a yellow circle, outlining it with a thin blue or grey ring for contrast, and add tiny dots around it. -
Dab distinct dots:
Using the back end of your brush handle dipped in yellow and red paint, stamp varying sizes of dots around the leaves and near the hairline to add texture. -
Highlight with white:
Add tiny specks of white or very pale yellow to the tips of the leaves and top of the swirls to make the design pop against the skin. -
Set the design:
Once everything is dry, mist lightly with a setting spray to prevent the design from smudging during festival activities.
Enjoy wearing this warm, autumnal masterpiece at your next fall gathering


Friendly Scarecrow Face
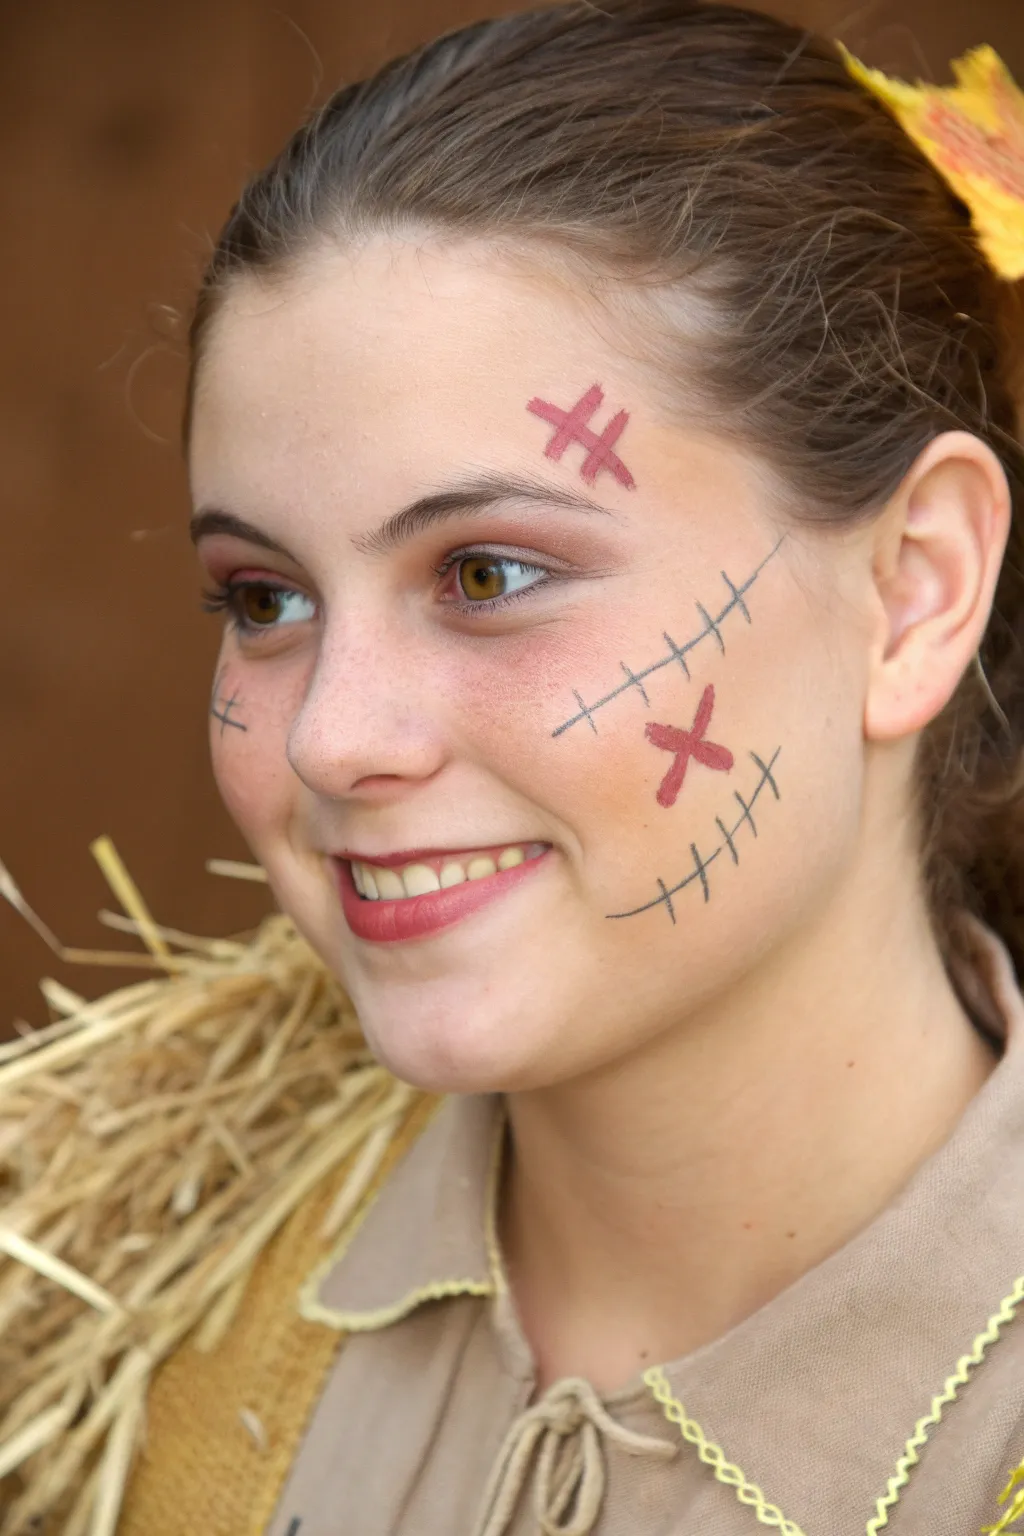
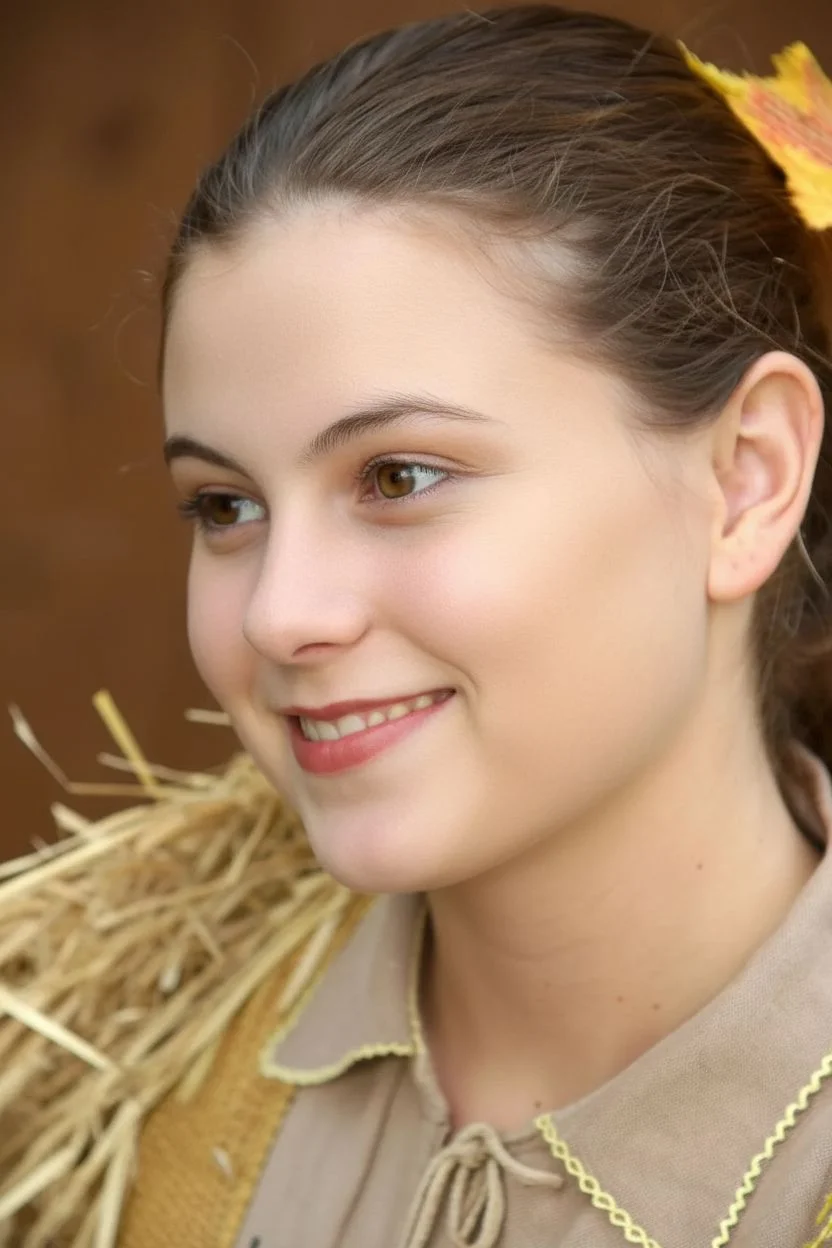
Transform into the friendliest scarecrow in the patch with this charming look that balances rustic details with sweet simplicity. Perfect for those who want a festive autumn style without covering their entire face in heavy paint.
Detailed Instructions
Materials
- Face paint palette (orange, red, black, brown)
- Small round makeup sponge
- Fine detail brush (size 1 or 2)
- Medium round brush (size 4)
- Setting powder (translucent)
- Makeup setting spray (optional)
- Small cup of water
- Paper towels
Step 1: Prepping The Base
-
Cleanse and moisturize:
Start with a clean, dry face. Apply a light layer of moisturizer to help the face paint glide on smoothly and protect the skin underneath. -
Subtle foundation layer:
If desired, apply a very light layer of the model’s regular foundation or a tinted moisturizer to even out the skin tone, creating a blank canvas for the scarecrow details.
Step 2: Rosy Rural Cheeks
-
Mix your blush color:
Combine a bit of orange face paint with a touch of red or pink on your palette. Aim for a warm, autumnal coral shade rather than a bright primary orange. -
Sponge application:
Dampen your small round sponge slightly—too much water will make it runny. Load it with your mixed coral color. -
Dab the cheeks:
Gently stipple the color onto the apples of the cheeks. Don’t paint a solid circle; instead, dab lightly to create a soft, diffused flush that fades at the edges. -
Add nose contour:
Using the residue left on the sponge, lightly tap the tip of the nose for a sun-kissed, outdoor effect that ties the look together.
Smudge Prevention
If the black lines are smearing into the red, your brush is too wet. Dry the bristles on a paper towel and reload with a creamy, drier paint consistency.
Step 3: Stitching the Smile
-
Load the detail brush:
Wet your fine detail brush and load it with black or dark grey face paint. Roll the brush tip on your palette to ensure a sharp point. -
Main cheek line:
On one cheek, start near the corner of the mouth and draw a thin, slightly curved line extending outward and slightly upward toward the ear. Keep the line weight light. -
Cross-Stitches:
Along the main line you just drew, add short, vertical hash marks. Make them slightly irregular in length and angle to mimic hand-sewn fabric stitches. -
Second cheek detail:
On the opposite cheek, you don’t need a long line. Instead, simply draw a small ‘X’ shape or a tiny cross-hatch near the cheekbone for asymmetry. -
Forehead patch:
Above one eyebrow (opposite to the main cheek stitches), draw two intersecting lines to create a larger ‘X’ or cross shape, simulating a patch sewn onto the forehead.
Fabric Texture
Use a toothbrush to flick tiny specks of brown paint across the nose and cheeks to simulate burlap texture or freckles.
Step 4: Rustic Red Accents
-
Switch to red:
Clean your detail brush thoroughly or switch to a new small brush. Load it with a deep red or maroon face paint. -
Highlight the stitches:
I like to add a second layer of dimension here by painting a small red ‘X’ directly over or next to the black cross-stitches on the cheek. This adds a pop of color. -
Forehead accent:
Similarly, trace over the forehead cross with the red paint, or add a second red cross slightly offset from the black one to create a shadowed effect.
Step 5: Finishing Touches
-
Define the eyes:
Apply a light coat of mascara and perhaps a touch of warm brown eyeshadow to the eyelids to define the eyes without overpowering the face paint. -
Lip color:
Choose a lip color that matches your rosy cheeks. A tinted lip balm or a sheer berry lipstick works perfectly. Apply it lightly. -
Set the look:
Dust a tiny amount of translucent setting powder over the painted areas to prevent smudging. Be careful not to dull the black lines too much. -
Final check:
Step back and look for symmetry in the blush application, but remember the stitches are meant to look a bit haphazard and handmade.
Now you have a lovable scarecrow face that captures the spirit of the harvest perfectly
BRUSH GUIDE
The Right Brush for Every Stroke
From clean lines to bold texture — master brush choice, stroke control, and essential techniques.
Explore the Full Guide
Cute Black Cat Whiskers
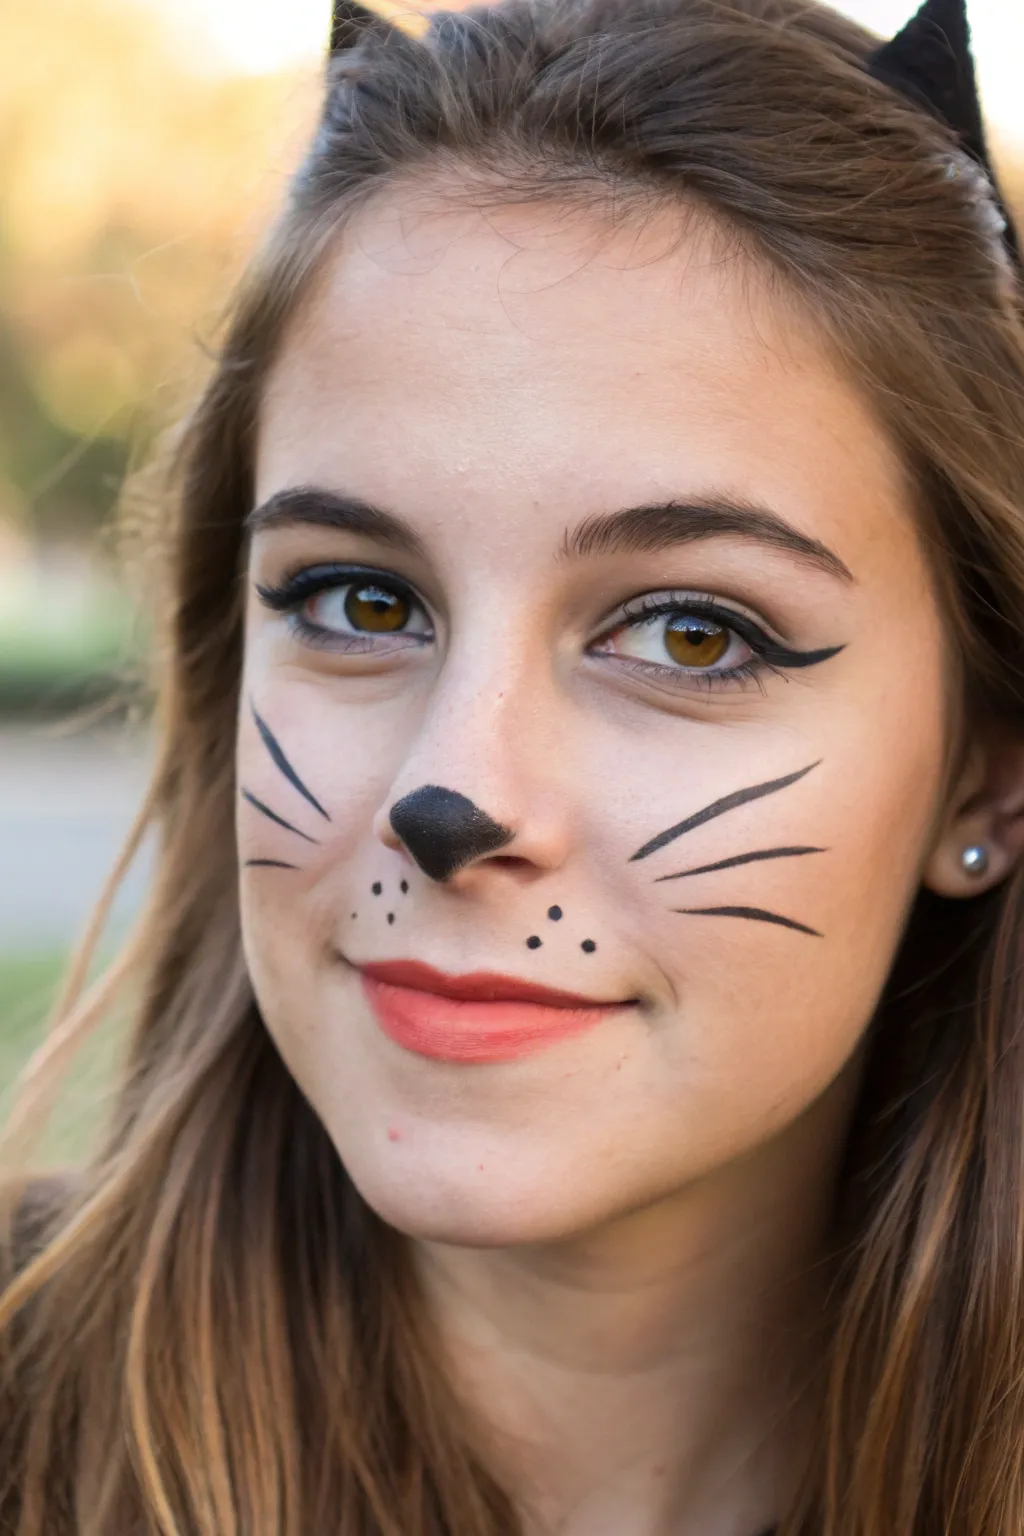
This charming black cat look relies on clean lines and classic makeup staples to create a sweet, festive appearance that works for all ages. With just a steady hand and a few basic products, you can transform a simple face into an adorable feline character in minutes.
Step-by-Step Tutorial
Materials
- Black liquid eyeliner (felt tip preferred)
- Black face paint or gel liner pot
- Fine detail makeup brush
- Medium eyeshadow brush
- Matte skin-tone eyeshadow or foundation
- Coral-red lipstick
- Makeup setting spray
- Black cat ear headband
Step 1: Base and Eyes
-
Prep the canvas:
Start with a clean, moisturized face. Apply a light layer of foundation or concealer to even out the skin tone, paying special attention to the nose area where the black paint will go. -
Set the lids:
Dust a neutral, matte eyeshadow over the eyelids. This prevents creasing and gives the eyeliner a smooth surface to grip onto. -
Line the upper lash line:
Using your black liquid eyeliner, draw a thin line starting from the inner corner of the eye, thickening it slightly as you move toward the outer corner. -
Create the wing:
At the outer corner, extend the line upward toward the end of the eyebrow to create a sharp wing. I personally find it helpful to look straight into a mirror while mapping this angle. -
Connect and fill:
Draw a line from the tip of your wing back down to the lash line to create a small triangle, then fill it in completely for a solid, opaque black look. -
Clean up edges:
If the wing isn’t perfectly sharp, dip a cotton swab in a tiny bit of makeup remover or concealer to clean up and sharpen the bottom edge.
Steady Hands
For sharper whiskers, rest your pinky finger on your cheek as an anchor while drawing. This stabilizes your hand and prevents shaky lines.
Step 2: Nose and Details
-
Outline the nose:
Switch to your black face paint or gel liner. Using a fine detail brush, outline the very tip of the nose also covering the bottom curve around the nostrils. -
Fill the nose shape:
Fill in the outlined area with solid black. Avoid going too high up the bridge; keep the shape rounded and focused on the bulb of the nose for that cute button appearance. -
Add the freckles:
On the upper lip area (the philtrum), use the tip of your liquid liner or a fine brush to place three small, distinct dots on each side in a triangular pattern. -
Draw the first whisker:
Starting from the cheek area just outside the smile lines, draw a long, thin stroke outward toward the ear. Use light pressure at the end so the line tapers off naturally. -
Complete the whiskers:
Add two more whiskers on each cheek—one above and one below your first line. Keep them slightly curved rather than perfectly straight for a more organic feel. -
Check for symmetry:
Step back and check that the whiskers on both sides are roughly roughly equal in length and angle, though they don’t need to be mathematically perfect.
Step 3: Finishing Touches
-
Apply lipstick:
Apply a coat of coral-red lipstick. Use a lip brush for precise edges, especially near the Cupid’s bow. -
Set the makeup:
Close your eyes and mist the face lightly with a setting spray to keep the eyeliner and face paint from smudging throughout the festival. -
Add the ears:
Place the black cat ear headband comfortably on the head, pushing the hair back slightly to keep the face clear and open.
Glitter Upgrade
Add a touch of cosmetic glitter over the black nose paint while it’s still tacky, or trace the top of the eyeliner wing with silver glitter.
Now you are ready to head out with a sweet and classic festival look that is sure to turn heads
Woodland Fox Festival Mask
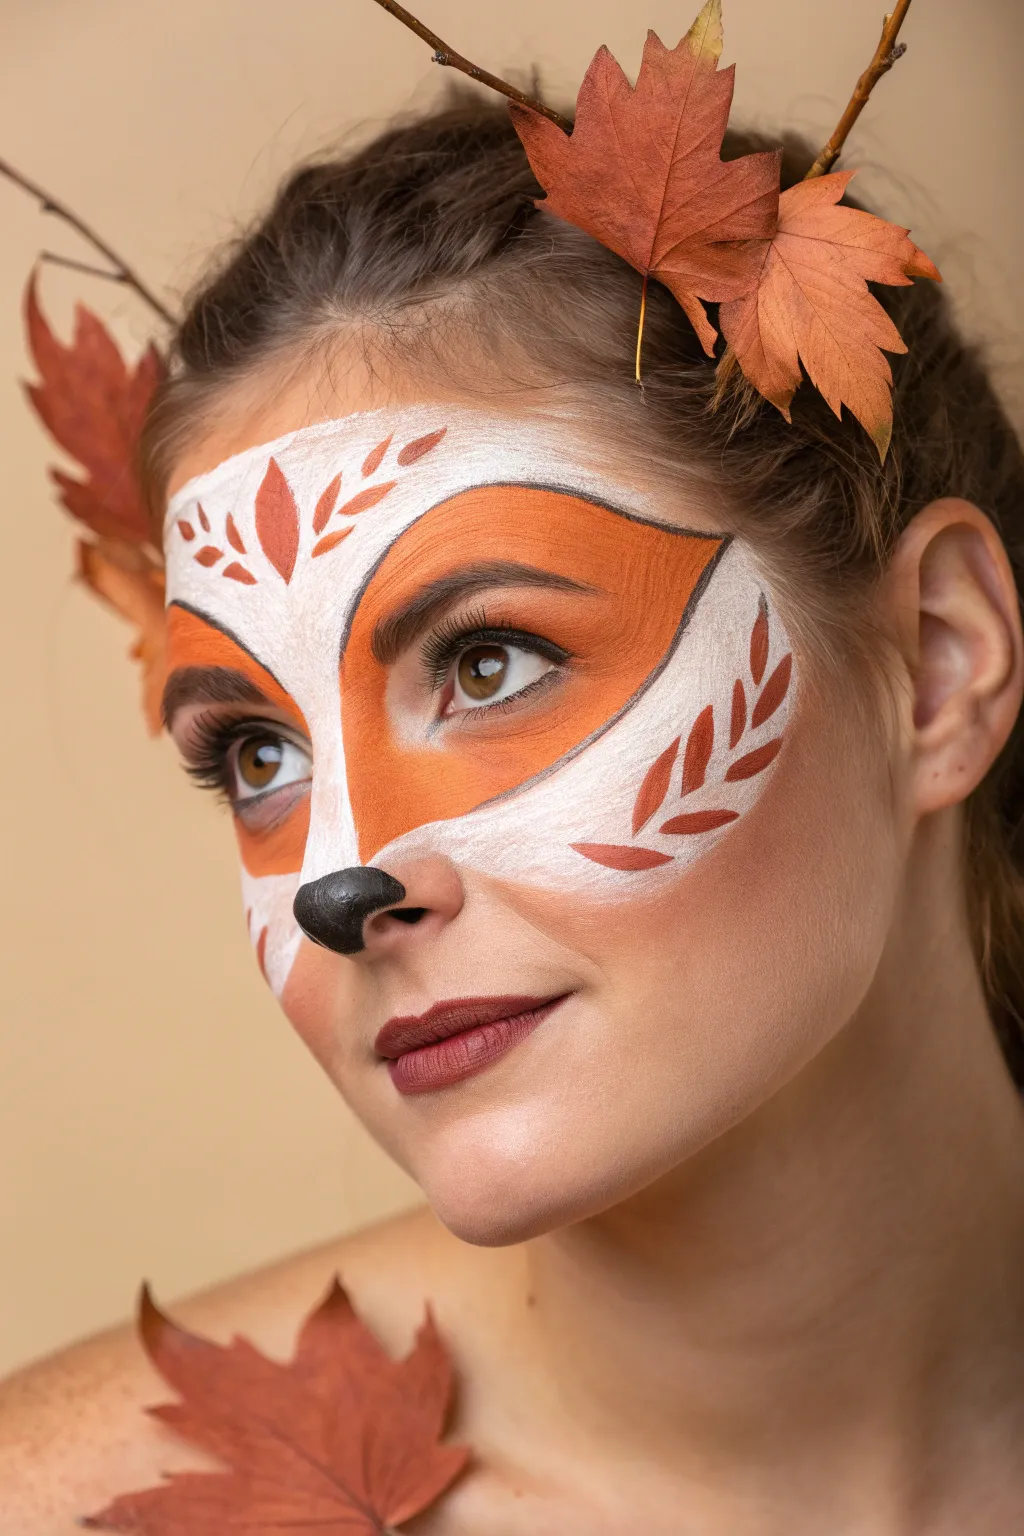
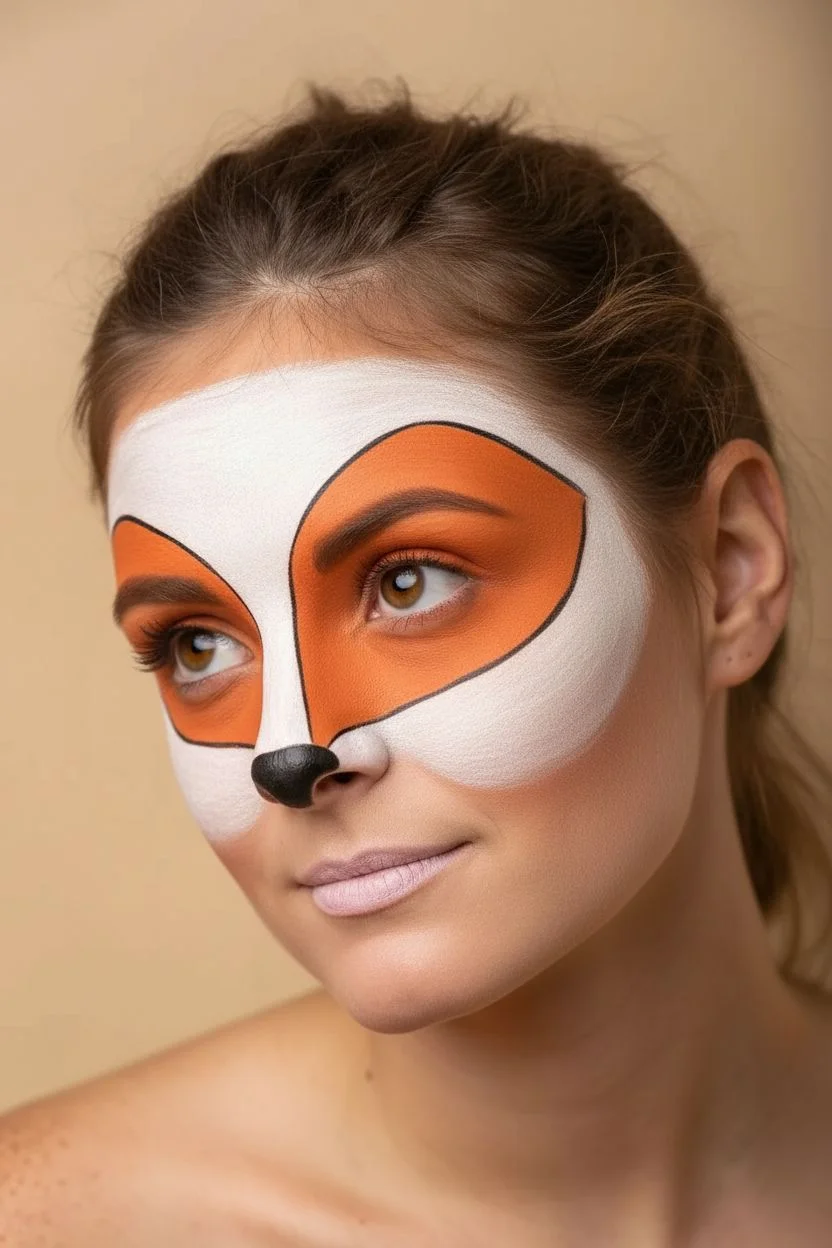
Transform into a whimsical woodland creature with this elegant fox mask design that blends theatrical face painting with natural fall elements. Featuring crisp white highlights, warm orange tones, and delicate leaf accents, this look is perfect for autumn festivals or costume parties.
How-To Guide
Materials
- White or ivory face paint (high-density)
- Orange face paint (warm, pumpkin shade)
- Reddish-brown face paint (terracotta or russet)
- Black face paint
- Matte brown lipstick (dark mauve or brick)
- Artificial maple leaves (small)
- Thin twigs or branches
- Eyelash glue or skin-safe adhesive
- Flat foundation brush (medium)
- Small angled brush
- Fine detail liner brush
- Makeup sponge
- Bobby pins
Step 1: Creating the Base Mask
-
Outline the shape:
Visualize a masquerade mask shape that spans across the forehead and down onto the cheeks. Using a thin brush and very faint white paint, lightly map out the generous curves over the eyebrows and the sweeping points on the cheekbones. -
Fill the white base:
Load a medium flat brush or sponge with high-density white face paint. Fill in the center of the forehead, the bridge of the nose, and the outer edges of the cheeks, leaving two large voids around the eyes for the color. -
Define the nose bridge:
Ensure the white stripe down the nose is crisp and opaque. I find it helps to drag the brush downwards in one smooth motion to create a defined ‘muzzle’ shape. -
Apply the orange fur:
Switch to a clean brush or sponge with warm orange paint. Fill in the large, almond-shaped areas around the eyes, blending carefully where the orange meets the white to keep a distinct, clean separation line rather than a blurry soft blend. -
Contour the eyes:
Before the orange dries completely, you can add a tiny bit of darker brown to the crease of the eyelid for subtle depth, though keeping it solid orange works well for a graphic look. -
Sharp outlining:
Using a fine liner brush and dark grey or thinned black paint, trace a very thin, precise line separating the orange eye patches from the white base. This emphasizes the fox’s sharp features.
Step 2: Adding Woodland Details
-
Paint the nose:
Load a small round brush with solid black paint. Paint the very tip of the nose, extending slightly onto the nostrils and creating a small triangular point at the top center. -
Create the forehead foliage:
Using the reddish-brown face paint and a detail brush, paint stylized leaf shapes on the white forehead area. Create a central leaf shape flanked by small teardrop petals or vines. -
Add cheek details:
On the white section of the left cheek, paint a vine of stylized leaves curving upwards towards the ear. Keep the strokes fluid and tapered at the ends to mimic falling leaves. -
Enhance the eyes:
Apply black eyeliner to the upper lash line, creating a slight wing to elongate the eye shape. Add mascara to top and bottom lashes to open up the gaze. -
Lip color:
Apply a matte brown or dark mauve lipstick. Keep the edges soft or use a lip liner for a defined look that complements the earthy tones of the mask.
Patchy Paint?
If the white paint looks streaky, let the first layer dry fully before patting (stippling) a second layer on top with a sponge. Do not drag the sponge.
Step 3: Applying Natural Elements
-
Prepare the hair accessories:
Attach small artificial maple leaves to bobby pins or small clips. You can also glue leaves directly to thin twigs for added height. -
Position the crown:
Pin the leaves and twigs into your hair, focusing on one side or arranging them symmetrically like ears. Angle the twigs upward to simulate antlers or wild forest growth. -
Shoulder embellishment:
Apply a small amount of skin-safe adhesive (like eyelash glue) to the back of a large artificial leaf. -
Attach the body art:
Press the leaf firmly onto your shoulder or collarbone area. Hold it in place for about 30 seconds to ensure the adhesive sets securely. -
Final freckles:
As a final touch, use a toothbrush or stiff brush with diluted brown paint to flick tiny speckles onto the shoulders and neck, mimicking natural freckles or dirt.
Gilded Glamour
Add a touch of magic by tracing the leaf designs on your face with a metallic gold liner or dabbing gold glitter gel on the tips of the real leaves.
Enjoy your enchanting transformation into a guardian of the autumn woods

PENCIL GUIDE
Understanding Pencil Grades from H to B
From first sketch to finished drawing — learn pencil grades, line control, and shading techniques.
Explore the Full Guide
Barn Owl Eye Rings
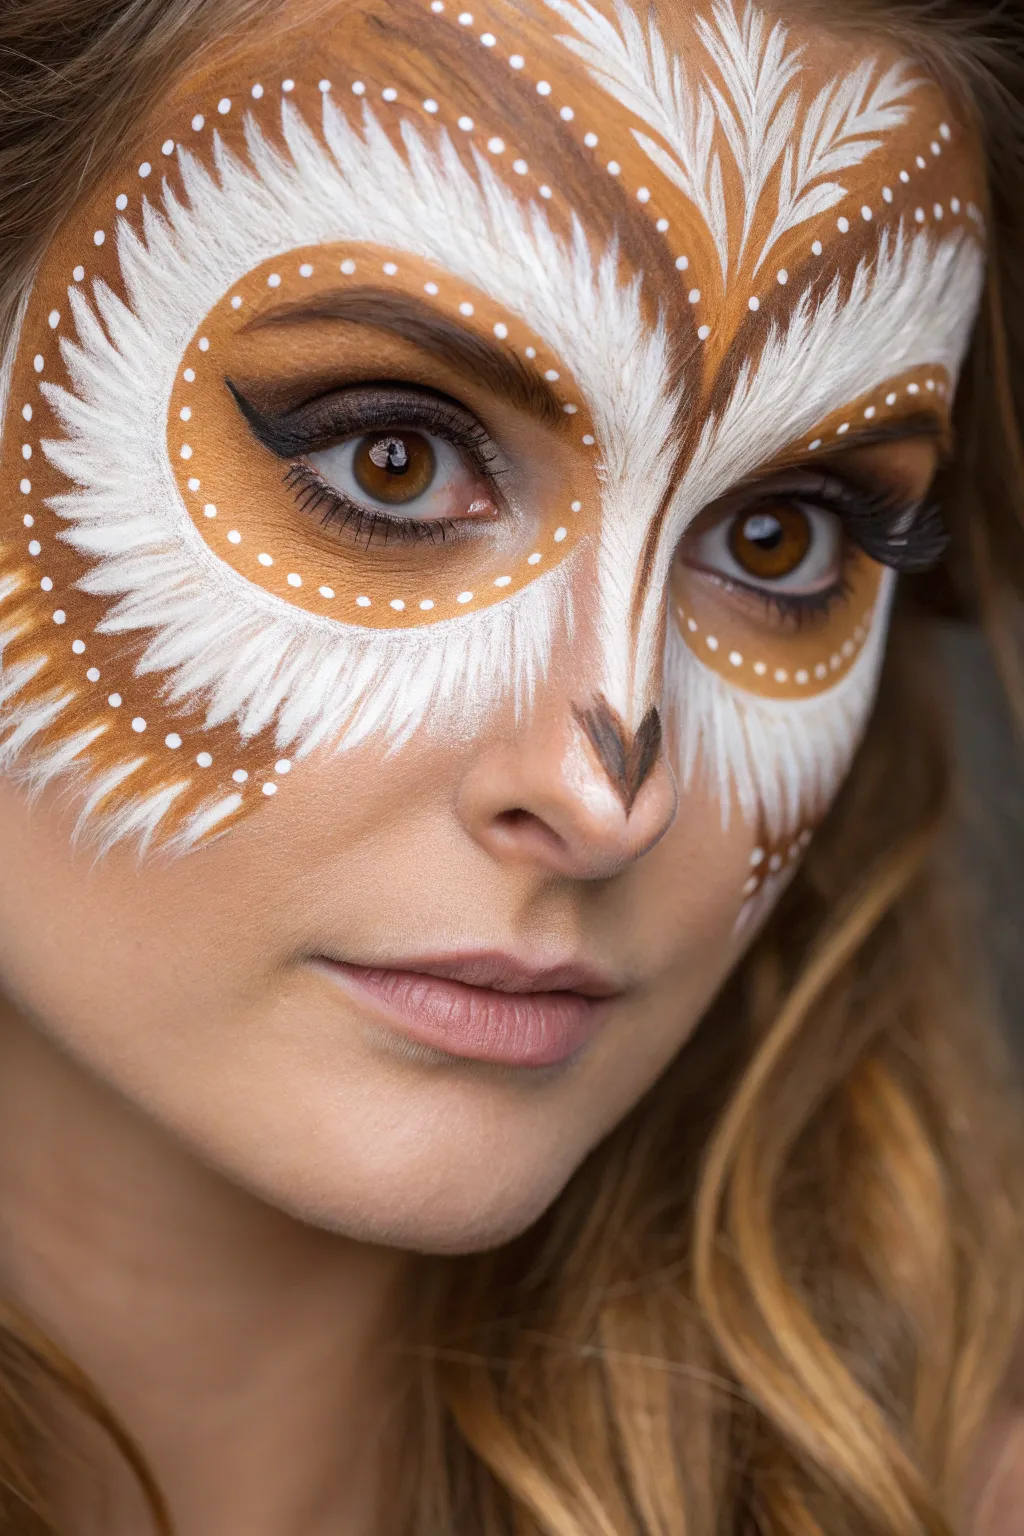
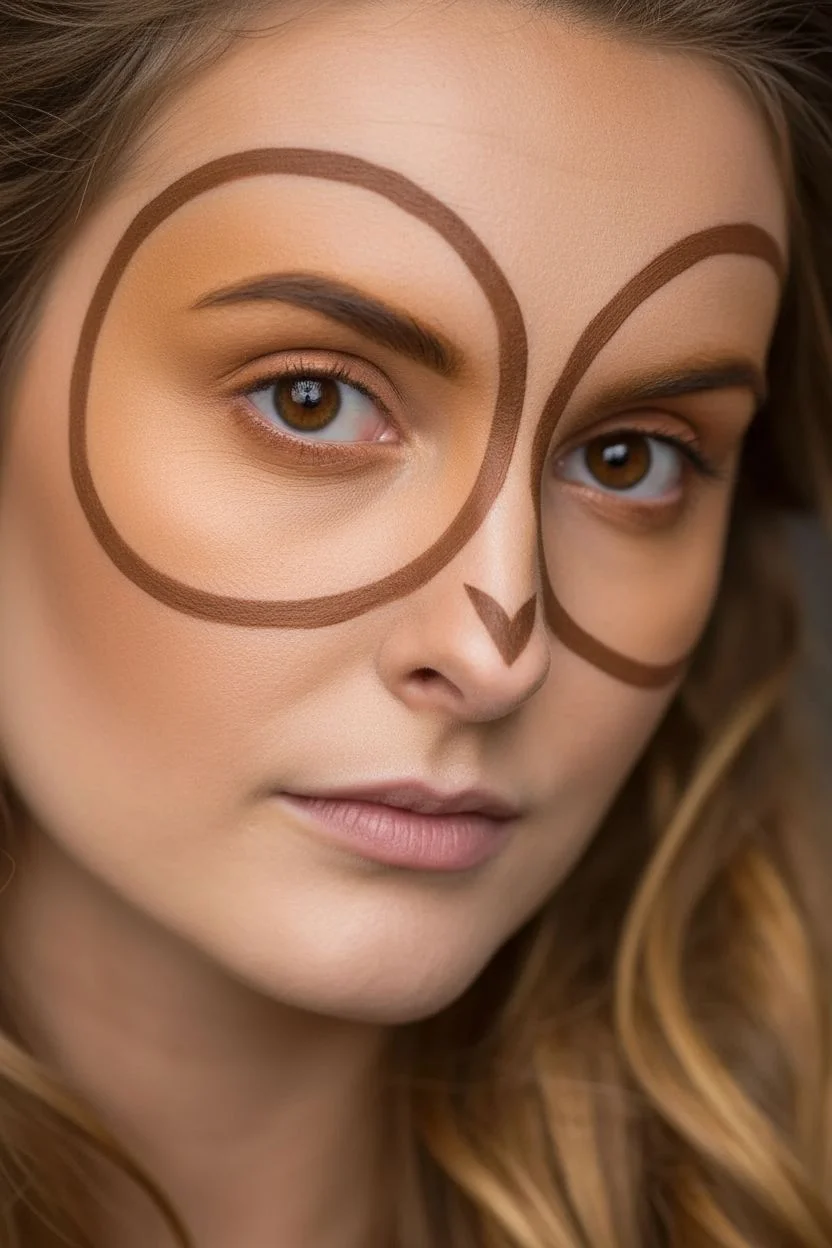
Transform into a woodland creature with this elegant barn owl face paint design, featuring delicate feathery strokes in warm browns and bright whites. The look centers around the eyes, creating a captivating mask-like effect that is perfect for any autumn festival.
Step-by-Step Guide
Materials
- High-quality white face paint (water-activated)
- Warm brown face paint
- Dark brown face paint
- Small round brush (size 2 or 3)
- Medium round brush (size 4 or 6)
- Fine liner brush
- Makeup sponge
- Cup of water
- Paper towels
Step 1: Base Structure
-
Define the eye rings:
Start by dipping a medium round brush into the warm brown paint. Draw two large, circular shapes around the eyes, extending from the bridge of the nose up to the forehead and curving down below the cheekbones. Leave the inner area (lids and immediate under-eye) bare for now. -
Thicken the borders:
Go back over your initial outline to thicken the line slightly, making it a solid, confident border. This warm brown ring will serve as the background for your white feather details later. -
Create the nose bridge:
Connect the two eye rings at the center of the forehead with a soft V-shape, mimicking the widow’s peak of a barn owl’s heart-shaped face. -
Paint the nose detail:
Using a small amount of dark brown paint on a small brush, paint a small, inverted triangle onto the tip of the nose. Add a tiny vertical line extending upward slightly to suggest a beak.
Fixing Smudges
If your white lines smear into the brown, let it dry completely. Then, re-paint the brown background over the mistake before re-applying the white stroke.
Step 2: Feather Details
-
Load the white paint:
Thoroughly load your small round brush or liner brush with creamy white paint. You want the consistency to be inky enough to flow smoothly but opaque enough to cover the skin. -
Paint center forehead feathers:
Starting at the center of the forehead (between the eyebrows), paint strokes that flick upwards and outwards. Imagine a fountain shape, with lines curving gracefully toward the temples. -
Inner eye feathers:
Move to the inner corners of the eyes. Paint short, fine strokes radiating inward towards the nose bridge, keeping them crisp and separated. -
Under-eye plumage:
Continue painting white strokes that start from the bare skin under the eye and flick downwards over the brown border on the cheek. Vary the length of these strokes to look natural. -
Upper eye plumage:
Repeat the process above the eyebrows, painting strokes that curve upwards and outwards over the brown painted border. -
Layering density:
Go back and add a second layer of shorter, finer white strokes in between your first ones to create depth and a fluffy texture. I find this really helps the design pop.
Add Some Sparkle
While the paint is still slightly tacky, dab a small amount of cosmetic glitter gel on the outer cheekbones or the center of the forehead for a magical feathery effect.
Step 3: Definition and Polishing
-
Add brown shading:
Clean your brush and pick up the warm brown paint again. Carefully add shading on the eyelids and just under the lower lash line to deepen the eye socket appearance. -
Apply eyeliner detail:
Using a fine liner brush and black or very dark brown paint, paint a classic winged eyeliner shape on the upper lid. Extend the inner corner point slightly downwards for a fierce bird-like gaze. -
Dot accents:
Dip the very tip of a clean small brush or a dotting tool into white paint. Add a row of tiny, evenly spaced dots along the outer edge of the brown rings for a decorative finish. -
Highlight the nose:
Add a tiny speck of white highlight to the center of the dark brown node detail to give it dimension. -
Final touches:
Check for symmetry. If one side looks heavier with white strokes, balance it out with a few extra flicks on the other side.
Step back and admire your beautiful avian transformation, ready for an autumn celebration
Acorn and Oak Leaf Cluster
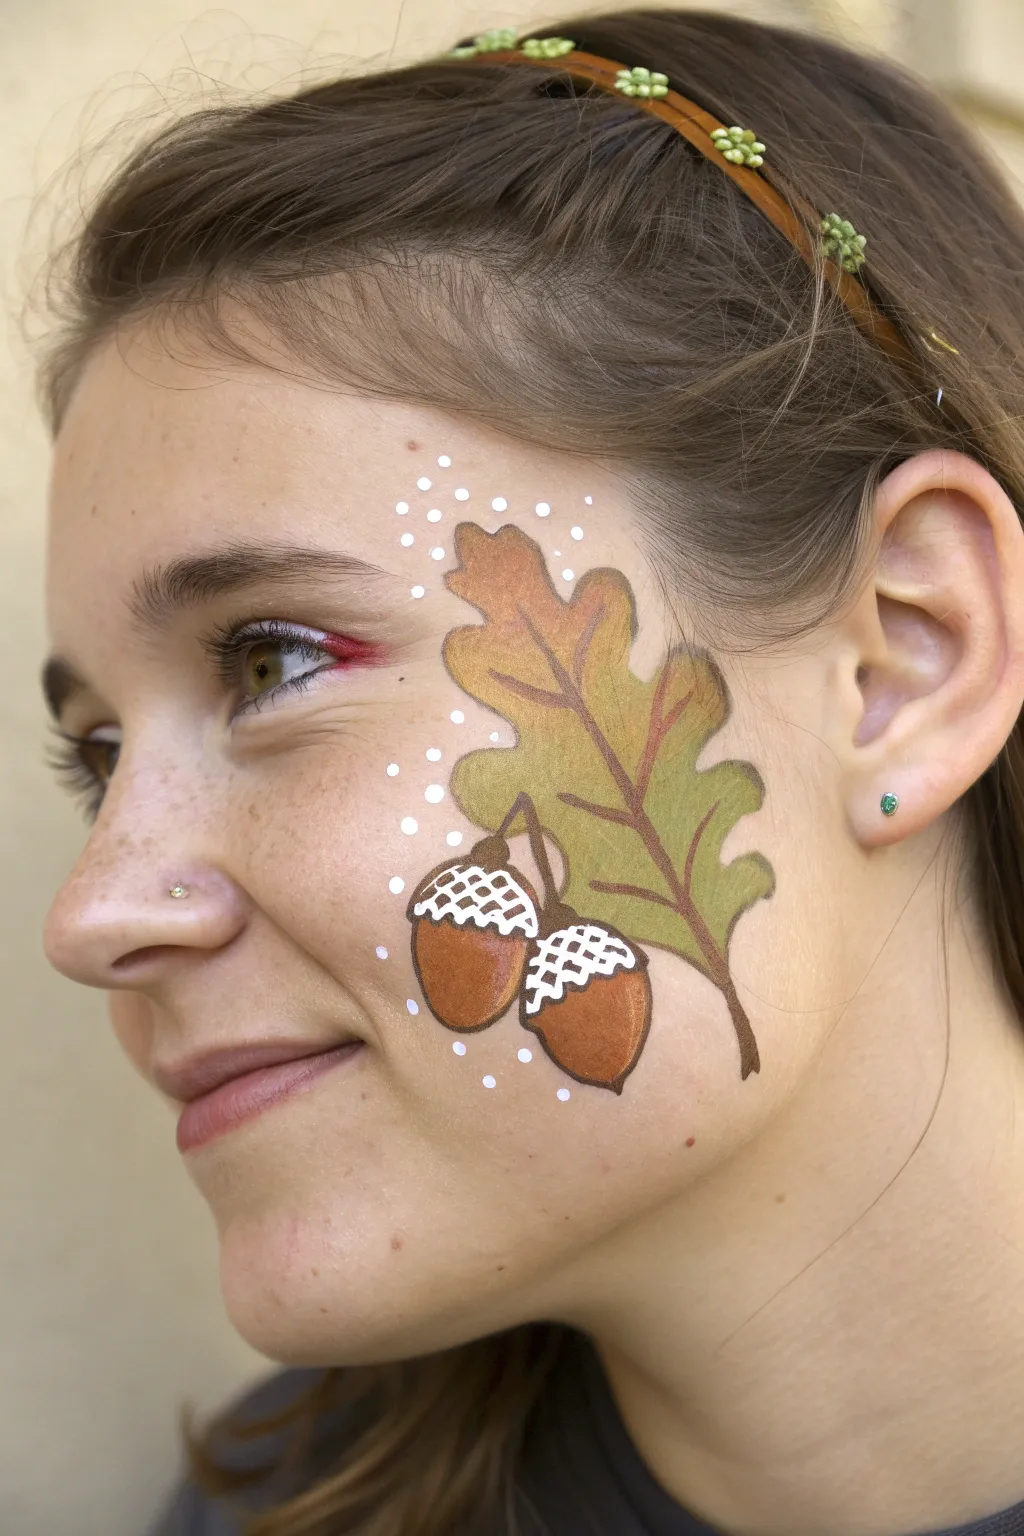
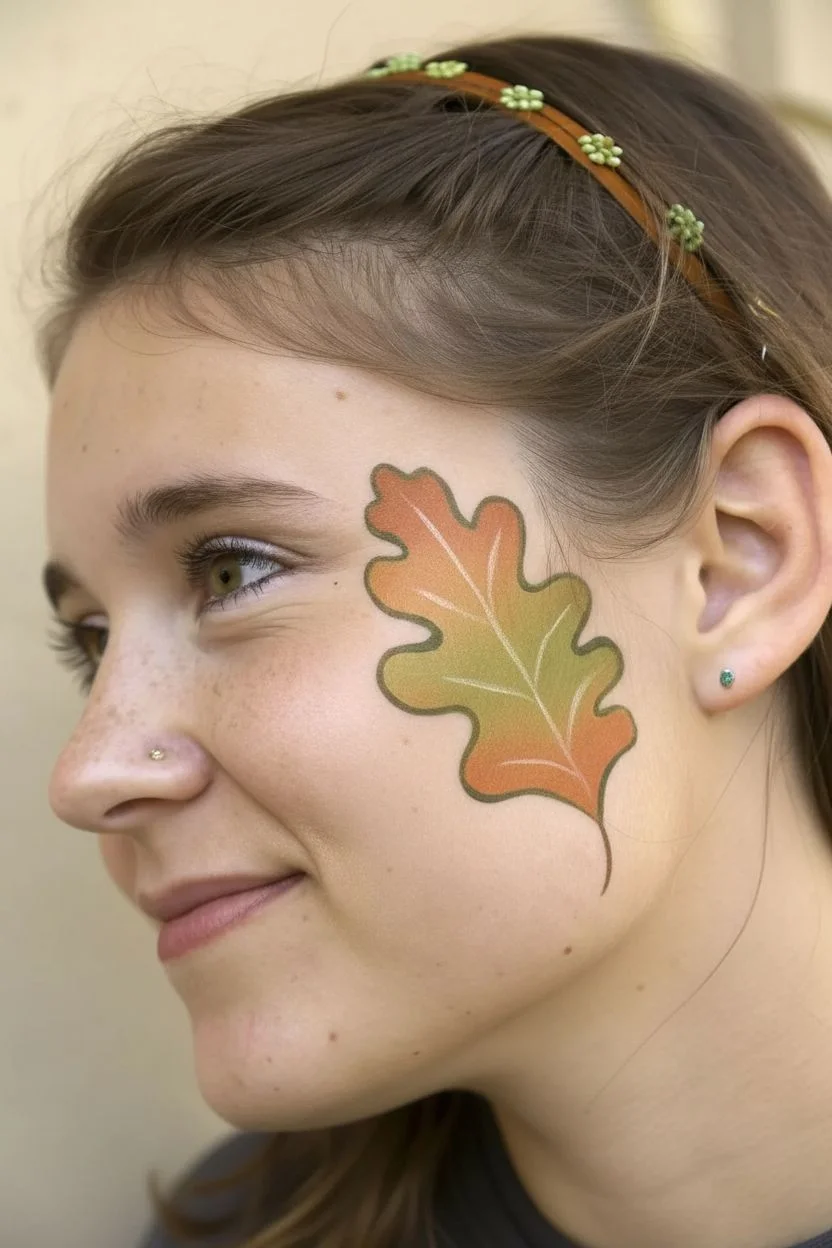
Capture the essence of the harvest season with this charming and elegant face paint design. Featuring a gradient oak leaf paired with two detailed acorns, this look is perfect for older children or adults wanting a sophisticated touch of fall.
Step-by-Step Tutorial
Materials
- Face paint (light olive green)
- Face paint (burnt orange/terracotta)
- Face paint (chocolate brown)
- Face paint (white)
- Face paint (maroon/reddish-brown)
- Face paint (dark green)
- Medium filbert brush or flat brush
- Round brush (size 2 or 3)
- Fine liner brush (size 0 or 1)
- Spray bottle with water
- Synthetic sponge (optional for blending)
Step 1: Painting the Oak Leaf Base
-
Load your brush:
Start by dampening a medium filbert brush or flat brush. Load it primarily with a light olive green face paint, but dip one corner into a burnt orange or terracotta shade to create a double-loaded effect for natural color variation. -
Outline the leaf shape:
Starting near the temple, use the chisel edge of your brush to sketch the central vein of the leaf, curving it diagonally down toward the cheekbone. -
Create the lobes:
Working from the central vein outwards, press and wiggle the brush to create the rounded lobes of the oak leaf. Paint about three to four lobes on each side, tapering them smaller as you reach the tip of the leaf. -
Blend the colors:
While the paint is still slightly wet, gently blend the orange and green sections where they meet on the leaf to avoid harsh lines. I find softly patting with a fingertip works well if the brush strokes look too distinct.
Pro Tip: Crisper Lines
For the tiny cross-hatching on the acorn caps, ensure your white paint is inky and fluid, not pasty. Roll your liner brush to a needle-sharp point before painting.
Step 2: Adding the Acorns
-
Paint the nut shapes:
Using a size 3 round brush and a warm medium-brown paint, create two oval shapes hanging just below the inner curve of the leaf. Position them so they are slightly angled away from each other. -
Add highlights:
Before the brown paint dries completely, take a tiny bit of white or lighter beige on the same brush and blend a small highlight on the rounded bottom of each acorn to give them volume. -
Create the acorn caps:
Switch to a darker chocolate brown. Paint a crescent or semi-circle shape on top of each nut oval. These should look like little berets sitting on the acorns. -
Connect the stems:
Using a fine liner brush and the dark brown paint, draw thin stems connecting the tops of the acorn caps up to the main leaf stem.
Step 3: Details and Outlines
-
Outline the leaf:
With a fine round brush and a mix of dark green and brown, gently outline the perimeter of the oak leaf. Keep the line thin and organic rather than a heavy, solid border. -
Paint the veins:
Using a maroon or reddish-brown shade on a fine liner brush, paint the central vein down the middle of the leaf and branch out into the lobes. This reddish contrast makes the green pop. -
Outline the acorns:
Refine the shape of the acorn nuts (the lower part) with a very thin outline of dark brown or black face paint. -
Texture the caps:
This is the crucial detail step. Load a fine liner brush with bright white paint. Paint a cross-hatch or grid pattern over the dark brown acorn caps to mimic their texture. -
Highlight the caps:
Add a slightly thicker white line along the rim of the acorn cap where it meets the nut, emphasizing the separation.
Troubleshooting: Muddy Colors
If your leaf green and orange merge into brown, let the first color dry for 30 seconds before adding the second, or rinse your brush thoroughly between colors.
Step 4: Final Flourishes
-
Add white accents:
Group small white dots around the top of the design, near the temple and above the leaf. Vary the sizes from tiny pinpricks to small specks. -
Scatter the dots:
Continue trailing the white dots down the side of the design, clustering them near the acorns and fading them out as you move away from the focal point. -
Optional eye detail:
If desired, add a subtle swipe of the reddish-brown paint to the outer corner of the eye as a small winged liner to tie the look together.
Now you have a whimsical, woodland-inspired design ready for any autumn celebration


Sunflower Harvest Halo
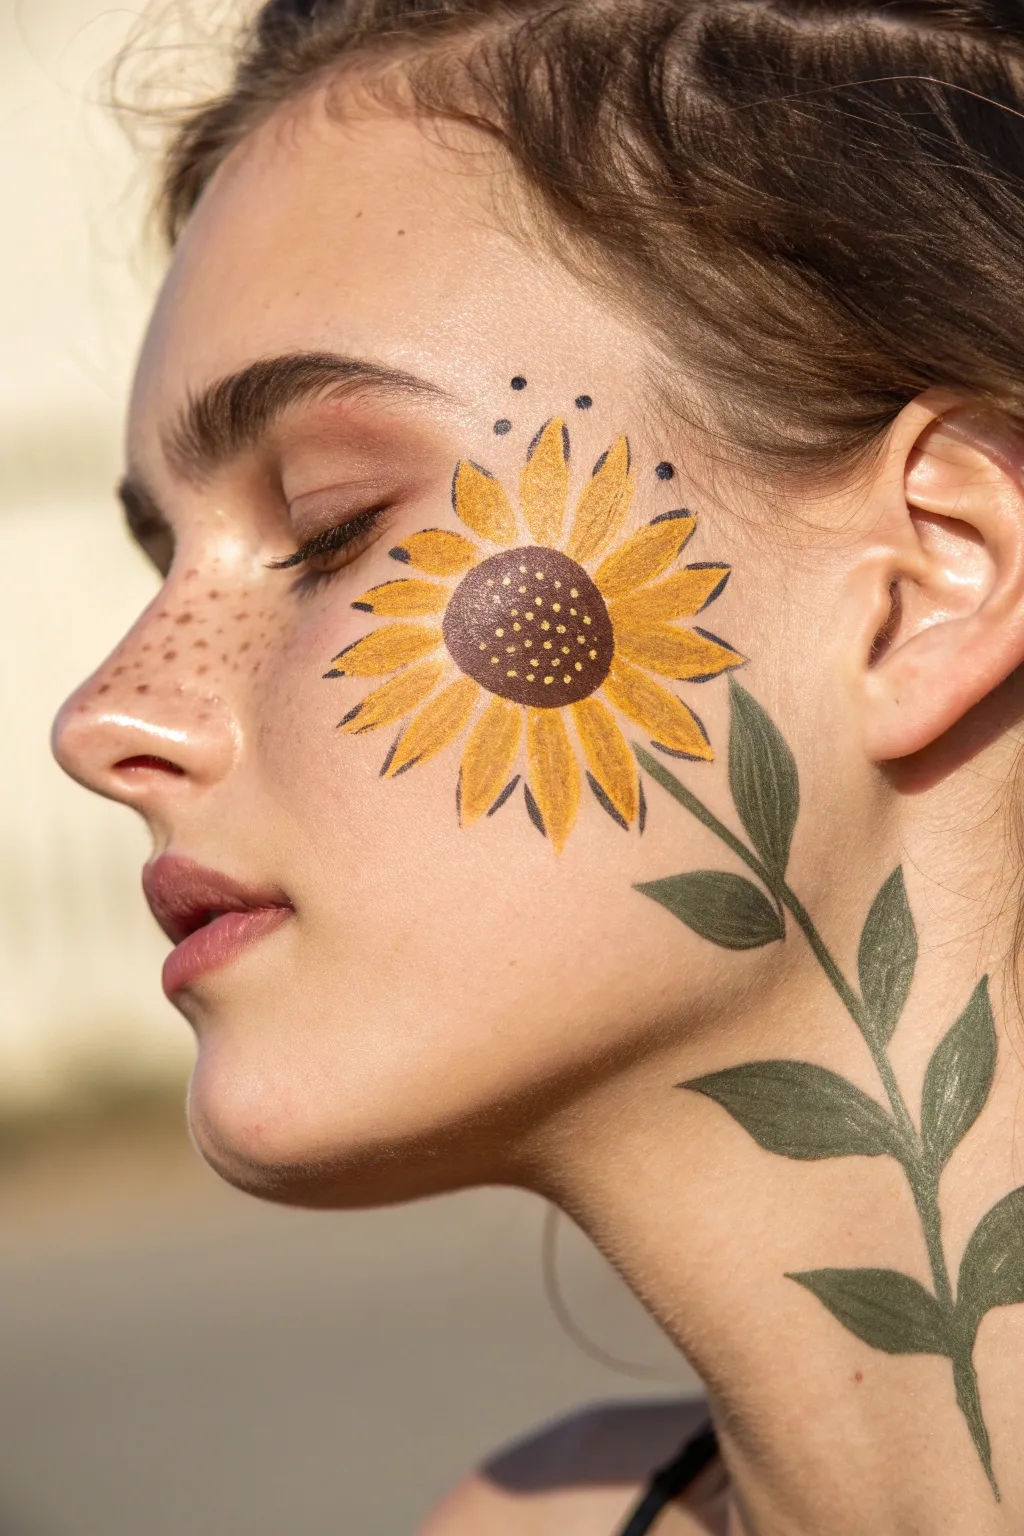
Embrace the golden warmth of autumn with this stunning profile face paint design featuring a blooming sunflower on the cheek and trailing vines down the neck. This look combines bold floral elements with delicate illustrative details for a sophisticated harvest festival style.
Detailed Instructions
Materials
- Face paint cake: bright yellow
- Face paint cake: golden ochre or dark yellow
- Face paint cake: warm brown
- Face paint cake: olive green
- Face paint cake: dark green
- Face paint cake: cream or white
- Face paint cake: black
- Round brush (size 4 or 6)
- Fine liner brush (size 1 or 2)
- Flat brush (small, optional for leaves)
- Cosmetic sponge
- Cup of water
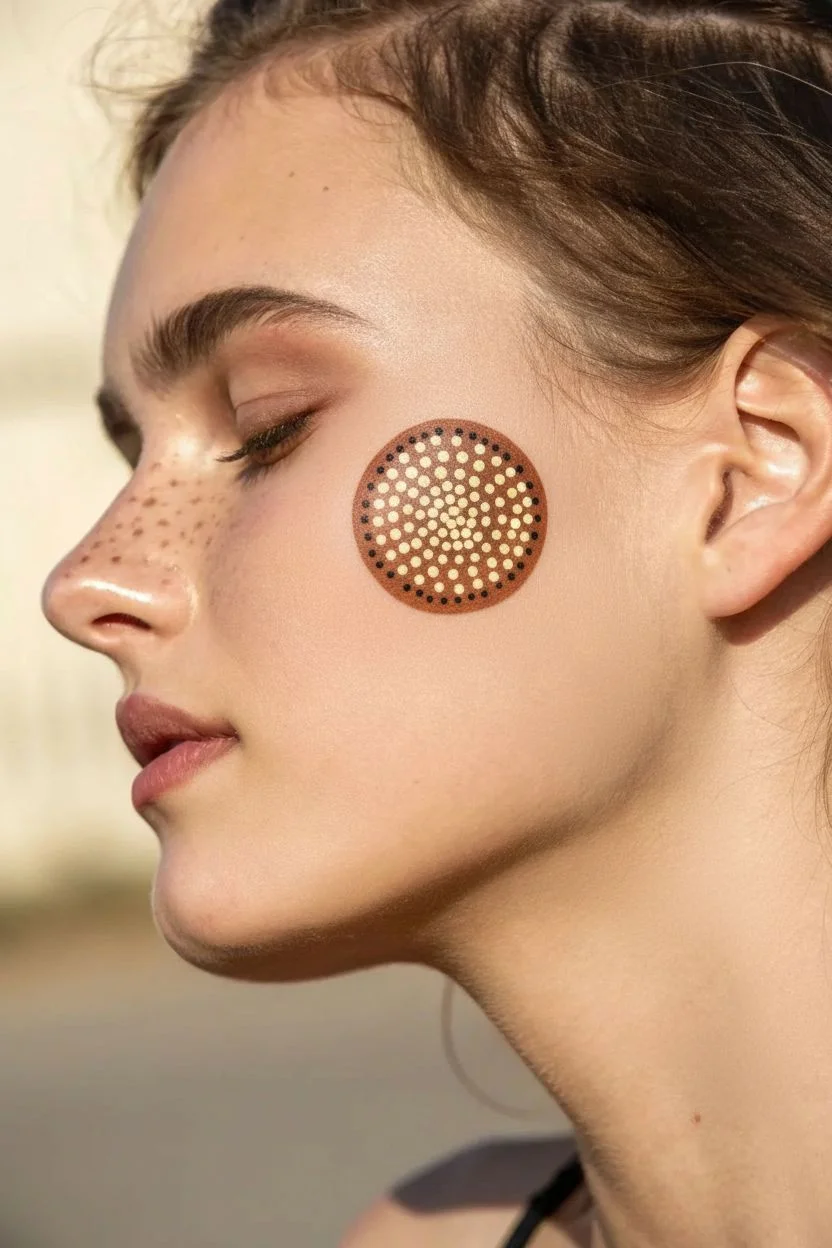
Step 1: The Centerpiece
-
Placement:
Visualize where the center of your flower will sit. For this profile look, aim for the high part of the cheekbone, slightly back towards the temple. -
Painting the Disc:
Load a round brush with warm brown face paint. Paint a solid circle about the size of a large coin on the cheekbone. -
Adding Seeds:
Dip a fine liner brush into cream or pale yellow paint. Add tiny dots clustered in the center of the brown circle to represent sunflower seeds. -
Seed Depth:
Clean your liner brush and pick up some black paint. Add a few sporadic black dots among the cream ones to create depth and texture within the seed head.
Uneven Petals?
Don’t panic if petals aren’t identical. Nature is imperfect. If one is too thick, simply refine the shape with the black outline step to ‘cut’ into the yellow.
Step 2: Golden Petals
-
Petal Base:
Using a round brush specifically loaded with bright yellow, press down near the brown center and pull outwards, lifting the brush at the end to create a pointed tip. Do this all around the circle. -
Layering Color:
While the yellow is still slightly damp, mix a bit of golden ochre. Paint a second layer of strokes starting from the center but only going halfway up the petal to add a shadowed gradient. -
Second Row:
Add smaller petal strokes in the gaps between the main petals using your bright yellow to make the flower look full. -
Outlining:
With a fine liner brush and thin black paint (inky consistency), carefully outline each yellow petal. Keep the line thin and expressive rather than rigid. -
Inner Detail:
Using the same black liner, draw a single, short line down the center of each petal, starting from the brown disc and flicking outward. -
Decorative Dots:
Add three to four small black floating dots near the upper tips of the petals towards the hairline for an illustrative touch.
Double-Loading Brushes
Load half your brush with yellow and the tip with orange. When you press to paint a petal, the colors will blend instantly for a beautiful gradient effect.
Step 3: Trailing Greenery
-
The Main Stem:
Load a round brush with olive green. Starting from under the bottom petals, paint a confident, slightly curved line trailing down the jawline and onto the neck. -
Leaf Shape:
Paint almond-shaped leaves branching off the main stem. Press the belly of the brush down to widen the leaf, then lift and twist to create the sharp tip. -
Leaf Variation:
Here I like to vary the sizes, placing smaller leaves near the flower and larger ones trailing down near the collarbone. -
Adding Shadow:
While the olive green is tacky, blend in a touch of dark green at the base of each leaf where it meets the stem. -
Leaf Veins:
With your fine liner brush and lighter green or cream paint, draw a central vein down the middle of the larger leaves.
Step 4: Finishing Touches
-
Freckle Prep:
If the model doesn’t have natural freckles, mix water with brown paint until it is very thin and watery. -
Splatter Technique:
Flick the bristles of a toothbrush or stiff brush loaded with the brown wash across the nose and cheeks to create faux freckles. -
Eye Definition:
Optionally, add a soft wash of warm brown eyeshadow to the eyelid to complement the autumnal tones.
Step back and admire your living work of art, perfect for hayrides and harvest parties
Wheat Stalk Ribbon Design

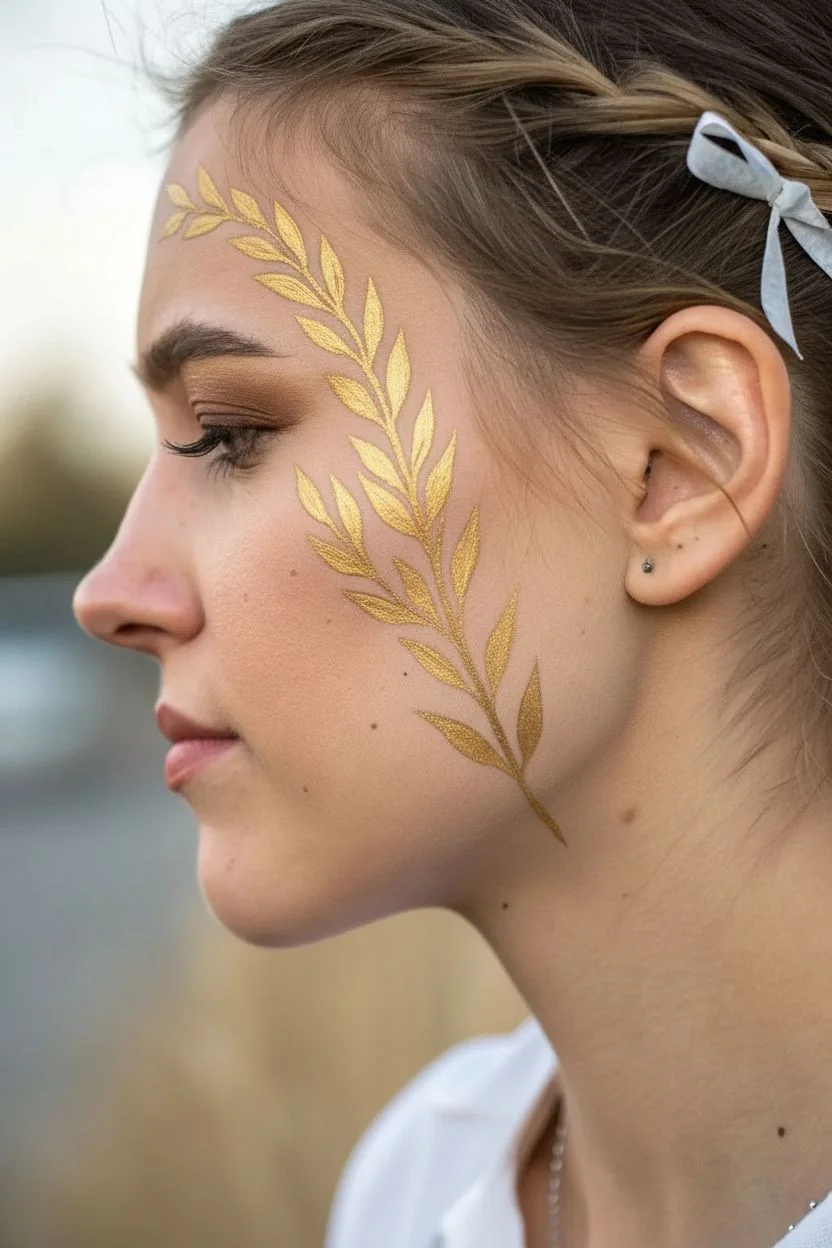
Capture the essence of autumn abundance with this elegant and minimalist wheat stalk design. By combining metallic gold with crisp white accents, you’ll create a sophisticated look perfect for fall festivals or seasonal photoshoots.
Step-by-Step
Materials
- Metallic gold face paint (water-activated or cream)
- White face paint (highly pigmented, water-activated)
- Round brush, size 2 or 3 (for the main shapes)
- Round brush, size 1 or fine liner brush (for details)
- Cup of water
- Spray bottle (optional, for activating paint)
- Setting spray (optional)
Step 1: Setting the Structure
-
Activate the Gold:
Begin by spraying or adding a few drops of water to your metallic gold face paint cake. Swirl your size 2 or 3 round brush in the paint until you achieve a creamy, ink-like consistency that flows smoothly but is opaque. -
Draw the Central Stem:
Starting near the jawline below the ear, paint a thin, curving line that sweeps upward across the cheek. Continue this line up past the temple and curve it gently inward over the forehead, ending near the center hairline. -
Define the Flow:
Ensure this central stem follows the natural contours of the face structure—hugging the cheekbone and arching over the brow.
Uneven Lines?
If your leaves look jagged, your paint is likely too dry. Add a tiny drop of water to the cake and rework it to a creamy yogurt texture for smoother flow.
Step 2: Creating the Golden Leaves
-
Paint the Base Leaves:
Reload your gold brush. Starting at the bottom of the stem near the jaw, press the brush down to create the widest part of a leaf, then lift as you pull outward to form a sharp tip. -
Continue Up the Cheek:
Paint pairs of leaves moving up the stem. These lower leaves should be angled slightly upward and outward, becoming gradually larger as you reach the cheekbone area. -
Refine the Leaf Shape:
To get that distinct wheat-grain look, keep the base of the leaves attached to the stem and ensure they are elongated ovals rather than round circles. -
Transition to the Forehead:
As you paint leaves above the temple and onto the forehead, start spacing them slightly closer together to mimic the denser head of a wheat stalk. -
Paint the Top Teardrops:
For the uppermost section on the forehead, change your stroke slightly. Instead of full leaves, paint smaller, elongated teardrop shapes that point towards the end of the stem. -
Dry Check:
Pause for a moment to let the gold layer dry completely. Metallic paints can sometimes smudge if overlaid too quickly.
Add Some sparkle
Before the paint fully dries, lightly tap cosmetic-grade gold glitter over the wet gold leaves. It adds a magical shimmer perfect for evening festivals.
Step 3: Adding White Highlights
-
Prepare the White Paint:
Clean your brush thoroughly or switch to a fresh size 2 brush. Activate your white face paint to a similar creamy consistency. -
Highlight the Upper Wheat:
Focus on the forehead section first. Paint white leaf shapes that interlock with or sit directly adjacent to the gold leaves. I find placing them on the ‘upper’ side of the stem creates a nice lighting effect. -
Layering for Dimension:
Don’t cover the gold completely. The white strokes should look like separate kernels or glints of light hitting the stalk. -
Paint Cheek Accents:
Move down to the cheek area. Instead of full white leaves, add thin white outlines or ‘swoops’ along the top edge of the existing gold leaves to define them. -
Fine Clean Up:
Switch to your size 1 or liner brush with white paint. Add tiny, wispy hair-like strokes extending from the tips of a few wheat kernels to mimic the ‘beard’ or awns of the wheat. -
Brighten the Stem:
Add a very thin, broken line of white along the main stem, particularly on the curves, to make the structure pop against the skin. -
Final touches:
Step back and check for symmetry and balance. You can add a tiny dot of gold or white near the earlobe if the design feels too top-heavy.
Enjoy wearing this delicate botanical art that celebrates the turning of the seasons
Candy Corn Color Block
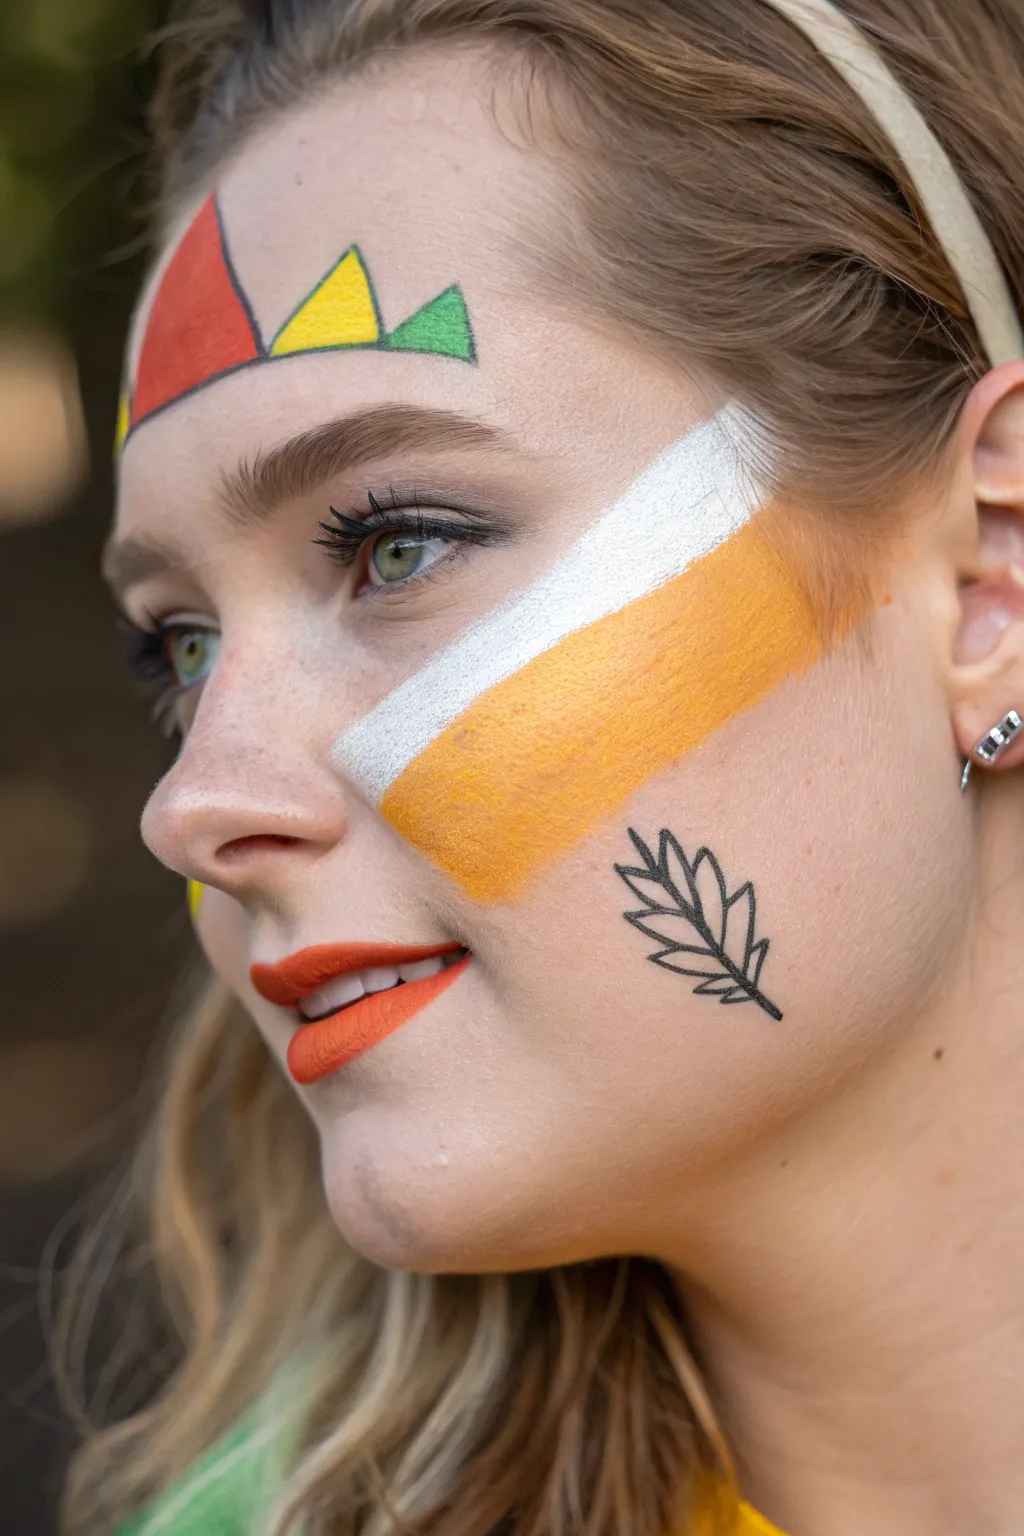
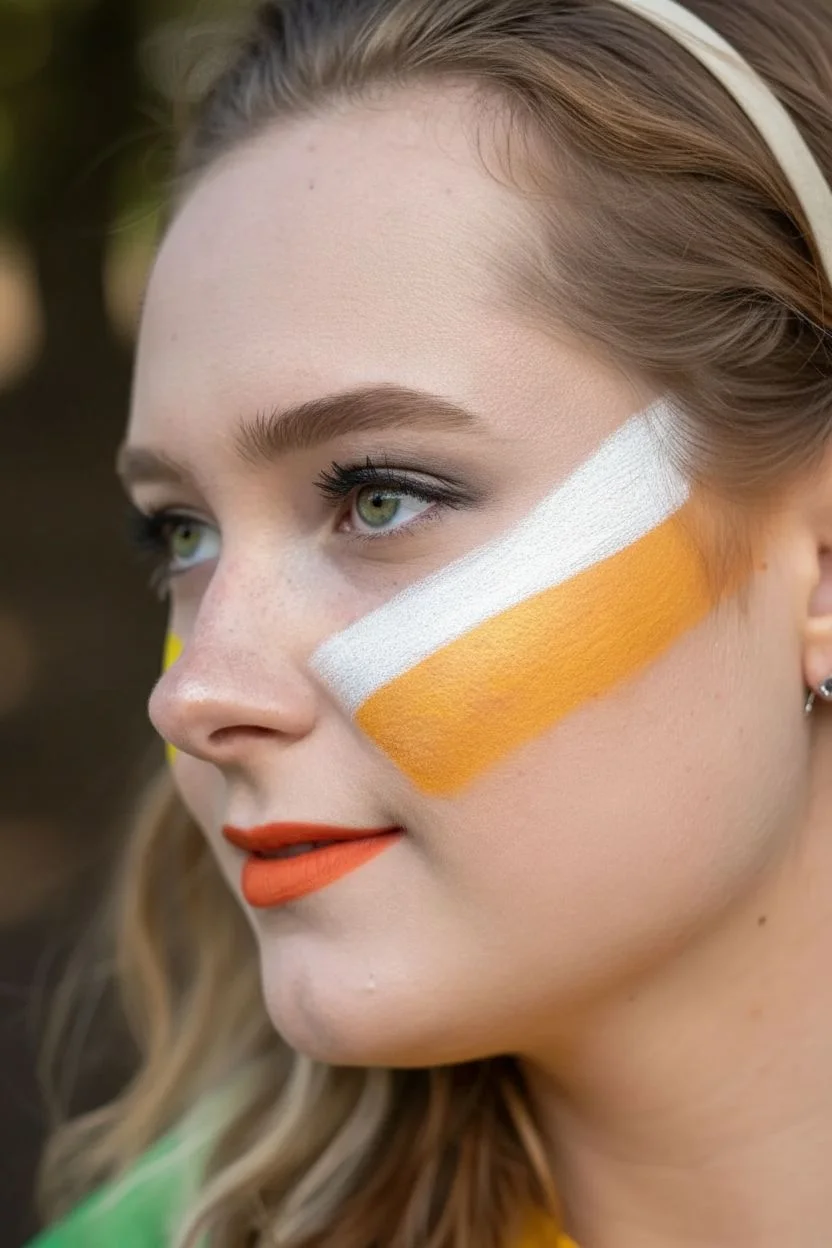
Capture the essence of the season with this fresh, modern take on fall face paint that combines bold geometric shapes with classic autumn hues. This design features a striking candy corn-inspired cheek stripe paired with abstract forehead details and a delicate leaf accent for a balanced, festive look.
Detailed Instructions
Materials
- Face paint cake palette (orange, yellow, white, lime green)
- Black face paint (fine liner or cake with thin brush)
- Flat brush (3/4 inch or similar wide brush)
- Medium round brush
- Fine liner brush (size 0 or 1)
- Orange lipstick or lip liner
- Setting spray (optional)
- Small cup of water
Step 1: The Candy Corn Cheek
-
Load the white paint:
Start by moistening your wide flat brush and loading it generously with white face paint. Ensure the consistency is creamy, not too watery. -
Create the upper swoosh:
Place the brush just under the outer corner of the eye, positioning it diagonally across the cheekbone. Pull a confident stroke upward toward the hairline. -
Load the orange paint:
Clean your brush thoroughly or switch to a fresh flat brush. Load it well with a bright pumpkin orange color. -
Apply the orange band:
Directly below the white stripe, apply a parallel stroke of orange. Make this band slightly wider than the white one, filling the space on the apple of the cheek. -
Blend the transition:
While the paints are still tacky, use a slightly damp (clean) brush to gently feather the line where the white and orange meet. I find a soft back-and-forth motion creates the smoothest gradient.
Patchy Paint?
If the white stripe looks streaky, let the first layer dry completely for 30 seconds before dabbing—not stroking—a second layer on top for opacity.
Step 2: Forehead Geometry
-
Paint the red-orange triangle:
Using a medium round brush, paint a large, tall triangle on the side of the forehead. The base should rest just above the eyebrow line. -
Add the yellow peak:
Next to the orange shape, paint a smaller yellow triangle. Make sure the edges touch, creating a continuous geometric flow. -
Finish with green:
Paint a third, smaller triangle in lime green next to the yellow one. This creates a descending size pattern across the brow. -
Outline the shapes:
Load a fine liner brush with black paint. Carefully outline the two smaller triangles (yellow and green) and the visible side of the large orange one. -
Connect the baseline:
Draw a thin black line underneath all three triangles to anchor them together, extending slightly beyond the green shape.
Step 3: Finishing Touches
-
Draw the leaf stem:
On the lower cheek, below the orange stripe, use your fine liner brush and black paint to draw a thin, curved central line for a leaf stem. -
Add leaf veins:
Draw small V-shaped lines branching off the center stem. Keep them simple and graphic rather than realistic. -
Outline the leaf:
Connect the tips of the veins with curved lines to create the outer perimeter of the leaf shape. -
Apply lip color:
Finish the look by applying a vibrant orange lipstick. Use a lip brush for crisp edges that match the geometric theme. -
Set the design:
If you plan on wearing this for a long event, give the face a light misting of setting spray to prevent smudging.
Add Sparkle
While the orange cheek paint is still wet, gently press some cosmetic-grade iridescent glitter onto the center of the color block for a festive shimmer.
Now you are ready to head out and celebrate the season with this crisp and colorful style
Caramel Apple Drip Cheek Art
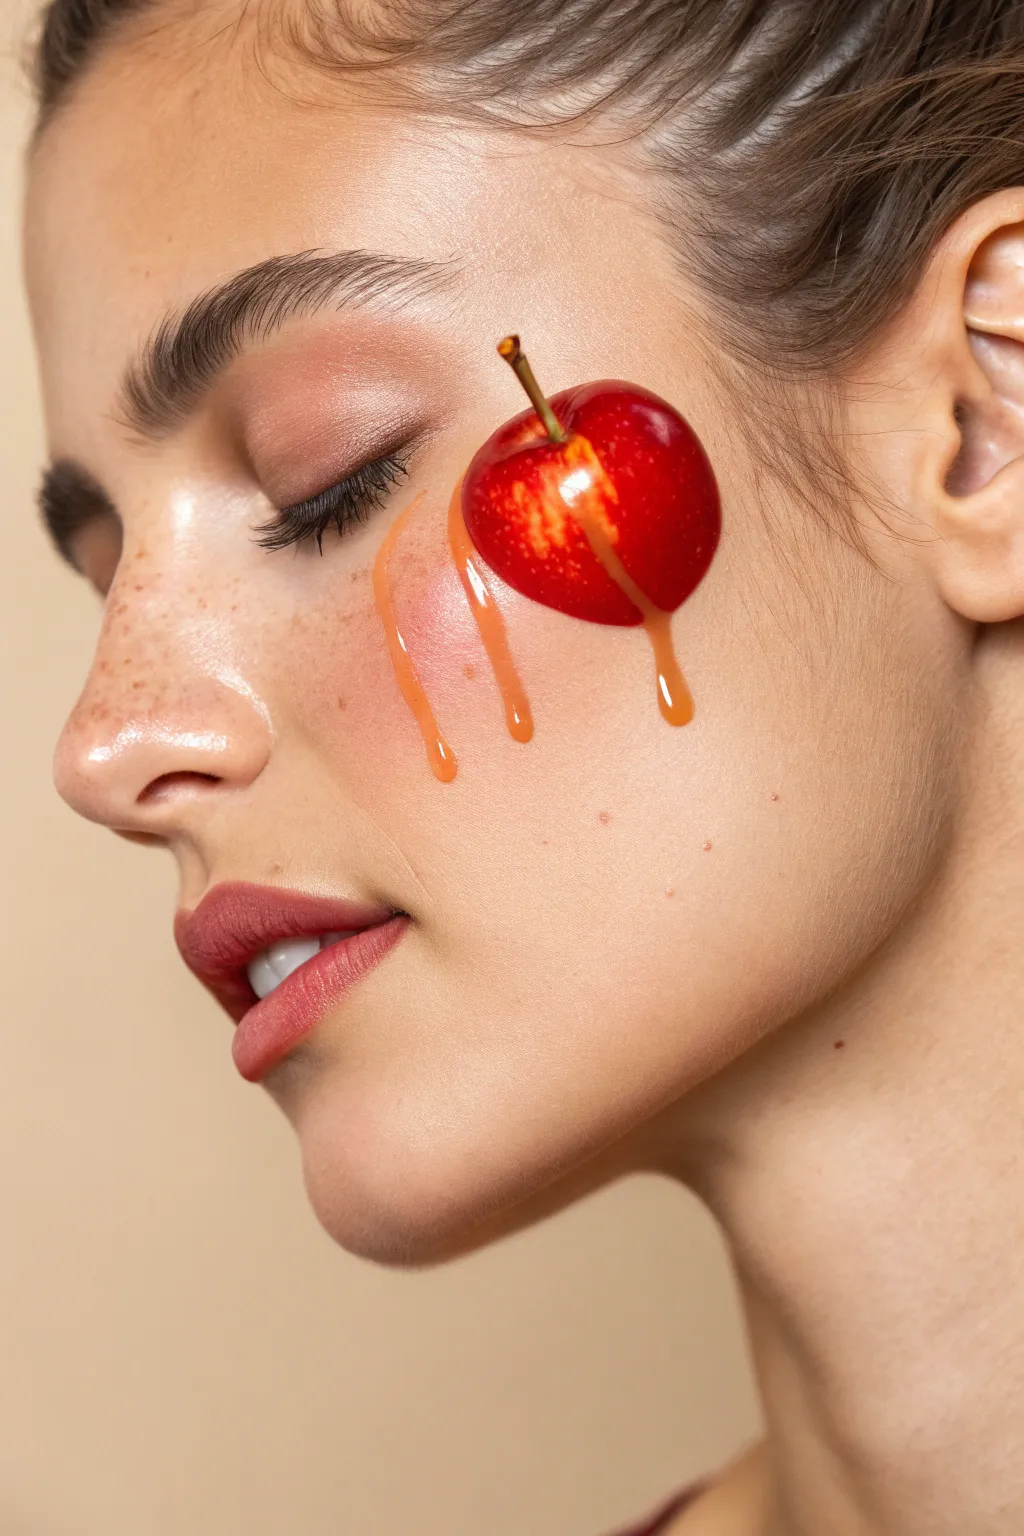
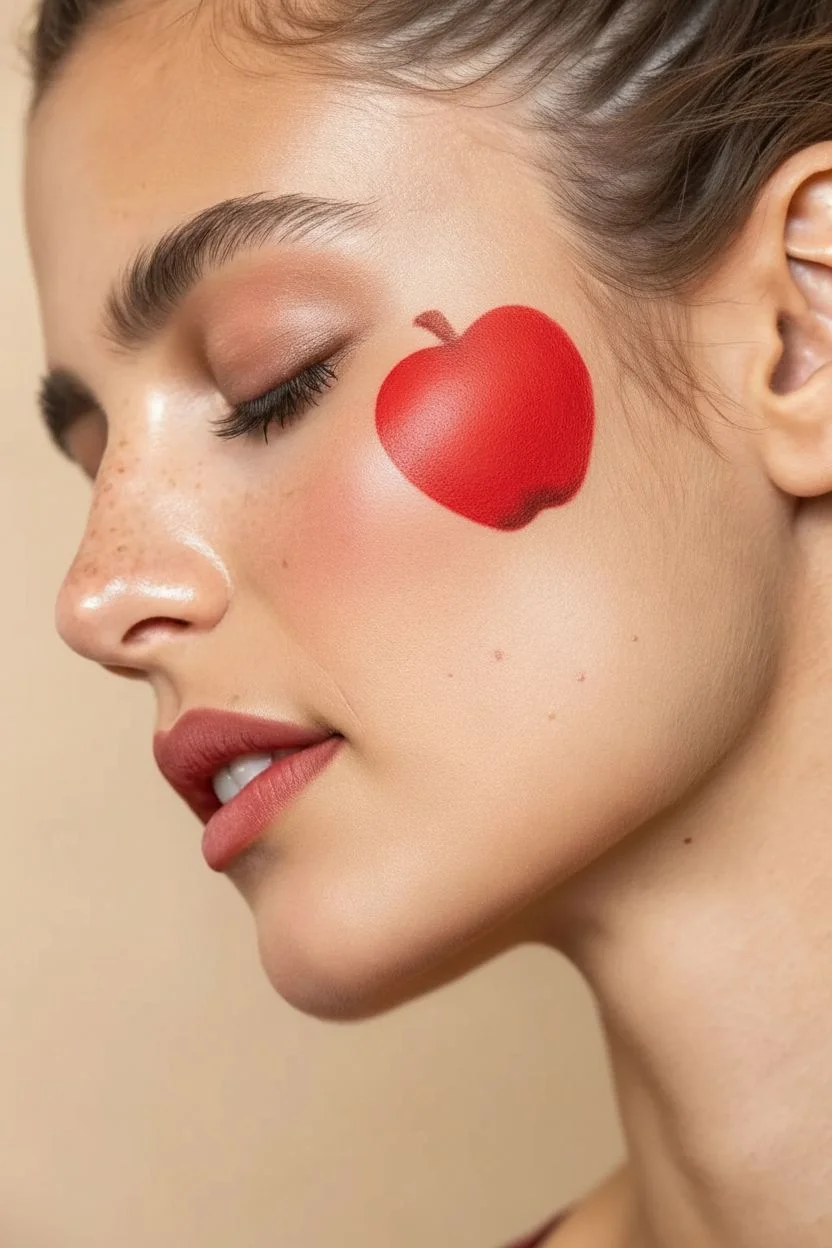
Capture the essence of a fall fair with this delightfully realistic caramel apple design that looks good enough to eat. It combines a bold, juicy red apple base with hyper-realistic caramel drips for a cheeky, seasonal statement.
Step-by-Step
Materials
- Red face paint (high-pigment, water-activated)
- White liquid face paint or liner
- Brown face paint (medium/chocolate shade)
- Yellow/Ochre face paint
- Orange face paint
- Round brush (size 4 or 6)
- Fine liner brush (size 0 or 1)
- Blending sponge or soft eyeshadow brush
- Setting spray (optional)
Step 1: The Apple Base
-
Outline the Shape:
Start by loading your round brush with bright red face paint. On the high point of the cheekbone, sketch a rounded apple silhouette—make it slightly wider at the top and tapered at the bottom. -
Fill in the Color:
Fill the entire apple shape with the red paint. Ensure the coverage is opaque; you may need a second coat after the first dries to get that rich skin color. -
Create Dimension:
While the red is still slightly damp, take a clean, slightly moist brush or sponge and lift a tiny bit of color from the center-left side to create a soft, natural highlight. -
Add Depth:
Mix a tiny touch of brown into your red paint. Use this darker red to shade the very bottom curve and the dip at the top where the stem will go, giving the fruit a rounder appearance.
Stay Sticky
For the caramel color, err on the side of transparency. Adding a tiny drop of water makes the paint sheerer, letting the skin show through slightly like real syrup.
Step 2: The Caramel Drip
-
Mix the Caramel Shade:
Combine yellow, orange, and a touch of brown paint on your palette. Aim for a warm, golden-amber toffee color. -
Start the Flow:
Using the round brush, paint a wavy, thick line across the upper third of the red apple, letting it overlap the red boundary slightly. -
Paint the Main Drip:
Extend a long, teardrop-shaped drip flowing from that wavy line down past the bottom of the apple and onto the cheek skin below. Make the bottom of the drip bulbous and heavy. -
Add Secondary Drips:
Create one or two separate caramel trails to the side of the apple directly on the skin. I find that staggering their lengths makes the movement look more natural. -
Highlight the Sauce:
Mix a lighter version of your caramel color (add more yellow/white) and paint thin, vertical streaks inside the drips to simulate glassiness and volume.
Step 3: Details & Highlights
-
Paint the Stem:
Switch to your fine liner brush and dark brown paint. Draw a thin, slightly curved line emerging from the top dip of the apple. -
Top the Stem:
Add a tiny, flattened horizontal dab at the very top of the stem to represent the cut end. -
Create Texture:
With the liner brush and yellow paint, add very subtle, tiny flecks or stippling on the exposed red part of the apple to mimic natural skin texture. -
Apply Crisp Highlights:
Using pure white liquid paint and the fine liner, add sharp, curved reflection lines on the upper curve of the red apple skin. -
Gloss the Caramel:
Add crucial white specular highlights—small dots or commas—on the fattest parts of the caramel drips. This is the secret to making it look wet and sticky. -
Final White Pop:
Place a tiny white highlight on the side of the stem to separate it from the background.
Sprinkle It On
Before the caramel paint dries, press cosmetic-grade glitter or real candy sprinkles into the ‘sauce’ area for a textured, 3D embellished look.
Enjoy showing off this sweet autumn accessory at your next seasonal event
Corn Maze Trail Map
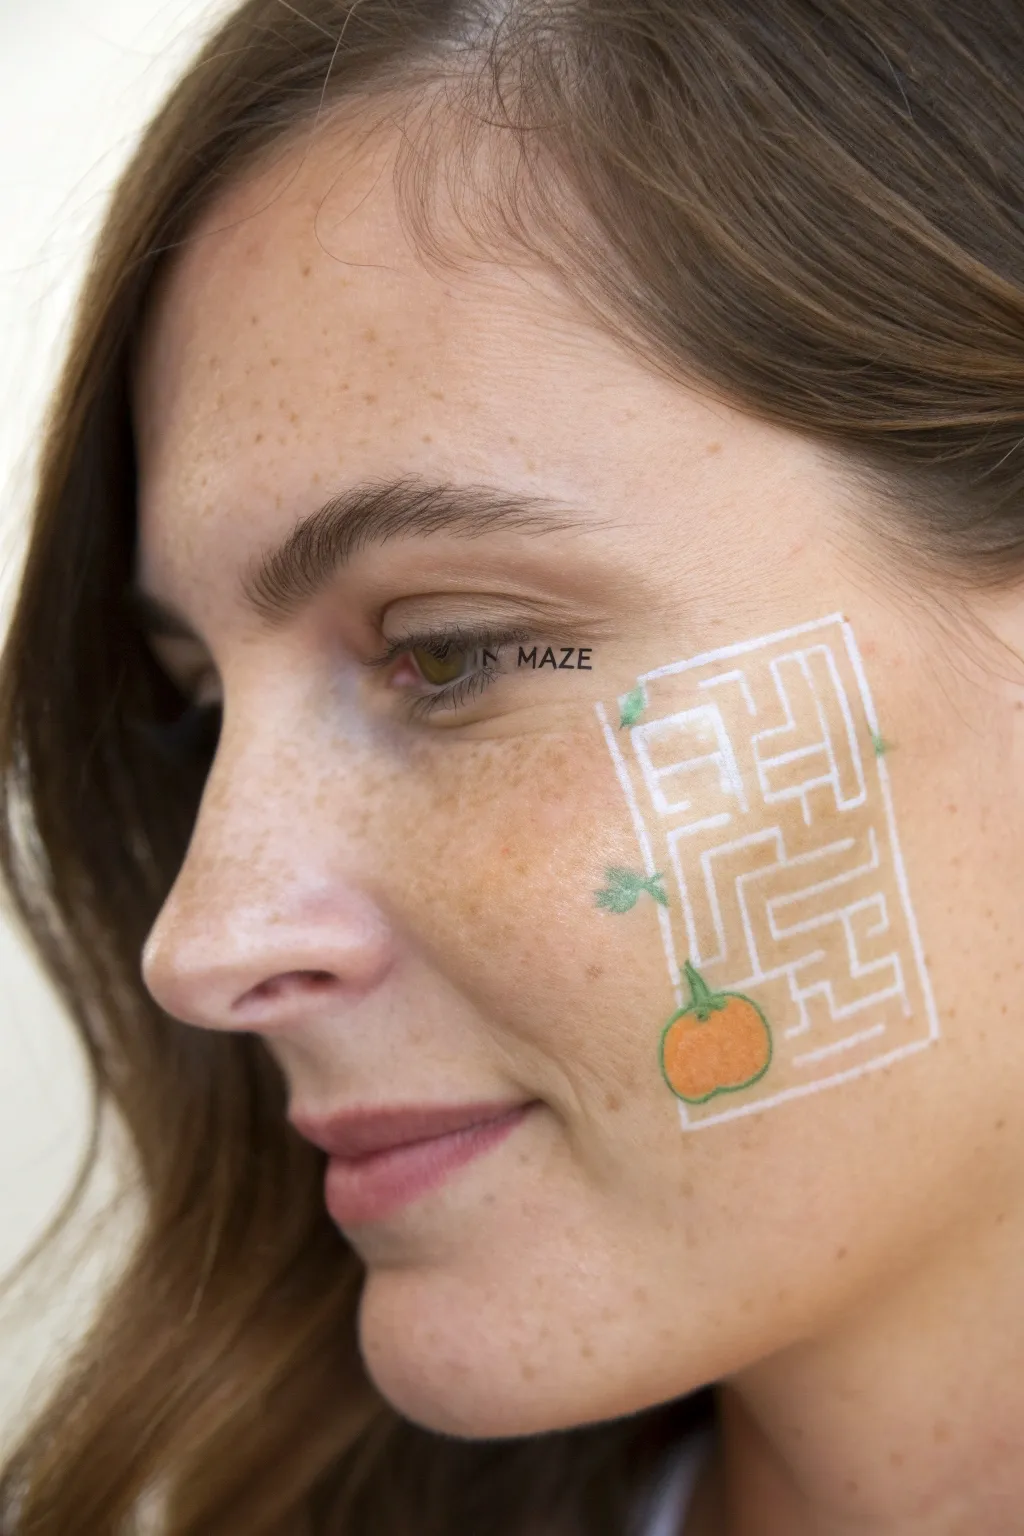
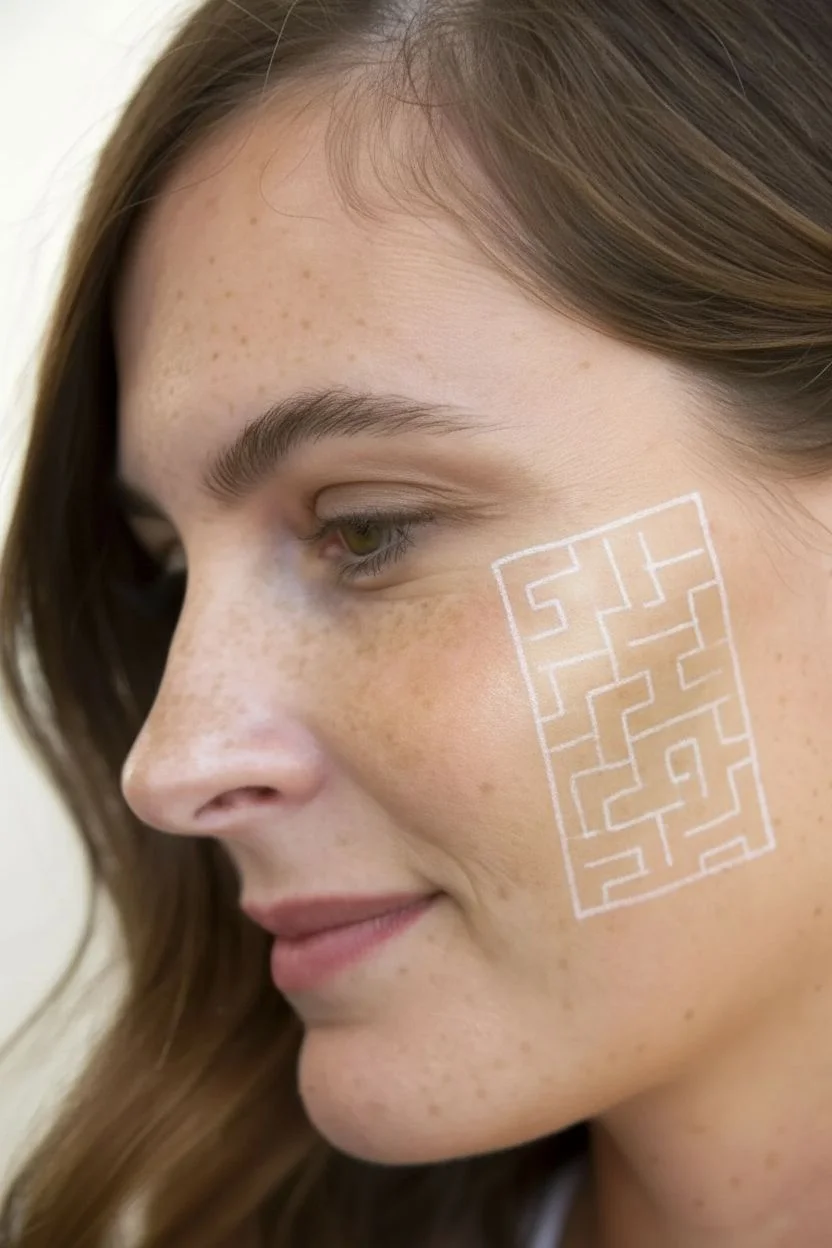
Get lost in the autumn spirit with this clever and minimalist face painting design featuring a winding trail map on your cheek. The crisp white lines mimic a classic corn maze layout, accented by a tiny, festive pumpkin at the entrance.
Detailed Instructions
Materials
- White water-activated face paint
- Orange water-activated face paint
- Green water-activated face paint
- Fine round brush (size 1 or 2)
- Very fine detail brush (size 0 or 00)
- Small cup of water
- Small spray bottle (optional, to mist paints)
- Paper towels
- Black eyeliner pencil or liquid liner (optional for text)
Step 1: Planning the Layout
-
Position the maze:
Choose the flattest part of the cheekbone, slightly angled towards the jawline, as your canvas. This area provides the smoothest surface for straight lines. -
Visualize the rectangle:
Imagine a vertical rectangle approximately 2 inches tall by 1.5 inches wide. You don’t need to draw the outline yet, but keep these boundaries in mind.
Wobbly Lines?
If your hands are shaky, anchor your pinky finger against the person’s chin while painting. This creates a pivot point and steadies your brush strokes significantly.
Step 2: Painting the Maze Structure
-
Load the white paint:
Wet your size 1 fine round brush and work it into the white face paint until you have a creamy, ink-like consistency. -
Paint the outer boundary:
Carefully paint a rectangular outline on the cheek. Keep your hand steady and use the very tip of the brush to ensure the line width is consistent. -
Create the entrance and exit:
If you want a ‘solvable’ maze, leave a tiny gap in the top line and the bottom line, though a closed box works perfectly for this aesthetic too. -
Draft the horizontal dividers:
Inside the rectangle, paint a few short horizontal lines. Don’t connect them all the way across; leave staggered gaps for the ‘path’ to flow through. -
Add vertical walls:
Connect your horizontal lines with short vertical strokes. This creates the classic T-shapes and dead ends found in real corn mazes. -
Fill in the complexity:
Look for large empty spaces in your grid and add small L-shapes or floating lines to make the maze look dense and tricky. -
Check line consistency:
Go back over any white lines that look semi-transparent. I like to let the first layer dry for about thirty seconds before adding a second coat for bright, crisp opacity.
Pro Tip: Brighter White
For the crispest white lines, use a ‘wax-based’ white face paint rather than glycerin-based. It requires less water and dries much more opaque.
Step 3: Adding the Pumpkin Marker
-
Paint the pumpkin base:
Rinse your brush thoroughly and load it with bright orange paint. Paint a small, slightly flattened circle near the bottom corner or entrance of your maze. -
Add dimension:
While the orange is still slightly wet, you can dab a tiny bit more pigment in the center to give it a rounder appearance. -
Draw the stem:
Switch to your smallest detail brush (size 0) and load it with green paint. Paint a tiny curved stem popping out of the top of the pumpkin. -
Add the vine details:
Using the very tip of the green brush, draw a thin, curly vine extending from the stem, perhaps wrapping slightly around the nearest white maze line. -
Paint scattered leaves:
Add two or three tiny green V-shapes near the pumpkin or at the corners of the maze to represent stray corn leaves or vine foliage.
Step 4: Final Touches
-
Clean up edges:
Dip a cotton swab in a little water (or makeup remover) to sharpen any white lines that might have smudged or become too thick. -
Optional text:
If you have a steady hand, use a fine-tip paintbrush or liquid black eyeliner to write small text like ‘MAZE’ or the year near the eye area. -
Set the paint:
Allow the entire design to dry completely without moving the face muscles too much to prevent cracking.
Now you are ready to guide everyone through the festivities with this adorable map artwork
Patchwork Pumpkin Couture
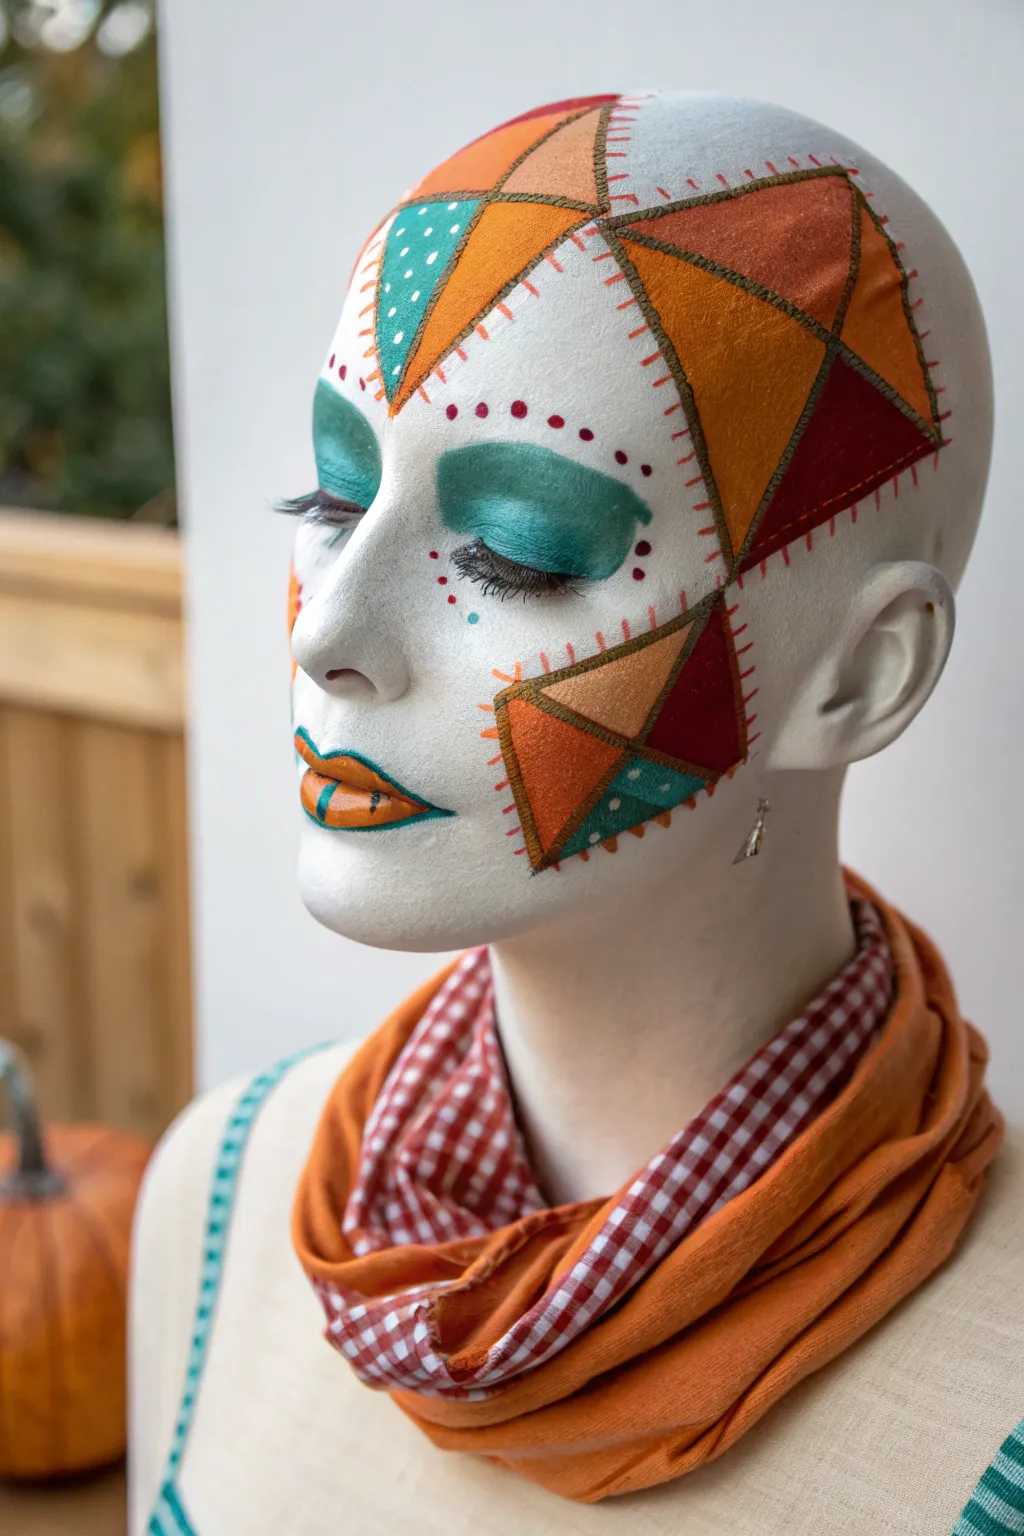
Transform yourself into a walking work of autumn art with this intricate scarecrow-inspired face paint design. Featuring bold geometric patches and rich fall colors, this look blends whimsical folk art with high-fashion aesthetics.
Step-by-Step Tutorial
Materials
- White cream makeup or face paint (full coverage)
- Setting powder (translucent)
- Face paints: Orange, deep red/burgundy, teal/emerald green, yellow ochre
- Fine detail brush (size 0 or 00)
- Flat shader brush
- Medium round brush
- Black eyeliner pencil or liquid liner
- Makeup sponges
- False eyelashes (optional)
Step 1: Creating the Canvas
-
Base layer application:
Begin by covering the entire face, neck, and ears with a solid layer of white cream makeup using a damp sponge. Dabbing rather than sweeping will give you better opacity without streaks. -
Set the base:
Dust a generous amount of translucent setting powder over the white base. This is crucial to prevent the colors we add later from muddying or sliding around.
Fixing Smudges
If a paint edge blurs, wait for it to dry completely. Re-apply a tiny bit of white base over the mistake with a detail brush, let dry, and then repaint the clean line.
Step 2: Geometric Patchwork
-
Mapping the shapes:
Using a very light touch with a pale eyeliner or a dry brush, sketch out the triangular ‘patch’ shapes on the forehead and left cheek. Think of these as fabric scraps sewn together. -
Painting the orange patches:
Fill in the largest triangles with a vibrant pumpkin orange face paint using a flat brush for crisp edges. -
Adding deep tones:
Paint the adjacent triangles with your deep red or burgundy shade. Ensure the colors touch directly to mimic sewn fabric. -
Teal accents:
Fill the remaining triangle sections with teal or emerald green. I like to add tiny white polka dots to the teal sections once dry to simulate patterned fabric. -
Stitching details:
With your finest detail brush and a rust-orange or brown paint, create short, perpendicular hatch marks along the outer edges of the triangle groups. These represent the ‘stitches’ holding the patches to the skin.
Step 3: The Eyes and Features
-
Teal eyelids:
Saturate the eyelids with the teal face paint or a highly pigmented eyeshadow, extending the color up past the crease into a soft, rounded shape. -
Defining the lash line:
Apply black eyeliner to the upper lash line. If using false lashes, apply them now for extra drama. -
Decorative dots:
Using the detail brush or the back end of a brush handle, dot burgundy paint in an arch above the teal eyeshadow on the forehead. -
Cheek details:
Add a small cluster of tiny dots (teal, red, and orange) under the eye and near the nose bridge for added texture.
Add Fabric Texture
Before the colored patches dry, gently press a piece of coarse burlap or linen against the paint to imprint a realistic woven fabric texture onto your ‘patches’.
Step 4: Lips and Final Touches
-
Ombré stitching lips:
Paint the lips with the pumpkin orange. Outline the lips in teal green for a striking contrast. -
Vertical lip stripes:
Paint a vertical teal line down the center of the bottom lip, adding two horizontal ‘stitch’ marks across it. -
Final stitch check:
Look over the design and add any extra small hash marks around the edges of your patchwork sections to balance the look.
Pair this look with a cozy scarf and you are ready to be the most stylish scarecrow at the harvest festival


Have a question or want to share your own experience? I'd love to hear from you in the comments below!