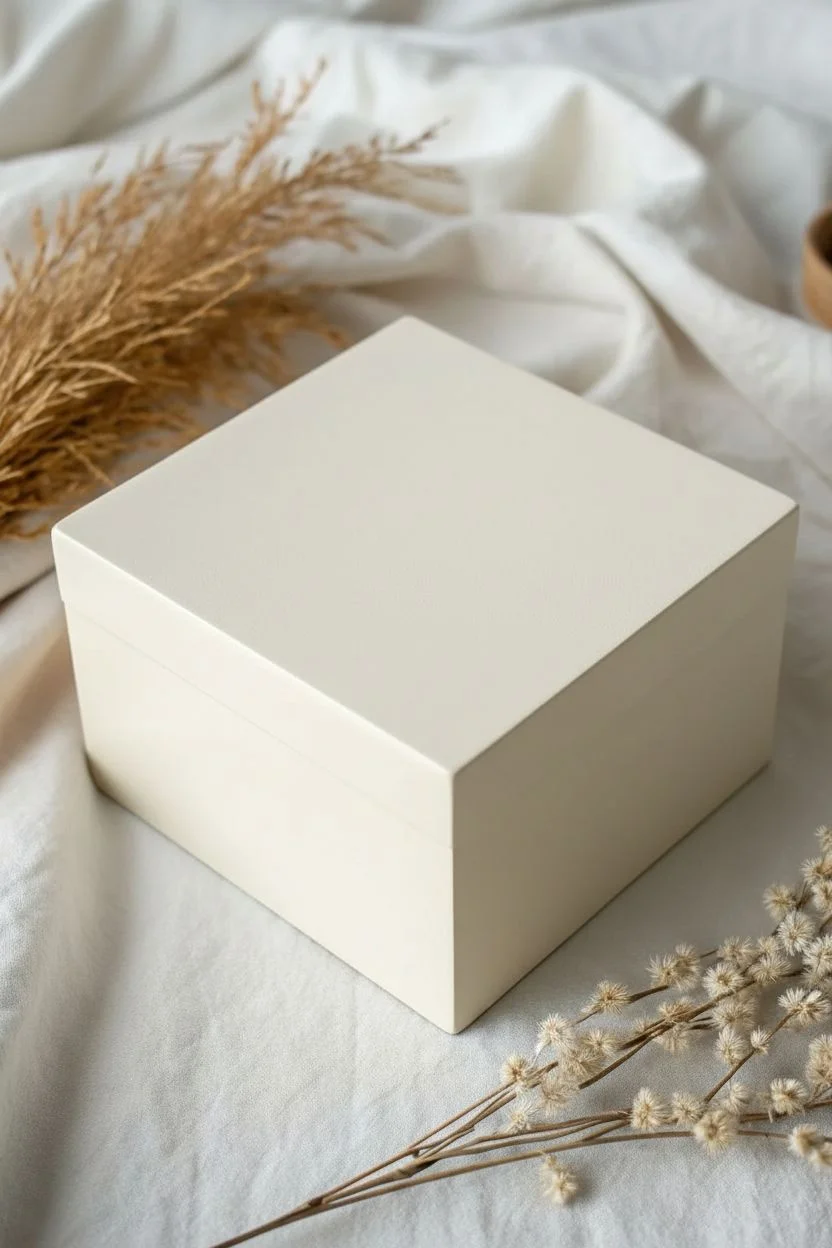
A plain little wooden box is basically the perfect tiny canvas—fast to paint, super satisfying, and instantly more “you.” Below are my favorite box painting ideas with an aesthetic vibe, from simple classics to the artsy, unexpected finishes that look amazing on a desk or vanity.
Minimal Stripes With Tape
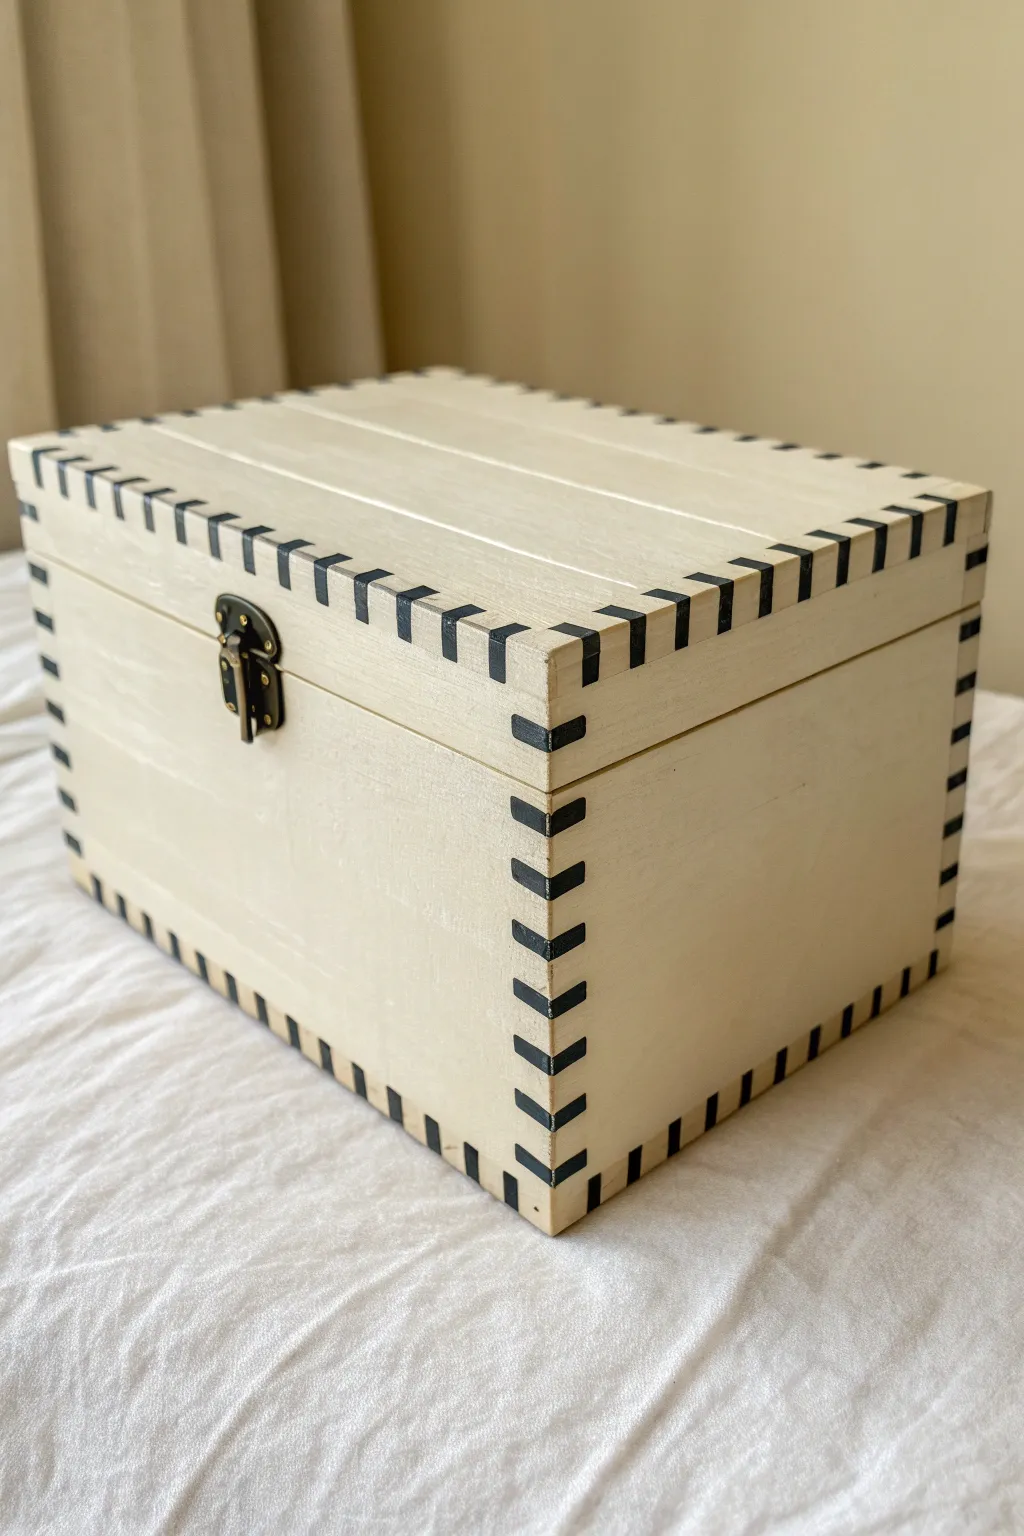
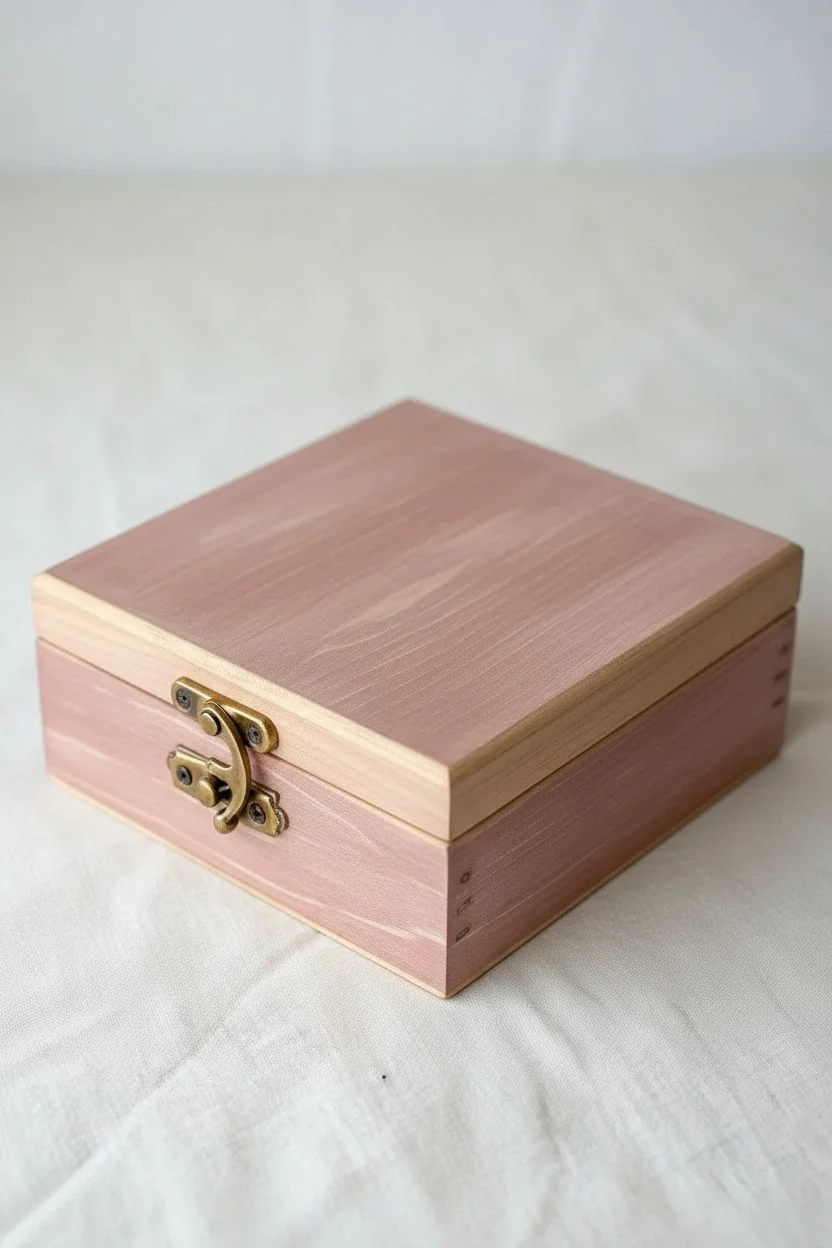
Transform a plain wooden craft box into a chic storage piece with this deceptively simple design. By simulating a stitched border with crisp, dark paint, you can achieve a modern yet handcrafted aesthetic perfect for hiding keepsakes or desktop clutter.
Detailed Instructions
Materials
- Unfinished wooden box with latch
- Cream or off-white acrylic paint
- Black acrylic paint
- Wide flat paintbrush (approx. 1 inch)
- Small square-edged paintbrush or flat artist brush (approx. ¼ inch)
- Fine-grit sandpaper (220 grit)
- Painter’s tape or Washi tape (optional, for guidelines)
- Small screwdriver (to remove hardware)
- Matte clear varnish or sealant
Step 1: Preparation & Base Coat
-
Remove hardware:
Before you begin, use a small screwdriver to carefully remove the latch and hinges. Keep these tiny screws in a safe dish so they don’t roll away. -
Sand the surface:
Give the entire box a light sanding with fine-grit sandpaper. Focus on any rough patches or splinters, especially around the corners where you will be painting later. -
Wipe it down:
Use a barely damp cloth or a tack cloth to remove all sanding dust. A clean surface ensures your creamy base coat will be smooth and flawless. -
Paint the first coat:
Using your wide flat brush, apply a layer of cream or off-white acrylic paint. Brush with the grain of the wood for the best finish. -
Let it dry completely:
Allow this first layer to dry fully. If the wood grain is still showing through more than you’d like, apply a second coat and let that dry as well. -
Paint the interior (optional):
If you want a finished look inside, paint the interior now. I generally prefer to leave the inside raw wood for a nice contrast, but a painted interior looks very polished.
Step 2: Creating the Striped Pattern
-
Plan your spacing:
This design relies on rhythm. You can eyeball the spacing for a hand-painted look, or lightly mark tick marks with a pencil every half-inch along the edges if you prefer precision. -
Load the small brush:
Dip your square-edged brush into black acrylic paint. You want enough paint for solid coverage but not so much that it drips or creates ridges. -
Paint the top lid edges:
Start with the top lid. Place your brush perpendicular to the edge and pull a short, straight stroke inward from the rim, creating a small black rectangle. -
Continue the pattern:
Repeat these strokes around the entire perimeter of the lid top, trying to keep the width of the gaps equal to the width of the paint marks. -
Wrap the corners:
For a true 3D effect, when you paint a mark on the top edge, paint a corresponding mark directly below it on the side vertical face. This creates the illusion that the stripe wraps around the corner. -
Paint vertical edges:
Move to the vertical corners of the box. Paint horizontal dashes going up the corner seam. Remember to wrap these around both sides of the corner as well. -
Paint the bottom rim:
Finally, add the dashed pattern along the very bottom edge of the box, mirroring the style you created on the lid. -
Clean up straight lines:
If any edges look a bit wobble, you can use a tiny bit of cream paint on a small brush to tidy up the straight lines once the black is dry.
Stamp It Easy
Struggling with straight brush lines? Cut a small rectangle of kitchen sponge to your desired stripe size, dip it in paint, and stamp the pattern onto the edges instead.
Step 3: Finishing
-
Seal the box:
Once the decorative stripes are completely dry, apply a coat of matte varnish over the entire exterior. This protects the light paint from dirty fingerprints. -
Reattach hardware:
Screw the hinges and latch back into their original holes. Hand-tighten them gently to avoid stripping the soft wood.
Level Up: Dash of Color
Instead of classic black stripes, try a deep navy or forest green for the ‘stitches’. For a pop art look, alternate two bright neon colors along the edges.
Now you have a stylish, minimal storage piece ready to organize your space.


Perfect Polka Dots

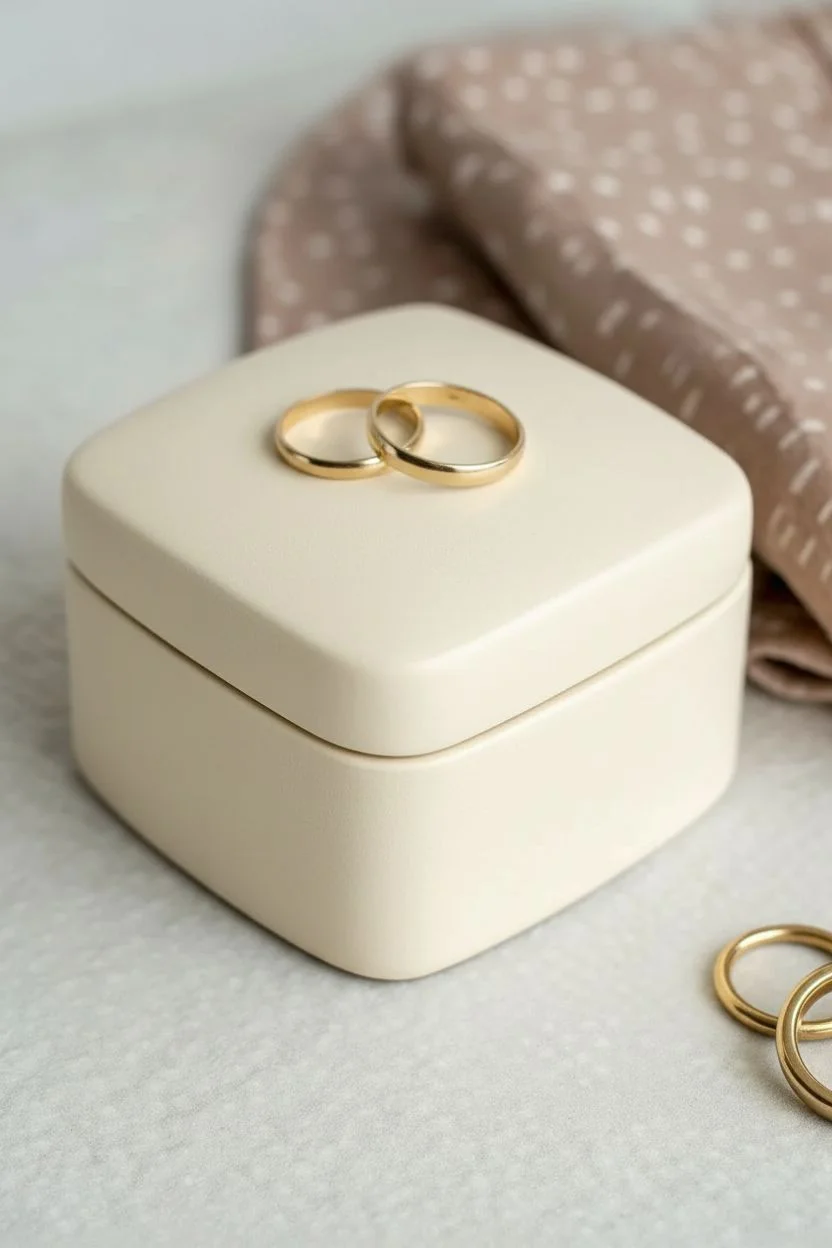
Transform a simple trinket box into an elegant keepsake holder with this subtle polka dot design. The soft ivory base paired with metallic gold accents creates a timeless, minimalist look perfect for storing your favorite rings.
How-To Guide
Materials
- Small square jewelry box (ceramic, wood, or sturdy papier-mâché)
- Fine grit sandpaper (220-grit)
- Cream or ivory acrylic paint (matte or satin finish)
- Metallic gold acrylic paint or gold leaf pen
- Small flat synthetic paintbrush
- High-density foam pouncer or a Q-tip
- Paper towels
- Clear acrylic sealant spray (matte)
- Disposable plate or palette
Step 1: Preparation & Base Coat
-
Prepare the surface:
Before painting, lightly sand the exterior of your box. This removes any existing sheen or rough spots, ensuring the new paint adheres smoothly. Wipe away all dust with a damp paper towel. -
Mix your base color:
If your cream paint looks too stark, mix in a tiny drop of warm brown or ochre to achieve that ‘biscuit’ pottery tone visible in the example. -
Apply the first coat:
Using your flat synthetic brush, apply a thin, even layer of the cream paint over the lid and base. Don’t worry about complete opacity yet; thin layers prevent brush strokes. -
Dry and repeat:
Allow the first coat to dry for about 20 minutes. Apply a second and, if necessary, a third coat until you have a solid, opaque finish. -
Smooth the texture:
For that ceramic-like finish, if you see brush marks after the final coat dries, gently buff the surface with the finest sandpaper or a piece of brown paper bag.
Step 2: Creating the Polka Dots
-
Test the applicator:
Dip the end of a Q-tip stick (cotton removed) or a very small dotting tool into your metallic gold paint. Test the dot size on a scrap piece of paper first. -
Plan the spacing:
Visualize a grid pattern but keep it organic. The charm of this design lies in the seemingly random yet balanced distribution of the dots. -
Start on the lid:
Begin applying gold dots to the top of the lid. Ensure the applicator is re-dipped frequently so every dot has the same saturation of gold. -
Work down the sides:
Continue the pattern down the sides of the lid. Be careful near the edges; wrap the pattern seemingly naturally as if the dots continue underneath. -
Let the lid dry:
Set the lid aside to dry completely before handling the base, preventing accidental smudges. -
Dot the base:
Repeat the dotting process on the bottom part of the box. I like to stagger the dots slightly compared to the lid so the lines don’t need to match up perfectly when closed. -
Check density:
Step back and look at the box from a distance. Fill in any large empty spaces with a single dot to maintain visual balance. -
Allow cure time:
Metallic paint often takes a little longer to cure fully than standard acrylics. Let the dots dry for at least an hour.
Uneven Dots?
If a dot smudges or looks too big, wait for it to dry completely, paint over it with a speck of your cream base color, and re-dot the gold once that patch is dry
Step 3: Finishing Touches
-
Seal the artwork:
Take the box outside or into a well-ventilated area. Apply a light mist of matte clear acrylic sealant. -
The second seal:
Once the first mist is dry (about 15 minutes), apply one final light coat to protect the gold paint from tarnishing or rubbing off over time.
Add Velvet Lining
Elevate the interior by cutting self-adhesive velvet or felt sheets to fit the bottom and inner sides for a truly luxurious jewelry resting spot
Now you have a chic, speckled home for your daily treasures


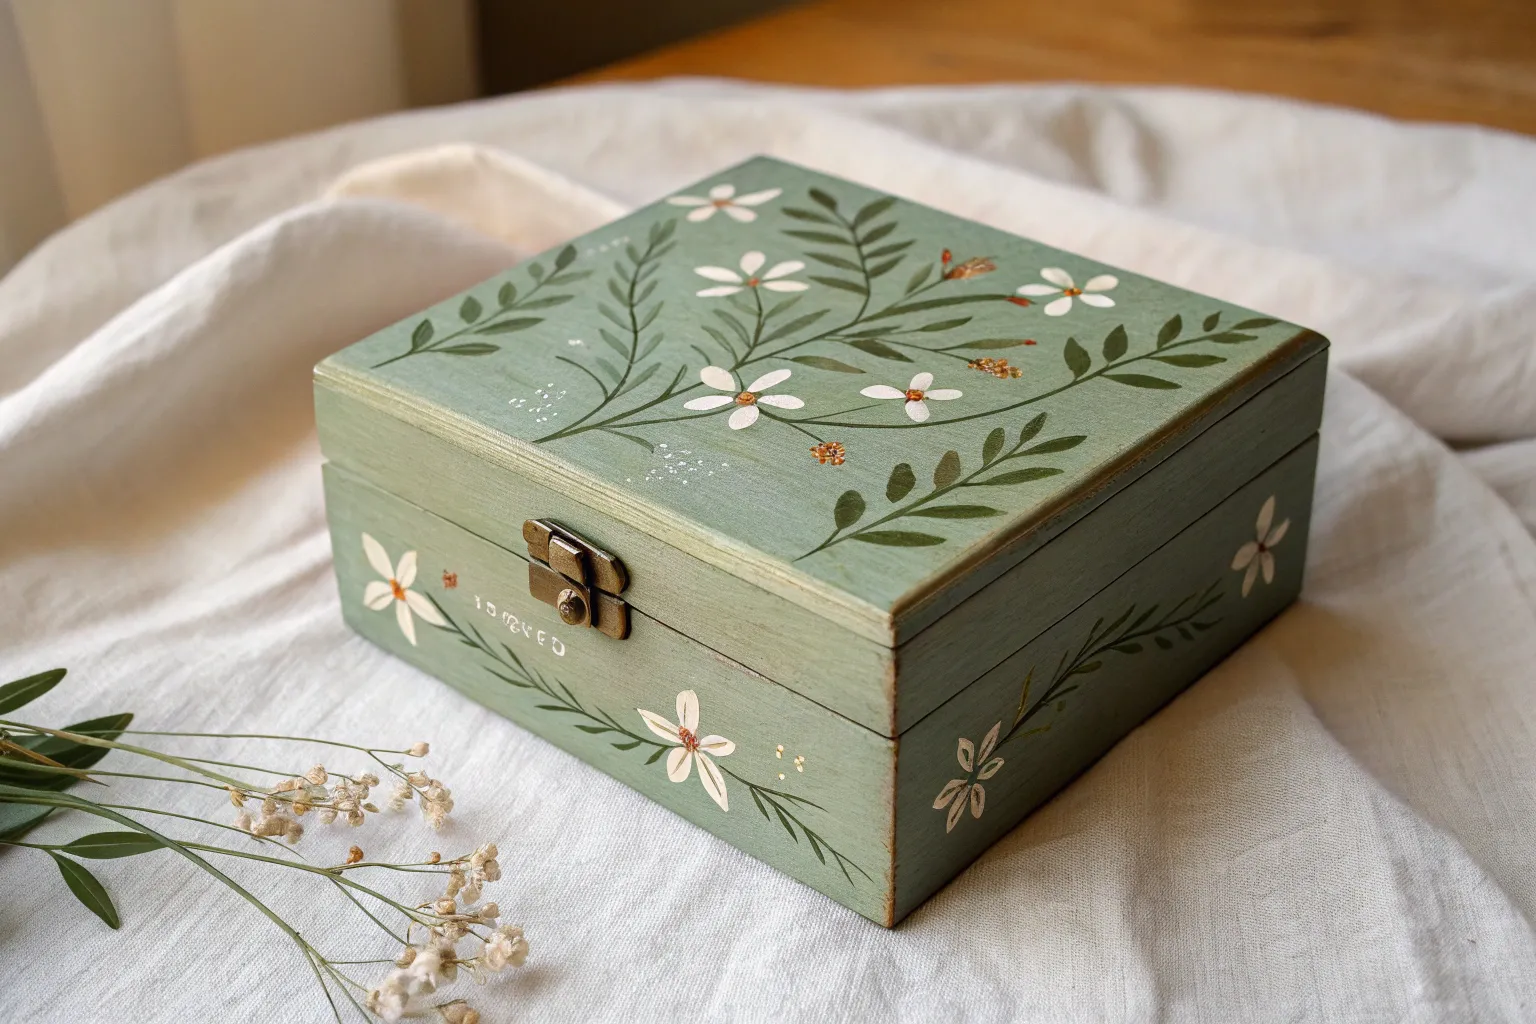
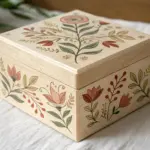
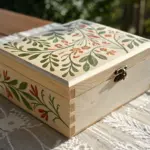
Delicate Floral Lid Bouquet
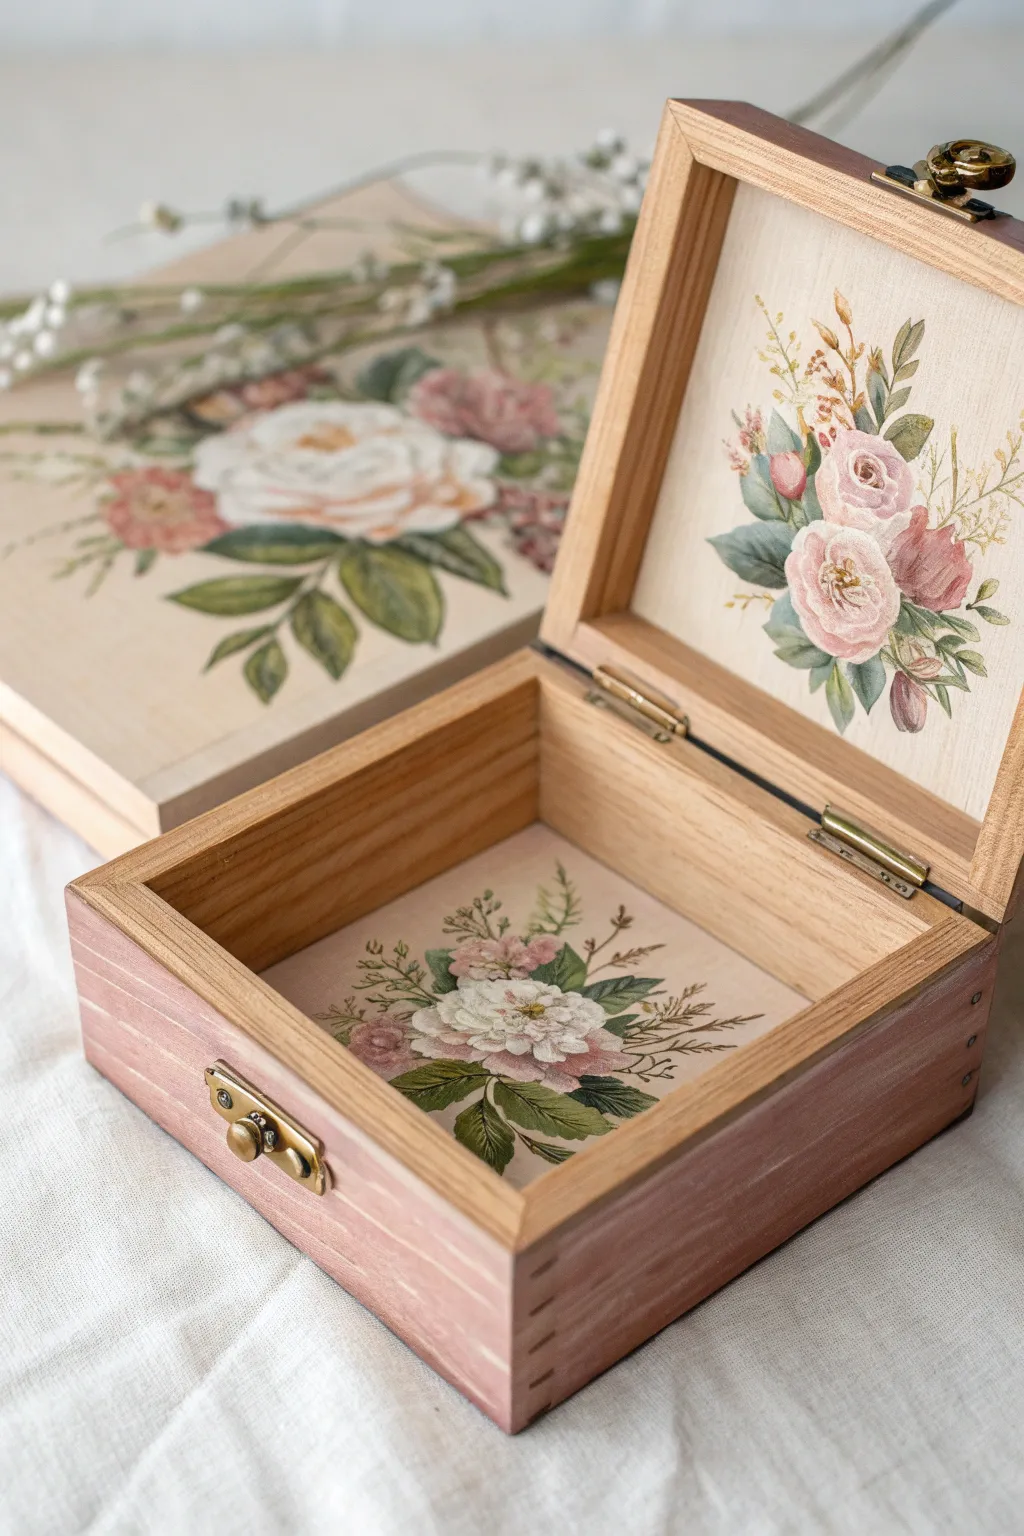
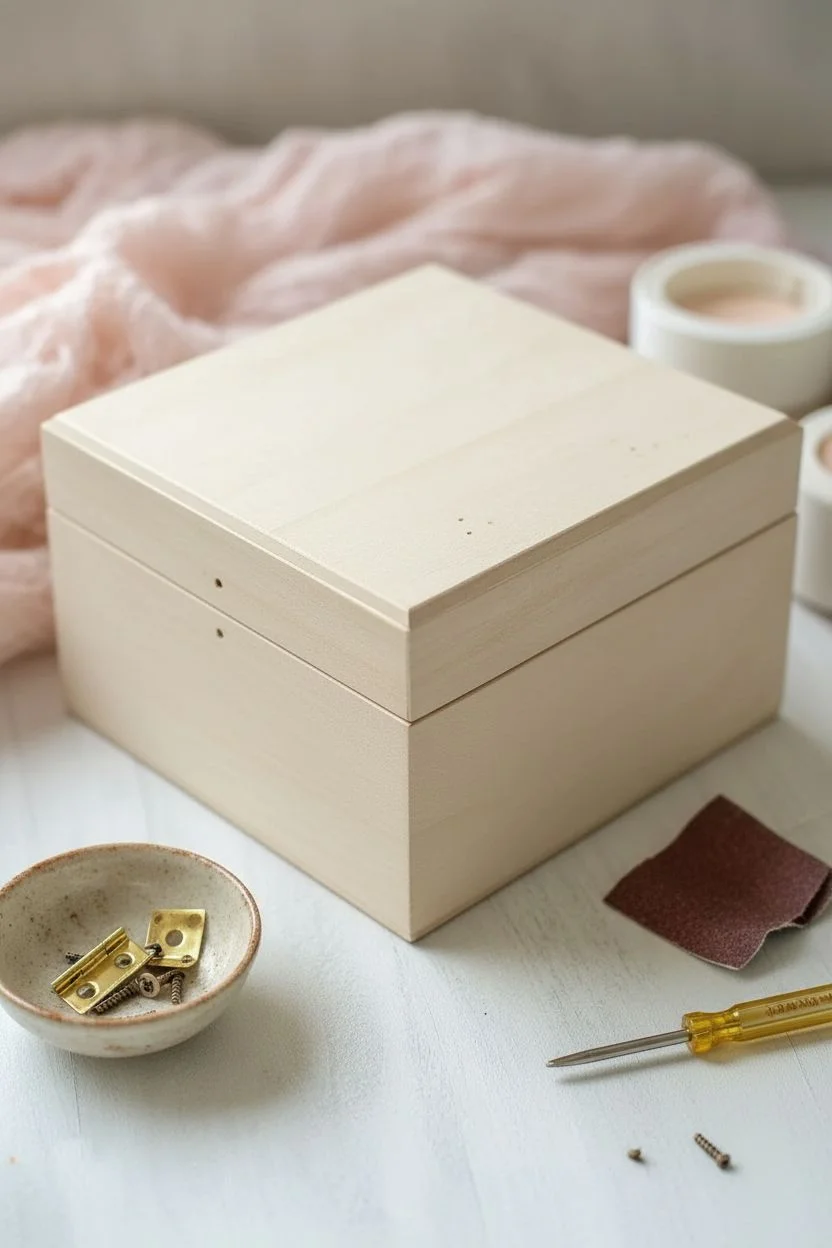
Transform a simple unfinished wooden box into a romantic heirloom using soft floral motifs and delicate washes of color. This project combines the charm of decoupage or hand-painting with a subtle stained finish for a beautifully aged aesthetic.
Step-by-Step Guide
Materials
- Unfinished wooden box with hinged lid
- Fine grit sandpaper (220 grit)
- Acrylic paints (Dusty Rose, Mauve, Sage Green, Olive, White, Cream)
- Acrylic glazing medium or water
- Small flat brush
- Fine liner brush (size 0 or 00)
- Small round brush (size 2)
- Matte varnish or sealer
- Pencil for sketching
- Paper plate or palette
- Paper towels
Step 1: Preparing the Base
-
Sand the surface:
Begin by lightly sanding the entire wooden box using 220-grit sandpaper. Focus on any rough edges or splinters, ensuring the wood is smooth to the touch. Wipe away all dust with a slightly damp cloth or tack cloth. -
Mix a color wash:
Create a semi-transparent wash for the exterior sides. Mix a small amount of Dusty Rose and Mauve acrylic paint with water or glazing medium. I aim for a ratio of about 1 part paint to 3 parts water/medium to keep the wood grain visible. -
Apply the exterior stain:
Using the flat brush, apply your pink wash to the outside walls of the box. Paint in the direction of the wood grain. If the color looks too opaque, wipe it back immediately with a paper towel to achieve that soft, stained look. -
Detail the rims:
Leave the top rim of the box base and the edges of the lid unpainted, or sand them back lightly if paint got on them, to maintain the natural wood contrast seen in the photo.
Smooth Gradients
For soft petal transitions, keep your brush slightly damp. This extends the drying time of acrylics, allowing you to blend the pinks and whites directly on the wood for a watercolor effect.
Step 2: Interior Floral Design
-
Sketch the placement:
Open the box. Lightly sketch a floral arrangement on the inside bottom panel using a pencil. Center a large bloom (like a peony or rose) and surround it with smaller buds and foliage. -
Base coat the main flower:
Mix a soft Cream or Off-White color. Using a small round brush, block in the shape of the central flower on the bottom panel. Don’t worry about details yet; just establish the silhouette. -
Add foliage base layers:
Using Sage Green, paint the larger leaves extending from your central flower. Use a flicking motion at the tips of the leaves to keep them looking natural and tapered. -
Detail the center bloom:
Once the cream base is dry, use a mix of diluted Pink and White to add curved strokes defining the petals. Keep the center darker and the outer petal edges lighter. -
Add delicate stems:
Switch to your fine liner brush. Mix Olive Green with a touch of brown for depth. Paint very thin, spindly stems branching out, adding tiny leaves or buds at the ends.
Step 3: Lid Interior Design
-
Plan the lid bouquet:
The inside lid features a vertical bouquet. Sketch a taller arrangement here, with two distinct pink roses—one fully open and one slightly closed—surrounded by greenery. -
Paint the roses:
For the lid roses, use a slightly deeper pink than the bottom flower. Start with a medium pink base. While wet, blend in White highlights on the upper curves of petals and a darker Mauve in the recessed shadows. -
Create filler flowers:
Using the tip of your round brush, dab small clusters of berries or tiny filler flowers in a muted coral or rust tone to add variety to the bouquet. -
Layer the leaves:
Paint leaves in varying shades of green. Mix a little blue into your green for cooler leaves (like eucalyptus) and yellow for warmer, fresh foliage. Overlap some leaves with the flowers slightly for realism. -
Refine with outlines:
I like to use a very diluted brown or dark green on my liner brush to add extremely faint, broken outlines to some petals and leaves. This sharpens the image without looking like a cartoon. -
Add golden accents:
If desired, mix a tiny bit of yellow ochre or gold paint to add wispy, dried-grass style stems poking out from the bouquet for an ethereal texture.
Personalize It
Hide a tiny message or a significant date within the leaves of the bottom floral panel. It adds a secret, sentimental discovery for whoever opens the box later.
Step 4: Finishing Touches
-
Clean up edges:
Check the unpainted wood frames around your floral panels. If any paint strayed onto the frame, use a clean damp brush or sandpaper to tidy the line. -
Let it cure:
Allow all paint to dry completely, preferably overnight. Acrylics dry to the touch quickly but need time to harden before sealing. -
Apply varnish:
Apply a thin coat of matte varnish over the painted areas (the pink sides and the floral interiors). This protects your work from dust and prevents the wood from yellowing too quickly. -
Reassemble hardware:
If you removed the hinges or latch for painting, screw them back into place carefully to complete your project.
Your delicate keepsake box is now ready to hold jewelry or tiny treasures with timeless elegance


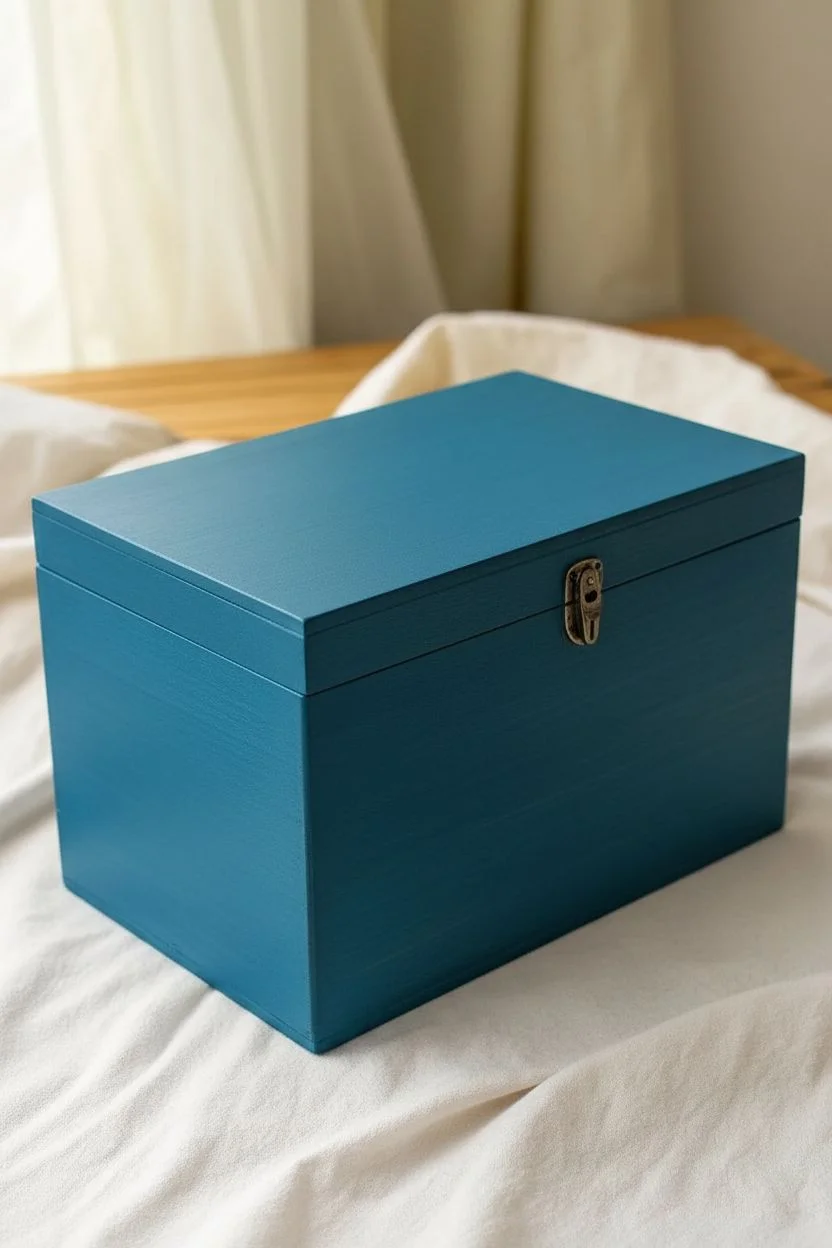
Soft Pastel Color Wash
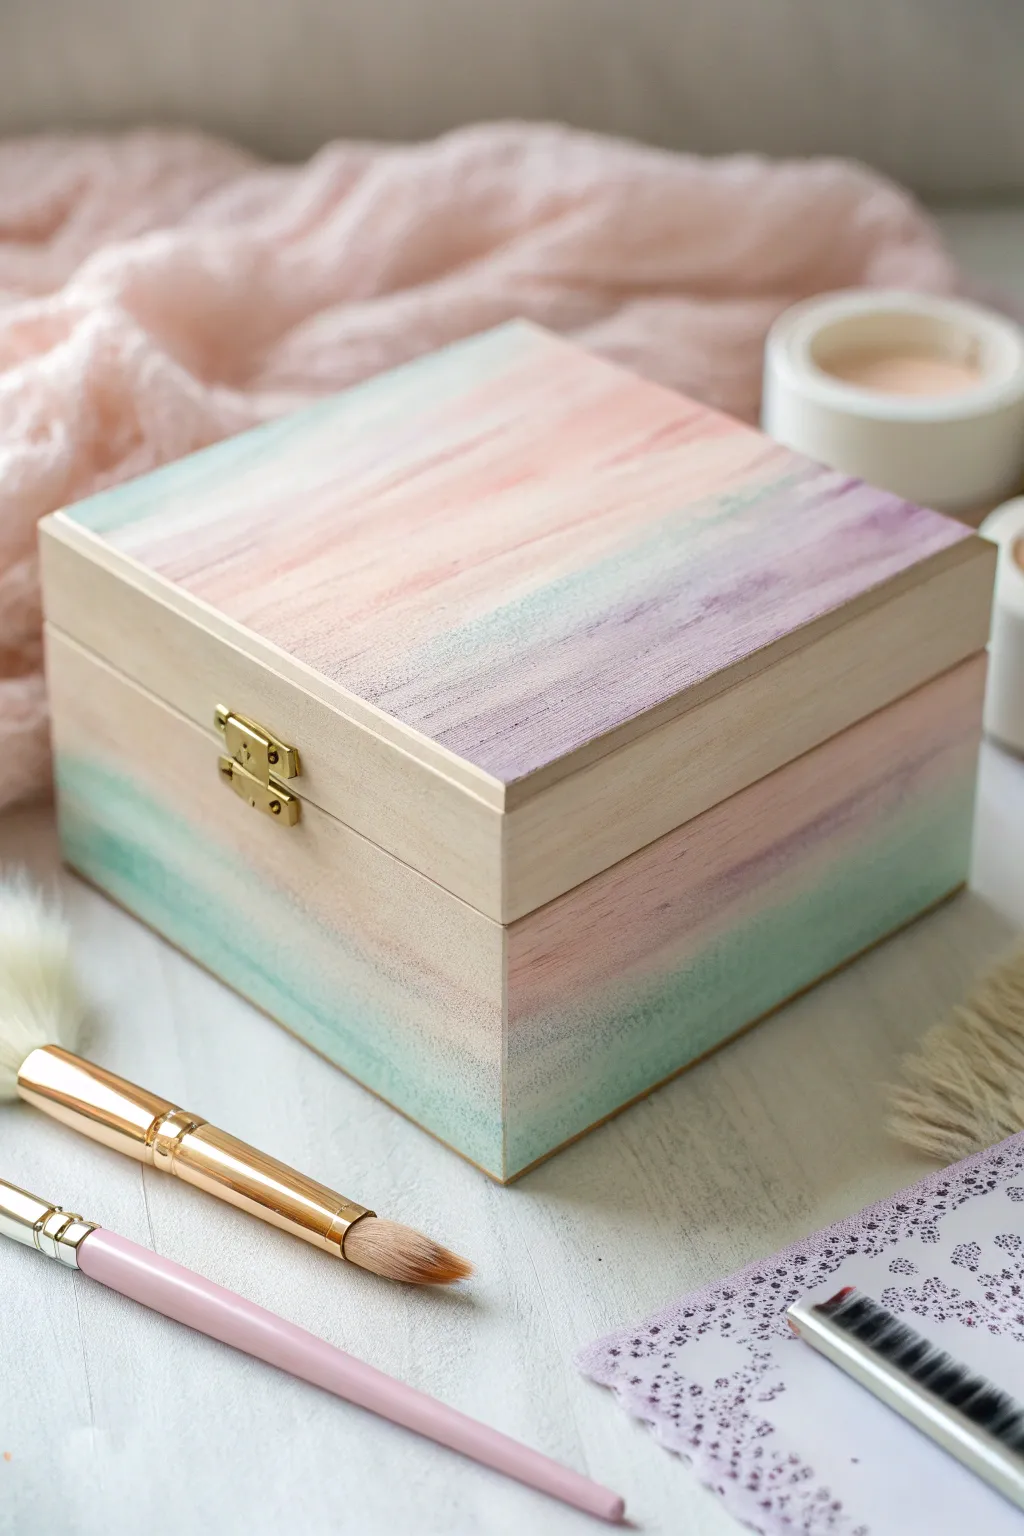
Transform a plain wooden keepsake box into a delicate treasure chest with this soft, blended watercolor-style technique. By layering diluted acrylics or watercolors directly onto unfinished wood, you create a dreamy, ethereal gradient that lets the natural grain peek through.
Step-by-Step
Materials
- Unfinished wooden box with metal clasp
- Acrylic paints (pastel pink, lavender, soft teal/mint green)
- White acrylic paint (for mixing)
- Small mixing cups or palette
- Soft synthetic flat brush (1-inch width)
- Fine grit sandpaper (220-grit)
- Paper towels or cotton rag
- Cup of water
- Matte spray sealant or clear wax
- Small screwdriver (for removing hardware)
Step 1: Preparation
-
Remove Hardware:
Before you begin, use your small screwdriver to carefully remove the metal clasp and hinges from the box. Keep these tiny screws and pieces in a safe bowl so they don’t get lost. -
Sand the Wood:
Lightly sand the entire exterior of the box using 220-grit sandpaper. You want the surface to be silky smooth to touch. -
Clean the Surface:
Wipe away all the sanding dust with a dry paper towel or a microfiber cloth. Any leftover dust will create gritty lumps in your paint wash. -
Mix Your Washes:
In separate cups, mix a pea-sized amount of each paint color with about a tablespoon of water. You want a consistency similar to skim milk—runny and translucent. -
Test the Opacity:
Flip the box over and test your wash on the bottom. If the color is too bold, add more water; if it’s too faint, add a tiny dot of paint.
Uneven Blotches?
If the wood absorbs the paint unevenly, lightly sand the blotchy area with fine sandpaper to lift the pigment, then re-apply a very watery wash over the spot.
Step 2: Painting the Lid
-
Dampen the Wood:
Take a clean brush dipped in plain water and lightly dampen the top of the lid. This pre-wetting helps the colors bleed and blend softly rather than creating harsh lines. -
Apply the First Stripe:
Load your brush with the diluted pastel pink and paint a diagonal stripe across one corner or section of the lid. Work quickly while the wood is damp. -
Add the Second Color:
Rinse your brush slightly (don’t dry it completely) and pick up the lavender wash. Apply it next to the pink, slightly overlapping the wet edges. -
Blend the Seams:
Using a slightly damp clean brush, gently sweep back and forth over the area where the pink and lavender meet to create a soft, cloud-like transition. -
Introduce the Teal:
Apply the mint/teal wash to the remaining section of the lid, again overlapping slightly with the previous color. -
Horizontal Strokes:
To mimic the look in the photo, ensure your final brushstrokes generally follow the direction of the wood grain, pulling the pigment across the surface smoothly.
Step 3: Painting the Sides & Finishing
-
Carry the Pattern Down:
Move to the sides of the box. Try to match the colors on the sides to where they end on the lid, creating a ‘waterfall’ effect where the pink flows from top to side. -
Keep Edges Clean:
Be mindful of the seam where the box opens. Avoid letting too much watery paint drip inside. I usually keep a paper towel handy to quickly blot the inner rim. -
Let it Dry:
Allow the box to dry completely. Because the washes are thin, this should only take about 15-20 minutes, but the wood will look lighter once dry. -
Assess Saturation:
If the colors look too washed out for your liking, repeat the painting steps with a second layer of wash to deepen the hues. -
Seal the Wood:
Once fully dry, spray the box with a matte clear sealant. This protects the wood and keeps the colors true without adding a shiny, artificial gloss. -
Reattach Hardware:
Screw the hinges and the front clasp back into their original holes.
Add Metallic Details
Mix a tiny amount of gold mica powder or gold watercolor into the pink wash for a subtle shimmer that catches the light only when the box is turned.
Enjoy using your beautifully softer, pastel-hued box to store jewelry or desk treasures
BRUSH GUIDE
The Right Brush for Every Stroke
From clean lines to bold texture — master brush choice, stroke control, and essential techniques.
Explore the Full Guide
Classic Checkerboard Pattern
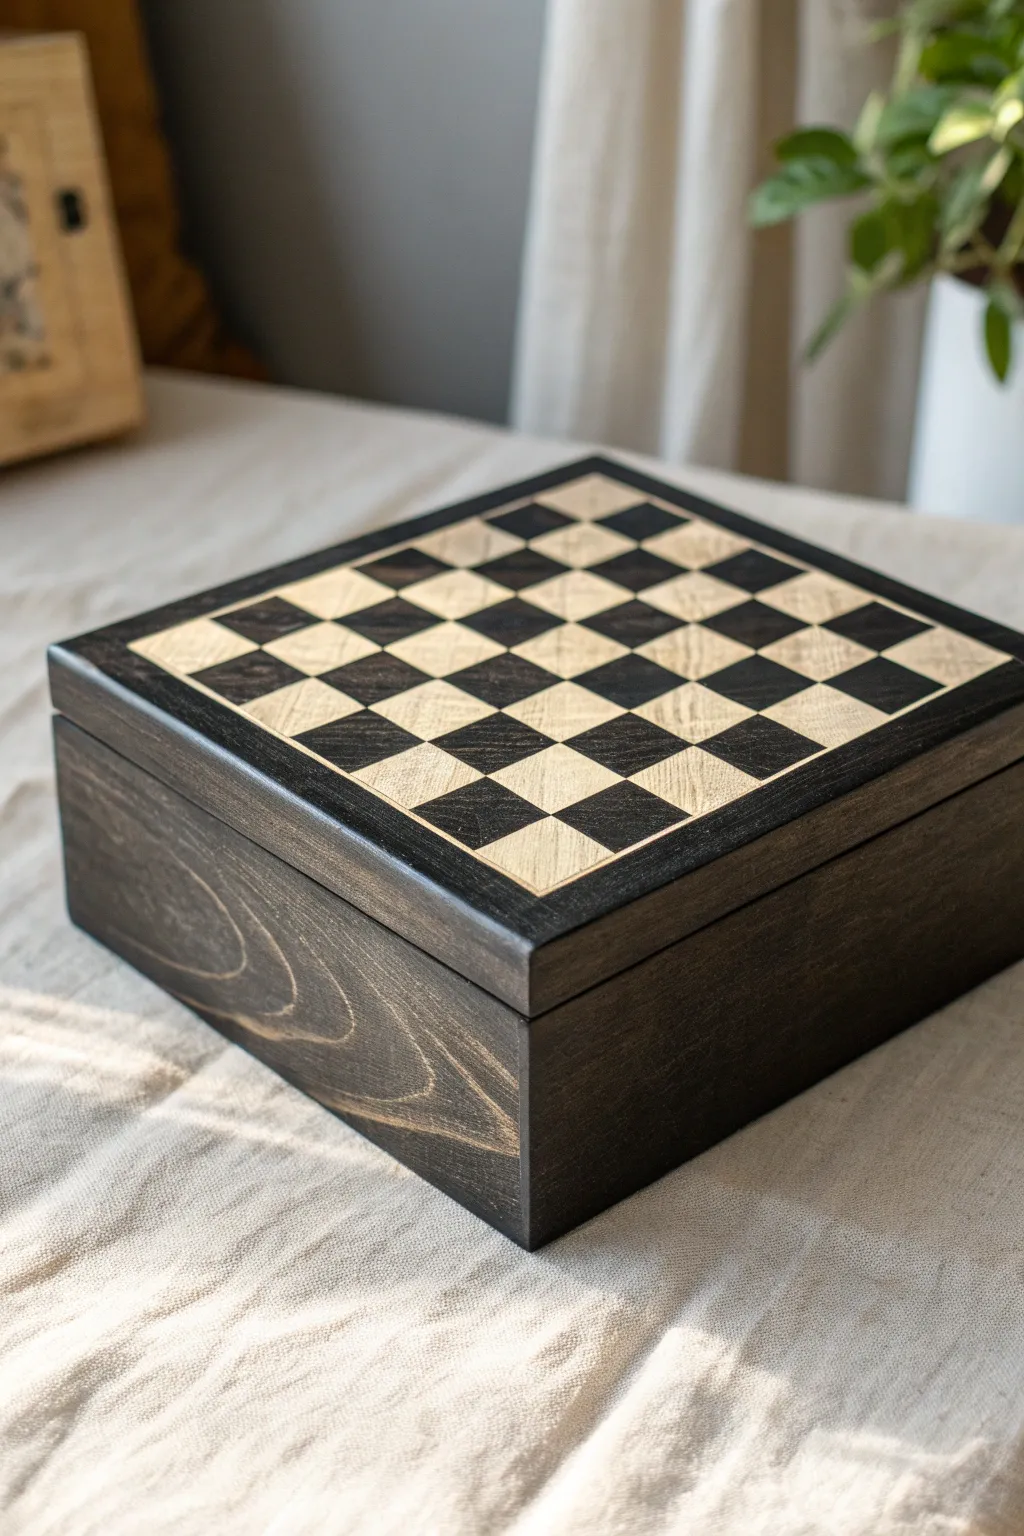
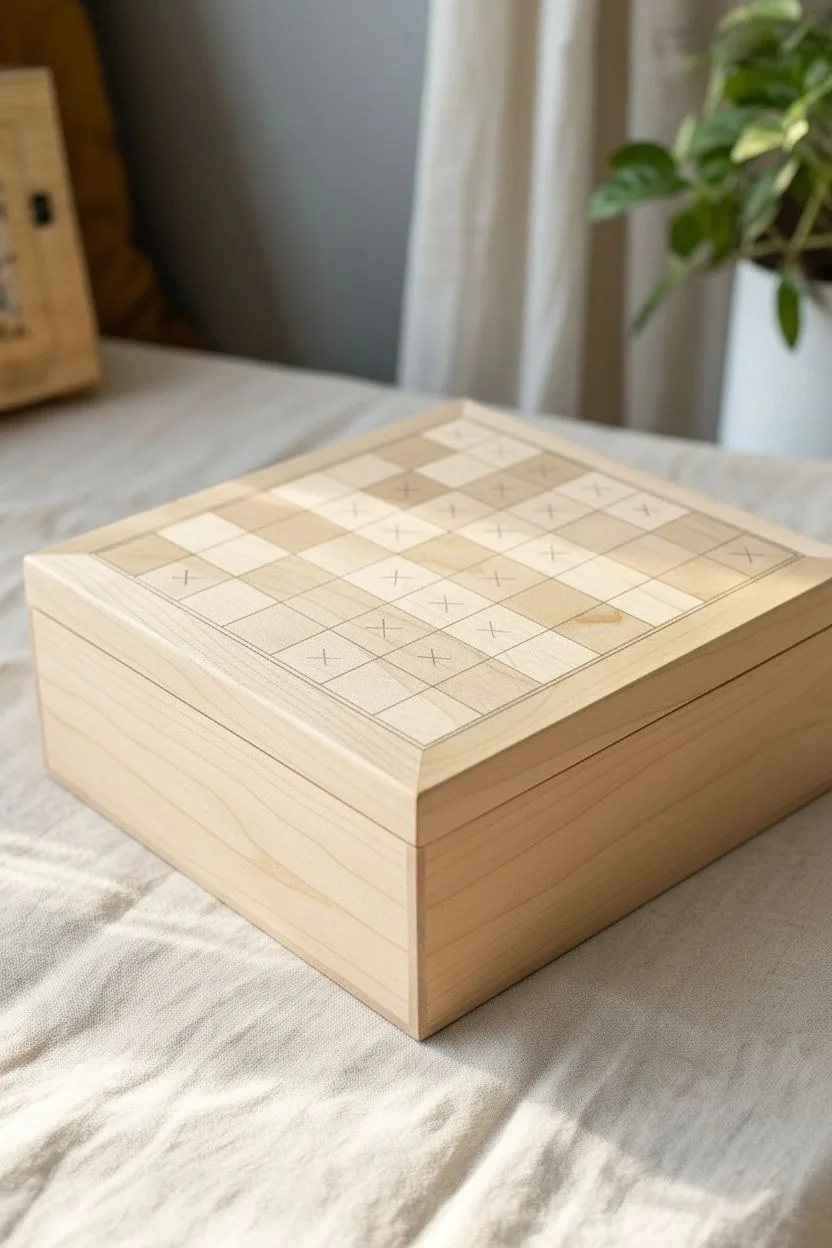
Transform a plain wooden box into a functional game board and elegant storage piece with this precise staining technique. The finished piece features a striking contrast between deep ebony tones and natural wood grain, perfect for housing chess pieces or simply acting as sophisticated decor.
Step-by-Step Tutorial
Materials
- Unfinished wooden box (square lid)
- Painter’s tape (high quality, low tack)
- Ruler (metal preferred)
- Pencil
- X-Acto knife or sharp craft blade
- Ebony or dark walnut wood stain
- Natural or light oak wood stain (optional)
- Foam brushes
- Lint-free rags
- Polyurethane sealer (matte or satin)
- Fine-grit sandpaper (220 grit)
- Tack cloth
Step 1: Preparation & Mapping
-
Sand the Box:
Begin by sanding the entire unfinished wooden box with 220-grit sandpaper to ensure a completely smooth surface. Pay special attention to the lid where the pattern will go. -
Clean the Surface:
Wipe away all sanding dust using a tack cloth. Any remaining dust will get trapped in the stain and ruin the finish. -
Measure the Lid:
Measure the dimensions of your box lid carefully. You need to create an 8×8 grid for a standard chess board. -
Calculate Square Size:
Divide the width of your intended board area by 8. If your lid is large, you might want to leave a border around the grid; if so, subtract the border width before dividing. -
Draw the Grid:
Using a sharp pencil and a metal ruler, lightly draw the 8×8 grid directly onto the wood. Keep the lines faint so they can be easily covered or erased later. -
Mark the Darks:
Place a small ‘x’ in every other square to mark which ones will be stained dark. Remember, the bottom right square should always be a light color for proper chess orientation.
Pro Tip: Bleed Prevention
Before applying dark stain, paint a layer of clear matte sealer over the tape edges. This fills any tiny gaps so the stain can’t seep under.
Step 2: Creating the Checkerboard
-
First Taping Phase:
Apply painter’s tape to cover the squares that will remain light (the ones without the ‘x’). You will need to tape off rows or individual squares depending on your precision. -
Cut the Tape:
I prefer to lay strips across the whole board and then use an X-Acto knife and a straight edge to carefully cut along the pencil lines, peeling away the tape from the ‘dark’ squares. -
Seal the Edges:
Firmly press down the edges of the tape with your fingernail or a plastic card. This prevents the dark stain from bleeding underneath into the light squares. -
Apply Dark Stain:
Dip a foam brush into the ebony stain and apply it sparingly to the exposed wood squares. Work with the grain. -
Wipe Excess:
After letting the stain penetrate for about 2-3 minutes, wipe off the excess with a lint-free rag. This reveals the beautiful wood grain shown in the photo. -
Stain the Body:
While the lid dries, apply the same dark stain to the sides and bottom of the box, wiping away excess to maintain a consistent look. -
Remove Tape:
Carefully peel back the tape while the stain is still slightly tacky or completely dry. Pull at a 45-degree angle to ensure clean lines.
Troubleshooting: Uneven Stain
If the stain looks blotchy, the wood might be soaking it up unevenly. Apply a pre-stain wood conditioner first to ensure smooth, uniform color absorption.
Step 3: Finishing Touches
-
Assess the Light Squares:
Examine the unstained squares. If you want them slightly warmer, you can apply a very light natural stain now, carefully using a small artist’s brush to stay within lines. -
Touch Ups:
If there was any minor bleeding, use a sharp blade to gently scrape the dark stain off the light wood, or sand lightly with a folded piece of sandpaper. -
Full Dry Time:
Allow the entire box to dry for at least 24 hours, or according to the manufacturer’s instructions on your stain can. -
First Sealant Coat:
Apply a thin coat of matte or satin polyurethane over the entire box to protect the wood and the game board. -
Light Sanding:
Once the first coat is dry, very lightly sand with fine grit paper to knock down any raised grain. -
Final Coat:
Apply a second, final coat of polyurethane for a durable, professional finish.
Now you have a stunning, handcrafted game board ready for a match or display
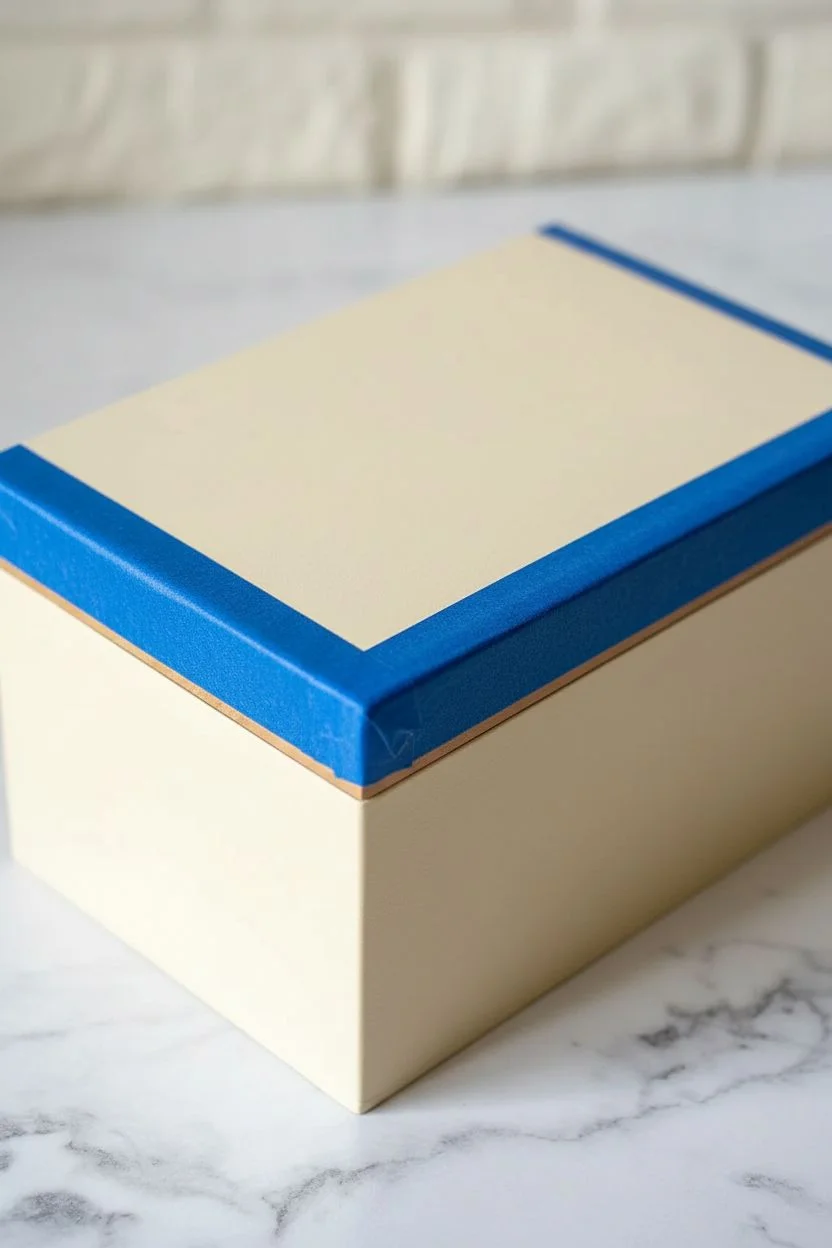
Three-Tone Color Blocking
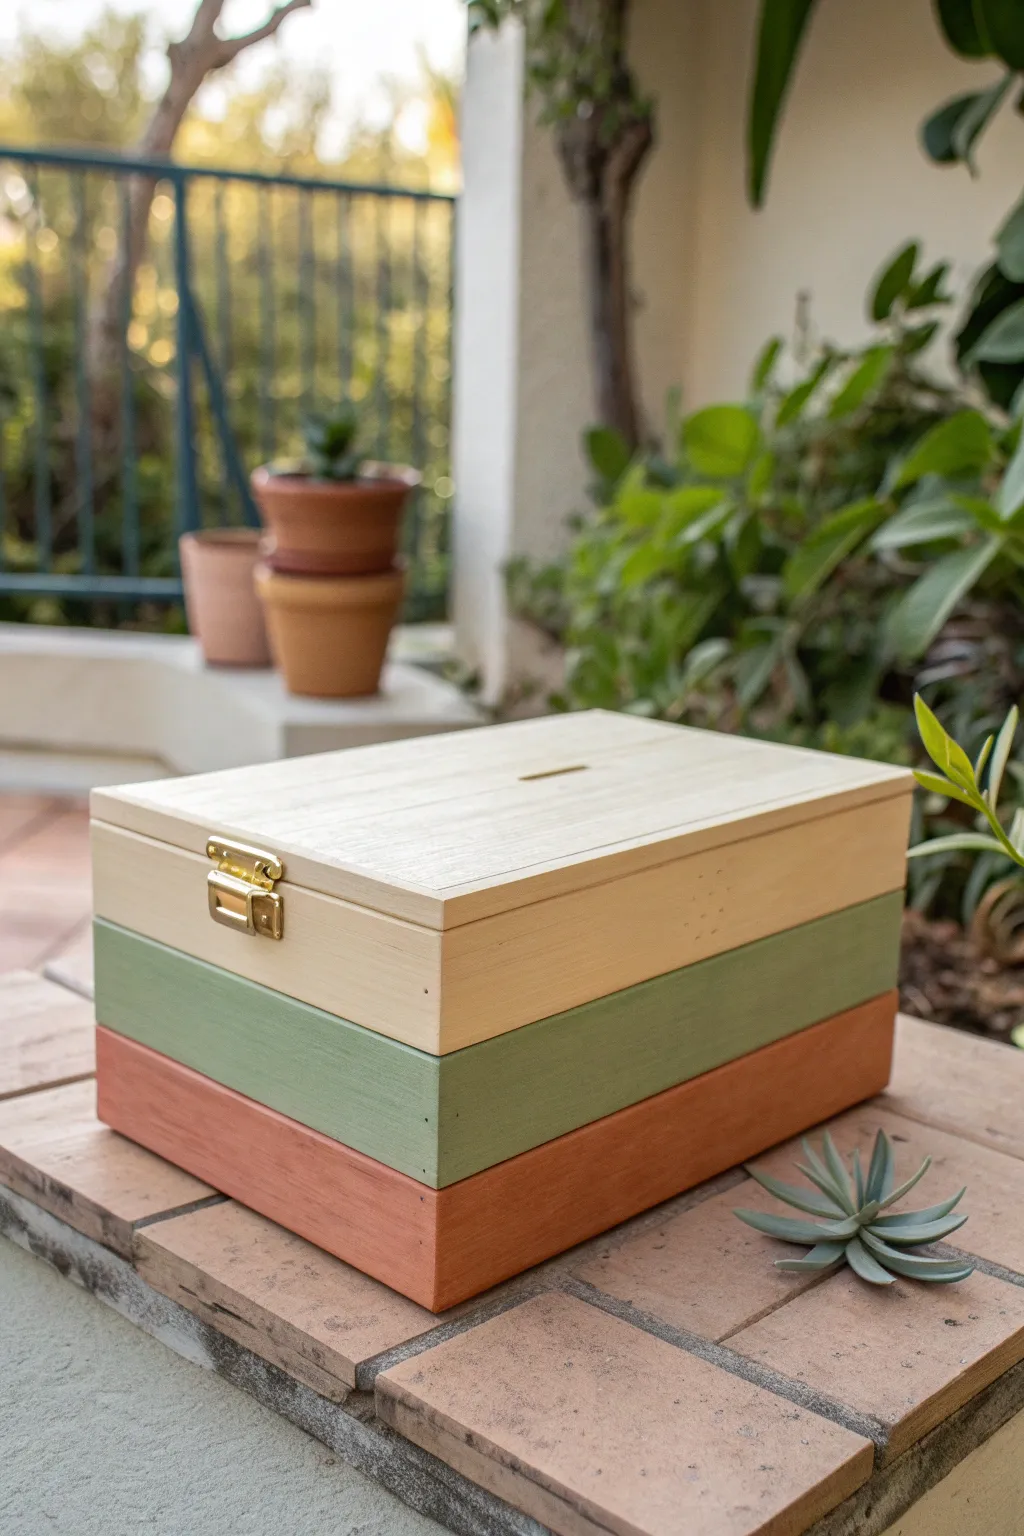
Transform a plain wooden box into a stylish decor piece with this clean, color-blocked design featuring muted earth tones. The distinct layers of cream, sage, and terracotta create a soothing gradient effect that perfectly complements the natural grain of the wood.
Step-by-Step Guide
Materials
- Unfinished wooden box with lid and clasp (slotted lid optional)
- Painter’s tape (high-quality, low-tack for clean lines)
- Sandpaper (220-grit)
- Acrylic craft paint: Cream or light beige
- Acrylic craft paint: Muted sage green
- Acrylic craft paint: Terracotta or rust orange
- Flat synthetic paintbrush (1-inch width)
- Small angled shader brush
- Screwdriver (to remove hardware)
- Matte clear sealant spray or varnish
- Ruler or measuring tape
- Pencil
Step 1: Preparing the Canvas
-
Remove Hardware:
Before you start, carefully unscrew and remove the gold front clasp and the back hinges. Place these small pieces and their screws in a bowl so they don’t get lost. Removing them ensures you won’t get accidental paint splotches on the metal. -
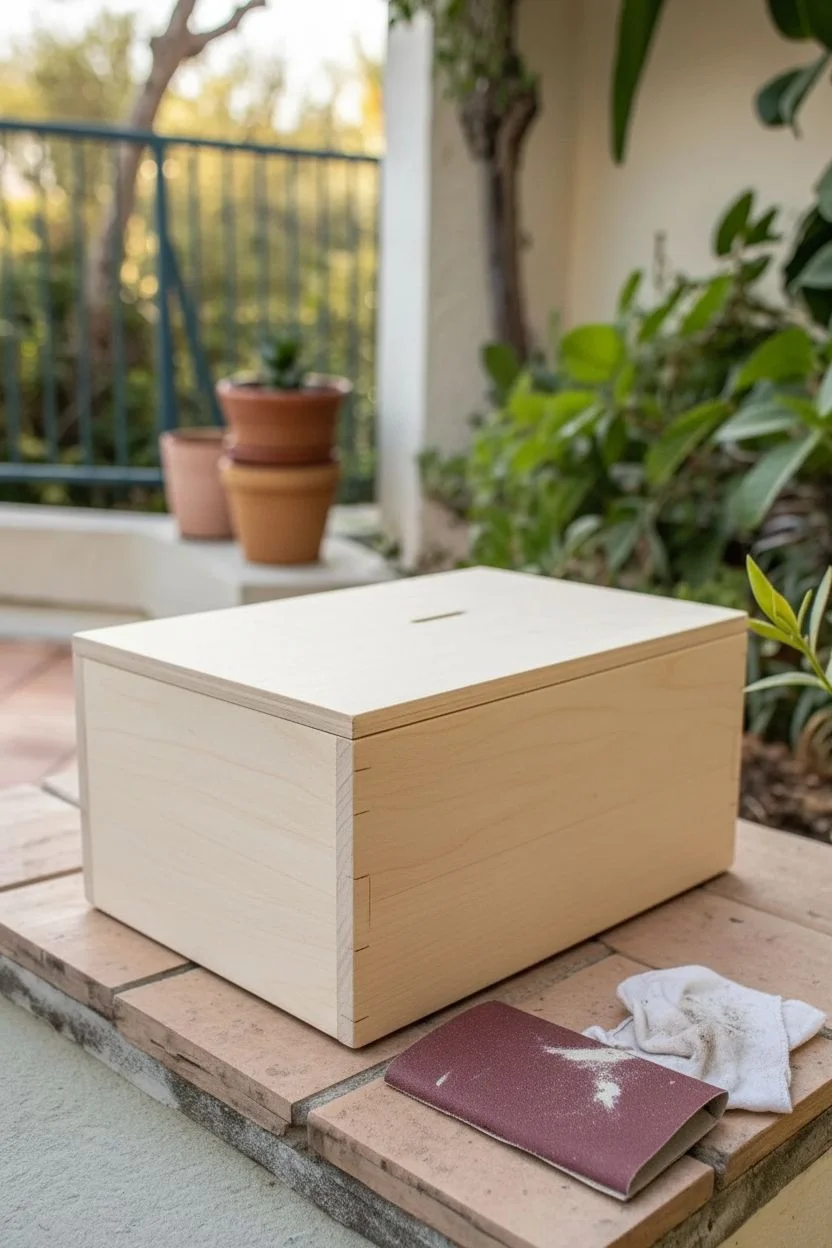
Sand the Surface:
Lightly sand the entire exterior of the box using 220-grit sandpaper. You want to smooth out any rough patches or splinters without removing too much texture. Wipe away the sanding dust completely with a clean, dry cloth. -
Measure the Sections:
To create the three distinct zones, measure the total height of the box’s side walls. Divide this number by three. The distinct lid section naturally forms the top tier, so you may only need to divide the main box body in half to create the bottom two sections. -
Mark the Lines:
Using your pencil and ruler, make small, faint tick marks around the perimeter of the box where the color transitions will occur. Ensure these marks are level all the way around.
Bleeding Lines?
If paint seeps under the tape, seal the tape edge first with a tiny bit of the *base* color (or clear matte medium) before applying the new color. This blocks the gap and ensures a crisp line.
Step 2: Painting the Layers
-
Tape the Middle Section:
Apply a strip of painter’s tape exactly along the line you marked for the top of the terracotta section. Press the edge of the tape down firmly with your fingernail to prevent paint bleed. -
Paint the Bottom Tier:
Load your flat brush with the terracotta paint. Apply the color to the bottom third of the box, painting in smooth horizontal strokes. Extend the paint slightly onto the bottom face of the box for a finished look. -
Apply Second Coat:
Allow the first coat of terracotta to dry for about 20 minutes. Apply a second coat to ensure opaque, solid coverage. Let this dry completely before moving or taping over it. -
Tape for the Top Tier:
Once the bottom is dry, mask off the area for the cream section. Since the lid is a separate piece, you might not need tape here, but painting the rim of the lid requires a steady hand. If your box has a deep lid that forms the entire top third, simply paint the lid separately. -
Paint the Top Tier:
Using the cream or light beige paint, cover the entire top section (or lid). Don’t forget to paint the top surface of the lid, including around the slot if your box has one. Two to three thin coats usually work best for lighter colors. -
Protect the Edges:
Wait for both the top cream section and bottom terracotta section to interact fully dry (at least one hour). Now, apply fresh painter’s tape over the dried paint edges to expose only the middle strip of bare wood. -
Fill the Middle:
Paint the exposed middle strip with your sage green acrylic paint. Be careful not to overload your brush, as excess paint can seep under the tape edges. -
Remove Tape:
While the green paint is still slightly tacky (not fully wet, but not rock hard), carefully peel back the painter’s tape at a 45-degree angle. This technique reveals crisp, clean lines between your three color blocks.
Step 3: Finishing Touches
-
Touch Up:
Inspect your lines. If any paint bled through, use a very small angled brush with the appropriate color to touch up the edges. Alternatively, you can gently scrape away minor bleeds with a craft knife. -
Seal the Project:
Once all paint layers are cured (I usually wait overnight to be safe), mist the box with a matte clear sealant spray. This protects the finish from fingerprints and dust without adding unwanted shine. -
Reattach Hardware:
Locate the screws and hardware you set aside earlier. Carefully screw the hinges back onto the rear and reattach the gold clasp to the front. -
Clean the Slot:
If paint accumulated inside the coin slot on top, use a folded piece of sandpaper or a small file to clean it out for a professional finish.
Pro Tip: Wood Grain
For a wash effect rather than solid color, water down your acrylics slightly (1 part water to 2 parts paint). This lets the natural wood grain show through the color blocks for a rustic look.
Place your newly painted box on a shelf or desk to add a subtle pop of modern, earthy color to your room

PENCIL GUIDE
Understanding Pencil Grades from H to B
From first sketch to finished drawing — learn pencil grades, line control, and shading techniques.
Explore the Full Guide
Tiny Mandala Dot Design
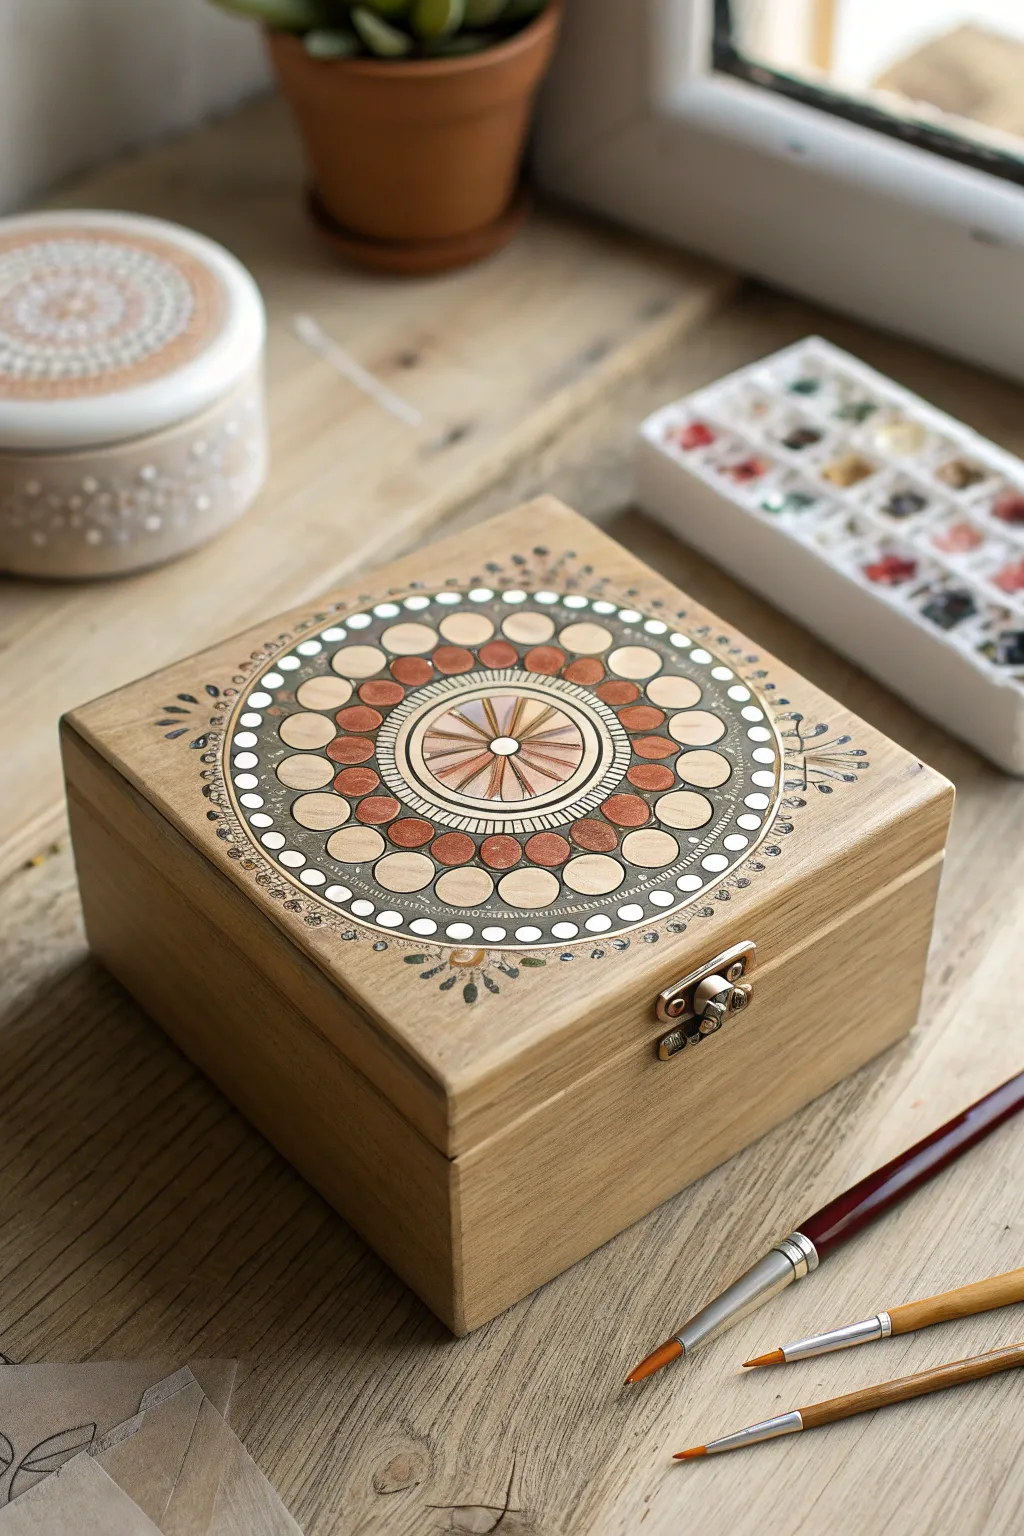

Transform a plain wooden keepsake box into a bohemian treasure with this calming mandala design. Using a palette of warm earth tones and crisp white accents, you’ll build layer upon layer of intricate dots and circles to create a centerpiece that feels both rustic and refined.
Step-by-Step
Materials
- Unfinished square wooden box with latch
- Fine grit sandpaper (220 grit)
- Acrylic paints (White, Black, Burnt Sienna, Copper/Bronze metallic, Beige/Cream)
- Dotting tools (various sizes) or ends of paintbrushes/dowels
- Fine detail brush (00 or 000 size)
- Compass and pencil
- Ruler
- Eraser
- Clear matte or satin varnish
Step 1: Preparation & Mapping
-
Smooth the surface:
Begin by lightly sanding the lid of your wooden box. Even if it looks smooth, a quick pass with 220-grit sandpaper ensures the paint adheres perfectly without snagging your fine brushes. Wipe away the dust with a slightly damp cloth. -
Find the center:
Use a ruler to draw faint diagonal lines from corner to corner. Where they cross is your exact center point. -
Draw guide circles:
Using your compass, draw a series of concentric circles radiating from the center. You’ll need a small inner circle (approx. 1 inch), a middle band for the geometric patterns, and a large outer ring that leaves about an inch of border on the box lid.
Paint Consistency
For crisp dots that don’t flatten out, use heavy body acrylics. If painting fine lines, thin the paint slightly with a drop of water to an ink-like consistency for smoother flow.
Step 2: The Central Motif
-
Paint the inner wheel:
Create the central ‘wagon wheel’ design. Start by painting a small white dot in the dead center. Then, paint thin spoke lines radiating outward to your first pencil circle using diluted Burnt Sienna or Copper paint. -
Fill the segments:
Carefully tint the spaces between the spokes with alternating shades of pale pink-beige and cream. Keep the paint thin enough to see the wood grain slightly if you want a rustic look, or go opaque for a bolder finish. -
Define the hub:
Outline the central wheel with a sharp black line using your finest detail brush. Add a second, slightly thicker ring around it to create a boundary for the next layer.
Step 3: Building the Mandala Layers
-
Create the first dot ring:
Just outside your central wheel, use a small dotting tool to place tiny, consistent white dots along the black outline. Keep them tightly spacing but not touching. -
Paint the copper circles:
Moving to the next guide ring, paint medium-sized solid circles using your Copper or Bronze metallic paint. Spacing is key here—try to fit them so they sit shoulder-to-shoulder around the center. -
Add the cream layer:
In the next outward ring, paint larger circles using your Cream or Beige paint. These should be slightly larger than the copper ones. Offset them so each cream circle sits in the ‘valley’ between two copper circles from the previous row. -
Outline the large shapes:
Once the cream and copper circles are dry, use your fine liner brush and black paint to carefully outline every single circle. This high-contrast step is what makes the design pop. -
Fill the negative space:
Paint the background area between your cream circles and the outer boundary ring with a very dark grey or soft black. This dark background creates a ‘band’ that highlights the final details.
Jewel Tone Upgrade
Swap the earth tones for deep teal, sapphire, and gold to create a luxurious peacock-inspired palette. Add a tiny rhinestone to the very center for extra sparkle.
Step 4: Outer Details & Finishing
-
The white pearl border:
On top of the dark grey band you just painted, use a medium dotting tool to stamp crisp white dots. Place one dot between each large cream circle to create a rhythmic pattern. -
Add tiny fillers:
With your smallest tool, add tiny white micro-dots in the remaining dark spaces to make the band look like intricate lace. -
Corner flourishes:
In the four corners of the box lid, freehand a simple organic sprig. Paint a central stem with black, add small green or grey leaves, and cap it with copper dots that mimic the center mandala. -
Erase guidelines:
Wait until the paint is absolute bone dry—I usually give it at least an hour to be safe. Gently erase any visible pencil marks from your initial compass work. -
Seal the artwork:
Protect your hard work with a coat of clear varnish. A matte finish looks most natural with the wood, but satin will give the metallic copper paint a nice sheen.
Now you have a stunning, personalized storage piece perfect for holding jewelry or trinkets on your desk
White Line Art on Wood Grain
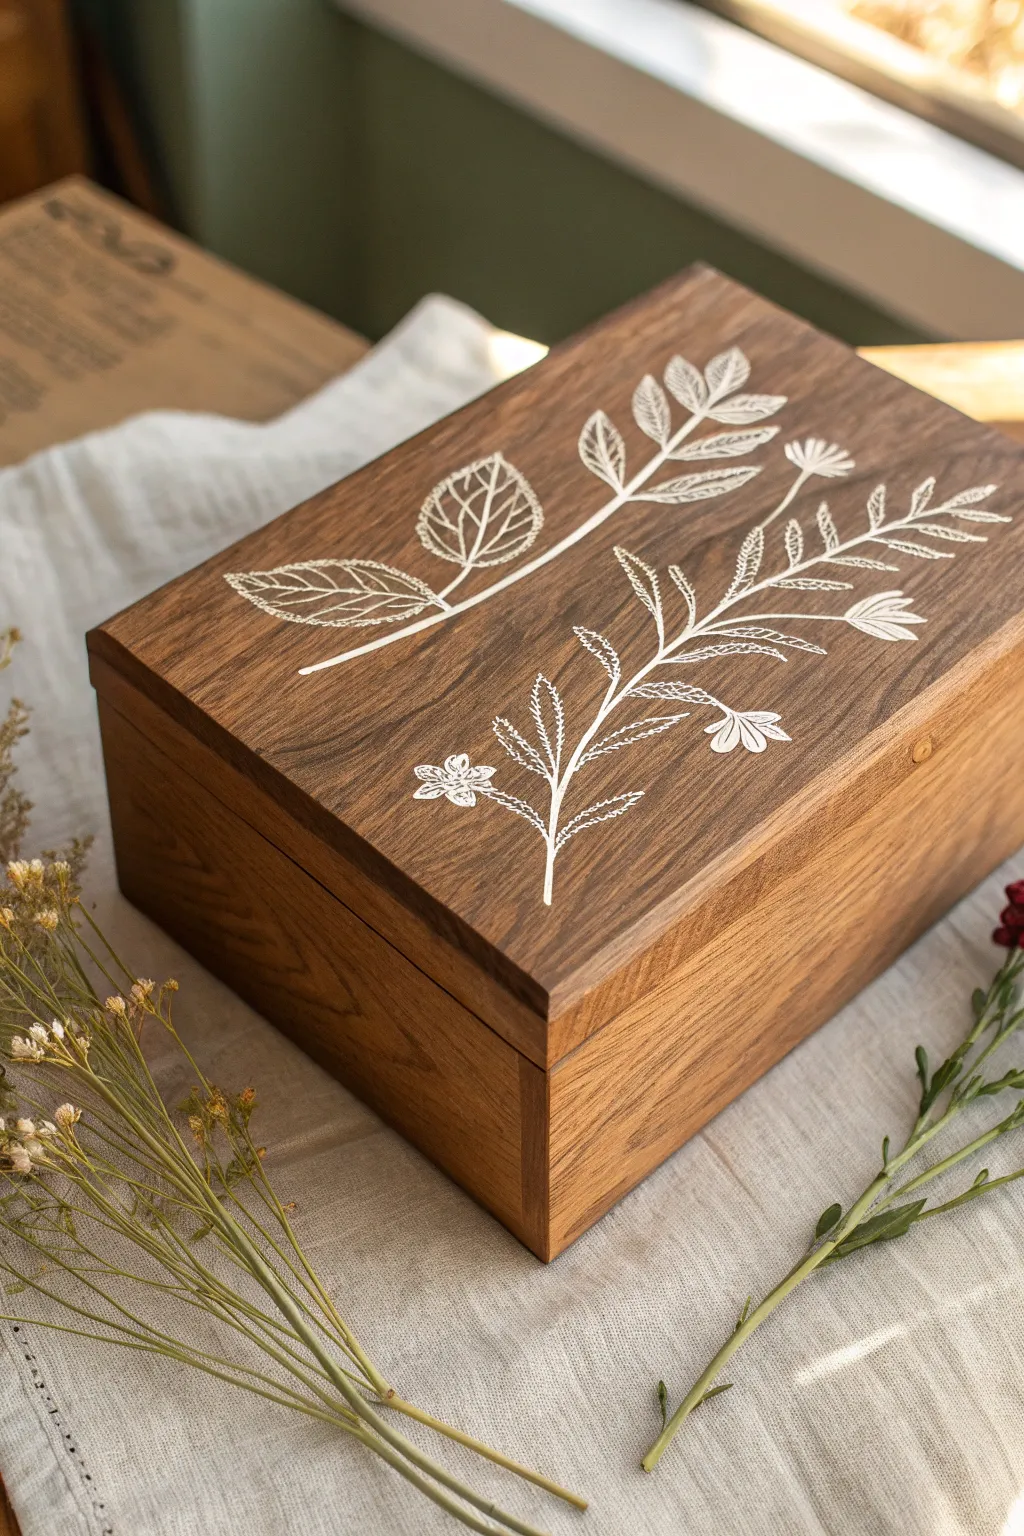
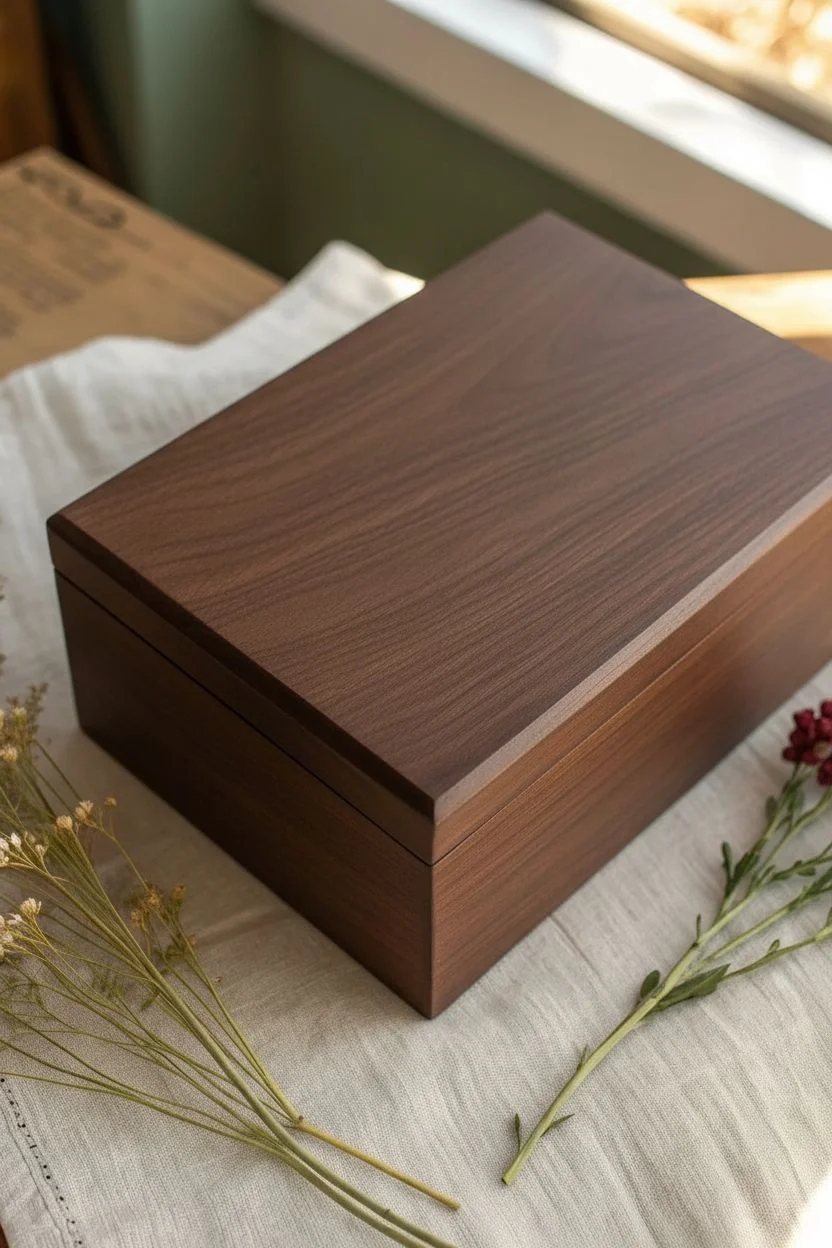
Transform a plain wooden keepsake box into an heirloom-quality piece with simple, elegant white line work. The contrast between the bright white botanical illustrations and the deep, natural wood grain creates a stunning, modern-rustic aesthetic that looks deceptive high-end.
Step-by-Step Tutorial
Materials
- Unfinished wooden box (walnut or stained oak works best)
- Fine grit sandpaper (220 and 400 grit)
- White paint pen (extra fine tip, 0.7mm or smaller)
- White acrylic paint (high flow or ink consistency)
- Ultra-fine liner brush (size 00 or 000)
- Graphite transfer paper (white or light grey)
- Botanical line drawing reference printout
- Pencil
- Painter’s tape
- Matte clear wood sealer spray or brush-on varnish
- Lint-free cloth
- Ruler (optional)
Step 1: Preparation
-
Sand the surface:
Begin by sanding the lid of your box with 220-grit sandpaper to remove any rough fibers. Since we are drawing fine lines, the surface needs to be incredibly smooth to prevent the pen from snagging. -
Clean the dust:
Wipe the box down thoroughly with a slightly damp lint-free cloth to remove all sanding dust. -
Evaluate the wood tone:
Check your wood color. If the raw wood is quite pale (like pine or birch), apply a medium walnut or oak stain first and let it cure completely for 24 hours. The white lines need a dark background to truly pop. -
Final smooth:
Give the lid one last quick pass with 400-grit sandpaper for a glass-like finish, then wipe clean again.
Pro Tip: Steady Hands
Rest your wrist on a clean, dry block of wood or a thick book next to the box. This elevates your hand to the same level as the lid, giving you much better control over fine details.
Step 2: Design Transfer
-
Position your reference:
Cut out your printed botanical line drawing and position it on the box lid. Play with the placement until the leaves flow naturally across the space. -
Secure the template:
Once you’re happy with the layout, tape the top edge of the paper to the box using painter’s tape to create a hinge. -
Insert transfer paper:
Slide a sheet of white or light grey graphite transfer paper under your printout, facing the wood surface. -
Trace the design:
Using a sharp pencil or a stylus, trace over your botanical lines with firm pressure. You only need the main stems and leaf outlines; don’t worry about the tiny shading hatching yet. -
Check your work:
Lift the paper occasionally to ensure the white transfer lines are visible on the wood before removing the template completely.
Step 3: Inking the Art
-
Prime the pen:
Shake your white paint pen vigorously and press the tip on a scrap piece of paper until the ink flows smoothly and consistently. -
Outline the main stems:
Start by drawing the central stems of the plants. Use a slow, confident stroke to keep the line weight consistent. -
Draw leaf perimeters:
Outline the shapes of the leaves. Turn the box as you work so your hand is always in a comfortable position, preventing smudges. -
Add vein details:
Using a very light touch, draw the central vein in each leaf. I find it helps to exhale slowly while drawing these longer, sweeping lines. -
Create texture with hatching:
This is where the artwork comes alive. Use short, quick strokes of the pen to create the ‘hatching’ marks inside the leaves and along the stems seen in the photo. Keep these lines thinner than your outlines. -
Fill in floral elements:
If your design has small flowers or buds, use dots or tiny dashes to shade them, leaving plenty of negative space so they don’t become white blobs. -
Refine with a brush:
If the pen skips or can’t get into a tight corner, dip your size 000 brush into a drop of white high-flow acrylic and carefully touch up the lines.
Troubleshooting: Blotchy Ink
If your paint pen pools or ‘blobs’ suddenly, immediately dab it straight up (don’t wipe!) with a dry Q-tip to soak it up, then let it dry and carefully sand that spot before redrawing.
Step 4: Finishing
-
Erase guidelines:
Allow the white ink to dry for at least 30 minutes. Gently erase any visible transfer paper lines with a soft eraser, being careful not to rub off the paint. -
Initial seal coat:
Apply a very light mist of matte spray sealer. Do not brush on the first coat, as the friction can smear the paint pen ink. -
Final protection:
Once the spray coat is dry, apply a final layer of brush-on matte varnish or wax to give the box a smooth, professional feel.
Now you have a beautifully personalized storage piece that brings a touch of nature indoors


Monogram or Initials in Script
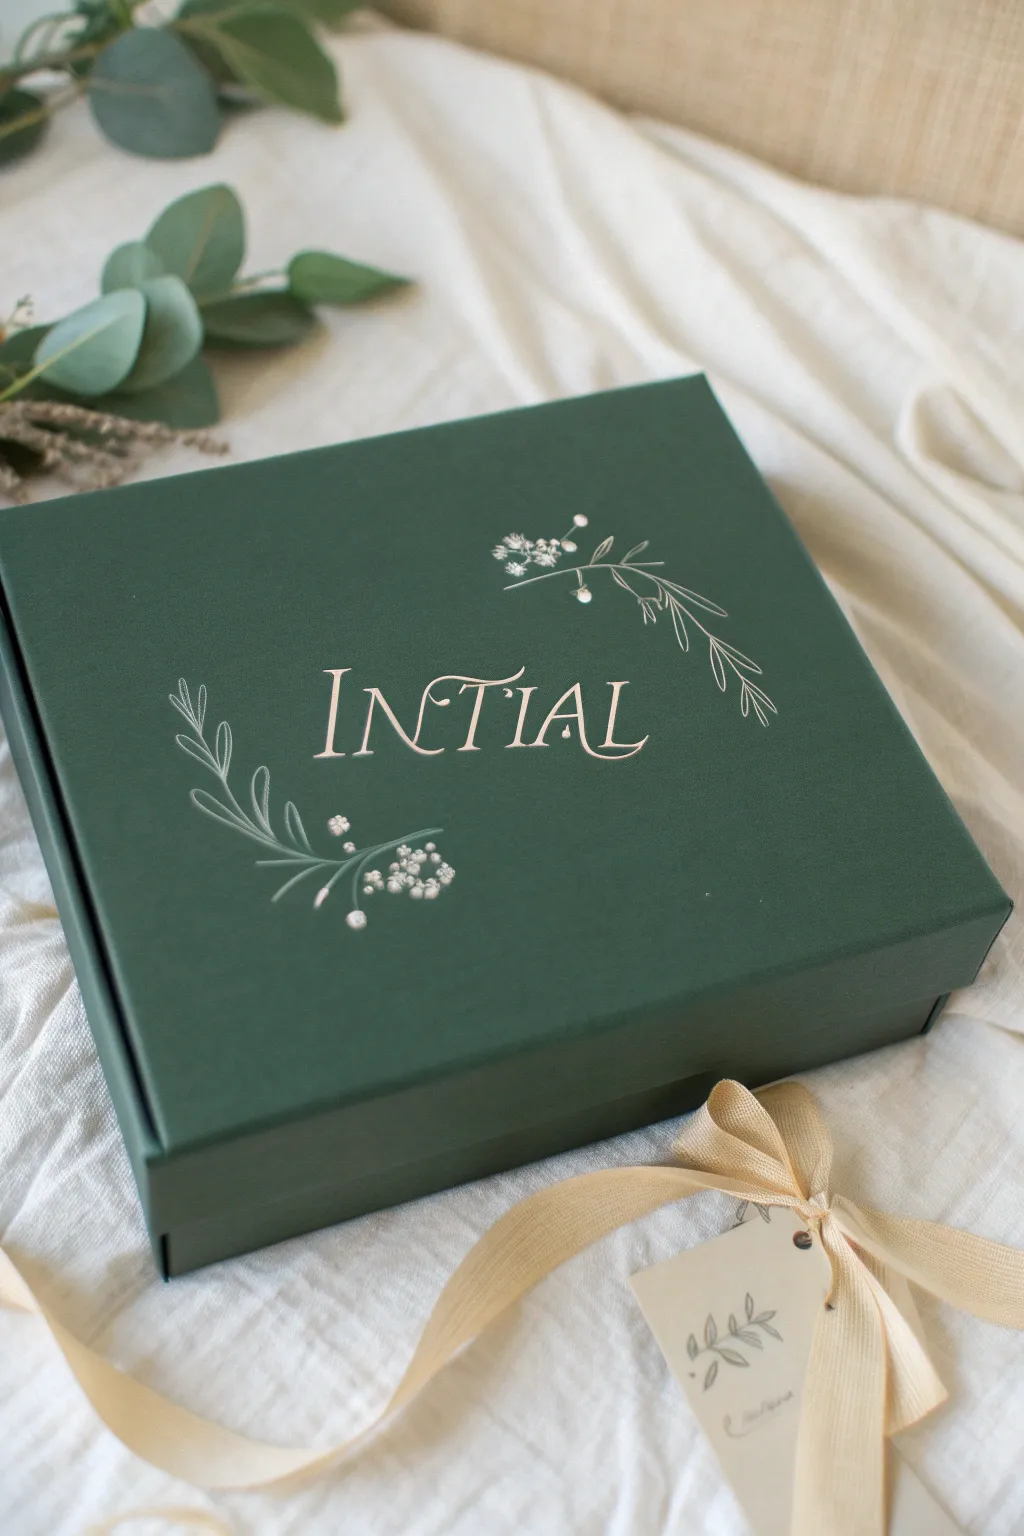
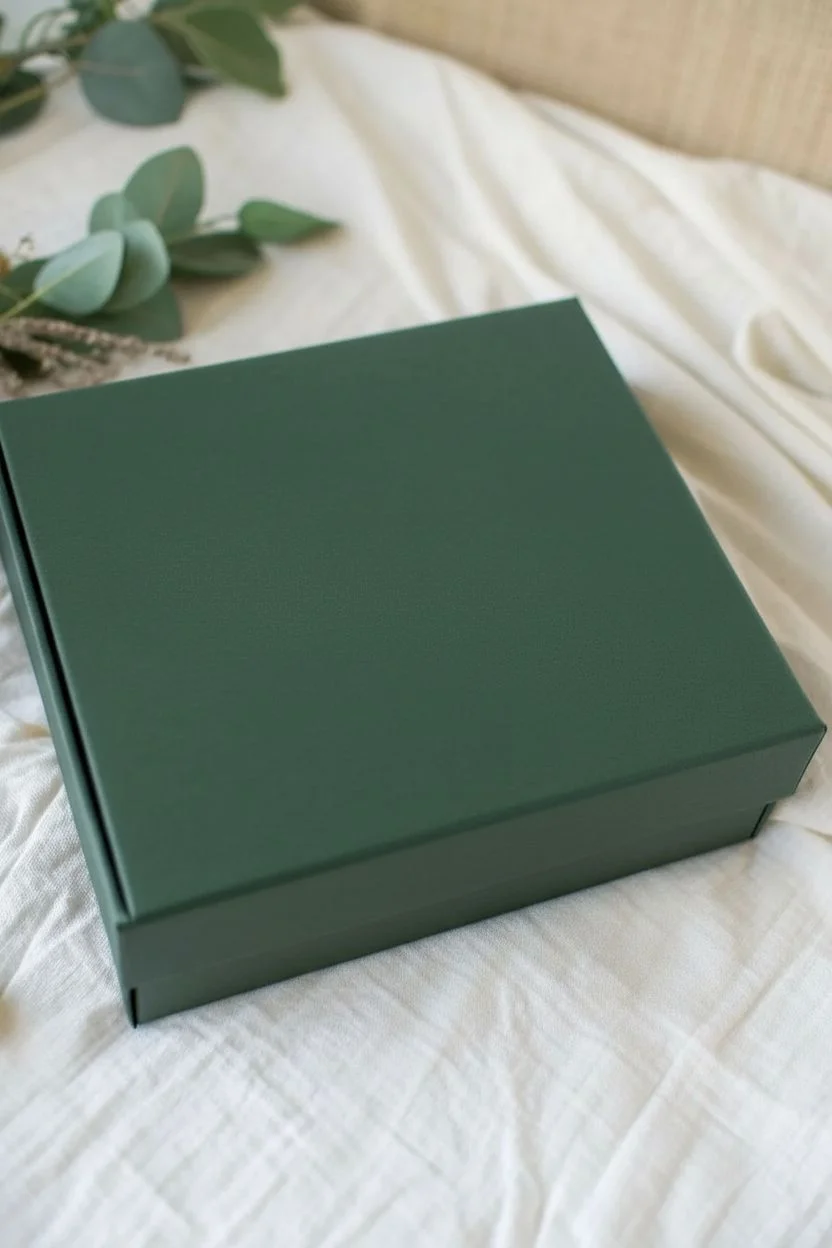
Transform a plain sturdy box into a luxurious, personalized keepsake with a rich forest green finish and delicate gold detailing. This project mimics the look of high-end hot foil stamping using accessible painting techniques for a sophisticated result.
How-To Guide
Materials
- Sturdy cardboard gift box (rigid construction works best)
- Matte acrylic paint (Forest Green or Deep Emerald)
- Wide flat synthetic brush (1-2 inch)
- Liquid gold leaf or high-pigment metallic gold acrylic paint
- Fine liner brush (size 0 or 00)
- White or light grey transfer paper
- Pencil
- Printed template of your monogram/word and botanical flourishes
- Ruler
- Painter’s tape
- Matte spray sealant (optional)
- Rubber eraser
Step 1: Base Coat Preparation
-
Clean the Surface:
Begin by ensuring your box is free of dust, oils, or sticker residue. Wipe it down gently with a dry microfiber cloth to ensure the smoothest possible base for your paint. -
Apply the Base Color:
Load your wide flat brush with the matte forest green acrylic paint. Apply the first coat in long, even strokes, moving from one edge to the other to minimize brush marks. Don’t worry if it looks slightly streaky; coverage will improve. -
Let it Dry:
Allow the first coat to dry completely, which typically takes about 20-30 minutes. If you rush this steps, the next layer might pull up the previous one. -
Second Coat Application:
Apply a second layer of green paint, ideally brushing in the cross-direction of your first coat to create a solid, opaque finish. I like to check the box under bright light to catch any thin spots. -
Paint the Lid Edges:
Don’t forget the sides and the inner lip of the lid. Careful coverage here gives the box a professional, seamless appearance. -
Final Drying:
Let the box cure for at least an hour. The paint needs to be fully hardened before we start tracing designs onto it.
Oops! Shaky Lines?
Cleanup edges by dipping a small angled brush in the green base color. Carefully paint over gold mistakes to ‘erase’ them and sharpen the lettering.
Step 2: Design Transfer
-
Prepare Your Template:
Print out your chosen word (like ‘INITIAL’) in a classy serif font and find a simple line-drawing of botanical sprigs. Arrange them on paper exactly how you want them to look on the box. -
Position the Design:
Place a sheet of white transfer paper (chalky side down) onto the center of the box lid. Lay your printed template on top of it. Use a ruler to ensure your text is perfectly centered and straight. -
Secure with Tape:
Use small pieces of painter’s tape to hold the template and transfer paper in place so they don’t shift while you work. -
Trace the Artwork:
Using a sharp pencil, firmly trace over the outline of your letters and the floral sprigs. Apply enough pressure to transfer the white chalk onto the dark green paint, but not so much that you dent the box. -
Check the Transfer:
Lift one corner gently to ensure the lines are visible. If they are faint, go over them again before removing the paper completely.
Level Up: Texture
Sprinkle fine gold embossing powder over the wet paint on the lettering and heat set it for a raised, professional 3D embossed effect.
Step 3: Painting the Gold Details
-
Prepare Gold Paint:
Shake your liquid gold leaf or metallic paint thoroughly. Place a small amount onto a palette or dish. The consistency should be fluid enough to flow off a liner brush but opaque enough to cover in one pass. -
Lettering Outline:
Dip your fine liner brush into the gold. carefully outline the letters first. Keep your hand steady and rest your pinky finger on a dry part of the box for stability. -
Fill the Letters:
Once the outlines are established, gently fill in the thicker parts of the serif font. Work slowly; liquid gold leaf can be unforgiving if it drips. -
Paint the Stems:
Move on to the floral elements. Use the very tip of your brush to paint the thin, curving stems of the botanical sprigs on either side of the text. -
Add Leaves and Buds:
Paint the small leaves using a ‘press and lift’ motion—press down slightly to widen the stroke for the leaf belly, then lift up to create a point. Add tiny dots for the flower buds. -
Highlight the Buds:
For extra dimension, you can mix a tiny dot of white into your gold (if using acrylics) or simply add a second dab of bright gold on the flower buds to make them pop. -
Clean Up:
Once the gold is fully dry (liquid leaf takes longer than acrylic), gently use a clean eraser to remove any visible white transfer lines that paint didn’t cover. -
Protect the Finish:
If the box will be handled frequently, mist it lightly with a matte spray sealant to protect the paint from scratches and oils.
Now you have a stunning, personalized box ready to serve as a thoughtful gift wrap or a chic storage piece for your own treasures
Clean Chevron Zigzags
This project combines the clean, modern appeal of white paint with the natural, textural warmth of cork. The sharp chevron pattern creates a striking geometric contrast that turns a simple wooden box into a stylish keepsake container.
Step-by-Step Tutorial
Materials
- Unfinished wooden box with hinged lid
- White acrylic craft paint (matte or satin finish)
- Wide flat paintbrush
- Fine grit sandpaper (220-grit)
- Adhesive cork sheet or roll
- Sharp crafting knife (X-Acto)
- Metal ruler
- Self-healing cutting mat
- Pencil
- Painters tape (optional for edges)
- Matte clear sealant spray (optional)
Step 1: Preparing the Base
-
Clean and Sand:
Start by removing the metal clasp hardware with a small screwdriver if possible; this makes painting much cleaner. Lightly sand the entire wooden box with fine-grit sandpaper to remove any rough splinters or burrs, then wipe away the dust with a tack cloth. -
First Coat of Paint:
Apply a coat of white acrylic paint to the exterior of the box. Use smooth, long strokes to minimize brush marks. Don’t worry about complete opacity yet; thin layers are better than thick ones. -
Sand and Repeat:
Once the first coat is completely dry, give it a very light scuff sand. This helps the next layer adhere and creates a professional, smooth finish. Apply a second coat of white paint and let it dry thoroughly. -
Detailing the Rim:
I like to carefully paint the rim of the lid where it meets the box, ensuring no raw wood shows when the box is closed. Let the box cure for at least an hour before handling it for the cork application.
Jagged Edges?
If the cork crumbles while cutting, your blade is likely dull. Snap off the tip or change it immediately. You can smooth minor rough edges with an emery board.
Step 2: Cutting the Chevron Pattern
-
Measure the Surfaces:
Measure the inset area of the lid where the pattern will go. Also, measure the height of the bottom section of the box for the side pattern. Accurate measurements are crucial for a seamless look. -
Mark the Grid:
Unroll your adhesive cork sheet on a cutting mat. On the paper backing side, use a pencil and ruler to draw a grid. Depending on the size of your box, mark vertical lines every 1 to 1.5 inches. -
Draw the Diagonals:
Within your vertical columns, mark the center points to create the peaks and valleys of your zigzags. Connect these dots with your ruler to draw the continuous chevron pattern. -
Cutting the Cork:
Using a fresh, sharp blade in your craft knife is essential here to prevent the cork from tearing or crumbling. Place your metal ruler along the pencil lines and cut firmly through the cork sheet. -
Separate the Strips:
Carefully separate your chevron strips. You will use alternating strips (cork vs. negative space) to create the pattern, so keep them organized.
Step 3: Assembly and Finishing
-
Dry Fit the Layout:
Before peeling any backing, arrange the cut cork strips onto the box lid to ensure the spacing looks correct and the pattern is centered. -
Adhering the Lid:
Peel the backing off the first central cork strip and press it firmly onto the center of the painted lid inset. Use this central piece as your anchor. -
Completing the Lid Pattern:
Working outward from the center, apply the remaining cork strips, using a scrap piece of cork as a spacer to ensure the white gaps between the zigzags are uniform. -
Wrap the Sides:
Repeat the process for the sides of the box. Align the peaks of the side zigzags with the pattern on the lid if you want a continuous flow designed look. -
Trim Excess:
If any cork hangs over the edges, flip the box upside down on the cutting mat and carefully trim the excess flush with the wood using your craft knife. -
Reattach Hardware:
Once all cork is secure, specificially check edges to ensure they aren’t lifting. Screw the metal clasp back into its original pilot holes. -
Final Seal (Optional):
To protect the white paint from smudges, you can apply a light mist of matte clear sealant, though the cork itself usually looks best left natural.
Spacer Trick
Use a spare strip of the cork you cut out as a temporary spacer between rows. This guarantees that your painted white ‘zigzags’ are exactly the same width as the cork ones.
Now you have a beautifully textured storage piece that looks professionally designed and handmade
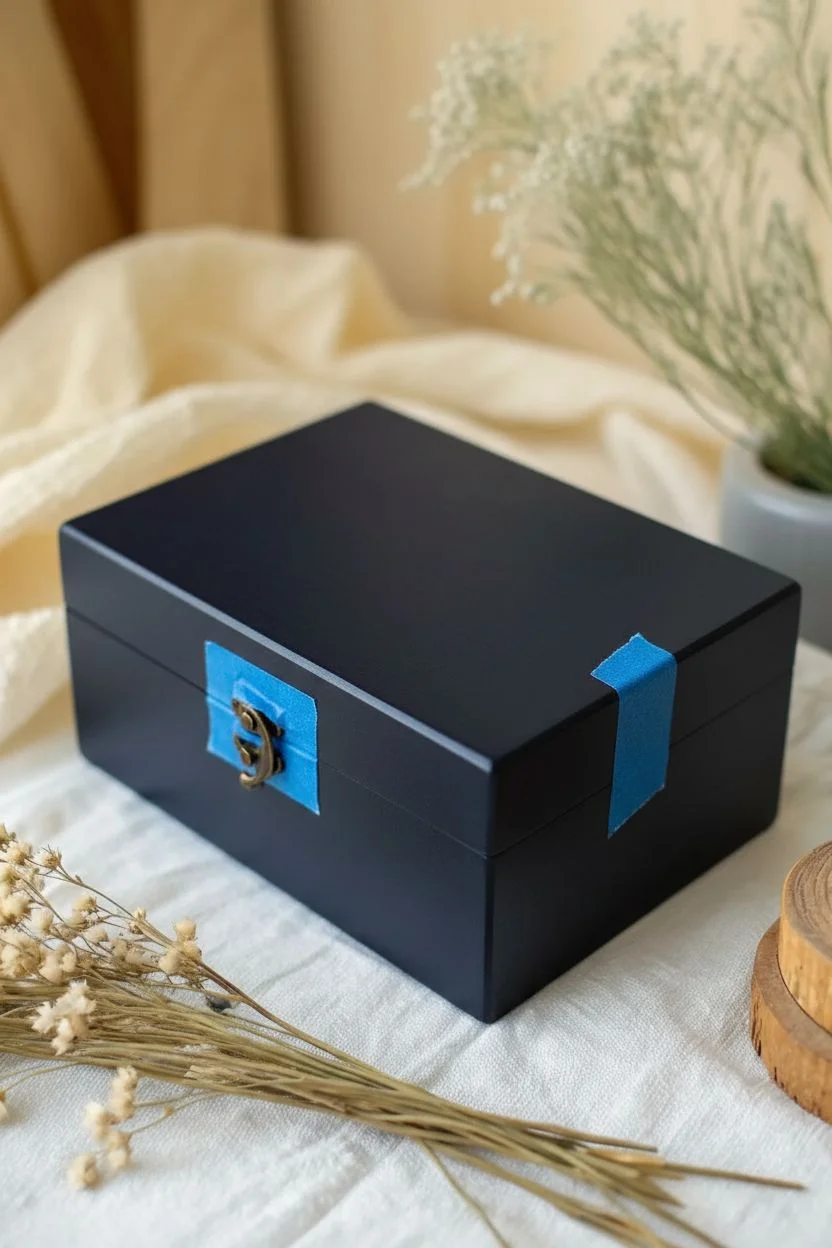
Starry Galaxy Sponge Texture
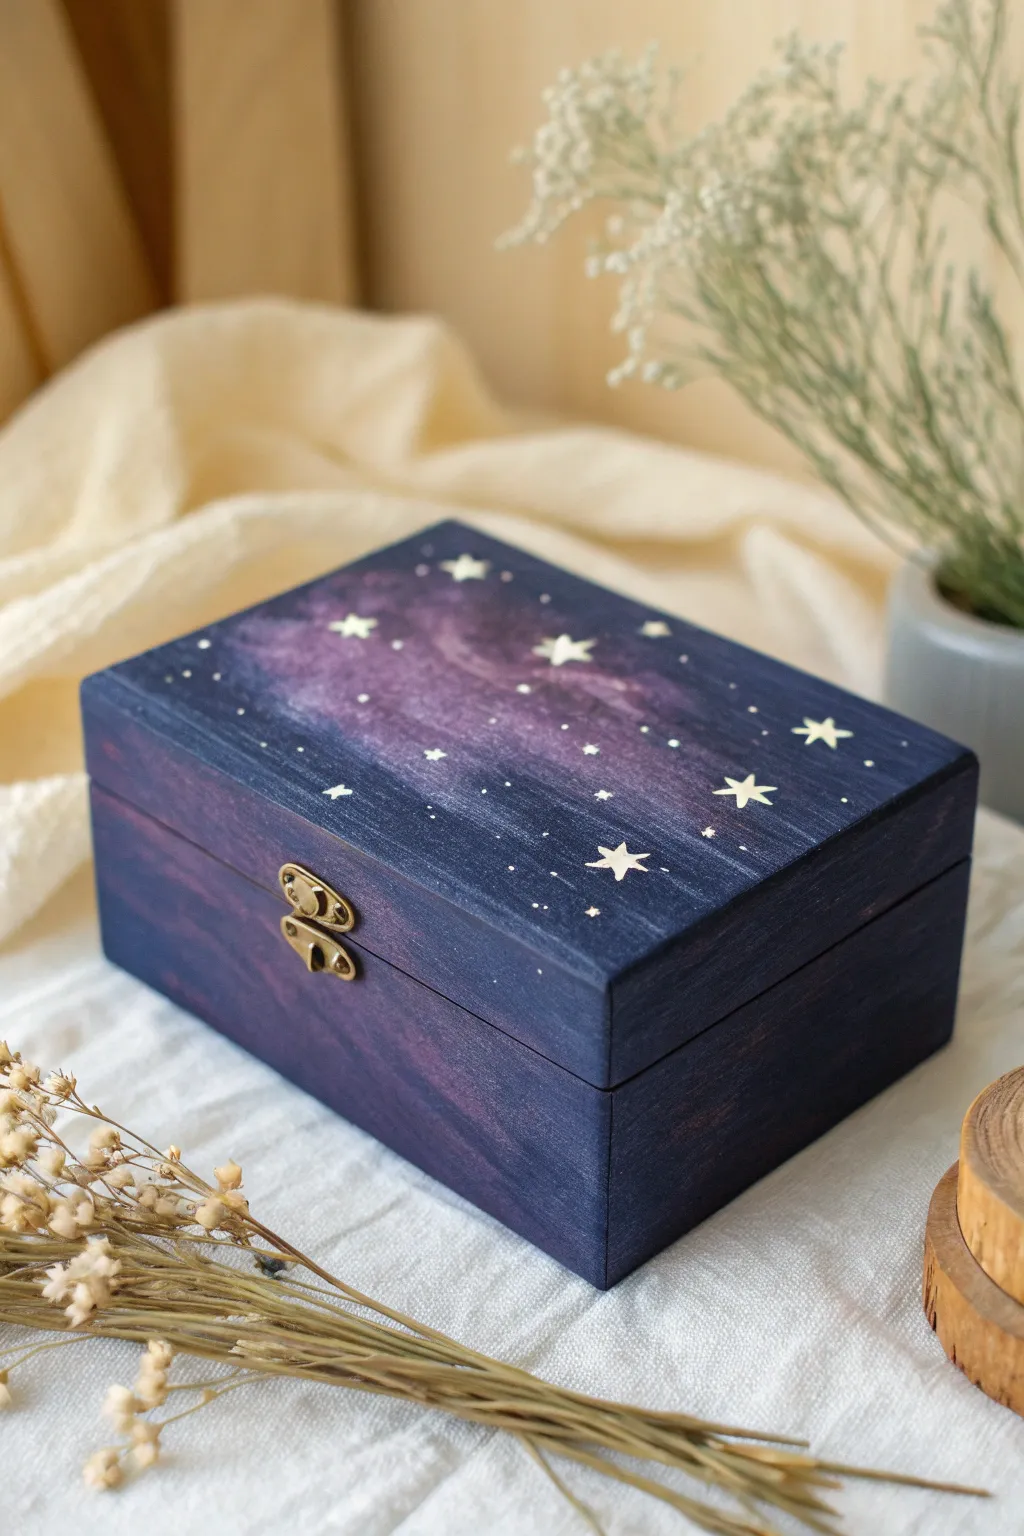
Transform a simple wooden container into a slice of the night sky with this dreamy galaxy painting project. By layering deep blues and violets with sponge techniques, you can achieve a soft, ethereal nebula effect that serves as the perfect backdrop for hand-painted stars.
How-To Guide
Materials
- Unfinished wooden box with latch (approx. 6×4 inches)
- Acrylic paints: Navy Blue, Black, Deep Violet, Magenta, Titanium White
- Flat paintbrush (1-inch width)
- Fine detail brush (size 0 or 00)
- Small kitchen sponge or cosmetic wedge sponge
- Painter’s tape
- Paper plate or palette
- Water cup
- Paper towels
- Matte or satin clear sealant spray
- Fine grit sandpaper (220 grit)
Step 1: Preparation & Base Coat
-
Prepare the wood:
Begin by lightly sanding the entire surface of your wooden box with 220-grit sandpaper. This removes any rough splinters and helps the paint adhere better. Wipe away all dust with a slightly damp paper towel. -
Protect the hardware:
Use small pieces of painter’s tape to carefully cover the metal hinges and the front latch mechanism. This ensures your hardware stays clean and shiny while you paint. -
Mix the darkest shade:
On your palette, mix a large amount of Navy Blue with a touch of Black. You want a very deep, midnight blue color, not a pure flat black. -
Apply the first coat:
Using the flat paintbrush, paint the entire exterior of the box with your midnight blue mix. Brush in the direction of the wood grain for a smoother finish. Let this coat dry for about 20 minutes. -
Apply the second coat:
Once dry, apply a second coat of the dark blue base to ensure solid, opaque coverage. Pay special attention to the corners and the rim where the lid meets the box.
Muddy Nebula?
If your galaxy colors start looking gray or brown, let the base layer dry completely before adding new colors. Wet-on-wet blending can sometimes over-mix into mud.
Step 2: Creating the Galaxy Clouds
-
Prepare your sponges:
Cut your sponge or cosmetic wedge into smaller pieces—about the size of a large coin. Having jagged, uneven edges on the sponge helps create a more natural cloud texture. -
Start the nebula:
Dip a dry sponge into Deep Violet paint and dab most of it off onto a paper towel until almost dry. Lightly pounce the sponge diagonally across the lid to create a soft, smoky trail. -
Build the gradient:
While the violet is still slightly tacky, take a fresh piece of sponge with a small amount of Magenta. Dab this sparingly into the center of your violet clouds to add depth and a glowing core effect. -
Blend the edges:
If your paint edges look too harsh, take a clean, slightly damp sponge and gently tap over the transition area between the blue background and the purple clouds to soften the look. -
Add subtle highlights:
Mix a tiny drop of White into your Deep Violet. Using a very light touch, sponge this lighter shade into just a few spots within the nebula to create dimension. I like to keep this very minimal so it doesn’t overpower the dark mood. -
Extend to the sides:
Don’t forget the sides of the box! Continue your sponge texturing down the sides, wrapping the galaxy colors around the edges for a continuous, immersive look.
Step 3: Stars & Finishing Touches
-
Paint larger stars:
Using your fine detail brush and pure Titanium White, paint 5-7 larger four-pointed stars on the lid. Focus them near the lighter parts of your nebula. -
Add medium stars:
Dip the tip of your detail brush into the white paint and gently dot several medium-sized stars around the larger ones. Vary the pressure to get slightly different sizes. -
Create distant star dust:
For the tiniest distinct stars, use the very tip of a toothpick dipped in white paint. Dot clusters of these tiny stars in the darker blue areas to represent distant galaxies. -
Remove tape:
Once you are completely satisfied with your painting and it is fully dry to the touch, carefully peel off the painter’s tape from the hinges and latch. -
Seal the artwork:
Take the box to a well-ventilated area. Hold your clear matte sealant spray about 10-12 inches away and apply a light, even coat over the entire box to protect your galaxy from scratches.
Level Up: Metallic Pop
Mix a tiny amount of metallic silver or pearlescent medium into your white star paint. The stars will shimmer subtly when the box catches the light.
Fill your new celestial chest with treasures or gift it to someone who means the world to you
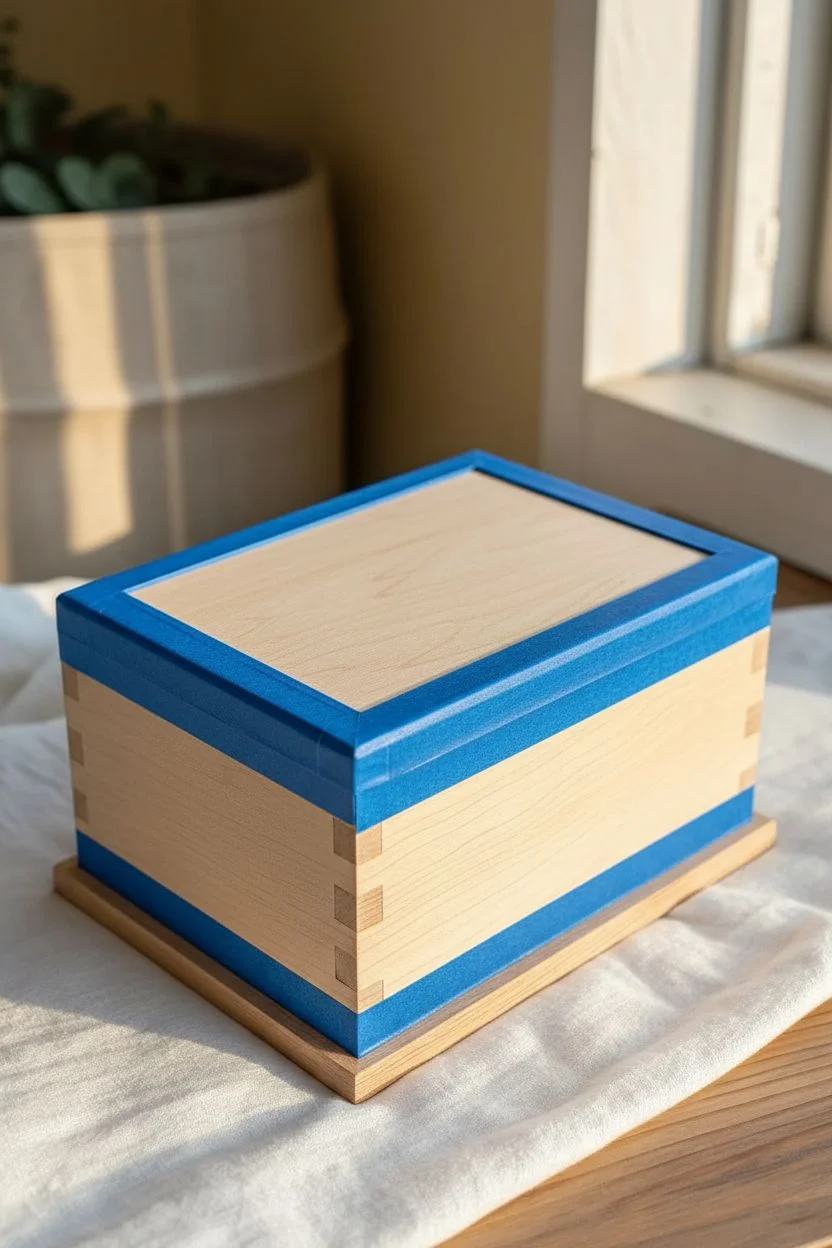
Sunset Gradient Fade
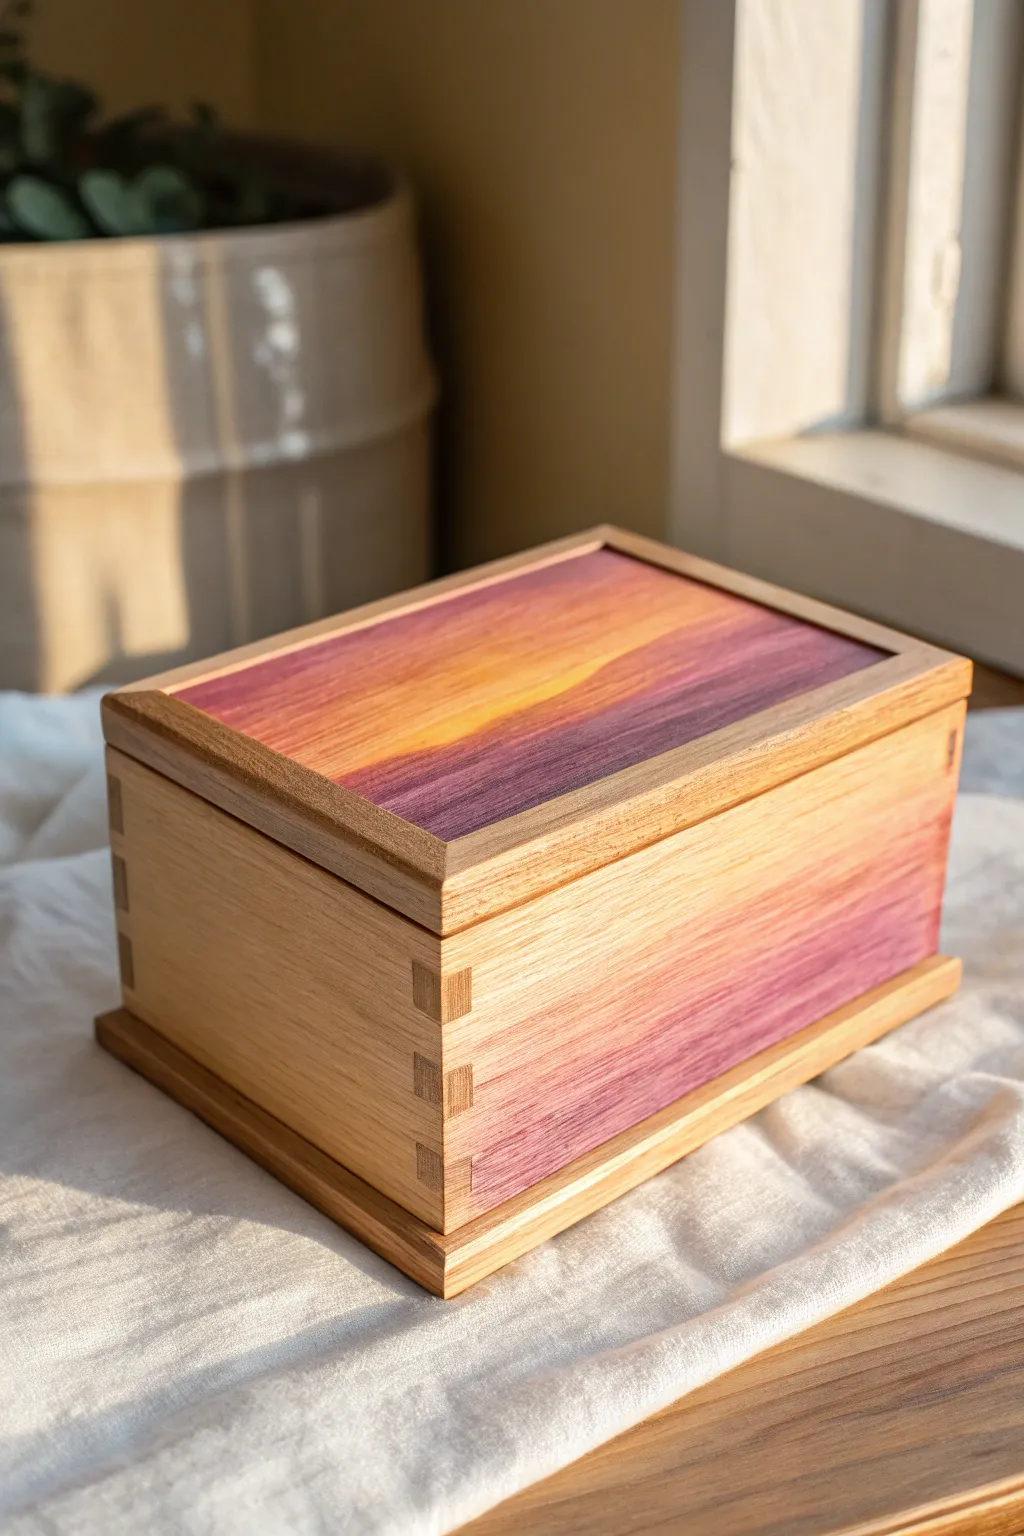
Capture the warmth of dusk with this painted wooden box featuring a seamless sunset gradient. The soft transition from deep plum to warm yellow mimics the evening sky, adding a sophisticated pop of color to natural wood joinery.
Step-by-Step
Materials
- Unfinished wooden box with inset panel lid
- Sanding sponge (220 grit)
- Painter’s tape (high quality)
- Acrylic paints (Titanium White, Cadmium Yellow, Orange, Deep Violet or Plum)
- Glazing medium or slow-drying medium
- Wide flat synthetic brush (1 inch)
- Soft blending brush or makeup sponge
- Water container
- Paper towels
- Matte or satin spray varnish
Step 1: Preparation & Masking
-
Prepare the surface:
Begin by lightly sanding the entire box with a 220-grit sanding sponge to ensure a smooth painting surface. Wipe away all dust with a tack cloth or slightly damp paper towel. -
Mask the frame:
This design relies on crisp lines between the painted panels and the natural wood frame. Use high-quality painter’s tape to carefully mask off the raised wooden frame on the lid. -
Seal the tape edges:
Press the tape down firmly with your fingernail or a credit card edge. I like to apply a very thin layer of matte medium along the tape edge to prevent any paint bleed-under. -
Mask the side panels:
Repeat the masking process for the side panels if they are framed like the lid. If the box is solid, tape off the dovetail joints if you want to keep them natural, or simply tape a clean border.
Step 2: Painting the Sunset Gradient
-
Mix your palette:
Squeeze out your violet, orange, yellow, and white paints. Mix a generous amount of glazing medium into each pile to extend the drying time and improve blendability. -
Apply the base colors:
Starting on the lid panel, paint a stripe of deep violet across the bottom third and a stripe of yellow across the top third, leaving the middle section empty for now. -
Add the transition shade:
Mix a soft orange using your yellow and a touch of red or orange paint. Apply this to the middle section, slightly overlapping the violet and yellow zones. -
Begin the blend:
While the paint is still wet, take a clean, dry blending brush. Gently brush back and forth horizontally where the violet meets the orange to soften the line. -
Refine the yellow transition:
Wipe your brush clean, then repeat the horizontal blending motion where the orange meets the yellow. The goal is a seamless fade with no harsh stop-and-start lines. -
Add a highlight:
For that glowing sun effect seen in the photo, mix a tiny bit of white into your yellow. Dab this into the very center of the yellow section and feather it outwards gently. -
Repeat for the sides:
Recreate the gradient on the side panels of the box. Ensure the color progression matches the lid (e.g., dark at the bottom, light at the top). -
Let it dry completely:
Allow the paint to cure for at least an hour. The glazing medium slows drying, so be patient to avoid lifting the paint.
Smooth Blends
Work quickly while blending! If the paint starts to tack up, lightly mist the surface with water or add more glazing medium to your brush.
Step 3: Finishing Touches
-
Remove the tape:
Carefully peel back the painter’s tape at a 45-degree angle. Do this slowly to ensure a crisp, sharp edge against the natural wood. -
Touch up edges:
If any paint bled through, use a small detail brush with water or a craft knife to gently scrape away the excess while it’s fresh. -
Seal the wood:
To protect both the raw wood and the painted artwork, apply a coat of clear matte or satin spray varnish over the entire box. -
Second coat:
Once the first coat is dry, lightly sand with a fine grit sponge and apply a second coat of varnish for a durable, professional finish.
Cloud Effects
While the gradient is wet, use a dry scruffy brush to gently lift small patches of paint, creating subtle, wispy cloud textures in the sky.
Now you have a stunning, hand-painted box that holds both your treasures and the beauty of a setting sun
Abstract Organic Color Blobs
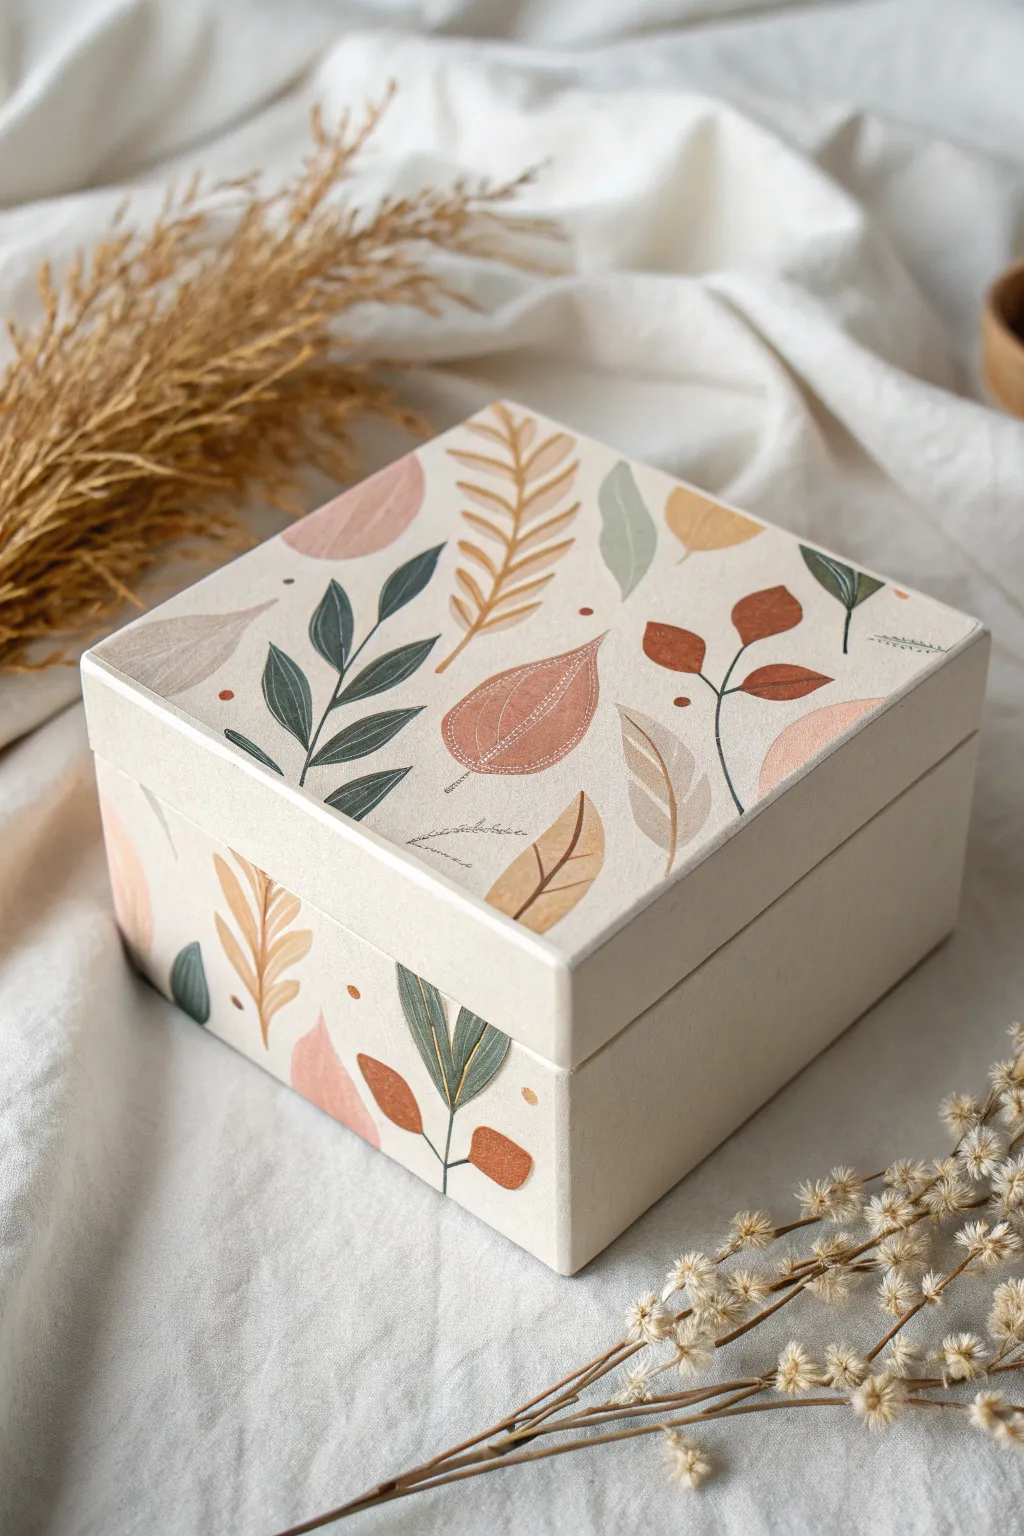
Transform a simple wooden storage box into a piece of functional art with this gentle, nature-inspired design. Featuring muted earth tones and flowing organic leaf shapes, this project captures a serene, aesthetic vibe perfect for holding jewelry or trinkets.
How-To Guide
Materials
- Unfinished wooden box (square, approximately 6×6 inches)
- Fine-grit sandpaper (220 grit)
- White or cream acrylic paint (for base coat)
- Matte acrylic paints (sage green, terracotta, mustard yellow, dusty pink, deep forest green)
- Fine detail brushes (sizes 0 and 1)
- Flat shader brush (size 6 or 8)
- Pencil with a light touch
- Matte spray sealant or brush-on varnish
- Palette for mixing custom shades
- Paper towels and water cup
Step 1: Preparation & Base Coat
-
Smooth the surface:
Begin by lightly sanding the entire wooden box using 220-grit sandpaper. Focus on the corners and edges to ensure there are no splinters or rough patches that could snag your brush later. -
Dust off debris:
Wipe the box down with a slightly damp cloth or a dry microfiber towel to remove all sanding dust. A clean surface is crucial for a smooth paint finish. -
Apply the primer:
Using your flat shader brush, apply a base coat of white or cream acrylic paint. The wood grain shouldn’t show through, so you might need two coats. -
Dry completely:
Let the base coat dry thoroughly between applications. If the first coat feels a bit rough after drying, give it a very light pass with sandpaper before the second coat.
Brush Control Tip
For the finest veins, thin your dark paint with a drop of water until it has an ink-like consistency. This helps the paint flow smoothly off the brush.
Step 2: Drafting the Design
-
Plan your placement:
Look at the box lid as your main canvas. You want a scattered, random pattern of leaves rather than rigid rows. Imagine the wind blowing leaves across the surface. -
Sketch lightly:
With a pencil, very faintly sketch the outlines of your main leaf shapes. Focus on variety: draw some simple oval leaves, some fern-like fronds, and some larger, broader shapes. -
Wrap around the sides:
Extend a few of your leaf stems or tips over the edge of the lid and down onto the sides of the box. This continuous flow makes the object feel like a cohesive artwork.
Fixing Smudges
If you accidentally paint outside your sketch lines, don’t wipe it! Let it dry completely, then paint over the mistake with your cream base coat.
Step 3: Painting the Botanicals
-
Mix your palette:
Prepare your earthy tones. I like to mix a tiny dot of brown or grey into my greens and yellows to desaturate them, ensuring that ‘aesthetic’ muted look. -
Block in color:
Start filling in the leaf shapes with flat color. Use the sage green for the longer, darker leaves and the terracotta for the rounded, organic blobs. -
Vary the opacity:
Some leaves can be solid and opaque, while others (like the beige or pale pink ones) look lovely with a slightly more translucent wash, mimicking dried petals. -
Add secondary colors:
Paint the mustard yellow fern shapes and any remaining dusty pink elements. Ensure no two shapes of the same color are touching directly to keep the composition balanced. -
Let the block layer dry:
Allow these color blocks to dry completely to the touch. If you try to add details too soon, the underlying paint will lift and muddy your lines.
Step 4: Fine Details & Finishing
-
Paint the stems:
Switch to your smallest liner brush (size 0). Using deep forest green or a dark brown, paint fine, continuous lines for the stems connecting your leaves. -
Add veining:
carefully paint the central veins on the larger leaves. For the dark leaves, use a lighter sage or cream color for contrast; for the light leaves, use a dark brown. -
Incorporate small accents:
Dot the empty spaces with tiny circles using the tip of your brush handle or a toothpick within the same color palette to add whimsical texture. -
Clean up edges:
Check the rim of the lid where it meets the box. If paint has smudged where it shouldn’t be, touch it up with your base cream color for a crisp finish. -
Seal the artwork:
Once the paint has cured for at least 24 hours, apply a clear matte varnish spray. This protects the delicate detailed lines from scratching and moisture.
Place this charming box on your dresser or desk to enjoy a touch of calm nature every day
Swirled Marbled Dip Look
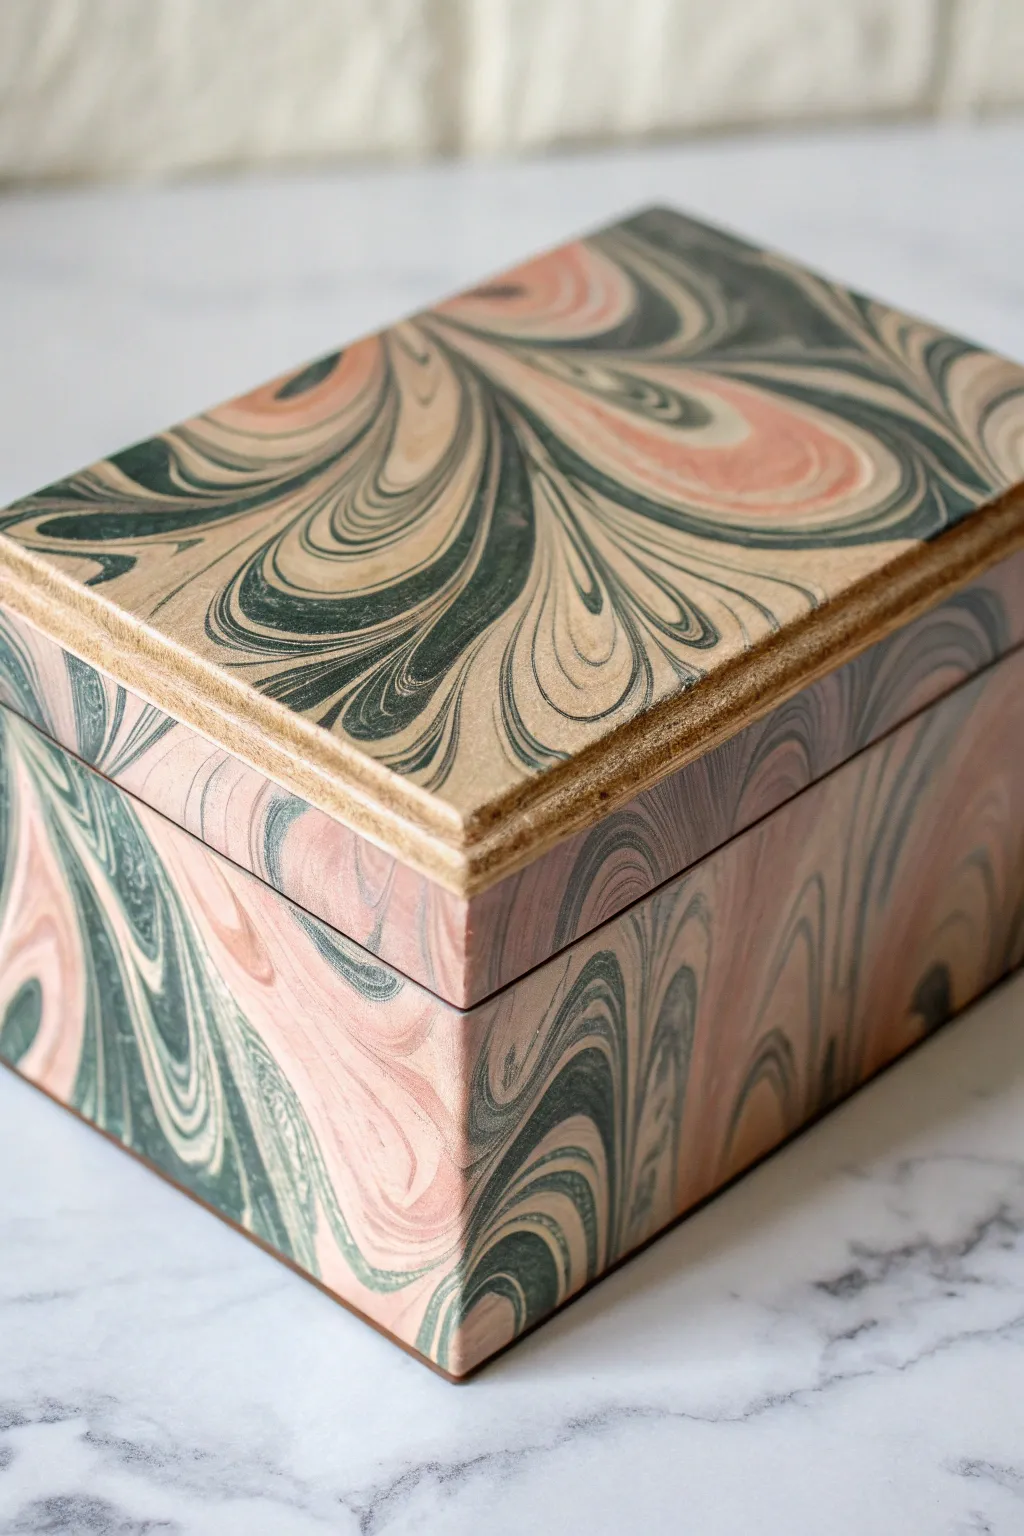
Transform a plain wooden or paper maché box into a sophisticated keepsake with this mesmerizing hydro-dipping technique. The swirling patterns in muted pinks and forest greens create an organic, high-end finish that looks far more intricate than the process actually is.
Step-by-Step Tutorial
Materials
- Unfinished wooden box with lid
- Sandpaper (220 grit)
- White acrylic primer or gesso
- Marbling medium (or liquid starch)
- Acrylic paints (Dusty Rose, Forest Green, Cream/Beige)
- Alum powder (optional, if using carrageenan marbling)
- Large plastic tub (deep enough to submerge the box)
- Wooden skewers or toothpicks
- Newspaper or drop cloth
- Painter’s tape
- Clear matte varnish spray
- Paper towels
Step 1: Preparing the Base
-
Sand the surface:
Begin by lightly sanding the entire exterior of your wooden box. Focus on any rough patches or splinters, especially around the corners and the rim where the lid meets the base. Wipe away all dust with a slightly damp cloth. -
Apply primer:
Paint a solid coat of white primer or gesso over the outside of the box and lid. This crucial step ensures your colors will pop against the background rather than soaking into the wood grain. Let this layer dry completely. -
Base coat application:
Once primed, apply a layer of cream or beige acrylic paint. This will act as the negative space in your marble pattern. I usually apply two thin coats for opaque coverage, allowing full drying time between each. -
Mask the interior:
Use painter’s tape to carefully seal off the inside edges of the box and the underside of the lid rim. You want the marbling to stay strictly on the exterior surfaces for a clean, professional look.
Pro Tip: Surface Tension
If your paint sinks immediately, the water tension might be too low. Try sprinkling a little talcum powder on the surface before dropping your first color.
Step 2: Creating the Marble Effect
-
Prepare the bath:
Fill a plastic tub with water and prepare your marbling size according to the package instructions. If using a specific marbling kit, this might involve dissolving powder; if doing a simpler hydro-dip, fill the tub with room-temperature water. -
Prepare your paints:
Dilute your Dusty Rose and Forest Green acrylic paints slightly with water or a pouring medium until they have the consistency of whole milk. They need to float on the surface, not sink heavily. -
Drop the first color:
Gently drip your dark Forest Green paint onto the surface of the water bath. Allow the drops to spread naturally into large circles. -
Add the second color:
Drop the Dusty Rose paint inside or around the green circles. You want to create concentric rings or adjacent pools of color that begin to interact. -
Repeat and layer:
Continue adding drops of cream, green, and pink until the surface of the water is largely covered in paint. Don’t rush this; let the colors settle. -
Create the swirl:
Take a wooden skewer and gently drag it through the floating paint. Start from the outside and spiral inward to create those characteristic ‘peacock’ or wave patterns seen in the image. Avoid over-mixing, or the colors will turn muddy.
Step 3: Dipping and Finishing
-
The dip technique:
Holding the box base securely (wearing gloves is a good idea!), dip it into the water at a 45-degree angle. Push it slowly and steadily beneath the surface so the paint wraps around the sides. -
Clear the surface:
Before pulling the box back up, gently blow on the water surface or wave your hand to disperse the remaining paint film. This prevents a second layer of pattern from depositing on top of your design as you remove the object. -
Remove and dry:
Lift the box out of the water and gently shake off excess droplets. Set it on a raised surface (like cups or cans) over newspaper to drip dry. Repeat the process with the lid. -
Touch ups:
Inspect the box once dry. If there are any air bubbles or missed spots, use a fine brush with your original paint colors to carefully blend them in. -
Remove tape:
Carefully peel away the blue painter’s tape. If paint has bridged the gap between the tape and wood, score it lightly with a craft knife first to prevent tearing. -
Seal the deal:
To protect that beautiful pattern, take the box outside and apply a coat of clear matte varnish spray. I prefer matte over gloss here to keep that natural, stonelike aesthetic.
Troubleshooting: Muddy Colors
Colors merging into grey? You mixed too much with the skewer. Make fewer, deliberate strokes through the paint to keep the distinct separation between pink and green.
Now you have a stunning, one-of-a-kind storage piece that looks like it was carved from polished stone
Lace-Pattern Stencil Texture
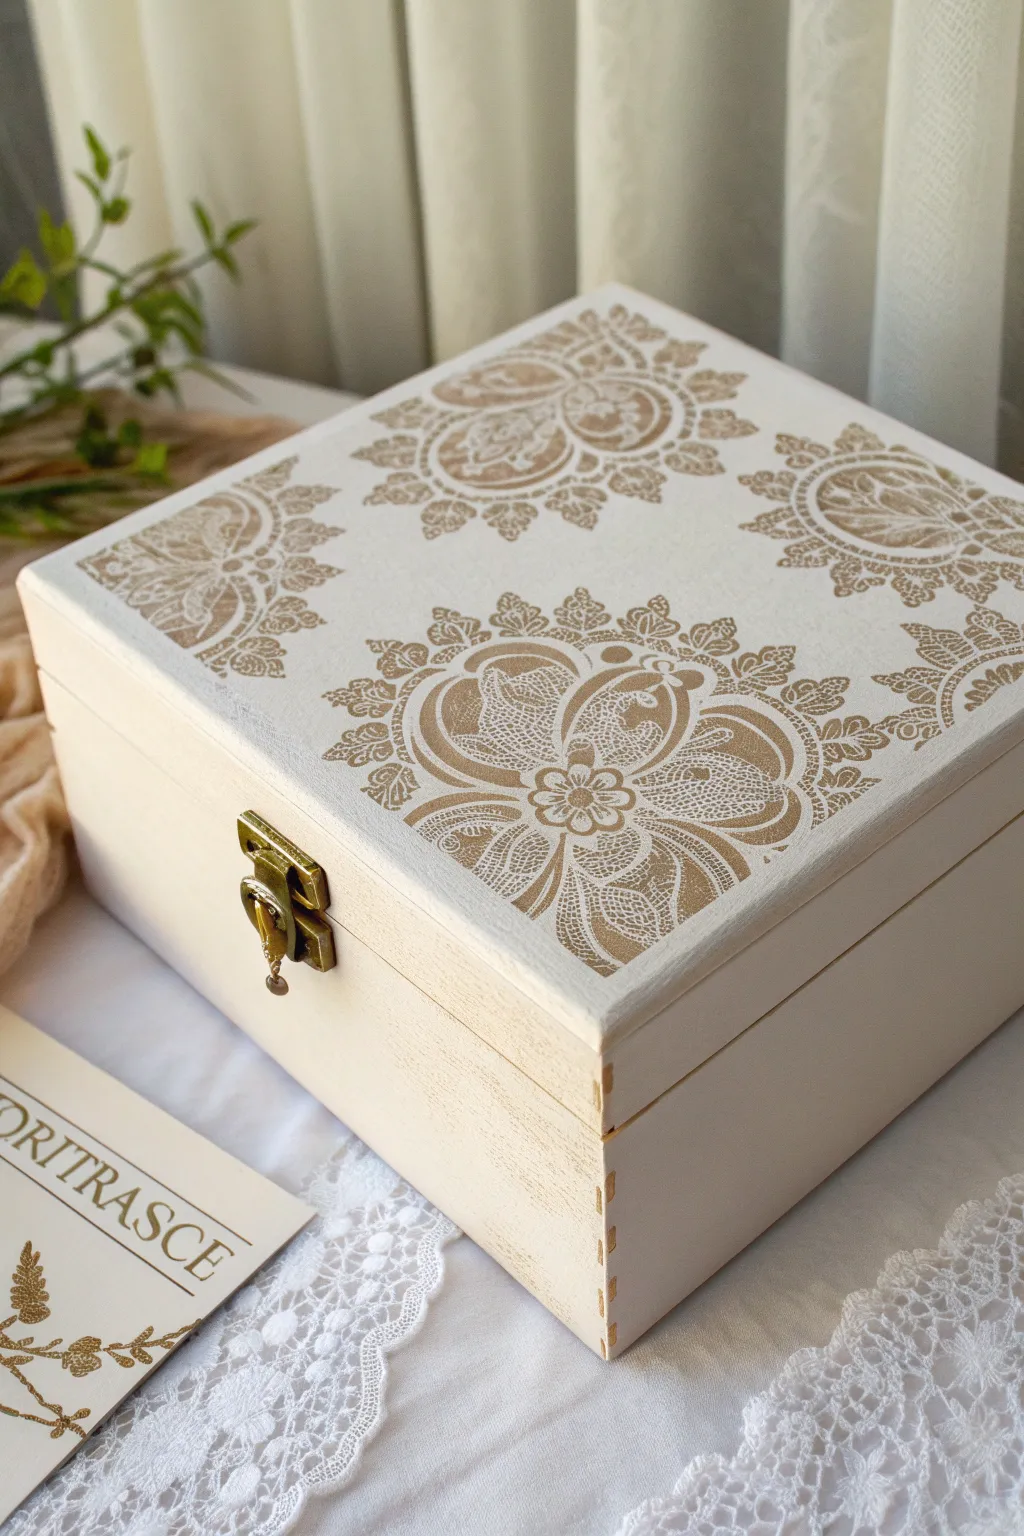
Transform a plain wooden box into a vintage-inspired heirloom with delicate lace patterns. This project combines the soft charm of off-white chalk paint with intricate metallic gold stenciling for a look that is both rustic and elegant.
Detailed Instructions
Materials
- Unfinished wooden box with latch
- Off-white or cream chalk paint
- Metallic antique gold acrylic paint
- Lace mandala stencil
- Stencil brush (short, stiff bristles)
- Wide flat synthetic paintbrush
- Painter’s tape or stencil spray adhesive
- Fine grit sandpaper (220 grit)
- Paper towels
- Matte clear coat sealer (spray or brush-on)
- Small screwdriver (to remove hardware)
Step 1: Preparation & Base Coat
-
Remove hardware:
Begin by carefully unscrewing the latch and hinges using a small screwdriver. Store the screws and hardware in a safe place so they don’t get lost. -
Sand the surface:
Lightly sand the entire box with 220-grit sandpaper to remove any rough splinters or factory varnish. Wipe away all dust with a damp cloth. -
First layer of paint:
Using your wide flat brush, apply a smooth coat of off-white chalk paint to the entire exterior. Brush in the direction of the wood grain for the best finish. -
Dry and repeat:
Allow the first coat to dry completely, which usually takes about 30 minutes. Apply a second coat to ensure full, opaque coverage. -
Smooth the finish:
Once the final coat is bone dry, run your fine-grit sandpaper very lightly over the surface. This creates a buttery smooth base for your stencil work.
Bleeding Paint?
If paint bleeds under the stencil, don’t panic. Once dry, use a tiny brush with your base color (off-white) to touch up and ‘erase’ the messy gold edges.
Step 2: Stenciling the Lace Pattern
-
Position the stencil:
Place your lace mandala stencil on the lid. Decide on your composition; centering one large motif or letting them hang off the edges creates a dynamic look. -
Secure the stencil:
Tape the edges of the stencil down firmly with painter’s tape. For extra security, I like to use a light mist of stencil adhesive on the back to prevent any slipping. -
Load the brush:
Dip just the tips of your stiff rounded stencil brush into the metallic gold paint. -
Offload excess paint:
This is crucial: swirl or dab your brush vigorously on a paper towel until it feels almost dry. Too much paint will bleed under the delicate lace lines. -
Apply the gold:
Using a vertical dabbing motion (stippling) or a gentle swirling motion, apply the paint through the stencil. Build the color up slowly rather than trying to get it opaque in one go. -
Check your progress:
Carefully lift one corner of the stencil to peek at your coverage. If the gold looks too faint, lay it back down and add another light layer. -
Repeat the pattern:
Lift the stencil straight up to remove it. Allow the paint to dry to the touch before repositioning the stencil to create the next lace motif on the lid. -
Blend the edges:
If you are overlapping patterns, ensure the first area is completely dry so you don’t smudge your work.
Pro Tip: Vintage Fade
For a worn, vintage look, lightly sand the gold stenciled areas after they dry. This distresses the pattern and makes it look like it’s been there for decades.
Step 3: Finishing Touches
-
Let it cure:
Allow the gold stencil work to dry fully, preferably for a few hours. Metallic paints can sometimes take a bit longer to set than standard acrylics. -
Clear coat:
Apply a thin layer of matte clear coat over the entire box to protect the paint and stenciling from scratches and dust. -
Reattach hardware:
Locate your saved screws and hardware. Carefully screw the hinges and latch back into their original holes.
Now you have a stunning custom storage piece perfect for jewelry or keepsakes
Vines and Tiny Leaves Wraparound
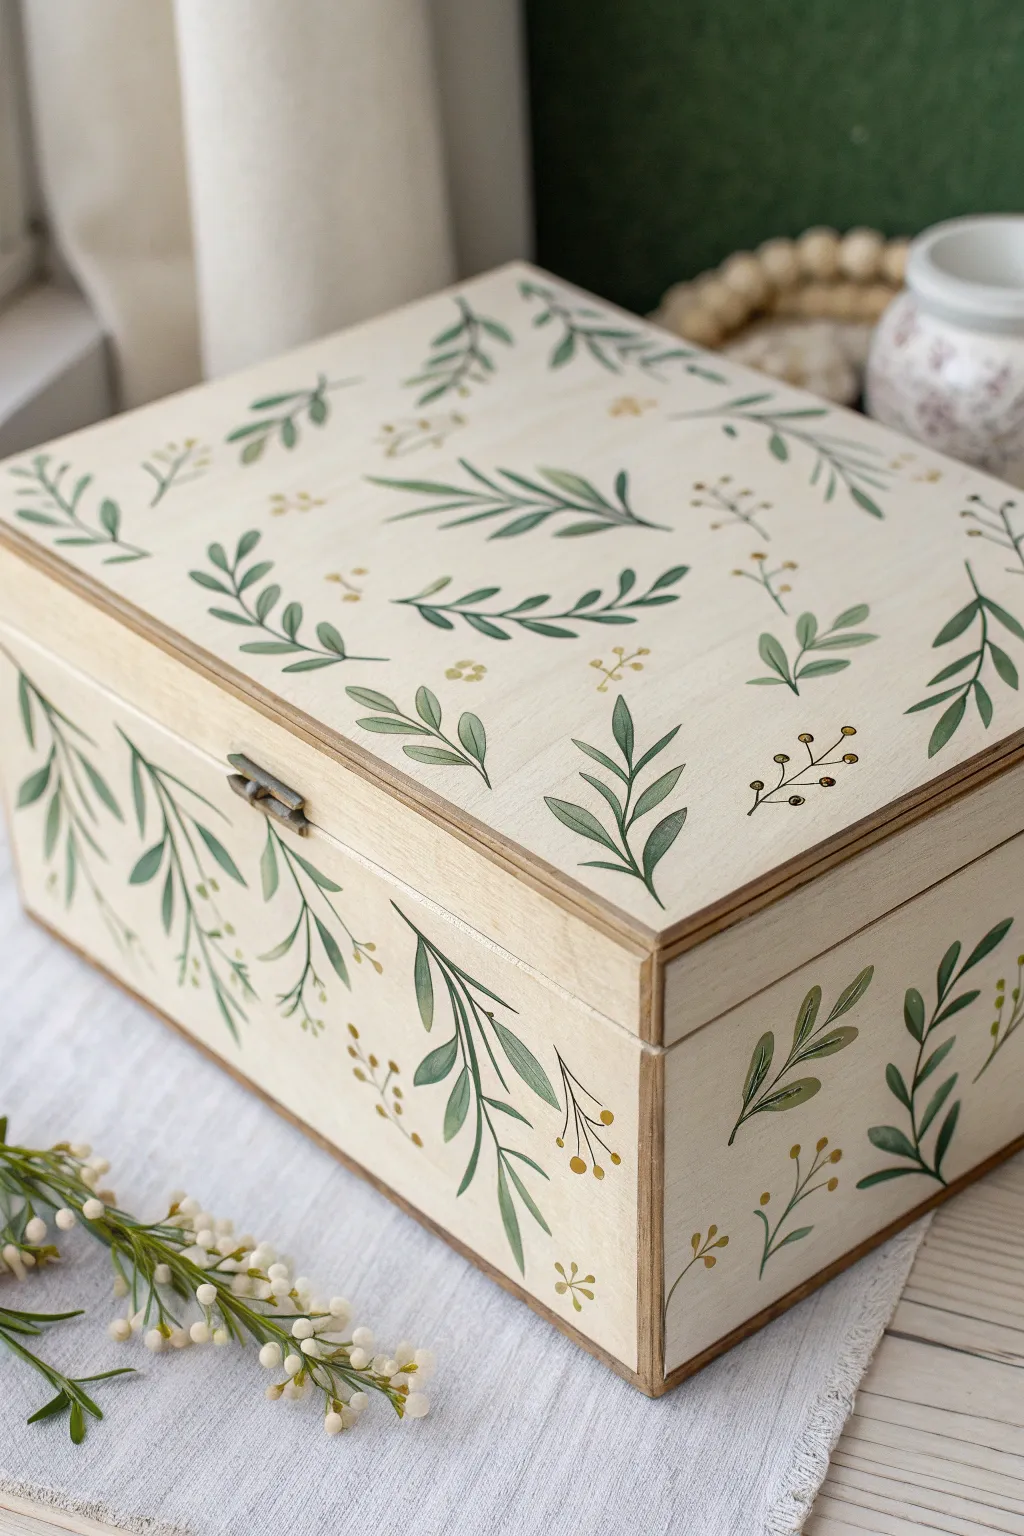

Transform a plain wooden box into a charming nature-inspired treasure chest using delicate vine patterns and soft earthy tones. This project wraps elegant greenery around every corner, creating a seamless, organic aesthetic perfect for storing jewelry or letters.
Step-by-Step
Materials
- Unfinished wooden box (hinged lid preferred)
- Fine grit sandpaper (220 grit)
- Clean tack cloth or rag
- Matte acrylic craft paints: cream/off-white (base), sage green, forest green, deep olive, mustard yellow/gold
- Flat shader brush (medium size)
- Round detail brush (size 1 or 2)
- Small liner brush (size 0 or 00)
- Pencil
- Eraser
- Matte spray sealant or clear wax
- Palette or paper plate
- Cup of water and paper towels
Step 1: Preparation & Base Coat
-
Sand the Wood:
Begin by lightly sanding the entire surface of your unfinished wooden box. Focus on the edges and corners to ensure they are smooth to the touch. -
Clean the Surface:
Wipe away all the sanding dust thoroughly using a tack cloth or a slightly damp rag. Any leftover dust will create a rough texture in your paint. -
Mix the Base Color:
Squeeze out your cream or off-white acrylic paint. If you want a more vintage wood look, mix a tiny drop of brown or beige into white paint to warm it up. -
Apply First Base Coat:
Using the flat shader brush, paint the lid and sides of the box with your cream color. Paint in the direction of the wood grain for the smoothest finish. -
Sand and Recoat:
Let the first coat dry completely (about 20 minutes). The wood grain might raise slightly, so give it a very light sanding again, wipe clean, and apply a second coat for solid, opaque coverage.
Step 2: Painting the Foliage
-
Plan the Layout:
Once the base is bone dry, use a pencil to very lightly sketch the main sweeping curves of your vines. Don’t draw every leaf; just mark the flow and direction to ensure the vines wrap nicely around the box. -
Mix Green Shades:
Prepare your palette with three distinct greens: a light sage, a mid-tone forest green, and a darker olive. Mixing these slightly creates natural variety. -
Paint Main Vines:
Using the liner brush and your mid-tone green, paint thin, flowing stems over your pencil guides. Vary the pressure: press lighter at the ends of twigs for a tapered look. -
Add Large Leaves:
I like to switch to the round detail brush here. Load it with the darker olive green and press the belly of the brush down to create the wider part of the leaf, lifting as you pull away to make a sharp point. -
Layer in Lighter Leaves:
cleaning your brush, dip into the sage green. Paint smaller leaves interspersed among the darker ones. This color variation adds depth and makes the pattern look less repetitive. -
Connect the Leaves:
Use the liner brush again to attach any floating leaves to the main stems with tiny, delicate lines. Ensure the connection points look natural. -
Create Wraparound Details:
Pay special attention to the corners. Paint a vine starting on the lid that visually continues down the side of the box.
Fixing Wobbly Lines
If your vine lines look shaky, your paint is likely too thick. Thin it with a tiny drop of water until it has an inky consistency for smoother strokes.
Step 3: Berries & Finishing Touches
-
Add Berry Stems:
Using a very thin mix of brown or dark green paint and your finest liner brush, paint thin, branching sprigs coming off the main vines or filling empty spaces. -
Paint the Berries:
Dip the tip of a stylus, the handle end of a paintbrush, or your small round brush into the mustard yellow/gold paint. Dot small clusters of berries at the ends of your delicate sprigs. -
Highlighting:
Mix a tiny amount of white into your sage green. Add a single, thin stroke to one side of selected larger leaves to simulate light reflecting off them. -
Clean Up:
Once the paint is fully dry, gently erase any visible pencil marks. Be careful not to scrub too hard over the painted areas. -
Seal the Artwork:
To protect your handiwork from scratches and dust, apply a coat of matte spray sealant or clear furniture wax. This also unifies the sheen of the paint.
Level Up: Antique Look
After sealing, lightly distress the edges with sandpaper to reveal raw wood, then rub a little brown antiquing wax over the box for an aged, farmhouse feel.
Now you have a beautifully personalized storage piece that brings a touch of nature indoors
Ocean Waves and Bubble Details
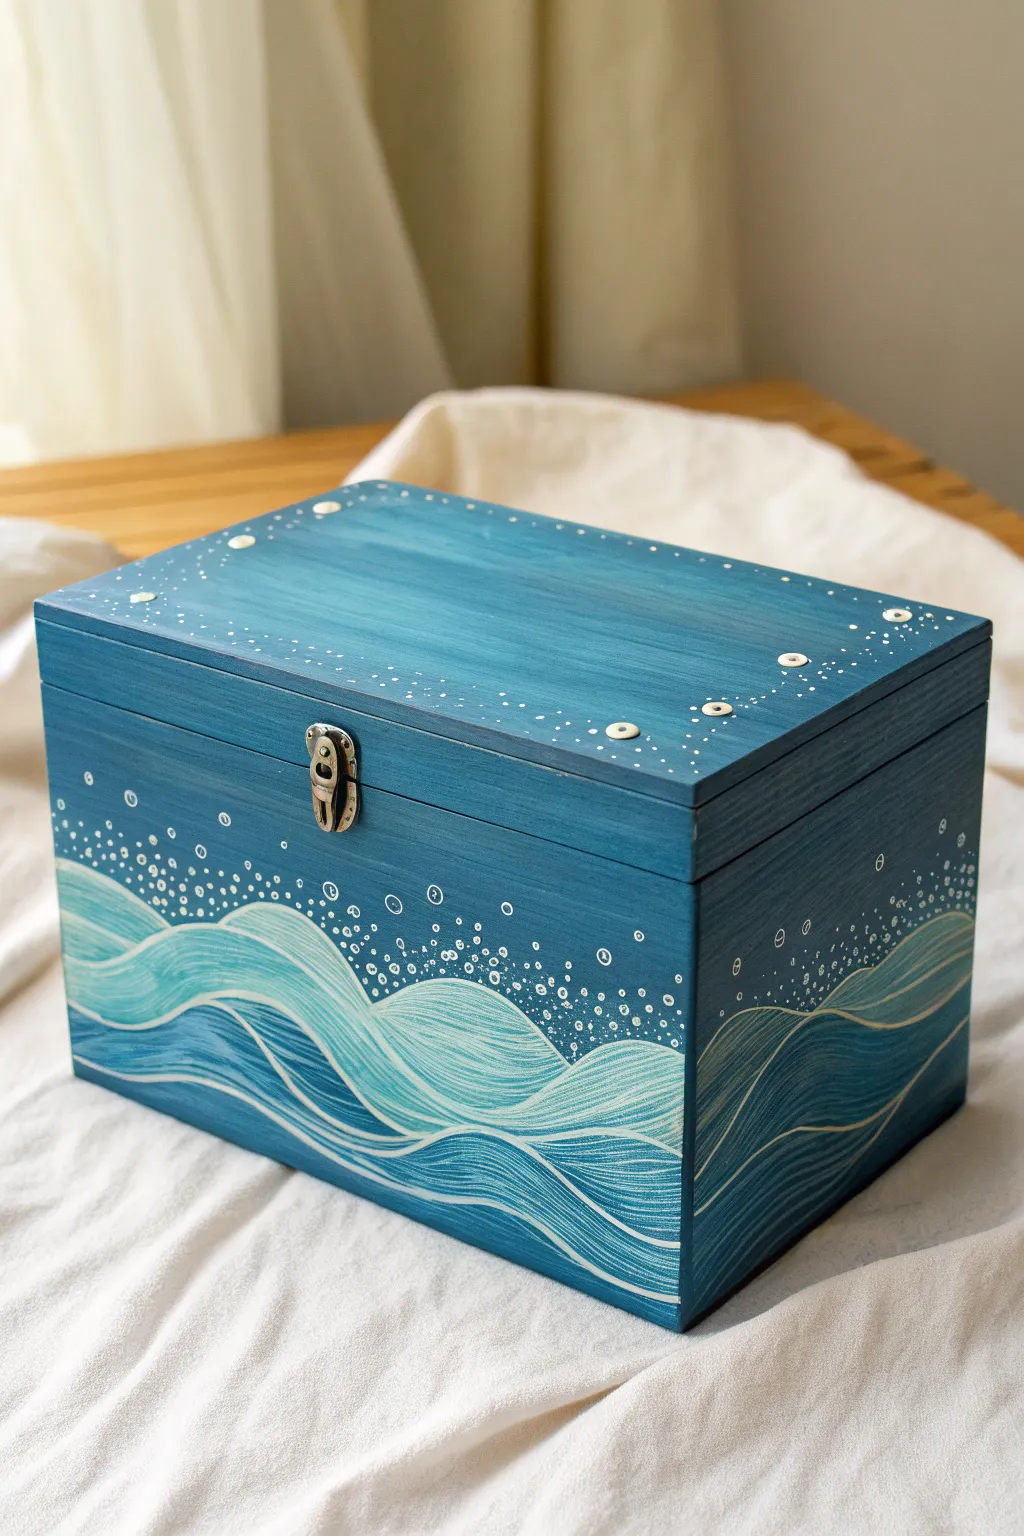
Transform a plain wooden box into a serene seascape featuring rhythmic rolling waves and delicate bubbly foam. This calming aesthetic combines soothing teal blues with crisp white line work for a truly stunning finish.
Step-by-Step Tutorial
Materials
- Unfinished wooden box with hinged lid
- Gesso or white acrylic primer
- Sandpaper (fine grit)
- Acrylic paints: Deep ocean blue, teal, aqua, and titanium white
- Flat shader brushes (medium and large)
- Fine liner brush (00 or 000 size)
- White or silver paint pen (fine tip)
- Dotting tools or toothpicks
- Small flat shell beads or sequins
- Strong craft glue (E6000 or similar)
- Matte varnish
- Painters tape (optional)
Step 1: Preparation & Base Coat
-
Prep the surface:
Remove any hardware if possible, or carefully tape over the metal latch. Lightly sand the entire wooden box to remove rough fibers, then wipe away the dust with a damp cloth. -
Prime the wood:
Apply a thin, even coat of gesso or white primer. This ensures your blue pigments will pop and prevents the wood from soaking up too much paint. -
Mix the base color:
Create a rich, mid-tone ocean blue. If your blue is too primary, mix in a tiny touch of black or burnt umber to deepen it into a sophisticated teal-blue shade. -
Apply the background:
Paint the entire box—lid and base—with your custom blue mix. Use long, horizontal strokes to mimic the horizon. You will likely need two coats for full opacity; let the first coat dry completely before adding the second.
Uneven Lines?
If your white wave lines look shaky, switch to a POSCA paint pen (0.7mm) instead of a brush. The firm nib offers much better stability for long curves.
Step 2: Painting the Waves
-
Draft the wave shapes:
Once the base is bone-dry, use a white chalk pencil or very light pencil pressure to sketch sweeping, curved hills along the bottom half of the box. Vary the height to create a natural, rolling rhythm. -
Block in wave colors:
Mix a lighter aqua shade by adding white to your base teal. Fill in the wave shapes you just drew. Don’t worry about the fine lines yet; just get the solid color down. -
Create distinct bands:
Paint a second, lower band of waves in a slightly different shade—perhaps a bit more blue or green—to add depth. This layering makes the ocean feel majestic and deep. -
Detail the linework:
Using your finest liner brush and slightly watered-down white acrylic (or a white paint pen for better control), draw flowy lines that follow the curve of your painted waves. Keep your hand loose to maintain organic movement. -
Intensify the contours:
Go back over specific ridges with thicker white lines or double up your strokes. This emphasizes the crests of the waves where the light would hit.
Dimensional Sparkle
Mix a pinch of iridescent glitter into your varnish or use a pearlescent white paint for the bubbles to give the water a magical, shimmering quality.
Step 3: Adding Bubbles & Embellishments
-
Create the sea spray:
Above the waves, begin adding small dots using a dotting tool or the back of a paintbrush dipped in white paint. Cluster them densely near the wave crests and scatter them as they float upward. -
Add floating bubbles:
Paint larger, open circles (rings) scattered among the solid dots. This variance in shape makes the ‘foam’ look bubbly and light rather than just like snow. -
Decorate the lid border:
Moving to the top of the lid, create a border of dots and tiny specks that frame the upper edge. I like to taper the density, making it heavier at the corners. -
Attach shell accents:
Select your small flat shell beads or sequins. Using a strong craft glue, adhere these periodically along the lid’s painted dot border to serve as focal points. -
Connect the accents:
Paint tiny groupings of dots around each glued shell bead to integrate them into the design, making them look like part of the magical sea foam.
Step 4: Finishing Touches
-
Clean up edges:
Check the rim where the lid meets the box. If paint has pooled there, sand it lightly so the box closes flush. -
Reattach hardware:
Remove any tape you applied earlier or screw the metal latch back into place. -
Seal the artwork:
Apply a coat of matte varnish over the entire painted surface. A matte finish looks elegant and suits the soft, natural theme, but gloss works if you want a ‘wet’ look.
Now you have a tranquil place to store your treasures that reminds you of the sea
Faux Stone or Concrete Finish
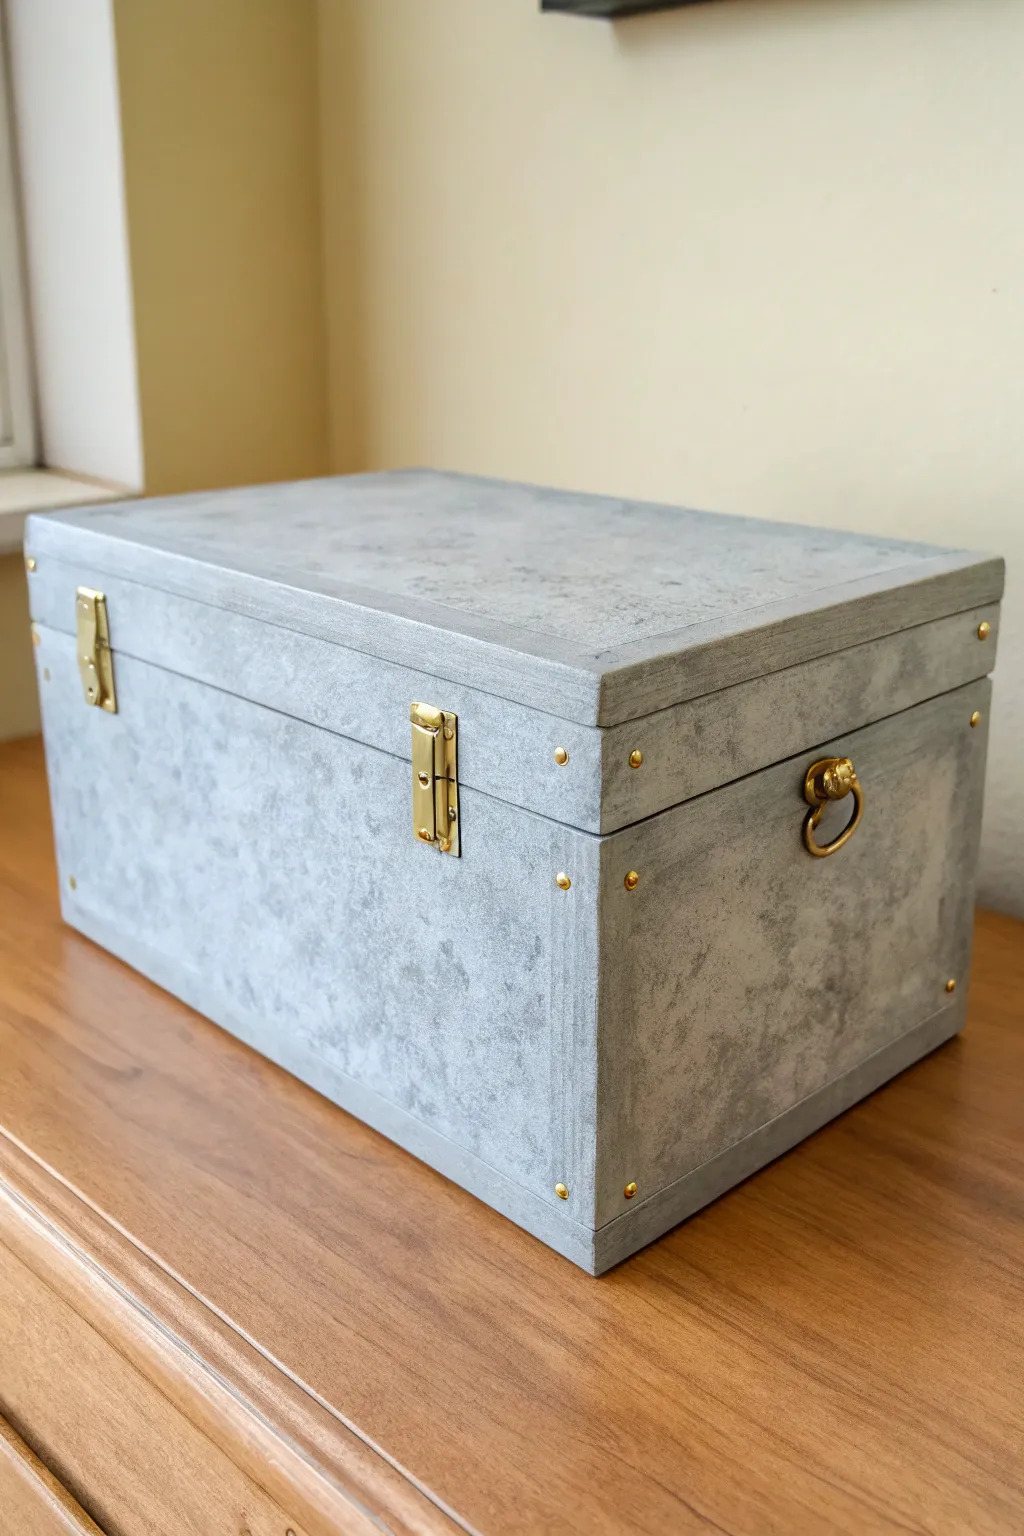
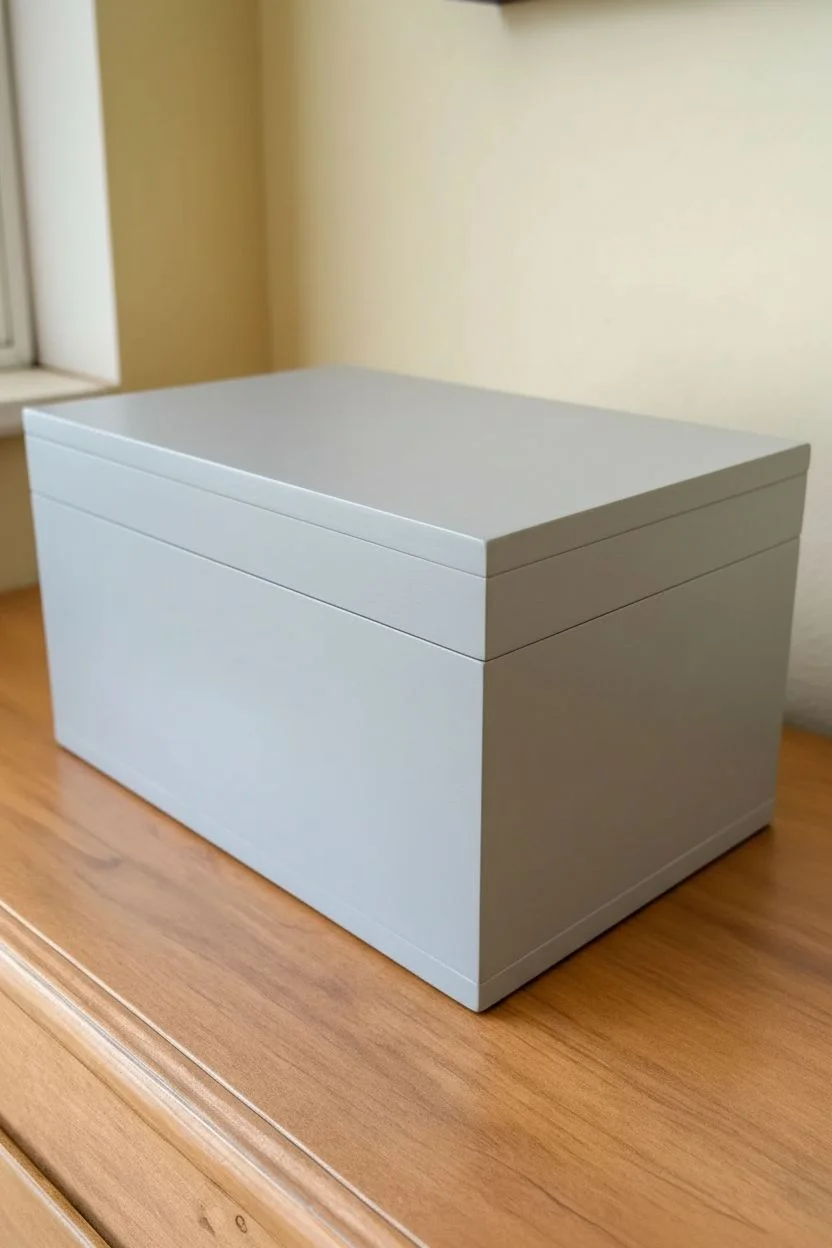
Transform a simple wooden chest into an industrial-chic statement piece with this realistic faux concrete finish. The unique mottled texture and contrasting gold hardware give it a solid, timeless appearance that looks heavy but feels light.
Step-by-Step
Materials
- Unfinished wooden box with hinged lid
- Sandpaper (220-grit)
- Painter’s tape
- Grey acrylic paint (mid-tone)
- White acrylic paint
- Dark grey or black acrylic paint
- Natural sea sponge
- Wide flat paintbrush
- Small detail brush
- Paper plate or palette
- Matte spray sealer or varnish
- Optional: Gold spray paint (if hardware isn’t already gold)
- Screwdriver (for removing hardware)
- Gold studs or upholstery tacks (if adding detail)
- Hammer
Step 1: Preparation
-
Remove Hardware:
Before you begin painting, carefully unscrew and remove all latches, hinges, and handles from the box. Place them in a baggy so you don’t lose the tiny screws. -
Sand the Surface:
Lightly sand the entire exterior of the wooden box with 220-grit sandpaper to remove any rough spots or splinters. Wipe away the dust with a barely damp cloth. -
Optional Hardware Prep:
If your existing hardware isn’t the bright gold shown in the reference, spray paint the removed metal pieces with metallic gold spray paint now so they have plenty of time to dry.
Too Blotchy?
If your sponge marks look too distinct, your sponge is too dry or has too much paint. Moisten it slightly and dab off excess paint on paper before touching the box.
Step 2: Creating the Base
-
Mix the Base Color:
Squeeze a generous amount of your mid-tone grey acrylic paint onto your palette. If it feels too dark, lighten it slightly with a drop of white. -
Apply First Coat:
Using a wide flat brush, paint the entire exterior of the box with the grey mixture. Use long, even strokes to ensure full coverage. -
Let it Dry:
Allow this base coat to dry completely. If the wood grain is still showing through significantly, apply a second coat of solid grey.
Add Age
For an ancient stone look, dilute some brown railing paint with water and flick tiny specks onto the surface using an old toothbrush before sealing.
Step 3: Building Texture
-
Prepare the Palette:
On your palette, create three distinct puddles: pure white, your original mid-tone grey, and a darker grey (mix a little black into the mid-tone). -
Prepare the Sponge:
Dampen your sea sponge and wring it out thoroughly until it is just barely moist. This prevents the paint from becoming runny. -
Start Sponging:
Dip the sponge into the mid-tone grey, dab off the excess on a paper towel, and begin lightly patting it over the dried base coat in random patterns. -
Add Highlights:
Without washing the sponge, dip a clean corner into the white paint. Dab off most of the paint—less is more here—and lightly pounce it over the box to create cloudy, concrete-like highlights. -
Add Depth:
Repeat the process with the darker grey paint, focusing on corners and edges to create shadows and depth. The key is layering these colors while they are wet so they blend slightly. -
Refine the Look:
I like to step back occasionally to check the balance. If an area looks too dark, sponge a little more mid-tone grey over it to soften the effect. -
Complete Drying:
Once you are satisfied with the stony texture, verify that all sides are covered and let the sponge painting dry completely, preferably overnight.
Step 4: Finishing Details
-
Seal the Finish:
To protect your paint job and unify the sheen, spray the box with a matte clear coat. A glossy finish will ruin the stone illusion, so verify your can says ‘Matte’. -
Reattach Hardware:
Once the sealer is dry, screw the gold hinges, latches, and handles back into their original positions. -
Mark Stud Placement:
To recreate the riveted look, use a ruler and pencil to lightly mark evenly spaced dots along the edges and corners where you want the gold studs to go. -
Hammer in Studs:
Carefully hammer the gold upholstery tacks or studs into the marked spots. Use a soft cloth between the hammer and the stud to prevent scratching the gold finish. -
Final Cleanup:
Wipe down the hardware with a soft cloth to remove any fingerprints, and your faux industrial chest is ready to display.
Enjoy the sturdy, industrial elegance this newly transformed box brings to your shelf
Intentional Paint Splatter Accent
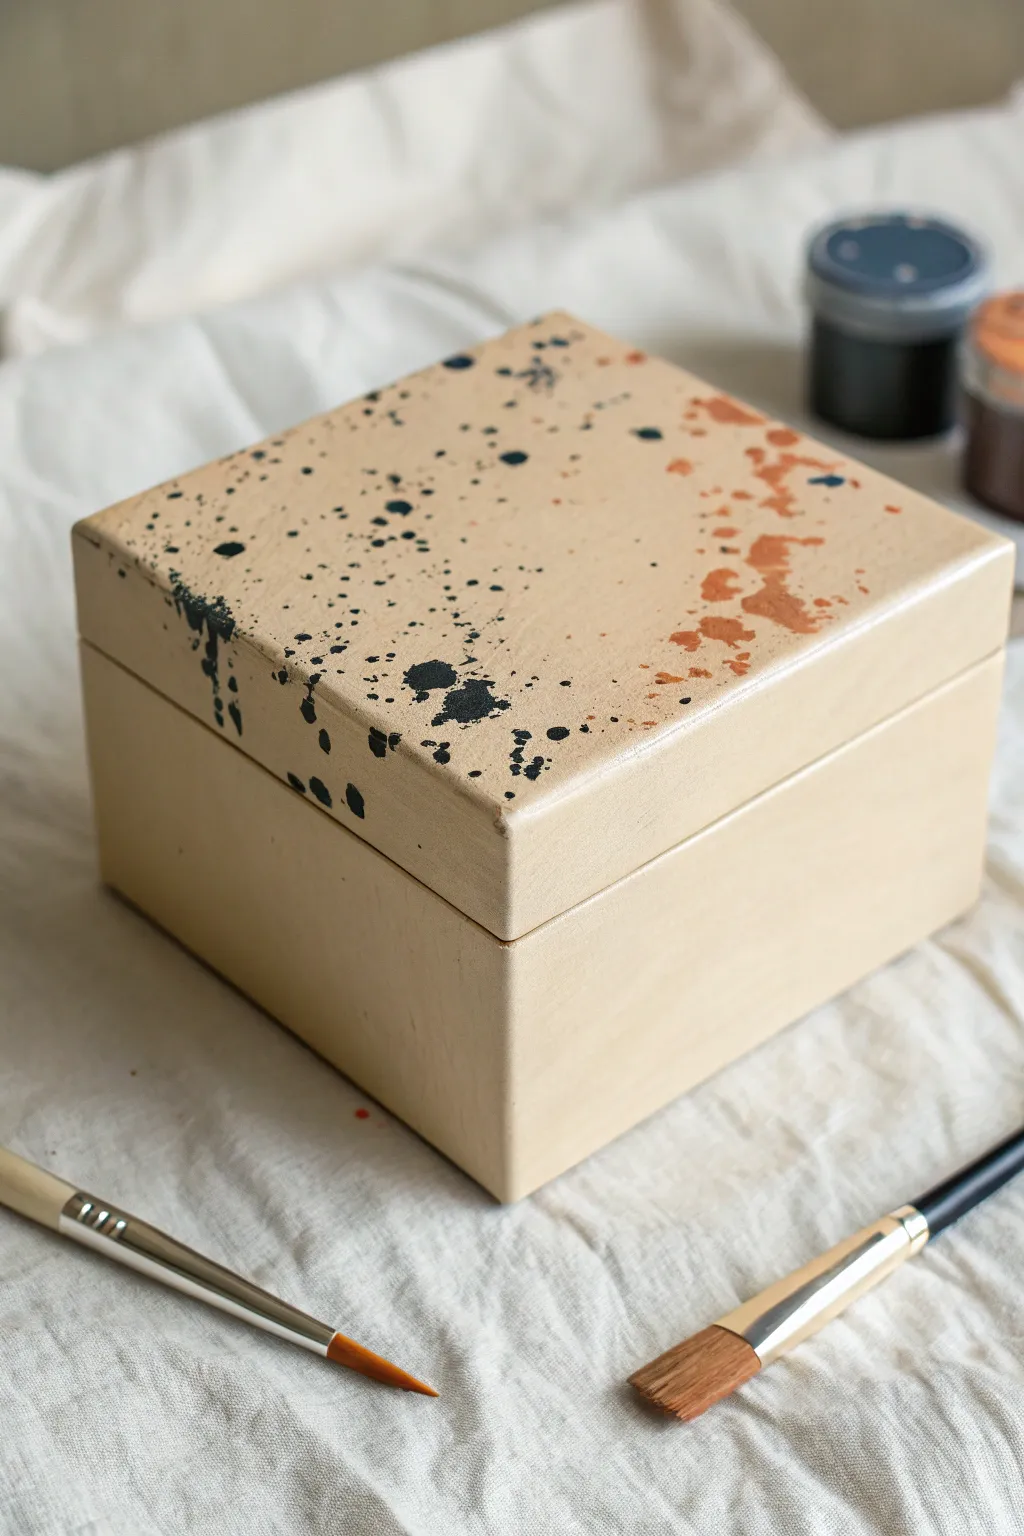
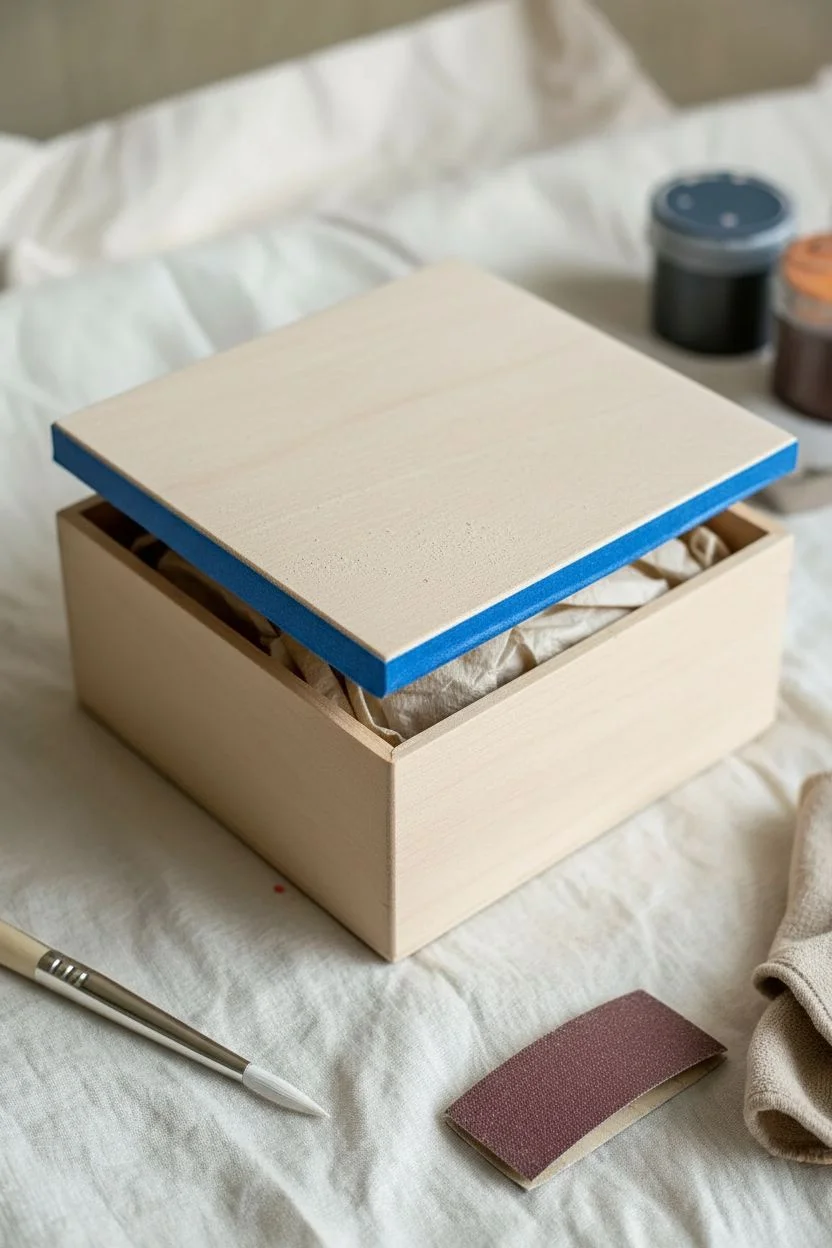
Embrace the beauty of controlled chaos with this minimalist splatter box design. By strategically placing black and terracotta accents on raw wood, you achieve a modern, organic look that balances negative space with artistic flair.
How-To Guide
Materials
- Unfinished wooden box (square or rectangular)
- Fine grit sandpaper (220 grit)
- Black acrylic paint
- Terracotta or warm brown acrylic paint
- Small round paintbrush (size 2-4)
- Flat shader brush (for mixing)
- Stiff-bristled toothbrush or fan brush
- Palette or paper plate
- Painter’s tape or scrap paper
- Matte spray sealant (clear)
- Cup of water
- Paper towels
Step 1: Prep Work
-
Sand the surface:
Begin by lightly sanding the entire exterior of your wooden box. Even if it looks smooth, a quick pass with 220-grit sandpaper ensures the raw wood is free of burrs and oils, creating the perfect canvas. -
Wipe clean:
Use a dry or very slightly damp microfiber cloth to remove all sanding dust. -
Protect the interior:
If you want to keep the inside pristine, line the inner rim with painter’s tape. You can also stuff the inside with a paper towel to catch any stray droplets. -
Plan your composition:
Observe the reference image; the splatters aren’t random. They form a diagonal relationship—black on the left, terracotta on the right. Visualize this zone before you start.
Splatter Control
If you feel nervous about over-splattering, use a piece of cardstock to mask off the ‘clean’ areas of the box while you flick paint. This creates a hard edge or protects the negative space.
Step 2: Creating the Black Splatters
-
Prepare the black paint:
Squeeze a dime-sized amount of black acrylic paint onto your palette. Add water drop by drop until it reaches an ink-like consistency—fluid enough to fly off a brush, but opaque enough to cover. -
Load the tool:
For fine, mist-like dots as seen on the left side, a stiff toothbrush or a stiff bristle brush works best. Dip the tips into the thinned paint. -
Test the spray:
Before hitting the box, I always do a test spray on scrap paper to gauge the density. -
Apply the black zone:
Hold the brush near the front-left corner of the lid. Run your thumb across the bristles to flick the paint downward. Aim for a dense cluster at the corner that fades out as it moves toward the center. -
Add larger droplets:
To create the few larger black spots mixed in, load a small round paintbrush with more paint. Tap the handle of the brush against your other hand over the target area to shake loose bigger drops. -
Let it dry:
Allow the black paint to dry completely (about 10–15 minutes) so you don’t accidentally smear it while working on the next color.
Level Up: Metallic Pop
Once the matte colors are dry, add a third layer of very sparse gold or copper splatters over the terracotta section. The metallic sheen adds a luxurious hidden detail.
Step 3: Adding the Terracotta Accents
-
Mix the warm tone:
Prepare your terracotta or warm brown paint. Thin this color slightly less than the black; slightly thicker paint creates the more textured, larger splotches seen on the right side. -
Load a round brush:
For the right side, switch to a round paintbrush. Load it generously with the thinned terracotta paint. -
The tap technique:
Position the brush over the back-right corner of the lid. Sharply tap the brush handle to release larger, more organic splashes. -
Control the spread:
Allow some of these terracotta splashes to drift toward the center, but keep the heaviest concentration at the edge. Let gravity help settle the drops into natural shapes. -
Connect the lid and base:
Make sure you splatter while the box is closed so the design flows seamlessly over the seam where the lid meets the base. -
Cleanup drips:
If any paint lands in an area you wanted to keep blank, quickly dab it up with a damp cotton swab before it sets.
Step 4: Finishing Touches
-
Full dry time:
Let the box sit undisturbed for at least an hour. Thicker paint blobs take longer to cure than the thin mist. -
Seal the deal:
To protect the raw wood without darkening it too much, use a clear matte spray sealer. Hold the can 12 inches away and apply a light mist coat. -
Second coat:
Once the first coat is dry, apply a second light coat of sealer for durability. -
Remove tape:
Peel off any painter’s tape you used on the interior.
This simple technique transforms a plain storage item into a modern art piece for your shelf
Twilight Cityscape Silhouette
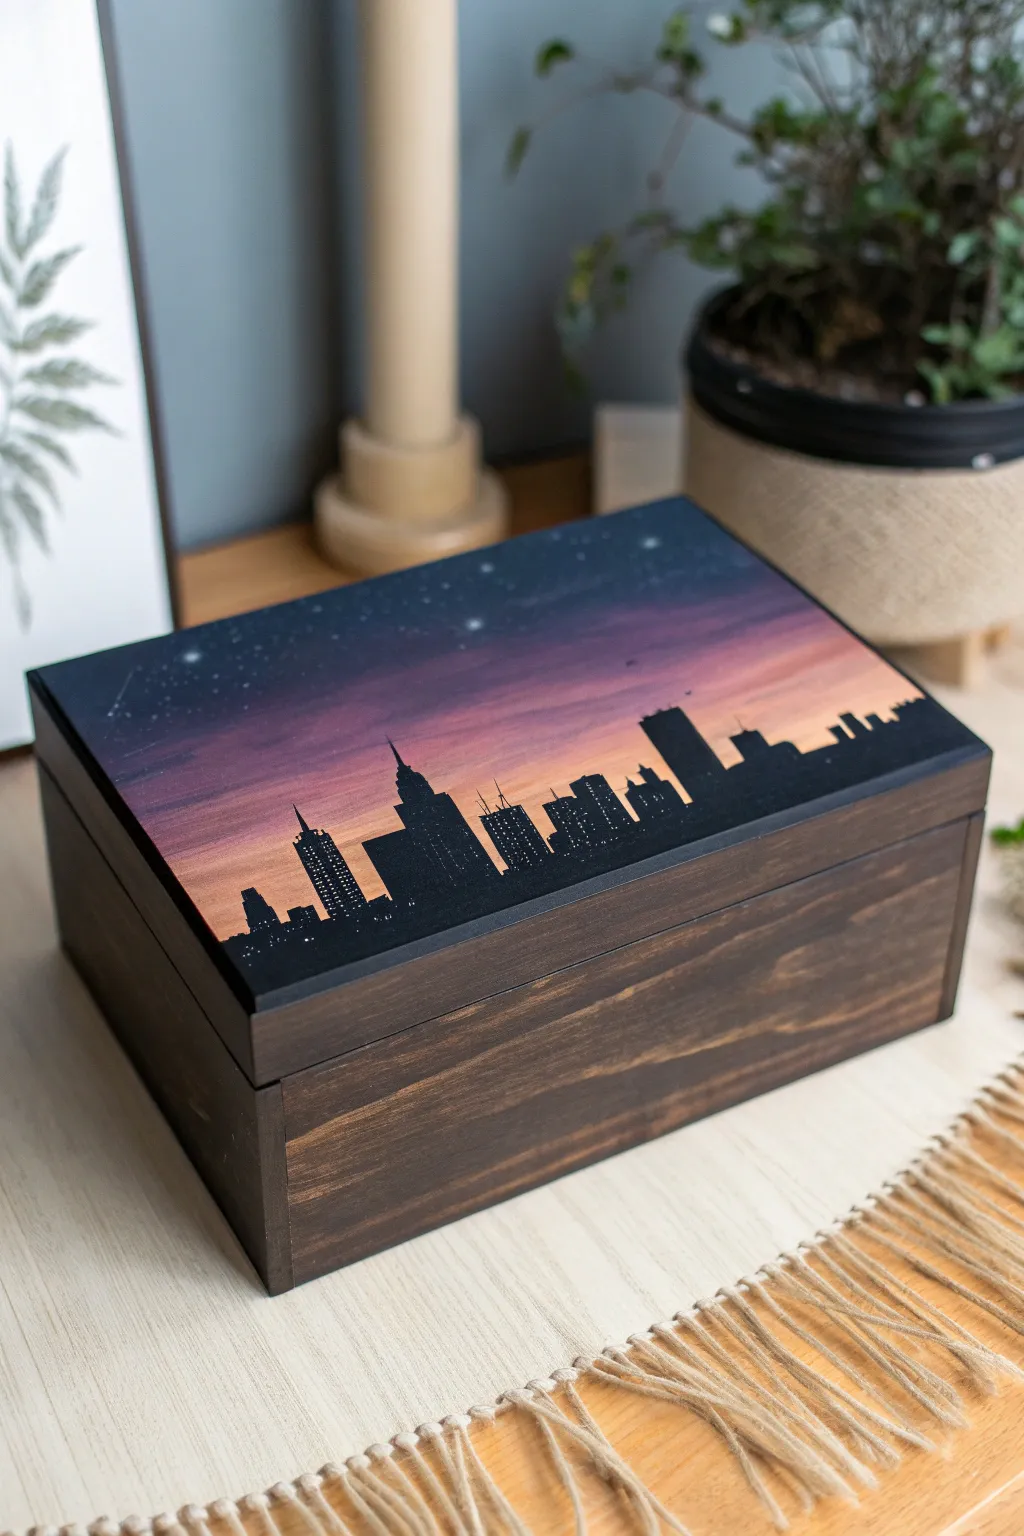
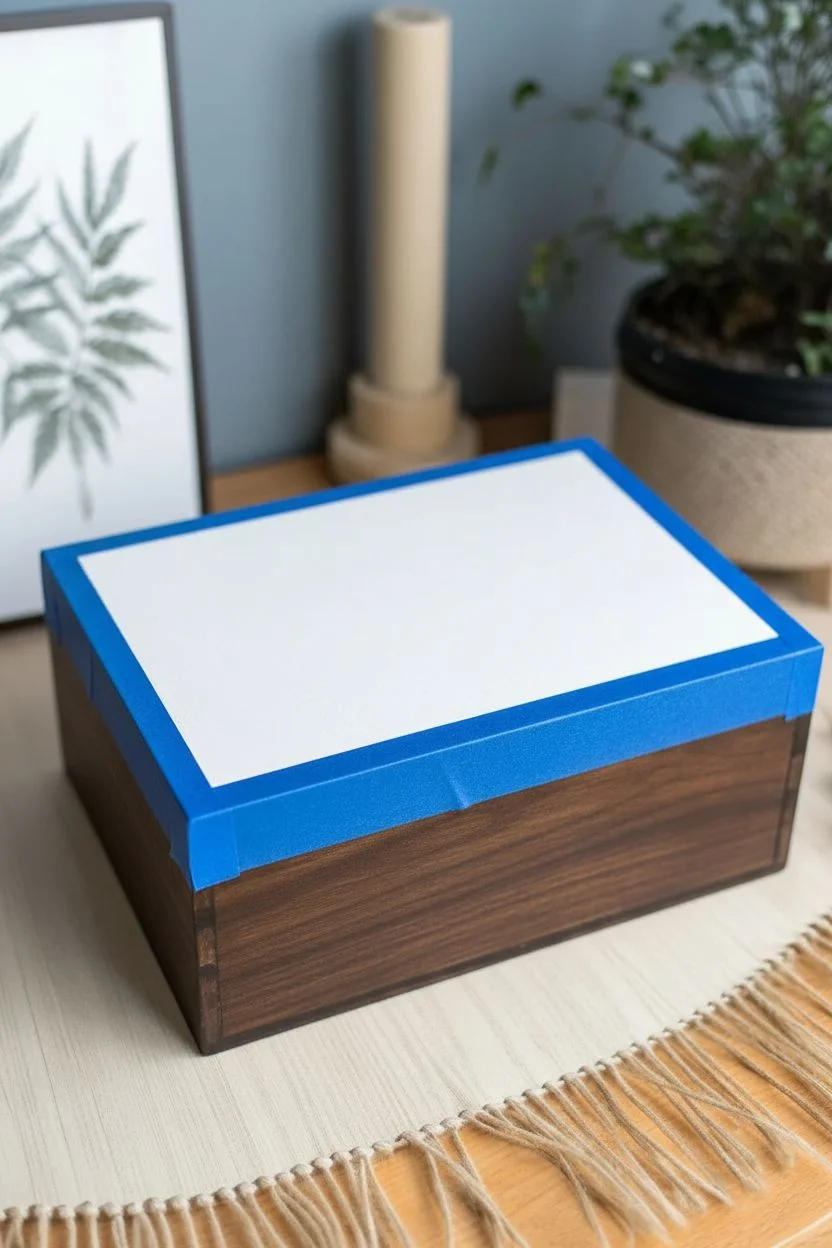
Transform a simple wooden box into a stunning piece of decor with this cityscape silhouette project. The lid captures the magic of a city at dusk, featuring a vibrant sunset gradient and crisp black buildings against a starry sky.
Step-by-Step Guide
Materials
- Unfinished wooden box with flat lid
- Sandpaper (medium and fine grit)
- Dark walnut wood stain
- Acrylic paints: Black, Indigo, Purple, Magenta, Orange, White
- Painter’s tape
- Flat shader brushes (medium and large)
- Fine liner brush
- Old toothbrush (optional for stars)
- Matte or satin clear sealant spray
- Clean rags or staining sponge
Step 1: Preparing and Staining the Base
-
Sand the surface:
Start by lightly sanding the entire wooden box using medium-grit sandpaper to remove any rough patches. Follow up with fine-grit sandpaper to ensure a smooth finish, wiping away all dust with a tack cloth or slightly damp rag. -
Mask the lid:
Since we only want paint on the very top face of the lid, carefully apply painter’s tape around the side edges of the lid. Press the tape down firmly to prevent stain or paint from bleeding onto the top surface edges. -
Apply the stain:
Using a clean rag or staining sponge, apply a coat of dark walnut wood stain to the sides and bottom of the box. Work with the grain of the wood, wiping away any excess stain after a few minutes to achieve an even, rich color. -
Let it cure:
Allow the stain to dry completely according to the manufacturer’s instructions. I usually let this sit overnight to ensure the wood is perfectly dry before I start painting near it.
Gradient Trouble?
If acrylic paint dries too fast while blending, mix in a drop of acrylic retarder or matte medium. This keeps the paint workable longer giving smoother transitions.
Step 2: Painting the Sunset Sky
-
Prime the lid:
Paint the top surface of the lid with a layer of white acrylic paint. This primer layer is crucial because it makes the sunset colors pop and prevents the wood grain from absorbing the pigment. -
Mix your palette:
Prepare your sky colors on a palette: deep indigo, rich purple, vibrant magenta, and a warm sunset orange. Keep them wet, as you’ll need to blend them quickly. -
Paint the top sky:
Start at the very top edge of the lid with the indigo paint. Apply a horizontal strip about an inch or two wide. -
Add the middle tones:
While the indigo is still wet, paint a strip of purple directly below it. Use your brush to blend the seam where they meet, creating a soft transition. -
Blend the horizon:
Continue down with magenta and finally orange at the bottom. Work back and forth with a damp brush to smooth out the gradients so the colors melt into each other like a real sunset. -
Dry completely:
Let this gradient background dry fully. If the colors look streaky, apply a second coat using the same blending technique once the first is dry. -
Add stars:
Dip an old toothbrush or stiff brush into watered-down white paint. Use your thumb to flick fine bristles over the dark indigo section at the top to create a field of distant stars. Add a few larger stars manually with a detail brush.
Step 3: Creating the City Silhouette
-
Outline the skyline:
Using a fine liner brush and black acrylic paint, lightly sketch the varying heights of your buildings along the bottom edge of the lid. Include a mix of tall skyscrapers and shorter blocks for visual interest. -
Fill in the shapes:
Switch to a small flat brush to fill in the building shapes with solid black paint. Ensure the bottom edge is perfectly straight and flush with the bottom of the lid surface. -
Add architectural details:
With your finest liner brush, paint tiny antennae, spires, or water towers on top of a few buildings. These small details add a lot of realism to the silhouette. -
Paint window lights:
Once the black paint is bone dry, use a tiny dotting tool or the tip of a toothpick dipped in white or pale yellow paint to add random patterns of lit windows on the skyscrapers.
Glow Up
Mix glow-in-the-dark pigment into your white window paint or star speckles. The city will charge by day and magically light up when the room goes dark.
Step 4: Finishing Touches
-
Remove tape:
Carefully peel away the painter’s tape from the lid edges. If any paint bled under, you can carefully scrape it away or touch it up with a bit of stain. -
Paint the rim:
Paint the exposed thin rim of the lid black to frame your artwork. This creates a clean, finished border that separates the painting from the stained wood of the box body. -
Seal the project:
Finish by applying a clear matte or satin sealant spray over the entire box. This protects both the wood stain and your delicate painting from scratches and fading.
Now you have a personalized keepsake box that captures the quiet beauty of the city night sky
Inside-Only Secret Garden Surprise

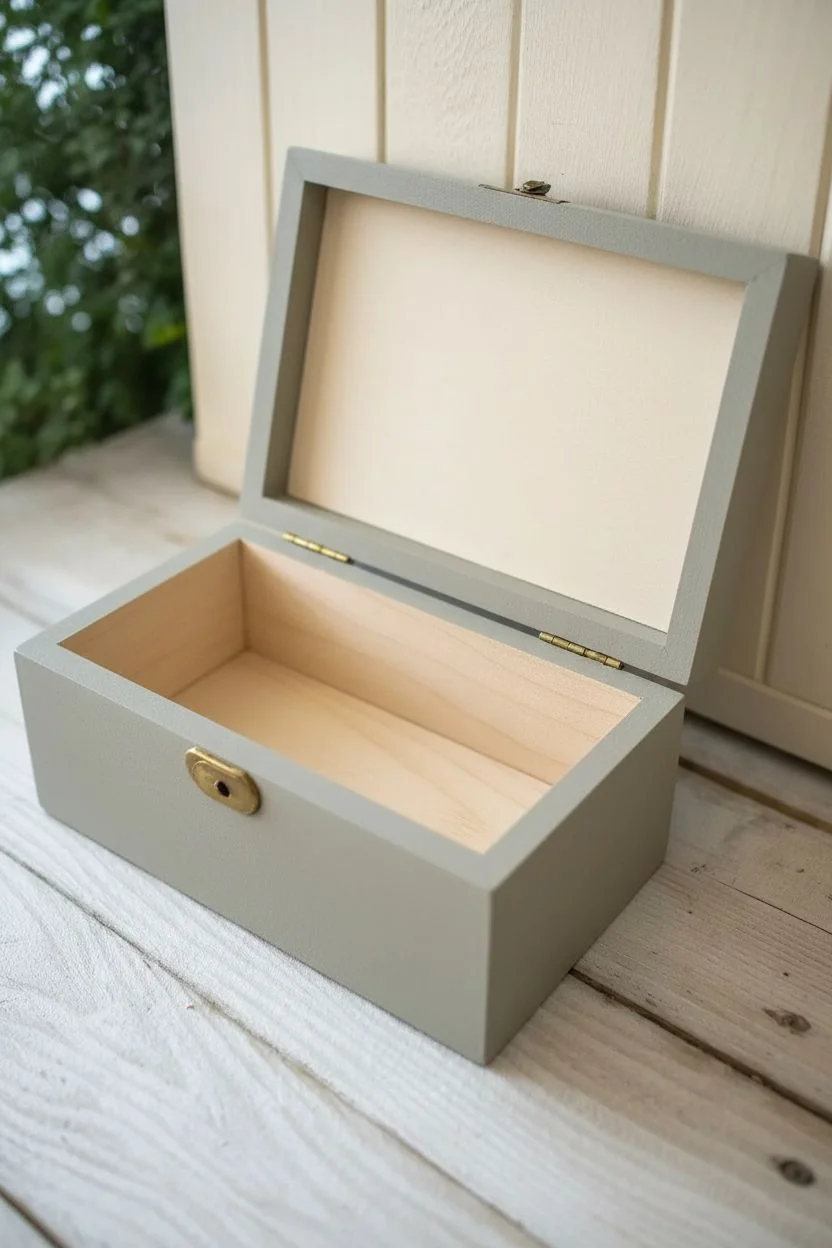
Transform a plain wooden box into a hidden floral sanctuary with this delicate mixed-media project. By combining subtle grey-green paint with botanical decoupage or transfers, you create a charming “Secret Garden” surprise that reveals itself only when opened.
Detailed Instructions
Materials
- Unfinished wooden box with hinged lid
- Light sage-grey acrylic paint
- Cream or off-white acrylic paint
- Detail paintbrush (size 0 or 1)
- Flat shader brush (size 6 or 8)
- Printed botanical graphics or decoupage paper (featuring soft pink/coral flowers and greenery)
- Mod Podge or decoupage medium
- Scissors
- Fine-grit sandpaper (220 grit)
- Ruler and pencil
- Gold finish hardware (optional upgrade)
- Matte clear sealant spray
Step 1: Preparation & Base Coating
-
Prep the surface:
Begin by removing any existing hardware like latches or hinges if they are easily unscrewable; this makes painting much cleaner. If you can’t remove them, cover them carefully with painter’s tape. -
Sand for smoothness:
Lightly sand the entire wooden box, focusing on rough edges and corners. Wipe away all dust with a tack cloth or slightly damp rag to ensure the paint adheres perfectly. -
Mix your exterior color:
Mix a soft, muted sage-grey paint. You want an opaque, matte finish that looks timeless rather than modern and glossy. -
Paint the exterior:
Using your flat shader brush, apply a thin, even coat of the sage-grey paint to the outside of the box and the rim of the lid. Let it dry completely, then apply a second coat for solid coverage. -
Paint the interior lid:
For the inside of the lid—the focal point—paint a rectangle of cream or off-white. Leave a small border of the raw wood or paint it grey, depending on your preference, but the background for your text needs to be light.
Step 2: Designing the Secret Garden
-
Prepare the graphics:
Source or print your ‘Secret Garden’ design. You’ll need two main elements: the text with surrounding florals for the inner lid, and a repeating botanical pattern for the bottom interior. -
Cut to size:
Measure the inside of your lid and the bottom of the box precisely. Cut your paper slightly smaller than these dimensions to avoid paper bunching in the corners. -
Apply the inner lid design:
Brush a thin layer of Mod Podge onto the painted cream area of the inner lid. Carefully place your paper (featuring the text and floral wreath) onto the wet surface. -
Smooth the paper:
Gently smooth the paper from the center outward using your fingers or a brayer to push out any air bubbles. Work slowly to avoid tearing the damp paper. -
Line the bottom:
Repeat the decoupage process for the bottom of the box. Ideally, use a pattern that complements the lid but is denser with foliage, creating a ‘carpet’ of flowers.
Paper Blending Trick
To make the paper edges invisible, gently sand the edges of your glued paper once dry. This feathers the fiber into the wood for a painted-on look.
Step 3: Hand-Painted Details & Finishing
-
Add exterior flourishes:
To tie the outside to the inside, hand-paint a delicate sprig of greenery on the front exterior panel. Use your detail brush and diluted darker green paint to create whisper-thin stems. -
Dab on floral accents:
Add tiny dots of coral or peach paint to your painted stems to mimic small buds. Keep this minimal; the big reveal should happen when the box opens. -
Seal the artwork:
Once all paint and glue are bone dry, apply a coat of matte decorative varnish or Mod Podge over the entire box, including the papered sections, to protect it from moisture. -
Reattach hardware:
Screw the hinges and latch back into place. For a vintage look like the example, consider rubbing a tiny bit of gold wax on the hardware to age it. -
Final inspection:
Check that the lid closes smoothly without catching on the decoupage paper. If it sticks, sand the edges very lightly and reseal.
Scented Surprise
Line the very bottom beneath your paper with a sheet of dried lavender or rose petals before sealing, or simply scent the wood with essential oil.
Now you have a charming vessel perfect for storing jewelry, letters, or small treasures


Have a question or want to share your own experience? I'd love to hear from you in the comments below!