I’m obsessed with how black light art turns simple marks into bold, glowing magic the second the room goes dark. If you’re craving that punchy neon glow and want ideas that actually shine under a UV light, you’re in the right place.
Neon Galaxy on Black Canvas
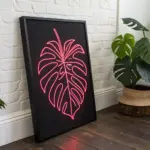
Transform a plain black canvas into a glowing galactic masterpiece with this high-contrast neon galaxy painting. Using a striking vertical composition, you’ll blend vivid pinks, cool teals, and deep purples to creating a stunning nebula that practically pops off the wall.
Detailed Instructions
Materials
- Large rectangular stretched canvas (e.g., 24×36 inches)
- Black acrylic gesso or flat black acrylic paint
- Neon/fluorescent acrylic paints: Hot pink, Magenta, Electric blue/Cyan, Violet, White
- Large flat paintbrush (2-inch)
- Medium round brush
- Sponge applicators or natural sea sponge
- Old toothbrush (for stars)
- Water cup and paper towels
- Palette or paper plate
Step 1: Setting the Void
-
Prime the Surface:
Begin by coating your entire canvas with black gesso or flat black acrylic paint. Ensure you cover the white edges of the canvas completely for a finished look. -
Double Check Coverage:
Hold the canvas up to a light source to check for any pinholes or missed spots. Apply a second coat if necessary to ensure a deep, opaque void. -
Dry completely:
Let the black base coat dry thoroughly before proceeding. This high-contrast background is essential for making the neon colors vibrate later.
Sponge Technique
Don’t drag the sponge! Use a tapping or pouncing motion. Dragging creates streaks, while tapping creates the fluffy, cloud-like texture of gas clouds.
Step 2: Building the Nebula
-
Map the Milky Way:
Load a slightly damp sponge with a mix of deep violet and a touch of magenta. Lightly dab a diagonal swoosh across the center of the canvas to establish the main shape of your galaxy. -
Intensify the Core:
Switch to your hot pink neon paint. Using a clean part of the sponge, dab densely along the center line of your violet swoosh. -
Create the Glow:
While the pink is still tacky, blend it slightly outward into the violet using a dry dabbing motion. This creates a soft, glowing transition. -
Add Cool Tones:
Load a sponge with electric blue or cyan paint. Dab this color along the outer edges of the violet/pink cluster, specifically focusing on the upper left and lower right borders of the nebula. -
Blend the Blues:
Gently tap the blue areas where they meet the black background to create a fading, misty effect rather than a hard line. -
Highlight the Center:
Mix a small amount of white paint with your hot pink to create a very bright, almost pastel pink. Sponge this concentrated brightness right in the distinctive ‘heart’ of the galaxy for a blindingly bright core.
Step 3: Adding the Stars
-
Prepare splatter paint:
Mix white acrylic paint with a small amount of water on your palette. You want a consistency similar to heavy cream or melted ice cream—fluid enough to fly off bristles, but thick enough to stay opaque. -
Test the consistency:
I usually do a quick test spray on a piece of scrap paper or cardboard first to ensure I’m not creating huge blobs. -
Create distant stars:
Dip an old toothbrush into the thinned white paint.Point the bristles toward the canvas and run your thumb along them to spray a fine mist of tiny stars over the entire canvas. -
Focus the stardust:
Add a slightly denser concentration of these fine speckles directly over the colored nebula cloud to make it look active and dense. -
Add hero stars:
Dip the handle end of a small paintbrush into pure white paint. Dot a few larger, distinct stars randomly across the black areas to create depth. -
Create flare stars:
Select two or three of your larger white dots. With a fine liner brush, carefully drag tiny lines outward from the center in a cross shape to create a twinkling flare effect. -
Final dry:
Allow the entire painting to dry flat for at least 24 hours to prevent the thicker dabs of paint from shifting.
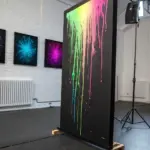
Glow Up
For a true lounge vibe, install a UV blacklight strip behind the canvas frame or nearby. The neon paints will phosphoresce brilliantly in the dark.
Hang your new window to the cosmos and enjoy the deep, starry view


Glowing Mandala Linework
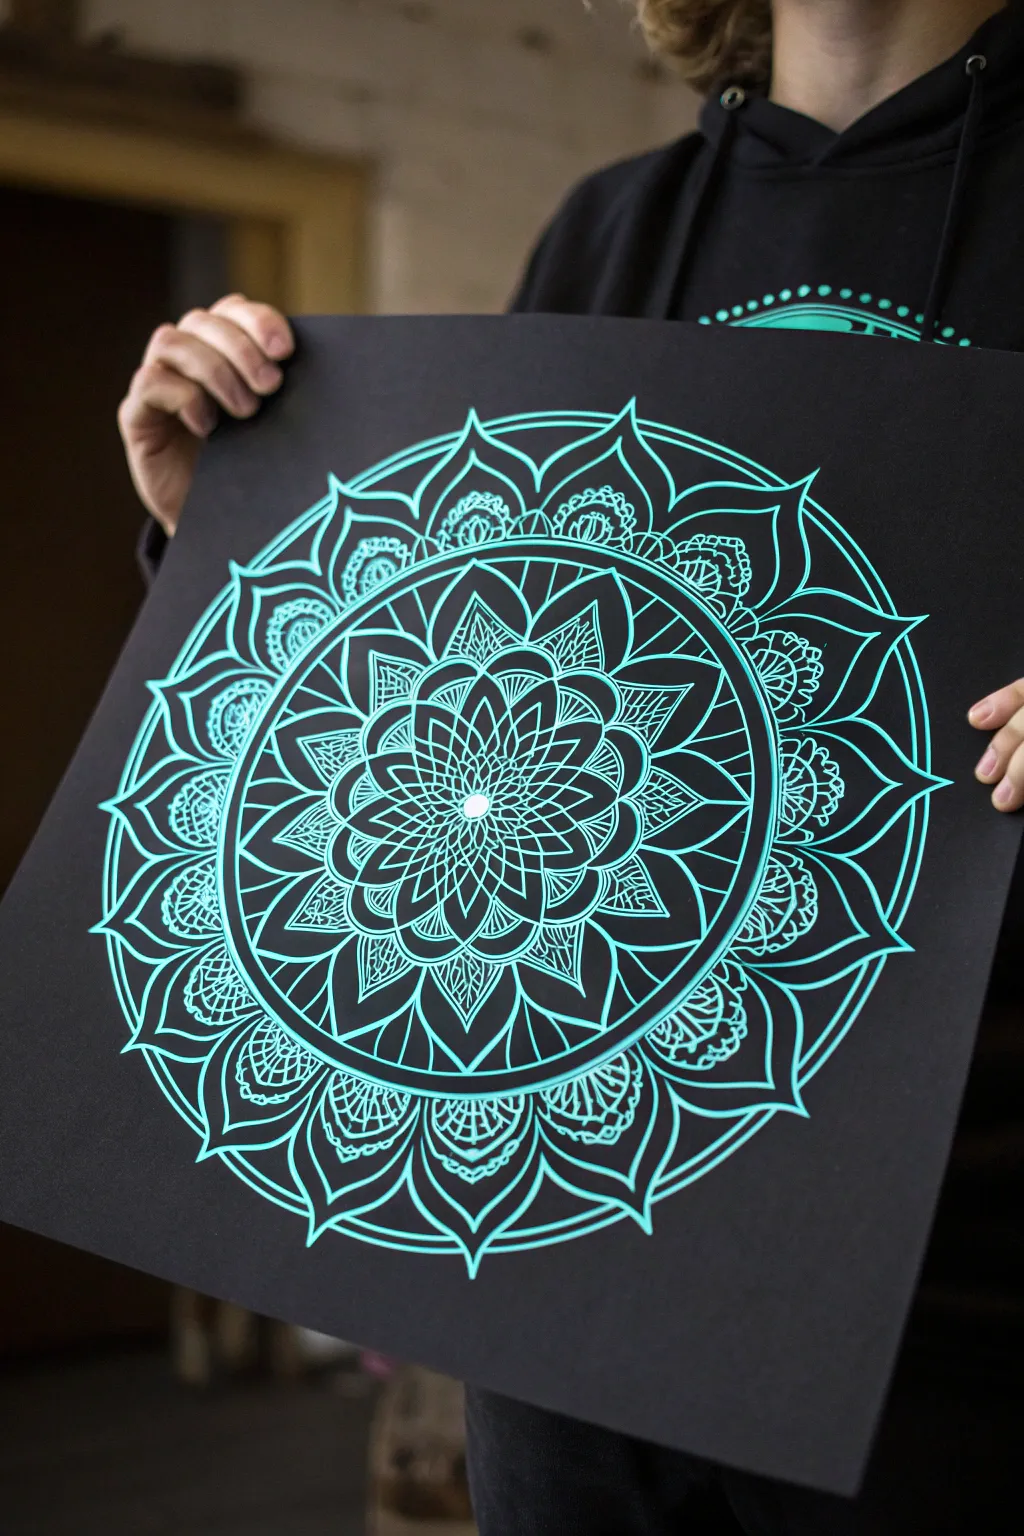
Create a mesmerizing, intricate focal point for your black light gallery with this high-contrast mandala design. The luminous cyan ink pops dramatically against deep black cardstock, creating an illusion of light radiating from the center.
Step-by-Step Tutorial
Materials
- Large format black cardstock or matte illustration board (e.g., 18×24 inches)
- High-quality compass set with extension bar
- Ruler
- Protractor
- White colored pencil or graphite pencil (hard lead, 2H or 4H)
- Neon cyan or fluorescent blue gel pens (Gelly Roll or Posca extra fine tip)
- Neon turquoise paint marker (extra fine, 0.7mm)
- Kneaded eraser
- Work surface with good lighting
Step 1: Drafting the Grid
-
Establish the Center:
Begin by finding the exact center of your black cardstock. Use your ruler to measure corner to corner; where the lines intersect is your visual anchor point. -
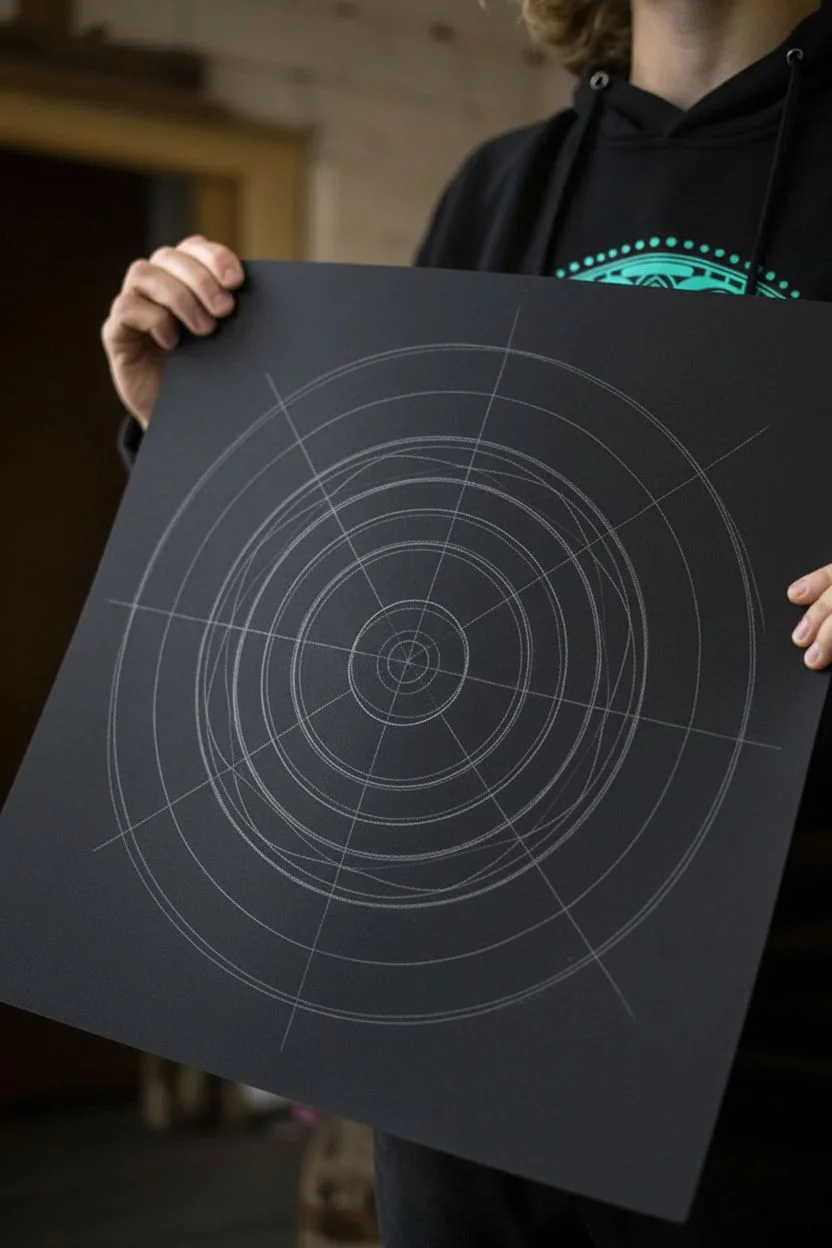
Draw Concentric Guides:
Using your compass and a hard graphite or white pencil, lightly draw a series of concentric circles radiating from the center. Space them roughly 1-2 inches apart, creating the structural rings for your mandala layers. -
Mark Angle Segments:
Place your protractor at the center point. Mark every 22.5 degrees around the circle. Use your ruler to connect these marks through the center, creating ‘pie slices’ that will help keep your pattern symmetrical. -
Refine the Inner Circle:
For the very center blossom, add two smaller guide circles within the first ring to help define the petal sizes for the innermost layer.
Step 2: Designing the Core
-
Sketch the Center Petals:
Switching to your white pencil, sketch the central flower shape. Draw eight teardrop-shaped petals extending from the center point, using your angle lines to keep them evenly spaced. -
Add Secondary Layers:
In the spaces between the first eight petals, sketch a second layer of slightly larger, pointed petals that extend into the next guide ring. -
Create Detail Zones:
Moving outward, draft a band of intricate geometric patterns or smaller petals. I like to keep these pencil lines very faint so they don’t smear when I ink later. -
Draft the Large Outer Petals:
For the grand outer layer shown in the image, sketch large, sweeping arches that curve gracefully. Ensure the tips of these petals align perfectly with your angle guidelines.
Clean Lines Secret
Rest your hand on a clean sheet of scrap paper while drawing. This prevents skin oils from transferring to the black cardstock and keeps you from smudging wet ink.
Step 3: Inking the Glow
-
Test Your Inks:
Before touching the final piece, test your neon pens on a scrap piece of black paper. Ensure the ink flows smoothly and glows brightly under UV light if you have one handy. -
Ink the Central Dot:
Start by filling in the very center circle with solid neon cyan ink. This anchors your eye. -
Trace Primary Lines:
Carefully trace over your main petal shapes with the neon gel pen or paint marker. Use steady, smooth strokes, pulling the pen toward you for better control. -
Thicken Key Borders:
Go back over the main structural rings and major petal outlines to thicken them slightly. This line weight variation adds depth and makes the design readable from a distance. -
Fill Internal Details:
Inside the larger petals, draw delicate internal lines—like veins on a leaf or grid patterns. Use your finest tip pen for these to create a lacy, airy texture. -
Add Decorative Flourishes:
embellish the negative spaces between petals with small circles, dots, or cross-hatching to increase the visual complexity. -
Complete the Outer Ring:
Ink the sweeping curves of the outermost layer. Double-check that your lines meet cleanly at sharp points.
Ink Skipping?
If your gel pen skips on the textured paper, try drawing slower. Speed often causes the rollerball to lift; slow, deliberate movement lays down more ink.
Step 4: Finishing Touches
-
Let it Cure:
Allow the ink to dry completely. Gel pens on non-porous paper can take longer than you think; give it at least 20-30 minutes to avoid tragic smudges. -
Erase Guidelines:
Gently roll a kneaded eraser over the entire surface to lift the graphite or white pencil guides without abrading the inked lines. -
Spot Correction:
Inspect your lines under a bright light. If the black paper shows through the cyan ink in spots, carefully re-apply a second coat to ensure maximum opacity.
Hang your masterpiece under a black light and watch the intricate geometry come to life


Fluorescent Abstract Drip Layers
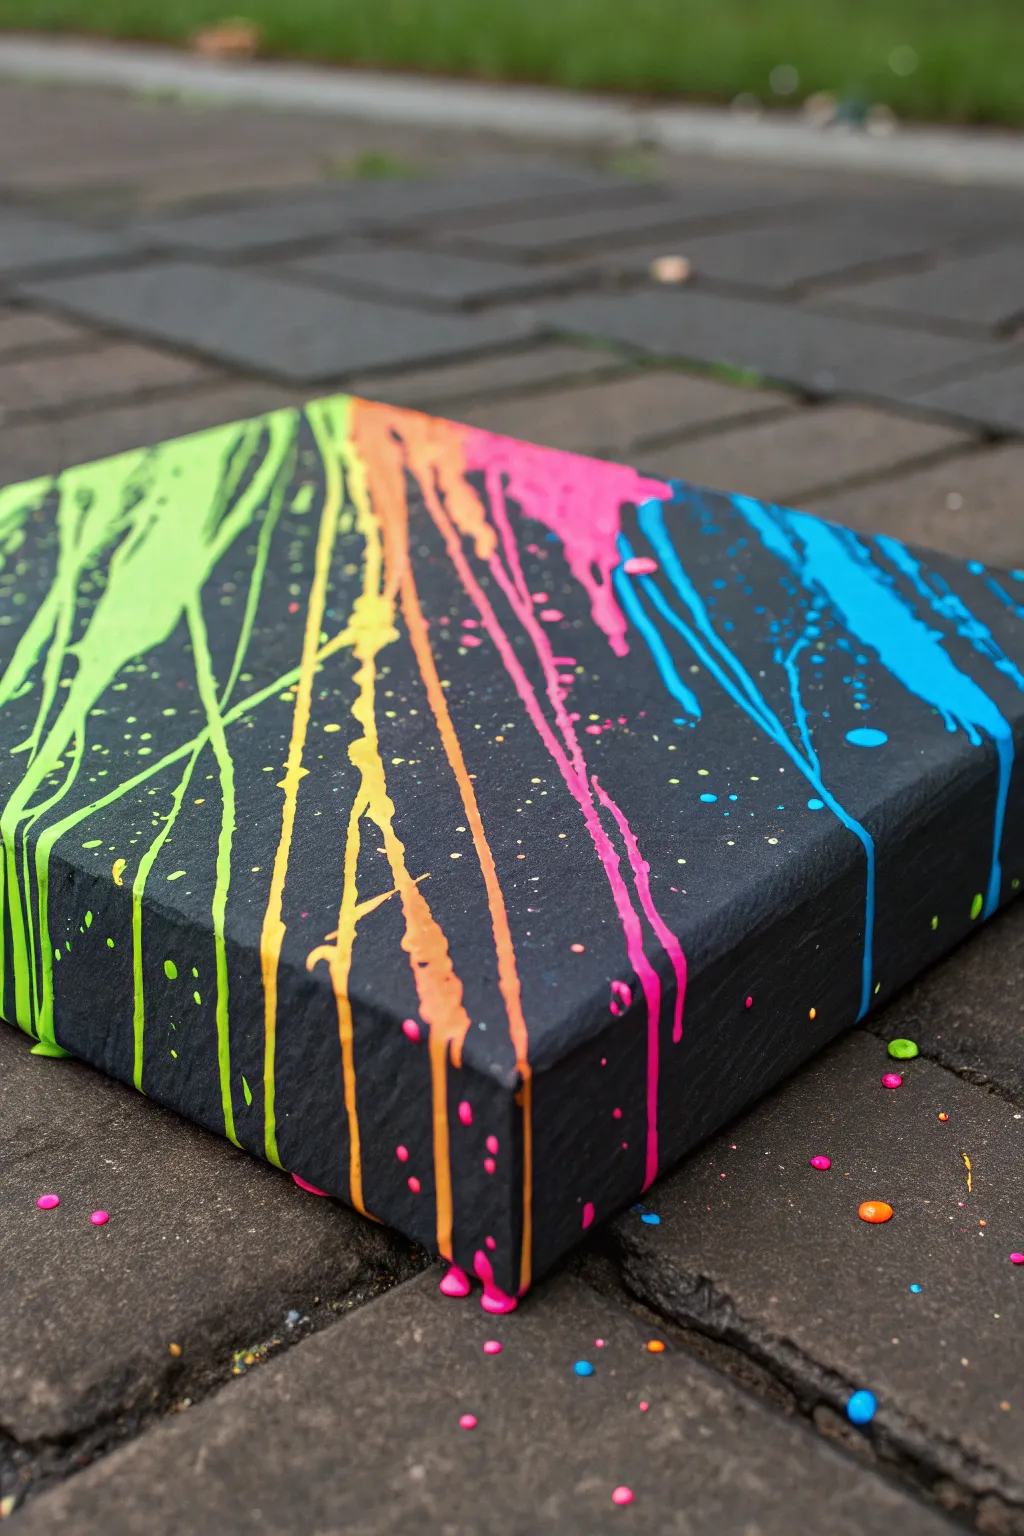
Bring the energy of the dance floor to your canvas with this electric, abstract piece. By layering vibrant fluorescent paints over a matte black background, capture movement and gravity in a stunning, high-contrast display that glows brilliantly under black light.
How-To Guide
Materials
- Stretched canvas (any square size like 12×12 works well)
- Black gesso or matte black acrylic paint
- Fluorescent/neon acrylic paints (lime green, bright orange, hot pink, cyan blue)
- Wide flat paintbrush (2-inch)
- Small plastic cups or squeeze bottles
- Water
- Pouring medium (optional, but recommended for flow)
- Drop cloth or large cardboard sheets
- Masking tape (for backs of canvas)
- Paper towels
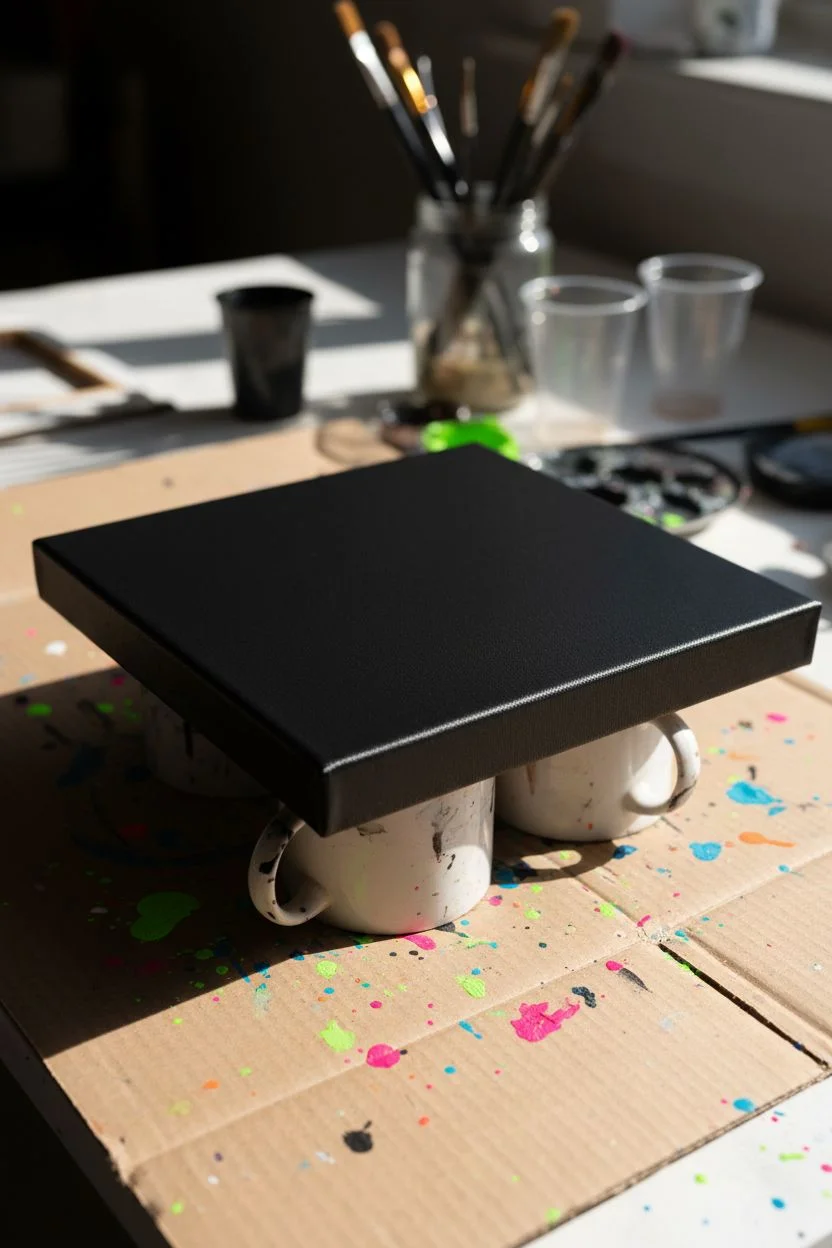
Step 1: Setting the Stage
-
Prepare your workspace:
This project gets messy by design. Lay down a generous amount of drop cloth or cardboard on the floor or a large table. Since we are dripping off the edges, you need to protect the surface underneath. -
Elevate the canvas:
Place your canvas on top of old cups, cans, or blocks. This lifts the edges off the work surface, ensuring the paint can drip freely down the sides without pooling at the bottom and sticking to the table. -
Prime the background:
Coat the entire front and sides of the canvas with black gesso or matte black acrylic paint. I prefer using a wide flat brush here to get smooth, even coverage quickly. -
Let it dry completely:
This step is crucial. The black base needs to be totally dry (about 30-60 minutes) so the neon colors sit on top rather than mixing into a muddy gray.
Step 2: Mixing the Neon
-
Prepare the colors:
Squeeze your neon green, orange, pink, and blue paints into separate cups or plastic squeeze bottles. -
Adjust consistency:
The paint needs to be fluid enough to run but thick enough to hold its color. Mix in a small amount of pouring medium (or water, sparingly) until it has the consistency of warm honey or melted ice cream. -
Test the flow:
Dip a stick or brush handle into the paint and let it drip back into the cup. If it creates a steady stream before breaking into drops, you are ready to go.
Muddy colors?
If colors are blending into brown, your paint is too thin or you’re layering wet-on-wet too heavily. Let one color set for 5 mins before adding the next neighbor.
Step 3: Creating the Drips
-
Tilt the canvas:
Prop up one side of your canvas slightly so it sits at an angle roughly 30-45 degrees. This gravity assistance helps the paint travel naturally. -
Start with green:
Begin at the top elevated edge. Using a spoon or pouring directly from a cup, drizzle the neon green paint along the top left section, allowing gravity to pull ribbons of color down the face of the canvas. -
Watch the edges:
Ensure enough paint goes over the top edge so that it runs down the side of the canvas too. The “wrapped” look is essential for the 3D effect shown in the photo. -
Add the orange layer:
Moving slightly to the right, pour the neon orange next. You can let the streams overlap the green slightly, but keep distinct lanes of color to maintain that rainbow gradient. -
Introduce hot pink:
Continue the progression with the hot pink paint. If you feel the paint is moving too slowly, you can manually tap the canvas on the table or tilt it steeper to encourage longer drips. -
Finish with blue:
Pour the cyan blue on the far right section. Create splashes and erratic lines rather than just straight stripes to keep the composition dynamic. -
Create splatter details:
Dip a stiff brush or an old toothbrush into your leftover paints. Flick the bristles to create tiny speckles and stars of neon color across the black areas that weren’t covered by drips.
UV Blast
Mount a small UV LED strip directly behind the canvas frame floating off the wall. This creates a backlit glow that makes the neon drips pop even without room lights.
Step 4: Final Touches
-
Clean the underside:
Run a craft stick or your finger along the very bottom edge of the canvas (underneath) to wipe away drips that are hanging off. This prevents bumps from forming as it dries. -
Dry horizontally:
Once you are happy with the composition, carefully lay the canvas flat on your drying props. Leaving it tilted while wet might cause all color to slide off completely. -
Patience is key:
Allow at least 24 hours for the thick drips to dry fully. The outer skin will dry first, but the center of the drips stays wet longer than you think.
Hang your luminous creation in a dim corner and watch it come alive with vibrant energy


Bioluminescent Ocean Waves
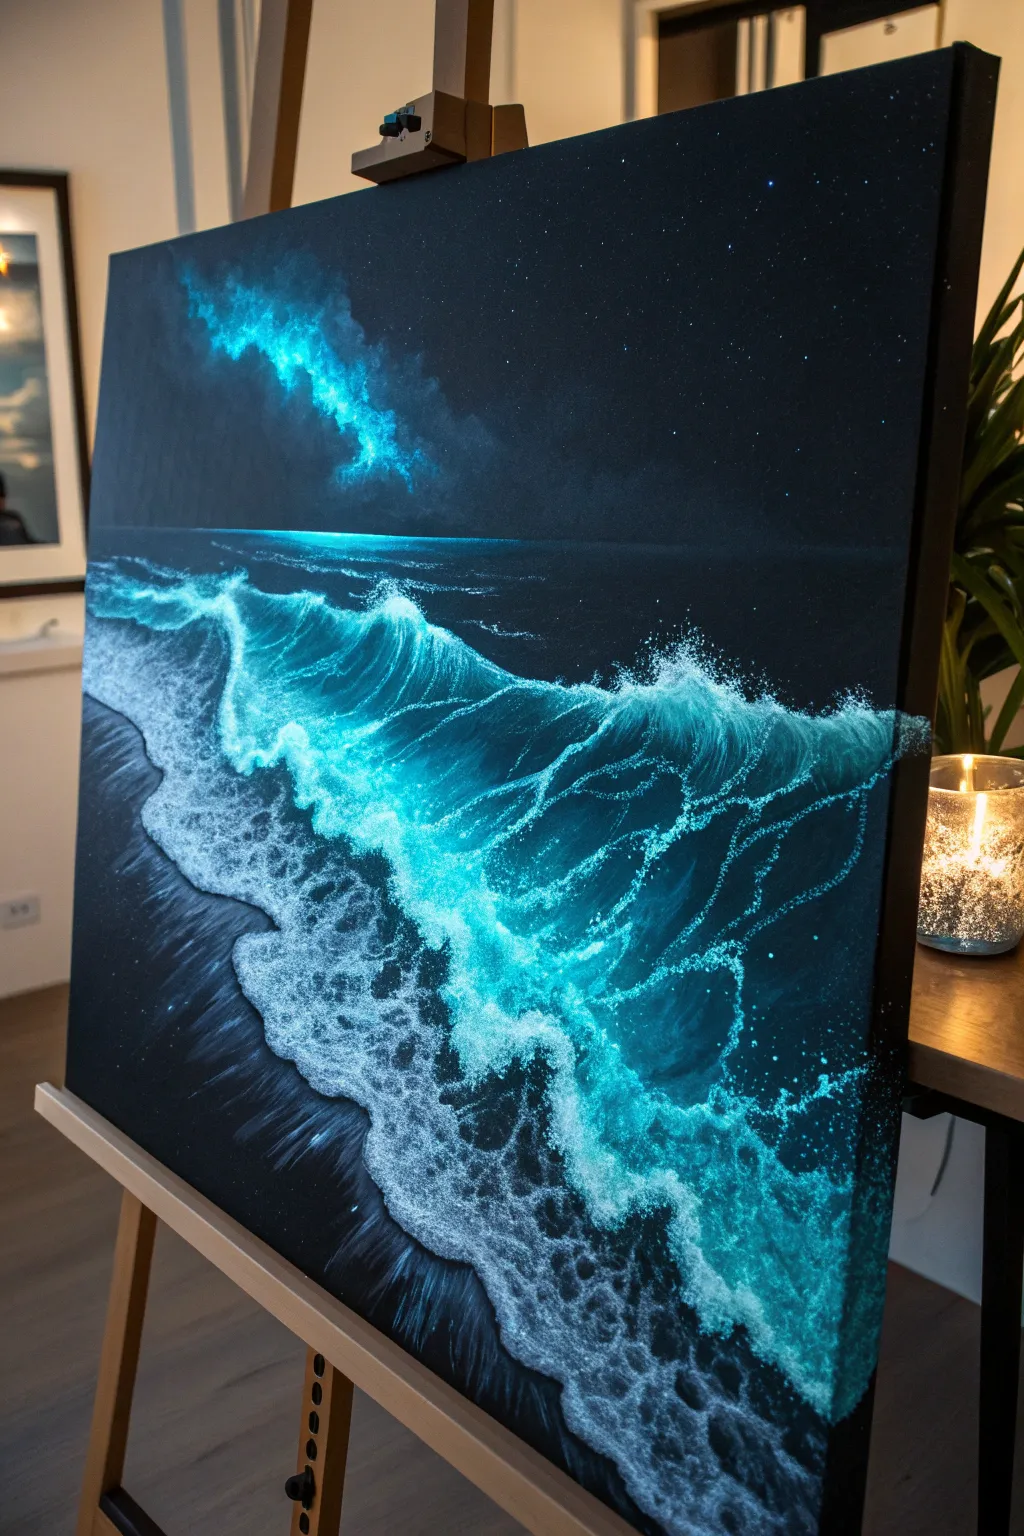
Capture the ethereal beauty of a bioluminescent beach with this striking, high-contrast painting technique. Using fluorescent acrylics against a deep black canvas creates an electrifying glow that looks vibrant in daylight and comes alive under black light.
Step-by-Step Guide
Materials
- Large stretched canvas (18×24 inches or larger recommended)
- Black gesso or high-coverage matte black acrylic paint
- Heavy body white titanium acrylic paint
- Fluorescent acrylic paints (Cyan, Blue, Green)
- Standard acrylic paints (Phthalo Blue, Prussian Blue)
- Large flat brush (2-3 inch) for background
- Fan brushes (various sizes)
- Fine liner brushes (size 0 or 00)
- Palette knife
- Spray bottle with water
- Old toothbrush (for stars/spray)
- UV/Black light (for testing while painting)
Step 1: Setting the Dark Stage
-
Prime the Surface:
Begin by coating your entire canvas with black gesso or matte black acrylic. The darkness needs to be absolute for the glow effect to work, so apply a second coat if the canvas texture is still visible. Let this dry completely. -
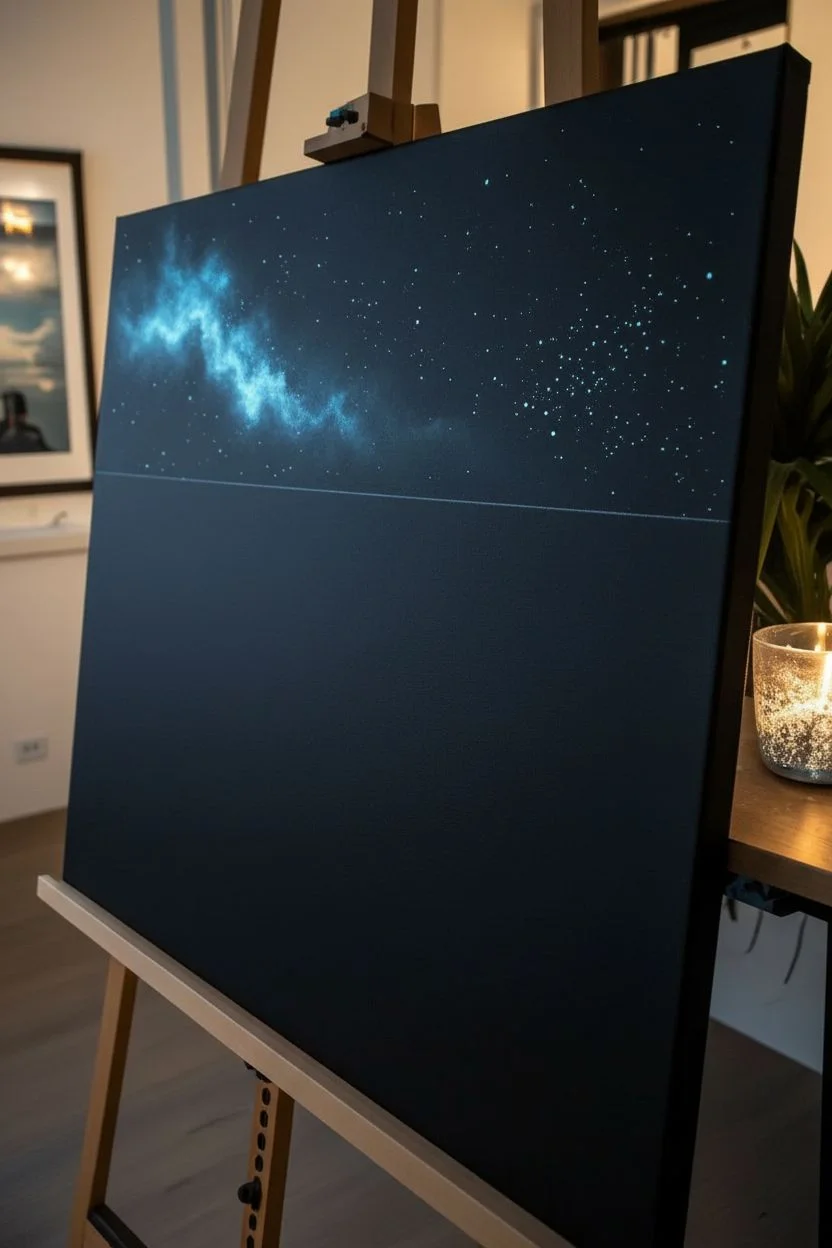
Establish the Horizon:
Using a ruler and a white charcoal pencil or very faint chalk line, mark your horizon line about one-third of the way down from the top. Keep it perfectly straight to maintain realism. -
Create the Nebula Sky:
Mix a tiny amount of fluorescent blue with water to make a glaze. Using a soft sponge or rag, gently dub a cloud-like shape in the upper left corner of the sky. Keep it subtle; it should look like faint cosmic dust. -
Splatter the Stars:
Dilute titanium white paint with water until it’s inky. Dip an old toothbrush into this mix and flick the bristles with your thumb to spray tiny stars across the black sky. Focus a few brighter splatters near the nebula cloud.
Layering for Luminosity
Fluorescent paint is transparent. Always paint a layer of pure titanium white first, let it dry, then glaze the neon color over it for maximum brightness.
Step 2: Building the Deep Ocean
-
Paint the Deep Water:
Below the horizon line but above where your wave will break, paint a gradient using Prussian Blue mixed with a little black. The water should be darkest near the horizon and slightly lighter as it approaches the foreground. -
Sketch the Wave Shape:
Using a thin brush and diluted white paint, loosely outline the cresting wave. Imagine a diagonal flow from the right side sweeping down towards the bottom left. -
Underpainting the Glow:
Mix Phthalo Blue with fluorescent cyan. Apply this underpainting to the body of the wave where the water is thinnest and light would shine through. It won’t look bright yet, but it provides a color base.
Step 3: Sculpting the Bioluminescence
-
Start the Foam:
Load a fan brush with pure titanium white. Tap the brush gently along the top of the wave crest to create the initial foam texture. Keep the brush relatively dry to get that broken, bubbly look. -
Apply the First Glow Layer:
While the white is still slightly tacky, glaze over it with your fluorescent cyan paint. The white underneath acts as a reflector, making the fluorescent pigment pop. -
Define the Wave Structure:
Using a smaller round brush, paint the veins of foam stretching down the face of the wave. These should look like lightning bolts or roots, connecting the crest to the dark water below. I find it helps to twist the brush slightly as I pull down to create irregular lines. -
Enhance the Brightest Points:
Mix titanium white with a touch of fluorescent green. Apply this highlight mixture to the very top edge of the wave and the thickest parts of the foam. This creates the ‘peak’ brightness. -
Create the Splash Zone:
Use a heavy amount of white and fluorescent blue on a stiff bristle brush. Stipple (tap repeatedly) the area where the wave crashes into the shore to build up a thick, frothy texture.
Enhance the Magic
Mix a tiny amount of ‘Glow in the Dark’ powder into your final white highlights on the wave crests. The painting will continue to shine even after the black light is off.
Step 4: Foreground and Details
-
Paint the Wet Sand:
For the bottom left foreground, mix black with a tiny drop of blue. Paint diagonal strokes mimicking the recede of the tide. Add faint white reflections on top to make the sand look wet and glassy. -
Add Sea Foam Patterns:
Use a liner brush to paint delicate, lacy foam patterns on the shore water. These should be erratic, interconnected ovals. Glaze these with fluorescent blue once the white base is dr. -
Mist the Spray:
Use the toothbrush splatter technique again, this time with pure cyan or white paint, focusing precisely on the top of the crashing wave to simulate ocean spray mist. -
Final UV Check:
Turn off the main lights and switch on your black light. Look for areas that feel ‘dead’ or dark and add glazes of fluorescent paint to balance the luminosity. -
Brighten the Horizon:
Add a very thin, sharp line of fluorescent blue right at the horizon line where the sky meets the water to separate the two planes distinctly. -
Vernish and Protect:
Once fully dry (give it 24 hours), apply a gloss varnish. The gloss finish is crucial as it deepens the blacks and makes the water look permanently wet.
Step back and admire how you’ve captured the electric energy of the ocean at night
BRUSH GUIDE
The Right Brush for Every Stroke
From clean lines to bold texture — master brush choice, stroke control, and essential techniques.
Explore the Full Guide
Neon Jellyfish Drift Scene
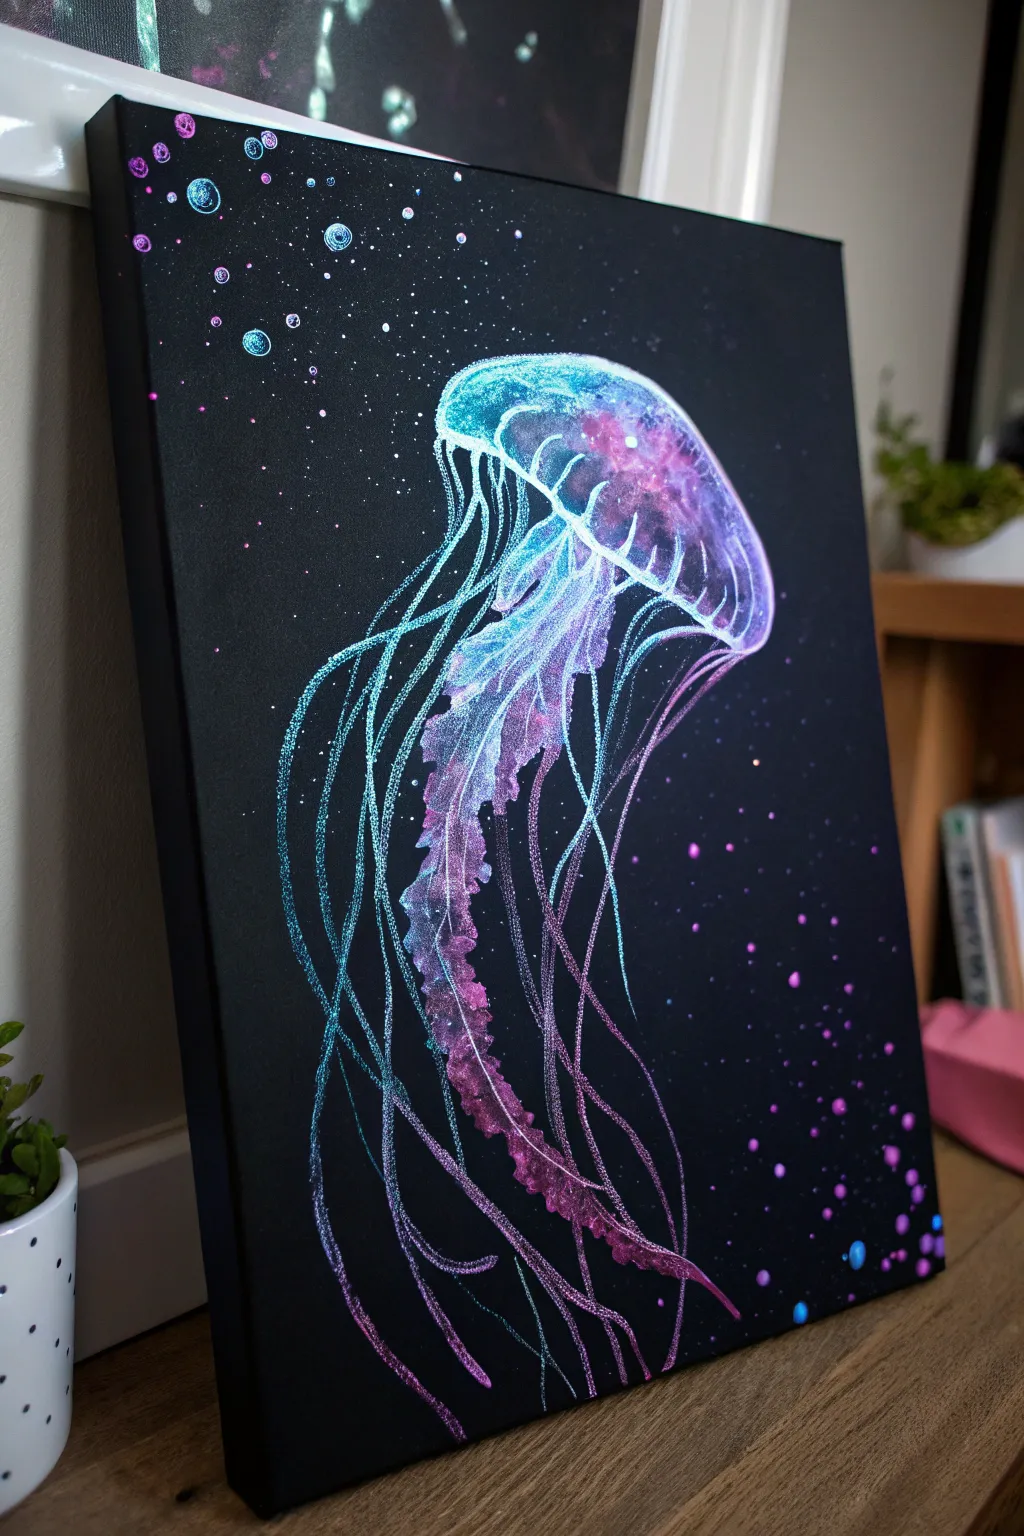
Using striking neon acrylics on a stark black canvas, you can bring this ethereal, glowing deep-sea creature to life. The high contrast creates an illusion of bioluminescence that looks incredible under daylight and even better under black light.
Detailed Instructions
Materials
- Stretched canvas (portrait orientation)
- Black acrylic gesso or matte black acrylic paint
- Neon/fluorescent acrylic paints (Pink, Blue, Purple, Teal, White)
- Wide flat brush
- Medium round brush
- Fine liner brush
- Palette
- Cup of water and paper towels
- Chalk or white colored pencil (optional for sketching)
Step 1: Preparation and Background
-
Prime the canvas:
Start by coating your entire canvas with black acrylic gesso or matte black paint. Ensure full, even coverage so no white canvas shows through. Let this base layer dry completely before proceeding. -
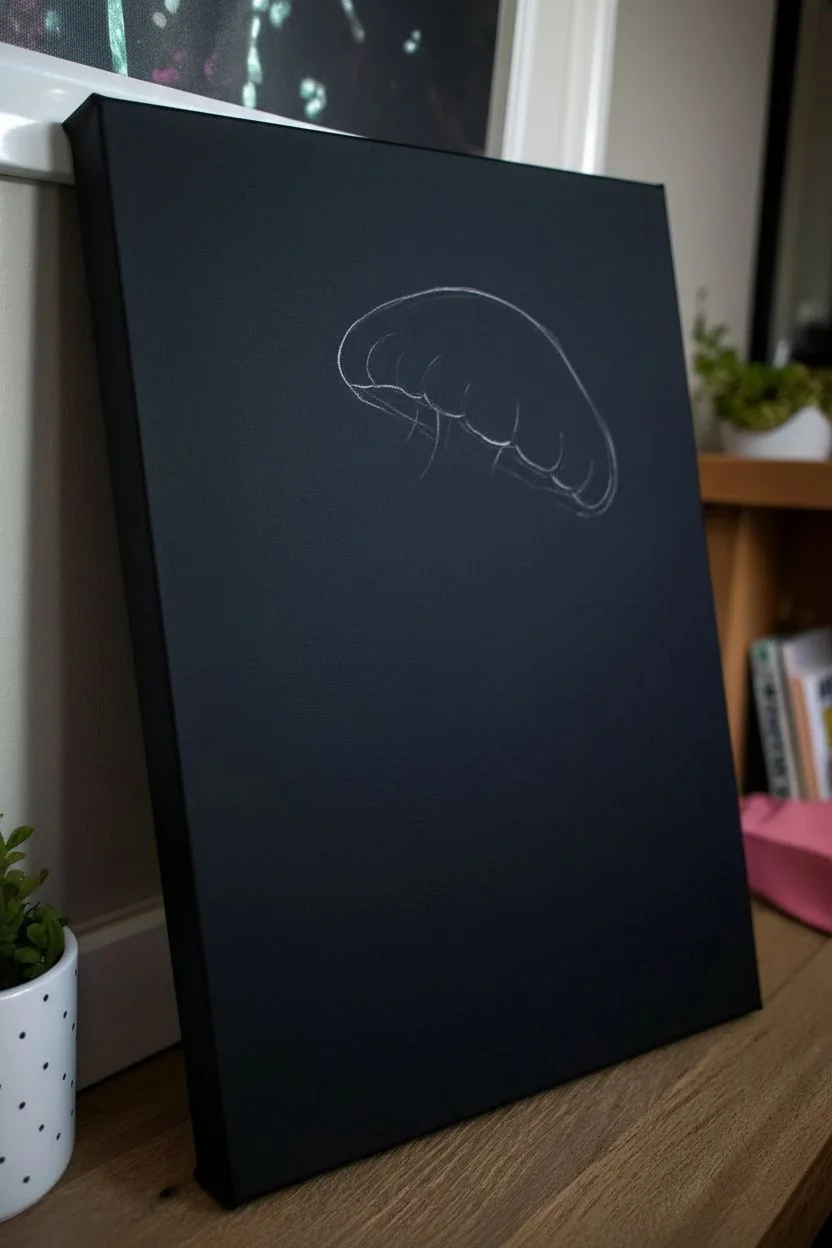
Sketch the outline:
Using a piece of chalk or a very lightly applied white colored pencil, gently sketch the mushroom-cap shape of the jellyfish bell near the upper center of the canvas. Don’t worry about perfect lines; these will be covered with paint.
Pro Tip: Fluid Lines
Add a few drops of water or flow improver to your paint when doing the tentacles. This prevents the brush from dragging and creates uninterrupted, smooth lines.
Step 2: Painting the Bell
-
Block in the bell shape:
Load your medium round brush with neon teal and a touch of white. Paint the top curve of the jellyfish bell. Keep the paint somewhat translucent in the center by mixing in a tiny bit of water or glazing medium to let the black show through slightly. -
Add the inner glow:
Switch to neon purple and pink. Dab these colors into the center and lower rim of the bell while the teal is still slightly tacky to create a soft, blended transition. This creates the ‘cosmic’ interior look. -
Highlight the rim:
Use white mixed with a drop of neon blue to paint a crisp, thin line along the very top edge of the bell. Add small vertical curved lines running down the bell’s surface to give it volume and definition.
Step 3: Tentacles and Oral Arms
-
Create the central oral arms:
Mix a vibrant purple with white. Using a smaller brush, paint the thick, ruffled appendages hanging directly from the center of the bell. Use a dabbing or stippling motion to replicate the frilly texture shown in the reference. -
Layer neon accents:
While the ruffled section is drying, layer touches of neon pink on the edges of the frills. This color grading from purple to pink adds depth and makes the center look dense. -
Start the long tentacles:
Switch to your fine liner brush. This is the most delicate part. Load it with thinned neon teal paint (an ink-like consistency works best). Paint long, flowing lines extending from the rim of the bell all the way to the bottom of the canvas. -
Vary the tentacle lines:
Make some lines wavy and others straighter. Allow some lines to cross over each other. I find that holding the brush loosely towards the end of the handle helps create more natural, fluid curves. -
Add color variation:
Clean your liner brush and repeat the previous step using neon purple and pink. Intertwine these new colored strands with the teal ones to create a multi-colored flow.
Troubleshooting: Chalky Black
If you accidentally get neon paint on the background where you don’t want it, don’t wipe it. Let it dry completely, then paint over it with your black base color.
Step 4: Final Details and Atmosphere
-
Enhance highlights:
Go back over the brightest parts of the tentacles and the bell rim with pure white paint. These stark white highlights are crucial for selling the ‘glow’ effect against the black background. -
Paint larger bubbles:
Using the tip of a round brush or a dotting tool, place dots of varying sizes around the jellyfish. Focus a cluster near the top left and bottom right corners. Use teal, purple, and pink for these. -
Detail the bubbles:
To make the larger bubbles look spherical, add a tiny crescent of color on one side and a tiny dot of white on the opposite side. -
Create the particle effect:
Dip a stiffer brush (like an old toothbrush or stiff bristle brush) into watered-down white or neon paint. Run your thumb over the bristles to splatter a fine mist of tiny stars across the background. -
Final inspection:
Step back and look at the overall balance. If any tentacles look too faint, carefully re-trace them to boost their opacity. Ensure your blacks remain deep and dark for maximum contrast.
Hang your new masterpiece in a dark corner or under a black light to see the full radiant effect take hold
Glowing Mushroom Forest
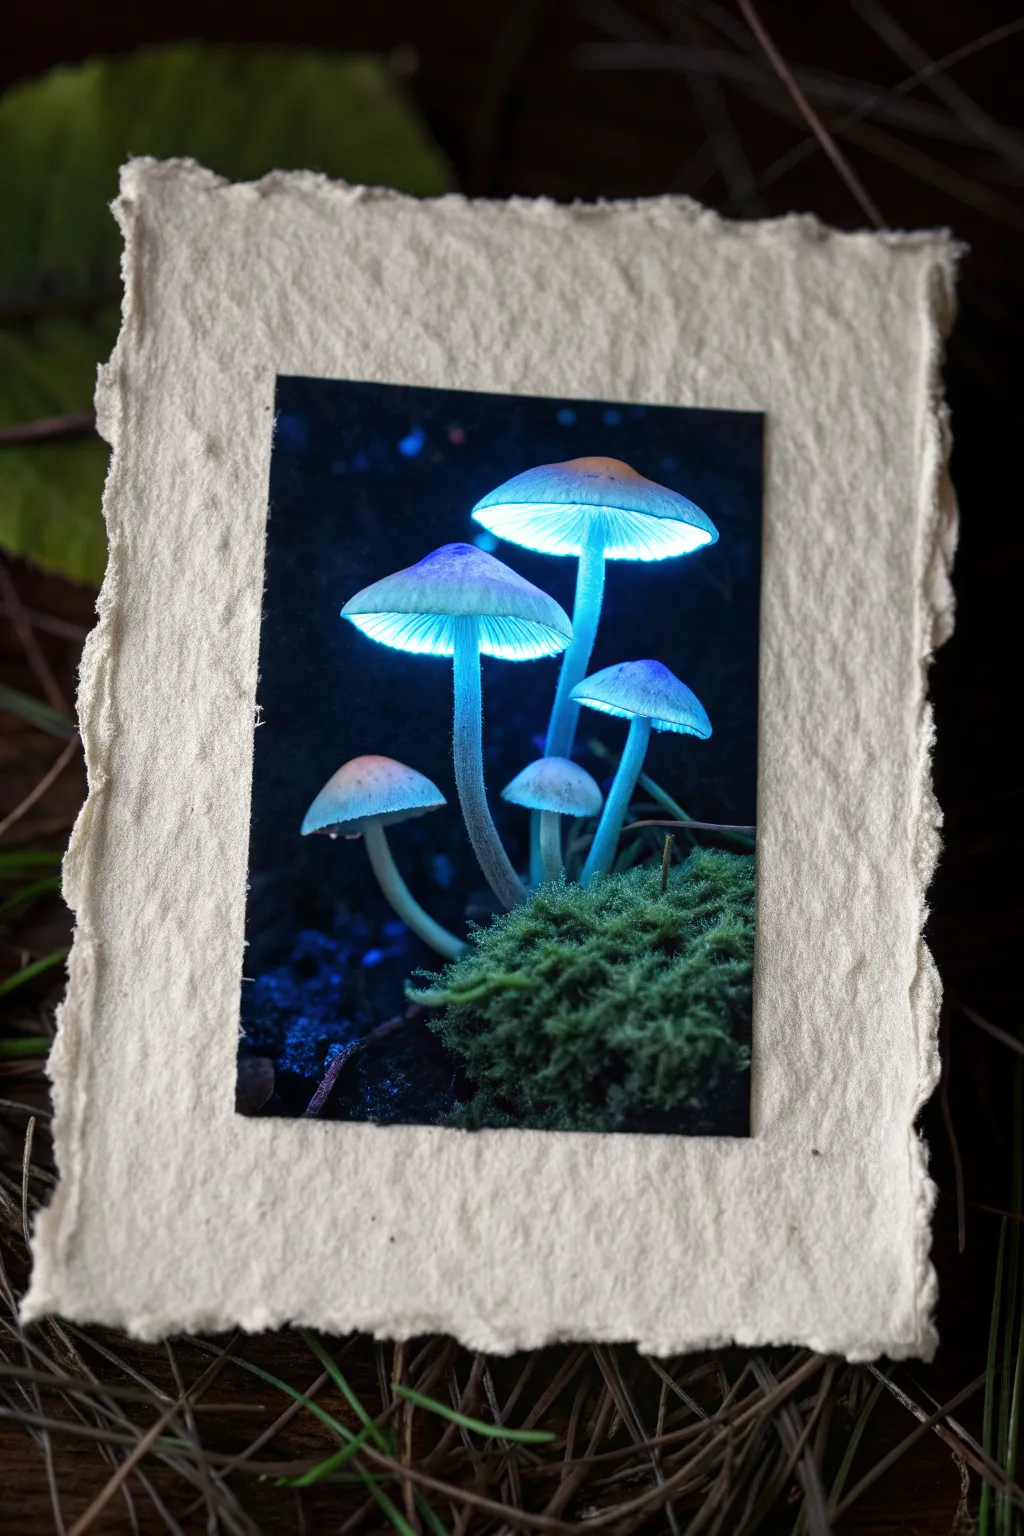
Capture the ethereal glow of a magical forest floor with this mixed media project that combines photography and textured paper crafting. By mounting a high-contrast print onto handmade deckled paper, you create a rustic yet mystical piece perfect for a black light display.
Step-by-Step Tutorial
Materials
- High-quality photo print of glowing mushrooms (glossy or metallic finish recommended)
- Heavyweight handmade cotton rag paper with deckled edges (creamy white)
- Archival spray adhesive or PVA glue
- Bone folder
- Ruler
- Self-healing cutting mat
- X-Acto knife with fresh blade
- Dried preserved moss (dark green)
- Matte gel medium
- Small flat paintbrush
- UV-reactive invisible ink or fluorescent paint (blue and white)
- Fine detail brush (size 0 or 00)
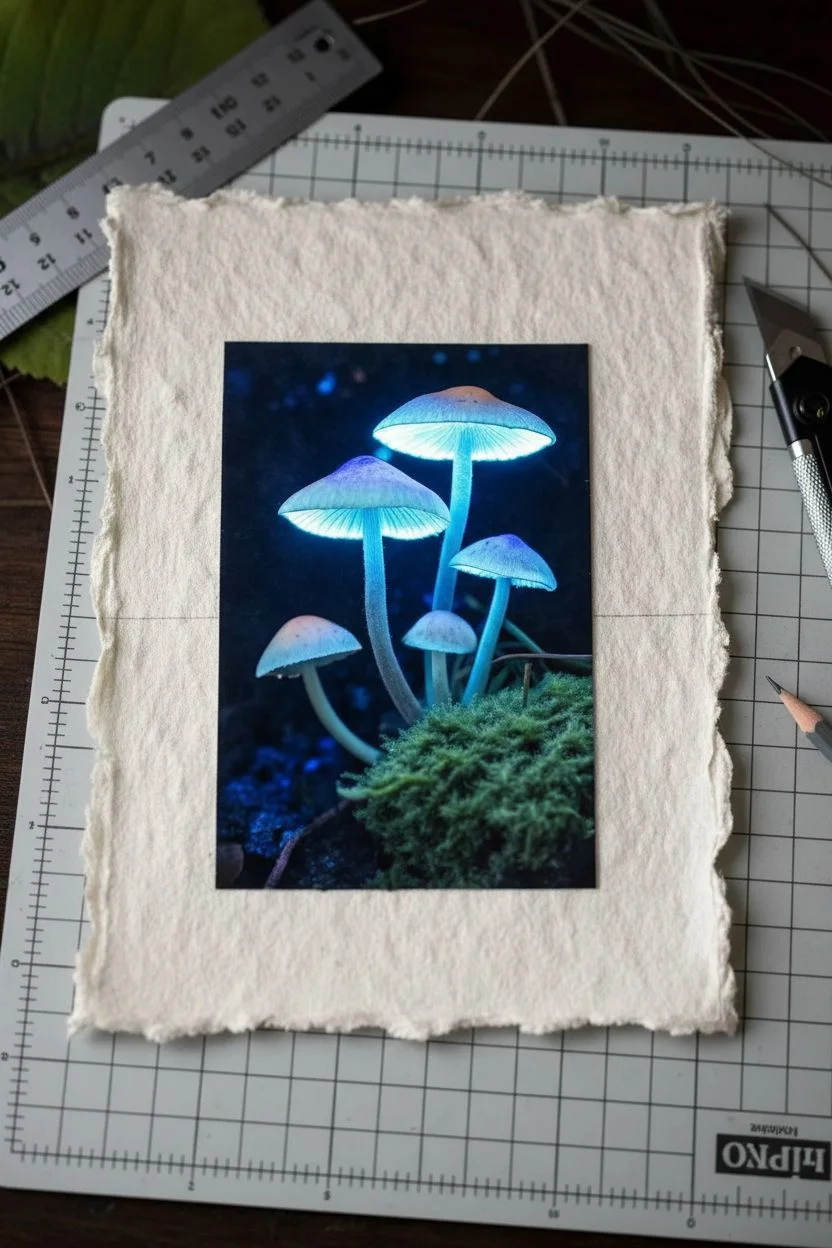
Step 1: Preparing the Base and Print
-
Selecting the paper:
Choose a sheet of heavy, handmade cotton rag paper that is significantly larger than your photo print. The paper should have rough, natural deckled edges to frame the slick, modern photo with organic texture. -
Trimming the photo:
Place your mushroom photo on a cutting mat. Using a ruler and a fresh X-Acto blade, trim any white borders off the print to ensure a clean, sharp edge that defines the dark background. -
Positioning the layout:
Lay the trimmed photo onto the center of your handmade paper. Use a ruler to measure equal distances from the sides, leaving a generous margin of the textured paper visible to act as a natural frame. -
Marking placement:
Lightly mark the corners of where the photo will sit with a pencil so you can return it to the exact spot after applying adhesive.
Natural Edge Trick
If your paper edges look too machine-cut, dampen a paintbrush with water, run it along the edge, and gently tear the paper to create a faux-deckle look.
Step 2: Mounting the Artwork
-
Applying adhesive:
Flip the photo over onto a scrap piece of paper. Apply an even coat of spray adhesive in a well-ventilated area, or brush a thin, uniform layer of PVA glue on the back. -
Placing the print:
Carefully align the top corners of the photo with your pencil marks and slowly lower it onto the handmade paper. I find it helps to start from the center and smooth outwards to prevent bubbles. -
Securing the bond:
Place a clean sheet of copy paper over the photo to protect the surface. Use a bone folder to burnish the print down firmly, paying special attention to the edges so they don’t lift later.
Step 3: Adding Texture and Glow
-
Preparing the moss:
Select small tufts of preserved dark green moss. Tear them into tiny pieces that match the scale of the moss in the photograph. -
Applying gel medium:
Using a small flat brush, dab a generous amount of matte gel medium onto the bottom edge of the photo where the mossy ground is depicted. -
Attaching the moss:
Press the small tufts of real moss into the wet gel medium. Allow some moss to overlap the bottom edge of the photo slightly, breaking the boundary between the 2D print and the 3D paper frame. -
Highlighting with UV paint:
Dip your fine detail brush into blue UV-reactive invisible ink or fluorescent paint. Carefully trace the gills under the mushroom caps to enhance their glow under black light. -
Adding bright spots:
Mix a tiny amount of white fluorescent paint with the blue. Dot this brighter mixture onto the very tops of the mushroom caps and the stems for added dimension. -
Sealing the details:
Let the paint and gel medium dry completely. If desired, you can add a final very thin layer of matte varnish over the painted areas to protect them, though be careful not to flatten the texture of the moss. -
Cleaning up:
Use a specialized adhesive eraser to gently rub away any stray pencil marks from your initial layout steps.
Glow with the Flow
Add a few tiny dots of UV paint floating in the dark background area of the photo to manipulate the scene into looking like fireflies are present.
Place your finished piece under a UV source to see your quiet forest scene come to life with vibrant luminescence

PENCIL GUIDE
Understanding Pencil Grades from H to B
From first sketch to finished drawing — learn pencil grades, line control, and shading techniques.
Explore the Full Guide
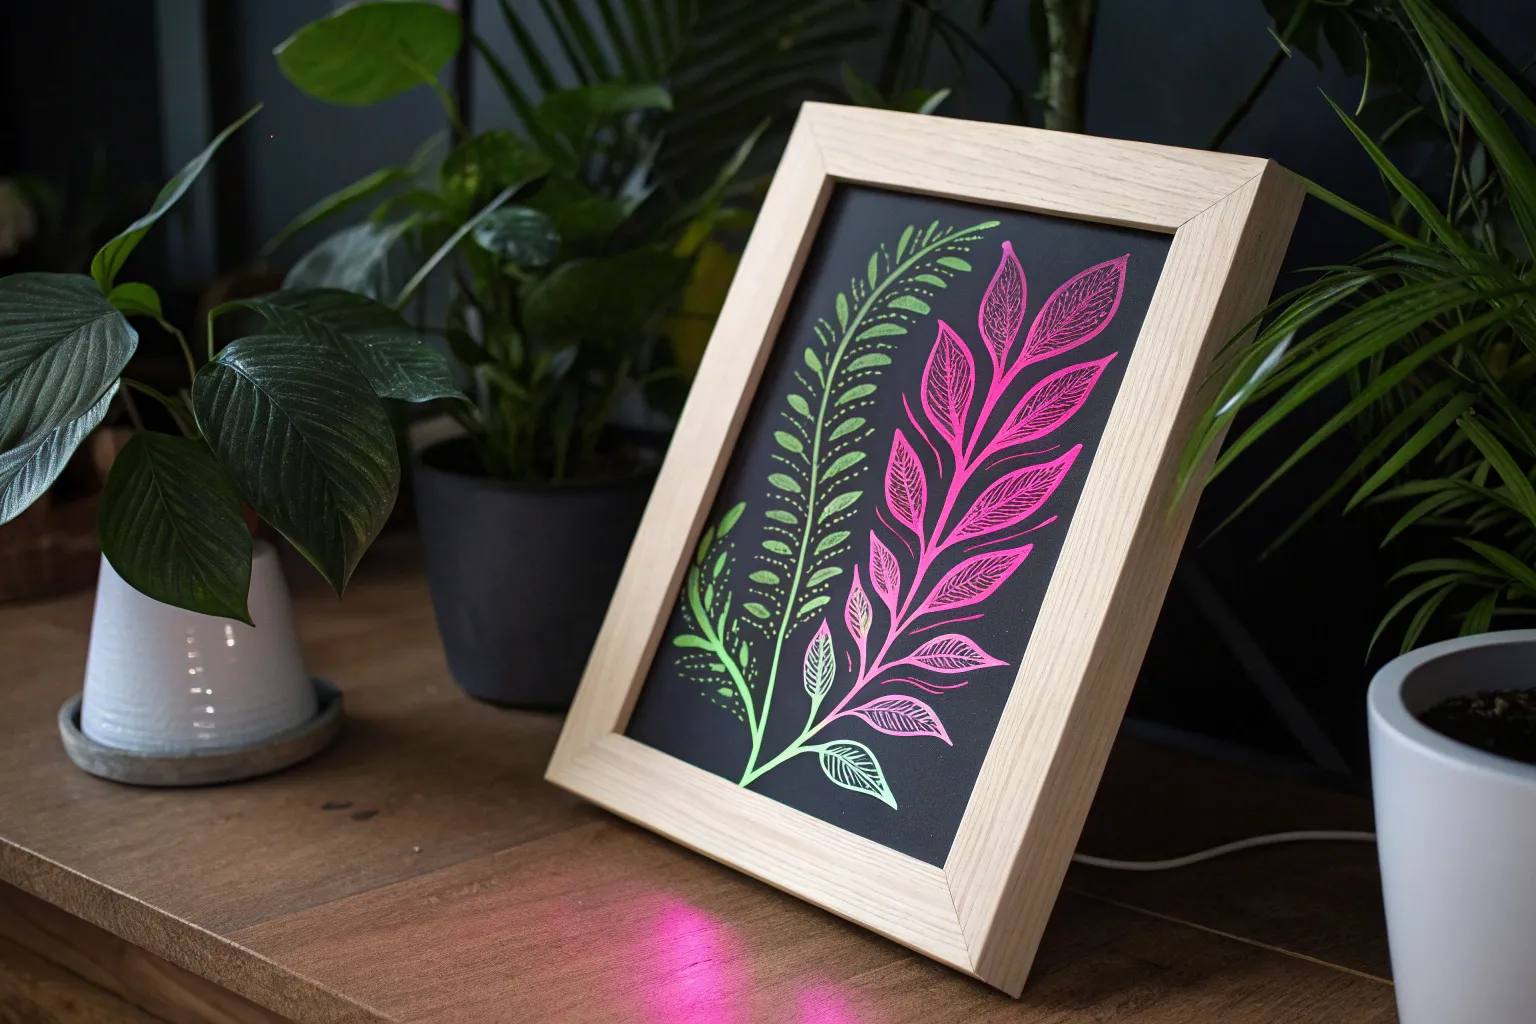
Luminous Butterfly Swarm
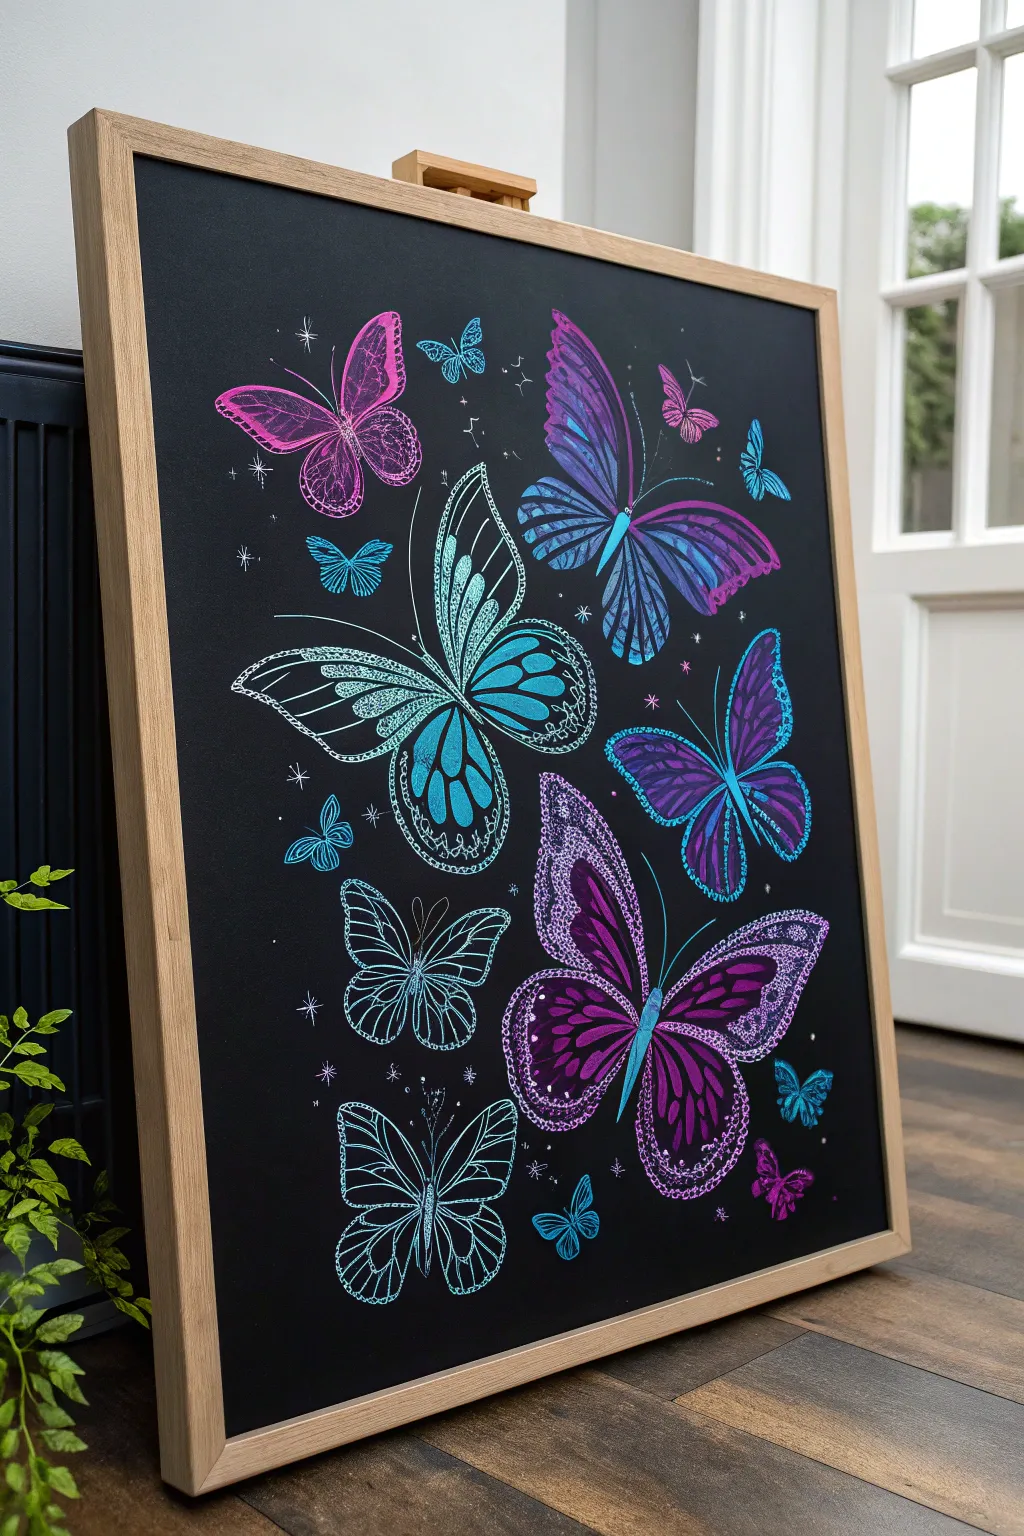
Transform a plain black surface into a vibrant aviary with this neon chalkboard art project. Using liquid chalk markers, you’ll create a stunning contrast between deep black negative space and electric butterfly wings that seem to flutter right off the board.
Detailed Instructions
Materials
- Large blackboard or chalkboard-painted canvas (approx. 24×36 inches)
- Wooden frame (optional, light oak finish)
- Liquid chalk markers (fine and medium tips: neon pink, electric blue, purple, teal, white)
- Soft pastel pencils (white, light blue) for sketching
- Damp microfiber cloth
- Cotton swabs (for blending)
- Ruler or tape measure
- Reference images of butterflies
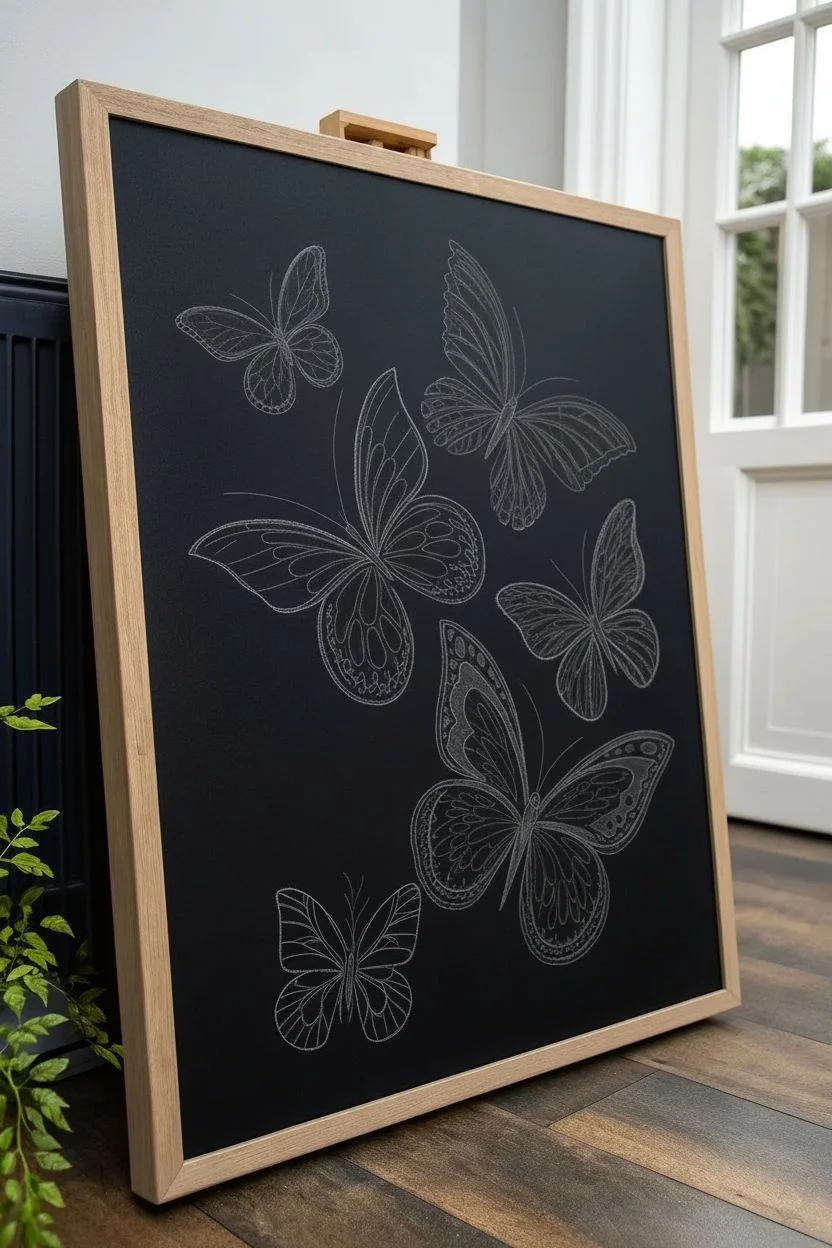
Step 1: Planning and Sketching
-
Prepare the surface:
Ensure your blackboard surface is clean and completely dry. If you are using a new chalkboard, ‘season’ it first by rubbing the side of a piece of regular chalk over the whole surface and wiping it off to prevent permanent ghosting later. -
Map out composition:
Using a white pastel pencil and a very light touch, faintly mark the general placement of your butterflies. Aim for a diagonal flow or an S-curve to create movement, mixing large focal butterflies with smaller filler ones. -
Sketch the primary outlines:
Lightly draw the basic wing shapes and bodies for the largest butterflies. Don’t worry about details yet; just focus on getting the symmetry of the wings correct. I find it helps to draw a center line for the body first.
Fixing Smudges
Liquid chalk can be unforgiving. If you smear a wet area, let it dry completely first. Then, flake it off with a dry scratchpad or paint over it with black chalkboard paint for a clean slate.
Step 2: Drawing the Main Butterflies
-
Start the large purple butterfly:
Select a large butterfly near the top right. Using a purple liquid chalk marker, outline the upper and lower wings. Fill the inner sections with broad strokes, leaving the edges slightly rough for texture. -
Add gradient effects:
While the purple ink is still slightly wet, layer electric blue near the body and wing roots. Use a cotton swab to gently smudge the transition, creating a beautiful ombré effect from blue to purple. -
Detail the veins:
Once the base color is dry, take a fine-tip black marker (or leave negative space) to draw the delicate veins running through the wings. Alternatively, outline the veins in a brighter neon pink for extra pop. -
Create the teal centerpiece:
Move to the large butterfly in the center. Outline it with a teal marker. Instead of solid coloring, use a stippling technique (lots of small dots) or fine hatching lines to fill the wings, giving it a translucent, lacy appearance. -
Draw the bottom purple butterfly:
For the large bottom butterfly, use a deep purple for the outer edges and a bright teal for the body. Add white or light pink dots along the outer edges of the wings to mimic the patterns found on Monarchs.
Glow Up
Trace over your white highlight lines with UV-reactive invisible ink pens. When you shine a blacklight on the finished piece, the wings will reveal a hidden, distinctive glow.
Step 3: Adding Variety and Fillers
-
Draw wireframe butterflies:
To create visual interest, draw several medium-sized butterflies (like the one at the very bottom center) using only fine teal lines. These ‘skeleton’ or wireframe butterflies should have zero fill, emphasizing their geometric structure. -
Insert small solid butterflies:
Scatter 3-4 tiny, solid-colored butterflies in gaps. Make one solid neon pink top-left, and a tiny blue one bottom-right. These should be simple silhouettes without vein details. -
Highlighting:
Take a fine-tip white liquid chalk marker. Go back to your large colored butterflies and add crisp white highlights to the tips of the wings and the antennae. This crucial step makes the neon colors look like they are glowing.
Step 4: Final Atmosphere
-
Add celestial details:
Fill the empty black spaces with tiny stars. Draw simple crosses, four-pointed stars, and small dots using white and pale blue markers. Group them loosely around the butterflies to suggest a magical swarm. -
Clean up edges:
Wait until every ink stroke is perfectly dry. Take a slightly damp Q-tip and clean up any smudges or lines that became too thick, sharpening the wing tips. -
Seal (optional):
If you want this to be permanent, spray the board with a matte fixative spray suitable for chalk or pastels. Keep the can 12 inches away to avoid spotting.
Step back and admire how your neon swarm illuminates the dark background with fluttery brilliance
UV Portrait With Neon Contours
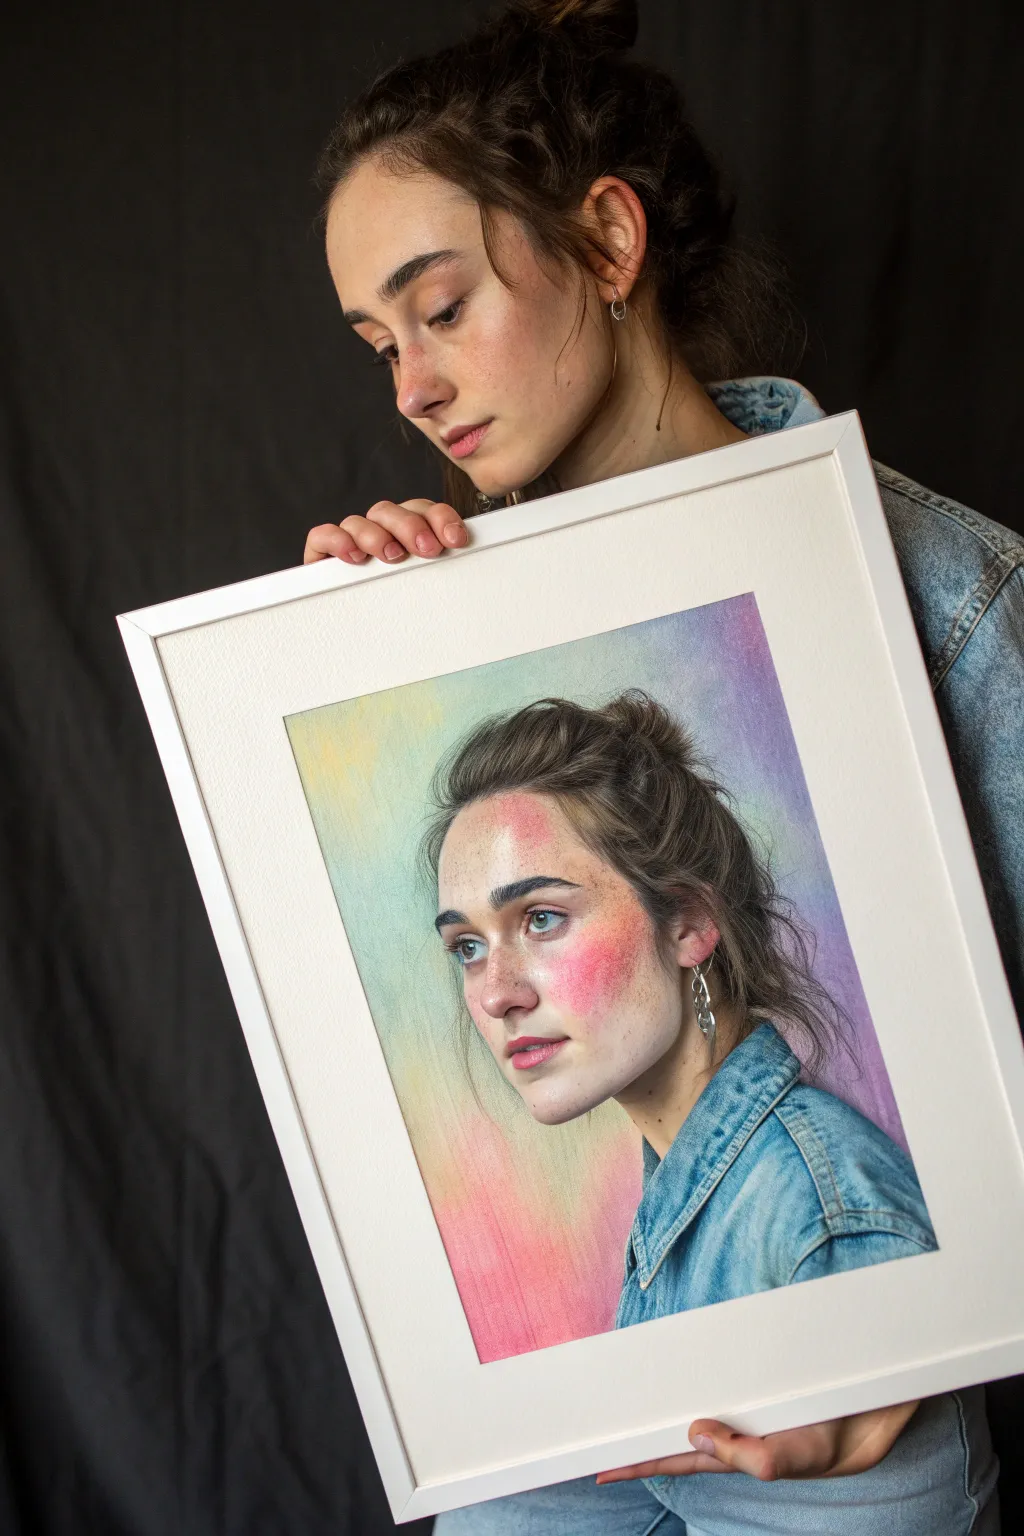
This striking mixed-media piece combines the precision of realistic portrait drawing with the dreamlike haze of vibrant color washes. The result is a luminous, expressive artwork where neon-like accents seemingly glow against the soft paper grain.
Step-by-Step
Materials
- High-quality mixed media paper or Bristol board (smooth finish)
- Graphite pencils (HB, 2B, 4B)
- Soft pastels or pastel pencils (neon pink, cyan, yellow, violet)
- Blending stumps or tortillons
- Kneadable eraser
- Fixative spray (workable)
- A sharp white colored pencil or white gel pen
- Blue denim jacket (for reference styling)
- White picture frame with mat
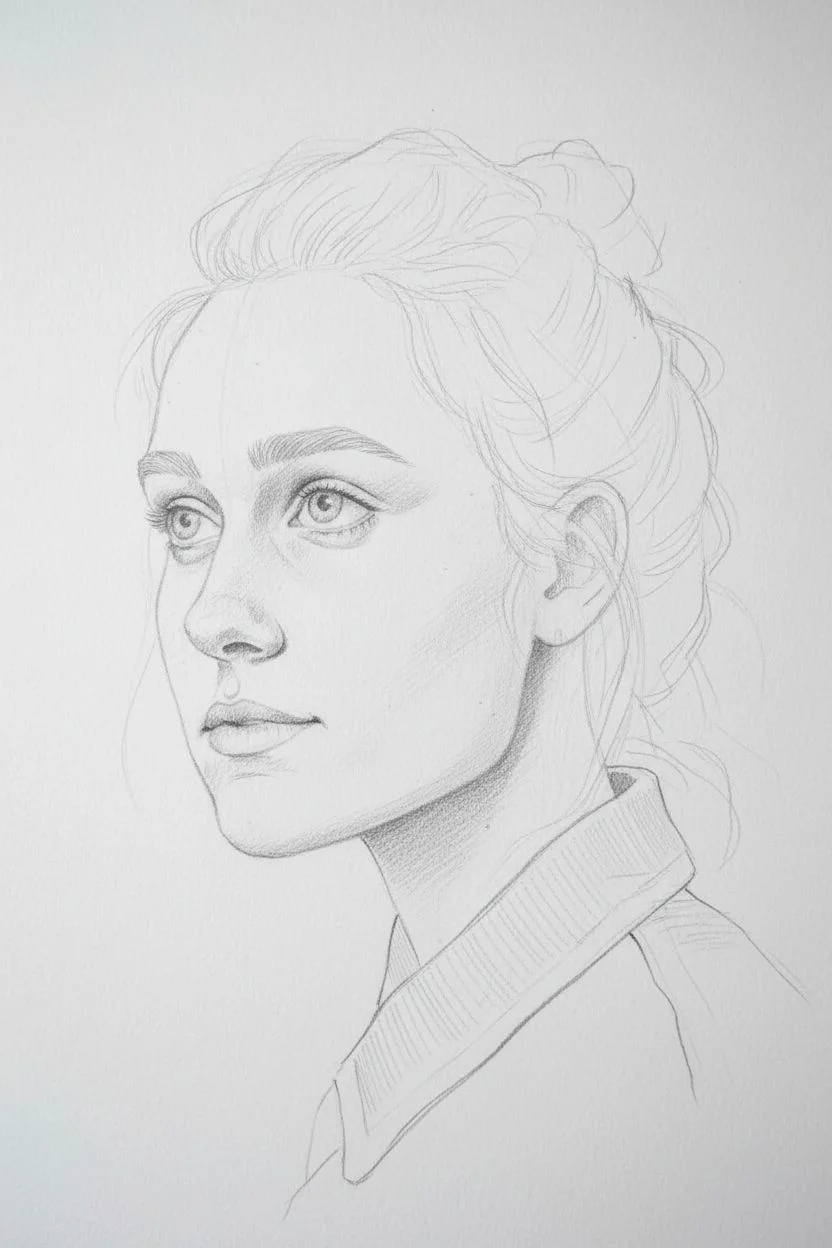
Step 1: Drafting the Foundations
-
Reference Selection:
Begin by selecting a high-resolution reference photo. A three-quarter view with clear lighting works best for this style, allowing for dramatic shadowing on the cheekbones. -
Rough Sketching:
Using an HB pencil, lightly map out the proportions of the face on your paper. Focus on the placement of the eyes, nose, and jawline without pressing hard. -
Refining Contours:
Once proportions are correct, refine the outline. Pay special attention to the hair silhouette, making it loose and messy to match the casual vibe of the original. -
Initial Shading:
Switch to a 2B pencil to lay down the base shadows. Shade the eye sockets, under the nose, and the side of the face away from the light source. -
Detailing Features:
Sharpen your 4B pencil for the darkest details: the pupils, nostrils, and the deep creases of the jacket collar. Keep your strokes directional to mimic the texture of denim.
Muddy colors?
If graphite smears into your bright pastels, it turns gray. Apply fixative over the graphite sketch BEFORE adding the pastel layers to keep the colors pure.
Step 2: Infusing Color and Light
-
Laying the Background:
Start applying soft pastel dust in broad patches around the head. Use yellow for the upper left, blending into iridescent blues and soft purples on the right. -
Soft Blending:
Use a tissue or your finger to gently rub the background pastels into the paper grain. You want a cloudy, ethereal effect rather than sharp lines. -
Cheek Blush Application:
Now for the signature feature: take a neon pink pastel and apply a concentrated patch on the cheekbone and temple. It should look almost like a sunburn or intense blush. -
Forehead Highlights:
Add a lighter touch of pink or coral to the forehead area. I find that layering a bit of yellow over the pink here creates a beautiful warm glow. -
Integrating the Face:
Use a clean blending stump to pull small amounts of the colored pastel from the background slightly over the hair and skin edges, marrying the subject to the environment.
Make it Glow
For a true ‘black light’ effect, swap standard pastels for UV-reactive fluorescent pigments. Under blue light, the pink cheeks will actually glow.
Step 3: Texture and Finishing Touches
-
Denim Texture:
Return to the jacket with a blue pastel pencil. Scumble the color over your graphite shading to give the denim a washed-out, realistic blue jean look. -
Defining the Eyes:
Use a sharp blue pencil to color the irises, keeping the edges dark. Add a tiny dot of white gel pen or pure white pastel for the catchlight. -
Creating Freckles:
With a sharp brown pastel pencil or 4B graphite, dot tiny freckles across the bridge of the nose and the pink cheek area. Vary the pressure so some are faint and others sharp. -
Highlights and Hair:
Use a white charcoal pencil or pastel to add flyaway hairs against the colored background. This adds depth and realism to the messy bun style. -
Setting the Work:
Lightly spray the entire piece with a workable fixative. This prevents the vivid pastel dust from smearing while you frame it. -
Framing:
Place your finished artwork inside a clean white mat and frame. The ample white space of the mat will make the colors pop even more intensively.
Hang your vibrant portrait in a well-lit spot to let those colors truly shine


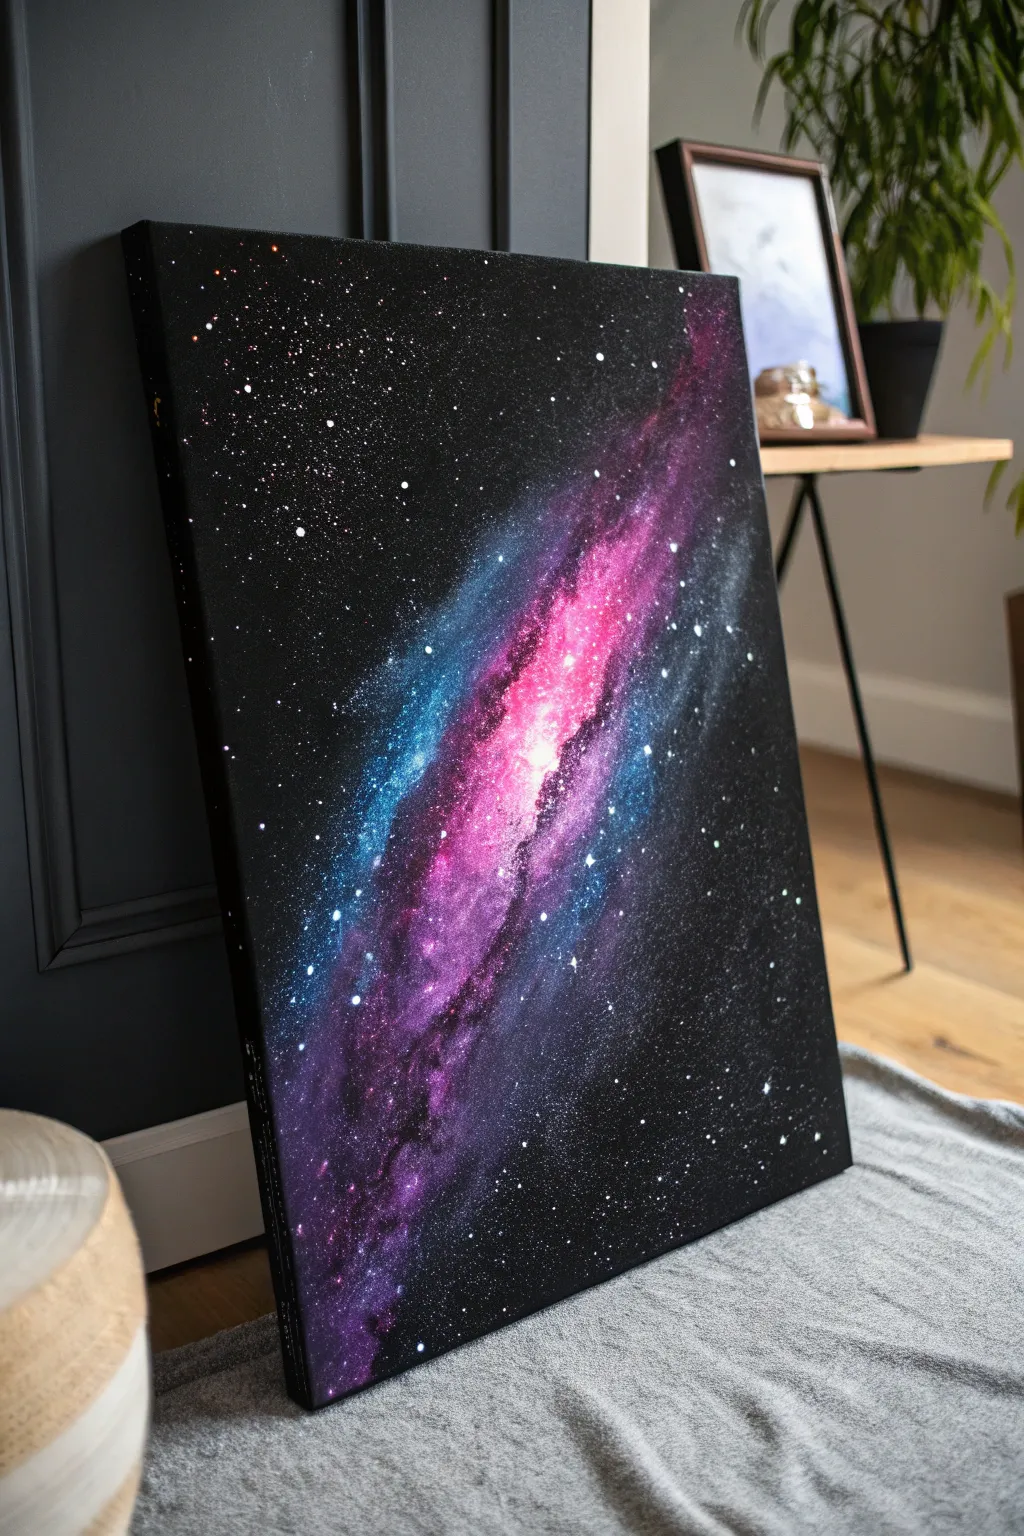
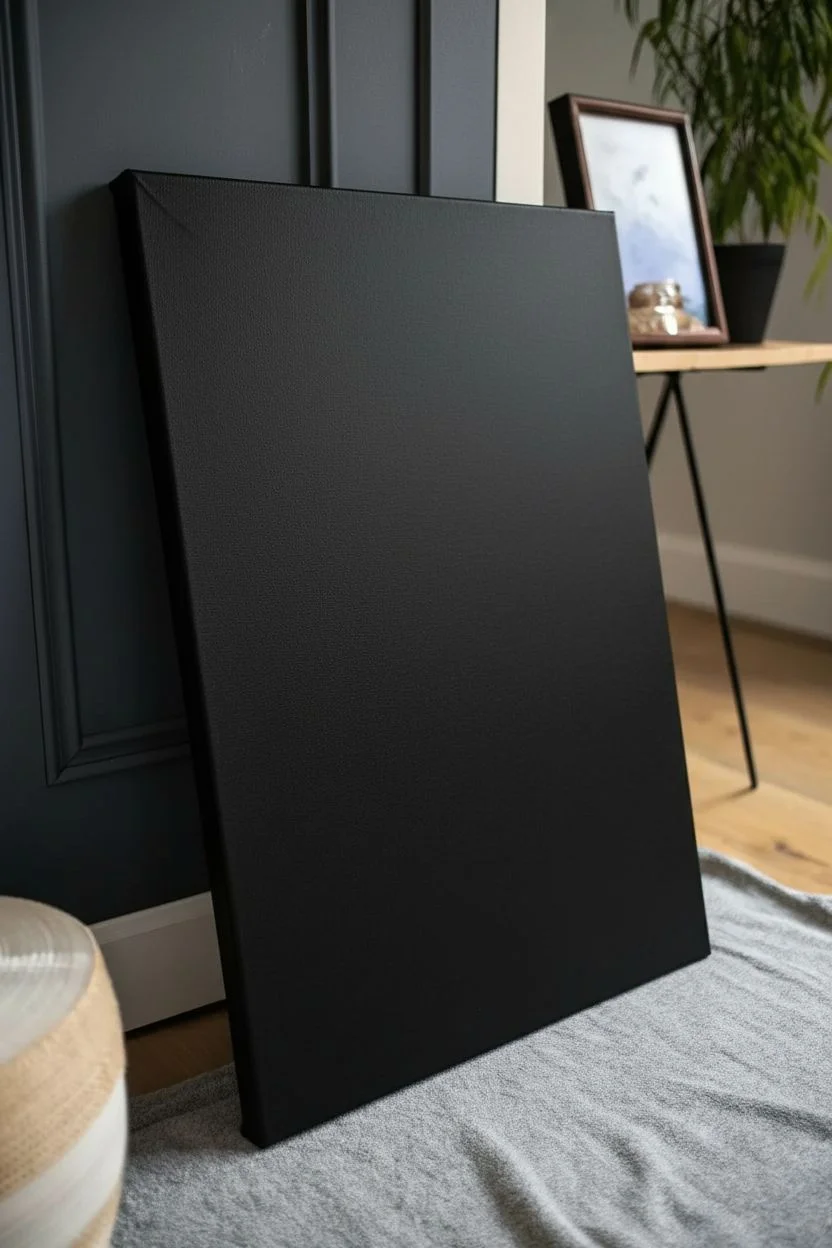
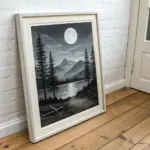
Day-to-Night Hidden Highlight Painting
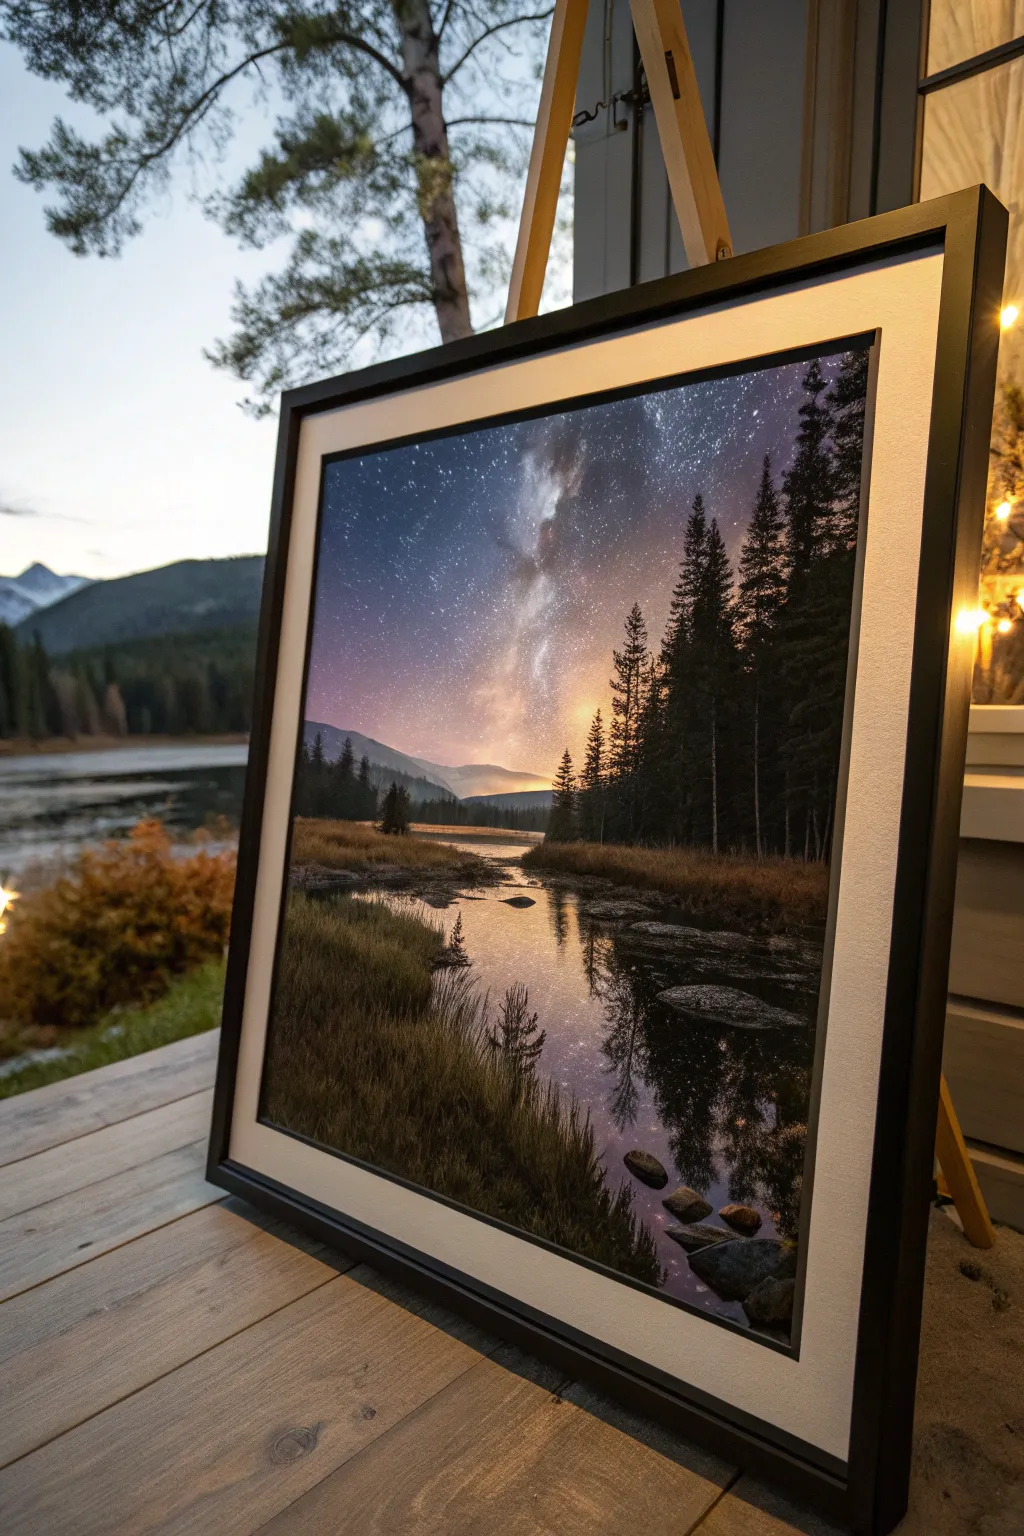
Transform a serene twilight landscape into a magical starry spectacle that comes alive under UV light. This dual-purpose acrylic painting looks like a beautiful sunset scene by day, but reveals a vibrant Milky Way hidden highlight when the black lights turn on.
Detailed Instructions
Materials
- Stretched canvas (18×24 inches or similar)
- Acrylic paints (Phthalo Blue, Dioxazine Purple, Titanium White, Mars Black, Cadmium Orange, Yellow Ochre, Burnt Umber)
- Invisible UV/Black light reactive acrylic paints (Blue, White, Pink/Orange)
- Black light flashlight (for checking work)
- Set of synthetic brushes (1-inch flat, medium filbert, fine liner)
- Fan brush
- Palette and water cup
- Easel
- Graphite paper (optional for sketching)
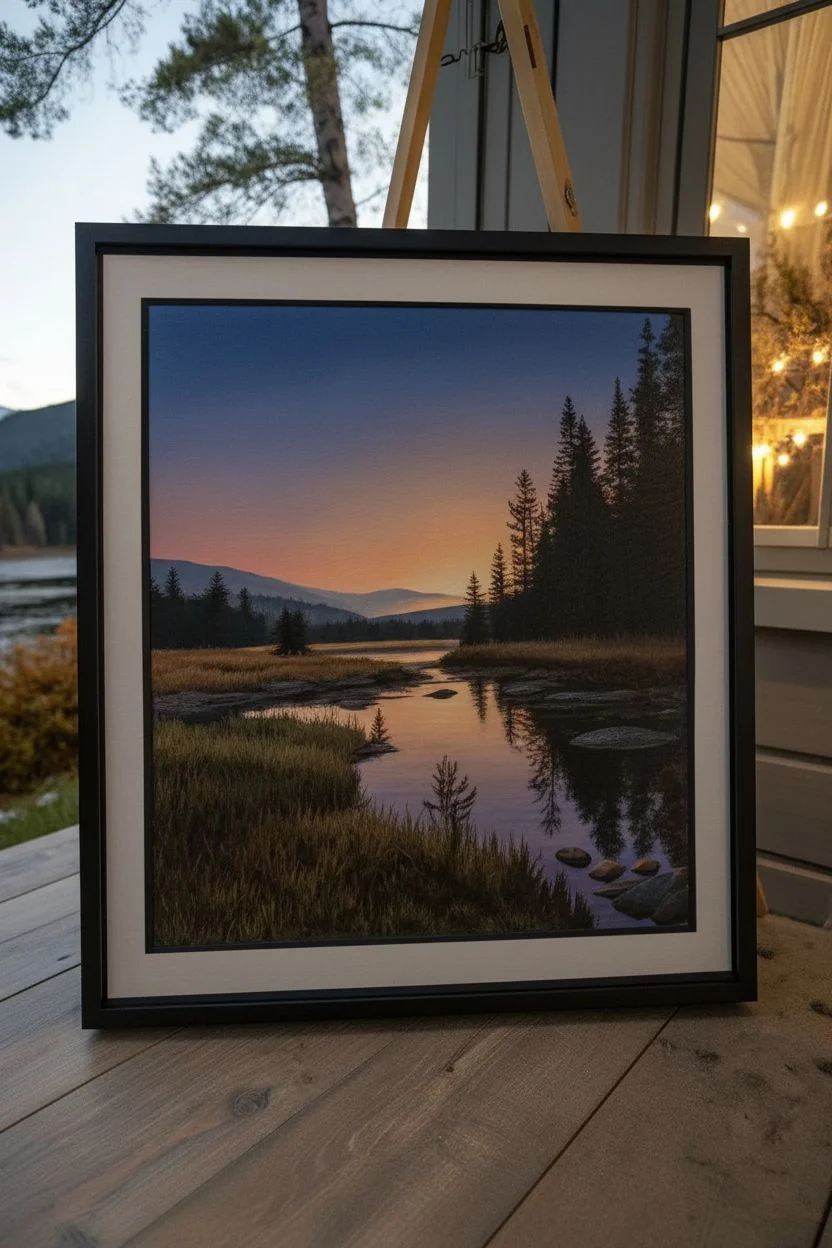
Step 1: Setting the Scene: The Day Layer
-
Prime the sky gradient:
Begin with the standard acrylics. Mix a gradient for the sky using Phthalo Blue and Dioxazine Purple at the top corners, blending down into Titanium White. As you reach the horizon line, mix in a touch of Cadmium Orange and Yellow Ochre to create a soft sunset glow. -
Block in the mountains:
While the sky is still slightly tacky, mix Mars Black with a tiny bit of white and blue to create a distant, hazy grey-blue. Paint the silhouette of the mountains in the background, keeping the edges slightly soft to suggest distance. -
Establish the water base:
Mirror the sky colors in the water section at the bottom. Start with the dark purples/blues at the bottom corners and work inward towards the orange reflection in the center. Use horizontal strokes to mimic the surface of the water. -
Paint the tree line:
Using deep black mixed with Burnt Umber, paint the distant tree line at the base of the mountains. Use a small flat brush and dab vertically to create uneven, organic tops for the trees. -
Create the foreground banks:
Mix Burnt Umber with Yellow Ochre and a touch of black. Paint the grassy banks on either side of the stream. Use upward flicking motions with a small round brush or fan brush to create the texture of tall grasses and reeds. -
Add the majestic pines:
Load a fan brush with your dark black-brown mixture. Turn the brush vertically to tap in the center trunk lines of the tall pines on the right. Then, use the corners of the fan brush to tap in the foliage, starting narrow at the top and getting wider towards the bottom. -
Refine water reflections:
Mirror the dark shapes of the trees and banks into the water. Ensure these reflections are slightly darker and less detailed than the actual objects. Glaze over them with very watered-down blue to settle them into the liquid surface. -
Detail rocks and shore:
Add small rocks along the water’s edge using grey and highlight the tops with a touch of tan where the sunset light would hit them. I like to add a few fallen logs or debris for realism.
Step 2: The Hidden Highlight Layer
-
Prepare the UV zone:
Let the painting dry completely. This is crucial so the UV paint doesn’t muddy with the standard acrylics. Dim the room lights and switch on your black light flashlight to guide the next steps. -
Lay the Milky Way foundation:
Using invisible UV White mixed with a tiny bit of UV Blue, sponge or dry-brush a diagonal band across the sky where the Milky Way will reside. Keep this layer translucent and cloudy. -
Intensify the core:
In the center of your Milky Way band, apply a slightly thicker layer of UV White and UV Pink/Orange to simulate the galactic core’s glow. Feather the edges so it fades seamlessly into the darker sky. -
Create the star field:
Dilute some UV White paint with water on your palette until it’s inky. Load a stiff bristle brush or a toothbrush, aim it at the canvas, and use your thumb to flick a fine mist of ‘stars’ across the entire upper section. -
Add major stars:
Switch to a fine liner brush. Dip it in undiluted UV White and dot in specific, brighter stars. Add tiny cross-shapes to a few of the largest ones to create a twinkling diffraction spike effect. -
Reflect the galaxy:
Don’t forget the water! Lightly dry-brush the invisible UV paint over the center of the water surface, mirroring the Milky Way shape above. Add a few distinct star reflections in the dark patches of the water. -
Highlight the terrestrial elements:
To integrate the scene, lightly brush invisible UV Blue on the tips of the pine trees and the edges of the rocks. This simulate moonlight or starlight hitting the landscape, making the whole image pop under black light. -
Final inspection:
Toggle the black light on and off rapidly. Check that the daytime painting still looks natural without the UV effect visible, and that the night mode is sufficiently bright. Add a varnish coat once fully dry to seal both layers.
Invisible Ink Check
Work with the black light ON for the second phase, but turn it OFF every few minutes to ensure you haven’t applied the invisible paint so thickly that it leaves a milky haze on your daytime scene.
Level Up: Firefly Magic
Use a tiny dotting tool and UV yellow/green paint to add ‘fireflies’ in the tall grass areas. They will be invisible by day but create a magical twinkling effect in the foreground at night.
Hang your masterpiece where it can catch natural light during the day and surprise guests with a hidden show when the black light comes on
Black Light Hand-Lettered Quote
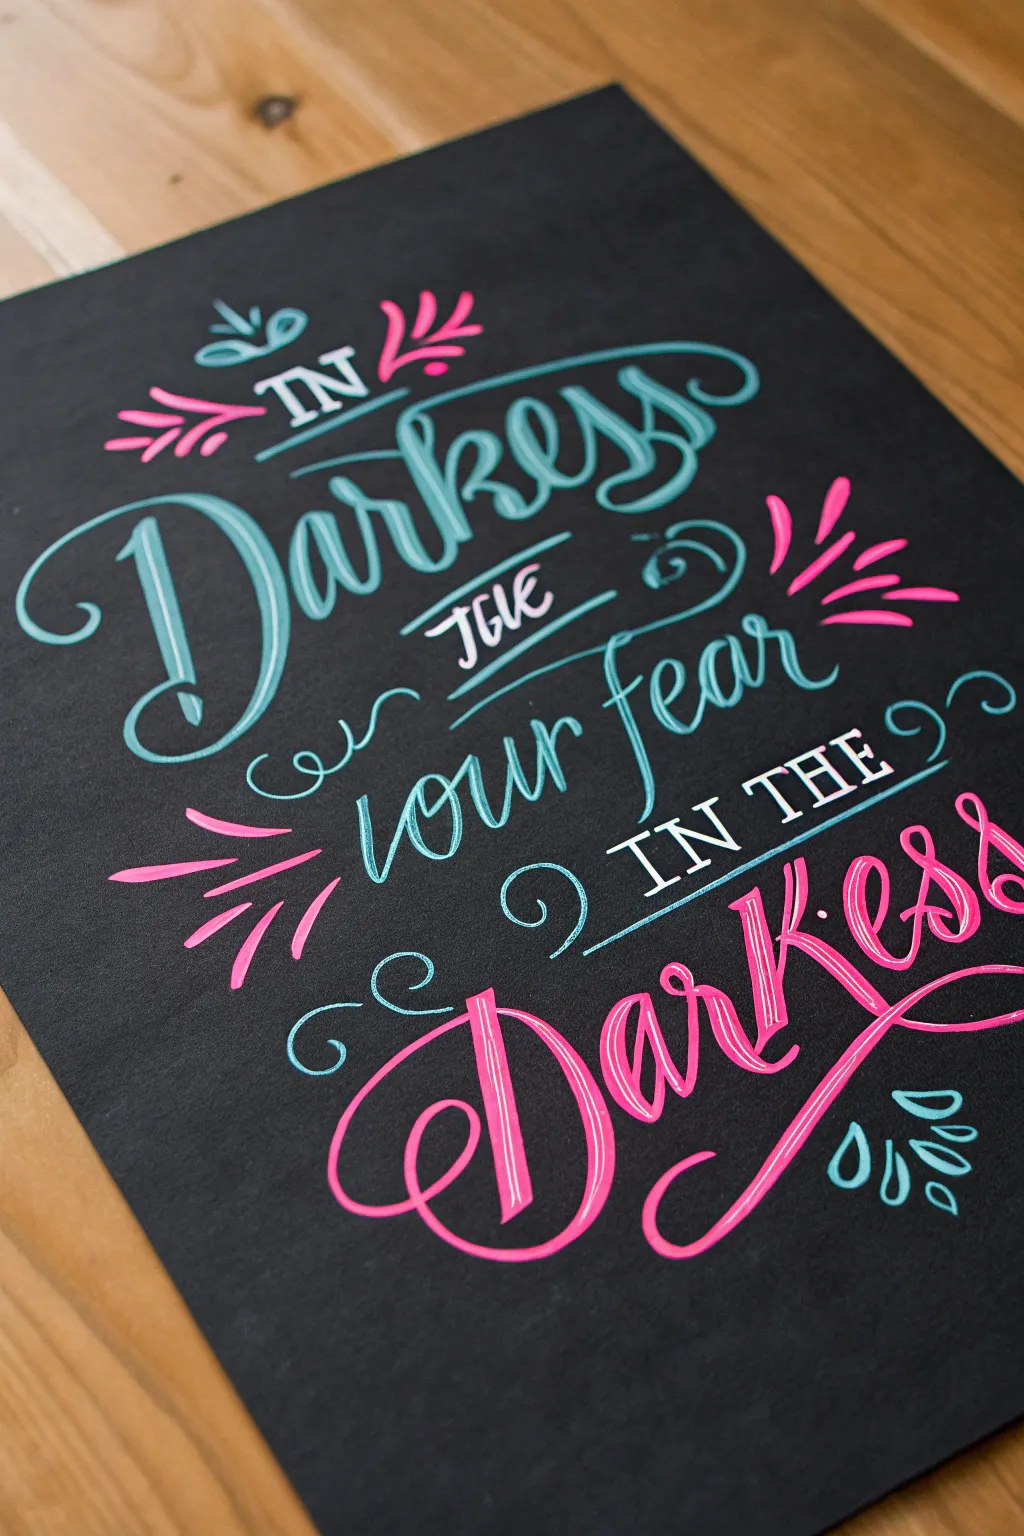
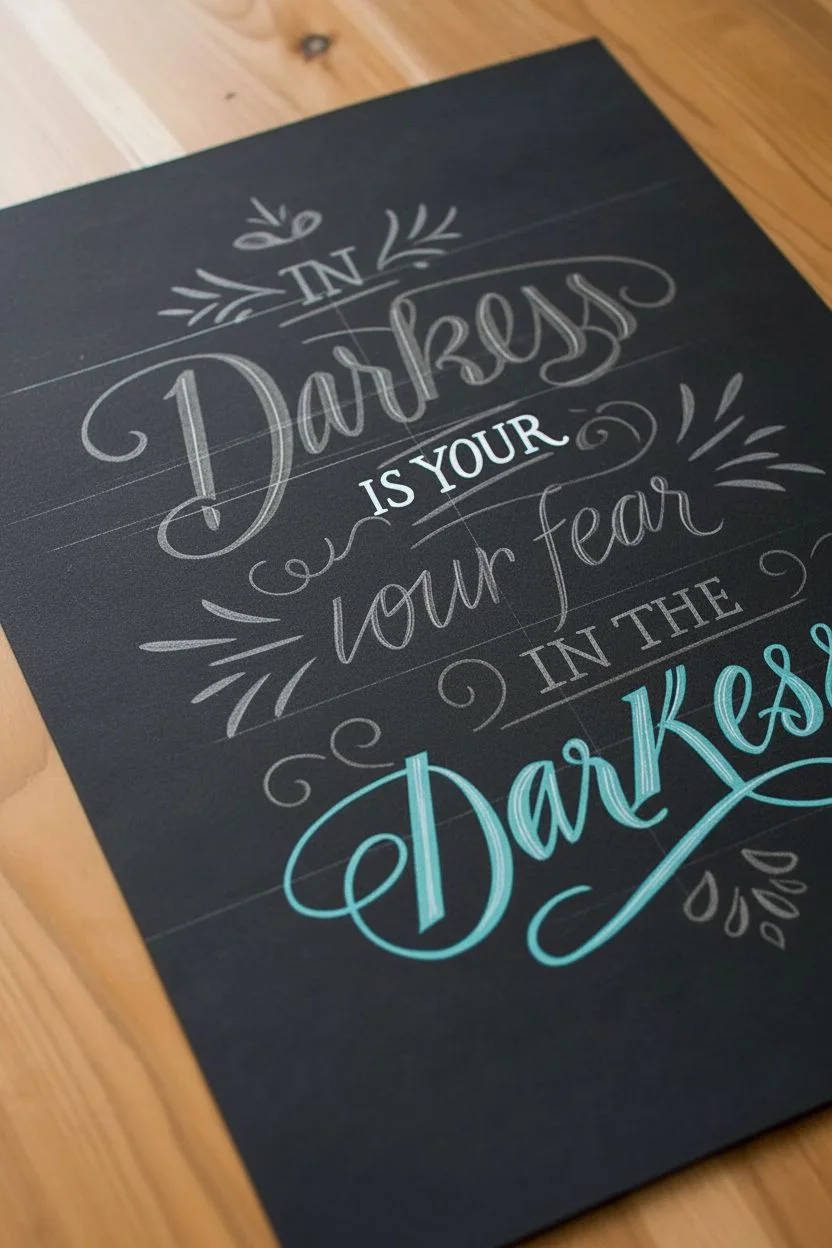
This striking hand-lettered piece pops with electric energy by using fluorescent gel pens or paint markers against deep black cardstock. The contrasting teal and hot pink hues create a vibrating effect reminiscent of classic neon signage.
Step-by-Step Guide
Materials
- Black cardstock or heavy black mixed-media paper (A4 or letter size)
- Pencil (HB or H)
- High-quality eraser (kneaded works best)
- Ruler
- Fluorescent teal/light blue gel pen or paint marker (fine tip)
- Fluorescent hot pink gel pen or paint marker (fine tip)
- White gel pen (optional, for extra highlights)
Step 1: Planning and Layout
-
Prepare the surface:
Place your black cardstock on a flat, clean surface. Ensure it is free of dust or oils from your hands, as these can resist the ink. -
Draft the guidelines:
Using your ruler and pencil, lightly draw horizontal baselines for your text. You will need four main lines. Leave generous spacing between them for the ascenders and descenders of the script font. -
Sketch the primary text:
Lightly sketch the word ‘Darkness’ on the second line and again on the bottom line. Use a large, sweeping cursive style. Focus on making the ‘D’ prominent and looped. -
Sketch the secondary text:
Fill in the connecting words. Sketch ‘IN’ above the first ‘Darkness’, ‘IS YOUR fear’ in the middle gap, and ‘IN THE’ just above the final ‘Darkness’. Keep these letters simpler and slightly smaller. -
Add flourish details:
Sketch the decorative elements: three radiating teardrop shapes on the left and right sides, small swirls flanking the middle text, and the stylized rays at the very top.
Ink Flow Secret
Store your gel pens upside down (cap down) for 30 minutes before starting. This ensures the opaque pigment is ready at the tip for bold lines.
Step 2: Inking the Teal Elements
-
Outline the first ‘Darkness’:
Take your fluorescent teal pen. Carefully trace over your pencil sketch for the top word ‘Darkness’. Use steady pressure to ensure the ink flows opaque against the black paper. -
Thicken the downstrokes:
To create a calligraphy faux-monoline look, go back over the downstrokes (any time your pen moved downward) and thicken them slightly, leaving the upstrokes thin. -
Letter the middle section:
Using the same teal pen, ink the phrase ‘is YOUR fear’. For ‘fear’, use a cursive style similar to ‘Darkness’ but slightly smaller. For ‘is YOUR’, use a simple serif or sans-serif block letter for contrast. -
Detailing the top:
Ink the small ‘IN’ at the very top with teal, adding small horizontal serifs to the letters. -
Add teal decorations:
Draw the swirly flourishes underneath the first ‘Darkness’ and the teardrop shapes at the bottom right corner in teal. -
Create inline highlights:
This is a key step for dimension: Draw a very thin line inside the thickest parts of the teal letters. The black paper showing through creates a ‘hollow’ or inline effect.
Step 3: Inking the Pink Elements
-
Letter the bottom ‘Darkness’:
Switch to your hot pink marker. Trace and fill the bottom instance of the word ‘Darkness’. Just like before, thicken the downstrokes to give the script weight. -
Ink the ‘IN THE’:
Write ‘IN THE’ above the pink ‘Darkness’ using the pink pen. Use block capitals to matching the style of the first ‘IN’. -
Add pink flourishes:
Draw the radiating teardrop shapes on the left side and the burst lines on the right side using the pink ink. -
Top decoration:
Ink the stylized flower/leaf burst at the very top center in pink. -
Pink inline details:
I find it helpful to wait a moment for the ink to dry before this step. Carefully draw the thin inline details on the thick pink downstrokes, letting the black paper peek through.
Fixing Smudges
If you accidentally smudge wet neon ink on black paper, wait for it to fully dry, then carefully color over the mistake with a black marker or pen.
Step 4: Finishing Touches
-
Add secondary accents:
Go back to the teal pen. Add small accent lines or ‘rays’ to the pink flourishes on the right to tie the colors together. -
Refine the edges:
Look closely at your letters. If any edges look ragged, smooth them out with a second pass of the pen. -
Erase guidelines:
Wait until the ink is completely dry—give it at least 15 minutes to be safe. Gently erase your initial pencil guidelines using a kneaded eraser to avoid smudging the pigment.
Now you have a vibrant piece of typographic art that looks ready to glow in the dark
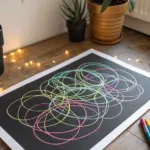
Tape-Resist Neon Geometrics
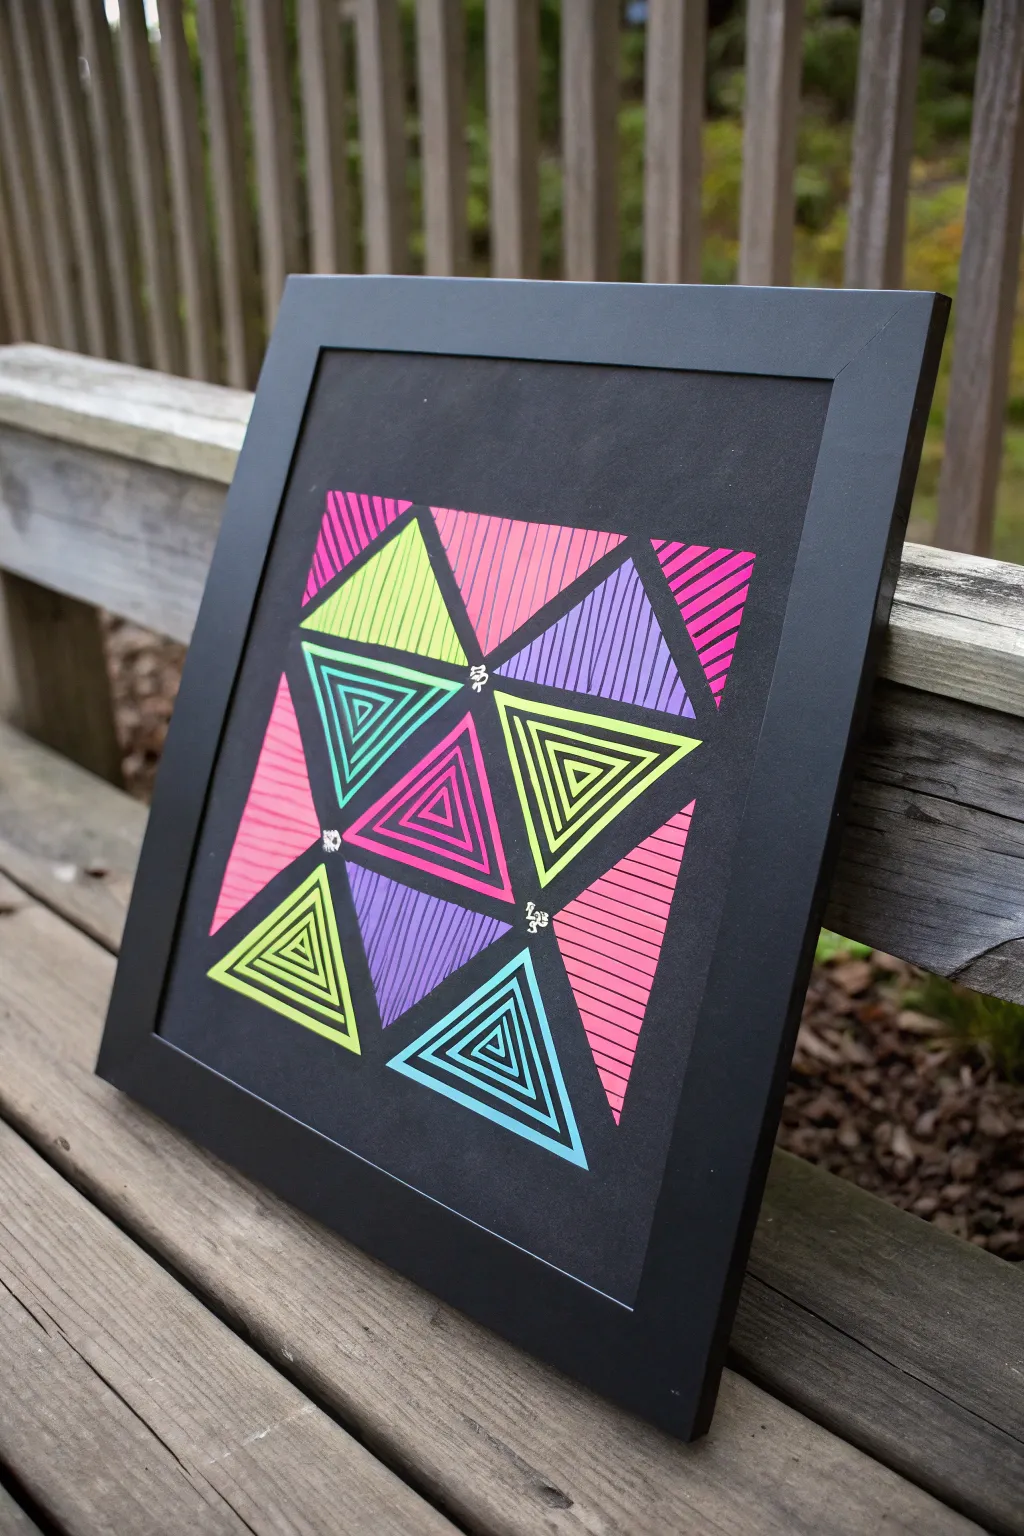
Transform standard black paper into a glowing geometric display using vibrant neon pens and a simple tape-resist technique. This project balances precise lines with electrifying colors, creating a striking modern piece that looks incredible under normal light and truly pops under black light.
Step-by-Step
Materials
- Black cardstock or heavy drawing paper (square format)
- White artist tape or drafting tape (1/4 inch or thinner width preferred)
- Neon gel pens or fine-tip paint markers (pink, green, purple, blue)
- Silver metallic gel pen (for accents)
- Ruler or straight edge
- Pencil
- Scissors or craft knife
- Black picture frame (square)
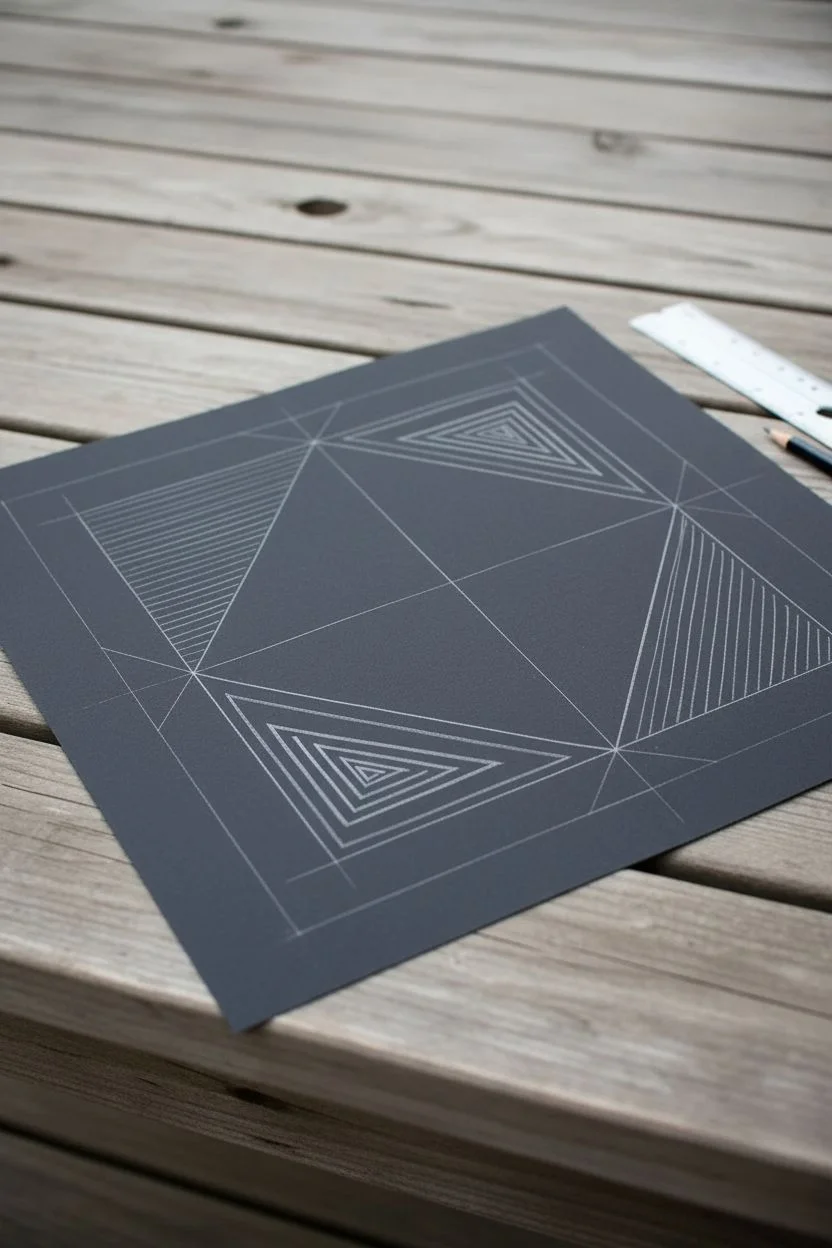
Step 1: Planning the Grid
-
Prepare your canvas:
Cut your black cardstock to a square size that fits your chosen frame. A standard 8×8 or 12×12 inch size works well for this pattern. -
Establish the main grid:
Using a pencil and ruler, lightly mark the center point of the paper. Draw a large square centered on the paper, leaving a wide black border around the edges. -
Divide into triangles:
Within your large pencil square, draw lines to create the triangular framework seen in the image. Start by dividing the square into four smaller quadrants, then draw diagonals through them to create a series of interconnected triangles.
Step 2: Applying Tape Borders
-
Tape the main outlines:
Apply your thin white artist tape over your pencil lines. The tape will serve as the negative space, creating the thick black outlines between the colored sections later. -
Secure the edges:
Run your fingernail or a bone folder firmly along the edges of the tape to ensure a tight seal. This prevents the ink from bleeding underneath. -
Add detail elements:
As seen in the photo, place small diamond-shaped or clover-shaped stickers (or cut small pieces of tape) at the intersections where the point of four triangles meet. This creates those delicate decorative white spaces in the center.
Precision Tip
If you can’t find thin artist tape, buy standard painter’s tape and cut it into thin strips on a cutting mat using a distinct ruler and craft knife.
Step 3: Coloring the Geometrics
-
Select your color palette:
Designate specific colors for each triangle to balance the composition. Notice how the example alternates between warm pinks and cool blues/greens/purples so no two identical colors touch. -
Draw the concentric triangles:
For the ‘inner triangle’ patterns (seen in the green, blue, and pink sections), use a ruler to draw progressively smaller triangles inside the taped area. Keep the line spacing consistent to create a mesmerizing tunnel effect. -
Fill the striped sections:
For the linear patterns, place your ruler parallel to one side of the triangle. Draw parallel lines filling the shape. Vary the direction of the stripes from one triangle to the next to add dynamic movement. -
Execute the solid fills:
Block in solid sections of color if desired, or stick to the tight hatching pattern shown in the purple and pink sections which mimics a solid look from a distance while saving ink. -
Let the ink set:
Neon gel pens can be juicy. I always advise waiting at least 15-20 minutes after finishing the drawing to ensure every line is completely dry before touching the tape.
Glow Up
Use UV-reactive fluorescent paint markers instead of standard gel pens. When you flip on a black light, the geometric pattern will actually glow in the dark.
Step 4: The Reveal and Finish
-
Peel the tape:
Slowly peel back the tape at a sharp 45-degree angle. Pulling slowly away from your drawn lines helps prevent paper tearing. -
Remove center details:
Carefully pick off the small clover/diamond stickers at the intersections using the tip of a craft knife or tweezers. -
Add silver accents:
Using a silver metallic gel pen, draw small symbols or doodles in the black negative space revealed by the intersection stickers. The example uses tiny abstract glyphs for a mystic touch. -
Clean up edges:
If any neon ink bled onto the black background, use a black marker to essentially ‘erase’ it by coloring over the mistake. -
Frame the work:
Place your finished artwork into the black frame. Using a frame without a mat emphasizes the dark background and makes the neon colors appear to float.
Hang your new geometric art in a spot that gets plenty of light to let those neon pigments shine their brightest
UV Constellation Star Map

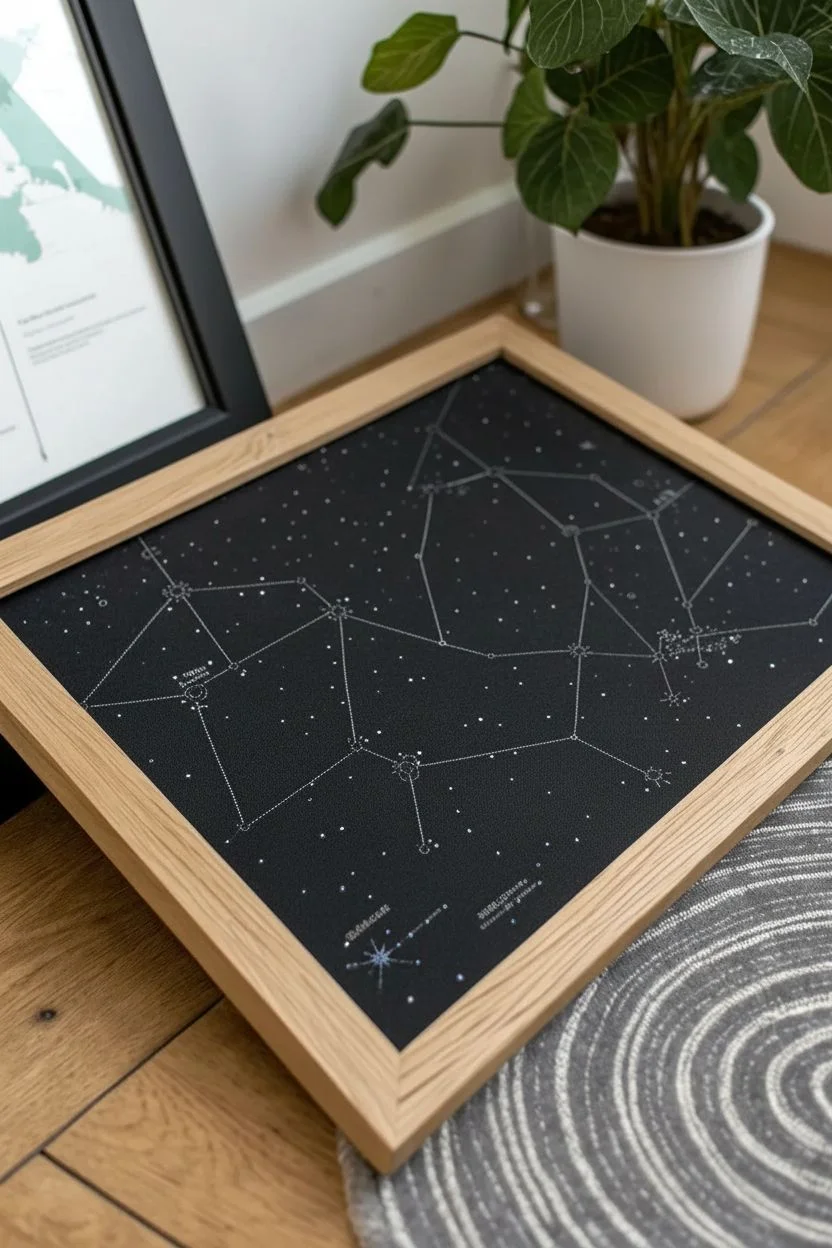
Bring the cosmos into your living room with this illuminated constellation map that truly shines under UV light. Using fluorescent embroidery floss or paint on dark fabric creates a stunning piece of wall art that looks elegant by day and electric by night.
Step-by-Step Tutorial
Materials
- Square wooden frame (approx. 12×12 inches)
- Black cotton fabric or heavy cardstock
- UV-reactive/neon gel pens (teal, pink, white)
- White or silver gel pen (for non-glowing stars)
- Ruler
- Pencil
- Printed star chart template
- Needle and UV-reactive embroidery floss (optional, for stitched version)
- Small fine-point paintbrush
- glow-in-the-dark or neon acrylic paint (teal)
- Scissors
- Tape
Step 1: Preparation
-
Prepare the backing:
Cut your black fabric or cardstock to fit the dimensions of your chosen frame. If using fabric, iron it flat to remove any creases. -
Choose your constellation:
Find a star chart of your favorite zodiac sign or a specific view of the night sky online. Print this out at the exact size of your frame. -
Transfer the design:
Place the printed paper over your black background. Use a sharp pencil to poke holes through the paper at every star location to mark the cardstock underneath, or use chalk transfer paper for fabric. -
Map the connections:
Keep your reference image nearby. Lightly sketch the connecting lines between the major stars using a ruler and a regular pencil to guide your permanent marks later.
Star Burst Technique
Use a toothpick to drag wet paint outward from the center of your largest stars to create tiny, sharp rays of light.
Step 2: Creating the Stars
-
Identify major stars:
Locate the largest stars in the constellation pattern. These will be the focal points of your piece. -
Paint the main stars:
Using a fine-point brush, dab a small circle of teal UV-reactive paint onto these major star points. I like to make these slightly larger than the others. -
Add the centers:
Once the teal paint is tacky but not fully dry, add a tiny dot of white UV gel pen or paint in the absolute center to create a ‘shine’ effect. -
Create background stars:
For the smaller, distant stars scattered around the background, use a white or silver gel pen to make tiny specks. Vary the pressure to create different sizes. -
Add colored accents:
Using a pink neon gel pen, add a few subtle stars or clusters in the lower corners or sparse areas to add color variety to the galaxy.
Step 3: Connecting the Constellations
-
Draw the main lines:
Use a teal neon gel pen and a ruler to draw distinct straight lines connecting your major stars, following your pencil guide. -
Create distinct line styles:
To differentiate between major constellation lines and secondary connections, use solid lines for the main shapes and dashed or dotted lines for weaker connections. -
Enhance intersections:
Where the lines meet the stars, carefully thicken the line slightly so it tapers smoothly into the star, rather than stopping abruptly. -
Embroidered variant (optional):
If you want texture, stitch these lines using a simple backstitch with neon embroidery floss instead of using pens. This adds a beautiful tactile element.
Ink Invisible?
If neon gel pens soak too much into fabric, apply a tiny dab of white acrylic paint as a primer base before drawing the color.
Step 4: Finishing Touches
-
Add textual details:
Using a very fine white or silver pen, write the coordinate numbers or star names near specific points if you want a scientific chart look. Keep the handwriting tiny and precise. -
Highlight the glow:
go back over your teal stars with a second coat of UV paint if needed to ensure they pop under black light. -
Create nebulae effect:
Lightly smudge a tiny bit of teal chalk or diluted neon paint in empty areas to create a faint, cloudy background glow. -
Dry completely:
Allow all ink and paint to dry for at least one hour to prevent smearing when framing. -
Frame the artwork:
Clean the glass of your frame thoroughly. Place your finished star map inside and secure the backing. -
Test the light:
Turn off the main lights and switch on a UV black light to verify which elements glow the brightest and enjoy your creation.
Hang your new celestial map in a dim corner and watch it transform your space when the black light comes on
Neon Silhouette With Glow Burst

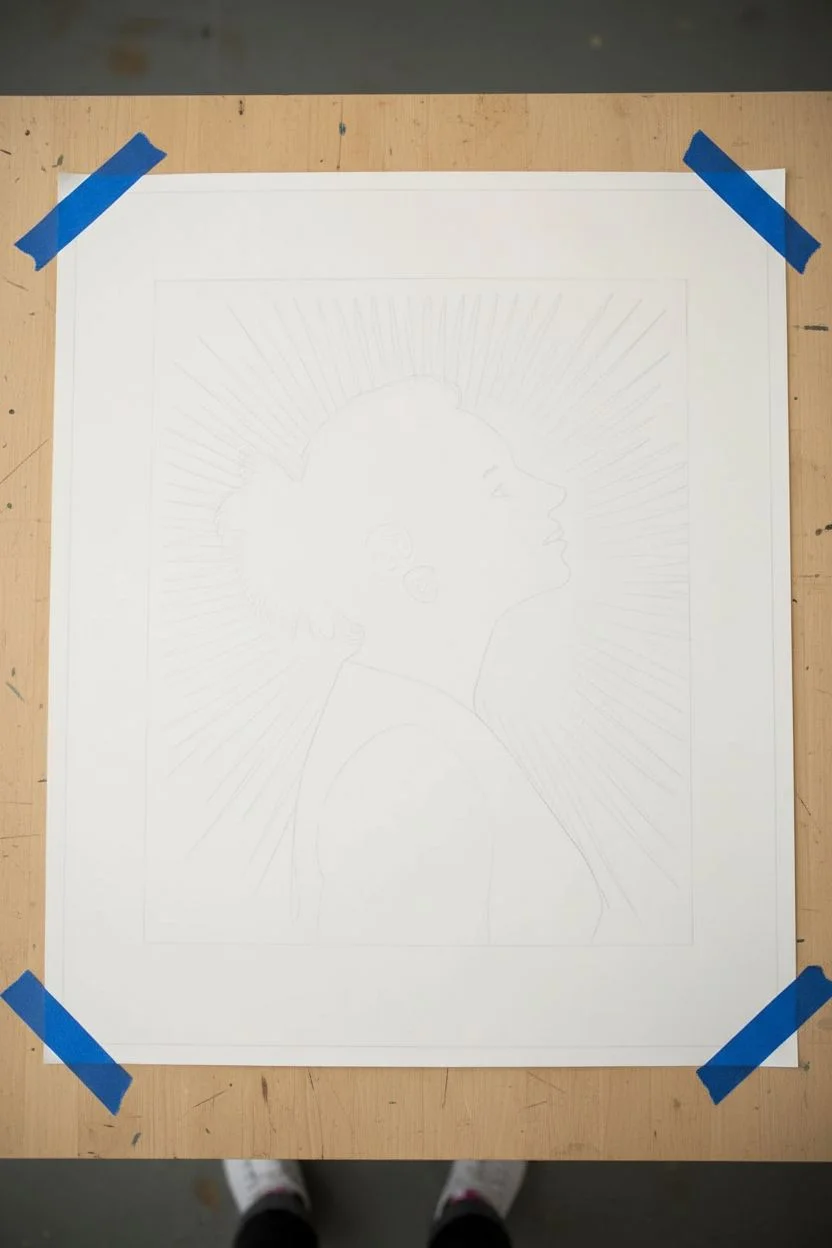
Capture a stunning profile silhouette surrounded by an electrifying burst of neon cyan and magenta. This high-contrast art piece mimics the look of a fluorescent screen print, using clever layering and starburst effects to make the subject pop against deep black.
Step-by-Step
Materials
- Large heavy-weight art paper (white or light cream, approx. 18×24 inches)
- Digital camera or smartphone
- Photo editing software (Photoshop, GIMP, or Illustrator)
- High-quality vibrant acrylic paints (Neon Pink, Cyan Blue, Black, White)
- Masking fluid or liquid frisket
- Old synthetic brush (for masking fluid)
- Set of fine-detail brushes and medium flat brushes
- Compass and ruler
- Pencil and eraser
- Printer (for templates) or projector
- Painter’s tape
Step 1: Preparation & Design
-
Capture the reference photo:
Take a side-profile photo of your subject (or yourself) against a plain, light-colored wall. Ensure strong lighting to create a clear definition of the nose, chin, and hair outline. -
Create the silhouette digitally:
Import your photo into editing software. Use the pen tool or threshold adjustment to create a solid black silhouette of the profile. Clean up any messy hair strands to create a stylized, graphic look. -
Design the starburst:
Behind the silhouette layer, visualize a radial burst pattern. You can design this digitally to use as a printing guide or plan to draw it manually later. The burst should center around the head area. -
Prepare the paper:
Tape your heavy-weight art paper down to a flat workspace using painter’s tape on the corners to prevent buckling during painting.
Step 2: Transfer & Masking
-
Transfer the silhouette:
Project your digital silhouette onto the paper using a projector and lightly trace the outline with a pencil. Alternatively, print it at full size, cut it out, and trace around it. -
Map the burst lines:
Using a ruler and a faint pencil line, mark the center point of your burst (likely near the ear of the silhouette). Draw radiating lines outward to guide your painting, keeping them somewhat random in length for energy. -
Mask the subject:
Apply masking fluid carefully inside the silhouette shape. This protects the area that will eventually become the black profile while you work on the colorful background. Let it dry completely. -
Mask the outer border:
Tape off a clean rectangular border around your image area to ensure crisp white edges, exactly like a professional print.
Clean Lines Hack
If you struggle with steady lines for rays, use thin strips of masking tape or drafting tape to block out the negative space between the rays before painting the background colors.
Step 3: Painting the Neon Burst
-
Mix your gradients:
Prepare your neon pink and cyan blue paints. I find it helpful to mix a tiny bit of white into the colors to increase their opacity and brightness on the paper. -
Paint the background gradient:
Start applying the pink near the center top of the burst area and the blue near the center bottom. Blend them where they meet to create a soft purple transition. -
Create the stippling effect:
For the dotted texture seen in the reference, use a small round brush or a dotting tool. Apply dense dots of neon color closer to the silhouette, spacing them out as you move away. -
Paint the radial rays:
Using a fine liner brush, paint the sharp, spikey rays extending outward. Alternate between pink and blue, following your pencil guides. Make the tips of the rays sharp and tapered. -
Add white highlights:
Once the color layer is dry, add very thin lines of pure white alongside some of the neon rays to simulate a glowing light effect.
Level It Up
Use actual UV-reactive fluorescent paints for the burst. Under a blacklight, the silhouette will become a void while the background creates an intense, glowing halo effect.
Step 4: Revealing & Refining
-
Apply the black background:
Carefully paint the area *outside* the starburst deep black. You want a sharp contrast where the neon rays end and the black void begins. -
Remove the masking:
Once the paint is bone dry, gently rub off the masking fluid to reveal the white paper underneath the silhouette area. -
Fill the silhouette:
Paint the revealed profile shape with solid black acrylic. Use a steady hand or a fresh layer of masking tape to ensure the edge is crisp against the neon background. -
Add internal details:
Use a white gel pen or a fine brush with neon paint to add the subtle outlines of the ear, collar, and earring. These delicate lines define the person within the shadow. -
Final touches:
Check your edges. If any black paint bled, touch it up with white acrylic. Remove the border tape slowly at a 45-degree angle.
Hang your bold new portrait in a spot with good lighting to let those neon hues truly radiate.
Mini Glow Canvases as a Wall Grid
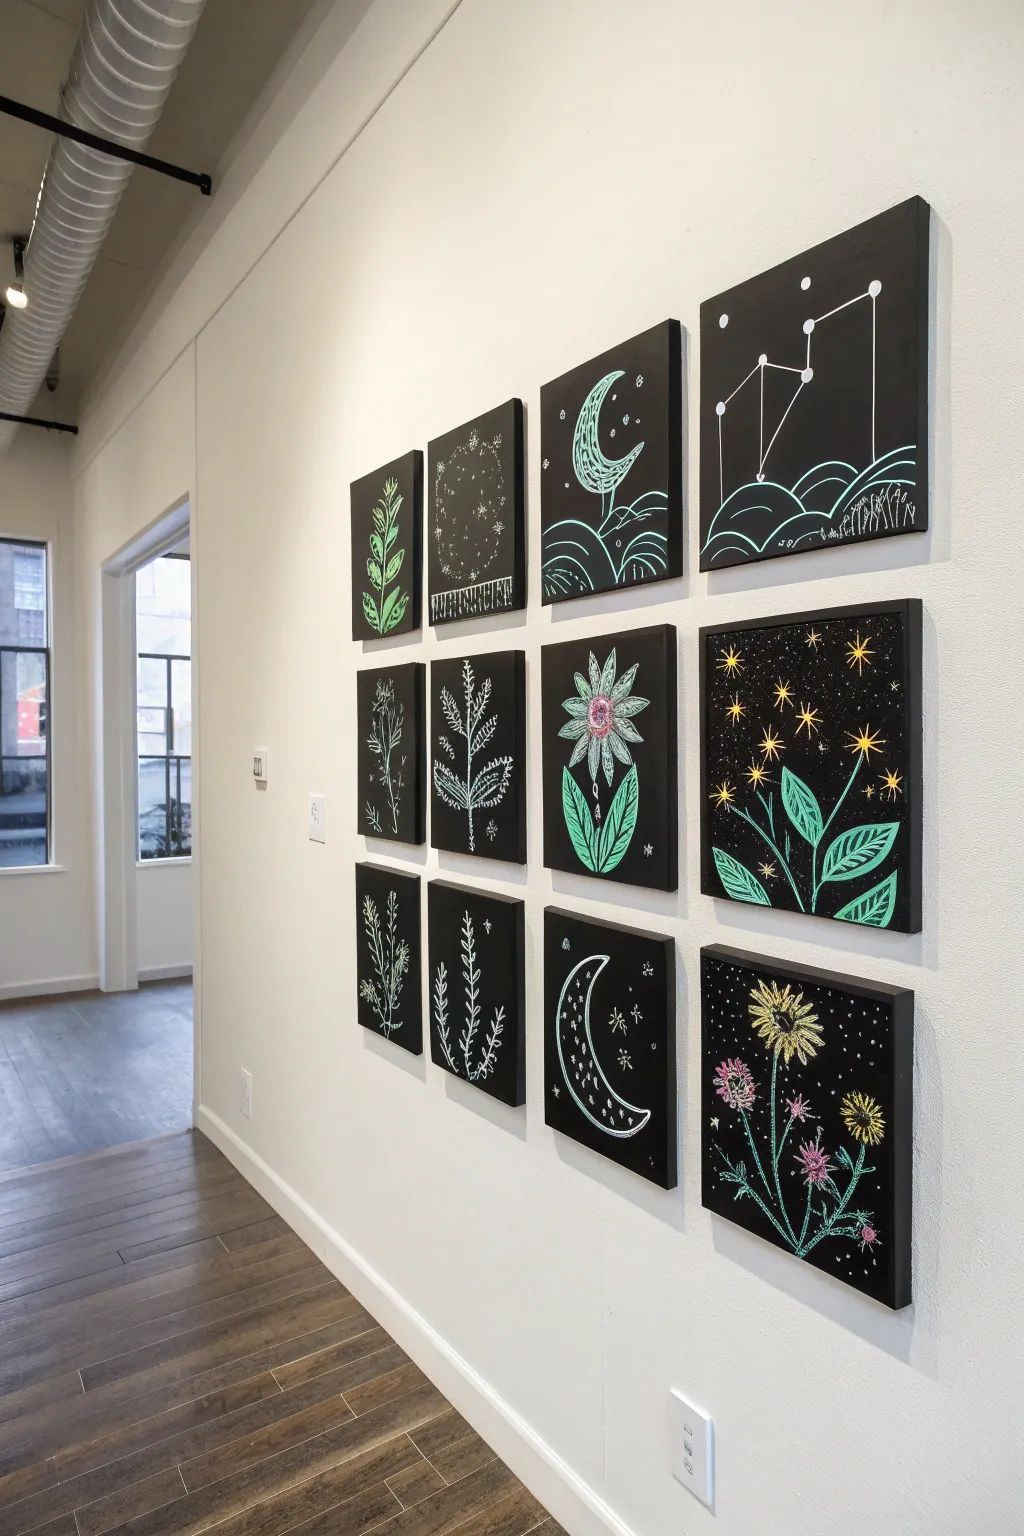
Transform a blank wall into a celestial gallery with these enchanting mini canvases featuring glowing botanical and astral designs. The crisp lines against a dark background create a striking high-contrast look that pops even more under UV light.
Step-by-Step Tutorial
Materials
- 12 Mini stretched canvases (approx. 6×6 inches or 8×8 inches)
- Black gesso or flat black acrylic paint
- Foam brush or wide flat synthtic brush
- Chalk markers (neon green, yellow, pink, white)
- White or glow-in-the-dark acrylic paint (optional for stars)
- Fine liner brush (size 0 or 00)
- Ruler
- Pencil
- Command strips or mounting clay
Step 1: Preparing the Night Sky
-
Base coating:
Begin by coating every canvas with black gesso or flat black acrylic paint. I prefer using a foam brush here to get a smooth, matte finish without heavy brushstrokes. Don’t forget to paint the edges for a finished look. -
Second layer:
Once the first coat is completely dry to the touch (usually 20 minutes), apply a second coat to ensure total coverage. You want a solid, deep void with no white canvas showing through. -
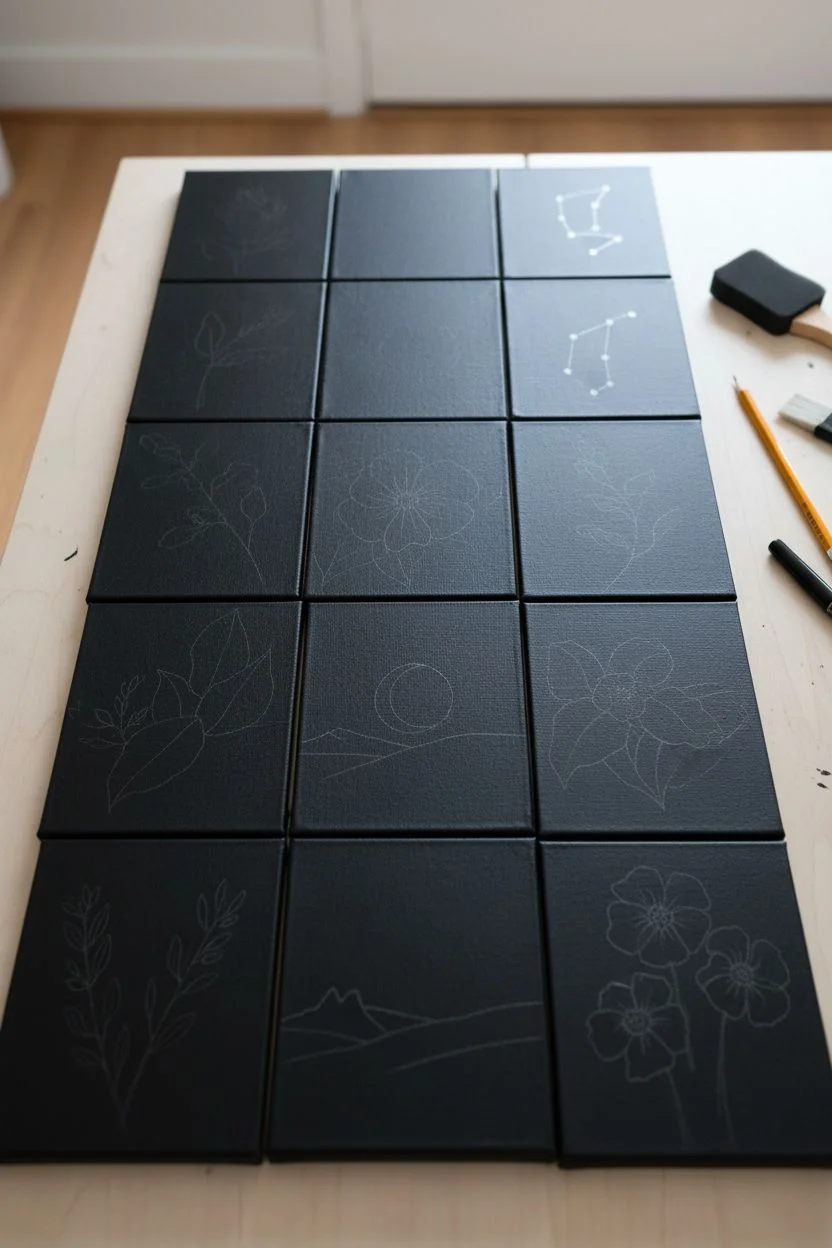
Grid planning:
Lay your dry black canvases out on a table in a 3×4 grid pattern. This helps you visualize how the designs will flow together before you start drawing. -
Sketching the layout:
Using a pencil very lightly, sketch the basic shapes for your designs. For the constellation panel (top right), mark dot positions for the stars. For the moons (top and bottom center), draw the arcs.
Step 2: Drawing the Botanicals
-
Leaf outlines:
Starting with the middle-left canvas, use a neon green chalk marker to draw a central stem, then add leaf outlines branching off symmetrically. -
Stippling details:
Instead of coloring the leaves in solid, use a stippling technique (tiny dots) or fine hatching lines inside the leaves to create texture that mimics the chalk aesthetic. -
Creating the focal flower:
For the prominent flower panel (middle row, third one), draw a small pink circle for the center. Surround it with pointed petals using a white or light blue marker. -
Adding oversized leaves:
Anchor that flower with two large, broad leaves at the bottom using the neon green marker. Draw a central vein in each leaf and add curved veins radiating outward. -
Vertical vines help:
For the bottom-left panel, draw two simple vertical vines with small, alternating leaves. Keep the lines thin and delicate to contrast with the bolder flower panel next to it. -
Mixed floral bouquet:
On the bottom-right panel, create a cluster. Draw three stems: one for a yellow dandelion-style flower, one for a pink clover, and one for a small bud. Add tiny distinct petals to differentiate the species.
Sharpen Your Glow
To get super crisp tips on your leaves, start your marker stroke at the stem and lift pressure quickly as you flick outward toward the leaf tip.
Step 3: Celestial Elements
-
The crescent moons:
Locate your moon panels. On one, outline a crescent shape with white or pale blue marker. Fill the interior with intricate patterns like spirals, zig-zags, or tiny stars. -
Constellation connection:
For the constellation panel, press firmly with a white paint pen or marker to make bold ‘star’ dots. Connect them with straight lines using a ruler to create a geometric star chart effect. -
Starry night panel:
On the middle-right panel, draw several eight-pointed stars using yellow. Vary the sizes—make two or three large ones and scatter smaller cross-shapes around them. -
Rolling hills:
On the top-right constellation panel and top-middle moon panel, draw simple curved lines at the very bottom to represent rolling hills or landscapes, grounding the celestial objects.
Marker Ghosting?
If you make a mistake with chalk marker on painted canvas, a damp Q-tip can usually erase it. If a stain remains, just touch it up with a bit of black paint.
Step 4: Final Touches & Mounting
-
Cosmic dust:
Take a white or silver glitter pen (or a toothbrush with diluted white paint) and gently flick tiny specks across the ‘sky’ portions of the canvases to create distant stars. -
Highlighting:
Go back over your main lines. If any look faint as the ink dried, add a second pass to ensure they are opaque and bright. -
Drying time:
Let the chalk markers or paint pens cure for at least an hour to prevent smudging during installation. -
Measuring the wall:
Use a level and a ruler to mark your wall. Leave about 1.5 to 2 inches of space between each canvas to create that gallery grid aesthetic. -
Installation:
Apply adhesive strips to the back corners of each canvas and press them firmly onto your marked spots on the wall.
Step back and dim the lights to see your personal galaxy come to life on the wall
Room-Scale Black Light Mural Illusion
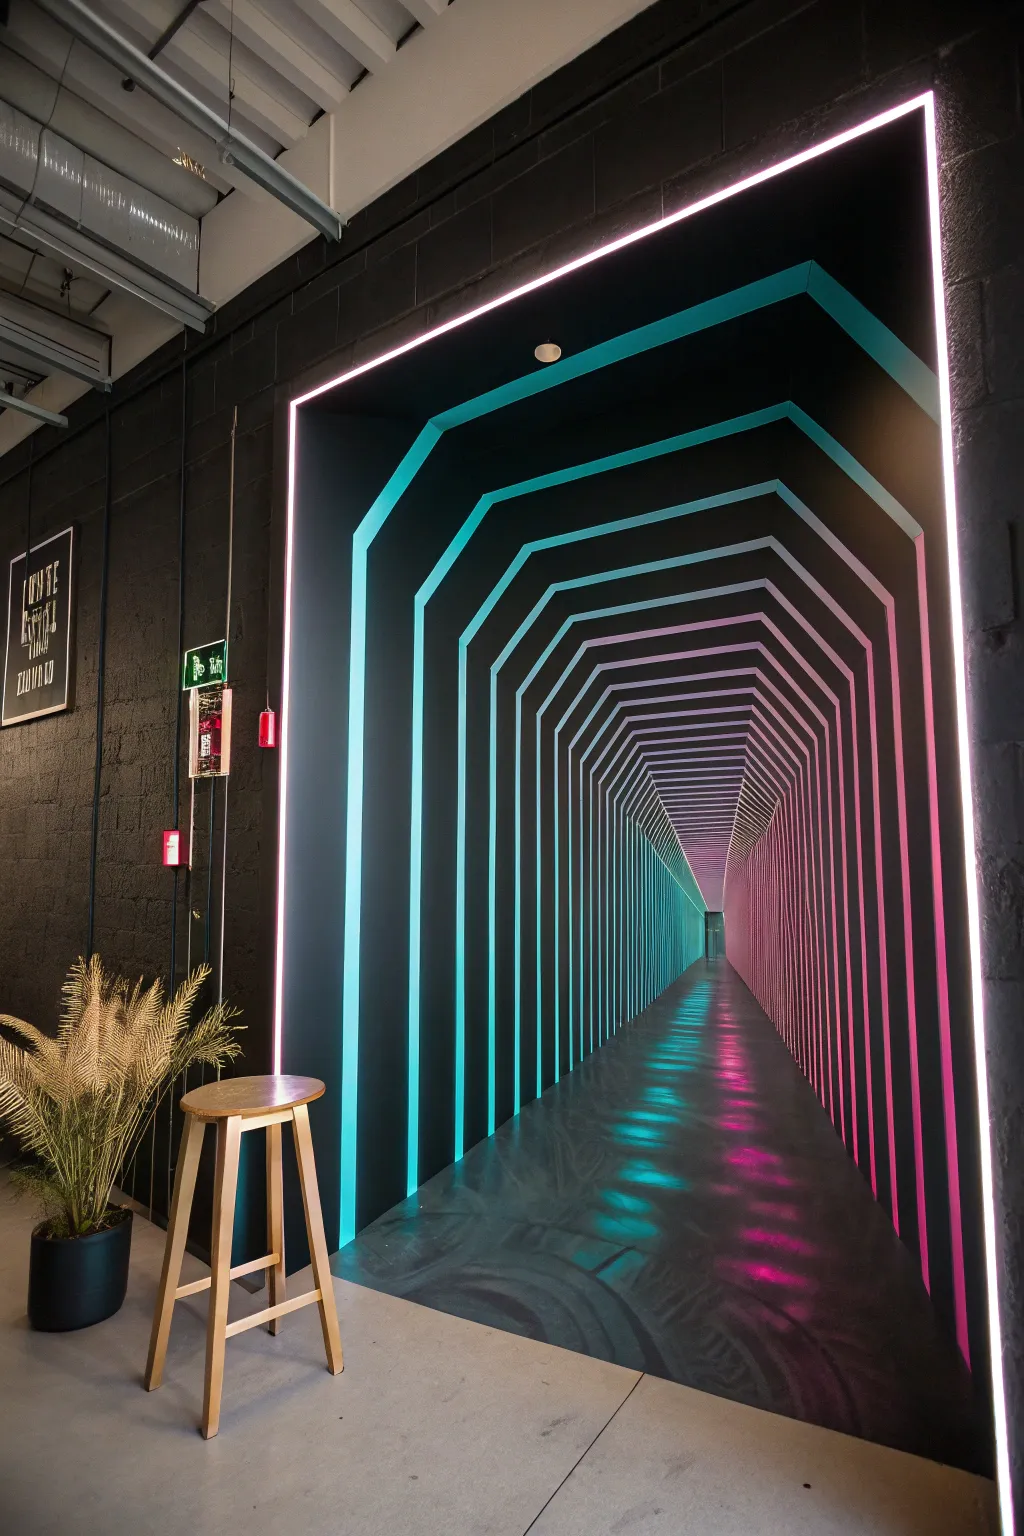
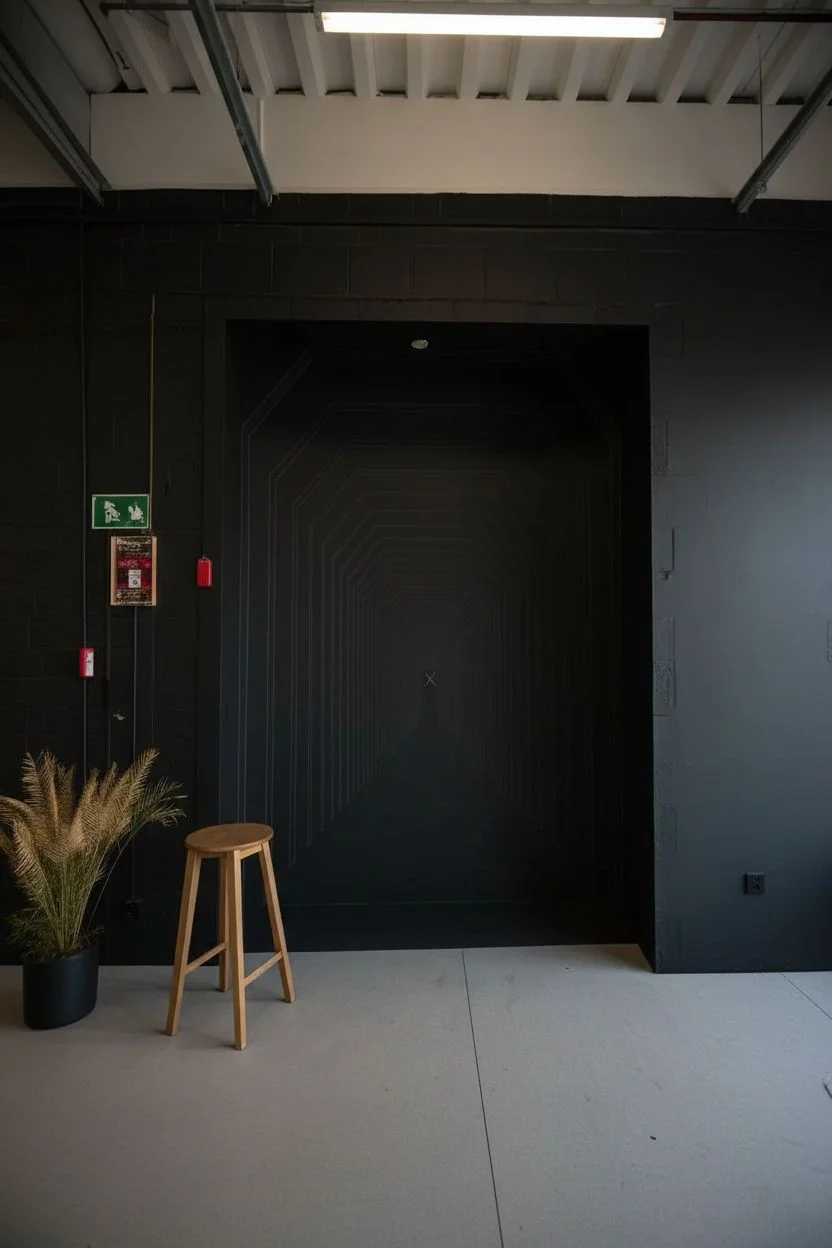
Transform a blank wall into a mind-bending portal to another dimension with this incredible forced perspective mural. By carefully layering distinct glowing colors against a deep black void, you’ll create an optical illusion of endless depth that commands attention in any space.
Detailed Instructions
Materials
- Matte black interior latex paint (high quality)
- Fluorescent or neon acrylic paints (cyan and magenta/pink)
- White primer or white acrylic paint
- Painter’s tape (various widths, mostly 1-inch and 2-inch)
- Long level (4-foot is ideal) or laser level
- Chalk line or very long straight edge
- Pencil and eraser
- Angled sash brushes (2-inch)
- Small flat artist brushes for touch-ups
- Roller and tray for the black base coat
- Floor sealant (polyurethane) if extending to the floor
Step 1: Preparation and Base
-
Prime the canvas:
Begin by cleaning your wall and floor area thoroughly. If the wall isn’t already dark, roll on two coats of high-quality matte black latex paint. The matte finish is crucial here because it absorbs stray light, making your neon colors pop intensely by comparison. Let this cure completely, preferably overnight. -
Establish the vanishing point:
Determine the center point of your illusion. This is where the tunnel will ‘end.’ Mark this spot clearly with a pencil or a small piece of tape at roughly eye level (about 5 feet off the ground) in the horizontal center of your wall. -
Map the outer portal:
Define the outermost edge of your tunnel. Use a level to draw a large rectangle or arch shape that frames the wall space. For the specific look in the photo, create chamfered corners (angled cuts) at the top left and right to start forming an octagonal feel.
Step 2: Drafting the Perspective
-
Draw the convergence lines:
This is the most critical step for the 3D effect. Using a chalk line or a long straight edge, lightly draw lines connecting every corner of your outer shape directly to your central vanishing point. These lines act as the ‘rails’ on which all your glowing rings will sit. -
Mark the ring spacing:
Along one of your convergence lines, mark spacing for the concentric rings. The gaps between rings should get progressively smaller as they get closer to the center to mimic depth perception. I like to reduce each gap by about 20% as I move inward. -
Connect the rings:
Connect your spacing marks horizontally and vertically to form the series of shrinking octagons. Use your level constantly to ensure the horizontal lines are level and vertical lines are plumb; if they tilt, the illusion breaks.
Clean Lines Only
If paint bleeds under tape, don’t wipe it! Let it dry completely, then paint over the mistake with your matte black base color.
Step 3: Painting the Illumination
-
Tape the first set of rings:
Tape off the designated ‘light strips’ for your blue/cyan side first. Tape along the pencil lines carefully, pressing the edges down firmly to prevent bleed. -
Apply the white base:
Before using neon paint, paint a layer of white primer or acrylic within your taped lines. Neon paints are naturally translucent; without a white underlayer, they will look dull against the black wall. -
Verify opacity:
Check the white layer once dry. It needs to be solid opaque white. If you see black showing through, add a second thin coat of white. -
Apply the neon cyan:
Paint your fluorescent cyan over the white strips on the left side of the tunnel. Use multiple thin layers rather than one thick gloop to keep the texture smooth. Peel the tape while the final coat is still slightly wet for crisp lines. -
Tape the opposing rings:
Once the blue side is fully dry (give it a few hours), repeat the taping process for the right side of the tunnel structure where the pink/magenta lights will go. -
Paint the magenta glow:
Repeat the white underpainting process, followed by your fluorescent magenta or hot pink paint. Ensure the colors meet cleanly in the center or fade out depending on your preferred design.
Glow Up
Install a real UV blacklight fixture on the ceiling above the mural. The fluorescent paint will fluoresce, making the tunnel look like actual neon tubing.
Step 4: The Floor Reflection
-
Extend lines to the floor:
To truly sell the illusion, extend the vertical lines of your tunnel down onto the floor surface. Lightly sketch the reflection of the arches distorting slightly as they move away from the wall. -
Paint the reflections:
Paint these floor sections using a dry-brush technique. Dip your brush in the neon paint, wipe most of it off, and lightly drag it horizontally across the floor markings. This creates a rippled, watery reflection effect rather than a solid hard line. -
Seal the floor:
Once the floor art is completely dry, apply two coats of clear polyurethane or floor sealant to protect your work from foot traffic. -
Final touch-ups:
Inspect the black negative space. If any neon paint bled under the tape or splattered, use a small brush and your matte black wall paint to essentially ‘erase’ the mistakes and sharpen the edges.
Step back and adjust your viewing angle until the tunnel creates that perfect moment of infinite depth.


Have a question or want to share your own experience? I'd love to hear from you in the comments below!