
When I need a quick creative reset, I reach for cute easy drawings that come together in just a few simple lines. Grab any pen and a scrap of paper, and let’s make something simple and seriously charming without overthinking it.
Simple Cat Face Doodle
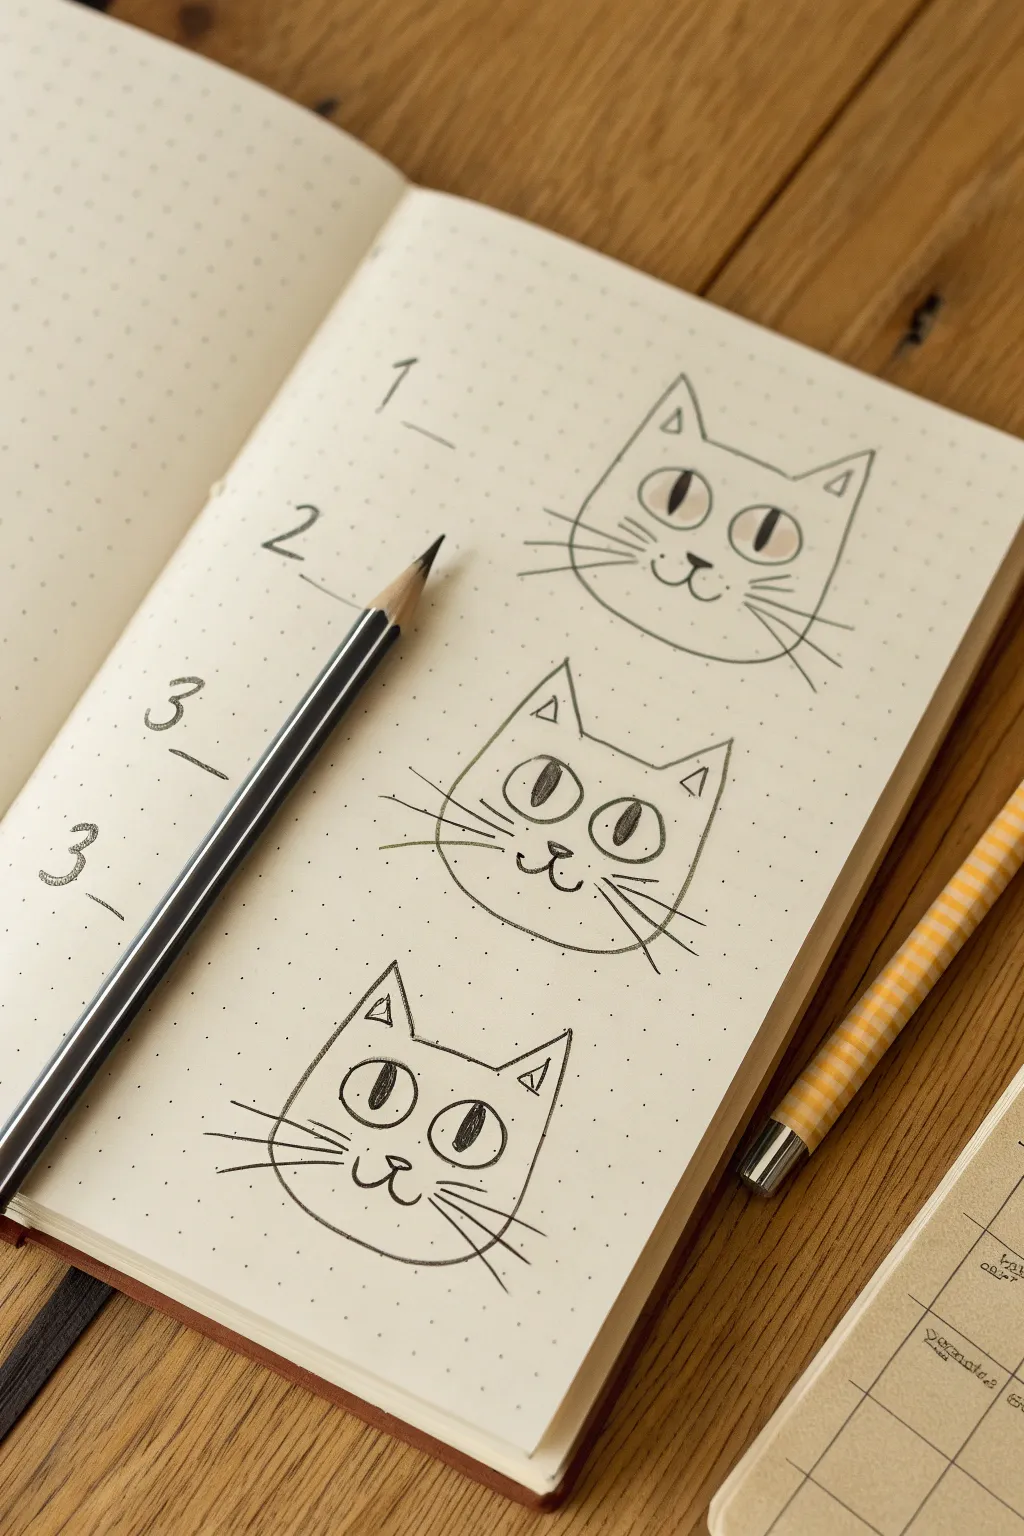
These charming cat doodles rely on simple geometric shapes to create expressive little characters. Using dotted grid paper helps keep their features symmetrical and neat as you practice drawing the trio.
Detailed Instructions
Materials
- Dotted grid notebook or paper
- Graphite drawing pencil (HB or 2B recommended)
- Pencil sharpener
- Eraser
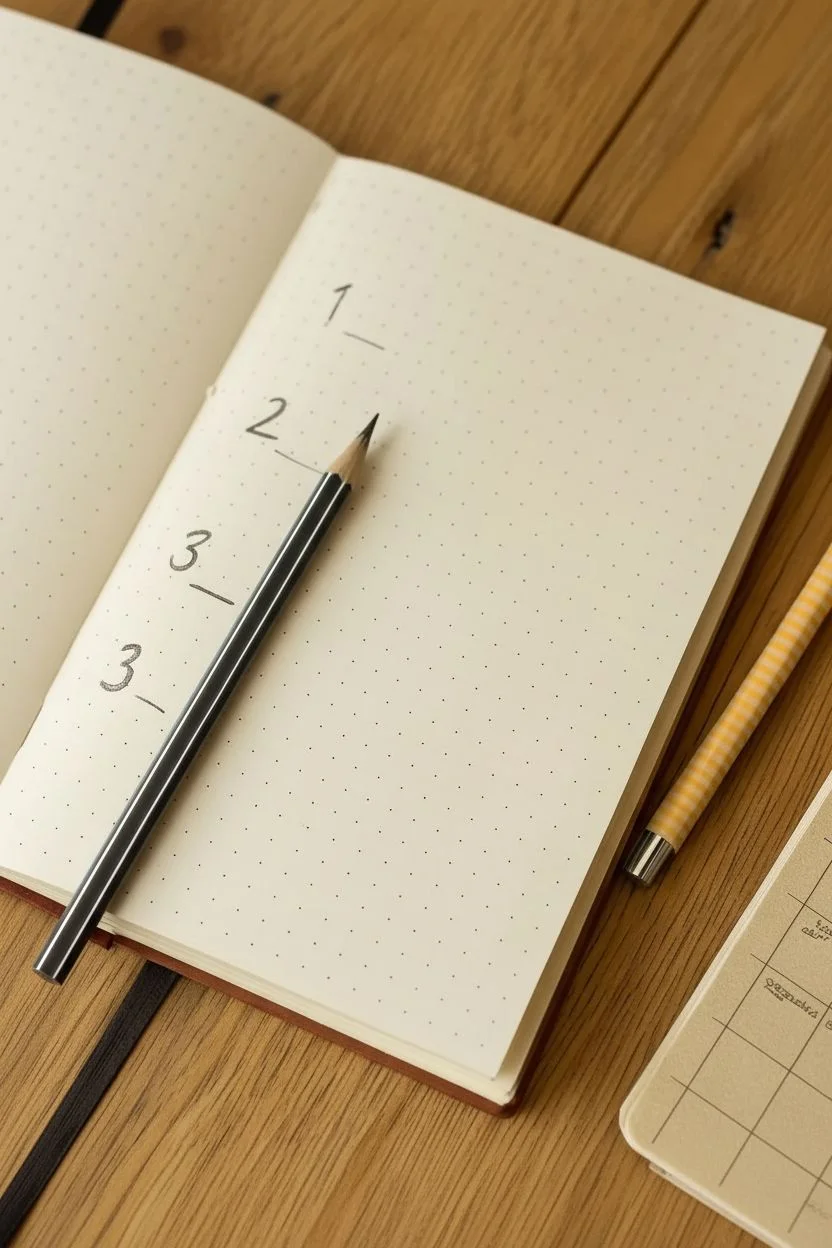
Step 1: Planning the Layout
-
Number your spots:
Begin by writing three numbers vertically down the left side of your page (1, 2, and 3), leaving about 2-3 inches of space between each number. This designates a specific home for each cat face. -
Add numbering lines:
Draw a short, straight underscore line next to each number to create a neat list format.
Fixing Wonky Eyes
If eyes look uneven, lightly mark the center point of the face first. Measure equal distance from that center dot for each eye before drawing the full ovals.
Step 2: Drawing the Base Shape
-
Start the ears:
For the first cat, locate a spot to the right of your number ‘1’. Draw two upside-down ‘V’ shapes for the ears, spacing them about an inch apart. -
Form the head top:
Connect the inner bottom corners of the two ears with a slightly curved horizontal line to form the top of the head. -
Outline the face:
Draw a wide ‘U’ shape starting from the outer base of the left ear, swooping down and around, and connecting back up to the outer base of the right ear. -
Add inner ear details:
Inside each ear triangle, draw a smaller triangle. Off-center them slightly or make them varied for character.
Make Them Unique
Give each cat a different personality by changing just the pupils! Try circles, hearts, or simple horizontal dashes for a sleepy look.
Step 3: Adding Facial Features
-
Draw the eyes:
Draw two large ovals in the upper third of the face, spacing them evenly. Use the grid dots to help align them horizontally. -
Create the pupils:
Draw tall, thin vertical ovals inside the eyes for pupils. Shade these completely dark with your pencil, leaving the rest of the eye white. -
Place the nose:
Below the eyes, centered between them, draw a small, filled-in triangle pointing downward for the nose. -
Sketch the mouth:
From the bottom point of the nose, draw a small vertical line down, then curve it outward on both sides to form a classic ‘3’ shape for the mouth.
Step 4: Polishing the Details
-
Add whiskers:
Draw three straight lines fanning out from each cheek area. I like to make sure they cross over the face outline slightly so they look like they are growing from the muzzle. -
Repeat for the second cat:
Move down to number ‘2’ and recreate the exact same steps. Try to keep the size consistent with the first drawing. -
Draw the final cat:
Repeat the process one last time next to number ‘3’. Focus on getting the whisker lengths even on both sides. -
Clean up:
Check for any smudges or stray lines and erase them gently to keep the page looking crisp and minimal.
Now you have a trio of friendly felines perfect for decorating your journal pages


Easy Puppy Face With Floppy Ears
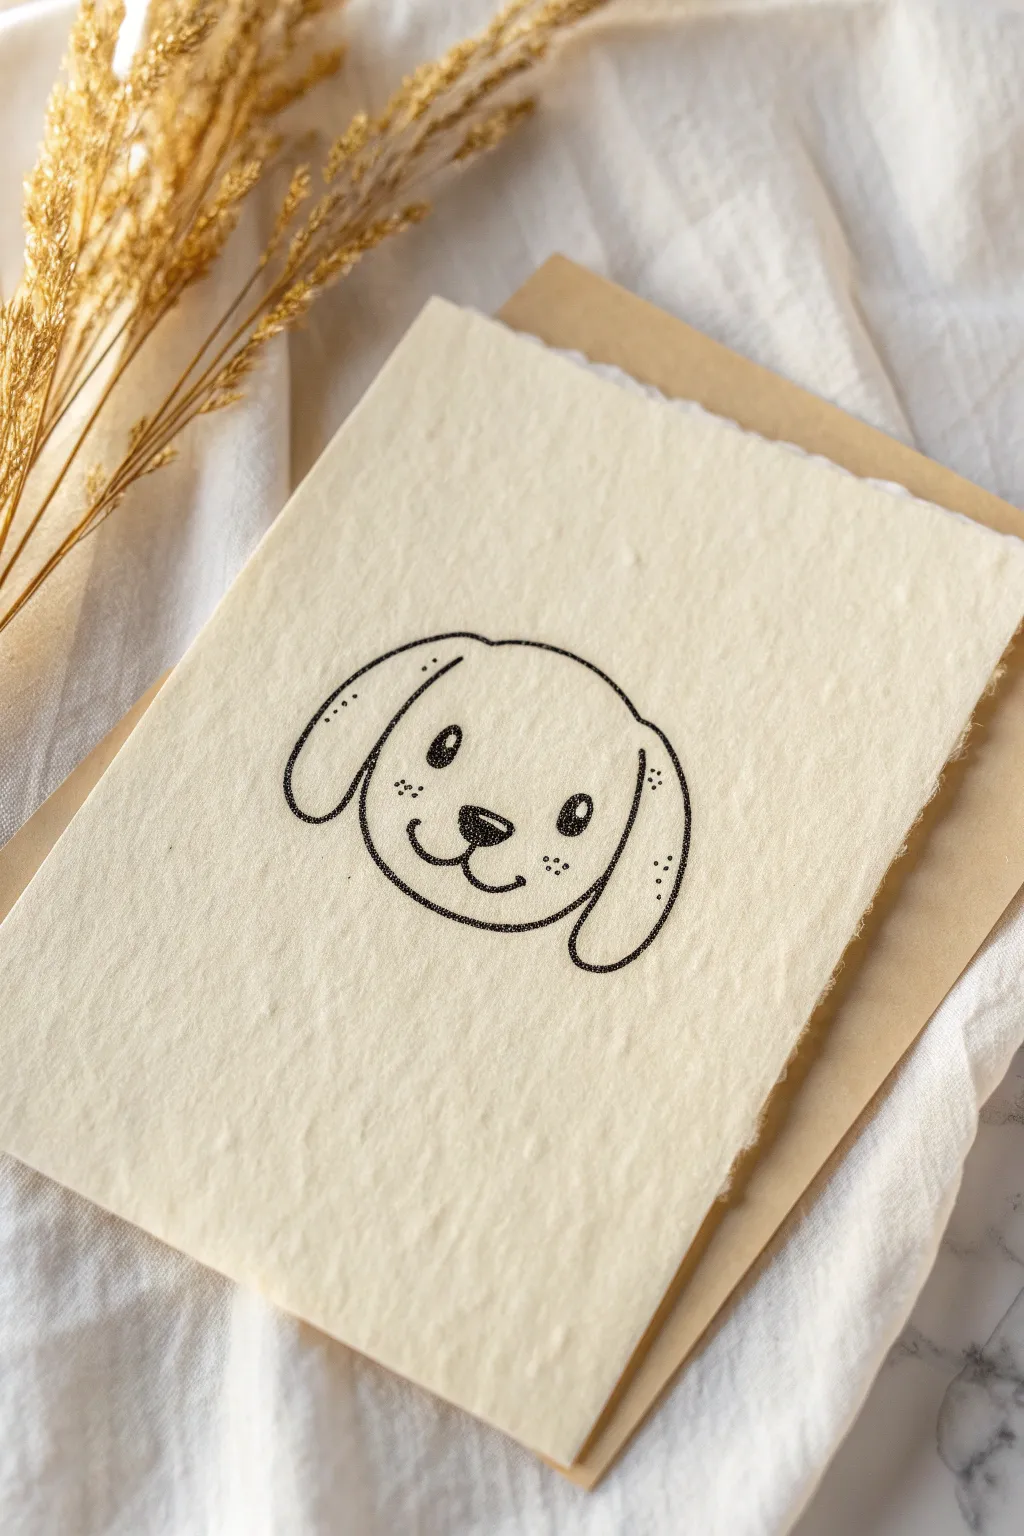
This charmingly simple puppy face captures sweet character with just a few well-placed lines. Drawn on textured handmade paper, the clean black ink creates a beautiful contrast that feels both modern and hand-crafted.
Step-by-Step Tutorial
Materials
- Handmade or cold-press textured paper (cream or off-white)
- Fine-point drawing pen (0.3 or 0.5mm, black)
- Pencil (HB for sketching)
- Kneaded eraser
- Kraft paper envelope (optional, for display)
Step 1: Planning the Face Shape
-
Establish the center:
Begin by lightly sketching a vertical centerline on your paper with a pencil to ensure the face stays symmetrical. -
Draw the main curve:
Pencil in a wide, gentle ‘U’ shape for the bottom of the puppy’s face. Keep the curve smooth and rounded. -
Sketch the top of the head:
Connect the sides of your ‘U’ shape with a broad, flattening arch across the top to complete the head outline.
Textured Paper Tip
When drawing on rough handmade paper, pull the pen toward you rather than pushing it away to prevent the nib from snagging on the fibers.
Step 2: Adding Features
-
Position the nose:
Sketch a small, rounded triangle in the lower third of the face. The top corners should be soft, not sharp. -
Draw the mouth:
From the bottom point of the nose, draw a tiny vertical line down, then sketch two curved lines branching out to the left and right to form a happy smile. -
Place the eyes:
Pencil in two ovals for eyes. Place them fairly wide apart, sitting just above the level of the nose. -
Outline the ears:
On the left side of the head, sketch a long, rounded ear shape that droops downward. It should start near the top of the head curve and hang lower than the chin line. -
Second ear:
Repeat the ear shape on the right side. I find it helpful to look at the negative space between the ear and cheek to match the symmetry.
Greeting Card Idea
Glue your finished drawing onto a slightly larger piece of kraft cardstock to create a framed greeting card suitable for any occasion.
Step 3: Inking the Drawing
-
Trace the outline:
Using your fine-point black pen, carefully trace over your pencil lines for the head shape. Allow the textured paper to create slight imperfections in the line for a natural look. -
Ink the ears:
Go over the ear outlines. Notice how the ears overlap the side of the head slightly; keep your lines fluid. -
Fill the nose:
Outline the nose and color it in solid black, leaving a tiny crescent or dot of white near the top for a highlight. -
Ink the eyes:
Outline the eye ovals. Inside each, draw a smaller oval highlight in the upper corner, then fill the rest of the eye with black ink. -
Finalize the mouth:
Trace the mouth lines. You can make the lines slightly thicker at the bottom of the curves to imply depth.
Step 4: Adding Details
-
Add freckles:
Dot three or four tiny specks on each cheek area using the very tip of your pen. This adds instant cuteness. -
Texture on ears:
Add a few vertical dotted lines or small specks near the top and bottom of the ears to suggest fur texture without drawing individual hairs. -
Erase guidelines:
Wait at least 5 to 10 minutes for the ink to fully dry. Then, gently dab—don’t rub hard—with the kneaded eraser to lift away the pencil sketches. -
Final check:
Look for any lines that need reinforcing. On textured paper, sometimes the ink skips, so you might need to re-trace distinct areas like the jawline.
Now you have an adorable, floppy-eared friend ready to be framed or gifted on a card


Chubby Bunny With Tiny Paws

This charming project features a chubby white bunny standing curiously on tiny paws, rendered with delicate ink lines and soft watercolor washes. The heavy, deckle-edged paper adds a beautiful, rustic texture that elevates this simple, sweet illustration into a lovely piece of art.
How-To Guide
Materials
- Cold press watercolor paper (deckle edge preferred)
- Fine liner pen (waterproof, black, size 01 or 03)
- Watercolor paints (Light Brown, Pink, Red)
- Small round watercolor brush (size 2 or 4)
- Mechanical pencil and eraser
- Jar of clean water
- Paper towel
Step 1: Sketching the Shape
-
Head and Body:
Start by lightly sketching a rounded pear shape for the bunny’s body. The top circle will be the head, slightly smaller than the rounded bottom for that cute, chubby look. -
Adding Ears:
Draw two long, rounded ears extending from the top of the head. Position the front ear standing straight up and the back ear slightly angled for dimension. -
The Tiny Paws:
Sketch two very small, U-shaped curves near the chest for the front paws. They should look suspended, as if the bunny is standing up. Add rounded feet at the base of the pear shape. -
Face and Tail:
Place a small circle for the eye and a tiny Y-shape for the nose and mouth. Finish the sketch with a fluffy, cloud-like tail at the bottom rear. -
Berry Sprig:
On the left side of your bunny, lightly draw a simple vertical line with a few short branches for the decorative plant.
Ink Smearing?
If your black pen smears when you apply watercolor, it isn’t waterproof. Stop and switch to a pigment micron pen or let the ink dry for 24 hours first.
Step 2: Inking the Outline
-
Tracing the Main Lines:
Using your waterproof fine liner, carefully trace over your pencil lines. Keep your hand relaxed to achieve a slightly organic, imperfect line quality. -
Creating Texture:
Instead of a solid continuous line, break the line slightly in areas like the cheeks or chest to suggest soft fur. Add small, jagged zig-zags on the back of the neck. -
Facial Details:
Fill in the eye completely black, leaving a tiny white dot for a highlight sparkle. Add three long, sweeping whiskers on each side of the snout. -
Final Ink Touches:
Draw small circles at the ends of your plant branches for berries. Add a few tiny dots on the bunny’s belly for extra texture. -
Prepare for Paint:
Wait at least five minutes for the ink to fully cure, then gently erase all visible pencil marks.
Make It Wintery
Switch the berry sprig for a tiny pine branch or a holly leaf, and add a light blue wash behind the bunny for a snowy, festive atmosphere.
Step 3: Watercolor Washes
-
Blushing Ear:
Dilute a small amount of pink paint with plenty of water. Gently apply this wash to the inside of the back ear, fading it out before it hits the black outline. -
Grounding Shadow:
Mix a watery light brown or beige. Paint a horizontal, organic brushstroke under the bunny’s feet to create the ground. I prefer to let the brush skip slightly over the paper’s texture here. -
Berry Pops:
Using a more concentrated red or deep pink, carefully dab color onto the small berry circles on the sprig. -
Subtle Shading:
With extremely watered-down grey or brown, add a barely-there shadow under the bunny’s chin and along the bottom curve of the belly to specify volume. -
Stem Work:
With a very fine tip and brown paint, re-trace the stem of the plant if you want it softer than the black ink, or simply leave it as ink.
Now you have a sweet woodland friend ready to frame or give as a greeting card


Tiny Kawaii Hearts in a Cluster

Fill your journal page with a sweet collection of blushing, smiling hearts that radiate happiness. This simple doodle layout combines gentle pastel pinks with bold black outlines for a charming, sticker-like aesthetic.
How-To Guide
Materials
- Dot grid journal or white sketchbook paper
- Black fine liner pen (0.3mm or 0.5mm)
- Pastel pink marker or brush pen
- Red marker or gel pen
- White gel pen (optional for highlights)
- Pencil and eraser (for sketching)
Step 1: Sketching the Layout
-
Establish the center:
Begin by lightly sketching a medium-sized heart right in the middle of your page with a pencil. This will serve as the anchor for the rest of your cluster. -
Add surrounding hearts:
Sketch about 6-8 more hearts of varying sizes around the central one. Try to angle them slightly differently—some tilting left, some right—to create a bouncy, floating effect rather than a rigid grid. -
Incorporate tiny filler elements:
In the empty spaces between the larger hearts, pencil in tiny hearts, small five-petal flowers, and little circles or sparkles to balance the composition.
Smudged Ink?
If your black outline smears when coloring, switch to waterproof fineliners like microns, or color the pink shapes first and outline them last.
Step 2: Inking the Details
-
Outline the main shapes:
Using your black fine liner, carefully trace over your pencil lines for all the heart shapes. Make sure to close your lines neatly for a crisp look. -
Draw the faces:
Choose about half of the larger hearts to be ‘characters.’ For these, draw simple faces using the fine liner. Wide-set eyes (dots or tiny curved lines) work best for the kawaii style. -
Sketch the smiles:
Add tiny, shallow ‘u’ shapes for mouths between the eyes. Place the mouth slightly higher up, closer to the eyes, to maximize cuteness. -
Ink the floral doodles:
Go over the small flowers found in the gaps. Give them simple rounded petals and a small center dot. -
Erase pencil marks:
Once the ink is completely dry—give it a minute to avoid smudges—gently erase all your underlying pencil sketches.
Make it Pop
Use a light gray marker to add a simple drop shadow to the right side of each heart. It instantly makes the doodles look like 3D stickers.
Step 3: Adding Color & Pattern
-
Color the solid hearts:
Pick a few hearts to fill in completely with your pastel pink marker. I like to choose ones that don’t have faces for these solid blocks of color. -
Create patterned hearts:
For one or two hearts, color them pink first, then let them dry. Once dry, use a white gel pen to add tiny polka dots or stripes on top for texture. -
Color the blushing cheeks:
On the hearts with faces, use a red or deep pink pen to draw tiny ovals or dashes just below the eyes to give them rosy cheeks. -
Fill the accent hearts:
Locate the tiniest hearts scattered in the background and color them in solid red for a pop of contrast against the lighter pinks. -
Add final sparkle:
Draw tiny black dots, small circles, and little ‘sparkle’ stars (cross shapes) in the remaining white space to make the whole cluster feel magical and finished.
Now you have a lovely page of cheerful hearts ready to brighten up your journal spread

PENCIL GUIDE
Understanding Pencil Grades from H to B
From first sketch to finished drawing — learn pencil grades, line control, and shading techniques.
Explore the Full Guide
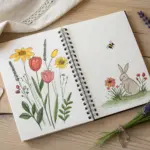
Flower Doodles Made of Five Petals

This charming sketchbook page features three simple floral doodles, each with its own distinct personality and height, creating a balanced and cute botanical composition. The clean ink lines against creamy paper make for a relaxing drawing exercise that emphasizes simple shapes and patterns.
Step-by-Step Tutorial
Materials
- Fine-liner pen (black, size 0.3 or 0.5)
- Sketchbook or drawing paper
- Pencil (optional, for drafting)
- Eraser
Step 1: The Tallest Bloom
-
Draw the center:
Start near the top right of your page by drawing a small circle. This will be the face of your main flower. -
Add the face:
Inside that circle, draw two tiny dots for eyes and a small caret symbol (like an upside-down ‘v’) for a mouth to give it a concerned or shy expression. -
Create the border:
Draw a scalloped edge around the inside perimeter of the face circle to create a textured border. -
Form the petals:
Draw five fluffy, rounded petals evenly spaced around the center circle. Keep them soft and roughly the same size. -
Draw the stem:
Pull a long, slightly curved line straight down from the bottom petal to the bottom of the page. -
Add first leaves:
Draw two almond-shaped leaves branching out from the stem about halfway up. Angle them upward. -
Add lower leaves:
Draw two more pairs of similar almond-shaped leaves further down the stem, spacing them out evenly. -
Detail the leaves:
Draw a central vein line down the middle of each leaf, then add small diagonal lines (hatching) on one side of the vein to create shading and texture.
Ink Confidence
Don’t connect lines perfectly. Small gaps where petals meet the center or where leaves meet stems add a relaxed, hand-drawn charm.
Step 2: The Little Daisy
-
Position the second flower:
To the left of the tall flower, start a new flower head about two inches lower than the first one. -
Draw the center:
Create a simple circle for the center of this bloom. -
Stipple the texture:
Fill this center circle with tiny dots (stippling) to make it look dark and textured, like pollen. -
Add petals:
Draw roughly six rounded petals around this center. These can be slightly smaller than the first flower’s petals. -
Draw the stem:
Draw a line downward for the stem, letting it cross slightly behind the leaves of the taller flower if they overlap, or just keep it parallel. -
Draw simple leaves:
Add a pair of leaves lower down on the stem. Make these simpler than the first set—just outlines with a central vein line, skipping the diagonal hatching on one side for variety, or hatch deeply on one half.
Add Some Color
Use watercolor pencils to lightly shade just the petals, then blend with a wet brush for a soft, dreamy look that doesn’t overpower the ink.
Step 3: The Berry Sprig
-
Start the sprig:
On the far left, draw a shorter, branching stem that reaches only about halfway up the page. -
Add branches:
From the main stem, draw two skinny Y-shaped branches splitting off toward the left. -
Draw the berries:
At the tips of the top branches, draw small solid black circles to represent berries or buds. -
Add foliage:
On the lower branches and base of the stem, draw small, simple teardrop leaf shapes in groups of three to fill out the bottom of the plant.
Now you have a sweet garden trio filling your page with personality
Smiling Clouds With Raindrops
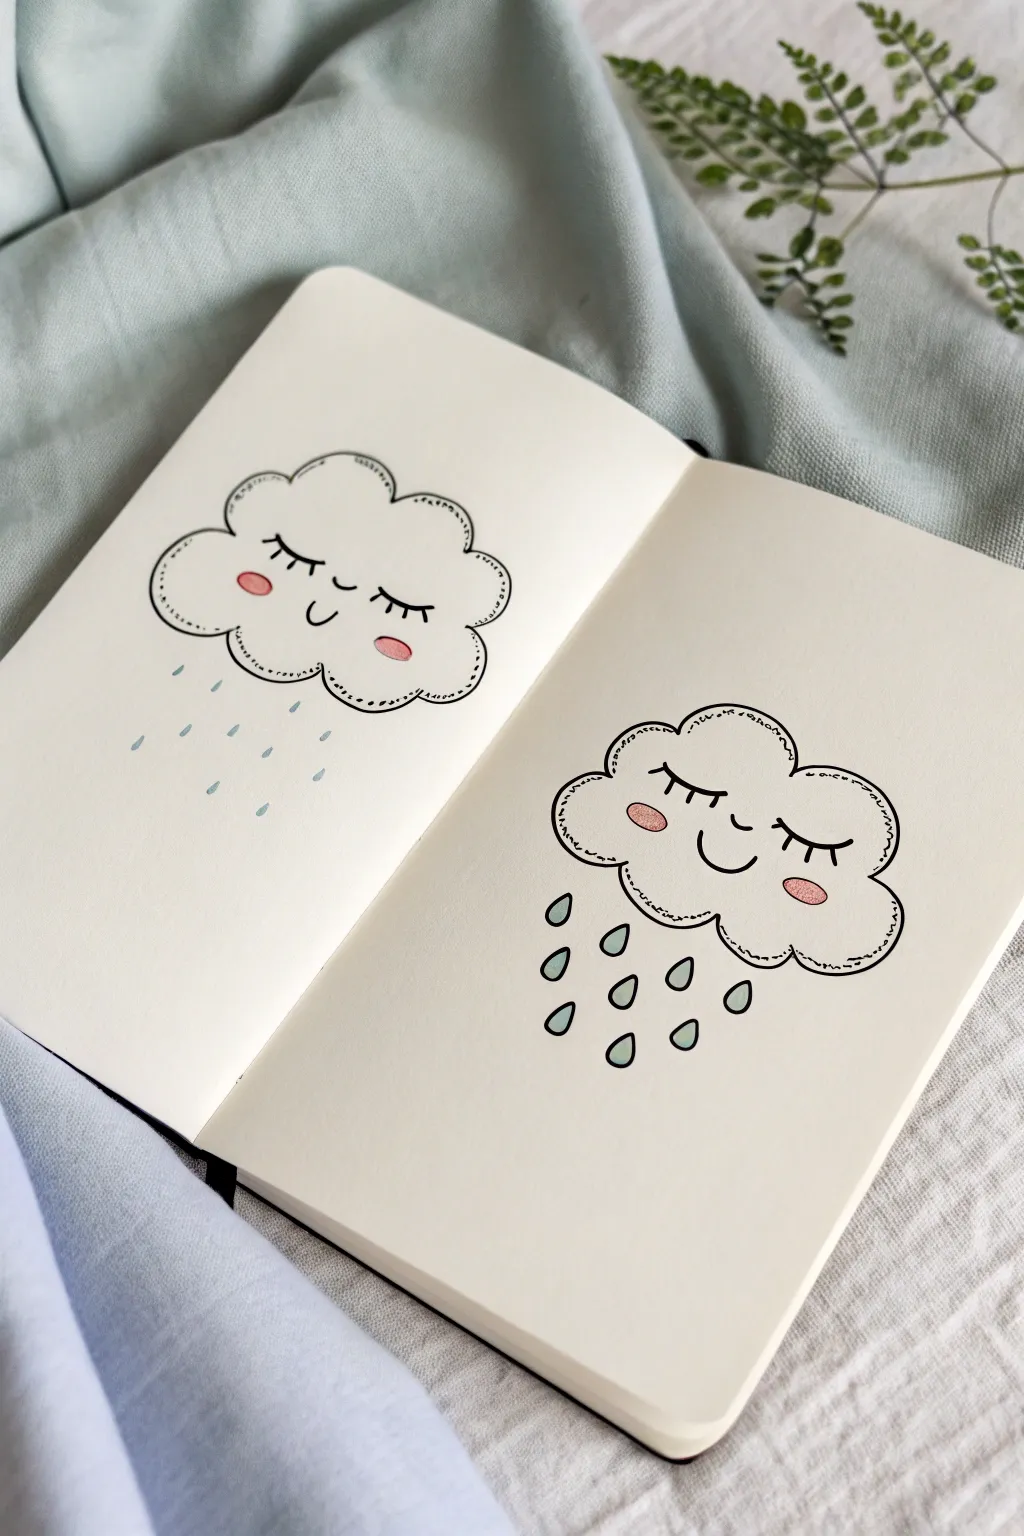
Brighten up your sketchbook with this adorable pair of smiling rain clouds, perfect for adding a cozy touch to your journal. These simple doodles combine soft, fluffy outlines with playful expressions and distinct raindrop styles for a charming, minimalist look.
How-To Guide
Materials
- Sketchbook or drawing paper
- Pencil (HB or H)
- Eraser
- Fine liner pen (black, 0.3mm or 0.5mm)
- Light blue marker or colored pencil
- Pink marker or colored pencil
Step 1: Drawing the Base Shapes
-
Position your clouds:
Visualize the center of each page in your open sketchbook to decide where your clouds will sit. Aim for the top half of the page to leave room for the rain below. -
Sketch the left cloud outline:
Using a pencil, lightly draw a fluffy cloud shape on the left page. Create about five or six distinct bumps, keeping the bottom edge relatively flat but still curved. -
Sketch the right cloud outline:
Repeat the process on the right page, making this cloud slightly wider or more irregular for variety gently pressing with your pencil so lines are easy to erase later. -
Refine the shapes:
Look at your pencil sketches. Adjust the curves to make them look soft and puffy, erasing any harsh angles until you are happy with the silhouette.
Step 2: Inking the Details
-
Ink the main outlines:
Take your black fine liner and carefully trace over your pencil lines. Use a steady hand to create a clean, continuous line for the cloud’s perimeter. -
Add the dashed interior:
Inside the main outline, draw a second, inner border using small dashed lines. Keep this dashed line parallel to the outer edge, maintaining a consistent gap all the way around. -
Draw the sleeping eyes:
In the center of the cloud, draw two small, downward-curving arcs for closed eyes. Add three tiny lashes to the outer corner of each eye for a sleepy look. -
Add a smile:
Place a small, U-shaped curve right between and slightly below the eyes to create a happy little smile. -
Repeat for the second cloud:
Ink the outline, dashed inner border, and facial features on the right-hand cloud just like you did for the first one. -
Erase pencil marks:
Allow the ink to dry completely for a minute, then gently erase all the underlying pencil sketches to clean up your drawing.
Clean Lines
When drawing the dashed inner border, rotate your sketchbook as you go. This helps keep your hand at a comfortable angle and ensures the spacing remains consistent.
Step 3: Adding Color and Rain
-
Rosy cheeks:
With a pink marker or colored pencil, draw a small oval on each cheek, just underneath the eyes. Color them in solidly for a sweet, blushing effect. -
Draw subtle rain (Left Page):
For the left cloud, use your light blue marker to make rows of tiny vertical dashes. Stagger them slightly to mimic a gentle drizzle falling from the cloud base. -
Draw teardrop rain (Right Page):
For the right cloud, draw larger, teardrop-shaped outlines using a fine black pen. Arrange them in a loose, falling pattern beneath the cloud. -
Color the teardrops:
Fill in the teardrop shapes with your light blue marker or pencil. If using marker, a single quick stroke usually fills the shape nicely. -
Check the balance:
Step back and look at your spread. If the rain looks too sparse on either side, add a few more dashes or drops to balance the composition.
Add Some Sparkle
For a magical touch, use a white gel pen to add tiny highlight dots on the pink cheeks or inside the blue raindrops to make them look shiny and wet.
Now you have a charming weather-themed spread to look back on whenever you need a smile
BRUSH GUIDE
The Right Brush for Every Stroke
From clean lines to bold texture — master brush choice, stroke control, and essential techniques.
Explore the Full Guide
Happy Sun With Simple Rays
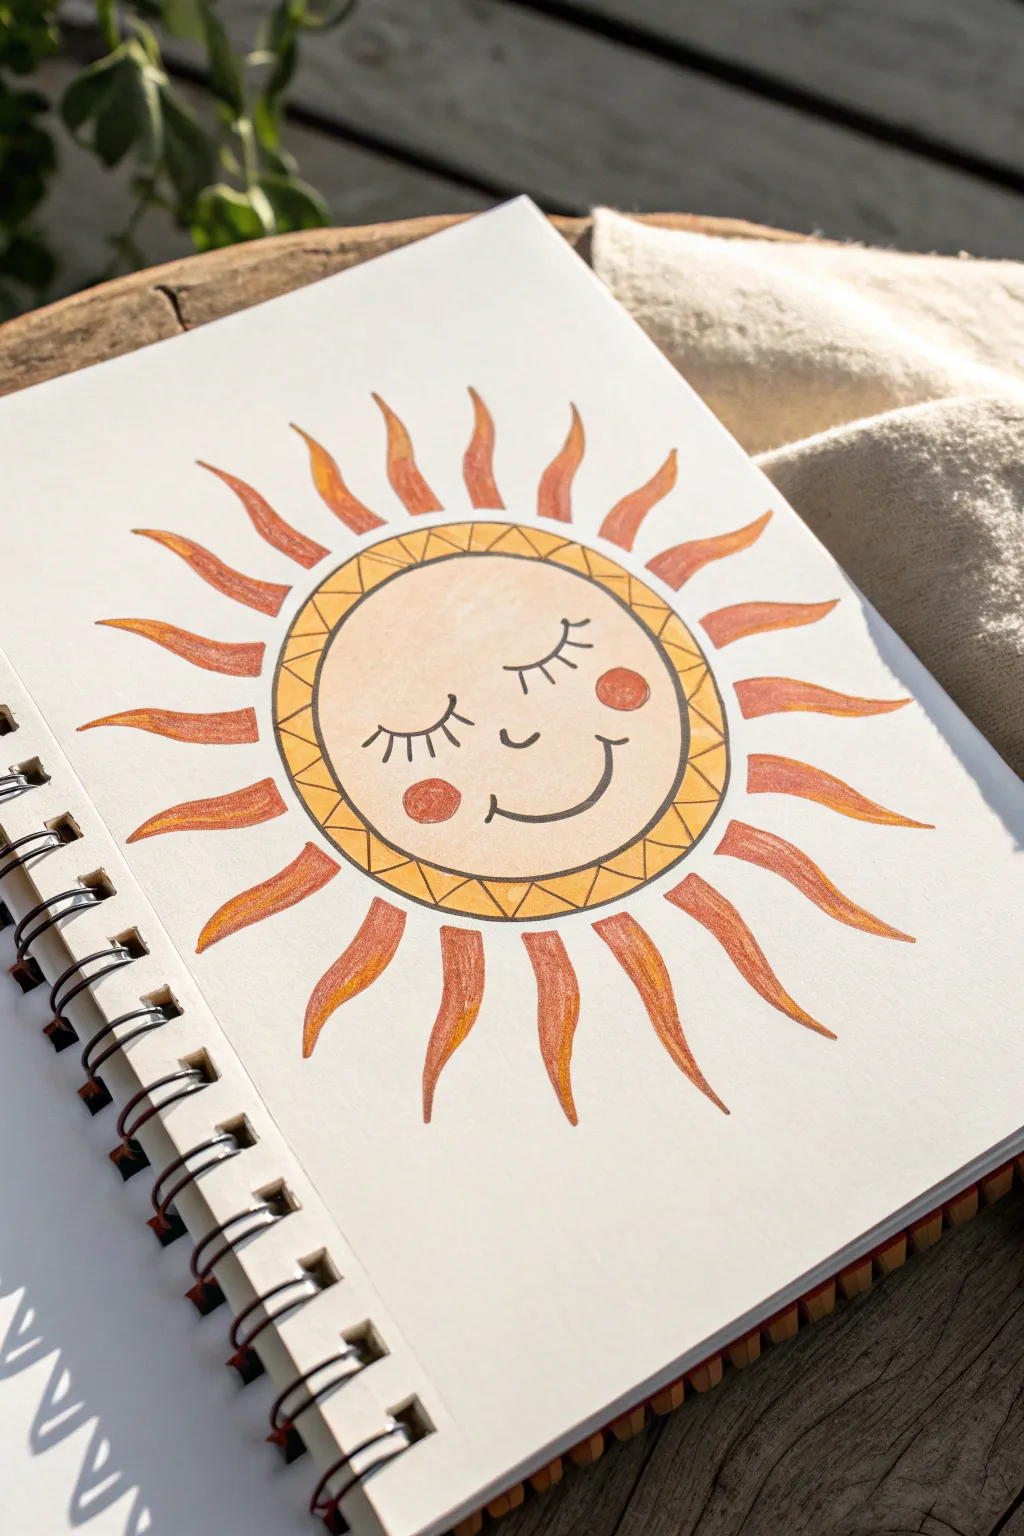
Brighten up your sketchbook with this cheerful, sunny face featuring warm, gradient rays and a sweet expression. It has a lovely boho vibe thanks to the soft colors and simple geometric patterns.
Step-by-Step
Materials
- Sketchbook or quality drawing paper
- Pencil (HB)
- Black fine liner pen (01 or 03 size)
- Colored pencils or markers (Mustard yellow, bright orange, blush pink/soft red, beige)
- Eraser
- Circle template (optional, like a jar lid or compass)
Step 1: Drawing the Base Structure
-
Outline the face:
Begin by drawing a perfect circle in the center of your page. You can freehand this if you feel confident, but tracing around a small bowl or using a compass guarantees a smooth shape. -
Add the border ring:
Draw a second, slightly larger circle around the first one. Keep the spacing consistent all the way around, creating a ring about 1cm wide. -
Create the zig-zag pattern:
Inside that ring you just created, draw a continuous zig-zag line. The points of the zig-zags should touch both the inner and outer circle lines, forming a series of triangles.
Gradient Magic
When coloring the rays, layer yellow first, then add orange at the bottom. The colors blend smoother when lighter goes down before darker.
Step 2: Adding the Face
-
Sketch the eyes:
In the upper half of the inner circle, draw two wide, downward-curving arcs for the closed eyes. Space them evenly apart. -
Add eyelashes:
Draw three small vertical lines coming off the top of each eye arc to create cute eyelashes. -
Draw the nose and mouth:
Just below the eyes, add a tiny ‘u’ shape for a button nose. Underneath that, draw a wider, gentle curve for a happy smile. -
Close the smile:
Add tiny ticking lines at the ends of the smile to give it distinct cheek dimples. -
Sketch the cheeks:
Draw two small circles on either side of the smile for rosy cheeks.
Step 3: Designing the Rays
-
Mark ray positions:
Lightly mark points around the outer circle where you want your rays to go. This helps ensure you don’t run out of space later. -
Draw the first curve:
Start a ray by drawing a wavy line extending outward. The line should curve gently to the right like a flame. -
Complete the ray shape:
Draw a second line starting from the same base point but slightly spaced out, curving to meet the tip of the first line. It should look like a long, slender leaf or a flame tongue. -
Repeat around the sun:
Continue drawing these flame-like rays all around the sun. Try to keep them roughly the same length but allow for natural variation.
Make It Personal
Change the expression! Try open eyes with pupils, adding glasses, or even drawing different shapes for the rays like simple straight lines.
Step 4: Coloring and Inking
-
Ink the outlines:
Go over your pencil lines with a black fine liner. Use a steady hand for the circles and quick, confident strokes for the rays. -
Erase pencil marks:
Wait a moment for the ink to dry completely, then gently erase all the underlying pencil sketches. -
Color the face:
Use a beige or very pale orange pencil to color the main face area firmly, giving it a smooth, skin-tone like appearance. -
Fill the cheeks:
Color the two cheek circles with a blush pink or soft red to make them pop against the beige face. -
Color the border ring:
Color the background of the zig-zag ring with a mustard yellow. You can leave the triangles lighter or color them in—I prefer coloring the whole ring a solid flat yellow. -
Define the ring pattern:
Go back with a slightly darker orange pencil and trace over the zig-zag pencil lines inside the yellow ring to make the pattern stand out subtly. -
Color the rays:
Fill in the rays using an orange pencil. Press harder at the base of the ray (near the circle) and lighter at the tip to create a nice gradient effect. -
Add ray details:
For extra dimension, take a yellow pencil and blend over the lighter tips of the rays, mixing it with the orange for a glowing look.
Now you have a warm, happy little piece of art to brighten your day
Rainbow With Cute Faces at the Ends
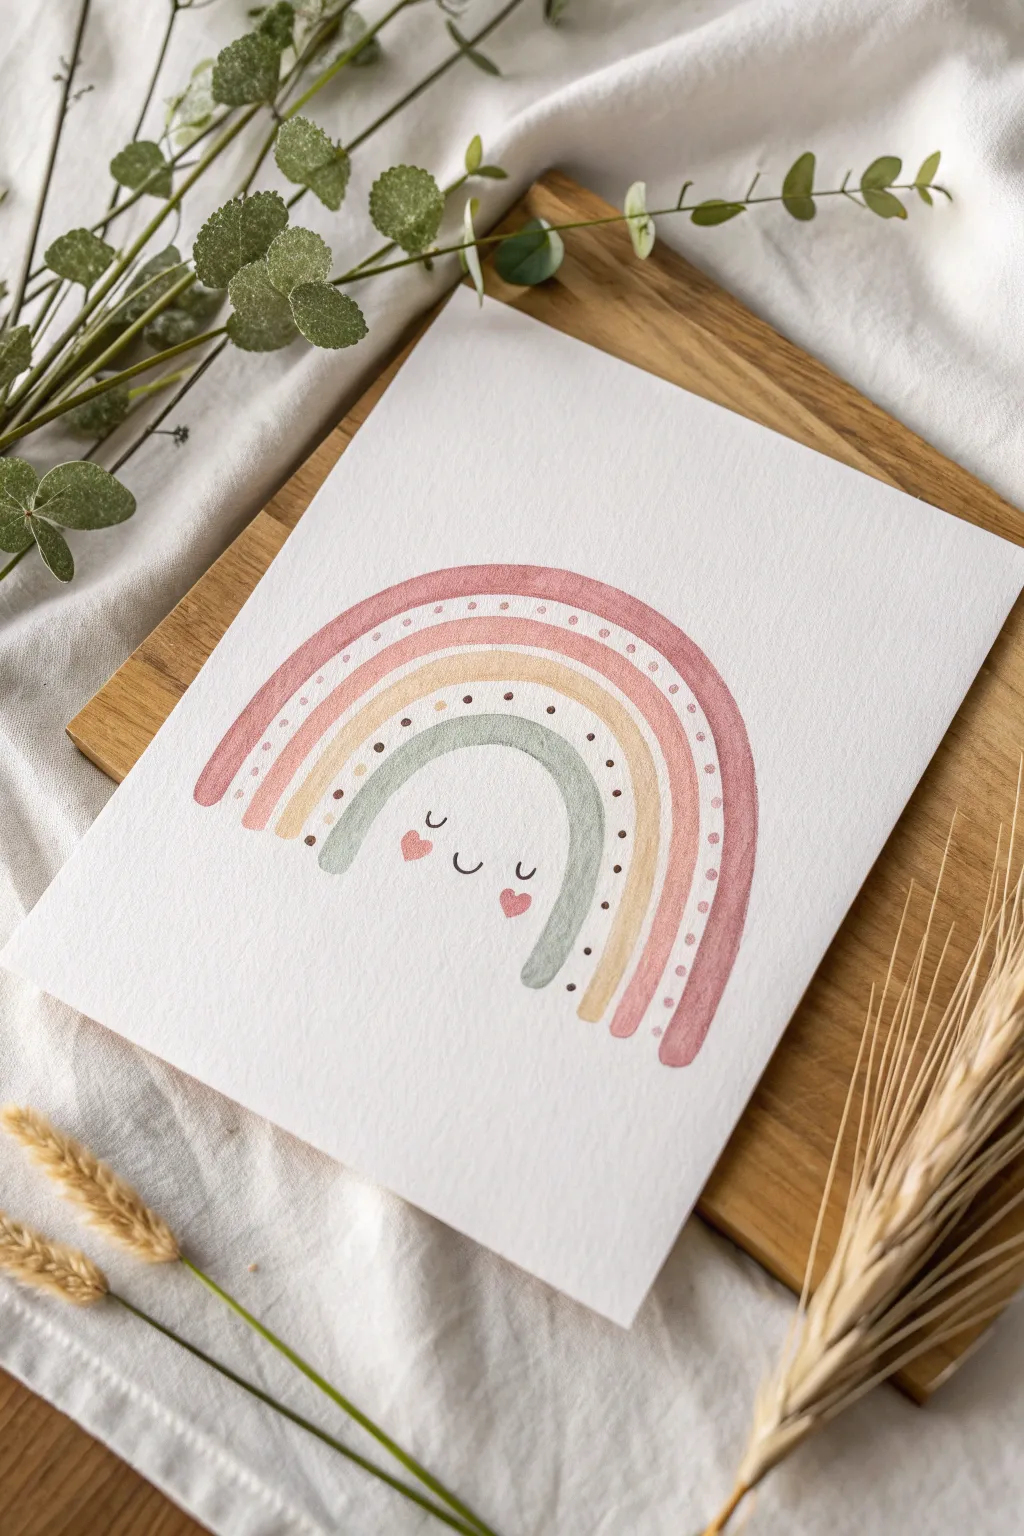
Create a soothing piece of nursery art with this gentle, muted rainbow painting. Featuring earthy tones and a sweet minimalist face, this project uses watercolor textures to bring warmth to any space.
Step-by-Step Tutorial
Materials
- Cold press watercolor paper (300 gsm)
- Watercolor paints (muted pink, peach, ochre yellow, sage green)
- Round watercolor brush (size 6 or 8)
- Small detail brush (size 0 or 1)
- Pencil and eraser
- Compass or round objects to trace
- jar of water
- Paper towels
Step 1: Sketching the Arches
-
Mark the center:
Find the center of your watercolor paper and make a tiny, faint dot near the bottom third. This will be the anchor point for your rainbow arches. -
Draw guide lines:
Using a compass or by lightly tracing circular objects, sketch four concentric semi-circles. Leave even spacing between each arch for the color bands to breathe. -
Lighten the sketch:
Before painting, take a kneaded eraser and gently dab over your pencil lines. You want them barely visible so the graphite doesn’t muddy your beautiful watercolors later.
Step 2: Painting the Bands
-
Mix the outer color:
Prepare a dusty rose or muted berry color. Ensure you mix enough water so the paint flows smoothly but retains pigment. -
Paint the first arch:
Using your medium round brush, paint the outermost arch following your guide line. Keep the edges soft and organic rather than perfectly sharp. -
Add texture detail:
While the first arch is drying, mix a slightly more concentrated version of the same dusty rose. Use the tip of your brush to add a row of small dots along the inner curve of this band. -
Mix the second color:
Create a soft peach or salmon tone. Test it on a scrap piece of paper to ensure it harmonizes with the dusty rose. -
Paint the second arch:
Paint the second band just inside the first, leaving a very thin sliver of white paper between them for separation. This negative space keeps the colors from bleeding into each other. -
Mix the third color:
Prepare a warm yellow ochre or mustard shade. This adds that sunny, boho feel to the palette. -
Paint the third arch:
paint the third band, again leaving a tiny white gap. I like to keep my brush fairly wet here to encourage natural watercolor blooms. -
Add inner dots:
Using a dark brown or deep grey mix, take your detail brush and paint tiny dots along the inner curve of the yellow band. Space them evenly for a rhythmic look. -
Mix the final color:
Mix a calming sage green. It should be muted and earthy, not bright neon green. -
Paint the inner arch:
Paint the smallest, innermost arch with the sage green. Round off the bottom ends of this arch slightly to make them look soft and friendly.
Pro Tip: Texture Magic
For that grainy, vintage look, use cold-press paper. The textured surface catches pigment in the valleys makes the painting feel more organic.
Step 3: Adding the Cute Face
-
Dry completely:
Wait until the green arch is 100% dry. If the paper is cool to the touch, it’s still damp. Patience prevents smudging. -
Sketch the face:
Very lightly pencil in the face placement in the white space under the green arch. You’ll need three small ‘u’ shapes for the eyes and mouth, plus cheeks. -
Paint the eyes and mouth:
Using your smallest detail brush and black or dark grey paint, carefully trace over your pencil lines to create the sleeping eyes and smiling mouth. -
Add rosy cheeks:
Dip into your dusty rose mix again. Paint two small hearts or circles on either side of the smile for the cheeks. -
Final erase:
Once absolutely everything is bone dry, gently erase any remaining visible pencil marks to clean up your finished piece.
Troubleshooting: Bleeding Colors
If arches bleed together, you’re painting too fast! Let each band dry completely before starting the neighbor, or use a hair dryer to speed it up.
You can frame this sweet artwork for a nursery or scan it to make your own greeting cards


Simple Moon and Stars Doodle Set
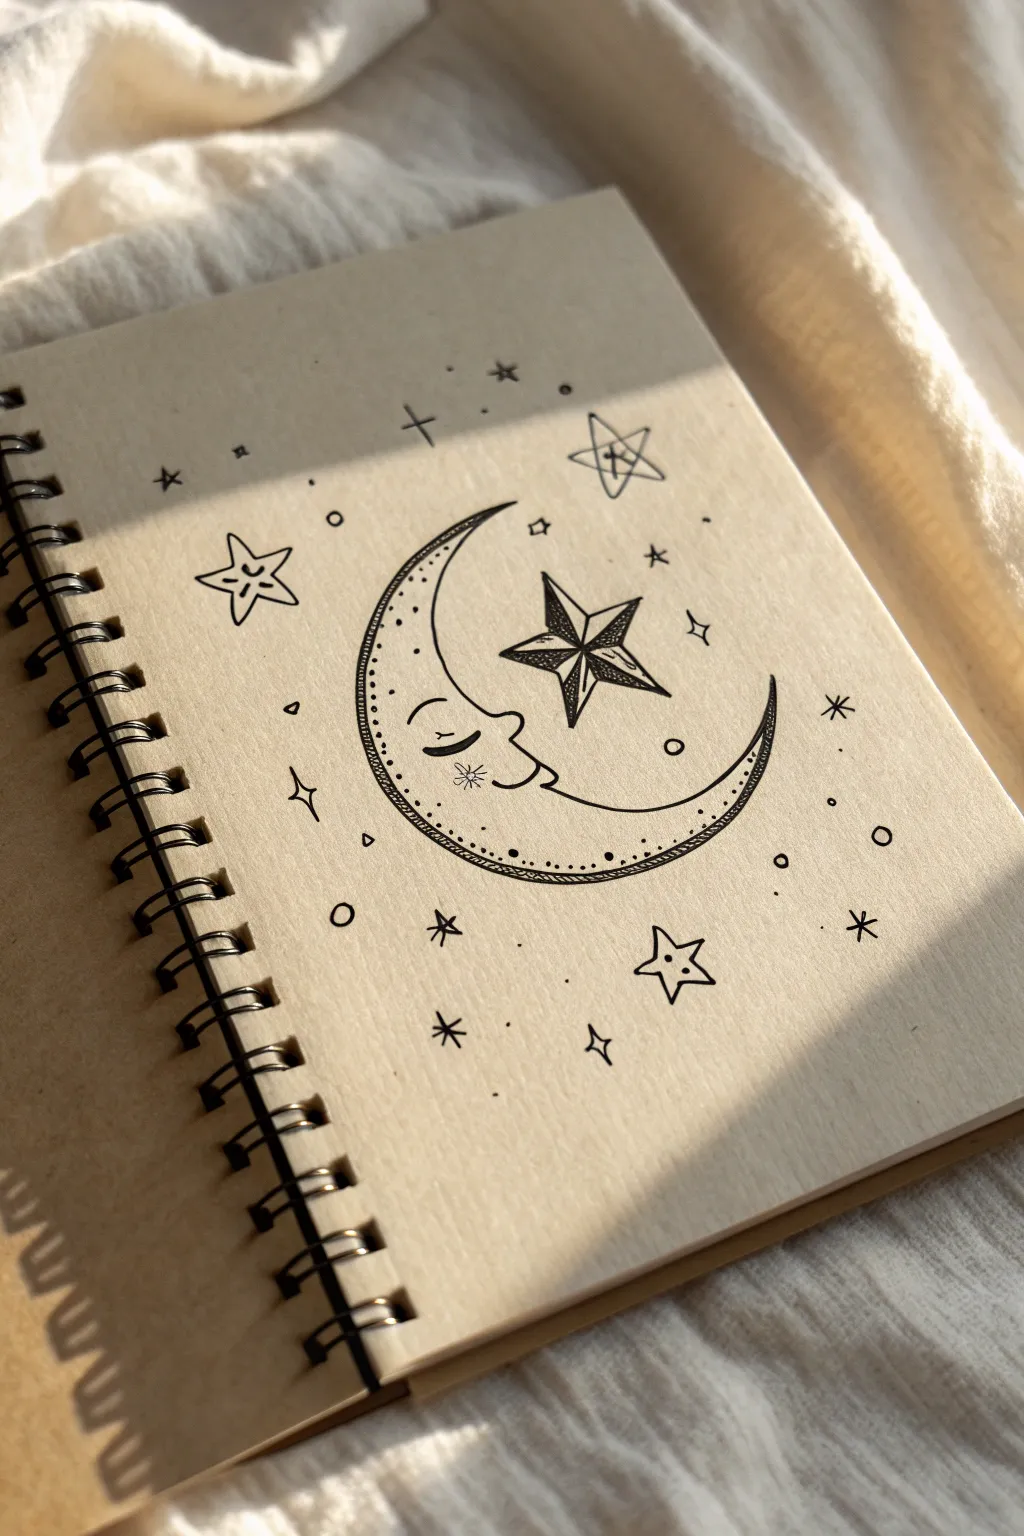
Capture the magic of the night sky with this charming celestial sketch. Using simple black ink on kraft paper creates a warm, vintage aesthetic that makes your doodle pop with personality.
How-To Guide
Materials
- Spiral-bound sketchbook with kraft / beige toned paper
- Fine liner pen (Black, preferably 0.3mm or 0.5mm nib)
- Pencil (HB or H for light sketching)
- Soft eraser
Step 1: Sketching the Base
-
Draft the moon shape:
Start by lightly sketching a large ‘C’ shape in the center of your page with a pencil. Make the curve smooth and give the moon a generous thickness, tapering to sharp points at the top and bottom. -
Add the face profile:
Along the inner curve, roughly halfway down, sketch a small bump for the nose. Below that, add a gentle curve for the smiling mouth. -
Outline the central star:
Draw a large, five-pointed star nestled right in the curve of the moon, between the nose and the top tip. One point should aim straight up.
Don’t Smudge!
Kraft paper is often more porous than white paper. Give your ink an extra 30 seconds to dry before your hand moves across it.
Step 2: Inking the Main Elements
-
Ink the moon outline:
Take your fine liner and trace over your pencil lines for the moon. Use a confident, continuous stroke for the outer curve to keep it smooth. -
Detail the face:
Carefully ink the nose profile and the mouth line. For the eye, draw a small, U-shaped curved line (like a sleeping eye) just above the nose level. Add two tiny lashes. -
Create the moon’s inner texture:
Draw a second line parallel to the outer curve of the moon, creating a thin border inside the shape. Inside this border, add a row of small dots all the way from top to bottom. -
Add the cheek detail:
Draw a tiny sunburst or asterisk symbol on the moon’s cheek for a cute blush effect. -
Ink the central star:
Outline your five-pointed star. To give it dimension, draw lines from the center point out to each inner crevice of the star spokes. -
Shade the star:
Fill in every other section of the star with hatching lines (closely spaced straight lines) to create a shadow effect.
Add Highlights
Use a white gel pen to add tiny highlights to the black inked areas or to draw extra white stars for contrast.
Step 3: Adding the Celestial Background
-
Draw the secondary stars:
Look at the negative space around the moon. Draw two or three medium-sized, five-pointed stars. I like to keep these hollow, with a smaller star shape drawn inside them. -
Add simple sparkles:
Draw several four-pointed stars (like diamonds with curved sides) scattered randomly. Keep these smaller than your main stars. -
Incorporate tiny elements:
Fill the remaining larger gaps with small open circles, simple crosses (+), and asterisks. -
Add floating dots:
Gently tap your pen to create tiny stardust dots in the emptiest areas. Vary the spacing so it looks natural and random rather than a grid. -
Erase guidelines:
Wait at least a minute for the ink to dry completely to avoid smudging. Then, gently erase all your initial pencil sketches.
Now you have a serene little piece of artwork perfect for journaling or a greeting card
Easy Butterfly With Symmetry Tricks
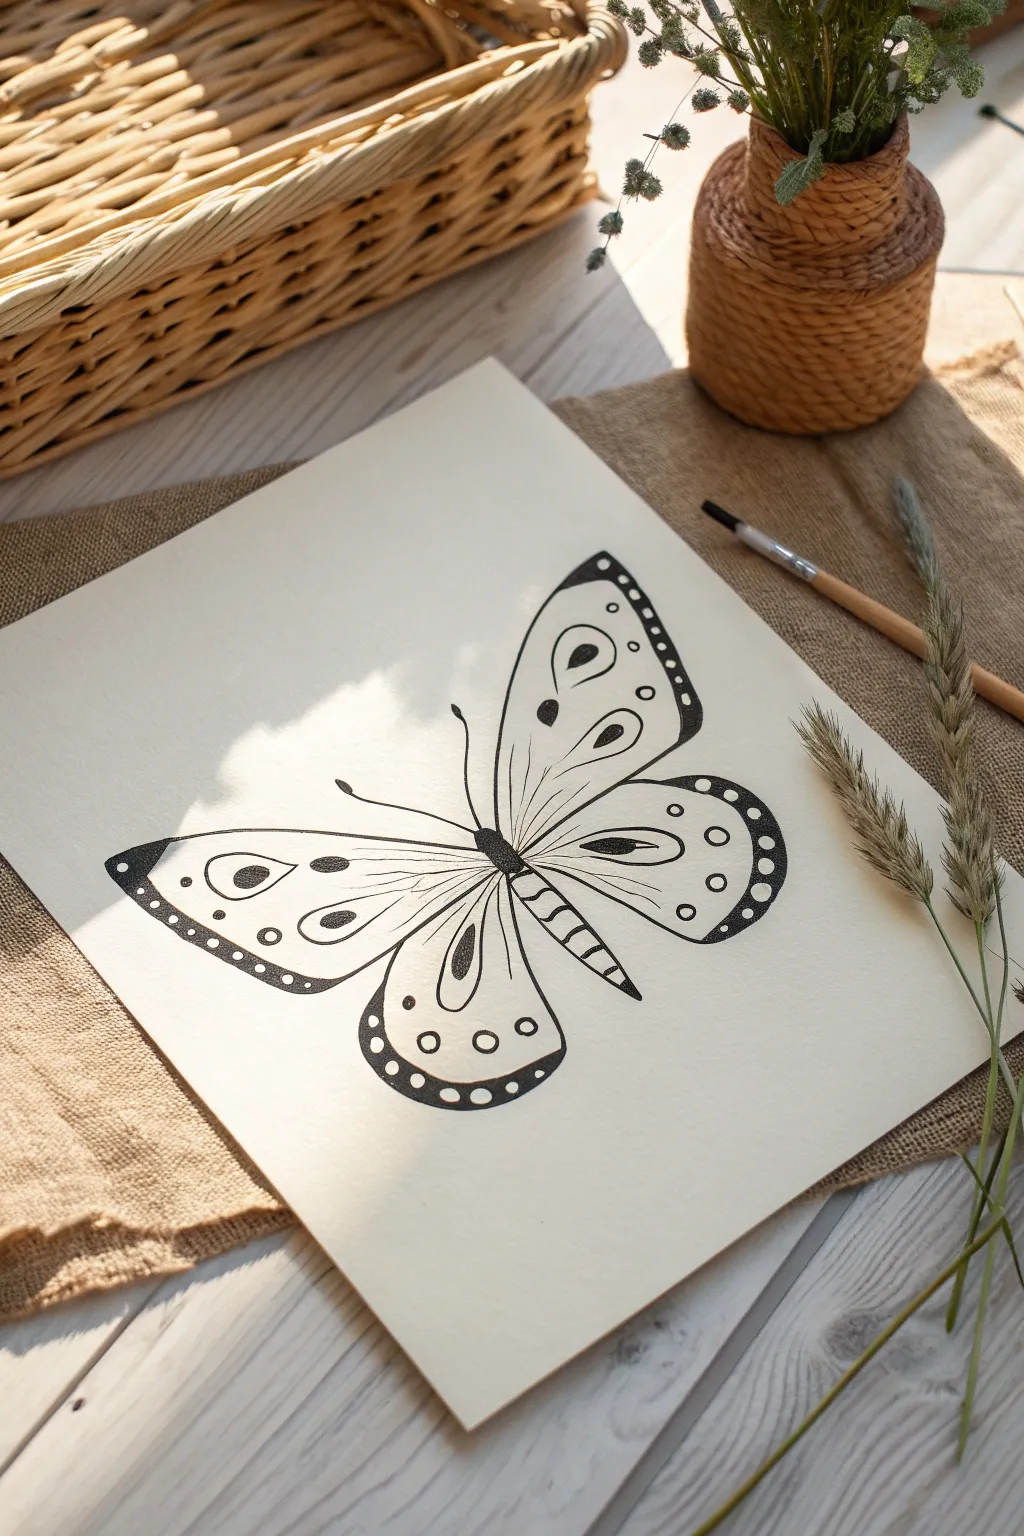
Create a charming, stylized butterfly illustration using simple black ink lines on textured paper. This project emphasizes bold symmetry and decorative patterns like dots and teardrops to bring a friendly insect to life.
Step-by-Step Guide
Materials
- Cream or off-white drawing paper (medium weight)
- Black fine liner pen (0.5mm)
- Black felt-tip marker or brush pen (for filling)
- Pencil (HB or 2B)
- Eraser
- Ruler (optional, but helpful for symmetry)
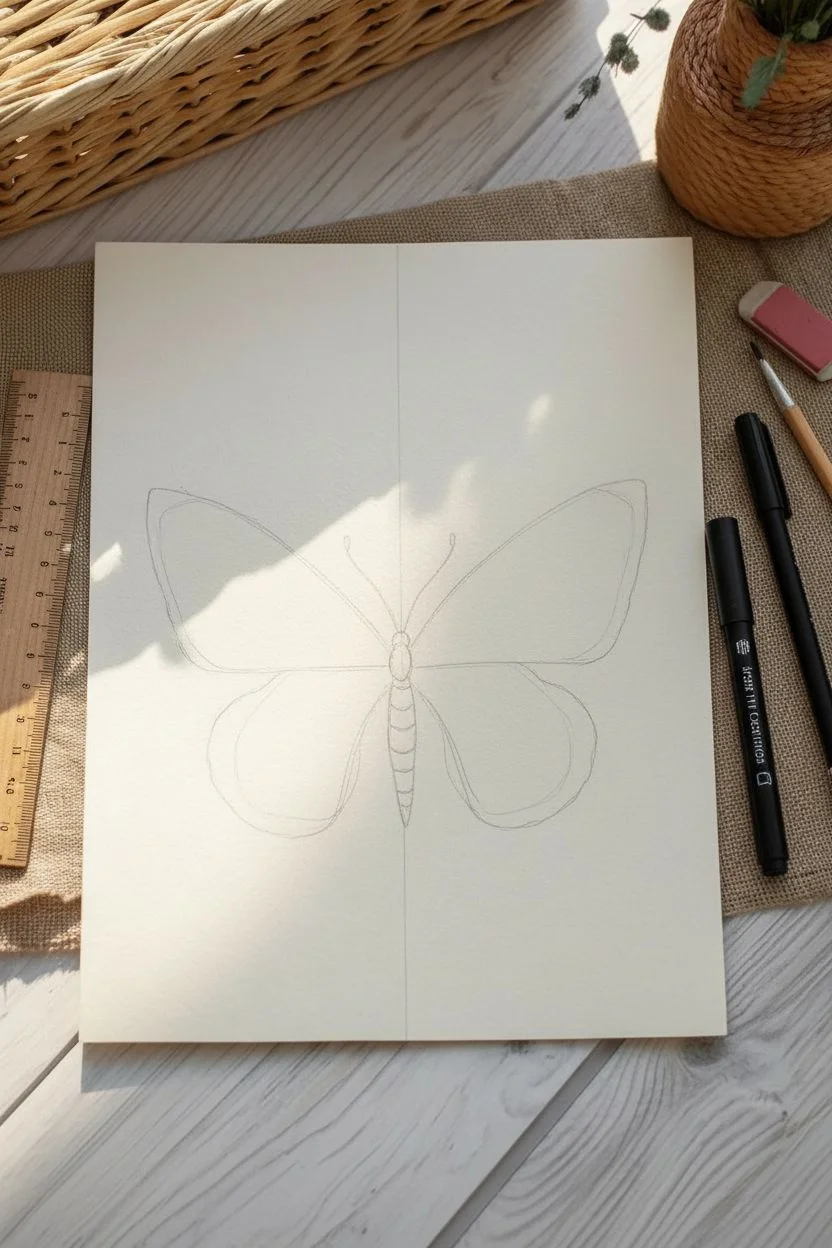
Step 1: Drafting the Outline
-
Mark the center:
Start by lightly sketching a vertical line down the center of your paper with a pencil. This will serve as the anchor for your butterfly’s body and ensure the wings stay relatively symmetrical. -
Sketch the body:
Draw the butterfly’s body along the center line. Create a small oval for the thorax (chest) and a long, tapering shape below it for the abdomen. Add a small rounded head at the top. -
Map the upper wings:
From the thorax, sketch two large, rounded triangular shapes extending outward and upward. These upper wings should be the largest part of the drawing, curving gently toward the top corners. -
Add lower wings:
Sketch two smaller, rounded lobes extending from the lower part of the body. These should tuck slightly under the upper wings to create a cohesive silhouette. -
Refine the shapes:
Go over your pencil sketch to smooth out the curves. I like to make the wing edges slightly wavy rather than perfectly rigid to give the butterfly a softer, organic feel.
Uneven Wings?
Don’t fret if symmetry isn’t perfect. If one wing is larger, thicken the outline on the smaller wing to balance the visual weight without redrawing.
Step 2: Inking and Patterning
-
Outline in ink:
Using your fine liner pen, carefully trace over the final pencil outline of the entire butterfly. Keep a steady hand, but don’t worry if lines aren’t perfectly straight—wobbles add character. -
Divide the wings:
Draw flowing veins inside the wings. Start from the body and sweep outward toward the wing edges, creating sections that will house your decorative patterns. -
Decorate the upper wings:
Inside the largest section of each upper wing, draw a prominent teardrop shape. Add a small solid black circle inside the wide part of the teardrop. -
Add decorative borders:
Create a distinct border along the outer edge of the upper wings by drawing a second line parallel to the edge. Fill this strip with small, evenly spaced circles. -
Fill the borders:
Use your thicker black marker to fill in the negative space around the small border circles, leaving the circles themselves white. This high-contrast detail makes the wings pop. -
Pattern the lower wings:
Mirror the border design on the lower wings. Draw the double line at the bottom edge, add the small circles, and fill the surrounding space with black ink. -
Detail the inner wings:
Add smaller decorative elements inside the wing veins, such as tiny dots, short dashes, or smaller teardrops. Keep the left and right sides roughly symmetrical. -
Stripe the abdomen:
Draw horizontal curved lines across the abdomen to segment it. Fill every other segment with black ink to create a striped appearance. -
Ink the thorax and head:
Color in the thorax completely black. For the head, leave it mostly white or add small eye details if you prefer a less stylized look. -
Draw antennae:
Sketch two long, slender antennae curving outward from the head. Top each one with a tiny, solid black dot.
Add Color Accents
Once the black ink is dry, use watercolors to lightly tint just the teardrop shapes or the white border circles for a subtle splash of color.
Step 3: Finishing Touches
-
Erase pencil marks:
Wait until the ink is completely dry to avoid smudging. Gently rub a clean eraser over the entire drawing to remove the initial pencil sketch and center line. -
Strengthen lines:
Look over your drawing and thicken any main outlines that look too thin. A slightly bolder perimeter line helps separate the butterfly from the background. -
Add shadows (optional):
For a bit of depth, use very fine hatching or stippling (tiny dots) near the body where the wings attach to suggest a slight curve.
Now you have a striking piece of butterfly art ready to be framed or gifted
Round Frog With Big Eyes
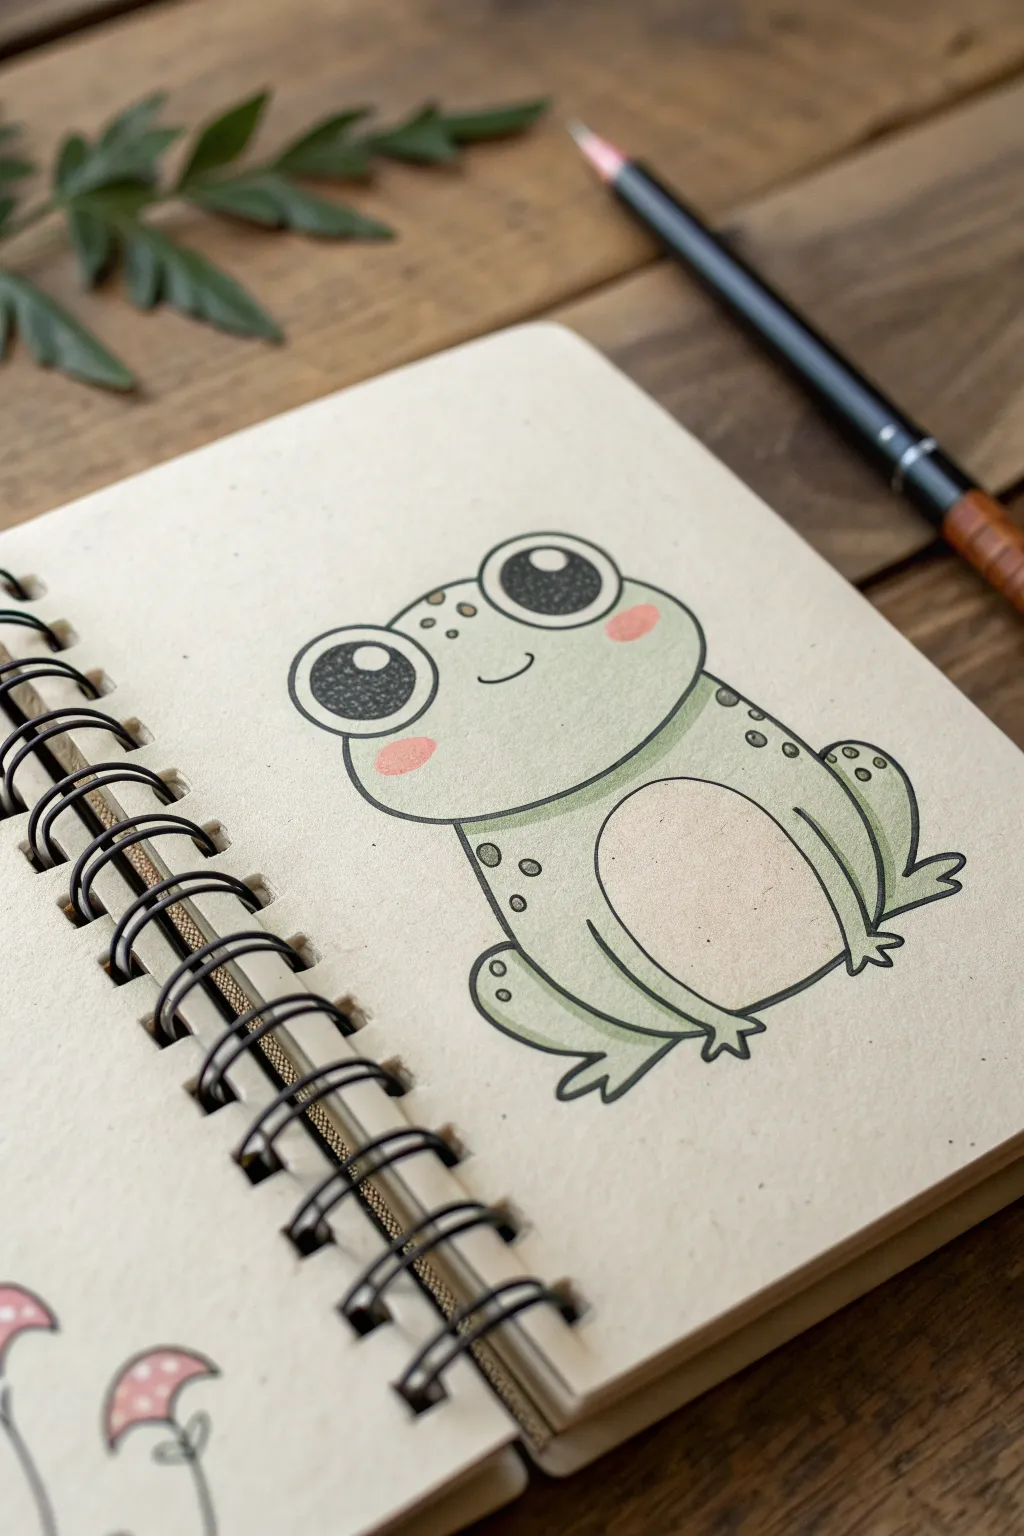
This charming little amphibian features big, soulful eyes and a wonderfully round body that makes it incredibly cute and easy to draw. With its soft green shading and simple lines, this project is perfect for adding a touch of whimsy to your sketchbook or journal.
Step-by-Step Guide
Materials
- Spiral-bound sketchbook (cream or off-white paper recommended)
- Black fineliner pen (0.3mm or 0.5mm)
- Pencil (HB for sketching)
- Eraser
- Light green marker or colored pencil
- Cream or beige marker/colored pencil
- Pink marker or colored pencil
- White gel pen (optional for extra highlights)
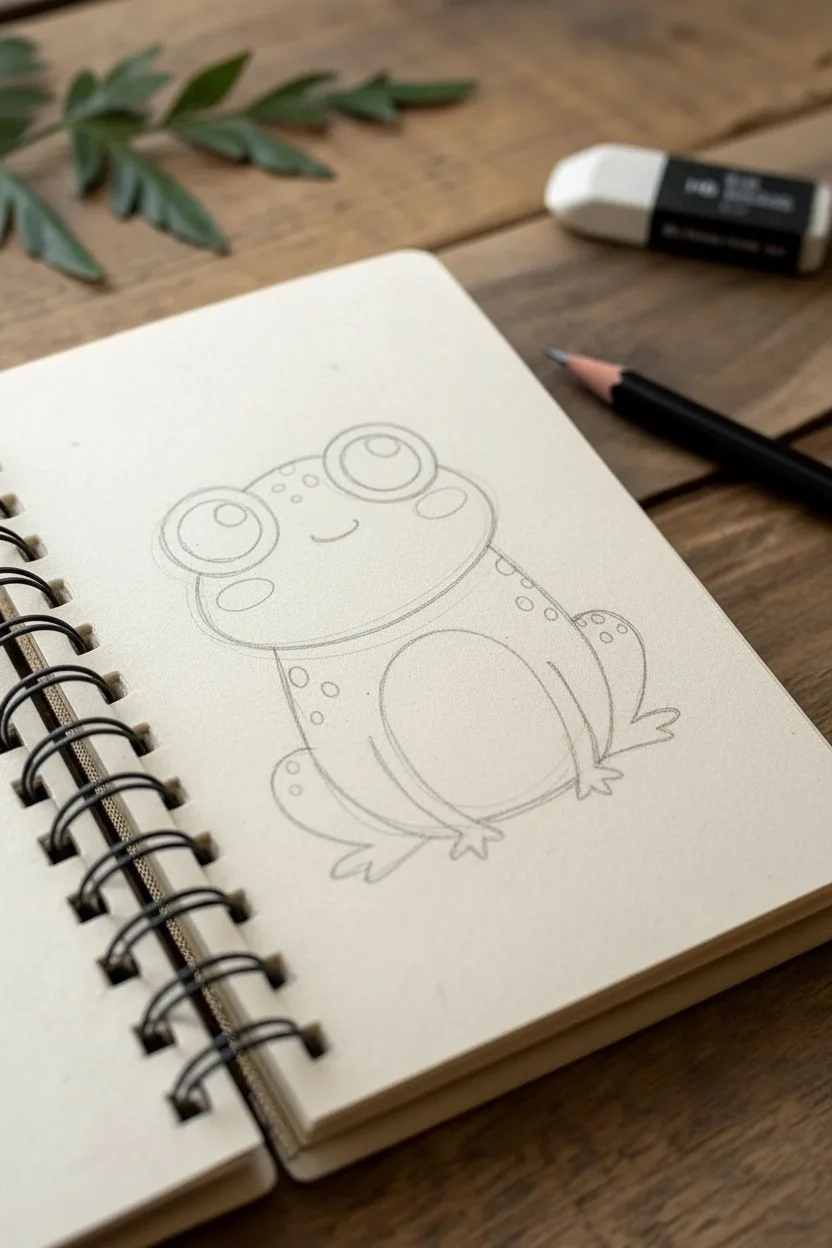
Step 1: Sketching the Base
-
Start with the eyes:
Begin by drawing two large circles near the top center of your page. These don’t need to be perfectly round; a slight oval shape adds character. Place them close together so they are touching or slightly overlapping. -
Outline the head:
Connect the two eye circles with a curved line underneath to form the bottom of the face. This line should be wide and gentle, creating the frog’s chubby cheek area. -
Draw the body shape:
From the sides of the head, draw two large curves coming down and inward, almost like you are drawing a large beanbag or a squashed circle. Connect them at the bottom with a flatter curve for the belly. -
Add the belly patch:
Inside the body outline, draw a large oval shape. This will be the lighter tummy area. Leave enough space between this oval and the outer body lines for the frog’s skin color.
Fixing Wobbly Lines
If your circle outlines aren’t perfect, thicken the line weight slightly on the uneven side. This disguises the wobble as a stylistic shadow choice.
Step 2: Details and Limbs
-
Sketch the front legs:
Drawing the front legs is simple; create two long, thin “U” shapes originating from the sides of the belly patch. At the bottom of each leg, add three small, pointy toes that splay outward. -
Add the hind legs:
For the back legs, draw a large curved line starting from the frog’s ‘hip’ area on each side. Curve it down towards the ground, then add the feet with three toes tucked right next to the front feet. -
Detail the face:
Inside the large eye circles, draw slightly smaller circles for the pupils. Leave a small white circle within each pupil specifically for the reflection or ‘catchlight’—this makes the frog look alive. Add a tiny, simple curved smile right between the eyes. -
Add texture spots:
Lightly sketch a few small circles on the frog’s back and sides to represent spots. Group them in threes or pairs for a natural, patterned look.
Eye Shine Tip
Make sure the white highlights in both eyes are facing the same direction (e.g., both top-right). This ensures the frog doesn’t look cross-eyed or confused.
Step 3: Inking and Coloring
-
Outline with fineliner:
Once you are happy with your pencil sketch, carefully go over the lines with your black fineliner. Use smooth, confident strokes. -
Fill the eyes:
Use the black pen or a thicker marker to fill in the pupils completely, being very careful to leave those white highlight circles empty. This high contrast is the most important part of the face. -
Erase pencil marks:
Wait a moment for the ink to dry fully to avoid smudging, then gently erase all the underlying pencil lines. -
Color the body:
Take your light green marker or pencil and color the main body, head, and legs. Keep the color soft and even. I personally like to leave the belly patch entirely uncolored for now. -
Color the belly:
Fill in the belly oval with a cream or very light beige tone. This subtle contrast gives the drawing dimension without being distracting. -
Add blush:
Draw small pink ovals on the cheeks, just below the outer corners of the eyes. This gives the frog its sweet, embarrassed expression. -
Fill the spots:
Take your green color again—or a slightly darker green if you have one—and fill in the small decorative spots on the back and legs. -
Final touches:
If you want the eyes to pop even more, add a tiny dot of white gel pen to the highlights to make them extra crisp.
Now you have a delightfully round frog buddy brightening up your sketchbook page
Slow and Sweet Snail Spiral
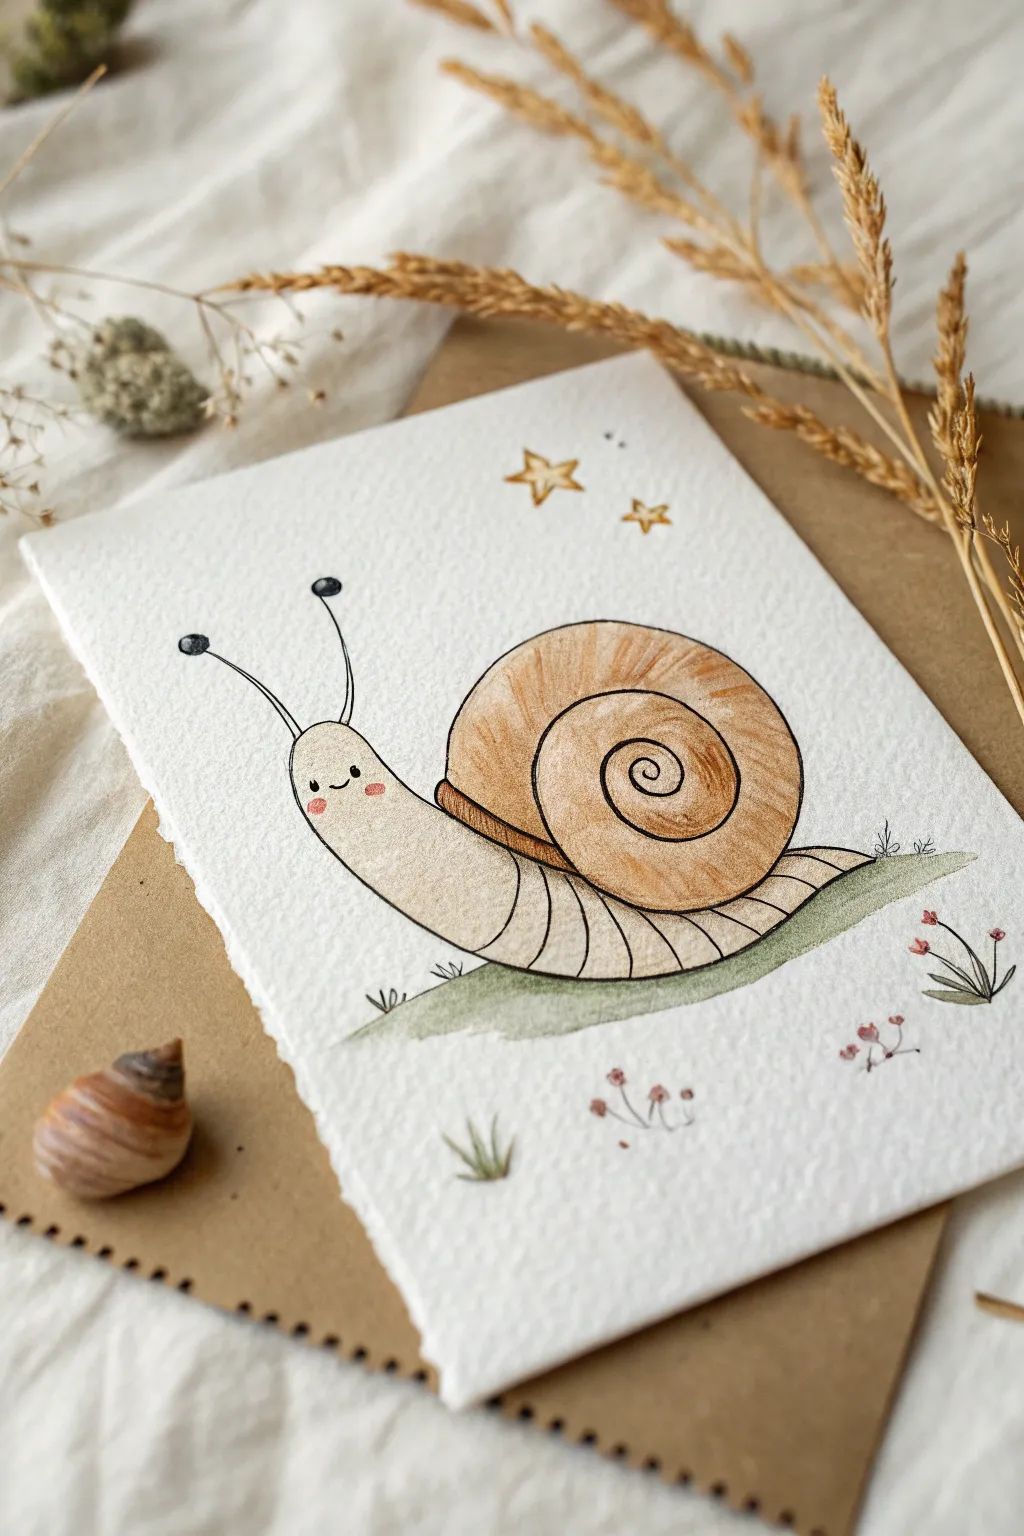
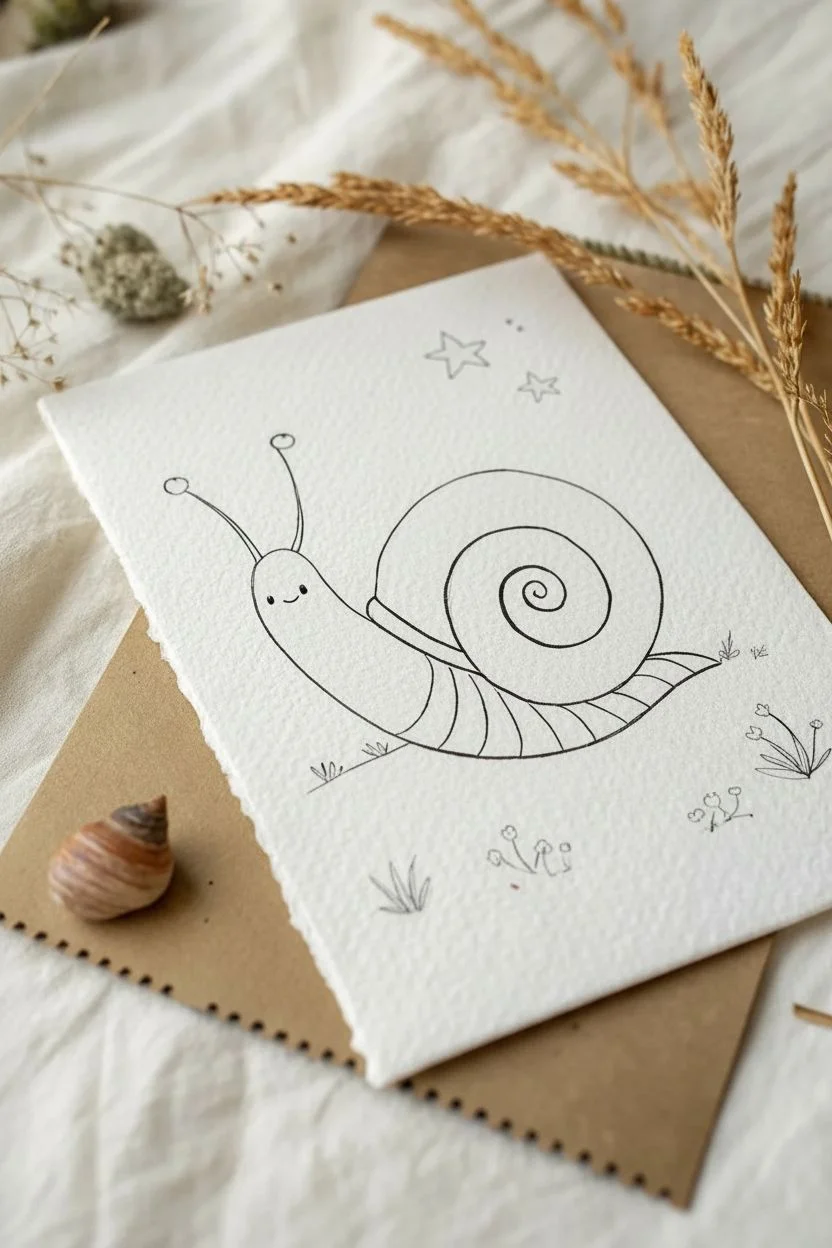
Capture the charm of nature with this sweet, spiral-shelled friend illustrated in simple watercolor and ink. This project focuses on gentle curves and warm, earthy tones to create a cozy piece of art perfect for a greeting card or wall decor.
How-To Guide
Materials
- Cold press watercolor paper (approx. 5×7 inches)
- Fine liner pen (black, waterproof, size 01 or 03)
- Watercolor paints (Yellow Ochre, Burnt Sienna, Payne’s Gray, Sap Green, light Pink)
- Round watercolor brush (size 4 or 6)
- Pencil (HB or 2B)
- Kneaded eraser
- Jar of water
- Paper towel
Step 1: Sketching the Outline
-
Draw the shell spiral:
Begin in the center of the paper by drawing a medium-sized circle. Inside this circle, draw a spiral starting from the center and winding outwards, creating the distinct coiled shape of a snail shell. -
Add the body:
Extend a curved line from the bottom left of the shell upwards to form the neck and head. Curve it back down and around to create the rounded bottom of the snail’s body, tucking the tail end underneath the shell. -
Create the stalks:
From the top of the head, draw two long, slightly curved lines extending upward and outward for the eye stalks. Add small circles at the very tips of these lines. -
Detail the face:
Sketch a tiny, simple smiley face low on the head. Two small dots for shiny eyes and a little U-shape for the mouth give it a friendly expression. -
Refine lines with ink:
Using your waterproof fine liner, carefully trace over your pencil lines. Be intentional with your strokes; keeping them clean is key for this illustrative style. Let the ink dry completely before gently erasing the underlying pencil marks.
Step 2: Painting the Snail
-
Base wash for the shell:
Mix a watery wash of Yellow Ochre and fill in the entire shell shape. Keep the pigment light and transparent to start. -
Shadowing the spiral:
While the shell is still slightly damp, drop in a mix of Burnt Sienna along the spiral lines to create depth and dimension. This makes the coil look rounded rather than flat. -
Painting the body:
For the snail’s body, use a very diluted mix of Burnt Sienna or a warm beige. Paint the entire body area, leaving the face section slightly lighter if possible. -
Adding blush:
While the face area is still wet, touch a tiny amount of diluted pink paint to the cheek areas just below the eyes. The wet paper will help it bloom into soft, rosy cheeks. -
Darkening the eyes:
Use your black pen or a tiny dot of concentrated dark paint to fill in the eye circles and the tips of the antennae stalks. Leave a tiny speck of white in the eyes for a highlight if you can.
Deckle Edge Trick
To get that rough, torn paper look shown in the photo, fold your watercolor paper back and forth along a ruler, then wet the crease with a brush before carefully tearing it.
Step 3: Adding Details and Surroundings
-
Texture lines on body:
Once the body paint is dry, use your fine liner to draw curved vertical lines along the bottom edge of the snail’s body. These suggest the texture of the snail’s foot muscle. -
Grounding the snail:
Mix a soft Sap Green. Paint a loose, organic patch of ground beneath the snail. You don’t need to be precise; a rough, grassy shape works best. -
Adding grass texture:
While the green patch is drying, use the tip of your brush to flick tiny upward strokes of darker green, creating little tufts of grass sticking out from the ground. -
Drawing tiny flowers:
Around the snail, sketch very simple flower stems with the fine liner. Add tiny dots of pink or red paint at the tips for blossoms. -
Adding stars:
In the sky area above the snail, draw two or three simple five-pointed stars with your pen. Paint them with a touch of Yellow Ochre. -
Final ink touches:
Review your drawing. If some lines look too faint after painting, carefully go over them again with the fine liner to make the illustration pop.
Ink Smearing?
Watercolor markers can bleed. Ensure your fine liner is labeled ‘waterproof’ or ‘archival.’ If unsure, test it on a scrap piece of paper with water before starting.
Now you have a charming little snail companion ready to brighten up your sketchbook or a friend’s mailbox
Ice Cream Cone With a Tiny Face

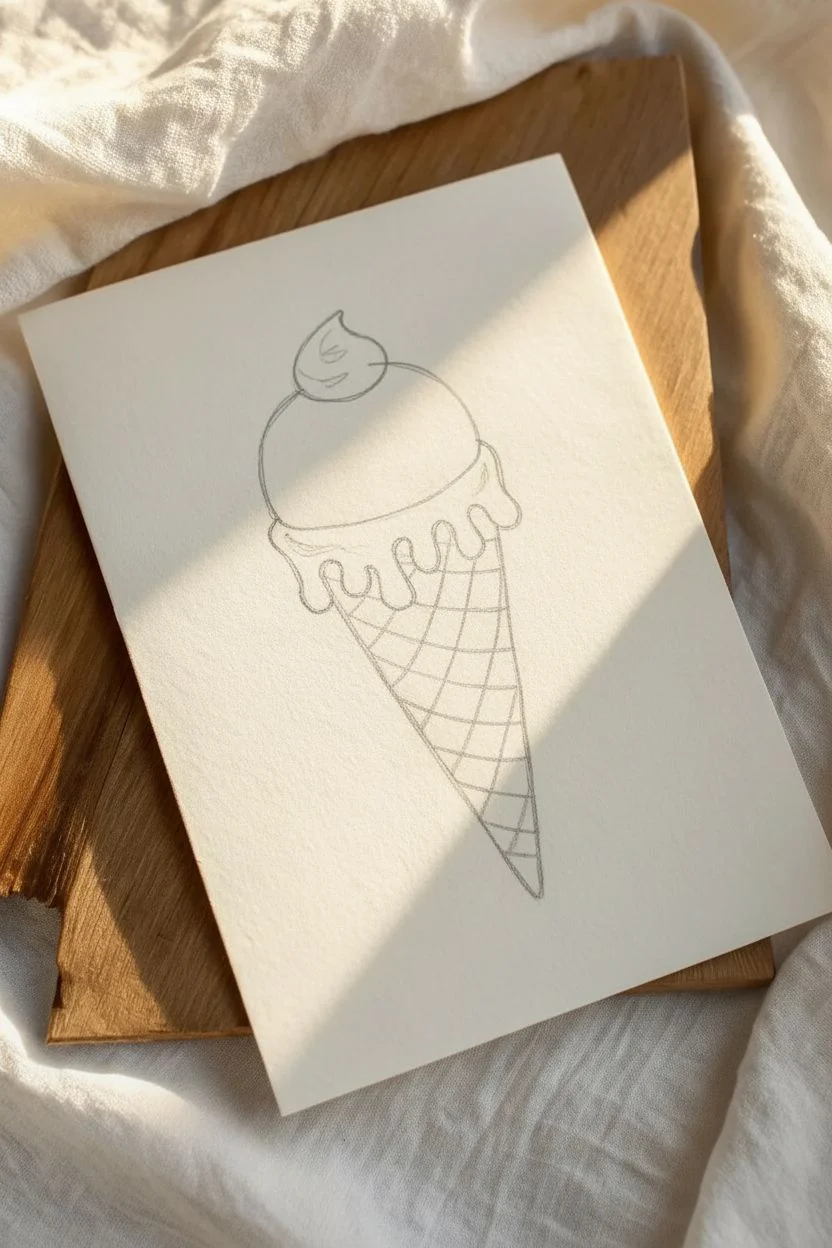
Brighten someone’s day with this adorably simple doodle of a melting ice cream cone. Using clean linework and subtle stippling for texture, you’ll create a friendly little character that looks fantastic on a handmade card.
Step-by-Step Guide
Materials
- Heavyweight drawing paper or cardstock (white or cream)
- Fine liner pen (black, approx. 0.3mm or 0.5mm)
- Thicker marker or brush pen (black) for outlines
- Light brown marker or colored pencil (for the cone)
- Pink marker or colored pencil (for cheeks)
- Pencil and eraser for sketching
Step 1: Sketching the Base Shape
-
Draw the scoop:
Start by lightly sketching a large semi-circle near the top center of your page. This will be the main body of the ice cream scoop. -
Add the dollop:
On top of the semi-circle, slightly to the left, sketch a small, curving teardrop shape that bends backward to look like a swirl of soft serve or whipped cream. -
Form the melting drips:
Along the bottom flat edge of your semi-circle, draw a wavy, uneven line. Make some waves dip lower than others to create the effect of melting ice cream overlapping the cone. -
Outline the cone shape:
From the ends of your wavy melt line, draw a long, narrow ‘V’ shape downwards to form the sugar cone. Make the tip slightly rounded rather than razor-sharp.
Step 2: Inking the Details
-
Create the heavy outline:
Using your thicker black marker or pen, trace over your pencil sketch. Use smooth, confident strokes, especially around the melting wavy edge. -
Add the face:
Switch to your finer pen. In the center of the scoop, draw two small arched lines for smiling eyes and a tiny ‘u’ shape between them for a smile. -
Draw the cheeks:
Using a pink marker or colored pencil, add two small, soft ovals just below the eyes for a rosy blush. -
Ink the splash drops:
Draw three small teardrop shapes floating on the left and three on the right of the scoop to represent splashing drips. Keep the pointed ends facing inward. -
Erase guidelines:
Once the ink is completely dry—I usually wait at least two minutes—gently erase all the underlying pencil marks.
Wobbly Lines?
Don’t stress if your ‘melting’ line looks shaky—it actually makes the ice cream look more realistic! Embracing imperfections adds charm to doodles.
Step 3: Adding Texture and Color
-
Add stippling to the top:
With the fine liner, add tiny dots (stippling) inside the top dollop swirl. Concentrate the dots on the left side to create a shadow effect. -
Shade the scoop:
Add more stippling dots along the left edge of the main scoop and just under the melting rim. This gives the ice cream volume without needing heavy shading. -
Grid the cone:
Draw diagonal lines crisscrossing down the length of the cone to create the classic waffle pattern. -
Base coat the cone:
Lightly color in the cone with a light brown marker or pencil. If using pencil, keep the pressure even for a smooth look. -
Shadow the cone edge:
Add a second layer of brown color or darker stippling along the right edge and bottom tip of the cone to make it look rounded. -
Highlight the eyes:
For an extra pop of cuteness, you can use a white gel pen to add a tiny dot to the tops of the cheeks or near the eyes if you drew them solid.
Add Sprinkles
Before doing the facial features, draw tiny pill shapes scattered on the scoop. Color them with rainbow markers for a confetti birthday cake vibe.
Now you have a sweet little character ready to decorate a notebook or give to a friend
Smiling Fruit Slice Mini Set
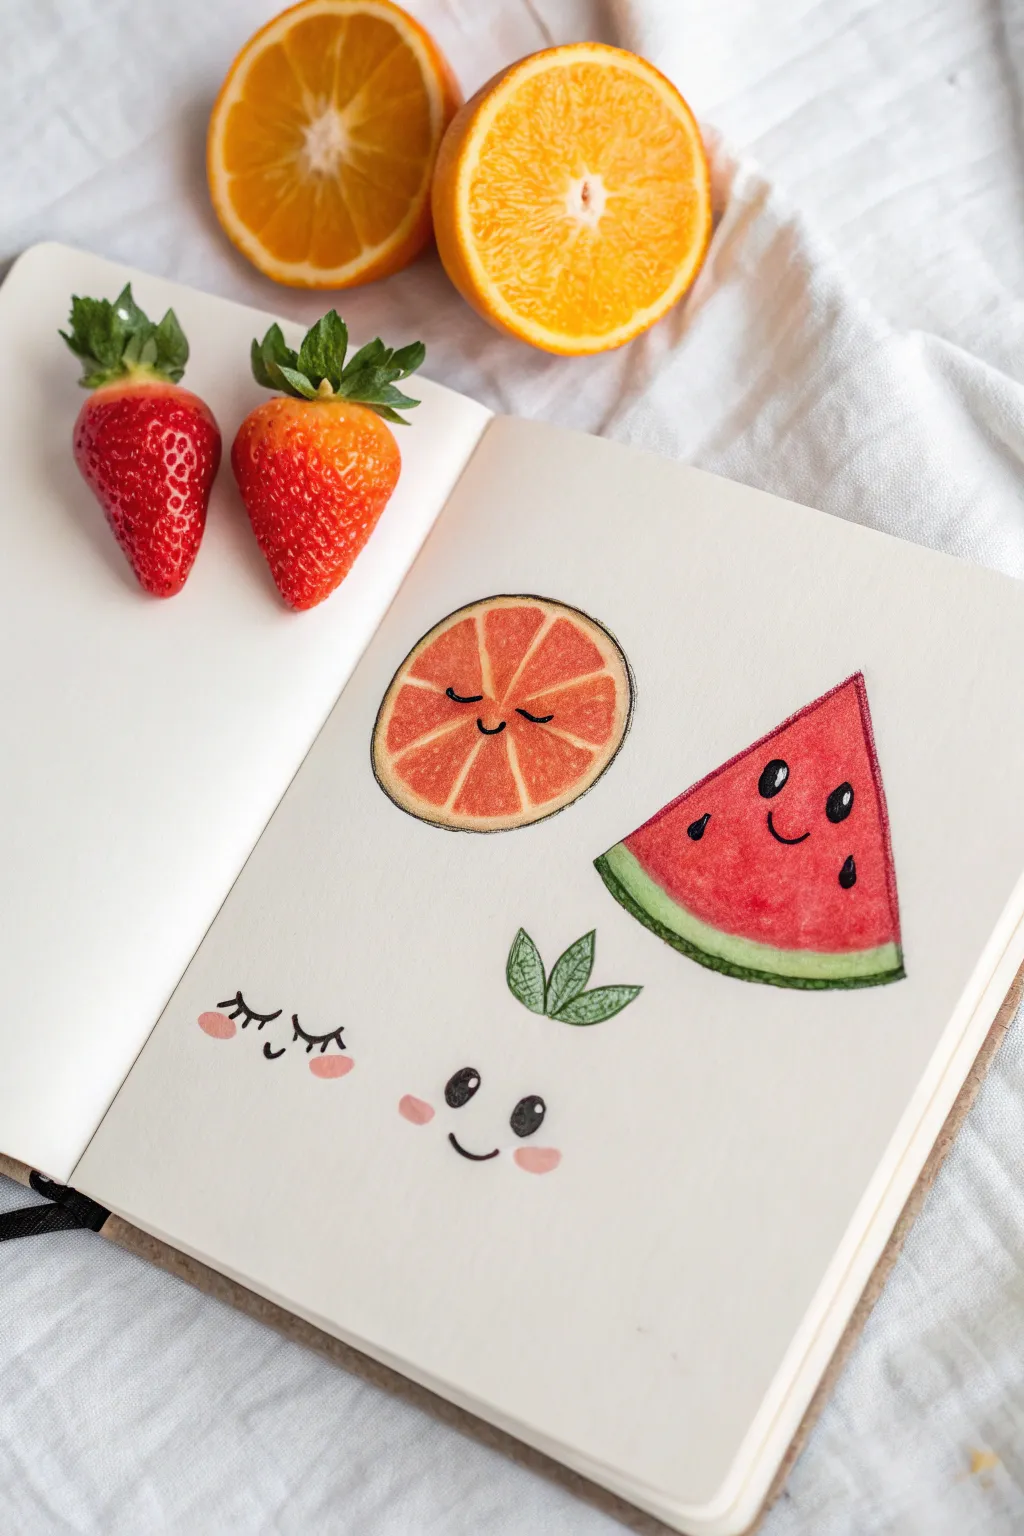
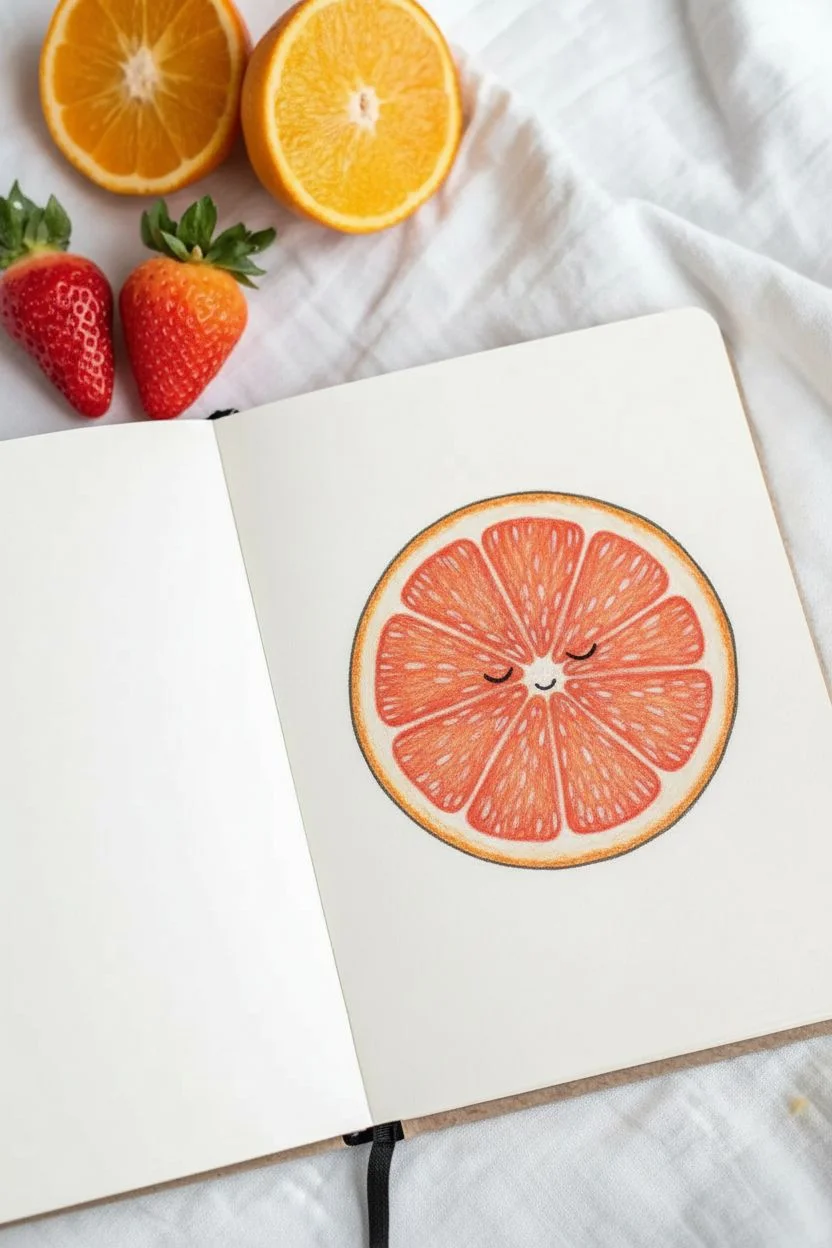
Brighten up your sketchbook with this adorable set involving a sleeping grapefruit, a happy watermelon slice, and a cheeky little character hidden in the details. The textures are created with colored pencils to give a soft, realistic yet cartoony feel.
Detailed Instructions
Materials
- Sketchbook or drawing paper (medium tooth)
- HB Graphite pencil
- Eraser
- Colored pencils (Orange, Red-Orange, Deep Red, Green, Lime Green, Pink)
- Black fine liner pen (0.3mm or 0.5mm)
- White gel pen (optional, for highlights)
Step 1: Sleeping Grapefruit Slice
-
Draw the circle:
Start by lightly sketching a perfect circle. You can trace a small lid or tape roll if specific tools aren’t handy. -
Define the rind:
Draw a second, slightly smaller circle inside the first one to create the thickness of the fruit’s rind. -
Map the segments:
Lightly sketch lines radiating from the center like wheel spokes to mark out the triangular fruit segments. Don’t press too hard, as these are guides. -
Add color texture:
Using an orange pencil, color the outer rind. For the inside segments, switch to a red-orange or pinkish-orange. Use small circular strokes to mimic the pulp texture, leaving thin white gaps between the segments. -
Outline and add face:
Take your black fine liner. Go over the outer circle with a sketchy, broken line for a natural look. In the center, draw two small arched curves for ‘sleeping’ eyes and a tiny ‘U’ shape for a smile.
Make It Juicy
For realistic fruit texture, use the ‘stippling’ technique with your colored pencils—lots of tiny dots instead of solid shading creates the perfect pulp look.
Step 2: Happy Watermelon Wedge
-
Sketch the triangle:
To the right of the grapefruit, draw a wedge shape—essentially a triangle with a slightly curved bottom edge. -
Create the layers:
At the bottom curve, draw two parallel lines following the curve. The bottom-most strip will be the dark rind, and the strip above it the pale rind. -
Color the flesh:
Fill the main triangle area with a vibrant red colored pencil. I like to vary the pressure slightly to give it a juicy, uneven look. -
Color the rind:
Use a dark green for the very bottom edge and a lighter lime green for the stripe just above it. Blend the lime green slightly into the red. -
Face and seeds:
With the black pen, draw two solid black ovals for eyes and a classic smile. Add three or four teardrop shapes scattered on the red part for seeds. -
Highlights:
Add tiny white dots to the black eyes to bring them to life.
Step 3: The Mystery Sprout
-
Position the face:
Below the grapefruit and watermelon, lightly pencil in two wide-set eyes. -
Draw the features:
Ink the eyes as solid black circles with tiny white highlights. Add a wide, shallow ‘U’ mouth connecting the space between them. -
Add rosy cheeks:
Take a soft pink pencil and draw gentle oval blushes underneath each eye. -
Top with leaves:
Instead of a full fruit outline, draw three small leaves sprouting from the top center of this invisible character’s head. -
Detail the leaves:
Outline the leaves in black ink and add a central vein to each. Color them lightly with green pencil, using cross-hatching to create texture. -
Bonus: Winking Face:
To the far left, draw a simple winking expression. Two curved lines for closed lashes, a small smile, and pink oval cheeks complete the set.
Fixing Smudges
If your black fineliner smears into the colored pencil, wait for the ink to dry completely (at least 5 mins) before coloring near the lines.
Now you have a refreshing page of fruit friends ready to brighten your day
Friendly Ghost Holding a Heart
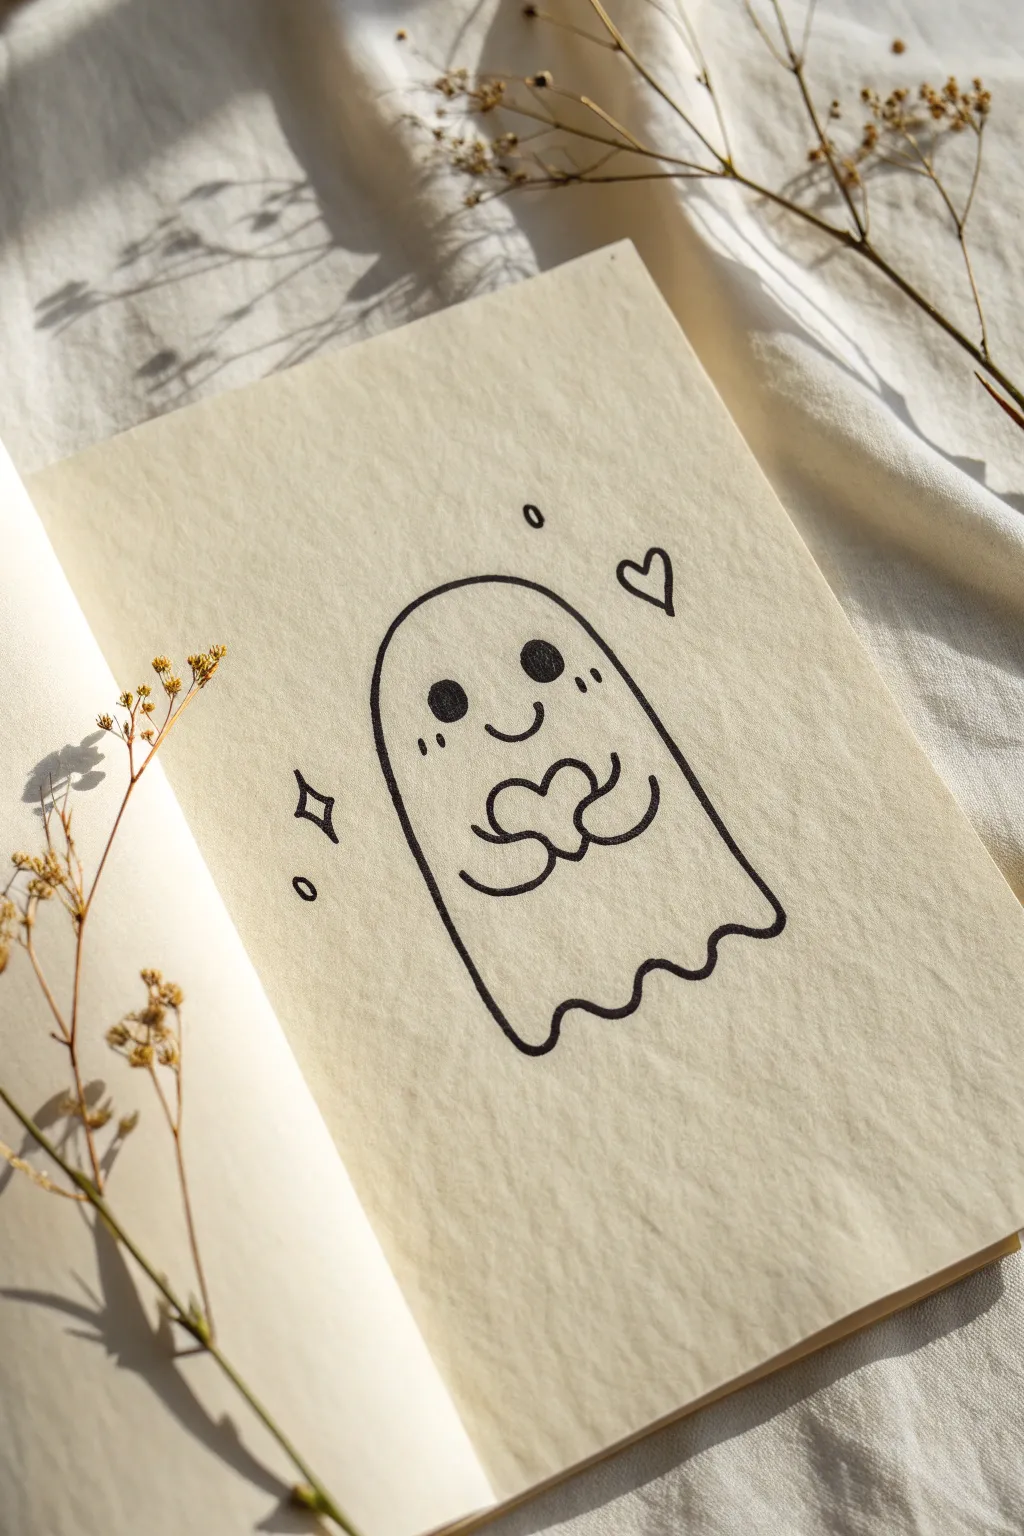
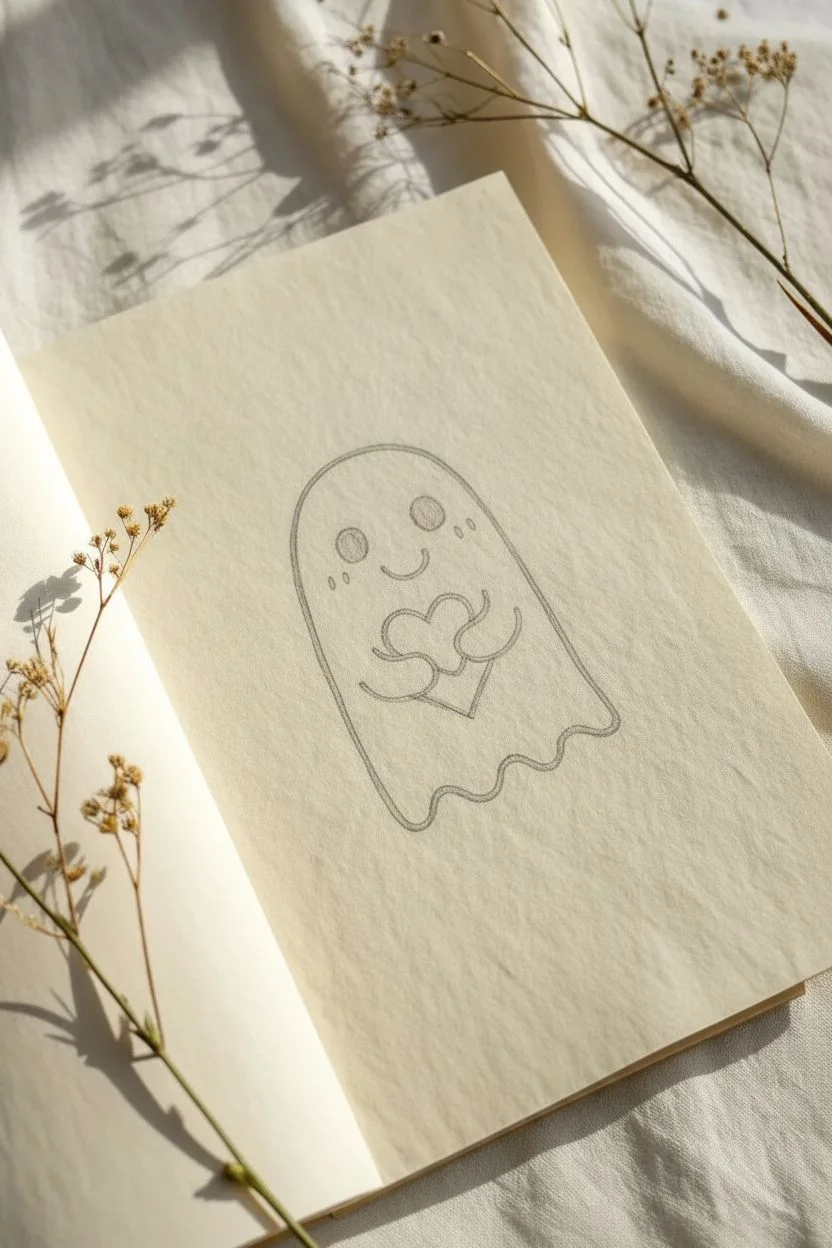
This adorable little specter proves that not all ghosts are spooky; some are just overflowing with love. With clean black lines on cream paper, this minimalist drawing captures a sweet ghost clutching a heart, perfect for adding a touch of charm to your sketchbook or journal.
Detailed Instructions
Materials
- Cream or off-white sketchbook paper (smooth texture)
- Black fineliner pens (sizes 05 and 08)
- Pencil (HB or H)
- Soft block eraser
Step 1: Drafting the Shapes
-
Map out the head:
Start by drawing a large, inverted U-shape lightly with your pencil. Make the top nice and round, bringing the sides down parallel to each other. -
Define the bottom hem:
Connect the two sides at the bottom with a wavy line. Create about three soft, flowing humps to mimick the edge of a sheet. -
Position the heart:
In the center of the ghost’s body, slightly below the halfway point, sketch a plump heart shape. This will be the focal point the ghost is holding. -
Add the arms:
Draw two small, curved arms coming from the sides of the ghost’s body. These lines should curve inward and end right where they meet the sides of the heart, as if grasping it. -
Sketch the face:
Above the heart, place two medium-sized circles for eyes. Right between and below them, draw a small, simple U-shape for a smile.
Keep It Smooth
Draw the long curves of the body by moving your entire arm from the shoulder, not just your wrist. This prevents ‘wobbly’ lines on long strokes.
Step 2: Inking the Outline
-
Trace the main body:
Switch to your 08 fineliner for a bold outlines. Carefully trace over your pencil line for the head and sides, keeping the pressure consistent. -
Finish the bottom edge:
Continue that bold line along the wavy bottom edge. Try to do this in one continuous stroke if you can to avoid shaky connection points. -
Outline the hands:
Trace the curved arms. When you reach the heart, stop the line abruptly so it looks like the hands are resting on top of the shape. -
Define the heart:
Still using the 08 pen, trace the heart shape carefully. Connect it seamlessly to the ends of the arm lines.
Make It Pop
Use a white gel pen to add a tiny ‘reflection’ dot inside the black eyes or on the heart to give the drawing a glossy, dimensional look.
Step 3: Adding Details & Expressions
-
Fill the eyes:
Using the 08 pen, or carefully coloring in with a 05, fill the eye circles completely black. They should be solid and opaque. -
Draw the smile:
Trace the small smile with the 05 fineliner. Using a slightly thinner pen here keeps the face looking dainty and cute. -
Add blush marks:
On the cheeks, just below the eyes on the outer edge, draw two tiny vertical dashes using the 05 pen. This gives the ghost a shy, blushing look. -
Detail the eyes:
Add two very small vertical dashes near the top right of the right eye specifically. This subtle detail adds character.
Step 4: Floating Elements
-
Draw the sparkle:
To the left of the ghost, draw a four-pointed diamond shape (like a star). Sketch it lightly first, then ink it with the 05 pen. -
Add a floating heart:
Up near the top right of the ghost’s head, draw a small, tilted heart outline. It should look like it’s floating away. -
Include bubbles:
Identify empty spaces (like above the head or near the sparkle) and draw tiny, hollow circles or ovals to fill the void. -
Erase guidelines:
Wait at least a full minute for the ink to dry completely. Gently erase all visible pencil marks underneath your ink to reveal the clean design.
Now you have a charming little companion on the page ready to share some love
Lightbulb With a Heart Glow

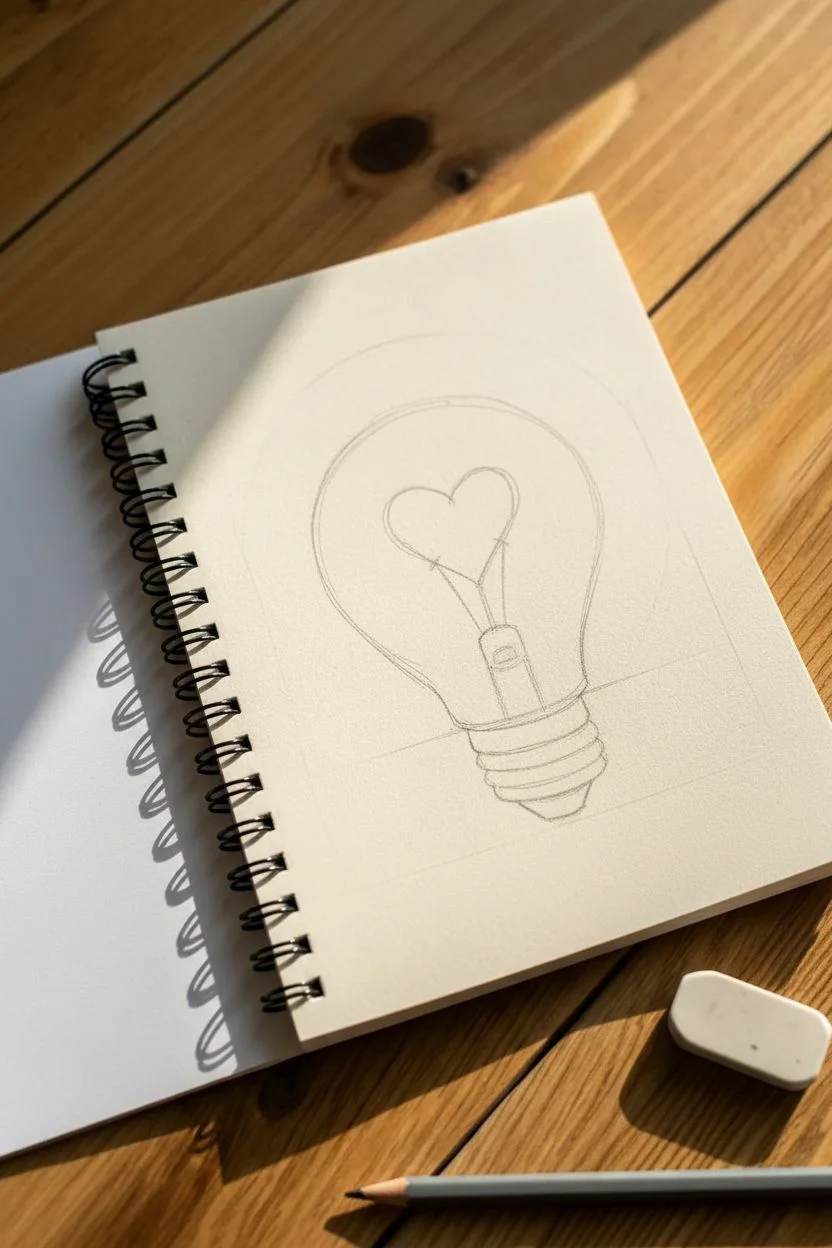
Brighten up your sketchbook with this charming doodle that combines warmth and inspiration. This sketch features a classic incandescent lightbulb but swaps the industrial filament for a soft, glowing pink heart, making it perfect for Valentine’s Day cards or just a sweet note.
Step-by-Step Guide
Materials
- Spiral-bound sketchbook or drawing paper
- Fine-liner pen (black, 0.5mm or 0.8mm)
- Pencil (HB or 2B)
- Eraser
- Pink colored pencil or pastel
Step 1: Drafting the Shape
-
Start the bulb:
Begin by sketching a large circle lightly with your pencil. This doesn’t need to be perfect; it just serves as the top portion of the glass. -
Taper the sides:
From the bottom sides of your circle, draw two lines curving gently inward and downward. Stop before they touch; you need space for the metal base. -
Draw the base mount:
Connect the two tapered lines with a slightly curved horizontal line. Below this, draw a rectangular shape for the threaded metal cap, making the bottom rounded rather than flat. -
Add the filament heart:
In the upper center of the bulb, lightly sketch a medium-sized heart. Position it so it floats nicely in the middle of the glass area. -
Connect the wires:
Draw two thin lines extending from the bottom point of the heart down toward the metal base. These are the support wires. I like to make them angle slightly inward as they go down.
Uneven Bulb Shape?
If your circle looks lopsided, trace a round object like a small cup or tape roll first. Use that as a guide for the top half before freehand drawing the tapered bottom.
Step 2: Inking and Details
-
Outline the glass:
Using your black fine-liner, trace over your pencil lines for the glass bulb. Keep the line steady but don’t worry about machine-perfect smoothness; a little wobble adds character. -
Define the base:
Ink the rectangular base area. Add horizontal stripes across it to mimic the screw threads of a real lightbulb. -
Darken the contact point:
At the very bottom tip of the bulb, draw a small, filled-in black cone or triangle shape for the electrical contact point. -
Ink the heart:
Carefully trace the heart shape. Make this line just a tiny bit thicker or go over it twice to make it stand out as the focal point. -
Draw the stem:
Trace the support wires leading down from the heart. Add a small rectangle or cylinder shape where these wires meet the base to show the inner glass stem.
Make it Pop
Make the heart glow intensely by using a neon pink highlighter for the center, then fading out with a standard pink pencil for the edges.
Step 3: Shading and Glow
-
Add glass reflections:
On the upper right curve of the bulb, draw two small, curved highlight shapes. They should look like little window reflections. -
Erase guidelines:
Once the ink is completely dry, gently erase all your underlying pencil sketches to leave a clean drawing. -
Create the warm glow:
Take your pink colored pencil. Gently color inside the heart, pressing softer as you move toward the center to give it dimension. -
Add a blush effect:
Lightly shade with pink just outside the heart’s outline, smudging it slightly with your finger to create a soft, radiant glow effect on the paper. -
Sketch the rays:
Drawing short, quick strokes radiating outward from the bulb. Vary the lengths slightly—some short, some long—to simulate light shining brightly. -
Final shading touch:
If you want extra depth, use your pencil to add very light gray shading along the left inner edge of the glass bulb.
Now you have a lovely little spark of creativity captured on the page
Tiny House With a Smiley Window


Using just a couple of pens, you can sketch this charming, rustic cottage on a sunny day. The style is deliberately simple and hand-drawn, making it a perfect starting point for beginner artists who want to create something cozy and cute.
Step-by-Step
Materials
- White sketchbook paper (smooth texture works best)
- Fine-liner pen (teal or slate blue) for the main lines
- Fine-liner pen (orange-brown or ochre) for the roof details
- Pencil (optional for initial blocking)
- Eraser
Step 1: Drawing the Base Structure
-
Draw the roof shape:
Begin by drawing a large, slightly asymmetrical triangle for the roof using your teal pen. Instead of a sharp point at the top, round it slightly to keep the look soft. -
Add the overhangs:
Extend the bottom corners of your triangle outward just a bit past where the walls will go, creating a nice eave overhang. -
Sketch the walls:
From the bottom corners of the roof triangle, draw two vertical lines straight down to form the sides of the house. -
Close the bottom:
Connect the two wall lines with a horizontal line for the ground, letting the line extend slightly past the house on the right side for a bit of flair. -
Define the roof area:
Inside your main roof triangle, draw another horizontal line connecting the two eaves. This separates the roof texture area from the house body.
Wobbly Lines?
Don’t stress if your lines aren’t perfectly straight! The charm of this doodle comes from the shaky, hand-drawn aesthetic. It makes the house look older and cozier.
Step 2: Filling in Architectural details
-
Create the door frame:
In the center of the bottom wall, draw a large arch shape for the entryway. -
Draw the door fanlight:
Draw a horizontal line across the upper third of the door arch. Inside the semi-circle created, draw a small semi-circle at the bottom center and fan out three lines like sun rays. -
Add the doorknob:
Place a solid, filled-in circle on the left side of the door, just below the window line. -
Add upstairs windows:
Draw two squares on the upper part of the house wall. Make them slightly imperfect squares for charm. -
Detail the window panes:
Inside each square window, draw a simple cross (+) to create four small panes. -
Add the chimney:
On the right slope of the roof, draw a rectangular chimney shape peeking out, tilted slightly to match the roof angle. Fill it in solid teal. -
Draw smoke wisps:
Add two squiggly vertical lines rising from the chimney to represent gentle smoke.
Garden Vibes
Add personality by drawing tiny tufts of grass along the bottom line or sketching a small potted plant next to the front door using the teal pen.
Step 3: Adding Texture and Surroundings
-
Switch colors:
Pick up your orange-brown or ochre pen for the roof texture. -
Draw vertical roof lines:
Fill the triangular roof space with angled vertical lines that fan out slightly towards the bottom. -
Draw horizontal roof lines:
Cross over your vertical lines with curved horizontal lines. Make them bow downward slightly, mimicking the look of shingles or tiles. -
Outline the sun:
Switch back to your teal pen. To the left of the roof, draw a simple circle for the sun. -
Give the sun personality:
Draw two small dots for eyes and a wide U-shape for a smile inside the sun circle. -
Add sun rays:
Finish by drawing short, straight lines radiating outward all around the sun’s circumference.
This simple line art style proves you don’t need complex shading to make a house feel like a home
Dreamy Stairway to the Moon Sketch
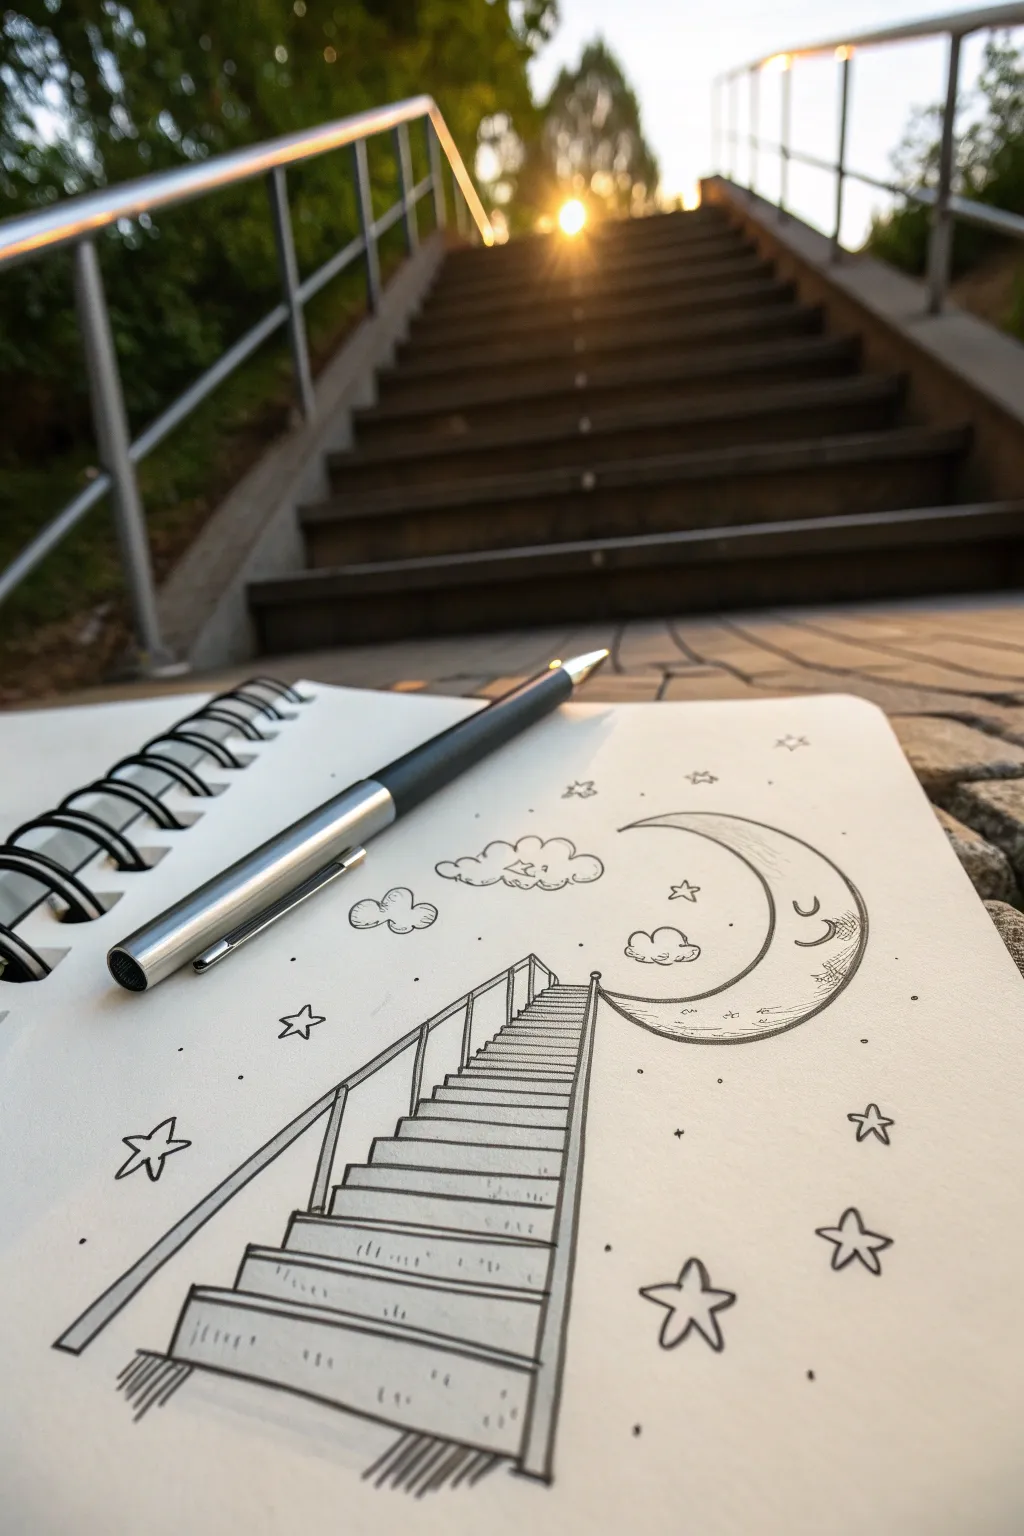
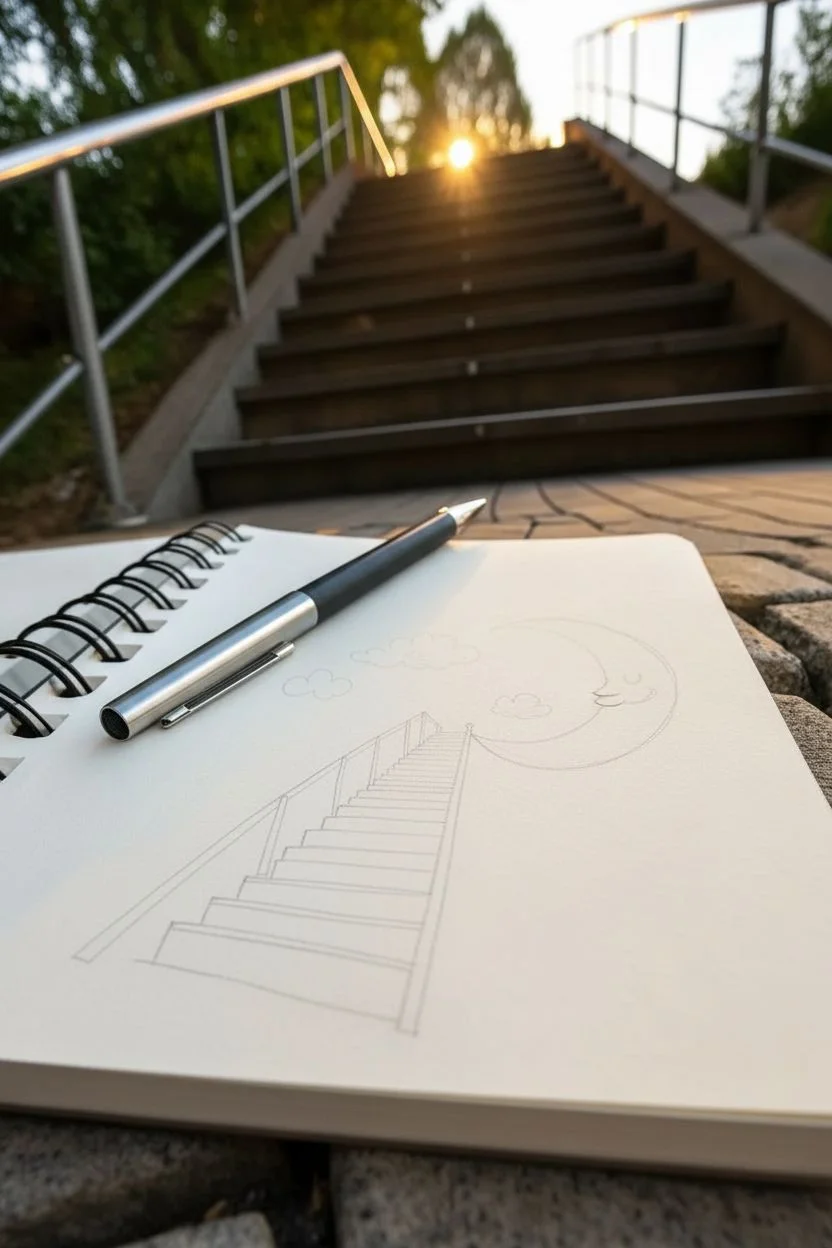
Transform a simple staircase into a magical journey with this dreamy ink sketch on paper. The illustration features a whimsical crescent moon waiting at the top of a long flight of stairs, surrounded by scattered stars and fluffy clouds.
Step-by-Step Guide
Materials
- Spiral-bound sketchbook with smooth paper
- Fine liner pen (black, 0.5mm or 0.8mm)
- Pencil (HB or 2B) for sketching
- Eraser
- Ruler (optional, for straighter lines)
Step 1: Setting the Scene
-
Draft the moon:
Start near the upper right corner of your page. Lightly sketch a large ‘C’ shape with your pencil to form the crescent moon. Give the inside curve a slight bulge to make it look full and friendly. -
Add a face:
Within the crescent shape, draw a closed eyelid with eyelashes and a gentle, curved smile. This gives the moon a sleepy, content expression. -
Position the stairs:
Decide where the bottom of your stairs will begin. Mark a spot in the bottom left area of the page. Then, draw two long, converging guidelines that lead from that bottom spot all the way up to touch the bottom tip of the moon.
Wobbly Lines?
Don’t stress about perfectly straight lines. A slightly shaky hand actually adds charm and a whimsical, storybook feel to this sketch. Embrace the imperfections.
Step 2: Building the Structure
-
Draw the steps:
Using your guidelines, begin drawing horizontal lines for the stair treads. Start at the bottom with wider lines and space them closer together as you go up to create perspective. -
Add the railing posts:
On the left side of the stairs, sketch vertical lines rising from every few steps to act as the railing posts. I usually place about five or six posts, getting smaller as they ascend. -
Connect the handrail:
Draw a long, continuous line connecting the tops of your vertical posts. Keep this line parallel to the angle of the stairs to form the handrail. -
Add dimension:
To make the stairs look 3D, draw short vertical lines down from the corners of each horizontal step tread. Connect these with another horizontal line to create the ‘riser’ or face of each step.
Step 3: Inking and Details
-
Ink the moon:
Take your fine liner pen and trace over your moon pencil sketch. Use short, light hatching lines near the bottom curve of the moon to add a bit of texture and shadow. -
Ink the stairs:
Carefully trace your stairway lines. You can make the outline of the stairs slightly bolder than the inner details to help them pop off the page. -
Ground the drawing:
At the very bottom of the stairs, add some quick, scribbled shading lines underneath the first step. This casts a shadow and grounds the structure so it doesn’t feel like it’s floating. -
Draw clouds:
Sketch a few fluffy clouds around the moon and the top of the stairs. Keep the lines bumpy and loose for a soft, airy look. -
Scatter stars:
Fill the empty space around the stairs with hand-drawn stars. Mix standard five-point stars with small dots to represent distant starlight.
Make it Shine
Use a white gel pen to add tiny highlights on the moon’s nose or the metal railing. Use silver or gold metallic markers for the stars.
Step 4: Final Touches
-
Add step texture:
Draw tiny, faint vertical dashed lines on the face of the steps (the risers). This suggests wood grain or concrete texture without overworking the drawing. -
Erase guidelines:
Once the ink is completely dry—give it a full minute—gently erase all your original pencil marks to leave a crisp, clean illustration. -
Review and refine:
Look over your drawing for any lines that need connecting or bolding. Sometimes I’ll add a few extra dots near the stars to balance the composition.
Now you have a whimsical pathway leading straight into the night sky


Have a question or want to share your own experience? I'd love to hear from you in the comments below!