If you’re in the mood to draw something peaceful but still packed with fun details, turtles are such a satisfying subject. I pulled together a mix of turtle drawing ideas that start super simple and gradually move into more stylized, wow-factor sketches.
Simple Cartoon Turtle From Basic Shapes
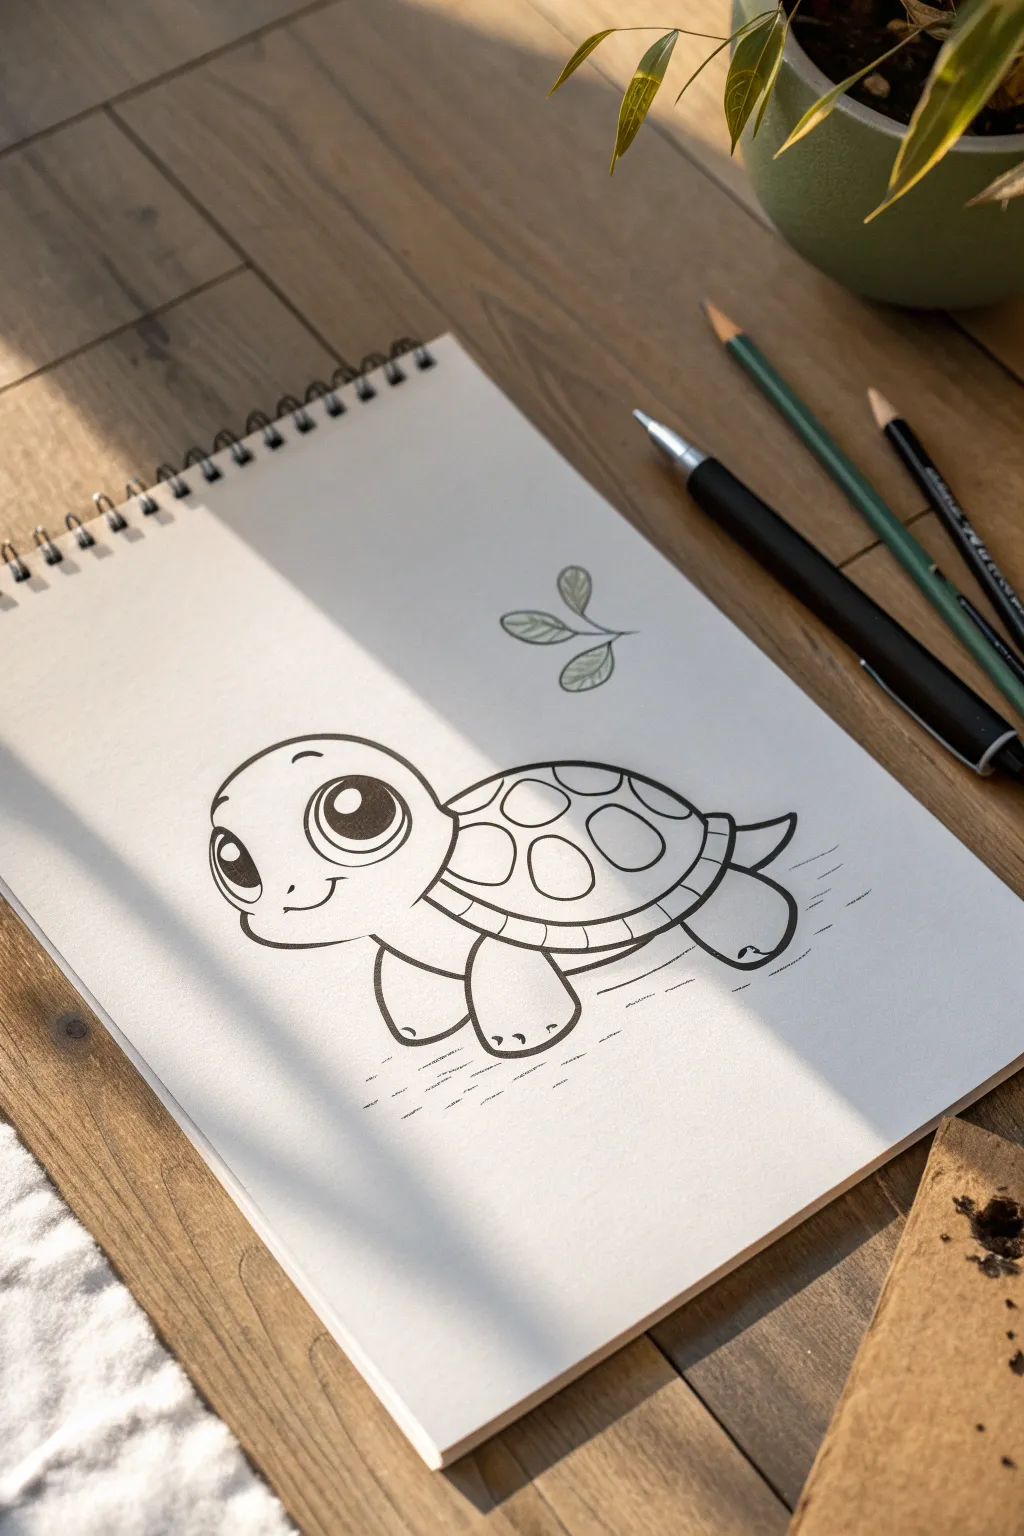
Learn to draw this adorable, wide-eyed cartoon turtle using simple lines and basic geometry. The finished sketch has a charming, polished look with thick outlines and clean details that are perfect for beginners or doodle enthusiasts.
Step-by-Step Tutorial
Materials
- Sketchbook or drawing paper
- Pencil (HB or 2B)
- Black fine liner or felt-tip pen (medium thickness)
- Eraser
- Green colored pencil (optional for leaves)
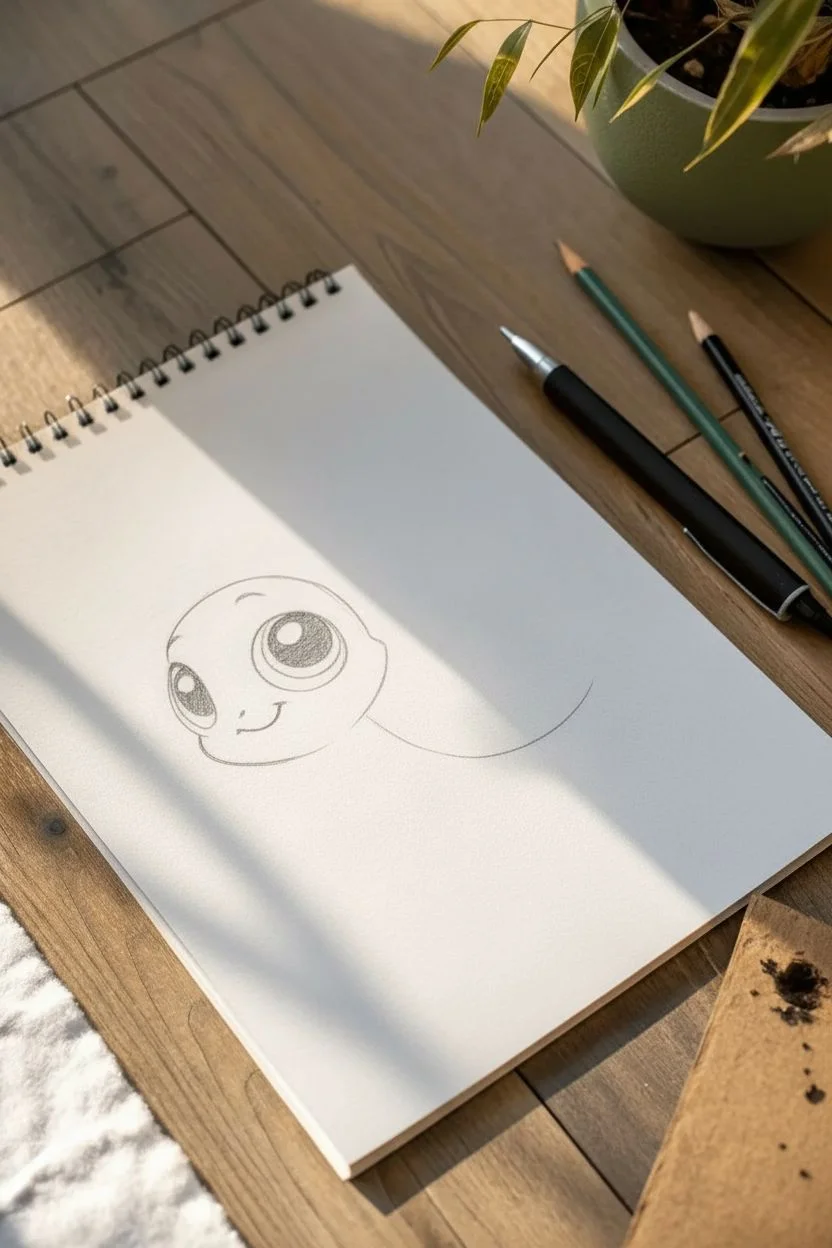
Step 1: Drawing the Head and Face
-
Start with the head shape:
Begin by drawing a smooth, rounded circle for the head, but leave the bottom right section slightly open where it will connect to the neck. -
Add the large eye:
Draw a large, prominent circle inside the head on the right side. This will be the main eye facing the viewer. -
Create the eye highlights:
Inside the large eye circle, draw a smaller circle near the top right for a highlight, and a crescent moon shape at the bottom. Color in the pupil dark black, leaving these highlight areas white for a shiny effect. -
Draw the second eye:
Sketch a partial oval protruding from the left side of the head profile to suggest the other eye peeking out. -
Add the smile:
Draw a small, curved line under the main eye for a cheek, and extend a happy, upturned mouth line from it. Add a tiny nose dot above the mouth.
Keep it clean
Wait at least two minutes for your black ink to dry fully before erasing the pencil sketch underneath. This prevents ugly grey smudges.
Step 2: Sketching the Shell
-
Outline the shell dome:
Starting from the back of the neck, draw a large semi-circle arching backwards to form the top of the shell. -
Draw the shell rim:
Connect the bottom of the shell arch with a slightly curved, horizontal band. This band should look like a thick rim separating the top shell from the bottom. -
Add the shell pattern:
Draw three or four large, rounded shapes (like soft polygons or ovals) along the top of the shell to create the classic turtle scute pattern. -
detail the rim:
Add small vertical lines spaced evenly along the horizontal rim of the shell to give it texture. -
Draw the tail:
Sketch a small, pointed tail peeking out from the back of the shell.
Step 3: The Body and Finishing Touches
-
Draw the front legs:
Draw a chunky, rounded leg extending down from the front of the body. Add a curved line at the top where it meets the shell. -
Draw the back leg:
Add a similar rounded shape for the visible back leg, making it slightly smaller since it’s further away. -
Add toes:
Draw three tiny U-shapes at the bottom of each foot to look like little toes or claws. -
Sketch the underbelly:
Connect the front and back legs with a simple curved line to form the turtle’s tummy. -
Inking the lines:
Go over your pencil sketch with a black felt-tip pen. I prefer to make the outer contour lines slightly thicker than the interior detail lines to make the character pop. -
Add ground movement:
Draw a few quick, horizontal dash lines underneath the turtle’s feet to suggest it is walking on the ground. -
Draw the floating leaves:
Above the turtle, sketch a simple stem with two or three oval-shaped leaves. -
Fill the leaves:
Use your pencil or a green colored pencil to softly shade the inside of the leaves with diagonal hatching lines.
Leg placement check
If the turtle looks off-balance, check the legs. The front leg should line up logically below the neck, and the back leg should be below the rear shell curve.
Once the ink is dry and the pencil lines are erased, you have a charming little turtle ready for your sketchbook


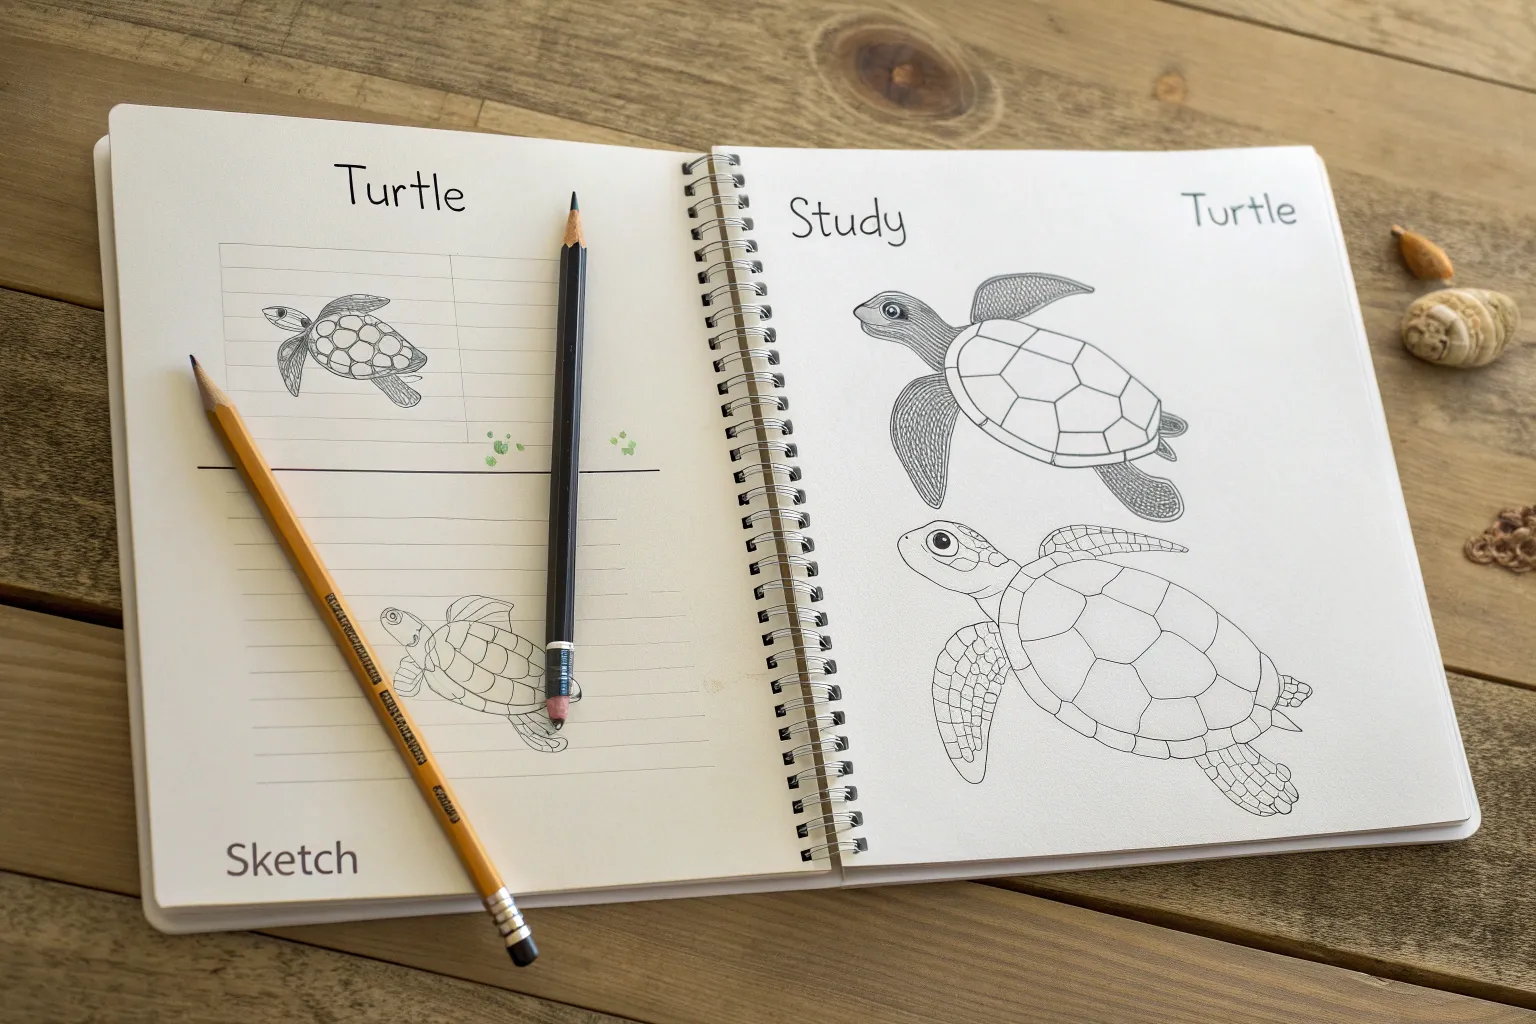
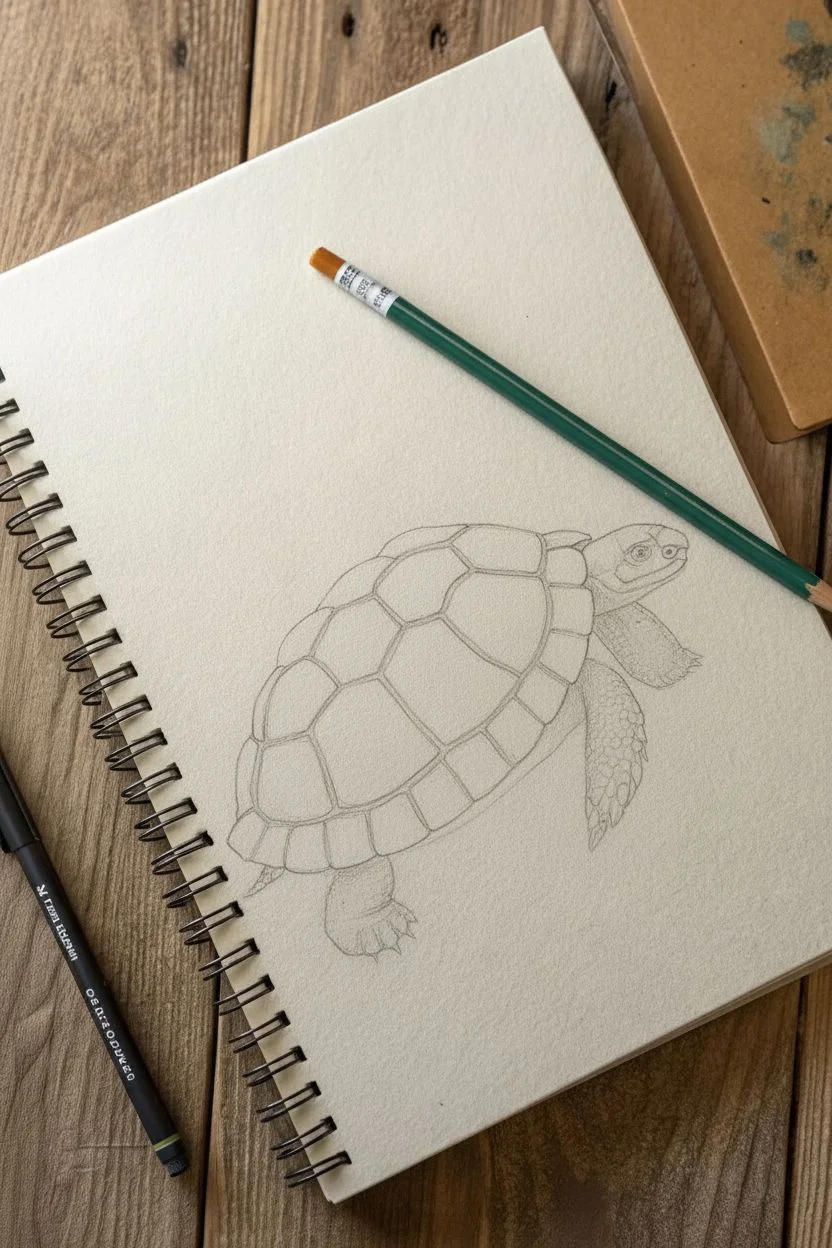
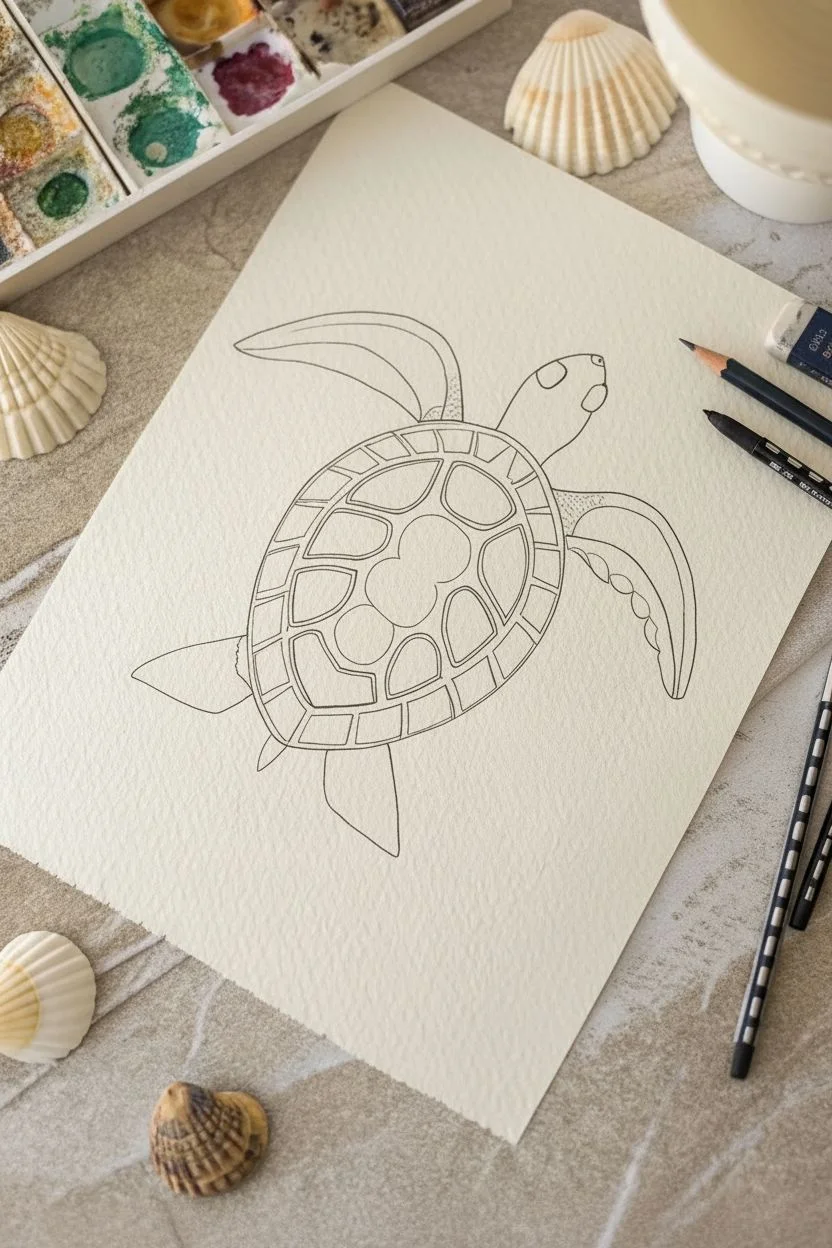
Classic Side-View Turtle With Shell Plates
This elegant sea turtle drawing combines clean outlines with delicate texture, capturing the gentle motion of ocean life. Using simple fine-liner pens, you will build up the patterned shell and create a sense of depth through careful shading.
Step-by-Step
Materials
- Sketchbook with smooth heavyweight paper
- HB or 2B graphite pencil
- Kneaded eraser
- Fine liner pens (sizes 0.1, 0.3, and 0.5)
- Ruler (optional for alignment)
Step 1: Planning the Form
-
Initial loose sketch:
Start with your graphite pencil. Draw a softly tilted oval shape for the main shell (carapace). This will be the body’s anchor. -
Adding the head:
Attach a smaller, rounded shape to the top right of your oval for the head. Add a slight curve for the neck connecting it to the shell. -
Sketching the flippers:
Extend a large, curved front flipper reaching forward from the top left of the shell. Draw a matching rear flipper curving backward on the bottom right. -
Completing the limbs:
Sketch the partially visible left-side flippers peeking out from under the shell to create a sense of three-dimensional depth. -
Defining the shell ridge:
Draw an inner oval inside your main shell shape. This separates the outer rim of the shell from the central dome. Add a faint centerline down the back to help align the plates later.
Ink Smearing?
If your ink smudges when erasing, wait at least 5-10 minutes before using the eraser. Also, check if your pen is water-based; alcohol or pigment markers dry much faster and safer.
Step 2: Drawing the Shell Details
-
Mapping the central scutes:
Along the centerline of the shell, lightly pencil in the five central hexagonal plates (scutes). They don’t need to be perfect hexagons; slightly rounded edges look more organic. -
Adding the lateral scutes:
Draw the side plates radiating out from the central ones. These shapes should angle downward slightly, wrapping around the form of the shell. -
Detailing the marginal scutes:
Divide the outer rim of the shell into small, rectangular segments. These marginal scutes frame the entire carapace. -
Refining the face:
Pencil in the eye, a small nostril, and the line of the mouth, giving the turtle a gentle expression.
Vary Your Line Weight
Use a thicker 0.5mm pen for the outermost silhouette and the bottom shadow areas, while keeping infinite details delicate with a 0.05mm or 0.1mm tip.
Step 3: Inking the Outline
-
The first ink pass:
Switch to your 0.3 pen. Carefully trace over your pencil lines for the main shell outline and the flippers. Keep your hand steady but allow for slight natural variations in line weight. -
Inking the shell plates:
Go over the internal shell patterns. I like to double up the lines between the scutes very slightly to make the ridges look raised and distinct. -
Adding the scales:
On the head and flippers, draw small, varied polygon shapes to represent scales. Make them larger near the center of the flipper and smaller near the edges. -
Erasing the sketch:
Once the ink is completely dry—give it a few minutes—gently erase all the underlying graphite pencil marks with your kneaded eraser.
Step 4: Shading and Texture
-
Stippling the darker areas:
Using the 0.1 pen, add tiny dots (stippling) inside the scales on the flippers. Concentrate the dots on one side of each scale to suggest a shadow. -
Shading the shell:
Add fine hatching lines inside the shell plates. Place these lines near the edges of each plate to make the center of the plate look slightly domed and highlighted. -
Deepening contrast:
Use the 0.5 pen to darken the area between the flippers and the shell, creating a cast shadow. This separates the limbs from the body visually. -
Texturing the skin:
For the wrinkly skin on the neck and armpit areas, use short, broken lines with the 0.1 pen instead of solid contours. -
Final touches:
Review your drawing for balance. If the shell needs more definition, thicken the outer perimeter line with the 0.5 pen to make the whole turtle pop off the page.
Now you have a timeless, detailed sea turtle drawing ready to swim across your sketchbook page


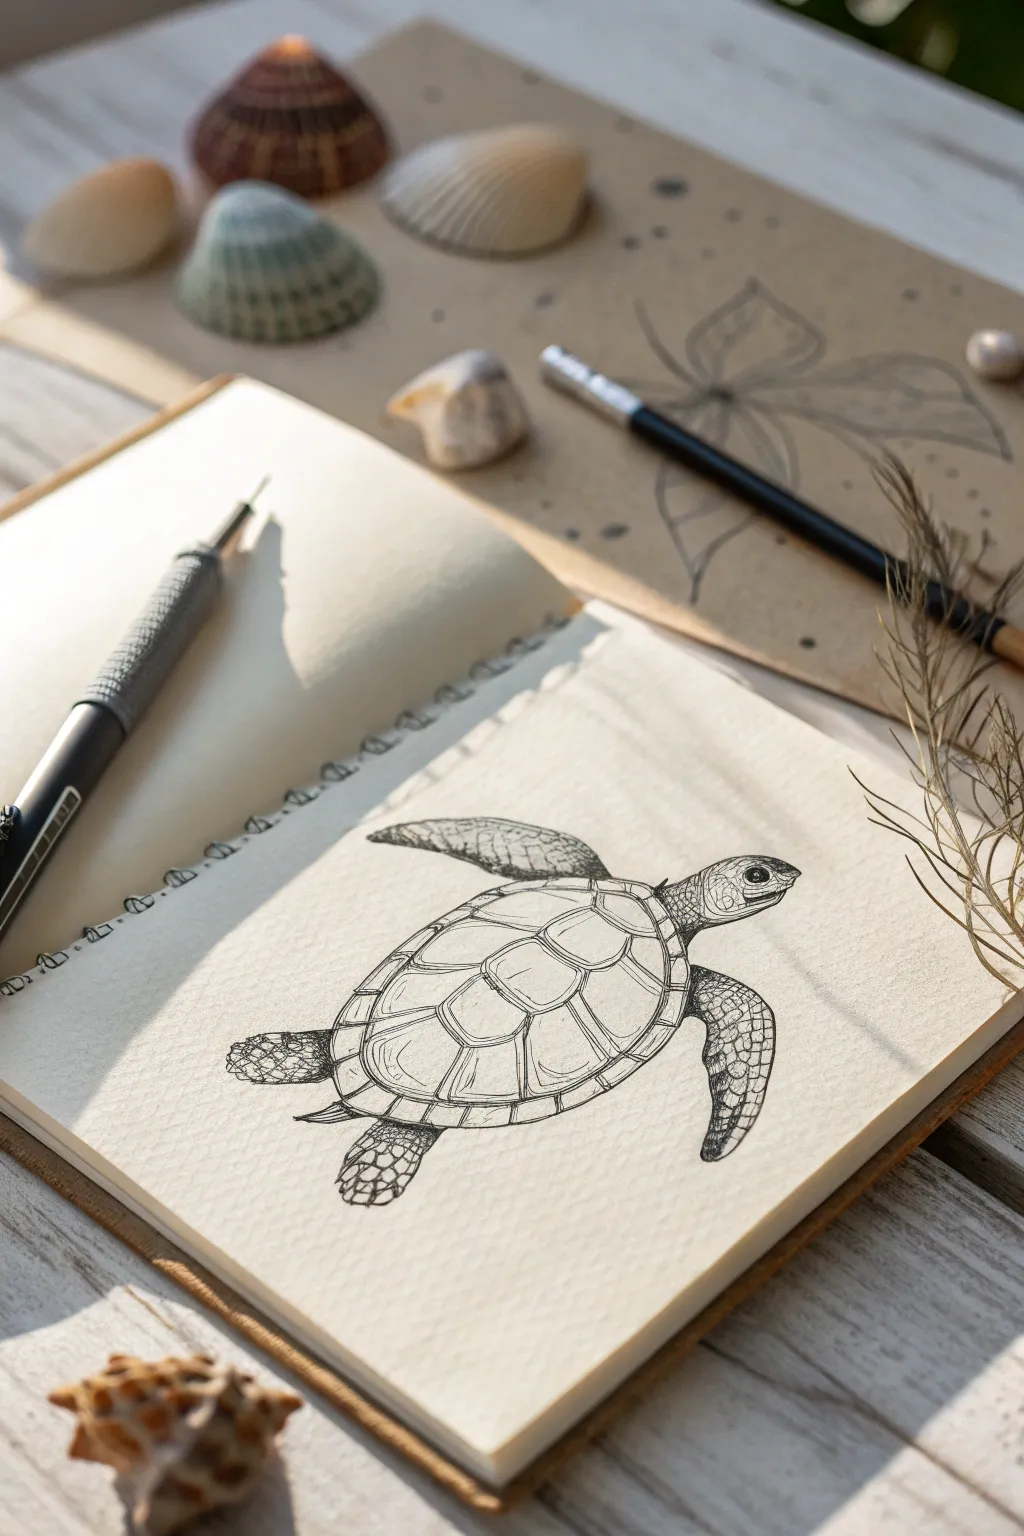
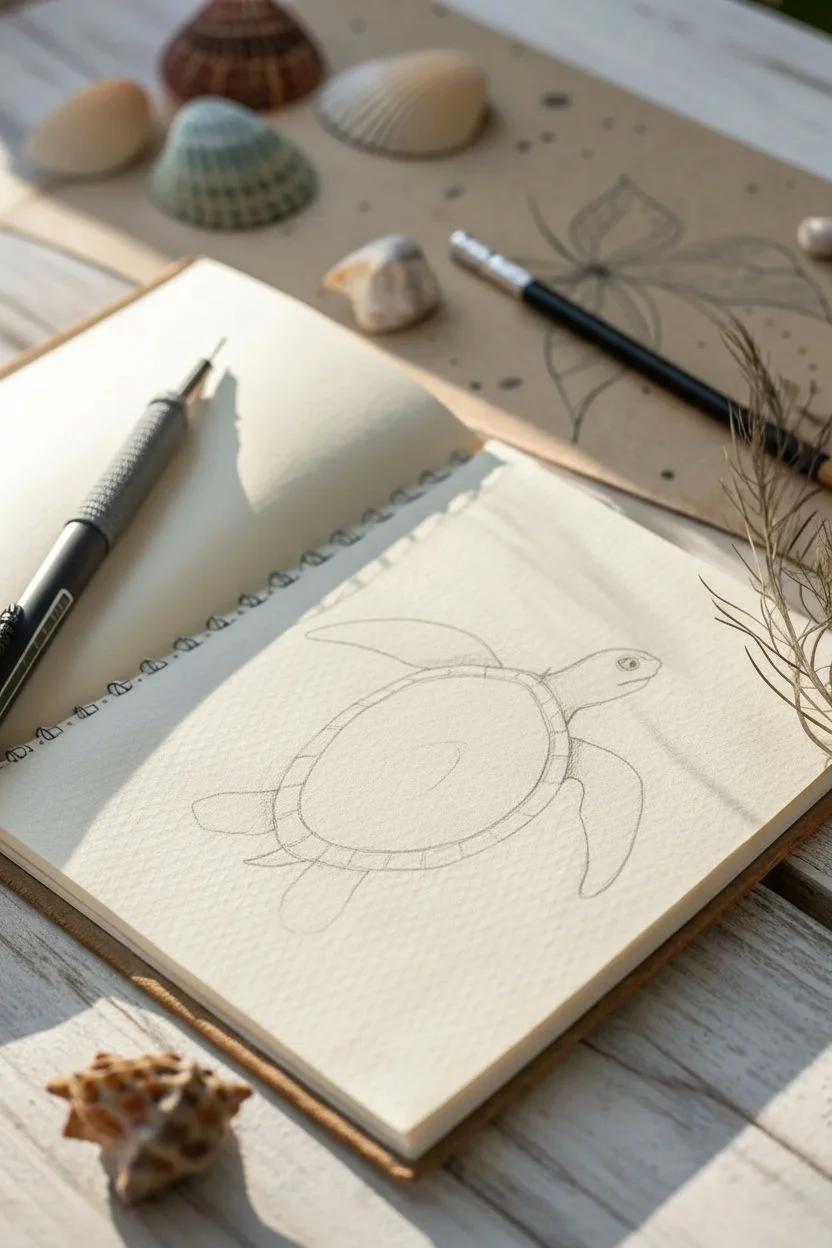
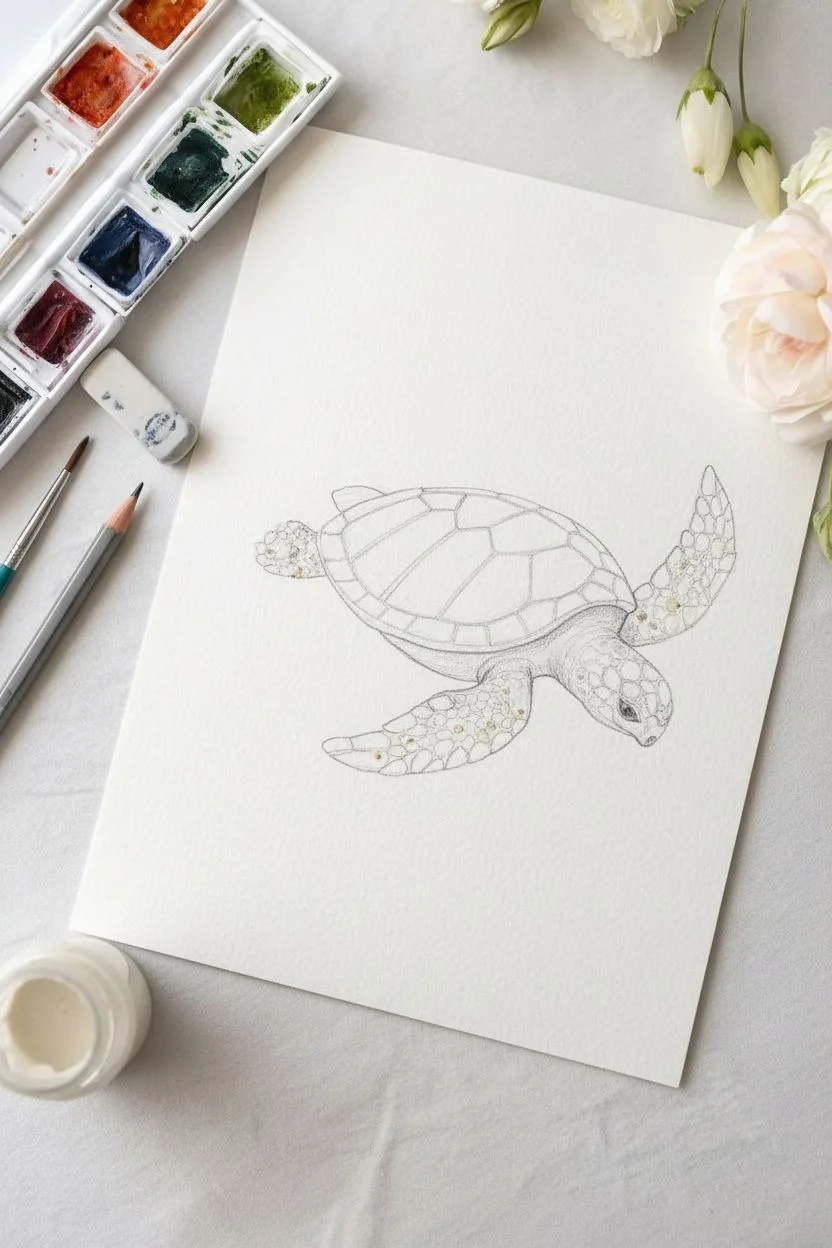
Turtle Face Close-Up Study
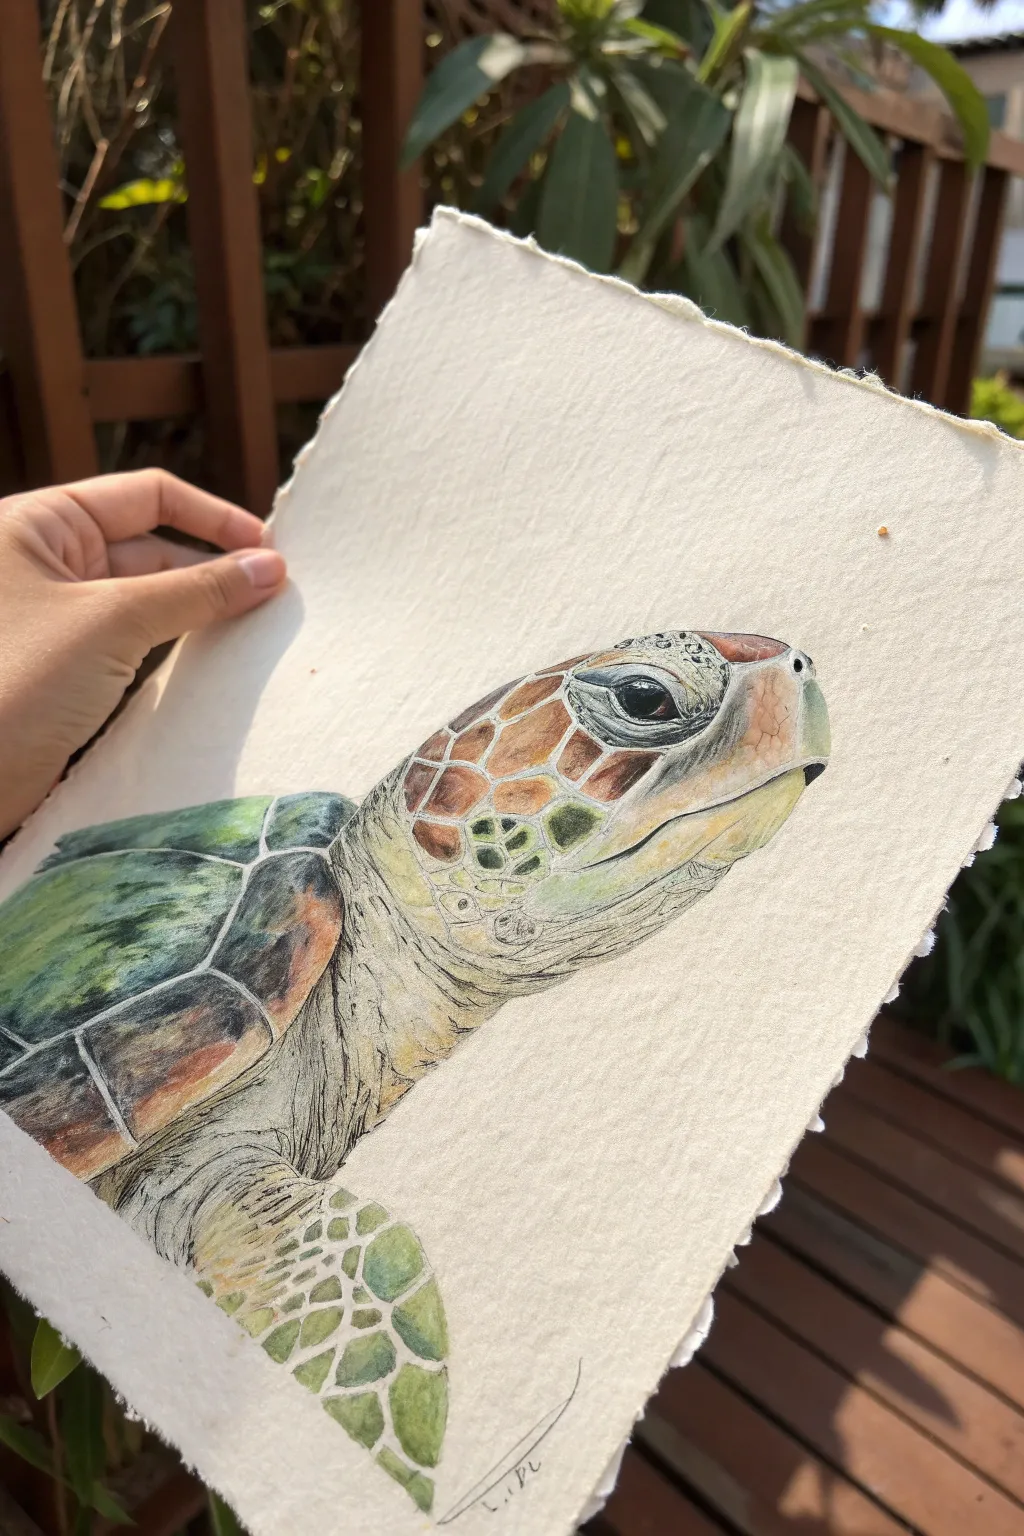
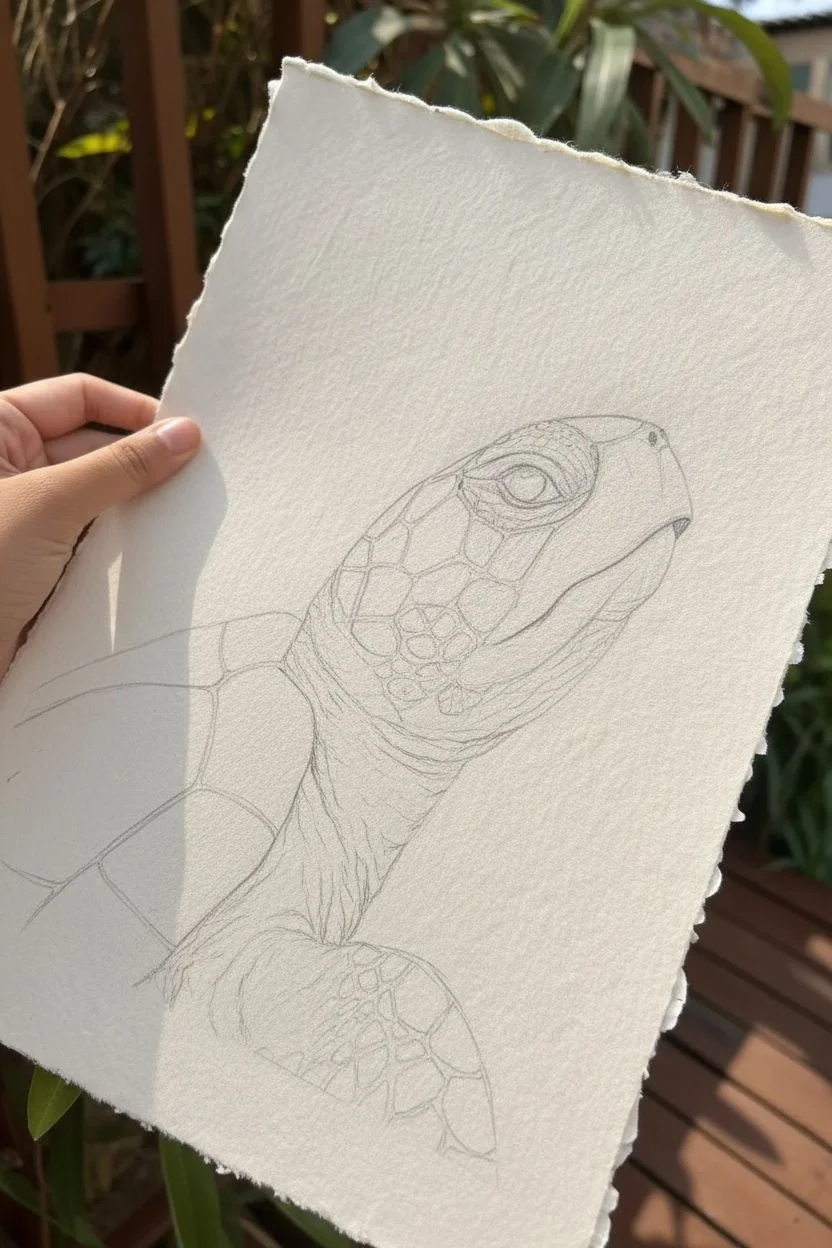
Capture the intricate beauty of marine life with this mixed-media study of a sea turtle. By combining watercolor washes with precise pencil detailing on textured handmade paper, you’ll create a piece that feels organic and full of character.
Step-by-Step Tutorial
Materials
- Heavyweight cold-press watercolor paper (300gsm or heavier) or handmade cotton rag paper
- Watercolor paints (Sap Green, Hooker’s Green, Burnt Sienna, Yellow Ochre, Paynes Grey, Indigo)
- Round watercolor brushes (sizes 2, 4, and 6)
- Fine liner pens (black or sepia, 0.1mm and 0.3mm)
- Colored pencils (various greens, browns, and ochre for detailing)
- Graphite pencil (HB) and kneaded eraser
- Palette
- Water cups and paper towel
Step 1: Preparation and Sketching
-
Prepare the paper edge:
If you are starting with a standard sheet of watercolor paper but want the rustic look shown in the image, create a faux deckle edge. Wet a line along the edge of the paper with a clean brush and gently tear the paper along that wet line to create a fibrous, uneven border. -
Outline the basic form:
Lightly sketch the turtle’s profile using an HB pencil. Focus on the oval shape of the head, the curve of the beak-like mouth, and the distinct slope of the neck leading into the shell. -
Map out the scales:
Sea turtles have very specific scute patterns on their faces. Lightly draw the puzzle-piece shapes of the scales on the cheek and around the eye. Don’t press too hard; you want these lines to be guides, not permanent borders. -
Define the eye:
Sketch the almond shape of the eye, marking out the pupil and the surrounding eyelid folds. This is the focal point, so take your time getting the proportions right.
Fixing “Muddy” Colors
If your greens and browns turn grey, let the layer dry completely. Glaze over it with a pure, transparent yellow or orange watercolor to bring back warmth and vibrancy.
Step 2: Watercolor Base Layers
-
First wash on the skin:
Mix a very dilute wash of Yellow Ochre and a touch of Sap Green. Apply this to the neck and lower jaw area. The goal is a pale, warm undertone, not full saturation. -
Base color for the face scales:
Using a size 4 brush, wet the individual scale shapes on the head with clean water first, then drop in Burnt Sienna and touches of orange-brown. Let the colors bloom slightly within the wet areas but try to keep the boundaries of each scale relatively distinct. -
Shell and flipper foundations:
For the shell section visible on the left, mix Hooker’s Green with a little Indigo for a deep, oceanic green. aApply this wet-on-dry, leaving small gaps of white paper between the scutes to represent the shell’s texture. -
Developing the flipper pattern:
Paint the distinctive mosaic pattern on the front flipper using various greens—mix Sap Green with lemon yellow for lighter areas and Hooker’s Green for shadows. Each scale should look like a small island of color. -
Layering the neck wrinkles:
Once the initial neck wash is dry, use a mix of diluted Paynes Grey and green to paint faint, curved lines following the contours of the neck skin. This establishes the folds and loose skin texture.
Level Up: Texture Pop
Sprinkle a tiny pinch of table salt onto the wet paint of the shell or flipper scales. As it dries, the salt pushes pigment away, creating incredible natural speckling.
Step 3: Refining and Detailing
-
Deepening facial contrast:
Go back into the facial scales with a stronger mix of Burnt Sienna and dark brown. Paint the edges of the scales to give them dimension, leaving the centers lighter to simulated a curved, reflective surface. -
Painting the eye:
Use nearly black paint or heavy Indigo for the pupil. Leave a tiny speck of white paper for the catchlight to bring the turtle to life. Paint the iris with a dark brown, blending it softly into the pupil. -
Adding texture to the shell:
While the green base on the shell is dry, dry-brush a little Burnt Sienna over parts of it to suggest algae or natural shell discoloration. This adds that rugged, realistic look. -
Enhancing with colored pencils:
Once all paint is completely bone dry, use colored pencils to enhance the texture. I find that lightly shading over the watercolor with a cream or light green pencil unites the painting and softens any harsh watermarks. -
Defining the beak:
The beak area often has a yellowish, bone-like tint. Use a light wash of yellow ochre, and once dry, define the line of the mouth with a dark sepia pencil or very fine brush.
Step 4: Final Ink Work
-
Inking the wrinkles:
Take your 0.1mm fine liner and very gently sketch over the pencil lines on the neck. Use broken, wavering lines rather than solid strokes to mimic the look of leathery reptilian skin. -
Outlining the scales:
Selectively outline the facial scales and the flipper pattern. Don’t outline every single shape perfectly; leaving some lines open or broken keeps the drawing feeling organic. -
Adding shadow and depth:
Use hatch marks with the pen in the shadowed areas, particularly under the chin and where the neck tucks into the shell. This cross-hatching technique adds a classic scientific illustration feel. -
Final eye details:
Darken the area immediately surrounding the eye with the pen to make it pop. Ensure the folds of skin around the eye look heavy and protective. -
Signing off:
Add a tiny signature at the bottom, perhaps following the curve of the turtle’s body, and verify that your edges are nicely textured and clean of stray paint marks.
Now you have a stunning, detailed portrait that honors the quiet grace of these ancient mariners.


Top-Down Shell Pattern Practice
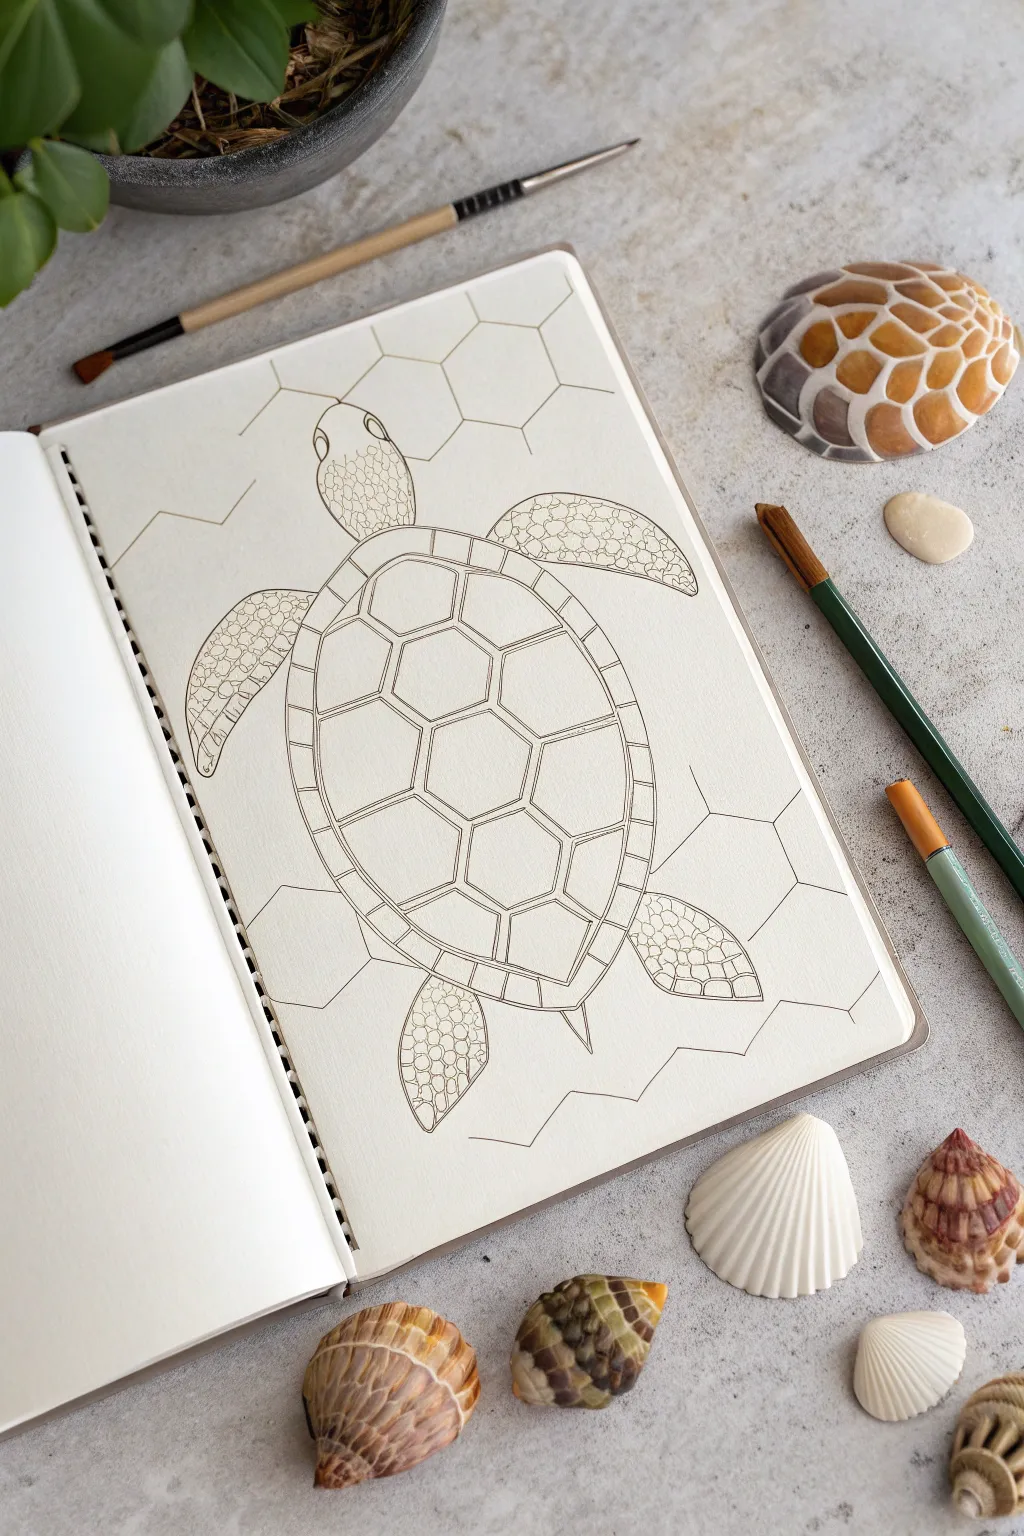
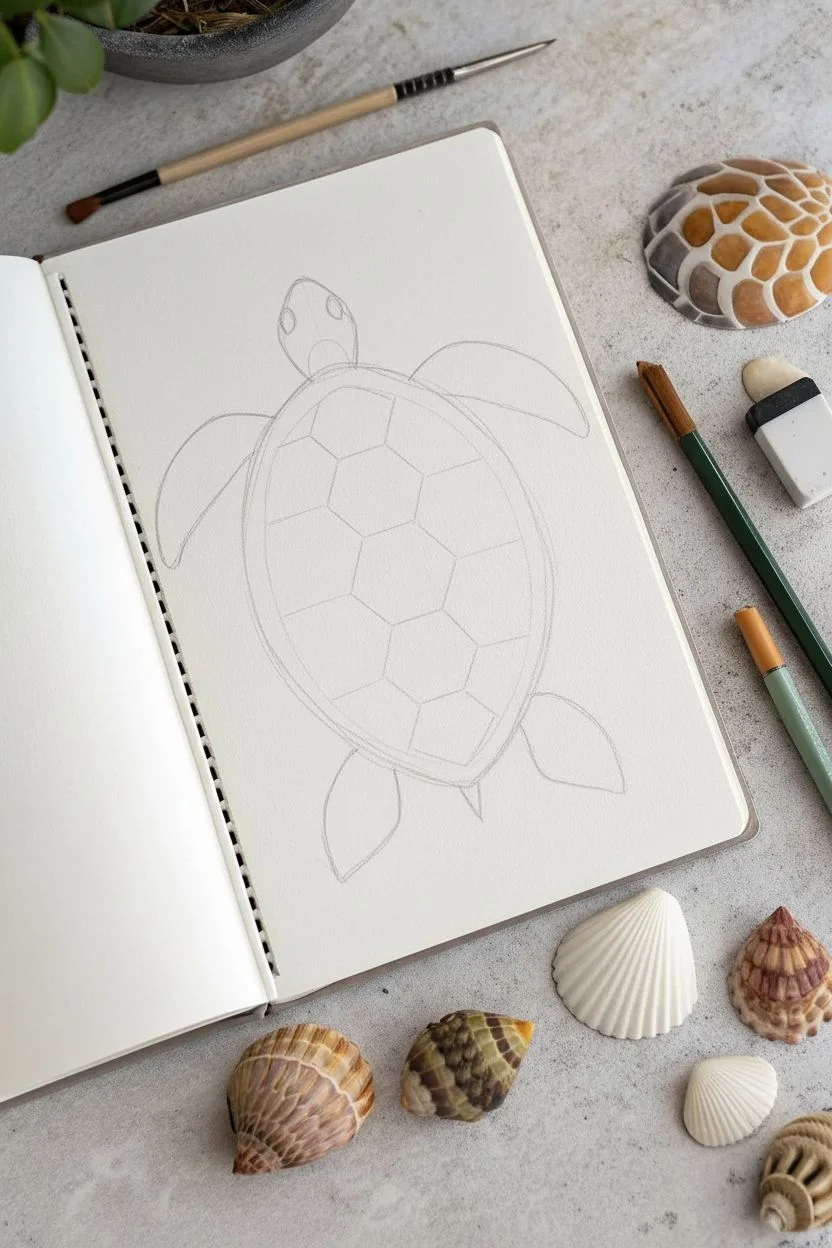
This tutorial guides you through creating a beautifully structured, top-down view of a sea turtle, focusing on the intricate geometry of its shell. The clean line art style combined with hexagonal background elements makes for a meditative and satisfying drawing session.
Detailed Instructions
Materials
- Sketchbook with cream or off-white paper (A4 or similar size)
- HB or 2B pencil for initial sketching
- Fine liner pen (0.3mm or 0.5mm, black or sepia)
- Thinner fine liner pen (0.1mm or 0.05mm) for details
- Kneaded eraser
- Ruler (optional, for background lines)
Step 1: Drafting the Basic Form
-
The Main Oval:
Start lightly with your pencil. Draw a large, vertical oval in the center of your page. This will become the main carapace (shell) of the turtle. It shouldn’t be a perfect circle; aim for an egg-like shape that is slightly broader near the top. -
Adding the Head:
At the top of your oval, sketch a smaller, somewhat triangular shape with rounded corners for the head. Connect it smoothly to the top of the shell with a short neck curve. -
Front Flippers:
Draw two long, curved shapes extending from the upper sides of the shell. These should sweep backward slightly, resembling bird wings or large petals. Keep the lines fluid and organic. -
Rear Flippers and Tail:
Add two smaller, paddle-shaped flippers at the bottom corners of the shell. Between them, sketch a tiny, pointed triangle for the tail.
Step 2: Detailing the Shell (Carapace)
-
The Central Ridge:
Lightly draw a vertical centerline down the shell to help with symmetry. Along this line, sketch out five large distinct shapes. The top one is roughly trapezoidal, followed by four hexagon-like shapes down the spine. -
Costal Scutes:
On either side of that central column, draw the lateral scutes (the side plates). There are typically four large plates on each side that interlock with the central ones like a geometric puzzle. -
Marginal Scutes:
Create the border of the shell. Draw a rim around the entire outer edge of the oval, dividing it into smaller rectangular segments. These marginal scutes frame the inner pattern nicely. -
Inking the Shell Outline:
Switch to your 0.3mm or 0.5mm pen. Carefully trace the outlines of all the shell plates you just drafted. Use confident, continuous strokes rather than sketchy lines for a crisp look. -
Double-Walling:
To give the shell depth, draw a second, inner line inside each plate shape on the shell. This creates a small gap or ‘channel’ between the plates, making them look like separate, fitted pieces.
Scale sizing tip
Make the scales largest on the leading edges of the flippers and the top of the head. As you move toward the soft skin areas (armpits/neck), make the scales tiny dots.
Step 3: Texturing and Background
-
Head Scales:
Using your thinner 0.1mm pen, draw a mosaic of small, irregular shapes on top of the turtle’s head. Larger scales go in the center, getting smaller and tighter towards the eyes and neck. -
Flipper Patterns:
Fill the flippers with a similar scale pattern. I find it easiest to start with larger, pebble-like shapes along the leading edge of the flipper and fade into smaller, denser marks near the body connection. -
Defining the Eyes:
Draw two small ovals on the sides of the head for eyes. Leave a tiny white highlight circle inside each pupil before shading the rest dark for a lively expression. -
Hexagonal Background:
Sketch a light, loose honeycomb pattern in the background. Don’t cover the whole page; just let clusters of large hexagons float behind the turtle, suggesting an underwater or geometric theme. -
Inking the Background:
Go over your background hexagons with the thinnest pen you have. Keep these lines very delicate so they don’t compete with the bold lines of the turtle. -
Cleanup:
Wait for all ink to be completely dry—give it a good five minutes. Then, gently erase all your initial pencil guidelines with the kneaded eraser to reveal the clean artwork.
Add a splash of color
Use watercolor to wash over just the shell scutes in varying shades of olive, brown, and ochre, leaving the background and skin purely black and white.
Enjoy the calming process of filling in those intricate shell patterns and admire your clean line work
BRUSH GUIDE
The Right Brush for Every Stroke
From clean lines to bold texture — master brush choice, stroke control, and essential techniques.
Explore the Full Guide
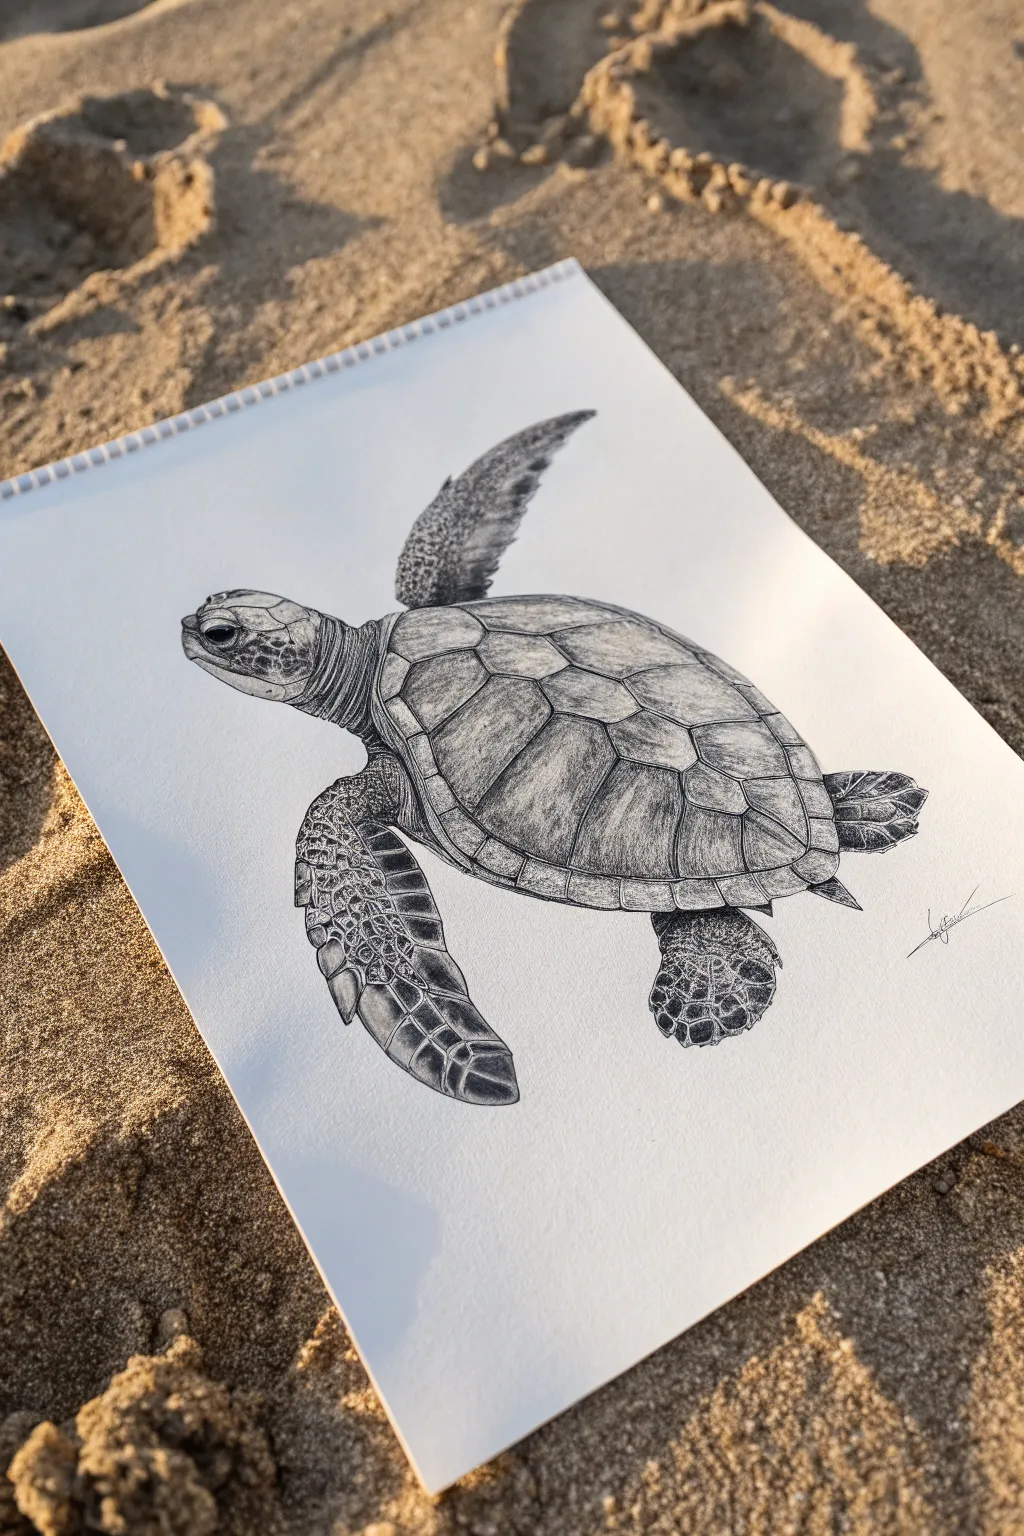
Realistic Turtle Shell Shading Study
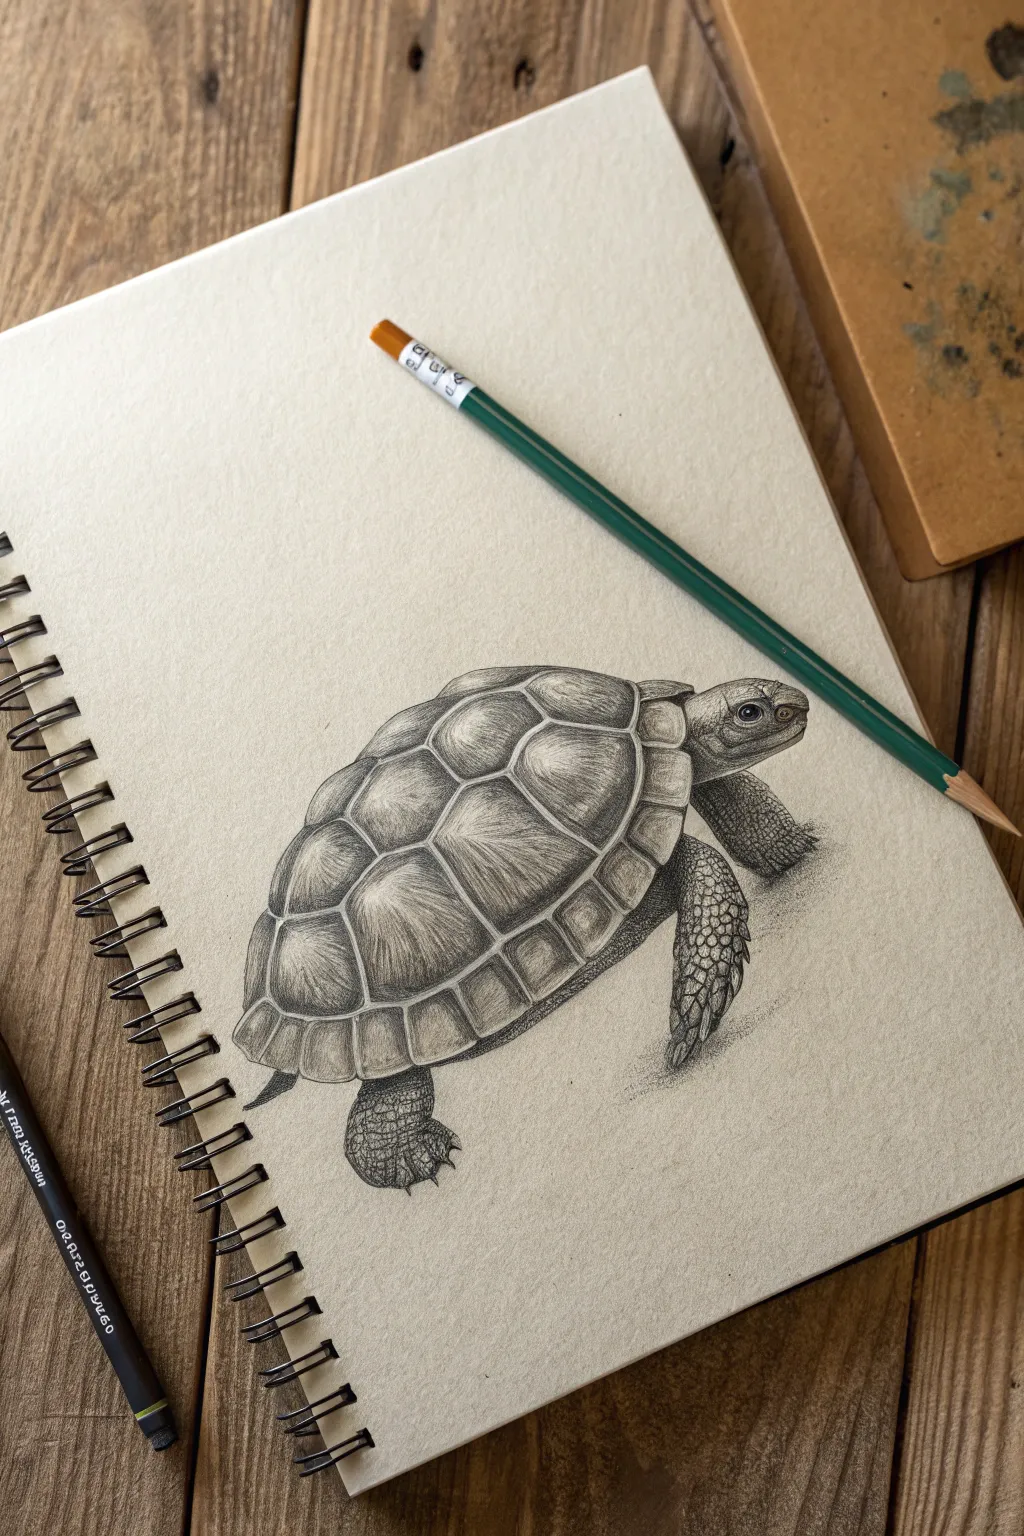
Master the art of texture and volume with this detailed pencil study of a tortoise. By focusing on overlapping layers of shading, you will render the domed dimension of the shell and the rough, scaly skin with striking realism.
Step-by-Step
Materials
- Spiral-bound sketchbook (medium tooth paper)
- Graphite pencils (HB for sketching, 2B and 4B for shading)
- Fine-point mechanical pencil (for details)
- Kneaded eraser
- Paper blending stump (optional)
- Green colored pencil (optional, for aesthetic photo styling)
Step 1: Conceptualizing the Form
-
Initial outline:
Begin with a light HB pencil to capture the basic oval shape of the shell. It should feel like a large, slightly flattened dome. Add the smaller shapes for the head protruding from the front right and the sturdy legs underneath. -
Mapping the scutes:
Lightly sketch the hexagonal and pentagonal patterns on the shell, known as scutes. Start with the central row running down the spine, then add the surrounding ring of plates. Don’t press hard yet; keep lines faint. -
Refining the anatomy:
Define the head’s shape, marking the eye and the beak-like mouth. Sketch the rough outlines of the legs, indicating where the heavy scales will go.
Step 2: Rendering the Shell
-
Establishing light source:
Decide on your light source coming from the top left. This means the top of each scute will catch highlight, while the bottom and right sides will be shadowed. -
Shading scute centers:
Using a sharp 2B pencil, begin shading the interior of each shell plate. Use radiating strokes that start from the center of the scute and fan outward, mimicking the growth rings naturally found on tortoises. -
Adding depth to separate plates:
Darken the valleys between the scutes with a 4B pencil. The lines separating the plates need to be the darkest points to create deep grooves, making the individual sections pop out. -
Creating the rim texture:
Move to the marginal scutes (the rim of the shell). These are often flatter. Shade them with vertical strokes, keeping the bottom edge distinct and slightly darker to show thickness. -
Highlighting:
Use your kneaded eraser to lift graphite from the upper-center of the most prominent scutes. This creates a rounded, domed effect.
Don’t Smudge!
Place a scrap piece of paper under your drawing hand. This prevents the oils in your skin from smearing your intricate pencil shading as you work across the page.
Step 3: Texturing the Skin
-
Detailing the head:
Switch to a fine-point pencil for the face. Darken the pupil, leaving a tiny speck created by the paper’s white for a glint of life. Shade wrinkles around the neck where the skin folds. -
Drawing leg scales:
The legs are covered in armor-like scales. Draw small, irregular oval shapes tightly packed together on the visible front leg. -
Shading the scales:
Shade each individual scale on the leg, making one side darker than the other to give them a pebble-like dimension. I find it helpful to squint occasionally to check the overall contrast. -
Rear leg and shadows:
The rear leg is further in shadow. Use broader, darker strokes here, focusing less on individual scale detail and more on the overall mass and darkness.
Try Watercolor
After the graphite drawing is done, try adding a very light wash of olive green and brown watercolor over the shell for an antique illustration look.
Step 4: Final Touches
-
Cast shadow:
Ground the tortoise by adding a cast shadow underneath the body. Keep the shadow darkest directly under the belly and feet, fading it out slightly as it moves away. -
Contrast check:
Go back over your darkest darks—specifically between the shell plates and under the shell rim—with your 4B pencil to maximize the 3D effect. -
Clean up:
Erase any initial construction lines that are still visible and clean up smudges around the outside of the drawing to keep the background crisp.
Take a moment to admire how simple pencil strokes have transformed into a textured, dimensional creature
Flipper Texture and Skin Wrinkles
This project captures the intricate anatomy of a sea turtle through detailed stippling and line work. By focusing on the patterns in the shell and the leathery texture of the flippers, you will create a realistic, high-contrast illustration that pops from the page.
Step-by-Step Tutorial
Materials
- Sketchbook with smooth, heavyweight paper (bristol or hot press watercolor paper recommended)
- HB pencil
- Kneaded eraser
- Fine liner pens (sizes 005, 01, 03, and 05)
- Reference photo of a sea turtle
Step 1: Basic Structure and Outline
-
Establish the curve:
Begin with an HB pencil to draw a sweeping curve for the top of the shell (carapace). This line dictates the turtle’s posture, so keep it fluid. -
Block in shapes:
Lightly sketch an oval for the main body and a smaller, rounded shape for the head. Add rough, elongated triangles for the front flippers and smaller, stubbier shapes for the rear flippers. -
Define the scutes:
Map out the large, hexagonal plates (scutes) on the shell. Start with the central column of plates and work outward toward the edges, ensuring the lines curve to follow the shell’s rounded form. -
Refine the outline:
Go over your sketch to finalize the contour of the head, beak, and flippers. Pay attention to the distinctive flipper shape, which looks a bit like a paddle with a jagged trailing edge. -
Initial inking:
Using an 01 fine liner, trace your final pencil lines. Keep your hand steady but allow for slight organic variations in line weight to avoid a ‘stiff’ look. -
Clear guidelines:
Once the ink is completely dry, thoroughly erase all pencil marks with a kneaded eraser so you have a clean slate for texturing.
Smudge Alert
Ink takes longer to dry on smooth bristol paper. Place a scrap piece of paper under your drawing hand to prevent oil transfer and accidental smudging.
Step 2: Developing the Texture
-
Detailing the head:
Switch to an 005 pen. Draw the small, cobblestone-like scales on the head and neck. These scales should be smaller near the eye and larger toward the neck. -
Shading the neck:
Add shading to the loose skin of the neck using fine parallel lines (hatching). Curve the lines to wrap around the neck’s cylindrical form. -
Shell texturing:
For the shell scutes, use stippling (tiny dots) combined with very short, scratchy strokes. Concentrate the dots near the edges of each plate to create a sense of depth and curvature. -
Building shell contrast:
Use an 03 pen to darken the crevices between the shell plates. Thicken the lines where the plates overlap to suggest shadow. -
Highlighting wear:
Leave the centers of the shell plates largely white/empty to represent the highest point catching the light.
Level Up: Environment
Instead of leaving the background white, add a subtle shadow underneath the turtle using stippling to make it look like it’s hovering or swimming.
Step 3: Flippers and Final Touches
-
Mapping flipper scales:
The front flippers have large, distinct scales along the leading edge and top. Outline these mosaic-like shapes with your 01 pen. -
Filling the scales:
Inside the larger flipper scales, use dense stippling or cross-hatching to make them appear dark and rough. Leave thin white gaps between the scales to define them. -
Texturing the rear flipper:
The rear flipper often has a bumpier texture. Use small, circular scribbles and dots here rather than clean lines to differentiate the skin type. -
Deepening shadows:
With an 05 pen, go back into the darkest areas—under the shell rim, the armpit area, and the bottom of the flippers—to punch up the contrast. -
Refining the eye:
Carefully ink the eye, leaving a tiny white circle for the highlight. Darken the area immediately surrounding the eye to make it look recessed. -
Final inspection:
Step back and look for balance. If the shell looks too light compared to the flippers, add another layer of stippling to the mid-tones.
Now you have a beautifully textured sea turtle study ready to frame or display

PENCIL GUIDE
Understanding Pencil Grades from H to B
From first sketch to finished drawing — learn pencil grades, line control, and shading techniques.
Explore the Full Guide
Turtle Drawing With Construction Lines
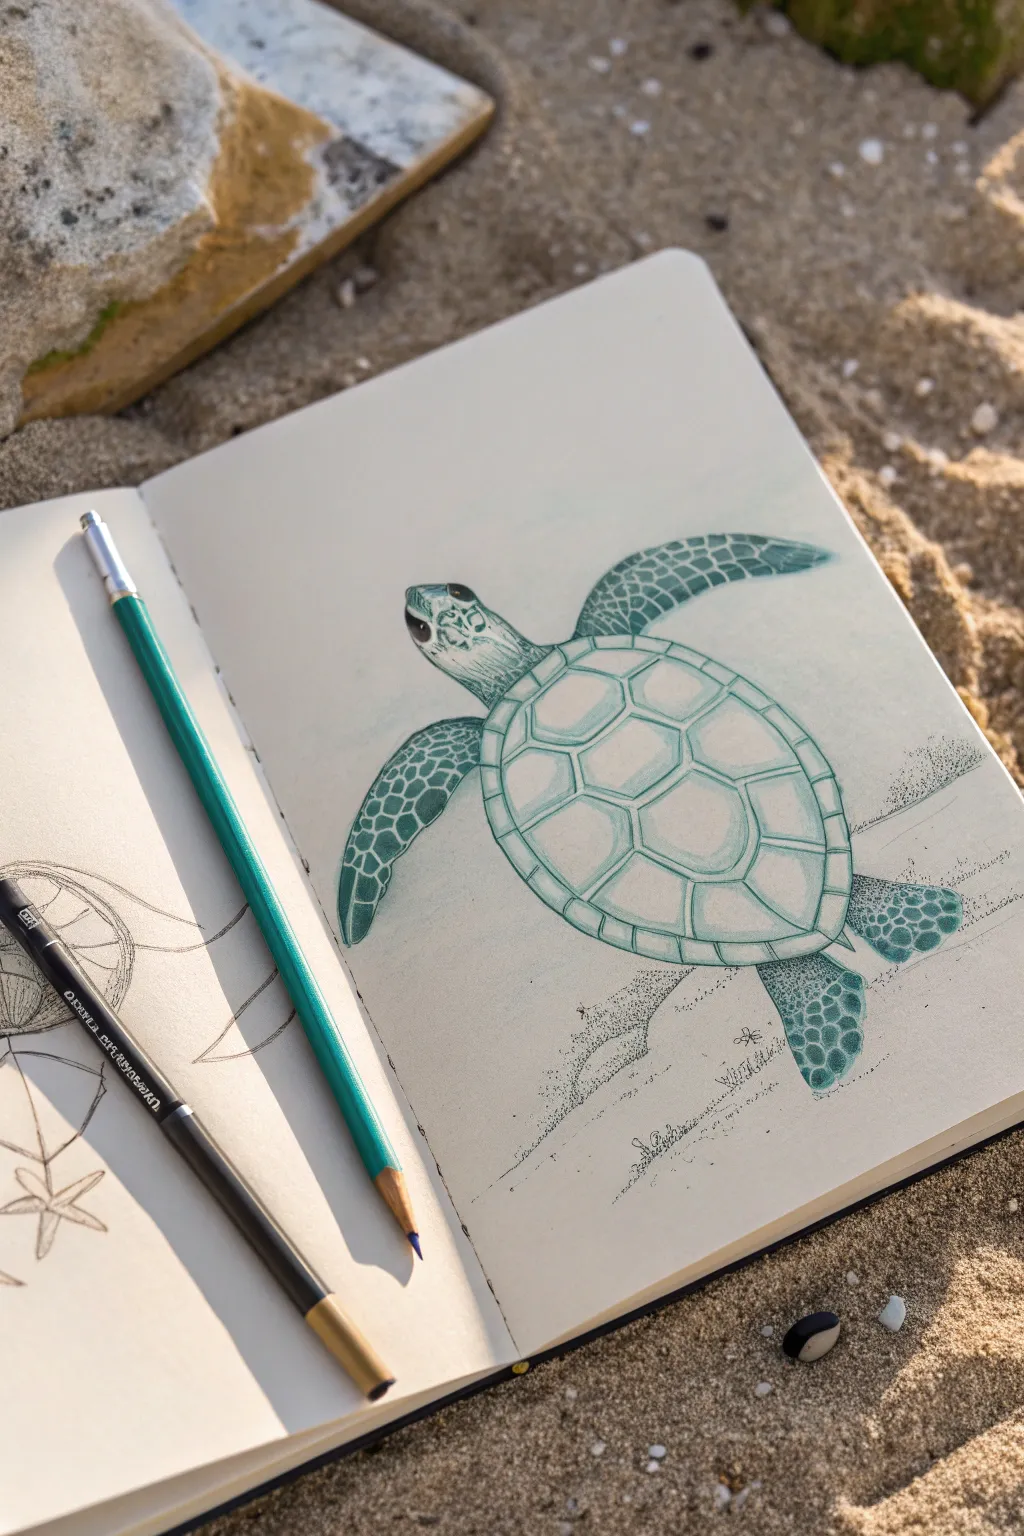
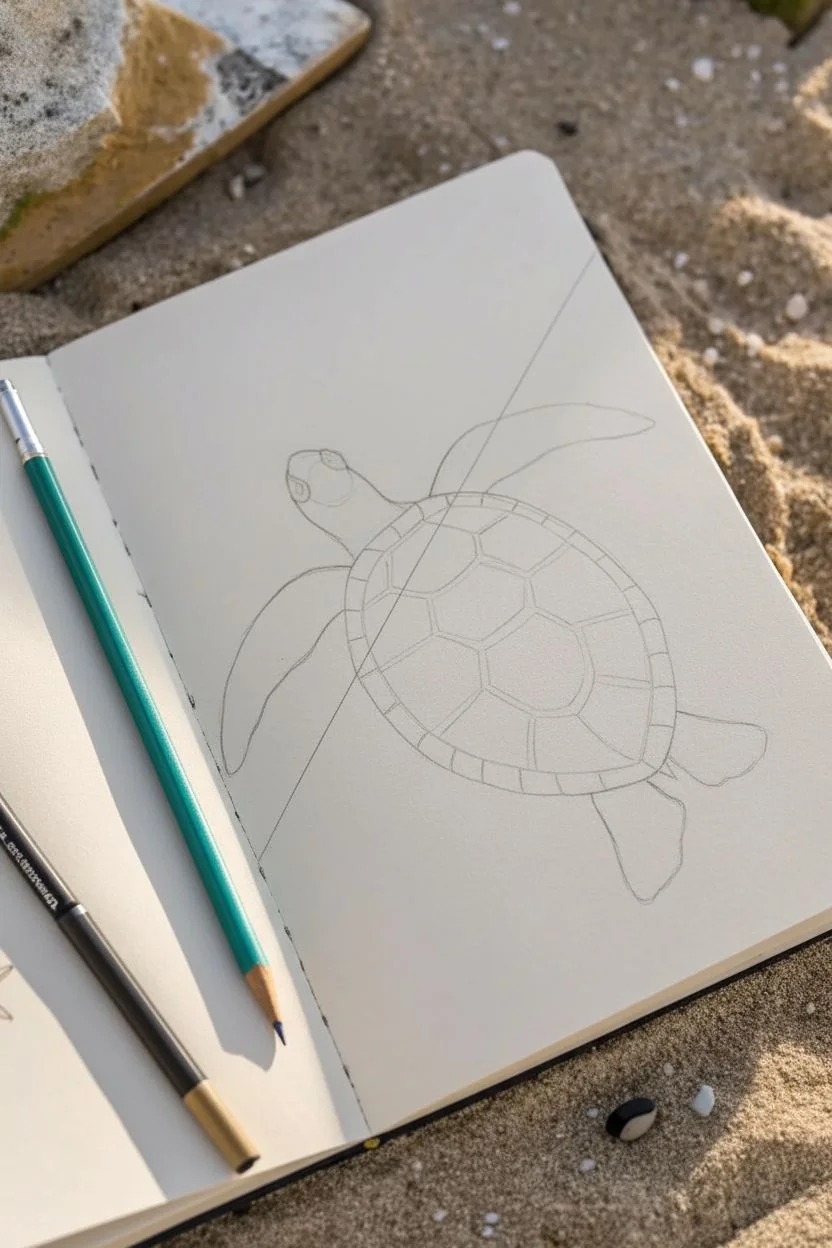
This sketchbook study captures the serene beauty of a sea turtle gliding through the ocean, rendered in soft teal and graphite tones. The drawing combines crisp structural lines with delicate shading to create a piece that feels both scientific and artistic.
Step-by-Step Tutorial
Materials
- Sketchbook (heavyweight paper recommended)
- HB or 2B Graphite pencil (for initial outlines)
- Teal or turquoise colored pencil
- Fine-point black ink pen (optional, for final defining lines)
- Eraser
- Pencil sharpener
Step 1: Constructing the Form
-
Establish the main axis:
Begin by lightly drawing a diagonal line across the center of your page. This will serve as the spine of the turtle and help you orient its swimming posture. -
Map the shell shape:
Draw a large, slightly elongated oval centered on your diagonal line. This is the carapace (top shell). Keep your pencil pressure very light so these construction lines can be erased later. -
Add the head:
Sketch a smaller, rounded shape at the upper left end of the shell for the head. Connect it to the shell with a short, thick neck. -
Position the flippers:
Draw two long, curved shapes extending from the front of the shell—these are the powerful front flippers. The one in the foreground should look larger and curve downward. Add two smaller, rounded shapes at the back for the rear flippers.
Step 2: Detailing the Shell
-
Draw the central scutes:
Starting down the middle of the shell, draw a column of hexagonal shapes (scutes). They don’t need to be mathematically perfect; slightly organic shapes look more natural. -
Add the side scutes:
Connect angled lines from the corners of your central hexagons out to the edge of the shell oval. This creates the radiating pattern typical of sea turtle shells. -
Define the rim:
Draw a border around the entire edge of the shell, dividing it into small rectangular segments. This creates the marginal scutes that frame the carapace. -
Clean up the lines:
Take your eraser and gently remove the initial construction oval and axis line, leaving only your detailed shell pattern visible.
Uneven Shell Pattern?
Don’t stress if your hexagons aren’t perfect. Real turtle shells are organic and asymmetrical. Slight irregularities actually make the drawing look more realistic and less like a computer graphic.
Step 3: Adding Texture and Color
-
Outline in teal:
Switch to your teal colored pencil. Firmly trace over all your graphite lines on the shell and body to give the drawing its distinct color palette. -
Shade the shell scutes:
I like to shade the inside edges of each shell segment lightly with the teal pencil. Leave the center of each scute white or very pale to create a highlighted, three-dimensional domed effect. -
Texture the head:
On the head, draw small, irregular scales using the teal pencil. Make the eye dark and prominent, leaving a tiny white speck for a catchlight. -
Scale the flippers:
Fill the flippers with a pattern of pebble-like scales. Draw larger scales on the leading edge of the flippers and smaller, tighter dots as you move toward the trailing edge. -
Deepen the shading:
Go back over the areas between the scales on the flippers and color them in solid teal, making the scales themselves pop out lighter against a dark background.
Highlight Pro-Tip
Keep your pencil sharp! Identify your light source (e.g., top left) and consistently leave the upper-left corner of every single scale and shell scute unshaded for a shiny, wet texture.
Step 4: Atmosphere and Finishing Touches
-
Create the surrounding texture:
Using a stippling technique (tapping the pencil tip repeatedly), create clouds of dots around the turtle, particularly near the rear flippers. -
Suggest movement:
Extend these stippled dots into faint, sweeping lines behind the turtle. This creates the illusion of disturbed sand or water currents as the turtle swims. -
Final darkening:
Review your drawing and press harder with the teal pencil on the shadowed underside of the shell and flippers to anchor the form. -
Optional ink outlines:
If you want clearer definition, use a fine black pen to selectively outline the eye and the deepest shadows between the shell segments, but keep it minimal to maintain the soft look.
Close your sketchbook knowing you’ve captured a peaceful moment of ocean life on paper
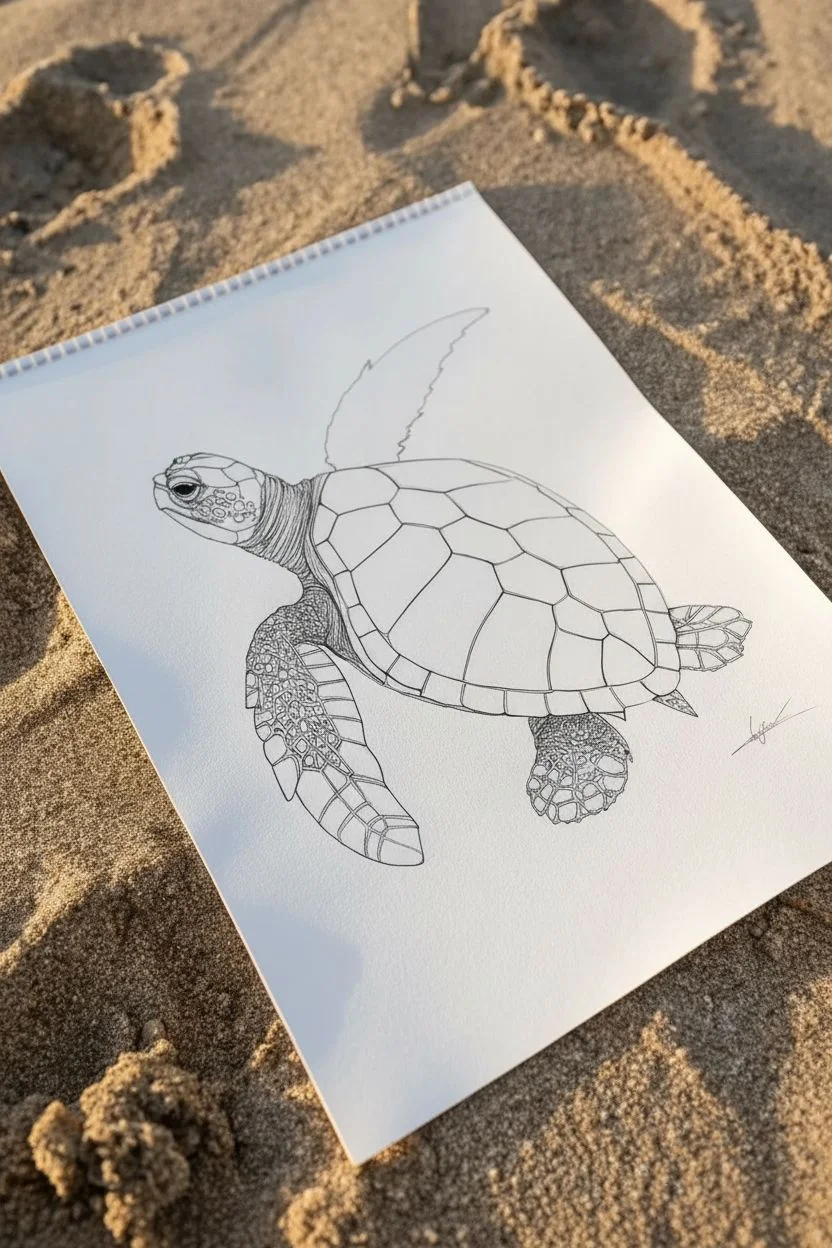
Bold Ink Turtle With Line Weight
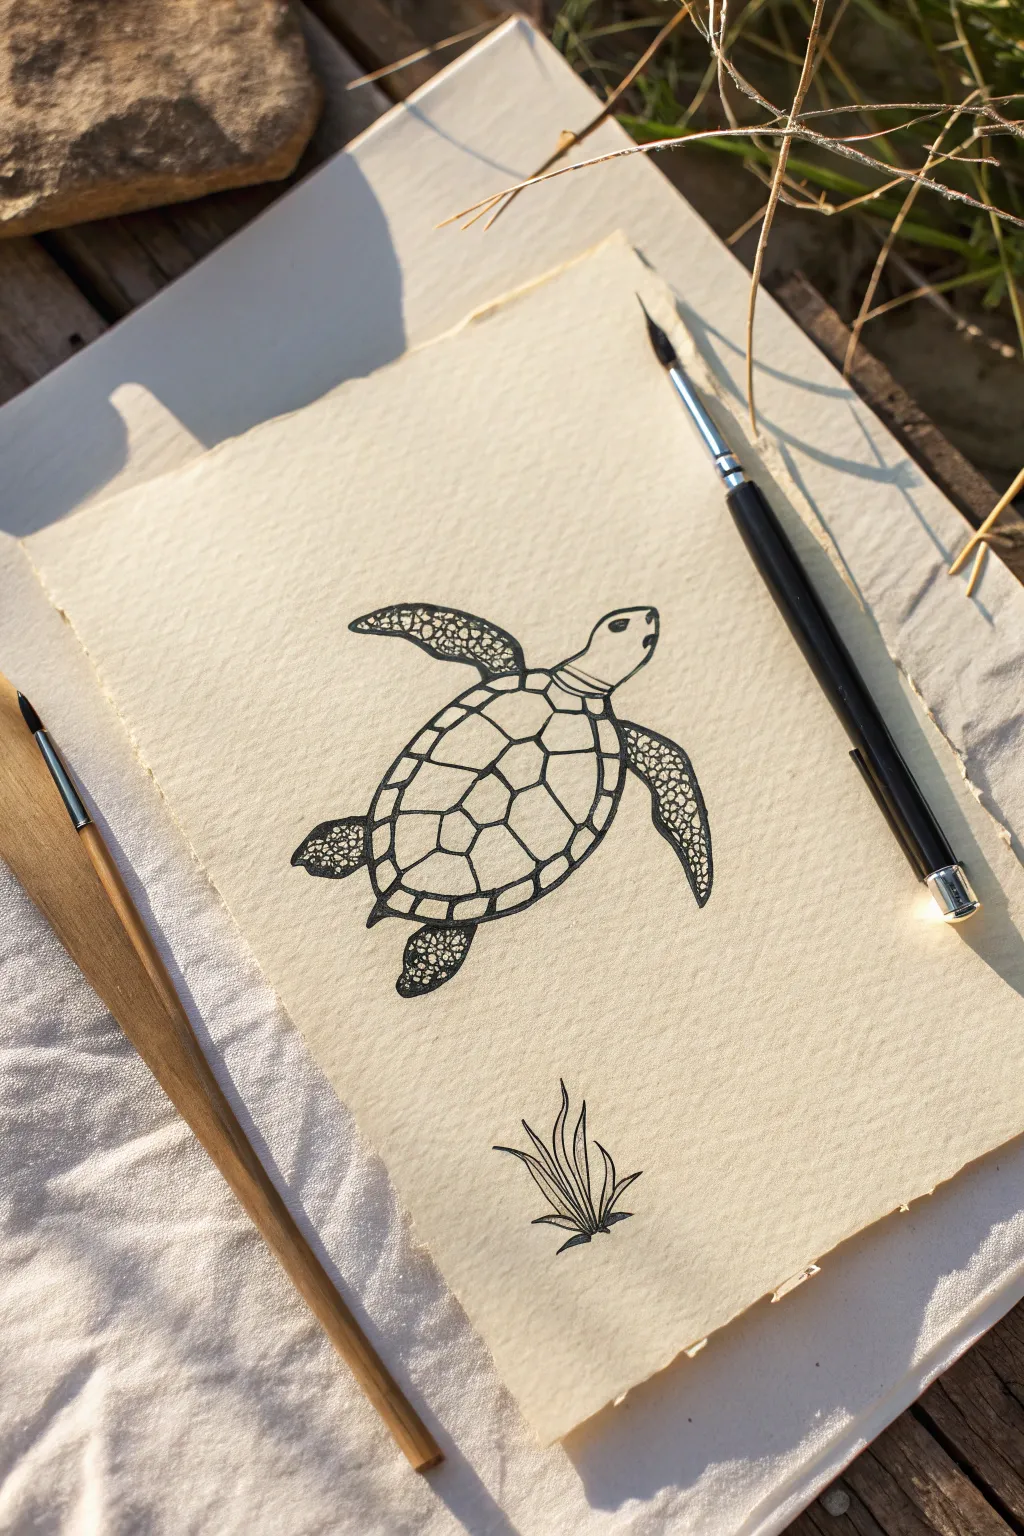
This elegant sea turtle illustration combines strong, confident outlines with delicate stippling textures to create a classic scientific study aesthetic. Using just black ink on textured paper allows you to focus purely on line weight and negative space for a strikingly crisp result.
Step-by-Step
Materials
- Textured cream or off-white watercolor paper (cold press)
- Black drawing ink (waterproof)
- Fine liner pens (0.1mm, 0.3mm, 0.5mm) or dip pen with nibs
- Pencil (HB)
- Kneaded eraser
- Small round brush (size 0 or 2) for filling large areas
- Ruler (optional for paper tearing)
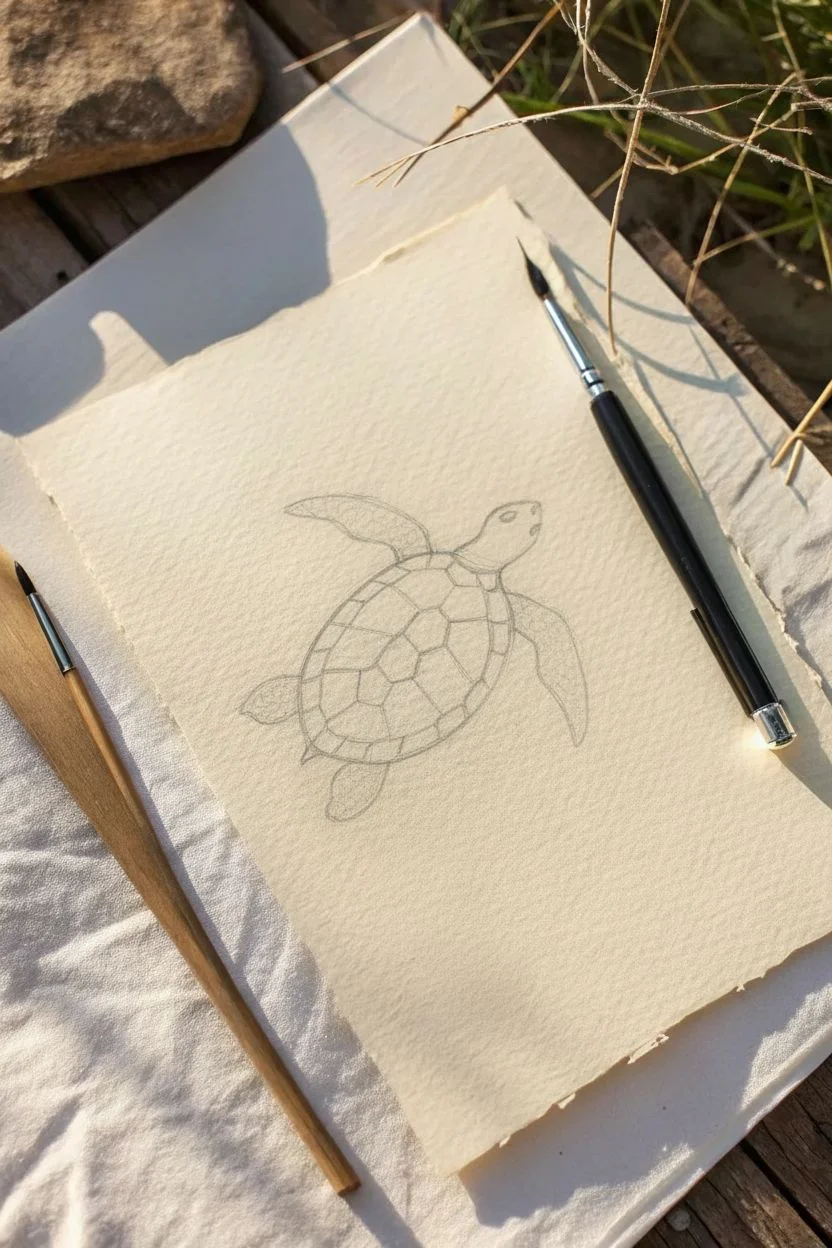
Step 1: Drafting the Shapes
-
Prepare the paper:
Start by tearing the edges of your watercolor paper against a ruler or table edge. This creates that lovely organic, deckled edge look seen in the reference, adding to the vintage field-study vibe. -
Outline the shell:
Using your HB pencil, lightly sketch a large oval shape for the carapace (shell) slightly angled on the page. Keep your pressure extremely light so the graphite creates no indentations. -
Add head and flippers:
Sketch the head protruding from the top right of the oval. Add the two large front flippers sweeping backward like wings, and the two smaller rear flippers tucking underneath the shell. -
Map the scutes:
Draw the geometric pattern on the shell. Start with a central row of five hexagonal shapes. Surround these with a ring of smaller, varied polygons that connect to the shell’s rim.
Step 2: Inking the Outline
-
Trace major contours:
Switch to your medium-weight pen (0.3mm) or a dip pen. Ink the outer perimeter of the shell and the flippers. Aim for a smooth, continuous line rather than sketchy strokes. -
Define the shell pattern:
Ink the lines separating the shell scutes. To achieve the ‘bold line weight’ look, go back over the outer edges of the scutes to thicken them slightly, making the shell pattern pop against paper. -
Ink the head features:
Carefully outline the head. Draw a small, solid black circle for the eye, leaving a tiny speck of white paper for the highlight. Add the mouth line and a few small scale lines on the neck. -
Erase pencil guides:
Wait until the ink is completely dry to the touch. Gently roll a kneaded eraser over the entire drawing to lift the graphite without damaging the textured paper surface.
Ink Control Pro-Tip
When thickening lines, always draw on the ‘shadow side’ of the line (usually the bottom or right edge). This naturally suggests volume and lighting without needing complex shading.
Step 3: Texturing and Details
-
Stipple the front flippers:
This is where patience pays off. Using your finest pen (0.1mm) or a very fine nib, fill the front flippers with a pattern of irregular, scaled shapes. It mimics a cobblestone texture. -
Darken the gaps:
Fill the spaces *between* the flipper scales with solid black ink. This ‘negative space’ technique defines the scales without outlining every single one individually. -
Texture the rear flippers:
Repeat the scaling process on the back flippers, but you can make the pattern slightly denser and darker to suggest they are further away or in shadow. -
Add shell details:
Using your finest line, add tiny, sparse dots or very short hatch marks near the edges of individual shell scutes. This gives the shell a slightly rounded, 3D appearance. -
Refine line weights:
Review your main outlines. If any lines look too thin or weak, trace them again with a slightly thicker pen (0.5mm) to ensure the turtle’s silhouette is the strongest element on the page.
Uneven Lines?
If your hand shakes and lines get wobbly, don’t panic! Just thicken the wobbly part slightly to smooth it out. Bold styles are very forgiving of minor corrections.
Step 4: Finishing Touches
-
Draft the seaweed:
About two inches below the turtle, lightly pencil a small clump of sea grass or aloe-like plant. Use upward, sweeping curves that meet at sharp points. -
Ink the plant element:
Ink the plant using confident, quick strokes that taper at the ends. The lines should be thinner at the tips and thicker at the base where the leaves cluster. -
Final assessment:
Step back and look at the balance. If the turtle feels too light, you might darken the shadow areas on the flippers with a little more ink density.
You now have a striking, minimalist piece of marine art ready to display


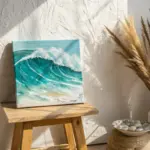
Watercolor Turtle With Soft Washes
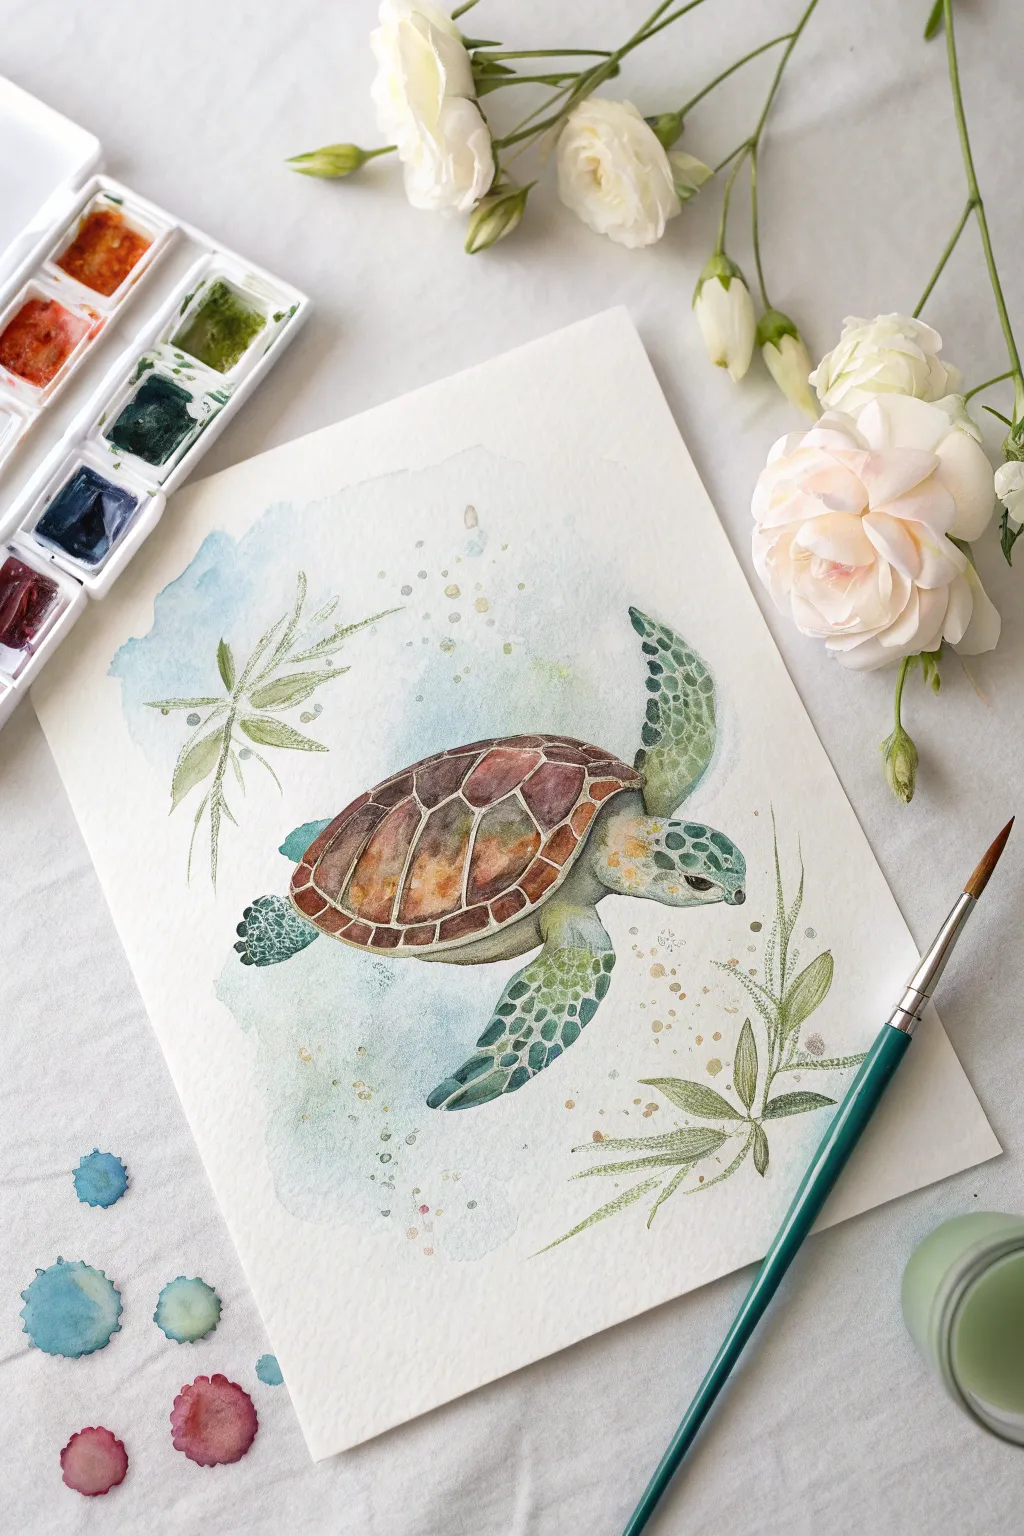
This project captures the gentle motion of a sea turtle gliding through the ocean using soft watercolor washes and precise detailing. The combination of a loose, misty background with the structured patterns of the turtle’s shell creates a beautifully balanced composition perfect for nature lovers.
Detailed Instructions
Materials
- Cold press watercolor paper (300 gsm)
- Watercolor paints (Sap Green, Burnt Sienna, Yellow Ochre, Indigo, Sepia, Turquoise)
- Round brushes (flats for washes, size 4 & 0 for details)
- Pencil (HB or H)
- White gel pen or gouache (optional highlights)
- Masking fluid
- Clean water jars
- Paper towels
Step 1: Sketching and Preparation
-
Outline the form:
Start with a light pencil sketch. Draw an oval for the main body and add the head extending forward. Sketch the front flippers curving downwards and back, simulating a swimming motion, and add the smaller rear flippers. -
Map shell patterns:
Lightly draw the hexagonal and pentagonal scutes on the shell. Don’t worry about perfection; organic shapes look more natural. Add faint indications of scales on the flippers and head. -
Mask highlights:
Apply tiny dots of masking fluid on the flippers and head where you want to preserve the white of the paper for sparkles or bright scales. Let this dry completely before painting.
Step 2: Painting the Background
-
Wet the paper:
Brush clean water around the outside of your turtle sketch, creating an irregular, cloud-like shape. Avoid getting water inside the turtle’s outline. -
Apply the wash:
Drop in watered-down Turquoise and a touch of Indigo into the wet area. Tilt the paper gently to let the colors drift and bloom, creating a soft, watery environment. Let this layer dry completely.
Fixing Muddy Colors
If colors bleed and turn muddy, stop immediately. Let the paper dry completely, then gently lift the unwanted color with a damp, clean brush before reapplying fresh paint.
Step 3: Bringing the Turtle to Life
-
Base layer for skin:
Mix a pale, watery wash of Sap Green and apply it to the head and flippers. While still damp, drop in hints of Yellow Ochre on the cheeks and tops of the flippers for warmth. -
Shell base colors:
Paint the scutes of the shell individually. Use a mix of Burnt Sienna and Yellow Ochre, varying the concentration in each scute to create a mottled, natural look. Leave tiny gaps of white paper between them if you can, or lift color with a damp brush for highlights. -
Deepening the shell:
Once the first layer is dry, mix Sepia with a little Burnt Sienna. Paint the outer edges of the shell scutes and add shadows to give them a convex, 3D appearance. -
Detailed scales:
Using your smallest brush and a mix of Indigo and Sap Green, paint the distinct scales on the flippers. Start darker at the tips and fade out closer to the body. This takes patience but adds incredible realism. -
Shadows and volume:
Add a shadow under the shell where the flippers attach using a diluted gray or violet mix. This separates the shell from the body. -
The eye:
Carefully paint the eye with dark Sepia or Black, leaving a tiny pinprick of white paper for the reflection to give it life.
Add Metallic Accent
Use metallic watercolor gold on the rims of the shell scutes or for the background splatters. It catches the light beautifully and mimics sun rays underwater.
Step 4: Plants and Final Touches
-
Botanical accents:
Paint simple, linear seaweed or plant forms in two corners (diagonal from each other) to frame the turtle. Use a light olive green for these ensuring they look delicate and translucent. -
Splatter texture:
Cover the turtle with a scrap piece of paper. Load a brush with watery green and gold paint and tap it against another brush handle to create fine splatters around the background wash for a bubbly effect. -
Remove masking:
Rub away the masking fluid to reveal the crisp white highlights on the skin. -
Refine lines:
I like to use a very fine brush with concentrated Sepia to crisply outline the major shell segments and refine the separation between the scutes. -
Final highlights:
If any highlights were lost, use a white gel pen or a tiny dot of white gouache to bring back sparkle to the water or the turtle’s wet shell.
Step back and admire the calm, aquatic scene you’ve created.
Turtle Surrounded by Flowers and Leaves
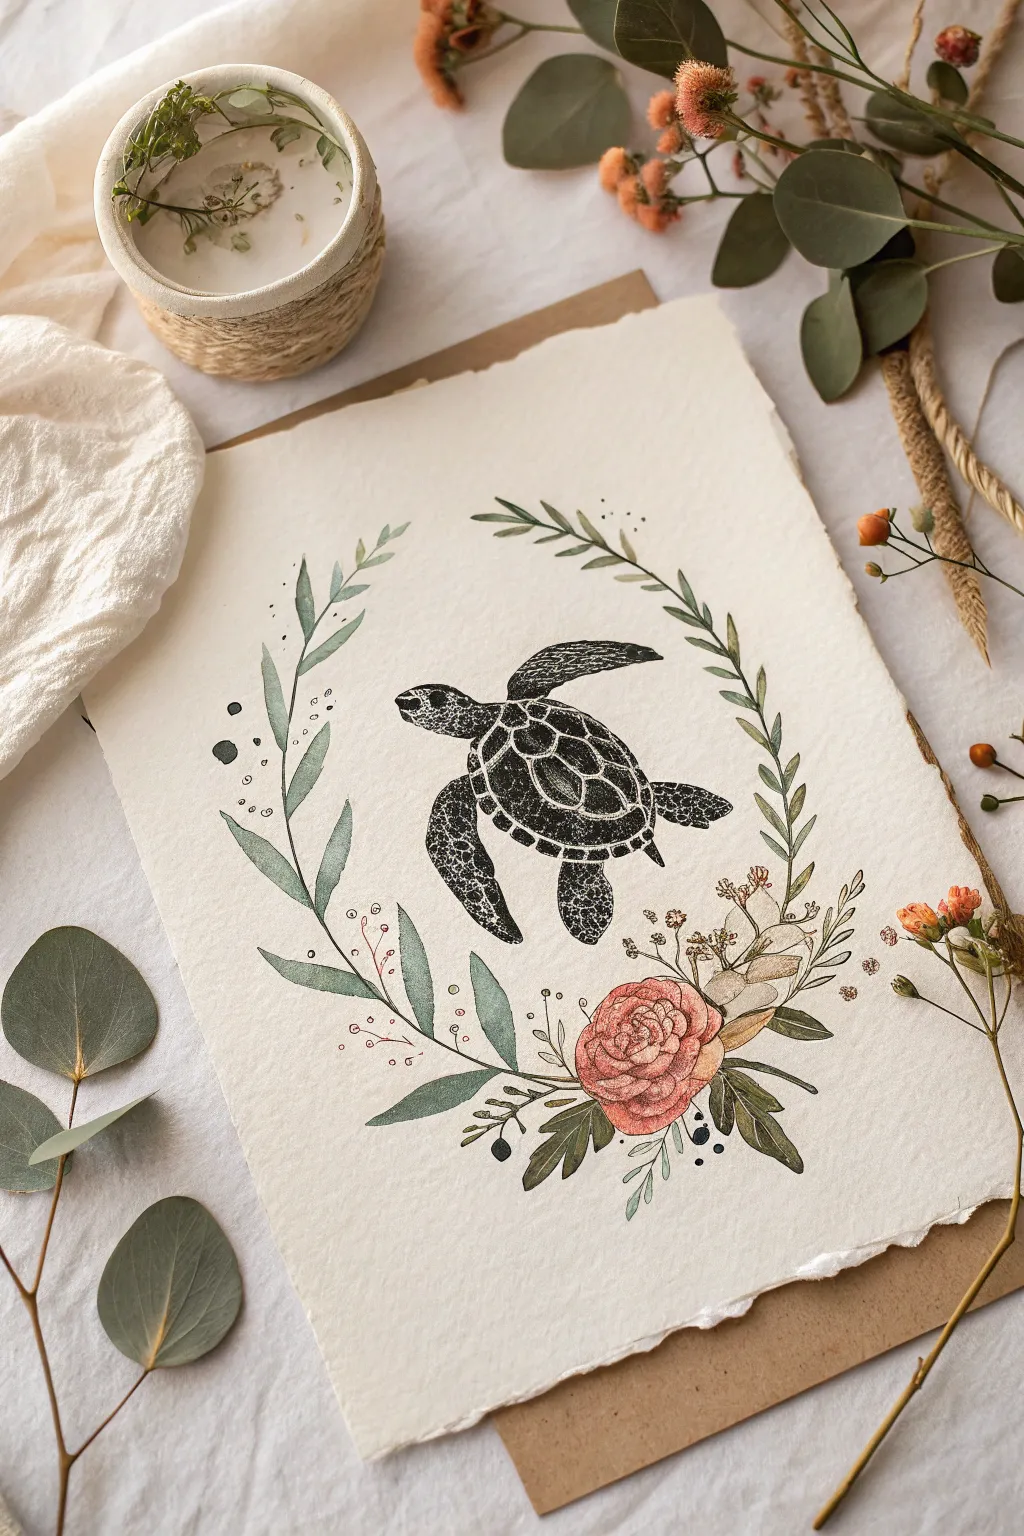
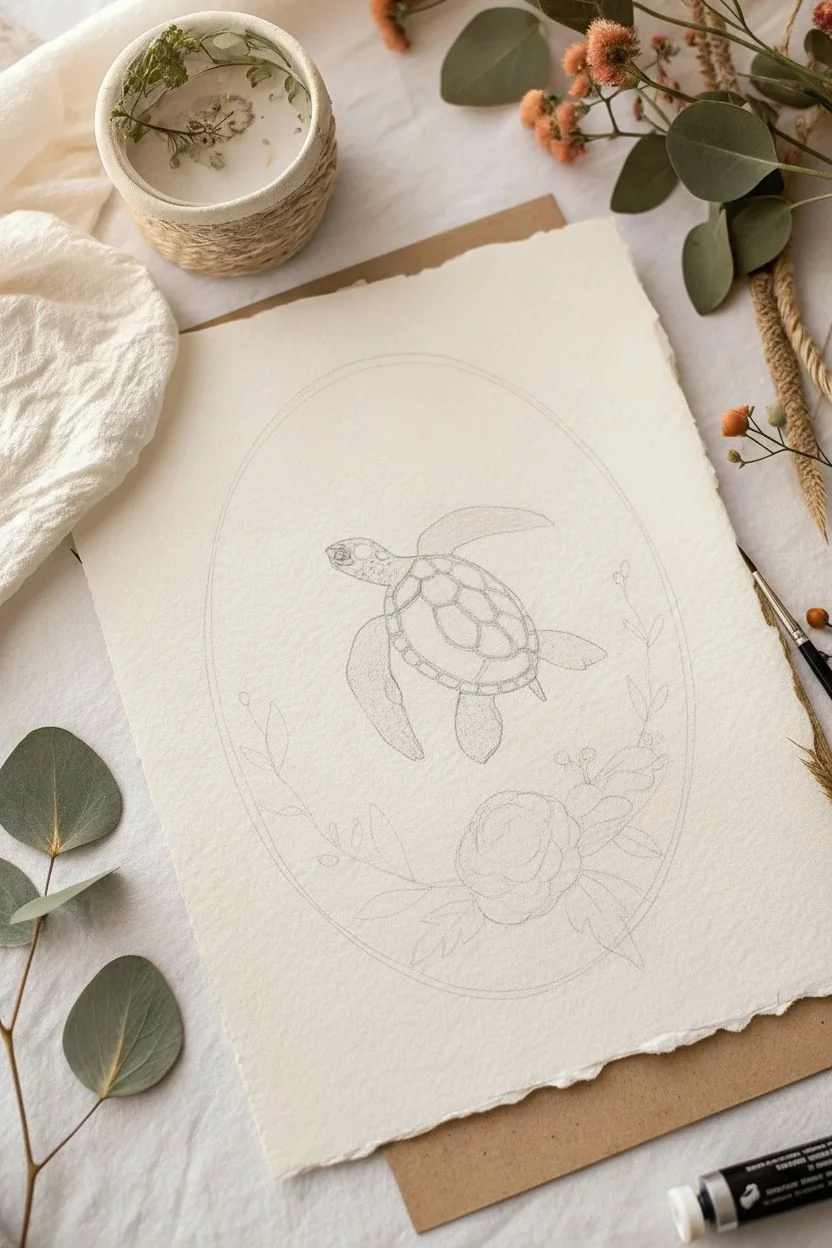
This elegant project combines the stark contrast of stippled ink work with the softness of watercolor botanicals. The centerpiece is a detailed sea turtle swimming through a delicate wreath of eucalyptus and roses, created on rustic deckle-edge paper for a vintage, organic feel.
Step-by-Step Guide
Materials
- Heavyweight watercolor paper (300gsm) with deckled edges
- Fine liner pens (sizes 005, 01, and 03) in waterproof black ink
- Watercolor paints (Sage Green, Olive Green, Dusty Rose, Burnt Sienna)
- Round watercolor brushes (Size 2 and Size 4)
- HB pencil and soft eraser
- Paper towel and water cup
- Optional: White gel pen for highlights
Step 1: Sketching the Layout
-
Establish the curve:
Begin by lightly sketching a large oval shape on your paper to serve as the guide for your wreath. It doesn’t need to be perfectly symmetrical; an organic shape works best for this natural style. -
Position the turtle:
In the center of the oval, sketch the outline of the sea turtle. Draw the tear-drop shaped shell slightly angled, then add the head, large front flippers reaching out, and smaller back flippers. -
Map the patterns:
Lightly draw the hexagonal scutes (the shell patterns) on the turtle’s back. Don’t press too hard with the pencil, as you want these lines to disappear under the ink later. -
Draft the botanicals:
Sketch the floral elements along the bottom right curve of your oval. Place a large rose shape as the anchor, then sketch sweeping stems with eucalyptus-style leaves growing upwards on both sides to form the wreath shape.
Stippling Patience
Stippling takes time! Don’t rush or the dots will turn into dashes. Take breaks to rest your hand to ensure your dots remain crisp circles.
Step 2: Inking the Turtle
-
Outline the shell:
Using an 01 fine liner, carefully trace the outline of the turtle’s shell and the internal scute patterns. Keep your lines confident but not too thick. -
Stipple the skin:
Switch to an 005 pen for the skin texture. Instead of coloring solid black, use tiny dots (stippling) to create shading on the head and flippers. Pack the dots closer together where shadows would fall, like near the shell, and spread them out for highlights. -
Detail the shell:
Fill in the gaps between the shell scutes with solid black using an 03 pen. Leave the scutes themselves mostly white or lightly textured with dots to create contrast. -
Enhance flipper patterns:
On the front flippers, draw small oval shapes to represent scales. Fill the space around these scales with heavy stippling or solid black, leaving the scales themselves light. -
Add movement:
Add a few small circles and dots outside the turtle’s flippers to suggest bubbles and movement in the water.
Step 3: Painting the Botanicals
-
Mix your greens:
Prepare a watery mix of Sage Green and a touch of gray. You want a very muted, transparent wash for the leaves. -
Paint the leaves:
Using a size 4 brush, paint the eucalyptus leaves. Start at the stem and pull outward, lifting the brush at the tip to create a tapered point. Vary the color intensity by adding more water to some leaves for a translucent look. -
Create the rose:
Mix a soft Dusty Rose color. Start from the center of the flower with a tighter, darker swirl, and paint wider C-shaped petals as you move outward, diluting the paint with water as the petals get larger. -
Add contrast leaves:
While the main leaves dry, mix a slightly darker Olive Green. Paint a few smaller leaves closer to the rose cluster to add depth and variety to the foliage. -
Paint subtle fillers:
Using a very pale brown or diluted Burnt Sienna, paint the tiny sprigs and filler flowers that poke out from behind the rose. Keep these very loose and faint.
Go Gold
Once the ink is dry, use metallic gold watercolor or a gold paint pen to add accents to the turtle’s shell or the leaf veins for a luxurious shine.
Step 4: Final Details
-
Ink the plants:
Once the watercolor is completely bone-dry, use your 005 pen to add very delicate outlines to the leaves. Don’t outline every single leaf perfectly; broken lines look more artistic here. -
Detail the flower:
Add fine ink details to the rose petals, focusing on the center folds. Use light, feathery strokes to define the petals without overpowering the soft paint. -
Connect the elements:
Draw thin stems in ink to connect your leaves and flowers, ensuring the flow of the wreath looks continuous. -
Erase guidelines:
Gently erase any remaining pencil marks, being careful not to rub the watercolor texture too vigorously. -
Add accent dots:
Scattered small ink dots among the leaves and near the flower add a whimsical, magical finish to the composition.
Now you have a serene piece of ocean-inspired art perfect for framing or gifting
Zentangle Pattern Turtle Fill
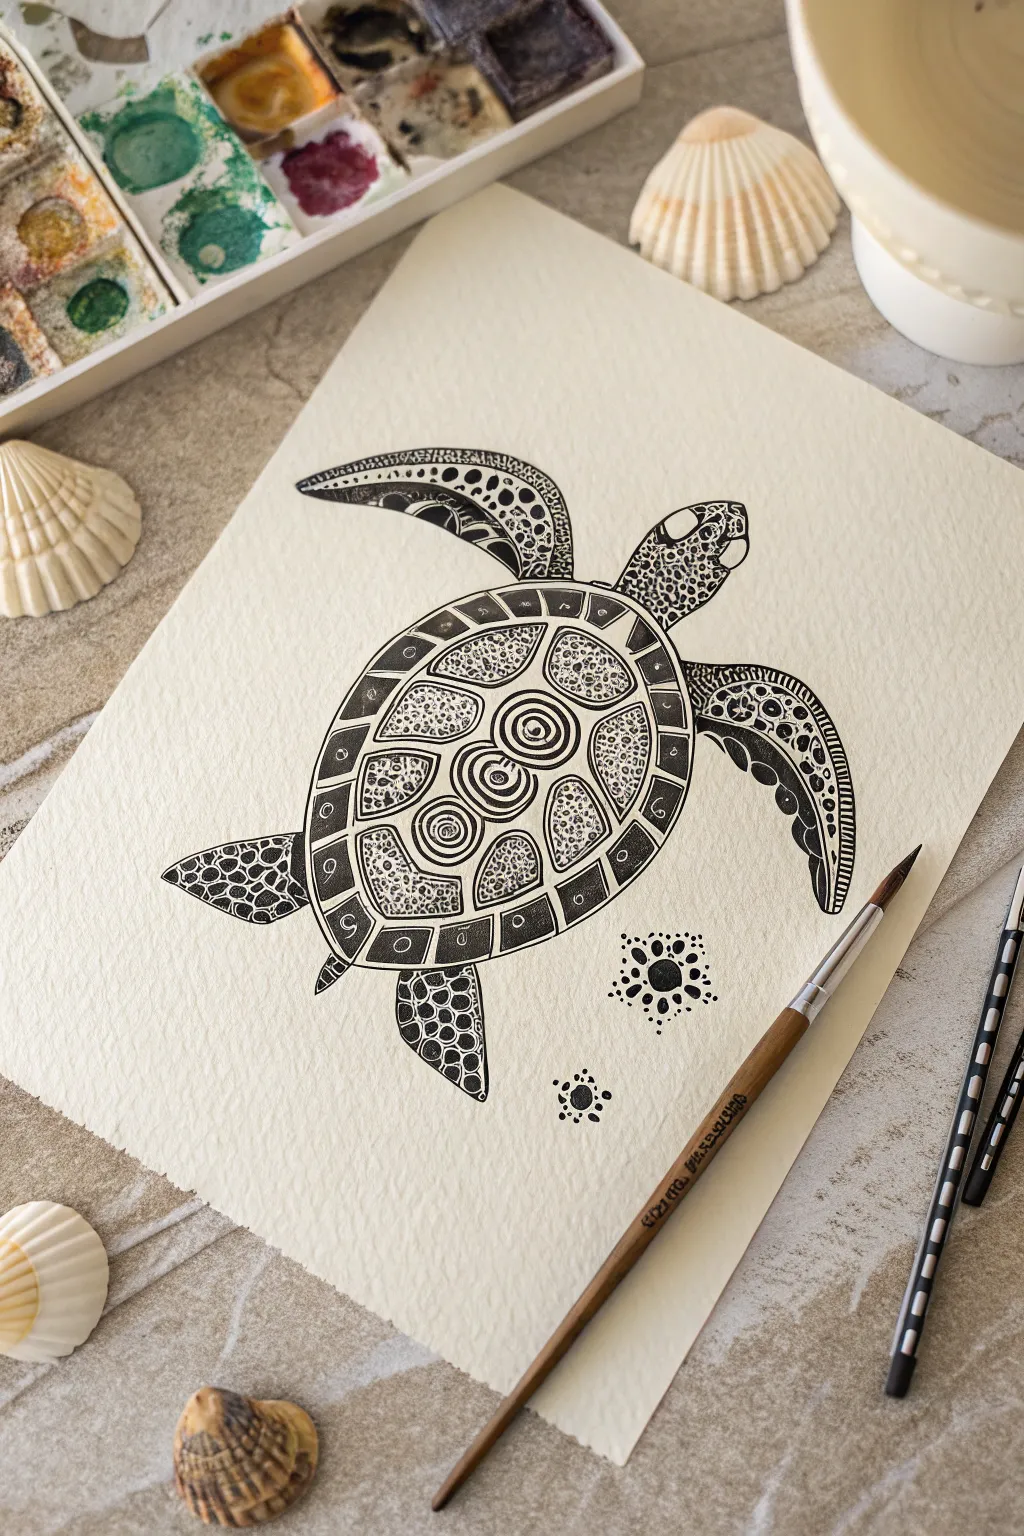
This meditative drawing project captures the serene beauty of a sea turtle using intricate patterns and high-contrast black ink. The result is a striking, stylized piece that combines organic shapes with structured geometric details.
Step-by-Step Tutorial
Materials
- Heavyweight watercolor or mixed media paper (smooth or cold press)
- Pencil (HB or H)
- Eraser
- Fine liner pens (sizes 005, 01, 03, and 05)
- Brush pen or thick black marker for filling large areas
- Ruler (optional for symmetry checks)
Step 1: Outlining the Form
-
Sketch the oval:
Begin lightly with your pencil. Draw a large, slightly elongated oval in the center of your page to represent the main shell (carapace). Angle it diagonally if you want a swimming motion. -
Add the head and tail:
Attach a smaller, rounded shape at the top right for the head, creating a small neck connection. At the opposite end, sketch a tiny, pointed tail. -
Draft the flippers:
Sketch two large, curved front flippers extending outward like wings. Add two smaller, paddle-shaped rear flippers near the tail. Focus on smooth, flowing curves. -
Define the shell segments:
Inside the main oval, draw a smaller oval to create a border. Then, divide the inner oval into a central column of shapes (roughly hexagonal) and surrounding side plates. Don’t worry about perfect symmetry; organic variation looks natural. -
Refine the outline:
Go over your pencil sketch with a 03 or 05 fine liner to create the definitive outer boundary of the turtle. Erase your initial pencil guides once the ink is dry.
Step 2: Detailed Patterning
-
Establish the border segments:
Using a 01 pen, divide the outer ring of the shell into rectangular segments. In the center of each segment, draw a small circle or oval. -
Fill the border:
Switch to a thicker pen or brush pen to color the space around those small circles black, leaving the circles themselves white for high contrast. -
Create the central focal points:
In the central column of shell plates, draw concentric circles. I like to start with the middle plate and work outward, varying the number of rings in each segment. -
Add stippling texture:
For the side plates of the shell, use a 005 or 01 pen to fill the shapes with tiny bubbles or stippling (closely packed dots). This creates a different texture from the solid lines. -
Detail the head:
Draw small, irregular pebble shapes on the head and neck. Keep the eye area distinct as a simple oval. -
Pattern the front flippers:
Divide the leading edge of the front flippers into sections with hatching or dots. For the trailing edge, draw large, distinctive circles or ovals. -
Ink the flipper contrast:
Color the background of the flipper’s trailing edge black, ensuring the large circles remain white. Add tiny dots inside the white circles for extra detail. -
Work on the rear flippers:
Repeat the pebble or mosaic pattern used on the head for the rear flippers. Color the spaces between the ‘pebbles’ black to make them pop.
Ink Smearing?
Work from top-left to bottom-right (if you’re right-handed) to avoid dragging your hand through wet ink. Or, place a scrap piece of paper under your hand.
Step 3: Final Touches
-
Add varying line weights:
Take a 05 pen and thicken the main separation lines between the shell plates. This makes the overall structure easier to read. -
Draw decorative accents:
To balance the composition, draw two small mandala-like flower shapes floating near the turtle. Start with a solid black circle and surround it with rings of dots. -
Clean up:
Do a final pass with your eraser to remove any stubborn pencil marks. Check for any lighter patches in your solid black areas and touch them up.
Add a Splash of Color
Once the ink is fully dry, use watercolor paints to add a wash of turquoise or sea green over the shell for a vibrant mixed-media look.
Step back and admire the rhythm created by your contrasting patterns and textures


Have a question or want to share your own experience? I'd love to hear from you in the comments below!