When I’m in the mood for acrylic Halloween painting, I always reach for bold silhouettes, glowing skies, and a couple of spooky classics that practically paint themselves. Here are my favorite acrylic Halloween painting ideas—from super familiar to delightfully unexpected—so you can pick a vibe and start tonight.
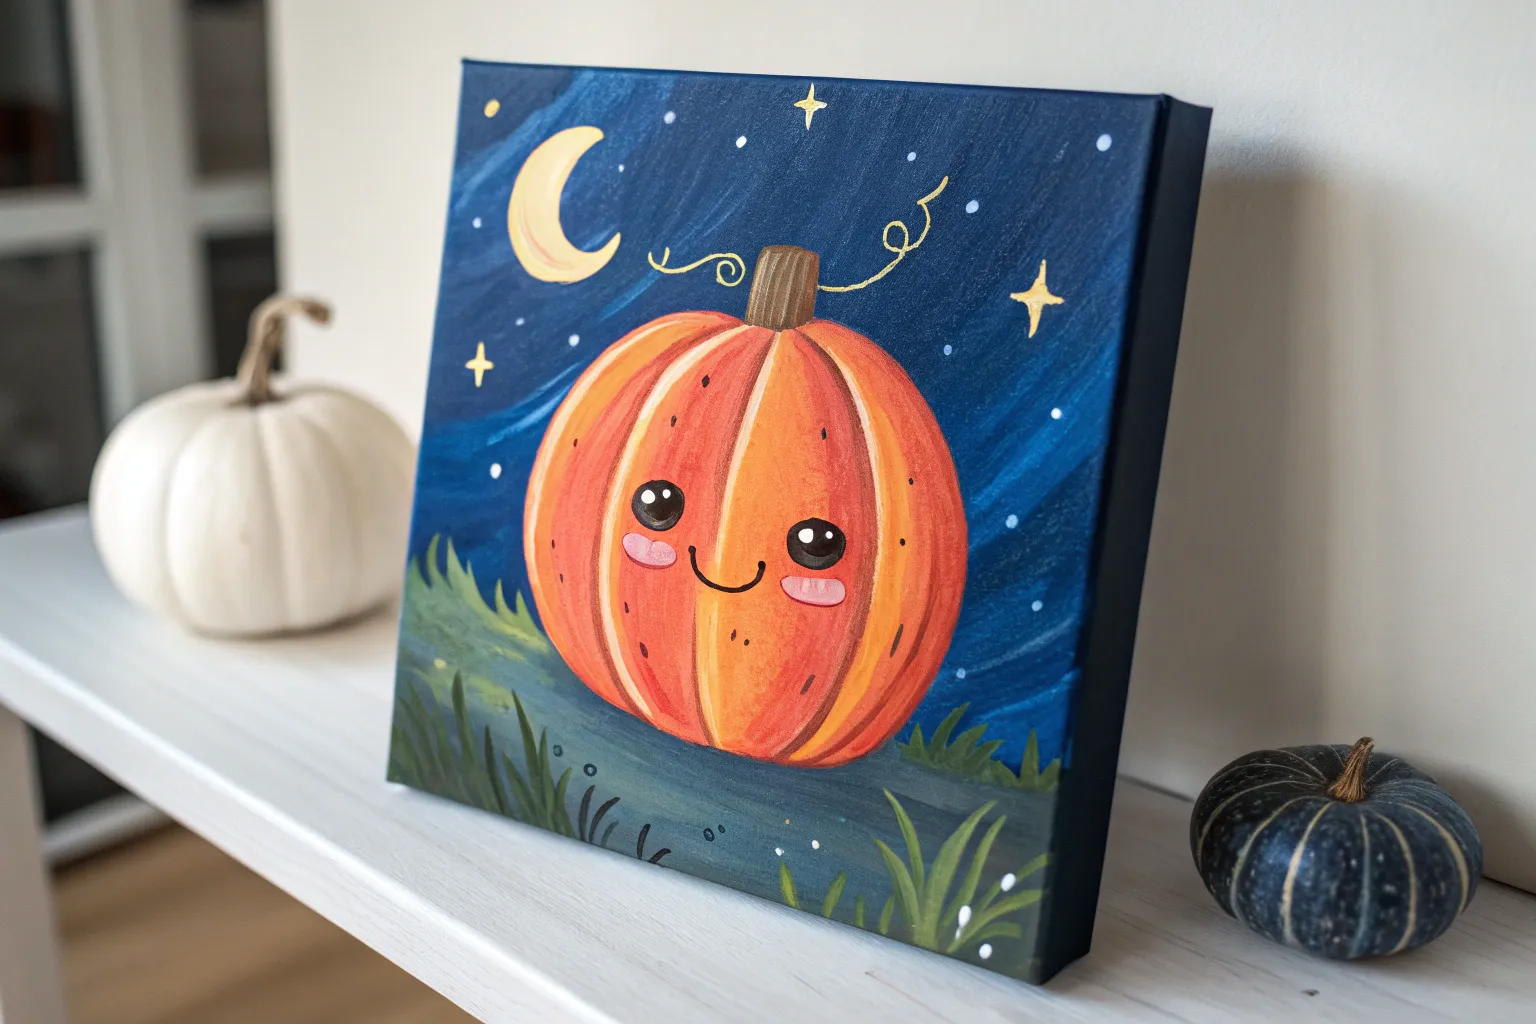
Pumpkin Patch at Twilight
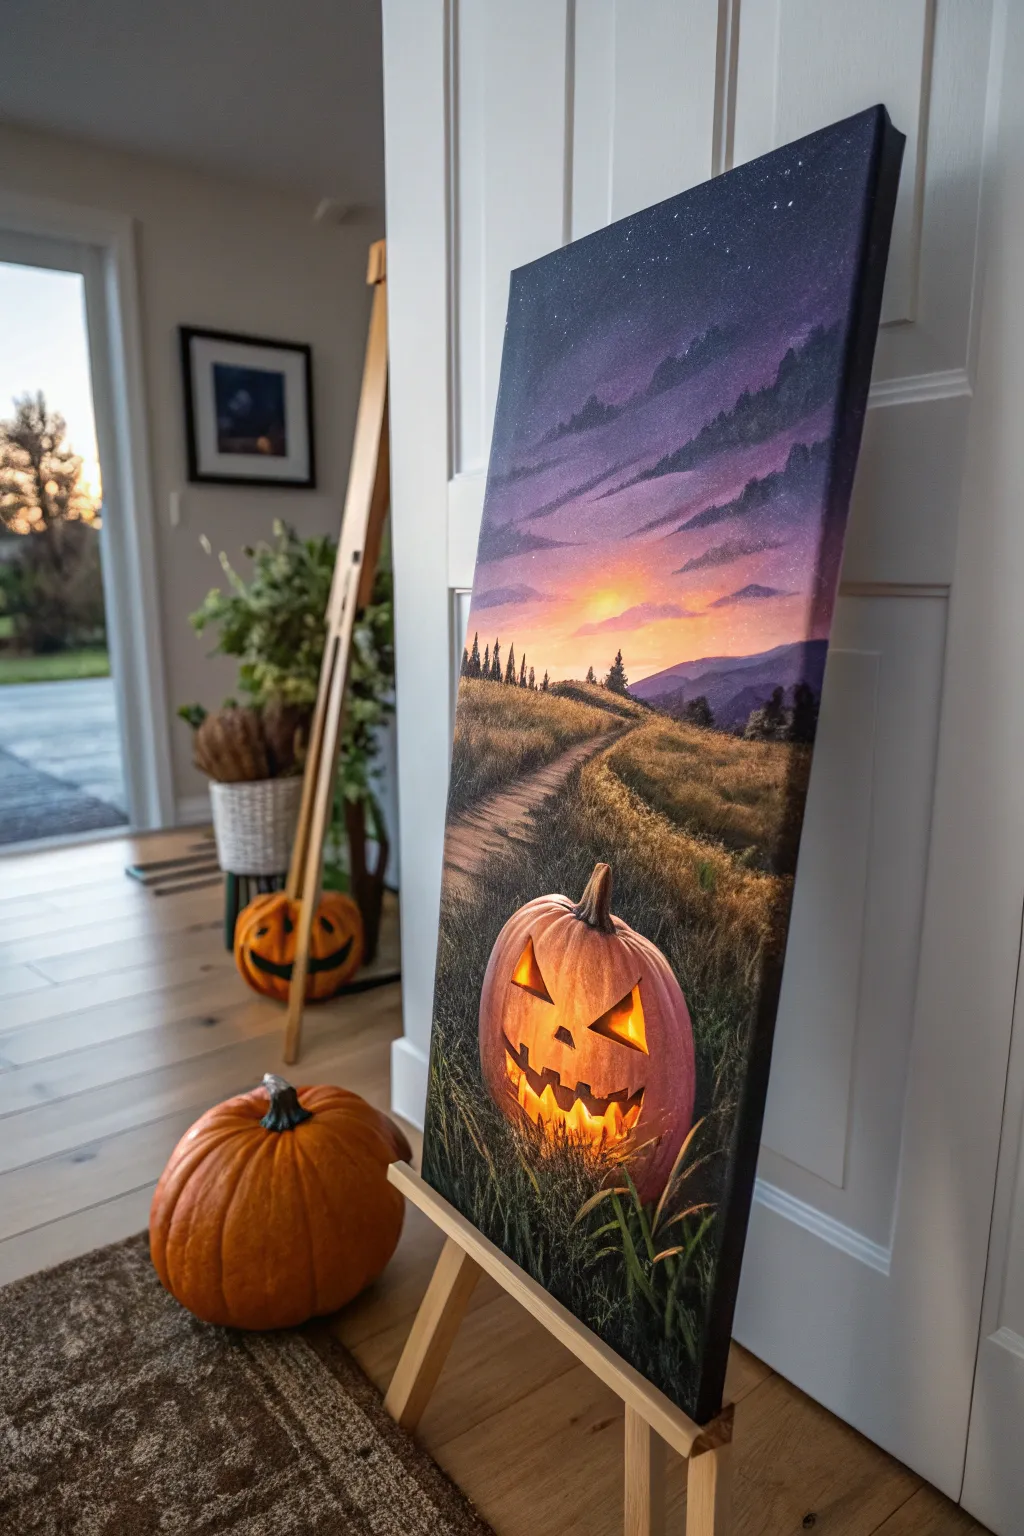

Capture the magic of Halloween night with this atmospheric acrylic painting featuring a vibrant sunset and a softly glowing pumpkin. The scene combines a dreamy, starry sky that fades into warm horizon colors, creating the perfect backdrop for a friendly Jack-o’-lantern.
Step-by-Step Guide
Materials
- Tall rectangular canvas (e.g., 10×20 or 12×24 inches)
- Acrylic paints: Titanium White, Mars Black, Ultramarine Blue, Dioxazine Purple, Magenta, Cadmium Orange, Cadmium Yellow, Burnt Umber, Hooker’s Green
- Large flat brush (1 inch)
- Medium filbert brush
- Small round detail brush
- Fan brush (optional for grass)
- Palette
- Water cup and paper towels
- Chalk or pastel pencil for sketching
Step 1: Sky and Horizon
-
Prepare the gradient:
Begin with the sky by mixing Ultramarine Blue with a touch of Dioxazine Purple and Black to create a deep, midnight indigo. Apply this to the top third of your canvas using a large flat brush, ensuring full coverage. -
Transitioning colors:
While the top is still slightly wet, blend in pure Dioxazine Purple and then Magenta as you move down the canvas. Allow the colors to overlap slightly to create a smooth, twilight fade. -
Painting the sunset:
Approaching the horizon line (about one-third up from the bottom), switch to Cadmium Orange and mix it into the magenta. Finally, blend in Cadmium Yellow right at the horizon where the sun is setting, creating a bright, glowing focal point. -
Adding clouds:
Using a medium filbert brush and a mix of Purple and a tiny bit of White, dab in soft, horizontal clouds stretching across the purple and orange zones. Keep the bottoms of the clouds darker and highlight the tops slightly where the sun hits them. -
Starry details:
Once the sky is dry, protect the lower area with a paper towel. Load a toothbrush or stiff brush with watered-down White paint and gently flick it to splatter tiny stars across the dark upper sky.
Step 2: Landscape and Path
-
Blocking in the hills:
Mix Ultramarine Blue with a little Purple and White to create a distant mountain color. Paint the silhouette of distant hills right above the horizon line, letting them fade into the yellow sunset glow. -
Creating the path:
Sketch a winding path starting wide at the bottom left and narrowing as it curves toward the center horizon. Paint the path using Burnt Umber mixed with White and a touch of Orange for a warm, dirt road look. -
Adding the fields:
Fill in the grassy areas on either side of the path. Start with a dark underlayer using Hooker’s Green and Burnt Umber. Once dry, layer clearer greens and golden ochres (Green mixed with Yellow/Orange) to suggest dry autumn grass. -
Texturing the grass:
Use a fan brush or an old, splayed bristle brush to tap ‘grass’ texture over the fields. Focus lighter, golden highlights on the tops of the hills where the setting sun would catch the blades. -
Distant trees:
With a small round brush and dark green-black paint, add tiny vertical silhouettes of pine trees along the ridge line to give the scene scale.
Pro Tip: Glowing Effects
For the brightest glow inside the pumpkin, wait for the yellow layer to dry completely before adding the pure white center. This keeps the white crisp and intense.
Step 3: The Pumpkin and Foreground
-
Sketching the pumpkin:
Use chalk to lightly outline the large pumpkin shape in the foreground, positioning it off-center to the right. Draw the triangular eyes, nose, and jagged mouth. -
Base coating the pumpkin:
Fill the pumpkin shape with a mix of Cadmium Orange and a little Burnt Umber. Don’t worry about shading yet; just get a solid base color down. -
Defining segments:
Mix a darker shadow color (Burnt Umber and Orange). Paint curved vertical lines to define the pumpkin’s ribs. Blend these lines outward slightly to create roundness. -
Highlighting the skin:
Mix White with Orange and Yellow to create a highlight color. Apply this to the center of each pumpkin rib to make it look three-dimensional and plump. -
Carving the face:
Paint the inside of the eyes, nose, and mouth with pure Cadmium Yellow. Then, paint the very center of these shapes with White to simulate a bright internal light source. -
Adding the glow:
To make it really glow, dry brush a little bit of the Cadmium Yellow and Orange around the edges of the carved openings, spilling onto the pumpkin skin. -
Painting foreground grass:
Using a liner brush or the edge of a flat brush, paint tall, individual blades of grass in front of the pumpkin base. I like to use dark green for the base and highlight the tips with yellow where the pumpkin light hits them. -
Final stem details:
Paint the stem with a mix of Burnt Umber and Green. Add a small highlight on the top edge to match the light source from the sunset.
Level Up: Atmospheric Depth
Glaze a very watered-down purple over the distant hills and the furthest part of the path. This pushes them into the background and unifies the twilight color palette.
Step back and admire your spooky yet serene autumn twilight scene.


Haunted House With Yellow Windows
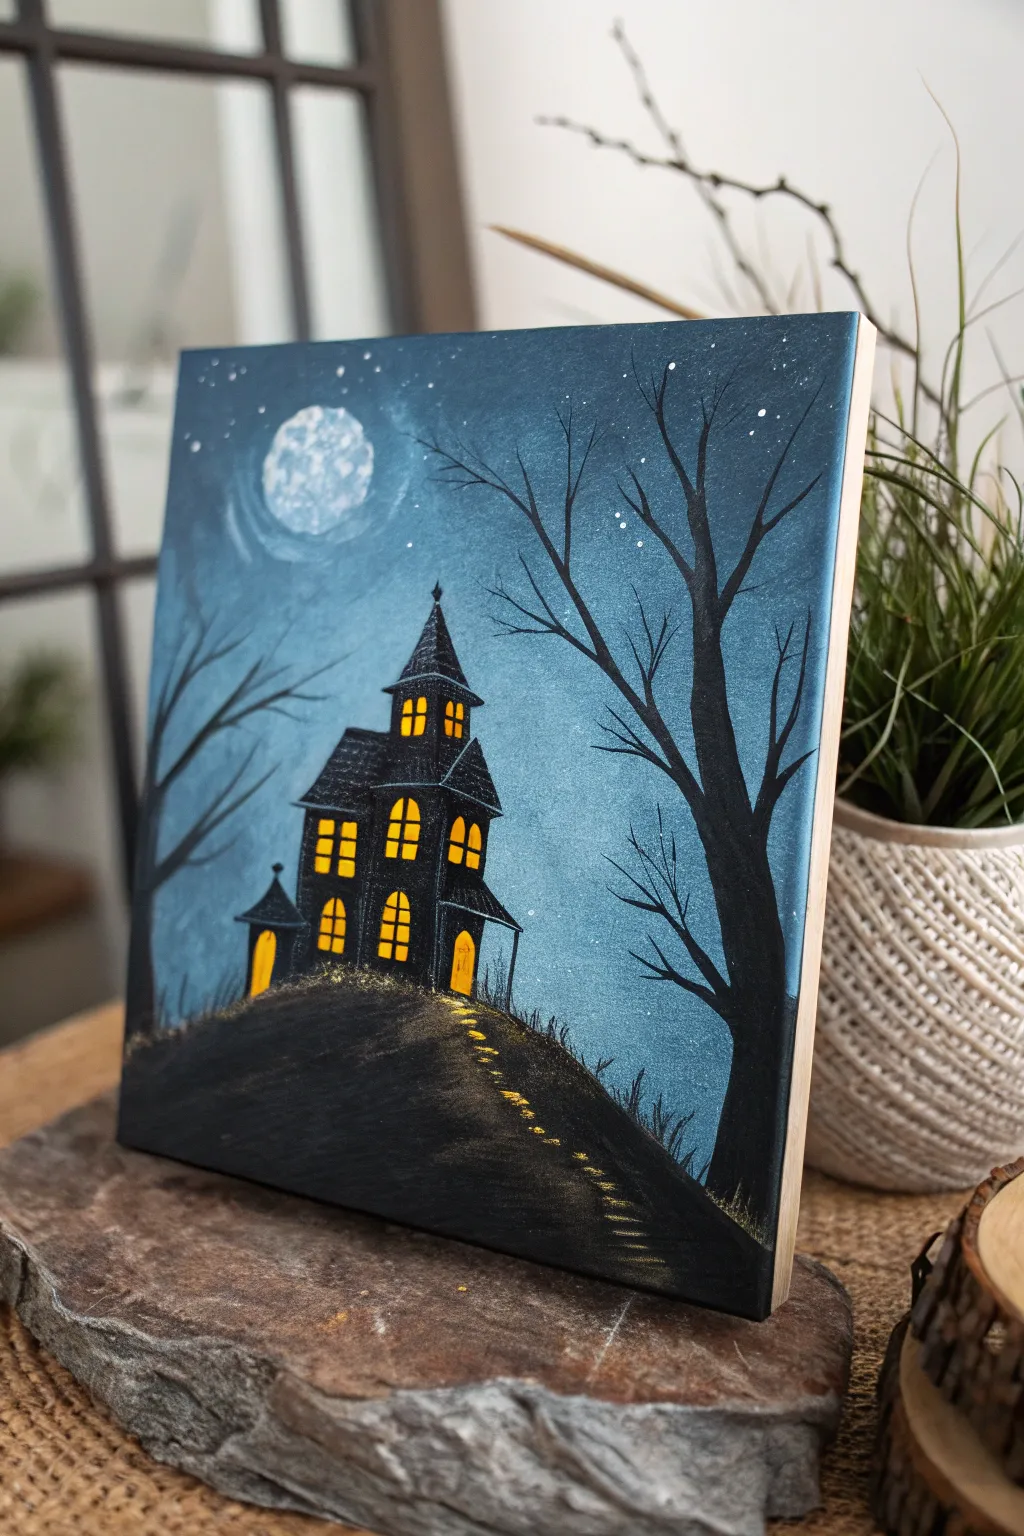
This spooky yet elegant acrylic painting features a stark black silhouette of a gothic mansion set against a moody, moonlit blue sky. The glowing yellow windows create an inviting warmth that contrasts beautifully with the eerie atmosphere, making it a perfect Halloween decoration.
Step-by-Step
Materials
- Square canvas (10×10 or 12×12 inch)
- Acrylic paints: Phthalo Blue, White, Mars Black, Cadmium Yellow, Orange
- Large flat brush (1 inch)
- Small flat brush (1/4 inch)
- Fine liner brush
- Sponge or paper towel
- Palette
- Water cup and cloth
Step 1: Setting the Scene
-
Prepare the gradient:
Start by mixing a dark blue using Phthalo Blue and a tiny touch of black. Apply this to the top corners and edges of your canvas using your large flat brush. -
Blend the sky:
Without cleaning your brush, pick up some pure Phthalo Blue and blend it inwards from the dark corners. While the paint is still wet, add Titanium White to the center area to create a glowing light source effect. -
Create the moon:
Mix a light grey-blue using white and a speck of blue. Use a sponge or a crumpled piece of paper towel to dab a rough circle in the upper left quadrant. This creates a textured crater effect. -
Add moonlight aura:
Take a clean, dry brush with a tiny amount of white paint and lightly scumble around the moon’s edges to make it glow. -
Sprinkle stars:
Load a wet brush with watered-down white paint. Flick the bristles or tap the handle against another brush to spray tiny stars across the top portion of the sky. -
Dry completely:
Let the entire background dry fully before moving on. If you are impatient like me, a hairdryer on a cool setting speeds this up significantly.
Step 2: Building the Silhouette
-
Outline the hill:
Using black paint and a medium brush, paint a steep, curved hill at the bottom of the canvas. It should slope upwards from the left to the right side. -
Draft the house shape:
Switch to a smaller flat brush. Paint the basic geometric shapes of the house: a tall central rectangle, a smaller side addition, and triangular roofs. Keep the edges sharp. -
Add architectural details:
Use the fine liner brush to add spires to the roof peaks and widening eaves. Don’t worry about interior details yet; focus on a solid silhouette. -
Paint the bare trees:
On the right side, paint a large, prominent tree trunk that reaches up past the house. Add jagged, reaching branches that taper off into thin twigs. -
Adding background trees:
On the left side, paint a smaller, fainter tree silhouette to balance the composition. Ensure the branches look spindly and dead. -
Texture the hill:
Use the tip of your brush to flick tiny grass blades upward along the curve of the hill, breaking the smooth line of the ground.
Windows Not Bright?
Yellow is naturally transparent. If your windows look dull against the black, paint them solid white first, let dry, and then layer your yellow on top for a pop.
Step 3: The Glowing Details
-
Basecoat the windows:
Mix Cadmium Yellow with a little white to make it opaque. Paint small arched shapes for the windows and doors on the black house silhouette. -
Add warmth:
Once the yellow base is dry, add a touch of orange to the bottom of each window pane. This creates a gradient that suggests candlelight inside. -
Define the panes:
Using your thinnest liner brush and black paint, carefully draw a cross or grid over the yellow windows to create the window pane muntins. -
Create the path:
Mix a dark grey-yellow. Paint small horizontal dashes winding down the hill from the front door, getting wider as they get closer to the bottom edge. -
Highlight the path:
Add pure yellow highlights to the center of the path dashes to make them look like reflected light from the house. -
Final highlights:
dry brush a tiny bit of grey on the roof edges and the tree trunk where the moonlight would hit to give the objects dimension.
Sharper Lines
For the window grids, thin your black paint with a drop of water until it’s inky. This helps the paint flow smoothly off the liner brush for crisp lines.
Place your finished canvas on a mantel or easel to add a touch of gothic mystery to your room


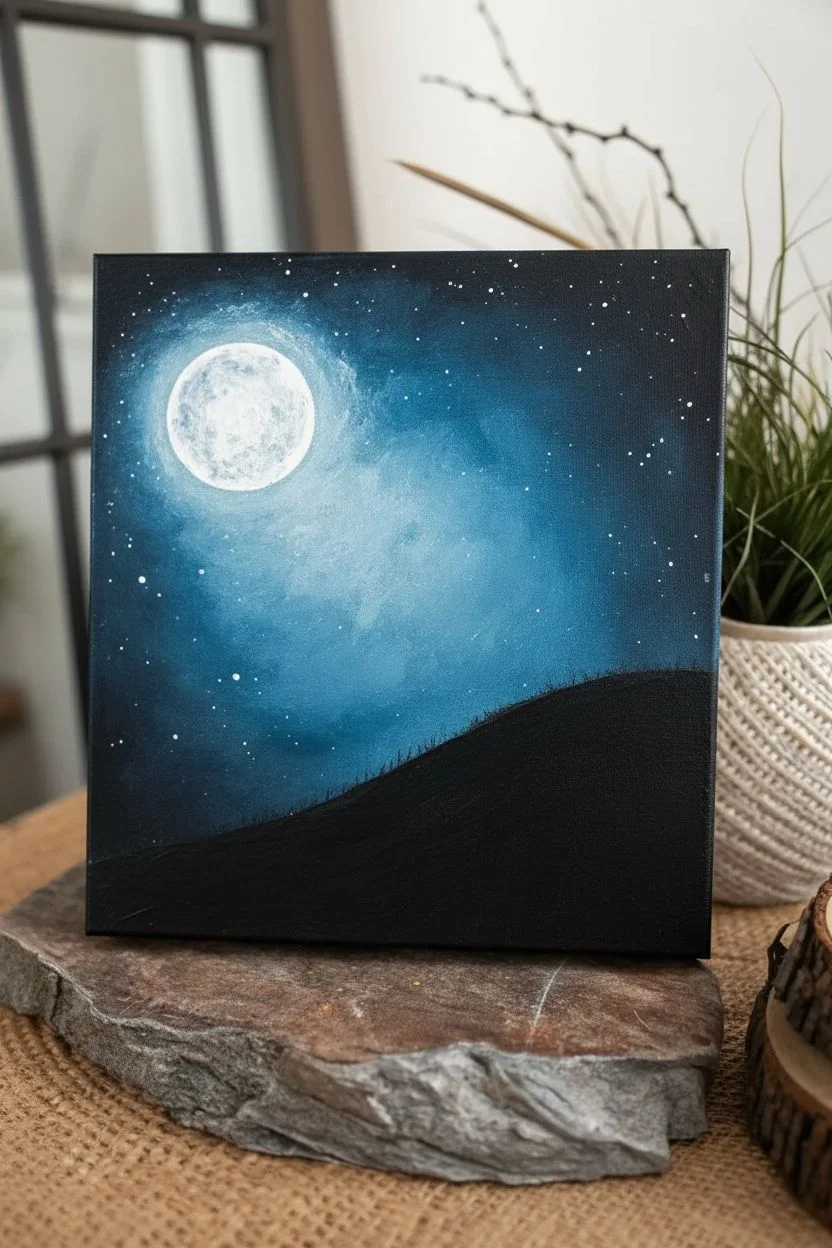
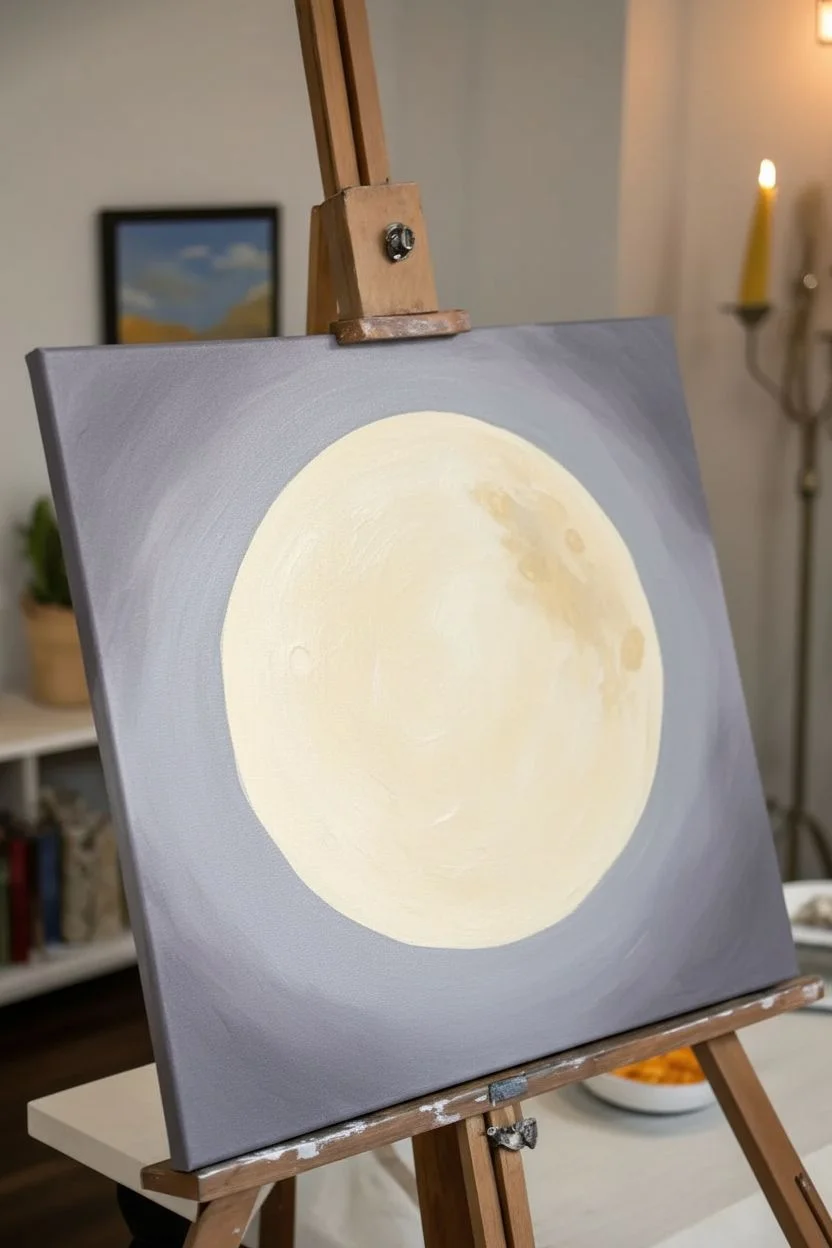
Full Moon and Bat Silhouettes
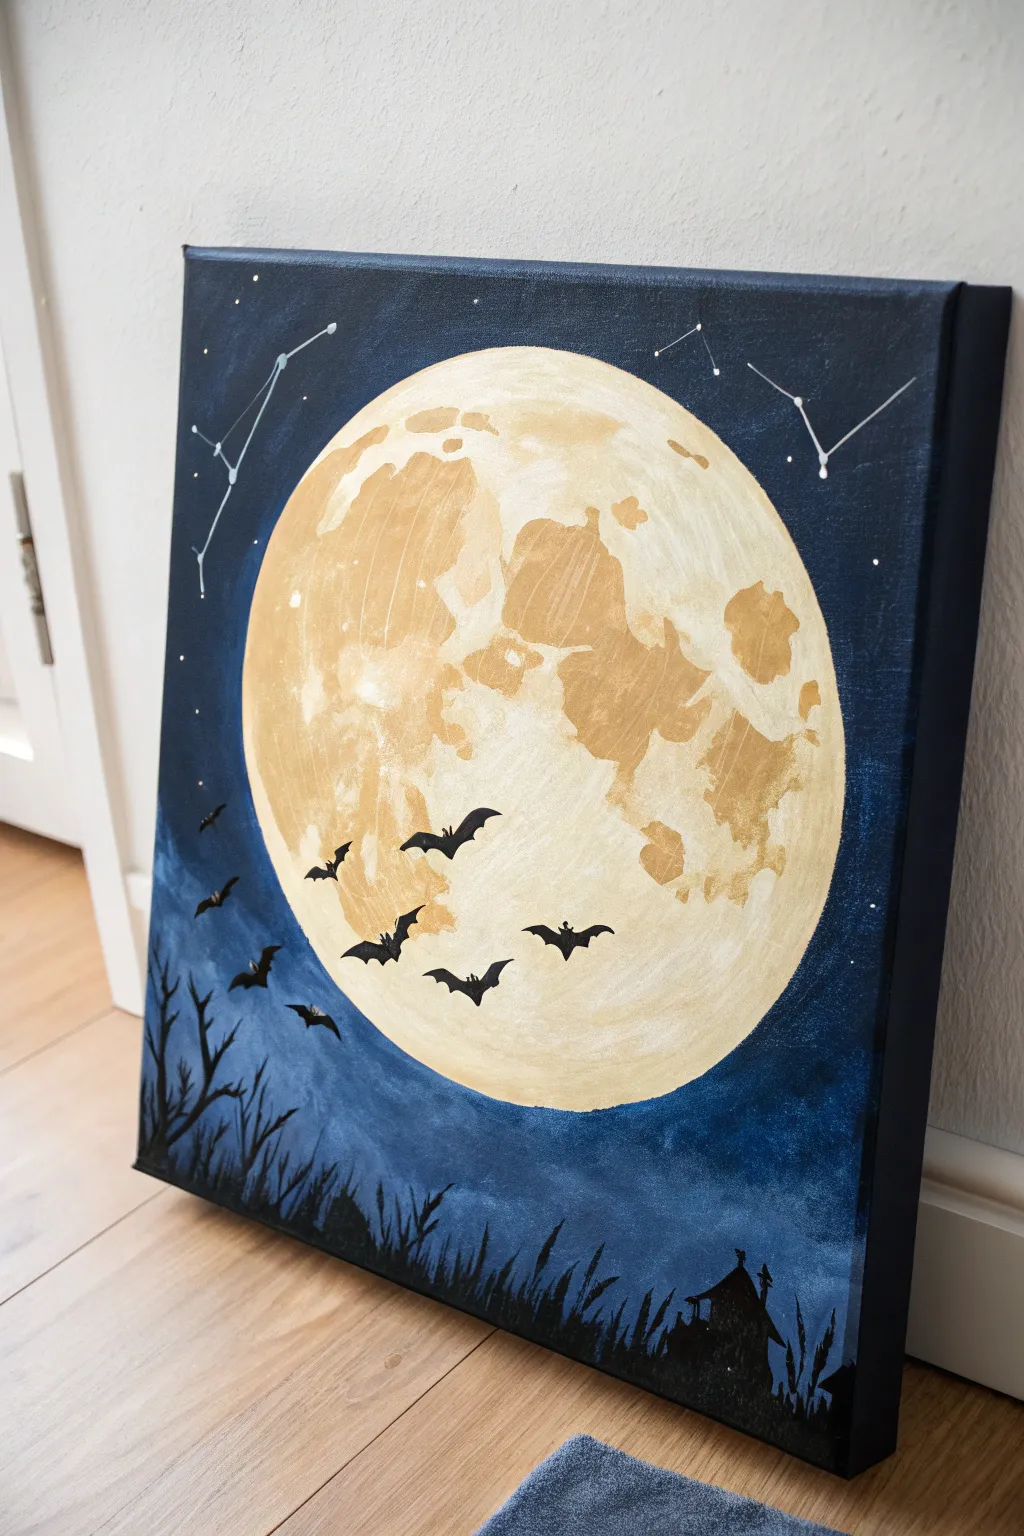
This striking acrylic painting captures the spooky allure of a crisp Halloween night with a glowing, textured moon and dancing bat silhouettes. The deep midnight blue background contrasts beautifully with the gold-toned lunar surface, making it a perfect statement piece for your spooky decor.
Step-by-Step Guide
Materials
- Square stretched canvas (e.g., 12×12 or 16×16 inches)
- Acrylic paints: Navy Blue, Black, Titanium White, Gold, Yellow Ochre
- Large flat brush (for background)
- Round plate, bowl, or compass (for tracing the moon)
- Medium round brush
- Small detail brush or liner brush (for stars and silhouettes)
- Palette or paper plate
- Cup of water and paper towels
- Pencil
Step 1: Setting the Night Scene
-
Trace the Moon:
Place your circular object (like a dinner plate or bowl) slightly off-center on the canvas to create a dynamic composition. Lightly trace around it with a pencil to mark where your moon will go. Don’t press too hard; you just need a faint guide. -
Mix the Midnight Blue:
On your palette, squeeze out a generous amount of Navy Blue and a touch of Black. Mix them to create a very deep, dark blue. You want it to look like the night sky, but not pitch black just yet. -
Paint the Background:
Using your large flat brush, paint the area outside your pencil circle. Paint all the way to the edges of the canvas, including the sides for a finished look. Use long, smooth strokes to ensure even coverage. -
Add Subtle Vignetting:
While the blue paint is still wet, blend a tiny bit of pure Black into the corners and edges of the canvas. This creates a vignette effect that draws the eye toward the bright center. -
Create a Glow:
Clean your brush thoroughly. Mix a little White with your Navy Blue to make a lighter blue. Carefully blend this lighter shade right around the outside edge of your moon circle, fading it outward into the dark background to create a soft atmospheric glow.
Step 2: Painting the Textured Moon
-
Base Layer:
Mix Titanium White with a small drop of Yellow Ochre to create a pale cream color. Fill in the entire circle with this mixture. It might need two coats to be opaque against the raw canvas. -
Adding Craters and Texture:
Mix a darker golden shade using Gold paint mixed with a little Yellow Ochre. Using a medium round brush, dab this color onto the moon in random, organic shapes to simulate craters and lunar maria (the dark spots). -
Refining the Surface:
I like to use a fairly dry brush for this part to keep the edges of the craters soft. Blot your brush on a paper towel before applying the darker paint to create a rough, textured look. -
Highlighting:
Once the gold texture is slightly tacky, take a small amount of pure Titanium White on a visible clean brush and add bright highlights to the top left edges of your craters to give the moon dimension.
Circle Troubles?
If painting a perfect circle by hand is tough, paint the blue background first. Once dry, place your plate back on the canvas and trace lightly with white chalk, then paint the inside.
Step 3: Stars and Constellations
-
Map the Constellations:
Wait for the background to be fully dry. Use your smallest detail brush or a liner brush dipped in slightly watered-down White paint to create small dots for stars. -
Connect the Dots:
Look up simple constellations like Cassiopeia or the Big Dipper, or create your own. Paint tiny, thin lines connecting specific stars to form the constellation shapes shown in the corners of the sky. -
Scattered Stardust:
Add a few random single dots around the sky, varying the size slightly to create depth. Keep the stars away from the very center so they don’t compete with the moon.
Pro Tip: Sponge Texture
For realistic moon craters, use a small piece of natural sea sponge instead of a brush. Dab the gold paint on lightly to create instant uneven, rocky texture.
Step 4: Silhouettes
-
Outline the Bats:
Using pure Black paint and your small detail brush, paint small ‘M’ shapes or jagged wing shapes over the lower half of the moon. Vary their sizes and angles to make them look like a swarming colony. -
Fill the Bats:
Carefully fill in the bat shapes with solid black. Adding tiny pointed ears and jagged edges to the wings helps them look more realistic. -
Foreground Grass:
At the very bottom of the canvas, paint upward, flicking brushstrokes in Black to create tall grass and weeds. Vary the height and direction of the blades. -
Adding the House:
Paint a small, crooked house silhouette nestled in the grass on the bottom right. A simple triangle roof and a crooked chimney give it that perfect haunted character. -
Final Touches:
Check your edges and touch up any black areas that look transparent. Once dry, stepping back reveals the full magical effect.
Hang your masterpiece where it can catch the light and add a touch of mystery to your room


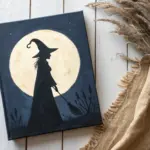
Witch on a Broom in the Moonlight
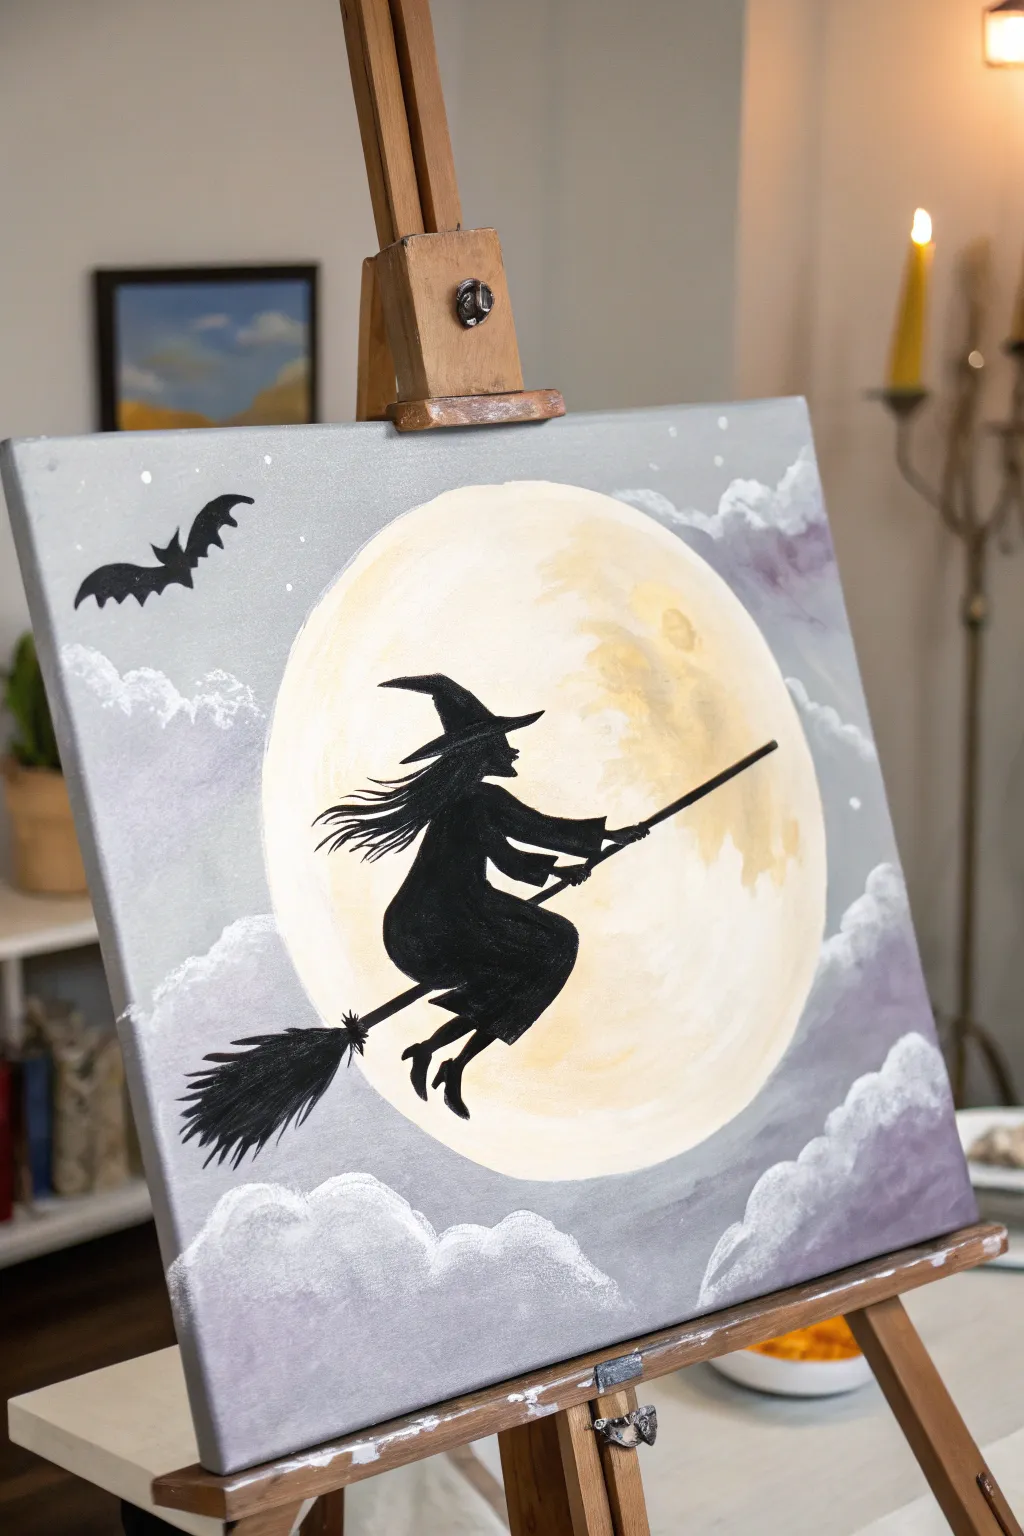
Capture the magic of a Halloween night with this enchanting acrylic painting featuring a classic witch silhouette soaring past a glowing full moon. Soft grey and lilac clouds frame the scene, creating a dreamy yet spooky atmosphere perfect for seasonal decor.
Step-by-Step Tutorial
Materials
- Square canvas (e.g., 12×12 or 16×16 inches)
- Acrylic paints: Titanium White, Mars Black, Cadmium Yellow, Payne’s Grey, Dioxazine Purple
- Large flat brush (1 inch)
- Medium round brush (size 6 or 8)
- Small detail brush (size 0 or 1)
- Round object for tracing (plate or bowl) or a compass
- Pencil
- Palette
- Water cup and paper towels
- Sponge or stipple brush (optional for clouds)
Step 1: Preparing the Sky and Moon
-
Trace the Moon:
Begin by positioning a round object like a dinner plate or bowl in the center of your canvas. Lightly trace around it with a pencil to define the shape of your full moon. -
Paint the Moon Base:
Mix a large amount of Titanium White with a tiny touch of Cadmium Yellow to create a very pale, creamy moonlight color. Fill inside the circle completely using your flat brush, keeping the edges neat. -
Add Moon Texture:
While the moon is still slightly wet, pick up a tiny bit of plain yellow on your brush (wipe most of it off). Gently scumble or dab in some texture on the right side of the moon to create craters and depth. Keep it subtle. -
Mix the Sky Color:
Prepare a soft grey-purple for the background. Mix plenty of White with a small amount of Payne’s Grey and a tiny dot of Dioxazine Purple. You want a misty, twilight hue. -
Paint the Background:
Paint the entire area outside the moon with your grey-purple mix. Carefully cut in around the moon’s edge first, then fill the rest of the canvas using broad, smooth strokes. -
Darken the Edges:
While the sky paint is wet, blend a slightly darker version of the same grey-purple into the four corners of the canvas. This vignette effect draws the eye toward the bright center.
Moon Shape Woes?
If your painted circle looks lopsided, wait for it to dry completely. Replace your tracing object (plate) over it and trace again, then repaint the edges with your background color to fix the shape.
Step 2: Adding Clouds and Atmosphere
-
Form the Lower Clouds:
Using a medium round brush or a sponge, mix pure White with just a speck of the background grey. Dab fluffy, rolling cloud shapes along the bottom edge of the canvas. -
Highlight the Clouds:
Dip into pure Titanium White and stipple the top edges of your clouds to make them pop against the darker sky. I find that using a dry brush technique here creates the softest, fluffiest texture. -
Add Upper Atmosphere:
Add a few wispy, translucent cloud streaks in the upper right and left corners using a watered-down white mix to balance the composition. -
Sprinkle Stars:
Using the handle of a small brush dipped in white paint, dot a few stars into the grey sky areas. Keep them random and sparse.
Make It Sparkle
Once the painting is totally dry, mix fine silver glitter into a clear gloss medium and paint over just the moon area. It gives the piece a magical shimmer under lights!
Step 3: Painting the Silhouette
-
Sketch the Witch:
Once the moon is fully dry (this is crucial!), lightly sketch the outline of the witch and her broomstick with a pencil directly over the moon. Position her centrally for the best impact. -
Outline the Shape:
Load your small detail brush with Mars Black paint that has been slightly thinned with water for better flow. Carefully outline the witch’s hat, profile, flowing hair, and dress. -
Fill the Figure:
Switch to a slightly larger round brush to fill in the main body of the witch with solid black. Ensure the coverage is opaque; you may need a second coat. -
Paint the Broom Handle:
Using a steady hand or a ruler as a guide, paint the straight line of the broom handle extending in front of and behind the witch. -
Detail the Bristles:
Use the small detail brush to flick quick strokes outward at the back of the broom to create the texture of straw bristles. Make the ends tapered and uneven. -
Add the Bat:
In the upper left corner of the sky, sketch a small bat shape. Paint it in solid black, ensuring the wings have sharp, defined points. -
Refine Edges:
Check your silhouettes for any jagged edges. Smooth out the curves of the hat and the flow of the dress with your smallest brush. -
Final Touches:
If transparency issues arose anywhere on the moon or sky, do tiny touch-ups now. Once dry, your spooky masterpiece is ready to display!
Hang your artwork proudly and enjoy the mystical vibes it brings to your space.
BRUSH GUIDE
The Right Brush for Every Stroke
From clean lines to bold texture — master brush choice, stroke control, and essential techniques.
Explore the Full Guide
Spooky Tree Branch Frame
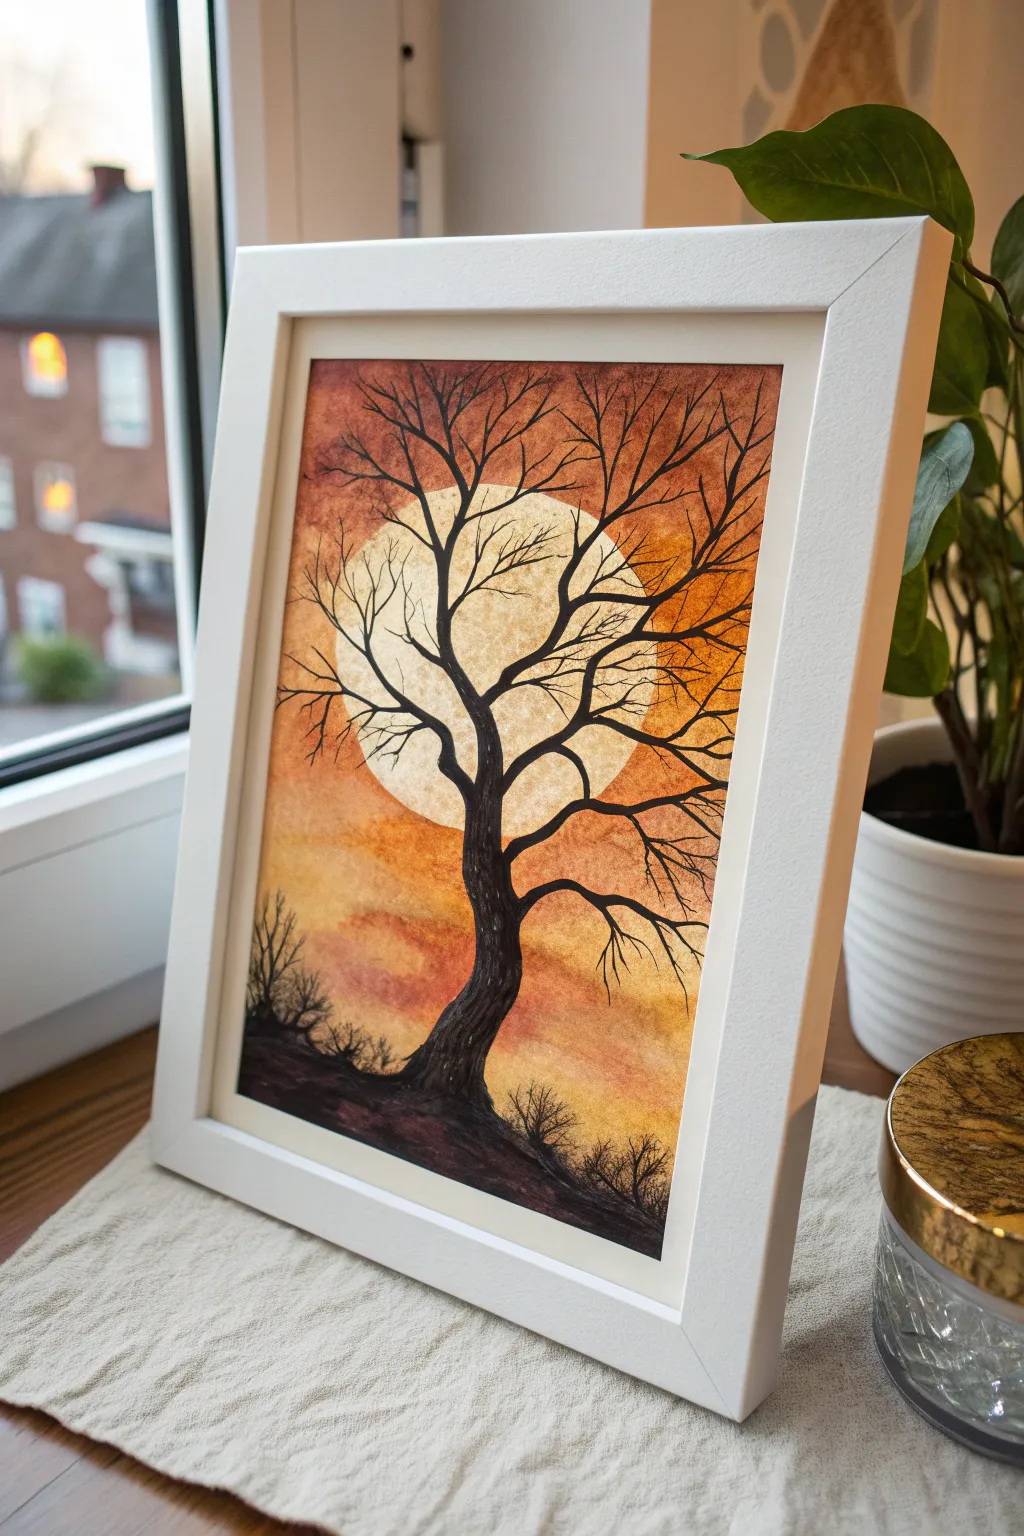
Capture the eerie beauty of a stark silhouette tree against a glowing, oversized harvest moon. This high-contrast piece uses warm washes to create an atmospheric backdrop perfect for subtle Halloween decor.
How-To Guide
Materials
- Watercolor paper or heavy mixed-media paper (Cold press texture works best)
- White picture frame with mat
- Acrylic paints: Burnt Orange, Yellow Ochre, Deep Red, Black, Titanium White
- Water spray bottle
- Masking tape or painter’s tape
- Large flat brush or sponge applicator
- Medium round brush
- Fine liner brush (size 0 or 00)
- Circular object for tracing (plate or lid)
- Pencil
Step 1: Setting the Scene
-
Prepare the canvas:
Cut your paper to fit your frame size. Secure the paper to a flat, hard surface using masking tape around all four edges. This creates a clean white border and prevents the paper from buckling when wet. -
Outline the moon:
Place your circular object (like a small plate or large lid) in the upper center of the paper. Lightly trace around it with a pencil to define your moon shape. -
Protect the moon area:
You can carefully paint around this circle later, but for a crisp edge, you might want to mask it off with masking fluid or a circle of low-tack tape. Alternatively, simply be mindful to keep the inside of the circle bright white or very pale yellow.
Uneven Coverage?
If your black silhouette looks streaky over the background, don’t overwork wet paint. Let the first black layer dry completely, then apply a second coat for solid opacity.
Step 2: Creating the Atmospheric Background
-
Mix your background wash:
Dilute your Burnt Orange and Yellow Ochre acrylics with plenty of water until they behave almost like watercolors. You want transparency here. -
Apply the first wash:
Using a wet flat brush or sponge, dampen the paper outside the moon circle slightly. Apply the diluted Yellow Ochre closest to the moon, blending outwards. -
Deepen the gradient:
While the paper is still damp, introduce the diluted Burnt Orange. Start from the outer edges and corners, working inward toward the yellow zone to create a seamless warm glow. -
Add dramatic shadows:
Mix a tiny touch of black or dark brown into your red/orange mix. Apply this to the very top corners and edges to create a vignette effect, making the center light seem brighter. -
Texture the background:
While the paint is wet, lightly dab a crumpled paper towel or dry sponge into the orange areas. This lifts subtle pigment creates a mottled, cloudy texture rather than a flat color. -
Paint the moon:
Once the surrounding sky is tacky, paint the moon’s interior with a very pale wash of Titanium White mixed with a tiny drop of Yellow Ochre. It should look luminous, not flat white. Let the entire background dry completely.
Step 3: Painting the Silhouette
-
Draft the tree structure:
Using a pencil, lightly sketch the main S-curve of the tree trunk. The base should be wider, tapering as it reaches up across the moon. -
Block in the trunk:
Switch to opaque Black acrylic (undiluted). Using your medium round brush, paint the base of the ground and the thick main trunk. I find it helps to use a slightly jagged stroke to mimic bark texture. -
Add primary branches:
Extend 3-4 main branches from the trunk. Ensure they cross in front of the moon to maximize the silhouette contrast. -
Switch to the liner brush:
For the delicate upper branches, move to your fine liner brush. Thin the black paint slightly with a drop of water so it flows smoothly like ink. -
Create fine twigs:
Paint many small, splintering twigs coming off the main branches. Vary the angles—some reaching up, some drooping down—to make the tree look old and gnarled. -
Add foreground details:
At the bottom of the painting, use the tip of your brush to add small, scrubby bushes or tall grass silhouettes on the hill. This grounds the tree and adds depth. -
Final touches:
Review the density of your branches. Add more tiny twigs near the edges of the canvas to balance the composition. Let the black paint dry fully before erasing any visible pencil lines.
Level Up: Creepy details
Enhance the Halloween vibe by painting tiny hanging bat silhouettes on the branches or adding a small owl shape perched on a limb against the moon.
Place your dried artwork into the frame and display it where the warm colors can catch the light
Cute Ghost With Soft Highlights
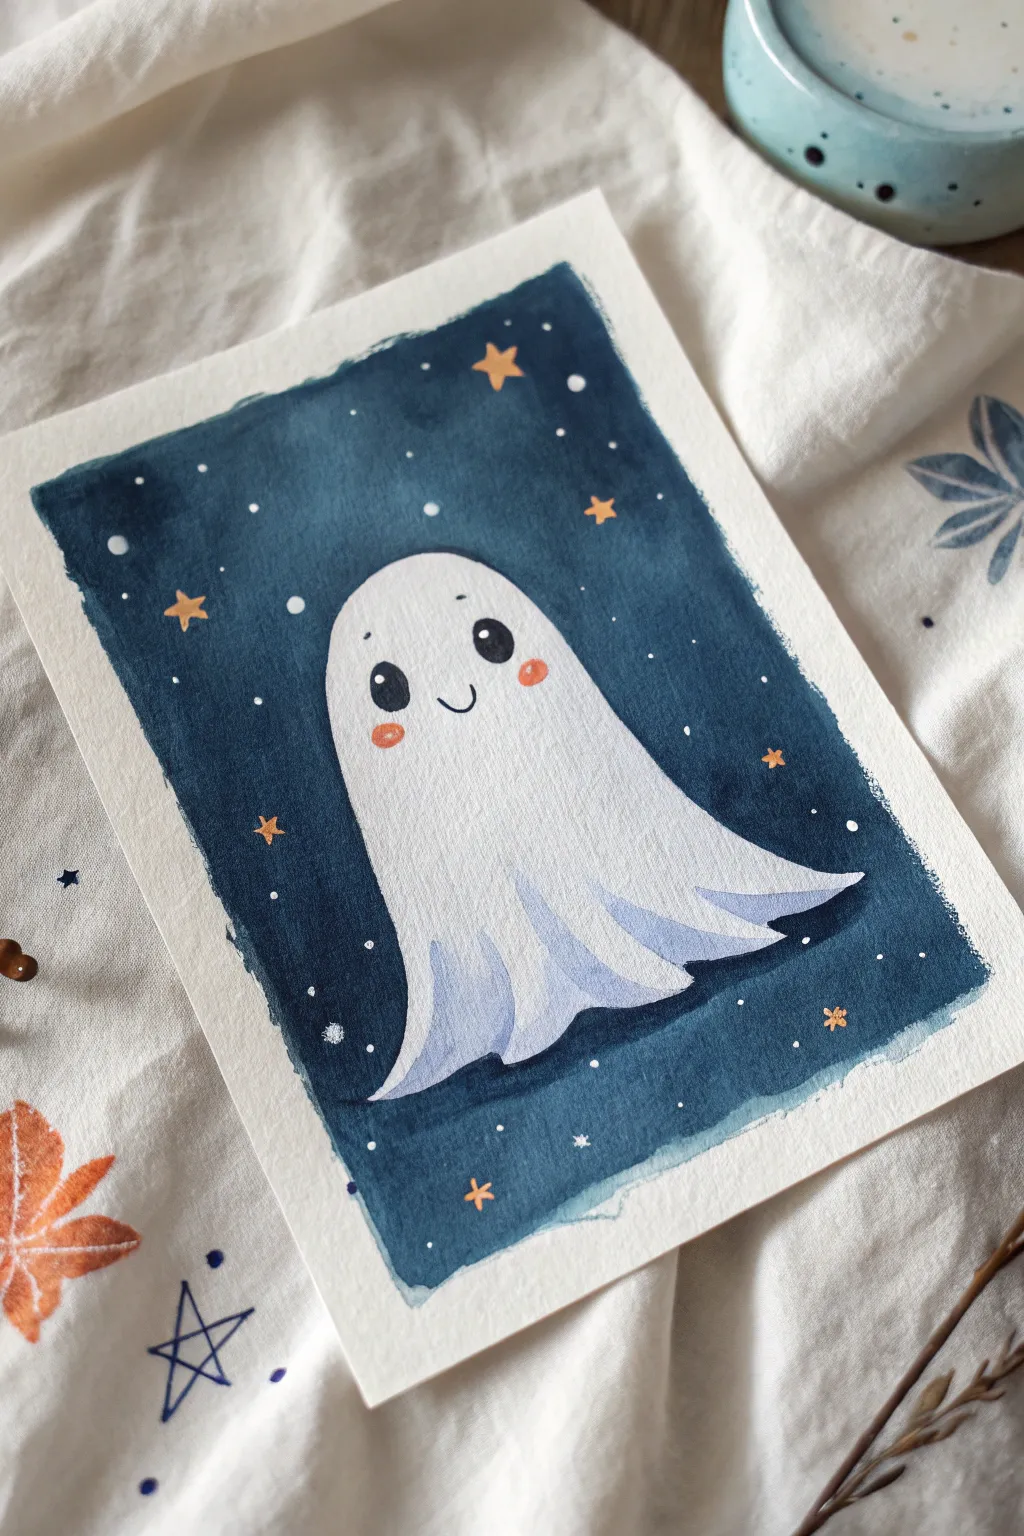
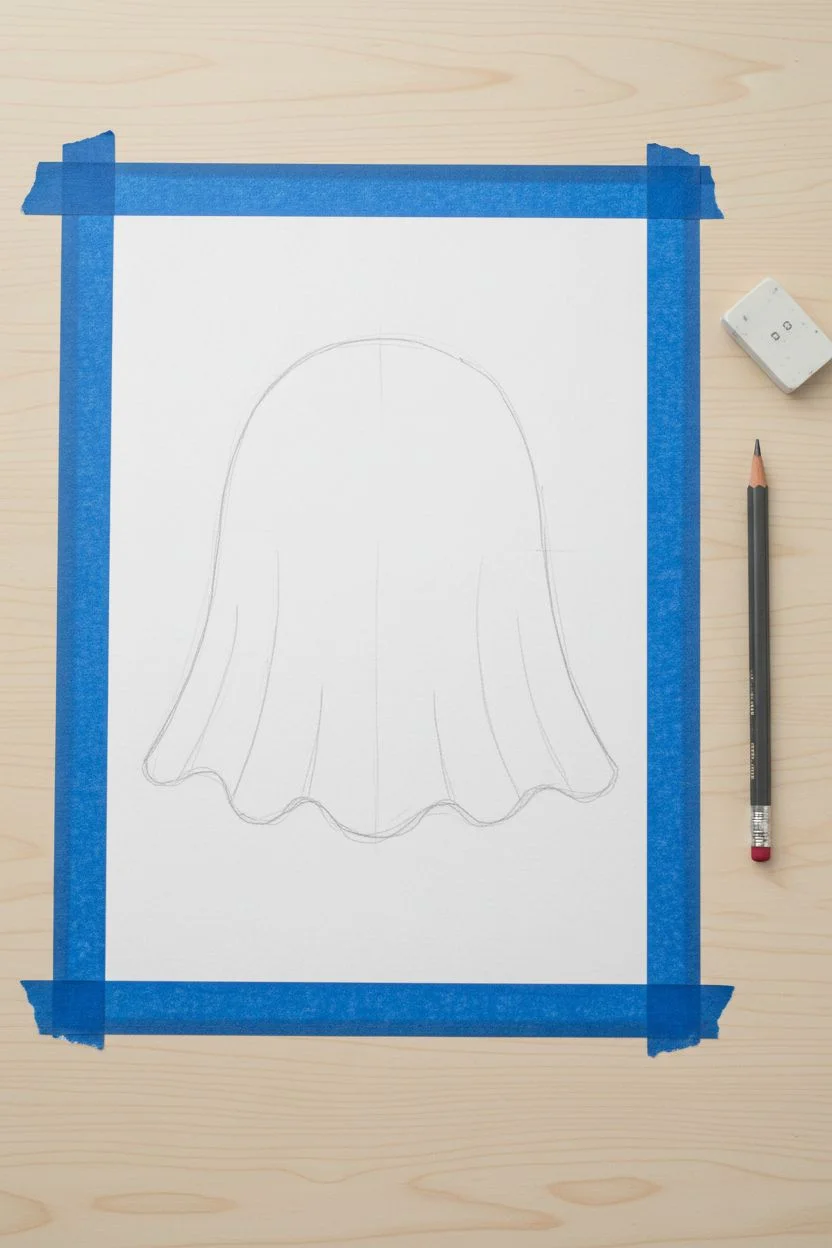
Capture the sweetness of the season with this charming portrait of a friendly ghost floating through a deep blue midnight sky. Using matte acrylics or gouache, you’ll create soft folds and glowing highlights that bring this adorable specter to life.
Step-by-Step Guide
Materials
- Heavyweight watercolor paper or mixed-media paper (approx. 5×7 inches)
- Acrylic paints (Dark Indigo/Navy Blue, Titanium White, Black, Peach/Coral, Burnt Sienna/Orange)
- Flat shader brush (size 6 or 8)
- Round detail brushes (size 0 and 2)
- Washi tape or painter’s tape
- Palette for mixing
- Water cups
- Paper towels
Step 1: Preparation & Drawing
-
Tape the edges:
Begin by securing your watercolor paper to a flat surface using washi tape or painter’s tape. Create a border around the edges to ensure a clean, crisp white frame once you peel it off later. -
Draft the ghost shape:
Lightly sketch a large, rounded arch shape in the center of the paper with a pencil. Make the bottom edge wavy and uneven to look like flowing fabric, flaring out slightly at the base. -
Refine the folds:
Add a few vertical curved lines rising from the bottom hem of the ghost towards the center body. These will guide where you paint the shadows for the fabric folds later.
Step 2: Painting the Background
-
Mix the night sky color:
On your palette, mix a deep navy blue or indigo. If you only have primary blue, deepen it with a touch of black and a tiny bit of burnt sienna to desaturate it slightly for a moody night look. -
Fill the background:
Using a flat shader brush, carefully paint the area around your pencil sketch. I like to outline the ghost shape first with the brush edge, then fill in the rest of the background out to the tape. -
Create texture:
While the blue paint is still slightly damp, you can dab unevenly with your brush to create a subtle, cloudy texture rather than a perfectly flat color. Let this background layer dry completely.
Clean Lines Pro Tip
To prevent paint from bleeding under your tape, paint a thin layer of white (or clear matte medium) over the tape edge first to seal it before applying the blue.
Step 3: Painting the Ghost
-
Base coat the ghost:
Fill in the entire ghost shape with plain Titanium White. You may need two coats if your background paint accidentally overlapped the lines, to ensure it is opaque and bright. -
Mix a shadow shade:
Create a very pale blue-grey wash. Mix plenty of white with just a tiny speck of your navy background color and lots of water or glazing medium to keep it translucent. -
Add fabric shadows:
Paint this pale shadow color along the bottom wavy edge of the ghost. Drag the color upward into the folds you sketched earlier, tapering them to a point so they vanish into the white body. -
Soften the edges:
Before the shadow paint dries, rinse your brush and use slightly damp bristles to feather the top edges of the shadows, blending them smoothly into the white upper body.
Level Up: Sparkles
Mix a tiny bit of iridescent medium or glitter glue into the white paint used for the stars to make your night sky actually shimmer.
Step 4: Facial Features
-
Paint the eyes:
Using a small round brush (size 0 or 2) and black paint, add two large vertical ovals for the eyes. Place them wide apart to enhance the cute factor. -
Add the smile:
With the very tip of your smallest brush, paint a tiny, thin ‘u’ shape directly between the eyes for a sweet little smile. -
Add blush cheeks:
Mix a soft coral or peach color. Paint small horizontal ovals just below and outside the eyes for rosy cheeks. -
Eye highlights:
Once the black paint is bone dry, add a tiny white dot in the upper right corner of each black eye oval. This gleam creates life and personality. -
Refine features:
If you like, add tiny little eyebrows using thin, short strokes above the eyes to give an expressive look.
Step 5: Final Details
-
Paint the stars:
Switch to your orange or yellow ochre paint. Using a fine detail brush, paint small 5-point stars scattered randomly across the blue background. -
Add distant stars:
Use white paint to dot tiny specks between the larger stars. Vary the size of these dots—some pinprick small, some slightly larger—to create depth in your galaxy. -
Highlight the cheeks:
For extra cuteness, put a minuscule dot of white on the upper edge of the coral cheeks. -
The reveal:
Ensure all paint is completely dry to the touch. Gently peel away your tape at a 45-degree angle to reveal the crisp white border.
Enjoy your friendly little ghost art, perfect for gifting or displaying on a shelf

PENCIL GUIDE
Understanding Pencil Grades from H to B
From first sketch to finished drawing — learn pencil grades, line control, and shading techniques.
Explore the Full Guide
Black Cat on a Fence Post
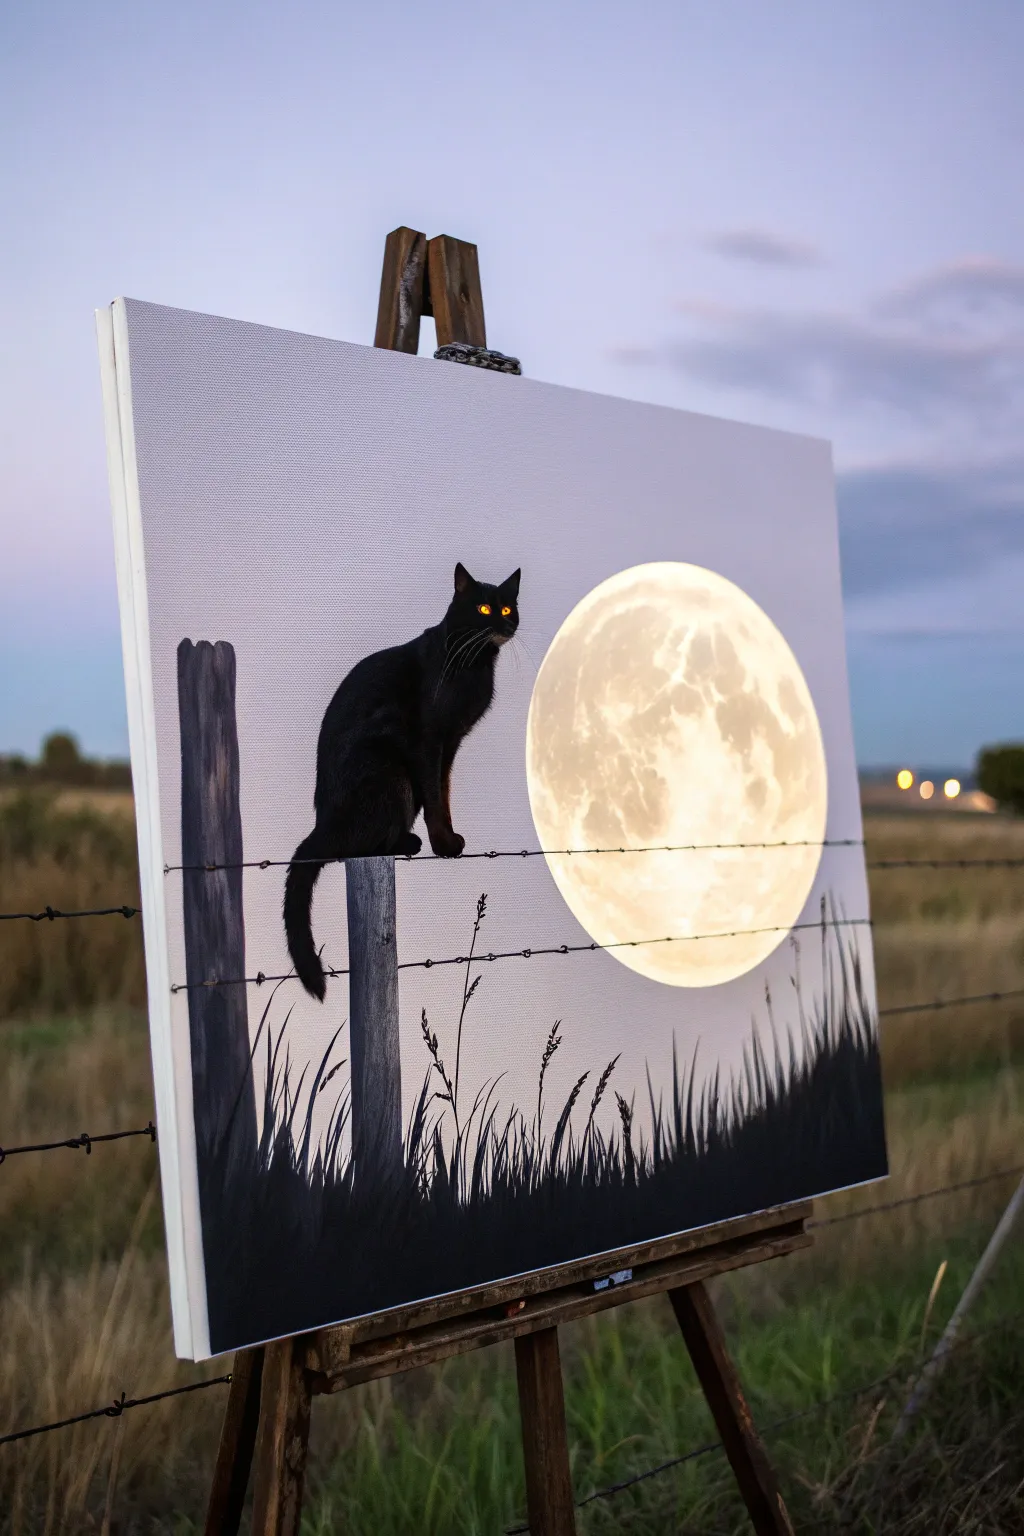
Capture the mystic stillness of a quiet evening with this acrylic painting featuring a sleek black cat perched on a fence post. The glowing, oversized moon creates a dramatic backdrop against the soft dusk sky, making it a perfect moody piece for autumn or Halloween decor.
How-To Guide
Materials
- Stretched canvas (rectangular)
- Acrylic paints (Titanium White, Mars Black, Violet, Payne’s Grey, Raw Umber, Yellow Ochre)
- Flat shader brushes (large and medium)
- Round detail brush (size 0 or 1)
- Script liner brush
- Circle template or saucer (for the moon)
- Chalk or pencil
- Mixing palette
- Water cup and paper towels
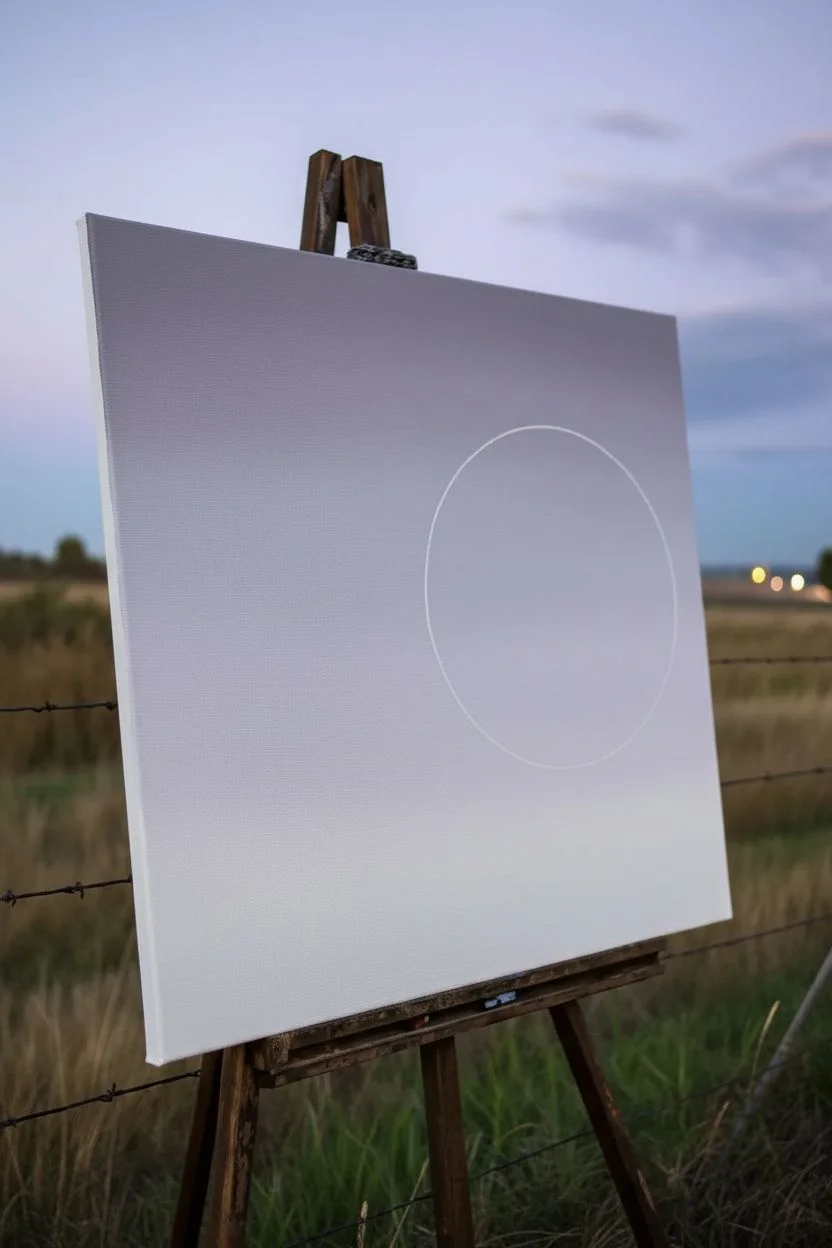
Step 1: Setting the Dusk Sky
-
Trace the Moon:
Position your circle template or a small saucer on the right side of the canvas, roughly centered vertically. Lightly trace the circle with chalk or a pencil to reserve this space for later. -
Mix the Sky Gradient:
Create a pale, dusty purple by mixing plenty of Titanium White with a tiny touch of Violet and Payne’s Grey. You want a very soft, almost neutral twilight color. -
Apply the Base Coat:
Using a large flat brush, paint the entire sky area around your traced moon circle. Keep your strokes horizontal and smooth to mimic the calm evening atmosphere. -
Fade the Horizon:
While the paint is wet, blend a slightly darker mixture of grey and violet near the top corners to create a subtle vignette effect, keeping the area near the moon lightest.
Step 2: Painting the Glowing Moon
-
Base White Layer:
Fill in the traced moon circle with solid Titanium White. Let it dry completely. I find applying a second coat ensures the moon looks truly luminous. -
Adding Lunar Texture:
Mix a very watery wash of Yellow Ochre and a speck of Raw Umber. Using a crumpled paper towel or an old scruffy brush, lightly dab faint, cloudy textures onto the white surface to mimic craters. -
Refining the Glow:
If the texture gets too dark, dry brush a little pure white over the top to push the craters back into the distance.
Rim Light Magic
Add a very thin line of white or pale yellow along the right side of the cat and fence posts. This rim lighting mimics the moon’s glow hitting the objects.
Step 3: Posts and Silhouette
-
Sketch the Layout:
With your chalk, lightly sketch the two main fence posts: a tall one on the left and a shorter one in the center where the cat will sit. -
Underpaint the Wood:
Paint the posts using a mix of Payne’s Grey and Mars Black. Don’t make them solid black yet; allow some grey to show through to suggest weathered wood grain. -
Vertical Wood Grain:
Using a smaller flat brush, drag vertical streaks of dark grey and black down the posts to create a rough, timber texture. -
Blocking in the Cat:
Outline the cat sitting on the center post. Focus on the smooth curve of the back and the alert posture of the head. Fill the shape with solid Mars Black. -
Adding Dimension:
While the cat is mostly a silhouette, mix a dark charcoal grey and add subtle highlights on the shoulder and thigh where the moonlight would hit.
Level Up: 3D Texture
Mix modeling paste into your black paint for the wooden posts. Apply it with a palette knife to create actual ridges that mimic rough, old wood bark.
Step 4: Details and Foreground
-
Painting the Eyes:
Using your smallest detail brush, dot two tiny almond shapes with Yellow Ochre or bright orange for the eyes. Add a microscopic dot of black for the pupil to bring the cat to life. -
Whiskers and Highlights:
With a script liner brush and watered-down white paint, flick very fine lines for the whiskers and subtle rim lighting on the cat’s ears. -
Barbed Wire Lines:
Use the liner brush with black paint to draw two horizontal lines of barbed wire connecting the posts and running off the canvas edges. Paint tiny ‘X’ shapes along the wire for the barbs. -
Foreground Grasses:
Load a medium round brush with black paint. Start from the bottom edge and flick upward quickly to create varying heights of grass blades. -
Seed Heads:
Add small dots or feathery textures to the tips of some taller grass blades to depict seed heads silhouetted against the light sky. -
Final Contrast Check:
Step back and ensure your black values are deep and opaque. Touch up the bottom edge with more black to firmly ground the scene.
Hang your finished painting in a well-lit spot to let that moon really shine.
Simple Skull With Floral Accents
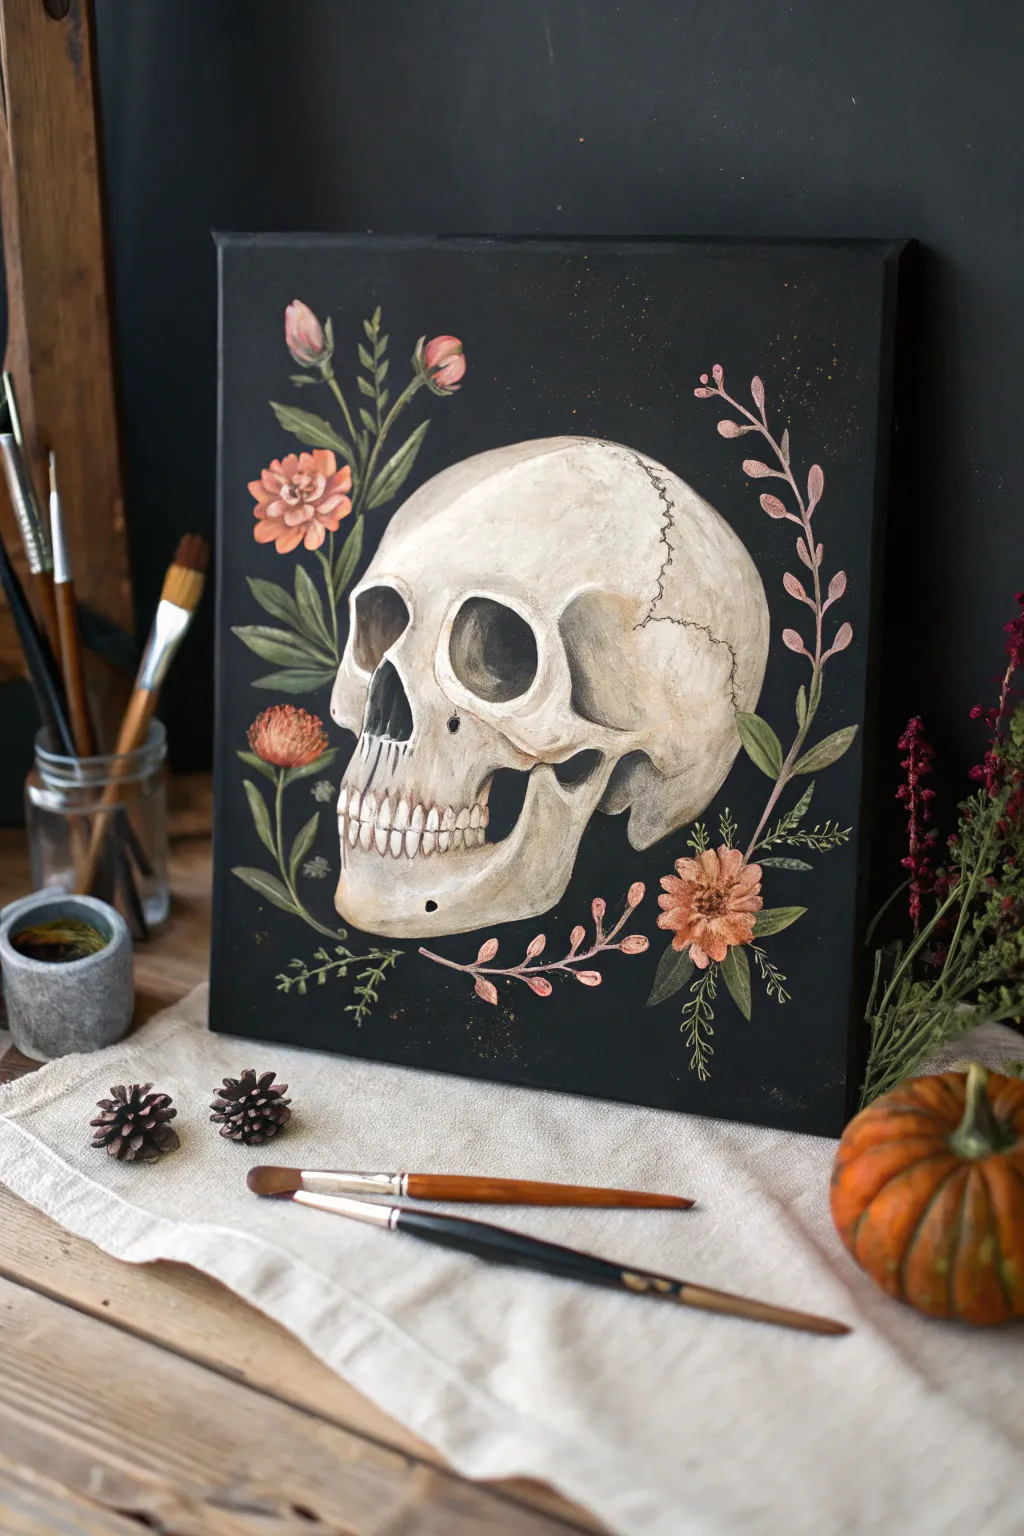
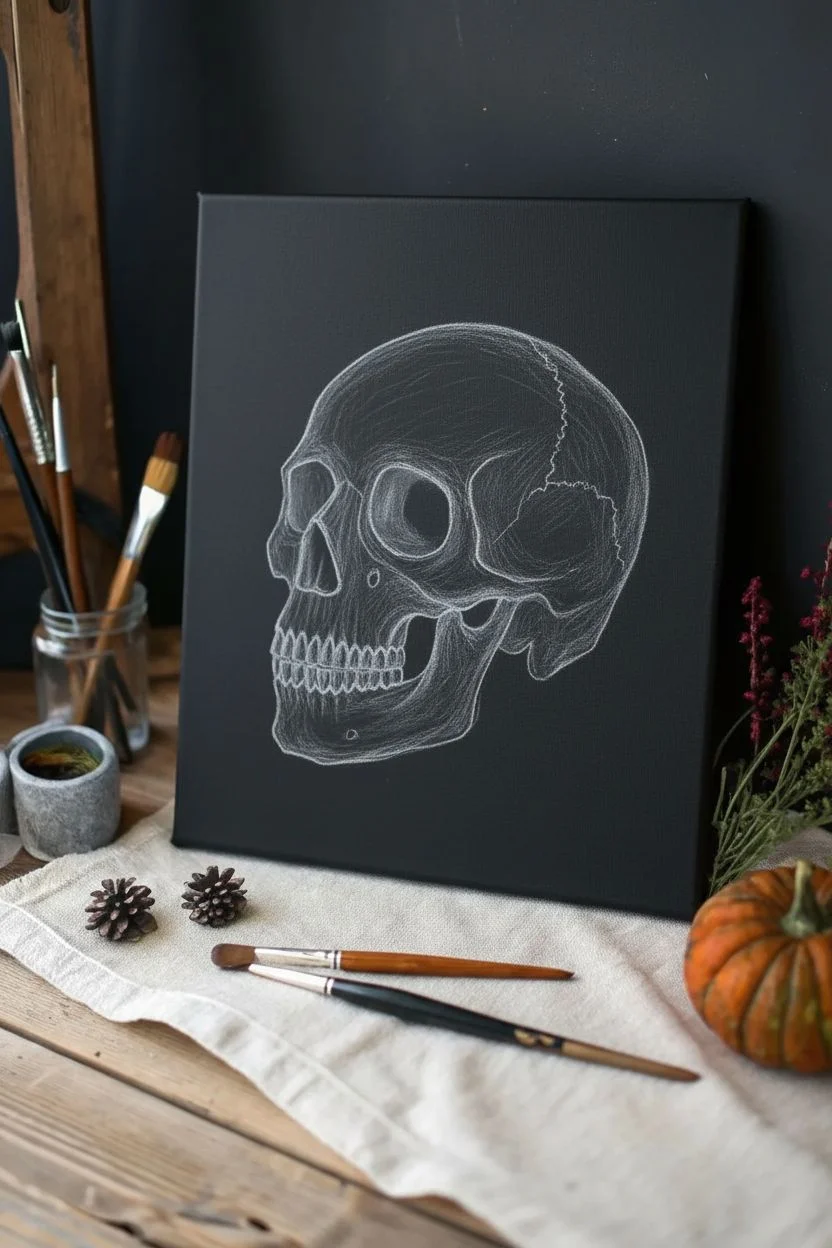
This elegant project juxtaposes the starkness of a skeletal profile with soft, trailing botanicals in warm autumn hues. The striking black background makes the bone tones and coral flowers pop, creating a sophisticated piece of seasonal decor.
Step-by-Step
Materials
- Black stretched canvas (11×14 or similar)
- Titanium White acrylic paint
- Raw Umber and Burnt Sienna acrylic paint
- Coral, pale pink, and sage green acrylic paints
- Flat shader brushes (sizes 6 and 10)
- Small round detail brush (size 0 or 1)
- Chalk or a white charcoal pencil
- Palette for mixing
- Cup of water and paper towels
Step 1: Sketching the Structure
-
Prepare the connection points:
Begin with a fully dry black canvas. Using a piece of white chalk or a white charcoal pencil, lightly sketch the basic oval shape of the cranium. Position it right of center to leave room for the flowers on the left. -
Refine the profile:
Draw the outline of the eye socket, the nasal cavity, and the cheekbone (zygomatic arch). Add the jawline, keeping the chin slightly squared but rounded at the bottom. -
Map out the teeth:
Sketch a gentle curve for the meeting point of the upper and lower teeth. Lightly mark vertical lines to indicate individual teeth, remembering they get smaller as they recede toward the back of the jaw.
Step 2: Painting the Base Layer
-
Mix the bone color:
Create a base bone shade by mixing a large amount of Titanium White with a tiny touch of Raw Umber and a speck of Burnt Sienna. You want a warm, creamy off-white, not a stark gray. -
Fill the silhouette:
Using a size 10 flat brush, fill in the entire skull shape with your bone mixture. Avoid the eye and nose sockets; leave these the raw black of the canvas for the deepest possible shadows. -
Establish the first shadows:
While the paint is still slightly tacky, mix a little more Raw Umber into your bone color. Brush this darker tone under the cheekbone, at the back of the skull, and along the temples to start creating volume.
Chalky Residue?
If your initial chalk sketch lines are still visible after painting, simply wipe them away gently with a damp Q-tip or a moist cloth once the acrylic paint is completely dry.
Step 3: Refining the Skull Details
-
Deepen the contrast:
Switch to a smaller brush. Mix a dark brown wash using Raw Umber and a tiny bit of black. Paint the ‘hollow’ beneath the cheekbone and define the rounded jaw joint where it connects to the skull. -
Highlight the form:
Using pure Titanium White or a very light cream, add highlights to the top of the cranium, the brow ridge, and the protruding part of the chin. Blend the edges softly into the mid-tones. -
Detail the sutures:
I like to use a size 0 round brush with thinned dark brown paint to create the wiggly, crack-like lines (sutures) on the side of the skull. Keep your hand loose to make them look organic. -
Paint the teeth:
Reform the teeth using your lightest bone color. Use the dark brown mix to outline them and paint the tiny gaps between the roots. Add a tiny dot of white highlight to the center of the front teeth for dimension. -
Add surface texture:
Dry brush a little bit of beige texture over the large flat areas of the bone to make it look weathered rather than perfectly polished.
Add Metallic Flair
For a glamorous touch, repaint the trailing pink vines with metallic copper or rose gold paint. It catches the light beautifully against the matte black background.
Step 4: Adding the Botanical Accents
-
Paint the main stems:
Using a sage green mixed with a little brown for warmth, paint main stems curving upward behind the skull and a smaller sprig near the jaw. These flowing lines soften the rigid bone stucture. -
Add the coral blooms:
Mix a soft coral color. Paint loose, circular flower shapes on the left side stems. Use short, dabbing strokes to simulate petals layering over each other. -
Detail the flower centers:
Once the coral paint is dry, dab a darker terracotta or brown into the center of the flowers. Add tiny dots of yellow or light orange for pollen texture. -
Create trailing vines:
With a pale pink or mauve shade, paint delicate, vine-like stems curving around the bottom right and top right of the skull. Add small paired leaves along these vines. -
Insert fern accents:
Using a very thin liner brush and a lighter green, paint wispy, fern-like fronds tucked in between the larger flowers and leaf clusters. -
Final touch ups:
Look for any accidental smudges on the black background and paint over them with black. Add a final bright white highlight on the brow bone to make the skull pop forward one last time.
Hang your sophisticated spooky masterpiece and enjoy the subtle autumn vibes it brings to the room


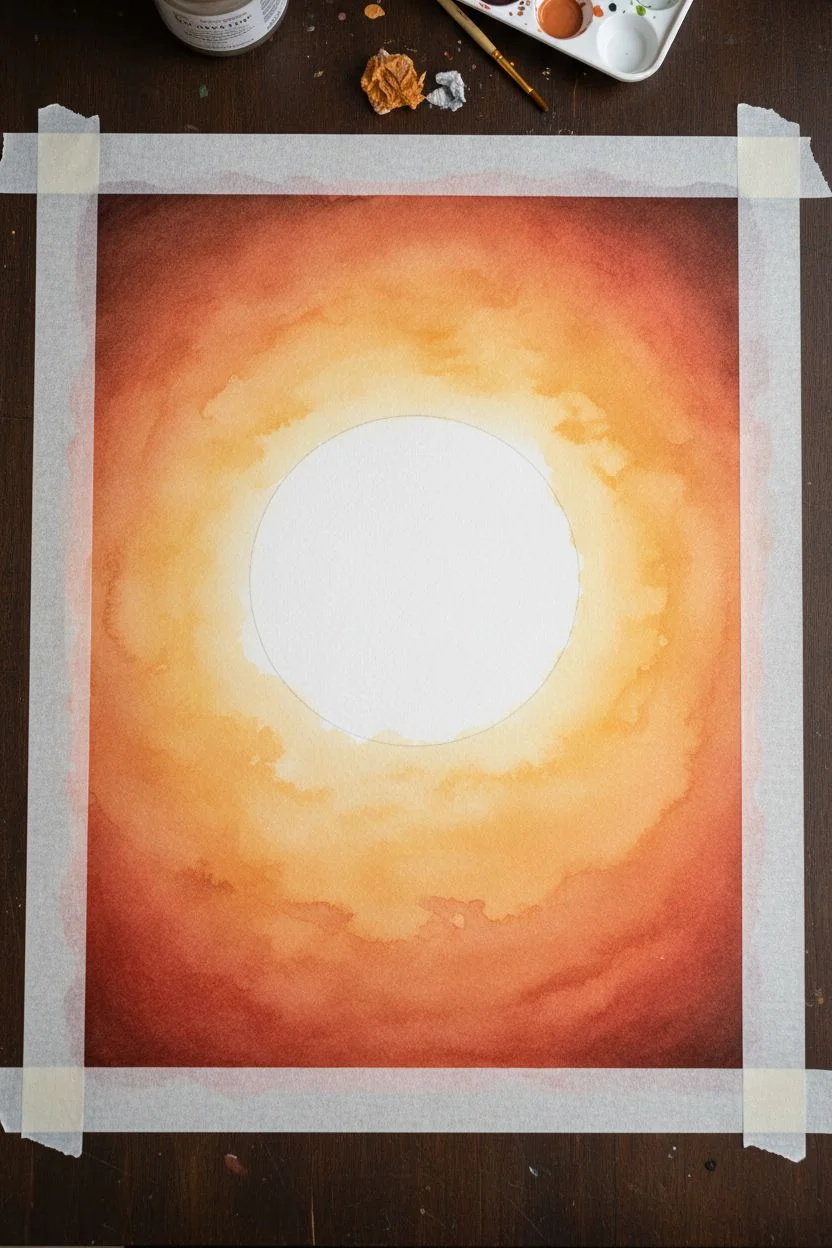
Candy Corn Color Gradient Sky
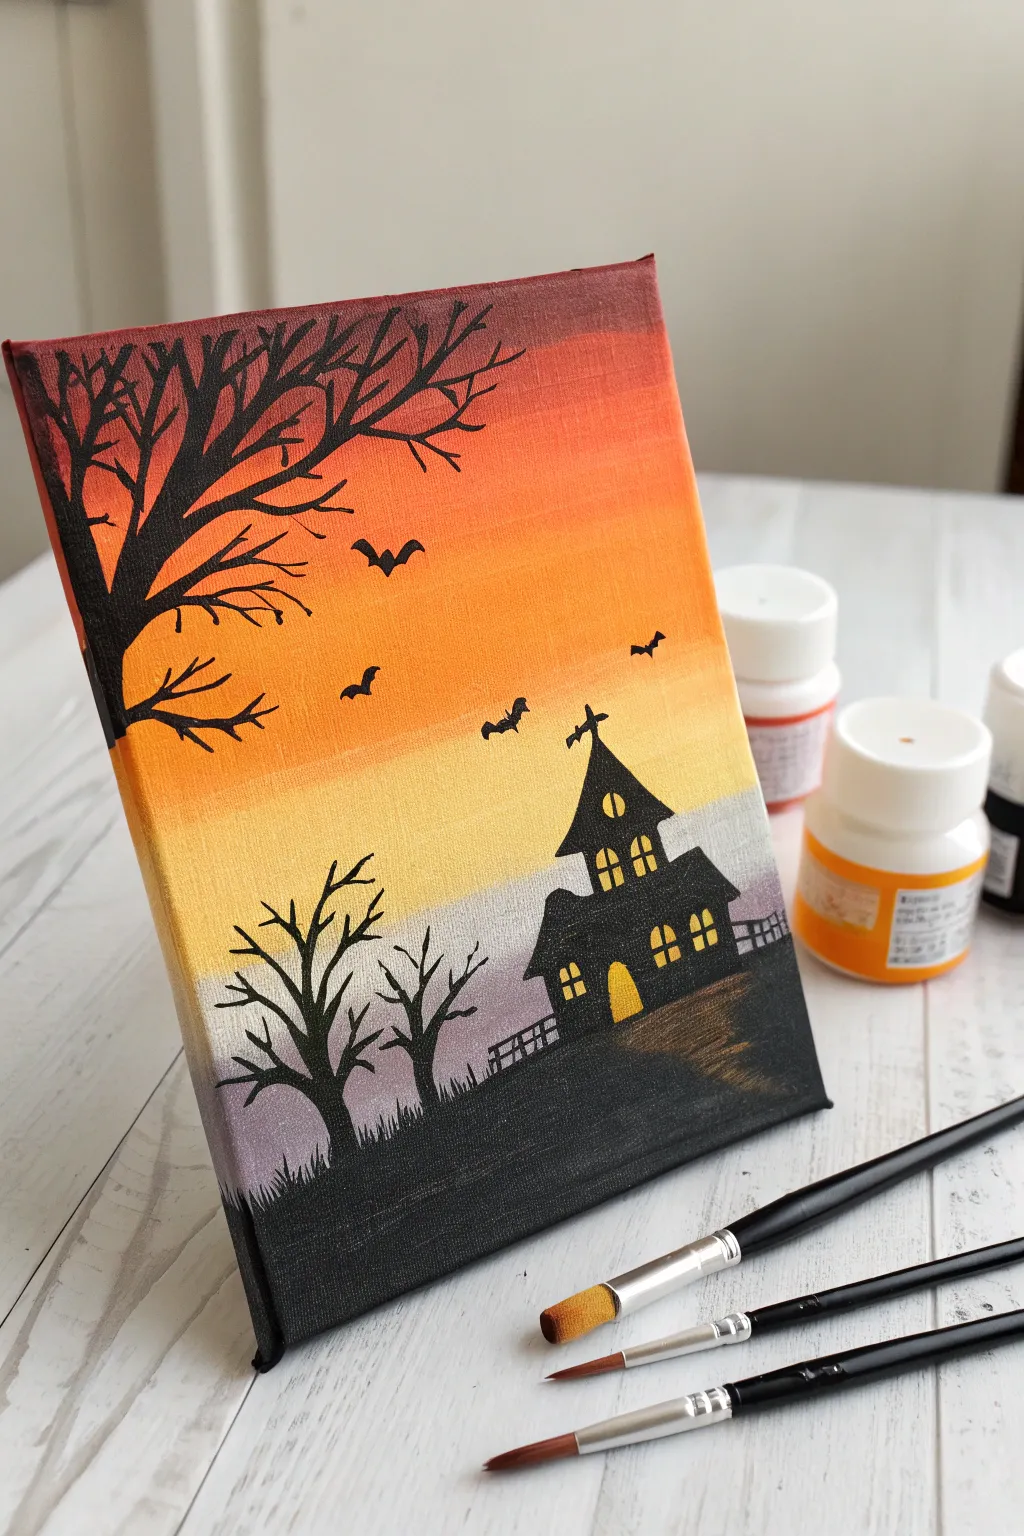
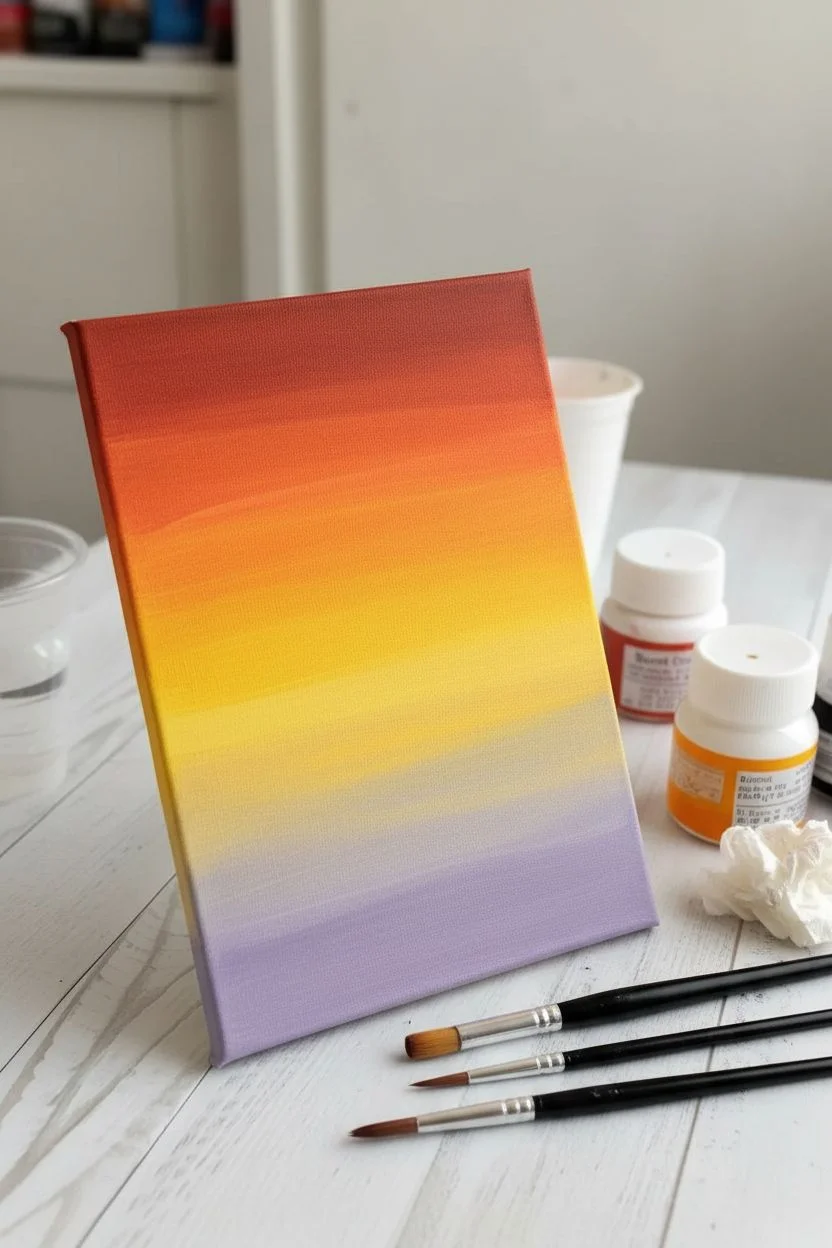
Capture the magic of Halloween night with this striking silhouette painting featuring a vibrant gradient sky reminiscent of classic candy corn colors. This beginner-friendly project uses bold contrast to create a moody, atmospheric scene perfect for seasonal decor.
Step-by-Step Guide
Materials
- Small stretched canvas (e.g., 8×10 or 5×7 inches)
- Acrylic paints: Burnt Orange, Bright Yellow, Titanium White, Lavender (or light purple), and Black
- Flat shader brush (medium size)
- Round detail brush (small size)
- Cup of water
- Paper towels
- Pencil (optional for sketching)
Step 1: Painting the Gradient Sky
-
Start with the top layer:
Begin by applying a generous band of Burnt Orange paint across the top third of your canvas using a flat shader brush. Don’t worry about the bottom edge being perfect, as we will blend it momentarily. -
Add the middle band:
Clean your brush thoroughly, then pick up the Bright Yellow paint. Apply this across the middle of the canvas, slightly overlapping with the bottom edge of the orange section while the paint is still wet. -
Blend the transition:
Using gentle, horizontal back-and-forth strokes, blend the area where the orange and yellow meet. You want a smooth transition without a hard line, creating a soft, glowing effect. -
Paint the bottom section:
Wash your brush again. For the bottom third, mix a touch of Titanium White with a very small amount of Lavender to create a hazy, dusk-like hue. Apply this to the remaining white space on the canvas. -
Final sky blend:
Blend the top of your lavender/white section into the bottom of the yellow section. The yellow and purple are complementary colors, so blending them too much can create brown mud—keep the overlap narrow and light for a misty horizon look. -
Let it dry completey:
This is crucial. Allow the background to dry completely before adding any black paint. A hairdryer on a cool setting can speed this up if you are eager to proceed.
Muddy Sky Fix
If blending orange/yellow creates mud, clean your brush immediately. Let it dry fully, then repaint that layer. Don’t overwork wet paint.
Step 2: Creating the Foreground
-
Block in the ground:
Switch to black acrylic paint. Paint a solid black, uneven hill rising from the bottom left to the right side using the flat brush. This establishes the foundation for your haunted house. -
Outline the haunted house:
Using a small round brush and black paint, sketch the basic geometric outline of the house on the far right of the hill. Start with a rectangle for the base and add a pointy triangular roof. -
Fill the silhouette:
Fill in the shape of the house with solid black paint. Add a small crooked chimney or a weather vane detail at the very peak of the roof for extra character. -
Add window details:
While the black house shape is drying, mix a small amount of yellow with a dot of white. Paint small, slightly arched shapes inside the black silhouette to create glowing windows and a door. -
Paint window panes:
Once the yellow window paint is dry, use your finest black detail brush (or even a black paint pen) to draw tiny crosses over the yellow circles to create window panes.
Step 3: Adding Spooky Details
-
Paint the large tree trunk:
On the left side of the canvas, use black paint to create a large tree trunk that extends off the top edge. The trunk should be thicker at the bottom and taper as it goes up. -
Branch out:
Use the very tip of your round brush to pull thin, jagged branches extending from the trunk towards the center of the sky. I find that shaking my hand slightly while painting these lines makes the branches look more organic and spooky. -
Add smaller trees:
Paint two smaller, barren trees in the middle ground, near the base of the hill. Make these significantly smaller than the main tree to create a sense of depth and distance. -
Create the fence:
To the right of the house, paint a tiny, slightly crooked fence using short vertical strokes connected by horizontal lines. -
Detail the grass:
Use a dry brush or just the tip of your detail brush to flick tiny upward strokes along the top edge of the black hill. This creates the texture of unruly, overgrown grass. -
Add flying bats:
Paint small ‘m’ shapes in the sky using black paint to represent bats flying in the distance. Vary their sizes and angles to make the flock look natural. -
Final touches:
Check your painting for any areas where the black might look patchy and add a second coat if needed for a solid, opaque silhouette.
Glow Up
Mix a tiny drop of neon orange or yellow into your window paint to make the house lights look like they are truly glowing in the dark.
Enjoy your homemade haunt, perfect for displaying on a mantle or bookshelf this season
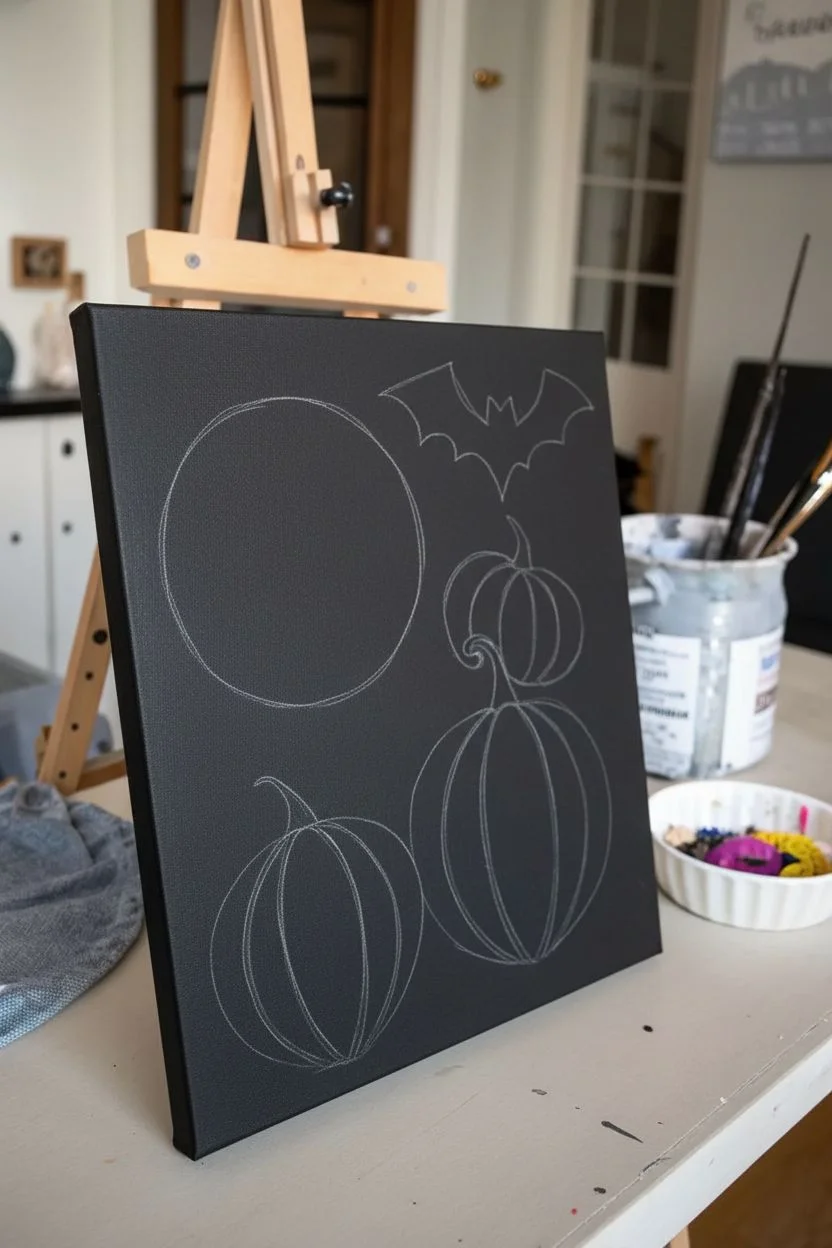
Jack-o’-Lantern Stack Character
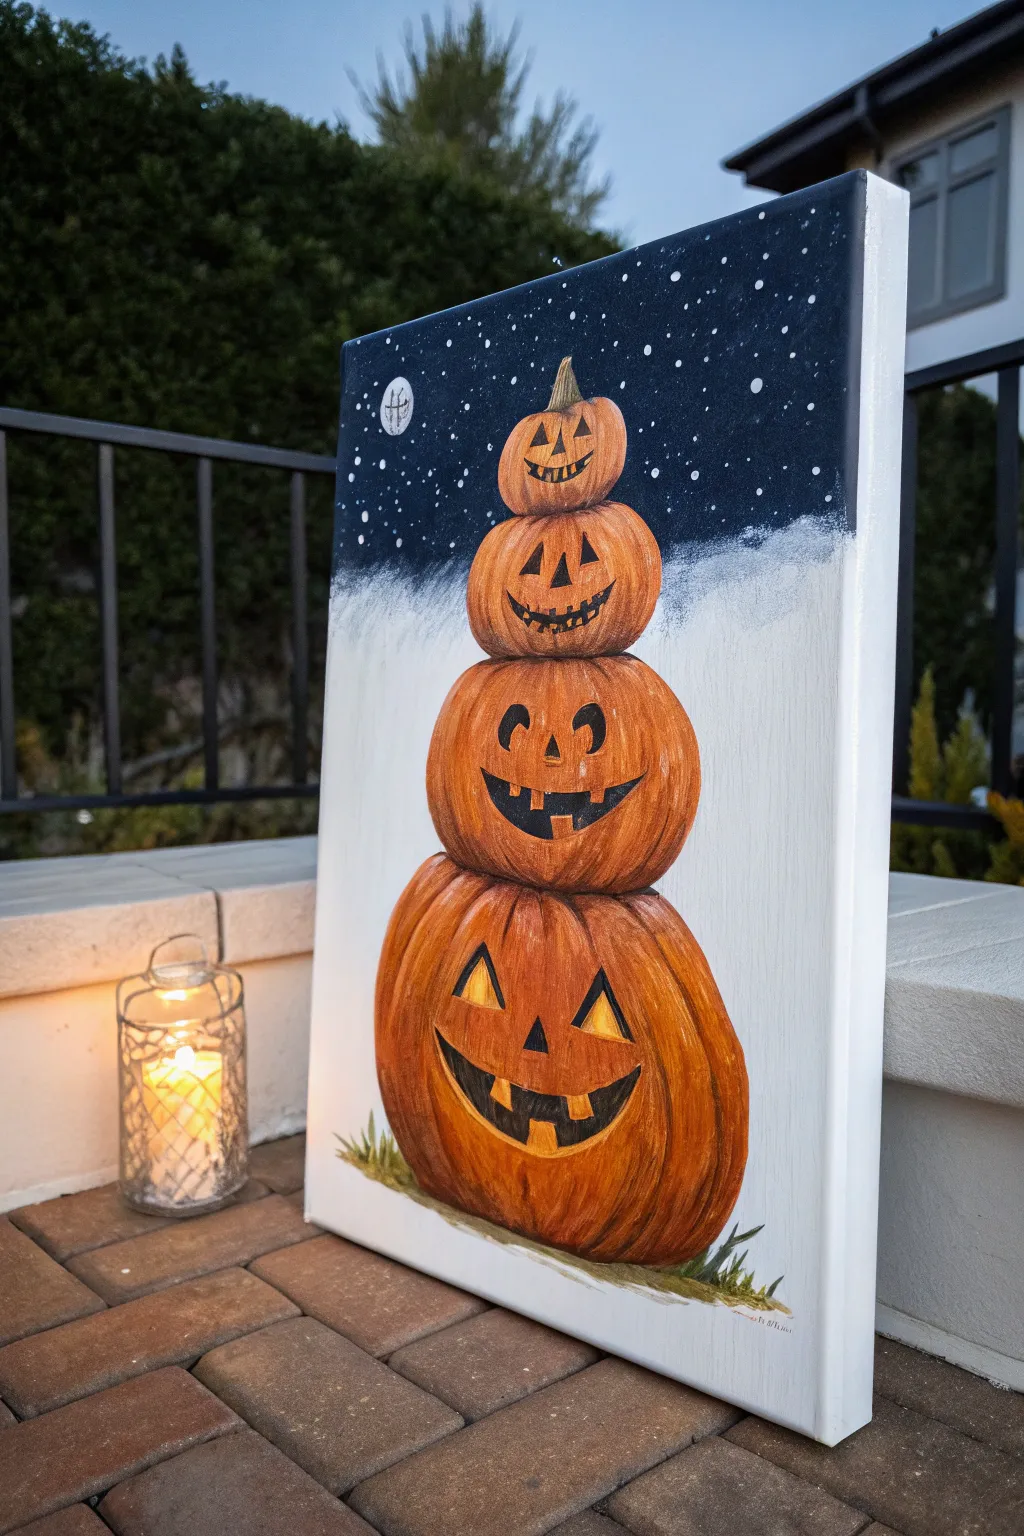
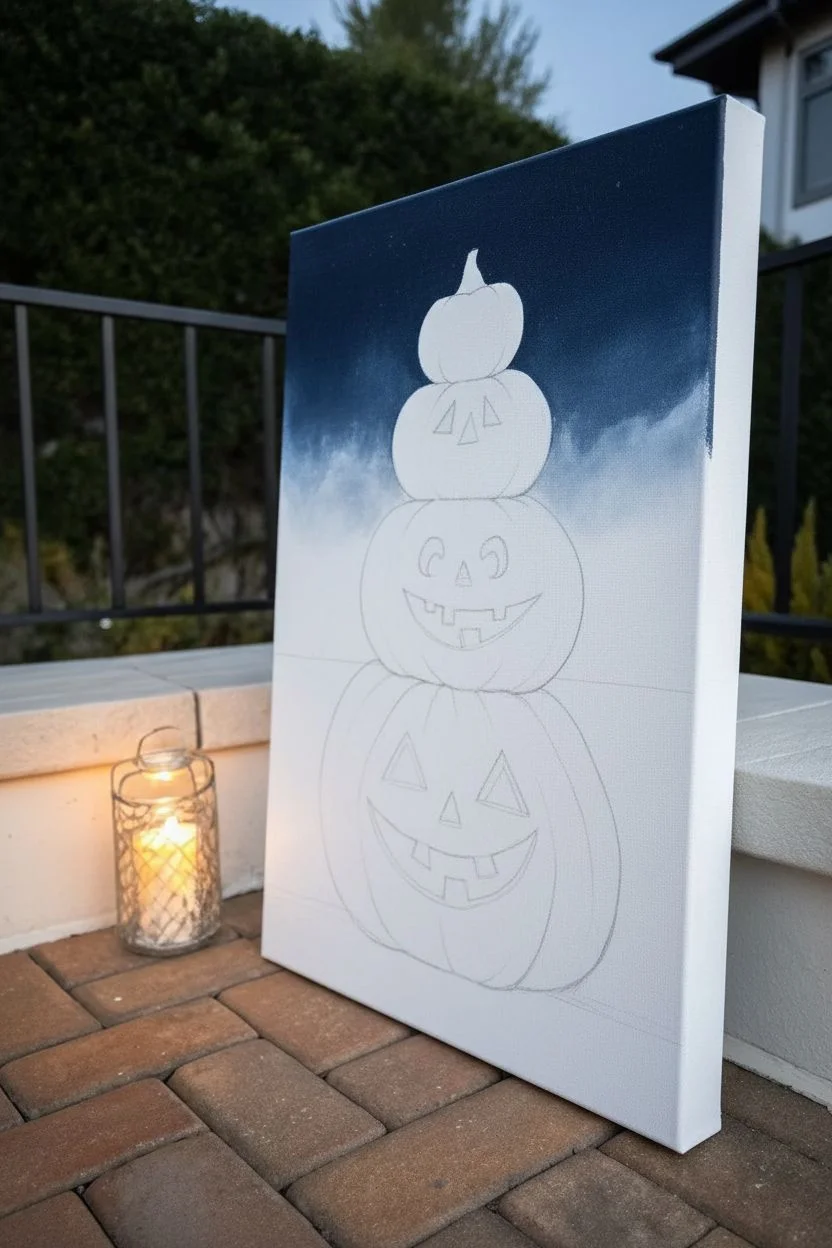
Celebrate the spooky season with this charming vertical composition featuring a family of four pumpkins stacked high against a starry night sky. The contrast between the deep navy heavens and the bright orange gourds creates a striking visual that captures the magic of a crisp Halloween evening.
Step-by-Step Tutorial
Materials
- Rectangular canvas (12×24 inch or similar tall ratio recommended)
- Acrylic paints: Titanium White, Mars Black, Burnt Sienna, Cadmium Orange, Yellow Ochre, Deep Blue (Ultramarine or Prussian)
- Flat brushes (large and medium)
- Round brushes (small and detail liner)
- Palette
- Water cup and paper towels
- Pencil for sketching
- Sea sponge or old stiff brush (optional for texture)
Step 1: Setting the Scene
-
Sketch out the stack:
Begin by lightly sketching your four pumpkins directly onto the canvas. Start with a large, wide pumpkin at the bottom, then stack three progressively smaller ones on top. Aim for slightly flattened, organic spheroid shapes rather than perfect circles to make them look heavy and settled. -
Define the faces:
Pencil in unique expressions for each tier. Give the bottom pumpkin large triangular eyes and a goofy grin, while the upper ones can have simpler smiles or rounder features. Don’t worry about perfect symmetry; quirks add character. -
Ground the painting:
Draw a faint horizon line about three-quarters of the way down the canvas. This will separate your snowy ground from the night sky. -
Paint the night sky:
Mix a deep navy using Deep Blue and a touch of Black. Using a large flat brush, paint the top section of the canvas, starting dark at the top edge and stopping just before your horizon line. Carefuly cut around the pumpkin shapes. -
Create the fade:
While the blue paint is still wet near the bottom edge, mix in some Titanium White to create a lighter blue transition. Blend this downwards into pure white as you reach the ‘snowy’ section, creating a foggy atmosphere behind the stack.
Curve Your Strokes
Always paint your brushstrokes in the curve of the pumpkin’s shape (like parentheses). Straight up-and-down strokes will make the pumpkins look flat rather than round.
Step 2: Painting the Pumpkins
-
Base coat the gourds:
Fill in all four pumpkins with a solid coat of Cadmium Orange. If your paint is transparent, you might need two coats to get a rich, opaque base layer. -
Establish the shadows:
Mix Burnt Sienna with a tiny bit of orange. Using a medium flat brush, paint vertical, curved strokes starting from the top and bottom of each pumpkin, curving toward the center. These strokes define the ribs of the pumpkin. -
Deepen the crevices:
With a smaller brush and pure Burnt Sienna, reinforce the shadows between each pumpkin segment and distinct shadows where one pumpkin sits on top of another. -
Add highlights:
Mix Yellow Ochre with a little White. Paint curved highlights on the center of each pumpkin rib to make the forms look round and bulging. Blending these slightly into the orange base creates a nice 3D effect. -
Paint the stems:
Use a mix of Burnt Sienna and a touch of Black or Green to paint the stem on the very top pumpkin. Make it slightly twisted and textured.
Step 3: Details & Atmosphere
-
Fill in the features:
Switch to a small round brush and Mars Black paint. Carefully fill in the eyes, noses, and mouths you sketched earlier. For a softer look, you can mix a tiny bit of brown into the black. -
Add bright accents:
To make the faces pop, add small triangles of bright Yellow or Yellow Ochre inside the eyes or mouth, suggesting a candle flickering inside. On the bottom pumpkin, distinct yellow triangles in the eyes create a glowing effect. -
Create the stars:
Dilute some Titanium White paint with water until it is inky. Load a brush (or toothbrush) and gently flick it over the dark blue sky area to create a field of stars. Paint a few larger dots by hand for variety. -
Paint the moon:
In the upper left corner, paint a small circle with White. While wet, dab in a tiny amount of grey to give it some crater texture. -
Ground the stack:
Mix a greenish-brown shade and use a small brush to paint tufts of grass peeking through the white snow at the very bottom of the canvas, grounding the largest pumpkin. -
Final touches:
Review your work. If lines feel too sharp, soften them with a dry brush. I like to add a final bright white highlight on the top left of each pumpkin to indicate moonlight reflection.
Make it Sparkle
Mix a little iridescent medium or glitter glaze into your white paint before flicking the stars. This gives the night sky a magical shimmer when the light hits the canvas.
Step back and admire your tower of grinning gourds.
Spooky Graveyard Horizon Line
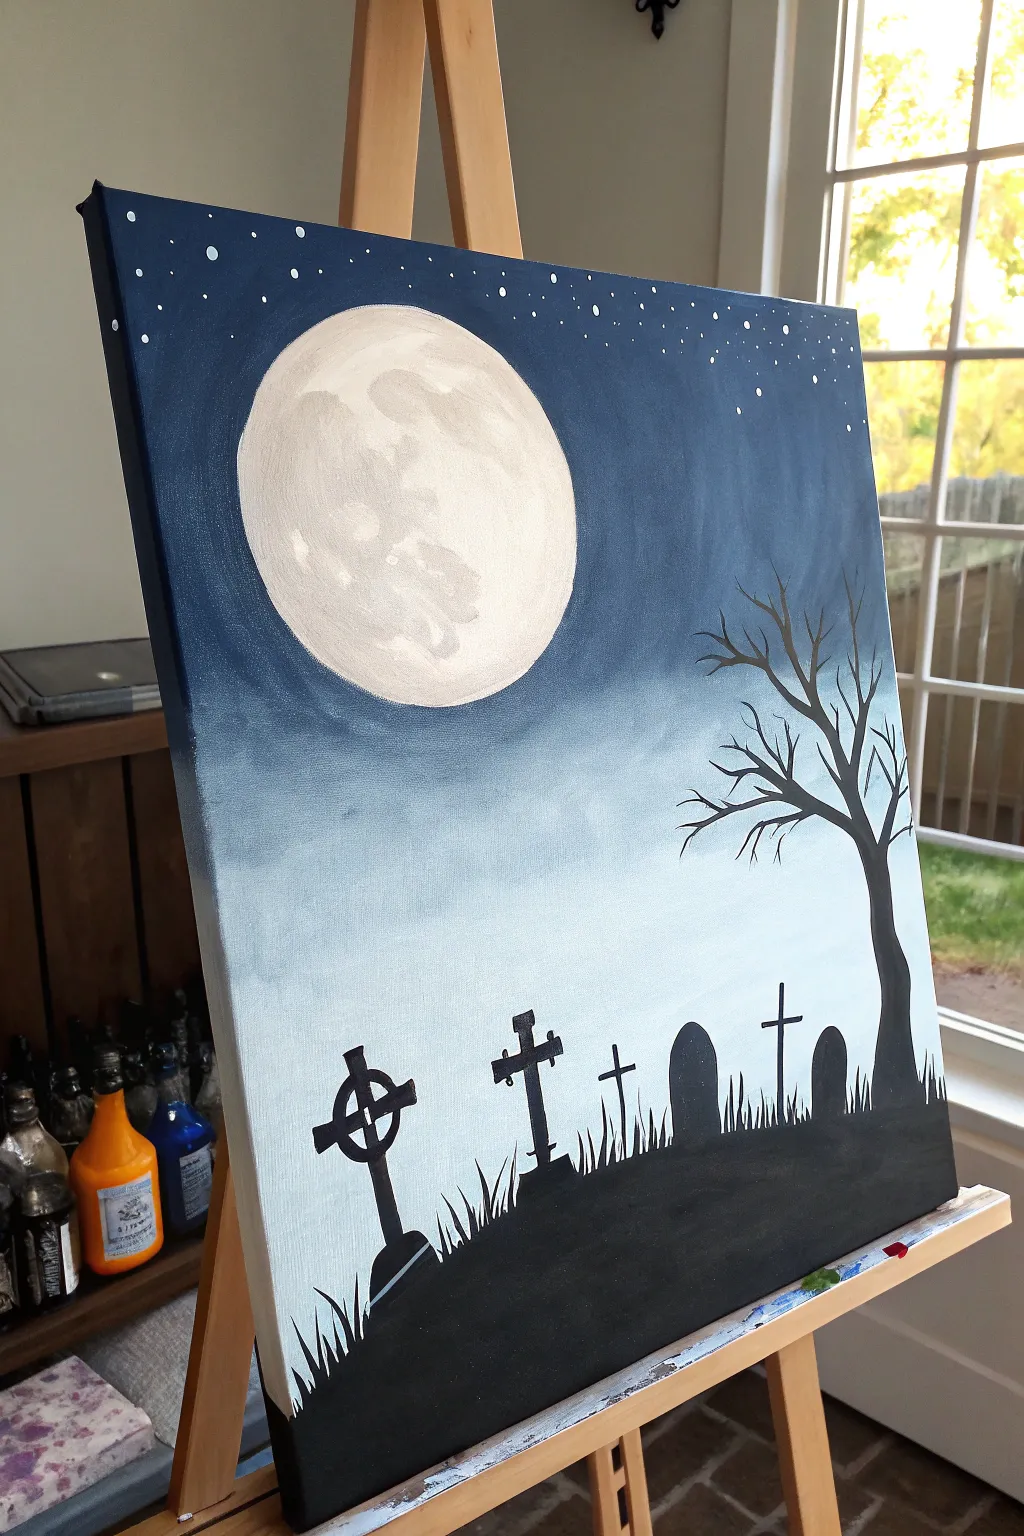
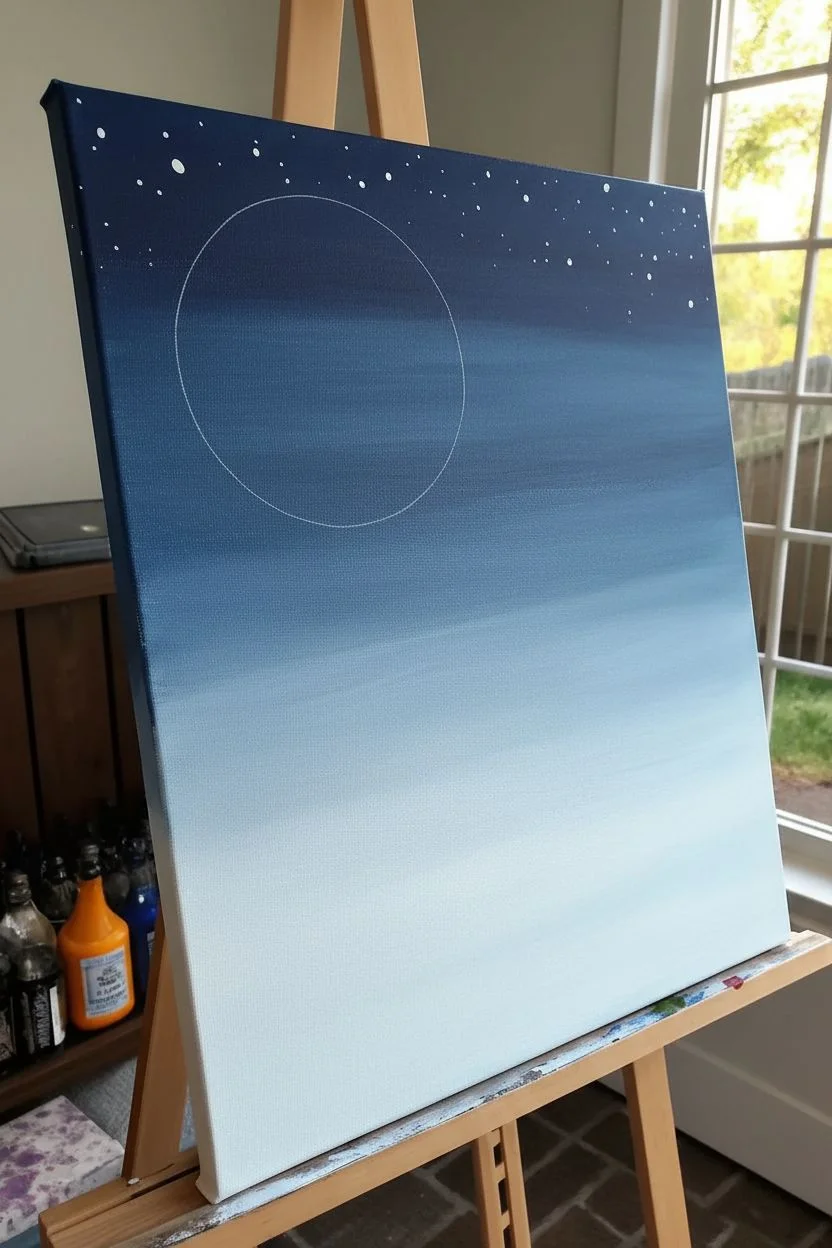
Capture the eerie stillness of a graveyard at midnight with this striking monochromatic acrylic painting. This project focuses on mastering a smooth gradient sky and using stark black silhouettes to create a haunting, high-contrast scene.
Step-by-Step Guide
Materials
- Stretched canvas (16×20 or similar)
- Acrylic paints: Navy Blue (or Phthalo Blue + Black), White, Black
- Paintbrushes: Large flat wash brush, medium flat brush, small round detail brush
- Palette for mixing
- Cup of water and paper towels
- Pencil or chalk (optional due to dark paint)
- Round object for tracing (like a plate or lid)
Step 1: Setting the Moonlit Sky
-
Outline the moon:
Begin by placing your circular object (like a small plate) in the upper-left quadrant of the canvas. Lightly trace around it with a pencil to mark your space for the moon—don’t paint inside this circle just yet. -
Mix your darkest blue:
On your palette, create a deep midnight blue. If you don’t have a pre-mixed navy, combine Phthalo Blue with a touch of black. It should be very dark, almost blending into the night. -
Paint the upper sky:
Using your large flat wash brush, apply the dark blue paint to the top corners and upper edge of the canvas. Paint around your moon circle carefully, extending the dark color about one-third of the way down the canvas. -
Create a mid-tone blue:
Add a scoop of white to your dark blue mixture to create a medium, slate-blue tone. Apply this below your dark section, using horizontal brushstrokes to begin blending the two areas where they meet. -
Blend the gradient:
While the paint is still wet, stroke back and forth horizontally across the transition line. I like to keep my brush slightly damp here to help the colors smoke together seamlessly. -
Finish the horizon:
Mix an even lighter, misty blue—mostly white with just a hint of your blue mix. Paint the bottom third of the canvas with this pale shade, blending it up into the mid-tone section. The canvas should now fade from dark night to a foggy gray-blue near the bottom. -
Add the stars:
Once the blue background is dry, load a round brush with watery white paint or use a toothbrush. Flick the bristles to spatter tiny stars across only the dark blue upper section. Add a few deliberate larger dots with a detail brush for bright stars.
Clean Lines
For the sharpest moon edge, paint the moon first, let it dry, cover it with a circular paper mask or masking tape, and then paint the sky over it.
Step 2: Painting the Glowing Moon
-
Base coat the moon:
Clean your brush thoroughly. Fill in the traced circle with a warm off-white color (mix white with a tiny dot of yellow or brown if you have it, or just plain white). -
Add lunar texture:
While the white is wet, dab a little bit of gray onto your brush. Gently scumble (scrub lightly) the gray into parts of the moon to create craters and shadows. Don’t overblend; you want blotchy texture. -
Refine the moon edge:
Use a small brush and pure white to sharpen the edges of the circle, making sure it stands out crisp against the dark blue sky.
Foggy Effects
Dry-brush a tiny amount of wispy white paint horizontally across the base of the tombstones to make the graveyard look mistier.
Step 3: Creating the Silhouettes
-
Paint the ground layer:
Switch to pure black acrylic. Using a medium flat brush, paint a rolling hill at the very bottom of the canvas. Make the hill slightly uneven to look natural, gently sloping upwards from left to right. -
Draft the tree trunk:
On the right side of the canvas, paint a thick, winding tree trunk growing out of the hill. Make the base wide and let it taper as it reaches upward. -
Branch out:
Using a smaller round brush, pull branches outward from the trunk. Use a ‘shakey’ hand motion to give the branches a crooked, spooky appearance. Let the tips taper off into thin, sharp points. -
Outline the tombstones:
Decide on the placement of your graves. Paint simple geometric shapes along the horizon line of the hill: rounded arches for standard stones and crosses for variety. -
Detail the Celtic cross:
For the feature gravestone on the left, paint a vertical line crossed by a horizontal one. Then carefully paint a circle connecting the arms of the cross. Fill it in with solid black. -
Add grassy textures:
Using your smallest detail brush or a fan brush turned on its side, flick tiny upward strokes of black paint along the top of the hill. This creates the look of overgrown grass around the base of the tombstones. -
Final touches:
Check your black areas for any transparency. If the blue background shows through, add a second coat of black to ensure the silhouettes are solid and opaque.
Step back and admire your chilling, moonlit masterpiece as it dries
Foggy Moonlit Path to the House
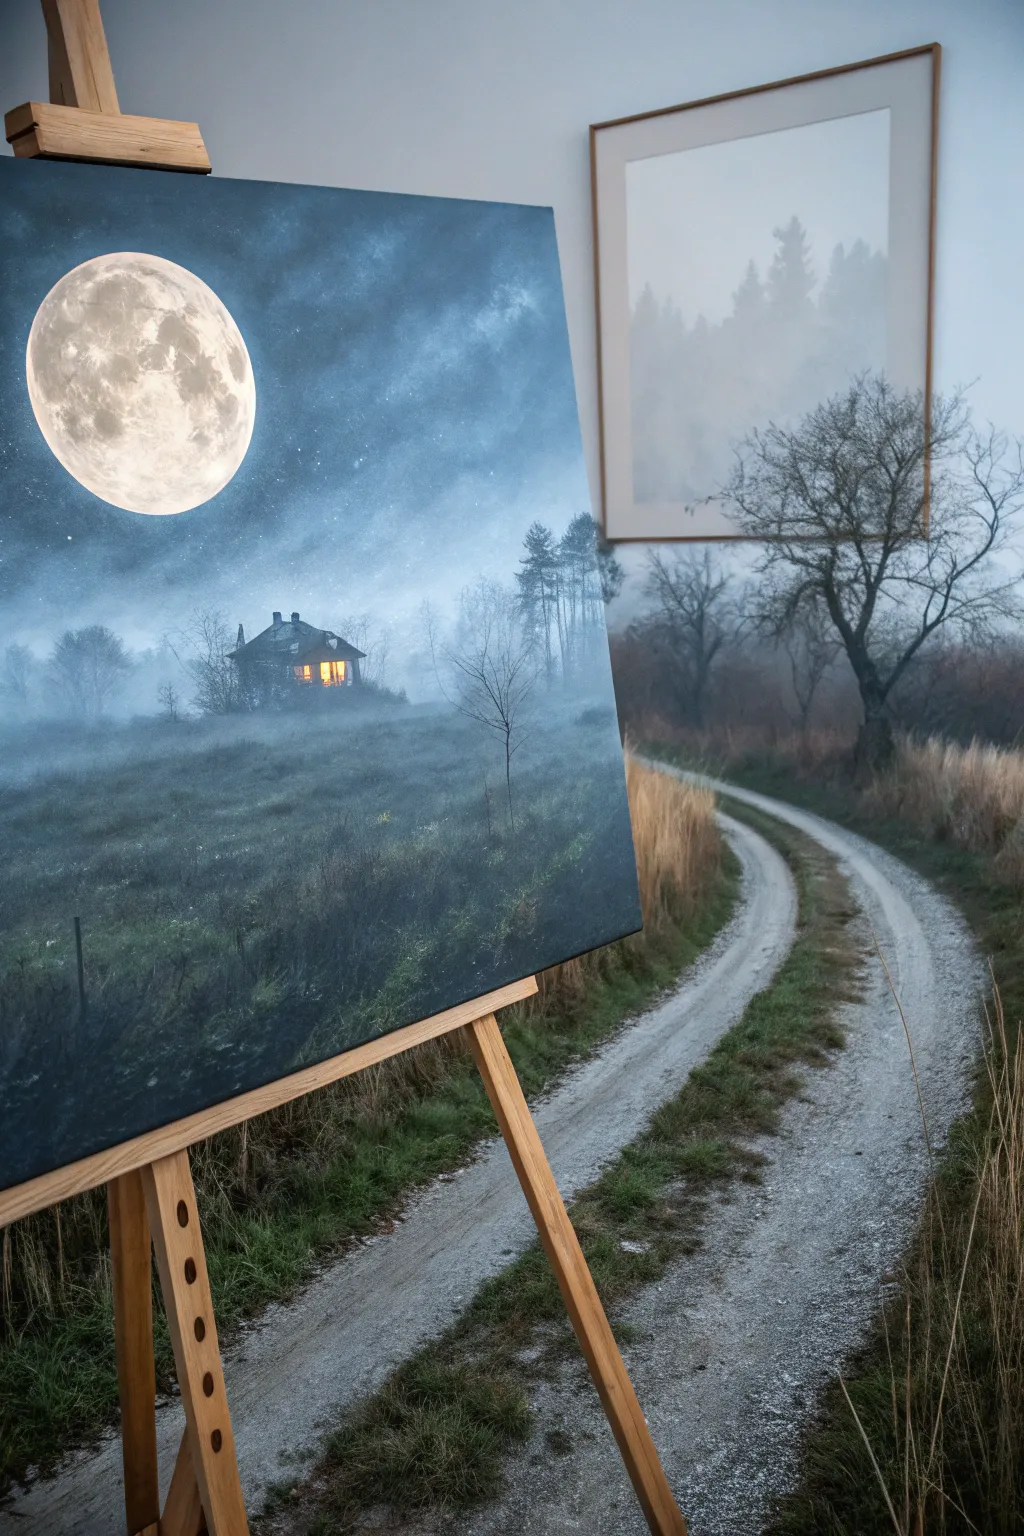
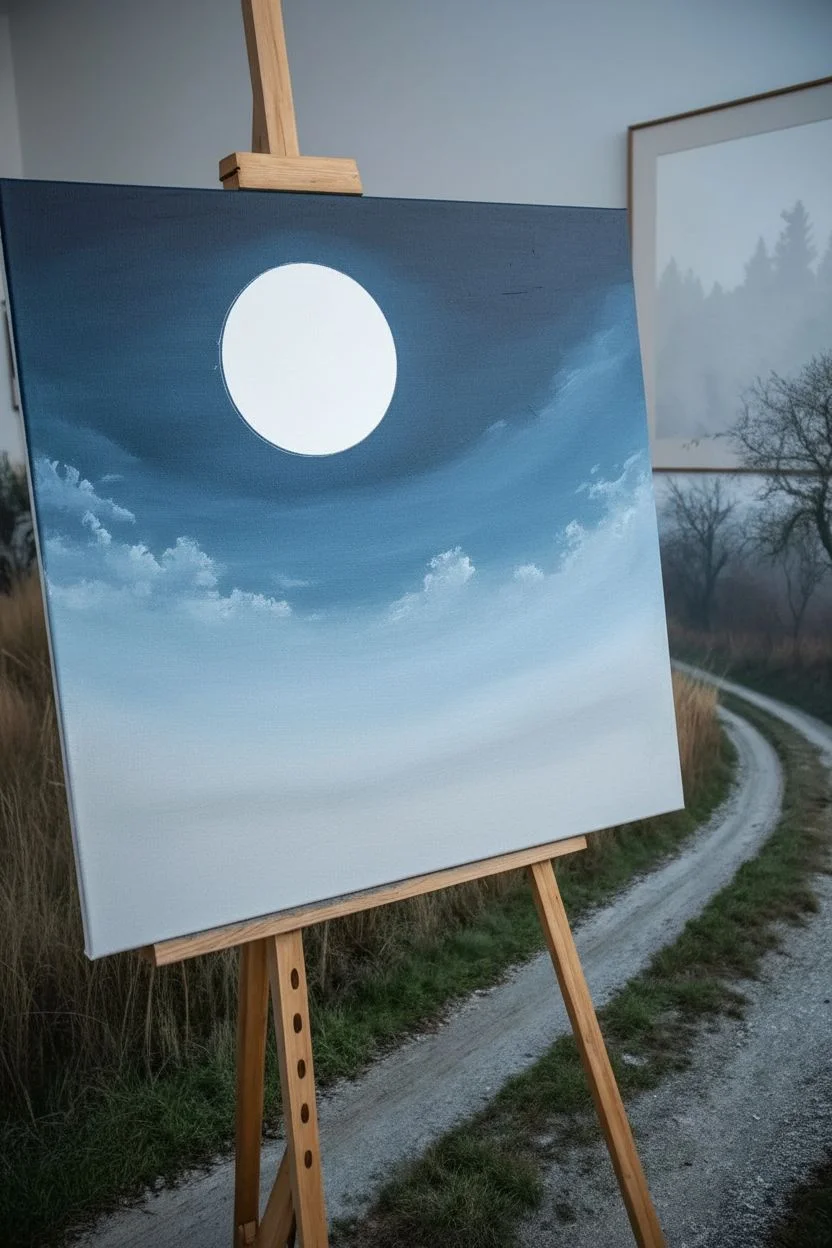
Capture the eerie serenity of a misty Halloween night with this atmospheric acrylic painting. You will learn to blend soft clouds, create a glowing celestial moon, and nestle a warm, inviting cottage into a cool, blue landscape.
Detailed Instructions
Materials
- Stretched canvas (16×20 inches or similar)
- Acrylic paints: Phthalo Blue, Ultramarine Blue, Titanium White, Mars Black, Burnt Umber, Cadmium Yellow, Cadmium Orange
- Large flat wash brush
- Medium filbert brush
- Small round detail brush (size 0 or 1)
- Fan brush
- Old toothbrush (for spatter)
- Circular object or compass for tracing
- Palette knife
- Water and paper towels
Step 1: Setting the Night Sky
-
Trace the Moon:
Begin by deciding where your moon will sit. Place your circular object (like a masking tape roll or saucer) in the upper left quadrant and lightly trace around it with a pencil or very diluted grey paint. -
Base Sky Gradient:
Mix Phthalo Blue with a touch of Mars Black. Using your large flat brush, paint the upper corners of the canvas, keeping the strokes horizontal and smooth. -
Blending Downward:
Gradually add small amounts of Titanium White to your dark blue mix as you work your way down the canvas. The sky should transition from a deep midnight blue at the top to a lighter, hazy steel blue near the horizon line. -
Preserving the Moon:
Carefully paint around your traced moon circle. It is crucial to keep this area pristine white canvas for maximum luminosity later. -
Creating Clouds:
While the sky paint is still slightly wet, load a filbert brush with opaque Titanium White and scumble lighter patches around the moon and drifting across the sky to suggest wispy cloud cover.
Step 2: The Glowing Moon & Stars
-
Painting the Moon Base:
Fill in the moon circle with pure Titanium White. Apply two coats if necessary to cover the canvas texture completely. -
Adding Lunar Detail:
Mix a very faint grey using White and a tiny speck of Black or Umber. Sponge or dab this lightly onto the moon’s surface to create craters and maria features, keeping the edges slightly soft so it doesn’t look like a sticker. -
The Starry Field:
Create a watery mixture of White paint. Dip an old toothbrush into it, and holding it near the canvas, flick the bristles with your thumb to spray a fine mist of stars over the darker blue areas. -
Moon Glow:
Using a dry brush technique with a very small amount of Zinc or Titanium White, softly buffer the sky directly surrounding the moon to create a bloom effect.
Moon Looks Flat?
If your moon looks pasted on, mix a transparent glaze of white and water. Lightly brush it over the edge where the moon meets the sky to blur the boundary.
Step 3: The Foggy Landscape
-
Horizon Mist:
Mix a pale, grey-blue shade (White + Phthalo Blue + tiny touch of Umber). Use a wide brush to lay in the mid-ground fog, blending it seamlessly up into the bottom of your sky gradient. -
Building the Hill:
For the foreground hill, mix Black, Phthalo Blue, and a little Green (or Yellow mixed with Blue). Paint the bottom third of the canvas in diagonal, upward strokes to suggest the slope of a grassy hill. -
Texturing the Grass:
Switch to a fan brush or a rough bristle brush. Tap various shades of dark green and blue-grey over the foreground hill to create the texture of tall, wild grass waving in the wind. -
Distant Trees:
Using a watered-down grey-blue mix, paint faint, vertical shapes near the horizon line. These trees should be barely visible, pushing them far into the misty background.
Make it Spooky
Add a tiny silhouette of a figure standing near the house or a black cat on the fence line to add a narrative element to your foggy scene.
Step 4: The Lonely House
-
Blocking the House:
Located near the horizon on top of the hill, paint a small silhouette of a house using a dark grey mixture (not pure black). Keep the shapes simple—a roof and walls. -
Adding Windows:
Mix bright Cadmium Orange with Cadmium Yellow and a lot of White. Paint small squares for windows. This warm light contrasts beautifully with the cool blue painting. -
Refining the Silhouette:
Add a chimney and perhaps a small porch roof detail with your smallest round brush. Keep the edges of the house slightly soft to show that it is enveloped in fog. -
Foreground Trees:
Paint a few distinct, thin trees in the mid-ground using dark grey. Use a rigger or liner brush for frantic, spindly branches that reach up into the paler sky. -
Final Mist Layers:
Glaze a very thin, watery layer of white over the base of the house and the bottom of the trees to ‘sink’ them into the rising fog.
Step back and admire how the warm window light cuts through the cool, mysterious atmosphere you have built
Starry Night With a Halloween Twist
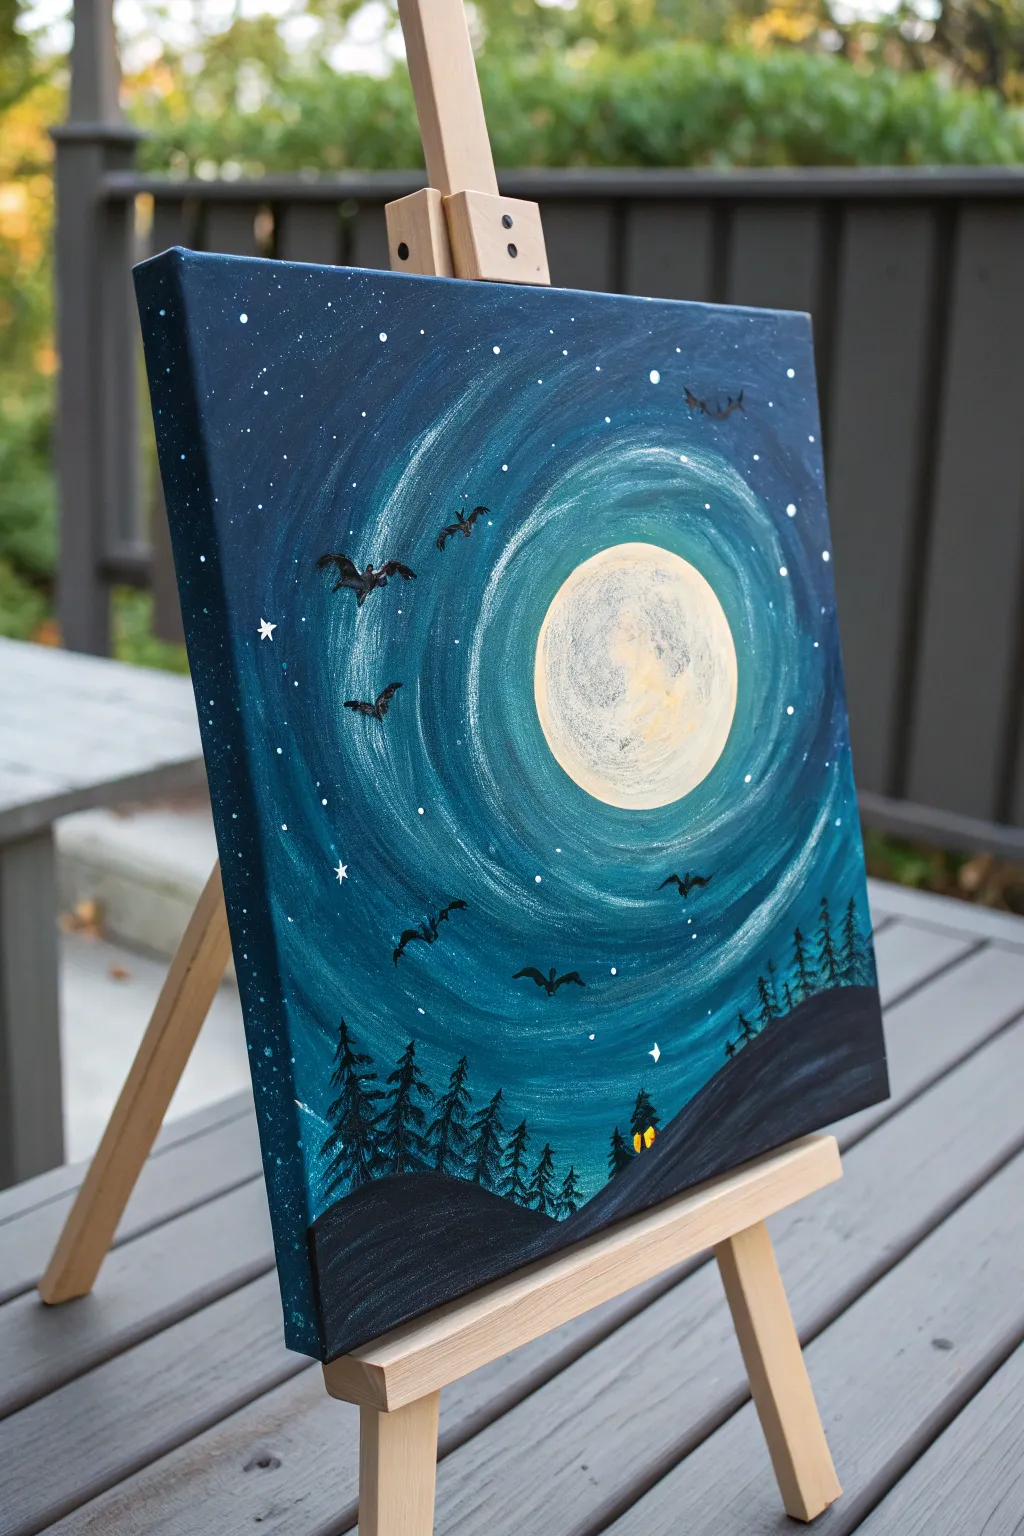
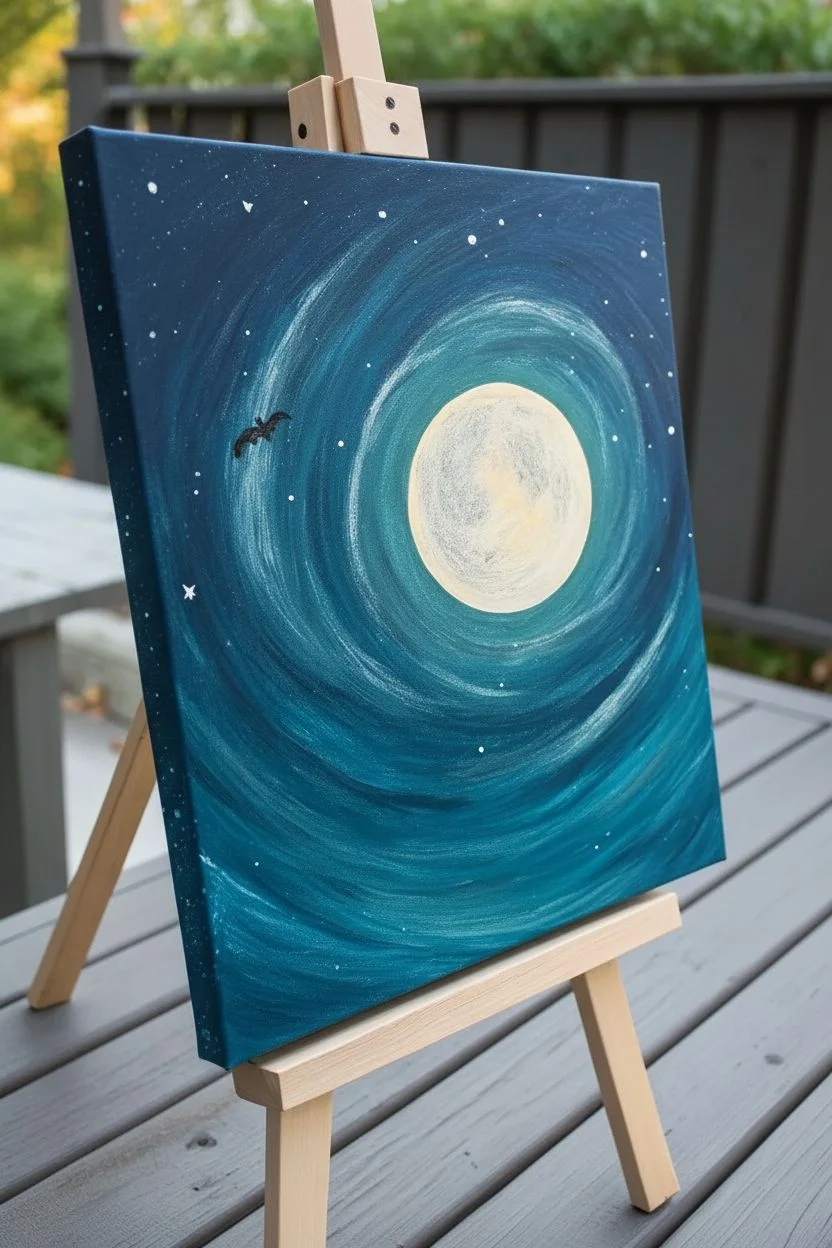
Transform a blank canvas into a magical, swirling night sky featuring silhouetted bats and evergreen trees. This project uses circular blending techniques to create a glowing moon effect that feels both mysterious and enchanting.
How-To Guide
Materials
- Square canvas (stretched or panel)
- Acrylic paints: Titanium White, Phthalo Blue, Teal/Turquoise, Black, Yellow Ochre
- Large flat brush (1 inch)
- Medium filbert brush
- Small round detail brush
- Fan brush (optional for texture)
- Cup of water
- Paper towels
- Palette or paper plate
- Easel (optional)
Step 1: Setting the Sky Scene
-
Prime the background:
Begin by covering the entire canvas with a layer of dark blue paint, mixing Phthalo Blue with just a touch of Black to create a deep midnight base. Don’t worry about it being perfectly smooth; texture adds character. -
Map the moon:
While the background is still slightly tacky, use a medium filbert brush loaded with Titanium White to paint a large circle slightly off-center to the right. This will be your moon base. -
Create the glow:
Mix a generous amount of Teal/Turquoise with White to make a light, milky aqua color. Using a dry brush technique, paint circular strokes around the moon, blending outward into the dark blue background. -
Build the swirl effect:
Load your brush with pure Teal paint. Make sweeping, curved strokes that echo the shape of the moon, spiraling outward toward the edges of the canvas. These visible brushstrokes give the painting its energy. -
Add depth to the sky:
Go back in with darker blue on your brush and add streaks between the teal swirls. This layering creates a dynamic, vibrating sky effect similar to Van Gogh’s style.
Swirls getting muddy?
If your blue and teal swirls are blending into one gray color, let the background layer dry completely before adding the lighter teal swirls on top.
Step 2: Detailing the Moon
-
Texture the moon:
Mix a tiny amount of Yellow Ochre with Titanium White. Dab this mixture onto your white moon circle using a scumbling motion (scrubbing circles) to create craters and uneven surface texture. -
Brighten the center:
Add a crisp layer of pure Titanium White to the center of the moon and the immediate edge facing the light source, making it pop against the teal swirls. -
Soften the edges:
If the moon’s edge looks too sharp, take a clean, slightly damp brush and gently blur the perimeter into the surrounding glow.
Make it shimmer
Mix a tiny amount of iridescent mixing medium or silver glitter paint into your white star mixture for a subtle, magical sparkle in the night sky.
Step 3: Adding the Landscape
-
Paint the hills:
Switch to pure Black paint and a flat brush. Paint two rolling hill shapes at the bottom: one foreground hill on the right that slopes down to the left, and a background hill on the left. -
Start the tree trunks:
Using a small round brush and black paint, draw vertical lines of varying heights along the hills to serve as the trunks for your pine trees. -
Add pine branches:
For the foliage, use a fan brush or a small round brush. Start at the top of each trunk and dab downward in a zigzag pattern, getting wider as you reach the bottom of the tree. -
Create the spooky house glow:
Near the base of the trees on the right hill, dab two tiny spots of Yellow Ochre mixed with White to represent glowing windows of a hidden cabin. -
Frame the windows:
Use your smallest detail brush and black paint to crisp up the edges of the yellow glow, turning them into distinct tiny window shapes.
Step 4: Finishing Touches
-
Add the bats:
With black paint and a fine liner brush, paint simplified bat silhouettes in the sky. Think of them as elongated ‘M’ shapes with curved wings, varying the sizes to show distance. -
Flick the stars:
Water down a small amount of white paint until it is inky. Load a brush, hold it over the canvas, and tap the handle against another brush to splatter tiny stars across the sky. -
paint larger stars:
I like to manually paint a few specific, larger stars using a detail brush, perhaps adding a traditional five-point star or two for variety. -
Final inspection:
Check your painting for any bare spots on the canvas edges (paint these black) and sign your work in the corner.
Step back and admire the spooky yet serene atmosphere you have captured on canvas
Neon Pop Halloween on Black Background
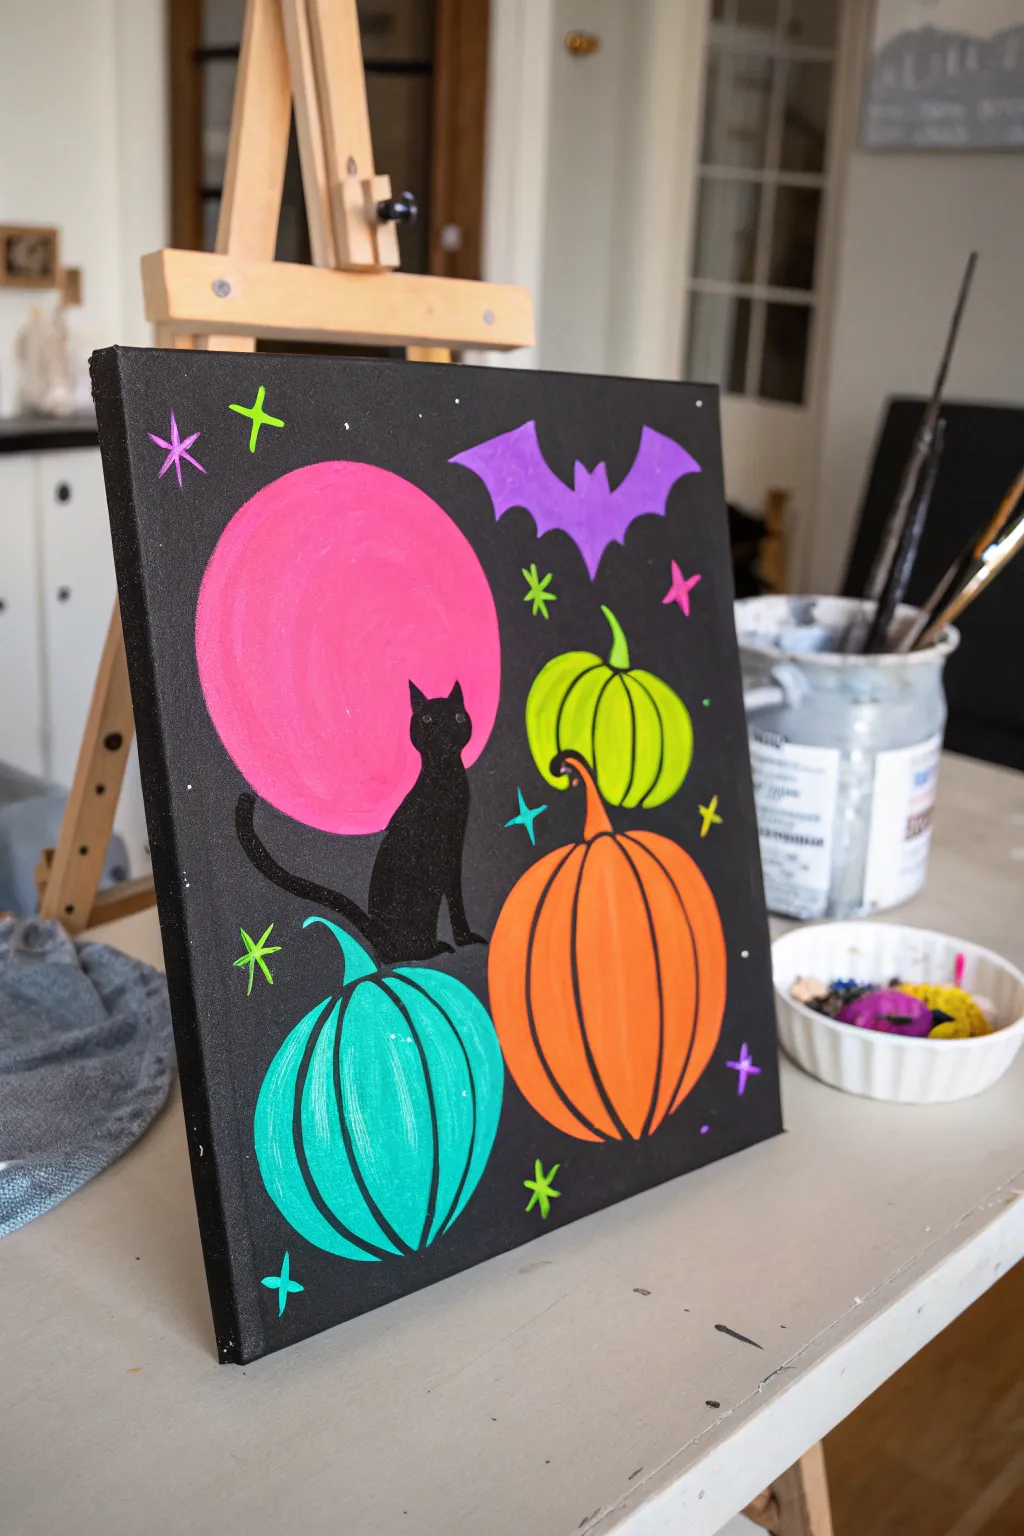
This vibrant acrylic painting pops with personality thanks to its high-contrast neon palette set against a deep black background. In this project, you’ll learn how to layer bright colors over dark surfaces to create a spooky yet playful Halloween scene featuring a classic black cat silhouette.
Step-by-Step Guide
Materials
- Square stretched canvas (approx. 12×12 inches)
- Black acrylic paint (matte)
- Titanium white acrylic paint (essential for underpainting)
- Neon pink acrylic paint
- Neon lime green acrylic paint
- Bright orange acrylic paint
- Teal or turquoise acrylic paint
- Lavender or light purple acrylic paint
- Wide flat brush (1-inch)
- Medium round brush (size 6 or 8)
- Small liner brush (size 0 or 1)
- Cup of water
- Paper towels
- Palette or paper plate
- Chalk or white pencil (for sketching)
Step 1: Setting the Stage
-
Prime the Background:
Begin by covering your entire canvas with a solid coat of matte black acrylic paint. Use your wide flat brush for broad, even strokes. Ensure you paint the edges of the canvas for a finished look. -
Dry Completely:
Allow the black background to dry thoroughly before moving on. If you’re impatient like me, a hairdryer on a cool setting speeds this up significantly. -
Sketch the Layout:
Using a piece of chalk or a white charcoal pencil, lightly sketch the main elements. Draw a large circle for the moon on the upper left, three pumpkins of varying sizes at the bottom, and a bat shape near the top right.
Chalk It Out
Use regular white chalkboard chalk for your initial sketch. If you make a mistake, it wipes right off the dried black paint with a damp paper towel without leaving marks.
Step 2: Underpainting for Vibrancy
-
Create White Bases:
Neon colors are naturally transparent and won’t show up well on black. Using a medium round brush and titanium white paint, fill in the shapes of the moon, the three pumpkins, and the bat. Don’t worry about the cat yet. -
Smooth the White Layer:
Try to keep this white layer relatively smooth. Allow it to dry completely; if you apply color while the white is wet, you’ll just get pastel tones instead of neon pops.
Step 3: Adding the Neon Color
-
Paint the Super Moon:
Load your medium brush with neon pink and paint over the white circle. You may need two coats to get that solid, punchy color. -
Fill the Teal Pumpkin:
Paint the bottom-left pumpkin with teal or bright turquoise paint, covering the white base entirely. -
Paint the Orange Pumpkin:
Fill the largest central pumpkin using bright orange paint. -
Paint the Lime Pumpkin:
Cover the smallest pumpkin on the right with neon lime green. -
Color the Bat:
Paint the bat silhouette in the upper right corner with a vibrant lavender or light purple. -
Second Coats:
Inspect your colors. If the white underpainting is peeking through or looks streaky, apply a second coat to any shapes that need more opacity.
Glow Up
For a true ‘neon’ effect, mix a tiny drop of fluorescent medium into your colored paints, or trace the final dry stars with Posca paint pens for sharper lines.
Step 4: Details & Shadows
-
Define Pumpkin Segments:
Switch to your small liner brush and black paint. Carefully paint curved vertical lines on each pumpkin to create the ridges. Start from the top stem area and curve outward, meeting at the bottom. -
Add Stems:
Using the same liner brush, paint a curved stem on top of the orange and lime pumpkins. For the teal pumpkin, draw a thin, curly tendril stem. -
Paint the Cat Silhouette:
Using black paint, verify the placement of your cat sitting on the teal pumpkin and overlapping the pink moon. Paint the body first (a pear shape), then add the round head with two small triangular ears. -
Add the Tail:
Paint a sinuous, curvy tail extending from the cat’s body to the left side. -
Optional Moon Texture:
If you want a little texture on the moon, mix a tiny bit of white with your pink and lightly dab a few subtle clouds or craters while the pink is still slightly tacky.
Step 5: Final Flourishes
-
Starry Sky:
Using your small liner brush, paint simplified stars scattered around the empty black space. Alternate colors—paint some lime green, some pink, and some purple. -
Star Shapes:
Vary the distinct shapes of the stars: try simple four-point stars (a cross shape), five-point stars, or simple dots. -
Highlights:
Add tiny white or light-colored highlights to the tops of the pumpkins or the edges of the stems to give them a little volume. -
Clean Up:
Check your edges. If you smudged any neon onto the black background, use a little black paint to touch up and crisp the lines.
Hang your finished masterpiece somewhere bold to brighten up your spooky decor
Paint Splatter Night Sky With Silhouettes
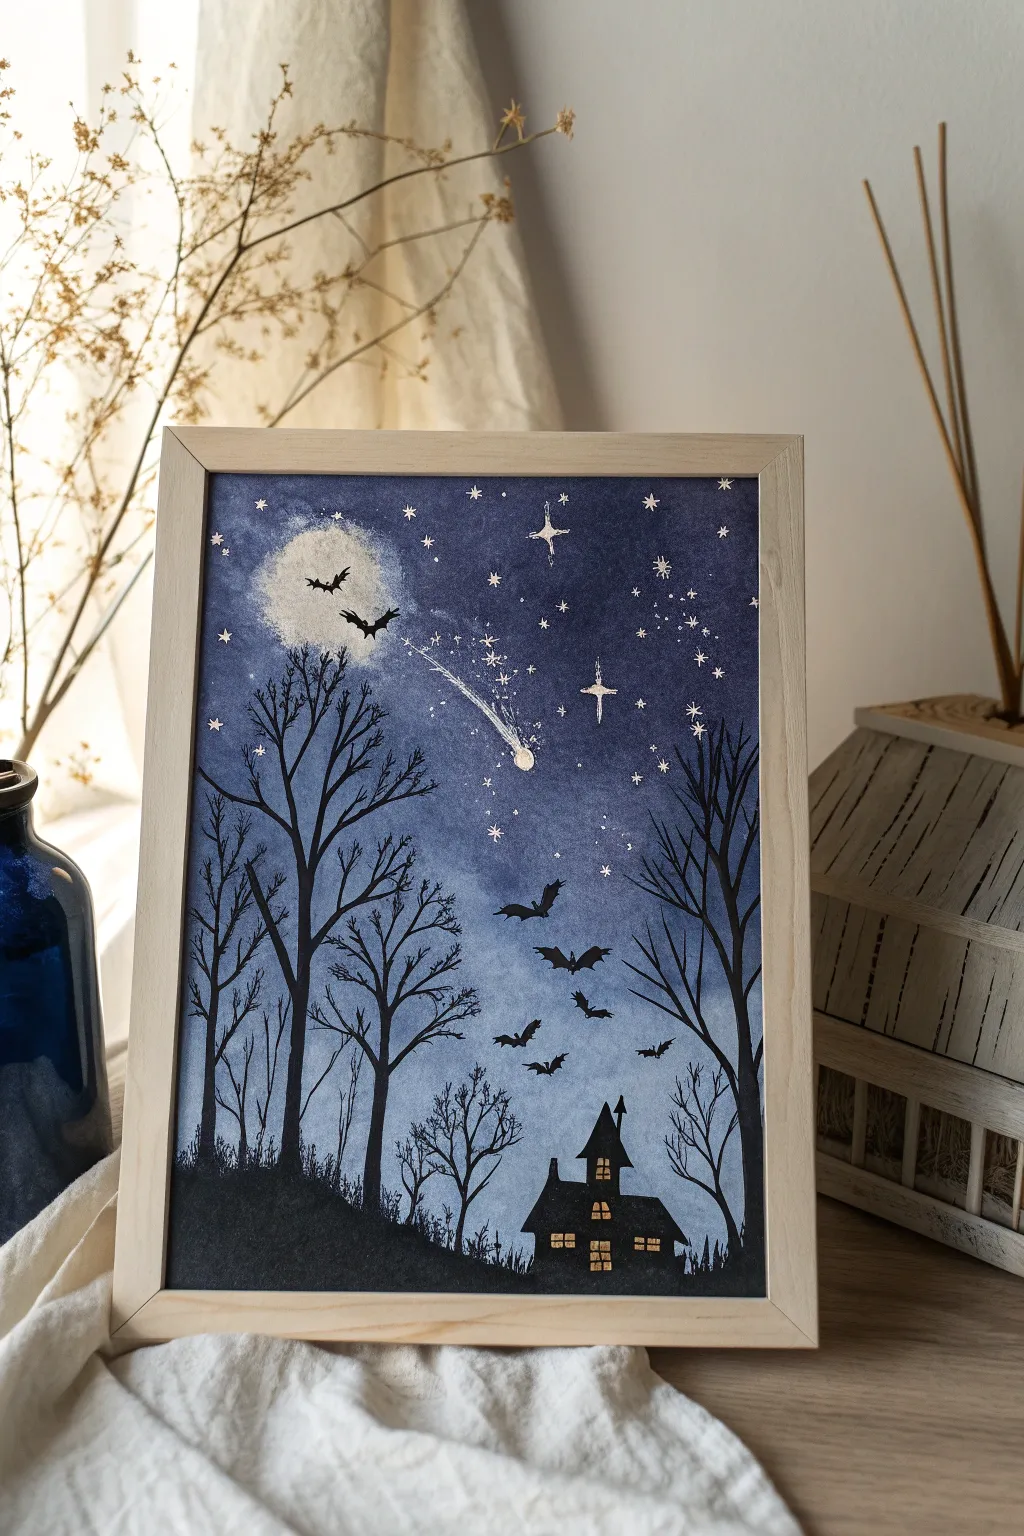
Capture the magic of a Halloween evening with this atmospheric painting featuring silhouetted trees, dancing bats, and a glowing haunted house under a shooting star. Using simple splatter techniques and layering, you’ll create a misty, enchanting night sky that looks far more complex than it actually is.
Detailed Instructions
Materials
- Watercolor paper or mixed media paper (heavyweight)
- Acrylic paints (dark blue, ultramarine, black, white, pale yellow)
- Wooden picture frame (light natural wood recommended)
- Flat wash brush (large)
- Detail round brush (size 0 or 1)
- Old toothbrush (for splattering)
- Paper towels
- Pencil (optional for sketching)
- Cup of water
- Palette or mixing plate
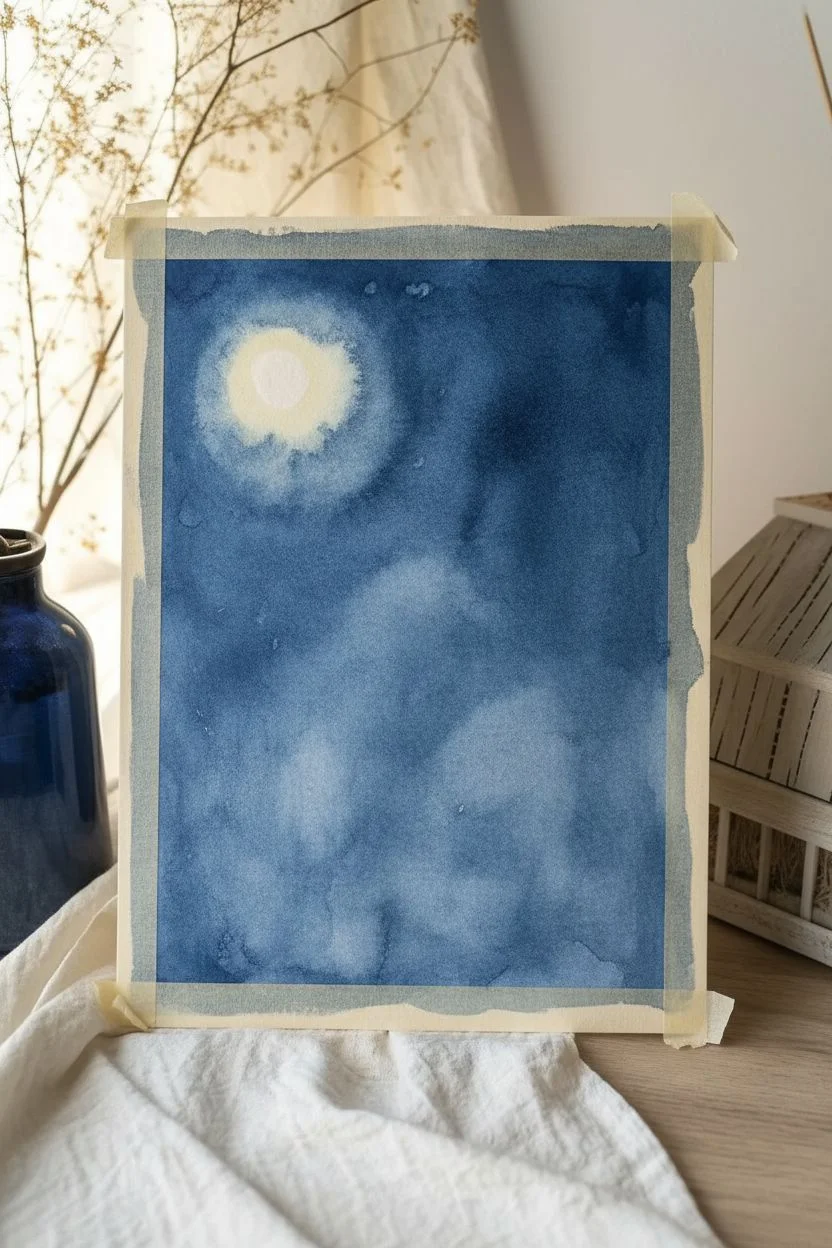
Step 1: Setting the Scene
-
Prepare your surface:
Start by taping down your paper to a flat surface if you aren’t painting directly on a canvas panel; this prevents buckling when we add the washes. -
Create the base wash:
Mix a watery wash of ultramarine and dark blue acrylic paint. Apply this loosely over the entire paper, letting the color naturally be uneven to suggest a misty atmosphere. -
Deepen the sky:
While the first layer is still slightly damp, drop in stronger, less diluted dark blue paint near the top corners and edges to create a vignette effect. -
Add the moon glow:
While the blue paint is wet, gently dab a clean, wet paper towel in the upper left area to lift off some pigment, creating a soft, circular white space for the moon. -
Intensify the moon:
Mix a tiny amount of pale yellow with white. Softly dry-brush this into the center of your lifted circle, blending outwards to create a hazy glow. -
Dry thoroughly:
Let the entire background dry completely before moving on. You can use a hairdryer on a low setting to speed this up.
Splatter Control
If your star splatters are too big, your paint is too watery or your brush is overloaded. Test the flick on a scrap paper first to get fine mist.
Step 2: Stars and Splatters
-
Mix your splatter paint:
Dilute white acrylic paint with water until it reaches the consistency of heavy cream. -
Create the galaxy:
Dip an old toothbrush into the white mix. Run your thumb across the bristles to flick tiny specks of ‘stars’ across the dark upper portions of the sky. -
Paint the major stars:
Using your smallest detail brush, paint a few larger, four-pointed or six-pointed stars scattered around the sky for visual interest. -
Add the shooting star:
Paint a white comet head near the center. Drag the brush tail backwards quickly to separate the bristles, creating a streaky trail.
Step 3: Silhouettes and Shadows
-
Establish the ground:
Switch to pure black acrylic. Paint a rolling hill shape across the bottom third of the paper, making it higher on the left side. -
Outline the haunted house:
On the lower right hill, paint the silhouette of a crooked house. Give it a pointy roof and a chimney to enhance the spooky vibe. -
Add glowing windows:
Once the black house is dry, use a tiny amount of yellow paint to add small squares for windows. I like to add grid lines inside them for detail. -
Draft the main trees:
Using thinned black paint (ink consistency helps flow), paint thin, vertical lines rising from the hill on the left side to varying heights. -
Branch out:
Add V-shaped branches extending from the trunks. Keep the lines jagged and irregular to mimic dead winter trees. -
Fill in the background trees:
Paint smaller, thinner trees slightly lighter (mix a tiny bit of blue into your black) behind the main trees to create depth. -
Add the flight of bats:
Paint small ‘m’ shapes in the sky. Vary their sizes, placing larger ones near the moon and smaller ones trailing off in the distance. -
Final details:
Add tiny vertical strokes of grass along the top of the hill silhouette to break up the smooth line. -
Frame your work:
Once fully dry, place your artwork into a simple light wood frame to contrast beautifully with the dark midnight blues.
Metallic Magic
Use metallic gold paint for the shooting star and the moon’s halo instead of white. It catches the light and adds a magical shimmer.
Hang your spooky masterpiece near a light source to let those subtle details shine


Have a question or want to share your own experience? I'd love to hear from you in the comments below!