When I paint angels, I’m always chasing that calm, weightless feeling—more mood than anatomy, more glow than detail. These angel painting ideas are meant to feel approachable and fun, with lots of room for your own style to shine through.
Classic Guardian Angel in Soft Clouds
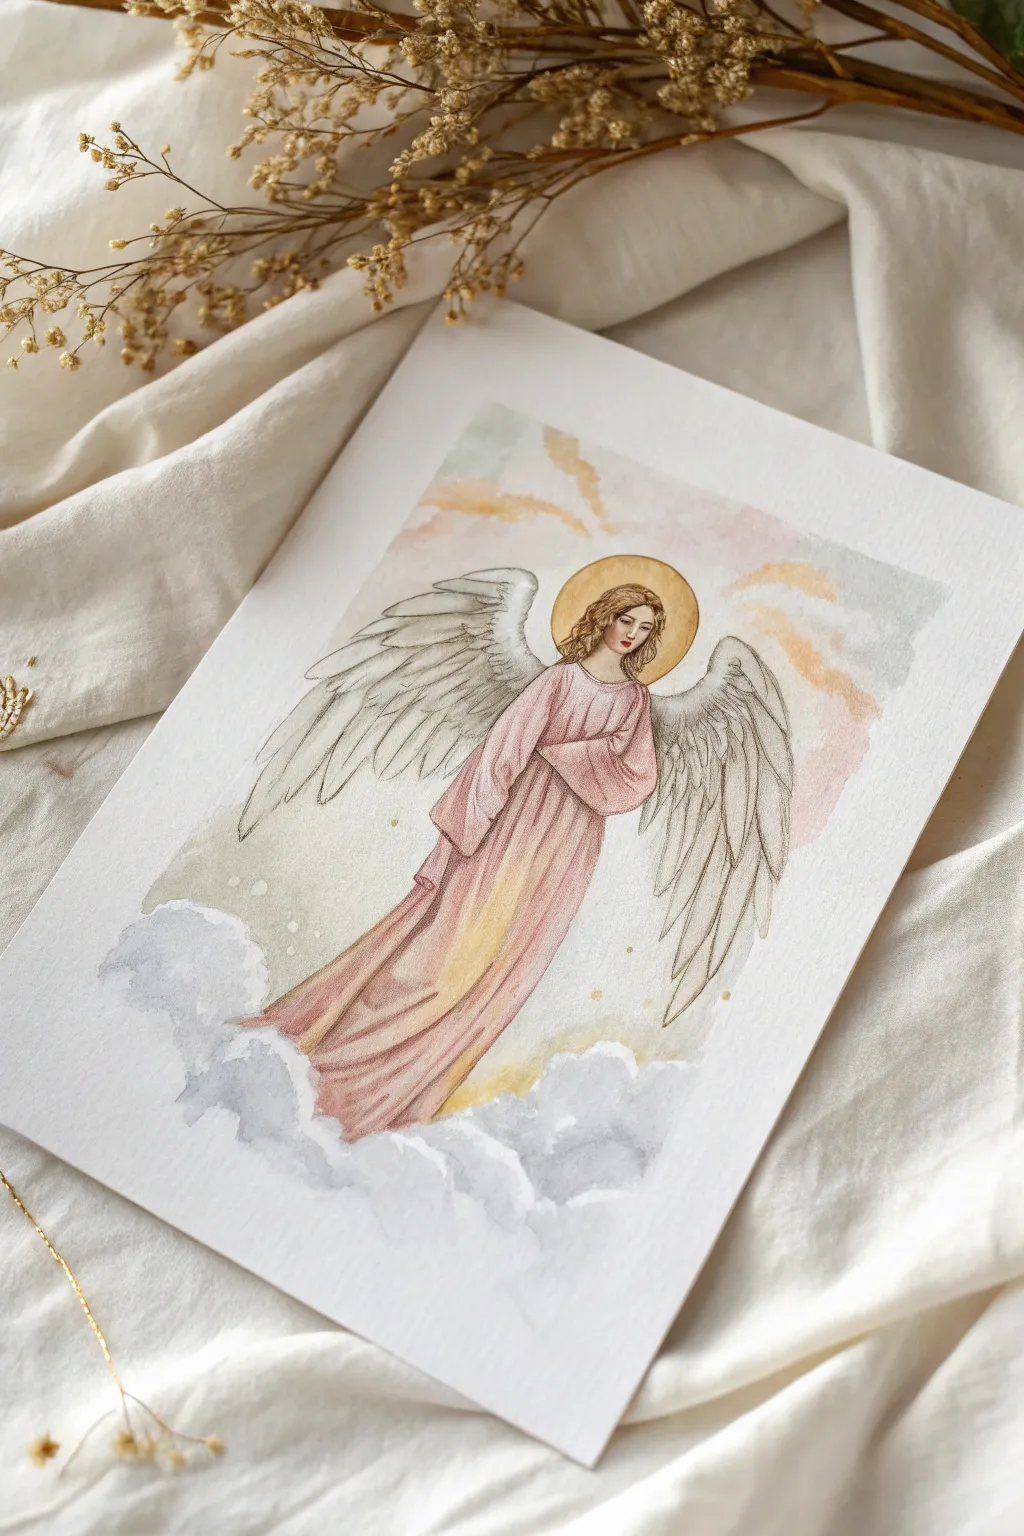
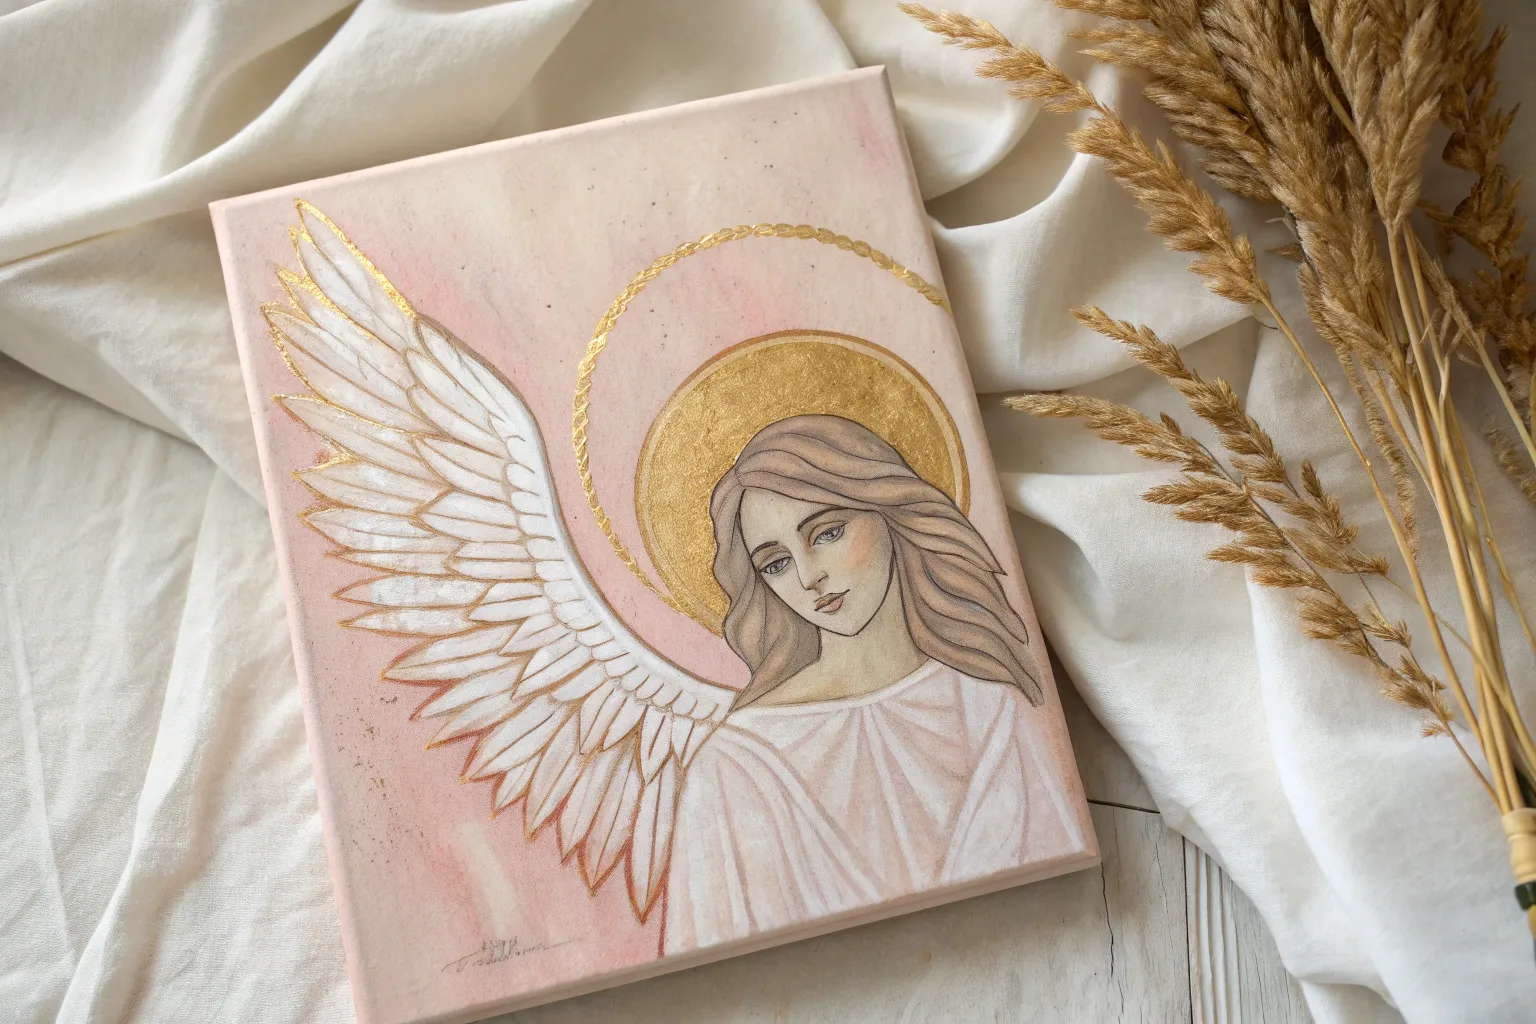
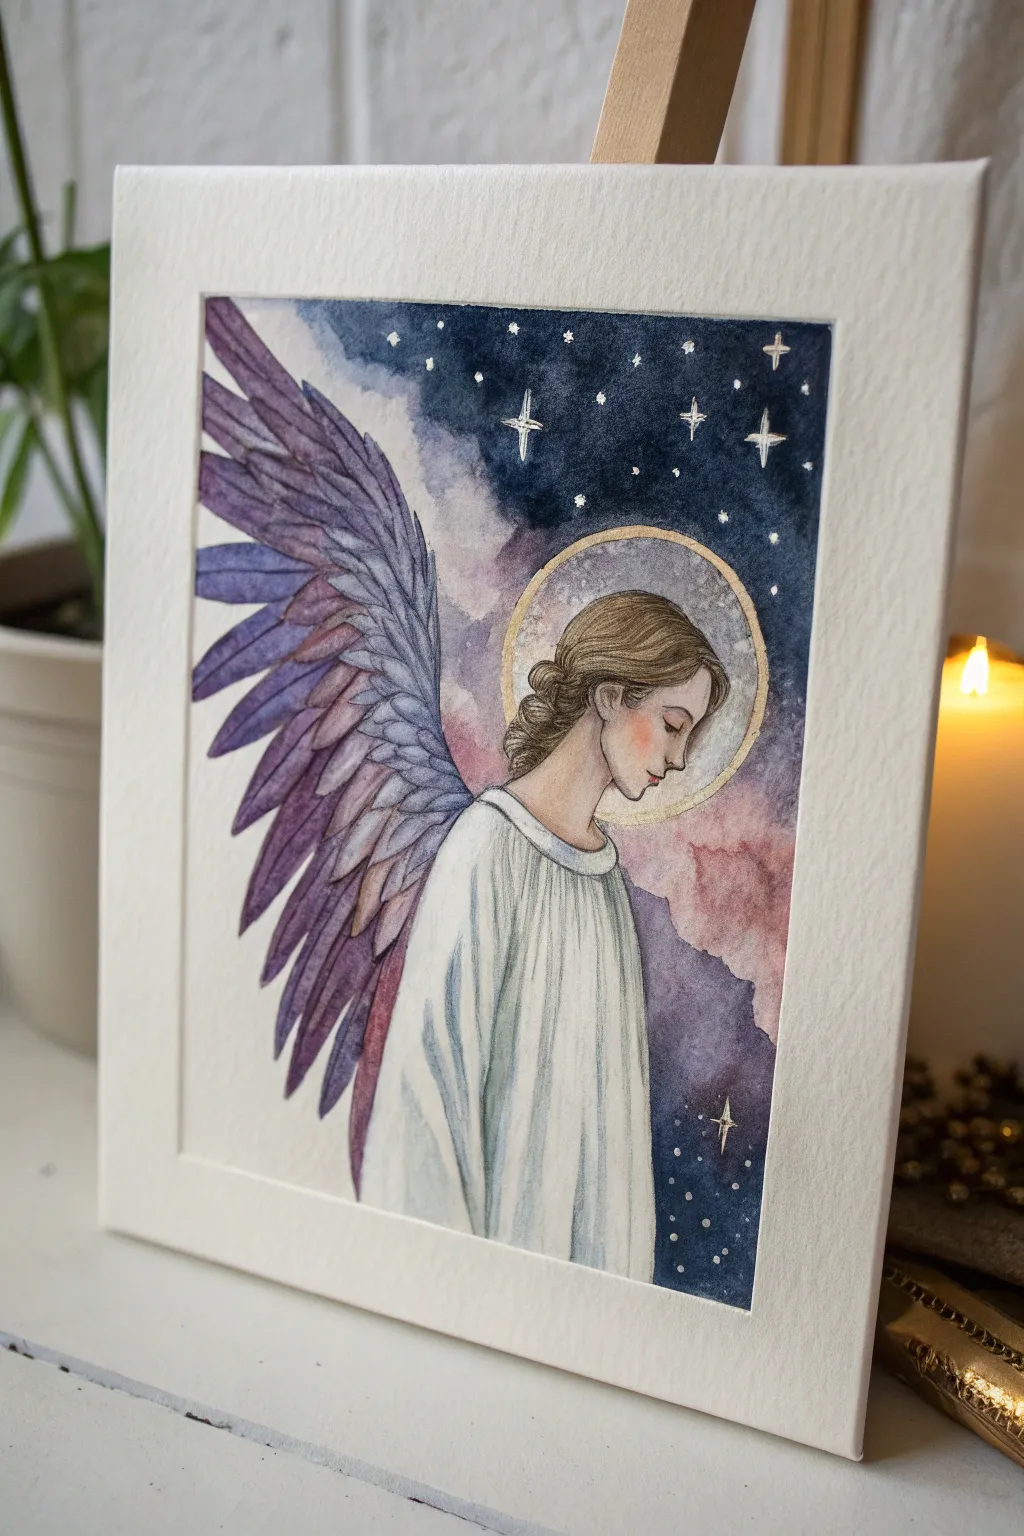
Capture the serenity of a guardian figure with this mixed-media project combining soft watercolors and delicate pencil work. This piece features a gentle angel in rosy robes floating amidst misty clouds, accented by a glowing halo.
How-To Guide
Materials
- Hot press watercolor paper (smooth texture, 140lb/300gsm)
- Pencil (HB or H for sketching)
- Fine liner or colored pencil (dark grey or sepia) for outlining
- Watercolor paints (Alizarin Crimson, Yellow Ochre, Ultramarine Blue, Burnt Sienna)
- White gouache (optional for highlights)
- Gold metallic paint or gold leaf pen
- Round watercolor brushes (sizes 2, 4, and 8)
- Clean water and paper towels
- Masking tape
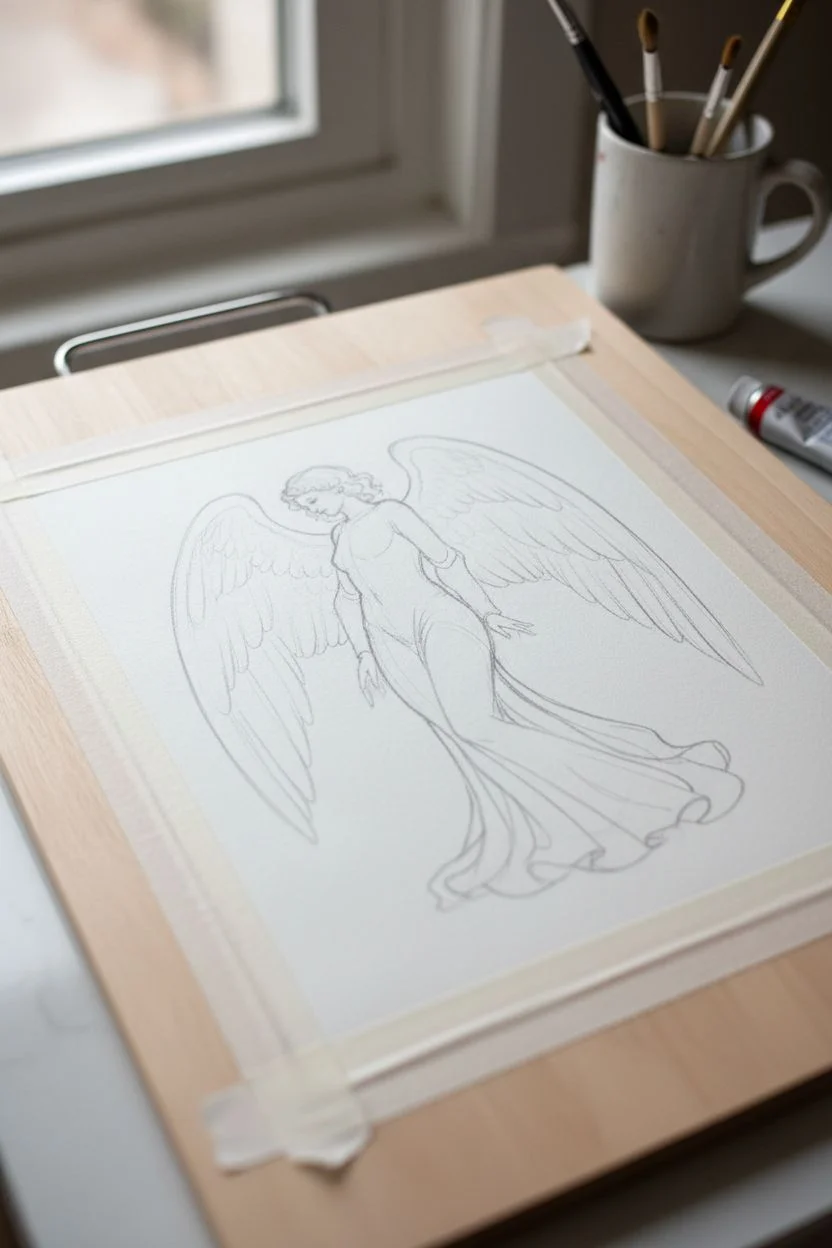
Step 1: Sketching the Celestial Form
-
Prepare the paper:
Begin by taping down the edges of your clean watercolor paper to a board. This prevents buckling when the washes are applied later. -
Basic posture:
Using an HB pencil, lightly sketch a long, flowing curve for the angel’s spine to establish a gentle S-shape. Mark the head position slightly tilted for a contemplative look. -
Drafting the robe:
Draw the voluminous robe by extending lines downwards from the shoulders. Create soft folds pooling at the bottom, imagining fabric draped over an invisible form. -
Wing placement:
Sketch the large wing shapes extending from the upper back. The wings should curve slightly inward, framing the figure. Keep the feather details minimal for now, focusing just on the silhouette. -
Refining the face:
Add facial features very gently. Sketch curly hair framing the face and drawing the eye downward.
Step 2: Applying the Washes
-
Background sky:
Mix a very dilute wash of yellow ochre and faint ultramarine blue. Using your largest brush, paint loose, wet patches around the upper head and wings to suggest a dawn sky. -
Cloud foundation:
While the background is still damp, drop in hints of grey (ultramarine mixed with burnt sienna) at the bottom to form the stormier, fluffy clouds beneath her feet. Let the edges bleed naturally. -
First layer of the robe:
Mix a watery Alizarin Crimson to create a soft pink. Apply a flat wash over the entire robe area, avoiding the hands and neck. -
Adding shadows:
While the pink layer is still slightly damp, introduce a slightly more saturated pink mixture into the folds of the dress to create volume. This wet-on-wet technique keeps the fabric looking soft. -
Wing base:
Apply a very pale grey wash to the wings. Leave plenty of white paper showing to represent the tips of the feathers catching the light. -
Golden glow:
Once the area near the head is completely dry, carefully paint a perfect circle behind the head using gold metallic paint or a strong yellow ochre mix for the halo.
Muddy Clouds?
If your grey clouds look muddy, your brush was likely too wet or you overmixed on the paper. Let it dry completely, then glaze a transparent blue over the top to cool it down.
Step 3: Defining Details
-
Feather definition:
Switch to your smallest brush (size 2). Use a darker grey mix to outline individual feathers on the wings. Keep the lines broken and delicate rather than solid outlines. -
Skin tones:
Mix a tiny amount of yellow ochre and crimson for a flesh tone. Carefully paint the face and hands, adding a tiny dot of crimson to the lips and cheeks. -
Hair details:
Use a mix of burnt sienna and yellow ochre to paint the hair. I like to use the very tip of the brush to create individual strands curling around the shoulders. -
Deepening cloud shadows:
Review the grey clouds at the bottom. If they dried too light, glaze another layer of cool grey over the shadow areas to make the white tops pop. -
Pencil outlines:
Once the paint is 100% bone dry, take a sharp dark grey or sepia colored pencil. Lightly trace over your initial pencil sketches to give the drawing definition and texture. -
High contrast folds:
Use the colored pencil to add deeper shading inside the darkest folds of the pink robe, reinforcing the visual weight of the fabric. -
Final highlights:
If you lost any brightness, use a tiny amount of white gouache to add highlights to the nose, the top of the wings, and the crests of the clouds. -
Gold accents:
Add tiny speckles of gold paint around the lower hem of the dress and near the clouds to simulate magical dust or starlight.
Level Up: Texture
Sprinkle coarse salt onto the wet paint of the background sky or the bottom clouds. As it dries, the salt pushes pigment away, creating incredible crystalline star-like textures.
Remove the tape carefully to reveal the crisp white border that frames your celestial creation


Faceless Angel With Minimal Features
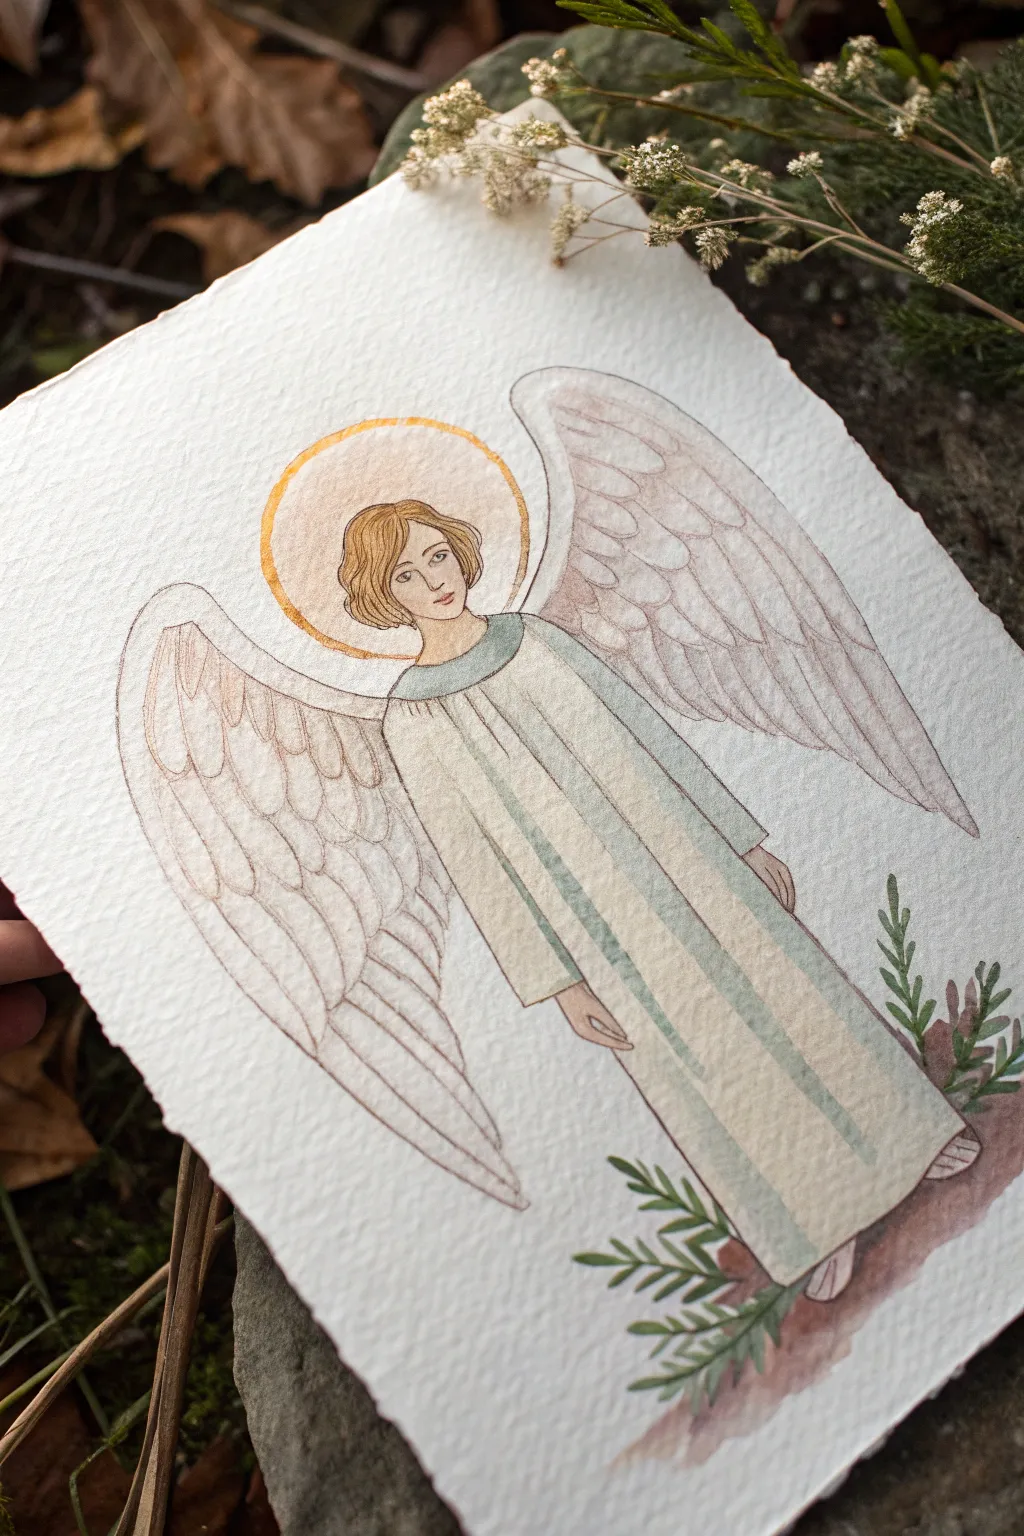
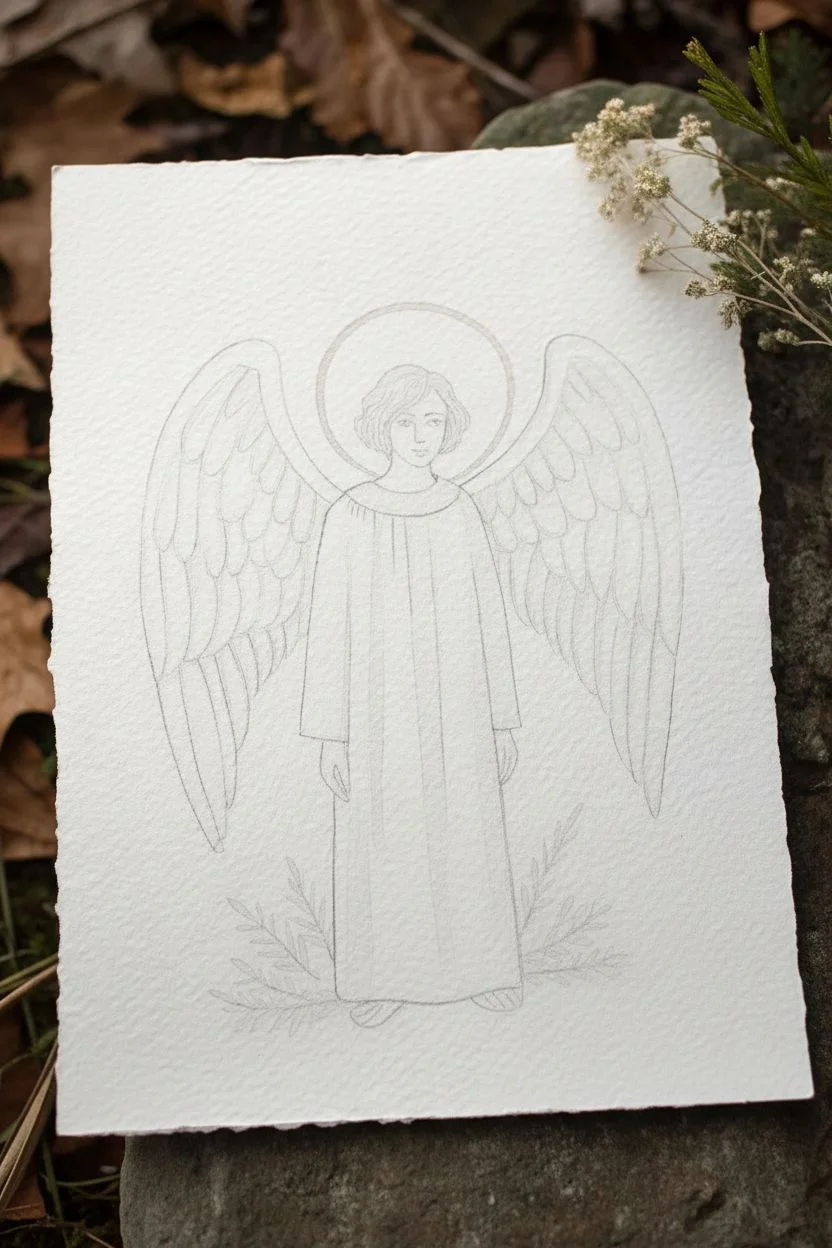
Capture the serene beauty of a celestial being with this gentle watercolor illustration. Featuring soft wings, a delicate halo, and a muted, earthy color palette, this project embraces a lovely folk-art aesthetic on textured paper.
Detailed Instructions
Materials
- Cold-pressed watercolor paper (300 gsm or heavier)
- Pencil (HB or H)
- Kneaded eraser
- Watercolor paints (Yellow Ochre, Burnt Sienna, Payne’s Grey, Sap Green, Sepia, Flesh Tint)
- Fine round brushes (size 0, 2, and 4)
- Gold metallic watercolor paint or gold ink
- Jar of water
- Paper towel
Step 1: Planning the Celestial Form
-
Paper Preparation:
Begin by tearing your watercolor paper to size rather than cutting it. This creates the soft, deckled edge seen in the reference, adding to the handmade, vintage feel. -
Sketch the Head and Halo:
Lightly sketch a small oval for the head near the top center of the page. Draw a larger circle around the head for the halo, leaving plenty of space for the hair. -
Outline the Robe:
Draw the angel’s robe extending downwards. The shape should be simple and columnar, slightly widening at the bottom. Add faint vertical lines to indicate the pleats and stripes of the garment. -
Add the Wings:
Sketch two large wings emerging from behind the shoulders. The top curves should be convex, sweeping down to pointed tips near the bottom of the robe. Keep the lines fluid. -
Detail the Face and Hands:
Draw the facial features lightly—almond eyes, a small nose, and lips. Add the hair in a short, wavy bob. Sketch simple hands peeking out from the sleeves. -
Finalize Pencil Work:
Add small leafy sprigs at the bottom corners near the hem of the robe. Use your kneaded eraser to lift any heavy graphite lines until they are barely visible guides.
Pro Tip: Deckled Edges
To get that perfect torn edge, fold your paper sharply, run a wet brush along the crease, wait 30 seconds for the fibers to soften, and then pull the paper apart gently.
Step 2: Painting the Angel
-
Skin Tones:
Mix a very dilute flesh tint (or a mix of Yellow Ochre and a touch of Red). Using a size 2 brush, gently wash over the face and hands. Let this layer dry completely. -
Hair and Facial Features:
Paint the hair with a mix of Yellow Ochre and Sepia. While you have a tiny size 0 brush handy, carefully define the eyes and lips with a darker mix of Sepia and Payne’s Grey. -
The Golden Halo:
Paint the halo disk using Yellow Ochre or Gold paint. Keep the wash semi-transparent so the paper texture shows through. Darken the outer rim slightly for definition. -
Robe Stripes:
Mix a pale, watery Sage Green (Sap Green + a touch of Grey). Paint the vertical stripes on the robe, leaving white paper between them for the lighter folds. -
Shadowing the Robe:
Once the stripes are dry, use a very diluted grey wash to add shadows to the white parts of the robe, suggesting the depth of the folds. -
Wing Feathers:
Use a diluted mix of Burnt Sienna or reddish-brown. With a size 0 brush, outline the individual scalloped rows of feathers. Keep the pressure light so the lines remain delicate. -
Washing the Wings:
Take a clean, damp brush and slightly blur the inner edges of your feather outlines. This softens the look so the wings don’t look too rigid or cartoonish.
Troubleshooting: Muddy Colors
If your robe starts looking muddy, stop immediately. Let the paper dry completely before adding any more layers. Wet-on-wet mistakes are hard to fix, but layered glazes are safer.
Step 3: Finishing Touches
-
Ground and Foliage:
Paint the small sprigs of leaves using Sap Green. Add a light wash of reddish-brown (Sepia) under the angel’s feet to ground the figure. -
Refining Contours:
I like to go back with a very fine brush and Sepia paint to re-outline the main shapes—the edges of the robe, the jawline, and the top of the wings—to give the piece a crisp, illustrative finish. -
Adding Texture:
If desired, add tiny hatched lines on the wings or hair to suggest texture, honoring the folk-art style.
Frame your serene angel in a floating glass frame to show off those beautiful torn edges


Golden Halo Light Burst
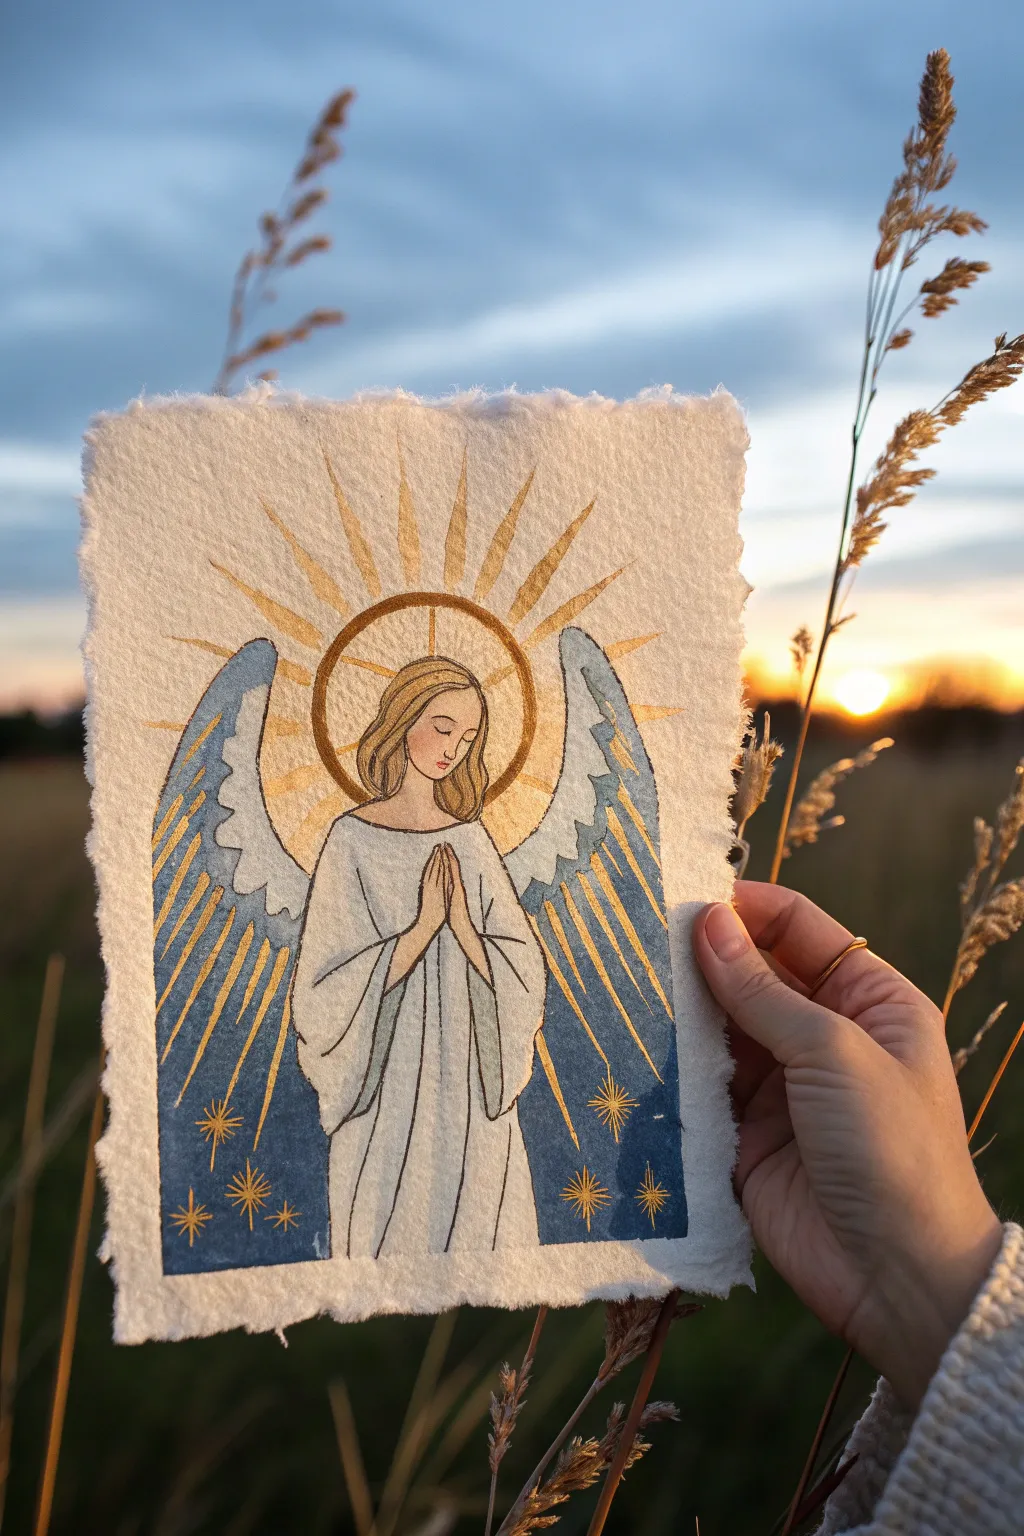
Capture the ethereal beauty of a guardian angel with this mixed-media project that combines soft watercolors with radiant gold leaf details. The stunning contrast between the deep blues and shimmering metallics on handmade paper creates a piece that feels both ancient and refreshingly modern.
Step-by-Step
Materials
- Heavyweight handmade cotton rag paper (deckle edge recommended, approx. 300gsm)
- Pencil (HB or H)
- Black waterproof fine-liner pen (0.1 and 0.3mm)
- Watercolor paints (Indigo, Payne’s Gray, Titanium White, Raw Sienna, Burnt Umber, Flesh Tint)
- Gold metallic watercolor or liquid gold leaf
- Small round brushes (sizes 0, 2, and 4)
- Ruler
- Clean water
- Paper towels
Step 1: Sketching the Celestial Form
-
Outline the Angel:
Begin by lightly sketching the central figure in the middle of your paper. Draw an oval for the head, followed by distinct, flowing lines for the robes. The robes should drape vertically with a few folds near the elbows. -
Add Prayer Hands:
Position the hands clasped in prayer at the center of the chest. Keep the fingers simple and elongated for a stylized look. -
Draft the Wings:
Draw large, arching wings extending from behind the shoulders. The top of the wings should curve upward and inward slightly, framing the head without touching it. -
Construct the Halo:
Use a compass or trace a circular object to create a perfect circle around the angel’s head for the halo. Add a second, slightly larger concentric circle to create a rim. -
Establish the Rays:
Using a ruler, lightly mark straight lines radiating outward from the halo. These will become the golden rays later, so ensure they are evenly spaced.
Uneven Gold Lines?
If your gold paint is too thick, it won’t flow off the brush smoothly. Thin it slightly with a drop of water to ink consistency for crisp rays.
Step 2: Inking and Base Colors
-
Ink the Outline:
Trace your pencil sketch with a waterproof fine-liner. Use a 0.3mm pen for the main contours of the angel and wings, and a finer 0.1mm pen for facial features and hair details. -
Paint the Skin:
Mix a very dilute wash of Flesh Tint with a tiny drop of Burnt Umber or Raw Sienna. Gently paint the face and hands, keeping the application light to suggest a pale, glowing complexion. -
Define the Robes:
Paint the robes using a very watery wash of Payne’s Gray or a cool blue-grey. Keep the center of the folds almost white and add pigment only to the shadowed crevices to create volume. -
Color the Hair:
Apply a base of Raw Sienna to the hair. While it’s still slightly damp, drop in a small amount of Burnt Umber near the darker areas around the neck and roots for dimension.
Step 3: Background and Gold Detailing
-
Paint the Sky:
Using your size 4 brush, paint the background behind the angel with a deep Indigo blue. Carefully paint around the wings and the halo area, but allow the blue to fill the spaces between the future gold rays. -
Detail the Wings:
Paint the upper feathers of the wings with a medium-strength wash of blue-grey. Leave the lower, longer feathers the color of the paper or a very pale tint for contrast. -
Apply the Gold Halo:
Once the watercolor is completely dry, take your gold metallic paint. Fill in the thick ring of the halo, ensuring an opaque, solid coverage. -
Create the Radiance:
Using the ruler again as a guide for your brush, paint the sharp gold rays extending from the halo into the blue background. Vary the lengths slightly for a natural burst effect. -
Gild the Wings:
Add thin lines of gold between the long feather segments on the wings. I find this really helps tie the wings to the celestial theme of the halo. -
Add Starlight:
Paint small, eight-pointed stars scattered in the lower sections of the blue background. Use fine strokes to make them look delicate and twinkling.
Level Up: Texture
Instead of metallic paint, use gold leaf size and real gold leaf sheets for the halo. The reflective quality is much higher and catches light beautifully.
Allow the metallic accents to cure fully before displaying your serene artwork


Ethereal Blue-and-White Heaven Palette
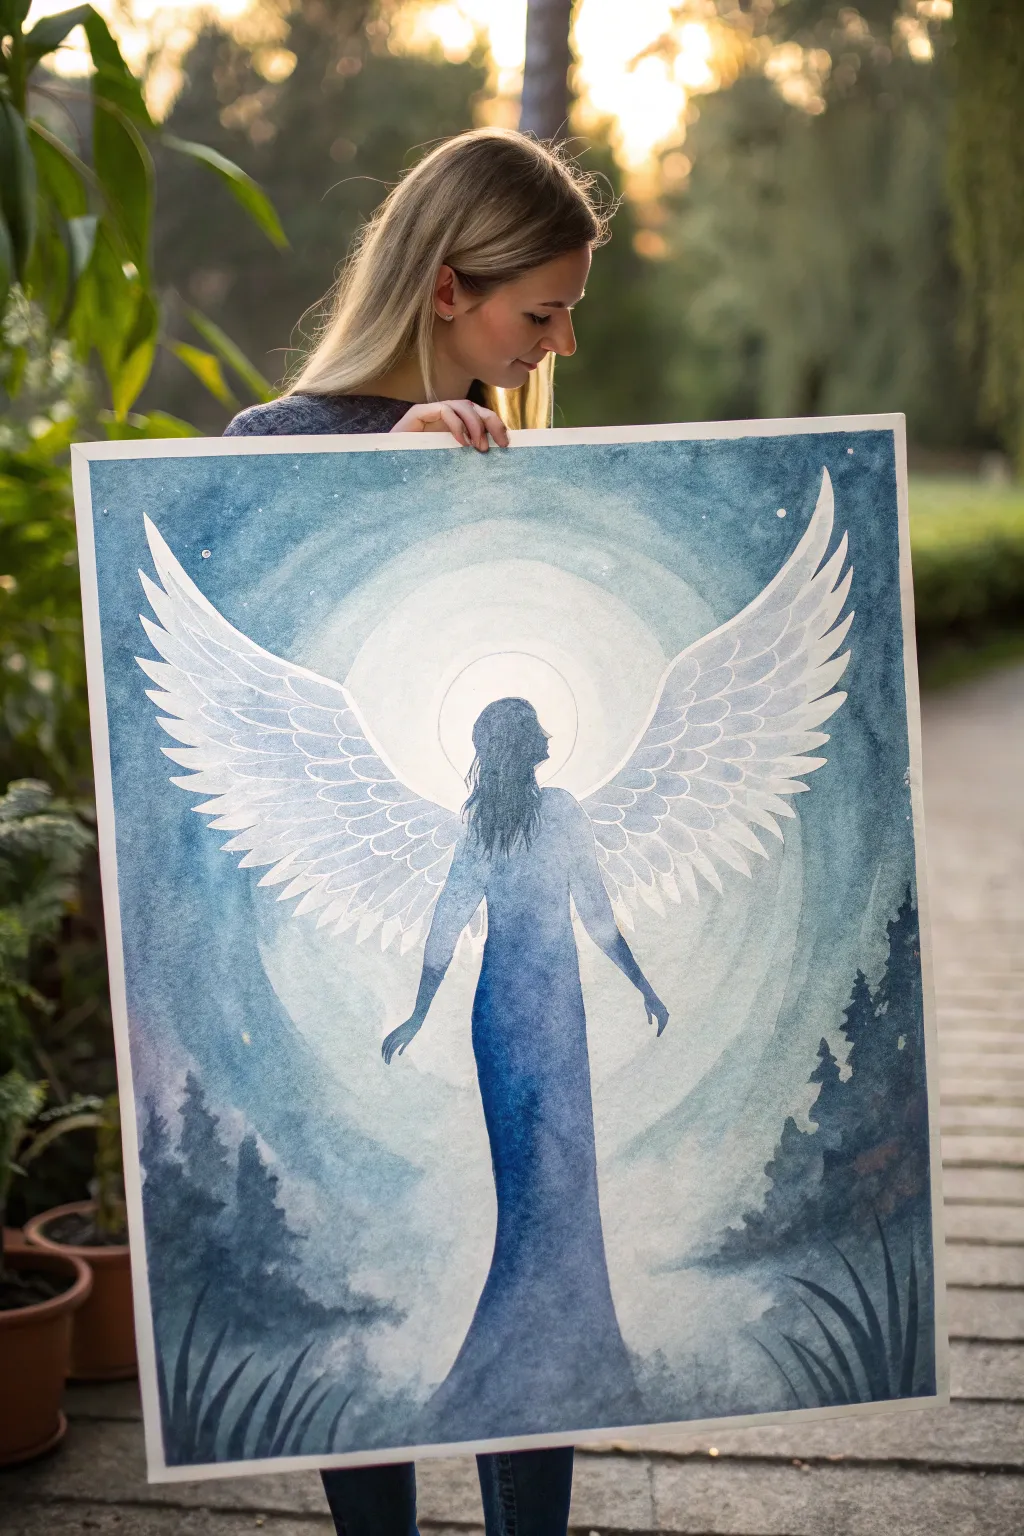

Capture the serene majesty of a celestial being with this monochromatic masterpiece that relies on the interplay of deep indigo and brilliant white. This large-scale watercolor project uses negative space and layering to create a glowing, ethereal light source that radiates from behind the central figure.
Step-by-Step Tutorial
Materials
- Large format watercolor paper (A2 or similar size, cold press, 300gsm)
- Watercolor paints: Indigo, Prussian Blue, Payne’s Grey, and White Gouache
- Wide flat wash brush (1-2 inch)
- Round watercolor brushes (sizes 4, 8, and 12)
- Masking fluid or white watercolor crayon (optional)
- Painter’s tape and drawing board
- Pencil and eraser
- Mixing palette
- Jars of clean water
Step 1: Preparation and Sketching
-
Secure the Paper:
Begin by taping your large sheet of watercolor paper securely to a board. Use painter’s tape along all four edges to create a crisp border and prevent the paper from buckling under heavy washes. -
Outline the Composition:
Lightly sketch the central figure of the angel. Start with the silhouette of the head and flowing dress, positioning her centrally near the bottom third. Extend large, majestic wings upward and outward toward the top corners. -
Map the Light:
Draw three concentric circles lightly behind the figure’s head and upper torso. These will guide your painting process to create the radiating halo effect, moving from bright white in the center to darker blues outward.
Step 2: Creating the Glow
-
First Wash: The Inner Glow:
Wet the innermost circle area with clean water, avoiding the angel’s silhouette. Drop in a very dilute, watery mix of Prussian Blue, keeping the center almost pure white to represent the strongest light. -
Second Ring Gradient:
While the center is still damp but not soaking, wet the second ring. stronger mix of Prussian Blue here, blending it softly into the edges of the first circle so there are no hard lines. -
Outer Sky Wash:
For the rest of the background (the sky), use your wide flat brush to apply a rich wash of Indigo and Payne’s Grey. Work wet-on-wet to create a mottled, cloudy texture, getting darker as you move toward the edges of the paper. -
Lifting Highlights:
Before the sky dries completely, use a clean, thirsty brush or paper towel to gently lift pigment in circular motions around the glow, enhancing the soft transition from light to dark. -
Adding Stars:
Once the background is mostly dry, flick a toothbrush or stiff brush loaded with white gouache or diluted white acrylic to create a splatter of stars across the darker upper sections.
Master the Glow
To get that perfect circular halo, trace different sized dinner plates or bowls lightly with a pencil before you start painting.
Step 3: The Angelic Figure
-
Filling the Silhouette:
Mix a medium-strength wash of Indigo and Prussian Blue. Carefully paint the angel’s body, starting lighter at the top near the light source and gradually deepening the color as you move down the dress. -
Gradient Dress:
While the dress area is wet, drop concentrated Indigo into the bottom hem area to give the figure weight and grounding. Let the colors bleed naturally upward. -
Defining the Wings:
For the wings, do not paint them solid. Instead, paint the negative space *between* the feathers using the background sky color to define the shape, or lightly outline individual feathers with pale blue-grey wash. -
Feather Details:
Once the basic wing shape is established, use a small round brush (size 4) to add delicate definition to the feathers. Keep the tips white and add shadows near the base of each feather row.
Fixing Hard Edges
If your gradient dries with a hard line, scrub the edge gently with a clean, damp stiff brush to reactivate the pigment and soften the transition.
Step 4: Atmospheric Details
-
Tree Line Base:
At the bottom of the paper, sketch varied heights of pine trees flanking the angel. Paint these using your darkest Payne’s Grey mix to create a silhouetted forest floor. -
Softening the Trees:
While the trees are wet, drag a damp brush along their base to create a misty, foggy effect where the trees meet the angel’s dress. -
Grass Blades:
In the immediate foreground corners, use the tip of your brush to flick upward strokes of concentrated Indigo, creating sharp silhouettes of tall grass blades. -
Final Highlights:
Use opaque white gouache to add final crisp highlights to the top edges of the wings and the silhouette of the angel’s head to make her pop against the glow. -
Remove Tape:
Wait until the painting is bone dry—patience is key here—before slowly peeling off the tape at a 45-degree angle to reveal your crisp white border.
This striking piece brings a sense of peace and wonder to any room it inhabits
BRUSH GUIDE
The Right Brush for Every Stroke
From clean lines to bold texture — master brush choice, stroke control, and essential techniques.
Explore the Full Guide
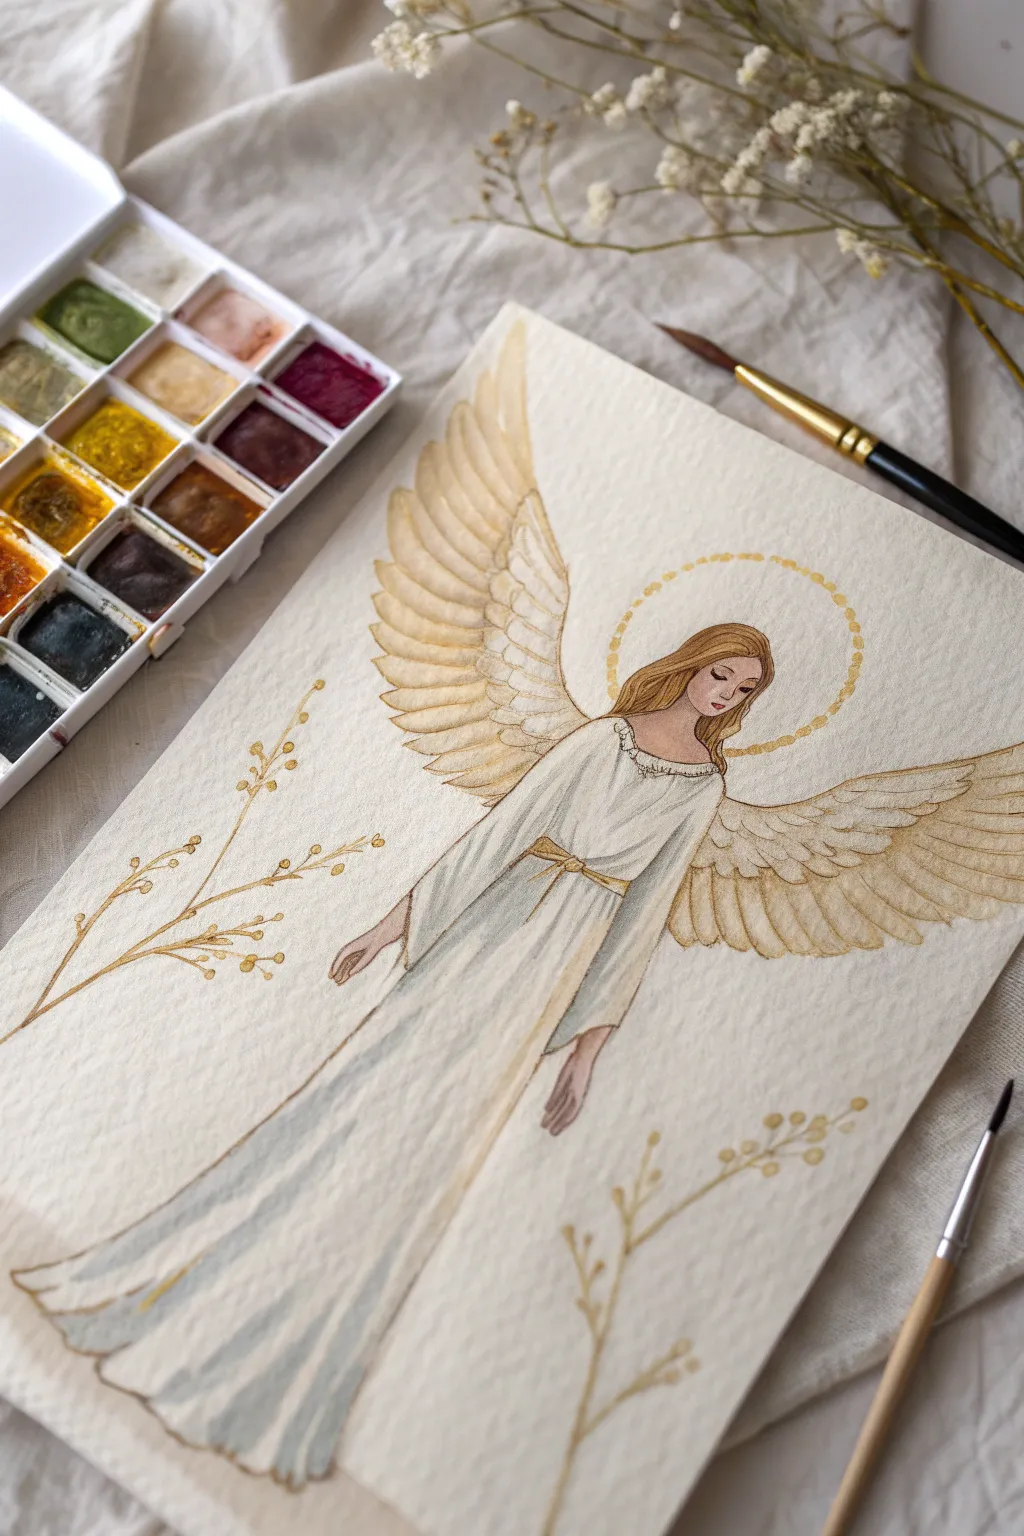
Warm Peach-and-Gold Angel Glow
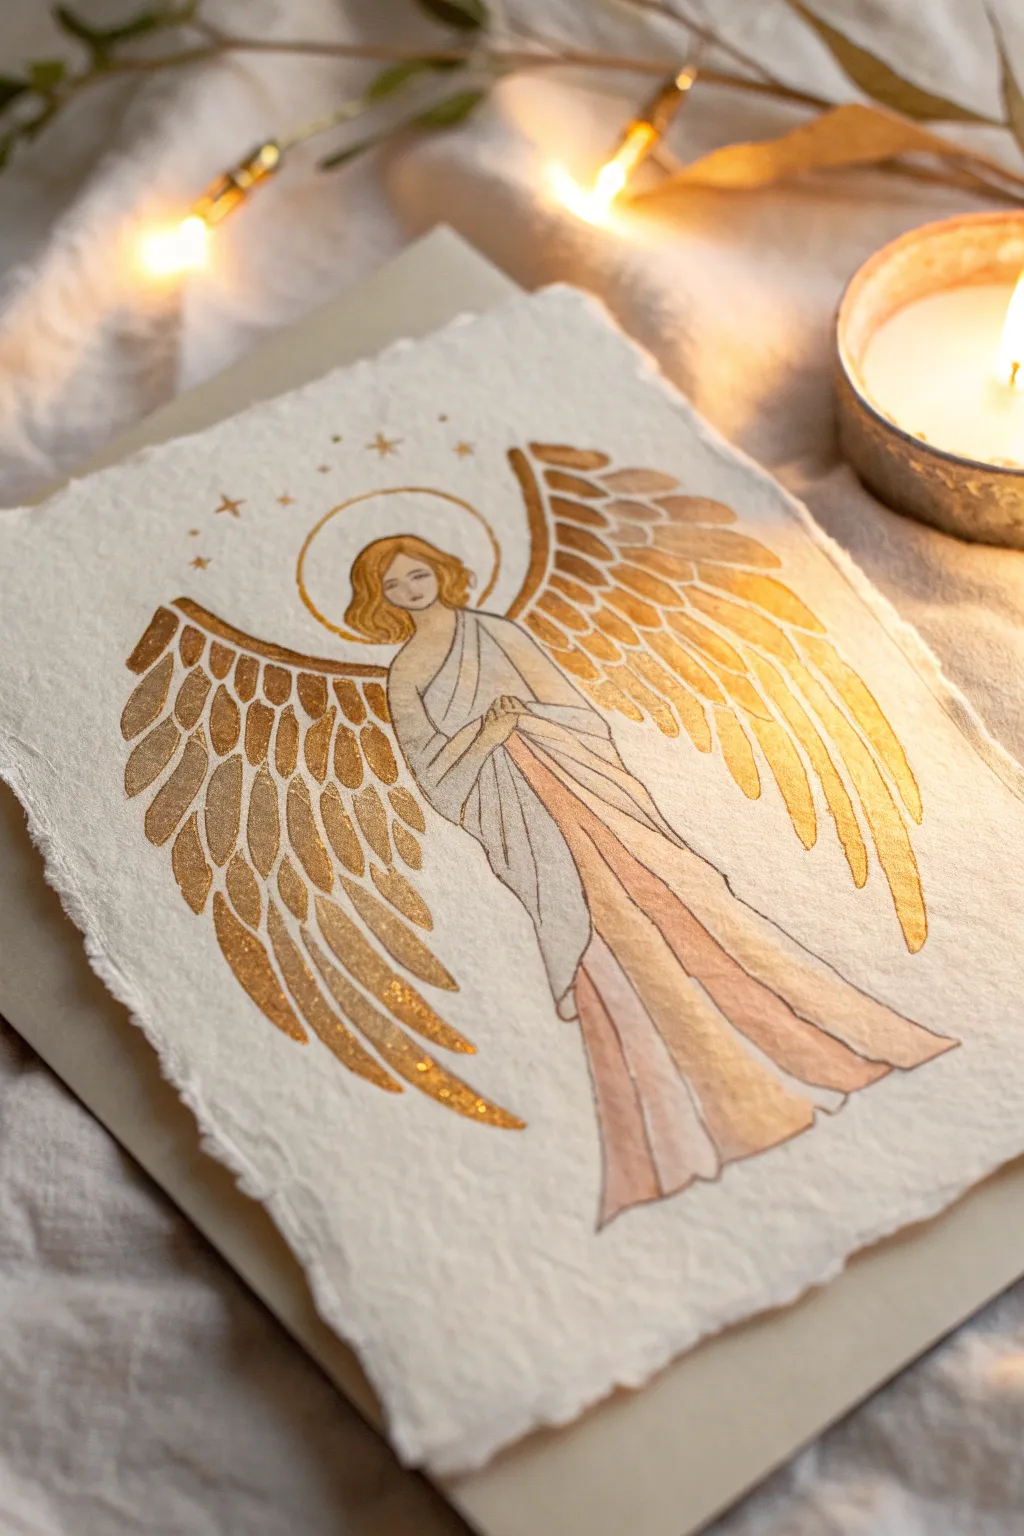
Capture the ethereal beauty of a guardian spirit with this delicate watercolor angel, featuring shimmering metallic wings and a soft peach gown. The textured handmade paper adds a rustic, timeless quality that makes the glowing gold accents truly pop.
Step-by-Step
Materials
- Heavyweight handmade cotton rag paper with deckled edges (A5 or 5×7 inches)
- Metallic gold watercolor paint or gold gouache
- Peach, soft pink, and muted brown watercolor paints
- Fine liner brush (size 00 or 0)
- Round watercolor brush (size 2 or 4)
- Pencil (HB) and kneaded eraser
- Jar of clean water
- Paper towels
- Palette for mixing
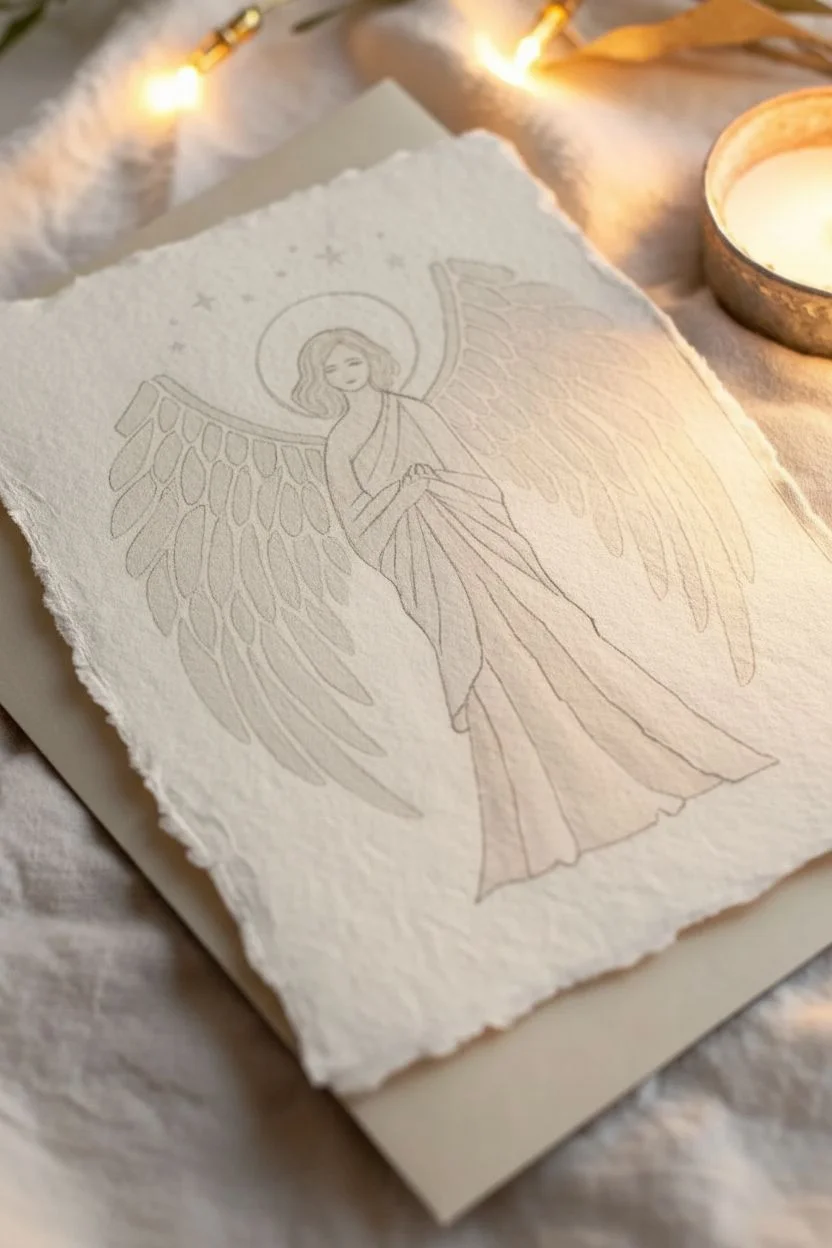
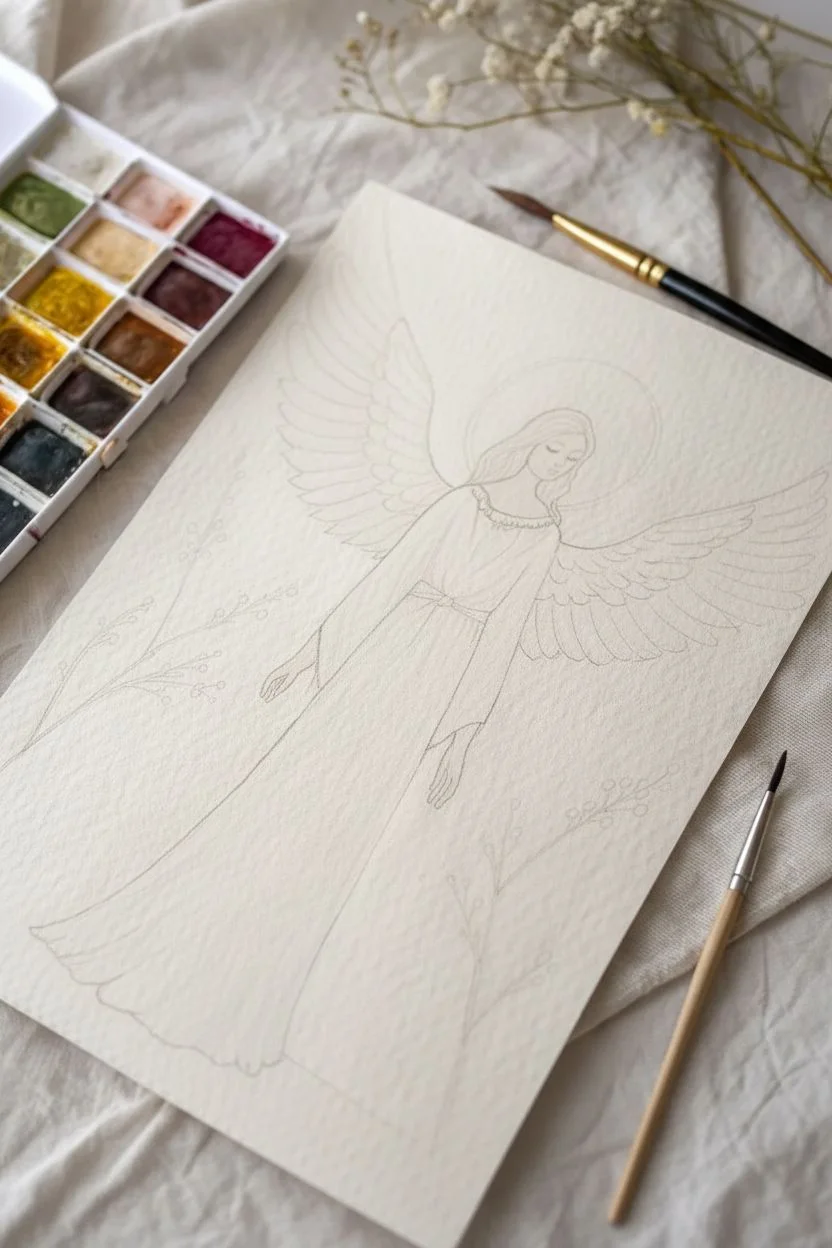
Step 1: Planning and Sketching
-
Center the composition:
Begin by lightly marking the center of your textured paper. Given the deckled edges, don’t measure too strictly; finding a visual center feels more organic to the paper’s style. -
Map the basic shapes:
Sketch a small oval for the head about one-third down from the top. Extend a gentle, curved line downwards for the spine and flow of the dress to establish the angel’s posture. -
Outline the wings:
Draw large, sweeping arcs extending from the shoulder area. The wings should be substantial, curving upward and then tapering down, almost framing the figure. -
Detail the gown folds:
Sketch the draping of the dress. Create a crossover effect at the bodice and draw long, vertical lines for the skirt’s pleats, allowing them to flare slightly at the bottom. -
Refine facial features and hair:
Add a simple, serene face and wavy hair that falls to the shoulders. Keep the facial features minimal—a suggestion of eyes and a mouth is often enough. -
Lighten the guidelines:
Gently roll a kneaded eraser over your sketch to lift the graphite until it is barely visible, ensuring the pencil marks won’t show through the translucent watercolor.
Uneven Gold Paint?
If the gold looks patchy, wait for the first layer to dry 100%, then add a second coat. Don’t overwork wet metallic paint or it loses its shine.
Step 2: Painting the Figure
-
Wash the skin tones:
Mix a very dilute pale peach or beige. Using your round brush, carefully fill in the face, neck, and hands. Keep this layer very light and airy. -
Paint the hair:
Use a golden-brown hue for the hair. Apply the paint in strokes that follow the wave of the hair, leaving tiny gaps of white paper for highlights if possible. -
Base layer for the dress:
Mix a watery grey-white for the upper part of the bodice to represent white fabric in shadow. For the skirt, transition into a soft, warm peach and dusty rose gradient. -
Define the folds:
Once the base layer is damp but not soaking, drop slightly darker peach pigment into the shadow areas between the pleats of the skirt to create volume. -
Outline the drapery:
Switch to your fine liner brush. Mix a sepia or dark grey tone and delicately outline the folds of the clothing to give them a crisp, illustrative look.
Step 3: The Golden Wings & Details
-
Pre-wet the gold paint:
Add a few drops of water to your metallic gold pan a minute before using it to ensure it reaches a creamy, opaque consistency. -
Paint the primary feathers:
Starting from the top curve of the wing, paint the individual long feathers. Press down to widen the stroke and lift up to create a tapered point for each feather tip. -
Fill the inner wing:
Paint the smaller, layered feathers closer to the body. Use slightly less water here so the gold sits rich and thick on the textured paper surface. -
Add the halo:
With a steady hand and your liner brush, paint a thin, perfect circle of gold hovering just above the angel’s head. -
Sprinkle the stars:
Using the tip of your liner brush, dot tiny stars and cross-shapes around the halo and upper wings. I like to vary the size of these stars to create a twinkling effect. -
Final outlines:
Use a diluted brown mix to outline the outer edges of the gold feathers. This adds separation and makes the gold appear even brighter by contrast. -
Let it shimmer:
Allow the painting to dry completely flat. The metallic paint may take a little longer to set than the standard watercolors.
Pro Tip: Texture Magic
Make the wings sparkle more by lightly tapping glitter into the wet gold paint before it dries. It adds a magical, 3D texture to the artwork.
Place your finished piece near candlelight to watch the golden wings catch the flicker and glow
Midnight Sky Angel With Stars
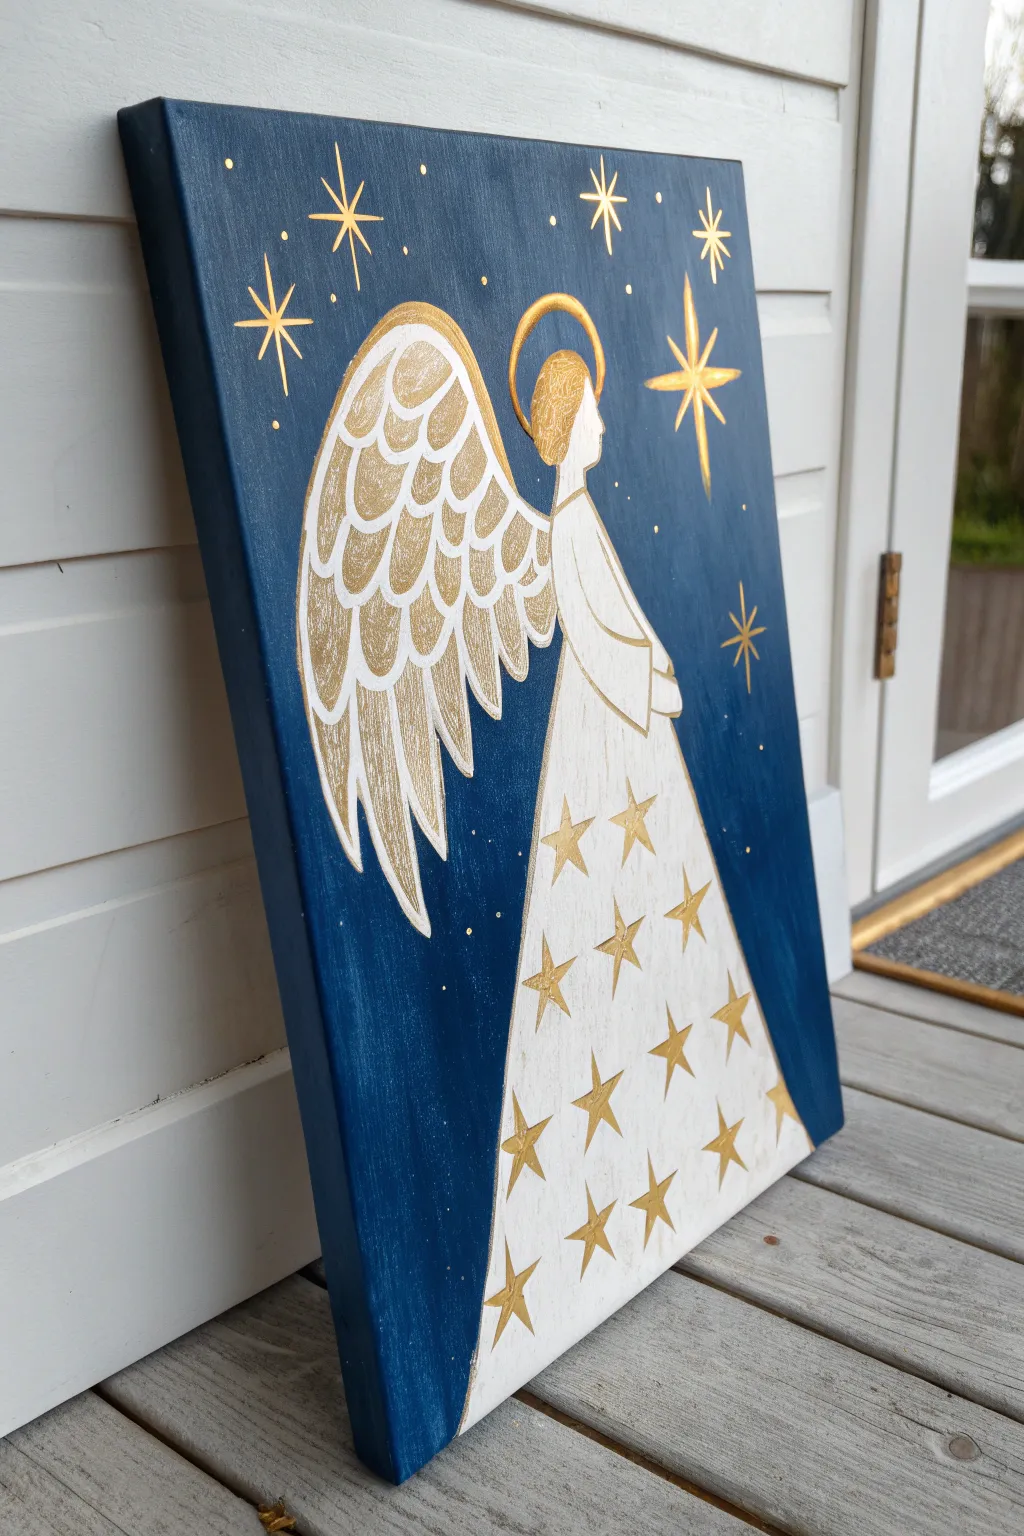
Capture the serenity of a silent night with this stylized angel painting. Set against a deep midnight blue background, the figure shines brightly in white and metallic gold, featuring a starry dress and expansive wings.
Step-by-Step Guide
Materials
- Rectangular stretched canvas (e.g., 16×20 or 12×16 inch)
- Acrylic paints: Midnight Blue, Titanium White, Metallic Gold
- Flat brush (1-inch width for background)
- Round brushes (sizes 2 and 6 for details)
- Fine liner brush (size 0 or 00)
- Pencil and eraser
- Ruler
- Paper plate or palette
- Cup of water and paper towels
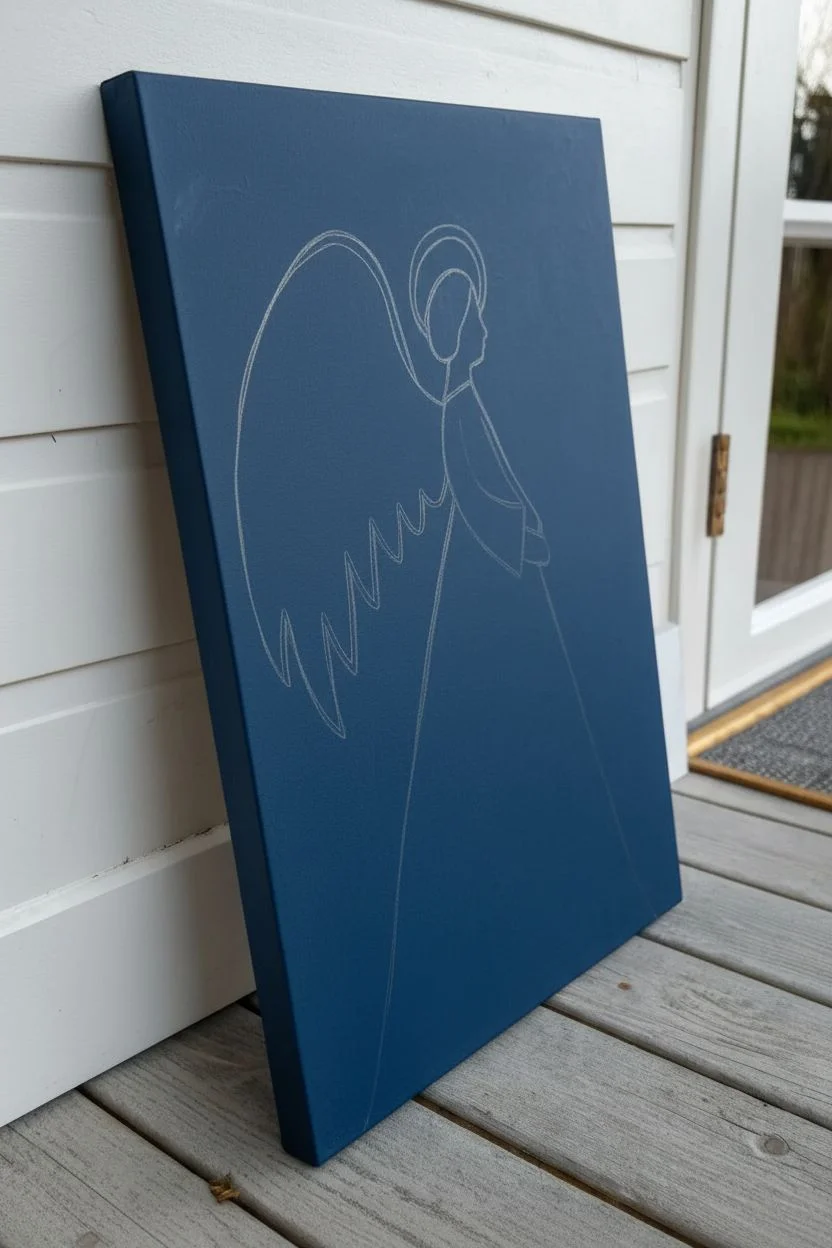
Step 1: Preparation & Background
-
Base Coat:
Begin by covering the entire canvas with two coats of Midnight Blue acrylic paint. Use your wide flat brush for this, ensuring you paint the sides of the canvas as well for a finished look. Let the first coat dry completely before applying the second to ensure deep, opaque coverage. -
Sketch Layout:
Once the blue background is fully dry, grab your pencil. Lightly sketch a large triangle shape for the angel’s dress, starting from a narrow point near the upper-middle and widening all the way to the bottom right corner. -
Outline the Figure:
Sketch the upper body above the dress point—a simple curved shape for the torso and a circle for the head in profile. Draw the large, sweeping wing shape curving up from the back and extending down towards the middle of the canvas.
Step 2: Painting the Angel
-
Fill the Dress:
Using a medium-sized round brush, fill in the entire dress shape with Titanium White. You will likely need two layers here, as white over dark blue can be transparent. Let the paint dry between layers so it doesn’t streak. -
Paint the Body:
Fill in the torso and arm shapes with white. Notice the simplified, almost geometric style—the sleeve is just a gentle curve. Paint the head silhouette white as well. -
Base Wing Layer:
Fill in the large wing shape with a solid coat of white. This acts as a primer for the gold details later and helps the wing stand out against the dark background.
Gold Pop Tip
For extra shine, wait for the gold paint to dry, then apply a second coat just on the center of the stars and the halo. This layering makes the metalic pigment reflect more light.
Step 3: Gold Details & Embellishments
-
Halo Creation:
Dab your medium brush into the Metallic Gold paint. Paint a thick, imperfect circle floating just above the angel’s head to create the halo. Ensure the gold is thick enough to catch the light. -
Defining the Hair:
Paint the hair area on the angel’s head using the gold paint. You can use small dabbing motions to give it a slightly textured appearance, contrasting with the smooth white skin. -
Wing Feathers:
Switch to your fine liner brush. Using the gold paint, carefully outline individual feathers inside the white wing shape. Start with larger U-shapes near the top and elongate them into long, tapered feathers near the tips. -
Feather Texture:
I like to add very faint, scratchy lines inside the gold feather outlines using a nearly dry brush with a tiny bit of white/gold mix to suggest texture, though leaving them outlined is also effective. -
Dress Stars:
Using the gold paint and a small round brush, paint five-pointed stars scattered across the white dress. Vary the sizes slightly, making some wider and some narrower for visual interest.
Glitter Upgrade
While the paint is still wet on the dress or halo, sprinkle a tiny pinch of fine gold glitter over it. Shake off the excess once dry for a magical, shimmering 3D effect.
Step 4: The Night Sky
-
Major Stars:
identify 3-4 spots in the blue background for the large ‘North Star’ shapes. Use your liner brush to pull long, thin lines of gold outward from a center point—north, south, east, and west—then add smaller diagonal lines between them. -
Minor Stars:
Scatter smaller, simple cross-shaped stars throughout the rest of the blue sky. Keep your hand steady and lift the brush at the end of each stroke to get sharp points. -
Tiniest Specs:
Use the very tip of your smallest brush or a toothpick to place tiny gold dots randomly in the empty spaces. This creates the illusion of distant galaxies and fills the void without cluttering the composition. -
Head Outline:
If the definition of the face got lost, mix a tiny drop of blue with white to make a very pale grey. Use your liner brush to add a faint line separating the chin and neck, or defining the nose profile.
Hang your finished piece where it can catch the evening light and enjoy the peaceful atmosphere it brings to the room

PENCIL GUIDE
Understanding Pencil Grades from H to B
From first sketch to finished drawing — learn pencil grades, line control, and shading techniques.
Explore the Full Guide
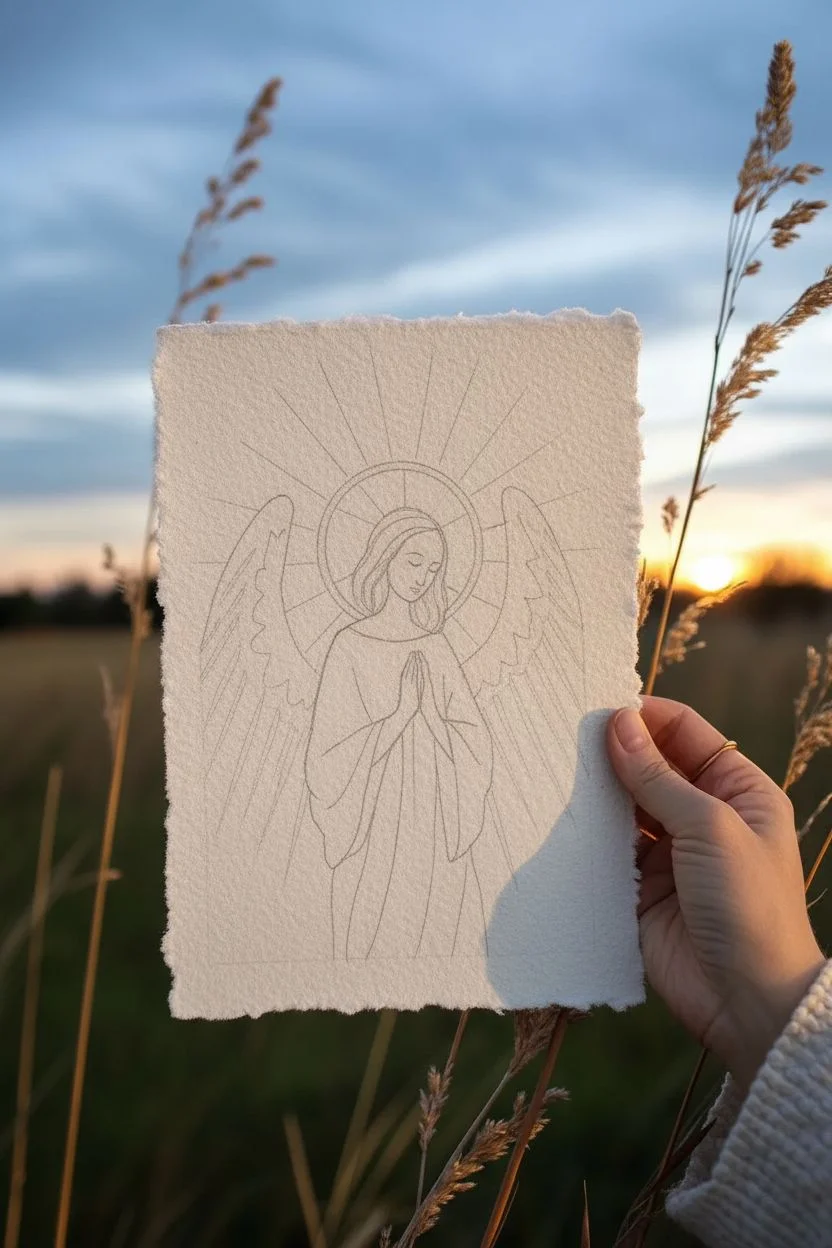
Praying Angel With Folded Hands
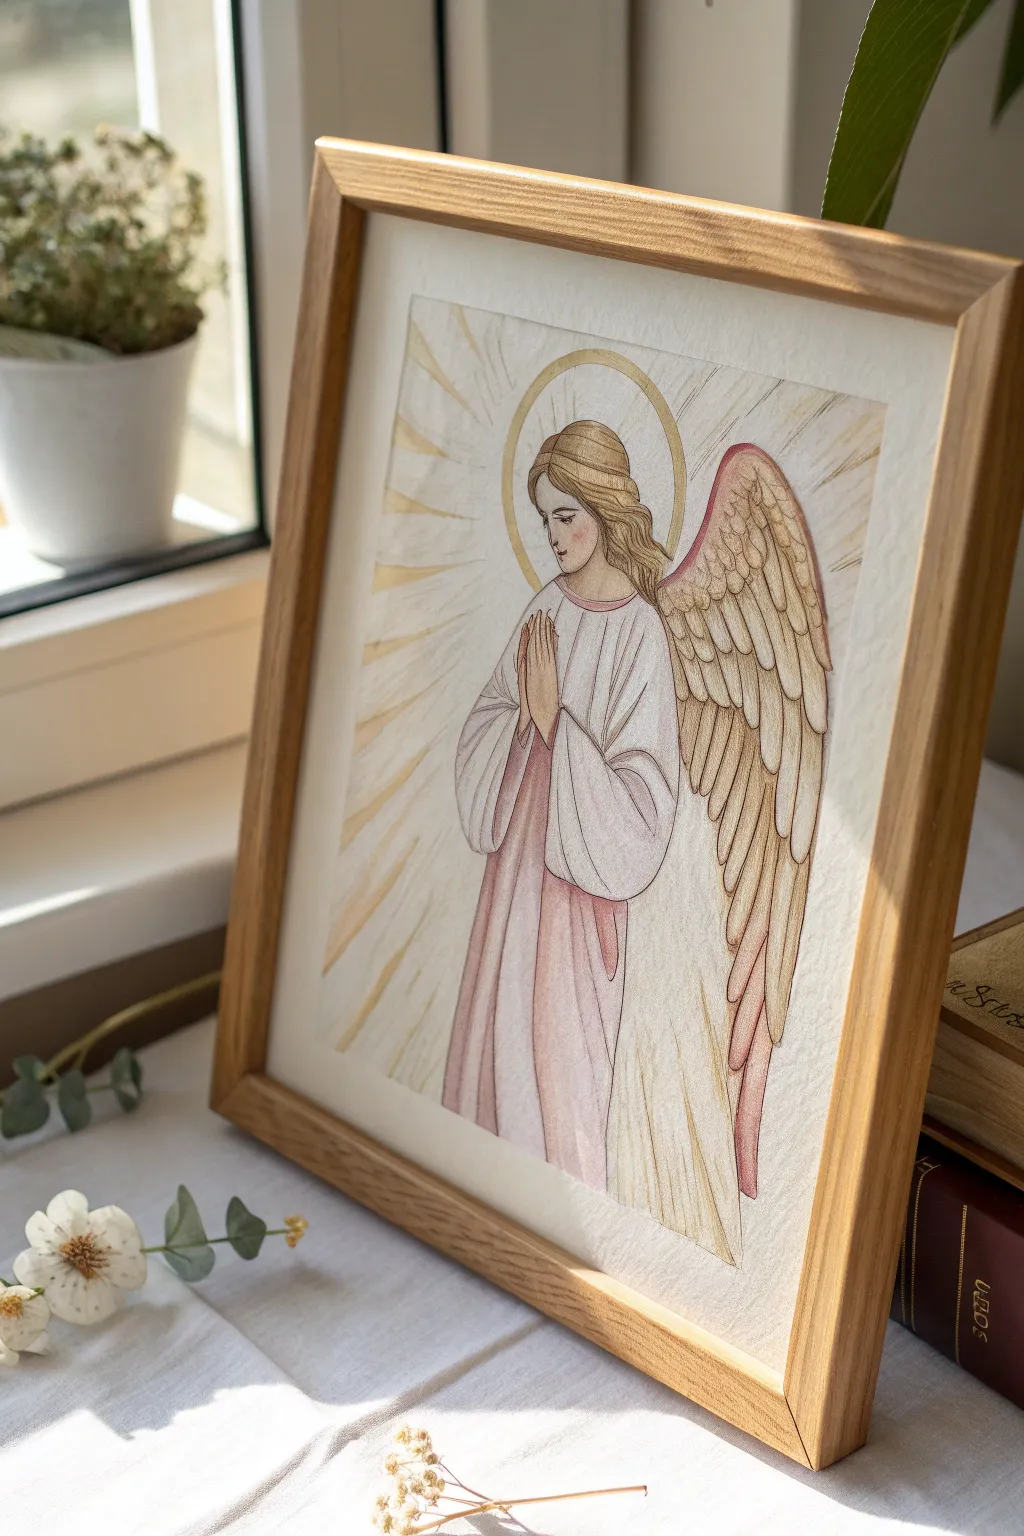
This serene watercolor and pencil artwork features a graceful angel with folded hands, bathed in divine light. The soft, textured paper and warm wood frame give it a timeless, classic feel perfect for a quiet corner of your home.
Detailed Instructions
Materials
- Hot press watercolor paper (smooth texture)
- Watercolor paint set (focus on soft pinks, ochre, gold, and light blue)
- Colored pencils (light brown, dark brown, cream, gold/metallic)
- Fine liner pen (sepia or dark brown, waterproof)
- Round watercolor brushes (size 4 and 8)
- Gold metallic watercolor paint or ink
- Pencil and eraser for sketching
- Ruler
- Wooden picture frame (light oak finish)
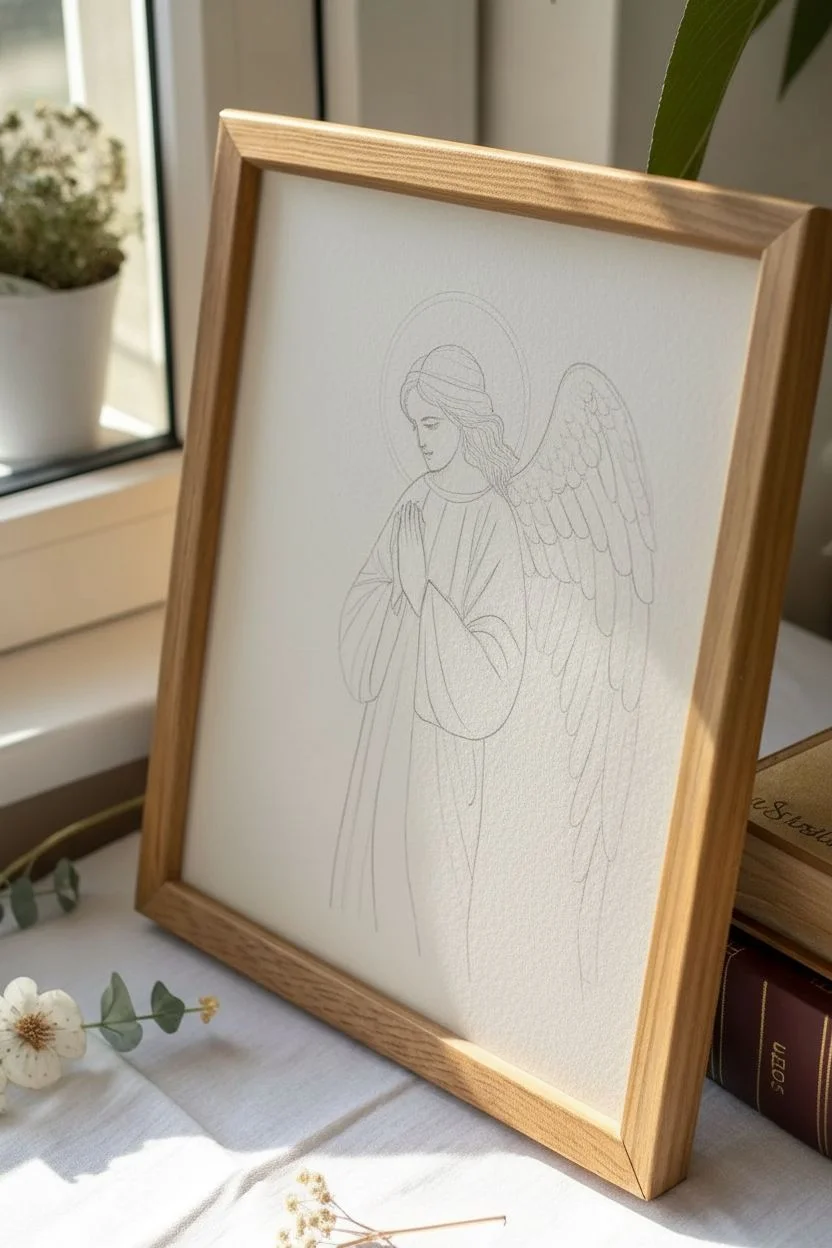
Step 1: Sketching the Foundations
-
Establish the composition:
Begin by lightly sketching a central vertical line on your paper to ensure the angel stands straight. Mark the top of the head and the bottom of the robes to set the height. -
Outline the figure:
Using a light hand, sketch the oval shape of the face and the gently sloping shoulders. Draw the arms bent upwards so the hands meet at the center of the chest in a prayer gesture. -
Define the robes:
Draw the flowing lines of the gown. Create long, vertical folds that start from the arms and drape all the way to the bottom edge. Keep the lines soft and fluid to mimic fabric. -
Add the wings and halo:
Sketch a large wing extending from the right shoulder, curving gently at the top and tapering down with distinct feather layers. Draw a perfect circle behind the head for the halo, leaving a small gap between the head and the circle’s edge. -
Detail the face and hair:
Refine the facial features with a calm, downward gaze and a soft nose. Sketch the hair flowing over the shoulders in loose waves.
Smudge Control
Place a scrap piece of clean paper under your drawing hand while adding the colored pencil details. This prevents oils from your skin from smearing the pencil or watercolor.
Step 2: Watercolor Washes
-
Paint the gown:
Mix a very dilute wash of pale pink and light ochre. Apply this to the gown area, working wet-on-dry. While still damp, drop slightly concentrated pink into the shadow areas of the folds to create volume. -
Base tone for the wings:
Using a diluted yellow ochre or cream mix, paint the entire wing area. Keep this layer very light as you will be building texture on top of it later. -
Skin tones:
Mix a pale skin tone using peach and a touch of white. Carefully paint the face and hands, adding a tiny blush of pink to the cheeks while the wash is still wet. -
The golden halo:
Once the nearby paper is dry, paint the halo ring using yellow ochre. If you want a shimmer, mix in a little metallic gold paint here for a radiant effect. -
Background radiance:
Paint faint, radiating rays of light emanating from behind the angel using a very watery yellow or gold wash. Let these fade out as they reach the edges of the paper.
Luminous Wings
For ethereal wings, leave tiny slivers of white paper unpainted between the feathers. These negative spaces catch the light and keep the texture from looking heavy.
Step 3: Colored Pencil Details
-
Refine the outlines:
Once the paint is completely bone dry, use a sharpened sepia or brown colored pencil to trace over your initial pencil lines. This gives the artwork that gentle illustrative quality. -
Texture the wings:
Using a light brown pencil, draw individual feathers within the wing shape. Start with smaller scallops at the top and elongate them into long, sweeping flight feathers at the bottom. -
Shade the feathers:
I like to create depth here by shading only the left side of each feather with a darker brown pencil, making the layers pop against each other. -
Add hair details:
Use sand and light brown colored pencils to draw individual strands in the hair. Follow the wave of the hair to keep it looking natural and soft. -
Highlight the radiance:
Use a gold or yellow pencil to strengthen the rays of light in the background. Draw straight lines radiating outward to emphasize the holy atmosphere.
Step 4: Final Touches & Framing
-
Deepen the shadows:
Check the folds of the dress. If they look too flat, lightly shade the deepest recesses with a mauve or dark pink pencil to add weight to the fabric. -
Enhance the halo:
Go over the inner and outer rim of the painted halo with your gold metallic pen or pencil to make it crisp and defined. -
Mount artwork:
Carefully center your artwork on the backing board of your frame. Ensure no graphite smudges remain on the white space. -
Frame the piece:
clean the glass on both sides, place the artwork inside, and secure the back. The light wood frame complements the warm tones of the angel perfectly.
Place your framed angel near a window to let natural light catch the subtle metallic details you added to the halo
Angel With Cascading, Textural Hair
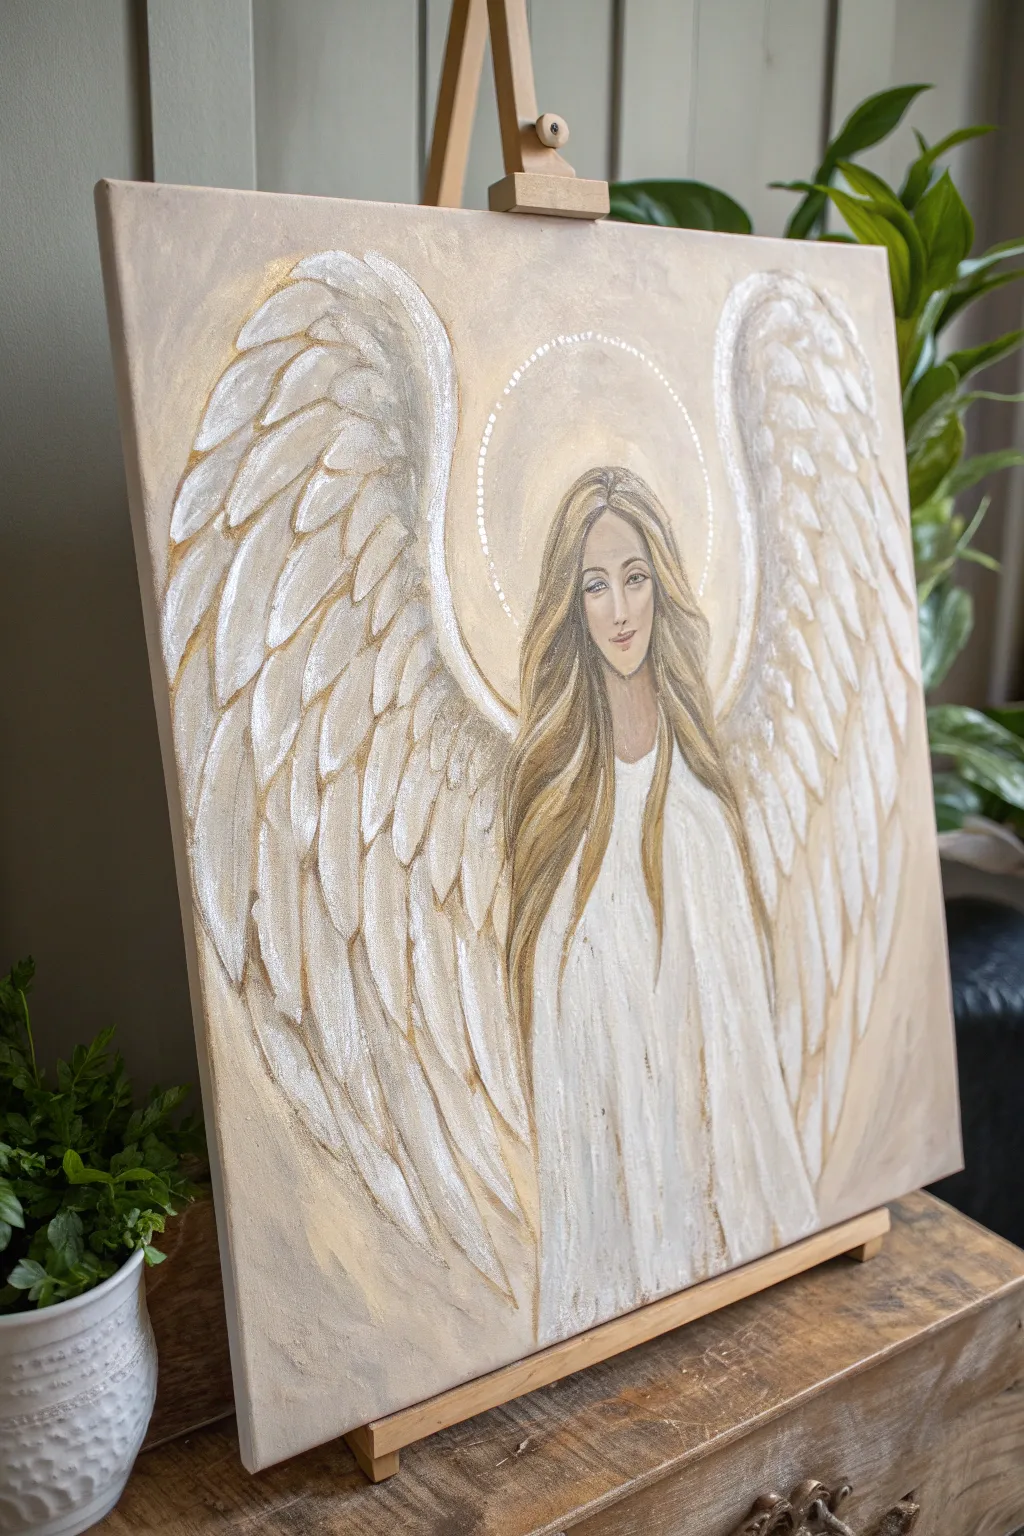
Capture celestial tranquility with this stunning angel painting, featuring heavily textured wings and soft, flowing hair. Using a monochromatic palette of creams, golds, and whites, you’ll create a piece that feels both ethereal and grounded.
How-To Guide
Materials
- Large stretched canvas (approx. 16×20 or larger)
- Acrylic paints: Titanium White, Unbleached Titanium, Raw Sienna, Burnt Umber, Gold metallic paint, Silver metallic paint
- Modeling paste or thick texture medium
- Palette knives (various shapes)
- Flat brushes (large and medium)
- Small round detail brush
- Pencil
- Palette for mixing
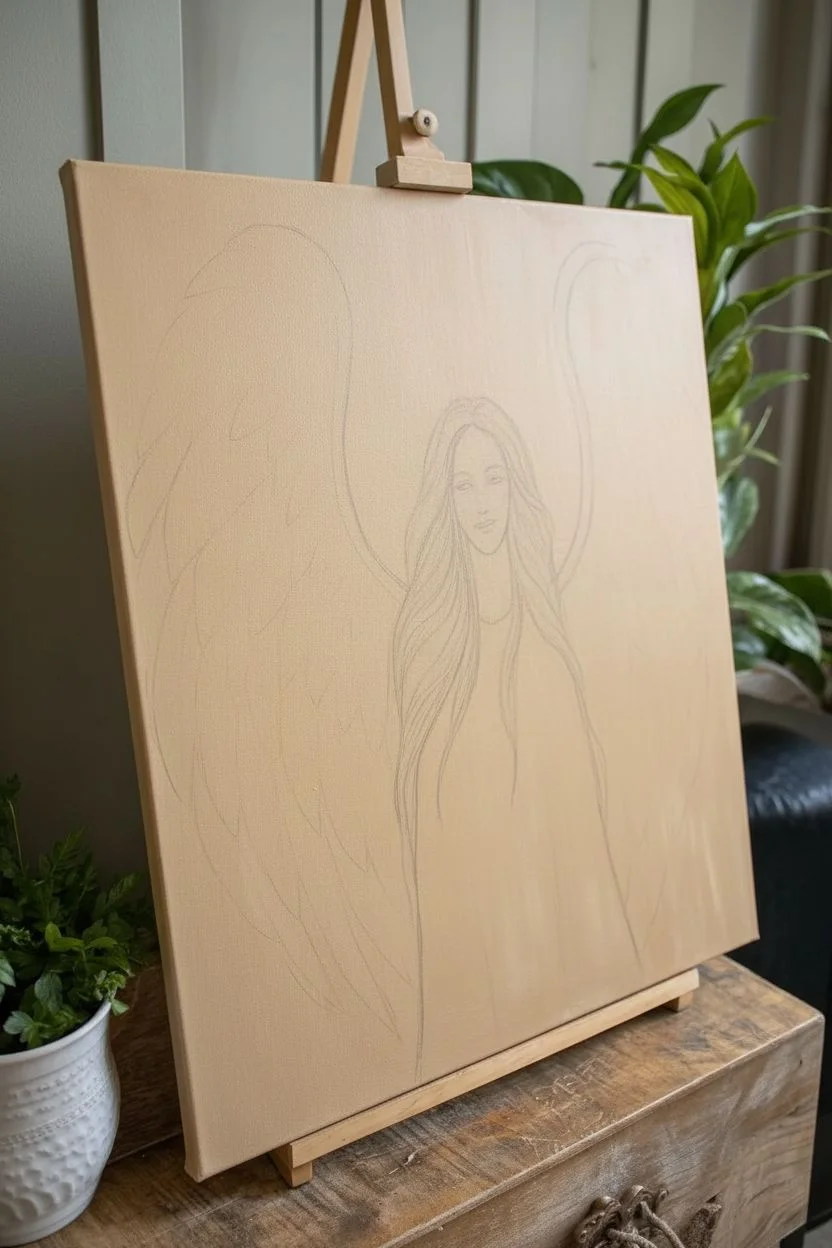
Step 1: Preparation and Sketching
-
Prime the background:
Begin by covering your entire canvas with a wash of Unbleached Titanium mixed with a tiny drop of Raw Sienna. Use a large flat brush and vertical strokes to create a warm, neutral base. Let this dry completely. -
Sketch the composition:
Lightly sketch the angel’s outline using a pencil. Start with an oval for the head in the upper center, then draw the flowing lines of the hair cascading down. Outline the dress shape widening towards the bottom. -
Outline the wings:
Draw two large, arching wing shapes starting from behind the shoulders and extending almost to the top corners and bottom edges of the canvas. Keep the lines sweeping and organic.
Oops, cracks appeared!
Thick modeling paste can crack if dried too fast. If significant cracks appear, fill them with a second thin layer of paint or paste once dry.
Step 2: Building Texture
-
Apply texture paste to wings:
Mix a generous amount of modeling paste with a little Titanium White. Using a palette knife, apply this mixture to the wing areas. Instead of smoothing it flat, press and lift the knife to create peaked, feather-like ridges that mimic the layers of plumage. -
Texture the dress:
Apply the modeling paste vertically down the dress area. Use the edge of your palette knife to drag long, vertical grooves that suggest heavy, draped fabric folds. -
Create the halo:
For the halo behind the head, you can either paint a solid circle or use a stippling technique. Use a small brush or the tip of a palette knife to dot small beads of paste or thick white paint in two concentric circles around the head. -
Let it dry:
This is crucial: allow the texture paste to dry completely. Depending on thickness, this could take several hours or overnight. Touching it too soon will flatten your beautiful ridges.
Step 3: Painting the Features
-
Paint the face base:
Mix a skin tone using White, a touch of Unbleached Titanium, and a tiny speck of Burnt Umber (or red if you have it, though this palette is very neutral). Paint the face area smoothly with a medium flat brush. -
Define facial features:
Switch to your smallest round brush. Use a watered-down Burnt Umber to gently define the eyebrows, eyes, nose, and mouth. Keep the expression soft; avoid harsh black lines. Add tiny white highlights to the eyes to bring them to life. -
Layer the hair:
Paint the hair using strokes of Raw Sienna and Burnt Umber. I find it works best to start with the darker shades near the neck and roots, pulling lighter Gold and Unbleached Titanium strokes over the top to create shine and volume.
Make it shimmer
Sprinkle fine iridescent glitter onto the wet paint of the wings or halo for an extra magical, sparkling finish that catches the light.
Step 4: Refining and Highlighting
-
Highlight the wings:
Once the paste is dry, dry-brush Titanium White over the raised ridges of the wings. This catches the texture and makes the ‘feathers’ pop against the shadowed crevices. -
Add metallic wing accents:
Using your Silver and Gold metallic paints, dry-brush specific feathers, focusing on the upper arches of the wings. The metallic sheen adds a magical quality when the light hits the texture. -
Paint the dress:
Paint over the textured dress area with Titanium White. While wet, streak in a little Unbleached Titanium into the recesses of the folds to create depth and shadow. -
Enhance the halo:
Go back to your halo dots. Carefully dab a mixture of White and bright Gold paint onto each dot to make them shimmer. -
Warm the background:
To separate the angel from the background, glaze the area around the figure with a very diluted Raw Sienna. This creates a subtle ‘glow’ effect around the head and wings.
Step 5: Final Touches
-
Deepen shadows:
Mix a darker grey-brown wash and carefully apply it between the main feather groups on the wings. This negative space painting makes the white feathers stand out more dramatically. -
Final highlights:
Add pure white highlights to the forehead, nose bridge, and the highest points of the dress texture. -
Seal the work:
Once fully cured (wait at least 48 hours for thick acrylics), apply a satin or gloss varnish to unified the sheen and protect the textured surface.
Hang your textured masterpiece in a well-lit spot to let the shadows play across the wings.


Loose Watercolor Angel Wash
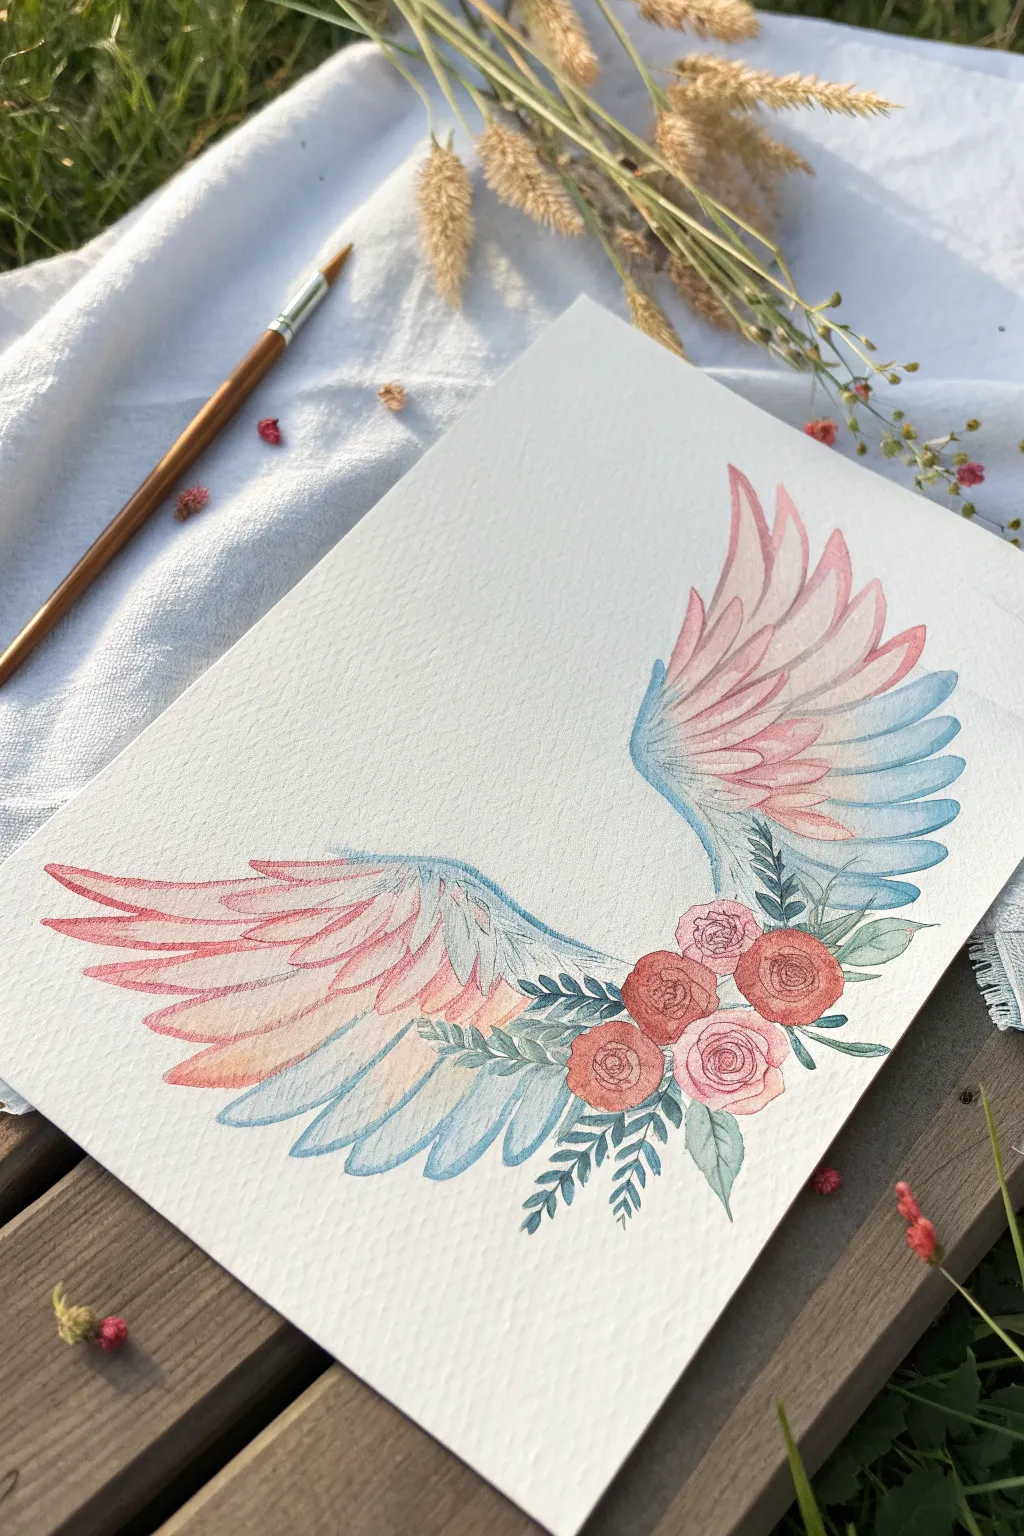
Capture the delicate beauty of angelic symbolism with this soft watercolor piece, featuring two graceful wings adorned with a cluster of vintage-style roses. The gentle gradient from blush pink to sky blue creates a dreamy, celestial atmosphere perfect for greeting cards or wall art.
Step-by-Step
Materials
- Cold press watercolor paper (300 gsm or heaver for texture)
- Round watercolor brushes (size 4 and 8)
- Small fine liner brush (size 0 or 1)
- HB pencil and kneadable eraser
- Watercolor paints: Rose Madder or Alizarin Crimson, Cerulean Blue, Sap Green, and Indigo
- Palettes for mixing
- Two jars of water (clean and dirty)
- Paper towels
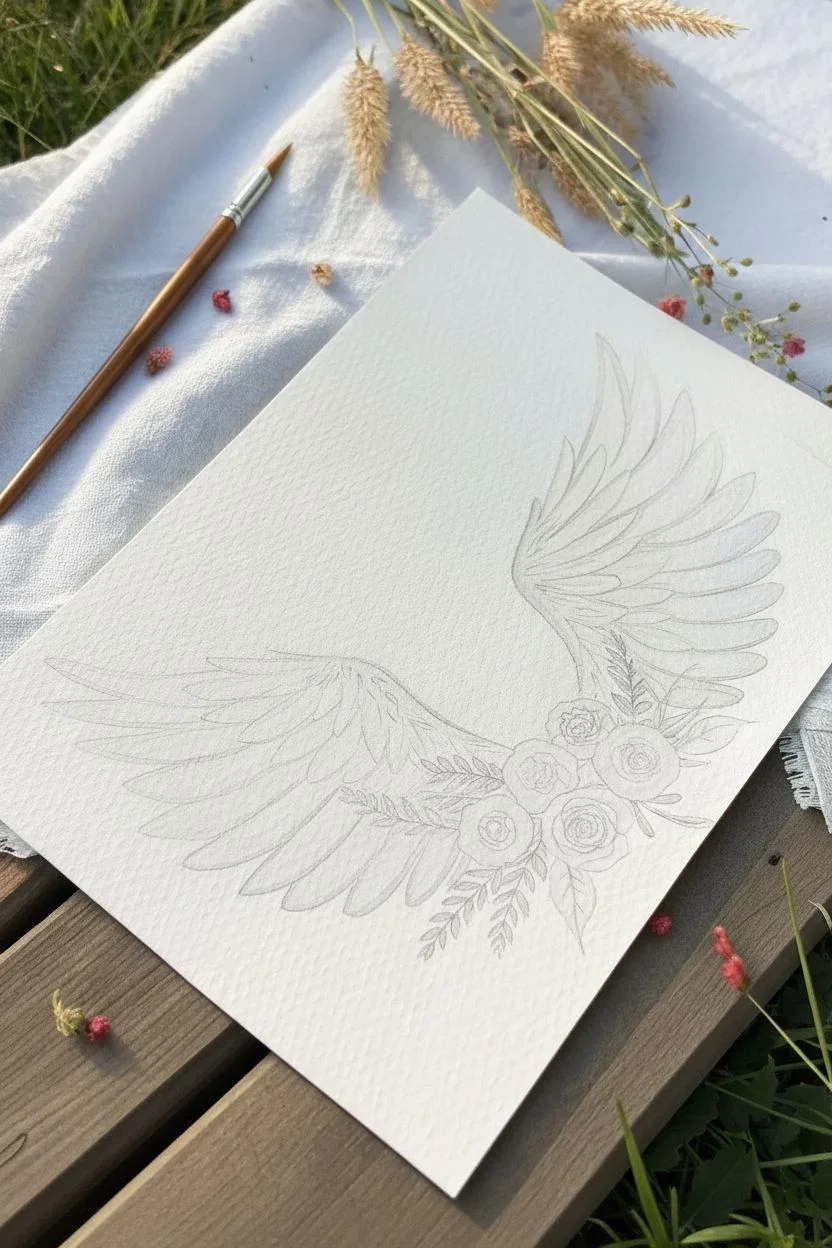
Step 1: Sketching and Preparation
-
Map the Wing Shapes:
Begin by lightly sketching the outline of two large wings. Since they aren’t symmetrical in this design, draw the right wing reaching upward and the left wing extending horizontally outward. Keep your pencil pressure very light so the graphite doesn’t show through the transparency of the paint later. -
Define the Feathers:
Inside your wing outlines, sketch rows of long, curved feathers. The primary flight feathers at the tips should be longest, getting shorter as you move toward the base of the wing where they attach. -
Add the Florals:
At the junction where the wings meet (or where the body would be), sketch a cluster of four or five roses. Draw rough circles with spiral centers to indicate the petals. Add sprigs of leaves extending outward to integrate the flowers with the wings. -
Lighten the Lines:
Before picking up a brush, take your kneadable eraser and gently roll it over the entire drawing. You want the lines to be barely visible—just faint guides for your brushwork.
Wet Edge Control
To keep feather edges crisp, wait for one feather to dry before painting the one immediately next to it, or leave a hairline gap of dry paper between them.
Step 2: Painting the Wings
-
Mix Your Gradients:
Prepare two watery puddles of paint: a soft, diluted Rose Madder (pink) and a diluted Cerulean Blue. You want these to be quite transparent. -
First Wing Wash – Pink:
Starting with the upright right wing, use your size 8 brush to paint the upper half of the feathers with the pink mix. Use a wet-on-dry technique for control, carefully filling the feather shapes but leaving tiny white gaps between them to define the separate plumes. -
Blending to Blue:
While the pink is still slightly damp, rinse your brush and pick up the blue mix. Paint the lower halves and tips of the feathers, allowing the blue to touch the damp pink. Let the colors bleed into each other naturally to create a soft violet transition. -
Left Wing Gradient:
Repeat this process on the horizontal left wing. Apply pink near the ‘shoulder’ of the wing and transition to blue as the feathers extend outward to the left side. -
Deepening Shadows:
Once the first layer is completely dry, mix slightly more saturated versions of your pink and blue. Using a smaller brush, add thin strokes along the shafts of the feathers and underneath overlapping feathers to create depth and dimension. -
Adding Texture:
With a very fine brush (size 0 or 1) and a concentrated blue-grey mix, draw incredibly fine, hair-like lines along the edges of the blue feathers to mimic the texture of barbs.
Step 3: Floral Details
-
Base Layer for Roses:
Switch back to your pink mixture, perhaps darkening it slightly with a touch of red. Paint the spiral centers of the roses first, then dab curved brushstrokes radiating outward for the petals. Leave small white spaces between strokes to keep the flowers looking airy. -
Defining Petals:
While the roses are drying, mix a darker crimson. Add tiny, C-shaped shadows deep inside the rose centers and under the outer petals to give them a three-dimensional form. -
Painting the Foliage:
Mix Sap Green with a tiny touch of Indigo for a muted, vintage green. Using the tip of your round brush, paint the small leaves tucking behind the roses. -
Leaf Variation:
For visuals interest, paint some leaves as solid shapes and others as delicate, fern-like sprigs with tiny individual leaflets. Vary the green tone by adding more water for distant leaves. -
Connecting the Elements:
Paint a few stray leaves or stems that overlap slightly with the base of the wings. This helps ground the floral cluster so it feels like part of the angel structure rather than just floating on top.
Add Metallic Magic
Once the painting is totally dry, trace the very tips of the flight feathers with gold watercolor or a gold gel pen for a divine, illuminated manuscript look.
Step 4: Final Touches
-
Refining Edges:
Inspect the edges of your feathers. If the watercolor dried with hard watermarks that look messy, soften them gently with a clean, damp brush. -
Final Contrast:
Mix a very dark grey-blue. Use your finest liner brush to add the tiniest accent lines in the deepest creases of the feathers and the darkest shadows of the leaves. This high contrast makes the soft colors pop.
Allow your painting to dry fully before erasing any remaining pencil marks to reveal your heavenly creation
Angel Wings Framed by Florals
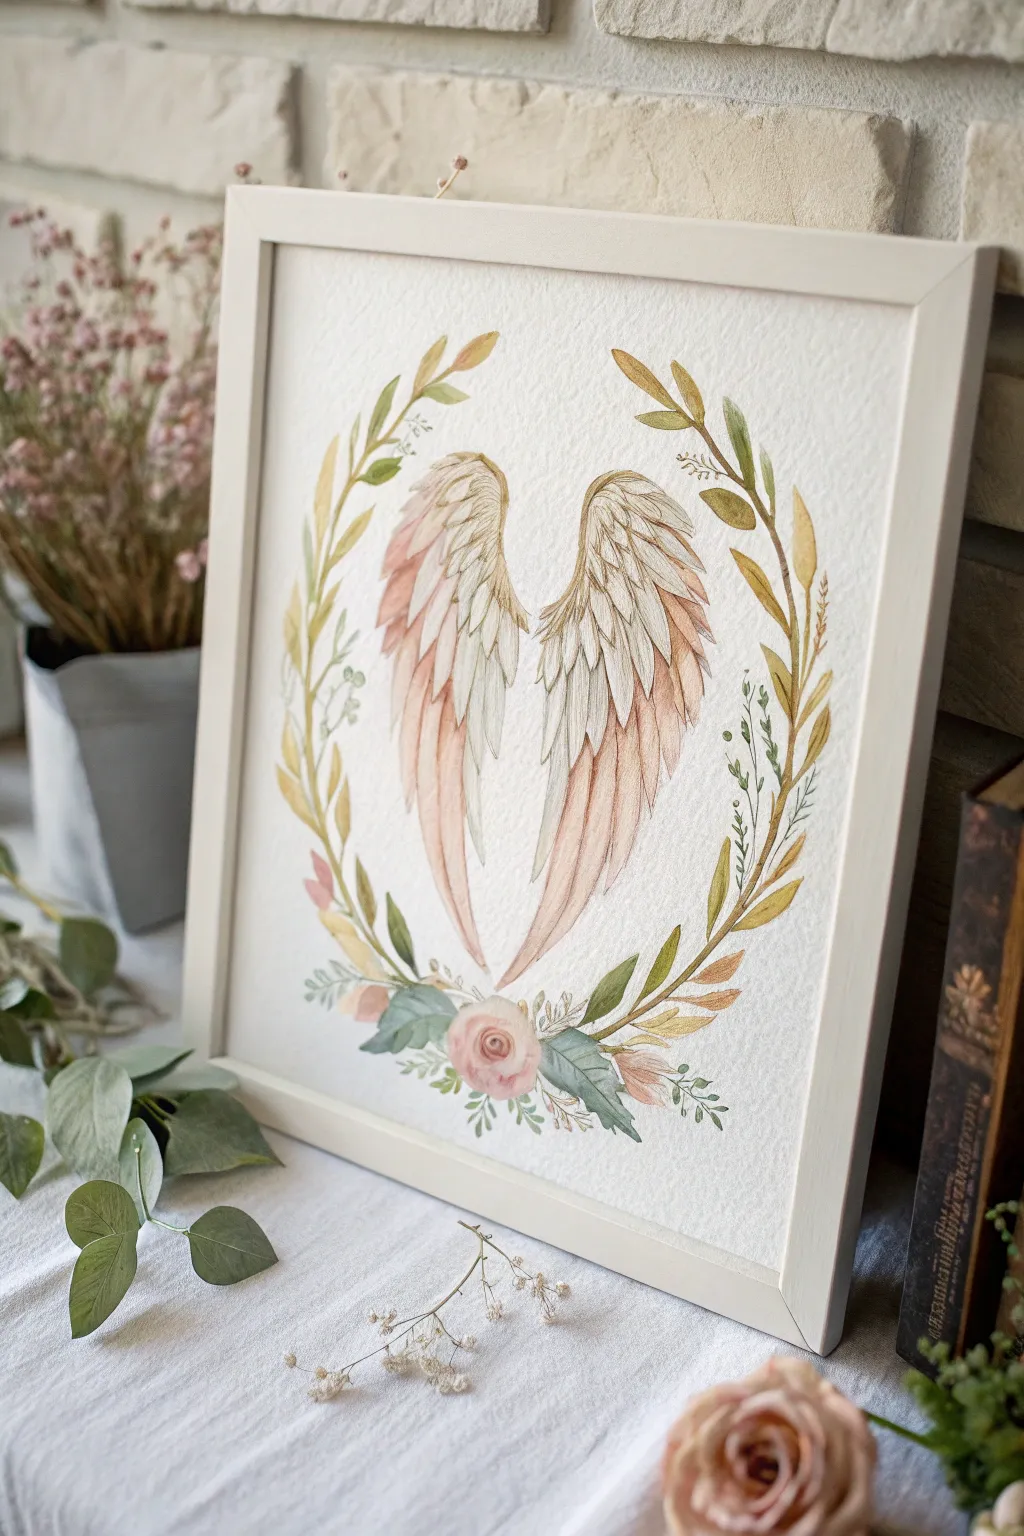
Capture the ethereal beauty of angelic wings cradled in a delicate floral wreath with this soft watercolor project. The gentle pinks and earthy greens create a serene composition perfect for a nursery or quiet corner of your home.
Step-by-Step Tutorial
Materials
- Cold press watercolor paper (300 gsm)
- Watercolor paints (Alizarin Crimson, Sap Green, Yellow Ochre, Burnt Umber)
- Pencil (HB or 2H for light sketching)
- Kneaded eraser
- Fine liner or waterproof archival ink pen (brown or sepia)
- Round watercolor brushes (Size 2 and 6)
- White or light wood frame
- Clean water and paper towels
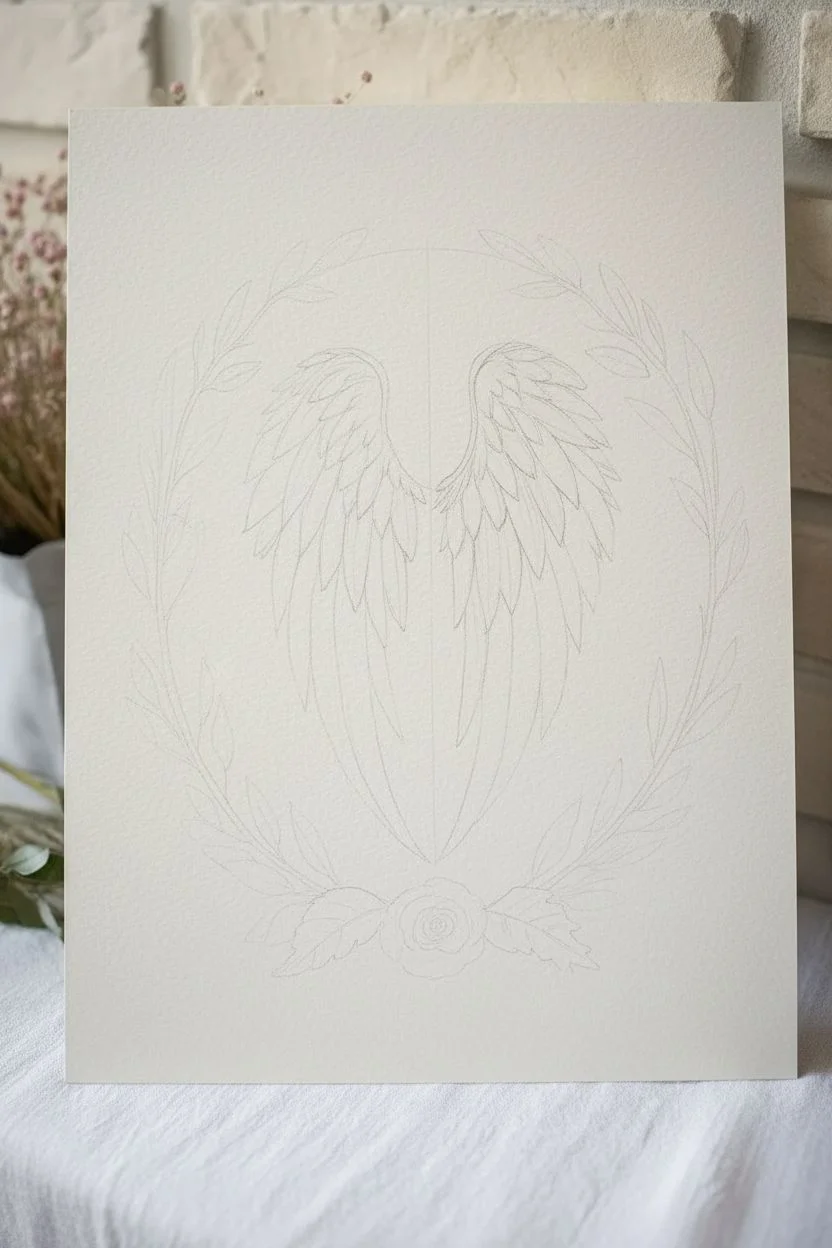
Step 1: Planning the Composition
-
Lightly sketch the layout:
Begin by lightly drawing a large circle in the center of your paper to guide the wreath shape. Inside the circle, mark the vertical center line where the wings will meet. -
Draft the wings:
Sketch two elongated wing shapes mirrored across the center line. Start with the bony upper ridge curve, then cascade downward into long, pointed flight feathers. -
Add feather details:
Inside the main wing outlines, draw rows of smaller covert feathers near the top, transitioning into the longer primary feathers at the bottom. Keep lines faint so they don’t show through the paint later. -
Sketch the floral elements:
Around the circle guide, draw curving stems. Place a central rose at the bottom anchor point, then add leafy sprigs and smaller buds climbing up the sides, leaving the top slightly open.
Clean Edges Pro Tip
Keep separate water jars for warm colors (pinks) and cool colors (greens). This prevents your delicate angel wing blush tone from turning muddy or gray.
Step 2: Painting the Wings
-
Base wash for feathers:
Mix a very dilute wash of Alizarin Crimson to create a pale blush pink. Using your size 6 brush, apply this wash to the tips of the long feathers, fading it out with clear water as you move upward so the tops remain nearly white. -
Add warmth:
While the first layer is still slightly damp, drop tiny amounts of Yellow Ochre into the mid-sections of the feathers for a warm, antique glow. -
Define shadows:
Once dry, mix a slightly darker pink-brown using Crimson and a touch of Burnt Umber. Use the size 2 brush to paint narrow shadows between individual feathers to separate them. -
Enhance texture:
Add very fine lines of the darker mix along the shafts of the feathers to mimic barbs and texture.
Level Up: Metallic Accent
Mix a small amount of gold watercolor or gouache and gently brush it onto the tips of the wreath leaves. The gold will shimmer beautifully when the light hits the frame.
Step 3: Creating the Floral Wreath
-
Paint the leaves:
Mix Sap Green with a little Yellow Ochre for an olive tone. Paint the leaves on the wreath using the tip of your brush for the stems and pressing down for the leaf bodies. -
Vary the greens:
I like to add a bit more blue or brown to my green mix for some leaves to create natural variety and depth in the foliage. -
Paint the bottom rose:
Wet the rose area slightly with clean water. Drop in your blush pink mix, letting it bloom outward from the center. Add darker pink swirls in the middle while wet to suggest petals. -
Add accent buds:
Dab small spots of pink and ochre near the tips of the branches to represent tiny flower buds or warm autumn leaves.
Step 4: Finishing Touches
-
Refine with ink:
Once the painting is completely bone dry, take your sepia fine liner. Loosely outline the feathers, breaking the line occasionally for an organic look. -
Detail the wreath:
Add ink details to the leaves, drawing center veins and outlining the rose petals to bring crispness to the soft watercolor. -
Erase guidelines:
Gently use your kneaded eraser to lift any visible graphite lines from your initial sketch that weren’t covered by paint. -
Frame your work:
Place the artwork into a white or light natural wood frame to complement the airy, ethereal aesthetic.
Now you have a serene piece of art that radiates gentle protection and peace
Geometric Halo and Wing Shapes
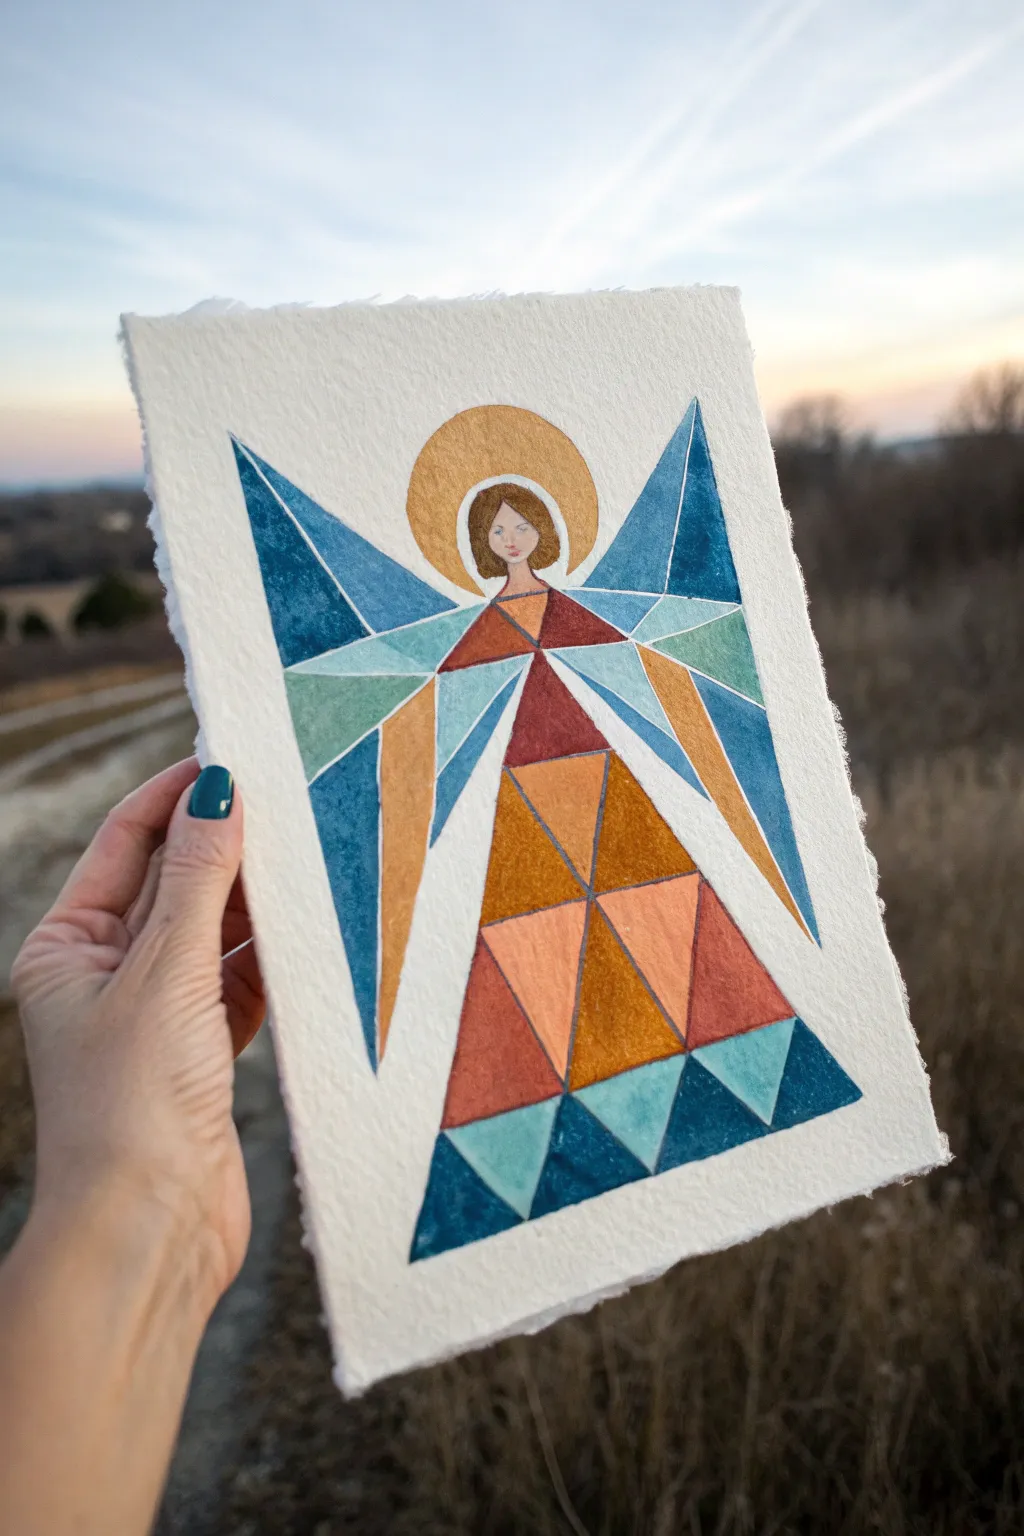
This striking angel design combines the crispness of geometric shapes with the softness of watercolor on textured paper. The result is a modern folk-art interpretation where triangles and polygons come together to form a serene celestial figure.
Detailed Instructions
Materials
- Heavyweight cold press watercolor paper (deckle edge recommended)
- Watercolor paints (indigo, teal, ochre/gold, rust red, terracotta, pale skin tone)
- Gold metallic watercolor or gouache
- Pencil (H or HB)
- Ruler
- Eraser
- Round watercolor brushes (sizes 2 and 6)
- Painter’s tape or a drawing board
- Jar of water and paper towels
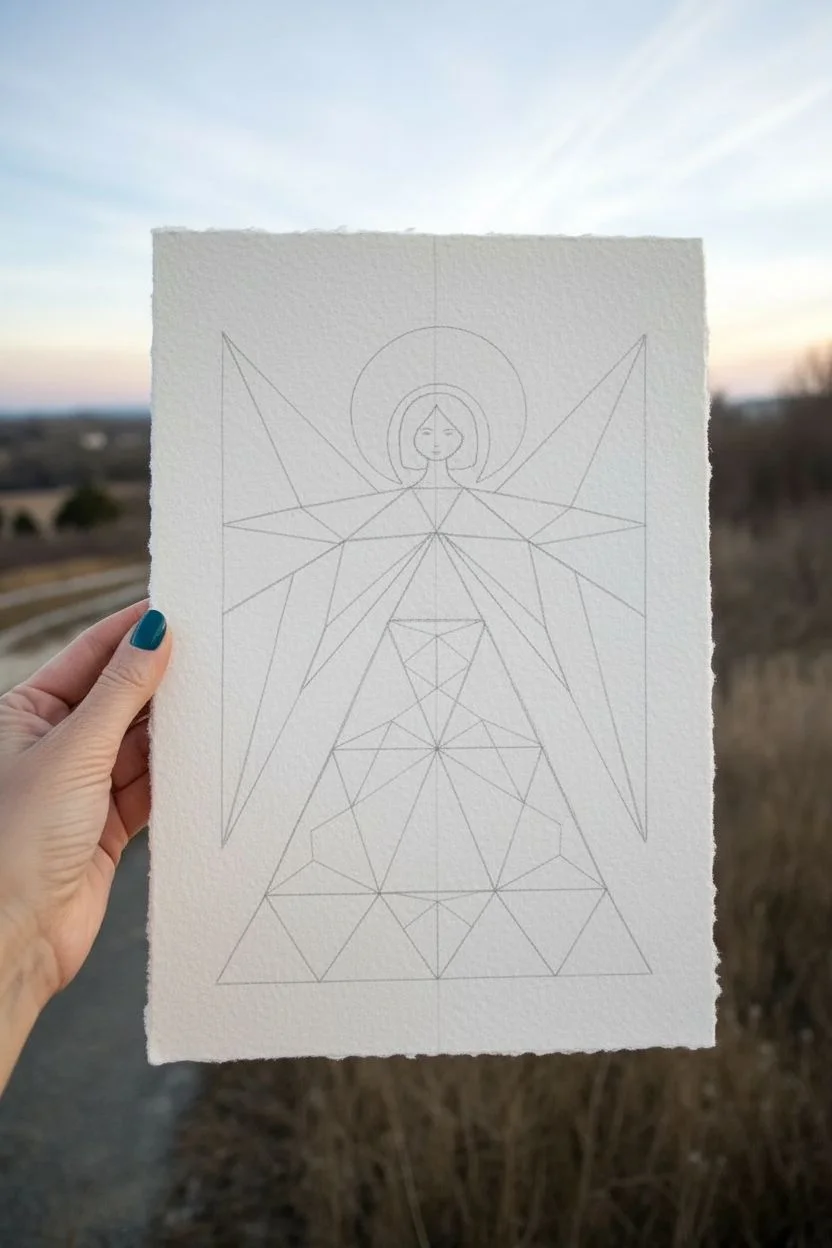
Step 1: Drafting the Design
-
Establish the centerline:
Begin by lightly drawing a vertical centerline down your paper with a ruler. This will serve as the anchor for the angel’s symmetry and help align the geometric body segments. -
Frame the halo and head:
Near the top of your centerline, sketch a small oval for the face. Around it, draw a larger, flattened circle for the halo, leaving a gap between the head top and the halo’s inner edge. -
Outline the triangular body:
Drawing downward from the neck area, sketch a large isosceles triangle that widens towards the bottom of the page to form the dress. Don’t worry about the internal patterns yet; just get the main silhouette. -
Sketch the geometric wings:
From the shoulder area, draw large angular wings extending outward and upward. Instead of soft feathers, think in terms of shards or crystals—sharp points and straight lines that mirror the angles of the dress. -
Grid the interior shapes:
Using your ruler, divide the large body triangle and the wings into smaller geometric subdivisions. Create a mix of large and small triangles for visual interest, ensuring lines connect cleanly at vertices.
Step 2: Painting the Figure
-
Paint the face and hair:
Using a small round brush (size 2), fill in the face with a pale skin tone. Once damp but not soaking, drop in brown for the hair, letting it frame the face in a simple bob shape. Add tiny facial features once the skin tone is completely dry. -
Apply the gold halo:
Load your brush with metallic gold paint and fill in the halo ring. I find that applying this fairly thick gives it a lovely, solid shine that contrasts with the translucent watercolor. -
Start the color blocking:
Select a color for your first few triangles—perhaps the deep rust red. Paint non-adjacent shapes to prevent colors from bleeding into each other. -
Balance the cool tones:
Switch to your indigo and teal shades. Fill in sections of the wings and the hem of the dress. The coolest, darkest blue works exceptionally well on the wing tips and the bottom-most triangles to ground the figure. -
Add warmth with ochre:
Incorporate the golden ochre and terracotta tones into the middle sections of the dress and the inner parts of the wings. This warmth bridges the gap between the metallic halo and the cool blues.
Bleeding Colors?
If wet paint bleeds across your white dividing lines, blot it immediately with a paper towel corner. Wait for it to dry fully, then gently touch up the white line using white gouache or a gel pen.
Step 3: Refining and detailing
-
Fill remaining gaps:
Continue painting the remaining geometric segments, working slowly. Allow neighboring shapes to dry completely before painting next to them to maintain those crisp, white gaps between colors. -
Create the ‘grouted’ look:
The charm of this style comes from the unpainted paper between shapes. If you accidentally paint over a line, you can gently lift the pigment with a clean, damp brush or re-establish the line later with white gouache. -
Deepen the shadows:
Once the first layers are dry, glaze a second layer of the same color over half of a triangle (for example, just the left side of a dress segment) to create a sense of dimension and faceting. -
Final touches:
Check the facial features and define them with a very fine point if needed. Erase any stray pencil marks that are still visible in the unpainted borders.
Go Bigger
Scale this up on a large sheet and use masking fluid or thin graphic tape for the white lines between shapes. This guarantees perfectly straight, uniform gaps without needing a steady hand.
Now you have a serene, geometric angel ready to frame or give as a holiday keepsake
Negative Space Angel in a Glow Field
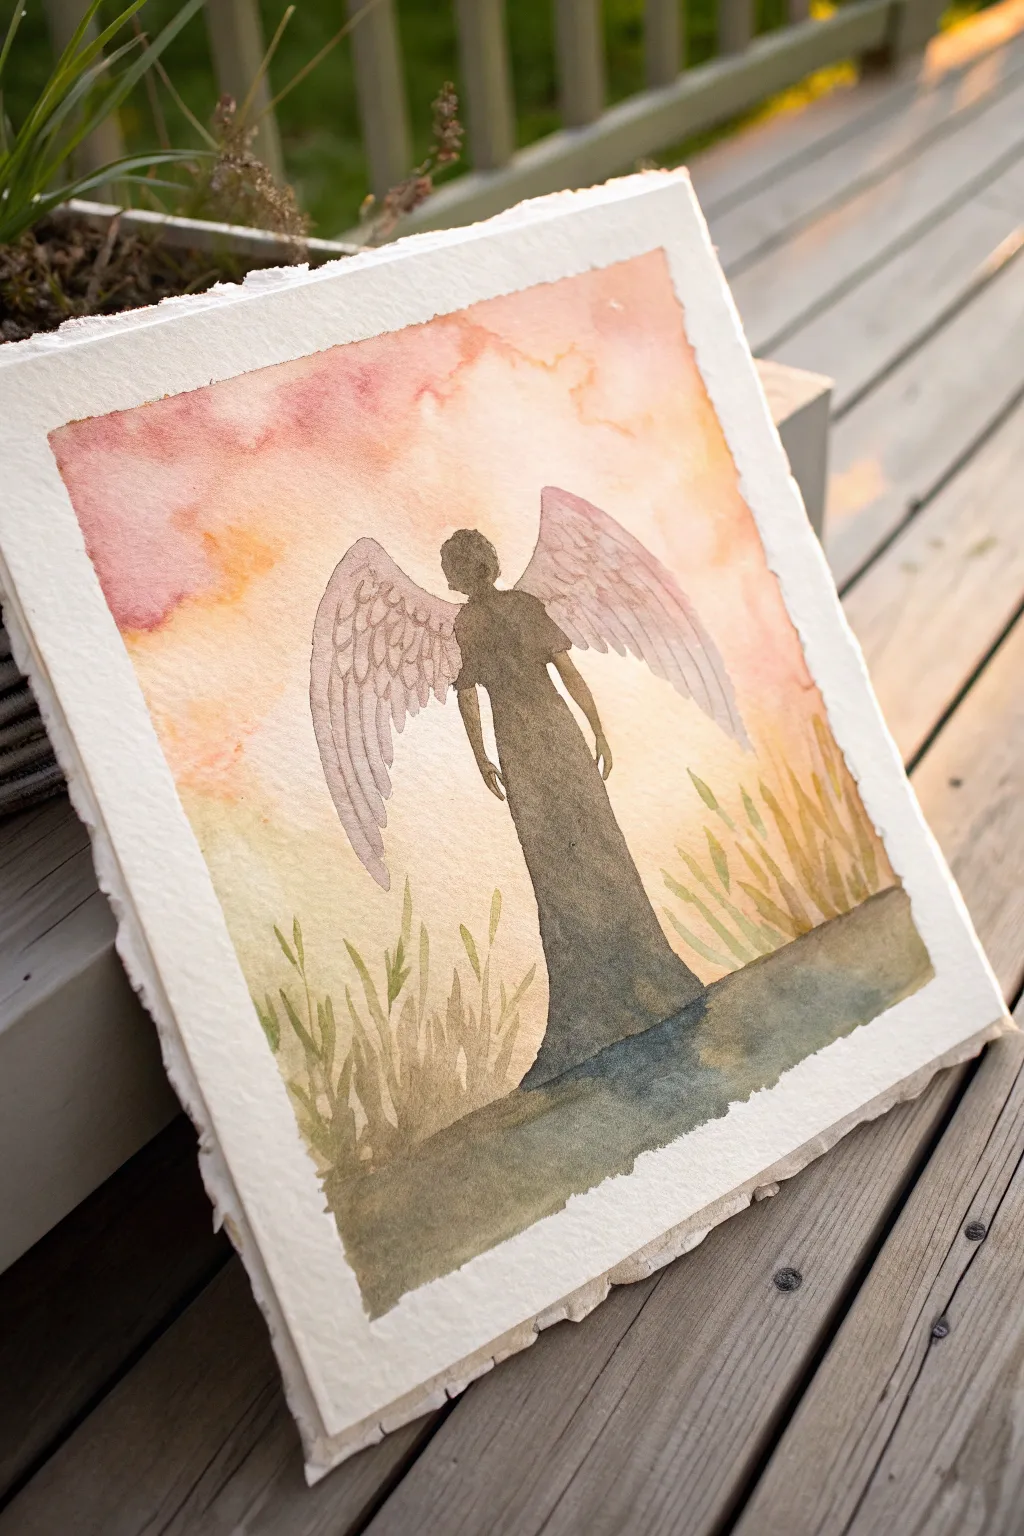
Capture the ethereal beauty of a guardian angel with this serene watercolor project, featuring a dark silhouette set against a glowing, sunset-hued background. The soft washes and crisp edges create a striking contrast that feels both grounding and transcendent.
Step-by-Step Guide
Materials
- Cold press watercolor paper (300 gsm)
- Watercolor paints (Payne’s Gray, Burnt Umber, Alizarin Crimson, Cadmium Yellow, Yellow Ochre)
- Round watercolor brushes (size 4, size 8)
- Small detail brush (size 0 or 1)
- Masking tape (for clean borders)
- Pencil (HB or H for light sketching)
- Jar of clean water
- Paper towels
- Palette for mixing
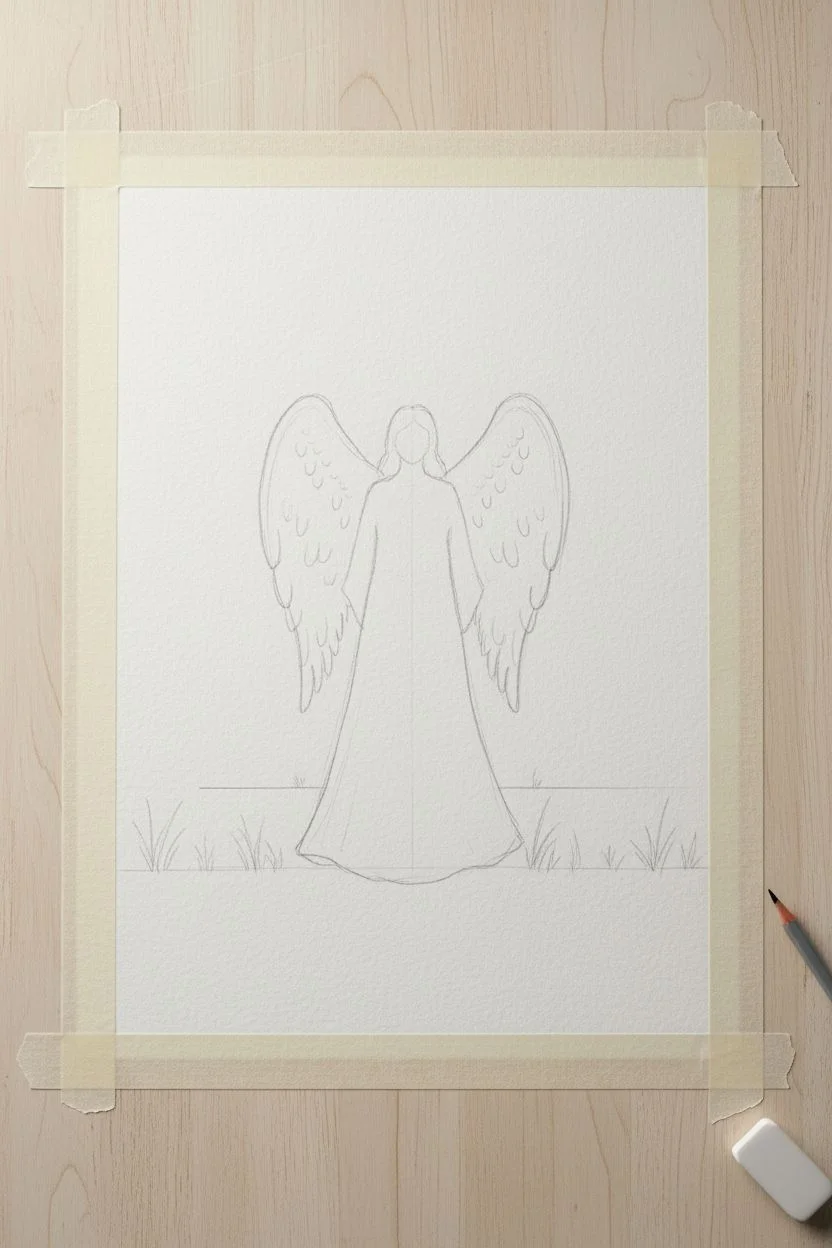
Step 1: Preparation and Sketching
-
Tape the edges:
Secure your watercolor paper to a board or table using masking tape. This creates that lovely crisp white border seen in the final piece and prevents the paper from buckling under heavy washes. -
Sketch the silhouette:
Lightly draw the outline of the angel character in the center. Focus on a simple, elongated robe shape that pools at the bottom. Keep pencil pressure very light so graphite doesn’t show through later. -
Outline the wings:
Add large, sweeping wings extending from the shoulders. Sketch the basic arc first, then indicate rows of feathers with gentle ‘U’ shapes. -
Add foreground elements:
Lightly sketch uneven grass blades rising from the bottom left and right corners to frame the figure. Add a distinct horizon line where the dress meets the ground.
Bleeding Edges?
If paint bleeds into the angel shape during the sky phase, clean a damp brush and gently ‘lift’ the unwanted paint while it’s wet, blotting with a clean paper towel.
Step 2: Painting the Glowing Sky
-
Wet the sky area:
Using your larger size 8 brush and clean water, thoroughly wet the paper *around* the angel figure. Be careful not to get water inside the angel shape itself, as we want that paper to remain dry for now. -
Apply the warm glow:
While the paper is glistening, drop in diluted Cadmium Yellow near the horizon line and around the angel’s torso area. Let the paint bloom naturally on the wet surface. -
Introduce pink tones:
Mix a watery Alizarin Crimson or rose tone. Apply this to the upper corners of the sky, letting it bleed down into the yellow to create soft, peachy transitions. -
Deepen the upper sky:
While the surface is still damp, add a touch more concentrated red or a hint of orange to the very top edge to create a vignette effect. -
Create background texture:
I like to leave the sky alone at this point; let the water move the pigment around. If puddles form, gently lift them with a thirsty, dry brush. Allow the sky to dry completely before moving on.
Step 3: The Angel Figure
-
Mix dark body color:
Create a rich, dark mixture using Payne’s Gray and a touch of Burnt Umber. It shouldn’t be pitch black, but rather a warm, deep charcoal tone. -
Fill the silhouette:
Using a size 4 brush, carefully paint the head and flowing robe of the angel. Ensure the edges are crisp against the background glow. -
Refine the arms:
Switch to your detail brush to paint the delicate, thin arms hanging at the sides. Keep the hands simple and suggestive rather than detailed. -
Paint the wing structure:
Use a very diluted wash of your dark mixture (so it appears pale grey) for the wings. Start painting the upper bone structure of the wings, keeping it lighter than the robe. -
Detail the feathers:
While the wing wash is drying but not soaked, use slightly darker grey paint to outline individual feathers. This wet-on-damp technique keeps the feathers soft, not rigid. -
Blend the wing base:
Darken the area where the wings attach to the body slightly to create depth, blending it outward toward the tips.
Make it Sparkle
Add a magical touch by flicking a small amount of gold metallic watercolor or white gouache over the sky area to simulate floating dust motes or stars.
Step 4: Foreground and Finishing
-
Mix earthy greens:
Combine Yellow Ochre with a dot of Payne’s Gray to make a muted, olive green for the grassy area. -
Paint the ground:
Fill in the ground area beneath the angel’s feet. Use uneven strokes to mimic uneven earth, blending it slightly into the bottom of the dress so the figure feels grounded. -
Add grass blades:
With a rigger or fine liner brush, flick upwards from the ground to create the tall grasses. Vary the pressure: press down at the base and lift off quickly for sharp tips. -
Vary grass tones:
Add a little more brown or yellow to your mix and paint a few more blades to give the foliage dimension and variety. -
Final touches:
Once everything is bone dry, carefully peel away the masking tape at a 45-degree angle to reveal your clean edges.
Step back and admire the peaceful solitude of your creation.
Celestial Angel With Galaxy Wings

Capture the serenity of the cosmos with this ethereal watercolor angel, featuring a dramatic purple wing and a deep indigo sky. The contrast between the soft, white folds of the gown and the sparkling night background creates a striking, peaceful composition.
Step-by-Step
Materials
- Cold press watercolor paper (300 gsm)
- Pencil and kneaded eraser
- Watercolors: Indigo, Payne’s Grey, Violet/Purple, Lavender, Raw Umber, Burnt Sienna, Yellow Ochre
- Gold metallic paint or gold watercolor
- White gel pen or gouache
- Round brushes (sizes 2, 6, and 10)
- Palette
- Water jars
Step 1: Drawing the Base
-
Outline the profile:
Begin with a very light pencil sketch. Draw the angel’s face in profile, focusing on a gentle downward gaze and a soft jawline. -
Sketch the hair and halo:
Add the hair swept back into a low, loose bun at the nape of the neck. Lightly draw a perfect circle behind the head to mark the halo’s placement. -
Draft the gown and wing:
Sketch the flowing lines of the gown falling from the shoulders. Then, draw the large wing extending upward, mapping out three layers of feathers: smaller ones near the top, medium in the middle, and long flight feathers at the bottom.
Bleeding Lines?
If your dark sky bleeds into the white angel gown, wait for it to dry, then use a stiff, wet brush to gently scrub the pigment away, dabbing frequently with a paper towel.
Step 2: Painting the Angel
-
Base skin tones:
Mix a watery wash of Yellow Ochre and a tiny touch of Burnt Sienna. Paint the face and neck, keeping it very pale. While wet, drop a hint of pink or diluted red onto the cheek for a blush effect. -
Hair details:
Use Raw Umber to paint the hair. Apply the paint in strokes that follow the direction of the hair strands, leaving small slivers of paper white for highlights. -
Shadowing the gown:
Since the gown is white, you are painting the shadows, not the fabric itself. Use a very diluted mix of Indigo or a cool grey to paint thin vertical stripes where the fabric folds. -
Softening the folds:
Before the grey lines dry completely, run a clean, damp brush along one edge of each shadow line to soften it into the white paper, creating a rounded dimensional look.
Step 3: The Galaxy Wing
-
Wing base layer:
Start with the upper, smaller feathers. Paint them with a wash of Lavender mixed with a touch of blue. Keep the paint somewhat transparent. -
Middle feathers:
Move to the middle row of feathers using a stronger purple mix. As you paint each feather shape, leave a tiny gap of white paper between them to define the edges without outlining. -
Long flight feathers:
Mix a deep Violet. Paint the long, slender feathers at the bottom of the wing. I like to let the tips of these feathers fade slightly or touch wet paper to diffuse the edges. -
Adding texture:
Once the first layer is dry, use a size 2 brush and darker purple paint to add thin lines down the center of each feather for the quill and barbs.
Textured Wings
Sprinkle a tiny pinch of salt onto the wet purple paint of the wings. As it dries, the salt pushes the pigment away, creating a stunning, feathery crystal texture.
Step 4: The Cosmic Background
-
Prepare the sky:
Wet the background area around the angel with clean water, being careful not to touch the angel or the wing. -
Drop in color:
Load a size 10 brush with Indigo and Payne’s Grey. Touch the wet paper and let the dark color bloom. Keep the area near the angel’s face slightly lighter to suggest a glow. -
Create cloudy textures:
While the blue is still wet, drop in hints of purple near the wing to merge the color palette. Blot small areas with a tissue if you want to create soft, nebulous clouds. -
Dry completely:
Let this background layer dry 100%. If the paper is cool to the touch, it’s still wet.
Step 5: Final Celestial Details
-
Paint the halo:
Using your gold metallic paint, carefully fill in the halo ring behind the head. Add a very thin gold rim to the neckline of the dress as well. -
Add the stars:
Using a white gel pen or opaque white gouache on a fine brush, dot small stars into the dark blue sky. -
Twinkling accents:
Select a few larger stars and draw four-pointed cross shapes to make them twinkle. Add a few tiny white dots near the bottom of the gown for magical dust.
Frame your celestial artwork to highlight the shimmering gold details and enjoy the peaceful atmosphere it brings to your space
Dripping Paint Angel Gown Effect
This serene watercolor project captures an angel with gently unfurled wings and a flowing, floor-length gown in soft, neutral tones. The delicate blending of whites, greys, and golds creates a luminous, spiritual feel perfect for holiday cards or wall art.
Detailed Instructions
Materials
- Cold press watercolor paper (300 gsm)
- Watercolor paints (Yellow Ochre, Burnt Sienna, Payne’s Grey, Sepia, Titanium White)
- Gold metallic watercolor paint or ink
- Round brushes (size 2 for details, size 6 for washes)
- Pencil (HB or H)
- Kneaded eraser
- Jar of clean water
- Paper towels
Step 1: Sketching the Form
-
Outline the figure:
Begin with a very faint pencil sketch. Draw a small oval for the head, slightly tilted, and extend a long, gentle curve downwards to establish the flow of the gown. Keep your lines incredibly light so they don’t show through the translucent paint later. -
Define the wings:
Sketch the large wing shapes extending from the shoulder area. The wings should curve upward and outward, resembling large leaves or feathers. Don’t worry about drawing every single feather yet; just capture the overall silhouette. -
Add gown details:
Draw the neckline and the cinch at the waist. From the waist down, draw long, vertical lines that fan out slightly at the bottom to represent the folds of the dress. Add the simple shapes of the arms hanging loosely by her sides. -
Sketch distinct features:
Lightly pencil in the facial features—closed eyes and a small nose—and the hair falling over her shoulders. Add thin, bramble-like branches on the left and bottom right corners to frame the composition.
Step 2: Painting the Angel
-
Skin tones:
Mix a very dilute wash of Burnt Sienna and a touch of Yellow Ochre. Carefully paint the face, neck, and hands. While the paint is still slightly damp, drop a tiny amount of more concentrated color onto the cheeks for a natural blush. -
Hair base layer:
Using a mix of Yellow Ochre and Sepia, paint the hair. Leave tiny slivers of white paper unpainted to act as highlights, giving the hair shine and dimension. -
Wing wash:
Prepare a watery mix of Yellow Ochre. Paint the entire wing shape with this pale wash. Let this layer dry completely before moving on to the feather details. -
The white gown:
For the dress, you want to preserve the white of the paper. Instead of painting the whole dress, mix a very watery Payne’s Grey. Paint only the shadows—the areas between the folds of the skirt and under the arms. Soften the edges of these grey lines with a clean, damp brush so they fade into the white. -
Deepening the shadows:
Once the first grey layer is dry, go back with a slightly darker grey mix to accentuate the deepest folds at the hem of the dress, creating a sense of weight and fabric movement.
Mastering the White Gown
Don’t use white paint for the dress! The brightest white comes from the empty paper. Only paint the shadows with diluted grey for a translucent effect.
Step 3: Adding Details & Gold
-
Defining feathers:
Return to the dry wings. Using a size 2 brush and a mix of Yellow Ochre and Sepia, paint the individual feather shapes. Start from the bottom of the wing and overlap them as you move upward towards the shoulder. -
Outlining the figure:
I find that adding a very thin, delicate outline really helps illustration styles like this pop. Use a fine brush and Sepia ink or paint to trace the jawline, the hair strands, and the main contours of the dress and wings. -
Golden halo:
Dip your brush into the metallic gold paint. Paint a circle of small dots around the angel’s head to create a shimmering halo effect. Keep the dots relatively uniform in size. -
Gown embellishments:
Use the gold paint to add a belt at the waist and subtle trim details around the neckline. You can also drag a very dry brush with gold paint lightly over the tips of the wing feathers for extra sparkle. -
Painting the branches:
Mix a light brown using Yellow Ochre and a touch of Burnt Sienna. Paint the thin stems of the branches sketched earlier. Add small dots or buds at the ends using the gold paint to tie the background into the main subject. -
Final touches:
Assess the painting for contrast. If the face looks too pale, add a tiny bit more definition to the eyes and lips with a fine point. Ensure the grey shadows on the dress have dried with soft edges.
Fixing Hard Edges
If your dress shadows dry with harsh lines, re-wet the edge slightly with a clean, damp brush and gently scrub to soften the transition back to white.
Let your painting dry completely before framing this peaceful celestial guardian.


Have a question or want to share your own experience? I'd love to hear from you in the comments below!