If you’re craving something relaxing to paint, beach scenes are basically instant calm on a canvas. I’m sharing a mix of classic, easy compositions and a few playful twists so you can find a beach painting idea that fits your mood and skill level.
Classic Horizon Line Beach Scene

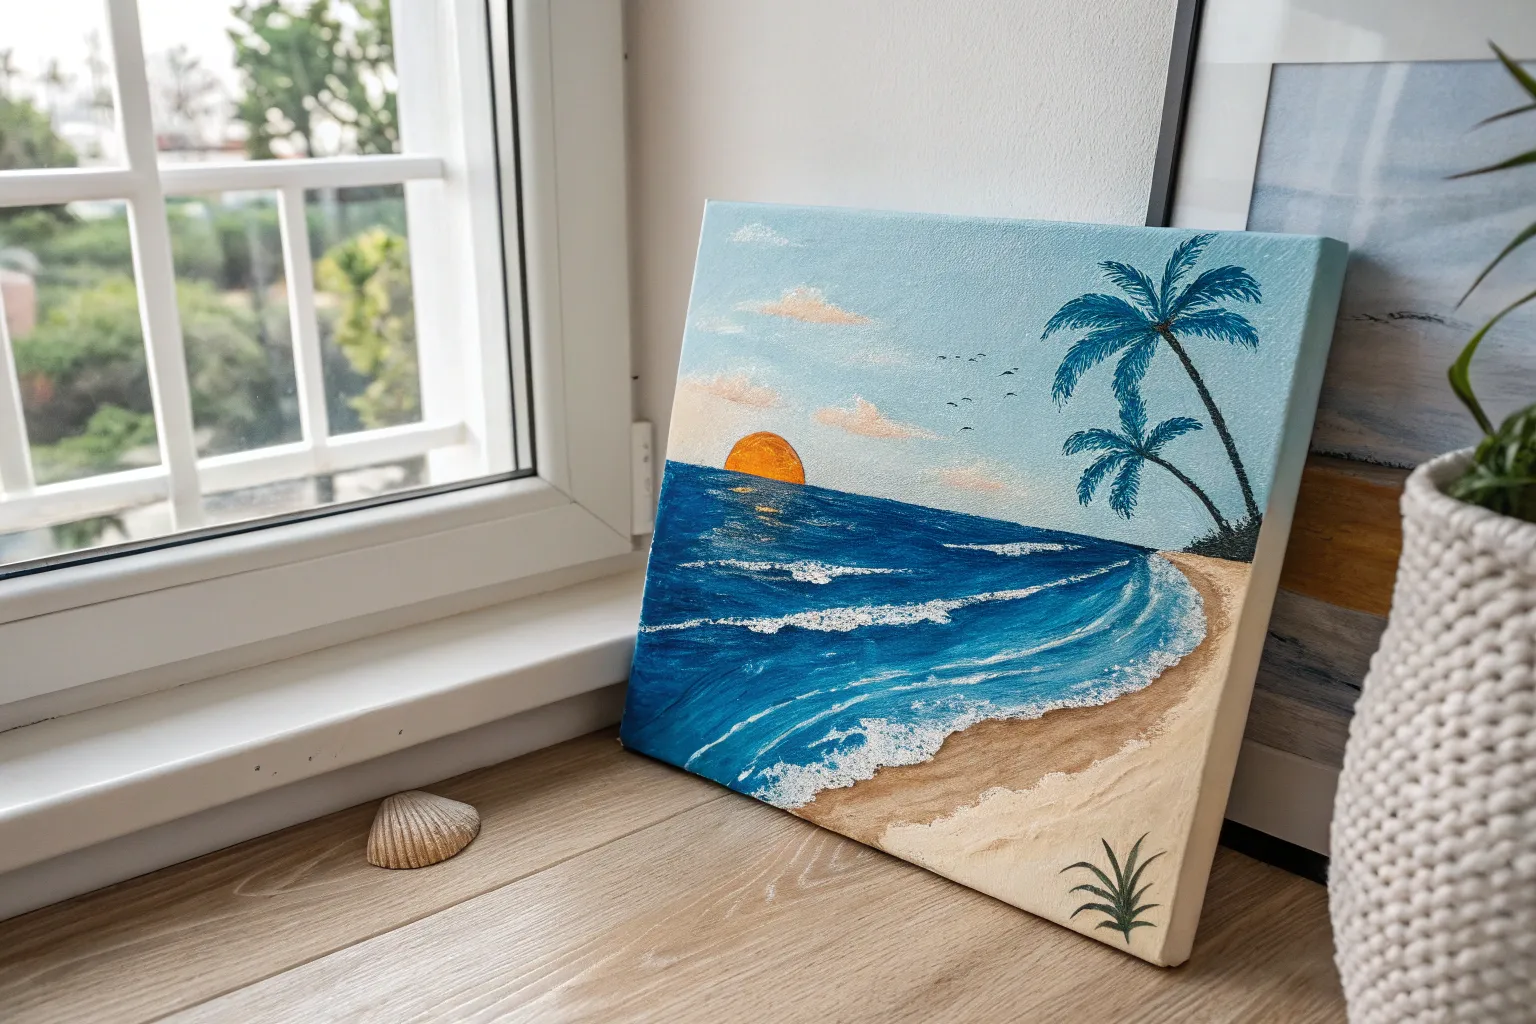
Capture the peaceful essence of waves meeting sand with this delicate shore landscape. Using soft color transitions and careful layering, you’ll recreate the gentle motion of the ocean and billowing clouds in a realistic style.
Detailed Instructions
Materials
- Cold Press Watercolor Paper (140lb/300gsm)
- Watercolor Paints (Phthalo Blue, Cerulean Blue, Burnt Sienna, Yellow Ochre, Alizarin Crimson, Payne’s Grey)
- White Gouache (for highlights)
- Round Brushes (Size 4, 8, and 12)
- Flat Wash Brush (1 inch)
- Masking Fluid
- Painter’s Tape
- Pencil (HB)
- Two Water Jars
- Paper Towels
- Mixing Palette
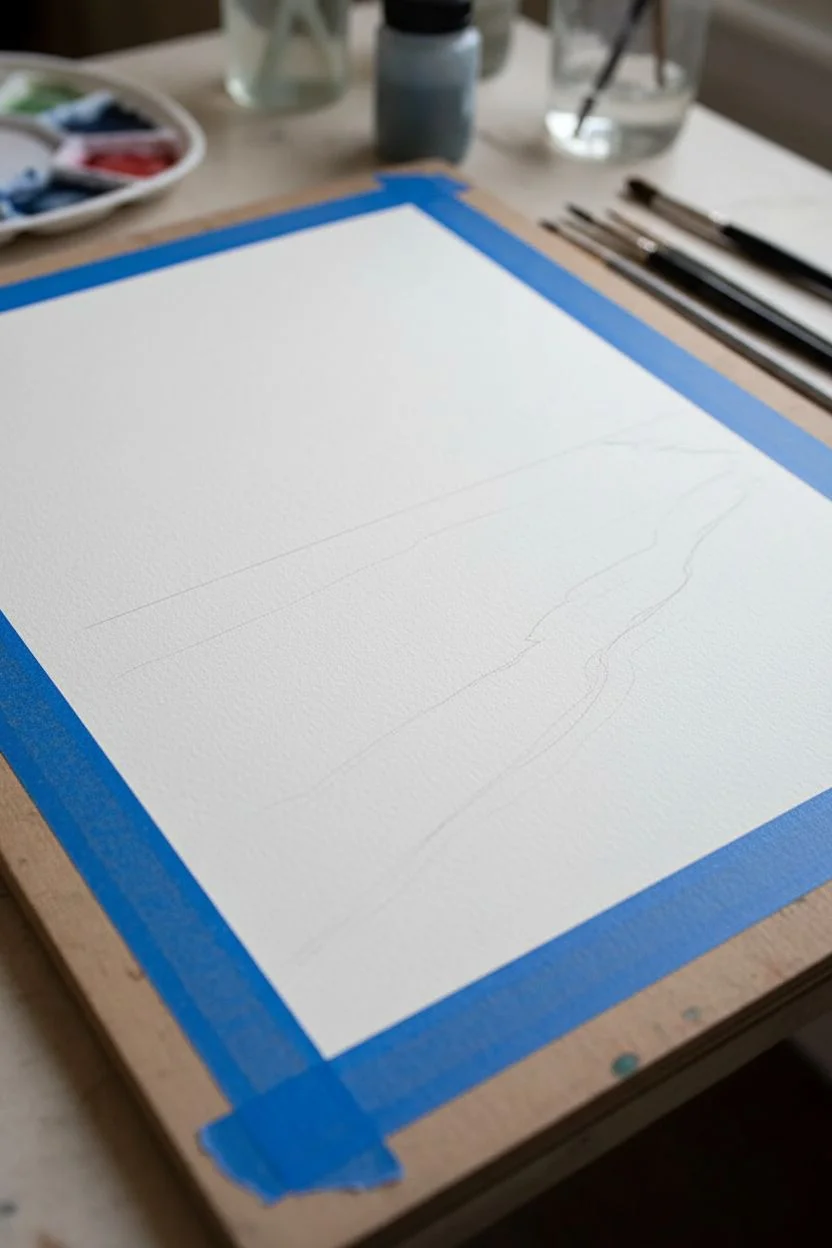
Step 1: Preparation and Sketching
-
Secure the paper:
Tape your watercolor paper down onto a hard board using painter’s tape on all four sides. This creates a clean white border and prevents buckling when the paper gets wet. -
Establish the horizon:
Using a ruler, draw a very straight, faint horizon line about one-third of the way up from the bottom of the paper. Keep your pencil pressure extremely light so it doesn’t show through the paint. -
Sketch the shoreline:
Draw the diagonal curve of the shoreline starting from the right foreground and sweeping gently towards the horizon line on the mid-right. Add faint suggestions for where the wave breaks will occur.
Muddy colors?
If your clouds turn grey, you likely mixed the pink cloud color into the blue sky while it was too wet. Let the blue layer dry slightly more before adding warm tones next time.
Step 2: Painting the Sky
-
Mix sky colors:
Prepare a very dilute wash of Cerulean Blue for the upper sky. Separately, mix a soft, dusty pink using a touch of Alizarin Crimson and Burnt Sienna with plenty of water for the clouds. -
Wet-on-wet technique:
With your large flat brush, wet the entire sky area with clean water until it glistens. I like to let it sit for just a moment so the water soaks in slightly. -
Apply the blue gradient:
Start at the top edge with your blue mix, brushing across and fading it out as you move down, leaving the middle and lower sky mostly white or very pale. -
Form the clouds:
While the paper is still damp, drop in your pinkish mix near the horizon to form the fluffy cloud bottoms. Use a clean, damp brush to soften the top edges of these clouds into the white paper, creating that billowy look.
Step 3: The Ocean and Waves
-
Define the horizon:
Once the sky is bone dry, mix a darker teal using Phthalo Blue and a tiny bit of Payne’s Grey. With a steady hand and a size 8 brush, paint a crisp, straight line right at the horizon. -
First ocean wash:
Grade the ocean color from that dark teal line down to a lighter turquoise (add more water) as you approach the shore. Leave distinct white gaps where your breaking waves will be. -
Shadowing the waves:
Mix a diluted purple-grey using Blue and Alizarin Crimson. Paint thin, soft shadows directly under the white foam areas of the waves to give them volume and lift. -
Shoreline gradient:
For the wet sand, mix Burnt Sienna with a touch of Blue to create a cool brown. Apply this right where the water meets the beach, creating a mirror-like reflection surface.
Expand the scene
Add life to your beach by painting tiny silhouettes of seabirds in the sky or a small sailboat on the horizon line for a sense of scale and story.
Step 4: Sand and Foreground Details
-
Warm sand wash:
Mix Yellow Ochre with a tiny bit of Alizarin Crimson for a warm, sandy beige. Paint the dry beach area in the bottom right corner, blending it gently into the cooler wet sand area. -
Adding texture:
While the sand wash is damp, spatter minuscule dots of a slightly darker brown mixture to simulate grains of sand and texture. -
Painting beach grass:
Using your smallest round brush (size 4) and a mix of Sap Green and Burnt Sienna, paint thin, flicking strokes in the bottom right corner. Vary the length and direction to make the grass look natural. -
Adding highlights:
Take your white gouache and use it to add crisp, bright highlights to the tops of the crashing waves. You can also dry-brush a little white over the shallow water to suggest foam patterns. -
Final touches:
Add a tiny, distant tree line or land mass on the far right horizon using a dark, desaturated green to anchor the perspective. -
Reveal the border:
Ensure the painting is completely dry, then slowly peel away the painter’s tape at a 45-degree angle to reveal your crisp white edges.
Place your finished piece in a simple white frame to complement the airy, coastal vibes of your new artwork


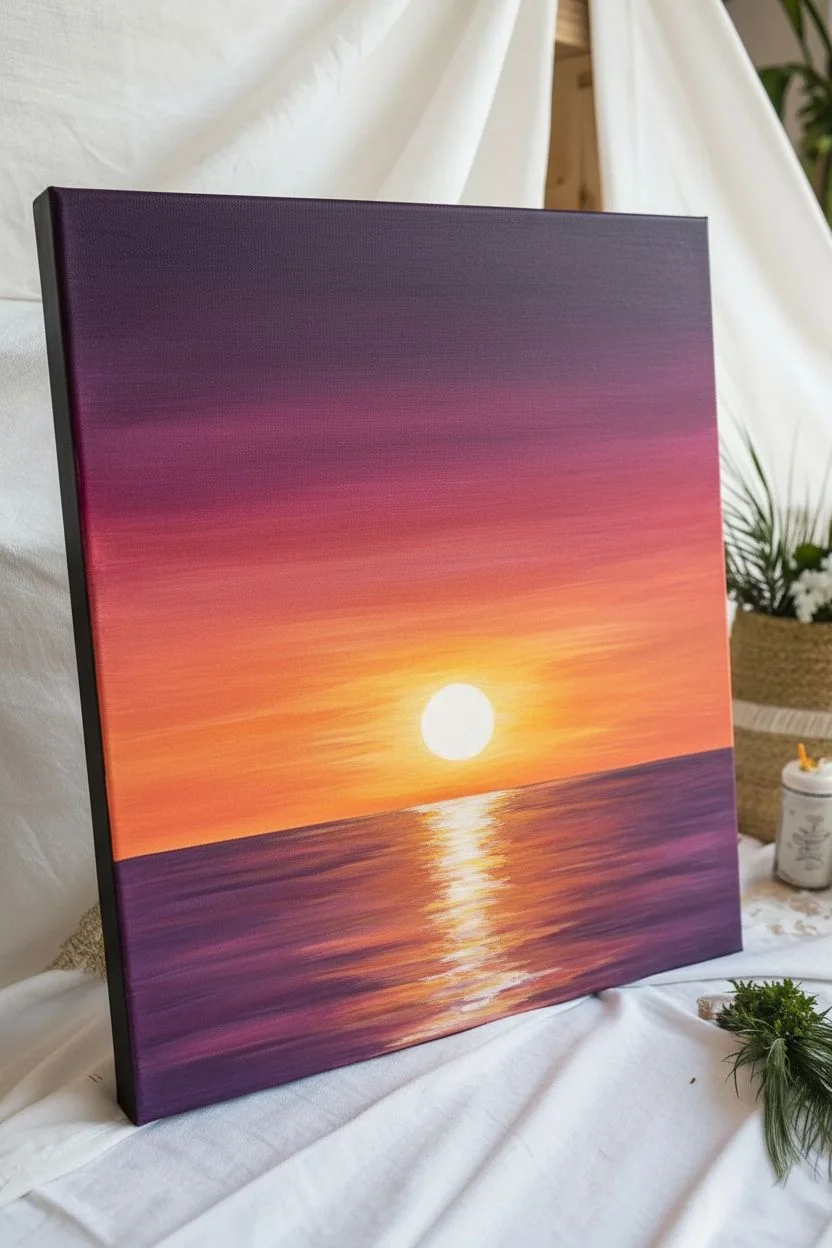
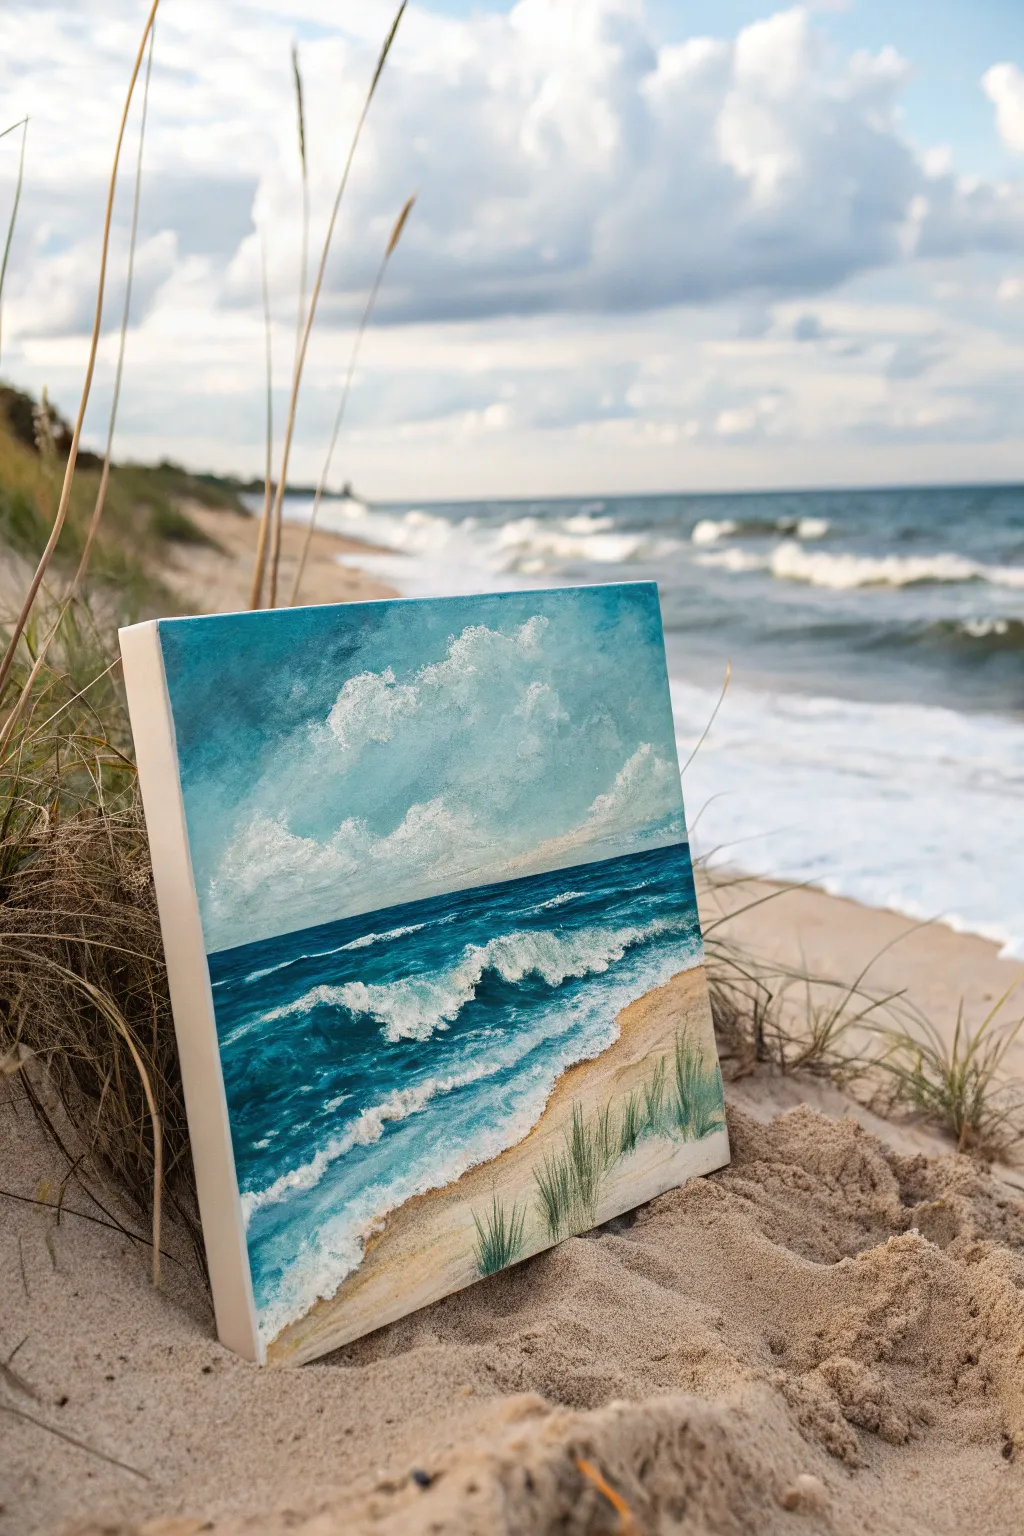
Easy Ocean Gradient With Soft Waves
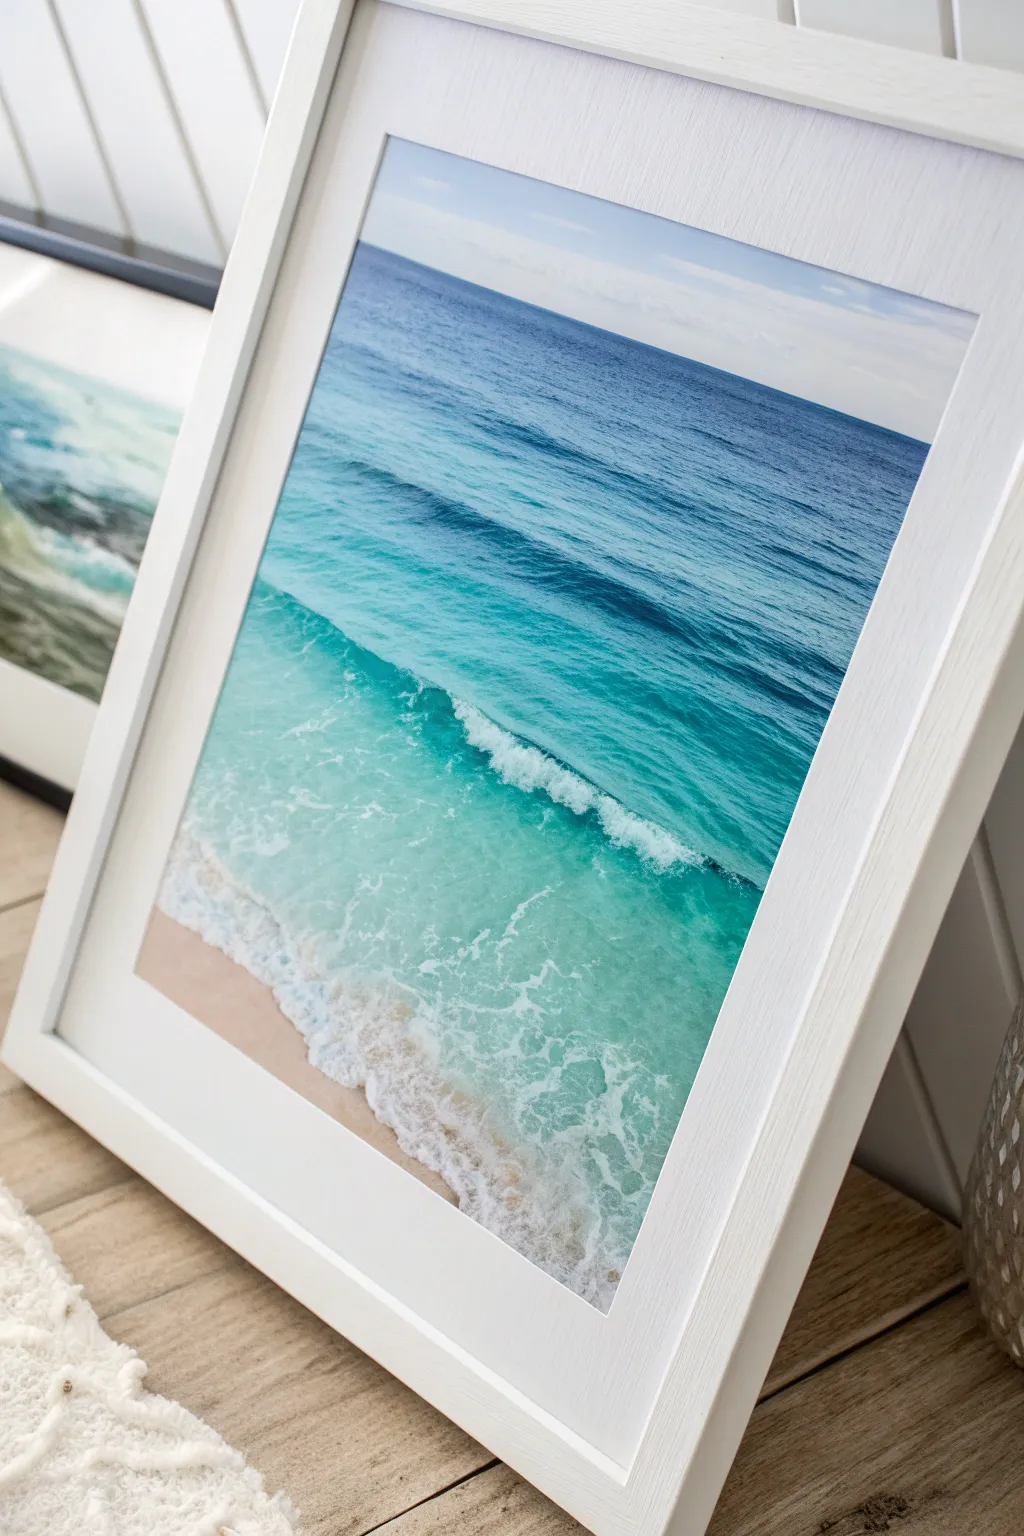
Capture the peaceful rhythm of the ocean with this gradient-focused painting that transitions from deep cobalt to crystal clear shallows. By layering soft glazes and building up foam textures, you will create a realistic sense of depth and movement right on your canvas.
Step-by-Step
Materials
- Stretched canvas or canvas board (16×20 recommended)
- Acrylic paints: Phthalo Blue, Ultramarine Blue, Turquoise, Titanium White, Burnt Sienna, Unbleached Titanium
- Large flat brush (1-2 inch) for blending
- Medium filbert brush
- Small round or fan brush for details
- Palette knife (optional for mixing)
- Water cup and paper towels
- Retarder medium or slow-drying medium
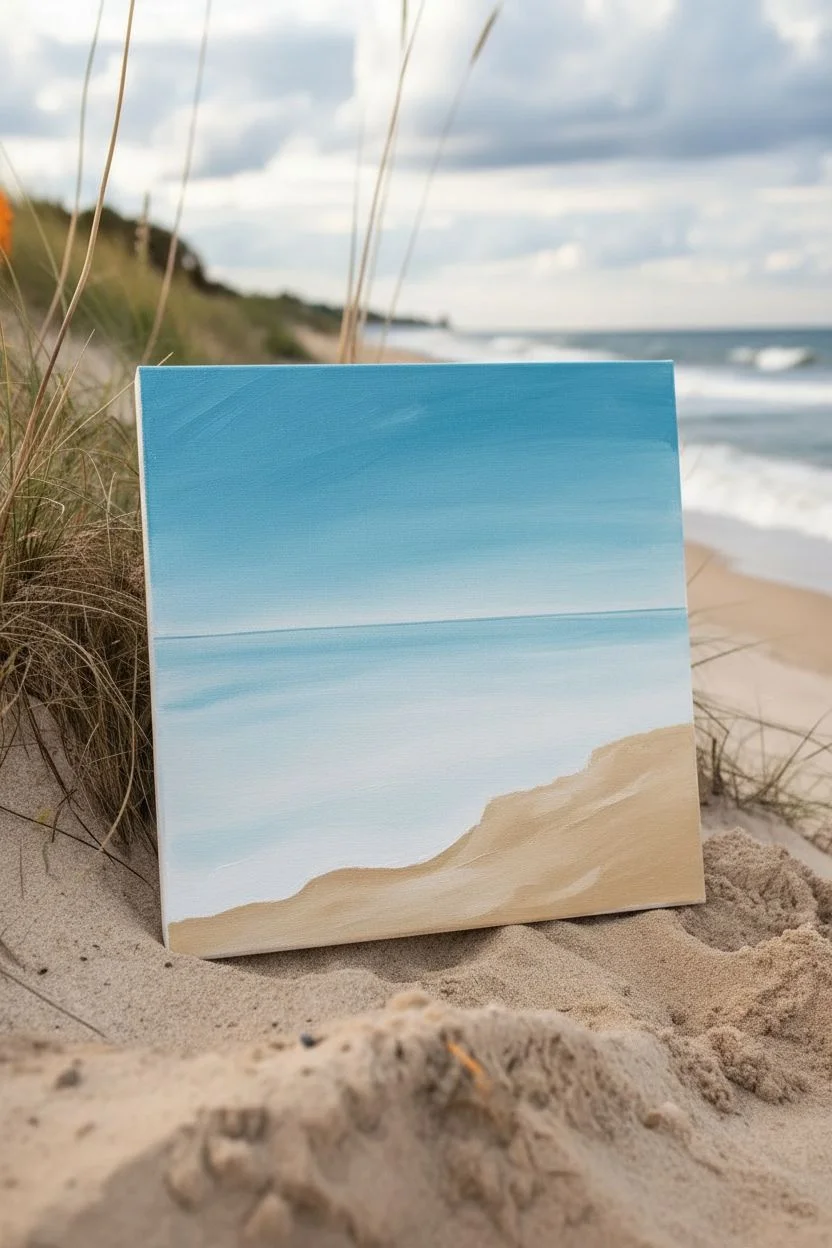
Step 1: Setting the Horizon
-
Prime and prep:
Start by ensuring your canvas is clean. If you want an ultra-smooth finish like the example, apply a layer of gesso, let it dry, and sand it lightly. -
Mark the horizon:
Using a pencil or a piece of masking tape, establish your horizon line about three-quarters of the way up the canvas. This high horizon line emphasizes the water’s texture over the sky. -
Mix the deep ocean blue:
On your palette, mix Ultramarine Blue with a touch of Phthalo Blue. Create a second pile adding a tiny bit of white to start the transition.
Wet-on-Wet Blending
Keep a misting spray bottle handy. A light spritz keeps acrylics wet longer, allowing for that buttery, seamless gradient blend essential for realistic water.
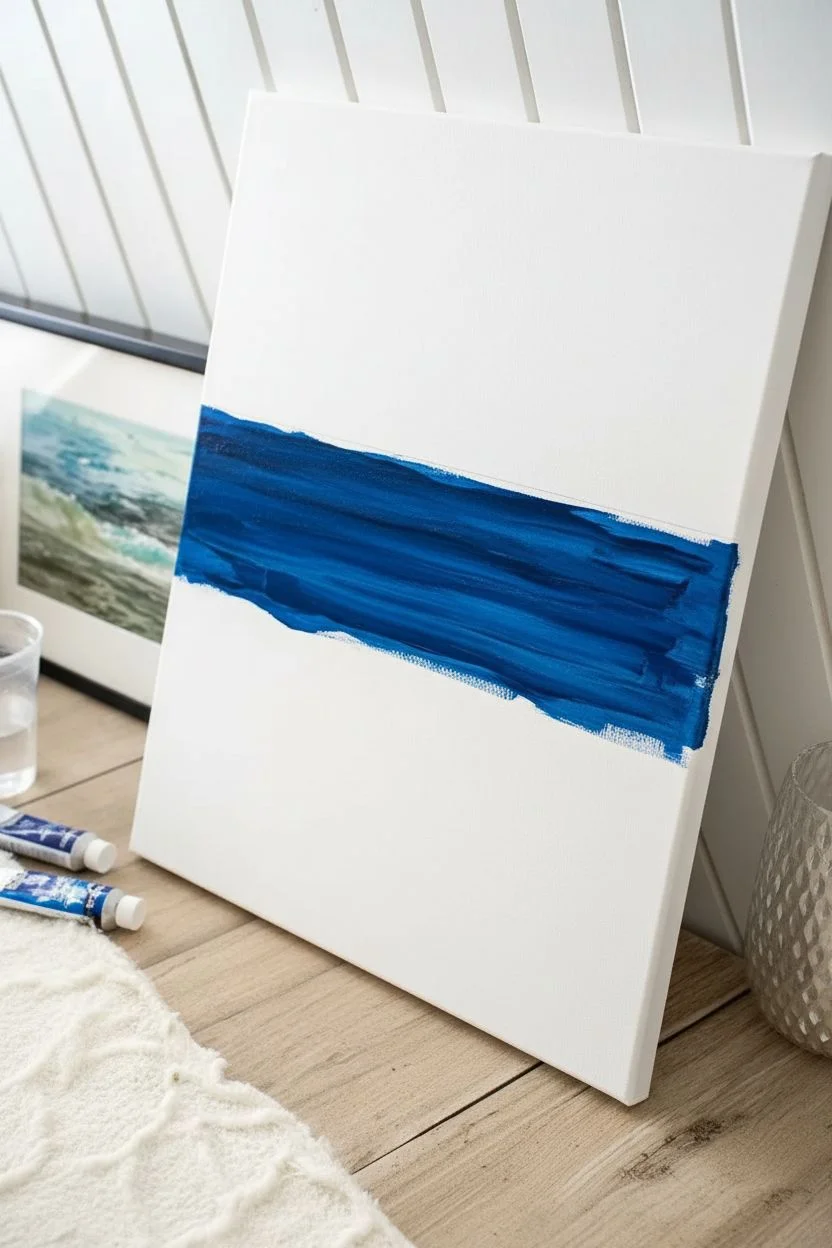
Step 2: Creating the Gradient
-
Paint the deep water:
Load your large flat brush with the darkest blue mix. Paint horizontal strokes across the top section, just below your established horizon line. -
Transition to teal:
Wipe your brush but don’t rinse it fully. Pick up pure Turquoise and blend it into the bottom edge of the deep blue while the paint is still wet. This creates that seamless mid-ocean shift. -
Lighten the shallows:
Mix Turquoise with plenty of Titanium White. Apply this to the lower middle section, blending upwards into the teal. The color should get progressively lighter as you move down the canvas. -
Establish the sand base:
Mix Unbleached Titanium with a tiny dot of Burnt Sienna and White for a warm beige sand color. Paint the bottom corner triangle where the water meets the shore. -
Blend the shoreline:
While the sand and light turquoise water are both wet, lightly blend their meeting point. This transparency mimics the shallow water washing over the sand.
Framing for Impact
Use a wide white mat and a white wooden frame like the photo. This ‘gallery style’ framing makes the blue tones vibrate and gives a modern coastal look.
Step 3: Refining Waves & Foam
-
Add wave shadows:
Using a medium filbert brush and a mix of Phthalo Blue and Turquoise, paint horizontal, slightly curved lines in the middle section. These darker streaks represent the backs of rolling waves. -
Softening the lines:
Clean your brush and use a damp (not wet) brush to gently soften the edges of your wave shadows so they don’t look like harsh stripes. -
Base layer of foam:
Mix Titanium White with a tiny drop of water or glazing medium to make it fluid. I like to use a fan brush here to lightly drag white paint along the tops of the darker wave lines. -
Crashing wave detail:
For the main crashing wave, use thicker, undiluted Titanium White on a round brush. Stipple (tap) the paint onto the canvas to create the fluffy texture of aerated foam. -
Sea foam patterns:
In the shallowest clear water, paint thin, interconnected web-like patterns using watered-down white. These should look like lace stretching over the surface.
Step 4: Final Touches
-
Enhance the shore wash:
Where the water meets the sand, stipple a thick line of white. Drag the bottom edge of this foam slightly onto the sand using a dry brush to show movement. -
Highlight the deep water:
Add very subtle, thin highlights of light blue in the deep water section to suggest distant swells catching the light. -
Add tonal variation:
Check for areas that look too flat. Glaze a tiny bit of darker Turquoise under the main white foam line to make the wave pop forward. -
Sky strip:
If you left room above the horizon, paint a very pale, almost white-blue sky. Keep it simple so it doesn’t distract from the water. -
Varnish:
Once completely dry (give it 24 hours), apply a gloss varnish. This step is crucial for ocean paintings as it makes the blues look wet and deep.
Step back and admire the refreshing coastal calmness you have just brought into your home


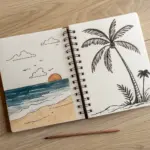
Sunset Beach Silhouette With Palms
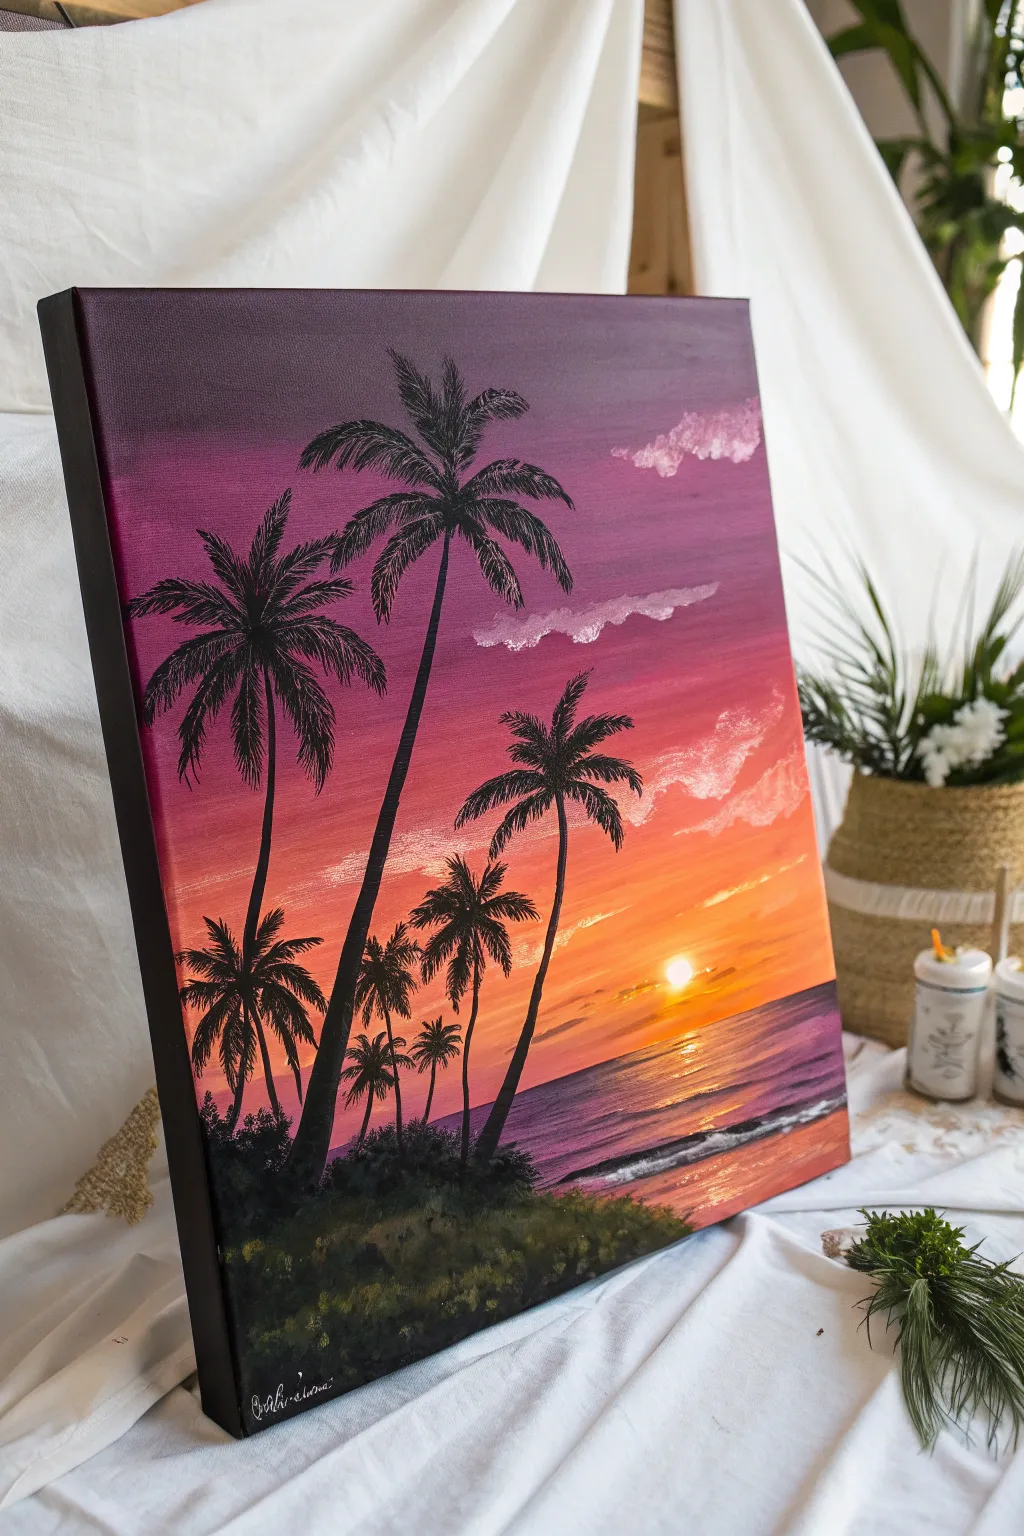
Capture the magic of a fading day with this vibrant canvas painting featuring a spectacular purple-to-orange gradient sky. The stark black silhouettes of palm use simple shapes to create a complex looking scene that feels like a warm vacation memory.
Step-by-Step
Materials
- Stretched canvas (12×16 or similar size)
- Acrylic paints: Violet, Magenta/Deep Pink, Orange, Cadmium Yellow, Titanium White, Mars Black
- Large flat brush (1-2 inch) for background
- Medium flat brush
- Small round detail brush (size 0 or 1)
- Fan brush (optional, for grass)
- Palette for mixing
- Cup of water and paper towels
Step 1: Painting the Sunset Gradient
-
Prime the sky:
Begin by dampening your large flat brush slightly. Load it with deep violet paint and apply horizontal strokes across the top third of the canvas. Ensure the coverage is solid and reaches the very top edge. -
Transition to pink:
Without cleaning your brush thoroughly (wipe off excess purple), pick up your magenta or deep pink paint. Blend this into the bottom edge of the purple section, working your way down to the middle of the canvas. -
Add the warmth:
Clean your brush. Pick up bright orange paint and blend it into the pink section, painting downwards. The colors should mix on the canvas to create a seamless transition. -
Create the horizon glow:
Mix yellow with a touch of white to make it opaque and bright. Paint the lowest section of the sky, blending it upwards into the orange. This will be the light source area. -
Paint the water base:
Define your horizon line about a quarter of the way up from the bottom. Paint the water area using horizontal strokes of the violet mixed with a little magenta, mirroring the sky’s colors but slightly darker. -
Add sun and reflection:
While the paint is still wet, use a small amount of pure white to dab a circular sun just above the horizon line where the yellow is brightest. Drag a little of this white and yellow mixture straight down into the water area to create a reflection.
Smooth Gradients
Keep a mister bottle handy. A light mist of water over your acrylics while blending the sky keeps the paint workable longer, preventing harsh lines between colors.
Step 2: Adding Clouds and Details
-
Drift in some clouds:
Mix a soft pink using magenta and white. Using the corner of a flat brush or a filbert brush, gently dab in horizontal cloud formations in the purple and pink sections of the sky. Keep the edges soft and feathery. -
Highlight the clouds:
Add a tiny touch of white to the top edges of these clouds to suggest they are catching the last light of the day. -
Refine the water:
Take a clean flat brush and dry-brush some horizontal streaks of orange and yellow across the water surface to simulate ripples catching the sunset light.
Step 3: Creating the Silhouettes
-
Block in the land:
Switch to black paint. Paint a sloping hill shape in the bottom left corner, extending across the bottom of the canvas. I like to tap the brush to create a bumpy, grassy texture rather than a smooth line. -
Underpaint foliage:
Mix a tiny bit of dark green into your black if you want subtle depth, or stick to pure black. Stipple (tap vertically) along the top edge of your land mass to suggest low-lying bushes and grass texture. -
Map out tree trunks:
Using a small round brush and slightly thinned black paint (add a drop of water), paint the curved lines for the palm tree trunks. Make the taller trees lean slightly into the center for composition balance. -
Start the palm fronds:
For the leaves, start at the top of a trunk. Paint 5-7 curved identifying lines sprouting outward like a firework explosion. These are the spines of the palm fronds. -
Flesh out the leaves:
Using the very tip of your detail brush, flick quick, short strokes downward from each spine line. These strokes should be thicker near the spine and taper to a point. -
Vary the fronds:
Make sure some fronds hang lower and look heavier, while top ones perk up. Don’t make them too perfect; a few gaps make them look wind-blown and natural. -
Add distant palms:
Paint smaller, thinner palm trees further back in the distance (lower on the horizon line and smaller in scale) to create a sense of depth. -
Highlight the foreground:
Once the black land is dry, mix a dark olive green. Lightly tap this over the black grassy area at the bottom to give the foliage some volume and suggest it’s being hit by faint light. -
Final touches:
Add a crisp white line along the shore edge to represent gentle foam washing up on the beach. Sign your name in a contrasting color like white or light gray in the corner.
Starry Night Twist
Before painting the trees, flick a stiff toothbrush loaded with watered-down white paint over the purple section to create tiny stars emerging in the twilight.
Step back and admire the tropical warmth you’ve brought into your room


Dune Grass on a Breezy Beach
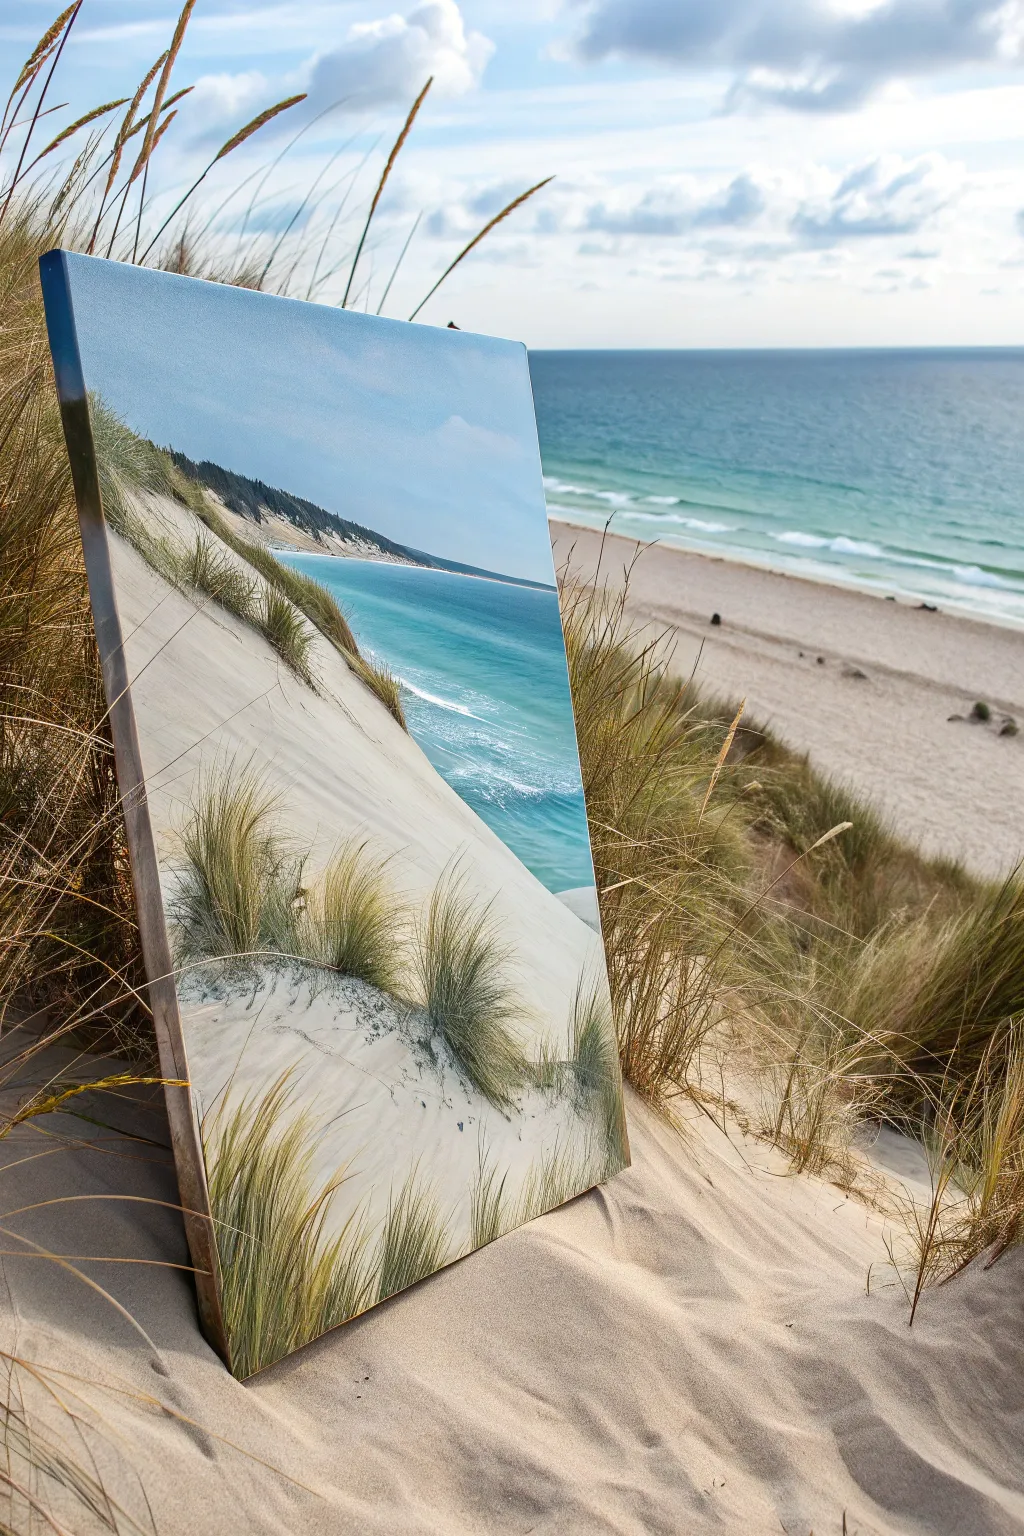
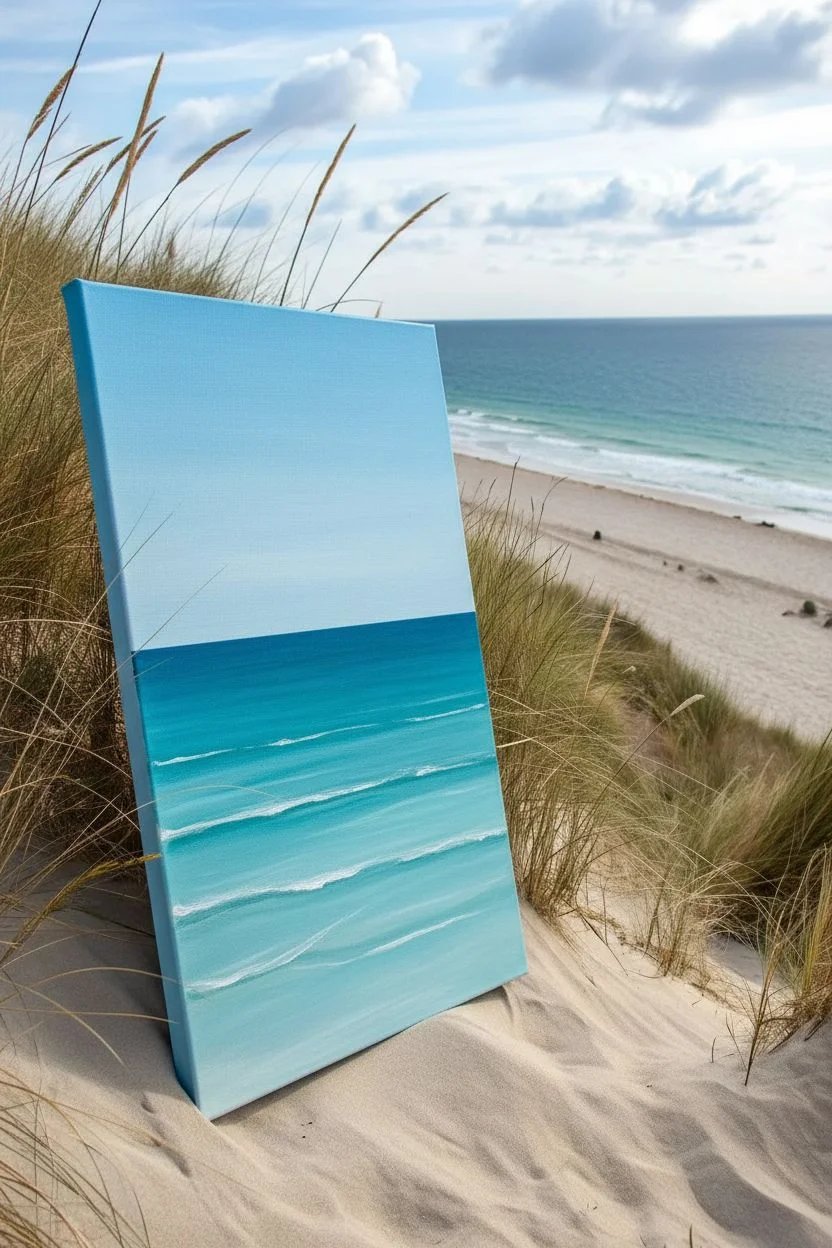
Capture the serenity of a quiet shoreline with this realistic acrylic painting, featuring sweeping white dunes and swaying grasses against a vibrant turquoise sea. This project focuses on texture and layering to create depth, making the viewer feel as if they can step right into the sand.
How-To Guide
Materials
- Stretched canvas (rectangular, e.g., 16×20 inches)
- Acrylic paints: Titanium White, Unbleached Titanium, Ultramarine Blue, Phthalo Turquoise, Burnt Umber, Yellow Ochre, Sap Green
- Large flat brush (1-inch) for sky and water
- Medium filbert brush for clouds and dunes
- Fan brush
- Fine liner brush
- Palette knife (optional for texture)
- Water cup and paper towels
- Easel or flat working surface
Step 1: Sky and Sea Background
-
Prime the sky:
Begin by invalidating the top third of your canvas with a mix of Titanium White and a tiny drop of Ultramarine Blue. Use your large flat brush in horizontal strokes. -
Deepen the blue:
As you move slightly lower, add a touch more blue to your mix to create a subtle gradient, keeping the horizon line quite low on the canvas—about halfway down. -
Paint the horizon:
Mix Phthalo Turquoise with Titanium White for the distant water. Paint a straight, crisp horizon line where the sky ends. -
Create the water gradient:
Transition the water color from a deep turquoise at the horizon to a lighter, clearer aqua near the shore by adding more white and a hint of Yellow Ochre as you paint downwards. -
Add gentle waves:
Using a smaller flat brush and pure Titanium White, paint thin, horizontal lines in the water to suggest breaking waves. Keep these loose and irregular.
Use a Rigger Brush
For the most natural-looking grass, use a long-bristled ‘rigger’ or liner brush. Thin your paint with water until it’s inky, allowing for long, uninterrupted swoops.
Step 2: The Sand Dunes
-
Block in the dune shape:
Mix Titanium White with Unbleached Titanium. Using a medium filbert brush, block in the large triangular shape of the sand dune rising from the bottom left corner towards the center right. -
Add sand shadows:
Mix a very small amount of Burnt Umber and Ultramarine Blue into your sand color to create a cool shadow tone. Paint subtle, curving shadows on the left side of the dune slopes to give them volume. -
Highlight the crest:
Use pure Titanium White on the very top ridges of the dune where the sun would hit the strongest. This high contrast separates the dune from the background. -
Texture the sand:
Creating a grainy texture is key here. I like to dry-brush a little bit of the shadow color lightly over the white areas to mimic the look of wind-swept sand ripples. -
Paint the distant tree line:
Mix Sap Green with Burnt Umber and a touch of blue for a dark, distant forest color. Paint a low, irregular strip of land on the far horizon, tapering it off as it reaches the water.
Step 3: Grass and Details
-
Start the grass clumps:
Load a fan brush with a mix of Sap Green and Yellow Ochre. Turn the brush vertically and tap the bottom of the canvas to create the base of the grass clumps. -
Flick the blades:
Using the edge of the fan brush or a liner brush, flick upwards quickly to create thin, tapering blades of grass. Ensure they curve slightly in the wind’s direction. -
Vary the grass colors:
Mix in some Burnt Umber for the older, dried grass underneath, and add Unbleached Titanium for sun-bleached tips. Layering these colors adds realism. -
Add foreground details:
With your fine liner brush, add very distinct individual blades of grass in the immediate foreground (bottom left). These should be the largest and most detailed. -
Detail the distant dunes:
Add tiny specks of green and brown along the ridge of the distant dune to suggest vegetation growing far away. -
Refine the shore:
Where the sand meets the water, blend the white sand color with the aqua water color slightly to show wet sand. -
Final highlights:
Add a few final dabs of pure white on the crests of the waves and the brightest tips of the dune grass to catch the light.
Add Texture Medium
Mix a coarse pumice gel or sand texture medium into your acrylic paint for the dune sections. This adds physical grit that catches the light like real sand.
Step back and enjoy the calming coastal view you have just brought to life.
BRUSH GUIDE
The Right Brush for Every Stroke
From clean lines to bold texture — master brush choice, stroke control, and essential techniques.
Explore the Full Guide
Tropical Cove Framed by Palm Trees
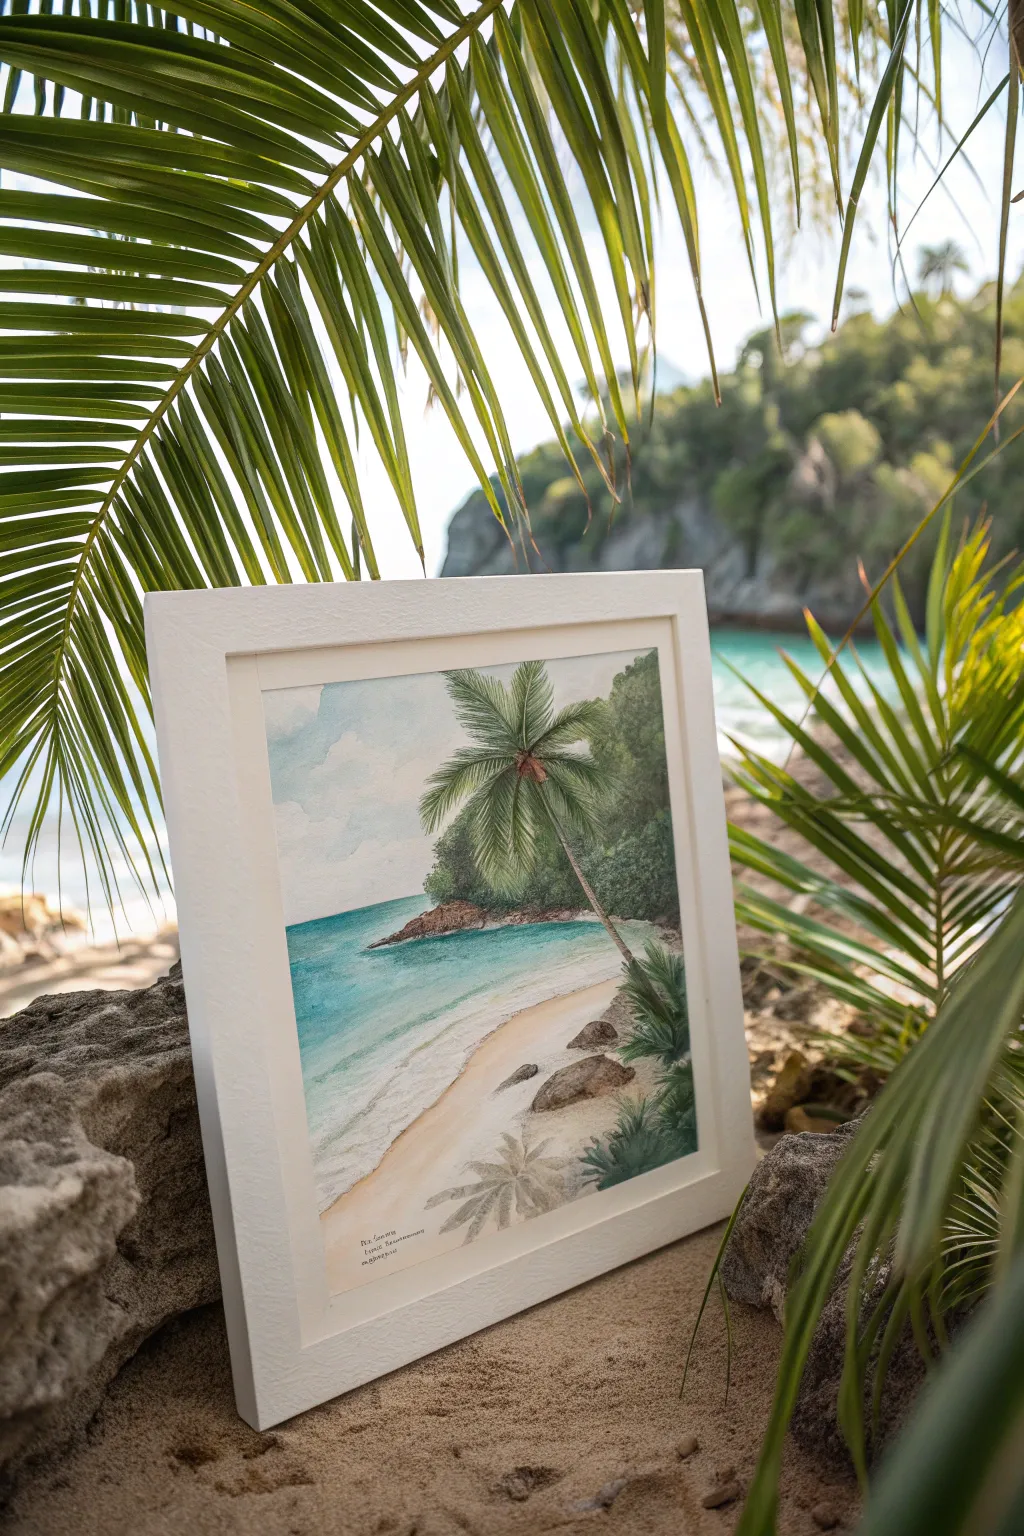
Capture the serenity of a hidden tropical paradise with this detailed watercolor project. Featuring soft turquoise waters, rugged coastline textures, and graceful palm fronds, this painting brings a window of summer warmth into any room.
Detailed Instructions
Materials
- Cold press watercolor paper (140lb/300gsm)
- Watercolor paints (Phthalo Blue, Sap Green, Burnt Sienna, Yellow Ochre, Paynes Grey, White Gouache)
- Round watercolor brushes (sizes 2, 6, and 10)
- Masking fluid and applicator (optional)
- Painter’s tape
- Pencil (HB) and kneaded eraser
- Paper towels
- Two water jars
- White or cream wooden frame (square format)
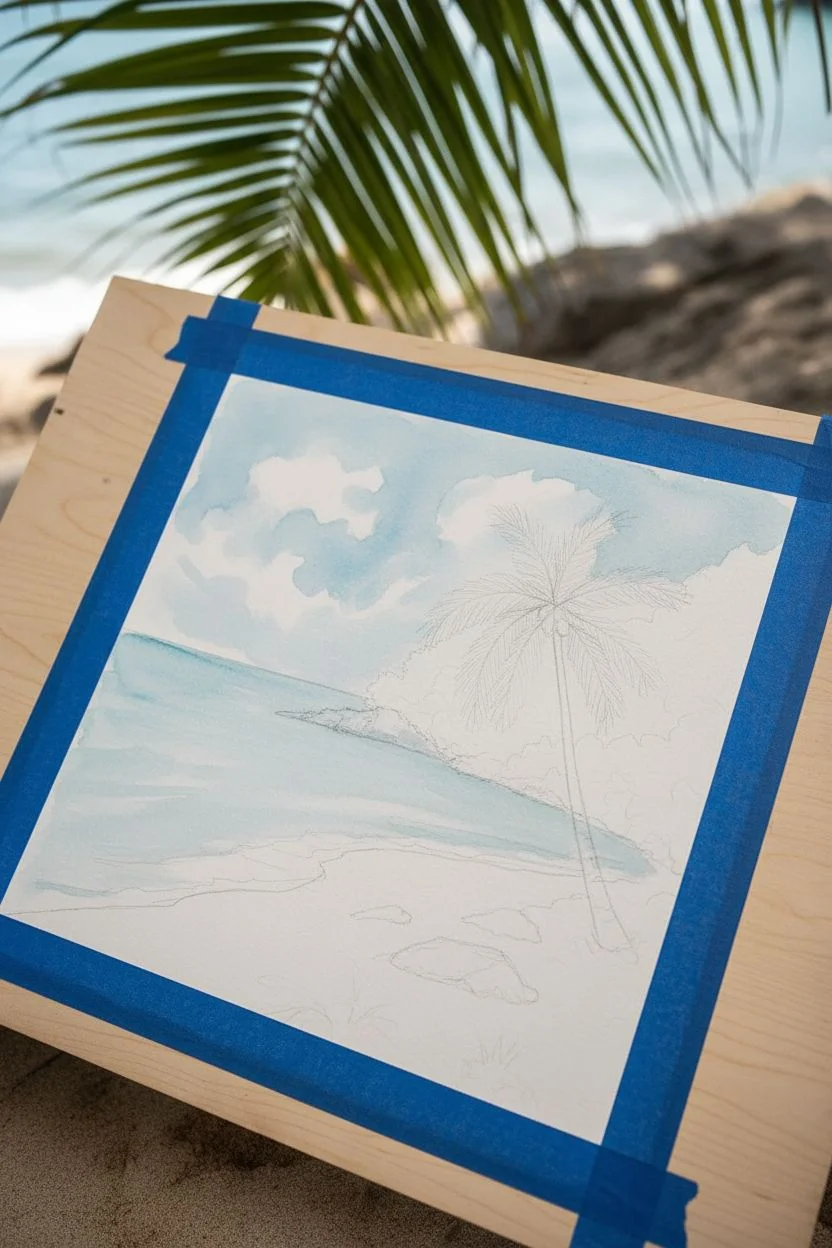
Step 1: Sketching and Sky
-
Secure the paper:
Tape down all four edges of your watercolor paper onto a board to prevent buckling. Ensure you have a square format to match the reference. -
Draft the composition:
Lightly sketch the horizon line about one-third up from the bottom. Outline the curve of the sandy beach, the rocky headland in the background, and the main leaning palm tree trunk. -
Wet-on-wet sky:
Using your large size 10 brush, wet the sky area with clean water. The paper should glisten but not hold puddles. -
Paint the clouds:
Mix a very dilute wash of Phthalo Blue. Drop color into the wet sky, leaving large white spaces for fluffy clouds. Soften any hard edges with a damp brush.
Natural Texture Hack
Before the sand paint dries, sprinkle a pinch of salt onto the wet wash. Once dry, brush it off to create a realistic, grainy sand texture.
Step 2: Ocean and Sand
-
Base ocean layer:
Mix Phthalo Blue with a touch of Sap Green for a turquoise hue. Apply this to the water area, keeping it darker near the horizon and fading to almost clear water near the shore. -
Deepen the water:
While the first layer is still damp, add slightly more concentrated turquoise to the deeper water sections to create depth. -
Paint the beach:
Mix Yellow Ochre with a tiny bit of Burnt Sienna. Paint the sand, starting with a stronger color at the bottom left and fading out as it meets the water’s edge. -
Soft shore transition:
Use a clean, damp brush to blend the meeting point of the sand and water, creating the look of wet sand and foam.
Step 3: Vegetation and Details
-
Background foliage:
Mix Sap Green with Paynes Grey for a dark, lush green. Using size 6 brush, dab in the dense jungle foliage on the background hill, varying the pressure to suggest texture. -
Rocky textures:
Paint the background rocks and foreground boulders using Burnt Sienna mixed with Paynes Grey. I recommend lifting out small highlights with a paper towel while wet to mimic sunlit stone. -
The main palm trunk:
With the size 2 brush and a mix of Burnt Sienna and reduced grey, paint the slender, segmented trunk of the main palm tree, leaning it gracefully over the water. -
Palm fronds base:
Using Sap Green, paint the central spines of the palm leaves extending from the crown of the tree. -
Leaf details:
Switch to your finest brush. Paint individual leaflets flicking outward from the spines. Use pure Sap Green for sunlit leaves and add blue to the mix for shadowed fronds. -
Foreground shadows:
Add cast shadows on the sand underneath the palm tree and rocks using a very sheer wash of Paynes Grey or violet. -
Highlights:
Once fully dry, use a tiny amount of white gouache to add sparkles on the water or define the brightest foam at the shoreline.
Did colors bleed?
If the ocean blue bled into the sand, let it dry completely. Then, re-wet just the edge and lift the unwanted pigment with a clean, thirsty brush.
Step 4: Finishing Touches
-
Review contrast:
Step back and check your values. Darken the core of the palm tree crown and the deepest crevices in the rocks if the painting looks too flat. -
Sign and remove tape:
Sign your work in the bottom corner with a fine liner or heavy paint. Carefully peel away the painter’s tape at a 45-degree angle. -
Frame the work:
Place the artwork into a simple, thick white frame to complete the modern coastal aesthetic shown in the photo.
Hang your framed masterpiece in a well-lit spot to enjoy a permanent vacation view.
Top-Down Shoreline With Aerial Patterns


Capture the breathtaking perspective of a drone-shot coastline with this vibrant acrylic painting project. You will learn to layer semi-transparent turquoise glazes and create frothy sea foam effects to achieve a realistic, high-altitude ocean view.
Step-by-Step Tutorial
Materials
- Square canvas (12×12 or larger)
- Acrylic paints (Phthalo Blue, Phthalo Green, Titanium White, Unbleached Titanium, Burnt Sienna, Raw Umber)
- Matte medium or glazing liquid
- Large flat brush (1-2 inch)
- Medium filbert brush
- Small round detail brush
- Old toothbrush (for splatter effects)
- Sea sponge (optional)
- Palette knife
- Water and paper towels
- White wooden floating frame (optional, for finishing)
Step 1: Setting the Foundation
-
Sketch the Composition:
Begin by lightly sketching a diagonal line across the canvas. This line divides the deep water from the shallow wash and dry sand. Aim for a gentle curve rather than a perfectly straight line to keep it organic. -
Paint the Sand Base:
Mix Titanium White with a tiny touch of Unbleached Titanium and a speck of Burnt Sienna to create a warm, pale sand color. Paint the entire bottom right triangle of the canvas with this mixture. -
Add Shadow and Texture:
While the sand layer is still slightly wet, mix a darker beige using more Burnt Sienna and Raw Umber. Dab this along the very bottom edge and where the water will meet the dry sand to suggest wet, compacted sand. -
Paint the Deep Water:
For the upper left triangle, mix Phthalo Blue and Phthalo Green with a small amount of black or dark blue-grey. Apply this rich, dark teal smoothly, ensuring full coverage.
Step 2: Creating Depth and Waves
-
Blend the Transition:
Mix a mid-tone turquoise using Phthalo Green, Blue, and White. Paint a band between the deep water and the sand, blending it slightly into the deep water while it’s wet to create a gradient. -
Establish the Shallow Water:
Mix a large amount of glazing liquid with a transparent turquoise (Phthalo Green + White). Glaze this over the edge of the sand area. The sand color underneath will show through, creating that realistic tropical shallow water look. -
Define the Wave Crest:
Using a filbert brush and pure Titanium White, paint the primary crashing wave line. Follow the curve of your shoreline, making the line irregular and thicker in some spots than others. -
Soften the Wave edges:
Take a clean, slightly damp brush and gently pull the bottom edge of your white wave line backward into the deeper water, blurring it to simulate movement and spray.
Making Water Translucent
Don’t just add white to lighten blue paint; it makes it chalky. Instead, use clear glazing medium to thin the pigment. This lets the underneath layers show through for true depth.
Step 3: Foam and Details
-
Create Lace Foam Patterns:
Mix Titanium White with a little water to make it fluid. Using a small round brush, paint interconnected, cellular shapes behind the main crashing wave. These should look like a stretched honeycomb pattern. -
Adding Sea Foam Texture:
I like to use a sea sponge here: dip it in thick white paint and lightly dab it along the shoreline where the water meets the sand. This builds up the texture of the messy, bubbly wash. -
Splatter for Sea Spray:
Load an old toothbrush with watered-down white paint. Run your thumb over the bristles to flick tiny droplets near the crest of the big wave. This mimics the mist of crashing water. -
Detailed Wave Shadows:
Mix a very diluted teal (darker than your shallow water). Paint extremely thin shadow lines directly underneath the thickest parts of the white foam to make the water look like it is lifting off the surface.
Level Up: Resin Finish
Pour a layer of clear art resin over just the water portion of the painting. It creates a glass-like realistic wetness that acrylic varnish can’t quite match.
Step 4: Vegetation and Finishing
-
Paint Dune Grass Tufts:
Using a script liner or tiny detail brush, mix Phthalo Green with Burnt Sienna to get an olive tone. Paint small, upward flicking strokes on the dry sand area to represent scattered beach grass. -
Add Grass Shadows:
Mix a translucent grey-brown glaze. Paint a tiny shadow extending from the base of each grass tuft towards the right, mimicking sunlight casting shadows across the sand. -
Add Debris Line:
Stipple tiny dots of Burnt Sienna and Raw Umber along the high-tide mark on the sand. This represents seaweed and small shells washed up by the tide. -
Final Highlights:
Add pure white highlights to the very top edges of the biggest waves and the brightest parts of the foam for extra contrast. -
Varnish and Frame:
Once fully dry (give it 24 hours), apply a gloss varnish to the water area to make it look wet, and a matte varnish to the sand. Frame in a white deep-set frame to match the reference.
Hang your new aerial seascape in a bright room to let the turquoise tones truly shine.

PENCIL GUIDE
Understanding Pencil Grades from H to B
From first sketch to finished drawing — learn pencil grades, line control, and shading techniques.
Explore the Full Guide
Abstract Beach Using Expressive Brush Marks
Capture the raw energy of the coast with this textured acrylic seascape, featuring crashing waves and swaying dune grass. Using a square canvas, you’ll learn to layer blues and whites to create movement in both the sky and the surf.
How-To Guide
Materials
- Square stretched canvas (12×12 or similar)
- Acrylic paints: Phthalo Blue, Ultramarine Blue, Titanium White, Yellow Ochre, Burnt Umber, Hooker’s Green
- Large flat brush (1 inch)
- Medium filbert brush
- Small round detail brush
- Fan brush (optional)
- Palette knife
- Cup of water and paper towels
Step 1: Setting the Scene
-
Prime the horizon:
Begin by lightly sketching a horizontal line roughly one-third of the way up the canvas. This will separate your sky from your ocean. -
Paint the upper sky:
Mix Phthalo Blue with a touch of Titanium White to create a medium sky blue. Using your large flat brush, apply this to the top corners and edges of the sky area, painting with diagonal strokes to imply wind. -
Lighten the horizon:
Add more White to your blue mix. Blend this lighter color downwards toward the horizon line, creating a natural gradient where the sky is palest just above the water. -
Block in the sand:
Mix Yellow Ochre with plenty of White and a tiny dot of Burnt Umber for a sandy beige. Paint the bottom right corner in a sweeping curve that mimics the shoreline.
Step 2: Building the Ocean
-
Deep water foundation:
For the deep ocean just below the horizon, mix straight Phthalo Blue with a little Ultramarine. Paint a distinct, dark strip right along the horizon line using the flat brush. -
Transition to teal:
As you move closer to the shore, introduce White and a tiny hint of Green to your blue mix. Paint horizontal strokes, allowing the color to become lighter and more turquoise as it approaches the sand. -
Create the wave form:
Using a medium filbert brush and dark blue, paint the shadowed underside of the crashing wave. It should curve upwards, creating a ‘C’ shape in the middle of the water. -
Add churning foam:
Load a clean brush or palette knife with thick Titanium White. Dab textured spots along the base of the wave and where the water meets the sand to represent sea foam.
Pro Tip: Sea Spray
Use an old toothbrush dipped in watered-down white paint to flick tiny droplets over the crashing wave for realistic spray.
Step 3: Texturing the Clouds
-
Form cloud shapes:
With a round brush and pure White, stipple undefined, fluffy shapes into the sky. Focus the largest clouds slightly off-center to balance the composition. -
Shadow the clouds:
Mix a very pale grey using White and a speck of black or dark blue. Dab this onto the bottom edges of your white clouds to give them volume and weight. -
Highlights and fluff:
Going back in with pure White, dry brush the top edges of the clouds. Use a scrubbing motion to soften the edges so they look windswept rather than like cotton balls.
Troubleshooting: Muddy Foam?
If your white foam turns blue, let the underlying ocean layer dry completely before applying the white highlights on top.
Step 4: Refining Details
-
Intensify the wave crest:
Take your palette knife with thick White paint and gently scrape it along the top edge of your breaking wave. This impasto technique mimics the spray of water. -
Water movement lines:
Use a small brush with thinned white paint to add thin, horizontal lines across the deep blue water, suggesting ripples and distant swells. -
Sea foam patterns:
On the turquoise water near the shore, paint intricate, lace-like patterns of white foam. I usually let the brush skip over the canvas texture here to keep it looking organic. -
Shadowing the sand:
Mix slightly darker beige (more Burnt Umber) and paint the wet sand right where the water touches the shore. -
Planting the grass:
Mix Hooker’s Green with a little Yellow Ochre. Using the very tip of your small round brush or a fan brush held vertically, flick quick strokes upwards from the sand area to create dune grass. -
Varying the grass:
Add a few darker green strokes and a few lighter strokes to the grass clumps to show depth and sun highlights.
Now you have a dynamic seascape that brings a breath of fresh ocean air into your home


Have a question or want to share your own experience? I'd love to hear from you in the comments below!