A memory box is already full of meaning, but painting it turns the outside into part of the story, not just the container. Here are my favorite memory box painting ideas—starting with the classics and drifting into the delightfully unexpected.
Handprint or Fingerprint Keepsake Lid
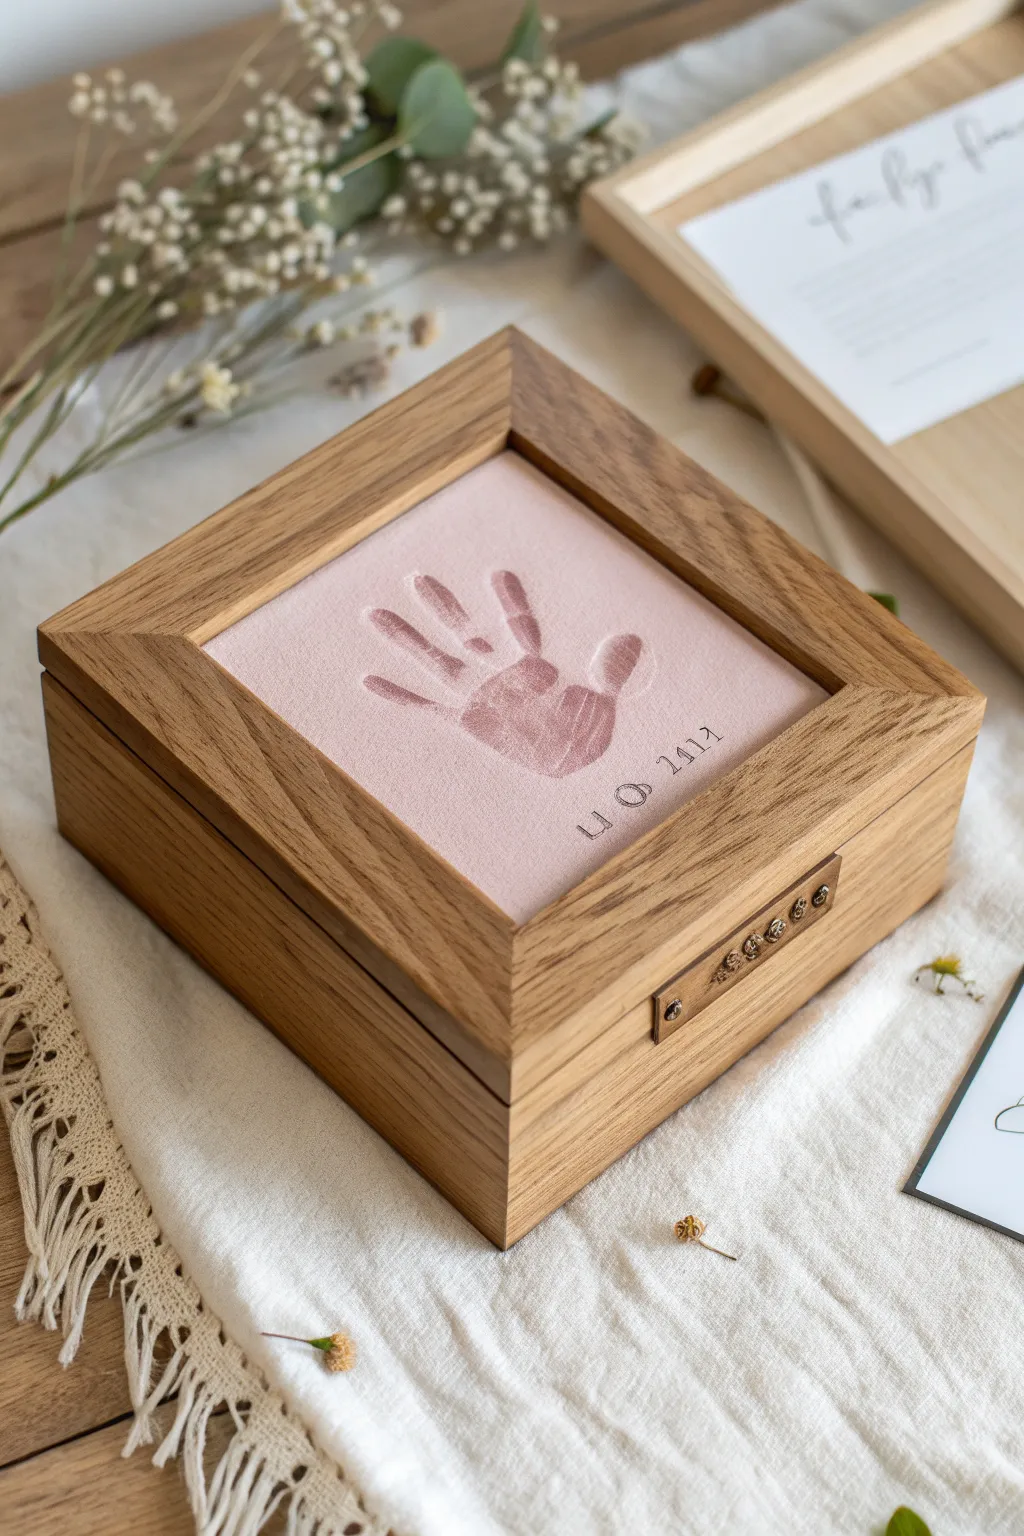
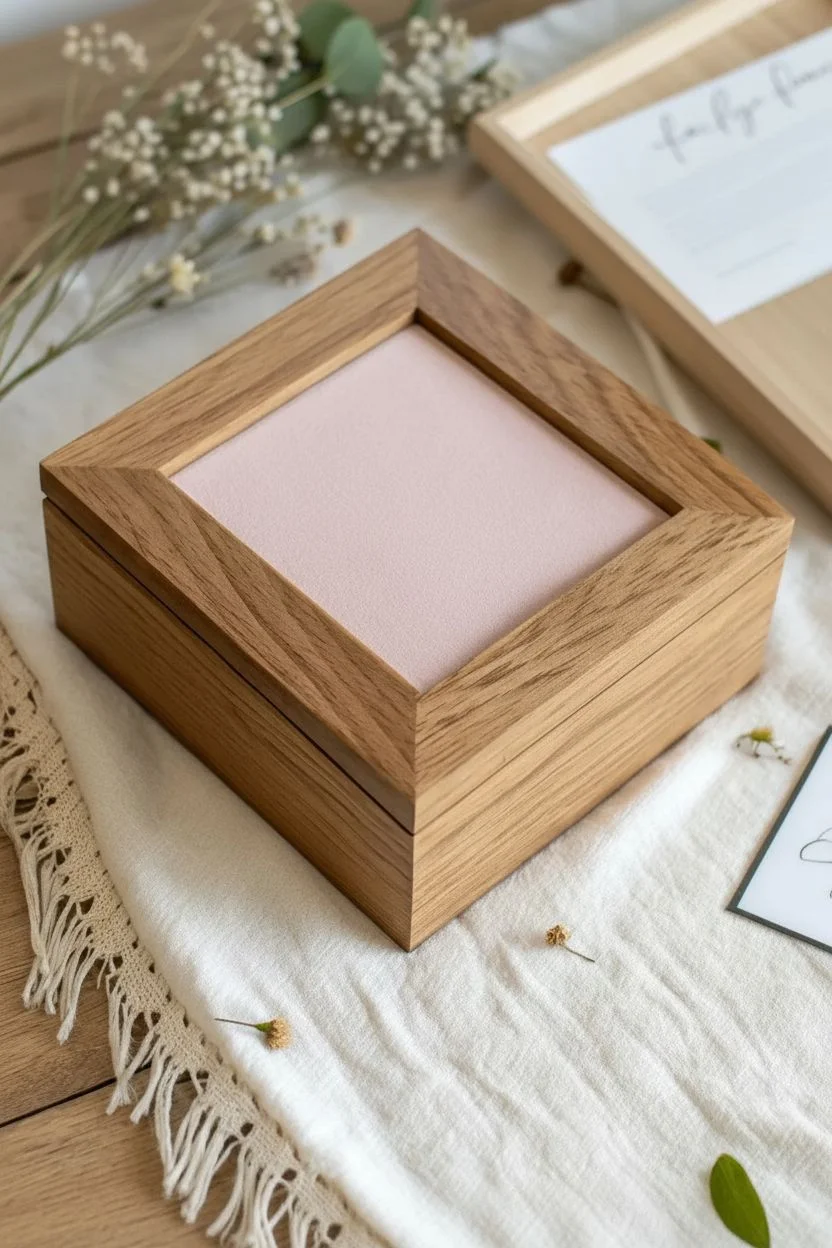
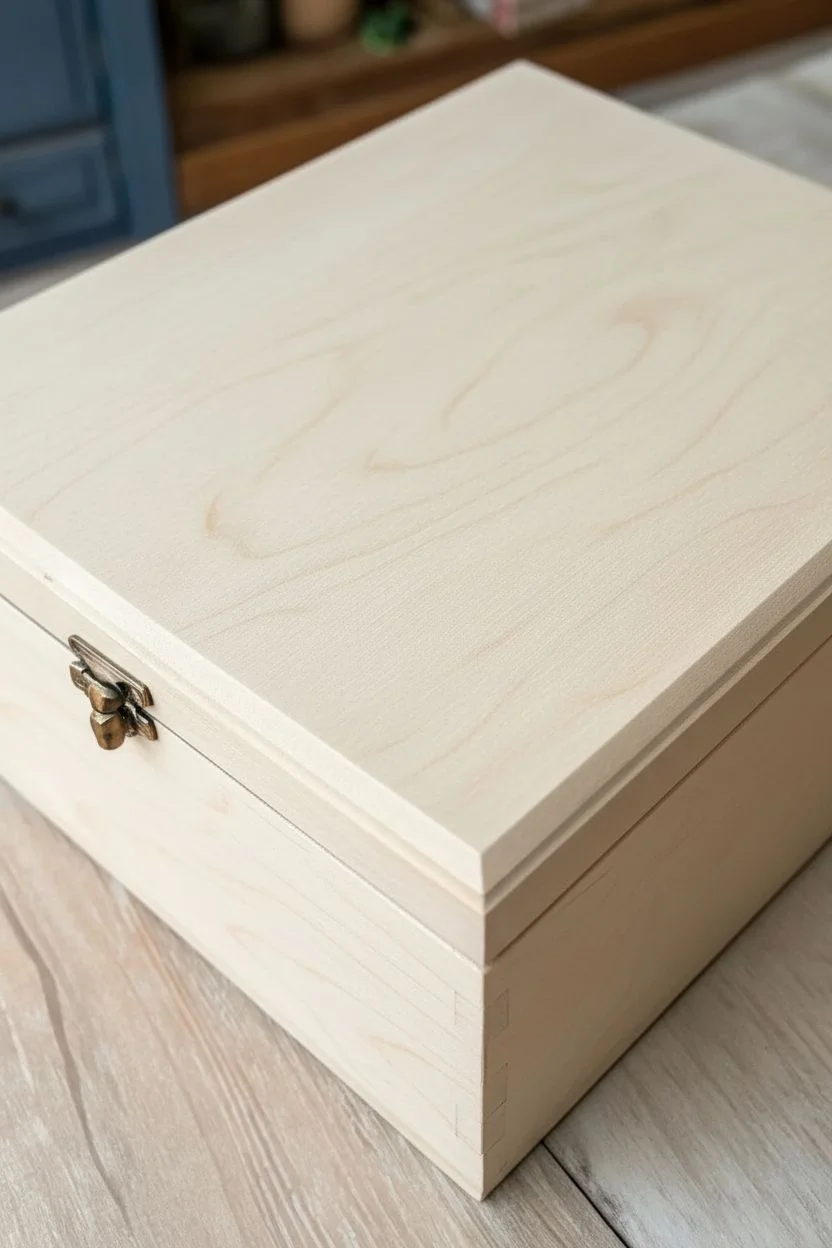
Preserve a fleeting moment in time with this elegant wooden keepsake box, featuring a customized dusty pink insert embossed with a child’s handprint. The natural oak frame beautifully contrasts with the soft, textured backdrop, creating a sophisticated vessel for your most treasured mementos.
How-To Guide
Materials
- Unfinished square wooden box with a recessed photo lid (oak or pine)
- Thick, high-quality cardstock or mat board (dusty pink or mauve)
- Acrylic paint (dusty rose/mauve) or fabric paint
- Textile medium (if using acrylics on fabric)
- Sponge brush or brayer roller
- Small metal letter stamps or a fine-tip archival ink pen
- Small metal latch plate (antique bronze finish)
- Small screws and screwdriver
- Strong craft glue or double-sided mounting tape
- Scissors or a craft knife
- Ruler
- Clear matte varnish (optional)
Step 1: Preparing the Box and Insert
-
Measure the recess:
Begin by carefully measuring the recessed area inside the lid of your wooden box. You need exact dimensions to ensure your artwork fits snugly without buckling. -
Cut the background:
Transfer these measurements onto your dusty pink cardstock or mat board. If you want a fabric texture like the photo, you can wrap a piece of cardstock in linen fabric, securing it tightly on the back with glue. -
Test the fit:
Place your cut piece into the lid recess to dry fit it. It should drop in easily but not slide around. Trim any edges if necessary to get that perfect, professional look. -
Prepare the wood:
If your wooden box is unfinished, lightly sand the surfaces with fine-grit sandpaper to remove any rough patches. Wipe away the dust with a tack cloth.
Clean Print Secret
Make a few practice prints on scrap paper first. This helps determine exactly how much paint creates the clearest ridge details.
Step 2: Creating the Handprint
-
Mix your paint:
Prepare your dusty rose paint. If you are stamping onto fabric, mix your acrylic paint with a textile medium according to the bottle instructions to prevent it from cracking when dry. -
Apply paint to the hand:
Using a sponge brush or a brayer roller, apply a thin, even coat of paint to the child’s palm. A thin layer captures better detail than a thick globs of paint. -
Position the hand:
Guide the hand over the center of your prepared pink insert. Ensure fingers are spread slightly apart for a clear silhouette. -
Press and lift:
Press down firmly on the palm and each finger to ensure good contact with the paper or fabric. Lift the hand straight up quickly to avoid smudging the edges. -
Let it dry completely:
Set the print aside in a safe, dust-free place. I like to let this dry for at least a few hours to ensure I don’t accidentally smear the print during the next steps.
Smudged Edges?
If the print smears slightly, use a fine toothpick with a tiny bit of the background color paint to tidy up the outer edges.
Step 3: Adding Details and Assembly
-
Add the date:
Once the paint is fully dry, add the date or a name below the handprint. You can use widely spaced rubber stamps with sepia ink for a vintage look, or careful hand-lettering. -
Secure the artwork:
Apply strong craft glue or heavy-duty double-sided tape to the back of your art piece. Press it firmly into the recessed lid of the wooden box. -
Seal the wood (optional):
To protect the wooden frame, you can apply a clear matte varnish or a wax finish. Keep the varnish away from the fabric or paper insert. -
Attach hardware:
Locate the front center of the box base. Position your small antique bronze metal plate. -
Mark pilot holes:
Use a pencil to mark the screw holes for the metal plate. This ensures your hardware sits perfectly straight. -
Install the plate:
Carefully screw the metal plate into place. If the wood is hard, you might need to make small pilot holes with a tiny drill bit or an awl first.
This personalized box will serve as a beautiful time capsule for years to come


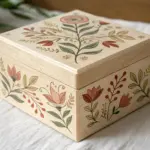

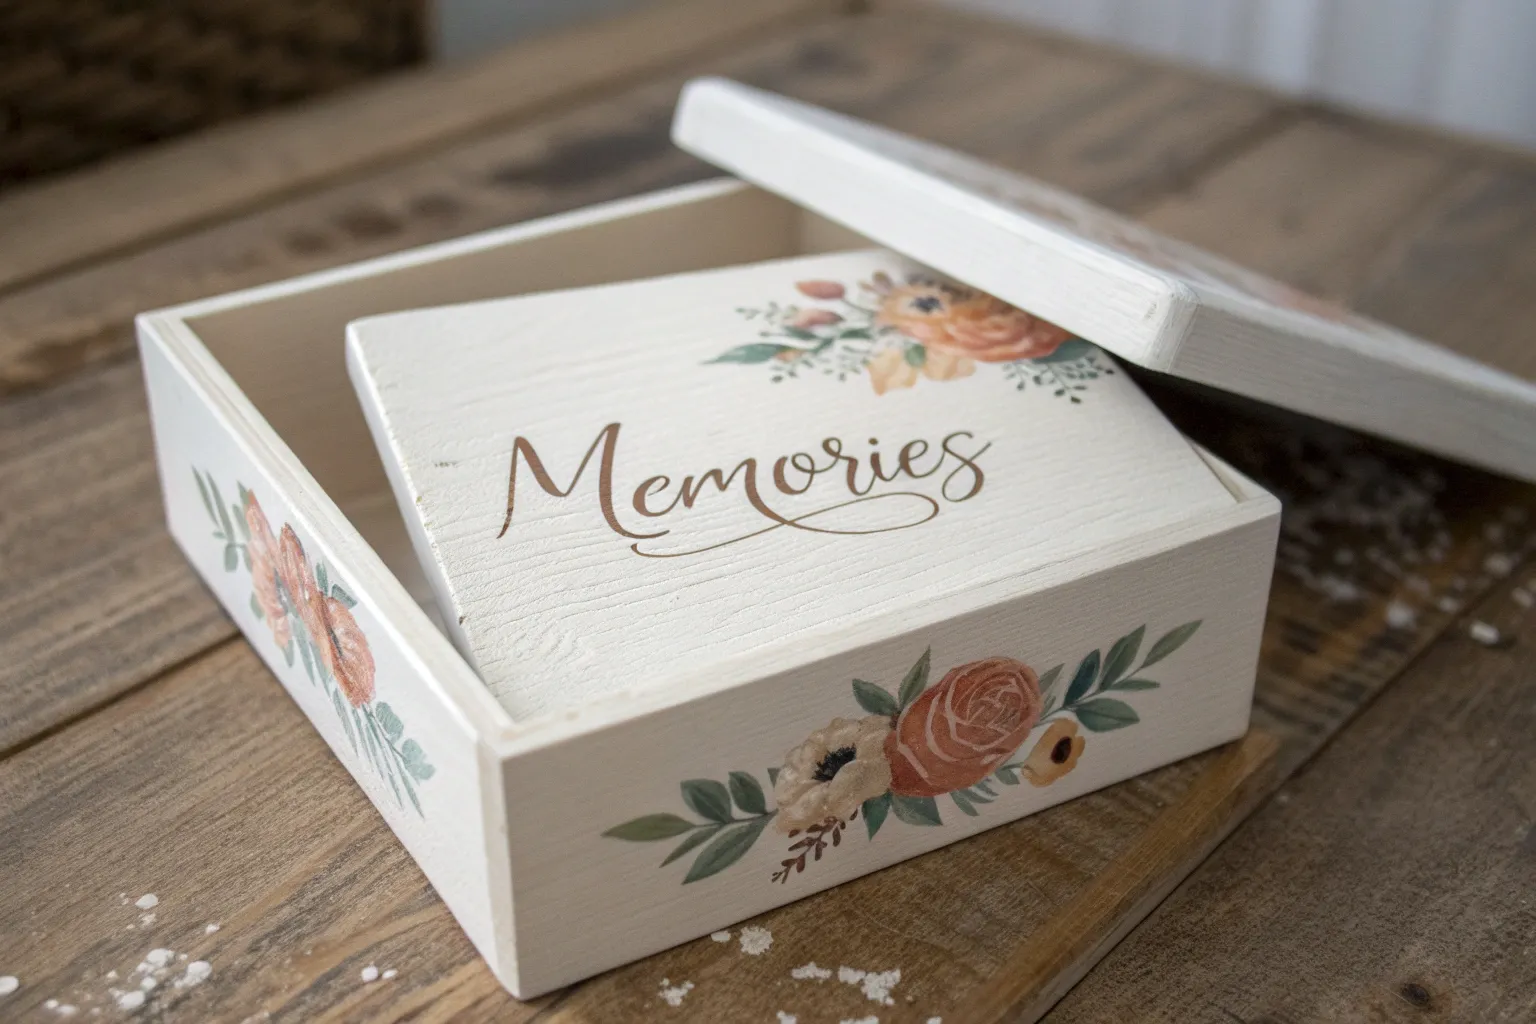
Soft Florals for a Sentimental Memory Box
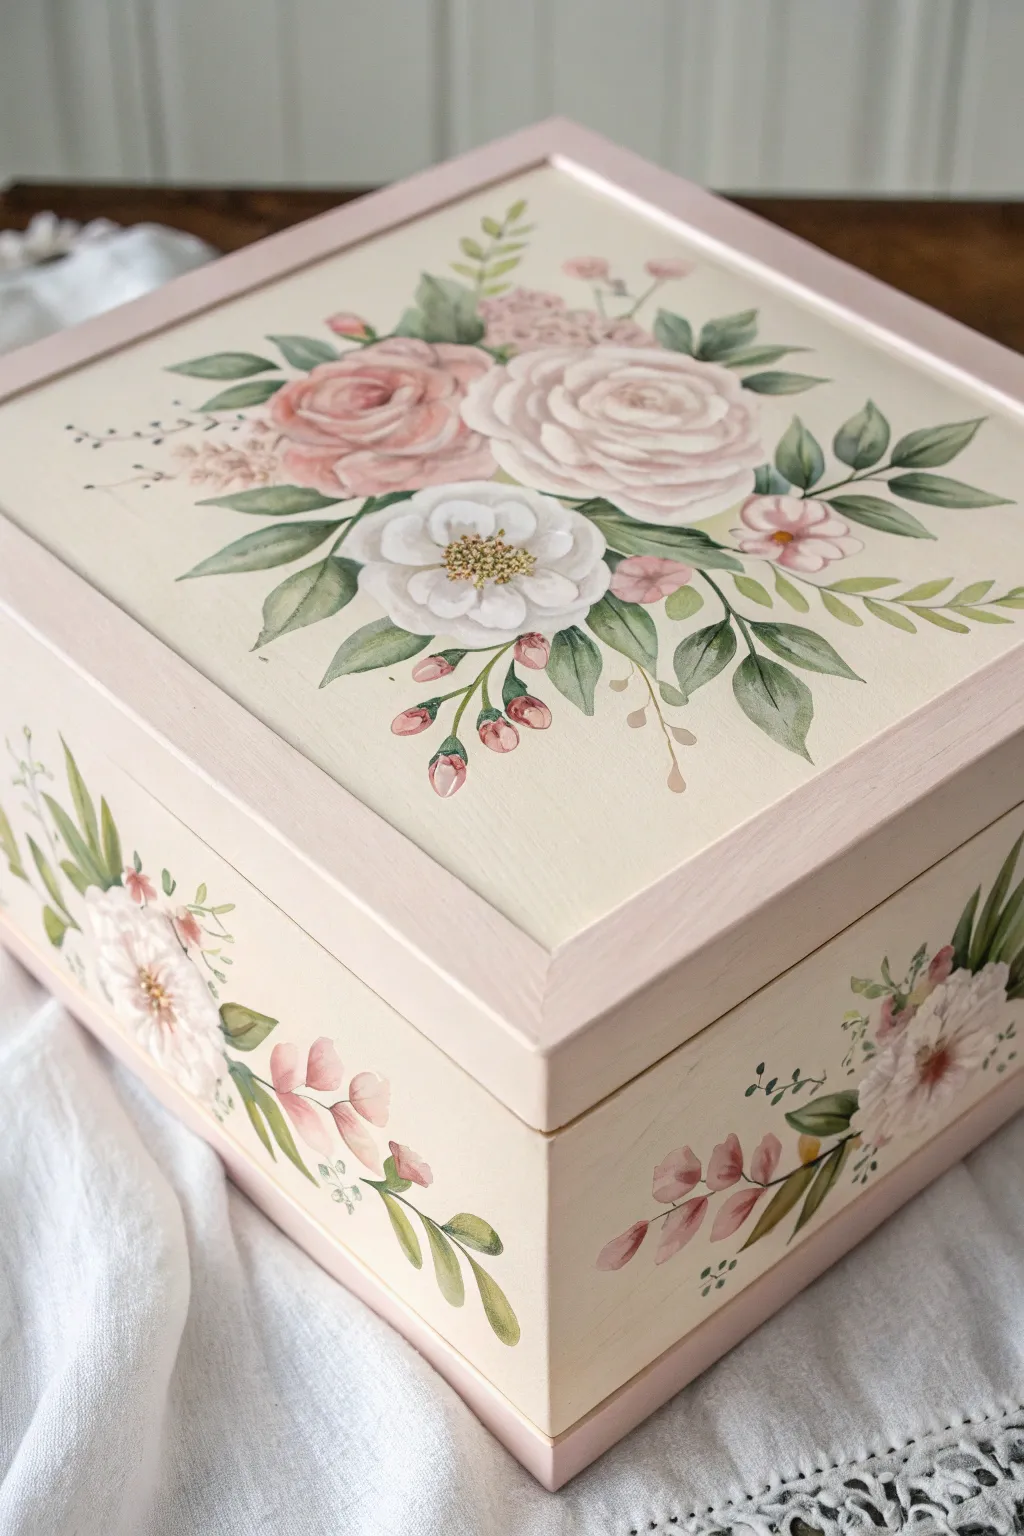
Capture the delicate beauty of a secret garden with this heirloom-quality memory box, perfect for storing treasured letters and trinkets. Featuring soft, buttery roses and gentle foliage on a creamy base, this project creates a timeless piece that feels as sentimental as the memories it holds.
Step-by-Step Guide
Materials
- Unfinished wooden box (approx. 8×8 inches)
- Sandpaper (220-grit)
- Acrylic craft paints (Cream/Off-White, Pale Pink, Dusty Rose, White, Olive Green, Sage Green, Deep Green, Yellow Ochre, Burnt Umber)
- Flat shader brushes (sizes 8 and 12)
- Round brushes (sizes 2 and 4)
- Fine liner brush (size 0 or 00)
- Painter’s tape
- Matte varnish or sealer
- Paper palette
- Water cup and paper towels
Step 1: Preparation and Base Coat
-
Surface Prep:
Begin by lightly sanding the entire wooden box with 220-grit sandpaper to remove any rough fibers or splinters. Wipe away the dust completely with a slightly damp cloth or tack cloth. -
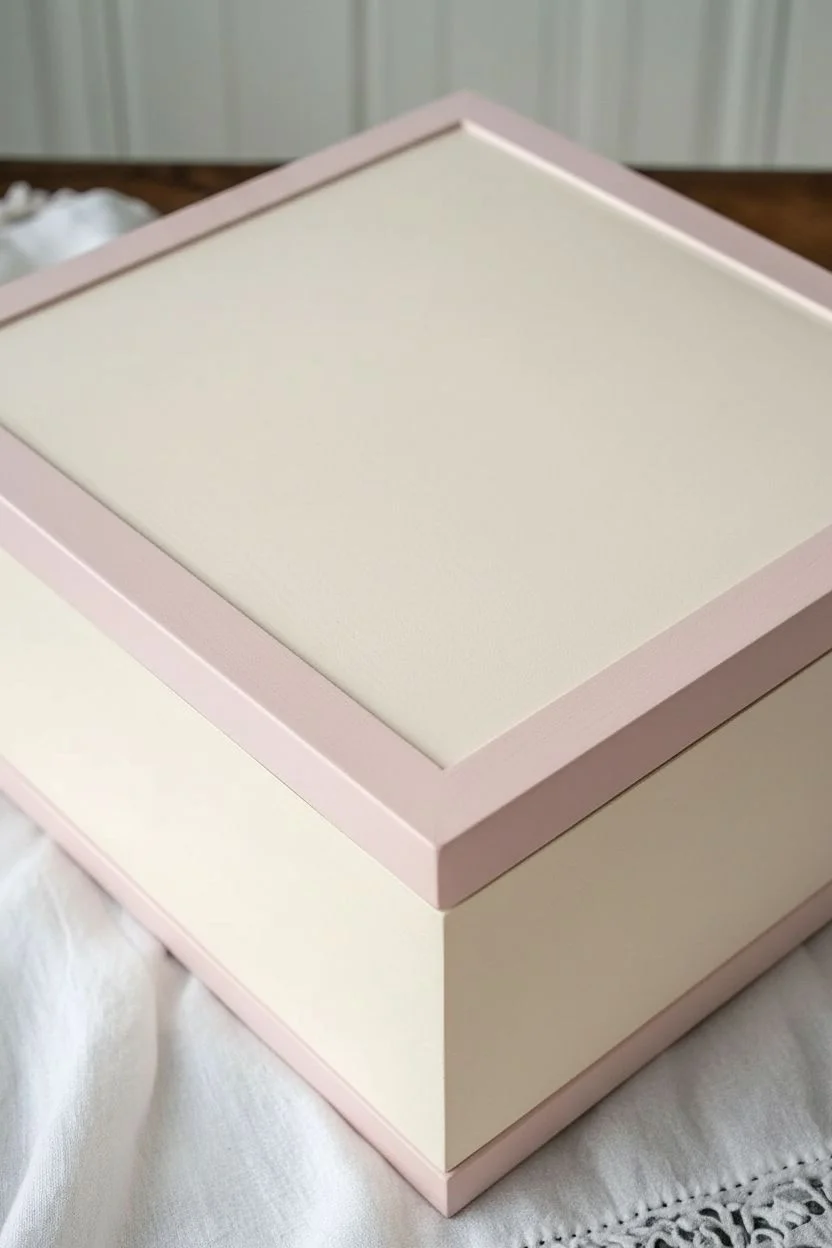
Tape the Trim:
Using painter’s tape, carefully mask off the main flat panels of the lid and the sides of the box. You want to leave the framing trim—the outer edges of the lid and the very bottom base trim, if applicable—exposed. -
Painting the Trim:
Paint the exposed trim areas with a soft Pale Pink. Use a flat shader brush for smooth, even strokes. Apply two coats for full opacity, allowing the first coat to dry completely before adding the second. -
Base Coating Panels:
Once the pink trim is dry, remove the tape. Now, carefully paint the main central panels (top and sides) with your Cream or Off-White paint. Use a steady hand near the pink edges, or re-mask the pink areas if you prefer extra safety. -
Smooth Finish:
Apply a second coat of the Cream paint to ensure a rich, consistent background for your florals. Let the box dry overnight or for at least several hours to ensure a hard surface for the detailed painting.
Step 2: Painting the Main Rose Cluster
-
Sketch the Layout:
Lightly sketch the position of the three main flowers on the lid using a pencil. Place a large rose slightly off-center to the right, a smaller rose to its left, and an open white bloom below them. -
Blocking the Large Rose:
Mix White with a tiny touch of Pale Pink to create a very light blush. Use a round brush (size 4) to paint the general round shape of the large rose. While wet, blend in slightly darker Dusty Rose towards the center to create depth. -
Adding Rose Petals:
Once the base shape is tacky but not fully dry, load your brush with White and define the curved petal edges. Start from the center with tight C-curves and work outward with larger, looser scallops. -
Second Rose and White Bloom:
Paint the smaller left rose using a deeper Dusty Rose mix, adding lighter pink highlights on the petal tips. For the bottom white flower, paint five distinct, rounded petals in Pure White, shading the centers with a touch of grey-green. -
Flower Centers:
For the bottom white flower, stipple (dot) the center with Yellow Ochre mixed with a tiny bit of Burnt Umber. Add tiny white dots on top for texture.
Chalky Texture Fix
If your acrylics feel too ‘plastic’ or shiny for this vintage look, mix a pinch of cornstarch or baking soda into your paint. This creates a matte, chalk-paint texture instantly.
Step 3: Foliage and Side Details
-
Base Leaves:
Mix Olive Green with a touch of Cream to get a soft, muted green. Using a round brush, paint almond-shaped leaves extending from under the rose cluster. Vary the sizes, keeping the larger leaves near the heavy blooms. -
Leaf Shading:
Before the green paint dries, touch the base of each leaf with a darker Deep Green and the tip with a lighter Sage Green. Gently blend the transition for a natural gradient. -
Adding Delicate Sprigs:
Switch to your fine liner brush. Mix a watery brown-green and paint thin, wispy stems extending outward. Add tiny, teardrop-shaped leaves or buds along these stems to create movement. -
Painting Buds and Fillers:
Add small clusters of pink buds (simple oval shapes) on thin stems. I like to add tiny three-dot clusters in pastel pink around the main bouquet to act as filler flowers. -
Replicating on Sides:
Repeat a simplified version of this process on the side panels. Paint a single white or pink focal flower on the corner or center, flanked by trailing leaves and stems that wrap gently around the box face.
Personalize the Interior
Line the bottom of the box with decorative scrapbooking paper or soft velvet fabric in a dusty rose shade to add a luxurious surprise when opened.
Step 4: Finishing Touches
-
Define the Veins:
Use the liner brush and thinned Deep Green paint to draw a very thin central vein on the larger leaves. Keep the line broken and light so it doesn’t look too graphic. -
Clean Up:
Check your cream background for any accidental smudges. Touch them up with a small brush and fresh cream paint if necessary. -
Sealing:
Once the entire artwork is fully cured (give it 24 hours), apply a coat of matte varnish. This protects the delicate painting without adding a distracting gloss, keeping the look soft.
Now you have a stunning, hand-painted sanctuary ready to safeguard your most precious mementos.


Butterflies as a Memory Box Symbol
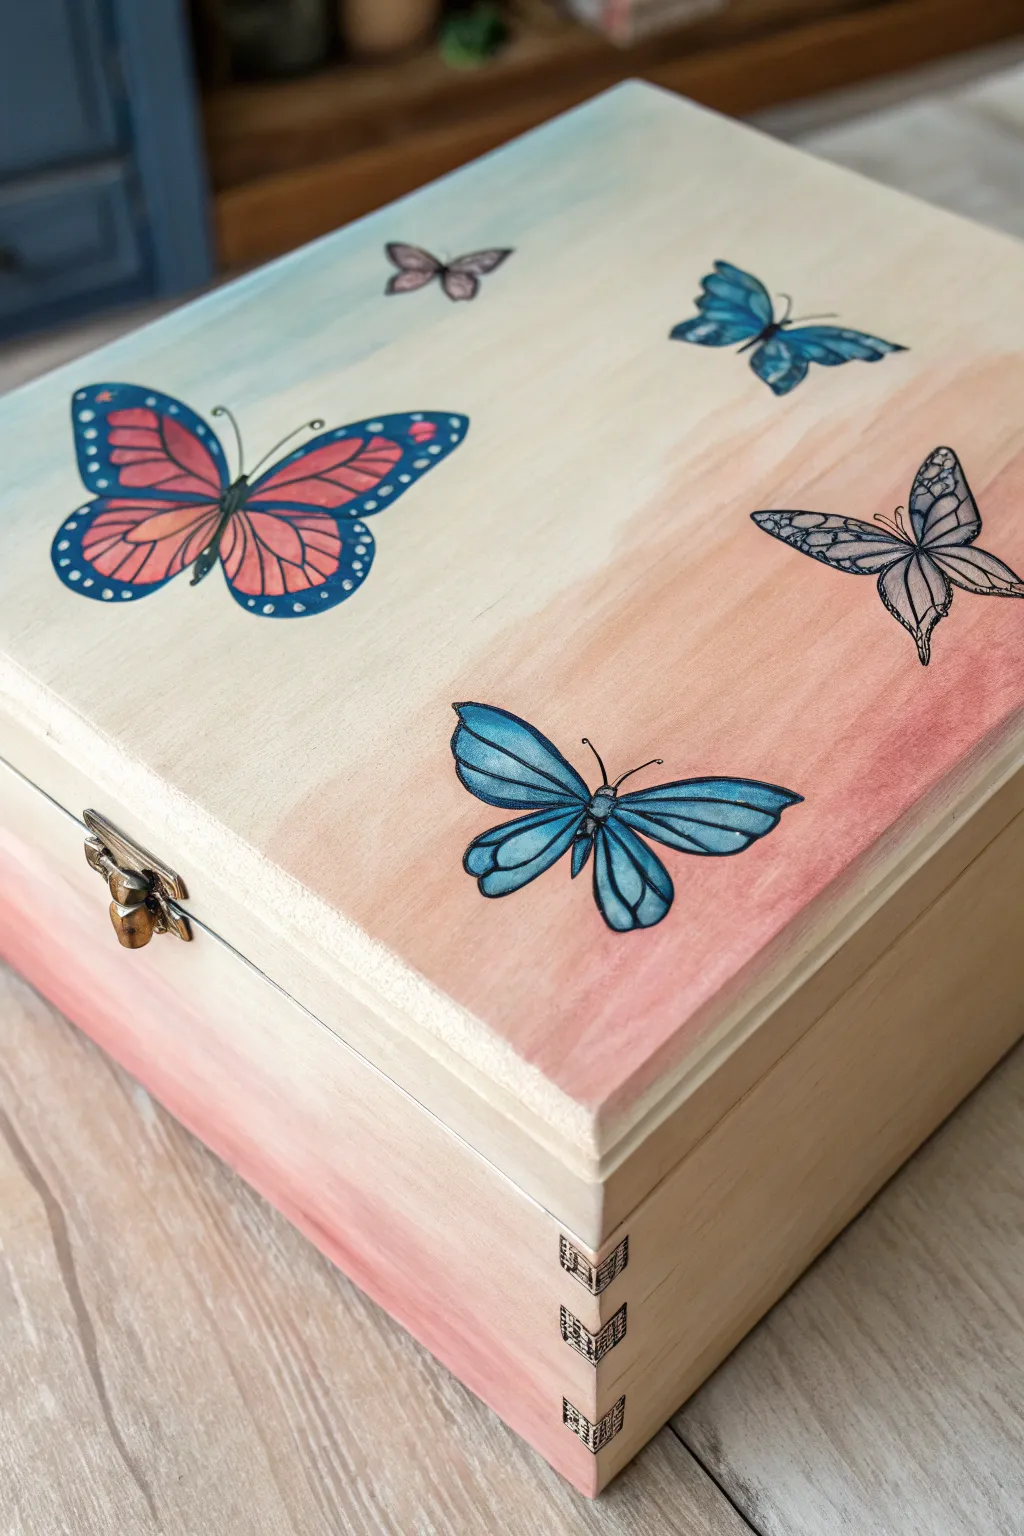
Transform a plain wooden box into a cherished keepsake with this delicate butterfly design. The project combines a soft, dreamy gradient sky with crisp, illustrative butterfly motifs for a look that feels both vintage and fresh.
How-To Guide
Materials
- Unfinished wooden box with sliding lid
- Fine-grit sandpaper (220-grit)
- Acrylic paints (pale blue, cream/off-white, dusty rose, terra cotta)
- Black fine-liner pens (waterproof) or very fine detail brush
- Flat shader brush (medium size)
- Small round detail brush
- Graphite transfer paper (optional)
- Matte or satin clear sealant spray
Step 1: Preparing the Canvas
-
Sand the Surface:
Begin by lightly sanding the entire exterior of your wooden box. Focus especially on the lid where your artwork will go, smoothing out any rough grain that might catch your pen later. -
Wipe Clean:
Use a tack cloth or a slightly damp paper towel to remove all sanding dust. The surface needs to be completely clean for the paint to adhere smoothly.
Fixing Wobbly Lines
If your black outlines get shaky or too thick, wait for the ink/paint to dry completely. Then, use a small brush with the background color to carefully paint over and thin out the mistake.
Step 2: Creating the Ombré Background
-
Mix the Sky Blue:
Mix a very pale blue using white and a tiny dot of blue acrylic. You want a washed-out, pastel look rather than a vibrant primary color. -
Paint the Upper Section:
Apply the pale blue to the top left corner of the lid, brushing diagonally towards the center. Keep the paint thin; a wash consistency allows some wood grain to peek through. -
Apply the Neutral Center:
While the blue is still slightly wet, pick up some cream or off-white paint. Apply this to the middle diagonal band of the box, blending the edge where it meets the blue to create a soft transition. -
Add the Sunset Tone:
Mix a dusty rose color. Paint the bottom right corner of the lid, again brushing diagonally and blending it gently into the cream section while the paint remains workable. -
Side Integration:
Don’t forget the sides of the box. Carry the dusty rose gradient down the front and side panels so the design feels continuous rather than just sitting on top. -
Let it Dry:
Allow the base coat to dry completely. Since we used thin layers, this should take about 20-30 minutes.
Step 3: Illustrating the Butterflies
-
Plan the Layout:
Decide on the placement of your five butterflies. I like to place the largest one in the top left as a focal point, with smaller ones scattered as if flying away. -
Sketch the Outlines:
Lightly sketch the butterfly shapes using a pencil. If you aren’t confident drawing freehand, print out butterfly silhouettes and use graphite paper to transfer them onto the wood. -
Base Fill the Wings:
Using your small round brush, fill in the wing shapes with base colors. For the large butterfly, use a gradient of pink to blue. For the blue butterfly, use shades of azure. Leave the grey butterfly monochromatic for variety. -
Detail the Large Butterfly:
Once the base color is dry, use a very fine brush or a black paint pen to draw the veins and edges of the large Monarch-style butterfly. Add the signature white dots along the wing edges. -
Outline the Blue Butterfly:
Move to the blue butterfly at the bottom center. Outline the wings in black, focusing on the teardrop shapes within the wings, making sure the lines are crisp. -
Detail the Smaller Moths:
Work on the smaller butterflies and moths. The grey butterfly on the right has intricate lace-like patterns—use your finest pen tip here for precision. -
Add Small Accents:
If you have tiny filler butterflies at the top, outline them simply to suggest distance. They don’t need as much detail as the main subjects.
Adding Dimensional Magic
Make your butterflies pop by adding a tiny drop of clear 3D dimensional glaze or glossy accents over the main wing sections. It creates a beautiful, raised enamel look.
Step 4: Finishing Touches
-
Refine the Edges:
Check the edges of the lid. Ensure the ombré paint line is neat where the lid slides into the box grooves. -
Seal the Artwork:
Protect your painting with a clear matte sealant spray. Apply in light, even coats to prevent dripping and let it cure fully before handling. -
Hardware Check:
If your box has a metal clasp or latch, you can gently polish it with a clean cloth to remove any accidental paint smudges.
Now your memory box is ready to safely hold your most precious treasures


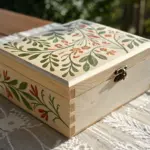
Tree of Life Memory Box Painting
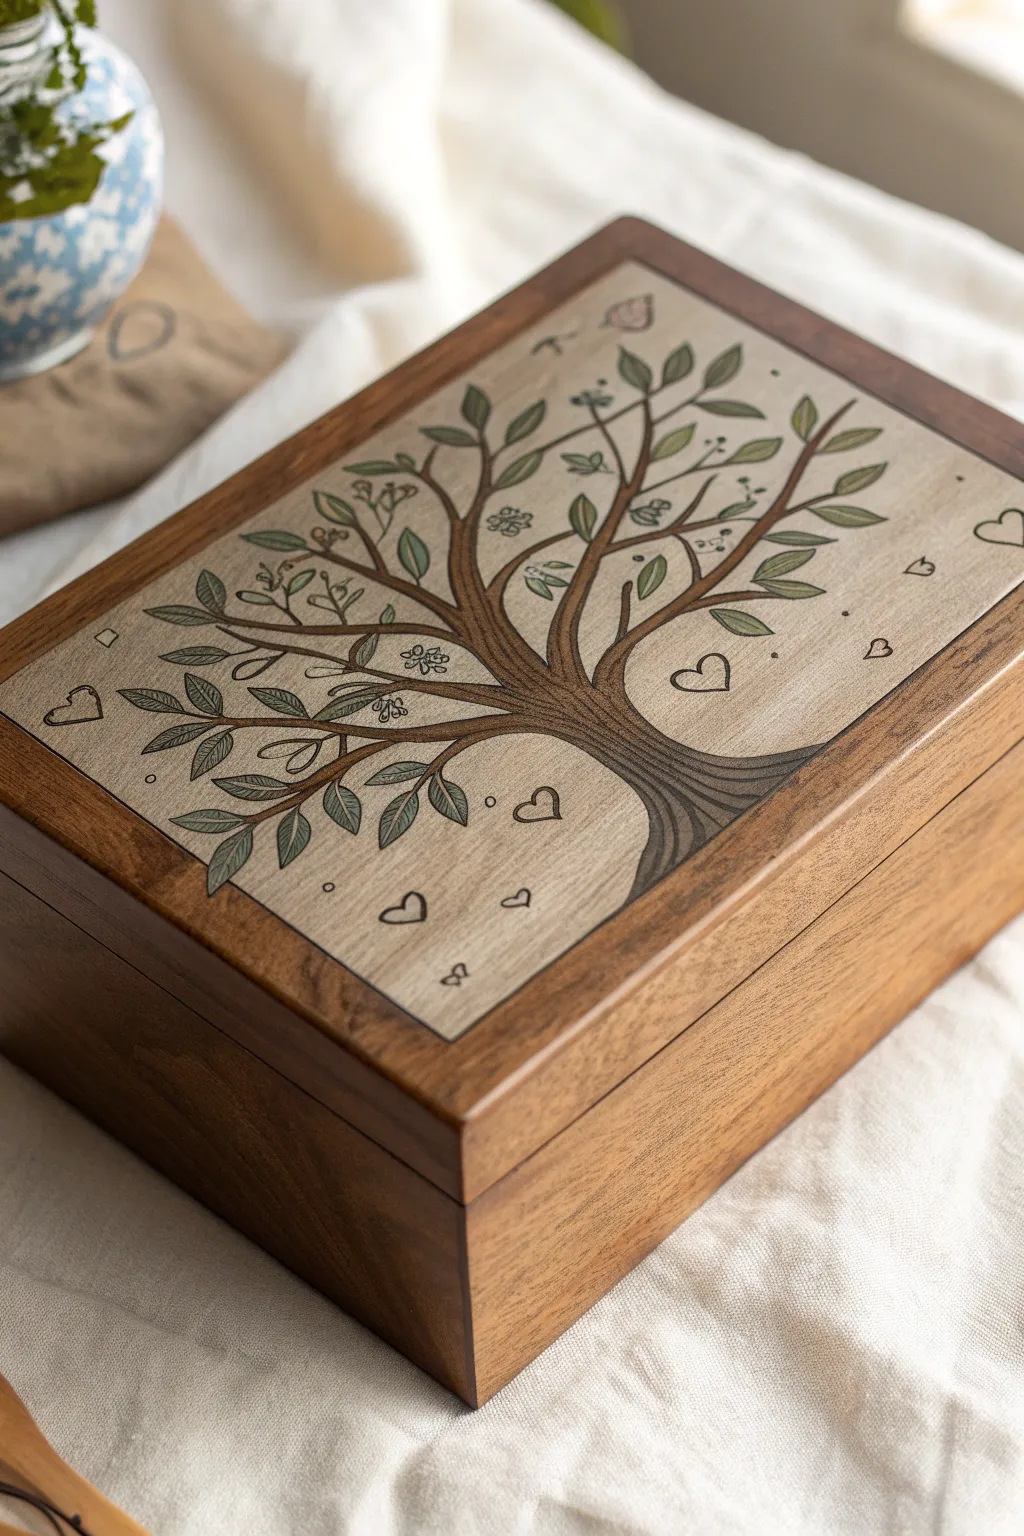
This rustic yet elegant memory box features a stylized tree of life design with delicate heart accents, perfect for storing precious mementos. The artwork combines natural wood tones with soft greens and clean line work to create a timeless, heirloom-quality piece.
Step-by-Step Tutorial
Materials
- Unfinished wooden box (approx. 8×6 inches)
- Sandpaper (220 and 400 grit)
- Acrylic paints: Dark Chocolate Brown, Olive Green, Sage Green, Antique White
- Paintbrushes: Fine liner (00 or 000 size), small flat brush, medium flat brush
- Fine-point permanent marker or acrylic paint pen (black or dark brown)
- Graphite transfer paper
- Pencil
- Painter’s tape
- Matte or satin wood varnish/sealer
- Ruler
Step 1: Preparation and Base
-
Prepare the surface:
Begin by sanding the entire wooden box, paying special attention to the lid where you will be painting. Start with 220 grit to remove rough spots, then finish with 400 grit for a silky smooth canvas. Wipe away all dust with a tack cloth or slightly damp rag. -
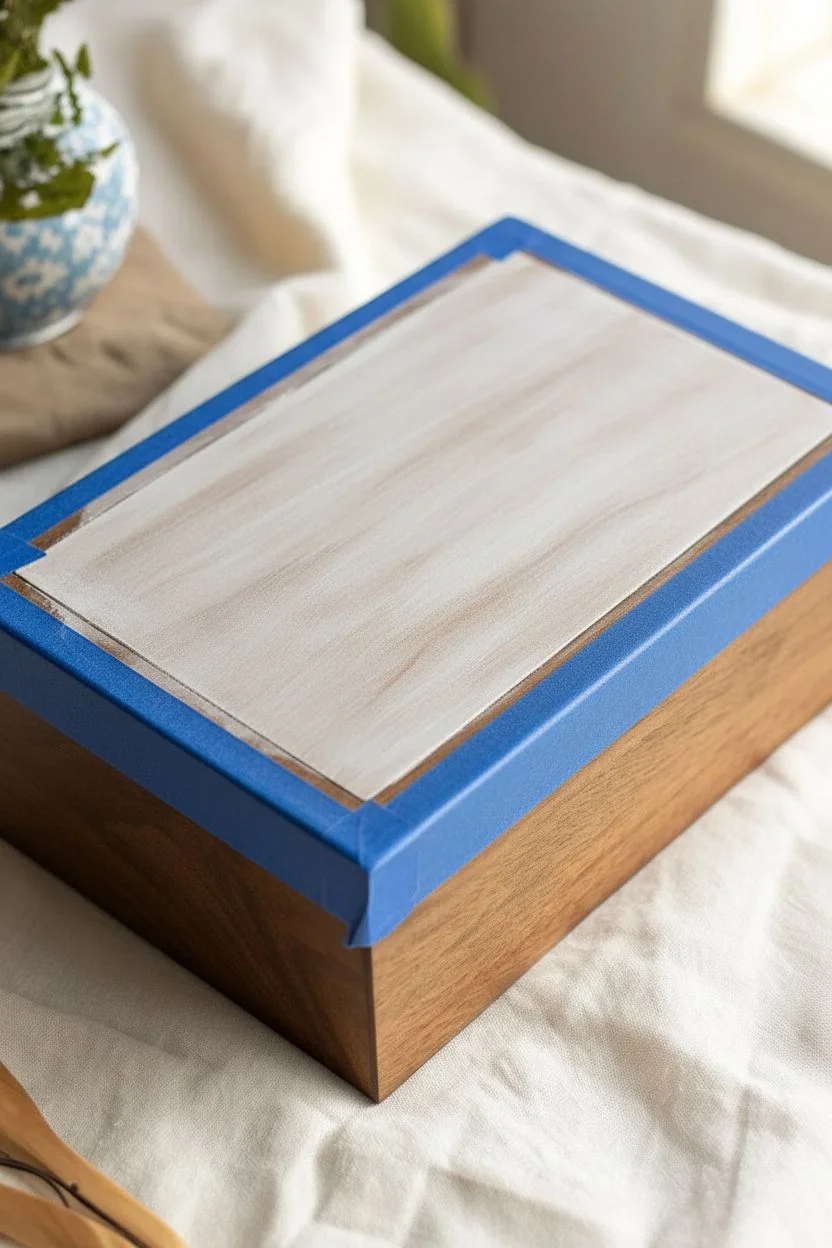
Tape the border:
Measure about 0.5 to 0.75 inches from the edge of the lid on all four sides. Apply painter’s tape firmly along these lines to mask off the outer border. This preserves the natural wood frame look seen in the reference image. -
Prime the center:
Mix a very small amount of white paint with water to create a thin wash. Apply this to the central recessed area of the lid. You don’t want an opaque white layer; the goal is a semi-transparent, milky background that allows the wood grain to peek through while providing contrast for your tree. -
Let it cure:
Allow this background wash to dry completely. Since it’s a wash, it should dry relatively quickly, but give it at least 20 minutes to prevent the wood fibers from swelling when you sketch.
Clean Lines Hack
If your brushwork is shaky, use a fine-tip permanent drawing pen (like a Micron) for the outlines and leaf veins instead of paint. It gives excellent control.
Step 2: Drafting the Design
-
Sketch or transfer:
If you are confident, lightly sketch a tree trunk rising from the right-center bottom, curving towards the left. If you prefer a guide, print a simple tree silhouette, place transfer paper beneath it, and trace just the main branches onto the painted background. -
Map the branches:
Extend 5-7 main branches outward. Ensure they curve organically. The style here is illustrative rather than realistic, so focus on pleasing curves rather than botanical accuracy. -
Leaf placement:
Sketch small oval leaf shapes along the branches. Vary their angles so they don’t look too uniform. -
Add floating hearts:
Draw several small hearts floating around the branches, as if they are falling leaves or fruit. Scatter them randomly for a whimsical feel.
Step 3: Painting the Tree
-
Paint the trunk:
Load your liner brush with thinned Dark Chocolate Brown acrylic. Carefully paint the outline of the trunk and the main branches. Fill in the trunk with long, flowing strokes to mimic bark texture, leaving tiny slivers of the background showing through for depth. -
Branch details:
Extend the smaller twigs using just the very tip of your liner brush. The paint should be fluid, almost like ink, to get crisp lines without drag. -
Solid leaves:
Mix your Olive Green and Sage Green paints. Use the small flat brush or larger round brush to fill in about half of the leaves. I like to alternate colors slightly for visual interest, keeping the tones muted and earthy. -
Lined leaves:
For the remaining leaves, do not fill them in. Instead, use your liner brush (or a thin paint pen) to outline them in dark green or black, adding a simple central vein line. This mix of solid and outlined leaves creates the signature illustrative style. -
Floral accents:
Using the Antique White, dot small clusters of three or four circles near the ends of some branches to represent tiny blossoms or berries. Keep these very subtle.
Make it Personal
Hide tiny initials of family members inside the leaves or carve them subtly into the trunk design to turn this into a true family tree heirloom.
Step 4: Finishing Details
-
Outline the hearts:
Using your fine-point marker or the finest brush with dark brown paint, outline the scattered hearts. Leave them unpainted inside to let the background wash show through. -
Define the tree:
Go back over the main trunk lines with your fine details tool (pen or brush) to sharpen the edges and add definition where the trunk creates the “roots” at the bottom edge. -
Remove the tape:
Once the paint is dry to the touch, carefully peel back the blue painter’s tape at a 45-degree angle. This reveals the crisp, clean edge between your painted panel and the natural wood border. -
Stain the frame (optional):
If your box wood is very light, you may want to apply a walnut or pecan wood stain to the unpainted border and the sides of the box to achieve the rich brown contrast shown in the photo. Apply carefully with a rag, avoiding your fresh artwork. -
Seal the artwork:
Wait 24 hours for all paint and stain to fully cure. Apply a coat of clear matte or satin varnish over the entire lid. Brush in long, even strokes following the wood grain. -
Final smooth:
Once the first coat of varnish is dry, lightly sand with a brown paper bag (yes, really!) to knock down any nibs, then apply a second thin coat for durability.
Now you have a beautifully personalized keepsake box ready to hold cherished memories for years to come
BRUSH GUIDE
The Right Brush for Every Stroke
From clean lines to bold texture — master brush choice, stroke control, and essential techniques.
Explore the Full Guide
Baby Milestone Memory Box in Gentle Neutrals


This custom wooden memory box features a soothing palette of cream, gold, and earthy greens, making it perfect for a nursery or milestone chest. With delicate vine details and a personalized nameplate, it captures a dreamy, celestial vibe that feels timeless.
How-To Guide
Materials
- Unfinished wooden box with lid
- Fine-grit sandpaper (220-grit)
- Cream or off-white acrylic paint (matte finish)
- Metallic gold acrylic paint
- Dark brown or bronze acrylic paint (fine tip marker recommended)
- Muted sage green acrylic paint
- Wide flat paintbrush
- Needle-point detail brushes (sizes 0 and 00)
- Pencil and eraser
- Ruler
- Carbon transfer paper (optional)
- Matte clear sealant spray
Step 1: Preparation & Base Coat
-
Smooth the surface:
Before dipping your brush, lightly sand the entire wooden box, focusing on corners and the lid edges. Wipe away all dust with a slightly damp cloth to ensure the smoothest painting surface. -
Apply the first base layer:
Using a wide flat brush, apply a thin, even coat of cream acrylic paint to the outside of the box and lid. Brush in the direction of the wood grain to minimize streaks. -
Dry and repeat:
Allow the first coat to dry completely for about 20–30 minutes. Apply a second or third coat until the wood grain is fully covered and the finish looks opaque and solid.
Steady Hand Pro-Tip
If you struggle with fine brushwork for the script, use an acrylic fine-tip paint marker instead. It gives you the control of a pen with the permanence of paint.
Step 2: Designing the Layout
-
Sketch the center elements:
Lightly sketch a crescent moon in the direct center of the lid using a pencil. Measure and sketch a rectangular nameplate frame on the front face of the box to ensure it is centered. -
Draft the leafy vines:
Draw two curving lines mirroring each other on the lid to form the main wreath shape around the moon. Add small, leaf-shaped outlines along these stems. -
Lettering guide:
Inside the front rectangle, lightly write the name in a cursive script. If you aren’t confident in your freehand lettering, I recommend printing the name in a font you love and using carbon paper to trace it onto the box.
Texture Level-Up
Add a 3D element by gluing small wooden star cutouts over the painted gold stars, or line the inside of the box with a soft velvet fabric or patterned paper.
Step 3: Detailed Painting
-
Paint the name frame:
Load a fine detail brush (size 0) with metallic gold paint. Carefully trace over the double-lined rectangular border on the front of the box. Steady your hand by resting your pinky finger on the dry surface. -
Fill the lettering:
Use a very fine brush or a paint marker in dark brown or bronze to fill in the cursive name. Go slowly on the curves to keep the line width consistent. -
Create the golden moon:
Paint the crescent moon on the lid with solid metallic gold. You may need two coats here to get a rich, shimmering effect. -
Outline the lid foliage:
Using the dark brown paint or a paint pen, trace the stems and leaf outlines on the lid relative to the moon. Leave the insides of the leaves unpainted for now to keep the lineart style prominent. -
Add gentle green leaves:
On the side and bottom panels, paint solid sage green leaves on dark stems. Use a ‘press and lift’ motion with a round brush to get a natural leaf shape that tapers at the end. -
Incorporate side foliage:
Mix a little gold into your brown paint to create varying shades for the decorative branches on the sides of the box, creating a mix of solid and outlined botanical elements.
Step 4: Final Touches
-
Scattered stardust:
Using your gold paint, add small five-pointed stars randomly around the moon and nameplate. Vary the sizes, making some tiny dots and others full stars. -
Clean up sketch lines:
Once you are absolutely certain all paint is 100% dry, gently erase any visible pencil marks. Be gentle to avoid rubbing off the acrylics. -
Seal the memory:
Take the box to a well-ventilated area and apply a light coat of matte clear sealant spray. This protects the light cream base from fingerprints and dust over the years.
Now you have a beautifully personalized heirloom ready to hold treasured memories for years to come
School Year Memory Box With Grade Icons
Transform a simple wooden container into a compartmentalized keepsake box featuring delicate, minimalist illustrations. This project combines soft, muted pastels with fine line art to create an organized home for special trinkets.
Step-by-Step Guide
Materials
- Unfinished wooden box with dividers (approx. 6-compartment)
- Fine-grit sandpaper (220-grit)
- Acrylic craft paints (light sage, dusty pink, charcoal, white)
- Fine liner pens (black, waterproof, 0.3mm or 0.5mm)
- Cardstock or watercolor paper (heavyweight, white)
- Ruler and pencil
- Scissors or a craft knife
- Mod Podge or strong craft glue
- Small flat paintbrush
- Matte clear varnish spray
Step 1: Preparation & Base
-
Prepare the box:
Begin by lightly sanding the entire wooden box, inside and out. Pay special attention to the dividers and the edges where the lid meets the base to ensure smooth movement. -
Dust and clean:
Wipe away all sanding dust with a slightly damp cloth or a tack cloth. A clean surface is crucial for the paper inserts to adhere flatly. -
Measure the compartments:
Using your ruler, carefully measure the interior dimensions of each square compartment in the base, as well as the large recessed area inside the lid.
Use a Template
Draw your designs on scratch paper first. Once happy, place your square inserts over the sketch and trace against a sunny window.
Step 2: Creating the Inserts
-
Cut the paper squares:
Cut six squares from your heavy cardstock that correspond to your compartment measurements. Trim them slightly smaller (about 1mm) than the actual space so they fit easily without buckling. -
Cut the lid panel:
Cut a larger rectangular piece of cardstock to fit the inside lid area. Test the fit before proceeding to decoration. -
Paint the background colors:
Select two or three of your paper squares. Paint them with a wash of the dusty pink acrylic paint. Aim for a matte, even finish. -
Mix the green tone:
Mix a small amount of sage green. Consider adding a touch of white to soften it. Paint two other squares with this green shade. -
Leave neutrals:
Leave the remaining squares and the large lid panel white for a crisp contrast. Let all paint dry completely for at least 30 minutes.
Step 3: Illustration & Assembly
-
Sketch the icons:
On the dried painted squares, use a pencil to very lightly sketch your icons. Choose simple themes like a leafy branch, a crescent moon, a star, or a coffee mug. -
Draw the details:
Trace over your pencil lines with the fine black liner pen. Use steady, continuous strokes for the stems and outlines. -
Illustrate the lid:
On the large white panel for the lid, create a collage of smaller doodles. Draw scattered leaves, small stars, and abstract shapes. Add tiny touches of color with a small brush if desired. -
Erase guidelines:
Wait until the ink is 100% dry to prevent smudging, then gently erase any visible pencil marks. -
Glue the inserts:
Apply a thin, even layer of craft glue to the back of each square. Press them firmly into the bottom of their respective wooden compartments. -
Secure the lid panel:
Glue the large illustrated sheet into the inside of the lid. Use the side of your hand effectively to smooth out bubbles. -
Seal the artwork:
Once the glue is cured, take the box outside and spray a very light coat of matte varnish over the paper inserts to protect the drawings from dust and wear.
Uneven Paper Edges?
If your paper squares don’t fit perfectly, use an emery board or nail file to gently sand down the edges for a custom fit.
Now you have a charming, gallery-style organizer ready to hold your tiny treasures

PENCIL GUIDE
Understanding Pencil Grades from H to B
From first sketch to finished drawing — learn pencil grades, line control, and shading techniques.
Explore the Full Guide
Love Letter Memory Box With Envelope Motifs
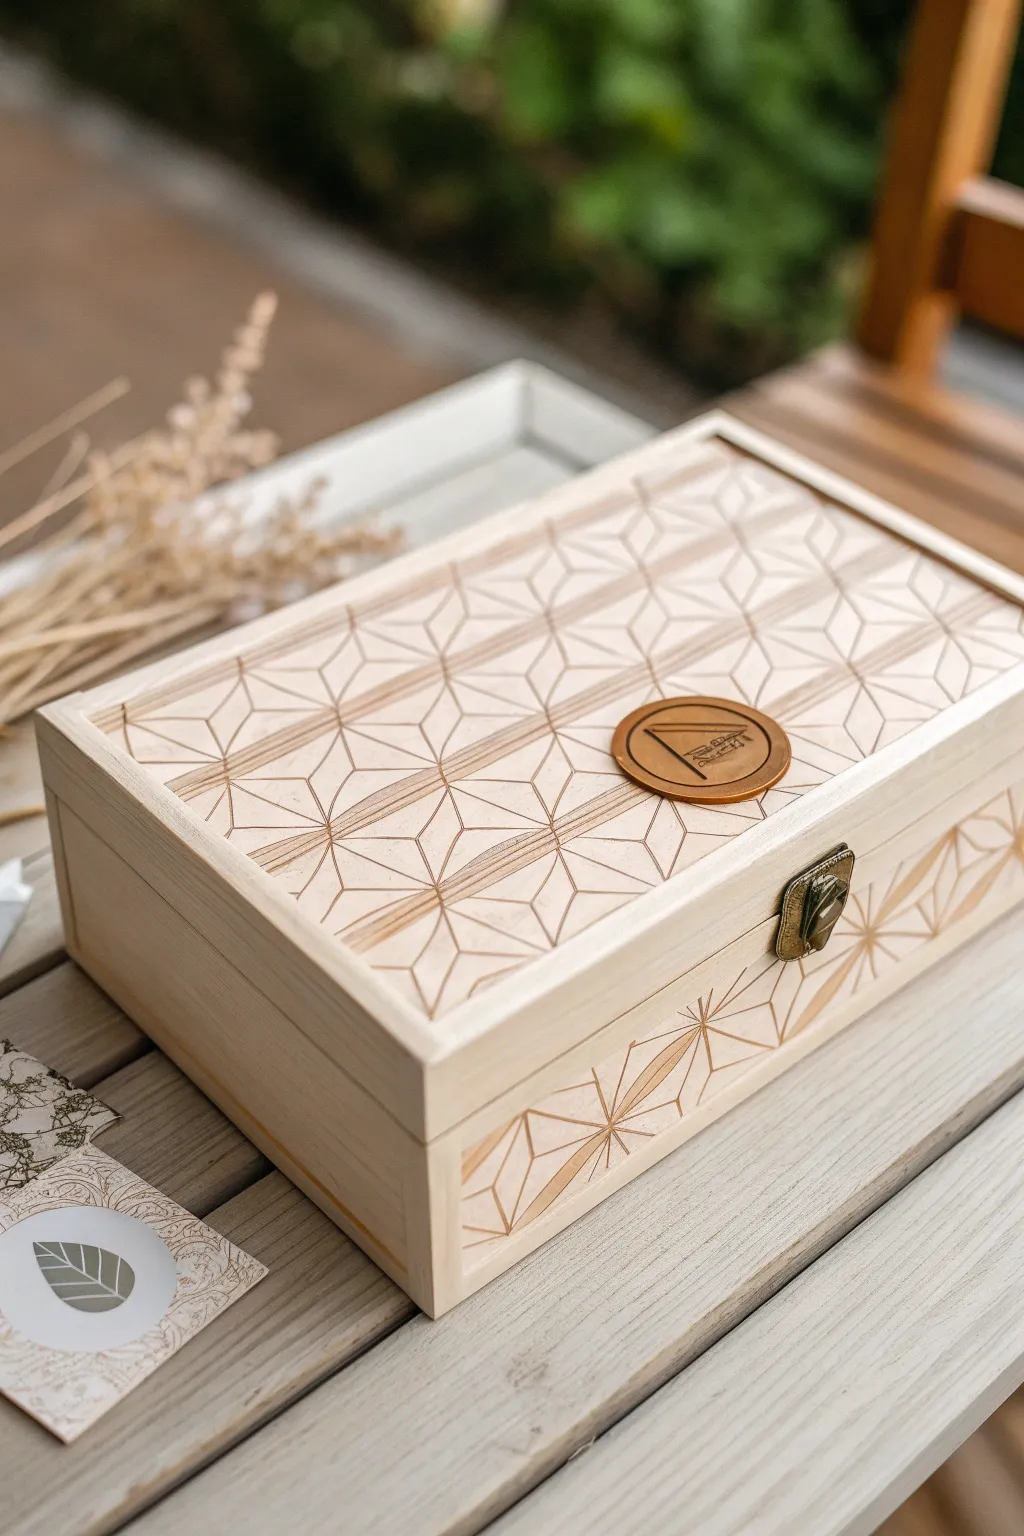
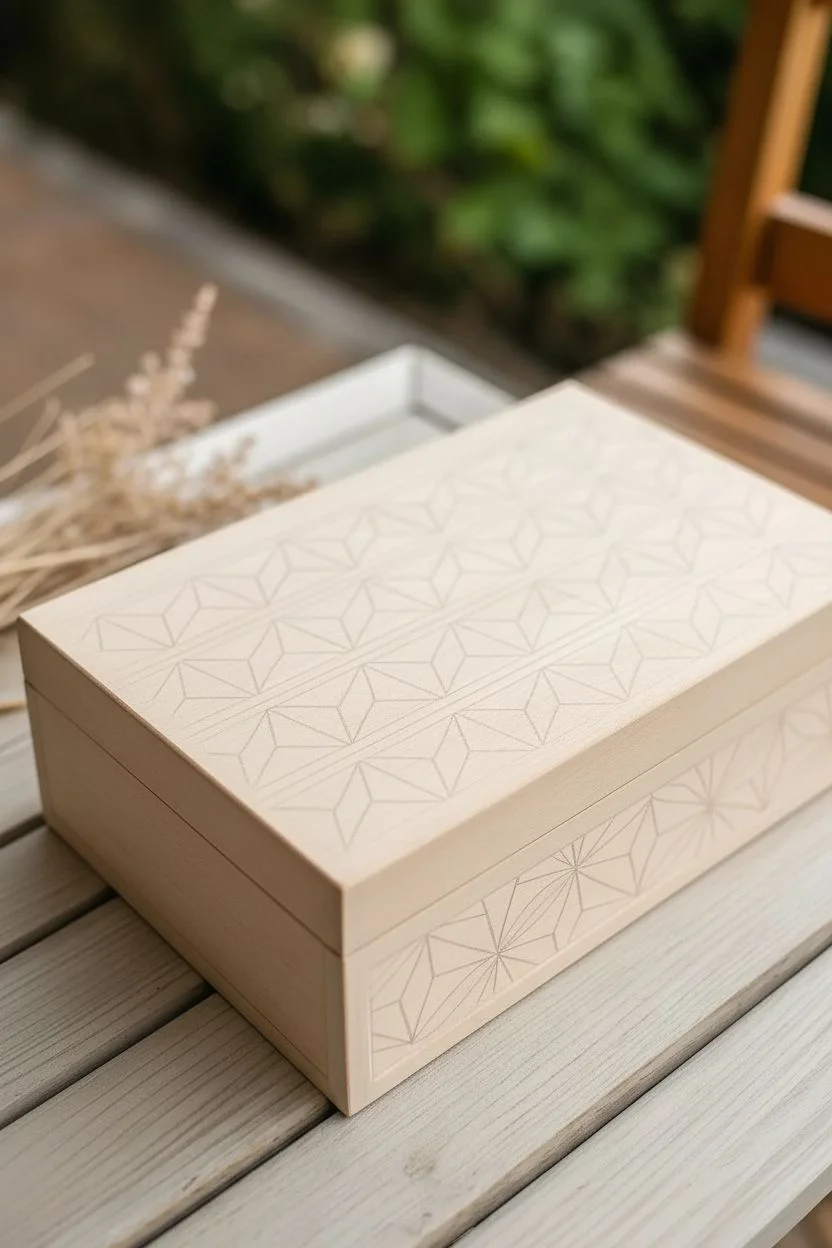
This elegant memory box captures the essence of correspondence with a repeating geometric pattern reminiscent of open envelope flaps. The natural wood finish combined with precise, engraved-style lines creates a timeless vessel perfect for storing cherished love letters and keepsakes.
Step-by-Step
Materials
- Unfinished wooden box with hinged lid and clasp
- Fine-grit sandpaper (220 and 400 grit)
- Pencil and eraser
- Ruler
- Protractor or triangle ruler
- Wood burning tool (pyrography pen) with a fine point tip OR brown permanent fine-liner pens
- Clear matte or satin spray varnish
- Round wooden disc (approx. 1.5 inch diameter)
- Bronze or dark brown metallic paint
- Small paintbrush
- Strong craft glue (E6000 or wood glue)
- Small brass clasp hardware (if not pre-attached)
- Masking tape
Step 1: Preparation & Planning
-
Smooth the surface:
Begin by sanding the entire wooden box with 220-grit sandpaper to remove any rough patches or splinters. Follow up with 400-grit for an ultra-smooth finish that will make drawing lines much easier. -
Clean the dust:
Wipe the box down thoroughly with a tack cloth or a dry microfiber towel to ensure no sawdust remains in the grain. -
Measure the grid:
The envelope pattern relies on a repeating grid. Measure the width of your lid and divide it into equal columns (roughly 1.5 to 2 inches wide). Mark these intervals lightly with a pencil at the top and bottom edges. -
Draw horizontal guides:
Using your ruler, lightly draw horizontal lines across the box lid to define the height of each row of ‘envelopes.’ These rows should match the width of your columns to create square-based shapes.
Step 2: Drafting the Design
-
Create the triangles:
In each grid square, draw an upside-down triangle. The point should land in the exact center of the square. This forms the ‘flap’ of the envelope motif. -
Add the starburst lines:
From the center point of each square (where the triangle tip ends), draw lines extending out to the corners of that square. This creates the geometric, star-like intersection points seen in the reference. -
Refine the pattern:
Repeat this process across the entire lid. You should see a pattern of diamonds and triangles emerging. I find it helpful to squint at the pattern periodically to ensure the symmetry looks right before committing to ink or heat. -
Extend to the front:
Don’t forget the front panel of the box. Continue the vertical grid lines down the front face so the pattern wraps seamlessly, drawing a single row of the geometric motif along the bottom edge.
Keep Lines Straight
Use a metal ruler as a barrier when wood burning. Run the hot tip against the metal edge for perfectly straight lines without wobbling.
Step 3: Executing the Lines
-
Choose your method:
For the most authentic look, use a wood burning tool with a fine tip. If you are less experienced with pyrography, a brown permanent fine-liner works beautifully and mimics the look of burnt wood. -
Burn or draw main lines:
Carefully trace over your pencil lines. Keep your pressure consistent. If burning, move the pen at a steady pace to avoid creating deep scorch pits. -
Add texture lines:
Notice the subtle horizontal striations within some of the diamond shapes. Add very fine, closely spaced parallel lines inside alternate rows to create depth and contrast, mimicking wood grain or texture. -
Erase guidelines:
Once the ink is fully dry or the wood has cooled completely, gently erase any visible pencil marks. Be gentle to avoiding smudging any ink.
Uneven Wood Burning?
If your burned lines look patchy or dotty, your tip isn’t hot enough or you are moving too fast. Slow down your stroke speed for a solid, dark line.
Step 4: The Wax Seal Emblem
-
Paint the base:
Take your small wooden disc and paint it entirely with the bronze or dark metallic paint. You may need two coats for opaque coverage. -
Create the symbol:
Once dry, use a fine tip dark marker or a darker paint shade to draw a simple geometric letter or logo in the center of the disc. -
Add a raised rim:
To mimic a wax seal, you can pipe a thin ring of dimensional paint or heavy-body acrylic around the edge of the disc, then paint over it with the bronze once dry. -
Attach the seal:
Apply a dab of strong craft glue to the back of the disc and press it firmly onto the center of the box lid, slightly off-center to the right as shown in the inspiration photo.
Step 5: Finishing Touches
-
Install hardware:
If your box didn’t come with the clasp attached, or if you removed it for easier drawing, screw the brass latch back into the center front of the box. -
Seal the wood:
Take the box to a well-ventilated area. Apply a light, even coat of clear matte spray varnish. This protects the raw wood and prevents the ink or burn lines from fading over time. -
Final dry:
Let the box cure for at least 24 hours before placing any letters inside to avoid any lingering varnish smell being absorbed by the paper.
Your beautiful, handcrafted memory box is now ready to safeguard your most precious correspondences
Wedding Keepsake Memory Box With Vow Script
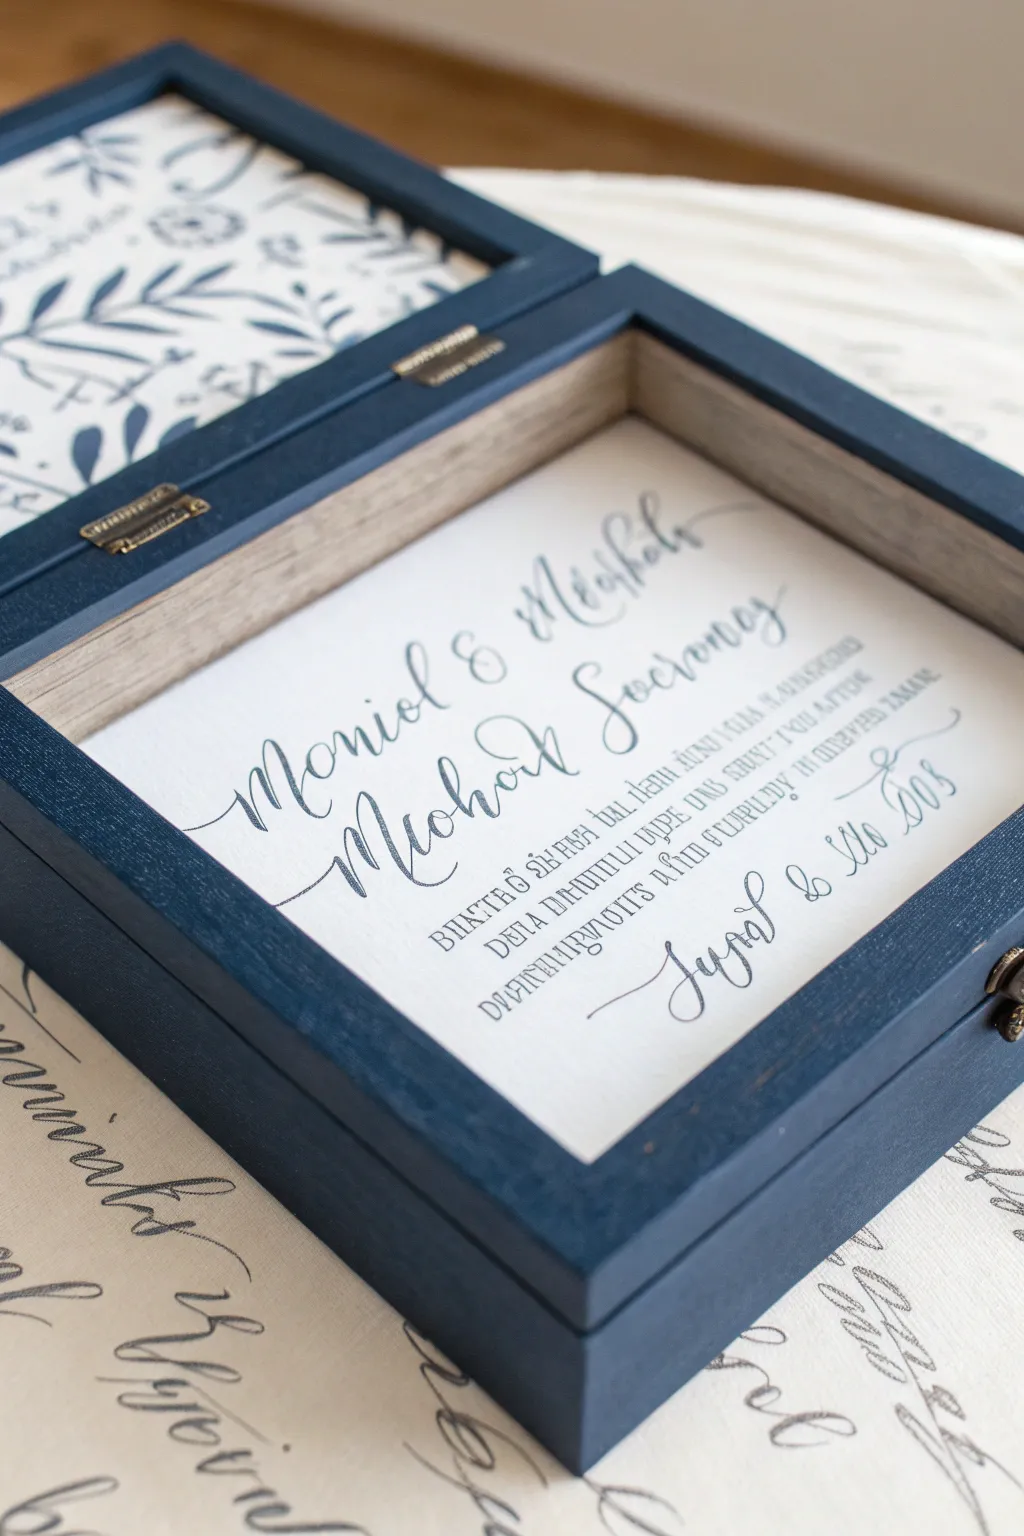
Transform a simple wooden hinged box into a sophisticated heirloom featuring elegant calligraphy and deep navy tones. This project perfectly preserves the memory of wedding vows in a clean, timeless display that looks professionally crafted.
How-To Guide
Materials
- Unfinished wooden box with hinged lid (approx. 8×8 inches)
- Deep navy blue acrylic paint (matte finish)
- Flat shader brush (1 inch)
- Small round detail brush
- Heavyweight white cardstock or watercolor paper
- Calligraphy pen or fine-tip permanent marker (dark grey)
- Pencil and eraser
- Ruler
- Patterned scrapbook paper (botanical or floral print)
- Mod Podge or craft glue
- Precision craft knife or scissors
- Masking tape or painter’s tape
- Fine-grit sandpaper (220 grit)
- Screwdriver (to remove hardware)
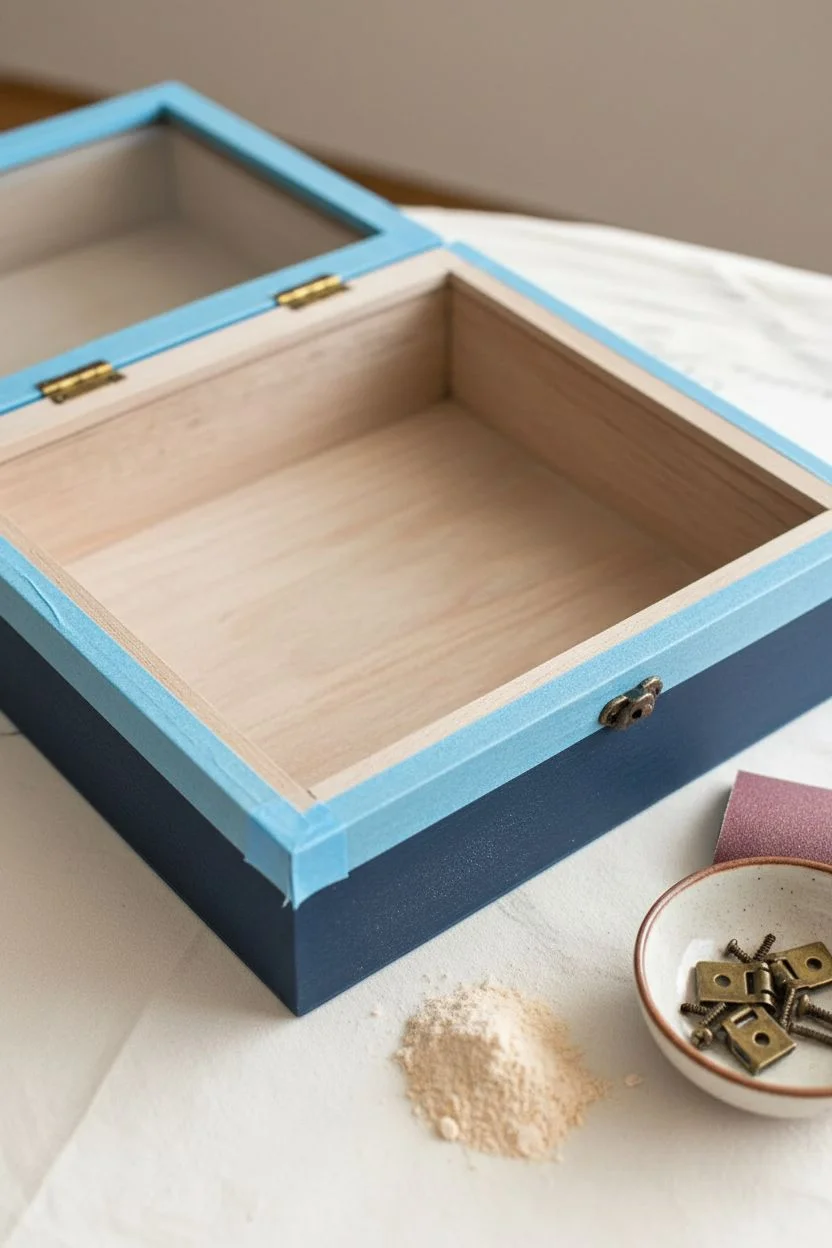
Step 1: Preparing the Box
-
Remove Hardware:
Before you begin painting, use a small screwdriver to carefully remove the hinges and latch from your wooden box. Keep these tiny screws and pieces in a small bowl so they don’t get lost. -
Sand the Surface:
Lightly sand the entire exterior and interior rims of the box using 220-grit sandpaper. This removes any rough splinters and creates a receptive surface for the paint. Wipe away all dust with a damp cloth or tack cloth. -
Mask the Interior:
Since we want the deep inner walls to remain natural wood for contrast (as seen in the photo), carefully apply painter’s tape along the inner edges of the rim. Press the tape down firmly to prevent paint bleeding.
Uneven Paint Coverage?
Dark blues can look streaky. If this happens, use a soft sponge brush instead of bristles for the final coat to get a smooth, matte finish without brushstrokes.
Step 2: Painting
-
First Coat:
Using your flat shader brush, apply an even coat of deep navy blue matte acrylic paint to the exterior of the box and the top rim of the lower section. Don’t worry about full opacity yet; thin, even coats are best. -
Second Coat Applications:
Allow the first layer to dry completely (about 20-30 minutes). I find that a second coat is almost always necessary for dark colors like navy to look rich and velvety. Apply the second coat and let it dry thoroughly. -
Inner Lid Detail:
Paint the frame of the inner lid blue as well, but be careful not to paint over the area where your patterned paper will go if the box design has an inset. If it’s flat, paint the rim only. -
Final Sanding (Optional):
For an ultra-smooth finish, you can very lightly sand the painted surface with a high-grit sandpaper (like 400 grit) once the paint is fully cured, then wipe clean.
Faux Calligraphy Hack
Can’t do calligraphy? Type your text on a computer using a script font, print it lightly onto the cardstock, and then trace over it with your marker.
Step 3: Creating the Inserts
-
Measure and Cut Vow Paper:
Measure the interior bottom of your box precisely. Cut a piece of heavyweight white cardstock or watercolor paper to fit snugly inside this space. Test the fit before writing on it. -
Draft the Calligraphy:
Using a ruler and a light pencil, draw faint guidelines on your cardstock. Sketch out the names and selected vows or date in a modern calligraphy style. Centering usually looks best for the names. -
Inking the Script:
Go over your pencil sketches with a dark grey calligraphy pen or fine-tip marker. Vary your pressure on the downstrokes to mimic the look of traditional nib calligraphy. Let the ink dry completely before erasing any pencil lines. -
Patterned Lid Liner:
Measure the inside recessed area of the box lid. Cut a piece of botanical or floral patterned scrapbook paper to these dimensions. This adds a lovely surprise when the box is opened.
Step 4: Assembly
-
Adhere the Lid Liner:
Apply a thin, even later of Mod Podge or craft glue to the back of your patterned paper. Press it firmly into the inside lid, smoothing out any air bubbles from the center outward. -
Secure the Bottom Insert:
Place a small amount of adhesive on the bottom of the box interior and press your calligraphy cardstock into place. Ensure it sits flat and level. -
Reattach Hardware:
Once all paint and glue are fully dry, carefully screw the hinges and latch back onto the box. Make sure the alignment is correct so the lid closes smoothly. -
Clean Up Edges:
Remove the painter’s tape from the inner wood walls. If any paint bled through, you can gently scrape it off with an X-Acto knife or sand it away lightly.
Now you have a stunning, personalized keepsake that beautifully protects cherished memories for years to come


Cosmic “To the Moon” Memory Box Theme
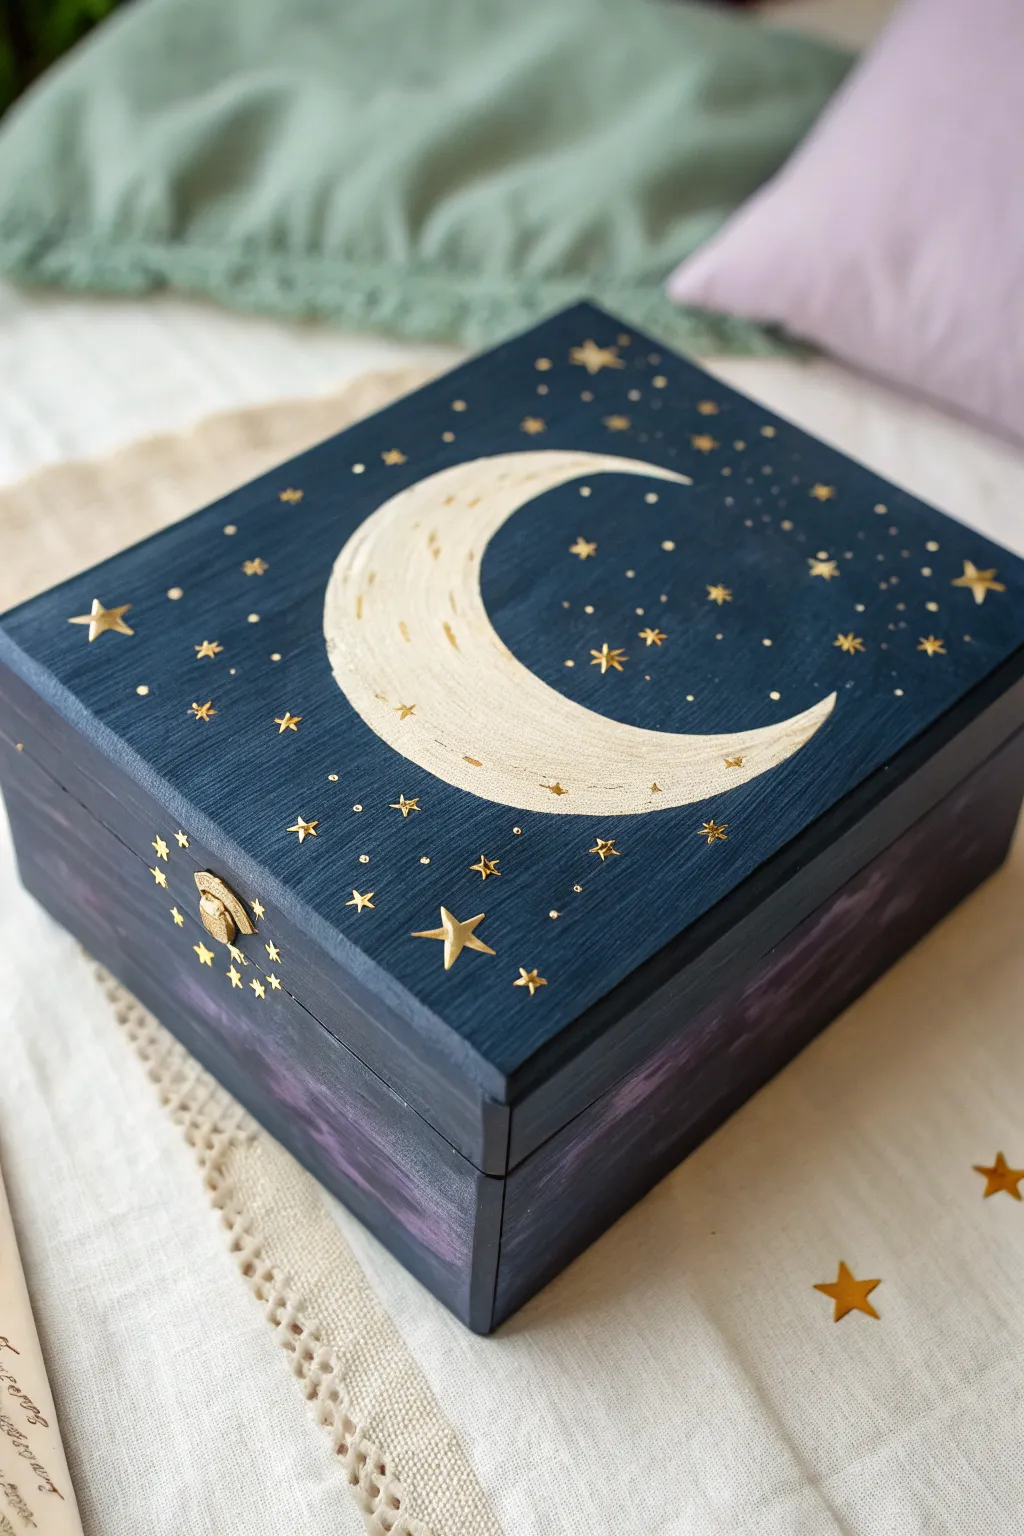
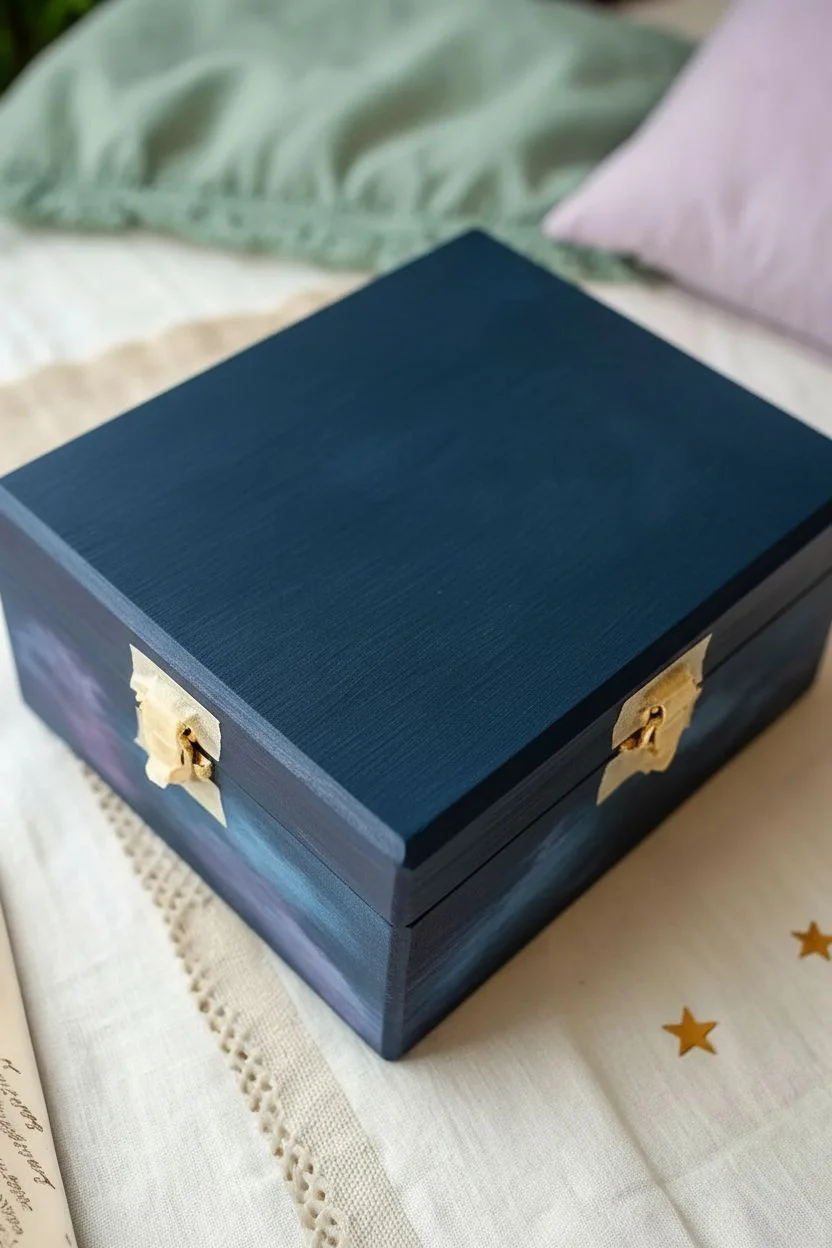
Transform a plain wooden box into a dreamy keepsake chest featuring a hand-painted crescent moon surrounded by glittering golden stars. The deep midnight blue background creates a stunning contrast that makes the metallic details truly pop, perfect for storing precious mementos.
Step-by-Step Tutorial
Materials
- Unfinished wooden box with hinged lid
- Sandpaper (fine grit, 220)
- Acrylic paints: Midnight Blue, Black, Titanium White, Purple (optional for shading)
- Metallic Gold acrylic paint or gold leaf pen
- Gold star sequins or confetti (tiny)
- Flat shader brush (medium)
- Small round detail brush
- Pencil
- Palette or paper plate
- Mod Podge or craft glue (clear drying)
- Painter’s tape or masking tape
- Matte or satin clear sealant spray
Step 1: Preparation and Base Coat
-
Prepare the surface:
Begin by lightly sanding your wooden box to remove any rough patches or splinters. Wipe away all the dust with a slightly damp cloth to ensure a smooth painting surface. -
Protect the hardware:
If possible, unscrew the latch and hinges. If they are fixed, carefully cover the metal latch and surrounding area with small pieces of masking tape to keep them paint-free. -
Mix the night sky color:
Create a deep, rich navy custom color. Mix a large amount of Midnight Blue with a touch of Black. You want a color that is dark and dramatic but not completely void of blue tones. -
Apply the first coat:
Using a flat shader brush, paint the entire exterior of the box, including the lid and sides. Use long, smooth strokes following the wood grain. Let this layer dry completely for about 20 minutes. -
Add depth and clouds:
While applying a second coat of blue, blend a tiny amount of purple or a lighter blue onto the lower sides of the box while the paint is still wet. This creates a subtle, nebulous cloud effect like the one seen on the side panel.
Uneven Moon Shape?
If your crescent looks wobbly, wait for the paint to dry completely. Then, use the dark blue background color to carefully cut back into the moon’s edge, refining the curve from the outside in.
Step 2: Painting the Crescent Moon
-
Sketch the outline:
Once the blue base is bone dry, use a pencil to very lightly sketch a large C-shape crescent moon in the center of the lid. If you aren’t confident freehanding, trace a circular object and then shift it slightly to trace the inner curve. -
Base coat the moon:
Fill in your moon shape with Titanium White paint. You may need two coats here to ensure the dark blue doesn’t show through. Let this dry fully. -
Add texture and glow:
Mix a very small amount of gold metallic paint into your white, or use a pearlescent cream color. Paint this over the white moon using curved brushstrokes that follow the shape of the crescent, giving it a textured, cratered look. -
Highlight the edges:
I like to take a tiny bit of pure gold paint on a dry brush and lightly sweep it along the inner curve of the moon to make it shimmer.
Step 3: The Starry Details
-
Paint larger stars:
Using your smallest detail brush and metallic gold paint, create several five-pointed stars scattered across the lid. Vary their sizes, placing some near the moon and others near the edges. -
Add distant starlight:
Dip the tip of a toothpick or the handle end of a paintbrush into the gold paint. Dot the lid repeatedly to create tiny, distant stars and clusters of “galaxy dust” around the larger stars. -
Apply the sequins:
For extra dimension, select a few spots where you want intense shine. Apply a tiny dot of craft glue and place a gold star sequin or confetti piece on top using tweezers. -
Decorate the front latch area:
Don’t forget the front of the box. Paint a small cluster of stars or add a few sequins around the latch mechanism to tie the design together.
Add Extra Sparkle
For a magical finish, mix a tiny pinch of very fine gold glitter into your final coat of clear sealant or Mod Podge. Brush it lightly over just the dark blue areas for a subtle starry shimmer.
Step 4: Finishing Touches
-
Remove tape:
Carefully peel off the masking tape from the hardware. If any paint seeped through, scratch it off gently with a fingernail or toothpick while the paint is strictly fresh, or use a damp cotton swab. -
Seal the artwork:
Once all paint and glue are cured (wait at least 4-6 hours), take the box to a well-ventilated area. Spray a thin, even coat of matte or satin clear sealant over the entire box to protect the paint from chipping. -
Final cure:
Allow the sealant to air dry according to the can’s instructions before handling or filling the box.
Now you have a celestial treasure chest ready to hold your most cherished memories
Watercolor Wash and Ink Memory Box Illustrations
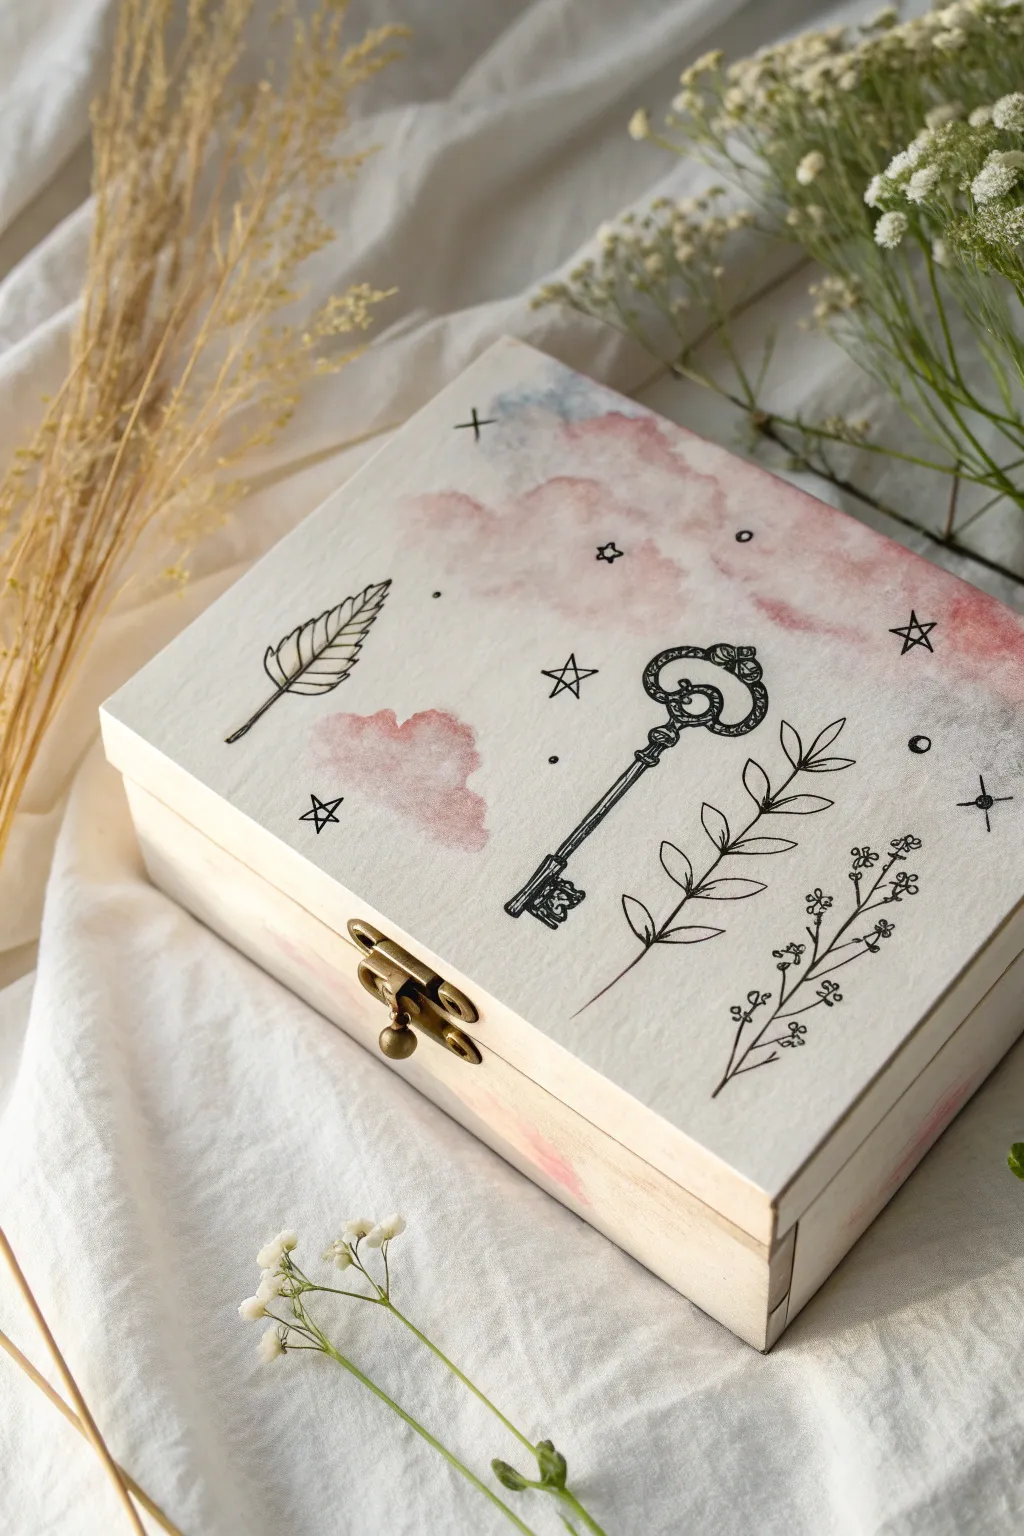
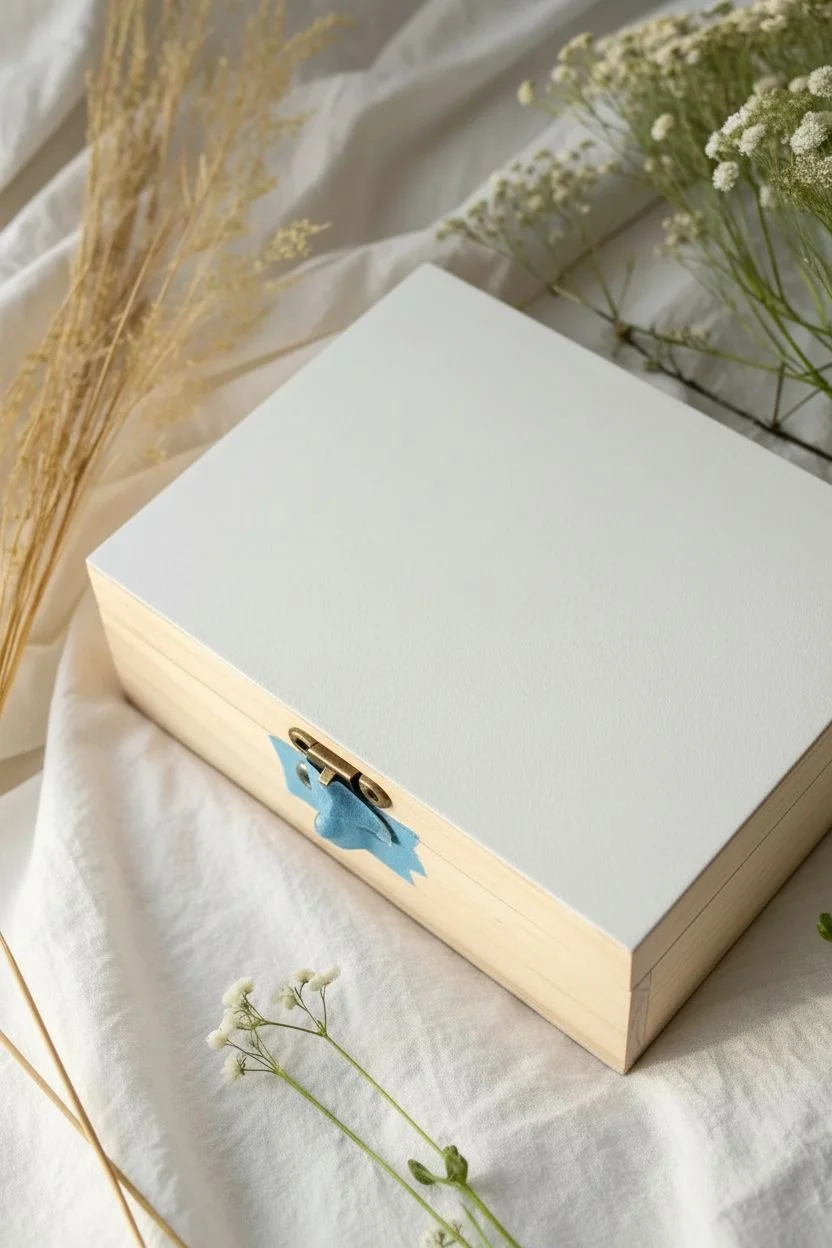
Transform a plain wooden box into a dreamy repository for your treasures using a soft watercolor wash technique paired with delicate ink illustrations. This project combines the ethereal look of pink clouds with grounding, witchy line art like keys, leaves, and stars for a truly magical finish.
Step-by-Step Tutorial
Materials
- Unfinished wooden box with metal clasp
- Fine-grit sandpaper (220 grit)
- White gesso or watercolor ground
- Acrylic paints (pink, light blue, white) or watercolors
- Medium soft round brush
- Fine liner brush or waterproof black ink pen (0.5mm)
- Clear matte varnish or sealant spray
- Paper towel
- Pencil
- Water cup
Step 1: Preparation & Base Coat
-
Sand the Box:
Begin by lightly sanding the entire surface of your wooden box, focusing on the lid where your artwork will go. This removes any rough patches and helps your primer adhere better. Wipe away all dust with a slightly damp cloth. -
Prime the Surface:
Apply a thin, even coat of white gesso or a dedicated watercolor ground to the lid. Since wood is porous, this step is crucial to create a surface that accepts watery paint without soaking it up instantly. Let this dry completely. -
Review the Clasp:
If possible, unscrew the metal clasp to avoid getting paint on it. If it’s fixed, carefully cover it with a small piece of painter’s tape to keep the hardware clean.
Bleeding Ink?
If your ink lines are feathering into the wood grain, your sealant layer was likely too thin. Apply another coat of clear gesso or matte medium before trying again.
Step 2: Creating the Watercolor Clouds
-
Prepare Your Palette:
Dilute a small amount of pink acrylic paint with water until it has a milky consistency. If you have a light blue or grey, water that down as well for subtle shadowing. -
Wet the Surface:
Brush a layer of clear water over the primed lid area. You want it damp but not forming puddles, which helps create that soft, bleeding edge look characteristic of clouds. -
Apply the Pink Wash:
Dip your round brush into the diluted pink paint and gently dab it onto the wet surface. Focus on the upper right corner and a few spots near the center-left. -
Soften the Edges:
While the paint is still wet, use a clean, slightly damp brush to feather out the edges of your pink blobs. This creates the misty, cloud-like texture rather than hard lines. -
Add Subtle Depth:
While the pink is drying but still tacky, drop in the tiniest amount of watered-down blue or grey into the shadow areas of the clouds for dimension. Don’t overwork it or it might turn muddy. -
Let it Cure:
Allow the watercolor wash to dry completely. It must be bone dry before you attempt any ink work, otherwise, the ink will bleed into the damp wood fibers. I like to let this sit for at least an hour to be safe.
Add Some Magic
For a truly mystical effect, use metallic gold ink for the stars or key. It will catch the light beautifully against the matte pink clouds.
Step 3: Inking the Illustrations
-
Sketch the Layout:
Using a pencil very lightly, sketch the placement of your key elements: a large vintage key in the center, a feather on the left, and various botanical sprigs on the right. -
Draw the Vintage Key:
Start with the key using your waterproof black pen or fine brush with ink. Outline the ornate bow (handle) first, then draw the long shaft and the bit (teeth) at the bottom. Fill in the darker areas of the metal to give it weight. -
Add the Feather:
On the left side, outline the feather’s spine. Draw short, angled strokes outward from the spine to create the vanes, leaving small gaps to show its texture. -
Ink the Botanicals:
Draw the leafy branches on the right side. Use confident, single strokes for the stems and small loops or ovals for the leaves and buds. Varying the pressure on your pen can give the leaves a nice organic feel. -
Scatter the Stars:
Fill the empty spaces with small five-pointed stars, tiny circles, and plus signs. This celestial ‘confetti’ ties the composition together and enhances the magical theme. -
Erase Pencil Marks:
Once you are absolutely certain the ink is dry, gently erase any visible pencil sketch lines. Be careful not to scrub too hard over the painted cloud areas.
Step 4: Finishing Touches
-
Side Details:
If you wish, carry the design over to the sides of the box. A few stray stars or a continuation of the pink wash near the edges makes the piece feel cohesive from all angles. -
Seal the Artwork:
Spray the lid with a clear matte varnish. Avoid brushing on a sealer if possible, as it can sometimes smear ink; a spray is much safer for preserving fine lines. -
Reattach Hardware:
Remove the tape from the clasp or screw the hardware back into place once the varnish is dry to the touch.
Now your custom keepsake box is ready to safeguard your most precious memories or small trinkets


Have a question or want to share your own experience? I'd love to hear from you in the comments below!