
I love how a simple cutting board can turn into instant decor with just a little paint and a good idea. If you’ve got a spare board (new or thrifted), these cutting board painting ideas will help you turn it into something you’ll actually want on display.
Buffalo Plaid Farmhouse Board
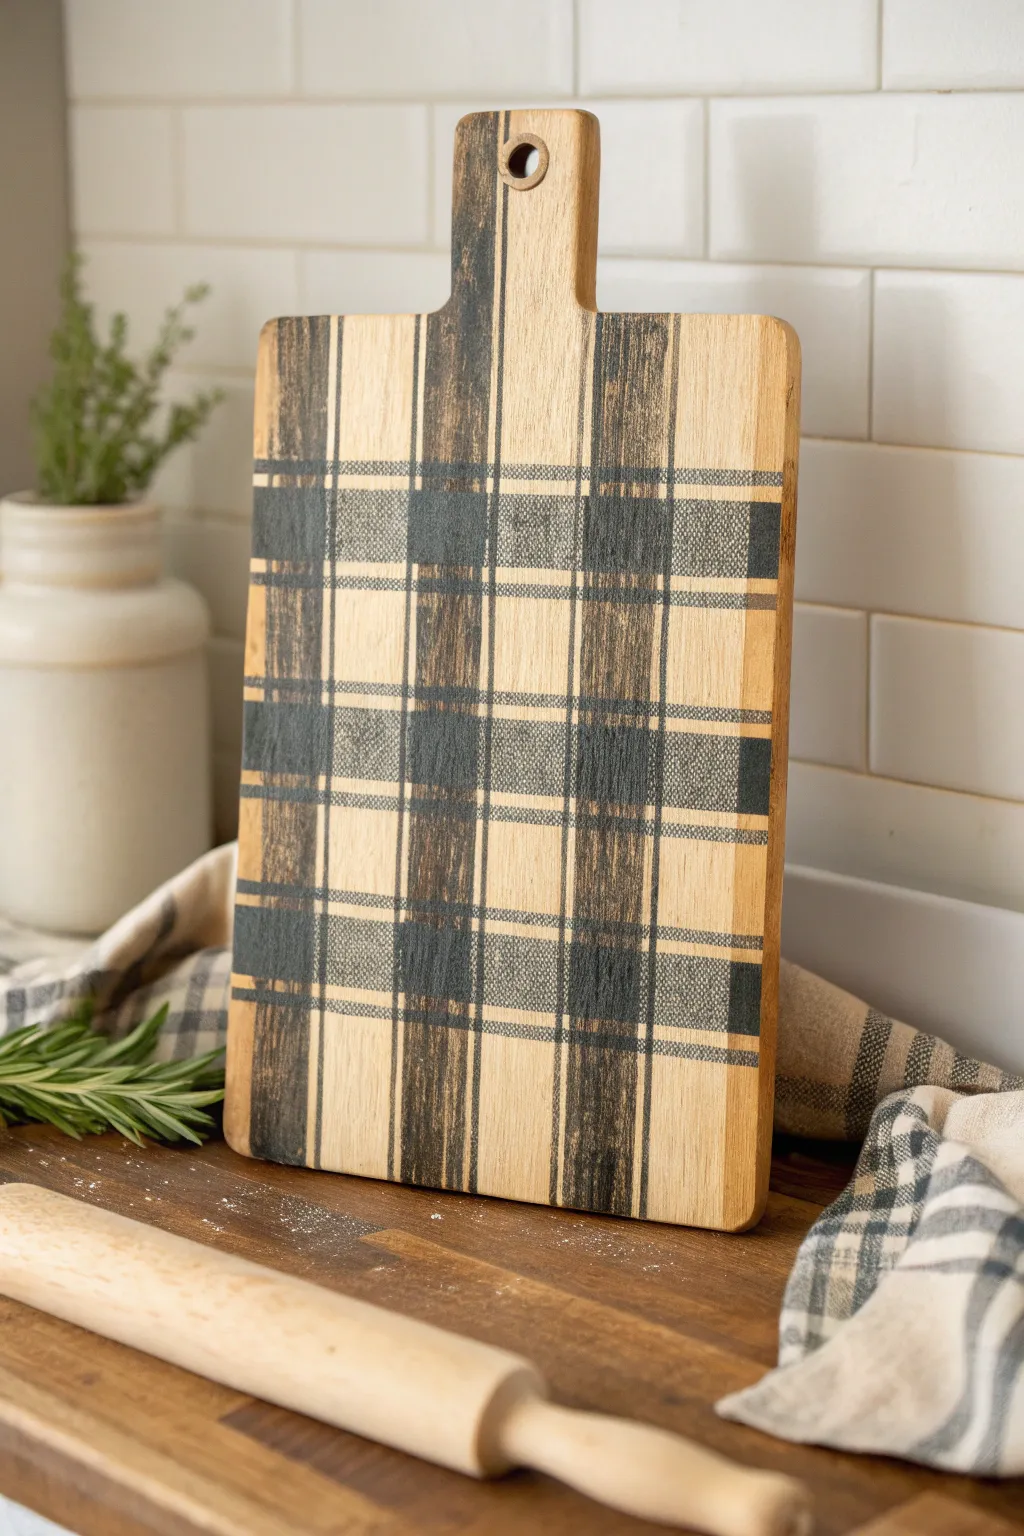

Transform a plain wooden cutting board into a charming farmhouse accent with this simple painted plaid technique. The distressing and matte finish give it a warm, aged look that perfectly complements cozy kitchen decor.
How-To Guide
Materials
- Unfinished wooden cutting board with handle
- Painter’s tape (1-inch width)
- Black acrylic craft paint
- Gray acrylic craft paint (or mix black and white)
- Small foam brush or stencil brush
- Fine-grit sandpaper (220-grit)
- Matte clear sealer or polycrylic
- Paper plate or palette
- Ruler (optional, but helpful for spacing)
Step 1: Preparation & First Vertical Stripes
-
Prepare the surface:
Start with a clean, dry cutting board. If the wood is rough, give it a quick sanding with fine-grit sandpaper and wipe away any dust with a tack cloth or damp towel to ensure smooth paint adhesion. -
Apply vertical tape lines:
Lay strips of painter’s tape vertically down the board. Start from the left edge. Place one strip of tape, then leave a gap approximately the width of the tape, then place another strip. Continue this pattern across the entire width of the board. -
Secure the edges:
Run your finger or a credit card firmly along the edges of the tape strips. This is crucial for preventing paint bleed and getting crisp lines, especially on wood grain surfaces. -
Paint the gray stripes:
Pour a small amount of gray acrylic paint onto your palette. Using a foam brush, dab the paint into the open vertical spaces between the tape. Apply a thin, even coat. It doesn’t need to be perfectly opaque as we will distress it later. -
Remove tape and dry:
Remove the painter’s tape immediately while the paint is still wet to avoid peeling. Let the gray vertical stripes dry completely before moving to the next step. You can use a hairdryer on a low setting to speed this up.
Tape Spacer Hack
Don’t measure the gaps! simply place a piece of tape down as a spacer, place your next tape strip beside it, and then peel up the spacer to use for the next gap. Perfect spacing every time.
Step 2: Horizontal Stripes & Intersections
-
Apply horizontal tape lines:
Once the gray stripes are fully dry, tape off horizontal stripes across the board using the same method: one strip of tape, followed by an open space of the same width. -
Seal tape edges again:
Just like before, press down firmly on the tape edges. This step is even more important now that you are taping over painted areas. -
Paint horizontal gray stripes:
Using the same gray paint, fill in the horizontal open spaces. I find that dabbing rather than dragging the brush helps keep the paint from pushing under the tape. -
Paint the intersections black:
While the horizontal tape is still on and the gray paint is wet, identify the squares where the new wet gray paint crosses over the first set of dry vertical gray stripes. These darker intersection points create the plaid effect. -
Apply black paint:
Dip your foam brush into black paint. Carefully paint *only* those intersection squares black. These are the spots where the vertical and horizontal ‘threads’ of the plaid would naturally overlap. -
Reveal the pattern:
Gently peel off the horizontal tape strips. You should now see a classic buffalo check pattern appearing, with white (wood) squares, gray stripes, and black intersection blocks.
Level Up: Functional Art
Only paint one side of the board and seal it well. Leave the back side unfinished and treat it with food-safe butcher block oil so you can actually use the reverse side for charcuterie.
Step 3: Finishing Touches
-
Let it cure:
Allow the entire board to dry completely. Since the black paint might be slightly thicker, give it extra time to ensure it isn’t tacky. -
Distress the surface:
Take your 220-grit sandpaper and lightly sand over the entire painted surface. Focus on the edges and the center to simulate wear. This breaks up the solid paint lines and gives it that authentic rustic farmhouse texture. -
Wipe clean:
Thoroughly wipe off all sanding dust with a clean, dry cloth. Any remaining dust will get trapped in the sealer. -
Seal the board:
Apply a coat of matte clear sealer over the entire front and sides of the board. This protects the paint from chipping and makes dusting easier.
Prop your finished board on a kitchen counter or hang it on the wall for an instant touch of cozy charm


Herb Garden Botanical Labels
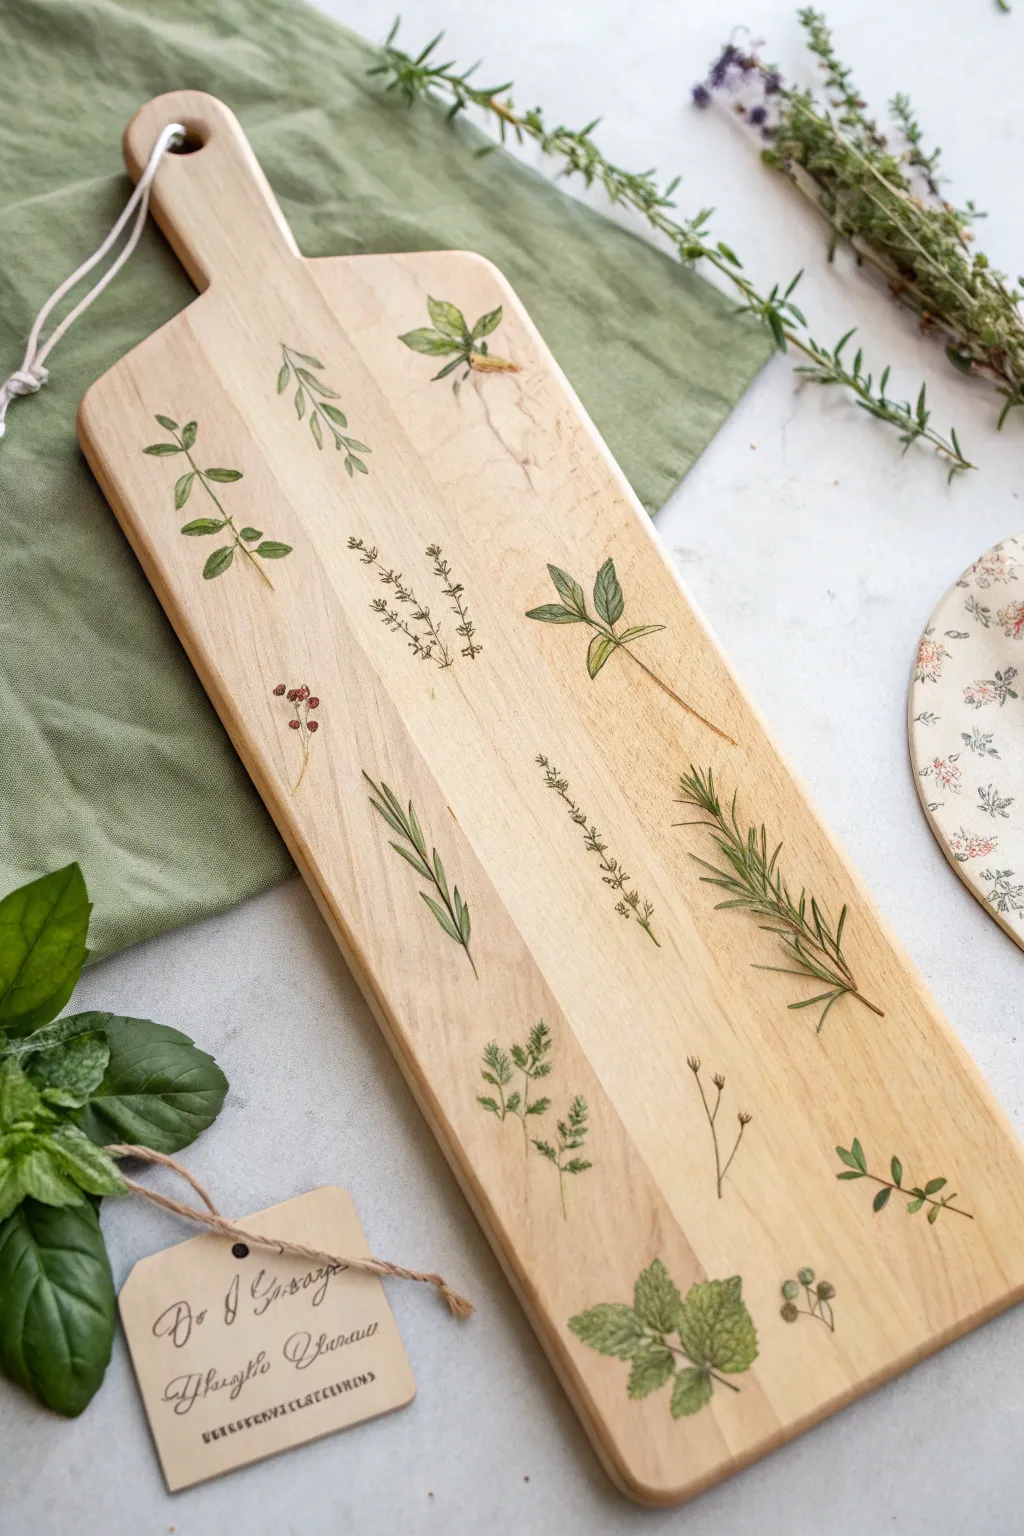
Transform a plain wooden paddle board into a functional piece of art reminiscent of vintage scientific illustrations. This project uses delicate watercolour techniques on wood to create airy, realistic herb sprigs that serve as both decoration and culinary inspiration.
Step-by-Step Guide
Materials
- Unfinished wooden paddle serving board (pale wood like maple or birch works best)
- Fine grit sandpaper (320-400 grit)
- Watercolor ground (transparent) or clear gesso
- Pencil (HB or H)
- Watercolor paints (sap green, olive green, burnt sienna, yellow ochre, alizarin crimson)
- Small round brushes (sizes 0, 1, and 2)
- Reference images of herbs (rosemary, thyme, sage, mint, basil)
- Paper towels
- Jar of water
- Food-safe sealant (like beeswax mineral oil blend or polyurethane if purely decorative)
Step 1: Preparation & Layout
-
Sand the surface:
Begin by sanding the entire face of the board with fine-grit sandpaper. You want an incredibly smooth surface so the wood grain doesn’t dictate your brushstrokes later. Wipe away all dust with a tack cloth or slightly damp paper towel. -
Apply the ground:
Wood is naturally absorbent, which makes painting fine details difficult. Apply two thin coats of transparent watercolor ground or clear gesso to the area where you plan to paint. Let it dry completely between coats according to the manufacturer’s instructions. -
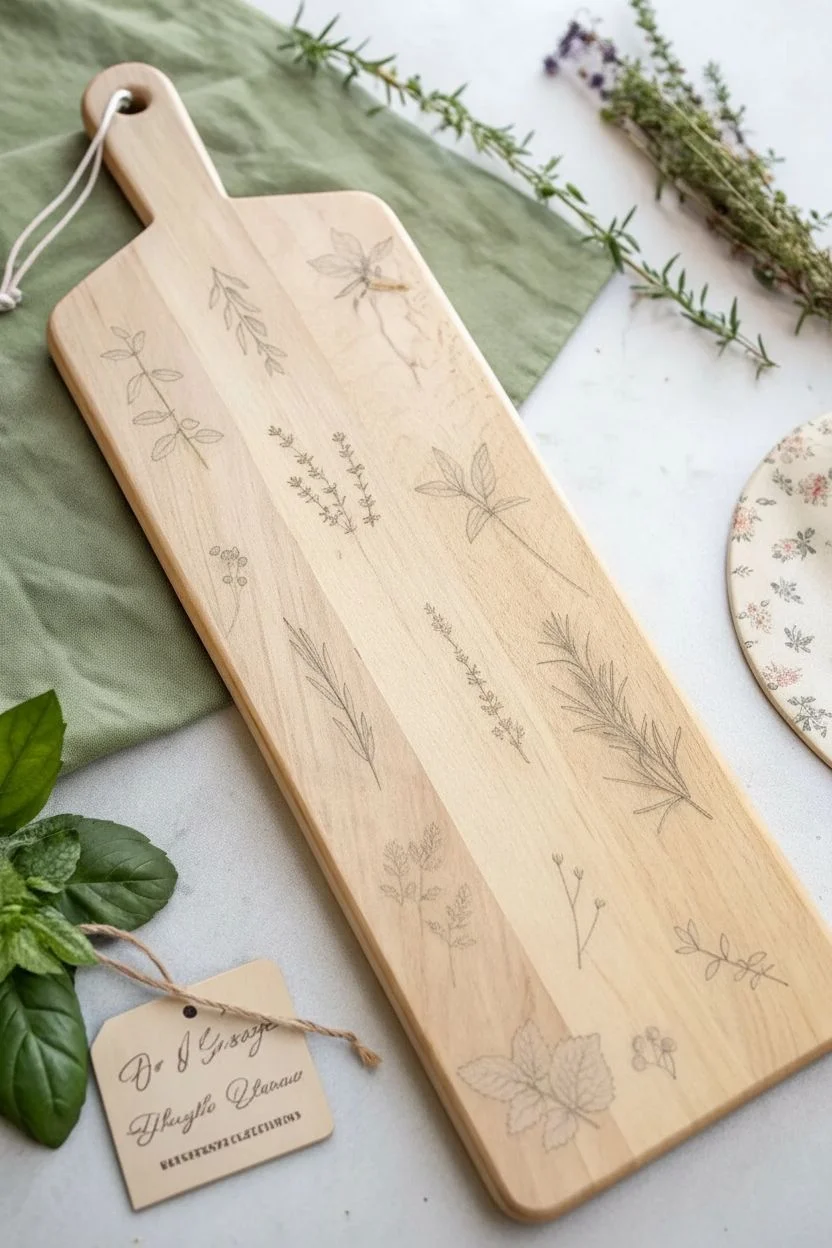
Sketch the composition:
Lightly sketch your herb sprigs directly onto the prepared wood using an H pencil. Arrange them loosely rather than in rigid rows to keep an organic feel. Include a mix of leaf shapes—some needle-like (rosemary), some broad (basil or sage), and some trailing (thyme).
Bleeding Lines?
If paint bleeds into the wood grain, your sealant layer was too thin. Let it dry, sand that spot lightly, and re-apply the clear watercolor ground before repainting.
Step 2: Painting the Greenery
-
Mix your base greens:
Prepare a few puddles of green on your palette. I like to mix sap green with a touch of burnt sienna for a warm, earthy olive tone, and keep a pure sap green for brighter leaves. Having variations ready helps the plants look natural. -
Start with stems:
Using your smallest brush (size 0), paint the central stems first using a very dilute mix of brown and green. Keep these lines extremely thin; you can always thicken them later, but you can’t make them thinner. -
Paint broad leaves:
For herbs like sage or basil (shown at the bottom), switch to a size 2 brush. Use a ‘press and lift’ motion—press the belly of the brush down to create the wide part of the leaf, then lift as you pull back to create a sharp point. Vary the opacity by adding more water for distant leaves. -
Detail the needle herbs:
For rosemary (middle right), go back to the size 0 brush. Use short, quick flickering strokes branching off the main stem. Use a darker, more concentrated green for the needles closer to the stem to create depth. -
Add delicate thyme:
For the thyme sprigs (center), use the very tip of your brush to dab tiny, tear-drop shapes along the stems. These leaves are incredibly small, so barely touch the wood with your brush.
Vintage Look
For an aged botanical chart feel, apply a very thin wash of yellow ochre or tea stain over the background wood (avoiding the green leaves) before sealing.
Step 3: Adding Depth & Color
-
Layering shadows:
Once the base layers are dry, mix a darker green (add a tiny bit of red or purple to your green mix). Paint this shadow color where leaves overlap or meet the stem. This small step stops the herbs from looking flat. -
Introduce accent colors:
Many herbs have woody stems or flowers. Use burnt sienna for the woody base of rosemary or sage stems. If you sketched berries or flowers (like the red accents on the left), use alizarin crimson sparingly. -
Softening edges:
If any paint edge looks too harsh, dampen a clean brush with clear water and gently run it along the edge of the dried paint to soften it slightly. This mimics the botanical illustration style. -
Evaluate the balance:
Step back and look at the whole board. If a sprig looks too light, add another glaze of color. If a space feels empty, consider adding a tiny fallen leaf or a loose berry.
Step 4: Finishing
-
Let it cure:
Allow the paint to dry for at least 24 hours to ensure all moisture has evaporated from the watercolor ground. -
Seal the artwork:
If this board will be used for food, apply a food-safe sealant like a beeswax/mineral oil finish over the entire board. Note that watercolour is delicate; for heavy use, apply multiple coats. If it is purely decorative, a matte polyurethane spray offers the strongest protection. -
Add the hanger:
Thread a piece of leather cord or rustic twine through the handle hole to complete the natural, garden-fresh look.
Hang your beautiful herbarium board in the kitchen to bring a touch of the garden indoors year-round


Lemon and Citrus Slices
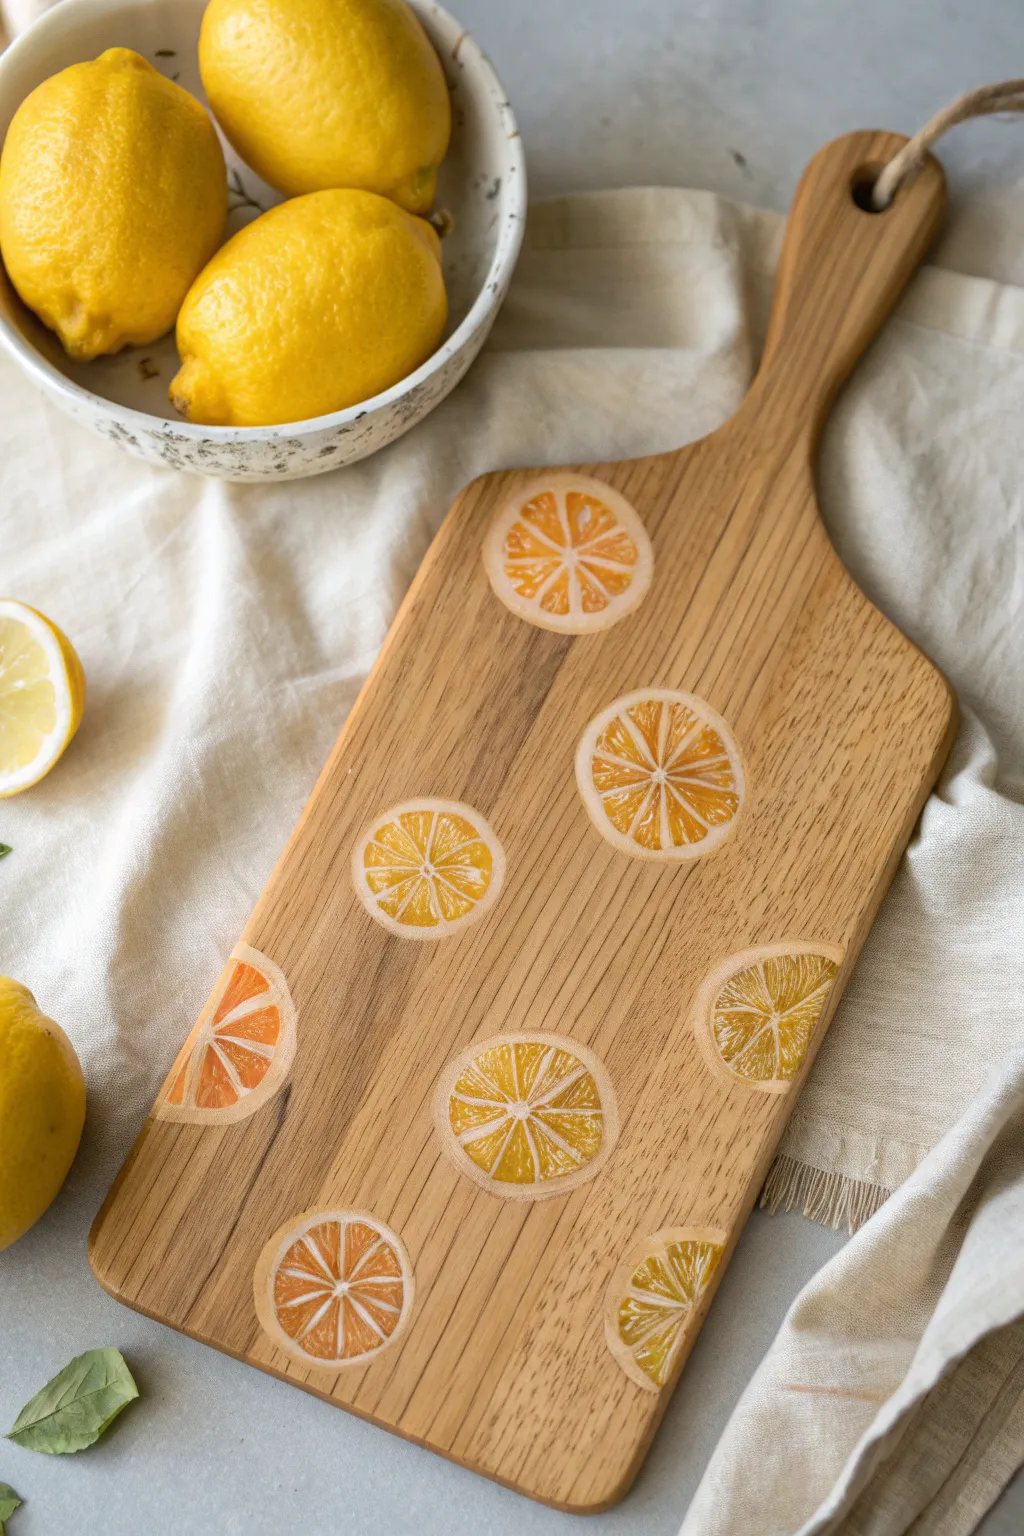
Transform a plain wooden cutting board into a fresh kitchen accent with these beautifully detailed citrus slice paintings. This project uses the natural grain of the wood as a backdrop, creating a transparent, realistic effect that makes the fruit look like it’s resting right on the surface.
Step-by-Step
Materials
- Wooden cutting board (paddle shape preferred)
- Sandpaper (220 grit)
- Acrylic paints (Titanium White, Cadmium Yellow, Yellow Ochre, Cadmium Orange)
- Small flat synthetic brush (size 4 or 6)
- Fine liner brush (size 0 or 00)
- Small round brush (size 2)
- Paper plate or palette
- Pencil for sketching
- Compass or small circular objects (cups, jars) for tracing
- Food-safe sealant (like beeswax or mineral oil finish) or water-based polyurethane (if for display only)
Step 1: Preparation and Layout
-
Prepare the surface:
Before touching a brush to the board, give the surface a light sanding with 220-grit sandpaper. This smooths out any rough grain that might interrupt your fine lines. Wipe away all dust with a damp cloth or tack cloth. -
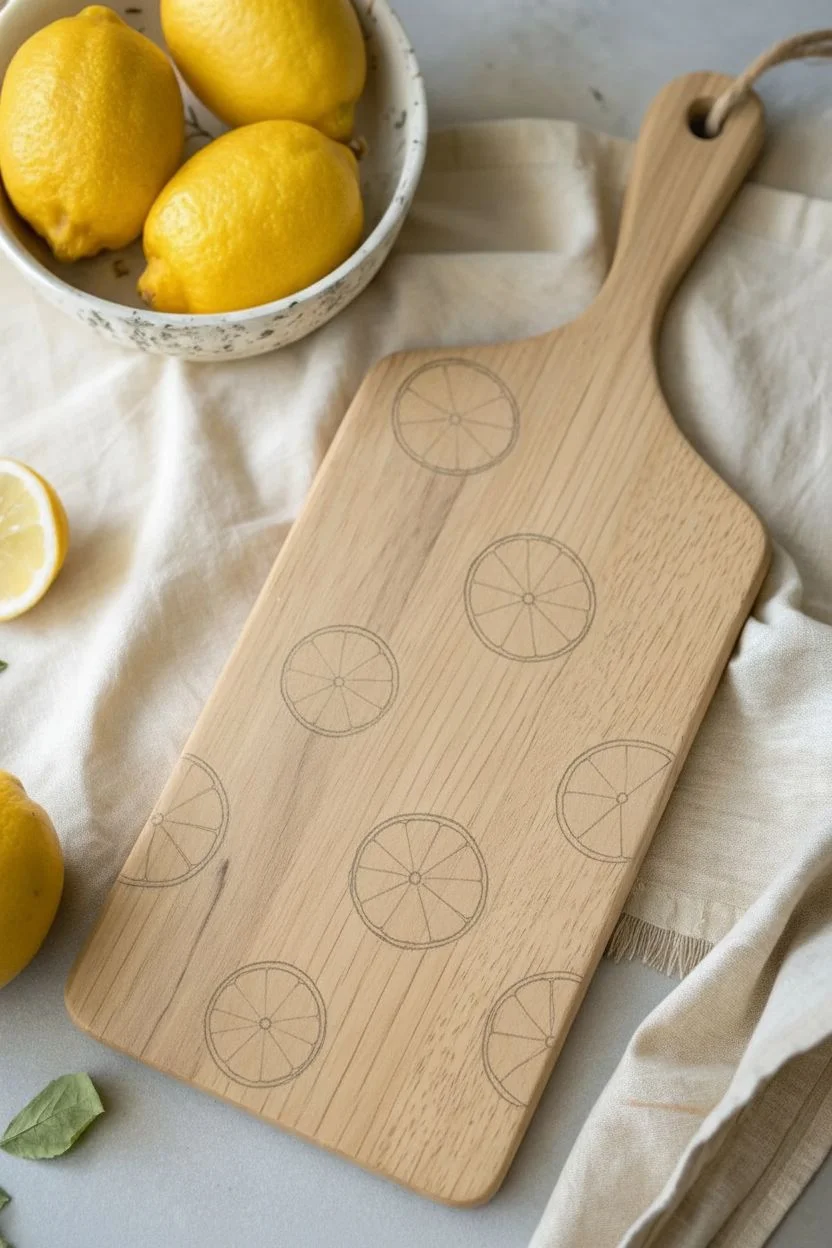
Trace the shapes:
Using a compass or by tracing the rims of small glasses, lightly draw 5-7 circles scattered across the board. Vary the placement so some look ‘complete’ while others are positioned on the edge of the board as ‘partial’ slices for a candid, scattered look. -
Sketch the segments:
Inside each circle, lightly sketch the internal structure of the citrus. Draw a small central point, then radiate lines outward to create the triangular segments. Don’t make them perfectly symmetrical; organic imperfection makes the fruit look real.
Bleeding Lines?
If paint bleeds into the wood grain, apply a clear coat of matte sealer to the sketched area before painting. This creates a barrier for crisp lines.
Step 2: Base Layers
-
Mix the pith color:
Mix Titanium White with a tiny dot of Yellow Ochre to create a warm off-white. This will be the colour of the pith (the white part under the rind). -
Paint the outer rim:
With a fine liner brush, paint the circumference of each circle using your off-white mixture. Keep this line thin but distinct. -
Define the segments:
Using the same off-white mix, carefully paint the radiating lines that separate the fruit segments. These lines should taper slightly as they move toward the center. -
Create the heavy pith:
Thicken the white line slightly where the rind meets the fruit flesh. You want a distinct white border enclosing the juicy sections. -
Dry the base:
Allow these white outlines to dry completely. Since we are painting on wood, the first layer might soak in a bit, which is fine.
Pro Tip: Translucency
Water down your acrylics slightly (glazing medium works best) for the fruit pulp. The wood grain showing through mimics citrus translucency.
Step 3: Adding the Juicy Color
-
Mix the yellow tones:
Create two yellow mixtures: a bright, pure yellow (Cadmium Yellow) and a slightly darker, orange-tinted yellow. We will use these to create depth using a wet-on-wet technique. -
Fill the segments:
Working one slice at a time, fill the triangular segments with the bright yellow paint. I prefer to leave tiny, microscopic gaps of wood showing through occasionally to simulate texture. -
Add depth immediately:
While the yellow paint is still wet, touch the outer corners of each triangle (near the rind) with the orange-tinted mix. Use a clean, slightly damp brush to gently blend this inward. -
Simulate pulp texture:
Once the base yellow is tacky but almost dry, take your smallest liner brush with a creamy white or very pale yellow. Paint tiny, irregular ‘V’ shapes or teardrops inside the segments to look like pulp sacs. -
Vary the fruits:
For variety, paint a few slices using more orange in your base mix to resemble oranges or tangerines, distinguishing them from the lemons.
Step 4: Finishing Details
-
Tidy the rind:
Go back to the outer ring. On the very outside edge of the white pith, paint a thin line of yellow (or orange) to represent the skin of the fruit. -
Add highlights:
Add tiny dots of pure Titanium White to the juiciest parts of the segments to make them look wet and glistening. -
Let it cure:
Allow the paint to cure for at least 24-48 hours. Acrylic needs to bond securely to the wood fibers. -
Seal the board:
If this board is for serving food, use a food-safe wax or mineral oil over the entire board. If it is purely decorative, a coat of water-based polyurethane will protect the art permanently.
Now you have a refreshing, custom piece of kitchen art that looks good enough to squeeze


Olive Branch Border
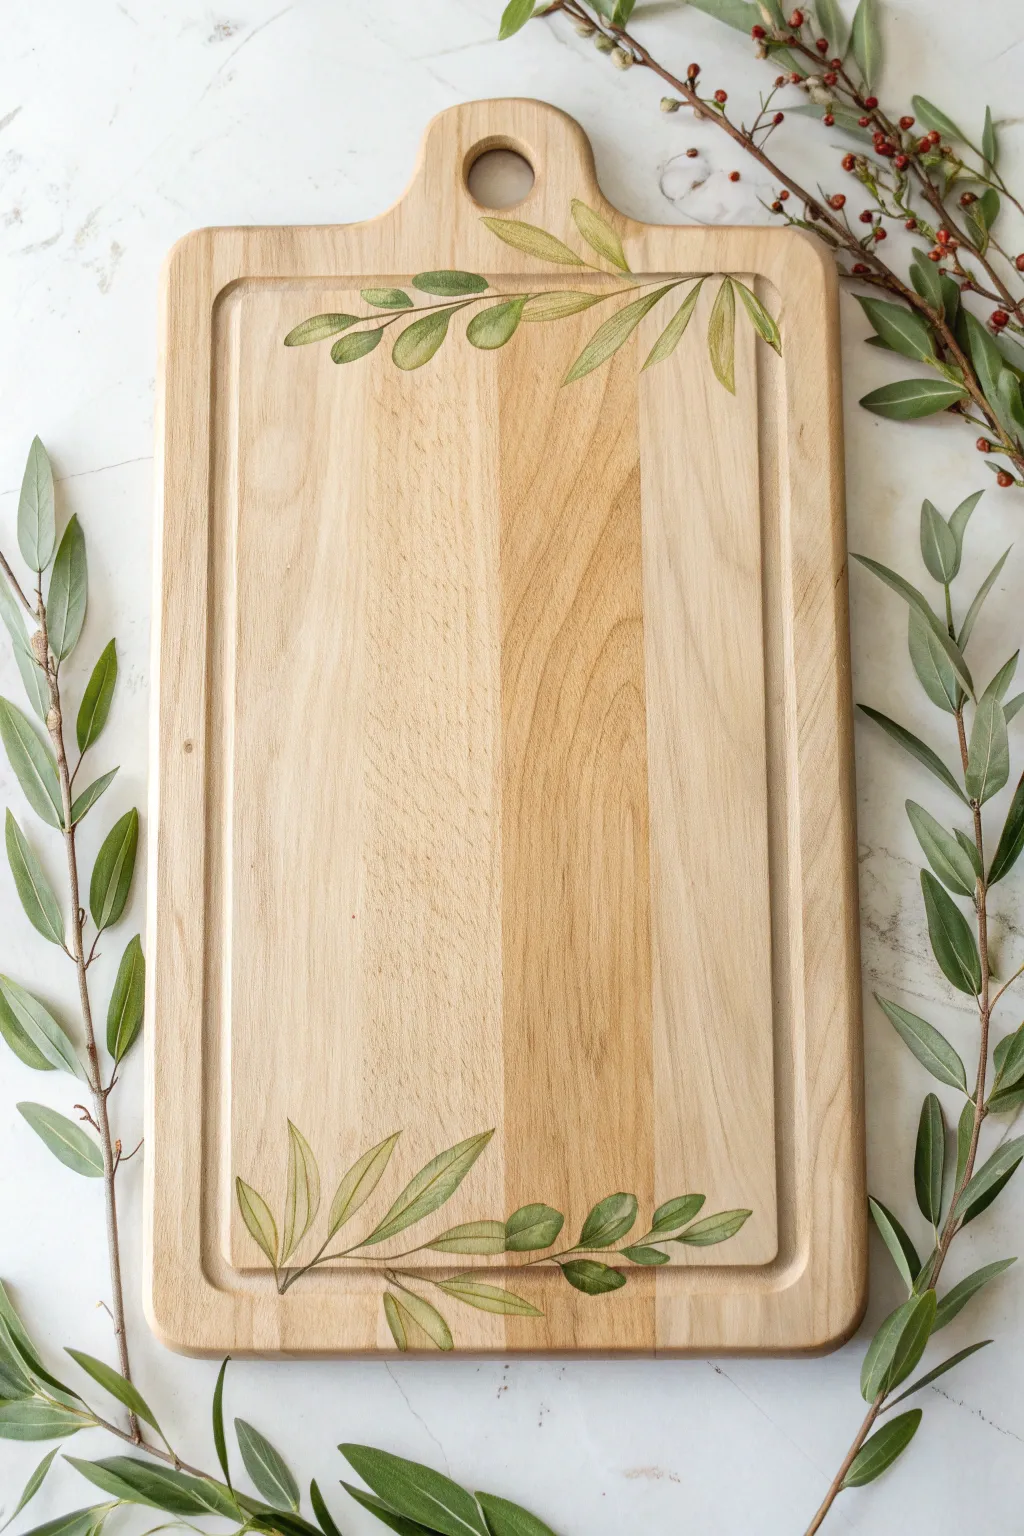
Transform a plain wooden cutting board into a stunning piece of kitchen art with this delicate olive branch design. The translucent, watercolor-style leaves allow the natural wood grain to peek through, creating an organic and elegant finish perfect for serving charcuterie.
Step-by-Step Guide
Materials
- Unfinished wooden cutting board
- Medium grit sandpaper (180-220)
- High-flow acrylic paints or watercolor paints (Sap Green, Olive Green, Burnt Umber, Yellow Ochre)
- Acrylic glazing medium (if using acrylics)
- Round synthetic brushes (Size 2 and 4)
- Fine liner brush (Size 0 or 00)
- Pencil
- Paper towel
- Water cup
- Food-safe sealant (like mineral oil, beeswax, or butcher block conditioner)
Step 1: Preparation & Sketching
-
Sand the surface:
Begin by lightly sanding the entire surface of your cutting board with 180-220 grit sandpaper. You want the wood to be extremely smooth so your paint doesn’t bleed into rough grain lines. Wipe away all dust with a tack cloth or damp paper towel. -
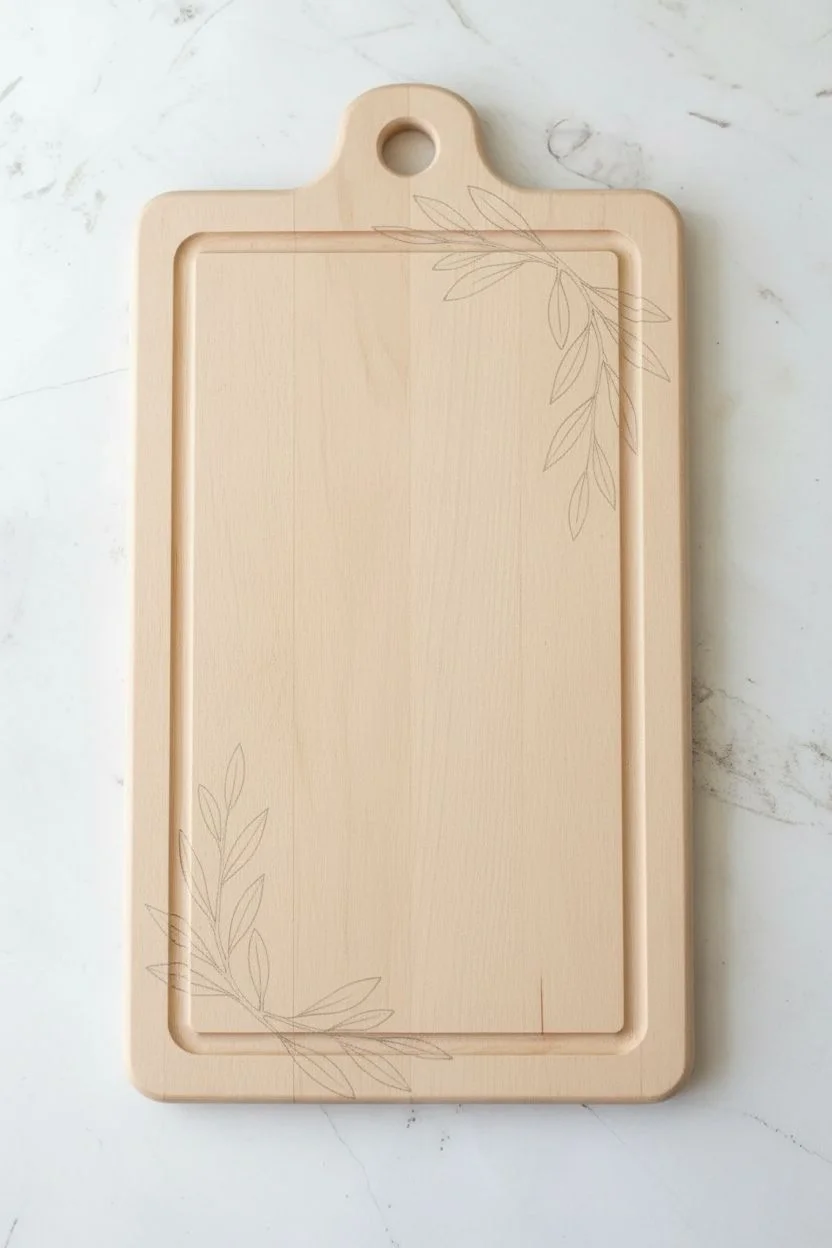
Sketch the top spray:
Using a pencil, lightly sketch the top branch design. Start at the right side of the handle hole and draw a main stem curving downward across the top right corner. Then, add a smaller stem stemming from the left side, slightly overlapping the groove if desired. -
Add leaves to top sketch:
Along these stems, draw almond-shaped leaves. Vary their angles—some pointing up, some drooping down—to create a natural flow. -
Sketch the bottom spray:
Repeat the process for the bottom left corner. Draw a main stem that sweeps upwards from the bottom edge. Add a secondary branch crossing underneath it. This asymmetrical balance keeps the design dynamic. -
Refine the leaf shapes:
Flesh out the bottom sketch with leaves. Keep them loose and slightly irregular; real olive leaves aren’t perfect clones of each other.
Wood Grain Wisdom
Work with the grain, not against it. When painting the larger leaf areas, brush in the direction of the wood grain to help the pigment settle naturally into the fibers.
Step 2: Painting the Foliage
-
Prepare the translucent mix:
To achieve the look in the photo, your paint needs to be semi-transparent. Mix your Sap Green with a generous amount of glazing medium (or water, if using watercolors). You want a consistency that stains the wood rather than coating it. -
Paint the first layer of leaves:
Using the Size 4 round brush, fill in the leaf shapes with your diluted green mix. Paint in single, confident strokes where possible. Don’t worry about perfect coverage; letting the wood grain show through is essential for this style. -
Add color variation:
While the first layer is still slightly damp, mix a drop of Yellow Ochre into your green. Touch this lighter warm tone to the tips of a few random leaves to simulate sun-faded areas. -
Paint the stems:
Switch to your Size 2 brush. Mix Burnt Umber with a touch of Olive Green to get a brownish-green hue. Carefully trace over your pencil lines for the stems. Keep the pressure light so the stems remain thin and delicate. -
Connect the leaves:
Ensure each painted leaf connects back to the main stem with a very fine line of your stem color. This grounds the floating leaves. -
Let it dry:
Allow the paint to fully dry for at least 30 minutes. The wood might absorb the moisture quickly, but the pigment needs to set.
Step 3: Detailing & Finishing
-
Mix a shadow color:
Create a slightly darker green by adding a tiny dot of Burnt Umber or a darker green to your original mix. This will be used for detailing. -
Add the veins:
Using the liner brush (size 0 or 00), paint a definitive central vein down the middle of each leaf. I like to keep this line very thin and slightly broken in places so it doesn’t look like a cartoon outline. -
Deepen the overlaps:
Where one leaf overlaps another or tucks behind a stem, apply a small glaze of the darker green mix. This adds depth and dimension, making the branches look three-dimensional. -
Erase guidelines:
Once the paint is bone dry—give it a full hour to be safe—gently erase any visible pencil marks that weren’t covered by paint. -
First seal coat:
Since this is a serving board, you must seal it. Apply a generous coat of food-safe mineral oil or butcher block conditioner with a soft cloth. Rub it in well, going over the painted areas gently. -
Final buffing:
Let the oil soak in overnight. If the wood looks dry the next day, apply a second coat. Finally, buff the board with a clean cotton rag to bring out a soft, satin sheen.
Berry Accents
For a pop of color, use the back end of your paintbrush dipped in deep red or purple paint to add tiny clusters of olives or berries along the stems.
Now your custom board is ready to act as a beautiful centerpiece for your next gathering
BRUSH GUIDE
The Right Brush for Every Stroke
From clean lines to bold texture — master brush choice, stroke control, and essential techniques.
Explore the Full Guide
Wreath Centerpiece With Bow
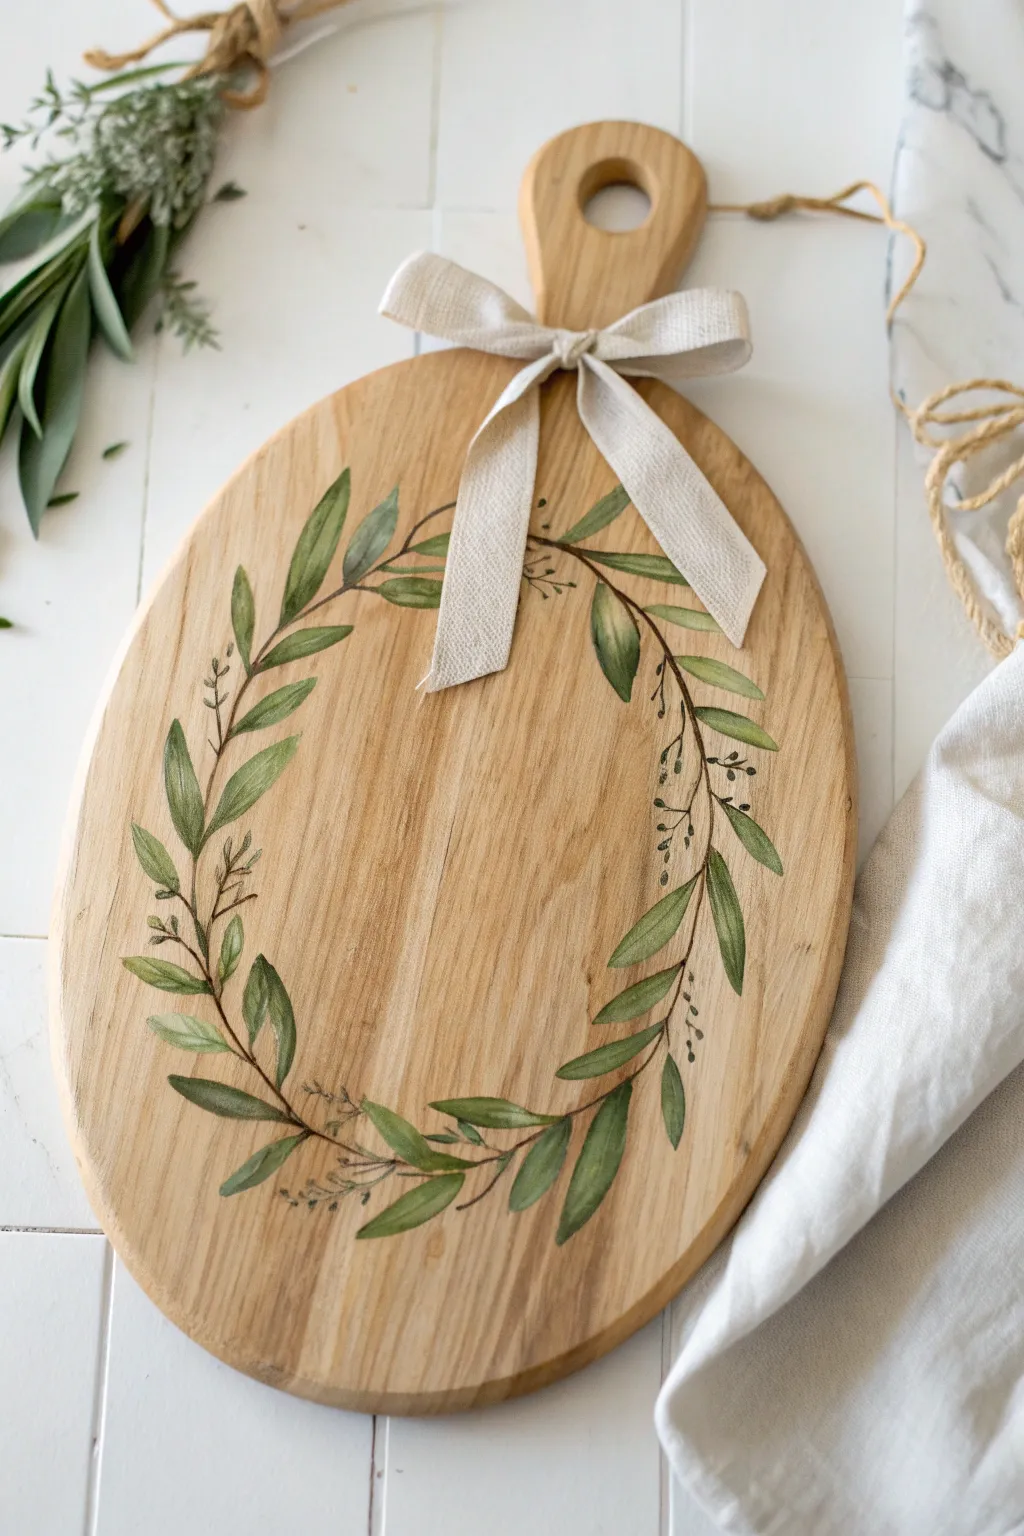

Transform a plain wooden cutting board into charming farmhouse decor with this delicate hand-painted wreath. The translucent leaf details let the natural wood grain shine through, creating a soft, organic look that is perfectly finished with a linen bow.
Step-by-Step Tutorial
Materials
- Oval wooden cutting board with handle
- Fine-grit sandpaper (220 grit)
- Acrylic paints (olive green, forest green, muted brown, white)
- Round paintbrushes (size 2 and size 4)
- Fine liner brush (size 0 or 00)
- Pencil
- Mixing palette
- Water cup and paper towels
- Matte finish spray sealant
- Beige linen ribbon (1-inch width)
Step 1: Preparation and Sketching
-
Prep the surface:
Start by lightly sanding the entire surface of the cutting board with 220-grit sandpaper to remove any existing glossy finish or rough patches. Wipe it clean with a damp cloth to remove all dust, as paint adheres best to raw or matte wood. -
Mark the center:
Lightly find the visual center of the oval part of the board. You don’t need to measure perfectly, but having a sense of the middle helps keep your wreath balanced. -
Lightly sketch the main vine:
Using a pencil, draw a large circle or oval shape that follows the contour of the board. Keep your lines incredibly faint so they are easy to erase or cover later. -
Add leaf placement:
Along your circle, sketch small, teardrop-shaped leaves extending outwards from the main line. Alternate the direction of the leaves to mimic natural growth: some pointing left, some right, and overlap them slightly in a few areas.
Step 2: Painting the Foliage
-
Mix your base green:
On your palette, mix olive green with a tiny drop of water. You want the consistency to be slightly fluid, almost like heavy cream, which helps the paint flow smoothly over the wood grain without looking too plastic. -
Paint the stem:
Use your fine liner brush and the diluted brown paint to trace the main circular vine. Keep the pressure light to ensure the line interacts naturally with the wood texture like a real branch would. -
Block in the leaves:
Switch to the size 4 round brush. Dip it into your olive green mix and paint the leaves using a ‘press and lift’ motion. Start at the base of the leaf with light pressure, press down to widen the belly of the brush, and lift up to create a sharp tip. -
Vary the shades:
While the first leaves are still damp, mix a darker forest green. Add this darker shade to the base of random leaves or the underside of the wreath curve to create depth and shadow. -
Add highlights:
Mix a little white into your original olive green. I find that brushing this lighter tint onto the tips of the leaves draws the eye and gives the foliage a sun-kissed appearance. -
Create thin branches:
Using the liner brush with brown paint, connect each leaf back to the main vine with a very thin, delicate stroke. -
Paint tiny buds:
To fill in sparse areas, paint very fine, spindly twigs extending out from the main Wreath. Add tiny dots at the ends using the very tip of your brush to represent small buds or berries.
Watercolor Effect
To get that translucent look on wood w/ acrylics, use a glazing medium instead of water. It thins the pigment without breaking the binder, keeping the paint durable.
Step 3: Finishing Touches
-
Refine the details:
Step back and look at your composition. If any area looks too empty, add a small sprig or a floating leaf. Use a clean, slightly damp brush to soften any edges that look too harsh. -
Let it cure:
Allow the paint to dry completely. Acrylics on wood can feel dry to the touch quickly, but give it at least 2-3 hours to fully set into the grain. -
Seal the artwork:
Spray the board with a matte clear coat. Apply 2-3 light coats rather than one heavy one to prevent drips. This protects the painting from dust and moisture. -
Tie the bow:
Take your beige linen ribbon and tie a simple bow around the neck of the handle. Trim the tails so they drape nicely over the top of the wreath without obscuring the painting.
Personalize It
Add a hand-lettered family initial or a short word like ‘Gather’ in the center of the wreath using a stencil or freehand calligraphy.
Now you have a stunning, custom piece of kitchen art ready to hang or gift
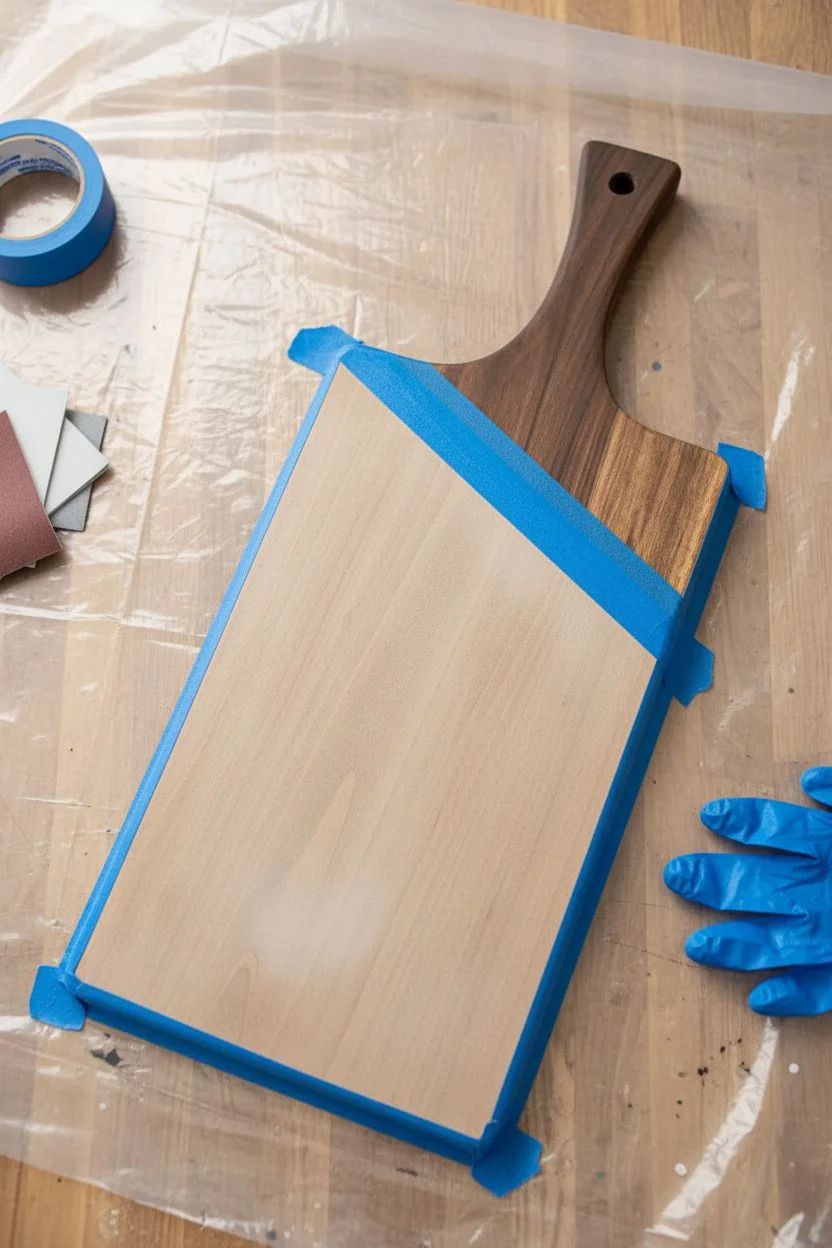
Painted Edges and Dipped Corners
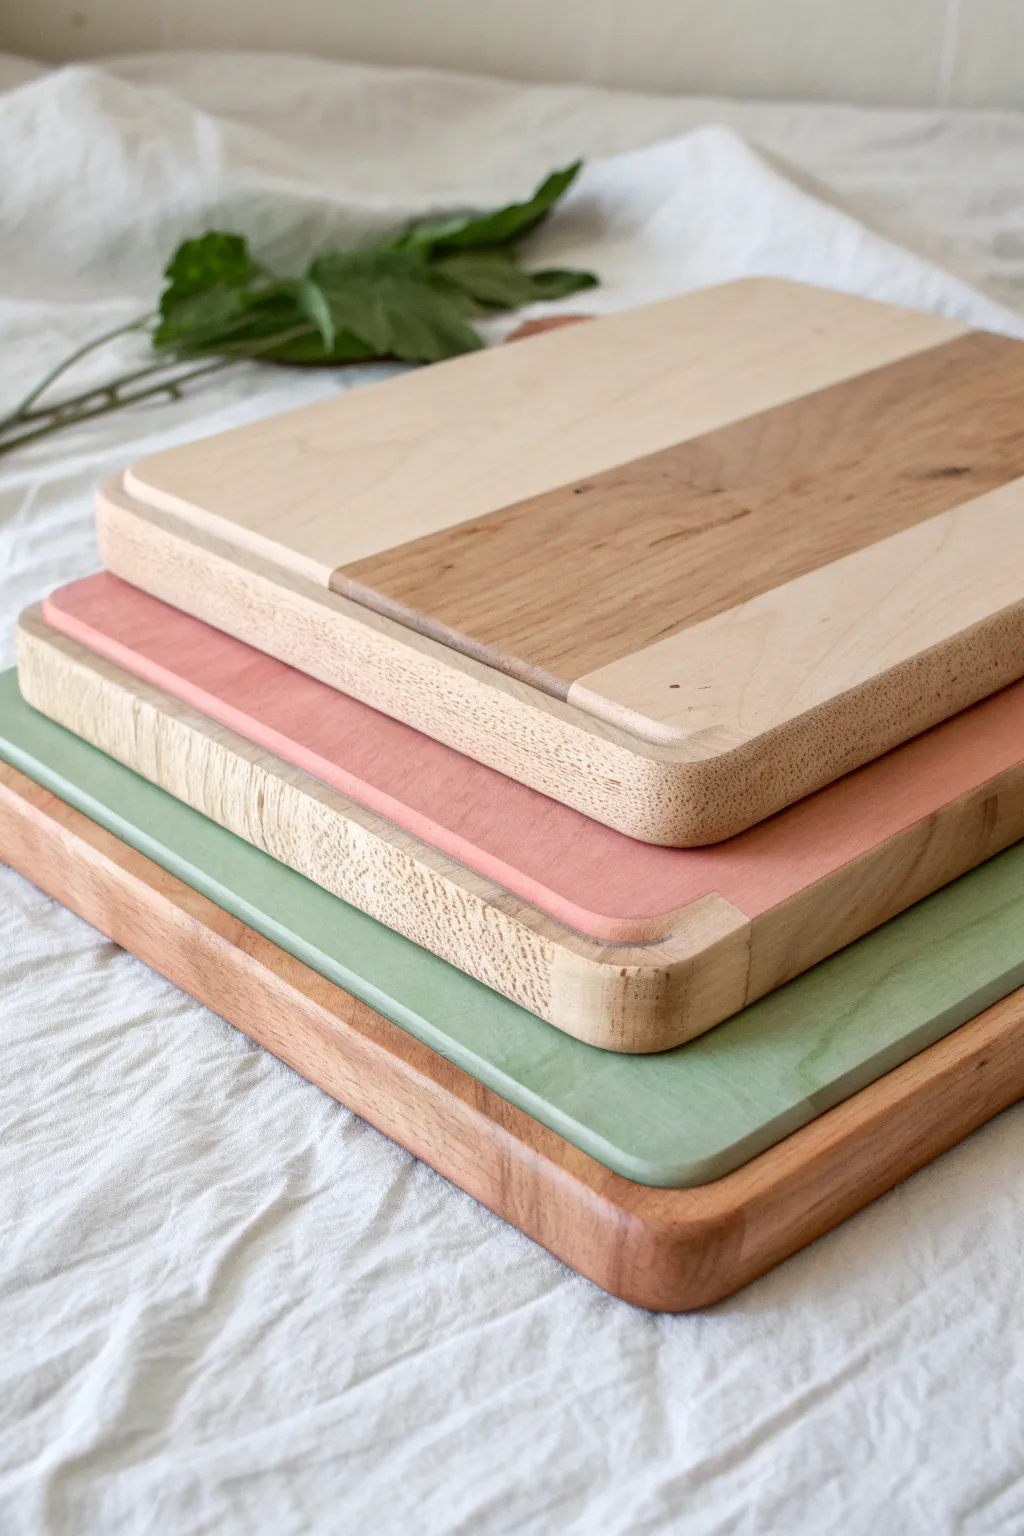
Transform plain wooden cutting boards into stylish serving platters with this simple dipped-corner and painted-edge technique. The matte pastel tones contrast beautifully against the warm wood grain, creating a modern, minimalist look perfect for entertaining.
Detailed Instructions
Materials
- Wooden cutting boards (light maple or beech works best)
- Sandpaper (120 and 220 grit)
- Painter’s tape (high quality)
- Acrylic craft paint (matte finish in peach, sage green, or cream)
- Small foam brush or flat synthetic brush
- Clear matte polyurethane or polycrylic sealer (food safe for indirect contact)
- Food-safe mineral oil or cutting board wax
- Ruler
- Pencil
- Tack cloth or clean rag
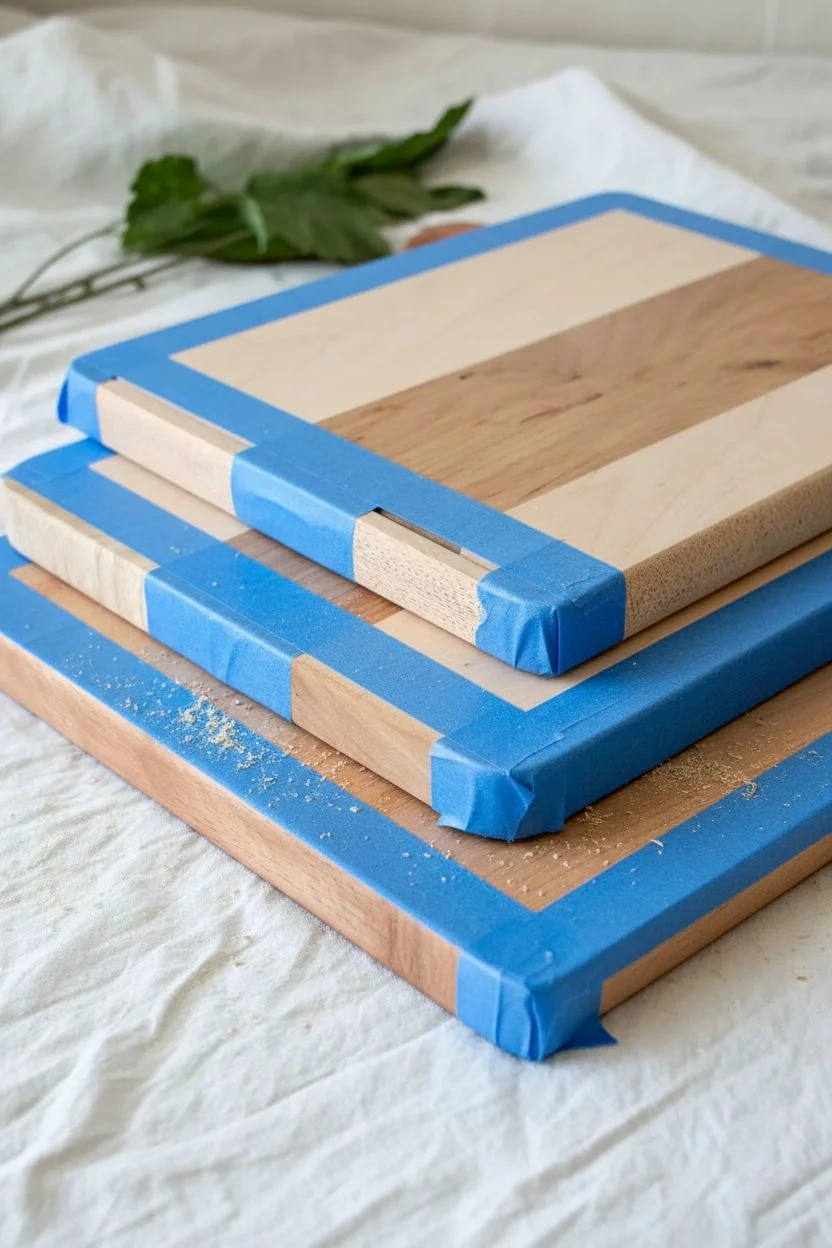
Step 1: Preparation & Masking
-
Sand the surfaces:
Begin by lightly sanding the entire cutting board with 220-grit sandpaper to remove any existing finish and create a smooth base for the paint. Pay special attention to the corners and rounded edges. -
Clean dust:
Wipe the board thoroughly with a tack cloth or a damp rag to remove every speck of sawdust. Any dust left behind will create bumps in your paint finish. -
Measure the painted area:
Decide how far you want the color to extend. For the ‘dipped corner’ look, I usually measure about 2 to 3 inches in from a corner on both adjacent sides. -
Mark lines:
Use a pencil and ruler to lightly mark your stopping points on the face of the board. -
Apply tape:
Place painter’s tape across the board, connecting your marks. Press the tape down firmly, especially right at the line where paint meets wood, to prevent bleeding. -
Seal the tape edge:
For razor-sharp lines, paint a very thin layer of clear matte sealer or decoupage medium over the tape edge first. This seals any tiny gaps so the colored paint won’t seep under.
Bleed-Proof Lines
Burnish your painter’s tape with the back of a spoon or a credit card before painting. That extra pressure creates a perfect seal on textured wood grain.
Step 2: Painting & Sealing
-
First coat of color:
Dip your foam brush into your chosen acrylic paint color. Apply a thin, even coat to the exposed corner area and the corresponding edges. -
Paint the edges:
Don’t forget to paint the vertical thickness of the board in that corner section. If you want the ‘slab’ look shown in the green board, paint the entire edge perimeter instead of just the corner. -
Dry and repeat:
Let the first coat dry for about 20 minutes. It will likely look streaky, but don’t worry. Apply a second thin coat for opaque coverage. -
Third coat (optional):
If the wood grain is still showing through more than you’d like, add a third light coat. Lighter colors like peach or cream often need this extra layer. -
Remove tape:
While the final coat of paint is still slightly tacky (not fully cured), carefully peel back the painter’s tape at a 45-degree angle. This prevents the paint from chipping. -
Let cure:
Allow the paint to fully cure for at least 24 hours before moving to the next step.
Color Coordination
Try mixing a tiny drop of white into your main color for the second coat. This creates a subtle depth and helps with opacity on lighter woods.
Step 3: Finishing Touches
-
Seal the paint:
Apply two coats of clear matte polyurethane only over the painted sections. This protects the color from chipping during washing. -
Sand paint edges:
Once the sealer is rock hard, run a piece of 400-grit sandpaper very lightly over the transition line to knock down any raised ridge of paint. -
Condition the wood:
Finish the project by rubbing a generous amount of food-safe mineral oil or board wax onto the unpainted wooden sections to bring out the rich grain.
Once dry, arrange your new serving boards in a stack to show off those beautiful, colorful edges

PENCIL GUIDE
Understanding Pencil Grades from H to B
From first sketch to finished drawing — learn pencil grades, line control, and shading techniques.
Explore the Full Guide
Negative-Space Stripe With Wood Grain
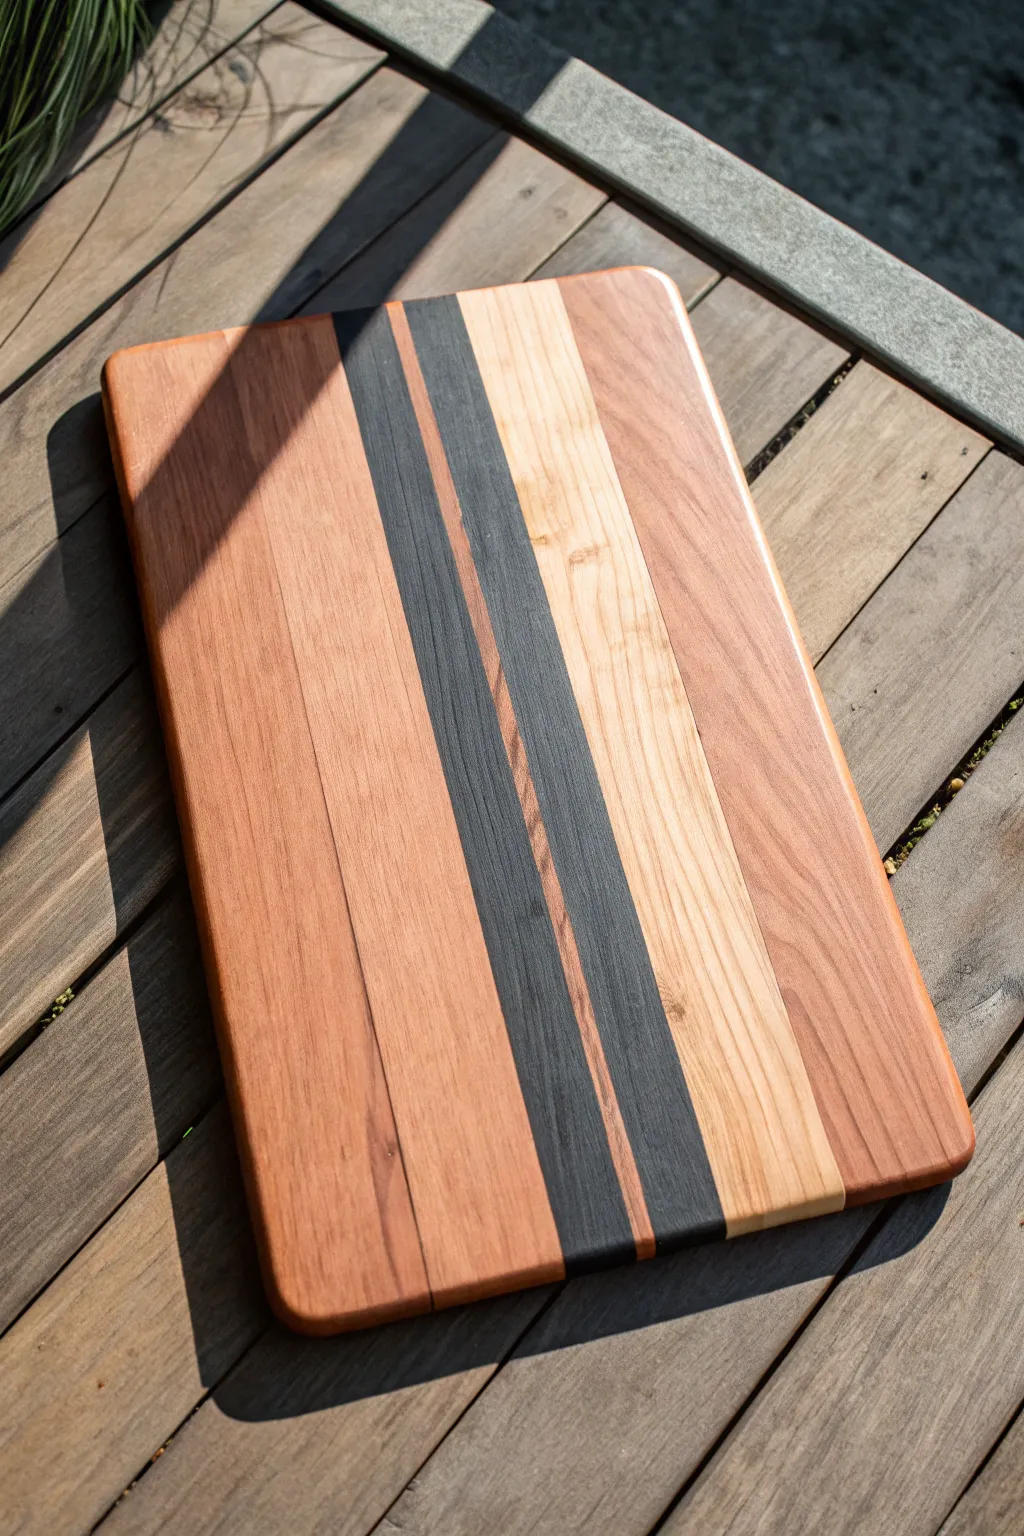
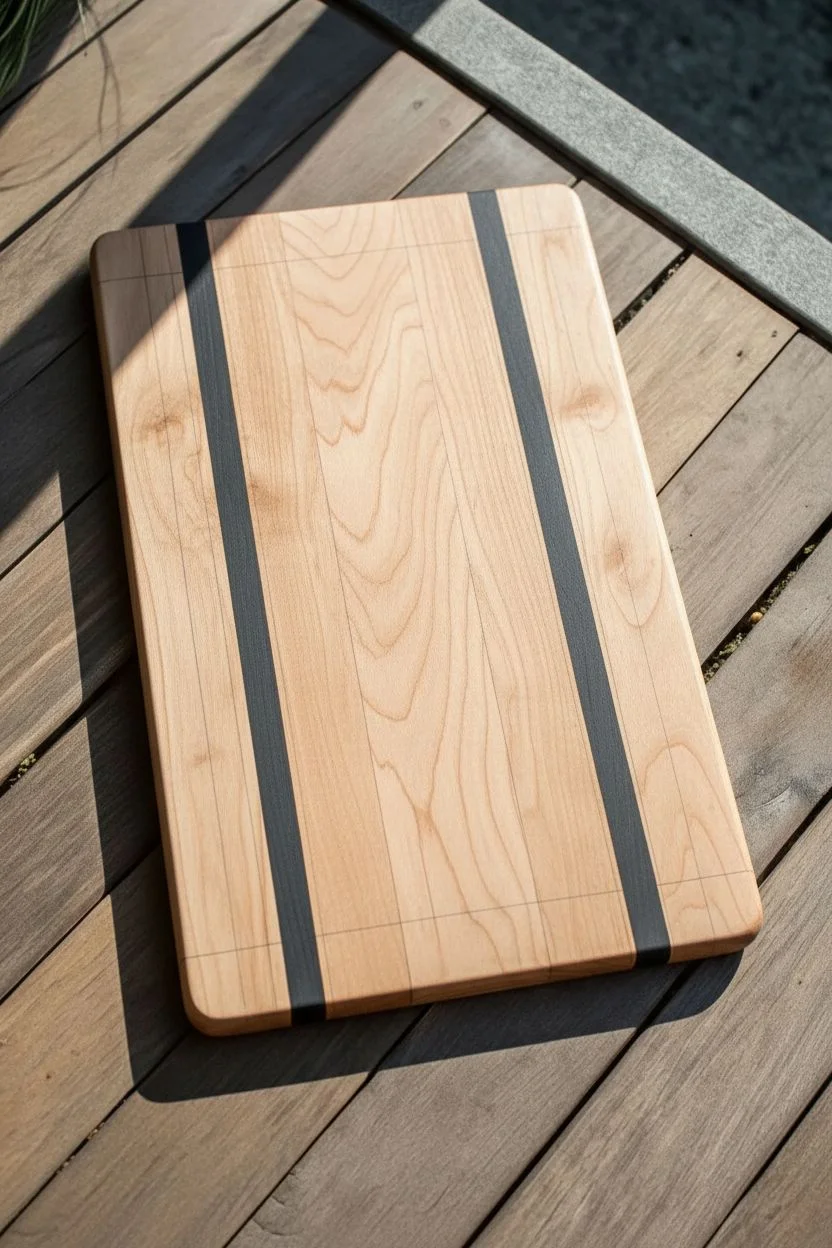
Transform a plain wooden cutting board into a modern statement piece by creating faux-inlay stripes that let the natural wood grain shine through. This negative-space technique uses strategic masking and paint washes to mimic the look of expensive, multi-species woodworking.
Step-by-Step Tutorial
Materials
- Unfinished wooden cutting board (rectangular)
- Painter’s tape or masking tape (various widths)
- Black acrylic paint or India ink
- Water for diluting paint
- Small mixing cup
- Synthetic flat paintbrush (1 inch)
- Fine-grit sandpaper (220-grit)
- Tack cloth or microfiber rag
- Food-safe sealer or mineral oil
- Pencil
- Ruler or straight edge
Step 1: Board Preparation
-
Sand the surface:
Begin by sanding your entire cutting board with 220-grit sandpaper. You want the surface to be exceptionally smooth so the paint doesn’t bleed into rough fibers. -
Clean dust:
Wipe away every speck of sawdust using a tack cloth or a slightly damp microfiber rag to ensure a clean base. -
Plan your design:
Visualize where you want your dark accents. The example features two dark vertical stripes slightly off-center. -
Mark the lines:
Using a ruler and a light pencil touch, mark the boundaries for your two stripes. Space them about an inch apart to create a central strip of natural wood.
Step 2: Masking & Painting
-
Apply tape borders:
Apply painter’s tape along the outside edges of your pencil marks. Press down firmly along the tape edge with your fingernail or a credit card to create a tight seal. -
Create the center mask:
Place a strip of tape in the middle section between your two future painted stripes. This protects the wood grain that will remain natural. -
Protect the rest:
Cover the large outer sections of the board with additional tape or paper to prevent accidental splatters on the main wood body. -
Prepare the wash:
In your mixing cup, dilute a small amount of black acrylic paint with water until it has the consistency of heavy cream. I find a 2:1 paint-to-water ratio usually works best. -
Test the opacity:
Test your mixture on a scrap piece of wood or the back of the board. You want it dark enough to look like ebony or walnut, but sheer enough to see the grain. -
Apply the first coat:
Brush the paint wash onto the exposed wood strips. Use long, smooth strokes following the direction of the wood grain. -
Wipe back excess:
Immediately after applying, gently wipe the painted area with a lint-free rag to push the pigment into the grain and remove surface pooling. -
Dry and assess:
Let this layer dry for about 20 minutes. If you want a deeper, more solid black look, apply a second coat using the same method.
Bleed Prevention
Before painting black, paint a thin layer of clear matte medium or clear sealer over the tape edge. This seals the tape line so your black lines remain razor sharp.
Step 3: Finishing Touches
-
Remove tape:
Once the paint is dry to the touch, carefully peel back the painter’s tape at a 45-degree angle. This reveals crisply defined edges. -
Light sanding:
Very lightly run your 220-grit sandpaper over the painted stripes just once or twice to knock down any raised grain fibers caused by the water in the paint. -
Clean again:
Give the board a final wipe with your tack cloth to remove any new dust. -
Seal the wood:
Generously apply a food-safe mineral oil or cutting board conditioner to the entire board. -
Let it soak:
Allow the oil to soak in overnight. The oil will darken the natural wood and deepen the black painted stripes, blending them beautifully. -
Buff to finish:
Wipe off any excess unabsorbed oil with a clean cloth. Your faux-inlay board is now ready for display.
Metallic Accent
For a glamorous twist, mix a tiny amount of gold mica powder into your mineral oil or use a thin gold paint pen to outline the black stripes after they dry.
This simple technique elevates a basic kitchen staple into a custom design piece that looks far more expensive than it cost to make
Pumpkin Patch Fall Board
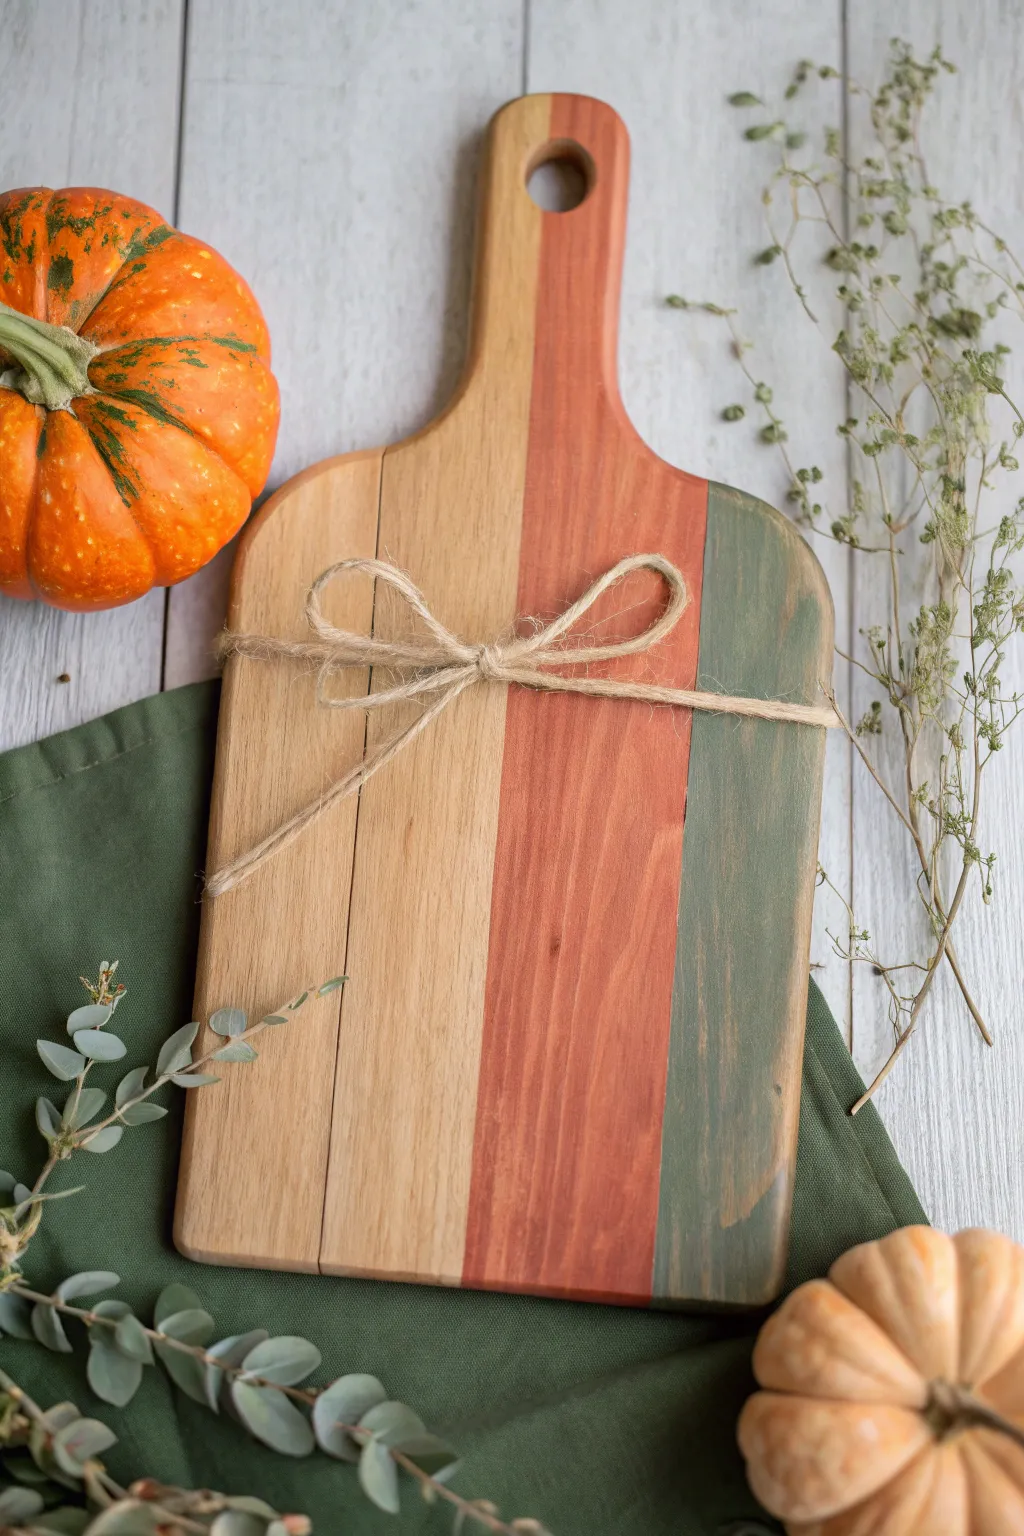
Embrace the cozy colors of autumn with this simple yet elegant painted cutting board project. Featuring a warm palette of natural wood, burnt orange, and sage green, this piece brings a touch of the pumpkin patch straight to your kitchen counter.
Step-by-Step Tutorial
Materials
- Unfinished wooden cutting board (paddle style)
- Painter’s tape (multi-surface or delicate surface)
- Acrylic craft paint (Burnt Orange/Terracotta)
- Acrylic craft paint (Sage Green/Moss)
- Foam brushes or flat synthetic paint brushes
- Jute twine
- Sandpaper (220-grit)
- Matte finish clear sealer (spray or brush-on)
- Ruler or measuring tape
- Pencil
Step 1: Preparation and Design
-
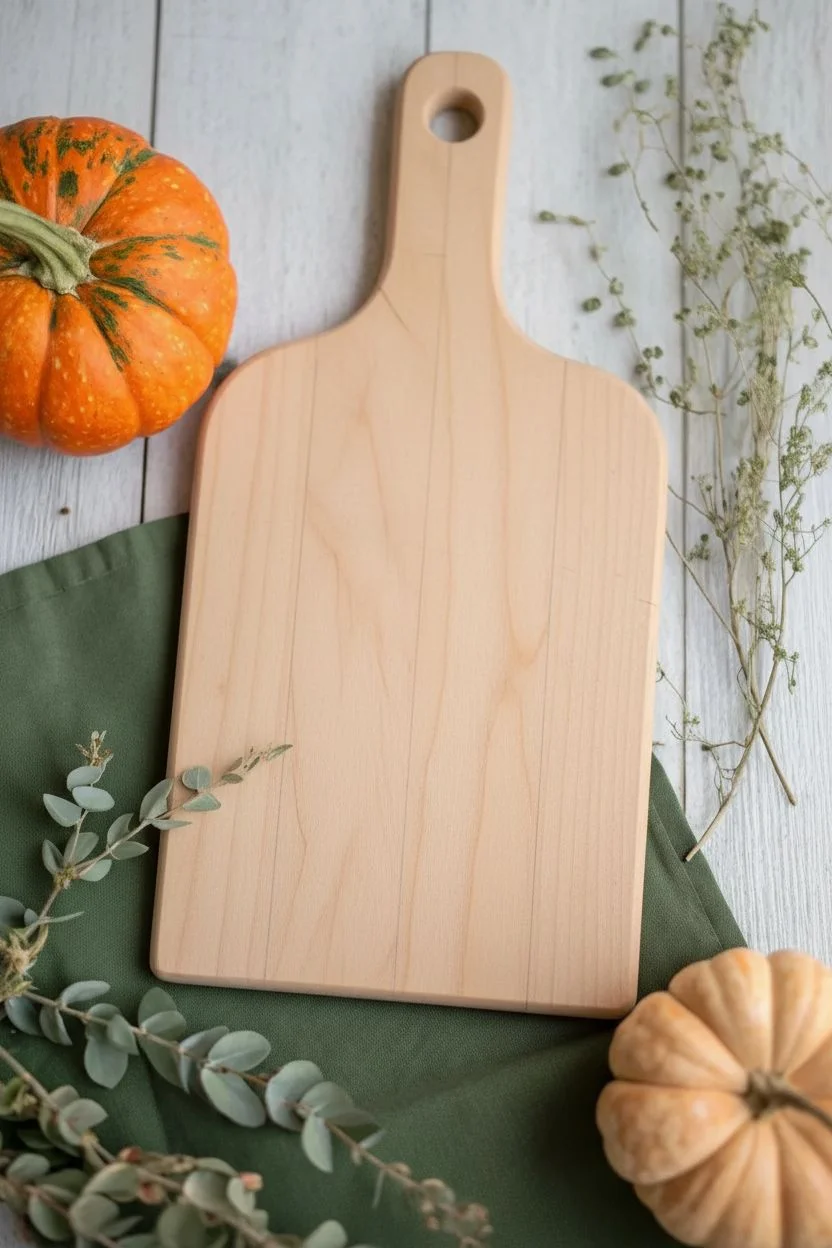
Surface Prep:
Before painting, ensure your wooden board is smooth and clean. Gently sand the entire surface with 220-grit sandpaper to remove any rough spots or manufacturing oils, then wipe it clean with a dry cloth. -
Plan Your Stripes:
Decide on the width of your three sections. For this look, divide the board into three roughly equal vertical stripes. The left side will remain natural wood, the center will be orange, and the right will be green. -
Mark Guidelines:
Using a pencil and ruler, lightly mark where your two color divisions will be at the top and bottom of the board.
Step 2: Painting the Center Stripe
-
Masking the First Stripe:
Apply a strip of painter’s tape vertically along your first pencil line (the one separating the natural wood from the center). Rub the edge of the tape down firmly with your fingernail to prevent paint bleed. -
Masking the Second Edge:
Apply a second strip of tape along the other pencil mark (separating the center from the right side). You are creating a ‘channel’ for the center orange stripe. -
Painting Orange:
Dip your foam brush into the burnt orange paint. Apply a thin, even coat to the center section between the tape lines. Paint with the grain of the wood for the smoothest finish. -
Second Coat:
Allow the first coat to dry for about 20 minutes. If the wood grain is still showing through too much for your liking, apply a second coat of orange paint. -
Remove Tape:
While the paint is still slightly tacky (but not wet), carefully peel back the painter’s tape at a 45-degree angle to reveal crisp lines.
Clean Lines Pro Tip
Before painting your color, brush a tiny amount of clear matte medium or sealer along the tape edge. This seals the tape and ensures any ‘bleed’ is clear, not colored.
Step 3: Painting the Green Stripe
-
Dry Time:
Wait for the orange center stripe to cure completely to the touch before moving on, as you’ll need to place tape over the edge of the fresh paint. -
Masking the Green Section:
Apply a fresh strip of painter’s tape directly over the edge of the dried orange stripe. Ensure it lines up perfectly with the painted edge to avoid gaps. -
Painting Green:
Using a clean brush, apply the sage green paint to the far right section of the board. Be careful around the curved edges of the board to get smooth coverage. -
Green Touch-ups:
Like the orange section, apply a second coat of green if necessary for solid opacity, then remove the tape carefully. -
Handle Detail:
Don’t forget the handle! Continue the vertical stripe pattern all the way up the handle and around the hanging hole for a continuous look.
Level Up: Lettering
Use a white paint pen or a stencil to add a fall-themed word like “Harvest,” “Gather,” or “Thankful” vertically down the unpainted wood section.
Step 4: Finishing Touches
-
Distressing (Optional):
To achieve the slightly weathered look seen in the photo, take your sandpaper and very lightly sand over the painted areas, focusing on the edges and corners where wear would naturally occur. -
Sealing:
Protect your work by applying a clear matte sealer over the entire board. This makes it easier to wipe clean and prevents the paint from chipping. -
Wrap It Up:
Cut a long piece of jute twine—about 24 to 30 inches depending on your board’s width. -
Tying the Bow:
Wrap the twine horizontally around the center of the board, crossing it in the front. Tie a simple shoelace bow, adjusting the loops so they are even and floppy. -
Display:
Arrange the twine so it sits nicely across all three color zones, completing that rustic farmhouse aesthetic.
Prop this charming board on your countertop or hang it on a wall to instantly warm up your kitchen for the season


Acrylic Pour Galaxy Finish
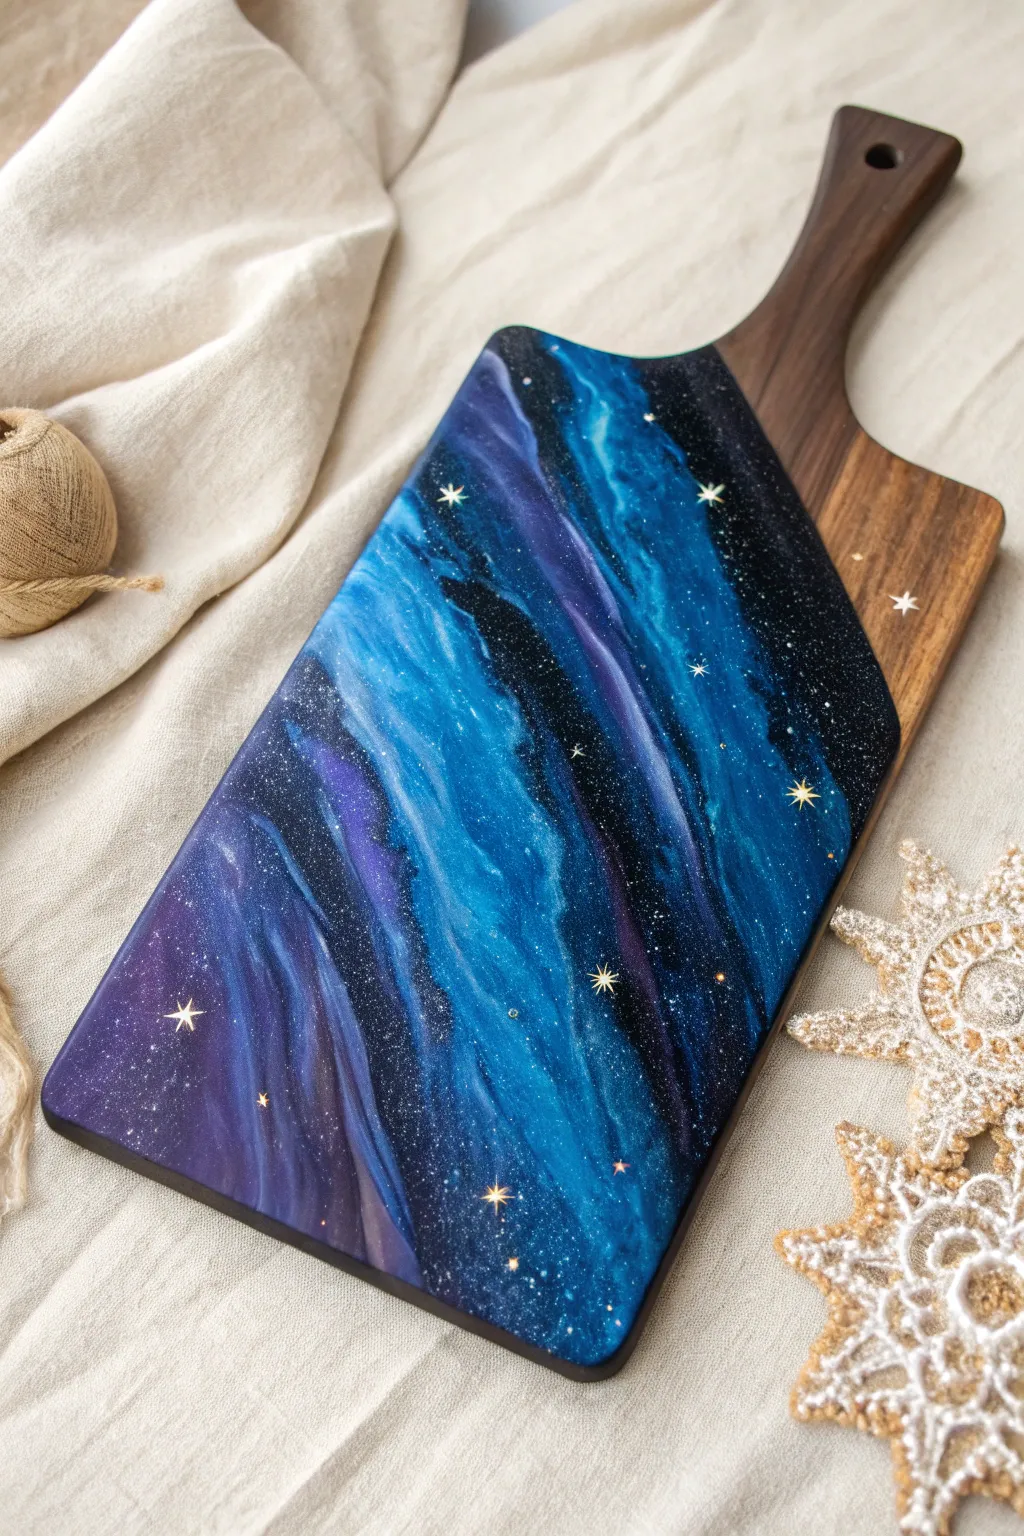
Transform a simple wooden serving board into a slice of the cosmos with this stunning galaxy pour technique. Using deep blues, rich purples, and shimmering stars, you’ll create a functional piece of art that looks like a window into deep space.
Step-by-Step Guide
Materials
- Wooden cutting board with handle (acacia or walnut recommended)
- Painter’s tape
- Epoxy resin (food safe art resin)
- Acrylic paints or resin pigments (black, navy blue, phthalo blue, deep purple, metallic white)
- White or gold acrylic ink (for stars)
- Fine silver glitter dust
- Heat gun or torch
- Plastic cups and stir sticks
- Nitrile gloves
- Fine detail brush
- Plastic drop cloth
- Sandpaper (220 grit)
Step 1: Preparation
-
Tape the Boundary:
Decide how much natural wood you want to show near the handle. Apply a strip of painter’s tape diagonally across the board to create a crisp line between the galaxy art and the bare wood. Press the edge down firmly to prevent leaks. -
Protect the Edges:
Wrap the sides and back of the board with tape as well, or plan to let the resin drip over the sides for a wrapped look. If letting it drip, prop the board up on cups so it doesn’t stick to your work surface. -
Surface Prep:
Lightly sand the area you plan to pour over with 220 grit sandpaper. This roughs up the smooth wood finish just enough to help the resin bond securely.
Pro Tip: Depth Perception
Mix just a drop of blue ink into your clear resin. Pouring this ‘glassy’ translucent blue over opaque black creates incredible visual depth.
Step 2: Mixing the Cosmos
-
Mix Base Resin:
Mix your epoxy resin according to the manufacturer’s instructions. You’ll need enough to cover about 3/4 of the board. Stir slowly for at least 3 minutes to minimize bubbles. -
Divide and Tint:
Pour the mixed resin into 4-5 small cups. Tint one cup black, one navy blue, one brighter blue, one purple, and one metallic white. Keep a small amount of clear resin aside. -
Add Stardust:
Mix a pinch of fine silver glitter into the black and navy blue cups. This creates that deep-space shimmer embedded within the darkest layers.
Step 3: The Pour
-
Pour the Dark Base:
Start by pouring the black resin in irregular patches, especially near the outer edges and corners. This anchors your galaxy with deep space contrast. -
Layer the Colors:
Pour ribbons of navy blue, purple, and bright blue next to and slightly overlapping the black. Work diagonally to mimic the flow of a nebula. -
Create Movement:
Use a heat gun on a low setting to warm the resin and push the colors around. Gently blow the lighter blues into the darker areas to create soft, smoky transitions. -
Add Milky Way Streaks:
Drizzle very thin lines of the metallic white or clear resin through the center of your color bands. Use your heat gun again to feather these out, creating wispy, ethereal clouds. -
Pop Bubbles:
Pass the heat gun or a torch quickly over the entire surface to pop any rising air bubbles. Don’t linger in one spot too long or you might scorch the resin. -
Initial Cure:
Let the resin sit for about 24 hours (or until hard to the touch) in a dust-free environment. Covering it with a large cardboard box is a great way to protect it.
Troubleshooting: Sticky Cure
If your resin remains sticky after 48 hours, the mixing ratio was likely off. Scrape it off while warm or apply a fresh, perfectly mixed coat over the top to seal it.
Step 4: Starry Details
-
Peel the Tape:
CAREFULLY peel away the painter’s tape while the resin is cured but perhaps not 100% fully hardened (check your resin brand’s demold time). If the edge is rough, smooth it gently with fine sandpaper. -
Paint Major Stars:
Using a fine detail brush and white or gold acrylic ink, paint small four-point or eight-point stars scattered across the darker sections of the galaxy. -
Flick the Small Stars:
Dip a stiff brush or toothbrush into the acrylic ink. Run your thumb across the bristles to flick tiny specks of ‘distant stars’ across the board. I usually protect the wood handle with a paper towel during this step. -
Top Coat (Optional):
For a perfectly smooth finish that protects your painted stars, apply a final thin layer of clear food-safe resin over the entire art area. Let this cure completely for 72 hours before use. -
Oil the Wood:
Finish the exposed wood handle by rubbing in a generous amount of cutting board oil or mineral wax to enrich the grain and match the richness of the resin.
Now you have a spectacular serving piece that brings the beauty of the nebula right to your dining table


Have a question or want to share your own experience? I'd love to hear from you in the comments below!