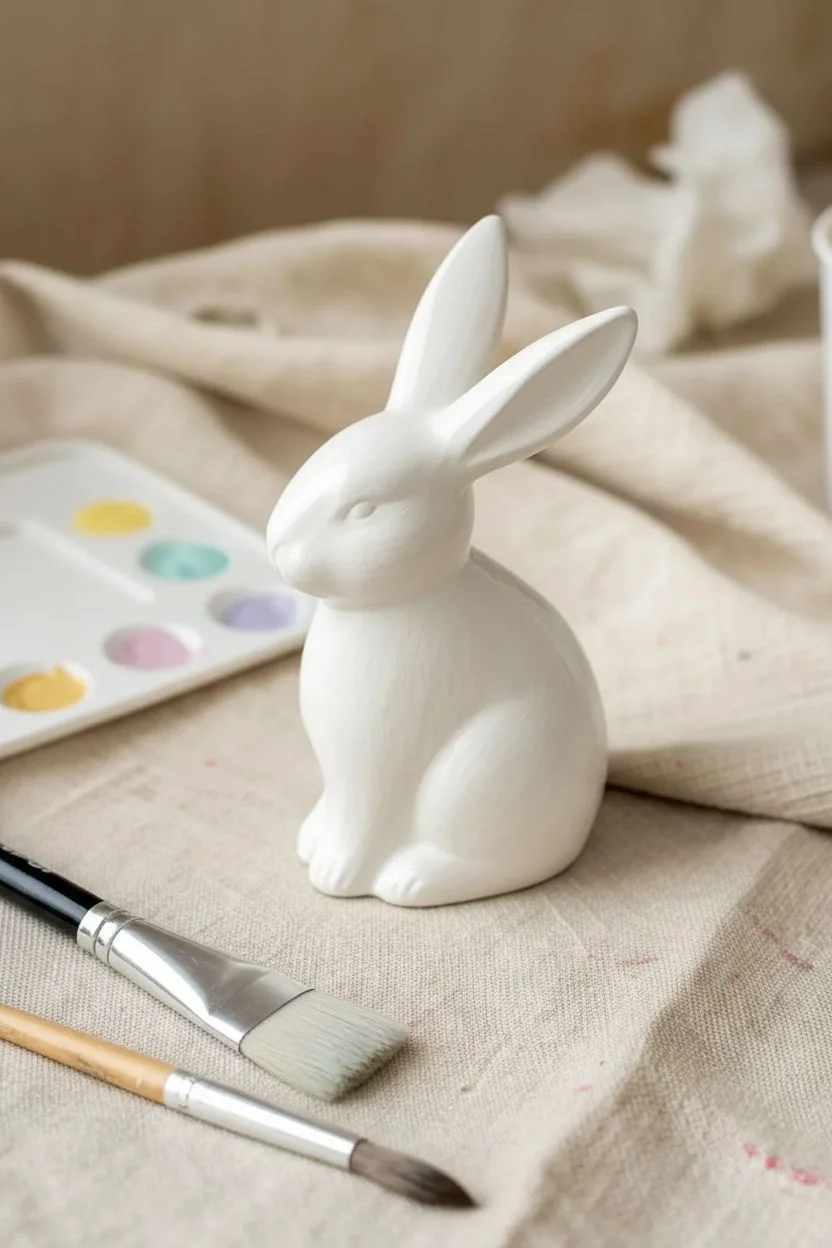
A blank ceramic bunny is basically a tiny sculpture just waiting for your color story. Here are my favorite ceramic bunny painting ideas—from classic, easy finishes to artsy details that feel like a little showpiece on your shelf.
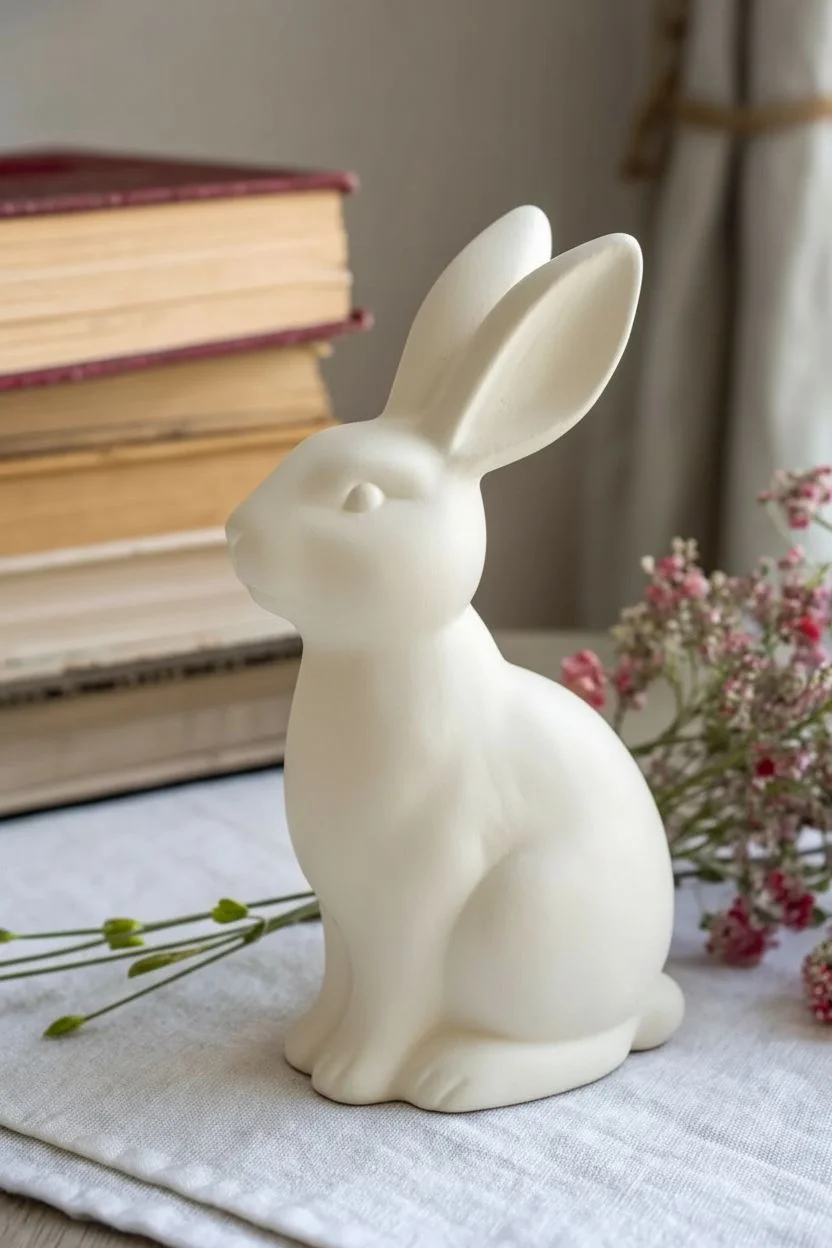
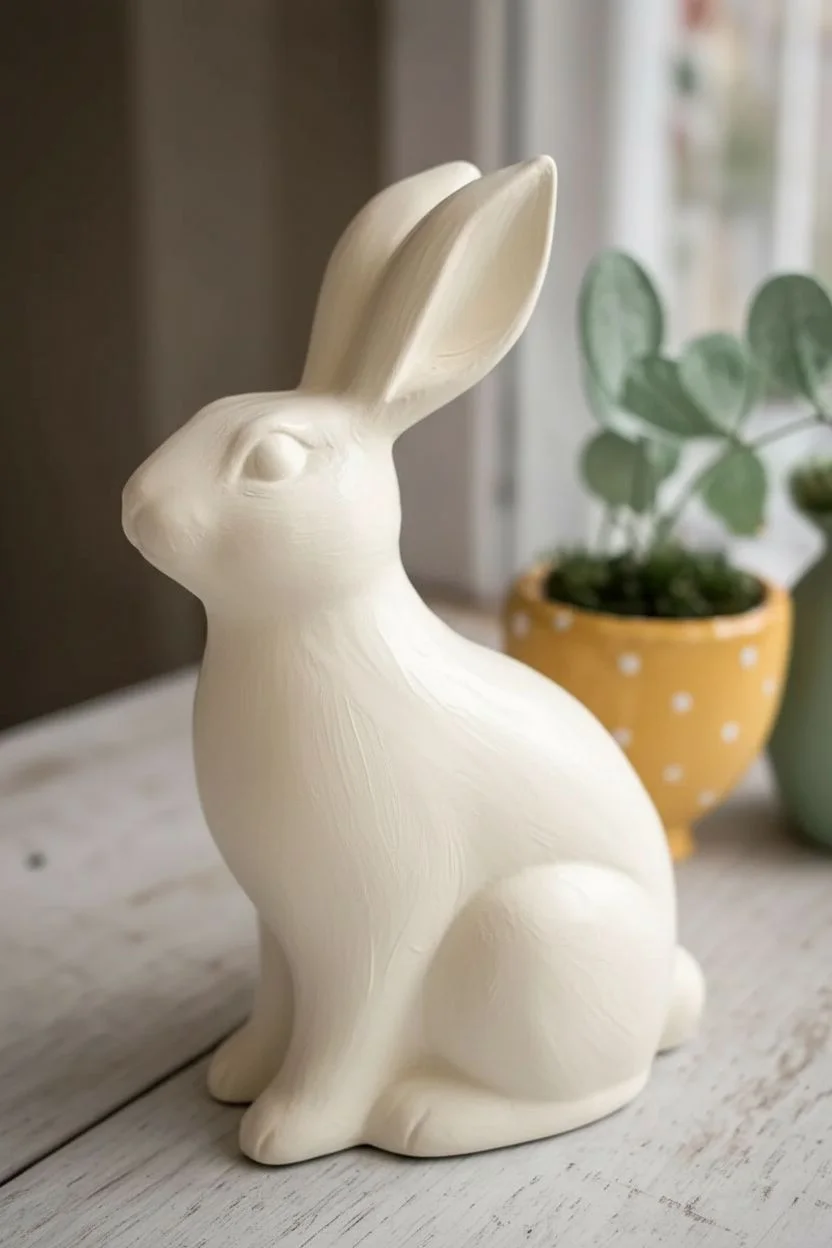
Classic Glossy White Bunny
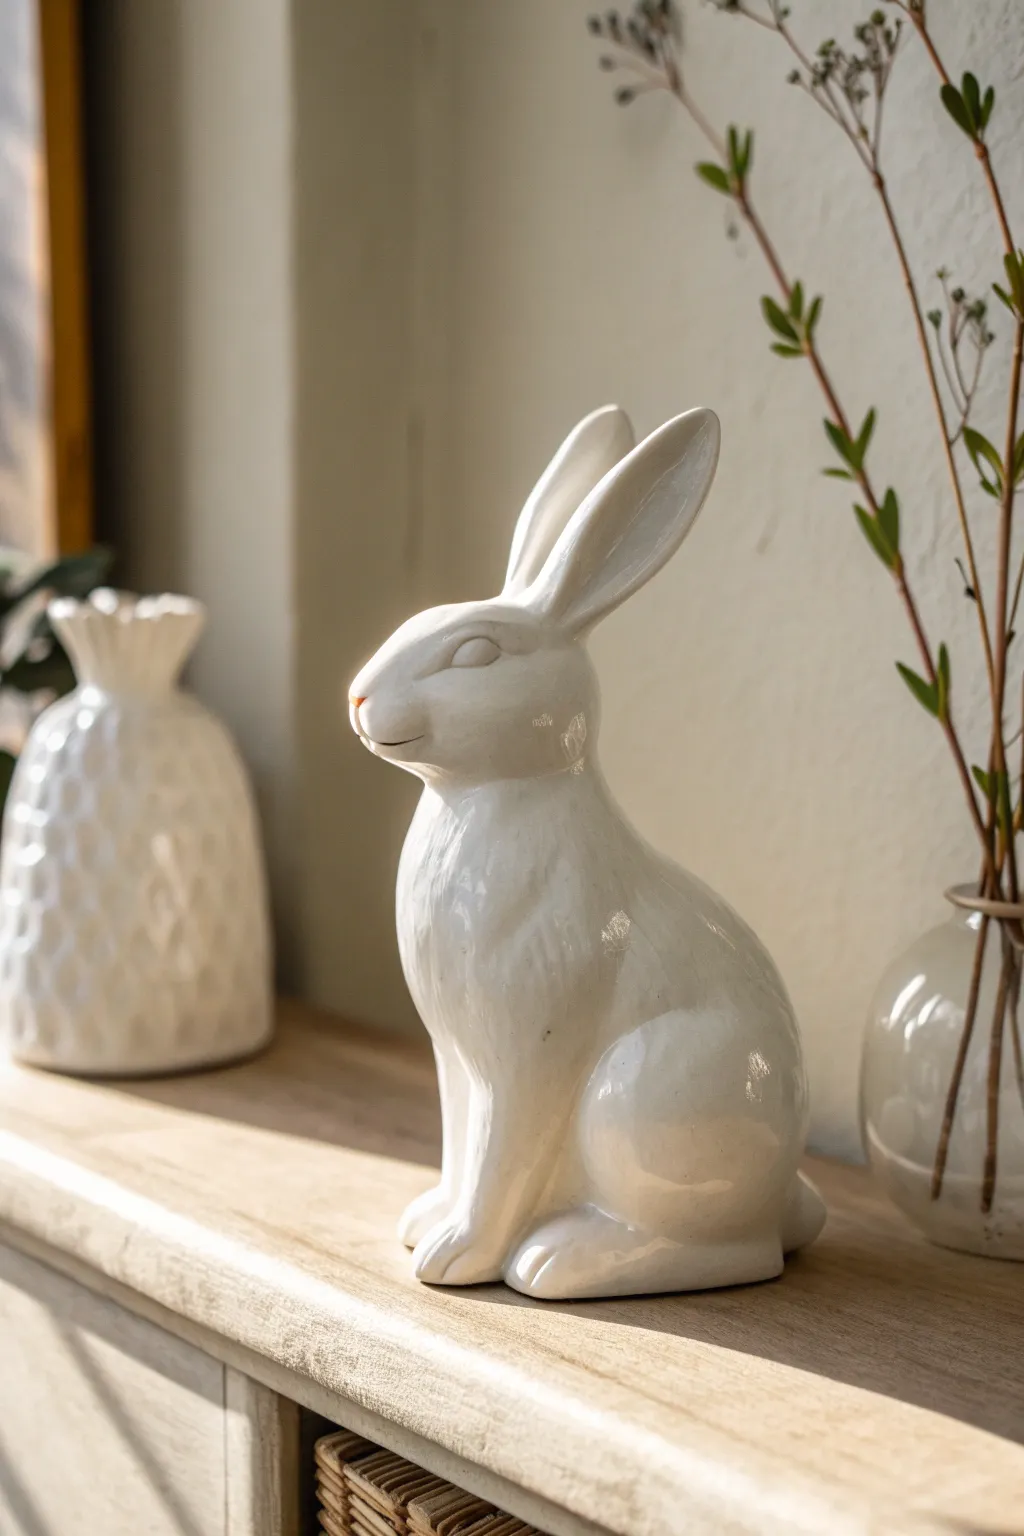
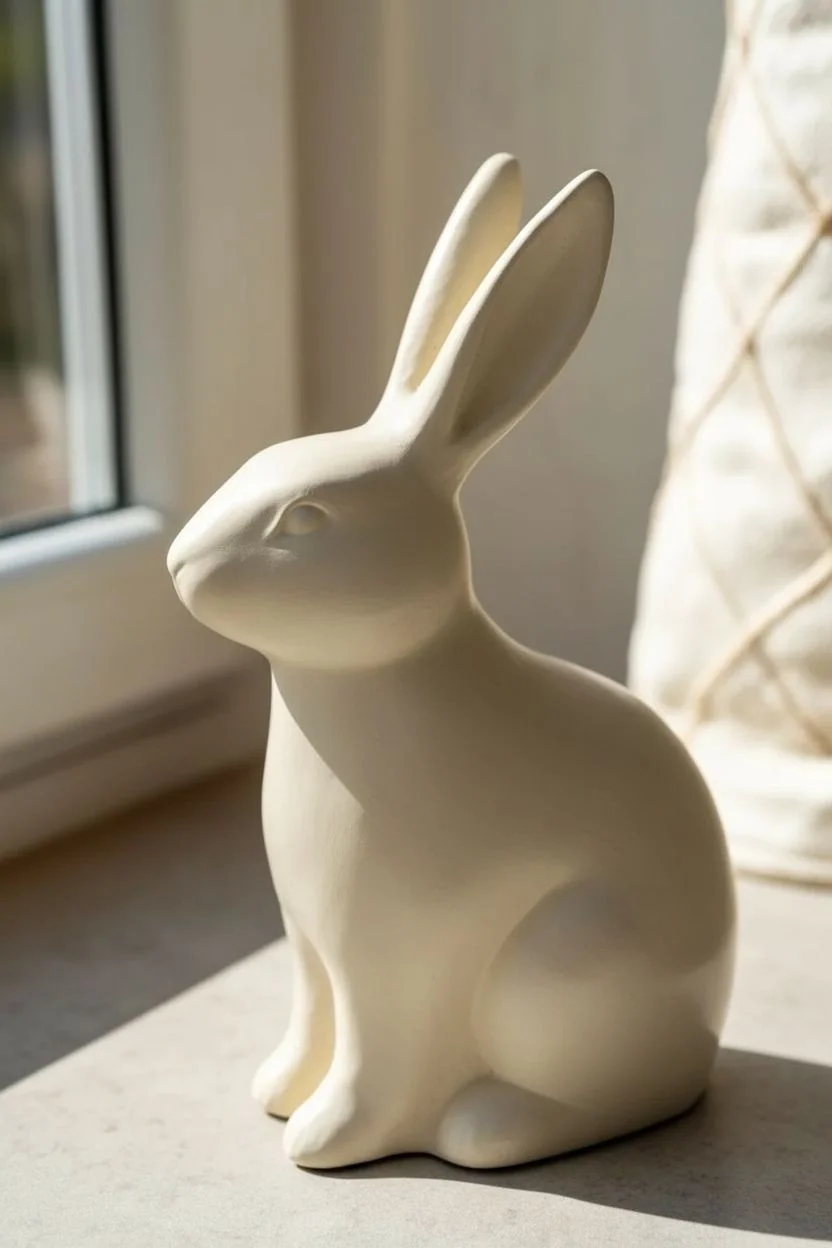
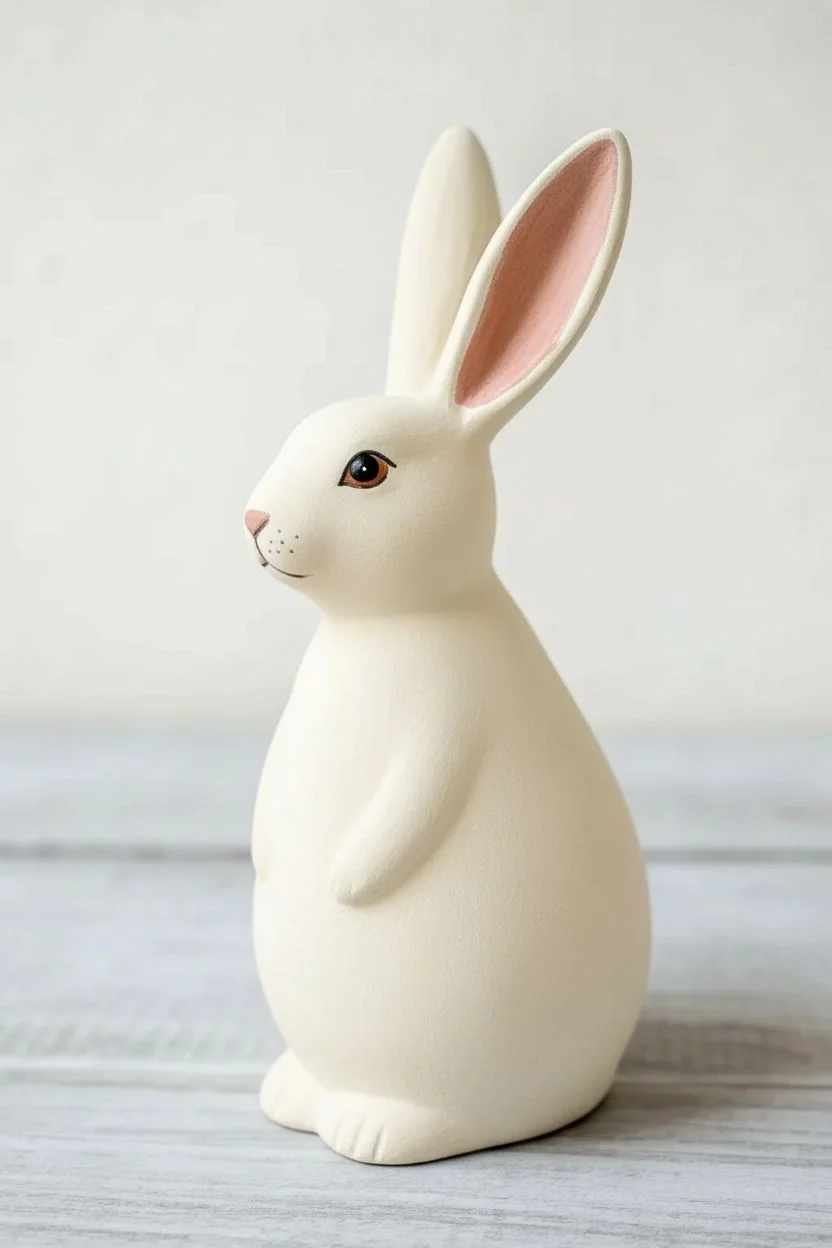
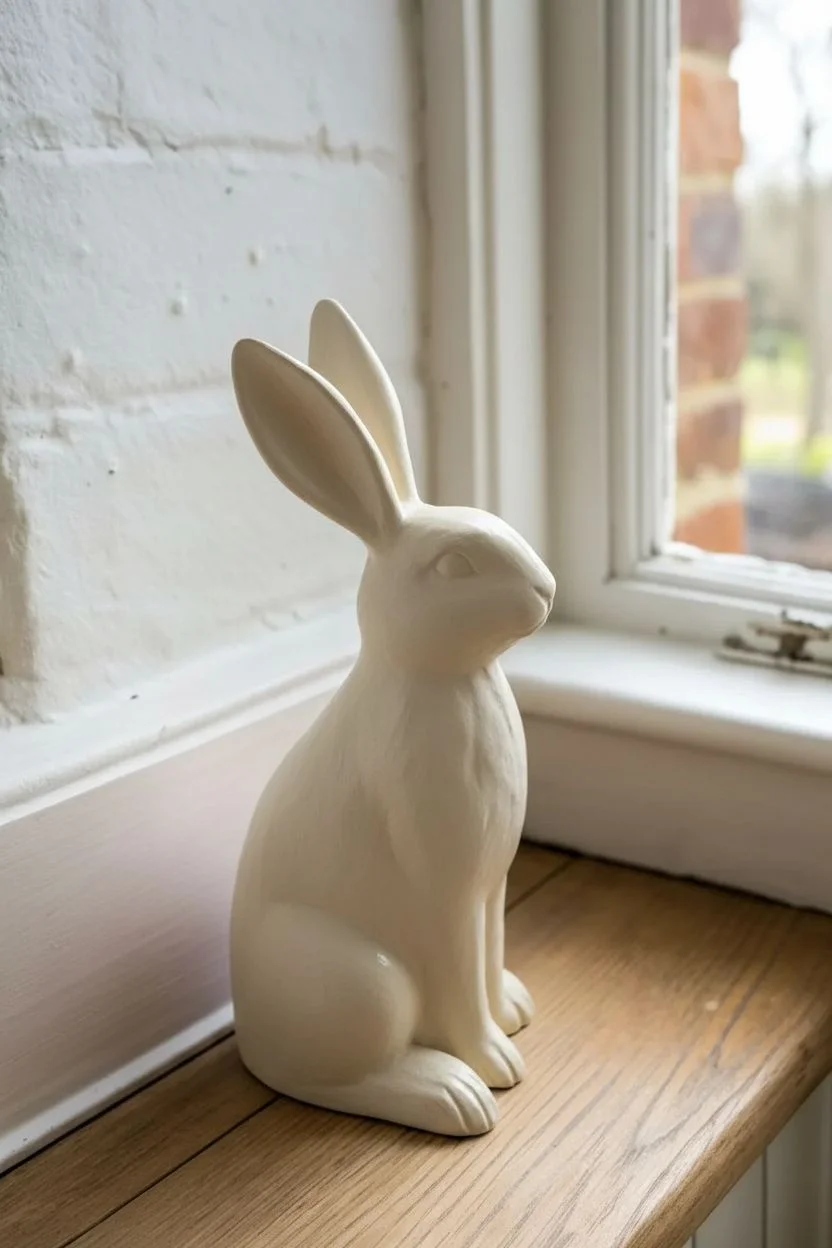
Achieve a sophisticated, high-end look with this classic glossy white finish that mimics expensive porcelain. The subtle warmth of the creamy glaze highlights the ceramic bunny’s sculpted details, making it a perfect neutral accent for any shelf or mantelpiece.
Detailed Instructions
Materials
- Bisque ceramic bunny (unfinished)
- Fine-grit sandpaper (220-400 grit)
- Damp sponge
- Creamy white high-gloss ceramic glaze (e.g., ‘Cotton’ or ‘Antique White’)
- Clear high-gloss sealant (if using acrylics instead of kiln-fired glaze)
- Soft synthetic flat brush (size 6 or 8) for broad strokes
- Small round detail brush (size 2)
- Palette or small bowl
- Painter’s tape (optional for base protection)
Step 1: Preparation
-
Inspect the Surface:
Begin by carefully examining your ceramic bisque bunny for any rough seams from the casting mold or small bumps. These imperfections will show through a high-gloss finish. -
Sand Imperfections:
Gently gently sand down those seams and bumps using fine-grit sandpaper until the surface feels completely smooth to the touch. -
Clean the Bisque:
Wipe the entire figure down with a damp sponge. This removes the ceramic dust created by sanding, which is crucial because dust prevents paint or glaze from adhering properly. -
Dry Completely:
Allow the bunny to air dry for about 15-20 minutes. The ceramic must be bone-dry before you apply any product.
Pro Tip: Surface Tension
To get a mirror-like finish without brushstrokes, consider using a pouring medium mixed with your paint, or a spray-on high gloss sealant rather than a brush-on one.
Step 2: Application
-
Load the Brush:
Dip your soft synthetic flat brush into the creamy white glaze or high-gloss acrylic paint. Ensure the brush is fully loaded but not dripping. -
Apply First Coat:
Start painting at the base and work your way up, using long, smooth strokes that follow the contours of the rabbit’s body. This helps minimize visible brush marks. -
Detail Work:
Switch to your smaller round brush to get into the crevices around the ears, eyes, and paws without pooling the paint. -
Check Coverage:
Once the first coat is on, hold the bunny up to a light source. You will likely see streaks or translucent spots; this is normal. -
Let it Set:
Allow this first layer to dry completely. If using acrylics, wait 30 minutes; for glazes intended for firing, follow manufacturer instructions for drying. -
Apply Second Coat:
Apply a second layer moving in a slightly cross-hatch direction to the first layer to ensure solid, opaque coverage. -
Smooth the Finish:
While the second coat is still wet, I like to lightly feather out any ridges with a very soft, dry brush to get that glass-like surface. -
Inspect Eyes and Ears:
Check the deep recesses of the eyes and inside the ears again. Paint tends to settle here, so scoop out any excess with a dry brush to keep the details sharp. -
Third Coat (If Needed):
If using a very translucent glaze, a third thin coat might be necessary to achieve that deep, solid cream color seen in the photo. Let dry fully between layers.
Troubleshooting: Stuck Dust
If you spot a piece of dust dried into your final glossy layer, very gently wet-sand that tiny spot with 1000-grit paper and re-apply a spot coat of gloss.
Step 3: Finishing
-
Assess the Sheen:
If you used a kiln-fire glaze, this step happens after firing. If you painted with acrylics, observe the finish once dry. It usually needs a boost to match the photo’s glossiness. -
Apply Gloss Varnish:
For the acrylic method, apply a coat of high-gloss clear varnish or polyurethane. Use a wide brush and apply quickly to avoid drag marks. -
Watch for Bubbles:
Keep an eye out for tiny air bubbles in the clear coat. Pop them gently with the corner of a dry brush before the varnish sets. -
Protect the Base:
Ensure no glaze or varnish has pooled on the very bottom of the bunny, as this will make it stick to your shelf. Wipe the underside clean. -
Final Cure:
Let the final bunny sit undisturbed for 24 hours to fully cure the glossy shell before placing it near your other decor items.
Place your gleaming bunny near a window where natural light can show off those elegant curves and glossy reflections.


Soft Pastel Bunny With Gentle Shading
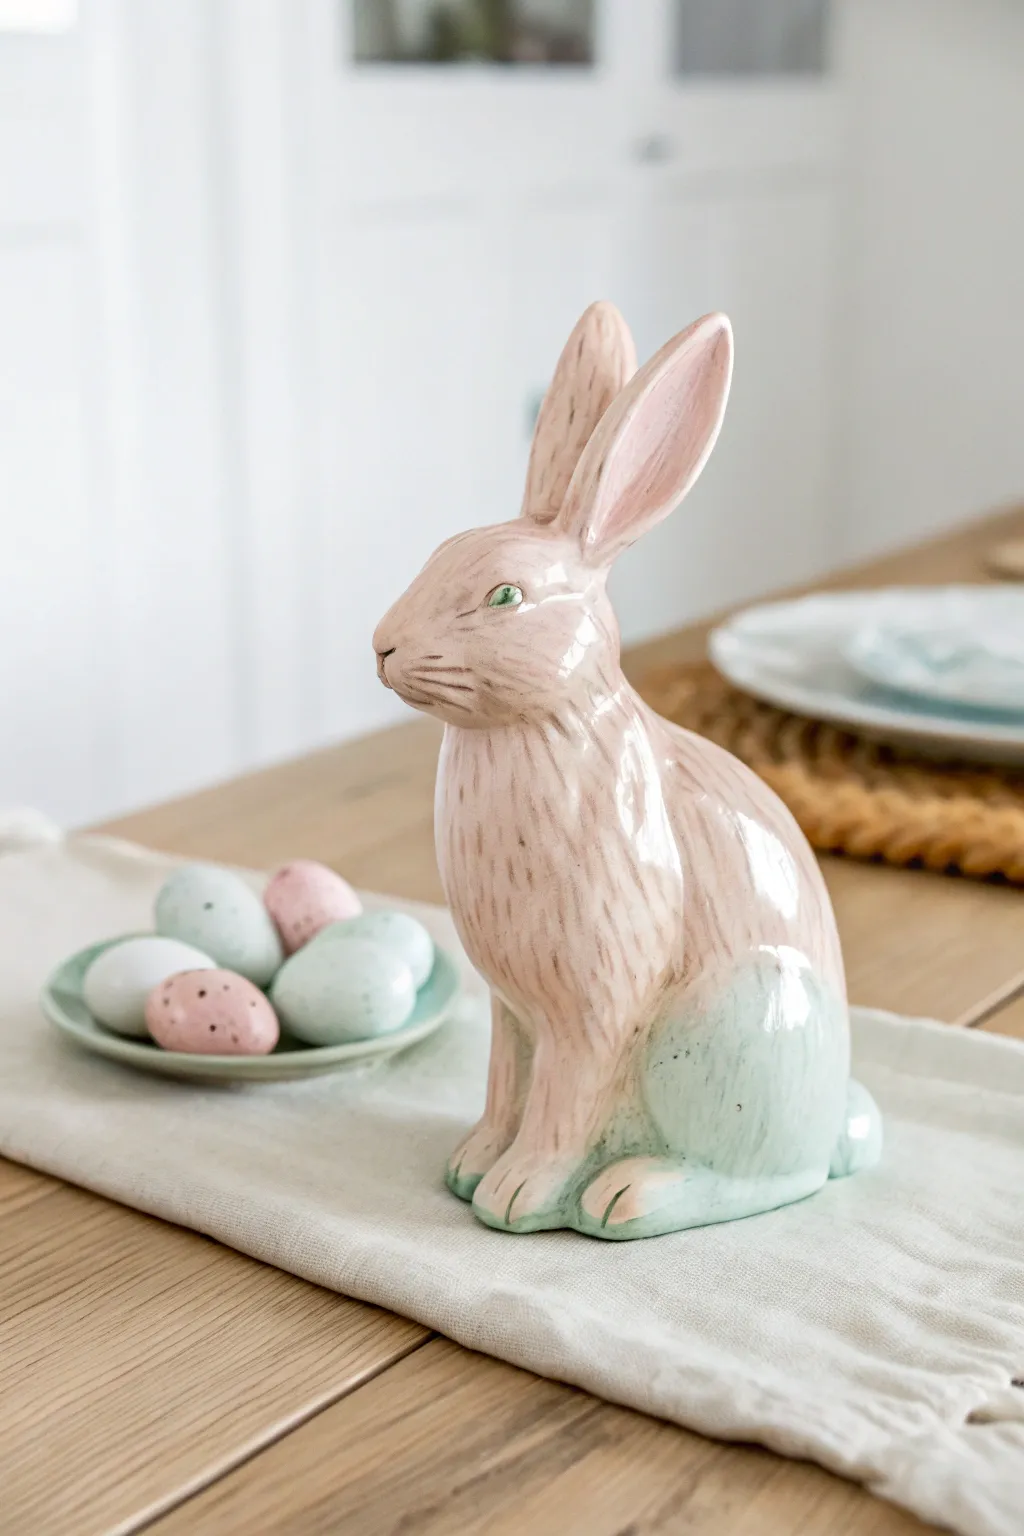
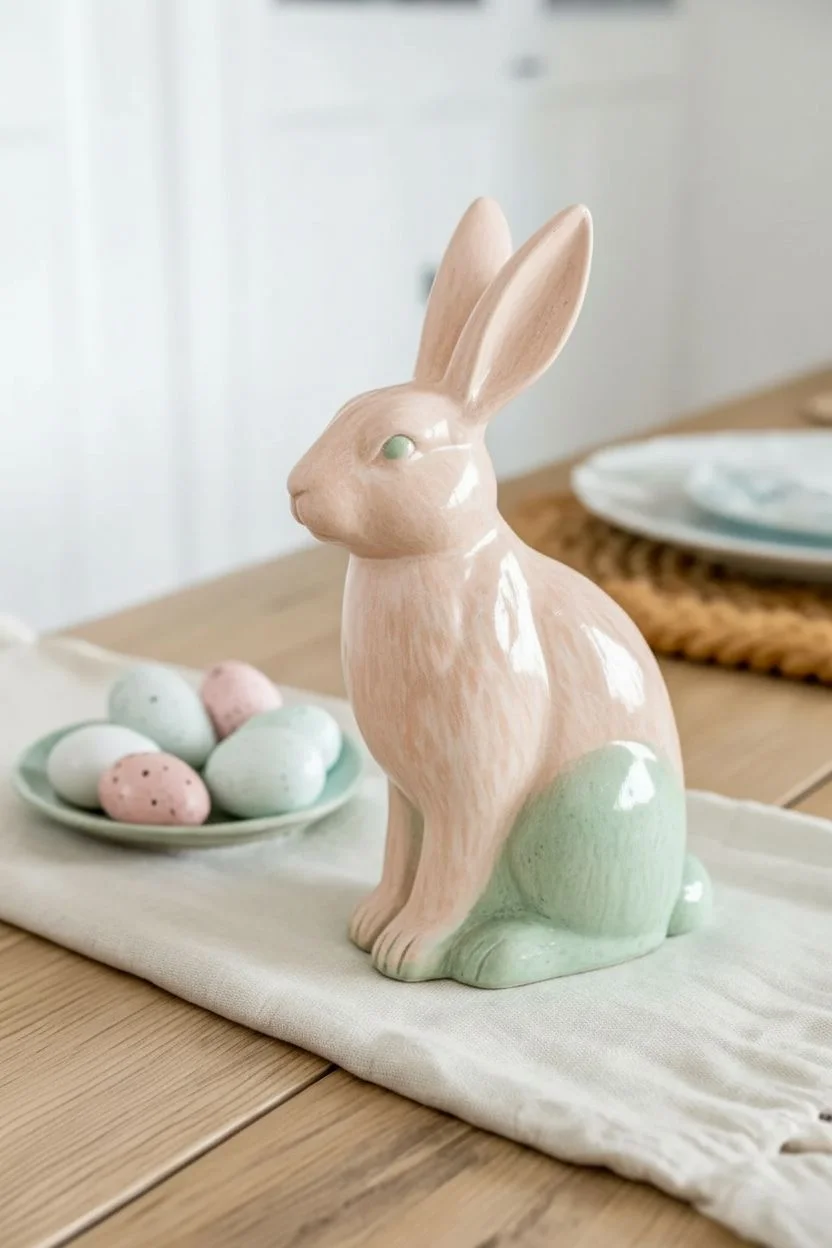
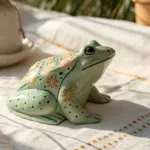
Achieve a vintage-inspired spring look with this soft pastel ceramic project. The combination of delicate peach fur textures and a surprising mint green accent creates a sophisticated, heirloom-quality finish.
Step-by-Step Tutorial
Materials
- Ceramic bunny bisque (unpainted figurine)
- Underglazes: Pale Peach/Pink, Soft Mint Green, White, and Deep Brown
- Clear dipping glaze or brush-on gloss glaze
- Soft fan brush (for large areas)
- Fine liner brush (size 0 or 00)
- Small round brush (size 2-4)
- Sponge
- Palette
- Cup of water
- Paper towels
- Kiln access (or use acrylics and gloss spray for a no-fire version)
Step 1: Preparation and Base Coat
-
Clean the bisque:
Before you begin painting, take a damp sponge and gently wipe down the entire ceramic bunny. This removes any dust from the shelf which can prevent the glaze from adhering properly. -
Mix a custom base color:
To get that specific vintage warmth, mix a small amount of white into your pale peach underglaze. You want a color that looks like milky tea or soft apricot. -
Apply the first wash:
Using a slightly damp soft round brush, apply this peach mixture to the head, ears, and chest of the bunny. Keep the application somewhat sheer rather than thick and opaque. -
Blend the transition point:
Stop the peach color around the mid-back and hips. Use a clean, damp brush to feather the edge of the paint so there isn’t a harsh line where the color stops. -
Apply the accent color:
Load a clean brush with the soft mint green underglaze. Paint the rear haunches, the little tail, and the back feet. I like to gently merge this into the peach section while both are still slightly damp for a dreamy gradient.
Brush Control Trick
For the fine fur lines, thin your underglaze with a drop of water until it’s ink-like. Hold the brush high on the handle and use only the very tip.
Step 2: Adding Texture and Detail
-
Mix a shading color:
Create a slightly darker version of your peach base by adding a tiny drop of brown. This will be used to define the fur texture. -
Dry brush the fur:
Dip a fine liner brush into the darker peach mixture, wipe most of it off on a paper towel, and make short, quick strokes following the direction of the fur. Focus on the neck and chest. -
Add deep accents:
Switch to your deep brown underglaze. With your finest liner brush, carefully paint thin, distinct lines for the whiskers on the cheeks. -
Define the face:
Using the same deep brown, gently outline the nose and the cleft of the lip. Keep your hand steady and light; less is more here. -
Paint the eye:
Fill the eye shape with a tiny dot of mint green first. Let it dry for a moment. -
Detail the pupil:
Place a small vertical almond shape of black or deep brown in the center of the green eye for the pupil. -
Add a catchlight:
This is crucial for life: dip the very tip of a brush handle or a toothpick into pure white glaze and place a tiny dot near the top of the pupil. -
Highlight the ears:
Mix a little pink into your peach base. Gently paint the inner curve of the ears to suggest the soft skin inside.
Speckled Egg Variation
Mimic the eggs in the photo by flicking a stiff toothbrush loaded with brown glaze over the bunny’s lower half for a speckled, robin’s egg effect.
Step 3: Glazing and Finishing
-
Let the underglaze dry:
Allow the painted bunny to dry completely. The surface should look chalky and matte, and be cool to the touch but no longer cold. -
Apply clear glaze:
If you are using a brush-on clear glaze, apply two to three flowing coats. Cross-hatch your strokes (paint one coat horizontally, the next vertically) to ensure even coverage. -
Check for pooling:
Watch out for glaze pooling in the deep crevices like the neck or between the toes. Redistribute any excess with your brush before it dries. -
Wipe the bottom:
Use a wet sponge to wipe the bottom of the figurine clean of any glaze. This prevents it from fusing to the kiln shelf during firing. -
Fire the piece:
Place the bunny in the kiln and fire according to your clay and glaze instructions (typically cone 06 or 04 for low-fire earthenware). The dull colors will transform into the glossy, vibrant hues seen in the photo.
Once cooled from the kiln, your sleek ceramic bunny will be ready to grace your table with its gentle charm


Polka Dot Bunny in Spring Colors
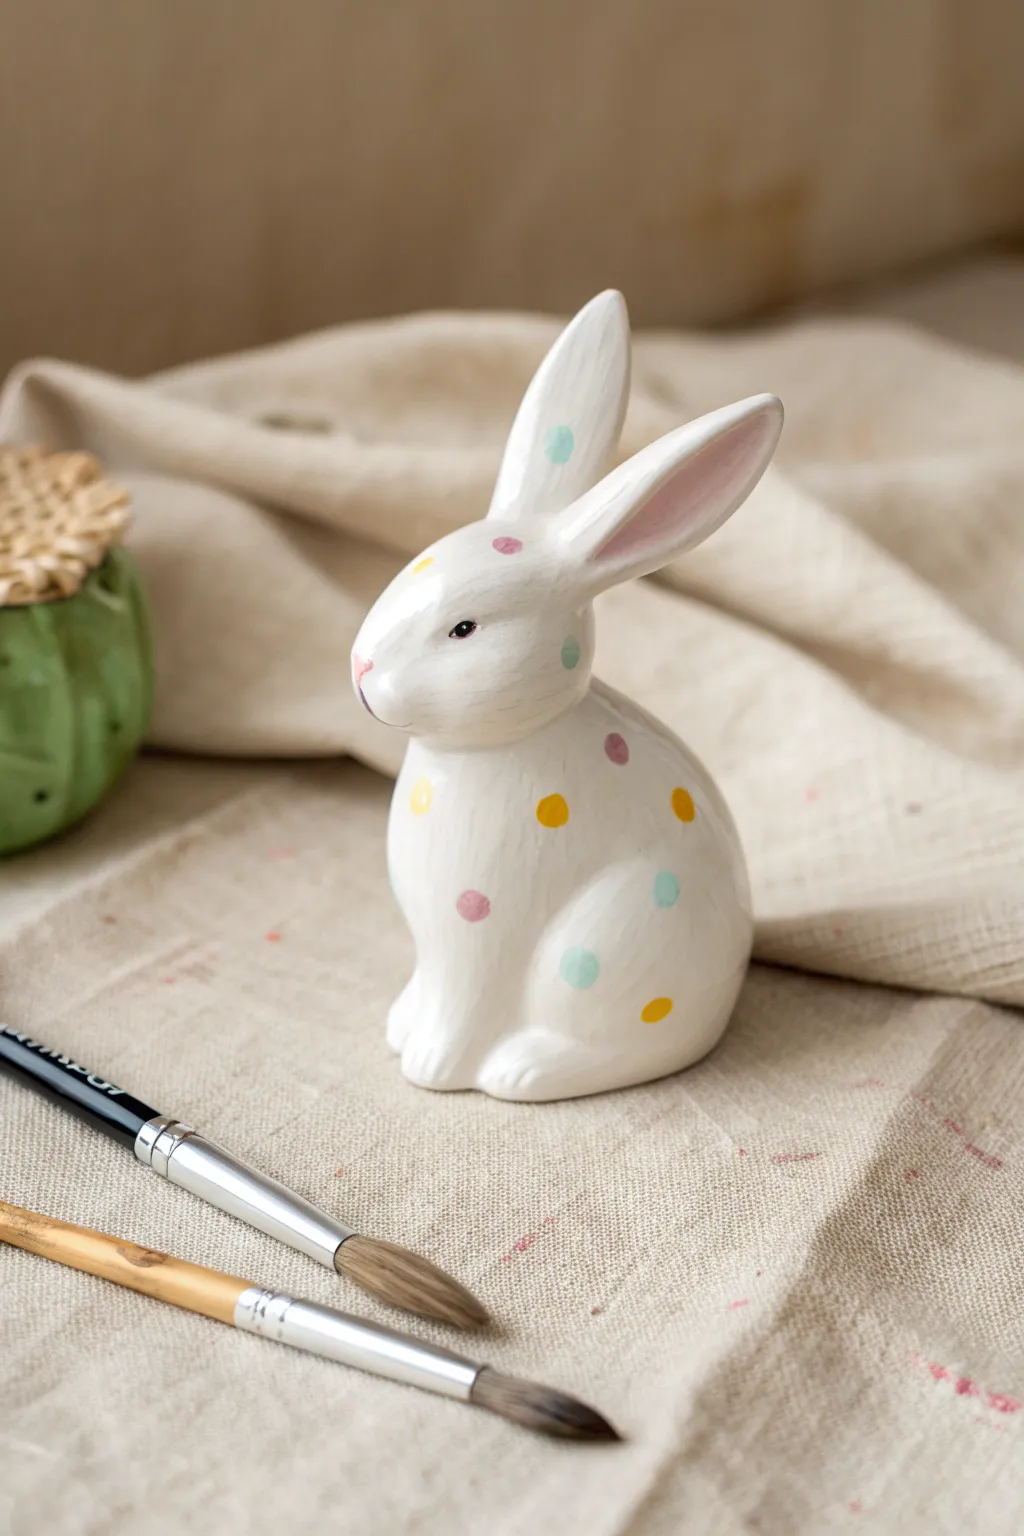
Spring has definitely sprung with this charming ceramic bunny project. Featuring a crisp white base scattered with confetti-like polka dots in soft pastels, this design is simple enough for beginners but yields a professional-looking piece of holiday decor.
Step-by-Step Guide
Materials
- Unpainted ceramic bunny figurine (bisque)
- White acrylic paint (priming)
- Acrylic paints in pastel shades: Buttercup Yellow, Baby Blue, Pale Pink, Lavender
- Soft synthetic flat brush (size 6 or 8)
- Small round detail brush (size 0 or 1)
- Dotting tool or the back of a paintbrush handle
- Clear acrylic sealant (matte or gloss)
- Palette or paper plate
- Water cup and paper towels
Step 1: Preparation and Base Coat
-
Clean the surface:
Before you even open a paint tube, take a moment to wipe down your ceramic bunny with a slightly damp cloth or paper towel. Ceramic bisque can accumulate dust on the shelf, which prevents paint from sticking smoothly. -
Apply the first base coat:
Using your larger flat brush, apply a generous coat of white acrylic paint over the entire bunny. Even if the ceramic is already white, painting it creates a uniform texture that accepts the colored details much better. -
Watch for brushstrokes:
Keep your brushstrokes long and follow the contours of the bunny’s body to minimize texture. I prefer to paint the bottom last so I have somewhere to hold onto. -
Let it dry completely:
Allow this first layer to dry for about 15-20 minutes. The surface should feel dry to the touch and not tacky. -
Apply a second coat:
For a truly opaque and professional finish, apply a second layer of white paint. This ensures no raw ceramic shows through and gives you a perfect blank canvas.
Step 2: Adding the Details
-
Paint the inner ears:
Switch to a smaller brush if necessary. Mix a touch of white into your pale pink to create a very soft blush color. Carefully paint inside the recessed area of the bunny’s ears, feathering the edges slightly so there isn’t a harsh line. -
Define the nose:
Using your smallest detail brush (size 0), paint a tiny pink ‘Y’ shape or triangle at the tip of the muzzle for the nose. -
Add the eyes:
Dip the very tip of your detail brush into black paint. Paint a small, almond-shaped eye on each side. If you are nervous about symmetry, mark the spots lightly with a pencil first. -
Give the eye a spark:
Once the black eye paint is dry, use a pin or the very tip of a clean brush to add a microscopic dot of white paint to the upper corner of the eye. This ‘catchlight’ brings the bunny to life.
Fixing Wonky Dots
If a dot smudges or isn’t round, don’t wipe it! Let it dry completely, then paint over it with your white base color. Once that dries, try the colored dot again
Step 3: Polka Dot Pattern
-
Prepare your dotting colors:
Squeeze dime-sized amounts of your pastel yellow, blue, pink, and lavender onto your palette. -
Choose your tool:
For perfect circles, use a dotting tool. If you don’t have one, the non-brush end of a paintbrush handle works perfectly well. -
Start with yellow:
Dip your tool into the yellow paint and press firmly onto the bunny’s body. Place these dots randomly, leaving plenty of white space between them for other colors. -
Add the pink dots:
Wipe your tool clean and switch to pink. Place pink dots in the empty spaces, trying to avoid placing two dots of the same color right next to each other. -
Layer in blue and lavender:
Continue the process with blue and finally lavender dots. Step back occasionally to look at the whole piece; you want a scattered, confetti look rather than rigid rows. -
Check the density:
Make sure you wrap the pattern around the back and lower legs of the bunny so it looks complete from all angles. -
Final drying time:
Let the dots dry completely. Because the paint is thicker where dotted, this might take 30 minutes or more to cure fully.
Add Metallic Flair
Swap one of the pastel colors for a metallic gold paint. Adding shimmering gold dots interspersed with the pastels gives the bunny a chic, high-end anthropologie vibe
Step 4: Finishing Touches
-
Inspect and cleanup:
Look for any accidental smudges. Since the background is white, you can easily touch up mistakes by dabbling a little white paint over any stray marks. -
Seal the project:
To protect your work from dust and fading, apply a clear acrylic sealer. A matte spray usually looks best for that soft, modern ceramic look, though gloss adds a nice porcelain shine.
Place your finished bunny on a mantel or as a centerpiece for a lovely handmade touch to your spring decor


Two-Tone Bunny With Painted Ear Tips
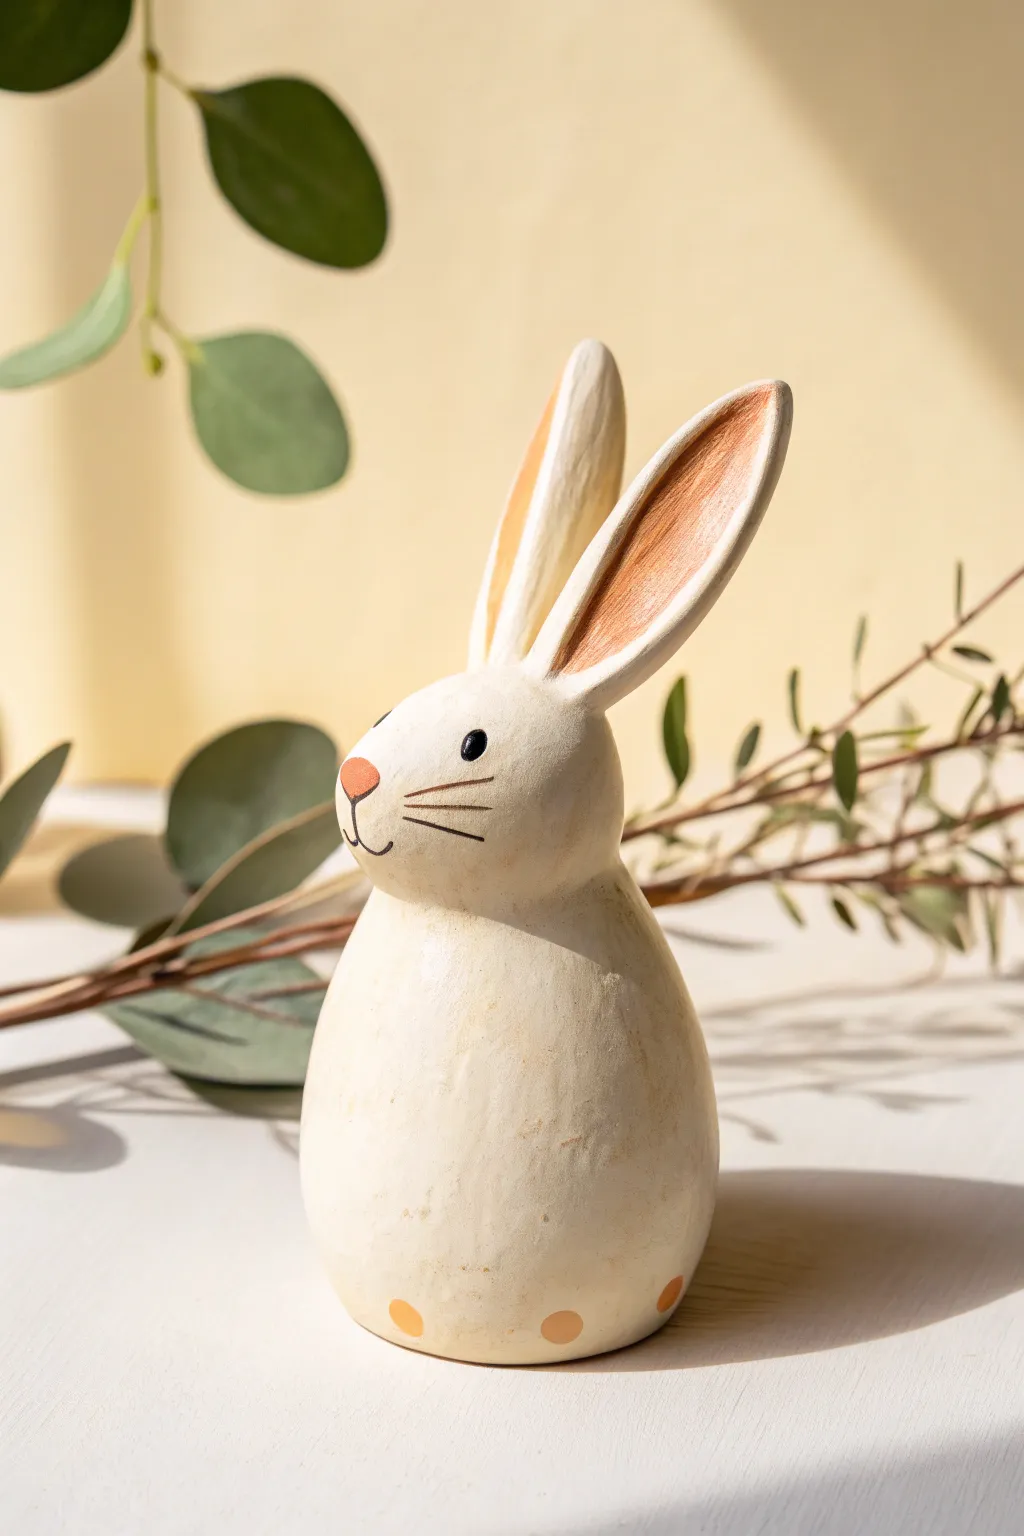
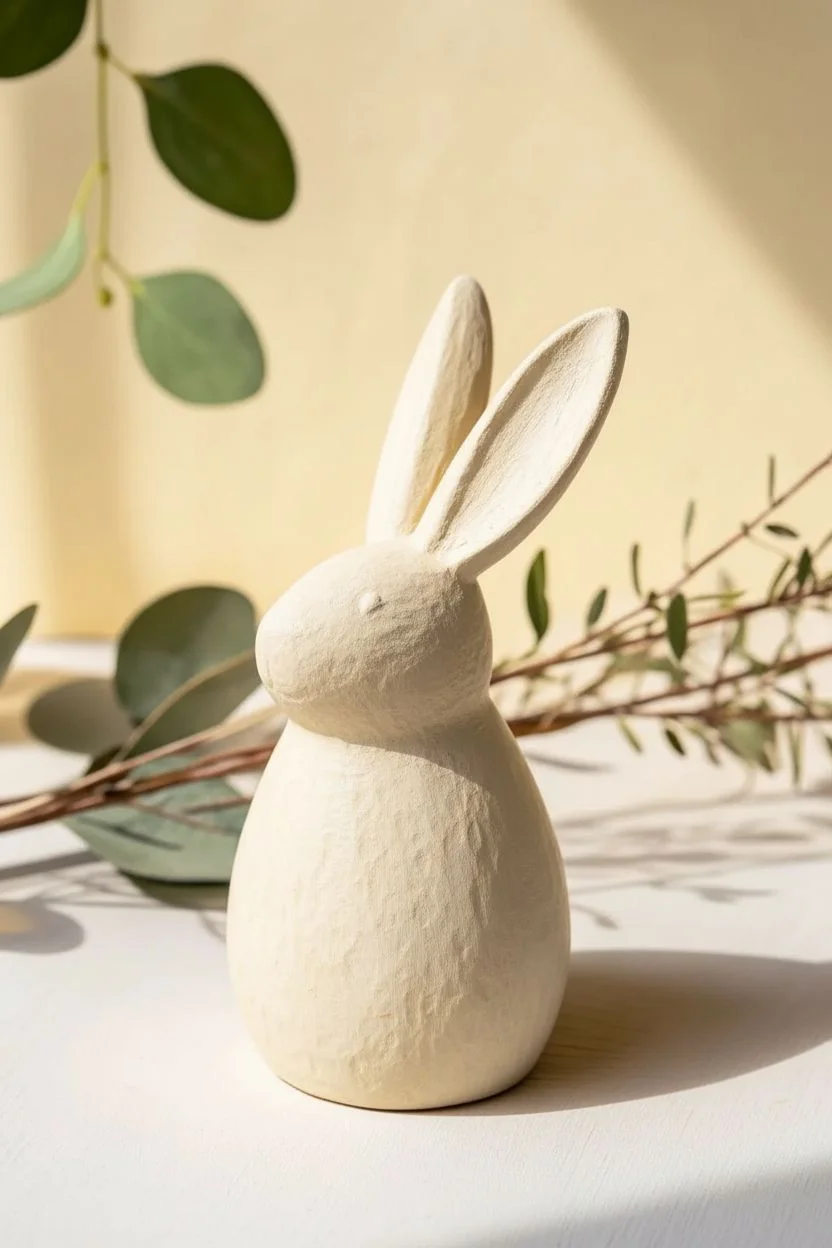
Embrace a charming, understated aesthetic with this rustic bunny figurine featuring muted orange accents and a beautifully aged finish. The creamy off-white base and subtle details create a piece that feels both handcrafted and timeless.
How-To Guide
Materials
- Unfinished ceramic bunny figurine
- Acrylic paint (Cream or Warm White)
- Acrylic paint (Muted Terracotta or Soft Orange)
- Acrylic paint (Black)
- Small flat paintbrush
- Fine detail liner brush
- Soft cloth or paper towel
- Matte sealant spray or varnish
- Optional: Antique medium or diluted brown paint for aging
Step 1: Base Coat & Texture
-
Clean surface:
Begin by wiping down your ceramic bunny with a damp cloth to remove any dust or ceramic powder. Let it dry completely to ensure the paint adheres properly. -
Apply base color:
Using a flat brush, apply a generous coat of warm white or cream acrylic paint over the entire figurine. Don’t worry about getting it perfectly smooth; slight brush strokes add to the rustic charm. -
Layering:
Once the first coat is dry to the touch, add a second coat if needed for opacity. I like to leave this layer slightly imperfect to mimic a hand-carved wood look. -
Create faint texture:
While the second coat is still barely tacky, you can gently dab a dry, clean brush or a crinkled paper towel over random spots to create subtle surface variations.
Step 2: Accents & Features
-
Paint inner ears:
Switch to a smaller brush and load it with muted terracotta or soft orange paint. Carefully fill in the inner depression of the bunny’s ears. -
Feather the edges:
For a softer transition, slightly feather the orange paint outward toward the rim of the ear, ensuring it doesn’t look like a rigid block of color. -
Add the nose:
Using the same terracotta shade, paint a small, soft triangular shape for the nose. Keep the edges rounded for a gentle expression. -
Paint the bottom details:
Near the base of the bunny, paint small, circular dots using the terracotta color. Imagine these are evenly spaced around the hem of a figurative dress or just a decorative border.
Wobbly Whiskers?
If painting fine lines is difficult, switch to a fine-tip permanent marker for the whiskers and mouth. Ensure the base paint is 100% dry first.
Step 3: Refining & Finishing
-
Paint the eyes:
Dip a fine detail liner brush (or use a toothpick) into black acrylic paint. Create two small, solid ovals for the eyes. Position them evenly on either side of the face. -
Add whiskers:
With the very tip of your detail brush and thinned black paint, pull three short, thin lines outward from the cheek area on both sides to serve as whiskers. -
Draw the mouth:
Connect the nose to the mouth area with a tiny vertical line, then curve two small ‘J’ shapes outward to form the smile. -
Subtle aging (Optional):
To achieve the aged look seen in the photo, mix a tiny drop of brown paint with water (or use antiquing medium). Lightly brush it over the cream body and immediately wipe most of it off with a rag. -
Dry brush highlights:
If the aging darkened the piece too much, dry brush a little bit of the original cream color back over the highest points of the cheeks and chest. -
Final dry:
Allow the entire piece to dry overnight to ensure all paint layers, especially the thickest parts, are fully cured. -
Seal the work:
Finish by spraying the bunny with a matte clear coat. This protects the paint while maintaining that natural, non-glossy ceramic finish.
Soften the Glow
Mix a tiny amount of your cream base paint into the orange ear color. This harmonizes the tones so the accent color doesn’t look too jarring.
Place your finished bunny near some greenery or on a sunny windowsill to enjoy its gentle charm
BRUSH GUIDE
The Right Brush for Every Stroke
From clean lines to bold texture — master brush choice, stroke control, and essential techniques.
Explore the Full Guide
Faux Stone Bunny Using Dry Brushing
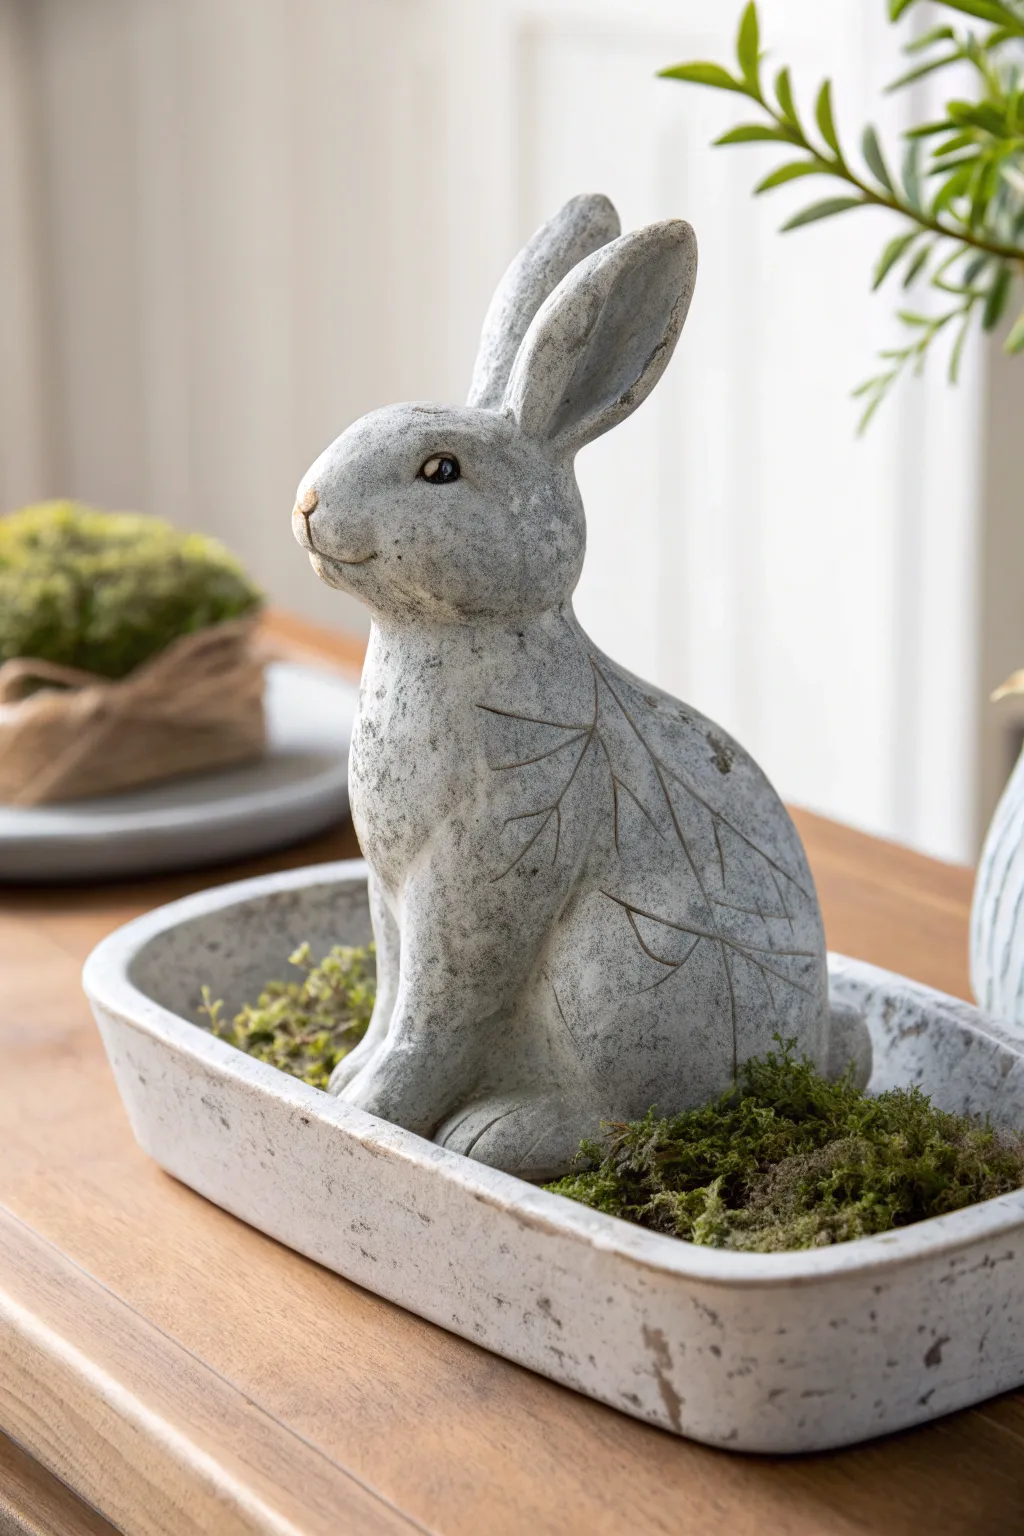
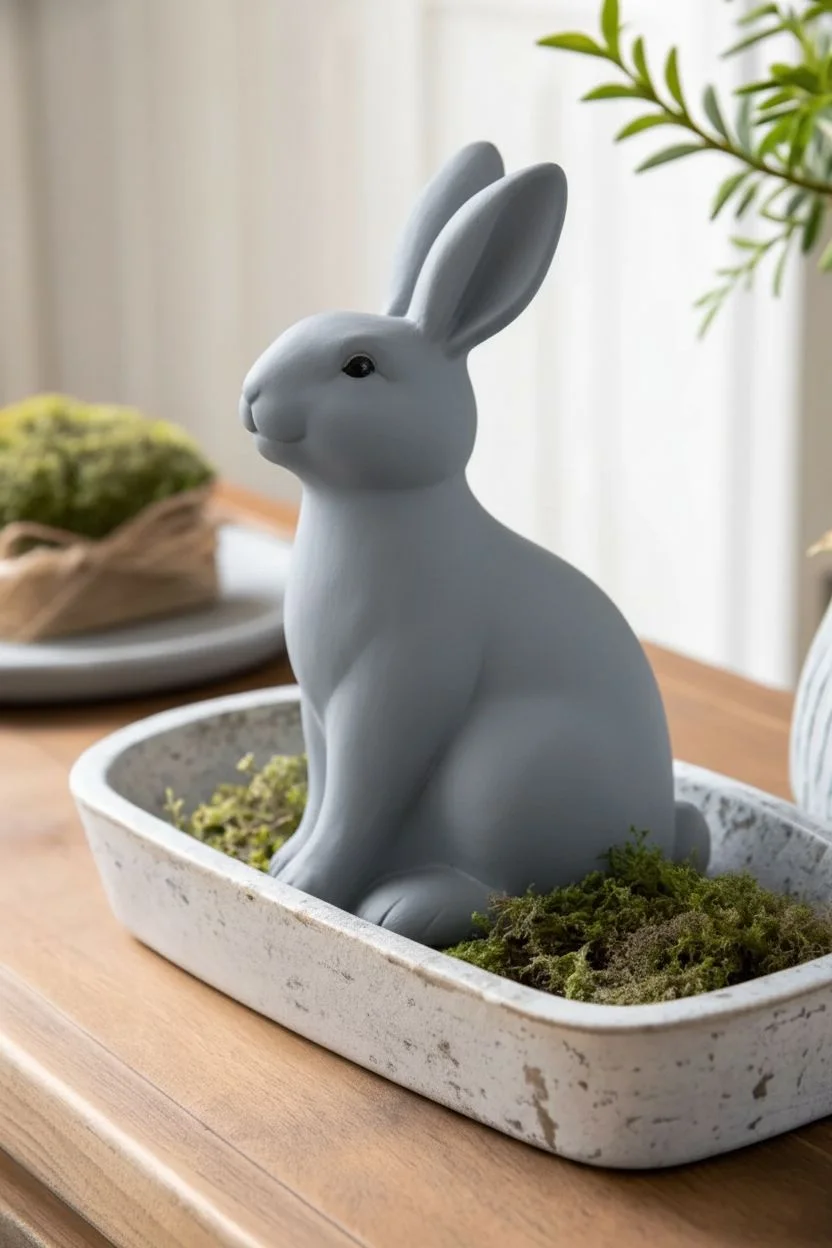
Transform a simple ceramic bunny into a piece of timeless garden décor with this convincingly aged finish. The dry brushing technique creates depth and texture that mimics the look of weather-worn concrete or carved limestone.
Step-by-Step Tutorial
Materials
- Ceramic bunny figurine (preferably smooth or slightly textured)
- Grey acrylic craft paint (medium slate grey)
- White or antique white acrylic craft paint
- Dark charcoal or soft black acrylic paint
- Medium flat synthetic brush
- Stiff-bristled chip brush or old paintbrush
- Paper towels
- Matte spray sealer
- Plastic palette or paper plate
Step 1: Base Coating
-
Clean surface:
Begin by wiping down your ceramic bunny with a damp cloth to remove any dust or oils. Let it dry completely before starting. -
Initial base coat:
Apply an even coat of medium slate grey acrylic paint over the entire figurine. Use your medium flat brush to get into all the crevices, especially around the ears and the paws. -
Check for coverage:
Inspect the piece for any skipped spots. If the ceramic color is still showing through, apply a second coat of grey. I usually find two thin coats work better than one thick, gloopy one. -
Full dry:
Allow the base coat to dry completely. It must be dry to the touch so the next layers don’t lift the paint.
Too much white?
If a spot gets too bright, simply dry brush a little of your original grey base color over it to knock it back.
Step 2: Adding Texture & Depth
-
Mix shadow color:
Mix a small amount of charcoal paint with water to create a thin, watery wash. -
Apply wash:
Brush this wash into the carved details, specifically the leaf patterns on the side, the inner ears, and around the eye socket. -
Wipe back:
Immediately wipe away the excess wash from the high points using a paper towel, leaving the dark pigment only in the deepest recesses to simulate accumulated dirt and shadows. -
Dry rubbing:
Take your stiff bristle brush and dip just the very tips into the slate grey paint (unthinned). Rub almost all the paint off onto a paper towel until the brush feels dry. -
Stipple texture:
Firmly stipple (pounce) the brush over the bunny’s body. This creates a speckled, uneven texture that breaks up the smooth ceramic surface.
Moss Accents
Glue patches of dried green moss into the crevices or base of the bunny for an authentic ‘forgotten in the garden’ vibe.
Step 3: Dry Brushing Highlights
-
Load the brush:
Clean your stiff brush and dry it thoroughly. Load a small amount of antique white paint. -
Offload paint:
Rub the brush vigorously on a paper towel. You want barely any paint left—if you see streaks, you still have too much on the bristles. -
First highlight pass:
Lightly sweep the brush across the raised areas of the bunny, moving against the grain of the shape. Focus on the curve of the back, the tops of the ears, and the nose. -
Build intensity:
Repeat the previous step, slowly building up the lighter color. The goal is a soft, chalky appearance rather than harsh white stripes. -
Detail areas:
Use a slightly heavier hand on the leaf etching to make the design pop against the grey background. -
Final eye touches:
Paint the eye solid black with a fine brush. Once dry, add a tiny speck of white for a life-like reflection. -
Seal:
Protect your faux stone finish with a light mist of matte sealer to prevent scuffs.
Place your creation in a planter or on a mantel to enjoy its rustic, gentle charm year-round
Faux Concrete Bunny With Layered Grays
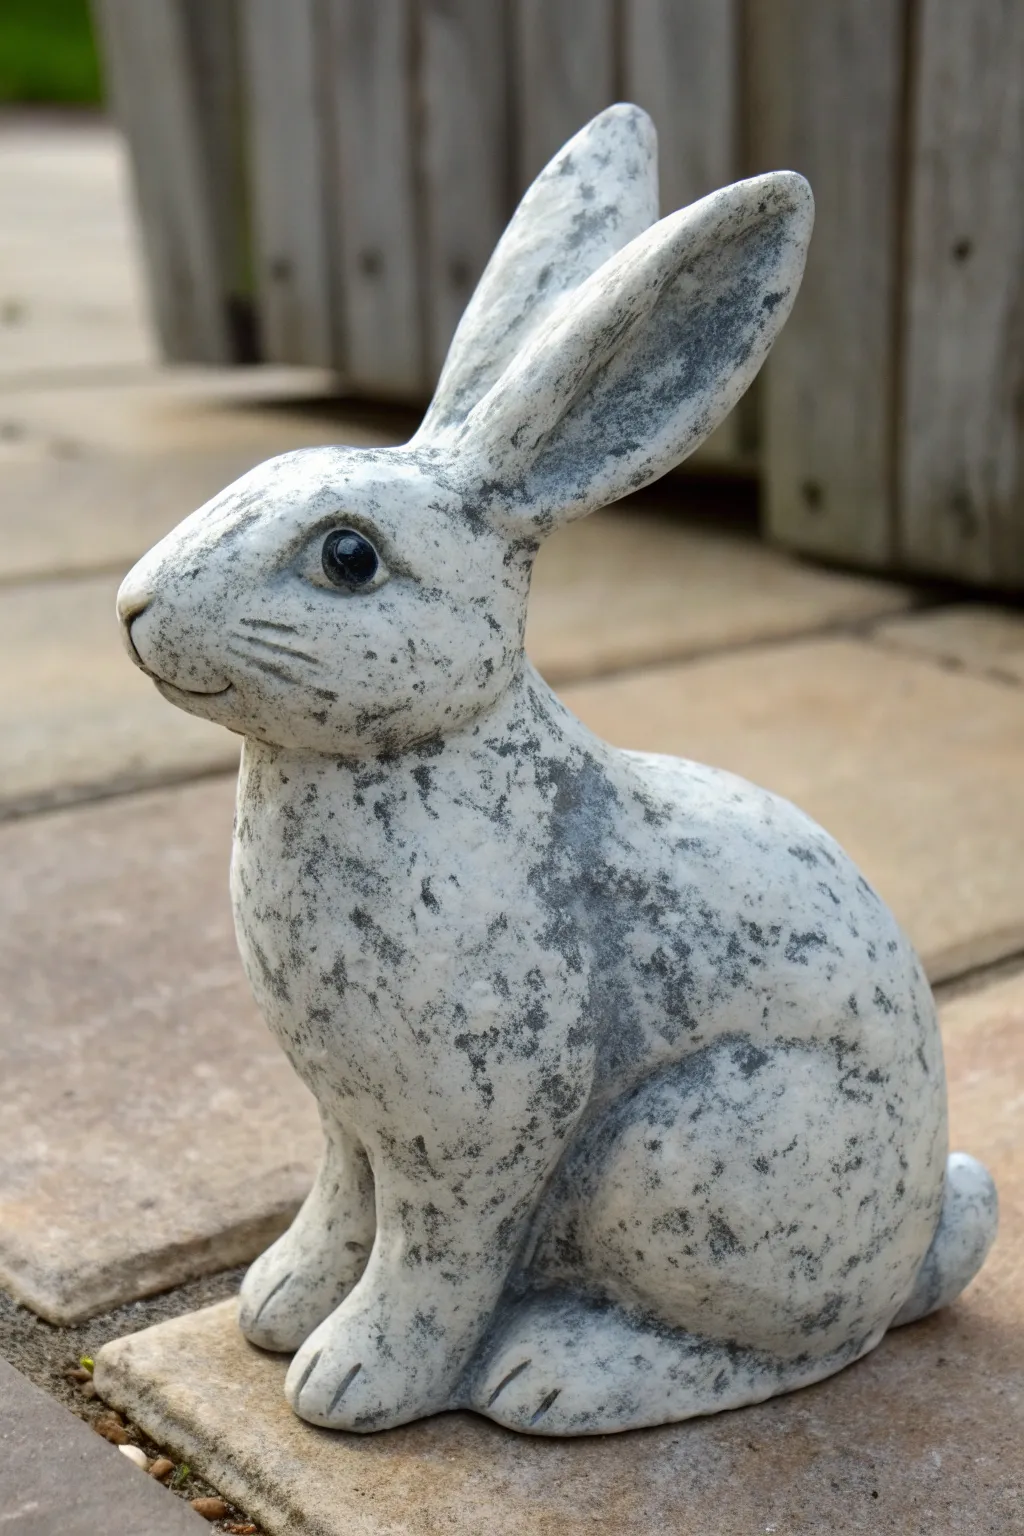
Transform a simple ceramic bunny into a piece of weathered garden art using nothing but acrylic paint and a sponge. This faux concrete technique uses layers of white and gray to create a textured, stony appearance that looks remarkably heavy but is light as a feather.
Step-by-Step Guide
Materials
- Unfinished ceramic bunny figurine
- Gray spray primer
- Acrylic paints: White, dark charcoal gray, medium warm gray
- Natural sea sponge
- Small round detail brush
- High-gloss varnish (for eyes)
- Matte clear coat sealer
- Parchment paper or palette
- Paper towels
Step 1: Base Prep
-
Clean the surface:
Before painting, wipe down your ceramic bunny with a slightly damp cloth to remove any dust or oils that might prevent the paint from sticking. -
Prime the figure:
Apply a coat of gray spray primer over the entire bunny. This provides a neutral mid-tone base that mimics the underlying color of concrete and helps the subsequent acrylic layers adhere better. -
Dry completely:
Allow the primer to dry fully according to the can’s instructions, usually about an hour.
Too Blotchy?
If your sponge marks look too heavy or distinct, re-sponge a thin layer of white over the top. This pushes the dark spots back, making them look like part of the stone rather than surface paint.
Step 2: Building Texture
-
Prepare the sponge:
Tear off a small piece of natural sea sponge. Dampen it slightly with water and squeeze it out until it is just barely moist, not dripping. -
Load the white paint:
Pour a generous amount of white acrylic paint onto your palette. Dip the sponge into the paint, then dab the excess off onto a paper towel until the texture looks mottled, not solid. -
Sponge the first layer:
Gently dab the white sponge all over the bunny. You want to cover about 80% of the gray primer, leaving small pockets of the base showing through to create depth. -
Add first gray accents:
While the white is still tacky, take a clean section of the sponge and dip it into the medium warm gray paint. Dab off heavily on paper towel. -
Apply shading:
Lightly pounce this medium gray into the crevices, like around the legs, under the chin, and inside the ears, to simulate shadows. -
Create the stone speckle:
Mix a tiny bit of dark charcoal gray with water to thin it slightly. Load the sponge tip and blot it almost dry. I find this works best if you test it on paper first to ensure it creates tiny speckles rather than blobs. -
Stipple the dark spots:
Gently stipple this dark charcoal color randomly across the back, ears, and face. Press harder in some areas to create larger irregular patches of ‘weathering’ as seen on the nose and ears.
Step 3: Finishing Details
-
Paint the eye:
Using a small round detail brush and undiluted black paint, carefully fill in the entire eye area. -
Add the eye highlight:
Once the black eye is dry, add a tiny white dot in the upper corner of the pupil to bring life to the face. -
Define the nose:
Use a very dilute wash of the dark gray on your small brush to trace the line of the mouth and the nose shape, wiping it back immediately with a finger so it looks like a stain rather than a painted line. -
Gloss the eyes:
Paint a drop of high-gloss varnish specifically over the eye area. This contrast between the shiny eye and the matte body really sells the illusion. -
Seal the piece:
Finish by coating the entire bunny (avoiding the glossy eyes if possible) with a matte clear coat spray to protect the finish and unify the sheen.
Mossy Level Up
For an aged garden look, mix watery moss green paint and dab it into the deepest crevices (ears, between legs). Wipe the high points clean so the ‘moss’ only sits in the recesses.
Now you have a charming, weather-worn bunny ready to hop onto your bookshelf or patio

PENCIL GUIDE
Understanding Pencil Grades from H to B
From first sketch to finished drawing — learn pencil grades, line control, and shading techniques.
Explore the Full Guide
Distressed Antique Bunny With Worn Edges
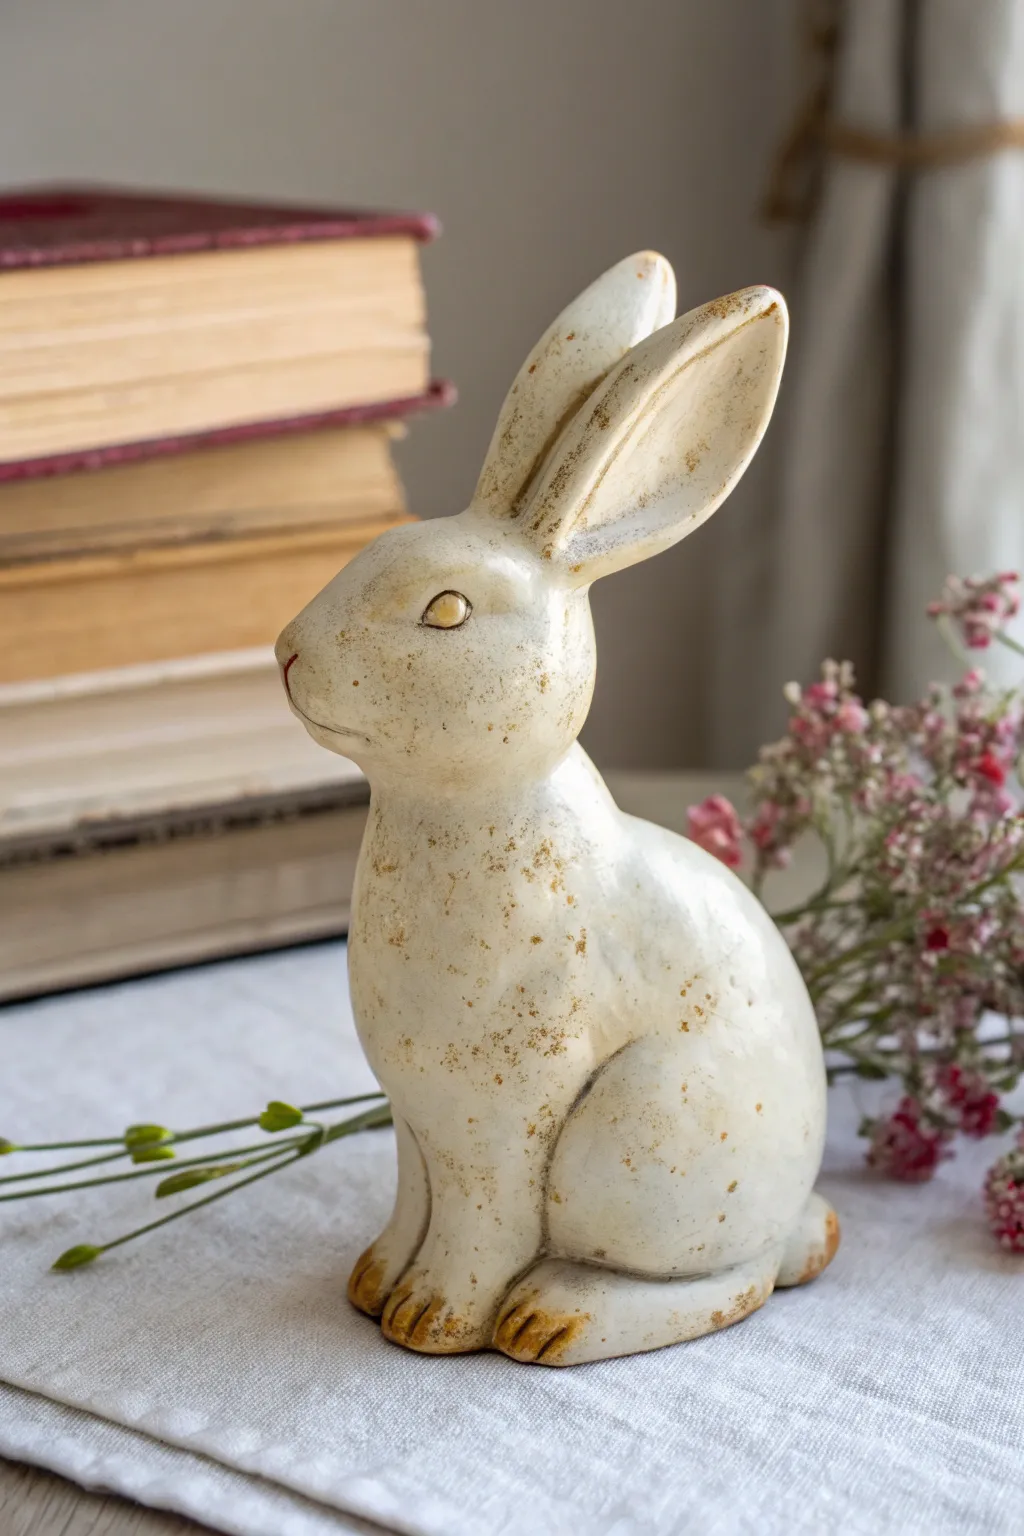
Transform a plain ceramic bunny into a cherished heirloom look-alike with this simple distressing technique. The finish features a creamy, aged white base accented by warm, golden-brown worn edges that mimic decades of gentle handling.
How-To Guide
Materials
- Bisque or plain ceramic bunny figurine
- Cream or antique white acrylic paint
- Burnt umber or metallic antique gold acrylic paint
- Matte finish sealer (spray or brush-on)
- Medium flat synthetic brush
- Small round detail brush
- Old stiff-bristled toothbrush
- Clean lint-free rag or paper towels
- Water cup and palette
Step 1: Base Coat Application
-
Clean surface:
Begin by wiping down your ceramic bunny with a slightly damp cloth to remove any dust or oils. Let it dry completely before starting to ensure the paint adheres properly. -
Base layer:
Apply a solid coat of cream or antique white acrylic paint over the entire figurine. Use your medium flat brush for the body and larger areas. -
Refine coverage:
Check for any bald spots, especially in the crevices of the ears or legs. Apply a second coat if the first layer looks streaky or translucent. -
Dry completely:
Allow the base coat to dry fully. This is crucial because you don’t want the white paint to lift when you apply the distressing layer later.
Too Much Brown?
If your ‘worn’ spots look too heavy, wait for them to dry, then dry-brush a little of the original cream color back over the top to soften the effect.
Step 2: Creating the Worn Edges
-
Select accent color:
Pour a small amount of burnt umber paint onto your palette. If you prefer a slight shimmer like the example, mix in a tiny drop of antique gold. -
Dry dry-brushing:
Dip your small round brush into the brown mix, then offload almost all the paint onto a paper towel until the brush feels dry. You want very little pigment. -
Target high points:
Gently sweep the dry brush over the raised areas: the tips of the ears, the nose, the curve of the back, and the paws. This simulates natural wear patterns. -
Deepen crevices:
Use the same brown mixture, slightly thinned with water, to carefully paint into deep lines like the separation of the ears and toes. This adds depth. -
Define the eye:
Carefully paint the eye area. Use a touch of the brown/gold mix for the outline and pupil to make the gaze soft but distinct. -
Soften edges:
If any brown lines look too harsh, instantly dab them with a clean finger or a damp rag to smudge and blend them into the white base.
Step 3: The Speckled Finish
-
Prepare spatter:
Dilute a small amount of your brown paint with water until it has an inky consistency. It should be fluid enough to fly off bristles. -
Load the tool:
Dip the tips of an old stiff toothbrush into the watered-down paint. Test the spray on a piece of scrap paper first. -
Apply speckles:
Hold the toothbrush about 6 inches from the bunny. Run your thumb across the bristles to flick tiny specks of paint onto the surface. -
Control density:
Focus the speckling on the lower half of the bunny and the chest area, keeping the face relatively clear for a cleaner look. -
Final touches:
Inspect the bunny for balance. I sometimes like to add a tiny extra smudge of brown on the very tip of the nose for extra character. -
Seal the work:
Once all paint is perfectly dry, apply a matte clear coat. This protects the finish and unifies the sheen of the different paint layers.
Add a Mossy Touch
For a garden-statue vibe, lightly stipple a tiny bit of muted sage green paint into the deepest crevices before sealing to mimic moss growth.
Now your bunny has that perfect vintage charm ready for display on a mantle or bookshelf
Terra-Cotta Bunny With Chalky Patina
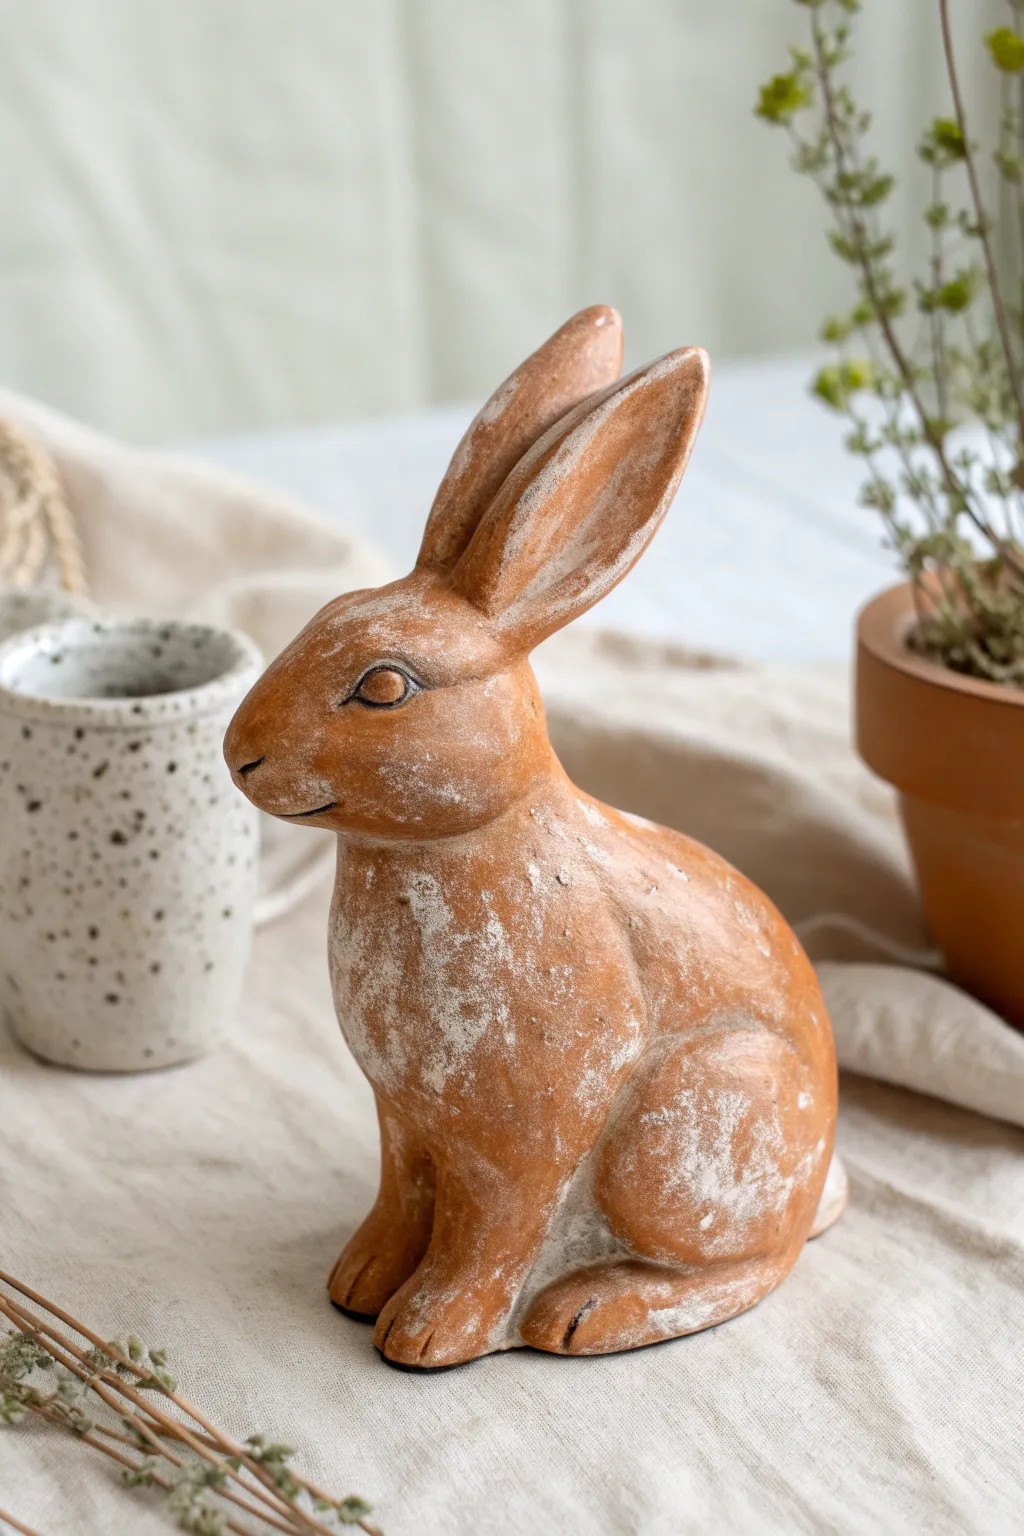
Bring the timeless charm of an antique English garden into your home with this faux-aged terracotta bunny. By layering chalky textures over an earthy base, you create a convincing weathered finish that looks like it has spent years nestled among the flower beds.
Step-by-Step Tutorial
Materials
- Unfinished ceramic or terracotta bunny figurine
- Terracotta colored acrylic paint (or burnt sienna mixed with a touch of orange)
- White chalk paint or matte white acrylic paint
- Paper towels or a soft lint-free rag
- Small flat paintbrush
- Medium round brush
- Fan brush or dry bristly chip brush
- Matte spray sealer (optional)
- Small cup of water
Step 1: Base Coat Application
-
Clean surface:
Begin by wiping down your ceramic bunny with a slightly damp cloth to remove any dust or oils from the surface. Let it dry completely. -
Mix terracotta hue:
If you don’t have a pre-mixed terracotta color, blend burnt sienna with a little bit of orange and brown until you achieve a warm, earthy clay tone. -
Apply base color:
Using your flat paintbrush, apply an even coat of the terracotta paint over the entire figurine. Ensure you get into the deep crevices of the ears and legs. -
Check for gaps:
Inspect the bunny for any missed white spots from the original ceramic. Touch up these areas to ensure a solid foundation. -
Dry thoroughly:
Allow this base coat to dry fully. It needs to be completely set so the next layers don’t lift the paint. I like to give it at least an hour.
Step 2: Creating the Chalky Patina
-
Prepare white wash:
Squeeze a small amount of white chalk paint onto your palette. It works best if it’s slightly thick, so don’t water it down yet. -
Dry brush technique:
Dip just the tips of your bristly chip brush or fan brush into the white paint. Offload most of the paint onto a paper towel until the brush feels almost dry. -
First dusting:
Lightly sweep the brush over the raised areas of the bunny, such as the back, the tops of the ears, and the curves of the legs. Use a fluttering motion. -
Concentrate on texture:
Focus the dry brushing on the chest and the haunches where natural weathering would occur. -
Stipple the chest:
For the heavier white patch seen on the chest, use a stippling motion (tapping the brush tip straight down) to deposit a bit more pigment. -
Soften edges:
Immediately use a clean, dry paper towel to gently blot the stippled area. This pushes the white paint into the texture and removes hard brush strokes. -
Highlight the ears:
Run the dry brush along the rim of the ears and inside the fold to accentuate their shape. -
Detail the face:
With a smaller brush, very lightly highlight the muzzle and the brow ridge above the eye, being careful not to paint over the eye itself.
Natural Texture
For a grittier, moss-covered texture, mix a pinch of baking soda or fine sand into your white paint before dry brushing. It mimics mineral buildup perfectly.
Step 3: Refining and Sealing
-
Defined eye detail:
Use a small detail brush with dark brown or black paint to carefully outline the eye and the pupil. This brings the character to life. -
Distress (optional):
If the white looks too uniform, take a very slightly damp rag and rub away small patches to reveal more of the terracotta base underneath. -
Assess the balance:
Step back and look at your bunny. Since I prefer a very aged look, I often add a second, very light layer of dry brushing to the highest points for more contrast. -
Final dry:
Let all paint layers cure for several hours. -
Seal the finish:
To protect your work, especially if placing it near plants, spray a light coat of matte sealer over the entire piece.
Mossy Accents
Dab diluted olive green paint into deep crevices (like where the legs meet the body) before the white layer dries to simulate realistic moss growth.
Now showcase your weathered bunny alongside some potted herbs or on a sunny windowsill for a charming rustic vignett


Speckled Bunny for a Handmade Pottery Look
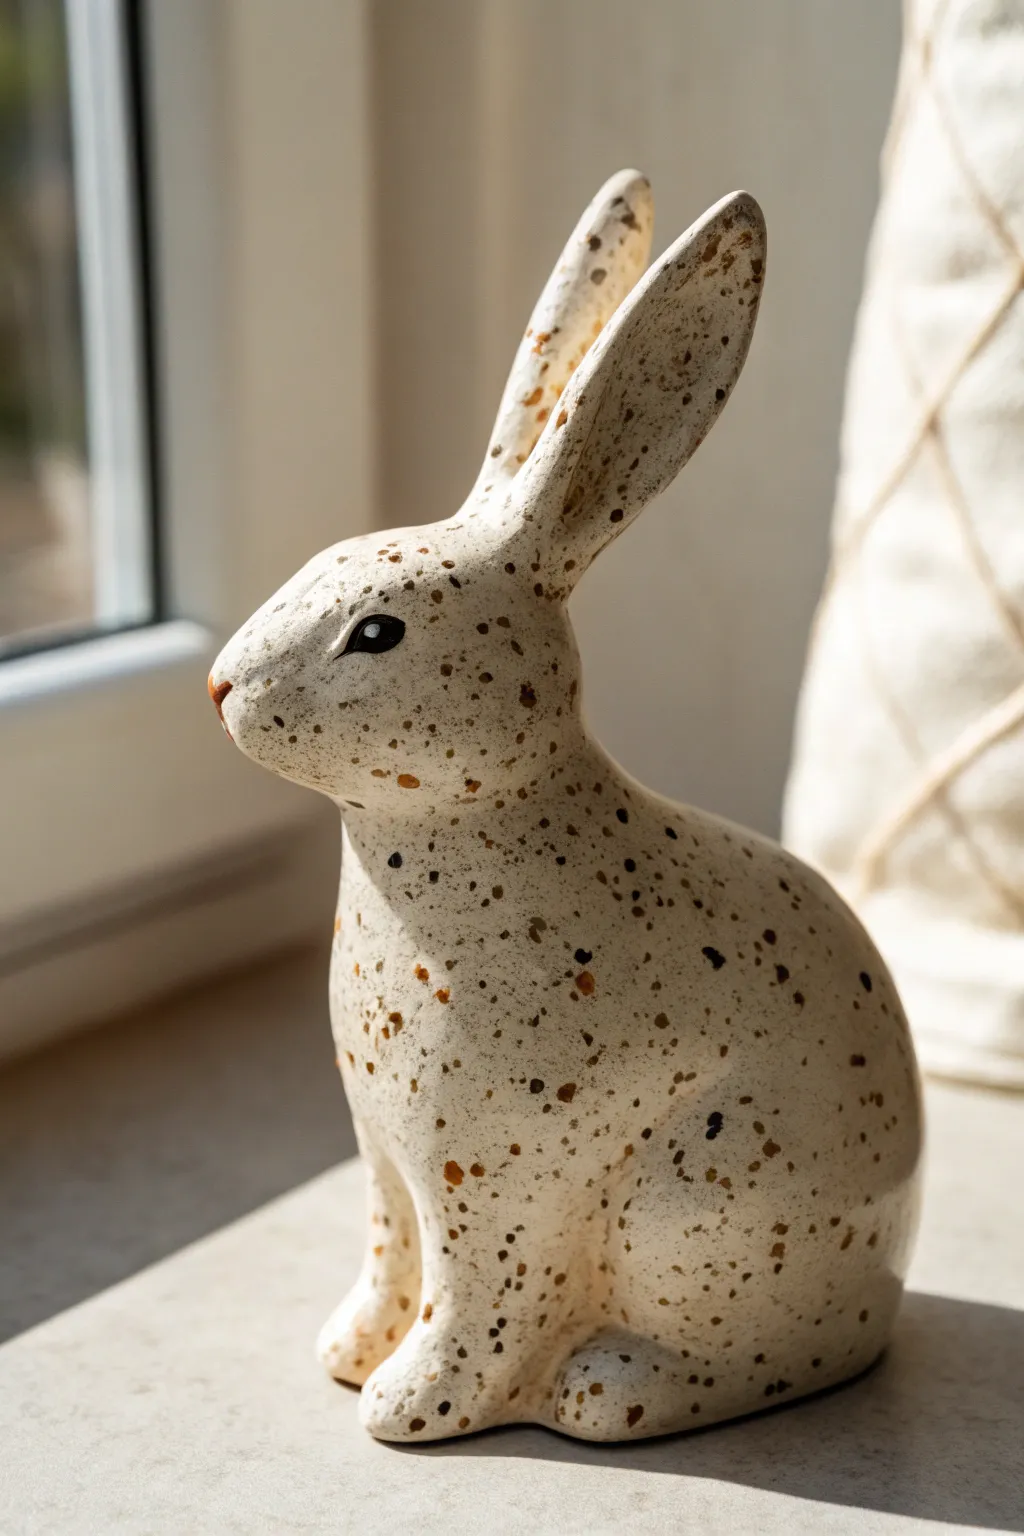
Achieve the sophisticated look of fired stoneware with this simple speckled painting technique. Using a ceramic bisque bunny and layers of neutral acrylics, you’ll create a textured, organic finish that mimics high-end pottery perfectly.
Step-by-Step
Materials
- Ceramic bisque bunny figurine
- Acrylic paint (warm cream or bone white)
- Acrylic paint (warm beige or tan)
- Acrylic paint (dark brown or espresso)
- Acrylic paint (black – small amount for eyes)
- Medium flat synthetic brush
- Old stiff toothbrush or spline texture brush
- Detail liner brush
- Matte or satin sealant spray
- Mixing palette
- Paper towels
- Water cup
Step 1: Base Coat Application
-
Clean surface:
Begin by wiping down your ceramic bunny with a slightly damp paper towel to remove any dust or manufacturing residue. Let it dry completely for a clean surface. -
Mix base color:
On your palette, pour out a generous amount of warm cream acrylic paint. I like to mix in a tiny drop of beige to warm it up so it looks more like natural clay than harsh white plastic. -
Apply first coat:
Using the medium flat brush, apply a smooth, even coat of the cream mixture over the entire bunny. Don’t worry about complete opacity yet; thin, even layers are key to avoiding brushstrokes. -
Dry and repeat:
Allow the first coat to dry for about 15-20 minutes. Apply a second coat to ensure solid coverage, paying attention to crevices around the ears and legs. -
Check for gaps:
inspect the bunny from different angles, especially under the chin and belly, to ensure no raw ceramic is showing through. Apply touch-ups if necessary.
Step 2: Creating the Speckled Effect
-
Prepare splatter paint:
Dilute a small amount of the dark brown paint with water on your palette. You want a consistency similar to ink or heavy cream—fluid enough to fly off a brush, but thick enough to hold its color. -
Test the splatter:
Before moving to the bunny, test your splatter technique on a piece of scrap paper. Dip an old toothbrush into the thinned paint and run your thumb across the bristles to flick the paint. -
Apply fine speckles:
Holding the toothbrush about 6-8 inches away from the bunny, gently flick the bristles to create a fine mist of brown speckles. Rotate the bunny to get even coverage on the back, sides, and face. -
Varied splatter sizes:
To create a more natural, pottery-like look, you want variation. Load the brush a bit heavily and flick closer to the surface in random spots to create slightly larger, darker spots. -
Add warm tones:
Clean your toothbrush and repeat the splatter process with the warm beige or tan paint. These lighter speckles add depth and dimension, making the surface look like textured stone. -
Control the face:
Be careful not to over-splatter the eye area. If you get a large blob in a spot you don’t like, quickly blot it gently with a damp paper towel before it dries.
Flick Control
For directional control on the speckles, try using a small stiff fan brush instead of a toothbrush. Tap the handle against a stick to shake drops exactly where you want them.
Step 3: Details and Finishing
-
Paint the nose:
Using the detail liner brush and a mix of tan and brown, carefully paint the nose area. Blend the edges slightly so it doesn’t look like a cartoon sticker. -
Refine the eyes:
With the detail brush and pure black paint, fill in the sculpted eye area. Keep your hand steady and outline the almond shape defined by the ceramic mold. -
Add eye highlight:
Dip the very tip of a toothpick or the handle end of a small brush into white paint. Place a tiny dot on the upper curve of the black eye pupil to bring the bunny to life. -
Final drying:
Let the speckles and details dry completely. Because the splatters can be thicker than the base coat, give this project at least an hour to set fully. -
Seal the piece:
Spray the entire bunny with a matte or satin sealant. A glossy finish tends to look plastic, while matte preserves that authentic stoneware pottery aesthetic.
Too Many Spots?
If you accidentally over-splatter an area, wait for it to dry completely. Then, gently sponge a thin layer of your base cream color over the busy area to mute the spots.
Now you have a charming faux-stone bunny that adds a natural, rustic touch to your seasonal decor
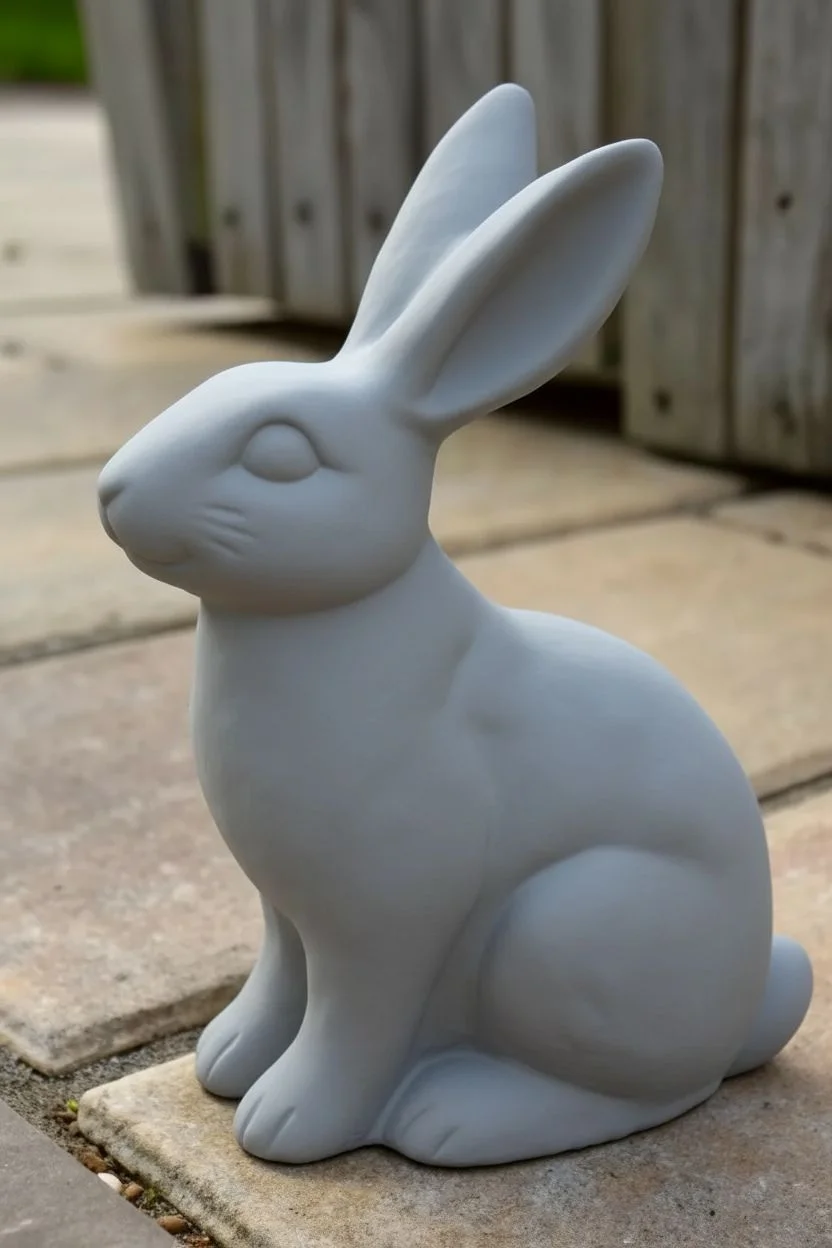
Gray Bunny With White Highlighted Fur Texture
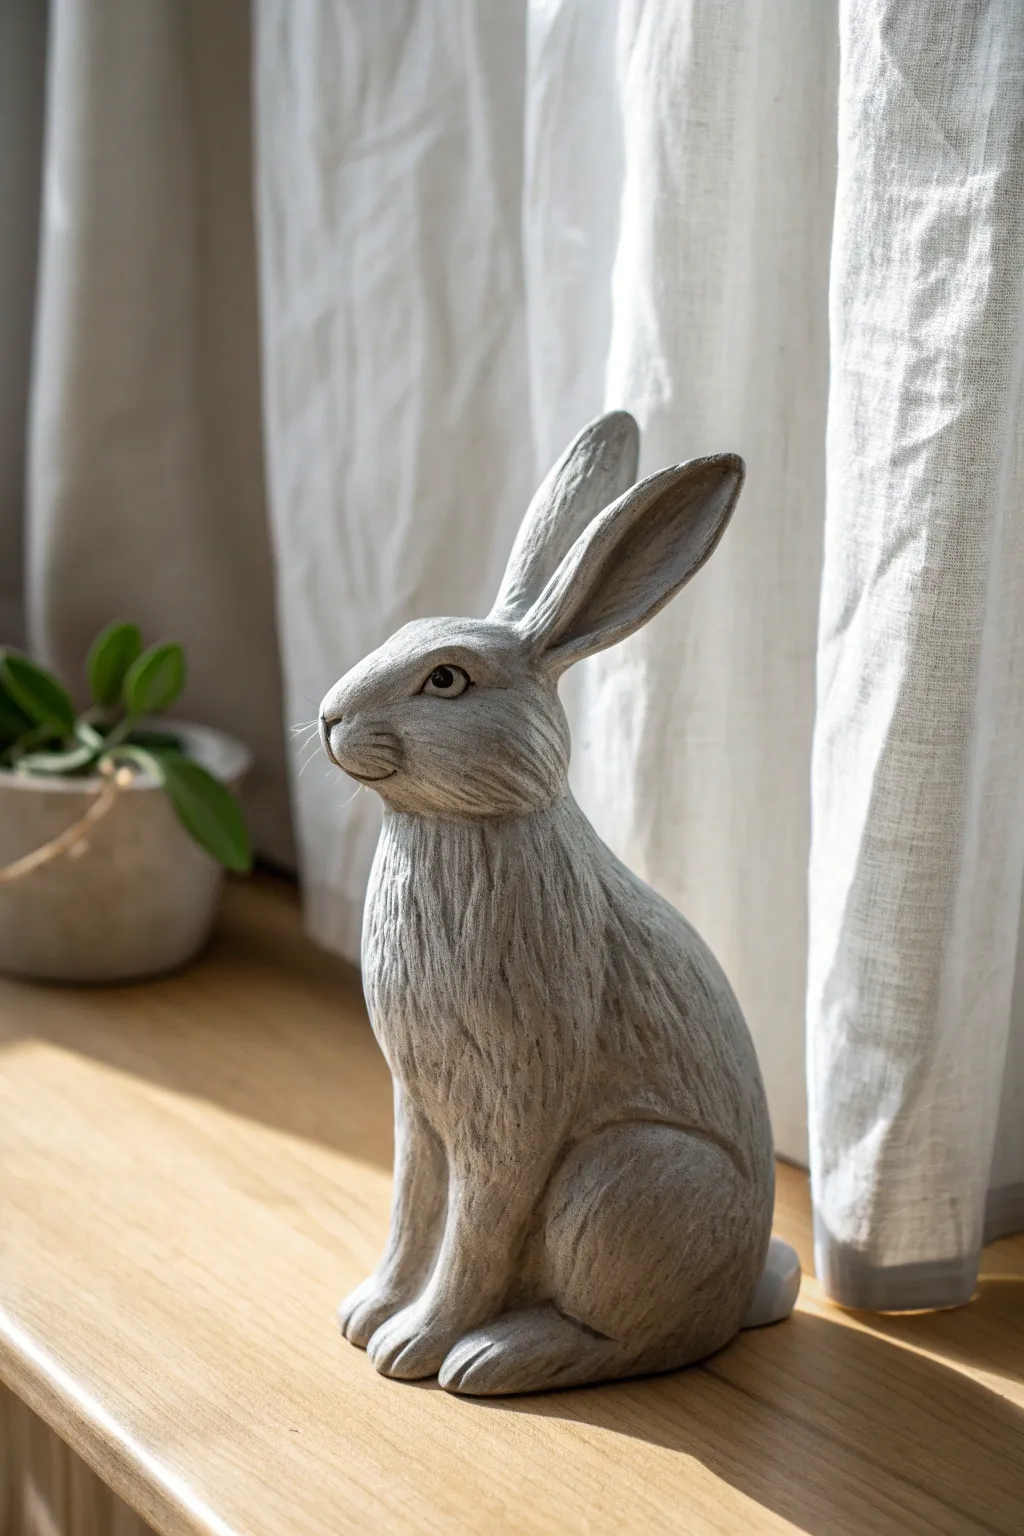
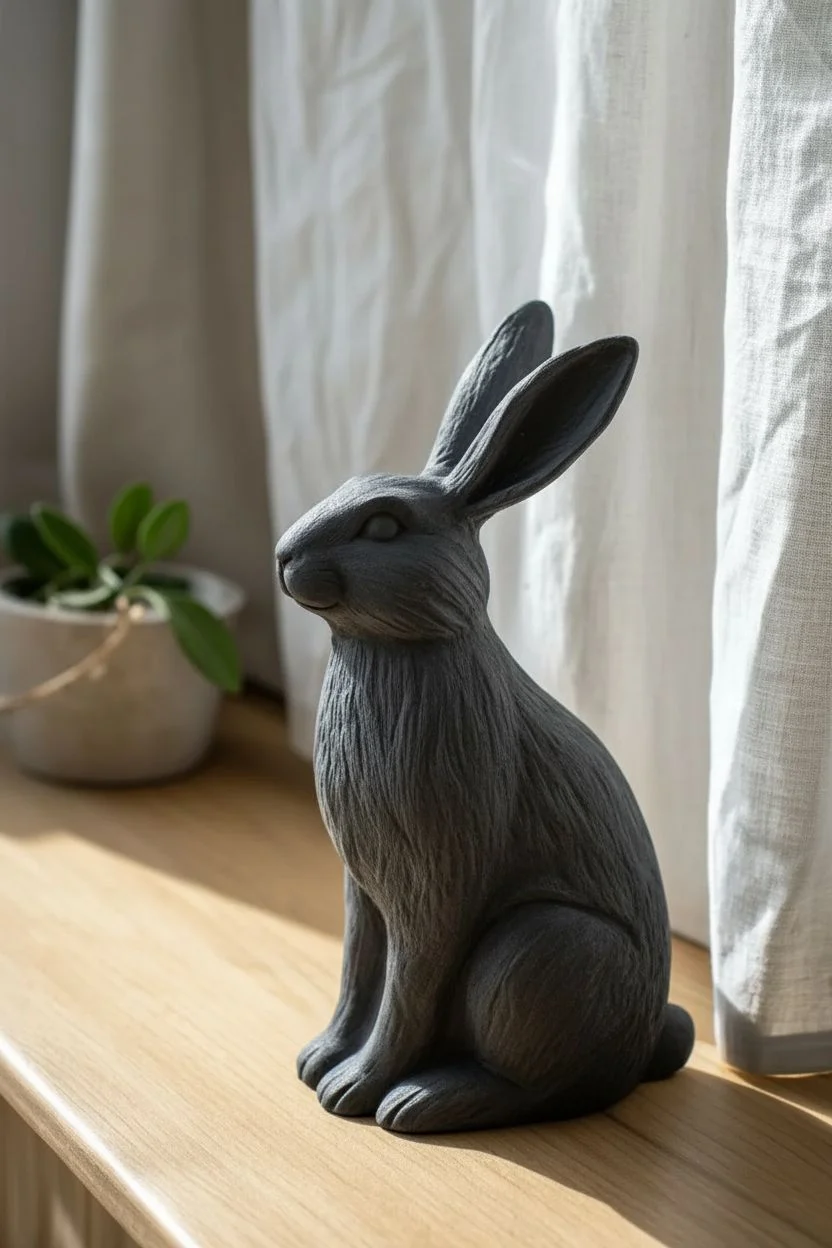
Transform a plain ceramic bunny figurine into a sophisticated piece of decor that mimics the look of carved stone. This project focuses on building up layers of gray acrylics and using a dry brush technique to make every strand of fur texture pop with realistic dimension.
Step-by-Step Guide
Materials
- Bisque or smooth ceramic bunny figurine
- Acrylic paint: Dark slate gray
- Acrylic paint: Medium cool gray
- Acrylic paint: Titanium white
- Matte paint sealer or spray varnish
- Wide flat brush (for base coating)
- Stiff-bristled round brush or chip brush (for dry brushing)
- Detail brush
- Paper towels
- Palette or paper plate
- Water cup
Step 1: Base Coating
-
Prepare the surface:
Wipe down your ceramic bunny with a slightly damp paper towel to remove any dust or oils from the surface. Let it air dry completely before painting to ensure good adhesion. -
Mix the base color:
On your palette, create a dark, solid gray by mixing your slate gray with a tiny touch of black if needed. You want a color that resembles wet concrete or dark river stone. -
Apply the first coat:
Using the wide flat brush, paint the entire bunny with the dark gray mixture. Work the bristles into the deep crevices of the fur texture to ensure no white ceramic shows through. -
Check for gaps:
Turn the figurine upside down and inspect it from different angles. It’s surprisingly easy to miss spots under the chin or behind the ears. -
Let it cure:
Allow this base coat to dry thoroughly. I prefer to wait at least 30 minutes, as a wet base layer will muddy the subsequent highlighting steps.
Step 2: Creating Depth
-
Prepare the mid-tone:
Squeeze out your medium cool gray paint. It should be noticeably lighter than your base coat but vastly darker than white. -
Load the dry brush:
Dip just the very tip of your stiff-bristled brush into the medium gray paint. This technique relies on having very little paint on the tool. -
Offload excess paint:
Vigorously wipe the brush onto a dry paper towel until almost no pigment comes off. The brush should feel dry to the touch, hence the name ‘dry brushing’. -
Apply the mid-tone layer:
Lightly sweep the brush across the bunny’s fur, moving against the direction of the texture. Use quick, feathery strokes to catch the raised areas while leaving the dark crevices untouched. -
Focus on high points:
Pay extra attention to the rounded areas like the haunches, the chest, and the cheeks, applying slightly more pressure to build opacity here. -
Let it set:
Give this layer about 10-15 minutes to dry. Acrylics dry darker, so you’ll be able to see the true contrast once the moisture evaporates.
Save Your Brush
Dry brushing is rough on tools. Don’t use your expensive watercolor brushes for this. An old, scruffy brush or a cheap chip brush actually creates better, more organic texture.
Step 3: Highlighting
-
Mix the highlight shade:
Create a very pale gray by mixing a large amount of titanium white with just a pinpoint of your medium gray. -
Prepare for extreme dry brushing:
Clean your stiff brush thoroughly and dry it completely—moisture is the enemy here. Load it with the pale gray mix and offload almost all of it onto your towel. -
Highlight the texture:
Process the surface again with extremely light pressure. The goal is to hit only the very tips of the fur strands. This creates that crisp, frosty look shown in the photo. -
Brighten the face:
Use a smaller brush with the same dry technique to carefully highlight the eyebrows, the bridge of the nose, and the tips of the ears. -
Detail the eyes:
With your fine detail brush, paint the eye area black. Once dry, add a tiny dot of pure white to the upper quadrant of the eye to create a lifelike glint.
Stone Speckle Effect
For a granite look, dip an old toothbrush in watered-down black paint. Run your thumb over the bristles to flick tiny specks of paint onto the finished bunny before sealing.
Step 4: Finishing Touches
-
Review the contrast:
Step back and look at your bunny. If the gray looks too flat, you can go back in with a watery dark gray wash in the deepest crevices to re-establish shadows. -
Check the paws:
Ensure the definition between the toes is visible. A quick dab of the dark base color between the toes can separate them nicely if the dry brushing bridged the gaps. -
Seal the piece:
To maintain the stone-like appearance, apply a matte spray varnish. Avoid glossy sealers, as they will make the bunny look plastic rather than ceramic or stone.
Now you have a timeless, elegant bunny that adds a touch of rustic charm to any shelf or mantel
Blue and White Porcelain-Style Bunny
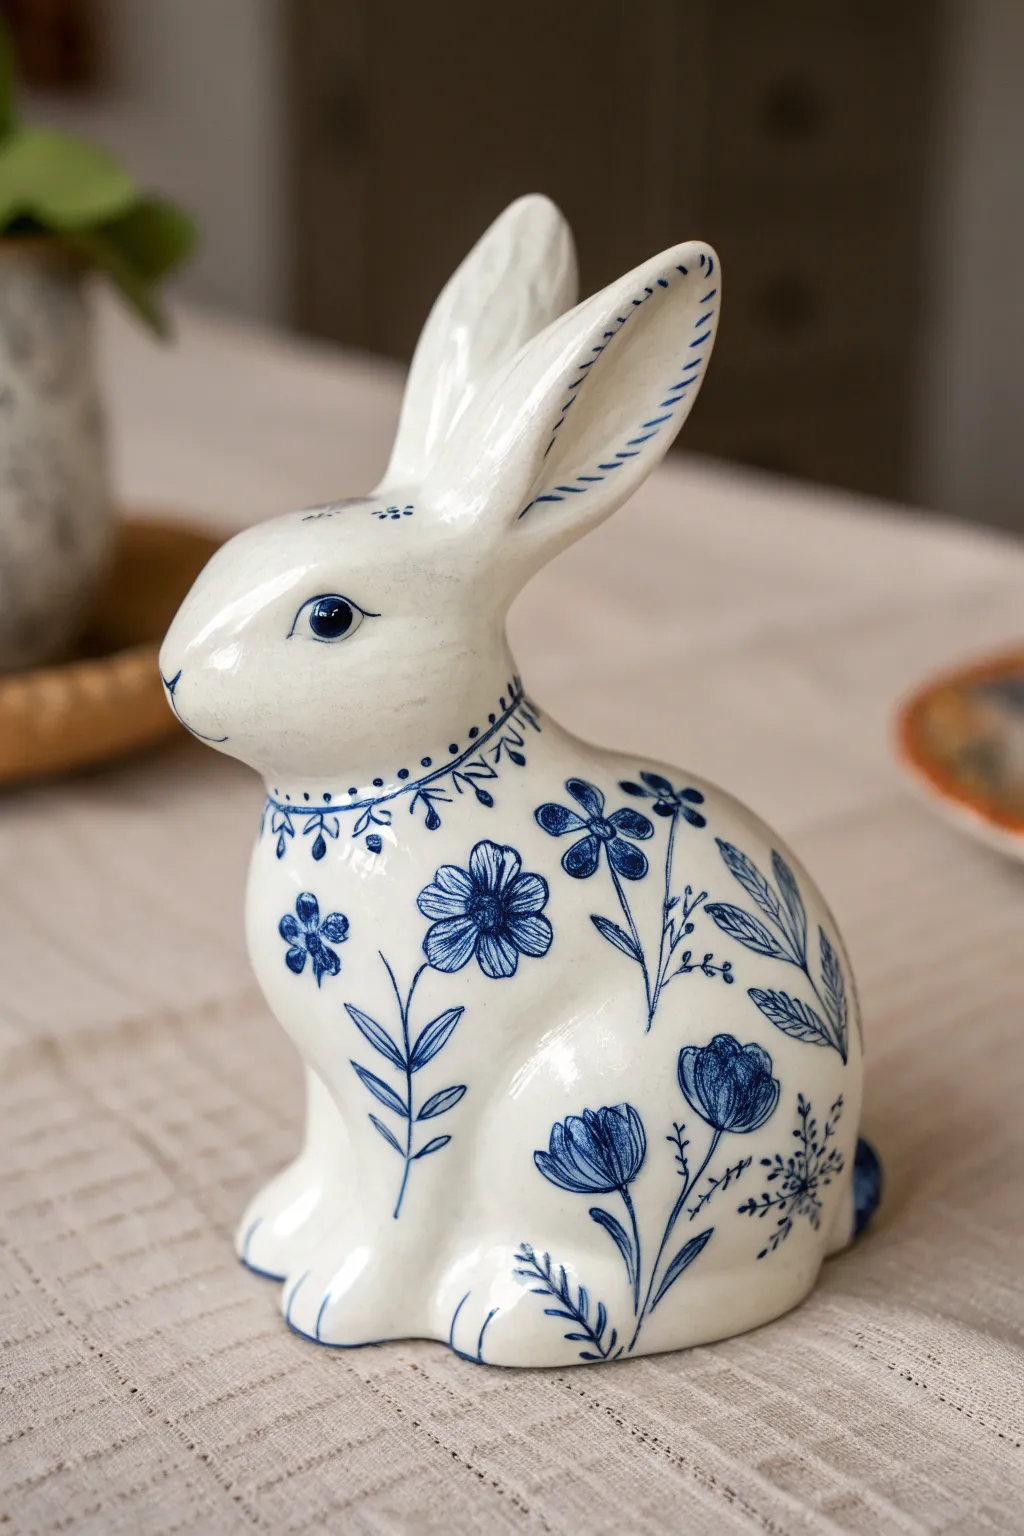
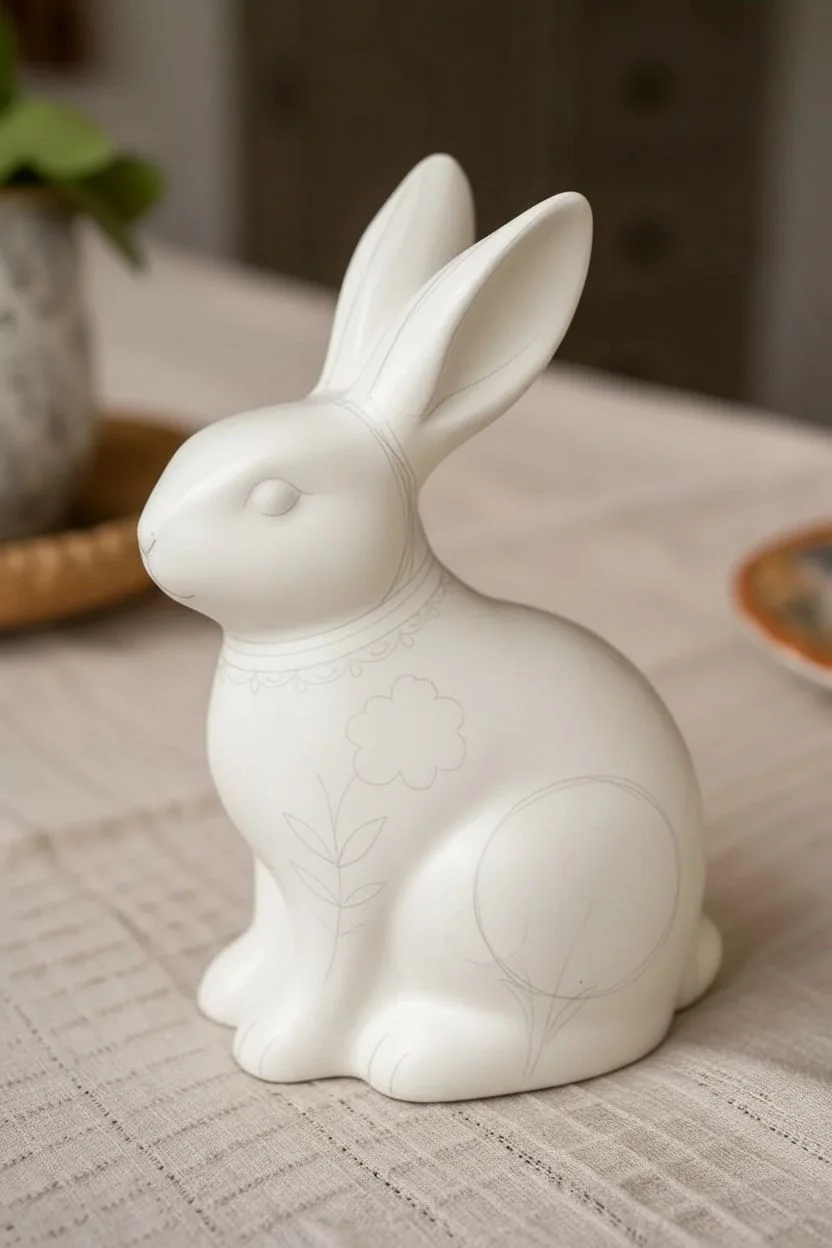
Transform a plain ceramic bunny into a faux-heirloom piece that mimics the timeless elegance of Delftware or Chinoiserie pottery. This project uses fine liner work to create delicate floral motifs and traditional patterns, resulting in a crisp, glossy finish that looks like it just came out of a high-end kiln.
Step-by-Step
Materials
- White glazed ceramic bunny figurine
- Porcelain paint markers (fine and medium tip) in Cobalt Blue or Navy
- High-gloss spray varnish or ceramic sealant
- Rubbing alcohol
- Cotton pads
- Pencil (optional for sketching)
- Kneaded eraser
- Cotton swabs (for cleanup)
- Scrap paper for testing ink flow
Step 1: Preparation and Planning
-
Clean surface:
Begin by wiping the entire ceramic bunny with rubbing alcohol and a cotton pad. This removes oils and dust that could prevent the paint from adhering properly. -
Prime markers:
Shake your porcelain paint markers well. Press the tip gently onto scrap paper until the blue ink flows smoothly and consistently without blobbing. -
Map the design:
Lightly sketch your main placement areas with a pencil if you’re nervous about freehanding. Focus on where the ‘collar’ band will go and where the large flank flower will sit.
Oops! Smudged Ink?
Don’t panic! If ink smears, wait for it to fully dry. Then, gently scratch the mistake off with a craft knife or toothpick before reapplying ink.
Step 2: The Face and Ears
-
Define the eye:
Using the fine-tip marker, carefully draw the outline of the eye. Fill in the pupil solid dark blue, leaving a tiny white dot unpainted for a reflective highlight. -
Outline the eye shape:
Add a thin line above the eye to suggest a brow or lid, giving the bunny a gentle expression. -
Detail the ears:
Along the inner curve of the ears, draw short, slanted hatch marks. These imitate the dashed patterns often found on antique dishware rims. -
Add forehead accents:
Place a few tiny dots or a small floral sprig right between the ears on the forehead to balance the white space.
Add Gold Accents
For a ‘kintsugi’ vibe or extra luxury, outline just the ear tips and the flower centers with a liquid gold leaf pen after the blue is sealed.
Step 3: The Decorative Collar
-
Draw the neckline:
Create the ‘collar’ by drawing two parallel curved lines around the neck base. I find it helps to rotate the bunny as you draw to keep the line even. -
Add geometric details:
Between or below your parallel lines, draw a repeating zig-zag or scallop pattern. -
Hang the charms:
From the points of your collar pattern, draw small tear-drop shapes or tiny three-petaled hanging flowers to create a necklace effect.
Step 4: Floral Bodywork
-
Central flank flower:
On the large rounded area of the bunny’s hip, draw a medium-sized flower. Start with a five-petal outline, resembling a wild rose or cosmos. -
Shade the petals:
Use very fine lines to hatch the inside of the petals, starting from the center and flicking outward. This mimics the look of brushed underglaze. -
Add vertical stems:
Draw long, slender stems rising up from the base of the bunny towards the back. Make these lines fluid rather than perfectly straight. -
Draw tulip shapes:
Top some of the stems with tulip-like blooms. Draw a ‘U’ shape first, then fill it with internal petals. -
Detail the tulips:
Shade the bottom half of the tulip heads densely with lines, letting the top fade to white. -
Add foliage:
Add leaves to your stems. Alternate sides, keeping the leaves simple and lance-shaped with a single vein line down the center. -
Fill empty space:
Look for large white gaps. Fill them with smaller floating flowers—simple five-dot clusters or tiny asters work perfectly.
Step 5: Finishing Touches
-
Check the paws:
Add simple curved lines to define the toes on the front paws. -
Clean up mistakes:
If you slipped anywhere, dampen a cotton swab with a little water (if paint is wet) or rubbing alcohol (if slightly dry) and gently wipe away the stray mark. -
Let it cure:
Allow the paint to dry completely. Follow your specific marker’s instructions; some require 24 hours of air drying, while others need to be baked in a home oven. -
Seal for shine:
Once fully cured or baked and cooled, spray the bunny with a high-gloss clear varnish. This gives it that authentic, wet-looking porcelain glaze finish.
Place your elegant blue-and-white bunny on a mantle or table setting and enjoy the sophisticated charm it adds to the room
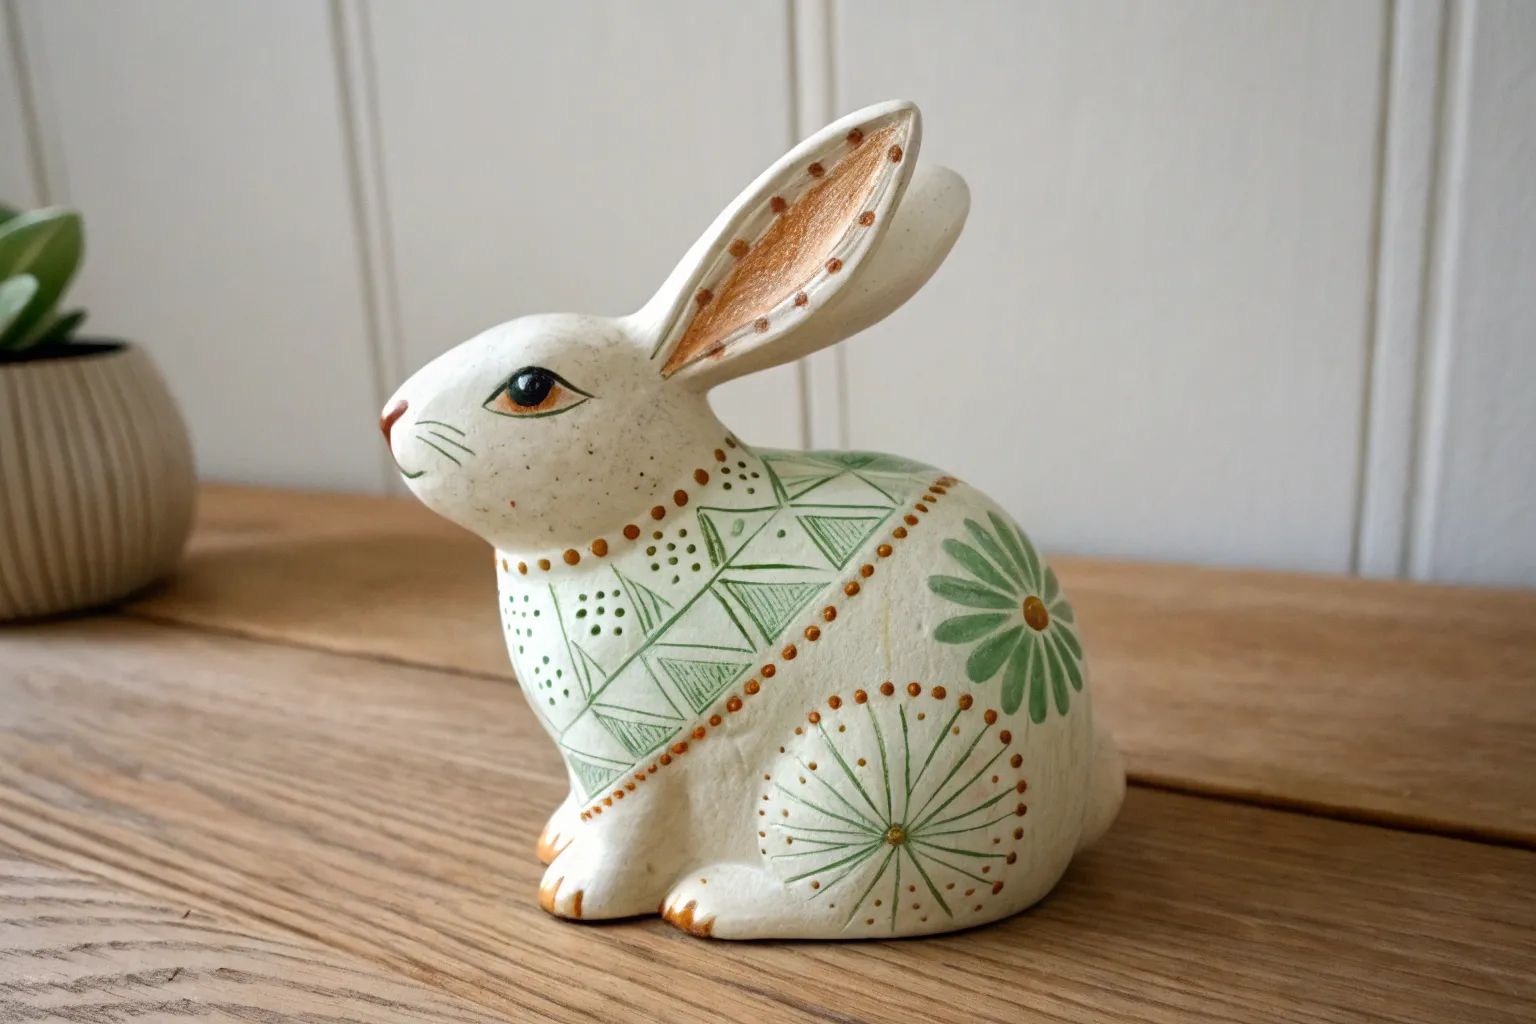
Floral Pattern Bunny With Bold Petals
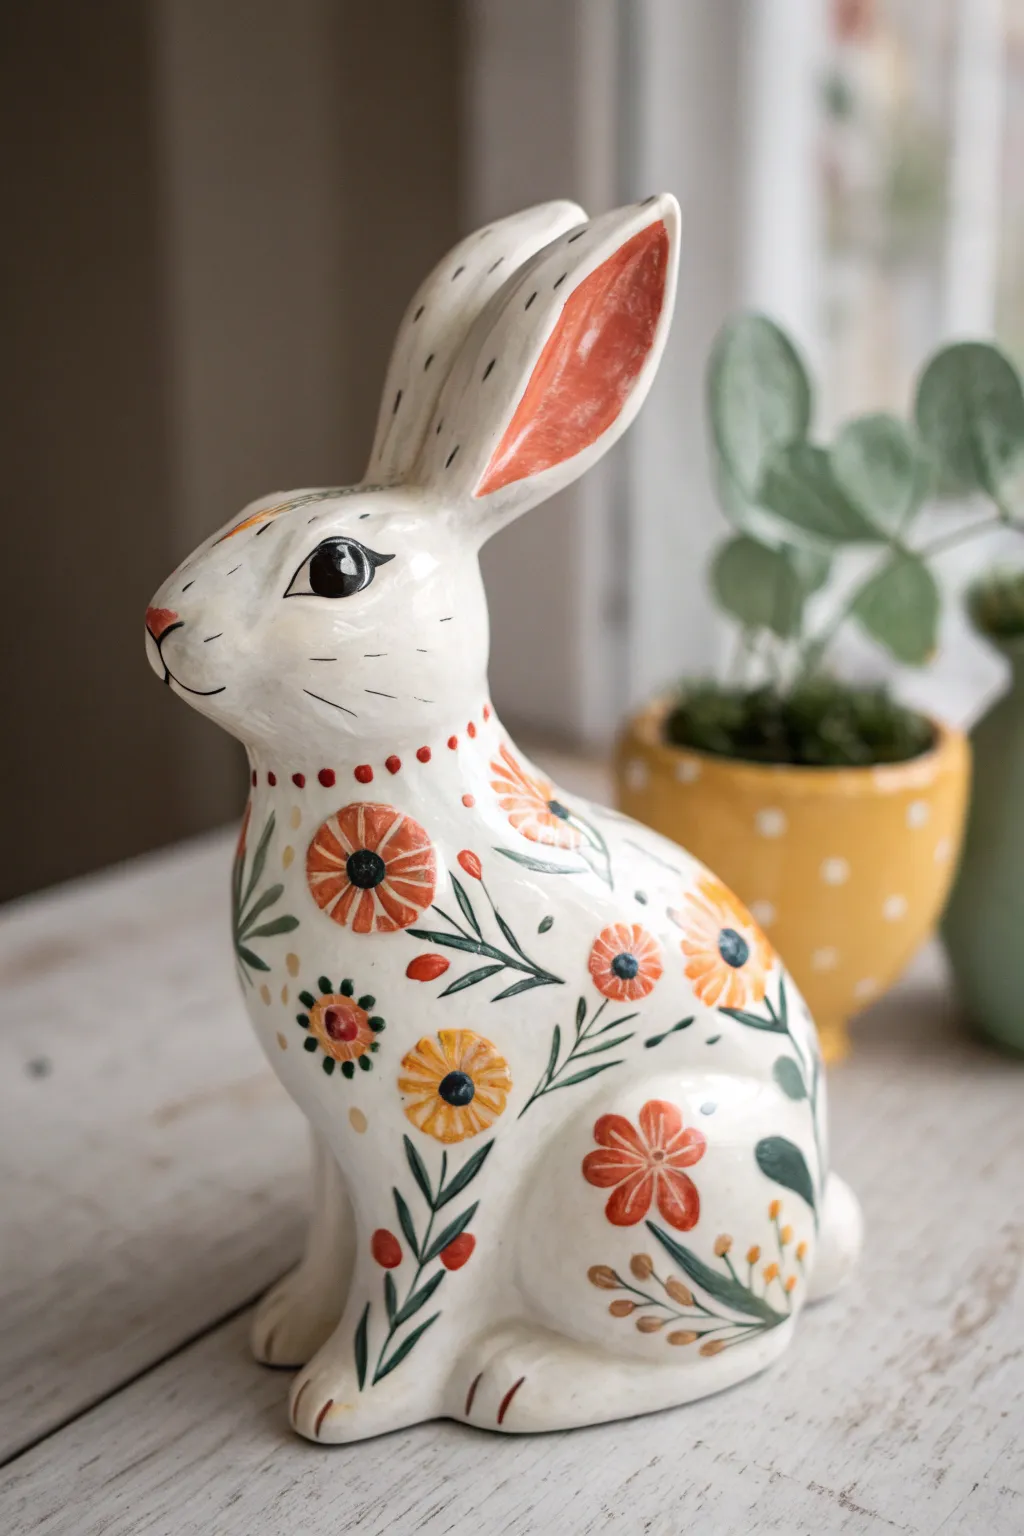
Transform a plain ceramic bunny into a charming piece of folk art with warm, earthy hues and bold botanical motifs. This project combines a creamy white base with striking orange and yellow blooms, perfect for adding a touch of rustic elegance to your spring décor.
Step-by-Step Tutorial
Materials
- Ceramic bunny figurine (bisque or white glazed)
- Acrylic craft paints (Cream/Off-White, Burnt Orange, Golden Yellow, Dark Hunter Green, Black, Terracotta)
- Gloss varnish or sealant
- Paintbrushes: medium flat brush, small round brush (size 1-2), fine liner brush (size 00)
- Palette
- Water cup and paper towels
- Pencil (optional for sketching)
Step 1: Base Coat & Preparation
-
Clean the surface:
Wipe down your ceramic bunny with a slightly damp cloth to remove any dust or oils. Let it dry completely to ensure the paint adheres smoothly. -
Apply the base color:
Using a medium flat brush, apply a coat of Cream or Off-White paint over the entire bunny. Use long, smooth strokes to minimize brush marks. -
Check coverage:
If the ceramic underneath is still showing through after the first coat dries, apply a second layer for a solid, opaque finish. Allow this base to dry fully before moving on to decorative details.
Step 2: Painting the Face & Details
-
Paint the inner ears:
Mix a warm Terracotta or light Burnt Orange color. Carefully paint the inside of the bunny’s ears, leaving a small rim of the cream base color visible along the edges. -
Outline the eye:
Switch to your fine liner brush and black paint. Carefully outline the almond shape of the eye, adding a thick upper lid line and small lashes flicking outward. -
Fill the eye:
Fill in the pupil with solid black, leaving a tiny white dot (or painting one in later) as a highlight to bring the character to life. -
Add nose and whiskers:
With a dusty pink or diluted orange, paint a small ‘Y’ shape for the nose and mouth. Use the liner brush and thinned black paint to sweep on light, delicate whiskers. -
Paint the collar:
Using the handle end of a paintbrush or a dotting tool, dip into red-orange paint and create a decorative ‘necklace’ of small dots around the bunny’s neck.
Uneven Dots?
If your decorative dots look wonky, try using the non-brush end of different sized paintbrushes dipped in paint. It acts as a perfect stamp for consistent circles.
Step 3: Creating the Floral Pattern
-
Plan your placement:
Visualize where your main flowers will go—one large bloom on the chest, a few on the flank, and one on the hind leg works well. You can lightly sketch circles with a pencil if you’re nervous about freehanding. -
Paint the main blooms:
Using a small round brush, paint circular flower shapes in Golden Yellow and Terracotta. For the wheel-like flowers, paint a central circle first, then add slightly wedge-shaped petals radiating outward. -
Add petal details:
Once the flower base colors are dry, use a contrasting color (like orange on yellow) to add lines or smaller circles inside the blooms for depth. A black center dot makes the colors pop. -
Paint secondary flowers:
Fill in gaps with smaller, simpler five-petal flowers in Burnt Orange. I like to scatter these irregularly to maintain that folk-art feel. -
Add greenery stems:
Mix a Dark Hunter Green. Using your liner brush, paint thin, flowing stems connecting the flowers. Let lines curve naturally along the bunny’s form. -
Paint the leaves:
Along the stems, press down with a small round brush and lift up to create tapered leaf shapes. Vary the size of the leaves to keep the pattern dynamic. -
Fill empty spaces:
Look for any large white gaps that feel unbalanced. Add tiny sprigs of leaves, small dots, or singular petals to balance the overall composition.
Antique It
Mix a tiny drop of brown paint with glaze medium or water and lightly wash it over the dried piece, wiping it back quickly for an aged, vintage pottery look.
Step 4: Finishing Touches
-
Review and refine:
Check your lines. If any edges look messy, use your cream base paint to ‘erase’ or tidy up the outlines of your leaves and flowers. -
Seal the artwork:
Once the paint is completely cured (wait at least 24 hours), apply a coat of gloss varnish. This mimics a glazed ceramic look and protects your handiwork.
Display your delightful bunny on a mantelpiece or windowsill to enjoy its cheerful expression year-round
Folk Art Bunny With Decorative Borders
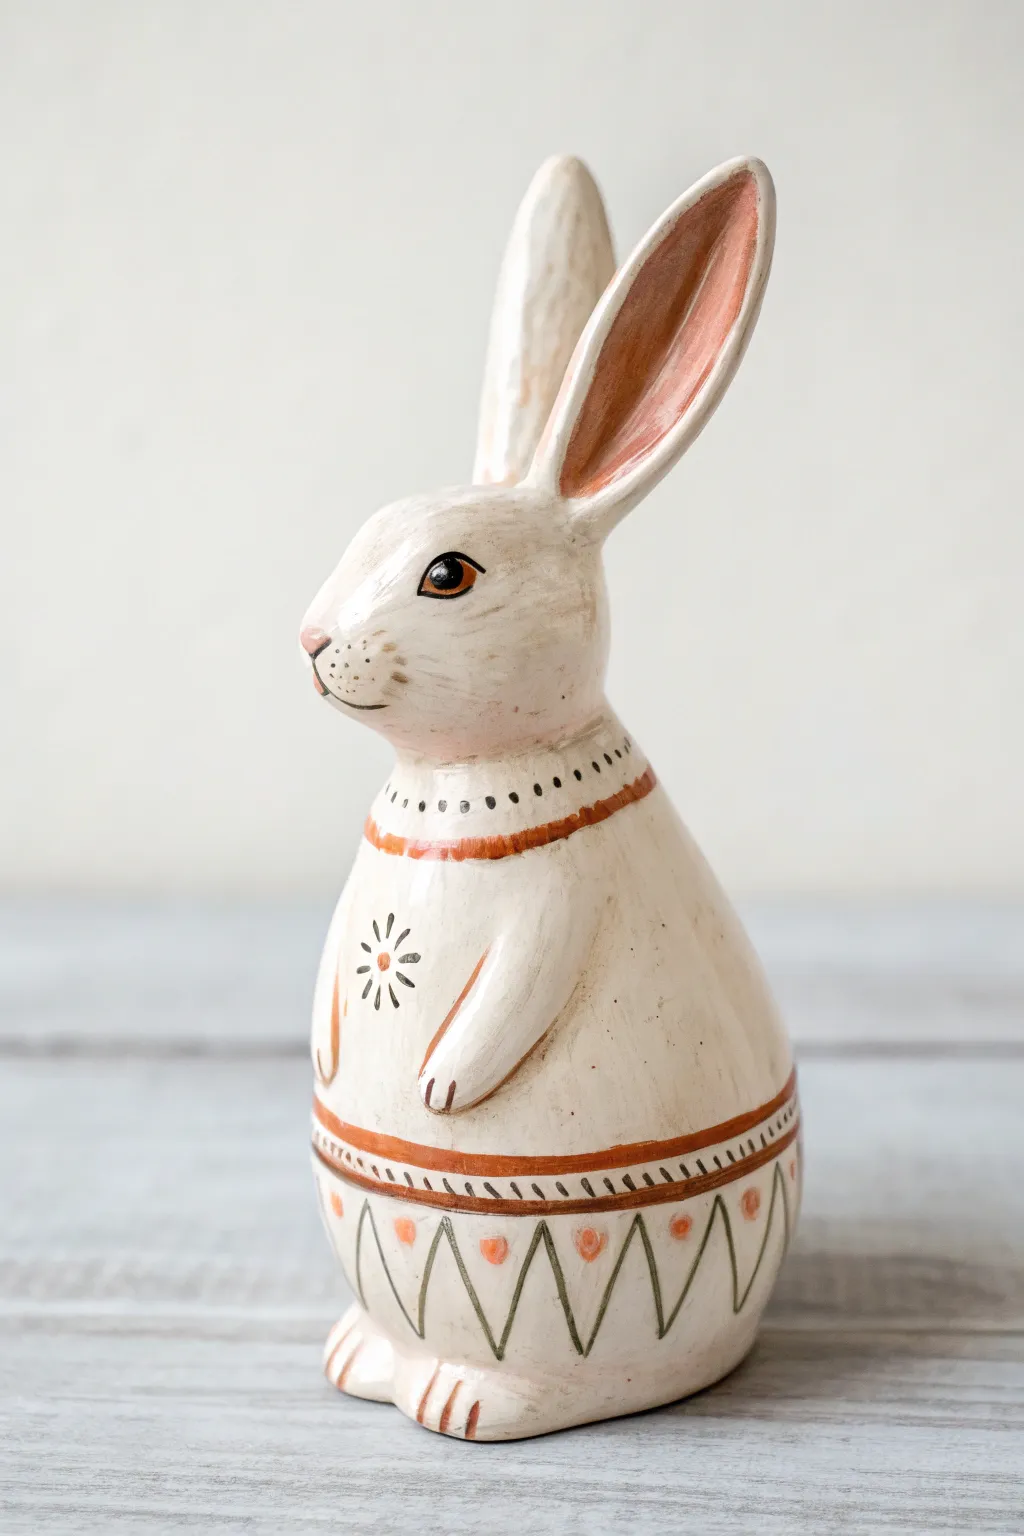
Embrace the charm of traditional craft with this folk art-inspired ceramic bunny, featuring warm earthy tones and simple geometric bands. The design balances a creamy, vintage-style base with burnt orange and deep olive accents for a piece that feels both rustic and refined.
Step-by-Step
Materials
- Bisque ceramic bunny figurine (standing pose)
- Acrylic paints: Cream/Off-White, Burnt Orange/Terracotta, Dark Olive Green, Dark Brown, Black, Soft Pink
- Flat shader brush (size 6 or 8)
- Round detail brushes (size 0 and 2)
- Pencil (light sketching)
- Matte or satin varnish
- Water cup and palette
- Paper towels
Step 1: Base Coat and Facial Features
-
Priming the surface:
Wipe down your ceramic bisque with a damp sponge to remove any dust. This ensures the paint adheres smoothly to the porous surface. -
Applying the base color:
Using the larger flat shader brush, coat the entire bunny with the Cream or Off-White acrylic paint. You will likely need two coats to get a solid, opaque finish; let the first coat dry completely before adding the second. -
Washing for texture (optional):
To achieve that slightly aged, vintage look seen in the photo, you can mix a tiny drop of brown into a lot of water and lightly glaze the surface, wiping it back almost immediately with a paper towel. This settles into crevices like the ears and legs. -
Painting the ears:
Mix a soft, dusty pink using white and a touch of terracotta. Paint the inner concave part of the ears, blending the edges softly into the cream base so there are no harsh lines. -
Adding the eyes:
With your smallest detail brush and black paint, create the almond-shaped eye. Add a tiny outline of burnt orange around the eye for definition, and don’t forget a small white dot highlight in the black pupil to bring it to life. -
Defining the nose and mouth:
Use a mix of pink and brown to paint the small triangular nose. Use a thin liner brush with dark brown paint to draw the mouth line and the whisker dots on the muzzle.
Steady Hand Trick
Turn the bunny, not your brush! When painting the horizontal bands, hold the brush still against the surface and slowly rotate the ceramic figurine for a cleaner line.
Step 2: Decorative Bands and Details
-
Planning the bands:
Lightly sketch horizontal guide lines around the neck and lower belly using a pencil. This helps keep your decorative borders straight as they wrap around the curved form. -
Painting the neck stripe:
Load a size 2 round brush with Burnt Orange. Paint a medium-thickness band around the neck area, following your pencil guide. -
Adding neck details:
Above the orange neck band, use the tip of a small brush to stamp a row of small black dots. Below the orange band, paint short, vertical brown dashes. -
Painting the belly band:
Moving to the lower section, paint a thicker Burnt Orange band horizontally across the lower belly. Try to keep the paint consistency fluid so the line remains smooth. -
Detailing the belly band:
Just like the neck, add a row of small, vertical brown dashes immediately below the thick orange belly band. -
Creating the zigzag pattern:
Below the belly band touches, paint a zigzag line using Dark Olive Green or a blackened brown. The points of the zigzags should point upward, creating triangles. -
Filling the triangles:
inside the upper ‘V’ of each zigzag section, paint a single Burnt Orange dot. This pop of color ties the bottom pattern back to the bands above. -
adding the floral motif:
On the chest area, centered between the arms, paint a simple folk-art flower. Start with a central dot and paint radiating dashes outward in black or dark brown. -
Finishing touches:
Paint three small stripes on each paw to represent toes using the Burnt Orange or Brown paint. -
Sealing the piece:
Once all paint is fully dry (I usually give it at least an hour), apply a coat of matte or satin varnish to protect the finish and deepen the colors.
Antique Polish
For a truly aged look, rub a little bit of beeswax or amber wax over the finished dried piece. It dulls the stark white and makes the folk art patterns look established.
Display your new folk art bunny on a mantle or shelf to bring a warm, handcrafted touch to your seasonal decor
Botanical Bunny With Leafy Garland
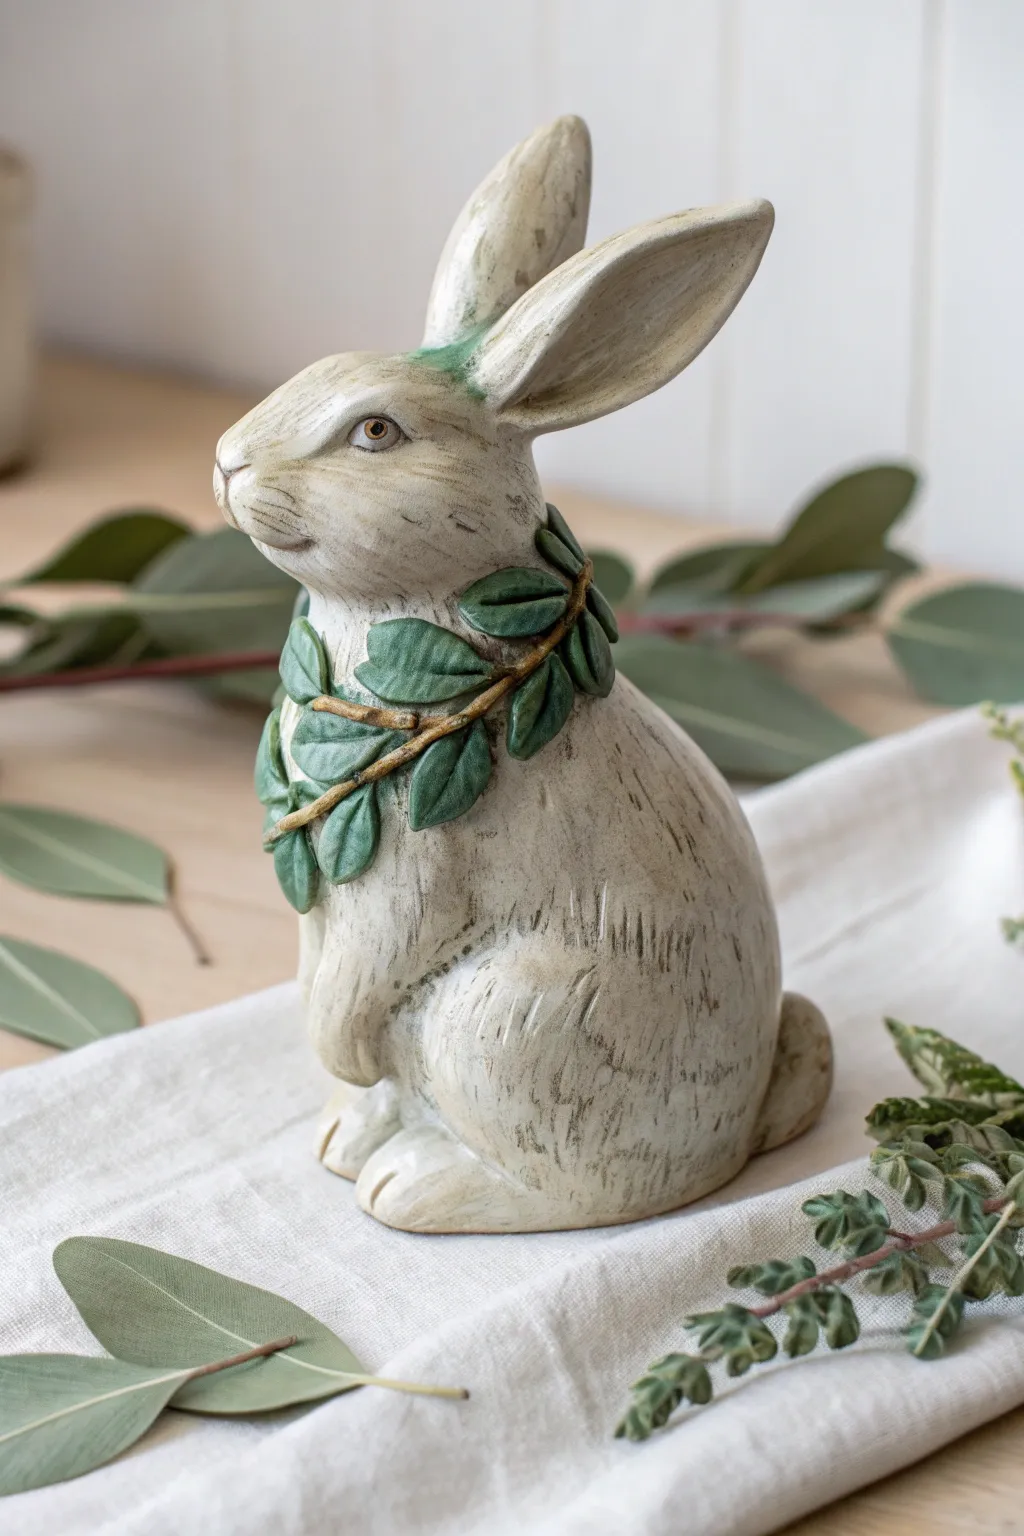
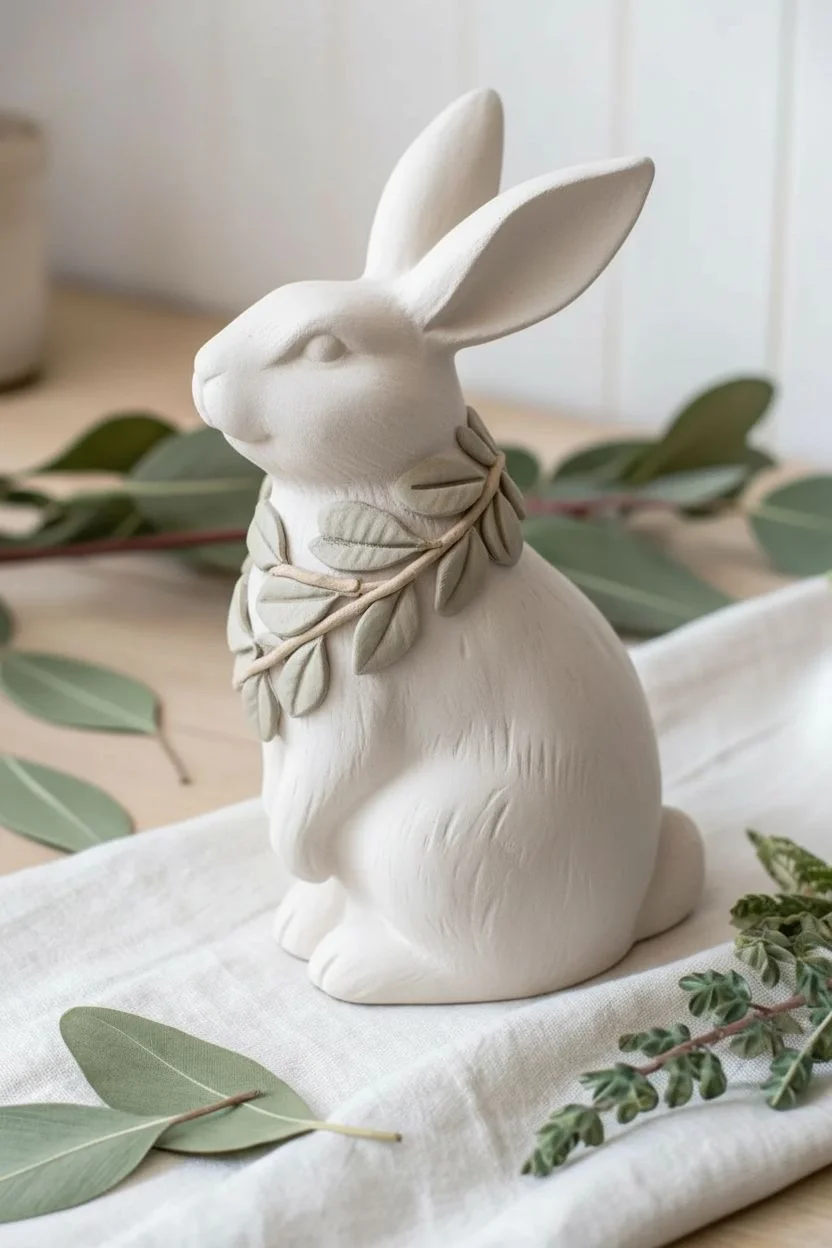
Bring a touch of woodland magic to your home decor with this beautifully understated ceramic bunny. The project focuses on creating realistic fur texture through antiquing techniques and adding a sculpted, leafy garland for a pop of organic color.
Step-by-Step Tutorial
Materials
- Unpainted ceramic bunny bisque (standing pose)
- Apoxie Sculpt or air-dry clay (for the garland)
- Sculpting tool or toothpick
- Acrylic paints: Cream/Off-White, Dark Umber/Espresso, Sage Green, Forest Green, Ocher/Gold
- Small flat brush
- Fine detail liner brush
- Soft cloth or paper towels (lint-free)
- Matte spray sealer
- Mixing palette
- Water cup
Step 1: Sculpting the Garland
-
Prepare the Clay:
Mix a small amount of your two-part epoxy clay or knead your air-dry clay until it is pliable and smooth. Roll it into a thin ‘snake’ long enough to wrap around the bunny’s neck. -
Drape the Vine:
Gently drape the clay snake around the bunny’s neck area, allowing it to dip naturally in the front like a necklace. Press strictly lightly to adhere it to the ceramic surface. -
Create Leaves:
Pinch off tiny pea-sized balls of clay. Flatten each one between your fingers into a teardrop shape to form individual leaves. -
Attach and Detail:
Press the leaves onto the vine section, varying their angles for a natural look. Using a sculpting tool or a toothpick, gently press a central vein down the middle of each leaf. -
Cure Time:
Allow the clay to fully harden according to the package instructions—usually 24 hours for air-dry clay or a few hours for epoxy sculpt—before you begin painting.
Sculptor’s Secret
Keep a small bowl of water nearby while sculpting. Dipping your tools or fingers in water helps smooth fingerprints out of the clay for a flawless leaf surface.
Step 2: Base Coating and Antiquing
-
Apply Base Coat:
Paint the entire bunny (avoiding the new clay leaves if possible, though overlap is fine) with a solid coat of Cream or Off-White acrylic. Apply two coats if necessary for full coverage. -
Dry Completely:
Ensure the base coat is bone dry before proceeding; using a hair dryer on a low setting can speed this up significantly. -
Prepare Antiquing Wash:
Dilute a small dollop of Dark Umber paint with water until it has the consistency of ink or thin milk. -
Apply the Wash:
Working in sections, brush the dark wash generously over the fur texture. It needs to sink into all the little crevices. -
Wipe Back:
Immediately take your soft cloth and wipe away the excess dark paint from the raised surfaces. The dark color should remain only in the grooves, highlighting the fur texture. -
Repeat if Needed:
If the definition isn’t strong enough, repeat the wash process. I find doing two lighter passes often yields a more controlled result than one heavy one.
Muddy Antiquing?
If your antiquing makes the bunny look dirty rather than detailed, your paint was too thick. Use a damp cloth to scrub the high points clean before it dries fully.
Step 3: Botanical Details
-
Paint the Vine:
Using a fine liner brush, paint the main ‘branch’ of your garland with a mix of Ocher and a tiny touch of brown to resemble wood. -
Base the Leaves:
Paint the leaves with a solid coat of Sage Green. You might need two layers to cover the clay completely. -
Leaf Accents:
While the green is still slightly tacky or after drying, lightly brush the edges or tips of the leaves with Forest Green to create depth. -
Highlight the Veins:
Mix a tiny amount of the Cream base paint into your Sage Green. Use the very tip of your detail brush to highlight the center vein of each leaf.
Step 4: Finishing Touches
-
Eye Detail:
Paint the eye area carefully. A simple dot of dark brown with a tiny white reflection spec brings the bunny to life instantly. -
Dry Brushing:
Load a clean, dry flat brush with a very small amount of Cream paint. Off-load almost all the paint onto a paper towel, then lightly whisk it over the chest and ears to brighten the raised fur. -
Seal the Work:
Once everything is completely dry, spray the entire piece with a matte sealer to protect the paint and give it a unified, professional finish.
Place your finished botanical bunny near some fresh greenery for a charming seasonal display
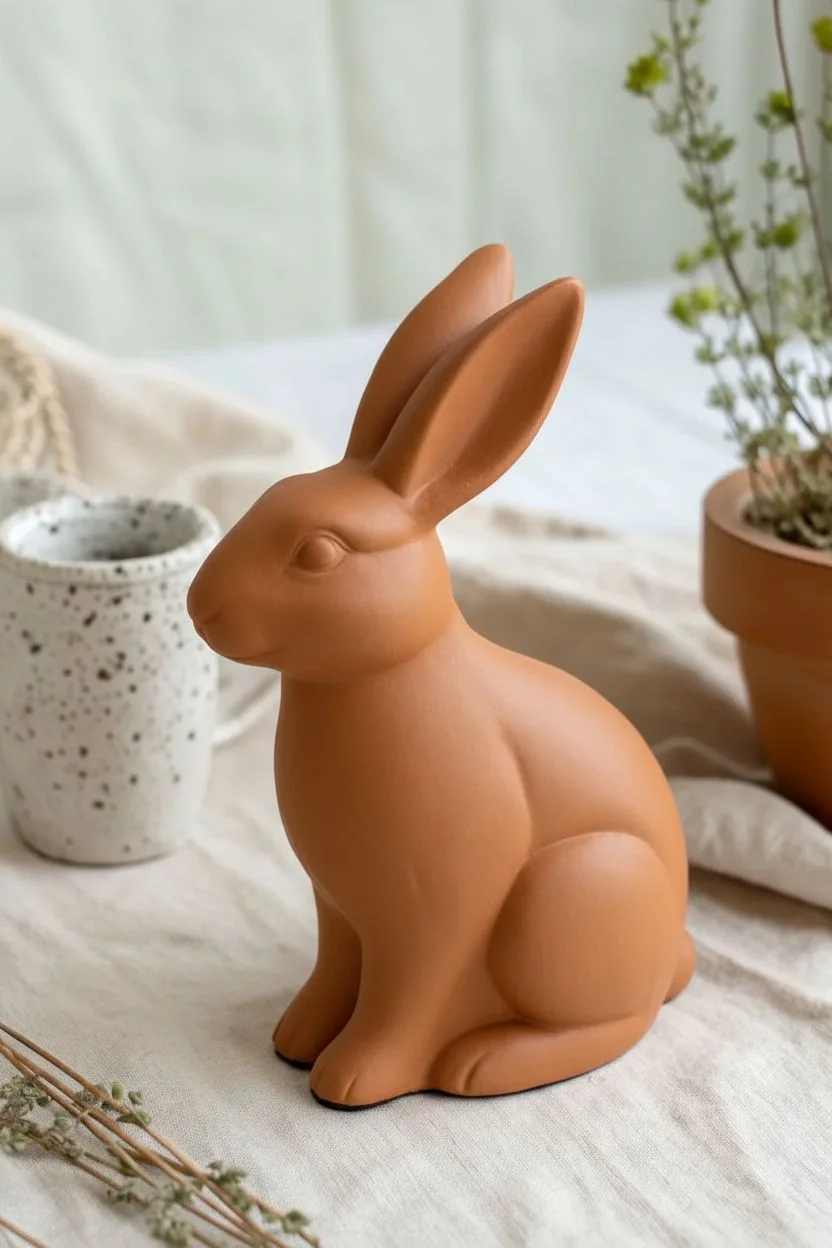
Ombre Bunny From Belly to Ear Tips
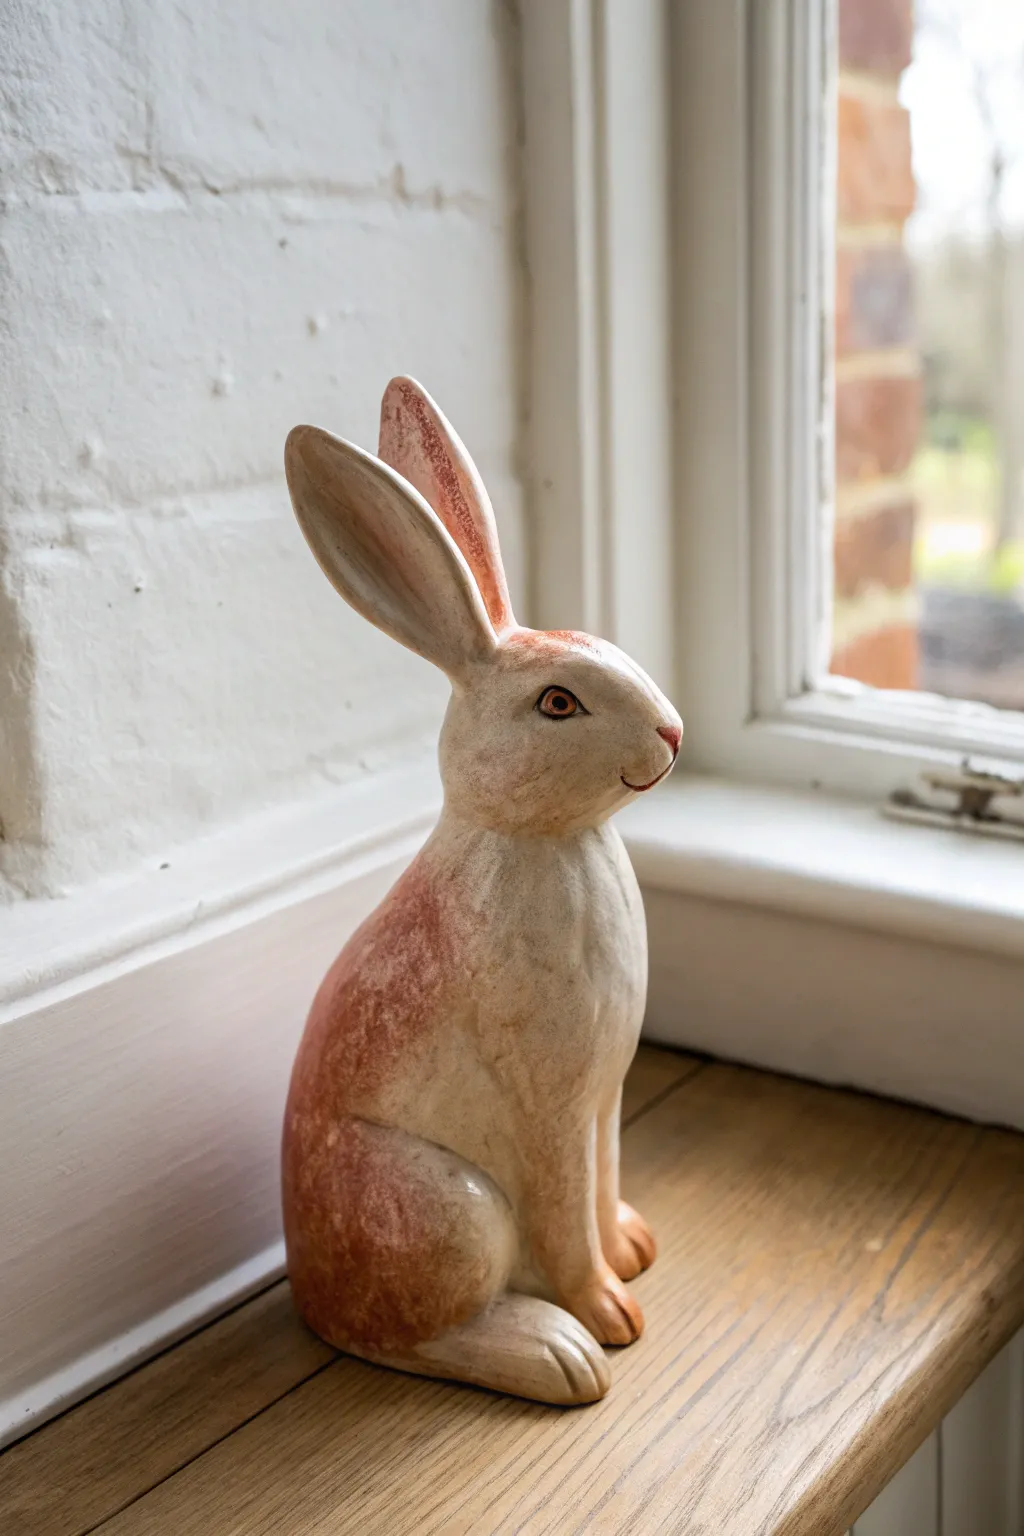
This charming project transforms a simple ceramic blank into a rustic treasure with a warm, sun-baked aesthetic. By layering terracotta tones against a creamy base, you’ll create a soft, ombre finish that looks beautifully weathered and organic.
Step-by-Step Tutorial
Materials
- Unpainted ceramic bunny figurine (bisque)
- Acrylic paints: Cream/Off-White, Terracotta (or Burnt Sienna), Deep Red, Dark Brown
- Synthetic paint brushes: medium flat brush, small detail brush
- Paper towels or soft rag
- Water cup
- Palette or paper plate
- Clear matte sealer spray
Step 1: Base Coat Application
-
Clean surface:
Before starting, wipe down your ceramic bunny with a slightly damp cloth to remove any dust or oils from the surface. Let it dry completely. -
Mix base color:
Create a warm, creamy off-white color. If your white is too stark, mix in a tiny dot of yellow or brown to soften it. -
Apply base layer:
Using your medium flat brush, paint the entire bunny with the cream color. Don’t worry about perfect opacity; a slightly translucent look mimics natural stone. -
Drying time:
Allow this base coat to dry fully for about 20-30 minutes. The ceramic will absorb the wet paint quickly.
Uneven Blending?
If your gradient looks striped, wet the transition area slightly with a clean damp brush, then blot with a paper towel to soften the lines.
Step 2: Creating the Ombre Effect
-
Prepare wash technique:
Mix a ‘wash’ by watering down your Terracotta paint significantly (about 1 part paint to 3 parts water). It should be fluid but not dripping. -
Apply wash to base:
Start applying the terracotta wash to the bottom third of the bunny, including the haunches, feet, and lower belly. Work quickly so the edges don’t dry hard. -
Blend upward:
While the paint is wet, dip a clean, damp brush into water and gently drag the upper edge of the terracotta paint upward towards the neck. This fades the harsh line. -
Layering depth:
For richer color on the hind legs and bottom, dab a slightly less diluted terracotta paint directly onto those areas. Use a paper towel to blot it softly, creating a textured, mottled look. -
Ear detailing:
Apply the same terracotta wash to the insides of the ears. I find using a smaller brush here helps control the flow so it doesn’t spill onto the outer ear color. -
Blending ear tips:
Add a touch of the wash to the very tips of the outer ears and blend downward, mirroring the effect on the body.
Rustic Texture Tip
Use a rough-bristle brush rather than a soft one for the terracotta sections. The stiffer bristles leave faint scratch marks that mimic fur texture.
Step 3: Adding Rustic Texture
-
Dry brushing:
Once the wash layers are dry, load a dry brush with a very small amount of un-thinned Terracotta paint. Wipe most of it off on a paper towel. -
Enhancing texture:
Lightly brush over the textured areas of the fur, focusing on the haunches and chest. This highlights the sculpted details without covering the cream base. -
Softening highlights:
If any orange areas look too intense, dry brush a little of your original cream color over them to tone it back down.
Step 4: Facial Features & Finish
-
Paint the eyes:
Using a fine detail brush, paint the eyes with dark brown. Leave a tiny speck of white unpainted, or add a white dot later, to simulate a light reflection. -
Define the rim:
carefully outline the eye with a thin line of terracotta to give it warmth and definition. -
Nose and mouth:
Mix a small amount of Deep Red with Terracotta for a rosy nose color found in the photo. Paint the nose tip and a thin line for the mouth simply and delicately. -
Claw details:
Use diluted brown paint to very faintly define the separation between the toes on the paws. -
Final assessment:
Step back and check the transition from the reddish bottom to the white top. If the gradient isn’t smooth, use a slightly damp sponge to blur the mid-section gently. -
Seal the piece:
Once completely dry (wait at least an hour), spray the entire figurine with a clear matte sealer to protect the finish without adding artificial shine.
Place your finished bunny near a window to let natural light show off the subtle warmth of the ombre painting
Celestial Bunny With Stars and Moon Details

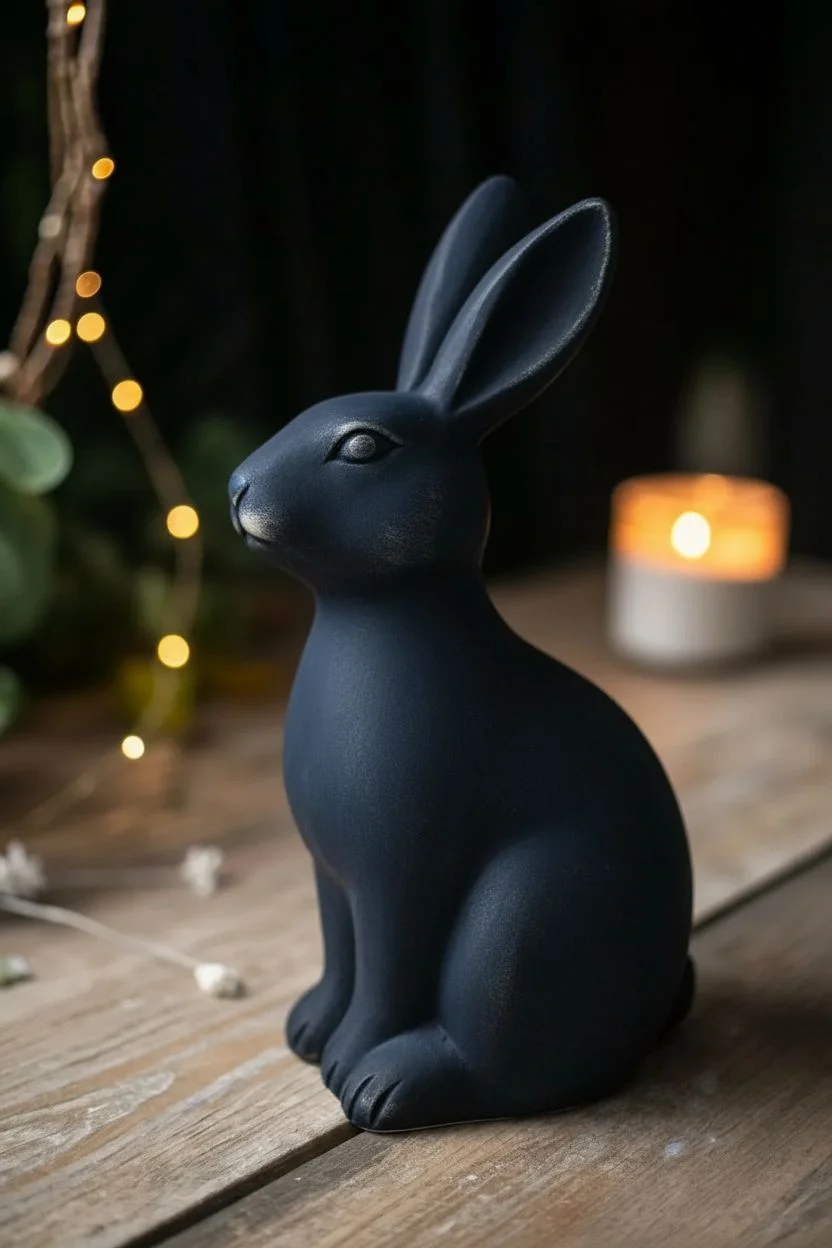
Transform a plain ceramic bunny into a mystical night sky creature with this enchanting celestial design. The deep, washed navy finish provides a dramatic backdrop for delicate gold stars and a crescent moon, creating a piece that feels both rustic and magical.
Step-by-Step Guide
Materials
- Bisque ceramic bunny figurine
- Dark navy blue acrylic paint (matte)
- Black acrylic paint
- Metallic gold acrylic paint or gold leafing pen
- White or cream acrylic paint (for speckling)
- Wide flat brush
- Fine detail brush (size 0 or 00)
- Old toothbrush or stiff bristle brush
- Water container and paper towels
- Matte spray sealer or varnish
- Fine-grit sandpaper or sanding sponge
Step 1: Preparation and Base Coat
-
Clean the surface:
Wipe down your ceramic bisque bunny with a slightly damp paper towel to remove any dust or oils that might prevent the paint from adhering properly. -
Apply the first dark layer:
Mix your navy blue paint with a tiny drop of black to create a very deep midnight shade. Apply a generous coat over the entire bunny using your wide flat brush, ensuring you get into the crevices of the ears and neck. -
Dry and inspect:
Let this first coat dry completely. Bisque absorbs paint quickly, so you might see some uneven patches. Apply a second coat if necessary to get a solid, opaque coverage. -
Create the distressed texture:
Once the base is bone dry, take a fine-grit sanding sponge and very lightly scuff the surface. Focus on raised areas like the nose, the curve of the haunches, and the tips of the ears to reveal just a hint of the ceramic texture beneath, giving it that weathered, stone-like look. -
Dry brush technique:
Load a dry, stiff brush with a slightly lighter navy tone (or just plain navy without the black mix). Wipe most of the paint off on a paper towel, then lightly sweep the brush over the fur texture to highlight the form.
Starry Precision
If you struggle painting stars with a brush, use a metallic gold gel pen or paint marker. The rigid nib makes drawing sharp starbursts much easier on the curved surface.
Step 2: Painting the Celestial Details
-
Sketch the moon placement:
Use a light pencil or watercolor pencil to faintly outline where you want your crescent moon. The image shows it placed prominently on the bunny’s rear haunch. -
Paint the crescent moon:
Using your metallic gold paint and the fine detail brush, carefully fill in the crescent shape. You might need two layers of gold to make it truly shine against the dark background. -
Start the large stars:
Identify 5-7 spots for your largest stars. Using the fine brush, paint an eight-pointed star by crossing a vertical line with a horizontal line, then adding smaller diagonal lines in the center. -
Add medium stars:
Fill in the empty spaces with simpler four-pointed stars or smaller six-pointed bursts. Distribute them randomly to mimic a natural night sky. -
Detailing the face:
Add a small touch of gold to the tip of the nose for a whimsical highlight. -
Refine the eyes:
Paint the eye area black if it isn’t already, then add a tiny dot of gold or white as a catchlight to bring the bunny to life. Outline the eye rim with a very thin line of lighter blue or gold.
Constellation customization
Personalize the bunny by painting a specific zodiac constellation on the side instead of random stars. Use a reference image to verify the star placement.
Step 3: Stars, Specs, and Finish
-
Prepare the speckling paint:
Mix a small amount of cream or white paint with water until it has an inky consistency. -
Test the spatter:
Dip an old toothbrush into this watery mix and run your thumb across the bristles over a piece of scrap paper to test the size of the droplets. -
Create the galaxy effect:
Gently flick the toothbrush bristles to spray fine white specks across the bunny’s body. These represent distant stars. Keep the spray light; you can always add more. -
Add precise dots:
I prefer to use the back end of a paintbrush dipped in white paint to add larger, distinct round ‘planets’ or stars in any areas that look too empty. -
Highlight the moon:
If you want an antique look, very lightly dab a tiny bit of watered-down brown or black paint onto the gold moon and wipe it off immediately, leaving just a hint of shadow in the texture. -
Final drying time:
Allow all the detail work to dry for at least an hour. The metallic paint may take slightly longer to cure than the matte acrylics. -
Seal the artwork:
Spray the entire piece with a matte sealer. This protects the finish and unifies the sheen of the different paints, locking in your celestial design.
Now you have a stunning, galaxy-themed piece of decor that looks wonderful next to candlelight
Whimsical Patchwork Bunny With Pattern Blocks
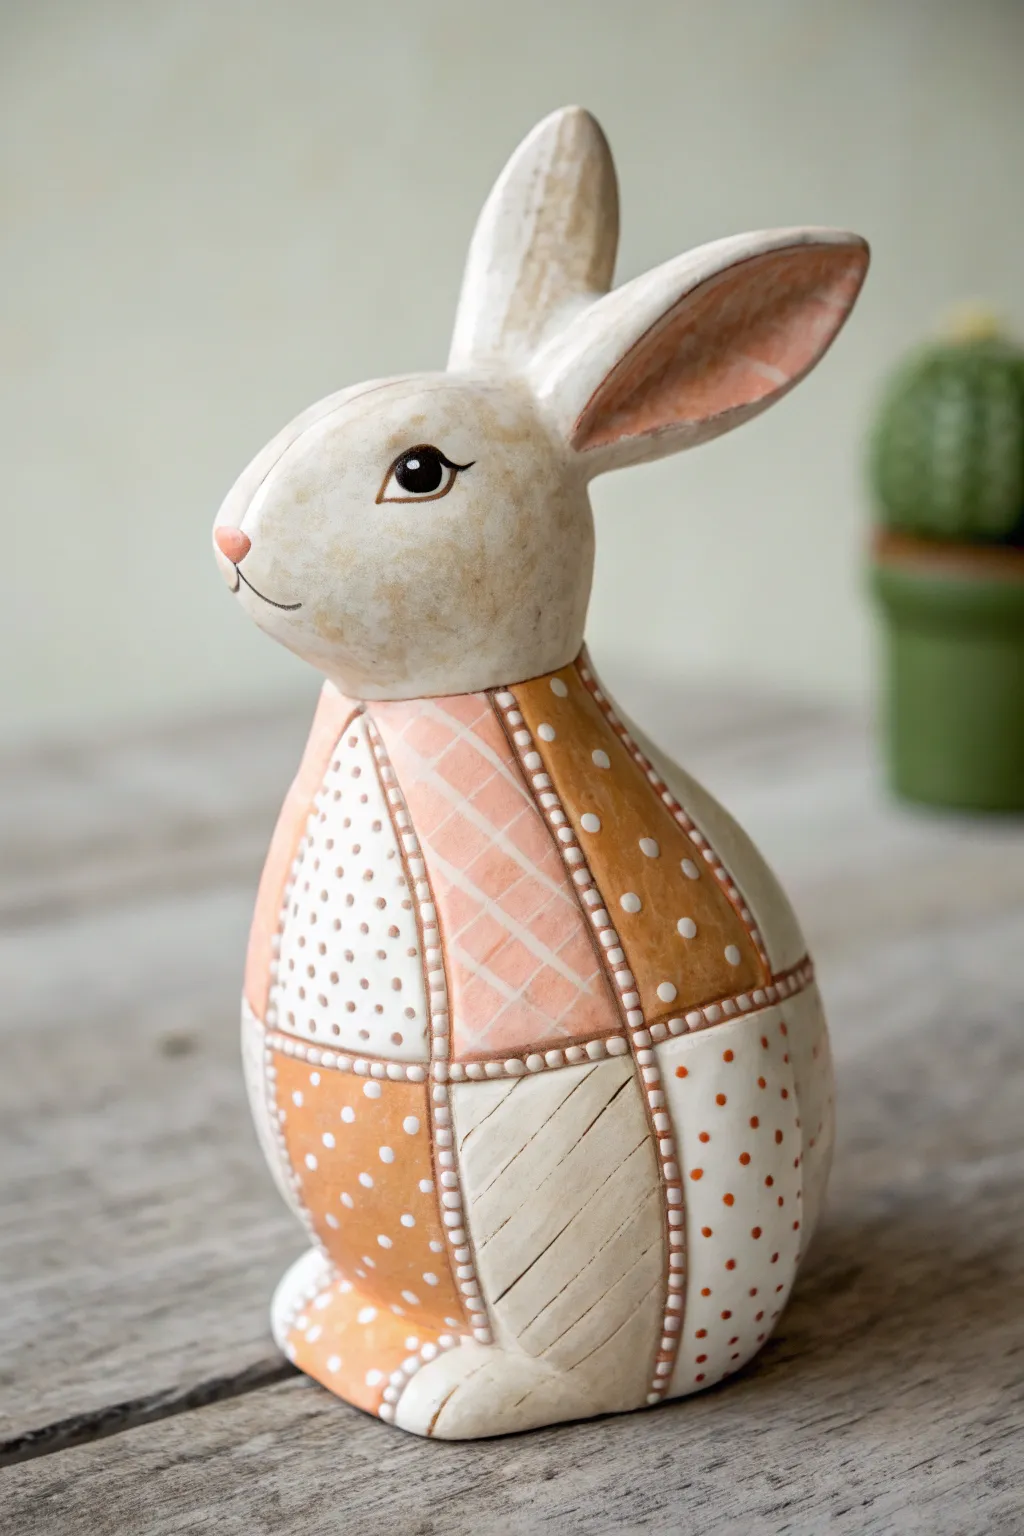
Transform a plain ceramic bunny into a charming faux-quilt masterpiece using easy painting techniques. This project combines geometric blocking with delicate dot work to create a warm, textured look reminiscent of a cozy blanket.
Detailed Instructions
Materials
- Unpainted bisque or pre-primed ceramic bunny figurine
- Acrylic craft paints (warm white, peach/coral, light brown, terra cotta)
- Small flat brush (size 4 or 6)
- Fine liner brush (size 0 or 00)
- Dotting tool or toothpick
- Pencil
- Matte or satin sealant spray
- Paper towels
- Water cup
Step 1: Planning and Base Work
-
Base Coating:
Begin by painting the entire bunny with a warm white or light cream acrylic paint. This ensures an even canvas and helps the subsequent colors pop. You will likely need two coats for full opacity; let the first coat dry completely before adding the second. -
Sketching the Quilt Lines:
Once the base coat is bone dry, use a pencil to very lightly sketch your patchwork grid onto the body of the bunny. Draw curved vertical and horizontal lines that contour around the bunny’s shape rather than straight lines, which helps emphasize its roundness. -
Mapping the Head:
Leave the head and ears mostly unmapped, as they will remain solid colored. However, lightly sketch the inner ear area where the pink tone will go, and mark small placements for the eyes and nose.
Uneven Grid Lines?
Don’t stress if your grid outlines aren’t perfectly straight. Wobbly lines actually enhance the hand-sewn fabric aesthetic and make the bunny look softer.
Step 2: Blocking in Colors
-
Painting the Peach Blocks:
Select several scattered sections of your grid to paint with your peach or coral shade. Use your small flat brush to fill these squares carefully. I like to space these out so no two same-colored blocks touch. -
Adding Earth Tones:
Fill a few other sections with the terra cotta or darker orange paint. These richer tones add depth to the ‘quilt.’ Keep your paint consistency creamy to avoid brushstrokes. -
Neutral Zones:
Leave the remaining blocks in the original warm white base color. If you made any messy edges with the other colors, you can touch them up with fresh white paint now. -
Ear Details:
Paint the inside of the ears with a wash of the peach color. You can water the paint down slightly here to give it a softer, more natural transition into the white fur. -
Antique Shading:
Using a very dry brush and a tiny amount of light brown paint, gently stipple or scuff paint onto the face, cheeks, and tip of the ears to simulate an aged, vintage texture.
Add Fabric Texture
Before painting, press a piece of coarse linen into the wet clay (if making your own) or use a texture paste under the base coat for a real tactile feel.
Step 3: Pattern and Detail Work
-
Polka Dots:
Dip your dotting tool or the blunt end of a paintbrush into white paint. Add polka dots to the terra cotta blocks. Clean the tool, dip it in terra cotta paint, and add dots to some of the white blocks. -
Cross-Hatching:
Mix a diluted, lighter version of your peach paint. With your fine liner brush, paint delicate diagonal cross-hatch lines over the peach blocks to mimic fabric weave. -
Stipple Texture:
On the remaining white blocks, use the tip of a toothpick to add tiny, dense speckles of light brown. This mimics a different fabric texture like calico or textured linen. -
Diagonal Stripes:
For variety, paint simple diagonal lines on one or two of the white blocks using a very pale grey or beige to suggest folded fabric. -
Stitching the Seams:
This step brings it all together. Load your fine liner brush with thick white paint (or use a dimensional fabric paint). Carefully paint small dashes or connected beads along every pencil grid line to look like embroidery stitching or piping.
Step 4: Finishing Touches
-
The Face:
Paint the nose a soft pink. For the eye, use black paint to create a simple almond shape with a white highlight dot near the top. Outline the eye thinly with black and add a small lash line. -
Refining:
Check your stitching lines. If any look too thin, go back over them to create a raised, tactile effect that separates the ‘fabric’ patches. -
Sealing:
Allow the bunny to dry for at least 24 hours. Finish with a spray of matte or satin sealant to protect the paint and unify the sheen of the different colors.
Place your finished patchwork bunny on a shelf where its cozy colors can warm up the room


Have a question or want to share your own experience? I'd love to hear from you in the comments below!