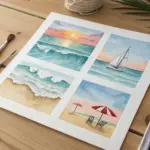
Summer light has a way of making every color feel louder and every brushstroke a little braver. Here are my go-to summer paint ideas for capturing that warm, easy, vacation feeling—whether you’re painting for five minutes or getting happily lost for an afternoon.
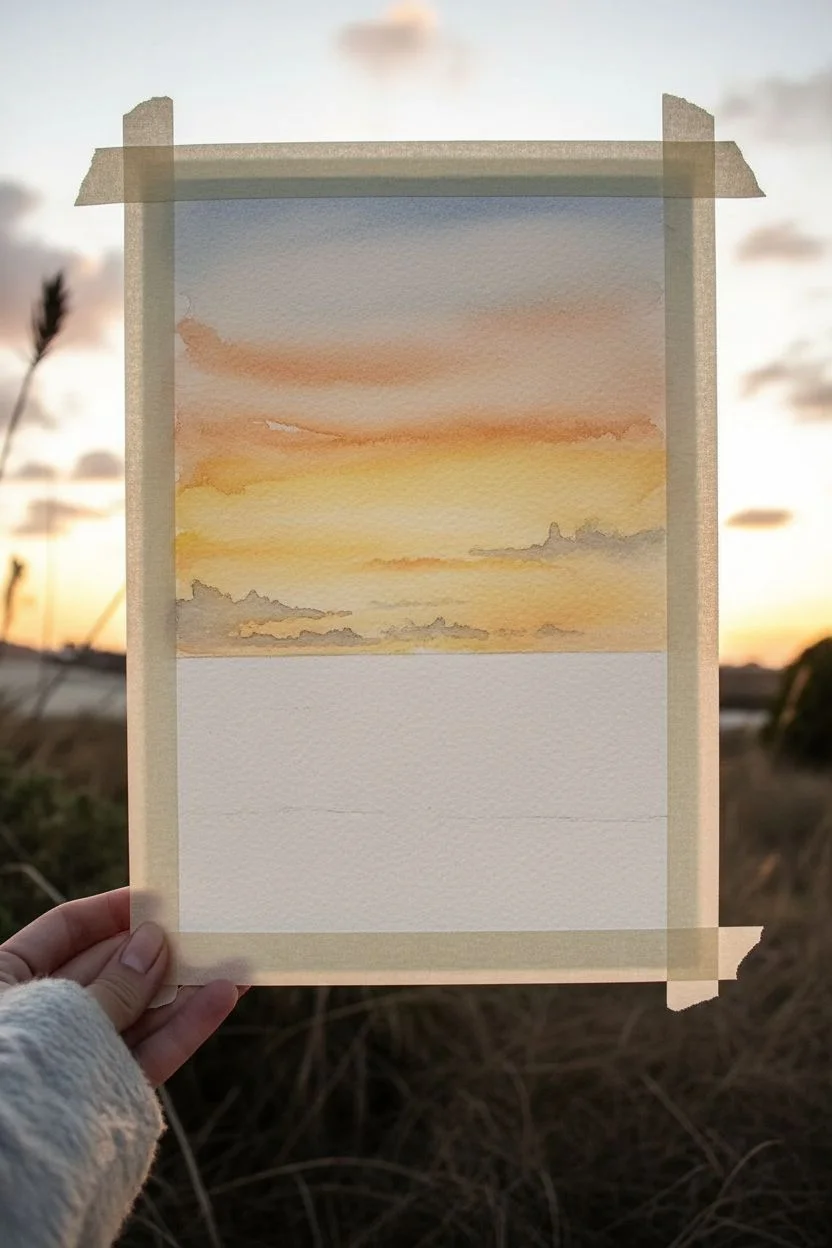
Sunset Over the Ocean Gradient
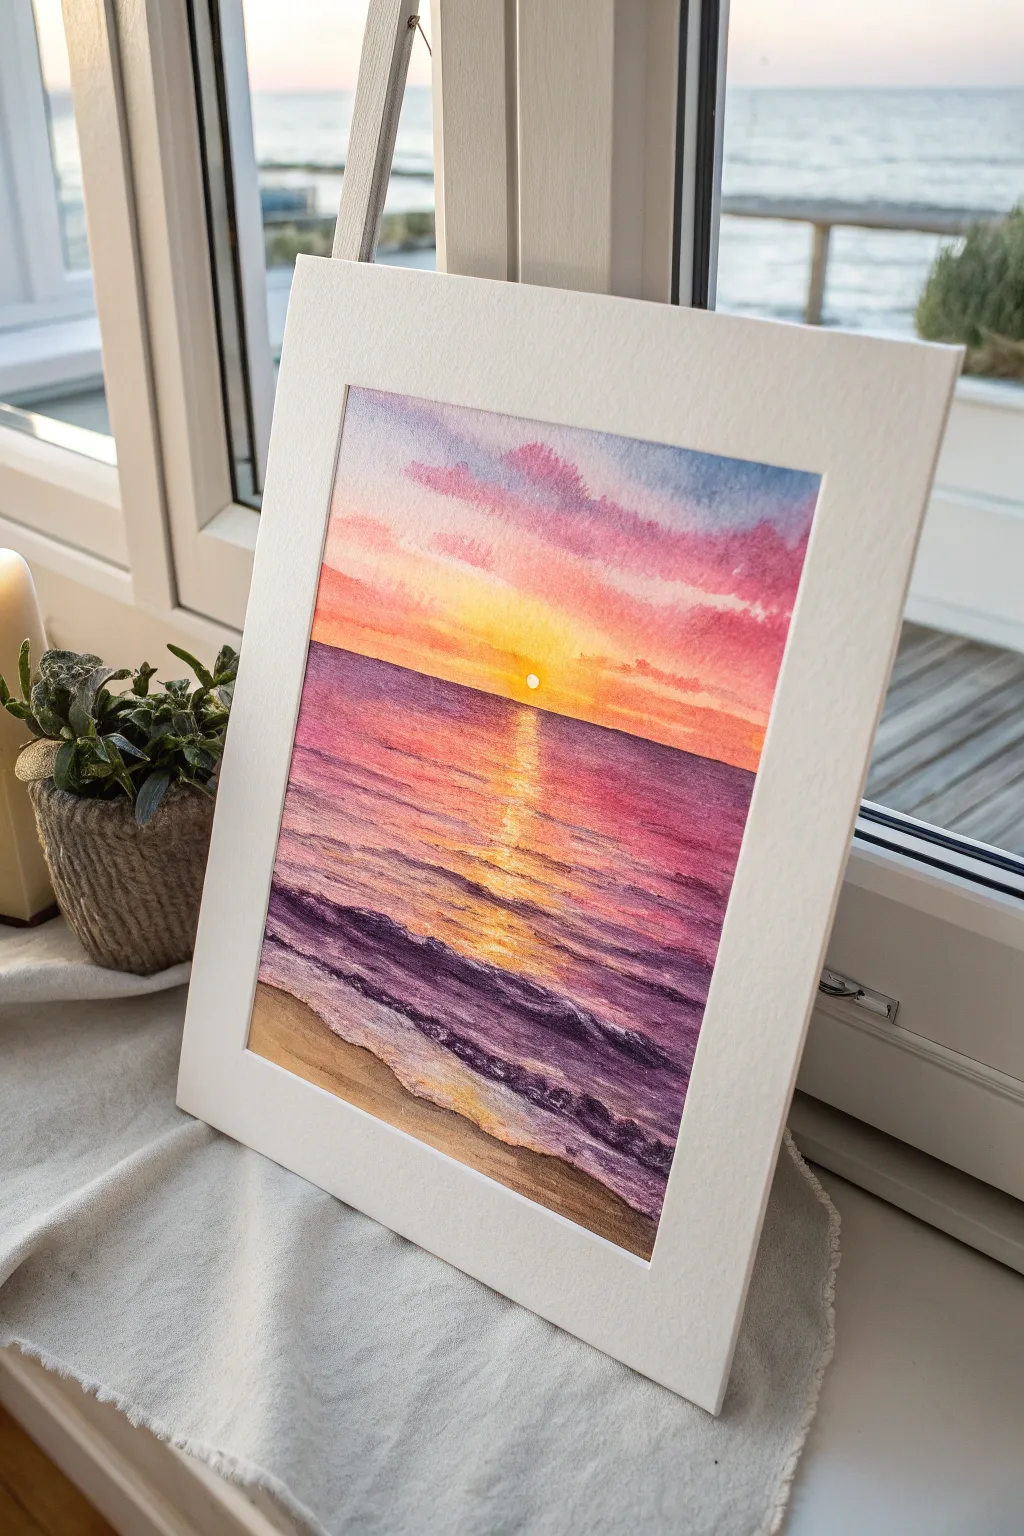
Capture the fleeting magic of twilight with this vibrant watercolor seascape, featuring a glowing sun dipping into a purple-hued ocean. The wet-on-wet technique creates effortless gradients in the sky, while layered brushstrokes give the waves realistic texture and movement.
Detailed Instructions
Materials
- Cold press watercolor paper (300 gsm)
- Watercolor paints (Lemon Yellow, Cadmium Orange, Alizarin Crimson, Ultramarine Blue, Burnt Sienna)
- Painter’s tape
- Flat wash brush (large)
- Round brushes (size 4 and 8)
- White gouache or masking fluid
- Two jars of water
- Paper towels
- White picture mat/mount
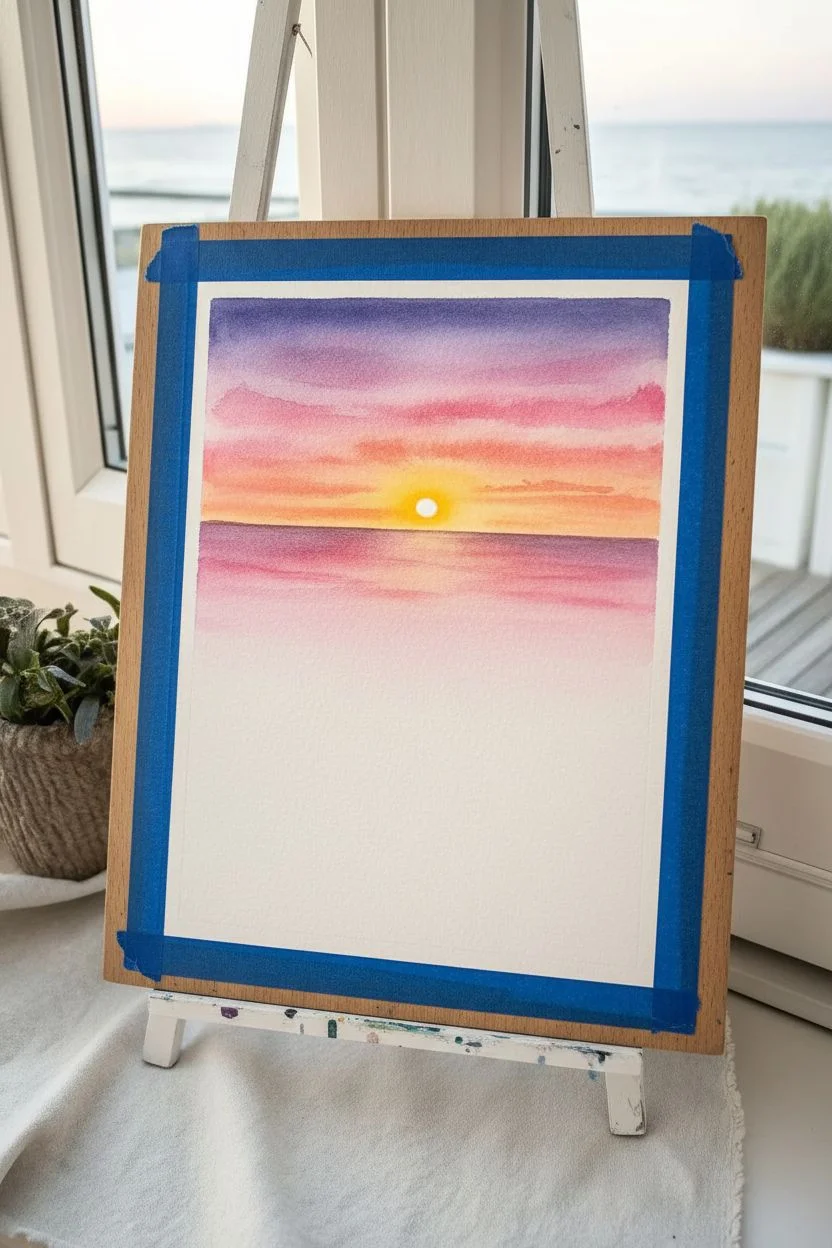
Step 1: Setting the Sky
-
Secure the paper:
Tape down all four edges of your watercolor paper to a board. This creates a clean white border and prevents the paper from buckling when wet. -
Pre-wet the sky area:
Using your large flat brush and clean water, wet the top two-thirds of the paper where the sky will be. The paper should glisten but not have puddles. -
Apply the sun:
While the paper is wet, drop a small circle of Lemon Yellow in the center, just above the horizon line. Leave the absolute center almost white if possible for maximum brightness. -
Paint the horizon glow:
Surround the yellow sun with Cadmium Orange, blending it outwards. Let the colors bleed naturally into the wet paper. -
Add pink clouds:
Mix a soft pink using Alizarin Crimson and a touch of water. Swiftly paint horizontal streaks above the orange area, suggesting cloud layers. -
Deepen the upper sky:
Mix Ultramarine Blue with a little Alizarin Crimson to make a violet hue. Apply this to the very top of the sky, blending it down into the pinks to create a seamless twilight gradient.
Step 2: Painting the Ocean
-
Define the horizon:
Allow the sky to dry completely. Use a piece of painter’s tape or a ruler to ensure a perfectly straight horizon line, then paint a deep purple strip across the water line using a mix of Ultramarine and Crimson. -
Create the sun path:
Directly under the sun, paint zigzagging strokes of yellow and orange down towards the foreground to reflect the light. Leave small gaps of white paper to represent sparkling highlights. -
Fill the water base:
surrounding the reflection, wash in a gradient of pinks and purples. Keep your strokes horizontal to mimic the calm movement of the sea. -
Darken the mid-water:
While the water layer is still damp, drop in stronger purples and blues on the sides, keeping the center reflection area bright and warm.
Sun brightness tip
To make the sun blindingly bright, carefully lift out a tiny circle of paint with a clean, damp brush or a Q-tip while the sky is still slightly wet.
Step 3: Waves and Details
-
Build wave texture:
Switch to your smaller round brush. Once the base layer is dry, mix a saturated dark purple. Paint thin, undulating lines to suggest the crests of rolling waves. -
Add foreground foam:
Near the bottom, paint the crashing waves. Leave jagged white spaces for the sea foam, or use white gouache later if you accidentally paint over it. -
Paint the wet sand:
At the very bottom, mix Burnt Sienna with a tiny bit of blue for a sandy brown. Paint a diagonal wash for the shore, letting it meet the purple waves. -
Enhance the shore shadow:
Add a thin, dark line right where the water meets the sand to show the shadow cast by the foam. -
Final highlights:
Use a detail brush with pure white gouache to add sharp highlights to the wave crests and reinforce the sparkles in the sun’s reflection path. -
Mount the artwork:
Once totally dry, carefully peel off the tape. Place the painting behind a white mat to instantly elevate the professional look of your sunset.
Add a silhouette
Once dry, paint a tiny black silhouette of a sailboat on the horizon or sea grass in the foreground to add scale and storytelling to your scene.
Now you have a serene little window to the ocean ready to brighten up any corner of your home


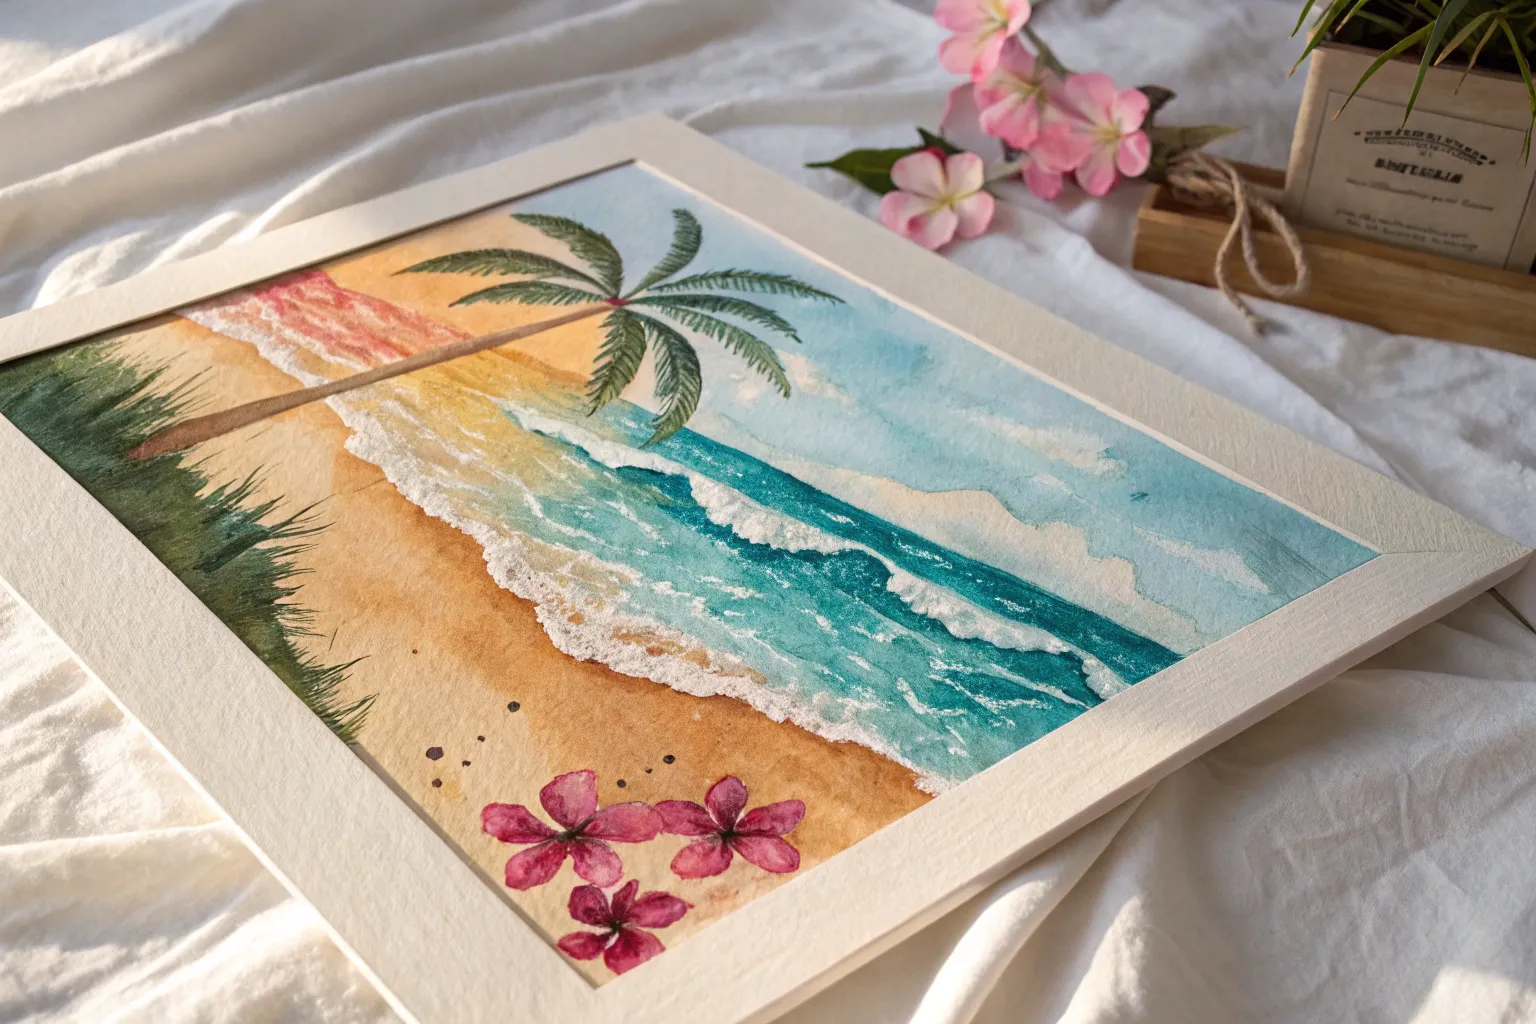
Palm Tree Silhouettes at Golden Hour

Capture the fleeting magic of a beach sunset with this stunning watercolor project. The high contrast of the dark palm silhouette against the vibrant, blended golden sky creates a dramatic and warm effect that embodies summer beautifully.
Step-by-Step Tutorial
Materials
- Cold press watercolor paper (deckled edge optional)
- Masking tape
- Watercolor paints (Yellow Ochre, Burnt Sienna, Payne’s Gray, Lamp Black, Indigo)
- Round brushes (sizes 6 and 2)
- Rigger or liner brush (size 0 or 1)
- Clean water jar
- Paper towels
- Pencil (HB or lighter)
Step 1: Setting the Sky
-
Tape and Prep:
Secure your watercolor paper to a board using masking tape on all four sides. Press the edges down firmly to prevent paint from seeping underneath, creating that crisp border later. -
Horizon Line:
Lightly sketch a straight horizon line about one-third of the way up the paper. Keep this line faint so it disappears under the paint. -
Sky Wash Base:
Using your size 6 brush, apply clean water to the sky area (above the horizon line) using the wet-on-wet technique. Ensure the paper is glistening but not swimming in puddles. -
Golden Glow:
Load your brush with a bright yellow or yellow ochre. Starting just above the horizon line, paint bold horizontal strokes, letting the color bleed upwards slightly. -
Adding Warmth:
While the yellow is still wet, introduce a burnt sienna or soft orange higher up in the sky. Blend it gently where it meets the yellow to create a seamless gradient. -
Cooling the Top:
For the very top of the sky, mix a faint wash of indigo or blue-grey. Apply this to the upper edge, letting it diffuse downward into the orange tones to suggest fading daylight. -
Cloud Texture:
With the sky still damp, dab in small touches of grey-purple near the horizon to suggest distant, low-hanging clouds. Let the water soften their edges.
Clean Edges Pro-Tip
For that perfect deckled look shown in the photo, tear your watercolor paper against a ruler before starting, or buy pre-cut deckle-edge paper, and skip the masking tape border entirely.
Step 2: Painting the Ocean
-
Ocean Gradient:
Once the sky is mostly dry (so the horizon stays sharp), wet the water area below the line. Apply a mix of burnt sienna and indigo, keeping it lighter near the horizon to reflect the sun. -
Establishing Depth:
Darken your color mix as you move toward the bottom of the paper to show depth in the foreground water. -
Water Ripples:
Using the tip of a smaller brush or a slightly dry brush, pull horizontal lines across the water area to mimic gentle waves reflecting the sunset colors. -
First Big Dry:
Wait for the entire background—sky and sea—to bone dry. If the paper is cool to the touch, it still needs more time.
Step 3: The Silhouette
-
Mixing the Darkest Dark:
Create a rich, opaque dark color by mixing Payne’s Gray with Lamp Black or a touch of dark brown. Avoid pure black to keep the painting looking lively. -
Base Foliage:
Paint a jagged, uneven shape at the very bottom right corner to represent the grassy dune or land mass where the tree sits. -
Trunk Structure:
Using a size 2 brush, paint the palm trunk. Start wide at the base and taper as you curve upward and slightly to the left. I suggest adding small notches along the trunk for texture. -
Frond Center:
Mark a small dot or cluster at the top of the trunk where all the fronds will emerge. This is your anchor point. -
Frond Spines:
Switch to your rigger or liner brush. Paint thin, arching lines radiating outward from the center point, curving them naturally like a fountain spray. -
Adding Leaves:
For the leaves themselves, use quick, flicking strokes pulling away from each spine. Keep these strokes consistent in direction for each frond but vary their length. -
Dense Core:
Make the fronds denser near the center of the tree and sparser at the tips. This adds realistic volume to the crown of the palm. -
Final Details:
Add tiny spikes of grass to the dark land mass at the bottom. -
The Reveal:
Once the black silhouette is fully dry, slowly peel off the masking tape at a 45-degree angle to reveal your clean edges.
Level Up: Salt Effect
While the ocean wash is still wet, sprinkle a few grains of table salt into the foreground water. The salt absorbs pigment, creating unique textures that look like sea foam.
Frame this piece or gift it to a friend to share those warm summer vibes


Tropical Beach With Turquoise Water

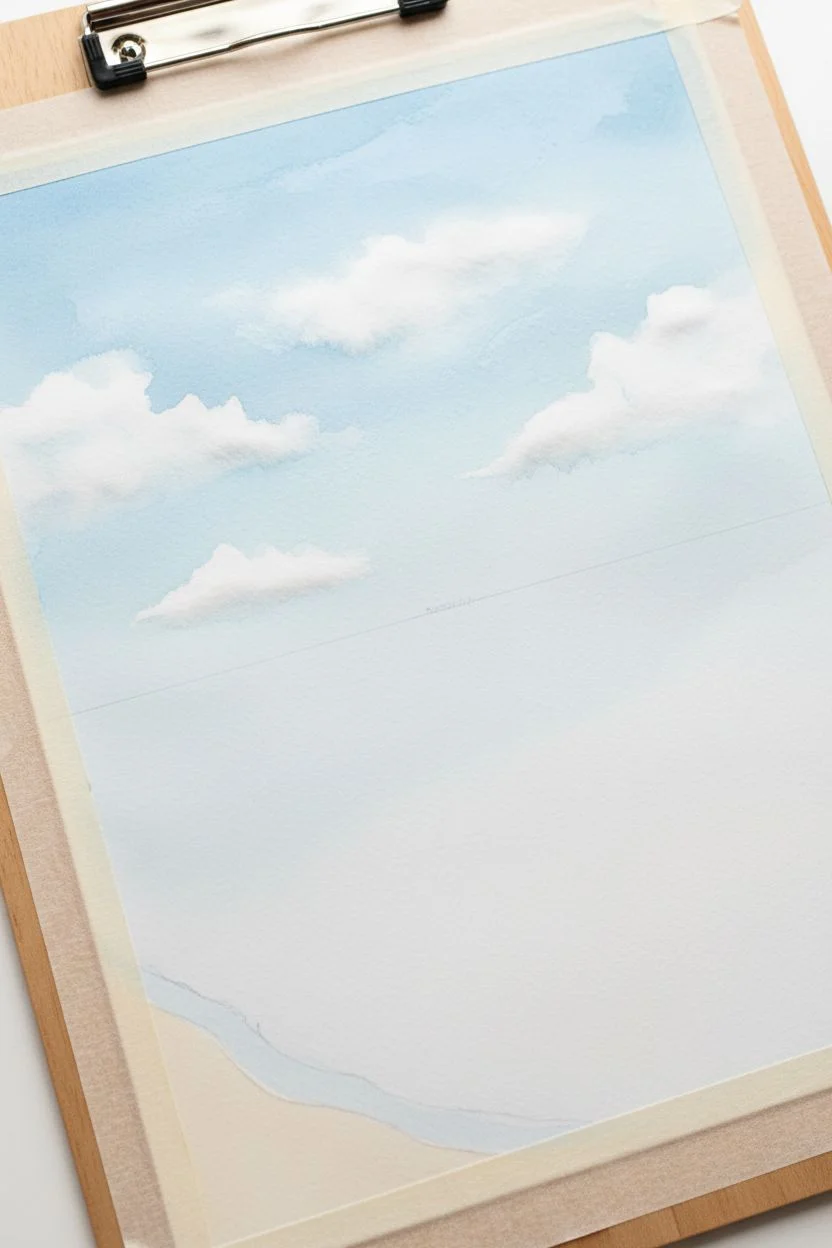
Capture the serenity of a perfect summer day with this glistening tropical seascape painting. Using layers of blended teal and aquamarine, you will recreate the shimmering depth of island waters crashing gently onto soft sand.
Step-by-Step
Materials
- Heavyweight watercolor paper (300gsm, cold press)
- Watercolor paints (Phthalo Blue, Turquoise, Viridian, Burnt Sienna, Yellow Ochre, White Gouache)
- Masking fluid
- Large flat brush or hake brush
- Round brushes (sizing 4, 8, and 12)
- Clean water jars
- Paper towels
- Painter’s tape and clipboard/board
- White or light wood frame with matting
Step 1: Preparation and The Sky
-
Secure the paper:
Tape your watercolor paper down firmly to a board on all four sides. This prevents buckling when the paper gets wet and leaves a crisp white border for easier framing later. -
Sketch the horizon:
Lightly draw a straight horizontal line about one-third of the way down from the top to mark where the ocean meets the sky. Draw a gentle diagonal curve near the bottom left for the shoreline. -
Wet the sky area:
With your large flat brush, wet the paper above the horizon line with clean water. The paper should glisten but not have standing puddles. -
Paint the sky gradient:
Mix a very dilute wash of Phthalo Blue. Apply it at the top of the paper and drag it downwards, adding more water as you approach the horizon so it fades to almost white. -
Adding clouds:
While the sky is still damp, lift out pigment using a crumpled paper towel to create soft, fluffy white clouds floating in the distance.
Step 2: The Deep Ocean
-
Mix the horizon color:
Combine Phthalo Blue and a touch of Viridian for a deep, rich teal color. This will be for the deepest part of the water at the horizon line. -
Establish the horizon:
Carefully paint a straight, sharp line right against your pencil mark. I find it helpful to turn the board upside down for this stroke to keep gravity away from the sky. -
Create the gradient:
As you move down from the horizon, gradually mix in more Turquoise and water. The water should transition from deep teal to a brilliant, lighter aquamarine. -
Add texture and movement:
While the main wash is wet, drop slightly more saturated teal into the wet paint in horizontal strokes to suggest waves and currents in the distance. -
Approaching the shore:
As you get closer to your shoreline pencil mark, dilute your paint significantly so it is very pale and transparent, mimicking shallow water.
Sunlight Tip
To make water look extra sparkly, leave tiny flecks of dry white paper untouched in the turquoise section, or sprinkle a pinch of salt on wet paint for texture.
Step 3: Sand and Shoreline
-
Mix the sand color:
Combine Yellow Ochre with a tiny dot of Burnt Sienna and plenty of water. You want a warm, beige-tan hue. -
Paint the beach:
Fill the bottom diagonal section with your sand mix. While wet, drop slightly darker touches of brown near the water’s edge to look like wet sand. -
Dry the painting:
Let the entire piece dry completely. Using a hairdryer on a low, cool setting can speed this up, but be careful not to blow wet paint around.
Add Dimension
For a hyper-realistic wet sand look, paint a glossy varnish or clear medium only on the sand area below the waterline after the paint is fully dried.
Step 4: Waves and Highlights
-
Mix opaque white:
Squeeze out some White Gouache. It’s more opaque than watercolor and perfect for the sea foam. Mix it to a creamy consistency. -
Paint the wave edge:
Using a smaller round brush, dab the white gouache along the shoreline where the water meets the sand. Use an irregular, scalloped pattern. -
Create sea foam web:
Drag the white back into the shallow turquoise water using dry brush techniques. Create a lacy, web-like pattern that fades as it goes deeper. -
Add sparkle:
Use tiny dots of pure white gouache in the middle turquoise section to represent sunlight glistening on the water’s ripple peaks. -
Deepen the shadows:
Mix a diluted dark teal and paint very thin, translucent shadows underneath the white foam edge on the sand side. This gives the foam volume and lifts it off the paper. -
Final framing:
Once totally dry, carefully peel off the tape at a 45-degree angle. Place your artwork into a clean white mat and frame to complete the professional look.
Hang your new masterpiece near a window and enjoy the calm, beachy vibes all year round
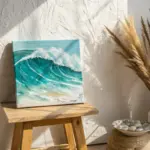


Ice Cream Cones With Melty Drips
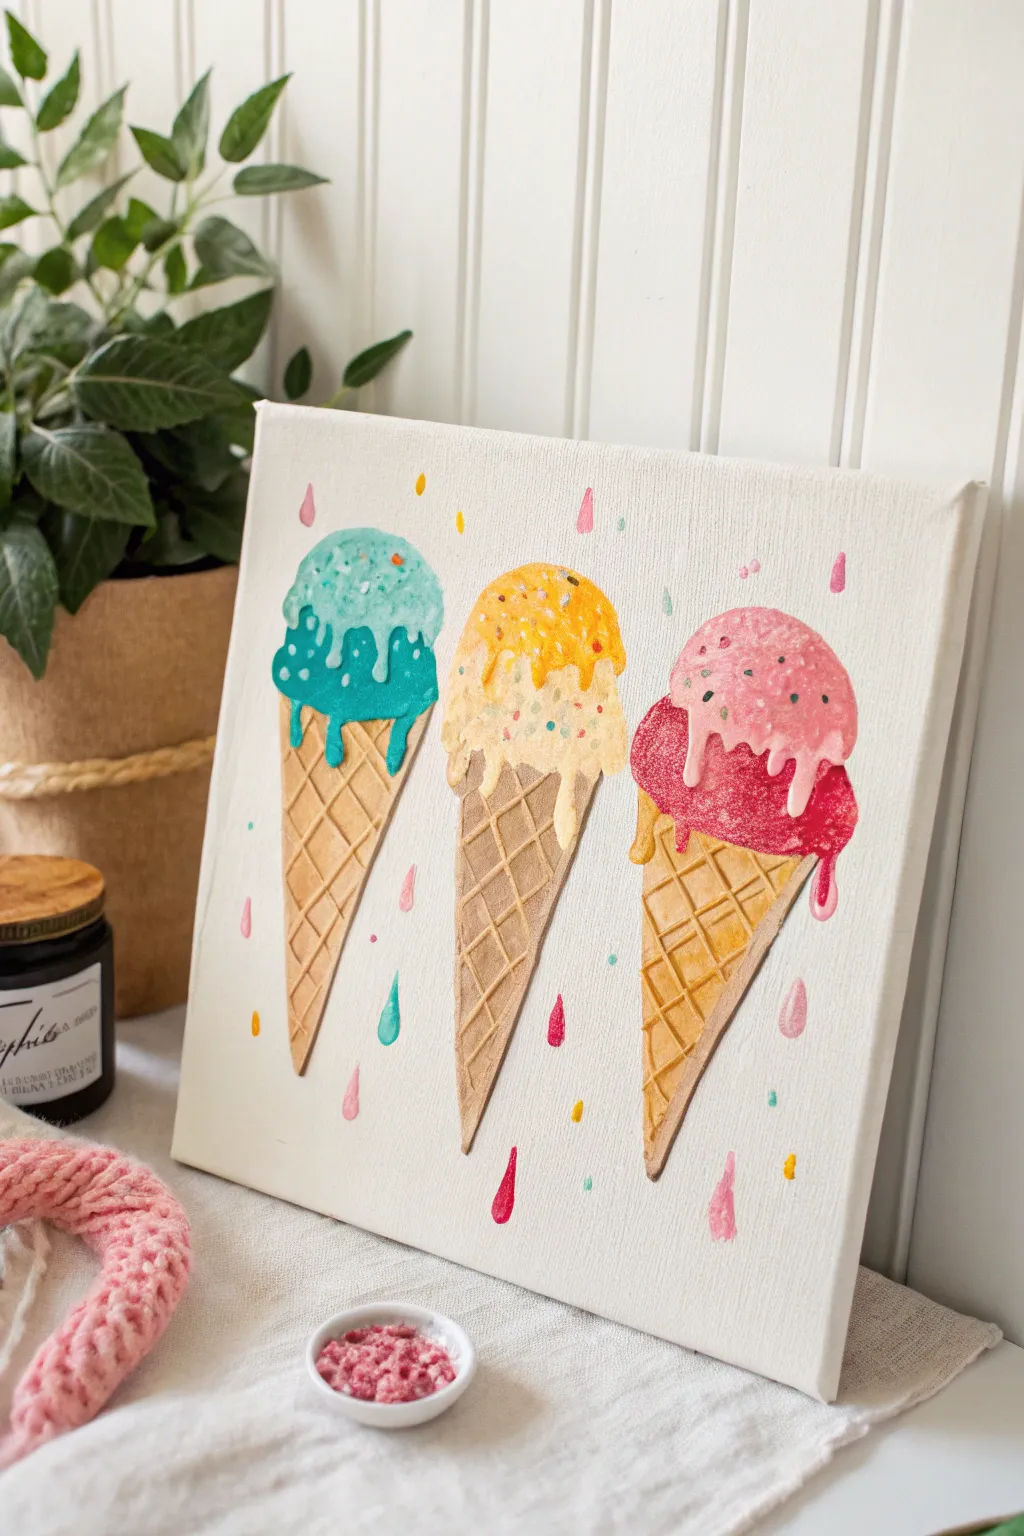
Capture the sweetness of summer with this delightful canvas project featuring three ice cream cones that literally stand out from the surface. By mixing modeling paste with your acrylics, you’ll create a satisfyingly scoopable texture that mimics real ice cream, complete with glossy drips and colorful sprinkles.
Step-by-Step
Materials
- Stretched canvas (e.g., 8×10 or 9×12)
- Acrylic paints (teal, yellow, orange, magenta, pink, tan, brown, white)
- Modeling paste or heavy structure gel
- Palette knife or craft stick
- Paintbrushes (flat shader and small round)
- Pencil
- Palette or paper plate
Step 1: Planning the Layout
-
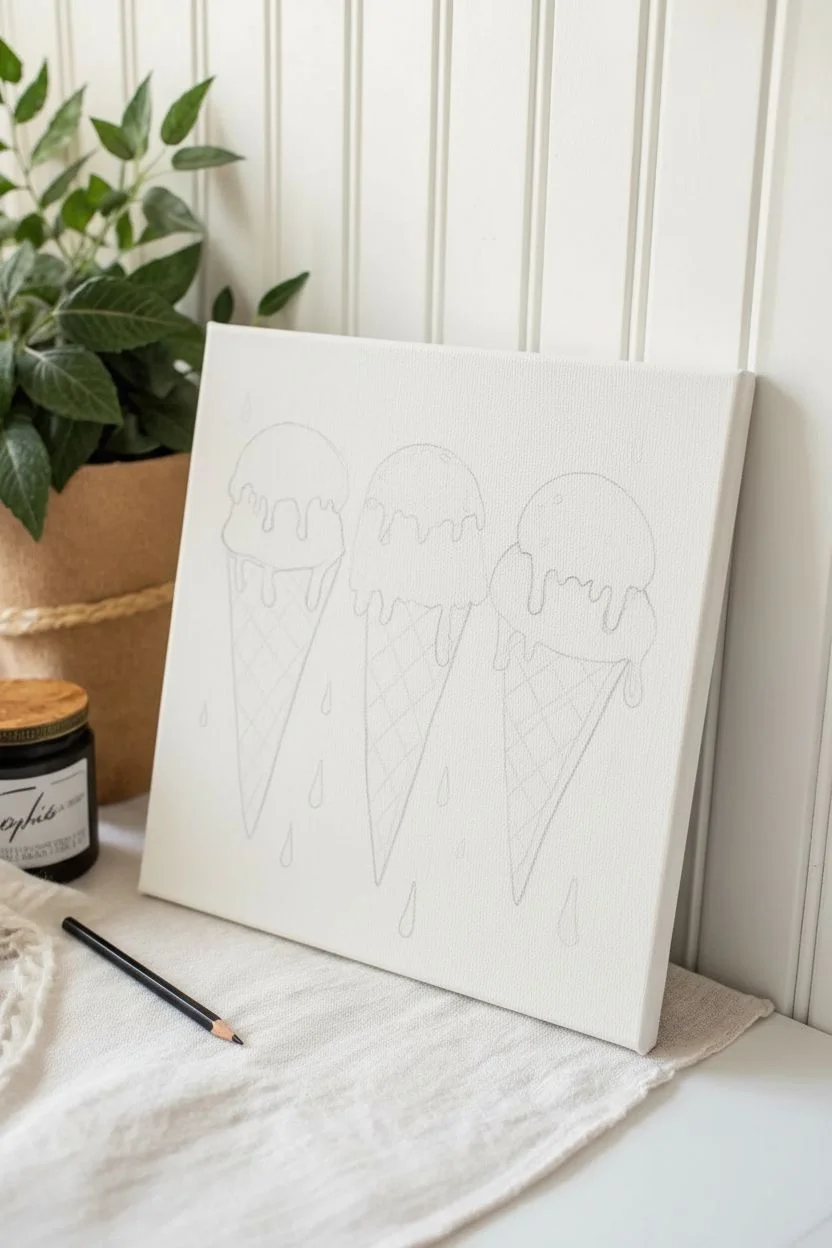
Sketch the cones:
Begin by lightly sketching three long, inverted triangles for the sugar cones. Ensure they are evenly spaced across the lower half of the canvas. -
Add the scoops:
Draw rounded dome shapes on top of each cone for the main scoop. Don’t worry about being perfectly circular; ice cream is naturally organic. -
Outline the drips:
Sketch wavy, melting lines cascading down from the bottom of the scoops onto the cones, and draw a few floating teardrop shapes in the background for falling drips.
Scoop It Up
For ultra-realistic texture, use an actual spoon to apply the modeling paste, using the same circular motion you would use to scoop real ice cream.
Step 2: Painting the Base Layer
-
Mix cone colors:
On your palette, mix a base tan color for the cones. You’ll need a lighter version for the main area and a slightly darker brown for the waffle shadows. -
Fill in the cones:
Paint the triangle shapes with your base tan color using a flat brush. Let this layer dry completely before adding texture. -
Paint the waffle pattern:
Using a small round brush and the darker brown paint, carefully draw diagonal intersecting lines across each cone to create the classic waffle grid. -
Add highlights:
Mix a tiny amount of white into your tan. Paint small highlights inside the diamond shapes of the waffle grid to give them dimension.
Cracking Paste?
If your modeling paste cracks while drying, it was likely applied too thickly in one go. Fill cracks with a little extra paint or paste once dry.
Step 3: Creating the 3D Ice Cream
-
Prepare the paste:
Mix a generous amount of modeling paste with your teal acrylic paint. The mixture should hold peaks like stiff frosting. -
Frost the first scoop:
Use a palette knife to apply the teal mixture to the left-hand scoop sketch. Spread it thickly, creating swirls and peaks just like real gelato. -
Add the other flavors:
Repeat the mixing process with yellow paint for the middle scoop and magenta for the right scoop. Apply them with the palette knife, wiping the tool clean between colors. -
Texture the drips:
Use the tip of your palette knife to drag some of the colored paste down over the top edge of the cones to create 3D melting drips.
Step 4: Finishing Details
-
Paint the drizzle:
Once the textured scoops are partially set, use regular acrylic paint (slightly watered down) in lighter shades—mint, pale yellow, bubblegum pink—to create the highlight drips on top of the scoops. -
Add floating drips:
Paint the floating teardrop shapes in the background using various colors from your palette to match the scoops. -
Sprinkle time:
Dip the very end of a small brush handle into different paint colors and dot them onto the textured scoops to create confetti sprinkles. -
Final dry:
Allow the canvas to dry flat for at least 24 hours. The thick modeling paste needs significant time to cure completely.
Hang your delicious creation in a kitchen or sunny room to keep those summer vibes going all year long


Have a question or want to share your own experience? I'd love to hear from you in the comments below!